If you see error 108 (0x6C) ERROR_DRIVE_LOCKED with an error message, The disk is in use or locked by another process; it could be due to corrupted system files, outdated Windows OS, or underlying disk issues.
To begin with, restart your computer and disconnect all the external peripherals connected to your system except the mouse and keyboard.
How can I fix 108 (0x6C) ERROR_DRIVE_LOCKED?
1. Check for Windows updates
Press Windows + I to launch the Windows Settings app.
Navigate to Windows Update, and then click the Check for updates button.
If an update is available, click Download & install to get it.
You should check for driver updates too; for that, click Advanced options on the Windows Update.
Locate Additional options and click Optional updates.
If an update is available, select it and click Download & install.
Once the update is installed, restart your PC
2. Update/reinstall the problematic drivers
Press Windows + R to open the Run console.
Type devmgmt.msc and click OK to launch the Device Manager app.
Expand the categories one by one to locate a device related to the problematic driver (to spot it, look for a yellow triangle with an exclamation mark).
Right-click it and select Update driver from the context menu.
Click Search automatically for drivers.
Now, follow the on-screen instructions to let Windows find a suitable driver version for your device. If there is more than one problematic driver, repeat the process to update them as well.
If there is no update available, you need to reinstall the driver. To do that, follow these steps:
Open the Device Manager app using the steps from the above method.
Locate the problematic driver, right-click it, and select Uninstall device from the context menu.
Click Uninstall again to proceed.
Once uninstalled, go to Action and choose Scan for hardware changes from the drop-down menu to reinstall the driver.
Press the Windows key, type cmd in the search box, and click Run as administrator to launch Command Prompt with administrative rights.
In the Command Prompt window, type the following command to clean up the Windows image to fix the issues to ensure your Windows functions properly and hit Enter: DISM /Online /Cleanup-image /Restorehealth
Wait for the command to complete, then copy & paste the following command to repair or restore the corrupted system files and press Enter:sfc /scannow
Wait for the scan to complete, then reboot your PC to let the changes take effect.
4. Restore your system to previous state
NOTE
Before proceeding with these steps, ensure you have saved all your work and note the names of newly installed apps and system settings preferences.
Press the Windows key, type control panel in the search box, and click Open.
Select Large icons for View by, then click Recovery.
On the following screen, click the Open System Restore link.
Select Choose a different restore point in the System Restore window and click Next.
You will get a list of restore points available. Select the oldest or most recent restore point before you saw the ERROR_DRIVE_LOCKED issue, and click Next.
Click Finish to start the restoration process.
Windows will restart and restore the system settings to the previous version. This process may take some time depending on your device condition, so don’t turn off your compute. Once your computer restarts, go to Settings, click Windows Update, and then Check for Updates. If an update is available, Click Download & Install to get the latest Windows updates.
If nothing helped you fix the issue, you can try resetting your computer; you can follow the detailed steps using this guide. This isn’t the only issue you can encounter, and recently we covered Error_Lock_Failed, so don’t miss it.
Did we miss any step that helped you fix the ERROR_DRIVE_LOCKED issue? If so, feel free to mention it in the comments section below. We will add it to the list.
Many users have reported that the AutoSave button is missing from Microsoft Office programs like Excel, PowerPoint, and Word. Version compatibility, unsupported file locations, disabled settings, outdated software, or issues with the Office installation could cause this issue.
First, check the version of Excel you are using, as AutoSave is available on Excel for Microsoft 365, Excel 2019, and Excel 2016 (with certain updates). Next, check the file type and ensure the file is stored in OneDrive, OneDrive for Business, or SharePoint Online.
How can I fix the Excel AutoSave button missing issue?
1. Check if AutoSave is enabled
Press the Windows key, type excel in the search bar, and click Open.
Go to File.
Click Options.
Go to the Save section located in the left pane of the Excel Options window.
Select the Save AutoRecover information every—minute option, and enter the time in minutes in the blank.
Now, place a checkmark next to Keep the last AutoRecovered version if I close without saving box option.
Also, place a checkmark next to the AutoSave files stored in the Cloud by default in Excel.
Click OK to confirm the changes, then restart Excel.
2. Update the Excel app
Press the Windows key, type excel in the search bar, and click Open.
Go to File.
Click Account.
From the right pane, click Update options, and from the drop-down, click Update Now.
Follow the on-screen instructions to complete the process.
Updating the Excel app can also help you fix the AutoSave button doesn’t work issue; to learn more, read this guide.
Go to the Services and subscriptions tab, locate Microsoft Office, and click Install to get the latest app version.
Once the installer is downloaded, double-click it and follow the on-screen instructions to complete the installation.
Reinstalling Microsoft Office can also fix other Office apps like Microsoft Excel not opening; check out this guide for other solutions.
This is how you can fix the AutoSave button missing in the Microsoft Excel issue; however, if you are dealing with corrupted files in Excel, we have a separate guide for you.
If you have any questions or suggestions about the Excel AutoSave button missing issue, feel free to mention them in the comments section below.
Windows Firewall’s default function is to block unauthorized connections to protect your system; therefore, configuring it properly on Windows 11 is vital, especially when setting up SQL Server for remote access.
When configuring the SQL Server for remote access, you must allow certain ports and programs through the firewall to ensure clients can connect to the database securely.
Before we begin, make sure you have administrative rights on the Windows server where the SQL server is installed. Furthermore, ensure that the SQL server is installed and configured correctly.
How can I configure Windows 11 Firewall for SQL Server?
1. Create inbound rules for the SQL server ports
1.1 Mention the SQL server port
Launch the SQL Server Configuration Manager.
Go to SQL Server Network Configuration > Protocols for (Instance Name)
Right-click TCP/IP and choose Properties.
Go to IP Addresses tab, scroll down to find the TCP Port settings. Make sure TCP/IP is enabled. If it is not, right-click it and choose Enable.
1.2 Configure Windows Firewall
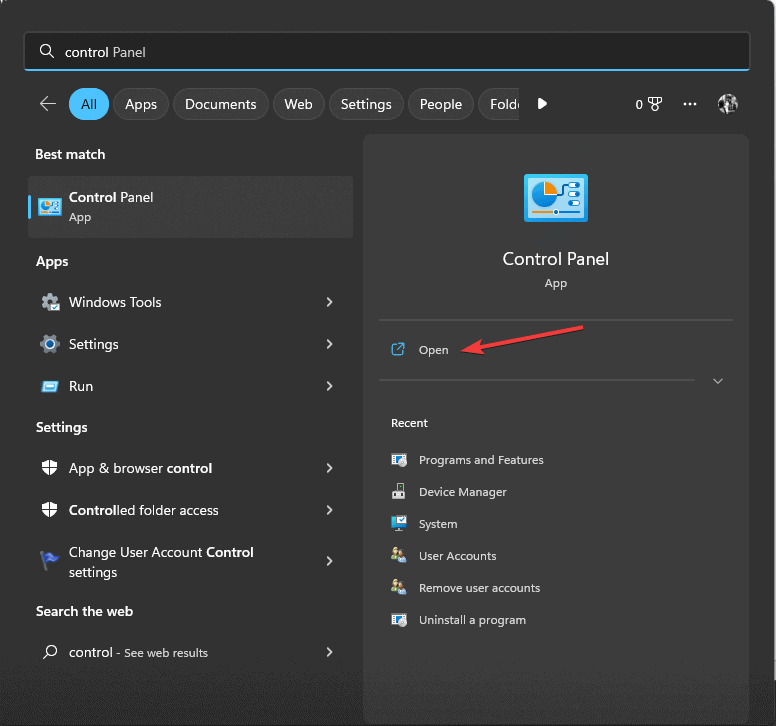
Press the Windows key, type control panel in the search box, and click Open.
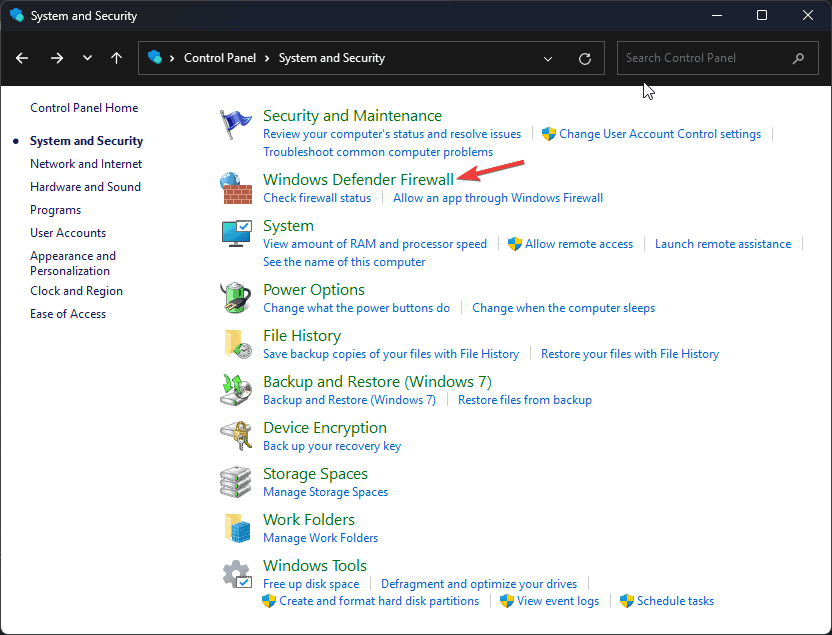
Select Category for View by and click System and Security.
Next, click Windows Defender Firewall.
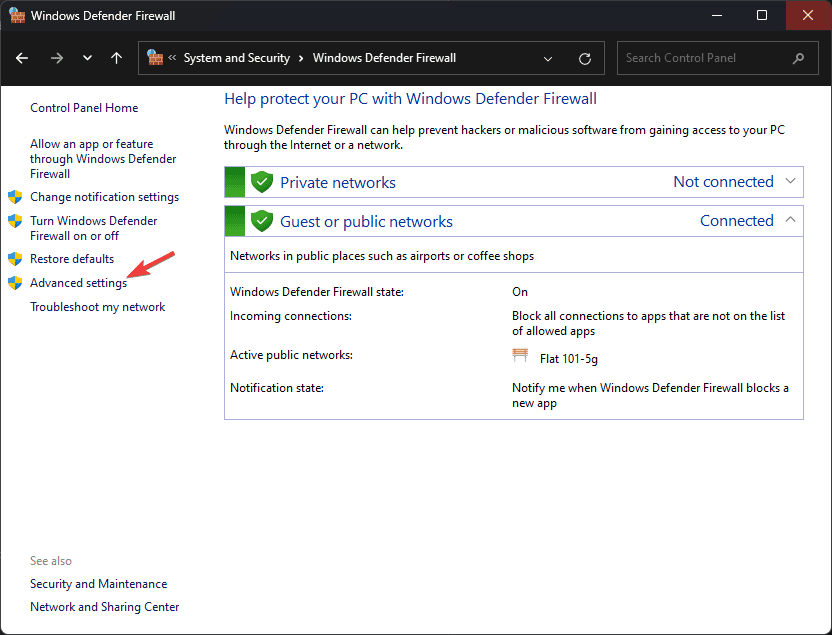
From the left pane, click the Advanced settings link.
On the Windows Defender Firewall with Advanced Security window, select the Inbound Rules option from the left pane and click New Rule from the Actions column.
On the New Inbound Rule window, select Port and click Next.
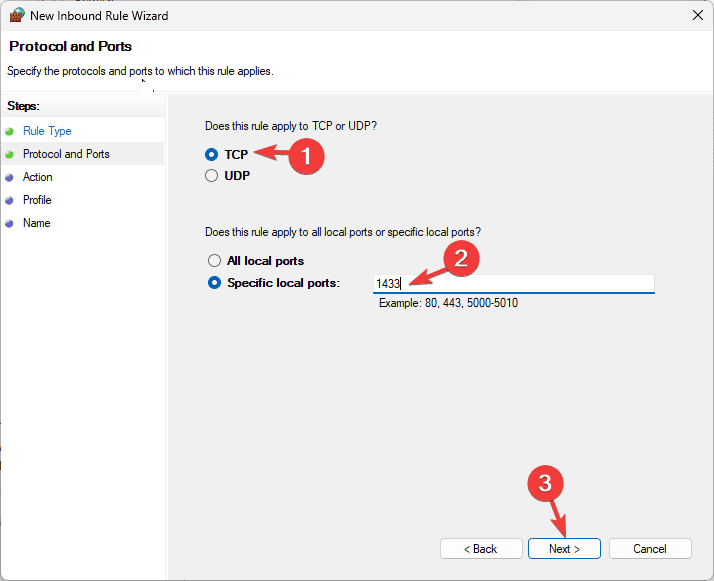
Choose TCP and for Specific local ports, enter 1433, then click Next.
Select the Allow the connection option and click Next.
Place a checkmark next to Domain, Private, and Public, then click Next.
Name the rule, add a description (optional) and click Finish.
Once done, you have to add the port SQL uses for UDP as well, follow these steps:
On the Windows Defender Firewall with Advanced Security window, select the Inbound Rules option from the left pane and click New Rule from the Actions column.
On the New Inbound Rule window, select Port and click Next.
Choose UDP and for Specific local ports, enter 1434, then click Next.
Select the Allow the connection option and click Next.
Place a checkmark next to Domain, Private and Public, then click Next.
Name the rule, add a description (optional) and click Finish.
1.3 Create a Rule for SQL Server Management Studio (SSMS)
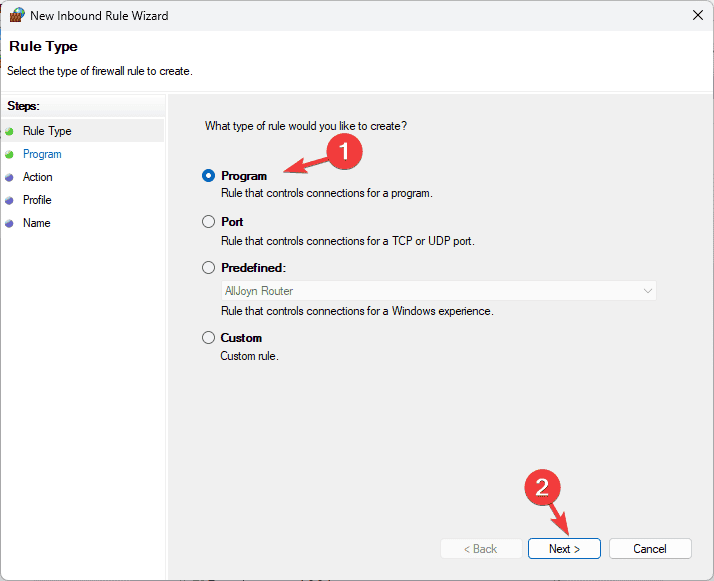
Repeat steps from 1.2 to create an inbound rule but instead of Port, choose Program and click Next.
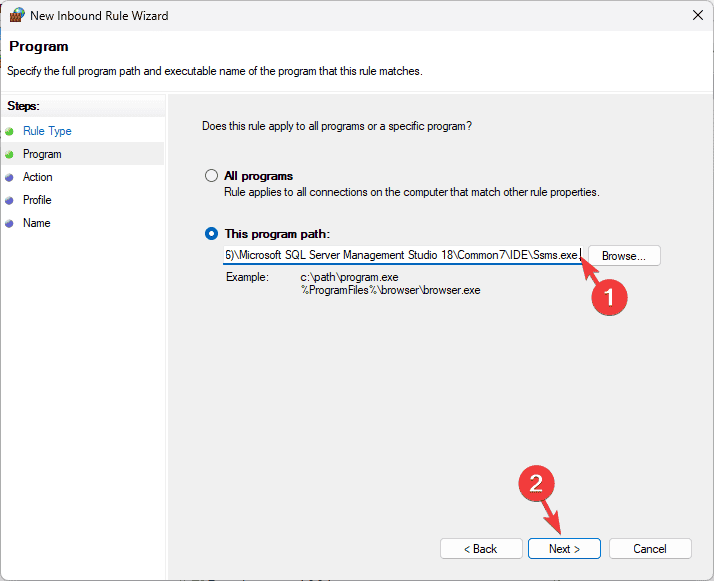
On the next page, select This program path and click Browse and locate SSMS executable or enter this path: C:\Program Files (x86)\Microsoft SQL Server Management Studio 18\Common7\IDE\Ssms.exe
Now select Allow the connection and click Next.
Choose all profiles on the following page, and click Next.
Name the rule and click Finish.
2. Allow the SQL Server applications in the Firewall
Press the Windows key, type control panel in the search box, and click Open.
Select Category for View by and click System and Security.
Next, click Windows Defender Firewall.
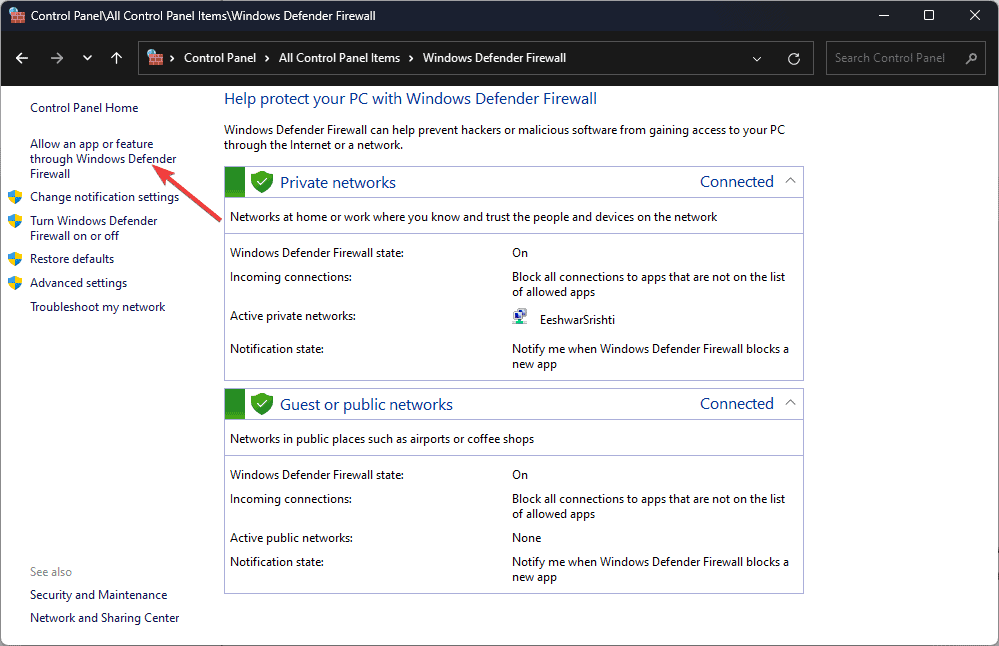
Click the Allow an app or feature through Windows Defender Firewall link from the left pane.
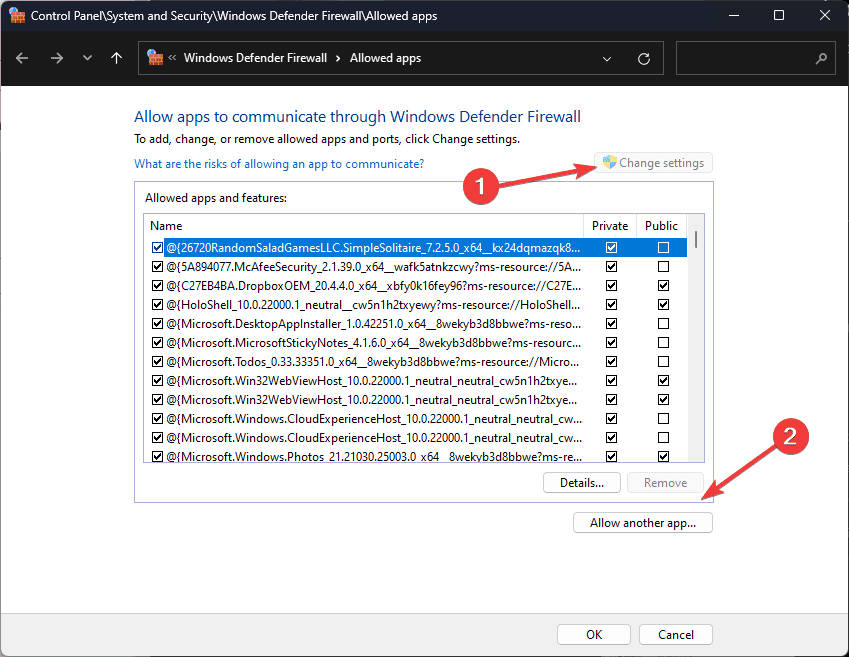
On the Allowed apps window, you will see Allow another app button. If it is greyed out, click the Change settings button to enable it.
Now, click the Allow another app button.
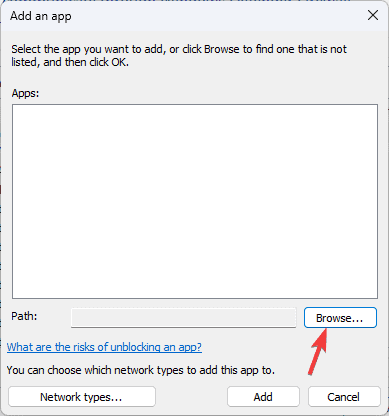
Click the Browse button.
Once you locate the sqlbrowser.exe file. This is the default location of the folder, navigate after replacing C with the system drive letter on your device: C:\Program Files (x86)\Microsoft SQL Server\90\Shared
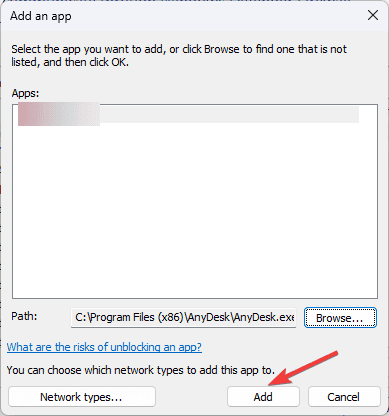
Click the Add button.
Click OK to save the changes.
Now you will have to add SQL Server Application; for that, follow these steps:
Open the Allowed apps window using the steps mentioned above, and click the Allow another app button.
Click the Browse button.
Once you locate the sqlserver.exe file. Here is the default location of the folder, but before navigating to the path, replace C with the system drive letter on your device: C:\Program Files\Microsoft SQL Server\<Version and Edition>\MSSQL\Binn
Click the Add button.
Click OK to complete.
To conclude, configuring the Windows 11 firewall for the SQL server is important for securing your database when enabling remote access. Remember to review your firewall settings and SQL security regularly according to your changing needs.
If you have any suggestions or things to keep in mind related to setting up a Windows 11 Firewall for the SQL server, feel free to share them with our readers in the comments section below.
Want to know how to allow Edge to access the Firewall? If you’re experiencing connection difficulties or problems with specific websites, it might be because firewall restrictions are blocking the browser. Follow this guide till the end to resolve these issues and continue your browsing.
Let’s begin!
How To Allow Edge To Access Firewall
Follow the below steps:
Press Windows + S, type Windows Security, then tap Open.
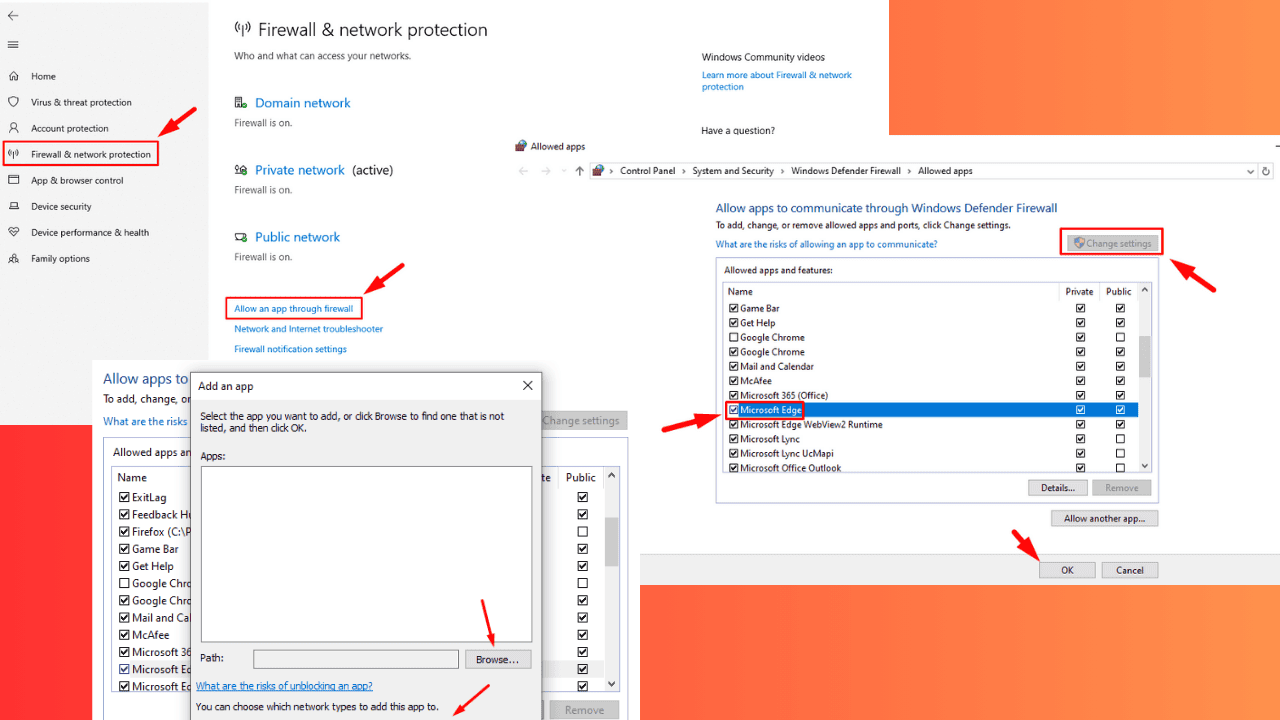
Tap Firewall & Network Protection, then click Allow an app through the firewall.
Click on Change settings. (You might need administrator rights to proceed.) Select the app from the list by clicking the box next to it. Tap OK.
Tap Allow another app if it’s unavailable in the list to add it manually.
Add “%ProgramFiles(x86)%\Microsoft\EdgeUpdate<version>\MicrosoftEdgeUpdate.exe” for 64-bit machines or “%ProgramFiles(x86)%\Microsoft\EdgeUpdate\MicrosoftEdgeUpdate.exe” for 32-bit machines in the path field.
Alternatively, you can tap the browse button to select the app from your PC. Then tap Add.
So, now you know how to allow Edge to access your firewall, resolving potential connectivity issues. This adjustment helps Edge communicate effectively with websites and services.
Virtual reality is more popular than ever, and there are many amazing smart glasses on the market. If you’re looking for a device to buy, then be sure not to miss our VITURE Pro XR review.
VITURE Pro XR, everything you need to know
VITURE Pro XR design
The first thing you’ll notice about these glasses is their design, and unlike the original model, this one is entirely black, so there are no more silver hinges which helps the device have a more uniform look.
The device still has rocker switches so you can easily adjust the volume or brightness. There is also a button available that you can use to switch between the modes or adjust the darkness of the lenses.
I noticed that nose pads seem more reliable compared to the previous model, and are less prone to falling out, so you’re less likely to lose them.
Design-wise, besides the color change, these glasses look rather similar to the original VITURE One, but this is where the similarity ends.
VITURE Pro XR specs and features
The biggest change is the improved UltraClarity display that now creates a 120-inch screen at a distance of 3 meters. The field of view has also been improved and it now stands at 46 degrees.
I was pleasantly surprised to see that the refresh rate has been improved as well, and you can now experience 90Hz and 120Hz refresh rates and enjoy smooth fast-paced action without skipping a beat.
That’s not all the VITURE Pro XR doubles the brightness thanks to the new micro-OLED panels. This model offers 4000 nits brightness, which is twice more than the original. All this brings delivers a clear and bright picture.
The device also seamlessly switches to 3D for spatial videos and back to 2D for regular content requiring minimal user interaction.
During my testing, I didn’t experience any blurriness, but that might not be true for all users, since it can vary by the head shape. Speaking of which, the IPD range was slightly increased, and it now ranges from 56.5mm to 70.5mm.
The glasses come with myopia adjuster dials ranging from 0 to -5, which can help users with nearsightedness.
The darkening of the lenses has been improved and I was shocked at how well the electrochromic lenses were able to block out the light.
The sound is decent, and it’s delivered via two small Harman speakers on the temples. I found the speakers loud enough for indoor use, but they might need a bit more volume if you’re using them outside. The sound was clear, but the base was lacking for my taste.
Lastly, I have to mention that dock that you can use to connect other devices to your VITURE Pro XR. The new version supports 120Hz as well as the passing of the 3D video.
VITURE Pro XR also brings XR is the first to bring the XR experience to the iPhone, and it lets iOS users experience 3DoF and video VR. This is all possible thanks to the adapter, and the adapter will also charge your phone so you won’t have to worry about running out of juice.
The start of the show is the SpaceWalker app that allows you to pin screens in virtual space, and I found this feature to be useful with a few minor bugs here and there.
The app has three modes, a stacked mode that shows screens one below the other, a code mode that stacks screens horizontally, and an ultrawide mode that is great for multimedia.
What I found incredibly useful is the support for keyboard shortcuts which allows me to quickly center my screen or make the screen larger or smaller.
The SpaceWalker app will also detect your head movement, and if I move my head down it will make the screen transparent so I can see my desk or keyboard. Raising the head will reduce the transparency, which allows me to focus on the screens again.
VITURE is vigilant with its firmware updates, and they are constantly fixing the bugs and introducing new features which is also a major plus.
Conclusion
While VITURE Pro XR offers an amazing experience, even the despite larger field of view, content can sometimes get cut off. Speakers are decent, but sometimes I had problems hearing them especially while using VITURE Pro XR on a busy street.
While brightness is amazing, I felt limited with just two dimming modes, and hopefully, that’s something that will be addressed in the future. I also noticed that the right arm gets warm after a while.
Lastly, the VITURE Pro XR is a pricy device that relies on your phone or VITURE neckwear to work, so it might not be for everybody. But if you need XR glasses, this is still a great model despite its flaws.
The Grammarly extension for is a must-have for anyone looking to improve their writing. This browser add-on can correct grammar, spelling, and punctuation mistakes with helpful suggestions.
Moreover, installing and using the Grammarly extension is easy. It can enhance your writing across different platforms, including emails, social media, and online documents. I’ll show you how, so let’s get into it!
How To Install and Use the Grammarly Extension for Chrome
In the search bar, type “Grammarly.” The extension should appear as the top result. Select it and click the “Add to Chrome” button.
A pop-up will ask for confirmation. Click “Add Extension” to start the download automatically.
After installing, you’ll be prompted to sign in if you have an account, or sign up if you’re new to Grammarly.
After adding your credentials or signing up, tap the extensions button and click on the pin icon.
You can adjust Grammarly’s settings by clicking the extension icon in the top-right corner of Chrome. Enable or disable specific features or set preferences for certain grammar rules here.
Now open Google Docs, emails, or social media and check for Grammarly suggestions. I’ll use Google Docs for this example. Tap on the red icon on the button right of your screen to view suggestions.
You’ll get a review of all the suggestions, including a check button for plagiarism and AI text.
Installing the Grammarly extension for Chrome is a quick and effective way to enhance your writing. Its automatic corrections and personalized settings can help you keep your online communication polished and professional.
However, in a recently published patent, Microsoft unveiled a co-browsing technology related to Edge (or any other browser, for that matter). It involves a multi-user approach to browsing the Internet. In other words, the technology allows multiple people to browse the web in real-time.
When a collaborative session starts, a group of tabs for each person involved is created. Others can be invited to join, and each person gets their tabs.
Collaborative browsing or co-browsing is not new, but it has only recently gained popularity for its efficacy in the corporate world. However, co-browsing is done within safe and secure environments, such as private spaces, and popular browsers cannot do it natively unless users install particular extensions or plug-ins.
In the co-browsing technology patented by Microsoft, all these individual tab groups are combined into one big group that updates instantly with any changes anyone makes. For example, if someone makes a change on their end, it gets sent to a central service, which then sends it to everyone else, keeping everything in sync.
The Collaborative Browsing Experience allows multiple people to browse the internet simultaneously. Think of it like a virtual meeting room where everyone can see and interact with the same web pages.
You can see what others are doing on their browsers now (real-time activity) and what they have done before (saved activity). When you start a collaborative session, it creates a particular group of browser tabs for that session. This group is linked to you, the person who started it.
You can invite other people to join your session. When they enter, they get their own set of tabs. Each person’s individual tab groups are combined into one big group. This big group updates instantly whenever anyone makes a change, like opening a new tab or navigating to a different page.
If you change your browser, it first happens locally (on your device). Then, this change is sent to a central service. The central service organizes everyone’s changes and sends them back to all participants. This way, everyone’s browser stays in sync, showing the same tabs and pages.
This technology makes it easy for people to browse the web together, share their browsing activities, and stay updated with each other’s changes in real-time.
While Microsoft doesn’t specify Edge, it does mention that the tech can include users from all sorts of devices, such as desktops, wired and wireless computing systems, mobile phones, tablets, notebooks, and laptops.
Is the Facebook Add Friend button missing when you want to connect with someone? This happens due to privacy settings or the lack of a mutual friend. You can send a friend request to a mutual friend to unlock the Add Friend button or you ask them to send you a friend request.
However, if you’re the account owner and wondering why other people can’t send you a friend request, there’s a way to fix it. I’ll show you how!
How To Fix Facebook Add Friend Button Missing
You can perform the procedure on the desktop or mobile app version.
On Desktop
Follow the below steps:
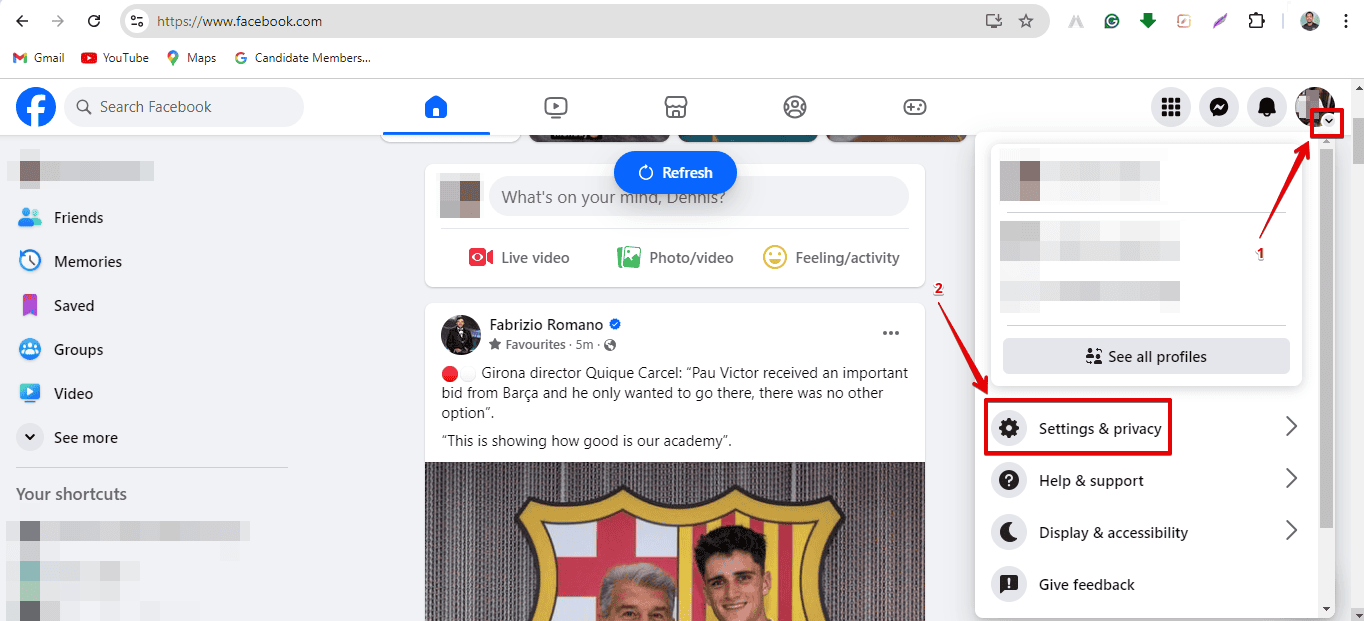
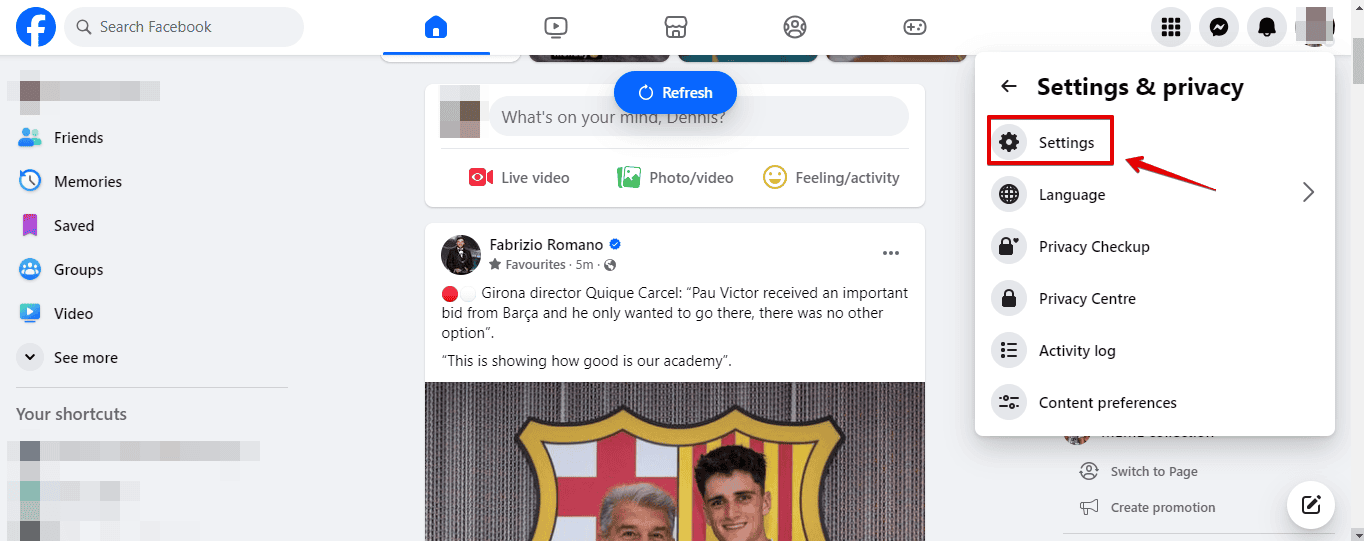
Log into your Facebook account and tap the arrow next to your profile picture at the top right of your screen.
Click Settings & privacy.
Tap Settings.
Scroll from the left panel and tap How people can find and contact you.
Click Who can send you friend requests? From the right panel.
Choose Everyone as the Audience, then tap Save.
The Add Friend button will now be visible to anyone on Facebook.
On Mobile
Here are the steps to follow:
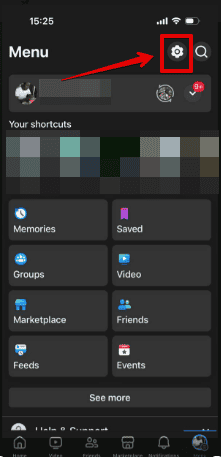
Open the Facebook app on your mobile device and tap the profile icon at the bottom right corner of your screen.
Click the setting gear on the top right corner.
Scroll and tap How people can find and contact you under Audience and Visibility.
Ensure you set Who can send you friend requests to Everyone.
Everyone on Facebook will now be able to add you as a friend.
If you notice the Facebook Add Friend button is missing, it’s usually due to privacy settings or the absence of mutual friends. By adjusting your settings to allow “Everyone” to send you friend requests, you can quickly resolve this issue and make the button visible again.
Also, learn to fix Facebook if it’s not showing birthdays and the dating or share button.
Is your Facebook share button missing? I’ll show you how to get it back and fix it.
Usually, the main reason for this lies in the privacy settings. Let me show you how to deal with this below!
How To Get the Missing Facebook Share Button Back
I’ll show you how to restore the share button on both Desktop and mobile Facebook versions.
On Desktop
Follow the below steps:
Open your favorite browser and log into Facebook. Tap the drop-down arrow next to your profile picture at the top right, then select Settings & privacy.
Click Settings.
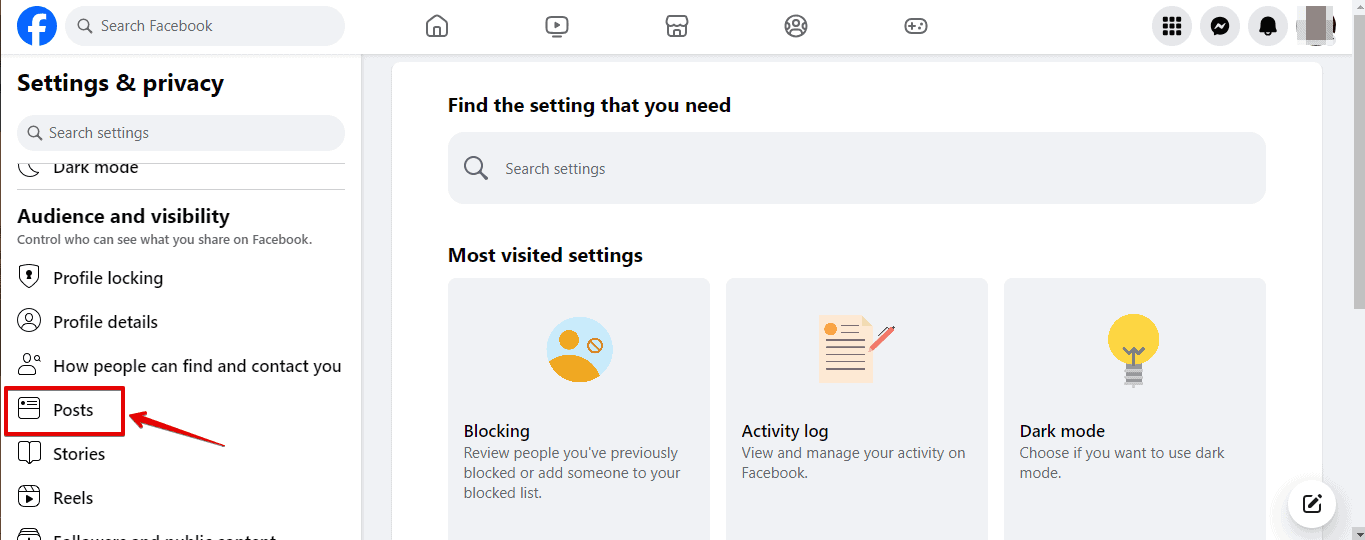
Scroll on the left panel and select Posts under Audience and Visibility.
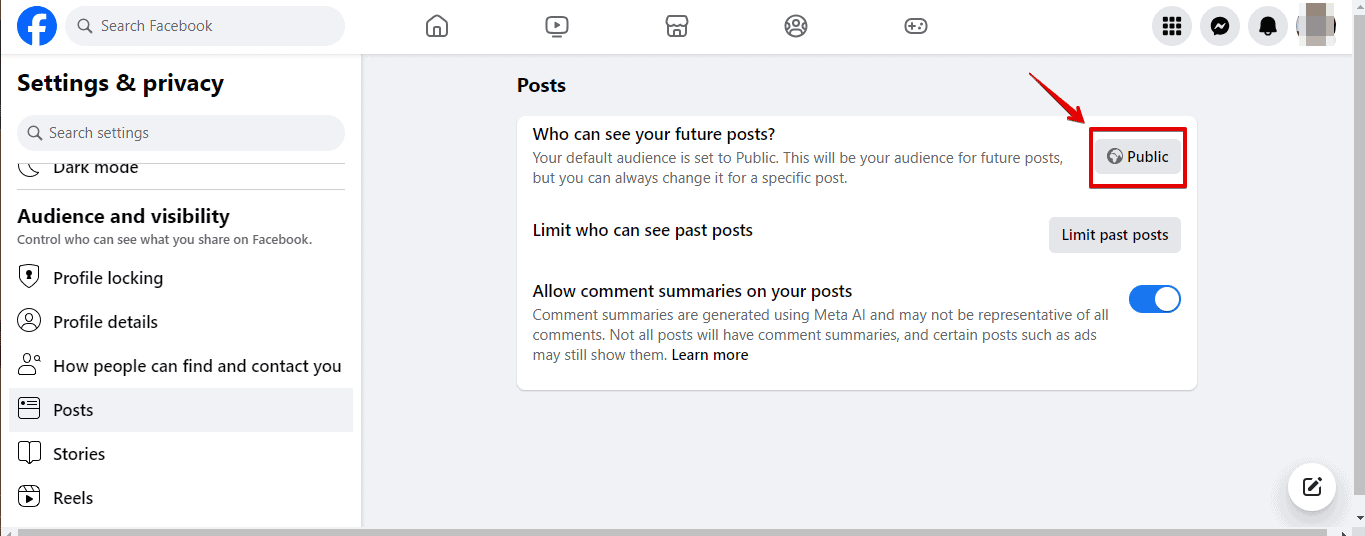
Set who can see your future posts to Public.
Ask a friend to check your posts, and they’ll notice that the share button is available.
On Mobile
Here are the steps to follow:
Log into your Facebook app and tap the profile icon in the bottom right corner.
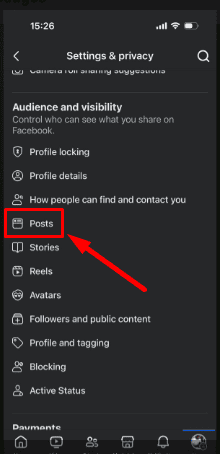
Click the setting gear on the top right corner.
Scroll down and tap Posts under Audience and Visibility.
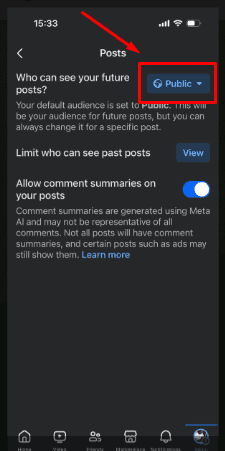
Tap on Who can see your future posts and select Public.
The share button should now be visible on your posts.
The Facebook share button goes missing due to privacy settings that limit post visibility. Adjusting your post’s audience to “Public” ensures that others can share your content. I’ve included steps for the desktop and mobile versions.
Microsoft has released Edge 129 to the Stable channel, introducing several changes to the browser. As you might already know, Crypto Wallet, a feature that lets you manage cryptocurrency within the browser, is deprecated. Microsoft said the change is intended to “improve the end-user experience” without elaborating and has been teasing it in the Insider channels for quite a while.
Deprecation of the CryptoWallet feature. To improve end user experience, the CryptoWallet feature and the CryptoWalletEnabled policy is deprecated. The CryptoWalletEnabled policy will be obsolete in an upcoming release.
Microsoft has also updated the minimum system requirements for Edge on macOS. In the future, the company will drop support for macOS versions older than 11.0, which was first introduced in 2020. “For more information, see Microsoft Edge Supported Operating Systems,” the notes say.
Edge 129 also includes several new web developer-focused features, including the deprecation of non-standard declarative shadow DOM serialization and the includeShadowRoots attribute for the DOMParser interface. You can read about the changes more thoroughly in the MDN Web Docs post here.
The update patches three vulnerabilities, two of which allow for remote code execution and one of which is a spoofing bug. If it hasn’t already, you should expect to see Edge 129 hit the stable channel soon.
While Edge 129 is now generally available, Microsoft also pushed Edge 128 to the Extended Stable channel, bringing it to enterprise customers.
You can update your Edge installation by navigating to Settings > About Microsoft Edge.
The “mediatoolbox.dll is Missing” error can disrupt your system and lead to malfunctions in some applications or functions. It occurs when the DLL file is corrupted, misplaced, or deleted due to system issues, malware, or faulty software installations.
Luckily, I can show you how to resolve the problem and restore your PC’s functionality.
Let’s get started!
How To Fix “mediatoolbox.dll is Missing”
Here are the solutions:
Run Windows Defender Offline
Malware or viruses can corrupt DLL files, causing errors like this one. You can run Windows Defender Offline to free your system from malware and viruses that a quick scan couldn’t detect.
Press the Windows icon + S, type Windows Security, and click Open.
Tap “Virus & threat protection.”
Click “Scan options.“
Select “Microsoft Defender Offline scan” and click “Scan now.“
After the scan, remove any detected threats and restart your computer. Check if the error is solved.
Run System File Checker (SFC)
The System File Checker tool scans and restores missing or corrupted system files, including DLLs like mediatoolbox.dll. Follow the below steps:
Right-click on the Start menu and select Windows PowerShell (Admin).
Type sfc /scannow and press Enter.
Wait for the scan to complete, then restart your computer.
Update Drivers
Outdated or corrupted drivers can sometimes lead to DLL errors. To update them, do this:
Locate the device drivers related to your issue (such as display adapters or sound cards).
Right-click on each and select Update driver.
Click Search automatically for drivers.
Follow the on-screen instructions to complete the update process.
Restart your computer.
Download and Register mediatoolbox.dll
If the mediatoolbox.dll file is missing or corrupted, you can download a new copy from reliable online sources. Be cautious and download from a trusted site to avoid further issues. Here’s what to do:
Copy and paste the file to C:\Windows\System32 for 32-bit systems or C:\Windows\SysWOW64 for 64-bit systems.
Press the Windows icon + R, type “cmd,” and hit Enter or tap OK to open the Command Prompt.
Type regsvr32 c:\windows\system32\mediatoolbox.dll for 32-bit versions or regsvr32 c:\windows\syswow64\mediatoolbox.dll for 64-bit versions and hit Enter to register the DLL file.
Reboot your PC to apply the changes.
Perform a System Restore
If you recently installed new software or made changes to your system configuration before encountering the mediatoolbox.dll error, a System Restore can help. It’ll revert your PC to a previous state where the error didn’t occur. Follow the below steps:
Press Windows + R, type rstrui, and hit Enter.
Tap Next.
A list of restoration points will appear. Select one, then tap Next.
Click Finish.
Your PC will automatically restart to begin the process. Once done, check if the error is solved.
If you follow the steps above, you should be able to resolve “mediatoolbox.dll is Missing”. Remember to back up your important files before making any significant system changes.
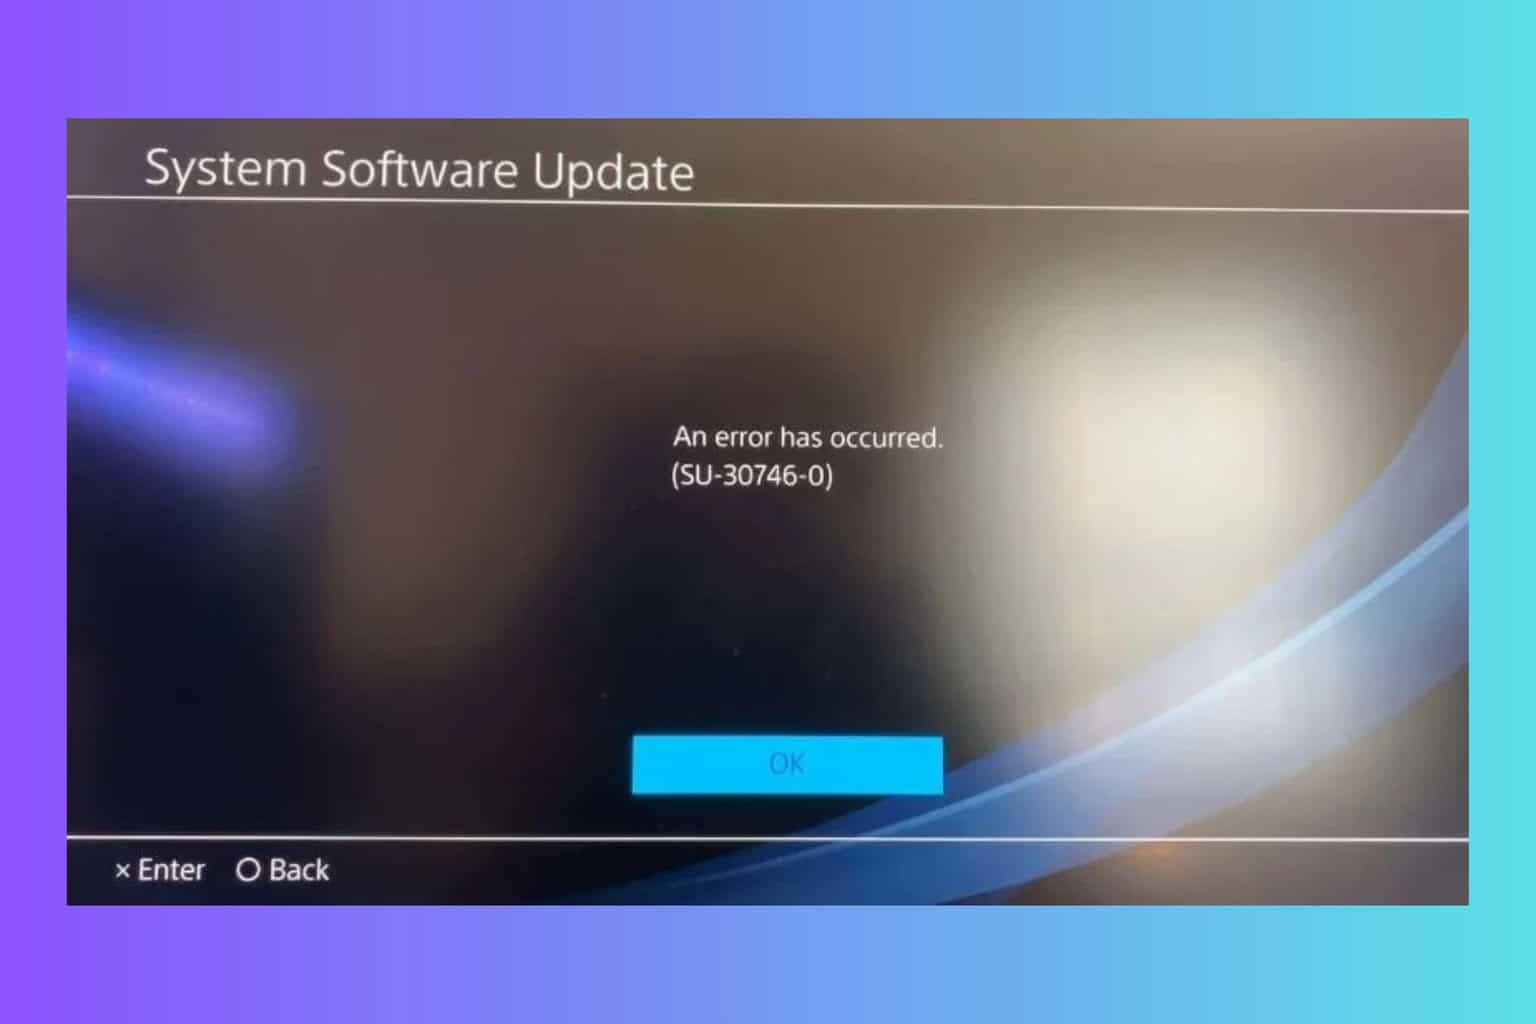
The PS4 error SU-30746-0 comes with the message The system software update has failed. This error is usually caused by an unstable internet connection or a server error. Your PlayStation 4 console couldn’t download and install the latest update properly. Before going through the solutions below, try to restart the console and try to update using a cable connection if available.
How do I fix the PS4 Error SU-30746-0?
1. Remove the update file
Go into the Menu of PS 4, select Notifications from the PS4 function area.
Highlight the update file and press the OPTIONS button, then select Delete.
It’s important to first remove the update that was incompletely uninstall to be able to freshly install it.
2. Restart PS4 in Safe Mode and retry the update
Turn off your PS4 completely.
Press and hold the power button until you hear two beeps (one immediately and one after about 7 seconds).
Connect your DualShock 4 controller using a USB cable and press the PS button.
In Safe Mode, select Update System Software.
Choose Update Using Internet to download the latest update directly from the PlayStation servers.
If this doesn’t work, you can try Update from USB Storage Device if you have the update file downloaded on a USB drive.
If updating the system software doesn’t resolve the issue, go back to Safe Mode.
Select Rebuild Database. This option scans the drive and creates a new database of all content, which can fix data corruption issues.
3. Restore PS4 to default settings
Use the previous solution to boot PS4 in Safe Mode.
Select Restore Default Settings. This will reset your PS4 to its original settings without deleting your data.
4. Reinstall the System Software
Download the latest PS4 system software update file from the official PlayStation website onto a USB drive formatted to FAT32 or exFAT and keep the file name intact.
In Safe Mode, select Initialize PS4 (Reinstall System Software) and follow the on-screen instructions.
This is only as a last resort solution because you will lose all files and data on your PS4 console.
If none of the above steps work, it might be best to contact PlayStation Support for further assistance.
Hopefully, by following the solutions above, you fixed the PS4 Error SU-30746-0 and now you’ve returned to your gaming session.
We also have a full guide on how to fix PS4 Error SU-42118-6 which is also related to an update issue. If you’ve stumbled across the PS4 error code CE-35694-7, click the highlighted link to get the right solutions.
Tell us in the comments below which of the solutions helped you.
Many gamers are astonished that the price of some Microsoft Flight Simulator Editions can reach hundreds of euros/dollars, with some costing as much as over $300. People have expressed their frustrations on Reddit about this.
The Reddit post then shows an image of Microsoft Flight Simulator 2024—Premium Deluxe Edition and Aviator Edition, which cost 140 Euros and 219 Euros, respectively.
We checked, and it’s true, although their American dollar counterparts are a bit cheaper—$129 and $199, respectively. Either way, if you’re playing Microsoft Flight Simulator from the States, it’s cheaper here.
However, the Limited Collection Edition is more expensive in the US than in Europe, with this version costing $309 and 279 Euros, respectively.
So why are they so expensive? Well, these editions come with tens of planes and aircraft available for users to try and learn. Since Microsoft Flight Simulator is a real flight simulator, it has real-life aircraft used by flying companies worldwide.
As one user said, Microsoft Flight Simulator is accurate enough for flight training. The aeroplane features are exposed and explained in great detail, and while you might not get the experience of flying a plane, you can surely learn everything about the controls and the numbers, and you can even experience malfunctions.
This. One that’s accurate enough to prepare for actual flight training. You may not get the landing but you’ll get the flying, the controls etc. and a good on paper education.
The price is totally reasonable IMO. Also, the peripherals are an arm and a leg.
If you’re interested in learning to fly a plane, Microsoft Flight Simulator can teach you a lot in a completely safe environment.
Plus, as we mentioned earlier, these editions feature many planes, each with its own set of controls (although not significantly different), setups and so on. The Aviation Edition, for instance, has 125 Aircraft and 160 Airports, giving you all you need to know your way around flying.
The aircraft can be bought separately, but they will cost more than the Editions. Take, for example, the Short SC.7 Skyvan, released earlier this year. It costs about $14.99 separately.
So, ultimately, you get not only a game but also almost a real-life simulator of a flying plane. For those starting their career in flying or wanting to become pilots, this emulator is more than mandatory for additional practice.
0x000000E9 ACTIVE_EX_WORKER_THREAD_TERMINATION is a blue screen of death (BSOD) error that can occur in Windows due to problems with the system’s drivers, recently installed applications or underlying hardware conflicts. It may result in system crashes, but you can fix the issue with the right approach.
So, try out these quick solutions before we move on to more detailed ones:
Unplug external hardware, then reboot your computer.
Update Windows – Press Windows + I > Windows Update > Check for updates > Download and install.
If these don’t work, let’s check out the in-depth fixes below.
How To Fix ACTIVE_EX_WORKER_THREAD_TERMINATION
Here are the five methods to resolve this error and get your system running smoothly again:
Run Windows Defender Offline
Windows Defender Offline is a powerful tool for detecting malware that might not be visible during regular scans. Running it can help eliminate harmful software triggering the ACTIVE_EX_WORKER_THREAD_TERMINATION error. Here’s how to do it:
Press Windows + I, then click Update & Security.
Click Windows Security, then select Virus & threat protection.
Tap Scan options.
Scroll and tap Microsoft Defender Offline scan, then click Scan Now.
Your PC will restart and check if the issue is resolved.
Scan Device Performance and Health
A performance and health scan helps identify issues related to storage, battery life, or software that could lead to the ACTIVE_EX_WORKER_THREAD_TERMINATION error. Here’s what to do:
Press Windows + I, then select Update & Security.
Tap Windows Security from the left pane, then click Device performance & health.
Check your computer’s Health report. If any issues are detected, follow the recommended steps to fix them.
Reboot your PC after performing the recommended fixes, and then check if the ACTIVE_EX_WORKER_THREAD_TERMINATION is solved.
Toggle Fast Startup
Fast Startup allows your system to boot faster by saving some system files during shutdown. Toggling this feature can minimize the possibility of a faulty thread termination. Follow the steps below:
Press the Windows icon + X, then tap Power Options.
Click Additional power settings on the top rightunder related settings.
Select Choose what the power buttons do.
Tap Change settings that are currently unavailable.
Uncheck the box next to Turn on fast startup. Then tap Save Changes and reboot your PC.
Uninstall Recently Installed Programs
Incompatible or faulty drivers and applications can cause BSOD errors like ACTIVE_EX_WORKER_THREAD_TERMINATION. You can uninstall recent apps to resolve the issue. Follow the below steps:
Press Windows + X, then tap Apps and Features.
Scroll to locate the recently installed program, click on it, and tap Uninstall.
After doing so, restart your computer to see if the ACTIVE_EX_WORKER_THREAD_TERMINATION error is resolved.
Restore Your Windows
If the issue persists after trying other methods, restoring your system to a previous state might be necessary. This step will roll back your system to a point before the error started, eliminating any software or driver changes that may have caused it.
Here are the steps to follow:
Press Windows + S, type System Restore, and tap Open.
Select System Restore.
Pick a restore point created before the error and tap Next.
Click Finish.
The ACTIVE_EX_WORKER_THREAD_TERMINATION error can be caused by various factors, from malware infections to driver conflicts. Luckily, I included each method to tackle a potential root cause for a thorough approach. We also have a guide for a similar problem, IMPERSONATING_WORKER_THREAD.
Moreover, you can learn to fix the blue screen error that appears when playing games.
Updating the driver for your Logitech G502 mouse can seem daunting, but it’s crucial for optimal performance and compatibility. Whether you’re a gamer or a professional, keeping your drivers up-to-date ensures your mouse functions smoothly and efficiently.
Follow the on-screen instructions to complete the installation.
Find and open the Logitech G HUB app from your programs list or desktop shortcut.
G HUB will automatically detect your G502 mouse.
If a firmware update is available, you’ll see an option to update. Click Update to start.
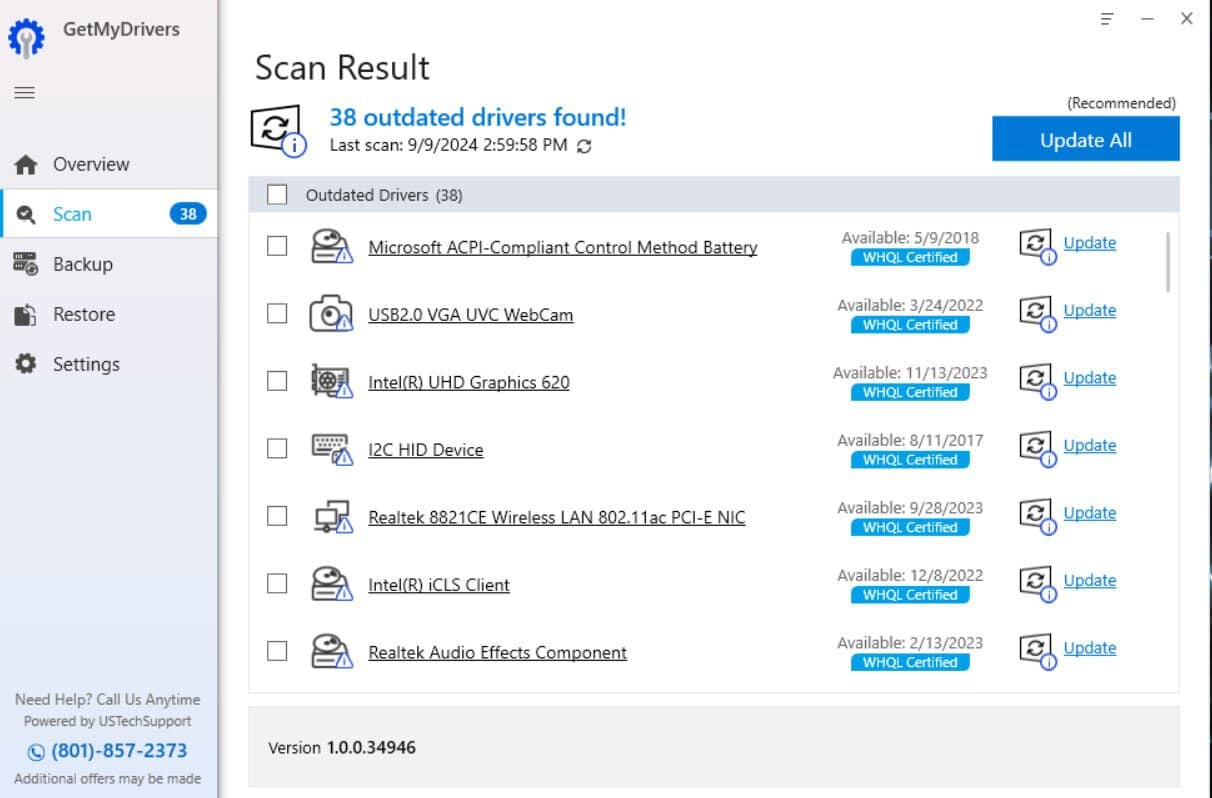
Driver updates and maintenance can also be done with the help of professional software. GetMyDrivers is able to scan your whole system and replace any outdated drivers it encounters in just a few minutes. Plus this software is great for long-term maintenance as you can schedule regular scans so you can make sure your drivers are always fresh.
GetMyDrivers
Update all your drivers with just a few clicks and keep them updated at all times with GetMyDrivers software.
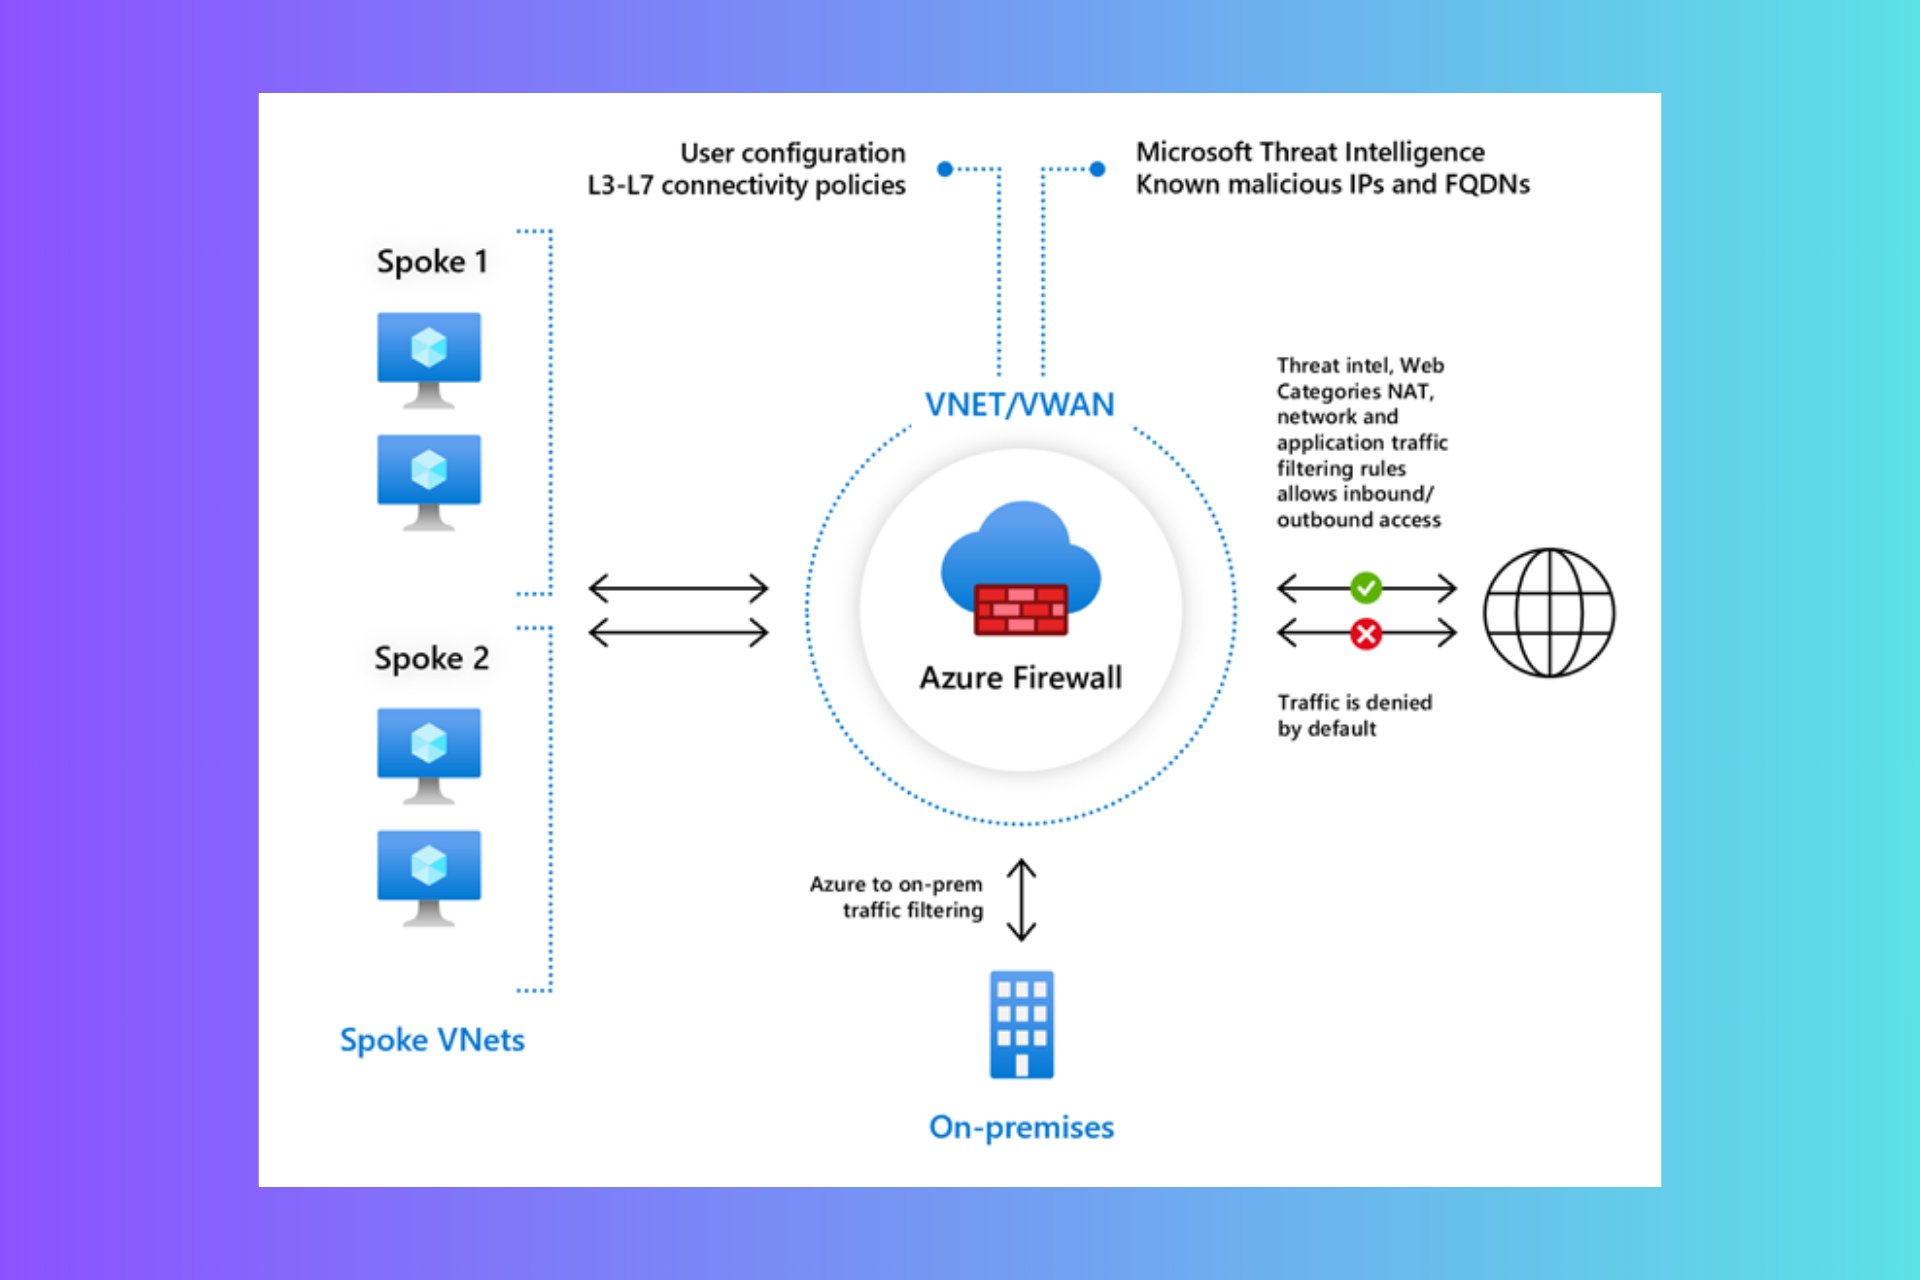
It might sound complicated to allow internet access through Azure Firewall, but our step by step guide below will get you through it without skipping a beat.
How to I allow internet traffic through Azure Firewall?
1. Create an Azure Firewall
Open a browser, go to the Azure portal and log in with your credentials.
Select Create a resource > Networking > Firewall.
Fill in the required details such as Resource Group, Name, Region, and Firewall Policy.
Click Review + create and then Create.
In case you already have an Azure Firewall, skip this step.
2. Create a Firewall Subnet and add a Route
In Azure, navigate to your Virtual Network.
Select Subnets > + Subnet.
Name the subnet AzureFirewallSubnet.
Specify a subnet address range (at least /26 in size), then click Save.
After creating the subnet, deploy the firewall into this subnet.
Go to the Firewall you created.
Under Settings, select Public IP configuration and associate a public IP address.
Go to All services > Route tables > + Add.
Fill in the required details and create the route table.
Once created, go to the route table and select Routes > + Add.
Add a route with the following details:
Route name: AllowAllOutbound Address prefix: 0.0.0.0/0 Next hop type: Virtual appliance Next hop address: The private IP address of your Azure Firewall.
To associate the Route Table with the Subnet, go to the Subnets section of your route table.
Click + Associate and select the subnet you want to route through the firewall.
Name: AllowAllOutbound Priority: 100 (or any priority that fits your rule set) Action: Allow
Add a rule with the following details:
Name: AllowAll Protocol: Any Source: Any Destination: 0.0.0.0/0 Destination Ports: *
4. Verify the configuration
Finally, it’s time to verify the configuration you just set up. For that, double check if the route table is correctly associated with the subnet.
Check that the network rule is active and correctly configured in the Azure Firewall. Test the outbound traffic from a VM in the subnet to ensure it routes through the firewall.
This setup will route all outbound traffic from the specified subnet through the Azure Firewall, allowing all outbound traffic as per the configured rules.
Microsoft Teams will allow users to vote on the most critical questions and sort them by the highest votes in meetings and Q&As. According to a recent entry to the Microsoft 365 Roadmap, the new capability will allow moderators to derive insights from the audience about what topics they care the most about and answer them.
The capability will also allow moderators of these meetings to move outdated or irrelevant questions to a separate feed so as not to disturb the meeting.
Question voting allows instance participants to upvote the most important questions and sort by highest votes or recent activity. This gives moderators the ability to derive insights from the audience about what topics they care the most about and address them. Additionally, for questions that might be outdated or irrelevant, moderators can move them to a separate feed to ensure that presenters can focus on providing the most value to attendees.
One advantage of this new capability is that the Redmond-based tech giant will make it available to all devices, including desktop, iOS, Android, and Macs. This will ensure that no one gets left behind in such a meeting and that users from all places can vote on important questions.
Another perk is that the ability to vote questions in Microsoft Teams will save a lot of time and unnecessary feedback or back-and-forth with participants to decide which questions are more important.
However, we’ll have to wait a few months before it becomes available, as Microsoft states that the feature will only be released in January 2025.
Updating your ASUS motherboard drivers can seem daunting, but it’s crucial for maintaining system stability and performance. Whether you’re a seasoned Windows user or just starting, this guide will walk you through the process step-by-step.
After installing the app, it will start automatically. The GetMyDrivers app automatically scans your PC to find any missing or problematic drivers.
Depending on your system and its state, in a few seconds, the app will provide a complete report of the driver situation, and will also detect the ASUS motherboard driver update if there is any.
Now, just find it in the list and click on Update or Install and the software will do the rest.
Restart the PC after the driver is installed.
Using a driver updater tool such as GetMyDrivers is the quickest way to get the latest drivers, not just the one from your ASUS motherboard. The best part is that GetMyDrivers will detect other updates that you didn’t even know about.
Moreover, if you buy the full version, you will be able to update all the drivers at the same time and even schedule checks to keep them fresh at all times. If anything goes bad, GetMyDrivers also saves the previous drivers so you can get roll them back at any moment.
2. Downloading and installing drivers from ASUS Support
Use the search bar to locate your motherboard model.
Click on the Driver & Utility section.
Choose the correct operating system from the dropdown menu.
Download the latest drivers for your chipset, BIOS, and other components.
Unzip the downloaded files, then run ASUS Setup or SetupChipset to start the installation process.
Follow the prompts to complete the installation.
Restart your computer to ensure the new drivers are properly installed.
Downloading and installing the latest drivers ensures that your system is using the most up-to-date software, which can improve performance and resolve known issues.
3. Update the drivers using Armory Crate
ASUS recommends using their own utility called Armoury Crate which you can download straight from the ASUS dedicated website.
This tool will automatically detect any driver update on your ASUS desktop PC or laptop and install the official drivers. If you have a newer ASUS ROG device, you probably have it already installed so just search for Armoury Crate on your PC to launch it.
Find your motherboard model and download the latest BIOS file.
Follow the instructions on the download page to rename the BIOS file correctly.
Copy the BIOS file to the USB stick.
Restart your computer and press the designated key (usually Del or F2) to enter the BIOS setup.
Navigate to the BIOS Flash Utility menu within the BIOS setup.
Select the USB device containing the BIOS file.
Follow on-screen instructions to start the BIOS update.
Do not turn off your computer during the update process.
Once completed, restart your computer for the changes to take effect.
Updating the BIOS can provide system stability and compatibility improvements, ensuring your hardware functions correctly with the latest software.
5. Manual driver update from Device Manager
Press Windows + X and select Device Manager.
Find the device you want to update, right-click on it, and select Update Driver.
Select Search automatically for drivers to let Windows find and install the latest driver.
Manually updating drivers from Device Manager can be useful if you prefer letting Windows handle the driver search and installation.
Each of these solutions addresses different aspects of updating ASUS motherboard drivers, ensuring that your system stays current and performs optimally. Regularly checking for driver updates and following the correct installation sequence can prevent many common issues and keep your system running smoothly.
Gaming on a Windows PC can be an exhilarating experience, but lag and performance issues can quickly ruin the fun. Optimizing your RAM is crucial to ensure your games run smoothly and efficiently. Here are some essential tips to help you get the most out of your system’s memory.
Click the Performance drop-down menu and select LiveBoost.
Now, from the Configuration menu, make sure you turn on OptiCore and RAM Jet.
OptiCore will focus the power allocation for your game while RAMJet will clear all the unnecessary processes and free up the RAM you need for the optimal gaming experience. Basically, IOLO System Mechanic will automatically perform all the methods we recommend below in manual procedures.
2. Monitor RAM usage with Task Manager
Press Ctrl + Shift + Esc to open Task Manager on Windows.
Click on the Processes tab on the left.
Sort the processes by memory usage by clicking on the Memory column header.
Identify high-usage applications and right-click to End Task or Quit Process.
Next, click on the Startup tab in Task Manager.
Disable unnecessary startup programs by right-clicking and selecting Disable.
After a restart, these apps won’t be included in the startup loading, minimizing RAM usage.
By monitoring and managing high-memory processes, you can quickly identify and terminate tasks that consume a lot of RAM, thus freeing up memory for other tasks.
3. Uninstall unused programs
Open the Start menu, type Control Panel, and press Enter.
Click Uninstall a program under the Programs section.
Find programs you no longer use, select them, and click Uninstall.
Unused programs can consume background resources, so removing them frees up RAM for more critical tasks.
4. Clear the browser cache (for browser gaming)
Open your browser (e.g., Chrome, Firefox).
Go to the Settings menu (three dots or lines in the upper-right corner).
Select History or Privacy, and click Clear browsing data.
Choose Cached images and files, select a time range, and click Clear data.
Clearing your browser cache frees up RAM because cached files can use a significant amount of memory.
5. Adjust virtual memory
Open Settings by pressing Win + I.
Navigate to System > About > Advanced system settings.
Under the Performance section, click Settings.
Go to the Advanced tab and click Change under Virtual memory.
Uncheck Automatically manage paging file size for all drives.
Set the initial size to 1.5 times your RAM and the maximum size to 3 times your RAM.
Adjusting virtual memory allows your hard drive to supplement RAM by acting as additional memory, which can help when your physical RAM is fully utilized.
6. Lower graphics settings and adjust resolutions
Open your game’s settings menu.
Find the graphics settings section.
Lower the resolution and reduce texture quality.
Disable advanced graphics features like shadows and motion blur.
Lowering graphics settings in games reduces the load on RAM and can lead to smoother gameplay, especially on systems with limited memory.
By following these detailed steps, you should be able to optimize your computer’s RAM for a better gaming experience. Regular maintenance and mindful usage can keep your system running smoothly and prevent future performance issues.
When diving into music production, a well-optimized PC can make all the difference. Lag, crashes, and slow load times can disrupt your creative flow. Here’s a comprehensive guide to ensure your PC is running at its best for music production.
Click the Performance drop-down menu and select LiveBoost.
Now, from the Select a PowerSense Mode menu, choose Ultra Performance – Music/Video Production.
This setting will set up your computer for maximum performance when working for music/audio production software by adjusting the power consumption. Basically, System Mechanic will perform most of the necessary adjustments instructed in the methods below.
2. Adjust the performance & power options
Click the Start icon, type Advanced system settings and press Enter.
In the Performance section, click Settings.
Under the Visual Effects tab, select Adjust for best performance.
In the Advanced tab, under Processor Scheduling, select Background services.
Change Data Execution Prevention settings to Turn on DEP for essential Windows programs and services only.
Click Apply and OK.
Changing these settings ensures your system allocates maximum resources to background services and processes, improving your DAW’s performance.
3. Manage USB Power Settings
Open the Start Menu and type “Device Manager,” then press Enter.
Expand the “Universal Serial Bus controllers” section.
Right-click each USB Root Hub and select “Properties.”
Go to the “Power Management” tab and uncheck “Allow the computer to turn off this device to save power.”
Repeat for all USB Root Hubs.
This prevents your PC from cutting power to USB ports, ensuring connected devices like MIDI keyboards and audio interfaces function without interruption.
4. Disable unnecessary background apps
Press Ctrl + Shift + Esc to open Task Manager.
Navigate to the Startup” tab.
Right-click on any non-essential programs and select Disable.
Go to the Processes tab and right-click on unnecessary processes, then select End Task.
Disabling these processes ensures your PC’s CPU and memory are focused on your DAW rather than other applications.
5. Optimize audio interface performance
Install the latest drivers for your audio interface from the manufacturer’s website.
If necessary, download and install ASIO4ALL, a third-party driver.
Open your DAW and select the ASIO4ALL driver if your interface lacks a robust native driver.
Adjust the buffer size and sample rate in your DAW settings for optimal performance.
Updating drivers and setting the correct buffer size ensures smoother audio processing and minimizes latency.
6. Use dedicated SSDs
Install SSDs for your DAW projects, sound libraries, and plugins.
Move these files to the SSDs to free up space on your main drive.
SSDs have faster read/write speeds than HDDs, significantly reducing loading times and improving overall performance.
7. Disable System Sounds and Notifications
Open Control Panel and select Hardware and Sound.
Click on Sound and go to the Sounds” tab.
Under Sound Scheme, select No Sounds and click Apply.
Open the Start menu, type Notifications & actions settings, and press Enter.
Toggle off notifications for all unnecessary applications.
Disabling system sounds and notifications prevents interruptions and potential conflicts with your audio software.
8. Manually set page file size
Open the Start menu, type Advanced system settings, and press Enter.
Go to the Advanced tab and click Settings under Performance.
Navigate to the Advanced tab and click Change under Virtual Memory.
Uncheck Automatically manage paging file size for all drives.
Select Custom size, set the initial size to 1024 MB or higher, and the maximum size accordingly.
Manually setting the page file size ensures your system has enough virtual memory allocated, preventing sluggish performance during intensive audio tasks.
By following these steps, you’ll ensure your PC is finely tuned for music production, allowing you to focus on creating without technical interruptions. Regular maintenance and updates can keep your system running smoothly in the long run.
If you’re experiencing lag while typing in Microsoft Word, you’re not alone. This common issue can be incredibly frustrating, especially when you’re trying to get work done efficiently. Here are some quick solutions to help you get back on track.
What do I do if my typing is lagging in Word?
1. Run IOLO System Mechanic’s optimization feature
From here, you can scan your system for any issues, including eventual problems that may slow your system. Once System Mechanic finishes the scan, you can fix all the issues with a single click.
Using System Mechanic helps by addressing the most common causes of errors and crashes, which can improve the overall stability of Microsoft Word. Not only that, but the software comes with a lot of extra tools that can free up your memory, fixing the typing lag in Word which is most likely produced by lack of resources.
2. Run Microsoft Word in Safe Mode
Close Microsoft Word completely if it’s open.
Press Win + R on your keyboard to open the Run command box.
Type winword /safe and press Enter.
Microsoft Word will open in Safe Mode, without add-ins. Create a new document and see if the lag persists.
If the lag is gone, it indicates that an add-in might be causing the issue.
To disable add-ins:
Open Word normally and go to File > Options.
Select Add-ins, then click on the Go button next to Manage COM Add-ins.
Uncheck all the add-ins you want to disable and click OK.
Restart Word to see if the issue is resolved.
Running Word in Safe Mode helps identify if add-ins are the cause of the lag. If the lag is gone, you can disable the problematic add-ins permanently.
3. Remove the Default Template file
Close Microsoft Word.
Open File Explorer by pressing Win + E.
Navigate to the following folder (replace YourUsername with your actual user name): C:\Users\<YourUsername>\AppData\Roaming\Microsoft\Templates
Find the file named Normal.dot or Normal.dotm, and delete it or rename it (e.g., to Normal.old).
Restart Microsoft Word.
Deleting the default template file can resolve issues caused by corruption. Word will create a new default template file upon restarting.
4. Turn off hardware graphics acceleration
Open Microsoft Word.
Go to File > Options.
Select the Advanced tab.
Scroll down to the Display section.
Check the box next to Disable hardware graphics acceleration.
Click OK to apply the changes.
Disabling hardware graphics acceleration can improve Word’s performance, especially on computers with limited hardware resources.
5. Clean up the Temporary files
Press Win + R to open the Run command box.
Type cleanmgr and press Enter.
Select the drive where Windows is installed (usually C:).
Click OK and then select the Temporary files option.
Click OK and then Delete Files to clean up the temporary files.
Cleaning up temporary files can free up system resources and improve the performance of applications, including Word.
6. Optimize your documents
Open your document in Microsoft Word.
Remove unnecessary macros by going to View > Macros > View Macros, selecting the macro, and clicking Delete.
Compress images by selecting an image, going to the Format tab, and choosing Compress Pictures.
Select the desired resolution and click OK.
Optimizing your documents by removing macros and compressing images can reduce the processing load and improve performance.
7. Repair Microsoft Office
Open the Control Panel by pressing Win + S and typing Control Panel.
Go to Programs and Features.
Select Microsoft Office from the list and click Change.
Choose the Repair option and follow the on-screen instructions.
Repairing Microsoft Office can fix any corrupted files or settings that might be causing performance issues.
By following these solutions, you can identify and resolve the lagging issue in Microsoft Word, ensuring a smoother and more efficient experience. To prevent future lag, regularly update your software and clean up temporary files.
As teased a while ago, Microsoft announced that the Windows app will be generally available for Windows, macOS, iOS, iPadOS, and web browsers starting today. The app is also in public preview for Android.
Windows App is a secure gateway to connect to Windows across Windows 365, Azure Virtual Desktop, Remote Desktop, Remote Desktop Services, Microsoft Dev Box, and more.
According to the official announcement, the unified app is designed to help people connect to the Windows experience they know and love from any device. The platform also provides a unified experience that simplifies access to Windows services, like Windows 365 and Azure Virtual Desktop, from a single app.
One of the key features of Windows App is multifactor authentication. This feature lets users securely connect to Windows resources and work remotely from any location.
The platform offers other capabilities as well. It provides enhanced security features and streamlined management for IT administrators. At the same time, end users can customize their experience with features like a customizable home screen, multi-monitor support, and USB redirection.
With it, users can access applications and files from the Start menu, local search, and more. It also supports device redirection, so users can print files, access local storage, and more.
The app is built on modern architecture and is tightly integrated with Microsoft’s cloud infrastructure to provide a fast and fluid experience.
Windows App is available from the Microsoft Store, the Apple App Store (for macOS and iOS), and Google Play (for Android). It can also be downloaded for Windows, macOS, iOS, iPadOS, and Android.
In this uMobix review I focus on the online-based tool packed with effective features that allow parents to be on guard and prevent an unpleasant or even damaging online experience for their child.
While mobile gadgets and technologies have simplified our lives and increased interconnectedness. This comes with the risk of malevolence and financial fraudsters, data thieves, sexual predators, etc.
Read on to find out how uMobix works against these threats, its key features, installation tips, pricing and more.
What Is uMobix, and How Does It Work?
With the increasing concern over online safety, uMobix offers a comprehensive parental control solution for parents who want to keep a close eye on their children’s digital activities and is designed to monitor various aspects of a child’s smartphone usage.
In terms of convenience, you can think of uMobix as just another app you install on the device – with the slight difference that it is invisible and undetectable. Besides, installation on a target device (smartphone or tablet, the activity on which you want to track) does not always involve direct installation. This is especially true for those that want to track iOS devices. We’ll get to that a bit later in this uMobix review.
The program is compatible with both Android and iOS devices; once installed, the app runs in the background without a noticeable impact on device performance, ensuring that the monitored individual remains unaware of the tracking.
When it comes to Android, uMobix operates by installing and unpacking a small APK file on the target device – usually a child’s smartphone. What happens after is that the app collects data such as call logs, text messages, GPS location, social media activity, etc., and then transmits it to the uMobix server, where it’s accessible via a user-friendly online dashboard.
Parents can perform uMobix login to their user space from any device with internet access and get real-time insights into what their child is doing on their phone remotely, even having remote controls for blocking access to the internet, WiFi, or the phone itself.
I found uMobix to be one of the most comprehensive monitoring apps on the market, with multiple tracking methods and the ability to observe, manage, and configure monitoring from its dashboard. Here’s what stands out the most:
Call Logs & Contacts
Although uMobix isn’t just about keeping an eye on call logs or text messages, it does that with flying colors. One of the fundamental features of uMobix is its ability to track all incoming and outgoing calls.
You can see who your child is talking to, the duration of each call, and even the contact’s name. This is particularly useful for keeping an eye on any unfamiliar numbers that might pop up frequently.
Text Message Monitoring
uMobix app goes beyond just showing you the current messages on your child’s device. It also lets you see deleted texts, giving you a complete picture of their conversations. This feature is crucial if you suspect your child might be hiding certain interactions from you.
GPS Location Tracking
Even if you decide to give your kid a lot of freedom, this does not change the fact that sometimes you will need to find out where they are and if everything is okay with them.
If you’re concerned about where your child is at any given time, uMobix’s GPS tracking feature has you covered. It provides real-time location data, allowing you to track your child’s movements. Additionally, you can access location history to see where they’ve been recently. This feature can bring peace of mind, especially when your child is out and about.
Social Media Surveillance
In a world where almost everyone has an account on at least one social network, it will be very difficult to restrict a child, and especially a teenager, from accessing them. In many cases, it would probably be much more reasonable to gradually let them socialize in the virtual world and do this with the help of a parental control app like uMobix.
uMobix excels at keeping you informed about your child’s online presence by monitoring popular platforms such as:
WhatsApp, Snapchat, TikTok, Viber, YouTube
Dating apps (Tinder, Badoo, LOVOO, Clover, Zoosk, yoomee, Jaumo, Hinge, BLOOM, and happn)
Grants full access to their postings, messages, stories, and more on Facebook and Instagram.
Social media monitoring is tracked via a screen recorder that takes screenshots every 10 seconds, ensuring real-time monitoring.
You can see who they’re chatting with, what they’re posting, and even view multimedia shared on these platforms. For parents worried about cyberbullying or inappropriate content, this feature is a game-changer.
If you find yourself in a worrisome situation when your kid does not pick up the phone or respond to messages, in addition to location tracking, uMobix has provided the option of a video or audio connection to the device. It is also possible to take a camera snapshot using the phone’s front or back camera.
Web Browsing History and Media
As an adult, you know exactly how much content not intended for the child’s eyes is stored on the Internet. uMobix logs all browsing history, including timestamps and the frequency of visits. This feature is incredibly useful for keeping an eye on whether your child is spending too much time on certain websites.
What’s more, the uMobix app allows you to view all the photos and videos stored on your child’s device. Whether they’ve taken a new picture, downloaded it from the Internet, or received a video from a friend, you’ll be able to see it. This is especially important for ensuring that your child isn’t being exposed to or sharing inappropriate content.
App Monitoring and Control
Last but not least, you will want to know what apps your child is using and how often. During this uMobix review, I found just that in the dashboard.
You get a detailed list of all installed apps and their usage frequency, plus it allows you to take control remotely by blocking specific apps or even locking the entire device if necessary. Feel free to block age-inappropriate websites, too. This level of control is beneficial for managing screen time or preventing access to certain apps altogether.
User Interface and Ease-of-Use
As you can tell in the screenshots above, uMobix operates from an intuitive web dashboard once you have installed the monitoring app on your child’s device. From here everything is smooth sailing.
When you log in, you get a nice map of recent locations, common calls and SMSs, most visited sites and social media apps, and a lot of other useful data.
On the left you’ll find all the main parent features, so you can view and configure calls and messages, socials, media, web browsing, location tracking, and other monitoring tools.
Overall, you will have no trouble navigating uMobix.
Customer Support
I found customer support to be fast and knowledgeable. You benefit from a 24/7 live chat on the uMobix website. After a few minutes I was able to connect directly to support staff.
Alternatively, there’s email support for less urgent issues. Plus paying customers get access to a premium phone support.
If you’re more comfortable reading and familiarizing yourself with the topic of remote device monitoring, you can check out their insightful blog. Moreover, if you’ve yet to make a purchase you can browse the dashboard with dummy data to see what it’s like.
Pricing
Access to features is subscription-based. If you find the uMobix pricing for a single month a bit steep, it may be more profitable to consider a subscription for a few months, allowing you to save more in the long run. Here’s a breakdown of the options for you:
1-month plan
$49.99
3-month plan
$29.99 per month (billed as $89.97 every three months)
12-month plan
$12.49 per month (billed as $149.88 annually)
It is also possible to start with a free trial for 2 days. To get it, contact customer support for details.
Its 14-day refund policy is limited to those experiencing technical issues.
The site also offers a quick demo, so you can navigate the main web dashboard as it’s populated with tracking information before committing to a plan.
The installation process is straightforward, but it differs depending on the operating system (OS) that will be monitored. The first three steps look the same for both Android and iOS.
Visit the uMobix website and register an account.
Select an OS for tracking and purchase a subscription (possible options are 1, 3, or 12 months).
Receive a welcome email and installation instructions.
And then the process of installing uMobix on the device takes a different turn:
For Android:
It is necessary to gain direct access to the target gadget and ensure a good Internet connection.
Unpack the APK file on this device and follow the instructions. Grant permissions as requested by the installer.
After this, give some time for synchronization and see the data in the appropriate sections in your personal account (on the dashboard).
For iOS:
In this case, there are no additional APK files. If you have credential data to the target’s iCloud, you need to enter it and enjoy monitoring. To get access to more features, scan the QR code using the target iOS device.
If you do not know this data, you can see it in the password manager on the target device, recover it using the device owner’s email, or ask the device owner directly for it.
Note: You will be guided by an installation wizard along the way, no tech skills are necessary. But if anything is unclear, 24/7 customer support is ready to help in a live chat.
uMobix Review – Verdict
To conclude this uMobix review, I found it to be an affordable and comprehensive monitoring solution, perfectly adapted for on-device functionality and the off-device dashboard. It covers everything you need to track your child, whether that be GPS monitoring or seeing who they are interacting with via call, SMS, social media, and on the web.
It performs well with no noticeable slowdown on the target’s device and fast, often real-time data relayed back to you.
The key drawback is that on Android you need to physically access your child’s device for the initial installation, which might be a hurdle for some parents. Moreover, due to Apple’s restrictions, some features are limited on iOS devices, but these are the same hurdles all monitoring apps face.
I say, give the Demo a try and you’ll soon know if it’s the right solution for you.
FAQ
Is uMobix Legit?
Now that I’ve used the service, I can attest uMobix is a legitimate parental control app with no false promises. Its features work as described!
Of course, it’s designed primarily for parents who want to monitor their children’s online activities and ensure their safety. However, it is not advised to use such an app to monitor adults without their consent. This may raise ethical concerns, and it is always best to use the app transparently, particularly when it comes to monitoring minors, and explain to them how this may contribute to their well-being.
What are the most prominent uMobix features?
As a phone tracker for Android and iPhone, uMobix boasts a wide array of features, including basic ones, such as call and SMS monitoring, GPS location tracking, and web browsing history, as well as more advanced ones: social media tracking with full access to certain apps, keylogger, deleted data and message access, app controls, etc.
Does uMobix allow monitoring multiple devices with one subscription?
No, each subscription is tied to a single device. You would need to purchase an additional package to monitor more devices. They can be tracked from a single online dashboard remotely. However, it is possible to unlink and link another device within 1 subscription.
Can uMobix be installed remotely?
As a rule, you will need direct access to the gadget to install uMobix. One-time physical access to the target device is required to provide all the necessary permissions and complete the initial installation successfully. The setup takes about 10 minutes and is guided by a wizard.
Is uMobix detectable on the target device?
uMobix runs in stealth mode, making it invisible and undetectable to the user. The program doesn’t display any visible icons or notifications and puts a light load on the phone’s performance in general.
Thanks to templates, you can create almost anything in Word quickly. If you’re looking to make a calendar, in today’s guide we’re going to show you how to create a calendar template for 2024 in Microsoft Word.
Does Microsoft Word have a calendar template?
Microsoft Word has a wide array of templates available, including the calendar template.
How do I insert a 2024 calendar template in Microsoft Word?
1. Use built-in templates
In Word, go to File and choose New.
In the search field type calendar and click the search icon.
Select one of many available templates.
Click on Create.
Once the template is downloaded it will be automatically open.
Download the desired template by clicking the Download button.
Alternatively, you can click the Customize button and customize your calendar. Once done, click Create Word Calendar to download it.
Run the downloaded file and click on Enable Editing.
Keep in mind that not all templates from third-party sources are 100% safe, so use only trusted sources.
Can you insert a calendar into a Word document?
Yes, besides templates you can use the Quick Table feature like this to add a calendar:
Go to the Insert tab and click Table.
Next, choose Quick Tables.
Select the desired calendar.
As you can see, it’s pretty simple to use a calendar template for 2024 in Microsoft Word. We recently wrote about brochure templates in Word, so you might want to check that guide out.
You can also use a desktop calendar tool such as DesktopCal when you need a more customizable option outside Word.
Microsoft announced in a blog post that the Xbox Ambassadors program, one of the most important Xbox platforms, will be discontinued on October 15. The program, known for its big rewards to the community, is being phased out as players find more value in engaging with the company in other ways, such as the Xbox Insider Program.
Even though the platform will be shut down on October 15, program members will have until then to claim any of their remaining codes or rewards. The company is also closing the Ambassador Quests, and the Xbox Ambassadors badge will get a new and final legacy design.
Any Xbox Ambassadors active with the program in the current season will get a special “thank you” in the rewards section. Before the shutdown date, the program will hold special weekly sweepstakes.
The Redmond-based tech giant will also change the Xbox Ambassador Champions program into Xbox Community Champions. While this program is going away, Microsoft plans to expand its Rewards with Xbox and Xbox Research program, with more details to be revealed later.
Over the last 13 years, Xbox Ambassadors have played a key role in fostering connections and positivity among Xbox players. Whether hosting a gaming session for players to connect or providing feedback on our games and hardware—you have helped shape Xbox in so many ways. While we have learned so much from this passionate group, today we are announcing the final season of the Xbox Ambassadors program as we continue to integrate its values across our platform and focus on creating more ways for you to directly influence and impact Xbox for all.
If you’re an Xbox Ambassador, you can join the Xbox Insider Program to get an early look at new Xbox console and PC app features and test upcoming games.
Microsoft released the 130.0.2835.2 build to Edge insiders within the Dev Channel. The build’s most exciting feature is the ability to upload custom images to the appearance page, meaning Microsoft Edge will now let you personalize your browser experience with your own photos.
The 130.0.2835.2 build also introduces a new loading icon for PDFs loading on Android. It fixes multiple bugs, including crashes that could happen when logging into a different MSA account on iOS, installing the Dark Reader extension on Android, and more.
As you know, the Redmond-based tech giant recently announced that Edge will have a new Settings page (just a new structure, not new functionalities), and the latest build to the Dev Channel seems to bring even more improvements to it.
The Settings banner that sometimes appears on the page is now only displayed once. Additionally, an issue where the new group was generated successfully, but the previously generated group became ungrouped was fixed.
Finding the best cursive fonts in Microsoft Word might be challenging, given that the platform has hundreds of fonts. Cursive fonts usually look organic and natural, perfect for emulating handwritten text.
Microsoft Word is an essential tool for many professionals, and this software offers more than just the ability to type up plain text. For example, you can select from many impressive cursive fonts to give your documents a more distinctive and personal look.
To help you explore the full scope of what Microsoft Word offers in this department, we’ve gathered a list of the best 30 cursive fonts for this platform.
25 Native Cursive Fonts in Microsoft Word
1. Goudy Old Style Italic
This classic font creates a time-honoured feel in formal documents, certificates, or old-world-style invitations that will make you feel you’re corresponding with someone in the 17th Century.
2. Vivaldi Italic
Vivaldi Italic is an elegant font that will make any document feel classy but sophisticated. It’s well-suited to high-end event programs and wedding invitations.
3. Sagona Book
Sagona Book is a cursive font designed for modern, upscale branding and editorial design in magazines and digital platforms while also painting a traditional, concise and elegant look.
4. Quire Sans Light Italic
Quire Sans Light is a perfect mix of modern and classy while remaining simple and elegant. It is the best font for writing in a digital journal.
5. Palace Script M
Palace Script M is complicated, good-looking, and suitable for documents related to places that host high events, such as operas, restaurants, or dinners.
6. Script MT Bold
Script MT Bold is the best cursive font for magazines, billboards, advertising sports, or copy. It’s attractive, right in your face, and easy to follow, keeping it classy.
7. Grandview Display Italic
Grandview Display Italic is incredibly clean and cut for its cursive characteristics, which makes it perfect for magazines or slogans.
8. Edwardian Script ITC
Edwardian Script ITC is good-looking on paper, but it can be hard to tell which letter is which. However, this doesn’t mean it shouldn’t be used for formal events or logos.
9. Speak Pro Light Italic
Speak Pro Light Italic is one of the more accessible cursive fonts for Word and also one of the best: It’s simple, looks good, and can be used in various use cases.
10. High Tower Text Italic
High Tower Text Italic is another good-looking cursive font. If you’re into that, it can be used to write journal entries, publications, or, why not, novels.
11. Meiryo Italic
Meiryo Italic can be too modern for cursive fonts, but it looks good nonetheless; we recommend using it on web pages, business documents, or tech magazines.
12. Vladimir Script
Vladimir Script is unique, as you can see below. If you prefer a very personal cursive font for Word, try this one.
13. Bodoni MT Italic
Bodoni MT Italic is elegant and structural, so using this cursive font on fashion-related documents and articles is best.
14. Cochocib Script Latin Pro
Cochocib Script Latin Pro is probably the most organic of all the cursive fonts mentioned here. It’s a beautiful font, but it might be hard to decipher initially.
15. Verdana Italic
Verdana Italic is direct, easy to read and understand, and neutral from an aesthetic point of view, meaning it can be used anywhere.
16. Fairwater Script Regular
Fairwater Script Regular is a stunning cursive font best suited for seaside-related businesses and documents. However, it can also be used in creative writing.
17. Rockwell Italic
Rockwell Italic is a clean and modern font that could look good on tech-related documents.
18. Freestyle Script
Freestyle Script is a carefree cursive font; you might want to use it on casual cafe documents.
19. Kunstler Script
Kunstler Script is a sophisticated, elegant-looking font that can be used on formal documents, such as declarations and diplomas.
20. Lucida Handwriting Italic
Lucida Handwriting Italic is perfect for informal documents, as its clean and unsophisticated style is easy to read and understand.
21. Alasassy Caps Italic
Alasassy Caps Italic is distinctive and unique, and you might want to use it to capture attention easily on a webpage.
22. Fave Script Bold Pro
As its name suggests, Fave Script Bold Pro is quite bold, but it’s also modern and eye-catching.
23. Georgia Italic
Georgia Italic is probably the best cursive Word font for writing anything creative, from short stories to articles and novels.
24. Brush Script MT Italic
Brush Script MT Italic is distinctive and thick; this font borrows the brush-painted look to capture attention.
25. Zapfino
Zapfino is elegant and classic, perfect for formal documents in operas, restaurants, or similar places.
The best non-native cursive fonts for Microsoft Word
If you’re still unsatisfied with your native choices, you can download and install fonts not native to Microsoft Word. You’ll have to get them from external sources, but Word will recognize them once installed.
Read our comprehensive guide if you don’t know how to install new Microsoft Word fonts. You’ll see how simple it is.
These are the best ones out there:
1. Signerica
Signerica is sophisticated and might be hard to decipher initially, but it’s probably the most elegant and personal cursive font on this list.
2. Blackjack
Blackjack is a good-looking font used on informal documents, from cafe-related documents to pubs, restaurants, or even party invitations.
3. Windsong
Windsong is elegant and classy, perfect for writing poetry, wedding invitations, or creative writing entries.
4. Allura
Allura is flowing and beautiful, and you might want to consider using it for special events, such as wedding invitations or anniversaries.
5. Moving Font
Moving Font is a fun and carefree font that can be used for party invitations, logos, and fun documents.
If you’re still in doubt, although I can’t see why, you can create your own cursive font for Microsoft Word. It’s easy; you can install the font and use it everywhere on your Windows 11 device.
It’s also worth mentioning that Microsoft has its library of fonts regularly updated with new ones. You can also find many cursive fonts for the platform that are not mentioned here.
How to choose the best cursive fonts for Microsoft Word?
Well, this is mainly a matter of circumstance. Depending on where you want to use them, the best cursive fonts for Microsoft Word must be easy to decipher, elegantly looking, and captivating.
You’ll need to take into consideration:
The context: By this, we mean choosing the best cursive font in Microsoft Word based on where you want to use it. Is it a restaurant, a pub, or a wedding invitation? Or maybe something very official and formal?
Its legibility: Can you easily read the font? If it’s more challenging, you might want to think twice about it, even if it looks good. While incredibly organic, the Cochocib Script Latin Pro can be a nightmare to decipher.
The brand: The best cursive font in Microsoft Word must be chosen depending on the business or brand where it’s used. Similar to the context, you’ll need to think about choosing a good font for a restaurant or a tech magazine. Maybe your brand is about fashion so that Bodoni MT Italic might be the best.
Particular languages: If you plan to use the font in a language other than English, you’ll need to know if the best cursive font suits those language’s special letters.
Design: The font must also accommodate the brand’s design and the context in which it’s used. For example, you’ll need to see if a cursive font for Microsoft Word looks good with specific colours and visuals. If you want to use them in vivid, neon-like colours, then you might want to choose other fonts.
Consider trying one of these fonts if you’re looking for a cursive font for your next project. The native ones can be accessed through Microsoft Word, and the rest can be easily found online.
And let us know which one you chose in the comments section below.
Over the years, Windows Firewall has evolved to enhance security and protection against emerging threats and unauthorized access. It also generates logs and provides insights into its activities, and you can monitor & troubleshoot security-related issues with its help.
This guide is for you if you want to learn where Windows Firewall logs are located and interpret them to ensure better security management.
Where can I check Firewall logs on Windows 11?
1. Using the Windows File Explorer
Press Windows + E to open the Windows File Explorer.
Go to the system drive; in our case, it is C.
Now, locate and click on the Windows folder.
In the Windows folder, go to System32 and click Log Files.
Open the Firewall folder.
Look for pfirewall.log.
2. Using the Windows Firewall with Advanced Security
Press Windows + R to open the Run window.
Type wf.msc and click OK to open the Windows Defender Firewall with the Advanced Security window.
Click Monitoring, and on the right pane, locate Logging Settings.
You will see a path with a hyperlink; click it to open the log file location.
The Firewall log contains static and descriptive information about the log version and the fields available. Here are some things you can find in the header of the log:
Version – Shows the version of the Windows Firewall security log
Time – Displays the timestamp information in the log in local time
Software – Shows the name of the software creating the log
Fields – Displays a list of fields available for security log entries.
Whereas in the body of the log file, you will see
Date – In YYYY-MM-DD format
Time – In HH:MM:SS format (24 hours format)
Action – Information related to the various actions Firewall performs, including logging connection attempts
Protocol – Protocol like TCP, UDP, or ICMP
SRC-IP – Source IP address
dst-ip – Destination IP address
src-port – Source port number
dst-port – Display port number
Size – Packet size in bytes.
tcpflags – Information about TCP flags in TCP headers.
tcpsyn – Shows the TCP sequence number
tcppack – Displays the TCP acknowledgment number
tcpwin – TCP window size
icmptype – Information about the ICMP messages.
info – Shows an entry that depends on the type of action happened
Path (SEND, RECEIVE, FORWARD, or UNKNOWN)- Shows the direction of communication
What if I can’t access the Firewall logs in the default location?
First, reboot your computer and install the latest Windows update to resolve the log generation issues. Also, make sure you have logged in using an administrator account.
1. Check the Firewall settings
Press the Windows key, type windows security in the search box, and click Open.
Go to Firewall & network protection and click the Advanced settings option to access the Windows Defender Firewall with the Advanced Security window.
Select Windows Defender Firewall with Advanced Security on Local Computer, and click Properties from the right pane.
Go to the Domain Profile tab or any other active profile (Public or Private), locate Logging, and click Customize.
Locate Log dropped packets and ensure Yes is selected from the drop-down menu.
Look for the Size limit option and increase the log file size.
Click OK, then OK to save the changes.
2. Check file permissions
Press Windows + E to open the File Explorer.
Navigate to C:\Windows\System32\LogFiles\Firewall\pfirewall.log
Right-click the pfirewall.log and choose Properties from the context menu.
In the Properties window, go to the Security tab, and you might not see anything but a warning You must have Read permissions to view the properties of this object, so click Advanced.
On the following window, click Continue.
On the Advanced Security Settings window, locate Owner and click Change.
On the Select User or Group window, type the user name of your account or click Advanced.
Click the Find Now button, select the user from the list, and click OK.
Click OK on the Select User or Group window.
Click Apply and then OK to save the changes. Click OK again.
However, if you see this page instead, skip steps 5-10, select your username from Group or user names, and click Edit.
In the following dialog box, locate the Permissions field and place a checkmark next to the Read and Write options. You can also select all of them. Click Apply and OK to save the changes.
Click Apply and OK again.
Accessing the logs allows you to track network traffic, identify blocked connections, and ensure that your device’s firewall settings are in place.
It’s not surprising that Microsoft has been one of the most popular targets for scamming: from hacking Microsoft 365 accounts to increasing AI-driven cyberattacks on the Redmond-based tech giant, the company is constantly bombarded with dozens of attacks every day.
While most can be easily spotted – after all, users now know how to spot a suspecting emails – hackers are coming up with ingenious ways to bypass every sort of security measure. The latest of these tricks is to replace the microsoft word from the email sent by Microsoft with rnicrosoft.
Can you spot the difference? If not, then you’re susceptible to this simple, but effective hack.
The ‘m’ in the second word is made up of ‘r’+’n’, which together seem like ‘m’, but it’s not. I had to pay close attention to this Reddit post until I found out what was wrong.
Apparently, this is working in some parts of the world, and according to this Reddit post, users are constantly getting hit with it. The ‘rn’ is also placed very conveniently in the email address, in a place users are not typically inclined to check.
As you can see in the picture, everything goes smoothly until you pay close attention. But it might all be too late if you don’t pay close attention when the time is right.
So rnicrosoft is another typo you have to be careful about. It’s right there in your face, but you only have to see it.
MSN Weather is introducing a new system that identifies unusual weather trends and notifies users if they are significant.
The new Climate Insights Engine leverages 70 years of detailed historical weather data to track temperature, precipitation, humidity, and wind. This engine compares local weather to historical trends to determine how unusual recent weather has been.
When something unexpected happens, the system will send notifications to keep users informed about the local climate.
In a blog post, Microsoft says MSN Weather provides insights such as “This month’s temperatures are 4.5 degrees lower than normal for your location,” “It’s been 35 days since there has been measurable precipitation at your location; this is the 2nd longest streak ever recorded”.
The new Climate Insights Engine was released to complement MSN Weather’s Weather Trends Page, which debuted last winter. This page provides users with monthly and yearly records and tracks recent weather trends for their location.
The insights engine will proactively inform users when significant trends and records have happened, while the trends page provides an attractive and useful tool for exploring deeper information about the climate patterns where users are.
The Redmond-based tech giant says MSN Weather’s new climate insights notifications are empowered by AI, which is interesting considering Microsoft recently released a patent describing an AI-based tech capable of forecasting unusual climate events, such as tornados or storms.
It’s also worth mentioning that MSN Weather has been consistently recognized for its world-leading forecast accuracy, with the latest recognition coming earlier this year.
MSN Weather integrates with Windows 10, Windows 11, Microsoft Edge, Bing, and the Bing and Microsoft Start mobile apps to provide weather information.
Many users want to know more about Windows 7 startup sound, and in today’s guide, we’re going to share some useful information that you didn’t know before.
What should I know about Windows 7 startup sound?
How do I turn on the startup sound in Windows 7?
Open Control Panel.
Go to Appearance and Personalization and then click on Change sound effects.
Check Play Windows startup sound and save changes.
How do I disable the Windows 7 startup sound?
Repeat the same first two steps from the previous section.
Uncheck the Play Windows startup sound checkbox.
Click on Apply and OK.
How do I change the Windows 7 startup sound?
Open the Control Panel and choose the option to Change sound effects.
Select Windows Logon from the list and pick a different sound from the Sound menu.
Alternatively, use the Browse button to pick a custom sound.
How can I use Windows 7 startup sound on Windows 11?
Firstly, you need to download Windows 7 startup sound on your PC. After that, follow the steps from our guide on how to change the startup sound on Windows 11.
With increasing concerns for privacy and security, it has become essential to understand and implement the best settings on your device for safety. Though Windows 11 has a robust firewall, you need to optimize the settings to maximize the first line of defense. In this guide, we will discuss some of the best practices for the Windows 11 firewall. Read on!
What are the Windows 11 Firewall best practices?
1. Always keep the Windows Firewall enabled
Press Windows + I to open the Settings app.
Go to Privacy & security, then select Windows Security.
On the Windows Security app, locate and click Firewall & network protection.
You will see a Domain network, a Private network, and a Public network. Check if all three say the Firewall is on.
If you see the Firewall is off message under any of them, click Turn on.
Click Yes on the UAC prompt and locate Microsoft Defender Firewall, and toggle on the switch to enable it.
The most fundamental thing is to keep the Windows Firewall enabled at all times, as a disabled firewall risks exposing your device to various threat actors.
2. Block the unused ports
Press the Windows key, type windows security in the search box, and click Open.
Go to Firewall & network protection.
Click the Advanced settings option to access the Windows Defender Firewall with the Advanced Security window.
Click Inbound Rules or Outbound Rules from the left pane, and click New Rule from the right.
Select Port and click Next.
Now, select TCP or UDP, enter the specific port number to block and click Next.
Select Block the connection and click Next.
Place a checkmark next to all the network profiles (Domain, Private, and Public), then click Next.
Name the rule and click Finish.
Reduce the number of entry points for unauthorized access to maintain system security and minimize the attack surface.
3. Enable security notifications
Press the Windows key, type control panel in the search box, and click Open.
Select Category for View by and click System and security.
Click Security and Maintenance.
Click Change Security and Maintenance settings.
Under Turn messages on or off, make sure Network Firewall is selected, and click OK to save the changes.
Enabling the notifications will help you get alerts whenever the firewall blocks apps or connection attempts, allowing you to identify and respond to unauthorized access requests.
4. Create outbound or inbound rules
Press the Windows key, type Windows security in the search box, and click Open.
Go to Firewall & network protection.
Click the Advanced settings option to access the Windows Defender Firewall with the Advanced Security window.
Click Inbound Rules or Outbound Rules from the left pane, and click New Rule from the right.
Follow the on-screen instructions and create rules, such as Allowing only trusted applications and services and restricting unwanted outbound connections to reduce exposure to threats.
Creating inbound and outbound rules can help you manage network security, protect sensitive information, and ensure that only authorized apps communicate with the network.
Press the Windows key, type windows security in the search box, and click Open.
Go to Firewall & network protection.
Click the Advanced settings option to access the Windows Defender Firewall with the Advanced Security window.
Select Windows Defender Firewall with Advanced Security on Local Computer, and click Properties from the right pane.
Go to the Domain Profile tab, locate Logging, and click Customize.
Look for the Size limit option and increase the log file size.
Locate Log dropped packets and select Yes from the drop-down menu.
Now go to the Public and Private profiles and do the same.
Click OK, then OK to save the changes.
Enabling the logging of dropped packers and increasing the size of the log file will help you identify blocked connections when the Firewall is causing connection issues.
6. Customize network profiles
Press the Windows key, type windows security in the search box, and click Open.
Go to Firewall & network protection.
You will see three network profiles: Domain, Private, and Public
Click Domain network, and under Incoming connections, select Blocks all incoming connections, including those in the list of allowed apps.
Click Yes on the UAC prompt. Then, use the arrow on the left side to return to the previous page.
Go to the private and public networks and make the same changes under these profiles.
Customizing network profiles in Windows 11 Firewall is essential for adapting security measures to different environments.
7. Setup connection rules
Press Windows + R to open the Run window.
Type wf.msc and click OK to open the Windows Defender Firewall with the Advanced Security window.
Click Connection Security Rules and select New Rule from the right pane.
Choose Isolation, Server-to-Server, or Tunnel per your preferences and click Next.
Now, follow the on-screen prompts to specify the connection type, authentication method, and the computer or network profile included.
Once you have configured it, name the rule and click Finish.
Setting up connection security rules in the Windows 11 Firewall protects data and maintains a strong security posture. If Windows Defender Firewall prevents connections on your device, you can check this guide for solutions.
8. Use the monitoring tools
You can use monitoring tools to track network activity, monitor apps accessing the network, and analyze firewall events. To do that, you can open the Windows Defender Firewall with the Advanced Security window, go to Monitoring, and use options like Firewall, Connection Security Rules, and Security Association.
Moreover, you can right-click Windows Defender Firewall properties, click Logging, and enable logging for dropped packets and successful locations.
In addition to all these, keep reviewing, adding, and removing rules regularly according to your network environment.
If you think there are more tips that you can follow, feel free to share them with our readers in the comments section below. We will add them to the list.
The Windows 11 24H2 release date was first hinted at as October 8 in a now-modified blog post from Microsoft, but the Redmond-based tech giant has shelved it for another date in October.
The blog now reads:
The shift to the Microsoft 365 app as the entry point for Microsoft Copilot is coming soon. Changes will be rolled out to managed PCs starting with the optional non-security preview release on September 24, 2024, and following with the monthly security update release on October 8 for all supported versions of Windows 11. These changes will be applied to Windows 10 PCs the month after. This update is replacing the current Copilot in Windows experience
After the press picked it up as the official release date for Windows 11 24H2, Microsoft added a statement to the blog saying:
Editor’s note 9.18.2024 – The dates conveyed below are for our regular monthly servicing updates for supported versions of Windows 11 and unrelated to when Windows 11, version 24H2 will be generally available.
Some speculated that Microsoft wouldn’t release the next Windows version this year (yes, reportedly Windows 12) and would instead focus on the next major Windows 11 patch, which now we know will be 24H2.
When will it be released? October, most likely. Windows 11 24H2, also known as the Windows 2024 update, has many new features, from an updated Quick Settings to reimagining Copilot for Windows.
The SponsorBlock add-on for Firefox that helps you skip through the YouTube clips sponsorship parts. So, when you visit a YouTube video, the extension will check the database for reported sponsors and automatically skip known sponsors. The add-on settings are very intricate, allowing you to skip intro and intermission parts, chaptering the clip and many more.
The add-on will be installed and you will see a new tab with the SponsorBlock settings.
As you can see from our caption above, the add-on is also available on Firefox for Android. It’s important to install it on your mobile as well if you watch most YouTube videos on your smartphone.
2. Set up SponsorBlock
SponsorBlock comes with default settings that you can leave untouched. For example, the main setting is to autoskip the sponsorship parts in the video. However, in the add-on settings tab you can change a lot of settings including this one. We will recommend the best settings below for the most important sections:
2.1 Behavior settings
Sponsor – Manual skip: You will be notified that a sponsorship part is next and you will be able to press Enter (or tap on your phone) to skip it. You can also leave the Auto Skip on and jump over it, but Manual skip will also allow you to upvote or downvote this sponsorship, so you will actually help the process of selection.
Unpaid/Self Promotion – Disabled: Although you can skip those too, this is all about the creator’s self promotions. These sections are mostly honest product placements of creator’s partnerships and brands that the person actually uses and endorses. However, if you notice foul play on those too, you can actually signal them for the community to skip them.
Interaction Reminder (Subscribe) – Manual skip: These are the parts where the content creator notifies the viewers to like and subscribe the channel or video and they are flagged only if they are long or intrusive throughout the video. If you already subscribed to a channel and follow it regularly, it’s nice to be able to press Enter and skip them.
Highlight – Show in the Seek Bar: These are the parts that contain the most information in the video and you might want to get there faster. That is why it’s important to show them so you can go straight to that point if you want to.
Intermission/Intro Animation – Auto Skip: You know when a streamer leaves an intro so that viewers have a chance to connect to their stream? Well, if you don’t watch the video live, there is no point in going through them. By default, this feature is set to Disable so enabling will save you a lot of time.
These are the most important settings that we recommend changing in the Behavior category. We also advise using them responsibly because many content creators sustain their channels through sponsorships. We tried to recommend the settings based on the fact that you already have a list of subscribed channels and creators you like and want to support.
2.2 Interface
Skip notice duration (seconds) – 3 seconds: This is the time you get to manually skip a section of the video. The default is set to 4 seconds but you can make it shorter or longer based on your reaction time.
Show Notice After A Segment Is Skipped – Disabled: If you want to be notified when a section or part was skipped, keep this setting enabled and set it to All Faded Skip Notices. However, we recommend disabling it. If you wanted to skip something consciously, you won’t need another distraction to let you know you actually did that, right?
These are the most important settings to change in the Interface category. However, you should know that there are many other settings you can change here if you want to.
What are the control keys for SponsorBlock?
There are key bindings that will help you navigate through the SponsorBlock options a lot faster. You can change all of them but make sure you’re not using the key or key combination in other active app on your PC.
Skip segment
Enter
Skip to Highlight
Ctrl + Enter
Close skip notice
Backspace
Start/stop segment
;
Open submission menu
'
Preview segment
Ctrl + ;
Submit segments
Ctrl +'
Next chapter
Ctrl + RightArrow
Previous chapter
Ctrl + LeftArrow
SponsorBlock is only available on Firefox so you will need to use the browser if you want to skip the sponsorship segments in YouTube videos. Also, you should know that the add-on doesn’t skip YouTube commercials. For that, you will need a YouTube Premium account.
Again, we recommend using SponsorBlock responsibly and even disable the extension when you’re watching the clips of your favorite content creators out there.
Many of us use Excel daily, and many users are wondering if is there a way to apply the Excel formula to the entire column. In today’s guide we’re going to show you the best ways to do that, so let’s get started.
How do I apply a formula to an entire column in Excel?
1. Double-click the autofill handle
Select the cell that has your formula.
Locate the small green square in the bottom right corner of the cell.
Double-click the green square to fill the column.
2. Use the Fill down option
In the column that has your formula, select the formula and all other cells beneath it that you want to fill.
Next, click on the Home tab.
After that, click on Fill and choose Fill down.
You can also perform this just by using shortcuts:
Select the cell that has your formula.
Press Ctrl + Shift + Down Arrow to select the entire column. Alternatively, use Ctrl + Shift + End to select all cells in the column that have the necessary data for the formula available.
Go to AutoFormat as You Type. Check Include new rows and columns in the table and Fill formulas in tables to create calculated columns.
After that, all your columns will be automatically filled.
As you can see, it’s easy to apply a formula to an entire column without dragging in Excel, and in most cases, you can just double-click the autofill handle or use the keyboard shortcut.
The much-anticipated God of War Ragnarok, the sequel to God of War, was officially launched on PC. Santa Monica Studio and Jetpack Interactive collaborated to bring the game to PC, introducing new features and settings for players. The game’s PC version is available via Steam and the Epic Games Store.
According to Sony, the developers aimed to offer players a more customizable experience with God of War Ragnarok on PC. As such, two new settings are being introduced to the game, both of which will be available in the console version.
The first is a “Reduced Puzzle Hints” setting, which, as the name suggests, will reduce the frequency of puzzle hints from other characters in the game.
The other setting, “Cinematic Audio Description,” will play audio descriptions of visual events during cinematics. These descriptions will provide additional contextual information alongside the spoken dialogue to create a more detailed experience for players with low vision.
The PC version of “God of War Ragnarök” also includes custom alerts for streamers, a new fan kit with social media banners and wallpapers, and more. And if you’re playing on a capable PC, you’ll be able to enjoy the game at high resolutions and frame rates.
The “God of War” series is no stranger to PC; the 2018 game hit the platform last year and was followed by “God of War: Chaos of Creation” in February. But with “Ragnarök,” PC players are getting a game day and date with the PlayStation release, a massive win for PC gamers eagerly awaiting the next chapter in Kratos’ story.
To celebrate the game’s launch on PC, Santa Monica Studio is making available a new fan kit with social media banners and wallpapers, including ultrawide options for those with supported monitors.
Regarding high-res support, “God of War Ragnarök” on PC will run at up to 4K resolution and 60 frames per second on capable hardware. The game also supports ultra-wide monitors, and players can customize their experience with toggles for depth of field, motion blur, and more.
However, if you want to know if you can play this game on your Windows PC, then make sure to check the system requirements. Hint: They’re buff, but every mid- to high-end PC should be able to run smoothly.



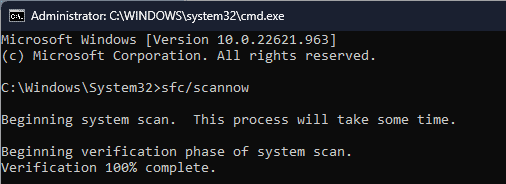
 NOTE