Windows 11 is here and many are eager to try it out, and if you want to know more about it, be sure of the fact that the new OS has a lot to offer.
In that regard, we prepared an in-depth comparison in our Windows 11 vs Windows 10 article, so be sure to check it for more information.
If you’re looking to try Windows 11 on your PC, in today’s guide we’re going to show you how to properly dual boot Windows 10 and Windows 11, so let’s get started.
How can I dual boot Windows 10 and Windows 11?
1. Prepare a special partition for Windows 11
Press Windows Key + X and select Disk Management.
Locate the drive that has extra free space. You’ll need about 50GB of free space, but more couldn’t hurt, especially if you plan to install additional apps.
Once you locate that drive, right-click it and choose Shrink Volume.
In the Enter the amount of space to shrink in MB field enter 50000 or more. Now click the Shrink button.
Now you should see Unallocated space in Disk Manager. Right-click the Unallocated space and choose New Simple Volume.
When the wizard opens, click on Next.
Set Simple volume size in MB to the equal to the Maximum disk space in MB and click Next.
Select the drive letter that you want to use for this drive and press Next to proceed.
Set the label for the new partition and click on Next.
Click the Finish button.
Now you should have a new partition available on your system. Up next, we’ll use this partition to install Windows 11 on it.
2. Create installation media
Connect a USB flash drive to your PC. You’ll need at least an 8GB drive, but 16GB would be better.
Select Create installation media (USB flash drive, DVD, or ISO file) for another PC and click on Next.
Make sure that the settings are correct. If not, uncheck Use the recommended options for this PC and change the settings accordingly.
Select USB flash drive and click Next.
Wait for the process to finish. This could take a while depending on your download speed, so be patient.
Once the process is finished, you can install Windows 10 on the partition that you created in the previous section.
3. Boot from the USB flash drive and install Windows on the new partition
Access BIOS. You can usually do that by pressing the Del key while your system boots, but some motherboards use a different key.
Once you enter BIOS, go to the Boot section.
Set your USB flash drive as the first boot device.
Save changes.
When your computer starts booting, you’ll be asked to press any key to boot from the USB flash drive, so be sure to do that.
Select the desired language and click on Next.
Click on Install now.
Select the version of Windows that you want to install and click on Next. It’s best to use the same version that you already have installed.
Accept the terms of service and click Next.
Select Custom: Install Windows only (advanced).
Select the drive that you created. Drives aren’t labeled, but you should be able to find your drive based on its size. Make sure that you don’t select the drive that already has Windows 10 installed on it. Click Next.
Now, wait for the installation to finish.
Once the installation is finished, you can go back to BIOS and select your hard drive as the default boot device.
Now you should have two versions of Windows 10 installed. The last step is to upgrade Windows 10 to Windows 11 technical preview.
After that, you’ll have dual boot for Windows 10 and Windows 11 enabled. Simply select the Windows 11 on the boot screen to boot to it and that’s it. Keep in mind that you’ll have to do this every time your computer starts.
What are the pros and cons of dual booting?
Dual-booting is great since it uses less hardware power than running a virtual machine. By dual booting, you can focus all your hardware resources on a single operating system and get better performance.
This is especially important if your PC barely matches the minimum Windows 11 hardware requirements. By using dual boot, you’ll be able to enjoy the other operating system natively, without relying on the virtual environment.
It’s worth mentioning that it has a few drawbacks, most notably in multitasking and switching between operating systems.
There’s no quick way to do that. You simply need to restart your PC, and then select the operating system that you want to use.
You’ll have to do this every time you want to switch to a different OS, and if you tend to switch frequently, this process might feel tedious after a while.
Dual-booting also requires a lot of storage space, so you’ll have to take away some space from one of your available partitions and assign that space to a new partition.
How can I set the default operating system when dual booting?
Press WindowsKey + R and enter msconfig. Press Enter or click OK.
Now go to the Boot section.
Select the operating system that you want to make default. Click on Set as default option. Now click Apply and OK to save changes.
After making these changes, your PC will boot automatically to the selected operating system. If you want to learn more about this tool, we suggest that you check out our System Configuration guide.
Which is better, virtual machine or dual boot?
This depends solely on the user’s needs, but in most cases, dual booting is a better option since it uses fewer hardware resources, so you can dual boot two operating systems even on low-end PCs.
Virtual machines require a lot more hardware power since you’ll be running an operating system inside of your current one, so if you don’t have enough hardware power, you might encounter performance issues.
On the other hand, using a virtual machine is more secure, since all malware threats and potential issues are contained within that virtual machine.
Moreover, if you need to quickly switch between operating systems, or you need to work on both of them simultaneously, a virtual machine is a superior choice.
You will want to learn how to install 7Zip on Windows 11 if you plan to organize, save storage space or want to secure your large files. 7-Zip is one of the most efficient and free file archiver tools available for Windows users. Whether you want to compress folders, extract RAR or ZIP files, or protect documents with encryption, this software can handle it all with ease.
In this guide, we’ll walk you through installing, setting up, and using 7-Zip on a Windows 11 PC. You’ll also learn how to compress files, encrypt them, and extract archives in just a few clicks.
7-Zip is one of the most reliable and free file archivers available for Windows 11. It helps users compress large files, extract archives, and protect data using strong AES-256 encryption. Here’s why it’s a popular choice:
Free for all users – No license needed for personal or commercial use
Multilingual interface – Available in over 80 languages
High compression ratio – Especially for 7z, ZIP, and GZIP formats
Supports multiple formats – Pack 7z, XZ, GZIP, TAR, ZIP, and WIM; unpack dozens more
Secure encryption – 256-bit AES support for ZIP and 7z
Massive file support – Compress archives up to 16 exbibytes
Look for the latest 7-Zip version (or for the one you need). Also, choose it according to your Windows bit version.
Click on the blue Download button.
From your Windows taskbar, open File Explorer.
Navigate to the folder where you downloaded the 7-zip setup file, then double-click it.
When you’re asked for permissions, click on Yes.
In the 7-Zip Setup window, click on the three horizontal dots.
Choose folder’s destination.
If you want to continue the process with the default location, select Install.
Wait a few seconds until the installation is completed.
Once it’s done, click on Close, and that’s it! You’ve just installed 7-Zip on Windows 11.
2. Set up 7-Zip in Windows 11
Hit the Windows key, then search for 7-Zip, right-click on it, then choose to Run as administrator.
If you’re asked again for permissions, choose Yes.
Once your 7-Zip app is opened, click on the Tools menu, then select Options.
Stay on the System tab, then click on the + button.
Now click on the second + button.
Click on Apply, then on OK to save the changes.
Note that you can associate and dissociate 7-Zip with files types individually, and also add and remove file types by just clicking on them.
If you right-click on a compressed file, you’ll see a series of options.
In case you want to view the classic context menu with more 7-Zip options, just choose to Show more options.
After the installation, you’ll need to set up 7-Zip in Windows 11. It is an important step, and you have to set this app as the default one for opening and creating archive files.
3. Compress files with Windows 11 7-Zip
Select one or multiple files you want to archive, then right-click on them, and choose to Show more options.
Hover over the 7-Zip option, then select either Add to filename.zip or Add to filename.7z (this will lead to quick compression).
If you want to choose a different file format and customize the compression settings, follow the same steps, but instead of adding to filename, select the Add to archive option.
Once the Add to Archive window is opened, you’ll see various settings to manage the compression according to your needs.
You can rename the file in the Archive field.
Also, you’re allowed to change the destination for saving the compressed file by clicking the three horizontal dots, next to the Archive field.
In case you want to select a different archive type, select a file type from the Archive format drop-down menu. You’ll be able choose between 7z, tar, wim, and zip formats to compress.
The Compression level can be increased or decreased. The fastest one is Store, while Ultra represents the slowest compression time with the most space saved. However, Windows will set by default the Normal option, which offers a more stable compression speed.
In this window, you’re also allowed to change the Compression method with different algorithms.
You can split the archive into different parts, by setting the file size in the Split to volumes, bytes: option.
After your configuration changes are completed, click on OK to start the compression.
4. Encrypt a file with password protection
Go to the Add to archive window, as you learned from the compressing files option.
There, choose a name and destination for the encrypted file.
Select the Archive Format as zip or 7z.
Look at the right window pane, then, under the Encryption section, enter and reenter your password.
Also, make sure that the AES-256 option is selected from the Encryption method drop-down menu.
In case you have the 7zArchive format, you can also tick the Encrypt file names box for added security.
Once you’re done with the changes, click on OK.
5. Extract Windows 11 files
Right-click on the file you want to extract, then choose to Show more options it.
Hover over 7-Zip, then choose how you want to extract files: Extract files…(This will allow you to select a destination and extract), Extract Here (It will let you to extract all the files to the current folder), or Extract to “filename\” (With this option you’ll be able to extract files to a new folder named the same as the archive file).
Can I extract or open an encrypted archive file with 7-Zip?
If you’re wondering whether or not you can extract/open an encrypted archive file with 7-Zip on Windows 11, then the answer is yes!
Follow the steps listed below to find out how you can do it:
Right-click on the encrypted archive file, then choose to Open it.
After that, you’ll be prompted for a password. Enter it, then click on OK to see the folder’s content.
To extract files, right-click, and choose to Show more options.
Open the 7-Zip items menu, then choose one of the three options to extract the files.
You’ll be asked for a password. Enter it to start the extraction.
So here you are, having a complete guide on how to use 7-Zip on Windows 11. As you can see, this software can be easily used in various ways, which will definitely simplify your day-to-day work. You can also get a modern Windows 11 theme for it so it matches your UI.
Like with any other software piece, errors are not out of the question and it seems that a corrupted ZIP archive is the most common one.
FAQs
Can I install 7-Zip on both Windows 10 and 11?
Yes, 7-Zip is fully compatible with both Windows versions.
What archive formats does 7-Zip support?
It supports 7z, ZIP, TAR, GZIP, and WIM for compression; and over 30 formats for extraction including RAR, ISO, DMG, and VHD.
Is it safe to use 7-Zip on Windows 11?
Absolutely. 7-Zip is open-source, widely trusted, and frequently updated.
Even if Windows has great capabilities, like any other OS, specific issues are not out of the question while running it on your computer.
Apparently, this usually occurs after trying to boot the OS on the Safe mode. Before anything else, note that 0xc0000005 is a critical Access Violation error that requires your immediate reaction.
But let’s take a look at some aspects which explain why this may harm your digital activity.
Why does the Windows 11 0xc0000005 error occur?
As a general rule, you can get the 0xc0000005 error message when trying to start some software programs. After that, the program terminates and you can’t get it to normally run.
This code might appear in other different error messages, depending on the software you need to start or install, or on the action you are trying to execute on your computer.
The most typical causes why you get this annoying problem are various, and you can find them listed below:
Corrupted registry
Malware and viruses
Faulty RAM
Drivers incompatibilities
Incorrectly written, installed, or updated software
Windows security features
Fortunately, some easy solutions will help you. Make sure you keep an eye on this article to discover the best ways to fix the 0xc0000005 error in Windows 11.
How can I fix the 0xc0000005 error in Windows 11?
1. Check if your PC meets the minimum requirements to run Windows 11
To fix this, first, make sure that your computer meets the minimum requirements to run Windows 11.
Considering its improvements, the latest OS also comes up with some specific needs on your hardware. You can find below the most common requirements:
64-bit processor
1GHz clock speed (at least 2 cores)
4GB of RAM
64GB Drive
UEFI, Secure Boot capable
Trusted Platform Module (TPM) version 2.0 or newer
9-inch display with a minimum resolution of 1366 x 768
Compatible with DirectX 12 or later with WDDM 2.0 driver
Checking for general Windows updates is a mandatory solution, that must be followed in the first place for each OS-related issue. This option will automatically scan and update any available aspect.
3. Check if driver updates are available
Open Windows Settings.
Navigate to Windows Update, then click on Advanced options.
Select Optional features.
If any driver update is available, you’ll see something similar as in the following picture.
Checkmark all the available updates, then click on the Download & install button.
For automatic scans of missing or outdated drivers, we encourage you to give a try to a dedicated tool such as Outbyte Driver Updater.
4. Use Command Prompt
Hit the Windows key, then type cmd, and choose to Run as administrator.
Type the following command, then press on Enter: sfc /scannow
Wait until the verification is completed.
This command will scan all protected system files and replace corrupted files with a cached copy that is located in a compressed folder.
5. Deactivate Data Execution Prevention
Press Windows + R keys.
Type sysdm.cpl, then click on OK.
Select the Advanced tab, then look at the Performance section, and select Settings.
Click on the Data Execution Prevention tab, then select to Turn on DEP for all programs and services except those I select.
Select Add, then search for the .exe file of the problematic program.
Click on Apply, then on OK.
Data Execution Prevention represents an integrated feature for protecting working memory. However, it might accidentally cause access problems like 0xc0000005 ones.
This method would work if some of your programs are incompatible with this security feature, meaning certain actions will always result in the error. Thus, deactivating the protection mechanism for that app should help you.
As you can notice at the beginning of this article, there are some reasons why this annoying error can occur. But now let’s see what you can do to prevent such a situation, so it will never bother you again.
Constantly update your drivers – You can do it both manually or automatically, depends on your preferences. But keep in mind that driver update producers are now preparing their latest versions. So you’ll have the newest, the most efficient, and the less-consuming method to perform this action.
Run the OS troubleshooter anytime something seems to not work properly – Doing it, you’ll constantly beaware of faulty components, and your operating system will automatically fix them.
Make sure you install correctly all software you need – It is critticaly important to perform this action right. The installation depends on programs and apps requirements, so make sure you check them twice before.
Always scan for malware and viruses – You can easily do it with dedicated antivirus software. We recommend checking the best antivirus options for Windows 11 that you should definitely try out today.
Check your RAM components – If your RAM is not optimally working, then apps and programs won’t run smoothly on your PC. Your overall OS will also work extremely slowly.
Using this option, Windows will automatically scan all protected system files, then replace the corrupted ones with a cached copy 0xc0000005 error.
These are the best solutions you can find to fix the Windows 11 0xc0000005 error, so make sure you find the one that suits you the most to solve this annoying issue.
For any other encountered troubles, do not hesitate to leave a comment in the section below.
Besides its refreshed UI, Windows 11 brought new keyboard shortcuts that can greatly help improve the efficiency of your workflow, so here are ones you should know.
To perform it, you should press simultaneously Windows + A keys on your keyboard. This shortcut was also available in Windows 10, but it works slightly differently in Windows 11.
While in the previous design this one could open up the Control Center and the Notification Panel, in the latest OS desktop, it launches just the Action Center with the Quick Settings panel.
If you wonder where this difference came from, consider that Microsoft has separated Action Center and Notifications Panel.
As you noticed, the Win + A keyboard shortcut is no longer available to open the Notification Panel in Windows 11. However, you can easily try the Win + N keyboard shortcut. This represents a new great built-in feature.
It allows you to navigate to Notification Panel, which is now tucked away under the clock icon, in the System tray.
3. Access Snap Layout
In Windows 11, Snap Layouts is a new feature that improves upon the Snap window management in Windows 10. To easily navigate there, you should press simultaneously on Windows + Z keys.
It allows you to open a pop-up window, which shows possible Snap window layouts when you hover over the Maximize button on any active window. It is also known as Snap Assist.
If this option is turned off, checking this easy method to enable Snap layouts on Windows 11 will help.
What are other general Windows 11 keyboard shortcuts?
The above sections presented how you can use the new Windows 11 keyboard shortcuts.
However, to ensure the maximum potential, you should also give a shot to some other options, which were also available on Windows 10.
Note that there are plenty of available combinations, but we’re going to present you only the day-to-day using ones.
Win + X – This will help you to navigate to the Start button context menu. This option has the same effect as if right-clicking on Windows icon with your mouse, but it’s much less time consuming.
Use Win + S keys – Performing this, you’ll be able to easily open Windows Search. Keep in mind that with Win + Q combination you can achieve the same goal.
Press Win + R – With this one, you can open the Run dialog box. It provides extremely quick access to programs, folders, documents, and other resources. You only have to know the respective launch command (take the picture below just as an example).
Use Win + I – This options will take you to the Windows Settings menu, instead of applying annoying mouse clicks until you get there.
UseWin + L keys – You can use it as an efficient alternative to quickly lock your computer. It is ideal for your workspace, where you have to keep computers safe when you’re away.
Capture parts of the screen with Win + Shift + S keys – This helps you to select and capture any portion of your desktop. And this is only possible with the support of Snip & Sketch. Of course, there are some additional methods to take a screenshot on Windows 11 that you should definitely try.
Win + E – With this one, you can easily navigate to File Explorer.
As you can see, there are plenty of Windows 11 keyboard shortcuts that can be used to simplify your work. Since they are extremely efficient we recommend saving them somewhere to quickly access when needed. If you are looking for more advanced features, we recommend Comfort Keys Pro which allows you to create custom shortcuts.
Why should I use Windows 11 keyboard shortcuts?
1. They boost productivity
Before anything else, note that they consume less time than traditional mouse alternatives. And why is that? Because you’re not necessarily reaching for the mouse all the time.
2. You can become a master in multitasking
Multitasking is required in life. If you’re programming, writing, doing digital research, or something related, you’ve probably ended up juggling dozens of open tabs at least once.
Thus, being aware of the right shortcuts allows you to find the tab you need in less than a second.
As mentioned before, this guide will present some useful recommendations on how to use Windows 11 keyboard shortcuts. We prepared a list that will simplify your work, so make sure you completely check it. And remember, you can always set up a keyboard shortcut for Settings.
You can also make your workflow faster by learning how to search for text in documents or browsers using Ctrl + F on Windows. It is one of the simplest and most effective shortcuts to find anything instantly.
FAQs
What are the must know Windows 11 keyboard shortcuts?
Win + E opens File Explorer, Win + I opens Settings, Win + D shows the desktop, Win + L locks the PC, Alt + Tab switches apps, Win + V opens Clipboard history, Win + Shift + S starts a screenshot, and Win + X opens the power menu.
How can I create my own keyboard shortcuts for apps?
Right click the app shortcut, open Properties, go to the Shortcut tab, click Shortcut key, press your preferred combo, then click OK; for deeper remapping and global shortcuts, install Microsoft PowerToys and use Keyboard Manager.
What is the fastest way to take screenshots on Windows 11?
Press Win + Shift + S to snip a region, window, or full screen and copy it to the clipboard, or use Win + PrtScn to save a full screen capture directly to the Pictures\Screenshots folder without extra prompts.
How do I manage windows and desktops with the keyboard?
Use Win + Z for Snap Layouts, Win + Arrow keys to snap and resize, Win + Tab to open Task View, Ctrl + Win + D to create a new desktop, and Ctrl + Win + Left or Right to switch between desktops quickly.
For Windows 10 users, here is a complete shortcut reference to speed up everyday tasks: Windows 10 keyboard shortcuts.
Are you excited about these features? Do you need more information regarding this subject? If so, do not hesitate to leave a comment in the section below.
Welcome back to our Windows news recap, where we go over the top stories of the past week in the world of Microsoft’s flagship operating system.
Windows 10 Xbox app now supports Cloud Gaming and Remote Play from your console
The Xbox app on Windows has gained the ability to stream games using Xbox Cloud Gaming, whilst also adding support for Remote Play, letting you stream games from your Xbox Series X|S or Xbox One console right to your PC.
Windows 11 on ARM on Apple M1 Macs isn’t officially supported, says Microsoft
Mozilla Firefox can now become your default browser in just one click on Windows PCs
Making Firefox your default browser on Windows PCs has become that little bit easier, with the browser adding a one-click option of setting it as your default. This feature means that the browser circumvents the behaviour of Windows 10 making you adjust the default browser via the Settings app.
PowerToys lands in the Windows 11 Microsoft Store
PowerToys, a suite of tools, has arrived in the Microsoft Store on Windows 11. This makes the installation process that little bit quicker, as previously you had to download it via GitHub.
Microsoft news recap is a weekly feature highlighting the top Microsoft news stories of the past week. Sit back, grab some coffee, and enjoy the read!
Office 2021 will be released on October 5, LTSC version is available today
Office 2021 for personal customers is set for release on October 5, on the same day as Windows 11. In addition, Office LTSC 2021, which is for government and commercial customers, and offers a perpetual licence, has been announced.
Microsoft President Brad Smith joins company board as Vice Chairman
Microsoft’s president and chief legal officer, Brad Smith, has gained a new role as Vice Chairman. At the time of the announcement, a dividend increase was also announced, alongside a share purchase program.
Microsoft is making passwords optional for MSA accounts to improve security
In a bullish attempt to make a move to a more password-less society, Microsoft has made passwords optional on personal MSA accounts. The feature makes use of the Microsoft Authenticator app to authenticate access to your account without a password.
That’s it for this week. We wll be back next week with more Microsoft news.
Microsoft just announced the latest OS version release, so users are more and more excited about using the related improvements.
We made some researches and we found out that some of you need to know how to enable and use Mixed Reality on Windows 11.
You need to consider that we don’t have yet any official news regarding either or not the latest Microsoft OS supports this type of extension, or how the app would look like.
However, if you want to prepare yourself and your computer for the big announcement, we have some useful tips that you should consider undoubtedly.
Make sure you read this article completely to discover a dedicated guide about Mixed Reality on Windows 11 and the best answers to your questions.
How can I set up Mixed Reality on Windows 11?
1. Make sure your PC meets the minimum requirements
Considering Windows 11 design is extremely similar to the previous one, Windows Mixed Reality won’t install or work properly until your PC meets the minimum requirements.
Speaking about Windows 10, for most headsets, the app could run in optimal conditions if your PC had the following capabilities:
Intel Core i5, Intel Core i7, Intel Xenon E3-1240 v5, equivalent or better, AMD Ryzen 5, equivalent or better
For more other information about this app, we also recommend accessing the Mixed Reality Portal, powered by the manufacturer.
2. Get Mixed Reality from Microsoft Store
Similar to the previous OS version, you can easily get the Mixed Reality Portal on Windows 11, from Microsoft Store. This is an ally that already proved its efficiency over time.
3. Make sure your PC recognizes the Mixed Reality headset
Click on the Start button.
Type Device Manager in the search box, and then select it.
Expand Mixed Reality devices and check if your headset is listed.
To make Windows Mixed Reality work optimally in Windows 11, you’ll have to check if your computer can recognize the headset that you’re using. The easiest way to do it is by following the above steps.
3. Modify settings
Press the Windows key.
Type Mixed Reality.
Select App Settings.
This is how you can access the Mixed Reality Portal settings. So, there you can find only the general ones. Continue to read this article to discover how to set certain configurations.
4. Adjust the Mixed Reality headset display
To use Mixed Reality on Windows 11, you can adjust the headset display. In the picture below, you’ll have a bigger perspective about what does it means:
You’re allowed to change the visual quality
You can enable or disable the positional tracking
For a comfortable home experience, display resolution can also be adjusted
You can adjust the frame rate, but note that this could affect your PC performance
To improve the quality of your visuals, set a custom calibration
You can turn your headset on the sleep mode, after certain time
5. Set Mixed Reality Startup & desktop
Using Mixed Reality on Windows 11 will allow you to have significant control in setting certain specifications for your VR experience.
As you can see in the picture below, there are plenty of Mixed Reality options that you can set on the newest OS. Thus, we consider the following:
Choosing how do you want to start the app
Setting the desktop view
Adjust the input switching
Allow Windows to use virtual display for apps.
6. Check for updates
Click the Start button from the taskbar.
Open Settings.
Select Windows Update, then click on Check for updates.
Even if we don’t have detailed information regarding our presented subject, we strongly recommend constantly checking for updates. This option is one of a kind, being able to solve plenty of troubles.
Thus, using Mixed Reality on Windows 11 should also require quick and automatic updates performed by your OS.
From what we already know, we can ensure that Windows 11 will come up soon with some incredible features, that will improve your virtual experience.
Common error messages on Mixed Reality
Like any other apps and program, Mixed Reality can sometimes show up some specific errors. Thus, you’ll need to be prepared for what to expect. Here is a list of the most common messages:
Check your USB cable – In this case, you’ll have to connect your headset to a different USB port, and also make sure it is a SuperSpeed USB 3.0. Another efficient way is to remove any extenders or hubs between headset and PC.
Check your display cable – Considering this, you should make sure your adapter is 4K capable or you can try using a different HDMI port.
More information about running Mixed Reality on Windows 11
With its combinations of advanced technologies, Mixed Reality can give you a blend of digital and physical dimensions.
Mixed Reality delivers a fusion of the human, the computer, and the environment, using human-computer interaction, the view of perception, and conventional reality.
This app offers you a unique experience based on state-of-the-art sensors and processing, that will surely make a difference in your virtual perspective.
Note that two main types of devices can create the most incredible Windows Mixed Reality experiences. Thus, you have to consider the following:
The holographic devices, which are characterized by the capability of setting digital content in the real world as if it was there.
Other devices are the immersive ones, which are characterized by the ability to create a sense of presence. Thus, the physical world comes up to be hidden and replaced with a digital experience.
We hope our guide sets some unclarities about setting Mixed Reality on Windows 11. Make sure we’re going to update the information as soon as Microsoft will announce the news.
The newest OS model comes up both with similarities and upgrades and, to convince yourself, take a look at our Windows 11 vs Windows 10 comparison.
Rounded corners are just some of the new and improved Windows 11 design features, which create a more elegant experience.
From what some users say, after upgrading to Windows 11 Insider Preview, all the features (including animations or flyers) are available, except the rounded corners.
How can rounded corners help me?
Rounded corners allow you to identify the needed Windows section without struggling.These models are more effective because they let your eyes comfortably follow lines.
By adding rounded corners, Microsoft created brand new designs that reconstruct the existing interface into a much more friendly and easy-to-use environment.
In case your operating system disabled rounded corners, this article will support you with some easy methods to get the best out of the Windows 11 design.
What can I do if there are no rounded corners in Windows 11?
1. Update your graphics drivers
Hit the Windows key, type device manager, then open it.
Look for the Display adapters section, then expand it.
Right-click on the first driver, then choose to Update driver.
Click on Search automatically for drivers.
Wait a few seconds, then if is any available driver that needs to be update, you’ll be notified.
Repeat this process to all the available drivers from the Display adapters section.
Reboot your PC.
In case you want to automate the process of updating your drivers now, and also be covered for future situations, you can also use a specialized driver updater software like Outbyte Driver Updater.
Type in update and click the Check for updates option.
Click the Check for updates button.
Wait for Windows to verify if any other versions are available.
Download any updates, and restart your PC if required to do so.
3. Refresh your operating system
Press on the Windows key, then select Settings.
From the left window pane, select System, then navigate to Recovery, from the right side.
Click on the Reset this PC button.
Choose either if you want to Keep my files or to Remove everything. We recommend selecting the first option.
Select either Cloud download or Local reinstall.
Click on Next.
Follow the on-screen instructions, then click on the Reset button.
Your PC will restart and go through a resetting process. This might take a while, so be patient.
If none of the above options worked for your situation, trying to reset the operating system might get you back to the original design, which includes rounded corners by default.
Keep in mind that you can also apply rounded corners in desktop apps for Windows 11, and you can take a look at a Microsoft guide that describes how you can do it.
As you can see, enabling the rounded corners on your Windows 11 OS is not that complicated, and can be achieved by ensuring that your drivers are updated at all times and that the OS has the latest version installed.
The last method is only to be used as a last resort, as it is the most invasive of the three presented in this guide, but it is worth mentioning nonetheless.
Windows 11 has been announced, and it’s coming soon to all Windows 10 users around the world. The new version of Windows comes with a new interface that resembles Chrome OS in several ways.
Windows 11 will be optimized for tablets, so it’s no wonder that Microsoft took a couple of pages from Google’s book in terms of visual interface and design.
That leaves us with an important question, how similar is Windows 11 to Chrome OS, and how does Windows 11 compare to it? In this guide, we’re going to find that out.
Windows 11 vs Chrome OS, how similar are they?
User interface
Windows 11 and Chrome OS share many similarities in terms of visual appearance, and with the new Taskbar that is positioned in the center, Windows 11 does resemble Chrome OS more than ever.
Although Chrome OS lets you pin apps to the Taskbar, it doesn’t have a Start Menu and instead it relies on the launcher that works similarly to the app drawer on Android.
Windows 11 Start Menu has a pinned apps section that allows you to pin your most-used apps, but there’s also a Recommended section that shows recently used applications, files, and recent apps.
These aren’t the only similarities, and the notifications and Quick Settings on Windows 11 look quite similar to the ones on Chrome OS.
What used to be Action Center is now replaced with quick settings, so you can easily adjust brightness, volume, turn Wi-Fi, Bluetooth, or Focus Mode on.
Notifications in Windows 11 have their panel, and they are separated from Action Center and your Settings. This isn’t the case with Chrome OS, and notifications are grouped with quick settings.
We like the design choice on Windows 11 better since it allows you to have your notifications and settings separate, but some users might not like that.
The biggest change in Windows is represented by the rounded corners, and you can find them on all windows and panes. This is quite reminiscent of the Chrome OS user interface, and it’s definitely a welcome change.
All these elements are from a canceled Windows 10X that was intended for touchscreen devices, most notably tablets and laptops, so it’s no wonder to see that Windows 11 and Chrome OS have a couple of similar design choices.
However, Chrome OS does lack certain features, one of them being widgets. Windows 11 is bringing back the widgets, but they aren’t like the widgets that were present in the older versions of Windows.
New widgets are here to replace Live Tiles, and they have their separate pane, so they won’t take up any precious space in your Start Menu like before.
Window snapping is another feature that is being improved with Windows 11, and now you can choose between up to six snap layouts to organize your open windows better.
A new addition to Windows is the Snap groups feature that will memorize your snap layouts and the applications that were in it. With this feature, you can restore all applications that you had open in your snap layout.
Chrome OS does support window snapping, but it allows you to align apps only horizontally, and you can only set apps to take 50% or 25% of your screen.
Overall, Windows 11 offers a better snapping feature, and with snap groups, you’ll be able to take multitasking to a whole new level on Windows 11.
In terms of design, Windows 11 is surprisingly similar to Chrome OS, but it has its touch of unique features such as window snapping and widgets, and it’s definitely a step in the right direction.
Application support
Chrome OS started humbly, and in the beginning, the operating system was very web-centric and it worked only with Chrome extensions and web apps.
However, the operating system got native support for Android apps, and now many Chromebooks can download and run apps from the Play Store.
This was a giant step forward for Chrome OS and Chromebooks, and now many models, even older ones, can run Android apps.
Chromebooks can also run Linux apps, but for that to work, you need to install a virtual machine. Once the Linux app is downloaded, you can use it like any other app alongside Android apps.
Unlike Android apps, the support for Linux apps is somewhat limited, and only the models that meet the hardware requirements can run them.
All this sounds pretty impressive especially when you remember how limited support for apps the Chromebooks had in the past.
Overall, it seems that Chrome OS is slowly by surely becoming a full-fledged operating system, but how does it compare to Windows 11?
Windows is a much larger platform with more users worldwide, so it’s no wonder that most applications are specifically developed and optimized for Windows.
While Windows 11 offers support for Win32 and Universal apps, a brand-new feature is the ability for Windows 11 to run Android apps natively.
However, there are few drawbacks, and if you want to use Android apps natively on Windows 11, you’ll need a processor that supports Intel Bridge technology.
We’re not sure how this will affect compatibility with other processors or older hardware, and we hope that older devices will be able to run Android apps as well.
What does this mean for the future of Android emulators on Windows 11? Due to hardware requirements, we believe that Android emulators will remain relevant on Windows 11.
Meanwhile, the number of Chromebooks that can run Android apps natively is increasing, and even devices that are released before 2019 can run Androids apps.
Lastly, we need to mention the number of available apps. Windows 11 uses Amazon App Store, which means that there are fewer apps to choose from than on the Play Store.
Amazon App Store has almost 500,000 apps to choose from, which is impressive, however, Google Play has 3.5+ million apps available.
Although you should be able to find almost everything that you need in Amazon App Store, you might miss out on certain applications.
As for Linux applications, there are plans to bring Linux GUI apps to Windows, and Windows already has Windows Subsystem for Linux, so we expect to see Linux applications available on Windows 11.
Windows 11 is a superior platform since it supports Win32 applications, and if you’re planning to run mostly Windows software, Windows 11 is an obvious choice.
With the addition of support for Android apps, Windows 11 will compete with Chrome OS, however, Android apps on Chrome OS have been present for years, so Chromebooks should be better optimized Android apps.
Lastly, Amazon App Store offers less variety when it comes to the list of available apps, which can be a problem for some users. On the other hand, Chrome OS uses Google Play Store, so you’ll get access to a greater variety of apps.
Security
Chrome OS utilizes sandboxing technology, which means that each software runs independently from one another. In case of malware infection, that software can’t affect other software on your device.
Chromebooks have a security chip that encrypts your sensitive data, as well as a Verified Boot feature that prevents malware from running during the boot.
To top it off, there’s built-in virus protection, so you can rest assured that your Chromebook is safe at all times.
Windows 11 doesn’t have a native sandboxing feature like Chrome OS, but Windows 10 has a Windows Sandbox feature, and we expect to see this feature in Windows 11 as well.
With the requirement for a TPM chip, Windows 11 will protect your PC similarly to Chrome OS by encrypting sensitive data.
Windows already has a Secure Boot feature, but Windows 11 will force you to use it, thus keeping your bootloader free from any malware.
As for antivirus software, Windows 10 comes with Windows Defender that is pretty reliable antivirus software, and we’re positive that Windows 11 will continue this practice.
Although these are similar features, there’s still one major difference. Chromebooks can only run Chrome extensions and Android apps, and in most cases, these are perfectly safe.
On the other hand, Windows holds almost 75% of the market share, and with such a large user base, there are bound to be more malicious users, more malware, and more security risks.
On the other hand, Chrome OS holds just 1.5% market share, so it has a lot smaller user base, meaning less malware and malicious users.
Windows can also run almost any type of file, and since malware is usually hidden as a .exe file, it’s a lot easier to get malware on Windows 11 than on Chrome OS.
This doesn’t mean that Windows 11 is unsafe, but it’s less safe than Chrome OS. However, with good antivirus software for Windows 11 and some precautions, you won’t have too many problems with malware.
Graphics card: DirectX 12 compatible with WDDM 2.0 driver
Display: 720p 9-inch display or larger
Keep in mind that not all processors will be compatible with Windows 11, so be sure to check the list of compatible processors and make sure that your CPU will work with Windows 11.
TPM chip is another requirement, and if you don’t have it, you might have to consider buying a TPM chip.
Can I run Windows on Chromebook?
Running Windows on Chromebook is possible, but this is an advanced process that requires you to flash your firmware first, so we suggest avoid this process unless you’re an experienced user.
All Chrome OS devices launched in 2019 or after can run Android apps. As for the older devices, not all of them support Android apps, and you can find the list of compatible devices on the Chromium Project page.
If you want to try running Android apps, you might want to consider getting one of these affordable Chromebooks.
Conclusion
Windows 11 and Chrome OS do share a couple of similarities, most notably in terms of visual interface, however, they do have major differences.
Due to its nature, Chrome OS is more secure, however, Windows 11 is more powerful and it should be able to run any application or game that you think of.
Chrome OS has support for Linux applications, but we expect to see that on Windows soon. Even with this feature, the software market caters to the Windows platform, so it’s expected to see more applications available for Windows.
The main difference comes to Android apps, and this is the biggest strength of Chrome OS. Many Chromebooks, even the older models, can download and run apps natively from the Google Play Store.
Android apps have been present on Chrome OS for years, while Windows 11 is just starting to implement native support for Android apps.
Hardware requirements and the reliance on Amazon App Store are the biggest drawbacks when it comes to running Android apps on Windows, and we’re eager to see how will Microsoft tackle this issue.
If you want to run Android apps and maybe a couple of Linux applications, then Chrome OS is a better choice. On the other hand, if you want to run Win32 apps, the latest games, and consumer software, Windows 11 is the only choice.
Back in June, Microsoft unveiled some important updates coming to Teams, including the ability to reply to specific chat messages. Today, the company has announced that the quoted reply feature is now available in public preview on the Microsoft Teams desktop apps, and it’s coming soon to the Teams web app.
The quoted reply experience has been available in the Teams mobile app for quite some time, and it’s finally available in 1:1, group, or meeting chats for desktop users. “Quoted reply allows you to select messages in chat that you want to include in your response. It is a great way to add context and clarity with who you are conversing with whether it is a recent message or from one earlier in the conversation,” the company explained in a blog post.
To reply to a specific message, hover over the particular message you want to reply to and then click the ellipsis (. . .) icon. Select the “Reply” option from the list, type your message with the reply embedded and send it. Users will also be able to click on the original quoted message to move to that specific location in the chat history directly. This should eliminate the need to go through the entire conversation manually.
The ability to reply to specific messages is one of the top-requested features from users and it should help to improve asynchronous collaboration between meetings. However, quoted replies are currently restricted to chat messages, and channel conversations and external messages are not supported yet.
If you’re one of those people who are not fans of a subscription-based Microsoft 365, there’s some good news coming your way fast.
A brand new consumer version of the Office suite, that only requires a one-time purchase, will be released on the 5th of October, along with Windows 11.
This was announced by the Redmond tech giant in a blog post on Thursday and users got really excited about this.
The new Office suite comes at the same time as the new OS
For the moment, Microsoft is remaining silent on further details about this product, such as pricing, but has published a document detailing the new features in the Office suite.
Developers also included a new translation function in Outlook, improved performance across the apps, and an updated draw tab.
This new version provides an alternative to the cloud-based version of Office, which is now dubbed Microsoft 365.
For consumers, the tech company only charges $6.99 a month or $69.99 a year for the service, but over time, an ongoing subscription can get pricey.
For quite some years now, Microsoft has been publicizing Microsoft 365 over the non-subscription-based Office suite.
This raised questions over whether the company might one day discontinue the conventional Office programs.
However, last year Redmond officials confirmed a successor to Office 2019 for both Windows and Mac would arrive in the second half of 2021.
Users will still need to wait a few more weeks for this new suite of apps, but in the meantime, the company has decided to begin releasing the commercial-grade version, dubbed Microsoft Office Long Term Servicing Channel (LTSC), to enterprise customers.
While this will not be our last perpetual release, we continue to make investments that make it even easier for customers to adopt Microsoft 365.
In the same blog post we mentioned throughout this article, Microsoft says it’ll keep releasing the non-subscription-based Office for at least one more generation.
This is great news, right? We know how important and useful these applications are to a lot of you, so we can very much understand the entuziasm.
The silver lining here is that the wait won’t be long, as October 5th is just around the corner.
Are you planning on purchasing the new Office 2021 suite? Let us know in the comments section below.
Microsoft is bringing its PowerToys suite of tools to the Microsoft Store for Windows 11. The PowerToys app was spotted on the Microsoft Store by XDA Developers earlier today, and this should make it a bit more convenient for power users to download the tool on the next-generation OS.
Up until now, Windows users had to download the PowerToys installer from GitHub, and there was also an option to using package managers such as Chocolatey or winget. Interestingly, the installation experience of the PowerToys app on Windows 11 is pretty much identical to the one you get from a regular installer on GitHub. However, the Microsoft Store doesn’t manage the updates for the utility, and the app will be responsible for installing the updates itself.
PowerToys is a set of free tools for power users that helps to optimize their Windows experience for greater productivity. It comes with a bunch of tools such as FancyZones, PowerToys Run, a color picker, as well as an image resizer tool. It has recently received a PowerToys Awake tool that lets users keep their PC awake as long as they need. The company is also currently testing a Video Conference Mute utility that can mute a camera or microphone on Windows PCs with a single keystroke.
Action Center, also known as the notification center, was first introduced with Windows Phone 8.1 in July 2014.
Now, it has been completely redesigned in Windows 11. It comes with WinUI and Fluent Design features and a brand new Quick Settings panel.
Considering these, plenty of users want to know how they can customize Action Center. Today’s guide will show you some options to do it.
But let’s see first some of the best Windows 11 Action Center features that will definitely simplify your workplace accessibility.
What are some of Windows 11’s new Action Center features?
WI-FI settings – This is the first adjustable option you’ll see in Windows 11 Action Center.
Bluetooth settings – You can enable/disable Bluetooth settings and make your device discoverable/hidden. However, if you encounter troubles related to it, check what can you do if Bluetooth is not working in Windows 11.
The Airplane mode – This feature turns off all the radio chips that might interfere with an airplane’s communication and navigation systems.
Battery saver – When activating this one from Action Center, certain settings would be changed in order to conserve battery power until you can recharge your device. Do not hesitate to check battery usage & health in Windows 11.
Focus assist – Enabling it will avoid distracting notifications when you need to stay focused.
Accessibility – With Windows 11’s Action Center support, you can turn on several accessibility options, such as Magnifier, Color filters, Narrator, Mono Audio or Sticky keys.
Sound settings – Change the sound settings by dragging the toggle button, available in Action Center.
Brightness settings – Windows 11’s Action Center also allows you to quickly adjust the brightness settings. However, if for some reason this option is not available, you can check some other ways to change brightness settings in Windows 11.
How can I customize the Action Center in Windows 11?
1. Add new shortcuts
Look at the right side of your Taskbar, then click on the Wifi, Sound, and Battery icon.
Click on the Edit icon, marked as a pencil.
Now, you’ll be able to view the unpin icon on each of the control shortcuts.
Choose to Add shortcuts.
Select the needed shortcuts.
Click on Done to finish the process.
By adding new shortcuts in Windows 11 Action Center, you can personalize your digital environment. However, keep in mind that there are limited options to choose from.
2. Remove shortcuts
Open the Action Center by pressing on the Wifi, Sound, and Battery icon (from the right side of your taskbar).
Press on theunpin iconover the shortcut you want to remove from the Action Center.
You’ll see now that it was removed from Windows 11 Action Center. In this case, we talk about the Airplane mode option.
Once finished, click onDone.
Repeat the same steps for any unnecessary shortcut.
With this option, the shortcuts will be removed from the Action Center. However, if you change your mind, you can add them back using the first listed solution.
3. Regroup shortcuts
Open the Action Center as learned before.
Press again on the Edit icon.
Click and drag the shortcut to reposition it according to your preferences.
This option lets you quickly access your most-used shortcuts. Thus, instead of frequently searching for the needed ones, you can efficiently rearrange them. In this way, you’ll save much more of your working time.
4. Adjust Transparency Effects
Click the Windows key, then on the Settings menu.
Click on Personalization, then navigate to Colors.
Disable the toggle button from the Transaprency Effects section. As you can see in the picture below, this option won’t be available if you didn’t activated your Windows license. So, make sure you do it before.
To enable it back, repeat the same steps, then toggle the button on the Off option.
Windows offers a slightly transparent look on the taskbar, Start menu, and the Action Center. So, it might seem to blend with your current wallpaper.
If you don’t like this translucent look but prefer a solid color for the Action Center, you can turn it off using the above steps.
Windows 11 Action Center versus Windows 10 Action Center
Before anything else, keep in mind that uses a new panels design where your notifications and controls will be split up into different groups, with notifications being housed above the Quick Settings panel.
The Action Center is now resizable/adaptive, and it still comes with a Clear all button at the top right of the panel.
Following the Windows 10 model, the new Quick Settings panel allows you to quickly access commonly used settings, such as Bluetooth, Airplane mode, Battery saver, the sound, etc.
In general terms, Windows 11 Action Center functionality is unchanged. However, considering the settings panel, it is now more customizable.
You can also enjoy some neat touches in animation and it’s noticeable when you click on an action in the Action Center to enable the feature.
Also keep in mind that, unlike Windows 10, the newest version offers you support for the new music control panel. It appears only when an app is playing audio.
The new music control feature allows you to adjust the audio content directly from Windows Action Center. In the previous OS version, this functionality was offered via dated music control UI.
As mentioned, the basic functionality of Action Center didn’t change, which means you can still jump into the Settings app to further customize the experience and how notifications appear.
If you have any other questions or thoughts, feel free to share them with us by leaving a comment below, in our dedicated section.
Seagate is reportedly getting ready to release a cheaper 500GB storage expansion card for Xbox Series X|S consoles to complement the 1TB model currently priced at $220. The French blog XboxSquad (via Video Games Chronicle) shared a screenshot of an internal listing from French retailer Micromania showing the new Seagate card.
According to the screenshot, the 500GB Seagate Extension card for Xbox Series X|S consoles will be priced at €154.99 in Europe (the 1TB model is €249.99), and it’s listed with a November 14 release date.
Image credit: XboxSquad.fr
The existing 1TB Seagate Expansion Card uses a new proprietary port on the back of Xbox Series X|S consoles, and it supports the same Xbox Velocity Architecture as the consoles’ internal NVMe SSDs. Games optimized for Xbox Series X|S consoles can only be launched from the consoles’ internal hard drive or a Seagate Expansion card, but the 1TB model probably remains too expensive for most gamers.
It remains to be seen if other manufacturers than Seagate will release their own Storage Expansion cards for Xbox Series X|S consoles at some point. If Microsoft’s proprietary plug-and-play technology is currently really easy to use, Sony went a different way with its PlayStation 5, allowing gamers to install M.2 SSDs inside the console. This is good for competition, but the installation process isn’t exactly seamless for consumers who also need to make sure to purchase a compatible M.2 SSD.
Xbox console owners with an active Xbox Live Gold subscription have three full games to play for free from now until the end of the weekend on Sunday, September 19 at 11:59 p.m. PDT.
Those with a console from either the Xbox One or Xbox Series X console families can play Hunt: Showdown and Blood Bowl 2: Legendary Edition while Xbox Series X owners will also be able to play Judgment.
As is typical with Free Play Days, there are also some discounts to be had for those interested in buying the games after the free play period ends. Hunt: Showdown currently has a 55% discount while Blood Bowl 2: Legendary Edition has received a massive 88% discount and is now for sale for just $4.
This new experience is now available for users in the Beta Channels, through the Windows Insider program.
We’ve now reached the tenth cumulative update for Windows 11 RTM Build 22000, and this one comes with some of the system apps that went through the revamp process.
If you check for updates today, a new patch called Cumulative Update for Windows 11 (22000.194), KB5005635, will appear available for download.
Today’s rollout includes the following application updates: Snipping Tool, Calculator, and Clock with Focus Sessions.
So if you are excited to take them for a test drive, remember to search the Store for updates.
Besides providing availability for the utility software mentioned above, Microsoft also packaged fixes for some of the pending issues that Windows 11 still struggled with.
Let’s take a look at what Redmond officials decided to tweak via build 22000.194 :
Addressed an issue where if you enable then disable a contrast theme, it would lead to artifacts in title bars, in some cases making the minimize/maximize/close buttons hard to see and use.
Fixed a crash with certain connected devices that could result in not being able to use Bluetooth.
Mitigated an issue that was resulting in subtitles not appearing when expected in certain apps, particularly Japanese language subtitles.
Fixed an issue that was causing certain PCs to bugcheck during modern standby.
Mitigated an issue when typing with certain 3rd party IMEs into the search box in Settings that could result in the candidate window being rendered elsewhere on-screen (not attached to the search box) and/or characters inserted into the search box not displaying.
Fixed an issue that causes PowerShell to create an infinite number of child directories. This issue occurs when you use the PowerShell Move-Item command to move a directory to one of its children. As a result, the volume fills up and the system stops responding.
This build includes a change that aligns the enforcement of the Windows 11 system requirements on Virtual Machines (VMs) to be the same as it is for physical PCs. Previously created VMs running Insider Preview builds may not update to the latest preview builds. In Hyper-V, VMs need to be created as a Generation 2 VM. Running Windows 11 in VMs in other virtualization products from vendors such as VMware and Oracle will continue to work as long as the hardware requirements are met. For more details on the Windows 11 system requirements – see this blog post here.
Be careful, build 22000.194 comes with a few issues of its own
Even though developers are working around the clock and doing everything they can in order to rid the upcoming OS of all its flaws, especially the critical ones, some problems still make their way into our homes.
Out of the issues that Microsoft engineers haven’t managed to sort out during this period, these have the highest possibility of making our lives miserable.
[General]
Investigating reports from Insiders in the Beta Channel where after upgrading to Windows 11, they are not seeing the new Taskbar and the Start menu doesn’t work. To workaround this if you are impacted, please try going to Windows Update > Update history, uninstalling the latest cumulative update for Windows, and the reinstall it by checking for updates.
Working on a fix for an issue that is causing some Surface Pro X’s to bugcheck with a WHEA_UNCORRECTABLE_ERROR.
[Start]
In some cases, you might be unable to enter text when using Search from Start or the Taskbar. If you experience the issue, press WIN + R on the keyboard to launch the Run dialog box, then close it.
System and Windows Terminal is missing when right-clicking on the Start button (WIN + X).
[Taskbar]
The Taskbar will sometimes flicker when switching input methods.
[Search]
After clicking the Search icon on the Taskbar, the Search panel may not open. If this occurs, restart the “Windows Explorer” process, and open the search panel again.
Search panel might appear as black and not display any content below the search box.
[Widgets]
The widgets board may appear empty. To work around the issue, you can sign out and then sign back in again.
Widgets may be displayed in the wrong size on external monitors. If you encounter this, you can launch the widgets via touch or WIN + W shortcut on your actual PC display first and then launch on your secondary monitors.
[Microsoft Store]
We continue to work to improve search relevance in the Store.
[Windows Sandbox]
Within Windows Sandbox, the language input switcher does not launch after clicking the switcher icon on the Taskbar. As a workaround, users can switch their input language via any of the following hardware keyboard shortcuts: Alt + Shift, Ctrl + Shift, or Win + Space (the third option is available only if Sandbox is full-screened).
Within Windows Sandbox, the IME context menu does not launch after clicking the IME icon in the Taskbar. As workarounds, users can access the functionalities of the IME context menu with either of following methods:
Accessing the IME settings via Settings > Time & language > Language & region > (e.g., Japanese) three dots > Language options > (e.g., Microsoft IME) three dots > Keyboard options.
Optionally, you may also enable the IME toolbar, an alternative UI, to quickly invoke specific IME functions. Continuing from above, navigate to Keyboard options > Appearance > Use IME toolbar.
Steam is one of the largest digital distribution platforms, with thousands of great titles to choose from. However, it seems that there are some issues with this service.
According to users, it seems that Steam is not signing in to Friends, thus making it harder for you to play with the people you know.
This can be a problem since you won’t be able to chat with others or invite them to play with you in certain games.
In today’s guide, we’re going to take a closer look at this problem, and show you how to easily fix it on your Windows 11 PC.
How many users does Steam have?
The platform currently has 25.47 million users worldwide. This is an increase of approximately 6 million new accounts from January 2020.
Number of Steam users worldwide (Source: Statista)
However, the number seems to drop slightly, but we doubt that this trend will continue, and we’re positive that the platform will increase the number of users in the future.
Can I play with my friends if the Friends list on Steam isn’t working?
In most cases, you should be able to play with people you know, even if the Friends list isn’t working on Steam.
Keep in mind that you won’t be able to invite a specific person to join your session from the chat, but instead, you’ll have to invite them from the game that you’re playing, by sharing the lobby ID or server IP address.
This varies from game to game, and with some games you might have issues while inviting your friends to join you.
What do I do if Steam is not signing in to Friends?
1. Turn off power saving for your network adapter
Press Windows Key + X and choose Device Manager from the list.
Expand the Network adapters section. Double-click your network adapter.
Go to the Power Management tab. Uncheck Allow the computer to turn off this device to save power. Click OK to save changes.
2. Restart your router/modem
Go to your modem.
Press the Power button to turn it off.
Keep the device turned off for a minute or so.
Now press the Power button to turn it again.
Wait for a minute until your modem boots completely.
If there’s a problem with a specific service, you’ll have to wait until it’s resolved.
How can I chat with friends if my Friends list isn’t available in Steam?
If the chat isn’t working, you won’t be able to communicate with other people over Steam.
The only way to circumvent this issue is to use VoIP software for gamers until the issue is resolved by Valve.
Download the VoIP software that you want to use, create an account and ask your friends to do the same. This isn’t an optimal solution, but it’s the only one available at the moment.
Why is Steam going offline while I’m playing?
There could be various reasons for this problem ranging from server issues to your network configuration.
In some instances, your installation might be corrupted or other applications might be interfering with Steam, causing it to go offline.
If you’re having this problem, be sure to check our guide on what to do if Steam is going offline for more information.
If Steam is not signing in to Friends, you won’t be able to stay in touch with the people you know while gaming. This is most likely a server problem, but hopefully, you’ll be able to fix it with our solutions.
In case you’re impatient, you can always adjust your network adapter’s power settings or restart your modem and check if that solves the issue for you.
Did you find a solution to this problem on your own? Share it with us in the comments section below.
Windows and ARM processors have a long history, and Windows 10 is fully compatible with them, so it’s no wonder that Windows 11 will do the same.
Taking a look at Windows 11 requirements, we can see that Qualcomm processors will work with it, although the list of supported models doesn’t seem too impressive at the moment.
In case you’re not familiar, these types of processors are usually used on mobile devices, and many are wondering how will they compare to regular desktop CPUs.
In today’s guide, we’re going to take a closer look at Windows 11 and Qualcomm compatibility and tell you everything you need to know about it.
What should I know about Windows 11 and Qualcomm support?
Qualcomm, a quick introduction
Qualcomm is a chip manufacturer from San Diego, California, and it has been making electric components since 1985, and they are one of the largest manufactures in the world.
The company is developing semiconductors for different industries, but Qualcomm is best known for its wireless chips and Snapdragon mobile processors.
Are Qualcomm processors good?
Qualcomm CPUs are one of the best on the smartphone market delivering amazing performance to their users.
Therefore, we’re not surprised to see that Windows 11 will be compatible with models from the Snapdragon series. Regarding the performance, here’s the list of the best smartphone processors:
As you can see, out of the top 10 smartphone CPUs, Snapdragon devices took four spots on this list, thus proving their quality and performance.
However, PCs and smartphones are drastically different devices, so how do these types of processors compare to their desktop and laptop counterparts?
How is Qualcomm CPU laptop performance?
Although the Snapdragon series are one of the best brands on the smartphone market, the situation is a bit different on the desktop market.
Compared to other high-end laptop CPUs, Microsoft’s SQ2 didn’t perform too well, and it offered low benchmark scores.
Moreover, compared to other ARM processors, it achieved lower results than its Apple competitor.
Microsoft SQ2 benchmark results (Source: CPU Benchmark)
As for Snapdragon 8xc Gen 2, the situation is the same, and this model is at the bottom of the list compared to the high-end x64 laptop CPUs, which is expected.
Snapgradon 8cx Gen 2 benchmark results (Source: CPU Benchmark)
Qualcomm processors can’t compare to the high-end x64 CPUs, but the situation is similar when compared to mid-range and even some low-end models.
Snapgradon 8cx Gen 2, Microsoft SQ2 benchmark results (Source: CPU Benchmark)
This comes down to the different architecture that processors are using, therefore it’s not fair to compare ARM and x64 devices.
Keep in mind that these are just benchmark results, and while they may offer some insight into CPU performance, they aren’t the best representation of real-life everyday performance.
Will Windows 11 be fully compatible with Qualcomm processors?
So far, we know that x86 Win32 applications will be able to run on ARM processors seamlessly, without any modification required by the developers.
However, when it comes to 64-bit applications, the situation isn’t as simple. Windows 10 on ARM has support for those types of apps using the ARM64 emulation.
This brought some compatibility and performance issues, and we’re expecting the new version to address that. To improve 64-bit emulation, Microsoft decided to develop and use ARM64EC.
The new technology will be available in Windows 11, and it will allow apps, processes, and modules to use both ARM64EC and x64 when needed.
Using this technology, the code will run natively, while the x64 code will use the built-in ARM emulation. In the past, the developers were encouraged to optimize their apps for ARM64 completely, but this was a lengthy and time-consuming process.
However, that changes with ARM64EC since now you can select which components you want to rebuild and optimize for ARM technology.
Other unoptimized x64 components will be emulated, thus allowing you to port essential parts of the application and speed up the optimization process.
This is a great improvement that will surely help the developers, but sadly, the performance will greatly vary depending on how developers choose to optimize their software.
What Qualcomm processors will work with Windows 11?
The latest version of Windows brought some new hardware requirements, especially in the CPU department, and unfortunately, some older models won’t be supported.
Currently, several Qualcomm processors are compatible with Windows 11, and we expect that number to increase in the future. Here’s the list of official compatible models:
Snapdragon 850
Snapdragon 7c
Snapdragon 8c
Snapdragon 8cx
Snapdragon 8cx (Gen2)
Microsoft SQ1
Microsoft SQ2
What are the pros and cons of using Windows 11 with a Qualcomm processor?
The biggest advantage of using Windows 11 with a Qualcomm processor is the battery usage. ARM devices use less power, and therefore they last longer on a single charge.
You can get up to 20+ hours of video playback, and with moderate usage, the battery can last up to multiple days on a single charge.
Since ARM processors use less electricity, they are generating less heat, meaning that your PC will remain cooler.
As a result, laptops that use them don’t require active cooling, allowing for manufacturers to make sleek, quiet, and light devices.
These CPUs also have built-in Adreno GPU, and support lightning-fast 4G LTE and 5G connectivity, allowing you to reach speeds up to 2Gbps on 4G and up to 7Gbps with 5G.
As for the flaws, we have to say that we’re concerned about application support and performance. Qualcomm states that the vast majority of apps will work on Windows 11 devices running on ARM processors.
This includes popular web browsers and collaboration tools such as Zoom, Slack, and Microsoft Teams. In case you’re not familiar with it, we have an in-depth guide on how to use Microsoft Teams on Windows 11.
Other applications include Microsoft Office, Adobe Acrobat Reader, Spotify, Pandora, Amazon Music and social media apps.
The question remains how will other applications, most notably 64-bit, work, and will there be any major performance issues and slowdowns, especially when using emulation.
ARM processors offer lower performance than some entry-level laptop CPUs, so if you’re looking to get a PC with high-end performance, maybe these types of devices aren’t for you.
What is the difference between ARM and x86/x64 processors?
Qualcomm processors are ARM devices and they are based on RISC architecture. On the other hand, x86/x64 CPUs are using CISC.
RISC has less than 100 instructions and it uses a 32-bit instruction format, as well as simple addressing mode, and register-based instructions.
This architecture uses more lines of code since it performs just one instruction per clock cycle, and this is why ARM processors use less electricity, which makes them perfect for smartphone devices.
On the other hand, CISC processors have from 120 to 350 instructions and they use variable instruction and data formats, and about 8 to 24 general registers.
This allows your CPU to execute one complex instruction instead of multiple simple instructions like with RISC processors.
As a result, x64/x86 processors are used in devices that need to perform complex tasks, such as laptop and desktop computers.
These devices offer high performance, but they require more cooling, and more electricity, while ARM CPU use less electricity and provide lower performance.
We’re excited about Windows 11 and QualcommCPU support, and we can’t wait to see how it works in action, but we’re still a bit concerned about how well will ARM devices handle x64 software.
To learn more about Qualcomm CPUs, our Snapdragon X Elite vs M4 article will give you more insight.
Are you going to get a device with an ARM processor or are you going with a different Windows 11 ready laptop? Let us know in the comments below.
To install Windows 11 on a virtual machine, you might need to enable TPM, and this guide will show you how to enable TPM in VMware software.
The process is fairly simple, but it can take a bit, depending on the size of the virtual machine, so let’s see how to do it.
How do I enable TPM on my VMware Workstation VM?
1. Encrypt your virtual machine
Open the VMware Workstation and select your virtual machine.
Select Edit virtual machine settings.
Go to the Options tab and select Access Control on the menu on the left.
Now click the Encrypt button.
Enter the password for the virtual machine.
Wait for the process to finish.
2. Enable Trusted Platform Module
Click on Edit virtual machine settings.
In the Hardware tab click on Add.
Select the Trusted Platform Module and click on Finish.
Navigate to the Options tab and select Advanced from the left pane.
In the Firmware type section, check Enable secure boot option, and click Apply and OK to save changes.
How do I enable TPM in VMware Player?
Locate your virtual machine file, right-click it, and open it with Notepad. It usually has a .vmx extension.
Add the following line managedvm.autoAddVTPM = "software"
Save changes and start your VM.
Does Windows 11 VM need TPM?
If you’re using Hyper-V, you must have a TPM chip to run Windows 11. As for VMware, you can run Windows 11 on VM without physical TPM. You still have to enable it by following our instructions from above.
How to install Windows 11 on VMware Workstation without TPM?
If you want to install Windows 11 without TPM on your virtual machine, you can follow the steps from our guide on how to bypass Windows 11 TPM requirements.
As you can see, it’s easy to enable TPM in VMware Workstation, and to do so, you need to adjust a couple of settings. Although using this feature is unnecessary, it can give you an extra layer of security.
Keeping your PC safe should be your priority, and security options like this will ensure that your bootloader is unaltered and that no malware is starting with your PC.
Windows 11 is finally here, but unfortunately, it seems that it won’t work with older devices, and this has many users worried.
To install the latest version, many users will be forced to upgrade their PC, or even buy a whole new computer, which is far from an optimal solution.
Microsoft decided to drop support for older hardware, and introduce the TPM requirement to boost the security of its users.
The new version has specific CPU requirements, and in today’s guide, we’re going to answer whether Windows 11 can work with Haswell processors.
Can I use Windows 11 and Haswell CPU?
What are Haswell CPUs?
Haswell CPUs are series is developed by Intel and released in 2013. These are 22nm processors, and they are designed to be optimized for power saving.
These models took many features from their predecessor, Ivy Bridge, but they also brought few new ones including support for new sockets, a wider core, improved performance, and new instructions.
The Haswell devices were a part of the fourth-generation core CPUs, but they were eventually replaced by Broadwell and Skylake models.
What are the Haswell CPU features?
The models from the Haswell series are the first desktop processors that were made for a system-on-chip architecture.
Regarding the thermal power design, these devices use 37-57W on laptops, 35-140W on desktops, and 11.5W-15W on the Ultrabook series.
Haswell CPUs had support for dual-channel DDR3 memory with a maximum capacity of 32GB, at 1333MHz or 1600MHz frequency. As for PCI Express, there was support for 16 PCI Express 3.0 lanes.
Some models from this series came with Intel HD Graphics 5000, allowing users to enjoy multimedia.
As for the number of cores, here’s a quick overview:
i7 – 4 cores and 8 threads
i5 – 4 cores/threads
i3 – 2 cores and 4 threads
Pentium and Celecorn – 2cores/threads
In terms of CPU speed, high-end devices could reach 3.00GHz-4.00GHz, while mid-range ones would usually run on up to 2.0GHz-3.5GHz, and the entry models would run at 1.3GHz-2.6GHz.
For 2013 Haswell had great specs, so it’s no wonder that some users still use it on their older PCs. However, the question remains, how will Haswell work with Windows 11.
Does Windows 11 support Haswell processors?
Windows 11 requirements are different from the previous versions, and they have caused a bit of controversy.
The latest version will require a TPM chip, and if you’re not familiar with it, we suggest reading our TPM and Windows 11 guide for more information.
What about Haswell processors? According to Microsoft’s documentation, you’ll need at least an 8th generation IntelCPU, meaning Coffee Lake or newer.
If you’re using a 4th generation, such as Haswell, it means that you won’t be able to run Windows 11 since your hardware isn’t supported.
Even if you can’t upgrade, support for Windows 10 will last until 2025, so you can continue using it at least for few more years.
Why doesn’t Windows 11 support Haswell CPUs?
When Windows 11 was first announced, it was able to run on devices that don’t meet the hardware requirements fully, so if you had any version of the TPM, you could’ve installed it.
To learn more about different versions of this feature, check our TPM 1.2 vs TPM 2.0 guide for more in-depth information.
As you can see, Microsoft didn’t strictly enforce their requirements, and users were able to install Windows 11 with a warning message about using unsupported hardware.
That’s not the case anymore, and many older processors are unable to run the latest version of the operating system.
The reason behind this is most likely security, and many older CPUs don’t support TPM 2.0, which is required for Windows 11.
It’s worth mentioning that older processors don’t support certain security features, so they can’t utilize virtualization security and hypervisor-protected code integrity features that are always enabled.
Many are speculating that this is because of Spectre and Meltdown malware, and Intel’s 8th generation of CPU has improved security designed specifically to deal with this type of threat.
Take into consideration that the 8th generation is the minimum requirement for Windows 11, which leads us to believe that this is one of the reasons why Microsoft dropped support for older CPUs.
Is there any way to run Windows 11 on Haswell CPU?
Although Haswell devices aren’t officially supported, that hasn’t stopped users from installing the new operating system. It seems that Microsoft isn’t enforcing strict hardware requirements for Insider Program at the moment.
This allows you to join it and download Windows 11 on your PC with ease. However, this might change soon.
A couple of users reported that you can remove a hard drive that has an operating system installed and connect it to another PC, even if it doesn’t meet the hardware requirements, and it should work.
Keep in mind that this is just a workaround, and it might get patched in the future. For a long-term solution, you might want to run Windows 11 on a virtual machine.
Lastly, there’s an option to download Windows 11 ISO, and then modify it with files from the older version to circumvent hardware and security requirements.
This method might be risky especially when modifying ISO files, so we won’t go into detail, but it’s one method that advanced users might try.
Are Haswell processors good?
When they were released, they were great, but now, years after the initial release, they just can’t compete with modern low-end devices.
Haswell CPUs support only DDR3 at 1600MHz, which is a lot slower compared to newer models. However, these processors can still be used for basic needs, such as web browsing, office work, and light gaming.
What can I do if Windows 11 won’t work with my Haswell device?
Although there are still a couple of workarounds that allow you to install the latest version on devices that don’t meet the hardware requirements, we assume that Microsoft will put an end to that in near future.
This doesn’t leave users with many choices, and they will have to upgrade to meet the hardware requirements or purchase a Widows 11 ready PC.
Is Windows 11 worth upgrading to?
Yes, as long as your PC meets the hardware requirements. We wrote an in-depth guide in which we compared Windows 10 vs Windows 11, so be sure to check it out for more information.
The new version brings some major changes in terms of functionality and visual appearance, offering a complete visual revamp.
Performance-wise, Windows 11 will use DirectStorage that will improve gaming loading time and performance. On top of that, there’s improved security with the requirement of TPM and Secure Boot.
If your PC doesn’t meet the hardware requirements, you can continue using the current version of Windows, but keep in mind that many app and game developers will slowly drop support for it in the upcoming years.
Windows 11 doesn’t support Haswell CPUs officially, but there are few workarounds that you can try and see if they’ll help you run it.
Keep in mind that Microsoft is most likely aware of these workarounds and that they will most likely be disabled soon.
What are your thoughts on the new version of Windows and its CPU requirements and have you managed to run it on unsupported hardware? Let us know in the comments below.
From what we found, it seems like there are plenty of users who are wondering how to efficiently use the Windows 11 Voice Typing Tool.
The great news is that there are no complicated ways. So, do not worry if you’ve never tried it before. In case you’re not that familiar with this feature, take a look at some reasons to give it a shot.
What can the Windows 11 Voice Typing Tool offer?
Also known as a dictation tool, voice typing does nothing more than its name says. It records what you’re speaking, then converts it into text in real-time.
Note that you can use it in any text box. So, we talk about text editors or composing boxes of a chat app, typing an email, and the list can go on with many other options.
It is no doubt that the latest operating system came up with some new great features and improvements, and that also applies to Voice Typing Tool.
On the previous OS, you were supposed to edit what you already dictated, and this means outlining yourself and punctuating the words accordingly. Now, your work will be more simplified, with Windows 11 doing all the job.
How can I use Voice Typing Tool in Windows 11?
1. Open the Voice Typing Tool
Select the text box where you want to type (in this particular case, we opened a Notepad box).
Remain with the cursor in that text box, then use the following keyoard shortcut: Windows + H.
A little pop-up box will appear and you’ll be able to move it anywhere.
In case it’s obstructing your screen view, just click and hold the bar at the top to drag and move it around the screen.
2. Enablethe Voice Typing launcher
Open the Voice Typing Tool, as you learned from the previous method.
In the pop-up box, click on the Settings icon (marked as a gear).
Make sure that the toggle button from the Voice typing launcher is On.
In case you enable this option, you’ll be able to quickly voice typing launcher when you’re in a text box. In other words, it will automatically appear anytime you click inside a text field.
For those who dictate often, this choice would be extremely helpful to save your working time. Of course, if you change your mind, it can always be turned back off.
3. Turn on auto-punctuation
Open the Voice Typing Tool, then navigate to Settings.
Look at the Auto-punctuation section, then make sure the toggle button is On.
4. End dictation
4.1 Stop or pause the dictation
Click on the Microphone icon.
If you decide to stop or pause the dictation, you can also use the following keyboard shortcut: Windows + H.
4.2 Exit Voice Typing Tool
The quickest way to exit the Windows 11 Voice Typing Tool is by pressing the Esc key.
What are the supported languages in Windows 11 Voice Typing Tool?
Even if voice typing is a great feature, there are a few catches you should consider. First of all, it is mandatory to be connected to the Internet. Besides that, it only works with certain languages.
Take a look at the list below and find out from what you can choose:
English (US, Australia, Canada, India, United Kingdom)
You can also try Google Assistant for PC to add powerful cross platform voice control alongside the built in Windows 11 tools.
Check out this Windows 11 voice assistant
Besides the Voice Typing Tool, Windows 11 comes up with an incredibly useful voice assistant. You’ve probably heard before about Cortana.
If not, keep in mind that you can use it for multiple reasons like setting a reminder, scheduling a meeting, searching the Internet, locating items on your PC or Windows phone, and much more.
Unlike the previous version, this time Cortana will no longer be included in the initial boot sequence, nor be pinned in the Taskbar.
The voice assistant is installed in Windows 11 but is not active by default. Before using it, you’ll need to turn it on, launch, and sign in to the Cortana app.
As you can notice in the picture below, it uses high-quality artificial intelligence. But let’s shortly explain what is this all about.
Raw data can originate from multiple sources, such as databases, apps, sensors, devices, and IoT systems.
On the other hand, various transformations, analytics, and machine learning processing can provide insights that are presented or delivered to users, apps, and automated systems.
Windows 11 brings up some new and improved features and the Start menu is one of them.
However, the opinions are divided. Some users are extremely excited about the latest upgrades, while others are not that happy with the refreshed Start experience.
To build a more personalized environment, the OS design allows you to customize the Windows 11 Start menu in various ways.
Before anything else, you should know that the newest design looks quite different from the Windows 10 version. For a full comparison between Windows 10 and Windows 11, check out our dedicated article.
What’s new about the Windows 11 Start Menu customization?
You can access the Start menu home page by hitting the Windows key on your keyboard or by clicking on the Windows icon from your centered desktop taskbar.
Pinned apps are displayed at the left top, and the All apps list button is placed on the right top side of the window.
Also, for perfect customization, you have the option to add and view recommended and recent items, which appear in the bottom half of the page.
As you can see in the picture below, Windows 11’s Start menu comes up with a brand new design, which also includes the round corner feature.
Now let’s see how this menu can be customized according to your own preferences. To build a unique Windows 11 Start menu, make sure you read each of our recommendations.
How can I make a great Windows 11 Start Menu customization?
1. Pin apps
Press on the Windows key, then click on the All apps button.
Search for the app you want to pin in the Windows 11 Start menu, then right-click on it, and select to Pin to Start.
If you go back to the Start menu, the app will appear in the Pinned section.
Repeat the process for any app you want.
This is a great option that will let you personalize one of the most used features. We also recommend checking more solutions to pin apps to the Start menu in Windows 11.
Note that if you ever change your mind, you can easily unpin certain apps, following the first two steps, but instead of the Pin to Start option, you’ll have to choose to Unpin from Start.
2. Rearrange pinned apps
After pinning the desired apps, you can also manage them, by moving it to any position. To simply do it, left-click on the app, then hold and drag it wherever you need.
Note that if you pin more than 18 apps to the Windows 11 Start Menu, then a second page will be added. You can scroll to move between different pages of pinned apps.
You can also search for Windows 11 apps in alphabetical order. To simply do it, you have to open the All apps section, then click on any alphabet letter.
3. Tune recommendations
Hit the Windows key, then open the Settings menu.
Go to Personalization, then select the Start section.
To find the new apps or programs in Windows 11 Start Menu, you can enable the Show recently added apps, right after installing it. With this feat you’ll be able to save time by not scrolling through the entire app list to find a newly installed app.
You can also turn on the Show the most used apps option. This will help you get recommendations of frequently used apps.
Now look at the Show the most used apps option, then if the toggle button is greyed out, you’ll have to enable a privacy setting to make it work, by following the next 3 steps. If it is not, jump directly to the step 9.
To easily do it, jump to the Privacy & Security section (from the Settings home menu), then navigate to General.
There, look at the Let Windows improve Start and search resultsby tracking app launches section, then enable it.
Go back and open the Personalization page once again. Now you’ll be able to turn on the Show the most used apps option.
In the same page, you canenable the Show recently opened itemsin Start, Jump Lists and File Explorer option. You’ll get quick access to files and programs you access across your Windows 11 Start Menu.
4. Add folders
Access again the Windows 11 Settings menu.
Go to Personalization, then navigate to Start.
Select the Folders section.
By setting the toggle button on On, you can add folders such as Downloads, Documents, Pictures, and more to the Start Menu.
To view these folders, go to the right bottom side of Start menu (next to the Power button). There, you can quickly access important folders, without being necessary to scroll through your pinned apps.
You can also add a custom folder to the Start menu. Right-click on that folder select the Pin to Start option.
5. Get back to the classic Start menu
Hit the Windows key, type Registry Editor, then open it.
Navigate to the following location: HKEY_CURRENT_USER\Software\Microsoft\Windows\CurrentVersion\Explorer\Advanced
Look at the left window pane, right-click on the Advanced option, then select New, and DWORD (32-bit) Value.
Enter the following value name, then press on Enter to save it: Start_ShowClassicMode
Double-click on the same value, then change its data to 1, and click on OK.
Restart your PC.
If you’re not happy with the newest aspect, Windows 11 Start menu customization is the key, by switching back to the old design.
What are the most common Start menu issues?
Like any other Windows feature, the Start menu can sometimes run into trouble. Take a look at the following list and be prepared for future possible problems.
Minor system issues – Your OS might sometimes be affected by small errors (random and temporary) that would prevent the Start Menu from properly starting. However, do not panic! It is possible that your system won’t be affected by critical bugs.
Critical errors affecting your OS – Beside the first case scenario, your Start Menu might also be occured by much more serious bugs. In these terms, we have to consider aspects like malware which can corrupt or damage your operating system. To prevent such situations, you should check these antivirus options for Windows 11.
So these are the most popular ways to customize your Windows 11 Start menu. We hope you’ll better enjoy your digital experience by applying each of them.
Some users already reported some Start Menu-related troubles. If you’re one of them, checking a full guide on how to solve Windows 11 Start menu not working issues would definitely help you.
The Windows 11 clipboard brings up a lot of new features that will surely increase your digital work satisfaction. Microsoft redesigned this item’s panel, inserting interesting upgrades.
Unlike the previous OS version, this one offers you more variety in using your clipboard options. To be more precise, we talk about interactive improvements and paste text actions.
We’re going to show you an easy guide about how to use the improved clipboard. So make sure you read this article entirely to discover some notable updates.
Why should I use the Windows 11 clipboard?
1. Never lose anything copied
It is not uncommonly to copy a text, then become distracted by some random stuff, and copy something else. Finally, you realize that you’ve lost what you need.
With the Windows 11 clipboard, you’ll not have to worry about losing anything. Thus, keep in mind that the clipboard manager keeps an ongoing record of something that you’ve copied.
In these terms, you’re allowed to scroll through your entire history and find your missing object.
2. Collect and compile
For those who are taken into deep research mode on their day-to-day activity and work with plenty of opened tabs at once, we have great news.
As you probably noticed, when you have a lot of web browser tabs opened, your PC is not running as it should be. Considering this, the Windows 11 clipboard will help you collect and compile all the needed URLs.
The only steps to follow are collecting all the URLs, then heading back to your clipboard manager to compile them.
3. Review your days
The clipboard can be a pretty good record of what you’ve been up to on your PC, on working or free days.
So, you’ll be able to scroll through the things you’ve copied on certain days. This is a great option to get you updated on what you’ve been working on.
For example, using the Windows 11 clipboard could remind you to get back and finish a particular work project.
How can I easily use the clipboard in Windows 11?
1. Open the Windows 11 clipboard
Press simultaneously the Windows + V keys.
The Windows 11 clipboard will appear on your desktop screen.
As you can see, opening Windows 11 clipboard is extremely simple, being done in a few seconds. Once you access your clipboard, make sure you continue reading this article to find out the best features that you can use.
2. Manage the most interesting clipboard features
2.1 Navigate to the emoji section
Use the keyboard shortcut mentioned in the previous step to open the clipboard.
Click on the Smiley face icon to access the advanced Emoji options.
After accessing this section, you’ll be able to select any category you need, according to your preferences.
At the bottom of the page, you can discover some additional information about this subject. We prepared some easy steps to find out a variety of cool Microsoft emojis.
However, do not get directly there! You should definitely take a look at all the instructions listed below.
2.2 Try the GIFs section
On the main clipboard screen, select the GIF icon.
As you can see, you can plenty of categories, such as: Trending, Italy soccer (with some new great updates of the Euro 2020 championship), monday, etc.
For a much more animated digital experience, you should definitely take a look at this category and use dedicated GIFs. Note that you can also use keywords to find the perfect GIF.
2.3 Use Kaomojis
Access the Kaomoji icon.
You have a variety of options from you can choose to express emotions like greeting, acting cute, sad, and so on. You can also view your recently-used kaomojis and the Classic Ascii Emoticons.
2.4 View the clipboard history
From the main clipboard menu, select the Notebook icon.
Here you can see all you clipboard history.
As you can observe, you’re allowed to remove the clipboard history by clicking on the Clear all button.
If you’re not able to see the clipboard history icon (the notebook), make sure you take a look at the following step.
3. Enable the clipboard history
Open Settings.
Go to System, then scroll down, and select Clipboard.
Make sure the toggle button from the Clipboard history section is On.
4. Use the Plain as text Windows 11 clipboard feature
Open the clipboard menu, by pressing the Windows + V keys.
Paste the copied content as plain text, removing all unwanted formatting.
Check out this cool variety of emojis from your Windows 11 clipboard
Emojis are some of the most used symbols in our day-to-day communication, becoming the main support of less-time consuming digital interactions.
As we mentioned before, the new clipboard allows you to use plenty of emojis, according to your state of mind or your daily perspectives. In the section below, we’ll present all the categories from which you can choose.
The first recommendation is the Recently-used emoji section. Thus, you won’t consume time searching for the day-to-day emojis.
You can also access the Smiley faces and animals section.
The third category is related to People.
The Windows 11 clipboard also offers you a Celebrations and objects emoji category.
For those ones who are foodie or nature-passionate, you have a dedicated Food and plants emoji section.
If you’re a traveler, the Transportation and places emoji category will surely make your digital experience more interactive.
Last, but not least, you have an additional Symbols section.
As you can see, the new clipboard on Windows 11 can be used in different easy ways. These are just some of the latest OS features that allow you to create a more interactive and dynamic digital environment. If you are looking for more advanced features to manage your clipped data, we recommend Comfort Clipboard.
If you have any other thoughts on this topic, do not hesitate to share them with us in the comments section below.
Microsoft’s official online Xbox Gear Shop has just launched two new lines of merchandise inspired by the company’s Xbox consoles and video game franchises.
The first line is called the Xbox 20th Anniversary Collection and includes a black hoodie and two T-shirts featuring the logo for the very first Xbox console that launched in North America back in 2001.
The second line of products is referred to as the Xbox Sphere Collection. This series of new T-shirts feature the modern Xbox logo shaded with a design inspired by one of the main first-party Xbox video game series.
Xbox Gear Shop’s Xbox Sphere Collection
Six Xbox Sphere T-shirts are currently available to purchase from the Xbox Gear Shop featuring designs inspired by Halo, State of Decay, and Psychonauts. All six are called Wave 1 on the website’s front page which suggests that more T-shirts in the style are on the way.
Windows 11 is amazing, but sadly, some PCs won’t be able to run it, due to changed hardware requirements.
This affects mostly older CPUs and devices that don’t have certain security features. In that regard, we suggest reading our Windows 11 and TPM guide.
The change sparked a bit of controversy, but luckily for Intel owners, Tiger Lake processors will support the new operating system.
To learn more about Windows 11 and Tiger Lake compatibility and performance, be sure to keep reading until the end.
What should I know about Windows 11 and Tiger Lake?
Find out all about Tiger Lake processors
These are the 11th generation of Intel Core mobile processors, released in September 2020. They are using the 10nm technology and Willow Cove microarchitecture.
This series comes with Xe integrated graphics, providing users with great multimedia performance. Regarding motherboard support, Tiger Lake CPUs use FCBGA1449 and FCBGA1787 sockets.
Will Windows 11 support Tiger Lake processors?
Yes, Windows 11 will support the Tiger Lake processors out of the box. This series was recently released, therefore it’s fully supported by the latest version.
To make sure that your IntelCPU is on the list of compatible devices, be sure to check Microsoft’s compatibility page for more information.
What are Tiger Lake CPU features?
As previously stated, these models will use 10nm+ technology, similar to previous generations, while delivering improved performance thanks to the chip redesign.
According to Intel, Tiger Lake offers 20% more system power and up to 20% faster speeds for office tasks. As for the clock speeds, the high-end models offer up to 5.0GHz, while entry CPUs will have 4.4GHz max clock speed.
Certain processors have built-in Intel Xe graphics that should double the performance compared to the previous Gen11 graphics.
Thunderbolt 4 support is available as well, enabling rapid file transfer and the ability to output a 4K signal on four displays simultaneously, or an 8K signal on a single display.
There are four different series available, each with different features, such as the number of cores, threads, and maximum frequency.
Overall, the Tiger Lake series is a great improvement compared to the previous generation, so it’s worth getting.
How does Tiger Lake compare to other processors?
Intel Tiger Lake series offers great performance and it can compete with AMD’s lineup. According to the benchmark tests, the high-end models are better than all of their competition.
Intel Core i9-11980HK benchmark results: CPU Benchmark
As we can see, Intel Core i9-11980HK dominates its competition with ease.
Other models such as Core i7-11370H also have solid benchmark results, and they can easily parry their AMD counterparts.
Intel Core i7-1185G7 benchmark results: CPU Benchmark
The situation is slightly different for Core i7-1185G7, but judging by the results, this CPU is more than capable, but don’t expect the same results as on the high-end models.
Intel Core i7-1185G7 benchmark results: CPU Benchmark
As for the real-life performance, Intel claims that the Tiger Lake series offers better performance compared to the previous series and AMD when it comes to everyday tasks.
This series will also offer better performance when using AI-enabled applications, such as Photoshop, Nero AI Photo Tagger, and Power Director.
Tiger Lake AI-enabled applications benchmark: Intel
Overall, these CPUs offer solid performance and should be more than capable of handling everyday tasks.
Are Tiger Lake processors good for gaming?
Windows 11 brings a smoother gameplay experience and performance increase thanks to the new DirectStorage API feature.
To top it off, there’s support for Xbox Game Pass for Windows, so expect to get your hands on some great gaming titles. However, the question remains, can Tiger Lake processors handle gaming?
Comparing to the previous generation of CPUs, the new series with Intel Iris Xe graphics offers better gameplay performance across the board.
Intel Core 10th generation vs 11 generation performance: Intel
The situation is similar when comparing i7-1185G7 to AMD Ryzen 7 4800U, and we can see that Intel’s CPU offers better in-game results in most games.
Intel Core i7-1185G7 and AMD Ryzen 7 4800U performance: Intel
Although this difference isn’t drastic, it’s noticeable, especially in games such as League of Legends, CS: GO, and Dota 2.
When comparing i7-1185G7 to a dedicated graphics card, such as NVIDIA MX350, Nvidia outperforms it in some games, but the performance difference isn’t too big.
It’s worth mentioning that i7 also outperforms NVIDIA in some games, so your results will greatly vary depending on the game you’re trying to run.
Intel Core i7-1185G7 and NVIDIA MX350 performance: Intel
Tiger Lake processors offer great performance, and they can handle gaming with ease, which makes them a perfect choice for gamers, as long as you keep your expectations realistic.
If you want a device that will give you a smooth and lag-free experience in the latest titles, perhaps you should consider getting a gaming laptop.
How many CPUs are there in the Tiger Lake series?
This series has about 50 different models available, and all of them are sorted into four different series, U, H-35, S, and H-45.
As for the meaning of each label, here’s a quick explanation:
U – Mobile power-efficient CPUs
H – High performance optimized for mobile, HK label means that the CPU is unlocked
S – Special edition
How do I know if my Tiger Lake CPU has a built-in GPU?
Most CPUs from this series have a graphics processor, but if you want to check that for your model, we suggest reading the official documentation.
A faster way to do that is to look at the processor model. The ones that have G1-G7 in their name have a built-in GPU, so they are easy to differentiate.
Devices that have G7 in their name are using Intel Iris Xe, while the ones with G4 in their name are powered by Intel UHD.
Are Tiger Lake CPUs better than Ryzen 4000 CPUs?
This isn’t a simple question, and while Tiger Lake can parry Ryzen 4000 series, Ryzen is using 7nm architecture while Intel is using 10nm.
7nm architecture gives an advantage to Ryzen and it offers better performance. TDP is also smaller on Ryzen, and the maximum is set at 54W while for Tiger Lake the maximum is 65W.
However, there’s a catch, and 65W TDP is for only a single high-end model, while Ryzen has several CPUs that have a TDP between 35 and 54W.
When you add the price into the mix, Ryzen is usually a better option compared to mid-range and low-end Intel devices.
Windows 11 will be fully compatible with Tiger Lake processors, and they should be able to handle any resource-intensive task, as well as some gaming without issues.
What are your thoughts on this CPU series? Let us know in the comments section below.
Journal, which is an inking app that’s a Microsoft Garage project, is getting some big updates. Microsoft announced today some new tools for the app which will make inking more powerful. These include a new lasso tool, multi-select support, and more.
There’s a total of eight different updates with the latest version of Journal, available on Windows 10 or Windows 11 through the Microsoft Store. With the lasso tool, Microsoft says that its AI can now handle cases where you write and circle items quickly, like numbers in a bulleted list. In addition, there’s a new music staff page style. With this, it should be easier to use Journal to write your music. You can see some of the other features in this update below.
Multi-select by holding down the CTRL key and tapping with a finger. You can then select whatever ink or item you want on that page.
Import your protected PDFs into a journal.
Set a default writing language. These new languages include Chinese (Simplified and Traditional), Dutch, French, German, Greek, Italian, Japanese, Korean, Portuguese, Russian, Spanish, and Turkish..
Save your pen state so that each time you open the app it remembers the pen you use.
Improved accuracy when copying stuff from Journal and into other apps.
Today’s update also brings some general bug fixes and delivers performance improvements. These include improved handling of opening and saving journals. Also included are headers and stars now being detected accurately, and improved performance of ink. If you’re not already using Journal, you can try it via the link below.
Although you might be tempted to think that VPNs and GPNs are similar given that their acronyms differ by only one letter, actually the two are quite dissimilar and were made for different purposes.
A VPN (virtual private network) is a service that – after you connect to one of its secure servers – routes all your internet traffic through an encrypted tunnel that no one can look into, not even your ISP (internet service provider).
In addition, it masks your ISP-provided IP and spoofs your current physical location by replacing it with a new virtual geo-location. This is done by assigning you a new IP depending on the country and specific location of the server you connect to.
Because of that, VPN services offer three great advantages to its users, namely, they secure your traffic and data, anonymize your online activities, and allow you to bypass geo-blocking.
This way, you can conduct your online sensitive businesses (e.g. online banking) in a very secure way, you shouldn’t worry anymore about third parties spying on you, and you’ll also be able to access websites, streaming services, games, apps, etc. that are not available in your country or region.
A GPN (gamers private network), on the other hand, does not provide any of the above mentioned VPN features, but it is specifically optimized for improving your online gaming experience.
What a GPN actually does is it relays your traffic as it is to the target gaming server while also prioritizing the speed between your device and that server during your online gaming sessions.
The GPN only handles online game traffic and tunnels only selected real-time game communications in order to provide you with the fastest route to the gaming servers. It does not encrypt your traffic or hide your activity, nor does it assign you a new IP to allow you circumvent geo-restrictions.
GPNs are only targeted at optimizing your online connections. By redirecting your real-time game data to an optimized path to the game server, the GPN will increase your gaming speed and help you reduce latency, ping, jitter and packet loss which often annoy you and frustrate you big time.
Furthermore, we invite you to go through our comparison/versus guide to experience more in-depth – both with written and visual examples – the differences between a VPN and a GPN so that you can easily decide what service to choose, depending on what you want to obtain.
VPN vs GPN – which is the best and for what?
VPN: best solution for geo-blocking, online anonymity and security
UI & Design
In addition to the features a VPN offers, it’s very important for the common user to be able to enjoy them and use the client without difficulty, and therefore, the user interface (UI) and design are important factors when choosing a product.
VPN services come in different versions for different devices and operating systems, and while they do vary as far as the user interface (UI) and design are concerned, they also serve their primary purpose, no matter what platform you’re using them on.
Whether you want to use a VPN on your PC, laptop, phone, tablet, TV, etc., there are software applications that you can download, install and use on most devices.
Once you installed the client on your device, you can use it right away to quickly connect to a server. When there’s no available client that you can install, you can do a manual configuration in order to use the service.
Usually, setting up a VPN on your device – especially those that come with automatic configuration – should be an easy task for most of you, as it does not require you to be any tech-savvy.
Some clients have a very easy-to-use interface, while others may sometimes give you a hard time if you want to dissect them, that is, change or configure certain settings or use some features of which you know nothing.
Anyway, we’ll get into details regarding the settings and features later. Once you understand the purpose of each feature, you’ll have no problems using your VPN regardless of whether it has a user-friendly client or not.
After you launch a VPN on your system, you’ll generally see a main window or dashboard from where you can quickly connect to a recommended or previously used server or you can go to the list of all the other available servers and pick one from there.
Then, you can go to the menu and access certain tabs such as settings, preferences, account, etc. From there you can enable or disable certain features, configure your preferred settings, etc.
It is recommended – for a smooth and hassle-free experience – that you only modify settings or enable features that you’re familiar with. Otherwise, you may experience issues with your VPN.
All of the VPN applications shown above are designed for desktop or laptop devices; the system they’re operating on does not matter that much design-wise, as the clients are pretty similar in Graphical User Interface (GUI).
There are also VPN extensions that you can add to your browser. They are pretty minimalist in design and features compared to traditional VPN applications, and can be easily used by enabling them in the browser and connecting to a server as you would normally do.
Unlike the other VPNs which route all the other traffic to and from your device through the VPN server, VPN extensions only route traffic going to and from your web browser.
Therefore, VPN extensions only apply to one single browser – the one you use them on – and all the other browsers, apps, tools, games, etc. will use a direct, unencrypted internet connection.
Furthermore, most of the VPN service providers also developed applications for mobile devices, which usually come with a user-friendly interface so anyone can set them up and use easily.
Given that so many users now prefer smartphones for their common online activities instead of laptop and desktop PCs, they can use VPNs on them either to bypass geo-restrictions or for privacy and security purposes.
VPNs for phones and tablets have a more simplistic UI compared to their PC counterparts, and while they do offer many of the general features that come with a certain plan, some of them are missing for the mobile versions.
Because of that, if you care specifically about some features and need them on your mobile device, you need to do your research in advance before purchasing a subscription so you won’t be taken aback if they lack.
The bottom line is that you shouldn’t worry anymore about what kind of device you’re using, as most of the decent VPN services existent on the market have integrations for multiple platforms.
Also, as you’ve already seen with the above examples, the VPN design and user interface are generally user-friendly with most of the services, especially if you choose a well-reputed product.
Settings & Features
Although VPN services share many features, there are others that can only be found in certain products, versions, platforms, etc.
Depending on the provider and its associated client, you can modify, enable, disable certain features and configure the VPN according to your specific needs.
Generally this can be done by accessing the settings/preferences sections as shown in the images below with different VPN clients.
Servers
VPN servers are a very important aspect to consider when choosing a VPN service since their primary function is to allow you bypass geo-blocking and online censorship in certain regions.
Top VPN providers usually offer a generous list of available servers from which you can choose to connect. The more countries, locations and servers a VPN offers, the better it is for you since you’ll have more options and your chances of accessing geo-blocked content will increase substantially.
Whether you want to access websites, stream movies, TV shows, music, play online games that are unavailable in your country or region, just go to the list of VPN servers, select one, connect to it and start surfing the web boundlessly.
Connecting to a VPN server is a very easy thing to do, and therefore, you are only a few clicks away of circumventing geo-location barriers, no matter where you’re currently physically located.
Many VPN clients have a quick connect option which allows you to connect to a recommended or previously used server.
The best advice we can give you if you’re very concerned about servers is to get a premium VPN subscription plan, as free versions only come with a small and limited number of servers available.
Encryption
Encryption plays a very important role when you use a VPN since it ensures your online security and data protection. This is particularly important when you conduct sensitive business online.
The VPN routes your internet traffic through a secure VPN tunnel, and therefore, an encrypted connection is established between you and the destination on the web. In addition to encrypting your data, the VPN also hides your IP address and location.
When your traffic is encrypted, you shouldn’t worry anymore about your data being intercepted and compromised. ISPs, governments, hackers won’t be able to read it even if they intercept it.
As such, you’ll be able to surf the web in a very secure and private way, that is, you’ll no longer be spied on by third parties and also not prone to cyberattacks.
Top VPN providers use military-grade VPN encryption such as the Advanced Encryption Standard (AES) which is the most secure and is also used by governments, militaries and top secret agencies.
Some VPNs (e.g. NordVPN) provide what is called a Double VPN or multi-hop feature that routes your traffic through two VPN servers instead of one, which leads to your data being encrypted twice.
This is a great feature since it adds an extra layer of security and privacy. Unfortunately, multi-hop is not at all common among the VPN providers, thus only a few of them have it. This might be due to the fact that the connection can become slower when traffic goes via two VPN servers.
Protocols
VPN protocols determine how your data is routed through a connection. In other words, they represent the sets of instructions and processes that VPN service providers use so that you can benefit from stable and secure client-server communications.
In fact, VPN protocols are a combination of transmission protocols and encryption standards. Some providers use more protocols than others; however, you’ll find the most common protocols with the majority of VPN services, and you’ll also be able to switch between them.
Among the major VPN protocols currently existing we have PPTP (Point-to-Point Tunneling Protocol), L2TP/IPSec (Layer 2 Tunneling Protocol), OpenVPN, SSTP (Secure Socket Tunneling Protocol), IKEv2 (Internet Key Exchange version 2), and the newer WireGuard.
OpenVPN is by far the most popular VPN protocol which is used by many VPN providers. Although you might experience slower speeds with OpenVPN, this protocol is very reliable and secure.
With OpenVPN you can also select the connection type, namely, choose between the UDP (User Datagram Protocol) and TCP (Transmission Control Protocol) communications/transmission protocols.
OpenVPN uses UDP by default since it functions best over it, so although you can choose between UDP and TCP, you should stick to the default settings unless there’s a concrete reason to not do so.
WireGuard, on the other hand, is a newer VPN protocol which is still being developed and is expected to have a better performance than OpenVPN or other protocols.
VPNs use different ports to establish a secured connection over the internet, so depending on the type of protocols a VPN uses, you can switch between different protocols for various reasons.
You may want to change port numbers in order to increase performance or unblock the connection if a certain port/protocol combination is blocked.
All in all, since protocols are important for the overall performance of a VPN, you should definitely look at what protocols a certain service offers before picking one.
Kill switch
Depending on the specific VPN service, you may find the kill switch feature under different names such as VPN kill switch/killswitch, network lock, firewall, etc.
Regardless of how it’s called, the VPN kill switch basically has the same function, namely, to automatically disconnect your device from the internet when your VPN connection drops unexpectedly. Your internet traffic will remain blocked until the VPN connection is restored.
When you enable the kill switch feature, you can rest assured that neither your IP will get accidentally exposed nor your online security and anonymity will be compromised, because all traffic entering or leaving your device will be stopped immediately.
In addition to turning the kill switch on or off, there are situations – depending on the VPN service – in which you can choose when to use the kill switch.
For example, you can use the kill switch system-wide, in which case it will block all internet traffic when the VPN connection fails, or you can use it only at the application level by specifying which applications should be blocked in case the connection to the server drops.
By providing you with these security measures, the kill switch is a great feature, so you might want to take it into account and check beforehand whether the VPN you want to choose offers it or not.
Split tunneling
When you’re connected to a VPN server, all your traffic is routed through an encrypted tunnel in order to get the maximum protection and privacy. However, with the split tunneling feature you can choose to split or divide your traffic depending on specific circumstances.
Split tunneling allows you to divide traffic by routing some of it through an encrypted VPN tunnel while the rest will be routed through a separate tunnel on the open network.
This way, you can keep part of your traffic secure and private and access foreign geo-blocked content while at the same time you can access web services from local IP addresses.
In addition to allowing you to access local and foreign networks at the same time, split tunneling is also helpful in saving bandwidth since routing all your data through the VPN uses more of it.
Of course, there’s also the risk of third parties accessing your traffic if you use split tunneling in order to exclude certain websites or apps from the protection of your VPN. Overall, we do think it’s a great feature and more VPN services should implement it.
Port forwarding
Port forwarding allows incoming internet connections to reach certain devices and applications on a private network. The private network can be made up of all the devices connected to the WiFi router or all the users connected to a VPN.
With port forwarding, internet data that is going to a specific port is then forwarded to another port. In other words, it reroutes the incoming connections so as to bypass the NAT firewall which sends those connections to the devices that requested them and also blocks unwanted incoming data.
So, if you want to remotely access your home devices from other devices, you have to set up port forwarding which allows unsolicited connections through the NAT firewall on specific ports.
Port forwarding works with VPNs as well, but many providers do not support it since it can pose security threats that might outweigh the benefits.
Although there are associated security vulnerabilities when using port forwarding, you can set it up, however, on a VPN since it will increase your torrent download speeds and it can also help you host online games with dedicated IPs.
Dedicated IPs
When you’re connected to a VPN server, you share the same IP address with other connected users. However, there are some VPN services that will allow you to get a dedicated IP address.
Unlike a shared IP, that is assigned to other users too, a dedicated IP will be available for your use only. Getting a dedicated IP may come with some advantages, depending on your needs.
For example, you can connect to remote corporate systems or private servers that only authorize a specific list of IP addresses, and you’ll also manage to avoid blacklists that can be common with shared IPs due to bad online behavior coming from other users.
In addition, when you do online banking and log in with virtual IPs from different locations, banks can treat this as a suspicious activity and you might end up with a locked account.
Obfuscation
Obfuscation – although not offered by many VPN providers – is a great feature that offers specialized VPN servers also known as obfuscated servers which conceal the fact that you’re using a VPN.
Since a VPN masks your IP and encrypts your data, no one can see what you’re doing; however, your ISP knows that you’re using a VPN based on how your data packets look.
So, when you connect to an obfuscated server, it will change your data packets and no one will realize that you’re using a VPN unless they inspect them manually.
Obfuscation can be a great solution to bypass censorship in heavily restricted countries. Some of those have a partial or complete ban on the use of VPNs, and therefore, you can circumvent the VPN blocks without taking any risks by merely connecting to an obfuscated server.
GPN: best solution for online gaming
UI & Design
GPNs are also known as ping reducers since their primary purpose is to optimize and improve the quality of your online gaming. Their purpose is pretty limited compared to VPNs in general, so their user interface and design are also minimalist.
As you can see with Outfox, it shows you a simple dashboard where you can find the games they support as well as some relevant characteristics at the bottom, such as ping, jitter, packet loss, their server and the game server.
After you play a game by connecting through a GPN server, you can see the results of your gaming session and observe how they compare with previous ones when you didn’t use a gaming VPN.
The settings area appears to be pretty bare as well. Apart from the server and account sub sections, there’s not much information that you can change or other settings that you can configure.
Outfox, for example, automatically identifies when you launch one of their supported games on your device and will do the job for you by directing you to the appropriate game server.
Wtfast, which is probably the most popular GPN, is a little bit more complex as far as its graphical user interface is concerned, because it provides some additional options and features.
Nonetheless, the client is very user-friendly, and unlike Outfox, you can launch their supported games from within if you already have them installed on your device.
The Dashboard tab allows you to go to the games list if you want to choose from there or you can QUICK CONNECT a previously played game, as seen above. Also, you can switch from the dashboard to other sections or you can access your Account Settings.
The Wtfast Settings tab shows you info regarding your account, such as subscription type, expiry date, the number of connected devices, your date of birth and avatar.
In addition, you can select your country and preferred server country. It is advisable that you pick a Wtfast server close to your location since it will help reduce latency and ping spikes. This is particularly good if you don’t know where the game server is located.
In case you know where the game server is, you should pick a GPN server that is closer to the game server. This will even better optimize and improve your online gaming experience by eliminating lag and further reducing latency, ping, and packet loss.
Unless you know where the game server is, you can ask the gaming provider for the exact location. Otherwise, if you still can’t find its actual location, you should stick to a server that is close to you.
With the Wtfast Help section you can access the knowledge base where you can find info regarding the product, request a game not listed yet, provide feedback, or contact customer support.
As you’ve already seen above, we compared here the design of two different GPN products or ping reducers, and as you can see, one is more simplistic, while the other is a little more complex.
Nonetheless, GPNs have a very user-friendly interface that allow you to quickly launch a game while connected to their servers. For the most part, they take care of everything once you select a game.
Games
GPNs usually have a list of games they support, so you can install any of those on your device and start playing at higher speeds and without lag which frustrates many gamers, and for good reason.
Some GPNs provide larger lists of supported games than others. If your favorite game is not available with a certain GPN product, just look for others, and you’ll probably find it.
Usually, a decent number of games is supported by a certain GPN, ranging from action, adventure, and role-playing to strategy, sports, etc. You can select them by category, and they will be shown in the GPN client as shown above with Wtfast GPN.
With Wtfast you can select to detect any games that you have installed on your system, and if they are supported by the GPN, they will appear under the MY GAMES section.
Once the detected supported games appear, you can pick one and launch it. With other VPNs like Outfox, there’s no need for you to do anything than merely launch the game from your system.
You can do that with Wtfast as well, but if you want to select a different server, for example, you need to use the Wtfast GPN client.
As you can see above with Counter-Strike which was launched from the Wtfast application, you have the option of selecting the game version/platform and the route. If you select an automatic route, the best one will be chosen using the GPN systems and algorithms.
Alternatively, you can choose a manual route and server by ping time. You’ll have a list with plenty of servers to choose from. As we discussed above, please beware how you choose the server (e.g. depending on the game server locations and/or your location).
After your gaming session is finished, you will be able to see the speed statistics, that is, you can notice whether there are any improvements after using the GPN to connect via its optimized servers.
From the session summary you can see the values for the lowest, average and highest ping, then for average jitter, lost packets and pink spikes. These all have to do with the quality of your online gaming session on the whole.
Furthermore, you can compare the latency (measured in milliseconds) that resulted before using the GPN and after. Also, you can see the average ping savings, if any. From these statistics, you will be able to draw a conclusion as to whether your lag reduced or your speed increased.
In many situations you are going to see considerable improvements in your overall gaming performance after using a GPN. However, in others – as shown above – the performance will be actually weaker.
This might be due to the distance between your location and that of the gaming and/or GPN servers as well as how many of them each service provides, how they are distributed, etc.
All in all, it is indeed proven that you can eliminate lag and increase your speed while playing a game connected via a GPN specialized server, and therefore, getting a GPN could be a good solution for a smoother gaming experience.
VPN vs GPN: final thoughts
As you’ve already seen, a VPN (virtual private network) and a GPN (gamers private network) aka ping reducer or gaming VPN differ to a large extent from each other and have different functions.
VPNs are a great solution for those concerned – and anyone should be – about their online privacy, anonymity, and security. When you use a powerful VPN, you shouldn’t worry anymore about ISP tracking, third-party surveillance or cyberattacks.
Moreover, with a VPN you can also bypass online censorship in very restrictive countries as well as geo-blocking in order to access websites, apps, streaming services, games, etc. not available in your country or region.
Pros
Anonymity via IP masking & location spoofing.
Security & privacy via strong encryption.
Bypass geo-blocking & online censorship.
Avoid bandwidth throttling.
Decent prices & easy setup.
Cons
Lower internet speeds due to encryption.
GPNs are a good option for the avid online gamer – and probably you’re one too – because they can significantly improve your gaming experience that very often can be affected by lag and slow speeds.
By redirecting your game data to their own gaming-optimized servers, GPNs focus only on in-game connection traffic in order to ensure the best network connection performance and prevent servers from overloading. This helps reduce ping which causes the unbearable lag.
Pros
Reduce lag & ping times.
Reduce jitter & packet loss.
Improve gaming speed & quality.
Multiple gaming-optimized servers.
Affordable pricing & easy-to-use interface.
Cons
Only a limited number of games supported.
In conclusion, given the above comparison in which we showed you how VPNs differ from GPNs, and also what kind of benefits and features each provides, we hope that you’re now more enlightened.
Depending on your specific needs and purposes, you should confidently get either of them or both for that matter, as you’ll benefit from many advantages, whether you want to surf the web freely, privately and securely, or play your favorite online games hassle-free.
You can lose your photos due to accidental deletion, data corruption, or device formatting. Regardless of the cause, it’s still an excruciating and terrible feeling to lose great memories.
Usually, the camera’s memory cards are the most common storage media for pictures, and they’re the ones that suffer data loss most of the time.
Fortunately, there are lots of photo recovery software tools available out there that can help you get back your digital data.
How does the accidental deletion occur?
Most digital cameras and mobile phones come with an SD card to save photos and other data on them. An SD’s capacity is limited, and it will get full very quickly.
In such a case, you have to transfer your pictures, and other data that you might have there to another place or you have to delete unnecessary data in your SD to make room for more.
Mistaken deletion is a frequent issue and users must have options to recover their deleted pictures from their SD cards.
An important aspect that is worth remembering is that whenever you format a device or delete any pictures from your camera or any other digital storage media, the link to the photo is removed, but the actual data will still be kept.
You will be able to recover it if it hasn’t been replaced with new data. Photo recovery software usually works on physically available data. Here are the best five tools for recovering your pictures from an SD card.
Developed by Stellar, Photo Recovery is a widely used tool for recovering unlimited file formats including JPEG, GIF, RAW, PNG.
What’s great about it is that it comes with an intuitive interface that allows users with just a general knowledge of computers to quickly recover all deleted photos from an SD card.
Moreover, since it supports the most recent CFast, CompactFlash, and microSDHC/XC cards, Stellar Photo Recovery also appeals to professional photographers, designers, and illustrators.
And don’t forget that you can use Photo Recover to retrieve videos and music files too, just in case you happen to delete them by accident.
Stellar Photo Recovery key features that you’ll soon enjoy:
Simple and intuitive interface
Support for 4k, 6k, 8k, UHD, and 360-degree files
Extended flexibility to add your own file types
File Type, Tree View, and Deleted List preview options
SMART information feature regarding your storage drive
Stellar Photo Recovery
Looking for the best tool to recover deleted photos from your SD card? Stellar is our top recommendation!
We’ve all lost our photo archives at some point doing data transfer. It may be overwhelming, because it may seem difficult or almost impossible to restore them.
There is a method to reclaim your cherished memories and moments with Easy Digital Photo Recovery. This software recovers every type of graphic image format, including the most cryptic.
Let’s capture Easy Digital Photo Recovery characteristics so you can rest assured that your static memories can be retrieved:
The data that’s been identified may be filtered by name, recovery status, creation date, and size.
Image types that can be recovered include JPEG, RAW, ARW, ORF, DCR. TIFF, RAF, DNG, X3F and much more.
Compatible with any Windows version, as well as the most recent hard drives and file systems from leading manufacturers.
It’s free to download and test it to see whether the image hasn’t been overwritten so you can restore it.
Contemporary data recovery techniques that are more successful than the efforts of a data retrieval specialist.
Manageable with any data transmitters, like sd-cards.
It does not harm your SD card and is entirely safe because its sole job is to restore photos.
The majority of the time, missing data lacks details, and you may be obliged to retrieve all files. Easy Digital Photo Recovery allows you to preview the lost and found image, which saves time and storage because you are simply looking for photographs, not all data.
Easy Digital Photo Recovery
Easy Digital Photo Recovery is one of the greatest agreeable recovery software on the market that is operating correctly, well-organized, and securely.
Erelive calls itself The best Data Recovery for Windows, and that’s not too far from the truth and that’s because this tool is very popular among users.
It doesn’t work only on SD cards, but it covers all types of media and storage devices including internal or external hard drives, SSD, USB drives, camera or camcorder memory, MP3 or MP4 players, game consoles, and more.
Moreover, this software can recover your data even if you permanently deleted the file, you formatted the drive, you reinstalled the system or you suffered a partition error.
As for the file types, Erelive can handle all of them whether there are documents, videos, photos, audio, archives, and more, without any size limitation.
Recovering your files is extremely simple. First, you preview and select the files that you want to recover, then you select the location from which you want to retrieve them and hit the Start Scan button.
After the scan is finished, you select the files you need to restore and click on the Recover button. That’s it! Your files are saved.
Let’s take a look at Erelive’s key features:
Simple and intuitive utilization
Can recover data from any type of media, including the camera internal memory
Can retrieve all types of files, including photos, videos, documents and even archives
Fast file retrieval
No file size limit
Erelive
Use this awesome tool to recover all types of files from all the types of media, even from the camera memory.
Whenever you accidentally delete data from an SD card, the first feeling you get is panic, so you naturally have no time for programs that have complicated UIs or ambiguous instructions.
That being said, you will want to try a different software tool, one like Kernel Data Recovery.
This program is as easy as they can get, allowing anyone that knows how to read the on-screen hints and instructions to perform complex data recoveries.
Of course, Kernel data Recovery doesn’t just deal with the data from SD cards, it deals with data from pretty much any type of medium, regardless of whether the deletion was an accident or caused by an error or corruption.
Simply launch Kernel Data Recovery, select the media that you want to scan for deleted data, and then proceed with the on-screen instruction to recover it in no time at all.
Kernel Data Recovery
If you need to recover data from any type of media, including SD cards, then you need a tool like Kernel Data Recovery!
Recoverit is quite a comprehensive software that provides users with a chance of getting back their deleted/lost photos and more data.
The tool is efficient, and it takes pride in its ability to restore the files which were damaged by viruses, accidental delete, formatting, or power failure. Here are its most significant features:
The tool is perfectly designed to fit both Windows and Mac operating systems
The tool is suitable for lots of types of electronic devices fromflash drives, hard drives, and memory cards
The program can retrieve a vast variety of file types without any difficulties
The software offers users lots of options for recovering their lost pictures and more files
It can recover pictures lost due to accidental delete, inaccessibility, improper partition or partition error, unexpected power off, virus damage, formatted device, factory reset without backup, and reinstalled Windows or a hard disk crash
Recoverit
Recover all files from your system, bot just your videos, with the help of this well-rounded recovery and repair tool!
Any Data Recovery is developed by Tenorshare, and this is one of the best SD card data recovery software on the market, and thousands of users currently trust it.
The software can easily wizard users to recover their photos and more documentsfrom all kinds of storage media including SD cards.
There are more than 500 file types that can be recovered with this program. Here are the most notable features of Any Data Recovery:
You can retrieve pictures that have been lost due to wrong deletion, virus infections, or power failure
You have the ability to restore formatted SD files due to mistaken formatting
You can recover photos from formatted damaged, defective, and unreadable SD cards
The tool provides users two ways of recovering photos, just to make sure that there’s 100% success of photo recovery
You will be able to preview the lost data before you decided to recover it
Any Data Recovery Pro provides support to all popular SD cards, like Sandisk Extreme Pro, Lexar Professional 600x, Verbatim, Premium UHS-I, PNY Pro-Elite Plus, Kingston Technology Ultimate XX, Samsung SDHC Pro, etc.
iCare Data Recovery is a risk-free data recovery program that is able to recover deleted photos and more files from various types of storage media including digital camera SD cards, USB drives, removable hard drives, hard drives.
Take a look at the essential features of the software:
The program supports a variety of file types including pictures, videos, documents, audio files, emails, and so on
You will be able to recover any type of storage media that can be used on a Windows system
The tool does a perfect job of recovering photos from corrupted SD cards
This read-only data recovering software will not damage your device
General tips for recovering deleted photos from an SD card
If you have just deleted a crucial batch of pictures from your memory card, don’t despair because there are ways for undeleting them.
First, you will need a card reader, a PC, the memory card itself, and a bit of patience. Arm yourself with all these things then follow the steps below:
Don’t do anything to your memory card once you have realized that your images have been deleted. By don’t do anything we mean do not take any more photos on the card and remove it from your camera immediately. Do not format it before restoring your lost photos.
Select your favorite recovery software. You have the five options that we listed above.
Install and set up any of these photo recovery software and choose the type of files you want to recover. In our case, it’s photos, of course. Follow the steps required to complete the operation. There will be different steps that you will need to follow depending on the software you chose to use.
In the end, check the files that have been recovered to make sure that everything is there.
Do not forget toback up your pictures this time to prevent anything like this from happening again.
Tips for keeping your memory cards as healthy as possible
Memory cards are resilient, but there are a few things that you can do, and a few precautions that you can take that will save you a lot of headaches. Here are also some tips for keeping your memory cards healthy:
You should always format the card in the camera; you have to perform a format regularly.
Never remove the card from the camera while data is still being transferred.
Always turn the camera off before removing the card.
Have a backup card just in case something terrible happens.
What can I do if the SD card doesn’t mount?
Sometimes, your memory card might not show up in your filesystem. There are various reasons for which such a thing might happen.
The obvious troubleshooting tips include taking the card out of your PC and rebooting the system. You also have to make sure that the card reader is compatible with the kind of memory card that you are using.
For example, if you have a card reader that is only compatible with SDHC it will not read SDXC cards. A CompactFlash reader will not read a CFAST 2.0 card.
We hope that all these tips for preventing your photos from getting lost and our solutions and tools for recovering your deleted photos will come in handy whenever something like this happens to you.
Is your choice Stellar Photo Recovery or do you find any other similar tools in mind? Let us know in the comments area below.
Coloring is one of the best methods to relax your mind after a hard day’s work. As simple and childish as this activity may seem, it is extremely relaxing at first sight and helps you de-stress in just a few minutes.
Adult coloring books are very popular nowadays, and nobody will question your sanity if you admit that coloring is one of your favorite hobbies. You can also give a try to digital watercolor painting software which is more advanced.
If you worry about the environment and you don’t want to use paper, you can install coloring book apps on your computer.
The majority of digital coloring books are designed for mobile devices, for obvious reasons, but we managed to find three coloring book apps for Windows 10 that we’ll list in this article.
This is by far the best and most popular Windows coloring app in the Windows Store. It features very intricate coloring patterns and a wide range of colors you can choose from.
When you first launch the app, a series of instructions are listed, but you can quickly skip them because the user interface is intuitive. You’ll immediately guess what each icon does.
The variety of color palettes is impressive, and you can always add more colors, apart from the standard ones. The Zen music playing in the background helps you to relax, while you play with colors.
The music is not intrusive and stops as soon as the app is in place in the taskbar. The coloring patterns are complex, and the mouse clicks have a very high degree of precision.
You can use the pencil to add shades, undo your actions, zoom in and out, and more. There are many artworks available, including two Free Artwork Packs.
More so, other paid coloring packs, such as Animals, Florals, Zen, Butterflies, Mandalas, and more. We really had fun coloring this cute owl below.
Zen: Coloring book for adults
Relax and enhance your creativity with this easy-to-use coloring book for adults!
Adult Coloring Book offers you beautiful illustrations, including mandala, zen, and animals, along with many color palettes. Let inspiration take over you and play with these beautiful colors.
Detailed illustrations and drawings will relax your mind and free your imagination. You’ll definitely feel full of energy after a coloring session.
This app offers 15 free coloring patterns, with the available colors placed on the right-hand side or at the bottom of the page. More complex coloring patterns are available as in-app purchases.
Simply select the color you want to use and click on the area you want to color. Pay attention to the edges because you may color the outline by mistake.
Keep in mind that the, although it is free, the software offers in-app purchases of different templates, colors, and other awesome stuff.
Adult Coloring Book
Get inspired and let your creativity fly with this versatile Adult Coloring Book!
You shouldn’t be surprised that we added this app to the list. Watching Disney cartoons is a guilty pleasure for many adults and the possibility to color the most popular Disney characters will appeal to many.
Unleash your creativity, reduce stress, and play around with your artistic side accompanied by princesses and villains. You can create beautiful designs of your favorite Disney and Pixar characters.
Lots of shades, gradients, and film palettes are available to inspire you. When you finish your masterpiece, you can also share it with friends.
Color by Disney requires around 520 MB to install, which is more than most Windows Store apps need.
The app gives you access to only 8 free pictures, which may be annoying for some users. Of course, additional patterns are available as in-app purchases.
Color by Disney
Color your favorite Disney characters and more with this creative coloring book for adults!
This adult coloring book is not to miss by anybody due to its various drawing models and floral designs.
You can use this tool for creating relaxing moments using creative drawings with vibrant colors. There are brushes and pencil strokes for better results.
More so, Colory has a tap-to-fill option that can enhance the process and color the page much easier.
Regarding colors, this app is among the fewest that gives you ink color options for never seeing colorful drawings.
In addition, you should know that it’s possible to add filters that improve the coloring designs from your book.
It is a proven fact that coloring relaxes the brain, and it works for both adults and children. While our thoughts are focused on this activity, our brains tend to relax.
Besides, the satisfaction you get when you finish coloring something, you try out new interesting colors and experiment with them.
Not to mention that it helps children develop and become more organized because they can’t cross boundaries.
Coloring is not just for children
We all know that coloring books are usually associated with children, especially during kindergarten, when they learn and experiment.
However, there are coloring books made for adults, that are made to relax the brain. Some people color as a hobby.
Those books usually contain mosaic-style paintings that are very intricate, usually having lots of small details to cover. The result, however, is satisfying.
Coloring books popularity
This niche market has always existed, but the real boom happened in 2015, when the market skyrocketed, leading to a shortage of coloring pens.
Although the trend was popular for a while, it didn’t keep its numbers. After only 1 year, the market started going downward.
Nowadays, not many people are interested in coloring books anymore, but you can still find plenty around if you decide you want to give it a try!
Since we’re talking about art and fun, why don’t you take a look at our awesome list of the best painting apps for Windows 10 and let your artistic spirit fly?
Have you already used the coloring book apps listed in this article? Tell us more about your experience in the comment section below.
Microsoft is announcing some updates for the Mesh App for HoloLens today. These are designed around users and bringing new features like an improved user interface, as well as co-location, and new brushes. If you’re lucky enough to have a HoloLens headset and have been trying out the app to connect with your coworkers in a virtual space, here’s what you need to know.
We start first with the biggest change, the redesigned UI. With this new UI, the Microsoft Mesh app should feel a bit more cohesive and feel more enjoyable to use. Microsoft added in new menus, 3D assets, icons, animations, magic windows, and more. In addition, you’ll also find some new brushes. There are now 40+ new brushes to enjoy, as well as new brush sounds and animations.
More importantly, Microsoft Mesh now is able to work with the eye gaze interaction. This lets you use your eyes to select holographic content and menu items, rather than use your hands or hand rays. Note that this is experimental. Some other new features can be seen below.
Co-location: This highly anticipated feature allows users in the same physical location to be in a collaborative session with each other (without needing an avatar) alongside remote avatar participants. Check it out with your coworkers as you return to the office.
The UI audio is now more consistent, delightful, and responsive. Experience audio feedback for user interactions, such as brushstrokes and joining/leaving a space.
Tap into your productive side with voice-enabled and keyboard-enabled sticky notes, which are located in the stickers sub-menu of the Tools tab. Enable this experimental feature in Settings > Experimental > Sticky Notes.
Microsoft Mesh was first announced back at Ignite 2021. It was the highlight feature of the conference and users are able to use the service to create virtual representations of themselves and connect virtually and share experiences for more immersive meetings. You can learn more about Microsoft Mesh here.
The ever-popular Apple iPod has evolved to a full-fledged media device from being just a music player. The latest generation of iPod comes with a powerful A8 chip, Touch ID, rear and front-facing camera, a touch screen display, and runs on iOS. The mobile OS means you can play your favorite games and watch multimedia content on the iPod.
This is all good until you want to transfer music from iPod to a computer or vice versa. The Apple devices are not the most user-friendly when it comes to working with non-Apple devices.
Now if you compare that to the Android devices, you only need to connect the phone to the computer, select File transfer mode and start moving files from and to your computer.
For file transfer from iPod to the computer, Apple recommends iTunes. But, what if you don’t want to use iTunes? This is where the third-party alternatives come in handy.
In this article, we take a look at the best software to transfer music from iPod to computer without using iTunes.
iOTransfer 4 is an iTunes alternative and an ultimate iPhone and iPad manager. The software offers one-click transfer of files, wireless file transfer, deep phone scan, and clean, video converter, and a built-in video downloader.
You can try it for free with the 7 days trial but with limited features. The other two premium versions have similar features except for the difference in license validity.
This service is useful for transferring files between iPod, iPhone, and PC. You can backup all the photos from your iPod with a single click to a PC. The albums can be managed from the dashboard and also you can delete duplicate photos in bulk.
IOTransfer 4 also felicitates the transfer of music and videos from an iPod to a computer. This is also helpful if you want to manage multiple iOS devices and transfer files between the devices.
The backup feature effectively backs up all the data including music, videos, photos, contacts, eBooks, podcasts, and voice memos to PC.
AirTrans allows you to transfer files locally over a Wi-Fi network. It also has a video converter feature that allows you to convert video into common formats like MP4, AVI, FLV, and MP3. Another interesting feature is the ability to download videos from streaming sites like YouTube, Vimeo, and Vine.
IOTransfer 4
A useful iPhone transfer tool that simplifies your life.
SynciOS Manager is an iPod manager that allows you to transfer music files from iPod to a computer. Apart from the music, it can also be used to transfer video files, photos, apps, ebooks, and contacts between the devices.
If you own an Android device along with an iPod and want to transfer data between the devices, SynciOS supports transfer between both iOS and Android devices.
You can backup, edit, transfer, and manage media files. Make unique ring-tone for iPhone and Android devices. Transfer audio and video files between iOS and Android devices.
The powerful contact manager deletes duplicate contacts automatically and also allows you to add new contacts and edit them on the computer. You can also backup and restore WhatsApp messages, but the features are only available for iOS users.
Similar to IOTransfer, SynciOS also allows you to download YouTube videos on iPod and Android devices for offline use. You can download videos from over 100+ sites in 4K HD resolution. The video files can be converted to supported video format or audio files directly.
The one-click backup and restore option creates a backup of personal data including contacts, apps, call history, playlist, Ebook, etc to your computer. You can restore all the data to a new device or the same device with one click as well.
If you want to set up a new device, use the batch app install function to install multiple apps simultaneously.
SynciOS comes in two versions. Download the free version for experiment and if needed buy the pro version which comes with additional features.
SynciOS Manager
Manage your files & transfer music on iOS and Android devices with SynciOS!
The Xilisoft iPhone Transfer is a smart iPod manager to synchronize your iPod to the computer. It is an iPhone manager and comes in both free but limited and paid premium versions.
Unlike SynciOS, Xilisoft iPhone Transfer only works with iOS devices including iPhone, iPad, and iPod running on iOS 12 and earlier. It is available for Windows and Mac platforms.
Xilisoft iPhone Transfer allows you to use your iPod as a flash drive. This means you don’t need to use the Xilisoft iPhone Transfer app to transfer files. You can directly drag and drop anything from your computer or your iPod easily.
This iPod manager allows you to manage documents for the supported formats. You can backup iPod contents such as music, movies, videos, pictures, podcasts, etc to your computer.
It also supports app transfer between your PC and iOS device with a drag-&-drop functionality. You can backup messages and contacts with ease well.
The file manager enables you to search and view files on your iPod quickly. You can also use it to create and edit playlists and photo albums.
You can connect multiple iOS devices and manage them all from one place simultaneously. If you don’t want to use USB cables, you can transfer the files over Wi-Fi.
Download the free version of Xilisoft iPhone Transfer to see how it works. For more features, you can opt for the premium version.
Xilisoft iPhone Transfer
Manage, transfer, and synchronize your documents with Xilisoft iPhone Transfer!
AnyTrans is a multi-platform iPhone content manager. It allows you to transfer across iPhone, iPad, iPod, iTunes, iCloud, and computer. You can move around all the data from your iPod to the computer as you want.
AnyTrans allows you to move the music from iPod to your computer or even rebuild the iTunes library. You can simply drag and drop new songs to iOS devices without any restrictions.
You can pick and set any song as a ringtone on your iPhone. The software also helps with photos and videos transfers from computer to iPod and vice versa. You can even convert HEIC images to JPG if needed.
The cleanup feature allows you to analyze all the contact messages and remove them in bulk based on their use. You can also back up the important messages and contacts to the computer.
Similar to SynciOS, AnyTrans also allows you to download YouTube videos to iPod and iPhone. You can even import or export video to the computer. The videos are automatically converted to iOS compatible format during transfer.
AnyTrans’s backup features automatically create a backup of your data such as photos, messages, app data, etc wirelessly and secure it on your computer with your permission.
AnyTrans is not the most affordable iPod management solution. But it comes with an extra set of features that are not available on other iOS device managers.
iMobie AnyTrans
Transfer and organize your media library files across multiple devices, download online media content, and more.
CopyTrans Manager is a simple iPhone/iPod manager tool that allows you to transfer music, contact, photos, create and restore backups, manage the iTunes library and the iCloud files from a single software.
CopyTrans bundle consists of 6 packs name CopyTrans Cloudly, CopyTrans Contacts, CopyTrans Shelbee, CopyTrans Photo, CopyTrans TuneSwift, and simply CopyTrans which helps in the transfer of music from iPod to computer.
The user interface is simple and easy to use and resembles with iTunes user interface. If you only want to transfer music files, get the CopyTrans app which is cheaper, but if you want the whole bundle, you will have to pay a little more.
There are several options available
CopyTrans Contact – This app allows you to manage iPod contacts, calendars and messages along with notes.
CopyTrans Cloudy – This app allows you to manage your iCloud account to download, delete and rescue the files.
CopyTrans Shelbee – Create and restore backup of your entire iPhone or selected data, use Shelbee feature.
CopyTrans Photo – This app is for transferring music from iPod to a computer.
CopyTrans Tuneswift – This is a multi-purpose app that allows you to transfer files, backs up data and restores iTunes library.
CopyTrans bundle is a simple iPod manager software that allows performing essential tasks like backup and file transfer with ease.
Whether you own an iPhone, iPad, or iPhone, these iOS managers can help you in managing all the data on your iOS device and move it to a computer.
You can create custom ringtones using ringtone cutters, convert videos and move them to iPod, download videos and audio files from streaming sites such as YouTube without using any external downloader, and more.
These iOS device managers allow you to bypass the restrictions placed by iTunes and make the most of your iPod and iPhone.
Previously, the Live captions and transcription features in Teams were only available for English-speaking users, but the app has now expanded this capability to 27 new spoken languages. The list includes French, Portuguese (Brazil), German, Hindi, and Japanese. This update should help to increase clarity and engagement during meetings.
To change the language of the Live caption during a meeting, select the menu (. . .) icon available at the bottom right corner of the meeting window and click the “Change spoken language” option. Choose your desired language and click confirm to apply the changes. Once changed, all meeting participants will see a notification on their screens informing them about this change.
If you have only enabled Live transcriptions in a meeting, you will need to navigate to the “Transcript” panel available on the right side of the screen and click the menu (. . .) icon. Select the “Change spoken language” option and then choose any language.
It is worth noting that this language change will affect both Live captions and transcriptions in Microsoft Teams meetings. Furthermore, the setting will be applicable to all meeting participants, and there is no way to set this option for specific users. If you want this to change, be sure to provide your feedback on Microsoft’s UserVoice forum.
There’s no shortage of note-taking apps these days, but Google recently started bundling Cursive, a new PWA note-taking app on new Chromebooks. Exclusive to Chromebooks, this new app is somewhat inspired by Microsoft’s own OneNote app.
We’ll start by looking at the user interface for the OneNote PWA. As you probably know, OneNote depends on a ribbon and tab-based experience. You get controls for File, Home, Insert, Draw, View, and Help up top. That’s then followed by another area for fonts and various document formatting options. On the left, meanwhile, you get a collapsable sidebar for all your notebooks and sections.
Google Cursive looks to make things more simplistic. On the main screen, you see a list of notebooks and a button for creating a new notebook. You can create a new page in a notebook without having to deal with a sidebar on the left. It is all represented by icons up top. Once in a notebook, at all times, you can jump back to your home screen with a home button up top. Even the drawing options are clear, represented by a floating bar at the top of the screen.
We like Google’s implementation a lot better, as there are fewer menus and buttons in the way. You only see the controls that matter most to you during your inking process, but there are some limits, as we get into next.
Pens & other drawing
The signature feature of OneNote has always been its pens. However, in the OneNote PWA, you just get one pen, with a highlighter, 16 colors, and various line thickness options. You even can manually type notes with your keyboard and solve math problems. On the other side of things with Google Cursive, things are different as the emphasis is on actual inking, rather than keyboard typing.
Google Cursive has a total of 28 different pen colors. It also has three different pen thickness options and the same 28 highlighter colors. You won’t find the ability to insert any text boxes, or even solve math. It’s all about using your pen to draw. If you need to take notes with a keyboard, then OneNote is the better solution.
We also want to mention the latency, too. We tested Google Cursive on a Pixel Slate, and there was just a slight delay between our pen strokes and what happened on the screen. On a Dell XPS with the OneNote PWA, meanwhile, there was no delay. Microsoft definitely has the upper hand when it comes to latency. Note that we used the same pen across both devices.
Quick controls
Google Cursive has a lot of quick control features for inking. We wish the OneNote PWA had these. For example, you can scribble over what you wrote to delete your content. You also can use your pen to draw a line, and then drag the line down to add a bit more space to your note. You even can select content, tap a copy icon, and press and hold where you want to paste.
Some of these features are present in the desktop version of OneNote but are missing in the OneNote PWA. Google definitely makes inking easier on Cursive, and I hope that Microsoft can learn a few lessons for those who are more interested in using a web browser app for inking than the traditional desktop app.
Not quite the OneNote replacement just yet
Google Cursive is great for inking with a pen. OneNote is still better for most students, though, since it has the ability to take notes with the keyboard, and also solve math problems. I’d also love to see Cursive work on products other than Chromebooks. For now, when you use the app on Windows, notebooks will be read-only.
In a sort of promotion, Microsoft President Brad Smith has been approved by the company’s board to come aboard as vice chairman.
Smith’s new leadership role won’t interfere with his current daily duties as Microsoft president but represents a reflection of his position among political, legislative, bureaucratic, and regulatory bodies as he represents the company.
“This reflects the unique leadership role that Brad plays for the company, our board of directors and me, with governments and other external stakeholders around the world,” said Satya Nadella, chairman and chief executive officer of Microsoft.
In addition to Smith coming aboard. Microsoft announced a quarterly dividend increase as well as a new share purchase program. There appears to be no causation between the two announcements but perhaps a light correlation that reflects kindly of Smith’s ability to navigate what could be some bumpy legislative battles in the future for Microsoft.
As for details on the quarterly dividends, the company declared $0.62 per share which represents an 11 percent increase over the current dividend offering, or an additional 6 cents. The increased dividend will be payable December 9, 2021, and to shareholders of record on November 18, 2021. The old dividend offering will pay out on November 17, 2021, for late movers.
Microsoft’s share purchase program is a little bit vaguer where the company approved up to $60 billion in share repurchasing but offered no expiration dates and included a termination clause that can be invoked at any time.
The company may offer more details at its next shareholders meeting, which is scheduled for later this Fall on November 30, 2021, and with newly minted vice chair Brad Smith in attendance.
Microsoft has announced that real-time co-authoring support for encrypted documents is now generally available on both Windows and Mac. This feature will let users collaborate with each other in real-time and make changes while working on protected Word, Excel, and PowerPoint files.
Previously, this capability was only available for Office on the web, but starting today, everyone with an active Microsoft 365 E3/A3/G3/E5/A5/G5 subscription will be able to use the new co-authoring feature. “With Microsoft 365, when sensitivity labels are used to encrypt Word, Excel, or PowerPoint documents, multiple users can now edit these documents in real-time with AutoSave, empowering teams to do their best work while maintaining protection across the document lifecycle,” Paras Kapadia, Principal Program Manager for Office 365 explained.
Microsoft noted that customers who want to try out the co-authoring experience can start deploying it by installing the latest Office Current Channel or Monthly Enterprise Channel updates. Users can go to the Microsoft 365 Compliance Center settings in order to enable and use the real-time co-authoring capabilities. You can find more details about the prerequisites of the feature on this support page.
Microsoft says that real-time co-authoring support on MIP encrypted documents is also coming to mobile users. However, the Redmond giant has yet to give a time frame when this feature will be added to its Office mobile apps.
“Beginning today, you can now completely remove the password from your Microsoft consumer account. Use Microsoft Authenticator app, Windows Hello, a security key, or a verification code sent to your phone or email to sign in to your favorite apps and services, such as Outlook, OneDrive, FamilySafety, and more,” explained Vasu Jakkal, CVP of Microsoft Security.
The reason Microsoft believes going passwordless is the future is pretty simple: it’s not only impossible for humans to remember multiple complex passwords that need to be changed from time to time, and passwords can also be obtained by hackers by various means, including social engineering techniques. For an organization, a hacker managing to breach a single account could have really devastating consequences.
“We’ve heard great feedback from our enterprise customers who have been on the passwordless journey with us. In fact, Microsoft itself is a great test case — nearly 100% of our employees use passwordless options to log in to their corporate account,” explained Jakkal.
To go passwordless with your personal Microsoft account, you’ll first need to install the Microsoft Authenticator app on your iOS and Android device and sign in there with your account. Once you’re ready, you can visit account.microsoft.com, sign in, and choose Advanced Security Options. Under “Additional Security Options, there should be a “Passwordless Account” option, which you can turn on.
Microsoft says that this feature will be rolled out to consumer accounts over the coming weeks, so you may not be able to go passwordless immediately. Anyway, be assured that you can still re-add a password for your Microsoft account if you’re not ready yet to go fully passwordless.



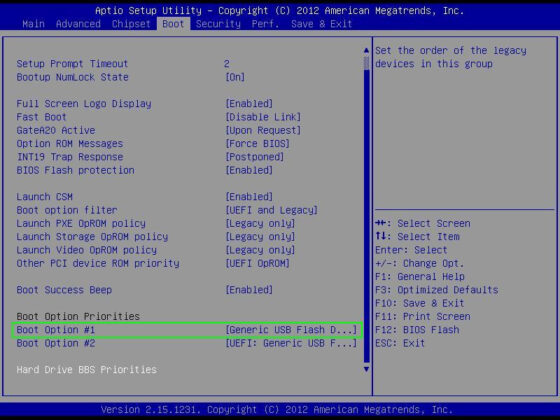
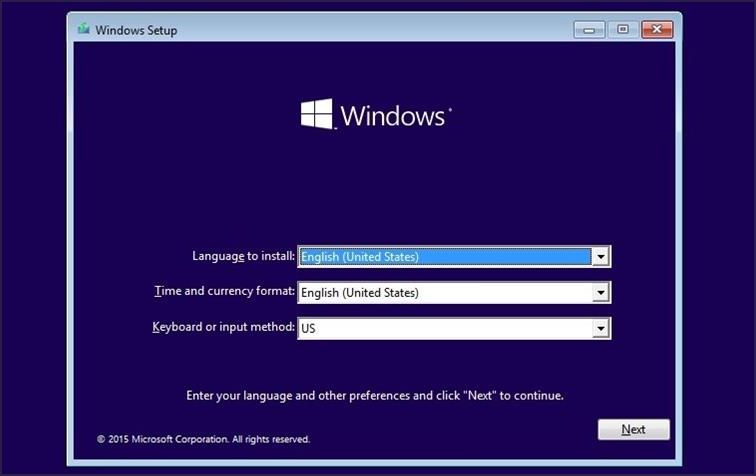


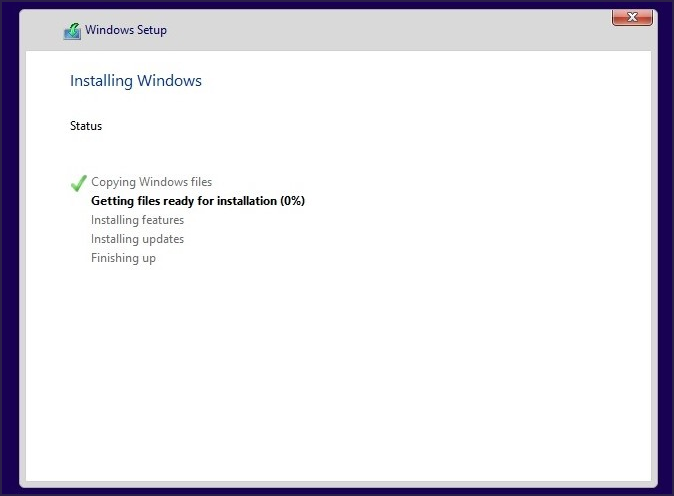
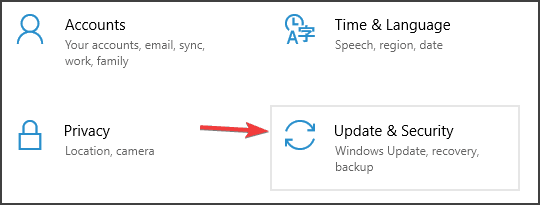
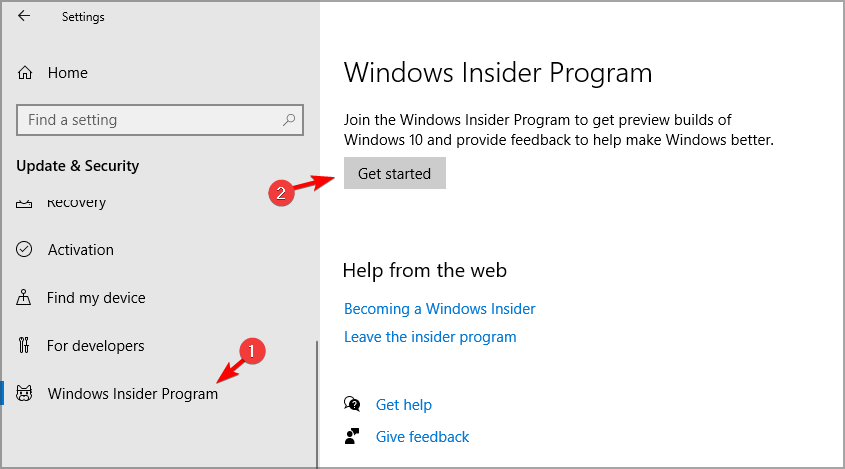
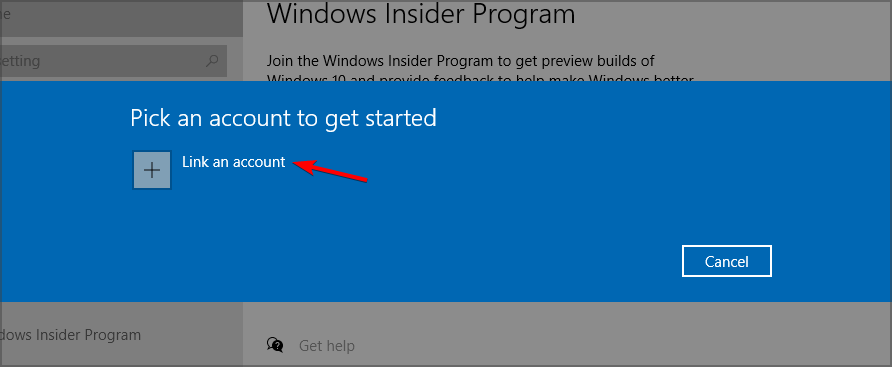
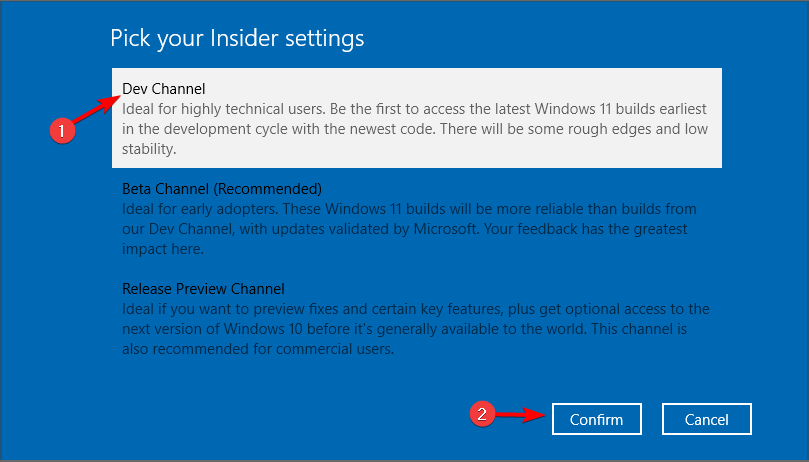
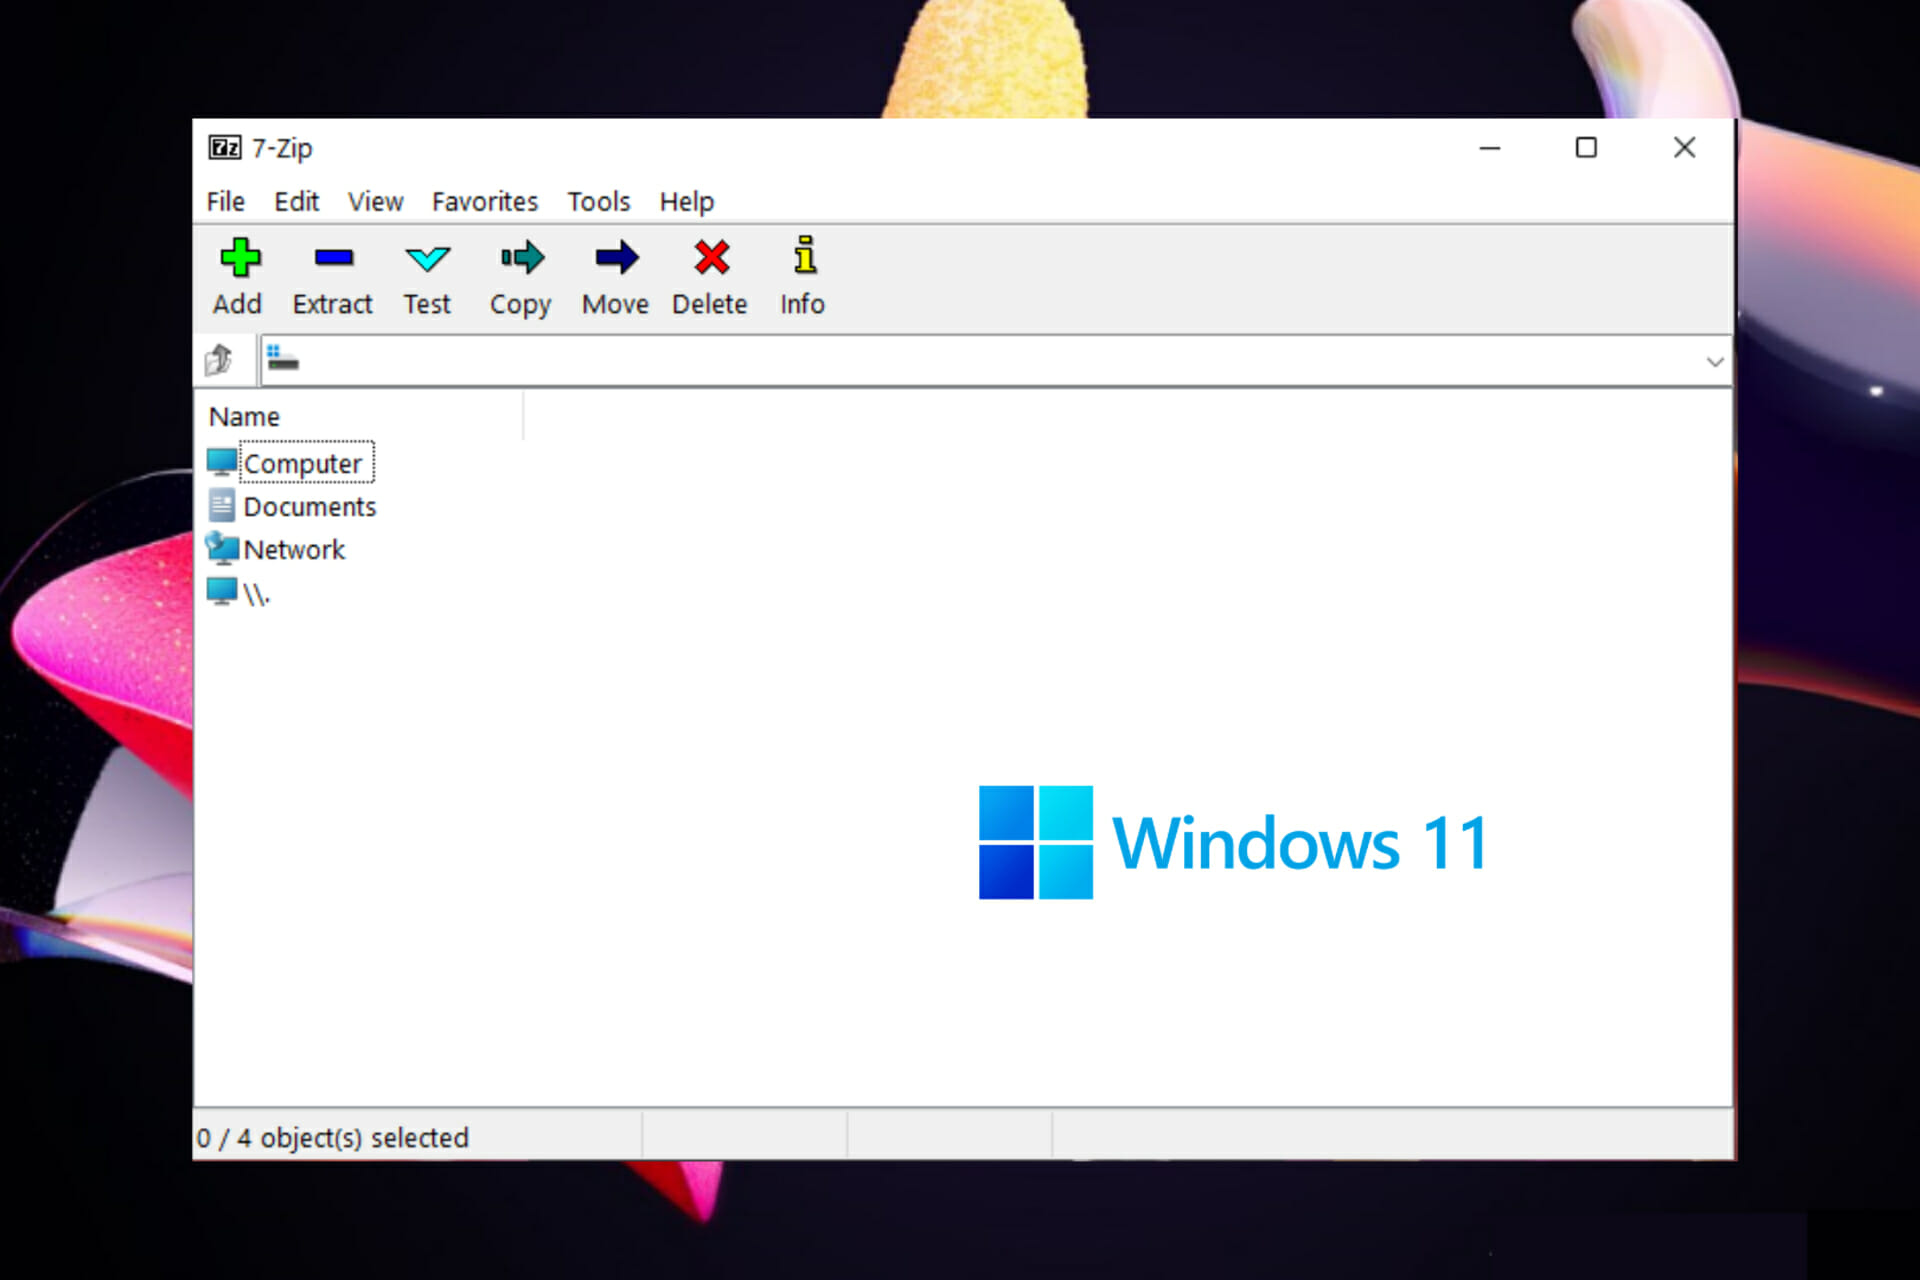


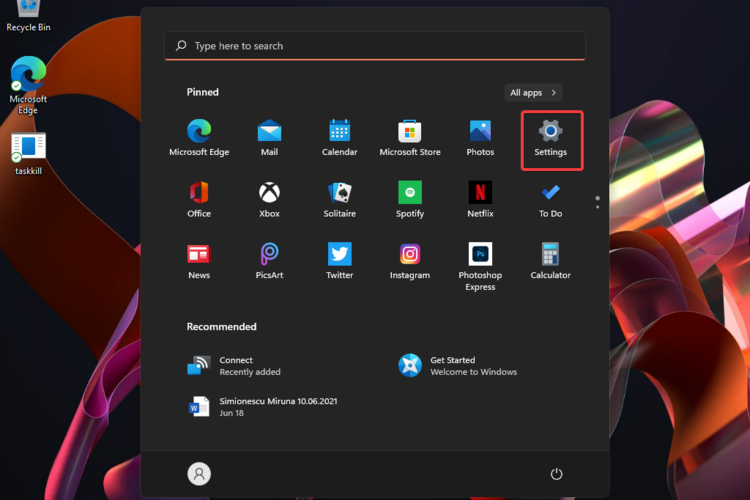
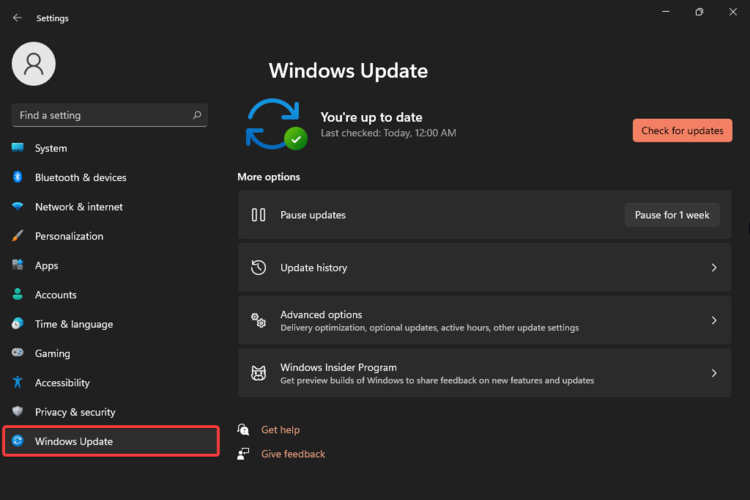
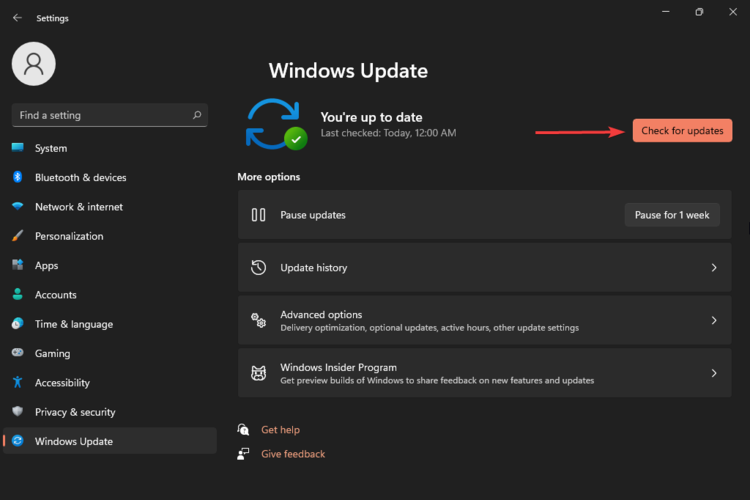
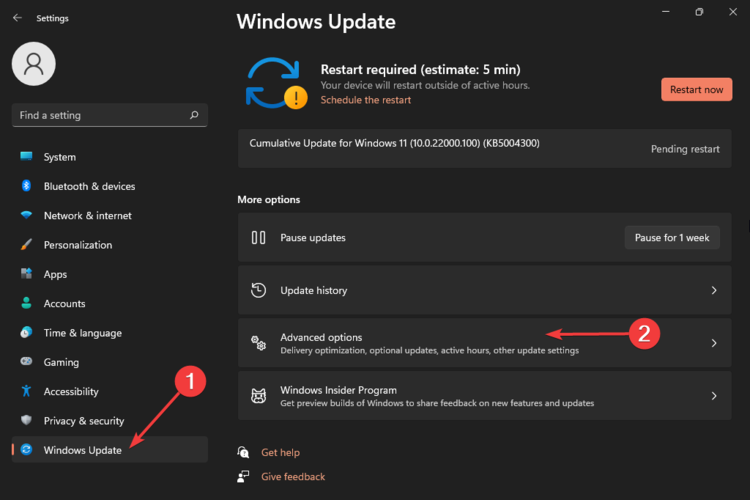
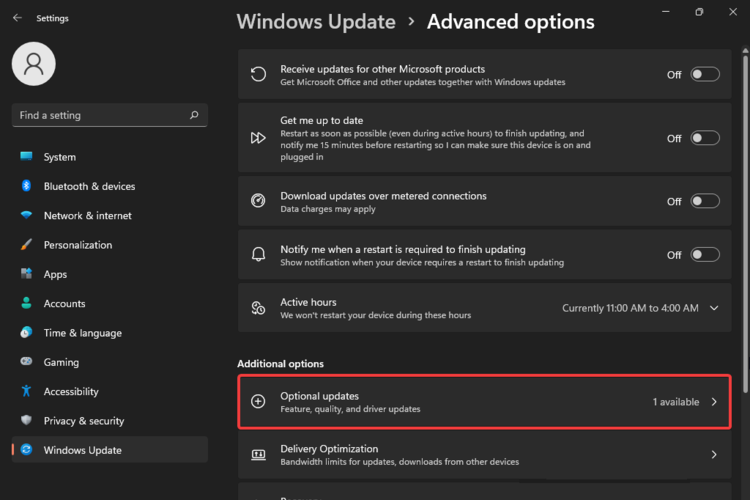
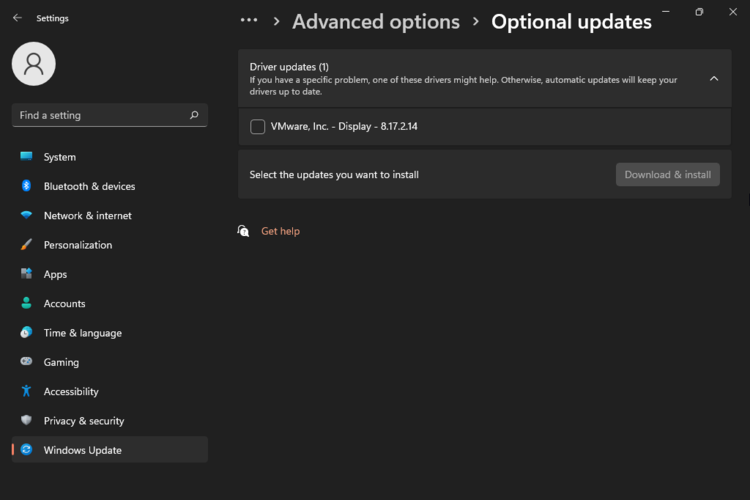
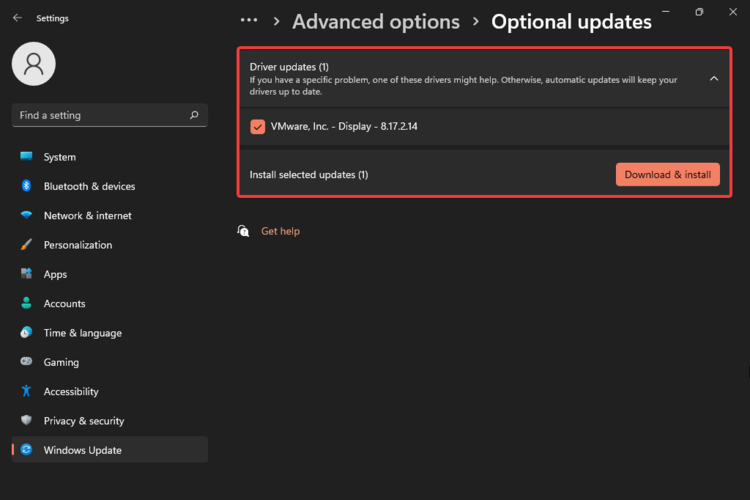
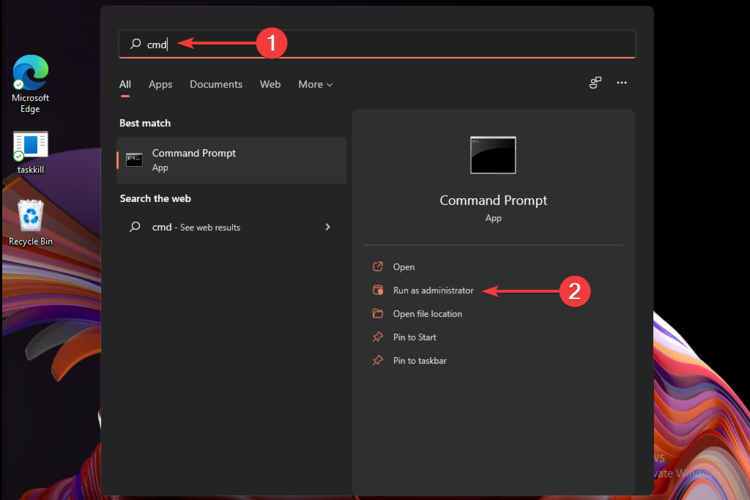
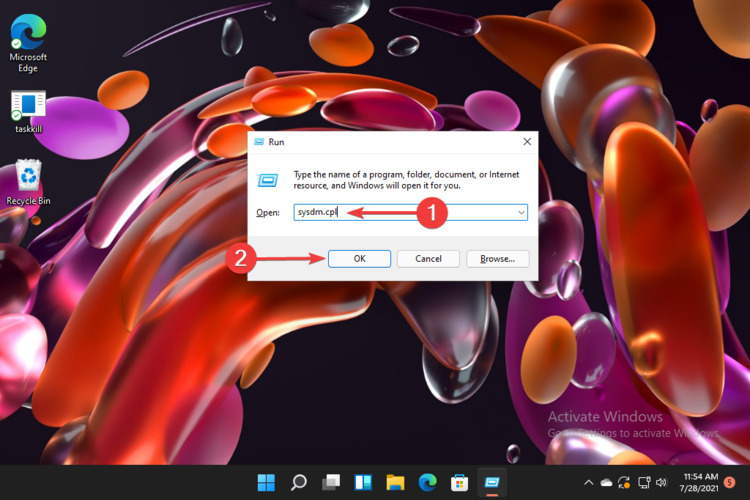
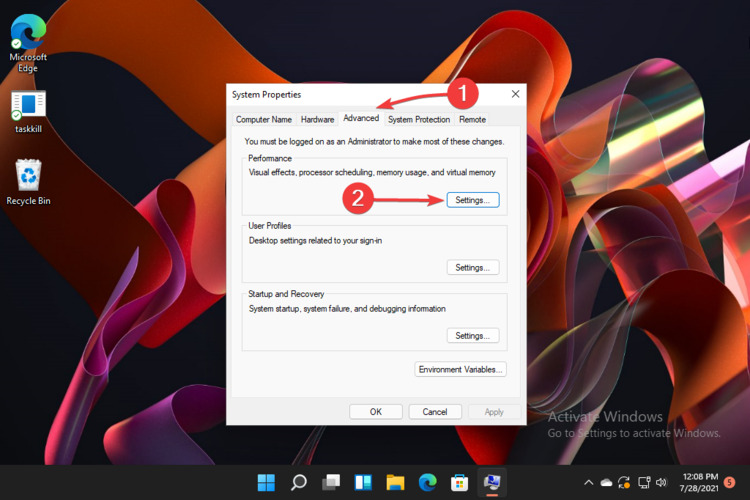
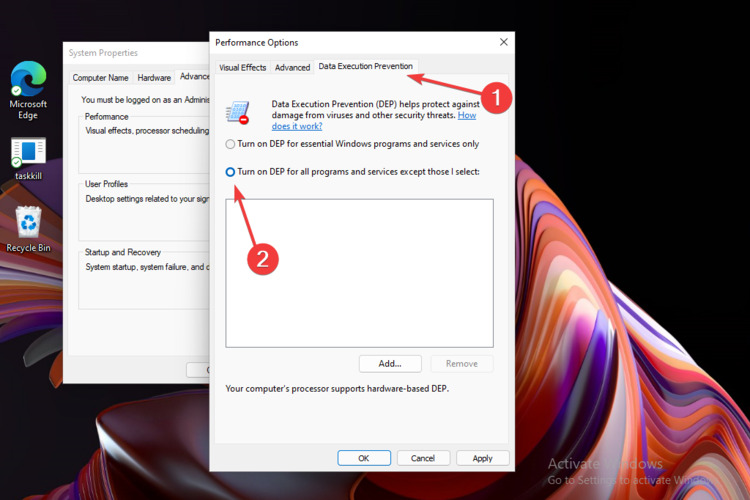
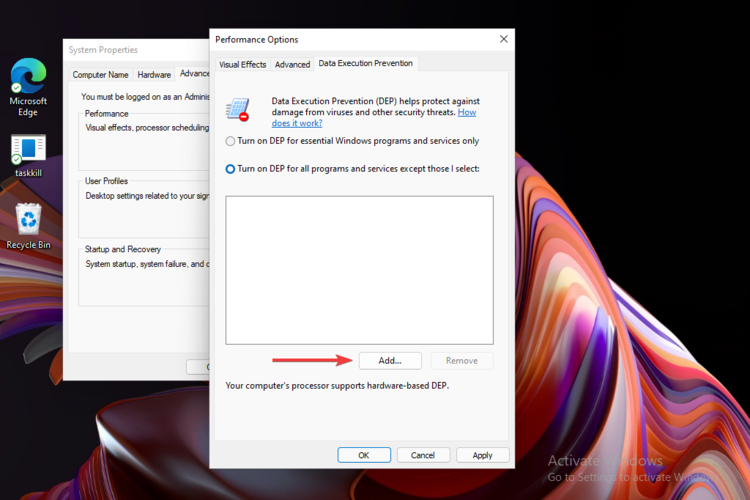
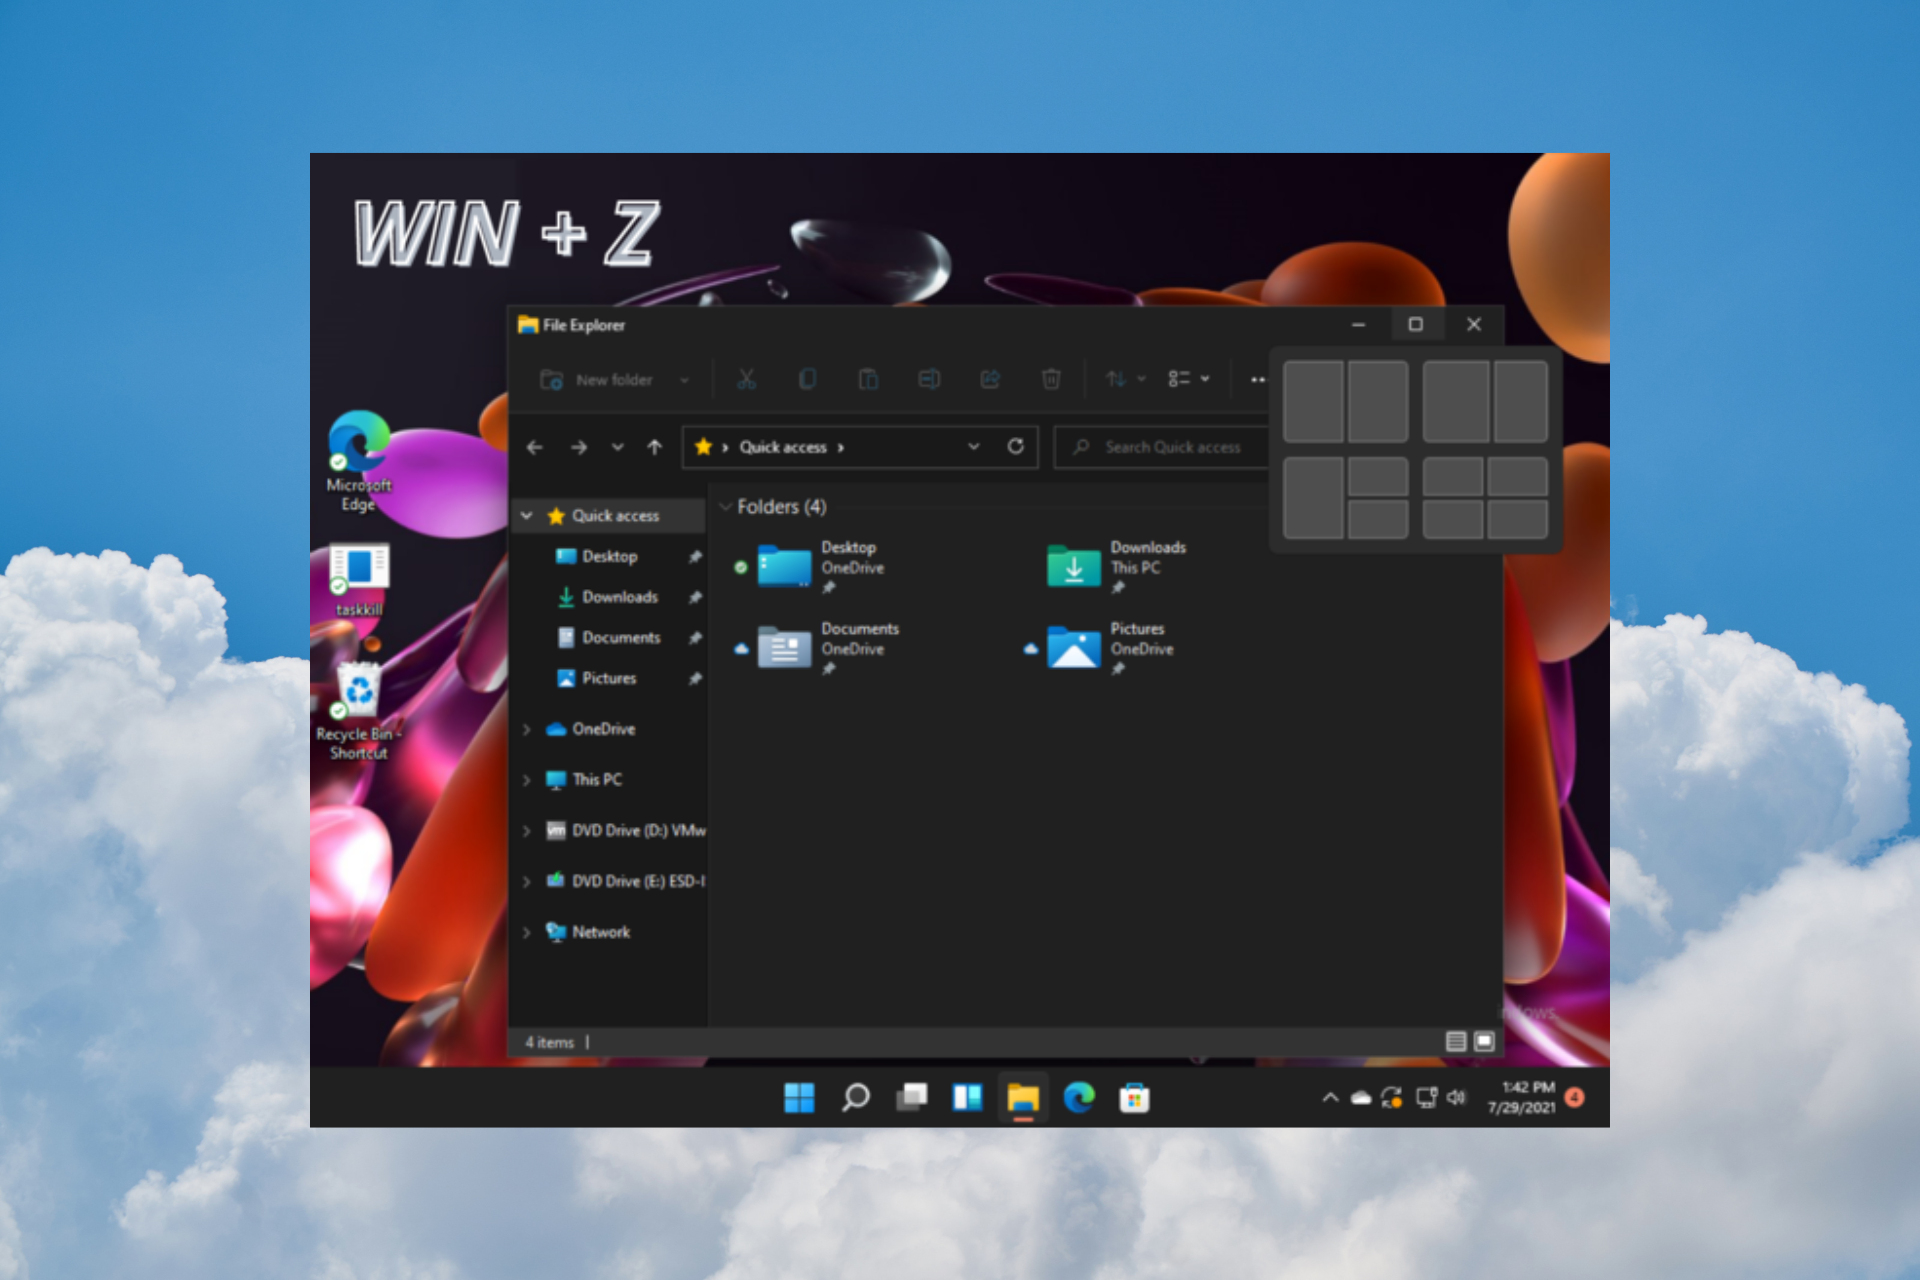


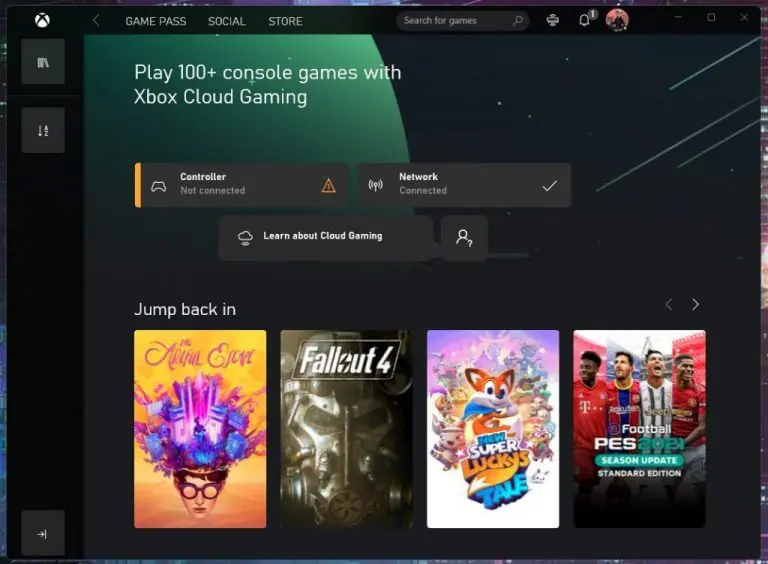
/cdn.vox-cdn.com/uploads/chorus_asset/file/22846262/firefoxdefaults.gif)






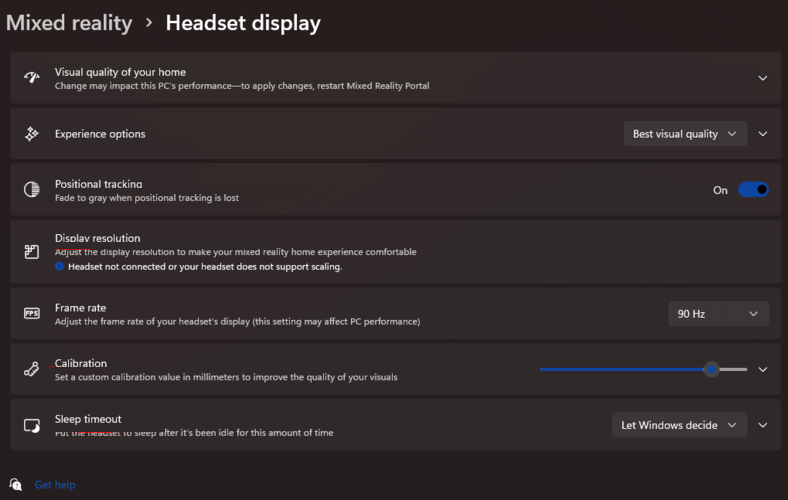
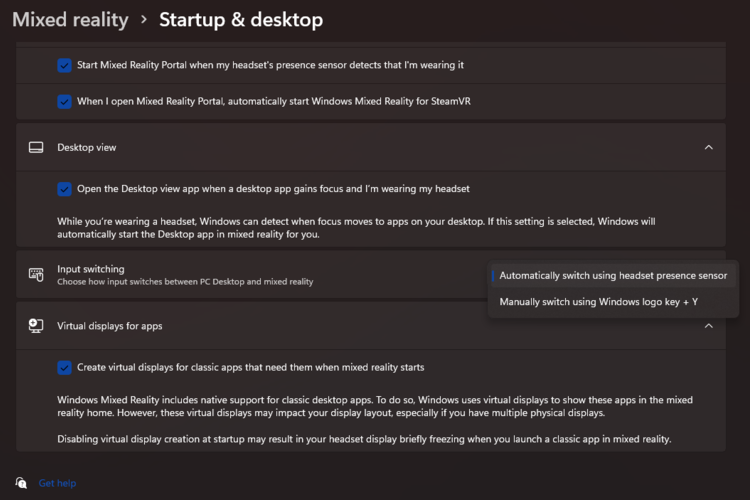


![Enable Rounded Corners in Windows 11 [3 Simple Methods]](https://windowsreport.com/wp-content/uploads/2021/08/Windows-Run-1024x529-1.jpg)
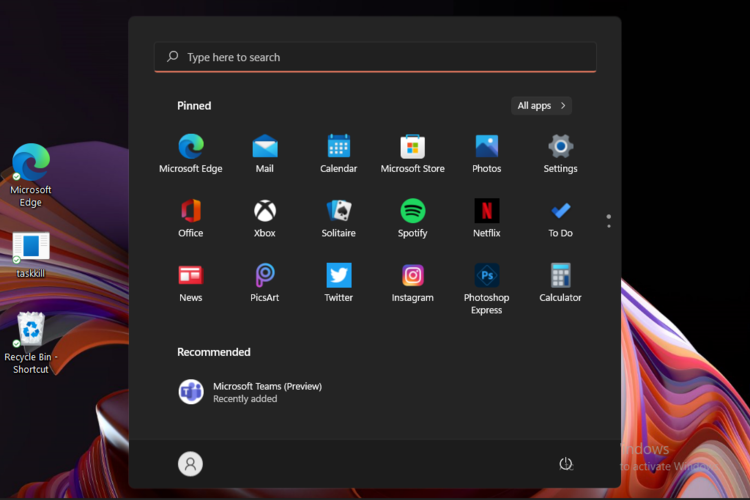
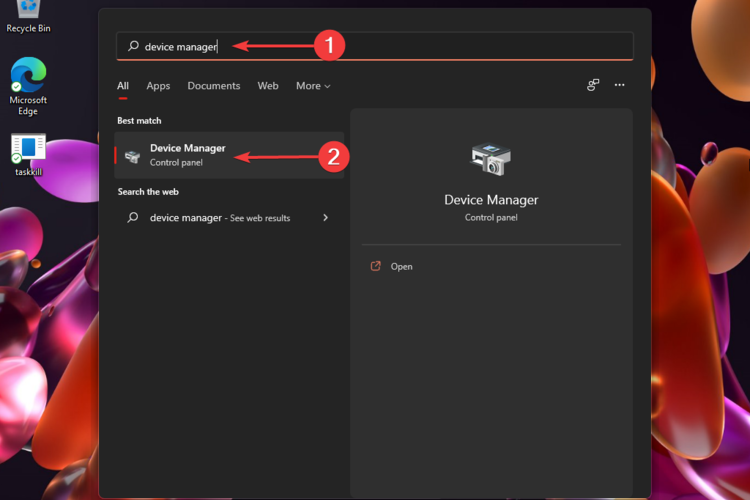
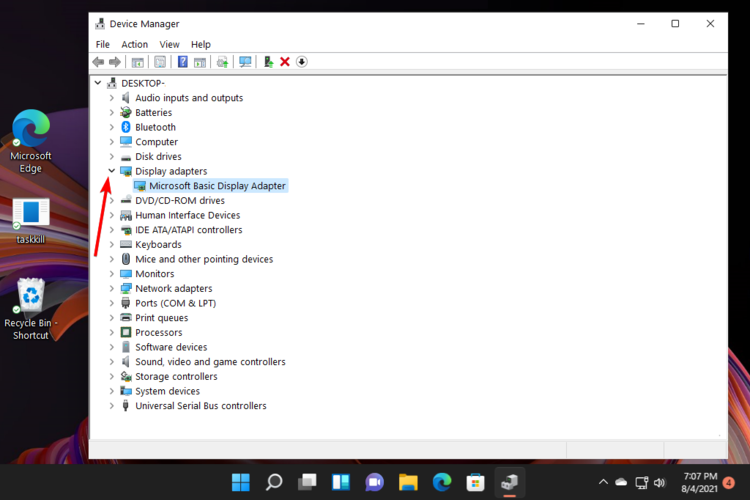
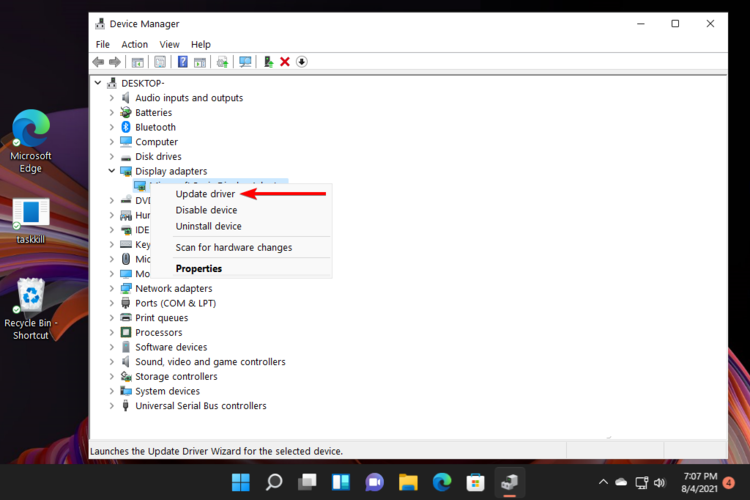
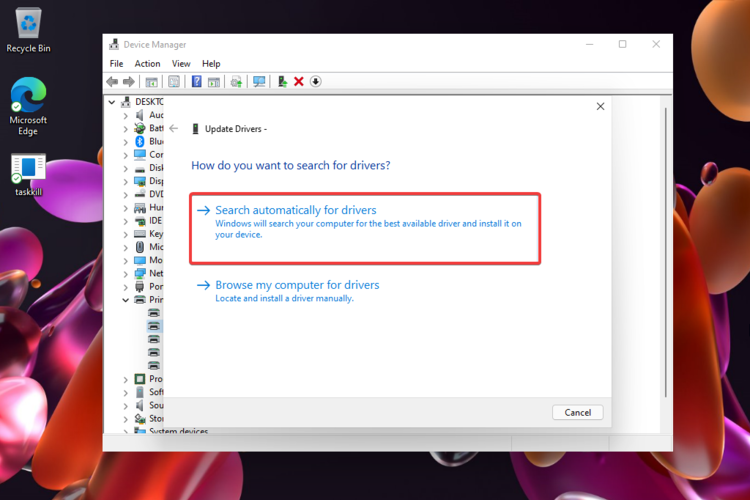
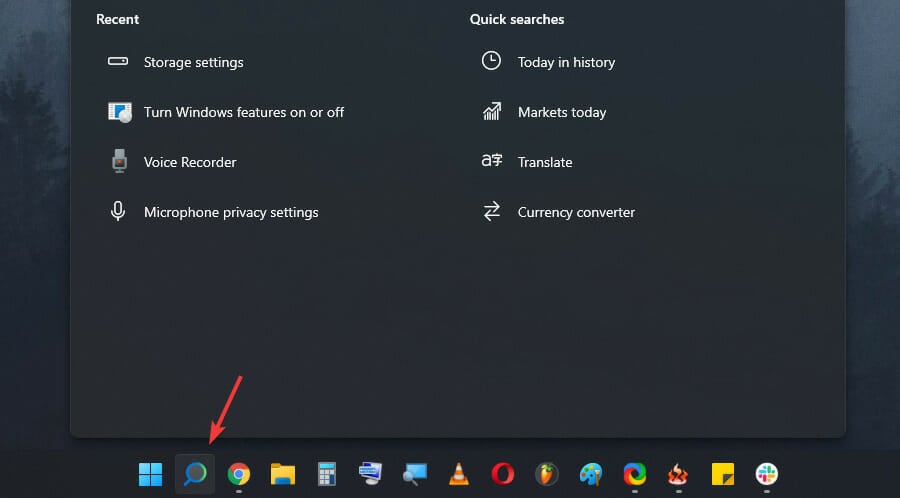
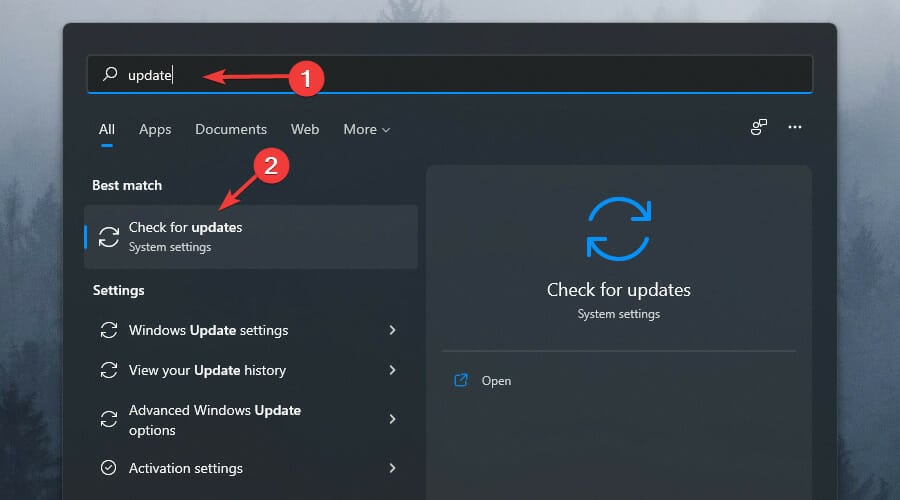
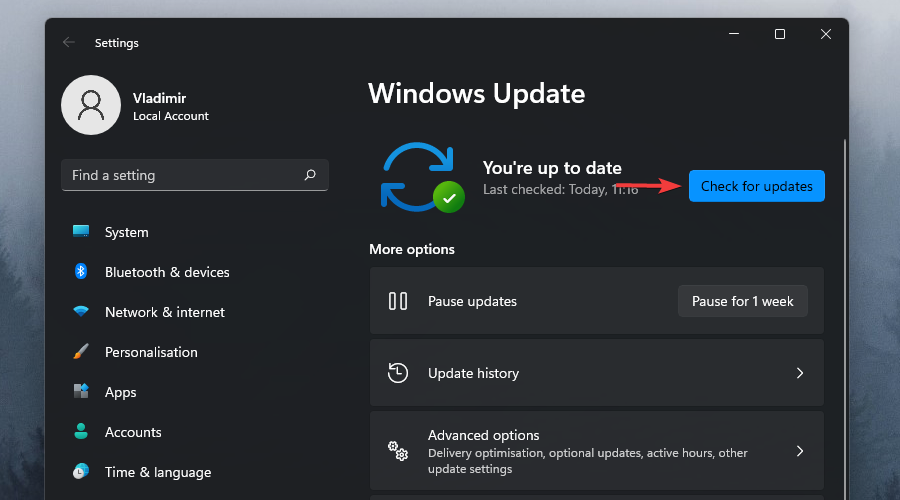
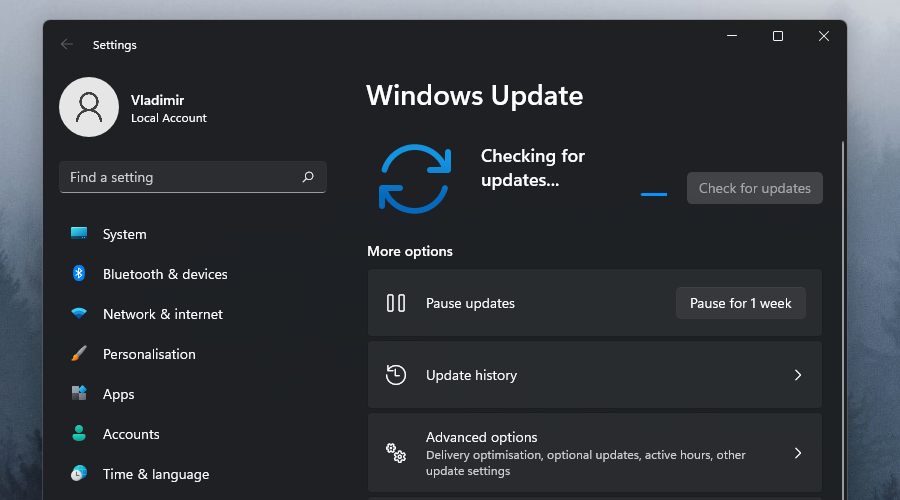
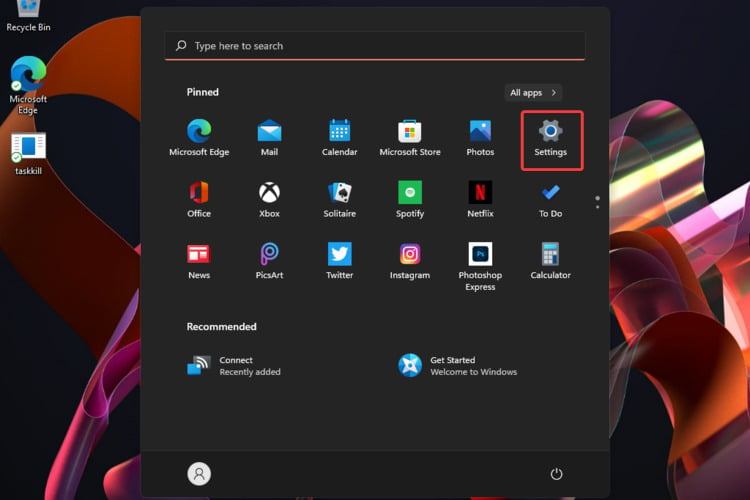
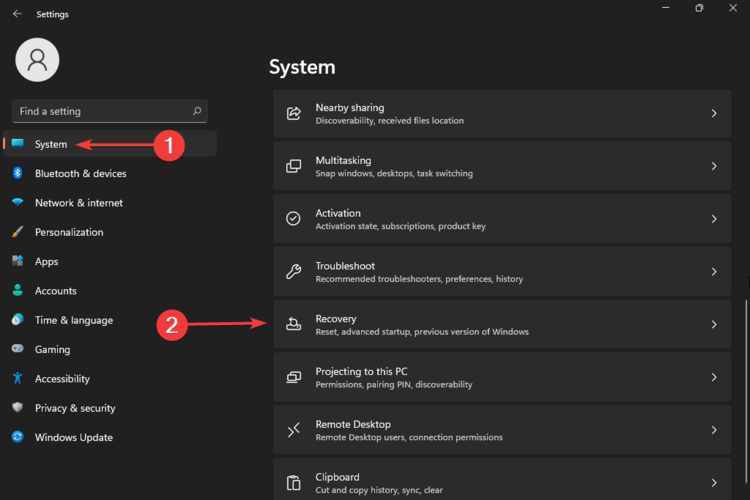
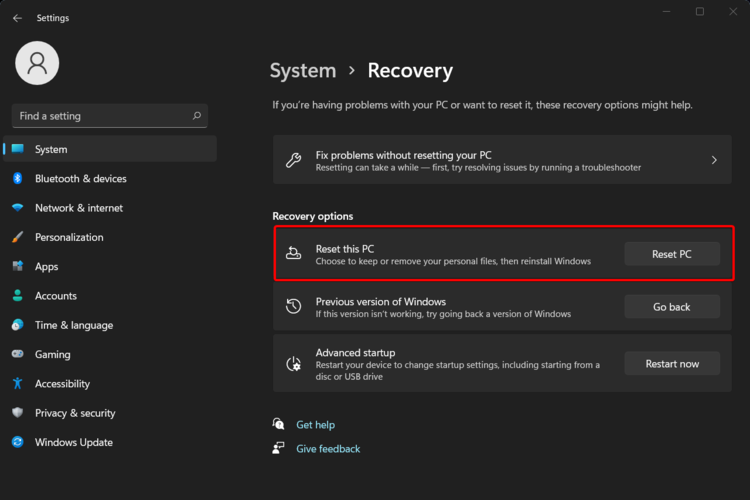
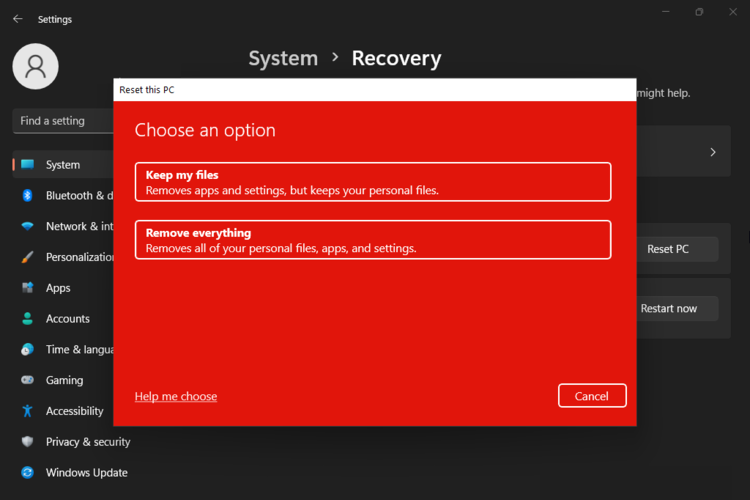
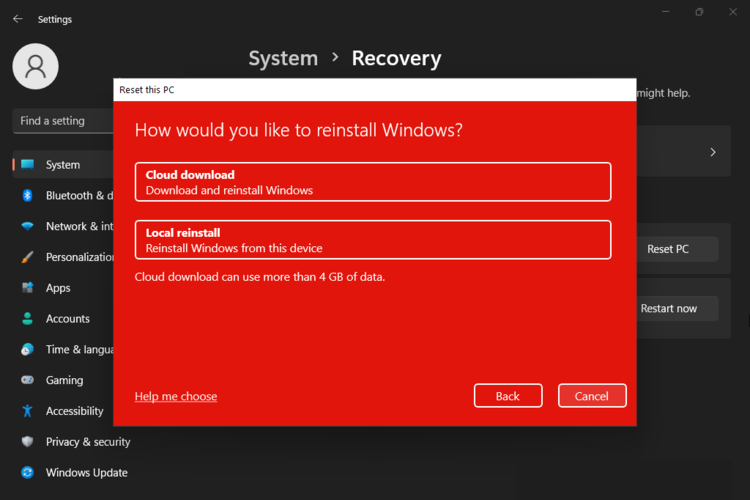
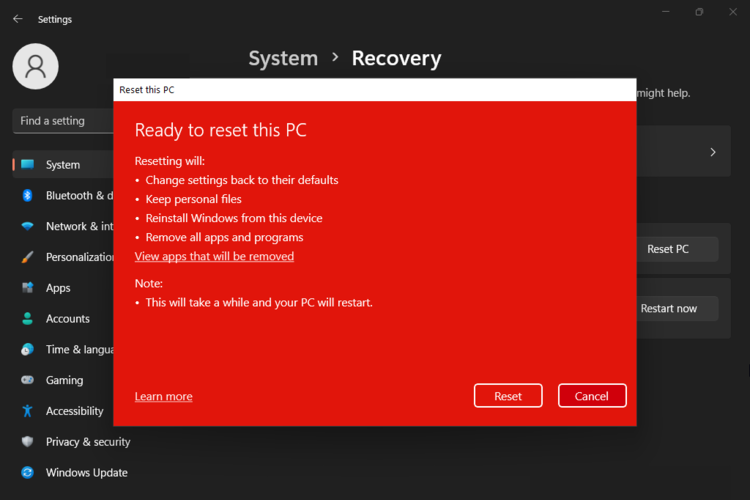
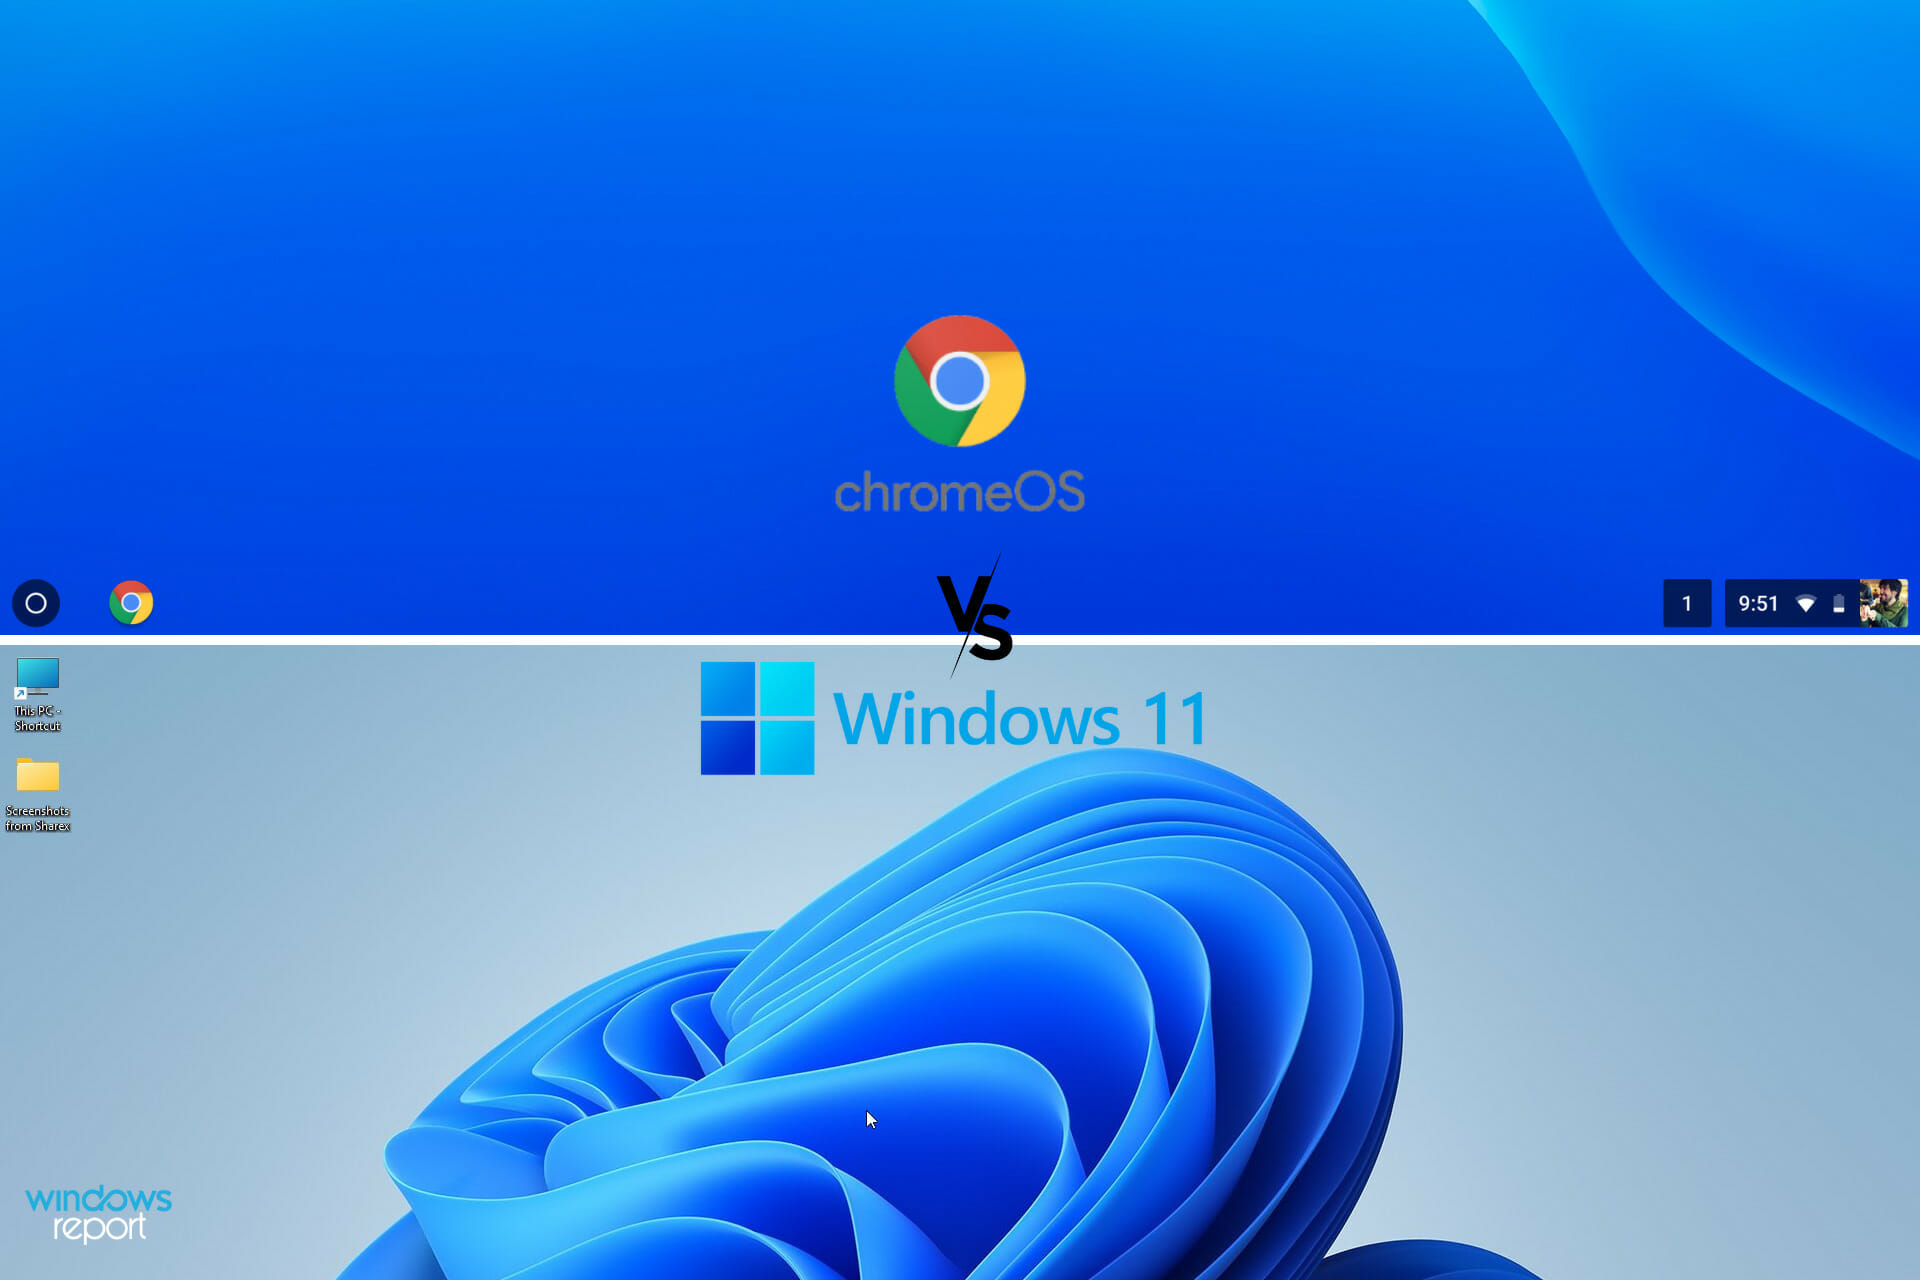
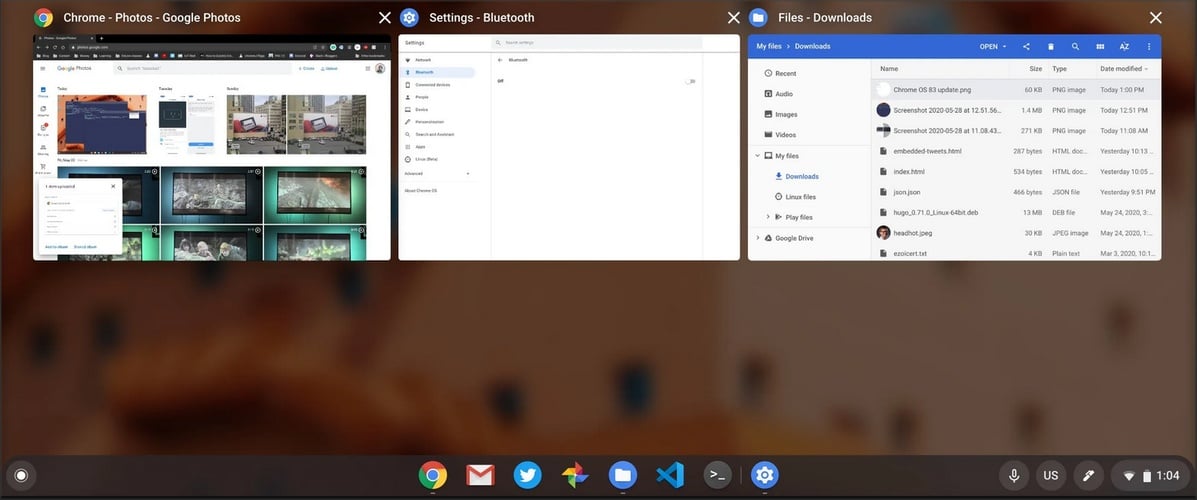
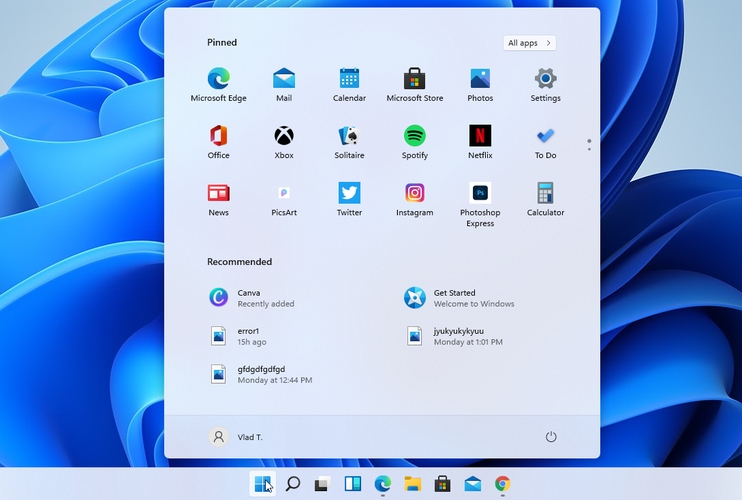
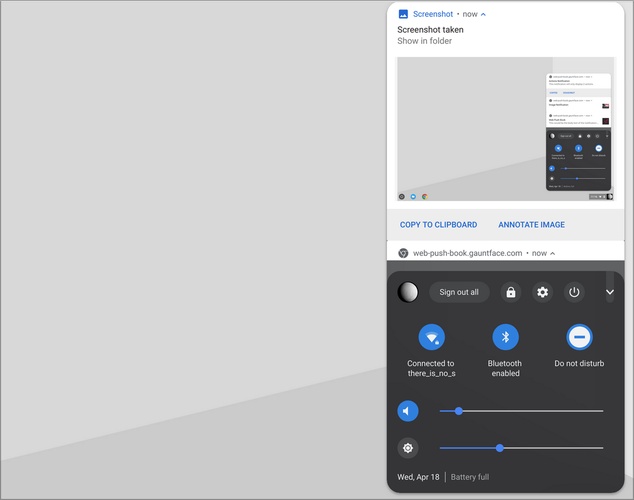
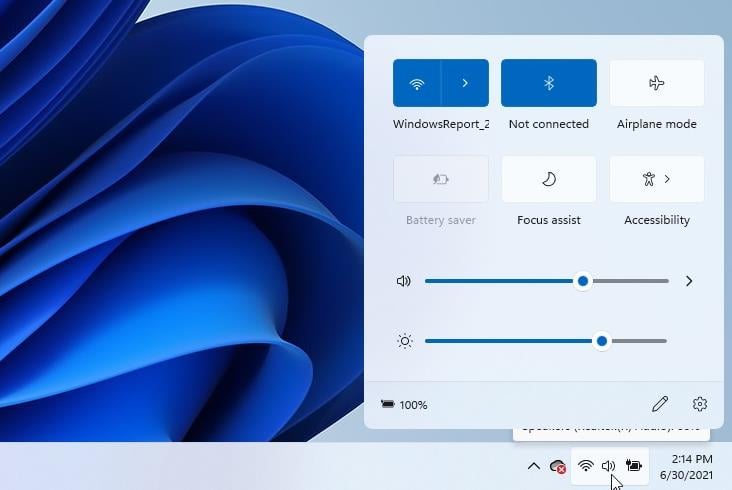

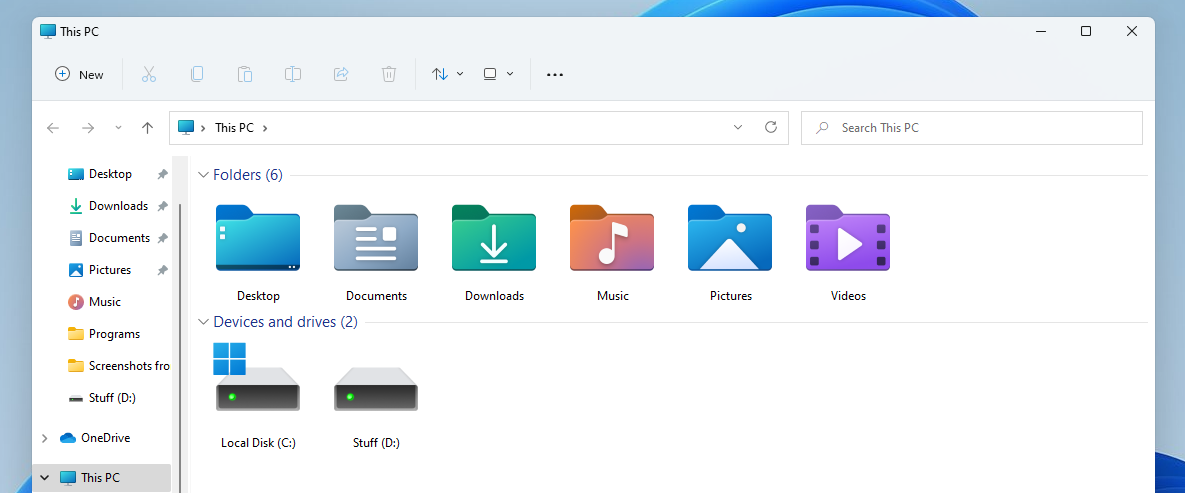
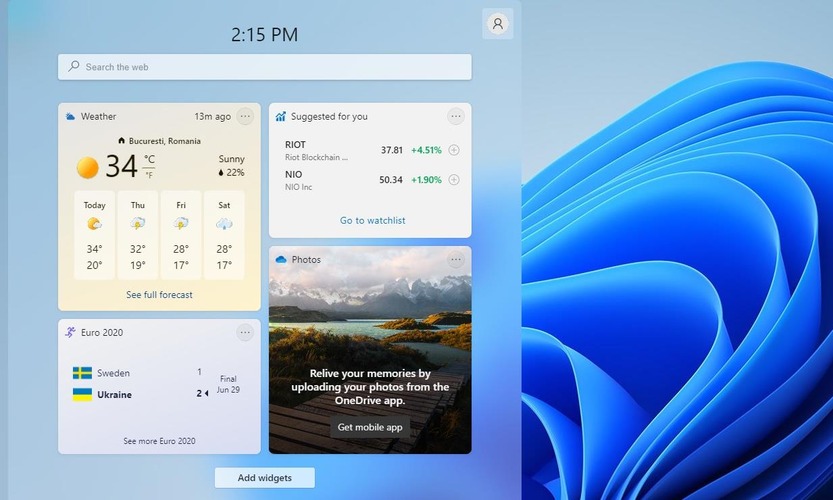
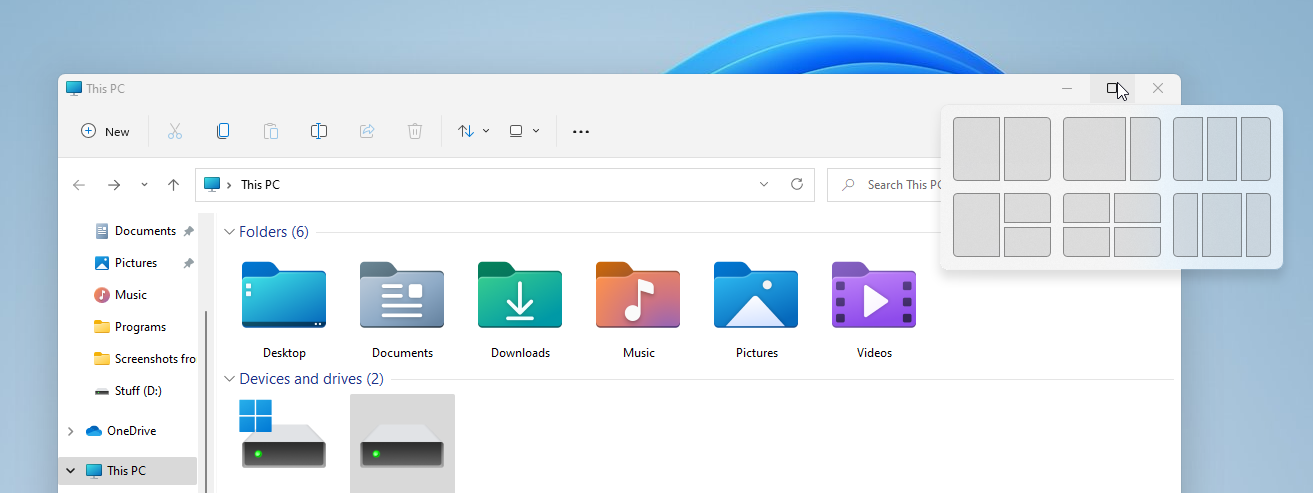
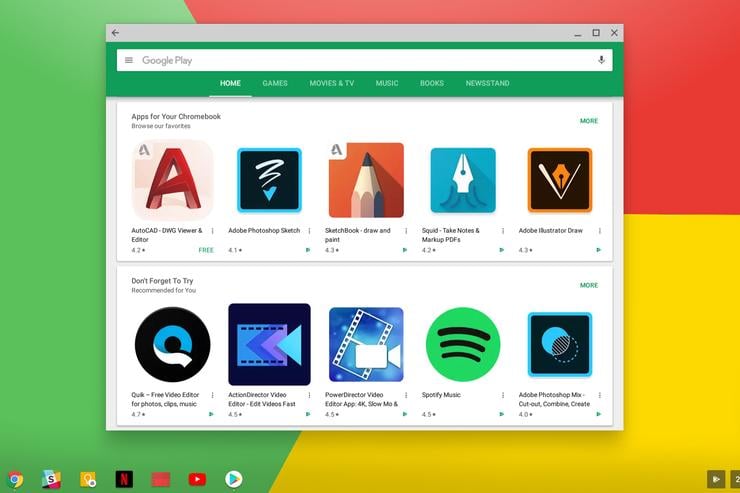
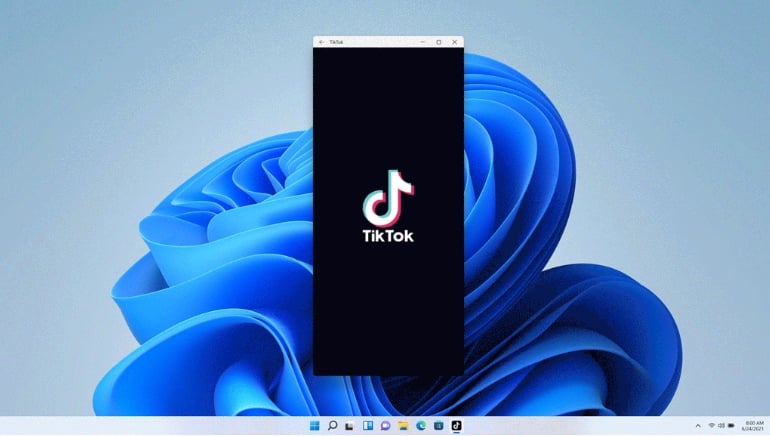



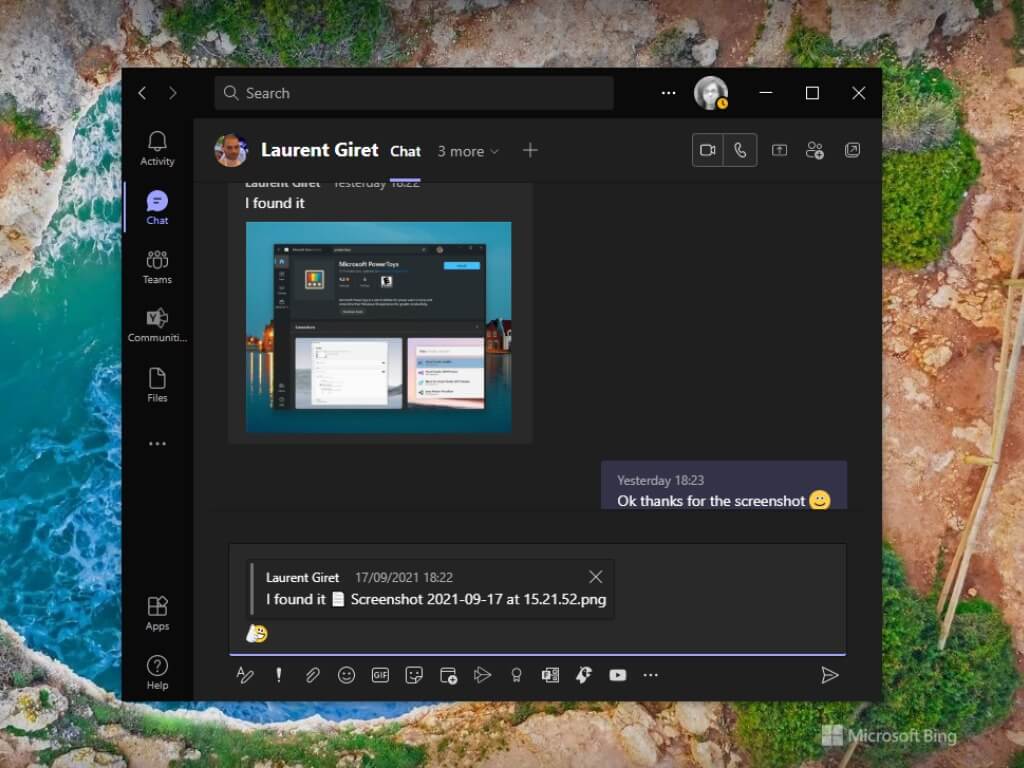
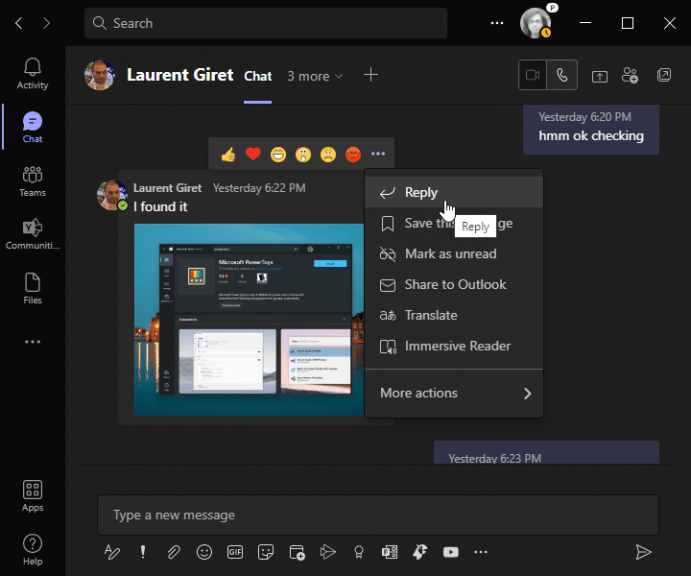
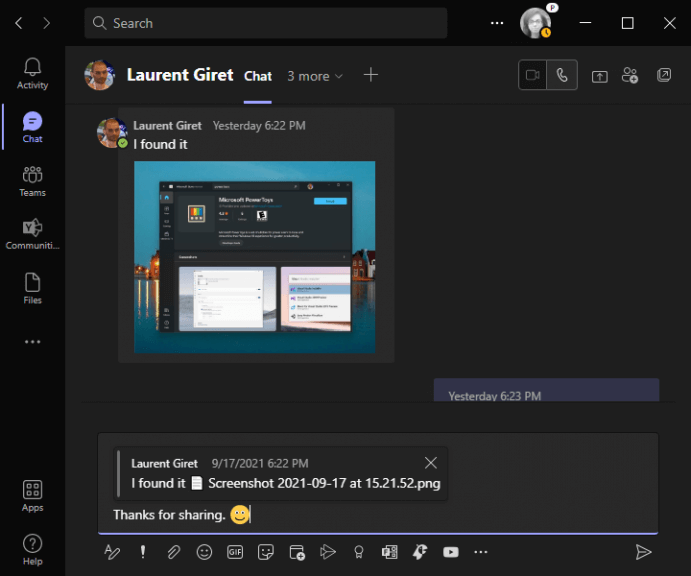


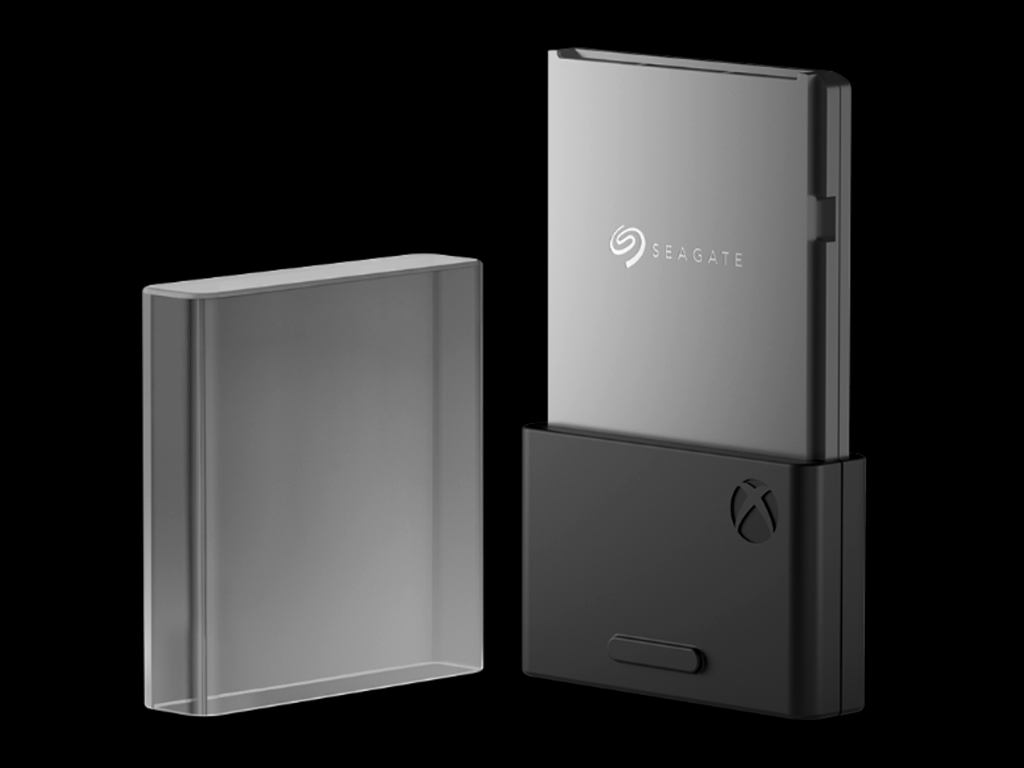
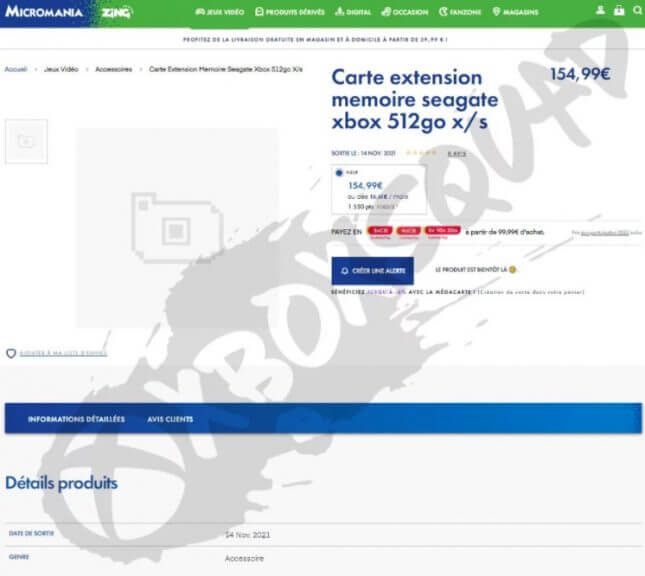




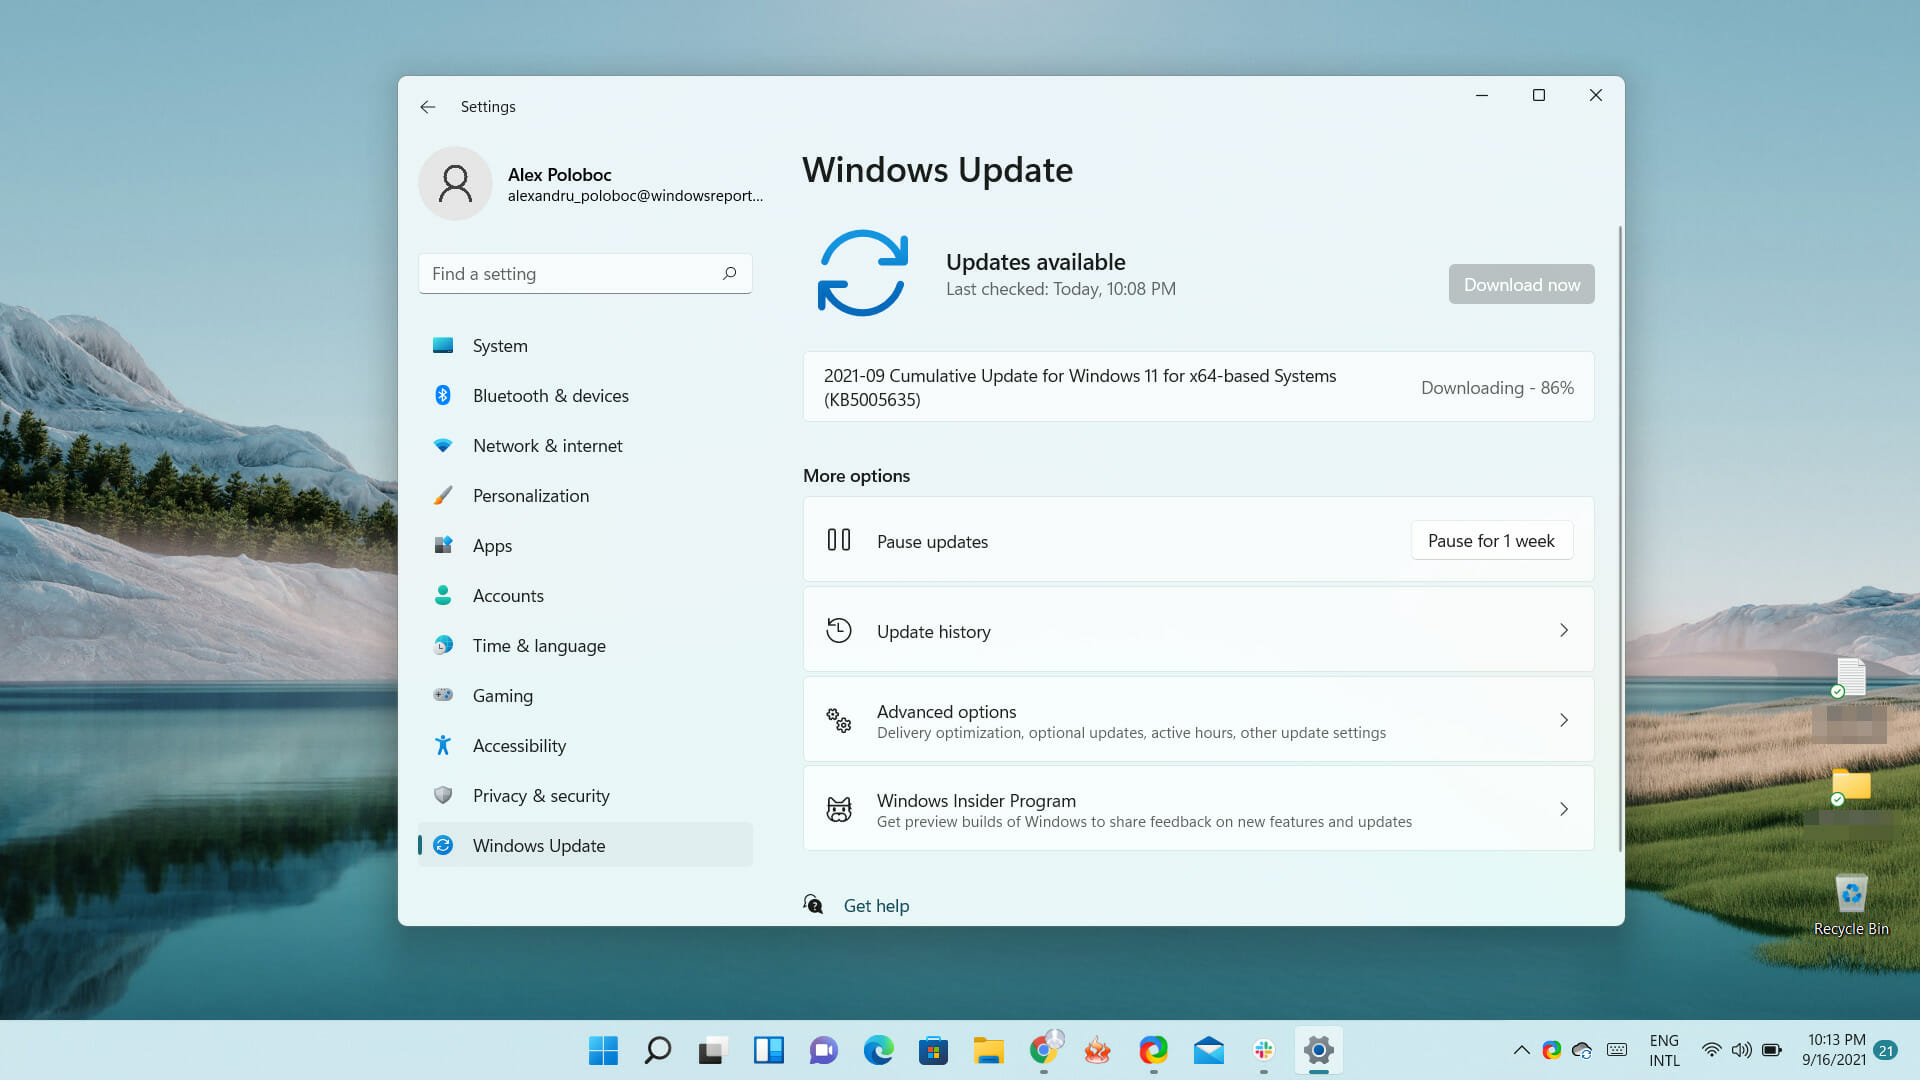


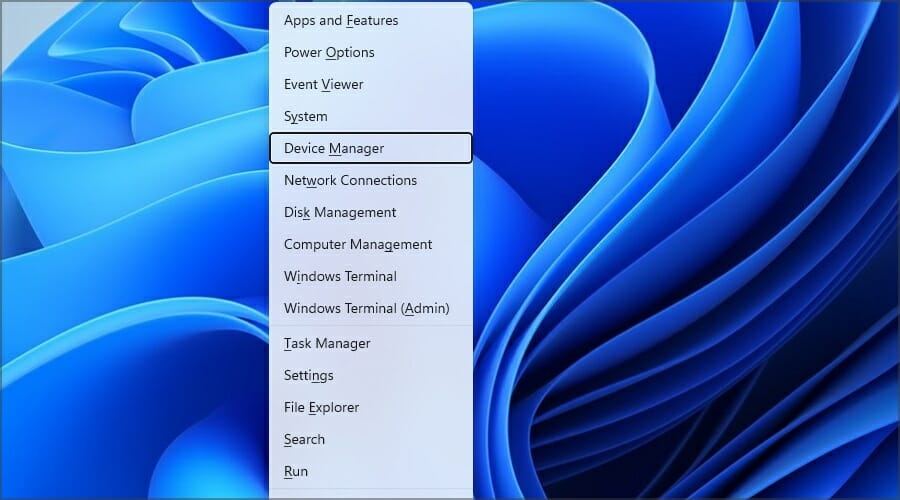


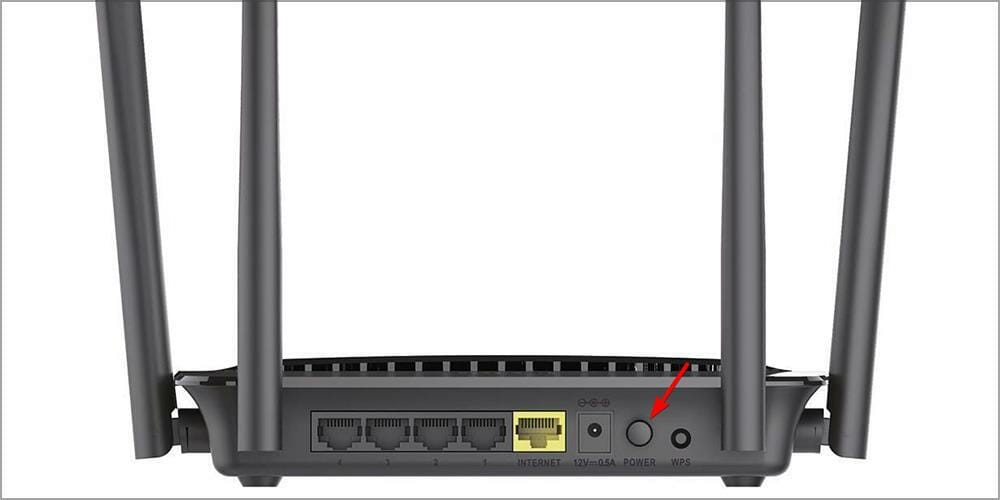



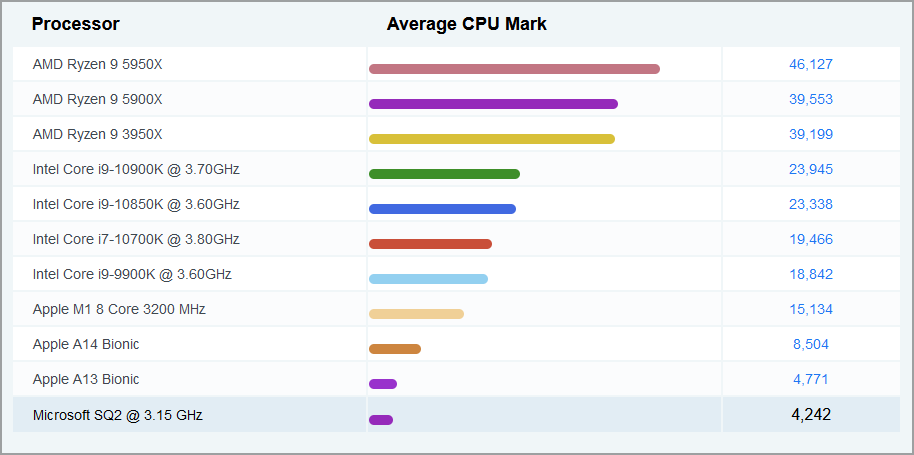
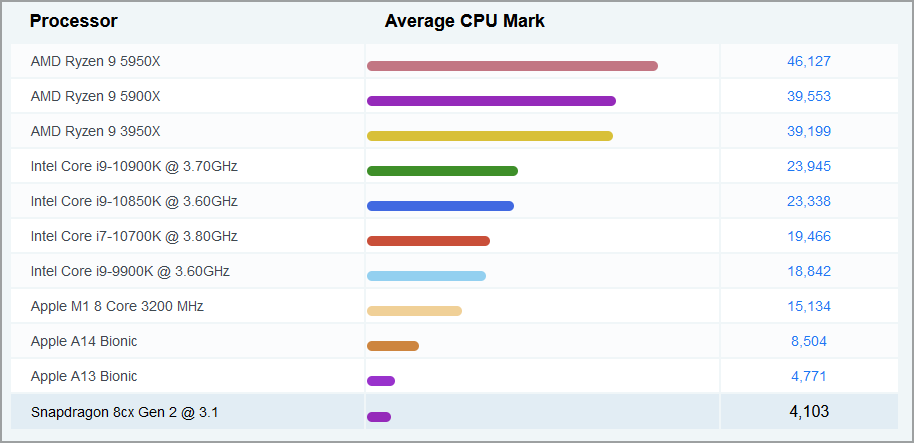


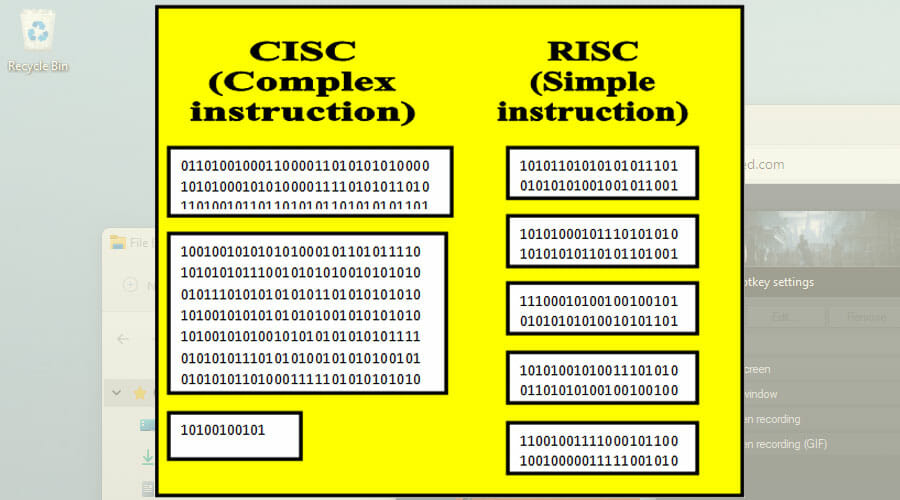
![Enable & Activate TPM 2.0 on VMware Workstation [How to]](https://windowsreport.com/wp-content/uploads/2021/09/How-to-enable-TPM-in-VMware-by-using-just-a-few-steps.jpg)