It’s been a bit of a wait for players but the free-to-play Warframe video game has finally received its Xbox Series X and Xbox Series S enhancements today as part of the new Call of the Tempestarii update which is now live in all regions.
In addition to support for over 60 frames per second in 4K Ultra HD on the Xbox Series X, this update also improves texture rendering on Microsoft’s new consoles, improves loading times, and adds dynamic lighting.
“Bullet Jump into the next generation,” a short blurb attached to a new Xbox Series X trailer for Warframe enthuses. “Bigger, better and more beautiful than ever before, immerse yourself in the enhanced rendering, dynamic lighting, faster loading times and more. Available now with Call of the Tempestarii!”
The rest of the Call of the Tempestarii update, which is also live on Xbox One, PC, and other supported platforms, adds a host of new game content such as new missions, areas to explore, and a new Warframe called Sevagoth. Full details on the update can be seen here.
Starting tomorrow on April 15th, a variety of items inspired by the hit Horizon Zero Dawn video game will be available to purchase within Fortnite’s in-game store.
Fortnite players will be able to buy an Aloy skin based on the game’s main character, a Blaze Canister back bling, a spear pickaxe, a Glinthawk glider, a Shield-Weaver wrap, and an emote. An Aloy the Skywatcher loading screen will also be available as part of a bundle containing all of the above items.
Horizon Zero Dawn was a console-exclusive video game for Sony’s PlayStation 4 console which makes this Fortnite content rather unusual as it’ll allow Fortnite players on rival consoles, such as the Xbox One, Xbox Series X, and Nintendo Switch, to play as, what is considered by most to be, a PlayStation character.
While all of this main Horizon Zero Dawn content will be available to Fortnite players on all platforms, those who play Fortnite on a PlayStation 5 will unlock an additional Ice Hunter Aloy style for the Aloy skin. Once unlocked, the additional style will be playable on all supported platforms so someone could play Fortnite on PS5 to get the skin and then switch back to Xbox Series X or Android if they wanted to.
Horizon Zero Dawn Fortnite Items
Aloy is the latest in a growing number of established video game characters that have come to Fortnite recently. Kratos, from PlayStation’s God of War franchise, was added to the game in Chapter 2 Season 5, as was Master Chief from Xbox’s Halo franchise. Both characters also received console-exclusive additional skins for PS5 and Xbox Series X players respectively.
Are you planning to buy the Aloy skin? What other video game characters would you like to see come to Fortnite? Share your thoughts with the community in the comments below and then follow us on Pinterest and Twitter for more gaming news.
Nowadays, we use our PCs and other devices for work, education, and during our free time because they allow us to communicate and interact with each other more easily.
Since more and more people are getting accustomed to the online environment, choosing to work or study from home, the demand for screen recorder software that aids them with their tasks has also increased.
This is where Movavi Screen Recorder comes into play. The software allows you to broadcast lessons or meetings with your colleagues and record your system’s sound and video separately.
Capture anything on the screen with Movavi Screen Recorder 2024
Movavi Screen Recorder brings a comprehensive and simplistic user interface that is easy to follow and customizable, allowing you to add tools to a special bar for quick access.
Additionally, the software allows you to customize your recordings, choose between different audio and video outputs, change capture screen size, and set up keybinds.
What does Movavi Screen Recorder 2024 brings?
1. Scrolling screenshots
Not all screen captioning software have an option for scrolling screenshots because it’s not that easy to perform.
With Movavi Screen Recorder 2024, after you make a regular image captioning, you have the option to click the Scrolling screenshot feature and select the window that you want to caption entirely.
The tool will create an image of the entire page, and it is highly useful when you want to get a whole scrollable web page.
2. Drawing on video recordings
Whether you’re making an instructional clip or you want to highlight something important in your recording, with Movavi Screen Recording 2024, you can use the pen tool to insert shapes, lines, or freehand drawings during the video recording.
Of course, you can change the point size and the colors to make different annotations for distinct elements in your video.
3. Record scheduling
You can set your screen recordings to start automatically at a certain time and date. Also, it is possible to create tasks, name them, set the date, and duration, and capture the recording area.
The Schedule window also contains a section for setting up time limits. Users can choose whether they want to time limit their recordings, record for an unlimited time, or schedule recordings. The free version does not have recording time limitations.
You will also notice a section called After capture where you can decide what will happen with the program after recording.
4. Noise reduction
Noise reduction is an excellent addition to Movavi Screen Recorder 2024, and it’s critical for crisp and clear audio in your recordings.
The background noise reduction is great, especially if you don’t have the best mic at the moment of recording.
5. Graphics acceleration
The video captioning settings allow you to enable different types of hardware acceleration to make your recording as smooth and fast as possible.
Apart from the SuperSpeed conversion feature, Movavi Screen Recorder 2024 also supports Intel, NVIDIA, and AMD GPU acceleration for optimal results.
6. Webcam recording
One of the program’s newest features is recording your webcam. You can fully customize your webcam’s size, framerate, and resolution on the screen. Moreover, you can change the position of the webcam during recording in any corner of the screen.
If you use multiple cameras, you can switch between them in the settings window. You can preview your webcam during the recording to get an idea of what others see.
You also have access to various settings related to camera control and filters that will help you adjust your camera quality depending on the situation.
Other notable features of Movavi Screen Recorder 2024
Record your audio without the screen – Another new addition to the program is the ability to record the audio from your system or microphone without recording the video, which is especially useful for podcasts and music.
Show keystrokes and the mouse cursor – If you want to make your recordings even more comprehensive, Movavi Screen Recorder gives you the options to show your mouse cursor, clicks, and keystrokes on the screen.
How do I use Movavi Screen Recorder?
Start Movavi Screen Recorder and click on the middle button.
Select the area you want to record.
Adjust the recording settings.
Hit the Rec button to start recording your desktop.
After you’re finished recording, the editor will start automatically.
You can easily cut certain parts of the recording and share the video on YouTube, Google Drive, and even on WhatsApp, Telegram, or create a link and distribute it.
Of course, you may also click the Export button to save the clip on your PC.
If you click on the Advanced button, you will also be able to change the resolution, FPS, sample rate, and channels of the video.
How much do I pay for Movavi Screen Recorder?
The free version of the program:
If you don’t want to spend any money, or you want to try the product out before you buy it you can choose to download the trial version of the Movavi Screen Recorder freely.
Their free version does not have any time limit. as it is a lifetime free version, meaning that you can use it as long as you want.
As for functional limitations, there are only two:
Watermark on the output videos
No option to add descriptions or tags to videos before sharing them on YouTube.
In comparison, the paid version of the software includes the following:
Movavi Screen Recorder 1 year sub
$35.95 billed yearly for 1 PC
1 year of use for all features
No watermarks
Record your screen for webinars and live streams
No limit to your recording time
Capture webcam output
Capture speakers and microphone sound separately
Movavi Screen Recorder lifetime
$57.95 billed once for 1 PC
Unlimited recordings for a lifetime
No watermarks
Record your screen for webinars and live streams
No limit to your recording time
Capture webcam output
Capture speakers and microphone sound separately
Movavi Video Suite
$67.95 billed yearly for 1 PC
Screen Recorder
Video Editor Plus
Video Converter Premium
Split Movie Module
Media Player
DVD & Blu-Ray Burner
Movavi Screen Recorder 2024
Easily capture your screen with this premium and feature-rich screen recording tool.
The Movavi Screen Recorder is a great program for professional and casual users. We were very pleased with the program’s simplicity. The software’s interface is easy to follow and self-explanatory.
Many would say that such a price wouldn’t justify software that only records your screen. However, the program does much more than that, offering you full customization of your recordings.
Overall, we consider Movavi Screen Recorder to be one of the best premium choices on the market, especially if you couple it with other video-related software from the company.
Remote Desktop is one of the simplest ways to fix problems on a computer remotely, but it seems that this feature has some issues on Windows 10.
Users reported The remote connection was denied error on Windows 10.
The full error reads:
the connection was denied because the user account is not authorized for remote login windows 10
We’ve looked over several solutions for this issue, and have put them together in this detailed article, as you can see below.
How can I fix the remote connection was denied error?
1. Change Remote settings
According to users, they are unable to start the Remote Desktop session due to this error, so in order to fix this problem, you need to check Remote settings on your host computer. To do that, follow these steps:
Press Windows Key + S and enter system. Choose System from the menu.
Select Remote settings from the left pane.
Be sure that Allow remote connections to this computer option is selected and click Select Users.
Click the Add button.
Enter the user name in Enter the object names to select and click Check Names. Be sure to enter the computer name before the user name like this: COMPUTERNAMEusername.
Save changes, and try to use Remote Desktop again.
If you have Remote Desktop Users group, be sure to add it by following the steps above.
2. Change Local Security Policy settings
Sometimes you can get The remote connection was denied error if your Local Security Policy settings are incorrect. To fix this problem you need to edit Local Security Policy by following these steps:
Press Windows Key + R and enter secpol.msc. Click OK or press Enter to run it.
When Local Security Policy window opens go to Local Policies > User Rights Assignment in the left pane.
In the right pane locate Allow log on through Remote Desktop Services and double click it.
Click Add User or Group button.
Enter the user name or group name in the Enter the object names to select and click Check Names button. If your input is valid, click OK to save changes. If you have the Remote Desktop Services group, be sure to add it.
3. Delete local and roaming profile
Few users claim that you can fix this problem by deleting local and roaming profiles. We don’t know if this solution works, but you might want to try it.
4. Set the Remote Desktop Services logon to Network Service
Users reported that The remote connection was denied error appears if the Remote Desktop Services service logon is set to Local System. To change that, follow these steps:
Press Windows Key + R and enter services.msc. Press Enter or OK.
When Services window opens, locate Remote Desktop Services and double click it.
When the Properties window opens, go to Log On tab and make sure that Local System accountisn’t selected.
After Network Service is selected, click Apply and OK to save changes.
After changing the Remote Desktop Services service logon to Network Service, the issue should be completely resolved.
One solution that users proposed is to edit your registry. To fix this problem you need to grant certain permissions to the Users group. Before we start, we have to mention that editing your registry can cause certain issues, therefore you might want to create a backup of your registry just in case. To edit your registry, do the following:
Press Windows Key + R and enter regedit. Press Enter or click OK.
Navigate to the HKEY_LOCAL_MACHINESOFTWAREMicrosoftWindows NTCurrentVersionWinlogon key in the left pane, right-click it and choose Permissions.
In Group or user names select Users. Make sure that Users group has Read permissions set to Allow. After setting the Read permissions to Allow, click Apply and OK to save changes.
6. Recreate Domain Certificates
After a bit of research, few users found out that their logon server was giving them Event 29 warning, and that warning was the cause of this problem. To fix this problem you need to recreate Domain Certificates by following these steps:
On the main domain controller, press Windows Key + R. Enter mmc.exe and press Enter to run it.
Go to File > Add/Remove Snap-in.
Select Certificates and click the Add button.
Select Computer account and click Next.
Now click the Finish button.
Click the OK button.
Go to Certificates (Local computer) > Personal > Certificates.
Locate old domain controller certificate, right-click it and choose Delete. Click Yes to confirm that you want to delete the certificate.
After deleting the certificate, you need to request the new one by following these steps:
Expand Certificates (Local Computer) and right click Personal. Select All Tasks > Request New Certificate.
Follow the instructions in the wizard to request a new certificate.
Lastly, you just need to verify the certificate. To perform this step you need to be a member of the Domain Admins group or have the appropriate privileges assigned to your account by your administrator. To verify the Kerberos Key Distribution Center (KDC), follow these steps:
Open Command Prompt as administrator. To do that, press Windows Key + X and select Command Prompt (Admin) from the menu.
When Command Prompt opens, enter certutil -dcinfo verify and press Enter to run it.
If the procedure is successful, reboot the domain controller and the server that you’re trying to connect to and the issue should be resolved.
7. Create a new DWORD
According to users, you can fix this problem by creating a new DWORD in the registry. To do that, follow these steps:
Start Registry Editor.
In the left pane navigate to the following Server key: HKEY_LOCAL_MACHINESYSTEMCurrentControlSetControlTerminal
In the right pane, right-click the empty space and choose New >DWORD (32-bit) Value.
Enter IgnoreRegUserConfigErrors as the name of the new DWORD and double-click it to open its properties.
Once the properties window opens, set the Value data to 1. Click OK to save changes.
8. Align the MaxTokenSize for the server
According to users, you should be able to connect to the server by using the mstsc.exe /admin command. After that, you need to align MaxTokenSize for this server and that should solve the issue.
9. Add domain users instead of Remote Desktop users
Users reported The remote connection was denied error on their PC while trying to use Remote Desktop feature, and according to them, they were unable to add Remote Desktop users for some strange reason.
To circumvent this issue, it’s suggested that you add domain users instead of Remote Desktop users. After doing that, this error should be fixed.
FIX: Remote connection denied because of username and password combination
1. Turn on CHAP and CHAPv2
Users reported this issue while trying to use VPN, and in order to fix it you’ll need to turn on CHAP and CHAPv2. By default Windows 10 disables these features, so you’ll need to enable them.
To do that, simply locate your VPN network, right-click it and choose Properties from the menu. Go to the Security tab and make sure that you check Microsoft Chap Version 2 (MS-CHAP v2). After doing that, click Apply and OK to save changes.
2. Use rasphone command
You can quickly connect to your VPN by using the rasdial command, but sometimes you can get The remote connection was denied error while using this command.
To circumvent this issue, users are suggesting to use rasphone command instead. To use it, simply start the command-line tool, enter rasphone -d “Your VPN connection name” and press Enter.
3. Create NTLMv2 Compatibility DWORD
You should be able to fix this problem by adding a certain DWORD to the registry. To do that, follow these steps:
Start Registry Editor and go to the HKEY_LOCAL_MACHINESYSTEMCurrentControlSetServicesRemoteAccessPolicy key in the left pane.
In the right pane, right-click the empty space and choose New > DWORD (32-bit) Value. Enter NTLMv2 Compatibility as the name of the new DWORD.
Double click NTLMv2 Compatibility DWORD to open its properties.
When the Properties window opens, enter 1 in the Value data field and click OK to save changes.
Close Registry Editor.
In case the error keeps occurring, another viable option is trying a different remote management software. Mikogo is a popular alternative that works well across multiple platforms. It comes with a free version which is enough for controlling one device at a time.
The remote connection was denied error can prevent you from using Remote Desktop or VPN, but we hope that you managed to fix this issue by using one of our solutions.
Remote Desktop is an ancient and nifty Windows tool that can make your life so much easier in many regards. With it, you can manipulate more than one Desktop via the Internet connection.
However, it’s not without its problems, especially when it comes to secondary monitors and DPI scaling.
For example, let’s say that you use a high-DPI monitor and try to duplicate it to monitor with lower DPI. An alternative monitor will project small icons, blurry screen, and barely readable interface.
In addition, it’s hard to address this issue with built-in system tools.
Luckily, there’s always a solution. Or multiple solutions, in this case. So, if you’ve experienced issues with DPI on your Windows 10 PC, follow the instructions below to resolve them successfully.
How can I fix DPI issues with Remote Desktop Protocol?
Windows will now check for updates and install them.
The first thing you should do is to make sure that your system is up to date. Additionally, all drivers need to be on point in order to experience optimal DPI transfer to an alternative, remote monitor.
Some users reported certain DPI issues after the major updates, so there’s a chance that these and similar problems may get resolved with the upcoming patches and cumulative updates.
So, make sure to install all of the updates that are provided trough Windows Update and hope for the best.
2. Log off prior to connecting peripherals
Another thing that’s quite important when it comes to any hardware changes, especially the ones related to monitors, is to log off before you connect peripheral devices.
So, log off, connect everything and log in again. That should resolve some of the DPI problems inflicted by changes of the hardware configuration.
In addition, make sure that everything is set as it should by following the instructions provided by the Remote Desktop Assistant application.
3. Use Manifest file
Press Windows Key + R, type regedit and press Enter.
Navigate to HKEY_LOCAL_MACHINE\SOFTWARE\Microsoft\Windows\CurrentVersion\SideBySide
Right-click in the right pane and choose New and select DWORD (32 bit) Value.
Name the newly created value PreferExternalManifest.
Double-click the PreferExternalManifest DWORD.
Select Decimal and change Value Data to 1.
Confirm changes and close the Registry Editor.
Now, after we dealt with Registry, open Notepad and paste the following:
Save the file and name it mstsc.exe.manifest. After you’ve done that, copy the file to this location:
C:\Windows\System32
Restart your PC and check for changes with the DPI scaling. This should resolve your problems.
Additionally, some users reported registry changes that occurred after an update and rendered this workaround unusable. What you got to do in that situation is to just repeat the steps we presented above and you should be good to go.
Note: This procedure demands some registry tweaks so make sure to backup your registry before we start with the steps.
To give you more options when you need to choose another way to do your work without disruption, we outlined the best screen-sharing software and apps to give you a fresh start with third-party assistance. One of these options that we strongly recommend is Mikogo, a reliable and safe remote desktop software.
With that, we conclude this article, and we hope that this guide helped you fix the Remote Desktop high DPI issues on your PC.
If you have any questions or alternative workarounds that solved the problem for you, make sure to tell us in the comments section below.
These updates particularly target Windows 10 users, since the security updates vary based on which version of Windows 10 they are running at any given time.
However, some updates stand out compared to others, since certain builds receiving long-awaited fixes for critical issues, while other updates break certain versions of Windows entirely.
However, there comes a round of Patch Tuesday updates that seem to be solely focused on fixing a string of current issues, and that seems to be the case with the April updates.
Recent Exchange Server attacks prompted immediate action
According to a Microsoft Security Response Center post, this months security updates focus primarily on dealing with a series of recent attacks that have affected Exchange Servers everywhere:
This month’s release includes a number of critical vulnerabilities that we recommend you prioritize, including updates to protect against new vulnerabilities in on-premise Exchange Servers.
These new vulnerabilities were reported by a security partner through standard coordinated vulnerability disclosure and found internally by Microsoft.
Because of this threat, and the severity of the CVEs associated with it, Microsoft advises that, given recent adversary focus on Exchange, users install the updates as soon as possible to ensure they remain protected.
One thing they did mention though is that customers using Exchange Online are already protected and do not need to take any action, since the web app is always the latest version.
Further details were given in the Exchange Release blog, such as which versions of Exchange Server were affected, and how applying the latest updates will affect your security and functionality.
This concludes our overview of this month’s Patch Tuesday Updates, and we hope those of you that use Windows 10, as well as Exchange Server, will now have a better idea of whether to apply these updates or postpone them a little while longer.
However, keep in mind that in two weekes Microsoft will release a new set of update that will usually act more as patchfixes than actual updates, so any problems you might find may be fixed by then.
All in all, there are very few exceptions when Patch Tuesday updates should not be applied, so if you don’t have any good reasons not to, go ahead and download and install them.
What do you think about this month’s Patch Tuesday updates? Let us know how you think applying this update will affect your Windows 10 experience by leaving us your feedback in the comments section below.
Now rolling out is Microsoft Edge Dev version 91.0.852.0. Expected to be the penultimate version 91 build (before a final one next week,) there’s nothing major to play with, but there are some added features, fixes and, reliability improvements we want you to be aware of. Here’s a look at what you need to know.
First off, added features. Microsoft says this release now finishes the rollout of Password Monitor. Microsoft also added the ability to open the History, Favorites, Downloads, etc. management pages by middle-clicking or ctrl+clicking their respective buttons on the toolbar or in the browser’s … menu, or by using the new entry in both of their respective context menus. See below for other added features.
Enabled Rebates when shopping by default now that it’s completed its rollout.
Enabled support for the management policy from Chromium to control the Import Startup Page Settings, which controls whether or not data import from another browser includes importing startup settings.
Enabled support for the management policy from Chromium to control the Import Startup Page Settings, which controls whether or not data import from another browser includes importing startup settings.
As for the reliability improvements, changed behaviors, there are some notable ones this week. First off, Microsoft fixed a crash when websites prompt for certain permissions like location. They also fixed an issue where opening a PWA or website installed as an app crashes the browser. Another fix relates to issues where certain extensions cause the browser to immediately re-open after it’s closed. Other reliability improvements, changed behaviors can be seen below, with the full list here at Microsoft.
Fixed a crash when interacting with the Downloads popup menu in an InPrivate window.
Fixed an issue where attempting to open Collections items in an InPrivate window when InPrivate is disabled via management policy causes a crash.
Fixed an issue where the Find On Page popup can sometimes cover up the address bar popup.
Fixed an issue where micro-feedback prompts sometimes are available even though the management policy to set if User Feedback is Allowed is set to Disabled.
Deprecated the management policy to Run All Flash In Allow Mode now that Flash is removed
Fixed an issue where Read Aloud sometimes doesn’t work on PDFs.
Fixed an issue where Read Aloud doesn’t work when the browser is displayed in certain languages.
Fixed an issue where 360 videos on YouTube sometimes don’t work.
Fixed an issue where logging into certain websites fails on older devices.
Once again, the known issues are the same as they have been the past few weeks. Nothing new to report on that end. But, what is new, is some notes on extensions. Microsoft is reaching out to developers and notes that if you’re a developer who is planning to ship an extension to the Add-Ons website, you can now have it featured on the main landing page.
Happy downloading and browsing, Edge Insiders! And remember to submit your feedback to Microsoft to help make Edge better for us all.
Minecraft doesn’t need any introductions, being an immensely popular game that’s being played every day by millions of people throughout the world. And of course, when you have that much pressure on servers and bandwidth, it’s inevitable that some errors will pop up.
Apparently, this time we’re talking about a chain of errors, as chatter from some Minecraft players seems to show. The first in line is the Piglin error code, but it seems to be linked with Parrot and Crossbow errors, as well. Here’s what one Reddit user has been saying:
As pointed out by the gamers, the error code Piglin occurs whenever they try to log in. If you’re a Minecraft player (disclaimer: I’m not, so be gentle with me), then you probably know by now what Piglins are. According to Fandom, they are neutral mobs found in the Nether. They attack players on sight unless the player is equipped with at least one piece of golden armor. Players can use gold ingots to barter with them for various items.
At least it’s nice that Minecraft’s developers didn’t decide to use incredibly dull error codes, just like Microsoft does.
However, it seems that in this particular case, the person who submitted the error isn’t actually happy about this naming choice. Parrot and Crossbow errors are just other instances of the Piglin one. There are some out there who got more exotic error codes, such as:
Error Code: Drowned
Error Code: Creeper
Error Code: Glowstone
Error Code: 9
Now, back to the issue at hand. From everything we’ve researched online…we couldn’t find anything else more valuable than suggesting you to do the following:
1. Keep trying to sign-in
I know, this is as silly as it can be, but from what affected Minecraft gamers have been saying, it could be a temporary glitch.
Sometimes, the servers just get overcrowded. Of course, you can also get in touch with Minecraft support through the following means:
However, it seems that if you go to the profile page on the settings screen to sign back in, this could work. Try that, as it seems to have helped a bunch.
2. Try a fix that applies to Xbox
From the looks of it, it seems that this particular error is pretty much the same as with the Xbox error code 0x80a40008, and since we’ve written about this a while ago, we would recommend you to check this nifty guide again.
I keep getting this error code called “Piglin” when trying to sign in to Minecraft for Nintendo Switch or aka Bedrock Edition and I have to countlessly click on it for it to work and it asks me to sign in again using the aka.ms link. Using Latest Version – 1.16.210. My question is how do I stop the error code from happening again? It happens everytime I open the game.
The suggestion here is to try the following guide directly from Xbox. When we first searched, there wasn’t an official support page, but apparently Xbox developers have become aware and made the guide available.
3. Update to latest Minecraft version
From the looks of it, it seems that the most affected users are those running an outdated version. So even if you’re on the Xbox or on the Nintendo Switch, make sure to be running the latest version there is.
Furthermore, there’s some evidence that the Bedrock Edition is the most affected; so you could try and stick with just one device of your choice, whenever that’s an option, of course.
4. Don’t switch networks
As we were saying early on, there seems to be a chain of errors, and the potential fixes for one should work for the whole bunch. As it turns out, and as it has been highlighted by someone on Reddit, you should try and abstain from switching network, and try to use just one:
Yeah, this morning I got Error Code Piglin (I’m on my switch lite) and I believe this happens when you switch networks. At least for me, when I swapped from my home wifi to my hotspot it said error code piglin and kicked me off. I closed and reopened the game. And had to go to https://aka.ms/remoteconnect again to log into my account. It works fine for me. Maybe go on the minecraft and/or microsoft forums if that doesn’t fix it.
5. Amazon Fire HD fix
If you’re running Minecraft on an Amazon Fire HD Kids with Freetime/Kids+, you can try and switch back to your parent account. From there, do the following:
Go to Settings
Child’s profile
Add content
Apps & Games
Then add the XBOX app
Various other fixes for Minecraft error codes:
Here’s a bunch of other stuff you can try too to fix these annoying errors:
Log out of your Microsoft account in Minecraft and clear sign in data. Then close Minecraft, reopen and log back in. Now go to the reconnect website and enter the code you’re provided with.
Stop switching been devices. We’re highlithing what we’ve previously mentioned -> if you can, play the game only on your PC or only on your consle.
Make sure to log into the Windows Store with the account that you redeemed the code to. If you login to Mojang Studios Account, look under “Minecraft: Windows 10 Edition Beta” and make sure that the code is marked as claimed.
NOTE
We are aware that the above fixes might not yet work for you, mainly because this seems to be a new chain of errors. We will keep searching and will update this article with more tips as we try them ourselves.
Champions League, the greatest football competition ever known to man, attracts millions of fans each year, from every corner of the world.
Tuesdays and Wednesdays have become sacred to many but a problem to some. Those who wish to watch the Champions League using a live stream on the PC may not even know where to start.
Well, today we’re going to showcase a couple of solutions that will cover online streams and channels for many countries, including the UK, USA, Canada, Australia, India, Germany, France, and not only.
Live online streaming of the UEFA Champions League is usually done through a paid network that owns the television rights for a particular country, but free solutions can also be found.
In regions where the Champions League is not officially offered, users will have to install a VPN software or a DNS changer which tricks the network into believing that the PC is located somewhere else.
This solution and other more ingenious will follow in the guide below.
How to watch UEFA Champions League live stream?
In a couple of words, the most sought of solutions are the free ones. Unfortunately, watching a free online stream of the UEFA Champions League usually implies poor viewing quality, interrupted sessions, and high latency.
Those that provide streams as such usually have a high number of users tuning in, but not the servers to support the load.
After these, buying a VPN service or installing a 3rd party software that changes your connectivity settings, is usually the preferred way to go.
This option works great for streaming soccer matches on wide-screen TVs as well, if they have a smart-internet browser.
For those who lack a TV set completely but still wish to know how to watch the Champions League constantly and in an old-fashioned way, the idea of a TV tuner is also described in this guide.
How to watch the official UEFA Champions League broadcast on PC?
Every year, television networks battle their competition to buy the rights for broadcasting the Champions League on cable television.
In some countries, this process is won exclusively by one network while in countries viewers have the option to tune in on two or three networks. Depending on the amount of money paid to UEFA, these options vary.
For instance, some companies obtain the right to relay every match played in that season, while others only chose to pay for serving the most anticipated match of the week.
Once the right to broadcast has been obtained, mostly all networks chose to stream football matches online, either through their official website or through a mobile application.
This is the option that we’re going to heavily rely on today as the main source of content, mainly because these live streams are of high quality, both audio and video while offering comments in the country’s natal language.
Moreover, users may have the option to save this match for later in their application or get professional insights on the game. Depending on the network, an application for smart TVs can also be available.
The main step in this guide is to locate the broadcast network which owns the UEFA Champions League streaming rights for your country.
Which networks stream Champions League in my country?
You can also check out the full list of the official UEFA Champions League broadcast partners in 2021.
Now, once you’ve selected the network available in your country, users will have to navigate to the official website and find the page which offers information related to the competition.
Usually, this type of service is not offered for free and it comes alongside a monthly plan, which has a discount for existing clients.
Thus, those who already have TV-cable services offered by the company in question will get streaming for free or for a discounted price.
Moreover, broadcast partners will offer viewers a free trial period in which the Champions League can be streamed online without cost.
Pretty straightforward until now, right? Well, what happens if none of these networks offer support for your country?
How to watch Champions League with VPN?
The idea is simple: your country does not have a UEFA-approved broadcast partner, so we trick the network into thinking that the user currently viewing the content is from another country.
For the sake of the argument, let’s say that a user from North Korea with access to the Internet wants to watch the Champions League games online, with English commentary.
By purchasing a VPN service (a virtual private network), that users would be able to bypass geo-restriction limits and change the country of access to the UK for example.
Then, he can browse the official BT Sports page, which owns the rights in England. From there, the user sets up an account and he’s ready to go.
Another case worth mentioning is traveling and migration, be it in the long term or the short term.
There are a lot of situations when a viewer is out of the country, be it on vacation purposes, job-related affairs or even enrolling as a student in another country.
In all of these situations, those who have an online account that permits them to watch the Champions League back home will be able to enjoy the same benefits abroad.
The process is simple and, in most cases, the user only has to buy the VPN service, install it and change the country. All the magic happens in the background. You could try PIA VPN for that purpose or check out other speedy VPN services.
The cheapest way to watch Champions League
While combining the price plans presented below with a VPN that can offer you a 3 or 6-months plan, you could alternate the payments between Champions League seasons and have all the matches a top-quality directly on your PC.
Because with a VPN solution you can virtually change the location to any country in the world, why not pick the one where UEFA Champions League is being streamed the cheapest?
From all the options explored we’ve found that nothing beats this price:
SonyLIV – the official partner for INDIA – comes with a plan of just $6.8 for an entire year. This is by far the cheapest option available.
To access it, go to the SonyLIV webpage and make sure you’re using a VPN redirected to India, otherwise you won’t be able to see the content.
Besides access to Champions League, SonyLIV users get access to the following programs as well:
UEFA Europa League
UEFA Nations League 2020-2021
Serie A: Full Impact
LaLiga World
LaLiga Show
ESPN FC Show
UEFA Super Cup
Inside Serie A
Just to compare, the cheapest official streams in the United Kingdom cost way more than that:
BT Sport for UK – $20.5 per month (the equivalent of £15), when you pay for a 24-month plan and a BT-broadband subscription is required.
In the United States, CBS has the Champions League rights. They are currently offering their CBS All Access service starting at $5.99 a month, but it is possible to even get a promotion.
Where to watch Champions League stream free?
Those that wish to watch Champions Leagues live using a free stream can appeal to a free streaming service.
There is a whole business constructed around this topic, with several sites taking content right from popular cable-TV broadcasting companies and putting it online.
From country to country, users can get access to Champions League matches for free, right on the day of the match.
The downside of these streaming services is usually the loading speed, the video resolution, the audio output, or the latency. Any of these issues can occur. This usually has to do with the quality of their servers.
If you rely on free streaming sites and run into buffering or outages, our CrackStreams not working guide explains quick fixes and safer alternatives.
Live streaming sites usually don’t require registration, but users may have to put up with commentary in a foreign language or frequent interruptions.
Also, some websites do impose geo-restrictions of their own so if you seem to encounter this issue as well, the workaround would be to buy a VPN service and change the country, as mentioned above.
Here are some worthy mentions:
Stream2Watch – free, no registration, instant access
TVPlayer – targets UK customers, offers free content, and a paid plan for extra features
BT Sport for UK – You will need a paid subscription
Taking into account that most of these streams are free, they usually tend to bring a hefty amount of ads into the equation. If you know other reliable services as well, leave a comment below and we’ll update our selection.
How to watch Champions League on YouTube and Twitch?
Bearing in mind that broadcasting networks own the rights to stream Champions League live, those who take that content and offer it publicly, without consent, are usually in trouble.
Therefore, streams with UEFA content can rarely be seen on popular live-streaming networks such as YouTube and Twitch. And rarely is the word to emphasize here.
With that in mind, there are a lot of people trying to stream live UEFA matches on the day of the event. When they get enough attention, someone alerts YouTube and they usually take it down.
While YouTube has a big copyrighting team and acts fast, there are times when users can even view one-half of the game before that happens.
How to watch Champions League on YouTube TV?
Another good option is YouTube TV. A newer service on the platform, YouTube TV streams online channels from over 60 networks, all USA-based.
Customers also get a cloud storage platform where they can keep matches and other recordings, with no bandwidth limits.
Especially for the Champions League, YouTube TV has a dedicated page where all details about the competition are shared.
For example, they offer support on how to view the upcoming Champions League matches online, with high-quality streaming.
A downside would be that this service is only available in the USA at this moment according to the YouTube page. Don’t forget that using a VPN, as described above, may get you around this geo-restriction.
With a price tag of $40/month, YouTube TV may be a bit expensive, but it comes with a wide range of advantages. For instance, the stream is high quality and with no interruptions.
Besides Champions League matches, users also get access to non-related sports channels, such as network-specific channels, news, entertainment, kids shows, educational documentaries, and movies.
On top of that, users can stream YouTube TV on a wide range of devices, including smartphones, tablets, PCs, smart TVs, Xbox One consoles, or streaming boxes such as Roku and Amazon Fire Stick.
Twitch
On the other hand, Twitch is a better place to see a soccer match than the regular YouTube. This is mostly because they are a smaller player than YouTube.
Particular users transmit sporting events live and a big part of these users are created overnight, right before the game. Our advice is to search for the match that interests you, right before it starts.
How to use a TV tuner for Champions League?
A bit old-fashioned, using a TV tuner on the PC is still a viable way to go. The scenario is simple: the user doesn’t have a TV or doesn’t want to use it and the computer is the only way to go.
All of these without making compromises on stream speed, video and audio quality, image lag, or continuous broadcast.
Essentially, owning a TV tuner is the way to transform a regular PC into a television set.
All that needs to be done is to buy the TV tuner (basically, it’s another board that can be attached to the mainboard), install it, and then purchase a regular TV subscription.
Some companies even offer a USB-based one, which can be used on laptops as well.
Moreover, TV tuners have evolved and now you can use a wireless one for mobile devices as well. Again, a subscription will be needed here as well.
Here are a couple of suggestions for a TV tuner:
HDTV tuner – a convenient solution that attaches over the mainboard
Hauppauge WinTV-DualHD – recommended by Amazon, offers streaming over USB; very easy to install
Those that do not have a conventional broadcasting plan but still wish to watch UEFA Champions League on their TV sets can do so simply.
The best deal is to use an online subscription to a broadcasting channel, as explained above, and then stream it on the TV.
If the user has a smart TV and the broadcaster has a dedicated application for TVs, then all that remains is to install it and hit play.
Alternatively, if there is no dedicated app for that, the user will have to start the Internet browser on the TV and manually navigate onto the website in question. From there, simply start the live stream as it was on the computer.
Another case is when the user has a TV but no smart support. Here, a streaming box will come in hand. Here’s a shortlist of options:
Above all these solutions, when the user reaches the Internet with these streaming solutions, the location may be a problem like before.
Even with the TV, geolocation restrictions come in place and the best way to avoid that is by adding a VPN service on top.
Some VPN providers offer specialized services for streaming boxes. For instance, Cyberghost also supports Amazon Fire Stick.
We hope that our guide has helped you enjoy your favorite Champions League game whether you’re using your PC or your mobile device.
And while you’re watching it, you might also be interested in one of the best soccer statistics software and keep a close eye on the evolution of the competition.
You can also try using Sportzfy TV on PC to watch sports content, and we have a great guide on how to install it.
If you have any ideas or suggestions, don’t hesitate to drop us a line in the comments section below.
If you are using RDP also known as Remote Desktop Protocol to connect to other Windows devices you might have stumbled upon the license related message:
The remote session was disconnected because there are no Remote Desktop client access licenses available for this computer. Please contact the server administrator.
So if you want to find out how to fix the license message in Windows 10 you only have to follow the tutorial posted below.
How can I fix the Remote Session was disconnected error on Windows 10?
Remote Desktop is a useful feature, but sometimes certain issues with it can appear. As for Remote Desktop issues, these are some of the most common problems that users reported:
Remote session was disconnected because there are no remote desktop – This is a relatively common problem that can occur with Remote Desktop. However, you should be able to fix it by configuring your network settings.
Remote session was disconnected because license store – This error can occur due to your computer policies. However, you can fix that problem by modifying your group policy settings.
Remote session was disconnected license modified – According to users, this error can appear if your license is modified. To fix the problem, you might have to make few changes in your registry.
Remote session disconnected error licensing protocol – This is another error message that can appear while using Remote Desktop. To fix it, be sure to try some of our solutions.
Remote desktop disconnected requires network level authentication – Several users reported this error, but according to them, they fixed it by changing their Remote Desktop settings.
Remote desktop disconnected this computer can’t connect, client could not connect – This issue can appear due to third-party applications such as your antivirus. If you’re having this problem, try changing your antivirus settings and check if that helps.
1. Delete the MSLicensing key
The reason why you get this license message when trying to connect with Remote Desktop Protocol is that the TS also known as the Terminal Server cannot find the License Server in the system.
For us to fix this license-related message and get your RDP up and running you will have to apply some registry tweaks to the operating system.
According to users, sometimes a Remote session was disconnected message can appear if there are problems with your registry.
Several users reported that a single key can cause this error to appear, and in order to fix that issue, you need to find and delete this key. To do that, just follow these steps:
Press Windows Key + R, enter regedit and press Enter or click OK to start Registry Editor.
When Registry Editor opens, navigate to the following location and expand it: HKEY_LOCAL_MACHINESoftwareMicrosoft
Now locate the MSLicensing key, right-click it and choose Delete from the menu.
Click Yes to confirm.
After removing the registry key, check if the problem still appears.
2. Configure Licensing mode and Licensing server
Press Windows Key + R and enter gpedit.msc. Now click OK or press Enter.
In the left pane, navigate to: Computer Configuration Administrative Templates Windows Components Remote Desktop Services Remote Desktop Session Host Licensing
In the right pane, select Use the specified Remote Desktop license servers or Set the Remote Desktop licensing mode. Configure both of these policies and save changes.
Save changes and restart your PC. After doing that, check if the problem is resolved.
If you want to know more about how you can edit the Group Policy, check out this article.
3. Run Remote Desktop as administrator
According to users, if you’re getting Remote session was disconnected error message, you might be able to fix it simply by running Remote Desktop Client as administrator. To do that, just follow these steps:
Locate Remote Desktop Client shortcut.
Right click the shortcut and choose Run as administrator from the menu.
If this method works, you’ll have to use it every time you want to run Remote Desktop. Alternatively, you can also set Remote Desktop to always run with administrative privileges. To do that, follow these steps:
Locate Remote Desktop Client, right-click it and choose Properties from the menu.
Go to the Compatibility tab and check Run this program as an administrator option. Now click Apply and OK to save changes.
After doing that, Remote Desktop will always start with administrative privileges.
If you’re an advanced user, you can also start Remote Desktop as an administrator by running a single command. To do that, just follow these steps:
Press Windows Key + R to open the Run dialog.
When the Run dialog opens, enter mstsc /admin and press Enter or click OK to run it.
4. Modify your registry
According to users, you can sometimes this error simply by making a few changes to your registry. To do that, just follow these steps:
Start Registry Editor. To see how to do that, check the first solution of this guide.
Optional: Since modifying the registry can be potentially dangerous, it’s advised to back up your registry before making any changes. To do that, go to File, and clickExport. In Export range select All, enter the desired file name and click the Save button.
In the left pane, navigate to HKEY_LOCAL_MACHINESYSTEMCurrentControlSetControlTerminal ServerRCMGracePeriod
Expand the RCM key, and locate the GracePeriod key. Now delete or rename the GracePeriod key. Keep in mind that you’ll need to take ownership of this key before you can modify it.
After doing that, check if the problem still persists.
5. Check your antivirus
Your antivirus is a crucial component, but sometimes your antivirus software can interfere with components of Windows and cause a Remote session was disconnectederror to appear.
However, you might be able to fix that problem simply by changing your security policies.
If changing the policies doesn’t solve the problem, you might have to remove your antivirus. To be sure that your antivirus is completely removed, we advise you to use a dedicated uninstaller application.
Many antivirus companies offer uninstallers for their software, so be sure to download one for your antivirus.
For the Norton users, we’ve got adedicated guideon how to completely remove it from your PC. There’s asimilar guidefor McAffe users, as well.
If you’re using any antivirus solution and you want to completely remove it from your PC, be sure to check outthis amazing listwith the best uninstaller software you can use right now.
Once you remove your antivirus, check if the problem still persists. If removing the antivirus solves the problem, you might want to consider switching to a different antivirus solution.
There are many great antivirus applications available on the market, and if you’re looking for a new antivirus, we advise you to try Bitdefender. All these tools offer great features, so feel free to try any of them.
6. Check your startup applications
As previously mentioned, sometimes third-party applications can interfere with Remote Desktop feature and cause Remote session was disconnected error to appear.
To fix this problem, you need to find the problematic application and remove it from your PC. To find the problematic application, you need to do the following:
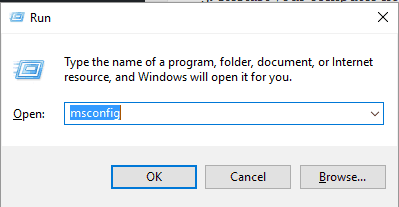
Press Windows Key + R and enter msconfig. Now click OK or press Enter.
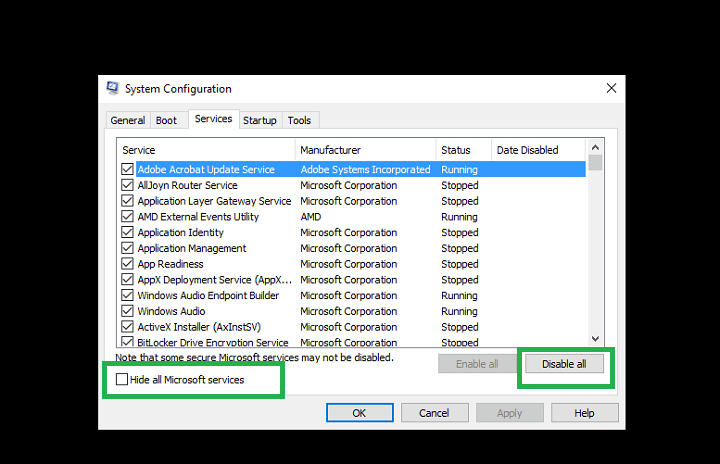
The System Configuration window will now appear. Navigate to the Services tab, check the Hide all Microsoft services option and click on Disable all.
Navigate to the Startup tab and clickOpen Task Manager.
A list of all startup applications will now appear. Right-click the first item on the list and choose Disable from the menu. Repeat this step for all startup items on the list.
After doing that, close Task Manager and go back to the System Configuration window. Click on Apply and OK to save changes.
After your PC restarts, check if the problem still persists. If not, it means that one of your startup applications or services is causing the problem.
To fix the issue, you need to enable disabled applications or services one by one or in groups. Keep in mind that you need to restart your PC every time after enabling a set of services or apps in order to apply the changes.
After you find the problematic application or service, you can keep it disabled, remove it or update it to permanently solve the problem.
If none of the measures above resolved the problem, we strongly advise you to use a web access remote platform to let you connect via screen sharing. Mikogo is great for providing the best remote support.
And there you have it, a quick way on how to solve the license-related message when you try to connect with Remote Desktop Protocol in Windows 10 to another device.
If you’re interested in more info on how to fix Remote Desktop licensing protocol errors, we’ve written extensively on the subject. Just check out this complete article and find all the additional info you need.
We also covered No healthy upstream issue in another guide, so don’t miss it.
If you do have other questions related to this subject and you need our help please write us in the comments section of the page situated below and we will help you further as soon as possible.
Now that the 13th of April is here and it’s past 10 AM PST, Microsoft has just released their newest round of monthly updates called the April Patch Tuesday Updates.
For those of you that don’t know, Patch Tuesday updates are an important part of the Windows update experience, since they bring tones of fixes and enhancements to the OS, along with security improvements.
Well, this month’s updates are no different, and not only will we be including detailed changelogs for each cumulative update, but we will also be providing you with direct download links to the Windows Update Catalog.
This is so that you can get the updates as soon as they become available, even if they aren’t yet available in your region.
Changes included in the April Patch Tuesday Updates
As of the writing of this article, Windows 10 v20H2 is the latest major version of Windows 10, and as such has the most experimental features on it.
Fortunately, most bugs that were first present when it was first made available have been weeded out, and this version of Windows 10 is far more stable.
That being said, you should upgrade to this version as soon as possible if your hardware allows it (the system requirements are the same as with Windows 10 v2004).
Addresses an issue in which a principal in a trusted MIT realm fails to obtain a Kerberos service ticket from Active Directory domain controllers (DC). This occurs on devices that installed Windows Updates that contain CVE-2020-17049 protections and configured PerfromTicketSignature to 1 or higher.
These updates were released between November 10, 2020 and December 8, 2020. Ticket acquisition also fails with the error, “KRB_GENERIC_ERROR”, if callers submit a PAC-less Ticket Granting Ticket (TGT) as an evidence ticket without providing the USER_NO_AUTH_DATA_REQUIRED flag.
Addresses an issue with security vulnerabilities identified by a security researcher. Because of these security vulnerabilities, this and all future Windows updates will no longer contain the RemoteFX vGPU feature. For more information about the vulnerability and its removal, see CVE-2020-1036 and KB4570006.
Secure vGPU alternatives are available using Discrete Device Assignment (DDA) in Windows Server LTSC releases (Windows Server 2016 and Windows Server 2019) and Windows Server SAC releases (Windows Server, version 1803 and later versions).
Addresses a potential elevation of privilege vulnerability in the way Azure Active Directory web sign-in allows arbitrary browsing from the third-party endpoints used for federated authentication. For more information, see CVE-2021-27092 and Policy CSP – Authentication.
Security updates to Windows App Platform and Frameworks, Windows Apps, Windows Input and Composition, Windows Office Media, Windows Fundamentals, Windows Cryptography, the Windows AI Platform, Windows Kernel, Windows Virtualization, and Windows Media.
Known Issues:
System and user certificates might be lost when updating a device from Windows 10, version 1809 or later to a later version of Windows 10.
Devices will only be impacted if they have already installed any Latest cumulative update (LCU) released September 16, 2020 or later and then proceed to update to a later version of Windows 10 from media or an installation source which does not have an LCU released October 13, 2020 or later integrated.
This primarily happens when managed devices are updated using outdated bundles or media through an update management tool such as Windows Server Update Services (WSUS) or Microsoft Endpoint Configuration Manager. This might also happen when using outdated physical media or ISO images that do not have the latest updates integrated.
Tip
When using the Microsoft Japanese Input Method Editor (IME) to enter Kanji characters in an app that automatically allows the input of Furigana characters, you might not get the correct Furigana characters. You might need to enter the Furigana characters manually.
Tip
Devices with Windows installations created from custom offline media or custom ISO image might have Microsoft Edge Legacy removed by this update, but not automatically replaced by the new Microsoft Edge. This issue is only encountered when custom offline media or ISO images are created by slipstreaming this update into the image without having first installed the standalone servicing stack update (SSU) released March 29, 2021 or later.
Addresses an issue in which a principal in a trusted MIT realm fails to obtain a Kerberos service ticket from Active Directory domain controllers (DC). This occurs on devices that installed Windows Updates that contain CVE-2020-17049 protections and configured PerfromTicketSignature to 1 or higher.
These updates were released between November 10, 2020 and December 8, 2020. Ticket acquisition also fails with the error, “KRB_GENERIC_ERROR”, if callers submit a PAC-less Ticket Granting Ticket (TGT) as an evidence ticket without providing the USER_NO_AUTH_DATA_REQUIRED flag.
Addresses an issue with security vulnerabilities identified by a security researcher. Because of these security vulnerabilities, this and all future Windows updates will no longer contain the RemoteFX vGPU feature. For more information about the vulnerability and its removal, see CVE-2020-1036 and KB4570006.
Secure vGPU alternatives are available using Discrete Device Assignment (DDA) in Windows Server LTSC releases (Windows Server 2016 and Windows Server 2019) and Windows Server SAC releases (Windows Server, version 1803 and later versions).
Addresses a potential elevation of privilege vulnerability in the way Azure Active Directory web sign-in allows arbitrary browsing from the third-party endpoints used for federated authentication. For more information, see CVE-2021-27092 and Policy CSP – Authentication.
Security updates to Windows App Platform and Frameworks, Windows Apps, Windows Input and Composition, Windows Office Media, Windows Fundamentals, Windows Cryptography, the Windows AI Platform, Windows Hybrid Cloud Networking, the Windows Kernel, Windows Virtualization, and Windows Media.
Known Issues:
System and user certificates might be lost when updating a device from Windows 10, version 1809 or later to a later version of Windows 10.
Devices will only be impacted if they have already installed any Latest cumulative update (LCU) released September 16, 2020 or later and then proceed to update to a later version of Windows 10 from media or an installation source which does not have an LCU released October 13, 2020 or later integrated.
This primarily happens when managed devices are updated using outdated bundles or media through an update management tool such as Windows Server Update Services (WSUS) or Microsoft Endpoint Configuration Manager. This might also happen when using outdated physical media or ISO images that do not have the latest updates integrated.
According to Microsoft, users that still have the Home, Pro, Pro for Workstation, and IoT Core editions of Windows 10 V1809 should know that it reached End of Service back in November 2020.
That is why it is advised that you update your OS to a newer, supported version.
Addresses an issue in which a principal in a trusted MIT realm fails to obtain a Kerberos service ticket from Active Directory domain controllers (DC). This occurs on devices that installed Windows Updates that contain CVE-2020-17049 protections and configured PerfromTicketSignature to 1 or higher.
These updates were released between November 10, 2020 and December 8, 2020. Ticket acquisition also fails with the error, “KRB_GENERIC_ERROR”, if callers submit a PAC-less Ticket Granting Ticket (TGT) as an evidence ticket without providing the USER_NO_AUTH_DATA_REQUIRED flag.
Addresses an issue with security vulnerabilities identified by a security researcher. Because of these security vulnerabilities, this and all future Windows updates will no longer contain the RemoteFX vGPU feature. For more information about the vulnerability and its removal, see CVE-2020-1036 and KB4570006.
Secure vGPU alternatives are available using Discrete Device Assignment (DDA) in Windows Server LTSC releases (Windows Server 2016 and Windows Server 2019) and Windows Server SAC releases (Windows Server, version 1803 and later versions).
Addresses a potential elevation of privilege vulnerability in the way Azure Active Directory web sign-in allows arbitrary browsing from the third-party endpoints used for federated authentication. For more information, see CVE-2021-27092 and Policy CSP – Authentication.
Security updates to Windows App Platform and Frameworks, Windows Apps, Windows Input and Composition, Windows Office Media, Windows Fundamentals, Windows Cryptography, the Windows AI Platform, Windows Hybrid Cloud Networking, the Windows Kernel, Windows Virtualization, and Windows Media.
Known Issues:
After installing KB4493509, devices with some Asian language packs installed may receive the error, “0x800f0982 – PSFX_E_MATCHING_COMPONENT_NOT_FOUND.”
Microsoft first announced that Windows 10 v1803 will reach the end of mainstream support, and starting with July there wouldn’t be any more optional, non-security releases for this version of Windows 10.
This security update includes quality improvements. Key changes include:
Updates the default values for the following Internet Explorer registry keys:
svcKBFWLink = “” (empty string)
svcKBNumber = “” (empty string)
svcUpdateVersion = 11.0.1000.
In addition, these values will no longer be updated automatically.
Updates the Volgograd, Russia time zone from UTC+4 to UTC+3.
Adds a new time zone, UTC+2:00 Juba, for the Republic of South Sudan.
Addresses an issue with security vulnerabilities identified by a security researcher. Because of these security vulnerabilities, this and all future Windows updates will no longer contain the RemoteFX vGPU feature. For more information about the vulnerability and its removal, see CVE-2020-1036 and KB4570006.
Secure vGPU alternatives are available using Discrete Device Assignment (DDA) in Windows Server LTSC releases (Windows Server 2016 and Windows Server 2019) and Windows Server SAC releases (Windows Server, version 1803 and later versions).
Addresses an issue that prevents you from specifying up to 255 columns when you use the Jet Text installable indexed sequential access method (IISAM) format.
Security updates to the Windows App Platform and Frameworks, Windows Apps, Windows Input and Composition, Windows Office Media, Windows Fundamentals, Windows Cryptography, the Windows AI Platform, Windows Hybrid Cloud Networking, Windows Kernel, and Windows Media.
Known Issues:
Microsoft is not currently aware of any issues with this update.
Note:Windows 10, version 1607 has reached the end of service for all of its available editions. Update to the latest version ofWindows 10in order to keep your system protected.
This security update includes quality improvements. Key changes include:
Updates the default values for the following Internet Explorer registry keys:
svcKBFWLink = “ ” (string with one empty space)
svcKBNumber = “ ” (string with one empty space)
svcUpdateVersion = 11.0.1000.
In addition, these values will no longer be updated automatically.
Address an issue that causes a system to stop working occasionally when users sign out or disconnect from remote sessions.
Addresses an issue with a heap leak that might cause explorer.exe to consume high amounts of memory.
Updates the Volgograd, Russia time zone from UTC+4 to UTC+3.
Adds a new time zone, UTC+2:00 Juba, for the Republic of South Sudan.
Addresses a race condition that causes PowerShell to stop working periodically and generates an Access Violation error. This issue occurs when you enable transcription on the system and run multiple PowerShell scripts simultaneously.
Addresses an issue that causes the sleep time defined in HKLM\Software\Microsoft\AppV\MAV\Configuration\MaxAttachWaitTimeInMilliseconds to be shorter than intended.
Addresses an issue in which a principal in a trusted MIT realm fails to obtain a Kerberos service ticket from Active Directory domain controllers (DC). This occurs on devices that installed Windows Updates that contain CVE-2020-17049 protections and configured PerfromTicketSignature to 1 or higher.
These updates were released between November 10, 2020 and December 8, 2020. Ticket acquisition also fails with the error, “KRB_GENERIC_ERROR”, if callers submit a PAC-less Ticket Granting Ticket (TGT) as an evidence ticket without providing the USER_NO_AUTH_DATA_REQUIRED flag.
Addresses an issue with high memory usage when performing XSLT transforms using MSXLM6.
Addresses an issue in spaceport.sys that might cause stop error 0x7E.
Addresses an issue with evaluating the compatibility status of the Windows ecosystem to help ensure application and device compatibility for all updates to Windows.
Addresses an issue with security vulnerabilities identified by a security researcher. Because of these security vulnerabilities, this and all future Windows updates will no longer contain the RemoteFX vGPU feature. For more information about the vulnerability and its removal, see CVE-2020-1036 and KB4570006.
Secure vGPU alternatives are available using Discrete Device Assignment (DDA) in Windows Server LTSC releases (Windows Server 2016 and Windows Server 2019) and Windows Server SAC releases (Windows Server, version 1803 and later versions).
Addresses an issue that prevents you from specifying up to 255 columns when you use the Jet Text installable indexed sequential access method (IISAM) format.
Security updates to Windows Apps, Windows Input and Composition, Windows Office Media, Windows Fundamentals, Windows AI Platform, Windows Hybrid Cloud Networking, the Windows Kernel, and Windows Media.
Known Issues:
After installing KB4467684, the cluster service may fail to start with the error “2245 (NERR_PasswordTooShort)” if the group policy “Minimum Password Length” is configured with greater than 14 characters.
This security update includes quality improvements. Key changes include:
Updates the default values for the following Internet Explorer registry keys:
svcKBFWLink = “ ” (string with one empty space)
svcKBNumber = “ ” (string with one empty space)
svcUpdateVersion = 11.0.1000.
In addition, these values will no longer be updated automatically.
Updates the Volgograd, Russia time zone from UTC+4 to UTC+3.
Adds a new time zone, UTC+2:00 Juba, for the Republic of South Sudan.
Addresses an issue with security vulnerabilities identified by a security researcher. Because of these security vulnerabilities, this and all future Windows updates will no longer contain the RemoteFX vGPU feature. For more information about the vulnerability and its removal, see CVE-2020-1036 and KB4570006.
Secure vGPU alternatives are available using Discrete Device Assignment (DDA) in Windows Server LTSC releases (Windows Server 2016 and Windows Server 2019) and Windows Server SAC releases (Windows Server, version 1803 and later versions).
Addresses an issue that prevents you from specifying up to 255 columns when you use the Jet Text installable indexed sequential access method (IISAM) format.
Security updates to Windows Apps, Windows Input and Composition, Windows Office Media, the Windows AI Platform, Windows Fundamentals, Windows Hybrid Cloud Networking, Windows Kernel, and Windows Media.
Known Issues:
Microsoft is not currently aware of any issues with this update.
This completes our articles covering the latest changes to come this Patch Tuesday. Depeinding on what version of Windows 10 you’re running, applying the latest cumulative updates may seem more or less appealing.
However, if you value your PC’s security and don’t want to fall victim to things like Exploit Wednesday or Uninstall Thursday, you should get the latest updates as soon as possible.
Speaking of getting the updates, manually installing the cumulative updates via the Windows Update Catalog isn’t the only means of updating your PC.
Remember that you can update your Windows 10 Pc by using the following methods:
The Windows Update menu on your OS
The WSUS (Windows Server Update Service)
Group Policies set up by your admins if you’re part of a larger network.
Alternatively, there’s also the option of postponing the updates until you see more promising changelogs.
Amazon’s Alexa Xbox skill just got a bit smarter. As reported by The Verge, it is now possible to ask and use the virtual assistant to download Xbox Game Pass games to a home Xbox console.
As you’d expect, this requires an active Xbox Game Pass subscription to work, for you to connect the Xbox skill to Alexa, and for you to enable virtual assistants on your Xbox console. You also need to live in the United States, as it is the only country where this is supported. More markets are planned for the future, though.
Anyway, if you’re already set up with Alexa on Xbox, though, no additional setup is needed. You can simply summon Alexa on any device, and say “Hey Alexa download [name of the game] on Xbox Game Pass” to get started.
The assistant will then read the terms and conditions of the game, and ask you if you want to download it. You should then see the game download on your console right away once you say “Yes.” Other than this, you also can use Alexa to ask about what’s popular on Xbox Game Pass, or what’s leaving the Xbox Game Pass service.
We tried out the skill using Alexa on our iPhone to install Forza Horizon 4 on our home Xbox. It is pretty seamless and quick, even more so than using the dedicated Xbox Game Pass app due to voice support.
It is great to see this feature come to Xbox consoles, especially after Amazon debuted a dedicated Alexa app on Xbox One. That app brings the top Alexa features to TVs to play music, view smart home cameras, manage shopping lists, and a lot more.
Microsoft has announced that it is bringing the new modern commenting experience in Microsoft Word to more platforms. Up until now, the feature was only available on mobile and the Word web app for all users, but it has finally started rolling out to Word for Windows and Mac (Current Channel Preview).
“Modern comments sets the stage for a richer Word collaboration experience for you and your teams by enabling modern features such as @mention notifications and more. It aligns how comments work across Office on different endpoints, so that you and your team can rely on a consistent experience regardless of whether you’re using Word, Excel, or PowerPoint on any platform,” the company explained.
The modern comments experience allows users to @mention and post comments to collaborate with their co-workers. Users will be able to respond to comments directly from an email notification and edit, delete or resolve a comment thread from within the comment. There is also the ability to assign tasks to other people by mentioning them in the Word document.
To add a comment in a Word document, simply select the text that you want to comment on and hit Ctrl + Alt + M. The comments pane will instantly appear on the right side of the screen, and it will let you type it in. Finally, click the “Post comment” button to publish it.
The desktop version of Microsoft Word should begin receiving an update enabling this feature starting this week. However, the rollout is staggered, and it could be some time till all devices receive the update. Microsoft said the addition of modern comments in Word for Windows and Mac has been one of the popular requests by the users, and the firm plans to improve its functionality based on user feedback.
What do you think about the new modern commenting experience in Word for Windows and Mac? Let us know in the comments down below.
Firewalls and your antivirus software may prevent you from being able to perform a system restore.
System Restore is used to create restore points when you install new applications on your computer, drivers, or Windows updates. It can also be done when you create restore points manually.
Although it isn’t recommended to permanently turn your computer’s antivirus security software off, doing this temporarily will troubleshoot the antivirus blocking System Restore on your computer.
If your computer or device is connected to a network, the network’s policy settings may prevent you from turning off your firewalls and antivirus software.
However, when you uninstall or disable your antivirus program, do not open any email attachments or click links in messages from unknown people.
Also, keep in mind that all the below tips may prove helpful when dealing with any of these issues:
System Restore not working due to antivirus – The error that you are getting is probably because of the antivirus program that’s running on the computer. Temporarily disable it or try out a more reliable solution that will keep you away from such issues
System Restore did not complete successfully Windows 10 antivirus – Users often complain about the same error message, and they are clearly entitled to suspect that the antivirus has an impact on the procedure: System Restore did not complete successfully. Your computer’s system files and settings were not changed
System Restore could not access a file – Once again, don’t be surprised that this is probably caused by the antivirus you’re using; the steps above are waiting to be applied
System Restore process failed – The antivirus may sometimes prevent running the procedure, but don’t worry; this issue isn’t here to stay
Immediately after you’re done fixing the error, we recommend you re-enable your antivirus and firewall in order to protect your PC from viruses.
How do I fix antivirus blocking System Restore error?
1. Try out another antivirus software
If your current antivirus is causing you issues, you may consider using another one that is fully compatible with Windows 10.
TotalAV antivirus will never block System Restore procedures due to its small system footprint and background running tools.
Plus, it is a modern antivirus tool, AI-powered, meaning that it is constantly learning how to provide your computer with better security against cyber threats without affecting your system.
2. Boot in Safe Mode then try to perform a system restore
Boot in Safe Mode
Click on the Start button and select Settings.
Click Update & Security.
Select Recovery from the left pane.
Go to Advanced startup.
Click Restart now.
Select Troubleshoot from the Choose an Option screen, then click Advanced options.
Go to Startup Settings and click Restart.
Once your computer restarts, a list of options will come up.
Choose 4 or F4 to start your computer in Safe Mode.
Safe mode starts up your computer with limited files and drivers but Windows will still run. To know whether you’re in Safe mode, you’ll see the words Safe Mode at the corners of your screen.
If the antivirus is still blocking System Restore, check whether it occurs while your computer is in Safe mode. Follow the above steps to start your computer in Safe Mode.
Perform a System Restore
While in Safe Mode, click Start.
Go to the search field box and type System Restore.
Click Create a restore point.
Press the System Restore button.
Then click Next.
Select a restore point created before you experienced the problem.
Click Next, then Finish.
Restoring doesn’t affect your personal files. It however removes apps, drivers, and updates installed after the restore point was created.
Is your antivirus still blocking the System Restore while in Safe Mode? If it does, then we recommend you try the next solution.
3. Uninstall and reinstall your current antivirus
Sometimes it helps to uninstall your antivirus and reinstall the correct version for the Windows 10 operating system.
After you uninstall the antivirus, you should download the newest version compatible with Windows OS from the official website.
The newest versions are more comprehensive regarding cybersecurity protection, have multiple features, and work better with your computer.
Try uninstalling and reinstalling it, and see if it fixes the antivirus blocking System Restore problem, or try the next solution.
However, uninstalling an antivirus is not always flawless. These tools can leave behind files called leftovers that can interfere with other software.
Fortunately, you can use an uninstaller tool that will help you completely remove your antivirus without leaving any residual files behind.
If you manage to boot in Safe Mode, perform a clean boot to eliminate any software conflicts that may be causing the System Restore problem in Windows 10.
Performing a clean boot for your computer reduces conflicts related to software that can bring up the root causes of the problem.
These conflicts can be caused by applications and services that start up and run in the background whenever you start Windows normally.
You will have a clean boot environment after all these steps are carefully followed, after which you can try and check if you can perform a System Restore.
Right-click on MRT and select Run as administrator.
Give administrator permissions or click Yes to allow.
Does this help fix the antivirus blocking System Restore problem? If not, perform an SFC scan as described in the next solution.
6. Perform a system file checker scan
Click Start.
Go to the search field box and type CMD.
Select Command Prompt.
Right-click and select Run as Administrator.
Type sfc/scannow.
Press Enter.
Restart your computer.
A System File Checker scan checks or scans all protected system files, and then replaces the incorrect versions, with the genuine, correct Microsoft versions.
If you still get the antivirus blocking System Restore problem, try performing an automatic repair in Windows Recovery Environment (WinRE) as described in the next solution.
7. Perform an Automatic Repair in Windows Recovery Tool
Insert Windows DVD or System Repair Disc.
Boot Windows Technical Preview from the installation media.
After you boot, a black screen will display with grey text that reads Press any key to boot from CD or DVD. Press any key.
Select the correct Time and Keyboard type.
Click Repair your computer.
Select Troubleshoot from the blue Choose an option screen.
Select Automatic Repair, then choose the operating system.
A blue screen will appear with an option to choose from. Choose Troubleshoot.
Select Advanced options.
Choose Automatic Repair from the Advanced boot option.
Follow the prompt’s instructions. Windows will search for problems on the hard drive(s) and verify that all required files are intact.
Using Windows 10 installation media, you can use Automatic Repair to detect and fix any problems that block System Restore.
Such problems include drivers, program conflicts, your antivirus program, malware, and memory.
However, if you do not have installation media, you can download and create Windows 10 installation media, then follow the steps above to perform the Automatic Repair.
8. Repair files through Command Prompt
Insert Windows DVD or System Repair Disc.
Boot Windows Technical Preview from the installation media.
After you boot, a black screen will display with grey text that reads Press any key to boot from CD or DVD. Press any key
Select the correct Time and Keyboard type.
Click Repair your computer.
Select Troubleshoot from the blue Choose an option screen.
Select Advanced options.
Click Command Prompt.
Type these commands and press Enter after each line of command:
Bootrec /fixmbr
Bootrec /fixboot
Bootrec /scanos
Bootrec /rebuildbcd
If the automatic repair doesn’t help, try using commands through the Command Prompt by doing as described above.
Open it then select the type of scan you want to run.
Start the scan.
Review scan results on the screen, which lists all malware identified on your computer.
To remove the Microsoft Safety Scanner tool, delete the msert.exe file by default.
When a virus infects your computer, it makes the machine’s performance slow down greatly. Running a virus scan means any infected files may be cleaned by deleting the file completely.
Microsoft Safety Scanner is a tool designed to locate and remove malware from Windows PCs. It only scans when manually triggered, then you get to use it 10 days after you download it.
This means you need to download the latest version of the tool before you perform each scan on your computer.
However, the Microsoft Safety Scanner tool doesn’t replace an antivirus, thus, you can use the recommended antivirus from above or any of these reliable security tools.
Did any of these solutions resolve the antivirus-blocking System Restore problem? Let us know in the comments section below.
The more horizontal tabs you open, the more website titles get cut off and tab controls shrink to make room to display more websites. You will spend more time trying to find, manage, and switch between tabs. Vertical tabs make it easier to view, organize, and close tabs so you can browser the web faster.
Here’s what you need to do to turn on this feature in Microsoft Edge.
Turn on (and off) vertical tabs in Microsoft Edge
In Microsoft Edge, enter the following into your URL address bar: edge://settings/appearance
By entering this in the address bar, you will be taken directly to the Microsoft Edge Appearance settings.
From here, make sure that the Show vertical tabs button toggled on to display the button in Microsoft Edge. Now you can toggle vertical tabs on and off on the fly by clicking the button in the upper left as shown.
Once you turn on this feature, you will see your websites disappear from the regular horizontal layout to a more manageable sidebar on the left.
Art the moment, this feature only works in Microsoft Edge on Windows 10; there is no way to enable it on Android or iOS. Microsoft has recently updated Edge in its Canary channel to provide more personalization of this feature. It may take a bit of time to get used to using tabs displayed vertically, but once you start this feature, it’s hard to go back.
Using a third-party antivirus solution is more than recommended especially if you are an active Windows 10 user who is always trying new apps and downloading different stuff from the web.
Only with the right antivirus programs installed, you can successfully protect your data and your identity. Unfortunately, in most situations the built-in Windows Defender program might not be enough as a more specialized software platform will be better for you.
Anyway, while in most situations the antivirus program is there to protect your Windows 10 device, in others its functionality might become quite annoying.
Think of the following scenario: you want to use an external USB device, so as usual, you plug it in; but, strangely the USB device isn’t recognized by your Windows 10 system, or if it is you cannot access it.
So, if the antivirus is indeed blocking the USB device, follow the guidelines explained below and learn how to re-enable the USB access within the antivirus built-in settings.
I’ve tried to cover the steps that should be followed for the most popular antivirus programs that are currently available, though similar procedures can be applied to almost any other security software that’s not included in the following list.
How do I stop my antivirus from blocking USB devices?
1. Stop ESET HOME Security Essential from blocking USB devices
Disconnect the USB device.
Open ESET HOME Security Essential.
Disable the firewall and real-time system protection.
Enable and disable real-time system protection.
Re-connect the USB device.
Check if the problem has been solved.
ESET HOME Security Essential
ESET HOME Security Essential keeps your computer protected from online threats and removes malware from your operating system.
Go to Policies and choose Create new Policy from the left side of the main Bitdefender Management Console.
Double-click on Device Scanning.
Now, from that window choose how to handle a new, or an existing, USB connection from your antivirus.
You can also add exclusions for a certain USB device if you know that the data stored there can be trusted. Here is what you need to do:
Launch Bitdefender and choose Protection.
From there click on View Features.
Go to Settings and click on Exclusions.
Similarly, you can add a Network exclusion and manage what to do with other devices that are connected to your Windows 10 device.
In other words, Bitdefender comes with great features that can be used for choosing how the USB devices are controlled by the antivirus each time a new USB connection is detected.
Bitdefender
Block all advanced malware that can damage your PC with Bitdefenders’ unmatched threat detection.
From the left panel of the main window access Protection.
Click on Device Control and select Settings.
Again, click on Settings from the right of Enable Device Control field.
From there you can choose what to enable or what to block.
Additionally, you can add certain exceptions following these settings. Open Settings, click on Additional, then on Threats and exclusions, choose to Configure exclusion rules, and Add.
Kaspersky Bundle
Maintain your device safe using Kaspersky’s AI-based protection against the latest viruses.
6. Removable Media Scan feature in Norton Security
With Norton, if the Removable Media Scan feature is enabled, the antivirus program will automatically scan any external device that’s connected to your computer.
So, if you think that Norton is blocking the USB, you should first disable the already-mentioned feature. You can do that from Settings, then Antivirus option.
Norton
A security program with anti-spyware, antivirus, malware, and ransomware protection for your PC.
A list will be displayed where you can choose what to scan.
You can perform a scan for the USB device in order to ensure that there is nothing to worry about.
In the end, you should be able to use the USB Device once more.
So that’s how you can re-enable USB access when external USB devices are blocked by antivirus programs.
Remember that the easiest way in which you can access your external device is by temporarily turning off the antivirus protection. Then, you will be able to use your USB device.
Though, you should do that only if you know for sure that all the files from that device don’t represent a security threat.
As already outlined, if you’re using different antivirus software from the already covered ones, don’t panic as you can use similar steps for obtaining the same result.
However, if you cannot find the right settings within your antivirus tool, tell us and we will try to assist you as soon as possible.
All these new accessories seem to be designed for the new work from home era, and they’re also not using the Surface brand, which usually commands a more premium pricing. Microsoft’s Modern Webcam will cost $69.99, and it will come with a 1080p sensor that should be good enough for most remote workers. Key features include support for HDR and autofocus, as well as a “True Look” technology providing auto white balance, auto light adjustment, and facial retouch.
Microsoft’s Modern Webcam is also certified for Microsoft Teams, and it also comes with an LED indicator and an integrated piracy shutter that covers the camera lens when the webcam is not in use. It will start shipping in just with a $69.99 price, and you can learn more about it on the Microsoft Store.
To complement its new Surface Headphones 2+ for Business, the company will also launch the more affordable Microsoft Modern USB and Wireless Headsets, which are both certified for Microsoft Teams. Both headsets will include a dedicated Teams button, a physical mute button, and a LED indicator. The Microsoft Modern USB and Wireless Headsets will start shipping in June, with prices starting at $49.99 for the USB model.
Lastly, Microsoft also unveiled the Microsoft Modern USB-C speaker today, which is designed for Teams meetings and casual music listening. “Designed with the same intuitive controls as our Modern USB Headset and certified for Microsoft Teams, the Modern USB-C Speaker helps you improve and manage your Microsoft Teams meeting experience with a powerful speaker driver, dual microphones and intuitive controls and indicators,” explained Pete Kyriacou, VP, Microsoft Devices.
There’s no mention of a Cortana integration, but with a $99.99 pricing, this clearly isn’t a competitor to the cheap Alexa or Google Nest speakers. Just like the Microsoft Modern Webcam and the Microsoft Modern USB and Wireless Headsets, the Modern USB-C Speaker will start shipping in June in select markets.
Microsoft has been making PC accessories for many years now, but this is the first time we’re seeing the company release new accessories tailored for the virtual meeting experience. As Microsoft Teams has remained one of the company’s fastest-growing apps since the beginning of the COVID-19 pandemic, we’re probably going to see a lot more accessories that are certified for Microsoft Teams in the future.
Microsoft has announced a bunch of new features and capabilities that aim to streamline approval requests in Teams. Most of these updates are already available, while the rest are slated for release later this month. The first new feature that the company highlighted today is the ability to create approval requests with an electronic signature natively within the new Approvals app.
“Now, key partners like Adobe Sign, DocuSign and other 3rd party providers allow you to create an electronic signature approval natively within the Approval app. With this new feature, approvers can add their signature without leaving Teams, enabling an efficient and faster approval process. Once the approval process is completed, the information is stored in Teams, and you can easily access the approval record and view the eSignatures,” the company explained. eSignature support will begin rolling out at the end of this month.
Next up, Microsoft Teams is introducing customizable templates in the Approvals app this month. Thanks to this feature, team owners and IT Admins will get the ability to create new templates quickly, customize and publish them for common approval requests like overtime and expense reports. This should make it easier for end-users to create and submit an approval request right from Microsoft Teams.
Microsoft has also launched some other new features, including new attachment capabilities. Teams users can now attach a generic link or any relevant files directly from OneDrive and SharePoint while creating an approval request. In addition, the company has introduced markdown support in the detail’s view and adaptive cards of the app.
Finally, the app has added new “Approve” or “Reject” buttons on the adaptive cards, allowing users to accept or reject requests from within chats or channels. Microsoft noted that these buttons would only be visible to select users who have permission to respond to the approval request. If you’re interested to learn more about these updates, you can check out the official blog post.
Today’s Inspiron unveiling marks the third device announced by the Dell within the first two weeks of April and based on their showing at CES 2021, there is still more to come.
Dell’s refreshed Inspiron lineup comes with five specialized variants that include the Inspiron 13, 14, 14 2-in-1, 15, and 16 Plus. The Inspiron 13, 14 & 15 are relatively identical in design with a spec sheet that includes:
11th Generation Intel processors with configurations from Core i3-1125G4 and Core i5-11300H up to Core i7-11370H.
AMD Ryzen 5000 U-Series Mobile Processors
128GB, 256GB, 512GB, 1TB and 2TB M.2 PCIe NVMe Solid State drives
11hrs and 16min battery life (for 13.3″ models)
Fingerprint reader in the power button
Lid-open sensor
Intel Iris Xe, NVIDIA GeForce MX450, and GTX or RTX graphic options
Adaptive thermals
Thunderbolt 4 ports
Dolby Vision support
HDR display support
3K ComfortView Plus resolution
16:10 FHD or QHD displays with Anti-Glare panels with narrower borders
8GB or 16GB LPDDR4x 4267MHz memory.
1.3mm key travel
Spill-resistant blacklight
Platinum Silver, Mist Blue, Peach Dust, Pebble Green color options
The main difference between the Inspiron 13, 14, & 15 models is highlighted in their display size, respectively.
Dell also boasts about Inspiron’s updated thermal management system that, “unleashes the power of your device while also preserving its thin design. Depending on your configuration; two to three fans, three or five heat pipes, and four vents work together for optimal heat dispersion.”
The other big changes coming to the Inspiron lineup is Adaptive Connected Modern Standby which improves on previous iterations as well as ExpressCharge Boost which enables charging from 0% to 35% in as little as 20 minutes.
Dell’s most popular laptop is getting even better. Announced today is the option for a new OLED display on XPS 13 models.
This new display option fits into the same 16:10 aspect ratio and 4-sided narrow bezel frame as you’d expect from the new XPS 13, but will come at a $300 upcost from the standard FHD display option. It comes in with a maximum brightness of 400 nits and sports a 100% DCI-P3 color gamut. Naturally, OLED also means more vibrant colors and contrasts, too, over the traditional display panels on other laptops. This makes it a great option for photographers.
Officially, Dell says the new OLED display on the XPS 13 comes in with a 3456 x 2160 resolution. Dell is calling this “3.5.” resolution, but you’ll still find a 4K+ LED option if you want more pixels. Note that the OLED panel, is touch, too.
Elsewhere, the XPS 13 with OLED screen will feature Intel’s 11th generation processors under the hood, options for 8GB, 16GB, 32GB of RAM, and up to 2TB of PCIe SSD storage. It is now available for purchase.
Windows 10’s Remote Desktop enables users to connect with a remote PC. However, a local security authority error can arise for some users when they try to set up, or log in to, a remote desktop connection.
The full error message states:
An authentication error has occurred. The local security authority cannot be contacted.
As a consequence, a remote connection can’t be established.
How can I fix Local security authority cannot be contacted?
1. Check that Remote Desktop is enabled
First, check that the basic Remote Desktop setting is enabled.
To do that, click Windows 10’s Type here to search taskbar button.
Input the keywordremote desktop settings in the search box.
Click Remote Desktop settings to open further options.
Then toggle the Enable Remote Desktop setting on if it’s off.
Then select the Allow remote connections to this computer setting if you need to .
Deselect the Allow connections only form computers running Remote Desktop with Network Level Authentication (recommended) option if it’s checked.
Click the Apply option.
Click OK to exit the window.
Users have confirmed they’ve fixed the local security authority error by deselecting the Allow connections only from computers running Remote Desktop with Network Level Authentication setting.
Click Administrative Templates on the left side of Group Policy Editor.
Then click on Windows Components and go to Remote Desktop Services.
Expand Remote Desktop Services and choose. Remote Desktop Session Host. Now select Connections.
Double-click Allow users to connect remotely by using Remote Desktop Services to open the window for that policy.
Select the Enabled radio button.
Click Apply to save the new settings.
Click OK to close the policy window.
Restart Windows after enabling Remote Desktop Services.
Some users might need to enable Remote Desktop Services with the Group Policy Editor on client PCs.
5. Flush DNS Cache
Some users have also resolved this issue by flushing the DNS cache. To do that, enter cmd in Windows 10‘s search box.
Select Run as administrator on the menu.
Click Yes if a UAC dialog box opens.
Input this command: ipconfig/flushdns
Press Enter to initiate that command.
If the error keeps occurring, we recommend switching to alternative software. Here’s a list of some of the best remote management software.
Those are some of the resolutions users have fixed the local security authority error with. So, there’s a good chance that they’ll fix the same issue for you.
Let us know which of the solutions solved this issue for you by leaving us a message in the comments section below.
Not all users have upgraded to Windows 10, even after Microsoft announced that all support for Windows 7 has ceased.
While this upgrade is something you will have to do eventually, environments, where the two OS coexist, are not unheard of.
Because of that, having PCs with different OS works together can be crucial. For example, some users may need to do a Remote Desktop connection from a Windows 7 PC to a Windows 10 PC.
The problem is that this isn’t always the case, and some users have reported having issues with performing an RDC between two PCs:
I have windows 10 Pro V1803 Build 17134.48, and I have three other PCs with Windows 7 SP1. […] After the windows recent update from MicrosWindows10, I can not RDP from windows 7 to windows 10 any more…. I still can RDP from Windows 10 to Windows 7 but I cant do RDP from Windows 7 to windows 10. it gives me error that the computer is not in the network or RDP is not enable.
Solutions were soon to follow, and because of that, we’ve compiled a list of all the things that you can do to enable RDPs between Windows 7 PCs and Windows 10 PCs.
How do I enable Windows 7 to Windows 10 RDPs?
1. Make sure Remote Desktop Protocols are enabled on the Windows 7 PCs
Press Start and go to Control Panel.
Click System and Security, then choose System.
Select Remote settings and go to the Remote tab.
Check Allow Remote Assistance connections to this computer.
Check Allow connections from computers running any version of Remote Desktop (less secure).
Click OK.
If these options are not enabled on the Windows 7 PC, no remote connection is possible from other computers. So, make sure to check both of them.
2. Enable Remote Desktop in Windows 10
Press Start and choose Settings.
Select System and from the left pane go to Remote Desktop.
Toggle On the option under Enable Remote Desktop.
This option enables you to receive incoming remote connections and also to use the computer to connect to other PCs by using the Windows tool or dedicated software.
3. Keep your Windows 10 PC updated
Press Start and select Settings.
Select Update & Security.
Click Check for Updates, or Install Updates if your PC already has pending updates.
It is a well-known fact that KB4103721 was known to affect RDPs. As such, it is highly advised that you update your Windows 10 PC to the latest version because subsequent updates managed to fix the issue.
If Windows update cannot currently check for updates, there is an issue with the update service. Take a look at our dedicated guide in order to fix the problem.
4. Allow RDPs through the Windows 10 Firewall
Press Star and search Windows Defender Firewall. Select it.
Select Allow an app or feature through Windows Firewall.
Click Change Settings.
Check the boxes next to Remote Desktop.
Windows Defender Firewall is a great built-in security feature. You can manage its settings, allowing or disabling access to some applications.
If Windows Defender is not working, we recommend you take a look at our comprehensive guide on how to fix this serious issue.
By following these steps, you should be able to perform Remote Desktop Protocols between Windows 7 and Windows 10 PCs.
If still, the mentioned solutions couldn’t help, we suggest you try one of the best remote support, Mikogo, which allows you to access the PC having connection issues. The IT assistance tool allows for immediate access and control of the situation.
Among the new items added to the Xbox Gear Shop were an official Age of Empires IV T-Shirt and jumper (see top image), a canvas, a pint glass, a mouse pad, and a premium print.
The Age of Empires IV canvas and print are interesting additions as they’re both the first kind of wall art added to the online store. This could mean that more high quality artwork based on Xbox video games is on the way which would definitely be interesting. Here’s hoping that whatever future artwork is added excludes the promo text from the images though.
TeamViewer is a proprietary remote control and desktop sharing app that is available in non-commercial as well as commercial versions.
If you have selected commercial or both of the above options during installation, TeamViewer will display your trial has expired error after 15 days of installation.
Additionally, TeamViewer will automatically classify your usage as commercial if the system it is installed on is running Microsoft Windows Server operating system.
Now, if you have accidentally selected the commercial version during installation, then here is how to get rid of this error and reinstall TeamViewer.
In this article, we show you how to fix the TeamViewer trial has expired error in Windows and continue using the app without any issues.
How do I fix the TeamViewer trial has expired error?
1. Uninstall and reinstall TeamViewer
Press Windows Key + R to open Run.
Type controlpanel and click OK to open Control Panel.
From the list of installed apps, select TeamViewer.
Click on Uninstall and then click Yes to confirm the action.
Wait for Windows to uninstall TeamViewer from the system.
Once TeamViewer is uninstalled, we need to remove all the leftover files associated with the software. If not, during installation, TeamViewer will recognize the software to have been installed before and will show the same error.
1.1 Clean TeamViewer files
Open File Explorer and navigate to the following location: C:\Users\username\AppData\Roaming
In the Roaming folder, right-click on the TeamViewer folder and select Delete.
Click Yes if prompted by UAC.
Next, navigate to one of the following locations: C:\Program FilesC:\Program Files (x86)
Delete the TeamViewer folder if it exists.
Once you have deleted all the TeamViewer related folders, proceed to clear the registry entries.
1.2 Clean TeamViewer registry entries
Press Windows Key + R to open Run.
Type regedit and click OK to open Registry Editor.
In Registry Editor, go to the following location: Computer/HKEY_CURRENT_USER/Software/TeamViewer
Right-click on TeamView key and select Delete.
Next, navigate to the following location: Computer/HKEY_LOCAL_MACHINE/SOFTWARE/WOW6432/Node/TeamViewer
Once you have deleted the corresponding keys, close Registry Editor.
The TeamViewer trial has expired error occurs if the trial period for the commercial version has ended or if the user accidentally installed the commercial version.
You can fix the issue by uninstalling the software and cleaning the TeamViewer files, followed by reinstallation.
Bitdefender Box is a great firewall device for your home, but if you’re not a fan of it, you might be interested in a Bitdefender Box alternative.
In this article we’re going to show you a couple of great firewall devices for home that will be a great replacement for Bitdefender Box, so let’s get started.
What is the best Bitdefender Box alternative to buy?
This device supports bandwidth up to 100Mbits which should be enough for smaller networks. Thanks to the Intrusion Prevention System, all devices in your network, both wired and wireless, will be protected.
Firewalla Red also has a built-in OpenVPN server, that will protect your privacy. Thanks to the Family Protect feature, you can limit network usage for certain users, block websites, or see their browsing history.
Firewalla Red is incredibly simple to use, and you can set it up even if you’re not an IT expert thanks to the dedicated mobile app.
Supports up to 100Mbps bandwidth
Protects your entire network against online threats
Fingerbox is designed to block intruders and malicious users before they can access your network and cause damage. This is achieved by scanning for open ports and vulnerabilities and warning you about them.
Thanks to the Digital Presence feature, you can easily see if household members are home and connected to the home network. For extra security, there’s a Digital Fence feature that will show you unknown devices around your home network.
With Fingerbox you can easily schedule Internet access for certain devices, and thanks to the Parental Control feature, you can easily block any harmful website.
Supports up to 100Mbps bandwidth
Protects your entire network against online threats
Another great Bitdefender Box alternative is RATtrap. This device requires no configuration, and you just need to connect it to your router and you’re good to go.
Once you set it up, RATtrap will continuously monitor your Internet traffic and protect all your network devices from malware.
Additional features such as parental control and ad-blocking are also there, so you can limit Internet usage or block malicious websites.
Offers speed up to 300Mbps
Requires zero configuration
Secures all network devices
Web browsing protection
Real-time notifications
Doesnu2019t work with DSL/PPPoE broadband services
GRYPHON protects your network against the latest online threats. The device will scan all your network devices for vulnerabilities, and to top it off, there’s also the Intrusion Detection and Malware Filtering feature from ESET.
Thanks to the dedicated app, you can easily use parental controls and limit Internet usage, view browsing history, filter harmful content, and enable safe search for your kids.
GRYPHON is an AC3000 device, and it comes with 6 high-powered antennas, 2.4GHz and 5GHz support, and 3 Gigabit ports.
If you’re looking for a Bitdefender Box alternative, you might want to consider Trend Micro Home Network Security. This device will monitor your Internet usage in real-time and protect you against all threats.
Regarding protection, there’s protection against phishing, ransomware, malware, and even a blocker for malicious websites and files.
Parental control feature is also available, allowing you to easily block social media, inappropriate content, and set time limits on network usage.
Trend Micro Home Network Security is easy to install and manage, so you can easily disconnect unwanted devices from your network, or block new devices from joining.
It’s no secret that Chromium-based browsers are becoming very popular among users, especially because of the open-source nature of the engine.
However, this doesn’t mean that the system is flawless, one perfect example being the fact that many YouTube users have reported audio issues whenever they watch videos through them.
Google and Microsoft have confirmed that they’re working together on fixing audio issues and providing enhancements for Chromium-based browsers, but not just for their own Microsoft Edge, but also Google Chrome.
YouTube complaints regarding the audio have been on the rise
Google revealed that there has been a significant rise in complaints on YouTube regarding a variety of issues, and after looking over all of them, they’ve narrowed down the issue to 3 probable causes:
Users may have accidentally muted YouTube
The output device may have been changed
This can happen if, for example, users have two monitors, but only one audio connection
Windows 10’s drivers.
Microsoft and YouTube will collaborate to fix the audio issue
The most feasible culprit for the Chromium-YouTube issues seems to be the drivers as both Microsoft’s native and third-party drivers have been known to cause issues with YouTube audio.
Besides, using devices such as HDMI monitors with independent volume, USB sound cards and others of the sort do nothing but further worsen the issue.
As such, both Microsoft and Google will start collaborating in order to test out the various compatibilities between drivers and the Chromium browser.
This adds getters/setters as well as notifications for the status of the application-level volume for Chromium
They went further, adding the following:
This allows Chromium-based browsers to develop solutions for user pain points that arise from having muted Chromium or having lowered its volume from system menus, then forgetting about the changes. Also, when other applications make these changes and Chromium UI does not reflect it
Unfortunately, everything is in mere testing phase, and there is no definitive roadmap as to when these changes will hit live, and therefore become available to the common user.
Have you been experiencing issues with YouTube’s audio? If so, let us know if you’re excited about these two developers joining their resources to fix the issue.
If you want to learn more about the latest developments in the tech world, let us know by leaving us a message in the comments section below.
Fans have been speculating Microsoft is in preparation for a Springtime Surface event that could be host to a new Surface Laptop 4, headphones, pens, and other accessories.
Today, Microsoft stoked the flames of conspiracy with a teaser video posted to its official Microsoft Surface Twitter account. In the 1:31 long video, Windows, and Surface hardware lead Panos Panay narrates the dedication and design the engineering teams have put into all Surface hardware. However, there is an overall emphasis during the video placed on the Surface Laptop which culminates in several shots at the end of various people making use of the clamshell device.
There is no date or timeframe associated with the video, but it seems perfectly reasonable that Panay and his team are ready to showcase the latest version of the Surface Laptop within the next couple of weeks.
Admittedly, Spring lasts until mid-June and the company could drag this whole marketing ploy until then, but as we’ve repeatedly reported, most of the specs and pricing have already leaked for a potential Surface Laptop 4, the only thing left to really report on is its official existence. From its spec bump-like processor upgrade to its potential new color, much of the Surface Laptop 4’s news has been covered over the past month, which has many, arguably, hoping for a little bit more from the company if and when they unveil its flagship laptop which includes talk of new webcams, removable SSD, and more.
We’ll be keeping an eye on the internet in the coming days to see if and when Microsoft might be ready to ship and sell its latest flagship laptop to the masses.
Do you keep getting a notification that says Check your virus protection on your Windows 10 computer?
It can be quite irritating to repeatedly see such a nagging message when you try to sign in or while working on your computer.
There are several ways to fix the virus protection notification from popping up all the time on your Windows 10 computer. To be more precise, here are seven tried solutions to help you resolve this issue.
What to do if I get the Check your virus protection error?
1. Temporarily disable your antivirus security software
Right-click Start.
Click Control Panel.
Select System and Security.
Click Security and Maintenance.
Click Change Security and Maintenance Settings to change the settings for both Windows Defender and your installed third-party antivirus program.
Whenever you install a third-party antivirus protection program on the Windows operating system, Windows Defender shuts off automatically.
You can temporarily disable the antivirus because you still need it to protect your computer against security threats. Immediately after you’re done fixing connection error, re-enable your antivirus.
Make sure to apply the above procedure to stop the constant notification alerts.
We also recommend switching to antivirus software that is trusted by people around the world. Thankfully, there are lots of premium products you can choose from.
TotalAV
TotalAV is an error-free and secure tool that will keep you safe and your data private.
Performing a clean boot for your computer reduces conflicts related to software that can bring up the root causes that lead to the Windows 10 check your virus protection error to keep popping up.
These conflicts can be caused by applications and services that start up and run in the background whenever you start Windows normally.
In order to successfully perform a clean boot, you have to be logged on as the administrator, then follow the steps above.
Learn everything there is to know about the administrator account and how you can enable/disable it by reading this quick article.
You will have a clean boot environment after all these steps are carefully followed, after which you can try and check if the Check your virus protection notification persists.
Review scan results on the screen, which lists all malware identified on your computer.
When a virus infects your computer, it makes the machine’s performance slow down greatly, and can also lead to system failure.
Therefore, running a malware scan means any infected files may be cleaned by deleting the file completely, so you may experience data loss.
Microsoft Safety Scanner is a tool designed to locate and remove malware from Windows PCs. It only scans when manually triggered, then you get to use it 10 days after you download it.
This means you need to download the latest version of the tool before you perform each scan on your computer. However, the Microsoft Safety Scanner tool doesn’t replace your antimalware program.
It helps remove malicious software from your Windows 10 computer. Then, to remove the Microsoft Safety Scanner tool, delete the msert.exe file by default.
5. Check if the antivirus is updated
Go to the Start menu on your computer.
Choose All programs, followed by your antivirus tools.
Select SecurityCenter.
When the SecurityCenter opens, you should see a green tick with the messageYou are protected or something similar.
If not, click the Update button to update it manually.
This involves checking whether the virus definitions on your installed third-party antivirus program are up to date.
NOTE
Keep in mind that the UI you will be different depending on the antivirus software you have.
6. Turn on Windows Defender and Firewall
Click Start.
Type Windows Defender.
Check whether its status says On.
Next, right-click Start.
Select Control Panel.
Click System and Security.
Select Windows Firewall.
Click Turn Windows Firewall On or Off on the left pane.
Ensure it is turned On.
Additionally, you should read this thorough guide if you are unable to open the Control Panel.
7. Schedule a scan on Windows Defender
Click Start.
Go to the search field box and type Schedule Tasks.
Open it from the Search results.
On the left pane, click Library Task Manager to expand it.
Click Microsoft, then Windows.
Scroll down, then double-click the Windows Defenderfolder.
Double-click the top middle pane on the Windows Defender Scheduled Scan.
Go to Scheduled Scanning (Local Computer) > Properties.
Select the Triggertab.
Go to the lower part of the window.
Click New.
Specify the frequency the scans should run, and when they should start.
Click OK.
Windows Defender already scans your device regularly to keep it protected, but you can schedule it to scan based on the frequency you want it to so that it doesn’t become nagging and disturb you as you work.
You just need to follow the steps above to schedule a scan on Windows Defender right away.
Let us know in the comments section below whether these solutions worked to remove the nagging check your virus protection notification on your computer.
A number of Norton Security Antivirus users have reported seeing the Your computer has a fix in progress message pop up, and the software gets stuck here.
This can become extremely annoying in time, as the pop-up keeps popping up randomly, and will not allow you to use your antivirus software normally.
After we performed our research regarding this issue, it seems that it is an error caused by Norton Antivirus not being able to complete its update.
This happens in Windows 10, and the only way to install the updates is by shutting down the PC. The error occurs after the update is initiated and it seems to get stuck showing that pop-up due to a glitch.
In today’s article, we will discuss the best methods to deal with this issue, and get full access again to your antivirus software. Read on to find out how to do it.
How can I fix Computer has a fix in progress Norton error?
1. Shut down your PC
Click on the Start button inside your taskbar.
Click on the Power button at the lower left side of your screen.
Select the Shut Down option and wait for your PC to be completely turned off.
Wait for a couple of minutes, and then turn your PC on again.
This should have given Norton a chance to install the lagging update, and the pop-up should disappear. If it doesn’t, please follow the next method.
If your Windows 10 computer doesn’t want to shut down, you have a serious issue. However, you can fix it using the solutions from our dedicated guide.
2. Turn Fast Startup off
Press Win+R hotkeys on your keyboard to open the Run dialog box.
Type powercfg.cpl then hit Enter.
Inside the Power Options window, click Choose what the power buttons do from the menu on the left of your screen.
Scroll down until you find Shutdown settings and un-tick the box for Turn on fast startup.
Click on Save changes and check to see if the issue is resolved.
If the options mentioned above are greyed out and you can’t select them, click on the Change settings that are currently unavailable option.
After you’ve read the license agreement, click Agree.
Select the option Remove & Reinstall.
Click Continue or Remove (varies depending on the version).
Select the Restart Now option when prompted.
Follow the on-screen instructions to reinstall Norton.
Run the Live Update after and reboot your PC again.
Norton Remove and Reinstall is a dedicated tool that helps you to easily reinstall the antivirus software on your Windows 10 computer.
Firstly, it will uninstall Norton and after the computer restarts, it will automatically install the latest version of the antivirus. This can be really helpful for the error.
4. Use another reliable third-party antivirus
Norton antivirus is one of the best security tools, but, if you are struggling with issues, you may consider using another reliable and error-free solution.
This tool is trusted by millions of users and will protect your PC against all types of malware, ransomware, and other online threats you can think of.
Additionally, it doesn’t require many resources from your PC, meaning that your computer won’t be slower.
Moreover, with its Gamer Mode, you can rest assured that no other computer program or pop-ups will disturb you while playing.
The new AI-powered feature enables Microsoft Teams users to share content side by side with meeting participants. “We have redesigned the meeting stage in order to optimize your experience of consuming shared content and engaging with video and audio participants. Dynamic View ensures that important items like audio/video thumbnails, content, pins/spotlights are shown as large as possible on your screen by smartly moving and resizing them based on the scenario,” the company explained.
The feature is enabled by default in the public preview channel of Teams for all desktop users. Microsoft noted that this update introduces a new optimized visual experience in Teams Meetings, and users will see the following improvements:
The app will automatically optimize the layout to enlarge the shared content, with more participants being visible.
Users can spotlight/pin particular participants in the meeting alongside the presentation to make their tiles larger than other participants.
The meeting stage will show video and audio participants separately, and audio-only attendees will appear in smaller tiles.
The Together Mode will appear alongside content during meetings.
Users can now dock the participant gallery to the top of their screen to improve eye contact with other people.
The new capability has been designed to improve the existing meetings experience in the Teams desktop app, which only displays the video feed of the speaker in a tiny frame when watching shared content. Do you think that the Dynamic View will help improve the visibility of the shared content and key participants during meetings? Sound off in the comments down below.
It doesn’t matter if you are talking about editing home videos, music videos, or gaming videos, you will always need the best video editor on the market if you want the best results.
As such, if you want your epic gaming moments to seem even more jaw-dropping, then you might as well use Adobe Premiere Pro.
Compile the best cutscenes together with this timeline-based video editor, add an epic soundtrack that will go well with the video, throw in some special effects, and more.
All of the above is something you can easily do, along with much more, thanks to Adobe Premiere Pro.
Here are some of the perks of using Adobe Premiere Pro:
Familiar timeline-based UI
Works well with other video editing tools like Adobe Spark or Adobe After Effects
Can easily import images from Adobe Photoshop or Adobe Illustrator
Projects can be easily resumed for editing even after you finish them
It can be tested out for free for 7 days.
Adobe Premiere Pro
Edit your videos with the help of this tool’s fantastic features and share them afterwards on your social media.
Gaming is all about having fun, and the same can be said about when you want to record your favorite gaming moments and create killer montages.
Well, with AceMovi Video Editor, things will be easy again, all thanks to the lightweight build of this program, and the simplistic and intuitive interface.
In fact, AceMovi has all the tools you may ever need to make a great gaming video from start to finish:
You can use it to record your screen while gaming
You can spice things up with great animations and transitions
You can cut, crop, rotate and mirror footage in whatever manner you want
Include yourself into your videos thanks to green-screen support
Import external media to add to your video
Export your finished products to cloud, external storage media and even social media platforms, and more!
AceMovi Video Editor
Record, compile, and create the ultimate gaming videos with the help of this complete video editing tool!
As one of the most powerful software for video editing, Corel VideoStudio cannot miss our list of recommendations under no circumstances.
This tool is very easy to use and comes packed with innovative and extremely useful features that will make video editing feel like a walk in the park.
Corel Video Studio will help you easily turn all your favorite memories into movies or smart slideshows, depending on what you are looking to create.
You can combine photos, videos, and even audio on multiple tracks and not to mention the 1,500 creative filters and effects that will enhance your final result.
Corel VideoStudio
Turn your memories into movies and have fun while creating them with this fantastic and easy to use tool.
When it comes to creating professional-looking videos and with amazing visual effects, then VideoPad is definitely worth giving a try.
VideoPad comes with over 50 transitions and visual effects while allowing you to adjust the speed, the inserted portions, and drag and drop videos for easier video editing.
It is one of the fastest programs on the market at this point and you can also burn videos to DVD and watch them on your TV.
VideoPad
Create professional looking videos easily with this powerful tool and share them instantly with your friends and family.
Blender, as it says, gives users the creative freedom with their game videos. It’s a free yet powerful game editing software that comes packed with features.
The software covers all features that are useful for animators, 3D printing, VFX, games developers, etc.
While it offers tools for animation, modeling, simulation, VFX, game creation, and more, it also offers a basic range of very powerful tools for video editing.
The software helps users carry out basic activities like video cutting and splicing, and also intricate tasks like video masking.
Live previews, histogram displays, audio mixing, speed control, adding video, images, audio, effects, etc. are some of its major features.
Filmora, by iSkysoft is an exceptional video editing software that’s especially useful for gamers. It comes with both the traditional and the cutting-edge editing tools.
The software is highly popular for its powerful video editor that enables users to customize game videos.
The program helps users to make some of the mind-blowing video clips using it special filters, effects, and designs.
Moreover, it also features standard templates, transitions, amazing sound effects, and much more. In addition, it works with various file formats and offers assurance to generate premium gaming video content.
Windows Movie Maker is an effective video editing software that lets users create movies from music, images, video clips.
It offers some elemental features like video trimming, inserting background music or text caption, and also more advanced ones like image filter, and transition effects.
It’s the simplest, yet powerful and cost-effective movie maker and video editing app available. Some of its significant features are:
Creating movies from images and video clips
Options to trim, rotate, join video clips
adding and editing background music using integrated music tracks
Support most of the major media formats like mp4, wmv, mkv, mov, avi, mpeg, mpg, mts, jpg, png, gif, mp3, m4a, and wav.
Making animated pan-zoom for still photo
A wide range of photo improvement filters
Over 30 Transition effects for photos and videos, and trendy fonts for caption
Offers HD video quality
Adding title slides, text caption on images, audio clip trimming, or fading-in/out effects, are some of its other significant features.
For those looking for the best game editor software, Shotcut offers all the features of an excellent app. It boasts a polished and customizable interface that’s perfect for both first-timers and professionals alike.
What’s more? Users can even export the game videos in 4K. Thanks to the dockable and undockable panels that result in a responsive user interface.
From dynamic video filters like color grading, diffusion, etc. to the track compositing modes such as HSL Hue, Overlay, difference, etc., the software has a lot to offer.
Users can also leverage the different audio filters like Downmix, Pan, Delay, etc. for an enhanced effect.
AVS Video Editor does all that any other game editor does, like editing and creating videos with visual and sound effects.
But it differs from others in its rich functionalities and video quality. It features a simple and responsive interface that lets users make videos effortlessly.
It’s a non-linear tool, where scenes come in a linear sequence and in a specific order. The program allows objects in focus to be position anywhere on the timeline and possess any size.
Moreover, it also comes with audio and video conversion tools that help convert files into different formats.
What’s more? It also allows users to burn and create DVDs with the videos using an integrated disk burning tool, easily.
Visual and audio effects, masking, subpixel accuracy, or blending modes are some of its significant features.
These are some of the best game editor software that are not just easy to use but also offer solid performance. Editing is crucial and no one would want to compromise with the final video quality.
So, select the video editor that can enhance the overall quality of your game video content.
There’s an abundance of video editing software, for both professionals and home enthusiasts. But, in that ocean of options, some particular traits make the difference.
Today, we’ll show you five video editors that support split-screen. With the help of these tools, you should be able to create the most beautiful split-screen videos for work or school projects or just for fun.
Do you want to find out what programs support this nifty, dramatic feature? Read on then.
What are the best split-screen video-makers to use today?
The Premiere is the industry standard for a good reason – it delivers all the tools you’ll ever need to create stunning videos, with crisp motion, image, and audio blending together to perfection.
From filming and recording to editing tools, there is nothing you cannot achieve with this all-in-one software designed to make your video projects shine.
Adobe Premiere Pro is a professional video editing program that allows you to combine two or more videos with the use of effects.
Making a split-screen video in Adobe Premiere Pro is a rather simple task. You just have to import both videos and choose Effects, and then Crop. From there, just choose the 50% Crop and there you have it.
Let’s quickly look at its key features:
Comprehensive industry-leading video editing tools
Seamless integration with other apps and services
AI-based technology for more efficiency and accelerated workflows
Supports any formats from 8K to VR and any device/camera
Cross-platform functionallity to carry on with your projects effortlessly across all devices
Adobe Premiere Pro
Split your screen and craft it into the ultimate footage with ease using the Premiere Pro!
The almighty Adobe Creative Cloud Suite has transformed video editing and video making for good and forever.
Following closely in the Premiere Pro’s footsteps, Elements takes it up a notch by adding much-needed sharing and organization features to the already ultra-comprehensive video editing toolkit that these two software share.
By constantly releasing new features backed up by step-by-step, interactive guidelines and tons of learning materials, Adobe Elements is always getting better allowing you to create memorable videos effortlessly.
Let’s quickly look at its key features:
Automated editing options and step-by-step guidance
Special effects from time-lapse videos to picture-in-picture
Restore and repair tools to reduce the noise effect
Trim, adjust, add titles, transitions, and themes or split your screen to create perfect videos
Create dynamic video collages combining photos and videos
Organization tool to optimize your workflows, reduce clutter and improve searching
Shareware features (via social media and more) plus import and export files in an instant
Adobe Premiere Elements
Split, trim, add transitions, themes, and effects to create memories with the greatest ease!
There are many video editing tools on the market that have split-screen support, and one of them is AceMovi Video Editor, a resource-efficient and user-friendly video editing software that features a complete toolset.
It lets you put together bits and pieces of videos, add photos to them, and working in split-screen makes everything all the more easier.
The buttons and toolbars are placed in a familiar fashion, so little prior experience in using such tools is needed.
Besides the aforementioned split-screen, here’s what else you will find among AceMovi’s toolset:
Picture in picture and green-screen support
Transitions and animations
Image rotation and flipping
Cropping and zooming
Audio overlaying
Screen recording
Text insertion
Filters
and more…
AceMovi Video Editor
Working in split-screen has never been faster or easier until you’ve tried AceMovi Video Editor!
Award-winning Corel VideoStudio combines the ease of use of a simple online editor with breakthrough features to help you create over-the-top videos, just the way you want.
Supporting multi-camera editing and complex tweaks while always keeping the end-user in mind, VideoStudio is perfect for all skill levels from rookie to expert.
You can count on countless effects, step-by-step guidance, and pre-made templates to kick-start your projects in an instant.
One particularly impressive feature is the Split Screen video allowing you to show multiple videos on screen by adding two video frames or create custom picture-in-picture effects.
In fact, the possibilities are endless once you control the layout and the best part is that the whole process is based on a simple drag and drop flow.
Let’s quickly look at its key features:
Creative effects, filters’ library, elegant titles, show multiple videos simultaneously
Versatile enough to suit all skill levels from beginner to advanced
Templates and learning materials to get you started effortlessly
HD, 4K & 360 video editing
Color and lens correction
Batch processing
Corel VideoStudio
Live the moment, catch it on camera and edit it to impress the world with new Split Screen video powered by Corel!
Exclusive features, access to an ever-growing library of plug-ins, native file format support, and high-end performance tools all wrapped up in a user-focused, highly customizable and intuitive interface – that is what you can expect from the PowerDirector.
This tool takes everything to the next level from motion graphics to animation with endless customization options allowing you to achieve the right look and feel for your videos each and every time.
You can use it to split, adjust, polish, and even repair or stabilize videos that came out shaky. In fact, you can pretty much do anything you want video-wise, no task is too big or too little for this versatile software.
Let’s quickly look at its key features:
Customizable vector and precise keyframe controls
Animation toolkit to create, adjust and share animated videos
Social-media optimized resolutions available
Green screen editing based on a chroma-key engine
Cool transition effects and advanced, frame-by-frame motion tracking
Ready-made templates complete with effects, titles, and transitions for beginners
VideoPad is a professional video editing software that perfectly embodies the principle of easiness of use.
With native support for all video formats, stunning transitions and effects, and countless customization options, this tool delivers everything you need to create split-screen videos and more quickly and effortlessly.
Once your work is done, all you need to do is share it with the entire world and the VideoPad does bring excellent sharing facilities to the table: get your project out on social media or burn, upload, and save it to disc in an instant.
Let’s quickly look at its key features:
Supports all popular video formats
Extensive digital audio toolkit with special effects to create your custom soundtrack
Visual effects and transitions
Edit and export 3D and 360 video files
Burn, upload, import, export and save to DVD
Create title text animations in seconds
Use lossless export for optimal quality
Optimize AVI or MPEG video files with VideoPad Movie Maker
Have you used and tried other software that allows split-screen? If you can think of a better alternative, feel free to share your experience in the comments section below.
They vary as much as the reasons why users take up video editing. You can make home videos, you can become a YouTube star, and you can even create VR experiences.
Most video editing tools for mainstream users are best used for any of these reasons.
Whatever 1080p video editing software software you decide to get, you should first make sure to check out its main features just to see if they’re following your specific needs and targets.
What are the best tools to edit high quality videos in 1080p?
Adobe Premiere Pro comes in our top as the best 1080p editing software as a no surprise, it being one the most popular and reliable options when it comes to advanced video editing.
Although for a beginner, the non-linear video editing capability can be overwhelming at the first sight, it is the option to go if you want to edit in a proper way any form of videos, be it a movie, vlog, or personal videos.
Some of the most amazing quality feature is that offers you 4K video editing capabilities which means that the 1080p video editing will work like a charm. You also have project templates with presets to fasten your workflow.
The 360 VR view and Lumetri Color feature allows you to you work with white balance, colors, and gradients.
With the Audio Mixer you can edit mono and stereo audio lines, reduce noise, equalize, compress, and much more.
Thanks to this HD video editor you also have an AI-Powered suggestion tool that will automate a lot of your editing tasks. In addition you can customize the interface to your liking.
Adobe Premiere Pro
Whatever is your mission, you simply cannot go wrong in 1080p when teaming up with this industry-leading video editing software.
Pretty much any modern-day smartphone can record in 1080p, and let’s not talk about big-screen TVs or monitors that can support 4K or even 8K.
Because of this, video editors need to keep up the pace with the rising technology, and AceMovi Video Editor certainly does a good job at it, supporting 1080p easily, and even more.
Of course, working with such massive video files can be taxing on any PC, so you’d probably hope that at least the base program is lightweight.
Well, in the case of AceMovi, you don’t need to worry about having a high-end PC when performing video editing, since your PC will not slow down as much as you’d expect.
Besides, videos edited in AceMovi will be greatly enriched with a wide variety of filers, transitions, animations, as well as the typical tools you’re used to seeing in other HD video editors, such as cropping, cutting, mirroring, and more.
AceMovi Video Editor
It doesn’t matter if your videos are 320p or 1080p, with AceMovi they will all look spectacular!
Corel VideoStudio Pro is a user-friendly 1080p video editor that’s great for casual users.
The latest version is also one of the few editors that include tools for editing360-degree videos which is an important feature when it comes to panoramic video editing.
VideoStudio Pro supports video editing of HD and even 4K formats, so you can try it right now without any problem.
Corel VideoStudio Ultimate X10 includes a premium special effects pack and a Mask Creator tool, but aside from that, there’s little difference between the versions.
Some of its key features include the template-based video creator FastFlick, which can help you automatically set up a video from your clips, plus and Instant Project tab to quickly set up finished videos
Enhance your videos with more than 2,000 transitions, effects, and animated titles. With this tool you can also balance the audio levels between clips and lower background sound.
You’ll definitely enjoy the multi-camera for syncing multiple footages, motion tracking to apply effects to specific moving subjects, and chroma key for adjusting background.
VideoPad Video Editor is an entry-level video editing app. It’s primarily designed for creators who want to publish their videos on Facebook and YouTube.
It’s effortless to use, and it will make your workflow of social publishing much easier.
Some great key features that you’ll like is the ability to easily fill out all metadata for your YouTube video and the fact that you can upload videos straight from the app without using YouTube’s web publishing tools.
The app comes with a significant library of tools and plug-ins for increased efficiency. It provides optional support software from advanced audio mixing to photo tools
VideoPad Video Editor
Specially designed for beginners in the video editing niche this tool comes with the greatest features!
If you’re a video editing lover, you’ll love this handy free 1080p video editorcompatible with all Windows versions.
The software comes with an easy interface, and there’s no technical knowledge required to obtain a final product will turn out perfect for your specific purpose.
The interface provides full access to the program’s various filters such as transitions, overlays, lighting, and captions. You’ll be able to fine-tune the results with the help of advanced effects.
Movavi Video Editor
Rely on a software that brings versatility and professional features at your fingertips!
Finally, the PowerDirector is quite frankly in a different league when compared to the previous 2 entries on our list. This software is all about professional editing tools, high-end performance, fine-tune retouches, and unparalleled control.
But don’t let these impressive features put you off as its interface is as intuitive as they come.
With the powerful masking tool you can create hyper-realistic image composites with unprecedented accuracy – the Dynamic Keyframe Controls will make sure of that.
Customization goes beyond the simple selection of color grading, you can set motion graphic titles, personalize text, color, and shape and add some pizzazz with the Sketch Animation Overlays feature.
CyberLink
Don’t miss out on a tool that comes with amazing graphic design abilities for your videos!
These are the best 1080p video editing software for Windows. Make sure you check out all of their features and decide which tool is the best for your own video editing needs and plans.
We’d like to hear more from you, so feel free to drop us a comment in the section bellow.
Talk of Microsoft entering discussions to acquire more companies is showing no signs of slowingdown, whether its Discord for its gaming division, or as is now being reported, Nuance Communications, an artificial intelligence and speech technology firm.
According to sources close to the matter (via The Boston Globe), an agreement could be reached and announced over the coming week, though it is important to note that, as of writing, no agreement is in place. It is suggested that Microsoft is currently in discussions at a price point of $56 per share, but again, this price point could change before a final decision is made, or no agreement be reached at all.
To put that price per share into context, it would value Nuance Communications at around $16 billion, an increase of 23% from where Nuance Communications stood at the end of Friday.
For those not familiar with the company, Nuance Communications helped lay the groundwork for Apple’s Siri voice assistant. Due to Nuance’s involvement in speech technology, Nuance was involved in the original incarnation of Siri, and more recently, has worked alongside Apple on its Business Chat platform. Outside of Apple, Nuance has also had a working relationship with Microsoft itself, mainly focused on a number of health-related projects, including entering medical data into patients’ electronic medical records based on conversations between patients and doctors, which began back in 2019.
Nuance Communications could offer a range of benefits to Microsoft and its products, as artificial intelligence continues to be expanded. In recent months and years, we have seen AI being employed in products such as Outlook and LinkedIn to pre-empt what someone might want to type, and Nuance could help to expand this further with its expertise. If the talks progress to an agreement, we will no doubt find out more about what Microsoft’s plans for Nuance could be.
Should an agreement be reached for Microsoft to acquire Nuance, it is likely to be Microsoft’s 2nd-largest acquisition to date, trailing behind the $24 billion it threw at acquiring LinkedIn.
Welcome back to our Windows 10 news recap, where we go over the top stories of the past week in the world of Microsoft’s flagship operating system.
Microsoft just killed its Windows 10 Translator app
A month after the announcement, Microsoft has killed its Translator app on Windows 10, removing it from the Microsoft Store. Instead, users will need to make use of the web version in order to perform translations on Windows 10. Other Microsoft Translator apps, such as on iOS and Android, are unaffected.
Microsoft Translator app icon.
Microsoft releases 64-bit version of OneDrive for Windows sync client in public preview
Microsoft Paint appears on the Windows 10 Microsoft Store
Announced awhile ago, Microsoft Paint has been expected to arrive in the Microsoft Store on Windows 10 for a little while. But now, it appears Paint is finally arriving in the Microsoft Store, as some users can download it, though it’s not yet available for all Windows 10 users.
That’s it for this week. We’ll be back next week with more Windows 10 news.
Microsoft celebrates 46th anniversary on Twitter by looking back at previous company logos
On 4th April, Microsoft had its 46th anniversary, and in the days following, its social media team have been celebrating by reminiscing over its previous logos.









![What is Movavi Screen Recorder & How Do You Use It [Review]](https://windowsreport.com/wp-content/uploads/2021/04/movavi-screen-recorder.jpg)
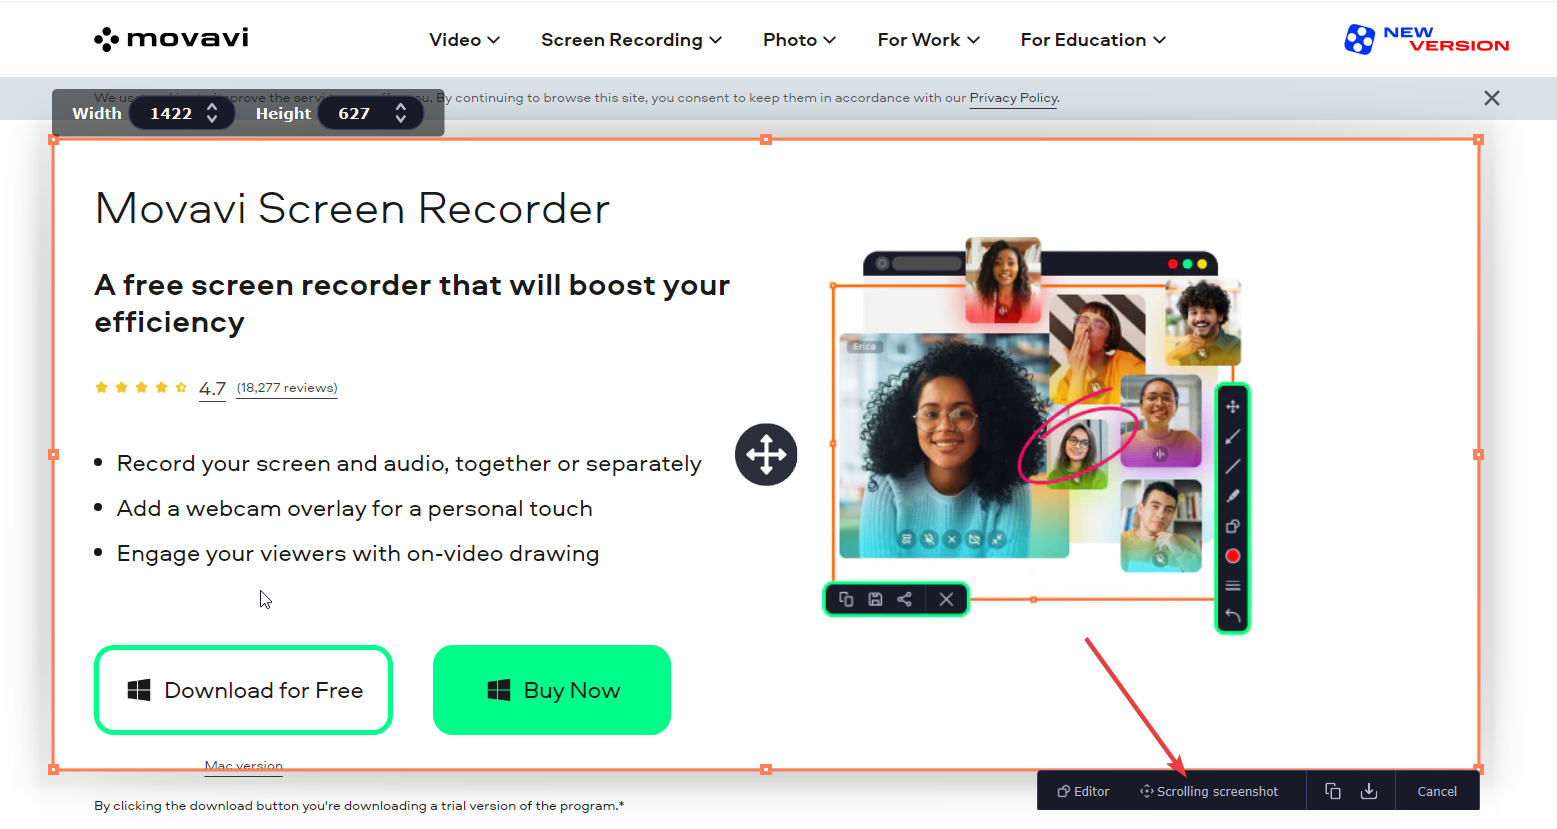
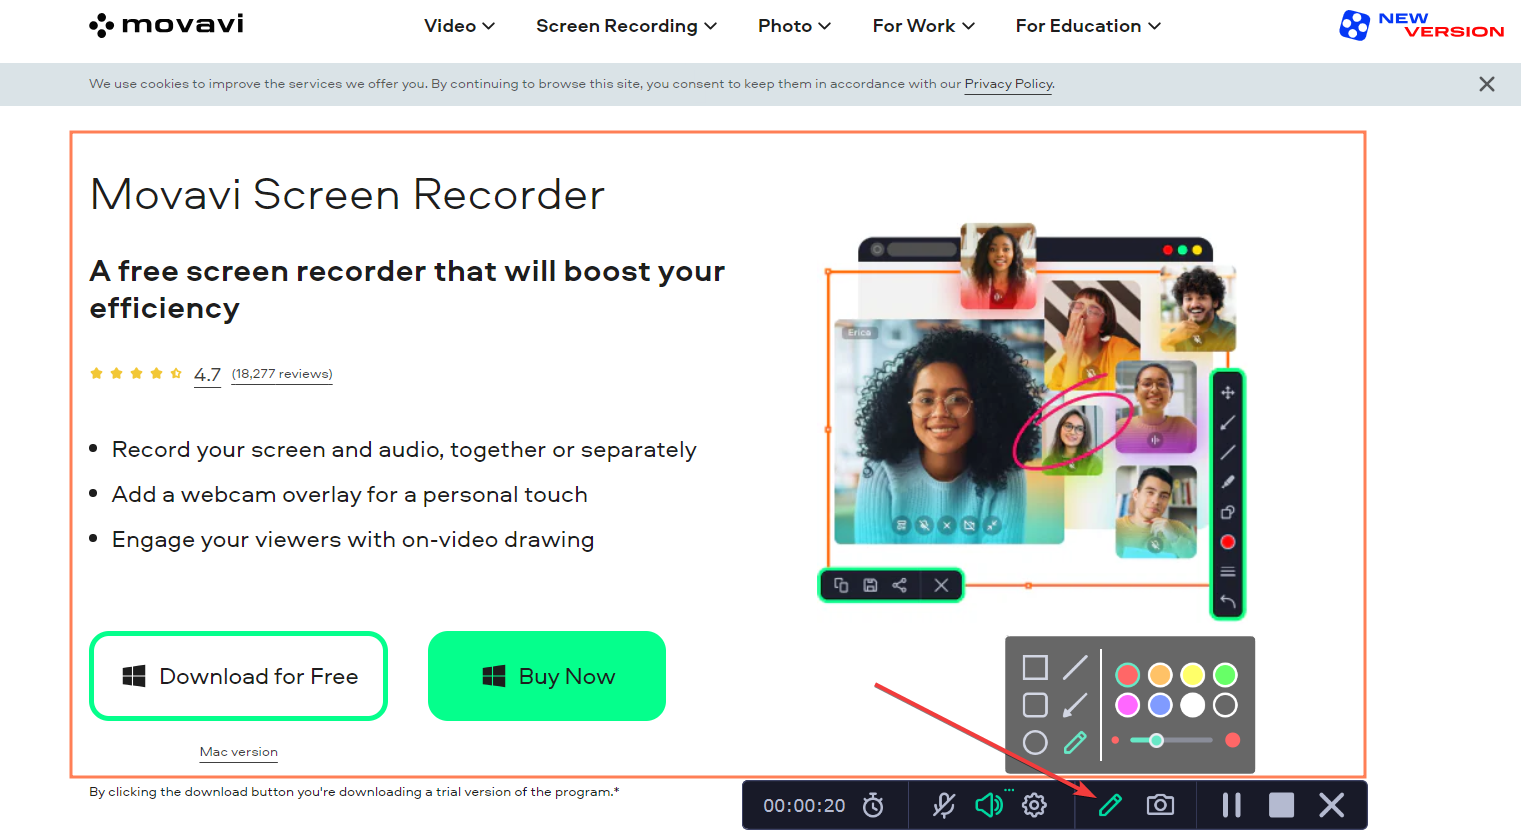
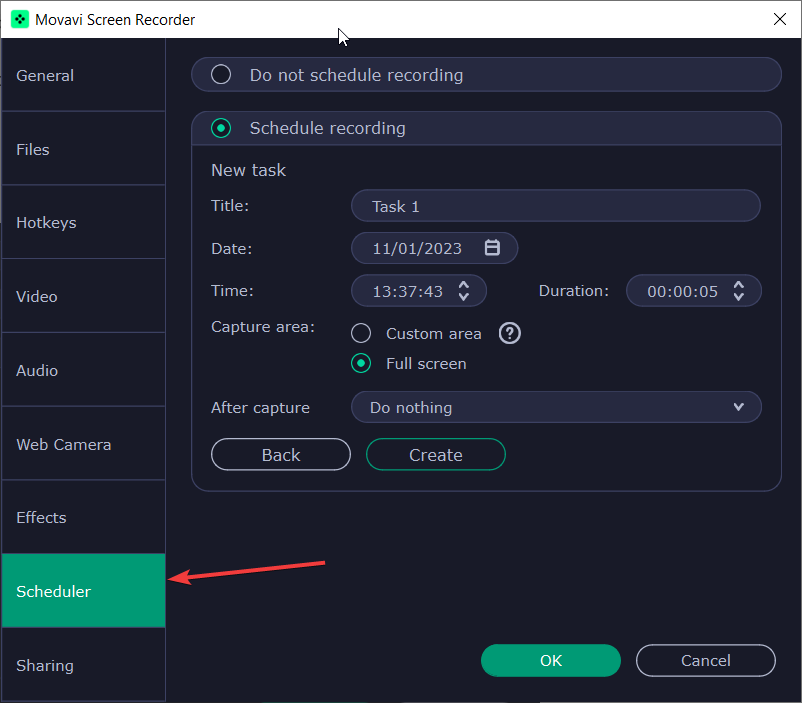
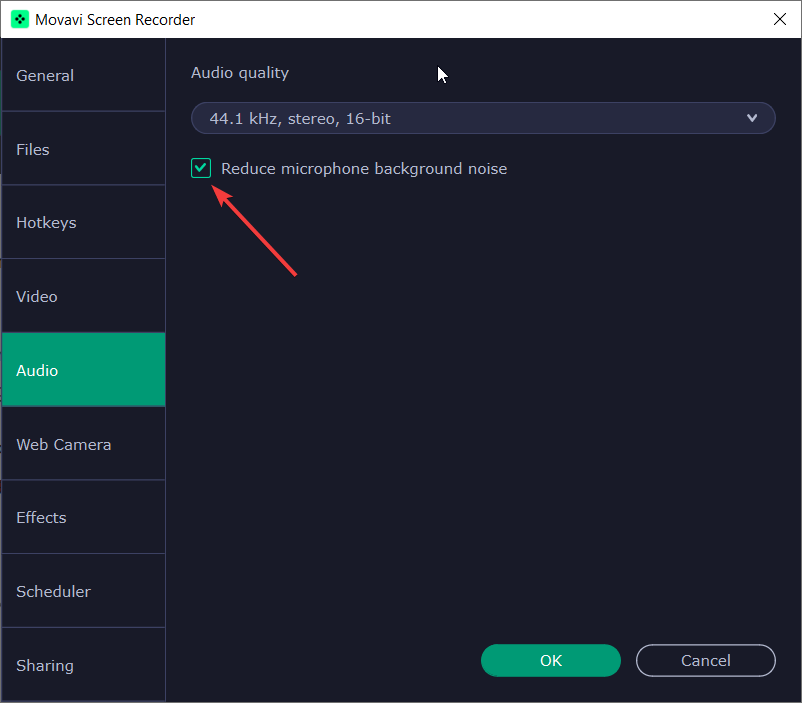
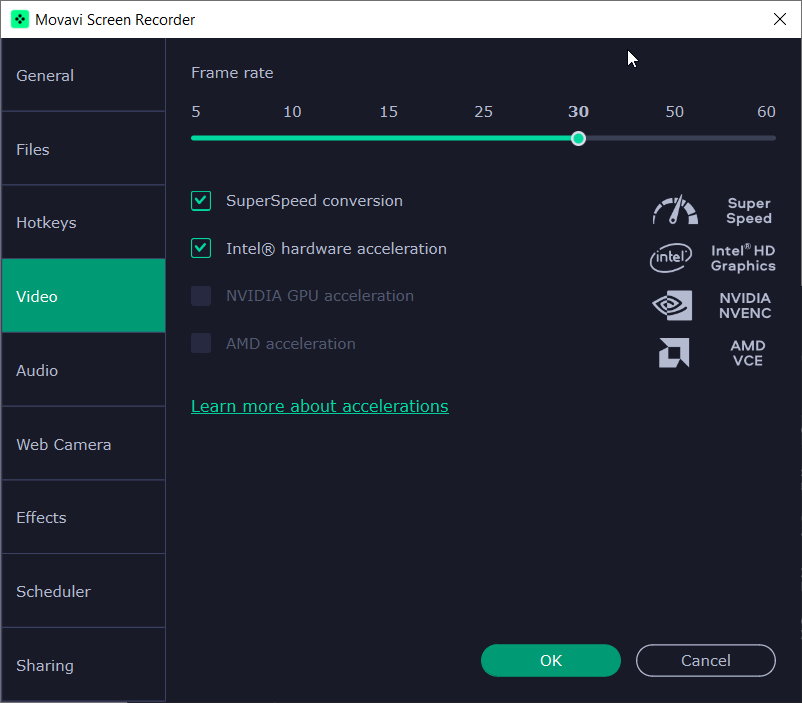
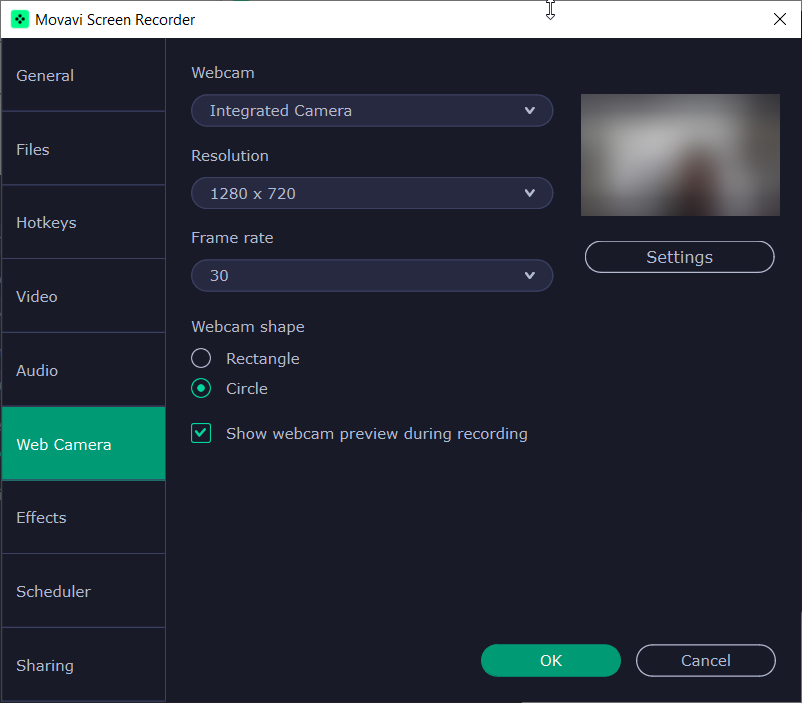
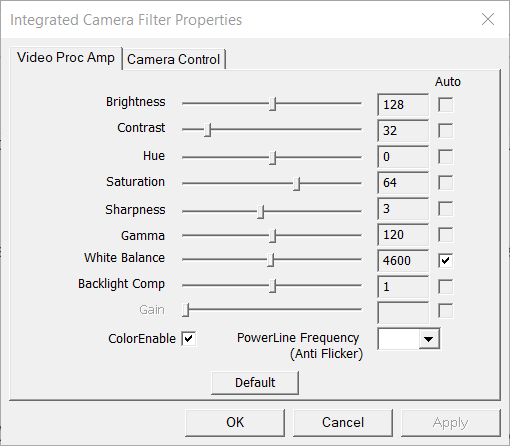
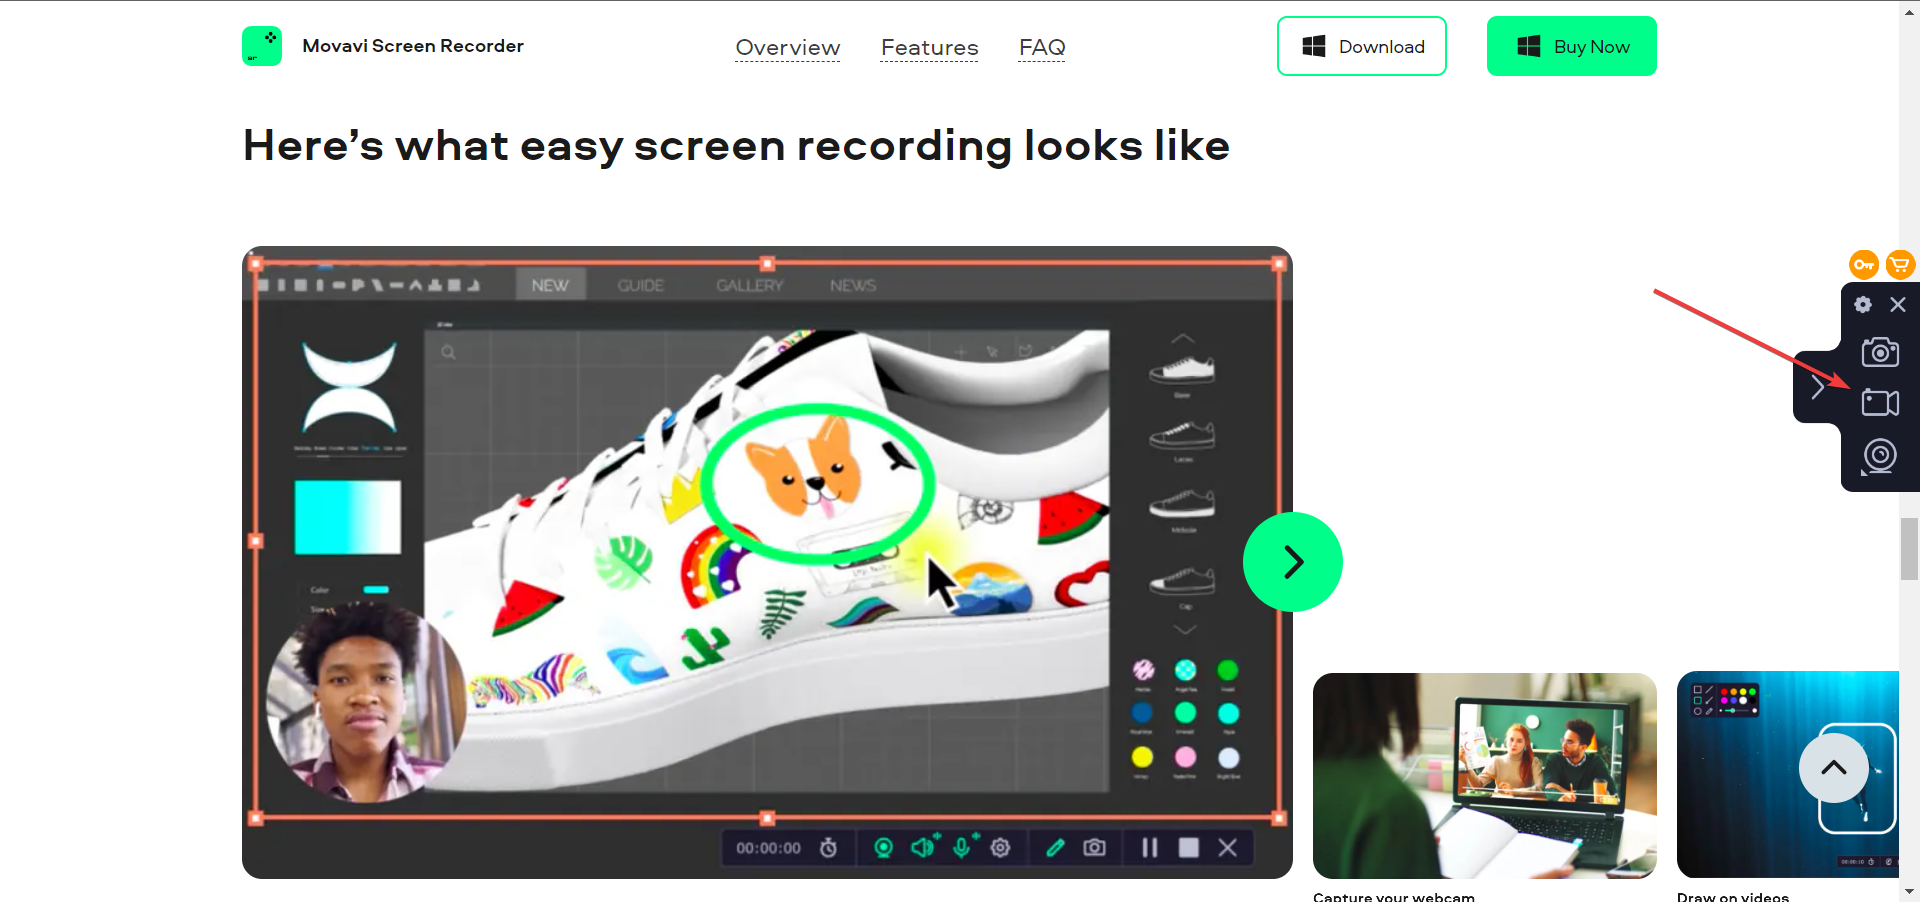
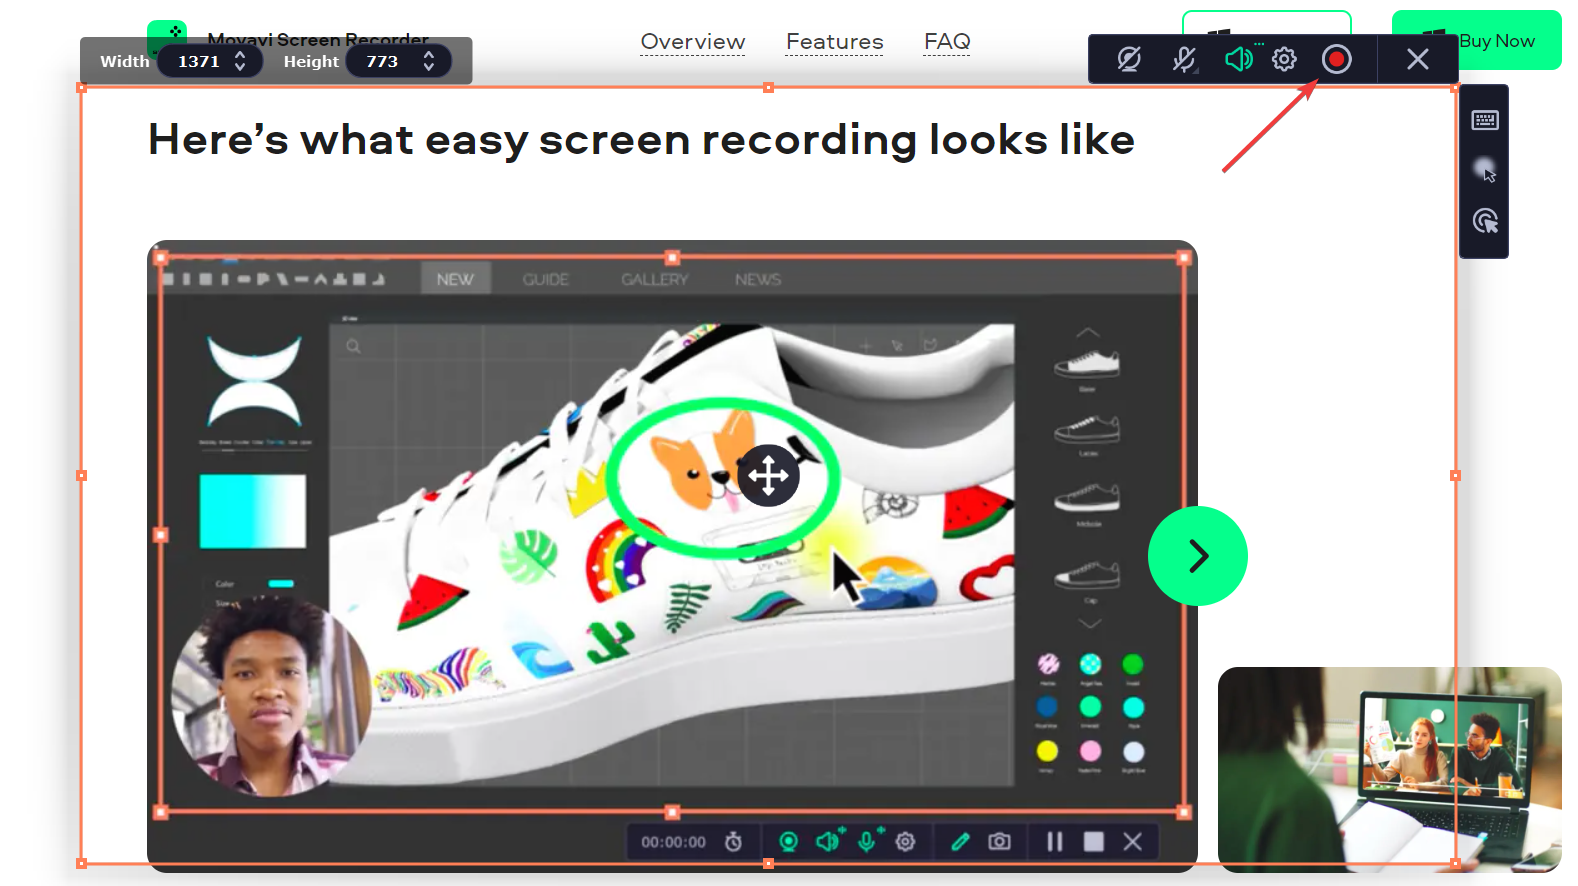
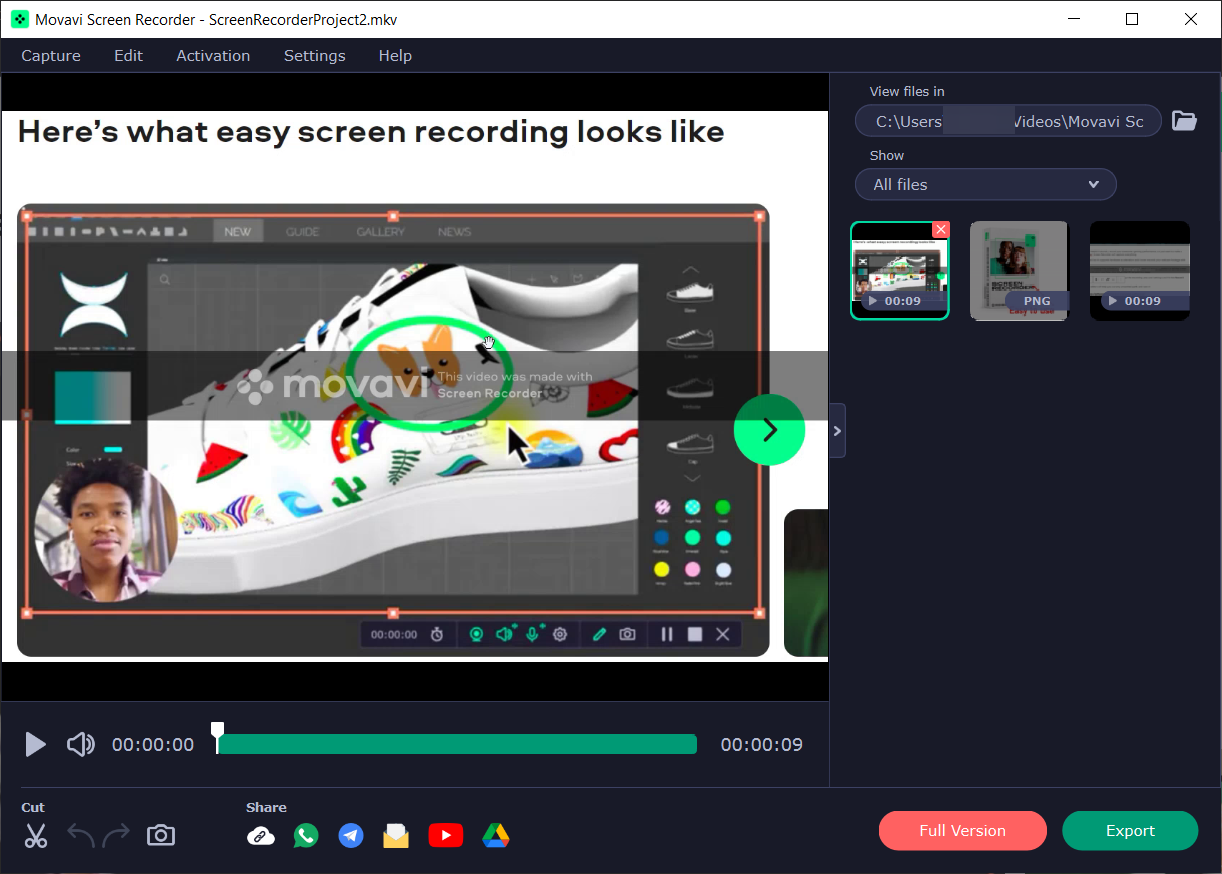
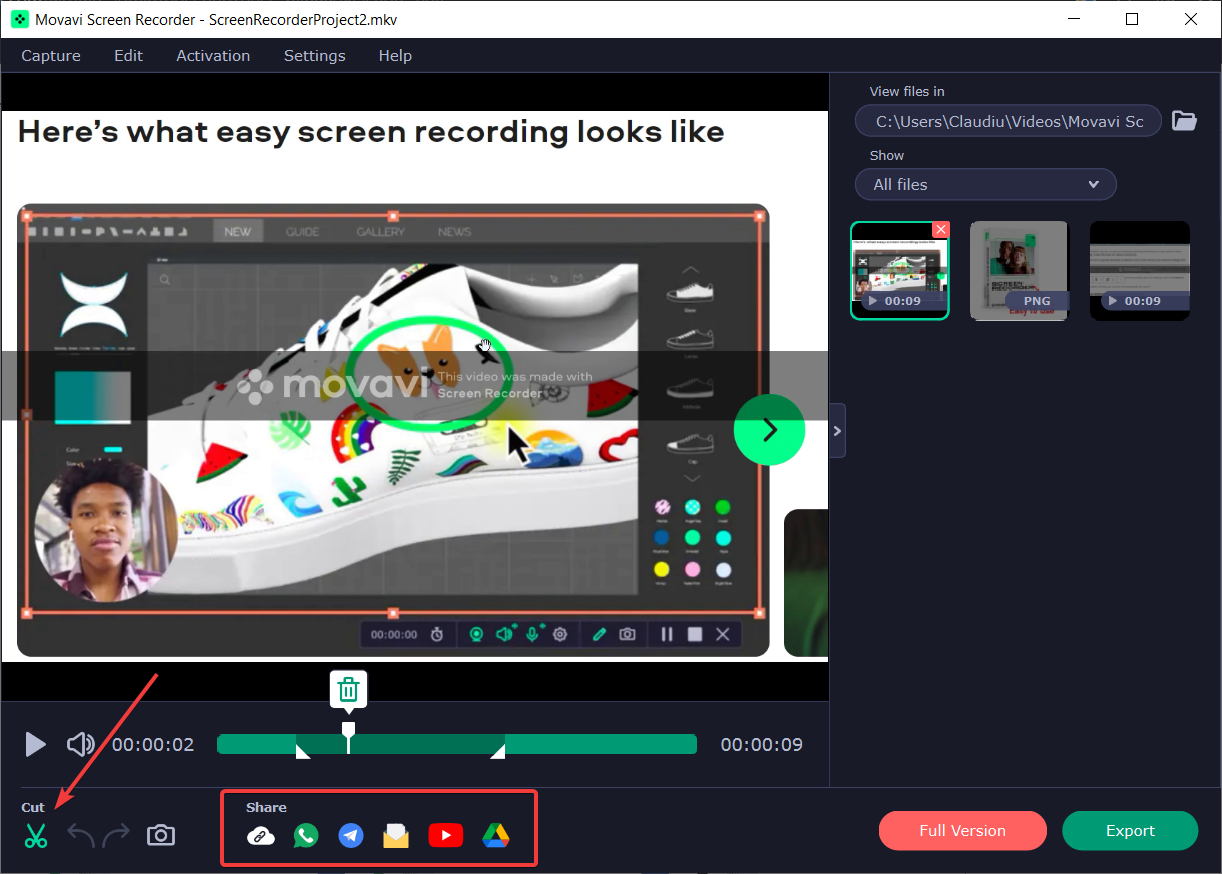
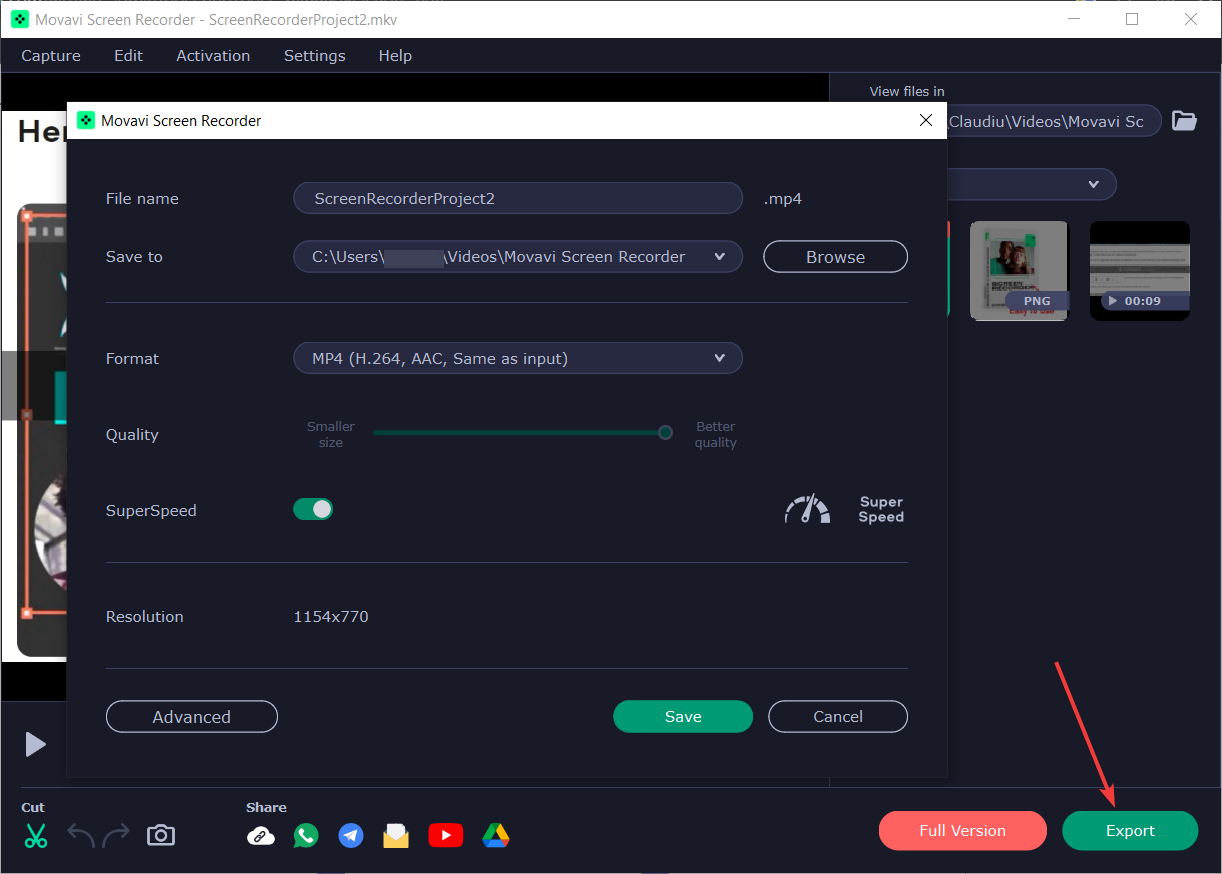
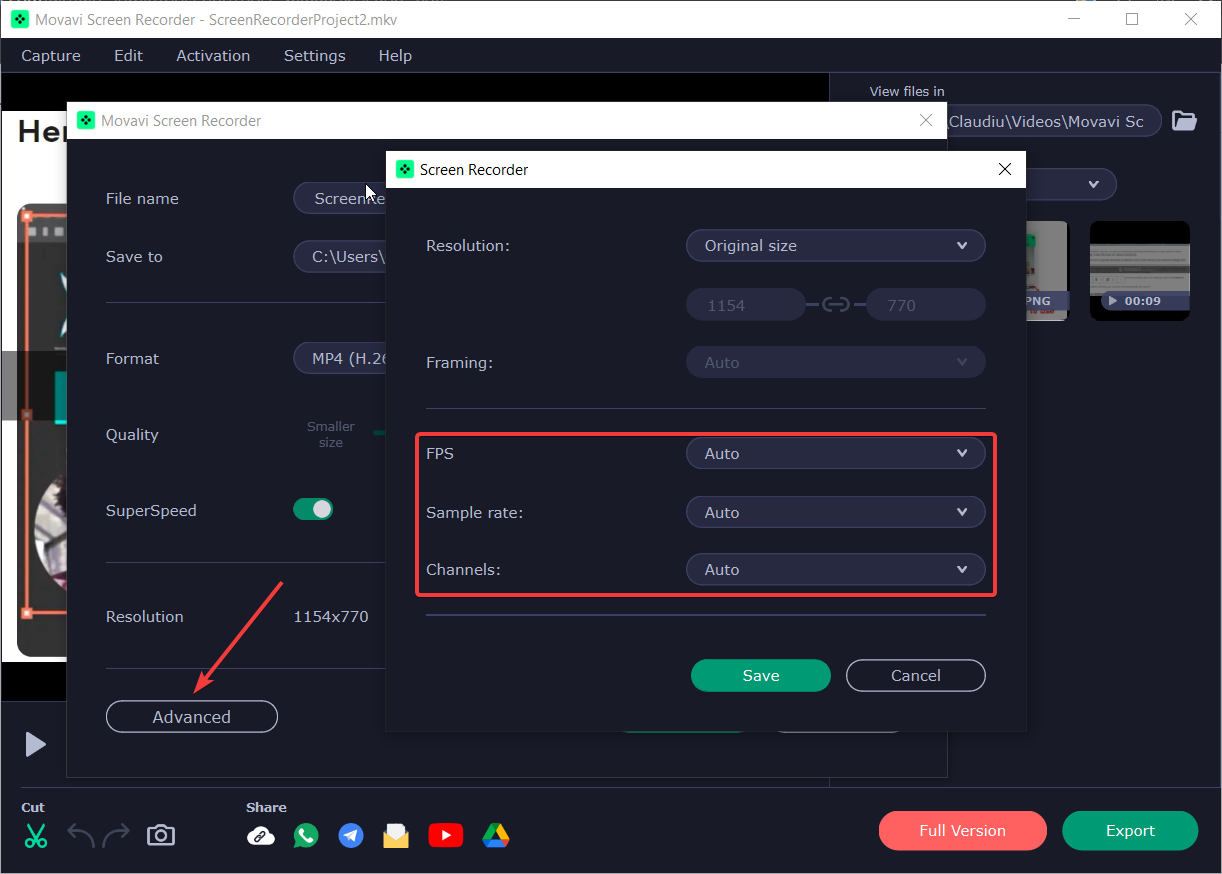
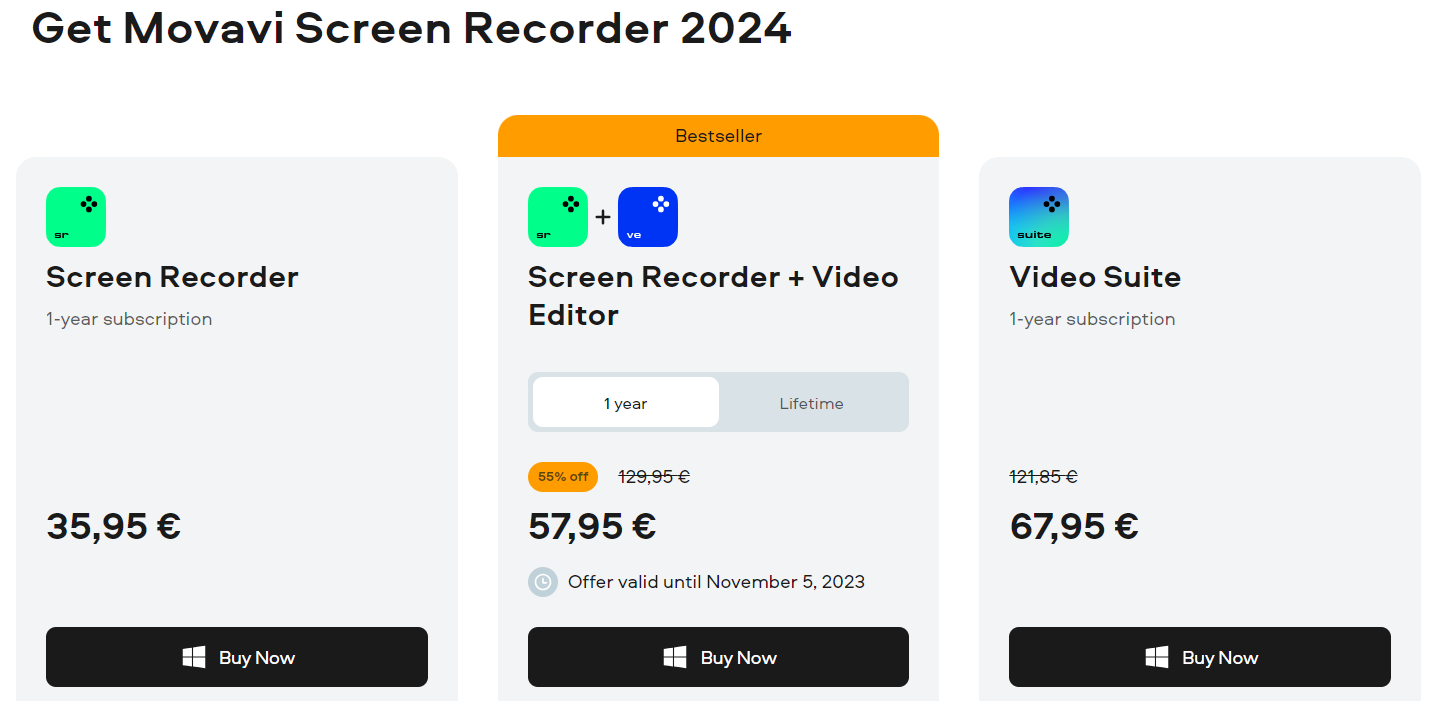




![High DPI issues with Remote Desktop in Windows 10/11 [Fix]](https://windowsreport.com/wp-content/uploads/2019/04/remote-desktop-high-dpi.jpg)
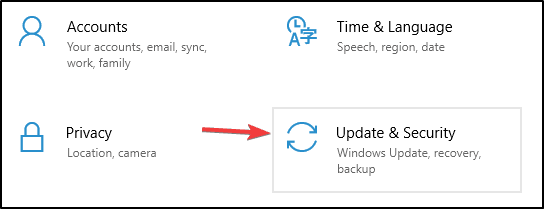
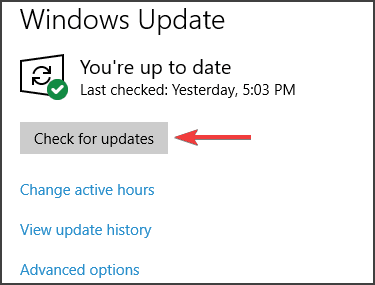
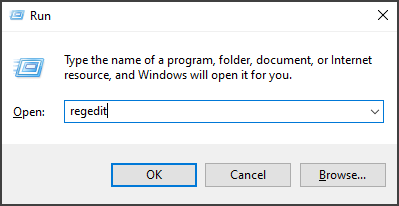



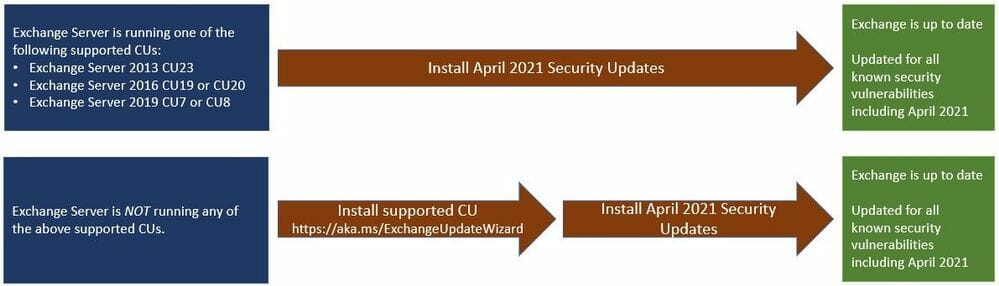
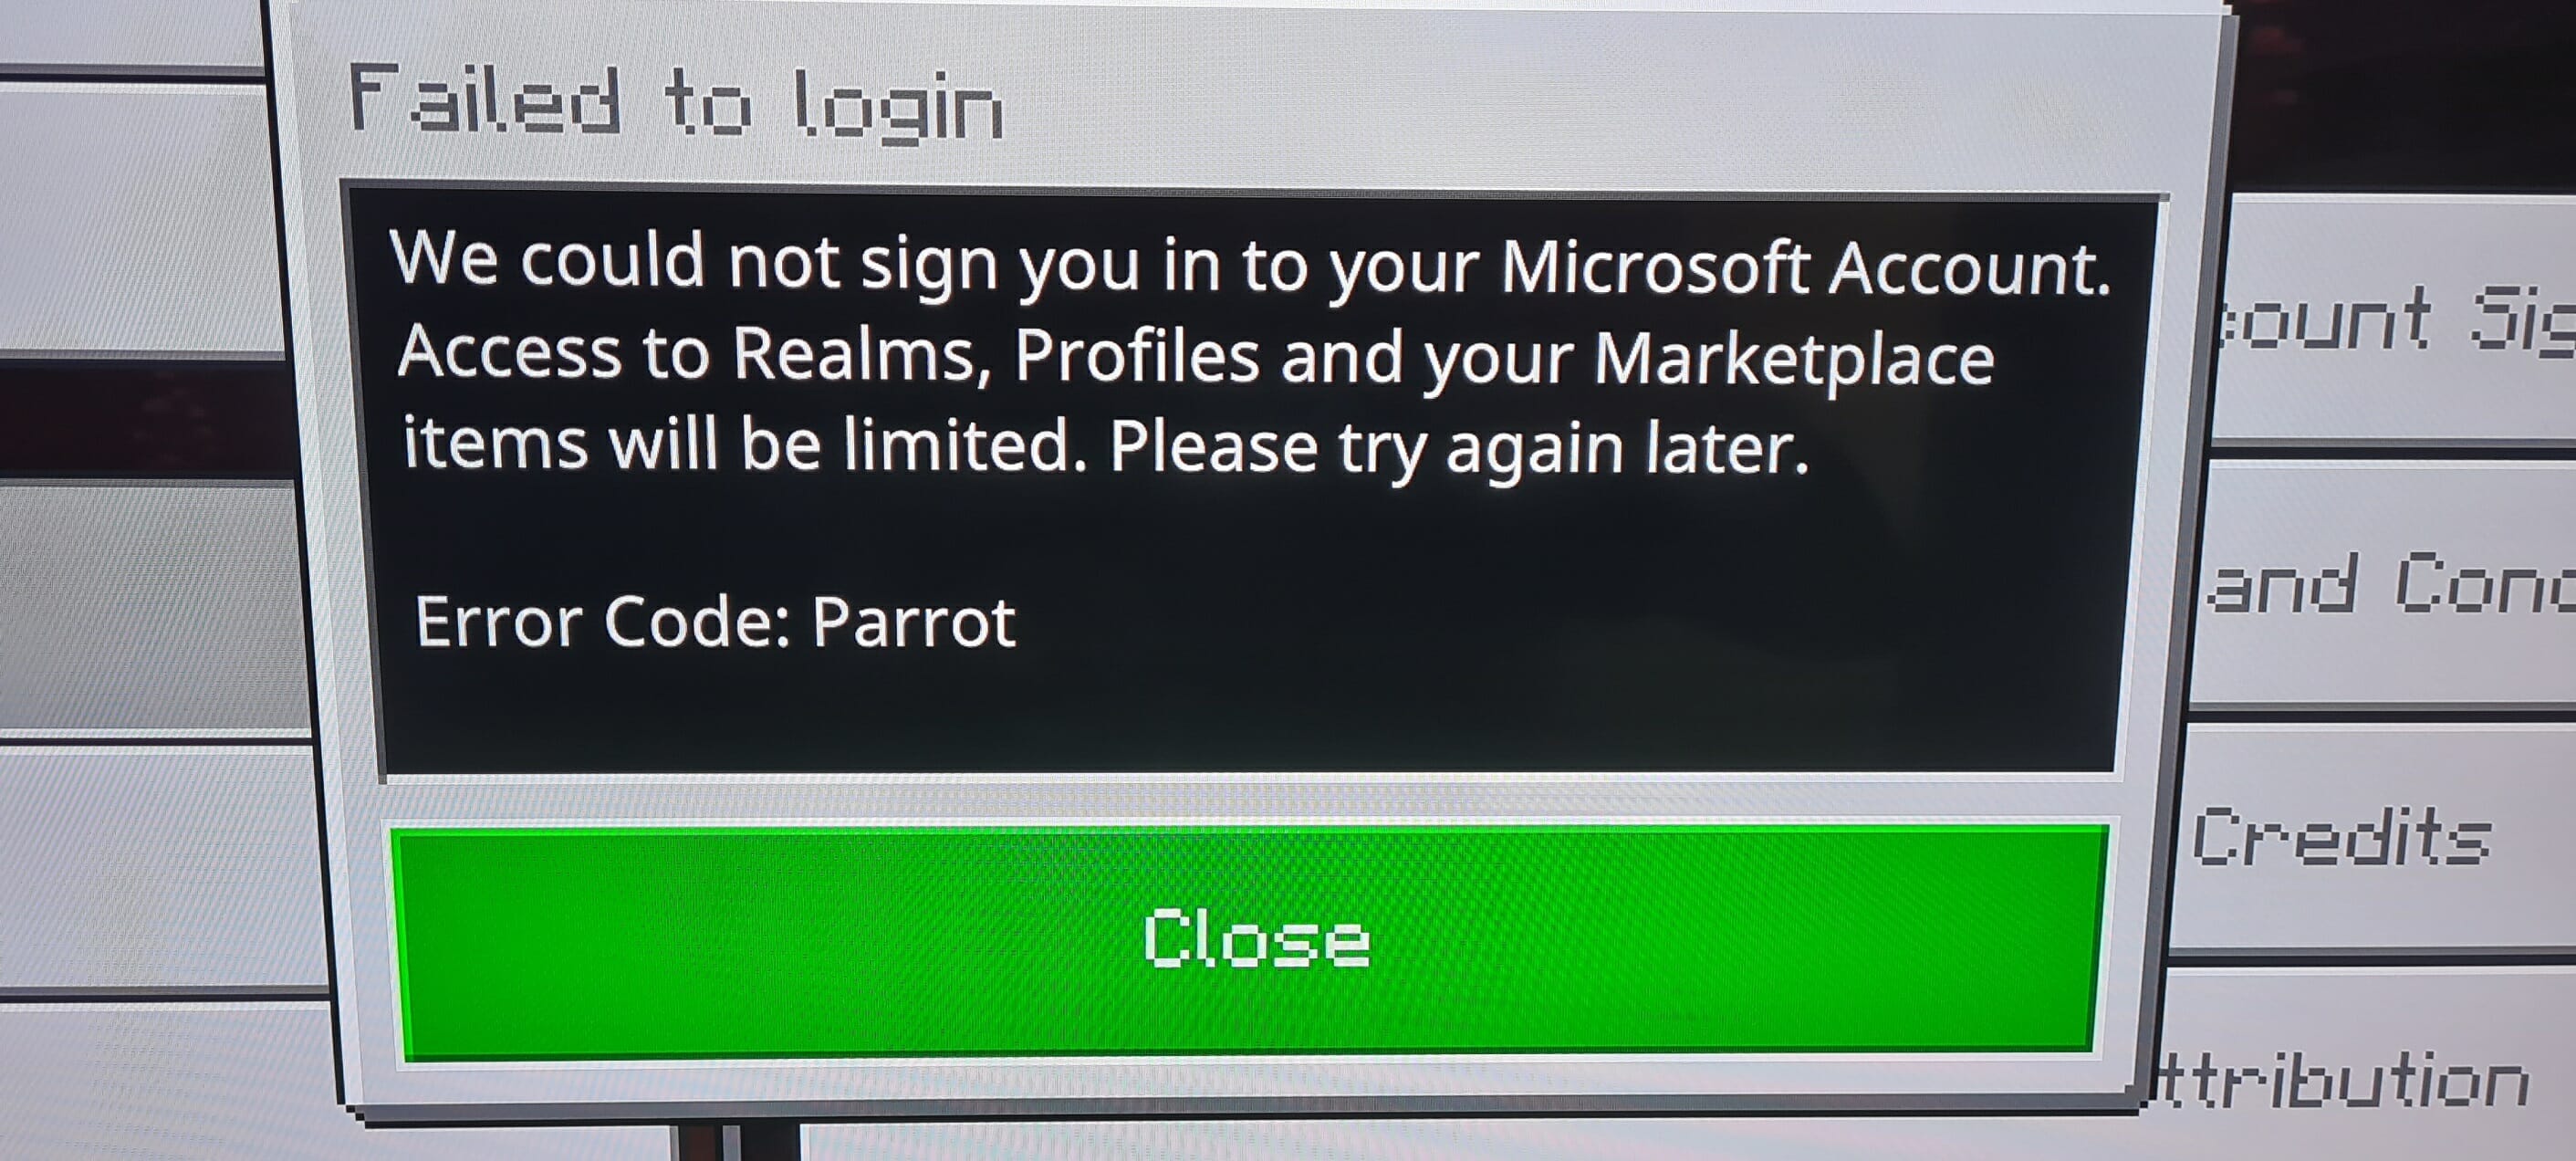






![The remote session was disconnected [Complete Guide]](https://windowsreport.com/wp-content/uploads/2021/04/Remote-session-was-disconnected-1.jpg)


![Windows 10 April Patch Tuesday [DIRECT DOWNLOAD LINKS]](https://windowsreport.com/wp-content/uploads/2021/04/Update.jpg)




![System Restore Failed Due to Antivirus Error [Full Fix]](https://windowsreport.com/wp-content/uploads/2017/12/Virus-preventing-system-restore.jpg)
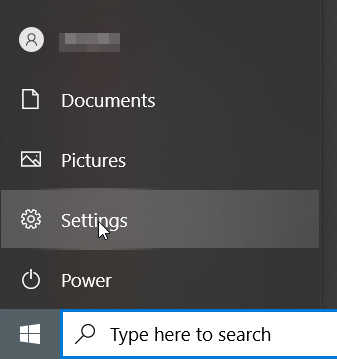
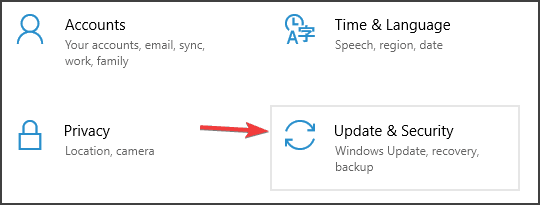
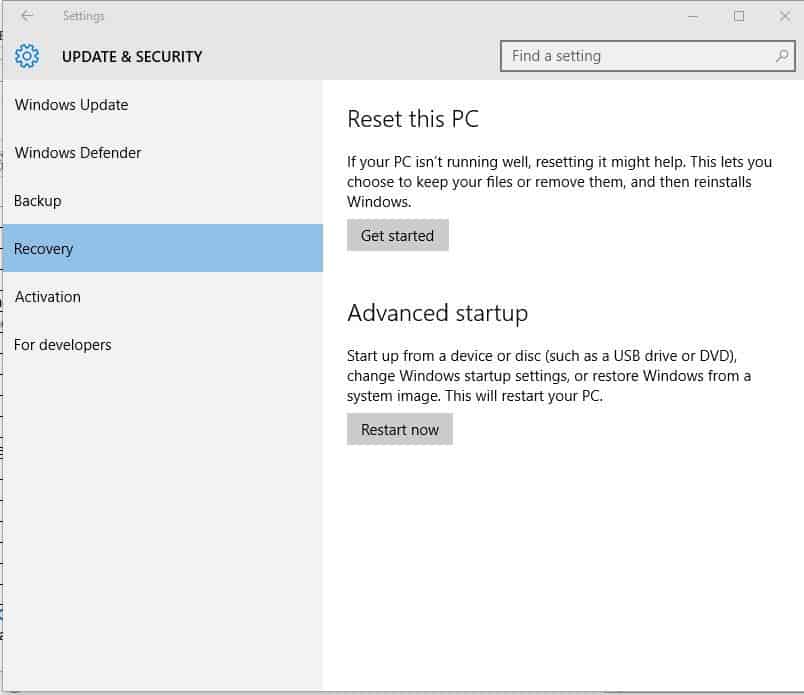
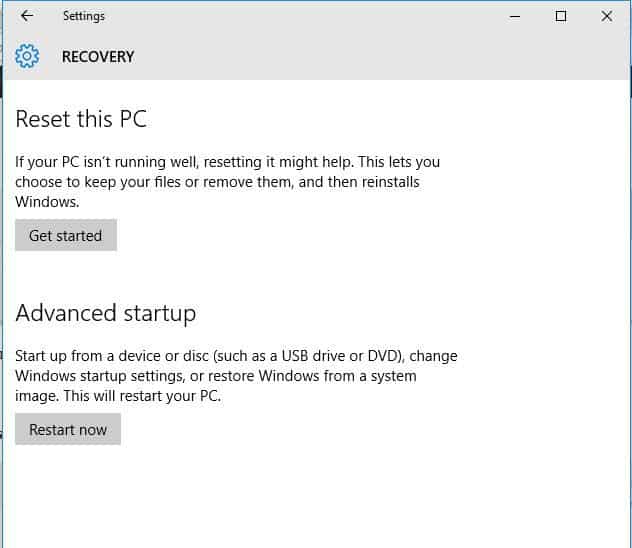
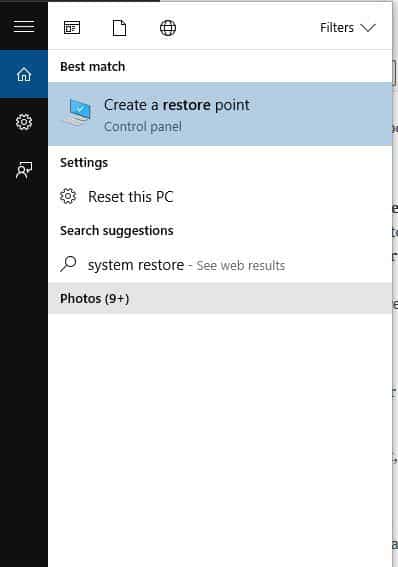
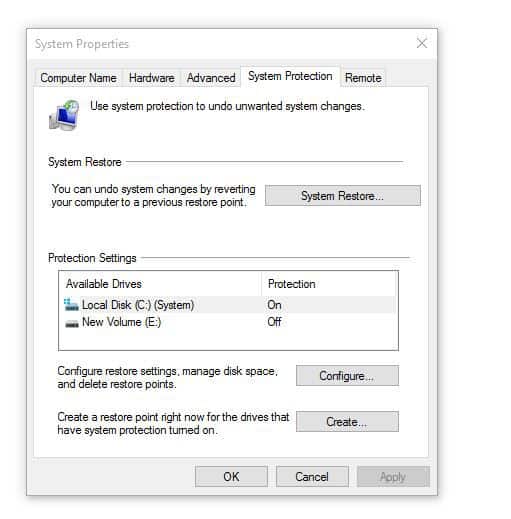
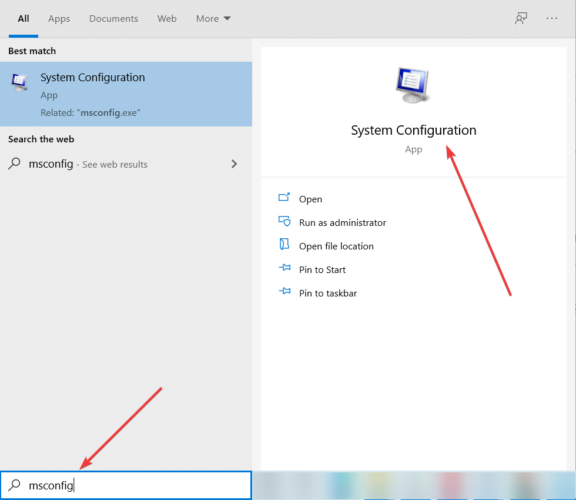
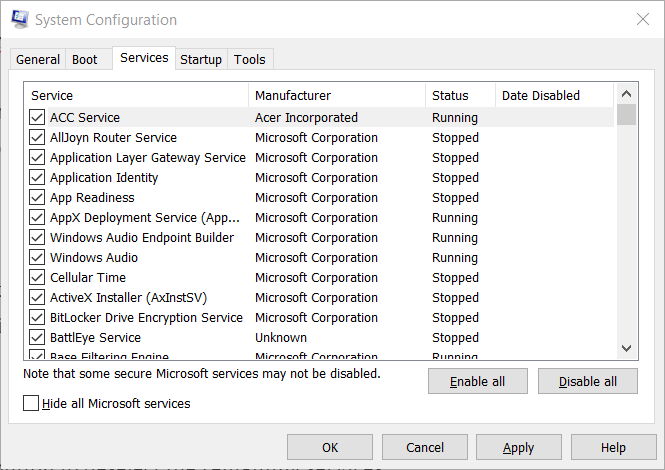
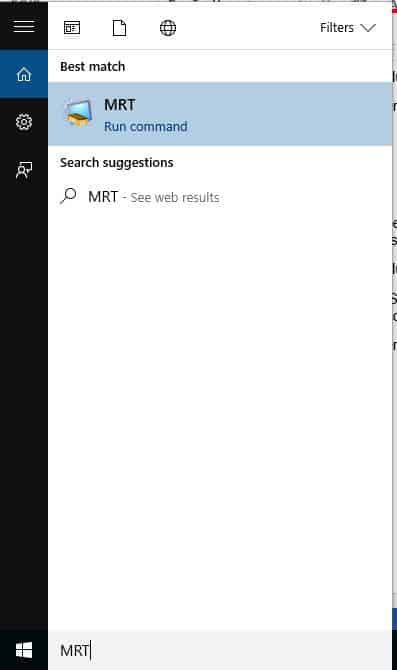
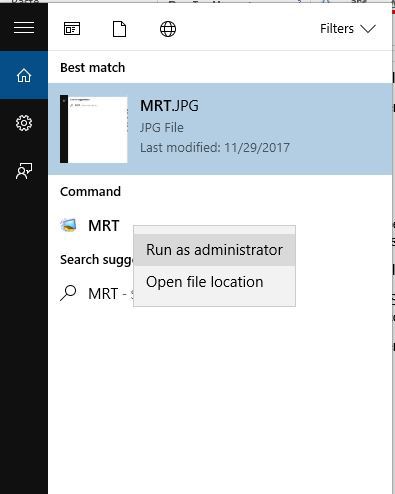
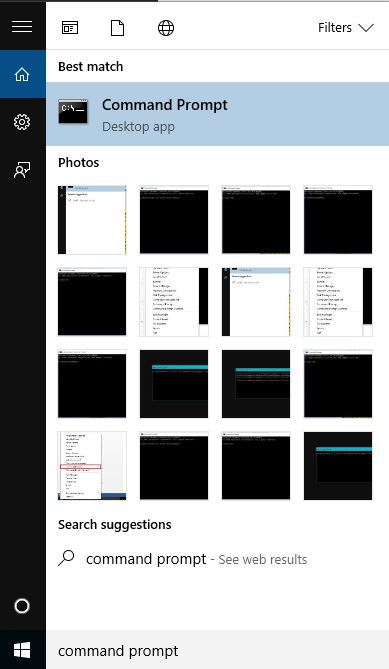
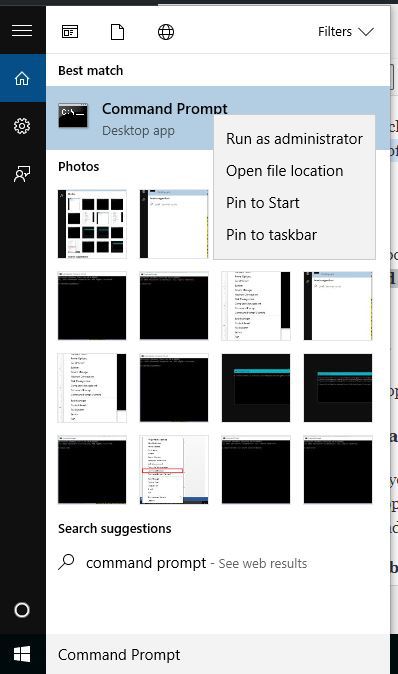
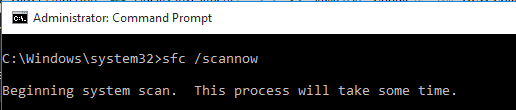
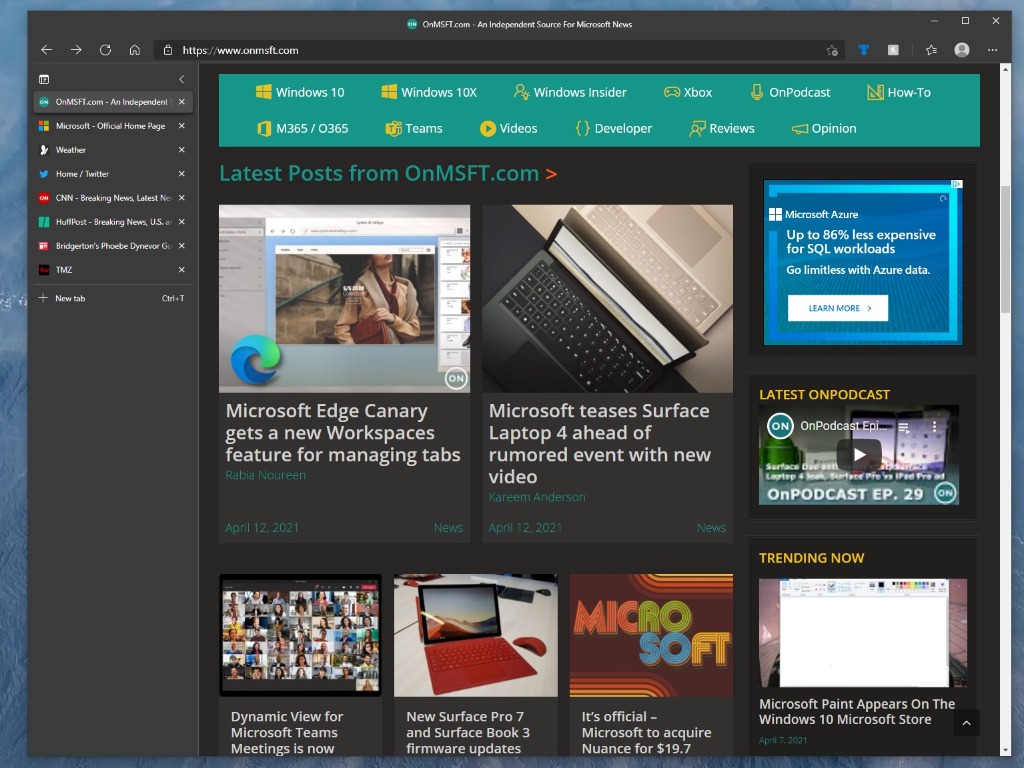
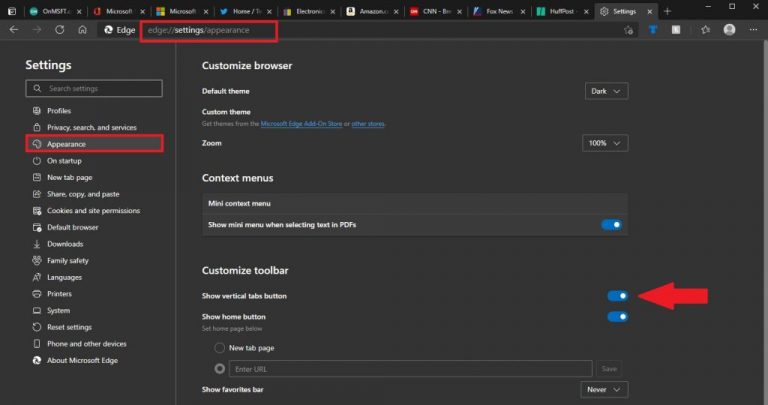

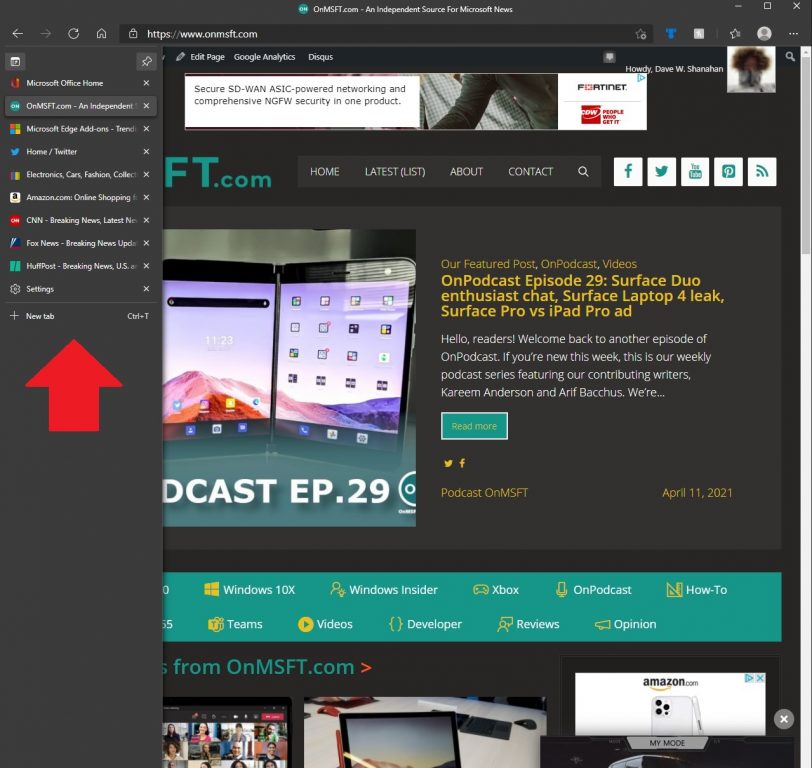

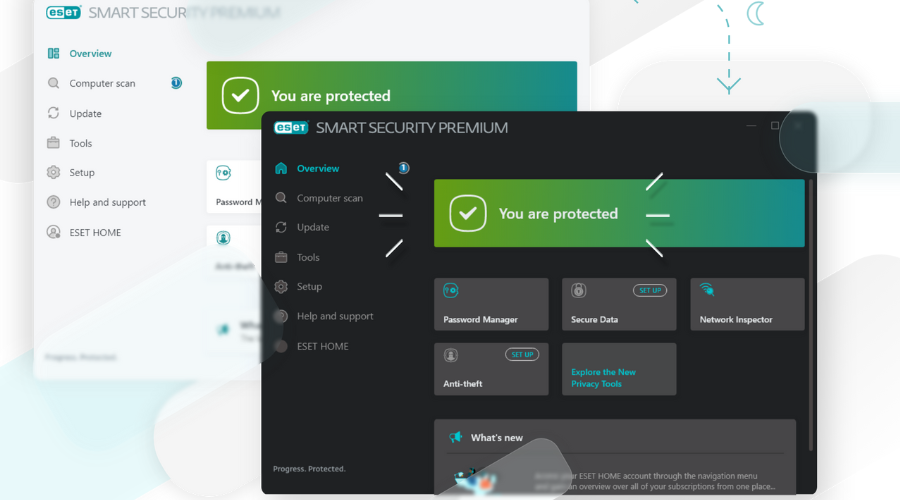

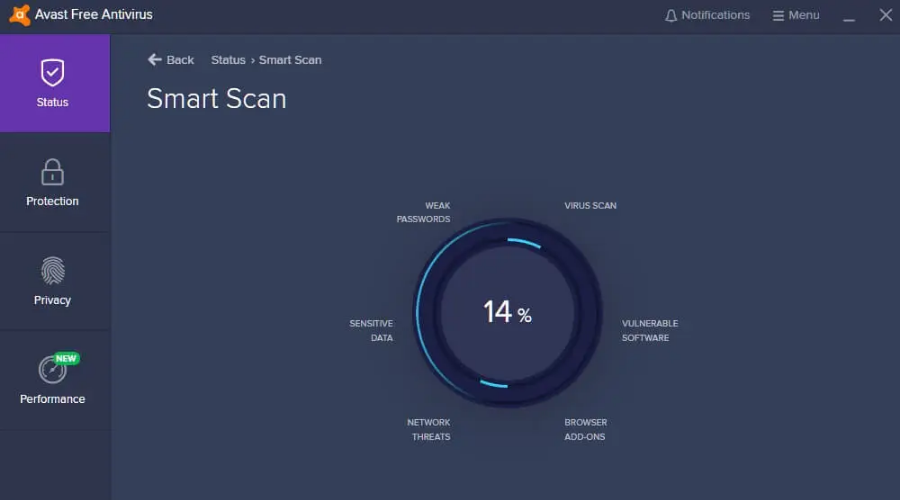




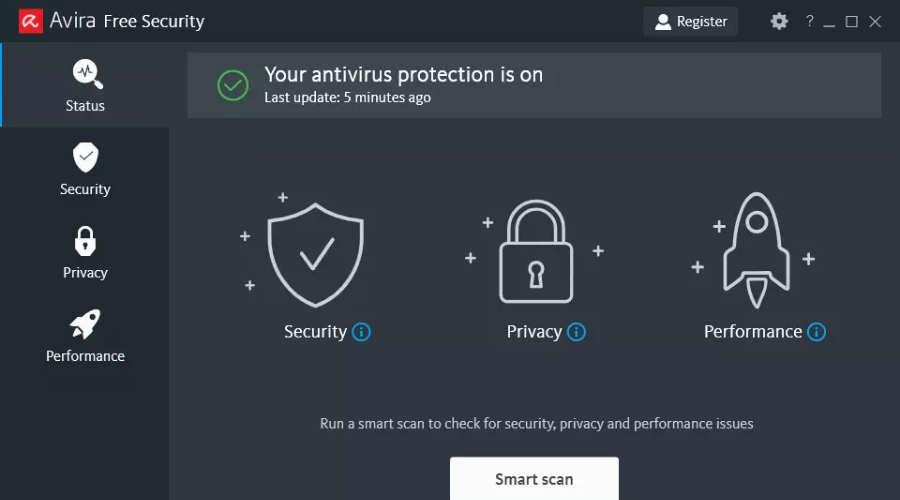

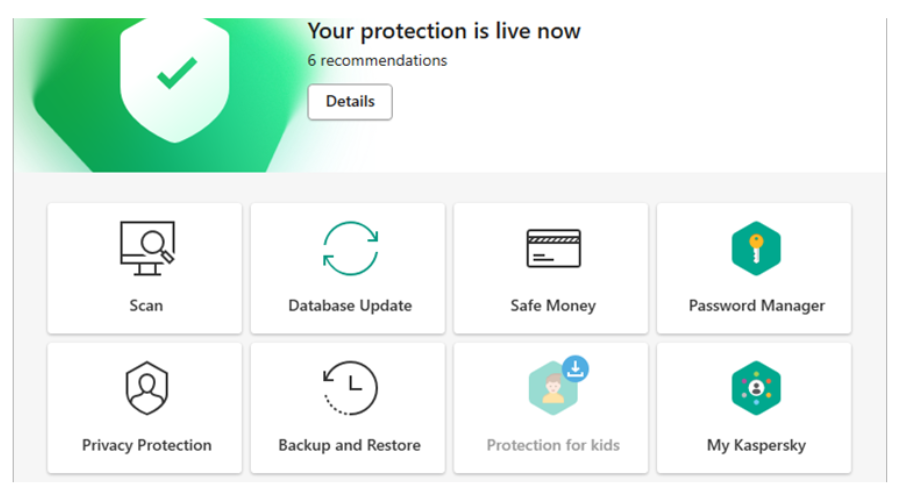










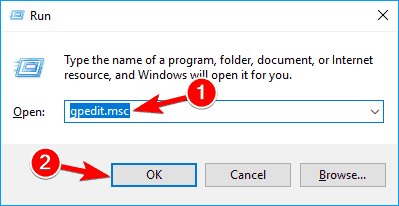


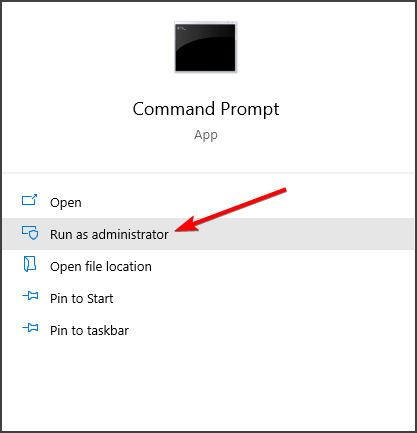

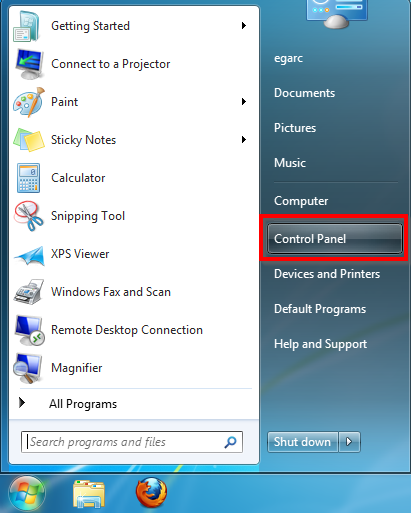
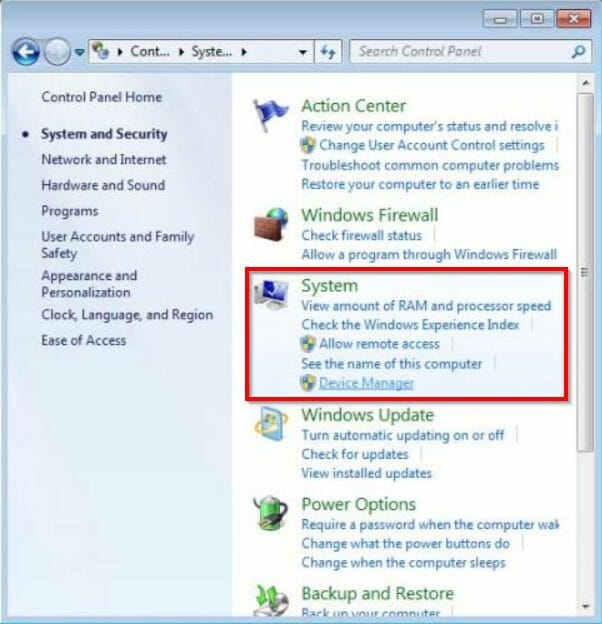
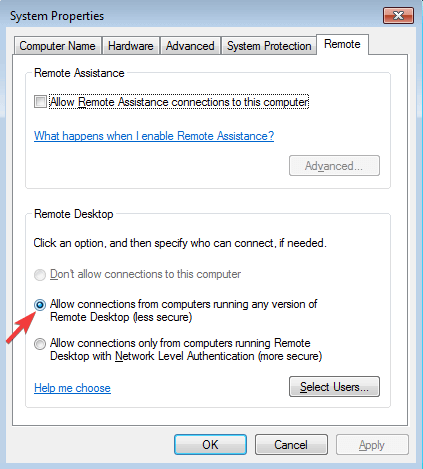
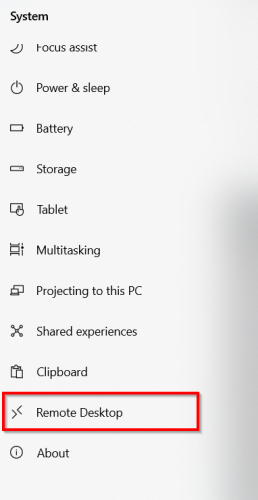
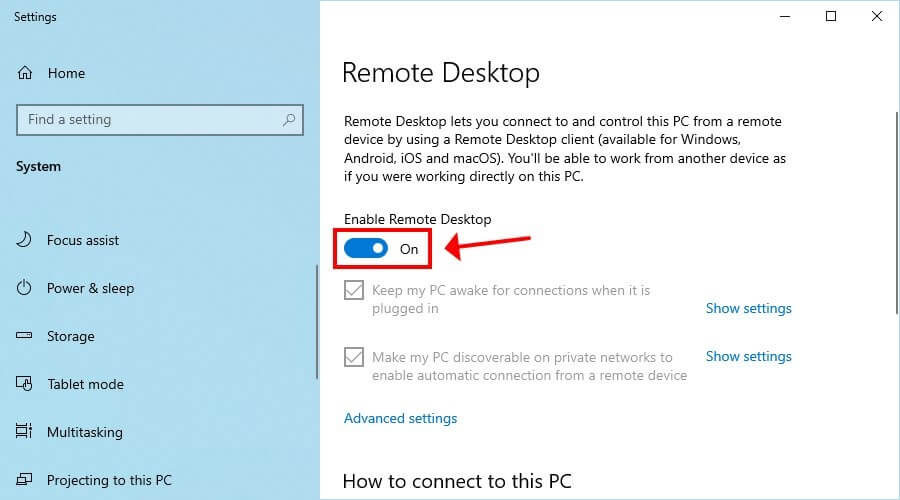
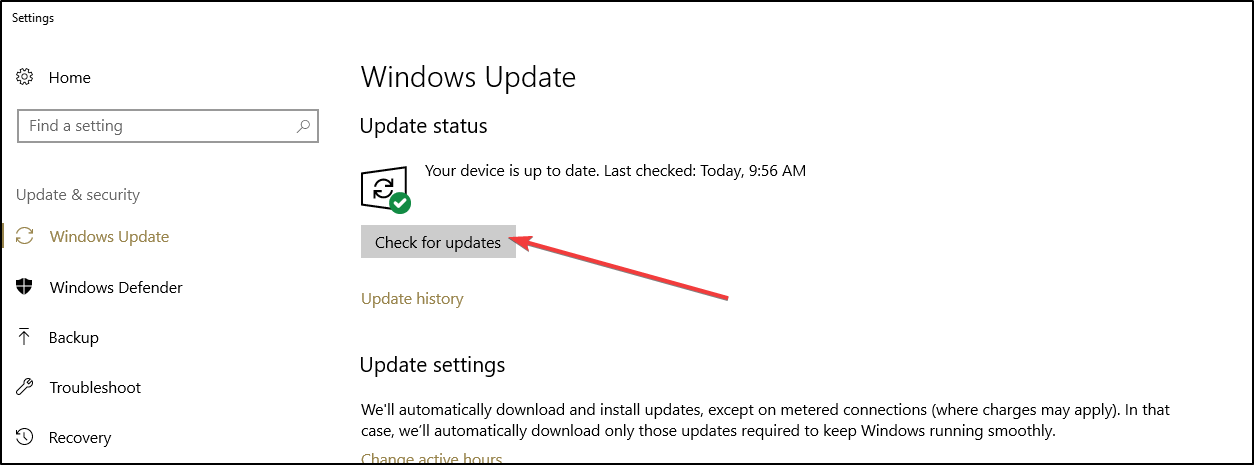
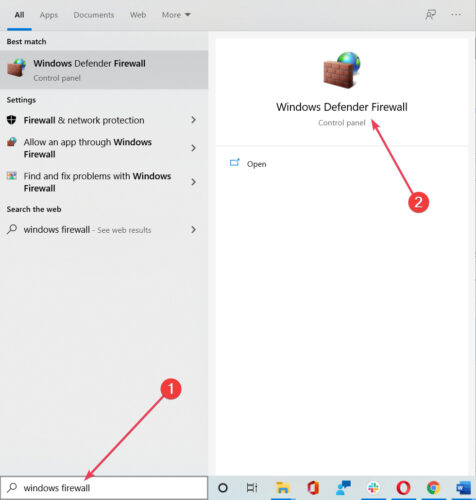
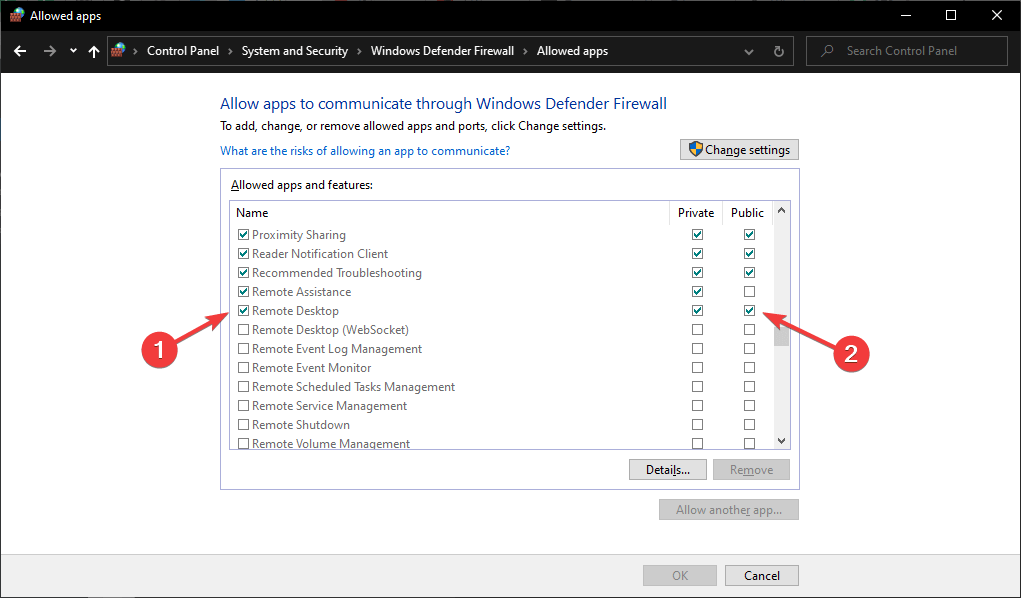


![FIX: TeamViewer trial has expired [Full Fix]](https://windowsreport.com/wp-content/uploads/2020/04/TeamViewer-trial-has-expired.jpeg)
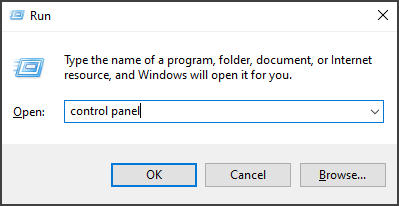


![5 Best Bitdefender Box Alternatives [Leading Solutions]](https://windowsreport.com/wp-content/uploads/2021/04/bitdefender-box-alternative-featured.jpg)