ScanGuard Antivirus Review: Is it legit and safe to use?

Browsing through Microsoft’s forum, we noticed there is one term that caught the attention of many people: ScanGuard. Most users believe this software is actually a malicious program and avoid installing it on their machines.

Other Windows users aren’t sure whether ScanGuard is a virus or not, and simply want to gather more information about it. So, is ScanGuar malware or not?

What is ScanGuard, is it safe, and should I remove it?

Do not use this, I believe it to be a scam. The first trick is it is free——-oh no it aint, sooner or later your brain will ask just how much is this going to cost me, carry on at your peril ! If you do back out (common sense kicks in) make absolutely sure you can delete it all in its entirety.

ScanGuard is a PC clean-up and optimization tool. Since it’s a very new program, there is not much information available about it.

All data indicates that ScanGuard was rolled out in September last year, but the fact that its creators have yet to provide potential users with more details is, indeed, worrisome.

However, the tool’s official website appears to be genuine, although this is not a solid evaluation criterion.

As far as users’ feedback is concerned, it appears ScanGuard leaves much to be desired because its behavior is similar to a malware’s.

Here’s what one user reports:

Beware this Scanguard software. If you don’t purchase the removal tools after it finds multiple problems on your computer it will then take over your computer via the Edge browser and threaten to lock it.

Other users report that while well-known antivirus solutions can’t detect any threats on their machines, ScanGuard comes up with a long list of potential threats.

big scam not free. found loads of malware on my computer that had just been scanned and found to be safe and clear, but they come up with loads of preinstalled alerts about infections that just are not there. then they expect you to buy it to clear your fictitious malware, not Free just a scam don’t use it.

What does Microsoft say about ScanGuard?

Microsoft’s forum moderators recommended users to stick to Microsoft Security Essentials and Windows Defender. These tools are powerful enough to protect your computer against virtually all the threats lurking in the dark.

For Vista or Windows 7 use MSE – Free. For Windows 8/8.1 and 10 use Windows Defender which in those OS’s is a full antivirus (same as MSE).
And use the Windows Firewall. Use Malwarebytes – Free as an On-Demand scanner if needed.

Why are there so many people promoting ScanGuard?
Many users are also wondering why there are so many tech websites and tech gurus promoting the product. There are quite a few positive ScanGuard reviews available online.

It is worth mentioning that ScanGuard has a very enticing affiliate program, its partners can earn up to $70 for each user that signs up for a paid account.

Of course, there may also be users and tech websites that actually found value in ScanGuard and then decided to promote the product — to each his own.

The suggested alternative to ScanGuard antivirus

While no cybersecurity company has confirmed that ScanGuard is a malware, the tool’s unstable behavior doesn’t recommend it for use. Indeed, the program appears to be genuine, yet its adware behavior ruin its reliability.

Users complained about its marketing oriented approach: you can download it for free, use it to scan your PC, but when it comes to actually removing the threats detected, you’ve got to show ScanGuard the money.

Many users wouldn’t have this hostile attitude towards ScanGuard if things had been laid out clearly from the very beginning. Again, technically speaking, the company behind ScanGuard never lied because it never stated that the tool would also remove the threats for free.

Indeed, the download and scanning processes are free. However, if you want ScanGuard to go to the next level, you need to pay.

With our software recommendation you can have total protection for your PC against malware threats. You can enjoy its amazing features for a 30-day trial period before you buy it.

Now you protect your data, can make secure bank payments, take care of your passwords and all the smart devices in your home at full capacity.

⇒ Get TotalAV

Conclusions —  ScanGuard: scam or legit?

In a nutshell, we don’t recommend ScanGuard to anyone. There are many user testimonials that point to its malware-like behavior. Also, the scan results always seem to be the same, and this raises many questions.

Another fishy element is the lack of reaction of the company behind ScanGuard Antivirus. Most user reviews are negative, yet ScanGuard has yet to issue any comments on the situation.

However, if you decide to give it a go, install it on an old PC where you don’t keep essential files and folders. In this manner, you can quickly reformat the device if you don’t like the way that the software is behaving.

Also, don’t forget to create a Restore Point before installing the software. In case anything goes wrong, you’ll be able to restore your PC’s settings and files to a time when everything was running smoothly.

We strongly suggest you check out some of the best lifetime license antivirus tools before falling prey to ScanGuard.

Please leave your comment below and let us know what has been your experience so far with ScanGuard on Windows 10 or on any other Windows OS version.

How to uninstall Segurazo antivirus [Easy Guide]

Malware enters your computer system in various forms. The Segurazo virus is a PUA (potentially unwanted application) that gets in by disguising as a legitimate productivity tool or antivirus.

This program is free to download, but many users also install it unintentionally.

Does the Segurazo harm your computer system? Is it a virus? Should you remove it? How do you uninstall the Segurazo virus? These are burning questions in the minds of everyone who’s installed this program.

In this article, we’ll answer all of these questions in detail.

Is Segurazo a virus, and should you uninstall it?

Segurazo is not really a virus, but it’s malicious. Also known as SAntivirus Realtime Protection Lite, this program claims to help you find and remove threats from your computer.

However, instead of doing that job, the Segurazo gives you false positives, showing you non-existent threats and encourages you to purchase software that you don’t need and may be harmful to your PC.

Therefore, you have to uninstall Segurazo before it causes further damage.

The Segurazo virus tricks you into downloading and installing it on your system. When you realize what the application really is, you also find that there’s no straightforward way to uninstall it.

The application hides, and you wouldn’t even find it in the Add or Remove Programs list. Even if you manage to uninstall it, the program tends to reinstall itself.

How can I uninstall the Segurazo application?

1. Use the Segurazo uninstaller

  1. Navigate to: C:/Program Files (x86)/Segurazo
  2. Double-click on SegurazoUninstaller.exe.
  3. Select Remove Protection.
  4. Restart your PC.
  5. Close all open windows and return to the Segurazo Uninstaller window.
  6. Mark the Segurazo Antivirus and Configuration Files checkboxes.
  7. Click on the Uninstall button.
  8. Don’t restart your PC when prompted. Hit No.
Note icon NOTE

2. Remove the Windows Registry entries

  1. Go to Search, type regedit, and open the Registry Editor.
  2. In the Windows Registry, hit the CTRL +F combination, search for Segurazo, and click on Find Next.
    It should take you to: HKEY_CURRENT_USER\Software\Microsoft\Windows NT\CurrentVersion\AppCompatFlags\Compatibility Assistant\Store
  3. Right-click and delete the uninstaller program found in: C:\Program Files (x86)\Segurazo\SegurazoUninstaller.exe
  4. Press the CTRL + F combination again and hit Find Next.
    This should take you to: HKEY_LOCAL_MACHINE\SOFTWARE\Microsoft\Tracing\segurazoclient_RASAPI32
  5. Delete the following folders:
    1. Segurazoclient_RASAPI32
    2. Segurazoclient_RASMANCS
    3. SegurazoService_RASAPI32
    4. SegurazoService_RASMANCS
    5. SegurazoUninstaller_RASAPI32
    6. SegurazoUninstaller_RASMANCS
  6. Press CTRL + F and click on Find Next. You should land on the following folder: HKEY_LOCAL_MACHINE\SOFTWARE\WOW6432Node\Microsoft\Windows\Segurazo
  7. Delete the Segurazo folder.
  8. Go to the following path and delete the PendingFileRenameOperations value:  HKEY_LOCAL_MACHINE\SYSTEM\ControlSet001\Control\Session Manager
  9. Press CTRL + F and click on Find Next.
  10. Delete the value: \Device\HarddiskVolume5\Program Files (x86)\Segurazo\SegurazoClient.exe
  11. Navigate to the folder: HKEY_LOCAL_MACHINE\SYSTEM\ControlSet001\Services\EventLog\Application
  12. Delete the SegurazoSvc key.
  13. Press CTRL + F and hit Find Next.
  14. Delete the value found at: \Device\HarddiskVolume5\Program Files (x86)\Segurazo\SegurazoUninstaller.exe
  15. Go up the Registry Editor navigation, and click on Computer.

3. Delete persistent files in Command Prompt

Remove DLL files

  1. Close all open programs on your system.
  2. Press the Windows key and search for cmd.
  3. Right-click on Command Prompt and select Run as Administrator.
  4. In the Command Prompt window, enter the following commands and hit Enter after every line:

del /f C:\Program Files(x86)\Segurazo\SegurazoShell64_v1069.dll

del /f C:\Program Files(x86)\Segurazo\SegurazoKD.sys

Remove the Segurazo folder:

  1. Open File Explorer and go to: C:\Program Files(x86)
  2. Delete the Segurazo folder.
  3. Permanently delete the folder from the Recycle Bin.

The process explained above is the right way to effectively uninstall the Segurazo virus for good. You don’t need to purchase or download any special uninstaller.

Also, modifying or deleting folders and values in the Windows Registry can damage your system; so you must be careful to follow the steps carefully.

4. Try an alternative antivirus tool

To make sure you don’t encounter other misleading software, you need a proper antivirus solution. That’s why we recommend using one of the most reliable antivirus tools on the market, which will protect your PC optimally.

This antivirus is available on multiple platforms, including Android, so give it a try. You also benefit from a free 30-day trial period where you can familiarize yourself with its best features.

This amazing software offers exquisite protection against all threats including spyware, rootkits, worms, viruses and even adware. So if security is a priority for you, then it’s worth a try!

TotalAV

Use one of the best antivirus solutions on the market and protect your PC from malicious software. Try TotalAV now!
Free trial Visit website

Malware has always been one of the biggest PC problems. We hope our solutions above have helped you to uninstall Segurazo antivirus safely.

If you want an antivirus with unlimited validity, be sure to try out any of the programs from our best lifetime license antivirus tools guide.

For more solutions to fix this problem or other questions, please visit the comments section below.

Fix corrupt battery alert: What is it and how to remove it

Sadly, the shock-and-awe scare tactics of the cybercriminals still work and that is increasingly concerning for all Windows 10 users.

Lots of Windows users still fall for the frivolous gimmicks, some of them get robbed of the precious data while others get completely overwhelmed by adware and PUPs.

One common false alarm informs the users that their laptop battery is corrupt, and they need to fix it with an enlisted tool.

We made sure to explain what is wab.exe in Windows 10 and provide you with ways to deal with it. Make sure to check the article in detail and find out how to fix this problem.

How can I fix the Corrupt battery prompt?

1. What is Corrupt battery prompt?

Let’s start with the most important disclaiming fact. Your battery can’t get corrupted. It can deplete faster than usual but you can also do something to preserve some of that battery life.

But it can’t get corrupted. What are we looking at is the malware scam in action.

One of the many false alerts which prey on inexperienced users. They click on the pop-up, thinking that the message comes from the system.

Hoping to fix this critical issue, they open their system to malicious invaders and that’s when the real problems start.

These can lead to a recently popularized ransomware attack or your whole system might get infected with a virus or adware.

Usually, they’ll suggest installing a frivolous third-party tool that will magically fix the battery corruption.

That’s why the presence of the antimalware solution, be it Windows Defender or a third-party suite, is of the utmost importance.

So, if you ever see a prompt which claims that a piece of your hardware, especially battery, is corrupted, avoid it like a plague. Don’t click on it and don’t download anything it offers.

2. How can I remove the Fix corrupted battery scam?

2.1 Use Windows Defender

  1. Open Windows Defender from the taskbar notification area.
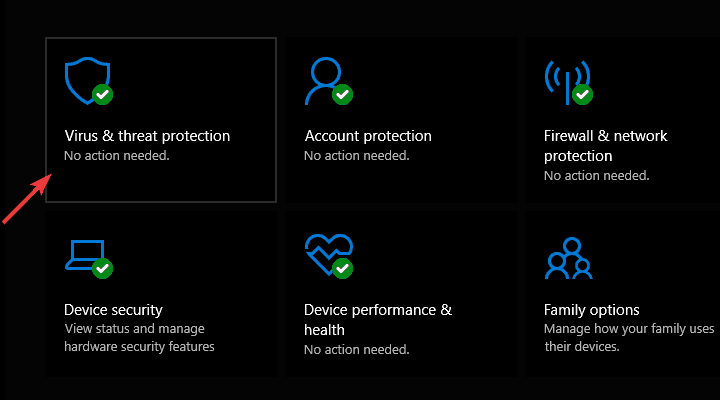
  2. Choose Virus & threat protection.fix corrupt battery
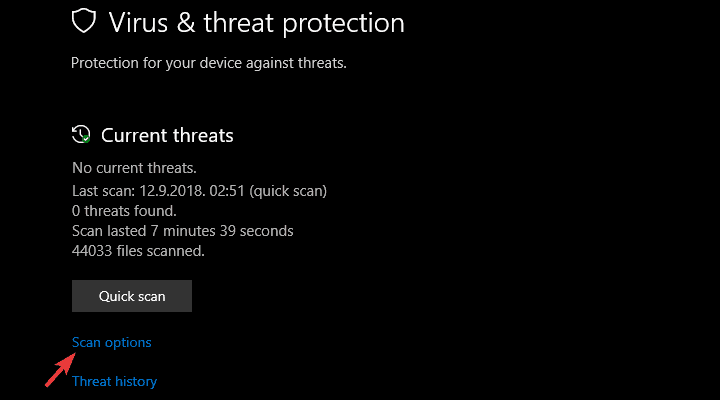
  3. Choose Scan options.fix corrupt battery
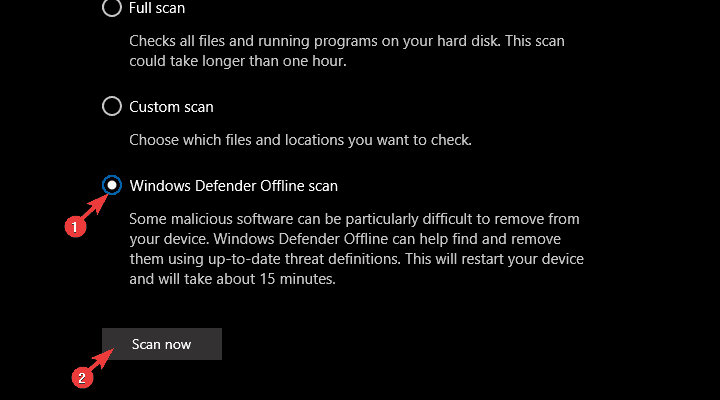
  4. Select Windows Defender Offline Scan.
  5. Click Scan now.fix corrupt battery
  6. Your PC will restart and the scanning process will commence.

In addition, you probably want to remove it from good and make your PC safe to use again. This is the next step you’ll need to follow through.

Most of the antimalware solutions will deal with it automatically. However, depending on the quality of the tool, these malicious atrocities can slip in without detection.

But not for good! By performing a deep scan, you should be able to clean everything. In addition, we suggest using some kind of anti-PUP and anti-Adware tool to clean all affected browsers.

We showcased the procedure for Windows Defender above. Of course, you can use any combination of security programs to get basically the same results.

2.2 Use a third-party antivirus

Windows Defender offers great protection but it’s not a top security solution and it might not get the job done and remove this malware.

That’s why we recommend using a third-party security solution that will definitely remove this pesky PUP and if you’ve had it installed it wouldn’t have allowed this prompt to get into your system in the first place.

The various versions of this antivirus is installed by over 110 million users around the world and that makes it a trusted solution everywhere.

TotalAV

TotalAV comes with a complete and reliable solution that will get rid of any malware and protect you further from other threats.
Free Trial Visit Website

After that, you shouldn’t see any more false alarming prompts regarding your battery. We can also advise keeping your eyes open while browsing and downloading third-party applications.

Lots of them tend to sneak in a PUP into your system. As they sometimes come through with an e-mail, you should also check our list with the best e-mail scanning software to get rid of any malware.

We provided the corrupted battery fix that should solve the problem. If you have additional questions or suggestions, make sure to post them in the comments section below. We’ll be glad to hear from you.

Snipping Tool Couldn’t Copy That Image: How to Fix it

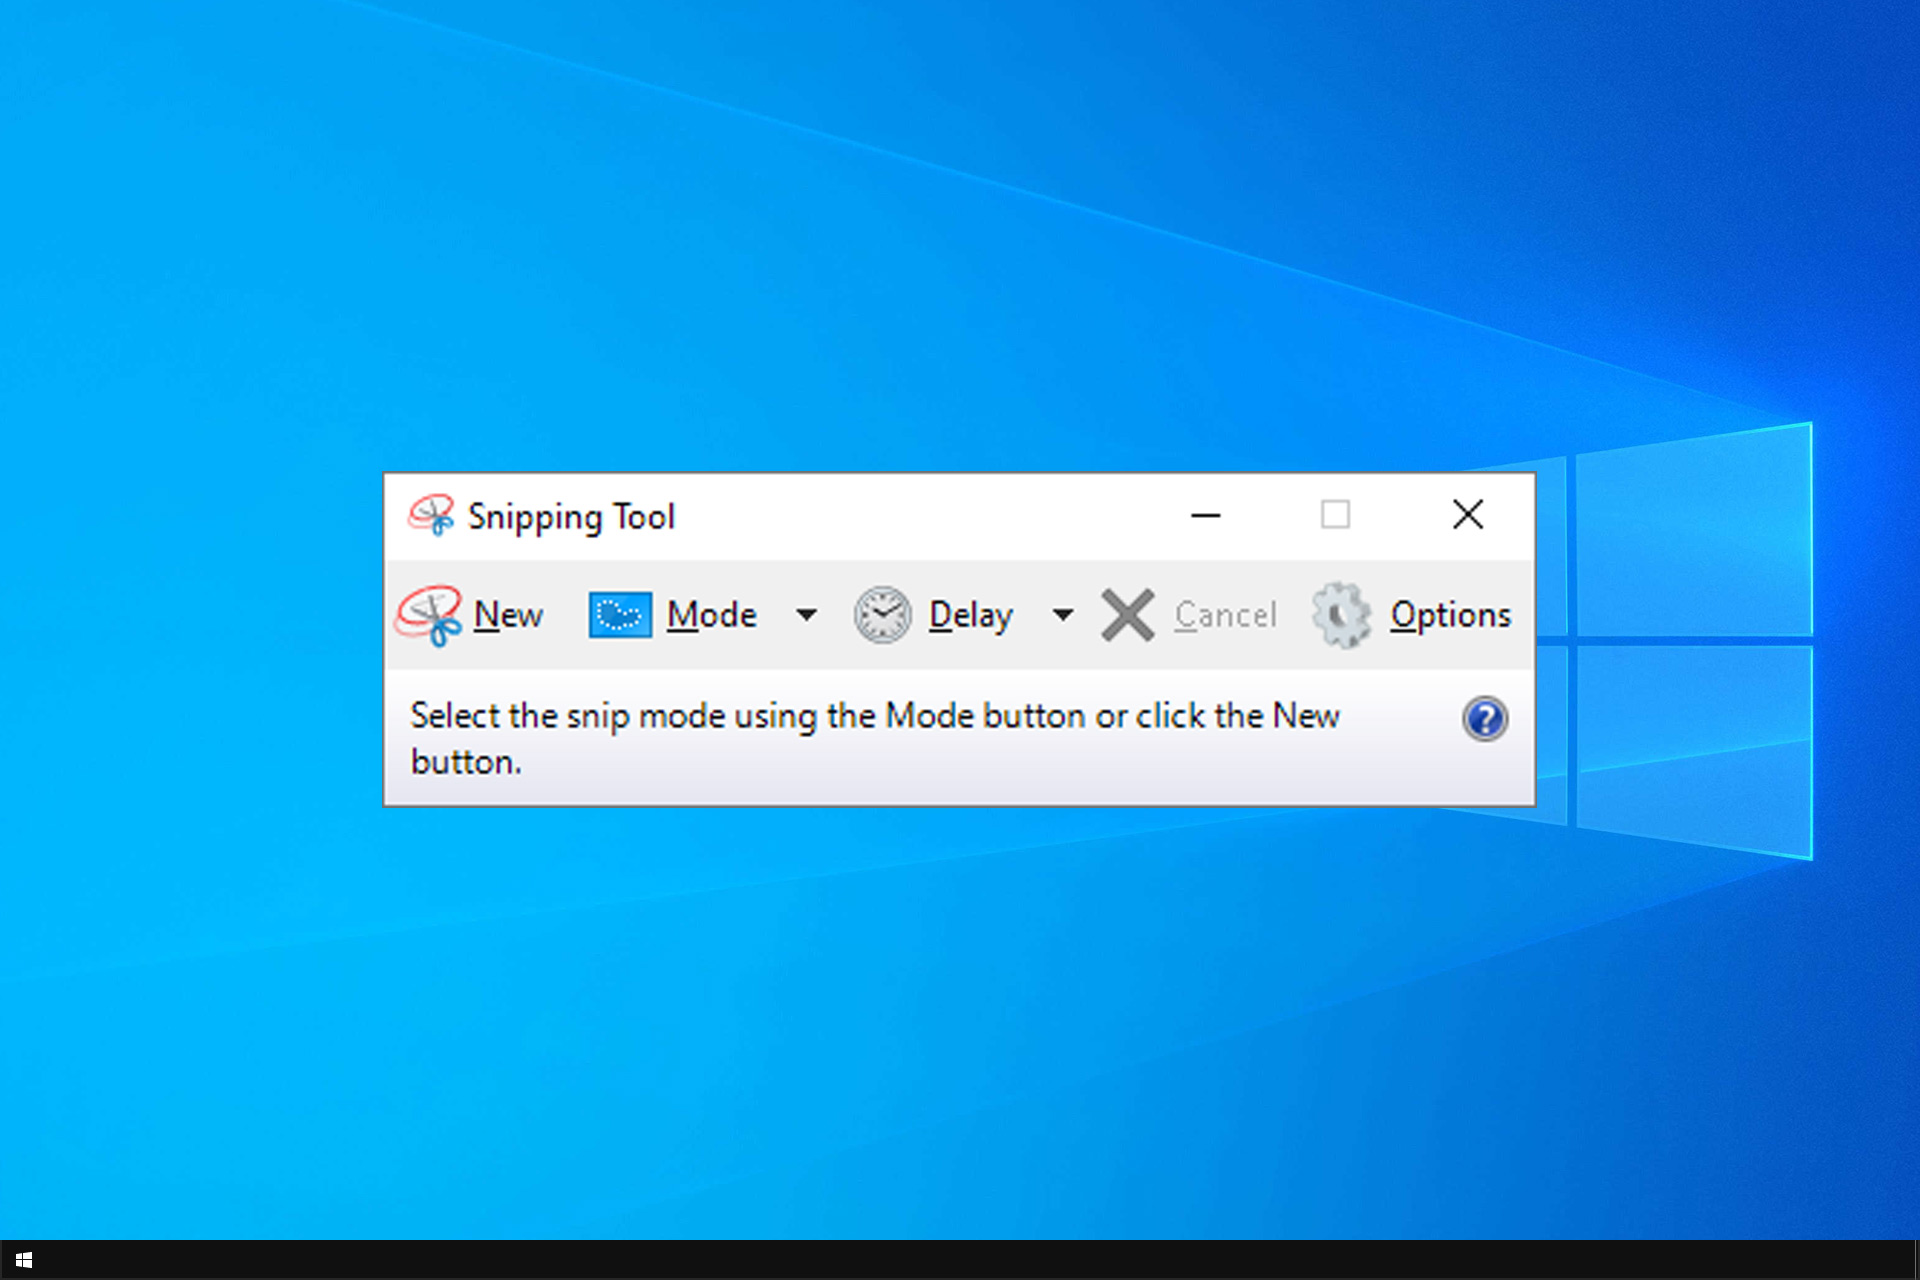
Snipping Tool can be useful if you want to make screenshots. However, many reported Snipping Tool couldn’t copy that image error message.

This will prevent you from copying and editing screenshots, which can be a big problem. However, you can always view snips and screenshots location and find your files.

However, this is just a workaround, so let’s see how we can fix this problem permanently.

Why can’t I copy an image in the Snipping Tool?

  • You might encounter this issue if the Auto copy feature isn’t enabled on your PC.
  • In some rare cases, third-party applications can cause interference with this feature.

How do I fix Snipping Tool couldn’t copy that image error?

1. Check the Auto copy to clipboard option

  1. Open the Snip and Sketch tool from the Desktop or Action Center.
  2. Click the Menu button (three dots).
  3. Select Settings from the options.
  4. In Settings, under Auto copy to clipboard, make sure the Update the clipboard automatically when annotating option is enabled.
  5. If not, turn on the option and close the Settings window.

On Snipping Tool:

  1. Launch the Snipping app and click on Tools.
  2. Click on Options.
  3. Check the Always copy snips to the clipboard option.
    Enable Copy to Clipboard option in Snipping Tool
  4. Now try to snip anything on your screen and check if it copies the image to the clipboard.
  5. If you don’t see the Settings option in your Snipping App, you may have to update your Windows OS to the latest build.

After making these changes, check if Snipping Tool is still not saving to clipboard. If Snipping Tool is not working, you won’t be able to paste in Paint as well.

2. Repair Microsoft Office

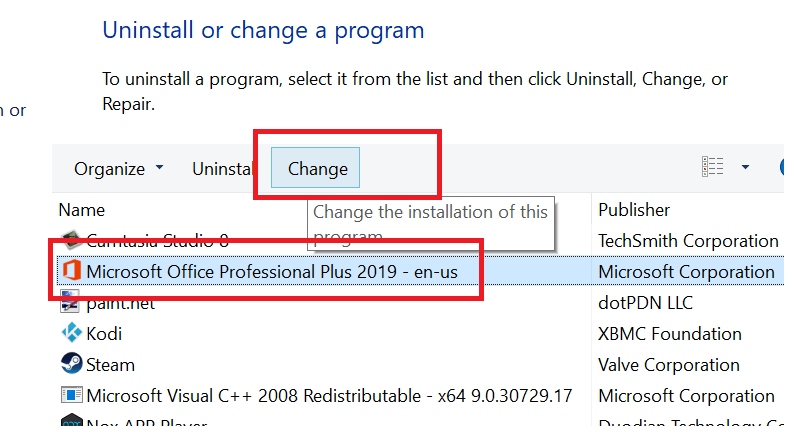
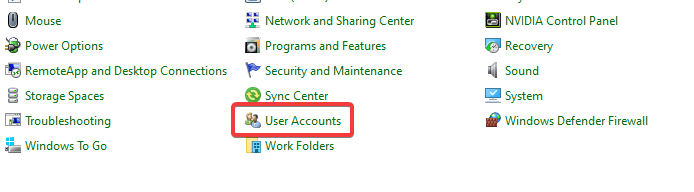
  1. Type Control Panel in the home screen search box and open the app.
  2. In the Control Panel, go to Programs and select Programs and Features.

  3. Select Microsoft Office and click on Change. Click Yes if asked to confirm.
  4. Here, you will see the following options:
    Quick Repair – Select this option first. It will quickly try to repair all the files related to your Office application without requiring internet access.
    Online Repair – Use this option if Quick Repair does not work. However, this option requires an Internet connection to find and resolve the issues.
  5. Reboot the system once the repair is complete and check for any improvements.

The solution is valid if the issue occurs when you try to copy/paste the screenshot on any of the Microsoft Office apps like Outlook or MS PowerPoint.

As you can see, it’s pretty simple to fix Snipping Tool couldn’t copy that image error message on your PC.

Unfortunately, this isn’t the only issue you can encounter, and many reported that they can’t find Windows Snipping Tool, however, we covered that issue in a separate guide.

What method did you use to fix this problem? Share it with us in the comments section below.

PowerToys experimental version 0.36 is now available with Video Conference Mute tool

Microsoft has released a new update of its PowerToys suite of tools to users running the pre-release versions. The experimental version 0.36 contains all the additions and fixes that were included in version 0.35, along with the much-anticipated Video Conference Mute tool.

Microsoft first announced the Video Conferencing utility back in September last year. As the name suggests, it enables users to mute audio and video feed during video calls with a single keystroke. However, the team had to remove it in subsequent releases because it needed more time to iron out issues and ship a workable solution.

After months of waiting and anticipation, the Video Conference Mute tool is finally available for testing in the experimental builds. The company adds that it has changed the virtual webcam driver into a DirectShow filter “This is our first release with the webcam driver actually being a DirectShow filter. This solves a multitude of quirks and simplifying the signing through our compile pipeline,” said Clint Rutkas, Program manager lead on PowerToys.

Moreover, it turns out that there are still a bunch of known issues with the Video Conference Mute feature, despite being tested for so long. Here’s the full list of known issues and limitations:

  • with some webcams, there is an incompatibility with Teams and the overlay image is not rendered, instead a corrupted frame is shown. If your camera has this quirk, please let us know the model in the [main tracking issue – #6246]
  • the application preview (Teams, Meet, etc.) may show the overlay image flipped horizontally but that is expected, the image will show correctly to the other people on the call.
  • in order to enable/disable the VCM, PowerToys should run as administrator
  • changes to some of the VCM settings require the application to restart to pick up the new values such as a new overlay image.
  • in some cases, the overlay image can be shown flipped vertically (the workaround is to edit the image and flip it before selecting it).
    (#6246)
  • if the PowerToys Video Conference Mute webcam doesn’t show up in the video conference app, try restarting the app and if still doesn’t show up try restarting Windows.

As of this writing, there is no word on the possible ETA for the official launch of the tool, and the firm is currently fixing bugs and finalizing the offering. Those that are interested to install the experimental version can head to the GitHub page to try out the Video Conference Mute feature.

How Good is Windows Defender to Protect My Computer

If you want to install a reliable antivirus on your Windows 10 PC but don’t know the best free antivirus, we are here to help you.

Even though many users swear by third-party security software solutions, Windows Defender should not be cast aside, as the software comes pre-installed on all Windows 10 devices for free.

This antivirus software has received several improvements in the last few years, but read more about it below.

Does Windows Defender protect your Windows PC?

is windows defender good

Microsoft has done an excellent job adding new features and upgrading a lot of the functions that Windows Defender comes with.

Now, having included ransomware protection, browser control, and device performance, the built-in antivirus can hold its own against most other antivirus utilities.

In the battle for the best free Windows antivirus between Windows Defender and Avast, Maximum PC choose Avast, but here’s what they said about Windows Defender:

Avast wins this bout by taking three of the five categories and tying in another, though it’s not quite as lopsided as it appears. Windows Defender, while not as fully featured as Avast, is capable of blocking common threats, and it doesn’t put a drain on system resources. Avast’s army of defenses is just bigger and better trained to spot danger from more places, like IM clients. It also has a bigger arsenal of weapons.

If you want extra protection or more features like email scanning or machine learning to block malware automatically, then you might be better served by a third-party antivirus solution.

Third-party antivirus software that can replace Windows Defender

As a third-party antivirus solution to replace Windows Defender, we recommend a tried and tested alternative.

Similarly to Windows Defender, our suggestion has little to no impact on your system, and it will quietly work in the background to provide the best level of security one can hope for.

In addition to the features offered by Windows Defender, using our suggestion, you can benefit from more specialized tools that incorporate functionality obtained by using several programs.

You have top-notch anti-malware protection, also a webcam protection, and all this with low system requirements.

Also, keep in mind that you can try out this antivirus for 30 days, completely free and with full functionality.

TotalAV

Enjoy the protection of your data and your Windows PC with this reliable antivirus solution.
Free trial Visit Website

If you are looking for an alternative to protect your PC, check out our list of the best lifetime license antivirus tools, and find the right one for your needs.

While Windows Defender is pretty reliable, if you encounter any issues, you can always use Microsoft Safety Scanner to remove viruses from your PC.

To ensure that no security issues occur, read our guide on the best Microsoft Defender advanced threat protection settings.

For more suggestions, please access the comments section below. Also, let us know what you prefer: Windows Defender or third-party security software.

Kingdom Two Crowns video game is free to play on Xbox One and Xbox Series X this weekend

As part of Microsoft’s weekly Free Play Weekend campaign, Kingdom Two Crowns has now been made free to play for all Xbox One and Xbox Series X console owners with an active Xbox Gold Live subscription.

As with previous Free Play Weekends, the video game will remain completely unlocked and free to play in full until the end of Sunday at 11:59 PM PDT.

Kingdom Two Crowns is a side-scrolling game that launched on Xbox One back in 2018. Kingdom: New Lands, also now available, builds on the world established in Kingdom Two Crowns while both are included in the Kingdom Treasury Collection for those that want to really dive in.

Here’s the official game description for Kingdom Two Crowns:

Kingdom Two Crowns is a side-scrolling micro strategy game with a minimalist feel wrapped in a beautiful, modern pixel art aesthetic. Play the role of a monarch atop their steed and recruit loyal subjects, build your kingdom and protect it from the greedy creatures looking to steal your coins and crown.

In the brand-new campaign mode, monarchs must now work to build a kingdom that stands over time until finding a way to defeat the Greed for good. Explore the environments to discover new mounts and secrets hidden in the deep. But you don’t have to rule alone! Introducing a cooperative play experience that is totally unique to Kingdom: Two Crowns, monarchs can now choose between a classic solo experience or seek the assistance of a friend, working together locally or online, dropping in or out at will.

Are you going to play Kingdom Two Crowns this weekend on your Xbox Series X or Xbox One? Let us know why or why not in the comments below and then follow us on Pinterest and Twitter for more Xbox gaming news.

Kingdom Two Crowns
Kingdom Two Crowns
Developer:
Raw Fury
Price:
$19.99


Kingdom: New Lands
Kingdom: New Lands
Developer:
Raw Fury
Price:
$14.99


Kingdom Treasury Collection
Developer:
Raw Fury
Price:
$29.99

MOVAVI Video Editing Range of Products [Review]

With the outgrowing number of content creators, online courses, and remote jobs, the demand for adequate software that helps interaction and learning has also increased.

Specialized software is required to create a video showcasing something, a tutorial meant to teach people, or even entertaining content for platforms such as Vimeo, YouTube, and many others.

There are many video editing software out there, some of them good, some of them bad. It is really important to choose software that suits your needs.

In other words, the quality of the programs you use to create, edit and finish your video will be reflected in your line of work.

That being said, today we are going to review some of Movavi‘s video editing software. Let’s see what these interesting tools have in store for us.

Movavi Video Editor

Movavi Video Editor is a comprehensive, easy-to-use desktop software that lets you dive into your creativity and develop crazy ideas into awesome videos.

Telling your story and inspiring others has never been easier, thanks to Movavi! The newly refined user interface has all the software’s tools at your fingertips.

Movavi Video Editor comes with two modes:

  • Quick Video: for creating movies automatically
  • Manual mode: for creating movies manually

Quick Video

This mode will automatically create movies based on videos and photos you upload. The process takes only 5 steps:

  1. Upload your files (either photos or videos).
  2. Choose the template that you like: Family, Memories, Love story, Travel, and more.
    • The template will define the titles, transitions, and music in your video.
    • Additionally, you can choose the No transitions theme and customize it yourself.
  3. Choose a soundtrack from the built-in collection, or upload your own.
  4. Preview your video. Insert text in the opening and closing titles, adjust the slide duration, and fill the black bars.
  5. Export the results. You can save the videos in any format, share them online, or continue editing them in manual mode.

Manual Mode

The manual mode gives you full control and editing freedom. You can customize your videos entirely, add your effects and other files, crop, cut, and insert video sections.

The editing space is multitrack, which lets you add up to 99 tracks that you can use in your video, audio, and titles. The handy timelines mark the length of your video.

You can scale it up and down for more precise editing. Thanks to the drag-and-drop style of controls, everything is done easily.

The preview window on the right lets you see the results and adjust the quality of the video for the preview. Keep in mind that higher resolutions will take up more system resources.

Additionally, the preview windows allow you to change the aspect ratio, enable guidelines for placing objects, and take screenshots.

The manual mode contains a series of useful editing-related tabs. Let’s take a look at them, shall we:

Import

In the Import tab, you can upload files from your computer, and record yourself with the webcam or microphone. You can add your files directly to the multitrack, or you can store them in the Media Bin for later use.

Additionally, you will find built-in content such as sounds, music, videos, backgrounds, and effect packs.

Filters

This tab contains a broad range of image and audio filters, including artistic effects, color filters, blur effects, 3D objects that you can insert into the video.

If you’re a fan of old movies, you can use one of the retro filters to give your work an old-school feel. You’ll find options such as sepia, vignette, grayscale, and much more.

Moreover, the tab also includes a Favourites section where you can find selected filters of your choice. To favorite a filter, all you need to do is click the heart icon.

Transitions

The Transitions tab contains a plethora of different effects, and even more available on the Movavi Effects Store. Join your clips together with elegant fades to make your video feel smoother.

Choose from parallax, artistic, zoom, circle, blocks, geometric, and many more quality transitions and give your video the uniqueness it deserves.

Titles

Next, we have the Titles tab, which contains different fonts to add to your videos. You can find more awesome fonts on the Movavi Effects store.

You can use an animated template to create opening or closing credits, subtitles, or captions, and you can also create your own intro video and save it as a sample.

Stickers

Another awesome and comical tab that lets you give your videos a heartwarming and cozy feel is called Stickers.

This collection of stickers contains various clip-art objects, arrows, headlights, emojis, and many more cool additions you can find in the store.

Tools

The Tools tab has enhancements and special effects for video and audio editing.

Video Editing:
● Color adjustments: easy (automatic filters and LUTs) and advanced (manual settings)
● Crop and rotate
● Overlay
● Pan and zoom
● Stabilization
● Animation
● Highlight and conceal
● Chroma Key
● Scene detection
● Logo
● Slow-motion

Audio Editing:
● Synchronization (similar tracks from different devices)
● Equalizer
● Noise removal
● Audio effects
● Beat detection

Export

Save your results in any file format available, including MP4, MOV, AVI, GIF, MP3, and even more by clicking the export button.

Moreover, you can also upload your video to YouTube, Vimeo, or Google Drive directly from the inside of the program, or optimize the output for your device.

Besides choosing the file format, you can also choose the aspect ratio, resolution, and video quality, and you will get information about the audio, and the file size before you finish exporting.

Pricing

Before mentioning the prices, you must know that Movavi Video Editor has a 7-day trial period which you can test out before you upgrade to one of its two price plans.

However, the trial version has some limitations:

  • Lasts for 7 days
  • All videos will have a watermark on them
  • When saving a project as an audio file, only half of the audio is saved

One year subscription

  • $39.95 renewed yearly
  • Benefit from all features
  • No watermark
  • No cut audio when saving in the audio format

Lifetime purchase

  • $59.95 for a lifetime purchase
  • Benefit from all features
  • No watermark
  • No cut audio when saving in the audio format

Movavi Video Editor

Create awesome content and customize it with a variety of effects by using Movavi Video Editor!
Check price Visit website

Movavi Video Converter

Being a content creator requires more than video editing software. It implies lots of research hours, searching for the perfect thumbnails or other multimedia you will include in the final product.

Thankfully, the company developed another tool that will help you during your research and content planning, respectively, Movavi Video Converter.

What is Movavi Video Converter, exactly? Simply put, it is a fast desktop multimedia conversion software that supports video formats but audio and graphic files as well.

The tool has a detailed UI, filled with useful information and options, yet it manages to keep everything simple, therefore, it is easy to use, requiring only 3 steps:

  1. Upload your files.
  2. Choose the output format or device.
  3. Click Convert and you’re good to go.
Note icon NOTE
If you’re interested in the program’s supported formats, you’ll be pleased to know that Movavi listed all of them on their official site.

Overview

Besides converting the files on your PC, Movavi Video Converter can identify any connected tablet or phone and will suggest optimal conversion changes.

You will also benefit from some additional settings for advanced file conversion:

● manually adjust bitrate type, bitrate size, and file size to see how it affects
the output quality
● convert a sample to make sure you like the results
● select audio tracks and remove the ones you don’t need
● change the frame size, frame rate, resize quality, and method

The built-in editor allows you to enhance your files if needed:

  • stabilize shaky footage
  • adjust colors manually or automatically
  • overlay effects: fill edges, fish-eye, sharpen
  • add color filters
  • crop videos
  • normalize volume
  • remove background noise
  • rotate and trim videos without conversion
  • add a text or image watermark

Movavi Video Converter has a whole range of tools for working with subtitles:

  • upload a file from your computer
  • search online from within the program’s interface
  • change fonts, colors, and position
  • synchronize subtitles with audio and video
  • remove unnecessary language tracks

Hardware acceleration

Movavi Video Converter supports hardware acceleration for NVIDIA NVENC, NVDEC, Intel HD Graphics, and AMD.

What is hardware acceleration? It’s a process that uses certain hardware to its full potential, thus making the conversion process faster.

Additionally, the converter is also optimized for multi-core processors, which dominate the market nowadays, using them most efficiently not to overload the CPU.

Learn everything about the software’s hardware acceleration, how it works, and its impact on its speed in Movavi’s official article.

SuperSpeed mode

Since we’re talking about speed and fast computing power, we need to mention Movavi’s Video Converter SuperSpeed conversion mode.

This mode is available only for specific formats and lets you convert files with the same codecs, but you cannot change the file’s properties.

It is based on the remultiplexing method that doesn’t require decoding and reencoding, thus keeping the file quality while taking only a few seconds to convert it to another format.

Obviously, you will have all the information and spicy details regarding the way this mode works and how impactful it is on their official site.

Pricing

Movavi Video Converter follows their price plan model, having a limited trial version as well as premium paid versions.

The trial version:

  • Watermarks the output videos
  • Has a 7-day trial period
  • When converting the audio files, only half of their length is converted
  • When using the SuperSpeed mode, only half the length of the video file is converted

One year subscription

  • $39.95 renewed yearly
  • Benefit from all features
  • No watermark

Lifetime purchase

  • $49.95 for a lifetime purchase
  • Benefit from all features
  • No watermark

Closing thoughts

We messed around with both programs for a while, and we were pretty pleased with what they are capable of.

We were never confused by the features because most of them have tutorials explaining what they do and how to use them, and the interface was easy to follow.

However, even if the free trial includes all the cool tools these programs have, it is still limited to 7 days. That shouldn’t be a problem, however, since upgrading to premium is totally worth it.

Movavi Video Converter and Video Editor are definitely on our top list of video editors, especially if you’re a beginner just starting on content creation.

New Surface Neo video leak appears on YouTube

In 2019, Microsoft announced two new dual-screen mobile devices at a New York hardware event. The Surface Duo and Surface Neo were the devices revealed at that event.

While the big M has released the Duo, the Neo remains on ice. A new YouTube video suggests Microsoft has canceled the Neo.

The Surface Neo was originally slated for a 2020 release. However, that device has not seen the light of day. Microsoft has reputedly delayed Surface Neo because of a changed Windows 10X strategy.

Therefore, it has been speculated Microsoft will hold back on releasing Neo until 2022.

Some speculate that the delay may lead to a cancelation

Such delays have inevitably fueled rumors that Microsoft has canceled Surface Neo. A new Hikari Calyx Tech video page on YouTube says the Surface Neo has been canceled.

That page includes the video directly below.

That video shows what looks like a genuine Surface Neo like the one shown in the official Microsoft Neo video. The video includes what looks like a prototype chassis of the Neo tablet. The device doesn’t incorporate its paired displays.

Rumors about Neo cancellation were raised by changes on the big M’s website. Microsoft has completely removed the Surface Neo product listing page from its website.

The original product listing page for the Neo once said Microsoft will release that device in the 2020 holiday season.

Yet, Microsoft’s Mr. Panay reiterated throughout 2020 the Neo is only delayed. In a Verge interview, Mr. Panay is quoted as saying:

Neo is delayed… I wanted the right time to bring that product with the right experience. We believe in that concept and form factor and size. It will be a beautiful complement to Duo with Windows and I’m excited about it. It’s a product that’s near and dear to my heart.

So, the official Microsoft line is that the Surface Neo has been delayed. If you really can’t wait for the Neo, Microsoft’s Surface Duo dual-screen mobile is the next best thing that is currently available

No Man’s Sky suddenly got laggy [Quick Fix]

No Man’s Sky is an exploration survival game released back in 2016. The game is available on Windows PCs, Xbox One, and PlayStation consoles.

Years after the initial release, and after several updates, the game is still affected by various issues. Some gamers said they encountered performance issues where the game suddenly started lagging on their devices.

One of the users even turned to Steam and created a thread about the issue. The OP described the issue in the following manner:

The last time I played the game was last year and everything was silky smooth. I was quite happy with performance. I’ve just started it again to check the latest updates and the whole thing is laggy as hell, even after turning settings way down and restarting. I’m currently going from 80fps down to 5fps with no warning, huge hiccups and lag spikes.

Many players from the gaming community responded to the thread confirming they also noticed performance issues. One of them encountered mouse sensitivity issues and reported that textures not loading properly.

How do I quickly fix No Man’s Sky lag issues?

Some gamers suggested updating the video card drivers or clearing the cache. Some players confirmed that clearing the cache worked for them. 

It looks like this problem is mainly caused by your system’s hardware configuration.

Alternatively, if the problem persists, you can uninstall the game, delete all the folders from your device with a dedicated tool such as CCleaner and then install the latest updates.

If you’ve successfully tried another method, please share it with us in the comments.

FIX: Password expired/ Remote PC won’t accept blank passwords

If you find yourself seeing the error message Your password may have expired or the remote PC might not accept blank passwords, you came to the right place.

This error occurs when trying to connect to a remote PC by using Remote Desktop, and a large number of users facing this issue are not happy about it.

Encountering this error message means that you will not be able to connect to the remote server, and the reasons for this error appearing are very varied.

There could be some issues with your Network Adapter, the machines you’re trying to connect might not be compatible because of different settings, or it could be caused by a conflict in installed drivers.

In today’s article, we will explore all the possible reasons for this error occurring, and we will discuss the best methods to apply in order to solve it.

Please follow the steps mentioned in this article in the order that they were written in. This will allow you to avoid making any changes that would impact your system badly.

How do I fix password issues on Remote Server?

1. Run the Network Adapter troubleshooter

  1. Press the Win+X keys on your keyboard and select Settings.
  2. Inside the Settings window, click on the Update and Security button.
  3. Choose the Troubleshoot option from the left-side menu.
  4. Scroll inside the right side menu and choose Network Adapter.Network adapter troubleshooting - Your password may have expired or the remote pc might not accept blank passwords
  5. Select Run the troubleshooter and follow the on-screen instructions to complete the process.

2. Change your server’s password and update your network drivers

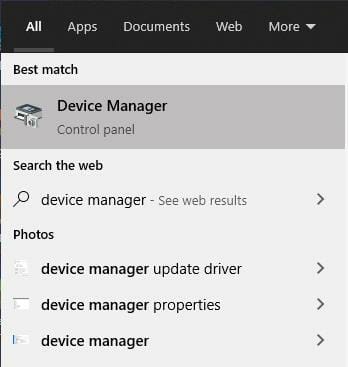
  1. Press Win+X keys and select Device Manager.
  2. Inside the Device Manager window, toggle the Network adapters list.Network adapters - Your password may have expired or the remote pc might not accept blank passwords
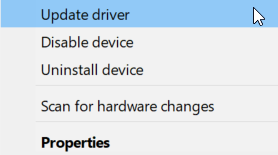
  3. Right-click your Network driver and choose Update driver.
  4. Press the option Automatically search for the best driver online then wait for the process to complete.
  5. If the search didn’t find any new drivers, please follow the next method. 

3. Disable the Network Level Authentication option

  1. Press Win+X keys on your keyboard and choose Settings from the menu.
  2. Click on System and choose the Remote Desktop option.System option inside Settings - Your password may have expired or the remote pc might not accept blank passwords
  3. Click the option Advanced settings found on the right.
  4. Un-tick the box next to Require computers to use Network Level Authentication to connect (recommended).
  5. Check to see if this fixes your issue.

4. Restart the Remote Desktop Services

  1. Press Win+R keys; type services.msc and press Enter.
  2. Inside the Services window, right-click the Remote Desktop Services and select Restart.Remote Desktop restart - Your password may have expired or the remote pc might not accept blank passwords
  3. Try to see if this method fixed your issue.

If you can’t fix the problem, you can try Mikogo as alternative remote management software. It is a popular tool that has many useful integrated features. Moreover, if you need additional support with your device, you can try these remote troubleshooting tools.

In today’s guide, we explored the best troubleshooting methods to apply in order to repair the Your password may have expired error.

Please feel free to let us know if this guide helped you solve your issue. You can do so by using the comment section below.

Posted in Fix

How to control the PC from your Android phone via Wi-Fi

There are moments when you want to have access to your Windows 10 computer while relaxing on the couch, being in another room, and enjoying your dinner.

Or you might need some documents from your computer and you search for alternative ways to manage your PC so that you can easily move slides and keep your audience engaged.

For such scenarios that are quite common, we present you with some great applications that allow you to control a computer from your Android phone via Wi-Fi.

There are not too many reliable apps that you can use on your Android smartphone or tablet to control your Windows 10 device.

But we have scanned thoroughly and found no less than five of the best remote control apps to use. Without further ado, take a closer look at what they have to offer right away.

What are the best apps to control the PC from Android?

Mikogo

To instantly connect to a meeting or try to screen share instantly on your phone, we strongly suggest using Mikogo. 

This platform links a huge number of users using a web browser on both the Mac and Windows operating systems. Let’s take a look at Mikogo’s features:

  • There is no need to download anything, you connect directly through a mobile browser 
  • Send files instantly 
  • 128 bit secure encrypted connection 
  • Cross-platform function to ease file transfer from Android to iOS
  • Access your PC remotely from the mobile app available to download
Mikogo

Mikogo

Instant connection and fast sharing through a browser? You’ll be able to do it with Mikogo!
Check priceVisit website

Microsoft Remote Desktop

The official Microsoft Remote Desktop application uses the RDP protocol, offering a fast and reliable way to access your Windows 10 system without installing additional server programs.

You need to enable remote connections on your PC by going to Control Panel > System and Security > System, then click on Remote settings from the left panel.

Then, on the Remote tab, simply check Allow remote connections to this computer. After doing that, connect your PC with an Android device.

Install, open the application, and tap on the + sign. Enter a name for your connection, the hostname or IP address of the PC, the login credentials, and click on Done.

⇒ Get Microsoft Remote Desktop

TeamViewer

get TeamViewer

For those of you who don’t know, TeamViewer also offers easy, fast, and secure remote access, being one of the world’s most popular providers.

You can control any Windows, Mac, and Linux computer from your Android device via Wi-Fi. TeamViewer is free for personal use and keep in mind that it’s capable of sound and High Definition video transmission.

After you download and install it, run the program on both your systems and from your Android device, connect to the PC using the ID and Password shown in the TeamViewer window.

⇒ Get TeamViewer

Splashtop

To access your computer from across the Internet you can use Splashtop, making your Android device control a PC simply via Wi-Fi.

The application fully supports Windows 10 touch gestures, giving you access to your applications and all data you have.

If you like the idea, Splashtop Personal is free, for personal use enabling you to use your desktop as you wish. For connecting to up to 5 computers, security, and manageability, there is a business version available, Splashtop Business.

Keep in mind that it is very easy to use. The first steps involve downloading and installing Splashtop on your Android device, then creating an account using an e-mail address and a password.

Then, you ned downloading the app on your Windows 10 system from the developer’s website and log in using the account you just created.

Now all you have to do is search for your computer on the Android device and connect. On a further note, interactive 3D gaming is part of the package as well.

⇒ Get Splashtop

Chrome Remote Desktop

As most of you enjoyed at least once the Google Chrome browser, you must know that is a tool that is extremely easy to use.

Well, let us tell you that you can remotely control your Windows 10 directly through it. All you have to do is to install a Chrome Remote Desktop extension on the browser, on your Android phone.

After that, just pair your device with your Windows 10 computer. You may now forget all about using your mouse and keyboard to control your computer

⇒ Get Chrome Remote Desktop

AnyDesk

get AnyDesk

The most noteworthy tool that you can use to control the Windows PC from your Android phone is none other than AnyDesk.

You should know from the very start that it provides robust communication across all major operating systems: Windows, Mac, and Linux for desktops, as well as Android and iOS for mobiles.

Therefore, if you ever change your mind and switch platforms, AnyDesk may easily remain your choice. What more could you take into consideration?

Well, when data is being transferred between devices, connections are secure. This software provides high levels of security with encryption and verified connections, keeping your data safe from prying eyes.

These are some key features that you’re about to enjoy:

  • User-friendly, intuitive interface
  • Increased stability
  • Safe access guaranteed by bank-level security standards
  • Two-Factor Authentication
  • Technical support by help desk ticket

⇒ Get AnyDesk

Hence, you are looking for alternative ways to control your computer. Doing so from your Android phone via Wi-Fi is easier than you can imagine, as you can see above.

Moreover, take a look at these best software tools to control another computer on Windows 10. Some of them may be what you need as well.

If you’re looking to perform other tasks like using your tablet as a drawing pad for your PC, we have a detailed guide on how to go about it.

Do not forget to let us know in the comments which of these apps is your final pick and if you managed to efficiently manage your PC.

Microsoft drops cross-device Timeline in the new preview build

Microsoft launched the new Windows Preview Build 21359 to all Windows Insiders with notable improvements in terms of new features.

It seems that Microsoft continues in the same trend as the previous build that brought along many user experience changes.

In terms of notable fixes, it’s worth mentioning that the developers have focused on issues caused by updates, which are extremely frequent with any system version.

Important feature changes and fixes in Preview Build 21359

1. No more device syncing

Windows Timeline eliminated

Starting with this build, those using the synching function across all their Windows devices are in for a great disappointment.

As such, they will no longer be allowed to upload new activities in Windows Timeline since all major browsers have an activity history included. Additionally, Microsoft suggests using OneDrive or Office to view recent files.

The activity history will remain accessible locally, only on that machine.

Introduced back in 2017, Timeline was meant to sync the users’ activity across all their devices connected via the same Microsoft account and allow them to pick off an activity where they’d left it.


2. News and Interest rolled out for all devs

news and interests on taskbar

All those part of the Dev Channel will now see the News and Interests feature on their Taskbar once they install this build.

It’s possible that the feature crashes upon hovering the mouse over it in this first stage, as some users complained on Twitter.

Until now, Microsoft only rolled out the feature to a limited number of Insiders. It’s expected that the feature will also be included in the stable and greater general update to be launched this spring.


3. Restart apps after a reboot

restart apps after reboot

Similar to browser behavior after an unexpected crash, Microsoft now ads a shortcut in the Start menu for users to resume activity after a reboot.

This setting appears in the Start menu and needs to be checked, to toggle the option under Settings > Accounts > Sign-in options > Restart apps.

Reactions about this feature have already started to appear on social media, as some consider that the option should be placed at the top of the list.


4. Black screen with mouse cursor fixed

black screen with cursor

Black screen with a mouse cursor is a common Windows OS issue. Following user feedback, Microsoft patched this bug in the current build.

Users that experience this problem because of their graphics card, should install the updates; if the issue persists, they should also press WIN + CTRL + Shift + B and/or report back to Microsoft.

The issue can have plenty of causes, including newly added Windows updates, outdated apps or operating system, or interfering programs.


5. Other notable fixes

What Microsoft didn’t manage to fix this time is the fact that the update process is sometimes hanging for several hours, for no apparent reason. The developers are working on it and a fix is expected to be launched in a future release.

On the other hand, those using Remote Desktop and experiencing connection issues after installing recent updates should see an improvement now.

Also, there’s been quite some enthusiasm about the reorganization of the Windows Tools folder; and now the build release note mention that in case you saw This PC applet displayed as Computer, the error will no longer appear.

You can check out the release notes in the full Microsoft document. As always, your comments are welcome in the dedicated section below.

Microsoft launches new website where you can customize your Surface with unique dbrand skins

Microsoft has launched a new website where you can customize your Surface with some really cool dbrand skins. Titled “WeAreOriginalByDesign” the website covers all of Microsoft’s modern Surface devices and features unique and original designs from select influencers and celebrities.

In total, there are seven skins that you can currently choose from on the website. Each of these skins is inspired by different people, with the exception of the seventh “Robot Camo” skin, which is one of Dbrand’s.

Anyway, the skins are designed by former NFL player Martellus Bennett, the photographer Brooke Shaden, the racer Collete Davis, DJ HAPA, the chef Fabio Viviani, and the artist Marcus Rivero.

You can visit the website and click through each one of these and then “try it on” by selecting your Surface device from the list. You’ll see a video explaining which Surface device this celebrity uses, and you’ll also hear more about their story and the inspiration behind the skins.

The navigation through the entire process is a bit weird, requiring scrolling, clicking, and some gestures, but it’s pretty easy to figure out.

Interestingly, though, if you’re looking for a Surface Pro X skin, you’ll have to first select Surface Pro, and then choose Surface Pro X. Anyway, if you’re considering buying one, the skins are $30 total. Purchases go through drband.com, which is an authorized seller of Surface skins.

Updated: 3/14/2023

Windows Terminal version 1.7 is out with new Settings UI

Microsoft has announced new versions of Windows Terminal both for general users and those using the preview version of the command-line tool. Windows Terminal version 1.7 is now rolling out to general users bringing all the features made available as part of the preview last month, including the new Settings UI, enhancements to windowing, and more.

The preview now moves to version 1.8 and brings a handful of additions. These include a new Shift+Click experience for profiles. The terminal now allows users to open a specific profile in a new window by holding the Shift key and clicking on the profile in the dropdown menu. Another addition is the support for the unfocused appearance settings that enable users to customize their profile when it’s is open and unfocused. More information on configuring this setting can be found on this support page.

There’s also a new Window naming experience, which lets users name their terminal windows. Users will now be able to assign names to both new and existing windows, making it easier to identify them when using wt commandline arguments in the tool.

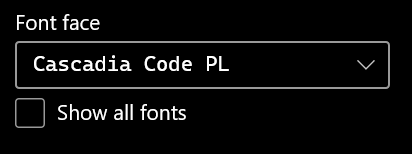
The Settings UI is also receiving some enhancements, including the addition of the font face dropdown. This means that users can now use the dropdown menu to select the font face instead of typing the font name manually. Apart from this, the company has removed the base layer page from the settings UI. Finally, there are some new command line arguments, miscellaneous improvements, and a couple of bug fixes, too.

Image font dropdown

Windows Terminal 1.7 and Windows Terminal Preview 1.8 can both be downloaded from the Microsoft Store. These updates can also be installed manually from the project’s GitHub page.

Windows Terminal
Windows Terminal
Price:
Free


Microsoft Edge version 90 starts rolling out with new Kids mode and Passwords Monitor

Microsoft Edge version 90 will start rolling out to the Stable channel this week, and it will be the first major update to be released following the switch to a faster four-week release cycle. The main new feature in this release is the new Kids Mode, which will allow parents to set up a protected online environment in Microsoft Edge when their children need to browse the web.

Kids Mode can be accessed by clicking on the account profile picture in the upper right corner of Edge. When clicking on “Browse in Kids Mode,” parents will be able to choose between two age ranges (5-8 and 9-12) providing different curated experiences to kids. Microsoft applies the strictest tracking prevention level to both choices, and Bing SafeSearch is also enabled by default in Kids Mode.

“Regardless of the age group, Kids Mode limits the sites that kids will have access to – from the get-go there are about 70 popular kid sites that are allowed, but you can fully customize the list in a couple of clicks in Microsoft Edge settings. If your kid tries to navigate to a site outside of that allowed list, they’ll be greeted with a friendly block page, encouraging them to either ask for permission or try navigating elsewhere,” explained Microsoft CVP Liat Ben-Zur.

The other big new feature launching with Microsoft Edge version 90 is Passwords Monitor, a feature that started rolling out in January but is now generally available with the latest Edge stable release. Password Monitor can check if passwords saved in Edge are included in the lists of leaked credentials, and in that case the browser will invite affected users to update their credentials immediately.

Animation of Password Monitor

Password Monitor also includes a useful password generator feature that will suggest unique passwords when users create new accounts on online services. Overall, Password Monitor should be a great free alternative to competing services like LastPass which recently added new restrictions to its free tier.

Another notable change in Microsoft Edge version 90 is the improved history search that now understands search terms like “news articles from last week” or “jacket from yesterday.” If you’re not seeing the update yet, don’t worry as it could take some time before Microsoft Edge version 90 becomes available on your PC. As a reminder, You can check for updates manually by opening edge://settings/help in the browser.

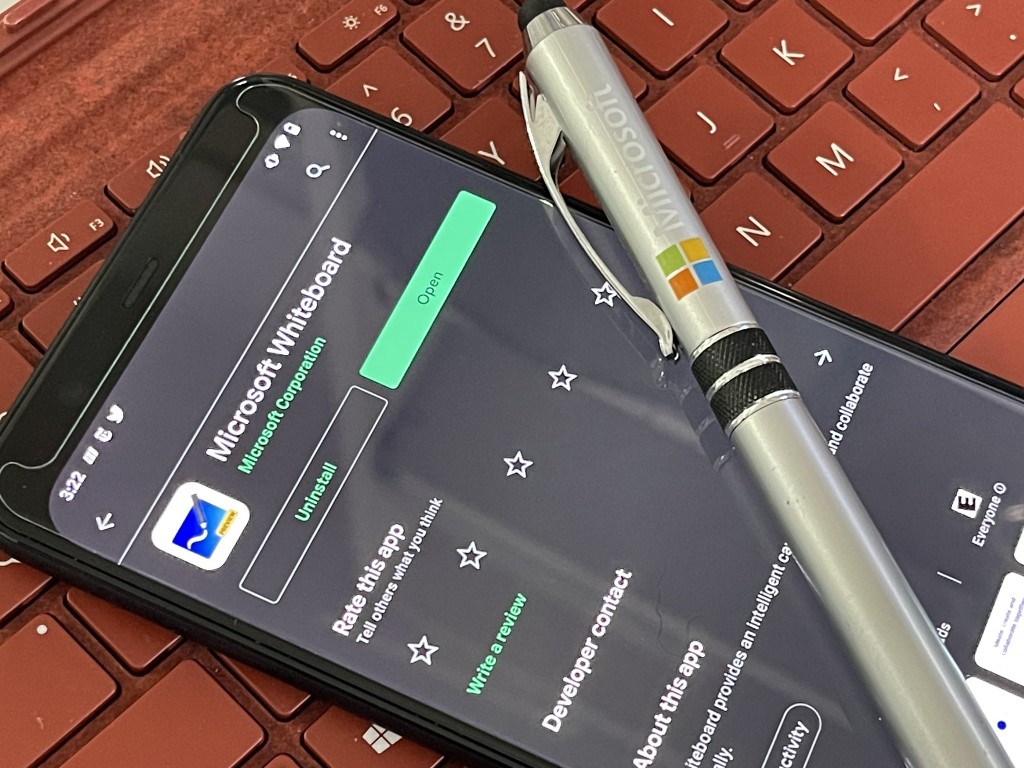
Microsoft Whiteboard adds new Fluent Design toolbar in Teams and on the web

Microsoft has released a Fluent Design update for its Whiteboard app in Teams and on the web. Ian Mikutel from the Microsoft Whiteboard team announced the news on Twitter yesterday, saying that the online collaboration tool has been updated with a new toolbar inspired by Microsoft’s Fluent Design language.

The most interesting novelty is the addition of new Fluent design elements, including shapes, lines, & arrows, to the Whiteboard app. The “Add shape or line” icon is available through the toolbar, and it features various symbols that can be used to draw flow charts quickly. This should make it easier for business and education users to collaborate with other people within Microsoft Teams during brainstorm sessions.

Microsoft revealed the Fluent Design system back in 2017 and announced its plans to incorporate its new design language across all its products. Microsoft Teams and Microsoft Edge are two noteworthy examples, and we also learned last month that Windows 10 is getting new icons in the File Explorer. This means that heading into the future, we will likely see more Fluent Design elements in other parts of the OS.

How to fix fatal errors in Kasperksy Antivirus

Some users have reported encountering the error message Fatal error inside Kaspersky. This error usually occurs during the installation process of your Kaspersky software.

This error can be extremely annoying, especially if you’ve seen it being displayed every time you want to install Kaspersky.

The Fatal error message inside Kaspersky can be caused by a conflict between a third-party antivirus software that was installed in the past on your PC.

Moreover, it can be caused by the Host files that are needed to connect the Kaspersky installer to the download servers.

For these reasons, in this article, we will explore some of the best methods to apply in order to fix fatal errors during the installation of Kaspersky.

How do I fix the Kaspersky Antivirus fatal errors?

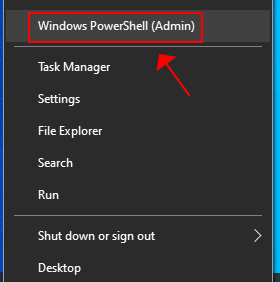
1. Run SFC command inside PowerShell (Admin)

  1. Press the Win+X keys on your keyboard and select PowerShell.
  2. Type sfc /scannow inside PowerShell editor and press Enter.sfc command - Fatal error Kaspersky
  3. The process of scanning will take some time. Please make sure to wait for the process to complete.
  4. Check to see if the problem is resolved. If it is not, please follow the next method.

System File Checker is a great Windows 10 built-in tool that is often used to repair corrupted system files. This utility is available on all versions of Windows OS.

However, if the Sfc /scannow stops on Windows 10, you can take a look at our dedicated guide and easily fix this problem.

2. Uninstall other antiviruses


There are some antivirus software options that require you to use a specialized removal tool to delete the entirety of the files. Here are some examples: Avast, AVG, TotalAV, McAfee, Sophos, and more.

If you’ve used any of the above-mentioned antivirus software before trying to install Kaspersky, it is recommended to use any of these best third-party uninstaller tools to get rid of stubborn software.

Follow the on-screen instructions from the uninstaller tool you chose to completely remove any trace of older antivirus software, and then try to install Kaspersky again.

3. Check for any leftover registry keys

  1. Press the Win+R keys on your keyboard to open the Run dialog.
  2. Type regedit then press Enter.regedit - Fatal error Kaspersky
  3. Navigate to the following link inside the Registry Editor window: HKEY_LOCAL_MACHINE\SOFTWARE\Microsoft\Windows\CurrentVersion\Run
  4. Expand the folder called Run and search for a registry key called avp**_post_uninstall (Ex. avp12_post_uninstall).
  5. Right-click the above-mentioned key and select Delete.
  6. Check to see if the issue persists.

Windows creates a registry key whenever you uninstall a Kaspersky product, and for some reason, this key gets forgotten by the installer when rebooting your PC to clear the files.

This registry key can cause conflicts with the new installation process of Kaspersky. In order to remove it completely, please follow the above steps.

It is also recommended that you clean your Windows registry from time to time. If you need more details, check our comprehensive guide.

4. Reset Hosts file to default settings

  1. Open the search bar and type Notepad, then tap or click the Notepad icon.
  2. In the Notepad file copy and paste this text:# Copyright (c) 1993-2006 Microsoft Corp. # # This is a sample HOSTS file used by Microsoft TCP/IP for Windows. # # This file contains the mappings of IP addresses to host names. Each # entry should be kept on an individual line. The IP address should # be placed in the first column followed by the corresponding host name. # The IP address and the host name should be separated by at least one # space. # # Additionally, comments (such as these) may be inserted on individual # lines or following the machine name denoted by a '#' symbol. # # For example: # # 102.54.94.97 rhino.acme.com # source server # 38.25.63.10 x.acme.com # x client host # localhost name resolution is handle within DNS itself. # 127.0.0.1 localhost # ::1 localhost
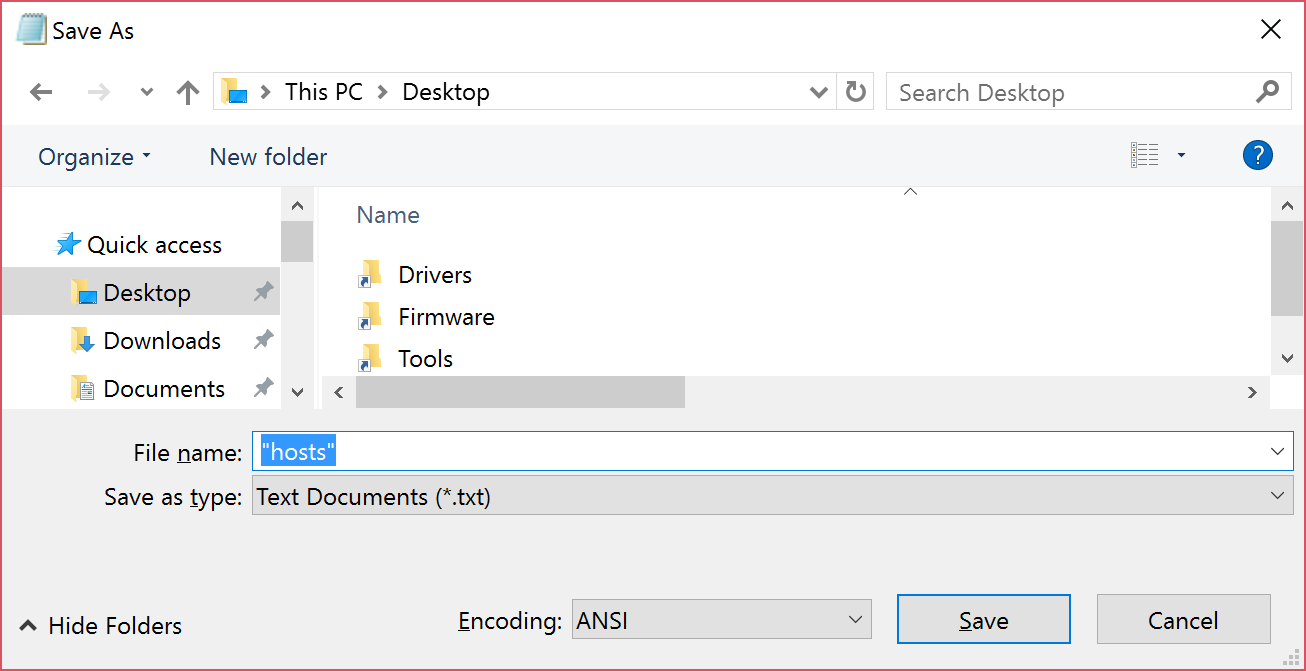
  3. Click the File menu, select Save as, type hosts in the File name box, and then save the file to the desktop.Screenshot showing how to save the "hosts" file
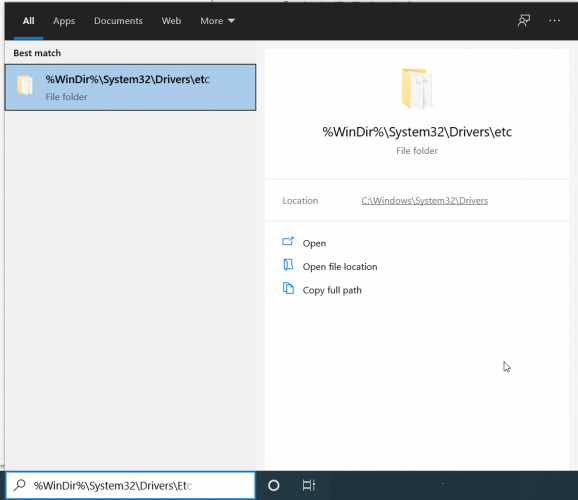
  4. Close the file and then click the start button and search for %WinDir%\System32\Drivers\Etc
  5. Select the folder.
  6. Here, right-click over the Hosts file, select Rename, and then change the name of the file as Hosts.old.
  7. Move the Hosts file that you created from the desktop to the %WinDir%\System32\Drivers\Etc folder.
  8. If you are prompted to enter an administrator password, select Continue.

The Hosts file is very important for Windows. It is used by the OS to map human-friendly hostnames to numerical Internet Protocol (IP) addresses that identify and locate a host in an IP network. 

5. Use another third-party antivirus

Kaspersky may be one of the best antiviruses, but, when you struggle with multiple errors, you might consider using another reliable solution.

We recommend you to use a cyber security tool that represents a new approach to truly integrated computer security.

The most recent version of its internal scanning engine, combined with custom Firewall and Antispam modules, utilize speed and precision to keep your computer safe.

The result is an intelligent system that is constantly on alert for attacks and malicious software that might endanger your computer.

⇒ Get TotalAV

In this article, we explored some of the best troubleshooting methods for dealing with the message of Fatal error inside Kaspersky.

If you want to discover even more solutions to keeps your computer safe, check our guide including the best antiviruses for Windows 10.

We would love to find out if these methods helped you solve your issue and manage to install Kaspersky Antivirus normally.

If you want to let us know, you can simply use the comment section found below this article.

Something went wrong while trying to turn on Spatial Sound [Fix]

Using your Windows 10 computer on your home theater requires some settings to be changed. You might get Something went wrong while trying to turn on Spatial Sound, but there’s a way to fix this problem once and for all.

Before we go straight to the solution for this error, download the latest version of the Dolby Atmos and install it on your PC. Once this is done, you choose the Dolby Atmos for your home theater from the list of options.

Something went wrong while trying to turn on Spatial Sound error can occur in several instances, when you connect the soundbar to the screen and when you select Dolby Atmos for home theater.

How can I fix the Spatial Sound issues?

  1. Use the required HDMI cable
  2. The Mono audio should be off
  3. Update Audio Drivers

1. Use the required HDMI cable

If you’re getting Something went wrong while trying to turn on Spatial Sound error, make sure you are using the required HDMI cable that supports Dolby Atmos.

Always confirm this at the point of purchase. In addition, be sure to choose an HDMI cable with the highest bandwidth so you can enjoy in high-quality video.

When you are using the AVR, ensure that you select Dolby Atmos for the home theater.

2. The Mono audio should be off

  1. Click on the Start button and select the Settings app.
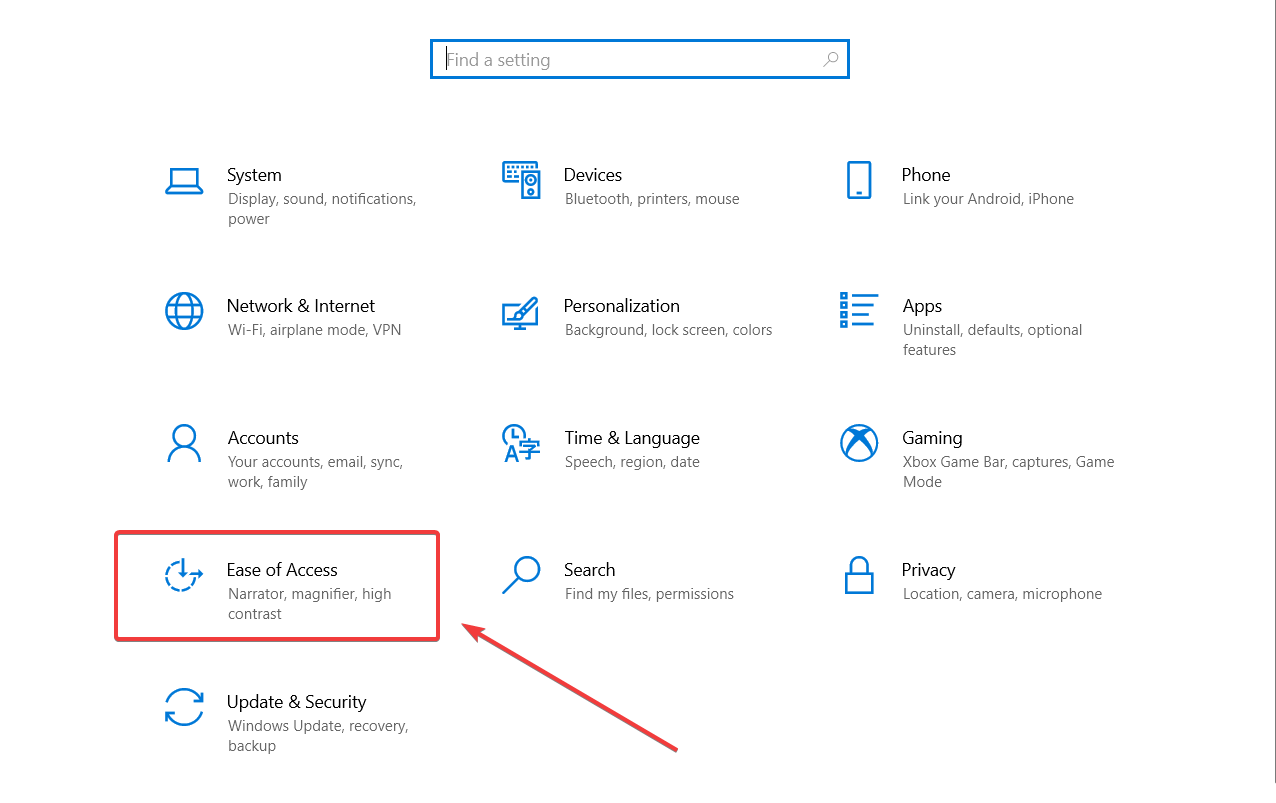
  2. Click Ease of access.
  3. Select Audio, then put it off.

Something went wrong while trying to turn on Spatial Sound error can be caused by Mono audio. To fix this problem, it’s advised that you disable Mono audio for the time being.

This is fairly simple, and you can do it by following the steps above so try it out and see if the issue still persists after that.

3. Update the audio drivers

  1. Ensure that the AVR and HDMI are connected.
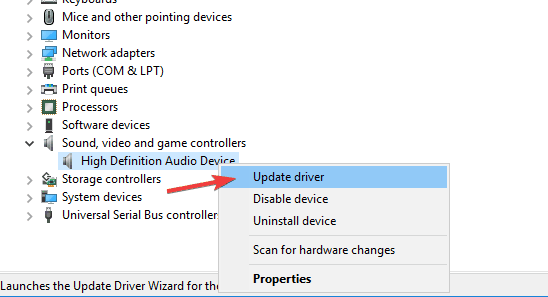
  2. Open Device Manager and then expand Sound and game controllers section.
  3. Also, click and update Intel audio driver.
  4. Right-click High definition device and choose Update driver.
    update driver can't turn on Spatial Sound
  5. Now follow instructions on the screen to update your drivers.

Something went wrong while trying to turn on Spatial Sound can also appear if your drivers are out of date. To fix this issue, it’s advised to update them by performing the steps above.

Alternatively, you can update all your drivers automatically with just a couple of clicks using third-party tools such as the one recommended below.

This tool can help you update and repair your drivers in just one shot and in record time without the need for any special skills or knowledge.

⇒ Get Outbyte Driver Updater

These are some of the solutions that you can use to fix Something went wrong while trying to turn on Spatial Sound error on your PC. Be sure to try them all and let us know if they work for you.

If you have any other suggestions, we welcome them in our comments section below.

10 Best Network Security Antiviruses to Use For Your Business

Digitization has brought with it a myriad of threats like viruses and malware in all their forms, which are constantly being revised and added to the plethora of already existing and curable threats.

Such threats infiltrate business networks raising an urgent need for network security antivirus programs that can protect the network from one endpoint to another effectively.

Network security is thus designed to protect the usage, integrity, privacy, and availability of your business network, and the data therein, including your hardware and software.

In order to safeguard your data and information from threats and breaches in your network, you need an effective network security antivirus.

It should include features such as access control, behavioral analytics, data loss prevention, firewalls, email security, VPN and web security, and mobile device and wireless security, among many others.

Here are the best network security antivirus solutions you can use for your business, no matter if it’s just a small one or a corporation.

What is the best network security antivirus to use?

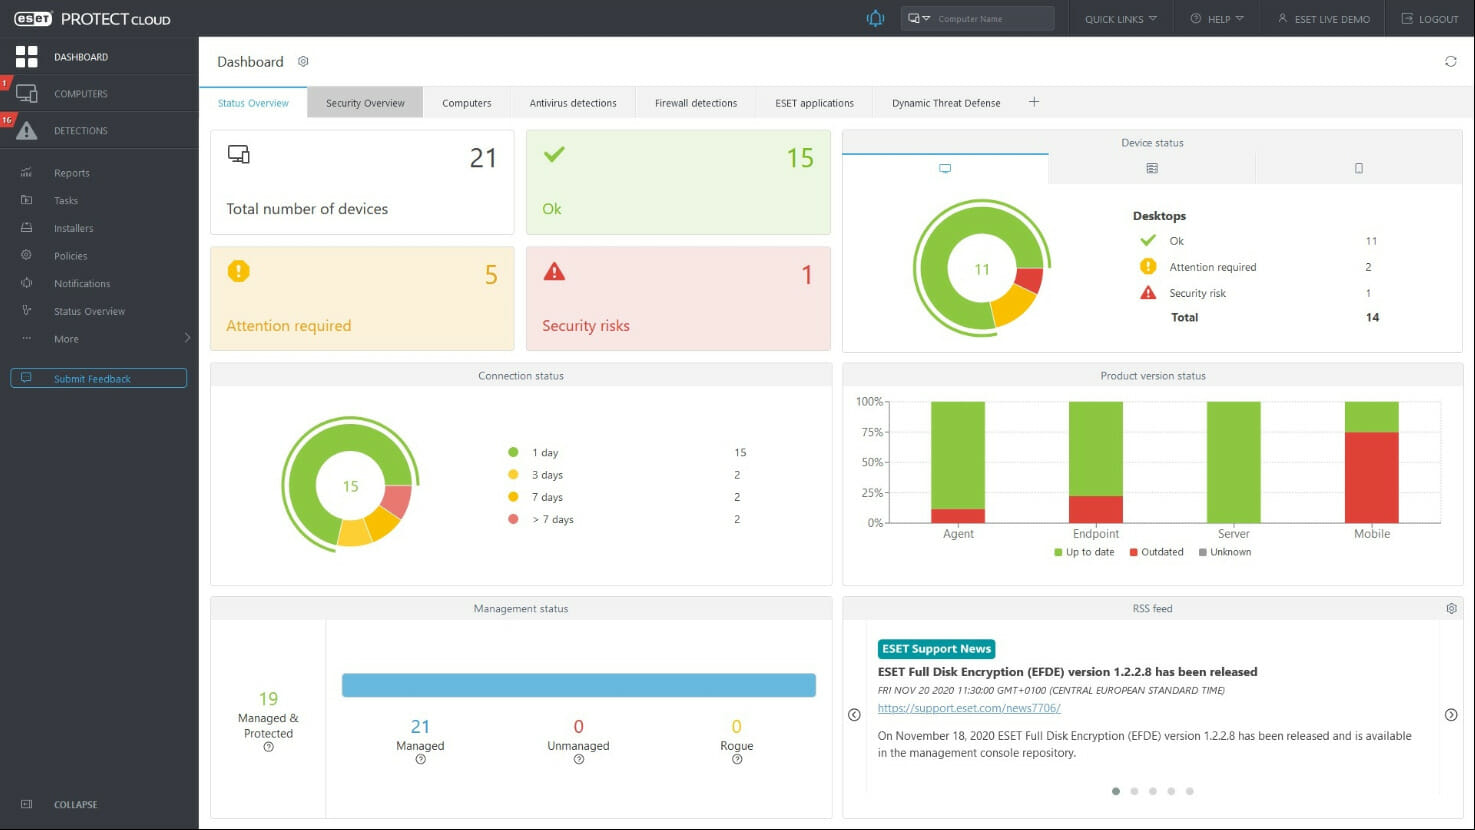
ESET Protect Advanced – Customizable security solutions

ESET Protect Advanced is one of the best antivirus solutions for small to large businesses. It protects your company endpoints, business data, and users with its multilayered technology.

The antivirus platform offers customizable security solutions, easy to manage from a cloud console. The remote security management tool is available both as cloud or on-premise.

Additionally, it features real-time protection for your company’s data passing through all general servers, and blocks all spam and malware emails at the server level, before they reach users’ mailboxes.

ESET Protect Advanced offers a premium threat defense characteristic with full protection against the latest cyber threats that use adaptive scanning and comprehensive behavioral analysis.

ESET Protect Advanced

Use a scalable and customizable solution that keeps your business one step ahead of any threat.
Check Price Visit Website

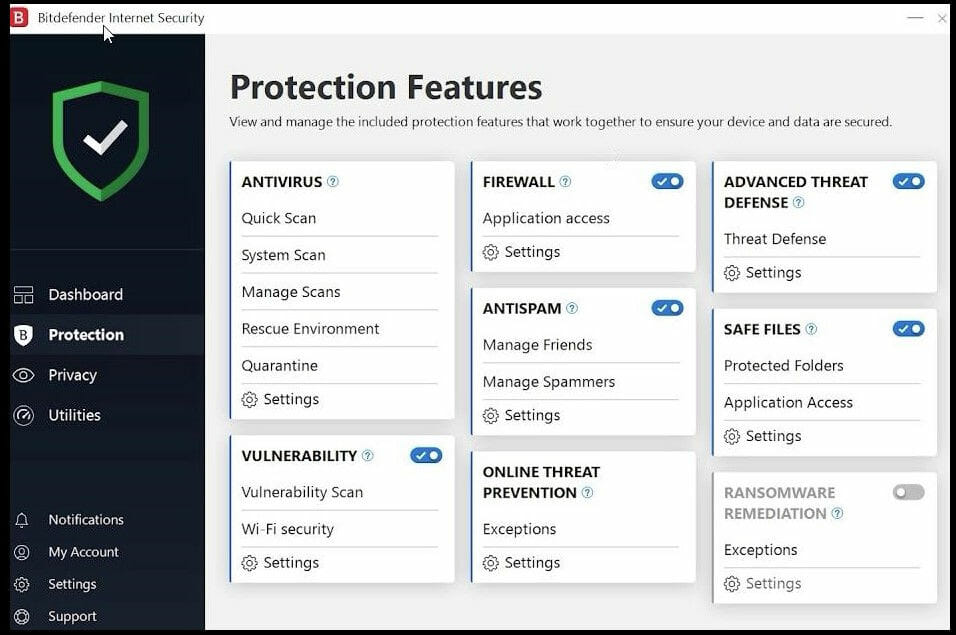
Bitdefender Internet Security – Unbeatable full protection

antivirus old pc

Bitdefender Internet Security is an outstanding antivirus app that can easily safeguard your business because of its advanced protection features.

Your data and privacy will always be safe from all digital threats, including viruses, worms, Trojans, ransomware, rootkits, spyware, and many others.

It has new cyber threat intelligence technologies that analyze and identify malicious network-related activities and block botnet URLs and cyber attacks.

Bitdefender Internet Security has an improved web-filtering technology that makes sure you never access malicious websites by ensuring that your search outcomes are safe before you even click the specific links.

Your financial data, including card numbers and passwords, are secured with the Bitdefender app because it blocks instantly any untrustworthy sites that may steal them.

Bitdefender Internet Security

Proactively checking any potential harmful activities that can damage your business.
Check Price Visit Website

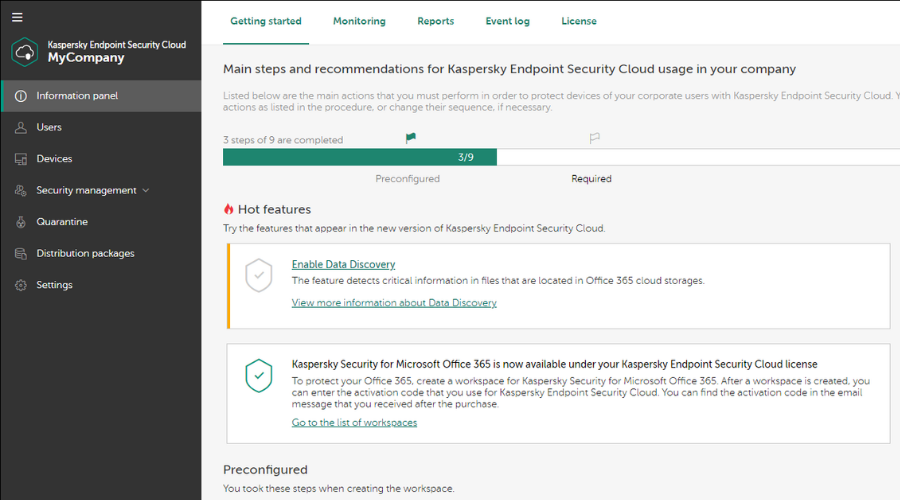
Kaspersky – Powerful multi-layered security

best antivirus software for small business

This network security antivirus provides agile security for any small, medium-sized, or enterprise business structure.

With Kaspersky endpoint security, you get powerful multi-layered security with extensive features on an easy-to-use interface that adapts to your needs regardless of your business size.

Features include application control, mobile security, preconfigured security profiles, a simple and intuitive cloud-based console, and an on-premise console with a granular setup.

It also comes with advanced protection for workstations and file servers, mobile device and application management, data encryption, as well as vulnerability and patch management.

It is a feature-packed network security antivirus for the best protection on your network’s endpoints.

Kaspersky

Protect your servers, and computers with a great antivirus without affecting their performance.
Free Trial Visit Website

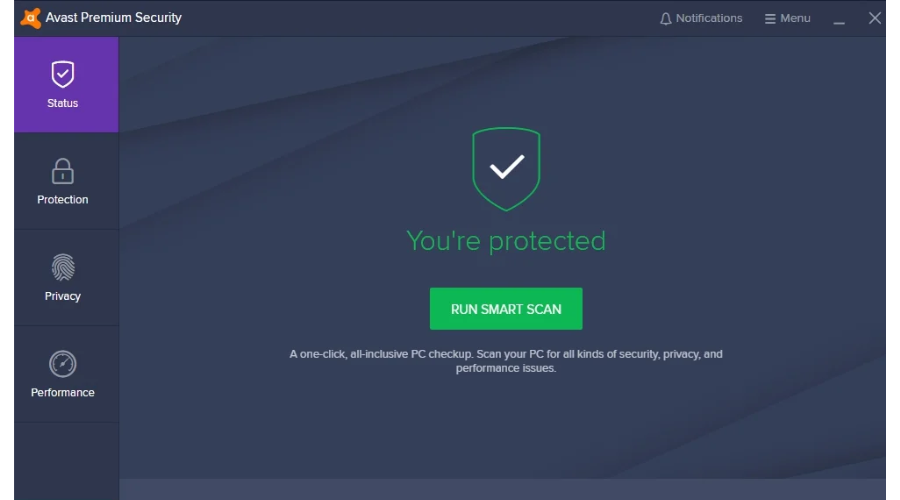
Avast Premium Security – SharePoint server protection

Avast Premium Security is another reliable solution that you can use to protect your network and all your business data from computer viruses and other threats.

The endpoint protection feature keeps your network safe when it’s accessed by wireless or mobile devices such as laptops, tablets, and cell phones.

This antivirus uses artificial intelligence, behavior-based machine learning, and proactive cloud threat lab analysis capabilities to keep your business fully protected from advanced cyber threats.

Additionally, it offers protection for your company’s data, including SharePoint Server Protection, and Exchange Server Protection.

Avast Premium Security

Artificial intelligence with behavior-based machine learning to protect your business at all times.
Check Price Visit Website

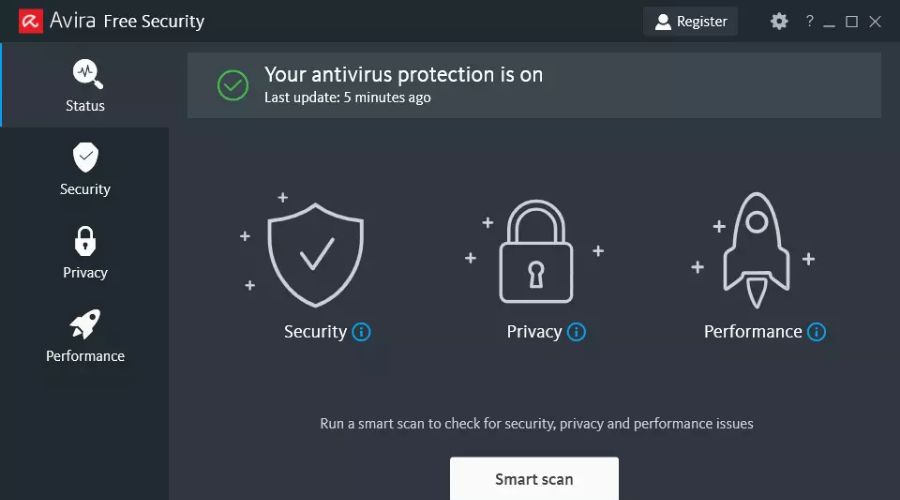
Avira – Vulnerable networks protection

Avira represents versatile and scalable security for your small business and a single license covers up to 50 devices.

With Avira, you get ultimate security with complete endpoint protection, secure online privacy, and optimized speed and performance.

It scans your entire system with one click for malware, weak passwords, outdated apps, and vulnerable networks, bringing together the power of a dozen apps within one, easy-to-use interface.

Moreover, it protects your business data, and your devices from all types of threats, including ransomware, fake and infected websites, malicious email attachments, and phishing attacks.

Avira

Protect protects your business data with a cross-platform and multi-device antivirus solution.
Check Price Visit Website

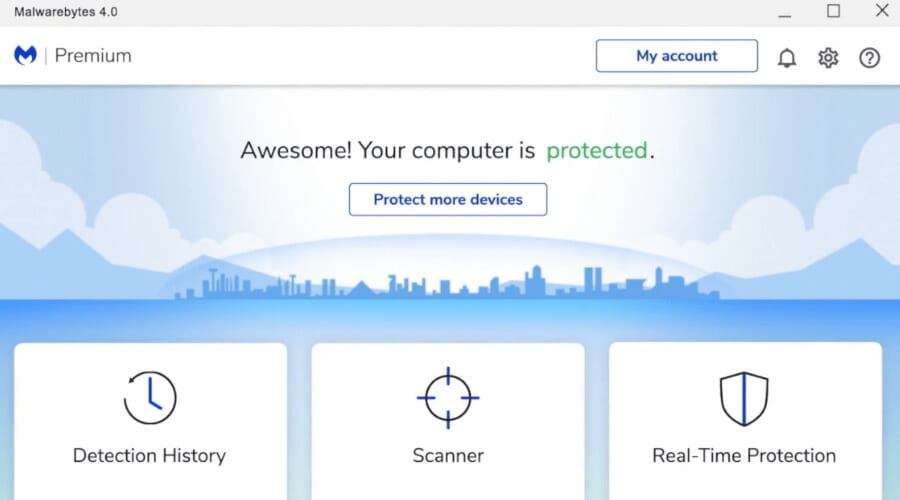
Malwarebytes – Multiple protection technologies

This is an advanced network security antivirus whose next-gen technology protects your business from attacks and remediates damages that other network security solutions don’t.

With Malwarebytes’ endpoint protection, which is delivered from the cloud for centralized management, you get seven layers of technology driven by the best-informed telemetry.

This technology protects endpoints from threats, both known and unknown. It prevents ransomware, malware, zero-day exploits, adware, and PUPs, among other threats.

You can have on-premise endpoint security with multiple technologies to protect your network proactively against threats, plus the incident response detects and remediates threats.

Malwarebytes

Malwarebytes business solutions bring a multi-layer defense model that scales with your needs.
Free Trial Visit Website

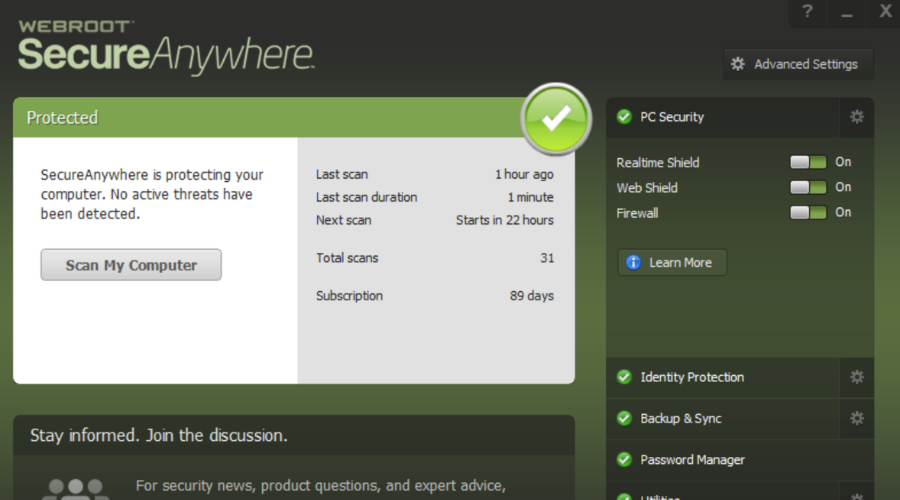
Webroot – Threat intelligence platform

antivirus tools for Amazon Fire device

Webroot’s endpoint protection is a network security antivirus with multi-vector protection to secure all your endpoints and users across all stages of a cyber-attack.

Features include deep learning that uses a layered approach to refine and enhance the accuracy of threat classification.

It also includes advanced behavioral heuristics, 100 percent efficacy over 24 hours, fast deployment and scans, no conflict with other security software, and no reimaging.

Furthermore, you’ll get online management anywhere and at any time, plus you can use it on a flexible billing arrangement with monthly or annual subscription options.

It also has the Threat Intelligence Platform, a cloud-based architecture that classifies and scores 95% of the internet thrice daily, providing the accuracy and context you need to protect your network.

Webroot

Use one of the best antiviruses with next-gen protection for endpoints and computer networks.
Check Price Visit Website

McAfee – Dynamic application containment

router antivirus

McAfee solutions orchestrate integrated cyber environments where protection, detection, and correction of threats occur simultaneously and collaboratively.

With McAfee endpoint security, you get intelligent and collaborative defenses against advanced threats with actionable forensics to prevent and fight them.

It helps you protect your productivity and get visibility into advanced threats as it shares events to take actions against potentially dangerous applications, downloads, websites, and files immediately.

The framework is futuristic and extensible so you can centralize it as your business grows, and the defenses evolve automatically while adapting its defense as threats are dynamic in nature.

The main features include Real Protect machine learning and Dynamic Application Containment to stop zero-day threats as they emerge, and thwart malware with reputation.

McAfee

In-depth protection against dangerous applications, malicious websites, and other digital threats.
Check Price Visit Website

Symantec – Memory exploit mitigation

This is the world’s most advanced single-agent endpoint network security antivirus with prevention, detection, and response, deception , and adaptation capabilities.

It secures your network’s endpoints to beat ransomware and unknown attacks using multi-layered protection.

Also, it minimizes false positives with machine learning and behavioral analysis, and blocks zero-day attacks that prey on your apps with memory exploit mitigation.

Features include antiphishing, vulnerability scans, fine-tuning for detection engines to optimize security status, safe browsing, and auto-classification of risk levels on all endpoint apps in use or resting.

It also reduces bandwidth usage, enables faster scanning times, and reduces IT resource use through automated updates to lower costs.

⇒ Get Symantec Endpoint Protection

Comodo Internet Security for Business

Another great antivirus for businesses is Comodo Internet Security. It has real-time protection that will put unknown files in a virtual environment and prevent any potential damage to your network.

The software also has a built-in firewall allowing you to easily manage which applications can access the Internet.

As for additional features, there’s Host Intrusion Protection, File Reputation Look-Up as well as Behavioral Analysis. URL Filtering feature is also available so you can restrict access to certain websites.

As for policies, using this tool you should be able to manage services, processes, and apps. It also has a default-deny anti-malware feature that will automatically prevent system access to unknown files.

In order to ensure that there’s no data theft, Comodo Internet Security for Business also allows you to manage USB devices and prevent them from running on all PCs in your network.

⇒ Get Comodo Internet Security

If you want to discover even more security solutions for your Windows 10 computer, take a look at our dedicated guide and choose the one you like.

Are you ready to take your network security a new notch higher? Let us know which of these best network security antivirus software matches your needs by leaving a comment in the section below.

Fix: Remote Access to The Server is Not Enabled [Full Guide]

Recent events such as the appearance of the COVID-19 caused significant changes in the labor market. For this reason, employers implemented procedures that allowed their employees to work from home.

However, there are some technical issues that occurred in this process such as the message saying: Remote access to the server is not enabled.

This error appeared to people using Remote Desktop, a feature that allows you to connect to other computers running Windows.

You must have the necessary credentials to connect (a user and password), and, very important, a reliable Internet connection.

Users have discussed about this issue on Microsoft forums:

We are using Windows 10 Pro and we would like to connect to the server using Remote Desktop. Unfortunately, we get the following error:

Remote access to the server is not enabled.

The remote access to the server is not enabled is the main issue you will encounter when using Remote Desktop to connect to a server.

However, here are some other issues that are common and will have the same effect:

  • The remote computer is turned off
  • The remote computer is not available on the network

Read this guide and check our solutions as they are conceived to solve these remote access issues in no time.

How do I fix the remote access to the server is not enabled?

1. Modify Windows Firewall settings

  1. Open Start and type in Allow an app through Windows Firewall.
  2. Click on the first selection.
     
  3. Select and click on the Change Settings option.
  4. Choose Remote Desktop from the app list from Windows Firewall.
  5. Click in the checkbox from the left side of Remote Desktop.
  6. Save changes and close the window.

Use this solution if you have encountered issues with the Remote Desktop feature. There are many instances when Windows Firewall blocks both incoming and outgoing connections by default.

Check out your Firewall setup, adjust it if necessary and then check if the Remote access to server is not enabled message is still there.

2. Check Allow Remote Desktop connections

  1. Open Start and type in Allow Remote Assistance.
  2. Select the first result from the list.
  3. Check the option Allow Remote Assistance connections to this computer.
  4. Click on Apply, and then OK.

Use this solution to check if your Windows allows connections from the Remote Desktop or not.

If they are not allowed, then the Remote Desktop connections won’t work even if you had previously set your Firewall to allow the Remote Desktop feature.

3. Reset the Remote Desktop credentials

  1. Open Start and type in Remote Desktop Connection.
  2. Click on Remote Desktop.
  3. Type in the address of the computer’s IP.
  4. Click delete to remove the credentials.

If you have saved the credentials for a certain computer and you wish to connect to another remote computer, the credentials will not match, and you will receive an error. 

The reason for this issue is that you have saved the Remote Desktop credentials, and you want to connect with a computer that has different credentials.  

If the Remote Desktop connection is still not working, also take a look at our Remote Desktop connection not working.

4. Add a remote computer IP address to your host’s file

  1. Press Windows + X keyboard shortcut at the same time, and select Windows PowerShell (Admin).
    powershell win + x menu xbox windows 10 app not getting party invites
  2. Type in the following commands and press Enter to run each one of them: cd C:/Windows/System32/Drivers/etc
  3. Type in: notepad/hosts
  4. Add the IP address of the remote computer.
  5. Click Close.
  6. Click Save to save all changes.

Use this solution if you want to connect to a computer whose address is not in your hosts file. 

Adding that remote computer’s IP address to your hosts file will prevent the remote access to the server is not enabled error.

5. Add RDGClientTransport key in the registry

  1. Press both Windows and R keys to open Run.
  2. Type in regedit, and press Enter.
  3. Navigate to the following path: HKEY_CURRENT_USER\Software\Microsoft\Terminal Server Client
  4. Click on New, and select DWORD (32-bit value).
  5. Name that DWORD RDGClientTransport.
  6. Double-click on this new key to access its properties.
  7. Set the value data to 1.
  8. Click OK, and close the Windows Registry.

This solution allows you to fix the remote access to the server is not enabled by modifying an entry in the registry.

After taking those steps, the Remote Desktop will not use HTTP/UDP connections anymore, using the RPC/HTTP instead. 

6. Modify network properties

  1. Press Windows key + I at the same time to enter Settings.Go to the Network section
  2. Click the Network & Internet section, then choose Status.
  3. Click the option Change connection properties.Remote access to the server is not enabled - error fix
  4. Choose Private.

There are some instances in which your network has been set as public, and this will activate the remote access to the server is not enabled error. Use this solution to change network status to private.

After using this solution, do not forget to verify if the issue has disappeared or not.

A different approach that might just be your best bet is trying an alternative remote control option. Mikogo is a high-standard, popular tool that has many useful integrated features which ensure a smooth, professional experience. You can also take a look at this list of the best remote management software and pick your favorite.

When getting the remote access to the server is not enabled message, keep in mind that we have created six solutions that will allow you to make this error disappear.

In this regard, we recommend you to verify your Windows Firewall, allow Remote Desktop Connections, reset your credentials for the Remote Desktop feature, or add the Remote Computer IP to your host files.

You can also modify your Windows Registry and add the RDGClientTransport key to it. Another alternative you should consider is switching the status of your network to Private.

Try out the solutions available for you in this guide and prevent this issue from happening again.

We hope our concise tutorials prove useful and ensure you a pleasant and error-free experience. Just leave us a comment and let us know how they work.

Android Apps to Control Windows 10: Best We Tested in 2026

Multi-platform integration is critical in today’s tech world. Technology now allows us to connect any device with another one.

This is directly related to maximized mobility and productivity, and there are also times when you don’t want to leave the couch to change the song on YouTube.

Perhaps the most popular multi-platform integration is between Windows PCs and Android. Various apps allow you to control a computer from the comfort of your bed.

Things are no different when you’re outside the house using Android apps. Two types of apps for remotely controlling a Windows 10 PC with a smartphone exist.

The first type serves as a projection client and transfers your PC screen onto our Android phone, allowing you to control the PC as we do with touch-enabled monitors.

The second one serves as a remote control for the mouse and keyboard on your PCs. Whichever type you prefer, we’ve prepared a list of the best Android apps (of both kinds) for controlling Windows 10 PCs.

So, sit back, relax, and find a proper app, and you’ll never have to get off your couch to do something on your computer.

What’s the best Android app to remote control Windows 10?

TeamViewer

TeamViewer is perhaps the most popular program for controlling one computer from another, but it also has an Android version.

For those who don’t know, TeamViewer for Android is pretty stable, fast, and secure, just like its Windows PC counterpart.

Besides controlling one device from another, TeamViewer allows you to transfer files between the devices. There’s also full keyboard support and support for multiple monitors.

Connecting your PC and Android via TeamViewer is the same as connecting two computers.

You need to enter your computer’s TeamViewer ID and password, and you’re good to go. Also, TeamViewer is perhaps the most business-oriented remote control app on our list.

⇒ Get TeamViewer

Remote Control Collection

get Remote Control Collection

Remote Control Collection is one of the most versatile apps for controlling your PC from your Android phone.

In fact, it is the combination of both methods mentioned above, as it allows you to control your mouse and keyboard, as well as project a PC screen on your phone.

Besides controlling your desktop, you can also manage files, slides, and more. However, only mouse and keyboard control are available in the free version.

For more advanced options, like Live Screen, Media Player, and Slideshows, you’ll have no option but to purchase the Pro version.

To connect the Remote Control Collection with a computer, download the app on your PC, identify your IP address, and pair two devices.

Setup is pretty easy, and it shouldn’t take you much time. When you start the app on your phone, you’ll notice it is divided into two sections, Remotes and Devices.

The Remotes section allows you to control your computer, while the Devices section allows you to manage all your connected PCs.

⇒ Get Remote Control Collection

Chrome Remote Desktop

get Chrome Remote Desktop

Google has also prepared its own app to remote control Windows 10 from Android. You only need to download Chrome Remote Desktop on your phone.

Then, install the extension of the same name on Google Chrome on your PC. Once you do so, you can pair two devices and remotely control your computer from Android.

Although this is just a Chrome extension, it is not limited to the browser only, as you can control anything on your computer, as long as you’re signed in to Chrome.

So, the only requirement is to have Google Chrome with this extension installed on your computer. When it comes to performance, it is pretty solid, and you should be satisfied.

However, there’s a slight delay while a connection is established, but you shouldn’t have any complaints after that.

⇒ Get Chrome Remote Desktop

Microsoft Remote Desktop

Microsoft’s answer to Chrome Remote Desktop is Microsoft Remote Desktop. Although the app works best with Windows 10 mobile devices, it is also available for Android.

All you have to do is to download the app on both PC and Android and pair two devices. With Microsoft Remote Desktop, you can control your PC wherever you are.

It also provides accurate screen projection and quality audio and video streaming. However, this feature is available only on Pro and Enterprise versions of Windows.

So, if you’re running Windows 10 Home, you’ll have to look for another option. You can download Microsoft Remote Desktop from the Microsoft Store.

⇒ Get Microsoft Remote Desktop (Google Play Store)

Remote Link

get Remote Link

If Google and Microsoft have their own remote control apps, why wouldn’t Asus think of a similar tool for its users and not only?

Asus’ Remote Link is a pretty stable app for controlling your PC from your Android phone, that offers everything you’d expect from such a service.

Among other features, Remote Link supports multi-pad gestures and Android Wear compatibility. So, with this app, you’re not only limited to your phone but can also control a PC from your Android watch.

The app’s user interface is pretty neat and clean, and you won’t have any problems getting around.

Even though Asus developed this app, it is not limited to Asus devices only, as you can use it on pretty much any phone, Android watch, and PC.

⇒ Get Remote Link

Unified Remote

Unified Remote is another feature-rich app for controlling your Windows PC with your Android Phone. However, this app works a little bit differently compared to its competitors.

Unified Remote supports over 90 Windows programs and apps you can control from your phone. Each program has controls and abilities you can manipulate with Unified Remote.

The app allows you to perform various tasks, like pausing a song on Spotify, moving on to the next slide in PowerPoint, and more.

Regarding design, Unified Remote has a clean user interface, which can be customized by choosing between various themes.

The app is free, but if you purchase the Pro version, you can use even more features, like voice commands, NFC commands, and Android Wear support.

⇒ Get Unified Remote

AnyDesk

AnyDesk

If you’re looking for an advanced all-in-one remote control solution, rest assured that AnyDesk will easily meet most of your demands.

This software encrypts every connection with asymmetric RSA 2048 key exchange, so it provides not ony amazingly fast, but also secure access to computers and your Android smartphone.

Moreover, it is fully compatible with several other operating systems and their various versions, including iOS, Linux, and macOS.

Some key features you are about to enjoy:

  • Light design, ideal even for less experienced users
  • No administrative privileges are required
  • Bank-level security standards
  • Constant updates
  • Unquestionable platform-independence

⇒ Get AnyDesk

Of course, there are many other apps for controlling a Windows 10 PC from an Android phone, but we’ve included these ones as the best options.

If you want to use the Windows PC mic on your phone, this guide will help you do that. Another great option worth mentioning is Remote Mouse, which lets you turn your Android device into a wireless mouse and keyboard for your Windows PC. You can check out the full setup guide here: how to use Remote Mouse on Windows.

Let us know what you think about our choices in the comments, and feel free to suggest more apps if you feel like we missed some essential ones.

FIX: Windows updates break Remote Desktop connection

Usually, Windows 10 cumulative updates fix a long list of bugs affecting a more stable system version. But just as often, these updates cause program crashes.

On this note, many users complained that Windows patches break Remote Desktop connections. In previous years, users mentioned KB4103727 causing trouble, but the same can happen with just about any similar update.

What can I do if Remote Desktop fails after an update?

For Remote Desktop issues, the users mentioned that the quickest solution when the tool stops working after installing updates is to simply uninstall the update.

We have had a few users with the newly released update who have had problems connecting to a Server 2016 RD Farm with over a gateway. Their session seemed to initialize, the logon/welcome screen is displayed for a second or two, but then the connection is abruptly stopped. […] Every client with this issue had KB4103727 installed. Issue is resolved by removing KB4103727 from the client. It is not clear to us whether the update is guaranteed to break this, or whether it’s dependent on several factors.

As you can see, this solution solves the problem for good but it involves installing the latest Windows 10 OS version on your computer.

There is also a temporary workaround that you can use. Namely changing a reg key or local policy on your computer so that the machine accepts the outdated version of CredSSP.

To add this key to your Registry or your clients’ Registry, send it via GPO and this should solve your problem:

HKEY_LOCAL_MACHINE\SOFTWARE\Microsoft\Windows\CurrentVersion\
Policies\System\CredSSP\Parameters] "AllowEncryptionOracle"=dword:00000002

If this fix solution did not help you resolve the remote desktop problem, you can use Mikogo for various remote desktop technical issues. Or, you choose from some other remote troubleshooting software.

There you go, we hope this post helps you fix the Remote Desktop connections you experienced after installing the latest Windows 10 updates on your computer.

If you experience further problems with the Remote Desktop connection, refer to our extensive guide.

How to block someone on Microsoft Teams in Windows 10 or mobile

Microsoft Teams is a great collaboration and communication tool on Windows 10. However, sometimes you may find the need to block someone on Microsoft Teams.

On Microsoft Teams, communication is usually locked down because who you can message or call is not open to just anyone, unless an authorized user invites that person to join a team.

So if you run into an issue where a certain user becomes a problem whether through bullying, stalking, or other harassment (i.e. spam), you can block someone in Microsoft Teams.

Can I block someone on Microsoft Teams?

The ability to block someone is a popular feature request in the Microsoft Teams UserVoice. There is a way to block someone from contacting you on Teams, but the feature is available only to block a guest user that is invited to a Teams channel that is not part of your organization.

If you need to block someone on Microsoft Teams from your work or school account, you will need to reach out to your system admin and/or the Human Resources (HR) department at your organization, as there’s currently no way to block a user who’s in your organization.

Of course, you can always turn off all notifications from the specific person on Teams or just leave the team channel.

Block a guest user on Microsoft Teams desktop or web app

If you are looking to block someone on Microsoft Teams on the desktop or the web app, here’s what you need to do.

1. Open Microsoft Teams
2. Go to the Chat tab
3. Left-click the more options button (three dot menu)
4. Choose Block from the dropdown menu
Block Someone

Block a guest user on Microsoft Teams on Android or iOS

Block someone on Microsoft Teams ios Android
If you are using Microsoft Teams on Android or iOS, you can also block a contact by following these steps.
1. Open Microsoft Teams
2. Go to the Chat tab
3. Tap the conversation thread
4. Tap the contact’s name
5. Tap Block contact

Mute someone on Microsoft Teams

If you do not have the option to block someone in Microsoft Teams, you can always mute the chat. When you mute a chat, you will no longer receive notifications whenever the person you muted sends you a message in Teams.

If you want to mute a contact on Microsoft Teams, here’s what you need to do.

1. Open Microsoft Teams
2. Go to the Chat tab
3. For the user you want to mute, Left-click the more options button (three-dot menu)
4. Choose Mute from the dropdown menu
Mute A Contact Microsoft Teams

Muting a chat on Microsoft Teams on Android and iOS is similar to the process for blocking someone. Here’s what you need to do.

1. Open Microsoft Teams
2. Go to the Chat tab
3. Tap the conversation thread
4. Tap the contact’s name
5. Tap Mute chat
Screenshotmutechat

Summary

Microsoft Teams is primarily used for work or school communication and collaboration. Unfortunately, in the enterprise space, Teams isn’t set up to give individuals the option to block people that are within the organization.

Microsoft Teams is an app that is built upon Microsoft 365 and bringing people together to achieve more. Unfortunately, blocking individuals is not the intended use-case for Microsoft Teams, instead the one thing you can do is separate groups of people within an organization.

Be sure to check out our dedicated Microsoft Teams hub for more news and updates! If you would like to make your voice heard in requesting the ability to block someone in Microsoft Teams, you can head over to the UserVoice here.

Do you think there should be an option to block people in Microsoft Teams? Let us know in the comments!

[Updated] New Windows 10 Insider build brings changes to Power Menu and Timeline

Microsoft has just released the Windows 10 build 21359 for Insiders in the Dev Channel, which brings minor changes to Timeline and the Power Button in the Start Menu. Starting with this build, users with personal Microsoft accounts (MSA) will no longer be able to upload new activity in Timeline, though nothing changes for Timeline users with AAD accounts.

Timeline is a feature that launched with the Windows 10 April 2018 Update, giving Windows 10 users a look at all their currently running apps and past activities. Microsoft later added Timeline support to the Microsoft Launcher on Android, but that was deprecated back in September. The Windows Insider team has now clarified that Timeline is actually not going away and that “all your local activity history still remain on Windows 10.” The team also recommends users to check for recent web activities and recently used files in Microsoft Edge, OneDrive, and Office.

The other notable change in this build is a new option to restart apps after signing in under the Power menu in the Start Menu. The feature already exists in Windows 10 version 20H1 under Settings > Accounts > Sign-in options > Restart apps, and using this new option under the Power menu will just toggle Restart apps in Settings.

The build 21359 also brings fixes for Auto HDR, Windows Update Settings, and Camera settings, and you can check the full list of changes and known issues below:

Changes and Improvements

  • We have added an option under the Power menu on the Start menu to restart apps after signing in when you reboot your device. When this setting is checked, it toggles the option under Settings > Accounts > Sign-in options > Restart apps we introduced in 20H1.
    • We have added an option under the Power menu on the Start menu to restart apps after signing in when you reboot your device.
  • If you have your activity history synced across your devices through your Microsoft account (MSA), you’ll no longer have the option to upload new activity in Timeline. AAD-connected accounts won’t be impacted. To view web history, Edge and other browsers have the option to look back at recent web activities. You can also view recently used files using OneDrive and Office. Note: Timeline and all your local activity history still remain on Windows 10.
  • We’re updating the Ease of Access category in Settings to now be called Accessibility.
  • We’re updating the Ebrima font to now support characters from Bamum (Unicode block U+A6A0 to U+A6FF).
  • We’re updating the Nirmala UI font family to improve how the Chakma characters are displayed when combined based on feedback.
  • Thank you to the Insiders who have taken the time to share feedback about the new version of our Korean IME. For the time being we will be reverting to the version included in previous releases.

Fixes

  • We fixed a bug that caused an issue when HDR was turned on, where the SDR content was being changed when the computer was locked or coming back from sleep.
  • We fixed the issue where in in some cases, Auto HDR might not correctly enable for all eligible titles. If you still run into trouble, please reach out to us via the Feedback Hub, on our Twitter (@DirectX12), or on the DirectX Discord.
  • We fixed the issue in the previous flight where in some cases user accounts were migrated during the upgrade, but the user profile was not. This issue would occur if a device was abruptly restarted during the upgrade process.
  • We fixed an issue where some cameras did not support adjustment in the Camera Settings page when the camera was also in use by another app.
  • We fixed an issue where the Camera Settings page was crashing on ARM devices.
  • We fixed an issue where Windows Update Settings might unexpectedly display two separate strings saying that updates are managed by your organization.
  • We fixed an issue where some non-managed devices were displaying “Some of these settings are hidden or managed by your organization” on the Settings > Update & Security > Windows Update page.
  • We fixed an issue impacting WSUS users where the “Check online for updates from Microsoft Update” option in Windows Update Settings was greyed out.
  • We fixed an issue resulting in some Insiders noticing frequent crashes in wuauclt.exe.
  • We fixed an issue resulting in the window frames losing their shadows after locking and unlocking your PC.
  • We fixed an issue resulting in some users seeing an ms-resource:AppListName entry in the Start menu apps list because of the People app change to no longer be displayed in the app list.
  • We fixed an issue that could result in a toast notification appearing on top of the Action Center.
  • We fixed an issue in recent flights where the UI would hang if you quickly used the touchpad gesture to switch back and forth between Virtual Desktops.
  • We fixed an issue impacting the ability to use Miracast with some devices in recent builds.
  • We fixed an issue that could result in the network connection on certain device and ethernet configurations getting stuck in an “Identifying…” state recently.
  • We fixed an issue where after upgrading to recent builds you couldn’t connect using remote desktop until you rebooted your PC.
  • We fixed an issue resulting in the brightness controls behaving erratically on some devices in recent builds.
  • We fixed an issue impacting some Insiders when playing certain full screen games in recent builds, resulting in the frame rate being unexpectedly lowered. If you continue experiencing issues in this space, please log feedback following the steps here.
  • We fixed an issue resulting in some games crashing on launch when Auto HDR was enabled.
  • We fixed an issue for certain devices that could result in the screen going black with only the mouse visible. If you continue experiencing black screen issues after upgrading, please press WIN + CTRL + Shift + B and then report it in the Feedback Hub under Display and Graphics > Black Screen, including as many details as possible.
  • We fixed an issue resulting in certain videos displaying distorted and pixelated in recent builds.
  • We fixed an issue where some devices received “The follow things need your attention…” error messages when attempting to install a new build.
  • We fixed an issue where getting and setting your international settings wasn’t working with PowerShell 7.1.
  • We fixed an issue where updates to your language list using the PowerShell commands wouldn’t be synced to your other devices if you had syncing enabled.
  • We fixed a race condition when using the Pinyin IME that could result in no longer being able to type in certain apps (until restarting the app) if you rapidly typed and selected IME candidates.
  • We fixed the issue impacting the migration of shortcuts into the new Windows Tools location where This PC shows up with the display name “computer.”
  • [ADDED] We fixed the issue where virtual GPU was broken for Windows and Linux guests.

Known issues

  • We’re looking into reports of the update process hanging for extended periods of time when attempting to install a new build.
  • [News and interests] Pressing ESC key to dismiss an opened context menu in the flyout dismisses the whole flyout instead.
  • [News and interests] Sometimes the news and interests flyout cannot be dismissed with pen.
  • [ARM64] Insiders who installed the preview version of the Qualcomm Adreno graphics driver on the Surface Pro X may experience reduced brightness of the display. This issue is fixed with an updated version of the preview graphics driver at https://aka.ms/x64previewdriverprox. If you are experiencing this issue, please see the feedback collection for more information.
  • We’re investigating an issue where elements of Search (including the search box in File Explorer) are no longer displaying correctly in dark theme.
  • Some non-administrative apps, such as 3D Viewer and Print 3D, that were previously in the Windows Accessories folder are now in Windows Tools. These app shortcuts will be moved back into Start with an upcoming bug fix. They are still searchable and accessible via Windows Tools in the meantime.
  • The Windows Camera App currently does not respect the default brightness setting set via the new Camera Settings page.
  • Accessing the virtual GPU is broken for Windows and Linux guests, adding a vGPU to a VM will have no effect and the VM will continue running with software rendering. FIXED.
  • Theme-aware splash screens are not visible in this build. A fix is coming to re-enable this in a future flight.
  • Split screen mode for Auto HDR does not work in this build; please look to the next build for a fix.
  • We’re working on a fix for an issue causing some USB attached printers to no longer work after upgrading to Build 21354 and higher.
  • We’re working on a fix resulting in WSL users finding that File Explorer launch performance regressed after upgrading to Build 21354 and higher.

The Windows Insider team didn’t explain why Timeline was losing some functionality for personal MSA accounts in this build. Timeline launched as a promising expansion of the existing Task View, but it never really evolved into a killer Windows 10 feature. If it’s pretty easy to ignore the Timeline button in the Windows 10 Taskbar, and Microsoft is currently testing a much more visible News and interests feature in the taskbar that could ship with Windows 10 version 21H1 later this year. Starting with the build 21359, news and interests on the taskbar is available for all Insiders in the Dev Channel.

Update 11:40PM PT: The Windows Insider team has updated its post to clarify that Timeline is not going away, and that News and interests in the taskbar is now available for all Dev Channel Insiders. We’ve updated our post to reflect that.

Minecraft’s big Caves and Cliffs update is being split into two releases

Minecraft developer Mojang Studios has changed its plans regarding the much-anticipated Caves and Cliffs update announced at the Minecraft Live event in October. The big update has now been split into two parts, with the first one still coming this summer and the second one to be released in the holiday season.

“We strive to deliver the most polished experience possible, and including all the Caves and Cliffs features in the summer update would have meant compromising on quality. And even though occasional bugs are a reality of game development, we want this update to be an amazing experience, not wreak havoc on your meticulously crafted worlds,” the Minecraft team said today.

At the Minecraft Live event last year, Mojang explained that the Caves and Cliffs update would introduce a new archaeology system to add more variety to caves and mountains. The developer described it as the most ambitious Minecraft update ever, though keeping its developers healthy during a worldwide pandemic remains Mojang’s top priority.

“We will be doing some deep dives into the summer update over the coming weeks, but for now, we can tell you that the first part will focus on some cute and fun mobs, cool items, and new blocks. There’s a lot to look forward to, and we’re working as hard as we can to bring you the entire Caves & Cliffs experience,” the team said today.

Microsoft is simplifying the name of its Tasks app in Teams

Microsoft is finally getting ready to simplify the name of its Tasks app in Teams. Currently, the old Planner experience in the Teams desktop client is called “Tasks by Planner and To Do,” but soon, it will just be called Tasks on both desktop and mobile.

Microsoft unveiled its plans to rename the Planner app within Microsoft Teams to “Tasks” last year, and this change is happening in three stages. The first stage rebranded the mobile version of Planner in Teams to Tasks, and then the desktop version of the Planner app in Teams was renamed to “Tasks by Planner and To Do” in the second stage back in December.

Microsoft Planner In Teams Name Change

This will change next month when the rebranding effort will hit its third and final stage, where the app gets renamed to Tasks.“This update reflects the final stage where we shorten Tasks by Planner and To Do to simply Tasks for simplicity, brevity and to better reflect the app combining the To Do and Planner experiences. You’ll still be able to find the app by searching Planner or To Do and this will not impact the functionality of the app,” the company explained in a message on the Microsoft 365 Admin Center.

Microsoft says that the name change will make it easier for users to find the “new hero task management app” in the desktop version of Teams. As usual, this update will be rolled out gradually instead of a quicker and broader release. It will start rolling out to all Microsoft Teams users in early May, and the deployment should be complete by mid-May. If you’re interested to learn more about these renaming changes, we invite you to check out our separate post.

How to get the most points out of Microsoft Rewards and earn easy money

Updated December 1, 2022.

If you didn’t already know, Microsoft has a program known as Microsoft Rewards. With the program, you can earn points for searching with Bing, completing quests on Xbox via Xbox Game Pass Ultimate, and also shopping, too. With the right commitment, you can end up earning a boatload of points to redeem for actual money by way of gift cards.

Here’s how you can get the most out of Microsoft Rewards.

Check out the daily sets and keep your streaks!

Our first tip to making the most of Microsoft Rewards involves visiting the Rewards dashboard every day. From here, you’ll see what’s called a “daily set.” Completing the activities usually earn up to 50-80 points daily. In addition, there are quizzes to complete, as well as quests that will take you to Bing for a specific search. Be sure to check this page every day, as it hosts a lot of great points offers!

Microsoft Rewards Streak


For completing the daily set each day, you’ll also get a bonus every so often known as a “streak.” The bonus streaks range from 45 points for 3 days, and 150 points for every 10 days after 54 days. It is best to finish your daily set each day to ensure you can lock in a points bonus towards redeeming gift cards.

We talked more about these daily sets and points bonuses in our separate piece, so be sure to give it a read.

Search on Bing and mobile via the Bing app or the web with Edge!

Microsoft is making changes to the way the points searches are valued in Microsoft Rewards. It used to be up to 150 points for searching on Bing on desktop, 100 points for searching Bing on mobile, and a 20-point bonus for using Microsoft’s Edge browser (5 points for each search).

Microsoft Rewards Search Values

This has now shifted a bit, with certain users seeing new points values to put a bigger emphasis on searching on mobile and with the new Edge browser. A group of Rewards users on Reddit is keeping track of the changes, but not everyone is impacted at this time. You can see how our points values have shifted above.

Either way, to make the most out of Microsoft Rewards, it’s best to keep searching on Bing, either via desktop or mobile. In fact, you can click the points breakdown button on your Microsoft Rewards dashboard to see how much your points are valued right now!

A good tip for searching on Bing is to use the autocomplete feature; tap or put your mouse in the search box for suggested trending searches. Be sure to visit the “Trending on Bing” page too, to earn points for those searches by clicking through each search.

Additionally, you’ll want to keep searching every month to lock in what’s called the “Level 2 bonus.” This is a bonus you get for earning 500 points a month. With the bonus, gift cards and other rewards will get a 10% discount.

So, more elusive gift cards become cheaper to redeem with your hard-earned points. For example, a $100 Microsoft gift card is valued at 91,000 points with a level 2 discount, instead of 100,000 points.

Sign up for Xbox Game Pass, and check the Microsoft Rewards app on Xbox

A third suggestion on our list to make the most out of Microsoft Rewards has to do with Xbox. If you have an Xbox One or Xbox Series S | X console, be sure to download the Microsoft Rewards app there.

The Microsoft Rewards for Xbox app will give you a “Rewards Weekly Set,” where you can complete quests each week to earn bonus points. You also can get 50 points for any Xbox achievement, too, and earn points for playing a specific game or quest.

Microsoft Rewards

The Rewards Weekly set has a streak system of its own as well, where you can earn 100 to 500 bonus points for keeping a streak. Again, keep the streaks going to earn the most possible points!

In addition to the standard Rewards app on Xbox, we also suggest you try out Xbox Game Pass Ultimate. For $10 a month, you’ll get access to some great quests on the Xbox Game Pass hub on your console. You can complete quests there to earn weekly, daily, and monthly points.

Shop and earn points

Our last tip is one that involves spending some money. If you’re buying movies, TV shows, or games on the Microsoft Store on Xbox, Windows 10, or Windows 11, you’ll earn some bonus Rewards points.

Microsoft Rewards

You can earn up to 1 point for each search dollar spent online at the Microsoft Store, either on games, movies, TV shows, or physical hardware like Surface or other accessories. You also earn cashback through Bing too, when spending at certain retailers using Bing Rebates.

You can visit this page here to learn more. Once you shop through Bing Rebates, money will be put back into your Microsoft Rewards account via PayPal, with some rebates going as high as 7%-15%.

Let us know how you’re earning!

We hope that you found our guide helpful. If you’re earning points at a higher rate than before, let us know in the comments below. We’d love to hear how you plan to spend your hard-earned Microsoft Rewards points and don’t forget to follow us on Twitter for the latest Microsoft news.

FIX: TeamViewer proxy error on Windows 10 [Versions 11 & 12]

If you experienced the dreaded TeamViewer proxy error, you’ve definitely come to the right place, as we’ll shine some light on it.

TeamViewer is a nifty remote-access tool that’s used by people all around the world, especially for remote assistance.

It involves a TeamViewer ID and a password, which are used for authentication. Thus, in order to connect to another PC through TeamViewer, you’ll need to know its ID and password. Quite simple.

What is a TeamViewer proxy error? Sometimes, the program might encounter certain connectivity issues. As a result, you may not be able to use it properly and establish a connection.

Reportedly, this especially happens to version 11 and version 12 users. Upon attempting to establish a connection to another device, the app urges you to check your Internet connection.

More so, it suggests that you’re probably using a proxy server, in which case you’d have to configure the program properly.

The thing is, almost none who complained about this error weren’t using proxy servers. Let’s see how we can get to the bottom of this.

How can I fix the TeamViewer proxy error?

1. Change your DNS

  1. Type control and click on Control Panel from the results.
  2. Select Network and Internet.control panel network and internet
  3. Click on the Change adapter settings button.Where to find the Change adapter settings menu
  4. Right-click your active connection.
  5. Select the IPv4 option from the list (make sure it’s checked and highlighted).
  6. Click the Properties button.
  7. If your DNS is set to auto, click the Use the following DNS server addresses radio button.
  8. Type 8.8.8.8 in the Preferred DNS server field.
  9. Go to the Alternate DNS server field and type 8.8.4.4.Unable to connect to authentication service
  10. Click the OK button.
  11. Launch CMD and type the following commands:
    • ipconfig /flushdns
      ipconfig /registerdns
      ipconfig /release
      ipconfig /renew
      netsh winsock reset
  12. Restart your computer.
  13. Check if the problem still persists.

It’s worth mentioning that you can also use other DNS servers than the Google Public DNS ones we’ve suggested. For instance, you can use 1.1.1.1 in the first field and 1.0.0.1 in the other one.

Note icon NOTE

2. Check your firewall

TeamViewer uses port number 5938 to establish connections to their servers and relay them to other PCs.

For that reason, you need to make sure that your firewall of choice (whether it’s Windows’ built-in one or another third-party solution) doesn’t block this port.

Furthermore, you can also check if your firewall or antivirus isn’t actively blocking the TeamViewer application. Last, but not least, check if your router blocks outgoing connections on port 5938.

If that’s the case, you’ll need to manually unblock them for TeamViewer to work.

3. Restart the app on your PC

Some users reported that the error started occurring if their PCs went in and out of sleep mode. That’s not exactly unheard of, apps becoming unstable after a good sleep.

Therefore, you can try closing the app (make sure it’s not still running in the tray) and launching it again. It did the trick for certain users, maybe it’ll also work for you.

Alternatively, you can try the old PC restarting trick. That is almost never prone to fail, and it definitely seems to work for some users.

4. Check if you’re not actually using proxy

4.1 Check the proxy settings on your system

  1. Hit the Windows key on your keyboard.
  2. Type Proxy.
  3. Click the Proxy settings button.
  4. Take a look at the proxy section.
  5. Scroll down and make sure it’s completely turned off.

If you’re not using a proxy, try the methods we’ve described above. Also, make sure that you turn off any VPN and try establishing the TeamViewer connection once more.

However, if your system is using a proxy, then write them down and then follow the steps above. If you can’t turn off the proxy in Windows 10, we have the perfect guide to help you do that.

4.2 Check the proxy settings on TeamViewer

  1. Launch the TeamViewer app.
  2. Click the Extras button.
  3. Select Options from the menu.
  4. Locate the Proxy settings section.
  5. Click the Configure button (check the screenshot).
  6. Select Use manual proxy (not Automatically detect settings).
  7. Type the proxy settings you’ve written down earlier (IP, port).
  8. Input your proxy username and password if necessary.
  9. Click OK.
  10. Restart TeamViewer.
  11. Check if the issue still persists.

It’s not a good idea to let TeamViewer detect proxy settings automatically. Many users reported that this feature doesn’t work and TeamViewer ignores proxy settings by default.

All things considered, if you’re unable to establish a connection on TeamViewer due to fake proxy detection, there are many things you can do about it.

Apparently, the most popular fix is changing your default DNS servers, but if this fails, feel free to try our other suggestions.

We also have an excellent guide on how to fix TeamViewer issues in Windows 10 so you should also check that for help.

TeamViewer is one of the best conferencing tools for business and personal use but when errors and problems start appearing, you should consider other solutions.

If your problems keep occurring, it might be time to pick an alternative remote control tool. Try Mikogo, a cross-platform solution that provides session recording and file transfer options, among other things.

You can also take a look at some of the best remote management software and choose whichever you prefer.

If you have any other suggestions or ideas, don’t hesitate to communicate them in the comments section below.

FIX: TeamViewer blocked by antivirus/firewall

The easiest and fastest way in which you can remotely control another computer is by using TeamViewer.

The software is quite handy for both personal and business purposes and can help you smartly manage different situations without wasting your time.

But, since it establishes the on-distance connection through the Internet, TeamViewer might be blocked by certain antivirus programs.

In that respect, the security solutions might see the app as a possible security breach so it will block its access and functionality just as a precautionary measure.

Well, if that happens and if you cannot use TeamViewer because of your antivirus software, don’t worry; you can re-enable the program easily by setting up an exception rule within Firewall.

Below we will see how to perform this process for the most popular antivirus programs that are currently used on the Windows 10 platform.

How do I fix the antivirus blocking TeamViewer?

1. ESET blocking TeamViewer

  1. Open ESET HOME Security Premium, then go to Setup and click Advanced setup at the bottom right.
  2. Select Detection Engine, then expand Exclusions.
  3. Next to Performance Exclusions, select Edit.
  4. On the Path section, select Add.
  5. Browse for the file path of the folder you want to exclude.
  6. To save your changes, click Ok.
  7. Now your TeamViewer should work as intended.

ESET is one of the best antivirus programs, antimalware solutions for both businesses and individuals. If it’s blocking a program, you can add it to the Exclusions list.

Users reported that ESET is sometimes blocking the VPN client. If this happens for you too, don’t hesitate to check our dedicated guide on fixing VPN if it’s blocked by ESET in order to solve this problem.

2. Avast blocking TeamViewer

  1. Open Avast and then pick up Settings.
  2. Switch to General tab from the left panel of the main window.
  3. There you can access the Exclusions feature from where you can add a specific program and create a Firewall rule.
  4. Use the file paths tab and add the path to TeamViewer.
  5. Now, the program will be excluded from future Avast scanning processes.

Avast is a great freeware security solution trusted by many users. If you are using this tool to protect your PC, but also need TeamViewer, create a Firewall rule.

To perform these actions, you have to open the antivirus. However, Avast won’t open if there are compatibility issues. To fix the error, use our comprehensive guide dedicated to fixing Avast if it doesn’t open.

3. Avira blocking TeamViewer

  1. Open Avira on your computer.
  2. Go to Menu and then pick up Configuration.
  3. Next, select the Internet Protection feature.
  4. The Application rules link should be displayed in the next window; access it.
  5. Now you should be able to access the Firewall settings.
  6. So, for adding TeamViewer into the exclusion list click on the Change parameters option.
  7. Within the allowed programs list you can find the TeamViewer entry. Make sure you enable access to this program.
  8. Save your changes and enjoy.
  9. Now Avira should no longer be blocking TeamViewer.

Avira is another great freeware antivirus, that you can use in order to keep your computer free of online threats, malware, and any types of viruses.

4. Bitdefender blocking TeamViewer

  1. Open Bitdefender on your computer.
  2. Switch to the Protection tab (click on the shield icon).
  3. Next, click on the View Modules link.
  4. From the upper-right corner of the main window, click on the Settings icon.
  5. Now, switch to the Exclusions tab.
  6. Select the list of files and folders excluded from scanning entry.
  7. Choose the Add button.
  8. Browse and access the folder where TeamViewer is located – make sure you select both on-demand and on-access scanning features.
  9. Click Add and save your changes.
  10. Afterward, select List of processes excluded from scanning and pick up the .exe TeamViewer executable file, and Allow its access.
  11. Save your changes, and reboot your Windows 10.

Bitdefender is one of the best security options available that gives you complete protection and is compatible with Windows, macOS, Android, and iOS devices.

It has an Exclusions tab for apps that are wrongly blocked by it. We also recommend you update your Bitdefender with the newest versions available. You can find details in our nice list of the best Bitdefender deals.

5. Kaspersky blocking TeamViewer

  1. Launch Kaspersky on your computer.
  2. From the main user interface access General Settings.
  3. Then, go and choose Additional.
  4. Pick up Threats and Exclusions – this field should be located in the right frame of the main window.
  5. Click on the Configure exclusion rules link.
  6. And from here you can choose what type of file to add to the Firewall exclusion list.
  7. So, add TeamViewer and save your changes.
  8. Reboot your device when done and then test the TeamViewer functionality.

Kaspersky is another great antivirus software used worldwide. But, it can sometimes block applications on your PC. If this happens, follow the above steps to exclude them.

6. AVG blocking TeamViewer

  1. Launch AVG and from the main user interface click on the Firewall section (the last one from the right).
  2. Click on the Settings icon and pick up Advanced settings from the displayed sub-menu.
  3. The AVG Internet Security window will be now displayed.
  4. From there switch to Applications tab – the second field located in the left panel.
  5. If TeamViewer is not listed there, click on the Add button.
  6. Browse and add the TeamViewer path and select the executable file for your program.
  7. When done, click on Create.
  8. Close the Firewall settings and check if TeamViewer can be used now.

AVG is a great free antivirus to use, but sometimes it creates issues with other PC components and software.

Besides blocking legitimate software, AVG can also cause sound errors. If this happens to you, use our detailed guide dedicated to Windows sound problems after installing AVG and fix the issue with ease.

7. Norton blocking TeamViewer

  1. From the Norton main window click on Advanced.
  2. The Firewall field should be located in the left pane – click on it.
  3. Now, click on the settings icon corresponding to Application Blocking.
  4. From Application Blocking Settings, click on Add application button.
  5. If TeamViewer isn’t displayed, click on Other and extend your search.
  6. Pick up the TeamViewer app from the Choose Application dialog window.
  7. Click Choose when done.
  8. In the end, select Done and reboot.

Norton is a reliable antivirus solution that includes Firewall, secure VPN, and protection for all computer threats such as spyware, ransomware, and malware.

8. Windows Defender blocking TeamViewer

  1. Open Windows Defender.
  2. Launch the Search field (click on the Cortana icon) and enter Windows Defender.
  3. From the antivirus main window click on Virus & Threat protection.virus and threat protection word document can't save
  4. Next, navigate towards Virus & Threat protection settings.
  5. Click on Add or remove exclusions.
  6. Add TeamViewer to the exclusion list so that the program can be re-enabled.
  7. Save your changes and reboot.

If you still have issues using TeamViewer even after you have added it to the exclusion list on your antivirus program, you may consider using other remote desktop software.

We recommend you to use, Mikogo, a secure solution, that is also trusted by IT professionals to connect to another computer, no matter the distance.

So, that’s how you can add a new Firewall rule for re-enabling TeamViewer access on your Windows 10 system.

Hopefully, now you should be able to remotely access other devices via TeamViewer while still using your favorite antivirus solutions.

Unfortunately, TeamViewer issues are a common thing, thus, we recommend you use another reliable tool. Check our dedicated guide about fixing TW issues if you still wish to solve the problems.

If you want to know about TeamViewer, we also have a great guide on Teamviewer_Service.exe, so don’t miss it.

If you have questions related to the tutorial that was explained above, don’t hesitate and share your thoughts with us. You can do it by filling out the comments form below

FIX: The name cannot be resolved Outlook error this way

Microsoft Outlook is the first choice for many enterprises and home users for a reason. With the seamless integration with other Microsoft tools, this email client is a rather valuable solution.

However, some users run into the following Outlook error: The name cannot be resolved. The connection to Microsoft Exchange is unavailable.

This error prevents users from accessing their user profile locally and we provide you with some solutions below.

How do I fix The name cannot be resolved Outlook error?

1. Run Mail Setup via Control Panel

  1. Open Control Panel.
  2. Select User Accounts.

    The name cannot be resolved Outlook error
  3. Choose Mail to launch Mail Setup.
  4. Once the Mail Setup Wizard launches, select the Show User Profiles.
  5. Select your profile and check the Always use this profile box.
  6. Click Add and name your profile.
  7. Add your credentials and click Next.
  8. After this, you shouldn’t have The name cannot be resolved Outlook issues anymore.

2. Delete and reset your Outlook profile

  1. Open Outlook and delete your User Profile.The name cannot be resolved Outlook error
  2. Navigate to these two folders and delete their contents: C:Users%username%AppDataLocalMicrosoftOutlook C:Users%username%AppDataRoamingMicrosoftOutlook
  3. Restart Outlook and try signing in with your credentials again.

This should address The name that cannot be resolved error in Outlook. If not, continue to the last step below.

3. Uncheck the Hide from Exchange address list box

  1. Log into Microsoft Exchange.
  2. Right-click on the User Profile with issues and open Advanced.
  3. Uncheck the Hide from Exchange address list box and confirm changes.
  4. Try using Outlook again.

If after running all these steps, Outlook still won’t work properly, perhaps you want to try an alternative email client. After all, Outlook isn’t the only business email client out there.

You can also use a web browser email service, however, this normally does not enable custom domains without paying extra. You may also be blasted with spam and advertising.

As a result, unlike web emails, desktop email software is more productive and includes a multitude of features. Desktop programs’ filtering, sorting, flagging, and tagging features are far better than those web-based. 

The integration of desktop clients with calendars, task management apps, to-do lists, and other programs to boost productivity is at the top of the list of perks.

When Outlook stops responding when you need it the most, there is always a solution waiting behind a closed door.


With those steps, you should be able to fix the mentioned Outlook error. In case you have alternative solutions, please do share them below, in the comments section.

FIX: Avira Antivirus update failed on Windows PCs

Avira is probably the most commonly used free third-party antivirus software at this moment.

While other solutions play on a variety of different cards, the go-to trait of Avira is the feature-rich suite that comes with a fast VPN. Avira issues are, also, quite rare which puts it in front of some other tools.

However, this seamless use is shortly disrupted by minor problems. One commonly-reported issue concerns updates or rather Avira’s inability to download updates.

If the Avira update failed, don’t worry, because we will provide some solutions for the problem in this article, so make sure you follow the solutions below thoroughly.

What can I do if Avira Antivirus can’t update?

1. Switch to another antivirus software

Before we jump to the other solutions, we’d like to make a warm recommendation that might come in as useful when you encounter problems with your current antivirus.

Namely, we advise you to switch to another antivirus software that is maintained better by its developers and that has other useful features.

While Avira is a great choice for those who prefer a free antivirus, there are better premium apps out there that include even more security-related tools.

In addition to protecting your PC from malware, ransomware, and other harmful files, the software will also secure your banking transactions, and protect your webcam and microphone from being hijacked.

Benefit from premium and trusted multilayered protection that utilizes machine learning to combat old and emerging threats.

TotalAV

TotalAV is an error-free antivirus software that uses advanced AI to scan and remove any threats from your PC.
Check Price Visit Website

2. Disable Windows Defender

  1. Open Windows Defender.
  2. Open Virus & threat protection.
  3. Select Virus & threat protection settings.avira antivirus won't update
  4. Disable Real-time protection.avira antivirus won't update

In order to easily disable Windows Defender, do not hesitate to apply the above steps. This fix has been already confirmed by several Avira users.

3. Disable Web protection temporarily

  1. Open Avira Antivirus.
  2. Select Settings.
  3. Open Internet protection.
  4. Disable Web Protection.
  5. Try downloading updates.

Since Avira covers all possible protective segments, like any other suite, it makes sure to protect the web-browsing as well.

Thankfully, some users resolved the Avira update failed issue by simply disabling the Web Protection temporarily. After that, they were able to update the Avira client for Windows 10 without additional problems.

Do not worry about being exposed to threats while browsing the internet because of this change. If you’re a Chrome user, you can protect yourself with one of the extensions on this useful article.

Note icon NOTE
If you’ve had any other solution installed prior to Avira, we suggest clearing every remaining associated files and registry entries. The best way to do so is by using third-party tools.

4. Reinstall Avira

  1. Download the Avira RegistryCleaner.
  2. Press and hold Shift and click on Restart to restart your PC.
  3. Select Troubleshoot and then Advanced options.
  4. Click on Startup settings and then Restart.
  5. Choose Safe mode on the next screen.
  6. Navigate to Control Panel and select Uninstall a program and remove Avira.
  7. Run the Avira RegistryCleaner tool to clear all registry inputs.
  8. Navigate to the following path and delete the Avira folder: C:\Program Files\Avira
  9. Restart your PC and download the latest Avira iteration.

5. Update Avira manually

  1. Download the Avira update free tool( Also known as Avira Fusebundle Generator).
  2. Unpack it and save it somewhere you can easily access it.
  3. Run the Fusebundle.exe file.
  4. Open Avira and click Update and select Manual Update.
  5. Load the VDF zipped file stored in the Avira Fusbundle Generator and select the Install folder.
  6. Wait until the updates are installed and restart your PC.

With that said, we can conclude this article. If the update problem persists, we suggest sharing the log files on the official support forum or contacting the support directly.

In case you have additional suggestions or alternate solutions, we encourage you to share them with us in the comments section below.

How to Fix Printer Error 482 in a Few Easy Steps

When trying to use the PrintForm function after altering page settings, you may encounter one of these error messages on one of your printers: Runtime error 482 Printer Error or simply Printer Error.

These runtime errors are the result of a system’s inability to connect to the PrintForm Windows library from applications that keep on using the Visual Basic integration engine.

Even if Visual Basic is ancient technology now, it continues to be used by the likes of Excel, Citrix, or Adobe Acrobat to provide embedded functionality for a system.

To resolve the problem, there are some confirmed fixes you can work through. You’ll find them detailed right below.

How can I fix printer error 482?

1. Update your drivers

  1. Open the Device Manager.
  2. Look for the devices you want to update.
  3. Right-click on the device and select Update driver.
  4. Repeat for all the devices that you want to update.

Updating the drivers may not be your favorite activity. This happens especially in Windows 10 since this OS version makes the procedure slightly harder than it used to be.

After finding yours, right-click it and hit Update driver. You may choose whether to search for the latest drivers automatically or manually if you have already downloaded the latest drivers or have them on external storage.

Updating your drivers with the Device Manager is not the safest and best thing to do, especially when we talk about newly released versions.

You can save yourself some time, and stress, and cause even more problems to your PC by updating the drivers automatically with specialized software such as Outbyte Driver Updater.

2. Turn the printer On

For starters, as silly as it may sound, the 482 error could appear when your printer isn’t online. Correct this innocent mistake by physically turning the printer On, or switching it to Online mode.

After you made sure that the printer is properly connected, and turned On, try to use it again and see if the error persists.

3. Use other printer settings

  1. Press the Windows Key + S and type in Printers & scanners.
  2. Open the Printers & scanners and change the settings.

You can also try to print by using different printer settings. Sometimes, switching from using the standard Print to PDF option to Microsoft Print to PDF solves this issue in a blink of an eye.

4. Make sure you have the appropriate printer installed

  1. Go to Control Panel.
  2. Click on Hardware and Sound.
  3. Then, click on Device Manager to see all connected devices.
  4. Click the Printers icon, then on Add a printer or scanner to install the printer.

This often happens when you don’t have your printer installed from the Windows Control Panel. The solution, in this case, is to ensure you change that.

5. Switch to the appropriate printer

Have you tried to print a form on a printer that can accept only text? Then, there’s no other quick fix than to switch to another printer that can handle graphics.

Obviously, you won’t be able to print images on a device that can only print text. So make sure that it is not the case.

6. Use a registry cleaner

The Windows registry is the core of a large number of error types. This comes as no surprise as that’s the main database storage area for software and hardware settings, with printer settings included.

The Runtime 482 error can be caused by some printer settings inside the registry that become damaged at some point.

To solve this, you need to use an automated registry cleaner, which is an automated tool that can fix all the damaged settings inside your PC.

These types of tools are easy to use. They scan your PC for registry issues and other problems such as unnecessary files. They can remove and repair all issues they find in bulk which can significantly improve your PC’s performance.

7. Clear out the print spooler

  1. Open run and type in services.msc.
  2. Scroll down to the list of services and click on Print spooler.
  3. At the top-right corner, click on Stop the service.

The print spooler is a queue through which Windows is able to manage most print jobs. Clearing it out is very efficient, and it can be done within the services.msc window, or the Command Prompt.

  1. Press the Windows Key + S and type cmd.
  2. Open the Command Prompt as an admin.
  3. Type in the following command: net stop spooler
  4. Then type: DEL /F /S /Q %systemroot%System32spoolPRINTERS
  5. Finally, type the following once more and press Enter: net start spooler
    • If you’re applying these steps on a server, make sure there are no other print jobs being processed on other printers as those will be deleted too.

If all these solutions can’t fix the problem, you might have to consider that your printer is jammed or out of paper or that your antivirus software hasn’t done its job.

A malicious file is potentially infecting the system and causing this error among others. In that regard, take a look at the best antivirus solutions for Windows 10.

While for some the error is printer-dependent, other people have reported it to occur when using Adobe Acrobat or similar tools. Reinstall the affected software if that’s also your case.

If you still have problems after applying these solutions, let us know in the comments section below.

FIX: TeamViewer doesn’t work in Windows 10/11

Windows 10 is the second most popular Windows version among users and many large software companies created programs that are compatible with it.

One of them is TeamViewer, which users reported they’re unable to use after they upgraded their systems to Windows 10.

How to fix TeamViewer issues on Windows 10?

  1. Lower screen resolution
  2. Tweak your Registry
  3. Run the Windows Troubleshooter
  4. Update Windows
  5. Use another remote desktop app

1. Lower screen resolution

lower screen resolution

Before we start with doing complicated things, we should try out simple ones.

Some users report that they didn’t have any problems with the previous OS version, but after they went for an upgrade, the screen went black every time they tried to access another computer.

They reported that they just lowered the screen resolution of the host computer, and all the problems were solved.


2. Tweak your Registry

  1. Create DisableDuplicationAPI as Dword, a value of 1 (if you don’t know how to do that, look for Microsoft’s support)
  2. Click Start, type regedit in the Search box, and then hit Enter.
  3. Go to HKEY_LOCAL_MACHINE\SOFTWARE\WOW6432NODE\TEAMVIEWER
  4. Go to File > Export and then add DisableDuplicationAPI to your registry.
  5. After that, close the Registry Edit window.
  6. Click Start, type services.msc in the Search box, and then press Enter.
  7. Find the TeamViewer process, right-click on the service, and hit restart.
Note icon NOTE
If there is no TeamViewer key, create a registry key as an alternative workaround for running the software properly.

3. Run the Windows Troubleshooter

  1. Open the Windows Settings.
  2. Go to Update & Security, then to Troubleshoot.
  3. Scroll down to Windows Store apps and run the Troubleshooter.
fix teamviewer

Launch TeamViewer and check if the app runs smoothly now and you have access to all its features.

This is valid if you downloaded TeamViewer from the Microsoft Store.


4. Update Windows

Make sure that you’re running the latest Windows OS updates on your machine. As a quick reminder, Microsoft constantly rolls out Windows updates in order to improve the system’s stability and fix various issues.

To access the Windows Update section, you can simply type update in the search box. This method works on all Windows versions. Then go to Windows Update, check for updates and install the available updates.

After applying one of these solutions you should be able to run TeamViewer in your Windows 10 without any problems.

But if neither changing the resolution or making an alternative registry key didn’t help, or you have some other comments or suggestions, we would like to hear that from you in the comment section below, so please express yourself if you want or need to.

Additionally, it might be a good idea to download the latest TeamViewer version to make sure you have all the updates.

Also, check out this older article which contains some suggestions that might still be helpful.

5. Use another remote desktop app

If none of the preceding efforts produce a result, we strongly advise you to use another tool for remote access.

The free version of Mikogo allows for one-on-one screen sharing, audio conferencing, remote control, file transfer, and chat through a browser.

We also prepared a leading track of top 5+ best remote troubleshooting tools for Windows 10 with third-party support, which is always a good option. Running a troubleshoot on your PC will aid in the removal of any risks or bugs

If you managed to troubleshoot TeamViewer using another method, we’d like to hear about that. Use the comments section to get in touch and tell us more.

Xodo PDF Reader updates on Windows 10 with new viewer settings

The Xodo PDF Reader app updated today for Windows 10 devices with a variety of bug fixes and some new settings for when viewing PDF files.

Here’s the full release notes for the update which brings Xodo PDF Reader up to Version 4.5.9:

New Features

  • New Viewer Setting: Enable Viewer Tab Scrolling
  • New Viewer Settings: Set to full screen signature window

Fixes and Improvements

  • Fixed issue where the selected document Tabs not getting updated properly
  • Crash Fixes
  • Minor UI updates
  • Improved Viewer startup performance

Xodo PDF Reader is a rather solid Windows app for opening, creating, and editing PDF files. The app first came to Windows back in 2014 and continues to receive updates on a very regular basis.

Do you use Xodo? Let us know in the comments below and then follow us on Twitter for more Windows app news.

Edit: Updated to remove reference to Windows 10 Mobile devices. Older versions of the app will run on some Windows phone models but it no longer receives updates. 

Remote Wake Up PC Software: 9 Best in 2026

We all love having access to all the data in our computers at all times, whether we have physical access to our devices or not.

If you want to use a remote desktop or any other server software, you may leave your computer at home/work when you leave. However, this approach wastes power.

Fortunately, there’s another way to remotely power on/off your PC whenever you want to use it.

That’s where the Wake-On-Lan (WOL) option comes in very handy. If you need to turn on your home or office PC remotely to complete some urgent and critical tasks, WOL is a great feature built into most PC’s and servers.

WOL works by sending a special WOL ‘magic packet’ over the network or internet, making the ‘target’ PC wake up from Sleep or Hibernate state.

Wake-On-Lan packets are usually sent from software using UDP Ports 7 and 9 which can wake up the device – computer, server, router, switch, etc.

Using a WOL allows your device to go into Low Power mode when the machine is not being used in order to save power.

In order to work, WOL should be enabled both on the computer you’re using at the moment and the ‘target’ PC/PC’s from your Motherboard BIOS and on the Network/Ethernet Interface.

In this article, we will explore the best free and paid Wake-on-Lan software for Windows 10.

Which are the best PC wake-up tools for Windows 10?

OpUtils

Software tools that offer in-depth control over all assets that are present within a given network are hard to come by since many of them fail to live up to expectations in terms of reliability.

However, OpUtiles seems to be an exception since it provides plenty of tools that make it an invaluable addition to any network administrator’s arsenal.

While primarily an IP address and Switch port management software, this tool is made to help with efficiently monitoring, diagnosing, and troubleshooting IT resources, including a Wake-on LAN tool.

This tool lets network administrators perform manual and scheduled boot-up of an inactive machine that is present within a network, providing them with uninterrupted access to all network devices.

The best part about OpUtils is that, despite there being plenty of vulnerabilities associated with WOL protocols, it doesn’t suffer from any of them thanks to the built-in protective features.

Here are some of the other benefits of using OpUtils:

  • Enhanced IP address management
  • Rogue device identification
  • Bandwidth monitoring
  • Config File Manager

OpUtils

Gain instant access to all network devices, regardless if they are on or off, by using OpUtils today!
Free trial Visit website

Parallels Access

Parallels - WOL

Parallels Access is the ideal remote desktop solution if you want to avoid lengthy help files and tutorials and begin working with content on a remote computer as quickly as possible.

Parallels Access allows you to easily initiate a remote desktop connection in order for you to remotely control your PC from another PC, using Wake-On-Lan. You can even use this tool to control a PC from a mobile device.

This software has two main versions, one for home users and another for business accounts.

If you choose the home user edition, you can create an account for one user. You can use this account to access up to five remote computers at once.

In the business version, you can create multiple accounts allowing you to access an unlimited number of remote computers at once.

Both versions of Parallels Access have a free trial option to help you decide what’s the best choice for your needs.

The simplicity of this software makes launching remote applications using WOL or switching between the remote application, a very easy process, even for users with no previous experience.

The setup process is remarkably painless. Simply download the free app, install it on your Windows 10 PC and your computer will be available for remote connections.

Even though Parallels Access has a very consumer-friendly user interface, it’s security features are in line with what you would expect from a premium product.

Parallels Access uses SSL and 256-bit AES encryption standards and it doesn’t allow sessions to be shared between the host and client services.

For a step-by-step tutorial regarding using Parallels Access Wake-on-Lan feature, go to Parallels Access’ support page.

⇒ Get Parallels Access

TeamViewer

TeamViewer -Screenshot

TeamViewer is one of most well-known remote desktop tools with over 1.7 billion live TeamViewer ID’s. It is a very versatile software that offers you the possibility of keeping all your computers, servers, and devices at your fingertips.

Its user-friendly interface makes it easy for people to establish incoming and outgoing remote desktop and computer-to-computer connections.

You can use this tool for real-time support or access to files and networks. You can also use it to collaborate online, participate in meetings, make video calls and even chat with individuals and groups.

It offers you the possibility to connect across multiple platforms, from PC to PC, mobile to PC, PC to mobile, and mobile to mobile.

TeamViewer can also be used to wake up one or more remote PCs using it’s Wake-on-Lan feature.

If it’s set up properly one of the most important features regarding the WOL option is the fact that you don’t need to set up port-forwarding, worry about the remote IP address or using third-party tools.

However, you still need to enable Wake-on-Lan in the BIOS and device manager.

In order to set up the Wake-on-Lan feature in TeamViewer, use the options under Extras > Options. Click the Configure button next to Wake-on-LAN to set them up.

If you’ve never used TeamViewer, check out this step by step guide to help you set up WOL.

⇒ Get TeamViewer

Wake on LAN by Microsoft

Wake on LAN - Microsoft -WOL

Wake on Lan created by HM Software NL for Microsoft, is a utility that allows you to send a so-called ‘magic packet’ via your ethernet or wireless connection in order to wake up any device compatible with WOL.

The configuration process is a bit more complicated than the other options presented in this article because you need to add a configuration by specifying a unique name and MAC address (usually found in routers).

You can also create multiple configuration files and add pictures to easily distinguish and switch between them.

⇒ Get Wake on LAN

RemotePC

RemotePC - WOL

RemotePC has a simple interface that allows you to effortlessly access remote computers 24/7 and enjoy the freedom of working from anywhere.

Comparing it to other high-end products like TeamViewer and Parallels Access, it has one of the easiest-to-understand menus. The tool doesn’t provide feature-packed toolbars or whiteboard capabilities.

You can set up RemotePC by downloading and installing a client app on the local and remote machines. When the app is launched, you will see a simple interface that lists all the available remote machines.

After you assign a name to your machine and create a password (access code), you can easily connect from any other machine.

RemotePC can also create a one-time access code that you can share with other users. However, we don’t think this feature is that practical.

You need to work with a twelve-digit Access ID and a four-digit key to access the respective computer. This takes time and the risk of entering the wrong key. In comparison, TeamViewer automatically sends an email with the access code.

Once the remote connection has been created, RemotePC opens a window that shows you the remote PC’s desktop. It offers a simple menu at the top of the window that lets you set resolution, send keystrokes, writes notes, and other standard remote functions.

The other apps presented in this article are more complex in the features offered to give you access to fine-tuning different options like whiteboards and audio options.

⇒ Get RemotePC

SolarWinds WOL

SolarWinds - WOL

SolarWinds is a lightweight and easy to set up an alternative which makes it a very good option for swiftly installing and configuring it on a system, and it’s also completely free.

In order to set up SolarWinds, you need to have the IP and MAC addresses of the remote machine you want to connect to.

Our suggestion is that you right-click the program, click on Properties, and then you’ll find the Configure button. Next, you want to find the Advanced tab and scroll to the bottom to check if the ‘Wake on Magic Packet‘ option is set to ‘Enabled‘

As long as the ‘Wake-up-On-Lan’ option is enabled in BIOS, SolarWinds works amazingly well. You just need to press the ‘Wake Up’ button, which automatically sends a ‘Magic Packet’ to the IP and MAC address of the remote machine you want to resume work on.

⇒ Get SolarWinds WOL

Aquilatech WOL

AquilaTech WOL

This is a simple software that offers a better visual experience compared to SolarWinds WOL.
Aquilatech WOL offers some functionality for troubleshooting WOL by monitoring the wake packets being sent and received and also has a built-in scanner for browsing host machines’ WOL functionality.

Aquilatech WOL key features:

  • Wake-up of remote machine that support Magic-Packet WOL
  • Shuts down Windows domain computers
  • Monitors and displays incoming WOL packets -useful for troubleshooting network routing issues
  • Network scanner – makes it easy to survey networks and add hosts
  • Ability to ping the selected remote computer, to display it’s status
  • Option to perform emergency shutdown of all defined computers at once
  • Scheduled wake-ups/shutdowns
  • Command line and GUY interfaces
  • Ability to auto-start with Windows
  • Send email notifications using it’s built-in scheduling system
  • Can be used in both static or DHCP adressing networks
  • Sound notifications when hosts change state
  • Supports Wake-up over the Internet using WOLAgent.

⇒ Get Aquilatech

EMCO WakeOnLan

Emco WOL

This program looks better than most of the simple WOL tools presented in this article. As a result, it offers a bit more functionalities.

EMCO WakeOnLan free version doesn’t do much more than most of the other free applications listed here, but its good-looking interface allows easy navigation and lets users adjust parameters very quickly.
The paid version offers more flexibility and has user management features and logging tools.

 EMCO WakeOnLan key features:

  • Fast and easy power-up of network PC’s
  • Automatic Wake-on-Lan stages for collecting MAC addresses for sending WOL packets
  • Allows powering up of one or multiple network PC’s
  • Easy automation of scheduled processes defined by date/time or regular periods (daily, weekly,etc.)
  • Works on networks of any scale
  • Ability to wake up PC’s located in the same subnet or across subnets

⇒ Get EMCO WakeOnLan

AnyDesk

If you’re looking for software for any kind of remote access, connectivity and work, then you should definitely try out AnyDesk, since it has pretty much all the tools you may ever need, and more.

Available on pretty much any platform, such as Windows, macOS, Android, iOS, Linux, and more, and the client is incredibly small, lightweight, and easy to deploy.

As an added bonus, AnyDesk facilitates managing your remote desktop contacts and connections, as well as the settings and configurations in Windows.

Thanks to this, you can finally focus on your projects rather than their administration.

Encryption is another strong point of this service, with TLS 1.2 encryption technology and in-depth verification of connections ensure end-to-end privacy and protecting your data at all times.

This allows you to have an autonomous, private network that fully shields your data while operating Windows remote desktops, without sacrificing productivity or additional resources.

⇒ Get AnyDesk

This article aims to give you an easy-to-understand analysis of all the remote PC wake-up software options for Windows 10. We covered both paid and free versions.

Making an informed decision regarding the Wake-on-LAN features of different software solutions will surely help you. After picking the desired software, properly enable wake on LAN and you’re good to go.

Thank you for reading this guide. If you’ve got any suggestions or comments, feel free to use the comment section below.