FIFA 20 Ultimate Team introduces ICON Swaps

FIFA 20 Ultimate Team, the most popular mode in FIFA 20 is back for a new season.

This game mode will be coming back with even more exciting features.

In the past, you could purchase ICONs on the Transfer Market or find them in Packs.

In FIFA 20 Ultimate Team they are now introducing ICON Swaps.

What exactly are ICON Swaps?

ICON Swaps is meant to be a new way to allow players to unlock select ICONs in exchange for Player Tokens.

As you all probably remember, you can earn Player Tokens by completing the objectives you exchange.

Official patch notes from EA revealed more about ICON Swaps:

In short, there will be 4 unique versions for each of the 89 ICONs in FUT 20 that will each be available during certain periods throughout the year.

These versions are called:

  • Base
  • Mid
  • Prime
  • Moments

They are inspired by the evolution of a real-life football player throughout his career.

For example, Base reflects a time in the player’s career when they were still new and had not yet reached their full capabilities.

On the other hand, Moments focuses on the highlights in an ICON’s career that elevated them to one of the all-time greats.

When will ICON Swaps become available?

Those eagerly waiting for FIFA 20 to launch will have to wait until the 11th of October for the ICON Swaps features to be available.

As for how long will these versions last, each of them has a different timetable:

Base

  • EA & Origin Access Trial until mid-December 2019 only.

Mid

  • This version will be available in packs from the start of the EA & Origin Access Trial until mid-February 2020 only.

Prime

  • This version will be available in packs from mid-December 2019 until the end of FUT 20.

Moments

  • This version will be introduced into packs throughout February 2020 until the end of FUT 20.

FIFA 20 ICON Swaps timetable

Apparently, the exact purpose of introducing ICON Swaps is to encourage versatility in squad building throughout FUT 20, as well as improve their accessibility and availability.

How to use Google Authenticator with Uplay correctly

Uplay is a proprietary game distribution platform created by Ubisoft, similar to EA’s Origin, or Trion World’s Glyph.

You can use it to purchase and download games and DLCs from all of Ubisoft’s known IPs.

However, you can also use it to chat with other players, and read up on news regarding Ubisoft titles.

For security reasons, Uplay requires users to log in using an account name and a password to access their content.

Another good example is the use of the Google Authenticator, where Google sends you a code only you can access to enter Uplay.

Some players have reported issues with the Google Authenticator security app, and would seem that sometimes they are receiving wrong codes.

This issue is preventing them from logging into Uplay, and the gaming community isn’t pleased at all.

Why is Google Authenticator not working on Uplay?

The reasons why Uplay may be having issues with the Google Authentificator are quite simple:

  • The Authenticator code is typed with spaces
  • The time correction for codes is out of sync
  • The date & time is incorrect on the mobile device
  • A common Uplay internal glitch

Use Google Authenticator properly

1. Type the Google Authenticator code without any spaces

Google Authenticator send codes in the form of three numbers, followed by a space and another three numbers.

When this happens, ignore the spaces between the numbers when typing it in.

While a lot of other apps know how to automatically remove spaces in order to recognize a code, Uplay doesn’t.

This means you need to be extra careful when imputing the code.

2. Sync the time corrections for your codes

  1. Open the Google Authentificator app on your mobile device
  2. Go to the app‘s Settings menu
  3. Tap on Time corrections for codes
  4. Tap Sync now and wait for the process to complete
  5. Restart your device, and perform a two-factor authentication again

Google Authentificator Time code sync uplay

3. Set the right time and date on your mobile device

Inconsistency with the time and date may make your time correction codes out of sync.

You can fix this by following these steps:

  1. Access the System app
  2. Navigate to Date & Time
  3. Make sure the Automatic date & time and Automatic time zone are enabled. are active
  4. Restart your device, and perform a two-factor authentication again

Google Authentificator Uplay Automatic time

If none of the solutions mentioned above seem to work, contact the Ubisoft’s support staff to help you in that matter.

FIX: SSD error mismatch detected

Some users have complained that their Intel SSD shows an error saying mismatch detected.

This issue seems to appear on a variety of Intel SSD devices.

In some cases, the error is accompanied by other issues like freezing and lagging, strange file corruption problems, and even failed Windows Update installations.

The error message is being displayed when users run the Full Diagnostics Scan from the Intel SSD Toolbox.

The scan stops at different percentages but shows the same error message: Data Integrity – Error: Data mismatch detected. Contact your reseller or local Intel representative for assistance.

If you’re worried that your SSD might be faulty, that may not be the case. In this fix article, we will explain why that is the case, and also what you can do to troubleshoot this issue.

Read on to find out more details.


Here’s how to solve the SSD mismatch detected error

1. Test your CPU/memory with LinX

motherboard - SSD error mismatch detected
Note: If you are using overclocking on your PC, or your CPU cooler is faulty or low quality, performing this step may cause your CPU to overheat. With modern CPUs, this should not cause any issues, but pay attention to the registered temperatures of your system and abort the process if it exceeds 90C.

  1. Download LinX and extract the files to a folder on your PC.
  2. Make sure to use a non-SSD drive if possible.
  3. Run LinX.exe.
  4. Press Settings -> set the threads to match your CPU thread count (If you use Intel i5 -> set it to 4/ If you use Intel i7 CPU -> set this to 8).
  5. Press the All button -> set the Run option to 10 minutes -> Press Start.
  6. Check the results of your tests and take the appropriate measures.
  7. If the LinX testing lasts more than several hours, then it might mean that your SSD could have a problem.

Want to move Windows 10 to SSD without reinstalling? Here’s how


2. Run MemTest on your PC

ram memory - SSD error mismatch detected
Running the memory test:

  1. Click Cortana -> type Control Panel -> select the first option from the top.
  2. Inside the Control Panel -> choose System and Security from the list to the right of your screen.
  3. Select Administrative Tools.
  4. Scroll down and double-click the Windows Memory Diagnostic shortcut.
  5. Choose the Restart now and check for problems option (this will restart your PC to start the process).
  6. Windows Memory Diagnostics environment will start and it will automatically start scanning for issues in the Standard mode (if you want to change the mode, you can simply press the F1 key and change the scan options to either Basic or Extended).
  7. After modifying the options, press F10 to start the scan.

Checking the results:

  1. Press the Win+R keys and type eventvwr.exe -> press Enter to open Event Viewer.
  2. Expand the folder Windows Logs -> right-click System -> click Find.
  3. Type MemoryDiagnostics-Results -> click Find Next.
  4. Double click the result -> check the results of the test.
  5. If the result reads The Windows Memory Diagnostic tested the computer’s memory and detected no errors -> then you have no issues.
  6. If the results show errors, then it means that your RAM memory could be corrupted, thus creating problems with your SSD.

Conclusion

Please feel free to let us know if this guide has proven useful in your situation by using the comment section below.

READ ALSO:

FIX: Mixer not saving streams

If you see that Mixer is not saving your past streams, aka VoDs (Video on Demand), you should know that you’re not the only one.

A VoD is a recording of a past stream that should be automatically saved on Mixer.

A large number of users have reported the same issue. This has caused a lot of people to get frustrated with the Mixer services.

This problem becomes even more of a nuisance if you’re using Mixer to record your streams to post them on your YouTube channel. This will ultimately result in you losing money, followers, and likes.


Here’s what you can try to make Mixer save past streams

Make sure the past streams option is enabled

laptop on desk with coffee cup - Mixer not saving streams
Even though at first look this notion might seem obvious, a large number of users didn’t perform this step.

This becomes a prevalent issue as the option Keep recordings of my streams is turned off by default.

You will need to perform the following steps every time you create a new Mixer profile. This will allow you to avoid losing any valuable streams.

  1. Log into your Mixer account.
  2. Click your avatar found at the top right side of your screen.
  3. Select Broadcast Dashboard.
  4. Scroll down and toggle the button on for the option Keep recordings of my streams.
  5. Scroll down a bit more and click the Save button.

Note: This option will not work if you enable it while streaming. You will need to apply this setting before starting your streaming in order for the save to take effect.


Can’t sign in on Windows 10? Try these methods out


Conclusion

In today’s fix article we explored the best way to deal with the issue caused by your Mixer account not saving your past streams.

Because this can cause you to lose followers, and even money (if you’re doing streaming professionally), it becomes even more important to deal with this issue.

We hope this guide managed to help you sort out your Mixer problem once and for all.

Please feel free to let us know if it did by using the comment section below.

READ ALSO:

Fix: SSD Won’t Wake From Sleep [Desktop & Laptop]

A great number of users have stormed the different online forums complaining about the fact that their SSD won’t wake up from sleep.

In today’s article, we will explore what are your best options if you find that your SSD won’t wake up from sleep. Please follow the steps carefully.

What can I do if my SSD won’t wake up from sleep?

1.  Perform an ATX reset

1.1. On a desktop computer:

  1. Shut down your PC completely and disconnect all external devices (keyboard, mouse, etc.).
  2. Unplug the power cord from the PC.
  3. Press and hold the power button for 15 seconds (at least).
  4. Connect the power cord but do not plug in the external devices.
  5. Turn your PC on and wait to see if it boots normally. (if it does, shut it down, reconnect all peripherals, and turn it on again).
    desktop ssd wont wake sleep

1.2. On a notebook:

  1. Disconnect all peripherals and unplug the power cord.
  2. Remove the battery and hold the power button for at least 15 seconds.
  3. Plug the power cord in and turn your notebook on (reconnect peripherals only after the boot process is completed successfully).

2. Reset BIOS by removing the CMOS battery

motherboard - SSD won't wake from sleep
  1. Shut down your PC and remove the power cord.
  2. Open up your PC and find the battery on the motherboard.
  3. Remove it, and wait for 5 to 10 minutes.
  4. Put the battery back in, plug the cord in, and turn on your PC.

3. Disconnect all SSD drives and reconnect

  1. Shut down your PC completely.
  2. Disconnect the power cord from the battery.
  3. Open up your PC, and disconnect the SSD from your motherboard.
  4. Wait for a few minutes.
  5. Connect the SSD again, and plug everything back in.
    connect ssd
  6. Start your PC normally.

If all of the above-mentioned methods failed to solve your issue, it is recommended that you try disconnecting your SSD drives and reconnecting them.

In today’s guide, we explored some of the best options to try if your SSD won’t wake up from sleep. Please follow the steps presented here carefully to avoid causing any other issues or getting any injuries.

If your SSD is dead, we have a detailed guide to help you revive it.

Let us know if this guide was helpful by using the comment section below.

Sony TV is Not Responding? How to Fix it if it Freezes

Sony has some of the best Smart TVs on the market, but many users reported that their Sony TV is not responding, and this can be a huge problem.

This isn’t the only issue that users encountered, and many reported that Bluetooth is not working on Sony TV. However, we solved that in a different guide.

Today we’re going to take a look at what are the steps to follow if your Sony Smart TV becomes unresponsive.

Why is my Sony TV not responding?

  • Interference from one of the external devices.
  • Glitches or other issues with your TV.
  • Issues with your TV settings.

What can I do if my Sony TV is not working?

1. Power reset your Sony Smart TV

  1. First, disconnect any external devices connected to your Smart TV. Remove any external drives, USB drives, Chromecast/Amazon Fire stick, or any other device.
  2. Turn the TV on if it’s not already.
  3. Turn off the TV from the remote or from the device.
  4. Now remove the power cord and wait for a couple of minutes to drain residual power. You can wait longer if you want to make sure that any additional power is drained.
  5. After that, plug in your TV back again. Make sure to connect it directly to a wall outlet. In some cases, bad extension cords or smart plugs can cause power issues with your TV, so bypass them.
  6. Start your Sony TV and check if it works properly.

The power reset is usually used to fix small problems, but it also might help if the TV freezes or is unresponsive.

With the help of this process, the electricity from your unit will be discharged and any error information in the memory will reset to default, making the TV work normally again.

2. Factory reset your Sony Smart TV

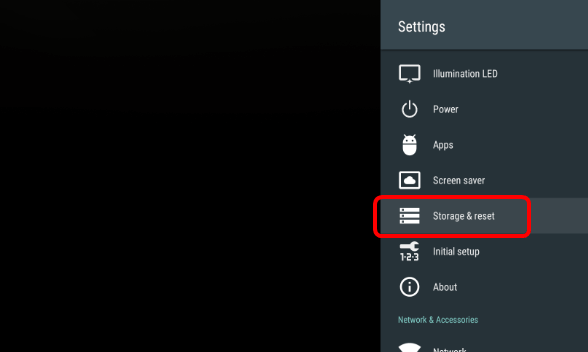
  1. Because the Sony Smart TVs run on Android, you can perform a factory reset as you would on any Android powered device.
  2. To start, press the Home button on your remote control.
  3. Now go to Settings.
  4. Under Storage & Reset select Factory data reset.
    fix sony smart tv is not working
  5. Choose Erase everything.
  6. Confirm by selecting Yes.

Keep in mind that this process will delete all of your history, personal data, saved information, and installed apps. After the process ends, everything will return to the factory default settings.

If you can’t access the TV‘s settings, you can perform a forced factory reset. To do that, follow the steps:

  1. Unplug your Smart TV.
  2. Now press and hold down the Power and Down buttons.
  3. While holding the buttons, plug in the TV into an outlet.
  4. Keep holding the buttons for around 30 seconds.
  5. After that, you should see a green LED light. When you see the light, you can release the buttons.
  6. Wait for the process to finish. Your TV should restart multiple times and run through the reset cycle.
  7. When the process is finished, you should see the original Welcome screen.

After following the steps carefully, your Sony Smart TV should work without any more problems.

As we said before, this isn’t the only problem, and many reported that apps have disappeared on Sony TV, but we covered that in one of our other guides.

If you have any other questions about Sony TV not responding, don’t hesitate to leave them in the comments section below and we’ll be sure to check them out.

How to Download GTA San Andreas on PC

Want to play GTA San Andreas on Windows 10 or 11? This guide shows where to buy it legally and how to install it safely – no piracy involved.

How to Download GTA San Andreas on Windows 10 / 11

1. Purchase from Rockstar Games Launcher

  • Visit the Rockstar Games official website and download the Rockstar Games Launcher.

  • Within the launcher, you can buy the GTA Trilogy (which includes GTA III, Vice City, and San Andreas) — individual purchase of San Andreas isn’t offered

2. Or Use Steam or Microsoft Store

  • GTA San Andreas is also available on Steam and was previously on the Microsoft Store (Windows Store). The Windows Store version is discontinued and no longer available as a legal purchase

3. Install and Launch the Game

  • After purchase, open the launcher or Steam app, download San Andreas, and install it.

  • Launch and enjoy!


System Requirements & Compatibility

  • GTA Trilogy installations work on Windows 10 and 11 with the launcher or Steam

  • The original version runs on modest hardware (~4–5 GB install size) and supports up to DirectX 9

  • The Definitive Edition (remastered) needs more: ~45 GB storage, 8 GB RAM, and a modern GPU/CPU like GTX 760 and Intel i5‑6600K


Common Issues & Fixes

🛠️ Fix Crashes on Windows 10 and 11

Try these steps:

  1. Run in compatibility mode: Set the .exe to Windows 98/ME mode.

  2. Change in-game resolution to about 1024×768.
  3. Update graphics drivers via Device Manager.

  4. Use a frame limiter (e.g., RivaTuner) to cap FPS at ~30.

  5. Enable Administrator privileges and Background Intelligent Transfer Service.

  6. Keep Windows updated

🎯 Mouse Not Working

  • Set CPU affinity to a single core using Task Manager.

  • Download and place DINPUT8.dll into the game folder.

  • Run the game in compatibility mode (Windows 7/8.1).
    These steps help resolve mouse control and input lag issues on both OS versions

💡 DirectX 9 Required

If you see an error about requiring DirectX 9, enable DirectPlay via Control Panel → Programs & Features → Turn Windows Features on/off → Legacy Components → DirectPlay. Then reboot


Why This Method Works

  • You’re buying from official sources, avoiding malware or illegal downloads.

  • The Rockstar Launcher ensures game updates, safe downloads, and cloud saves

  • Compatibility settings and small file size (~4.7 GB) let the original version run smoothly on older hardware or low-spec laptops


Quick Install Checklist

  1. Download and install Rockstar Games Launcher or open Steam.

  2. Purchase the GTA Trilogy (includes San Andreas).

  3. Install the game, check for DirectX/driver updates.

  4. Apply fixes if needed—compatibility mode, affinity, resolution, DLL file, etc.

  5. Launch and enjoy San Andreas, safely and legally.


FAQs

Can I buy GTA San Andreas individually?
No—only part of the GTA Trilogy package via Rockstar Launcher or Steam

Is the Microsoft Store version still available?
No—Windows Store version is no longer legally available as of today Reddit.

What about download size?
Original version: about 4.5–5 GB. Definitive Edition: up to 45 GB

Will it run on Windows 11?
Yes. Both original and remastered versions support Windows 11 with proper updates and settings

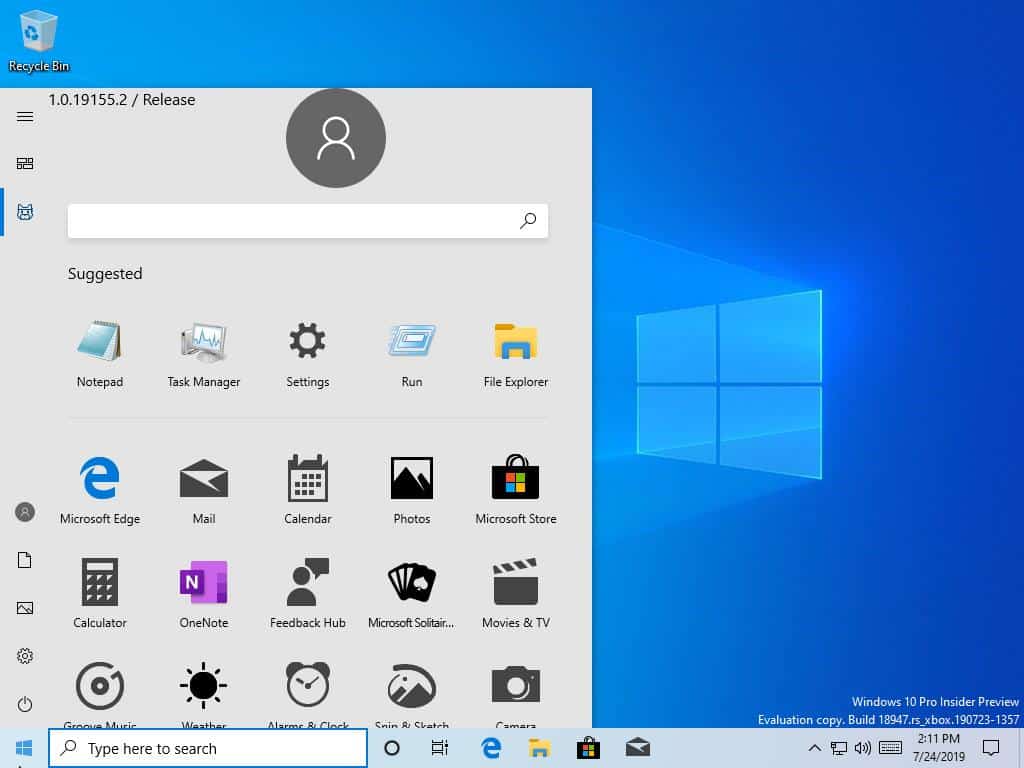
Windows 10 rumor mill heats up with hints of build 19480 for 21H1 (!?) and Windows Sets

This year has been a pretty strange one for Microsoft’s Windows Insider Program. Back in February, Microsoft invited select Insiders to start testing the 20H1 update that will ship in the first half of 2020, and the whole Spring passed the company giving any information about 19H2, the next Windows 10 update that will precede 20H1.

Even though the software giant has yet to say it explicitly, it seems that the company is ready to move to one major Windows 10 update in the Spring, followed by a minor update in the Fall. And it seems that traces of what could end up being 21H1, the major Windows 10 update to be released in the first half of 2021 can already be found in the wild.

Windows 10 build 19480 sighting

Italian blog Aggiornamenti Lumia is reporting today that the Windows 10 build 19480 and newer are mentioned in languages packs available on the Microsoft Store. 19480 represents quite a big jump from the 19H1 build 18985 that Microsoft released for Fast Ring Insiders yesterday.

Windows 10 rumor mill heats up with traces of build 19480 and Windows Sets

Is Sets returning?

WalkingCat, the Microsoft leaker with pretty good track record added a bit more grain to the rumor mill today by hinting that Windows Sets could come back in these advanced builds that could already be tested internally. As a reminder, Windows Sets was a feature that would have allowed Windows 10 users to group together apps, browsers tabs and more in a single window using a tabbed interface.

https://twitter.com/h0x0d/status/1174973635515142145

The Redmond giant removed Windows Sets from 19H1 preview builds last year, and Microsoft’s Joe Belfiore later said at Build 2018 that the feature would come back “when we think it’s great.” We wouldn’t blame you if you had forgotten about the feature in the meantime, and it would be surprising to see Microsoft bring it back. Recent big new Windows 10 features such Cortana, Paint 3D, My People, or Timeline don’t seem to have really resonated with users, and the previous version of Windows Sets that we saw in preview 19H1 builds wasn’t really intuitive, even though it got some love from power users.

Windows 10 Sets

Microsoft’s upcoming Surface event in New York City is right around the corner, and even though hardware should be the main focus, we could well hear more about the future of Windows 10 during the event. The company could also use the event to announce a release date for Windows 10 version 1909 (19H2), as it did last year for the October 2018 Update.

Do this if you experience Borderlands 3 FPS drops

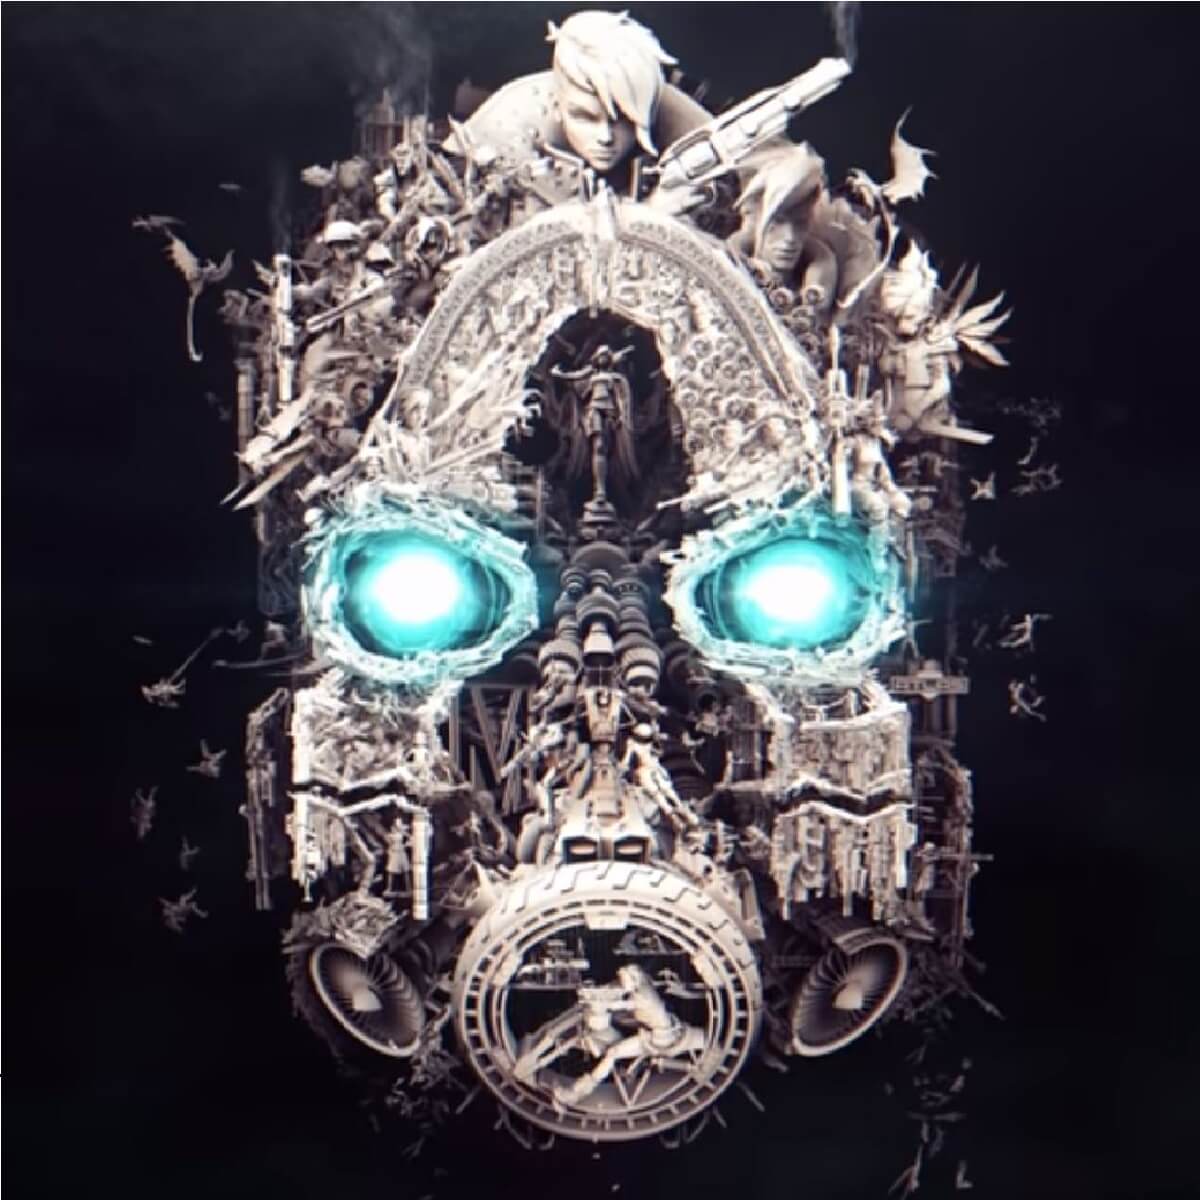
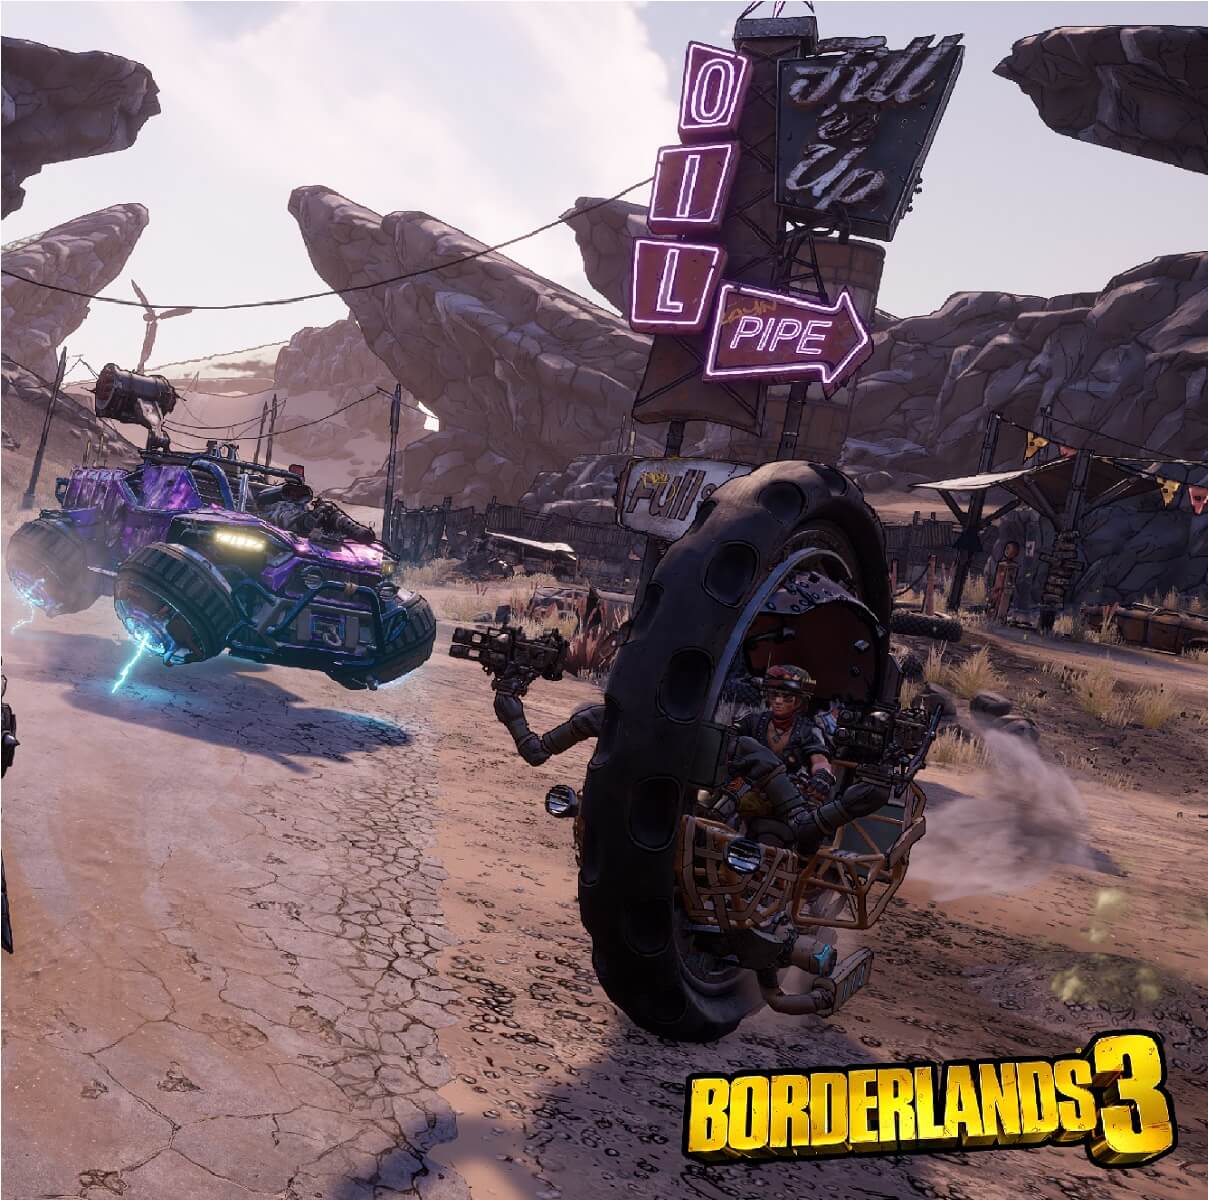
Borderlands 3 is an action role-playing first-person shooter video game that is currently at its 4th installment.

Like any sequel, it is far superior to its predecessors in pretty much anyway.

However, more isn’t always better, since players have been reporting that they are experiencing extreme FPS drops.

High-end PC and for the life of me I cannot figure out why the game is having so many FPS issues.

Apparently, these FPS drops happen even when performing the simplest of tasks, such as:

  • Running up to a loot a cache when you open it
  • Opening your inventory
  • Opening a gun chest and view the stats on the weapons

The list goes on and on, but all of these could be considered minor issues.

The real problem is that these FPS drops also happen during combat, making the game incompletable.

What to do in case of Borderlands 3 FPS drops?

1. See if your PC can handle Borderlands 3

While this may seem like a no-brainer, there are players out there that don’t know the minimum system requirements for Borderlands 3.

Given that the game series started back in 2019, a good guess would be that not all fans of the series managed to upgrade their PC since then.

Borderlands 3 FPS drops DXDiag


2. Update your drivers

If your drivers aren’t updated to the latest version, this may explain the occasional FPS drops you may be experiencing.

Keep note that gaming performance is heavily reliant on your graphics driver, so look at them first.

Here are the official driver download links for the most common drivers used on Windows PCs:

Borderlands 3 FPS drops update driver


Need to update your drivers? Update your drivers within minutes with our guide!


3. Update your Windows 10

While not officially confirmed, it seems that a Windows 10 update is to blame for high CPU usage, which could be the cause of your FPS drops.

If you are also experiencing high CPU usage in Task Manager, proceed by doing the following:

  1. Press Ctrl + Shift + Esc
  2. Look for the SearchUI.exe process
  3. Just open the Registry Editor, navigate to:
    • ComputerHKEY_CURRENT_USERSoftwareMicrosoftWindowsCurrentVersionSearch
  4. Here you could try to set the BingSearchEnabled value to 1, or you could delete the Search key.

Additionally, if a new update is available for Windows 10, install it right away, as a fix may have been implemented.

Borderlands 3 fps drops windows update


If you’re afraid you may ruin your Windows 10’s registry, look over this useful guide.


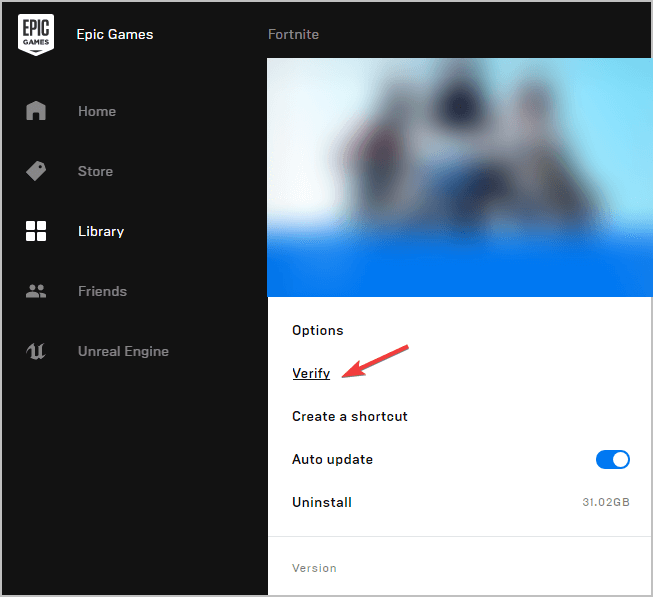
4. Check your in-game files

  1. Open the Epic Launcher
  2. Head over to your Library
  3. Hover your mouse over Borderlands 3
  4. Click on the Settings icon next to the Launch icon
  5. Select on Verify
    borderlands 3 fps drops epic games launcher
  6. Restart the launcher after the verification is complete

5. Launch the Epic Games Launcher with administrator rights

  1. Right-click the Epic Games Launcher on your desktop or Start Menu
  2. Select Properties
  3. Open the Compatibility tab
  4. Change all the settings to All Users
  5. Check Run as administrator under the Privilege Level
    fix borderlands 3 fps drops epic games launcher properties
  6. Select Apply

6. Close any overclocking applications

While this may sound a bit counter-productive, many games have been having problems with overclocking apps like MSI Afterburner or the Zotac Firestorm.

Try running the game with your graphics card’s default clock speeds.

borderlands 3 fps drop MSI afterburnerIf you found our article helpful, feel free to let us know by leaving a comment below.

READ ALSO:

Revolut Balance not Updating? Here’s What to do

The Revolut app offers a progressive banking solution to users by keeping their finances safe. The app offers free turbo transfer and unlimited FX volumes. However, sometimes the app may fail to update the balance leaving the users annoyed.

Many Revolut users have reported the Revolut balance not updating issue in the official community forums. Some of the users have reported issues like this:

When opening the app by clicking on a pop-up notification, the reported balance is not updated. The only way to make sure the balance is correctly reported is to force-close the app and start it again.

If you are also troubled by Revolut balance not updating issue, here are a couple of troubleshooting tips to help you resolve the problem.

How to fix Revolut balance not updating

1. Force close and relaunch

  1. If the balance update problem occurs when you open the app using the notification, then it can be a temporary glitch.
  2. On your Android device, tap on Settings.
  3. Scroll down to Apps section.
  4. Tap on Manage Apps option and wait for the installed apps to load.
    Revolut balance not updating
  5. Scroll down and locate Revolut app.
    Revolut balance not updating
  6. At the bottom of the page, tap on Force Close button.
  7. Click Yes when asked for confirmation.
  8. Tap on the Revolut app icon to launch it and check for any improvements.

Clear Revolut app cache

  1. If the issue persists, try clearing the app cache and check again.
  2. From your home screen go to Settings > Apps > Manage Apps.
  3. Locate and tap on the Revolut app.
  4. At the bottom of the page, tap on Clear Data.
    Revolut balance not updating
  5. Select Clear cache and tap on Yes.
  6. Relaunch the Revolut app and check if the balance is updated.

2. Update Revolut app

Revolut balance not updating
  1. The Revolut balance not updating is an old bug and it is possible that the developers have released an update for the same.
  2. Launch Play Store app on your device.
  3. Search for Revolut app and check if any update is available.
  4. Tap the Update button to download and install the latest version of the App.

3. Check for service issues

  1. If none of the functionalities of the app is updating or working, it could be due to service outage at the developer’s end.
  2. You can check the Revolut’s official social media accounts to get an update on the same.
  3. You can also contact support to get a precise response.

4. Reinstall Revolut app

Revolut balance not updating
  1. If the issue persists, try uninstalling and reinstalling the app.
  2. From the Home screen, locate the Revolut app.
  3. Tap and hold the Revolut app icon and select Uninstall from the options.
  4. Tap Yes when asked to confirm.
  5. Open Play Store and download the Revolut app.
  6. After the installation check if the balance not updating problem is resolved.

How to fix Borderlands 3’s steering issue

Borderlands 3 is the latest installment in the Borderlands franchise, and it is bigger than ever.

However, like all of its predecessors, it has its fair share of bugs and issues.

Fans are complaining on the Gearbox official forums that they are having problems with their vehicle controls:

I see the controls in the bindings for driving show A and D as steer left/right but in-game they do not. […] Why are the bindings not working? I tried remapping each to A and D again but it didn’t help.

It would seem that players can’t steer their vehicles in Borderlands 3 using the A and D keys, and it is frustrating.

What makes matters even more annoying is that since they cannot steer with the keys, they are forced to steer with the mouse by default.

While mouse steering isn’t all that bad, the guns are on turrets so you should be able to drive one direction and shoot another direction.

Another hassle is looking around to find things while driving, since moving the mouse to look steers you in that direction.

What to do if your A & D keys don’t work for steering?

If you’re a Borderlands fan, your first thought might be to disable mouse steering entirely.

Unfortunately, that option is no longer available in Borderlands 3, so keyboard mapping just got a whole lot harder.

A such, your only solution is to change the control settings in the Gamepad options:

  1. Enter the Gamepad options in your game‘s menu
  2. Scroll down to the Driving Button Scheme
  3. Change it to Vehicle Relative: Left Side

Do not change the controls in any of the other settings within the Gamepad options.

Once you’ve completed these steps, you will now be able to drive with the WASD keys and freelook or aim using the mouse.

Some users reported that after following these steps, the W & S keys no longer for going forward or in reverse.

it worked…but the W/S doesnt work anymore…LOL, even if i rebind the key xD

If this happens to you as well, reset the Gamepad options to their default value, and repeat the steps mentioned above, and nothing else.

This wouldn’t be the first time players are having difficulty changing Borderlands 3’s settings.

However, this is but a minor setback compared to more serious issues plaguing Borderlands players.

Fortunately, Gearbox is actively trying to seek out and fix all of the most common and most serious issues, so players should rest assured.

Waze is not showing any traffic reports? Here’s the solution

Waze is a popular traffic app that gives directions, a live traffic map, as well as road alerts. It is a time-saving app and available on multiple platforms.

However, sometimes the app may stop showing traffic reports. Waze not showing traffic reports are common issues and can occur due to several reasons.

You can find may users complaining about the same in the reddit community forums.

Drive sharing: You can still share a destination with “friends” but they no longer see your live location and an accurate ETA. My only regular Waze friend is my wife, and we use it know who will get home from work first (and take out the dog). I used to know exactly where on her route she was and when she’d be home to the minute. Now, I’ll receive a notification that she’s on her way home or to a store or whatever,  the map doesn’t show her live location anymore and the ETA is wrong- the ETA always shows the current time.

If you are also troubled by this issue, here are a couple of solutions to fix Waze not showing traffic reports problem in your device.

How to Fix Waze not showing traffic reports

1. Try to Clear Waze Cache 

  1. A bad cache can create issues with the traffic reports in the Waze app. Try clearing the Waze app cache and check for any improvements.
  2. Make sure the Waze app is closed.
  3. From your home screen, tap on Settings. You can also access it from the App Drawer.
  4. Scroll down to Apps section. Tap on Manager Apps (anything similar depending on your version of the Android OS).
  5. Wait for all the apps to be loaded. Locate the Waze app in the list and open it.
    Waze not showing traffic reports
  6. Tap on Clear Data option at the bottom of the screen.
    Waze not showing traffic reports
  7. Tap on Clear Cache option and tap OK to confirm the action.
    Waze not showing traffic reports
  8. Next, tap on Force Stop button at the bottom of the screen.
  9. Select OK to confirm the action.
  10. Relaunch the Waze app and check if the error is resolved.

Windows 8, 10 App Check: FlightRadar24, Air Traffic in Real Time


2. Turn on Traffic Layer and Traffic Jams

Waze not showing traffic reports

  1. For the Waze app to update the traffic report automatically, the Traffic Layer and Traffic Jams feature must be turned on.
  2. Launch the Waze app.
  3. Go to Settings > Display Settings > Show on Map.
  4. Make sure the “Traffic Layer and Traffic Jam” options are turned on.
  5. Close and relaunch the app. Check for any improvements.

3. Uninstall and Reinstall Waze

  1. If the issue persists, you may need to reinstall the app. Uninstalling the Waze app will not delete any of the data and history.
  2. On your Home Screen, tap and hold the Waze icon.
  3. Select Uninstall option and then tap on Yes.
  4. Open the Google Play Store app and install Waze.
  5. Launch the app and login with your credentials. The app will restore all of your data from your accounts.

RELATED STORIES YOU MAY LIKE:

4 Ways to fix Waze not connecting to contacts error

Waze is used by most people for a stress-free commute every day. The app offers traffic information and road diversion alerts in advance to save time. Sometimes, the contacts feature in Waze may not work resulting in Waze not connecting to contacts problem.

You can see many users complaining about not being able to see their contacts in the Waze app on Reddit.

Can’t add phone number or friends?
The only option I have in my settings is to connect to Facebook and edit my email address. This is only since I upgraded my phone
Follow the steps in this article to troubleshoot Waze not connecting to contacts problem in your device.

How to fix Waze not connecting to contacts

1.  Check App Permission

  1. If you are on an Android device,  check if the app has required permission to access the contacts.
  2. On your phone, go to Home Screen and click on Settings.
  3. Scroll down to Apps section.
  4. Tap on the Permission option.
  5. Scroll down and tap on Contacts. Wait for the device to load all the apps that have access to your contacts.
  6. Scroll through the apps and check if the Waze app has required permission.
  7. Toggle the switch on the right side to turn on contacts access to Waze.
  8. Close settings.
  9. Relaunch Waze and check for any improvements.

Waze map disappeared? Get it back in a few easy steps


2. Clear Waze App Cache

  1. If the issue persists, try clearing the Waze app cache from the Settings.
  2. Pull the App Drawer and tap on Settings.
  3. Scroll down to the Apps section.
  4. Tap on Manage Apps and let the device load all the installed apps.
  5. Locate and tap on the Waze app.
  6. Tap on Clear Data option at the bottom.
    Waze not connecting to contacts
  7. Select “Clear Cache” option and tap on Yes.
    Waze not connecting to contacts
  8. Tap on the Force Stop button and select Yes.
  9. Relaunch the Waze app and check if the contacts are syncing again.

3. Grant Access to Contacts

  1. If you are using an iOS device, to grant access to your contacts or friends you need to verify your phone number in Waze.
  2. On your iOS device, launch the Waze app.
  3. Tap on Menu and select Settings.
  4. Tap on Account and Login.
  5. Select Phone number. Type in your phone number and tap Send.
  6. You will receive a verification code. Enter the verification code and that should grant access to your contacts.
  7. Relaunch the app and log in.
  8. Tap on the Friends icon in the bottom right corner and tap “Allow access to contacts“.

4. Reinstall Waze

Waze not connecting to contacts

  1. If the issue persists, the issue can be with the app and may require reinstallation.
  2. From the home screen, tap and hold the Waze icon and select Uninstall.
  3. Select Yes to confirm your action.
  4. Open your Apps Store and reinstall the Waze app. Upon installation, Waze will automatically restore your Waze data once you login to the app.

RELATED STORIES YOU MAY LIKE:

How to delete navigation history on Waze

If you’ve used Waze for some time, you certainly have a lot of searches and want to delete your history.

Every time you do a new search and use that specific search for a route, it will automatically remain in the search history as a valid option for future reference.

This is very helpful if you plan to use the same destination multiple times, but some users want to get rid of their history and it seems that there is no easy way to do it.

Let’s see what are the quickest ways to get rid of your history searches.

How do I remove my Waze search history?

1. Clear the history from the Waze app

  1. Open the Waze app on your Android or iOS device.
  2. In the bottom-left of your screen, tap on the magnifying glass.
  3. Under the Where to? search box you’ll see a list of the most recent searches.
  4. Next to every recent search you’ll see three vertical dots (on iOS three horizontal dots). Tap on them.clear waze search history from the app
  5. A pop-up screen with multiple options will appear. Locate the trashcan icon named Remove and tap on it. remove search history in waze
  6. The recent search will disappear from your recent search history.
  7. Repeat the process for every entry that you want to delete.

This method always works, but it’s tedious and can take a lot of time. If you want a easier method, check out the next solution.


If you want to learn how you can edit the Waze map like an expert, check out this awesome guide.


2. Clear the Waze cache or reinstall the app

clear search history in Waze

  1. Go to Settings on your Android device. You can do that from the drop-down notification panel or the app drawer.
  2. Find Apps & notifications and tap on it.
  3. On the bottom of the screen select See all apps.
  4. Now scroll down until you find Waze and tap on it.
  5. In the App info screen, select Storage.
  6. Tap on the CLEAR CACHE button.
  7. This will clear the Waze app cache and all your search history with it.

As an alternative, after step 4, you can tap on UNINSTALL to make sure that you clear all the cache and the storage. After that, head over to the Play Store, search for Waze, and reinstall the app.

Login with your credentials and you’re good to go.

The same steps can be applied on iOS.

Make sure that before clearing the cache or reinstalling the app, you’re logged in with you’re account and all your settings, preferences, and trips are saved.

Deleting the search history data from time to time is also recommended by senior Waze editors because when Waze returns a search result, it saves the location of the pin in the app.

When you search for the same location, Waze will recommend that specific result from the saved data. This might negatively affect your routing, as you won’t get the most updated map pin.

Waze editors are constantly updating the map pins, and if you don’t clear your history data, you’ll get the old saved pin instead of the new updated one.

READ ALSO:

Dropbox Icon not Showing in Taskbar? Restore it Quickly

If you updated your Windows PC, you might suddenly see that the Dropbox icon is not showing inside your taskbar, even though the process is running.

It is extremely frustrating to need to quickly access your Dropbox settings or files just to find that you can’t do so. Here’s how to tackle this issue and get your Dropbox icon to show inside your taskbar once again.

How can I restore the Dropbox icon if it is not showing on my taskbar?

1. Check permissions in your antivirus software

Even though it is recommended that you use antivirus software on your PC, sometimes programs will not get the required permission to run because of it.

Depending on the specific antivirus software that you use, the steps you need to take will vary.

You will need to make sure Dropbox is whitelisted (allowed to run without interference from the antivirus).

2. Modify taskbar settings

  1. Right-click your Taskbar and choose Taskbar settings.
    Taskbar settings- Dropbox not showing in taskbar
  2. Scroll down to the Notification Area section and choose the Select which icons appear on the taskbar option.
  3. Search for the Dropbox button in the list and turn it on.
  4. This should solve your issue, but if it doesn’t, please try the next method.

Some users have reported that even though the setting was toggled On, the Dropbox icon is still not in the system tray. They turned it off, and for some unknown reason, the icon appeared in the taskbar. Be sure to try this as well.

3. Uninstall and reinstall the application

  1. Press the Windows key + X on your keyboard and select Apps and Features.
    Apps and features - Dropbox not showing in taskbar
  2. Scroll down through the app list and select Dropbox.
  3. Click on the Uninstall button and follow the on-screen instructions to complete the process.
  4. Now, download the latest version of Dropbox (download process will start automatically).
  5. Run the installer package and follow the on-screen instructions to complete the installation.
  6. Check the system tray for the Dropbox icon.

If all the methods mentioned above failed to solve the no Dropbox icon in Taskbar issue, there is one more thing you can try.

Some users have had success in fixing the issue with the Dropbox icon not showing up in their Taskbar by uninstalling and reinstalling the app on their PC.

We have compiled some of the best troubleshooting methods to try and fix the issue caused by your Dropbox icon not showing up in the Taskbar.

Similarly, if the Dropbox sync icon is missing on your PC, check our comprehensive guide to restore it.

Please let us know if you managed to solve the issue by using any of these methods. You can do so by using the comment section below.

How to go invisible on Waze and hide your location

Waze, among many other features, offers the ability to be visible or invisible on the map.

By default, your profile is visible on the public map. This means that other Wazers, including your friends, can see and locate you on the Waze map based on real-time data.

This is a very useful feature that helps the map to stay constantly updated with location-based information.

But sometimes, privacy-focused users need to drive incognito, without others knowing their location. Well, you’ll be happy to know that you can do that directly from the Waze app.

How do I turn ON/OFF invisible on Waze?

turn on invisible mode in waze

  1. Open the Waze app on your Android or iOS device.
  2. In the bottom-left of your screen, tap on the magnifying glass.
  3. Now tap on your user profile name in the top of the screen.
  4. You’ll see your profile page.
  5. Under your name and points you’ll see the option Go invisible.
  6. By default, when you’re visible, the option is unchecked and gray.
  7. Tap on the switch next to Go invisible to make it green.
  8. You’ll get the message You’re invisible. You appear offline to friends and can’t send reports.
  9. Now you’re invisible and can drive in incognito mode.
  10. To make yourself visible again, follow the same steps and tap on the Go invisible switch to make it gray again.

If you want to learn how you can edit the map in Waze, take a look at this dedicated guide.


Keep in mind that when going invisible, everything will work as usual, except the fact that your friends won’t see you on the map and you won’t be able to send traffic reports.

Your Waze mood and info won’t be available on the public map, and you won’t be able to send messages to your friends and other users.

Other Wazers will continue to see you on the road when you pass by them. Also, it’s worth mentioning that if you have a defined route, you still can send your ETA to anybody, even if you’re in invisible mode.

Invisible mode is very useful when you don’t want your friends to know about your whereabouts, want to make a surprise to someone, or you’re very privacy-focused.

Turning the option ON and OFF is pretty straightforward and you can do it with ease by following the steps in this article.

If you have any other suggestions or questions, drop them in the comments section below.

READ ALSO:

How to Download and Install FFmpeg on Windows 10

FFmpeg is a popular open-source tool that is used to perform several operations on audio and video files. These operations include multiplexing, de-multiplexing, encoding, decoding, filtering, streaming, etc.

It is also used for scaling and rotating videos and extracting information regarding files stored on your Windows PC.

However, the app does not come with a GUI, and that is why users often experience problems while installing FFmpeg. Follow this installation guide if you are wondering how you can install FFmpeg on Windows 10.

How do I install FFmpeg on Windows 10?

1. Download FFmpeg installation files

  1. First and foremost, visit the official website of FFmpeg and hit the Windows logo to download the installation files.
  2. Choose one of the Windows build providers.
  3. Locate the version of FFmpeg that meets your processor and operating system requirements and click the download link. 
  4. Wait until the download process is complete, and unzip the download folder. 
  5. Now right-click the new folder, click rename and type FFmpeg to change its default name.
  6. Right-click the FFmpeg folder and click Copy.
  7. Go to your C drive and paste the FFmpeg folder there. It will allow you to run the FFmpeg commands in the command prompt.

2. Use Environment variables to add FFmpeg to Windows 10 path

  1. To enable FFmpeg in Command Prompt, right-click This PC and select Properties.
  2. Navigate to the top left-hand side of your screen and click Advanced System Settings.
  3. Click the Advanced tab and select the Environment Variables option at the bottom of the window. click environment variables ffmpeg windows 10 how to download & install
  4. Once the Environment Variables window is open, double-click the Path variable under the User variables for lamba section to Edit it. edit path ffmpeg windows 10 how to download & install
  5. Click the New button, paste C:FFmpegbin, and click OK to save the new path. add new path ffmpeg windows 10 how to download & install
  6. FFmpeg files are now added to the system path on your Windows 10 PC. Finally, close the environment variable window to use FFmpeg.

3. Verify the FFmpeg path in Command Prompt

  1. Now you need to check the installation process, press the Windows + S keys, type cmd, and click Run as administrator under Command Prompt.
  2. Once the Command Prompt opens on your screen, type the command below and hit Enter: ffmpeg -version
  3. If FFmpeg is installed on your Windows 10 system, you will see details such as configuration or version number. check version ffmpeg windows 10 how to download & install
  4. However, if the installation is unsuccessful, you will see the following message: ‘ffmpeg’ is not recognized as an internal or external command, operable program or batch file

In this case, check to see if you have properly followed all the steps to add the FFmpeg folder to the system path.

Keep in mind that FFmpeg can encounter various issues, such as Invalid data found when processing input, but we have solutions for it in a separate guide.

Installing FFmpeg can also help with missing avformat-52.dll file, so if you’re having issues with it, be sure to install this software.

We hope that these instructions helped you to install FFmpeg on your Windows 10 system.  If you have any questions, feel free to let us know in the comments section below.

Want to earn points faster in Waze? Check out these tips

Want to get Waze points faster? Then you’ve came to the right place.

If you didn’t know already, Waze has a points system for contributing to the map. Wazers can add new items to the map and report road hazards to get points and rank up.

As you rank up, things that you edit can’t be modified by other users that are lower rank than you.

Also, points show how much you contributed to Waze and you can compare yourself with other Wazers from your country and worldwide. Let’s not forget bragging in front of your friends.

How can I earn Waze points faster?

1. Get points fast in Waze

get Waze points faster
There are a couple of ways to get points in Waze:

  • First, you can get Driving points by keeping the app running while driving. You get 5 points per mile for Normal driving (3.2 points fro KM), and 16 points per mile for Road munching (10 points per KM).
  • You can also get points by reporting issues on the road. You get 6 points for every Road reporting, 8 points for Gas/fuel price reports, and 3 points for Report comments.

If you want to get more points faster, the most important thing to keep in mind is map editing. Editing the map as much and as often you can will get you a lot of points fast.

You can’t make too many edits on your map? Well, that’s because many objects/items/reports were already done by higher rank editors.

The solution is to drive further to make your map bigger and have a lot more editing area. After you have a bigger map, you can start searching for things that need to be edited.

If you want to check how many points you have, follow the steps:

  1. Open the Waze app on your device.
  2. In the bottom-left of your screen, tap on the magnifying glass.
  3. Now tap on your name.
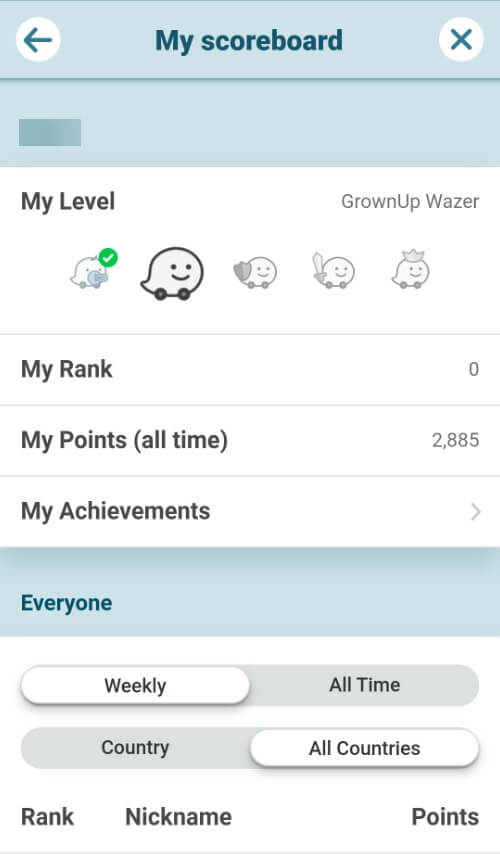
  4. Here you’ll see your name, points, and when you joined Waze. You’ll also see a lot of other options, including Scoreboard where you can check your level, points, and achievements.

Make sure to complete all the achievements if you want to get a lot of points fast. Some of them are worth between 500 and 1000 points, so there are very important for a quick rank-up.

Depending on your driving points, you’ll also achieve better Waze ranks.


Want to learn how to edit the map faster? Check out the useful tips from this awesome article.


2. How to become a level 2 editor

waze level 2 fast
To become a level 2 editor, you have to complete 1000 map edits. This is a must an can’t be avoided in any way.

If you’re a new editor and want to learn more about Waze and map updates, be sure to check out all the tutorials and information provided on Waze’s official website.

Because a lot of Wazers complain about the inability to level up faster, we recommend to drive more and further to expand your map and get a bigger editable area.

After having a large enough map, be sure to check for edits because you’ll have a lot more now.

If you need to make any changes to locked streets/segments, you can request unlocks on this official Waze website.

Remember that you can always make place updates. The place updates rarely need approval from higher level editors.


Waze is not updating the map? Follow the simple steps from this guide and fix the problem quickly.


Although 1000 map edits sounds a lot, it doesn’t require a lot of time. The plus is that you get familiar with the map, features, and how to make changes fast.

As a reminder, getting points fast or ranking up is not as important as making the right updates and keeping the map complete and accurate.

If you have any other suggestions or questions, feel free to leave them in the comments section below and we’ll be sure to check them out.

READ ALSO:

Windows 10 20H1 Build 18985 brings improved Bluetooth pairing experience to Fast Ring Insiders

Microsoft has finally released a new Windows 20H1 build today, as Fast Ring Insiders can now install the preview build 18985 on their machines. The main new feature in this build is an improved Bluetooth pairing experience, which can now be completed right in the Windows 10 notification panel, no visit to the Settings app necessary.

Unfortunately, Microsoft is continuing to do some A/B testing in the Fast Ring, and this new Bluetooth pairing experience will only be available for 50% of Fast Rings Insiders who will install this new build. Moreover, this improved experience will only be supported on select Microsoft accessories for now, and the list includes the Surface headphones and the Surface Mobile mouse.

The release notes also mention some improvements to how Windows Update will display optional updates (driver updates and Windows 10 updates). Lastly, the Windows team said today that it’s rolling out a new Snip & Sketch app update to all Insiders in the Release Preview ring, plus select users on the Production ring. You can get all the details below:

Improving your Bluetooth pairing experience

For Windows 10 version 1803, we announced a new streamlined experience for pairing supported Bluetooth devices. The idea was simple—if a supported device was nearby and in pairing mode, we’d show a notification that prompted you to go through pairing. This saved you from opening Settings yourself and finding the right place to go. Today, we’re rolling out an update with improvements we hope you’ll like.

Here’s what’s new:

  • Pairing is all done in notifications now. You don’t need to go to the Settings app anymore to finish pairing.
  • For faster pairing time, we improved the UI by showing one less notification.
  • We added a Dismiss button to the first notification to give you more control while using Swift Pair.
  • To make the notification more helpful, now we show the device name and category when we can.

We’re excited for Insiders to try it out and share feedback. This new experience is currently rolled out to 50% of Insiders, and we’ll let you know as the rollout increases. Supported devices include:

  • Surface Ergonomic Keyboard
  • Surface Precision Mouse
  • Microsoft Modern Mobile Mouse
  • Surface Mobile Mouse
  • Microsoft Arc Mouse
  • Surface Arc Mouse
  • Surface Headphones

Improving your optional update experience

As some Insiders have noticed, we’re working on making it easier for you to see all optional updates (including drivers, feature updates, and monthly non-security quality updates) in one place. Once optional updates are detected, they will be listed in a new page under Settings > Update & Security > Windows Update > View optional updates. For drivers, you no longer need to browse Device Manager for a specific device to update. Windows Update will automatically keep your drivers up-to-date, same as before, but if you’re having a problem one of those optional drivers might help.

Other updates for Insiders

Snip & Sketch app update

After spending time in both the Fast and Slow rings, we’re now starting to roll out Snip & Sketch version 10.1907 to 100% of Insiders in the Release Preview ring. We will also be rolling this update out to a small percentage of those using retail builds. As a reminder, this update includes two notable improvements based on your feedback:

  • Single window mode: We’ve heard that some of you prefer your previous snip to close when you click New in Snip & Sketch, so you don’t end up with a bunch of windows. Going forward, this will be the default option. If you liked having multiple windows, don’t worry! That’s still an option too if you go to Snip & Sketch settings.
  • Zoom support: You can now zoom in on your screenshots if they’re a bit too small for you to annotate on (and yes, touch, CTRL+Plus, CTRL+Minus and Ctrl+Mouse wheel are supported!) If you prefer keeping a small Snip & Sketch window, we’ll also zoom out to ensure the whole snip fits in the Snip & Sketch window.

Showing a small Snip & Sketch window, where the screenshot has been shrunk to fit the window.

What snipping improvement would you like us to work on next? Let us know! Fastest way to get to the right place is to select the “…” menu in Snip & Sketch, and then choose Send Feedback.

As usual, this new build also includes some bug fixes and general improvements, and Microsoft has fixed an issue impacting the reliability of Settings when accessing the Network & Internet section. You can learn more about other improvements and known issues in this build on our separate post.

Learn how to edit the map in Waze with these useful tips

Waze involved the community and its input from day one, and editing the map for more accurate info is one of its biggest strengths.

In many countries, the Waze map imported publicly available road data, but in many cases this data can get outdated pretty fast. That’s where the wazers come in.

Users can add new things to the map, edit the old ones, and keep the map updated and accurate.

If you also want to know how you can edit the Waze map, keep reading to find out all the info that you’ll ever need.

How do I edit my map on Waze?

1. Edit the Waze map from the app

edit waze map in the app
There are a couple of ways to edit the map and add more information. The first step is to update the map from the Waze app on your Android or iOS device.

To do that, first open Waze on your device and then, in the bottom-right corner of your screen, tap on the orange bubble.

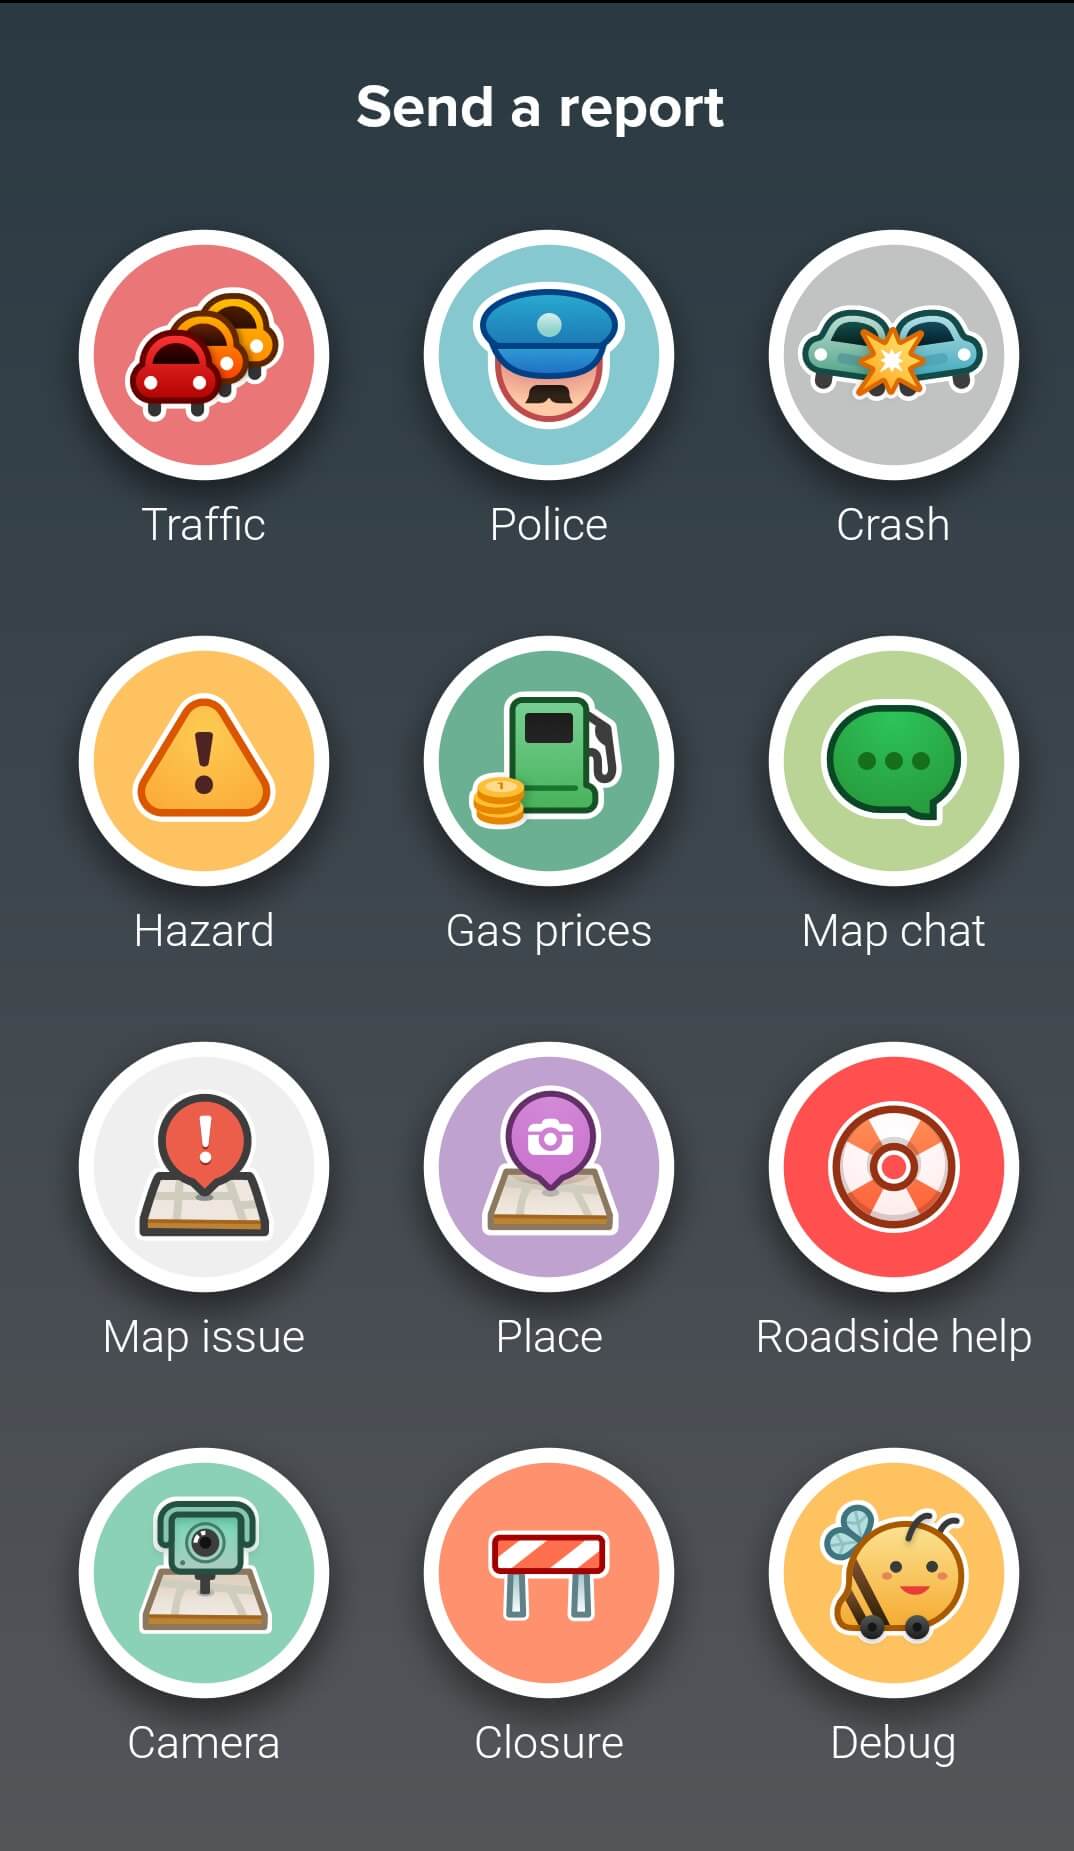
Now you’ll see a list of all available reports and changes that you can add.

From here, you’ll be able to add Traffic, Police, Crash, Hazard, and many other reports. To do that, you’ll just have to tap on the report you want to add.

As an example, let’s say that you want to send a Traffic report. Tap the Traffic icon and you’ll be presented with a couple of options. First, you’ll have to choose if the traffic jam is Moderate, Heavy, or Standstill.

This will inform other Wazers about the traffic situation from your current location.

Next, you’ll have the option to take a picture or add a comment, to offer more context to your report. After that, you just have to click on Send and your traffic report will appear on the map.

This process works similarly for the other traffic reports.

There is also the option to add a new place and ask for roadside help from other users, emergency services, or road assistance. When adding a new place, you’ll have to take a picture of it so that other Wazers can easily spot it.


Waze is not updating your map? Check out this useful guide and learn how to fix the issue in no time.


2. Edit the map from the Waze Map Editor (WME)

edit waze map with waze map editor
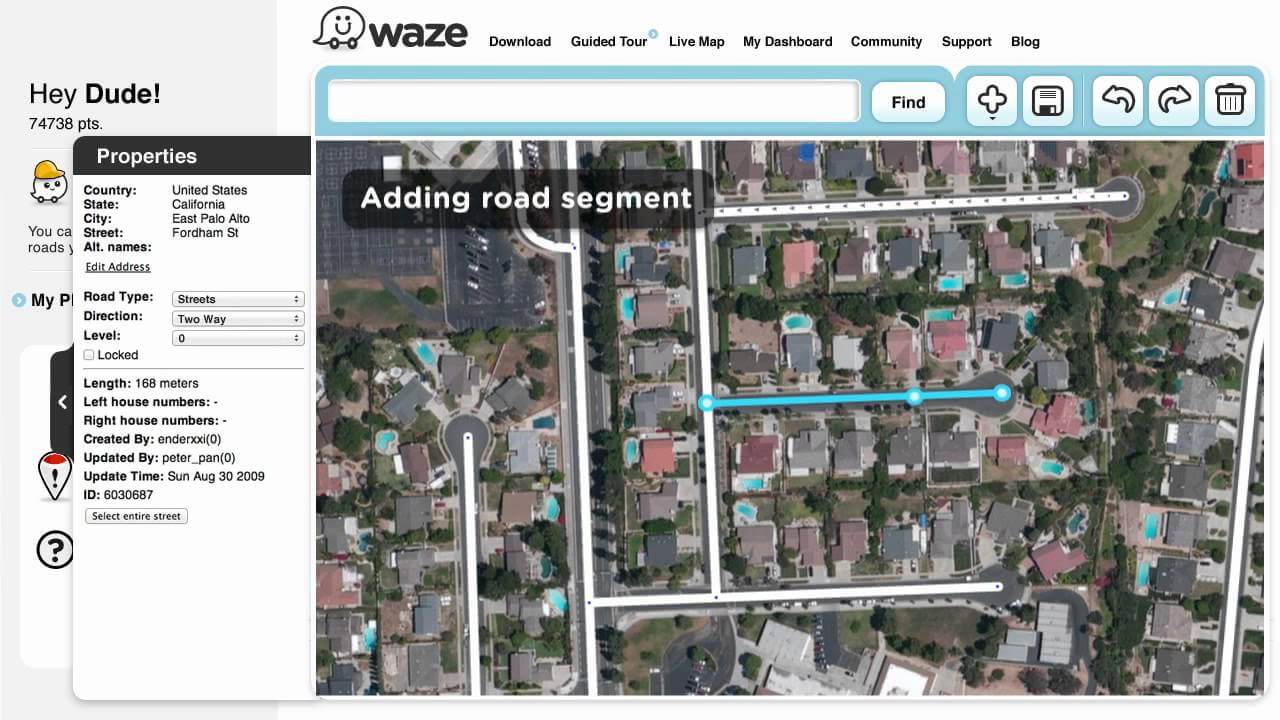
WME is the default editor for Waze since 2011. It has been updated since, and you can use it to change any information on the map.

Keep in mind that for now, WME is officially supported only on Google Chrome.

First, you’ll have to go to www.waze.com and in the top-right, click on the Live map. After that, in the bottom-right, under the sharing button, you’ll see a orange edit button. Click on it.

Now you’re in the WME. You have the option to Log in or Try practice mode.

After that, you’ll have to go through some tutorials and learn how to properly edit the map. It is very important to learn the basics and watch the tutorials, so please don’t skip them.

After you’ve learned the basics, you can start editing. You’ll just have to log in.

Keep in mind that you won’t be able to edit or modify in any way objects that were previously edited by a user with a higher editing rank than you.

You can edit nearly any object in the editable area including adding/deleting/updating a road segment, rename it or change its direction, change road turn restrictions, add a park landmark or build an overpass, and much more.

To edit/create any object on the map, click on it or click on the item you want to create under the drawing button. For each item you’ll have lots of options to choose from. After you’ve finished, click on the Save button.

For more settings and user preferences, click on the Settings tab in the left pane.

If you want to edit the map faster, there are also a lot of keyboard shortcuts that you can use.


Want to learn how you can easily add a stop in Waze? Follow the simple steps from this guide.


Remember to check all the tutorials on the Waze Map Editor to learn how you can do specific things and create a more accurate and complete map for all Wazers.

If you have any other questions or suggestions, feel free to reach for the comments section below.

READ ALSO:

Add a stop in Waze in just a couple of easy steps

If you’re using Waze for your daily route or you went on a trip and realised that you have to stop somewhere, you can add a stopover directly in the app.

You don’t have to end your current trip and start a new one just to add a stop. There are a few methods to modify your route without ending it, and today we’ll take a look at them.

How do I add a stop to Waze?

1. Add a stop on Android or iOS

how to add a stop in waze

  1. Open the Waze app on your Android device.
  2. On the bottom of your screen, tap the ETA bar (the one with the estimated arrival, estimated time, and estimated km).
  3. In the new pop-up screen, under your destination, choose Add a stop. You can also tap on the gas or food icon if you want suggested stops along your route.
  4. In the Where to? search box, enter the name of the location where you want to stop.
  5. Now tap on the Add a stop button.
  6. Select Go now to confirm.

If you want to change your final destination with your stopover, choose New drive instead of Add a stop. You’ll see your stop location marked on the map by a blue pin.

After adding your stop, when taping on the ETA bar, you’ll see the estimated time of arrival for both the stop and the final destination.

The same process applies to iOS devices.


Your Waze map disappeared? Check out this awesome guide and learn how to get it back in no time.


2. Add a stop on Android Auto

add a stop in waze on android auto

  1. On the summary screen of your route, select Add a stop.
  2. In the Where to? search box, enter the name of the location where you want to stop.
  3. Now tap on the Add a stop button.

The stopover will be marked on your map by a blue pin.

3. Add a stop by choosing a new destination

add a stop in waze by starting a new route

  1. Open the Waze app on your device.
  2. You can add a stopover by choosing a new destination. If you’ve already started a trip and have a final destination, you can search for a new destination to add it as a stopover.
  3. On your map screen, in the bottom-left of your screen, click on the magnifying glass.
  4. In the Where to? search box, enter the name of the location where you want to stop. Alternatively, you can choose one of your earlier searches marked by a clock icon below the search box.
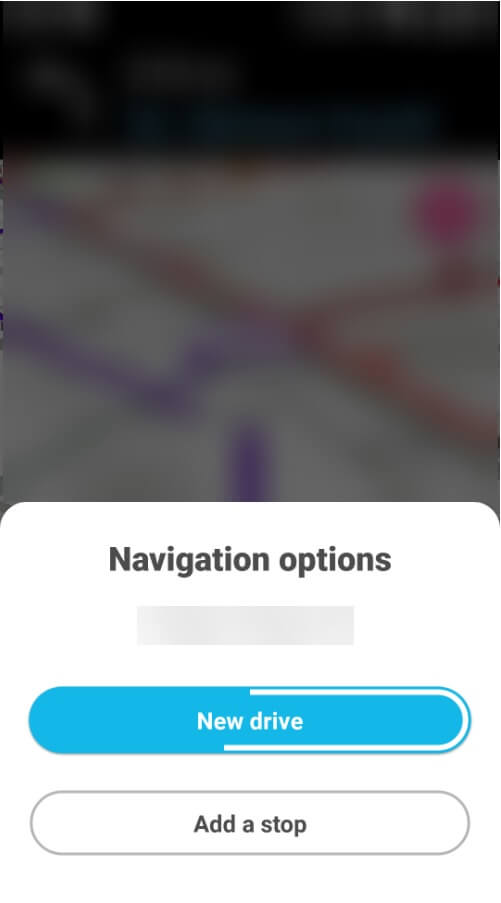
  5. When you click on a new location, a Navigation options screen will appear with two options: New drive and Add a stop.
  6. Tap on the Add a stop button.
  7. Now select the Go now button.

4. Add a planned route to Waze

how to plan a route with waze
Waze allows you to add only one stop on a route. The ability to add multiple stops and make planned routes is not yet available, despite the fact that wazers are asking for this feature for years.

But there is a workaround to add a planned route to Waze. It can be done by using routing apps and then syncing them with Waze.

The routing app will create your full route and Waze will be used for step-by-step instructions. The most used routing solutions that work with Waze are Route4Me and RoadWarrior.

If you want more alternatives, just go to the App Store (iOS) or the Play Store (Android) and search for route planner. A bunch of apps that can be synced to Waze will appear. Choose your favourite.

As you can see, adding a stop to Waze is pretty easy. The same can be said about planning a route and using Waze, just make sure that the app or service that you use can be synced with Waze.

If you have any other suggestions or questions, don’t hesitate to leave them in the comments section below.

READ ALSO:

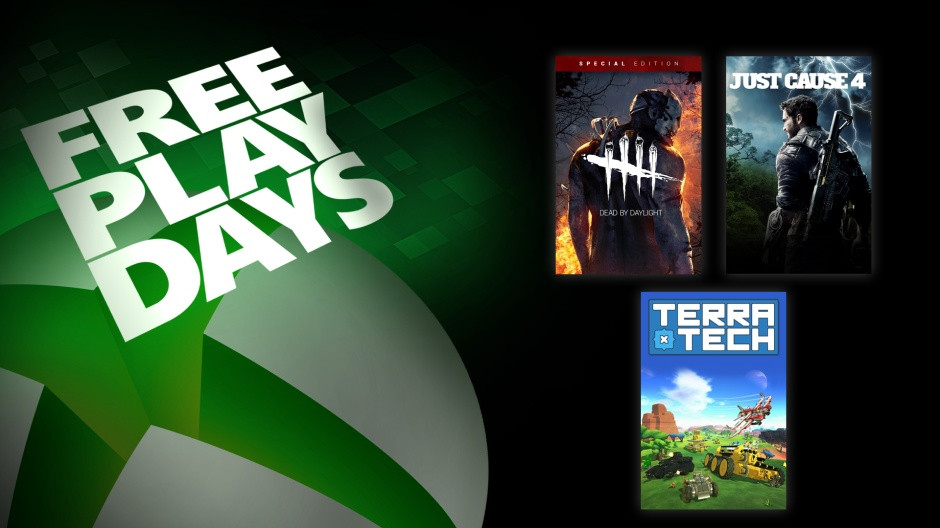
Just Cause 4, Dead by Daylight, and TerraTech are free to play with Xbox Live Gold this weekend

Microsoft has just kicked off a new Free Play Days event on Xbox One, and Xbox Live Gold and Xbox Game Pass Ultimate members can now play Dead by Daylight: Special Edition, Just Cause 4, and TerraTech for free through Sunday, September 22. All three games are also on sale during this Free Play Days event: Just Cause 4’s all three editions are 67% off, while Dead by Daylight: Special Edition and TerraTech are both 50% off.

As you may know, Just Cause 4 and Dead by Daylight are both already included in the Xbox Game Pass catalog, so TerraTech may deserve a bit more of your attention this weekend. The open-world sandbox game was released last year on Xbox One, and it lets you design and construct vehicles and battle other cars, tanks and planes.

If you don’t have Xbox Live Gold already, don’t forget that you can get two months of Xbox Game Pass Ultimate for just $2 for a limited time. This new bundle includes Xbox Live Gold, Xbox Game Pass for console as well as Xbox Game for PC.

How to access shared folders in VMware? Try this method

Virtual machines are great tools to share folders between different operating systems such as Windows and Linux.

However, Windows shortcuts and Linux symbolic links might not work correctly if you access them via the shared folder.

Also, you can share folders between virtual machines and the host computer.

It is worth mentioning that you need to install the latest version of WMware Tools on the host operating system to make sure everything will run smoothly.

Moreover, you should not open the same file in multiple applications from different operating systems. Opening a file in this manner might cause corruption.

To avoid this problem and other issues, today we will show you how to access shared folders in VMware.

How to enable a shared folder in virtual machines

In a guest Windows OS, you can view shared files with Windows Explorer. Open My Network Places under VMware Shared Folders to access them.

Alternatively, you can open Windows Explorer and look in My Network Places. Also, it is worth mentioning that My Network Places is called Network Neighborhood in Windows NT.

To make things easier, here is the detailed path to access shared files: My Network Places > VMware Shared Folders > .host > Shared Folders > shared files.

In a Linux virtual machine, you can find the shared folders in /mnt/hgfs/shared files.

Moreover, you can add a new shared folder to your list. It’s easier to do this operation in a Windows host. Simply follow the instructions from the wizard.

To change the settings for a shared folder already on the list, highlight the folder by clicking its name, and then select Properties.

Change the settings you want and then click OK.


Do you need to change the network adapter type of VMware? Here an easy guide for this!


Conclusion

Viewing shared folders on VMware is a useful feature to transfer certain files to a virtual machine. As you can see, you can do that even for the Linux operating system.

Keep in mind to update VMware and don’t open the same file multiple operating systems. Also, the shared folders feature will not work for Windows shortcuts and Linux symbolic links.

Did our article help you access shared folders in VMware? Let us know in the comments section below!

RELATED ARTICLES YOU NEED TO CHECK OUT:

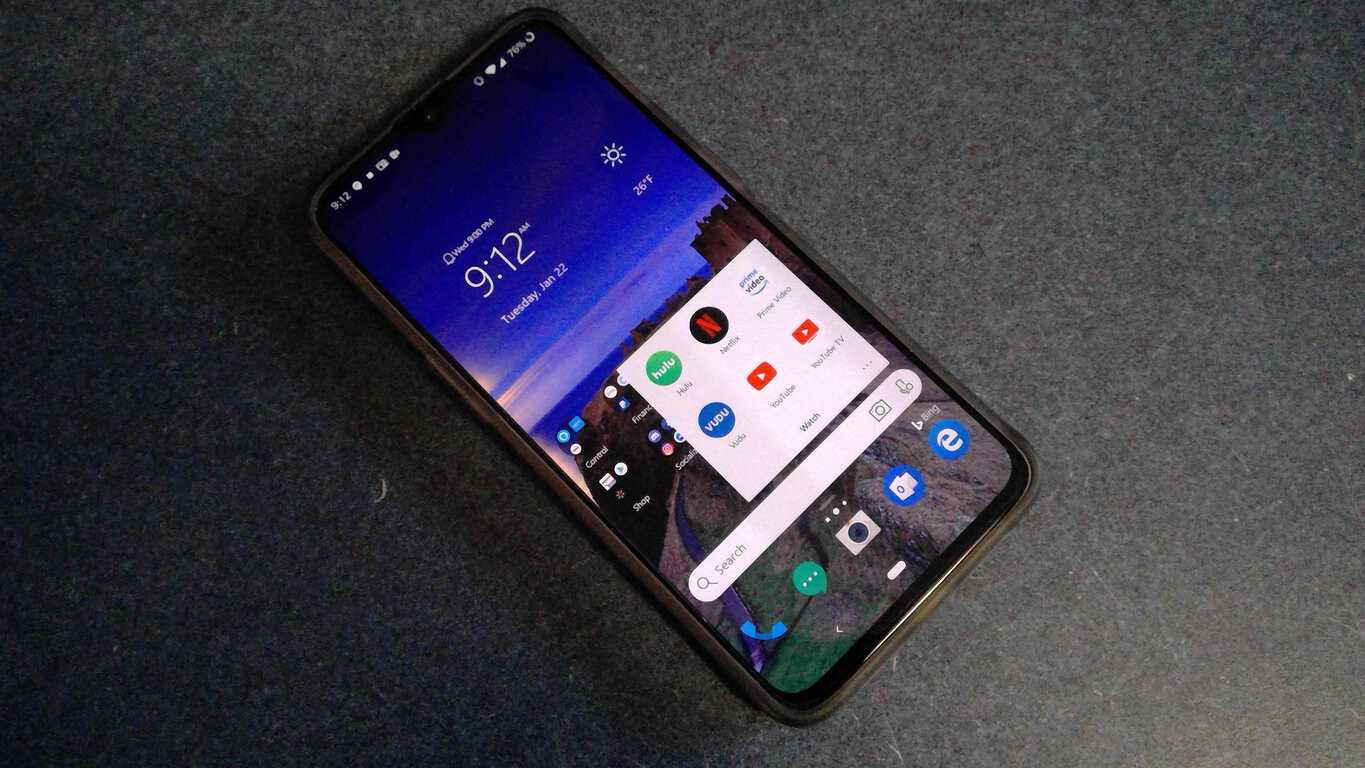
Microsoft launcher 5.9 beta now rolling out, with improved Calendar icon

The version 5.8 update for Microsoft Launcher was just two weeks ago, complete with new features for IT admins, as well as search optimizations, but a new beta has already been released. Now coming at version 5.9 (via MSPoweruser,) the latest beta is introducing a new calendar icon, as well as some other improvements.

With this beta release, the Calendar icon in Microsoft launcher will now constantly show the right date, similar to how it is on the stock calendar app on iOS. The icon itself has also been updated with a more simplistic look. Other than that, the release is fairly minor, only including general fixes for the anchor, background, calendar card, and other performance improvements.

As always, you can sign up for the Microsoft Launcher Beta by visiting the app listing in the Google Play Store from the link below and then tapping on the “Join the Beta” link. Once this beta testing period is complete, you can expect this same version to hit the standard version of the app.

Microsoft Launcher
Microsoft Launcher
Price:
Free

Microsoft’s GitHub acquires Semmle, makers of a code analysis tool

Roughly over a year after becoming part of Microsoft, GitHub yesterday bolstered its dominance with the announcement of the acquisition of Semmle, the makers of a code analysis tool. The move comes as a chance to allow more ways for developers to secure their apps, and find vulnerabilities in their code.

As part of the new acquisition, there will be no disruption to existing Semmlle products. Both GitHub and Semmle will stay committed to open source, and Semmle LGTM.com service will remain free for public repositories and open source projects. Semmle will also continue on its open-source research projects, but at the same time, integrate with GitHUb’s existing product line. Semmle CEO and co-founder Oege De Moor reflected on this in a statement.

“By joining GitHub we are taking the next step in changing how software is developed, allowing every developer to benefit from the expertise of the top security researchers in the world. I can’t imagine a more fitting recognition of our team’s hard work or a better opportunity to realize the full potential of the vision and technology”

Semmle holds offices in San Francisco, Seattle, New York in the United States. It also has an international presence in Oxford, Valencia, and Copenhagen. The company’s mission is to “secure all software by bringing the security and development communities together.”

[Updated] Microsoft appears to be favoring Microsoft 365 branding over Office 365

Whenever you launch an Office 365 app on your computer, you typically will notice the Office 365 logo as it loads up. Well, that might soon change, as it appears as though Microsoft might soon be favoring the Microsoft 365 branding over Office 365.

According to Twitter user Florian B, Microsoft is experimenting with replacing the Office 365 branding with Microsoft 365 in the Office apps. Despite not being subscribed to Microsoft 365 (and holding a standard consumer Office 365 subscription,) he noticed the new branding on the loading and account options screen for some of the Office desktop apps.

Specifically, he’s enrolled in the “Dogfood Ring” of the Office Insider program, which he joined with a registry hack. That said, it would appear as though this is a change that not everyone will see. It might be in the process of being tested internally with Microsoft employees. It is also not certain if it will roll out to all Office Insiders, but it could eventually hit other rings soon, as Florian points out.

In addition to Florian B, another eagle-eyed Twitter user, Yannick, noticed that the Office 365 logo from the Office Updater has now disappeared. It now uses the Microsoft logo, further hinting at the favoring of the Microsoft 365 branding. Other users, including Michael Reinders, seem to confirm both Yannick and Florian’s experience. In Reinder’s case, Microsoft Office 365 Pro Plus, switched over to Microsoft 365 Pro Plus under the account options, removing the Office branding. It’s not clear how, this happened, however.

As we’ve previously explained, the Microsoft 365 service encompasses Windows 10, Mobility, Security, as well as Office 365 apps and services. It is separate — and not to be confused with — Office 365, which just includes access to Office apps and other Microsoft services like Yammer or Teams.

Importantly, Microsoft watcher Richard Hay points out that Microsoft 365 could to be a big deal for the company moving forward. The lines between it and the standard Office 365 subscriptions are blurring. Over 61 percent of planned sessions at Microsoft’s upcoming Ignite conference mentioning both Office 365 and Microsoft 365, so it would make sense for Microsoft to combine the two as one into the future.

Update: We’ve updated an earlier version of this piece with a new Tweet, to clarify that Florian B isn’t the only one experiencing the Microsoft 365 branding with an Office 365 subscription.

Stay healthy at work: Hands on with MyAnalytics in Office 365

Other than productivity software included with Office 365, one of the key parts of having a successful business is keeping workers healthy and positive. Sure, you can accomplish this with team bonding, and other activities, but, workers already spend 8+ hours a day at their desks. How can you show them hard data on work patterns, wellbeing, collaboration, and their network?

MyAnalytics, a new part of Office 365, is one solution. This online service is included at no extra cost with most Office 365 Business subscriptions. It collects Office 365 data every day to give workers insights about their meeting habits, their most-used apps, and more. We recently went hands-on with it, and here are our thoughts on the experience.

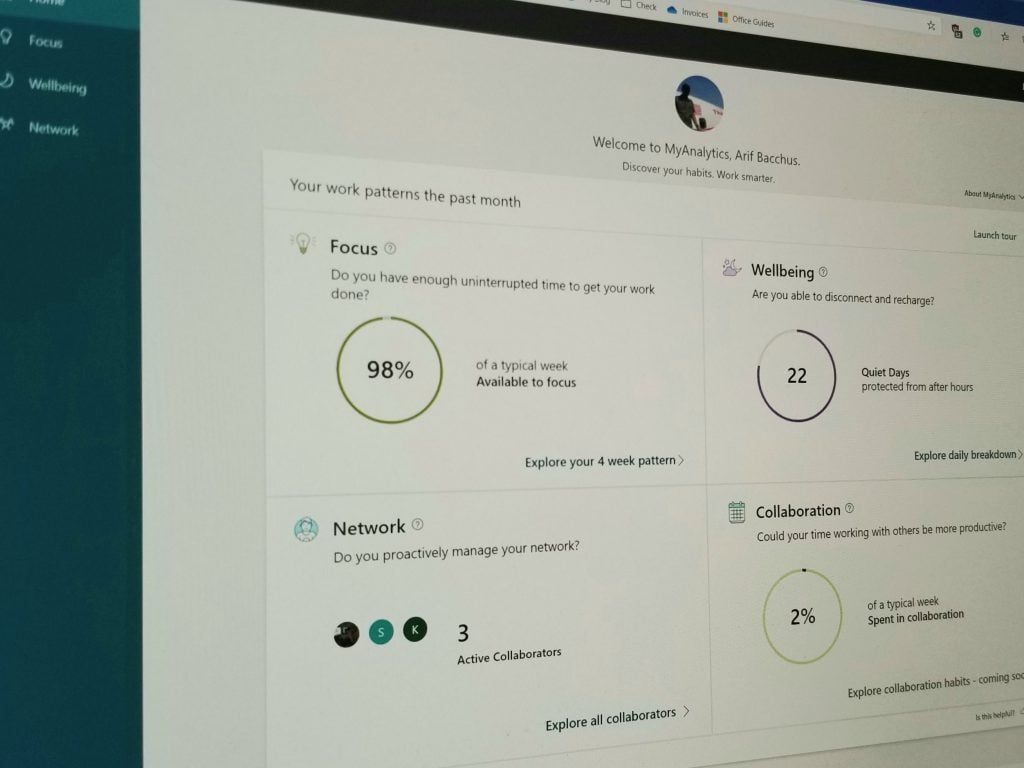
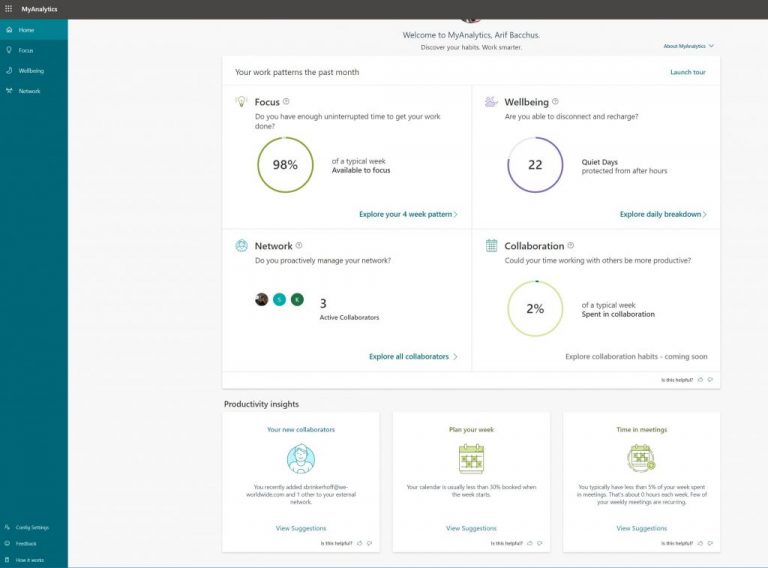
The main dashboard

The core of the MyAnalytics experience is the dashboard. From this simplistic and clean-looking main page, there are several tiles. Focus, Wellbeing, Network, and Collaboration are the main tiles running along the top. On the bottom, are some insights on productivity. These include people recently added to an external network, and suggestions on how to plan a week or spend time in meetings. You can always click the view suggestions button to get more ideas on your productivity flows.

It should be noted, though, that each of the main tiles on the dashboard will show you a quick look at some active data, represented in the form of a circle. It’s really simplistic and helps make sense of data you otherwise wouldn’t be thinking about.

Finally, along the side, there’s a tab for navigating to the more in-depth areas of the dashboard. We have more on those later on.
Stay healthy at work: Hands on with MyAnalytics in Office 365

Focus — a look at your uninterrupted work time

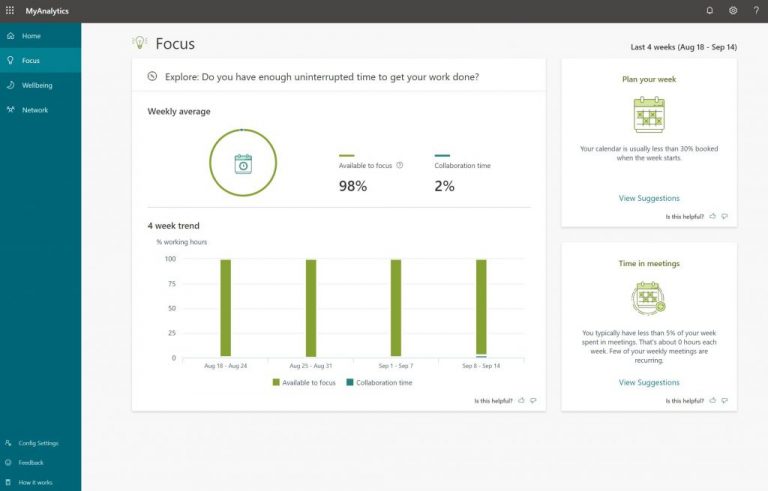
The first area of the MyAnalytics dashboard is Focus. Here, you’ll have a 4-week look at your work habits, and if you have enough uninterrupted time to get work done. This is calculated based on collaboration time, in meetings, emails, chats, and calls. Any of your time on your Outlook calendar with none of these activities is counted towards focus.

There are two main insights here, an ability to focus, and collaboration time — both calculated on a percentage scale. You’ll also see both of these represented in a weekly average represented in form of a circle.

On the right-hand side, you can also see some suggestions on how to plan out a week, and how you’re spending time in meetings. These simple but efficient reminders can help you stay focused on work, and plan out specific tasks. Again, it’s a clean and visually efficient way to represent productivity data that otherwise would go uncollected from Outlook, and other Office apps.
Stay healthy at work: Hands on with MyAnalytics in Office 365

Wellbeing — a look at how long you’re away from your work

Next, there’s the Wellbeing section. From this section, you can see how long you’ve been working outside of your normal working hours — what Microsoft calls “Quiet Hours.” Similar to the Focus area, the data is collected over the last four weeks and will show you how long you’ve kept your quiet hours streak. You can configure the quiet hours and working days as needed in settings.

There’s also a pie chart on the right side to show what has interrupted quiet hours, be it meetings, emails, chats or calls. In this case, the more quiet hours the better, as it is essentially your ability to disconnect from work, and stay stress-free.

Once again, it’s rather interesting to see this data represented in the form of a chart, as not everyone will think that answering an email or Teams message can impact their wellbeing at work.
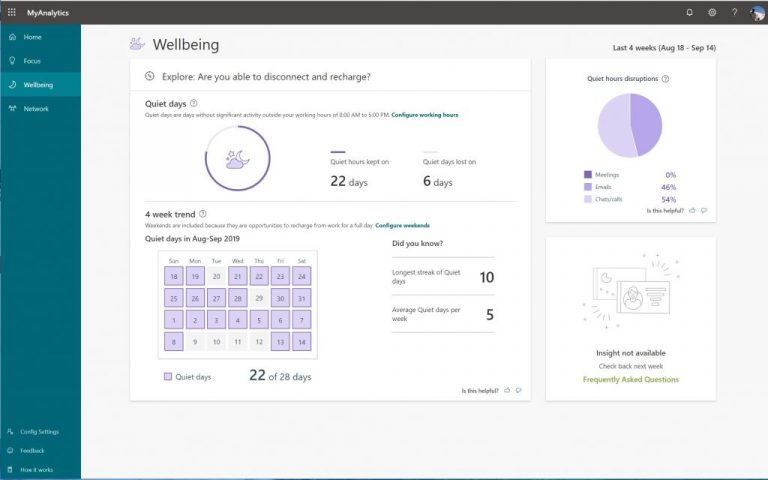
Stay healthy at work: Hands on with MyAnalytics in Office 365

Network — who are you interacting with?

Third up, there’s the Network section. This section pulls data from Outlook and Teams and will give you a look at some of the people you’ve most often contacted. There’s a look at the total number of people you’ve collaborated with via emails or Teams. You also can see a look at the top people you’ve contacted. It’ll be divided into External contacts, Active contacts, New contacts, and your important contacts. There’s even an option to “map” our your contacts to visually see how often you’ve reached out to them.

Beneath this main collaborators section will be the Explore area. Here’s where you can see how often you’ve contacted your important contacts. You also can search for contacts and add them to the list, if needed. Finally, beneath the Explore area will be the suggested important people area. These smart important people suggestions are pulled from your email.
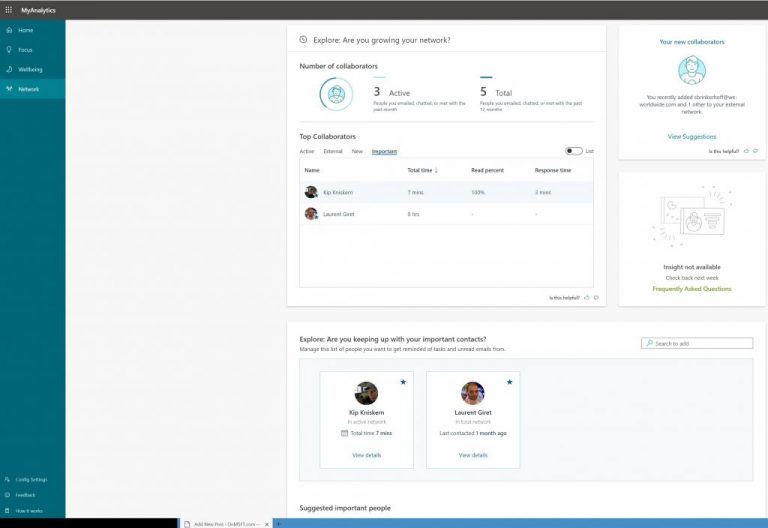
Stay healthy at work: Hands on with MyAnalytics in Office 365

Collaboration —- measuring how much you work

Finally, there is the collaboration section. While this area does not have a dedicated page with in-depth stats as yet for us, it will provide you a quick look at your workflow. The collaboration area looks at the estimated amount of time you’ve spent in meetings, emails, chats, and calls. Like wellbeing and focus, it is measured in a percentage.

On our end, this will just show this information in the form of a percentage. However, the more you use MyAnalytics, the more data it will collect. You might be able to see tips on how to batch email, reduce meetings, respond to meetings, meetings agenda, and how to start and end meetings on time.
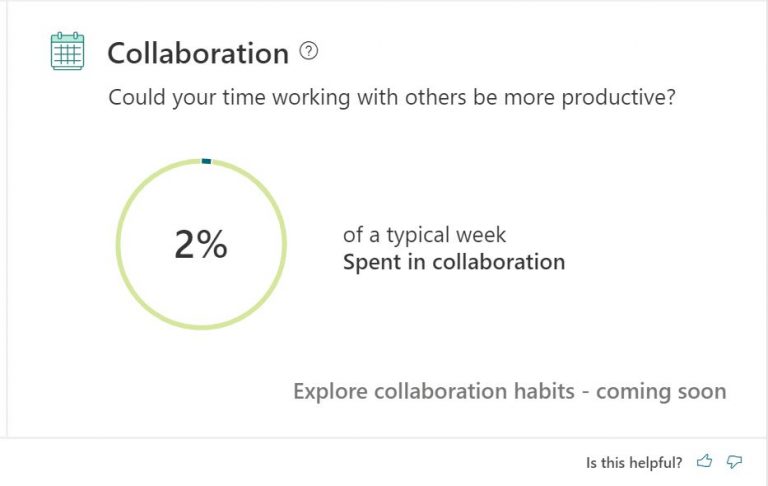
Stay healthy at work: Hands on with MyAnalytics in Office 365

Do you find MyAnalytics useful?

Be it the network, collaboration, focus, or wellbeing, all data collected as part of MyAnalytics is private and is only visible to you. It’s meant to keep you healthy at work and also improve your workflows. You can always opt-out of the experience by opening MyAnalytics and selecting the settings gear and turning the control to off. Do you think MyAnalytics is useful? Let us know in the comments below.

Microsoft will no longer share details about Xbox Live monthly active users in earnings reports

It’s been years since Microsoft stopped sharing details about Xbox One sales, preferring to focus on user engagement. Xbox Live monthly active users is a metric Microsoft has been highlighting in its quarterly earnings reports for quite some time now, but the company has quietly announced in a FY20 Investor Metrics and Disclosure Update that it will stop sharing this information going forward.

The news was spotted by a games industry enthusiast on Twitter yesterday. With Microsoft no longer sharing details on Xbox Live monthly active users and hardware growth going forward, the company will now focus on what it calls “Xbox content and services revenue.” This new metric includes video games sales, as well as revenue from Xbox subscription services such as Xbox Live Gold and Xbox Game Pass. The company will still continue to disclose gaming revenue in SEC filings.

While Sony has been regularly sharing updates about how many PlayStation 4 units the company sold worldwide (the 100 million units milestone was crossed back in July) over the years, Microsoft’s choice to focus on revenue generated by Xbox services is interesting. However, it’s also hard not to think about Apple, which is no longer reporting sales numbers for the iPhone and its other hardware products in its quarterly earnings reports. Just like Microsoft, the company now prefers to put the emphasis on services such as the App Store, iCloud, or its new Apple Arcade and TV+ subscription services.

In its FY19 Q4 earnings report published in July, Microsoft revealed that Xbox Live monthly active users had reached 65 million, up from 57 million a year ago. However, the company has never shared any details about the number of subscribers to Xbox Game Pass, its new gaming subscription service that is now available on Windows 10 in addition to Xbox One consoles. Again, Sony was more transparent and revealed back in April that PlayStation Now, its game streaming service had now more than 700,000 subscribers.

How to find out what woke your Windows 10 PC from sleep

Problems with unexpected sleep resumes are fairly common on Windows devices, at least judging from the volume of reports on Microsoft’s support forums. The first step towards diagnosing any automated wake-ups is to find out what’s causing them. You’ll then be prepared to make adjustments to the offending source to stop it waking your PC in the future.

Running Command Prompt as administrator

This guide requires use of the Command Prompt, as Windows doesn’t expose this information in any graphical interface. You’ll need to launch Command Prompt as an administrator – search for cmd in the Start menu, right-click the program result and click “Run as administrator.” Approve the UAC prompt which appears.

Finding out what woke your PC is achieved with a single command:

powercfg -lastwake

Type the command and press return. The output of the command will vary depending on the type of event that woke your computer. In the screenshot below, the culprit can be seen to be a USB hardware device. You may see a different kind of source, such as network activity or a scheduled wake timer.

powercfg -lastwake

This information should help you to identify the causes of any unexpected wake-ups. Your next steps will vary depending on the event type which is causing the wake-ups. We’ll cover two of the most common sources below.

Resolving device wake-ups

In most instances, a device-initiated wake-up can be readily resolved through Device Manager. Search for Device Manager in the Start menu and launch the program.

Using the information from the Command Prompt, you should be able to find the named device in Device Manager. Take care if the command indicates a generic hardware item, such as a USB root controller. In this case, it might be any of the USB devices attached to that controller which is causing the problem.

Power management settings in Device Manager

Once you’ve identified a suspect device, double-click it to open its Properties pane. Switch to the “Power Management” tab, if one is visible – if not, the device shouldn’t be able to wake your PC. Within the Power Management tab, clear the “Allow this device to wake the computer” checkbox.

Preventing wake timers from waking your PC

Another common cause of wake-ups is background wake timers. These can be configured by Windows and apps to wake your PC on a schedule. They’re commonly used for automatic maintenance routines.

Power Options in Windows 10

To disable wake timers, search for Power Options in the Start menu and open the Control Panel link. Click “Change plan settings” next to your active power plan, then the “Change advanced power settings” link on the next screen.

Power Options in Windows 10

In the popup prompt which appears, expand the “Sleep” item in the tree view, then “Allow wake timers.” Change the drop-down’s value to “Disable” and click “Apply” and “OK”.

These techniques should allow you to resolve many of the most common wake-up problems. However, Windows has a habit of refusing to obey sleep-related power settings, so you may find further investigation is required. Tools like Event Viewer will help you further narrow your search, using the wake source information acquired from the Command Prompt.

How to prevent Borderlands 3 save file loss

Borderlands 3 is the 4th Borderlands title to be launched, and it manages to keep the franchise as successful as ever.

However, no game series is without flaws, and Borderlands 3 has its own fair share.

Fortunately, history shows us that any issue that arises can be handled in one way or another.

Several players have reported on the official Gearbox forums that their save files have disappeared entirely without a trace.

I was trying to launch the game but it say my save was corrupted and lost my progress and was reset back from lvl 43 to 34 and reset back to story even though me and my friends finished the story.

This is an overarching problem, as you lose story progress, golden keys, your character levels and so forth.

It would seem that players get notified that their save file became corrupted.

What causes the Borderlands 3 save file corruption?

Players on Twitter have reported problems after activating cloud saves that then either wiped progress completely or rolled back to an earlier save point.

If you are playing Borderlands 3 with Cloud Saves on more than one device through the Epic Games Launcher, you may experience Cloud Save conflicts. 

What is a Cloud Save conflict?

Cloud Save conflicts are mainly the result of you playing the game on one machine while in offline mode.

After much research, it was discovered that the source of the problem is actually a whole different issue.

It seems that a bug is keeping the Cloud Save conflicts pop-up screen from showing up.

This makes it so that the cloud saves end up being chosen by default, leading to progress rollback or even a complete wipe.

What to do in case of a Borderlands 3 Cloud Save conflict

Once a Cloud Save conflict appears, you would normally be prompted with a window that looks something like this:

Borderlands 3 lost save Cloud error

You need to pay attention to the timestamps  and choose the most recent one.

You could also just simply look for the one with the Newer label in front of the time stamp.

In the end, it seemed that this entire issue boils down to players experiencing one of two things:

  • Choosing the wrong save files when prompted with a Cloud Save conflict
  • Not getting the chance to choose the save file at all

How to clone virtual machines in VMware

Virtual machines are emulations of computer systems. They can play the role of physical computers. So, you can use multiple operating systems on the same physical machine.

Cloning virtual machines allows users to test certain computer architectures in a safe environment. At the very worst, you can break a clone operating system, but not the original one.

So, with a virtual machine, you have an entirely new computer available on your physical machine. The virtual machine behaves like a real computer, with virtual hardware devices.

However, cloning virtual machines is not as easy as might seem. Today we will show you how to do this operation in VMware.

Create clone virtual machines in a few easy steps

First and foremost, you can’t clone a virtual machine if you’re connected directly to an EXSi host. So, to clone a virtual machine, you should connect to vCenter Server.

Then, you must follow the steps below.

  1. Open the VMware vSphere or Infrastructure Client and sign in.
  2. Select from the inventory the virtual machine you want to clone.
  3. Choose if the virtual machine should be powered on or off when you clone it.
  4. Right-click on the virtual machine selected.
  5. Choose Clone from the context menu.
  6. Follow the on-screen instructions.
  7. You can clone the entire virtual machine to a single location, or you can move certain virtual machine disks to other locations.
  8. Complete the steps from the on-screen instructions to begin the clone operation.

It is worth mentioning that you can choose a live option (when the virtual machine is powered on) for the VMware VirtualCenter 2.5 and later versions.

So, if you have an older version, it is recommended to update VirtualCenter to made this option available.


What to do if VMware is not booting? Check out this guide to solve the problem in no time!


Conclusion

Before you power on the virtual machine clone, you should know some important aspects.

The clones have a new UUID (Universally Unique IDentifier).

Also, the new virtual machines get new MAC addresses if they have virtual network adapters. So, some software can be affected by this change.

However, the clone might share IP addresses and computer names with the original operating systems. We also have a great guide best settings for VMware running Windows 10, so don’t miss it.

Did our article help you clone a virtual machine in VMware? Do let us know in the comments section below!

How to update your Steam client to the Beta version

Anyone who knows a thing or two about PC gaming most likely knows what Steam is.

This video game digital distribution platform is probably the most currently recognizable one on the market.

However, staying on top of the video game food-chain isn’t easy, and Steam continues to evolve.

One great example of Steam‘s evolution is the news that the Steam Library is getting a complete revamp.

How do you change your Steam client to the Beta version?

1. Join the Beta while Steam is in Small or Large Mode

  1. Launch Steam
  2. Select Steam (Upper-left corner)
  3. Select Settings
  4. Go to the Account tab
  5. Click on Change next to where it says Beta participation
  6. Choose the Steam Beta Update from the drop-down list and click OK
  7. Select the Restart Steam button when prompted

Steam beta How to Large Mode

2. Join the Beta while Steam is in Big Picture Mode

  1. Select Settings
  2. Select System
  3. Check the Participate in client beta option
  4. Select the Restart Steam button when prompted

Steam beta How to Big Picture Mode

What does the new Steam library bring to the table?

Quicker access to game updates

With the new client,  you’ll be the first to know every time games in your library receive an update or host an event

All you have to do is click on an event to browse all the recent updates for that game.

An area where recently played games are displayed

With the new Steam client, you’ll now have a shelf that shows the games you played or purchased most recently.

All you need to do is push the big green button to pick up where you left off in your last game.

Steam Beta Recently Played

Your friends’ activity log

With the new Steam tab, you can see what your friends are currently playing, and you may even find a new game worth trying.

Steam Beta Friends List

A Collections tab

You can add a custom shelf or twenty, and you can highlight your favorite collections or just showcase all your games.

Steam Beta Collections tab

All the information about a game on a single page

Steam Beta Info Revamp

Better Library organization

The new Steam client will make it easier to explore, sort, hide and feature your games.

Steam Beta Library organization

If all of these features sound extremely promising, then most likely you’ll want to join the beta phase as soon as possible!

Fix: Photoshop has encountered a problem with display driver

While working with Photoshop, you may come across several errors. One such error is “Photoshop has encountered a problem with the display driver and has a temporarily disabled enhancement which uses the graphics hardware”.

As the error message indicates, the issue is probably caused due to the graphic card driver. Similar issues faced by other photoshop users can also be seen in the Reddit community.

Hey guys. I’ve had photoshop for a while now but this is the first time this has come up and I’ve run out of ideas. I can’t seem to check the graphics processor on as it says “Photoshop detected an error in your display driver. Update or reinstall the driver and check Use Graphic Processor to retry”.

If you are also troubled by this error, here are a couple of troubleshooting tips to help you resolve Photoshop has encountered a problem with display driver problem in Windows.

Troubleshoot Photoshop has encountered a problem with display driver

1. Update Graphic Card Driver

1.1. Update Graphic Card Driver from Device Manager

The common cause of this error is an incompatible or outdated graphic card. You can update the graphics card from the “Device Manager” to resolve it.

  1. Press “Windows Key + R” to open Run.
  2. Typ devmgmt.msc and click OK to open the Device Manager.
  3. Expand the “Display Adapter” section.
    hotoshop has encountered a problem with display driver
  4. Right-click on your graphics device and select “Update Driver”.
    hotoshop has encountered a problem with display driver
  5. In the next window, select the “Search automatically for the updated driver software” option.
  6. Windows will now look for any pending updates from the manufacturer. Make sure you are connected to the internet to download the driver update.
  7. After the update is installed, reboot the computer and check for any improvements.

1.2. Update the Graphic Card Driver with a driver updater tool

Updating drivers can be easier using dedicated software that can do all the hard work for you. By choosing to automatically update your Graphics Card Driver with a specialized driver updating tool you’ll be safe from any malfunction. Moreover, it’s a time-saver and you can also use it to find all the missing drivers your PC needs

2. Roll Back Display Driver Update

  1. If the issue started to occur after updating the Display Driver, try to roll back the update.
  2. Press “Windows Key + R” to open Run.
  3. To open the Device Manager, type devmgmt.msc and click OK.
  4. Expand the “Display Adapter” section.
    hotoshop has encountered a problem with display driver
  5. Right-click on the display adapter and select “Properties”.

  6. Click the Driver tab and then click on Roll Back Driver.
  7. Click Yes to confirm the action.
  8. If Roll Back Driver option is greyed out, close the properties window.
  9. Reboot the computer and check for any improvements.

3. Disable Sniffer.exe

  1. Sniffer.exe is a Photoshop application that detects the GPU modules installed on your computer. In case, the Sniffer application is affected by a glitch; it can stop the Photoshop app from functioning correctly.
  2. Open File Explorer and navigate to the following location:
    C:\Program Files\Adobe\Adobe Photoshop CC 2019
  3. Inside the folder, search for “Sniffer.exe” file. Right-click on the file and select Cut. Paste the file in any other folder outside the Photoshop Directory.
  4. Reboot the computer and check if the error Photoshop has encountered a problem with display driver is resolved.

4. Check Photoshop Installation Drive

  1. If you have multiple storage drives installed, make sure the app is installed on the Windows drive.
  2. Installing the app on a secondary drive can create issues with Photoshop and system resources.
  3. Simply uninstall the current version of photoshop. Then reinstall the Photoshop app on your Windows drive.

Fix: Ubisoft Store Oops, your Payment Could not be Processed

Uplay is a proprietary game distribution platform owned by Ubisoft. This is where you can buy, download and launch Ubisoft games, but some users complain of oops, your payment could not be processed error while trying to pay in the Store.

If you are also facing this issue, the solution in this guide will help you fix it for good.

Why can’t I buy anything through Uplay?

There are multiple reasons why you may have issues with your payments made through Uplay, for example:

  • You made your purchase during a high-profile sale, such as a Black Friday deal. In this case, it will take a little longer for your order to be processed since plenty of other users made payments as well.
  • General issues may make it so that purchases can take up to 48 hours to process
  • Your Uplay client is corrupted, and you need to either restart it or re-install it.
  • The credit card you are using is having issues, such as a lack of funds, incorrect billing information, etc.
  • The game you are trying to buy is region-locked
  • The purchasing region does not match the region associated with the card.

What can I do if my Uplay payment could not be processed?

1. Make sure your credit card info is on point

  • Check to see if your card is expired
  • See whether you have reached or exceeded your credit limit
  • Verify whether you have exceeded your daily charge limit
  • Make sure the information entered at checkout matches the billing information associated with the credit card
  • Be sure that the purchasing region matches the region associated with the card.

2. Try buying from the website

If you suspect your Uplay client may be acting out, try force-stopping it, or uninstalling it.

3. Force stop Uplay and restart it again

  1. Press Ctrl + Shift + Esc.
  2. Select the Uplay process.
  3. Click on End task.
  4. Restart Uplay.
Can't purchase through Uplay

4. Uninstall and re-install Uplay

  1. Press Windows + R.
  2. Type in appwiz.cpl.
  3. Right-click Uplay and select Uninstall.
  4. Go to Ubisoft’s website and download a fresh new Uplay client
  5. Install the client.
Can't purcase through Uplay uninstall

If that doesn’t work either, go to the Ubisoft store on their website, log in with your Ubisoft account, and make your purchases from there.

The games will soon appear in your game library the next time you log into Uplay.

5. Have patience

Because there are plenty of cases where purchases will take a lot to process, you’ll just have to wait it out.

You will either receive the game or you will get your money back.

If neither happens, contact the Ubisoft support staff with proof of your attempted purchase, such as screenshots.

How to bypass Power BI sign-in issues quickly

Many users using the desktop version of Power BI are experiencing sign-in issues.

If you are one of them, you should know that this may because by one of three causes:

  1. Power BI is being blocked by your Firewall
  2. Proxy Authentication errors
  3. Non-HTTPS URL redirect errors

Some users have reported encountering issues when trying to log into the desktop version of Power BI.

[…] My manager is trying to sign in to PowerBI desktop using his work email. But he is not able to sign in, when he enters his credentials, there is absolutely no response! It neither signs in nor throws an error! But he can sign in fine for PowerBI Web.

Power BI is being blocked by your Firewall

Make sure Power BI is added in the exception list of your Firewall:

  1. Click Home
  2. Type Windows Firewall
  3. Select Windows Defender Firewall from the list
  4. Select Allow an app or feature through Windows Defender Firewall
  5. Check the box next to Power BI’s services

How do I fix proxy authentication errors

Whitelist the appropriate domains

For proxy authentication servers

If your network uses a proxy authentication server, whitelisting these domains on the proxy authentication server will most likely fix the issue:

  1. app.powerbi.com
  2. api.powerbi.com
  3. domains in the *.analysis.windows.net namespace

For those part of government clouds

If your network is part of government clouds , whitelisting these domains on the proxy authentication server will most likely fix the issue:

  1. app.powerbigov.us
  2. api.powerbigov.us
  3. domains in the *.analysis.usgovcloudapi.net namespace

Non-HTTPS URL redirect errors

Use secure connections for authentication

Most recent versions of Power BI Desktop use the latest version of the Active Directory Authentication Library (ADAL), which does not allow a redirect to non-secured URLs.

As a measure of precaution, let your administrator know he should check that secured URLs are used for their authentication sites.

Use the Web version

The web version of Power BI is the first one to automatically update. So if you find any issues with the desktop version, just switch to the web version.

Waze sound alerts are not working? Here’s what you have to do

One of the biggest differences between Waze and other GPS navigation software is the alerts system.

Waze benefits from a user input system that allows constant alerts about speed cameras, police, speed alerts, and more. Of course, speed limit and the usual driving alerts are also present.

But lots of wazers complain that the audio alerts are not working and they only get visual updates about hazards.

If you encountered the same problem, there’s a couple of things that you should be aware of.

What can I do if the audio notifications in Waze don’t always work?

1. General tips

waze audio alerts not working

  1. Make sure that your sound is turned on. Go to Waze > Settings > Voice & sound > Sounds > choose Alerts only or On.
  2. Raise the volume level in the app.
  3. Check if you have a Waze voice selected.
  4. Close and then restart the Waze app. Additionally, you can also restart your device.
  5. If Waze is connected to Android Auto or Apple CarPlay, make sure that the volume level is at an appropriate level and there are no other car settings that block audio.

2. Waze not alerting police

waze police alert sound not working
First of all, make sure that you’re alerts are ON and the volume is turned up.

If Waze is not alerting police, it is possible that it was reported on the other side of the road. If that’s the case, the app won’t alert you.

Another possible issue could be the fact that you have an incomplete voice pack download. If the sound clip for police is missing from your voice pack, then you won’t hear any alert.

To fix this you’ll have to connect to Wi-Fi and change your Waze voice. Let it download and then change back to your default voice that you use and let it fully re-download.

3. Waze not alerting speed cameras

waze speed camera alert sound not working
If Waze is not alerting speed cameras and red light cameras, first you’ll have to know a couple of things:

  1. To get any king of notification, the camera has to be on your driving direction.
  2. Waze will notify you about a camera if it’s valid, it’s on your driving direction, and you’re exceeding the speed limit. Keep in mind that the app will not alert you with audio if you’re under the speed limit.
  3. The last wazer that edited the camera, locks it to his rank. A lower rank user won’t be able to edit or delete the camera.

The most important things that you have to keep in mind is that the camera needs to be confirmed by an editor and you’ll get audio alerts only if you exceed the speed limit of that camera.

If your voice alert prompts are corrupted, you can reinstall the client or clear the cache and the storage. You can do that by following the steps:

  1. On your Android device, go to Settings.
  2. Navigate to Apps & notifications.
  3. On the bottom of the screen tap on See all apps.
  4. Search for Waze and tap on it.
  5. Then on Storage.
  6. Tap on CLEAR CACHE and then on CLEAR STORAGE. Confirm by taping OK.

After that, login again in the Waze app and check if the alerts are working properly.

The same steps can be followed if there are no audio alerts at all in Waze or if the volume is too low, even when the device volume is turned all the way up.

Most of the sound and alerts issues on Waze are caused by improper settings or corrupted sound packs. Clearing the cache or reinstalling the app should fix these problems.

If you have any other suggestions or questions, feel free to leave them in the comments section below and we’ll be sure to check them out.

READ ALSO: