Microsoft To-Do updates on Windows 10 & web with new flagged email feature

The Microsoft To-Do app updated today for the web and Windows 10 devices with the new flagged email smart list feature.

This new feature activates automatically when a user logs in with the same account information used for Office 365 and can be enabled from within the app’s settings.

After it’s enabled, a new Flagged Email smart list will appear within the left column that will pull the 10 most-recently flagged emails from the last two weeks. Each email will appear in To-Do as a task that can be managed, deleted, or checked off.

The Flagged Email smart list will not function for those that aren’t using a connected Office 365 account.

Have you had a chance to use this new feature yet? Share your thoughts on it with the community in the comments below and then follow us on Pinterest for more Microsoft tech content.

Download Windows 7 KB4489885, KB4489878 on Patch Tuesday

Well, the March 2019 Patch Tuesday edition didn’t bring any major updates to Windows 7 users.

While there are two new updates available for download (KB4489885 and KB4489878), they only focus on adding general security updates to various Windows components.

The changelog is rather “thin” and reads as follows:

Addresses an issue that may prevent the Event Viewer from showing some event descriptions for network interface cards (NIC). 
Security updates
to Windows App Platform and Frameworks, Windows Cryptography, Windows Hyper-V, Windows Storage and Filesystems, Windows Fundamentals, Windows Server, Windows Kernel, Windows MSXML, and the Microsoft JET Database Engine

It is worth mentioning that security update KB4489885 brings one additional bug fix that fixes the issue causing the abbreviated Japanese Era names to be incorrect.

Windows 7 KB4489885, KB4489878 bugs

These updates also come with a known issues. Microsoft acknowledged that after installing one of these patches, Internet Explorer 10 may have authentication issues.

As the Redmond giant explains, this problem occurs when two or more people use the same user account for multiple, concurrent login sessions on the same machine.

When this happens, you may experience one of the following issues: cache size and location show zero or empty, keyboard shortcuts may not work properly, webpages may intermittently fail to load or render correctly, credential prompts will keep on popping and you won’t be able to download files from the internet.

In order to avoid this problem in the first place, the best solution is to simply use different user accounts for each user.

If you already downloaded KB4489885, KB4489878 and you encountered additional bugs, do let us know in the comments below.

KB4489868, KB4489886, KB4489871 and KB4489882 [Download links]

If you’re running older Windows 10 versions, there are four new cumulative updates that you can install on your computer.

Each OS version has its own cumulative update.

If you’re interested in downloading the stand-along update package, follow the direct download links listed below.

March 2019 Patch Tuesday update download links

The March 2019 Patch Tuesday edition brought only “thin” updates, so to speak. In other words, the new patches feature less than 5 bug fixes and improvements on the official changelog.

More specifically, there are two common fixes and improvements that these four cumulative updates share.

Microsoft has fixed the software issues causing error 1309. At the same time, the tech giant added a series of security updates to many Windows 10 components and programs.

Addresses an issue that may cause users to receive “Error 1309” while installing or uninstalling certain types of MSI and MSP files.

Security updates to Internet Explorer, Microsoft Edge, Microsoft Scripting Engine, Windows Shell, Windows App Platform and Frameworks, Windows Input and Composition, Windows Storage and Filesystems, Windows Wireless Networking, Windows Fundamentals, Windows Hyper-V, Windows Server, Windows Linux, Window Kernel, Windows MSXML, and the Microsoft JET Database Engine.

It is worth mentioning that KB4489871 and KB4489882 also fixed the issues that causes users to receive an erroneous return value of “0” when calling _isleadbyte_l().

Have you already installed the latest Patch Tuesday updates on your Windows 10 machine? Tell us more about your experience in the comments below.

Download KB4489899 to fix graphics and mouse issues in games

If you’re running Windows 10 v1908 on your computer, you can now check for updates and download KB4489899.

If you’re also a gamer, you’ll definitely want to download this patch as soon as possible as it fixes a series of annoying bugs limiting your gaming experience.

Download KB4489899 [Direct download links from Microsoft]

As stated above, you can also download the updates automatically via Windows Update.

Hit the ‘Check for updates‘ button and the updates will download automatically.

KB4489899 changelog

This cumulative update brings only 3 bug fixes, as well as some security improvements.

Here’s the official changelog:

  • Addresses an issue in Microsoft HoloLens with tracking and device calibration that has affected some users. You may notice improvement 10-15 minutes after installing this update, but we recommend resetting the holograms for best results. 
  •  Addresses an issue that may cause users to receive “Error 1309” while installing or uninstalling certain types of MSI and MSP files.
  • Addresses an issue that may degrade graphics and mouse performance with desktop gaming when playing certain games, such as Destiny 2, after installing KB4482887.
  • Security updates to Microsoft Edge, Internet Explorer, Microsoft Scripting Engine, Windows Shell, Windows App Platform and Frameworks, Windows Kernel-Mode Drivers, Windows Server, Windows Linux, Windows Hyper-V, Windows Datacenter Networking, Windows Storage and Filesystems, Windows Wireless Networking, the Microsoft JET Database Engine, Windows Kernel, Windows, and Windows Fundamentals.

Keep in mind that some users may experience audio issues and browsing slowdowns after installing this patch.

Chrome’s new smooth scrolling feature lands later this year

Google’s Canary Build has revealed Microsoft’s plans to add the smooth scrolling functionality to the newly designed version of Edge. Users will be able to scroll using scrollbars when the main thread is busy.

The decision will impact Mac, Windows, Linux,  Android and Chrome OS as the platforms that support Chromium based browsers. 

We have reported earlier that the upcoming Edge browser will be based on Chromium. The news was later confirmed as Microsoft officially started contributing to the open-source project.

We can expect significant improvement in the native Chrome browser itself as a result.

Recent reports suggest that Microsoft is planning to fix the scrolling issues in Chrome and other Chromium based browsers by adding a new feature. The news came into the spotlight as a result of recent commit by Microsoft to the Gerrit source code management of Chromium.

Instead of a bug, users have reported the smooth scrolling to be a feature request accepted by the company.

Microsoft will enhance the feature on Windows devices because we known the smooth scrolling feature is already available in Google Chrome. The company said that Windows 10-based accessibility client apps will be compatible with the latest version of Edge.

How to enable smooth scrolling in Google

Google is working on the feature and it is now available in the Chrome‘s Canary build. Users can enable the smooth scrolling feature if they have the new Canary build. Move towards the Chrome flags and look for Smooth scrolling. Your scrolling on the browser will be improved as you have enabled the feature.

The news surfaced online as Microsoft is ready to release the latest Chromium-based version of Edge. A few days ago, a leaked screenshot unveiled the UI of the Chromium based Edge browser.

Reports confirm that the new browser will be equipped with a lot of latest capabilities, features, and improvements. Some of these features include Chromium for Arm, touch optimization, and browser-accessibility features.

Up until now, Microsoft has not allowed Chrome users to have access to test or enable the smooth scrolling feature.  The feature is currently under development and we can expect it to be released in the second half of the year.


Minecraft will join the Xbox Game Pass catalog on April 4

Minecraft, the popular sandbox game that Microsoft acquired back in 2014 is finally coming to Xbox Game Pass. The Xbox One version of the game will join the Game Pass catalog on April 4, but Microsoft is leaving Minecraft for Windows 10 out of the party for now.

“Since its launch in 2009, the Minecraft community has remained one of the most active and passionate in gaming, attracting over 91 million players of all ages from virtually every country in the world. Those joining through Xbox Game Pass will enter a vibrant, global community that plays across 20 unique platforms like Windows 10, Nintendo Switch, Xbox One, and mobile. Xbox Game Pass players will also gain access to an ever-expanding array of content for purchase via the in-game Minecraft Marketplace, which contains over 1,000 pieces of content from 60 distinct creators,” explained Parimal Deshpande, Director of Product Marketing for Xbox Game Pass.

Minecraft was one of the few first-party games that Microsoft had yet to add to its Xbox Game Pass subscription service, and there are still a couple left such as Forza Motorsport 7, an Xbox Play Anywhere title released last year. We hope this will change soon so Xbox Game Pass finally becomes the only service you need to play all Xbox Game Studios games from the past, present and future.

Halo: The Master Chief Collection is coming to the Windows 10 Microsoft Store and Steam, with Halo: Reach to be added soon

The rumor was true, Halo developer 343 Industries has been secretly working on a PC version of Halo: The Master Chief Collection, and the anthology will be released on the Windows 10 Microsoft Store and Steam later this year. That’s pretty great news for PC gamers, as the last Halo game to be released on PC was Halo 2 back in 2007.

Halo: MCC on PC will include the same content as the Xbox One game, but 343 Industries’ Brian Jarrard said today that the games will actually roll out one by one. Another great news that Jarrard announced today is that Halo: Reach, Bungie’s latest Halo game released back in 2010 on the Xbox 360 will soon be added to Halo: MCC on Xbox One and PC. On Xbox One, the multiplayer content will be free for everyone who owns Halo: MCC, but the campaign and Firefight modes will be available as a paid DLCs (all content will be available for free for Xbox Game Pass subscribers).  This will be different on PC as Halo Reach will actually be the first game to be released on this platform, and the PC version will include all game content.

The Master Chief’s arrival on PC will happen in stages with each title releasing one by one over time -– giving the development teams the ability to ensure each one is right, while giving players a chance to jump in right away, rather than having to wait for the entire suite of games to be completed. Our current plan is for this journey to begin with the launch of Halo: Reach – the fictional beginnings of Master Chief’s saga – with the rest of the titles following in chronological order thereafter. Halo: Reach, Halo: Combat Evolved, Halo 2, Halo 3, Halo 3: ODST (Campaign), and Halo 4 will each be available for individual purchase within MCC as they become available. And each game will evolve and grow over time with community input.

Jarrard said today that Halo: MCC will be released on PC later this year, but didn’t share an ETA. We also don’t know if the Microsoft Store version will support Xbox Play Anywhere and cross-platform multiplayer between Windows 10 and Xbox One, but 343 Industries will likely share more details in the coming months.

Microsoft sues FoxConn over unpaid royalties, and FoxConn is furious

In some Chinese industries the business procurement of international intellectual property can be a murky undertaking, to put it nicely.

Citing a report by Phys.org, “a survey of US businesses by the American Chamber of Commerce shows IP infringement continues to be a top challenge for some in China, citing inadequate laws and the difficulty of prosecuting cases as the most vexing IP issues.”

As with most companies who deal with and in China, Microsoft has found itself in a quagmire trying to enforce infringement issues with its Windows software, where in many cases, the operating system is bundled with hardware to customers by manufacturers who have not paid the well-known licensing fee asked by the software maker.

Today, March 12, 2019, Microsoft is planting another flag in the ground around IP infringement and this one is at the expense of upsetting a very powerful Chinese manufacturer in Foxconn.

Foxconn which has become almost synonyms with the iPhone and many of the other big tech items purchased around the world, just received notice of a lawsuit filed against the company by Microsoft.

According to an article from Reuters, Microsoft’s lawsuit against FIH Mobile Ltd, a Foxconn subsidiary, is asserting to the North District of California, that the company has been “unpaid royalties for patents used in devices for clients including a top Chinese smartphone vendor.”

In reaction to the news, founder and chief executive of Foxconn Terry Gou was furious claims an insider. Gou conducted an impromptu conference to address the lawsuit and explain that Foxconn “has never paid any patent fees to Microsoft.”

On the flipside, Microsoft is proclaiming that its original 2013 deal with Hon Hai Precision Industry Co Ltd, before it became known as Foxccon, supersede its current understanding with Foxconn.

It is unclear at this point exactly what was infringed upon by FIH Mobile Ltd, especially with Microsoft almost comically exiting the mobile hardware game over two years ago.

Regardless of the infringement claims, Foxconn’s Gou is not going to take the lawsuit sitting down and appears ready to deal with it in court, answering questions about the incident at a press conference with “they should not pick on manufacturers.

With latest update, Fortnite now forces Xbox One / PS4 multiplayer crossplay

Fortnite, the widely popular 100-player battle-royale first-person shooter from Epic Games, has received an update today, bringing cross platform multiplayer between the PS4 and Xbox One editions to table (via Thurrott). This means that Epic will be putting both console users in the same matchmaking pool, as opposed to keeping PS4 users in their own. Of course, you’ll have to opt in to the feature, but if you opt out you’ll be restricted to Creative Mode and Playgrounds.

Interestingly, Nindendo Switch users will be removed from the console matchmaking pool, and will instead be moved to the same pool as Android and iOS users. In the changelog, Epic says that they “expect an on-average better per-game experience for both Mobile and Switch players,” although it’s hard to understand why given the different input methods (controller vs. touchscreen) of the two groups of players.

But on the bright side, at least cross-platform multiplayer now works on the PS4 due to Sony’s softening of its stance on cross-platform multiplayers games. This could likely result in more titles getting cross play for the platform, bringing gamers from both sides together instead of keeping them apart.

Fortnite
Fortnite
Developer:
Epic Games Inc.
Price:
Free


The app was not found in the store. ?

How to trigger a Windows 10 BSoD on-demand

The Blue Screen of Death (BSoD), or stop error, is an error that appears on your Windows 10 PC during a system crash. Windows Insiders running Preview builds on their Windows 10 PCs will experience a Green Screen of Death (GSoD). Obviously, a BSoD is not exactly the best thing you want to see on your Windows 10 PC, as it often means really bad news for you. Sometimes, though, you might want to see how well your Windows 10 PC recovers after a BSoD, or if you’re a developer you may want to see how an app handles a system crash. Oddly enough, Microsoft has instructions on how to modify your Windows 10 PC’s Registry to enable a keyboard shortcut to force a BSoD. In this guide, we’ll show you how to trigger a Windows 10 BSoD on-demand.

Microsoft, Windows 10, BSOD, Windows 10 PC
Green Screen of Death (GSoD) for Windows Insider builds

As always before we start, I need to point out a warning that editing your Registry can cause permanent and irreparable errors to your Windows 10 PC. Please back up your PC before attempting any of the following instructions. Additionally, this process will only work for Windows 10 PCs using a PS/2 or USB keyboard with a Scroll Lock key. With that out of the way, let’s begin.

How to trigger a Windows 10 BSoD on-demand

Here are the 10 steps you need to follow:

1. Type in “Regedit” in the Windows 10 search bar
2. Once you see the “Registry Editor” app pop up, click run as administrator.
3. Go the following path: HKEY_LOCAL_MACHINESYSTEMCurrentControlSetServiceskbdhidParameters
4. Right-click on the right panel, select New, and select “DWORD (32-bit) Value.” Microsoft, Windows 10, BSOD, Windows 10 PC
5. Name the new DWORD “CrashOnCtrlScroll” and press Enter.
6. Double-click CrashOnCtrlScroll and change its hexadecimal value from 0 to 1.Microsoft, Windows 10, BSOD, Windows 10 PC
7. Click OK to confirm the new value.
8. Go to the following path: HKEY_LOCAL_MACHINESYSTEMCurrentControlSetServicesi8042prtParameters
9. Repeat Steps 4-7
10. Restart your computer to apply the new Registry settings.

In order to remove the keyboard shortcut to trigger a Windows 10 BSoD, all you need to do is repeat Step 3 and Step 8 and delete the “CrashOnCtrlScroll” DWORD from both paths. You can trigger a BSoD in Windows 7 and Windows 8.1 using the same steps in your Registry Editor.

Once you complete these steps, you can use your keyboard to intentionally trigger a Windows 10 BSoD crash by holding down the right Ctrl key and pressing Scroll Lock twice. The keyboard shortcut sequence will force Windows 10 to trigger a KeBugCheck and generate a 0xE2 error displaying the BSoD screen, along with a “MANUALLY_INITIATED_CRASH” message. Your Windows 10 PC will also create and save a crash dump that can be used for debugging later if needed.

Alternatively, there is another option to trigger a BSoD (or GSoD) on your Windows 10 PC, using the Command Prompt. It’s a faster process and does not require you to edit any of your registry settings. You can trigger a Windows 10 BSoD (or GSoD) in 3 steps:

  1. Open Command Prompt, and choose “Run as administrator”
  2. Type in the following command: TASKKILL /IM svchost.exe /F
  3. Press Enter

Once you press Enter, you will see the BSoD (or GSoD) error screen. The reason you are seeing a BSoD or GSoD is that the command line you entered forcibly killed a critical process needed for Windows 10 to run correctly. Please note: TASKKILL is not available in Home versions of Windows 10, TSKILL is used in its place. One might wonder why anyone want to force their computers to see the Windows 10 BSoD.

For starters, some developers might use the BSoD to get to the route of an issue they are experiencing with their Windows 10 PC that is a custom hardware build. Other times, developers might need to trigger a BSoD to test an application’s resiliency after an unexpected restart. Otherwise, it’s a fun way to prank a friend or family member.

RPG Maker MV is no longer coming to Microsoft’s Xbox One consoles

RPG Maker MV, a video game that lets players create their own old-school roleplaying games, will no longer be coming to the Xbox One family of consoles.

The game was originally set to launch on the Nintendo Switch and PlayStation 4 in late-2018 with the Xbox One version being a late addition to the release schedule. The Xbox One version was expected to gain cross-play with the Nintendo Switch version.

While the Switch and PS4 version did come out in November, the Xbox One version of RPG Maker MV was delayed until early-2019.
The official announcement of the cancellation (Japanese) doesn’t specify why the Xbox One version was abandoned, simply stating it was canned due to “various circumstances.”

Were you looking forward to RPG Maker MV on Xbox One and are you disappointed by this cancellation? Share your thoughts with the community in the comments below and then follow us on Pinterest for more Xbox gaming content.

3 cool Windows 10/11 spring wallpapers to download right now

Microsoft has just rolled out three new wallpaper packs for Windows 10. All of them are based Spring-themed. You can download them for free from the Microsoft Store.

These themes come with high-quality images. They are named Pi Day, an African Safari and Smiling Creatures. If you install them, you will not see any new sounds or visual modifications apart from the wallpaper itself. 

Spring is right around the corner, followed by a hot summer season. If you are a fan of the Spring season you will see amazing flowers everywhere.

We can not deny the fact that desktop the dull and boring desktop can never be a great source of inspiration. So, Microsoft has released pretty cool and nice wallpapers to spice up your boring desktop this spring. 

Download Spring-themed wallpaper packs

1. AN AFRICAN SAFARI

Microsoft describes the “An African Safari” theme as:

Cheetah cubs in the savannah, a giraffe in a misty forest, and zebra outlined by the Serengeti sunset. These are just a few of the magnificent African animals featured in this 20-image set, free for Windows 10 Themes.

DOWNLOAD AN AFRICAN SAFARI 

2. PI DAY

Microsoft describes the “Pi Day” theme as:

How will you celebrate the elegance of the mathematical constant p (pi)? It’s approximate, irrational, and circular… or you could just eat some pie on March 14 instead. Do the math: these eight images are free for Windows 10 Themes.

DOWNLOAD PI DAY

3. SMILING CREATURES

Microsoft describes the “Smiling Creatures” theme as:

Need a smile? Have 16! Grins grace the faces of these 16 adorable animals, fish, and one happy grasshopper, free for Windows 10 Themes.

DOWNLOAD SMILING CREATURES

After you have downloaded the themes, you can navigate to Settings > Personalization > Theme to enable the free themes published by Microsoft.

You can now switch between different wallpapers right from your desktop. Change the wallpaper by just a right-click on the desktop and Next background.

You can install the wallpapers on up to ten devices running Windows 10.

RELATED ARTICLES YOU NEED TO CHECK OUT:

Download March 2019 Patch Tuesday updates as soon as they’re out

Microsoft is going to release the March Patch Tuesday updates in just a few hours’ time.  

The updates will specifically address the existing vulnerabilities in the Windows OS. At the same time, the patches will fix usability and performance related issues.

Users are looking forward to this release after the failed release of the October 2018 Update.

A bug was reported in this update that caused the removal of some user files. Therefore, Microsoft was forced to pull back the update right after it was released.

Windows 10 March Patch Tuesday updates

Apart from the typical security patches, we expect the Windows 10 March 2018 Patch Tuesday updates to finally fix the bugs (including authentication issues) in Internet Explorer 10.

The bugs are currently restricting two or more users from using the same user account for various concurrent login sessions. Furthermore, it may fix the issues in Microsoft Access 95.

1. OS bug fixes

As far as the past few updates are concerned, Microsoft is focusing on the fixing the issues in the OS.

As mentioned earlier, these cumulative updates will also bring a handful of improvements and bug fixes to increase the stability and reliability of the operating systems.

The same is valid for cumulative updates for Windows 10 and monthly roll-ups for Windows 8 and 7.  


Which is the latest version of Windows 10? Find out from our constantly updated article!


2. Microsoft Office bug fixes

Last week, Office 2010, 2013 and 2016 users got many non-security Microsoft Office updates. The upcoming update will also fix the issues that currently exist in the Microsoft Office productivity suite.

Download March 2019 Patch Tuesday Updates

Let’s see how the update turns out to be as Microsoft will roll out the Windows 10 cumulative updates in the next few hours.

The upcoming updates will automatically start installing on your PC if you have enabled automatic updates. Moreover, manual updates can be installed by checking for updates via the Settings page.

check for updates

Follow our latest news stories for the list of changes and any potential bugs in the new cumulative updates tomorrow.

RELATED ARTICLES YOU NEED TO CHECK OUT:

LMS.exe: What is it and how to fix high CPU usage

Depending on the task that you’re performing, you may keep noticing the LMS.exe process in your task manager.

And just with other .exe files, the presence of the lms.exe process in our systems is a bit disconcerting considering that it’s not a very well-known program.

As a matter of fact, other users have reported that the file seems to be resources-thirsty apparently gobbling up to 80% of the CPU time.

This causes their computers to take an eternity to respond and makes using a PC a frustrating experience.

But what is the lms.exe file and should it worry you? Then, how can you fix its high CPU usage issue? Read on to get the answer.

What is lms.exe?

What does LMS EXE do

In full, LMS is Local Management Service.

It is part of the Intel Management and Security Application, a utility that helps you access, troubleshoot, and manage PCs using intel Core vPro processors remotely.

The app needs the installation of a stable Microsoft .NET Framework to run.

In terms of roles, the LMS delivers Windows-related Intel remote management functions and typically runs in the background to facilitate requested tasks of it by the Intel platform.

By and large, Lms.exe is more useful in a business environment.

Where is lms.exe located?

The LMS.exe typically resides in either the C:Program Files (x86)IntelIntel(R) Management Engine folderLMS folder or a variation of theC:Program Files (x86)IntelAMT subfolder.

There have been several releases of the program so the file exists in several versions.

Is lms.exe Malware?

Undoubtedly, the program is authenticate and has no history of messing up systems in its native format. However, some malware masquerades as lms.exe and can wreak havoc in your machine without being detected by your antivirus.

The fact that the file can hide itself while remaining active behind the scenes makes it a favorite among notorious cybercriminals.

Indeed, it’s probably a malware if you find it operating from funny paths such as the documents folder, your system32 subfolder, and C:WindowsFonts.

Issues associated with Lms.Exe

The LMS.exe frequently brings problems. Besides the high CPU usage, it has been blamed for conflicting with other tools and occasioning issues in overall PC operation.

How to get rid of LMS.exe high CPU usage

We will discuss a number of fixes but let’s focus on the biggest complaint: how to sort the lms.exe CPU intensive challenge before everything else.

Well, it’s not always that the process will hijack the CPU. However, if you’re simultaneously administering too many procedures all related to the utility program, then it will automatically pull down your PC’s performance.

This is what you should do:

1. Change the current configuration setup

You can use the Windows MSConfig (Microsoft System Configuration) facility to change how windows behave at boot and hence the starting of the LMS process.

Steps:

  1. Click on the Start button and type msconfig on the search box then click ok.What is LMS process?
  2. Choose the startup tab then click ok.
  3. Click on open task manager.
  4. Locate Intel management engine and tap on disable.How does an LMS work?
  5. Close this Window and click ok.
  6. Restart the PC and see if the hiccup persists.

2. Use Windows Task Manager to manually disable it

If the msconfig steps seem daunting, you can opt to utilize the good old task manager in aborting the offending process.

Steps:

  1. After boot, open Windows Task Manager(press CTRL+ALT+DEL keys).
  2. Scroll through the processes window and locate the lms.exe.lms.exe high cpu usage
  3. Click on it and choose end process.

3. Disable from BIOS

Additionally, your system has the AMT (Active Management Technology) or ME (Management Engine) in the BIOS tabs in the BIOS and you can halt them from there.

Steps:

  1. Restart your PC
  2. Press the appropriate key to enter into BIOS at startup.
  3. Find the AMT/ ME areas and set them to disable. To be on the safe side, do this for every other Intel Management Engine connected Components and Intel Management Engine software you come across.
  4. Exit BIOS (Saving the changes) and reboot.

Should I remove LMS.exe?

Because of its enterprise computing nature, it could be unwise to uninstall the tool in a company PC.

On the other hand, it may not have much of an effect on computers used in home environments though we still recommend that uninstallation should be your last resort.

Steps:

  1. Go to start button.
  2. Type cmd (in the search dialogue)
  3. Chose command prompt (desktop app) then run as administrator from the results.lms exe windows 10
  4. Type sc delete LMS on the open command window then press enter.intel management and security application local management service disable

This should erase the LMS.exe tool.

How to fix other lms.exe issues

Please note that the fixes I have highlighted above can also be useful for a couple of other errors emanating from the lms.exe.

Here are some extra successful solutions:

Update The Process and supporting framework

Most of the reported lms issues are primarily due to the application running into problems when operating.

Now, one of the most accomplished ways to stop these issues is to update the relevant applications.

Steps:

Just search the Intel website for the most recent Intel Active Management Technology (Local Manageability Service)update.

You then download and install it.

Also, check that the essential .NET Framework (3.5 or 4.x) is correctly installed and updated (see how How you can Download the .NET Framework for Windows 10). lms.exe

Your problems could soon be gone if all goes well.

Run an Antivirus scan

Do you recall what we said about the file being a darling of creators of harmful software?

Now, the only way you can rule out the possibility of your machine being under an attack from these dangerous apps is to perform a thorough virus/attack check on your system.

Again you have alternatives:

Option 1: Use the powerful Microsoft Safety Scanner

Microsoft Safety Scanner has been designed to diligently find and oust viruses, spyware, and other kinds of malicious software from infected Windows computers and is quite effective.

You simply download the free security scanner and run it.

It will not only discover even sneaky malware like Mydoom and Sasser but will also attempt to reverse all injurious changes implemented by the identified threats.

Steps

  1. Download this tool (choose the 32-bit link or 64-bit link) and open it.
  2. Then select your preferred type of scan and start the malware scan.
  3. Let it complete and review the results as displayed on your screen to see if the LMS.exe file appears.

Please backup your files prior to executing the disinfection process as any affected data files may be deleted in their entirety (and data lost) during healing. 

Option 2: Use your installed antivirus program

If you have one of the best antivirus software with encryption installed, then just launch a virus scan using it. Check the manufacturer’s website if you have forgotten the steps.

You can even clean your system using Windows Defender.

RELATED STORIES TO CHECK OUT:

Windows Background Slideshow Not Working [Fix]

Occasionally, you’d like to see your best photos and/or pictures saved on your computer displayed as the background or a slideshow. But many who did try reported that the Windows background slideshow is not working.

Why is my background slideshow not working?

The problem is most likely within your computer’s power settings, which you must change before the background slideshow can work again.

However, the main problems could be:

  • Feature not turned on: The background slideshow option is not enabled
  • Issues with the compatibility: Background slideshow won’t work from previous Windows versions or isn’t found at all
  • Problems selecting photos: Links to your photo album send back the No items match your search error message when selecting a folder with your pictures.

There is good news for you: we have working solutions to fix the issue of your Windows 10 background slideshow function not working.

What can I do if Windows 10 background slideshow not working?

1. Change the power settings

  1. Right-click Start.
  2. Select Control Panel.
  3. Search and select the Power option.
  4. Click Change Plan settings.
  5. Now, click Advanced power settings.
  6. Click Desktop Background settings.
  7. Go to the Slideshow tab.advanced power options
  8. Change it from Pause to Available.

If your desktop background slideshow won’t change, go to the next solution.

2. Save as Theme

  1. Go to Themes
  2. Save your current background settings as a theme.
  3. Give the theme a name.
  4. Click Save.

When Windows 10 slideshow is not working, saving it as a theme should do the trick, as it did for other users!

3. Change the Personalization settings

  1. Click Start and choose Settings.
  2. Click Personalization.
  3. On the Background drop-down menu, select Slideshow.
background settings

When the Windows 10 background slideshow is not showing all pictures, changing the Personalization settings will help!

4. Turn on the Desktop background settings

  1. Click Start and select Settings.
  2. Now, click Ease of Access settings.ease of access
  3. Click Other options.
  4. Turn on the Show Windows Background setting.

Usually, when the desktop background is a solid color, it was probably turned off on this setting. You can also right-click on your desktop, choose Next desktop background, and see if it helps.

5. Restore the albums folder 

  1. Click Start and go to Settings.
  2. Now, click Personalization.background settings
  3. Click Lock screen on the left pane.
  4. Go to Background and select Slideshow from the drop-down menu.
  5. Select Choose albums for your slideshow.background slideshow
  6. Remove the folder that holds the photos or pictures.
  7. Restore the folder.

If the Windows 10 photos slideshow is not working, removing the folder and then adding it all over again should work.

6. Check if you’re using sub-folders

Sub-folders are not well supported for the background slideshow function, whether in Settings or Control Panel.

If you set your Picture library to be the root of your subdirectory system, selecting the Picture library as your slideshow folder is advisable.

Choose a folder that directly contains the images or photos you want to use for your background slideshow.

And by now, you should have things running when the background slideshow is not working in Windows 11 or the previous iterations.

Before leaving, find the best Windows slideshow maker software and get one today!

Did any of these solutions resolve your issue? Share with us your experience in the comments section.

Skype for Web drops support for ChromeOS and Linux

Skype released a brand-new version for Skype for web that enables the users to make Skype calls directly from their browsers. The twist in the story is that the web application has dropped support for Linux and Chrome OS.

Last year Skype for web has introduced some new and exciting features such as Skype-to-Skype call recording, high-definition video calling, and a notifications panel.

Furthermore, it allows the users to search for any specific message with in the a conversation. In this way you can save a lot of time and effort that is required to scroll through all of your chat history.

Skype for Web offers all the features that you will currently find in the desktop application. It even has the same look and feel, and you can perform all these activities using the latest version:

  • Access the Skype profile
  • Update the activity status
  • Get a Skype number
  • Add credit
  • Access Settings

Limitations for some users

Back in 2015, when Skype was experimenting with its Web version it was supporting the Linux and Chrome OS. It was available for both the platforms after its launch on the two big platforms macOS and Windows.

It looks like the web application was found to be stable enough on macOS and Windows so it dropped the support for the other two smaller platforms.

Users running MacOS 10.12 or higher and Windows operating system along with Microsoft Edge and Google Chrome can only enjoy the latest features.

It’s clear that, if you are using a Linux system or a Chromebook, you won’t be able to access the new version of Skype for Web.

Moreover, the tool does not support the Firefox browser and mobile devices. It clearly means that you might have to face “Browser not supported” message if you are using any unsupported browser.

Most of the loyal Skype users found that to be annoying. They still had to use the desktop application because of the limitations.

It’s still unclear that when the web application will be launched for the unsupported platform. But users still hope that will happen soon.

RELATED STORIES TO CHECK OUT:

Microsoft reveals new “MixPot”rewards you can win by watching Inside Xbox on Mixer tomorrow

Microsoft’s Inside Xbox live show is coming back for a new episode tomorrow, and the company has just revealed some exclusive “MixPot” rewards for its Mixer audience. This time, those of you who watch the show on Mixer will win a Lollipop accessory box for Black Desert Online, a MMORPG that was released on Xbox earlier this month.

That’s not all, as everyone will also get the chance to win a digital copy of One Piece: World Seeker, an upcoming action-adventure game to be released March 15.

The program for tomorrow’s episode appears to be pretty exciting. There will be news about State of Decay 2, Tom Clancy’s The Division 2, DayZ, new Xbox Game Pass updates, as well as a major Halo: The Master Chief Collection announcement. The Xbox One anthology is expected to be finally released on Windows 10, but many Halo fans would also like to see Halo: Reach, Bungie’s latest Halo game to be added in a remastered form.

We’ll be covering this new Inside Xbox live tomorrow,  but make sure to watch it live on Mixer at 5PM ET / 2PM PT.

Microsoft is bringing 13 brand new ID@Xbox titles to GDC

Microsoft has just announced 13 new ID@Xbox titles ahead of the Game Developers Conference (GDC) in San Francisco next week. The Redmond giant is planning a big presence at GDC this year with some sessions dedicated to Project xCloud, as well as a new cross-platform Xbox Development Kit (XDK).

“We’re looking forward to this year at GDC, with 13 newly announced titles joining us in San Francisco and a total of 30 games featured across the Microsoft Booth, in the lower level of the South Hall, and our Developer Showcase event for media,” wrote Jessica Ronnell, ID@Xbox Events and Community Management Lead. The latest ID@XBox tites include Beholder 2, Boomerang Fu, CrossCode, Dead Static Drive, Door Kickers: Action Squad, HyperDot, Mowin’ & Throwin’, StarCrossed, Stela, The Forgotten City, Totem Teller, UnderMine and Unrailed. You can learn more about these games on Xbox Wire.

The ID@Xbox program remains a great way to bring more indie devs to release their games on Xbox One, and the program passed the 1,000 titles milestone last year. Highlights include the vintage-looking run and gun game Cuphead, the puzzle-platformer INSIDE or the farming simulation game Stardew Valley. These games usually get much less exposure than blockbuster AAA games, but if you pay attention you’ll definitely notice some beautiful gems here and there.

YouTube Pauses Randomly or by Itself: How to Fix it

Most people use YouTube daily, but many reported that YouTube pauses randomly. This can be an inconvenience, but it’s not as serious as an Error occurred on YouTube message.

Nevertheless, it’s important to ensure smooth video playback, and this guide will show you how to fix it properly. And thanks to our dedicated guide, fixing interruptions with YouTube Music playback is also possible in no time.

Why does YouTube pause randomly?

  • Issues with your cache can sometimes cause this problem.
  • Temporary glitches with the browser or network can cause various problems.
  • Certain extensions can cause this issue as well.
  • Hardware acceleration can sometimes lead to this problem.

How do I stop YouTube from pausing randomly?

Before we start fixing this error, there are a couple of checks that you can perform:

  • Check your network and ensure you’re not using up all your bandwidth.
  • Restart your router and PC in order to fix any temporary glitches that you might be having.
  • Try using a web browser for streaming if you’re getting this issue.
  • In some instances, the only thing you can do is wait for YouTube to fix the issue.

1. Remove your history and cache

  1. Click the Menu button in the top right corner and choose Settings from the menu.
    settings Chrome
  2. Click Show advanced settings at the bottom of the screen.
    chrome advanced settings
  3. Go to the Privacy section and click on Clear browsing data button.
    clear browsing data chrome
  4. Now, select the beginning of time in the Obliterate the following items from the menu. Check Browsing history, Cookies, and other site and plugin data, Cached images and files and Hosted app data. Now click the Clear browsing data button.
    clear browsing data chrome

2. Change Adblock Plus settings

  1. Press the Menu button and choose More tools and then Extensions from the menu.
    chrome extensions
  2. Locate Adblock Plus and click on Options.
    change adblock settings
  3. Go to the Filter lists tab and click on Add filter subscription.
    filter settings adblock +
  4. Select EasyList (English) and click Add. If you’re using other languages be sure to add them as well.
    filter settings adblock +
  5. After doing that, restart your browser and save changes.

Some users also suggest disabling EasyList, updating it, and enabling it again. This is rather simple and you just need to do the following:

  1.  Open AdBlock Plus options as in the steps above.
  2. Uncheck the Enabled check box next to EasyList.
  3. Click the Update now button and wait for EasyList to update. Enable EasyList again and check if the problem is resolved.
    filter settings adblock +

3. Restart Adblock Plus

  1. Go to the Extensions tab. To see how to do this, check the previous solution.
  2. Now, locate Adblock Plus on the list. Look for Enabled checkbox next to it and uncheck it.
    disable adblock +
  3. Restart the browser.
  4. Go to YouTube and check if the problem is resolved. If so, enable Adblock Plus again by following the same steps. Check if the issue appears again.

4. Reset your browser

  1. Open the Settings tab.
  2. Click the Show advanced settings and scroll all the way down.
  3. Click on the Reset settings button. When the confirmation message appears, click on Reset.
    reset chrome to factory values

After doing that, check if the YouTube problem is resolved.

5. Disable hardware acceleration

  1. Open the Settings tab. Click on Show advanced settings.
  2. Locate the System section and uncheck Use hardware acceleration when available.
    disable hardware acceleration chrome
  3. Restart your browser and check if the problem is resolved.

All modern browsers have support for hardware acceleration, so be sure to disable this feature and check if that solves the issue.

YouTube is an amazing video hosting website, but you can experience certain issues with it from time to time. Speaking of which, many also reported Video paused, continue watching message.

If YouTube videos pause at the start, we strongly recommend that you try some of our solutions above and let us know how they worked out for you in the comments below!

DHCP Not Working on Windows 10: How to Enable it Again

If DHCP is not working on Windows 10, your devices won’t be able to obtain the IP address, and they’ll have difficulty connecting to the Internet.

Therefore, it if you want to restore Internet connectivity, you need to fix this issue, and this guide will show you how to do it properly.

Why is my DHCP not working?

  • The required services aren’t enabled on your PC.
  • Your adapter isn’t configured to automatically obtain an IP address.
  • Firewall or antivirus might be interfering with the service.
  • Outdated network drivers can sometimes cause this problem.

What can I do if DHCP is not working on Windows 10?

1. Turn on the DHCP Client service

  1. Right-click the Start button and click Run to open that accessory’s window.
  2. Input services.msc in the Open text box and click OK to open the Services window.
  3. Double-click DHCP Client to open the properties window in the shot directly below.
  4. Click the Startup type drop-down menu to select Automatic.
  5. Select the Apply option.
  6. Click OK to close the window.
  7. Thereafter, reboot the desktop or laptop.

2. Adjust the network adapter settings

  1. Open Run in Windows.
  2. Enter control.exe /name Microsoft.NetworkAndSharingCenter
  3. You’ll now see a Control Panel applet shown directly below.
  4. Click Change adapter settings on the left side of the Control Panel window.
  5. Right-click your connection and select Properties.
  6. Select Internet Protocol Version 4 (TCP/IPv4) and click Properties to open the window shown directly below.
  7. Select the Obtain an IP address automatically option.
  8. Then click the Obtain DNS server address automatically radio button.
  9. Press the OK button on the IPv4 window.
  10. Click OK on the Wi-Fi Properties window.
  11. Thereafter, restart Windows before opening a web browser.

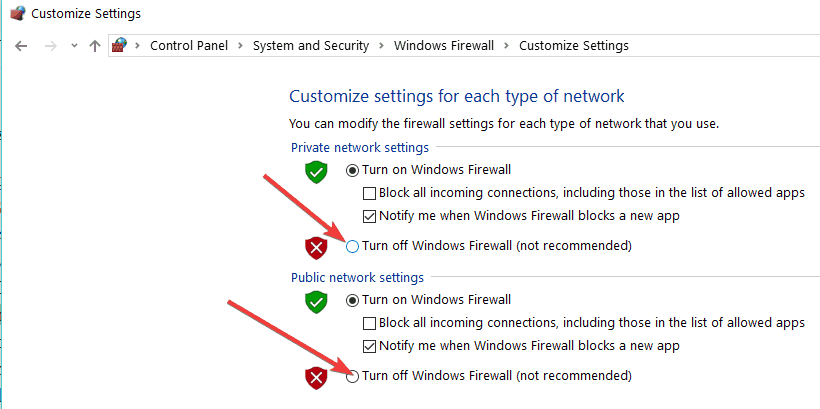
3. Turn off the Windows Defender Firewall

  1. Open Cortana’s search box by pressing the Windows key + Q keyboard shortcut.
  2. Enter firewall in Cortana’s Type here to search text box.
  3. Select Windows Defender Firewall to open its Control Panel applet.
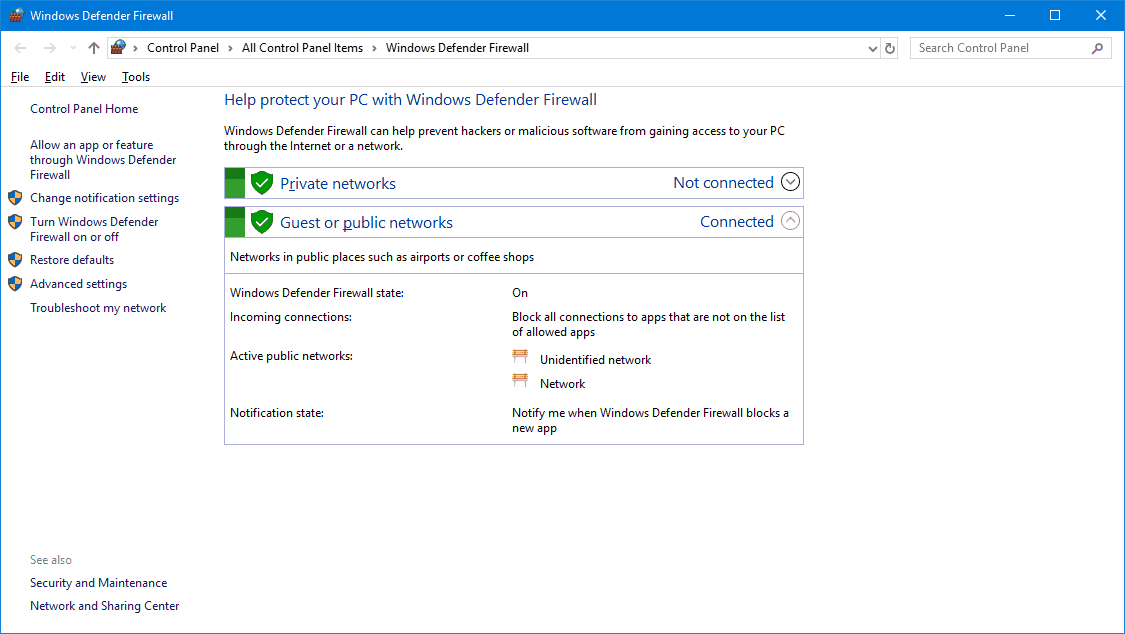
  4. Click Turn Windows Defender Firewall on or off to open the options shown below.
    Turn off Windows firewall
  5. Select both the Turn off Windows Defender Firewall settings, and click the OK button.

If turning the firewall does unblock the DHCP, restore WDF to its defaults. To do that, click Restore Defaults on the left of the firewall’s Control Panel applet. Then press the Restore defaults button.

4. Reinstall the network adapter driver

  1. Right-click the Start button to select Device Manager.
  2. Double-click Network adapters to expand that category.
  3. Right-click the Wi-Fi adapter listed there and select the Uninstall device option.
  4. Select the Uninstall option on the dialog box window that opens.
  5. Right-click the Wi-Fi adapter listed there and select Scan for hardware changes.
  6. Thereafter, restart the Windows OS

5. Disable third-party antivirus utilities

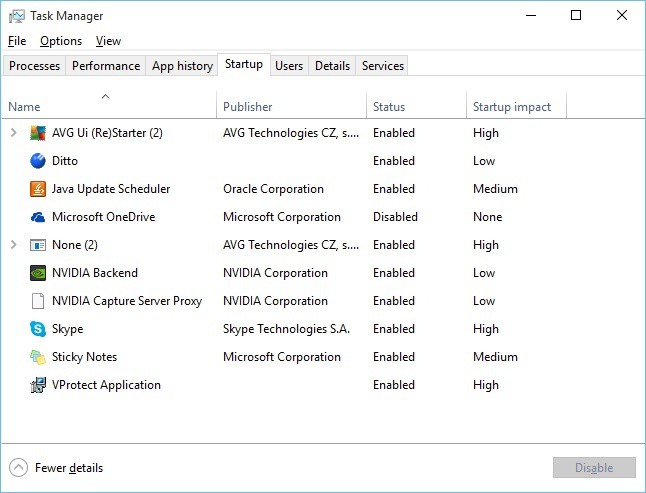
  1. To remove an antivirus utility from the system startup, right-click the taskbar and select Task Manager.
  2. Select the Startup tab on Task Manager’s window.
  3. Select the antivirus utility to disable from the startup.
  4. Then select the Disable option.
  5. Restart Windows 10 after removing the antivirus utility from the startup.

6. Reset the TCP/IP protocol and winsock

  1. Enter the keyword Command Prompt in Cortana’s search box.
  2. Right-click Command Prompt and select Run as administrator to open the CMD.
  3. Enter ipconfig /flushdns
  4. Next, input nbtstat –r
  5. Enter the command netsh int ip reset
  6. Then input netsh winsock reset
  7. Thereafter, close the Command Prompt window. Then restart the laptop or desktop.

Those are a few potential resolutions that might enable DHCP so that Windows gets an IP address. Then users can open websites in their browsers once again.

There are other network issues that you can experience, and many reported that the PC was unable to contact DHCP server. This is most likely because DHCP is not enabled for Ethernet or your network connection.

If this happens, Windows can’t get DHCP address and work properly. Luckily, we covered most of these issues in separate guides.

Did you find a different way to fix this issue? If so, share it with us in the comments below.

Windows 10 news recap: more than 800 million devices running Windows 10, new info on Chromium-based Edge browser, and more

Welcome back to our Windows 10 news recap, where we go over the top stories of the past week in the world of Microsoft’s flagship operating system.

Google reveals 0-day vulnerabilities affecting Google Chrome and Windows 7, recommends updating to Windows 10

Google has revealed that it has found a zero-day vulnerability that affects Google Chrome and Windows 7. Google recommends updating Google Chrome and upgrading to Windows 10.

There are more than 800 million devices running Windows 10, says Microsoft

Microsoft has announced its latest stat on how many devices are running Windows 10. It now claims that there are more than 800 million devices running Windows 10, while also claiming the highest customer satisfaction “in the history of Windows.”

Documentation for Chromium-based Edge shows up online, new browser only works on Windows 10 64-bit for now

New documentation has been found for Microsoft’s upcoming browser, Microsoft Edge based on Chromium. The documentation reveals that Microsoft’s next attempt at a web browser will only be available on 64-bit systems, to start with at least.

Microsoft acknowledges gaming performance issues with latest patch for Windows 10 version 1809

The latest patch for Windows 10 version 1809 has apparently brought some performance degradation for those wanting to play games on Windows 10. Microsoft has now acknowledged the problem and that it is working on a solution to the issue.

That’s it for this week. We’ll be back next week with more Windows 10 news!

Microsoft news recap: new Skype for Web experience live everyone, Oreo-inspired new Xbox One console revealed, and more

Microsoft news recap is a weekly feature highlighting the top Microsoft news stories of the past week. Sit back, grab some coffee, and enjoy the read!

New Skype for web experience goes live for everyone, support still limited to Google Chrome and Microsoft Edge

The new Skype for Web experience is now officially live for everyone, dropping the preview tag. The new experience brings a number of enhancements and new features, such as HD video calling, call recording, and more. It is only available on Google Chrome and Microsoft Edge.

Microsoft reveals new Xbox One console inspired by Oreo cookies

Microsoft has created an Oreo-inspired Xbox One X and controller for a competition on Twitter. Available in the United States, D.C, and Puerto Rico, gamers have the chance to win the Oreo-inspired console, which will not be available for sale.

KC Lemson, who started the Ninjacat meme, steps away from Microsoft

The original creator of the Ninjacat meme is stepping away from Microsoft to focus on “not working”, family life. In a post on LinkedIn, Lemson said:

I’ve decided it’s time for me to try something new: not working. Or to rephrase it in the standard corporate lingo: I’ll be on an extended leave of absence for the foreseeable future, during which time I will be pursuing some personal projects and spending more time with my family. I’ll still be in the GAL and on email occasionally, but I’ll be focusing on the non-Microsoft part of my life after this week.

ninjacat

Microsoft cuts 200 from commercial sales team as move to the cloud continues

It is believed that Microsoft is preparing to axe 200 jobs in its commercial sales team, as part of its continuing reorganisation. It comes as Microsoft continues to focus on the cloud.

That’s it for this week. We’ll be back next week with more Microsoft news.

Download Windows Calculator App Code from GitHub

Microsoft launched its Windows Calculator application on the GitHub platform as an open-source software. The developers are now able to participate in the design process of the upcoming features and also implement them in collaboration with Microsoft engineers.

Anyone who has even used any version of Windows must have used the Windows calculator app. The Windows 1.0 was first released in 1985 and it has been an integral part of each version released up to Windows 10.

Microsoft has been encouraging its community members to participate in the development of old File Manager from Windows 3.0 and PowerShell.

Windows Calculator app is now open-source

We can see that Microsoft is still committed to the open-source software with the announcement of the Windows Calculator app to be open-sourced. Microsoft plans to make it available to all the developers on GitHub.

If you want to download the app now, follow the download link listed below:

⇒ Download Windows Calculator app [from Github]

Microsoft seems to be interested in improving the experience of Windows 10 users, since the Calculator app belongs to the current version of Windows.

However, Microsoft listed a few requirements so that the changes made by the community can be approved for a production release.

Furthermore, you can participate other projects on GitHub. This allows the developers to report issues, participate in discussions, and suggest ideas.

It is definitely going to be a good learning experience for the developers as they will be allowed to build their own projects by reusing the code.

Microsoft is also planning to enhance Windows UI Library and Windows Community Toolkit by bringing API extensions and custom controls from the app.

The current move has been made as a part of the Microsoft’s plans to expand the development of its technology specifically to third party developers.

Microsoft wants its new plan to be a successful one because recently around 60,000 patents were offered as open-source for Linux. Prefer something simpler without going through GitHub? Try these Windows 10 calculator alternatives that are easy to install and use.

You can find the full documentation of the Windows calculator app including unit tests, product road map, and the build system on the GitHub page.

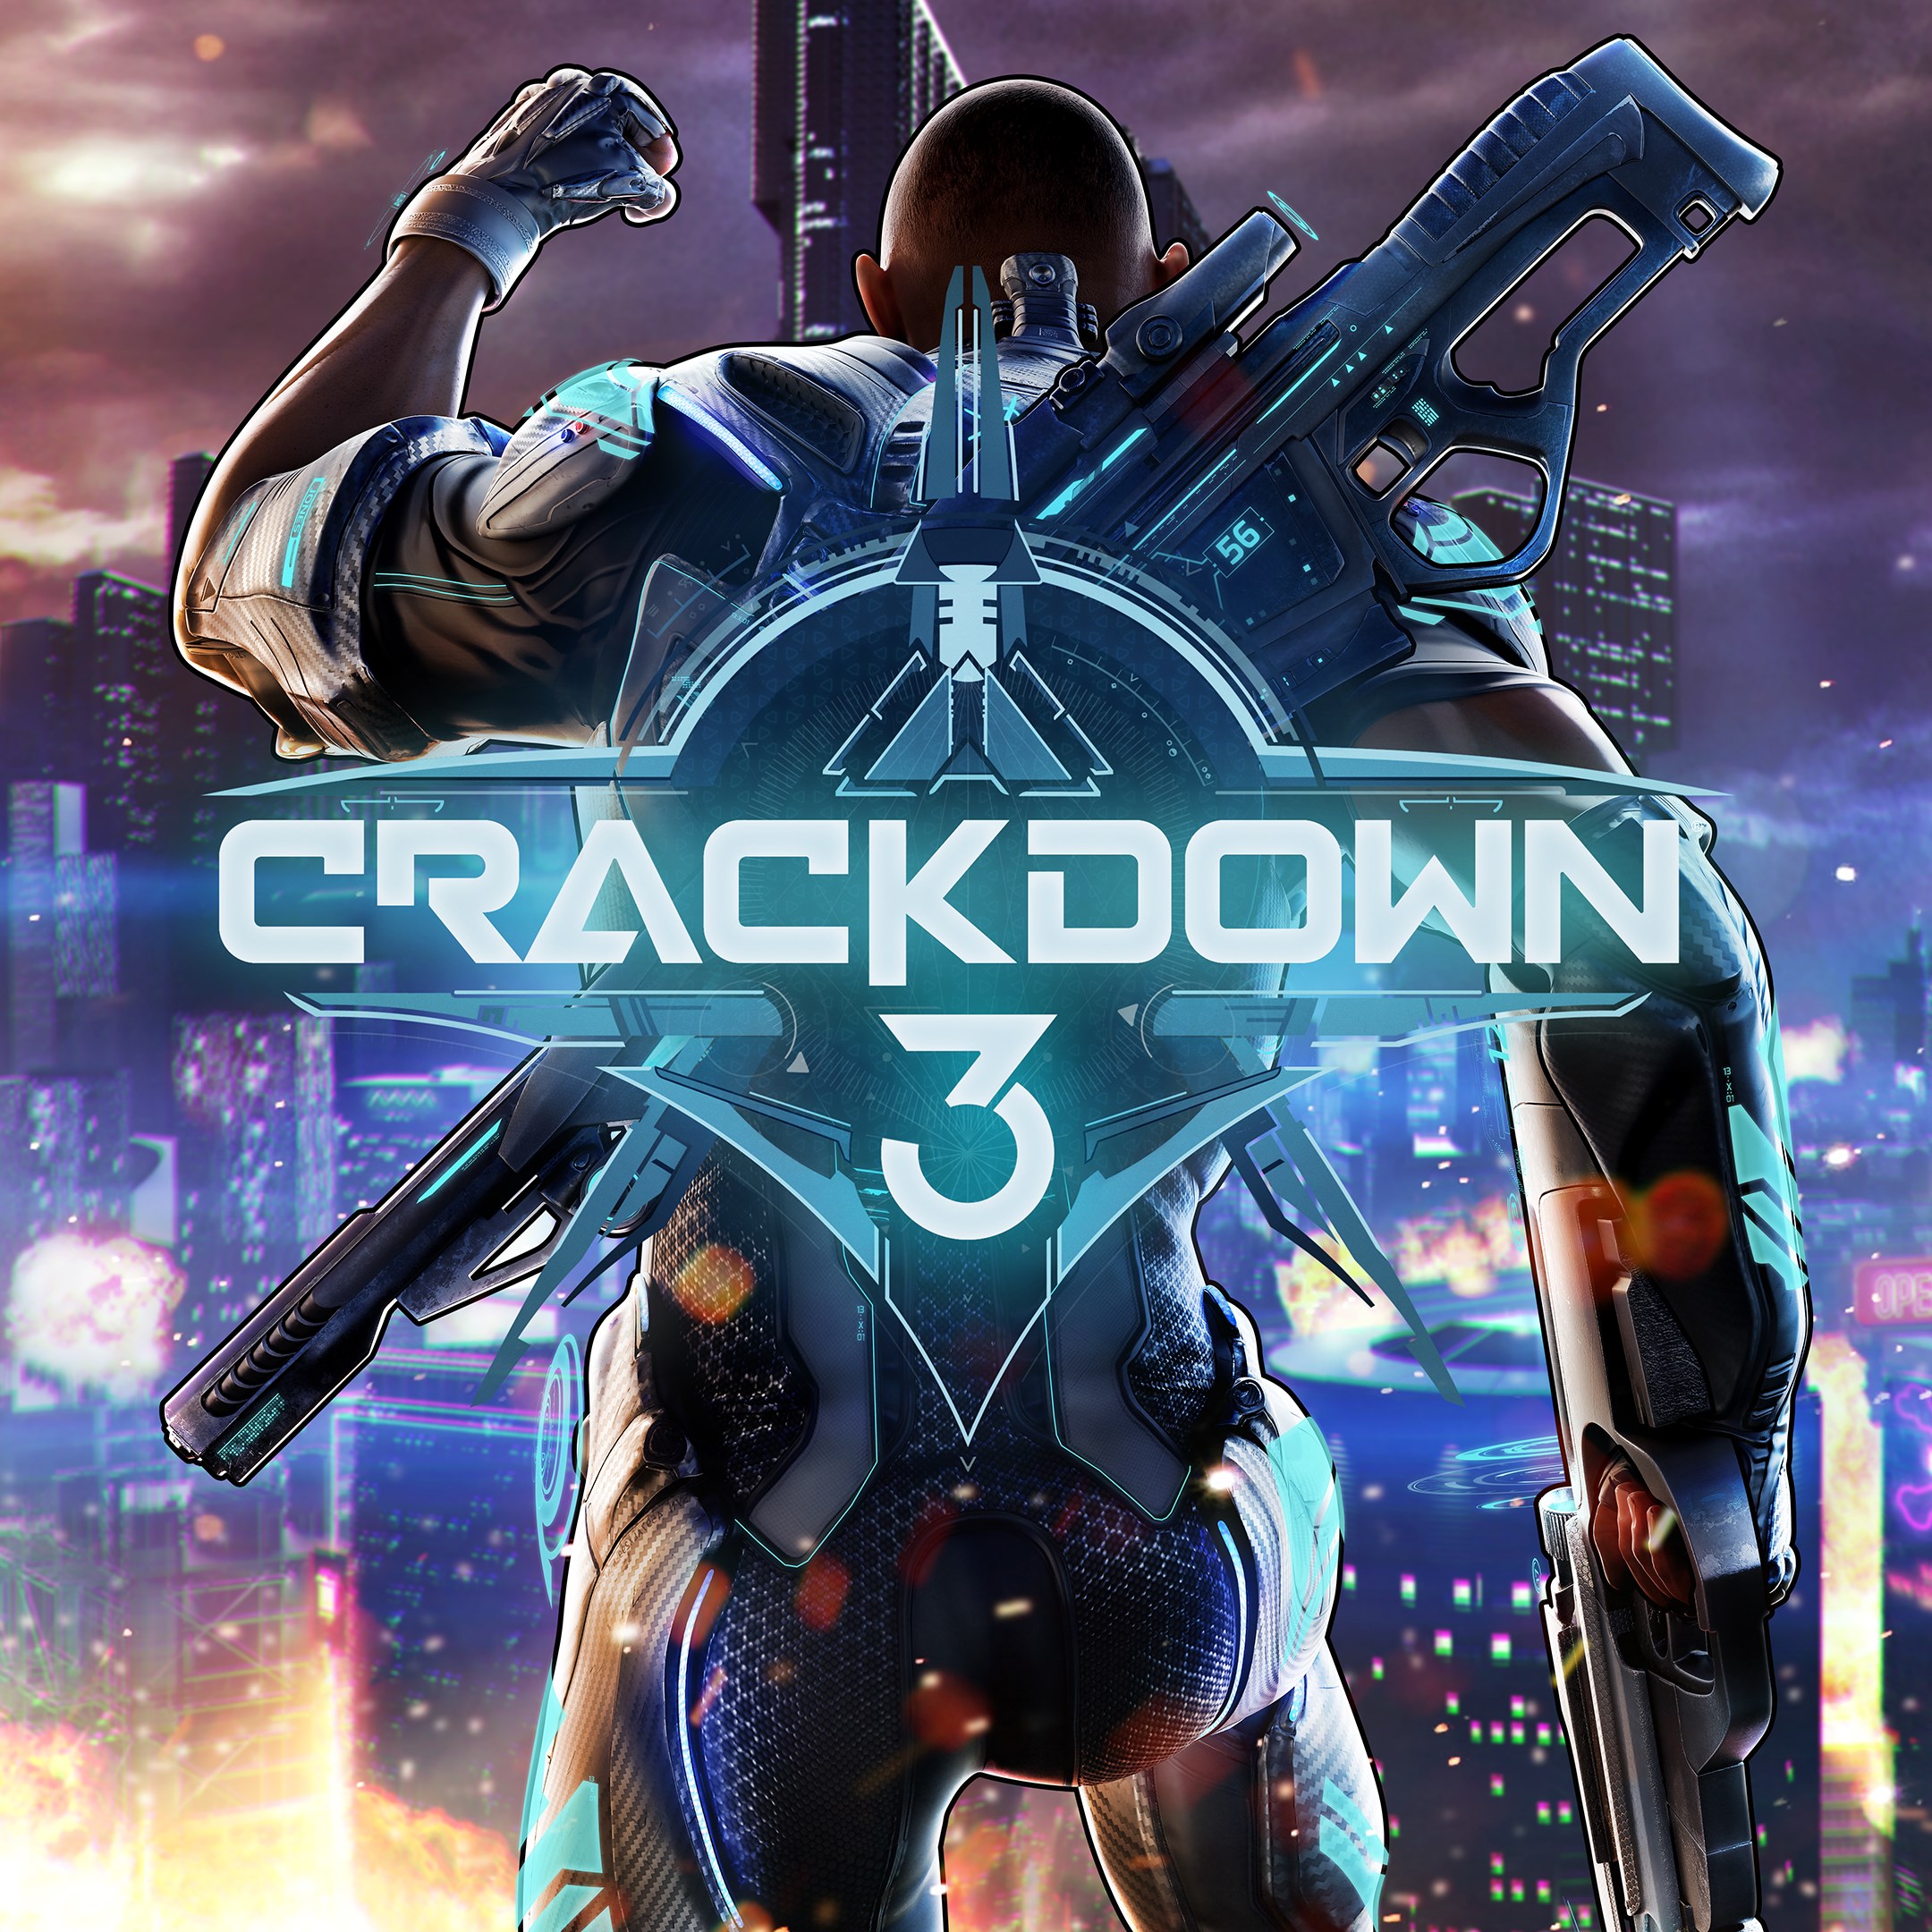
Crackdown 2 becomes backward compatible and free to play on Xbox One

Good news for Crackdown fans, the second episode released back on 2010 on Xbox 360 has just become backward compatible on Xbox One. Even better, the game is following the footsteps of Crackdown 1 and is now free to play for everyone on Xbox 360 and Xbox One.

In addition to the exciting Crackdown 2 news, the Crackdown team also shared some details about the latest update for Crackdown 3, which is now available on Xbox One and Windows 10. This update brings an updated Crime Map, Boss fight balance updates, as well as plenty of bug fixes and improvements on both platforms.

Last but not least, the team also revealed that Crackdown 3 will soon get a “Keys to the City” update that will unlock the developer tools that the team used to create the open world game. This update is expected to arrive in about eight weeks, and the team will share more details ahead of launch.

If Crackdown 1 and 2 are now free to play on Xbox One, we remind you that can play Crackdown 3 for free with Xbox Game Pass. For a limited time, you can pay just $1 instead of $9.99 for your first month of subscription.

Crackdown
Crackdown
Developer:
Microsoft
Price:
Free


Crackdown 2
Crackdown 2
Price:
Free


Crackdown 3
Crackdown 3
Developer:
Xbox Game Studios
Price:
Free

Windows 10 build 18353 brings a new round of bug fixes

It’s Friday and there’s a new build in town. Windows 10 build 18353 is now available for download for Fast Ring Insiders.

As expected, this build release does not bring any new features to the table. The Redmond giant is now focusing on making the OS as stable as possible. In just a few weeks’ time, Microsoft will roll out Windows 10 19H01 — hence the focus on bug fixing.

Without further ado, let’s see what this build release brings in terms of fixes.

Windows 10 build 18353 changelog

  1. We’ve enabled microphone in Windows Sandbox, which among other things will improve several accessibility scenarios.
  2. We’ve added functionality to configure the audio input device via the Windows Sandbox config file.
  3. We’ve fixed an issue in which the Windows Sandbox time zone was not synchronized with the host.
  4. We’ve enabled the Shift + Alt + PrintScreen key sequence in Windows Sandbox which activates the ease of access dialog for enabling high contrast mode.
  5. We’ve enabled the ctrl + alt + break key sequence in Windows Sandbox which allows entering/exiting fullscreen mode.
  6. We fixed a recent issue resulting in some Insiders experiencing bug checks upon lid close, monitor plug, or monitor unplug.
  7. We fixed an issue resulting in preferred region settings getting reset on upgrade in the last few flights.
  8. We fixed an issue resulting in the Chinese version of multiple games not working.
  9. We fixed an issue in memcpy that caused some drivers to hard-hang the system on load; this could manifest as a hang on upgrade, depending on the system.

More slots for State of Decay

If you haven’t grabbed State of Decay for free yet, additional slots are available again. On the other hand, if you already got the Insider version of State of Decay, you can now download the first dedicated update for the game.

To download it, open the Store app, click […] and then go to ‘Downloads and Updates‘.

Install Windows 10 build 18353

In order to download Windows 10 build 18353 on your computer, go to Settings and check for updates.

RELATED STORIES TO CHECK OUT:

Windows 10 Insider Build 18850 brings Microsoft Edge bug fixes

Microsoft rolled out Windows 10 Insider Preview Build 18850 with a few bug fixes. The preview is currently accessible to Insiders in the Skip Ahead ring. 

The build comes with bug fixes for the Windows Sandbox, Microsoft Edge, Start Menu, Narrator, and Lock Screen. Furthermore, it also enhances the syncing reliability with the cloud clipboard. 

The Redmond giant has offered the Snip and Sketch’s latest version i.e v10.1901.10521.0.

What’s new in Windows 10 Build 18850?

1. Snip & Sketch version 10.1901.10521.0

The recent release of the Snip & Sketch program has increased its current version to 10.1901.10521.0. Microsoft has added narrator (screen reader) confirmations,  changed the default save format to be png and fixed various issues.

However, you can still enjoy the updated version even if you have not installed the Windows 10 Build 18850. 

2. Crash Fixes for Windows Sandbox Settings app 

The tech giant has fixed the bug that was experienced by most of the Windows Sandbox users. Previously, when someone navigated to the Narrator settings the Settings app used to crash.

3. Crash Fixes for Microsoft Edge

Windows users have been reporting for a long time that while tabbing and editing through PDFs sometimes Microsoft Edge crashes.

4. Start menu launch bug fix

The release also brings bug fixes for the Start menu launching issues.

Download Windows 10 Build 18850

In order to download the 1885 build, you must be a Windows Insider who is currently in the Skip Ahead ring. Just navigate to the Settings menu and then check for new updates in the Update & Security > Windows Update. 

Microsoft has also mentioned a couple of known issues that have been reported so far. One of them is that the built-in Color Management application might be missing monitors, as far as the display calibration scenarios are concerned.

Microsoft suggests to the users that they should use the Settings app for choosing the color profile.

You can have a look at the complete changelog at the Microsoft Blog.

RELATED ARTICLES YOU NEED TO CHECK OUT:

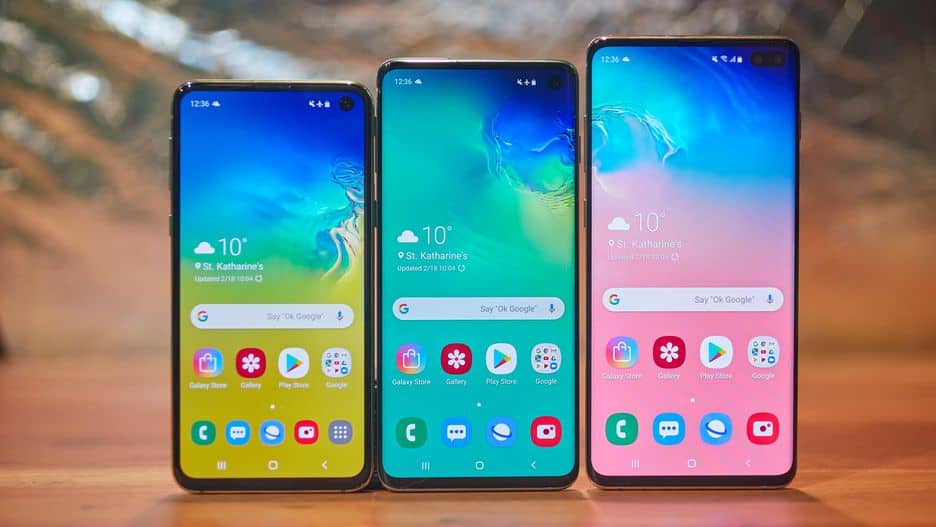
Samsung’s Galaxy S10 lineup can be purchased through the Microsoft Store

With Microsoft firmly out of the smart phone hardware game, it’s been free to ‘trojan horse’ and promote itself on to any partner devices it deems valuable and today, that partner happens to be Samsung.

Over the past few Galaxy releases, Microsoft has found a cozy and highly successful smart phone line to peddle its smart phone ware such as a new launcher, pre loaded software and services and digital assistants, as an almost native Microsoft experience on a smart phone. With that said, it’s no wonder it’s found a new way to help promote its partner’s latest flagship.

As millions of US residents make their way to their prefered carrier of choice over the weekend to upgrade, trade-in or replace their aging Galaxy device, they’ll be met latest and greatest from Samsung in its Galaxy S10 line up of phones.

Fortunately, Windows 10 users have an even shorter route to getting their next Galaxy phone as Microsoft and Samsung have seemingly partnered to put the phone in the Microsoft Store and users can purchase right from their devices.

Heading to the Microsoft Store and searching “Samsung Galaxy” should bring this page up for many. As Microsoft doesn’t offer a smartphone of their own, the categorization of the Galaxy S10 line up isn’t  explicitly highlighted anywhere in the Store, however, when searched, a slew of Galaxy devices and accessories such as the new Watch Active, Galaxy Buds, and cases surface.

For anyone interested in getting the new Galaxy S10, the Microsoft Store is yet another convenient place to grab Samsung’s latest flagship.

How to use “slide to shut down” on any Windows 10 device

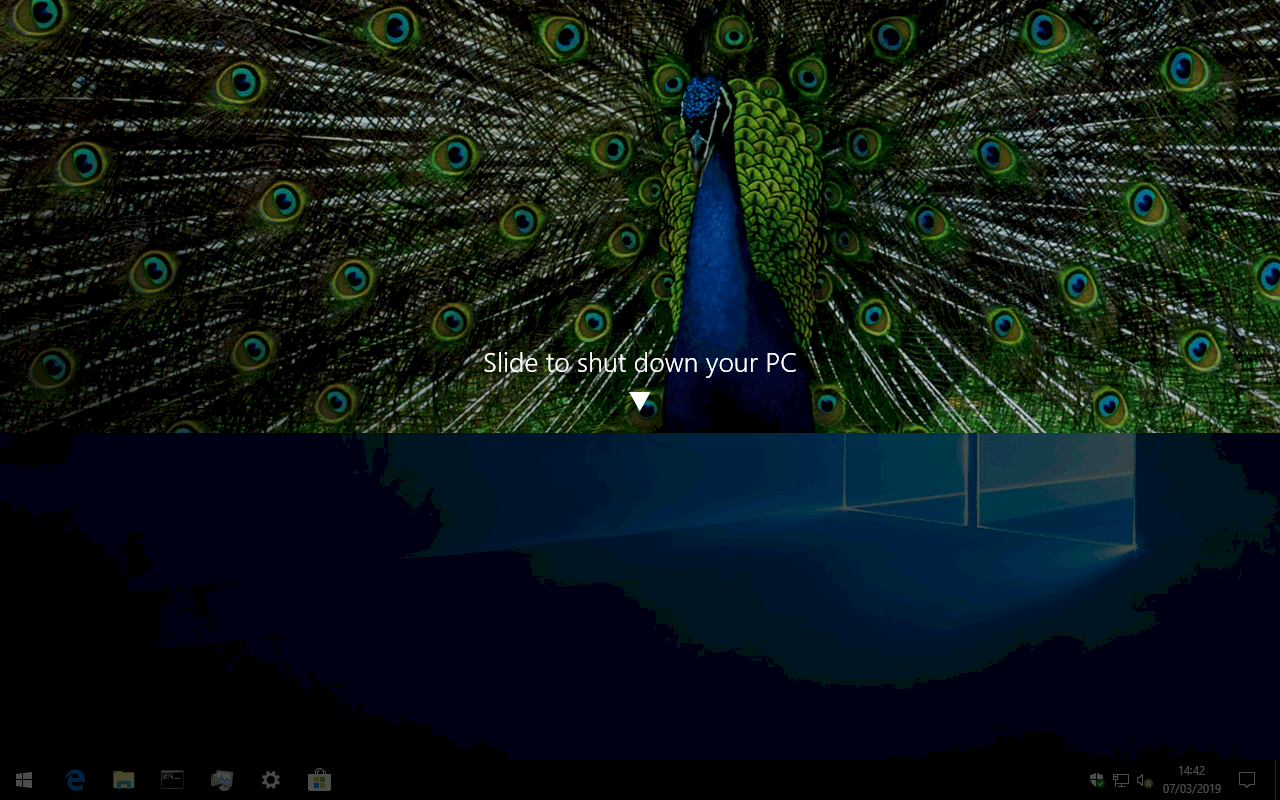
Windows 10 tablets and phones have a “slide to shut down” interface which appears automatically when you long-press the power button. This screen, as the name implies, allows you to quickly turn off your device by swiping an overlay downwards.

Unless you’ve got a touchscreen device with a physical power button, you’ll likely never see this screen. It’s not exposed within the rest of Windows’ power options and there’s no built-in setting to enable it. There’s nothing to stop you using it with a mouse though, should you wish to have another shutdown option. This guide will show you how to assign a shortcut key to “slide to shut down” so you can use it on any device – whether it meets the usual hardware requirements or not.

The Slide to Shut Down screen is provided by its own program – SlideToShutDown.exe. Consequently, accessing the interface is as simple as launching the program. It’s located inside Windows’ System32 folder, which means you should be able to find and run it by typing “SlideToShutDown” directly into the Start menu.

Typing this name will quickly become tedious if you use the feature regularly. Instead, create a new link to the program on your desktop. You can then assign a keyboard shortcut to the link, letting you invoke the interface from anywhere within Windows.

To get started, launch the Run utility by typing “Run” into the Start menu. In the box which appears, type “system32” (without the quotes) and press Enter. The System32 folder will appear in File Explorer. You should take care here since this directory contains thousands of important Windows system files.

Scroll to or search for “SlideToShutDown.exe”. Next, right-click the file and choose Send to > Desktop (create shortcut). You can now use your new desktop shortcut to invoke the Send to Shut Down interface.

Finally, assign a keyboard shortcut to your link. Right-click the shortcut on your desktop and choose “Properties.” In the “Shortcut key” input field, press the keyboard shortcut you want to use – we’re using Ctrl+Alt+S, but you can assign whichever sequence works best for you. Click Apply and then OK to close the properties window.

You should now be able to display Slide to Shut Down at any time using your keyboard shortcut. In our case, pressing Ctrl+Alt+S from anywhere in Windows launches the overlay. You can then click or tap and drag downwards to shut down your device, as if you were using a Windows phone or tablet.

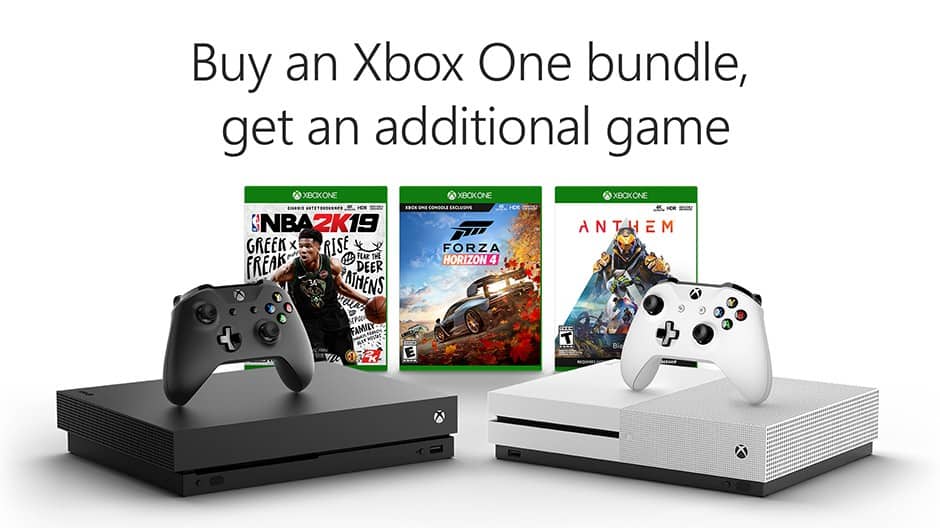
Deal: Get an addition free game of your choice with the purchase of an Xbox One bundle

For a limited time, Microsoft will be offering a free bonus game when you purchase an Xbox One bundle on the Microsoft Store or other participating retailers in the US. The free games you can choose include the brand new Devil May Cry 5, Metro: Exocus, Anthem, or the upcoming Tom Clancy’s The Division 2.

If you choose to purchase an Xbox One bundle on the US Microsoft Store, the company is also currently offering a bonus Gears of War 4 digital code with all Xbox One S and Xbox One X bundles. Please note that the Xbox One X Robot White Special Edition 1TB console is still on sale at $399 ($100 off), and the same bundle with a black Xbox One X is similarly priced. All Xbox One S bundles are currently at $299, so if you can afford the additional $100 for the much more powerful console you probably won’t regret it.

The US-only promotion kicks off today, March 8 and will last through March 16. Let us know in the comments if you plan to take advantage of this sale to buy a new console.

EA opts for ‘fan events’ over an official E3 2019 presence

Electronic Arts studio is joining a growing list of non-participants in this year’s E3 gaming convention.

According to an EA press release regarding the resurrection of EA PLAY, the studio confirms that it will be skipping its traditional press conference held during E3, and instead is opting for multiple live streams that will happen during the first two days of the conference.

Under the guise of “less talk more play,” EA is choosing to pre-empt E3 by hosting its own events before and during the normal E3 schedule with the first event starting Friday Night, June 7, 2019.

It all starts this year on Friday night, June 7, 2019, with an all-new EA PLAY kickoff event. We’re skipping the press conference this year and are replacing it with multiple live streams that will air during the first two days of the event, bringing you more of what you’ve told us you want – more gameplay and insights from the teams making the games.

Weekends are meant for play, and this year we’ve moved the EA PLAY fanfest to Saturday, June 8 and Sunday, June 9 where players will get hands-on with our games. We’ll also have content creators streaming live from our Creator’s Cave in the Hollywood Palladium providing gameplay content to our players viewing online. EA.com will be the home for all online EA PLAY content. Players can get behind-the-scenes with our games via exclusive gameplay reveals, developer talks and breaking news.

As if seeing EA’s game roster first hand and being able to test out some of the games in development were not enough, EA is also making their events ‘free for all to attend.”

While the events are free, fans will still need tickets to enter. Tickets for the various events will be available starting next month, April 2019.

With another high profile studio exiting the gaming conference, it’s becoming incumbent that Microsoft have enough of gaming story and deliverables to carry much of the show this year.

Can’t sync emails on Windows 10/11? Here’s how to fix it

Not being able to sync your emails on Windows 10 can be a big problem, especially if you relay on email for communication. Although this can be a major problem, there’s a way to fix it.

Are you frustrated or stuck trying to sync emails on your Windows device or computer? Worry no more because we’ve got solutions to help you fix it.

The digital age has come with a myriad of benefits including being able to view and respond to emails via multiple devices, besides your computer.

But what happens when you cannot sync emails on your Windows device or PC?

Usually, it may seem as easy as clicking or pressing the sync tab and expecting the process to continue, but sometimes, there are situations that call for different solutions to getting all your messages.

Here’s how you can sync emails on Windows when it doesn’t seem to be working.

Having Windows 10 mail sync problems? Try these solutions

  1. Run App troubleshooter
  2. Change privacy settings to enable syncing
  3. Change Mailbox Sync settings
  4. Remove the email account then add it back
  5. Reconfigure your account
  6. Run a System File Checker scan
  7. Manually reinstall missing FOD Package
  8. Run Windows Update troubleshooter
  9. Download the latest version of Windows 10
  10. Check your security software
  11. Turn off Windows Defender Security Center
  12. Check Advanced Mailbox settings
  13. Check Two-factor authentication
  14. Check account settings if they’re outdated

Solution 1 – Run App troubleshooter

  1. Right click Start
  2. Select Control Panel
    control panel emails won't sync
  3. Go to the top right corner and change View by option to Large icons
    large icons emails won't sync
  4. Click Troubleshooting
    troubleshooting email can't sync
  5. Click on View all option on the left panel
    view all emails won't sync
  6. Select Windows store Apps
  7. Follow the instructions to run the app troubleshooter

Check whether you are able to sync emails again. If not, go to the next solution.


Solution 2 – Change privacy settings to enable syncing

  1. Click Start
  2. Select Settings
    start menu open emails won't sync
  3. Click Privacy
    settings app sync emails
  4. Select Calendar on the left pane
    calendar sync emails
  5. Turn on Let apps access my Calendar
    let apps access my calendar emails won't sync
  6. Go to Choose apps that can access calendar
  7. Ensure that access for App Connector and Mail and Calendar are on

Does this let you sync emails again? If not, try the next solution.


Solution 3 – Change Mailbox Sync settings

  1. Click Start
  2. Select Settings
  3. Select Accounts
    settings accounts sync emails
  4. Click your account to edit settings
  5. Click Change Mailbox Sync Settings
  6. In the Download Email from menu, choose any time
  7. Click Done
  8. Click Save

Check whether you are able to sync emails again. If not, go to the next solution.


Solution 4 – Remove the email account then add it back

You can try to confirm if you remove the email account from Mail App, then add it back again to resolve the sync emails issue.

  1. Click Start
  2. Type Mail in the search field box
  3. Click the Mail app to open it
    mail app search sync emails
  4. At the bottom of the left pane, click the Gear icon
  5. Select Manage Accounts
  6. Choose the account you want to remove
  7. Select Delete account from this device
  8. Add the account back again

You can remove your account and then add it again using advanced setup if you still cannot sync emails after the above process.

The option to delete the email account will be disabled if you’re using the account with the Microsoft account ID you’re logged into.


Solution 5 – Reconfigure your account

You will have to first change the Microsoft account into a local account, then change it back to a Microsoft account.

This helps the email account to sync emails in Mail app.

Here’s how to do this:

  1. Click Start
  2. Select Settings
  3. Click Accounts
  4. Under Your Account on the left pane, select Sign in with Local Account instead
  5. Follow the same steps to switch back the account to a Microsoft account

When you switch back to the Microsoft Account, enter your credentials correctly.


Solution 6 – Run a System File Checker scan

A System File Checker scan checks or scans all protected system files, and then replaces the incorrect versions, with the genuine, correct Microsoft versions.

Here’s how to do this:

  1. Click Start
  2. Go to the search field box and type CMD
  3. The Command Prompt app will be listed in the search results
  4. Right click and select Run as Administrator
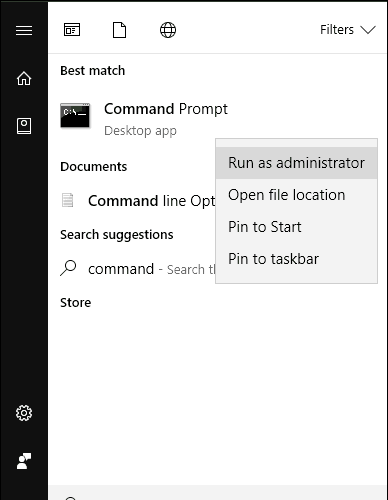
    command prompt can't sync emails
  5. Type sfc/scannow
  6. Press Enter
  7. Restart your computer

If you still can’t sync emails after this scan, try the next solution.


Solution 7 – Manually reinstall missing FOD Package

Sometimes after upgrading your Windows Build, you may experience problems with Mail for Windows 10 such as your email accounts not syncing new emails, or inability to view email settings, or you just cannot create new email accounts.

This happens because one of the main components for email functionality is a Function-on-demand (FOD) package that may have been removed.

Here’s how to manually reinstall the missing FOD package using Command Prompt:

  1. Click Start
  2. In the search field box, type CMD
  3. Go to Command Prompt on the search results and right click on it
  4. Select Run as Administrator
  5. Click Yes to let the app make changes to your computer or device
  6. At the command prompt, enter this command:

dism /online /Add-Capability /CapabilityName:OneCoreUAP .OneSync~~~~0.0.1.0

  1. Press Enter
  2. The reinstall will start. If there is no progress, press Enter again
  3. Once reinstall is complete, you’ll be prompted to reboot your computer. If not, restart it yourself
  4. After restarting, confirm the account can sync emails in the Mail app.

If your account doesn’t sync emails correctly, try the following:

  1. Click Start
  2. In the search field box, type Mail
  3. Select Mail app from search results
    mail app sync emails
  4. Go to Settings
  5. Click Manage Accounts
  6. Select the account to edit its settings
  7. If Account Settings dialog is available, then the component was installed successfully
  8. If your account still can’t sync emails, delete it then add it back again in Mail App by clicking Settings>Manage Accounts>Select account>Delete account from this device>Delete

Once the account is deleted or removed, select Add account to add it back again.


Solution 8 – Run Windows Update troubleshooter

Sometimes you can’t sync emails if your computer can’t find the correct IP address when trying to resolve a URL for Windows Update website, or for Microsoft Update website.

This error, usually coded as 0x80072EE7, may occur if the hosts file contains a static IP address.

Windows Update troubleshooter resolves any issues that prevent you from updating Windows.

Here are the steps to fix this by running Windows Update troubleshooter:

  1. Click Start
  2. In the search field box, type Troubleshooting
  3. Click Troubleshooting
    troubleshooting emails won't sync
  4. Click View all in the left pane
    view all sync emails
  5. Select Windows Update
    windows update
  6. Run Windows Update Troubleshooter and follow the instructions on the screen

windows update troubleshooter sync emails
Does this let you sync emails? If not, try the next solution.


Solution 9 – Download the latest version of Windows 10

If your Windows 10 version is outdated, then Mail and Calendar apps may not work properly, making you unable to sync emails.

Here’s how to find out if your Windows 10 is the latest version and download updates:

How to determine if Windows is outdated:

  1. Click Start
  2. Select Settings
  3. Click System
  4. Click About
  5. Note the numbers near Version and Build
  6. Go to Windows 10 release information and check the recommended version and build that shows ‘Microsoft Recommends’. If the recommended one is higher than your current version or build, download the latest version.

How to download the latest Windows version

  1. Ensure you’re connected to the internet
  2. Click Start
  3. Go to the search field box and type Updates
    check for updates emails won't sync
  4. Click Check for Updates
  5. Go to Windows Updates
    windows update sync emails
  6. Click Check for updates
    check for updates emails won't sync
  7. Try and install the updates shown

If you still cannot update it, do the following:

  1. Go to Microsoft website and click Download Windows 10
  2. Select Update Now
  3. At the bottom of the page, click Run when asked what to do with the file download
  4. Follow the instructions in the Update Assistant and restart your computer if prompted to

Solution 10 – Check your security software

Firewalls and your antivirus program software may prevent you from being able to sync emails and even calendar events.

It isn’t recommended to permanently turn the security software off, but doing this temporarily will check if it is the actual cause preventing you from syncing emails.

If your computer or device is connected to a network, the network’s policy settings may prevent you from turning off your firewalls and antivirus software.  If you disable your antivirus program, do not open any email attachments or click links in messages from unknown people.

Immediately after you’re done fixing connection error, re-enable your antivirus and firewall.


Solution 11 – Turn off Windows Defender Security Center

This is a free security software included in Windows 10. If you’ve not installed any other security software besides this one, turn off Windows Defender Security Center temporarily by doing the following:

  1. Click Start
  2. Open Windows Defender Security Center
  3. Select Fire and network protection
  4. Choose a network profile
  5. Turn off Windows Firewall for the network profile you’ve chosen
  6. Repeat the same for each profile

If you’re able to sync emails, allow the Mail and Calendar apps through the firewall by doing the following:

  1. Click Start
  2. Open Windows Defender Security Center
  3. Select Fire and network protection
  4. Click Allow an app through firewall
  5. Click Change Settings
  6. In the list of allowed apps and features, check the box next to Mail and Calendar
  7. Check the box in the Private and Public columns
  8. Click Ok

Repeat these steps to re-enable the firewalls for each profile.


Solution 12 – Check Advanced Mailbox settings

If your email account is Google, Yahoo Mail, iCloud, IMAP or POP3, check the settings from the advanced mailbox settings to ensure it is configured to the email provider’s specification.

If you’re using Outlook, Office 365 or Exchange account, advanced mailbox settings won’t be there unless you set up the account using advanced set up.

Follow these steps to check advanced mailbox settings:

  1. Click Start
  2. Type Mail in the search field box
  3. Click the Mail app to open it
    mail app sync emails
  4. At the bottom of the left pane, click the Gear icon
  5. Select Manage Accounts
  6. Click Change Mailbox sync settings
  7. Select Advanced mailbox settings
  8. Confirm that your incoming and outgoing email server addresses and ports are correct
  9. If your email provider doesn’t need authentication, uncheck the box next to Outgoing server requires authentication
  10. If your email provider requires separate authentication for sending emails, uncheck the box next to Use the same name and password for sending email then provide the outgoing server username and password

You can also change the following settings where applicable:

  • If your provider needs SSL for incoming mail, check the box next to Require SSL for incoming email. For outgoing email, check the box next to Require SSL for outgoing email.
  • Confirm that your Contacts server, and Calendar server addresses are correct.

Note: If you’re using Exchange account that needs advanced settings, remove it, then add it back using the advanced settings.


Solution 13 – Check Two-factor authentication

The two-factor authentication function protects your account from being infiltrated by outsiders or unknown people.

It’s a means of protecting it from others accessing or signing into it, by verifying your identity using a password, plus a second method like your contact or security information.

Mail and Calendar apps on Windows 10 do not support the two-factor authentication, so if it is turned on for your account, create an app password for the account, which will be used instead of your normal password for apps that don’t support two-factor authentication.

Check with your email provider on how to do this.


Solution 14 – Check account settings if they’re outdated

If your account settings are out of date, this can be due to an incorrect password.

Here’s how to fix this:

  1. Go to Mail app
  2. Go to the notification bar at the top of the app
  3. Click Fix account
  4. Update your password
  5. Enter the new password
  6. Select Done

For Gmail or iCloud, you’ll need to go to the respective websites to change your password.

Any luck with these solutions? Let us know in the comments section below.


RELATED STORIES TO CHECK OUT:

Xbox One’s NBA LIVE 19 video game is now live in the EA Access Vault

The NBA LIVE 19 video game joined the EA Access Vault today which means that all EA Access subscribers can now play the full game for free, well, if you don’t count the EA Access subscription fee that is.

NBA LIVE 19 came out on Xbox One in mid-2018 and is the latest in the NBA Live series of basketball video games. It supports local multiplayer for up to four players and online multiplayer for up to 10.

Here’s the official game description:

NBA LIVE 19 redefines the way you play a basketball game. 1v1 Everywhere featuring Real Player Motion gives you control in every possession, providing you the ability to change momentum in any game and dominate your opponent. Pursue basketball glory with the freedom to create your path in the return of THE ONE. Build your squad of superstars, legends, and cultural icons to join your quest for greatness on courts across the globe in the League, The Street World Tour and your ONE COURT where you customize your rules and your line up reign. Defend your court and challenge the Community to be the ONE.

To celebrate its addition to The Vault, EA Access members who play NBA LIVE 19 between March 7th and the 19th will unlock Devin Booker and some in-game Nikes.

Do you have EA Access? Share your favorite game in The Vault with the community in the comments below and then follow us on Pinterest for more Xbox gaming content.

The app was not found in the store. ?

Chromium Edge won’t be available for 32-bit Windows 10 PCs

Microsoft announced toward the end of 2018 that it will turn Edge into a Chromium-based browser.

The software giant is ditching that browser’s EdgeHTML rendering in favor of the Google Chromium engine, which underpins Chrome, Vivaldi, and Opera.

Users are still waiting for the first preview of the new Edge. However, a new support document highlights that the first Chromium Edge previews will not be compatible with 32-bit Windows platforms.

A new support document page titled “Microsoft Edge Insider builds: Troubleshoot install and updates” has emerged on Microsoft’s website.

That page lists some error message resolutions for Microsoft Edge Insider builds (Edge Canary and Edge Dev). The support document page also states:

Check your operating system. Microsoft Edge Insider builds are currently only available on Windows 10 (64-bit). Other versions of Windows are not supported at this time.

So, the first Microsoft Edge Insider builds will be exclusively for 64-bit Windows platforms. Microsoft is excluding 32-bit Windows users from the testing phase of Chromium Edge at least. Nor has the software giant made it clear if its flagship browser will support 32-bit Windows at all.

Those users who are not sure if their platforms are 32 or 64-bit Windows can check via the Control Panel. In Windows 10, press the Windows key + Q to open Cortana.

Then enter ‘system’ in the search box. Click System to open the window in the snapshot directly below. The system type detail tells users if their platforms are 32 or 64-bit Windows.

The emergence of an official Edge support document also highlights that the first preview version of the new Chromium browser might roll out soon.

Some of the first screenshots of Edge Canary and Dev already leaked. One screenshot includes a New Tab page open in the browser that shows that Chromium Edge will include extensions and a profile picture to right of the URL bar much the same as Chrome.

Another screenshot includes the new Microsoft Edge Store that will include a larger repository of extensions for the browser.

Microsoft has not confirmed when it roll out the first Chromium Edge preview build. However, the software giant might showcase the new Edge at May’s Build Developer conference.

When the big M does release a Chromium Edge preview build, it will be not be a part of the Windows Insider Program. However, users will still need a compatible 64-bit Windows platform to run the browser.

RELATED STORIES TO CHECK OUT: 
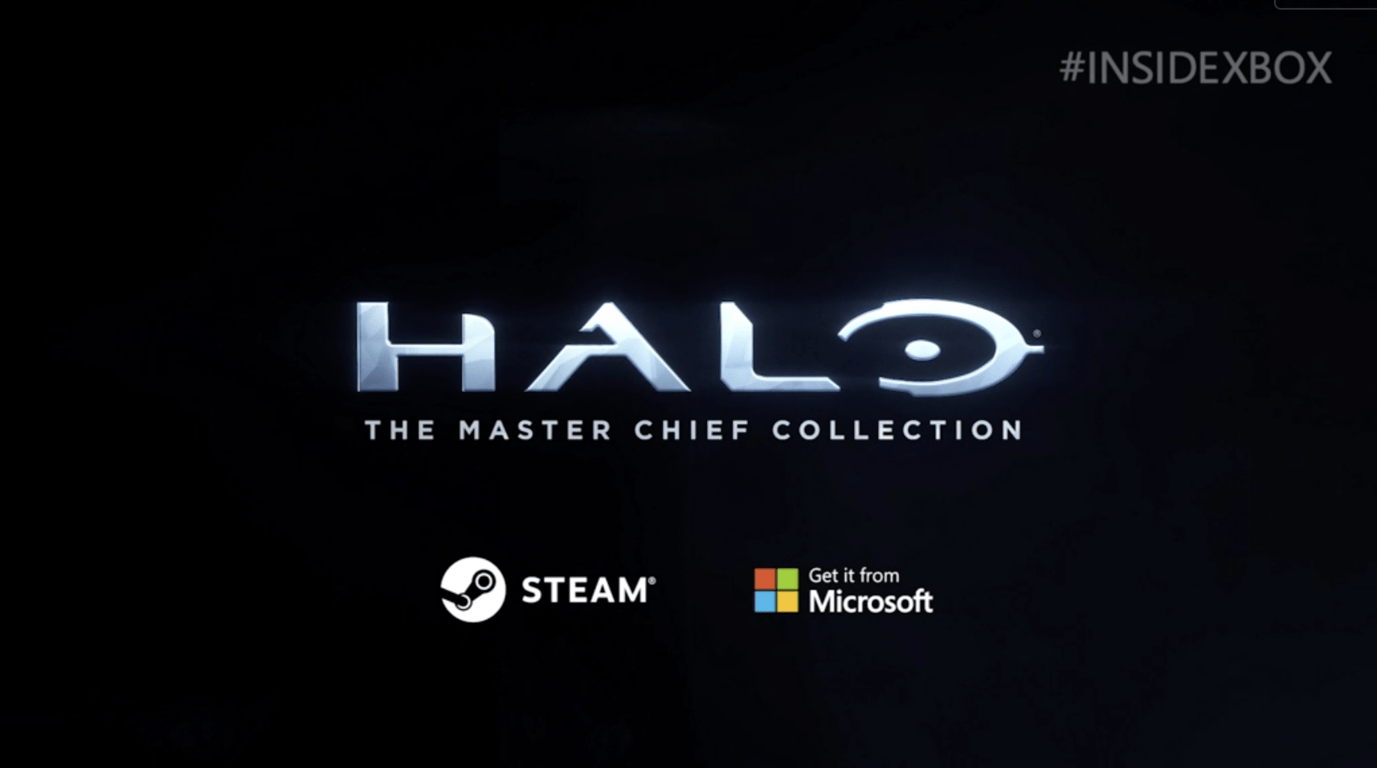
KC Lemson, who started the Ninjacat meme, steps away from Microsoft

KC Lemson, who in her 21 years at Microsoft worked on Outlook, Exchange, Windows Phone, Windows, and Surface, is stepping away from the company. In a blog post today on LinkedIn, Lemson made the announcement:

I’ve decided it’s time for me to try something new: not working. Or to rephrase it in the standard corporate lingo: I’ll be on an extended leave of absence for the foreseeable future, during which time I will be pursuing some personal projects and spending more time with my family. I’ll still be in the GAL and on email occasionally, but I’ll be focusing on the non-Microsoft part of my life after this week.

Lemson has done a lot in her time at Microsoft, but is perhaps best known, at least outside the company, for social media presence. She seems to keep popping up, as a Microsoft Life post in 2018 reported, in memes like Bedlam cards, an iconic photograph of 7,000 Microsoft employees forming a Seattle Seahawks “12” on a soccer field in Redmond, and most notably for bringing to life the Microsoft version of Jason Heuser’s iconic “Welcome to the Internet.” As Lemson tells it in a 2016 post on Raymond Chen’s The Old New Thing blog, as with much of what comes out of Microsoft, the ninjacat started as a PowerPoint slide:

In mid 2014, a couple of us in that team were working on a presentation about what would later become known as Windows 10, and as a joke we made a slide that started with this image (that made the rounds of social media in 2013) and then animated it into a slide full of “kittens and puppies and rainbows and unicorns” with a design that was inspired by the amazing Welcome to the Internet image by Jason Heuser.

Like most memes, things kind of took on a life of their own from there, especially after Tom Warren at The Verge wrote about a ninjacat sticker he’d seen on a Microsoft employee’s laptop. Warren called it “the perfect example of a company with a bit of personality.”

Like anyone who’s attended Microsoft’s various conferences and events over the years, we’ve run across KC Lemson and been handed our share of stickers, always with a smile and a laugh. We wish her all the best, just stay off the email and enjoy life!


Chrome update to fix video quality issues in low resolution settings

A recent playback quality and colour bug on Windows was reported by a user on Chromium Gerrit. The OP observed aliasing and colour issues in the video.

He said that when the video was played at a low resolution, like 144p and it was not occluded, aliasing/pixelation was observed.

But, surprisingly, the effect vanished when the mouse hovered over the screen. A similar sort of issue affected colors. In the lighter colour sections of the video, when the mouse was moved over the screen or the screen was scrolled down, the colour of the video changed.

What was reported, is discussed below.

How to reproduce the problem

This section deals with the problem in the quality and colour of the video and the changes that occurred in the quality and colour of the playback when the mouse was moved over the video.

Aliasing:

  1. Navigate to sample video https://www.youtube.com/watch?v=w4wvgbnzhlA&list=RDded49w9Fr4k&index=3
  2. Set the quality to 144p.
  3. Make sure the video is not occluded. E.g. the mouse is not hovering over the video and the page is not scrolled down at all.
  4. Observe pixelation/aliasing on the video.
  5. Move the mouse over the video.
  6. Observe the aliasing goes away.

Colour:

  1. Navigate to sample video https://vimeo.com/302312473
  2. Skip to a section of the video that is lighter in color, e.g. 1:24.
  3. Observe the colour of the video.
  4. Mouse over or scroll down on the page to partially cover the video.
  5. Observe the colour changes on the video.

This was a strange thing observed. It was expected that the video should not be pixelated when not occluded and the video colour should not change when it was not occluded.

But the results were opposite to the anticipations and the video quality was dramatically worse when the mouse was not over the video. Whether this problem was with Flash or HTML5? It was with HTML5.

This issue was observed in:

  • Chrome version: 72.0.3626.119 Channel: stable
  • OS Version: 10.0
  • Flash Version: 32.0.0.142


Reportedly, this issue of video upscaling can be solved by calling SetBitmapInterpolationMode() to change the interpolation mode to linear.

Improve the video upscaling quality in low-resolution mode on Windows This is done by setting interpolation mode to linear indirect composition visual. The visual default is the nearest mode and the quality is not good. The upscaling quality improves after calling SetBitmapInterpolationMode() to change the interpolation mode to linear.

It is reported that this bug has been fixed in the stable release of Chrome. But one user reports that he still observes this issue.

I am still seeing the behaviour on the stable release of Chrome. Has the finch change taken effect on the stable branch yet?

The upcoming Chrome update will reportedly fix this issue for good.

Do you face a similar issue? Why not let us know in the comments below?

RELATED STORIES TO CHECK OUT:

Get ready to use Windows 10 on Nintendo Switch 

There is one curious developer who is getting closer to creating a method for running Window 10 on Nintendo Switch. Judging by the current results, it seems like he will soon succeed in his efforts. 

Recently, some pictures revealing attempts to install Windows 10 ARM version on Nintendo’s hybrid console were leaked by a Twitter user.windows 10 nintendo switch

Most of the problems that were encountered by the developer have been documented on Twitter. The recent status update made by the developer revealed the Windows boot logo on the console.

The user also mentioned that the project is currently in the development stages and he’s planning to work on the memory part primarily. As the functionality of the current development is still unclear, tweaking the device to run the Windows 10 might take some time.

If you are a developer and interested in contributing to the project, you can simply check out the GitHub project to work on the current UEFI firmware.

You might not be convinced by the idea of Windows 10-powered Nintendo Switch. One advantage is that you can easily switch to a large screen by docking it to a monitor or television.

As quick reminder, Microsoft is also experimenting to enhance the usability of Windows 10 ARM on lower-powered ARM-based SOCs. So, this third-party attempt to run Windows 10 on Nintendo Switch is not surprising at all. Not if we take into account the recent rumors suggesting that Microsoft is bringing Xbox Game Pass and app to Nintendo Switch.

Although the idea seems great, it is still unclear that either the touch screen work with the OS and the performance of certain apps is also yet to be seen.

It is going to be interesting to see how the developer forces the hardware and software to work against its specifications. It is just a matter of time to wait and watch how the developer overcomes these issues.

RELATED POSTS TO CHECK OUT: