Microsoft has released the Windows 11 version 24H2 Evaluation ISO images, a move that usually signals the final, stable version is near.
The evaluation images available today include Windows 11 version 24H2 Enterprise/LTSC 2024, Windows Server 2025 (based on version 24H2), and Azure Stack HCI version 24H2. They come with KB5043080, bumping the build number to 26100.1742.
The images are available in several languages; you can download them from the Microsoft Evaluation Center. If you need languages other than English, the server edition, or Azure Stack HCI, user Bob Pony has you covered with a list of additional download links.
Microsoft has released updated EVALUATION ISO files (KB5043080 integrated, x64 ONLY) for the upcoming Windows releases: – Windows 11 Version 24H2 (Enterprise/LTSC 2024) – Windows Server 2025 (based on version 24H2) – Azure Stack HCI, version 24H2
Windows 11 24H2 Evaluation ISOs don’t require activation and can be used for 90 days. If you want a regular ISO for a Windows 11 version 24H2 consumer version, the wait should be over soon. Famous Windows insider @phantomofearth reported over the weekend that Windows 11 v24H2 retail ISOs are being prepared.
Windows 11 v24H2 retail ISOs are now being prepared for the big day (GA). You can generate links, but they don't work yet.
In other words, we’re now in the final stretch before the Windows 11 version 24H2 release. In the meantime, here’s what you should expect from the new update.
Lenovo will expand its Legion Go series with two new models, which are reportedly in the works. The company is set to produce a Lite version and a second-generation version.
While nothing official has come out, Videocardz has obtained a product roadmap from Lenovo that shows a release date for the Legion Go Lite in 2025 and the Legion Go Gen Two in 2026. The roadmap also states that the Legion Go series will include a “mini” device in 2027 and a larger device in 2028.
The original Legion Go, which we were the first to report, costs $699, and the Gen Two and Lite are expected to be priced similarly.
The current Legion Go has an 8.8-inch display, but the Legion Go Lite will purportedly have a 7-inch screen, making it smaller, lighter, and thus more portable.
However, it won’t support a detachable controller, which could make it less versatile for gaming on the go.
The Legion Go Gen Two will offer better specs, but there are no specifics on those improvements. Lenovo’s current Legion Go uses an AMD Ryzen Z1 chip, but newer chips are available. Videocardz speculates that the Legion Go Gen Two could be powered by an unannounced chip, the AMD Ryzen Z2, or Intel’s upcoming Lunar Lake processor.
Would you consider a handheld gaming device from Lenovo? What do you want to see from the Legion Go line?
Many users reported that awesomium.dll cannot be loaded message while trying to run certain games, and this had many users worried. However, there are ways to fix this issue, and today we’re going to show you how to fix it.
How can I fix the awesomium.dll error?
Before we start, try running the application that is giving you the error as an administrator. You can also try reinstalling the application that is giving you this error.
1. Delete the appcache folder
Navigate to the Steam installation directory: C:\Program Files (X86)\Steam\appcache
Delete everything from the appcache folder.
Try to start the game again.
2. Whitelist your Steam folder
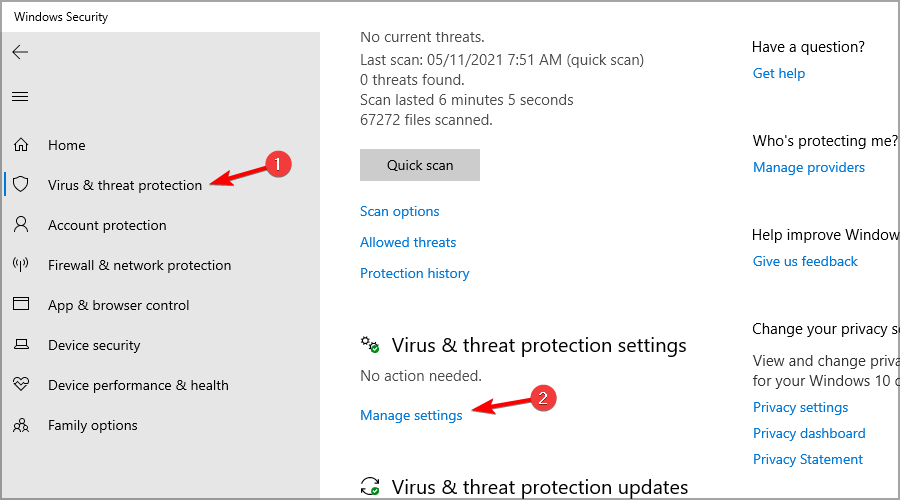
Press Windows key + S and type security. Choose Windows Security from the list.
Go to Virus & threat protection and click on Manage settings in Virus & threat protection settings.
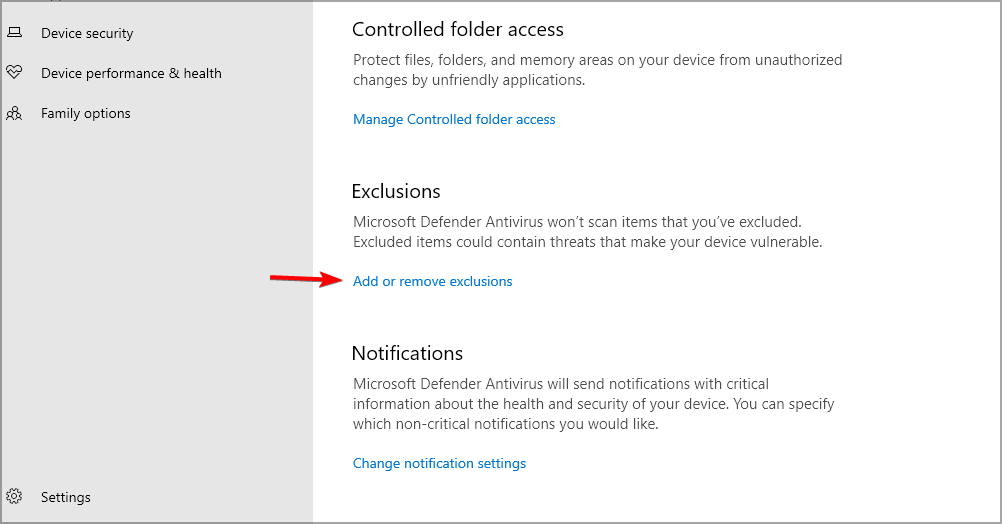
Next, click on Add or remove exclusions.
Choose Add an exclusion and select Folder.
Locate your Steam installation folder and select it.
Often awesomium.dll is flagged by antivirus as malware and automatically removed, which leads to this issue. Whitelisting the Steam folder will prevent that. These steps are for Windows Defender, but if you’re using a different one, you’ll have to whitelist Steam in that software instead.
Missing awesomium.dll file will cause a lot of problems, and it can cause certain games to not work properly, but luckily the problem can be easily fixed.
The Ambiguous Name Detected error in Excel VBA typically occurs when there are duplicate names for procedures, variables, or other elements within the same scope.
How do I fix the Ambiguous name detected error?
When the error pops up, the VBA editor will highlight the line causing the issue. Note the name that is causing the conflict, displayed after Ambiguous name detected:.
Look through your code to find any procedures, variables, or other elements with the same name. This can include: subroutines (Sub), functions, variables and constants.
If you find duplicate names, rename them to something unique. For example, if you have two procedures named CalculateTotal, you could rename one to CalculateTotal1.
After renaming it to any relevant positions, go to the VBA editor menu and click on Debug > Compile VBAProject. This will check your code for any remaining issues.
If the compile option is greyed out, it means your code has compiled successfully.
Run your VBA code to ensure that the error is resolved and that your code functions as expected.
How do I prevent future VBA errors?
To prevent future errors, consider organizing your code by:
Using meaningful and unique names for all procedures and variables.
Grouping related procedures into separate modules.
Adding comments to your code to explain the purpose of each procedure and variable.
Here’s a simple example to illustrate the process:
Before Fixing:
Sub CalculateTotal()
    ' Some code here
End Sub

Sub CalculateTotal()
    ' Some other code here
End Sub
After fixing:
Sub CalculateTotal()
    ' Some code here
End Sub

Sub CalculateTotal1()
    ' Some other code here
End Sub
By following these steps, you should be able to resolve the Ambiguous name detected error in your Excel VBA project.
Microsoft has released more details about its upcoming Recall security and privacy features in the latest Windows 11 update. Recall is a new AI-powered feature designed to help users find information, documents, and more that they have seen on their PC.
Recall works by taking “snapshots” of your PC activity, including web pages, documents, emails, and more. You can then search through these snapshots using text or images to find something you remember seeing but can’t quite remember where.
Security and privacy are among the most significant concerns around a feature like Recall. You don’t want a record of everything you see and do on your PC stored and accessed by other parties. And Microsoft says that it has worked to address those concerns with Recall.
In a blog post, Microsoft says that Recall’s “snapshots and associated data” are stored in secure enclaves in Windows 11 that use the Trusted Platform Module (TPM) and Windows Hello biometric data as keys.
To access that data, apps must use Microsoft’s Recall User Activity API and request the user’s permission through Windows Hello. All the recall data is also encrypted, and Microsoft says the information stays on the user’s device.
Recall is designed so that the user and only the user is in control of their information. No data or information is sent to Microsoft or any third party, and only the user can manage and delete their data.
Microsoft says Recall also supports enterprise-grade privacy controls, so admins can manage how It works on corporate machines. Users can also completely disable recall in Windows settings.
In addition to the security model, Microsoft also details the underlying architecture of Recall. Multiple components, including a secure settings store, a semantic index, a snapshot store, the Recall user interface, and more power the feature. Microsoft says that Recall’s data stores are isolated from other Windows APIs and apps and that the data is “rate-limited” to prevent abuse.
Recall will be available as a preview in the weeks ahead, and Microsoft says it’s working with several partners to build integrations with third-party apps to make user activity within those apps searchable.
Microsoft OneDrive has officially launched its Copilot feature on the web. This functionality, available to all subscribers with a Microsoft 365 license, uses AI to automate specific tasks while browsing files in OneDrive.
In a blog post, Microsoft says Copilot is designed to help users generate document summaries, compare differences between multiple documents, answer complex questions using files, and generate ideas for new documents using information stored in OneDrive. It works with various file types, including PDFs, Word documents, and PowerPoint presentations.
To use Copilot in OneDrive, users hover over a file, select multiple files, and click the Copilot button in the command bar. Copilot is now available on OneDrive for the web, and Microsoft says it will bring the feature to additional platforms.
Copilot is now available in OneDrive for Web; here’s what to expect
Microsoft is currently working on bringing Copilot to OneDrive for Web. With this feature, you can ask questions and get information from your files without opening them.
This sounds impressive, and it will help you find important information faster than before. In addition to searching, Copilot will be able to summarize multiple files with ease.
Regarding the supported format, this feature will support DOC, DOCX, FLUID, LOOP, PPT, PPTX, XLSX, PDF, ODT, ODP, RTF, ASPX, RTF, TXT, HTM, and HTML files.
Copilot for OneDrive is different from Copilot Pro
The new Copilot for OneDrive is different from Copilot Pro, and it’s available for $20. Strangely enough, Copilot for OneDrive is a more business-oriented feature than Copilot Pro, which is dedicated to prosumers, not just professionals.
This sounds like an exciting feature. We can’t wait to see how Microsoft incorporates Copilot with a new OneDrive design. Regarding availability, the rollout starts in May, so stay tuned.
By default, when you type, for example 🙂 in Discord, the app will automatically convert it into its emoji smiley face. If you don’t want that, you can easily turn off automatic emojis on Discord. We’ll show you how to do that on any platform.
How do I turn off automatic emojis on Discord?
1. Turn off auto emojis on desktop and browser
After you open the app on your PC or in the browser and you’re logged in, click on the cogwheel icon (Settings).
Scroll down and click on Chat under App Settings, then scroll down on the right and toggle Off Automatically convert emoticons in your messages to emojis.
That will change the emoji conversion off in all the opened instances of Discord.
2. Turn off auto emojis on mobile
Open the app on your phone, and tap on the icon showing your face.
Now, click on the cogwheel icon on top of the screen.
Just like in the previous solution, look for the Chat section, then turn off Automatically convert emoticons in your messages to emojis.
The result is the same as on PC. You don’t need to do the same process on all the apps. The Discord app keeps track of your settings on all the platforms so it’s enough to do this on your phone or on the desktop app.
3. Turn off auto emojis for certain messages
If you want to avoid converting the emoticons only for certain messages, there is a simple trick to do that. Instead of just typing the emoticon, place a \ (backslash) in front.
So, instead of typing :), type \:) and the emoticon will not be converted. Don’t worry, the chat will not show you the backslash.
Now you know how to disable automatic emojis on Discord, no matter which platform you’re running it. You can also zoom in and out to adjust the readability.
After a recent patch, Space Marine 2 gamers reported the error code AVF on Windows 11, Linux and Steam Deck. The developers know about this problem and promised a fix. However, days have passed since users can’t log into their online servers. If you were playing on Linux, the developer retired the linux64 anticheat module so you can’t do much about it. If you’re playing on Windows 11, we have the solution below.
How do I fix Space Marine 2 Error Code AVF?
1. Delete the game’s configuration file and verify game files in Steam
Press Win + E to open File Explorer and go to the game folder in Steam > Steam Apps.
Look for Warhammer 40000 Space Marine 2 cfg file right under the game’s executable and delete it.
Now, open Steam, and go to the Space Marine 2 game in the Library.
Right-click the game and select Properties.
Go to Installed Files and click on Verify integrity of game files.
This will reset any modes or cheats you might have installed and get a fresh configuration file.
2. Allow the game through the firewall
Click the Start button, type firewall and open Windows Defender Firewall with Advanced Security.
Go to Inbound rules and click on New rule.
Select Program and click Next.
Now, click the Browse button to go to the Warhammer 40000 Space Marine 2 location on your PC.
Click on the EasyAntiCheat folder, select the EOS file and click on Open.
Click on Next, then select Allow the connection and click Next again.
Give the rule a name and hit Finish.
Next, repeat the steps 2-4 and do another rule for the start_protected_game file and the Warhammer 40000 Space Marine 2 executable in the Space Marine 2 folder.
Now, go back to the Windows Defender Firewall with Advanced Security and create new Outbound rules for the same files.
You will notice that some of the files don’t allow the outbound connection so this is mandatory.
Basically, this solution will provide access to the game executable files and the EasyAntiCheat through the firewall. If you have a third-party firewall, disable it prior to applying this solution.
If you’re playing the game through the Epic launcher, there are a lot more files to allow through the firewall with inbound and outbound rules: EpicOnlineServiceUserHelper, EpicOnlineServices, EpicOnlineServices.exe, EOSOverlayRendered-Win64-Shipping.exe, EasyAntyCheat_EOS, eac_launcher.exe.
Since there is a longer process, we simply recommend reinstalling the game, which will have the same effect. Just remember to back up your saves first.
The error code AVF is caused by a conflict between some of the modes you’re using that are trying to bypass the EasyAntiCheat. By resetting the mods, you will be able to play the game on Windows 11 without any issues.
Hopefully, by applying the solutions above you’ve fixed the Space Marine 2 error code AVF on Windows 11.
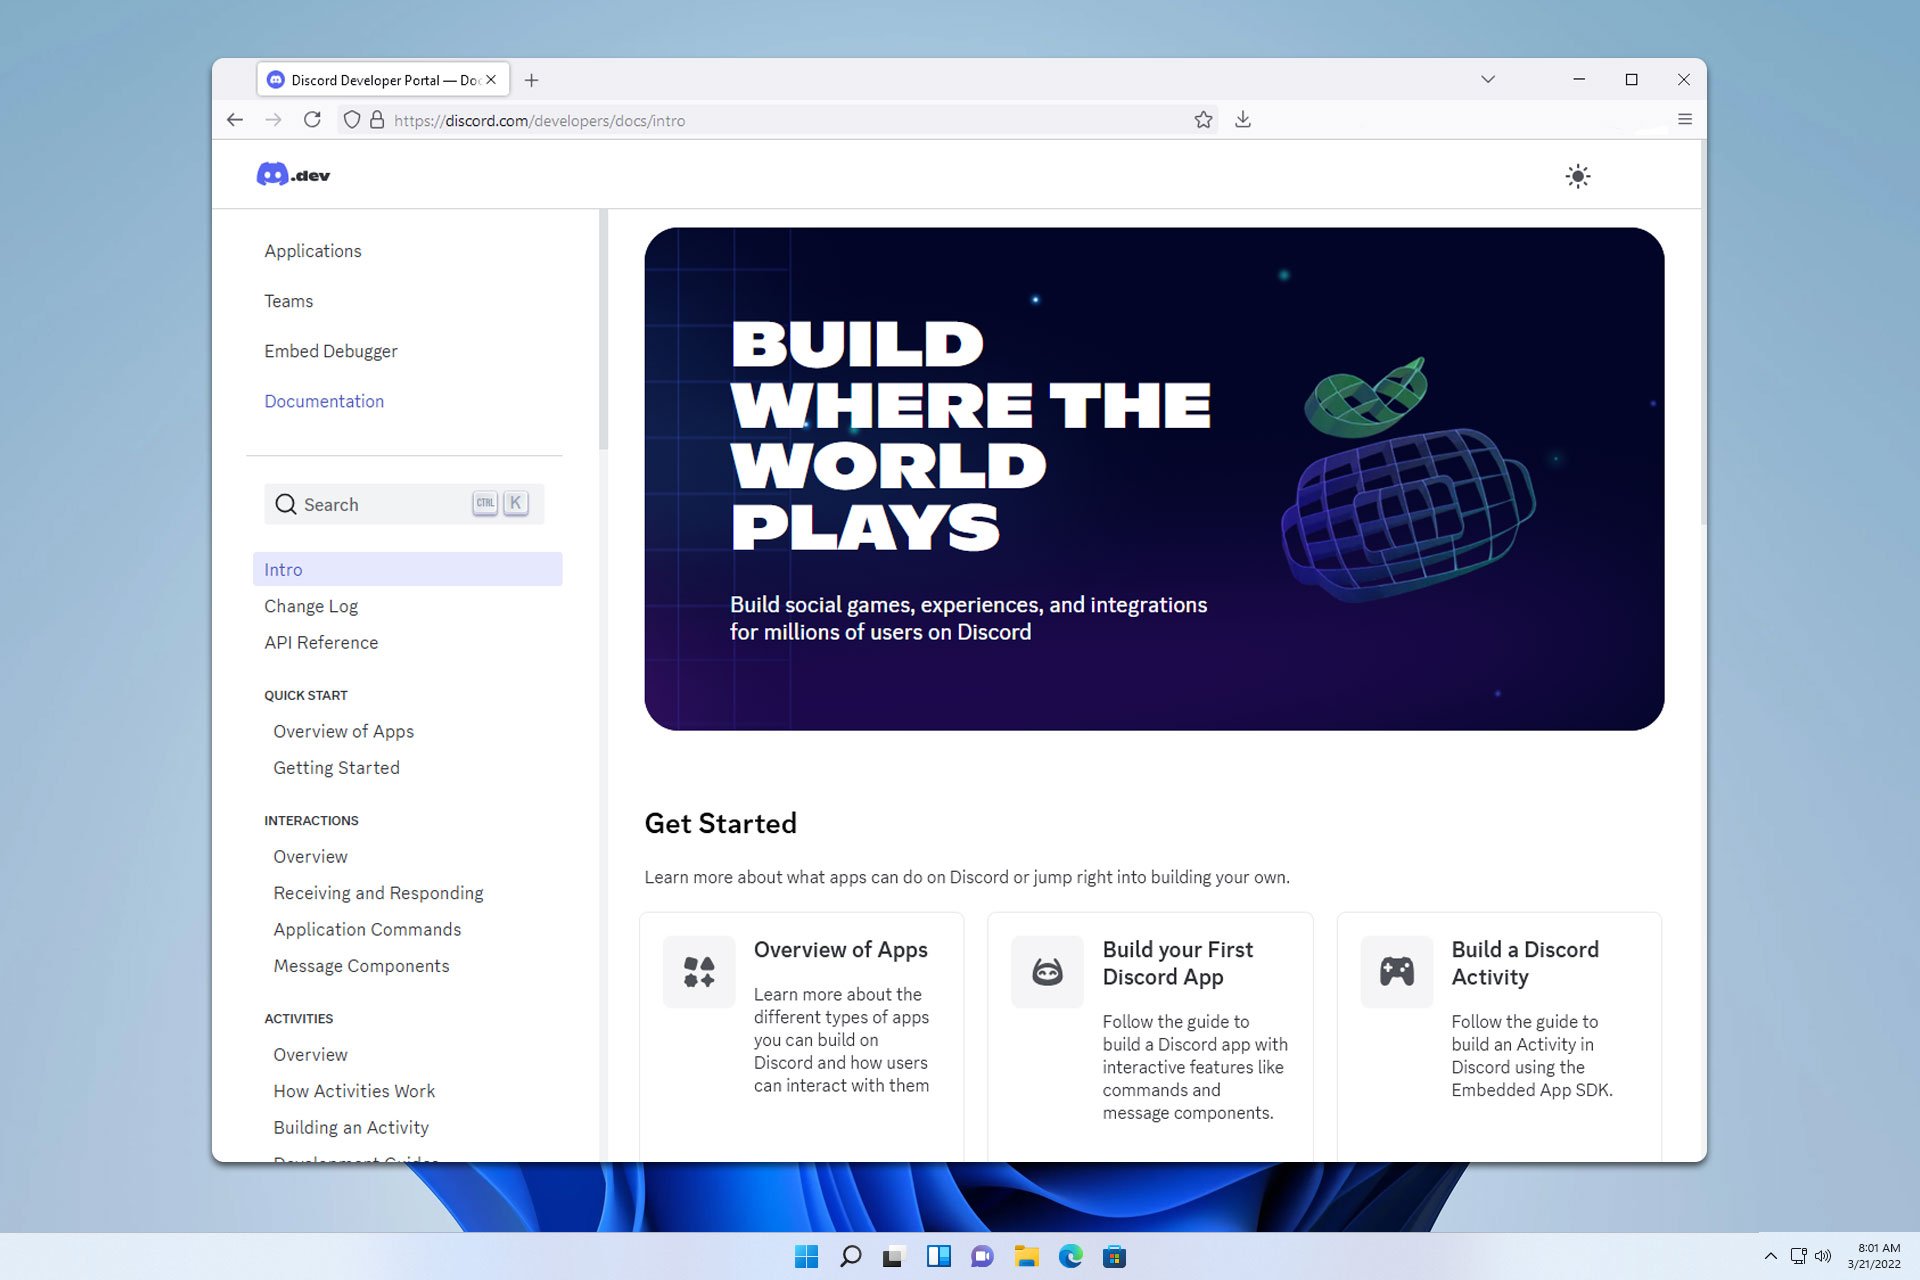
If you ever wanted to create a Discord app, you might’ve heard about the Discord Developer Portal. If you’re not familiar with it, in today’s guide we’ll show you everything you need to know about it.
What is Discord Developer Portal and how can I use it?
What is Discord Developer Portal?
Discord Developer Portal is a platform for developers that allows users to create their applications and bots that will interact with Discord.
What can the Discord Developer Portal do?
Create applications –The service can create applications and bots that will interact with Discord API and perform various tasks.
Bot management –With Discord Developer Portal you can configure your bot including its name, avatar, permissions, and tokens.
OAuth2 Integration – Using this service you can provide access to OAuth2 authentication, thus allowing you to log in to your app or website to login via Discord.
Use Webhooks – Discord Developer Portal allows you to create and manage webhooks.
Design your app –With the service you can design the look of your app and provide interactivity.
API and documentation – Lastly, the service allows you to access extensive Discord API. It also provides documentation that can help you learn more about the API.
How can I create a new application in the Discord Developer Portal?
Log in with your Discord account and go to the Applications page. Click the New Application button.
Enter the application name and click on Create.
Look for the Application ID and Public Key. You’ll need these values later.
Ensure that you have NodeJS and Git installed on your PC.
Open the command line and run the following: git clone https://github.com/discord/discord-example-app.git
Next use the following commands to go to the discord-example-app directory and run the dependencies: cd discord-example-app npm install
Next, go to the project folder and rename the .env.sample to .env.
Open the .env file and replace <YOUR_APP_ID> and <YOUR_PUBLIC_KEY> with values from Step 3. Don’t close the file yet.
Lastly, go to Developer Portal, go to Bot, and click on Reset Token.
Copy the next token to the .env file and replace <YOUR_BOT_TOKEN> with it.
Save changes.
Now you can start coding and developing your app. For more information, we suggest visiting the API Reference page.
As you can see, it’s pretty simple to set up the Discord Developer Portal for a bot, and we hope this guide helped you understand how this service works.
Recently, we reported that AI-powered Microsoft Designer’s image editing feature is coming to Microsoft Edge and will be available to users from November onwards. Here is how you can make Microsoft Designer the default Image Editor in Edge browser and use it now in Canary. You don’t even need to wait.
Microsoft Designer is a powerful graphic design tool that uses artificial intelligence (AI) to help you create stunning visuals quickly and easily. Whether you’re a seasoned designer or a beginner, The Designer helps you bring your ideas to life.
Microsoft Designer’s AI features include text-to-image generation, design suggestions, automatic background removal, image editing improvements, and style transfer. These tools help users create high-quality visuals with ease.
At present, Microsoft Designer competes with Canva and other AI editing tools in the market. However, Microsoft Designer often stands out with its AI features and deeper integration with Microsoft Products.
Microsoft Designer is available on the Web, Windows (both integrated into Microsoft Photos and as a standalone app), and mobile devices (free on iOS and Android). The company has already integrated Designer with Microsoft 365 apps like Word, PowerPoint, and Outlook. Microsoft recently announced that Designer will be integrated into Microsoft Edge for image editing.
According to Microsoft, you can customize your images by removing unwanted elements, adding text overlays, improving visuals with automatic cropping, or blurring or removing backgrounds—all without leaving your Edge browser.
Note: Microsoft Designer is currently available for free to everyone. However, it’s important to note that the free version may have some limitations compared to the paid version.
How to enable and use Microsoft Designer to Edit images in Edge browser
Close Edge Canary.
Right-click on its shortcut and select Properties.
In the Target field, at the end, give a space and add the following. --enable-features=msEditImageWithDesigner
Click OK and Apply.
The Designer’s integration into Microsoft Edge brings several benefits to users when it comes to image editing using AI. Users no longer need to visit the Microsoft Designer website; in Edge browser, they can simply right-click on an image in the web page and select “Edit Image with Designer”—that’s all, that easy.
Edit image with Designer right click menu option in Edge. Image Credit:WindowsReport.
Please note, that users need to sign into Microsoft Edge with a Microsoft Account to utilize Microsoft Designer for advanced image editing; otherwise, the tool may not work for you.
Image edited with Microsoft Designer in Edge. Image Credit:WindowsReport.
Microsoft Designer worked well for us, except for its AI feature that restyles photos into artistic works. The edited images will be saved directly to the Microsoft Designer Project website when you sign in with your Microsoft Account. You can also download or copy the image to the clipboard.
Video:
So far, we haven’t needed to edit images using AI, especially with Microsoft Designer’s advanced image editing features. We hope you find the tool useful.
Overall, with Microsoft Designer integration into Edge, image editing will be easier than before. Designers and content creators will find Designer in Edge especially useful for quickly editing product photos or creating social media graphics.Users can easily access and use its AI features to remove unwanted elements, add text, or improve the total look of their images.
Microsoft is testing an “Instant updates” feature in the Edge beta (preview) that will automatically restart the browser to install any pending updates when the user is idle.
Keeping web browsers up-to-date is important to protect against critical vulnerabilities that are exploited in the wild. Browser vendors are doing their best to patch them. If you’ve kept your device running for days without restarting, you could be losing security and new feature updates.
Microsoft is previewing an optional ‘Instant Updates’ feature in Edge that allows for faster updates
Imagine someone compromising your device remotely by exploiting a vulnerability in Edge. This can be avoided if you turn on “Instant updates,” which Microsoft Edge is previewing in beta.
How to turn on Instant Updates in Microsoft Edge
Open Microsoft Edge.
Visit Settings > Privacy, search, and Services
Under Security, enable “Instant updates.
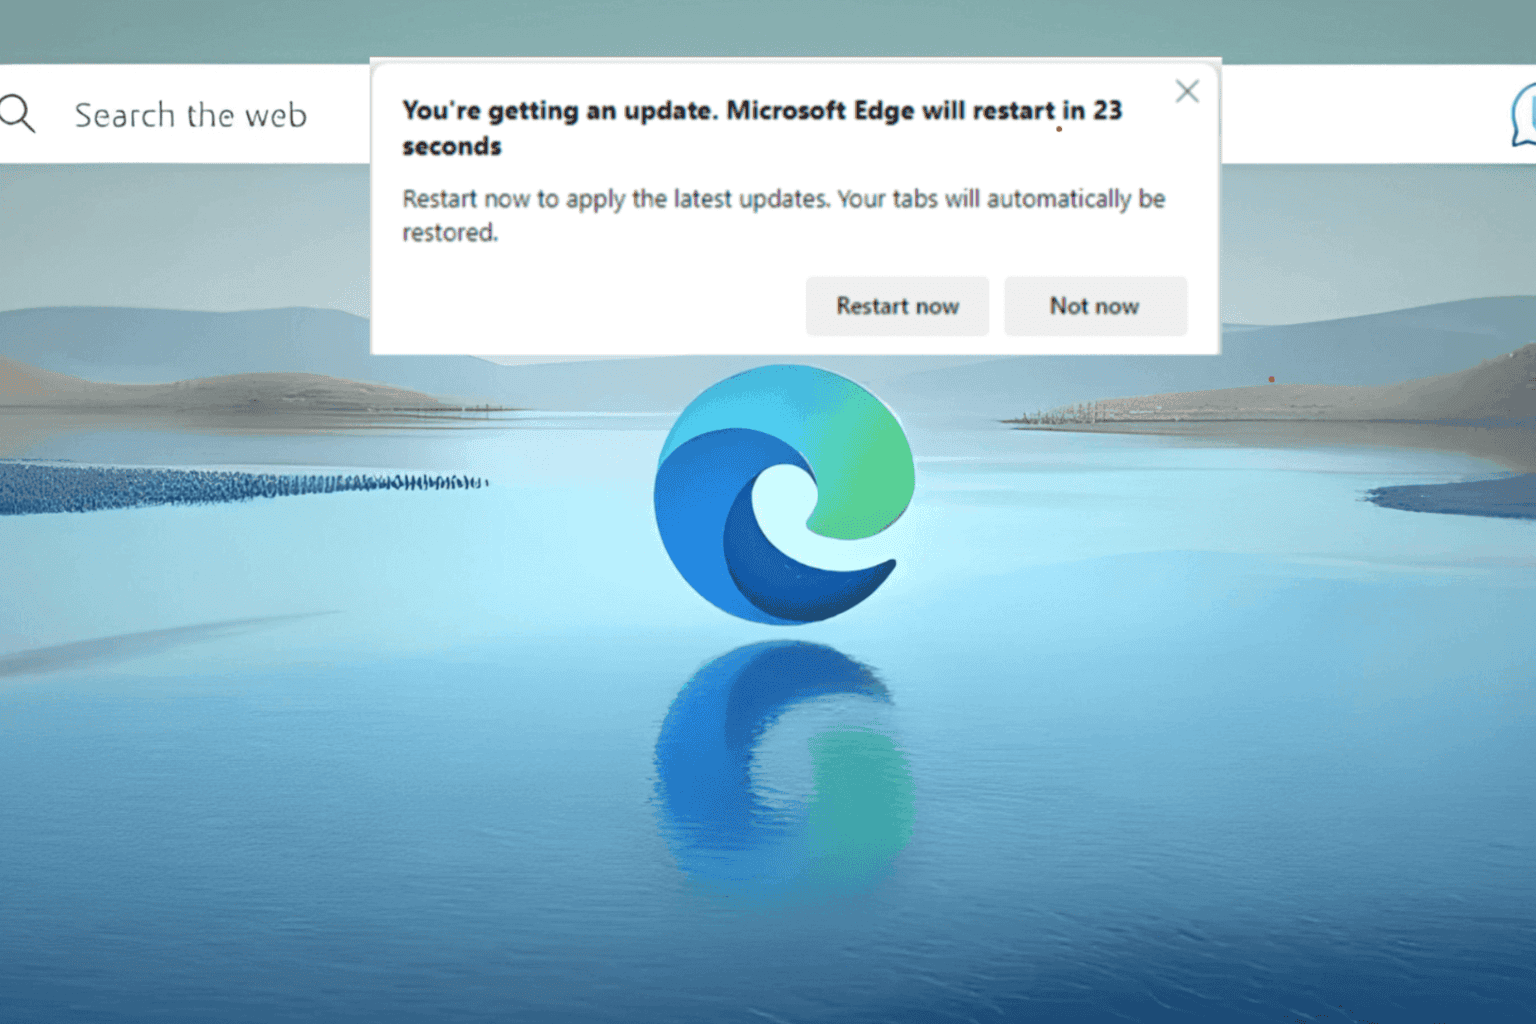
If there are any pending updates, you will receive a notification to restart Edge. This notification will only appear when your device is idle, and when the 23-second countdown ends, Edge will restart and automatically open it by restoring previous tabs.
Microsoft Edge’s Instant Update setting. Image Credit:WindowsReport
“You’re getting an update. Microsoft Edge will restart in 23 seconds. Restart now to apply the latest updates, your tabs will automatically be restored” the notification says.
Since the “faster updates” feature is opt-in, there will likely be no issue for users who choose not to use it. However, there is a risk of data loss if the feature is enabled and the user is away when an update is applied.
Please note that the feature may have been A/B tested in the past. We noticed the feature setting under Privacy, search, and Services in the Edge Beta version, but disabled by default. It has a “Learn more” link to the support page with documentation and FAQs about the feature and how it works.
Microsoft Edge’s Instant Updates support document was first published on August 1 this year, followed by the latest update on September 15. Based on this observation, we can understand that the official introduction of the feature is approaching.
Microsoft Edge’s new update feature, currently available in Edge Beta, may soon be rolled out to the public stable version. In addition to getting browser update alerts via Browser Essentials, this will be useful optional feature for sure.
Automatic Gain Control on Discord helps you maintain consistent microphone volume during voice chats. It automatically adjusts the input levels to prevent your voice from being too loud or quiet. However, some users may prefer more control over their audio settings or find that the feature doesn’t work well for their needs. I’ll show you how to disable it for better audio management.
Let’s begin!
How To Disable Automatic Gain Control in Discord
You can disable AGC on your desktop or mobile device.
On Desktop
Follow the below steps:
Open Discord, log into your account, and tap the settings gear beside your username.
Scroll on the left panel and tap on Voice & Video.
Scroll the right panel to locate Automatic Gain Control, then toggle the button off.
That’s it! Simple, right?
On Mobile
Here are the steps:
Open your Discord app and tap the smiley icon labelled “You” in the bottom right.
Tap the settings gear on the top right corner.
Scroll down and click Voice.
Scroll again to locate Automatic Gain Control under Voice Processing, then toggle it off.
The Automatic Gain Control Discord feature is useful for maintaining consistent audio levels but may not suit everyone’s preferences. Disabling AGC allows you to have more manual control over your microphone settings.
If you see the “Discord email is already registered” message, you’re mistakenly trying to create an account instead of logging in. Luckily, you can fix the error by tapping on the login and adding your credentials. However, if you registered accidentally or someone did it without your consent, you can recover it or remove your phone number and delete the account.
I’ll show you how!
How To Recover a Discord Account
Follow these steps:
Go to the Discord website and tap Login in the top right corner.
Enter the email address and tap “Forgot your password?”
Discord will notify you that instructions to change your password have been sent to your email.
Open your email to access the messages, tap Reset Password, enter a new one, and click Change Password.
You’ll get your account back and receive an email confirming that you’ve changed the password.
That’s it! If you registered accidentally, you now have your account with an updated password. However, if someone registered it without your knowledge, you can delete it.
How To Delete a Discord Account
Here are the steps to follow:
You’ll first need to recover your Discord account, as shown above.
Log in and tap the settings icon beside your username.
Scroll and click Delete Account under Account Removal.
So, now you know how to deal with the “Discord email is already registered” error. These steps will help you recover an old account or delete it if someone uses your email for registration. Remember to keep your account information secure and follow Discord’s guidelines.
Online gaming is always fun until you run into region restrictions. Whether you want to access exclusive content or play on international servers for a different challenge, it can be difficult without the right tools.
As an avid gamer, I decided to explore the possibilities, what works, and the steps to take so you can access video games and servers outside your region. Here’s everything you need to know:
Why access games or servers from different regions?
There are many benefits to unlocking different regions of games and servers. These include:
Exclusive Content – Some games and servers offer region-exclusive content, such as special in-game items, events, or game modes.
By accessing servers in different regions, you can enjoy entirely new content from your native region and breathe new life into your favorite games.
Better Matchmaking – In multiplayer games, the matchmaking system usually prioritizes players from the same region to ensure a smooth and lag-free gameplay.
However, you may choose to play on international servers to find more players, to play with friends who are located elsewhere, or for a more challenging experience.
Early Access to Games – Sometimes, games are released in certain regions before they become available globally. Unblocking these regions allows you to play the game before its official release in your home country.
Accessing Blocked Games –In some cases, entire games or game servers may be restricted in certain regions due to local laws, regulations, or licensing agreements. Bypassing geo-restrictions can open a whole new library of titles you may never get to play in your home country.
Pricing – Although this is a gray area, purchasing games, DLC, and content in another region can be cheaper than your home region.
Language and Community Preferences – You may prefer to play on servers in a specific region due to language preferences. Perhaps you grew up in a different country or otherwise wish to be part of a gaming community in that region.
Gaming and Traveling – If you are traveling to different countries, it makes sense to want access to games and servers in the places you travel, which can be difficult if your account is already set to your home region.
General Solutions for Accessing International Games and Servers
Some common methods for accessing different regions for gaming include:
Game Server Browsers – Some games have built-in server browsers that allow you to view and connect to international game servers directly. This can be a convenient option if your game supports it.
Direct Connection – In some cases, you may be able to connect to international game servers by manually entering the server’s IP address into your game’s network settings. This method may require some technical knowledge and can vary depending on the game you’re playing.
Proxy Servers – A proxy server in your chosen region acts as an intermediary between your device and the internet, allowing you to bypass regional restrictions and access international gaming content.
While there are free proxy lists and web-based browsers, you’ll want a paid service to provide enough speed for gaming.
Nonetheless, proxies tend not to work on mainstream platforms like Steam.
Smart DNS – Similar to a proxy, a Smart DNS service can help you access region-specific content by rerouting your DNS queries through a server located in that region.
VPNs – The best way to change your visible location and IP address is to use a premium VPN. A good VPN service lets you choose the specific country or region you wish to gain access to.
How to change Steam Region Legitimately?
Steam uses your account region to determine the content and pricing you see in the store. While it is technically possible to change your Steam region, this is usually limited to situations where you move country or are overseas for an extended period.
1. Log in to your Steam account and click your username in the top-right corner of the page and then open your Account Details page.
2. Under Store and Purchase History, click on Update Store Country.
3. Follow the prompts to update your store country and payment information.
Note: You must use a payment method supported locally in that country to successfully change regions. CD Keys and Steam Wallet Codes are not valid for this process.
Alternatively, you can follow a similar process while checking out a purchase:
1. Browse the store while in the new country and begin the checkout process.
2. From the Cart page select the country you are currently located. This will update the pricing and payment methods.
3. Use one of the available payment methods in that country to checkout and your Steam region is now updated.
Create a New Steam Account
If you do not wish to carry over your purchase history and library, you can easily create a brand-new Steam account in the country you have moved to or traveled to and use it while in that region.
Once you return or move again, you could keep the account by following the steps above to legitimately change your Steam region. The only drawback is you can only update the region once every 3 months.
How to change Steam Region when located in a different region?
Attempting to change your Steam Country while located in a different country is technically a violation of terms of service, but it is not impossible when using some clever workarounds.
Note: We do not officially endorse these methods, and you take on any risks associated with losing your Steam account.
Use a VPN
You can use a VPN to change your Steam country, but it cannot be just any VPN, especially a free VPN provider.
This is because Steam recognizes general VPN usage and extra steps and advanced features, such as those from services like CyberGhost VPN are required.
Note: It’s safer to open a new Steam account through a clean browser, with the VPN switched on, rather than changing your Steam country from a previously active account.
Nonetheless, follow these steps for the best chance of successfully bypassing Steam geo-restrictions.
1. Clear your browser data, making a special note to remove all cookies from Steam.
2. Purchase a premium VPN that includes your desired region and the ability to use a static and private IP address linked to that region.
This is important, because constant IP changes or IPs shared by different users can be a red flag for VPN usage.
3. Enable your static IP address and connect to your desired region.
4. Follow the previous steps to change your Steam country or create a new account as suggested above.
5. To make a store purchase with a regional payment method, options include purchasing a steam gift card online for that country/currency, loading a prepaid card for that country, or borrowing a friend’s payment information from that country.
6. Whenever you launch Steam or play a game, ensure the VPN is connected. Make use of the VPN’s automatic kill switch, which will halt all internet activity if the connection drops, so your real location is never leaked and flagged by Steam.
Note: If you are not familiar with the country’s language, you should access the Steam store via web browser and use Google Translate.
Conclusion
Accessing games and servers outside your region is a great way to experience new content, players, early releases, and blocked games.
In some cases, games are open to everyone and it’s as easy as choosing the right server or making a direct connection. In others, a basic proxy or Smart DNS is all you need.
Platforms like Steam are a little more stringent, but by using the change country setting or carefully using a VPN with the right features, you can unblock content in any region from anywhere in the world.
What’s your chosen method for bypassing geo-restrictions for gaming, or do you know of other methods that work? Let me know in the comments below!
Microsoft is thinking about enhancing Copilot with the capability to turn it into a brainstorming assistant, streamlining and facilitating virtual meetings for all participants. This new enhancement was unveiled in a recently published patent suggestively called ‘VISUAL COLLABORATION SYSTEM AI COPILOT FOR IDEA GENERATION,’ available online.
The technology describes Copilot as a system that helps people collaborate using a brainstorming template. The template includes an AI chat interface that can take natural language commands from participants. These commands are combined with context prompts and sent to Microsoft Copilot, which responds. The response is displayed on the brainstorming canvas for everyone to see.
According to the whitepaper, the enhancement will allow Copilot to participate lively in brainstorming sessions within Microsoft Whiteboard. The AI model can generate ideas, answer questions, or provide information during brainstorming, as seen in the image below.
It’s worth mentioning that Microsoft announced Team Copilot earlier this year at the Microsoft Build conference in May. Team Copilot is an assistant that will be present in Teams chats to help all users access information quickly. It’s strikingly similar to the tech the Redmond-based tech giant has presented in this patent above.
Team Copilot is also capable of a Group Moderator feature that will allow it to respond to questions and help users access information. It will also be a manager, and Microsoft developed it to supervise projects.
On the other hand, in the patent, Microsoft envisions Copilot as capable of brainstorming by allowing it to collaborate with the other participants and leverage its AI capabilities to generate ideas, answer questions, and provide insights, which can be incredibly valuable in a team setting.
The patent also mentions that this Copilot can be easily integrated with Microsoft Teams, further solidifying the argument that it could be about Team Copilot.
Take a look by yourself, and read the patent here.
Microsoft Teams Essentials is the most affordable small-business communication and collaboration solution for non-Microsoft 365 users.
It’s one of the leading online communication apps for work, school, and home use. According to Statista, Teams has a 32.29% market share in the video conferencing software niche, just after Zoom.
However, gig owners, freelancers, and small businesses faced a challenge when transitioning from easier options like Zoom and Google Meet, as they had to subscribe to the entire Microsoft 365 productivity suite. Here, Microsoft Teams Essentials steps in with a standalone solution.
Also, there are other useful and fun features. I’ve tested the app in various ways from an end user’s perspective, so you don’t have to. Let’s see if it truly fits your work or business style.
What Is Microsoft Teams Essentials?
Microsoft Teams Essentials is an affordable edition of the original Teams app. You can install the standalone app for your PC or access the web version. Also, it lets you access all the standard online communication and virtual collaboration tools that the original Microsoft Teams has except for apps and other enterprise features.
Teams Essentials is perfect for small teams, small businesses, small not-for-profit organizations, schools, and group freelancers. Since you might already be using another workspace solution and might not be willing to shift everything to the Microsoft 365 environment for a steep price, you can just go for this one.
Furthermore, it extends the features of the free Teams edition with increased cloud storage, longer video call durations, support for more participants, and more. Additionally, you don’t need any specialized IT training to use it. Anyone can join a Teams meeting just as easily as a Google Meet call.
Pros
Cons
Teams is an affordable alternative to Zoom and the full version of Microsoft Teams.
It lacks advanced Microsoft Teams features and isn’t suitable for a large organization.
It has exactly those features you need to run a for-profit business, nonprofit organization, school, church body, etc.
If you move to Teams Essentials once, you lose access to the free plan forever from the same email account.
Teams is a standalone app. No need to install the Microsoft 365 package.
Microsoft has designed these functionalities keeping in mind the requirements of small businesses, gig owners, NGOs, church bodies, schools, and freelancers:
More meeting time: All group and one-on-one video or voice call sessions can last for up to 30 hours.
Cater to a larger participant base:Up to 300 users can join your video or voice call events.
Integrate with a digital calendar: It readily integrates with your existing work and personal calendar in Outlook. Microsoft also has plans for rolling out a Google Calendar integration.
Easy to send and accept invitations: Teams Essentials offers a no-installation, no sign-in, and no sign-up experience for the participants. You only need to click the email link and start listening, speaking, or sharing screens.
Professional meeting tools: You can use the most advanced virtual meeting features, like screen sharing, meeting lobby, Together mode, virtual backgrounds, live reactions, live closed captions, scheduled meetings, noise suppression, etc.
More cloud storage: It allows up to 10 GB of online storage space for each user. You can also edit Microsoft 365 documents on the OneDrive web or Teams Essential desktop interface.
Threaded chats: Teams follow a continued conversation style. It doesn’t delete your chats until you do that manually. Chats in online video and voice calls are also preserved even after the call ends.
Small business chat templates: It offers ready-to-use group project templates with chat, calling, and file-sharing features.
Chat dashboard: The Chat Dashboard tool automatically organizes shared content for one-on-one or group chats in sections, like photos, locations, task lists, etc.
Support from Microsoft: Teams Essential runs on the Azure Cloud platform. Hence, you get the same level of SLA, security, performance, and accessibility as Microsoft Teams enterprise users do.
Security and compliance: The Microsoft Azure Cloud platform ensures complete encryption of all data communications.
Administration: You get exclusive access to the same Microsoft 365 Admin Center as other Microsoft Office subscribers do. From this console, you can manage access for up to 50 users. You can also pay their monthly or yearly subscription fees.
Microsoft Teams Essentials Pricing
Teams Essentials will cost you $4.00/ user/ month. It comes with an annual contract. The subscription auto-renews if you don’t cancel manually.
Here are the services included with this subscription:
Unlimited group meetings
Screen sharing
Unlimited 1:1 calls
Group meeting duration 30 hours for up to 300 participants
Custom backgrounds
Meeting scheduling
Live transcription and captions only for English
Calendar app integration
Invitees can join without a subscription
Unlimited group and one-to-one chats
Polls
10 GB OneDrive storage
Google calendar sync
Microsoft Teams data encryption.
You can claim a one-month free trial before getting an annual subscription. However, it’s available in limited regions, like the US, UK, Canada, etc.
How To Get Teams Essentials
You can get Teams Essentials directly by visiting the Microsoft Subscription Plans portal. If you buy from Microsoft, you get additional services, like automatic organization of shared content, files, photos, and more.
Alternatively, you can subscribe through Microsoft’s cloud service partners:
Crayon
Ingram Cloud
Pax8
Rhipe
TD Synnex
Telefonica
Vodafone Business
Wortmann AG.
The Cons of Transitioning to Teams Essentials
Before you move your text, voice, and video calls to Teams Essentials, consider the following drawbacks first:
You can’t use the same email address for the Free Teams subscription plan.
Free trial isn’t available in all the regions where Microsoft operates.
Summary
If you like the Teams interface, Microsoft Teams Essentials is a great way to get started. You pay less for a great user interface and experience, not to mention the incredibly easy file sharing through OneDrive.
Would you try Teams Essentials? Are you already using it? Comment below to share your thoughts and suggestions.
If you have Discord high ping issues, that is usually due to server or connection problems. Background processes or using an older version of the app may also cause high ping in Discord. Apparently, also speaking in Discord while playing a game causes high ping.
To eliminate at least one cause, check the Discord status page to see if there are any outages and test your internet connection on a dedicated website such as Speedtest. Also, remove any apps that work in the background and use bandwidth.
How do I fix Discord high ping?
1. Change the server region
If you’re in a voice channel, try changing the server region.
Click on the server name at the top of the channel list.
Select Server Settings.
Go to Overview and change the server region to one closer to your location, if the option is available.
2. Enable Quality of Service High Packet Priority
Open Discord and go to User Settings (gear icon).
Navigate to Voice & Video.
Scroll down to Quality of Service and toggle on Enable Quality of Service High Packet Priority.
3. Disable Hardware Acceleration
Go to User Settings in Discord.
Click on Advanced under Appearance.
Toggle off Hardware Acceleration.
Sometimes, hardware acceleration can cause high ping in Discord, so disabling will fix this problem quickly.
4. Clear the Discord cache
Clearing the cache can help improve performance:
Press Win + R to open the Run dialog.
Type %appdata% and press Enter.
Find the Discord folder and delete the Cache folder.
5. Update the network drivers
Open Device Manager by pressing Win + X and selecting Device Manager.
Expand Network adapters.
Right-click your network adapter and select Update driver.
We left this solution last because if the network driver is a problem, the connection lag and high ping will also manifest in the browser or other apps.
By following these steps, you should be able to reduce high ping issues on Discord and enjoy a smoother experience. Moreover, if you want to disable Automatic Gain Control, we’ve got you covered.
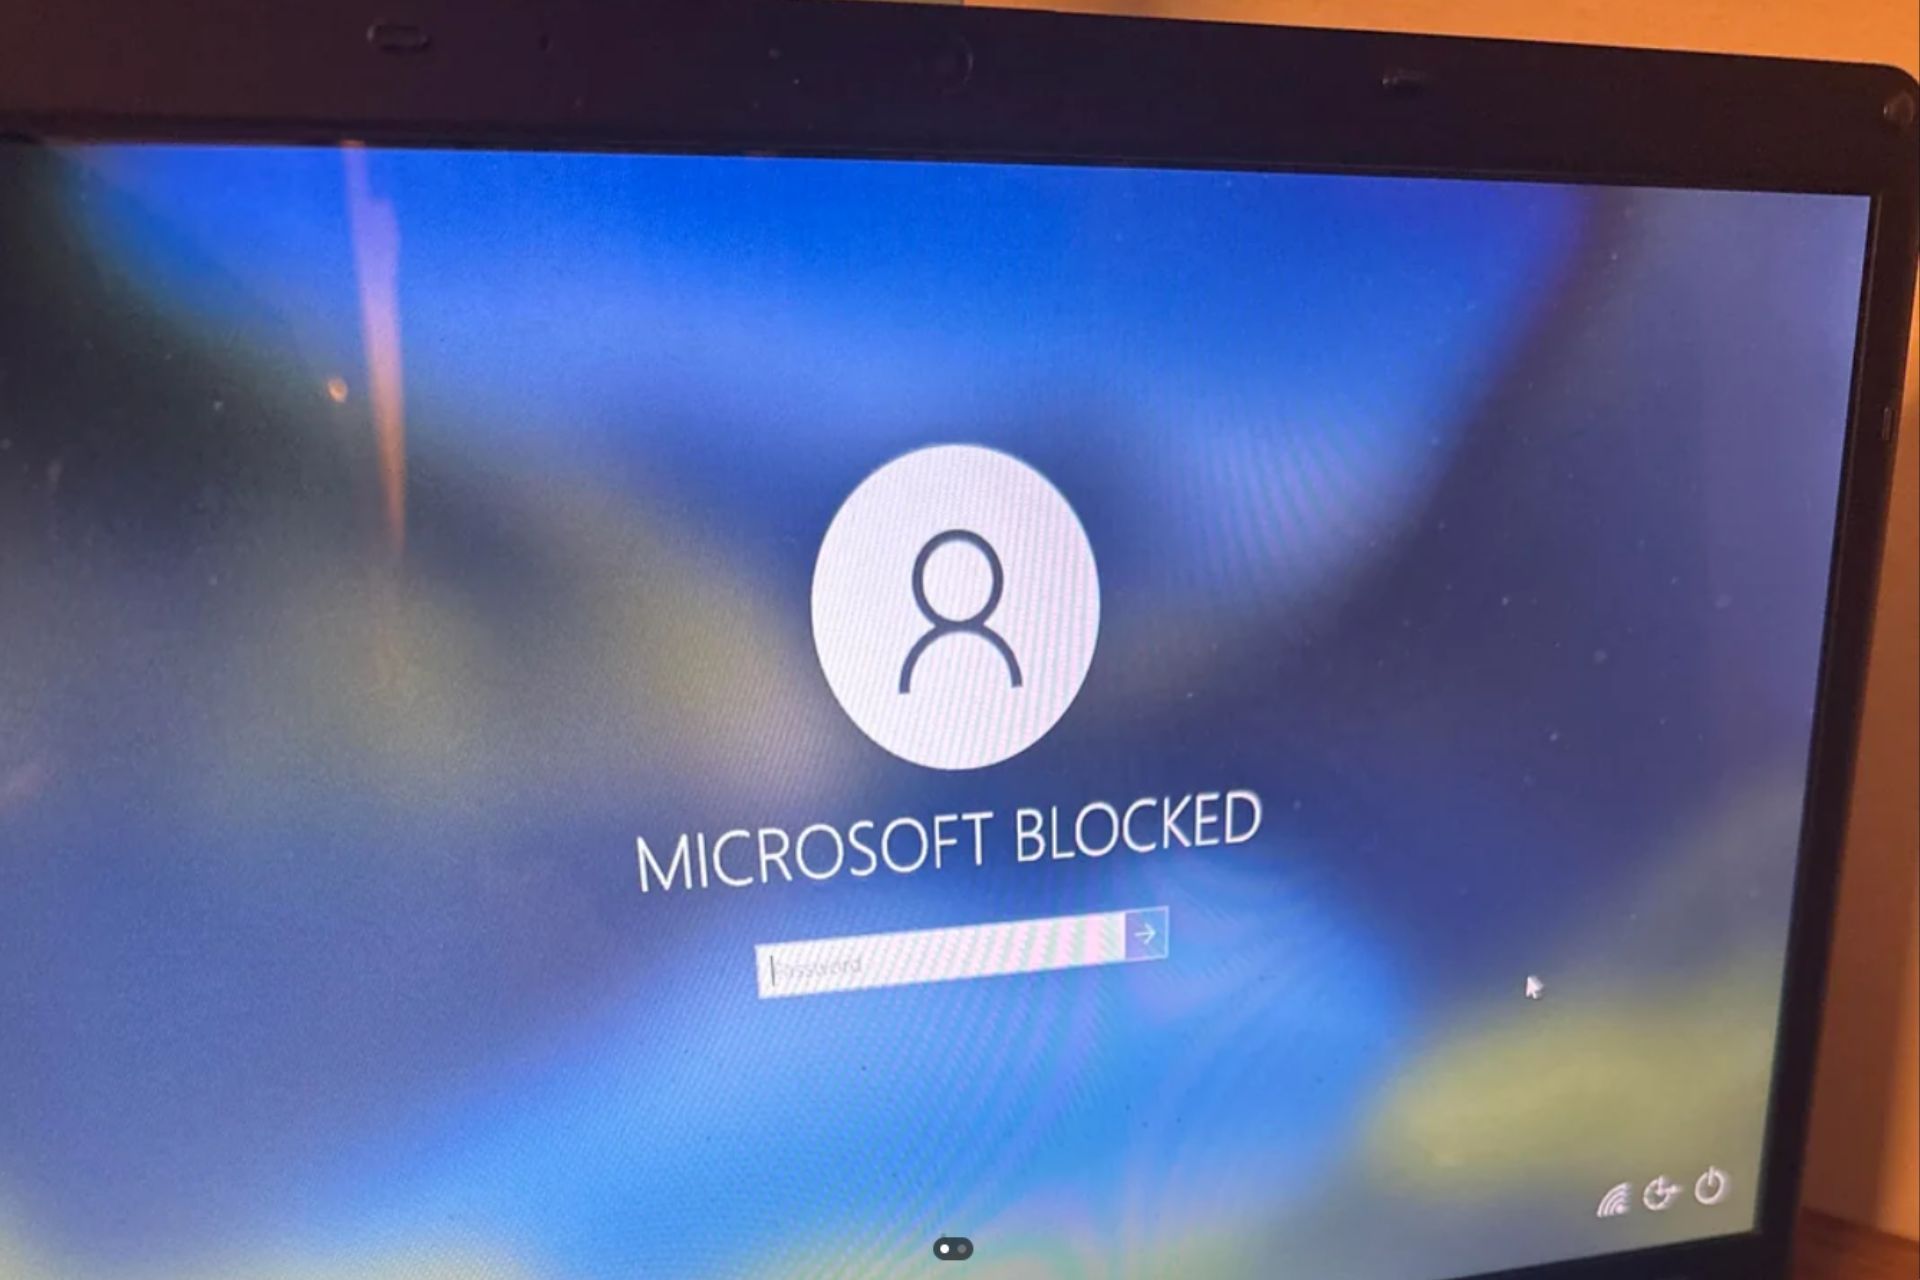
Windows 10 devices are being hit with a strange but obvious scam that splashes the login screen with the MICROSOFT BLOCKED message. (Please note that the message can also appear in lowercase letters)
The scam compromises these devices, and users can no longer access them unless they follow the hacker’s instructions.
While this is by no means new—Microsoft products and services are constantly hit by hackers, scammers, phishing attacks, and so on—the MICROSOFT BLOCKED scam is starting to gain popularity, as more and more Windows users on Reddit reported that their devices were affected.
What can you do to protect yourself from these scammers?
Don’t open suspicious links in emails or download files from untrustworthy sources. Also, make sure you have all the means of protection enabled, including changing your passwords frequently and enabling 2FA (2-factor authentication) or MFA (multi-factor authentication).
However, if you were scammed this way, know you can still recover and bypass this scam by changing the password to Windows without having to log in. The trick is to follow our comprehensive guide and have some patience.
Don’t be discouraged by the title; the good thing with these solutions is that if they worked on Windows 7, there is a good chance they’ll work on Windows 10, as well. It involves using Command Prompt and some commands inside of it to access the accessibility utilities executable and replace it.
After successfully accessing your PC, scan it and secure your files, folders, and sensitive data.
Microsoft Edge will soon be enhanced to support editing images with Designer directly in the browser.
According to a recent entry to the Microsoft 365 Roadmap, the new enhancement, which will be released in November 2024, will let users edit images by erasing objects, adding texts, auto-cropping them, or even removing and blurring the background, all within Edge.
Edge users will only have to right-click an image to edit it with Microsoft Designer, as the browser will have the new Edit image with Designer for users to try on.
For organizations, admins can control the availability of this feature using the “ImageEditorServiceEnabled” special policy.
Discover advanced AI-powered image editing in Microsoft Edge with Designer. Easily personalize your images by erasing objects, adding text, enhancing visuals with auto crop, removing or blurring the background, and more, all without leaving your browser. Start editing by right clicking an image in your browser and selecting “Edit image with Designer.” Administrators can control the availability of this feature using the “ImageEditorServiceEnabled” policy.
Microsoft Designer, the new AI-powered Image Editor from the Redmond-based tech giant, was recently made available to all users with a personal Microsoft account. The platform’s many intriguing capabilities, such as the Restyle Image, which turns your images into works of art, have been released throughout 2024.
This new enhancement should make it easier for users to use Microsoft Designer in Edge, as it is presented as a default editing option.
What do you think about it? Have you used Microsoft Designer before?
Many reported that they can’t properly use Xbox Cloud gaming on their device, so in today’s guide, we’re going to show you how to get Xbox Cloud Gaming unblocked on your device.
How can I unblock Xbox Cloud Gaming?
1. Configure content restrictions
On your console press the Xbox button, go to Profile & system, and then choose Settings.
Go to General.
Next, select Online safety & family and choose Family settings.
After that, select Manage family members and choose the profile whose access you want to change.
Select Access to content and choose Unrestricted in Access to content & apps.
You can also do this from the Family Settings app:
Open the Family Settings app and choose Settings.
Select the member whose access you want to adjust.
In Content restrictions go to Apply age filters and select the current filter.
Lastly, set Allow content suitable for to Age 18+ (unrestricted) and save changes.
Keep in mind that this only works for members who are added to your family. It will also unlock content that might not be suitable for all ages, so keep that in mind.
2. Other tips to try
If you’re on a network, contact your network administrator and ensure that Xbox Cloud gaming isn’t blocked by the firewall.
If Xbox Cloud Gaming is blocked in your country, then you might be able to unblock it by using a VPN.
If you want to get Xbox Cloud Gaming unblocked, you need to adjust content restriction settings on your console or contact the network administrator to unblock it.
Microsoft has revealed its plans to launch the first expansion pack, called Immortal Pillars, for Age of Mythology: Retold, the recent fantasy real-time strategy (RTS) remake.
Microsoft announced these plans during a live stream event during the Xbox Tokyo Game Show 2024. The first expansion is called Immortal Pillars. This expansion will introduce a new Chinese-themed pantheon to the game, giving players on PC and Xbox Series X|S access to a collection of new gods, myth units, and godpowers to play with.
This new expansion will bring the myths and majesty of China to life with an all-new pantheon of gods, myth units, god powers, and a brand new compelling campaign inspired by the stories of Chinese mythology. Age of Mythology: Retold fans can earn the favor of 12 new gods, including Nüwa, goddess of creation, Chiyou, bull-headed god of war, and Nüba, restless goddess of drought. Not to mention summoning all-new god powers, including the mighty Yinglong, the flying rain dragon of Chinese mythology.
Microsoft has yet to announce when Immortal Pillars will be available for purchase. However, the expansion will be free to download for anyone who purchases the Age of Mythology: Retold premium edition for $49.99.
The expansion will also be available for $24.99 as part of an upgrade to the premium edition for standard Age of Mythology: Retold owners.
At the same time, Microsoft is also planning a second expansion for Age of Mythology: Retold,which will be sold separately. The publisher has not said anything about what this expansion will include or when it will be released.
Until then, though, it might be worth checking out AgeMythologyFans.com, the ultimate fan site dedicated to all things Age of Mythology: they’ll teach you how to master the new Chinese mythology, its creatures and units, buildings, and god powers.
If you’re not a Premium gamer, you can wishlist Age of Mythology: Immortal Pillars on Steam.
Microsoft Teams, a popular tool for workplace communication, has just announced its system requirements for the new client version. The new Teams client is available on PCs, Macs, and mobile devices and can be accessed via a web browser.
The new Teams client brings many improvements, thanks to its up to two times faster app performance while using 50% less memory. The system requirements for the new Teams client are the same as those for the classic Teams version.
However, the new Microsoft Teams won’t be available for the older Windows 10/Windows 11 versions. Windows 10 21H2 and older versions, the new Microsoft Teams deprecation will happen on January 15, 2025. It will happen on Windows 10 and 11 LTSC on August 15, 2025.
If you want to use the new Microsoft Teams on Windows or macOS devices, the system requirements have changed slightly.
According to Microsoft, Windows PC desktops require a minimum processor speed of 1.1 GHz or faster (minus Intel Turbo Boost Technology speed), 4 GB RAM, and 3 GB of available disk space. The display should have a resolution of 1024 x 768 or higher.
The macOS desktop version requires a dual-core processor, 4 GB RAM, and 1.5 GB of available disk space. The display should have a resolution of 1200 x 800 or higher. The macOS version should be one of the three most recent operating system versions.
The Teams web version shares the exact hardware requirements as the underlying operating systems. It’s supported on Microsoft Edge, Chrome, Firefox, and Safari browsers.
Teams are also available for Linux users as a progressive web app, and the web version supports the exact hardware requirements as the underlying operating system.
The Teams mobile app is available on Android and iOS devices. On Android, Teams is compatible with the last four major OS versions. On iOS, it’s compatible with the two most recent major iOS versions.
Teams can run with minimal hardware requirements. However, for specialized user scenarios like Avatar, Teams Live Events, and large meetings, Microsoft recommends a system with 8 GB RAM or higher and a four-core processor from 2018 or later.
Microsoft has released new preview updates under KB5043145 for Windows 11, version 23H2, and Windows 11, version 22H2 operating systems, bringing them to OS Builds 22621.4249 and 22631.4249.
The latest KB5043145 for Windows 11 versions 23H2 and 22H2 includes several new features and changes, such as sharing local files directly from the taskbar’s search box, a redesigned delivery optimization settings page, and the removal of the search box from the Windows Share window.
When media is playing, the media controls show in the lower part of the lock screen at its center. Microsoft has moved the Sign-out option to the account manager when you open the Start menu, which makes it easier to switch to a different user. The company has also added a “Sign out” option to the Account User Interface (AUI) that appears when you hover over the user’s name on the Start menu.
Additionally, the updates resolve an issue that caused Microsoft Edge to stop responding when users attempted to use Internet Explorer (IE) mode and an issue that caused the Task Manager to stop responding when switching from a high-contrast theme to a standard theme.
However, one of the most valuable features of KB5043145 to Windows 11 is the ability to manage your Copilot Pro subscription in Settings without accessing additional web pages. This makes it easier and faster for users.
A known issue in the new Windows 11 version 23H2 and 22H2 updates prevents users from entering their credentials more than once for Outlook or another encrypted email app. Microsoft says it’s working on a fix that it expects to release in the coming days.
Microsoft also released new servicing stack updates (SSU) to improve the robustness of the Windows 11 servicing stack. The update, which you can download from Windows Update, is available for all Windows 11 versions, including 23H2 and 22H2.
Excel is a popular spreadsheet software that offers a wide range of functionalities and is used by students, business professionals, or anyone who wants to organize information. Therefore, learning basic formulas is essential to enhance your data analysis and management skills. In this guide, we will mention 30 essential Excel formulas that you should know, ranging from operations like calculations, data manipulation, and logical operations.
What are the basic formulas you should know in Excel?
Basic Formulas: A Quick Overview
Formula
Syntax
Usage
Practical application
SUM
=SUM(number1, [number2], …)
Adds up the select range of numbers
Helpful in summing monthly expenses
AVERAGE
=AVERAGE(number1, [number2], …)
Calculates the average of a group of numbers
Used for determining the average score of a student
SUBTOTAL
=SUBTOTAL(function_num, ref1, …)
Calculates a subtotal in a list or database
Used for summarizing data in filtered lists
MIN
=MIN(number1, [number2], …)
Shows you the smallest number in a range.
Can be used to track the lowest temp over a month
MAX
=MAX(number1, [number2], …)
Shows you the largest number in a range.
Can be used to track the highest temp over a month
COUNT
=COUNT(value1, [value2], …)
Counts the number of cells that has numbers
Helpful in tracking the number of sales transactions in a month
COUNTA
=COUNTA(value1, [value2], …)
Counts the number of non-empty cells.
Allows you to keep track of completed tasks in a project
Used for classifying performance ratings on the basis of multiple criteria
IFERROR
=IFERROR(value, value_if_error)
Returns a specified value if the formula shows an error, else returns the formula result.
Managing errors in calculations in data processing
If any of your Excel formulas disappear after you save your workbook, it could be because the formula is too complex and exceeds the memory capacity or is too long/complex; read this guide to learn more about it and the solutions to fix it.
1. SUM
The SUM function is a basic Excel formula that can be used to add a series of numbers together. You can quickly calculate the totals from the selected range. For example, if you want to find the total sales from cells B2: B13 as in the picture, type = SUM(B2: B13) and press Enter. This will add all the values within the selected range. The SUM function’s efficiency allows it to handle large datasets and simple totals, ensuring you can complete your numerical analysis quickly and accurately.
If the SUM formula doesn’t add the values correctly, it could be due to wrong cell references, hidden rows or columns, or cells with text or errors; read this guide to learn more.
2. AVERAGE
The AVERAGE function calculates the mean of selected numbers, giving insights into overall trends and is useful for measuring performance.
For example, if you want to find the average sales amount in cells B2: B13, use AVERAGE(B2: B13) and press Enter. This function adds up the values in the selected range and divides them by the count of numbers to calculate the average. This can be beneficial in financial forecasting and performance reviews.
3. SUBTOTAL
The SUBTOTAL function allows you to calculate aggregate values in a filtered database. It only calculates the relevant entries without including the excluded data. Unlike SUM functions, SUBTOTAL doesn’t include hidden rows, making it ideal for summarizing visible data.
For example, if you use =SUBTOTAL(9, B2: B13) and hit Enter, you will get the total of the visible values in that range. The number 9 in the formula represents the SUM function, so don’t change it. You can use it on pivot tables and filtered lists.
4. MIN and MAX
The MIN and MAX functions help you find the smallest and largest values in a selected range. For example, if you type =MIN(B2: B13) and hit Enter, it will show you the smallest value from the specified range. However, you will get the largest number if you type =MAX(B2: B13) and press Enter.
These functions are theoretical concepts and practical tools that you can use to identify extremes in your data. Whether it’s the lowest and highest sales figures, test scores, or any other data point, the MIN and MAX functions help you make sense of your data.
5. COUNT
The COUNT function counts the number of cells containing numeric values within the selected range. For example, if you type =COUNT(B2: B13) and press Enter, you will get the number of cells in that range containing numbers.
This basic Excel formula can be helpful in statistical analysis, as it allows you to understand how many data points are numeric. It can also help you in data validation and ensure the datasets are complete, making data management easier.
6. COUNTA
COUNTA is a formula that counts all non-empty cells in a selected area, regardless of whether they contain text, numbers, or errors.
For instance, the formula =COUNTA(A1:C13) will give you the number of cells with data in the area. This can help you track progress in datasets, such as counting completed tasks. Its efficiency in providing data usage insights surpasses COUNT’s, making it an essential tool in data analysis.
7. REPLACE
The REPLACE function allows you to change a portion of a text string based on chosen parameters. For example, if you type =REPLACE(B1, 1, 6, “AMT”) and press Enter, it will replace the first six characters in cell A1 with AMT starting with the first character.
This function allows you to correct errors or update specific text parts, such as typos. This is important for streamlining data management and enhancing efficiency in text processing.
8. SUBSTITUTE
SUBSTITUTE replaces specific occurrences of a text string within another string, which gives you precise control over text changes.
For instance, if you type =SUBSTITUTE(B1, “Amount”, “AMT”) and hit Enter, it will replace Amount with AMT in the text found in cell B1. You can use this formula to make changes in multiple places in a document. This basic formula of Excel can help change outdated terms, correct repeated errors, and ensure clarity in your data.
9. NOW
The NOW formula shows the current date and time, which can be helpful when time-stamping data entries or tracking changes.
To get the exact date and time, you must type =NOW() and hit Enter. This is a dynamic function, so the date and time are updated every time the spreadsheet recalculates. This can benefit project management, scheduling, and real-time event tracking.
10. TODAY
The TODAY function gives the current date without the exact time, which can be ideal for date-based timelines.
To get today’s date, type =TODAY() and press Enter. You can use this formula when setting deadlines and tracking time in projects.
The TODAY function is dynamic, meaning it automatically updates the date when the spreadsheet is opened. This feature is particularly useful for maintaining up-to-date reports, planning tools, and more.
11. TIME()
The TIME function shows you a time value in specified hour, minute, and second inputs.
For example, if you type TIME(14, 30, 0) and press Enter to execute it, you will get 2:30 PM as the output. You can use this function to schedule events and calculate time intervals in tasks.
This basic formula of Excel allows you to generate precise time values, which can be helpful time management, promoting better organization and planning
12. HOUR, MINUTE, SECOND
HOUR, MINUTE, and SECOND functions retrieve hour, minute, or second from the time value selected. For example, if you type=HOUR(L1) and press Enter, this will extract the hour component from the time in cell L1. Similarly, if you type =MINUTE(L1) or =SECOND(L1) and press Enter, you can get the minutes and seconds mentioned in the cell.
You can use these basic Excel formulas while analyzing time and breaking down the time data for detailed reporting, including time spent on tasks.
13. MODULUS
The MODULUS function shows the remainder after division, which can be helpful for mathematical checks. For example, type =MOD(J1, 2) and press Enter, it determines whether the value in cell J1 is even or odd( it returns 0 for even). This function can categorize data or implement periodic tasks. It can also simplify complex calculations, speed up processes, and facilitate batch processing.
14. LEFT, RIGHT, MID
The LEFT, RIGHT, and MID functions show you specific characters from text. Left will display the number of characters from the start. Type =LEFT(K1, 3) and press Enter, and you will get the first three characters.
However, if you type =RIGHT(K1, 4) and hit Enter, you will extract characters from the end. For MID, type =MID(K1, 2, 5) and press Enter to get the middle characters starting from the specified position.
You can also use these functions for data parsing, like extracting area codes from phone numbers.
15. IF
The IF formula allows you to perform a logical test and gives different values based on the result.
For example, if you type =IF(L1 >= 60, “Pass”, “Fail”) and hit Enter, it will evaluate whether the value in L1 meets the threshold of 60, so it will return “Pass” if true and “Fail” if false.
It is usually used for decision-making scenarios like performance evaluations and grading systems.
16. DATEDIF
DATEDIF calculates the difference between two dates in specified units: years, months, and days. For example, if you type =DATEDIF(M1, N1, “Y”) and press Enter, you will get the years between the dates mentioned in cells M1 and N1. The DATEDIF function is a time-saving tool that automates date calculations. Whether calculating ages, tracking project durations, or simplifying date comparisons for planning and reporting, this function can handle it all, saving you time and effort.
The POWER function raises a number to a certain power. For example, if you type =POWER(3, 2) and press Enter, you will get a result of 9.
This function enables you to perform complex calculations efficiently and is essential in financial projections and mathematical and scientific calculations.
18. CEILING
The CEILING function rounds up the number in a cell to the nearest specified multiple. For example, if you type =CEILING(O1, 10) and hit Enter, the value or number in cell O1 will be rounded off to the nearest ten.
You can use it in financial calculations, such as estimating budgets or costs, as it accurately rounds off values and provides a clear understanding.
19. VLOOKUP
The VLOOKUP function looks for a value in the first column of a table and returns a related value from another column.
For example, if you type =VLOOKUP(B3, B2:E7,2, FALSE) and hit Enter, it will look for the value in B3 within the first column of the range B2:E7 and will show you the corresponding value from the second column.
YOu can use this function for data retrieval in large datasets, which makes accessing related information quickly, like prices or product details.
20. HLOOKUP
The HLOOKUP function works similarly to VLOOKUP, but it searches horizontally across the first row of a table. For example, if you type =HLOOKUP(Q1, A1:E5, 3, FALSE) and press Enter, it will find the value in Q1 in the first row and show you the corresponding value from the third row.
You can use it for horizontal tables like survey results or tabulated metrics, as it will help you retrieve data easily.
21. TRIM
The Trim function cleans up text by removing extra spaces from a string. It deleted leading spaces (spaces before the first character, trailing spaces (Spaces after the last character), and extra spaces between words.
For example, if cell A1 has the text ” Hello World “, you can type =TRIM(A1) and press Enter to get “Hello World”.
This function can be used if you are importing data from external sources, where there are spaces that can cause issues with data processing.
22. UPPER, LOWER, PROPER
The UPPER, LOWER, and PROPER are used to change the case of text in a cell. Upper changes the characters in a text string to uppercase. To do that, type =UPPER(R1) and hit Enter.
On the other hand, Lower changes all the characters to lowercase. To do that, type =LOWER(R1) and press Enter.
The Proper function capitalizes the first letter of each word. To do so, type =PROPER(R1) and hit Enter. You can use these functions to ensure the text in your data is uniform, enhancing readability.
23. FLOOR
The FLOOR function rounds a number down to the nearest specified multiple. For example, if you type =FLOOR(O1, 5) and press Enter, the value or number in cell O1 will be rounded off to the nearest five.
You can use this function in calculating discounts or at the time of budgeting. This function makes precise calculations, ensuring accuracy in financial reporting.
24. CONCATENATE
The CONCATENATE function allows you to join multiple text strings into a single string. For example, if you type =CONCATENATE(T1, ” “, U1) and hit Enter, it will combine the content of both T1 and U1 with a space in between.
This function is used in creating full names from first, middle and last names correctly. You can also use it to merge information from different cells into a single field.
25. LEN
The LEN function counts the number of characters, including spaces and punctuation, in a text string. For example, if you type =LEN(V1) and press Enter, you will get the character count of the text in V1 cell.
You can use this function for data entry, content creation and more as it can help validate input lengths in forms, and also helps manage text efficiently
26. INDEX-MATCH
The INDEX-MATCH combo can improve data lookup capabilities and is considered an improved version of VLOOKUP.
INDEX displays the value of a cell in a selected row and column, while MATCH finds the value’s position within the selected range.
For example, if you type =INDEX(A1:A10, MATCH(W1, B1:B10, 0)) and hit Enter, it will search for the value mentioned in V1 within B1 to B10, returning to a matching value from A1 to A10. This combination formula makes handling large datasets easy.
27. COUNTIF
The COUNTIF function counts the number of cells if they meet a specific criterion within the selected range. For example, if you type =COUNTIF(X1:X10, “>100”) and press Enter, it will count the values in range X1 to X10 greater than 100.
You can use it to track sales above a target or count occurrences of specific conditions. It can provide important insights into datasets, which helps you make data-driven decisions wisely.
28. SUMIF
The SUMIF function adds up the values in cells under a specified condition within the selected range. For instance, if you type =SUMIF(Y1:Y10, “>100”, Z1:Z10) and hit Enter, it will add up the values in Z1 to Z10 that match with cells in Y1 to Y10 that are greater than 100.
You can use this function to calculate totals based on specific criteria and, therefore, be helpful in budgeting and reporting.
29. If-Else
The If-Else function in Excel allows the application of conditional logic in formulas. It works like the IF function but comes with multiple other conditions.
For example, you can use =IF(A1 > 90, “Excellent”, IF(A1 > 75, “Good”, “Needs Improvement”)) to distinguish scores. This function can help you make complex decisions in data analysis and categorize data based on various scenarios.
30. If-Error
The IFERROR function allows you to capture and manage errors in formulas as it provides an alternate result when an error appears. For example, if you type =IFERROR(A1/B1, “Error in Calculation”) and press Enter, wherein A1 is 10 while B1 is 0, it will result in an Error in Calculation as you can’t divide a number by zero.
This formula can help you avoid confusing error messages and enhance the robustness of data analysis, thereby improving the overall user experience.
Conclusion
These are the basic Excel formulas you can use to transform the way you analyze your data. As you become familiar with these functions, you can gain deeper insights into your data and make better decisions.
The best Discord alternatives should have voice, video, and messaging features to provide a smooth communication experience. Discord is popular for gaming and community chats, but there are several options if you want more security or better voice quality.
After testing over 20 platforms, I singled out five with unique features. Eager to know which ones made it to the list?
Telegram has grown in popularity due to its powerful group chat features and high file-sharing limits. It allows users to send files up to 2GB in size, making it suitable for teams and individuals who frequently share large documents, videos, or images. This platform also supports several operating systems, including Android, iOS, Windows, macOS, and Linux.
Telegram allows up to 200,000 members in a group and includes private chats, which are end-to-end encrypted for those who prioritize security.
Another unique feature is the bot ecosystem. You can automate tasks, schedule reminders, and interact with various web services. It’s also cloud-based so you can access your messages and files from any device by linking them.
Pros:
Supports up to 2GB file sharing.
Cloud-based access across multiple devices.
Secure private chats with end-to-end encryption.
Feature-rich group chats with up to 200,000 members.
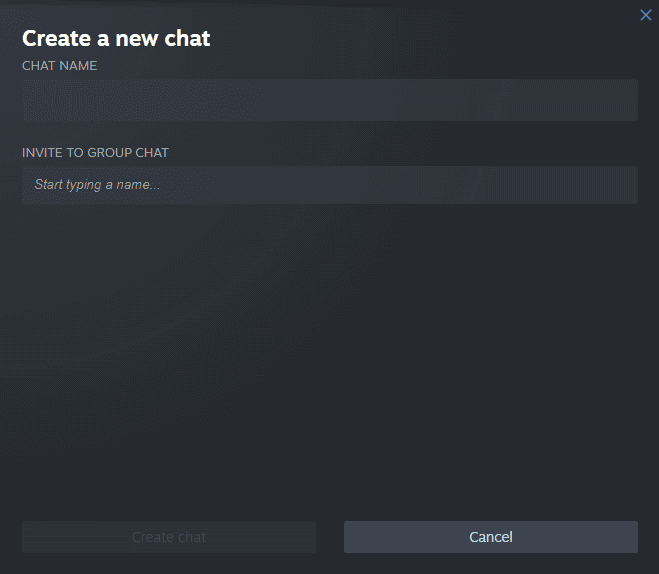
Steam Chat is an effective communication tool for playing, discussing, and creating games. It has several features, including voice, video, and text messaging, and it’s tailored for gaming communities. Steam Chat allows users to create custom group chats and voice channels.
You can also send links, images, and even game invites directly through the chat. It’s an excellent alternative for gamers who don’t want to switch platforms.
Plus, Steam Chat features end-to-end encryption for secure communication and the option to protect accounts using two-factor authentication (2FA) called Steam Guard.
Pros:
Seamless integration with Steam for in-game chats.
Custom group chats and voice channels.
Easy media sharing, including images, links, and game invites.
Slack is well-known for its team collaboration tools, making it a great alternative to Discord, especially for professionals and businesses. While it’s designed primarily for workplace communication, its advanced features suit all communities. It has channels for organizing conversations and direct messaging for private chats.
This platform also has a powerful search button to find past discussions or shared files quickly.
Another unique feature is its ability to integrate third-party apps and services, such as Google Drive, Zoom, and Trello. Additionally, Slack supports voice and video calls, though its focus remains on text-based communication.
Pros:
Advanced organizational tools with channels and threads.
Integration with apps and services.
Strong search function for finding past conversations and files.
Supports both voice and video calls.
Ideal for professional and project-based communication.
Cons:
The free version limits message history and integrations.
Less focused on gaming and entertainment communities.
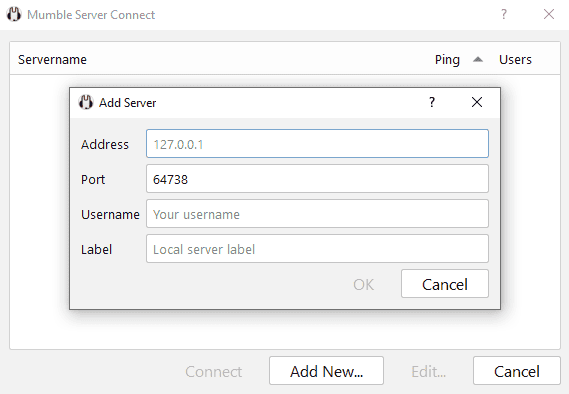
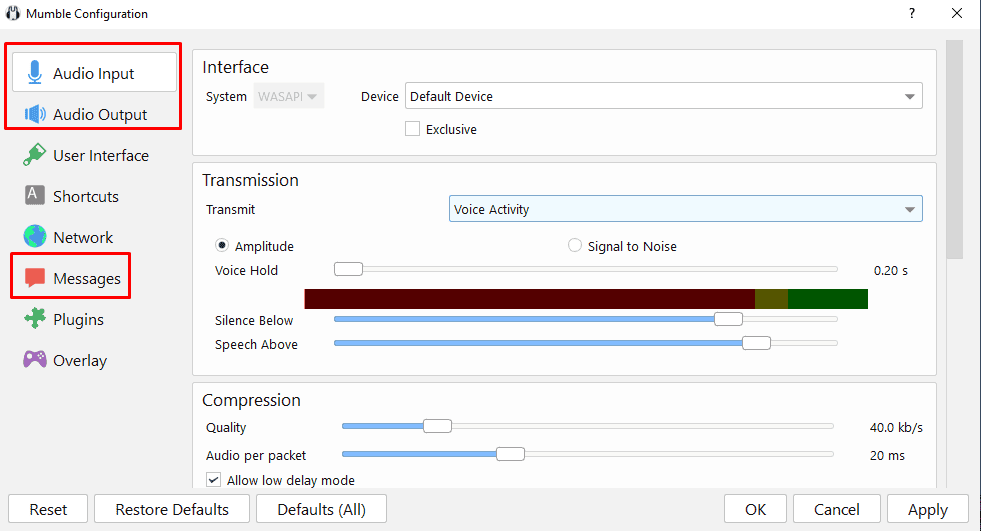
Mumble is an open-source, low-latency voice chat platform mainly used by gamers and teams that require real-time communication. One of its standout features is the low delay between speaking and being heard. It’s highly customizable, allowing users to run their servers and giving them more control over privacy and functionality.
Mumble is also known for its positional audio feature, which changes voice chat audio based on the position of players in a game.
Additionally, it’s lightweight and uses minimal system resources, so it’s a solid choice for users with less powerful hardware. The software supports voice chat and text but lacks video and multimedia features, focusing strictly on clear communication.
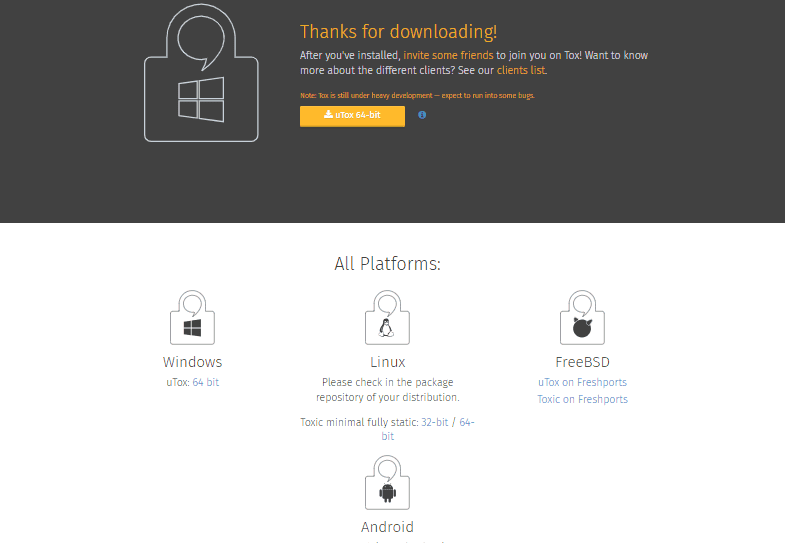
Tox is a decentralized messaging platform that emphasizes privacy and security. What makes Tox unique is its peer-to-peer architecture, meaning that no central server can go down or be hacked. Every conversation is encrypted end-to-end.
Also, it’s compatible with several Operating Systems, including Windows, Linux, FreeBSD, and Android.
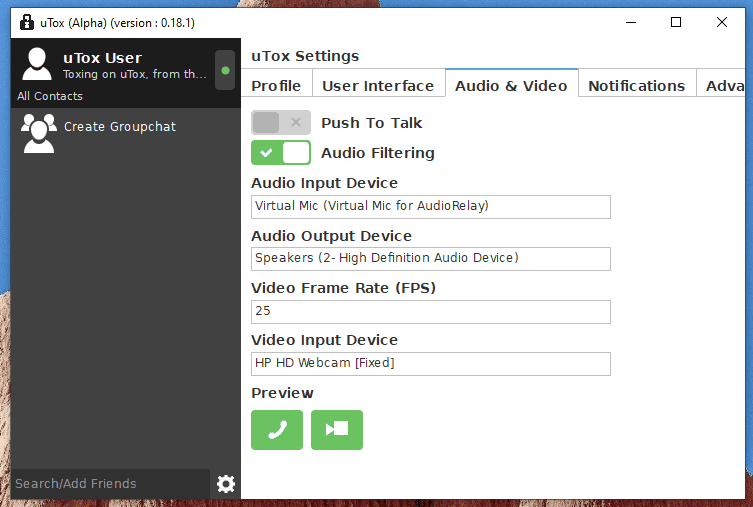
Tox offers several communication options, including text, voice, video, and file sharing. It’s also open-source, allowing anyone to inspect or modify its code.
However, since it’s decentralized, users may experience slower speeds and higher resource consumption than centralized services.
Pros:
Complete privacy with end-to-end encryption.
Decentralized, meaning no central server control.
Has text, voice, video chat, and file-sharing features.
While selecting these alternatives, here’s what I considered:
End-to-end encryption and decentralized communication for maximum user privacy.
High-quality, low-latency audio and video chat performance.
Strong customization options allow users to tailor their experience to fit specific needs.
Ease of use, accessibility, and overall user experience.
Availability across different devices and operating systems.
If you want more information, we have a fresh Discord vs Telegram guide that compares the two services in detail, so you might want to check it out.
The best Discord alternatives depend on your needs. Whether you prioritize privacy, voice quality, or user experience, each platform offers something unique. Consider what matters most to you, such as secure communication or cross-platform compatibility. There’s a solution for everyone looking for a new way to stay connected.
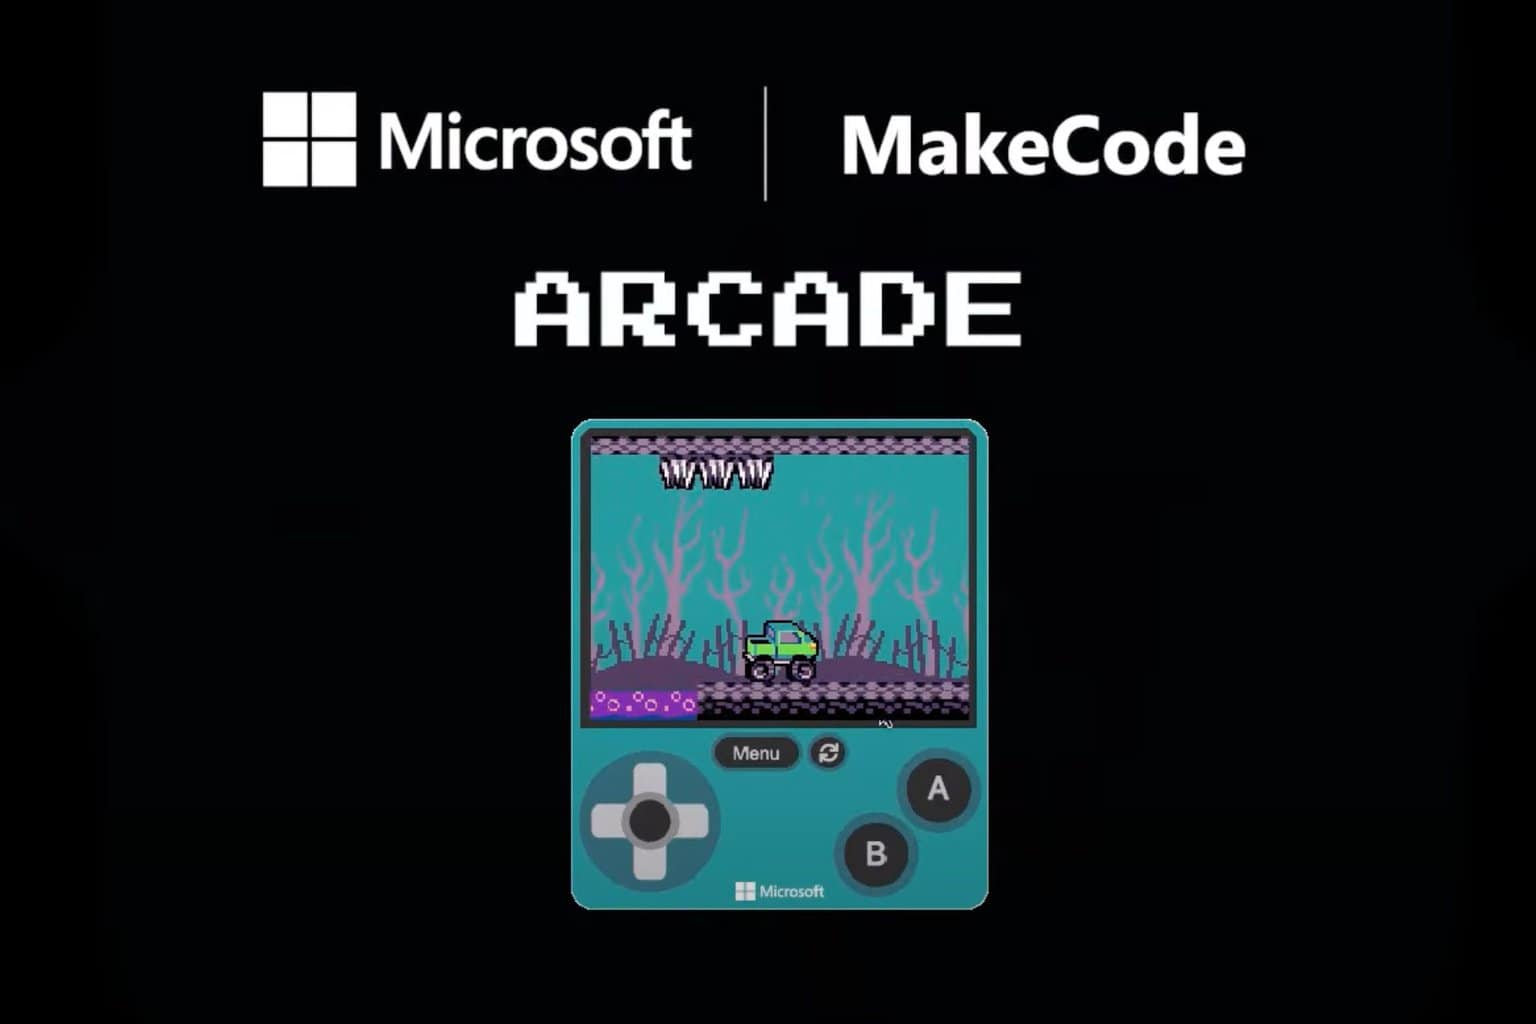
Microsoft Makecode Arcade is a free online code editor designed to help students (but not limited to them) learn coding skills while enjoying a fun, creative experience. With Makecode Arcade, users can create, customize, and share their retro arcade games for the web or handheld consoles, online and for free.
The platform is heavily visually centered, and it has many interactive elements that make it easy to remember where to put code and where to put other aspects. Speaking of interaction, with Microsoft Makecode Arcade, you can develop your own video game, even if you don’t have any experience with coding or game design,
Microsoft Makecode Arcade: Who is it for?
Generally speaking, Microsoft Makecode Arcade is a suitable platform for everyone, from beginners to those with coding experience. But it’s also ideal for:
Children who are passionate about video games or coding.
Programming students or those learning how to code.
Video game enthusiasts and game designers.
Adults seeking to learn how to code.
Teachers and education professionals looking to provide students with an engaging yet balanced learning experience.
And indeed, the list can go on.
Microsoft Makecode Arcade: What can you do with it?
If you’re curious about coding, Microsoft Makecode Arcade is the place to go. The platform now allows users to code in JavaScript and Python, two of the most popular and widely used programming languages.
Microsoft Makecode Arcade currently only supports Blocks, JavaScript, and Python, so you might want to look elsewhere to learn a back-end programming language, such as C+.
Tutorials are available for coders at every level, from introductory to more advanced, and users can either start by using Block Code for an intuitive experience or directly work in JavaScript for more control.
For educators, Makecode Arcade has a wide range of lesson plans and courses across various subjects, such as AP Computer Science Principles, Introduction to Computer Science with Makecode Arcade, and GameGo Programming.
There’s even an Educator’s Lounge where teachers and facilitators can share resources and discuss best practices.
While coding games is the primary focus of Makecode Arcade, the platform also provides lessons on creating DIY hardware, such as building custom controllers and arcade cabinets.
For those with hardware such as micro: bits or Meowbits, Makecode Arcade offers resources to integrate these devices into the coding experience. To further inspire creativity, Makecode Arcade offers non-tech projects, such as creating a LEGO brick mural.
Ultimately, Microsoft Makecode Arcade is a valuable resource for anyone looking to develop coding skills in a fun and engaging way. With a rich source of projects and tutorials, it’s an excellent environment to grow your coding knowledge. It’s also a fantastic platform for novice game developers to learn the ropes of coding.
That said, learning to use Microsoft Makecode Arcade is not hard. The platform’s focus on vivid colors, highly interactive elements, and assisted learning through tutorials makes the whole experience easier, even for those who haven’t coded their entire life.
How to use it?
To start coding/building your game on MakeCode Arcade, navigate to the arcade.makecode.com site.
You can choose to log in or not. But if you’re not logged in, you won’t be able to save and share your projects. To log in, go to the top-right corner and choose your preferred method (you can log in using your Microsoft, Google, or Facebook account, among others).
On the platform, as a beginner, it’s highly recommended you should try the tutorials and skill maps, and Microsoft MakeCode Arcade has dozens of them, such as:
Beginner Skillmaps
Next Level Skillmaps
Tutorials
Multiplayer Tutorials
Multiplayer Games
Live Coding
Blocks Games
JavaScript Games
Game Jam
Advanced Livestream
Community Games
Game Design Concepts
Graphics and Math
Arts and Crafts
Lessons
Courses
Arcade Compatible Devices
DIY Hardware
How to Make a Game Videos
John Park’s Workshops
Each section contains between 3 and 20 examples of games, puzzles, lessons, and tutorials, so you have more than enough to learn everything about coding and making games. Take your time to go through each of them, as they will all teach step-by-step how to use every element in Microsoft MakeCode Arcade to build a video game.
You can also create a new project by clicking the New Project button.
Once you decide to create a new project, you can give it a name by typing up your preferred name in the Give your project a name box; you’ll need to select your preferred code options – you have three options:
Blocks, JavaScript, and Python
Python Only
JavaScript Only
When everything is done, hit the Create button.
And while we’re here, we’ll show you everything you need to know about creating your first video game in Microsoft MakeCode Arcade.
You’ll be greeted with the main window, your programming space, where you can piece together your game code. (Note: everything on these sections is interactive)
There are three sections. The first is the Preview Area, where you can see your game’s progress in real-time.
The Toolbar section is where you can search for and select elements and blocks of code you need for your game.
The Working space is where you combine all elements to create the video game.
You can access all the code blocks required to build a game from the colored and categorized drawers. If you have trouble finding a particular block, there’s a search box to help you. You can also easily drag and drop blocks from the Toolbar section into the Working space, which will be previewed in the Preview area.
As you start creating your game, it will be previewed in the simulator window, enabling you to test it using keyboard controls.
As you become more advanced in coding, you can switch between drag-and-drop blocks and different text-based languages, such as JavaScript or Python, for more complex programming.
You can save your work by naming the file and clicking Save. This will download the file to your computer and save the game to your computer’s cookies if you want to resume working on it later.
You can also save it as a GitHub Repository, but you’ll need to link your GitHub profile with Microsoft MakeCode Arcade.
When you’re ready to share your game, you can use the share button to distribute it in various ways, including social media networks.
Once your project is done, you can also download it by clicking the Download button at the bottom left of the page. Microsoft MakeCode Arcade will then show you a list of options.
Now that you have an excellent introduction to what Microsoft MakeCode Arcade is capable of, you can easily build your own arcade game in no time while also learning to code in JavaScript and Python.
If you’re looking for more advanced engines, you’ll find the best list here, but if you have no experience in game design or coding, it’s probably best to start with this platform first.
What do you think about it? Did you know about this platform?
The gws_rd=ssl#spf=1 may appear on your browser address path when you visit a site. If your site loads, it isn’t much of a problem. It’s simply Google’s way of ensuring the data transmitted between the server and your browser is encrypted hence forcing the SSL connection.
The redirection is actually meant to ensure your web security is in place. However, if you experience extended load times, lagging or sites won’t load, then it may be another problem with your SSL certificate that needs to be addressed.
How do I get rid of the gws_rd=ssl#spf=1 error?
1. Verify the site’s certificate
Try to open the website that is giving you this error.
Click the lock icon in the address bar.
Look for Connection is secure option. You can click it to view more information.
Now when you click on certificate, you’ll see detailed information about it.
2. Adjust your tracking prevention settings
Open Microsoft Edge or your select browser and click on the three horizontal ellipses at the top right corner.
Click on Settings.
Select Privacy, search, and services.
Toggle on the Tracking prevention option and click on Balanced.
3. Add the blocked site as a trusted site
Open the Start Menu, type Internet options, and hit Enter.
Go to the Security tab and select Trusted sites.
Click on Sites.
Add the problematic website to the trusted site list.
Press the Windows key +R keyboard hotkeys to bring the Run box.
Type the line below and press Enter: inetcpl.cpl
Switch to the Content tab. Click on Clear SSL state.
Save your changes and close this window at the end.
5. Ensure site’s SSL certificate is valid
Try visiting the website again, and if you see the SSL_ERROR_BAD_CERT_DOMAIN error code, click I understand the Risks.
Now click the Add Exception button.
On the Add Security Exception window, click Get Certificate to retrieve the certificate and understand the issues related to it.
Now, to check the certificate for more details, click the View button.
Under General, locate and check the Period of Validity.
6. Turn off SSL scanning from antivirus software
6.1 BitDefender
Open the BitDefender interface and access Settings.
From there, go to Privacy Control and switch to the Antiphishing tab.
Disable Scan SSL.
On other BitDefender versions, you might have to access Protection, and from under Web Protection, you can find the Scan SSL feature.
6.2 AVAST
Open Avast and navigate towards Settings.
Select Protection, and under Core Shields, select Web Shield.
From there, you can disable the SSL scan.
6.3 Kaspersky
Access Kaspersky’s Settings page.
From there, go to Network Settings.
SSL settings will be displayed at this point.
Just disable the settings that are related to the SSL scan.
Your antivirus software may be blocking legitimate HTTPS connections so disabling it temporarily can help get rid of this error. However, we do not recommend switching off this scan as it foregoes scanning any encrypted traffic that may contain malicious content that can infect your device.
For more like errors like the gwl_rd=ssl or gws-rd-cr, check out our detailed article on how to resolve it. In future, we recommend leaning more towards browsers focused on privacy and security as they often integrate encryption features by default.
Otherwise, let us know if you have any other solutions that worked for you in the comment section.
Having a portable battery is a must-have if you’re traveling or on the go, and in today’s guide, we’re going to show you the best 25000mAh power bank you can get.
The first you’ll notice about this model is its design and a large TFT display that gives you all the relevant information regarding the remaining battery, input/output power, voltage, and more.
This model has a 25000 mAh capacity which should be enough to recharge your phone about 5 times. As for charging, there are two USB-C ports available along with a single USB-A port, so you can charge three devices at the same time.
Regarding the output, this power bank can deliver up to 200W, allowing you to recharge various devices up to 50% in under 30 minutes.
The recharging speed is also great, and with 65W input power, the entire battery is charged fully in just 2.5 hours. Overall, UGREEN Nexode Power Bank offers outstanding performance, which makes it a perfect traveling companion.
This device from Anker comes with 25,600 mAh capacity, which is more than enough to recharge your laptop or any other device. That’s enough power to recharge an iPhone about 5 times and a MacBook Air once with some charge still remaining.
The device has 3 USB ports, two USB-A ports that deliver 18W of shared output power, and a USB-C port that provides 60W.
Anker 737 Power Bank comes with a 65W wall charger that allows you to recharge it fully in just 2.5 hours. With its great capacity and output power, this is one power bank that you mustn’t miss.
Sharge Storm 2 comes with a transparent case, so it stands out from other power banks in terms of design. As for the capacity, this bank offers 25600 mAh capacity which is enough to charge MacBook almost twice and iPhone up to 7 times.
The device has 100W input and output power delivery, so it will charge your devices faster than before. Regarding the number of devices, this model can charge up to 3 devices.
There are two USB-C ports available, and one can deliver up to 100W thanks to PD 3.0, while the other is limited to 30W, but it also uses PD 3.0 as well as QC 4+. Lastly, there’s a USB-A 18W port with QC 3.0 support.
It also has a 75W DC output/input that might come in handy. The power bank also has a low-reflective IPS screen that gives you information regarding battery life, temperature, voltage, and other useful real-time information.
Sharge Storm 2 takes only 90 minutes to fully recharge, and with its transparent design, it’s one of the most unique power banks that we have seen recently.
UGREEN Power Bank is a premium energy backup product for fast charging. You can recharge laptops that support USB-A and USB-C charging cables, at a lightning-fast speed using the 145W charging capability.
The portable battery pack has a capacity of 25000mAh. It uses three output ports to deliver charge to the connected devices. Of those three, two are USB-C and one is USB-A.
The first USB-C port comes with the in & out technology. It can charge the power bank at a 65W rate when functioning as an input and charges the connected device at 145W capacity as its output feature. The second USB-C port has an output rating of 65W and the USB-A port has a rating of 22.5W.
It also includes a bidirectional charging feature. The 65W input fully charges the power bank in two hours. For smaller devices, like smartwatches, you can use the USB-A port for a lesser output current.
This power bank comes with a 24,000mAh capacity, and it will give you enough power to recharge your iPhone 13 five times or iPad Pro once, with without using all of its capacity.
As for the output, there’s 140W Power Delivery 3.1 technology that can charge MacBook Pro 16 up to 40% in just 40 minutes. As for the bank itself, it takes about 52 minutes to fully recharge it.
As for available ports, there are two USB-C ports available with 140W max output. As for the USB-A port, it will deliver up to 18W max.
Lastly, we have to mention the smart digital display that will give you all the relevant information such as battery level, remaining battery time, and output per port.
This is a great power bank, and it does have slightly less capacity than other entries on our list, but it makes up for it with amazing speed and performance.
So, these are some of the most powerful external battery packs. You can choose the best power bank of 25000mAh depending on your requirements and budget.
We’ve got our hands on the Samsung Galaxy Book4 Edge laptop and we’re bringing you an unbiased review based on our experience and information from other sources. As you probably know already, Book4 Edge is the series that boasts the Snapdragon X Elite X1E-80-100 and X1E-84-100 SoCs from Qualcomm.
But Samsung Galaxy Book4 Pro with Intel Core Ultra 7 CPU is at exactly the same price ($1,749.99) as Samsung Galaxy Book4 Edge with Snapdragon X Elite X1E-84-100. So, it’s about ARM or X86 Flavors here. So, first, we’re going to talk about Samsung Galaxy Book4 Edge and do a short comparison with the Intel CPU version.
Samsung Galaxy Book4 Edge Review
1. Technical specifications
We’re starting with the main technical specifications for the Samsung Galaxy Book4 Edge.
2x USB Type-C (USB 4.0), 1x HDMI 2.1, 1x Audio Jack (3.5 mm)
Connectivity
Wi-Fi 7, Bluetooth 5.4
Webcam
1920 x 1080
Audio
2.2 speakers (2 tweeters, 2 woofers), Dolby Atmos
Dimensions
13.99 x 9.86 x 0.48 inches (16″ model)
Weight
13.42 lbs. (16″ model)
Operating System
Windows 11, Copilot Plus
Special Features
Anti-reflective cover glass, Vision Booster, AI key, Windows Studio Effects
The technical specifications are solid, but we were curious on how the relatively small 61.8Wh battery will cope with the big screen and normal usage, but we will get back to that below.
Another thing we noticed is that the SSD is actually soldiered on the motherboard. That means you can’t add or change the storage if you want to.
2. Look, feel and ports
For all it takes, we can’t get past Samsung Galaxy Book4 Edge’s elegant design. It looks and it feels like a premium device. And after you power it up and the 16-inch AMOLED display (2880 x 1800 pixels) turns on, you can’t help but being mesmerized by the brightness and colors.
The keyboard is smooth to the touch and the thin bezel looks like a fancy photo frame. It’s almost a pity that you can get to touch it with your fingers, but that is also a great feature of the awesome display.
It’s also impressive to see a laptop with a huge 16-inch screen that is so thin (just 0.48 inches thick!). However, we didn’t get too excited about that because a thin case also translates into less room for cooling, but we’ll come back for that aspect.
As for the ports, you get 1 USB3.2 and 2 USB4.0 ports, one MicroSD card reader, a HDMI 2.1 port that supports 4K@60Hz and an audio jack. That’s less then ideal, but that’s the general approach of all manufacturers for this kind of slim laptops. Let’s just say that if you’ll need more wired peripherals, you’ll have to get a fast USB hub.
3. Running the apps and working
Installing a browser and streaming some videos was a pleasure and everything was running pretty smoothly, but after a couple of hours, the Wi-Fi disconnected inexplicably while other devices in the same room were still connected. Turning off and on the Wi-Fi cleared that problem, but it happen twice in a day.
Looking through other user reviews we’ve discovered that a few users had the same problem, so we’re wondering if it’s a general bug or just a scarce occurrence with some adapters.
Another issue appeared after we started Microsoft Word. It randomly froze during typing. We realized that we also had 10 Chrome tabs opened and Slack, plus a File Explorer window and the memory usage was close to 80%. We blame this on the ARM SoC running X86 apps. It wasn’t a big annoyance or a deal breaker, but for such a power laptop, the apps we were running should be a breeze.
Apparently, there is still a lot of work to be done in optimizing the X86 content for ARM, and that should be a reason enough to wait a while and see the technology mature. The ARM wave is just at the beginning and we’re sure it’s going to solve all these issues, but right now, it’s pretty tough if you’re an early adopter.
We also tried playing a 3D cozy game called Palia, that has great music and graphics. We turned all graphics settings to max and the game ran smoothly and nice, but after half an hour, we noticed that the laptop seriously heated up so we took it down a notch. However, this is not a gaming laptop, it has onboard graphics and it was created for regular usage like doing some office work, streaming content, browsing, studying etc.
4. Battery life
We’ve looked at a couple of reviews prior of testing Samsung Galaxy Book4 Edge. Some users were telling stories about 14 hours of battery life, others were disappointed, reporting less than 8 hours of juice. We tried simulating a normal usage for this laptop and after 8 hours of working with some communication tools, word processor, and a browser, we fired up a video on demand app and watched a movie.
We barely got to see it in full, the laptop switching to the energy efficiency mode to spare the battery. We rinsed and repeated the process a few days and the results were pretty much the same. The battery was running out after around 10 hours.
However, we need to mention that we used a balanced power mode and we didn’t use the auto dimming option. We kept a steady 60% brightness. We mention these because especially for a big display, the power mode and brightness can make a notable difference. Even so, it’s hard to believe that you can reach a 14 hour battery life mark if you are using the laptop for work and leisure throughout a day.
Is Samsung Galaxy Book4 Pro better than Samsung Galaxy Book4 Edge?
In the beginning of this article, we promised to make a comparison with the Samsung Galaxy Book4 Pro that comes with an Intel Core Ultra 7 CPU just because they are listed at Samsung’s website at exactly the same price point.
From the get go, we didn’t tested the Samsung Galaxy Book4 Pro, but we have looked for a lot of relevant user reviews. Almost all of them touted a battery life of 13-14 hours for Samsung Galaxy Book4 Pro with regular usage similar to the one we’ve tested on Samsung Galaxy Book4 Edge which is significantly better while the performance was obviously better for native X86 applications.
That is even though all the artificial benchmarks out there, including the one from Nanotech show that Snapdragon X Elite X1E-84-100 is more powerful than Intel Core Ultra 7 Processor 155H. We’re not saying you should ignore the benchmarks, but we encourage you to research more into the actual experiences of the users before taking that leap into buying your next laptop.
Otherwise, the laptops are almost identical. Samsung Galaxy Book4 Pro is a bit heavier, but it can receive up to 32 GB of RAM and it also has an upgradable NAND flash storage.
As a conclusion to this review, Samsung Galaxy Book4 Edge is a pretty good personal laptop, but for the same price, Samsung Galaxy Book4 Pro is better equipped to handle Windows apps, at least for now.
Do you already own a Samsung Galaxy Book4 Edge laptop? Let us know about your experience in the comments below.
Many users don’t know that they can make a new line in a cell in Excel, and this is easier than you think. If you wish to learn how to do it, keep on reading.
How do I make a new line within a cell in Excel?
1. Use the keyboard shortcut
Enter the desired text in the cell.
Place the cursor where you want to add a line break.
Lastly, press left Alt + Enter.
This shortcut will let you make a new line in the Excel cell in a matter of seconds, so don’t hesitate to try it.
2. Use the Wrap Text option
Select the cell that has the text you want to wrap.
Next, go to Home tab and click on Wrap Text.
Adjust the column width and the text will automatically break in a new line.
Select the cell that you want to perform a line break in.
Click the function field in the top and add the following =(A3) & CHAR(10) & (B3)
The formula will now take values from A3 and B3 and add them to your cell with a line break between them.
Alternatively, you can use the following formula: =CONCATENATE(A3,CHAR(10),B3)
In case this looks confusing to you, this formula adds an Excel new line character, CHAR(10), in the cell between the two values.
How do you press Enter in Excel and stay in the same cell?
This is possible only if you use the Alt + Enter shortcut.
As you can see, it’s pretty simple to create a new line in Excel cell, and the fastest way to do that is with a keyboard shortcut, but more advanced users might be interested in using formulas instead.
Microsoft recently released KB5043064, the cumulative update for Windows 10 version 22H2. Needless to say, while the patch is mandatory, it has also caused many issues for users since its release.
First, the 0x800f0831 error code prevented the KB5043064 patch from installing on Windows 10 devices, but fortunately, the bug also has a solution now.
However, it seems that the patch has also run into another bug. The 0x80070643 error is stopping KB5043064 from installing in Windows 10. Some users have tried installing the patch on Windows forums for over a week.
I have been trying to install this update for over a week. I have tried several suggestions, but all I get is the update reaching 20% sometimes and 100% the other but then failing to install.
So, how can the 0x80070643 error be fixed, stopping KB5043064 from installing on Windows 10? There is a solution, and it requires repairing the device altogether.
Click Upgrade this PC now, and follow the steps to complete the repair installation.
The process will repair your Windows 10 device without erasing your data. To do so, enable the Keep personal files and apps option.
It’s not the first time that the 0x80070643 error has appeared when installing Windows 10/Windows 11 updates. If the solution above still doesn’t work (although we doubt it), you might want to check other fixes for this frustrating bug.
Setting up a Windows 11 hotspot via CMD (the Command Prompt) is a great solution when you’re without a Wi-Fi router.
Just like your smartphone, your Windows 11 PC can easily create a Wi-Fi hotspot. It’s a simple process, especially if you’re comfortable using the Terminal or Command Prompt tools.
I’ve provided a step-by-step setup below and alternative methods, so let’s get started!
What Is Windows 11 Hotspot CMD?
Windows 11 Hotspot CMD is a simple method that allows you to create a Wi-Fi hotspot directly from your PC. You can use the command-line tool (CMD) to execute specific commands and create a hotspot with customized settings. It’s the built-in Windows Command Prompt or Windows PowerShell.
You might want to follow this method rather than the Windows Settings app for the following reasons:
CMD offers granular control over your hotspot settings, allowing you to customize functions that might not be available through the GUI.
You can create scripts to automate the hotspot creation process, allowing you to activate the feature even when you’re not around.
CMD can provide more detailed information and troubleshooting options when you face problems with the Windows 11 mobile hotspot feature.
System Requirements for Hotspot
You can use this approach if the user account and PC meet the following conditions:
Your Windows 11 PC must have a Wi-Fi adapter that supports the Hosted Network feature. This is typically a modern wireless adapter.
You’ll also need to run CMD or Terminal as an administrator to create and manage the hotspot.
The PC is running the latest driver for the Wi-FI adapter.
How To Configure Windows 11 Hotspot via CMD
Now, let me outline below the simple commands and steps you can follow to get started:
Check Hosted Network Support
In the first step, you’ll find out if your PC supports the Hosted Network feature by running a simple command in CMD.
Click on the Start menu and type CMD.
Select the Run as administrator option for Command Prompt.
The Windows 11 CMD will open in admin mode showing the following default address:
C:\Windows\System32>
Now, copy and paste this command inside the CMD and hit Enter:
netsh wlan show drivers
An elaborate report will show up in CMD.
Depending on the Wi-Fi adapter’s capabilities, you’ll get either Yes or No for the Hosted network supported parameter in the report.
If you see Yes, move on to the next step.
Contrarily, if you see No, get a Wi-Fi adapter that supports Hosted Network.
Enabling a Mobile Hotspot
Let’s consider that your PC’s Wi-Fi adapter has the necessary functionalities. Now, go back to the same CMD you opened earlier and enter the following command into it:
netsh wlan set hostednetwork mode=allow ssid=MyHotspot key=12345678
In the above script, make changes in the following code parameters:
ssid=MyHotspot: Replace MyHotspot with the network name you want to set for your device.
key=12345678: This is the hotspot network password parameter. Replace 12345678 with your own passphrase.
Hit Enter to execute the code.
If the device’s Hosted Network feature is working, you’ll see the following results in the CMD console:
The hosted network mode has been set to allow.
The SSID of the hosted network has been successfully changed.
The user key passphrase of the hosted network has been successfully changed.
So far, you’ve configured the hotspot network name or SSID and the hotspot password.
Now, run the following command in the same CMD interface to activate the Windows 11 Mobile Hotspot feature.
netsh wlan start hostednetwork
After successful execution, the CMD window will show the following values:
The hosted network started.
This confirms that you’ve enabled Windows 11 hotspot CMD the right way.
Checking the Hotspot Status
You can check the status of the active Windows 11 Mobile Hotspot feature using a simple CMD command. Find below the script you must run:
netsh wlan show hostednetwork
When the script runs successfully, you’ll get a report of the hotspot status in the following format:
Hosted network settings
-----------------------
    Mode                   : Allowed
    SSID name              : "MyHotspot"
    Max number of clients  : 100
    Authentication         : WPA2-Personal
    Cipher                 : CCMP

Hosted network status
---------------------
    Status                 : Started
    BSSID                  : xx:xx:xx:xx:xx:xx
    Radio type             : 802.11n
    Channel                : 11
    Number of clients      : 2
Here’s a quick rundown on this information to help you analyze the wireless network status:
Mode: It says whether the device has allowed the Hosted Network.
SSID name: This parameter shows the name of the Wi-Fi network. In this case, it’s MyHotspot.
Status: When you see the Started message in the Status parameter, the feature is active and your device is sharing its internet via Wi-Fi or Bluetooth.
BSSID: This is the MAC address of the virtual adapter of Windows 11 Mobile Hotspot.
Number of clients: It indicates the number of active devices sharing the network. In the current exercise, it’s two devices.
Change the Hotspot Configuration
Here are various commands you can use to customize the hotspot settings:
Configure the Maximum Number of Clients
Type in the following command inside an administrator CMD terminal and hit Enter:
netsh wlan set hostednetwork mode=allow ssid=YourNetworkName key=YourPassword maxclients=Number
In the above command, replace YourNetworkName with the SSID you need, YourPassword with a passphrase, and Number with a numeric value, like 10 for up to 10 devices.
If successful, you should see this output in the terminal:
The maximum number of clients has been successfully changed.
Change the Authentication Method
The Windows 11 Mobile Hotspot feature uses an encrypted authentication system for enhanced security. If you wish to change the protocol, use the following script in CMD:
netsh wlan set hostednetwork mode=allow ssid=YourNetworkName key=YourPassword auth=WPA2-Personal
The terminal will reply with the following message:
The authentication type has been successfully set to WPA2-Personal.
Modify the Wireless Mode
Should you need to change the Wi-Fi or Bluetooth network sharing mode, use the following script to start Windows 11 Mobile Hotspot feature:
netsh wlan set hostednetwork mode=allow ssid=YourNetworkName key=YourPassword mode=n
Replace WirelessMode with g for 802.11g mode or n for 802.11n mode.
You’ll get the following reply in the CMD if the activation is successful:
The radio type has been set to 802.11n.
Reset Hosted Network Settings
If the wireless network is running slow or not accepting connection requests from a new device, you can refresh it. Here’s the command you can try:
netsh wlan refresh hostednetwork
If the process is successful, you’ll see the following message in the terminal:
Hosted network has been refreshed.
Stopping the Mobile Hotspot
When you need to disable the Windows 11 Mobile Hotspot service, run the following script in CMD:
netsh wlan stop hostednetwork
The following output confirms that the service is now inactive:
The hosted network stopped.
Setting up a Windows 11 Hotspot Using CMD Batchfile
Do you want to enable the hotspot feature on system startup? Follow these steps:
Open a new Notepad file.
Copy and paste the following scripts inside the Notepad file:
Do you remember Winamp? The iconic media player Winamp Classic is back on the market, this time as open-source. The application, which has been around since the 1990s, was initially developed by Nullsoft, a company that eventually got acquired by AOL.
While the player has lost its former popularity, it’s still cherished by many, and now developers and enthusiasts can help shape its future.
The official Winamp account on X (formerly known as Twitter) announced the move, revealing that the “Winamp Legacy” source code is now available on GitHub. “Developers & retro lovers, it’s your chance to shape the iconic player’s future,” the tweet reads.
The #Winamp Legacy player source code is now open!
Developers & retro lovers, it’s your chance to shape the iconic player’s future.
Explore, modify, and build on the classic you know and love.
Nullsoft, now part of Microsoft, initially revealed plans to open-source Winamp earlier this year. The developer claims that the player has “slowed down” but that making it open-source should let enthusiasts bring Winamp up to date and “meet the current user needs.”
The current version of Winamp does not look the same as the media player it used to be. However, there is a legacy version that users can download, and with Winamp being open source now, the media player might not only survive but thrive in our era.
The source code for Winamp Classic is available at this link. You can download the player from the Winamp website if you lack development skills but still want to show Winamp some love.
The Winamp source code is available at the time of this writing, but the project’s GitHub page is still pretty empty.
Many users reported an Asset error detected in MTG Arena, and the error will prevent you from playing the game properly. However, there are a few solutions that you can use that will fix this issue.
How can I fix the Asset error detected in MTG Arena?
1. Change the regional format and region
Close the game completely.
Next, go to Settings and choose Time & language. Next, choose Language & region.
Set Regional format to English (United States).
Optional: Set Country or region to United States.
Optional: Some users suggest switching your Windows language to English.
Save changes and try to start the game again.
2. Renew your IP address
Press the Windows key + S and type cmd. Choose Run as administrator.
Run the following commands: ipconfig /release ipconfig /renew
Open the following directory: C:\Program Files\Wizards of the Coast\MTGA\MTGA_Data\Downloads\Data
Delete everything from the Data folder.
Start the client and let it download the missing files.
4. Modify your registry
Press the Windows key + R and enter regedit.
Next, navigate to the following path: HKEY_CURRENT_USER\Software\Wizards Of The Coast\MTGA
In the right pane, locate HashFilesOnStartup_h572346022 and double-click it.
Set the Value data to 1 and click OK.
How do I fix the MTG Arena network error?
This is another common error that occurs in MTG Arena, and to fix it visit our MTG Arena network error guide.
As you can see, it’s pretty simple to fix the Asset error detected in MTG Arena, and in most cases, you just need to change your regional settings. If nothing else works, you might have to reinstall your game.
ERROR_HANDLE_EOF is easier to fix if you follow this DIY troubleshooting guide.
You might face Windows update and driver installation errors where the task ends abruptly. In all such cases, the installer can’t read the whole installation package.
I’ve recreated the issue in a test environment and have tried several troubleshooting approaches. Here are the methods that worked out for me!
What Is ERROR_HANDLE_EOF?
ERROR_HANDLE_EOF is a Windows error that means a software code, package installer, or multimedia player is trying to read a file beyond its last byte. It usually occurs because the faulty program expects more data than what’s already in the source file or software code.
Here’s the detailed description:
ERROR_HANDLE_EOF: 38 (0x26) Reached the end of the file.
It commonly occurs during:
Installing Windows updates from a package installer, like applying Service Pack upgrades to Windows 7 or earlier operating systems.
Now, let me walk you through the proven methods to fix error code 38 (0x26), “Reached the end of the file.”
Try These Basic Fixes First
Restart device: The best option is to try to reboot the PC and start the operation again to see if the issue goes away by itself.
Clear software distribution folder:
Open the Start menu and type Command Prompt.
Right-click on Command Prompt and select Run as administrator.
In the terminal, type net stop wuauserv, and press Enter. This will stop the Windows Update service.
Type del /f /q %windir%\SoftwareDistribution and press Enter. This will delete all files and folders in the SoftwareDistribution directory.
Type net start wuauserv and press Enter. This will restart the Windows Update service.
Close the Command Prompt window.
Windows Update will start filling the directory with the necessary files.
Redownload the source file: Often, the installer or updater program works just fine. The problem lies with the file being read. Delete the existing file and download a fresh copy. You can check with the file developer for any clarification regarding the bug ERROR_HANDLE_EOF.
Use a different software: For database, multimedia, etc., files, use an alternate tool to read and write those files.
Fix File Permissions Issues
Your Windows User Account must possess enough Read and Write permissions to a file so apps can read and write files seamlessly. Often, Read and Write permissions might get overwritten by Deny actions if permissions have been set up incorrectly. Follow these instructions to check and rectify them:
Locate the source file, right-click, and choose Properties from the context menu.
If you’re on Windows 11, click Show more options after right-clicking.
You should see the File Name Properties dialog.
Navigate to the Security tab.
Select your user name below the Group or user names section.
Look for all available Allow and Deny permissions.
The following file permissions must be allowed:
Modify
Read & execute
ReadWrite
If the necessary permissions are enabled, abort this troubleshooting method and move on to the next.
However, if they aren’t, click on the Edit button.
Again select your User Account in the Permissions for File Name dialog box.
Uncheck all the boxes below the Deny column.
Also, checkmark all the boxes below the Allow column.
Click Apply and OK on all the dialog boxes.
Restart the PC.
Check for and Fix Disk Issues
If ERROR_HANDLE_EOF is due to HDD errors, then Error checking can help. Here’s how to utilize that:
Go to the drive where the source file is located.
Right-click and select Properties.
Go to Tools in the Properties dialog box.
Click on the Check button in the Error checking section.
Hit Scan drive on the pop-up warning.
Allow the Windows Error checking tool to scan and repair bad sectors.
Now, try to access or run the same file and see if the issue is fixed.
Fix Windows File System With SFC and DISM Scans
If you repeatedly face the ERROR_HANDLE_EOF error when installing Windows Updates or device drivers, follow these steps:
Perform an SFC Scan
Click on the Start menu button and type CMD.
Select Run as administrator on the right side.
Type sfc /scannow in the terminal and hit Enter.
It might take a while for the scan to finish as it depends on the Windows installation drive size.
Once the scan is complete, it’ll show any of the following outcomes:
Windows Resource Protection did not find any integrity violations: No actions needed.
Windows Resource Protection found corrupt files and repaired them successfully: SFC scan fixed file system errors.
Windows Resource Protection found corrupt files but was unable to repair them: Move on to the DISM scan step below.
Run DISM Scan
Type the following command in the same Command Prompt terminal and hit Enter:
DISM /Online /Cleanup-Image /RestoreHealth
Terminal will start processing the DISM scan.
You’ll see two progress bars in the terminal.
If you see the following message, the process is complete:
Completed successfully
Restart the PC.
Run Windows Update Troubleshooter
Try the following troubleshooting instructions if you experience the, “38 (0x26) Reached the end of the file.” error frequently when updating Windows:
Press the Windows + I keys together to launch the Settings app.
Click on the System menu in the left-side navigation panel.
Scroll down on the right in the System window, find Troubleshoot, and click on it.
Click on Other troubleshooter below the Options section.
You should find the Windows Update troubleshooter in the Most frequent section on the right.
Click Run.
The troubleshooter will start diagnosing and fixing the issue.
When you see the Troubleshooting has completed dialog, try to update Windows again.
If it works, click Yes and then hit Close.
If the fix didn’t work, click No and select Close the troubleshooter button.
Apply Service Pack Updates Manually
If ERROR_HANDLE_EOF is showing up on a Windows 7 PC, especially when you’re installing a Service Pack update, try this method. A workaround is to apply the Service Pack update manually:
Visit the Microsoft Update Catalog portal to download a Service Pack update that’s compatible with your Windows 7 PC.
Double-click on the installer and follow all on-screen instructions carefully.
The PC might restart a few times during the Service Pack update process.
Restore the PC to a Previous Configuration
If you regularly back up your system, you can use a Windows System Restore Point to revert the PC configuration to a previous, working state:
Press the Windows + R keys together to launch the Run command.
Type rstrui.exe in Open and hit Enter.
The System Restore wizard will open.
Select the Choose a different restore point option and hit Next.
Choose a Restore Point from the next table and click Next again.
Click Finish to close the wizard and start restoring the PC.
Reset the PC
You might need to reset the device if you face the ERROR_HANDLE_EOF intermittently, after several troubleshooting sessions. Here’s how:
Click on the Windows flag or Start button and find the Power menu.
Press the Shift key and click Power.
Don’t let go of the Shift key.
In the Power context menu, select Restart.
Keep the Shift key pressed until you see the manufacturer’s logo or POST.
Release the Shift key.
Windows will enter WinRe.
Click Troubleshoot on the Continue screen.
Inside Troubleshoot, choose Reset this PC.
You can now choose any one from the following:
Keep my files: Windows will keep your personal files but not apps.
Remove everything: The Reset program will remove everything.
You’ll now see the options to reinstall Windows. You can choose:
Cloud download: Suitable for stable and high-speed internet connection.
Local reinstall: Pick this if you can’t go online or the internet is sluggish.
The next screen is for finalizing the process. Click Reset to confirm.
From now on, follow the on-screen instructions to successfully reset your device.
Summary
So, now you know how to fix ERROR_HANDLE_EOF in any Windows PC.
Try the troubleshooting suggestions in the order they appear to resolve the problem in the least possible time.
The Microsoft Excel keyboard shortcuts will definitely make you more proficient in dealing with your tables. However, there are more than a hundred shortcuts in Excel and you can’t possibly know all. Also, some of them are rarely or never used so here’s our list with the most efficient Excel shortcuts.
What are the most efficient Excel shortcuts?
1. Frequently used shortcuts
Action
Shortcut
Close a workbook
Ctrl + W
Open a workbook
Ctrl + O
Save a workbook
Ctrl + S
Copy selection
Ctrl + C
Paste selection
Ctrl + V
Undo recent action
Ctrl + Z
Remove cell contents
Delete
Cut selection
Ctrl + X
Apply bold formatting
Ctrl + B
Center align cell contents
Alt + H, A, C
2. Ribbon keyboard shortcuts
Action
Shortcut
Go to the Home tab
Alt + H
Go to the Insert tab
Alt + N
Go to the Page Layout tab
Alt + P
Go to the Data tab
Alt + A
Go to the View tab
Alt + W
Open the context menu
Shift + F10
Add borders
Alt + H, B
Delete column
Alt + H, D, C
Go to the Formula tab
Alt + M
Hide the selected rows
Ctrl + 9
3. Navigating in cells
Action
Shortcut
Move to the edge of data region
Ctrl + Arrow Key
Move to the previous cell
Shift + Tab
Move to the next cell
Tab
Move to the beginning of the row
Home
Move to the beginning of the worksheet
Ctrl + Home
Move to the last cell in use
Ctrl + End
Move one screen down
Page Down
Move one screen up
Page Up
Move one screen to the right
Alt + Page Down
Move one screen to the left
Alt + Page Up
3. Formatting cells
Action
Shortcut
Open Format Cells dialog
Ctrl + 1
Apply or remove bold
Ctrl + B
Apply or remove italics
Ctrl + I
Apply or remove underline
Ctrl + U
Open the Font tab of the Format Cells dialog
Ctrl + Shift + F
Open the Fill tab of the Format Cells dialog
Alt + H, H
Apply the General number format
Ctrl + Shift + ~
Apply the Currency format
Ctrl + Shift + $
Apply the Percentage format
Ctrl + Shift + %
Apply the Date format
Ctrl + Shift + #
4. Working with data, functions, and the formula bar
Action
Shortcut
Start a new line in the same cell
Alt + Enter
Insert the AutoSum formula
Alt + =
Enter the current date
Ctrl + ;
Enter the current time
Ctrl + Shift + :
Display the Insert Function dialog
Shift + F3
Calculate all worksheets
F9
Calculate active worksheet
Shift + F9
Insert a function
Shift + F3
Toggle absolute and relative references
F4
Display the Function Arguments dialog
Ctrl + A
This guide covers a wide range of shortcuts to help you work more efficiently in Excel. If you need some great Word shortcuts, click the highlighted link for the complete list. We also have a handy guide with Windows 11 shortcuts.
If you need more specific shortcuts or have any other questions, feel free to ask in the comments below.