When you need to run applications built with Microsoft Visual C++, having the correct Redistributable package is crucial. This guide will help you download and install the Microsoft Visual C++ 2015-2019 Redistributable Package (x64) from various trusted sources.
How to Download and Install Microsoft Visual C++ 2015-2019 Redistributable Package (x64)
Scroll down until you find the section titled Visual Studio 2015, 2017, 2019, and 2022.
Look for the X64 version link, usually labeled as vc_redist.x64.exe.
Click on the link to start your download. You might be prompted to choose a location to save the file.
Once the download is complete, locate the downloaded .exe file and double-click to open it.
In the installation window, check the box to agree to the license terms and conditions.
Click the Install button.
If prompted, restart your computer to complete the installation.
Downloading and installing from the official site ensures you get the latest version with all the recent updates and security patches.
2. Install older versions of Microsoft Visual C++ Redistributable Packages
If you want to install a specific version, let’s say the Visual Studio 2015, go to Microsoft’s dedicated download page and get it from there.
On the highlighted page, you will find dedicated download links for Visual Studio 2015, 2017 and 2019, as well as Isolated and Integrated Shells and Visual C++ Redistributables.
You will see that there are several websites that feature Microsoft Visual C++ Redistributable Packages downloads, but we don’t recommend getting them from third-party websites due to security concerns.
Here’s what you need to do to make sure that the new installation will work:
Ensure Compatibility: Make sure your operating system is compatible with the Redistributable package you are downloading.
Check for Existing Installations: Before installing, verify if a previous version is already installed to avoid conflicts.
Administrator Rights: Ensure you have administrator rights on your computer to install the software successfully.
Downloading and installing the Microsoft Visual C++ 2015-2019 Redistributable Package (x64) is essential for running applications built with these tools. Following any of the above methods will ensure you have the necessary components on your system for smooth application performance. Always keep your Redistributable packages updated to avoid compatibility issues and ensure optimal performance.
Windows 11 is about to get one of the most significant changes in all its history. It may give some iPhone users a feeling of nostalgia. Imagine a Start menu that is not just an app list but also shows categories, similar to how the App Library looks on iOS. Pretty cool. This is what Windows 11 users can expect shortly.
Microsoft is experimenting with a new Category View option in the Start menu that arranges apps and games into groups in Windows 11. The popular Windows Insider, @phantomofearth, spotted it in the recent preview version from the Beta Channel.
It looks like another Start menu > All apps view option is coming soon: Category view. Present in build 22635.3930, with some not yet functional categories.
You can imagine how convenient it would be to have all your applications automatically sorted into categories such as “Productivity,” “Entertainment,” or “Games” without any effort required. The aim is to make your digital life more straightforward and cleaner.
The Category View in Windows 11 is eye-catching, but it’s not yet ready for tasting. The first version of it – which you can see in build 22635.3930 – may be a little rough here and there.
Yet its possibilities are quite clear to see. The future of customization looks bright, with the classic alphabetical list, a new grid view, and this upcoming categorized view all available for selection.
So, what are your thoughts? Does this iOS-inspired change in the Windows 11 Start menu make you feel excited? It’s a daring move towards a more orderly and user-friendly interface, and we’re all in for it.
Microsoft released the new Windows 11 Insider Preview Build 22635.3930 or KB5040550 to the Beta Channel. The patch brings some significant features, enhancements, and changes to Windows 11. Here are the most important ones that you should know about.
First, there is the Shared Content in File Explorer Home. This amazing feature lets you easily find all the files shared with you. It’s like having a special section in your File Explorer for things people send or give you. If it was an attachment in an email or document from Teams chat – as long as someone shares something and logs into their Microsoft account, then everything will appear here too quickly.
Now, for those who possess a Microsoft Entra ID account due to their business dealings, you will also find all the files shared with others. It’s similar to possessing a magic gateway that stores every document you share in one location.
File Explorer will now provide you with quick access to files that have been shared with you. If you are signed into Windows with your Microsoft account, you will be able to view files that have been shared with your account, such as email, Teams chat, etc.
Microsoft
With KB5040550, Microsoft has also introduced a “reduced system tray” where date and time details are shown in shorter form with modified taskbar previews and animations. And, if you’re a fan of shortcuts, you can navigate with the first letter in the taskbar. Press one letter, and there you are, all enlarged on the required application.
For tech lovers, KB5040550 also highlights Windows Studio Effects, which provides AI camera and audio improvements for gadgets with a Neural Processing Unit (NPU).
Windows Studio Effects delivers AI-based camera and audio enhancements on devices equipped with a Neural Processing Unit (NPU). Today, you can access Studio Effects in Quick Settings from the system tray of the taskbar. To further streamline your experience, an icon will now appear in the system tray when using any application with a Studio Effects-enabled camera. Simply click on this icon to launch the Studio Effects page in Quick Settings. Additionally, hovering over the icon will display a tooltip indicating which application is utilizing the camera.
Microsoft
Also, sharing content with your Android device is now simpler due to an improved UI in the Windows share window.
We are updating the UI in the Windows share window for sharing content to an Android device that began rolling out with Build 22635.3785. The option is also move to be under “Nearby Share” in the Windows share window. The feature requires you to pair your Android device to your Windows PC using the Link to Windows app on Android and Phone Link on your PC.
Microsoft
Since no update is perfect from the start, KB5040550 has some issues. They mainly focus on the system tray and File Explorer. But Microsoft is aware of them, and it’s working to fix them with the next updates.
Are you prepared to investigate these updates? Remember that these features are being released slowly, so if they don’t appear immediately, be patient. And if you’re not a member of the Windows Insider Program yet, perhaps this is the moment to consider joining the adventure. If you’re considering joining the Canary channel, Microsoft updates it regularly.
Getting your Steam Deck to run smoothly with Windows 10 can be a bit tricky, especially when it comes to audio drivers. But don’t worry, I’ve got you covered with this step-by-step guide to install Steam Deck audio drivers on Windows 10.
How do I install the Windows 10 Steam Deck audio drivers?
1. Decompress the Audio Driver Files Before Installation
Use a file decompression tool like WinRAR or 7-Zip to extract the contents of the downloaded RAR file into a single directory.
Go to the directory where you decompressed the files and find the cs35l41.inf and NAU88L21.inf files.
Right-click on the cs35l41.inf file.
In the context menu, select Install.
Similarly, right-click on the NAU88L21.inf file and select Install.
Decompressing the files ensures the INF files are accessible for installation, resolving issues where the Install option is not available. After installing both inf files, you can also install the APU driver. When installing the driver, on Windows 11 you also have an option for Additional Options. Click on it and select the check box for Factory Reset for the update to work. On Windows 10, you will not have that problem.
2. Change the boot order to Boot from SD Card
Turn off the Steam Deck completely.
Press and hold the Volume Down button, then press the Power button to turn on the device. This will bring up the Boot Manager.
Use the Boot Manager to select the SD card where Windows is installed.
Once booted into Windows, run the setup.exe file for the APU drivers and follow the on-screen instructions. When prompted to reboot, choose the option to reboot later.
Shut down the Steam Deck, then repeat steps 1 and 2 to boot back into Windows from the SD card to complete the APU driver installation.
Follow steps 4-6 from Solution 1 to install the audio drivers.
Changing the boot order ensures that the Steam Deck boots into the correct OS, allowing for the successful installation of the APU and subsequent audio drivers.
3. Update and Install APU Drivers
Go to the official Steam Deck Windows Resources page highlighted in Solution 1 and download the latest APU driver.
Execute the setup.exe file from the APU driver package.
Proceed with the installation by following on-screen prompts. When asked to reboot, choose to continue without rebooting.
Manually reboot into Windows using the Boot Manager as previously instructed.
With APU drivers installed, follow steps 4-6 from Solution 1 to install the audio drivers.
Updating the APU driver ensures compatibility and support for the audio driver installation, resolving common conflicts.
Troubleshooting Steam Deck audio problems
Some users reported that even though they installed the latest audio drivers successfully, they experience sound issues on Steam Deck. If you have no sound on Steam Deck, we have a complete guide on how to fix the problems if the Windows audio drivers are not working.
By following these solutions, you can successfully install the audio drivers on your Steam Deck running Windows 10. To avoid future issues, always ensure your drivers are up-to-date and keep a backup of your essential files.
Did you manage to install the Steam Deck Windows 10 audio driver? Let us know in the comments below.
Edge Workspaces let you organize your browsing into separate areas for different projects or interests. Each Workspace has its own set of tabs and favorites, so you can find what you need quickly. Plus, Workspaces save automatically, keeping everything organized, these can be accessed offline also.
The desktop version of Microsoft Edge Workspaces is already available to the public. You’ll see the Workspaces icon appear after your profile icon. It allows you to create new workspaces and edit or delete existing ones.
Many users have requested Workspaces for the mobile version of Edge, and it’s finally making its way to Android, at least in the Canary channel (currently behind a flag).
How to Enable Workspaces in Microsoft Edge for Android (Canary):
Launch the latest Microsoft Edge for Android in the Canary channel.
Visit edge://flags.
Find and enable “Edge workspace for Android”
Restart the browser.
Tap on the tab count icon. You’ll notice a new “Workspaces” icon before the InPrivate, Tabs, and Recent sections. Tapping this icon opens your current workspaces (based on the number of tabs you have open).
The Workspaces menu shows your current workspaces and allows you to “Exit Workspace.”
Image Credit: Windows Report
Since this is the initial appearance of Workspaces in Edge on Android, the feature is partially functional. Additionally, the “welcome page for android” is mentioned in the “Welcome to your Workspaces” page, indicating it’s not yet implemented.
Microsoft is constantly updating the Canary version of Edge for Android with new features and improvements. Recently we reported about Half Page Screen summaries with Copilot, now, Edge Canary on Android is experimenting with Password autostuffing and download manager performance improvements in another update.
Password Autostuffing
First, you shouldn’t confuse autostuffing and autofilling. While both help you automatically enter saved login credentials on websites and apps, they have slight differences:
Autofilling occurs when your password manager automatically fills in the username and password fields on a website’s login page with your saved credentials. You don’t actively prompt the password manager; it happens automatically.
Most major web browsers (including Chrome, Firefox, Edge, and others) and some password managers (like LastPass and Dashlane) enable auto-filling by default.
Autostuffing is a less common term, but it seems to refer to a similar concept. It likely involves automatically filling in login fields but without the user’s explicit action or control.
You can enable and test Password autostuff in Edge on Android by turning on the respective flag, “Enable Password Autostuff” on the about://flags page. When enabled, it allows autostuffing passwords on login pages.
Microsoft is also working to show download file thumbnails in the download manager appear quickly without any lag.
The two flags named “Download Manager UX performance improvement v1” and “Download Manager UX performance improvement v2”, indicate Edge is aiming to improve the display performance of the downloaded item thumbnails.
A dedicated setting within Chrome will allow users to control these notifications, likely highlighting new features or providing tips on using existing ones. This feature is only accessible on Chrome-branded Windows machines and is currently disabled by default, indicating it’s in an experimental stage.
As spotted by Windows Report, the commit reveals the “Add feature notifications system setting. This CL adds a setting and pref that will control Chrome system notifications about its features. This setting only applies to Chrome-branded Windows builds, and is controlled by an experiment (currently disabled by default).”
Google is planning to add a setting called “Show system notifications about Chrome features and tips” with a toggle, that enables Chrome system notifications about features.
This notification system could be helpful for users unaware of all of Chrome’s features. By keeping users informed, Chrome can potentially enhance the user experience.
Chrome might want to educate users about its features and encourage them to try new ones, leading to a more engaged user base. However, too many notifications can be annoying, and irrelevant suggestions or pushy notifications could create a negative perception of Chrome.
The key for Chrome will be to strike a balance. Feature notifications could be helpful if done thoughtfully. They could provide granular control, smart targeting, and a non-intrusive format to avoid annoying users.
Overall, Chrome’s intent with feature notifications might be good, but the execution needs to be careful to avoid annoying users. Only time will tell how Chrome implements this feature and whether it finds the right balance.
If you’re in an organization setting or manage computers on a domain, you may need to prevent or limit access to the Command Prompt through a GPO setting.
We can all acknowledge how the Command Prompt is a powerful feature when it comes to system administration but in the hands of a wrong person, it can be catastrophic.
Apart from unauthorized access, disabling it can also help secure loopholes that can be exploited by malware, and help enforce administrative policies in an organization.
How do I remove access to Command Prompt in Group Policy?
Hit the Windows + R keys to open the Run console.
Type gpedit.msc in the dialog box and hit Enter to open the Group Policy Editor.r
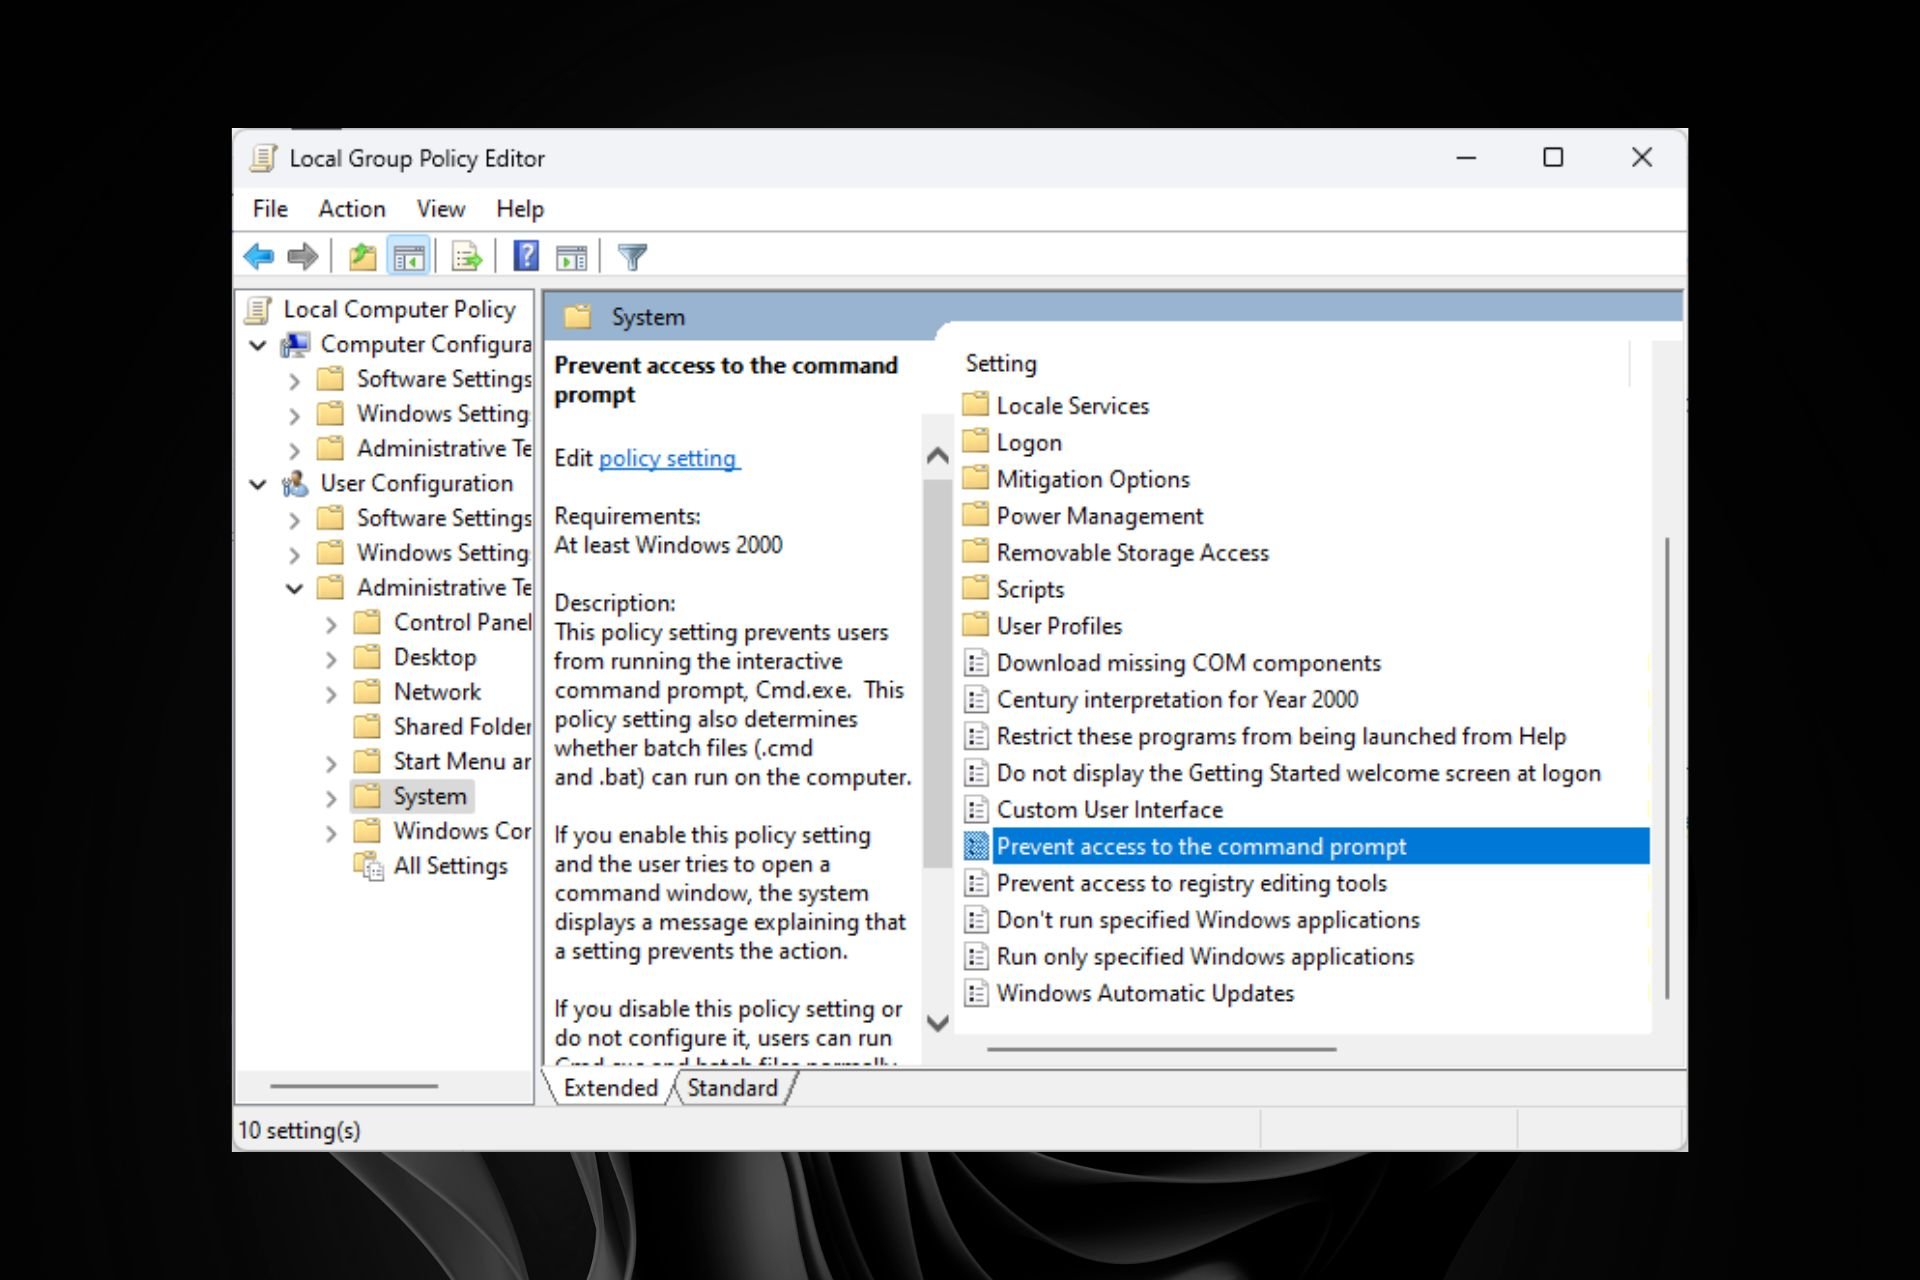
Navigate to the following path: User Configuration > Administrative Templates > System.
Find the Prevent access to the command prompt option on the right-hand side pane and double-click on it.
Select Enabled in the top-left corner then click Apply and OK buttons.
Restart your PC for the changes to take effect.
If you’d like to re-enable Command Prompt, change the setting to Not Configured in step 5. Elsewhere, the Group Policy may fail to apply or the Group Policy keeps reverting. In such cases, you can also use the Registry Editor to prevent access to the Command Prompt.
While preventing access to the Command Prompt reduces the attack surface area, it also has its drawbacks. If you had an issue that you needed to troubleshoot using the Command Prompt, you’ll be unable to execute any commands.
That’s all we had for this article but let us know some of the benefits or disadvantages you have experienced first-hand from preventing access to the Command Prompt in the comment section below.
Changing the owner of Microsoft Forms is a simple process that helps you manage ownership and permissions in scenarios like an employee leaving or changing the organization’s hierarchy. In this guide, we will outline the steps to transfer ownership of Microsoft Forms, which can help you easily manage permissions.
How can I change the owner in Microsoft Forms?
Go to Microsoft Forms and sign in with your Microsoft account.
On the main page, go to My forms.
Hover over the form you wish to change the ownership to get the three-dot icon, and click it to get options.
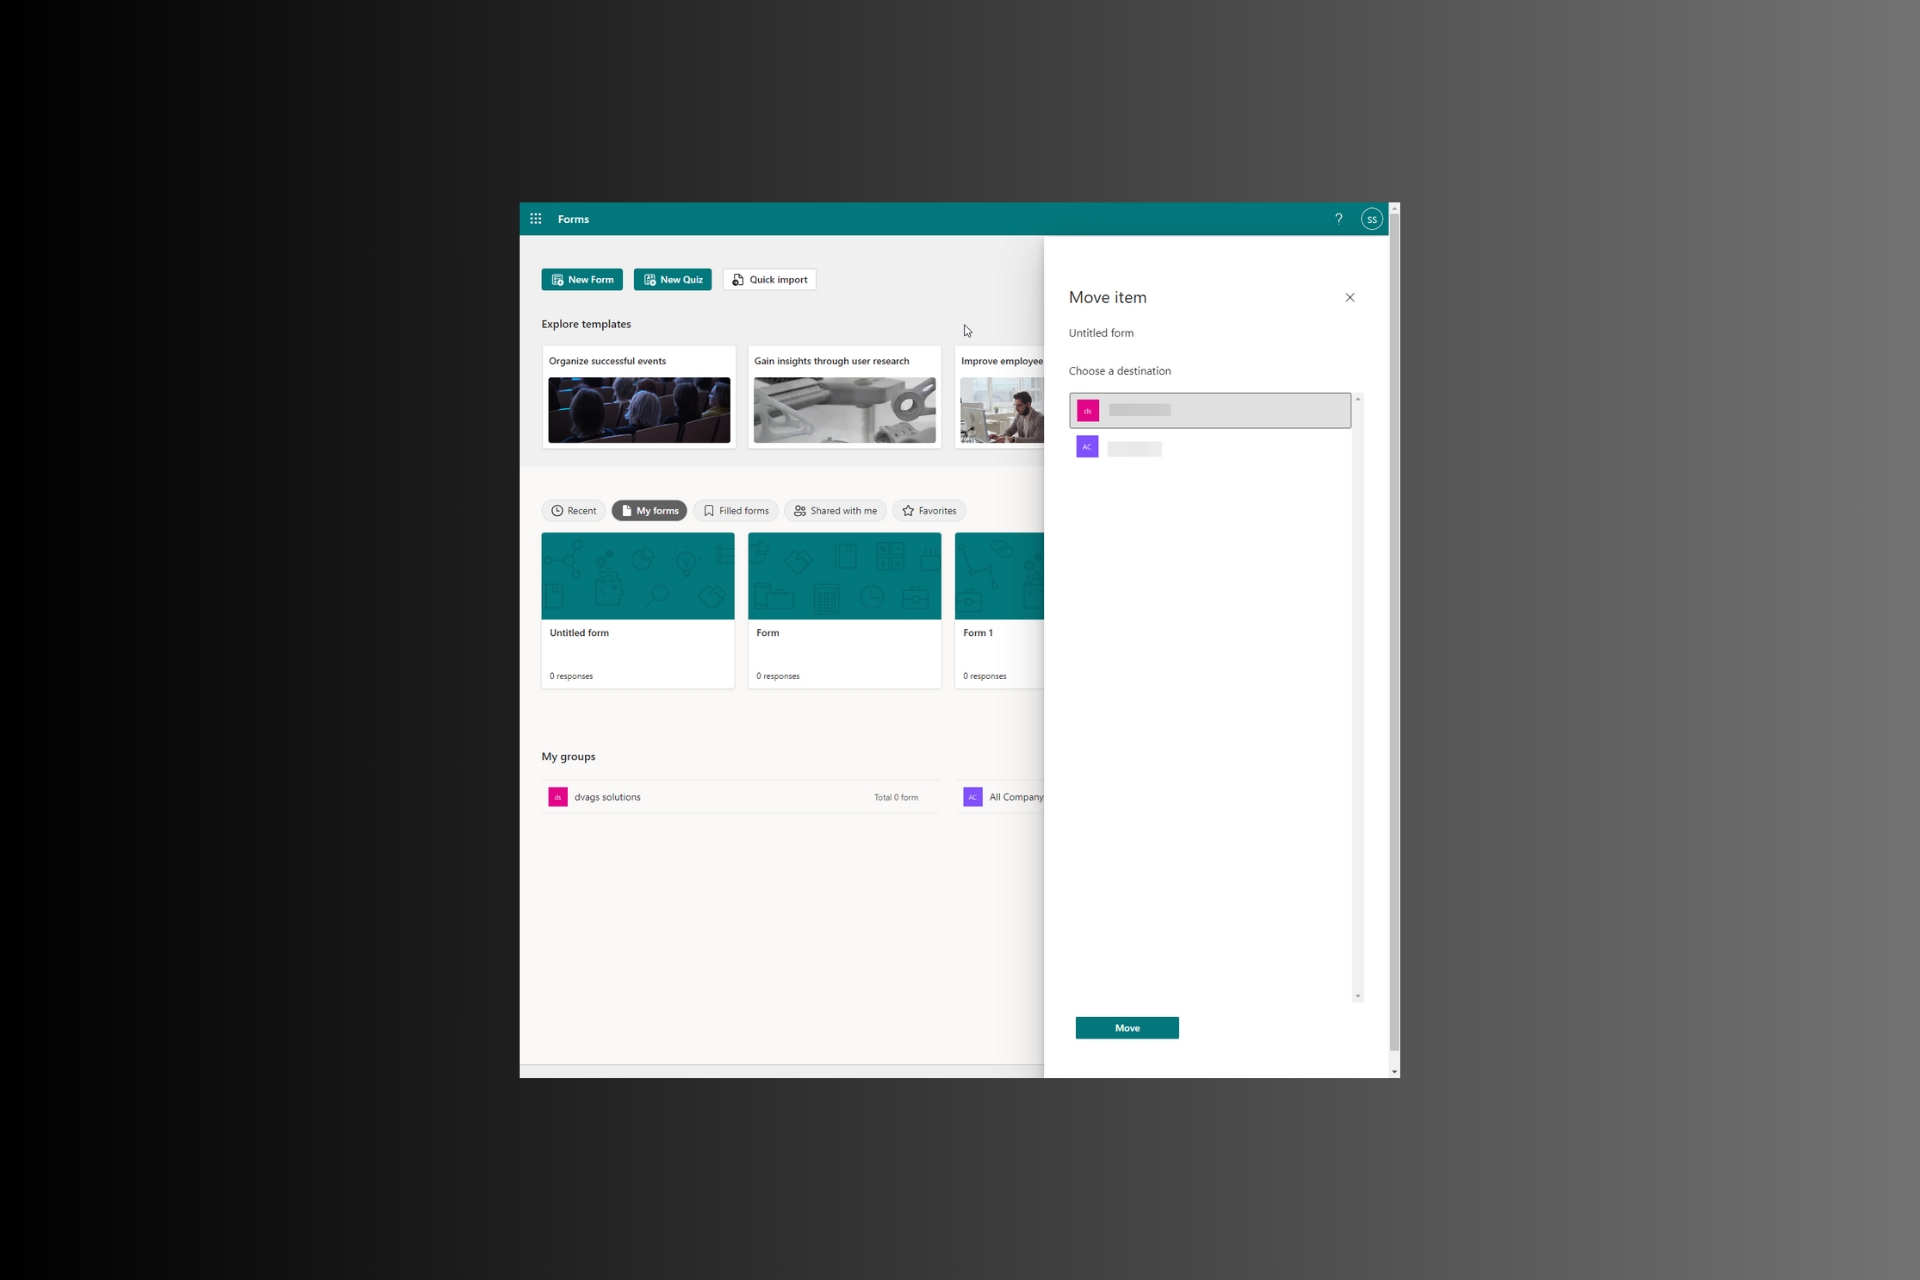
From the context menu, select Move to a group.
Now choose the destination group from the following pop-up, then click Move.
Once done, you will get the Form moved message on the top of the page.
Now, you can access the form under the My Groups section.
Tips to keep in mind while transferring the ownership
Remember, once a form is moved to a group, all the members of the group get ownership roles. This can enhance collaboration, but you must choose the group carefully.
However, if you wish to transfer the ownership of an internal form to an individual, Microsoft Forms doesn’t support it until now.
But if you want to give it to a personal user, you must provide them with the Share as a template link. The other person can then duplicate the form, which will create a separate form, and you need to merge the responses on the spreadsheet later.
If you transfer ownership from an employee who left the company, ensure you disable the owner’s account at least during the transfer process.
Also, ensure you transfer all the Forms data from a deleted account in 30 days, as the data is only retained for that period.
Review owner, editor, and respondent access regularly and remove the unnecessary ones.
Opt for Group Forms when working with a team or for better collaboration. This will allow multiple people in the group to own, download, and manage the form in the absence of the primary owner.
After moving a form to a group and setting roles, improve collaboration by adding a free text field for feedback. To do that, see our how to add a comment box in Microsoft Forms guide. Once you transfer ownership, you can make the form more dynamic by learning how to add sub questions in Microsoft Forms so group members can collect more detailed responses.
To conclude, changing ownership in Microsoft Forms empowers administrators to alter permissions and data accessibility efficiently across their organization.
Sometimes it’s necessary to install an older version of a driver, and the easiest way to do that is to roll it back. Speaking of which, in today’s guide we’re going to show you how to roll back a driver on Windows 7.
How do I roll back drivers in Windows 7?
1. Use the roll back option
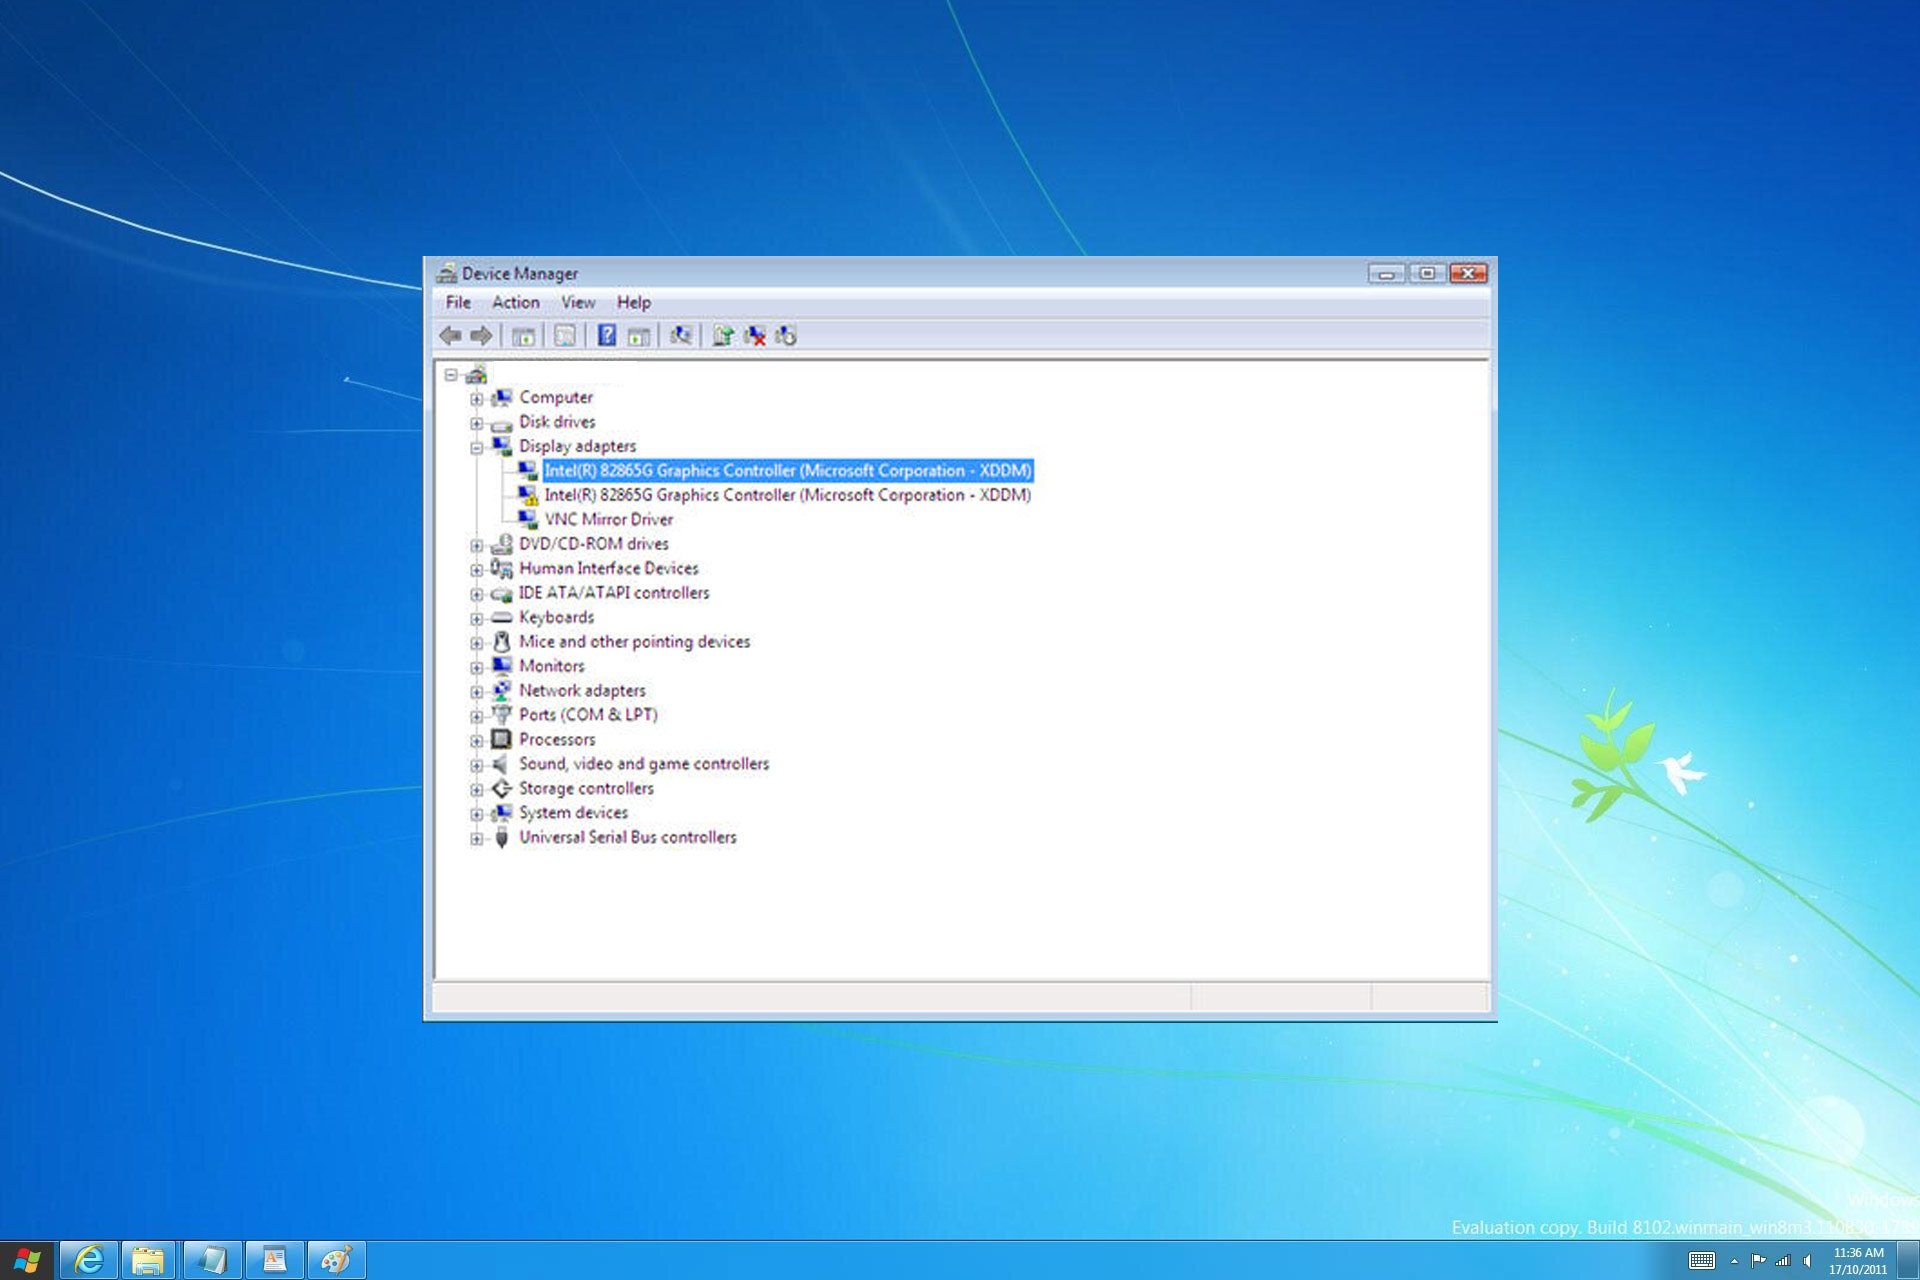
Open the Control Panel and select Device Manager. Alternatively, you can use Windows key + R and type devmgmt.msc.
Double-click the device whose driver you want to roll back.
Go to the Driver tab and click on Roll back driver.
When the confirmation dialog appears, click on Yes.
2. Reinstall the driver
Open Device Manager.
Locate the driver you wish to remove.
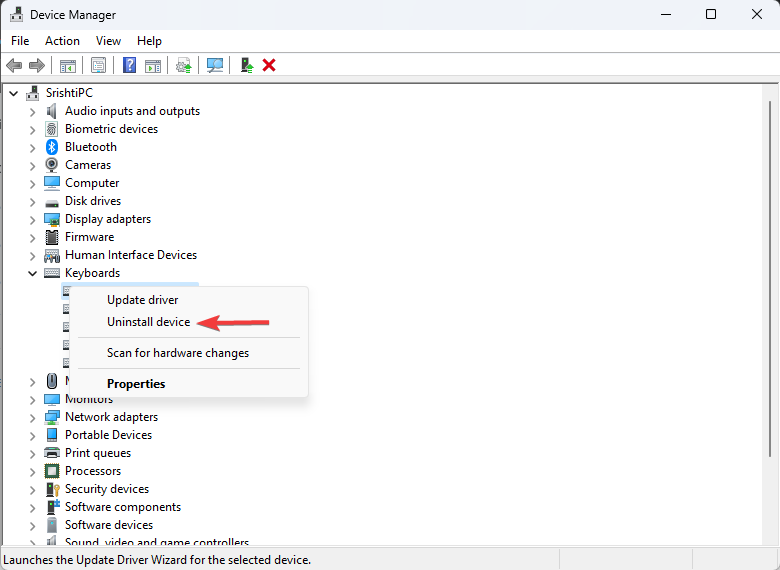
Right-click it and choose Uninstall device.
Click Yes to confirm.
Download the desired driver version and install it.
Why won’t my computer let me roll back drivers?
If this happens, it means that your computer didn’t have the older version of the drivers installed or it didn’t keep it after the driver update.
The best way to do that is to manually download the driver from the hardware manufacturer’s website. To learn how to do that, check our guide on how to update outdated drivers on Windows 10. The process is almost identical for all versions of Windows.
If you’re using the latest version of Windows, we also have a guide on how to roll back the driver on Windows 11, so don’t miss it for more information.
If you need to reload tabs now and then to stay updated with the latest information while tracking dynamic web content, real-time data, or website changes on your Firefox, and you don’t need to do it manually, you need tab reloader extensions.
In this guide, we will discuss some of the best tab reloader extensions for Firefox to help you save time and keep updated with the current information.
What are the best tab reloader extensions for Firefox?
Tab Reloader was developed by James Fray. It provides a toolbar panel that reloads an individual tab unlimitedly.
You can set a custom period with a random variation for each tab and enable or disable the reloading tasks via a toolbar panel.
You can allow the reloading of an active or inactive tab and restore the reloading pages even after a restart.
It shows the remaining time of the subsequent reloading in the badge area and, in the browser action popup, gives you the list of all tabs with active reloading jobs.
Other essential features of Tab Reloader:
Allows you to set custom rules to reload a tab when the URL or hostname matches
With Scroll to the end with reload, the extension takes you to the bottom of the web page after every reload
Allows bypass form submissions
Runs custom JavaScript code on every reload
Lets you define a policy that prevents reloading based on time and URL
FoxyTab add-on is developed by erosman, which adds many tab-related actions to the Tab context menu, including tab reloading, Tab Counter, Country Flag, etc.
The context menu allows you to create Duplicate, close Duplicates, merge windows, close to the left, copy title, save as PDF, Host keep/close/close other, Asce/Desc, copy Urls Tab/All/Left/Right, sort by URL/Title, move, reload, and set the reload timer.
To customize the extension’s settings, click the extension, select Options, and choose a custom reload value for a webpage.
You can right-click on a tab to get Foxytab and choose options like Move, Discard, Hide, Show, Pin, and Reload.
Other essential features of FoxyTab:
Allow you to create a shortcut to access the single tab or all opened tab
Lets you reload all the open tabs at once.
Allows you to choose to reload a webpage every 1 to 5 min
ReloadMatic: Automatic Tab Refresh is an extension developed by pylo, which automates the periodic refreshing of your browser tabs.
One of the most highlighted features, Smart Timing, prevents scheduled reloads from disturbing the user.
It also has cache control, custom intervals, POST support, and browser features like tab restore incognito mode, and pinning.
The extension can reload at custom intervals and can reload with caches disabled once or repeatedly. To access the extension, right-click on the existing tab and select Reload from the context menu to access options like Don’t reload, Remember page, Randomize, Sticky reload, custom interval, and more.
Other essential features of ReloadMatic: Automatic Tab Refresh:
Enables you to fix the URL
You can select to reload every 5 secs, 15 secs, 1 min, 5 mins, 15 mins, every hour, and every 4 hour
Allows you to reload all tabs at once
You can delete all remembered pages under the extension settings whenever you like
Reload All Tabs, developed by Glin, lets you quickly reload all tabs with a single button click. You can use a keyboard shortcut or toolbar button to refresh the tabs.
It is a lightweight add-on that allows you to select or exclude specific tabs from reloading; however, you can’t do that based on the URL.
To access Options to customize the add-on, click the Extensions icon at the top right corner, click the Cog or Settings icon next to Reload All Tabs, and select Manage Extension. Now click the Options tab to access various settings.
Press Alt + Shift + C on the keyboard to reload all tabs. However, if you want to change the combination from the extensions page in your browser.
Other essential features of Reload All Tabs:
Allows you to choose not to load the active tab
You can also exclude the pinned tab from being refreshed
Lets you use local cache when reloading tabs
You can choose not to load a tab if it is incognito or discarded
Auto refresh page by Softpulse Infotech is a simple extension that refreshes your web pages automatically to keep the information up to date.
The add-on refreshes the page in 5 Sec, 10 Sec, 15 Sec, 5 Min, 10 Min, and 15 Min, but you can also set the countdown manually.
You can choose to display a visual timer on the webpage, and if you enable the Stop refreshing if you click anywhere on the page option, a single click can stop auto-reloading.
The extension also has a hard refresh option, which clears your webpage cache data. It doesn’t need to be monitored; you just set the time and let it do the work.
Other essential features of the Auto refresh page:
The auto refresh list shows all webpages; you can pause or start any webpage refresh from the list
Allow you to set a number of auto-refreshes you want for a tab
You can choose to get notifications of auto refresh after the set number of reloads
You can make it remember the auto-refresh timer position
Remember that installing too many add-ons and customizing too many settings could cause your Firefox to use too much memory, so choose your extensions wisely.
How can I add the tab reloader extension on Firefox?
Once you have chosen an extension from the above list, go to the Firefox Browser add-ons website and search for it.
Select the one you want from the search results, then click Add to Firefox.
The extension will be downloaded and installed. Click Add to allow the extension to access browser tabs and browser activity during navigation.
You might also get a prompt to allow this extension to work in a private session. To enable it, place a checkmark and click Okay.
In conclusion, tab reloader extensions provide the leverage of automating the reloading of tabs at certain intervals, saving you time and effort.
These add-ons allow you to consistently monitor live data or track time-sensitive information across several tabs, enhancing convenience and productivity.
If you are looking for auto-refresh extensions for other browsers like Chrome, we have a separate guide for you.
In case a webpage is slowing down your Firefox browser, corrupt or excessive cache files could be the reason; check out this detailed guide to learn more.
Is Google Workspace Sync for Microsoft Outlook not working? You can try these proven troubleshooting methods to fix the issue and retrieve your emails.
The GWSMO tool allows Outlook users to seamlessly import emails, calendars, contacts, etc., from Google Workspace to Microsoft 365 or Office 365 environment.
However, due to the following root causes, the tool might behave differently:
Faulty configuration or installation of GWSMO profile for Outlook.
Internet connection is weak or throttled by ISP, VPN servers, etc.
You’re not using a secure network if your organization imposes restrictions on public Wi-Fi, mobile internet, blacklisted ISP, etc.
Windows Security or any third-party antivirus is blocking GWSMO from accessing the internet.
Certain Outlook settings, automation, and add-ins might impair GWSMO.
The PST and OST files of your Outlook installation are corrupted.
The PST file has reached its limit.
In any case, follow this guide til the end to resolve this issue once and for all.
How To Fix Google Workspace Sync for Microsoft Outlook Not Working
After carefully investigating all the possible causes in a test environment, I’ve created a list of the best remedies below. I’ve arranged the fixes in the order of complexity, starting with the easiest ones.
Perform These Basic System Checks
Make sure that the following are ensured for GWSMO’s successful operation:
Moderate-speed broadband internet through a Wi-Fi router or Ethernet.
For secure organization devices: You’ve registered your IP and ISP with the organization’s IT admin.
You’re not using any VPN services.
If the VPN isn’t active, try activating it and see if it works.
The GWSMO app isn’t in the Windows Firewall disallow list.
Update GWSMO and Outlook
If you haven’t updated these apps recently, it’s a good time to do so now as it might solve your problem.
Updating Outlook
When the Outlook app is open, press Alt + F + D + R to bring up the Update Options button for Microsoft 365 apps.
Click on the Update Now button.
Let the app download and install updates automatically.
Install it on your PC. It’ll replace the existing GWSMO installation.
Press Ctrl + Esc + Shift to bring up the Task Manager.
Below the Processes tab, find the running instance of Microsoft Outlook. Click on that to expand its processes tree.
There, you should see the GWSMO process in Outlook.
Right-click and choose End task from the context menu.
Both the Outlook and GWSMO apps will stop running as background services.
You can verify that from the system tray. Normally, when the apps are running, these services would also show up on the system tray.
Now, launch Outlook again for the GWSMO update to become globally effective.
Turn Sync Modules Off and On
When none of the GWSMO modules are syncing to update the content in Outlook, perform these steps to force a sync:
Click on the Windows System Tray to bring up the list of apps running in the background.
Right-click on the GWSMO tool icon and select the Turn sync modules On/ Off… option.
A dialog box will pop open. There, uncheck all boxes, like Google Contacts, Google Mail, etc.
Click OK to save the selections.
GWSMO will ask you to restart the Outlook app which simply means you must close the client.
Now, repeat the same steps again to checkmark all the items in the dialog box Turn sync modules On/ Off…
Save the changes you’ve made by clicking OK.
A warning dialog box will ask you to restart Outlook.
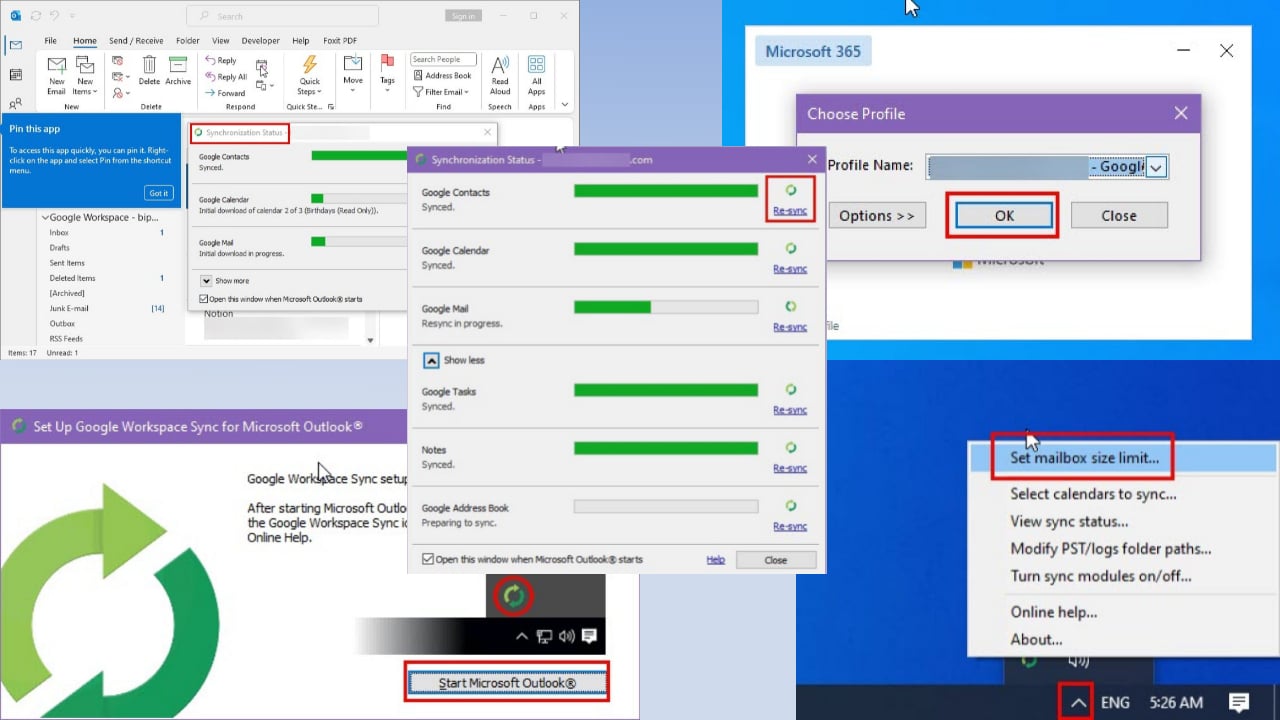
Now, open the System Tray again, right-click on the GWSMO tool, and choose View sync status from the context menu.
On the Synchronization status dialog, click on the Show more drop-down arrow.
Hit Re-sync for all the items in the dialog box one after the other and wait for the syncing to be completed.
Now, restart Outlook. Ensure you see the following dialog box when relaunching the email client.
It confirms that the email tool is designated to sync content from the Google Workspace profile.
When you land on the mailbox, you should see new contents that weren’t available before due to the GWSMO Outlook not working issue.
Customize the Mailbox Size Value
Microsoft Outlook works smoothly and efficiently when you select a small local file size for the mailbox. This space is used by GWSMO to cache emails from Google Workspace webmail.
Irrespective of the mailbox size you choose for the local directory, GWSMO will import all the emails of your webmail.
If you choose the Unlimited (slowest) option, you’ll also slow down Outlook significantly.
So, click on the Windows System Tray and right-click on the Google Workspace Sync app.
Now, click on the Set mailbox size limit.
Choose a local mailbox directory size of 1 GB, 2 GB, or 4 GB.
Uncheck Unlimited (slowest) if you’ve selected it previously.
Reconfigure GWSMO
Any changes in the Google Workspace email account policy or credentials will immediately impact the integration with its counterpart, Outlook. So, if you suspect some changes might have taken place, follow these steps:
Find the Delete saved Google Workspace Sync passwords tool in the Start Menu.
Click on it and hit the Delete Stored Password button.
Now, close the dialog box.
Open the Set up a Google Workspace Sync user tool from Start Menu.
Enter the Google Workspace email address from your organization. Any free Gmail account won’t work.
Click Continue.
If the account has been already added to Google Chrome, the tool will open the same for authentication.
Follow the on-screen instructions to authorize your Google Workspace account.
Once done, you’ll see a message on Chrome that you can now open the GWSMO tool.
The Set Up Google Workspace Sync for Microsoft Outlook dialog box will show up.
Click on the Create profile button.
You’ll now see another dialog box with a button for Start Microsoft Outlook. Click on that.
Outlook should automatically select the newly added Google Workspace email if this is the first profile you’ve created on your PC.
Click OK on the Choose Profile dialog box.
When you’re on the Outlook app, you’ll see that the GWSMO tool has started importing emails, contacts, calendar events, etc.
Temporarily Disable Antivirus and Windows Firewall
If your device security system or firewall are inappropriately blocking the GWSMO tool, the following should revert that restriction:
Disable Windows Security
Click the Start Menu and type Windows Security in the search bar.
Click on Windows Security.
Select Virus & threat protection.
Under Virus & threat protection settings, click Manage settings.
Toggle the switch to Off for Real-time protection.
Disabling Windows Security leaves your computer vulnerable, so consider the risks before proceeding. Quickly test if GWSMO is working or not after disabling Windows Security. Once the evaluation is over, enable Real-time protection again.
Disable Firewall
Click on the Start Menu and search for the Allow an app through Windows Firewall option.
Select the Allow an app through Windows Firewall tool under the Best match section.
This will open the Windows Firewall settings.
Click on the Change settings button.
If you’re prompted for administrator permission, click Yes to continue.
In the list of allowed apps and features, scroll down and check the box next to Google Workspace Sync.
If you don’t see it listed, click on Allow another app…
In the Add an app window, click on Browse…
Navigate to the app installation directory for Google Workspace Sync or Profile Editor.
Opera, the long-standing pioneer in the web browser industry, has recently taken a bold step by appealing to the EU General Court. Their goal? To challenge the European Commission’s decision that left Microsoft Edge out of the “gatekeeper” category under the Digital Markets Act (DMA).
In a press release, Opera says this decision isn’t just about competition; it’s about ensuring that every user has the right to choose their preferred browser on every platform, including the ubiquitous Windows operating system.
Today, we are appealing the European Commission’s decision* not to designate Microsoft Edge as a gatekeeper despite meeting all of the quantitative thresholds of the DMA. We believe that the decision in particular fails to properly assess Edge’s durable and privileged position on Windows devices which creates an uneven playing field for its competitors. Edge, like Internet Explorer before it, is the gatekeeper through which users on Windows must pass to download another browser. This is precisely the type of gatekeeper role which the DMA was intended to address.
Opera
For nearly three decades, Opera has been at the forefront of advocating for open standards and fair access to technology. Their latest appeal is a testament to their commitment to these principles.
The DMA, legislation designed to dismantle the control of powerful digital platforms over user choice, has significantly promoted browser diversity on mobile devices. Now, Opera argues, it’s time to extend these freedoms to desktop users.
Despite the progress made on smartphones, third-party browsers like Opera still face an uphill battle on Windows. By not being designated as a gatekeeper under the DMA, Microsoft Edge enjoys a privileged position that makes it harder for users to switch to alternative browsers. Opera believes this is unfair and inconsistent with the DMA’s objectives.
A simple yet powerful belief drives Opera’s DMA appeal: you should be free to choose your browser, regardless of the platform. In an era where browsers play a crucial role in how we interact with the digital world, ensuring that this choice is respected is more important than ever.
Opera’s journey reminds us of the ongoing battle for fairness and choice in the digital age. As they present their case to the General Court of the European Union, the outcome could have far-reaching implications for how we experience the internet.
Meanwhile, Microsoft Edge’s market share remains steady at over 13 percent. Google Chrome is still the most popular browser worldwide, while Opera is the fifth most popular. However, Opera’s recent One R2, an AI-based browser set to change how we consume media on the Internet, might boost the browser to a higher place.
During a recent inside all-hands meeting, the people at OpenAI revealed their fresh roadmap toward Artificial General Intelligence (AGI), and according to the latest reports, they have planned five stages for it.
They introduced a classification system with five levels to monitor their advancement, from chatbots to artificial intelligence that manages an entire organization.
Level 1: Chatbots: AI with conversational language capabilities
Level 2: Reasoners: AI with human-level problem-solving abilities
Level 3: Agents: Systems that can take actions on behalf of users
Level 4: Innovators: AI that can aid in invention and discovery
Level 5: Organizations: AI that can perform the work of an entire organization
At present, we are comfortably situated in Level 1 but approaching Level 2, where AI will showcase problem-solving talents similar to humans. Picture an AI with the intelligence of a person who holds a doctor’s degree.
They demonstrated their GPT-4 model, which implied features similar to human reasoning. This race is not only for OpenAI; Google’s DeepMind is also moving ahead with its AGI framework.
The idea of AGI, though, is a significant matter, for it brings in numerous opportunities and difficulties. How can we guarantee that these strong instruments are used for good rather than causing harm? Also, how do we manage the rate of advancement?
OpenAI’s method is bold and clear. It aims to ensure investors and the public are informed. This might establish a fresh standard in the AI community, encouraging an atmosphere of honesty and teamwork.
Ultimately, working on a project as transformative as AGI isn’t only about technology. It is about how it affects society, ethics, and our future. What do you think? Are we prepared for the upcoming levels of AI, or are there other aspects still needing to be considered?
There are many great Chromium browsers on the market, with Thorium being the latest one. Speaking of which, today we’re going to compare the Thorium browser vs Chrome, so let’s get started.
Thorium browser vs Chrome, here’s what you should know
Appearance and features
When it comes to appearance, both browsers use using Chromium engine, so they look rather similar. Thorium uses a fork of Chromium, but despite that, if you’re familiar with Chrome, you’ll be familiar with Thorium.
Unlike Chrome, Thorium comes with a sidebar, and it can be used to show bookmarks, history, or the page in reading mode. We didn’t find this too useful and during our testing, the sidebar had a red background which was rather distracting.
We assume this was a bug and that will be fixed in future releases. There are other minor visual differences but none of them negatively affect our experience.
Performance
In the performance department, the two browsers couldn’t be more different. During our testing, a single tab in Chrome used 642MB.
This is somewhat expected from Chrome, but Thorium used only 81MB to render the same page, so the difference in RAM usage is impressive.
We also tested both browsers with two HD videos on YouTube and the results were similar. Chrome used 433MB during this process.
As for Thorium, it used only 197MB which is twice less.
We also tested Chrome in Motion Mark 1.2 and got 799.2.
As for Thorium, it got a slightly lower results at 621.9.
After that, we tested Chrome with Speedometer 3 and got 8.06.
On the other hand, Thorium scored just 6.09.
While Thorium uses less RAM, Chrome scored better on benchmarks, so keep that in mind when choosing your browser.
Why is Thorium good?
During our testing, Thorium used significantly less RAM than Chrome. The browser also has certain optimization flags that boost its performance on various CPUs.
It’s also available on legacy operating systems, and we even have a guide on how to run Thorium on Windows 7.
Is the Thorium browser trusted?
In general, it’s safe to use, and since it’s open source, the community can always check the source code and find anything wrong with the browser. On the other hand, Chrome is a closed source, so its source code remains hidden.
However, the Thorium team is much smaller, and it’s usually behind security updates. At the time of writing, the latest version was almost two months old, making the browser potentially vulnerable to any emerging threats.
Compared to Chromium, Thorium might have an advantage in terms of performance, but Chromium has an active community that is actively developing the software and fixing the security vulnerabilities.
In the long run, Chromium might be a better option simply because it’s much more actively maintained. However, before you make your decision, check out our Thorium browser review.
Conclusion
Is Thorium better than Chrome? In terms of optimization and memory usage, Thorium is a much better choice. However, Chrome outperforms Thorium on benchmark tests.
Both browsers have the same features, but Chrome has unlimited resources for its development and it’s constantly getting updates while Thorium is maintained by a single person and is updated less frequently.
However, Thorium is available on legacy operating systems, which is one of its main advantages. Overall, if we had to choose, we’d go with Chrome since it’s much more reliable and maintained, despite its high resource usage.
To learn how Chrome compares to other browsers, we have a great guide on Kiwi Browser vs Chrome, so don’t miss it.
Microsoft has devised an inventive solution for businesses dealing with the problem of leaked documents by presenting a dynamic watermarking feature on its Word, Excel, and PowerPoint applications for PC and web.
This clever instrument is made for groups that hold licenses for sensitivity labels in Microsoft 365, delivering extra protection to tackle document illicitness.
Dynamic watermarking adds a unique watermark to documents each time they are labeled with a sensitivity label. This is not just any watermark; it has the email address of the person who views the document embedded in it.
In a blog post, Microsoft says this interesting feature helps prevent leaks because the watermark remains visible even when you read, edit, or work together on a document. The problem is that you can’t magically remove the watermark without having special permissions.
However, it’s still possible for someone to take a picture of a sensitive file on their screen or of a presentation being shared either online or in-person. (Some forms of screenshotting cannot be blocked with existing technology.) This loophole presents a simple way to bypass the protections that sensitivity labels place on a document. Dynamic watermarking can be a potent weapon in combatting these kinds of leaks.
Microsoft
However, if somebody attempts to open a watermarked file with a Microsoft 365 version that cannot handle it, they will receive an “access denied” notification.
Dynamic Watermarking is currently accessible in Microsoft Word, Excel, and PowerPoint to web users and Current Channel Preview users on Windows and Mac. It will be made widely available in the future.
In other news, Microsoft Word, Excel, and PowerPoint for the web were recently updated with new menus, and the new design will be generally available to users starting in August.
Skype offers free international calls. The catch is that it has to be Skype to Skype. However, if you’d like to make an international call using Skype to someone with a landline or an unregistered Skype number, you’ll have to pay.
Are Skype international calls free?
If it’s Skype to Skype, it’s free but if the user is not on Skype, you’ll need to purchase Skype credits or subscribe to a Skype plan. The difference is the Skype credits plan offers a pay-as-you-go option while a subscription plan offers you unlimited talk time.
Both are great options but if you want to purchase one, you’ll have to look at your call habits. If you make many calls in a month, the subscription will offer you great value for money. However, Skype credits are your go-to if you talk to fewer people.
Your Skype credits are used up in accordance with the calling rates of each country. Some may be relatively affordable and others expensive. You can pay using various payment methods like PayPal or your credit cards and select an auto-renewal plan.
Luckily, a lot of people use Skype so you probably won’t need a subscription and even if you did, it would be for a handful of people.
How do I make Skype international calls?
Launch Skype on your desktop or phone, sign in and navigate to the Calls tab.
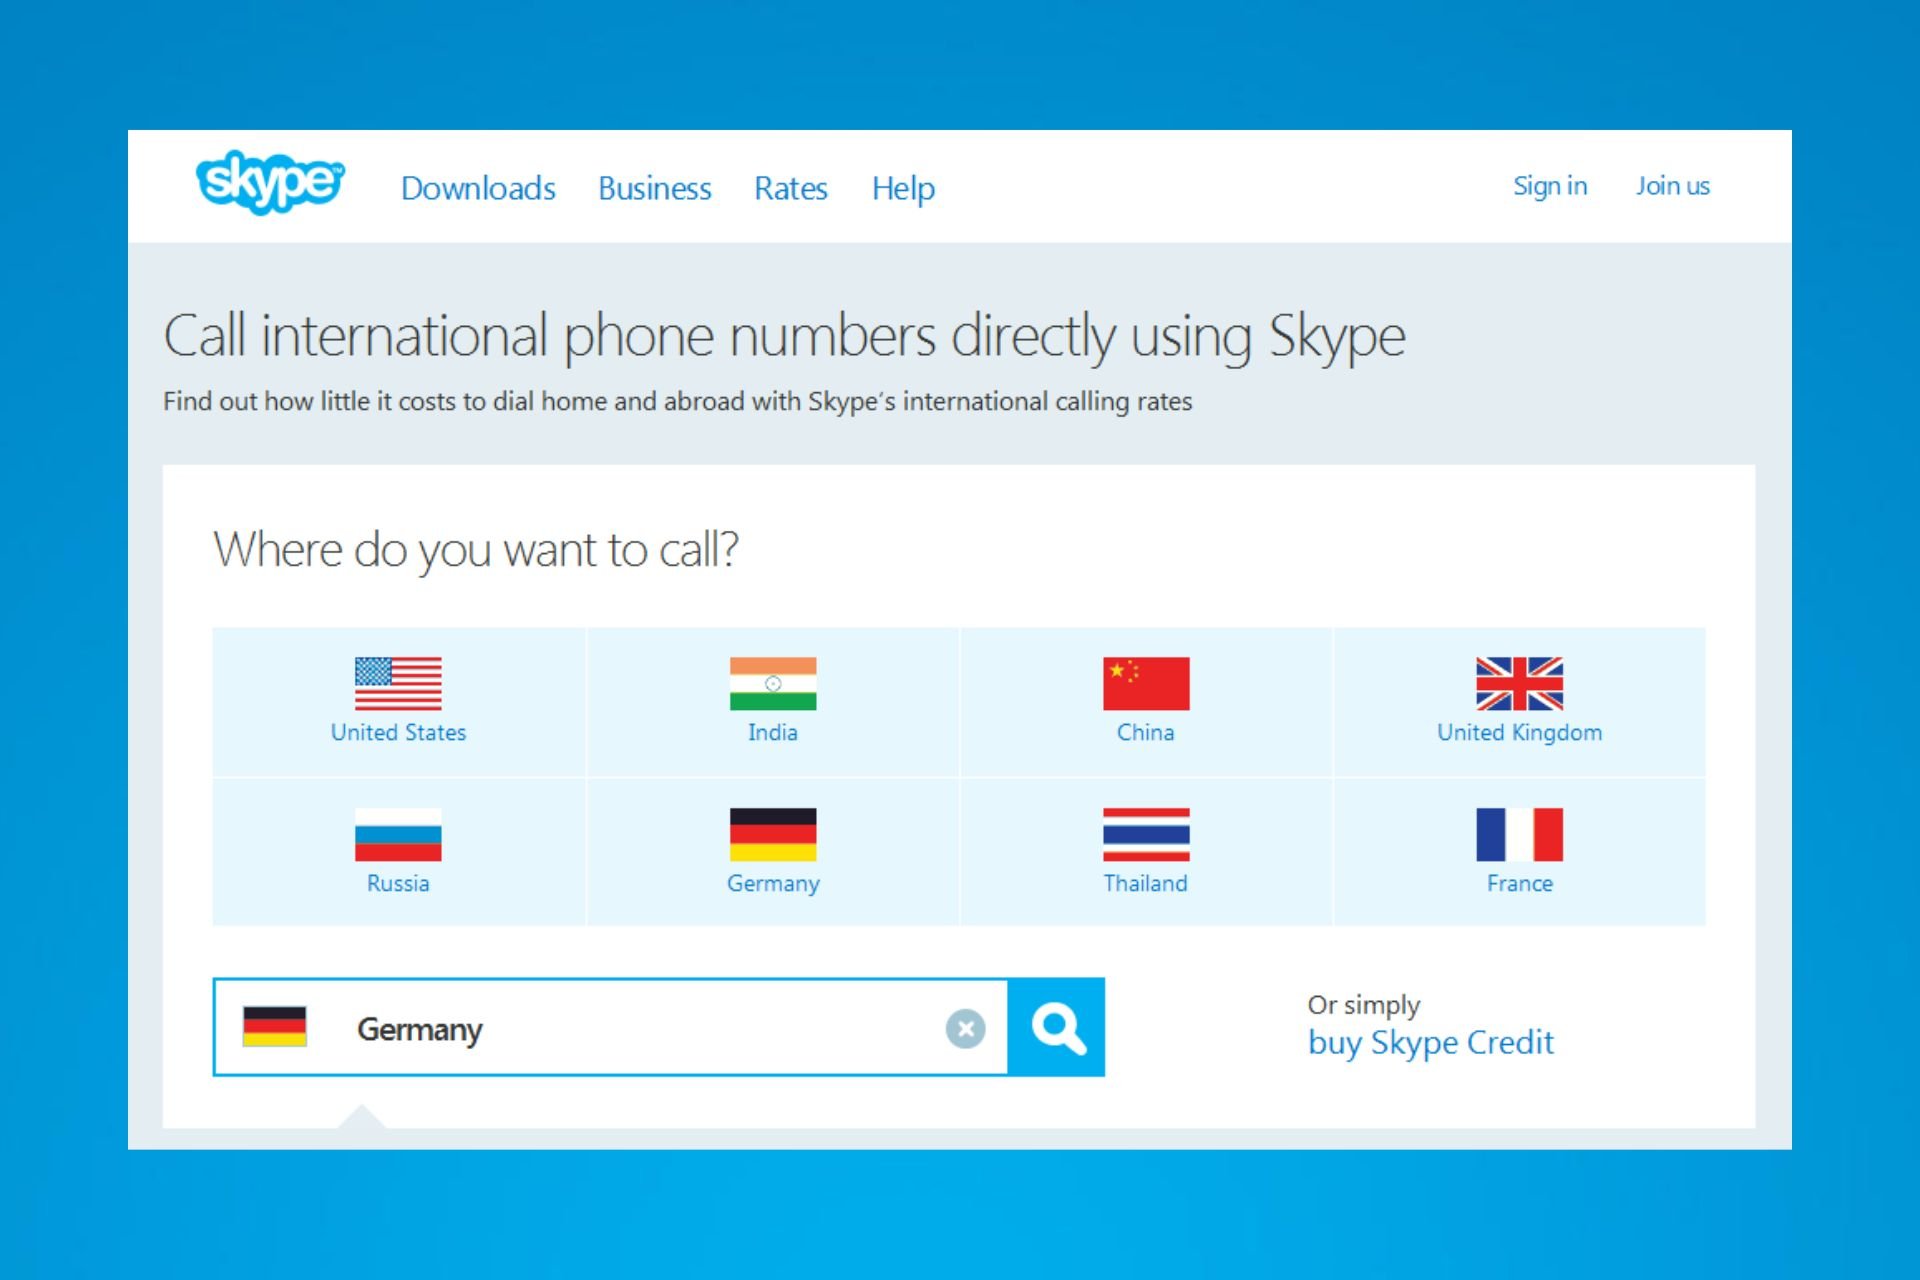
On the dial pad, select the country name where you need to make a call from the drop-down menu for the appropriate calling rates to be applied.
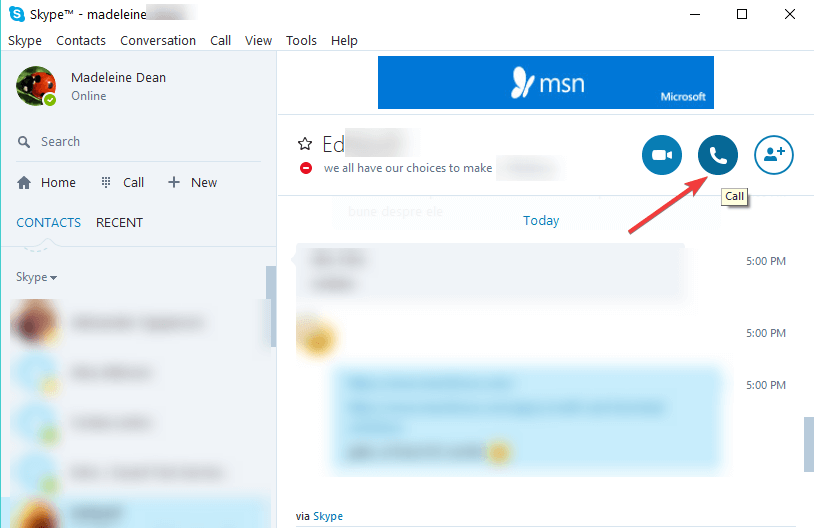
Next, enter the number you want to call and hit the Call button.
Difference between Skype subscription and Skype credits
Skype subscription
Skype credits
Subscriptions are based on fixed time intervals
Credits are on a pay-as-you-go basis
Subscriptions are limited to select areas
Credits can be used in any country hence more flexible
Subscriptions have an expiry date
Credits do not expire
Unused subscriptions can be refunded
Credits can be used to purchase other features
Subscriptions offer a free trial
Credits don’t have free trials
What are the pros and cons of Skype subscriptions and credits?
Skype subscriptions
Pros
Convenient – With unlimited calls, you don’t have to worry about topping up your subscription whenever you’re about to make a call.
Cost efficient – For users who make a to of calls, it is cheaper to be on a subscription because of unlimited calls. The subscription rates are also relatively affordable with the lowest going for $2.54 and the most expensive at $6.79 for a monthly subscription.
Cons
Limited coverage – The plans, although affordable, they only cover limited locations. If you want to make a call in an uncovered area, you’ll have to purchase an additional subscription.
Flexible – Since it’s on a pay-as-you-go basis, you can top up as little or as much as you want depending on the Skype international calls you’ll be making.
Skype credits
Pros
No expiry date – As long as your Skype account is active, your credits will remain until you use them.
Wide coverage – You can use your Skype credit in all areas.
Cons
Expensive – Because of its flexibility to call all areas, it may be expensive to call some areas and your credits get used up more than they would if you were on a subscription.
Cumbersome -You’ll have to check your credit balance often to ensure it doesn’t interrupt your call or get a Skype call failed error message. This can get cumbersome.
Both plans have their own pros and cons but ultimately, the final choice lies on you. After evaluating your calling needs, you can choose the most appropriate option.
We’d recommend getting both. Get subscriptions for areas where you make a significant number of calls then use credits for occasional calls for areas excluded from the subscription plan.
Have you tried Skype international calls? Were you on a subscription plan or using Skype credits? Which one would you recommend? Let us know in the comment section below.
Microsoft has made the Entra Suite, a thorough security and online identity toolkit for businesses in the digital age, generally available. The Entra Suite aims to offer one united system that makes it easier and more powerful to stop unauthorized entry into business systems.
The suite changes the game for businesses. It mixes network access safety with identity systems to ensure workers can securely get into needed apps and networks, whether at work or doing their jobs from another location.
Today we announced the general availability of Microsoft Entra Suite – the industry’s most comprehensive secure access solution for the workforce. The Microsoft Entra Suite delivers the most comprehensive Zero Trust user access solution and enables organizations to converge access policy engine across identities, endpoints, and private and public networks
Microosft
In the Entra Suite, Conditional Access is like the beating heart. It’s a risk assessment tool that carefully reviews every access request and ensures that only the correct people can see sensitive information in real-time.
This is important because it gives businesses the power to handle system entry more efficiently and decreases the chances of breaches. Picture yourself sleeping better at night knowing your company data are secured as strong as Fort Knox.
According to the blog post, the suite includes password-less authentication and single sign-on features, simplifying work and protecting workers from cyber dangers. It is similar to having a modern security guard stand outside your digital possessions, verifying identity cards and allowing only authorized individuals inside.
Additionally, for businesses concerned about the intricacy and expenses associated with handling numerous security tools, the cloud-based solution provided by Entra Suite might be able to substitute old-fashioned systems such as VPNs or Secure Web Gateways located on-premises.
The suite is priced at $12 per user per month. In today’s cyber security world, this seems like a reasonable amount to pay for peace of mind. However, one must sign up for a Microsoft Entra P1 subscription before using Entra Suite.
Microsoft’s new products give hope for better protection against cyber dangers. The Entra Suite and Microsoft Sentinel offer strong instruments to safeguard business digital environments.
So, if you run a company in the current digital era, maybe it is the right moment to think about what Microsoft can provide. After all, can you afford not to in the age of cyber threats?
You can find out more about the availability of the Microsoft Entra suite here.
It’s important to back up your Windows 10 drivers before you make any important changes to your system. There are several methods to achieve this and have the drivers ready for recovery. Here are the easiest manual and automatic methods to back up your drivers in Windows 10.
How do I back up my Windows 10 drivers?
1. Using Command Prompt
Press the Win + E keys to open File Explorer.
Go to a drive that does not have Windows installed and create a new folder called Drivers Backup.
Press the Windows key, type cmd and select Run as administrator.
Type or paste the following command and press Enter (Replace D:\Drivers Backup with the actual path where you created the folder): dism /online /export-driver /destination:"D:\Drivers Backup"
Open File Explorer again and open the Drivers Backup folder to see the backed-up drivers.
This method helps by creating a full backup of all your device drivers, ensuring you can quickly restore them if something unexpected happens.
2. Use PowerShell to back up the drivers
Create a Drivers Backup folder on a non-system drive, just like you did in the first solution.
Click the Start button, type powershell, and click on Run as administrator from the results.
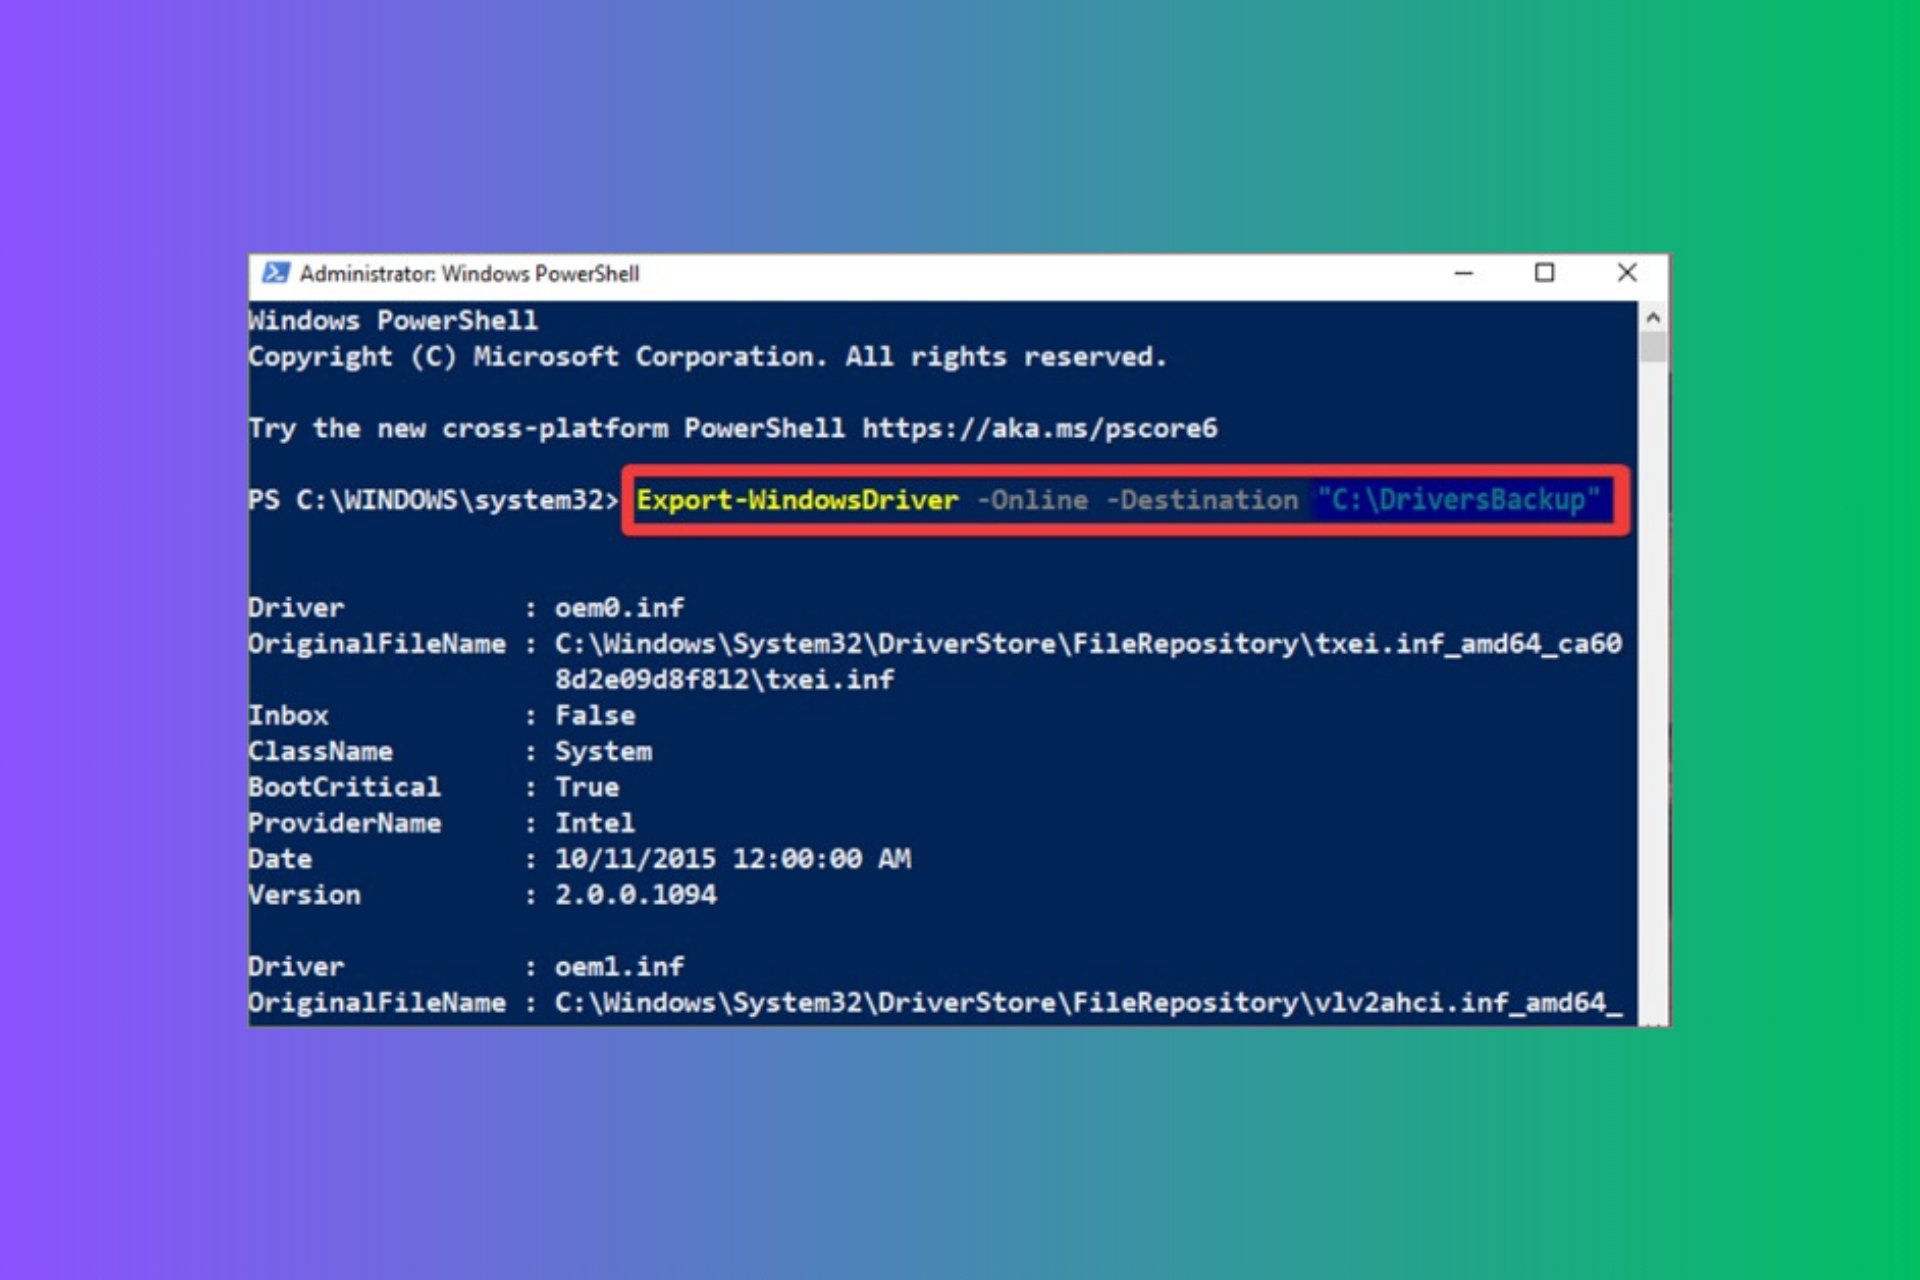
Now, type or paste the following command and press Enter to run it: Export-WindowsDriver -Online -Destination "D:\Drivers Backup"
Just as you did in the first solution, replace D:\Drivers Backup with the right folder path if it’s different.
Check the Drivers Backup folder to confirm the backed-up drivers.
PowerShell has similar functionality to Command Prompt for backing up drivers, although it has a slightly different syntax.
3. Use a third-party backup and restore software
Now you can clearly see that manually backing up your drivers can be a bit complicated if you’re not familiar with command line tools. Therefore, it’s a lot easier to use a dedicated driver backup software that also has the ability to restore them if something goes wrong.
We prepared a list of the best driver backup tools for Windows. Just choose the right one for your needs. Some of them have also complete system backup features.
How do I restore the backed up drivers in Windows 10?
Right click the Windows button and select Device Manager from the menu.
Here, right-click on the driver that needs a restore and select Update driver.
Choose Browse my computer for driver software.
Click Browse…, then locate and select your Drivers Backup folder.
Check the box next to Include subfolders and click on Next.
Windows will search the Drivers Backup folder and install the needed drivers.
This method enables individual driver restoration. If you want to restore all the drivers, you will need one of the dedicated tools highlighted above.
So, now you know how to create a Windows 10 backup on your drivers and how to restore them properly. Make sure you update and back up your drivers as often as possible to avoid potential issues in the future.
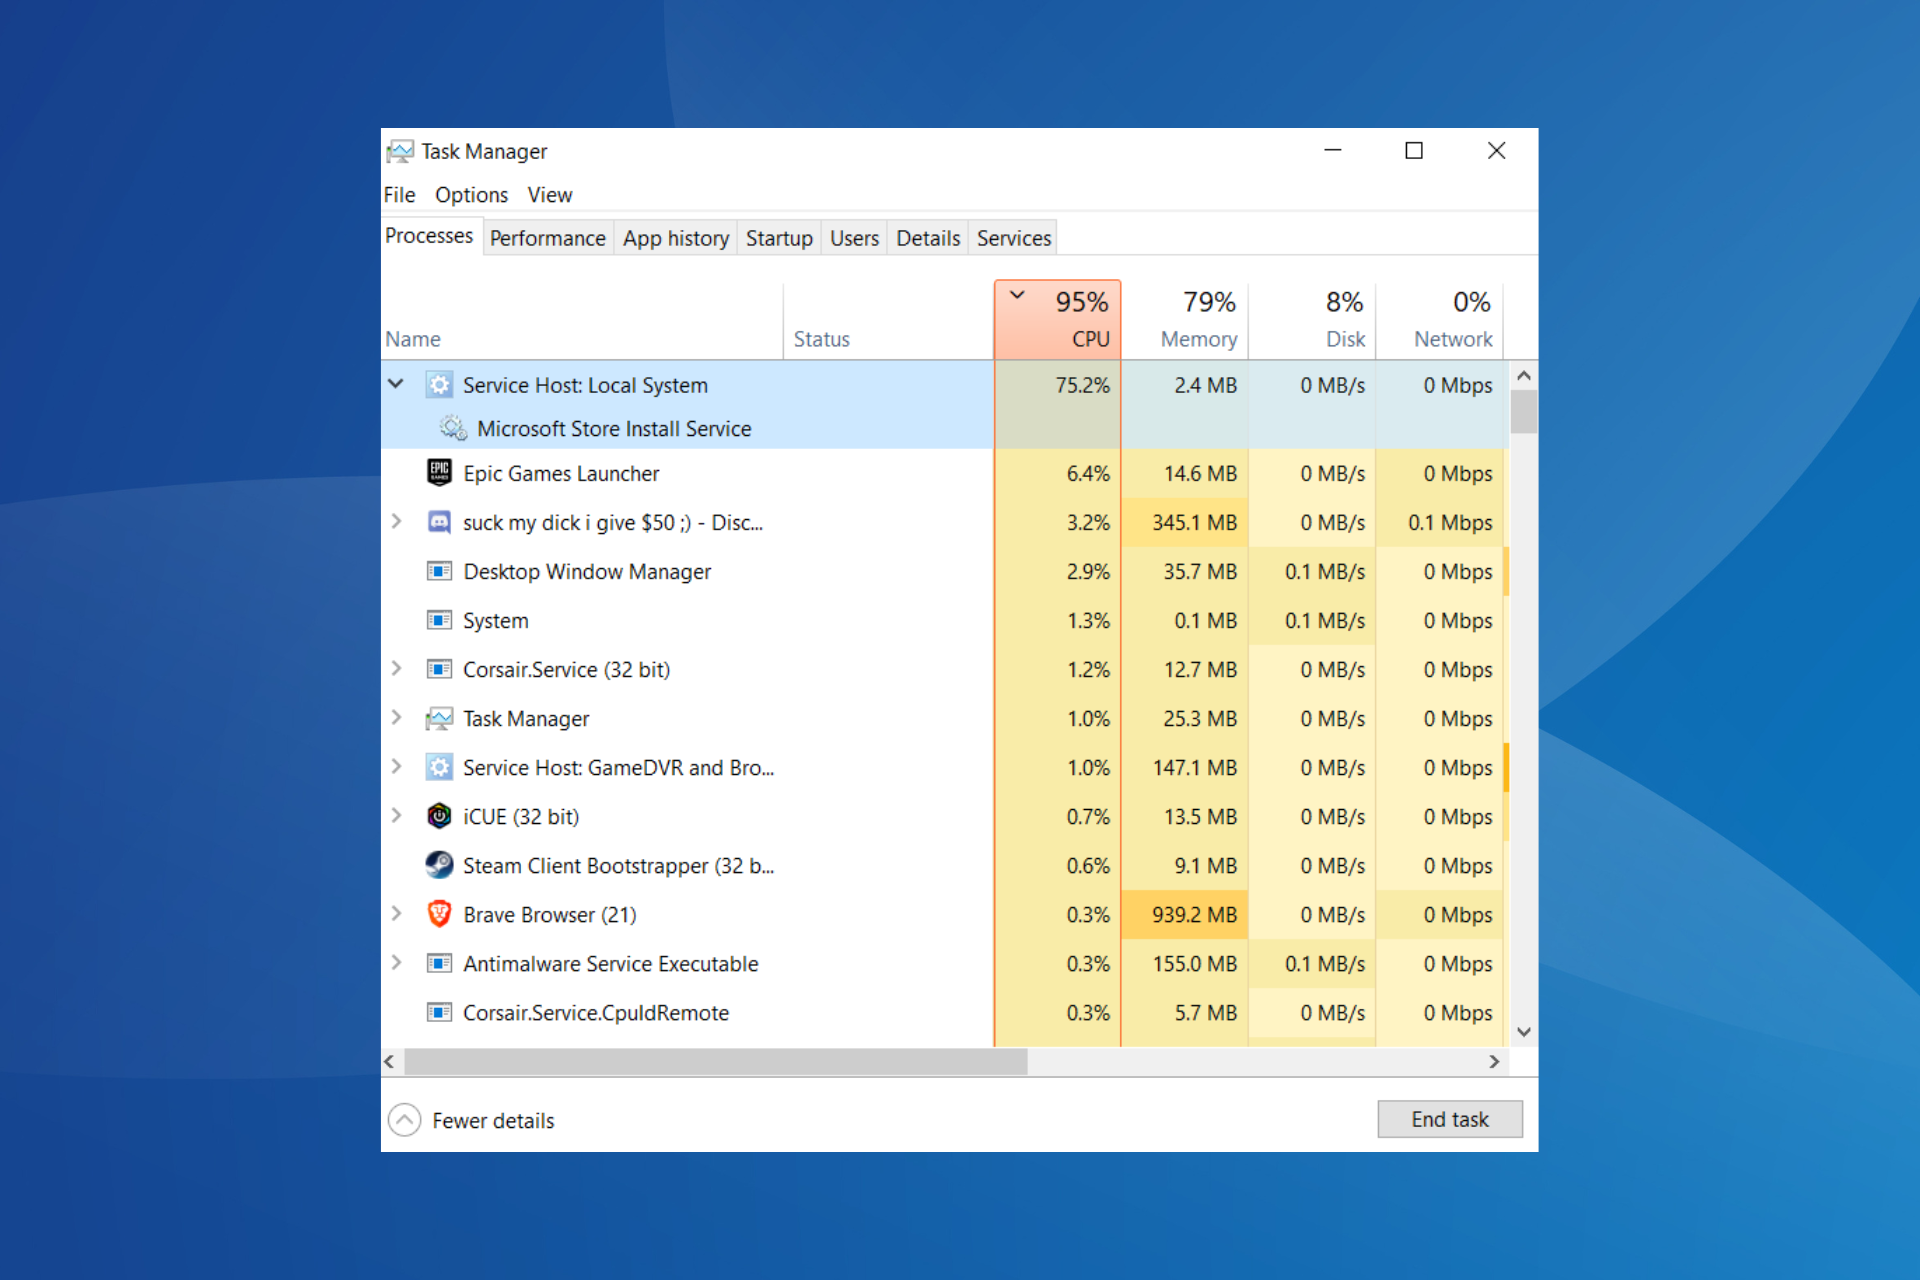
If the computer suddenly starts running slow and you head to the Task Manager to identify what’s consuming all the resources, you may find the Microsoft Store Install Service taking up high CPU, sometimes 75%-100%!
The problem is usually caused by misconfigured MS Store settings, active tasks, corrupted system files, or issues with the Microsoft Store Installer Service itself.
Before you start troubleshooting, restart the computer and check for improvements. If the CPU usage continues to remain high, install any pending Windows updates.
What can I do if the Microsoft Store Install Service uses high CPU?
1. Turn off auto updates in the Microsoft Store
Press Windows + S to open Search, type Microsoft Store in the text field, and click on the relevant result.
Click on the profile icon near the top-right corner, and select Settings.
Disable the toggle for App updates.
Now, restart the computer and inspect the CPU usage for the Microsoft Store Install Service.
2. Disable the Microsoft Store Install Service
Press Windows + R to open Run, type services.msc in the text field, and hit Enter.
Scroll down, right-click on the Microsoft Store Install Service, and choose Properties.
Select Disabled from the Startup type dropdown menu, and click the Stop button under Service status if the Microsoft Store Install Service is currently running.
Click on Apply and OK to save the changes, and then restart the computer.
Disabling the Microsoft Store Install Service won’t cause any issues if you don’t actively rely on the Microsoft Store to install apps. On the contrary, it will free up system resources!
3. End the ScanForUpdates task
Press Windows + S to open Search, type Task Scheduler in the text field, and click on the relevant result.
Navigate the following path using the left pane: Microsoft > Windows > InstallService
Right-click on the ScanForUpdates task, and select Delete from the context menu.
Click Yes in the confirmation prompt.
After deleting the task, restart the PC and check for improvements.
If the Microsoft Store Install Service keeps running even after you have disabled it from the Service.msc console, it might be the ScanForUpdates task to blame for this behaviour, and deleting it will fix things in no time!
Deleting the task also helps if you face high memory (RAM) consumption by the Microsoft Store Install Service.
4. Repair the corrupt system files
Press Windows + S to open Search, type Command Prompt in the text field, and click on Run as administrator.
Click Yes in the UAC prompt.
Paste the following DISM commands individually and hit Enter after each: DISM /Online /Cleanup-Image /CheckHealthDISM /Online /Cleanup-Image /ScanHealthDISM /Online /Cleanup-Image /RestoreHealth
Next, execute the following command to run the SFC scan: sfc /scannow
Finally, restart the computer to apply the changes.
If there are corrupt system files on the PC, the Microsoft Store Install Service may show 100% CPU usage. In this case, running the DISM commands and SFC scan will restore all problematic files with their cached copy stored on the PC!
5. Repair/reset the Microsoft Store
Press Windows + I to open Settings, go to Apps from the navigation pane, and then click on Installed apps.
Scroll down to the bottom and click on System components.
Locate Microsoft Store, click on the ellipsis next to it, and select Advanced options.
Click the Repair button, wait for the process to complete and check for improvements.
If the high CPU usage continues, click on Reset.
Again, click Reset to confirm, and the CPU usage should come to normal levels.
If the Microsoft Store Install Service continues running with high CPU usage, you can repair/reset the app. A reset will delete all Microsoft Store’s data, including the cache stored over time.
When all else fails, the last option is to factory reset Windows 11, though for 9 out of 10 users, disabling the Microsoft Store Install Service will bring the CPU usage under check!
Are Microsoft Teams notifications not working? Try these proven troubleshooting ideas for a quick remedy.
Many users have started seeing unusual notification issues after the recent upgrade of the Classic Microsoft Teams to New Teams.
There are many threads where users are asking for help on the Microsoft Answers portal. One example is this one created by Microsoft Answers alias Chris West2:
I’ve reproduced the issue and tried several fixes to see which one works reliably. Read on to find out which ones are worth a try!
How To Fix Microsoft Teams Notifications Not Working
I organized the following fixes from easiest to hardest. If you’ve already tried some of these, you can skip them.
Update Windows and Teams
If you’ve just seen the New Teams app, you’ve likely received an OTA update for Microsoft Teams only. Windows might be missing the necessary system codes to integrate the app within its notifications system.
Therefore, you must update Windows 10 or 11 by following these steps:
Press the Windows + I keys to get to the Settings app.
Click on the Update & Security option on a Windows 10 PC and Windows Update on a Windows 11 PC.
Click on the Windows Update menu on the left side navigation panel.
On the right side menu, click on Resume updates or Check for updates.
Wait for the device to update the necessary systems that’ll include New Teams notifications to Windows OS.
Enable Teams Notifications in Windows Settings
Before updating Windows, you might not find the New Teams app as an option on the Notifications & options.
After updating the OS, try the following:
Open the Settings app by typing Settings in the Start Menu or pressing the shortcut key.
Choose System from the Settings menu in Windows 10 or select System from the left-side navigation panel in Windows 11 Settings app.
On the System settings menu, select Notifications & actions on the left-side navigation panel.
Scroll down to the Get notifications from these senders section on the right-side menu.
Find the New Teams app in the list.
Click on the toggle button to enable notifications.
If this option isn’t available yet, move on to the next troubleshooting ideas below.
Allow Notifications in New Teams Settings
Someone has likely deactivated various notification choices in the New Teams app. Or, when your organization configured your profile for the app, they might not have enabled system notifications. In these situations, try the following steps to fix Microsoft Teams notification errors:
Open the New Teams app from the Start Menu.
Click on the Settings and more (three-dots menu) to the left of the Teams avatar or profile picture in the top-right corner.
Select Settings on the context menu that opens.
You should now see the General section.
On the Settings sidebar, click on the Notifications and activity option.
There, make the following selections:
Checkmark Play sounds with notifications.
Select Play sounds with incoming calls…
Checkmark Show message and content previews… and Show notifications during calls…
Missed activity emails should be set to Once every 10 minutes.
Select Show in banner for Chat message notifications.
Activate the @Mentionstoggle button.
Choose Show in Activity and banner for Likes and reactions.
Unmute Meeting chat notifications.
For the Calendar section, set all available selections to Show in Activity state.
Restart the app.
Disable Focus Assist
The Focus assist tool might block notifications from the Teams app if it’s enabled.
Deactivate this service by accessing Focus assist from the Start Menu and selecting the Off radio button.
Change Microsoft Teams’ Status
Did you set your MS Teams’ status to anything other than Available? If so, certain statuses can prevent notifications to allow you distraction-less work.
If you select any of these statuses, notifications will be blocked automatically:
Appear offline
Do not disturb
Busy.
Click on your MS Teams profile picture to open the statuses context menu. There, click on the current status and choose Available from the drop-down menu.
If you used Viva Insights to book a focused work time on Teams, you also won’t see any notifications. Do the following to deactivate this setting:
Click on the Apps icon in the left-side navigation bar.
In the search field, type Viva Insights.
Click Open on the right-side search results on the Viva Insights app.
Go to the Settings page by clicking on the three dots menu in the top right corner.
There, navigate to the Protect time tab.
Deactivate all quiet time settings there, like Mute mobile options.
Click the Save changes button.
Enable Channel Specific Notifications
If Microsoft Teams notifications aren’t working for a specific channel, follow these steps to remedy this problem:
Click on the Teams icon in the left-side navigation panel.
A sidebar will open showing all the teams you’re in right now.
Click on the expansion arrow for the team to which the channel belongs.
Once you’ve revealed all the channels, click on the three-dot menu of the target channel.
Click on the Channel notifications icon on the context menu.
On the Channel notification settings dialog box, select Banner and feed for all options.
Click Save.
Clear Microsoft Teams Cache
Close the Teams app.
Disable the Teams system tray icon as well.
Press Windows + R to open the Run dialog box.
In the Run command field, enter the following destination:
"%appdata%\Microsoft\Teams"
Hit Enter.
The MS Teams cache directory will open.
Select all the content of the directory and press Shift + Delete.
Run Teams in Safe Mode
If you’ve integrated third-party apps in Teams and they’re interfering with its notifications system, safe mode should help.
Find the app icon in the Start Menu. Press Shift on the keyboard and double-click on the app.
This should force Teams to launch in safe mode.
Repair Microsoft Teams
On the Start Menu, type Teams.
You should see Microsoft Teams under the Best match section.
Right-click on the icon and select App settings from the context menu.
The Settings page for Teams will open.
Scroll down until you find the Reset section.
Click Repair.
Wait until the repair process is over.
If you repair Teams, you won’t lose existing data.
Switch to the Classic Teams
If none of the above works for you, go back to the Classic Teams app by following these steps:
On the New Teams app, click the Settings and more button in the top right corner near the profile picture.
Look for the Turn off New Teams toggle button.
If it’s there, click on that to deactivate the New Teams interface.
The app will close and the classic user interface will open.
If you don’t find the above setting, uninstall the new app from the Start Menu by clicking on the Uninstall option in the right-click menu.
Now, download Classic Teams from the Go.Microsoft.Com portal. This is the official build.
Install the app to access the classic interface.
Summary
So, now you know how to deal with Microsoft Teams notifications not working.
Do you know a secret hack to fix the Teams notifications issue? Let me know by commenting below. Moreover, if you’re having trouble with the vertical scrollbar missing on the app, or the Unknown User error, we’ve got you covered!
In the fast-changing world of digital collaboration, Microsoft is adding a new feature to its Loop collaboration app that’s sure to stir the pot. Picture yourself in a lively organization where sharing ideas and tasks with external partners or freelancers is difficult. Now, Microsoft Loop introduces guest sharing, making teamwork more open and without boundaries.
In the past, when working with Microsoft Loop, you could only share pages, workspaces, and components within your organization. Microsoft has realized this and introduced a feature that allows users to share Loop content with guests. This is a game-changer for organizations that thrive on collaboration and innovation.
Users in organizations that don’t use sensitivity labels can now share pages and components with any email address as long as it aligns with administrator policy. Even more, Microsoft is planning to expand guest sharing to you later this year when they make sensitivity label functionality for Loop workspaces generally available.
According to the official blog post, sharing a Loop page or workspace with someone outside your organization is quite simple. You’ll just need to click on the Share button, choose either the Page or Workspace option, and then type in their email address.
Once you set the settings, you can share the Loop page through Teams, Outlook, or other apps that support Loop. But, one thing to note: before you can share a Loop workspace with guest users, they need access to a shared Loop page. There might be some waiting time of about an hour or two before the workspace becomes shareable.
This new feature is coming to those who have Microsoft 365 Enterprise, EDU, or SMB licenses.
If you are managing a project and want to improve communication with outside contractors or are an artistic professional excited to show your work to clients, then the guest-sharing feature of Microsoft Loop will make your collaborative attempts easier and more inclusive.
Speaking of new Loop features, Microsoft is finally bringing Copilot to the platform, teasing it as being capable of coming up with ideas when users don’t have any. Talking about a great helper.
What do you think about these changes coming to Microsoft Loop?
Those who use Microsoft’s Start and Bing apps to access the Cashback Program receipt scanning feature, we have some bad news for you: the Redmond-based tech giant announced that it is shutting down the receipt scanning function, which enables users to get cash back from their bought items
According to the latest reports, the deprecation is scheduled for July 25, 2024. Some people may wonder why this feature was stopped. Even though Microsoft has not given a precise reason, it is not difficult to guess that the characteristics may not have become as popular as they had anticipated.
Thank you for using the receipt scan offers as part of the Microsoft Cashback Program. Due to recent changes, the receipt scan feature will no longer be available as of July 25th 2024, and you will no longer be able to earn cash back by scanning receipts through Microsoft applications.
Microsoft
When we consider it, the Start and Bing apps are not usually the first ones that people open on their phones. This is disappointing, especially since the feature was launched with a big claim: “Earn cash back on every purchase, no exceptions.” This meant you could get bonus money from places like Walgreens, Walmart, and Target for items like eggs, fruit, and milk.
But it’s not all bad news. The Microsoft Cashback Program is not completely disappearing. You can still enjoy its benefits if you like earning additional money from your online shopping by using Microsoft Bing and Edge and participating online sellers. Microsoft appears to be emphasizing “shopping anywhere” via its platforms.
What’s next for those who enjoy earning money by taking pictures of their receipts? Many other apps, like Fetch and Swagbucks, provide the same benefits. And if you are devoted to Microsoft, the Cashback program via Bing and Edge is still a possible choice—yet more digital.
Backing up your drivers in Windows 11 is a crucial step to ensure your system remains stable and recoverable. Whether you prefer using command-line tools or a graphical interface, there are several methods to achieve this. Let’s dive into the different ways you can back up your drivers on Windows 11.
How do I back up my Windows 11 drivers?
1. Back up drivers using Command Prompt
Press the Windows key + E simultaneously to open File Explorer.
Navigate to a drive that does not have Windows installed (e.g., D:).
Right-click in the directory, choose New > Folder, and name it Drivers Backup.
Press the Windows key, type cmd and select Run as administrator.
Type or paste the following command and press Enter: dism /online /export-driver /destination:"D:\Drivers Backup"
Replace D:\Drivers Backup with the path to your created folder if it differs.
Navigate to the Drivers Backup folder to see the backed-up drivers.
This method helps by creating a full backup of all your device drivers, ensuring you can easily restore them if needed.
2. Back up drivers using PowerShell
Follow the steps in the first solution to create a Drivers Backup folder on a non-system drive.
Press the Windows logo key and type powershell, right-click on Windows PowerShell from the search results and select Run as administrator.
In PowerShell, type or paste the following command and press Enter: Export-WindowsDriver -Online -Destination "D:\Drivers Backup"
Just like in the previous solution, replace D:\Drivers Backup with your specific folder path if different.
Check the Drivers Backup folder to confirm the backed-up drivers.
PowerShell provides a streamlined alternative with similar functionality to Command Prompt for backing up drivers.
3. Use third-party backup and restore software
As you’ve seen above, backing up your drivers can be a bit tricky if you don’t really use command line tools too often. That’s why it’s a lot easier to use a dedicated driver backup software that also has the ability to restore them if something is wrong.
Luckily, we have a whole list of the best driver backup tools for Windows. With a few bucks and clicks you can keep everything in order. Also, the tools have advanced features to back up all the data, not just the drivers.
How do I restore the backed up drivers in Windows 11?
Right click the Windows button and select Device Manager from the menu.
In Device Manager, right-click any device needing driver restoration and select Update driver.
Choose Browse my computer for driver software.
Click Browse…, then locate and select your Drivers Backup folder.
Check the box next to Include subfolders and click Next.
Windows will search the Drivers Backup folder and install the needed drivers.
Close the window once the process is completed.
This method enables individual driver restoration using the backup folder created, making it particularly handy if only specific drivers need to be restored.
Each method provides a robust way to back up and restore your drivers in Windows 11, ensuring your system remains stable and recoverable. Remember to periodically update and back up your drivers to avoid potential issues in the future.
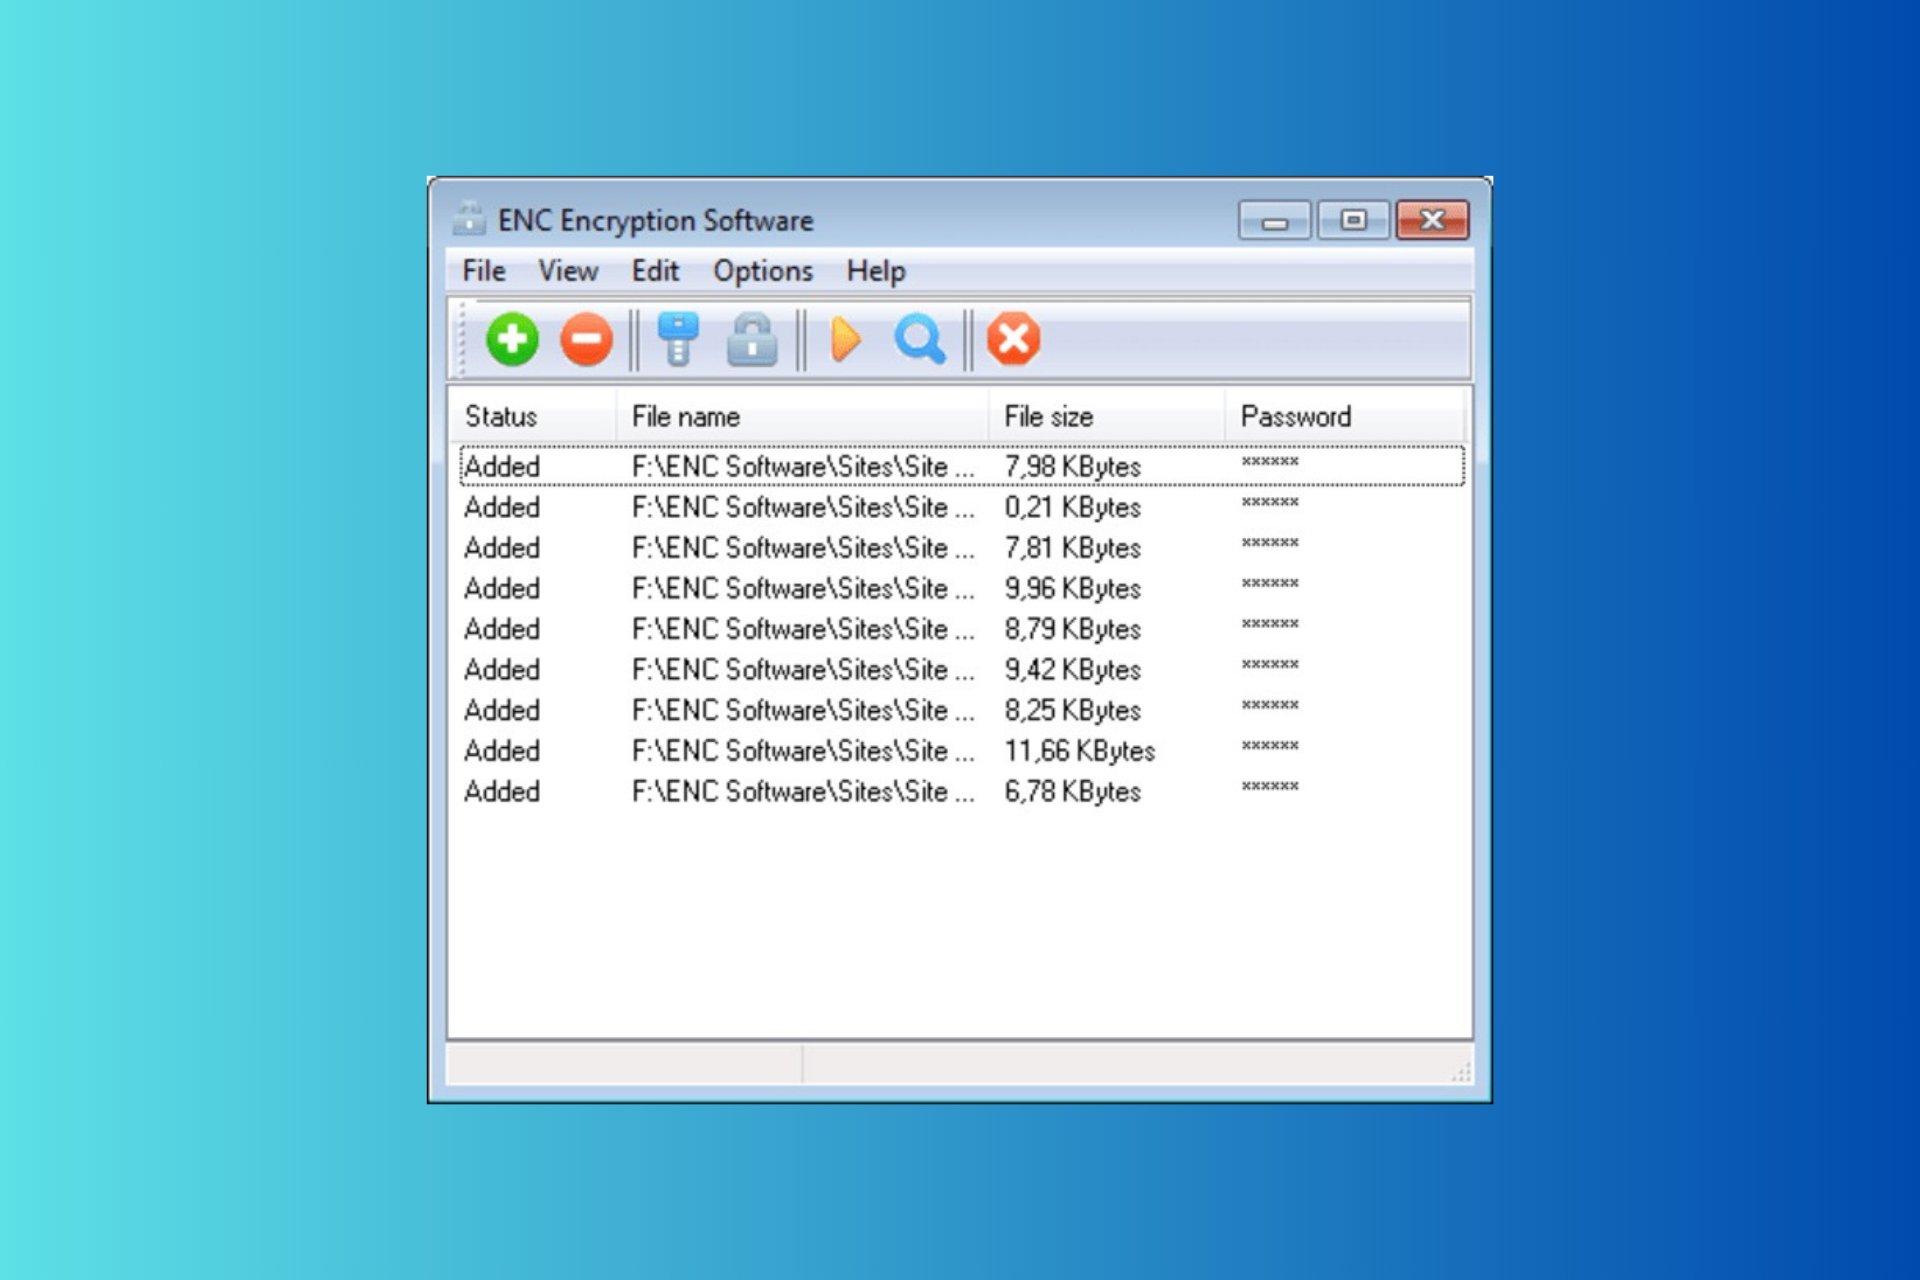
Whether you’re dealing with encrypted documents, having a reliable ENC file viewer is essential. However, opening an ENC encrypted file requires the decrypting key and there are no such ENC file viewers online. We also remind you that the best way to open an ENC encrypted file is by using the tool you initially encrypted the file with. There are, however, online tools that decrypt and convert ENC encrypted PDF files. We also included other ENC file viewers for archives, encore musical notation files and even nautical charts readers.
CopySafe PDF Reader is tailored for professionals who need to open and view encrypted (ENC) PDF files. It excels in providing strong encryption to protect sensitive content.
The software offers various security measures, including password protection, ensuring that your documents remain secure. Its user-friendly interface makes it easy to navigate and use.
Unique to CopySafe PDF Reader is its focus on encrypted PDFs, making it a specialized tool for handling sensitive documents securely.
Pros:
Specifically designed for opening and viewing ENC files
Provides strong encryption to protect PDF content
User-friendly interface
Allows setting of various security measures (e.g., password protection)
pdfFiller is ideal for users needing to convert ENC files to PDF format while maintaining the integrity and quality of the original file.
The tool supports a wide range of file formats and offers a quick and efficient conversion process. Its user-friendly interface ensures easy navigation and use.
A standout feature is its ability to handle large files efficiently, making it a reliable choice for professional use.
Pros:
Allows conversion of ENC files to PDF format
Maintains the integrity and quality of the original file
User-friendly interface for easy conversion
Quick and efficient conversion process
Supports a wide range of file formats
Cons:
Requires a subscription for full features
Online tool dependent on internet connection
Potentially large files may take longer to upload and convert
FileProInfo is a free, online ENC viewer that works on any device with a modern browser, making it highly accessible. However, keep in mind that this viewer will only open encore musical notation files (.enc) and it has nothing to do with encryption.
The tool processes files securely on dedicated cloud servers and supports large file sizes up to 150 MB. No registration is required, ensuring a hassle-free experience.
Its primary advantage is the ability to view ENC files without the need for installation or registration, making it a convenient option for quick access.
NOAA Online ENC Viewer is specifically designed for viewing Electronic Navigational Charts (ENC), providing detailed vector data for marine navigation.
The tool is free to use and updated weekly with new data. It also supports extracting ENC data into GIS-supported formats, making it versatile for marine professionals.
Its specialization in navigational charts makes it a valuable tool for those in the marine industry.
Pros:
Specifically designed for viewing Electronic Navigational Charts (ENC)
Free to use
Provides detailed vector data for marine navigation
Updated weekly with new data
Supports extracting ENC data into GIS-supported formats
Cons:
Limited to navigational chart data
Requires internet connection to access
Not suitable for encrypted document types outside of navigational charts
This concludes our list of ENC file viewers online. As a conclusion, there are no online ENC file decryption tools online. However, there are ENC online viewers for specific purposes like ENC PDF files, network data capture, musical note sheets and even for navigational charts.
We included all possibilities in this guide although we remind you once again that if you’re dealing with an ENC encrypted file, you should view it with the software that you have used to encrypt it.
Microsoft recently made a significant move by issuing an update to handle an annoying vulnerability known as CVE-2023-24932 that has caused problems for those using Windows 10 and 11.
The bug is related to BlackLotus UEFI Secure Boot, which could offer attackers a path past the Secure Boot feature. For those who may not know, Secure Boot is a security measure that ensures your PC starts up with software only from sources trusted by its manufacturer. With its intended operation, it can serve as a powerful barrier against various attacks.
Microsoft’s response was fast and complete. In its July 2024 Patch Tuesday updates, the company issued patches, not just regular ones. In a blog post, the Redmond-based tech giant provided a plan with steps for organizations to implement and control the needed changes. The process begins by opting into the mitigation, which means putting a fresh signing certificate into device firmware. Then, it involves updating the boot manager on the device and, at last, updating any recovery or external bootable media used with these devices.
The Secure Version Number (SVN) update to the firmware is important. It ensures that devices are safe from rollback attacks, taking advantage of the CVE-2023-24932, which a hacker could try using an old and weak edition of the boot manager.
However, it’s worth mentioning that if you activate these mitigating actions, you cannot turn back unless you stop using Secure Boot. Microsoft has highlighted the necessity of extensive testing before full deployment. This is not just about avoiding a minor annoyance but also about ensuring that your devices can boot up correctly and that you do not accidentally lock yourself out of your systems.
Want to know how to change your default Google Account on Chrome? Managing multiple accounts can be a hassle, especially when Google Chrome defaults to the wrong one.
This happens because Chrome prioritizes the first account you log into as the default for all services. Whether you use different accounts for work or personal matters, you should know how to switch through them and set them up.
I’ll show you how, so let’s jump right in!
How To Change the Default Google Account on Chrome
Follow the below steps:
Open Chrome and click on your profile picture in the top-right corner of your screen.
Select Sign out. If you logged in with multiple accounts, tap “Sign out of all accounts.”
Click Sign in the top-right corner of the screen.
Tap Use another account.
Add the email address of the account you want to be your default and tap Next.
Add the password and hit Next.
The account at the top right corner of your screen is now your default account.
So, now you know how to change your default Google account on Chrome. Following the steps outlined above, you can ensure that your preferred account is always ready for use!
There are only a handful of browsers that still work on older operating systems, and speaking of which, today we’ll show you how to install the Thorium browser on Windows 7.
How do I install the Thorium browser on Windows 7?
Next, locate the version that matches your CPU and select it.
Once it’s downloaded, run the setup or extract the archive.
Keep in mind that you need to choose the version that matches your SSE instructions on the CPU.
Which browser still supports Windows 7?
There are only a few browsers that work on Windows 7, with Supermium and Thorium being the most known.
We have an entire guide dedicated to the best browsers for Windows 7, so you’ll be able to find the one that meets your needs.
Does Chromium work on Windows 7?
No, Chromium doesn’t work on Windows 7 anymore. However, forks of Chromium, such as Supermium, which Thorium is based on, still work on Windows 7 without issues.
No, modern versions of Chrome won’t work on Windows 7. You can use version 109 which was released in early 2023, and it should work.
However, this version isn’t getting updates, so it will become unsafe to use soon.
What can I use instead of Google Chrome on Windows 7?
Supermium or Thorium are the best Chrome alternatives on Windows 7. They use the fork of the Chromium engine, so they look and work almost exactly like Chrome.
As you can see, Thorium is fully compatible with Windows 7, and it doesn’t require any special instructions, just download the right setup file from GitHub and run the installation, it’s that simple.
If you’re a fan of legacy operating systems, we have a great guide that explains if you can still use Windows 7 and how to do that, so you might want to check it out.
Often, while trying to sign in to the EA app on a Windows PC, Mac, or Xbox, you get the EC 10000 error code. The error message reads, Something went wrong. There’s a problem with your account, without shedding light on what caused the error in the first place!
Based on the available reports, the EC 10000 error code appears due to missing permissions, corrupt app cache, misconfigured DNS settings, or the connection being blocked by your antivirus/firewall.
When faced with the EA sign-in error, verify whether the servers are up and running through a real-time monitoring service like Downdetector. If everything’s fine here, switch to another network, preferably a mobile hotspot. You may also sign out, log in with another account, log out again and then sign in to the affected account. For a few, even logging in to EA via the Steam account did the trick.
How do I fix the EA error code EC 10000?
NOTE
The steps listed here are for a Windows PC due to the high error encounters on the device. In case you face the sign-in error on another device, apply the equivalent measures.
1. Use a VPN
One of the easiest solutions that worked for 3 out of 5 users when faced with EA sign-in error code EC 10000 on Windows or Mac was to use an effective VPN solution. A VPN basically reroutes your connection through a different server, bypassing local issues!
If you are unsure about a paid one, there’s always the option to use a top-rated free VPN. Although, it has a limited feature set and server options.
An excellent choice for this task is EpressVPN. This professional VPN comes with thousands of servers you can choose from and offers excellent connection speed so you won’t run into any issues when playing games on the EA app.
Right-click on the EA app’s shortcut, and select Properties.
Go to the Compatibility tab, and tick the checkbox for Run this program as an administrator.
Click Apply and OK to save the changes.
3. Clear the EA cache via App Recovery
Press Windows + S to open Search, type EA in the text field, right-click on the relevant result, and select Open file location.
Run the App Recovery executable (.exe) file here.
Click on Clear cache, and wait for the EA app to relaunch.
Once done, verify whether you are able to sign in without getting the EA error code EC 10000 on your PC.
4. Fix DNS issues
4.1 Clear the DNS cache
Press Windows + S to open Search, type Command Prompt in the text field, and click on Run as administrator.
Click Yes in the UAC prompt.
Paste the following command and hit Enter: ipconfig /flushdns
Now, restart the computer, launch EA, try signing in and check for improvements.
4.2 Switch to Google’s DNS
Press Windows + R to open Run, type ncpa.cpl in the text field, and hit Enter.
Right-click on the active network adapter, be it Wi-Fi or Ethernet, and choose Properties.
Select Internet Protocol Version 4 (TCP/IPv4), and click on Properties.
Now, select the Use the following DNS server addresses option, and enter the following data:
Preferred DNS server: 8.8.8.8
Alternate DNS server: 8.8.4.4
Tick the checkbox for Validate settings upon exit, and click OK to save the changes.
Reboot the PC, launch EA, and verify whether you can now log in.
In several of the cases I came across, DNS issues were the primary reason for the EA error code EC 10000. And flushing the DNS cache and/or switching DNS addresses fixed things in no time. While I used Google’s public DNS due to its reliability, you can go with the fastest DNS server near you for better speed!
Also, remember that changing the DNS helps fix the EC 10000 error code with EA on Xbox and Mac.
5. Whitelist the EA app in Windows Firewall
Press Windows + S to open Search, type Windows Defender Firewall, and click on the relevant result.
Choose Allow an app or feature through Windows Defender Firewall from the left pane.
Click on Change settings.
Now, click on Allow another app.
Click on Browse.
Go to the following path if you went ahead with the default app installation, select the EALauncher.exe file, and click Open: C:\Program Files\Electronic Arts\EA Desktop\EA Desktop
Click on Add.
Make sure both the Private and Public checkboxes are ticked for EA.
Finally, click OK to save the changes, then relaunch EA, and you should be able to sign in.
When the firewall is blocking an app, whitelisting it does the trick for most. But in the case of sign-in error code EC 10000, a few recommend uninstalling the EA app, then disabling the firewall, and finally reinstalling the app. So, you may try that as well!
6. Restore firewall settings to defaults
Press Windows + S to open Search, type Windows Defender Firewall, and click on the relevant result.
Select Restore defaults from the left pane.
Click on the Restore defaults button.
Now, click Yes in the confirmation prompt.
Once restoring Windows Defender Firewall to default helps get rid of the EA error code EC 10000, you may have to reconfigure a few of the earlier settings, especially other apps that were whitelisted.
7. Create an exception for the EA app in your antivirus
Press Windows + S to open Search, type Windows Security in the text field, and click on the relevant result.
Click on Virus & threat protection.
Click on Manage settings under Virus & threat protection settings.
Now, click on Add or remove exclusions.
Click Yes in the UAC prompt.
Click on Add an exclusion, and choose Folder from the list of options.
Now, head to the following path, choose Electronic Arts folder, and click on Select Folder: C:\Program Files
Finally, reboot the device, and check whether you can now sign into the EA app.
While you could just add the EA Launcher as an exclusion, excluding the entire folder ensures that none of the other critical EA processes are blocked by the antivirus. Besides, if you have a third-party antivirus installed on the PC, for instance, BitDefender, you must instead add EA as an exclusion there to get rid of the EA error code EC 10000 on your PC.
Microsoft released the Windows Server Preview Build 26252, and the patch is finally bringing new features after the last one didn’t.
Firstly, this is not a typical update. It is an introduction to the next Windows Server Long-Term Servicing Channel (LTSC), which contains the Desktop Experience and Server Core installation options for Datacenter and Standard editions.
Windows Server Build 26252 also introduces an annual channel for container hosts and Azure Edition solely for VM evaluation.
Today we are pleased to release a new build of the next Windows Server Long-Term Servicing Channel (LTSC) Preview that contains both the Desktop Experience and Server Core installation options for Datacenter and Standard editions, Annual Channel for Container Host and Azure Edition (for VM evaluation only).
Microsoft
Windows Server Build 26252 also introduces the Windows Admin Center (WAC). From this build onwards, you can download and install the WAC directly from your Windows Server Desktop. It’s as if they are simplifying our lives step by step. Go to the start menu and look for “Windows Admin Center Setup.” You will find it easily. But remember, this is possible only when you have a desktop version of the Windows Server 2025 Datacenter or Standard Preview.
Another cool feature is delegated Managed Service Accounts (MSA). This feature allows for a significant change from old-style service accounts to machine accounts. These machine accounts have managed and fully randomized keys, which helps avoid annoying credential harvesting attacks.
Windows Server Build 26252 also brings changes to the Feedback Hub app, which is now provided for Server Desktop users. For those dealing with the 0% progress bug when upgrading, the ISO media download option is suggested. Microsoft also acknowledges some issues, such as the Access denied error in Diskpart or the peculiar label swap, which could make you believe you’re installing Windows 11.
Microsoft released a new build for Windows 10 Insiders, KB5040525. While the patch doesn’t bring many new features, it is a big patch that fixes dozens of errors on the almost 10-year-old operating system. For example, there is a solution that moves the search box to secondary monitors, which is quite useful.
We are beginning to roll out a fix where you will see search box on your secondary monitors when the setting for search on the taskbar is set to “Search box”.
Microsoft
The KB5040525 update addresses specific problems that could have been bothering you. Did you ever face difficulty with the Group Policy editor or realize that your Universal Print clients were not behaving as expected? This upgrade intends to fix those little insects, improve Windows Backup, and increase the Windows Kernel Vulnerable Driver Blocklist to maintain your system’s security.
However, there is a small problem with DHCP Option 235. Some devices might have difficulty utilizing Microsoft Connected Cache (MCC) nodes within their network, which might result in more download traffic coming from the public internet. Microsoft recognizes this problem and is working on fixing it.
KB5040525 is now available to download and install, and you should do so if you’re enlisted in the Windows 10 Insider Program. Let us know what you think about it.
In other news, Windows 11 Insiders also got a new patch in the Release Preview channel, and the Redmon-based tech giant finally released Windows 11 24H2 ISOs for clean installations. However, they’re only available to Insiders for now. It’s been quite the week.
Microsoft released new builds for Windows 11, specifically versions 22621.3951 and 22631.3951, or KB5040527, to people in the Release Preview Channel. The updates are significant, with fresh features and enhancements coming to Windows insiders.
Firstly, for Windows users in China using Windows Share, you should turn on Wi-Fi and Bluetooth to ensure nearby sharing works well. Windows will gently remind you to turn them on if they’re switched off. But remember, this feature is rolling out in stages, so patience is key.
Have you ever wished for a File Explorer tab that could be copied with a right-click? Your wish has been answered. For those who prefer their apps close by, simply drag them from the Pinned section in the Start menu onto the taskbar.
KB5040527 also focused on making File Explorer more reliable by fixing annoying crashes and hangs. Some memory leaks and unexpected behaviors have been fixed, too, so you won’t need to wonder anymore.
Have you ever experienced the “End Task” button not giving a warning before closing down an unresponsive program? They have updated the logic, making it smoother for those who enabled this under the For Developers settings.
However, Microsoft’s efforts don’t stop there. With KB5040527, the company also focuses on fixing issues related to high CPU usage and packet loss in TCP/IP. Additionally, the Redmond-based tech giant has resolved communication problems with the Universal Print service for those who use it professionally. For gaming enthusiasts and Bluetooth users alike, these updates ensure a smooth experience.
Data loss can be a significant setback, especially when dealing with encrypted files. Our team rigorously tests these tools to recommend the best ENC file repair software, not just the ones with the biggest budgets. It’s important to know that the best way to get back the encrypted files is to reverse the encryption by using the software you encoded them with.
Selection criteria:
File Type Support: Ability to recover various file formats, including custom and encrypted files.
Ease of Use: User-friendly interfaces that simplify the recovery process.
Compatibility: Cross-platform support for different operating systems.
Speed: Quick recovery times, including GPU acceleration for faster processing.
Security: Secure handling of files to prevent unauthorized access.
Preview Feature: Option to preview files before final recovery.
Cost: Value for money, considering the range of features and capabilities.
ENC Recovery excels in recovering a wide range of file types, including custom extensions and GoPro footage. It’s designed for professional use, making it ideal for system administrators who need to restore digital vaults and their directory structures.
The software offers a simple, intuitive five-step recovery process, ensuring ease of use even for those who may not be highly technical. Its cross-platform compatibility with Windows and macOS makes it versatile.
One unique feature is its ability to show proof of data recovery before purchase, adding a layer of trust and transparency.
Pros:
Recovers a wide range of file types, including custom extensions and GoPro footage
Capable of restoring digital Vaults and their directory structures
Simple, intuitive five-step recovery process
Cross-platform compatibility (Windows, macOS)
Shows proof of data recovery before purchase
Cons:
Free trial requires purchase for full recovery
Limited user reviews and ratings
Some features may be complex for non-technical users
Passware Kit Forensic is a powerhouse for recovering over 360 file types, including MS Office, PDF, ZIP, and RAR. It’s tailored for law enforcement and corporate users, making it a top choice for professional environments.
The software supports full disk decryption for various encryption formats like BitLocker and FileVault2. With GPU acceleration, it ensures faster password recovery, and the batch mode allows for multiple file recovery tasks simultaneously.
A standout feature is its inclusion of 5 agents for distributed password recovery, enhancing efficiency.
Pros:
Supports over 360 file types, including MS Office, PDF, ZIP, RAR, and more
Full disk decryption for various encryption formats (BitLocker, FileVault2, etc.)
GPU acceleration for faster password recovery
Batch mode for multiple file recovery tasks
Includes 5 agents for distributed password recovery
Cons:
High cost ($1,195) compared to other solutions
Requires technical knowledge for optimal use
Limited to law enforcement and corporate users for some features
SecureData’s File Repair Software offers over 40 downloadable utilities for repairing various file types, making it a versatile tool for system administrators. It’s designed for quick recovery without complex menus, ensuring ease of use.
The software supports a wide range of file types, including Excel, Word, and PDF, and ensures secure handling of files to prevent third-party access. Its affordable pricing for individual file repair tools makes it accessible.
However, each tool is sold separately, which can increase the overall cost if multiple repairs are needed.
Pros:
Over 40 downloadable utilities for repairing various file types
Quick recovery process without complex menus
Secure handling of files to prevent third-party access
Supports a wide range of file types including Excel, Word, PDF, and more
Affordable pricing for individual file repair tools
Cons:
Each tool is sold separately, potentially increasing overall cost
Sysinfo Windows Data Recovery is a comprehensive solution for recovering data from damaged partitions and external storage. It’s tailored for Windows users, supporting both FAT and NTFS file systems.
The software offers a user-friendly interface with step-by-step guidance, making it accessible even for less experienced users. The preview feature before recovery ensures you can verify the data before finalizing the process.
However, it’s limited to Windows OS and may not support encrypted or highly specialized file types.
Pros:
Comprehensive solution for recovering data from damaged partitions and external storage
Supports both FAT and NTFS file systems
User-friendly interface with step-by-step guidance
Preview feature before recovery
Compatible with various Windows versions
Cons:
Limited to Windows OS
Performance may vary based on file system damage
No support for encrypted or highly specialized file types
For system administrators managing organizational networks, ENC file repair software is crucial. It helps recover lost or corrupted data, ensuring business continuity. With the rise of remote work, securing and restoring data has become more critical than ever. Tools like these help mitigate risks associated with data loss, cyber-attacks, and hardware failures, ensuring your network remains robust and reliable.
When choosing ENC file repair software, consider your specific needs and the features that best align with your organizational requirements. Each tool offers unique benefits, so select the one that meets your data recovery demands effectively.
Did you manage to get back your ENC files? Tell us all about it in the comments below.
Many have encountered ENC file format, and they can’t use it on their PCs, so today we’re going to show you how to convert an ENC file to a different format, so let’s get started.
What is the ENC format?
ENC file is a generic encoded file that is usually encoded to be protected from unauthorized people viewing its contents.
Do keep in mind that you’ll need to know the password to decrypt the file.
As you can see, several services can convert an ENC file, but since these files are encrypted, you’ll have to use the right password to open the ENC file.
Windows Insiders are in for a treat, as Microsoft released the most recent preview ISO images for Windows 11, version 24H2, and now clean installations can be performed.
Microsoft’s fresh ISO images for Windows 11 24H2 carry version 26100.1150 and are made to fit x86 and ARM64 structures, so it doesn’t matter if your computer uses an Intel or AMD chipset.
However, you must still activate these preview images with a real license key. It’s just a small obstacle for developers and enthusiasts who are already part of the Windows world. However, people who wish to try without making any long-term commitment can use official virtual machines from Microsoft, but they have an expiration date set on July 15th.
For those who are quick to embrace new technology, especially those who own Copilot+ PCs, Windows 11 version 24H2 is being released. The others, particularly individuals with Intel or AMD setups, might have to wait for some time. It could be until September or October before they get it.
Notably, Microsoft is considering the lifecycle of its operating system in a future perspective. By launching Windows 11 24H2, they are getting ready to leave behind previous versions such as 21H2 and 22H2. This means that these versions will cease receiving updates within less than 90 days, so users might want to upgrade as soon as possible.
The most recent ISO release from Microsoft can be seen as more than just another regular update. It shows a move towards making sure every person using Windows, no matter their hardware type, has the opportunity to utilize the latest features and security precautions.
You can download the Windows 11 24H2 ISO from here.
Whether you are a developer, tech lover, or enjoy having your PC work well, this update is for you. So, have you planned your installation yet? Let us know if it all worked well for you!