Adobe Indesign e-book creator that you can run on Windows and Mac platforms.
The software is an advanced EPUB e-book editor that has plenty of options and tools for editing digital book layouts.
This tool is about creating experiences through powerful designs and media instruments like audio, video, slideshows, and animations.
Authors find it very intuitive as it helps build from head to toe the digital publications by resizing and adapting their layout in order to have perfect spacing and custom styles.
For an attractive appearance of e-book style, you can choose from Adobe Indesign’s fonts, so you can be sure that you will have the typography style.
A book without a catchy design cover is not worth opening, so Adobe Indesign easily integrates with Photoshop, XD, Premiere Pro, and Illustrator so you can put creativity into action with the help of these tools.
Publishing is also not a problem, as Adobe has flexible ePub formats for Apple iBooks, Kindle and many other more.
You definitely can make an impression with Adobe’s instruments.
Adobe InDesign
Team up with the best layout and page design software to create and publish an e-book that truly reflects your style!
Scrivener is e-book-publishing software for the Windows, macOS, and iOS platforms.
This is a flexible content generation software that probably has all the options and tools you’ll need for compiling e-books.
Scrivener’s editor includes extensive text editing and formatting options. Its feature rich text editor enables users to add tables, bullet points, pictures, custom font styles and footnotes to their e-books.
Furthermore, you can incorporate video, audio and graphics in your e-books with this software.
Scrivener also includes a novel corkboard, or cork noticeboard, with which you can organize synopsis index cards for e-books.
When you’ve done the book, you can export it to various e-book formats, such as EPUB or MOBI, with the software’s Compile tool.
Scrivener
All the tools you need to create and publish your perfect e-book are now gathered in one place. Explore Scrivener!
If you want to create and publish really stunning e-books or catalogs for that matter, then the PDF to Flash Catalog is the right tool for you.
This software allows you to create flash page flip online catalog and e-books using PDF documents.
You can also insert hyperlinks, logos, and icon images to pages, which is a very useful feature.
We like this product because it supports full customization. You can add background sounds, background images (including animated backgrounds), custom navigation buttons, you name it and the PDF to Flash Catalog can deliver.
The tool also offers free themes for those moments when you’re running out of ideas.
Finding the information you’re looking for is essential when reading any written material.
For this reason, the PDF to Flash Catalog allows you to import bookmarks and add or edit your own bookmarks in order for readers to easily browse your material.
Motion capture also known as motion tracking or mo-cap refers to the process of digitally recording natural movements in order to transfer them to character models later on.
You can use it to trace the movement of any element in your footage. Then, simply set other layers in your composition to follow your tracked object(s).
Hugely popular in the entertainment field and game development, motion tracking serves as the starting point for the stunning animations and breath-taking visual effects we all know and love.
Let’s make this simpler. Remember Neytiri from Avatar? Good.
Now, how exactly did she effortlessly jump from ridiculously high trees straight on to the back of a dragon? That’s the mo-cap magic in action. And that is exactly what motion capture tools do best.
Go through our top picks and choose the software that can make your next project truly astonishing.
If we’re talking about visual effects, there aren’t many software that can match Adobe After Effects’ powerful capacities.
While motion capture is not a standalone effect, it helps to create the most hyperrealistic of animations. After Effects tracks motion by matching previously selected image data from succeeding frames.
Thanks to the integrated 3D camera tracker, you can also track camera motion or insert 3D objects in 2D footage effortlessly and these are just some of its remarkable tools, perfectly adapted to capture motion.
Let’s quickly go through its key features:
3D Camera tracker
Warp Stabilizer (to transform shaky footage into smooth shots or to hold a moving object still in the frame)
Combining elements filmed separately
Animate still images to match the motion of action footage
Animate effects to follow a moving element
Adobe After Effects
Get your characters to move naturally with the best motion graphics and visual effects software.
MotionBuilder is a 3D character animation software that enables users to manipulate and refine data efficiently.
Both responsive and interactive, this tool has an optimized display and powerful features that allow you to capture motion, edit, and playback complex character animation.
Let’s quickly go through its key features:
Real-time 3D engine (create realistic movements for your characters with the fastest animation tools)
Its motion tracking feature allows you to track different objects in your clips in order to impregnate movement to pictures, titles, and other elements. You can even use it to blur faces.
Handling this powerful capacity is amazingly straightforward, beauty lies in simplicity more often than not. All you have to do is drag your clip on the timeline and click on the Track Motion icon from the toolbar.
Then, you can make use of the trackers to pinpoint the position or area you want to track. You can even set a multi-point tracker to censor objects.
Of course, you can also remove the trackers, save the created paths, match an image or video with tracked motion and finally, add transitions to the matched object to create a softer, more gradual effect.
The PowerDirector 365 is a professional video editing suite that delivers best-in-class editing tools wrapped in a streamlined interface that does not intimidate the average user.
The motion tracking feature is particularly intuitive and easy to work with allowing you to achieve spectacular results.
You can easily track both people and objects in your footages using motion trackers to obtain super-realistic effects that emulate natural movement to perfection.
While motion tracking in itself is not a visual effect, it is quintessential for the creation of visual effects.
By recording natural movement and playing it back on a digitally created model, motion capture software have proved indispensable for the gaming, animation, film-making, and overall entertainment industry.
If you’re aiming to really bring your characters to life and make them move it, move it, have a go at one of the finest software for the job.
Let us know how what worked for you in the comments section below.
Most of the available drawing software tools have set a new standard for what is possible and the level to which art can be produced.
There are many such great available programs out there, each with different functionalities and features included.
We have gathered a list of the best layer painting software to use with your Windows 10 device or Mac computer, which will make it easier for you to choose the one that best fits your artistic needs.
Without a doubt, Adobe Fresco is still the number one choice for many professionals out there, since it brings together the most impressive collection of vector and raster brushes.
Additionally, you will have access to live brusher different from anything you can find on other programs, which help you achieve natural painting results.
If you work with watercolors or if you are using oil, Adobe Fresco helps give a natural touch to both of them thanks to its highly customizable tools.
You can draw with an unlimited number of layers designed to help you explore your creative ideas and make unique combinations using the effects, blending colors and models and many more.
Moreover, thanks to the constant updates and improvements, this software remains a top competitor on the market, ensuring the highest quality level possible.
Adobe Fresco
That’s your chance to create unique paitings with the unlimited number of layers Adobe Fresco has to offer!
Clip Studio Paint is another fantastic painter software tool that comes with a variety of layers to help you better manage all your projects.
With the layer mask, you can hide unnecessary parts or limit the area if needed and work on the other areas of the painting.
Although there is not a certain way of knowing how many layers this software has, the maximum number though is around 10.000.
In order to create a new layer in Clip Studio Paint, you simply need to go to the layer menu and select the new layer option. From there on the steps are extremely intuitive.
Clip Studio Paint
Clip Studio Paint lets you enhance your paintings with the amazing layers available. Eager to try it out?
Corel Painter has its main focus on the artistic painting for cartoons, anime, or canvas art. Other features such as photo editing and image manipulation are present too.
One of the main strengths of Corel Painter is its layer features. Thanks to this feature you can merge, group, and blend elements. Moreover, the app has pixel-based, media-based, or vector-based.
Additionally, you have dynamic and reference layers available but as a side note, the default layer for Corel Painter is the pixel-based one.
On this pixel-based layer, you can only use watercolor and liquid ink brushes. The pixel-based layers allow for more specialized operations, such as building an image hose nozzle or creating an animation.
Corel Painter
Corel Painter helps you create paintings and animations with ease. Are you ready to give it a try?
We hope that all the details offered in our list will help you make the best decision on which layer painting app for Windows 10 or Mac could enhance your creative skills.
If you have other recommendations or suggestions, we would love to hear them all. Just use the comments section below in that regard.
Many users have reported that Silhouette Studio won’t update. This is an extremely frustrating issue in case you need to use some newly developed features for your projects and can’t get access to them.
For these reasons in this article, we will explore the best way to troubleshoot the issue caused by Silhouette not updating.
Please make sure to follow the steps in the order that they were written to avoid any unnecessary problems.
How can I fix the Silhouette update problems?
1. Update Windows 10
Click on Cortana search box in your desktop toolbar, and type inWindows Update
Choose the first option from the top of the search results.
In the newly opened window, click on the Check for Updates button, and wait for the process to complete.
Try to see if the issue persists.
2. Scan and repair system files using SFC
Press the Win + X keys on your keyboard, and selectWindows PowerShell (Admin).
Type the command sfc /scannow (without quotes), and press Enter.
After the process is completed, Windows PowerShell will give you valuable information about your system, and also try to fix any error it encounters. It will look something like this:
3. Use an alternative third-party tool
Despite seeming like such a niche software, Silhouette Studio is not the only program out there specialized in silhouette designs.
Other premium products such as Adobe Illustrator are equally capable of handling such a job, and arguably better too.
Illustrator is not just your typical vector-based image editor, as it holds the tools that allow it to be anything, from a graphics designer to a digital artwork tool, all within the same interface.
In Adobe Illustrator, there are various methods for creating silhouettes. Image Trace and the Pen Tool are two tools that are frequently used for this purpose. The pen tool is ideal for drawing basic silhouette shapes, whereas Image Trace is ideal for creating silhouettes from complicated images.
Because there are so many complex details, it would take you long to produce a silhouette of a building if you use the pen tool to outline it. However, utilizing Image Trace, you may do the task in less than a minute.
More so, the files can be easily exported and imported to and from other Adobe products, such as Premiere Pro or Adobe Photoshop.
4. Reset and fix Windows Update components
Download the officialWindows Update Troubleshooter.
Once the download process is completed, run the application by double-clicking it.
Select the option Windows Update from the window that opens, and click Next.
After the process is completed, click the Close button.
Open Windows Update Troubleshooter again, and now select the second option in the list Windows Network Diagnostics.
Click the Next button.
After the process is completed, click the Close button.
Restart your PC, and try updating Windows again.
5. Clean boot your Windows 10 PC
Press the Win + R keys on your keyboard, type in msconfig, and click Ok.
Inside the General tab, select Selective startup.
Deselect the Load startup items check box.
Inside the Services tab, select Hide all Microsoft services option found at the bottom.
Click Disable all.
Inside the Startup tab, click Open Task Manager.
On the Startup tab of Task Manager, right-click all enabled processes and select Disable.
Click OK.
Select Restart.
Check if the problem is still there.
In this article, we explored some of the best ways to troubleshoot Silhouette Studio not being able to update to the latest version. Please make sure to follow these steps carefully in order to avoid any other issues.
Feel free to let us know if this guide helped you by using the comment section below.
4K videos are the latest industry-standard in video recording, although 8K quality is also starting to emerge as well.
However, 4K is the new industry-standard, being far more present in households than it was a few years back. That being the case, users not only want to watch 4K videos, but they also want to edit them as well.
That being the case, we’ve decided to create this guide that will show you exactly what you need to do in order to edit 4K videos.
Vieweing and editing 4K videos
The only difference per se between a 4K video and an HD or SD video is strictly the image quality and the resolution.
However, since more pixels need to be processed per frame at any given time, the CPU and GPU load is exponentially higher with 4K videos than with HD or SD videos.
That being the case, you will an above-average PC with a crystal-clear monitor in order to video the 4K video.
Of course, this requirement also translates itself to video editing as well, since the CPU and GPU requirements are even higher than when you are just plain viewing the video.
How can I edit 4K videos?
Use a professional-grade video editor
The software also differs when talking about 4K videos, since not any crummy freeware that you can download off of the Internet will be able to handle 4K video editing.
That being the case, your only solution is to go with a borderline professional software solution, and no tool is better for this job than Adobe Premiere Pro.
This timeline-based video editor from Adobe is perfectly capable of handling 4K videos (and even 8K for that matter), the only limitations being your hardware and whether it is capable of handling the load.
You can use Premiere to do anything with the video, from taking the raw footage to cropping it, adding a different soundtrack to it, adding special effects (with a little help from Adobe After Effects), and more.
Normally, this tool would only be available with a subscription, but we consider that the program is well worth the money, especially if editing 4K videos is something that you do for a living.
More so, the program can now be tested for free for 7 days, so why not take advantage of this irresistible offer? Who knows, after the Trial is over, Premiere Pro may just become your new favorite program.
Adobe Premiere Pro
Edit 4K video like a pro with all the features you need only with Adobe Premiere Pro. Try it out now!
Lenovo Yoga Book did not disappoint its users with this innovative model that falls somewhere between a laptop and a notebook.
For those that enjoy creating and drawing, let’s just say that Lenovo Yoga Book is a perfect choice, considering its capabilities, features, and overall design.
Finding and choosing the best drawing software though can be a tedious task but you don’t have to worry about that anymore.
We have tested a few software and in this article, we will give you more details about the best drawing app to use with Lenovo Yoga Book.
Can Lenovo Yoga be used as a drawing tablet?
Lenovo Yoga Book is a good device and it is also called a 2-in-1 tablet, as you can utilize it as a laptop or a tablet.
Regarding the drawing aspect, it is pretty decent to use. You can draw on the keyboard with its stylus pen after you enable the AnyPen mode from the settings tab.
However, if you want to enhance your drawing experience, we also recommend reliable drawing software with a wide variety of customizable brushes, color palettes, beautiful templates, and many more.
What are the best drawing software for Lenovo Yoga Book?
What makes Adobe Illustrator so popular are its vector graphics features that help create amazing scalable graphics.
Moreover, Adobe Illustrator is part of the Abode Creative Cloud subscription model which makes it easier to integrate with the other Adobe programs.
Without a doubt, this software has set the standard for creating web and mobile graphics pretty high.
It’s constantly updated and improved and thanks to the new Adobe Sensei AI you can now automatically extract colors from photos, and images, and add them to your design.
Cloud document management with offline access, enhancement tools, and smart glyph snapping are some of the newest additions to the software.
Other best features include:
Interactive interface
Great editing tools
Beautiful templates
Adobe Illustrator
Fully compatible with Lenovo Yoga Book this fantastic drawing software will help you create amazing digital art.
If you don’t want to start spending just yet a lot from your budget on painting software and don’t want to compromise on features and quality available, then Clip Studio Paint is a perfect choice.
If you have already invested in a Lenovo Yoga Book then you will be thrilled as this painting software is fully compatible with it and allows for complete use of features.
With Clip Studio Paint you will have over 1000 new materials each month in its Assets section thanks to it being constantly updated and improved. Moreover, you can fully customize every aspect of your brushes until the desired outcome is reached.
Clip Studio Paint comes with an intuitive interface, and it’s suitable for all users, both beginners and professionals.
Other best features include:
Smooth and precise brush strokes
Customizable 3D reference models
Realistic pens
Clip Studio Paint
Use this software on your Lenovo Yoga Book and enhance your painting skills.
Although not as popular as other drawing software, Autodesk SketchBook is yet an excellent drawing software for artists and technical illustrators.
In the Pro version of the app, you have access to over 100 brushes, all highly customizable that come with special effects, such as synthetic, glow, and smudge.
Additionally, you can also create a canvas up to 100mpx without losing any of the zoom-in feelings of the traditional drawing.
Imports from paper to digital scans, multiplatform support, compatibility with drawing tablets, and multiple media platform integrations are some of the other key features of this software.
If you have a tablet such as Lenovo Yoga Book that usually means that you can create stunning art with the right drawing program.
All it takes is some imagination and a good understanding of the used programs, such as Adobe Illustrator and Autodesk SketchBook.
Let us know in the comments section below if you have other recommendations or suggestions or which one of the presented drawing software you like using the most.
Gdiplus.dll is another of those Windows DLL (Dynamic Link Library) files that provide instructions for third-party software to call upon.
DLLs are shared files that software can call upon for various things. For example, the software will call upon the printer DLL for printing documents.
The gdiplus.dll file is a component of the Microsoft Graphics Device Interface Library that handles graphics components for image handling, anti-aliasing, filling gradients, etc.
As such, gdiplus.dll missing error messages on Windows 10 are probably more likely to pop up when running graphics design software or games.
One of the more prevalent gdiplus.dll error messages states: This application failed to start because gdiplus.dll was not found. Re-installing the application may fix this problem.
Those error messages can pop up when you launch some software, and then the programs won’t start in Windows. This is how you can fix gdiplus.dll errors in Windows 10.
These kinds of system repair tools come with features that will help you keep your operating system files clean and uncorrupted.
Plus, many have features that will protect your OS from viruses, while also making your internet browsing safe. Not only are they capable of scanning, but they repair it and make the PC run faster by improving its overall performance.
2. Scan system files
First, press the Cortana taskbar button.
Enter the keyword Command Prompt in Cortana’s search box.
Right-click the Command Prompt to open its context menu, and select the Run as administrator option.
Enter DISM.exe /Online /Cleanup-image /Restorehealth in the Prompt first, and then press the Return key.
Thereafter, input the command: SFC /scannow
Press Enter to initiate the System File Checker scan, which might take up to 30 minutes.
A gdiplus error highlights that the gdiplus.dll file, and perhaps other system files, might be corrupted. You can easily fix these if you use the in-built cmd commands for checking system files.
So the System File Checker, which repairs corrupted system files, is one utility that can feasibly fix gdiplus errors in Windows. You can fix it by following the steps above.
3. Update the Graphics Card Driver
To manually update your driver, download it from the manufacturer’s website. You can also open the Device Manager on your PC, Click on Display adapters, right-click on your Graphics card driver, and click Update driver.
Be careful when you download drivers manually because installing a mismatched driver can cause severe system issues. A safer and quicker solution would be to use dedicated driver updater software.
Fortect Driver Updater allows you to update your Graphics Card Drivers with just one simple click. The software will scan your computer for available drivers, then it will list them to you. Upon your approval, it will install the driver within minutes.
The software can also detect missing or damaged drives and fix them. On top of that, you can set it up to make regular scans and fix your drivers automatically.
4. Check for Windows Updates
Open Cortana’s search box.
Enter the keyword Windows update in the search box.
Select Check for updates to open the Windows directly below.
Press the Check for updates button on that window.
Then you can press a Download button if there are any updates available.
Windows updates replace and update Microsoft DLL files, and some updates might include the gdiplus.dll. Thus, it might be worth checking for Windows updates to fix gdiplus errors.
The Windows Update service usually automatically updates the platform (if configured for automatic updates), but you might still miss a few updates. You can manually check for further updates by following the steps above.
5. Re-register the DLL File
Open the Win + X menu with the Windows key + X hotkey.
Select Command Prompt (Admin) to open the Prompt as administrator.
Unregister the DLL by entering regsvr32 /u gdiplus.dll in the Prompt, and press the Enter key.
Input regsvr32 /i gdiplus.dll and press Enter to reregister gdiplus.dll.
The Microsoft Register Server, otherwise Regsvr32, is a command-line tool that you can reregister DLL files with. You need to make sure that the command has been registered.
If the gdiplus.dll has not been correctly registered, reregistering it with Regsver32.exe will likely resolve the error. This is how you can reregister gdiplus.dll with Regsver32.
Then click Download to save the ZIP for the latest gdiplus.dll, which is at the top of the DLL file list. Select to download a 32 or 64-bit DLL dependent on your system type.
Press the File Explorer on the taskbar, and open the folder you saved the DLL ZIP.
Press the Extract all button to extract the compressed folder.
Open the extracted folder, and select the gdiplus.dll file.
Press the Copy to button, and then select to copy the gdiplus.dll to System 32. Alternatively, you can also drag and drop the gdiplus.dll file to: C:WindowsSystem32C:WindowsSysWOW64
After, it will be in another folder.
Press the Continue button if a Destination Folder Access Denied window pops up.
Then you can delete the extracted gdiplus.dll folder by right-clicking it and selecting Delete.
Register the new gdiplus.dll file by entering regsvr32 gdiplus.dll in an elevated Command Prompt.
Gdiplus errors can occur if that DLL file is missing. To check if the gdiplus.dll has been deleted, enter the keywordgdiplus.dll in Cortana’s search box. Cortana usually shows you the gdiplus.dll file as the best match:
Note: If the gdiplus.dll file is missing, you can download a replacement from DLL-Files.com, which is among the more reputable sources for DLLs.
Open CCleaner’s setup wizard to add the registry cleaner to Windows.
Launch CCleaner and click Registry to open the software’s registry cleaner.
Select all the registry check boxes for the most thorough scan.
Press the Scan for Issues button.
Then press the Fix selected Issues button, and you can click the Yes option to back up the registry.
Click the Fix All SelectedIssues option to fully repair the registry.
DLL errors can often be due to invalid registry errors. So scanning the registry with system optimizer software might also fix gdiplus errors.
There are plenty of freeware system optimizers you can utilize for registry scanning. CCleaner is a highly-rated registry cleaner with a huge user base. Follow the aforementioned steps to learn how to fix it.
8. Restore Windows 10
Input Run in Cortana to open the Run accessory in Windows.
Enter rstrui.exe in Run and click OK to open System Restore.
Click the Next button.
If there are lots of restore points, you can usually select a Show more restore points option. So select that setting to expand the number of listed restore points.
Select a system restore point that will revert Windows to a time when your software wasn’t crashing with a gdiplus.dll error.
Press the Scan for affected programs button to see what software will be deleted for a selected restore point.
To confirm your selected restore point, press the Next and Finish buttons.
The System Restore utility saves restore points that you can roll Windows back to. Restoring Windows to an earlier time will restore system files and registry settings.
System Restore can also fix gdiplus errors so long as you select to roll Windows back to a date when there weren’t any gdiplus.dll error messages popping up on your desktop or laptop.
So there are various potential resolutions for gdiplus.dll errors. Aside from those fixes, there are other numerous DLL fixer apps, such as DLL Suite, that can resolve gdiplus errors.
Make sure to give us any feedback regarding the subject in the comment section below.
Yesterday, 343 Industries kicked off a series of monthly “Inside Infinite” updates to provide insights on the development on the next Halo game, now expected in Fall 2021 on Xbox consoles and PC. The blog post is a long interview with members of the Sandbox team, which is tasked with creating all the vehicles, equipment, weapons, and objects players will interact with in Halo Infinite.
While the blog post is pretty light on new details overall, the Sandbox team shared some interesting comments about 343 Industries’ in-house Slipspace Engine, which has apparently been rebuilt after the prior version was too focused on optimizing things for last-gen Xbox One consoles. Here’s what Game Foundation Architect Daniele Giannetti said in yesterday’s blog post:
Here’s something that excites me as an engineering architect: For Halo Infinite, we rebuilt the engine multi-threading solution to ensure high execution efficiency across all platforms and PCs, instead of running optimally just on Xbox One. We used this new system to transition the renderer to a massively parallel multi-threaded framework to support the increased cost of all our new rendering features and achieve high graphics efficiency on PC CPUs of various size as well as Xbox Series X/S and Xbox One X/S hardware. In practice, this means that we are doing our very best to make sure Halo Infinite runs optimally on any device you may choose to play on! –
Halo Infinite was officially announced at E3 2018, which was before Microsoft revealed its next-gen Xbox consoles. The first E3 2018 cinematic trailer was made with 343 Industries’ brand new Slipspace engine and looked really impressive at the time. However, the visual downgrades were quite obvious in the first Halo Infinite gameplay demo we saw back in July, which was actually running on a PC. The poor reaction led 343 Industries to delay the game to 2021, and after seeing Cyberpunk 2077’s horrible performance on last gen consoles last month, many Halo fans are still wondering if shipping Halo Infinite on Xbox One is actually a good idea.
According to the Sandbox team, things seem to be doing well within 343 Industries right now. “All of our launch content is in-game and being played daily but it takes a strong effort to get something from 90% to a full 100% ship quality. So, we are pushing hard to squash bugs and tune our toys so they are in a good spot as we get closer and closer to launch (and public flighting before that),” said Quinn DelHoyo, Lead Sandbox Designer at 343 Industries.
We’re really looking forward to getting more details about how Halo Infinite will run across platforms. 343 Industries announced back in July that the game would run in 4K at 60FPS on the Xbox Series X, and that’s pretty much all we’ve heard so far. 343 Industries also announced yesterday that Halo Infinite would allow players to fully rebind and remap their controls regardless of platform, which will be a first for a Halo game.
We hope the team will be back with more exciting information next month. Future “Inside Infinite” updates should be published on Halo Waypoint, the last Thursday of every month going forward, and we definitely recommend Halo fans to take the time to read the first one here.
In 3D model painting, a user can add color and details to their paint, rotate the objects, adjust their placement, and even apply 2D objects as stickers.
Suffice to say that this type of painting takes the 2D painting to the next level creating art close to perfection.
In this article, you will find more information about the best 3d model painting softwarewhich will help you make an informed decision.
Adobe Photoshop offers a vast pallet of features that allow you to perform photo editing, digital painting, animation, and graphic design.
This software allows you to paint directly on a 3D model and the process is similar to painting on a 2D layer. First, you will need to select the needed tools to target the specific areas of the model that you want to paint.
Adobe Photoshop provides three painting levels in 3D: Live 3D Painting, Layer Projection Painting, and Projection Painting.
You can choose which ever best suits your needs as working with any of them is easy and the workflow is intuitive.
Adobe Photoshop
Choose any of the 3D model painting available and create amazing works of art with this fantastic software.
Autodesk Maya is a powerful tool that comes with complex features that allow you to create realistic effects to your 3D objects.
This software is the first choice for many professional thanks to how they can create fabulous complex characters, scenery and stunning effects.
You can create some amazing environmental details, from snow to sand and dust, explosions and many more. everything through the available to use graphs.
All the above is possible thanks to the dynamic solvers that allow the creation of blockbusters unto which you can quickly add the desired effects.
Autodesk Maya
Create the most fantastic and fabulous characters and effects with this versatile software. Get the best deal now.
Corel Painter offers blank canvas painting and diverse photo-art tools for professionals working with Windows 10. The software features are constantly improved and aligned with its users needs.
Thanks to one of the most recent improvement Corel Painter registers how you paint and allows for much greater control and performance for your hardware setup.
The software puts at your disposal a wide number of realistic brushes that can be used for painting, illustrating and create complex works of art. Thanks to the customization feature you can create your own brushes, textures, pallets and even more, on an empty canvas.
Of course, you can at any time simply use the preset brushes form the toolkit in case you don’t need or want to customize them, and there is no additional cost for them.
The Thick Paint workflow, the new AI styles, Clone Tinting are some of the latest improvements that bring a considerable performance improvement.
Corel Painter
This software enables you to create unique 3D model paintings with the helps of effects and customizable brushes.
Autodesk Mudbox is another rather powerful tool from the Autodesk suite that could not miss from our recommendation list. This time we would recommend you use it as one of the best 3D model painting software.
One of the best utility for Autodesk Mudbox has everything to do with creating stunning characters and environments thanks to the available 3D geometry and models.
The software comes with an intuitive interface and exquisite tool set while the workflow has been mostly optimized taking into consideration the best efficiency and productivity results.
Maya, 3D models, Max, Arnold, and many more are some of the integrated tools available.
Also, when using Autodesk Mudbox, you can paint directly on your 3D models across multiple channels and use the smooth brushes from the available toolkit.
Autodesk Mudbox
Industry-leady 3D model painting software that help you create amazing visual effects and modeling elements.
Lastly, but definitely not the least, Adobe Substance Painter is the leading software solution for 3D materials. With the included tools you can bring all your creation to life, in a way that can equal your imagination.
The integrated tools will allow you to directly paint the 3D models and bring that realistic touch. Thanks to the available brushes from Adobe Photoshop you can experiment as much as you like until the desired touch is found.
Adobe Substance Painter comes with a vast premium library of 3D materials, all created by professionals in the field.
Thanks to these you can generate as many textures as you want in order to fill all the creative applications from your project.
Additionally, you can create new work projects by scanning photography or images. You can even modify existing materials if any are available and you’d like to give them a different touch.
Adobe Substance Painter
Bring your creation to life in unique ways with this 3D industry-leading model software.
The new Chromium-based Edge browser is now receiving new features at a much faster pace, with Microsoft opting for a 6-week release cycle. The company has maintained a Microsoft Edge release schedule for the Beta and Stable channels and an Enterprise roadmap for customers for quite some time.
In a new blog post published yesterday, Microsoft has reiterated its ambition to keep enthusiasts and consumers informed about upcoming features. As it turns out, the company has redesigned the “What’s Next” page available on the Edge Insider website, and we now have a more detailed feature roadmap for the browser.
“We have been working on improving the release notes and will continue to investigate changes that we can make to be more immediate and descriptive. For the roadmap, we are happy to announce that in addition to the Enterprise focused roadmap we have revamped the What’s Next page on our insider website,” the company explained.
The updated “What’s Next” section details almost all the new features the company aims to ship in the first half of 2021. “We published the first set of items there before the end of the year and will be updating with each Beta release as they come out,” the Microsoft Edge team said yesterday.
Microsoft believes that this should be a useful resource for people going forward, and it will keep them informed about when the Microsoft Edge team plans to release important updates for the Beta and Stable channels. You can find more details about upcoming features on the Microsoft Edge Insider website.
In this article, we’ll show you the best programs for laser cutting that can also create vector files.
Very few of these are made especially for laser cutting, but they allow you to create precise vector graphics that you can use in your laser cutting projects.
In our opinion, the best applications to design your laser cutting project are the following, keep reading.
Adobe Illustrator is the best-known vector editing software, and it allows you to create vector graphics for any project, taking advantage of the precision and efficiency of professional drawing tools.
Besides having a complex range of vector paths and rendering features of shadows, blurs, and outstanding effects, Adobe Illustrate is coming with an innovation for iPad.
So, you can start to create your drawing with the help of touch or Pencil. You can also choose between many available fonts, and that’s just the tip of the iceberg.
This tool is designed for industry professionals, so whatever vector graphics you want to create, Adobe Illustrator is the right choice for you.
As for supported formats, Illustrator works with AI, PDF, DXF, DWG, SVG, EPS.
Moreover, Adobe Illustrator is adapted to different laser cutting techniques like Vector Cutting. Vector Engraving and Raster Engraving.
This tool allows you to set the parameters for final cutting material using one or more artboards. In this way, you will simplify the overall process of laser cutting.
Adobe Illustrator
Adobe Illustrator has a wide array of features, but all your standard features such as various shapes and objects are there, so try it out!
CorelDRAW has all standard features that vector graphics editors have, allowing you to create various shapes and objects with ease.
The application offers a simple and friendly interface, so you can easily see all your tools and organize your objects and paths. The latest version of CorelDRAW brings support for PDF/X-4.
As for the tool itself, it’s incredibly versatile, and it allows you to create any kind of graphics, ranging from logos to professional prints.
This software also has some new features such as non-destructive effects, symmetry mode, objects docker, and pixel perfect mode.
These are some of the features that CorelDRAW offers, but if you’re a professional, feel free to consider this tool as your software of choice.
AutoCAD is a professional tool for architects, but it’s also useful for electricians or mechanics. The software allows you to choose from a palette of blocks and add various objects.
In addition, there’s a quick measurement tool available ensuring that all your objects are at the right size.
It’s worth mentioning that AutoCAD has implemented various performance improvements, and now it offers 50% installation time.
Speaking of performance, this software has a purge feature that allows you to easily remove unneeded objects and reduce the project size.
This is just a tip of the iceberg when it comes to AutoCAD and its features, but if you’re a professional, this tool will be perfect for you. As for supported formats, this tool works with DWG, DXF, 3DS, WMF, (DWF), PLT.
Another tool that you can use for laser cutting is Archicad. The tool is designed for architects to model various buildings with simplicity and ease.
The tool also supports the Solibri connection allowing you to collaborate with other users with ease.
The application also offers an enhanced performance, so you’ll be able to draw and create various models faster than before.
Another feature that we have to mention is the improved CineRender Engine and enhanced the user interface.
Overall, Archicad is perfect for experts, so be sure to try it out. As for supported formats, this application works with PLN, DWG, DXF export PDF, 3DS, OBJ.
These are the best tools for laser cutting. If you’re looking for an affordable solution, we recommend Inkscape, but if you need a more professional tool, feel free to try any other application from the list.
Back in 2015, Microsoft co-founder Bill Gates gave a much talked-about TED talk where he predicted that the world wasn’t ready to handle a worldwide pandemic. Fast forward to 2021, it turns out that Gates pretty much hit the nail on the head as the world is still dealing with a brutal COVID-19 outbreak that has now claimed the lives of over 2 million people.
If this pandemic has led to unprecedented breakthroughs with several vaccines being already available, we’ve also seen an unprecedented amount of conspiracy theories about the origins of the virus, with many of them claiming that the Microsoft co-founder and his allies created this pandemic to make money and take control of people through vaccines.
In a recent interview with Reuters, Bill Gates said that he had been appalled by the propagation of these “crazy” and “evil” conspiracy theories, which also accused US immunologist Anthony Fauci of many terrible things. “Nobody would have predicted that I and Dr. Fauci would be so prominent in these really evil theories,” Gates said. “I’m very surprised by that. I hope it goes away.”
‘Do people really believe that stuff?’ — Bill Gates is speaking out about the absurd COVID-19 conspiracy theories that he and Dr. Fauci have faced during the pandemic pic.twitter.com/oWPOgtPD9D
Through the Bill and Melinda Gates Foundation, the Microsoft co-founder has so far pledged to contribute at least $1.75 billion to support the various efforts to put an end to the COVID-19 pandemic, including better diagnostics, new treatments, and vaccines. Gates is also supportive of the new Biden administration, praising the fact that the new US president has “appointed smart people, and the fact that Dr. Fauci won’t be suppressed.”
The various conspiracy theories about Bill Gates probably won’t go away anytime soon, and the Microsoft co-founder seems to be still scratching his head about them to this day. “But do people really believe that stuff?,” Gates asked. “We’re really going to have to get educated about this over the next year and understand .. how does it change peoples’ behaviour and how should we have minimized this?”
One of the benefits of being 65 is that I’m eligible for the COVID-19 vaccine. I got my first dose this week, and I feel great. Thank you to all of the scientists, trial participants, regulators, and frontline healthcare workers who got us to this point. pic.twitter.com/67SIfrG1Yd
Last week, Bill Gates, who is 65 years old, made public the fact that he received his first shot of the COVID-19 vaccine. “I got my first dose this week, and I feel great. Thank you to all of the scientists, trial participants, regulators, and frontline healthcare workers who got us to this point,” the Microsoft co-founder said.
A WiFi channel scanner is informative software that elevates the security level of your wireless connection.
This kind of software provides information about WiFi problems, the best channel for your router, the best place for installing the router, and more.
Also, a WiFi scanner for Windows 10 and 11 is not hard to find in the current market. But not all are up to the standards or they may even create a breach in the security system of your connection.
With a Wi-fi channel scanner, you can see what wireless networks are available near you, what channel they’re using, or the power of wireless signals for each network.
A WiFi scanner for Windows 10 or 11 is ideal for people that have problems with their connection due to interferences with other networks across them.
If you encounter connection problems with other neighbors’ networks, you can use this tool to your advantage by changing network channels.
Usually, the channel for your wireless network will be set at startup on your router device.
Thus, a WiFi channel scanner is the most efficient way to monitor your network channels and resolve connection issues effortlessly.
This tool is developed by one of the biggest network security companies in the world. It will let you maintain an overview of all your devices that are connected to a wireless network.
It will help you check the speed, load, traffic, status, signal strength of your routers. Basically, it is your best friend when you need to check what’s happening on your WiFi pipes.
First, of all, PRTG will allow you to see when your routers are not available so you could fix this and re-establish the WiFi connection.
This is a crucial factor for a network with multiple devices connected for sync or sharing purposes, even if it is only your home network and the connected devices.
You will also be able to see when your network is too loaded so you could avoid disruptions. Just keep an eye on the bandwidth markers from PRTG and see what device and what app is consuming most of your connection.
One of the most needed features is to see where the WiFi connection is lacking strength.
If a router has some problems with its emitters, then you will be able to see it on the software’s dashboard.
Another crucial feature is seeing the last access to a device. It is really useful to monitor what device from the network accessed the WiFi during the night or when normally there shouldn’t be any access.
This will help you remove the unneeded devices that are consuming the internet and bandwidth.
You can try this program for 30 days and you can go on the free (but limited) version after that or you can continue by upgrading to a pro plan.
PRTG
Get the best Wi-Fi scanner and verify your network traffic and keep your device safe. No more exposed data with this amazing tool!
This application is developed by Matt Hafner and has an average of 4.3 out of 5 stars obtained from the feedback of more than 800 people.
The first thing that you have to do when you open this software is to set your location.
WiFi Analyzer will show you a pop-up where it will ask you for that. It has 3 different tabs for 3 different actions: Connected, Analyze, and Networks.
The Connected page is providing you with information about the current Wi-Fi connection.
On the top area, you will find a graphic of the connection quality based on link speed and signal level in negative dBm.
It also shows different icons that indicate bad link speed, bad channel, bad connection, the absence of internet connection, and unsecured connections.
On the bottom menu, you have a button to toggle between the State and Link Speed indicator.
The Link Speed shows the current and the top speed on the current session and the State mode shows only the improvement percentage. If this percentage is 100% it means that your connection quality was not affected.
The Analyze page is the place where you can make changes for a better connection.
You can access the graphics and the channel ratings, you can switch between channels and also toggle between the frequency bands.
To better understand the evolution of your connection you have full access to customize the colors of the graphics and the SSID/MAC.
You can also filter the SSIDs shown in the graphics by the minimal signal bars, frequency band, overlapping, WiFi method, and network type.
This software has different features like enabling an adapter, preventing the screen to turn off, and enabling vendor detection of access points. The only disadvantage of this program is the high number of ads.
WiFi Analyzer
Identify Wi-Fi problems and find the best channel for your router effortlessly!
Wi-Fi Commander software has achieved an average of 4.6 points out of a total of 5 from 490 feedbacks.
The interface is very easy to use for any category of users because the facilities are divided into 4 categories: Networks, Monitor, Analyze 3D, and Settings.
The Network tab contains the list with all available connections and their details. To see all the details available for a certain connection all you have to do is click on that connection.
This will open a pop-up where you will find everything you need to know about it, such as BSSID, beacon interval, and time discovered.
From the same pop-up, you can connect or disconnect from the SSID.
The network tab also has a system that scans the quality of the connection. This provides details of the last scan.
It is useful only when you want to find out some details about the connection quality. If you want to watch its progress in real-time, the Monitor and Analyze 3D page will display details about the connection quality regularly.
On the upper area of this tab, you will find details such as the time of the last scan and the total number of access points. From that menu, you can also customize the information displayed.
The Monitor tab is devoted exclusively to the study of the connection. On that page, you find different graphics that will show the evolution of connection in real-time.
This tab has different filters that will help you customize the details displayed and switch between the 2.4 and the 5 GHz bands.
On the Analyze 3D tab you can find a 3D type of channel usage graphs for both 2.4 GHz and 5.0 GHz on the same page.
This tab also has customizable filters for details and specifications. Graphs can be viewed in a classical or modern style in order to reduce the difficulty of reading them.
From the Settings tab, you can change the visual theme for the GUI and select the WiFi adapter.
WiFi Commander
3D channel distributions analyzer, real time signal monitoring and more!
Wi-Fi Monitor is software published by the developer of the VoiceWake and GrooveGrid, Mark Rizzo. It has an average rating of 4.7 out of 5 from more than 100 feedbacks.
This program is structured into 5 tabs to streamline its work: Dashboard, Graph, List, Speed test, and Ratings. All pages have come accompanied by suggestive names and icons to be used even by the most inexperienced users.
The Dashboard tab is more like the main menu where it displays details about the current network. These include the network name, signal strength, frequency, encryption, uptime, beacon interval, and more.
By default, the software takes you to the Graph tab where you can see a graphic with the signal of each network
In the bottom area, you have a button for changing between the 2.4 GHz and 5.0 GHz bands and adjusting the bar threshold to fade out low signals.
On the List tab, you will find a list with all the available networks and a few details about them. If you click on the network you can view the detected access point vendor and you can connect to them through the application.
From the Speed Test tab, you can run a measuring network speed process. In this way, you can see the speed of download and upload files at any moment.
WiFi Monitor
Inspect nearby WiFi networks and choose the one that best suites your needs!
Wi-Fi Tool is published by the developer of the Network Data and HD-POS applications, Helge Magnus Keck. It has the highest rating of all the programs presented so far.
He managed to get an average of 4.7 out of 5 from almost 300 feedbacks. The interface is structured in 4 tabs (WLAN, Analyze, Traffic, and Settings) that can be found on the left side of the dialog box.
The WLAN tab will display a list with all the available SSIDs with the corresponding details. When you are connected to a network, the SSID will be displayed on the top of the dialog box.
In the same area, you will find shortcuts and filters to customize the information displayed and also a disconnect button to end the connection any time you want.
When you click on any SSID from the available networks it will open a new menu on the left side of your dialog box. You will find here all the information you need to be structured in graphics and tables.
All you have to do to connect to one of the available networks is to right-click on the desired network.
On the Analyze page, you can find different graphics that show the evolution of your connection which can be flipped between 2.4 GHz and 5.0 GHz.
The first graphic is the channel usage but you can also change it to a line graph which will show you the signal power over time.
You have a set of filters at the bottom of the dialog box to adjust and customize the information displayed. More than that, you can choose a 3D presentation for each graphic.
On the upper area of the dialog box, you can find a shortcut to a feature that activates the split view mode where you can view two kinds of graphics at the same time.
Furthermore, in that area you will find a shortcut to a list of networks, so you do not have to switch to the WLAN tab. You can combine this feature with the split view to have 2 graphics and a network list on the same screen.
The Traffic tab is dedicated to the data usage area. This feature is measuring the number of uploads and downloads from every session as a bar graph.
From the main graphic menu, you can select the time period you want to be analyzed. This attribute is available even for networks to which you previously connected.
In the live tile, you can select 2 fields to be displayed. Furthermore, you can customize the Wi-Fi Tool to send a notification every time you connect or disconnect from a wireless network.
WiFi Tool
Team up with the most powerful WiFi analyzer and discover the best channels for your network.
In the first place, the WiFi channel software tells you how the network channels are used for other connections, so you can change your network channel to avoid interferences.
Mainly, this software can scan your Wifi connection in two separate ways:
The first method is active scanning and it runs with the client device searching for wireless networks by transmitting probes and giving results from the access points in range. The results include the configuration and capabilities of the networks managed by the access point.
More so, you have the passive scan that works differently by listening to beacons, specific data transmitted from the access points to report their presence.
It is recommended to use the active scan method to get the best results of available networks that you can use to enhance the wireless connection quality.
In this article, we presented the best Wi-Fi scanners that will make life easier for you.
They will help you with monitoring your traffic, upload speed, and the strength of your router’s signal among other amazing features we already detailed above.
FAQs
What is a WiFi channel scanner used for?
A WiFi channel scanner shows nearby wireless networks, their signal strength, and channel usage. It helps you choose the best channel to reduce interference and improve connection stability.
Do I need a WiFi channel scanner for Windows 10 or 11?
Yes. If you experience slow speeds or frequent drops, a WiFi channel scanner for Windows 10 and 11 can identify overlapping channels and guide you to the optimal settings.
How does a WiFi channel scanner improve internet speed?
By detecting congested channels and recommending less crowded ones, the tool reduces interference from neighboring networks. This often results in faster speeds and a more reliable WiFi connection.
Is active scanning better than passive scanning?
Generally, yes. Active scanning transmits probes to access points and delivers more detailed results. Passive scanning only listens to beacons, which may miss some networks.
If you also need more insights about your wireless connection, you can simply use highly efficient WiFi analyzer tools and resolve any network matters.
Check them all out, and if you have any additional suggestions or questions, don’t hesitate to leave them in the comments section below.
The Medium, the first Xbox Series X|S exclusive game of 2021 has been released yesterday on Microsoft’s next-gen consoles, in addition to Windows PCs. The game is also available on day one on Xbox Game Pass, and it will be followed later this year by other exclusive titles from third-party developers such as Scorn or Warhammer 40K: Darktide.
The Medium is the latest game from Polish developer Bloober Team, who earned praise for its psychological horror games including Layers of Fear and Blair Witch. Even though The Medium isn’t an AAA game, it already has a special place in Xbox history as the first high-profile game from a third-party developer launching exclusively on Microsoft’s next-gen consoles.
Bloober Team actually delayed The Medium’s release date from December 10 to January 28 due to COVID-19, and to prevent the game from being overshadowed by CD Projekt Red’s much-anticipated Cyberpunk 2077. January is indeed a pretty quiet month for new games releases, and The Medium launching on day on Xbox Game Pass for Console and PC should also really help it to get more exposure.
Microsoft released its Xbox Series X|S consoles last fall without a big new exclusive game, and with Halo Infinite having been delayed to Fall 2021, many early adopters are still waiting to be blown away by a game with true next-gen graphics. The Medium isn’t exactly the best-looking game you can play on Xbox Series X|S consoles right now, but according to Bloober Team, it’s doing some unique things that wouldn’t have been possible on the previous console generation.
One of The Medium’s unique features is the dual reality gameplay that let you simultaneously move in the material world and the spirit world at certain points in the game. When that happens, the screen is split either vertically or horizontally to render both worlds at the same time, and that requires additional resources Xbox One consoles are lacking.
“Most other games that support split-screen displays two different instances of the same location. In The Medium, the real and the spirit worlds look completely different and use their own sets of graphical assets, such as models or textures. This is much more demanding in terms of memory, storage, and the rendering cost. Additionally, such effects as motion blur or ambient occlusion need to be calculated and rendered twice. All in all, the game requires a significant amount of VRAM and fast storage, much faster than what was used in the previous generation of hardware,” the Bloober Team explained.
I played The Medium on both the Xbox Series X and the Xbox Series S, and it’s a good looking game overall with the Series X version supporting ray-tracing reflections in select locations. According to Digital Foundry’s technical analysis, the game uses a dynamic resolution on both consoles: The Series X shows variations between 1440p and native 4K, while the Series S can vary between 900p and 1080p. However, the resolution drops significantly during dual-gameplay sequences, with the Series X reaching a minimum of 900p and the Series S sometimes dropping to an even lower 648p.
The game targets 30FPS on both consoles, and there’s no 60FPS Performance mode even on the Series X. Since The Medium is mostly a contemplative experience with close to none action sequences, I think it’s acceptable to trade smoother frame rates for a more detailed world. So far, I didn’t encounter any noticeable frame rate drops on both the Series X and the Series S, even during the more demanding dual reality gameplay sequences.
If The Medium is a third-person game, be aware that the game doesn’t use an “over-the-shoulder” camera. Instead, the game uses a dynamic camera that will follow you throughout the environment, and this can be quite disorienting at times. For me, this was an instant throwback to the old-school Resident Evil games and their even more obnoxious fixed camera angles, though The Medium didn’t inherit from these games’ tank controls.
Bloober Team’s game stars Marianne, a Medium who has the ability to see the world from two perspectives. The game doesn’t give you much about Marianne’s background, and it starts with its lead protagonist getting ready to go to a funeral home to say a last goodbye to her father. That’s when you’ll first experience The Medium’s dual-reality gameplay, with Marianne being able to speaker to her father in the alternate world before sending his spirit away.
After this short prologue, Marianne will get a phone call from a mysterious man named Thomas, who gets Marianne’s attention by mentioning details about her recurring nightmares. The man will ask Marianne to meet him in Niwa, a derelict vacation resort where Thomas is apparently being threatened by a mysterious force.
The Medium seems to be a very linear game overall, though you’ll often need to use Marianne’s “Insight” power to reveal clues like footsteps on the ground, or echoes from the past. Some objects in the game have auras, and Marianne can sense their stories by touching them. When arriving in Niwa, Marianne describes the soviet-looking complex as a landfill of memories, with strong energy all around.
You’ll encounter some of the game’s puzzles during the dual-reality gameplay sequences, and when you’ll exist in these two realities, you’ll be affected by both them: This means that when a door is locked in the real world, you won’t be able to go through that passage in the astral world even though this door is absent in this alternate reality. Solving the game’s puzzles will often require you to do some things in the astral world that will have consequences in the real world.
I didn’t go far enough to see if the game has a lot of these puzzles, but The Medium becomes really interesting once you reach the Niwa complex, a mysterious place that is also the subject of urban legend, the “Niwa massacre.” The Medium can feel like a walking simulator at times, especially if you try to find all items that still have traces of the people who were there, but the Niwa hotel instantly looks like a fascinating world to explore.
You probably shouldn’t expect big jumpscares or exciting action sequences, The Medium is a slow-paced game and that’s actually fine. The gameplay feels somewhat dated at times, with a camera that can get frustrating in closed spaces, but I’m still excited to spend more time in the game over the weekend.
The Medium is probably not going to be a system seller for Microsoft’s next-gen Xbox consoles, and I actually wouldn’t be surprised if the game eventually makes its way to the PlayStation 5, which reportedly has a bigger install base. It should still be good filler content for Xbox Game Pass, and you should definitely check it out if you’re looking for a new next-gen to play on your Xbox Series X or Series S console.
Lens correction software is your savior if you have a shot you don’t want to give up on. We found tools that offer both manual and automatic correction options.
They let you adjust images based on content, lens type, focal length, and even camera model.
Sounds good? Check them out!
What are the best tools to correct lens distortion on PC?
Adobe Photoshop – industry leading editing with lens correction tools
Renowned for its powerful photo editing, Adobe Photoshop is ideal if you like in-depth, manual adjustments, but it also supports automatic lens correction.
Once you load a photo, go to Filter>Lens Correction> Custom> Auto correction. If you prefer more advanced options, you can fix the lens barrel and pincushion distortion.
Key features:
Easy to find and use interface
Real-time adjustment preview
Fix lens barrel
Pixel adjustements
Adobe Photoshop
Correct digital photo errors with industry-leading features!
DxO ViewPoint – advanced perspective and distortion correction
DxO ViewPoint is the latest version of DxO Labs’ volume deformation and perspective correction tool.
This can successfully be used as a standalone app and as a plug-in for Adobe Photoshop as well and for more popular programs. It includes automatic distortion correction via the tool’s Optic Modules.
Key features:
Automatic distortion correction based on lens profiles
Manual correction
8-point perspective correction tool
Detailed instructions for beginners and advanced users
RadCor – dedicated software for radial distortion correction
RadColor stands for Radial Distortion Correction, and this is a dedicated piece of software targeted at lens distortion correction. It comes with lots of options for correcting distortions that are caused by various camera lenses.
This tool provides both automatic and manual correction options, and it offers surprising results. Take a look at the most interesting features that are included in this tool below:
GIMP – open source image editor with lens correction
Lens distortion correction in GIMP is straightforward to manage, and it can be performed for images with small to medium lens distortion.
All the lenses distortion correction in GIMP will have to be performed manually by adjusting a few parameters, but things are really effortless to carry out.
These are our best five picks for tools that can fix lens distortion for your photos. All of them are able to do a great job fixing your photos, so no matter which one you will end up using, you will be extremely pleased. Good luck!
Video editors are essential for recording lots of footage with cameras or for vloggers and content creators.
Having recorded a video, you can edit and refine the final output with video-editing software and export it to numerous file formats for playback on various devices.
Most standard video editors include timelines that display linear layouts of videos, transitions and effect options, themes and templates, and text options for adding titles and credits to footage.
However, the best video editors also include audio mixers, video stabilizers, motion tracking, masking, multi-cam modules, and 3D video-editing tools.
They are also compatible with the latest 4K, 8K, and 360-degree video technologies. These are some of the best Windows video editors that include most of those tools.
Adobe Premiere Elements is a non-subscription alternative to Premiere CC that simplifies video editing for its users.
The new version of the software includes new tools for extracting images from the footage, adding motion titles to frozen frames, and adding bounce-back effects to videos.
The software is compatible with 64-bit Windows 10/8/7 and Mac OS platforms.
Adobe Premiere Elements provides Quick and Guided editing modes for more straightforward video editing.
In Quick mode, you can simply select the media to include for Premiere Elements to arrange on the video timeline.
You can add more than 400 transitions, effects, and objects to the footage when editing in Adobe Premiere Elements.
Elements users can apply video stabilization, add more contrast to landscape videos with Dehaze, replace solid colors in footage with images, drop their videos into templates, and many more.
So there are loads of editing tools at your disposal in Premiere Elements.
Premiere Elements also scores highly for export and production. You can export videos to about 19 file formats and add them directly to YouTube, Facebook, and Vimeo from within Elements.
The software enables you to set up DVD and Blu-ray discs for your videos with customized menus and themes. You can also select to optimize videos for mobile and TV playback.
Adobe Premiere Elements
Easily create amazing-looking videos with the versatile Adobe Premiere Elements.
Adobe Premiere Pro is another of the industry-standard editors with which you can edit almost any type of video format, including 8K and virtual reality.
Unlike Premiere Elements, the latest Premiere Pro CC version supports multi-cam and 360-degree editing.
The software has a decently-priced monthly subscription, and for that, you also get plenty of regular updates and Adobe Media Encoder.
You can run the software on 64-bit Windows 10/8/7 and macOS platforms, and you’ll need at least eight GB RAM for it.
Adobe Premiere Pro CC includes a huge toolset for editing all the latest video formats this year.
Premiere Pro probably has the most comprehensive video and audio format support of any editor, and its users can import footage from almost any type of recording device.
The software doesn’t include the widest selection of transition options, but you can always add more with additional plug-ins.
This is one of the best editors for multi-cam editing as it accommodates any number of angles. Premiere Pro’s Lumetri Color Tools provide a huge amount of scope for adjusting colors in the footage.
CC also includes extensive text options and a great selection of fonts for adding titles and captions to footage.
Premiere Pro does include its own export options, but it also comes with the Adobe Media Encoder package. That provides Premiere Pro CC users with a wide variety of presets optimized for various output formats.
You can configure your own presets if AME doesn’t have one you need. Furthermore, you can also export videos to DVD and Blu-ray and share them on Twitter, Youtube, Vimeo, and other sites with AME.
Adobe Premiere Pro
Take your video editing to the next level with the Pro version of Adobe Premiere today!
Movavi is truly one of the finest PC video-editing software for Windows 10, thanks to its simple interface, a variety of ready-made effects, filters, stickers, backgrounds, and much more.
It has a Quick Video option that lets you build a video out of photos and enhance it with background music in a matter of minutes.
Enabling you to modify and reduce the volume on each audio clip is a major advantage, as it allows the music to fade in and out as required. This is very effective when moving from photo to video message snippets that you’ve provided.
The animation option, which actually brings the project to life, is the most fascinating feature.
You may use Movavi’s Chroma Key to simply transform the background of your video to anything you like. Explore lightning-fast file processing and rendering, as well as attractive titles, transitions, stickers, and other additional material designed by professionals.
The trial version, however, imposes some limitations, like placing a watermark on the files it generates and installs desktop icons without asking.
Movavi Video Editor
Movavi is a great video editor that has all of the elements you’ll need while building a dynamic project.
Corel VideoStudio Pro is a user-friendly video editor that’s ideal for casual users. The latest version is also one of the few editors that include tools for editing 360-degree videos.
Corel VideoStudio Pro includes a premium special effects pack and a Mask Creator tool, but aside from that, there’s little difference between the versions.
Corel VideoStudio Pro is a good choice for novice users as it includes the template-based video creator FastFlick.
This tool can automatically set up a video from your clips, and an Instant Project tab that you can quickly set up finished videos with.
The software provides you with more than 2,000 transitions, effects, and animated titles.
It includes a plethora of invaluable editing tools such as its multi-camera for syncing multiple footages, motion tracking to apply effects to specific moving subjects, and chroma key for adjusting backgrounds.
VideoStudio Pro users can also balance audio levels between clips and lower background sound with the editor’s audio tools.
This editor has plenty of output and sharing options. The software’s MyDVD disc authoring tool enables you to export clips to DVDs with themed templates.
You can export videos for playback on Apple TV, iPad, Xbox, and other devices. VideoStudio Pro also enables its users to set up AVCHD 2.0 videos for SD card output.
Corel VideoStudio Pro
Create awe-inspiring videos with this easy-to-use and efficient tool.
CyberLink PowerDirector is one of the most highly rated prosumer video editors for Windows 10/8.1/8/7 that’s compatible with all the latest video technologies.
It’s an ideal choice for both novice and professional users who need a full suite of video-editing tools.
There are separate PowerDirector 19 Ultra and Ultimate versions, which are priced differently according to what is included.
PowerDirector 16 Ultimate has more templates and effects, but aside from that, there isn’t much difference between the versions.
PowerDirector has all the editing tools you’ll need. You can add plenty of templates and effects & transitions along with titles and credits to videos with the software’s design tools.
The editor includes design tools for fusing video clips together, overlaying animated objects, and even setting up video collages.
PowerDirector also packs in an audio mixer, video stabilizer, chroma-key, MultiCam Designer module, 360-degree video, and motion tracking editing tools.
The application supports all the latest formats for both importing and exporting videos. This software is 4K compatible and enables its users to export 2K and 4K videos to 15 file formats.
You can upload your videos directly to six social media and video websites, such as YouTube and Dailymotion.
Furthermore, the software incorporates both DVD and Blu-ray authoring so that you can add videos to CDs, DVDs, or Blu-ray discs.
Power Director 365
With this professional software, you can get access to powerful instruments as well as to Shutterstock’s plentiful collection, so you can invigorate your video-editing skills.
VideoPad is a lightweight editor with which you can edit and export both 2K and 4K videos.
This is among the best budget video editors for 2021 that’s available for a small price on the publisher’s site, but the software is freely available for non-commercial usage.
The VideoPad Master’s edition is also compatible with external VirtualDub plug-ins.
You can add this editor to Windows (XP to 10), Android, Kindle, and Mac OS X platforms by clicking the download links on the software’s homepage.
VideoPad might lack some of PowerDirector 16’s more advanced tools, but it has still got all the essential tools you’ll need for video editing.
The software enables you to import footage from almost any kind of input device, apply more than 50 stunning visual effects, adjust the playback speed, add new images to video sequences, and many more.
VideoPad offers a decent selection of device optimization profiles for exporting videos. The software enables you to optimize and export output for a wide variety of devices, such as PSP, iPod, iPhone, and 3GP mobiles.
VideoPad users can also export their videos to DVD, Blu-ray, HD-DVD, or CD or add them directly to YouTube, Flickr, and Facebook websites.
VideoPad Masters Edition
VideoPad has advanced editing features such as video stabilization, 3D editing, and motion tracking.
Icecream Video Editor is another app from the bestselling software company that comes on the market to help you edit your favorite videos absolutely for free.
This tool allows you not only to edit your videos but also to create your own videos using photos, images, and audio files from your library.
As free software, it does not have every tool on the earth, but it comes with enough interesting features that you might use. Here they are:
Single timeline to merge your multimedia files
15 free transitions
Add movie effects (blur, old movies, etc.)
Simplified trim feature
Flip and rotate
Changing video speed
There are more interesting features, but these are enough to create a simply stunning video without being a pro. More than that, you can share these videos through Youtube, Google Drive, or Dropbox directly from the app.
By choosing Icecream Video-editor you have essential video editing tools you’ll find in the subscription-based software. Plus, there are multiple video and image formats you can use without limitations.
The software is available on different Windows versions, starting from Windows 7 to 8, 8.1, and 10.
If you want to know more about this amazing software, you can download it from the Icecream Apps website.
Icecream Video Editor
Combine videos and images, create transitions, edit films, apply visual effects, speed up, and let your imagination run wild!
Wondershare Filmora 9 Video Editor is a simple but powerful video editing software, which makes it perfect for both first-time users and professional video editors.
The application has a simple-to-use interface that allows you to combine audio, video, and various effects.
To create your own videos, you just have to drag and drop your media files to the timeline to combine them.
To make the editing process faster and simpler, the application already has a number of available audio, text, transitions, filters, and overlays available to use out of the box.
If you need more effects, transitions, or audio files, you can always download them from the Effect Store.
It’s worth mentioning that Wondershare Filmora9 Video Editor can work with up to 100 video tracks, so you can create complex videos.
Of course, the application offers fast export and import of videos, so you’ll easily import media or save your creations.
There’s also full 4K support, so you’ll be able to create crystal clear videos with ease. In order to provide you with a smooth user experience, the application supports real-time rendering, so you should be able to easily render 4K videos.
The application also has improved video stabilization, which is perfect if you’re editing clips that are filmed outdoors or without a tripod.
In addition to stabilization, there’s improved chroma key support, so you’ll have an easier time working with the green screen.
As for audio, the application has support for up to 100 audio tracks, so you can easily organize background music and audio effects. As for additional features, there are keyframing, noise removal, and equalizer.
In addition, there’s an audio mixer available, so you can easily adjust audio and video volume.
When it comes to exporting, you can choose between many popular video formats, and you can even customize settings for each format.
This allows you to easily change your encoder, resolution, bitrate, and other settings. Of course, you can also export your videos directly to YouTube or Vimeo or burn them to a DVD.
Overview of key features:
Sleek and simple user interface
4K support
Support for up to 100 audio and video tracks
Cross-compatibility between PC and Mac
A plethora of video effects, overlays, and text effects
Overall, Wondershare Filmora9 Video Editor offers an incredibly simple and sleek user interface, and with a wide array of effects, transitions, and audio files, it will be perfect for both first-time and professional users.
Wondershare Filmora
Create one-of-a-kind videos on your PC by using this amazing software today!
HitFilm is a freeware video editor and VFX package that’s ideal for indie filmmakers and YouTube enthusiasts.
You can add lots more special effects to videos with HitFilm than most alternative software.
Although this is freeware, the software’s add-ons are not freely available, and there’s also a Pro version that includes all the add-on packs.
You can add HitFilm to Windows 10/8/7 by clicking theGet Hitfilm Free link on the website page down below.
HitFilm is an editor with some revolutionary effects that will transform your videos. The freeware version boats more than 180 visual effects.
You can just add more basic transition effects, but HitFilm also enables its users to add pre-built 3D effects, customizable lens flares, gunfire effects, and temporal effects to their videos.
This editor also boasts both 2D and 3D compositing so that you can combine different visual elements from alternative sources into video sequences.
Even if you don’t need to create Hollywood blockbusters, you can still refine and fine-tune your videos with the software’s timeline editor that offers an unlimited number of tracks.
While not as popular as some of the tools listed above, DaVinci Resolve is a feature-rich video editor that deserves your attention.
DaVinci Resolve 17 perfectly combines offline and online editing, color correction, audio post-production as well as visual effects. Yes, all these features are available in one tool.
The software is perfect for collaboration purposes. You can easily edit your videos and instantly share the results with the whole team. There is no need to export files or use a third-party tool to do that.
DaVinci Resolve supports multiple editors, assistants, colorists, VFX artists, and sound designers. The best part is that everybody can work on the same project at the same time.
DaVinci Resolve 16 is suitable for advanced and professional users only.
Sure, certain functions require the Premium Upgrade, but it is mainly for teamwork and if you require more special effects. However, the free version is strong and feature-rich enough to make any type of video.
Lighter, more efficient export files make it easier to compress and archive with Resolve, and you spend less time uploading to YouTube or any other online video site.
Resolve is a well-known and widely praised program for all aspects of editing, not only grading and online editing.
Those are 10 must-have video editors for this year. Of those, Wondershare Filmora 9, Adobe Premiere Elements, and Adobe Premiere Pro CC have the most comprehensive editing toolkits.
All being said, consider this software guide anytime if you need more effective video editor tools with minimal system requirements.
Adobe is most famous to the general public for the Acrobat Reader and Photoshop. However, they also have another drawing and painting app that is growing more successful by the day.
Adobe Fresco was created with stylus and touch devices in mind and it first came out for the Apple iPad.
Back in November 2019, Adobe launched the app for Microsoft Surface devices. They were technically Windows devices but now, the app is expanding to all Windows 10 devices.
To be exact, that means it’s also available for your Windows 10 laptop or PC running version 1903 or later. Your computer will also need to have DirectX 12.1 to download the Adobe app.
How can I install Adobe Fresco on Windows 10?
1. Download and install Adobe Fresco
It’s pretty easy to get the Adobe Fresco app and it starts by clicking on the Visit website button below to get to the Adobe website.
By clicking next on the Get free app button, you will be presented with three options.
You can install the free trial app for Adobe Fresco, or you can get the Photoshop app that includes Adobe Fresco.
The third option, All apps, will give you access to the whole Creative Cloud suite that includes all the Adobe apps in free trial versions.
Adobe Fresco has a 30-day trial period so you can test its limits. The learning curve for this excellent app is pretty steep.
Adobe Fresco
Adobe Fresco is an excellent drawing app that will instantly click with your immagination and creativity.
2. What are the requirements to install Adobe Fresco?
If you want to install Adobe Fresco on your Windows 10 PC, you will need an Adobe ID account. If you don’t have one, don’t worry because you will be prompted to create one during the installation process.
You will also need Internet connectivity because you will need to activate the software, validate any potential subscriptions, and, of course, accessing the online services.
You will also need a minimum of 3 GB of free space on your PC to install and run the application. However, Adobe recommends you to have 16GB of available storage for best performance.
3. What are some of the newest features of Adobe Fresco?
Adobe not only brought the app to your friendly PC but in 2020 they also introduced some new features like a Clipping Masks tool a Brushes Management tool to name the most important.
The Clipping Masks Tool is a feature that makes it a lot easier to clip one or more layers to another layer or layer group. Here’s a clip from Adobe that shows you exactly how to use the new Clipping Mask feature.
Brushes Management feature was needed because you have a lot of brushes to choose from and this is a new way of setting up a personalized set of brushes.
Another interesting feature is the Brush Stamp Preview that helps you know exactly how much area you will be covered with the stamp.
It’s a simple indicator for Photoshop, Pixel, and Eraser brushes that will appear when you touch the screen with a stylus or finger.
If you succeeded in installing Adobe Fresco, leave us your feedback in the comments section below.
Because trading stocks is a hard area of business as it is, you’ll need all the help you can get.
By teaming up with the best software to track stock trades, you will be able to better coordinate stocks and make decisions based on real-time data.
This type of software allows you to perform advanced-level analysis of the stock market, can set custom reminders, and alerts regarding a price stock limit, and much more.
It is worth mentioning that not all stock market software allows you to buy and sell stock from the app.
However, you needn’t worry if this feature is not included. These stock market software programs are fully compatible with brokerage tools.
Having real-time information is one thing, making quick decisions is another, and selling or buying stocks is the final element.
You can gather real-time information by using the software we will list in this article, creating your own charts, and creating custom settings for the stock filter used to get relevant information.
Let’s explore some of the best software to track stock trades on the market.
eToro is a multi-asset platform, offering both investing in stocks and crypto assets, as well as trading CFDs. You should know that only real cryptocurrencies are available for US users.
Besides, the company is considered one of the pioneers in cryptocurrency trading. They offer the largest range of cryptos anywhere and are focused on expanding this market whenever an established token reaches the mainstream.
For beginners, eToro is the best place to start trading. It also offers a fully functional demo account, with a $100,000 virtual portfolio to find one’s strategy before trading independently or copying other traders.
eToro also provides a free mobile trading app, so you can trade on the go, anytime, anywhere.
Note that the platform is geo-limited; it accepts traders from most countries, except Iran, Turkey, Japan, Canada, Hong Kong, and Singapore.
eToro USA LLC does not offer CFDs, only real Cryptocurrencies are available for US users.
eToro
A leader in the fintech industry for over a decade and the perfect crypto trading platform for beginners.
Disclaimer: 74% of retail investor accounts lose money when trading CFDs with this provider. You should consider whether you can afford to take the high risk of losing your money. eToro USA LLC and eToro USA Securities Inc.; Investing involves risk, including loss of principal; Not a recommendation.
TradingView is a freemium social network for traders and investors on Forex, Futures and Stock markets. The platform offers Live quotes, stock web-based charts and expert trading ideas.
It is best appreciated for the ease of use of their charts, having a modern, sleek and practical interface, with a lot of functionalities in one charting package.
Some of the other notable features are:
A wide library of technical indicators that are routinely being added to and updated
An alert system for any indicator or drawing; highly customizable
Volume profile indicators to all paid members
Proprietary, easy to learn, a scripting language (Pine Script)
Great free permanent plan
One of the few drawbacks of TradingView is the fact that only a very small amount of brokers offer in-the-box trading with this platform.
TradingView comes in four plans. The free one offers most features that you would get with the paid plans, only at a slower data flow and with fewer indicators available. Yet the free plan is great to start with.
Moving upwards with the paid plans – Pro, Pro+ or Premium, one gets access to an increasing number of charts, faster workflow, and certain exclusive features.
TradingView
Learn the ropes of trading stocks with this modern user-friendly charting web-based system.
TC2000 is a fully featured software stock option that covers all your needs when it comes to scanning charts and also trading stocks.
The scanning feature found in TC2000 is incredibly fast and gives you a perfectly structured report of all stocks that meet your requirements and are also based on the risk involved in that transaction.
This software allows you to use notes and flag stocks, by remembering which charts you were using and organizing them into a comprehensive and easy-to-access list.
TC2000 has a smart scaling feature, and you can visually compare trends and the difference between swing sizes as well.
Here are some other very useful features found in TC2000:
Easily modify and place orders by dragging on the charts
Can keep an overview over positions and orders in your watchlists
Can overlay underlying stocks with option strategies
Great projections of P&L zones (profit and loss statements)
Easily set up step-limit orders that help you get a better price
Can access your portfolio anywhere – mobile platform, Windows, or online Web Trader
Trading is done by using top of the range types of trendlines, channels, and indicators
EquityFeed’s features are similar to the TC2000 software, but with a different software structure and with some different skills.
As in the case of TC2000, EquityFeed offers you access to all the tools you need to order to stay informed, make informed decisions, and see real-time results of your stock transactions.
One of the best features found in EquityFeed is its ability to scan for stock in depth, with the power to customize the scanning filters.
These filters are so efficient that they can reduce the time spent searching for the stock you’re interested in, from 10-20 minutes to a few seconds.
Having this feature at your disposal allows you to make informed decisions without risking to lose your funds.
Another very useful tool found in EquityFeed is the professional-level trade alerts. These alerts are generated automatically by EquityFeed by using the powerful built-in pattern recognition tool.
Using this feature allows you to stay ahead of the curve by staying informed in real-time regarding any price variations for your selected stocks, breaking price average, moving large block trades, etc.
As we all know, the most important stocks are the ones we put in our portfolio or the ones we targetted for future transactions.
In order to have unlimited access to these items without any issues, EquityFeed gives you the power to keep the entire range of information safe.
You can also create an unlimited number of watchlists, and check each of them out as the stocks are sold/bought.
Optuma is another great analysis software for the share market that offers you real-time information about the stocks you are interested in, with built-in alerts for price changes and variations of stocks.
Let’s explore some of the best options found in Optuma:
Single security charts (a chart that is calculated on the price history of single security) – contains all the single chart styles – bar, candle, point & figure, swing charts, etc.
QuantShare is another great stock market software that allows you to perform a variety of tasks – charting, backtesting, optimizing, composites, etc.
The wide range of tools found in this program gives you the power to display charts, add indicators, create custom watchlists.
You can apply specific trading strategies, and can even create portfolios based on the choices of strategy that you made.
This software was designed with traders and investors in mind and integrates perfectly with Forex, Futures, Options, and also ETFs trader software.
When using QuantShare, you can access a wide range of pre-made data downloaders, watchlists, trading systems, and also get personalized support through the process.
Here are some of the best features found in QuantShare:
Can work with multiple accounts and databases
More than 25 drawing tools
Charting features
Advanced money management
News/Data plugin
Easily share items and ideas with other QuantShare users
In this article, we explored some of the best software options on the market to help you with real-time data gathering and also actual selling and buying stocks.
Please feel free to let us know what your experience with these software options was by using the comment section below.
Adobe XD is a popular UI/UX design app that can be used to create wireframe, animation, prototype, and even collaborate with other creators. Similar to other Adobe software, Adobe XD is also part of the company’s Creative Cloud.
Adobe Creative Creative cloud service offers a collection of 20+ apps for photography, design, video, UX and more. Adobe requires the users to install the Creative Cloud desktop app to be able to install XD and other apps.
CC desktop client is also responsible for managing Adobe subscription, keeping the apps upto date, cloud synchronization and more. While the app is a useful utility, some users may prefer to install Adobe XD without Creative Cloud.
Unfortunately, Adobe does not offer a standalone Adobe XD installer for the latest version. So, is there a workaround to install Adobe XD without Creative Cloud? Well, let us find out.
How to install Adobe XD without Creative Cloud?
Contact Adobe for a direct download link
Make sure you have an active Adobe XD subscription.
Go to Adobe Help page and click the Chat icon in the bottom right corner.
Sign in to your Adobe account with valid credentials.
Once logged in, ask the Adobe agent to provide you with a direct download link for Adobe XD installer. You can use the below template if required: Hello, I need the direct download links (offline installers) for the new 2021 releases of Adobe XD Could you please help me?
Use the temporary download link provided by the agent to download Adobe XD installer.
Extract the Zip file and click on the setup.exe file to install the Adobe XD without Creative Cloud.
If the Adobe agent refuses to provide a direct download link, simply exit the chat and try to connect with another agent.
Although rare, at times you may have to try your luck a few times before getting the direct download link.
Adobe XD
You don’t need Creative Cloud to install Adobe XD, but you still need a subscription to install it regardless.
Press the Windows key on your keyboard and type Task Manager.
Open the Task Manager app and click the Startup tab.
In the Startup tab, select Adobe Creative Cloud app and click the Disable button.
Once disabled, close Task Manager. Also, exit the Creative Cloud app by expanding the System Tray icon.
As discussed earlier, the Adobe Creative Cloud desktop does more than just manage Adobe creative software. It can keep all the 20+ Adobe up to date, manage cloud synchronization, and offer access to additional Adobe assets.
However, at times the app can cause high system resources usage due to various active background processes. This can impact system performance and make your system slow.
To fix the problem, you can disable the Creative Cloud app from running in the background. If it does not work, check out additional steps to stop the Creative Cloud from running at start.
Uninstall Creative Cloud desktop application
Download the latest Creative Cloud desktop app uninstaller.
Once downloaded, extract the Zip file and then run the uninstaller.
Click the Uninstall button when the pop-up window appears.
Click OK once the app is uninstalled.
Before installing the Adobe XD app using the offline installer, make sure you have uninstalled the Adobe Creative Cloud desktop app.
To completely remove the Adobe Creative Cloud, use a dedicated Uninstaller listed in the steps above. Make sure to reboot the computer after uninstallation to apply the changes.
While Adobe requires the users to install the Creative Cloud desktop application to install its software like Adobe XD, at times, installing the app is not feasible.
Fortunately, Adobe does provide an offline installer for individual Creative Cloud apps with temporary download links to install the apps without the CC desktop app.
Adobe is widely known to the general public thanks to its extraordinary suite of programs, and mostly known are Acrobat Reader and Photoshop.
Photoshop was created for photo editing, digital painting, animation, and even graphic design. All these can be easily done with the help of a single tool.
In the January 2021 release of Photoshop desktop (version 22.1.1) and Photoshop on iPad (version 2.0.3), you will see the most reported bugs solved. Make sure to check out the Fixed issues page for more details.
As for those of you who want to install Adobe Photoshop without Creative Cloud, rest assured that there is a way to do that. Just read the lines below.
How can I install Photoshop without Creative Cloud?
In Creative Cloud, there is a generous collection of 20+ desktop and mobile apps that meet almost any need related to photography, design, video, UX, and many others.
The Photoshop brushes, content-aware fill, and photo effect features are among the most appreciated and utilized by professionals all over the world.
They help you enhance your skills and create amazing works of art within an elegant and easy-to-use interface.
Adobe Photoshop
Photoshop lets you discover all kinds of creative tools designed to put your creation on the map.
Photoshop comes with a complete suite of features and tools that are constantly improved and updated in order to satisfy the most complex needs of any professional using it.
Additionally, don’t forget to check the Photoshop Learn & Support section in order to get started with the help of the available guides and tutorials.
Thanks to this software, it’s never been easier to create valuable works of art. Let us know if you think the same by using the comments area below.
There’s no doubt that this is the year of VR. The high-end VR devices are now available for everyone, and it’s never been easier to record a VR 360-degree video.
There are literally tons of 360-degree videos all over the internet. The majority of browsers support them, so we can enjoy watching VR content online, without owning a VR device.
But what if we want to download a 360-degree video? Your regular video players, such as Windows Media Player or the Windows 10 Video app still don’t support it, although they probably will in the future.
Luckily, there are some players that, besides regular video formats, support VR videos, as well. As a result, we’ve come up with a list of the best 360-degree video players for Windows you can find right now.
Check out our list below, to find out the best solutions for the best possible VR experience in Windows 10.
What are the best 360 video players for Windows 10?
Even though Adobe Premiere Pro is a versatile video editing software, it works like a charm when previewing 360 degrees videos in it.
And not only that you can preview the 360 videos, but Premiere also gives you the tools required to convert the video to any format you desire. This allows you to watch the 360 videos later on with any video player.
And if you think it can’t get any better than this, the video encoding power and features in Premiere will surely leave you breathless.
Let’s quickly look at its key features:
Works seamlessly with all Adobe products, but especially useful with Adobe After Effects
Large library of resources available with just a few clicks of your mouse
Fast video processing no matter the file size
A very large number of tutorials available
Full compatibility with almost any video file format
Adobe Premiere Pro
Enjoy VR as you’ve never experienced it before with this industry-leading video editing software.
Some may say that the CyberLink PowerDVD is the world’s no 1 media player, but we know for a fact that this powerful multimedia app does more than just play DVDs.
This is a premium tool designed to streamline your viewing experience in every aspect from the highest quality media playback and wireless access to your media library from any device to content management features.
You can watch 360-degree videos on your PC and enjoy a wide variety of formats such as ultra HD Blu-ray and 8K or go big using the built-in TV Mode with support for 4K and HDR 10.
You can even add your favorite streaming devices such as Apple TV or Roku, or store your content in a generous 100 GB cloud space to take it with you wherever you go and watch it on the PowerPlayer app.
Let’s quickly look at its key features:
TrueTheater cinematic enhancements for supreme video and audio quality
Multichannel lossless sound system
Compatible with all platforms and entertainment devices from PC and mobile to steaming devices
Content management features to easily search, browse and view your favorite videos
Seamless Playback for your entire media collection
View wirelessly on any device
CyberLink PowerDVD
Enjoy 360-degrees videos, 4K, 8K, HDR, and more! Simply unleash the PowerDVD’s potential to enhance your multimedia experience.
GOM is definitely the most famous name on our list, and one of the best-known video players, in general. This video player is used mainly for playing ‘regular’ videos but also has 360-degree video support.
GOM Player allows you to play 360-degree videos downloaded on your computer, but the best thing is that you can play 360-degree videos directly from YouTube, without bothering to download them.
To play a 360-degree video in GOM Player, simply right-click anywhere on the screen, go to Playback 360-degree video, and then click Playback 360-degree video to load a list of 360-degree videos available on YouTube.
As soon as you select a video you want to play, the playback will automatically start. You can watch a video from various perspectives, like the top, bottom, left, or right.
Just move your mouse cursor between the screens, or use a dedicated keyboard shortcut.
GOM Player
Better UI and UX experience on the marker, with GOM Player you can have full control of your VR videos.
If you’re more into UWP apps for Windows 10 than regular programs, Video 360 is a VR video player for you.
This extremely simple app allows you to watch 360-degree videos on any Windows 10 device, as it’s compatible with both Windows 10 and Windows 10 Mobile.
It allows you to easily move the camera with your fingers on Mobile devices, or with a mouse cursor on your computer. The app uses YouTube as a source for 360-degree videos.
Since it was developed Webrox, the developer of one of the most popular YouTube clients for Windows 10, Tubecast, these two apps perfectly work together.
As soon as you open Video 360, it will use Tubecast to search for 360-degree videos on YouTube, and you’ll be able to play them.
Video 360 is available in the Windows Store for the price of $2.99, but you can try its trial version for free.
5KPlayer is also one of the best VR players for Windows computers. It supports a high variety of formats, including 4K, 5K, HD, SD, and even 8K videos. And of course, 3D/360° VR videos, and VR movies.
Another great feature of 5KPlayer is that it allows you to download videos from more than 300 video-sharing services, including Facebook, Yahoo, DailyMotion, Vimeo, Vevo, Metacafe, Myspace.
Other 360 video-sharing services are Vine, UStream, MTV, Instagram, Bliptv, LiveLeak.
So, if you’ve just seen a great VR video on YouTube, you can keep it on your computer with 5KPlayer.
Plain VR is another UWP app for playing 360-degree content, but unlike Video 360, it’s free and only available on Windows 10 Mobile.
You don’t need a VR device connected to your phone to be able to watch VR videos with this app. Plain VR shows VR videos in a regular view, allowing you to pan around by moving the phone.
The biggest downside of this app is that you can only watch online VR videos with it. To do so, you need to import a video URL from the source and stream it through the app.
You can’t watch videos locally stored on your device, but we hope the developer will eventually change this.
That’s about it for our top picks for watching 360-degree videos on Windows 10 devices. We know the offer is not very generous, but that’s simply because the VR technology itself is relatively young.
As we said, we expect many more video players will start supporting VR technology soon. Until then, we have to work with what we have.
Do you agree with our choices? If you have other recommendations, let us know in the comments below.
Adobe Premiere Pro is the industry standard for video editing and used in film, TV and the web.
With the help of creative tools, third-party and Adobe Suite integration, and Adobe Sensei’s power, you can craft footage into polished films.
That said, being a part of Adobe’s Creative Cloud suite, installing Adobe Premiere Pro requires you to install the Adobe Creative Cloud desktop app first.
Once installed, you can install other Adobe software like Adobe Premiere Pro, Photoshop, and Illustrator.
Now, what if you want to downloadAdobe Premiere Pro without the Creative Cloud?
For the uninitiated, Adobe has stopped releasing the standalone installer for Adobe Premiere Pro, Photoshop, and Illustrator. However, you can stilldownload Adobe Lightroom as a standalone app from the Windows Store.
How do I download Adobe Premiere Pro without Creative Cloud?
1. Get direct download link from Adobe support
Go to the Adobe Help page and click the Chat icon in the bottom left corner.
Make sure you have an active Adobe XD subscription.
Sign in with your Adobe credential.
When connected with an Adobe agent, ask them to provide you with a direct download for Adobe XD installer.
Use the template below if required: Hello, I need the direct download links / Offline installer for the new 2021 releases of Adobe Premiere Pro, could you please help me?
The Adobe agent will provide a temporary link to download Adobe Premiere Pro.
Download the file as soon as possible, as it may expire after 24 hours.
Once downloaded, extract the zip file and run the Setup.exe file inside the folder.
Follow on-screen instructions to install Adobe Premiere Pro without Creative Cloud.
Before installing the app, make sure you have completely uninstalled the Creative Cloud desktop app using the Creative Cloud uninstaller. Here’s how to do it.
Adobe Premiere Pro
You don’t need Creative Cloud to download and install Adobe Premiere Pro. Simply download the program directly and you’re halfway there!
Download the latest Creative Cloud desktop app uninstaller.
After the download is complete, unzip the file and run the installer.
When prompted by the uninstaller, click Uninstall.
Click OK after you see the success message.
Restart your computer. After the restart, run the Adobe Premier Pro offline installer to install the app without the Creative Cloud desktop app.
Creative Cloud is essential for stable Adobe software performance
Unlike Adobe Lightroom, that is offered as a standalone app in Microsoft Store, other Adobe apps like Adobe Premiere Pro still require the users to download it via Creative Cloud app.
Creative Cloud is an Adobe desktop client that allows you to manage 20+ Adobe apps.
You can launch and update your desktop apps, manage and share your assets stored in Creative Cloud, synch files with your Adobe cloud account, and more.
Removing or uninstalling Adobe Creative Cloud will leave you with no option to update Adobe Premiere Pro and other apps, manage Adobe Fonts and more.
However, if you still prefer to install Adobe Premiere Pro without Creative Cloud, you can use the workaround listed above to get a direct download link by contacting Adobe support.
3. Stop Creative Cloud background process
Right-click on the Taskbar and select Task Manager.
In the Task Manager window, open the Startup tab.
Scroll down and select Creative Cloud.
Right-click on the app and choose Disable.
Close the task manager and restart your computer.
After the restart, open the Task Manager to see if the app is running the background.
Creative Cloud, by default, will start automatically after every restart. In some instances, the CC background process can take up more system resources than required.
To fix the problem, you can disable the app from the Startup apps tab.
Adobe’s Creative Cloud desktop app is required for almost all the Adobe software, including Adobe Premiere Pro.
However, if the CC desktop client is causing system resource usage issues, you can disable it from the startup apps tab.
While you can still remove Creative Cloud using Adobe Creative Cloud Cleaner Tool, once uninstaller other Adobe apps associated with the tool will stop responding.
So, the best way to install Adobe Premiere Pro without Creative Cloud is to contact Adobe support and get a direct download link to install the app.
With the latest technological advancements in the domain of portable devices, entertainment is a very important part of the structure of our society.
Today we carry these devices everywhere we go, allowing us to keep in contact with our loved ones, and also access digital content on the go.
One important part of the way we choose to be entertained as a society is based on watching video clips.
When we want to relax after a hard day at the office, forget about issues for a while, we choose to connect to another environment. This environment can be filled up with movies, TV shows, music clips, etc.
Because of the increase in popularity for video content across the web, one of the most used formats is .MOV. This format was created originally by Apple.
It is important we are able to play our favorite MOV files without any interruptions. Because of corruption in the video files, sometimes you can’t play the video at all.
Video files can become corrupted for a variety of reasons – a broken header, loss of internet connectivity when the file was being downloaded, or even a power loss of your PC when the media is playing.
If you have any of these issues, read on to find out more about MOV repair software, that can repair your corrupted video files.
What are the best software tools to repair MOV files?
Premiere Pro is not a MOV repair software itself, but a complex video editing software with supported native video and audio formats for import.
The tool is compatible with the latest broadcast formats such as 3GP, 3G2, AAC, Apple ProRes, ProRes HDR, ASF, AVI, HEVC, M1V, M2T, M4A, M4V, MOV, MP3, MP4, MPEG, VOB, WAV, and WMV.
The MOV is a container video file format whose files are encoded with a particular codec. Premiere allows you to troubleshoot file formats and codecs in order to restore and play your corrupted video content.
Besides, you will enjoy a plethora of additional capacities while using this software such as automated tools to edit footage in any format, from 8K to VR.
Even more, get ready for seamless integration with Photoshop, After Effects, Audition, and Adobe Stock, and cross-platform functionality.
Let’s quickly go through its key features:
Auto Reframe (intelligent reframing whether it’s square, vertical, 16:9, or in 4K resolution)
Lumetri Color tools for curve adjustments
Accelerate audio mixing (Essential Sound panel)
End-to-end VR 180
Step-by-step, interactive tutorials covering basics to advanced techniques
Seamless integration with other apps and services (Photoshop, After Effects, Adobe Audition, and Adobe Stock)
Premiere Rush (an all-in-one app that works across all devices)
Adobe Premiere Pro
Adobe Premiere Pro is a great software option designed to tackle issues with corrupted video files.
Stellar Video Repair is an incredibly powerful tool that allows you to repair corrupted or broken MOV files, but it also offers support for MP4, AVI, MKV, WMV, FLV, DIVX, MPEG, etc.
This software has a very user-friendly interface and can repair these video file formats no matter how they got corrupted and also allows you to process more than one video at the same time.
If your corrupted file is damaged severely, Stellar Repair uses a sample file. This file has to be of the same size as the corrupted video, taken with the same device, and with the same format.
If all criteria are met, you can then repair videos that you normally couldn’t by the use of any other software. This makes Stellar Repair one of the best MOV repair software solutions.
After the repair process is completed, you can save the new video to your preferred folder on your PC, or even on a USB stick or CD.
Stellar Video Repair
Don’t know how to easily repair your MOV files? Stellar Video Repair specializes in solving video issues!
Those times when MOV videos are not playable due to the corruption of video files when downloading are no longer frustrating if you choose to use Wondershare Video Repair.
This tool doesn’t focus specifically on repairing broken MOV files, but it also lets you see a preview of all repaired data and has absolutely no limitation on the size and amount of video files for repair.
Moreover, that’s not only a top-notch data recovery software tool for MOV formats. You can get the same impressive results for MP4, AVI, MKV, MTS, M2TS, FLV, M4V, or 3GP files.
One of the best features of this software is the fact that it assures you that no data is lost in the repair process.
This will most likely give you peace of mind to know that the results will keep all the important information and discard the errors.
Key features that Wondershare Video Repair brings to the table:
Repairs faulty video files on Windows and Mac OS
It supports Standard Definition, Full HD, and 4K resolution files
Nifty 3-steps recovery procedure
Perfect results with no jittery files to worry about
Trial version for those who want to test it first
Wondershare Video Repair
Looking for a way to fix MOV files with ease? Let Wondershare Video Repair handle this task for you!
This software is specifically designed to tackle possible corruption issues on .MOV files. Remo Repair can repair your MOV and MP4 videos coming from a variety of sources – cameras, smartphones, etc.
Remo Repair MOV has a simple to understand and use user interface that offers you quick access to repairing your damaged files.
This software works by analyzing the video you provided, splitting it into an audio and video streams (to be able to identify errors), fixes the errors, and then joins them back together automatically into a healthy and playable MOV or MP4 file.
Here is a list of video file codecs that are supported by Remo Repair MOV:
Audio – sowt, RAW, mp4a
Video – avc1, mp4v, mjpeg
It is worth noting that the level to which this software can repair your corrupted file comes down to the model of the camera used to capture it, and the supported codec formats found above.
Yodot MOV Repair is another great software option that gives you the ability to repair video files – MOV, MP4, M4V.
This app has a good looking user interface that offers clear information and access to any of the app’s features.
This software automatically analyzes the file you submitted, splits it into separate audio and video tracks, analyzes them, and then fixes the found errors.
After the repair is completed, Yodot Repair automatically joins the audio and video paths together and offers you the final result: a perfectly working video file.
One of the best features of this app is that it allows you to repair High Definition MOV files created by HD cameras like GoPro, but also high-quality CCTV cameras, among others.
Having this ability allows you to repair videos at a professional level, and get incredibly crisp results, without losing any of the original content.
After the repair process is completed, Yodot allows you to preview your video file before saving it, making sure that your entire video is correctly repaired.
This software works with files created by different camera brands like Canon, Nikon, Olympus, GoPro, etc., and offers a user-friendly way of repairing your videos fast.
Even though it is obvious from the title that this is not actually a video repair software, VLC is an incredibly powerful multimedia player.
It can help you easily repair your corrupted video files – MP4, MOV, AVI, QTRM.
VLC also has support for almost all audio and video compression methods and formats, making it one of the most versatile media players on the market.
In order to use this great feature of VideoLan Media Player, you will need to go to Tools > Preferences.
In the new window that appears you will need to find and click on Inputs and Codecs, then scroll down to the bottom of the page, and find the Damaged or incomplete AVI file section.
If you click on that option, you will see a drop-down menu with a few more extra options. Choose Always Fix, and save your preferences. When you will play the video next, VLC will automatically try to fix it.
If your video is damaged severely and VLC doesn’t seem to fix the issue, it is recommended that you try one of the other software options presented in this article.
We all hate not being able to watch our favorite videos without any interruptions. It is important that we understand the options available on the market that can help to achieve these goals.
For this reason, in this article, we explored some of the best MOV repair software options, that can repair many other formats as well.
We would love to find out what your experience with using this type of software was, and if you have any recommendations. Please feel free to let us know in the comment section below.
Adobe Creative Cloud enables you to sync your files via a CC account. However, not all users need to sync files with Creative Cloud. So, some users might actually prefer to disable file sync for Adobe CC.
In today’s article we propose you some simple solutions to disable Creative Cloud sync, so keep reading.
How can I disable Creative Cloud sync?
1. Install the latest version
First, let’s make sure you have the latest functionalities, updates, and bug fixes. Then we go to making our settings changes from the next step.
First, launch the Creative Cloud app from the Start menu if it’s not already running.
Click the Creative Cloud icon on the system tray.
Go to the gear button at the top right of the CC app window, and select Preferences.
Select the Creative Cloud tab.
Then click Files to open the options shown directly below.
Thereafter, toggle the Sync On/Off setting off.
3. Delete the Creative Cloud Files folder
You can remove the shortcut for the Creative Cloud Files folder on the left Navigation panel of File Explorer with the PinCCF.zip, which contains an official registry file from Adobe. Download this PinCCF.zip file to a folder.
Open File Explorer’s window by pressing the Windows key + Ehotkey.
Then open the folder that includes the PinCCF.zip.
Click the PinCCF.zip to open it.
Press the Extract all button to open the window shown directly below.
Click the Extract button.
Double-click the unPinCCF.reg file in the extracted folder.
A Registry Editor dialog box will then open. Click the Yes button on the window to proceed.
Press the OK button.
RestartWindows after updating the registry with unPinCCF.reg.
Thereafter, the Creative Cloud Files folder will not be on File Explorer’s Navigation panel. Users can restore the Creative Cloud Files folder by double-clicking the rePinCCF.reg file.
So, that’s how you can disable CC’s file syncing and remove the Creative Cloud Files folder on the left of File Explorer. Note that the Creative Cloud Files folder might reappear when the CC app gets updated.
For any more questions or suggestions, reach to the comments section below.
Some of its features that make it really great is its high speeds, ultra-secure protection, ease of use, instant setup, and access across 94 countries on over 1700 global VPN servers, DNS/IPv6 leak protection, kill switch, and split tunneling.
However, VPNs sometimes experience a few troubleshooting issues here and there and ExpressVPN, owned by Express VPN International Ltd., is no different.
Some users of the ExpressVPN service may encounter DNS errors through leaks while running antivirus programs. Such DNS errors that come in form of leaks are caused by the antivirus making the user’s computer use another DNS server.
If you happen to get the ExpressVPN DNS error, even restarting your computer may not be the solution, whether short-term or not, to resolve the issues. Check out some of the solutions listed below and see if it helps.
How can I fix ExpressVPN DNS errors?
1. Ensure your DNS is set to Automatic
Sometimes, when you disconnect from your VPN, it doesn’t change back from static to obtain automatically. If this happens, you need to configure it to be set to automatic in the DNS category.
Here’s how to do this:
Right click Start and select Run command
Type ncpa.cpl and hit Enter
In your network connections window, right-click on your main internet connection and click Properties.
Select Internet Protocol Version 4 (TCP/IPv4)or Internet Protocol Version 4 (TCP/IPv6) (whichever is checked)
Click on Properties
Select Obtain DNS server address automatically
Click OK.
If you’re unable to do this using the above steps, try the steps below to achieve the same:
Click Start and select Control Panel
Go to Network and Sharing center
Click Change adapter settings
Right-click on your WiFi adapter
Select Properties
Go to IPv4 (Internet Protocol Version 4) and click on it to check the box
Select Obtain automatically for DNS
Do that for all your adapters if they’re like your WiFi adapter. Does this help fix the ExpressVPN DNS error? If not, try the next solution.
2. Change your VPN service
DNS errors are both annoying and also a danger to your privacy. You are either leaking data or you simply cannot connect to the Internet and the service becomes useless.
Thankfully, we live in a highly competitive world and there are options available all around us. One of the best options is Private Internet Access. This US-based VPN service owned by Kape Technologies, is a top contender and a privacy-focused VPN just like ExpressVPN.
Most, if not all of the features provided by ExpressVPN, can be found in PIA as well.
Here are the main reasons we recommend it:
No logs policy
Running their own DNS servers
Strong encryption methods
Over 3000 servers available
Unlimited bandwidth
Private Internet Connection
Make the switch to PIA which offers the same features at a lower price point thanks to this limited-time deal!
Microsoft announced the general availability for Azure Defender for IoT, a built-in dedicated security solution specifically for Internet of Things (IoT) and operational technology (OT) devices.
IoT security risks are on the increase among all organizations that employ smart technologies in their infrastructure. Yet, IoT security solutions are harder to find.
So the move is meant to fill a gap in the security layer of many large businesses in various industry domains, whose infrastructure includes smart devices, and who are also threatened by cyber-attacks.
Many IoT and OT devices do not support the installation of agents and are currently unmanaged and therefore invisible to IT and security teams. Without this visibility, it is extremely challenging to detect if your IoT and OT infrastructure has been compromised.
Moreover, traditional security software can’t be deployed for such infrastructures, leaving them even more vulnerable.
How to secure IoT/OT devices with Azure Defender
The now generally available Azure Defender for IoT uses CyberX-based agentless behavioral analytics and threat intelligence to detect possible threats.
Much like regular antivirus solutions, this is what Azure Defender for IoT can do for your network:
Detect threats by analyzing the specialized protocols, devices, and machine-to-machine behaviors found only in IoT/OT environments
Make a complete inventory of all IoT/OT assets
Analyze diverse industrial protocols to identify device details including manufacturer, type, serial number, firmware level, and IP or Media Access Control (MAC) address
Quickly identify the root cause of operational issues such as misconfigured devices
Identify network vulnerabilities (unpatched devices, open ports, unauthorized applications, and unauthorized connections)
Detect changes to device configurations, programmable logic controller (PLC) code, and firmware
Prioritize fixes based on IoT protocols
Catch zero-day malware and similar exploit attempts
Azure Defender for IoT
Complete security solution for IoT and OT environments, with flexible deployment options and powerful threat-detection capabilities.
A great advantage of Azure Defender for IoT is that it uses a flexible deployment model including in environments protected with the Azure Sphere or Azure Sentinel technologies, with no changes over the existing infrastructure.
Moreover, network admins can modify the source code to further customize the agent to the organization’s needs. The tool’s impact is minimal, with no OS kernel dependencies.
Note that Azure Defender for IoT differs from the regular Azure Defender product, which is designed for general cloud environments.
Microsoft offers plenty of documentation for enterprises to get started with Azure Defender deployment and further stay informed with the latest updates.
If you have in mind the idea of finding an amazing drawing software tool for Windows XP, don’t hesitate to take a closer look at Adobe Photoshop CS6.
Just a Creative Cloud subscription is required in order to get access to a variety of advanced tools that can easily transform all your images with the power of AI.
Virtually unlimited layers and thousands of custom brushes are part of the package, not to mention all those unique effects that can polish any drawing project.
Adobe Photoshop
The creative power of Photoshop CS6 could be on your hands. Just don’t hesitate to give it a try!
If you are looking for a versatile, unique software that will help you bring that distinct touch to your drawing, then Clip Studio Paint is a perfect choice.
This app is highly customizable and it gives you the liberty and support to create the exact brushes and tools you need, in the manner that will best fit your requirements.
Moreover, productivity will not be an issue, since this software will work for you and not against, enhancing your full creativity.
Additionally, if you need to stop working, you’ll be able to continue it from where you left it off without much effort.
Clip Studio Paint
Stay productive and create unique works of art with the help of this versatile and powerful app.
Corel Painter is a digital art software that aims to stimulate as precisely as possible the appearance and feel of traditional painting or drawing.
It works great with Windows XP and Mac as well, which makes it the number one choice for most professionals.
This fantastic app comes with the largest selection of natural-media brushes, canvas texture, and many more. You can achieve painting and drawing perfection with this software.
The interface is modern, based on powerful in app learning system, and the Photoshop compatibility certainly makes it easily to use among the other apps from your portfolio.
Corel Painter
Advance your creation skills and achieve perfection with this complex and reliable tool right away!
Krita is another great drawing software tool that will help you create wonders; as expected, it works perfectly with Windows XP.
This app is created by artists who try to make this tool available to as many people as possible.
The great thing about Krita is that although it’s open source, it comes with some amazing features, it’s updated constantly, and you can see quick bug fixes.
You can create illustrations and comics, concept arts or basically anything else your creativity leads you to since Krita has all the important features integrated.
Krita
Krita is an amazing drawing tool created for illustrators, concept artists, and comic book creators. Ready to give it a try?
With an approach that helps creative individuals work on their projects with all the support they need, Autodesk Sketchbook definitely stands out from the crowd.
The interface and the design of this app are truly elegant and you’ll lose yourself easily in a world of creativity.
The drawing engine supports 100mpx canvas while still maintaining the feeling of traditional drawing.
Additionally, if you feel inspired by a photo, you can scan it with your phone and then import it in the application as a sketch, with a transparent background, and all is left to do is to start coloring it.
Autodesk SketchBook
Tutorials, multiple features, elegant design – these are just some of the things this amazing app will offer.
These are our recommendations for the best drawing software for Windows XP and we hope the information we gathered in this article will help you choose the one that best fits your needs.
We would love to hear about what drawing software you are using in the comments section below.
Microsoft Teams may have become one of the most popular collaboration tools in just a couple of years, there’s still some room for improvement for the desktop app for Windows and Mac, which is built on the Electron platform. Since launch, Microsoft Teams users have been complaining about high memory usage on the desktop, especially when multiple apps in Teams are running simultaneously.
Fortunately, Microsoft is aware of these performance issues and the company is working to optimize the resource usage of Teams on the desktop. The company has confirmed on the Teams UserVoice forum that it’s actively investigating these performance issues, and substantial improvements are coming for Windows and Mac users.
“Improving performance across the board remains a topmost priority for us. We acknowledge there is more work to do,” a member of the Microsoft Teams engineering team wrote earlier this week. There’s no ETA available as to when these improvements will eventually go live, but the team will keep listening to user feedback to investigate performance problems in Teams.
Microsoft Teams also works well on the web, though some video conferencing features such as the new 2×2 gallery view were available first in the desktop app. Many users also prefer to have a native app that can operate in its own window, use native OS notifications and be pinned to the taskbar, and Microsoft Teams on the desktop will also soon allow users to add personal Microsoft accounts and switch between work accounts as well.
Do you prefer using the Microsoft Teams via the desktop app or the web app on your PC? Let us know in the comments if you’ve also encountered performance issues when using the desktop app.
Adobe Photoshop is one of the most popular tools for editing images and pictures. Users have a lot of reasons to prefer Photoshop to other similar tools. It is relatively simple to use and has many features.
Also, one of the main reasons is reliability. In other words, people trust this image-editing tool to offer an issue-free experience to get their job done.
However, this is not always the case. Quite a few people encountered the Could not complete your request because of a program error message when trying to open Photoshop.
This is a major issue that makes Photoshop impossible to use. Luckily, there are some solutions available and today we will show you what to do if you encounter this problem.
What to do if Photoshop could not complete your request?
1. Download the most recent Adobe Photoshop version
As a quick reminder, Adobe cherishes its customers and releases updates for all its products on a regular basis.
If you are using an outdated Adobe Photoshop version, then don’t act so surprised to encounter such errors.
They don’t actually appear out of the blue, so it’s time to take action. Our advice is to download the latest software version of Adobe Photoshop.
After a quick install, the image-editing tool you enjoy all the time should work properly again.
2. Unlock the library folder
For some reason, users reported that the library folder is locked. A recent update might have changed this option. Don’t hesitate to unlock the library folder to fix the problem.
3. Change the file type to PNG
If the solution above didn’t work, try changing the file type to PNG. PNG files might work better. This way you will avoid encountering the same Could not complete your request because of a program error message.
As we said at the beginning of this article, this is a major problem in Photoshop. Users can’t do anything in Photoshop, which means their work is halted.
If you work in the industry of standard motion graphics and composition software then most probably you are familiar with Adobe After Effects, Adobe Illustrator, Adobe Lightroom, and more.
Adobe After Effect is popular among graphic and motion designers, animators, or 3D artists thanks to the software’s ability to create fantastic animations.
The Creative Cloud is the subscription system through which you can download the app, but there is also the option to download it free, as an independent app.
Downloading Adobe After Effects to your PC, without the creative cloud is incredibly simple and we will explore exactly that in this article.
How can I download Adobe After Effects as a single app?
To start with, you can get Adobe After Effects as a 7-day trial, to see how it works and if it best suits your needs.
When it comes to the available features, there is no difference to what is available in the trial version as compared to the paid ones.
Adobe After Effects
Create everything that your imagination can envision with the help of this versatile tool features. Try it out now!
What steps do I need to take for the installation?
In order to install the free trial of Adobe After Effects you will first need to have an Adobe ID.
Setting up your account in order to get the ID is easy and simple. You will need to access the Adobe Account page, click ‘Create Account’ and follow the instructions.
Next, all you need to do is click on the Free trial option and simply follow the instructions. Another thing to pay attention is that you will be required to enter the credit card details.
Don’t alarm, as long as you cancel your account within the trial period, there won’t be any charge made on your credit card.
Once you installed the program on your device, don’t forget to have a look at the Adobe After Effects tutorials to help you easily get started with the software and enhance your skills and level of know.
Similar methods can be used for other Adobe products as well, so if you’re looking to install Adobe Lightroom without using Creative Cloud, check out this article to learn more about how to do it.
The Graphics Interchange Format a.k.a GIF has been one of the most exciting ways of sharing animated pictures. The support and the portability for the image format lead to the popularity of the GIF.
Cute Cat, Crazy memes, and what not, GIF has almost evolved as an impromptu language much like the emoji.
Despite supporting the GIF file format from Windows XP, the recent versions of the operating system don’t support GIF files on the native picture viewer.
In all likelihood, the GIF pictures will be set to open in a browser and that’s not exactly helpful if you want to see a bunch load of animations.
At this juncture, Windows is yet to add support for GIFs but in the meanwhile, one can check out the super cool third-party viewers that will bring GIF support to Windows 10.
The list is curated to help you get a hold on the third party GIF viewer for Windows 10.
Adobe Photoshop is the core software for each artist, photographer and graphic designer as it provides a wide range of tools for photo editing.
With Adobe you also can create spectacular GIFs that can be used in marketing, advertising, and, why not, for posting your personal experience on social media.
This tool allows you to create GIFs from a sequence of photos in an easy way by using the Create Frame Animation tab, where you can find it in Window > Timeline > Timeline panel.
You can compose from individual layers powerful animation frames that can be exported as a GIF.
Moreover, Adobe has a wide range of customized brushes that can add originality to your digital creatives, so you can create 3D text animation GIF or hand-lettering designs.
As well, all drawing tools will give the impression of a new dimension of your work, so you will not be bothered by experimenting with all Adobe Photoshop presets.
Adobe is an advanced software for professional users, but it has a lot of learning materials for those who want to experience their creativity.
Adobe Photoshop is part of Creative Cloud, so if you can combine different apps in order to create the best GIF animation ever.
Adobe Photoshop
Create, view and edit any of your GIF with the industry-leading software for photo editing.
File Viewer Plus is a universal file viewer for Windows that can open and display over 400 different file types.
The Graphical Interchange Format files are supported by this viewer. It allows you to open, view, edit, save and convert GIF files as JPEG, PNG, TIFF, BMP, JPEG2000.
I was surprised by the straightforward interface that allows you to open files quick and easy, view metadata and file properties or edit images.
This is a good alternative to expensive software that you would need to buy in order to view over 300 file formats. The best thing is that you can try it yourself for free by downloading the fully-functional trial.
Once you’re happy to buy it, you won’t have to bother with subscriptions or recurring fees. It’s all yours, and the flexible license allows you to install it on two computers.
FileViewer Plus
Browse, view, edit, and convert your GIF files with one easy-to-use application.
To be honest, I had never used the FastStone Image Viewer until now. The Interface is pretty advanced and it does offer a comprehensive set of features.
The left pane comprises of a file directory tree and its here you can open the desired folder.
The good part, however, is that the images are displayed as a thumbnail which is useful for previewing the file without actually opening it.
The editing options were not that impressive but one can still zoom in, zoom out, and can switch between different images.
If you are on a quest for the most simplistic GIF viewer then theInVieweris one of the best choices out there. The best part is that it still offers the quintessential features despite being employing a simple UI.
Apart from GIF animations and other image formats the viewer also supports popular audio and video formats including AVI, MP4 and MPG.
The Video player comes with the usual set of controls and also offers rudimentary zoom and video playback control features.
Thankfully the application doesn’t hang even while viewing heavy GIF files and neither does it gobble up the computing resources.
The Irfan Viewer has been topping the popularity charts for quite some time. I personally don’t find the Irfan Viewer to be very intuitive but again it gets the job gone when it comes to GIF.
Additionally, Irfan Viewer is accomplished enough to handle nearly all the image file formats thrown at it.
The usual set of controls include zoom/in/out and image setting. On the downside the viewer doesn’t offer rotating, resizing, color correction tools.
However, it makes it by offering a feature that lets you extract frames from GIFs.
I found this GIF Viewer whilst browsing around in Windows Store. The GIF Viewer is by far the most comprehensive viewer I have seen and it is available in both free and paid (pro) version.
With the GIF viewer, one can view a series of files as a movie and the Pro version offers functions like play/pause, resizing, single step forward, or even backward.
The only downside though is that the viewer can get pretty sluggish at times but again this is not something that happens that frequently.
LaTex allows its users to create both technical and scientific documents and it’s been recognized as the standard for the publication of scientific documents.
Finding the best drawing software for LaTex could be tedious and time-consuming work, but thankfully you don’t have to worry about that anymore since we have tested the available software for you.
If you are looking for the best drawing software for LaTex make sure to keep on reading this article and see what are our recommendations.
What are the best drawing software tools for LaTex?
Adobe Illustrator is our number one choice for recommending it as the best software that can be used for LaTex.
You can do all the drawing graphs in Illustrator and its compatibility with LaTex is highly recognized. Using the fonts or the symbols that you need won’t be an issue.
Additionally, you can import the needed fonts into Adobe Illustrator or you can simply save them as a PDF and add them afterward.
Most professionals use this program thanks to its advanced features, constant updates, and complex available tools.
Adobe Illustrator
Use this versatile and complex tool for all your LaTex projects to bring them to the next level. Try it out now!
Our last recommendation, but definitely not the least will go to Clip Studio Paint. This is another powerful software to use with LaTex and rest assured that it deserves all your attention.
The illustration and design features allow you to create the exact design or vector that you need for your projects.
With Clip Studio Paint you will be able to draw LaTex reflections and rim light effect easily, and with perfect precision.
The incorporated tools available such as rubber, brush, and color palette are highly customizable also, in order to give you the liberty of setting the desired characteristic of the used tools.
Clip Studio Paint
This versatile tool is designed to help you create complex projects. Eager to give it a try as well?
CorelDRAW is a drawing software tool that comes with cutting edge typographic technology that will not make you regret choosing it.
The software comes with an impressive library of tools that are specially designed to create digital art and complex graphic projects.
The powerful vector illustration features will help turn any basic shape and line into a complex work of art. Moreover, you can add effects with tools such as Contour, Envelope, Blend, Mesh Fill, and many more.
In the font management section you’ll find a multitude of fonts, and you can use other fonts from the Corel Font Management without even needing to install them.
CorelDRAW
That’s the most powerful and reliable vector illustration tool to use on your projects. Ready to give it a try?
The Medium, the much-anticipated psychological horror game from developer Bloober Team is now available on Xbox Series X|S consoles, PC, and Xbox Game Pass. This is the first Xbox Series X|S exclusive game of 2021, and it’s quite a looker on the Series X which has ray-tracing effects the Series S version of the game currently lacks.
The game was initially expected to be released last month on December 10 alongside Cyberpunk 2077, but the Polish developer delayed it to January 28 due to the COVID-19 pandemic, and to avoid a situation where The Medium would be overshadowed by CD Projekt Red’s much-hyped game. We all know what happened ultimately with Cyberpunk 2077, which still sold very well despite the bad buzz, but Bloober Team probably made the right call by delaying The Medium to late January.
The Medium is a third-person game where you play Marianne, a medium who’s able to see an alternate reality called the spirit realm. This dual-reality gameplay is one of the reasons why The Medium is a next-gen only game, as the aging Xbox One hardware probably isn’t powerful enough for this unique gameplay that plays out across two worlds displayed at the same time.
Bloober Team previously earned praise for its previous horror games including Layers of Fear and Blair Witch, but The Medium received pretty mixed reviews so far, with several testers pointing out the convoluted story and some pretty dated gameplay mechanics. We’ll go hands-on with the game later today, so stay tuned to OnMSFT for our first impressions coming tomorrow.
VHS (Video Home System) cassettes were once the standard for videos during the 1980s. However, they started to decline in the 1990s with the advent of DVD and are now obsolete.
Do you have some old recorded VHS movies gathering dust that need converting to digital DVD format? If that’s the case, there are three ways you can convert antiquated analog video movies to DVD.
First, note that old movies does not mean copyrighted films. It’s illegal to copy copyrighted VHS films to DVDs. However, it’s fine to convert your own recorded VHS movies to a digital format.
We have compiled a list of solutions for you to be able to convert old movies to digital format, so keep reading!
How can I convert old movies to digital format?
1. Use Adobe Premiere Pro
If you are wondering how to convert old movies to digital, then you should know already that Adobe Premiere Pro is an industry-leading timeline-based video editor and converter.
This amazing software can be used to do pretty much whatever you want with a video file. In the case at hand, the program can even be used for digitizing analog video.
More so, the program can be used to compile and edit videos from scratch, add special effects, filters, soundtracks, and more.
Adobe Premiere Pro
Your memories on the old tapes are now saved. Adobe Premiere Pro lets you convert old movies to digital in just a few steps, so try it out!
How do I digitize analog video with Adobe Premiere Pro?
Connect the analog device’s video and audio outputs to the digital device’s analog inputs.
If the digital device is an external digitizer, deck, or camcorder:
Connect its FireWire or SDI port to PCs.
If the third-party digital device is a digitizer with device controls:
Connect its device control port with the same type of port on the analog device.
Turn on the analog source and the digitizing device.
If the digitizing device is a camcorder, set it to VTR, VCR, or Play mode.
Set the input selection control on the digitizing device to the proper analog input.
Now that you’ve connected the device properly, it is time to go to the actual conversion phase:
Start Adobe Premiere Pro.
When the Welcome screen appears, do one of the following:
To start a new project using a capture card:
Click New Project.
Select the capture card’s preset from the Load Preset pane.
Click OK.
To open an existing project using a capture card:
Select an existing project that was set up with the capture card’s preset.
To start a new project using an external device, such as a camcorder or deck, to digitize:
Click New Project.
Select a DV or HDV preset that matches your target television standard and format.
Click OK.
To open an existing project using an external device, such as a camcorder or deck, to digitize:
Select an existing project that was set up with the correct DV or HDV preset.
Now that you’ve set up Adobe Premiere Pro, it is time to choose what to do with the old video:
Go to File, and select Capture.
In the Capture panel, carefully check the settings on the Settings pane.
If you need to change them, click Edit.
Do one of the following:
If the digital device offers no device control:
Cue up your source using the analog device’s own controls.
Press Play on the analog device.
Click the Record button in the Capture panel.
If the digital device offers device control:
Capture or log footage using the Capture panel’s controls, as you would with a digital source.
2. Take the video to an alternative VHS-to-DVD conversion service
If you have just one or two VHS videos to convert to DVD, it’s probably better to take them to a VHS-to-DVD conversion service such as those provided by Walmart.
Walmart will convert a two-hour VHS video to DVD with chapter menus and music video highlights at a good price. You can find further details at this web page.
However, there are plenty of alternatives to Walmart, like Southtree or Costco.
As you’ll still need some extra software and hardware to convert an old movie yourself, the conversion services might be a better alternative.
3. Convert the VHS movie to disc with a VHS-DVD combo player
It might be more economical to convert lots of VHS videos (perhaps 10 or more) to disc yourself with a VHS-DVD combo player.
VHS-DVD combo players play both cassette videos and DVD, and you can copy a VHS video to DVD with one of those. Combo players are also in obsolescence, so they’re getting cheaper.
Converting a VHS video to digital versatile disc is straightforward with a VHS-DVD combo player. Just insert the VHS cassette and a blank, rewritable DVD in the VHS-DVD player.
Then press the record button on the DVD side and the play button for the VHS video – or the combo player might have a direct dubbing option.
That’s all there is to it usually, but some VHS-DVD combo players might have more unique settings. So check the manual first before converting VHS to DVD.
4. Convert the old movie with a VHS to DVD software
VHS to DVD software that comes with a digital-to-analog converter is an alternative to VHS-DVD combo players.
That software enables you to convert VHS to digital format by connecting a desktop or laptop to your old VHS player with a digital-to-analog converter like the one shown directly below.
The best VHS to DVD programs will include a video editor, and options to burn the captured video to disc.
As such, you can enhance the footage with the software by removing some content from it and adding transitions and other effects.
Diamond One-Touch Video Capture VC500 for Windows and Mac is one of the best VHS and DVD programs for Windows, and it comes with software to burn videos to DVD.
This is how you can convert an old movie to digital format with this software:
First, connect your desktop or laptop to the VHS player with the digital-to-analog converter cables that came with the software.
Insert the USB end into the laptop’s or desktop’s USB slot, and the red, white and yellow RCA cables to the matching colored outputs on the VCR (videocassette recorder) player.
If your VHS video is dusty, dust it down, and insert the cassette in the VCR player.
Open your recording software in Windows and press its recording option.
Next, play the VHS tape on the VCR player.
When the video finishes, stop the recording software.
Then stop the video on the VCR. Now your old movie is a digital video!
Insert a blank, rewritable DVD in your laptop’s or desktop’s disc drive, and you’ll need an external DVD drive if it doesn’t have one.
You can add the captured video to the disc with the software’s DVD burner tool for imported files.
However, you could also use software such as Windows DVD Maker for adding the video to the disc.
So that’s how you can convert old movies to digital format for playback on DVD. When you’ve converted the videos, you can toss away those dusty VHS tapes that had piled up and watch the movies in digital format.
Then you can also add the video clips to YouTube and share them on social media sites, which is another big advantage of copying them to Windows.
One user reported a similar bug with Microsoft Office Picture on the Microsoft Community forum:
Recently installed Office on new pc. When I open jpg with Picture Manger I can crop, resize etc, however I am unable to save these changes and the jpg reverts to it’s original state.
This error can occur if the image properties are set to read-only or if there is a glitch in the Picture Manager. Continue reading to find out how to fix this issue in Windows 10.
What to do if Windows Photo Viewer can’t save the changes?
1. Try an alternative tool
Since the Microsoft Office Picture Manager app allows users to view, edit, and save pictures, might as well replace it with a program that is known as the best at doing that.
If the Microsoft Office Picture Manager keeps acting up, then you might as well try an alternative software solution, in the case at hand that being Adobe Photoshop.
This raster-based image editor is probably the most well-known of its kind in the world, and can now be tested out for free for 7 days as well.
Adobe Photoshop
Can’t save the changes during image editing? This is never the case with Adobe Photoshop, so try it out!
Open File Explorer and navigate to the image path that you are trying to edit and save.
Right-click on the image, and select Properties.
On the General tab, check the last section named Attributes.
Uncheck the Read-only box if it is checked.
Click Apply, and OK to save the changes.
Reopen the image in the Picture Manager and check if you can make and save edits.
When the file properties are set to read-only, Windows will prevent the users from making any changes to the file. In this case, you can’t make edits and save.
If the read-only attribute is automatically applied to all the photos imported from a particular source, then try the following:
Assuming you are importing photos from your digital camera, connect the camera to your Windows computer.
Instead of dragging and dropping the files onto your computer, select Import pictures and videos using Windows.
You can access it by right-clicking on your connected device from the File Explorer.
This seems to be a glitch, but should fix the issue temporarily.
It’s good to mention that this is a standard event that can occur in any situation when you import the image from a third-party app, but now you also have the solution to solve it quickly.
3. Repair Picture Manager installation
Repair from the Control Panel
Click on Start, and type control.
Click on Control Panel.
Go to Programs, and select Programs and Features.
Choose the Microsoft Office app, and click on the Change button.
Picture Manager is available on Microsoft Office 2010 and earlier version only.
These steps don’t apply to Office 2013 and newer releases.
Select Repair, and click on Next.
Check the Detect and Repairerrors in my Office installation box, and click on Install.
Once the repair is finished, click OK.
Launch Picture Manager and check for improvements.
You can’t open Control Panel? Take a look at this step-by-step guide to find a solution.
Repair using Microsoft Office disc (Windows XP / Windows 7)
Launch the Microsoft Office Picture Manager app.
Click Help, and select Detect and Repair.
Check the Restore my shortcuts box. Make sure you uncheck the second box.
Click Start.
If your PC prompts you to insert the disc of Microsoft Office, insert the disc.
Follow the on-screen instructions and let the troubleshooter fix any issues with the app.
Reopen the Picture Manager app and check for any improvements.
4. Picture Manager error some files could not be saved
Open File Explorer, and navigate to the folder where the file is saved.
Right-click on the file, select Open with, and choose MS Paint.
On the Paint app, click on File, and select Save as.
Save the file in PNG format.
Now open the same file in Picture Manager, and make the edits.
The Microsoft Office Picture Manager not saving edits error is caused due to a read-only attribute being applied to the picture you are trying to edit.
If not, try running the repair tool to see if that resolves the error. In nothing else works, you might have to uninstall and download Microsoft Office Picture Manager again.
Did these solutions help you solve the problem with Windows Photo Viewer can’t save the changes?
If you have any other questions or suggestions, feel free to leave them in the comments section below, and we’ll be sure to check them out.
Buffering is probably the worst tech issue regarding videos on the web. Software for avoiding buffering lets users stream HD videos smoothly and significantly reduces buffering times.
Such tools will make sure that you are able to enjoy accelerated videos without any interruptions.
There are lots of programs that help avoid buffering while streaming videos and we’ll show you five of the best ones along with their sets of features to help you make your decision much more comfortably.
SPEEDbit Video Accelerator eliminates YouTube buffering and allows you to watch smooth online videos without getting frustrated from 5 to 5 minutes due to interruptions.
On this program’s official website, you’ll also see a video featuring video expert Dave Kaminski who tested an HD YouTube video on a faster than 20MG connection.
You will see that it got stuck 25 times but when he used the SPEEDbit Video Accelerator, the same video played flawlessly.
Check that video out and see more great features included in this program below:
SPEEDbit Video Accelerator lets you stream HD videos quickly with significantly reduced buffering times
You will be able to download your favorite iTunes content faster
Using this program, you will be able to enjoy accelerated videos from YouTube and 165 sites such as AOL Video, Break, Facebook, Yahoo Video, CNN, MySpace, Dailymotion and more
All you have to do is install the software and enjoy a new higher quality of watching videos online
SPEEDbit Video Accelerator configures itself automatically in order to be able to offer you the best web video experience available
The software works with your web browser to stream web videos from various sources at the same time, and it allows you to enjoy improved download speeds and video playback
Although not a fully-fledged anti-buffering software, this tiny Chrome extension will turn out very useful in reducing buffering, so we decided to add it to our top 5 picks.
Hola Video Accelerator speeds up your web browsing while saving your data, reducing buffering, and unblocking censored sites.
All you have to do is head to Chrome’s official website and get the extension to enjoy HD online streaming without buffering.
Take a look at more exciting features that you’ll be able to enjoy if you decide to install Hola Video Accelerator:
You will be able to enjoy smoother videos with less buffering, and you can watch HD flawlessly
This extension will also help with reduced data costs, saving data usage by 20-30% over time
It provides faster Internet with quicker web surfing and downloads
Using Hola Video Accelerator, you can also enjoy uncensored Internet because it comes with an Unblocker VPN service
Turbo Internet Accelerator is another software that offers you a way to speed up online video streaming. You will be able to watch videos from YouTube and other websites without issues.
This program helps you to use your Internet connection to its full potential.
You will get a 14-day free trial, and if you decide that you like Turbo Internet Accelerator and want to get the full version, you will also get free updates all the time.
Check out more features worth mentioning about this software:
The software speeds up online videos faster than ever, and it works with all online video websites.
Using this program, you will never have to worry about buffering while watching online videos.
Turbo Internet Accelerator also optimizes your Internet connection for each website.
It speeds up all download operations from the web.
The program’s interface is user-friendly and really easy to understand even for beginners.
The program’s download manager is one of the fastest and easier downloads managers ever.
Turbo Internet Accelerator is 100% compatible with all popular browsers including Internet Explorer, Mozilla Firefox, Opera, Google Chrome, iTunes, and more.
You will be able to download multiple files at the same time, pause, and resume the video.
Turbo Internet Accelerator comes with multi-language support.
With Leawo Video Accelerator, you can download online videos and watch online videos without buffering-related issues.
This is a great all-in-one free online video downloader, video accelerator, browser, video manager and video converter that will improve your whole online video experience.
Leawo Video Accelerator will efficiently speed up the video buffering and loading allowing you to enjoy online videos seamlessly and smoothly without any hiccups.
Besides functioning like a professional video accelerator that facilitated high-quality video enjoyment, you will see its various additional features and functions if you head over to its official website and take a closer look.
You can get a free trial and then buy the full version of the program.
Just check out its best features below:
Leawo Video Accelerator lets you download videos from YouTube, Facebook, Dailymotion, MySpace, and more.
You will be able to enjoy accelerated video loading for smoother online video playback with a built-in FLV player as well.
Using this software, you will get the opportunity to convert online videos to more than 140 video formats for various payers.
You can manage your downloaded videos effortlessly.
SpeedyiTunes is able to smooth your downloads and accelerate the web videos eliminating buffering.
With the help of this software, you will be able to cut down more than half of the waiting time of movies, Flash videos, music, and so on.
SpeedyiTunes not only accelerates your streaming online but also ordinary file downloading.
The software is really effortless to use, and all you have to do is download it from its official website, and install and run the program. It is 100% free of any malware, spyware, and viruses.
SpeedyiTunes is one of the most accessible solutions to enjoy entertainment media smoothly, free, fast and also legally.
Check out its best features listed below:
Using this software, buffering will stop being a problem while you are watching videos online.
SpeedyiTunes can also automatically record online mp3 while you’re listening to it and this makes it the easiest way to get loads of free music for free and legally.
The program also includes an FLV downloader, and it automatically records flash while viewing.
SpeedyiTunes is a video converter as well, and after it downloads your video, it will automatically add it to your iTunes library.
These are our top picks for software that’s able to avoid buffering and no matter which your option will be, we can guarantee that you’ll be able to enjoy HD videos online without these issues.


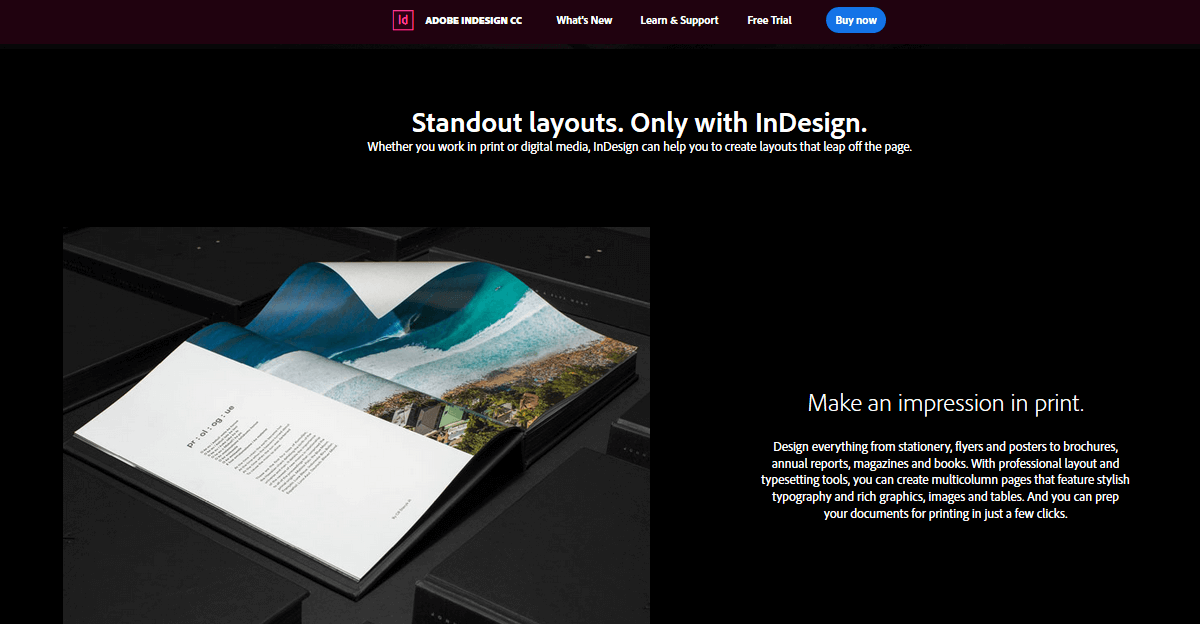



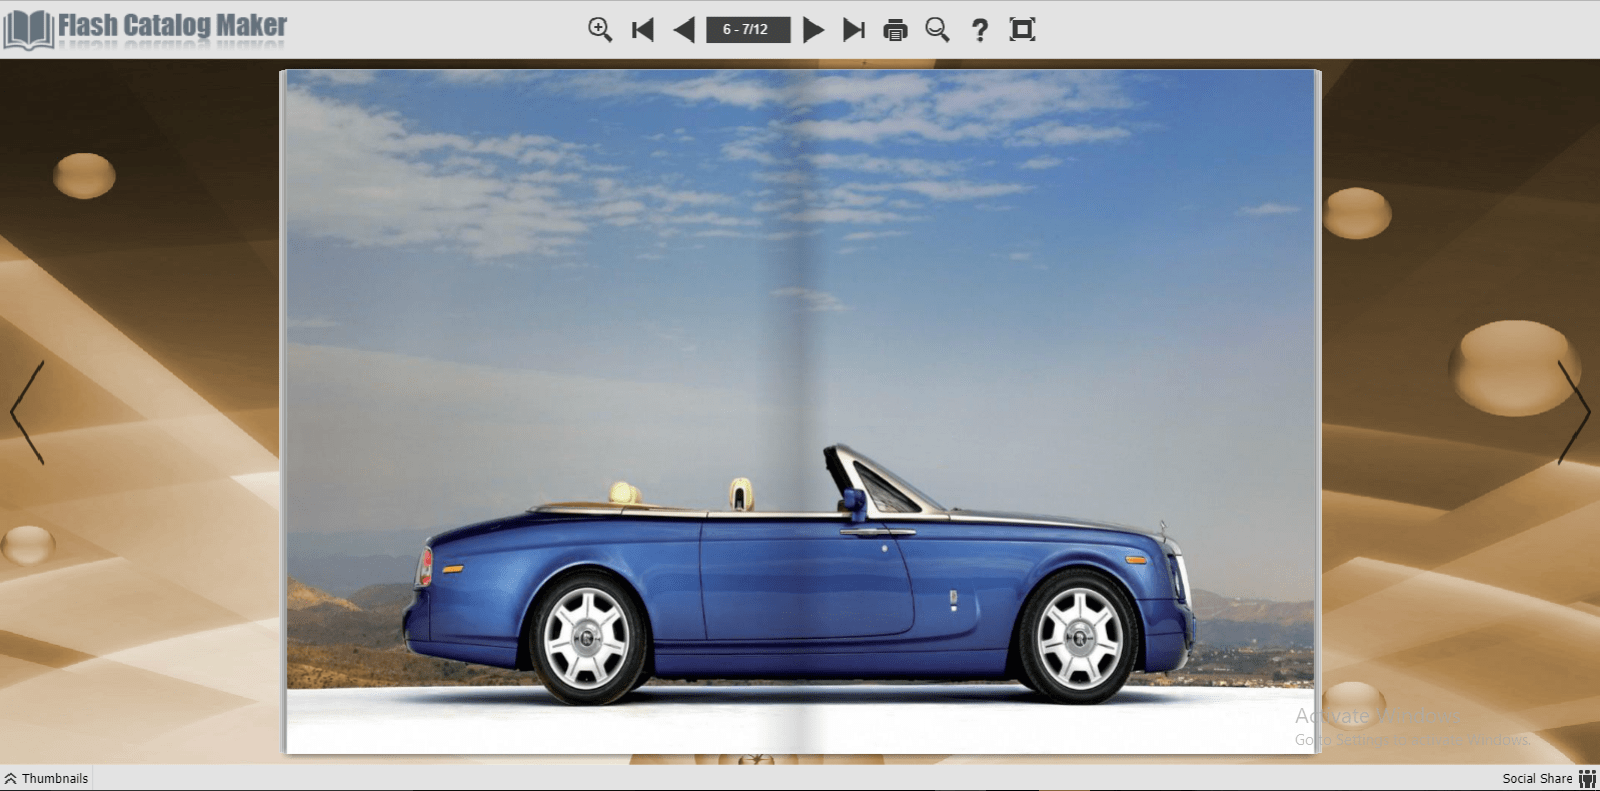



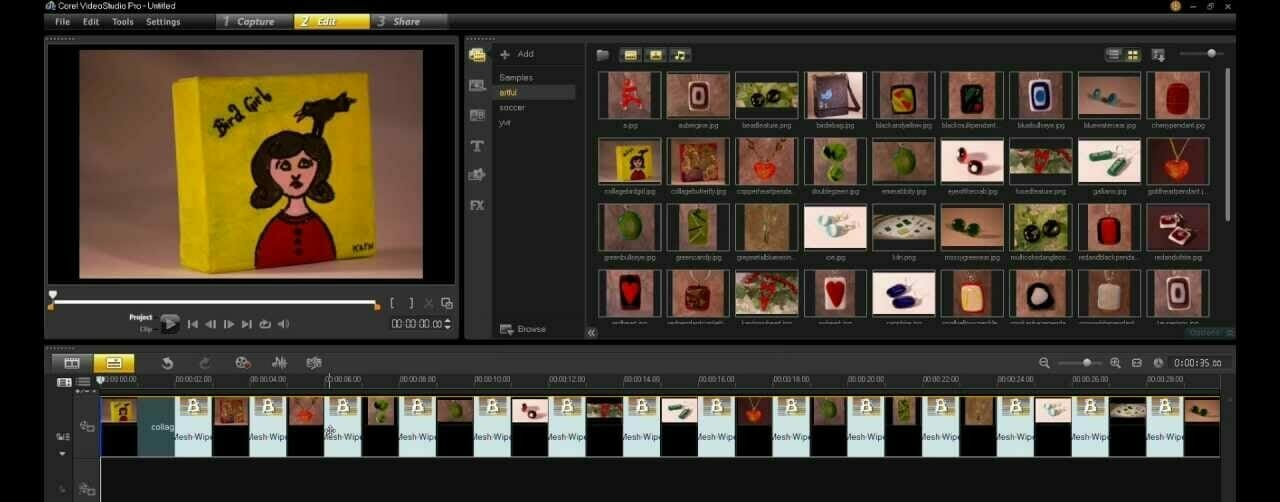











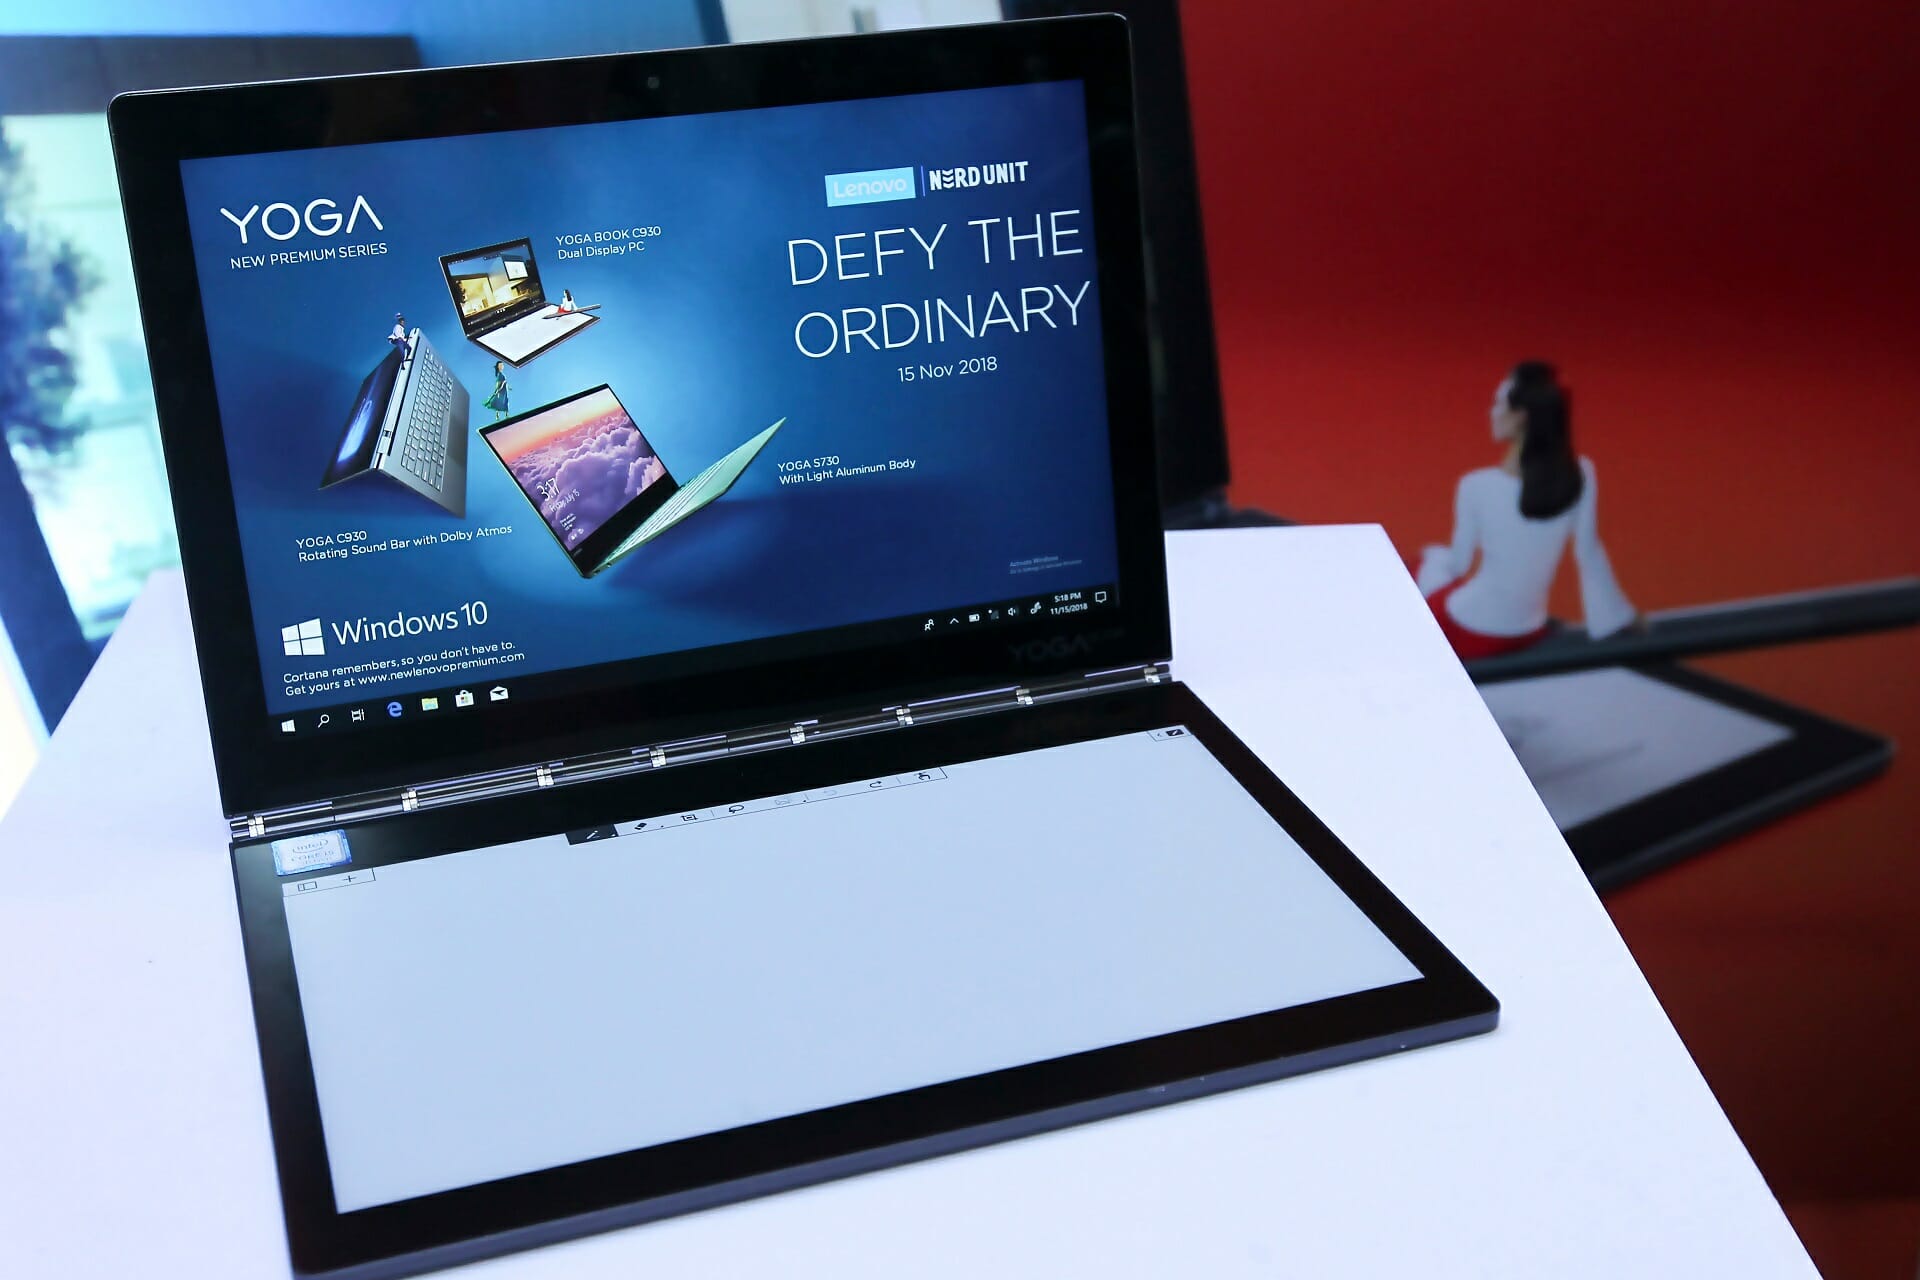
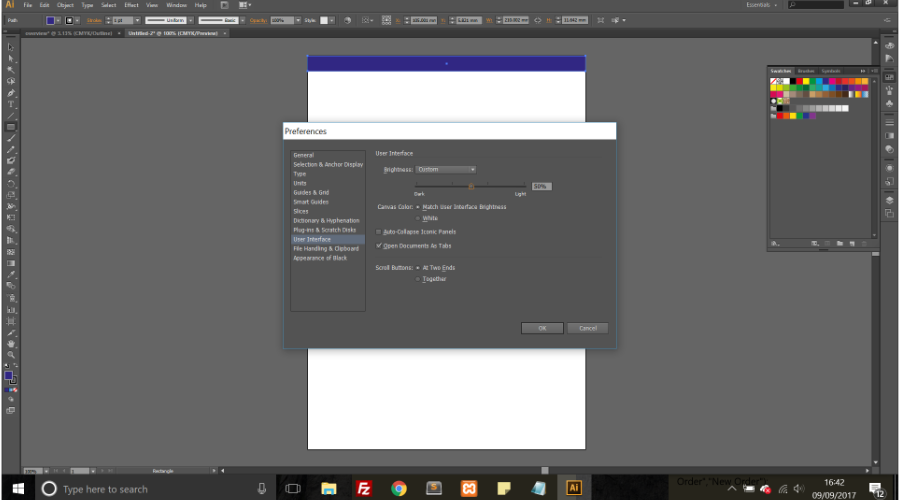

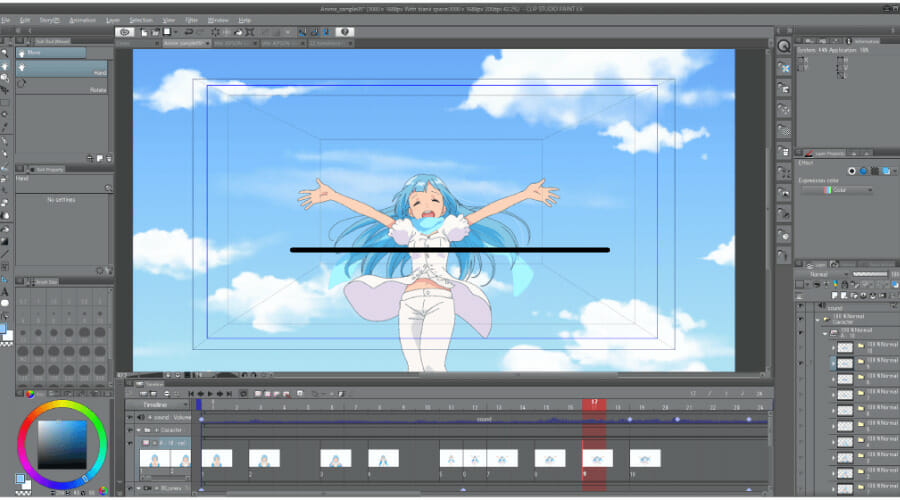



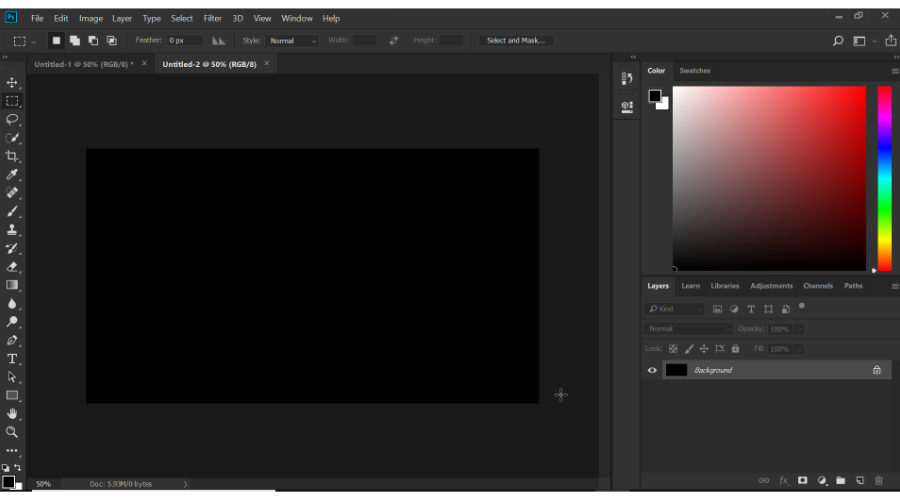
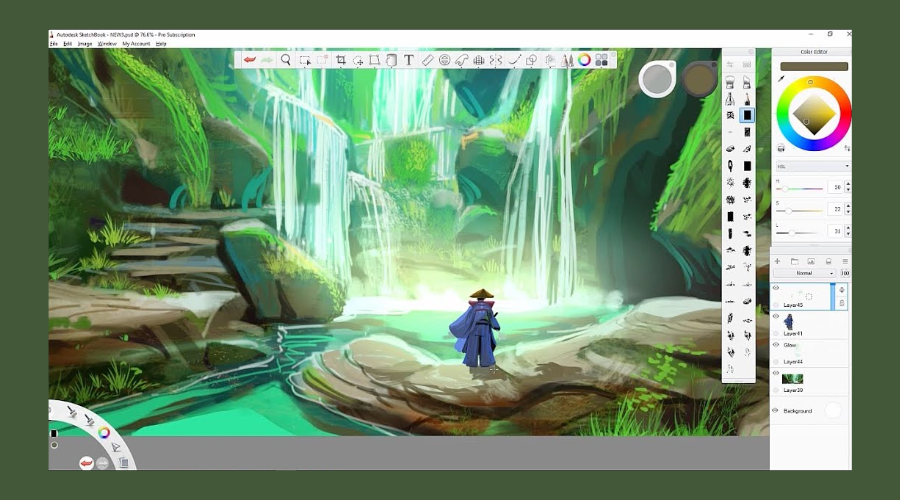


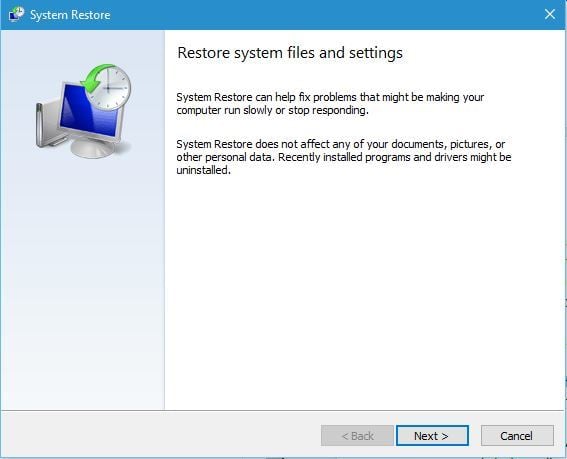








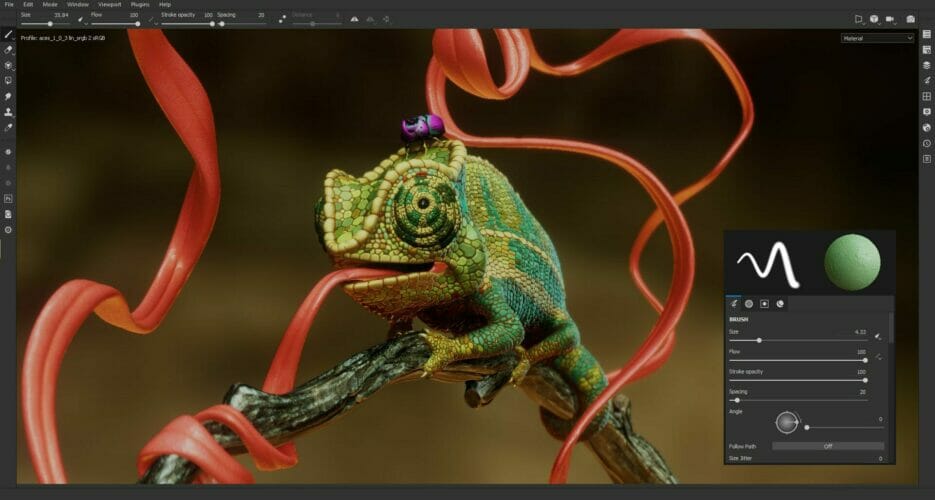



![Laser Cutting Software for Mac & Windows [2026 Updated List]](https://windowsreport.com/wp-content/uploads/2020/05/5-best-laser-cutting-software-for-Windows-Mac.jpg)






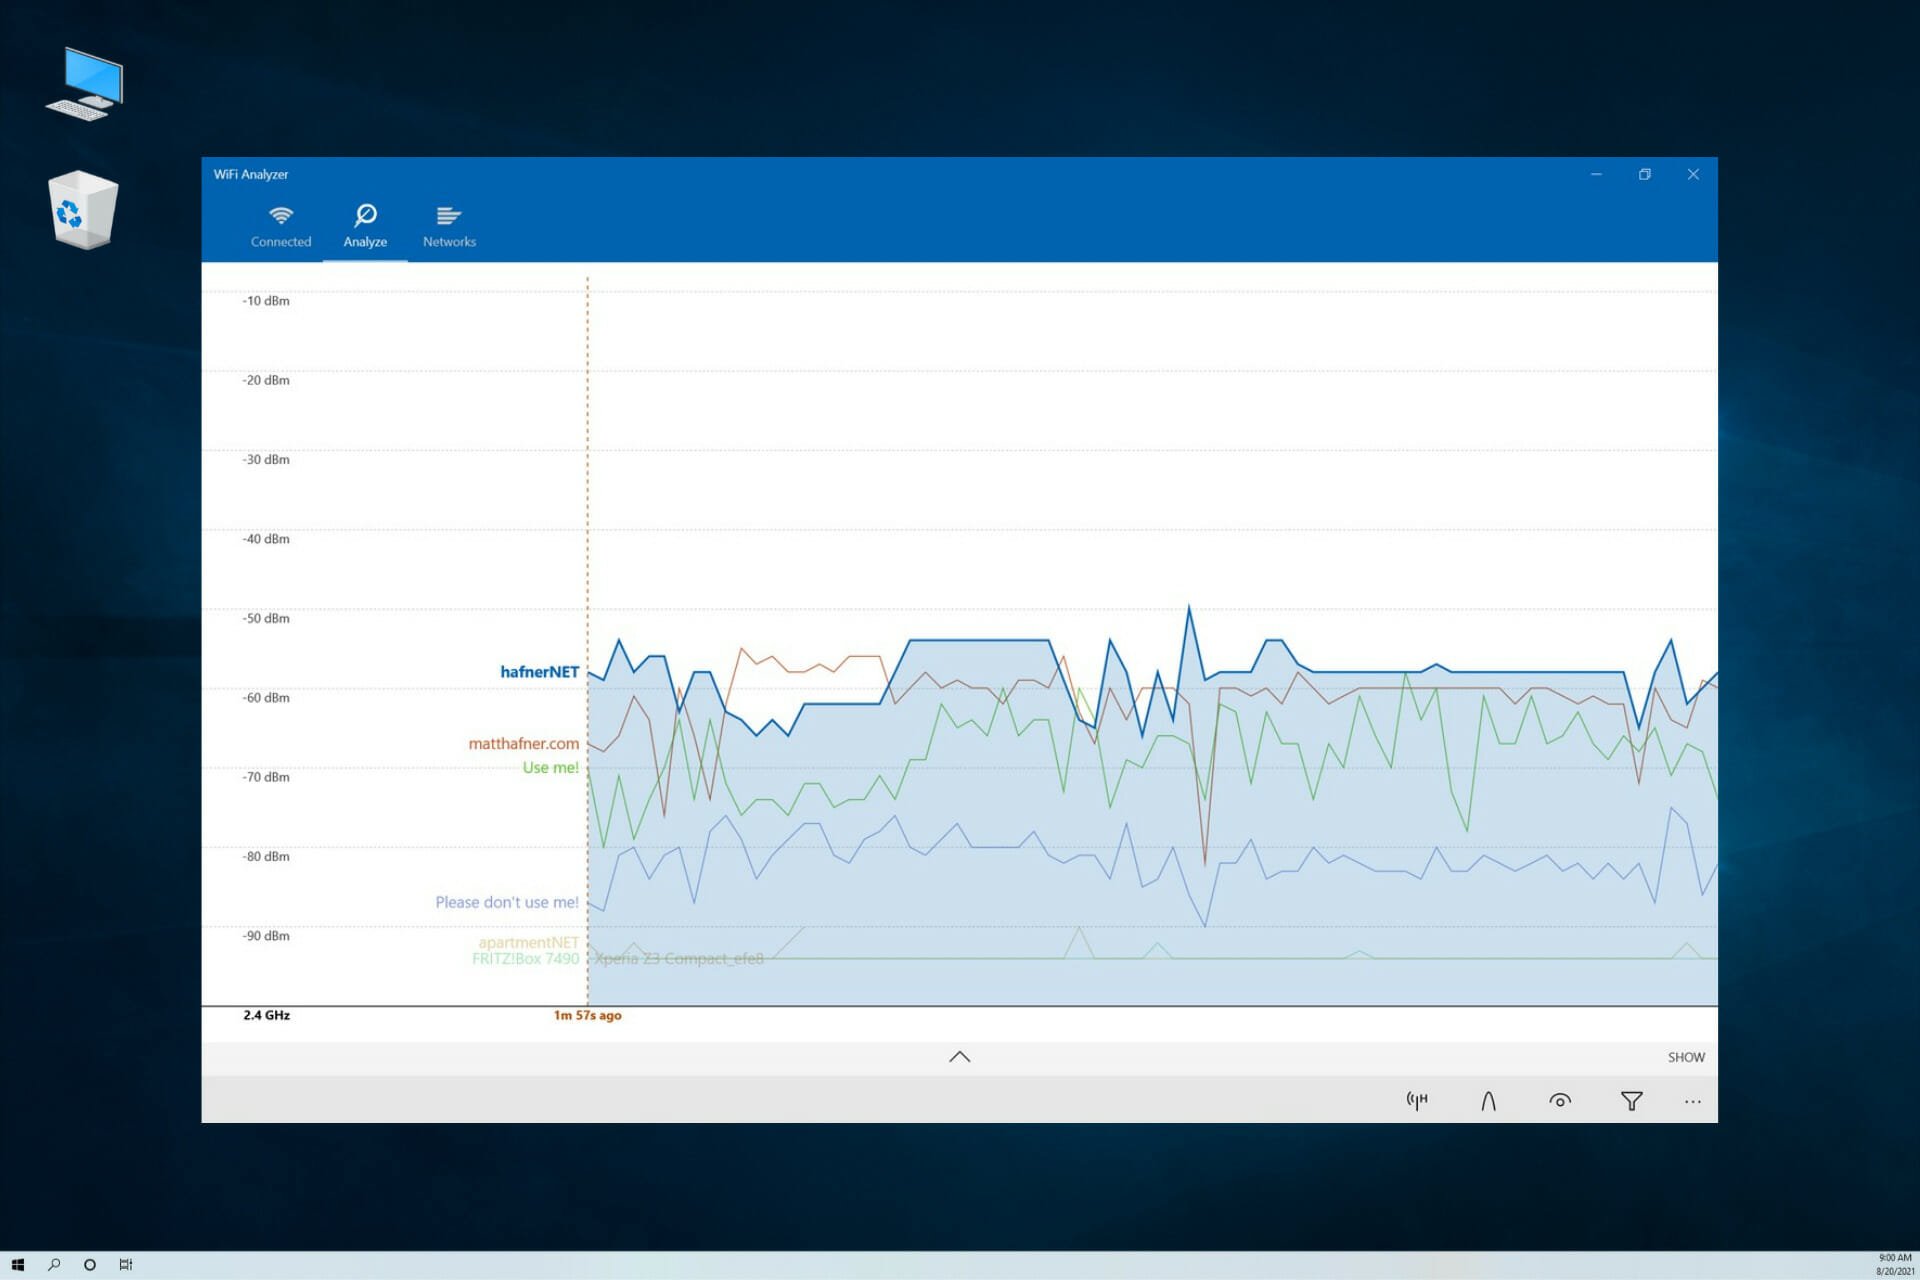





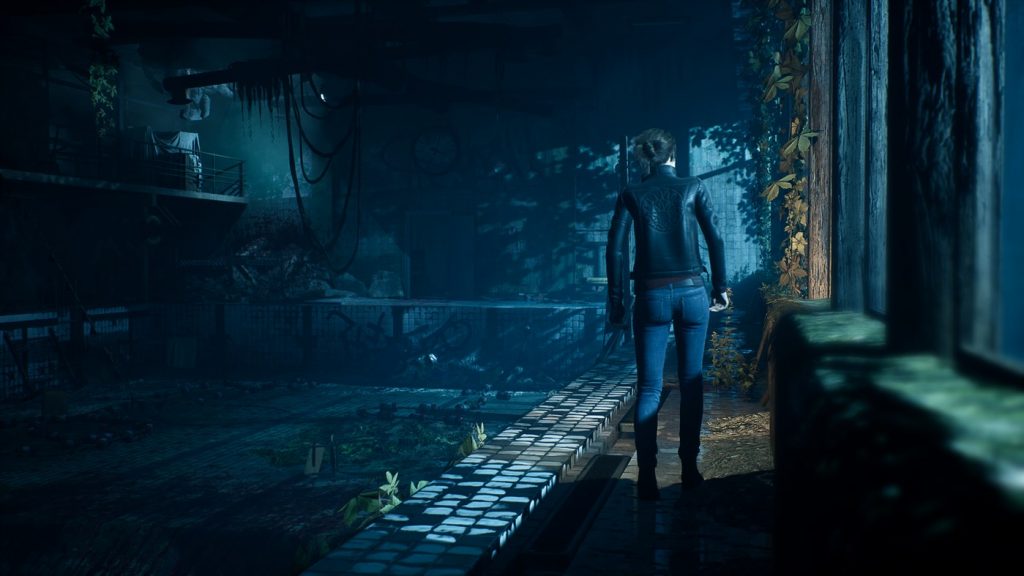
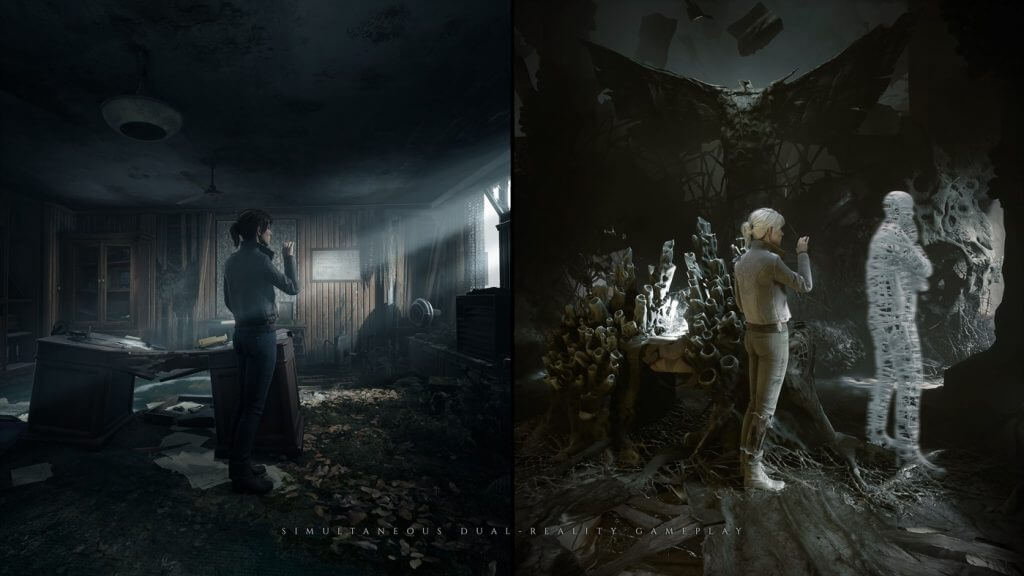
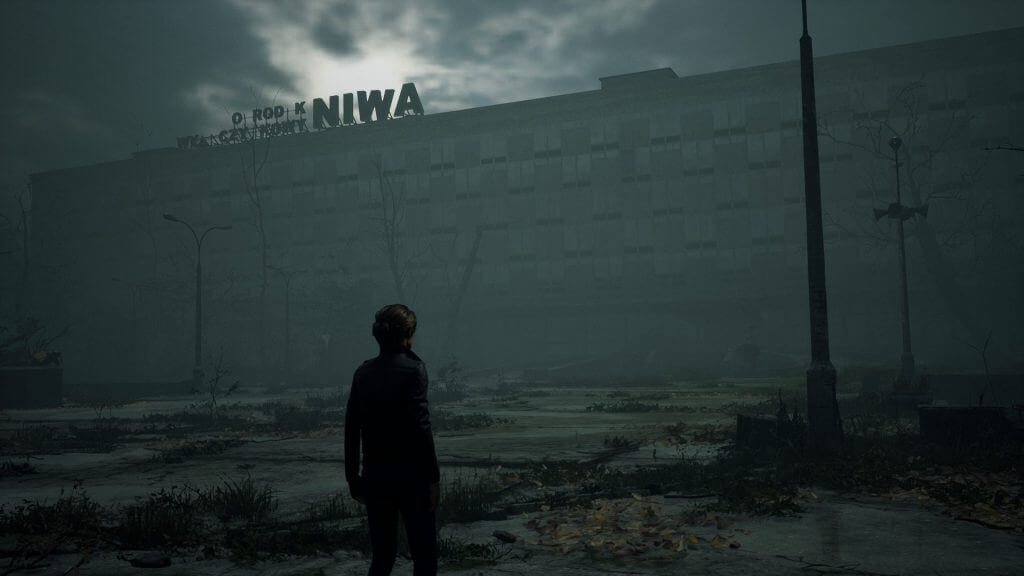

![7 Best Lens Correction Software to Fix Distortions on PC [2026]](https://windowsreport.com/wp-content/uploads/2020/04/Lens-Distortion.jpg)
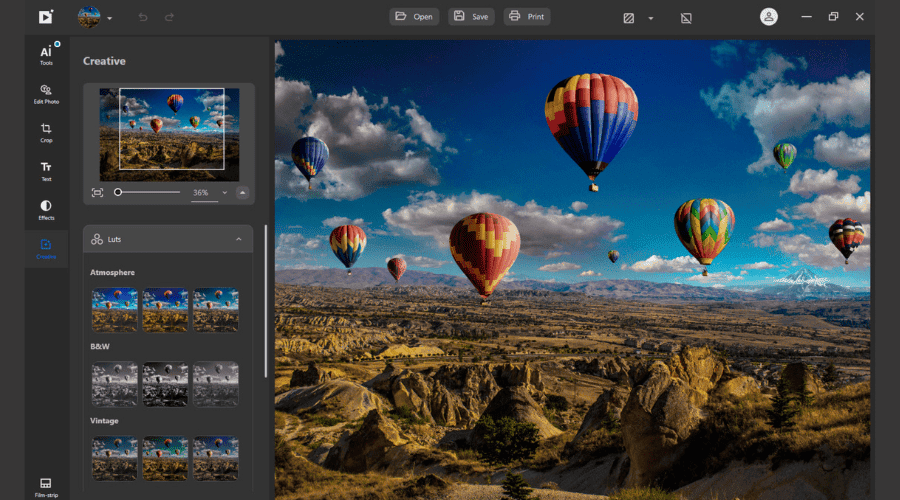




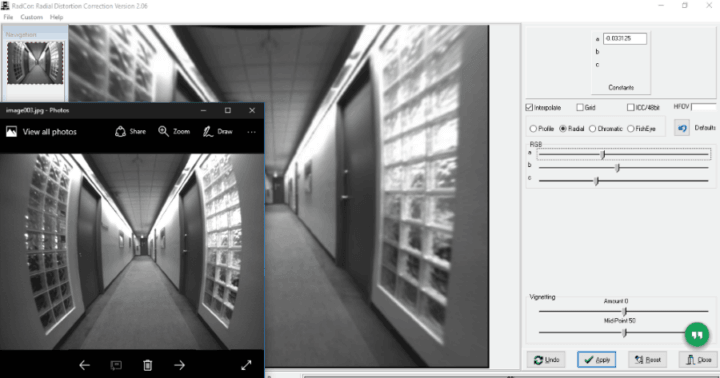
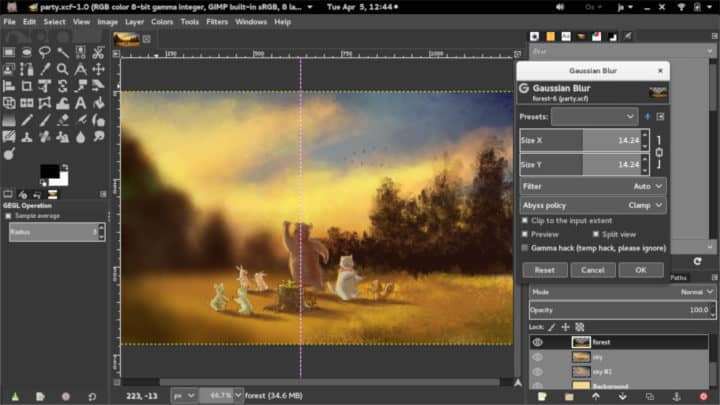
![10 Best Video Editing App for PC in 2026 [Most are Free]](https://windowsreport.com/wp-content/uploads/2017/12/pc-video-editing-software.jpg)
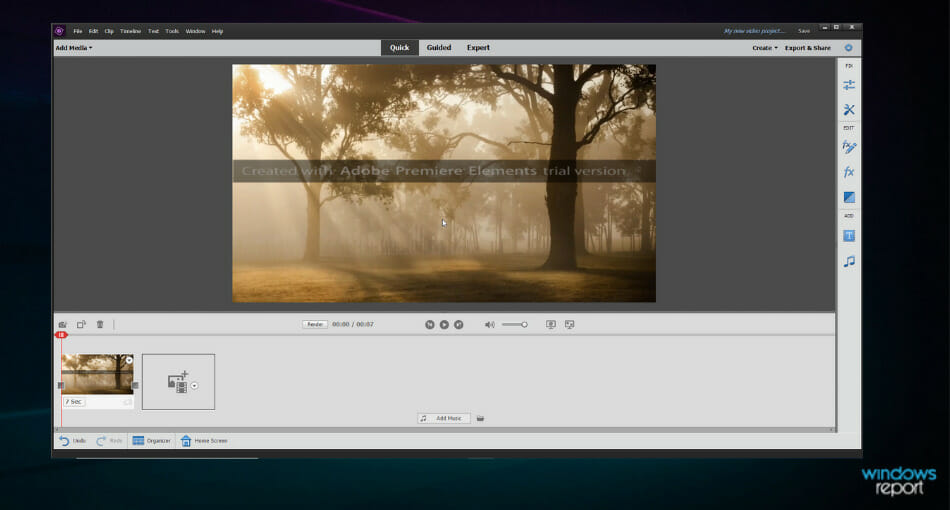

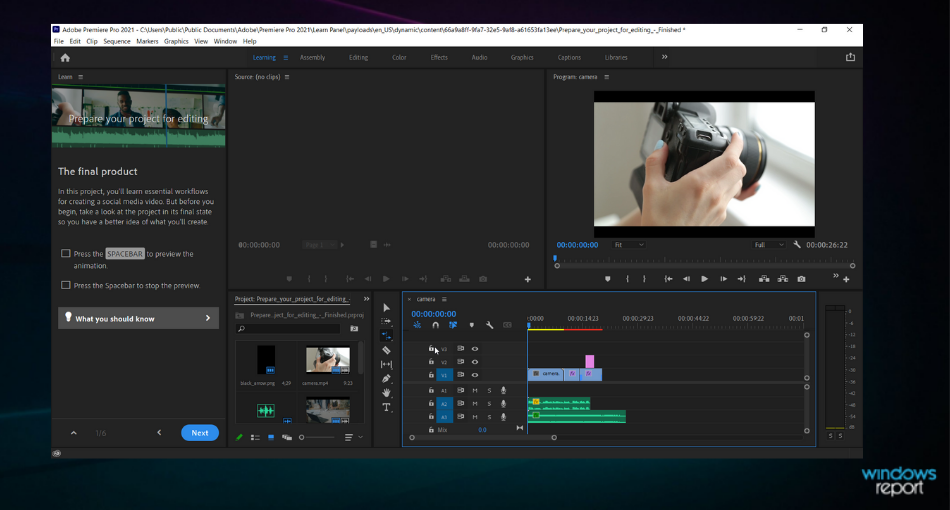
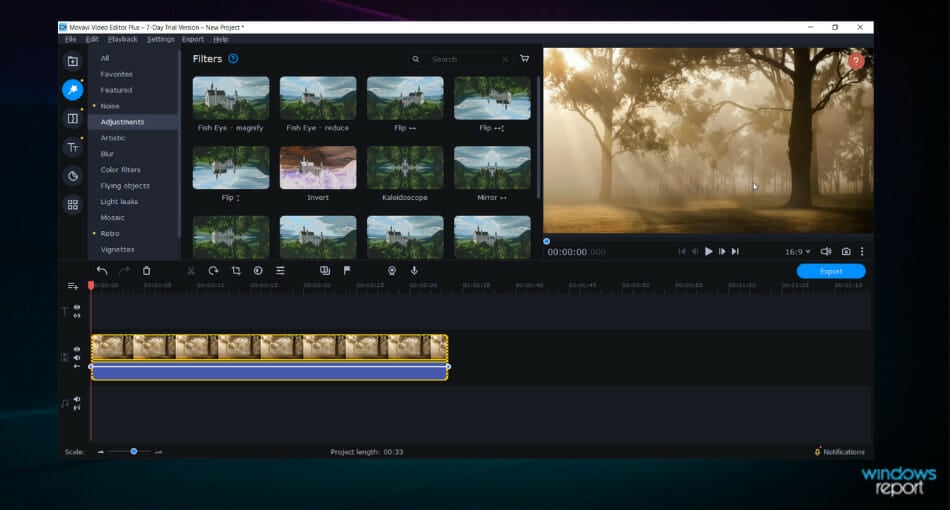

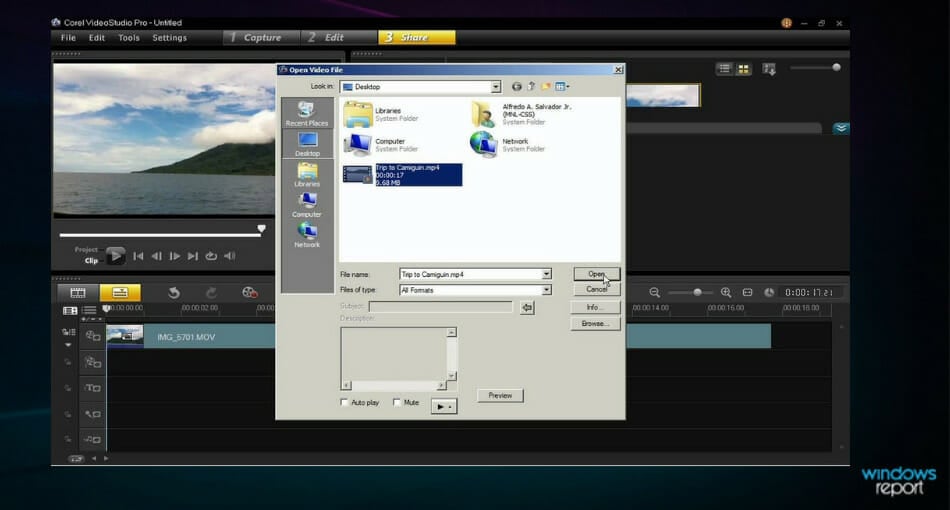

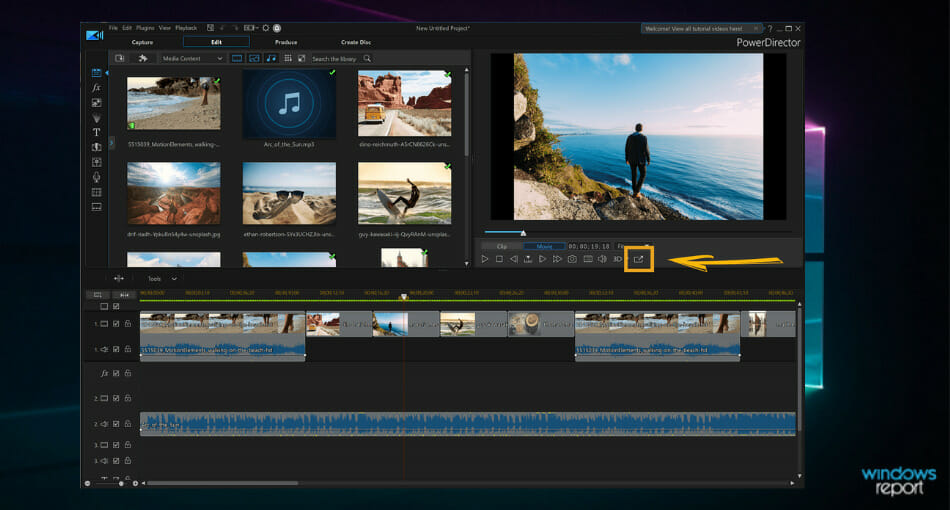

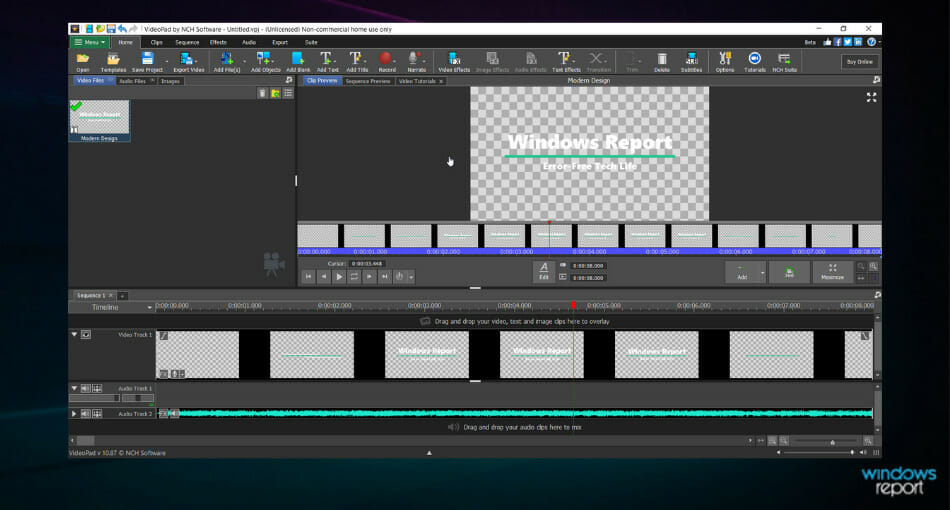


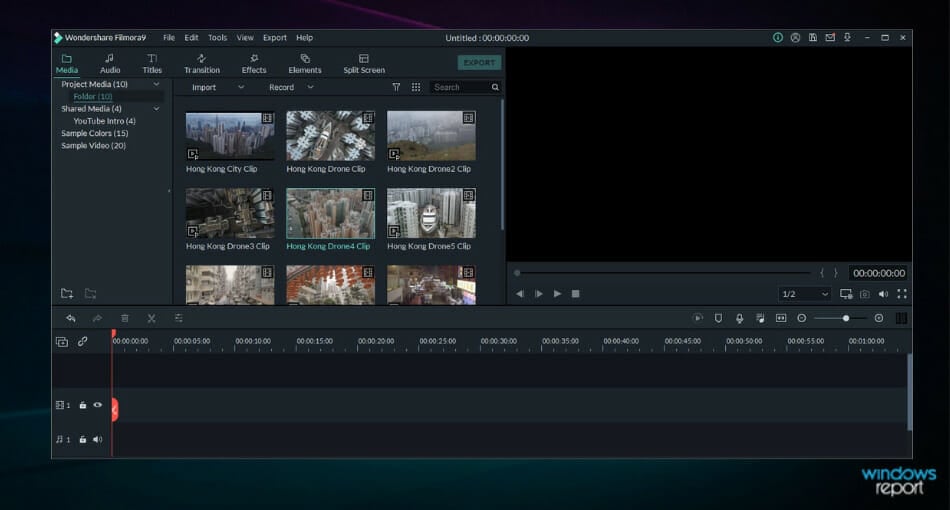

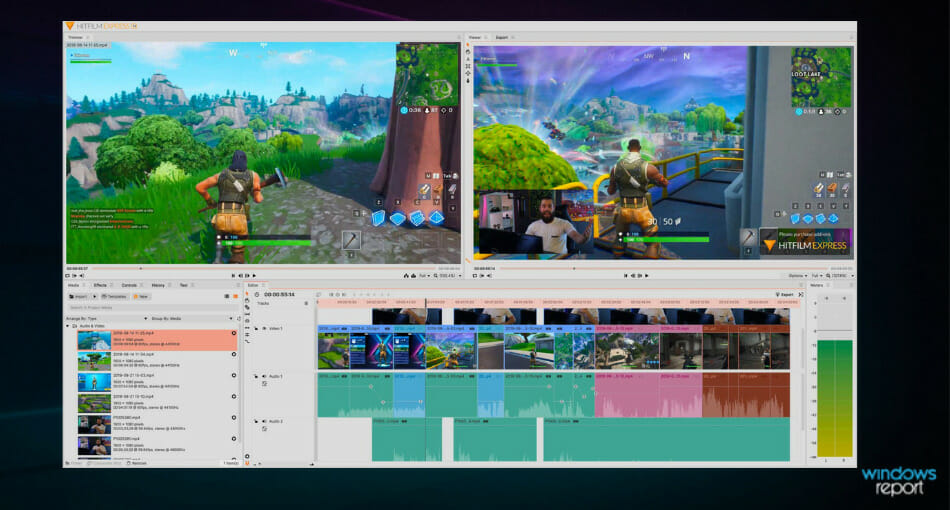
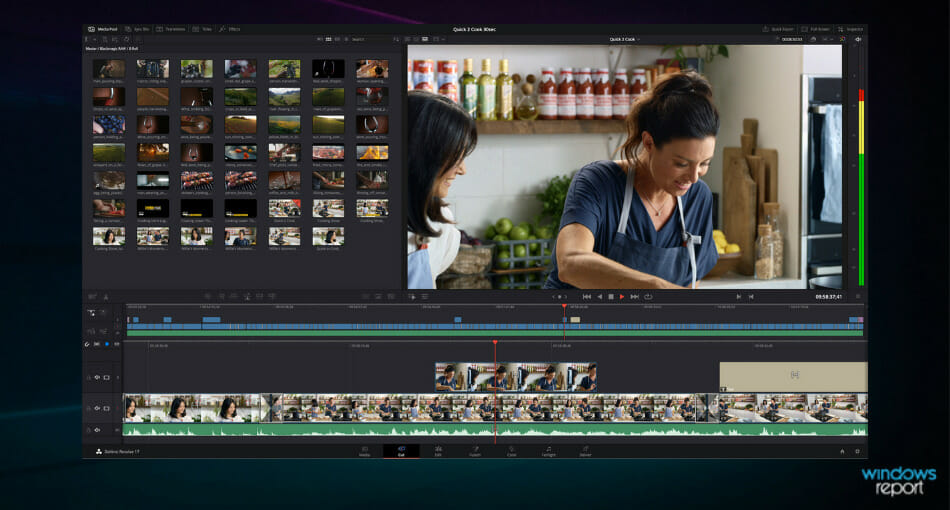










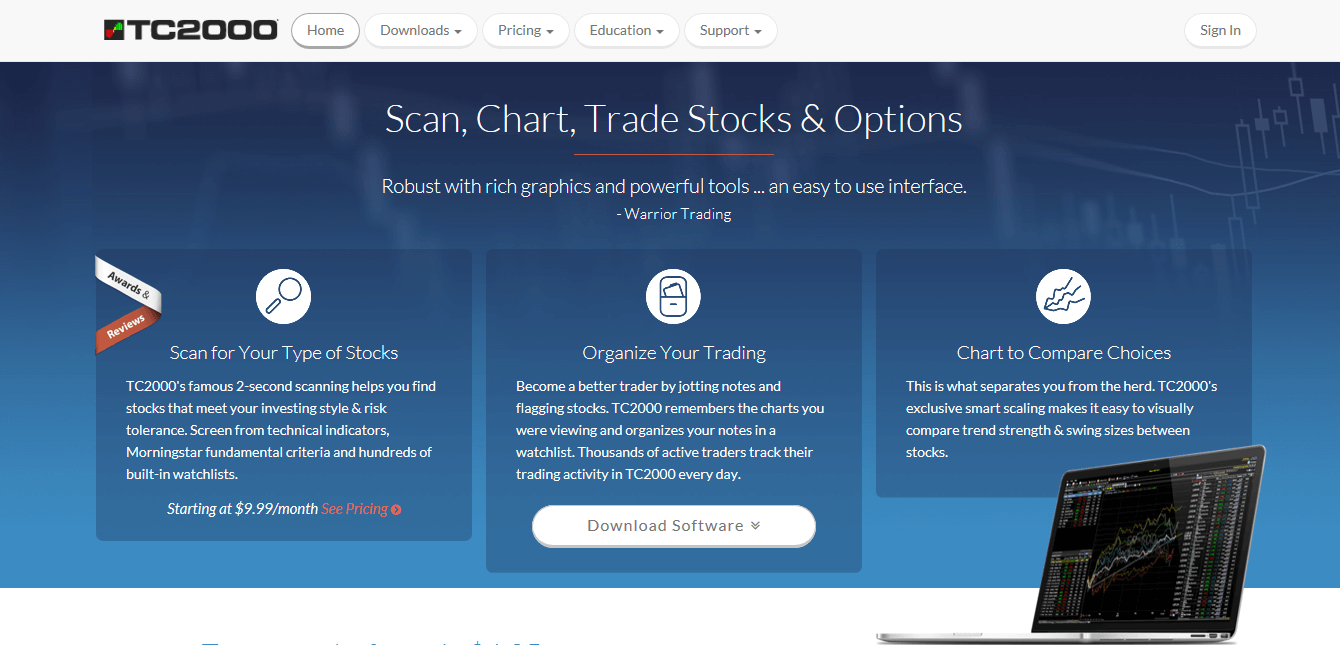
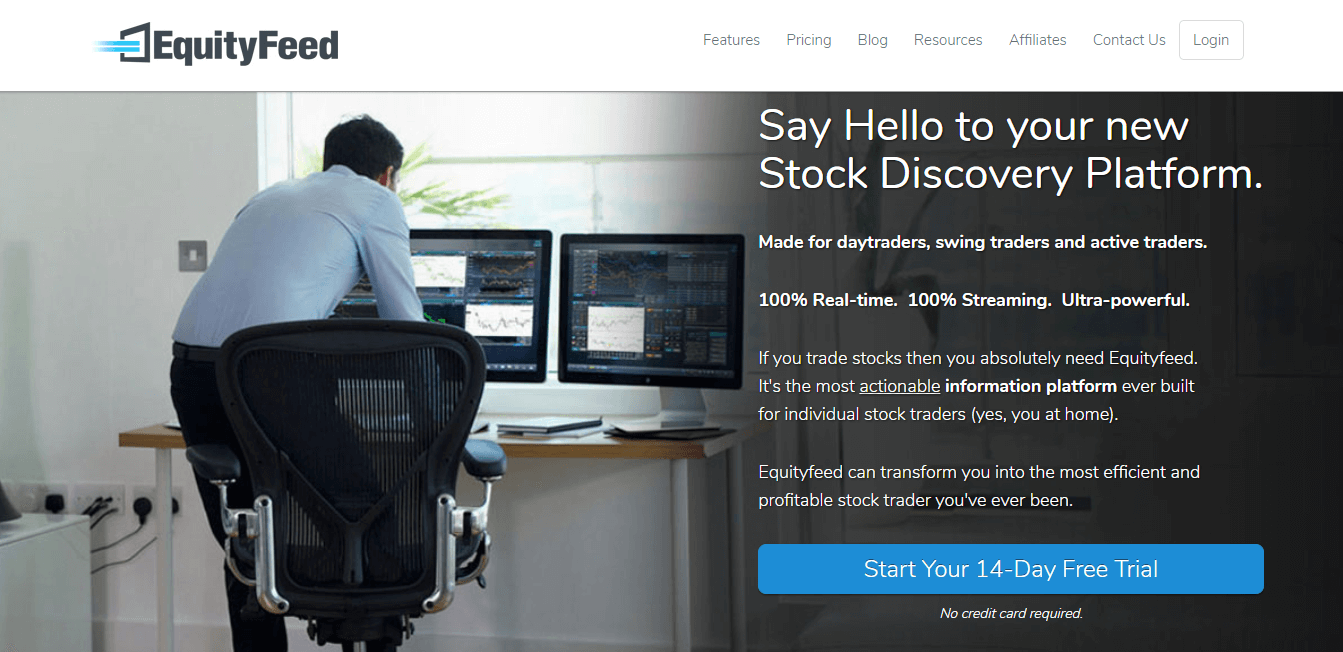
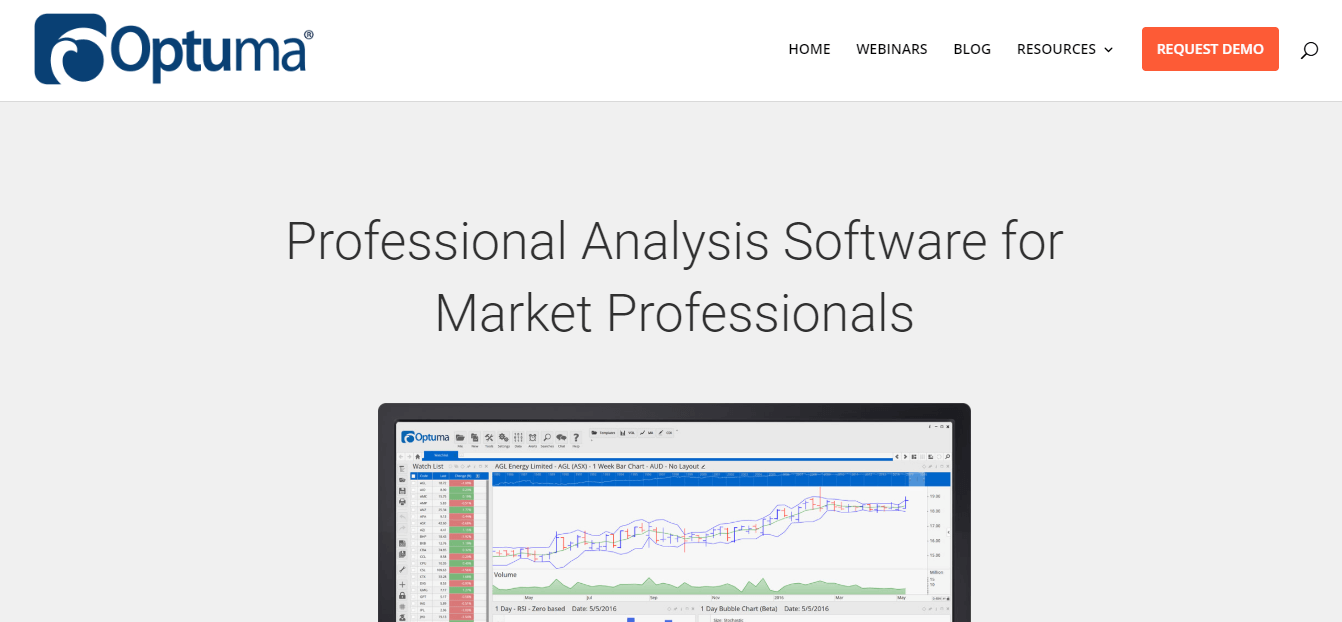
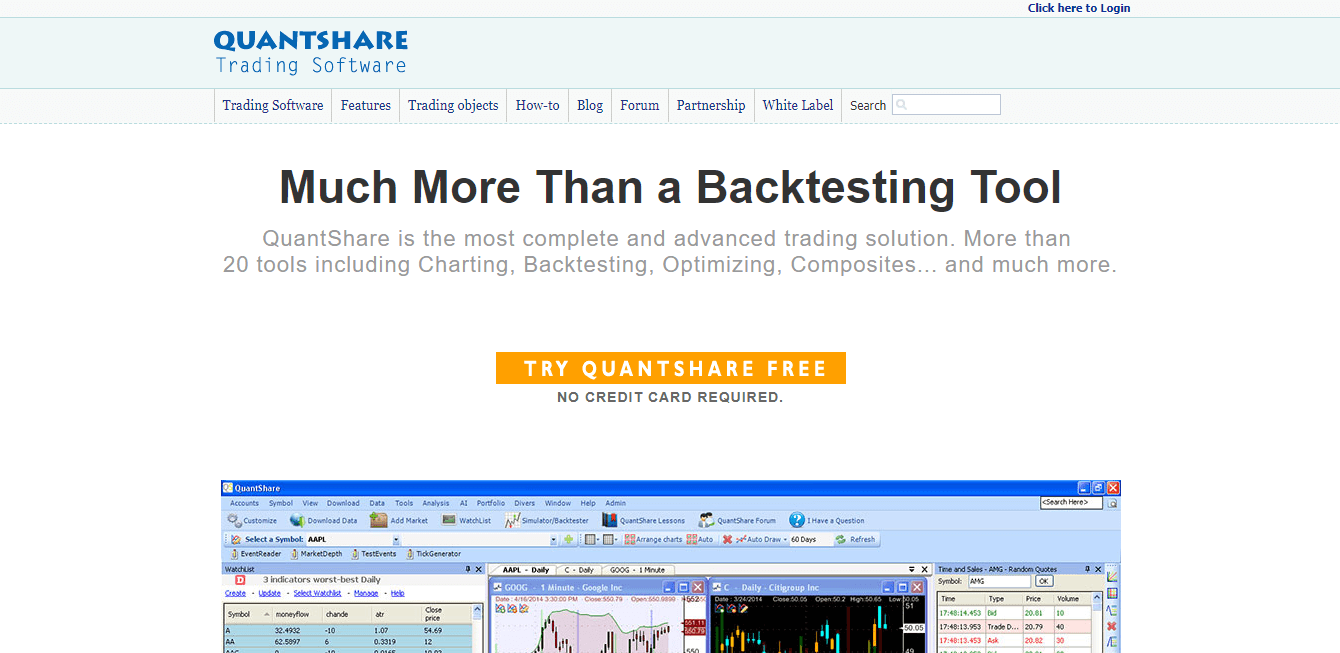





![360 Video Player: Best to Use in 2026 [Out of 15 Tested]](https://windowsreport.com/wp-content/uploads/2019/11/VR-headset.jpg)









![FIX: ExpressVPN not working [DNS error connecting to server]](https://windowsreport.com/wp-content/uploads/2020/04/d2erprd-a15ea915-301d-45e9-be1c-09fc9e708ae5.png)