FIX: Surface Pen tilt feature is not working on Windows 10/11

One of the key takeaways of the Surface Pen is its Tilt feature. The reason is obvious too as it gives users newer abilities to let lose their creativity.

In fact, the Tilt feature will let you create the same effect as say, shading, edging, and so on.

And the technique is similar too as all that you need to do is to hold the pen at about a 45-degree angle to create the brushing effect.

However, so much for all the amazing effects that the Tilt functionality can bring along, there also are instances when users complained of the feature not working with their Surface Pen.

But then, getting things back on track isn’t too big a chore either as a few simple steps is all it would take to enable the Tilt functionality once again.

What can I do if the Surface Pen tilt is not working?

1. Install Adobe Illustrator

As you’re about to see below, compatibility is quintessential for this feature to work as expected.

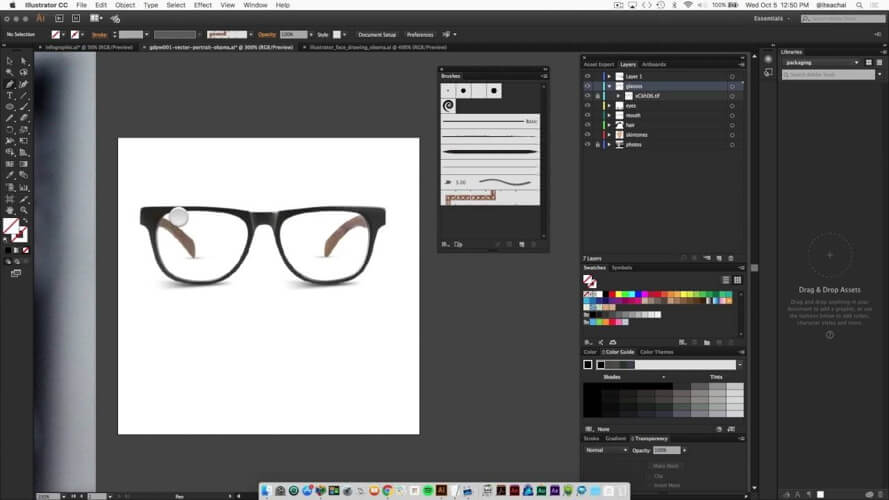
This is why you recommend you use a fully compatible, amazing editor along with your Surface Pen such as Adobe Illustrator.

The Surface pen’s precision, fluidity, and full pressure sensitivity are guaranteed in the Illustrator.

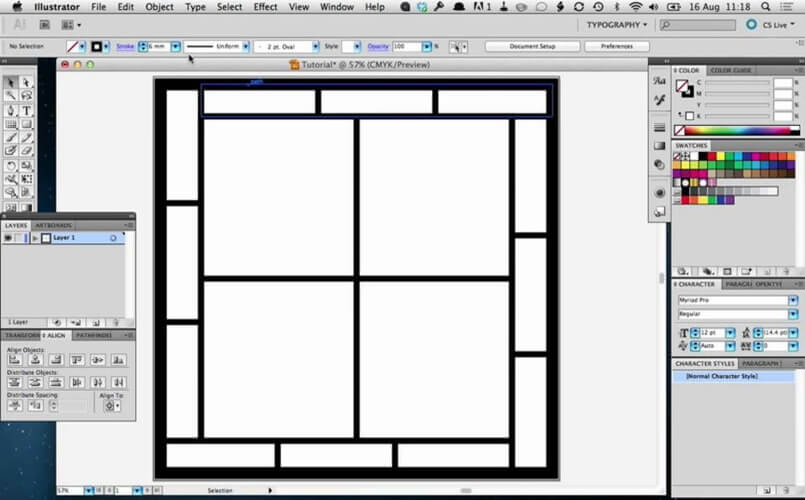
Running Adobe Illustrator on a Surface Pro device does more than allowing you to create vector artwork, it also provides a workspace optimized for touch. And the stylus is a big part of that.

The Surface Pen works seamlessly in the Illustrator enabling you to create rounded edges objects and adjustable curved paths. You can even hover it over the align tool to get a preview of your canvas.

⇒ Get Adobe Illustrator

2. Check the app compatibility

The Tilt functionality is app dependent, which means you will get to see the effect only if the app supports the same.

Some other apps that are compatible with the Surface Pen include Sketchable, Mental Canvas, DrawBoard PDF, StaffPad, and Plumbago.

Of course, this isn’t the most exhaustive list so that there might still be a few other apps compatible with the Surface Pen and all of its features.

If you aren’t able to use the Tilt feature, check if the app is compatible with the new Surface Pen.

3. Check for updates

Make sure you are running the latest versions of the relevant software as older versions have often been found to interfere with the Surface Pen performance.

So if you’re using Surface Pro or Surface Book 2, for instance, ensure both the devices are running the latest versions of Windows 10.

Also, check for updates if you are owning any Surface devices other than the two listed above.

4. Adjust Pen sensitivity

Adjusting Pen sensitivity too has been found to enable the tilt feature. Here is how you do it:

  1. Launch the Surface App. You can do that simply by typing Surface in the taskbar search box.
  2. Alternatively, you can also search it manually via the Start button.
  3. In the Surface App, select the Pen icon.
  4. Thereafter, adjust the pen sensitivity by following the on-screen instructions.

5. Adjust brush settings

Oftentimes it has been found that the Tilt feature has always been working, although users didn’t get to visualize it due to an improper brush setting.

Refer to the individual app documentation to make changes to the brush settings so that the tilt effect becomes visible.

This should be all that you might need to do if the Tilt function on your Surface Pen isn’t working. Let us know which solution helped you restore your Pen’s functionality in the comments section below.

6 best jazz music software to use today

Are you a fan of the jazz music genre or a composer who needs to put together or refine some new jazz compositions?

If so, there are a few jazz music software that you can add to Windows whether you are a jazz music fan or a composer.


What are the best jazz software to unleash the music genius?

Adobe Audition

Adobe Audition

Adobe Audition does more than allow you to listen to jazz, it enables you to craft your own jazz tunes with studio-quality results.

The Audition is a professional DAW (digital audio workstation) that helps you create, record, mix, design sound effects, and even restore audio files, and it’s the natural choice for jazz music production.

Shaping saxophone, trumpet, trombone, piano, bass, drums, and guitar sounds to your will has never been this easy thanks to the Audition’s comprehensive toolset that includes multitrack, waveform, and spectral display for creating, mixing, editing, and restoring audio content.

Let’s quickly look at its key features:

  • Record, edit, and design sound effects
  • Seamless integration with Adobe Premiere Pro
  • Step-by-step, interactive tutorials, right in the app
  • Essential Sound panel for professional-quality audio
  • Remix any song to fit any duration
  • Audio cleanup, restoration, and precision editing tools (spectral frequency display, Diagnostics panel, and more)
Adobe Audition

Adobe Audition

Adobe Audition is the perfect choice for jazz music production, if you want to create, record, mix and design specific sound effects, so try it on!
Free trialVisit website

Impro-Visor

Impro-Visor, otherwise Improvisation Advisor, is a music production notation software designed more specifically for jazz. Even though, the latest version is not restricted to jazz styles.

You can utilize Impro-Visor to both compose and analyze jazz music sheets.

The software provides a plain text editor with which to construct lead sheets and solos, but you can also enter chords with a roadmap editor that analyzes the chord changes.

Impro-Visor’s automatic note colorization highlights dissonant and consonant notes, and it also includes harmonic and transposition options to further guide composers.

When you’ve finished the music, you can then export it with both MIDI and MusicXML formats.

Overall, this is a flexible jazz software tool that you can utilize for notation, play along, editing styles, transcribing solos from other musicians, and more besides.

This freeware software is compatible with Windows platforms from XP to 10, Mac OS X, and Linux; and you can save its setup wizard to your HDD.

Interested in the best options for royalty-free music software that are also compatible with your Windows 10 PC? Check out our Top 3 picks.

⇒ Get Impro-Visor


Modern Jazz Pianist

modern jazz pianist

Modern Jazz Pianist is a software primarily designed for playing music from renowned jazz pianists.

It also displays chord notations and keyboards for all pieces played, and you can run it on 32 and 64-bit Windows platforms from XP up.

The Modern Jazz Pianist includes 50 pieces from renowned jazz pianists, such as Renee Rosnes, Richie Beirach, and Herbie Hancock.

MJP users can select to play solo, trio, waltz, blues, duo, and polytonal jazz types. Aside from the real-time jazz recordings, the software includes pianist biographies and a trivia game.

The software also comes with a built-in mixer so that you can configure patches, panning, volumes, tuning, chorus, and reverb with General MIDI modules.

⇒ Get Modern Jazz Pianist


Jazz Scale Suggester System

Jazz Scale Suggester System

Jazz Scale Suggester System, otherwise JSSS, is a software that analyzes jazz chord charts entered by its users. Thus, this software can provide invaluable input for jazz composers.

The developer stopped supporting the software, but you can still add the freeware JSSS to most Windows platforms by clicking Download JSSS Lite on this website page.

JSSS is a jazz tool that analyzes chord changes in submitted chord charts. The program provides jazz scale suggestions for its users when they press the Suggest Jazz Scale button.

This software covers scales such as Natural, Minor, Jazz Minor, Dorian, Blues, Harmonic, Whole Tone, and more besides.

While the developer concedes this software might be a little outdated, it’s still a handy tool for jazz composers to refine their compositions with.

⇒ Get JSSS Lite


Music Maker Jam

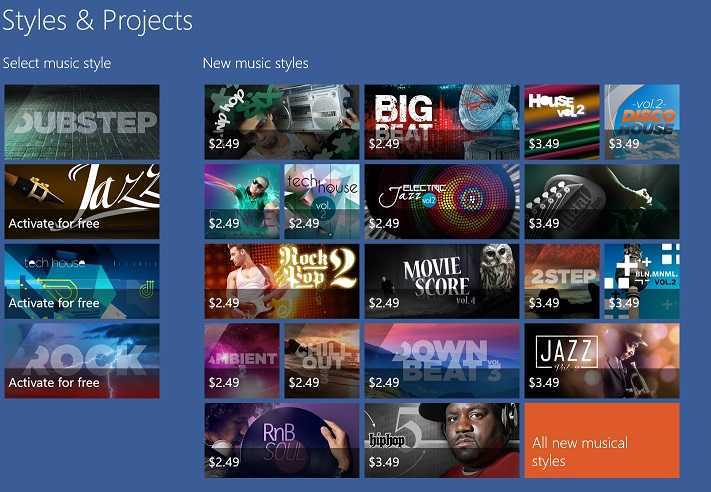
Music Maker Jam is a straightforward music production app for Windows 10. It provides pre-recorded loops for jazz, dubstep, tech-house, and rock; and you can add more music styles with in-app purchases.

Making jazz music is a piece of cake with Music Maker Jam. The software includes a wide range of loops that you can arrange across eight tracks with its eight-channel mixer.

Music Maker Jam users can configure diverse jazz instrument presets, adjust the music tempos and harmonies, and apply custom effects to the tracks.

This is also a music app for tablets, and you can remix tracks by shaking tablet devices. When you’ve completed the jazz piece, you can then record it as an MP3 for playback in media players.

This is a fun app that users can put together their own jazz pieces with.

⇒ Get Music Maker Jam


Radio Swiss Jazz

Radio Swiss Jazz is an online radio station that streams a plethora of ad-free jazz music.

The Radio Swiss Jazz app enables you to browse through and play the station’s extensive jazz music database from your Windows, iOS, and Android devices.

⇒ Get the Radio Swiss Jazz app


Those are a few of the notable jazz music production and playback programs for Windows. Artists can compose and edit jazz pieces with Adobe Audition, Music Maker Jam, JSSS, and Impro-Visor.

Or you can playback plenty of jazz music with the Modern Jazz Pianist and Radio Swiss Jazz software. Let us know what is four favorite music-making tool from this list or not by hitting the comments section below.


Windows 10 build 21301 improves the touch keyboard for Dev Channel Insiders

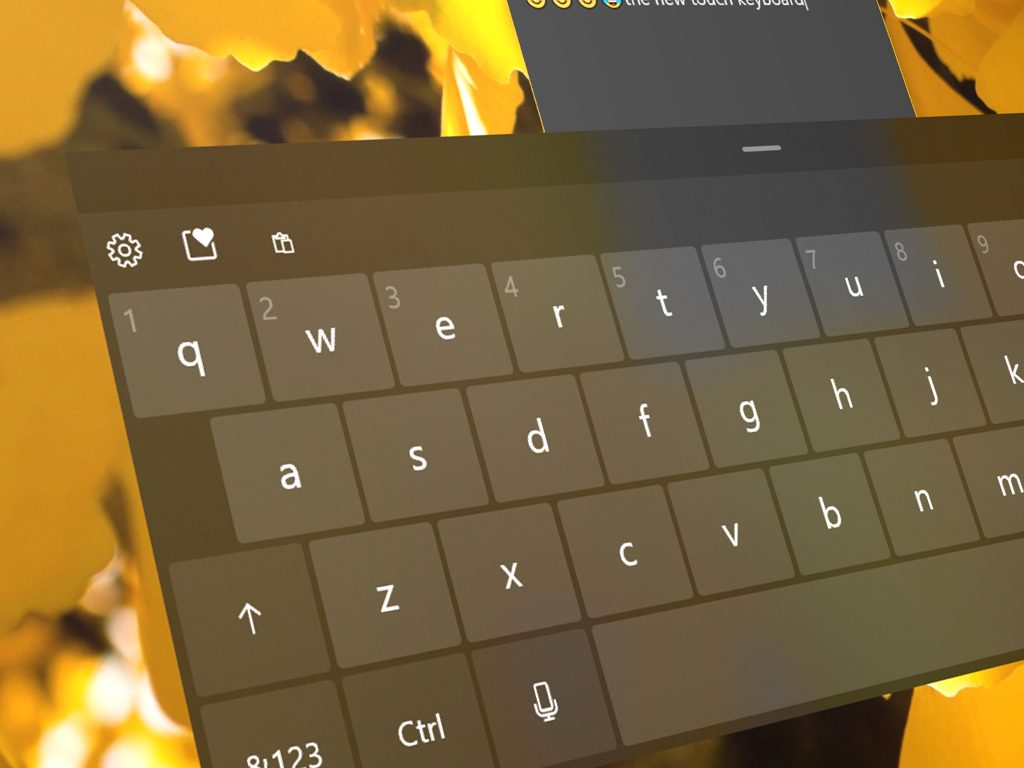
Microsoft has just released the Windows 10 preview build 21301 for Insiders in the Dev channel, which brings improvements to the touch keyboard design inspired by Insider feedback. Today’s build brings pretty minor changes overall, but users of 2-in-1 devices will notice that the touch keyboard will now switch to the Small keyboard layout when undocking the keyboard, and the gripper region at the top of the touch keyboard will also make it easier to move it around the screen.

Other updates to the touch keyboard include an updated symbol’s view for the small and split layouts based on the default layout, as well as a less cluttered settings menu. When in a password field, a new password feedback icon will also appear at the left side of the space bar to turn on visual key press feedback on the touch keyboard.

The revamped touch keyboard settings menu allows you to quickly change between keyboard modes, access more settings and give feedback.

On devices with 12” or larger screens, some Insiders will also notice that the touch keyboard now uses a more traditional layout with the addition of Esc, Tab, and windows keys. To reduce distractions, the candidate bar will also be less cluttered with a maximum of 5 suggestions appearing above the keyboard.

The updated default layout now features the Esc, Tab, Windows, and Alt keys.

Today’s build 21301 also brings other minor changes for Jump Lists and Touchpad settings, and Microsoft has also fixed a bug causing news and interests in the taskbar to use 100% of CPU. You can find the full list of changes, bug fixes, and known issues below:

Changes and Improvements

  • We made a change so that when you right click locally saved files displayed in jump lists, in addition to Open you will now have the option to Open File Location.
  • We updated our N’Ko keyboard layout to add access to currency and some other symbols by tapping the keys along the top row of your keyboard while holding the Shift key.
  • We updated the Touchpad on/off toggle under Settings > Devices > Touchpad such that it no longer requires admin privileges to change.
  • We updated our backend dictionaries to help improve spellchecking and text prediction relevance.

Fixes

  • We fixed an issue so that the taskbar context menu and news and interests should no longer overlap.
  • We fixed an issue where in certain circumstances, news and interests would use 100% of CPU when it is first launched.
  • We fixed an issue that could result in Task Manager crashing when switching to the Details tab.
  • We fixed a recent issue for some Insiders related to the Clock and Calendar flyout that could result in ShellExperienceHost using an unexpectedly high amount of CPU.
  • We fixed an issue resulting in the State Repository Service being prematurely terminated during service startup. If you were impacted, one possible symptom was it taking longer to load the desktop when signing in. If you’re continuing to experience performance issues when logging in, please file them with a trace under Install and Update > Logon hangs.
  • We fixed an issue where if you searched for “change your password” and used the result to launch Settings, Settings would crash.
  • We fixed an issue where Aero Shake was unexpected disabled in the last few flights.
  • We fixed an issue where when moving a window between mixed DPI monitors it could result in the window margins being calculated with the wrong DPI, leading to the window overflowing on the other monitor when maximized.
  • We fixed an issue that could result in certain HEIF files not rendering although the correct codecs were installed.
  • We fixed an issue resulting in pinning a website to your taskbar from Microsoft Edge not working in the last few flights.
  • We fixed an issue that could result in VPN repeatedly connecting and disconnecting in a loop.
  • We fixed an issue resulting in some 32-bit systems lost network connection in recent flights.
  • We fixed an issue resulting sometimes in nothing happening after clicking a “Wi-Fi password needed” notification.
  • We fixed an issue where certain games like State of Decay 2, or Assassin’s Creed, may hang or crash when launching.
  • We fixed a few issues resulting in Narrator not reading elements of our troubleshooters when in Scan Mode.

Known issues

  • Miracast users may experience very low frame rates in this build.
  • We’re looking into reports of the update process hanging for extended periods of time when attempting to install a new build.
  • We’re investigating an issue impacting the reliability of Start and other modern apps, which started in the previous flight. If you are impacted, you may experience the Start menu layout resetting.
  • Live previews for pinned sites aren’t enabled for all Insiders yet, so you may see a grey window when hovering over the thumbnail in the taskbar. We’re continuing to work on polishing this experience.
  • We’re working on enabling the new taskbar experience for existing pinned sites. In the meantime, you can unpin the site from the taskbar, remove it from the edge://apps page, and then re-pin the site.
  • [News and interests] Sometimes the news and interests flyout cannot be dismissed with pen.
  • [News and interests] News and interests uses more taskbar space on the left than expected.
  • [News and interests] The taskbar button can show stale information each time the user signs into their Windows session.
  • [News and interests] The news and interests flyout shows content in a single column before quickly switching to double column.
  • [News and interests] Text in taskbar button can look pixelated in high resolution screens.
  • [News and interests] Attempting to share content dismisses the flyout.
  • [News and interests] In certain situations, the flyout may not dismiss until the taskbar button is clicked or the hover effect may appear stuck.
  • [ARM64] Insiders who installed the preview version of the Qualcomm Adreno graphics driver on the Surface Pro X may experience reduced brightness of the display. This will be addressed in a future update.

The Windows Insider team has yet to announce what to expect for the Windows 10 21H1 update to be released in the first half of 2021. Previous reports suggest that this is going to be another minor update like the October 2020 Update (20H2) was, and the Windows Insider team has yet to confirm that news and interests in the taskbar and other changes currently in testing will a part of the 21H1 update.

In case you missed it, Microsoft also released a new Windows Experience Feature Pack for Insiders in the Beta channel yesterday, which brings improvements to the screen snipping experience. The Windows Insider team has been testing this new way to ship new features to Insiders without having to flight a full build, and it’s going to be interesting to see if the team will start to do the same with Dev Channels Insiders in the coming weeks.

Best DWG to PDF Converter Software for Windows 10/11

AutoCAD is one of the most used and appreciated CAD software that allows you to create incredibly complex and realistic designs by using only your computer and the design skills.

CAD software gives you unlimited power of creation, no matter if you’re an architect, engineer, artist, or just passionate about designing your own furniture.

This type of software can be used both in designing 2D elements, and also 3D models, giving you an unending array of tools and possibilities.

Transforming your DWG/DWF files to PDF allow the people you are going to present your work to better understand the details.

This also means that anybody with a PDF reader can get access to the information in your files. Even more, your clients/colleagues don’t need to be experienced in using CAD software in order to understand the concept.

For these reasons, in this article, we will explore some of the best software options on the market that allows you to easily transform your AutoCAD files to PDF.


What are the best AutoCAD file to PDF converter software?

Adobe Acrobat

try out Adobe Acrobat

The work can be done in minutes when using Adobe Acrobat. Firstly, you’ll always feel right at home when seeing that clean-looking interface.

However, what truly matters are the main benefits of this professional PDF solution. Well, all users appreciate having the chance to compare two document formats and convert files into various formats.

This clearly includes the ability to convert AutoCAD files to PDF. That’s what brought you here in the first place, so be sure that such a nifty option is a part of the package.

QUICK TIP: To enable AutoCAD to PDF conversion, the latest version is required. Creating a feature-specific registry key on Windows is also mandatory:

  1. Open the Registry Editor first.
  2. In the Registry Editor, go to:
 HKEY_LOCAL_MACHINESOFTWARE(Wow6432Node)AdobeAdobe AcrobatDCFeatureState
  1. Under FeatureState, you need to create a key of type DWORD.
  2. Name it bEnableODAWorkflow.
  3. Then, change its value to 1.
  4. You may now close the Registry Editor.
Adobe Acrobat

Adobe Acrobat

If you want to enable AutoCAD to PDF conversion, the latest version is required, so try it out now!
Free trialVisit website

AnyDWG to PDF converter

AnyDWG - autocad to PDF converter

AnyDWG is a great tool that allows you to easily convert DWG, DXF, and DWF file formats to PDF.

AnyDWG is full of useful features. It can automatically resize the page based on the data stored in your file, and can also recover your drawing in the event that it becomes damaged.

What makes this software stand out from the crowd, is its ability to set your output files to create only one PDF for each layout, one PDF for each of the drawings, or to move every bit of information into one single PDF file.

This feature allows you to have full control over the way you will use the information once it’s transformed.

Here are some of the best features found in AnyDWG:

  • Can customize the output – size, quality, output color, etc.
  • Doesn’t require AutoCAD to work
  • Converts all SHX, TTF fonts, your embedded raster images, or Excel tables
  • Active layout settings
  • Can create bookmarks inside your PDF – allows you to easily navigate the PDF file
  • Supports all versions of DWG, DXF, and DWF files

⇒ Get AnyDWG PDF Converter


AutoDWG

AutoDWG Best AutoCAD file to PDF converter software

AutoDWG is another great software options that give you the power to easily transform your AutoCAD files (.DWG, .DWF, .DXF) to PDF file format.

This software allows you to choose a specific layout or layer to be transformed, and the process of converting doesn’t affect TTF (True  Type Font).

You can easily search your new PDF file for TTF, without any issues. You can set different permissions for different users, and you can use it for printing, clipboard copying, etc.

Furthermore, you can customize the line width, and offers full support for importing CTB files.

The quality of output for the AutoDWG conversions process is extremely good. This software uses Smart Object Recognition, and you also have the ability to set passwords and encrypt the data inside your PDF.

⇒ Get AutoDWG


AConvert

AConvert is another great tool that enables you to simply and efficiently transform your AutoCAD files (.DWG, .DWF, .DXF) into a PDF file, without losing any of the information.

This tool is very useful for people who don’t want to download any third-party software.

You can simply visit the Acoverter website, choose the PDF option from the side menu, and you’re ready to upload your file.

After selecting which CAD file you want to transform, you can select the output file format, and hit ‘Convert now’.

⇒ Get AConvert


Zamzar

Zamzar Best AutoCAD file to PDF converter software

Zamzar is another great online tool that can help you transform your AutoCAD files to PDF format.

As in the case of the previously mentioned online conversion tool, Zamzar can be very handy if you need to transform files on the go.

Because it is entirely located online, this tool has limited capabilities when it comes to setting up the way your output file will be like.

In order to use this software, you need to visit their webpage, upload the DWG file you want to convert, select the output format as PDF, and then click on Convert. The process usually takes less than a minute.

⇒ Get Zamzar


In this article, we explored some of the best software options on the market that allow you to easily transform AutoCAD file formats to PDF.

You can choose the third-party options presented in this article if you need more customized results, or use the online tools on the go.

Please feel free to let us know if this article helped you by using the comment section found below.


5 Best Video Background Blur Software to Get Today

Whether it’s for stylistic purposes or because you want to improve a poorly shot video with visual effects, the blur effect is clearly desired by many of you.

Are you confused with all those video background blur software options you may choose from? There’s no surprise that you feel overwhelmed, but we are here to help you make an informed choice.

These are quite a few remarkable video editing tools that will make each video edited more visually pleasing.

Once you use the right tool and learn how to implement background blurring in the process, your worries will go away.  So, don’t hesitate to learn more about each of these programs right away.

What’s the best video background blur software to try out?

Adobe After Effects – The most complete one

Adobe After Effects software

Adobe After Effects is a popular video editing tool intended for users who want to focus on making high-quality videos and editing them with ease.

It gives users a plethora of options when it comes to getting closer to impressive results.

It’s up to you to choose from exciting effects, create VR videos to keep your audience entertained, and set anything in motion with unique expressions.

Adding the background blur effect you’re after is also an easy task in the After Effects video editing software.

Then, thanks to the auto-save feature accessible in Team Projects, you may take the previously saved versions of your video and start new projects right away.

Here are some of Adobe After Effects’ main features:

  • Motion can be easily added to objects thanks to After Effect CC’s keyframes
  • JSON data files may be easily imported to add animations to the composition
  • Immersive virtual reality effects and immersive virtual reality titling/graphics are supported
  • GPU accelerated effects
  • Premium features are constantly rolled out
  • Motion graphics templates

Adobe After Effects is a digital visual effect software often used in the post-production process of film making and television production, so blurring your background will work like a breeze when using this tool.

Best of all, anyone can learn to use this software, regardless of their skill level. So, don’t be shy and try it out even if you’re a newbie. Your videos will always look and sound fantastic.

Adobe After Effects

Get unlimited graphic and virtual reality effects for your videos with Adobe’s amazing built-in features.
Free trial Visit Website

Corel VideoStudio Ultimate – Fun creation tools

Corel VideoStudio is a perfect choice for all videographers looking for a simple way to edit videos they want to share with family members or post on social media.

When a background issue holds you back, Corel VideoStudio steps in to correct it. To edit videos, all you have to do is to drag and drop your clips into an area at the bottom of the interface.

This video software includes a range of special effects that you can use when editing and creating videos.

Adding transitions to the timeline is merely a drag-and-drop procedure, while its special color correction tools let you fine-tune colors using HSL controls and Look-Up Tables. And that’s not all!

Let’s quickly go through some Corel VideoStudio key features:

  • A wide selection of fun video-creation tools
  • Double-clicking a template fills the timeline with transitions and a background music soundtrack
  • Support for 360-degree VR, 4K Ultra HD, as well as 3D media
  • Multipoint Motion tracking if you want to attach objects, texts, or effects to something moving in your videos

Corel Video Studio Ultimate

An amazing video editing software to access a fully-equipped professional recording studio.
Free trial Visit Website

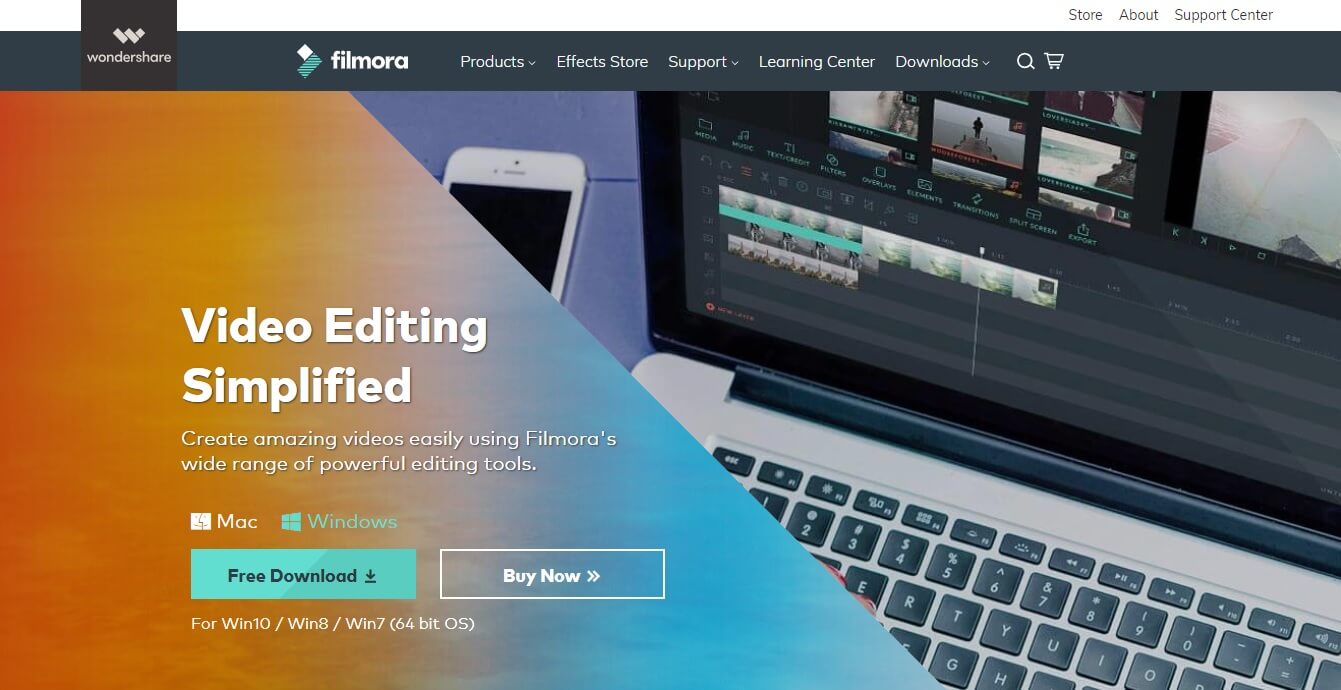
Wondershare Filmora – Amazing color-grading presets

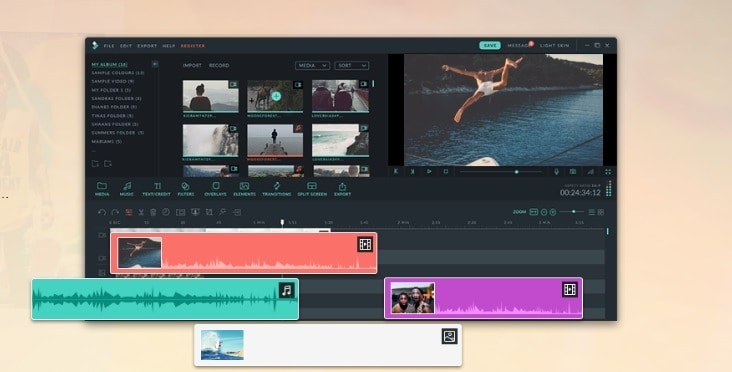
Wondershare Filmora is a great Adobe After Effects alternative you may as well consider using for background blurring.

Moreover, it’s the go-to software when looking for new ways to express yourself through your videos.

Wondershare Filmora ensures every frame of your creation is crisp with full 4K support, while tools such as the chroma-key may be accessed simply by double-clicking on the clip once you’ve put it on your timeline.

Finally, you can easily upload your project directly to video-sharing sites like YouTube or Facebook.

You may find this feature a great time saver if you have a tendency to post your videos to social media, yet don’t leave aside the option to burn your project to a DVD.

Filmora lets you add dynamic backgrounds and special effects to your videos, with its advanced green screen feature.

The software also lets you edit and adjust the audio track of your video. You can easily cancel out background noises, add music, insert new audio tracks, and more.

Wondershare Filmora key features you’ll most likely find useful:

  • Amazing color grading presets
  • Frame-by-frame preview to make sure no errors ever occur
  • Editing support for 4K videos
  • Multiple effects to choose from, such as slow-motion and reverse
  • Creative filters and professional 3D LUTs at your disposal

Wondershare Filmora is a subscription-based service with dedicated plans for individual, business, and educational use.

Wondershare Filmora

Deliver high-quality videos with multiple effects and convenient, direct upload.
Free trial Visit Website

AVS Video Editor – Easy-to-use software

AVS Video Editor is a comprehensive video editing software tool geared toward novice and casual users.

You should know from the start that it allows you to blur your video in a few clicks.

It offers you a few professional video effects you’ll most likely appreciate using, including Blur, Gaussian Blur, and Motion Blur.

You can choose the one that suits you best and adjust the Blur level. By default, it is set to the maximum value and higher values always produce a more intensive blur effect.

However, the choice is yours, just as you may blur the entire video or the selected parts only.

AVS Video Editor includes other post-production features for quick and efficient video edits. It lets users rotate, split, cut, and trim video footage.

It also provides a set of effects and transitions. Plus, users can section their videos and organize the materials by adding menus and subtitles.

Because this software is geared toward the casual user, it lacks some of the features you may expect to get from a video editing program, yet it compensates with others.

AVS Video Editor key features you may enjoy:

  • Easy-to-use software
  • Make stunning slideshows that include audio tracks, video effects, and transitions
  • No less than 300 innovative video effects and transitions
  • Directly publish your creative work on social networks

AVS Video Editor is a licensed product. It is compatible with Windows operating systems starting with the XP version and going up.

AVS Video Editor

Create professional-looking videos within minutes with easy-to-use editing tools and effects.
Free trial Visit Website

Movavi Video Editor Plus – Professional touch

Movavi Video Editor Plus is a program that does blur images. As its name suggests, you may use it to edit and enhance videos easily.

This includes blurring the background of your videos. In order to apply a basic video blur effect, choose between Blur – mild or Blur – intense, according to the amount of blur you want to add.

You may even add an artistic touch to your blurring. For that, give a try to the effects in the Bokeh blur series.

Different bokeh shapes – diamonds, hearts, and flowers – are waiting for you. This isn’t enough if you want to become the director of your own story.

This video editing software, although intuitive and easy to use, provides the necessary tools to produce professional-level video materials.

These tools include keyframe animation options, chroma key, and tons of effects for transitions, annotations, and more.

The software offers support for the video’s audio track, allowing users to record and insert voiceover materials directly from the UI.

Other Movavi Video Editor Plus key features you may find useful:

  • It is incredibly easy to install
  • Simple interface
  • Filters, captions, and transitions add a professional touch to your videos
  • You may instantly save and share these images on your preferred social networking platforms like Facebook and WhatsApp

Movavi Video Editor is a licensed product for Windows operating systems.

Movavi Video Editor Plus

Achieve appealing videos with Movavi’s large set of effects.
Free trial Visit Website

Have you come to a similar conclusion or do you fancy the idea of using another high-end tool from our list? Don’t hesitate to share your opinion in the comments area below.

How to use clothing design templates in Adobe Illustrator

Creating clothes takes a lot of time and imagination, especially when you are trying to make something special. Of course, no matter how great the fabric and how well you sow them, the most important part is actually the designing phase.

While this was something you could do using pen and paper in the old days, now that everything is digital, software that can make this task far easier is flooding the market.

However, the journey between the image that you have in your head and the actual drawing board is incredibly tedious, let alone seeing the clothes in real-life.

Since the lack of imagination is also something that is quite common, one great way to simplify the process is to use and follow templates, and then expand from there using your own unique touch.

Unfortunately, this is is easier said than done, since finding a good template cand be hard enough, let alone find plenty of good templates in one place.

The good news for you is that there is a way you can get your hand on a wide range of templates, and they are all found in one single software tool: Adobe Illustrator

How can I use clothing design templates in Illustrator?

What is Adobe Illustrator?

Adobe Illustrator is a vector graphics editing tool created and distributed by Adobe.

The first iterations of Adobe Illustrator began somewhere in Adobe Illustrator 1985, and it has slowly grown to become of the most recognizable and widespread graphic editors in the world.

Adobe Illustrator

Adobe Illustrator

With hundreds of templates at your disposal, clothing design will just become easier and intuitive by the day!
Free trialVisit website

How to use templates in Illustrator?

  • Choose File and select New From Template.
  • Choose File and go to New.
    • In the New Document dialog box that appears, click Templates.
  • In the Welcome screen, click From Template in the Create New list.

Don’t forget to also install any plug-in or template that you plan on using for your clothing design.

These steps apply to pretty much any type of project you are working on using Adobe Illustrator, regardless of whether we are talking about clothes, business cards, logos, etc.

Given the present scenario, what makes Adobe Illustrator great is not necessarily the toolset that it brings, but rather the fact that it comes with an extremely expanded library of tools and templates at its disposal.

These allow for Adobe Illustrator to be used in designing pretty much anything, and that is just with the templates provided by Adobe itself.

However, plug-ins created by both Adobe and users can help Illustrator expand its use even more.

For example, there are plenty of templates that can allow you to create clothing more easily.

These include either the typical fabric patters that you can use to see how a given piece of clothing would look like when made from a certain material or even templates of clothes that are almost completed, and you need to do is add your own personal touch to them.

That being said, if you want to design some fine-looking clothes without too much of a headache, you might as well follow some templates as a starting point, and let your imagination run wild from there.

While other programs may help you do that, Adobe Illustrator is among the very few that offer all the tools that you may ever need, plus a library of templates that will leave you in awe.


FIX: Adobe Creative Cloud Installer Failed to Initialize

To make use of any of the Adobe apps, you need to install the Adobe Creative Cloud installer.

However, some users have reported the Adobe Creative Cloud installer failed to initialize error while installing the app or updating the Adobe Application Manager on Windows.

This error can occur because of corrupt installation files, and you should address it immediately.

What can I do if the installer failed to initialize in Adobe?

1. Reinstall Creative Cloud Desktop app

  1. Type control in the home screen search box and click on Control Panel.
  2. Go to Programs, then to Programs and Features.
  3. Right-click on the Adobe Creative Cloud app and click on Uninstall.
    Adobe Creative Cloud failed to initialize
  4. Restart the computer when the process ends and run the installer.
  5. Make sure you download the latest version.
  6. Once the installation process has finished, check for improvements.

Adobe Creative Cloud

The latest version of Creative Cloud comes with 20+ Adobe apps, 100GB of storage, and awesome collaboration features.
Free trial Visit Website

2. Rename the OBE Folder

  1. Open File Explorer from the Taskbar.
    Adobe Creative Cloud failed to initialize
  2. Navigate to the following location:
    C:/ Program File(x86) / Common Files / Adobe
  3. Locate the OOBE folder.
  4. Right-click on it and select Rename.
  5. Enter OOBE.old and rename the folder. Click Yes if asked to confirm the action.
  6. Now try to run the Adobe Creative Cloud installer again and check if the error is resolved.

As mentioned, this error mostly occurs due to older incomplete downloaded files or corrupt installation. By renaming the OBE folder, you allow the installer to install new files.

3. Repair Adobe Creative Cloud App

  1. Press the Windows Key + R to open Run.
  2. Type control and click OK.
  3. In the Control Panel, go to Programs, then to Programs and Features.
  4. Select Adobe Creative Cloud and click on Uninstall/Change option on the toolbar.
  5. Click Yes when asked if you want to uninstall/change the software.
  6. Now you will see a dialogue box with Uninstall and Repair option.
    Adobe Creative Cloud failed to initialize
  7. Select Repair and follow the on-screen instructions.
  8. Once the repair is complete, restart the PC.
  9. Run the Adobe Creative Cloud installer again and check for any improvements.

Keep this Adobe Creative Cloud built-in repair tool in mind; it might come in handy for other app issues.

4. Reinstall with Adobe Creative Cloud Cleaner tool

  1. First, mMake sure you have uninstalled the Adobe Creative Cloud app from the Control Panel, as shown before.
  2. Once done, restart the computer.
  3. Download the Adobe Creative Cloud Cleaner Tool (official source).
  4. Right-click on the file and select Run as Administrator.
    Adobe Creative Cloud failed to initialize
  5. Follow the on-screen instructions. (This tool uses the command line interface so you may have to select some option accordingly.)
  6. All you have to do is remove all the files related to Adobe Creative Cloud, so make sure you select the right option.
  7. If successful, an Adobe Creative Cloud Tool completed successfully message will appear.
  8. Re-run the installer provided in the first solution and check for any improvements.

We hope the solutions in this article will help you to resolve the Adobe Creative Cloud installer failed to initialize error in Windows 10.

If you have any other questions or suggestions, feel free to leave them in the comments section below and we’ll be sure to check them out.

5 Best AMV Editing Software to Use in 2026

Thanks to the latest advancements in video editing, now anybody can create professional-looking Anime music videos. And all that from the comfort of their own home.

Nevertheless, in order to capture the entire range of emotions you want to represent, you will need specialized software. Fortunately, there are a lot of choices on the market at the moment.

These tools usually contain a large number of features, incredible processing power, and strong rendering capabilities, which is a lot to handle for a beginner. But you needn’t worry!

We will explore the best software options that can help you create amazing AMV projects to share with your friends and family. Make sure to read on to find on more about dealing with AMV making software.


What is the best AMV making software?

Adobe After Effects

Adobe After Effects

This motion graphics software from Adobe is a great tool that allows you to create amazing professional-looking anime music videos.

Adobe After Effects is part of the Adobe Creative Cloud pack, and its features cover a wide spectrum of customization tools for your video projects.

Even though you need a bit of experience in order to be able to use all the features found in this software, there are a lot of official Adobe tutorials that can help you on your learning journey.

Let’s quickly look at its key features:

  • Custom keyboard shortcuts can be set that streamlines the entire process of video editing
  • You get access to a wide range of masking and shaping points that allow you to create incredible video projects
  • Powerful built-in motion graphics features
  • Can easily animate any element you choose to by using the incorporated data-driven animation tools
  • Unlimited editing power at a professional level
  • 3D pipeline with Cinema 4D Lite R19
  • Wide range of incredibly realistic effects
Adobe After Effects

Adobe After Effects

Optimize your anime music video to the finest detail with the best motion graphics software Adobe has yet produced
Free trialVisit website

Adobe Premiere Pro

Yet another product from Adobe made it in this list and that is for good reason. We’ve included two Adobe products in this list thanks to their synergy to create stunning AMV as they fill different needs.

You can create basic transitions and crossfades with free software, but you should consider investing in a professional video editing software if you are looking to become a pro.

Adobe Premiere Pro is mainly used for mixing, splitting, removing, and joining video clips, whereas Adobe After Effects is used to create special effects, titles, motion graphics, and animations.

Let’s quickly look at its key features:

  • Industry-leading automated video editing toolkit
  • Seamless integration with other apps and services (After Effects, Adobe Audition, etc.)
  • Cross-platform compatibility and support for any camera and format from 8K to VR
  • Auto Reframe function to optimize footage with intelligent reframing
  • Selective color grading presets
  • Step-by-step in-app tutorials
Adobe Premiere Pro

Adobe Premiere Pro

Looking for a friendly AMV editor? The Premiere Pro is just what you need to achieve perfect timing between music and clips
Free trialVisit website

Vegas Pro

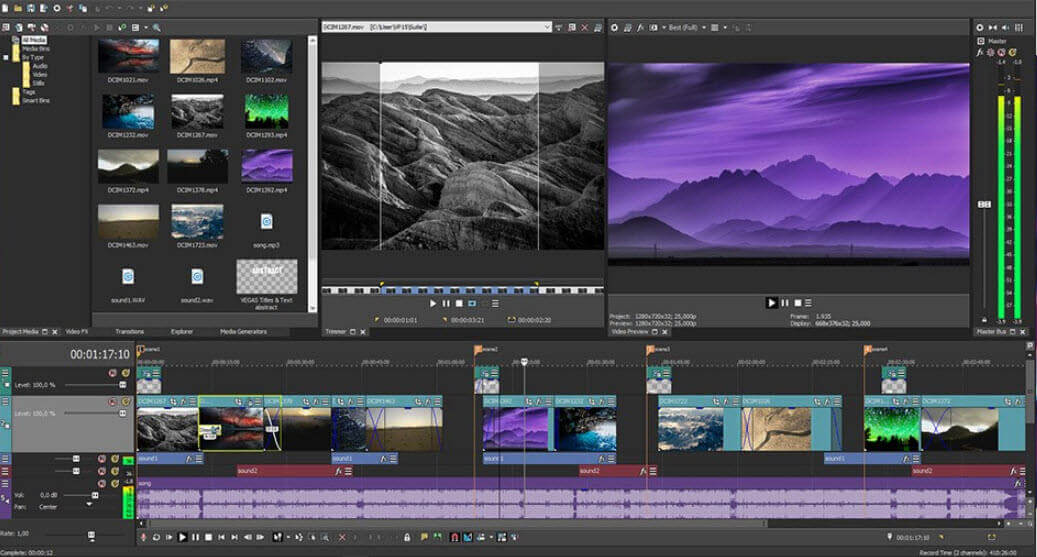
Vegas Pro is one of the most used applications in the domain, allowing you to create amazing-looking anime video movies.

The wide range of professional features found in this software is extremely useful, but if you’re a beginner, it implies that you spend some time figuring out what every option does in order to achieve great results.

You can use this software to do 3D editing, apply specific color corrections, compositing, allows automatic crossfades, multi-cam editing, and offers you access to an incredibly wide range of special effects.

Let’s quickly look at its key features:

  • Incredibly exact motion tracking
  • Automatically creates subtitles and sets custom timeline regions of a specific video file
  • ACES 1.0 (Academy Color Encoding System) to create real-like colors
  • Supports 4K video quality
  • Multicamera editing
  • Great video stabilization features – allow you not to worry about your video being shaky
  • Full support for HDR (High Dynamic Range) color
  • 360° editing to create immersive environments for projects that can be customized endlessly
Vegas Pro

Vegas Pro

Vegas Pro is an excellent, reliable and easy to use program that will help you create awesome AMV
Check priceVisit website

Cyberlink PowerDirector

Boasting premium video editing tools, an intuitive user interface, and an impressive royalty-free stock collection, the PowerDirector is best equipped to help you craft professional-looking AMV projects.

It includes advanced mask tools to manage images with unparalleled precision, enhanced keyframing for dynamic motion graphics, professional-grade effects, and countless templates.

Let’s quickly look at its key features:

  • Dynamic vector-based keyframe controls and frame by frame motion tracking (Stop Motion, Freeze Frame, Zoom & Pan)
  • Professional effects (green-screen effects, transition effects, glitch effects, distortions, and more)
  • Fully customizable animated templates
  • Color management (adjust the saturation, hue, and brightness, multi-key color sampling, selective transparency, color grading presets, and more)
  • Comprehensive correction and video enhancement tools (correct Fish-Eye distortions, eliminate white balance, stabilize shaky footage, and more)
  • Premium format and camera support (HD and 4K video rendering)
Cyberlink PowerDirector

Cyberlink PowerDirector

Cyberlink PowerDirector is the ultimate video editing tool, featuring professional effects and video enhancement tools
Check priceVisit website

Aiseesoft Video Converter Ultimate

Aiseesoft Video Converter Ultimate is one of the best AMV editors on the market.

Well-balanced and feature-rich, this software delivers premium editing tools all wrapped up in a neatly organized interface that will not intimidate inexperienced users.

You can easily crop, rotate, merge, add a watermark to customize your videos, and more. Even the finest details such as saturation, hue, brightness, or contrast are not overlooked.

You can play with filters, add custom images and sound effects (including audio tracks and subtitles) and even adjust the color, font, and style of the text to perfectly shape your desired watermark.

Let’s quickly look at its key features:

  • Native support for all popular video and audio output formats
  • Cross-platform compatibility (including Windows, Mac, Android, and iOs devices)
  • Robust video editing toolkit (filters, effects, color management, text adjustment, watermarks, etc.)
  • Add, remove or modify audio track and subtitles
  • Process AMV videos for better playback
Aiseesoft Video Converter Ultimate

Aiseesoft Video Converter Ultimate

Experience the highest quality of video editing features with Aiseesoft Video Converter Ultimate

In this article, we explored some of the best software options that can help you create amazing anime music videos.

The features found in these software options should cover all your requirements – do let us know if this is indeed the case by reaching for the comments section below.


How to install and manage fonts in Windows 10 [Quick Guide]

If you want to add some additional cool fonts to your Windows 10 OS, you don’t have to put much effort in it, because it’s very easy.

And in this article we’ll show you not only how to install fonts in your Windows 10 but we’ll also provide you with interesting data on how to manage them.


How can I install and manage new fonts in Windows 10?

1. Use the Fonts folder in Control Panel

  1. Go to Search.
  2. Type fonts and open Fonts.
  3. Drag your font file to Fonts folder and wait until the installation is complete.

Your fonts are packed in .otf files and these files have an installing option, so just right-click on the font you want to install, and choose Install.

There are two ways to add fonts to Windows 10: you can add them simply by installing them or putting them in the Fonts folder in Control Panel.


2. Download fonts from the Microsoft Store

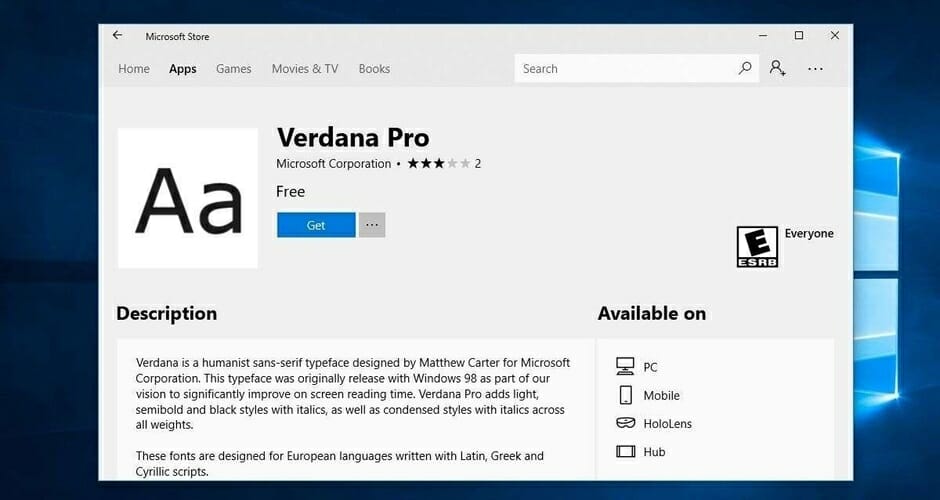
You can also download and install Windows 10 fonts from the Microsoft Store. There are many resources that you can use to add new fonts on your computer.

For example, the Fonts app lets you customize your posts and replies on social media using a wide variety of fonts.

You can write in different styles and your text will definitely stand out in the crowd. You can also rotate your text if you want to puzzle your friends.


3. Use Adobe Fonts

However, if you want to see what it is truly like to have all of the top-quality fonts at your disposal, then your best bet is with Adobe Fonts.

By using Adobe Fonts, you will get the fonts directly on the websites that you are using. More so, they become synced via Adobe Creative Cloud to applications installed on the subscriber’s PC.

Get ready to be amazed by the multitude of style fonts that can help you enhance the impact you make whether you’re an entrepreneur or a media content creator.

You have over 1.000 different options to choose from and they’re all one click away, all you have to do is switch the toggle button and you’re free to make the best of those amazing fonts.

The fonts you download with this smart tool can also be used with other editing programs, for example you can add the Adobe font to Photoshop in your Windows 10.

A great advantage of this high-quality tool is the fact it’s reliable so you won’t have to deal with bugs or other annoying errors.

Adobe Fonts

Adobe Fonts

Get your hands of this amazing tool that provides you with the largest variety of professional fonts!
Free trial Visit website

4. Manage your fonts

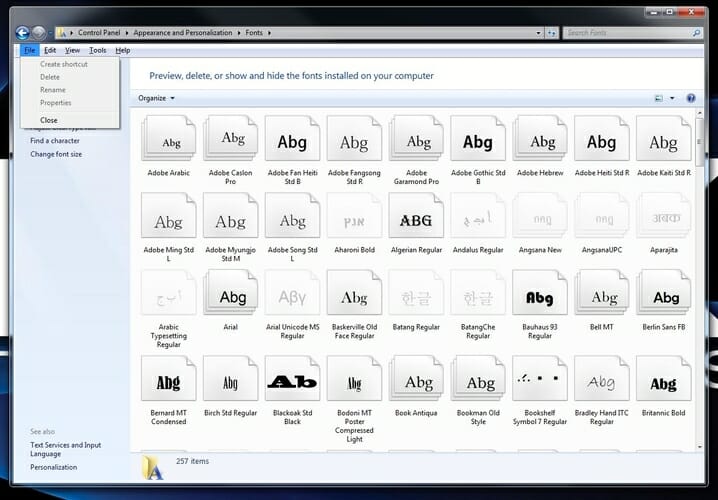
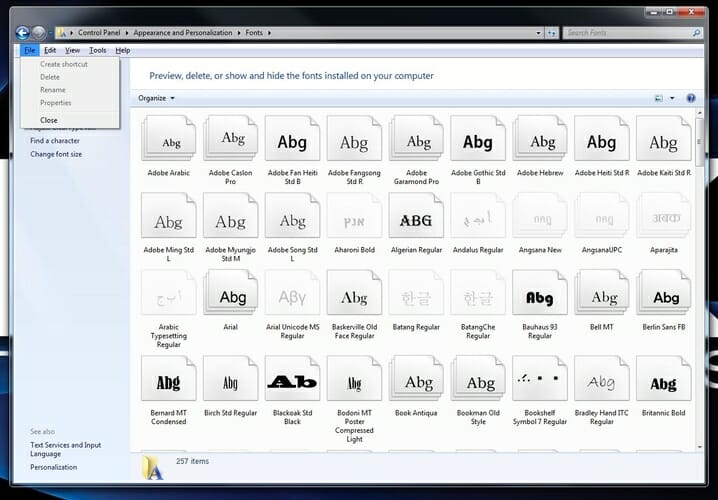
Once installed, you can manage your fonts. You can preview them to make sure that you really like them, hide them if you’re not planning on using them any time soon or you can simply delete them.

All you need to do is go to Start, type fonts and double click on the first result. The fonts window will now open and you just have to select the font that you want to manage and click on the option of your choice.

There you go, with just a few simple steps, you have new fonts installed on your computer, ready to decorate your project or other kinds of work.

As we already showed you, managing your fonts is as easy as installing them. Just go to the above-mentioned Fonts folder in Control Panel, where you can preview, add, delete or even print your fonts.


5. Manage possible font issues

Upgrading to Windows 10 can also create some font-related problems. These are not some out-of-normal issues but can seriously obstruct you from using your PC.

Hopefully, we have managed to find the necessary fixes for the most faced font issues in Windows 10.

First of all, we have a great fix article if you encounter problems with installing fonts in Windows 10 that it’s definitely worth your attention.

Fortunately we managed to offer solution for one of he most common issues that users confront with and you can check it in our article on how to fix the font being too small in Windows 10.

If you’re having issues with changing the default font in Windows 10 Registry Editor, take a look at this guide that will help you handle the problem. Checking the fixing guides above will help you get rid of various font issues in Windows 10.


As you can there are plenty of sources if you want to install fonts in Windows 10 and we recommend you to try all of them.

Don’t forget that if you encounter any issues you can always check out the useful guides we mentioned about how you can fix potential errors.

If you have some additional comments or questions, please write them down in the comments section below, we would love to hear them.


FIX: Photos App Not Opening in Windows 10/11

We’ve been hearing reports that certain apps either open slow or don’t open at all in Windows 10. Such is the case with the Photo app, which doesn’t open after the Windows 10 upgrade for some users.

Now there’s a fix for the annoying problem

Many users have been complaining that the Photos app is either not opening in Windows 10, or not working at all.

We finally have some fixes suggested by users on the Microsoft Community support forums. One user said the following:

It doesn’t seem to want to load all of my local photos. Directories which contain 30-40 photos sometimes only display 1 image…and some photo directories don’t show up at all.

SkyDrive integration is pretty much zero as it simply throws me into the handicapped Metro browser

And somebody else completed, saying this:

I am unable to open photo app. All that happens is that it sits there for a while then opens showa thumbnails of photos then shuts down and goes straight to desktop.

Any help would be appreciated. I have tried trouble shooter, re booted but no change.

Multiple forum postings have been created with the same problem on Microsoft’s community network. If you find yourself in the same situation, here’s what you need to do.

  1. Try a third party photo editor
  2. Disable Photo Shuffle
  3. Update Windows 10
  4. Update the Photos App
  5. Run the Windows App Troubleshooter
  6. Repair your Registry
  7. Restore the Photos app
  8. Install third-party photo apps

How can I fix the Photos App on Windows 10?

1. Try a third-party photo editor

If the Photos App is constantly blocking or simply won’t open, you might want to consider a third-party software that can execute the same functions and also add numerous new capacities for your benefit.

Adobe Lightroom is a great alternative as it not only also you to view photos, but also to edit, organize, store, and share your photos across any device.

This cloud-based app provides easy-to-use editing tools that deliver professional-looking results, a photos management solution (it can manage any number of photos), 1TB, or more for storage and access to an online inspirational library.

Let’s quickly look at its key features:

  • Interactive, in-app tutorials on both desktop and mobile
  • Photos library for inspiration
  • Panorama fill edges
  • Smarter organization (machine learning-powered Adobe Sensei to quickly find photos or create albums)
  • Cross-device functionality
  • 1TB or more Cloud storage

⇒ Get Adobe Lightroom

2. Disable Photo Shuffle

  1. In Windows 10 Photos App, turn off Shuffle Photos from the Charms > Settings > Options
  2. Delete the jpg and .dat files from
    AppDataLocalPackagesFileManager_cw5n1h2txyewyLocalState

    AppDataLocalPackagesFileManager_cw5n1h2txyewySettings
  3. Enable Library Options in any Explorer File Folder
  4. Move all pictures out of the Pictures Library folder to a different folder, but then copy that new folder back to it
  5. Enable Thumbnails by unchecking Always show icons, never thumbnails in Folder Options
  6. Open Windows 8.1 Photos app and try Setting a Photo as Tile Photo. You can also try re-enabling Photo Shuffle instead; this cancels setting a photo as the tile photo. Close app.
  7. Check Photos app on Start Screen for Live Tile option

This might not be the simplest solution, but it will be helpful if the Photos app is not working on Windows 10.

3. Update Windows 10

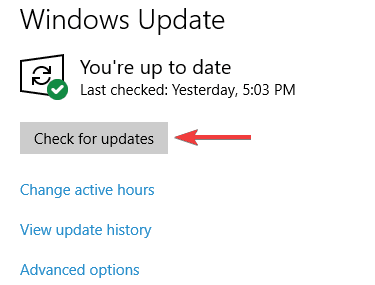
  1. To access the Windows Update section, you can simply type update in the search box and select Windows Update.
  2. Now click on Check for updates button.
    check for updates

If the Photos app is not opening on Windows 10 the problem might be related to missing updates.

Install the latest system updates on the computer, restart it, and then try to launch the app again to see if this fixed the problem.

As a quick reminder, Microsoft constantly rolls out Windows updates in order to improve the system’s stability and fix various issues.

Some of these updates may target native Windows apps, including the Photos App so make sure to turn automatic updates on or check for updates from time to time.

4. Update the Photos app

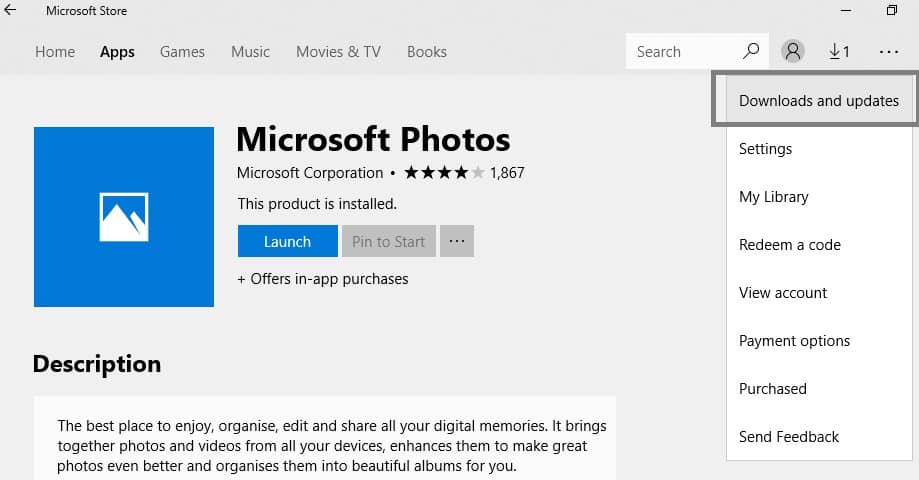
update photos app
  1. Go to the Windows Store.
  2. Open the Photos App page, click on the menu (the three dots) and check for updates.

New updates will automatically get installed on your computer.

If you don’t want to install all the Windows updates available for your OS version, you can update only the Photos app.

Keeping the Photos app up to date is the best way to fix any bugs and issues, so if the Photos app is not working on Windows 10, be sure to update it.

5. Run the Windows App troubleshooter

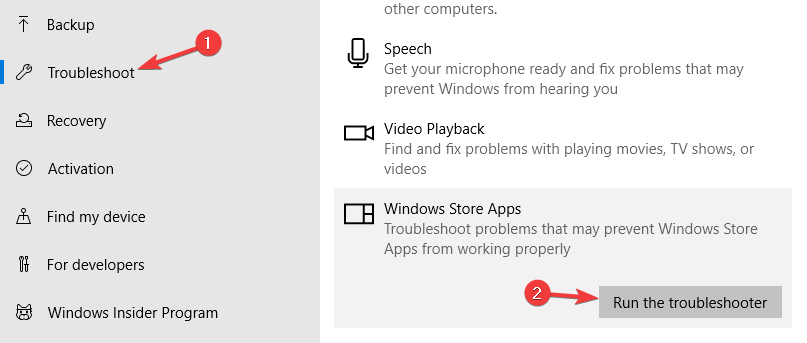
  1. Go to Settings and head over to Update & Security. Select Troubleshoot in the left-hand pane.
  2. In the new window, go to the section Find and fix other problems  scroll down to Windows Store Apps and click the Run the troubleshooter.

Built-in troubleshooter that can fix a bevy of PC issues, and if the Photos app is not opening, be sure to try it out.

6. Repair your Registry

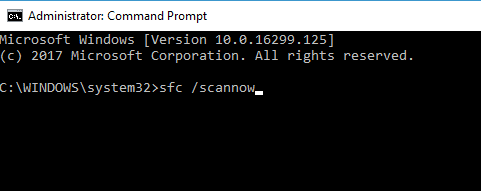
  1. Go to Start, type cmd, right-click Command Prompt and select Run as Administrator.
  2. Now type the sfc /scannow command.
  3. Wait for the scanning process to complete and then restart your computer. All corrupted files will be replaced on reboot.

If the Photos app is not working, you can use Microsoft’s System File Checker to check for system file corruption.

Corrupted or missing registry keys may prevent the Photos App from launching. The simplest way to repair your registry is to use specialized tools that can fix your registry.

To do this securely, we kindly advise you to use the most efficient registry cleaner programs that will automatically take care of the damaged files.

Don’t forget to first backup your registry in case anything goes wrong.

7. Restore the Photos app

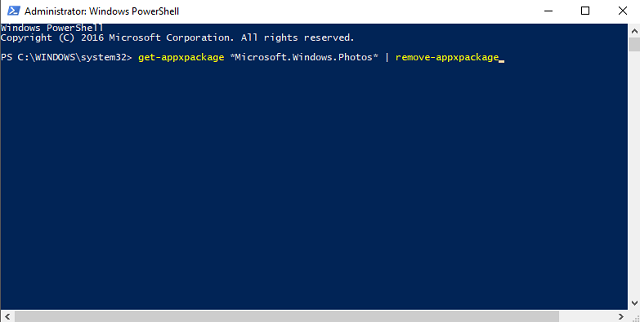
  1. Go to Start, type powershell, launch Windows PowerShell (Admin)
  2. Enter the following command, and then hit Enter:
    get-appxpackage *Microsoft.Windows.Photos* | remove-appxpackage
  3. Wait until the Photos App is removed from your computer and then reboot it.
  4. Go to the Microsoft Store and download and install the Photos App again.

You can also try to restore the Photo app using the methods mentioned above if Photos app is not opening on Windows 10.

8. Install third-party photo apps

Well, if nothing worked, the best solution is to install a third-party photo management app.

For more information about the best photo apps to install on your Windows PC, check out our 10+ best photo management and editing software for Windows 10 article.

Has this solved your issues with the Photos app in Windows 10? If not, leave your comment and we’ll look together into your problem and try to find a working fix for it.

Kinetic Typography Software: 5 Best to Use in 2026

Kinetic typography can be found almost anywhere on the web. This handy way of presenting text is popular because it successfully catches your attention.

Videos that include kinetic typography can help you present complicated ideas with simplicity, create immersive commercials for your products, whiteboard explained videos, etc.

Are you looking for a way to create videos with animated texts easily?  Then, read on. In this article, we will explore some of the best options on the market that allow you to do just that.

Even more, the options presented in this list cover other features of video editing/creation that you might find useful.

What is the best software to create animated text videos?

Adobe After Effects CC

Adobe After Effects

This motion graphics software from Adobe is the best text animation software that allows you to create kinetic typography. Adobe After Effects is part of the Adobe Creative Cloud pack.

Compared to the other options presented in this article, this software is more complex and requires you to have extensive training before diving in.

Fortunately, there are a lot of tutorials online that provide you with step-by-step instructions on how to get started.

If you are a beginner and want to learn how to use Adobe After Effects, you can find a wide range of specific topics on the Adobe official site. You can also use this specific guide on how to create animated text in After Effects.

Let’s quickly look at its key features:

  • Use keyboard shortcuts
  • Access to mask and shape points
  • Wide range of motion graphics
  • Data-driven animation tools — you can easily animate charts, graphs,etc.
  • Great range of optimization tools
  • Professional editing features
  • 3D pipeline with Cinema 4D Lite R19
  • Multiple effects
Adobe After Effects

Adobe After Effects

Take typography to the next level with the industry-standard motion graphics and visual effects software
Free trialVisit website

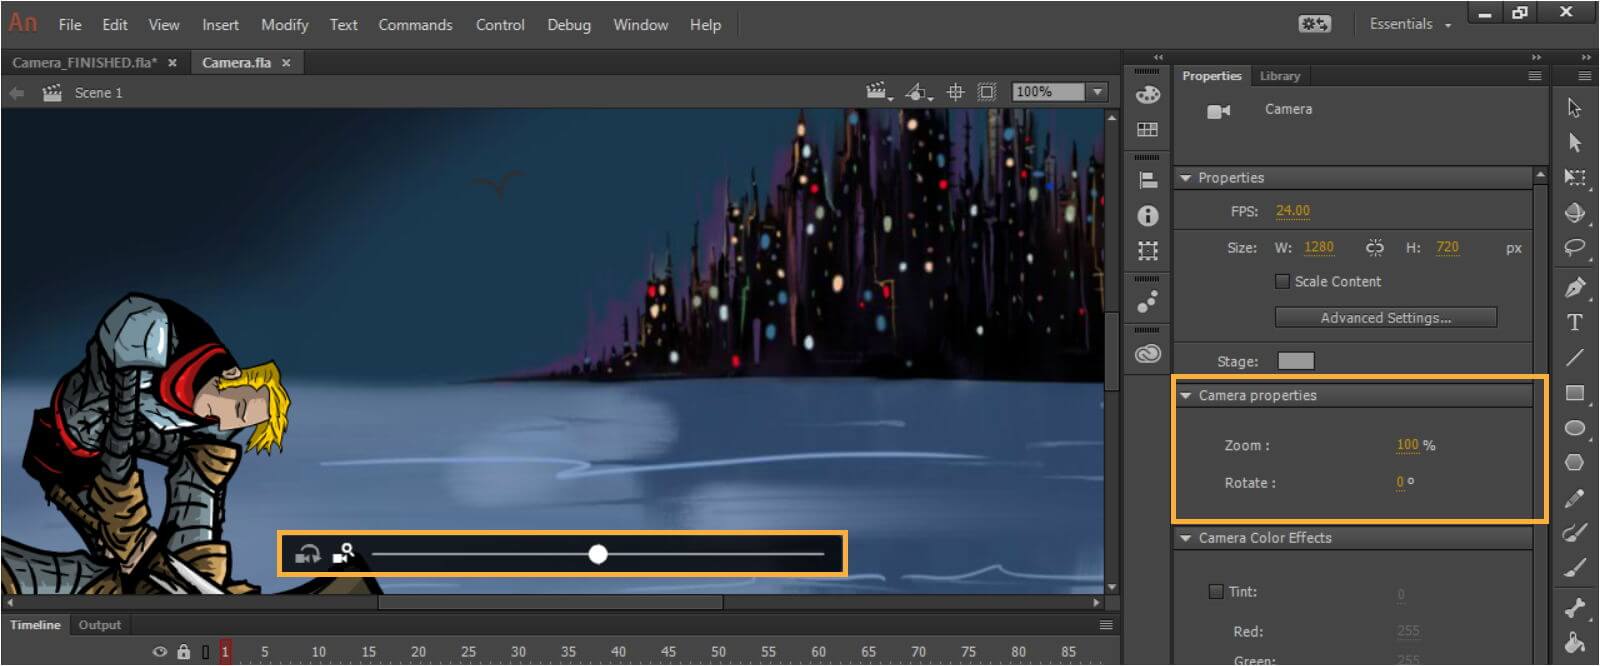
Adobe Animate CC

Animate CC is another great animation tool that is part of Adobe Creative Cloud. Compared to After Effects, this software is simpler, allowing you to experience a shorter learning curve.

Adobe has been around for many years, and it has always stayed on top of its competition, bringing quality products with a large variety of features at their disposal.

Moreover, Adobe’s popularity also comes from the fact that their programs are filled with tutorial videos that help novices learn the basics of their software.

You can find a wide range of tutorials regarding how to use Animate on the official Adobe site.

Let’s quickly look at its key features:

  • Animate anything from cartoons and banner ads text
  • Compatible with any platform and any device
  • Quick sharing to social media
  • Simplified tool for rigging and modifying animated characters
Adobe Animate CC

Adobe Animate CC

Breathe life into your text with Animate Animate CC powered effects and its plethora of awesome features
Free trialVisit website

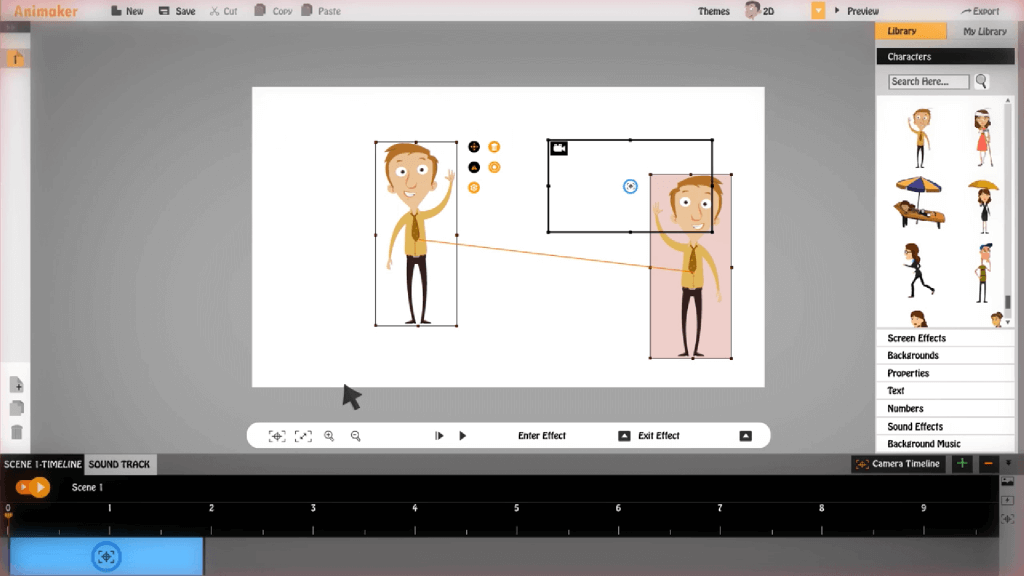
Animaker

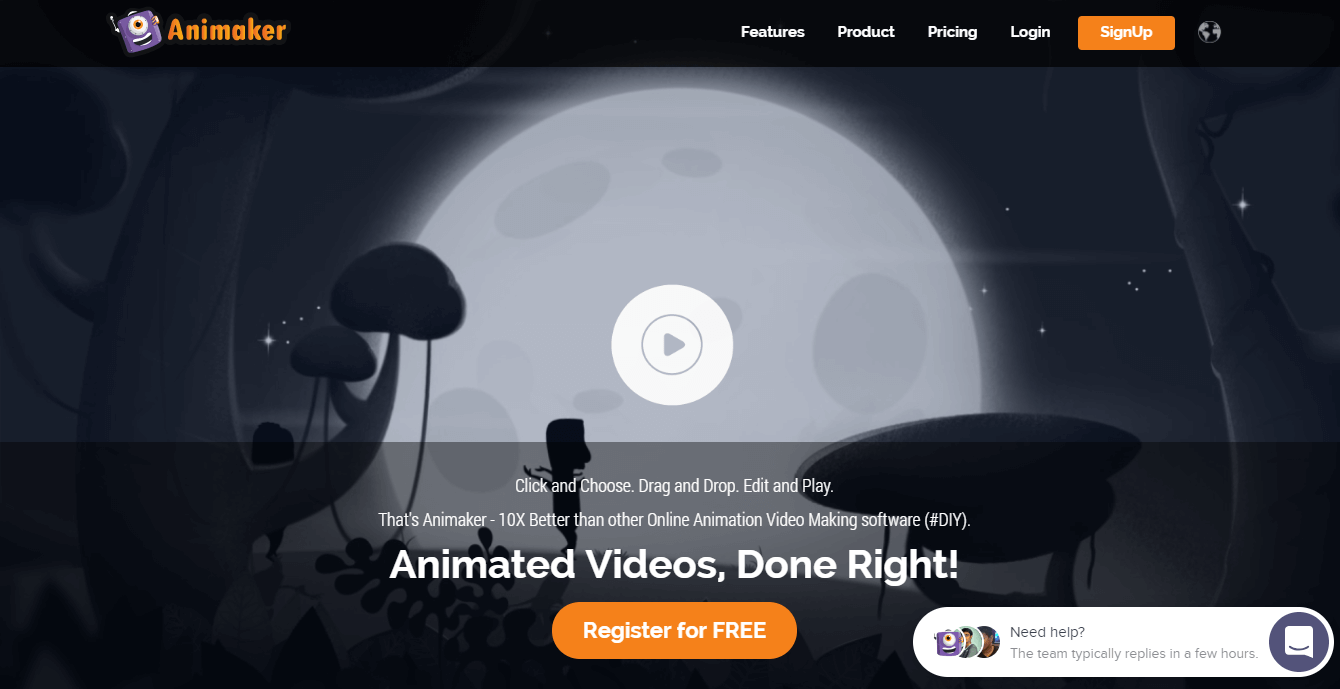
Animaker is a great web-based video creation tool that will give you all the features required to create a kinetic typography video.

This program has 8 visual tools, features that allow you to collaborate with your team easily, and a very encompassing animated library.

Animaker’s user interface was designed to offer you a simple and yet effective video editing experience, making it a viable option for beginners and experienced users alike.

You can easily create animated videos, video infographics, and a range of animated presentations as well.

Let’s quickly look at its key features:

  • Animaker deck (includes record, multimove, curve features and more)
  • Text to speech converter
  • 50+ background music tracks
  • Direct voice recording
  • Create Full HD videos and export them easily
  • Wide range of animations and transitions
  • Customizable templates
  • Social sharing

Animaker

Animate your typography with unique and custom templates, and create stunning visual effects with Animaker
Check price Visit website

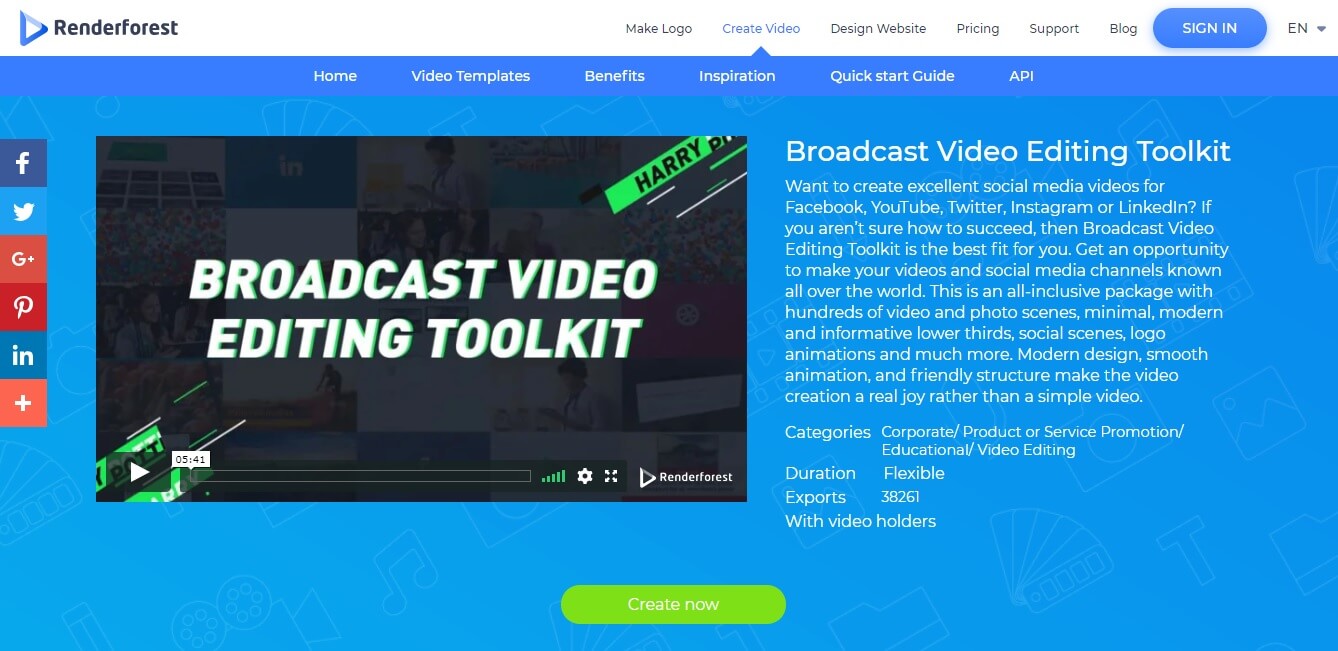
Kinetic Typography Maker – Renderforest

This web-based platform is a very powerful and simple to use tool that can be used to create kinetic typography videos easily for everyone.

The Kinetic Typography Maker from Renderforest can be used by beginners and experienced users alike. It is absolutely free.

In addition, the interface is intuitive and comprehensive, while also rocking a modern simplistic style. This makes Renderforest a great product that you shouldn’t miss.

Let’s quickly look at its key features:

Renderforest

Create awesome and attractive kinetic typography videos with this useful and easy-to-use tool
Get it free Visit website

Biteable

Biteable is an intuitive, online video editor that is perfect for quick editing and animating text, characters, and pretty much anything you want.

The tool is flexible and easy to use offering a generous collection of premade templates to get you started. Plus, it is completely free.

With Biteable, you can create videos that stand out in a snap. Moreover, the program has been used by renown companies such as Disney, Amazon, etc.

The software’s goal is to allow everyone to create animations that suit their unique style, thuse they are constantly adding features and customization options to it.

Let’s quickly look at its key features:

  • Impressive library (over 800.000 stock footage clips and stunning animations)
  • Add special effects and animation to your clips
  • The extensive brand colors palette
  • Sharing and download options to keep your content forever

⇒ Download Biteable

In this article, we explored some of the best software options that allow you to create animated text videos.

The options covered in this list give you the opportunity to choose the best option for your needs, depending on your skills.

We would love to find out what you chose from this list, so don’t be shy to let us know in the comments section below.

Car Design Software: 7 Best to Use in 2026

Automotive design is a type of design primarily concerned with developing the visual appearance and aesthetics of a vehicle. In order to be able to design a car, you will need specialized software (CAD).

CAD stands for Computer-aided design, and it is the use of computer systems to help you create, modify, and optimize your design ideas.

CAD software is extremely useful as it enhances the productivity of the designer and it also creates the necessary documentation.

One of the main advantages of using CAD software for car design is the fact that it is way easier to master this type of software than to use the classic pen and paper.

This type of software allows you to share the designs with others easily, great detail when it comes to measurements and your intricate design can be rotated and observed from any side.

What is the best car design software for Windows 10?

Adobe Illustrator

Our top pick for the Best car design software is Adobe Illustrator. This powerful software gives you an incredible array of tools that can help you design the next flagship car.

Adobe Illustrator was built from the ground up with the idea of design in mind, and this has permitted the creators to pack it full of incredible tools and features that can simplify the design process.

Because the designing process is so well thought-through, this enables you to focus on the details of your creation, without worrying about limited capabilities.

Key features of Adobe Illustrator:

  • Anchor points with custom sizing capabilities.
  • Full integration with the Creative Cloud suite.
  • Fast rendering speeds for the blur, drop shadow, and glow effects.
  • Puppet Warp tool that enables workspace optimization.
  • Properties Panel offers you customized options depending on the selected elements.
Adobe Illustrator

Adobe Illustrator

Create the car of your dreams with this top vector-based design software used by millions of designers all over the world.
Free trialVisit website

Adobe Photoshop

Photoshop CC - Best car design software

Adobe Photoshop is another great software option if you want to design beautiful cars. This application has offered users a way to design unlimited amounts of life-like projects, digital art, game characters, etc.

Because of its powerful set of features, Photoshop has been considered the most useful computer design app.

Even though in this guide Photoshop has occupied the second position, it is truly a beast when it comes to design.

Here are some of the key features of Adobe Photoshop:

  • Very powerful 3D design capabilities.
  • Object selection based on AI.
  • Surface Dial option that allows you to adjust the sizes of your brushes, opacity, and more.
  • Automatically converts Smart Objects back to layers for fast editing.
  • A wide array of pencils and brushes (over 1200).
Adobe Photoshop

Adobe Photoshop

Design your gorgeous car with Adobe Photoshop and make the best of your creative ideas.
Free trialVisit website

Autodesk Alias

Alias is a software designed by Autodesk and it is an incredibly powerful tool that you can use to work on industrial designs but is specially designed to be used in automotive projects.

This program has a wide range of tools that are very useful for sketching and modeling, and it allows you to easily go from 2D sketches to 3D models. It is actually used by Aston Martin to develop their car designs.

Key features include:

  • Sketching and illustration tools – draw, edit, craft shapes, add details and materials, review.
  • Ability to define a surface from scanned mesh.
  • You can easily add helix surfaces in Freeform.
  • Enhance design reviews with VR.
  • Dynamo integration – allows you to quickly generate repeatable patterns.
  • Snap, scale, pivot images.
  • Multithreading.
  • New interface enhancements – customizable keyboard controls, snapping, marking menus, etc.

⇒ Get Autodesk Alias

Autodesk 3DS MAX

If you need to work on automotive designs, 3DS Max from Autodesk is an interesting pick. This is a highly accurate tool used by professional designers. Virtual Reality support is also available.

3DS MAX is a powerful software that can be used for shape modeling, that is why it can be useful to make a great car body.

3Ds Max could be a real advantage for your design process as it can totally help automotive manufacturers to create realistic car designs.

Key features include:

  • Easy and robust modeling.
  • High-end rendering.
  • Efficient 3D animation.
  • Flexible interoperability – Revit, Inventor, Unity, Unreal compatible.
  • MAXtoA integrated plug-in.
  • Open Shading Language (OSL) – create OSL maps from simple math notes.
  • 3D Boolens – ability to create parametric Boolean operations.

⇒ Get Autodesk 3DS MAX


Blender

Blender is an open-source 3D software that bolsters a wide range of useful tools for automotive designs.

It has simulation tools, supports NURBS surfaces and polygon meshes and if you are an advanced user, you can develop your own features.

Because of it’s big community, Blender offers you a wide range of training materials and courses.

Key features include:

  • Cycle Render Engine – Ultra-realistic rendering, real-time viewport preview, PBR shaders and HDR lighting support.
  • Modeling, sculpt, UV – Creating, transform and edit your models easily.
  • Advanced sculpting tools and brushes.
  • 3D painting with textured brushes and masking.
  • Python scripting and a customizable Python controlled interface.
  • VFX – it allows you to import raw footage, track it and mask areas.
  • Animation and rigging.
  • Combine 2D with 3D.

⇒ Get Blender

Rhino 3D

Rhino 3D has many 3D modeling tools, and the drawings are so accurate that you can use them to even design prototypes of complex machinery. This program allows you to get the 3D capture of existing data.

In Rhino 3D, the accuracy of large projects is guaranteed because of its control over annotation styles and history for different dimensions.

Other features include:

  • Free-form 3D modeling tools
  • Compatible with all other design, drafting, CAM, engineering, analysis, rendering, animation, and illustration software
  • Read and repair meshes and extremely challenging IGES files
  • Easy to learn and use
  • Fast even on an ordinary laptop computer
  • Affordable purchase price and no maintenance fees

⇒ Get Rhino 3D

LightWave 2018

LightWave is a leading car design software that offers powerful modeling tools with the ability to create smooth subdivisions surfaces interactively.

This program has a simple to use layer-based system (nodal system) and it allows you to easily manipulate the filters, animations, and effects.

You can easily duplicate objects in a scene using its Instancing feature, and also randomly select, scale and position even surfaces that are entirely different compared to the source.

Key features include:

  • Physically-based rendering system.
  • Render and light buffers.
  • Volumetric engine.
  • OpenVDB support.
  • Surface editor, material nodes, and surface preview.
  • Virtual Reality camera.
  • Integrated FiberFX.
  • Layout-based parametric shapes.

⇒ Get LightWave

In this article, we explored some of the best options on the market for car design software.

This list presents you with a description and an overview of features so you can easily choose the best option according to your creative skills and needs. Let us know what you chose in the comment section below.

Best Colorizing Software for Black and White Photos [2026]

Do you have an old album of black and white photos you would like to bring back to life? If so, then the colorizing software might be the right choice for you.

There are many applications that can help you with that, and in today’s guide we’re going to show you our best picks.

What is the best app for colorizing photos?

Adobe Photoshop – Superb photo colors

Photoshop is a multipurpose image manipulation tool, which is widely used by millions of professional (and amateur) photographers and creative artists across the globe.

One of the key functions of Photoshop is photo colorization; hence, it is arguably one of the best photo colorizing software out there.

Photoshop, though easy to use, requires a certain level of photoshopping or photo-editing skill to use the color management features of the software.

Some of these features include the color wheel, color replacement, eraser, paintbrush, and color plug-ins among others.

Other photo manipulation features of Photoshop include:

  • Marquee, Lasso, Magic wand
  • Video editing, slicing tools, image cropping, frame tools
  • Symmetry mode, drag & drop
  • Multilingual support (26+ languages)
  • Cloud storage (up to 1TB)

Normally, Adobe Photoshop is a subscription-based product, but you can now try it for free, along with all other Adobe products included in the Adobe Creative Cloud Suite.

Adobe Photoshop

Adobe Photoshop

Adobe Photoshop is the master software for image editing so it’s no surprize that it also has a colorization feature.
Free trial Visit website

AKVIS Coloriage – Various color pallets

best photo colorizing software

AKVIS Coloriage is a top-rated colorizing software, which is optimized to provide natural-looking colors to black and white photos.

AKVIS Coloriage hosts an intuitive user interface, which requires no form of layering or complex color management skill to use. Typically, everything is set, executed, and finished within a few brush strokes in minutes.

Basically, with Coloriage, you can add color to black and white photos, remove the color from colored photographs, add color to sketches, desaturate color patterns on photos, recolor fading pictures, and so on.

Other notable features of AKVIS Coloriage include:

  • Multicolor mode, auto-colorization, color library.
  • Multi-format support (PNG, JPEG, TIFF, RAW, PSD and more).
  • Multilingual interface and helplines (9 languages).
  • GPU acceleration, large format print, color print, IPTC & EXIF support.
  • Recolor brush, photo share.
  • Comprehensive online guide.
AKVIS Coloriage

AKVIS Coloriage

Make renewing old photos a simple task with this powerful software.
Free Trial Visit Website

Luminar Neo – Uses the power of AI

Luminar Neo has a simple-to-use interface that lets you organize photos more easily. There are even various AI-powered presets, so you can add various effects with a single click.

You can also find various tools for editing that can help you remove noise or objects, enhance the details, colorize your photos, and more.

Overall, this is a simple but powerful tool, and you can enhance it even further with various extensions, so if you want to colorize photos or edit images, this might be the right tool for you.

Other great features:

  • Powered by AI
  • Comes with a wide array of presets
  • Supports layers
  • Can be enhanced by extensions
  • Easy to use
Luminar Neo

Luminar Neo

Give old photos a new life with this specialized software.
Check Price Visit Website

What is the best AI colorizer?

This depends on your needs and knowledge. Most tools on our list support AI, so if you need a software that can colorize photos with the help of AI, be sure to try one of these tools.

Is there a free program to colorize photos?

Many web services allows you to colorize photos for free. Some of them are:

  • DeepAI Colorizer
  • Image Colorizer
  • Colourise.com
  • Deoldify

For more information, check our guide on best free tools to recolor images online.

Photo colorization is one of the most important photos of manipulation techniques today. With the advent of this technique, old – vintage – photos can now be brought back to life with near-perfect coloring.

If you’re fan of old photos, don’t miss our guide on photo restoration apps. We also have a list of tools that can convert black and white photos to color online, so check them out as well.

In essence, photo colorizing software is an essential tool in photography and graphics designing. And we have reviewed five of the best photo colorizing software for Windows PC.

Digital pre-orders open for The Elder Scrolls Online: Blackwood on Xbox Series X and Xbox One

A variety of options are now available for Xbox One and Xbox Series X console owners looking to prepare themselves for the upcoming June 8th launch of The Elder Scrolls Online: Blackwood content which will add an additional 30 hours of story and a host of other content to the popular online video game.

A basic Blackwood Upgrade is available for Xbox consoles for those that already own the base game. In addition to guaranteeing access to the Blackwood expansion when it launches, the upgrade will also unlock the Dremora Kynreeve Outfit, Deadlands Wamasu Pet, one Iron Atronach Crate, three Blackwood Treasure Maps, and two Experience Scrolls in June and the Nagahide Welwa Ravager Mount and Nightmare Bear Cub Pet for immediate access today.

For those that are feeling fancy, a Blackwood CE Upgrade is also available and contains the Battlefield Nightmare Senche Mount, Jewel-Feathered Sep Adder Pet, Temperamental Grimoire Memento, Deadlands Gladiator Outfit Style, and the Offer Weapon Emote bonus content.

Interested gamers who have yet to play Elder Scrolls Online can pick up the new The Elder Scrolls Online Collection: Blackwood or The Elder Scrolls Online Collection: Blackwood CE bundle which includes the base game, access to the Blackwood access at launch, and the previously released Greymoor, Elsweyr, Summerset, and Morrowind expansions. The same extras featured in the above expansions are also included in the relevant bundles.

The Elder Scrolls Online launched on Windows with a required monthly subscription in 2014 but switched to a post-buy free model when it came to Microsoft’s family of Xbox One consoles the following year. The game was playable on the Xbox Series S and X consoles on Day One due to their support for the majority of Xbox One video games.

Do you play The Elder Scrolls Online and are you hyped for the new Blackwood content? Share your thoughts with the community in the comments below and then follow us on Pinterest and Twitter for more Xbox gaming news.


5 Best Landscape Painting Software To Use

Whether you are looking to build a painting portfolio or trying it as a hobby, digital painting software can help you paint a complete beautiful landscape from start to finish.

When looking for painting software, it is important to look for a tool that allows you to edit your photo background, alter tone and color to the artistic feel and use light to improve focus and dominance.

In this article, we have compiled a list of the best landscape painting software for illustrators, graphics and web designers, animators, and everyone else who likes to paint. So, let’s get started.


What are the best landscape painting software?

Adobe Photoshop

Photoshop-CC-2020

Adobe Photoshop is a popular image manipulation tool. However, it is also a capable drawing software to create digital art. With its unrivaled set of tools for image creation, manipulation and enhancement, and integration with other Adobe software, you get complete control of your assets.

Adobe Photoshop allows you to create fast and precise selections by drawing a simple rectangle or lasso around objects. With Adobe Sensei AI technology, explore a range of creative ideas with new filters. The Quick Selection tool can replace the sky in a photo, adjust your scenery, and more.

For painters, it comes with different kinds of highly customizable brushes to create spray paint, ink wash, markers, chalk, and felt-tip pens effects inspired by iconic artists.

Key features of Adobe Photoshop:

  • Excellent collection of highly customizable and preset brushes
  • Many photo correction and editing tools
  • Clean user interface with improved help and demo menu
  • Synced libraries and cloud document support
Adobe Photoshop

Adobe Photoshop

Paint incredibly immersive digital landscapes with one of the best art-creation tools in existence.
Free trialVisit website

Adobe Illustrator

Another Adobe software that makes a case for a great drawing software for landscape painting is the company’s popular vector graphics program Illustrator.

From turning shapes and colors into logos, and creating typography, draw freehand, and trace recolor graphics, this software can do it all.

With the introduction of Adobe Sensei AI technology, you can now automatically extract colors from a photo, add them to your design, auto-trace a hand-drawn sketch, turn in into a vector graphic, and more.

The new update has added a more powerful cloud document manager, intelligent features to speed your process, type enhancements, and smart glyph snapping to help with text and objection position precision.

Key features of Adobe Illustrator:

  • Good vector graphics design capabilities
  • Improved user interface and performance
  • Compatible with Wacom tablets and Adobe file formats
  • Adobe Sensei AI to automatically extract colors from designs
Adobe Illustrator

Adobe Illustrator

Never feel limited when it comes to digital landscape art creation by using this great tool.
Free trialVisit website

Clip Studio Paint

Landscape painting software

Clip Studio Paint is an outstanding drawing and illustration program that is highly recommended for comic creators. With its superb page management tools, customization option, and drawing features, Clip Studio Paint is geared towards usability.

If you have used Photoshop before, the user interface and work layout will feel like home. However, its relatively inexpensive price tag means you can get into digital painting without breaking the bank. If you have invested in a drawing tablet, pairing it with a stylus means you can reflect every nuance of your pen as it can detect up to 8192 levels of pen pressure.

Clip Studio Paint also features 1000 new materials every month on Clip Studio Assets to help you find something to match your signature style. You can also customize every aspect of your brushes to match your personal style.

Key features of Clip Studio Paint:

  • Range of tools and brushes with unlimited painting styles
  • Greater compatibility with third-party editing software and drawing tablets
  • Excellent value for money
  • Accurate and responsive work layout
Clip Studio Paint

Clip Studio Paint

Clip Studio Paint enables you to create realistic landscape art offering you access to a multitude of brushes and effects.
Free trialVisit website

Corel Painter

Corel Painter is a professional painting software for Windows offering blank canvas painting and photo-art tools. The latest iteration of the software tackles how you paint, and offers greater control and performance for your hardware setup.

With hundreds of realistic brushes, you can paint, illustrate and make unparalleled photo-art in your signature style. The customization option allows you to create your own brushes, patterns, textures, palettes, and more on a blank canvas. If you don’t want to customize brushes, Painter offers creative preset brush packs for an additional cost.

The latest update also brings several performance improvements, including Thick Paint workflow, to take advantage of piled paint’s depth, lighting, and shadows. There is also new AI styles, Clone Tinting, and enhanced layers feature.

Key features of Corel Painter:

  • Clean and streamlined user interface
  • Vastly improved color tools
  • Brush Accelerator to make use of computer hardware
  • Tons of customization options
Corel Painter

Corel Painter

Corel Painter enables you to create great digital landscape paintings with a multitude of tools and effects.
Free trialVisit website

Autodesk SketchBook

Popular for drawing capabilities, Autodesk SketchBook is an excellent tool to use with a limited but effective set of features making its a pure drawing program.

Autodesk SketchBook offers a clean user interface with minimal distraction, helping you focus on your creativity. With a large 100 mpx canvas, the drawing engine can handle big canvas without losing traditional drawing’s zoomed-in feeling.

Other features of the tool include paper to digital nap, multi-device support, over 190 customizable brushes, pencils, inks, and markers. PSD compatibility means you can import or export files from Photoshop without losing PSD layers.

Key features of Autodesk SketchBook:

  • Great value for money
  • Quick learning curve
  • Paper to digital snap feature
  • Compatible with PSDs and Wacom tablets
Autodesk SketchBook

Autodesk SketchBook

Easily and effectively create landscape digital art by using Autodesk SketchBook.
Free trialVisit website

While Adobe Photoshop still reigns supreme as an all-in-one solution for digital artists, there are several excellent landscape drawing software that fits your requirement and budget.

Autodesk SketchBook is one of the best pure drawing software that focuses on one thing and does it better.

Go through the list of landscape painting software listed in this article and let us know your pick in the comments below.

Here’s what to do if Camtasia doesn’t record audio

Camtasia is a popular screen recording tool, but many users reported that it doesn’t record audio. This can be an annoying issue, but there’s a way to fix it.

Speaking of Camtasia problems, here are some common issues that users reported:

  • Camtasia won’t record system audio – If Camtasia isn’t recording your system audio, it’s possible that your drivers aren’t up to date, so be sure to update them and check if that solves the problem.
  • Camtasia not recording sound, microphone – There are various issues that can appear with Camtasia, and if you encounter them, feel free to try any of the solutions from this article.
  1. Try third-party solutions
  2. Install the latest Windows updates
  3. Update your audio drivers
  4. Check the list of recording devices
  5. Check the Volume Mixer
  6. Make sure that you disable additional microphones
  7. Remove other audio applications
  8. Make sure that your audio device is properly configured
  9. Check microphone settings in Camtasia
  10. Reinstall Camtasia or try a different software

What can I do if Camtasia doesn’t record audio?

1. Try third-party solutions

If Camtasia no longer supports audio recording, a quick and easy solution is to have it replaced by a different software that can.

There is reliable digital audio editing software that allows you not only to record, but also to mix, edit and design sound effects or even to restore audio content.

Working seamlessly with other Creative Cloud apps, such programs boasts an impressive toolset that includes multitrack, waveform, and spectral display.

If Camtasia does not record audio, then switching to a more efficient alternative for all your audio recording and editing needs might be the right choice.

⇒ Get Adobe Audition

2. Install the latest Windows updates

  1. Open the Settings app. The fastest way to do that is by using Windows Key + I shortcut.
  2. Once the Settings app opens, head over to the Update & Security section.
    update and security camtasia not recording audio
  3. In the right pane, click the Check for updates button.
    check for updates cmtasia audio not recording

Windows will now check for available updates. If any updates are available, they will be downloaded automatically in the background and installed as soon as you restart your PC.

If Camtasia audio is not working, it can be because your version of Windows isn’t up to date.

If Windows isn’t up to date, glitches with certain applications can appear, and those glitches can affect Camtasia and similar applications.

Bear in mind in mind that these glitches are somewhat rare, but if you’re having Camtasia issues, it’s advised to update Windows 10 to the latest version.

For the most part, Windows 10 downloads the updates automatically, but you can also check for updates using the steps from above.

3. Update your audio drivers

If Camtasia doesn’t record audio on your PC, the likely cause is your audio driver. Sometimes if your drivers aren’t up to date, you might encounter certain issues with applications that can record audio.

To fix this problem, users are suggesting updating your audio drivers to the latest version.

This is fairly simple to do and to do it, you just need to visit your motherboard manufacturer’s website and download the latest audio driver for your model.

This can be a bit complicated process if you don’t know how to find and download the necessary drivers, but you can also use third-party tools for this purpose as well.

Tools such as Outbyte Driver Updater allow you to automatically update all outdated drivers on your PC with just a couple of clicks, so you might want to try out this tool as well.

Disclaimer: some functions of this tool might not be free

4. Check the list of recording devices

  1. Right-click the sound icon in the left corner of your Taskbar. Choose Sounds from the menu.
    sounds menu camtasia not recording
  2. Head over to the Recording tab and right-click the empty space. Now check Show Disabled Devices and Show Disconnected Devices.
    recording devices camtasia not recording system sounds
  3. Stereo Mix option should now appear. Right-click it and choose Enable. Now click Apply and OK to save changes.

After making these changes, check if the problem is still there.

If Camtasia is not recording audio, it’s possible that there’s an issue with recording devices. This problem is fairly simple to fix, by using the methods mentioned above.

5. Check the Volume Mixer

  1. Right-click the volume icon in the Taskbar and choose Open Volume Mixer from the menu.
    volume mixer camtasia not recording audio
  2. Once the Volume Mixer opens, look for Camtasia on the list, and make sure that its slider is set all the way up.

After doing that, Camtasia should be able to record audio from your PC without too much trouble.

Several users reported that Camtasia does not record audio because it’s not maxed out in Volume Mixer.

As you probably know, you can adjust the volume for each application in Volume Mixer, and several users reported that in order to record audio with Camtasia, you have to have Camtasia’s volume maxed out in Volume Mixer.

6. Make sure that you disable additional microphones

  1. Open the Recording window as you did in Solution 3.
  2. Make sure that both hidden and disabled devices are shown.
  3. Locate Digital Audio Sound Blaster recording device, right-click it, and choose Disable. Bear in mind that the name of the virtual recording device might be different.
    recording disable camtasia audio not recording
  4. After you disable the virtual recording device, click Apply and OK to save changes.

Once you make these changes, check if the problem is still there.

According to users, sometimes you might have two recording devices on your PC. This is usually your actual microphone and a virtual device that is installed by some applications.

Having two recording devices can cause issues on your PC, therefore it’s advised to disable the virtual recording device.

If Camtasia audio is not working on your PC, you need to disable the virtual recording device by doing the following:

7. Remove other audio applications

If Camtasia doesn’t record audio, the problem might be caused by other audio applications. Sometimes applications can come into conflict without you knowing about it, and this can be a problem.

To make sure that other applications aren’t interfering with Camtasia, check the list of installed applications and be sure to remove other audio recording applications from your PC.

Several users reported that Nahimic Audio caused the problem, but after removing the application, the issue was gone.

There are several methods that you can use to remove an application, but the most effective one is using uninstaller software such as CCleaner.

⇒ Get CCleaner

In case you’re not familiar, uninstaller software is a special application that will remove all files and registry entries associated with a certain application.

By doing so, you’ll ensure that the application is completely removed from your PC and that there are no leftover files available that can interfere with your system.

8. Make sure that your audio device is properly configured

  1. Open the Sound window as we showed you in Solution 3.
  2. Go to the Playback tab, and locate your speakers or headphones. If they aren’t on the list, make sure that you reveal hidden and disabled devices.
  3. Right-click your audio device and choose Set as default. Click Apply and OK to save changes.

In addition, be sure to check the settings of the application that you’re trying to record, and make sure that it’s using the same audio device for output. Lastly, you need to check Camtasia settings by doing the following:

  1. Open Camtasia Recorder.
  2. In the Recorder inputs, click the little down arrow next to Audio and choose Record system audio.

After doing that, save changes and check if the problem is resolved.

Sometimes Camtasia does not record audio if the audio device isn’t properly configured. This can occur for various reasons, but in order to fix the problem, you need to make sure that the correct audio device is set as the default playback device.

9. Check microphone settings in Camtasia

  1. In Camtasia go to Tools > Options > Inputs.
  2. Make sure that your microphone is set as the Audio device in the Audio
  3. Be sure to adjust the microphone level so that Camtasia can actually pick up your microphone. If you want to record system audio as well, be sure to check Record system audio After doing that, click OK to save changes.

After making these changes, Camtasia should be able to pick up and record audio from your microphone without any problems.

Sometimes Camtasia audio is not working it can be due to issues with your microphone. The microphone might not be properly connected or configured and that can lead to this and many other problems.

To fix the issue, be sure to check if your microphone is connected properly to your PC.

Also, check the Recording devices and make sure that your microphone is set as the default recording device. You can test if your microphone is working in other applications.

10. Reinstall Camtasia or try a different software

If you’re having problems with Camtasia, perhaps the only solution is to reinstall the application.

Sometimes your installation can be corrupted, and that can lead to various problems with Camtasia. To fix the issue, some users are recommending to completely reinstall Camtasia.

If reinstalling the software isn’t a valid long-term solution, perhaps you might want to consider switching to a different screen recorder.

There is a wide array of screen recording tools on the market, and if you’re looking for a good and reliable screen recorder, perhaps you might want to try want to our specialized guide of best audio recorder software.

If Camtasia doesn’t record audio, the issue is most likely related to your drivers or your audio settings.

We hope that you’ll manage to fix this problem by using one of our solutions. If not, you might still get a great tip from this article and that is discovering Adobe Audition.

Have you tried this DAW? Share your impressions with us in the comments section below.

6 best software to fix Album Art issues

An important feature of every music album is the Album Art. This tool helps you to quickly identify music as you browse it in your library. An Album Art is usually embedded with most music files.

However, sometimes this may not be the case. This could cause difficulties when surfing your music library on a portable device such as your MP4 player.

Meanwhile, you can solve this problem by downloading Album Art individually from websites that offer album art, but when trying to update multiple albums this method is tedious and time-consuming.

The best way to fix Album Art is to use the best Album Art downloader on the market. These downloaders search multiple album art website sources to get matching art for your music albums.


What are the best programs that can fix album art?

Adobe Audition

At first glance, those of you that know a little bit about Adobe Audition are probably wondering why it is at the top of our list.

Understandably, an audio editor may seem like the last place you should be looking for if you want to fix an audio file’s album art.

However, Adobe Audition’s toolset is also comprised of several features that have to do with creating, editing, and clearing an audio file’s metadata, and that includes album art.

That being said, if you want all of your songs to be well organized, with their album art placed nicely, then you might as well give this tool a try.

More so, you can use it to do a little remastering or remixing of the songs while you’re at it since Audition has everything you need.

Here are some of the pros of using Adobe Audition:

  • Makes quick and efficient work of an audio file’s metadata
  • Great for remastering and editing songs
  • Efficient at removing background noises and imperfections from recordings
  • Compatible with most other Adobe products
  • Can be tested for free for 7 days
Adobe Audition

Adobe Audition

Adobe Audition allows you to create and view digital graphical image, including Album Art
Free trialVisit website

Targhycardia

Targhycardia is a free utility tagging tool which fixes album art and tags in music files. The utility helps users to repair tag problems which may cause your music to be inaccessible on your Windows PC.

In addition, Targhycardia scans your music directories for music files without album art and searches the internet for matching album art which can be embedded in your music file.

The program automatically detects corrupt track numbers from your music directories and replaces them with correct ones.

Targhycardia has a lyric downloader that can be used to download and embed lyrics to your music. Lastly, this program is an excellent program to fix album art.

⇒ Download Taghycardia


Cover Retriever

This freeware is quite resourceful in downloading missing album art for your music player. Cover Retriever works by searching for the album art on Google search engine from the music tags found in your music player.

In addition, this tool enables you to save your album art downloaded by clicking on the audio files with the title cover.

Also, the program also searches for album covers by scanning your music folder and saves the correct cover in the audio file. Cover retriever is simple to use and is an ideal album art fix program.

⇒ Download Cover Retriever


Album Art Downloader

Album Art Downloader is a popular program to fix album art. The program is free to use and automatically searches for matching album art for your music files.

The program then places the correct album art into their corresponding music file. However, Album Art Downloader has a huge list of regularly updated sources to ensure the latest Album Art is available.

The program has a simple attractive user interface which makes it an ideal album art fix program for beginners.

Meanwhile, album art downloaded from this program is easily saved to the music folder which your music player can access.

⇒ Download Album Art Downloader


Bliss

Bliss album art downloader is an excellent application that is widely used to fix album art problems. The software comes with over 300 free album fixes. The software has integration with many music players.

In addition, Bliss is also compatible with iTunes, searching the web for compatible album art. The software only searches a single library at a time and automatically saves the album art to the music file.

Meanwhile, the software has a clean interface that presents a brief tutorial that guides users on the basics of the application. Bliss is free to download and compatible with the Windows operating system.

⇒ Download Bliss


Creevity

This cover downloader enables users to easily fix album arts to desired mp3 files. Creevity cover downloader automatically searches your music folder for music without album art and replaces it.

After which it downloads the album art and embeds it into your mp3 collection.

Meanwhile, Creevity has an easy to use interface with an inbuilt music player and tag editor, and it works with many popular music players such as Windows media player and iTunes.

⇒ Download Creevity


Conclusively, the programs listed above are the best programs to fix Album Art. Although they may seem to have similar attributes as they mainly search online for Album Art to fix your music files.

They differ in various functionality and compatibility with music players. If you have anything to add to the subject please let us know in the comment section below.


Game Animation Software: 5 Best to Use in 2026

Game developers are striving to achieve ever more mind-boggling effects when it comes to animations by using excellent game animation software.

Through explosive effects, stunning graphics, and even VR, animation tools are taking us all one step closer to what we could barely imagine just a couple of years ago.

Modeling and rendering software for design visualization, games, and animation are gaining more and more popularity because of their capacity to transport gaming aficionados into a whole new dimension.

But regular users also benefit from the perks of storytelling beautifully rendered and this is exactly what animation tools are used for.

There are of course numerous options available on the market, so how exactly do you make your pick? The decision will certainly be influenced by the budget, your skills as an animator, and your preferences.

Of course, an aspiring animator will not choose the most complex tool just as an expert game developer will most likely not go for a free edition of software to design his or her artwork.

There are plenty of aspects that need to be taken into consideration when choosing the best software for game animation and we haven’t even started to address the individual features of these tools.

No need to worry, we have highlighted only the top picks of the industry for you, so make sure to go through the list below and choose the one product that can perfectly meet your needs.

What is the best software for animation?

Adobe After Effects

Part of the Adobe Creative Cloud, After Effects is the best of the best when it comes to motion graphics and visual effects software and there is practically nothing you can’t achieve with it.

Create anything you can imagine and get mind-blowing results every time. When it comes to games, perhaps you want to animate a character – make it spin, roll, twirl, bend it to reflect your artistic vision?

You can easily set anything in motion with keyframes or expressions and you can do so from scratch for unique results or by using the available presets to kick-off your designs.

Get animated, combine videos and images and add explosive effects or create VR videos to drop your audience right into the action with the very best animation software on the market.

After Effects is always getting better, with new features coming out regularly. The best part is that you will never fall behind thanks to the fast and easy tutorials covering everything.

Let’s quickly go through its key features:

  • Preview and playback performance enhancements (threading improvements and a new GPU-accelerated display system core)
  • Enhanced EXR workflows (12x faster performance) and faster shapes
  • Graphics and text enhancements (new dropdown menu expression controls, templates that are easier to update in Premiere Pro, etc.)
  • Expression improvements (40% faster processing)
  • Expanded format and better playback support (Canon XF-HEVC, Animation with delta frames and MJPEG)
  • Better notifications for system compatibility
Adobe After Effects

Adobe After Effects

Create awesome animations with the best software for motion graphics and visual effects.
Check priceVisit website

Adobe Animate

Adobe Animate_best game animation software

If we’re talking about vector graphics and game animation, Adobe Animate is the tool for you.

Also included in the Adobe Creative Cloud suite, the tool brings animation into the new age offering support for video and audio embedding, rich text, scripting, and raster graphics.

With powerful illustrations and animation tools, the Animate allows you to build game environments, design start screens, integrate audio, and even share your artwork as augmented reality experiences.

The brushes boasted by the tool are another quintessential feature cherished by animators since they allow you to create characters that truly come to life before your eyes.

As always, Adobe takes a particular interest in making the most of the user experience, thus getting started is fast and easy thanks to their step-by-step tutorials.

Let’s quickly go through its key features:

  • Fluid Brushes (brand new vector brushes in all sorts of styles)
  • Onion Skinning (this option allows you to draw new frames of animation on top of previous frames)
  • Infographics (including animated charts)
  • Layer parenting (introducing a simplified tool for modifying animated characters)
  • Publish to any platform (HTML5 Canvas, WebGL, Flash/Adobe AIR, desktop, mobile, and TV in order to reach viewers on any screen)
Adobe Animate

Adobe Animate

Bring characters, games and banners to life with a great software designed for animations.
Check priceVisit website

Autodesk 3ds Max

A popular choice among video game developers, Autodesk 3ds Max is a professional computer graphics program for 3D animations with enhanced modeling capabilities and a flexible plugin architecture.

The tool enables you to create professional-quality 3D game animations thanks to its integrated texture/color editor and character animation and rigging tools or keyframe and procedural animation tools.

Design visualization is brought to the next level through stunning effects, embellishments, while procedural animation and scene modeling tools make realistic characters and game environments.

Let’s quickly go through its key features:

  • Flexible toolset (to create professional animation designs with full artistic control)
  • Create massive worlds in games
  • Visualize high-quality architectural renderings
  • Model finely detailed environments and objects
  • Bring characters and features to life with animation and VFX
  • Built-in Arnold renderer (for an interactive experience that can handle the most complex characters and scenes)
Autodesk 3ds Max

Autodesk 3ds Max

One of the best tool to use for 3D modeling and rendering, design visualization, games, and animations.
Free trialVisit website

Houdini

Houdini_best game animation software

Packed with features for modeling, texturing, rigging and 3D animation, Houdini is used for high-quality graphics and intense, but accessible 3D animation experiences.

This animation maker comes as a solution for game devs that are required to come up with vast amounts of content without compromising the visual effects.

Using motion graphics and even VR, the tool allows the creation of compelling animations that provide the user with interactive gameplay and a unique game experience.

Let’s quickly go through its key features:

  • Game development (using procedural animation to bring a smarter way of creating quality games)
  • Realtime FX (award-winning particle and dynamics tools to create optimized game FX)
  • Procedural workflow
  • SideFX Labs Toolset (generating vertex animation textures for a wide range of FX to speed up game workflows)
  • Vertex animation (effective vertex shader playback of high-resolution simulations)

⇒ Get Houdini

Blender

Blender_best game animation software

A professional animation software, Blender makes an excellent choice for quality visual effects and video games offering features like rigging, modeling, animating, simulating, and, rendering.

Boasting masking and textured brushes for 3D painting, CPU, GPU, and VR rendering support, this animation software is also fully customizable thanks to its flexible Python controlled interface.

You can match it with a wide array of add-ons to adjust layout, colors, size, and fonts or you can simply use Blender’s Python scripting based API.

Let’s quickly go through its key features:

  • Cycles Render Engine (an integrated path-tracer engine that offers ultra-realistic rendering)
  • CPU, GPU, and VR rendering support
  • Advanced modeling and sculpting tools (sculpting brushes, 3D painting with textured brushes and masking)
  • Python scripting for custom tools and add-ons (customize the interface layout and colors or connect with the API)
  • High-quality rigging and animation tools (combine 2D with 3D in the viewport)
  • Full Animation Support with Onion Skinning

⇒ Get Blender

Depending on your skills, range of features, and of course, the budget you can now make your choice knowing that the products listed above will bring you the best when it comes to 2D or 3D game animation.

What will it be? Do let us know what was the feature that most appealed to you in the comments section below.

Fix: This Document Enabled Extended Features in Adobe Reader

PDF files are incredible as far as file types go. They can be text documents, images, and much more, plus they are compatible across all available versions.

One of the leading developers of PDF-oriented products is Adobe, with its proprietary line of software tools known as Adobe Support Community forums:

I have filled up a form using Foxit Reader. When I tried to open the form with Adobe Acrobat Reader DC I got error The document enabled extended features in Adobe Acrobat Reader DC. The document has been changed since it was created and use of extended features is no longer available. Please contact the author for the original version of this document. I tried some other PDF programs, no issue when opening this form.

Apparently, the problem was with how the user handled the PDF file in the first place.

How to enable extended features of Adobe Reader?

1. Try using only Adobe products

Adobe Reader is the premier solution for viewing, creating, managing, and printing PDF files. It is a widespread format used in many situations.

Actually, the .pdf file was developed by Adobe, the same company that has Adobe Reader. So who wouldn’t know more about PDFs than the actual creators?

To use all extended features in Adobe Reader, you shouldn’t make changes to the document in a different program. Keep using the same product family.

Not only does this ensure that you won’t encounter any errors, but it will also pave the way for important product updates and special deals for other product versions or new releases.

Adobe Acrobat

Adobe Acrobat

Manage your documents only with the PDF standards global trendsetter, Acrobat Reader. Try it now!
Free trialVisit website

It would seem that whenever you create a PDF file with an Adobe product, a digital signature is applied.

Apparently, only other Adobe products are able to modify and re-save documents without breaching that digital signature.

2. Try a different PDF viewer

If all you are interested in is viewing or printing the document, then you can simply ignore the error message altogether.

But if you want to edit or change security preferences, then you will need to fix the document first.

It is also possible to try out a different PDF viewer for this task. One great alternative is Icecream Ebook Reader.

Although it was designed for eBooks mostly, for sure you can use it for any large PDF document.

This top-notch PDF viewer allows you to resume reading where you left it, mark your favorite parts of a book, alter the text to better suit your needs, and much more.

⇒ Check out Icecream Ebook Reader


Note that it is possible that other developers use the same digital signature feature on PDF files.

Anyway, as far as Adobe products go, try using only their programs when creating, viewing, or editing PDF documents.

⇒ Use Adobe Acrobat Reader

⇒ Use Adobe Acrobat Pro DC

Did you find this guide useful? Let us know in the comment section below.

Microsoft Q2 2021 earnings: Game Pass bet paying off, Surface hardware hits $2 billion in revenue

The pandemic hasn’t slowed Microsoft’s march to profits as it rounded out an arguably disruptive 2020 calendar, on a high note. According to the latest fiscal earnings report, Microsoft’s Q2 2021 results were rather impressive with the company adding $15.5 billion to its coffers. To put that amount in context, Microsoft just made back its large investment in Bethesda with an extra investment to spare, over the past three months.

Aside from delivering a 34% increase in stock value at $2.03 a share for investors, Microsoft also managed to increase its revenue by 17%, bring in 47.5 million Microsoft 365 subscribers, increase its gaming revenue by 51%, bring up hardware sales by 86% and finally hit that elusive $2 billion marker for Surface revenue.

For more details and context, below are the investor’s notes Microsoft’s chief financial officer Amy Hood touched upon during her opening remarks to investors.

Revenue in Productivity and Business Processes was $13.4 billion and increased 13% (up 11% in constant currency), with the following business highlights:

  • Office Commercial products and cloud services revenue increased 11% (up 9% in constant currency) driven by Office 365 Commercial revenue growth of 21% (up 20% in constant currency)
  • Office Consumer products and cloud services revenue increased 7% (up 6% in constant currency) and Microsoft 365 Consumer subscribers increased to 47.5 million
  • LinkedIn revenue increased 23% (up 22% in constant currency)
  • Dynamics products and cloud services revenue increased 21% (up 18% in constant currency) driven by Dynamics 365 revenue growth of 39% (up 37% in constant currency)

Revenue in Intelligent Cloud was $14.6 billion and increased 23% (up 22% in constant currency), with the following business highlights:

  • Server products and cloud services revenue increased 26% (up 24% in constant currency) driven by Azure revenue growth of 50% (up 48% in constant currency)

Revenue in More Personal Computing was $15.1 billion and increased 14% (up 13% in constant currency), with the following business highlights:

  • Windows OEM revenue increased 1%
  • Windows Commercial products and cloud services revenue increased 10% (up 8% in constant currency)
  • Xbox content and services revenue increased 40% (up 38% in constant currency)
  • Surface revenue increased 3% (up 1%in constant currency)
  • Search advertising revenue excluding traffic acquisition costs increased 2% (up 1% in constant currency)

“Accelerating demand for our differentiated offerings drove commercial cloud revenue to $16.7 billion, up 34% year over year. We continue to benefit from our investments in strategic, high-growth areas.”

Distilling the numbers further, it’s apparent that Microsoft’s gamble on Xbox Game Pass is working for now as it helped guide revenue growth by 40% during a quarter where the division had few exclusive titles to push digital sales. In addition, Microsoft’s aggressive pricing and low tier entry Surface devices are resonating with its commercial base as its Surface revenue growth outpaces its Windows 10 OEM partner licensing growth.

Azure continues to make strides year over year as Microsoft adds larger multi-year contracts notches to its belt that include the DoD, Walmart, and others.

While Microsoft’s upward trajectory was plotted many quarters ago, today’s numbers are still a bit shocking to investors who hedge against minimal gains during a downturn in a stagnant economy. With more people slowly going back to work and Microsoft’s hybrid on-premises cloud solutions holding steady, it’ll be interesting to see if the company can shock again in a few months.

10 Best Vector Graphics Software for PC [Free & Paid]

Many designers use vector graphics in order to create attractive designs. Since vector graphics will always retain their original quality, it’s no wonder that many designers are using them for their projects.

If you’re a designer, or you simply want to try creating vector graphics, today we’re going to show you the best vector graphics software for Windows 10, so keep reading.

What is the best vector graphics software for Windows 10?

Adobe Illustrator – Professional vector editing

Adobe Illustrator is the most popular vector graphics software on the market. This is a professional vector graphics tool, and it offers a wide range of advanced features.

The tool allows you to create pixel-perfect artwork and align all your shapes perfectly on the pixel grid.

Adobe Illustrator allows you to easily export your drawings, and you can export multiple artboards or individual objects easily, and also have access to Adobe Stock, so you can use new templates and graphics.

The tool uses Creative Cloud Library to store all your brushes, shapes, colors, and styles, so you can access them easily on any device.

The latest version supports faster font finding, so you can find the desired font in a matter of seconds. Regarding fonts, you can now see live previews of the font simply by hovering over the desired font.

The tool also allows you to zoom into any object, path or point that you select.

We also have to mention that now you can fill objects with placeholder text in order to better visualize your designs. In addition, you can also import text into any path or shape.

We briefly covered some of the latest features of Adobe Illustrator, but this tool also offers a wide range of features for advanced users and professional designers.

Adobe Illustrator is one of the best vector graphics tools on the market, and you can download and try it for free. If you want to continue using this tool, you’ll need to purchase a license.

Adobe Illustrator

Impress the hardest audience with bold graphics and vector designing tool.
Free trial Visit website

CorelDRAW Graphics Suite – Stunning vector graphics

CorelDRAW is probably one of the most-known vector graphics software. This is a professional tool, and it supports a wide range of features.

The tool is fully compatible with previous versions of Windows, so you’ll have no compatibility issues with it.

Regarding the supported formats, CorelDRAW Graphics Suite supports AI, PSD, PDF, JPG, PNG, SVG, DWG, DXF, EPS, TIFF, DOCX, PPT and many other formats, it also supports multiple monitors, and it can work on 4K displays.

CorelDRAW has Font Manager that allows you to organize your fonts with ease. There’s also an advanced font filtering and search available that allows you to easily find the desired font.

In order to make the editing even simpler, you can hide desired objects or layers. Another new feature is the ability to copy curve segments. This is incredibly useful if you need to copy only specific parts of an object.

CorelDRAW also has a knife tool that allows you to split specific objects or groups along certain lines. The software also supports various extensions, and you can download them right from the application.

The tool also offers more than 10000 royalty-free clip art and more than 2000 high-resolution images. There are also about 1000 fonts, 350 templates, and over 1000 frames, files, and patterns.

The tool also offers total control over fills and transparency thus allowing you to create some impressive results.

CorelDRAW offers precise layout and drawing tools, so you can position and align your shapes perfectly. In order to achieve maximum performance, this tool has native 64-bit and multi-core support.

CorelDRAW is one of the best vector graphics tools, and it offers a wide array of features. This tool is perfect for professionals, and you can download and try it for free.

However, if you want to continue using it, you’ll need to purchase a license.

⇒ Get Corel Draw Graphics Suite

Corel PaintShop Pro – Improved AI editing

PaintShop Pro Corel_best photo correction tool

Corel PaintShop is no less than a professional vector graphics and universal software for the photo editing industry.

If you need vector graphics tools, this tool hits home. You have various editing and drawing tools that can help you design inspiring drawings.

Corel comes with the latest drawing features in terms of vector editing, such as specific texts or shapes.

As an example, you can use the famous Bezier tool for distinct drawing shapes or curves that gives your image a new dimension.

More so, there are object manipulation tools to help you customize vector drawings in your own way.

In addition to this, you have coloring fill and strokes that should help you express your vision in a much more creative manner.

Corel PaintShop

Have a confident try with this vector graphics solution for professionals.
Check price Visit website

Clip Studio Paint – Vector graphics art drawings

If you need an original painting tool, this is the most suitable creative drawing designed for artists.

Studio Paint software has unparalleled vector graphics tools that can help anyone to edit and optimize their artwork.

An essential benefit of this solution is the vector layers that help you to draw and edit vector objects, such as lines or curves for improved paintings.

You can therefore utilize various vector drawings tools such as pens or brushes for crafting eye-catching drawings with detailed elements.

More exactly, you have more than 40,000 brush types for complex drawing and editing. Plus, you can use 3D object editing to create characters with realistic body movements.

In other words, this solution is the best choice for concept art drawings or vector graphics drawn by hand.

As a last note, you should pick this authentic drawing tool for character art or animation purposes because it has everything you imagine.

Clip Studio Paint

Create breathtaking artwork using this complete drawing resource for artists.
Free trial Visit website

Vectr – Free vector illustrations

Vectr is another free vector graphics software. Unlike the previous entry on our list, you can use Vectr online without downloading it.

If you choose to download this tool, you can run it without installation, which is great if you want to save space.

The software offers a friendly user interface, so it will be perfect for basic users. All your pages and layers are sorted on the left, and all object-related configuration is on the right.

Once you select an object you can change its background, border, shadow, color or opacity.

The tool supports basic objects, but you can also use the pen tool to create custom shapes. In addition, there’s a freehand pencil tool as well as the ability to add text.

Each object can be moved along Z-axis thus allowing you to create some impressive results. The tool also allows you to share your designs easily.

Simply share the link to your document so you can easily collaborate with others.

Vectr offers great design and a simple user interface, but it seems to lack some advanced features. The tool will be perfect for first-time users that want simple vector graphics software.

If you’re looking for simple and free vector software that supports collaboration, you might want to try Vectr.

⇒ Get Vectr

Affinity Designer – Effective UI for vector designs

According to its developer, Affinity Designer is the fastest and most precise vector graphics software on the market. The application offers all the tools that you need, ranging from a pen to a gradient tool.

Affinity Designer offers great speed and accuracy, and it allows you to pan the screen at 60fps. In addition, it supports 10000000% zoom, so you can see and edit the smallest details.

Just like other vector graphics software, Affinity Designer supports RGB, CMYK, LAB, and Grayscale colors. The tool also has ICC color management and 16-bit channel editing.

Regarding the supported formats, the tool supports PSD, SVG, EPS, PDF, and FH files.

In addition to standard vector tools, the application offers many tools for raster graphics as well. Affinity Designer also supports wide range of adjustment layers and blend modes.

Of course, there are also masks and clipping layers as well. We have to mention that these effects are non-destructive, so you can easily remove them or disable them.

The tool has customizable workspace, and you can adjust it any way you like. It’s worth mentioning that the tool has unlimited undo option, so you can easily fix any mistake.

Affinity Designer offers wide range of brushes as well as pressure control and tilt. This means that you can use this tool with your stylus in order to create natural-looking artwork.

You can also edit vector brush strokes and brush parameters. If you want, you can even create your own brushes or import new brushes in .abr format.

The tool also supports wide range of shapes, and almost every shape comes with customizable corner settings. This application also allows you to add text, and you can add text to any vector path.

This software has a powerful export mode that lets you select areas, layers or objects to export. This is perfect if you’re a UI designer that needs to export only specific objects from a vector document.

We also have to mention that this tool supports unlimited number of artboards, thus allowing you to create variations of your design. The application also supports real-time editing for embedded documents.

By using this feature you can make changes to an embedded document and see the results in other documents in real-time.

Just like any other professional vector graphics software, this one supports outline, pixel and split screen view. There’s also a corner tool that allows you to easily round multiple corners on shapes.

Affinity Designer offers wide range of features, and it will be perfect for basic and advanced users alike. The tool is available as a free trial, but you’ll need to purchase it if you want to continue using it.

⇒ Get Affinity Designer

Calligra – Various file formats

Calligra is a free vector graphics software with extensible user interface. The application offers loading support for ODG, SVG, WPG, WMF, EPS/PS formats.

Regarding writing support, the application supports ODG, SVG, PNG, PDF and WMF files. The software has customizable user interface, and you can freely move toolbars and dockers.

Calligra supports layers so you can easily create complex documents. You can preview thumbnails or group shapes simply by dragging and dropping. If needed, you can lock certain shapes or control their visibility.

There’s also an advanced path editing that allows you to create unique custom shapes. Regarding the tools, the application has basic tools such as draw path tool, pencil tool and calligraphy drawing tool.

Of course, there’s full support for patterns and gradients. The application allows you to create pixel perfect designs thanks to its advanced snapping features.

There’s support for guide lines, but you can also snap your objects to a grid. Just like any other vector software, this one also supports basic shapes such as circles, rectangles, starts, etc.

Of course, there’s text support and you can even add text to paths. We also have to mention that this tool supports wide range of plugins, and if you’re a developer, you can even create your own custom plugins.

Calligra is simple and free vector graphics software. The tool is available for Linux, Mac and Windows.

Although this tool doesn’t offer some advanced features, it will be perfect for basic users or designers that are tight on budget.

⇒ Get Calligra

Xara Photo & Graphic Designer – High quality editing

Unlike other tools on our list, this application is a vector graphics software, but it also works with raster graphics.

According to the developer, the application offers fast and non-destructive editing that doesn’t use too much of your resources.

The tool offers photo-enhancing features, and you can easily change brightness, contrast, saturation and other options. There’s also flexible cropping, red eye removal, brightness level controls, etc.

Although this application offers great raster graphics editing, it also supports vectors graphics.

Using this tool and its Bitmap tracer feature you can easily convert raster graphics into vector shapes. Just like any other vector software, Xara Photo & Graphic Designer supports basic shapes such as rectangles and circles.

There’s support for text, and you can add text to your documents, resize it, or even add it to a path. The text supports transparency, fills and other non-destructive effects.

Regarding the available fonts, this application offers more than 600 Google Fonts. There are also more than 1500 material design icons and symbols available.

We also have to mention that this application has 3D extrude tool that allows you to easily create 3D version of any shape.

The tool also supports blends and you can create them from one shape to another. This feature uses drag and drop technique, and it’s quite simple to use.

Using this feature you can create highlights, patterns and all sorts of other effects. Xara Photo & Graphic Designer also supports gradient vector transparency and vector feathering.

The application uses high-performance vector rendering engine, thus delivering maximum performance to the users.

The application has Direction Action Tools that allow you to add transparency, shadow, gradient and other effects by using drag and drop method.

Xara Photo & Graphic Designer also supports unlimited undo and redo, so you can easily fix any mistakes. If you’re working on detailed documents, you’ll be pleased to know that this tool supports up to 25000% zoom.

The tool is fully compatible with Adobe Photoshop PSD files, so you can import and export them easily.

We have to mention that imported and exported files have layer support, so you can continue editing where you left off. The tool also supports GIF, JPEG, BMP, PNG, TIFF and RAW format.

Regarding vector formats, there’s support for PDF, AI/EPS, SVG, and EMF/WMF.

Xara Photo & Graphic Designer is a great vector graphics software, and it offers wide array of features for both basic and professional users.

In addition to vector graphics, this tool fully supports raster graphics, which is also a major plus. The tool is available for free trial, but if you want to continue using it, you need to purchase a license.

⇒ Get Xara Photo & Graphic Designer

Inkscape – Designer shapes and lines

Inkscape is a freeware vector graphics tool that allows you to create vector graphics with ease. The tool allows you to create various simple shapes such as rectangles, ellipses, polygons and spirals.

In addition, you can create simple paths with freehand tool or Bezier curves and straight lines with pen tool. This application also supports text, so you can easily add text to your designs.

Inkscape offers extensive object manipulation thus allowing you to move, scale and rotate any vector object. Of course, there’s support for Z-ordering, so you can easily arrange objects on Z-axis.

To make the editing process even faster, the tool supports grouping, so you can group desired objects and edit them simultaneously.

Of course, there’s support for layers and you can hide or reveal specific layers, or change their order.

Inkscape supports various color selections, ability to copy and paste styles, gradient editor and patterns. There’s also support for dashed strokes and path markers.

The tool offers node editing, so you can move nodes and handles on Bezier curves easily. If you want, you can also easily convert any shape to path to edit it.

Regarding the supported formats, the tool is fully compatible with SVG file format. As for exporting, the tool can export files in PNG, OpenDocument Drawing, DXF, sk1, PDF, EPS, PostScript and many other formats.

Inkscape is a great vector graphics software, and it allows you to create amazing vector graphics. It offers most features that you’ll need, so it’s perfect for all users.

The tool has a learning curve, so it might take you a while to fully master it. Nevertheless, Inkscape is powerful tool and it’s available for free, so there’s no reason not to try it.

⇒ Get Inkscape

Creative Docs .NET – Simplest interface

This is another free vector graphics software. You can download and share this tool and use it without any limitations for personal use.

The application supports polygons so you can create custom shapes easily. In addition, you can also create Bezier curves. The tool also supports text, and you can even add text to paths.

Creative Docs .NET supports basic objects such as rectangles and circles. Regarding objects, you can save different styles and apply them to objects.

This tool also supports alignment, so you can always align your shapes perfectly. There’s also support for boolean operations, so you can easily remove the background or foreground of overlapping objects.

To make the editing process even simpler, you can combine shapes into groups for simple organization.

Creative Docs .NET is a decent vector graphics software, and it offers all the basic features that users need. This application is free to download, so we recommend that you try it out.

We have to mention that this software wasn’t updated in a while. As a result, it has a bit outdated user interface, but despite this minor flaw, it’s still a decent vector graphics tool.

Vector graphics software allows you to create resizable graphics with ease. These types of tools are perfect for designers, and we hope that you found a suitable application for you on our list.

⇒ Get Creative Docs .NET

  • What software do graphic designers use for logos?

There are a couple of options on the market, but the most popular ones are Adobe Illustrator and CorelDRAW Graphics Suite which can handle any complex logo design project.

  • What is the best free vector graphics program?

There are plenty of vector graphics programs on the market, but to be sure you find the proper one for your needs, check out our vector graphics software list.

Billboard Design Software for PC: 7 Best to Use

Banners and billboards are an efficient form of advertisement, so they have to look good in order to attract clients. That being said, you can’t just use any regular software tool to design them.

The tools need to be powerful enough to handle a wide range of features, but at the same time, they also need to produce banners and billboards that look good when they are both small enough to fit on a flyer.

The Internet is full of products that offer such capabilities, but we will be looking over some that we consider to be the best among them.

We’ve taken into consideration the toolset that they bring to the table when it comes to designing banners and billboards, their price, how easily you can get used to using the program, and other such criteria.

What is the best banner and billboard design software?

Adobe Illustrator – Unforgettable designs

Topping out our list is a software tool that can be considered the default graphics design tool that you should always be thinking of.

Since banners and billboards are sometimes meant to be enormous in size, you will want to use a tool that is vector-based, such as Adobe Illustrator, and not pixel-based, such as Adobe Photoshop.

In simple terms, vector-based files will never lose quality regardless of how much you stretch them. Since banners cover the entire facade of buildings, making sure that they aren’t pixelated is no easy task.

Of course, this isn’t the only reason you should go for Adobe Illustrator. It is perfectly capable of handling other types of projects as well, from small-scale logo designs to beautiful digital art.

Thus, if you’re going to buy a license for a product, you might as well go for a product you can use for more than just one task.

Here are some of Adobe Illustrator’s main features:

  • Vector-based design tool
  • Full compatibility with other Adobe products
  • Full layer support
  • Large library of brushes
  • Their website is full of great guides
Adobe Illustrator

Adobe Illustrator

Create awesome banners and billboards with the industry-leading software for graphic design.
Free trialVisit website

CorelDRAW – Professional graphics

CorelDRAW

The second entry on our list is yet another product that is vector-based and thus well-suited for the job of designing banners and billboards.

However, one big difference between CorelDRAW and the previous entry is the skill level required to master it.

CorelDRAW’s UI can be described as far more user-friendly, although the overall capabilities are somewhat more limited.

However, if you’re working on a personal project and are not all that versed in the ways of digital design, then CorelDRAW is definitely the tool for you.

More so, if you’re just into digital art, doodling, or even the occasional 2D CAD, then you can use CorelDRAW for that as well.

Here are some of CorelDRAW’s main features:

  • Intuitive interface
  • Easy to learn and master
  • Versatile in terms of what it can be used for
  • Strikes a balance between manual and automatic controls
  • Shaping docker gives maximum usage
CorelDRAW

CorelDRAW

Use one of the best software well suited for designing banners and billboards.
Free trialVisit website

Canva – Explosion of designs

This free online platform called Canva is known and used by millions for good reasons. Complete design and billboard templates and edits.

It’s possible to easily craft multiple billboard designs using existent templates for a variety of designs like banners, social media posts, or marketing products.

At the same time, it has plenty of features that help you create any digital media. For instance, you can compose photo collages, YouTube videos, or print media.

Another worth mentioning feature is the vector design tool that comes in handy to design inspiring artworks.

Here are Canvas main features:

  • Sharing and printing options
  • Collaboration tools for feedback sessions
  • Unlimited Marketing templates
  • Document creation tools

Canva

Deliver the most persuading billboard designs with this creative solution.

Xara Photo & Graphic Designer – Inspiring projects

This professional image editing and drawing tool has tons of creative templates, and design elements, with a simple UI.

First of all, you have the easiest vector image graphic tools for creating any project according to your vision.

There are simple-to-use editing tools regardless of your project. Then, it can transform your imagination into real products like a billboard.

More so, the tool also comes with blending shapes for detailed projects. So, you can use the drag-and-drop technique to tweak your marketing output quickly.

Not only that, it allows you to create highlights and other effects and compose every kind of project from e-books to print media.

Here are the Xara Photo & Graphic Designer main features:

  • High-quality photo editing
  • Advanced photos manipulation
  • Customizable template ideas
  • Smart scaling tools
  • Creative text editing

⇒ Get Xara Photo & Graphic Designer

Affinity Designer – Compatible with all apps

Affinity Designer was first created as a dedicated graphics design tool for Mac users but has slowly transitioned to Windows as well.

As far as the interface is concerned, Affinity Designer offers a modern, intuitive UI that allows users to transition almost seamlessly between it and Illustrator.

Those that are new to graphics design will have no problem finding all the basic tools that they will need, yet veteran Illustrator users will know their way to the more advanced settings and tools easily.

In fact, those that are used to Illustrator and Photoshop will pretty much realize that the learning curve for Affinity Designer is almost non-existent.

However, Affinity pales in comparison to Illustrator when it comes to sheer features, tools, and shortcuts. Then again, this is indeed reflected in the lower price tag.

Here are some of Affinity Designer’s main features:

  • Intuitive interface for beginners
  • familiar interface for Photoshop and Illustrator users
  • Both Vector-based and raster-based design
  • Low price tag
  • Great for Mac users

⇒ Download Affinity Designer

Inkscape – Object manipulation tools

The next entry on our list is a product that will probably deceive you at first glance when you find out that it is completely free and open-source.

However, nothing in the quality department has been sacrificed when creating this product. It is perfectly capable of handling vector-based products such as designing large banners and billboards.

Of course, there’s no way you can compare the sheer amount of resources that it has at its disposal compared to the premium products on our list.

However, if you’re working on projects that are more simplistic, or if you are perfectly capable of creating certain design elements by hand or with the few tools that you have, then you might as well go for Inkscape.

It is updated constantly, and you can even contribute with donations in order to make the program a whole lot better.

Here are some of Inkscape’s main features:

  • Completely free
  • Open-source and constantly updated
  • Packed with features considering the non-existent price tag
  • Vector-based
  • Versatile in terms of what it can create (banners, billboards, digital art, logos, etc)

⇒ Download Inkscape

Vectr – Pro vector graphics

Closing our list is yet another free vector-based graphics design tool.  It’s a simple yet powerful web and desktop cross-platform tool to bring your designs into reality.

What makes it stand out compared to all other entries on our list is that it can be used online, so there’s no need to occupy your disk space with it.

Simply go through your browser, visit Vectr’s website, log into your account, and start editing. Of course, those that lack a strong Internet connection can still opt for the traditional desktop client.

More so, you can send your design to other users instantly, and you can even make it so that they can watch you edit live.

Here are some of Vectr’s main features:

  • Completely free
  • Can be used as both an online web-based client and as a desktop client
  • Very lightweight
  • High-quality vector-based design
  • Makes sharing your work extremely easy

⇒ Download Vectr

Designing banners and billboards is no easy task. Even if you know precisely what you want them to look like, using the right tool for the job is crucial if you want to make it work.

Always remember when choosing design tools for projects such as these ones to always go for vector-based design tools and not raster-based, since the image quality will go down as the image size goes up.


How to update Windows 10 if you run a Conexant audio driver

More than one month after the last update regarding Windows 10 update issues for devices with Conexant ISST audio drivers, Microsoft releases a workaround, yet not the full solution.

It is known that devices with Conexant drivers can’t install newer Windows 10 versions (v2004 or 20H2) due to confirmed incompatibilities between the two.

Consequently, the workaround implies a driver update via the manufacturer or an update rollback.

Windows 10 update, still preferable, despite the conflict

Devices that run Conexant ISST audio driver and need to install Windows 10, version 2004 (the Windows 10 May 2020 Update) will still experience bugs during or after the installation, even with the proposed workaround.

The affected drivers – Conexant ISST Audio or Conexant HDAudio Driver – can be found in the Device Manager, under the Sound, video and game controllers section.

There, one should look for file names uci64a96.dll through uci64a231.dll and a file version of 7.231.3.0 or lower.

The solution found by Microsoft, until investigations reveal other solutions, is to contact your driver manufacturer and ask for an updated driver version, if available.

Since in most cases it is possible that your device already runs on the latest driver version, the solution is to roll-back your Windows 10 and attempt another update to v2004 at another time.

Additionally, updating will be rolled out cautiously, for some devices, Microsoft added:

As of January 14, 2021, we are adjusting this safeguard to allow certain devices with the affected driver to update to Windows 10, version 2004 or Windows 10, version 20H2.

The recommendation to avoid manually updating via the Media Creation Tool or the Update Now button is still available.

You could try using professional third-party software designed to perform automatic updates and keep your Windows OS healthy. The tool can perform an in-depth scan and find the right drivers for your PC within minutes.

⇒ Get Outbyte Driver Updater

A final fix for the incompatibility issue is expected in the next Windows 10 release, this spring.

Did you manage to update your device yet although you’re running Conexant ISST drivers? Tell us how it went in the comments.

6 Best Video Tutorial Software to Make Interactive Videos

In the last five years or so, the amount of video content uploaded to various social media networks has increased drastically. Everybody can launch their own YouTube channel and start vlogging.

Therefore, being able to edit the videos you share and bring them to top-notch quality is very important.

YouTube is currently the largest video sharing platform on the internet. More than 4 million hours of content are been uploaded each day, and these numbers are constantly rising.

If you want to attract the attention of millions of users and have the upper hand over content uploaders, you will need a good video editing software.

This allows you to organize your raw footage and to clear off any mistakes before uploading your videos.

You can find any type of video you want to on YouTube – ranging from tutorials, cooking recipes, fitness workouts, meditation videos, etc.

In this article, we will explore the best options on the market that allow you to easily create high quality tutorial videos – no matter if you’re a beginner or a pro. So, continue reading.


What are the best YouTube tutorial video software?

Adobe Premiere Pro (recommended)

Adobe Premiere Pro may seem like your typical timeline-based video editor, but that is the only typical thing about this program.

Among all the programs included in the Adobe Creative Suite, Adobe Premiere Pro is by far the choice for those looking to create, edit and compile videos for a wide variety of projects.

You can do anything you with this tool, from cutting videos to merging multiple short movies into one, all from within the same UI.

The program’s interface isn’t all that complicated given how many tools are at your disposal, and anyone with just a bit of experience editing videos will have no problem adapting to Adobe Premiere Pro.

Once you are done, you can go ahead and add a bit of extra movie magic with Adobe After Effects with which it works very well.

Here are some of the perks of using Adobe Premiere Pro:

  • Professional timeline-based video editor
  • Highly versatile in terms of imported and exported file formats
  • Can process video files from any type of video camera
  • Great plug-in support for extra flexibility
  • Can be tested out for free during a 7-day trial period

⇒ Get Adobe Premiere Pro


Pinnacle Studio (suggested)

pinnacle-studio-interface - YT tutorials

Pinnacle Studio 22 is a video editing software that provides a wide range of input file formats making it suitable for any user.

Pinnacle Studio brings advanced video editing tools to beginners and professionals alike, simplifying the video editing process.

This software is equipped will all the basic video editing features, and even offers paint effects or 360-degree video editing support.

For YouTubers, Pinnacle has a mosaic blur with motion tracking feature that allows you to conceal private information in the video, but it is only available in the Ultimate version of the software.

The Plus or Ultimate Pinnacle Studio versions, allow you to edit 3D and 4K videos.

General features of Pinnacle Studio include:

  • Multi-track video editing
  • You can enhance color and add effects
  • Royalty-free music, voice-overs
  • Burn to disc feature
  • You can upload to directly to social media
  • Export options to all file formats

Pinnacle Studio features :

  • 1,500+ effects, titles, and templates
  • 6-track HD video editing
  • Simplified color grading
  • Selective color
  • Multi-camera screen recorder
  • Stop motion animation

Pinnacle Studio Plus features :

  • 1,800+ effects, titles, and templates
  • 24-track HD video editing
  • Three and four-point editing
  • Basic color grading
  • Enhanced motion tracking
  • Wide-angle lens correction
  • Pro-level audio tools
  • And all the options included in Studio version.

Pinnacle Studio Ultimate features :

  • 2,000+ effects, titles, and templates
  • Unlimited HD and 4K video editing
  • Split screen video with keyframes
  • 3D motion objects
  • Seamless transitions
  • Effects from NewBlueFX
  • Enhanced 360 video editing
  • More formats and support
  • And, of course, all the other features included in Studio Plus

⇒ Get Pinnacle Studio 22


Corel Video Studio

corel-video-studio - Yt tutorial

Corel Video Studio is another great software with multi-track video editing options and a number of professional editing features.

Some of the best features found in Corel Video Studio include lens correction tools, 3D video editing, and stop motion animation.

This program gives you the ability to crop or resize videos and also helps you if you want to have more than just one video source by its split screen feature.

Video Studio is equipped with video hardware acceleration technologies that boost the speed of rendering a video. You can export your finished video to YouTube, Flickr or Vimeo.

Key features include:

  • Split-screen video templates
  • Multi-camera video editor – easily combine footage from multiple cameras
  • Track transparency – adjust the opacity of your tracks directly in the timeline
  • Customize motion path – control the movement of graphics, titles, etc.
  • Filters and effects – drag-and-drop effects, animated titles, transitions, etc.
  • Motion tracking – you can add moving text, graphics or blur faces
  • Green screen – ability to adjust how objects blend with the background
  • Audio editing tools – normalizer, audio ducking
  • Royalty-free music library
  • Ability to add filters and enhance color
  • Offers video tutorials

⇒ Get Corel Video Studio


Vegas Pro 16

magix-vegas-pro - Yt tutorials

Vegas Pro 16 is designed for Windows users who need a professional and advanced video editing software.

Vegas Pro has tons of advanced features like 3D editing, composting, color correction, automatic corssfades, multicam-editing, chroma keying and various special effects.

Most notable features of Vegas Pro 16 include:

  • Full support for High Dynamic Range (HDR) color
  • Video stabilization
  • Motion tracking
  • 360° editing
  • High DPI scaling
  • Automatic subtitle creation from timeline regions
  • Ability to find missing streams automatically
  • Time Stretch/ Compress Shuffle Editing
  • ACES 1.0 (Academy Color Encoding System)
  • FX masking
  • Integrated 3D adjustments
  • Compositing modes – enables you to assign tracks as parent or child tracks
  • 4K support

⇒ Get Vegas Pro 16


Wondershare Filmora

Wondershare Filmora - Yt tutorials

Wondershare Filmora is another great tool that allows you to create tutorial YouTube videos. With the numerous effects found in the library, you can change the way your video looks by adding text or image overlays.

This software has royalty free music that can help you create the perfect intro for your tutorials.

In order to help you create the perfect YouTube video tutorials, Filmora allows you to add text or use the split-screen feature.

Other notable features of Wondershare Filmora include:

  • Extremely intuitive UI
  • Simple color correction and audio editing
  • Advanced features like PIP, Green Screen, Tilt-shift, Mosaic, etc
  • Compatible with the most commonly used formats like MP4, MKV, MOV, FLV, etc

⇒ Get Wondershare Filmora


Broadcast Video Editing Toolkit – Renderforest

Renderforest - Yt tutorials

The Broadcast Video Editing Toolkit from Renderforest allows you to create excellent quality videos for Youtube with ease.

This software has hundreds of video and photo scenes that will give you the opportunity to create the perfect video without any skills.

Key features include:

  • More than 400 video templates
  • Easy to use video editor
  • 115.000+ HD royalty free stock footages
  • A wide range of commercial music tracks
  • Media Library to keep all your files in one place
  • Thousands of animated scenes for your projects
  • Ready-made stories to fasten your video creation
  • Upload your photos, videos, music or voice over
  • Publish to YouTube or Facebook with 1 click

If you feel like you need a quick start guide go to Renderforest’s guide page.

⇒ Get Broadcast Video Editing Toolkit


In this article, we explored some of the best editing software options that allow you to create amazing tutorial videos for your YouTube channel.

The options presented here are suitable for both beginners and professionals.

Some video editing software presented in this article are suitable for beginners – Wondershare Filmora, Renderforest, etc.

Other options are creative professional-grade software like Vegas Pro 16 or Pinnacle Studio 22. The software presented in this list will surely get you on track with your YouTube tutorial videos fast.

If you have any other software suggestions, let us know in the comment section below.

New Windows Feature Experience Pack update improves screen snipping experience for Beta Channel Insiders

Microsoft has released today a new Windows Feature Experience Pack update for Windows Insiders in the Beta Channel. This update is now available in Windows Update for Beta Channel Insiders running the 20H2 Build 19042.662 or higher, and it should be faster to install compared to a full-fledged build.

Back in November, the Windows Insider team announced that it would start shipping new Windows 10 features to Beta channel Insiders through Windows Feature Experience Pack updates. This is all about making the process of testing new Windows 10 features more agile, allowing the team to improve certain features and experiences that are now developed independently of Windows 10.

The Windows Feature Experience Pack 120.2212.2020.0, which is now available in Windows Update for Beta Channel Insiders brings minor changes to the Screen snipping experience. The Windows Insider team said that this update should make screen snipping more reliable “especially with apps that access the clipboard often.” Moreover, this update will remove the ability to copy and paste a screen snip directly into a folder in File Explorer as the Windows Insider team needs to fix a bug recently discovered by Windows Insiders.

Microsoft is just getting started with this new process for flighting new features to Beta channels Insiders, and that’s why today’s update brings very minor changes. “Over time, we hope to expand the scope and the frequency of releases in the future. Eventually, these Windows Feature Experience Pack updates will get folded into the already existing servicing process for Windows 10 and delivered to customers that way through Windows Update,” the Windows Insider team said today.

5 Best EXR Viewer & Editor Apps For Windows

EXR files aren’t supported by Windows, and to view one you’ll need an EXR file viewer. Many professional tools can handle these files, but there are a few free alternatives as well.

While some apps have native support others might require additional plugins to work with this file type, so it’s not easy to pick the right one for you. Luckily, this guide is here to help you make the right choice.

What is the best EXR file viewer software?

Adobe After Effects – Amazing EXR file viewer

Adobe After Effects is a software tool that looks and feels as if it was created with EXR files in mind. All you need to do is double-click the file or drag it onto an open After Effects window and the file will be open.

You can then make short work of it, modifying all image settings that you can imagine, from colors to luminosity.

More so, gaining access to Adobe After Effects will open up a whole new world of possibilities as far as video editing is concerned, as it is a world-leader in the domain.

In fact, by the time you get used to the entire tool set (and it will take some time to do so), the fact that it can open EXR files will probably be the last thing on your mind

Here are some of Adobe After Effects‘ main features:

  • The projects created in After Effects are fully compatible with most other Adobe products
  • Everyone uses it, so the Internet is full of helpful guides
  • Extensive plug-in support
  • Comes with a free trial
  • Great for creating high-quality products

⇒ Get Adobe After Effects

Autodesk 3DS Max – The best choice for 3D modeling

Another great software tool that everybody knows that can handle EXR files is Autodesk 3ds Max.

While few might have expected CAD software to be included on our list, the fact that it can open these types of files is what brought it here.

The images can be used in conjunction with the 3D models that you can create, resulting in stunning pieces of work.

In simple terms, imagine that the EXR images will most likely be used as the surface texture for the 3D objects that you created.

Of course, Autodesk 3ds Max is not just an EXR file opener, it is a program that holds the potential of creating entire 3D worlds as long as you invest the necessary time.

Here are some of Autodesk 3ds Max’s main features:

  • Create massive worlds in games
  • Visualize high-quality architectural creations
  • Model finely detailed interiors and objects
  • Bring characters and features to life with animation and VFX
  • Students and schools have access to free licenses

⇒ Get Autodesk 3ds Max

Adobe Premiere Pro – Professional post-production tool

If Adobe After Effects is the program that you use to add special effects to a video during the post-production phase, then Adobe Premiere Pro is the program you build the video from the ground up with.

This program is well suited for the creation and editing of videos, regardless of size or purpose. More so, the program has proven itself to be perfectly capable of opening EXR files as well.

Despite the Adobe namesake, the program is just like the typical timeline-based video editing tool, but with a professional-level toolset.

All in all, if you want to open EXR files in order to use them in basic video editing projects, then Adobe Premiere Pro is the software that you need.

Once the video is complete, consider using After Effects as well to further enrich your movie.

Here are some of Adobe Premiere Pro‘s main features:

  • Simplistic time-line-based movie editing
  • Great for creating videos from the ground up
  • Fully compatible with other Adobe products, especially After Effects
  • Not very resource-intensive
  • Can be tested during a 7-day trial period

⇒ Get Adobe Premiere Pro

DaVinci Resolve – Free post-production solution

This is an all-in-one post-production solution that offers non-linear editing to its users. It features drag and drop interface as well as context-sensitive auto-trimming tools.

We have to mention the library that has an array of effects, transitions, and titles you can add to your creations. Cutting is also simple with this tool due to its simple interface, dual timelines, and smart editing tools.

The software has advanced color correction and hundreds of 2D and 3D tools for visual effects and motion graphics. Regarding file compatibility, the application can handle a wide array of files, including EXR.

DaVinci Resolve is a professional tool, and its basic version is available for free, so don’t hesitate and give it a try.

Other great features:

  • Offers professional video editing features
  • Advanced color correction
  • Easy-to-use interface for seamless video cutting and trimming
  • Support for various formats, including EXR
  • The basic version is completely free

⇒ Get DaVinci Resolve

Luminance HDR – Open source alternative

This software is designed for HDR imaging and it allows you to fuse multiple pictures to create an HDRi. Regarding the supported formats, it works with JPEG, TIFF 8bit and 16bit, RAW, and many others.

With Luminance HDR you can save and load HDR files, rotate them, tonemap images, apply projective transformations, and copy EXIF data between images.

As for supported HDR formats, the software can work with EXR, TIFF, RAW, and PFS. Overall, this is a great free solution to open an EXR file on your PC and make small adjustments to them.

Other great features:

  • Open source
  • Available on all desktop platforms
  • Supports JPEG, PNG, PPM, PBM, TIFF, FITS
  • Works with EXR, RGBE, TIFF, RAW and PFS

⇒ Get Luminance HDR

How do I view an EXR file in Windows?

Windows doesn’t have native EXR file support, so to view it you need to use one of many applications that can open it. Simply open the application that supports this file type and then open the EXR file within the application.

How do I open an EXR file online?

  1. Go to the OpenHDR Viewer page.
  2. Click on Choose a file or drag it here.
  3. Select the file you want to view and wait for it to upload.
  4. Once uploaded, you should be able to see it.

As you can see, EXR files are quite versatile in terms of what they can be used in, especially since our list comprises two video editing tools, a CAD tool and a photo editor.

If you need more tools that can work with these files, check our guide on the best free video editing software or our best post-production software guide.

What software do you use to work with these files? Let us know in the comments below.

Microsoft Teams meetings will support 2×2 gallery view on the web next month

Microsoft Teams is finally planning to add support for 2×2 gallery view on the web for video calls and meetings. The company expects to release this feature to the Teams Web client in February, allowing users to view up to 4 video-call participants during a meeting in the Edge or Chrome browser.

Microsoft is also working on letting Mac users include their computer’s sound when sharing their desktop or a window in a meeting. This means that the Teams desktop app will add the ability for users to share audio from their speakers with other meeting participants to make their meetings a bit more interactive.

Install driver

According to an entry in the company’s roadmap, the new capability is currently under development, and it will be generally available in early February 2021. Microsoft says that users will need to install an audio driver to enable this feature on their machines.

Easy Movie Maker: 6 Best Free to Download [Beginner-Friendly]

Windows 10 users can find and use many video editors on the market. However, it is really difficult to select the most suitable video editing software for Windows 10.

That’s why we wrote this article. In order to help you make a decision, we listed six movie maker software that are very easy-to-use on PC, so keep reading.


What are the best easy movie maker software for Windows 10?

Adobe Premiere Pro

Adobe Premiere Pro_best film-making software

Adobe Premiere Pro is the pinnacle when it comes to video editing, boasting effective tools, cross-integration with apps and services, and great new features including Premiere Rush.

With automated tools and integrated workflows, the Premiere helps you craft footage without leaving your timeline and edit it in any format, from 8K to VR.

By introducing Premiere Rush, a new all-in-one app that works across all devices, the software allows you to extend your editing platform wherever you are.

It integrates seamlessly with other apps and services within the Adobe Creative Cloud, including Photoshop or After Effects, and even with third-party extensions to help you and your team to easily collaborate.

Adobe dedicates a lot of resources into turning their products as user-friendly as they get and this industry-leading video editing software makes no exception. Detailed tutorials and valuable insights are on the house.

Let’s quickly go through its key features:

  • Automatically reformat videos (accelerate your workflow and optimize footage for social media – square, vertical, 16:9, or in 4K resolution)
  • Instantly improve audio (accelerate audio mixing, dial down background noise and reverb with new sliders)
  • End-to-end VR 180
  • Time remapping to 20,000 percent (re-timing shots without nested sequences for bigger speed changes)
  • Improved native format support (H264, HEVC, and ProRes including ProRes HDR)
  • More drivers audited in System Compatibility report
  • Faster scrolling in the Media Browser, easier Media Cache management, and more
Adobe Premiere Pro

Adobe Premiere Pro

Thanks to the innovative features of this software, you can now edit videos and create footage like a pro, so give it a try!
Free trialVisit website

VirtualDub

VirtualDub is an open-source program available for Windows 10.

The interface is intuitive and allows you to perform simple operations such as adding and deleting files, cutting the sidebars, rearrange, and rotate parts of the video.

It is a comprehensive program that is also capable of converting videos, in addition to editing them. Indeed, these are some interesting functions that may prompt you to use VirtualDub.

Pros

  • The program offers the video capture function, avoiding the need to import movies for editing.
  • You can manipulate files through third-party video filters.
  • It supports multiple processing, so it can work on multiple video files at the same time.

Cons

  • Despite the intuitive interface, performance quality is often something that can frustrate the user.
  • Beginners will have some trouble understanding how the program works.

So if you want a comprehensive tool that is free and offers a lot of features, check out VirtualDub in the link below.

⇒ Get VirtualDub


Windows Movie Maker

An alternative solution can be represented by the Windows Movie Maker. It is a free program, and for this reason, it may not have all the features you are looking for.

However, this does not have to be a daunting element.

In fact, Windows Movie Maker has a series of interesting features like a set of basic editing tools to slow down or speed up videos, cut them, and add effects and transitions.

When it comes to Windows Movie Maker, a so popular video editing tool, it’s not all black or white. Like every Windows experience, there are shades of gray.

Pros

  • Windows Movie Maker comes standard on almost every PC, so it’s hard to complain about its price (free).
  • Movie Maker provides a relatively easy introduction to video editing software for beginners. Its workflow elements with symbols of its professional editing system and its intuitive interfaces are easy to navigate for beginners and experts.
  • Windows Movie Maker is essentially the perfect tool to create a home video or film presentation to share your memories with family and loved ones. With built-in themes, fun transitions, and the ability to easily add music to slides, it’s a great tool for home video fans.

Cons

  • Movie Maker is designed for beginners and therefore becomes rather limited. It only allows one track, the green screen is out of the question. So your creativity is paralyzed and limited only to pre-installed effects.
  • If you are an advanced editor or have experience with other programs, Windows Movie Maker can be frustrating to use.
  • A problem that many of the Windows programs have is that Movie Maker crashes … quite a lot. Screenshots are often blocked causing you to rage and lose everything you were doing. Save your work often!

Windows Movie Maker is no longer supported by Microsoft, but if you don’t have it already, you can get it by following the link below.

⇒ Get Windows Movie Maker


Filmora Video Editor

Filmora Video Editor is a video editing tool fully compatible with Windows 10. It supports all types of audio, video and photo files, and can also record your PC screen.

It provides all the basic tools necessary for editing, including cutting, merging, and dividing.

It also brings a series of special effects such as face-off, mosaic, green screen, picture-in-picture, filters, and overlays.

Let’s quickly go through its key features:

  1. Simple interface, with all the editing tools shown in the main window. Users can find and use all the tools with great ease.
  2. It supports almost all audio, video, and photo file formats. There are no incompatibility problems.
  3. Selected threads, overlays, animated graphics, opening, and closing credits. The list of effects is updated periodically.
  4. Exporting videos in different formats, or optimized for sharing on YouTube, Facebook, and Vimeo.
  5. Specific versions for Windows and Mac, compatible with the latest operating systems.

Pros

  • Easy to learn and use.
  • It provides all the basic editing tools for a beginner.
  • The price is lower than professional applications but allows you to create professional-looking videos.

Cons

  • It may not be fully stable when importing multiple videos.
  • A number of functions are lower compared to other professional software.

A huge number of titles, transitions, and animated effects are also available. Check out the free version in the link below.

⇒ Get Filmora Video Editor


Pair your video editor with one of the best video optimizers. Check out our best picks in this article.


What are the best movie maker software for beginners (paid version)?

And now let’s see what are the best premium paid Windows 10 movie maker software available on the market.

These tools bring additional features and options compared to the free software listed above.


Pinnacle VideoSpin

The way this software is designed allows a very intuitive and reliable approach for both beginners and professional video editors. Its goal is simplicity of use by beginners and video editing experts alike.

Let’s quickly go through its key features:

  • Create photo slideshows
  • Delete unnecessary scenes from a movie
  • 2D transitions
  • Video effects and the ability to add audio or text overlays

In case your editing needs are concurrent in these functions, the choice of Pinnacle VideoSpin for video editing suits perfectly.

Pros

  • The program guarantees support for a huge number of file formats, with a very high compatibility rate.
  • The timeline makes the editing process very simple, eliminating a number of related difficulties.

Cons

  • You must register to be able to install the program on your computer
  • You may need to purchase the Advanced Codecs Pack, which will still have restrictions in certain formats.

Pinnacle VideoSpin is not exactly cheap, but it has a lot of features, and it’s worth every penny. Check it out in the link below.

⇒ Get Pinnacle VideoSpin


Sony Vegas Movie Studio

Sony Vegas Movie Studio software

Sony Vegas was created specifically for Windows and is one of the best choices in the field of video editing.

Through this program, you get fantastic videos with very little effort. If you are passionate about video editing, Sony Vegas Movie Studio is the right tool.

You can also download a trial version to test its potential.

Sony Vegas Movie Studio is an integrated solution for video editing thanks to a vast number of functions. You can manage those from a very intuitive interface with tools such as video stabilization, adding text, and effects in real-time.

Pros

  • It supports an unlimited number of incoming and outgoing files.
  • The compatibility of the formats is absolutely guaranteed, regardless of the one used.

Cons

  • The selling price is not very competitive. It is out of reach for some users’ pockets, and the trial version only provides a limited set of features.

So, if you want a professional tool to help you with your video editing, check out Sony Vegas Movie Studio in the link below.

⇒ Get Sony Vegas Movie Studio


That’s our list of the best video editors to use on Windows 10. Now it’s time to pick your favorite software and start editing!

The list above highlights some of the best movie maker software that are very easy to use. As a result, these tools are perfect for beginners.

Use the comment section below to let us know which software you downloaded.


Aukey EP-T32 True Wireless Earbuds Review: A good pair of budget sports buds for close to $50

These days, there’s no shortage of wireless earbuds. You can find them on the cheap from everywhere, and you even can find more premium earbuds from Microsoft as well as Apple and Google.

But what if you’re looking for a balance, but without spending too much? That’s where Aukey steps in with their latest product, the Aukey EP-T32 True Wireless Earbuds. We were provided a pair for review, and here’s a look at why they’re a good pair of budget earbuds for under $50 (on sale at Amazon, with coupon.)

The charging case and battery life

Aukey Headphones Box 2

Much like when I reviewed Surface Earbuds, I’ll start first by mentioning the charging case included with these buds. Though Aukey markets this specific earbud for sports, the wireless charging case is a bit on the big side. It doesn’t really fit in my jeans, and I needed to slide it into my jacket pocket when using the earbuds on my daily walks. I can see this being troublesome if you’re a jogger or someone who doesn’t have space to carry the case around, but it’s not all a loss.

You can technically charge and pair up the headphones, and then leave the case at home, if you want. Each time the headphone is in the case, and the lid is opened, it will enter a pairing mode. When it is taken out, it will connect to what device you’ve paired it with. You can then turn off the earbuds by holding them down on the side for 5 seconds. It is a very seamless pairing process, but the earbuds only pair with one device at a time. You’ll need to turn off Bluetooth on one device if you want to switch it to another.

Anyway, Aukey markets that, with the case, the headphones can last for 35 hours, with 7 hours of playtime for each charge. This is where the big case size comes into play. It houses a battery that can charge up the wireless earbuds around five times. In fact, I charged my earbuds the day I received them (a Wednesday,) and it lasted me through to the weekend on four charges (through Sunday.) During my time I switched between my phone and my PC, for music as well as video editing, and used the earbuds throughout for roughly five hours each day.

Aukey Headphones Box

It should be noted that charging happens via USB-C, (supporting fast charge) but if you have a wireless charger, you also can put the case on it to charge it up. This is a great feature, usually reserved for premium earbuds. In fact, Microsoft’s own Surface Earbuds lack this.

The extended battery life is also great, too, as you can use these without worrying about having to charge. For comparison, Microsoft’s Surface Earbuds charging case can hold up to 24 hours of battery life with a single charge — or 8 hours of a single charge on the earbuds. Aukey’s has the edge here, for sure.

The fit

Aukey Headphones On 2

Now, for the most important part, the fit of the earbuds. Thanks to a “hook” and the curved design, the earbuds manage to grab onto the outside part of your ears when you put them on. This is important, as these are marketed as “sports” buds.

Overall, it’s a pretty comfy and subtle fit. There’s no need to “twist” or turn the earbuds in either. They just fits perfectly into my ears. No need for strange “turning” motions to get it to fit and stay stable in my ears like I had to do with Surface Earbuds or even my AirPods. I even went for a jog with the earbuds, and they didn’t slide off my ears as I moved, they stayed firm and secure.

I’ll also mention the IPX8 Waterproofing. Aukey tells me these Wireless headphones feature a fully sealed waterproof shell. It’s rated against sweat and rain. I walked in a slight drizzle with the earbuds, and they remained fully functioning. Of course, I would not suggest soaking your earbuds in water.

Like other earbud makers, Aukey includes three tips in the box — small, medium, and large, You can pull the tips in and out, to fit your ear size. I used the smallest one, as it creates a good seal for when you listen to music. A tighter seal will keep outside noise out.

The music, and the call quality

But what about music and call quality? On this end, the Aukey EP-T32 True Wireless Earbuds are great. While these aren’t meant to take on Apple’s AirPods with sound-canceling features or spatial audio support, the sound quality is definitely there for the price. It sounds about 20% lower than what I get with my Apple Airpods, but it does work well for the price you’re paying.

As you can see in the clip above, I wore these earbuds for our Podcast, and it felt just as if I had on a pair of over-the-ear headphones. The sound quality is clear and concise and I heard Kareem’s voice very clearly with the buds on. For long-range Teams or Zoom calls, these earbuds will definitely work well for comfort as well as audio quality.

Aukey Headphones Box 3

For music, there are no “tin” sounds as you’d get in cheaper headphones. These sound good for the price. The bass isn’t the greatest but music with lots of rhythm like Rihanna’s We Found Love were very lively. Aukey says “powerful 12mm / 0.36” speaker drivers deliver high-fidelity audio with deeper bass response.” Aukey also has the Qualcomm 3020 Bluetooth 5 chip, with integrated support for aptX and AAC codecs on board.

As for voice calls, the microphones on board are great. I gave my friend in Albany a call on my iPhone when wearing these earbuds. She told me I sounded “decent” compared to when I was using my iPhone’s mics. Aukey mentions the use of CVC 8.0 noise-reduction microphones onboard these buds, which could be the reason for that.

The touch controls

Aukey Headphones On

Finally, I’ll touch on the touch controls. Microsoft’s Surface Earbuds have a touch control surface which lets you control your music. Aukey does something similar with these earbuds.

You can tap on the outer surface of either earbud to play or pause music, and then triple-tap either earbud to summon your voice assistant. A double-tap on the left earbud, meanwhile, takes you back to your previous track, and can also answer or end a call. Going to the next-track will require a double-tap on the right earbud, too.

Like Apple’s Earpods, the Aukey earbuds also support single Earbud use. If you take one off when music is playing it will pause. You also can use each earbud as a standalone headset. It would have been great to see volume control on these Aukeys, but I could see that it might have pushed the price up a bit.

Summary

Priced at around $50, and even less when on sale, the Aukey EP-T32 True Wireless Earbuds provide a good balance. The battery life makes these earbuds reliable, and the fit make it a great companion for fitness, or long-haul Teams, or Zoom calls. There could be slight improvements in sound quality, but for $50, the Aukey EP-T32 True Wireless Earbuds don’t disappoint.

Screen Annotation Software: 11 Best to Use in 2026

On-screen annotation or screen marker software lets you annotate desktop screens and apps and then save your results.

In other words, screen annotation software can also be seen as a mix of presentation, screen capturing, whiteboard and note-taking tools.

Such tools are useful especially for teachers or professional who often deliver presentations and don’t want to spend too much time preparing slides.

Here are the essential features for screen annotation software:

  • Includes all kinds of drawing tools including pen, arrow, rectangle, text box, and free hand; it should also sport focus tools.
  • It allows you to delete and move objects, erase, undo and so on.
  • Features smooth on/off annotation.
  • Captures the whole screen or just a region in an editable format.
  • Works with any software.
  • Provides you the opportunity to magnify areas.
  • Features automatic numbering.
  • You should be able to hide it or certain things on the screen.

What are the best screen annotation software?

Adobe Reader

Adobe Reader is the most popular PDF reader in the world. This fact alone confirms the great value of this tool.

You can use the free version of Adobe Reader to view PDF files and add annotations, or you can get the premium version if you want to edit, convert, and protect your PDF files.

If several persons or team members are working on the same document, leaving notes, comments, sticky notes or drawings is a great way to provide feedback or share ideas.

Adding comments is really simple. You don’t need to open any complicated menus, you can add your comments while you’re reading your PDF documents.

All you need to do is select the text or the image you want to annotate and click on the Add Note option.

The secondary toolbar of the Comment feature is located on the right side of the screen for additional options. You can also add a Sticky Note to leave a comment.

You can also use the drawing tool to add a specific shape and then type your comment. Also, you can type a text message using the Sticky Note tool.

Adobe Acrobat Reader

Annotating the documents in your presentations will be far easier with Adobe Acrobat Reader!
Free Trial Visit website

Soda PDF

Soda PDF is a popular Acrobat alternative, accessible through any device with a web browser. This is the only PDF reader equipped with a 3D View mode and it has a robust menu of annotation instruments.

You can use the free online software to edit your documents, add comments, or highlight important ideas. Alternatively, you can get the Premium version, with no size or daily usage limitations, and enjoy more tools, including the 3D technology viewer.

Soda PDF offers you many import options, allowing you to add images, links, shapes, or even interactive forms to your files. 

The markup tools, as well as the Sticky Notes function, let you pick the desired colors, making it easier to organize your project or presentation.

Since it works from the cloud and on multiple devices, several people can edit a document at the same time. Soda PDF is the ideal annotation software for company use, especially due to its e-signing function. With this service, you can prepare, send and track the progress of e-signatures for your PDFs.

Check out its other key features:

• Advanced file encryption

• Customizable interface

• Inbuilt batch tool

• Split/merge PDF files functions

• Fast PDF conversion from Word, Excel, PowerPoint, RTF, HTML, JPG files, and more

• Inbuilt Optical Character Recognition (OCR) and Spell Check features

The fully functional PDF solution offers round-the-clock customer support and volume licensing discounts.

Soda PDF

Soda PDF

Batch edit PDF files and make impressive 3D presentations with the innovative Soda PDF software!
Check priceVisit website

Presentation Pointer

With the help of Presentation Pointer, you will be able to grab your audience’s attention and focus. Check out its most useful features below:

  • Pointer Effect highlights visibility pointer, mouse movements, and it also provides a spotlight effect.
  • The Mouse Click Effect displays a circle when you click the mouse, and you can also get an animation effect and different colors for different buttons.
  • The Live Drawing feature allows you to draw freely on the screen without locking it; you can draw horizontal lines, vertical lines, and arrow lines and if you press the hotkey you can clear everything.
  • With Live Zoom, you can zoom in and out of the windows, but you can work on the screen at the same time.
  • The tool also displays your keystrokes in an overlay at the bottom of the screen.
  • The Keystroke filter lets you define a list of custom keystrokes that will not be displayed.
  • You can activate and deactivate all the effects with the toggle Hotkey.
  • All the effects can be managed in two modes, together and standalone.
  • Everything about this tool is customizable.

You can try it for free with the trial version or buy Presentation Pointer and get a discount if you buy multiple licenses.

⇒ Get Presentation Pointer 


Presentation Marker

This tool provides users various screen marker tools including Curtain, Spotlight, Arrow Point, Screen Digital Clock, Screen Capture, Magnification and so on.

The tool is perfect for a product demonstration or a foil presentation where annotation comes in handy for better illustration.

Check out its key features:

  • You can mark on your screen, and the screen marker tools include Arrow, Line, Ellipse, Brush, Pen, and Rectangle.
  • Electronic Whiteboard which allows you to draw freely on the board; you can add more boards and set different background colors.
  • Full-Screen Zoom allows zooming the screen with the keyboard or wheel.
  • Live Drawing on Screen lets you draw freely on the screen but not lock the screen.
  • With Live Zoom, you can zoom in and zoom out the windows but allows you to work on the screen.
  • You can preside over a meeting more effectively with Countdown timer, Task shortcuts, and you can also play background music.
  • You can grab your audience’s attention and focus with Pointer effect, Mouse click effect, and Keystrokes displaying.

The software also features a portable version that you can carry together with your multimedia lecture content. You just have to plug your USB drive into the PC and then run it. For some users, the tool palette may be overkill.

⇒ Get Presentation Marker


Windows Snipping Tool

Windows Snipping Tool is the built-in grabber on Windows that you might not even know it exists. This tool is available on all Windows systems, including Windows XP.

Users usually ignore it as it’s hidden in the deepest recesses of the Start menu.

Take a look at its most notable features:

  • Even if the tool is straightforward, it has enough power to take useful screen captures.
  • It allows you to get full-screen images, rectangles, and the currently active window.
  • It can also perform free-form snips: you can drag your mouse around the area of the screen that you are interested in highlighting, and it will bring in the pixels within your sketch.
  • You also get the chance of scribbling on your shots with quite a rudimentary highlighter and pen, but it’s working well.
  • You can also set a delay on captures in case you need to set something particular up.

In case you don’t need complicated features, you will definitely be better off using Windows’ built-in tool. Just go to Start, type Snipping Tool and double-click the first result to launch the tool.


Annotate Pro

Annotate Pro is quite an ergonomic software, and you can check out its most important features below:

  • You can annotate so that your audience can efficiently follow along with you. You can easily exit the draw mode by clicking the arrow button on the right-click on your mouse and then continue to the next area of your training.
  • The tool allows you to communicate effectively with your colleagues, and you can draw on top of any program that’s running on your desktop.
  • You can also draw anywhere on your screen to communicate all product changes to the development staff.
  • You can annotate and save a screenshot, and your help desk can troubleshoot your problem much easier; you won’t need expensive or hard to use graphics software.
  • The latest features included in the newest release of the program include multiple undo, arrow tool, highlighter, hotkeys and more.

In case you have to deal with display errors with arrows and more geometric forms the whole issue will go away after you click twice on the transparency button. The software is not recommended for Windows 7.

⇒ Get Annotate Pro


Gadwin PrintScreen

In case you want to create a screenshot that is suitable for printing or saving, Gadwin PrintScreen is the right tool for you. You have to download it first, but it’s definitely worth your time.

Here are the most important features of the tool:

  • It offers a few hotkey combos to choose from, and after you have chosen your favorite one, you have to get to the Destination tab and have the screen print out instantly.
  • You can perform full-screen captures, or you can only capture a particular window.
  • The tool is a mix of a first-class screen capture app with an advanced image editing and annotation utility.
  • It is very versatile and straightforward.
  • The tool comes stocked with customizable arrows, colorful speech bubbles, blur, and more features to mark your screen capture.
  • You can use captured images to show off your product on the web, and the tool will help you enhance the technical or sales documents.

Using this tool, you’ll save time and increase your screenshots’ quality.

⇒ Gadwin PrintScreen


DemoHelper

DemoHelper is an annotation and screen zoom tool, and you can use it for your tech presentations that include app demonstrations.

The software is open-source, free, and you have to download one executable file, and that’s all.

Check out its main features:

  • It will help you in all your demos and presentations whenever you need to offer explanations.
  • It runs unobtrusively in the system tray.
  • The tool is activated by the context menu of the tray icon or by customizable hotkeys.
  • It allows you to draw on the screen to mark special areas, and you can also zoom in on an area on the screen.

DemoHelper requires Windows XP or later versions, and it’s important to note that it won’t work on Windows 2000.

⇒ Get DemoHelper


ZoomIt

ZoomIt is a screen annotation and zoom tool targeted at tech presentations that come with app demos.

The tool runs in the system tray, and it can be activated with customizable hotkeys to zoom in on an area of the screen, move around while it’s zoomed and also draw on the zoomed image.

The tool is compatible with all versions of Windows, and you can also use pen input for drawing on tablet PCs.

Here are more of its principal features:

  • The first time you run the tool, it shows a config dialog that describes the tool’s behavior.
  • It allows you to specify alternate hotkeys for zooming and for entering the drawing mode without zooming.
  • You can also choose hotkeys for customizing the drawing pen size and color.
  • You can use the draw-without-zoom option to annotate the screen at its native resolution.
  • There’s also a break timer feature that stays active also when you tab away from the timer window.

ZoomIt is free, but it’s not open-source.

⇒ Get ZoomIt


SnapDraw Free

SnapDraw Free is a feature-packed capture tool with lots of post-processing effects. Below, we’ll present its most important features:

  • The tool allows you to create high-quality screenshots with alpha transparency, reflections, annotations, and 3D rotation/perspective effects as well.
  • The tool can capture the entire desktop, an active window or an object under your mouse cursor when you press a keyboard hotkey.
  • You can also add annotations (shapes, lines or text), insert images.
  • You have the ability to adjust or even disable reflection effects.
  • It allows you to set a background color or image, and you can also add a text/image watermark.

The tool is an excellent choice for users who are looking to create high-quality captures featuring 3D rotation and reflection effects.

You can also automatically upload your images to an FTP server, or you can email them

⇒ Get SnapDraw Free


Ink2Go

Ink2Go is a mix of screen annotation and screen capture software, and it allows saving annotations as images or as *.wmf videos. Check out its key features below:

Annotation features of the tool are simple, and you can use either a highlighter or a configurable pen.

The tool is straightforward to learn just by taking a look at the tools tips.

It features configurable shortcuts for toggling display and for recording modes, and you can change these by just clicking its icon from the taskbar.

The exit icon from the top right of the toolbar will not exit from the program, and this is only used to stop the annotation process and to hide the toolbar; if you want to exit then click on the icon in the taskbar.

You can purchase the tool, and in case you’re interested in live annotations, it’s an ideal program.

⇒ Get Ink2Go


Our list of on-screen annotation and screen marker software ends here. We guarantee you that whichever tool you decide to install, you will not be disappointed.

For a lightweight screen annotation app that draws over any window, try the Epic Pen tool for quick markup during lessons and demos.

All the tools listed above are great and offer many useful features. So, what have you tried from these software apps? Leave us your answer in the comment section below.


Vinyl Cutter Software for Windows & Mac: 5 Best in 2026

The business of cutting vinyl is one that requires technique and precision which is exactly what a vinyl cutter is made for. It is important to research for the best vinyl cutter tailored to your needs.

The past decade has seen advancement in tech as most vinyl cutter equipment comes with built-in software which typically allows custom designs and graphics.

Furthermore, there are excellent vinyl cutter software in the market which gives more freedom in choice of design, graphics and intricate settings on the machine.

If you’re searching for the best software for vinyl cutter, we’ve got you covered, our team have researched and tested some of the best vinyl cutter software available on the market.

What is the best vinyl cutter software for Windows 10?

Adobe Illustrator

Adobe Illustrator has occupied the first position in our recommendations because of its very wide range of features, an amazing set of features, and customizable workspace.

This app not only offers you all the required tools you need in order to successfully and efficiently cut vinyl records but also does it more exactly and efficiently than any other software available on the market.

The most useful option that helps you create detailed vinyl cuts easily is the Snap to Pixel feature. As the name suggests, this feature works pixel by pixel to perform exact selections and cuts.

On top of this, the Pen Tool allows you to match any curves in your design perfectly. Here are some other useful features found in Adobe Illustrator:

  • Amazing selection of effects, styles, and fonts
  • Integrates perfectly with other Adobe products
  • Incredibly varied set of tutorials for any art project
  • Supports CSV and XML files
  • Very useful customizable keyboard shortcuts to ensure a fast creation process
Adobe Illustrator

Adobe Illustrator

Create custom and awesome designs for your vinyl records with the feature-rich Adobe Illustrator
Free trialVisit website

CorelDRAW Home & Student Suite

pixel painting software

CorelDraw Home & Student Suite is one of the popular graphic design software suite with over 500 million users worldwide and has different packages.

With CorelDraw, you would have a wider scope of possibilities than Sure Cuts A Pro as there are a larger library and more features available in the graphics suite.

In addition, CorelDraw comes with tons of design templates, images, and illustrations. Furthermore, its features and options make it an ideal software to employ as a layout and tracing tool.

Also, CorelDraw has a huge user base with lots of tutorials online and YouTube video tutorials which enable a faster learning curve.

Nevertheless, CorelDraw supports numerous file formats and is also compatible with several Windows versions.

Consequently, CorelDRAW Home & Student Suite is an ideal software for a vinyl cutter as you get diverse graphical options.

CorelDraw Home & Student Suite

CorelDraw Home & Student Suite

Bring your ideas to reality by creating and cutting captivating vinyl designs with CorelDraw
Check priceVisit website

Easy Cut Studio

Easy Cut Studio has increased in popularity in the past few years as a top quality software for vinyl cutter.

With a budding user base, Easy Cut Studio incorporates good features that provide users with diverse options for designs.

Unlike CorelDraw which is a general design software, Easy Cut Studio is developed solely for the needs of vinyl cutting, which makes the program very useful.

Moreover, this software comes with vinyl cutter specific features such as Bezier Operations, auto-tracing, m Lattice design, freehand drawing, and much more.

It also comes with a user-friendly interface which enables easy navigation with remarkable ease in cutting images.

Furthermore, like most graphical software, users can import many formats like PF, AI, SVG, etc. Easy Cut Studio is also compatible with many Windows OS versions as well as over 400 models of vinyl cutters.

Updates are also keeping it in touch with the latest vinyl cutter models and cutting plotters. Easy Cut Studio is similar to Sure Cuts A Lot but just offers a little extra making it the best software for vinyl cutter.

⇒ Download Easy Cut Studio


Sure Cuts A Lot Pro

Sure Cuts A Lot Pro is specially designed for vinyl cutting machines and integrates a cut and design mechanism which enables a range of variation for users.

This is one of the top-rated software for vinyl cutter in the market which provides users with extensive features most especially its library of shapes.

One unique feature of this best software for vinyl cutter is that it enables users to create images from scratch for designs such as T-shirts, and signs.

In addition, Sure Cuts A Lot Pro comes with a simplified user interface that is compatible with many brands of vinyl cutters, so it is handy for businesses that utilize different brands of vinyl cutter machines.

The weeding process is also achieved more efficiently as you can add extra lines to your work graphics.

In addition, the software supports file formats from popular design programs such as CorelDraw and Illustrator making it possible to import a wide range of designs.

Sure Cuts A Lot Pro also excels in after-sales support such as free technical support for existing customers. Besides, its interactive website offers a series of training videos for beginners and expert users.

⇒ Download Sure Cuts A Lot Pro


StoneCut Pro

StoneCut Pro is a decent software for a vinyl cutter that has been going strong in the market. Based on the Smartcut Pro software algorithms, StoneCut Pro features a user-friendly platform that allows users can produce vinyl signage, vinyl decals, and other functions.

One unique feature of this best software for the vinyl cutter is its seamless integration with other graphics software such as CorelDraw and Illustrator. Nevertheless, StoneCut Pro 2 can also be used as a standalone application.

Furthermore, StoneCut Pro 2 integrates special features such as the automatic configuration of rhinestones in tightly spaced areas.

It is compatible with over 550 models of Vinyl cutters. StoneCut Pro 2 is a decent software and can be tested for free before purchasing the full version.

⇒ Download StoneCut Pro


Clipart DeSIGN

Clipart Design is not a traditional software for vinyl cutter but offers users vector images which can be used for different purposes.

This platform makes things easier as users can select any design which fits their needs and requirements. Besides, all images available via Clipart DeSIGN are compatible with several software for vinyl cutter.

Nevertheless, Clipart DeSIGN images can be downloaded in different formats including PNG, AI, and CDR. The images can be used for garment printing, vinyl cutting, and other diverse industries.

Although, these images cost a fraction of what it would cost on online stock image websites. We recommend the software for its readymade images which gives good value for money.

⇒ Download Clipart DeSIGN


Have you made use of any of the best software for vinyl cutters we mentioned above? Please make sure you let us know in the comment section below.

6 Best Automated Animation Software [Amazing UX]

Whether you want to create a short movie, an advertisement for product promotion, a video resume, or simply try your hands at animation for the first time, knowing what tools to use is important.

There is a lot of animation software available in the market today, but the truth is all of us don’t need highly sophisticated and complicated animation software to create basic animations.

So, which animation software should you choose? It depends on your requirement. If you want something easy to learn and use and still be able to create high-quality animation, you can opt for automated 2D animation software that can produce natural motions in a few minutes with a visual editor.

However, in case you want to create a professional-grade animation that you have seen on film, games, and television look for animation software with 3D modeling, game creation, and motion tracking capabilities.

If you have still confused about what animation software you should begin with, let us help you make a better judgment.

Today, in this article, we will walk you through the best-automated animation software to create feature films and cartoons in 2D and 3D.

What’s the best-automated animation tool for beginners and professionals?

Adobe Animate CC – Excellent 3D animation software

Adobe Animate CC is suited for beginners as well as professionals who are looking to create high-quality and captivating animated videos.

You can create basic 2D characters or use a more complex graphic design tool like Adobe Illustrator that will help you create detailed characters that you can easily export into the software.

You can animate static shapes by using different animation templates as well as create a basic 3D effect by using the multiple layer feature and axial camera motion.

You can make your character talk, blink, and move frame-by-frame. The content can be triggered by a click or scroll which makes it perfect for interactive banner creation.

The package also comes with a suite of drawing tools such as vector brushes, rotatable canvas, and colored skinning which are more than enough for a basic animated video.

Once your content is ready, you can easily publish it on the web or TV by exporting it in any HTML5 Canvas, WebGL, Flash/Adobe AIR formats.

Adobe Animate CC

Create stunning and professional-looking animations with minimum effort with this amazing tool from Adobe
Check price Visit Website

Autodesk Maya – Best animation app for Mac

If you think the online animation software listed above is too simple and basic for your needs, meet Autodesk Maya.

A 3D animation, modeling, simulation, and rendering software from the house of Autodesk, might be the right choice for you.

Autodesk Maya has been the industry leader for decades. The software is used by some of the leading Hollywood studios to create animation, environment and motion graphics.

That being said, Maya is a complicated and powerful software that costs quite a bit. But then it addresses professionals looking for solid software with a powerful toolset.

For 3D animation, Maya comes with:

  • Parallel rig evaluation for rig manipulation
  • General animations for keyframes procedural and scripted animation
  • Time editor to make high-level animation edits with a clip-based, nonlinear editor
  • Shape tuner to fine-tune 3D characters and animations with ease
  • Speed enhancer to make animation scenes faster

In addition, it also comes with pipeline integration, 3D rendering, and shading options, dynamic and effects, and 3D modeling features.

Autodesk Maya involves a learning curve and can be intimidating with its features to beginners.

Autodesk Maya is a flexible solution for 3D animation artists as it offers more than just animation tools and allows you to make precise modifications to meet the client’s requirement.

Autodesk Maya

CD animations will be incredibly easy to create if you have a trusty software tool like Maya on your side.
Check price Visit Website

Animaker – Built-in custom character builder

Animaker for Windows automated animation software

Let me begin by saying that Animaker has nailed the intro video on its website which is probably made using the Animaker software. If nothing else, the intro video itself will get you excited about this cloud-based animation software.

Animaker comes with a free plan but is limited to 2-minute of video length and five exports a month with SD quality, watermark, and other limitations.

Animaker boasts the world’s largest animated library. It is DIY software for marketing professionals and freelancers for creating a simple yet effective marketing campaign, intros, and instructional videos.

Getting started with Animaker is easy even for beginners. Animaker also has a good collection of how-to videos on the website to help you understand the working of the software.

With six video styles, Animaker allows you to create 720 different types of animated videos that include infographics, whiteboard animation, typography, animated, and 2D and 2.5D animation.

The user interface is simple and supports drag-and-drop functionality. The basic editing tools offered by Animaker include cut, paste, edit, record, multimove, curve, camera, transition effect, and enter/exit effects.

You can further customize the videos by adding ready-made background music tracks, and sound effects and importing custom tracks to the video. To add voice to your video you can use the text speech feature or add voice over using direct voice recording.

Other notable features offered by Animaker are multi-user collaboration, task management, file management, and an in-app file manager in the Enterprise version. The videos can be exported in Full HD, and HD resolution, and the video length can be 5, 15, and 30 minutes depending on the plan.

Animake offers an excellent set of features to create a stunning animated marketing video and runs on the cloud sparing your PC from having another program installed. Sign up for the free plan to see if it meets your requirements before upgrading.

Animaker

Creating animations is something you do for your children, and software like Animaker will make it so that it is also easy.
Check price Visit Website

Viddyoze – Best video animation software for social media

viddyoze automated animation software

Viddyoze is a cloud-based live-action animation software that allows you to add a layer of animation and effects on top of your marketing or promotional video.

The huge library consists of premade video templates, animated intros, special effects, backgrounds, and more.

As for the templates, the company claims that they add new animations and templates every month. So, if you are a creative professional who opted for a monthly plan, you will have new contents to stylize your client’s project every month.

Viddyoze has two types of plans – Business and Marketplace. The Marketplace plan offers a one-time purchase where you can choose how many animations you want to create an advanced and pay accordingly or select a monthly plan based on your requirement.

Viddyoze is a fully automated software that allows you to create stunning and professional 3D animations in a few clicks.

The animations can be customized per the requirement of the client.

The business plan offers access to the entire Viddyoze library with other features such as exclusive new templates every month, multi-rendering processing, multi-user access for team collaboration, and tailor-made templates on demand.

Viddyoze is simple to use and allows you to create studio-quality content by adding new effects on top of your existing content

⇒ Get Viddyoze

Marionette Studio – Top-notch cartoon maker utility

Marionette Studio automated animation software

Marionette Studio is a cloud-based of kind animation software that is completely available online and does not require you to install anything on your computer.

From simple UI to tons of artwork and excellent export options, Marionette Studio doesn’t disappoint as an animation software for beginners and has enough tools for professionals.

The user interface reminds us of the old Adobe Flash program. Marionette Studio offers every nut and bolt to piece together a professional-looking 2D animation in no time.

The automated animation feature allows skipping the process of creating each step for the animation movement.

To create a walking human animation, all you have to do is define point A and point B for the object, and the software will fill in the legwork automatically.

This can be done with anything that needs to be shown as covering distance or in motion.

Marionette Studio comes equipped with advanced features such as the ability to customize animation curves, natural deformation to apply the skin on the auto-generated mesh, weight painting, auto-meshing with refining features, animation FX with Pixel art, and Motion Blur support and inverse kinematics.

The animations can be exported in multiple formats in HD and SD resolution. The animations can be used as a sprite sheet for creating games with Unity, Cocos2D, and other game engines.

Marionette Studio is an excellent tool for beginners as well as creative professionals to create 2D animations for less complicated projects.

As for the lack of features compared to full-blown animation software, this software is targeted at indie developers offering flexibility and features to create fast-paced animation.

⇒ Get Marionette Studio 

PowToon – Best animation program for beginners

Whether you want to create an animation video for marketing, HR, IT, training or for report creation, PowToon can help you make a stunning video presentation in a few minutes.

PowToon is among the oldest cloud-based animation software with tools to create professional-looking videos using ready-made templates, built-in voice tools, and advanced animations.

PowToon offers a free plan for everyone, but it comes with tight restrictions and a watermark on the finished project. The basic plan though starts at $16 per month.

The users can start making videos by selecting a look that includes Whiteboard, infographics, cartoons, training, etc. Next, you need to choose a template under three categories that include Work, Personal and Education.

You can customize each slide with text, graphics, and images from the library or by uploading your own and the background music.

PowToon has lots of features to explore and it takes more than one session to grasp it all. However, it is a great alternative to PowerPoint slides for creating a presentation. It may not be as good as Animaker or Marionette Studio on the functionality standpoint but it can certainly make for an excellent presentation maker.

⇒ Get PowToon

The animation software listed here can help you create an effective marketing campaign for your business, for presentation, and for those who are into the instructional video production profession.

Animaker and Marionette Studio are excellent automated animation applications.

For adding animations to your live-action video use PowToon or Viddyoze. If you want something more sophisticated, Autodesk Maya is an excellent option as well.

Tell us which one you prefer!

Improving the capturing and sharing experience on Xbox is now “a priority” for Microsoft

If the Xbox OS and the Xbox Store received a fresh coat of paint last fall ahead of the release of the Xbox Series X|S consoles, Microsoft still has a lot of work to do to improve social features on Xbox consoles. Despite Microsoft adding a new Share button to the new Xbox Series X|S controller, the capture and sharing experience on Xbox consoles continues to lag behind what Sony offers on PlayStation consoles.

As of today, uploading screenshots and clips to Xbox Live can be very slow, and sharing captures to OneDrive or Twitter can also be quite cumbersome. Despite the Xbox Series X coming with over 800GB of internal storage, it’s worth noting that the OS still requires gamers to use external storage to record longer clip that can only be up to 60 minutes long. For some reason, clips and screenshots from Xbox games captured on external storage can’t be shared to Xbox Live, OneDrive, or Twitter, which is another weird limitation.

A revamp of the Game DVR and sharing experience on Xbox consoles is obviously long overdue, and we’re happy to report that the Xbox team is already working on revamping these features. Answering a question about the lackluster Capture and video sharing experience on Xbox, Jason Ronald, Director of Program Management at Xbox replied that “We have heard the feedback and working on a number of improvements to the capture and share experience. Nothing to share yet, but a priority for the team.”

With the release of the new Xbox mobile apps for iOS and Android last fall, which allows users to managed their Xbox Live captures and share them on social media, Microsoft has also discontinued the Upload Studio app on Xbox consoles, a video editing app that made its debut with the Xbox One back in 2013. Xbox gamers are still able to edit trim clips via the Capture & Share tab in the Xbox Guide, though many are still wishing to see a true replacement for Upload Studio.

Are you glad to see that improving the capturing and sharing experience on Xbox consoles is now a priority for the team? If so, let us know in the comments what kind of improvements you would like to see.

5 Best Software to Make Video from Photos [2026 List]

Do you want to make your loved ones feel special? You can now create a meaningful and personalized video slideshow out of your favorite photos, and offer it as a gift.

You can create slideshows with photos from birthdays, weddings, graduation or family celebrations, parties with friends.

Or you can create them for your own use, to keep your vacation memories stored in one easy accessible video file.

For a personalized slideshow, it is best to use specialized software since it comes with some great optional features like batch processing, video and photo effects, stickers, etc.

Slideshow creator programs are designed to be used by anyone, beginner or experienced users alike.

All you need in order to create a meaningful slideshow is to have the right photos at your disposal and a bit of time and inspiration.

In this article, we will explore some of the best software on the market that allows you to easily create slideshows out of your photos, and offer good effects and sticker options for customization.

What is the best software to make videos from photos?

Adobe Premiere Pro

Turning photos into movies isn’t all that hard if you what tools to use within a video editor’s arsenal. However, having that particular arsenal arranged in an intuitive way can greatly help you out.

That’s precisely why Adobe Premiere Pro landed the first spot in our list, since not only does it have a UI that is welcoming to beginners, but the toolset will greatly satisfy veteran video editors.

This same toolset is what made Adobe Premiere Pro a world leader in terms of video editing, having set its own high standards that few other programs can come close to.

Of course, all of this shouldn’t scare you, since the program is still your typical timeline-based video editor, just that it pretty much has everything you could ask for.

Here are some of the perks of using Adobe Premiere Pro:

  • Perfectly compatible and sometimes dependent on Adobe After Effects
  • You can share the projects that you are working on
  • Several expansive libraries filled with resources
  • You can test it for free for 7 days.
  • Supports a wide variety of video formats
Adobe Premiere Pro

Adobe Premiere Pro

Put some life into your photos by creating a stunning video in any format, just the way you like it.
Free trialVisit website

Camtasia

Camtasia - photo to video

Camtasia is a great software option that allows you to easily create video slideshow, and also has a wide range of other video editing options that will surely cover your needs.

The latest version of this software, Camtasia 2018 has a series of great new features that are worth mentioning. You have the opportunity to use the new set of video assets that include customizable intros, outros, etc.

You can also easily create themes and save them in a safe storage environment. This feature allows you to keep every theme separated and organized into specific folders for easy access and faster video processing.

In order for you to start making videos out of PowerPoint presentations, you can now import the slides into this software and edit them to fit your needs. First, you need to close PowerPoint, then click the Import Media button and choose your file.

This software will turn every slide into a PNG image, and then it will add it to the media bin for later use. You can use the provided sliders to adjust every aspect of your project, and then export it with ease to any physical or online medium.

Other notable features of Camtasia include:

  • Create training and tutorial videos
  • Mouse movement recording abilities
  • Can record keystrokes
  • Add notes and annotations to your video
  • Drag and drop video editor
  • Good range of motion graphics
  • Wide number of pre-made transitions for video scenes
  • Green screen options – allows you to immerse yourself into the video scene

If you feel like you need a bit of help regarding how to use Camtasia, you can find the official tutorial page by clicking here.

⇒ Download Camtasia


Movavi Slideshow Maker

Movavi Slideshow Maker is another easy to use tool that allows you to easily transform your photos to video files. Even if you are a beginner, it takes a short amount of time for anybody to understand how this program works, making it a very good option for all levels of experience.

Because of its intuitive user interface, Movavi offers fast access to any of its features by using drag and drop features, and it also allows you to export your finished project into all popular formats.

You can use the 150+ filters, 100+ transitions, 40+ titles found in this software you customize your video slideshow to reach any desired result, can manually add music that automatically fits the speed of your slideshow, or choose a song or more from the built-in database.

The Movavi Store has a great number of video effects available for download that cover a wide range of topics. Some examples include:

  • Built-in media – video clips, backgrounds, sound, music, etc.
  • Can combine multiple videos on one screen
  • Audio tools – frequency, remove noise, etc.
  • Can import media files from different sources – hard-drive, phone, tablet, etc.
  • Multi-track editing
  • Can easily remove unwanted parts of your video, move parts around, add titles and transitions, filters, etc.
  • Can share your projects directly to YouTube
  • Special visual effects: Retro, Vignette, Flying hearts, etc.
  • Save time with automatic slideshow creation by the use of the built-in Montage Wizzard
  • Customizable color settings

⇒ Download Movavi Slideshow Maker


PhotoStage Slideshow by NCH

PhotoStage by NCH is a greatly useful software that allows you to easily create slideshows out of your photos.

The friendly UI (user interface) found in this software allows you to create professional-looking slideshows out of your favorite photos, add filters and text to them and export them to any popular format.

This software has a wide range of video transitions and effects, digital audio tools, and also good video optimization tools :

  • Drag and drop feature for easy access
  • Wide range of effects – zoom, crop, fade, pan, ken burns effect, etc.
  • Great optimization tools for both photos and videos
  • Easy export of projects either to hard-drive, web-based applications, or external devices
  • Panning and zoom effects
  • Fade transitions – allows you to customize the way your slideshow act
  • Preview the effects in real-time
  • Customize the duration of the effect
  • Photo optimization – brightness, color, saturation, crop, rotate, flip, etc.
  • Add music tracks to your slideshow
  • Fade, loop, and add track effects to your audio
  • Can record your own narration easily
  • Transition effects – crossfade, fade to black, dissolve, etc.

You can also export your project directly from PhotoStage to a DVD or CD, to a video file saved on your computer’s hard-drive (avi, wmv, mpg, etc.), or choose the option to post your project directly to sites like Flickr, YouTube, or Facebook.

⇒ Download PhotoStage by NCH


Magix Photostory Deluxe

Magix Photostory Deluxe is a great software that offers a good range of editing and optimization features, making it easier than ever to create the perfect video slideshow out of your favorite photos.

With this software, you can create professional-looking animated slideshows with the possibility to choose from over 1,500 effects & music, and after you reached your desired results, can easily export them to your hard-drive, DVD, or USB stick.

One of the best features found in Magix Photostory Deluxe is the ability to use the intuitive Effect Wizard. This tool allows you to simplify your workflow by making professional suggestions regarding what effects could be used to make your image/video pop. 

Another useful feature is the Magix Travel Maps feature. This feature shows you the route of your travels on an animated map and can help you make your presentations better by using details of your travel in your slideshow – stops along the way, speed of travel, time spent in certain locations, personal impressions, and notes, etc.

If you feel like you need a bit of guidance regarding how to use this software, you can access the official Magix help page.

⇒ Download Magix Photostory Deluxe

This top 5 list is a selection of the best software options to create custom slideshows out of your photos, and easily export the resulted video file to any medium – hard-drive, USB stick, online storage, etc.

These tools offer a great range of useful options like – custom color schemes, batch processing, the ability to add audio and text, different pre-made templates, color and design suggestions, and more.

We would love to know what software option you chose. Feel free to let us know in the comment section below.


Excel for the web now lets users open and edit notebooks even faster

Microsoft has announced a bunch of performance improvements that are being added to the web version of Excel this month. These updates should improve the usability of the popular spreadsheet software and bring improvements to the workbook loading, scrolling, selection, cell modification, and navigation.

Most notable for Excel is an improved scrolling experience for web users. Microsoft understands that scrolling is a “fundamental part” of working in Excel workbooks. With the latest update, users should be able to scroll through their workbooks smoother and faster than ever.

Microsoft is also making improvements to the loading experience, and the company noted that the workbook loading time has now been significantly reduced starting this month. In addition to this, Microsoft Excel has introduced cell selection optimizations for web users. This means that users will now be able to interact with the content in their workbook even faster.

thumbnail image 2 captioned Selection in Excel for the Web

Lastly, the Redmond giant has also recently brought a host of improvements to navigation, making it easier for users to use the find, Go-To, search, page-up, and page-down operations. The cell modification function has also received additional refinements to reduce lag and improve formatting speed for users.

Favicon Software For Your Website: 7 Best to Download

In today’s competitive market, making your website stand out from the rest of the crowd if not impossible, is not easy either.

However, as long as you are offering what the user wants, that is, quality and great user experience, not having an out of the world design for your website is forgivable.

That being said, there are a few little yet important things that you can do to make a positive impression and also increase user engagement. When done right, it helps your website stand out from the crowd.

In other words, it will appear in bookmarks and favorite lists of the readers and results in better engagement via returning visitors, and also help you build brand awareness.

Graphics designers use sophisticated tools like Photoshop or Coreldraw to create icons and favicons for their websites.

However, there is specialized online and offline software to create favicons that give you the freedom to sculpt your favicons exactly the way you want them to be.

In this article, we take a look at the best software to create favicons and icons for your website and app.

The list consists of both free and paid tools, so take the free/trial version of the software for a spin before committing to a favicon maker.


What’s the best favicon maker software for your website?

Adobe Illustrator

There’s no other vector graphics software to match what Adobe Illustrator has to offer to its users. Even if you aren’t planning on pursuing billboards design, Adobe Illustrator is a great favicon maker too.

Since it packs a wide variety of tools, effects, and filters, the program may be used to create graphic designs for websites, brand logos, and favicons with ease.

Not sure that this is what you’re looking for? This means that you don’t know how Illustrator functions. Long story short, it uses mathematically-defined paths to create outlines of shapes.

There are endless possible combinations of options to create the desired final image. Its clean and well-designed interface accompanied by various tutorials available to make the learning process easy.

All these make Adobe Illustrator a fantastic tool for non-designers and professionals alike.

Impressive key features to consider before choosing your very own favicon maker:

  • Intuitive interface that might become familiar to all users in no time
  • Easy to access and use design presets and templates
  • Impressive range of options for the creation of vector graphics, page layouts, and not only
  • Delivers iconic results for projects at any size
  • It works seamlessly with other popular Creative Cloud apps that you’re already enjoying
Adobe Illustrator

Adobe Illustrator

Create the most interesting, unique, and attractive icons for your website using Adobe Illustrator
Free trialVisit website

Favicon.io

Favicon.io is a free online favicon creator that allows you to create text, emoji and image-based favicons with few clicks.

There is nothing fancy here. It is a basic favicon creator and has three options to choose from.

If you select the Text favicon generator option, you can customize the text, background shape, font color, and font size on the editing page. Click the download button to download favicons in PNG and .ico format.

To create a favicon from an image, upload an existing image, logo, or icon. Click the download button to convert the image into an icon.

If you want to create something funky, try the emoji favicon option. Select any of the emoji you want to use and click on Download ICO or Download PNG button to download the icon in their respective format.

It also has a logo creator, which allows you to create a text-based logo with an icon. If you want to create something quickly, favicon.io is a good choice.

⇒ Try favicon.io 


Icons Flow

Icons Flow (formerly known as Free Icon Maker) is a web-based icon editor. It is a premium service but does offer a free plan which is limited to max two icon sets with five icons per set, 32px, and PNG export.

The premium plan starts at $9.99 per month. Icon Flow offers a modern web-based editor. It has a huge library of icons for almost every category including technology and social media.

You can get started using the editor by visiting the official website. However, to save the icon, you need to register for an account.

Start by selecting an icon from the category or upload your own image. If you prefer the first letter of your logo to be the icon, select text option (ABC 123).

You can further customize the size, background color, shape color, shape scale, shadow settings, background theme, and shape from the right-hand side pane.

To save some time, add, multiple icon shapes and styles to the editor, and when you apply any changes it will affect all the icons in real-time. You can choose the one you need depending on the final result and export it.

Icon Flows is an impressive tool and can be even used to create simple text and shape-based logos. However, the premium plan may not be for everyone. So, give it a try to see if it worth your time and money.

⇒ Try Icons Flow


X-Icon Editor

X-Icon Editor is a more traditional icon editor with a simple yet practical interface offering the most basic icon editing tools to the users.

It is a free online software tool and can be used to create an icon of 16×16 to 64×64 size. There are three ways to create icons using X-Icon Editor.

You can upload an image and crop it to fix icon size. Paint your icon using the cursor on the canvas or type in icon text using the text box.

If you have a logo already, we would recommend uploading the image and converting it to an icon.

X-Icon Editor offers basic tools such as paintbrush, pencil, Eyedropper tool, paint bucket, line tool, Rectangle and Circle shape tool, and the eraser.

You can change the size text of the and also play with different colors using the sliders. On the right side, there is a slider that allows you to change the background and increase and decrease the pattern blocks.

Click on Import to download the image. X-Icon Editor saves the image in .ico format.

⇒ Try X-Icon Editor


Logaster

Logaster is an online logo maker and is quite popular among users. Apart from Logo, Logaster can be used to create a business card, envelope, letterhead, and favicons.

Once you signup, proceed to create a logo. Enter the text and Logaster will automatically create your logo. It will display the logo preview on various mockups like a business card, letterheads, and website, etc.

You can further customize the logo design using the built-in editor according to your requirements.

Logaster is free to signup and try different logos and make changes. But to download, you need a premium account.

The editor allows you to change layouts, add text, change colors, select fonts, and different shapes for your logo. You can easily convert the finished logo to a favicon and download it to your PC.

You can download one full-sized logo for free. However, you can create numerous variations of logos and branded product designs for free as well, but that’s it. For anything else, you need a premium account.

The free account also allows you to share, compare, and discuss the logos created. You can download a small-size watermark-free logo for your website.

For some reason, Logaster was painfully slow during our trial run. However, the pricing structure is affordable for both freelancers as well as individuals.

⇒ Try Logaster


SIB’s Free Icon Editor

Free Icon Editor is a Windows utility to create and edit icons for your website. As the name suggests, it is entirely free to download and use.

This icon maker allows you to create and edit icons in either standard or custom sizes. You can adjust transparency, export in PNG formats, create a button for websites, and more.

The editing tools include eyedropper tools, pencil tool, shape and line tool, text tools, and more.

You can get a pre-made icon for free from online resources or get a premium pack from third-party design studios and edit them using Free Icon Editor.

⇒ Try Free Icon Editor


GIMP

GIMP (GNU Image Manipulation Program) is a free open source image editing tool that comes with all the features you would seek from a professional-grade image manipulation program.
With all the bells and whistles it has on offer, one handy feature in GIMP is the ability to create favicons.

If you know how to use GIMP and have it installed on your PC, you don’t need any other favicon creation tool. Creating a favicon using GIMP is easy ( assuming that you have used GIMP before).

Begin with creating a new image file and set the size to 48×48 pixels. Since the image layout is small, zoom in to adjust the work area.

Some of the features in GIMP that you can use to get a better viewability to include antialiasing to reduce the negative effect of aliasing, Shading, and gradients to enhance any object and experiment with highlights and shadows to improve the look further.

You can use the basic shape, bending, color, and layer tools to create custom icons with little effort. The final result will be a professional-looking icon ready for your website or app.

GIMP is an excellent image manipulation software and creating favicon is one of its uses.

However, if you have not heard of GIMP before and wanted just a favicon maker, this is probably not the best tool for you to get started.

⇒ Try GIMP


This list consists of premium as well as free icon editors. What kind of icon editors you want to use depends on your use.

If you are a graphic designer or a freelancer offering your services, you may need something that is feature-rich like Icon Flow or GIMP or even Photoshop.

However, if you want to create a basic but high-quality favicon for your website or business, any of these free favicon editors will be more than sufficient.

If you know of a better favicon maker and think that it deserves to be on this list, make sure you let us know in the comments below.