Can’t add friends to Uplay? Here’s what you should do

Uplay is Ubisoft‘s proprietary game distribution platform, where players can buy and download games and DLCs.

Additionally, you can use it to view your achievements, read up on news and chat with friends.

However, this last feature has been having problems, as players have been complaining that their friends list disappeared.

Further details where given on the Ubisoft official forums:

The friend list is not loading anymore and wont show up. It´s just loading and loading but no friends showing up. How do we fix this problem?

Other players are stating on other forums that while they can see their friends list, all of them appear offline despite being online.

Uplay says my friends are offline but they are online. I can send them private messages they can send me a private messages but I dont see them online. 

Friends from Steam can’t be added to Uplay either

More so , players are reporting that they cannot import their friends from other gaming platforms, such as Steam.

I can manually add someone on uplay who has a uplay account but when trying to import friends from steam it gives the error of “Something went wrong. Your steam friends could not be imported.”

While not officially confirmed that the two problems may be linked, it is a well known fact that Uplay has some compatibility issues with Steam.

What to do if your Uplay friends are not showing up

These solutions were proposed by users on the forums, and most of them state that this a solution that indeed works.

1. If you are using both Steam and Uplay

  1. Log out of Uplay
  2. Log out of Steam
  3. Press Ctrl + Shift + Esc
  4. Look for the Steam and the Uplay entries
  5. Select them and press End Task for each of them
  6. Log back onto Steam
  7. Log back onto Uplay
  8. Check your friends list.

It should be working now, and if not, follow the solution bellow.

Uplay friends cant add Steam

2. If you only use Uplay

  1. Go to Uplay desktop menu and click Go Offline
  2. Afterwards while in offline mode, go to the menu and click Go Online
  3. Check your friends list.

Uplay cant add friends go offline

3. Check to see if the problem is at Ubisoft’s end

If you and some of your friends are having the same problems at around the same time, go to Ubisoft‘s website and check to see if there is a server-related problem.

Ubisoft performs frequent server maintenance which they usually announce beforehand.

Additionally, their servers have been the subject of plenty of cyber attacks, so unexpected server shutdowns may also be a possible explanation.

How to Execute Files in The Task Scheduler That Have Spaces

Some utilize Task Scheduler to set up scheduled tasks that open software and files. However, those scheduled tasks might not always work for users. That is often because the files the tasks need to open include spaces in their file titles.

Consequently, a scheduled task might not open the software or a file it’s supposed to. However, it’s relatively easy to fix scheduled tasks that don’t open files with spaces.

How can I fix scheduled tasks that include files with spaces?

1. Add quote marks to the file paths

  1. Users can fix the scheduled tasks by adding quotation marks around the paths that include file (or folder) spaces. To do that, press the Windows key + S hotkey to open the search utility.
  2. Enter ‘Task Scheduler’ in the search box.
  3. Click Task Scheduler to open the window shown directly below.Task Scheduler how to execute files in the Task Scheduler that have spaces
  4. Double-click Task Scheduler Library on the left of the window to expand it.
  5. Select the folder that includes the scheduled task that needs fixing.
  6. Then right-click the scheduled task and select Properties.
  7. Select the Actions tab in the snapshot directly below.Actions tab how to execute files in the Task Scheduler that have spaces
  8. Select Start a program, and then press the Edit button. The Edit Action window will then open.Edit Action window how to execute files in the Task Scheduler that have spaces
  9. If the Program/script path does not include quotation marks around it, add them to the beginning and end of the path.
  10. Then add quotation marks at the beginning and end of the file path in the Add arguments box.
  11. Click the OK button.
  12. Then press the OK button on the properties window.

2. Delete spaces from file titles

  1. Alternatively, try deleting spaces from file and folder titles within the paths included for the scheduled task. To do that, open File Explorer with the Windows key + E hotkey.
  2. Then open the folder that includes the task file with spaces in it.
  3. Right-click the file and click the Rename option.The Rename option how to execute files in the Task Scheduler that have spaces
  4. Delete all the spaces from the file title.
  5. Then press the Enter key.
  6. If any of the folder titles within the software or file paths include spaces, remove the spaces from the folder titles.

3. Add backslash and quote marks to file paths in the Command Prompt

Users who utilize the Schtasks.exe Command Prompt utility to schedule tasks need to include additional backslash (\) and quote (“) marks around the file path with spaces (excluding arguments or switches) within the command. For example, a file path with arguments in the schtasks /create command would look something like this:

“\”c:\foldername with spaces\file.bat\” arguments”

Instead of this:

“c:\foldername with spaces\file.bat arguments”

The example above encloses the first file path within  “\ and \” character combinations. However, arguments is left outside the character combinations, but it is still enclosed within the quote marks. With those character combinations included around the path, the task will run at the time scheduled within the command. A full command might look like the one in the snapshot below.

The schtasks command how to execute files in the Task Scheduler that have spaces

So, users can add quotation marks to the file paths in the Edit Action window, remove spaces from file paths, or add character combinations around file paths that include spaces in Schtasks commands. Then, the scheduled tasks should work.

If you are facing the Task Scheduler failed to launch an action issue, we suggest you check out this solution guide.

FIFA 20 Division Rivals not working? Try this fix

Many people are thrilled about FIFA 20. This is a great game for Football fans. But not everything is fine with the game.

Quite a few users encountered a problem with playing Division Rivals mode in PC. In other words, the game crashes when starting the game.

One user provided some details on the issue on the EA official forum.

when i have screen for looking opponent and you see that fifa found opponent then its crashing

The game is crashing immediately after finding a rival. Also, many users reported that the issue has something to do with the controller emulator.

What to do if FIFA 20 Division Rivals is not working

1. Re-enable the wireless controller

  1. Go to the Control Panel and select Devices and Printers
  2. Find Wireless controller and select Properties
  3. Select the Hardware tab and HD compliant game controller, click on Properties, and then Change settings.
  4. Under the Driver tab, click on Disable Device.
  5. Then, re-enable the device.

2. Install the best emulators

To avoid technical solutions, you can install DS4Windows or HidGuardian.

For more information on how to use DS4Windows on your PC, check out this guide.

Conclusion

You can fix FIFA 20 Division Rivals with our simple solutions. Re-enable the wireless controller or install the best emulators.

Did our solutions work for you? Do let us know in the comments section below!

RELATED ARTICLES YOU NEED TO CHECK OUT:

Posted in Fix

How to export Virtual Machine in VMware

Many people use Virtual machines to run multiple operating systems on their PCs. However, there are times when you need to do some changes. It is better to keep a backup of your virtual machine so that you can use it in case of any issues.

If you are wondering how you can export your virtual machine in VMware, this article explains the process to export a virtual machine in OVF format. The OVF format to get a complete specification of the VM that is helpful for the administrators.

Carefully follow the below-mentioned steps in order to avoid any unnecessary complications later at any stages.

How do I export Virtual Machine in VMware?

1. Power off your Virtual Machine

  1. First and foremost, select the virtual machine you want to export.
  2. Right-click on the virtual machine go to Power and click Shut Down Guest.
  3. Wait until the Shutdown process is complete and proceed to the next step.

2. Export To OVF Format

  1. To export your virtual machine to OVF format, select your virtual machine and navigate to File >> Export >> Export OVF Template. export OVF template vmware how to export a virtual machine
  2. Once the Export OVF Template window opens on your screen, specify the Name of OVF.
  3. Choose the Directory where you want to save the OVF file and select OVF from the list of formats. enter OVF name vmware how to export a virtual machine
  4. Click the OK button to begin the export process.
  5. You can see the progress of the export process in the Exporting dialoge box. Wait until your system displays the Completed Successfully message.
  6. Open the directory where you have saved the exported OVF file.

In this article, we have explored how we can export a Virtual Machine in VMware. We hope that this method helped you to export your VM. You can now import the OVF file as per your requirement. Feel free to leave your questions in the comments section below.

Sign up today to get into Project xCloud preview, launching in October in US, UK, and S. Korea

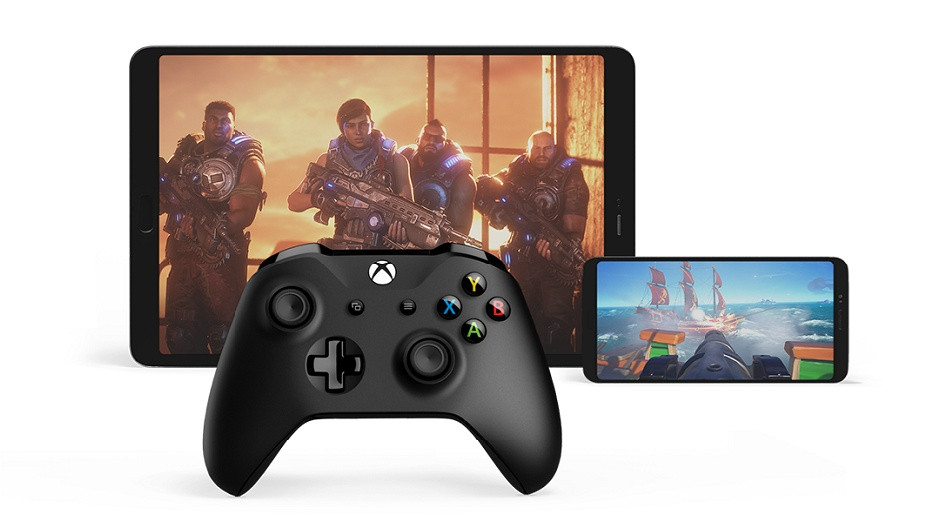
Microsoft’s Project xCloud game streaming service will be available for public testing next month, and the company revealed today during its latest Inside Xbox webcast that it has just opened registrations for consumers in the US, UK, and South Korea on this page. “We’ll begin to send invites in the coming weeks,” the company said today.

The company expects to receive a lot of applications starting today, and not everyone will get early access to Project xCloud. “It is our intention to accommodate as many eligible players as possible and we’ll continue to invite more gamers into the preview over time,” the blog post on Xbox Wire reads.

Kareem Choudhry, CVP of Gaming cloud at Microsoft was on stage during today’s Inside Xbox to share more details about the service. Four games will be available when the public beta kicks off next month: Halo: 5 Guardians, Gears 5, Sea of Thieves, and Killer Instinct. “This is just the beginning as our content library will continue to grow as the preview progresses,” the Xbox team announced today. Importantly, all these games will be free to play even if you don’t purchase them on your Xbox One.

As for the console streaming feature that Microsoft announced back at E3 2019, it still being developed and will ship to Xbox Insiders first, but the company didn’t share an ETA today. Unlike Project xCloud, this feature will just stream Xbox games you own from your own console to mobile devices, and it should be a nice extension to Microsoft’s full-fledged cloud gaming service.

Sign up today to get into Project xCloud preview, launching in October in US, UK, and S. Korea

To try Project xCloud, you’ll just need a Bluetooth-enabled Xbox Wireless Controller and an Android phone or tablet. The service will work on both Wifi and mobile networks, and Microsoft has also teamed up with T-Mobile in the US, Vodafone in the UK, and SK Telekom in South Korea to optimize the experience for gamers on these networks, but xCloud will/should work with any cellular network within the US, UK, or Korea.

Sign up today to get into Project xCloud preview, launching in October in US, UK, and S. Korea


Project xCloud content will be available through a dedicated Microsoft Game Streaming app that will be released on Android in the coming weeks. Microsoft didn’t share a launch date for the Project xCloud public beta next month, and it’s also not clear how long the beta test will last. “The preview will continue until customers are consistently reporting a great, fun experience and the technology meets our internal quality standards. As is typical of our preview programs, we plan to begin with focused groups in the early stages for stability purposes and then to expand over time,” the company said today.


Windows 10 20H1 build 18990 is out with WSL improvements and automatic restart option for UWP apps

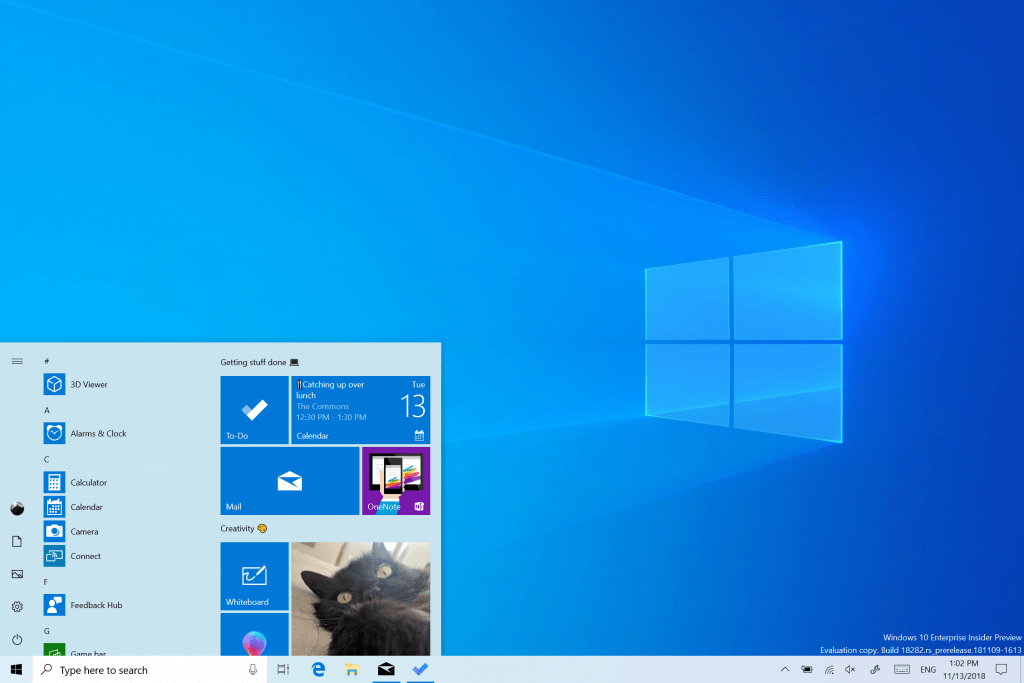
As Microsoft’s first 20H1 Bug Bash will kick off tomorrow, September 25, the Windows Insider team has just announced the release of Windows 10 20H1 build 18990 for Fast Ring Insiders. This latest build is a minor update that brings more control over restarting apps at sign-in. In the build 18965, a new setting allowed registered desktop apps from your previous sign-in session to automatically restart when signing back in to Windows, and Microsoft is now enabling automatic restart for UWP apps in the build 18990.

This new build also includes minor improvements for the Windows Subsystem for Linux (WSL), and the team also mentioned today that an FPS counter and achievement overlay has started rolling to the Xbox Game Bar app. You can learn more about new features and other updates for Insiders below.

Enabling automatic restart for UWP apps

Last month, we introduced a new separate setting to control if registered desktop appsfrom your previous sign-in session are restarted when signing back in to Windows. In the latest Insider Preview builds, in addition to registered desktop apps, when you opt into this setting, the majority of open UWP apps are now also automatically restarted as well! To reduce sign-in time, UWP apps are restarted minimized, in a suspended state, giving Windows and other apps more resources to get started. To try it out:

  1. Go to Settings > Accounts > Sign-in options and turn on “Automatically save my restartable apps when I sign out and restart them after I sign in.” under “Restart apps”.
  2. Start one or more UWP apps, such as Feedback Hub.
  3. Sign out and then sign back into Windows.

UWP apps that were started, such as Feedback Hub, should restart minimized with a taskbar button.

Windows Subsystem for Linux (WSL) improvements

  • Improved the performance for directory listings in \\wsl$
  • [WSL2] Injected additional boot entropy [Github Issue 4461]
  • [WSL2] Fixed Windows interop when using su / sudo commands [Github issue 4465]

For the full details of changes in this latest Insider Preview build, please see the WSL release notes.

Other updates for Insiders

Xbox Game Bar Updates

In case you hadn’t seen, we’re starting to roll out an FPS counter and achievement overlay! Thanks to everyone who shared feedback about this. The update will come via the Microsoft Store. Just set focus to your favorite game and press WIN + G to get started.


NOTE: You may have to be joined to receive Game Bar updates via the Xbox Insider Hub app (under Insider Content) from the Microsoft Store to see this update.

Reset your PC from the cloud

Earlier today in our Windows Insider webcast, we had the Deployment Team as guests to talk about the new feature that is coming with 20H1 that allows you to reset your PC using the cloud. For more information, check out this article from Program Manager Aaron Lower. You can also watch the on-demand video of this morning’s webcast by visiting our Mixer channel!

As usual, this new build also comes with bug fixes and quality improvements, and the release notes mention a fix for an issue impacting Action Center reliability. You can learn more about other fixes and known issues in our separate post.

Lastly, if you want to participate to the first 20H1 Bug Bash, you can check out the Windows 10 Feedback Hub app at midnight (PDT) to start completing the first Bug Bash Quests. The event will last through October 2, and more quests will be added in the coming days.

Windows 10 Server Insider build 18985 and Windows 10 SDK build 18985 are now available

Following the release of Windows 10 20H1 build 18985 last week, Microsoft is following up by flighting the Windows Server vNext Insider Preview Build 18985 and the Windows 10 SDK preview build 18985 today. The new Windows Server build includes no new features (just like the previous release), and you can get it from the Windows Server Insider Preview download page.

The new SDK also doesn’t bring any new features except some under the hood API changes. As usual, you can download this new Preview SDK from the developer section of Microsoft’s Windows Insider website.

We were hoping to get a new Windows 10 20H1 build ahead of the first 20H1 Bug Bash, but that’s apparently not happening. The Bug Bash will run from September 25th to Oct 2nd, and those of you interested in participating can get ready to check out new quests in the Windows 10 Feedback Hub.

New DTS Sound Unbound app can enable immersive spatial audio on your Windows 10 PC

DTS:X is now officially available for all Windows 10 users running on the May 2019 Update (via Windows Latest). The audio company has released an app on the Microsoft Store to allow users to take advantage of full panoramic audio experiences for movies on DTS:X and DTS Headphone:X capable devices.

As per the app’s description, the app works with Microsoft’s 3D spacial audio to bring surround sound to Windows 10 devices with capable speaker systems or headphones. And since it’s all powered by an app, this potentially means it could make its way to the Xbox One devices later.

In addition to bringing surround sound to movies, the app can also bring these 3D audio experiences to games as well. It’s description notes a handful of titles, including Gears 5, Borderlands 3, Call of Duty Modern Warfare, Forza Horizon 4, and Shadow of the Tomb Raider, just to name a few.

While the app can be downloaded for free, there’s still a premium to pay to fully use the service. DTS is offering a free trial to those who download the app, but you’ll still need to shell out a one time payment to keep the service.

Would you pay for a surround sound experience for your PC? Share your thoughts in the comments area below.

DTS Sound Unbound
DTS Sound Unbound
Developer:
DTS, Inc.
Price:
Free

The Windows Insider webcast is coming back at 10AM PDT today, watch it here

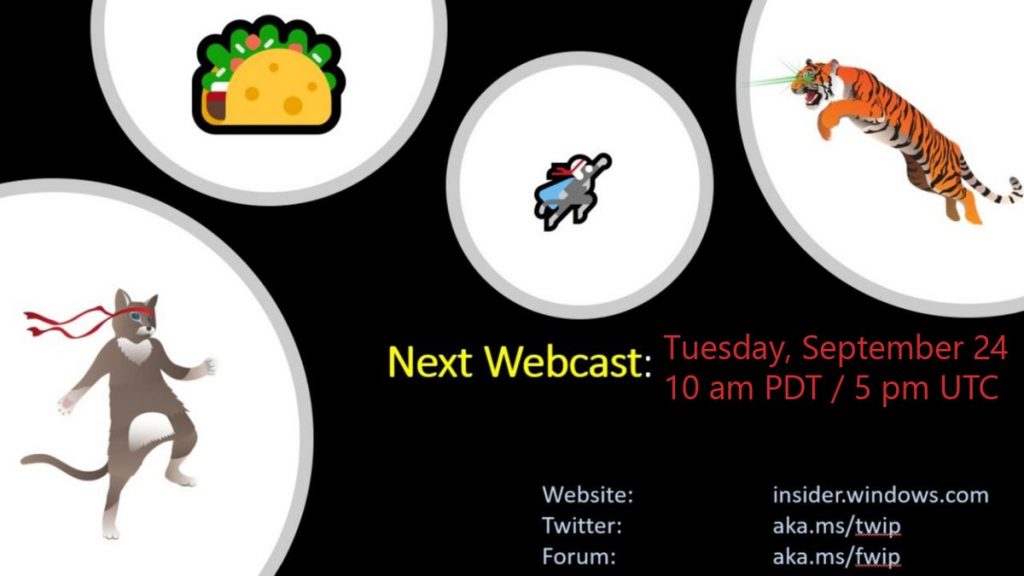
The Windows Insider team will be back today at 10AM PDT for a new episode of the Windows Insider webcast. This time, the team will discuss deployment and the upcoming 20H1 Bug Bash, which will run from September 25th to Oct 2nd.

Broadcasting all episodes of the webcast on Mixer allows the team to interact live with Windows Insiders, and you’ll be able to ask your questions later today when the stream kicks off. It’s not clear yet if this first 20H1 bug bash will be focused on the preview build 18985 released last week, unless Microsoft plans to flight a fresh new 20H1 build later today

Anyway, you probably don’t want to miss this latest webcast if you want to learn more about Windows 10 and the latest 20H1 builds. We may also hear more about the latest 19H2 builds, especially since Microsoft released the 19H2 Build 18363.329 for Windows Insiders on the Release Preview ring yesterday.

Samsung tries again with renewed Galaxy Fold launch coming September 27th

Seems Samsung is refusing to take comedian and writer W.C. Fields’ infamous quote to heart regarding the Galaxy Fold, “If at first, you don’t succeed, try and try again. Then quit. No use being a damn fool about it.”

Shortly following Samsung’s unveiling of its foldable smartphone aptly named the Galaxy Fold, the company was mired with bad press as the review units seeded to prominent tech journalists began breaking and suffering issues related to its signature foldable mechanism. Samsung quickly retrieved the devices from reviewers but maintained the original release schedule with retailers until it became clear not only was the manufacture not going to have a viable device to sell at that time, but that the issue with the hinge was a deeper construction problem than previously thought.

Since pushing the release date back two additional times, Samsung eventually stopped making declarations about the Fold’s release and partnering retailers have also seemingly shelved public-facing marketing materials, until now.

Samsung is re-announcing the release of the Galaxy Fold in the US on September 27, 2019.

Earlier this month, Samsung announced it intended to ship the Galaxy Fold soon, but didn’t offer a concrete date for the US as it seemed the company was still fine-tuning the hinge. Since its September announcement, Samsung began shipping the Galaxy Fold to Korea on September 6, 2019, with France, Germany, and Singapore getting theirs September 18, 2019.

Presumably, Samsung has worked out the kinks that plagued the original Galaxy Fold that included debris getting caught in the hinge, and a protective coating that was too easily removed by reviewers. Speaking of reviewers, a select handful of journalists have recently gotten some hands-on time with the re-jiggered Galaxy Fold as it makes it way through international release dates and the overall sentiment is cautious optimism as many of the issues have been addressed to some degree.

Perhaps, not fully confident in their changes, Samsung has also created a Galaxy Fold Premier Service which will allow owners a chance to speak with “Fold Concierge” to go through the ins and outs of the device as well as spot-check issues that may arise.

Samsung showed off the Galaxy Fold roughly the same time as its Galaxy S10 device and I would wager that they plan to show off an updated version again around the same time, which give the company about a four-month window to get whatever stock of the original Galaxy Fold off the shelf and into consumer’s hands.

Not Enough Physical Memory in VMware: 4 Ways to Fix

A large number of users reported Not enough physical memory while using VMware. If this error happens, you won’t be able to use the software properly.

We already covered VMware not working in a separate guide, and we encourage you to check it out for more solutions.

Today we’re going to focus on memory issues, so let’s get started.

What is physical memory in VMware?

Physical memory refers to the amount of RAM that you have. There are two types:

  • Host physical memory that is available on the host machine.
  • Guest physical memory that is available to the OS running in VMware.

How can I fix Not enough physical memory message in VMware?

1. Uninstall Windows update

  1. Open the Settings app and click Update & Security.
  2. Navigate to the left-hand side and click Windows Update and choose View update history.
  3. Click Uninstall Updates to uninstall the latest updates from your system.

2. Run VMware as Administrator

  1. Shutdown your VMware Workstation.
  2. Open Start menu and search for VMware Workstation.

  3. Right-click on VMware Workstation and select Run as administrator.
  4. Now run your VMware Workstation and check to see if the issue still persists.

This is a simple workaround, but it might help if you’re getting Not enough physical memory in VMware.

3. Update the config.ini file

  1. Shut down your virtual machines and close the VMware Workstation.
  2. Navigate to the following path C:\ProgramData\VMware\VMware Workstation
  3. Open the config.ini file.
  4. Scroll down to the end of the file and add the line vmmon.disableHostParameters = “TRUE”
  5. Save the file and restart your system to apply the new changes.

4. Modify VMware settings

  1. Open your VMware Workstation and go to Edit and choose Preferences.
  2. Click the Memory option from the left pane and navigate to the Additional memory section.
  3. If you want to use some virtual machines with the best performance, select Fit all virtual machine memory into reserved host RAM. set preferences Not enough physical memory error in VMware
  4. Alternatively, click Allow most virtual machine memory to be swapped if you want to choose multiple VMs at the same time.
  5. Click OK to save the changes.

If you have properly followed the steps, you should no longer see the error. However, you need to install the latest version of VMware if the problem still persists.

Today we have discussed some quick troubleshooting steps to fix the error Not enough physical memory is available to power this virtual machine with its configured settings.

In case you have further problems, our Operating system not found in VMware article might be able to help you.

If you found a different solution to this problem, share it with us in the comments section below.

Troubles with your Uplay login? Here’s what you can do

Some users have reported that they are having problems when trying to log in to their Uplay client.

Apparently, they receive an error message that looks like the following:

uplay not logging in

Players on the forums are rather furious at the matter

[…] since Yesterday I have not been able to log into Uplay even though I never Changed my Password. I tried to recover my Password, and even though I do get the recovery email and make a new password It keeps on saying that the link is either invalid or expired despite me clicking seconds after it appears.

Apparently, the problem is not random, and it also happens to users who have allegedly never changed their Ubisoft password.

More so, the problem also seems to be linked to Ubisoft’s password recovery system.

Uplay states that either your login email or password is incorrect

The same users on the forums reported that eventually the problem sorted itself out.

Apparently, the passwords they already tried suddenly became valid again.
The only explanation for why a password may not work now but may work later is one of the following:

1. Contact your Internet Service Provider

Ask them whether or not they’ve made changes to the Internet or network settings around your area.

If they did, ask what exactly did they change, so that you can take the appropriate measures.

2. Check your PC for malware

Install a third-party antivirus tool and run a complete system scan to see if your PC is infected.

Once all threats are detected, add them to your virus vault and try logging in again.

Make sure to use an up-to-date antivirus with a high detection rate, such as ESET HOME Security Essential.

It is one of the most appreciated tools in the cybersecurity industry because it offers complete protection against malware, ransomware, phishing attacks, spyware, and any other emerging threats.

⇒ Get Eset HOME Security Essential

3. Make sure you’ve actually typed in the right password

Ubisoft has a habit of asking you to change your password from time to time.

This is mainly for security issues, and most of the time you never even bother to remember these occasions.

If that’s the case and Uplay isn’t accenting your password, just perform a password recovery.

4. Make sure you’ve actually typed in the right E-mail

While it may sound silly, users try so hard to remember their password they end up forgetting which email to use.

If that’s the case and Uplay isn’t accenting your password or email address, just perform a password recovery.

Wrong email recover password

Tell Microsoft how much you love or hate the Windows 10 touch keyboard

Microsoft is inviting you to share your feedback regarding the Windows touch keyboard with the engineers who are directly responsible for designing and developing it.  This will be a perfect opportunity to share your thoughts on the touch keyboard, and offer suggestions on improvement.

Those interested can participate in an online session on Sunday, September 29, 2019, from 5:30 to 7:30 PM (Pacific Time).  All you have to do is bookmark this page.

During the feedback session, which is basically a live chat, Microsoft will take notes on your experiences when its your time to participate in the one-on-one talk.  The company might even ask you for your thoughts on new design ideas for other Microsoft products and features.

You won’t have to provide any personal data, such as name, birth date, phone number, etc.

“Our engineers are excited to hear from you! As we’ve seen with previous research sessions, the insights and suggestions you provide have an important impact on future development for Windows users around the world,” Microsoft says.

This is a pretty cool way to gather feedback directly from users.  Let us know in the comments below if you plan on participating, and/or if you have any feedback regarding the touch keyboard in Windows.

Microsoft to add new Dynamics 365 AI-driven insights applications

Microsoft announced today an important update for its portfolio of AI-driven Dynamics 365 apps. First of all, the Dynamics 365 Customer Insights app that launched earlier this spring is getting new features to address B2B scenarios.

“Now, with the ability to add an organization as a first-class entity, organizations can map leads and contacts to buying groups, accounts and account hierarchies, giving them the ability to build segments and measure the relationship between an account and contact. Any organization—in any industry, from amusement parks to retailers and manufacturers— can effortlessly connect data from every source of interaction and arm employees with a single source of truth right within the external business applications they use every day,”

explained Alysa Taylor, CVP of Business Applications & Global Industry at Microsoft.

The company also introduced today two new retail-focused apps named Dynamics 365 Commerce and Dynamics 365 Connected Store. The first one is a solution that unifies back office, in-store, call center and digital experiences in a single interface with intelligent features, while the second one will help companies improve the retail experience by analyzing data from video cameras and IoT sensors.

This “wave 2” rollout of Microsoft’s Dynamics 365 suite will also include Dynamics 365 Product Insights, a new app which will use product telemetry to help companies “build richer relationships and improve engagement.” To learn more about these latest Dynamics 365 updates, make sure the watch the free Microsoft Business Applications Virtual Launch Event that the company will hold October 10.

Microsoft joins UN-led Playing for the Planet Alliance, promises to certify 825,000 Xbox consoles as carbon neutral

Amidst the growing global concern regarding climate change, 14 CEOs of some of the biggest game franchises in the industry are getting together to form the Playing for the Planet Alliance to combat CO2 emissions.

The Alliance’s announcement was made during a UN Secretary-General led Climate Action Summit at UN Headquarters today, September 23,2 2019 and included representatives from Microsoft, Rovio, Google, Sony Interactive, Ubisoft, Sybo and more have made a pledge to combat a growing climate crisis making changes in game design, energy management, packaging, and device recycling to reduce CO2 emissions by 30 million tons.

Microsoft executive vice president of gaming, Phil Spencer spoke to the new commitments, “Climate change is impacting each industry and every sector, and we believe technology can play a critical role in enabling and empowering the response to this challenge. Initiatives like our Minecraft Build a Better World Campaign and CarbonNeutral Xbox pilot provide a great opportunity to tap into Microsoft’s technology sustainability and gaming community to make a difference in this key area of our business.”

Perhaps, in an effort to be transparent and accountable, various commitments were created and facilitated by UNEP with support by Playmob and following the GRID-Arendal study Playing For the Planet. The combined efforts help detail and outline what each company plans to do to reach a united goal of reducing CO2 emissions.

  • Microsoft will announce the expansion of its existing operational commitment to carbon neutrality, established in 2012, into its devices and gaming work. It will set a new target to reduce its supply chain emissions by 30 per cent by 2030 – including end-of-life for devices – and to certify 825,000 Xbox consoles as carbon neutral in a pilot program. In addition, Microsoft will engage gamers in sustainability efforts in real life through the Minecraft its ‘Build a Better World’ initiative, which has seen players take more than 20 million in-game actions.
  • Sony Interactive Entertainment will unveil new progress and plans to utilize energy-efficient technology (on-track to avoid 29 million tonnes of CO2 emissions by 2030), to introduce low power suspend mode for next-generation PlayStation, to assess and report their carbon footprint and to educate and inspire the gaming community to take action on climate change.
  • Google Stadia, which is set to launch later in the year, will produce a new Sustainable Game Development Guide as well as funding research into how “green nudges” can be effectively incorporated into gameplay.
  • Supercell (Clash of Clans) will offset the entire footprint of their community, Rovio (Angry Birds) has offset the carbon impact from their players charging their devices, and Sybo (Subway Surfer) and Space Ape (Fastlane) will offset 200 per cent of their studio and their gamers mobile energy use. Guidance documents will assist other companies to take similar actions.
  • Wild Works (Animal Jam) will integrate restoration elements in games and, like Green Man Gaming, they will focus on restoring some of the world’s forests with major tree-planting initiatives
  • Ubisoft will develop in-game green themes and will source materials from eco-friendly factories and Sports Interactive will eliminate 20 tonnes of packaging by switching from plastic to a recycled alternative for all future Football Manager releases.
  • Creative Mobile’s ZooCraft will evolve into a conservation-focused game with Reliance Games (Little Singham) generating awareness in the fastest growing mobile gaming market by creating awareness with kids to make them ambassadors for climate change with in-game events and initiatives across India. The biggest independent gaming platform in China, iDreamSky has committed to putting green nudges into its games.
  • E-Line Media (Never Alone, Beyond Blue), Strange Loop (Eco) and Internet of Elephants (Safari Central) will share their expertise of making high impact environmentally-oriented games into the Alliance
  • Finally, Twitch has committed to utilizing their platform to spread this message to the global gaming community with Niantic Inc (Pokemon Go) committing to engage their community to act around sustainability issues.

On the face of it, the video game industry stepping in and making changes to combat further irreparable climate change seems tangential at best, several franchise CEO’s highlight the reach gaming has with a combined audience of up to 2 billion people playing games. With an audience of close to a quarter fo the population, the gaming industry’s lead in altering practices to address a global crisis could go a long way to exacting change.

Latest Xbox app for iOS and Android adds voice chat, more

The Xbox app got a new update that adds voice chat, and other new features for Android and iOS users. As noted in a post on WIndowsBlogItalia, here’s a look at the new features included in the update.

  • You can now upload images from your phone into messages! Press the “+” button in a chat to send photos from your gallery or camera.
  • We have added voice channel support to conversations. Tap the headset icon when in a chat to get started.

On Android and iOS, OneGuide is disabled while the Xbox team works on improving OneGuide for mobile users. OneGuide will come back in a future update. The Xbox app is gaining more helpful features for mobile users in each update. It will be interesting to see if Microsoft plans to bring the ability to play Xbox games on Android and iOS. We’ll have to wait and see if Microsoft will release Xbox games to mobile users.

Xbox
Xbox
Price:
Free


‎Xbox
‎Xbox
Price:
Free

Inside Xbox is coming back tomorrow with news about Project xCloud and X019

Microsoft has shared the program for its next Inside Xbox livestream that will air tomorrow, September 24 at 3 p.m. PT / 6 p.m. ET. The hour-long episode will include “the latest on Project xCloud,” news about the X019 event in London (tickets will be available for purchase tomorrow), as well as various video games news including new Xbox Game Pass additions.

As Google has already revealed pricing details for its competing Stadia game streaming service coming in November, it’s time for Microsoft to do the same for Project xCloud. The service is expected to enter public testing in select markets next month, and it’s still not clear if it will require a special subscription and what games will be available on mobile devices. We had the chance to test both Project xCloud and Google Stadia last month at gamescom, and we learned back then that Project xCloud may only work on select Android phones at launch.

We also hope to learn more about the console streaming to mobile devices feature during this Inside Xbox episode. We heard first about this feature during Microsoft’s E3 press briefing, but it hasn’t been mentioned among the features coming in the October 2019 Update for the Xbox One. However, we saw in leaked screenshots last month how the set up process will work on the console.

As usual, you’ll be able to follow this new Inside Xbox episode on Mixer, Twitch, YouTube, Facebook, and Twitter. We’ll also be covering the event live, so keep an eye on OnMSFT tomorrow after it airs. Coincidentally, this latest Inside Xbox episode tomorrow will be preceded by a “State of Play” livestream from Sony at 1PM PDT.

Microsoft shoots down recent Windows 10 Sets in 21H1 rumor

Last week, we learned that traces of Windows 10 build 19480 had been found in languages pack available from the Microsoft Store. Serial leaker WalkingCat confirmed the original scoop from Italian blog Aggiornamenti Lumia, adding in a tweet that Windows 10 Sets, the organizational feature that Microsoft briefly tested in previous Insider builds last year could make a come back in the Windows 10 build 19481.

Well, Brandon LeBlanc from the Windows Insider team has now answered to that tweet to say that the rumor was wrong: Windows Sets isn’t coming back anytime soon, though LeBlanc confirmed the existence of these internal builds mentioned by Aggiornamenti Lumia and WalkingCat. According to LeBlanc, these internal builds “are largely the same as what Insiders are seeing.”

Back at Build 2018, Microsoft’s Joe Belfiore said that Windows Sets would make a comeback “when we think it’s great,” and we didn’t really hear anything about the feature from the Windows Insider team since then. According to WalkingCat, the feature could still be present in some ways in the internal Windows 10 builds from the separate development branch that LeBlanc mentioned, though we have no way to confirm this for now.

https://twitter.com/h0x0d/status/1176038259585167360

Windows 10 Sets, which allowed Windows 10 users to group together Edge tabs, Windows 10 apps and more in a single window sounded like an interesting feature when it was still in testing, though at the time the the execution wasn’t that intuitive, and it’s possible that the majority of Windows 10 users would have found it confusing to use. We still don’t know if Windows Sets will make a come back at some point, but Microsoft may well prefer to focus on incremental changes for now, such as the better tablet experience for 2-in-1 PCs that recently appeared in 20H1 builds.

Microsoft will extend free Windows 7 security updates to voting systems in 2020

As part of its Defending Democracy Program, Microsoft recently announced that it would extend Windows 7 security updates for free for voting systems in 2020. As you may know, the 10 years old operating system is finally reaching end of support in January 2020, and it turns out that there are still a not so insignificant amount of voting machines that are still using it a year ahead of the next US presidential election.

“As a next step in protecting the 2020 elections, the Defending Democracy Program will make extended security updates available for free to federally certified voting systems running Windows 7. We will do this through the end of 2020, both in the United States and in other democratic countries, as defined by the EIU Democracy Index, that have national elections in 2020 and express interest. We are also working with major manufacturers that have sold voting machines running Windows 7 to ensure any security updates provided to these systems are successful,” explained Tom Burt, CVP of Customer Security & Trust at Microsoft.

In addition to providing extended security updates for free for voting machines still running Windows 7, the company will also offer special technical assistance to election authorities that are Microsoft Azure customers. Government official overseeing 2020 elections can get more details by contacting the Defending Democracy team directly at [email protected].

Ubisoft Connect Achievements not Showing: 3 Ways to Fix it

Uplay is an amazing game distribution platform created by Ubisoft. It can be used to buy and download games as well as DLCs.

It can also be used to chat, read news about games, and manage your game library and achievements. The problem is that some players have reported that they are having problems with their achievements.

Why won’t Ubisoft synchronize achievements?

Below are some of the reasons your Ubisoft Connect achievements are not showing:

  • Issues with the app: Sometimes, this problem might be due to an issue with the Ubisoft app. In this case, you need to create a backup of the app and reinstall it.
  • Server issues: At times, this issue might be due to server problems from the provider’s side. You can only wait for it to be resolved.

What can I do if Ubisoft Connect achievements is not showing?

1. Make a backup of your Achievements folder

Normally, Uplay should upload the achievements file of all of your games to the cloud.

However, it doesn’t seem to do this with all of the games, such as with some Assassin’s Creed titles.

Because of this, you have to do it manually.

You’ll first need to complete the game with some of the Achievements for testing purposes.

Navigate to where your achievements are locally stored: C:\Users\%USER%\AppData\Local\Ubisoft Game Launcher\spool\%manynumbers%

After that, you’ll just have to uninstall and re-install Uplay and your game:

  1. Press Windows + R, type in appwiz.cpl, and click OK.
    appwiz ubisoft connect achievements not showing
  2. Right-click on the Uplay entry.
  3. Select Uninstall/Change.
  4. Finally, follow the onscreen instructions to complete the process.

If you Uninstall Uplay, it will delete the Ubisoft Game Launcher folder.

If you install Uplay again, you’ll notice many Achievements will be reset, but if you also restore the .spool file, the Achievements will be back.

spool folder Ubisoft achievements not syncing

2. Wait it out

Sometimes achievements won’t be granted the exact moment you’ve met all the prerequisites.

In fact, some reports state that it may take up to 48 hours until you may receive them.

3. Contact the customer support

If all solutions listed above fail to yield results, you should consider contacting Ubisoft customer support.

While this is indeed a serious problem, the only thing players could hope for is a patch to be released in the near future. Until then, players will just have to back up their own files.

In the same vein, if Ubisoft payment is not working on your PC, check our detailed guide to fix it.

Feel free to let us know the solution that helped you sync your achievements in the comments below.

FIX: Ubisoft server unavailable

The market is filled with game distribution platforms like Steam, Epic Games Store or GOG.

As such, some gaming giants have decided to build their very own gaming platforms for all of their IPs.

Such would be the case with Ubisoft, who decided that the best way to distribute their games is through a client.

This client, like any other software, is bound to have the occasional bugs here and there.

One such bug is an error message some players have been receiving:

Players aren’t exactly pleased about the matter, and they aren’t shy to express themselves on the public forums:

[…]it shows “A Ubisoft service is currently unavailable. You can try again later or switch to offline mode.” in Uplay on starting. I cannot login Uplay and cannot play […]

This error seems to prevent users from being able to log in with their accounts.

More so, you can’t play a Ubisoft game without it running in the background.

Consequentially, this means that the error also prevents you from playing anything, single-player or not.

Ubisoft servers are online, but Uplay says otherwise

1. Make sure the Ubisoft servers are actually up to date when you receive this error.

They usually go through periodic maintenance from time to time, during which most services will be unavailable.

2. Modify your PC’s system date

While a strange solution indeed, this solution seems to have worked for many users.

  1. Hover over the Date and time in the taskbar on the right
  2. Right-click it
  3. Select Date and time setting
  4. Disable the automatic setting of the date and time
  5. Click on Change and set an earlier date
  6. Save the changes made
  7. Pres Ctrl+ Shift + Esc
  8. Select the Uplay entry
  9. Press End Task (Bottom-right corner)
  10. Re-launch the client with administrator rights

3. Uninstall and re-install Uplay

  1. Press Windows + R
  2. Type in appwiz.cpl
  3. Look for the Uplay entry
  4. Right-click it
  5. Select Uninstall
  6. Once that is finished, hear over to Ubisoft‘s official website and download a fresh new Uplay client
  7. Install it

Keep note that when you uninstall Uplay, you need to back-up the save files for your locally stored single-player games.


4. Disable your antivirus program while running a Uplay title

Generally, most antivirus programs should be active in the system tray.

Right-clicking it and looking for a Disable for…… message will usually do the trick.

However, this procedure varies depending on the antivirus client you are using.

Head over to your antivirus manufacturer’s homepage to see the exact steps.


You’re an avid gamer but care about your PC’s security as well? Why no try these antivirus software?


5. Run Uplay with administrator rights

  1. Right-click the Uplay icon on your desktop or in your Start Menu
  2. Select Run as administrator


Posted in Fix

Error Code 0xe0000100: Fix It with These 7 Solutions

Microsoft regularly releases updates for Windows to add new features and deliver patches for known bugs, and every few years, we have a new iteration with several upgrades and a different UI. But the transition to a newer version or iteration may sometimes throw the 0xe0000100 error.

The error has long been present in Windows, with numerous reports affecting Vista too. The Windows Update error is tricky to troubleshoot, so here we are with everything you need to know and the solutions for it.

What is error code 0xe0000100?

The error code 0xe0000100 appears both while updating Windows or installing a fresh copy of it. For the installation part, the error message reads, Windows installation encountered an unexpected error. Verify that the installation sources are accessible, and restart the installation.
Here are a few reasons you might be getting the Windows update or install error:

  • Corrupt Windows Update Components: The primary reason users get the update error is due to corrupt Windows Update Components, but these are easy to fix.
  • Corrupt system files: Corrupt system files, too, can trigger a range of issues, ranging from basic functions in the OS to the ability to install updates.
  • Firewall or antivirus blocking the update: Several third-party security software can block Windows Updates from downloading the latest version.
  • Faulty installation setup: If you get the 0xe0000100 error while installing Windows, it’s likely that the setup has not been created properly.
  • Malfunctioning USB port: Another reason for the Windows installation error is a malfunctioning USB port when installing the OS from a bootable USB drive.

How can I fix error 0xe0000100?

Before we head to the slightly complex solutions, here are a few quick checks to perform:

  • If you install Windows on a clean drive, ensure it’s working and can be accessed from other PCs.
  • For those running a third-party antivirus or firewall, disable it or uninstall the program and check whether the 0xe0000100 error is fixed. If so, we recommend you switch to a more reliable antivirus with a built-in firewall.
  • Your PC needs to meet the minimum system requirements for the iteration you are trying to install. So check that and make sure it does.
  • Make sure the USB port or CD drive is fully functional, depending on whether you use a bootable or Windows CD.
  • Check for RAM issues and ensure it’s plugged in properly.

If none work, move to the fixes listed next.

Note icon NOTE
The solutions listed here that use Command Prompt require booting the OS. If you cannot install Windows, plug in the bootable drive or CD and then access the Recovery Environment to open Command Prompt.

1. Run DISM and SFC scan

  1. Press Windows + R to open Run, type cmd, hold Ctrl + Shift and click OK.command prompt
  2. Click Yes in the UAC prompt.
  3. Paste the following three commands individually and hit Enter after each:DISM /Online /Cleanup-Image /CheckHealth DISM /Online /Cleanup-Image /ScanHealth DISM /Online /Cleanup-Image /RestoreHealth
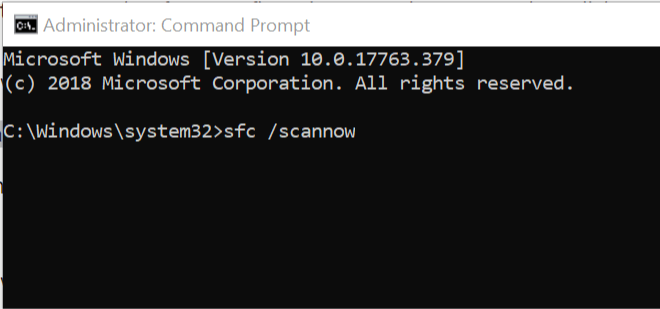
  4. Once done, execute the following command to run the SFC scan:sfc /scannowsfc scan to fix 0xe0000100

If it’s the corrupt system files triggering the 0xe0000100 Windows Update error, running the DISM tool and SFC scan would help repair or replace them in time.

2. Use third-party software for Windows errors

The most convenient solution is to use professional third-party software that aims to address every Windows error and fix damaged registry files instantly.

With strong automated support, you can repair serious Windows issues that may occur out of nowhere, including updating issues on your PC.

Such dedicated tools are highly capable of fixing system malfunctions or virus damages with powerful restoring options. Besides, it will completely scan potential problems and repair them accordingly with intelligent technology.

3. Run the Check Disk utility

  1. Press Windows + S to open Search, type Command Prompt, and click on Run as administrator.command prompt
  2. Click Yes in the prompt that appears.
  3. Paste the following command and hit Enter:chkdsk /rcheck disk to fix 0xe0000100
  4. If asked to schedule a scan the next your PC restarts, press Y and then hit Enter.confirm check disk
  5. Finally, restart the computer and let the CheckDisk utility identify and fix issues with the drive.

When you face the 0xe0000100 error in Windows 11 due to bad sectors or some corrupt nature of the drive, the Check Disk utility will aid and eliminate all such problems.

4. Reset Windows Update Components

  1. Press Windows + R to open Run, type cmd, and hit Ctrl + Shift + Enter.cmd
  2. Click Yes in the prompt.
  3. Now, paste the following commands individually and hit Enter after each to stop the BITS and Windows Update services:net stop bits net stop wuauservstop services
  4. Next, run this command:Del "%ALLUSERSPROFILE%\Application Data\Microsoft\Network\Downloader\qmgr*.dat"
  5. Execute this command next:cd /d %windir%\system32
  6. Now, you will have to run all the commands here individually to register the critical files:regsvr32.exe atl.dll regsvr32.exe urlmon.dll regsvr32.exe mshtml.dll regsvr32.exe shdocvw.dll regsvr32.exe browseui.dll regsvr32.exe jscript.dll regsvr32.exe vbscript.dll regsvr32.exe scrrun.dll regsvr32.exe msxml.dll regsvr32.exe msxml3.dll regsvr32.exe msxml6.dll regsvr32.exe actxprxy.dll regsvr32.exe softpub.dll regsvr32.exe wintrust.dll regsvr32.exe dssenh.dll regsvr32.exe rsaenh.dll regsvr32.exe gpkcsp.dll regsvr32.exe sccbase.dll regsvr32.exe slbcsp.dll regsvr32.exe cryptdlg.dll regsvr32.exe oleaut32.dll regsvr32.exe ole32.dll regsvr32.exe shell32.dll regsvr32.exe initpki.dll regsvr32.exe wuapi.dll regsvr32.exe wuaueng.dll regsvr32.exe wuaueng1.dll regsvr32.exe wucltui.dll regsvr32.exe wups.dll regsvr32.exe wups2.dll regsvr32.exe wuweb.dll regsvr32.exe qmgr.dll regsvr32.exe qmgrprxy.dll regsvr32.exe wucltux.dll regsvr32.exe muweb.dll regsvr32.exe wuwebv.dll
  7. Once done, run this command to reset Winsock:netsh winsock reset
  8. Finally, execute these two commands to restart the services you disabled initially:net start bits net start wuauserv

After you have reset the Windows Update components, check whether the 0xe0000100 update error is fixed. If not, the next option is to install the update manually.

5. Manually install the update

  1. Locate the KB (Knowledge Base) number for the failed update.
  2. Now, go to Microsoft Update Catalog, enter the KB number in the search field, and hit Enter.update
  3. Click on the Download button for the option that matches the system architecture, i.e., 32-bit or 64-bit.download to fix 0xe0000100
  4. Click on the listed link to start the download. link
  5. Run the setup and follow the on-screen instructions to complete the installation process.setup to fix 0xe0000100

Microsoft offers every update for manual download on the Update Catalog, accessible via the dedicated website. So, anytime you receive the 0xe0000100 or any other update error, try installing it manually.

6. Run Diskpart (for installation issues)

Note icon NOTE
We recommend following this method when you are unable to install Windows. In that case, you can run Command Prompt from Recovery Menu.
  1. Plug in the bootable USB drive, boot the PC using it, and click on Repair the computer in the setup.repair your computer to fix 0xe0000100
  2. Choose Troubleshoot, followed by Advanced options.advanced options
  3. Now, select Command Prompt.command prompt to fix 0xe0000100
  4. Paste the following command and press Enter:diskpartdiskpart
  5. Now, run this command:list disklist disk
  6. Next, execute the following command while replacing X with the number assigned to the system drive:select disk Xselect disk
  7. Run this command:list partitionlist partition
  8. To choose a partition, run:select partition Xselect partition
  9. Use this command to delete the partition while replacing X with the assigned partition number:delete partition Xdelete partition to fix 0xe0000100
  10. Once done, close the command prompt, and try reinstalling Windows using the bootable drive.

If the problem lies with the partition, running the DISKPART utility via the Command Prompt should fix the 0xe0000100 error in no time.

7. Perform an in-place upgrade

  1. Go to Microsoft’s official website, select the correct version from the dropdown menu, and click on Download to get the ISO file for Windows 11.download
  2. Choose the desired language, and click Confirm.confirm
  3. Click on the provided button to start the download.iso file to fix 0xe0000100
  4. Double-click on the downloaded ISO file, and choose Open in the prompt that appears.open
  5. Run the setup.exe file.setup.exe to fix 0xe0000100
  6. Click Yes in the UAC prompt.
  7. Click Next to proceed.setup to fix 0xe0000100
  8. Now, click on Accept to agree to the license terms.agree to license terms
  9. Verify that the setup reads, Keep personal files and apps, and click on Install.install windows 11 to fix 0xe0000100
  10. Wait for the in-place upgrade to complete. It may take a few hours.

An in-place upgrade eliminates a host of problems in Windows, including the 0xe0000100 update error, without affecting the files or apps stored on the PC. But it’s a time taking process, so we recommend you go with it as a last resort.

Once done with the error, check some quick and simple tricks to speed up Windows in no time.

Tell us which fix worked for you in the comments section below.

Uplay Not Installed Error? Here’s How to Fix It

No PC gamer alive can call himself a true PC gamer if they haven’t tried a game from Ubisoft. Of course, trends continue and the market for distributing games digitally is ever-changing.

That’s how game distribution platforms like Uplay, Origin, Steam, Epic Games Store or GOG came to be. Uplay is Ubisoft‘s digital distribution platform for all content related to Ubisoft.

Here, you can download games and DLCs, check Ubisoft-related news, and chat with other Uplay users. However, no game distribution platform is perfect, and Uplay has its own fair share of issues. One such issue is an error message some players receive when trying to launch a game from Uplay.

What can I do if Uplay is installed, but PC says it’s not?

1. Uninstall Uplay and Re-install Uplay

  1. Press Windows + R
  2. Type in appwiz.cpl
  3. Look for the Uplay entry
  4. Right-click it
  5. Select Uninstall
  6. Once that is finished, head over to Ubisoft‘s official website and download a fresh new Uplay client
  7. Install it

Please note that when you uninstall Uplay, you need to back up the save files for your locally stored single-player games.

2. Disable your antivirus program while running a Uplay title

How you do this varies depending on the antivirus client you are using. Head over to your antivirus manufacturer’s homepage to see the exact steps.

3. Run Uplay with administrator rights

  1. Right-click the Uplay icon on your desktop or in your Start Menu
  2. Select Run as administrator

4. Reboot your router

Turn off your router, keep it deactivated for around one minute, then activate it again.

If this doesn’t work, try to connect to the Internet directly through the cable, bypassing the router.

5. Disable any proxy or VPN

Make sure you disable the Work with Proxy settings in the Uplay client. Also, try not to use VPNs when launching Uplay, since that may cause issues.

6. Keep pressing Log in

In some cases, the error could be caused by a momentary communication mishap. Sometimes, persisting in pressing the log in button may work.

If you encounter Uplay compatibility issues, our guide on solving ‘Uplay_r164.dll Not Found or Untrusted System File‘ errors can help.

Did you manage to fix this error? Let us know what method worked for you.

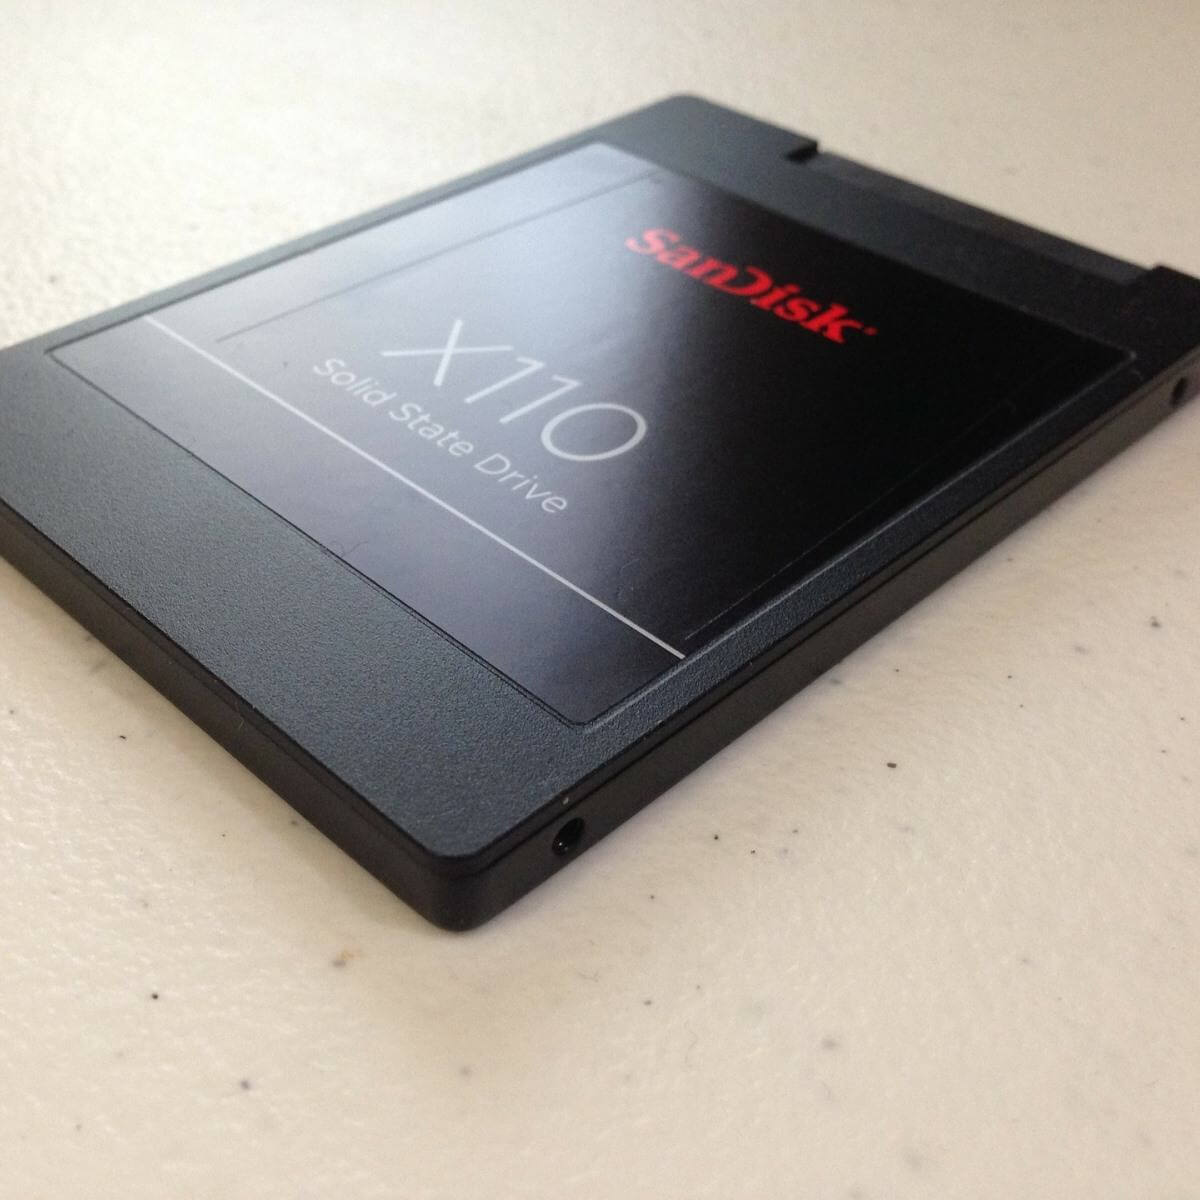
SSD Won’t Format in Windows? 2 Ways to Fix it

Many people using an SSD drive have reported that their SSD won’t format, or if the process starts, it will stop at offset. If you are in the same situation, we understand how frustrating that can be.

Using an SSD should be much easier than with a normal hard drive, but errors are prone to happen occasionally, no matter what type of drive you’re using.

It is recommended that you only buy and use branded SSDs, as the generic ones can cause you a lot of trouble, and there is no support available for them. This would imply that if your drive fails for whatever reason, you will need to replace it.

Now, let’s explore some of the best methods to fix things when you can format the SSD drive.

What can I do if the SSD won’t format?

1. Remove write protection from your SSD drive

  1. Press Windows + R to open Run, type diskpart, and hit Enter.
  2. Paste the following command and hit Enter:list disk
  3. Identify the SSD in the list, type the following command, and press Enter (where X is the name of your SSD):select disk Xdiskpart - SSD drive won't format/SSD format error occured at offset
  4. Run the command: attributes disk clear readonly
  5. Wait for the process to complete and then close the Command Prompt.
  6. Try formatting your SSD drive again.

If your SSD is write-protected, you will not be able to write any new information on it or change the information stored already. To remove the write protection, you can use the Diskpart tool.

2. Format the raw SSD

Tip icon Tip
It is recommended that you open Disk Management to check the status of your SSD. When the item is shown as Raw inside the Disk Management window, you should format the SSD
  1. Run Diskpart in an elevated Command Prompt with the following command:diskpartdiskpart to fix ssd won't format
  2. Execute the following commands individually and replace X in the second one with the number currently allotted to the SSD, and m is the letter you want to assign it later:list disk select disk X clean create partition primary format fs=ntfs quick assign letter=m

If you want to format your external SSD drive to FAT32 or exFAT, you should replace NTFS with FAT32 or exFAT.

In this fix article, we explored the fastest and easiest steps to take if your SSD drive won’t format, even a new one, or if a format error occurred at the offset of the formatting process.

You will first need to make sure that your SSD drive is not write-protected and change it if that’s the case. Then, you will need to format your SSD using some Diskpart commands.

Please let us know if this guide was helpful using the comment section below.

Fix Xbox One error 0x800401fb in four easy steps

Many Xbox One users reported 0x800401fb error on their console. This error appears when they try to perform specific actions. Notably, it either appears at the startup or when you are trying to access My games & apps menu.

This problem restricts them from accessing the dashboard, starting any apps, and performing other tasks. Here’s is how one of the users affected by this issue reported on Xbox user forums

As soon as I turn of my Xbox it displays this error code (0x800401fb) and a “close” button. Hitting the home button or the “close” button doesn’t work. Please help.

If you have also encountered this error, try performing our tried and tested solutions.


How to fix Xbox One error 0x800401fb?

1. Perform a power cycle

power cycle error 0x800401fb xbox one

  1. To reset your console, press and hold the Power button for around 10 seconds. Wait for the switch to turn off completely.
  2. At this step unplug your console and wait for around 30-60 seconds before turning it on again.
  3. Finally, plug-in the console and press the Power button and wait until the Xbox animation logo appears.
  4. The power-cycling procedure is now complete and the problem should be resolved now.

2. Check the status of Xbox Live services

check xbox live status error 0x800401fb xbox one

  1. Some times the Xbox Live services are temporarily unavailable during the maintenance period. Visit this site to see if there’s a problem with the service.
  2. Check the current status of Xbox Live core services.
  3. Proceed to the next solution if all the services are running normally.
  4. If the services are down, you need to wait until Microsoft resolves the server issues at the backend.
  5. Check again after a few hours by restarting your console and see if the problem persists.

3. Contact customer support

contact support error 0x800401fb xbox one

  1. In case, if none of the above-mentioned solutions worked for you, contacting the Xbox support team might be helpful.
  2. Visit the Microsoft web site and head towards the Support section to get live support.

4. Reset the console

reset console error 0x800401fb xbox one

  1. First, open the guide menu by pressing the Xbox button located on your controller.
  2. Once the guide menu is open, navigate to System -> Settings -> System -> Console Info.
  3. Now select Reset console from the Console Info menu.
  4. Select Reset and keep my games & apps available under the Reset your console menu.
  5. Your console will reinstall the operating system at this step. Based on your network, you need to wait for a while until the process is complete.
  6. The console will go through an automatic restart at the end of this process.

Once the reboot is complete, 0x800401fb error should disappear and you should be able to use your game station without any issues.

We hope that you were able to get rid of the frustrating error with the help of our list of solutions. Comment down below if you found this article useful.

How to delete a virtual machine on VMware

In case you’re wondering how to delete a virtual machine on VMware, you have found the perfect guide.

Using VMware virtual machines can be extremely useful if done properly.

There will be moments in which you will need to clean up your VM set and remove any old or un-used virtual machines from your system.

Doing this allows you to make your PC run more efficiently, and in turn, to make use of your virtual machines at full speed, and without any clutter bothering you.

VMware has made it easy for you to edit your VMs, but there are a few differences depending on what version of the software you’re using currently.

In this how-to guide, we will discuss those differences and will give you an exact list of steps to follow in order to manage to delete a virtual machine on VMware.

Please make sure to read the guide carefully, and to follow the steps in the order that they were written in.

This will allow you to make sure that none of your useful virtual machines will disappear, or become corrupted in any way.

Read on to find out more.


Follow these steps to ensure that you properly delete a VM in VMware

Note: Deleting a virtual machine means that all the data stored on it will be completely erased.

If you have any doubts about what VM to delete, or you are deleting it to re-create it, please make sure to backup your data and store in on a secure device.

Delete a virtual  machine on VMware Workstation 7.x and above:

notebook and pen - VMware how to delete a virtual machine

  1. Open VMware and navigate to the list of virtual machines stored on your hard drive.
  2. Click the name of the machine you want to remove.
  3. Select the Manage in option found in the Workstation menu bar.
  4. Choose the option Delete from disk.
  5. Confirm the deletion process by clicking Yes in the pop-up that appears.
  6. This will remove the VM and place it into your Recycle Bin.
  7. To free up space on your Workstation, you will need to right-click the Recycle Bin -> select Empty Recycle Bin.

Wondering how to boot from USB drive in VMware? Try this


Delete a virtual  machine on VMware Workstation Player 12.x:

Laptop with user and coffee - VMware how to delete a virtual machine

  1. Open VMware on your machine -> navigate to the list of installed virtual machines.
  2. Right-click the virtual machine you want to remove -> select Delete from disk.
  3. Confirm that you want to delete it by pressing the Yes button inside the prompt.
  4. To also free up disk space, you will need to empty the Recycle Bin as well.

Conclusion

In today’s how-to guide we explored the most efficient ways of deleting a virtual machine on VMware, and also how to clear up space on your hard-drive.

Please feel free to let us know if this article was helpful by using the comment section found below this article.

Before you leave, you might be interested in the best settings for running Windows 10 in VMware, and we have an entire article dedicated to this subject.

SSD errors occured during data transfer [SOLVED]

SSDs (short for “solid-state drives“) are reliable and fast hardware for storing data. Tech giants started the transition from HDDs (hard-disk drives) to SSDs some years ago.

The reasons for this change are many. SSDs are less prone to physical damage and as we said before, they are faster. Desktop computers and laptops work much better with SSDs. Also, users encounter fewer errors with SSD than with HDDs.

However, these pieces of hardware are not perfect. Quite a few users encountered issues when trying to transfer data on an SSD.

This is a major issue, but fortunately, there are a few solutions available to solve the problem quickly. Today we will show you what to do if you can transfer data on an SSD.

Solve data transfer errors on SSD

1. Try another SATA cable

Sometimes, you can solve this issue by replacing the SATA cable. These cables are used to connect the motherboard to the SSD.

Moreover, try different SATA ports to check if your original port is broken.

If this solution doesn’t work, try the next one.

2. Run an SFC scan

Corrupted files could cause data transfer errors in an SSD. To scan and fix this issue, you can run an SFC scan.

  1. Press the Windows key + X and type Command Prompt.
  2. Select Command Prompt (Admin) to open the Command Prompt as an administrator.command prompt administrator
  3. Type sfc /scannow and press Enter.run Sfc scannow command - Windows update fix
  4. The repair process will now start. Wait until the repair process is complete.
  5. When the SFC scan is complete, the Command Prompt might state, “Windows Resource Protection found corrupt files and successfully repaired them.” If that’s the case, restart Windows.

Conclusion

As you can see, this issue can be solved quickly with some easy solutions. You can try another SATA cable or run an SFC scan.

However, if these methods don’t work, your SSD might be damaged. Still, you can try to connect the SSD to your motherboard through other SATA ports.

Also, it is recommended to keep your SSD healthy. Try one of these tools from our fresh list to improve your drive’s performance!

Did our article help you? Did you find another way to solve data transfer errors on SSD? Do let us know in the comments section below.

Want to attend the Oct 2 Microsoft Event in NYC? Enter for your chance right now!

Microsoft’s Surface hardware events typically are reserved for influencers, journalists, and those with very close ties to the tech industry. However, Microsoft executive Yusuf Mehdi has just announced new sweepstakes, where you can enter for a chance to join the best of the best, and experience the upcoming October 2 Microsoft event in person.

To enter, all you need to do is respond to Mehdi’s above tweet, and say what you love about Surface. Since this is a Twitter sweepstakes, you’ll also need to use the hashtag #MicrosoftEventSweepstakes. Mehdi will choose a winner this Sunday, September 22, at 6 PM PT.

If you’re not from the New York City area, and you happen to win this sweepstakes, Microsoft will pay to send you to the October 2 event. For the winner, that will include a round trip coach airfare from a major airport closest to your home. A 2-night hotel accommodation, transportation to and from the hotel, and a $300 spending allowance during the trip are included as well. You’ll also get an admission to attend an exclusive Microsoft Fan Event, in addition to the product announcement event.

There is some fine print, and you must be 21 years old to enter. You also must be following Mehdi on Twitter, and there’s a limit to one entry per person. Full terms are available here.

Windows 10 news recap: Surface Pro 7’s Surface Pen could have wireless charging, virtual desktops can be named, and more

Welcome back to our Windows 10 news recap, where we go over the top stories of the past week in the world of Microsoft’s flagship operating system.

The Surface Pro 7’s Surface Pen might support wireless charging

A new FCC filing suggests that the Surface Pro 7 could have a Surface Pen that supports wireless charging.

You can name your virtual desktops in Windows 10, thanks to user feedback

Based on Windows Insider user feedback, Microsoft is adding the ability to name virtual desktops in Windows 10. The feature is currently available to Insiders.

Rockstar Games launches new game launcher on Windows and offers GTA: San Andreas for free

Rockstar Games has launched its own game launcher on Windows, in an aim to get gamers to purchase games directly rather than via game distribution platforms, such as Steam. As an enticing offer, it is offering GTA: San Andreas for free.

Wi-Fi 6 gets certified, marks new milestone in adoption of a faster wireless standard

The next generation of WiFi, Wi-Fi 6 has been certified. The new wireless standard aims to deliver even faster WiFi connections.

Microsoft, Azure Data Centers

That’s it for this week. We’ll be back next week with more Windows 10 news!

Common Blasphemous bugs and how to fix them

Blasphemous is an action-platformer that could only be described as punishing.

However, despite how simple a pixel-art platformer may seem, it isn’t safe from being riddled with bugs.

Apparently, most of them are the same bugs reported with the demo version.

A reason why they managed to make it to the live version was soon to follow:

They can’t be fixed yet. This version was pushed long before the demo came out. It will all be fixed in a post-release patch. Hopefully it comes soon.

How can I fix Blasphemous bugs?

1. Controller issues on high-frequency monitors

Many players have discovered they are unable to drop down a level.

Unfortunately, in a platformer, this is fundamentally a game-breaker,  since if you can’t drop down a level, then you cannot play.

Fortunately, all you need to do is deactivate V-Sync, and all issues should be solved.:

  1. To turn off V-Sync, go into the game options
    • If you are in-game, open your map screen where you can access the game options by pressing X or Square

As mentioned above, this issue seems to be common among users who have monitors that will go above 60 FPS, especially 144 Hz monitors.

2. You sometimes can’t climb ladders

Similar to the bug mentioned above, players are reporting that sometimes they can’t climb ladders.

There is no known fix for this bug.

3. Striking toxic drops with your attacks makes the screen shake

Normally the camera would shake for added effect when striking mobs, but this also happens with toxic drops which you should avoid.

Whether this is actually a bug or as designed is not yet known.

However, your graphics card’s driver might be the fault.

Try to uninstall your GPU driver and install the default one from Windows:

  1. Press Windows + R
  2. Type in hdwwiz.cpl
  3. Select Display adapter
  4. Right-click the one you need and select Uninstall
  5. Restart your PC and wait for it to install the default one

Hardware drivers are programs that allow Windows to communicate with your computer’s hardware.

You can update drivers manually if you are completely familiar with the drivers your PC requires.

These drivers are developed by device makers, and you can obtain them directly from the manufacturer of your PC on the official website.

Keep in mind that doing this on your own can take some time, and there is always an alternative to ensure the correct driver is installed.

A computer cannot manage video cards, computer programs, sound cards, or other hardware on its own; they must be managed by a driver. When a driver issue occurs, it’s good to try a tool dedicated for such cases.

Outbyte Driver Updater is a useful software for installing and updating drivers on your computer. After the installation, you only need to scan your PC. It will detect specific missing drivers and request your permission to install them.

⇒ Get Fortect Driver Updater

2. The game fails to transition through scenes

When entering a doorway to another level, the camera simply drops down and all you can do is exit the game and try again.

Until a patch will come out to fix this issue, your only choice is to re-load the game from a previous point.

4. Some mobs stay invincible

Ghosts will sometimes stay invincible if the spawning sound that accompanies them plays in a loop continuously.

Until a patch will come out to fix this issue, all you can do is re-load the game from a previous point.

5. You sometimes can’t avoid enemy damage

There are cases of players still receiving damage when struck by an enemy, despite the parry or dodge animation playing successfully.

More so, if two enemies synchronize their attacks at the same time, you cannot parry them.

Whether this second one is actually a bug or as designed is not yet known.

What to do if Borderlands 3 is crashing

Borderlands 3 is an immense success among the fanbase, but it comes with its own fair share of issues.

The biggest issue that could probably plague any game is when it suddenly crashes, and you have to restart it, possibly losing hours of progress made.

Fans of the 4th entry into the Borderlands series have already started reporting that this is happening to them as well.

My game keeps crashing probably 5 – 10 min in to the game(not in Menu)

This is a serious issue, since crashing after a few hours’ worths of binging means you could lose all progress made.

However, crashing less than 10 minutes into the game is worse, since players will simply give up, and maybe even ask for refunds.

How to stop Borderlands 3’s crash issues?

1. Make sure your hardware meets the games minimum system requirements

Head over to Gearbox’s official website and find out if your PC meets Borderlands 3’s minimum system requirements.

Borderlands 3 FPS drops DXDiag

2. Launch the Epic Games Launcher using administrator rights

  1. Right-click the Epic Games Launcher on your desktop or Start Menu
  2. Click Properties
  3. Go to the Compatibility tab
  4. Choose Change settings for all users
  5. Check Run this program as administrator
  6. Select Apply
Borderlands 3 crashes run as admin

3. Make sure your drivers, especially your graphics cards, are up to date

Here’s a list of the official driver download links for the most common drivers used on Windows PCs:

If you are not sure about what driver version you need to download for your PC, we recommend you use dedicated driver updater software such as Fortect Driver Updater.

This tool will automatically match your hardware with its corresponding driver, eliminating the major issues that may come when you install a faulty driver.

Fortect Driver Updater is lightweight and easy to use and it can save you a lot of time and hassle. You can set it up to do regular driver scans and updates.

⇒ Get Fortect Driver Updater

4. Keep your Windows 10 updated to the latest version

Many users are having problems ever since they’ve installed the KB4512941 update.

It would seem that this updating is causing high CPU usage, even when idle.

If you open the Task Manager and see a high CPU usage with the SearchUI.exe process, then you should try this fix:

  1. Open the Registry Editor
  2. Navigate to
    • ComputerHKEY_CURRENT_USERSoftwareMicrosoftWindowsCurrentVersionSearch
  3. Set the BingSearchEnabled value to 1.

Handling registries can be quite risky, so if you don’t know what you’re doing, read this handy guide for the quickest solutions to the issue.

registry editor borderlands 3 crashes

5. Verify your game’s files with the Epic Games Launcher

  1. Open the Epic Games Launcher
  2. Go to your game Library
  3. Hover your mouse over Borderlands 3
  4. Click on the Settings icon 
  5. Select on Verify
  6. Restart the launcher after the verification is complete
Borderlands 3 Epic games Launcher game verify

6. Close any overclocking applications

While overclocking apps may be a gamer’s bread and butter, there have been issues with overclocking apps like MSI Afterburner or the Zotac Firestorm.

Try running the game with your graphics card’s default clock speeds.

There you go, these are a couple of solutions that might help you with Borderlands 3 crashes. If you found our solutions helpful, let us know in the comments section below.

How to Change Bank Card or Add Card on Revolut

Many are wondering how to change a bank card on Revolut and this guide will show you how to do that with ease. So without further ado, let’s get started.

How can I change the bank card on Revolut?

How to add a card to Revolut

  1. On the Home screen, go to Add money.
     add money revolut
  2. Select your currency and tap on Change.
    change revolut
  3. Tap on Add card securely.
    add card securely
  4. Select the card type and follow the instructions on the screen.

If you want to update your card information, you’ll have to remove it by following similar steps and add it again.

Can I get another card on my Revolut account?

Yes, you can have multiple cards on your Revolut account. However, you only add up to 5 new cards per month.

As you can see, you can’t really change your bank card on Revolut, but you can add a new one instead.

Before you leave, find out how to use the Revolut web app, in case you prefer making changes from the desktop.

We also have guides on how to top up Revolut account as well as a guide on what to do if you can’t use your Revolut card online.

Have you changed any details recently? Do let us know your experience in the comments.

How to Close Revolut Account [Step-by-Step Guide]

Revolut is a popular financial startup that operates as a bank but purely on a digital basis through an app. Being a fully digital service, opening a Revolut bank account is easy and takes no more than 10 minutes.

However, what if you want to delete or close a Revolut account or currency account? You may have several reasons to close your Revolut account. You probably don’t like the service, you are not actively using it, and you don’t want to keep your details with the financial firm.

Irrespective of the reason, closing your Revolut account is easy. In this article, we take you through the process of successfully deleting your Revolut account with ease.

Is it easy to close a Revolut account?

Closing your Revolut account is actually easy, as it requires just a couple of steps. You can permanently delete your Revolut currency account from your mobile phone or the official website.

You just need to take of care some requirements which we will list in the next section.

What to consider before deleting your account?

Below are some of the things you need to consider before deleting your account according to Revolut:

  • Remove all funds from your account
  • Ensure that you conclude all pending transactions
  • If you want a live agent to help you close your account, you must be ready to provide the identity document you used for verification
  • You must be on the Free plan. If you are not, you need to change your subscription type
  • If you got any free metal card in the last 3 months, you need to pay a certain amount of money

How can I permanently my Revolute account?

1. Delete the Revolut currency account

  1. Launch the Revolut mobile app or go to the official website and log into your account.
  2. Click the Settings option from the profile in the top left corner of your screen.
  3. Select the Close account option at the bottom of the page.
  4. Finally, choose a motive for deleting your account, and it will be deactivated immediately.

2. Contact a live agent to delete your account

Before deleting your Revolut account, you need to do a couple of things so that you don’t lose any of your money in the process.

According to Revolut, before closing the account, the users should withdraw all currency balances in their account. All transactions (card payments, transfers) must be completed.

This is important because once the account is closed, all the cards linked to the account will be terminated.

Once you have made sure that all the currencies are withdrawn from the account, you need to contact Revolut live agent.

You can find more details about contacting the live agent on the Revolut website or on the app.

The live agents will ask you some security questions before closing the account.

 What’s not deleted?

According to Revolut, the company keeps the user data for 6 years due to financial regulations. However, your account is completely deleted, and no transaction can be made through the concerned account.

That’s it. We have discussed all the steps that you need to take to delete and close your Revolut account safely without any hassle. However, make sure you consider other points in the article before deleting your account.

Similarly, if your Revolut login is not working, check our detailed guide to fix it.

Feel free to let us know if you were able to delete your account or not in the comments below.

Fix Waze not announcing directions with these steps

Waze being a traffic and direction map works with your car’s infotainment system. However, the uses can also use it as a standalone app directly from their phone. Sometimes, you may encounter Waze not announcing direction issues with the app.

You can see similar complaints in the Reddit community about the waze app not announcing directions.

Hello folks, I noticed Waze voice instructions weren’t working in AA a couple of months ago on my Huawei 8X connected to my Pioneer AA head unit – the music volume would duck when the voice commands should have been happening, but there was no guidance.

If you are also troubled by this issue, here are a couple of troubleshooting tips to help you fix waze not announcing directions.

What can I do if Waze is not announcing directions?

1. Check sound output

  1. Restart your phone once before trying any other solutions listed in this article. If that does not work, follow these steps.
  2. Waze has multiple sound output options. You can play the audio output through your phone’s speakers or connected Bluetooth device.
  3. Launch the Waze app on your smartphone.
  4. Tap on Settings and select Voice and Sound.
  5. Make sure “play sound to phone speaks” option is unchecked. If not, uncheck the option.
  6. Relaunch Waze and check if the voice directions are working.

Want to earn points faster in Waze? Check out these tips


2. Clear cache and force close app

  1. If the issue persists, try clearing the bad cache from the app. You may also have to force close and restart the app process to get it to work again.
  2. On your smartphone, tap on Settings. You can access settings from the app drawer or home screen.
  3. Scroll down to Apps section and tap on Manage Apps.
  4. Locate and tap on the Waze app.
    Waze not announcing directions
  5. In the properties window, tap on Clear Data option.
    Waze not announcing directions
  6. Tap on Clear Cache options.
  7. Next, tap on Force Close option at the bottom of the page.
    Waze not announcing directions
  8. Tap on Yes to confirm the action.
  9. Relaunch Waze and check for any improvements.

3. No verbal warning for speed cameras

Waze not announcing directions

  1. If you are not getting any verbal warning for the speed cameras, this is due to you being under the speed limit.
  2. Waze only uses verbal warning to alert the users in case the driver is overspeeding near a speed camera.

4. Reinstall Waze app

  1. If the issue persists, it can be due to a glitch in the app itself. In this case, you may need to reinstall the app to resolve the issue.
  2. From the home screen, tap and hold the Waze app icon.
  3. From the options, select Uninstall. Tap Yes to confirm the action.
  4. Open your Apps Store app and search for Waze.
  5. Download and install the Waze app and check for any improvements.

Reinstalling the app should resolve the Waze not announcing voice direction problem. However, if the issue persists, you can submit a support a ticket on the Waze official forum.

RELATED STORIES YOU MAY LIKE:

FIFA 20 starheads: The place to check player faces [SPOILER]

FIFA 20 is all about accurately reflecting (more or less) the current football scene.

This includes the roster of available players for each team, as well as the way they look.

Such would be the beginning of the term Starhead.

What is a starhead?

The definition of a starhead goes as follows:

[…] it occurs when a team is dispatched by EA to football clubs’ training facilities where they sit the team down in their makeshift studio to take a number of photos in which, over time, are applied to a players‘ in-game face. […]

The results are quite outstanding, as they could be considered a version of motion capturing.

There are different types of faces in FIFA. They are the following:

Scanned

When the above-mentioned treatment is applied to a player:

Scanned starhead

Starhead

When a team sent by EA take multiple pictures using a singular camera and  apply them to a players‘ in-game counterpart:

Normal Starhead

Custom

When the player in-game is designed by the graphics team:

Custom starhead

Generic

When a player has an in-game face that is modelled on them without going into great detail.

It would seem that prioritizing who gets scans and starheads is based on the player‘s rating.

Thus, higher-rated players receive scans and starheads first, and far more often afterwards.

As you can see for yourself, the difference in quality is far too great to even bother comparing them.

As such, FIFA players will be thrilled to that over 80 players are getting new starheads, including:

And the list goes on.

Of course, players were quick to respond to these rumours.

Their responses varied, some of which included suggestions regarding who should receive starheads.

Other users suggested that some too many players have generic models and should definitely deserve a scan or at least a starhead.

For more information about starheads, and who’s next in line to get one, visit this dedicated forum thread.

Do you have a favourite player that didn’t get a top-quality starhead?

Let us know in the comments sections below!

Waze Bluetooth not working? Try these solutions

Waze is a popular driving direction and traffic map app that offers the commuters best route in real-time with help from other drivers. Waze is compatible with both Android Auto and Apple CarPlay. That said, sometime, you may encounter Waze Bluetooth not working issue with the app.

Waze Bluetooth not working issue has been reported by many Waze users across the tech forums such as Reddit community.

I recently switched back over to Waze and noticed that my Ford Fusion’s Sync feature does not seem to pick up on Waze’s sound at all. I can even have music playing simultaneously through Sync, but my navigation sound plays only through the phone. Is this a known issue? Is there a workaround at all? I use a Pixel XL phone.

Follow the steps in this article to troubleshoot Waze Bluetooth not working issue in Android Auto and CarPlay.

What can I do if Waze is not connecting to my car?

1. Set Bluetooth as output

Waze bluetooth not working

  1. While Waze should set the output as Bluetooth automatically once connected to the CarPlay or Android Auto, double-check to make sure that the output is set to Bluetooth.
  2. Launch the Waze app.
  3. Tap on Setting > Sound and Voice.
  4. Go to Advanced.
  5. Make sure the Output is set to Bluetooth.
  6. Close and open the Waze app. Check if the app connects to your car.

Add a stop in Waze in just a couple of easy steps


2. Check for update

Waze bluetooth not working


  1. The developers tend to released periodic updates to fix bugs and glitches in the app. Make sure you have the latest version installed to fix the issue.
  2. Open Play Store or Apps Store.
  3. Search for Waze and open it.
  4. You should see an Update button if the newer version of the app is available.
  5. Download and install the app. Try connecting the app to your car and check for any improvements.

3. Clear cache and force close Waze

  1. Clearing the old cache can help you resolve Waze Bluetooth not working problem.
  2. From the Home Screen, tap on Settings.
  3. Scroll down to Apps > Manage Apps.
  4. Wait for the device to load all the installed apps.
  5. Locate and tap on Waze to open its properties.
    Waze bluetooth not working
  6. Tap on Clear Data button at the bottom.
  7. Select Clear Cache and then tap on Yes.
    Waze bluetooth not working
  8. Next, tap on Force Close button at the bottom of the page.
  9. Close the Setting page and relaunch the Waze app.

4. Disable power/battery saver

Waze bluetooth not working

  1. Smartphones offer a power-saving feature to increase battery backup. However, it can also create issues with the apps that consistently rely on sending and receiving information like Waze.
  2. Make sure your phone does not have power saver enabled.
  3. To check this, pull the app drawer and check if the Battery saver or power saver option is turned on.
  4. Turn off any power-saving feature and then try connecting your device to the car.

5.  Reinstall Waze

  1. If the issue persists, you may need to reinstall the Waze app. Uninstalling Waze does not delete any data except recent history.
  2. From the home screen, tap and hold the Waze icon.
  3. Select Uninstall and then tap on Yes to confirm the action.
  4. Reinstall Waze from the Apps Store.

RELATED STORIES YOU MAY LIKE: