Windows XP and Vista PCs will no longer have access to iTunes store starting May 25

Noted by The Verge, Windows XP and Vista PCs will no longer have access to the iTunes store starting May 25. Apple announced it is introducing new security changes and users with Windows XP and Vista PCs are being urged to upgrade to Windows 7 or newer in order to use iTunes.

According to Apple, Windows XP and Windows Vista users can still use previous versions of iTunes on their PCs, but without support from Apple. Unfortunately, though, this means XP and Vista users won’t be able to make new purchases from the iTunes Store or redownload previous purchases.

This should not come as much of a surprise as these older operating systems are now unsupported and unsecure. Microsoft ended support for Windows XP over four years ago, and Windows Vista just last year.

That said, it’s best to invest in a new PC, or upgrade your existing Windows XP or Vista PC to Windows 10 if you want to continue making purchases from the iTunes Store and re-download previous purchases. The latest version of iTunes can be found here, and Microsoft also has a handy guide here for new PC purchases. Oh, and by the way yes we’re still waiting for an iTunes on Windows 10 app, announced last year at Build and promised by the end of 2017.

Dev reportedly gets Windows 10 on ARM running on Lumia device

As you already know, Microsoft has confirmed that there will be no further development on Windows 10 Mobile and the platform is dead. However, there are still some highly-skilled developers who are also Windows Phone fans that are not giving up so easily. As noted by a report on Softpedia, @Hikari_Calyx has posted some pretty convincing evidence on Twitter of Windows 10 on ARM on full display on a Lumia prototype.

The Lumia prototype in question appears to be the “Nokia Hapanero,” an unreleased version of the Lumia 950 that Microsoft presented at Build 2015. Interestingly enough, @Hikari_Calyx was the one responsible for the leaked photos of the Nokia Hapanero device.  Judging by the clips on Twitter, if this is in fact Windows 10 on ARM and all features will be useable on Lumia devices, such as the Lumia 950 and Lumia 950 XL, this could be great news for Windows Phone fans.

@Hikari_Calyx reassures us “It’s neither remote desktop nor playing video on this phone, I promise.”

While there are some die-hard Windows Phone fans holding out for a possible Surface Phone on the horizon, this might be their only hope. The more likely scenario is Microsoft will release an “Andromeda” device with Windows Polaris or focus on Progressive Web Apps (PWA) instead.

Microsoft, Xiaomi to partner on cloud, laptop sales, Cortana

Last week Microsoft announced the signing of a Strategic Framework Memorandum of Understanding (MoU) with Xiaomi, the $46 billion Beijing, China mobile device maker, to partner on cloud, laptop sales, and Cortana. Microsoft hopes this to help solidify Xiaomi’s leadership and also contribute to the acceleration the Xiaomi’s international expansion.

Under the MoU, Microsoft and Xiaomi will specifically focus on cloud support, laptop-type devices, Cortana and Mi AI Speaker, and a collaboration on AI Services. Microsoft points to the following aspects of the MoU.

  • Xiaomi and Microsoft will explore utilizing Microsoft Azure cloud platform to support Xiaomi’s user data storage, bandwidth, computing and other cloud services in international markets.
  • Xiaomi will leverage Microsoft’s support on joint marketing, channel support, and future product development for Xiaomi’s laptop and laptop-type devices to penetrate international markets.
  • Both companies are discussing opportunities to integrate Cortana with Mi AI Speaker. Senior executives from both parties are involved to drive deeper technology integration and collaboration for AI-powered speakers.
  • Xiaomi and Microsoft intend to explore multiple cooperative projects based on a broad range of Microsoft AI technologies, such as Computer Vision, Speech, Natural Language Processing, Text Input, Conversational AI, Knowledge Graph and Search, as well as related Microsoft AI products and services, such as Bing, Edge, Cortana, XiaoIce, SwiftKey, Translator, Pix, Cognitive Services and Skype

Xiaomi was founded in 2010 by serial entrepreneur Lei Jun and the company has been working with Microsoft since 2015. The company recently adopted Microsoft Azure (operated by 21Vianet in China) to run its Mi Cloud service for smartphone users and has also pre-installed Microsoft Office and Skype apps on its Android tablets.

“By collaborating with Microsoft on multiple technology areas, Xiaomi will accelerate our pace to bring more exciting products and services to our users. At the same time, this partnership would allow Microsoft to reach more users around the world who are using Xiaomi products,” said Wang Xiang, Global Senior Vice President and Head of International Business, Xiaomi.

MWC 2018: Lenovo Announces Yoga 730, Flex 14 Windows 10 convertibles

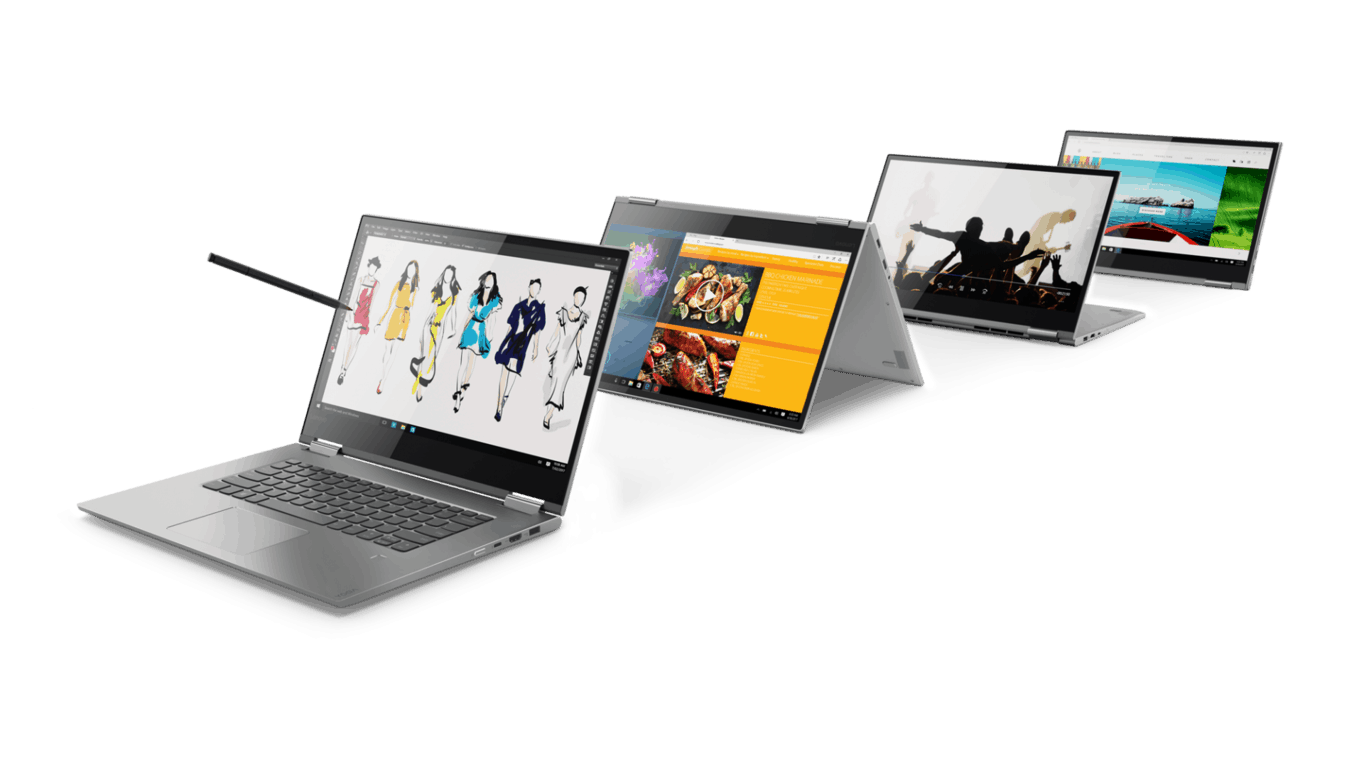
This week at Mobile World Congress, Lenovo is announcing the new Yoga 730 and the Lenovo Flex 14 convertible. The Yoga 730 comes in 13-inch and 15-inch models, and the Flex 14 promises natural, intuitive and convenient experiences. As usual, we’ve divided up the new models for you below, including specs, descriptions, and all you need to know ahead of release.

Yoga 730 (13-inch) April 2018, Starts at $879.99

Lenovo’s Yoga 730 packs a 4K display and is elegantly designed in Copper, Iron Gray, and Platinum Silver colors. It also comes with the latest 8th generation Intel Core i7 processors, sure to give you enough power to unleash your inner creativity. Both the 15-inch and 13-inch model also come with support for Amazon Alexa on Windows 10. Specs are listed below.

  • Processor: Up to 8th Gen Intel Core i7
  • Display: 13.3″ UHD IPS touchscreen
  • Graphics: Intel HD 620/UHD 620
  • RAM: UP to 16GB DDR4 RAM
  • Storage: Up to 512 PCIe SSD
  • Up to 11 hours battery life on FHD model and 11.5 on UHD model
  • Weight: 2.46 lbs
  • JBL Speakers & Dolby Atmos headphones
  • Ports: 2 x Type-C (Thunderbolt); 1x USB 3.0 with always-on charging & audio jack
  • Supports Lenovo Active Pen 2 with 4,096 levels of sensitivity.
  • Windows Hello Fingerprint reader on board
The 13 inch model of the Yoga 730


Yoga 730 (15-inch) April 2018, Starts at $899.99

The 15-inch model of the Yoga 730 looks to be a powerful device. It comes with an optional NVIDIA GTX1050 discrete graphics card powered by Pascal. Lenovo also notes the device is designed for a versatile life, so we’re sure it is bound to impress. The 15-inch model comes in the same Iron Gray and Platinum Silver colors, and you can see below for some more detailed specs.

  • Processor: Up to 8th Gen Intel Core i7
  • Display: 15.6″ up to UHD IPS touchscreen
  • Graphics: Up to NVIDIA GTX1080
  • RAM: Up to 8GB DDR4 onboard + 8 GB DIMM
  • Storage: Up to 1TB SSD PCIe
  • Up to 11hrs on FHD and 9 hours UHD model
  • Weight: 4.16 lbs
  • JBL Speakers & Dolby Atmos headphones
  • Ports: 2x USB 3.0, 1x USB-C HDMI, audio jack
  • Supports Lenovo Active Pen 2 with 4,096 levels of sensitivity.
  • Windows Hello Fingerprint reader on board
  • Support for Amazon Alexa on Windows 10.
The 15 inch model of the Yoga 730

Lenovo Flex 14: April 2018, Starts at $599.99

Lenovo’s Flex 14 is a stylish and affordable Windows 10 convertible which packs all the features you may need in your life. The device has support for Lenovo Active pen and Lenovo promises dazzling visuals and audio clarity.  There is only one color for this device— Onyx Black— and you can see other specs below.

  • Processor: Upt o 8th Gen Intel Core i7
  • Display: 14” up to FHD (1920 x 1080)
  • Graphics: Up to NVIDIA GeForce MX130 (4 GB DDR5 dedicated)
  • RAM: Up to 16GB DDR4 RAM
  • Storage: Up to 512GB PCIe SSD
  • Up to 10 hours battery life
  • Harman Speakers with Dolby Audio Premium
  • Weight: 3.25 lbs
  • Ports:1 USB 3.1 Gen 1 (Type-C), 2 USB 3.0 Type A, 1 HDMI, 4-in-1 card reader, audio jack
Flex 14

These devices join the upgraded ThinkPad X, T, and L, devices announced at CES 2018 in Lenovo’s lineup. It also joins the Miix 630, and updated ThinkPad X1 models. Do you have a Lenovo device that you’re looking forward to this year? Let us know your thoughts in the comments.

Windows 10 news recap: Huawei unveils the MateBook X Pro at MWC, multiple instances of UWP apps coming soon, and more

Welcome back to our Windows 10 news recap, where we go over the top stories of the past week in the world of Microsoft’s flagship operating system.

Huawei unveils the MateBook X Pro, bringing a hidden webcam and upgraded CPU

Mobile World Congress (MWC) 2018 has kicked off, and with it Huawei has announced the next member of the MateBook family, the Huawei MateBook X Pro. The MateBook X Pro brings a hidden camera built-in to the keyboard, as well as an upgraded CPU.

Microsoft Store is selling Windows 10 Mobile Lumia handsets again

Strangely enough, Microsoft has seemingly begun selling Windows 10 Mobile Lumia handsets on the Microsoft Store again, after removing them all last year. So, if you’re wanting to get yourself a new Windows 10 Mobile device, now might be the time.

Windows 10 Mobile on Lumia 950

You’ll soon be able to run multiple instances of some UWP apps at the same time

While it won’t be a feature for all UWP apps like some may want, Microsoft is adding support for some UWP apps to support having multiple instances of the same UWP app at a time, making it a bit more Win32-like.

WIndows 10 PCS Featured Image Generic Hero

Two new Microsoft patents reveal locking mechanism, detachable hinge for foldable mobile device

Microsoft looks to be continue to look into potential features of a foldable mobile device, as two new patents pop-up around a locking mechanism and a detachable hinge for a foldable mobile device.

https://twitter.com/h0x0d/status/966893196729925635

That’s it for this week. We’ll be back next week with more Windows 10 news!

Xbox news recap: Phil Spencer talks toxic gaming culture, gaming has best month in seven years and more

Welcome to our weekly Xbox news recap series, where we go over the top stories of the past week in the world of Xbox. Let’s get started.

Phil Spencer talks toxic gaming culture

At the DICE summit in Las Vegas this week, Xbox boss Phil Spencer took the time to talk about toxicity in video games. Whether it’s sexism, racism, or just general toxic behavior, many users have experienced harassment while playing any number of video games. Spencer didn’t offer much in the way of specific solutions, but he gave the discussion a decent jumping off point, and noted our collective responsibility to fix the issue.

Xbox's Phil Spencer at E3

Gaming has its best month in seven years

Video games made over $1 billion in the month of January, marking the best month that the industry has seen in 7 years. The Nintendo Switch, predictably, did the best in console and game sales with titles like Breath of the Wild and Mario Odyssey. Microsoft’s best seller, far and away, was PUBG – signalling that Microsoft’s investment in the franchise was a smart one.

Microsoft, Xbox One, Xbox, PUBG

Direct Twitter sharing coming to Xbox

You’ll be able to share your gameplay captures directly to Twitter very soon, according to a tweet from Mike Ybarra. When asked on Twitter, Mike said that the feature was coming “very soon” to preview, and should be shipping in a couple months. This is a big milestone to social media sharing for the console, and should check off a big box for a ton of gamers on Xbox.

Plex gets new codec support and bug fixes on Xbox

In addition to improving several of the language translations, Plex has gained support for more codecs and several bugs from the previous version have been squashed. Plex is one of the most popular media streaming services on the platform and the addition of more codecs is going to have a considerable impact on people who use it.

Xbox One Controller

Thanks for joining us. To keep up to date with all the latest Xbox news, keep a close eye on our Xbox One tag.

FIX: Brown Screen of Death on Windows 10/11

A screen of death occurrence is traceable to a Kernel Panic otherwise known as Stop Error for Windows OS. A kernel panic (KP) is regarded as a safety measure taken by the kernel of an operating system upon detecting a fatal error which will either result in a major loss or damage of data if the system continues or makes it impossible for the system to recover safely.

Most SODs are displayed on colored backgrounds with bug check codes, and an advice demanding that the user restarts the computer.

The most common screen of death error include Brown, Blue, Black, Green, Purple, Red, White, Yellow screen of death. Each of these SODs has technical significance and are associated with various platforms and operating systems.

This guide exclusively treats the Brown Screen of Death experienced by Windows 10 users and also provide ways to resolve the issue.

What is the Windows 10 Brown Screen of Death (BrownSOD)?

The Microsoft Windows 10 Operating System Brown Screen of Death is an on-screen fatal error notification with bug check codes which is seen when a computer crashes due to graphics hardware or software related problems (failing graphics drivers).

Causes of Brown Screen of Death in  Windows 10

It is now known that the Brown Screen of Death encountered on Win10 OS is GPU related. This SOD can occur for any of the following reasons:

  • A machine running on corrupted or outdated graphics drivers
  • Missing or Faulty Graphics Card
  • GPU and CPU overclocking
  • Driver Conflict
  • Security Software Conflict
  • Thermal Overheat
  • Inadequate Voltage to perform tasks

In most cases, the Brown Screen of Death may come up when you are trying to play a video game on your computer or when your GPU or CPU experiences overclocking while trying to achieve a better gaming/3D performance. Newer graphics cards have also been reported to be susceptible to the Brown Screen of Death while running games.

How to Fix Brown Screen of Death errors

  1. Perform a Graphics Driver Uninstall/Rollback or Upgrade
  2. Use a Driver Management Troubleshooter
  3. Ensure safe CPU/GPU overclocking
  4. Resolve Security Software Conflicts

Step 1: Perform a Graphics Driver Uninstall/Rollback or Upgrade

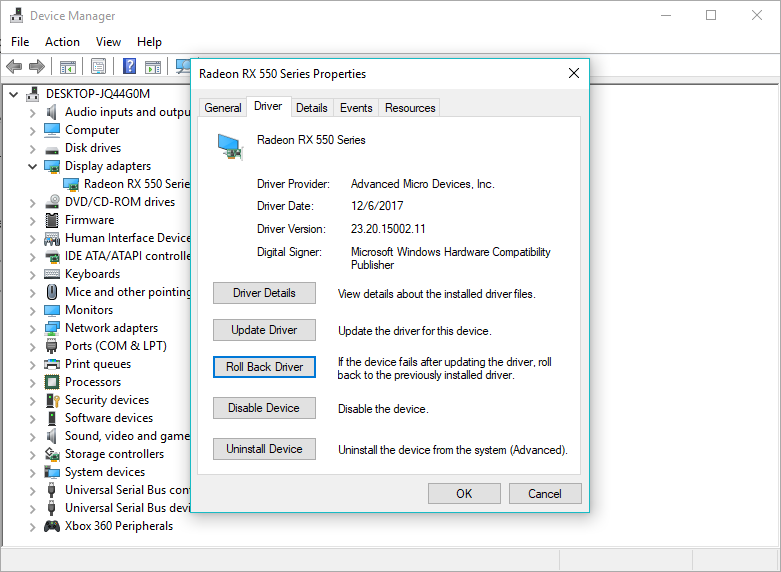
Performing a graphics driver rollback, uninstallation/re-installation or upgrade might just be sufficient to resolve the Brown Screen of Death issues. To perform a graphics driver rollback, re-installation or upgrade, follow these procedures:

  1. Go to Search > type ‘device manager’ > select the first result to launch Device Manager
  2. Double-click on Display Adapters to open the device drop down
  3. Right-click on the suspected graphics driver > select Properties
  4. Click on the Driver tab
  5. To restore the graphics driver to its previous version, click on Roll Back Driver and then OK.
  6. To update the graphics driver, select Update Driver and the OK. Follow the on-screen instructions to complete the procedure.
  7. To remove the driver and perform a reinstall, select Uninstall Device and then follow the on-screen instructions to complete the uninstall procedure. Then visit the graphics driver’s official website to download a compatible version for your windows 10.

After performing a rollback, update, removal and reinstallation of the graphics driver, restart your computer. Now launch your games or GPU intensive software and the BrownSOD should be gone.

Step 2: Use a Driver Management Troubleshooter

Sometimes, manually resolving driver issues using Device Manager becomes stressful and might require some level of proficiency with Windows operating system to successfully complete the task.

Driver management/update tools are a better way to resolve driver issues without hassles. In very easy steps, a driver management/update tool will:

  • Scan your machine
  • Identify all installed hardware devices
  • Detect the outdated conflicting, missing or corrupt driver
  • Updates the identified driver where necessary.

In order to prevent PC damage by installing the wrong driver versions,  we suggest to do it automatically by using an automatic tool that will help you not damaging your PC by downloading and installing the wrong driver versions. After several tests, our team concluded that this is the best automatized solution.

Step 3: Ensure safe CPU/GPU overclocking

First, it is essential to give a brief description of overclocking. The term overclocking describes the ability of a machine to increase the clock speed of one or more of its components (GPU, CPU, motherboard or RAM) above the manufacturer’s rating. These machine components would include the Graphics Processing Units (GPUs) and the Central Processing Units (CPUs).

In the case of a CPU, overclocking means jacking up the core multiplier while for GPUs, it could mean boosting the clock speed, increasing the memory or core to achieve better graphics (3D) performance while gaming or using GPU intensive software.

There are many tools that you can use to overclock your Windows 10 computer.

Despite the advantages of CPU/GPU overclocking, it also has its downsides which may include:

  • System instability or complete damage to precious components
  • System crash or boot failure which indicates that you should only make slight adjustments to your machines core clocks
  • A significant reduction in the overall service life of your machine’s graphics drivers and other components
  • Very high-temperature levels (overheating: sometimes >70oC)

Before overclocking your computer, ensure that you follow safe and proven procedures to avoid damaging or crashing it. An unsafe or unproven overclocking procedure may result in the Brown Screen of Death and subsequently, irreparable damage to the components of your machine.

We recommend installing one of these dedicated programs to test overclocking and make sure that your machine can handle the stress.

Step 4: Resolve Security Software Conflicts

Security software conflicts are known to have been responsible for a few reported cases of computer instability and screens of death. If the action of an installed program that requires the Graphics Processing Unit of your computer to function properly is infringed on by security software, a Brown Screen of Death might be inevitable at this point.

The first thing you should do is to identify possible security software conflicts. Secondly, you must take necessary actions by keeping one and uninstalling the others. For instance, if you have ESET Security and Avast Antivirus installed on your machine, you must decide on which one you want to keep. Sometimes, it might be necessary that you update your security software to the most recent build.

After removing the other security software, restart your computer, and try launching your game or high-end software and you should be good to go.

Windows 10 Insider Preview 17107 drops for Fast Ring PCs with ‘Settings’ fixes in tow

While there might now be a shiny new Skip Ahead release scheduled for today, Windows 10 Insiders are still being greeted with a much appreciated Fast Ring fix it build.

Insider Preview 17107 was recently released to the public and brings a whole slew of fixes making it a bit more stable of a release for the weekend as well as new operating system behavior that should make your old PC run like new.

Here’s everything that’s being fixed with this build.

General changes, improvements, and fixes for PC

  • We fixed an issue where Settings would crash when you tried to open Themes.
  • We fixed an issue where the Settings tile didn’t have a name if you pinned it to Start.
  • We’ve updated About Settings to include at a glance entries for the two new
  • Windows Defender pillars (Account Protection and Device Security).
  • We fixed a typo in Storage Sense Settings.
  • We fixed an issue resulting in all dropdowns in Settings appearing blank until clicked.
  • We fixed an issue that could result in Settings crashing after having navigated to and left Sound Settings.
  • We fixed an issue where closing certain apps after using in-app search could result in them hanging on the splash screen the next time they were launched.
  • We fixed an issue where plugging in an external optical drive (DVD) will cause an Explorer.exe crash.
  • We fixed an issue resulting in the hamburger button in Windows Defender overlapping the home button.
  • We fixed an issue where certain games using Easy Anti Cheat could result in the system experiencing a bugcheck (KMODE_EXCEPTION_NOT_HANDLED).
  • We fixed an issue where we had observed seeing longer-than-normal delays during install at the 88% mark. Some delays were as long as 90 minutes before moving forward.
  • We fixed an issue resulting in the Windows Defender offline scan not working in recent builds.
  • Some Insiders may have noticed a new message when holding down the power button which says “Please release the power button. We just need a few more seconds to shut down”. This is an Insider-only feature that gathers additional diagnostic data for situations where holding down the power button was used to recover an unresponsive or nonfunctional system. It is important to note that holding down the power button is not the appropriate way to shutdown/reboot a system that is functioning properly. See this support page for additional information on how to properly shutdown your PC.

And, for the bonus, Insiders are getting their first glimpse at what I’m dubbing Background Updates. Microsoft may be stepping on a landmine here when it comes to user privacy, but it’s attempting to make Windows 10 run a little like ChromeOS and preemptively downloading and installing updates.

Windows Update Improvements

Keeping PCs Up-to-date: In an effort to prevent PCs from becoming out of date, we are introducing a change in behavior to Windows Update that is designed to be more proactive at keeping PCs updated. In RS4, now when Windows Update scans, downloads, and installs on a PC with AC power – it will prevent the PC from going to sleep when it is not in active use, for up to 2 hours when receiving an update in order to give Windows Update more opportunity to succeed. If you are not seeing this new behavior, let us know by sending in feedback via Feedback Hub.

There we have it, build 17107 in a nutshell. Insiders on both the Fast Ring and Skip Ahead release cycles can check their Settings page for the update.

Here’s how Microsoft Photos Companion on iOS made my life easier

When you’re a blogger like me, you’re likely working with multiple devices and constantly taking photos to go with posts. Even with services such as OneDrive, this means there is still a lot of photo syncing that needs to happen across platforms. Things can sometimes get messy, so enter Microsoft Photos Companion on iOS, the app that made my blogging life much easier.

Local Storage— You’re in control:

My favorite part of the Microsoft Photos Companion on iOS is the level of control. With most cloud services, my entire photo library gets uploaded whenever Wi-Fi is available. For instance, with Microsoft OneDrive, all of my photos can automatically be backed up to the cloud and streamed to all my devices or my PC. This is great for (god forbid) that one day I may one day lose my phone, but sometimes it just gets in the way of my privacy.

I don’t want that embarrassing photo I took of my friend to show up when I open up the OneDrive app on my devices— or even in the Windows 10 Photo app. I also don’t want to take up space on my OneDrive with the hundreds of unnecessary screenshots I take with my phone. That’s where Microsoft Photos Companion saves the day.

With Microsoft Photos Companion, I can scan the QR code on my Windows 10 PC and easily transfer just the photos I want to a secure location on any PC I own. The most recent photos also show right in front on my phone, and I can scroll through the list and select a specific photo I want to move to my PC.

This proved to help me a lot when I had to transfer app screenshots over to my PC. It is something I do more than you think, and the Photos Companion app really helps since it cuts out my usual OneDrive app upload and OneDrive download routine.

Transferring Photos

It is relatively easy:

Yes, cloud backups from OneDrive or Google Photos are automatic and more convenient, but the Photos Companion app proved easier and much more instantaneous once I got used to it. The transfer process does not take much, and I didn’t need to visit the web, click on folders, or wait for OneDrive to fetch just that one Photo I wanted on my PC.

To transfer a photo with Photos Companion, you simply need to have your phone and PC on the same network, enable transfer via Wi-Fi in the Photo app settings,  press import from mobile over WiFi, and scan the code with the app on your phone. The app works its photo transfer magic (even if your PC is connected via Ethernet!) and then creates an “Imported from Photos Companion” folder on your PC for convenience. It also shows up directly in the Photos app, for viewing pleasure.

Since I have OneDrive Files on Demand disabled on my PC (as do some people for storage reasons), the Photos Companion app eliminated my usual visits to OneDrive.com. I now just launch the transfer process, check my PC, and the photos I wanted to be transferred are right there. It’s just like manually plugging in my phone and dragging and dropping pictures! No USB Cables or cloud necessary— just Wi-Fi.

A look at where the folder photos get saved in

At the end of the day, the Photos Companion app saved me some time. It helps me transfer select photos from my phone to my PC, without the need for a USB cable. But as great as it is, it is still a bit flawed. The app needs Wi-Fi to function, and it won’t work on your phone’s cell service. It also is not available on Windows 10 Mobile, as OneDrive already uploads the camera roll on a Windows phone. Anyway, this feature seems very similar to Apple’s Airdrop, and I hope Photos Companion stays around for a long time.

The app was not found in the store. ?


The app was not found in the store. ?

Sword Art Online: Fatal Bullet launches on Microsoft’s Xbox One consoles

Sword Art Online: Fatal Bullet, a new video game based on the popular Sword Art Online anime series, is now available to play on the Xbox One family of consoles. The game is an action roleplaying game and supports online multiplayer for up to eight players. Here’s the official game description and link.

Your fate has just begun… Experience an original story where you are the protagonist in the world of Gun Gale Online. Create your own avatar and explore devastated lands while experiencing exciting third person shooting in this action RPG. Encounter enemies and run into new and familiar faces from the Sword Art Online series.

Journey through a world of guns where after a chance encounter you’ll gain the help of a very rare AI, ArFA-Sys. Along the way, you will have to make choices. But every choice comes with a price… Will you bring hope or despair? This is your adventure… This is your story…

Are you a Sword Art Online fan and will you pick this up? Let us know in the comments down below.

An update is being prepared for your device, but it’s not quite ready yet

The first thing that comes to mind when someone mentions Windows 10 issues are the infamous updates problems.

Since the introduction of Windows 10 (Windows as a service), we encountered a sea of various update errors, including the one we’ll try and address today.

This error is distinguished from other since it comes without the code.

It’s, more or less, an informative prompt saying ”An update is being prepared for your device, but it’s not quite ready yet. We’ll keep trying, or you can try again now”.

In order to resolve this, we prepared a bundle of tips and various troubleshooting steps below.

In case you’re stuck with the latest available update, being a standard user or an insider, make sure to check try them out.

How to address ”An update is being prepared for your device, but it’s not quite ready yet…” error in Windows 10 update

  1. Wait for some time and try again
  2. Run Update troubleshooter
  3. Run DISM
  4. Reset Update services
  5. Download updates manually
  6. Download updates with Media Creation tool

1: Wait for some time and try again

This error is mostly occurring on Insider Builds, especially for the Fast Ring insiders. Nonetheless, it can affect standard users as well.

As the informative message under the update section says, it’s advisable to wait for some time. Namely, the users which encountered this error received the update after some time.

You can also restart your PC and check the connection in order to refresh the update sequence. Most of the time, the error will be revoked after the restart.

On the other hand, if you’ve waited for the extended period of time and the update isn’t available, make sure to check alternative steps we provided below.

2: Run Update troubleshooter

We can’t move through an update troubleshooting procedure while excluding the built-in Update Troubleshooter.

This specific tool is commonly used for resetting update services and it should, hopefully, resolve the halt in the update sequence.

Nonetheless, the success rate of Unified troubleshooters in Windows 10 is fairly lackluster and there’s a good chance you’ll need to continue through the list.

Either way, here’s how to run Windows Update troubleshooter in Windows 10:

  1. Press Windows key + I to open Settings.
  2. Choose Update & Security.An update is being prepared for your device, but it's not quite ready yet
  3. Select Troubleshoot in the left pane.
  4. Expand Windows Update troubleshooter and click ”Run the troubleshooter”.An update is being prepared for your device, but it's not quite ready yet

If this falls short, make sure to continue with the below-provided steps.


Windows troubleshooter has stopped working? Here are the best tips to solve the issue quickly!


3: Run DISM

Deployment Image Servicing and Management tool is the system tool with the main purpose to fix various system errors.

It’s utilized through the elevated command-line and it uses either system resources or the installation media to restore the affected system files.

It’s your choice whether you’ll use first or the second approach.

Since Windows 10 update feature has roots deep in the system and the corruption of related files isn’t uncommon, DISM should help you address this.

We made sure to explain how to use DISM, both with the native resources or with the external media installation drive. Make sure to check the explanations below.


Epic guide alert! Everything you need to know about DISM is right here!


With the system resources

  1. Right-click on the Start and open Command Prompt (Admin).
  2. In the command line, type the following line and press Enter:
    • DISM /online /Cleanup-Image / ScanHealthAn update is being prepared for your device, but it's not quite ready yet
    • DISM /Online /Cleanup-Image /RestoreHealthAn update is being prepared for your device, but it's not quite ready yet
  3. It’ll take up to 10 minutes for the DISM tool to repair corrupted files.
  4. Restart your PC.

With the external installation media (if the first way fails):

  1. Mount your Windows 10 installation media, either USB or ISO DVD.
  2. Open Command Prompt (Admin) again.
  3. In the command line, type the following commands and press Enter after each:
    • DISM /online /Cleanup-Image /CheckHealth
  4. If there’s not any single error, enter this command and press Enter:
    • DISM /online /Cleanup-Image / ScanHealth
  5. If DISM finds any errors, enter the following commands and tap Enter:
    • DISM /Online /Cleanup-Image /RestoreHealth /Source:repairSourceinstall.wimAn update is being prepared for your device, but it's not quite ready yet
  6. Have in mind that you’ll need to replace the ”repair source” part of your installation media with the source path.
  7. Wait for the procedure to end and restart your PC.

4: Reset Update services

Back in the days, the main Update services weren’t as active as they’re in Windows 10. The latest Windows iteration is known for frequent updates which can, ultimately, fail to deliver.

The worst thing about Windows 10 updates are forced, and those are issues-prone, frequently result in a large variety of errors. This error, although it sounds different, belongs in the same group.

In order to fix this, you might need to reset update services accompanied by restoring the folder which stores update files.

You can do it manually, by using a specialized batch file, or by running a certain group of dedicated commands in the elevated Command Prompt. Here’s how to do the last one in a few steps:

    1. Open Command Prompt with the administrative permission.
    2. Copy-paste the following commands in the command line and press Enter after each:
      • net stop wuauserv
      • net stop bits
      • net stop cryptsvc
      • Ren %systemroot%SoftwareDistributionSoftwareDistribution.bak
      • Ren %systemroot%system32catroot2 catroot2.bakAn update is being prepared for your device, but it's not quite ready yet
      • net start wuauserv
      • net start bits
      • net start cryptsvc
    3. Restart PC, navigate to Updates and try updating again.

Learn everything there is to know about Windows Update Reset Script from our article!


5: Download updates manually

Since the standard over-the-air update distribution failed Windows 10 users so many times, Microsoft provides all updates in the web-based catalog.

From there, you can download all latest updates and install them just like any other desktop application on your Windows platform.

The important thing is to know which exact update is causing the error-inflicting halt.

Follow these instructions to download and install Windows 10 updates manually:

  1. Open Edge (another Microsoft’s try to enforce Edge) and navigate to Microsoft Update Catalog.An update is being prepared for your device, but it's not quite ready yet
  2. In the search bar, type the exact registration number of the troubling update and search for it.An update is being prepared for your device, but it's not quite ready yet
  3. Download the update and install it.
  4. Restart your PC.

Windows 10 updates won’t download? Here is what you need to do!


6: Download updates with Media Creation tool

Besides the manual installation, you can surpass the built-in update distribution system with the Media Creation Tool, as well.

This nifty tool was introduced for easier digital distribution of Windows 10, and it has various applicable uses besides the creation of the installation media.

With Media Creation Tool you can also obtain the latest updates without interfering with a few troublesome services.

The procedure is rather simple and you can do it on the affected PC right away without relying on an alternative PC.

Follow these instructions to obtain Media Creation Tool and install the required updates:

  1. Download Media Creation Tool by following this link.
  2. Right-click on the tool and choose to run it as an administrator.
  3. Accept the Licence Terms.An update is being prepared for your device, but it's not quite ready yet
  4. Now, choose to Upgrade this PC.An update is being prepared for your device, but it's not quite ready yet
  5. Wait until all files are downloaded and the installation should start afterward.

Encountering problems when running Windows 10 Media Creation Tool? Check out this guide for solutions!


That should do it. We hope that one of these steps helped you in resolving the issue at hand. As a conclusive note, don’t forget to tell us if there are alternative ways to fix this error in the comments section below.

RELATED STORIES YOU SHOULD CHECK OUT:

How to Change The Default Windows Font on Your PC

While Windows is fairly customizable, many wonder how to change the default font. This isn’t as easy as changing your settings, but it’s possible.

The default system font in Windows is Segoe UI. However, it’s possible to change it with a few minor tweaks.

Before we start, keep in mind that this is an advanced method, so it’s always a good idea to create a backup.

How can I change the Windows 10 default font?

1. Change your registry

  1. Press the Windows key + R to open the run Window and type regedit. Press Enter to start Registry Editor.
  2. When Registry Editor opens navigate to HKEY_CURRENT_USER\Control Panel\Desktop\WindowsMetrics
  3. On the right side of Registry Editor you’ll see a list of keys such as Caption font, Icon font, etc.change windows 10 default font
  4. Select the font you want to change, right-click it, and choose Modify.
  5. A new window will open with the name of the registry key and font name on the right side.
  6. Change the font name to name of the font you want to use. Be sure that you watch the spaces while entering the new font name.

2. Add reg file to the registry

  1. Go to Start and type control panel. Select Control Panel.
  2. Go to the search box type fonts and click the Fonts option.change default font windows 10
  3. The list of fonts available on Windows 10 should now be available on the screen.
  4. Launch Notepad, copy this Registry code into the document, and replace ENTER-NEW-FONT-NAME with the name of the font that you want to use:
    Windows Registry Editor Version 5.00
    [HKEY_LOCAL_MACHINE\SOFTWARE\Microsoft\Windows NT\CurrentVersion\Fonts]
    "Bell MT UI (TrueType)"=""
    "Bell MT UI Bold (TrueType)"=""
    "Bell MT UI Bold Italic (TrueType)"=""
    "Bell MT UI Italic (TrueType)"=""
    "Bell MT UI Light (TrueType)"=""
    "Bell MT UI Semibold (TrueType)"=""
    "Bell MT UI Symbol (TrueType)"=""[HKEY_LOCAL_MACHINE\SOFTWARE\Microsoft\Windows NT\CurrentVersion\Font\Substitutes]"Bell MT UI"="ENTER-NEW-FONT-NAME"
  5. Go to the File menu and save the document.
  6. Click Save As and save it with the .reg extension.
     
  7. Double-click on the new .reg file to add it to the registry.
  8. Confirm your choice and restart your machine.

Changing fonts isn’t as simple as changing font size or installing new fonts since it requires modifying the registry. Since this is an advanced process, we advise extra caution. 

On the other hand, it’s pretty simple to change font, style, and size in Notepad on Windows 11. We also have a great guide on how to change the font in Outlook on Windows 11 or bold letters in Discord.

Did we miss another method to change the default font on Windows? If so, let us know in the comments below.

Microsoft 365 prepares for upcoming GDPR changes

Microsoft is prepping Microsoft 365 for some important GDPR changes in an update available now. GDPR, which stands for General Data Protection Regulation, started off as a regulatory requirement, but Microsoft saw it as an opportunity to gain trust with its customers and provide greater transparency. Microsoft hopes to help Microsoft 365 enterprise customers utilize Azure to identify and protect pertinent company data to support GDPR compliance.

As noted on the Microsoft blog, The newest update gives Microsoft 365 the following capabilities:

  • Compliance Manager general availability for Azure, Dynamics 365, and Office 365 Business and Enterprise customers in public clouds.
  • Compliance Score availability for Office 365.
  • Azure Information Protection scanner general availability.

In this video, Microsoft 365 team members explain what GDPR is and how customers can use the new update.

Besides the newest update, Microsoft 365 can help customers protect their data in apps and in the cloud with Azure, as well as support data protection across multiple platforms. Also, Microsoft 365 Compliance Manager is a Microsoft Cloud services application that helps enterprises evaluate compliance obligations like GDPR. The Compliance Manager is now generally available for Azure, Dynamics 365, and Office 365 Business.

Microsoft has a free GDPR assessment available to see what Microsoft 365 can offer your business. Microsoft also offers a free GDPR white paper and eBook for those interested.

Microsoft opens new South Dublin, Ireland headquarters

Noted by Ireland’s National Public Service Broadcaster, after nearly three years of construction, Microsoft has finally opened their new South Dublin Ireland headquarters. Located in Leopardstown, Microsoft says the new 34,000 square meter building is a “representation of the cultural transformation” that the company has experienced in recent years (via MSPoweruser.)

2,000 employees will be working in the new building, showing that Microsoft is well committed and invested in Ireland. The campus features a large open “Dreamspace’ which can be used to educate children and others about STEM fields. More standard features of the campus include a “Harbor” entrance area, a fitness room, a yoga studio, a nail bar, massage room and a music room.

Cathriona Hallahan, Managing Director for Microsoft Ireland explained what the building means for Microsoft:

“I think this building epitomises the future for Microsoft and it is us opening our doors to our customers, the community, to have an impact on society as a whole… What we are doing in this building is bringing all of the teams together, whether it is engineering, or operations or digital sales, and helping them to innovate in this new culture of one Microsoft…”

Interestingly, there are no offices in the new campus, and employees instead sit in “neighborhoods” which have different areas across the floor. There are, however, 80 meeting rooms, and a technology center which can seat up to 3,000 people.

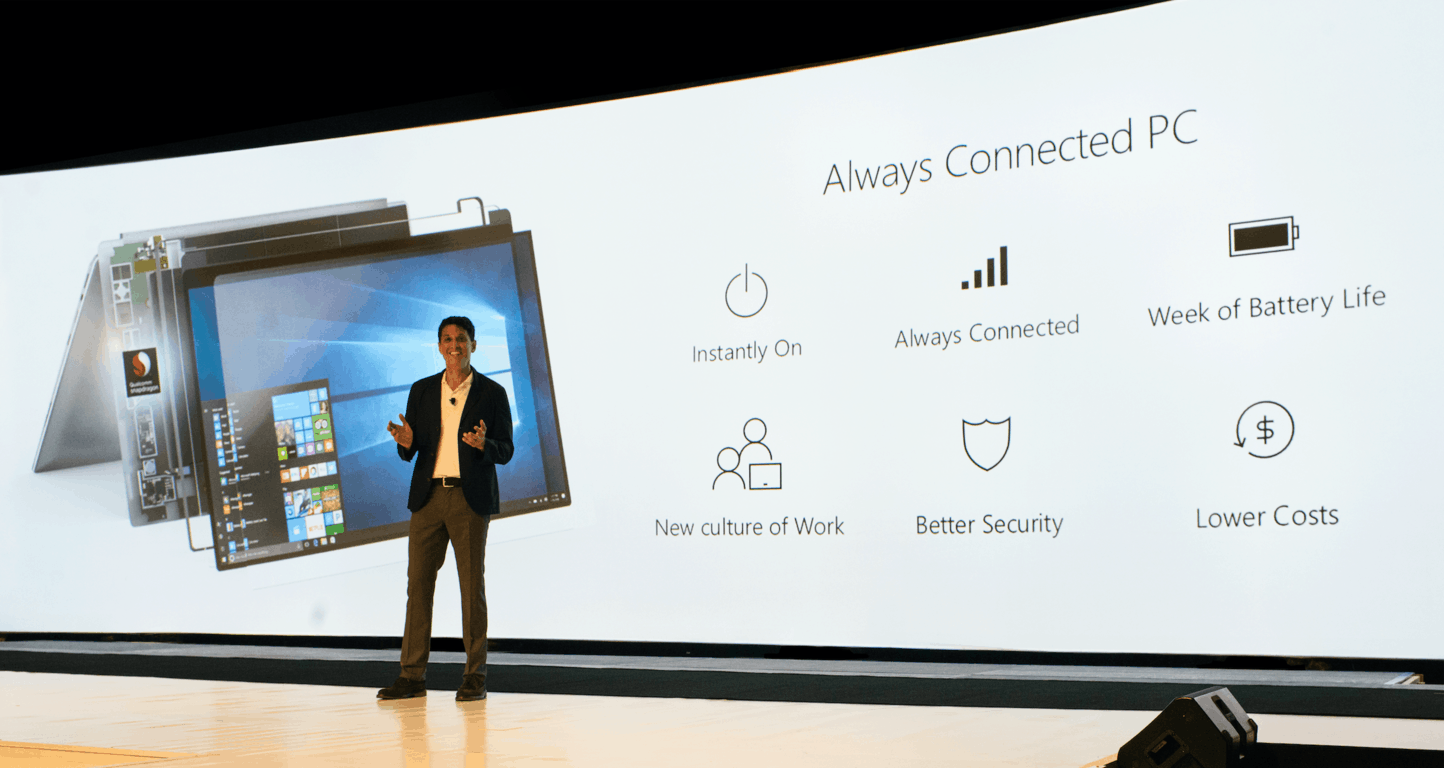
Microsoft and Qualcomm announces first retailers that will sell Always Connected PCs this quarter

The first Always Connected PCs powered by Qualcomm’s Snapdragon 835 SoC will start shipping this quarter, Microsoft and Qualcomm confirmed yesterday. So far, only Asus, HP and Lenovo announced such devices which will run full Windows 10, although with some limitations.

Qualcomm also revealed the first leading retailers that will distribute these new Windows 10 on ARM laptops:

  • U.S.A: Amazon, Microsoft Stores
  • Australia: Microsoft Stores
  • China: JD.com
  • Italy: Unieuro
  • France: Boulanger, Fnac
  • U.K.: Asus Stores, BT Shop, John Lewis, Microsoft Stores, PC World

In a separate press release, Qualcomm said that “select operators also plan to stock Always Connected PCs in their retail locations,” without sharing more details. In the US, the AT&T, Verizon, Sprint and T-Mobile will all support these first Always Connected PCs on their networks, which is very encouraging. As the first quarter of 2018 is coming to a close, we may hear more about Always Connected PCs next week during Mobile World Congress.

Intel releases OEM firmware updates for 6th, 7th, 8th gen chips to help patch Meltdown and Spectre

Yesterday, Intel announced a new round of microcode updates for devices running the 6th, 7th, and 8th generation Intel Core chips. Though the updates are once again meant to protect against Spectre and Meltdown, they are now rolling out through PC OEMs instead of Windows Update (via Neowin.)

Since these updates are available through PC OEMs, consumers will need to use the pre-installed utilities (such as Lenovo Vantage) that came with their PC to download. Businesses and data centers with devices running the latest Intel Core X-series processor and Intel Xeon Scalable or Intel Xeon D Processors should also be seeing this update.

Intel is also still urging people to keep their systems up to date and to check out this schedule to see when updates will become available for a specific processor. Navin Shenoy, the Executive vice president of Intel, noted the company will be sharing more soon and also expressed “sincere appreciation” for Intel customers and partners who are supporting the company.

We’re sorry, sign-in isn’t working right now [Fix SharePoint error]

SharePoint is a useful platform where you can store, organize, share, and access files and folders from any device using your browser of choice.

Unfortunately, sometimes SharePoint is unavailable and the following error message appears on the screen: ‘We’re sorry, sign-in isn’t working right now. But we’re on it! Please try again later.  If this problem persists, contact your support team’.

In this article, we’ll tell you why this error occurs in the first place and how you can fix it.

SharePoint sign in is not working

  1. Refresh the page
  2. Check if the account is deleted
  3. Check the time zone configuration
  4. Delete the recurring calendar events
  5. Contact your support team

First things first, make sure that SharePoint and Office 365 are not affected by any issues. Go to the Office 365 service health status page and check if there are any known issues on the list. Obviously, if the service is affected by general issues, the only thing that you can do is wait for Microsoft to fix them.

If everything’s up and running, follow the instructions listed below.

1. Refresh the page

If you’re lucky, you can quickly fix this problem by refreshing the page several times. Many users confirmed this basic workaround helped them fix the problem. So, give it a try, refresh your browser tab and then check if you can sign in.

2. Check if the account is deleted

If your account has accidentally been deleted this might explain why you’re getting this error message. In this case, all you can do is try to recover the deleted account or create a new one.

For more information on how to troubleshoot deleted user account in Office 365, go to Microsoft’s Support page. Browse through the list of solutions and select the one that best describes your case.

3. Check the time zone configuration

This error might also occur if your time zone isn’t properly configured. Make sure that you time zone settings are correct.

  1. Go to Start > type ‘date’ > select ‘Date and Time Settings’date time settings
  2. Navigate to the Time zone section > check if your current time zone is correct.
    change time zone windows 10 pc

4. Delete the recurring calendar events

Users suggested that this error message might occur due to calendar event issues. Many noticed that this problem occurred when recurring events were on the list. Delete the respective appointments and event fixed the issue, so you may want to use this suggestion as well. You can restore your events at any time once the issue has been fixed.

5. Contact your support team

If the issue persists, maybe you should contact your support team. If certain settings are disabled or particular parameters are turned off, this might explain why you can’t sign in to SharePoint.

There you go, we hope that these quick solutions helped you fix the problem.

Also, if you’ve got additional tips and suggestions on how to SharePoint sign-in issues, you can list them in the comments below.

RELATED STORIES TO CHECK OUT:

Xbox One’s Plex app gets new codec support & fixes in latest update

The official Plex app for Xbox One consoles has updated with a variety of fixes and changes. In addition to improving several of the language translations, the app has also gained support for more codecs and several bugs from the previous version have been squashed. Here’s the official changelog.

  • Updated translations
  • Added direct play support for wmv2/vc1/wmav2 codecs in wmv containers
  • Fixed the titles for recently added TV shows
  • Fixed the player sometimes not being able to play watch later/recommended videos
  • Fixed bug that could cause app to fail to load
  • Fixed cases where playback would error or fallback to a transcode near the end of a video
  • Fixed some issues around player buffering indefinitely on start or while seeking

Plex is primarily a media streaming app but it can also function as a DVR service for recording television broadcasts. Do you use Plex on your Xbox One? Let us know how you use it in the comments below.

Plex
Plex
Developer:
Plex
Price:
Free

Microsoft’s Phil Spencer talks about toxic gaming culture in DICE keynote

During his keynote speech at the DICE Summit in Las Vegas, Microsoft’s head of Xbox, Phil Spencer, focused heavily on the evolution of Microsoft into a company that’s more accepting of new ideas and embracing diversity.

“We stand for inclusivity. I personally committed to do better,” he said. “I think it’s a leader’s job to absorb the hit, to take personal accountability. And to be clear about our culture: who we are and what we stand for. Just as culture is renewing Microsoft, I think culture can be the tool that enables us to realize the true power and potential of gaming.”

Spencer also spoke about how unique the gaming culture and industry is, emphasising on its ability to bring people together despite their different backgrounds. “It is the only art form where you walk in someone’s shoes and you see the world from their eyes. It’s the only art form where you are on equal footing, regardless of age, education, socioeconomics, race, religion, politics, gender, orientation, ethnicity, nationality, or ability,” Spencer enthused. “This is why gaming can be one of the great equalizers and great unifiers for society. Together, we can make gaming a reflection of the world we don’t just want to see, but help change it into the world we want it to be.”

An issue that has been discussed more in gaming circles and in the media recently is harassment and abuse both in the video game industry and the games themselves (via online interactions). Spencer emphasised how much Microsoft is aware of these issues and encouraged those listening to try put an end to toxicity in gaming culture when given the chance.

“Honestly, toxic behavior doesn’t just hurt the individual it hurts our entire industry,” he said. “When toxicity is aimed at one of us, it stops with all of us. That’s why I’m encouraged when our community comes together to talk about specific actions.”

Spencer spoke in rather general terms and didn’t offer too many solutions, instead presumably aiming to provide a springboard for further cultural change.

Do you think there’s a problem with toxic behavior in video game communities and has Microsoft done a good job dealing with it? Share your thoughts with the community in the comments below.

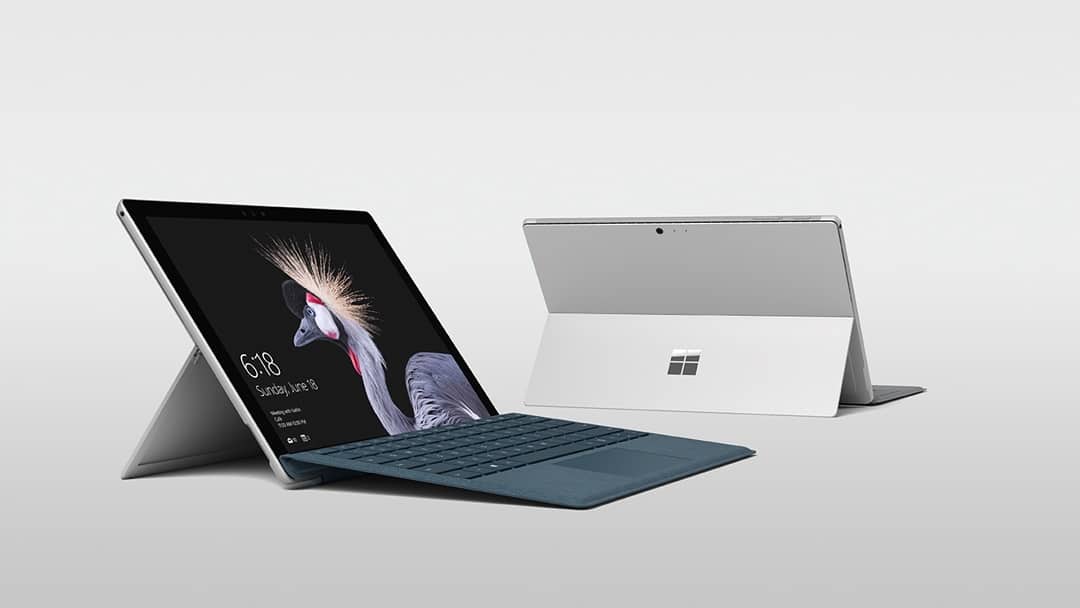
The new Surface Pro finally launches in India

If you’re a Surface fan in India, there’s some good news for you. After being launched in the United States in June last year, followed by other markets, the new Surface Pro has finally launched in India.

While Microsoft skipped the first two generations of Surface in India, Surface Pro 3 and Surface Pro 4 were launched together in India in January 2016.

We are delighted to announce the launch of Surface Pro in India and offer our consumers another superior device that will enable them create, study, work and play virtually anywhere. We continue to push boundaries to better serve the needs of our customers who are seeking greater mobility and power in their devices to stay productive. The new Surface Pro delivers the versatility of a laptop and a creative studio in one thin, lightweight device.

– Vineet Durani, Director – Windows and Devices, Microsoft India

The Surface Book thought still hasn’t made it to India.

The new Surface Pro will be available online on Amazon and Flipkart as well as leading offline stores like Croma, Reliance Digital, Vijay Sales, and other authorized retailers. For commercial customers, the new Surface Pro will be available through more than 130 commercial resellers.

Unlike last time, when the Surface Pro was exclusive to Amazon, Microsoft has chosen to make the devices available broadly this time around. However, like the last time, only limited color variants are available.

What do you think of the pricing of the Surface Pro in India, and would you like to pick one up? Tell us in the comments!

FIX: KB4074588 breaks keyboard and mouse on PCs running Vipre Antivirus

If you’re running Vipre Antivirus on your Windows 10 computer and you installed KB4074588, don’t be surprised if your machine crashes, freezes, becomes unresponsive or behaves in a peculiar manner.

As a quick reminder, Microsoft rolled out KB4074588 to Windows 10 v1709 computers on Patch Tuesday, but thousands of users reported this update failed to install or broke their machines.

Recent reports revealed that Vipre Antivirus users may also experience mouse and keyboard issues.

Apparently, KB4074588 removes the HID compliant drivers but fails to install the new version. The good news is that we have a fix for you.

How to fix KB4074588 keyboard and mouse issues

So, long story short, the only way to fix severe issues such as crashes is to uninstall KB4074588.

If you can’t use your mouse and keyboard after installing KB4074588, you can get the drivers from a computer that’s already running KB4074588.

You can also get the entire ‘Drivers’ and ‘DriverStore’ folder from System32 from a machine patched and working with KB4074588.

driver folder system 32

You can also download the drivers from this file hosting platform. User T1b3r1um zipped the drivers from his machine and uploaded them to the respective platform.

Keep in mind that you might see the ‘Unknown Device’ alert under ‘Other Devices’ after you install the drivers. However, it seems that this alert doesn’t cause any issues, so you can simply ignore it.

Vipre is working on a fix

Vipre already received many complaints about this problem. They are aware of the bug and working on a permanent fix.

I contacted Vipre CS, and they say they have been receiving reports of this through the day. They are aware of the bug and working to address it. If you have Vipre logs on machines where this issue is occurring, it will help them resolve this. I personally addressed the issue by uninstalling KB4074588 and paused updating on my environment until I’m confident the issue is resolved.

For the time being, it seems that this issue is affecting only HID USB devices.


Meanwhile, until Vipre fixes this problem, you can install a different antivirus software on your computer. Bitdefender is one of the best antivirus solutions in the world and can protect your machine against virtually any cyber attacks.

For more information on how to install Bitdefender on your Windows 10 computer, check out this guide.

You can also read our review on Bitdefender.


Have you experienced similar issues after installing KB4074588 on your Windows 10 computer? Let us know if this quick workaround helped you solve the problem.

RELATED ARTICLES TO FIX DRIVER ISSUES:

My computer screen rotated 90 degrees or 180 degrees [FIX]

When you’re working on something and then suddenly your computer screen rotates 180 degrees, or it tilts, it could be caused by either hitting a wrong key or a change in the display settings.

For a tablet device, usually, there’s the screen rotation option that can be turned off and restore the screen back to normal view. However, if you’re using a laptop or computer, there are ways to resolve this issue and get your screen back to normal mode.

FIX: Computer screen rotates by itself

  1. Use CTRL+ALT+UP
  2. Check Screen Orientation
  3. Check Graphics options
  4. Check Advanced settings
  5. Perform a System Restore

1. Use CTRL+ALT+UP

For this to work, sign in to your computer, and then press CTRL, ALT, and UP arrow keys at the same time. This will rotate your screen back to the normal mode, or default display settings.

If your computer screen rotated 180 degrees, and this doesn’t work, press CTRL, ALT, and either the Left, Right, or Down arrow keys together to rotate to the display setting you want or normal view mode.

2. Check Screen Orientation

  • Right click on the screen
  • Select Screen Resolution or Display Settings
My computer screen rotated 90 degrees/computer screen rotated 180 degrees
  • Find Orientation
  • Select Landscape
My computer screen rotated 90 degrees/computer screen rotated 180 degrees

If your computer screen rotated 180 degrees, and the screen orientation doesn’t help, try the next solution.

3. Change rotation from the graphics options

  • Right click on the screen
  • Select Graphics options
My computer screen rotated 90 degrees/computer screen rotated 180 degrees
  • Click Rotation
My computer screen rotated 90 degrees/computer screen rotated 180 degrees
  • Select Rotate to Normal or Rotate to 0 degrees
My computer screen rotated 90 degrees/computer screen rotated 180 degrees

Any luck? If not, try the next solution.

If you have the same issue with your Mac computer, there is a handy article to help you rotate your Macbook screen accordingly.

4. Check Advanced settings

If my computer screen rotated 90 degrees, or computer screen rotated 180 degrees, I’d check Advanced settings for the screen and do the following:

  • Right click on the screen
  • Click Graphics Properties
My computer screen rotated 90 degrees/computer screen rotated 180 degrees
  • Open Display properties window
My computer screen rotated 90 degrees/computer screen rotated 180 degrees
  • Click Settings
My computer screen rotated 90 degrees/computer screen rotated 180 degrees
  • Click Advanced to open monitor settings
  • Click the tab with your graphics card, then click to reveal rotation settings option depending on the type of graphics card you have installed
  • Under rotation settings, choose 0 degrees or Normal option to return the display to an upright setting. If you get the option of disabling rotation keys so that the issue doesn’t recur, you can select it
  • Click Ok to save changes

If this didn’t work, try a system restore as described in the last solution.

5. Perform a System Restore

Use System restore to create restore points when you install new apps, drivers, or Windows updates, or when you create restore points manually. Restoring doesn’t affect your personal files. It however removes apps, drivers, and updates installed after the restore point was created.

If the computer screen rotated 180 degrees, try and restore the system and see if it helps.

  • Click Start
  • Go to the search field box and type Restore
  • Click Create a Restore Point in the list of search results
My computer screen rotated 90 degrees/computer screen rotated 180 degrees
  • Enter your administrator account password or grant permissions if prompted to
  • In the System Restore dialog box, click System Restore
My computer screen rotated 90 degrees/computer screen rotated 180 degrees
  • Click Next
  • Click a restore point created before you experienced the problem
  • Click Next
  • Click Finish

To go back to a restore point, do the following:

  • Right click Start
  • Select Control Panel
  • In the control panel search box, type Recovery, and then select Recovery from the search results
My computer screen rotated 90 degrees/computer screen rotated 180 degrees
  • Click Open System Restore
My computer screen rotated 90 degrees/computer screen rotated 180 degrees
  • Click Next
  • Choose the restore point related to the problematic program/app, driver or update
  • Click Next
  • Click Finish

Let us know in the comments section whether any of these solutions worked to resolve screen rotation the issue.

Google’s Project Zero outs another yet to be patched Windows 10 security flaw

Google’s Project Zero computer and security researchers have just disclosed another Windows 10 security issue that has yet to be patched by Microsoft. With this latest saga, the search engine giant revealed an Elevation of Privilege flaw in Windows 10 which allows a normal user to gain administrator privileges (via The Verge.)

The full security flaw can be found here and was originally brought to Microsoft’s attention in November as part of a separate security issue with Windows 10. Microsoft addressed one of the issues, but labeled the elevation of Privilege flaw as “important” and not “critical,” claiming the flaw can only be exploited with a “specially crafted application.” Google, in turn, publicly and separately disclosed the Elevation of Privilege flaw today since Microsoft failed to patch it within Google’s 90-day period. The flaw only affects Windows 10, and you can read more on it below.

In order to execute the exploit you’d have to already be running code on the system at a normal user privilege level. It cannot be attacked remotely (without attacking a totally separate unfixed issue to get remote code execution), and also cannot be used from a sandbox such as those used by Edge and Chrome. The marking of this issue as High severity reflects the ease of exploitation for the type of issue, it’s easy to exploit, but it doesn’t take into account the prerequisites to exploiting the issue in the first place.

Microsoft already faced criticism from the Google Project Zero team following the discovery of a vulnerability in Edge this past weekend. It remains unclear if Microsoft will patch this latest flaw, but given how things have gone in the past between the two companies, they’re likely a few Microsoft engineers who are furiously working hard right now.

Chandler Riggs and Brendan Greene to play PUBG in the next Xbox Live Sessions

Microsoft today announced Chandler Riggs from AMC’s The Walking Dead as the next celebrity to appear on Xbox Live Sessions. He will be playing Player Unknown’s Battlegrounds (PUBG) on the Xbox One X alongside PUBG Creative Director Brendan Greene and you can watch the action live on Mixer.

The stream will kick off on Thursday, February 22 at 2 p.m. PT and you can tune in to submit questions for the two and also win some awesome prizes. This Xbox Live Session will be hosted by Microsoft Studios Community Manager Rukari Austin, who has appeared in many streams before.

PUBG has proven to be quite popular, and Microsoft holds there have been over 4 million PUBG players on Xbox One. Per recent reports, the game is also set to get its third map within the next four months, timed for before the end of June. More information is coming in March and this wait for new content is mainly because the developer has been busy banning cheaters, nearly 1 million in January alone.

Microsoft announces support for e-mail addresses in 15 Indian languages

On the occasion of International Mother Language Day, Microsoft announced support for email addresses in 15 Indian languages across its apps and services. The initiative is part of the company’s ongoing efforts to support Email Address Internationalization (EAI) across its products and services.

Going forward, you will be able to use local language email addresses, like व्यक्ति@संगठन.भारत, across Office 365, Outlook 2016, Outlook.com, Exchange Online, and Exchange Online Protection (EOP). You will also be able to send/receive mails to/from local language email addresses via Outlook client on PCs, outlook.com, as well as Outlook apps for Android and iOS.

Microsoft has introduced support for those languages that support Unicode, the international encoding standard for use with different languages and scripts. Local language email addresses are inseparably linked with Internationalized Domain Names (IDNs). Microsoft has shared that the company will also support additional Indian languages as and when their IDNs and email addresses become available in the future, making this feature forward compatible.

In India, users can register local language email addresses from third-party EAI address providers such as XgenPlus.

Microsoft, a member of Universal Acceptance Steering Group (USAG) along with international partners including XgenPlus, Coremail, CNNIC and SaudiNIC, is working to support email addresses in any Unicode script through its apps and services, including RTL (right to left) languages such as Urdu and Arabic.

According to Meetul Patel, COO, Microsoft India, the move will help ensure that language is not a barrier to adoption of technology which is key for digital inclusion and growth.

XCOM 2 video game is now Xbox One X Enhanced, new collection launched

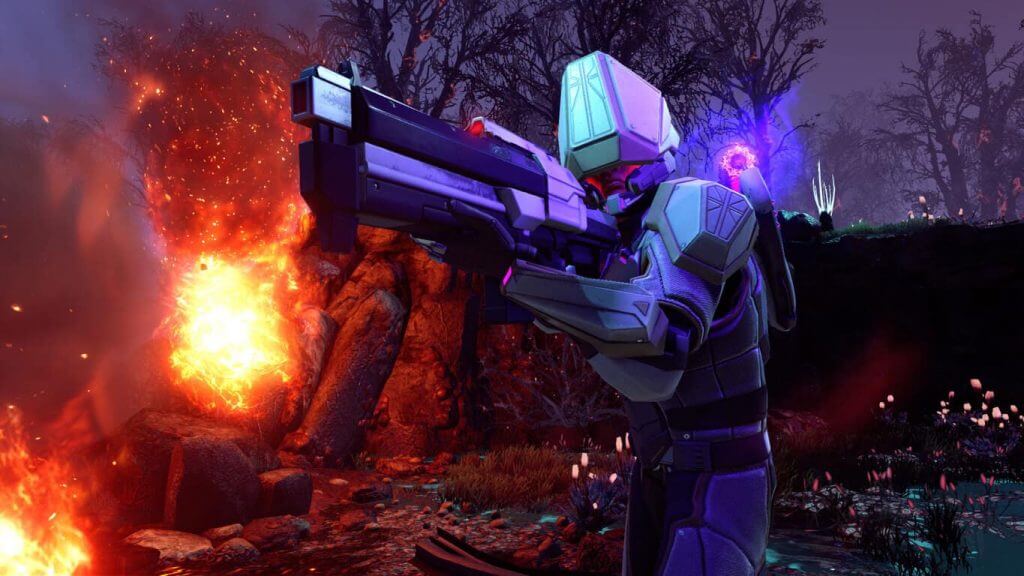
XCOM 2: War of the Chosen received a free update for Xbox One owners today that makes several changes to the game and also fixes a variety of bugs. Of particular interest is the fact that this update has now made XCOM 2 an Xbox One X Enhanced title which means that it will run and look better when played on Microsoft’s new Xbox One X console.

It’s important to note that this update didn’t make XCOM 2 a 4K title however it has received a graphical boost to 1440 resolution which makes it better than the usual 1080p but slightly less than 4K which is 2160. Here’s the list of main changes made with this update. You can find the complete, much longer, list here.

Numerous gameplay fixes have been issued to War of the Chosen including:

  • Challenge mode adjustments and fixes to the Leaderboard
  • Skirmisher ability changes.
  • Fixed disabling status effects carrying over past Chosen Stronghold missions
  • Improved Shadow rendering
  • XB1X graphic improvements
  • Enabled Screen Space Reflections
  • Enabled Bokeh Depth of Field
  • Increased FXAA Quality
  • Increased XB1X Resolution to 1440

To coincide with this update, a special XCOM 2 Collection has been released in the Microsoft Store. This bundle contains the main XCOM 2 video game as well as all of its downloadable content that was released post-launch.

Have you played XCOM 2 since updating? Let us know your impressions in the comments below.

XCOM® 2 Collection
XCOM® 2 Collection
Developer:
2K
Price:
$9.99

Digital pre-orders open on Xbox One for R.B.I. Baseball 18

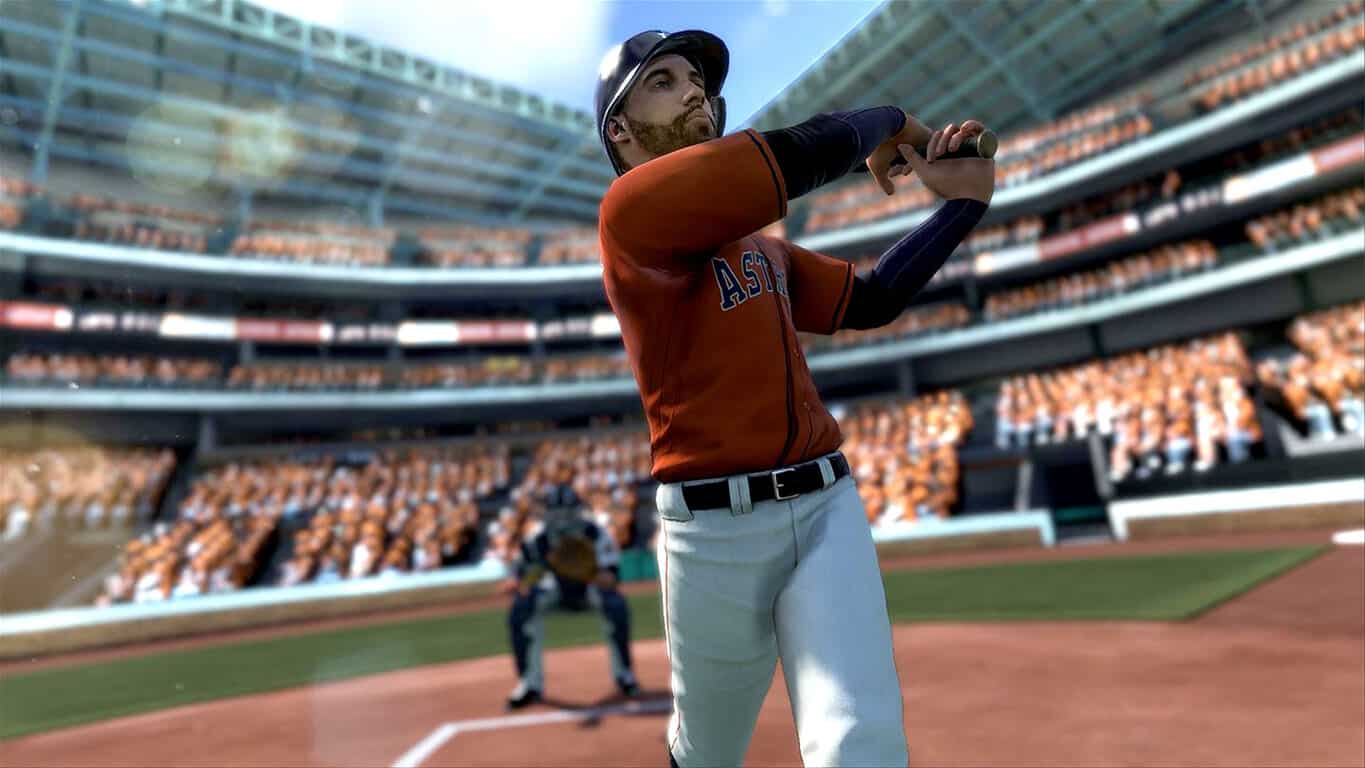
R.B.I. Baseball 18 is now available for digital pre-order and pre-download on Xbox One. The game is the latest in the R.B.I. Baseball franchise and features a variety of improvements over its predecessors such as new player models, improved UI, a new Franchise Mode, and a new Home Run Derby Mode. Here’s its official list of features and trailer.

  • All-New Franchise Mode: Take control of your favorite MLB team! Make trades, pick up free agents or call up rookies through multiple seasons.
  • Home Run Derby Mode: Challenge a friend or the CPU in the ultimate slugfest!
  • Authentic MLB Players: Completely redesigned player models including over 300 digitally modeled likenesses and hundreds of new animations
  • Better Ballparks: Experience enhanced lighting, textures, revamped 3-D crowd system and new dynamic camera angles in all 30 MLB ballparks.
  • MLB Legends: Play as the greats with over 100 historic players
  • Online Multiplayer: Jump into ranked and friendly online exhibition games
  • Roster Updates: Get the latest rosters throughout the 2018 season and use the new Import Rosters feature to keep your in-progress Franchise current without starting over!

R.B.I. Baseball 18 is due for release on March 20th. Are you going to pre-order it? Let us know in the comments below.

R.B.I. Baseball 18
R.B.I. Baseball 18
Developer:
MLB
Price:
Free

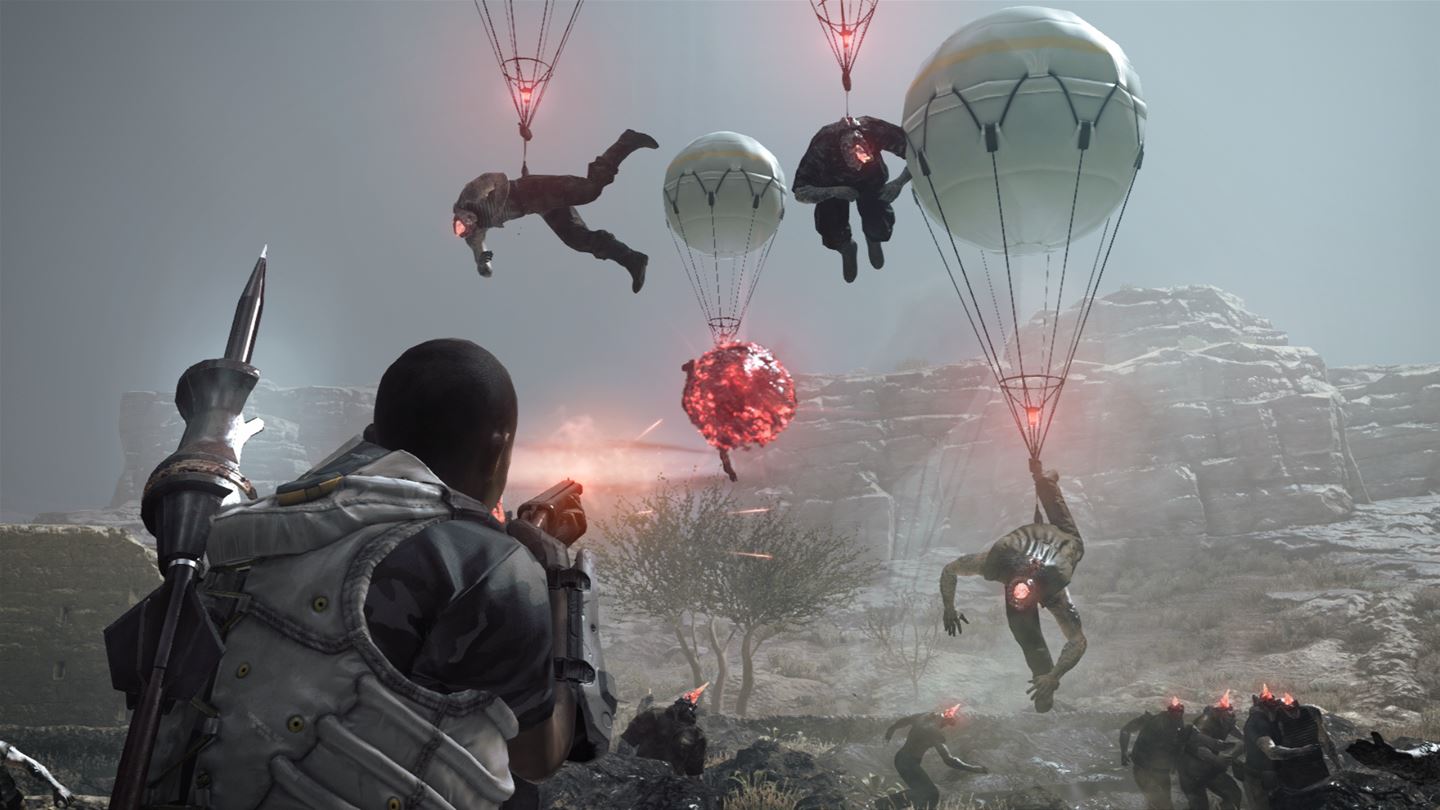
Metal Gear Survive is now available on Xbox One

Metal Gear Survive is now available to play on Microsoft’s family of Xbox One consoles. The game is a spin-off from the popular Metal Gear video game series and is enhanced with HDR visuals for when played on an Xbox One S or Xbox One X console. Here’s its official description.

METAL GEAR SURVIVE builds upon METAL GEAR SOLID V’S enduring stealth action gameplay while introducing the new elements of exploration and survival to create a bold new experience.

  • METAL GEAR SURVIVE is a spin off from the main METAL GEAR SOLID V story that takes place in a strange alternative universe.
  • Create your own character and learn to survive. Scavenge resources, craft weapons, build a base camp and explore the unknown while developing the survival skills necessary in this hostile environment.
  • In CO-OP mode, assemble a team of four players to infiltrate and defend areas from hordes of creatures. Place fortifications and defensive weapons strategically to give you an advantage against ever intensifying enemies. Team work and resourcefulness are key in these fast paced co-op missions.

Are you a Metal Gear fan and will you give this game a try? Let us know in the comments below.

METAL GEAR SURVIVE
METAL GEAR SURVIVE

Here’s a new colorful Firefox Quantum dynamic theme for Windows 10

If Mozilla Firefox is your default browser and you want to add more color to your Windows 10 experience, then you should try out this new dynamic theme for Firefox Quantum.

This colorful theme colorizes the title bar, tabs, and URL bar based on your Windows accent color.

Its author initially created it to work with just dark colors. He explained that while he was making the script to get the system accent colors, he realized that the only way to create variations was to create transparent layers of black over top. In other words, he accidentally discovered that this would work with other themes as well. You can see the result in the screenshot below.

firefox quantum dynamic theme

The theme works with any accent colors. However, keep in mind that the font might sometimes look a bit strange on very light colors. Also, you should use accent colors that are dark enough in order to enable better contrast between the text color and the background. Otherwise, these two might conflict.

It is worth mentioning that this new theme works on all operating systems.

As far as user feedback is concerned, this theme already has a large number of fans.

Honestly, this is something I kept thinking about for a long time, it’s an awesome idea, and really well done, it works really nice! Thanks for your time and effort.

Of course, there is still room for improvement. For example, the browser color changes when the browser is not in focus. This is how the browser looks like when in focus.

firefox dynamic theme

But when I opened Windows 10’s Settings page, that beautiful green color simply turned into dark blue. I actually thought it would remain green irrespective of what I was doing on the computer.

dynamic theme firefox

If you’re interesting in installing this dynamic Firefox theme, you can download it from the browser’s add-on page.

RELATED STORIES TO CHECK OUT:

Task Scheduler is Not Waking up Computer: How to Fix it

Scheduling tasks is relatively simple, but many reported that Task Scheduler is not waking up the computer.

This can be a problem if you want to automate PC tasks on your computer, so it’s important to tackle this issue. But let’s see what causes this problem in the first place.

Why is Task Scheduler not waking up the computer?

  • Your settings – If settings such as Hybrid Sleep aren’t enabled, you might experience this issue.
  • Power plan settings – Your power plan might not be configured properly, which can cause issues such as these.

What can I do if Task Scheduler is not waking up the computer?

Before we start, you can try the following:

  • Create a new task – Sometimes, you have to create a new task to get this feature to work.

1. Enable Hybrid Sleep

  1. Click Start and select Control Panel.
  2. Go to Hardware and Sound.
    Task Scheduler won’t wake up computer
  3. Click Power Options.
    Task Scheduler won’t wake up computer
  4. Select Change Plan Settings for your current power plan.
    Task Scheduler won’t wake up computer
  5. Select Change advanced power settings.
    Task Scheduler won’t wake up computer
  6. Go to Sleep.
    Task Scheduler won’t wake up computer
  7. Select Allow wake timers and enable them.
    Task Scheduler won’t wake up computer

2. Create a new user profile with admin rights

  1. Click Start.
  2. Select Settings.
  3. Click Accounts.
    Task Scheduler won’t wake up computer
  4. Select Family and Other people.
    Task Scheduler won’t wake up computer
  5. Click Add someone else to this PC.
    Task Scheduler won’t wake up computer
  6. Fill in the form with the user name and password. Your new user account will be created.
  7. Click on Change account type.
  8. Click the drop down arrow and choose Administrator to set the account to administrator level.
  9. Restart your computer.

Login to the new account you just created and set Task Scheduler.

3. Reset and restore power plans to default

  1. Go to the search bar and type CMD.
  2. Right click on Command Prompt and select Run as administrator.
    Task Scheduler won’t wake up computer
  3. Run the following command: powercfg –restoredefaultschemes

This will reset the power plan settings to default, so any customized power plans will be removed.

4. Set the computer to wake up and run a task

  1. Go to the search bar and type task scheduler then press enter.
  2. On the right pane, select Create Task.
    Task Scheduler won’t wake up computer
  3. Go to General tab and fill Name and Description.

  4. Check the box Run with highest privilege.
    Task Scheduler won’t wake up computer
  5. Go to Triggers tab and click New.
    Task Scheduler won’t wake up computer
  6. In the new window, select One Time (set the date and time you want your system to wake from sleep.
    Task Scheduler won’t wake up computer
  7. Go to Actions tab and mention a task then click New

  8. Select Action as: Start a program. If you want to schedule a task that executes cmd.exe command with command line arguments, copy-paste under Program/script/c “exit”.
  9. Go to Conditions tab and check the box Wake the computer to run this task. Click OK and exit task scheduler.

Your computer will wake up from sleep at the time you set it to.

5. Check your graphics card driver and enable Hibernation

  1. Go to the search bar and type CMD.
  2. Right click on Command Prompt and select Run as administrator.
    Task Scheduler won’t wake up computer
  3. Type the command powercfg –h on and press Enter.
  4. Go to Control Panel and click Hardware and Sound then select Power Options.
    Task Scheduler won’t wake up computer
  5. Click Choose what the power buttons do.
    Task Scheduler won’t wake up computer
  6. Click Change settings that are currently unavailable.
    Task Scheduler won’t wake up computer
  7. Scroll down and tick Hibernate then click Save changes.
  8. Click Start>Power>Hibernate to test the new feature.

We hope that our guide helped you fix this problem. To learn more, we suggest reading our guide on how to schedule tasks in Windows.

Did any of these solutions fix the problem? Let us know by leaving a comment in the section below.

Fix: Darksiders 2 issues in Windows 10/11

If you are a fan of hack and slash role-playing games, you might be familiar with Darksiders 2. This game was released in 2012, and it’s no surprise to see Darksiders 2 has certain problems on Windows 10, so today we’re going to fix those problems.

Fix Darksiders 2 problems in Windows 10

Table of contents:

Fix – Darksiders 2 crash

Solution 1 – Turn off Steam Overlay

If Darksiders 2 is crashing on your Windows 10 computer, it might be due to Steam Overlay, so in order to fix this problem, it advised that you disable Steam Overlay. We have to mention that by disabling Steam Overlay you won’t be able to see any Steam-related notifications and messages, so keep that in mind. To disable Steam Overlay do the following:

  • Open Steam, locate Darksiders 2 and right click it. Choose Properties from the menu.
    steam-properties
  • Go to General tab and make sure Enable the Steam Overlay while the in-game option is not checked.
    enable-steam-overlay
  • Save changes and run the game again.

Solution 2 – Disable Steam Cloud synchronization and delete options.dopt

Users reported that after changing few options the game doesn’t start anymore and instead it crashes to Desktop every time. This problem makes Darksiders 2 almost unplayable, but there’s a way to fix it.

First, we need to disable Steam Cloud sync:

  • Start Steam and go to your game Library. Right-click Darksiders 2 and choose Properties.
  • Navigate to Updates tab and uncheck Enable Steam Cloud synchronization for Darksiders 2.
    steam-cloud
  • Click Close.

After Cloud sync has been disabled, you can safely remove options.dopt file by following these steps:

  • Go to <your steam folder>userdata<number>388410remote and delete options.dopt file.
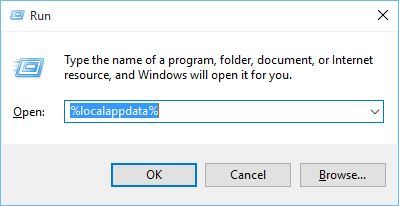
  • Press Windows Key + R and type %localappdata%. Press OK or Enter.
    localappdata-run
  • Locate Darksiders2 folder and delete options.dopt file from it.

You should be able to start the game, but keep in mind that all your graphics settings will be reverted to default values. If you need to adjust any video settings remember not to change the shadows setting, or you’ll cause the game to start crashing again.

Solution 3 – Lower shadows setting in graphics options

If Darksiders 2 is crashing on your computer, a crash can be related to the shadows setting. It’s advised not to set shadows to Maximum, so make sure that you lower or turn off shadow settings.

For a better gaming experience, we recommend downloading Game Fire for free. It will help with various gaming issues, such as freezes, crashes, low FPS, lags and slow PC.

Solution 4 – Run the game in compatibility mode

Windows 10 is a modern operating system, and certain software and video games aren’t fully compatible, therefore it’s recommended to run those game in compatibility mode. To do that, follow these steps:

  • Locate Darksiders 2 shortcut or .exe file and right click it. Choose Properties.
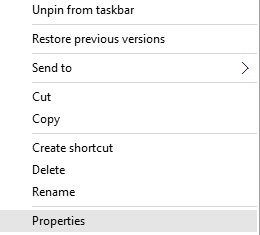
    open-properties
  • Navigate to Compatibility tab and check Run this program in compatibility mode for.
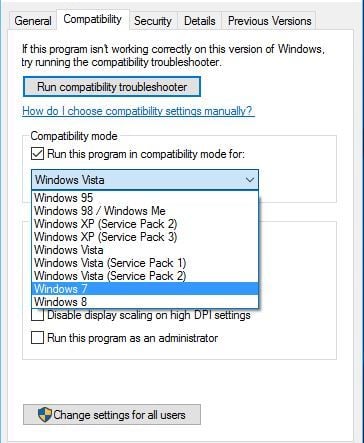
    compatibility-mode
  • Choose one of the older versions of Windows, for example, Windows 7 or even Windows XP.
  • Click Apply and OK to save changes and run the game again.

Solution 5 – Install DirectX and Visual C++ Redistributables

Darksiders 2 requires DirectX and Visual C++ Redistributables in order to work properly, and if any of those isn’t installed, it will cause the game to crash. In order to fix that, you need to install both DirectX and Redistributables from Darksiders 2 directory.

  • Navigate to C:Program Files (x86)SteamsteamappscommonDarksiders 2.
  • Inside Darksiders 2 folder you should see the vcredist folder. Open it and install both vcredist_x86.exe and vcredist_x64.exe.
  • Head back to Darksiders 2 folder and find DirectX folder, open it and run dxwebsetup.exe.

After installing all the required components, Darksiders 2 should start working again.

Solution 6 – Turn off anti-aliasing and Vsync

Darksiders 2 can crash due to your graphics settings, and users reported anti-aliasing option can sometimes cause issues with Darksiders 2. In order to fix this problem, it’s advised that you disable anti-aliasing option from the options menu. Another cause of the Darksiders 2 crash is Vsync, so it’s recommended that you turn off this option as well.

Solution 7 – Add Darksiders 2 to the list of exceptions in your firewall/antivirus

Darksiders 2 crashes can sometimes be caused by your antivirus or firewall software, so before starting Darksiders 2, make sure the game is added to the list of exclusions in your firewall and antivirus.

Solution 8 – Reinstall Darksiders 2

Another common-sense-driven solution is to perform a clean reinstall of the game. There are various reasons why the installation might’ve gone awry, starting with the corruption of some files or the nature of Windows 10 which changes the platform with every major update. For that purpose, we advise you to reinstall the game and move from there.

Here’s how to do it with Steam:

  1. Open Steam.
  2. Choose Library.
  3. Locate Darksiders 2, right-click on it and choose ”Uninstall”.
  4. Use IOBit Uninstaller or similar third-party tool to remove the remaining files and registry entries.
  5. Open Steam again and navigate to Library.
  6. Download Darksiders 2 and install it again.

Fix – Darksiders 2 black screen

Solution 1 – Delete AMD_Logo_movie.wmv

If you are getting a black screen while the game is starting, you should know this problem is related to a single file. If you’re having this issue, it’s advised you open the game’s installation directory, navigate to mediavideos and delete AMD_Logo_movie.wmv. Before deleting the file, be sure to make a copy and save it to a safe location, just in case.

Solution 2 – Change your desktop resolution

Few users reported black screen issue was caused due to their system resolution, and the only solution is to temporarily change your desktop resolution. It seems Darksiders 2 has issues detecting certain resolutions, so it’s advised that you lower your screen resolution and try starting the game again. We have to mention that you might have to try a few different resolutions before you find the one that works for you.

Solution 3 – Disable Comodo defense+ feature

As we previously mentioned, it’s important to add Darksiders 2 to the list of firewall exceptions, but in some cases, that doesn’t fix the black screen issue. Users reported Comodo firewall can cause issues with Darksiders 2, so if you’re using Comodo, be sure to disable its defense+ feature before starting the game.

Solution 4 – Update GPU drivers

Game issues too often go hand in hand with faulty or incompatible graphics drivers. The thing with drivers is the complexity of the problem. Sometimes generic drivers provided via Windows Update won’t suffice, sometimes they will. On other occasions, Darksiders 2 might be supporting only the specific driver release for your graphics card.

This means that even the official drivers that are up-to-date won’t work as intended. Basically, you’ll need to experiment with drivers in order to find the one who can run the game.

Here’s how to install/upgrade proper drivers in Windows 10:

  1. Right-click the Start button and open Device Manager.
  2. Expand Display adapters.
  3. Right-click on your GPU device and uninstall it.
  4. Navigate to one of these sites in order to obtain the proper drivers:
  5. Download and install proper drivers and restart your PC.

A safer and quicker method is to use dedicated software such as Fortect Driver Updater. It will detect whether your driver is out of date and download and install the best version available. It is easy to use, lightweight, and most of the process is automated.

Solution 5 – Run the game as an administrator

Another side workaround that can come in handy is to run the game with administrative permissions. By doing so, you should be able to avoid possible limitations imposed on the game’s process.

Follow the instructions in order to run Darksiders 2 on Windows 10:

  1. Navigate to the folder in which Darksiders 2 are installed.
  2. Locate the game’s main exe file.
  3. Right-click on it and open Properties.
  4. Under the Compatibility tab, check the ”Run this application as an administrator” box and confirm changes.

Fix – Darksiders 2 stuttering

Solution 1 – Make sure you meet the requirements

The first rather obvious thing we can’t overlook when addressing stutters in Darksiders 2 is system requirements. Darksiders 2 isn’t an overwhelmingly demanding game, but it’s still valuable to meet, at least, the minimum hardware requirements.

Minimum requirements:

  • OS: Windows Vista/7/8.1/10
  • Processor: 2.0Ghz Intel Core2 Duo Processor or AMD equivalent
  • RAM: 2GB
  • Hard Drive: 20 GB space free (10 GB free after install)
  • Video Card: NVIDIA 9800 GT 512 MB Video Card or AMD equivalent
  • Online Steam account

Recommended requirements:

  • OS: Windows 7/8.1/10
  • Processor: Any Quad-core AMD or Intel Processor
  • RAM: 2GB
  • Hard Drive: 20 GB space free (10 GB free after install)
  • Video Card: NVIDIA GeForce GTX 260 512MB Video Card or AMD equivalent
  • Online Steam account

Solution 2 – Use RadeonPro

Before we start, we have to mention this solution only applies to AMD owners, so if you own a Nvidia graphics card, skip this solution.

  1. Before we start, make sure Vsync is turned off in Darksiders 2.
  2. Download RadeonPro from here.
  3. Run the program and add Darksiders 2 profile.
  4. Go to Advanced tab, find flip queue size and set it to 1.
  5. In RadeonPro go to Tweaks tab and set Vsync to Always on.
  6. To apply changes find your Darksiders 2 profile in RadeonPro, right click it and choose to Apply now.
  7. Minimize RadeonPro and start Darksiders 2.
  8. Close the game and start it again in order to apply changes.

Solution 3 – Change Nvidia Control Panel settings

  1. Make sure that Vsync option is disabled in Darksiders 2.
  2. Open Nvidia Control Panel and click on Manage 3D settings.
  3. Go to Program settings tab and locate Darksiders 2 on the list. If the game is not on the list, click Add and locate game’s .exe file to add it.
  4. Find Maximum pre-rendered frames option and set it to 1.
    darksiders-2
  5. Turn on Vertical Sync.
  6. Click Apply and close Nvidia Control Panel.

Solution 4 – Change Catalyst Control Center options

  1. Open Catalyst Control Center.
  2. Go to Performance tab and select Framerate.
  3. Move the slider up to 60fps.
  4. Navigate to Games tab and choose Properties.
  5. Locate Framerate control and turn on Vsync and Triple Buffering.
  6. Start the game and activate Vsync from the options menu.

Solution 5 – Replace d3d9.dll file

If Darksiders 2 is stuttering on your computer, download this file. After you’ve downloaded the file, open it, and move d3d9.dll and antilag.cfg to Darksiders 2 installation directory.

Solution 6 – Change Darksiders 2 process priority to High

In some cases, Darksiders 2 can stutter if its priority isn’t set to High, but we can easily change that by doing the following:

  1. Start Darksiders 2.
  2. Press Alt+Tab to minimize the game.
  3. Press Ctrl + Shift + Esc to open Task Manager.
  4. Go to Details tab and locate Darksiders 2 process.
  5. Right-click Darksiders 2 process and choose Set Priority > High.
    set-priority-high
  6. Close Task Manager and return to the game.

If this solution fixes stuttering problems, you will have to repeat it every time you start Darksiders 2.

Darksiders 2 is an extremely fun game, but as you can see, it has its share of issues on Windows 10. If you’re having any of these issues, feel free to try some of our solutions.

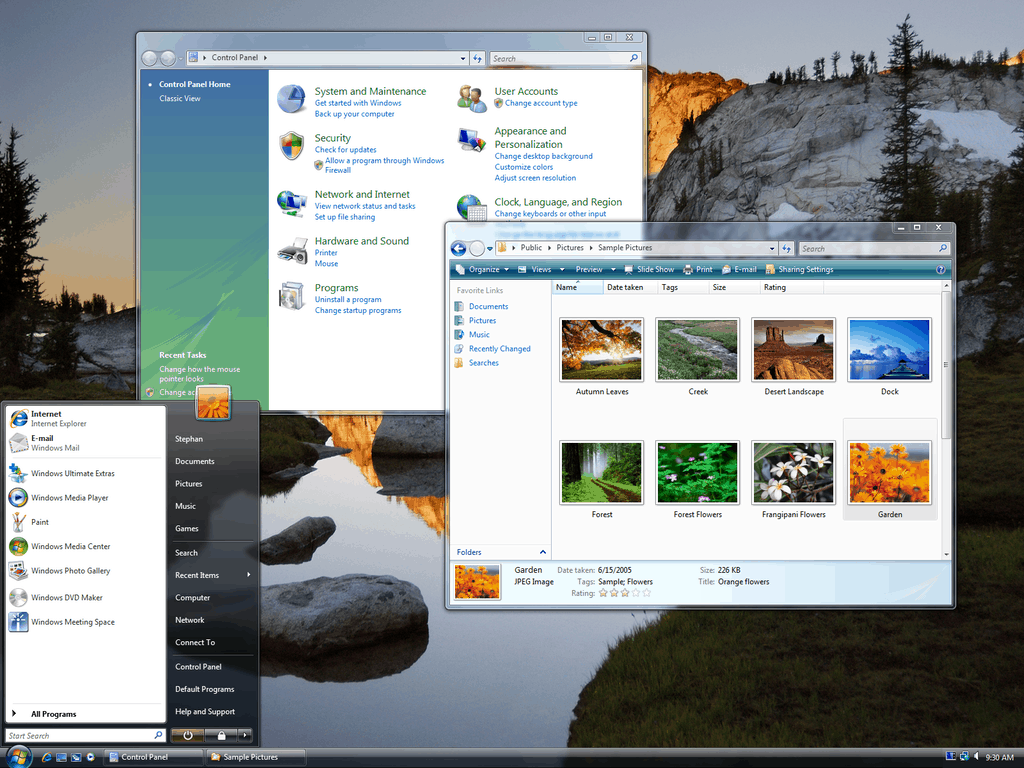
Windows 10 is Stuck at Low Resolution? Change it by Force

Low resolution on Windows 10 can be a big problem since it will interfere with your daily activities and it will make your PC harder to use.

This will also affect the quality of your display, so it’s important to fix this issue, and today’s guide will show you how to do that.

Why is my PC stuck on low resolution?

  • Your drivers might be outdated, and that can cause issues with resolution.
  • Specific settings in the registry might not be configured properly, thus resulting in low resolution.
  • DPI value isn’t correctly set on your PC.

How do I fix low resolution on Windows 10?

1. Update your display driver

  1. Visit your graphics card manufacturer’s website.
  2. Locate your model on the list.
  3. Download the latest driver.
  4. Once it’s downloaded, run the setup file to install it.

For more information, check our guide on how to update your graphic driver. This should help if Windows 10 has low-resolution programs or games.

All your drivers need to be updated, but doing it manually is very annoying, so we recommend you use a professional driver updater tool to do it automatically. 

Update drivers automatically

If you don’t want the hassle of updating drivers manually, we strongly suggest doing it automatically. This third-party driver updating tool will check your installed driver versions against its cloud database of the latest versions and recommend proper updates.

2. Change the registry values

  1. Run Registry Editor by typing regedit in the Search box and selecting Registry Editor from the list of results.
  2. When Registry Editor opens you’ll need to search for a specific value, and you can do so by pressing Ctrl +F.

    In the Find, window enter display1_downscaling_supported.
  3. Double-click click Display1_DownScalingSupported key and change its Value Data to 1 and click OK to save the changes.
    Next, you need to press F3 to search again. Now repeat the step 4 and 5 for all Display1_DownScalingSupported keys that you find.
  4. After you’ve changed all Display1_DownScalingSupported you can restart your computer.

If you can’t find Display1_DownScalingSupported in Registry Editor try this:

  1. Open Registry Editor and search for LogPixels key. You can search it by Pressing Ctrl+F, or you can navigate to: HKEY_CURRENT_USER\Control Panel\Desktop
  2. Find LogPixels and double-click it.low resolution windows 10
  3. Set its value to 87. Depending on your screen size, you might need a lower value.

In case you’re stuck at certain Windows resolution, this guide might help you. If you can’t edit your registry, we have a special guide that can help you with that.

3. Roll back your driver

  1. Go to Search, type devicemngr, and open Device Manager.
  2. Find your graphics card under Display Adapters, right-click it and go to Properties.Windows 10 low resolution programs
  3. Head over to the Driver tab.
  4. Click Roll back driver.
  5. Follow further on-screen instructions.
  6. Restart your computer.

If the rollback is successful and the problem disappears, you’ll have to block Windows from automatically updating drivers in the future.

4. Set DPI size

  1. Go to Settings and select System. Then, choose Display.
  2. Now, go to custom scaling, and you’ll see a screen like this:

Now, choose one of these three options and save the changes:

  • Smaller – 100% = 96 DPI (Pixels/Dots Per Inch)
  • Medium – 125% = 120 DPI (Pixels/Dots Per Inch)
  • Larger – 150% = 144 DPI (Pixels/Dots Per Inch)

Once you’ve chosen the right DPI size, just restart your computer, and you should be good.

5. Update monitor drivers

  1. Go to Search, type devicemngr, and open Device Manager.
  2. Expand Monitors.
  3. Right-click your monitor, and go to Update driver.Windows 10 low resolution games
  4. Let your computer find new drivers for your monitor.
  5. If there are any new drivers available, let the wizard install them.
  6. Restart your computer.

Bonus: Stuck at a certain resolution

  1. Go to Settings > System > Display.
  2. Go to Display adapter properties.
  3. On the Adapter tab, click List all modes.Stuck at Windows resolution
  4. Choose a desired resolution.
  5. Save the changes and restart your computer.

If you want to create custom resolutions, we have a dedicated guide that will surely help you.

This is a common and easy-to-solve issue, so one of these solutions will definitely help. If you have some other screen problems after the Windows 10 update, you can check out our article about solving problems with screen in Windows 10.

If you have any questions or comments, reach for our comments section, below.

VANQUISH, Lara Croft, and Guardian of Light and Brave come to Xbox One Backward Compatible catalog

Today is Tuesday, traditionally the day on which Microsoft adds new games to the Xbox One Backward Compatible catalog. That said, there are three Xbox 360 titles which are coming to Xbox One via Backward Compatibility today: VANQUISH, Lara Croft and Guardian of Light, and Brave. As always, we’ve included the details for you below the Tweet.

VANQUISH: ($19.99)

VANQUISH is a sci-fi shooter of epic proportions with a fast, fluid and frenetic combat system. It takes the shooter genre to the next level by adding unique offensive and defensive moves, and kinetic melee combat.

Lara Croft and Guardian of Light: ($14.99)

Experience the first ever co-op action-adventure game featuring Lara Croft. Team up with a friend or go at it alone as you traverse and solve deadly traps, fight hordes of undead enemies, and collect over 60 artifacts and relics. Lara Croft and the Guardian of Light offers fast-paced action and breathtaking visuals shown through an isometric view.

Brave: The Video Game: ($19.99)

In Disney Pixar Brave: The Video Game, challenge destiny and change your fate! Play as Merida, a Will ‘o the Wisp and other popular characters from new Disney Pixar film, as you run, jump and battle your way through the rugged landscape of mythical Scotland. With your wits and bravery, face off against fierce enemies to end a magical curse and save the kingdom!  Play as Merida Single-Player or Coop with a Will ‘O The Wisp  Compete with archery mini-games using Kinect for Xbox 360

These three titles are the first to join the catalog since Mafia II and the 2006 Prey game joined back last week. Just as usual, if you own digital copies of these titles they should appear in the ready to download section of the Xbox One guide now. And, if you own physical copies, all you need to do is insert the disk into the Xbox One and let the system work that Backward Compatible magic.

Xbox One’s Super Lucky’s Tale could be getting a sequel

Super Lucky’s Tale is a solid and adorable Xbox and PC platformer, but could there be more adventures and perhaps a sequel ahead for the furry fox hero? A new tweet from the developer of the game suggests so, saying that we’re likely to see Lucky again.

It’s not exactly clear if the studio is indeed already working on a sequel or DLC for Super Lucky’s Tale, but the tweet does suggest that the studio has some sort of additional plans. This is great news for those who were a fan of the original game, which may have felt a bit too short.

As usual, more is likely to develop over time, but for now, fans of Lucky will have to settle for replaying Super Lucky’s Tale in 4K on Xbox One X.  The game is already solid as is, and we’re hoping the rumors will hold up to be true. You can download Super Lucky’s Tale via the link below.

Super Lucky's Tale
Super Lucky's Tale
Developer:
Xbox Game Studios
Price:
Free

Parallels Toolbox 1.5 for Windows is out with new features to help you be more productive

Parallels, the Bellevue-based company behind Parallels Desktop for Mac is launching a new version of its Parallels Toolbox suite of productivity tools for Windows and Mac today. “The new suite of easy-to-use tools simplifies tedious everyday computing chores down to just a click or two,” the company explained, and there is indeed a lot to like about the collection of 30+ tools available in an all-in-one app.

For Windows users, one of the most important additions in Parallels Toolbox 1.5 is the new Presentation mode, which was already available in the Mac version of the software. When you turn it on, Presentation mode will hide all files on your desktop, block all notifications, prevent sleep mode and automatically optimize display settings.

Also new in Parallels Toolbox 1.5 are Clean Drive, a tool that can help you reclaim disk space on your PC, as well as a Switch Resolution which can optimize display settings to makes text and images look easier on the eyes. Many existing Parallels Toolbox tools for recording audio or videos from your screen, downloading videos from YouTube, Facebook, Vimeo and more have also been updated in this new release.
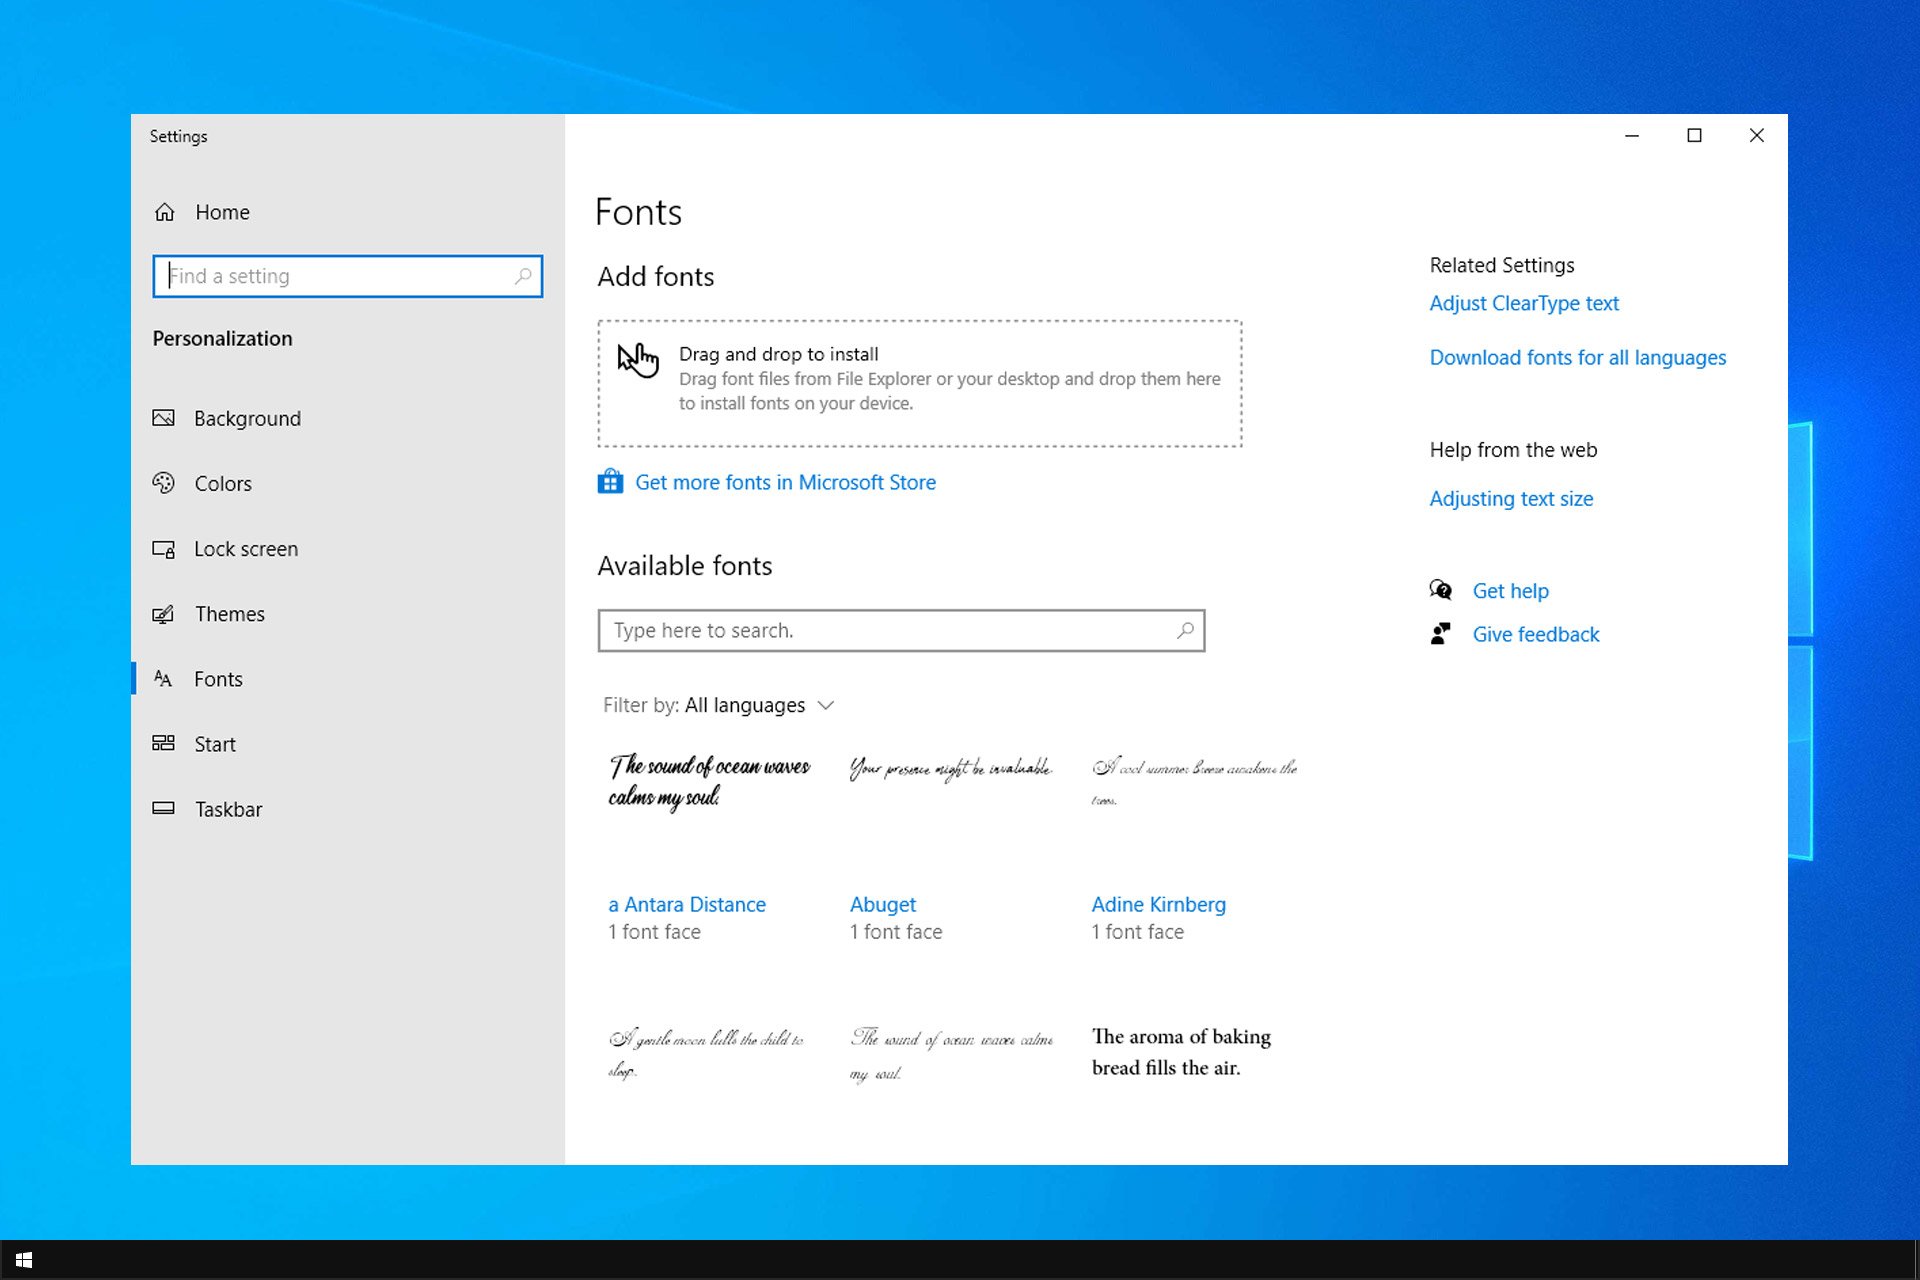
For Mac users, Parallels Toolbox 2.5 for Mac comes with enhancements to existing features plus three new tools for batch image conversion, reclaiming RAM memory and taking screenshots of webpages. The company is also launching today Parallels Toolbox Business Edition, which will make it easier for IT admins to manage licenses and customize the tool library for employees.

Parallels Toolbox 1.5 for Windows and Parallels Toolbox 2.5 for Mac are both available as a $19.99 yearly subscription, which will give you access to free updates and enhancements several times a year. You can download a free 7-days trial from Parallels’ website and see for yourself is the collection of time-saving tools can help you be more productive.

Cybercriminals stole $16.8 billion worth of personal data in 2017

Businesses’ efforts to combat fraud were not very successful in 2017 because it turns out that cybercriminals stole $16.8 billion personal data last year according to the latest researches.

A new identity study states that the number of victims increased by 8% in 2017 compared to 2016 and it reached 16.7 million people last year. This is, unfortunately, the highest number of victims since the phenomenon started to be measured about 15 years ago by the research company Javelin Strategy & Research.

Fraud is becoming more complex

Embedded chip cards made it possible for the fraud to shift online, so it went beyond physical stores. Fraudsters are becoming more and more adapted to the newest technologies, and they are continually improving their criminal techniques.

It seems that there’s a change in the way that fraud was committed last year because cybercriminals opened a massive number of intermediary accounts including e-commerce services on Amazon and email payments made via PayPal.

The main findings of the fraud-related research

  • 35% Social Security numbers were compromised and 30% credit card numbers in breaches.
  • 64% of consumers were victims of identity fraud in 2017, and this means a million more compared to 2016.
  • Account takeover tripled over 2017 compared to 2016 and victims had to pay about $290 and spend around 16 hours to resolve the issues.
  • Cybercriminals are using more complex methods to devise monetization schemes.
  • Consumers are losing trust in institutions due to data breaches.

The Equifax data breach might be connected to the fraud

The same survey mentioned about says that the Equifax breach has something to do with what happened in 2017 – the fraud rose from 51% in 2016 to 69% in 2017. The Equifax breach is extremely dangerous for the victims because cybercriminals can use the stolen data to craft even more convincing campaigns for phishing. This is serious because phishing is blamed for 9 out of 10 data breaches.

Other severe examples of data breach are WannaCry contagion from May 2017 and GoldenEye/Petya a few months after that.

General Data Protection Regulation will be implemented shortly, and businesses all over the world should consider enhancing their IT security as soon as possible.

Speaking of improving security, check out the following articles to learn how you can protect your online privacy: