Encountering issues where GeForce Experience downloads the driver but fails to install it can be incredibly frustrating. This will prevent you from achieving maximum performance, so let’s see how we can fix this.
What can I do if the GeForce Experience driver downloads but doesn’t install?
Before we try more complex solutions, ensure that your Windows installation is up to date. Also, try disabling your antivirus software before starting the installation.
1. Perform a clean install of the NVIDIA driver
Go to the NVIDIA Driver Downloads Page and select your product type, series, and operating system. Choose either the Game Ready Driver or Studio Driver based on your needs, then click Search and Download the driver installer.
Close all open programs, especially GPU monitoring utilities (like EVGA Precision X or MSI Afterburner), and any aggressive antivirus programs that might interfere with the installation.
Right-click the downloaded driver installer and select Run as administrator.
Click Yes if prompted by Windows User Account Control.
Choose the default path for temporary driver files by clicking OK.
Click Agree And Continue.
Choose Custom (Advanced) and click Next.
Tick the Perform clean install option and click Next.
Once the installation completes, reboot your PC to finalize the process.
This method ensures all old driver files are completely removed, reducing the chances of conflicts. For more detailed instructions, visit our guide on how to update graphics drivers on Windows 11.
2. Remove the Nvidia driver completely and reinstall it
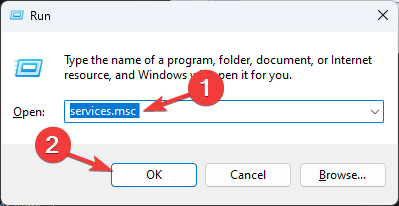
Press Win + R to open the Run dialog, type services.msc, and press Enter.
Find and stop all services starting with NVIDIA.
Open Task Manager by pressing Ctrl + Shift + Esc.
Find processes starting with nv or NVIDIA and end them.
Press Win + R, type regedit, and press Enter.
Navigate to HKEY_LOCAL_MACHINE\SOFTWARE\NVIDIA Corporation\Logging and HKEY_LOCAL_MACHINE\SOFTWARE\Wow6432Node\NVIDIA Corporation\Logging. If these keys exist, delete them.
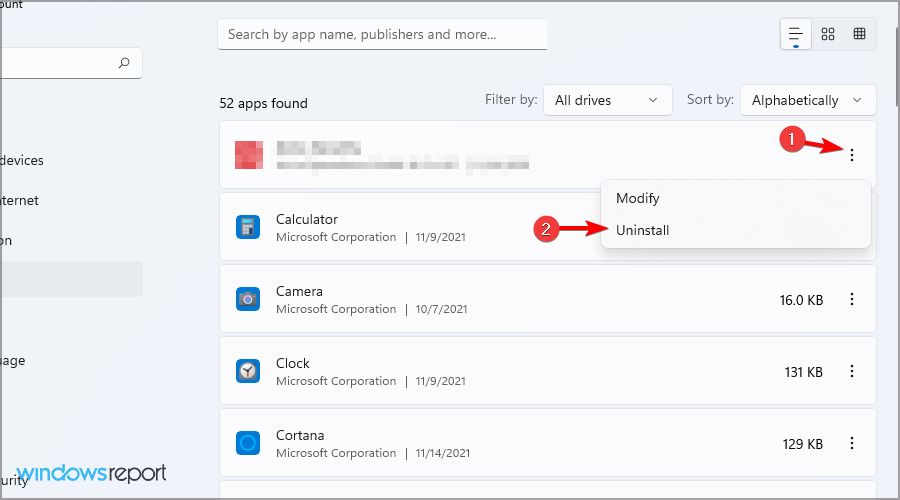
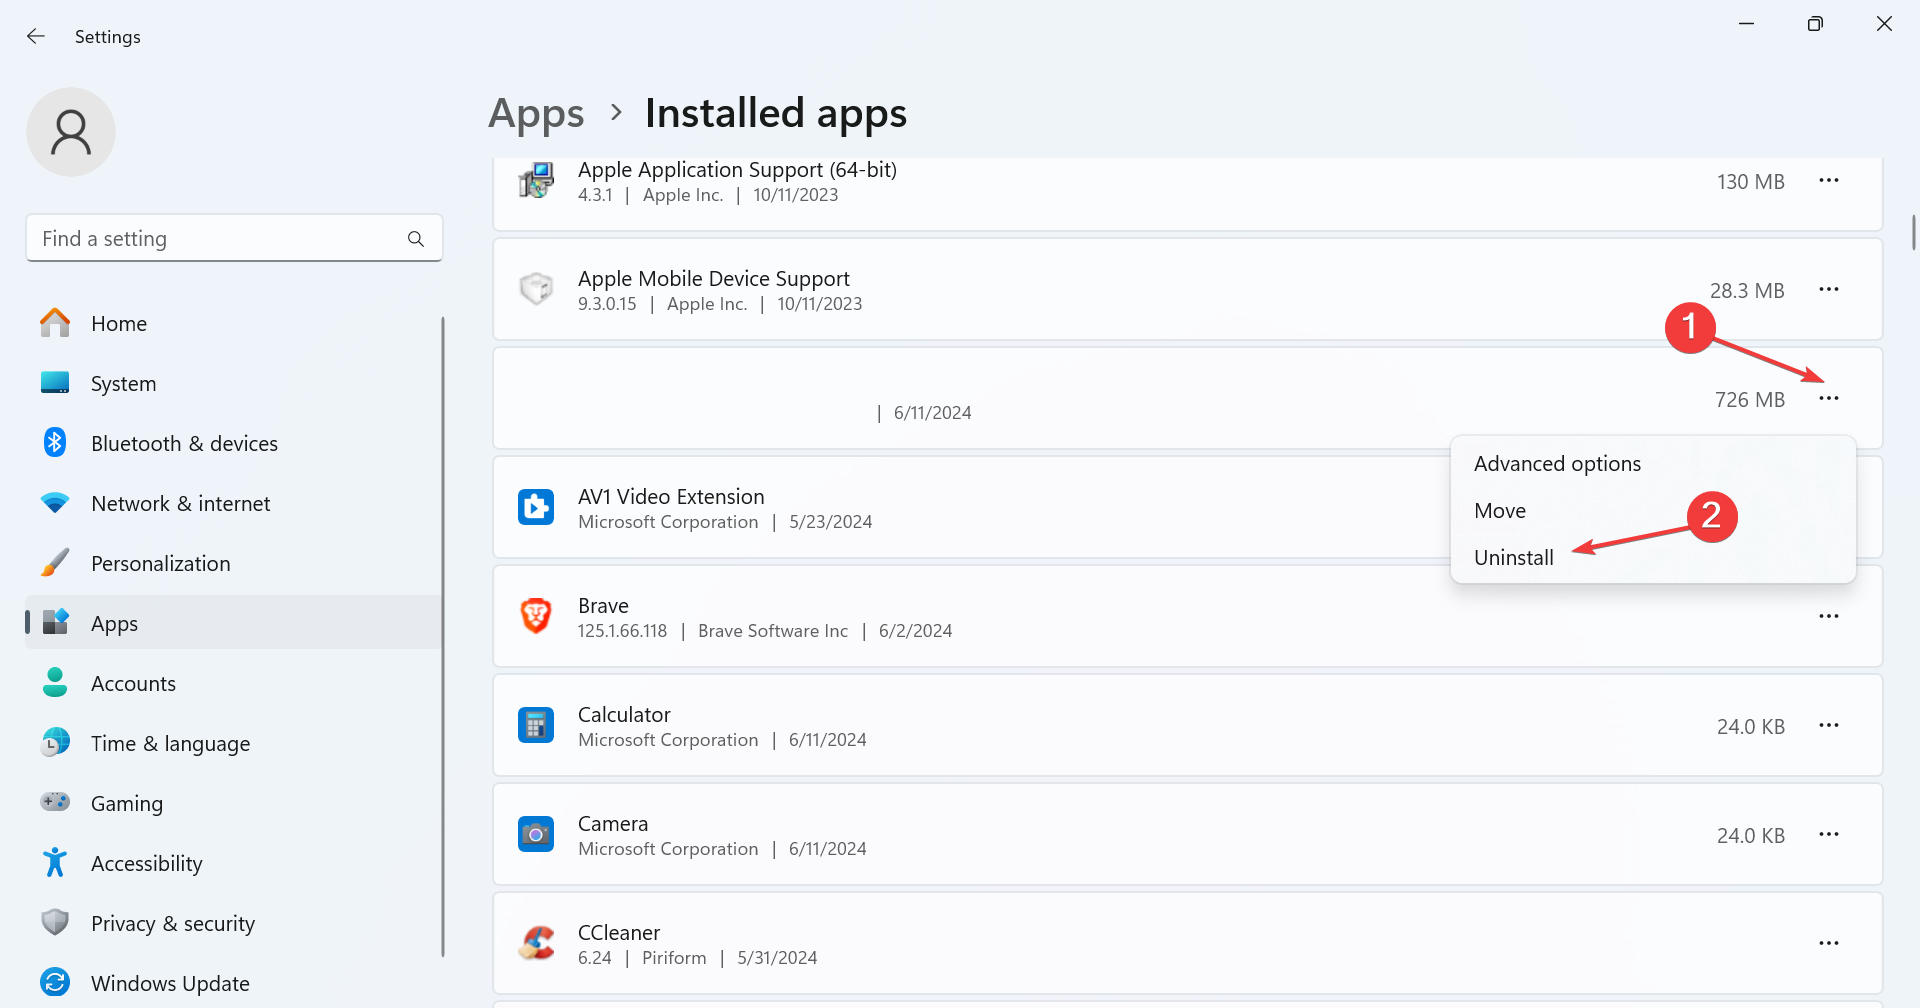
Open Settings > Apps > Installed apps.
Find all NVIDIA applications, click the three-dot menu next to each, and select Uninstall.
Follow the steps from the previous solution to install the NVIDIA driver again.
If this method seems too complicated, you can always use Display Driver Uninstaller to completely remove your drivers.
There are numerous causes, such as your antivirus, permissions, or file corruption. To learn more, check our dedicated guide to learn what to do if Nvidia drivers aren’t installing on Windows 11.
By following these steps, you should be able to resolve issues with NVIDIA driver installations. Let us know if you’ve found a different solution that worked for you.
Many of our readers have complained about encountering the MF.DLL not found issue while launching some of the system apps. The error usually appears when the mf.dll file is either missing or corrupted. You can also see this DLL missing error when there is third-party software interference.
How can I fix the MF.DLL not found error?
1. Use a third-party DLL fixer
MF.DLL is an essential system file for Windows, and if you need to restore it, you need to be very careful while doing so. You can manually copy and paste the file from another computer, but this method can be risky and cause further issues if not done correctly. Therefore, the safer option is to use a third-party DLL fixer tool.
These software are designed to automatically detect and resolve DLL issues, thereby minimizing the risks and ensuring your system’s stability.
2. Run SFC & DISM scans
Press the Windows key, type cmd in the search box, and click Run as administrator.
To replace or restore incorrect, corrupted, or damaged versions of system files, type the following command and hit Enter: sfc /scannow
Next, copy & paste the following commands one by one and press Enter after every command:
Press the Windows key, type control panel in the search box, and click Open.
Select Large icons as View by, then click Recovery.
Click Open System Restore.
Select Choose a different restore point in the System Restore window and click Next.
You will then see a list of available restore points. Choose the oldest one or the most recent restore point from when your computer was functioning correctly and click Next.
Click Finish to initiate the process.
Windows will restart and restore to the version you selected. This process may take some time, don’t turn off your computer in between. If you see the System Restore wasn’t completed successfully message after the restart, we suggest you check out this informative guide for solutions.
4. Download the DLL file manually
NOTE
If you decide to manually restore the DLL file, you should always choose a reliable website like DLL-Files. It has been tested and verified by WindowsReport experts and the files on it are safe to use.
Visit the DLL-Files website, search MF.DLL, choose an appropriate option, and click Download.
Double-click the downloaded folder to open, locate, and copy the .dll file.
Go to this path and paste the DLL file. Don’t forget to replace C with your system drive letter if it is not C for you: C:\Windows\System32
Reboot your computer to save the changes.
In conclusion, to fix any issues related to MF.DLL, you should run SFC & DISM scans, perform a system restore, or use a third-party DLL fixer to restore the missing DLL file.
Dealing with the Error_Drivers_Leaking_Locked_Pages on Windows can be incredibly frustrating, especially when it leads to those dreaded blue screen errors. But don’t worry, we got you covered with some tried-and-true solutions that can help you get your system back on track.
How can I fix Error_Drivers_Leaking_Locked_Pages?
Before we start fixing this error, ensure that all your drivers are up to date.
1. Disable problematic driver from Safe Mode
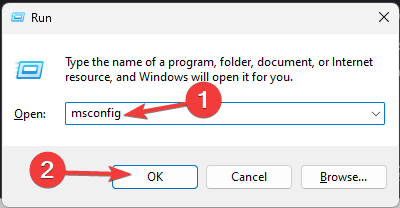
Press Win + R, type msconfig, and press Enter. Go to the Boot tab, check Safe boot, and select Minimal. Restart your computer.
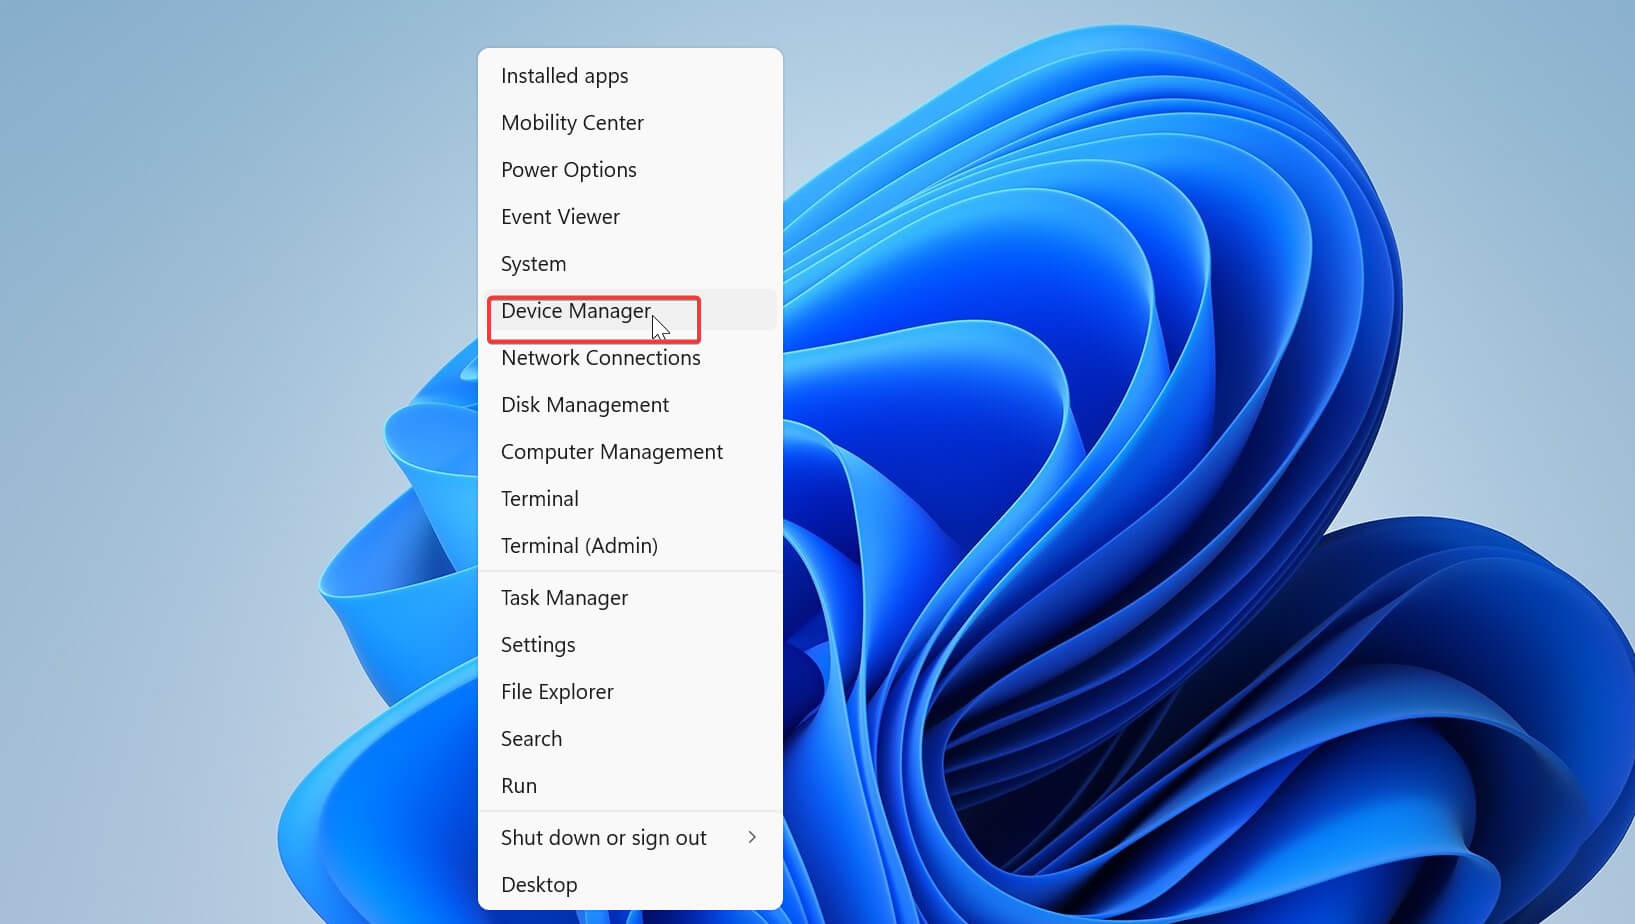
Press Win + X and select Device Manager.
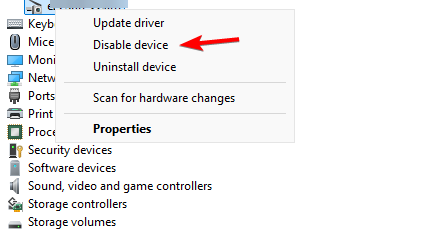
Locate the problematic driver, right-click on it, and select Disable device.
Open msconfig again, uncheck Safe boot and restart your computer.
Disabling a problematic driver can stop the blue screen errors if the driver is faulty or incompatible with your system.
2. Check system integrity
Press Win + X and select Command Prompt (Admin).
Type sfc /scannow and press Enter. Wait for the process to complete.
If SFC finds errors but can’t fix them, type DISM /Online /Cleanup-Image /RestoreHealth and press Enter.
3. Enable Driver Verifier
Press Win + R, type verifier, and press Enter.
Choose Create standard settings and click Next.
Select Automatically select unsigned drivers or Select driver names from a list.
After setting up the Driver Verifier, restart your machine.
Driver Verifier will put stress on your drivers and crash your system if it detects any violation, helping you pinpoint the faulty driver.
4. Edit the registry
Press Win + R, type regedit, and press Enter.
Go to HKEY_LOCAL_MACHINE\SYSTEM\CurrentControlSet\Control\Session Manager\Memory Management
Right-click on the Memory Management key, select New > DWORD (32-bit) Value, name it TrackLockedPages, and set its value to 1.
Save your changes and reboot.
Editing the registry to track locked pages helps Windows save stack traces and identify which driver is causing the problem.
5. Use Debugging Tools
Press Win + R to open the Run dialog box, type cmd, and press Enter.
By following these solutions, you will be able to pinpoint and resolve the Error_Drivers_Leaking_Locked_Pages error. Keep in mind that sometimes you might get a blue screen after installing drivers, but we have a guide that will help you fix that.
Slack lets you change your email address when transitioning to a new job, switching email providers, improving security, or aligning with company-wide email updates. It’s part of maintaining professional and secure communication.
I’ll take you through the whole process, so let’s get started!
How To Change Your Email on Slack
Here’s the procedure:
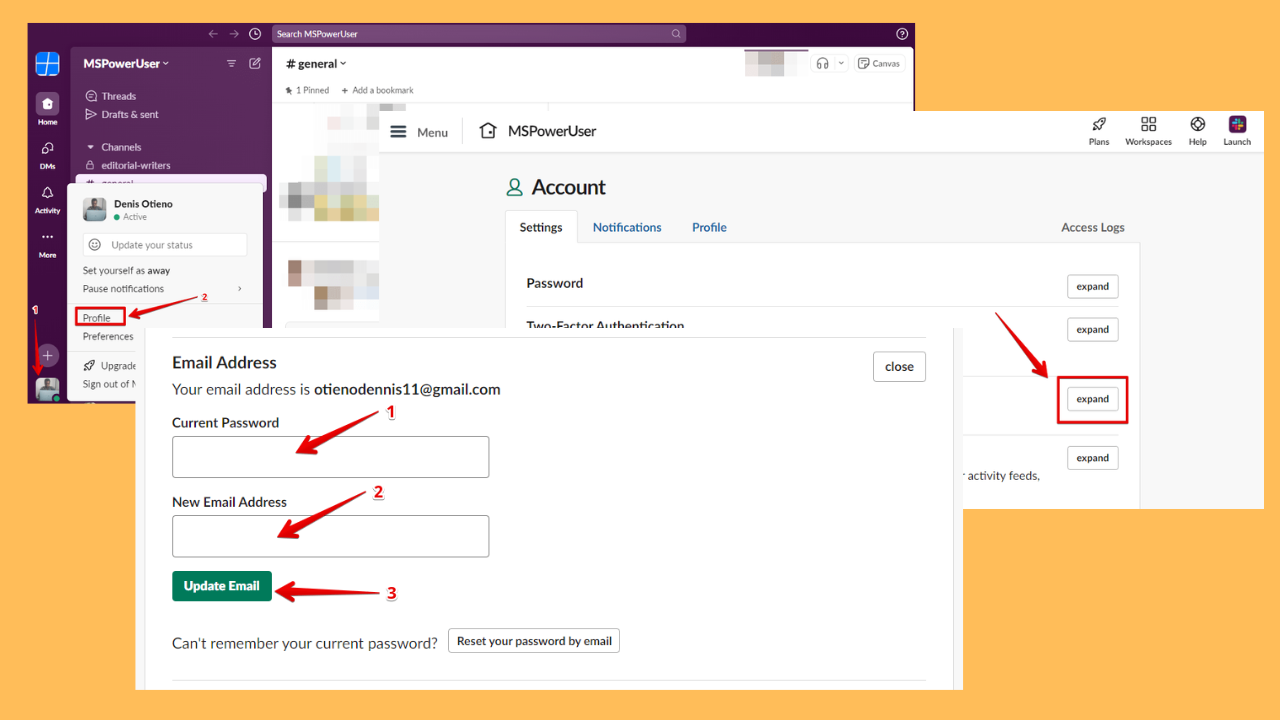
Open Slack, tap on your Profile picture, then select Profile.
Your profile will appear on the right. Click on the three dots beside View as, then tap Account settings.
A new window will open. Tap the expand button beside Email Address.
Enter your password and the new email address, then tap Update Email.
You’ll receive an email to confirm and finally update your new email address
The procedure is pretty much the same for desktop and mobile users on a web browser.
However, if your Workspace Owner has enabled single sign-on, you might have limited access to edit personal details, including your email address.
Overall, Slack lets you change your email address to keep your account secure and up-to-date. These steps ensure a smooth transition, whether due to a job change, email provider switch, or enhanced security measures.
Besides updating your personal details, it is also useful to know how to manage your team. See our step-by-step guide on how to remove a member in Slack for clear instructions.
The new Outlook will finally be enhanced with the ability to drag and drop emails into the Calendar icon in the app bar to create an event. This essential and handy capability is not currently available in the app, and while we wonder why it took Microsoft so long, we’re glad it’s coming.
The Redmond-based tech giant wants to release it next month, in September, according to the latest entry to the Microsoft 365 Roadmap,
Users can drag and drop emails into the Calendar icon on the left app bar of Outlook to create an event. #newoutlookforwindows
Believe it or not, you can’t currently do that. When we tried to drag emails into the new Outlook, the classic STOP emoji (or icon) appeared, as you can see in the featured image above.
Either way, this essential capability is only available to the new Outlook, which recently became widely available to users everywhere. Microsoft has not yet announced whether it will bring it to the classic Outlook.
Microsoft is developing a technology that allows low-end cameras to capture high-resolution images with great detail. The technology uses a sparse Bayer system to arrange the camera’s sensor pixels.
Imagine a camera similar to the one you might have on your phone but with a unique twist. This camera has a sensor designed with a sparse Bayer pattern. Simply put, it’s a way of arranging the red, green, and blue pixels on a camera sensor, but with fewer colour pixels and more monochrome ones, which are great for capturing light and detail.
As this camera snaps away, taking multiple images, the technology does something else behind the scenes. It also gathers data from an Inertial Measurement Unit (IMU) for each image captured. This IMU data is like a secret ingredient, telling the user the exact pose of the camera for each shot.
Why does this matter, you ask? The technology can feed the images and IMU data into a clever motion model system with this information.
This motion model is where the magic happens. It uses the IMU data to align and filter the images over time, creating separate images for red, green, and blue colours. Combining these colour-specific images can produce a high-resolution colour image that’s clearer and more detailed than any original shots.
In the patent, Microsoft explains that this technology has been mainly designed for VR/AR devices. If we follow the recent patent that unveiled some design plans for a potential VR/AR headset, this technology may be implemented in the future Hololens 3.
Still, it can enhance a variety of other cameras, such as scanning, visible, low-light, thermal imaging, UV, and any other kind of camera system, from virtual to depth cameras.
This means the technology can capture highly accurate images in places where light doesn’t provide a proper setting. As you can imagine, its applications vary, from perfectly captured night images to mapping the ocean floor.
You can more about Microsoft’s camera technology here.
Blue screen errors like driver overran stack buffer can disrupt your workflow and may require several fixes, from driver updates to hardware checks. For users encountering this problem on Windows 10, a step-by-step set of solutions is available in the driver overran stack buffer Windows 10 guide.
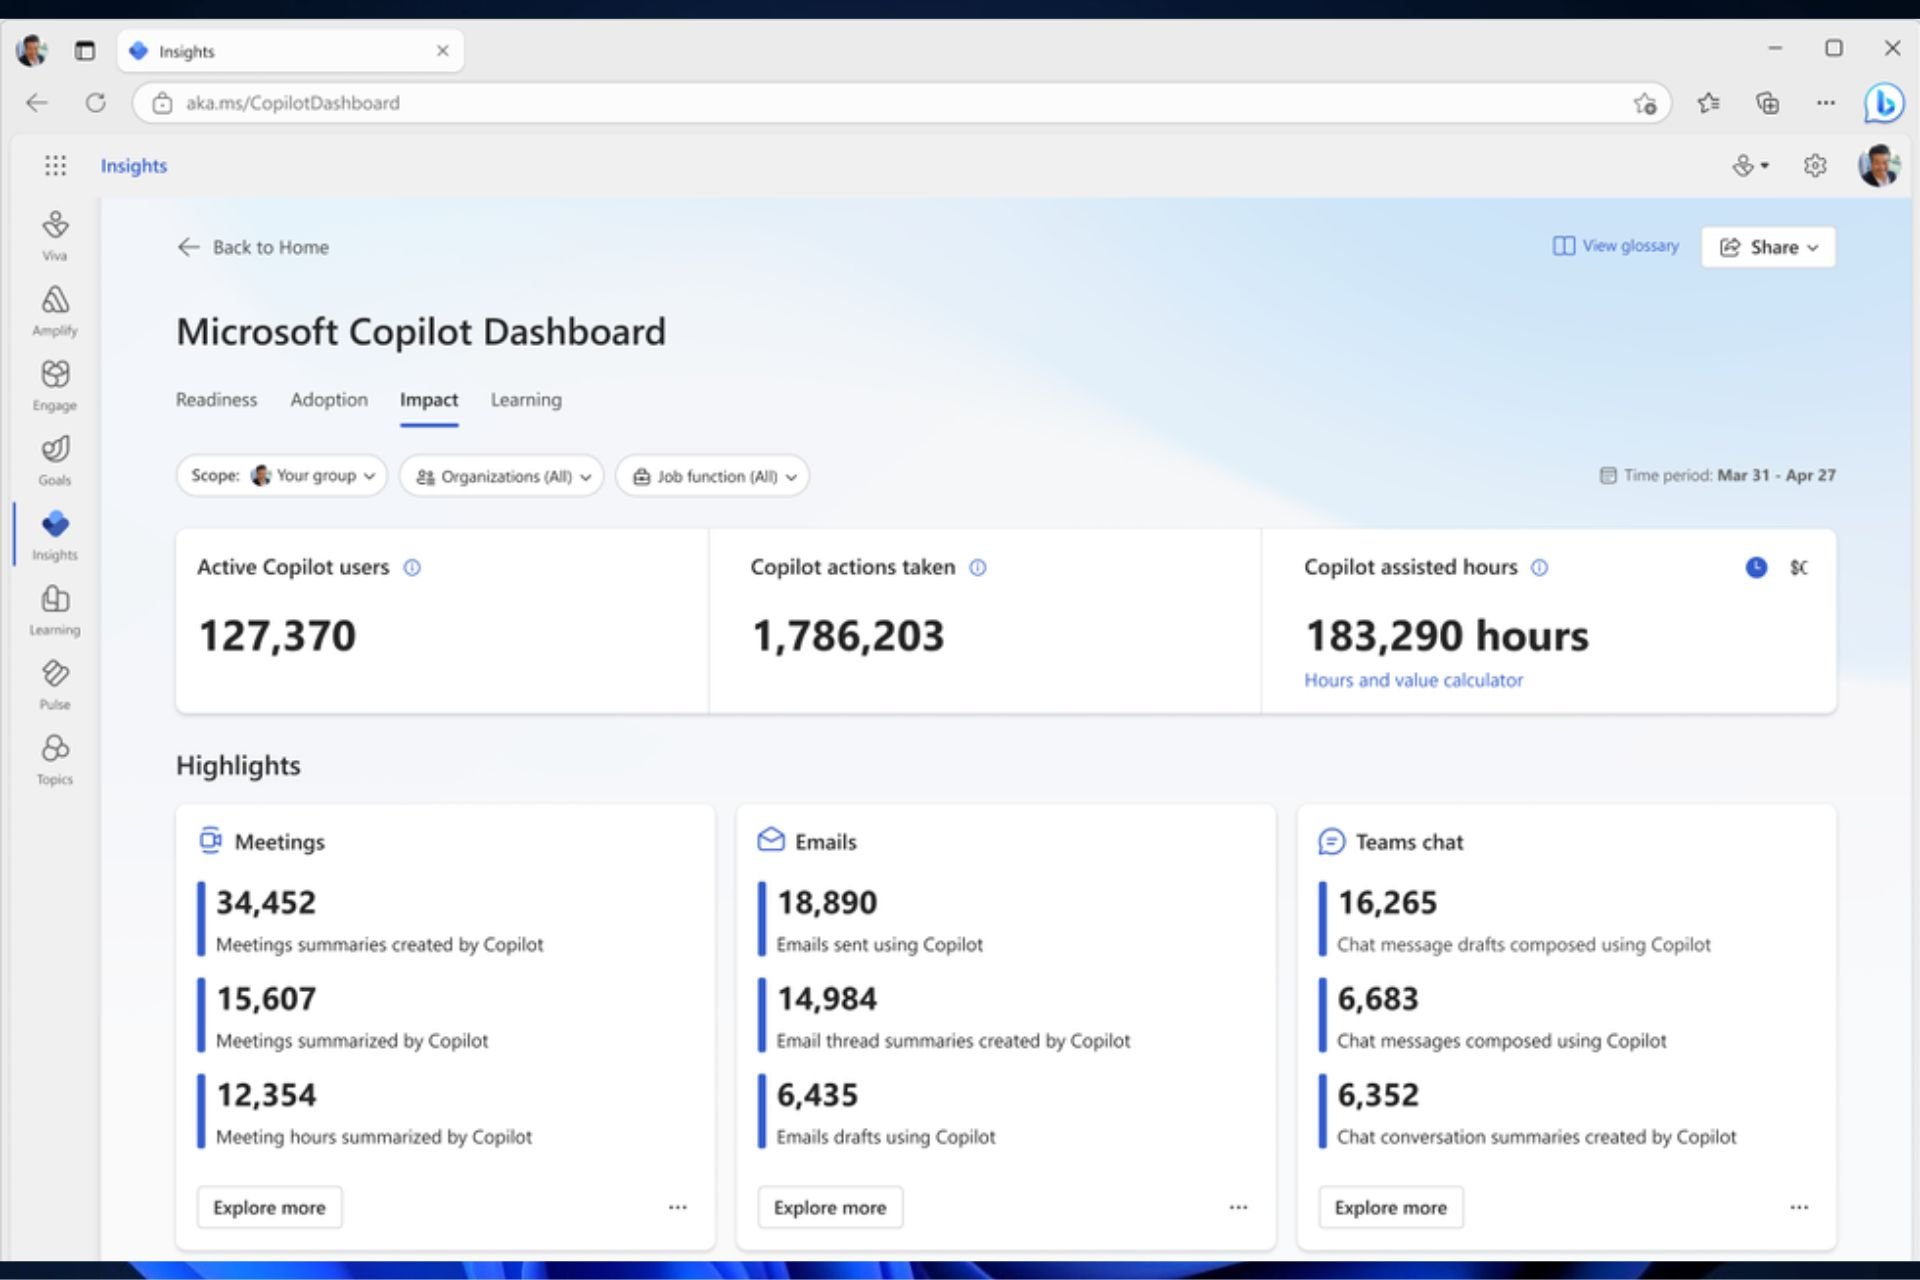
After announcing and previewing it earlier this year, Microsoft launched the Microsoft Copilot Dashboard. This feature gives businesses a more detailed understanding of how their workers use the company’s generative AI assistant. At first, only people with a Viva Insight license could access this dashboard.
The Copilot Dashboard will be released in phases over the coming months. Initially, companies that possess over 100 Copilot for Microsoft 365 licenses will be given priority in acquiring this new attribute.
To encourage the adoption of this new tool, Microsoft has started enhancing the Copilot Dashboard with new features designed to help businesses track and understand Copilot’s adoption trends. In a blog post, Microsoft says that with the introduction of the Trendline feature, companies can now monitor Copilot’s adoption over six months, offering insights into the number of Copilot-licensed employees, active users, and even the impact of Copilot in terms of hours saved, emails sent, and meetings summarized.
The Redmond-based tech giant has also introduced the Copilot Value Calculator. This nifty tool allows businesses to quantify the value of using Copilot by calculating the hours saved multiplied by an average hourly monetary value. This feature, by default, uses $72 an hour as the benchmark, but it allows businesses to adjust this rate according to their specific contexts.
Moreover, the dashboard now includes metric guidance to aid businesses in comparing Copilot usage across different groups within the organization. This could be a game-changer for understanding how Copilot benefits various teams differently. And for those at the helm, Microsoft has made it possible to delegate access to Dashboard data, ensuring that insights can be shared and utilized for data-driven decisions across the board.
Access to these dashboard features might be limited for smaller businesses with fewer than 50 Copilot licenses, but Microsoft’s direction with these updates is clear. They’re not just selling a product but providing tools to ensure that the product integrates seamlessly and beneficially into business operations.
There is still something for smaller companies with less than 10 Copilot for Microsoft 365 licenses. They will keep getting a restricted edition of the Copilot Dashboard, where only “tenant-level metrics” are shown. This ensures that no business misses out on utilizing AI’s advantages.
Although a Viva Insights license is not needed for the Copilot Dashboard, having one will offer more features. This involves looking at user data older than 28 days and making customizable reports for Copilot Adoption and Impact.
You can read more about Microsoft Copilot Dashboard’s new capabilities here.
Black Myth: Wukong has been out for some days on certain consoles and Windows PCs, but unfortunately, the game is experiencing a release delay on Xbox Series X|S, and users of these platforms cannot play it currently.
According to a recent report from Windows Central and IGN published earlier this summer, here’s what Microsoft’s spokesperson said in a statement regarding the Black Myth: Wukong’s delay:
We’re excited for the launch of Black Myth Wukong on Xbox Series X|S and are working with Game Science to bring the game to our platforms. We can’t comment on the deals made by our partners with other platform holders, but we remain focused on making Xbox the best platform for gamers, and great games are at the center of that.
The developer of the game, Game Science, earlier announced that the Black Myth: Wukong will be out on PS5, Xbox Series X|S, and PC on August 20, 2024. Not to forget, Game Science announced the release date at the recently held Games Awards 2024.
While that is true, the game developer skipped mentioning an Xbox Series X|S version when it launched the trailer at the Summer Game Fest. Game Science, however, confirmed the delay in Black Myth: Wukong’s release on Xbox Series X/S citing optimization as the primary reason. It mentions:
PC and PS5 users can enjoy the full game starting August 20, 2024. We are currently optimizing the Xbox Series X|S version to meet our quality standards, so it won’t release simultaneously with the other platforms. We apologize for the delay and aim to minimize the wait for Xbox users. We will announce the release date as soon as it meets our quality standards.
It’s been buzzing around that the game’s delay on Xbox isn’t because of any tech snafus but rather a hush-hush exclusivity deal with Sony. The tech issues, including a rumoured memory leak that a leaker supposedly discussed after chatting with Xbox devs at Gamescom, aren’t the real culprits behind the delay. Instead, whispers in the gaming corridors suggest Sony and Game Science, the brains behind the game, have a deal keeping the game off Xbox for now.
Neither Sony nor Game Science has disclosed any details about this exclusivity arrangement.
Are you excited about the release of Black Myth: Wukong on Xbox X|S? Please share your thoughts in the comments below.
Microsoft Edge has released many updates to the Beta Channel, and with them, the browser sees the deprecation of some critical capabilities, such as CryptoWallet, while also improving existing ones.
The new update addresses everything from bug fixes to feature updates. For instance, some policies were adjusted to allow wildcards in URL patterns, which is a big deal if you’re into the nitty-gritty of browser security and customization.
One of the standout changes includes the update to supported operating systems. If you’re a macOS user, you must be on macOS 11 or newer to continue receiving updates. This move ensures that users benefit from the latest features and security enhancements, but it also means saying goodbye to updates if you’re on an older version.
Speaking of saying goodbye, Edge will deprecate the CryptoWallet feature. It seems Microsoft is streamlining its features to focus on what enhances user experience the most. And for those who use the Microsoft Edge sidebar, there’s a bit of a switcheroo happening. The sidebar is turned off by default for new or inactive users, but don’t worry; you can quickly turn it back on in the settings if you miss it.
Feature updates are also a big part of the Edge experience. For example, the Edge Bar has seen some improvements, making it more accessible and user-friendly. And for those concerned about security, Microsoft Edge is stepping up its game by discontinuing support for CPUs that lack SSE3, ensuring that the browser runs on hardware capable of handling modern security standards.
But it’s not all about tightening security and fixing bugs. Microsoft is also thinking about the user experience. For instance, introducing instant updates means that your browser stays up-to-date without you having to lift a finger. It’s all about making your online experience as seamless and secure as possible.
Encountering the BOUND_IMAGE_UNSUPPORTED error (0x97) on your Windows computer can be quite frustrating, especially when it disrupts your workflow.
How can I fix the Bound_Image_Unsupported error?
Before we start, make sure you have the latest Windows Updates installed. Also, ensure that all your drivers are up to date. Disconnecting all external devices can also help.
1. Uninstall recently installed software
Press the Windows key + X and choose Apps and Features.
Select the problematic software, click the three dots next to it and choose Uninstall.
Follow the on-screen instructions to complete the uninstallation process.
Restart your computer to check if the error persists.
2. Toggle Fast Startup
Open search and type choose a power plan. Select Choose a power plan.
Click Choose what the power buttons do on the left side.
Scroll down to the Shutdown settings section and locate Turn on fast startup.
If the fast startup is enabled, disable it by unchecking the box, then click Save changes. If it is disabled, enable it by checking the box.
Restart your computer to see if the issue is resolved.
Select Safe Mode with Networking by pressing the corresponding keyboard key.
Once in Safe Mode, open the Start Menu and type Windows Update, then press Enter.
Click View update history and select Uninstall updates.
Identify and uninstall recent updates that may have caused the issue, then restart your computer.
4. Run System Restore
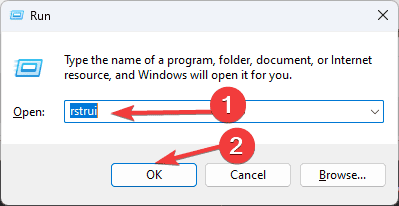
Press the Windows key + R and type rstrui.
Follow the System Restore wizard to choose a restore point from a date when your computer was working fine.
Confirm your restore point selection and click Finish to start the process.
Wait for the restoration process to complete and restart your computer.
Keeping your system updated and regularly scanning for hardware and software issues can help prevent errors like 0x00000097 Bound_Image_Unsupported in the future.
Windows 10 received another update, the non-security update KB5041582 for version 22H2, under the build number 19045.4842. It’s full of enhancements and improvements that will make you download it, even if it’s optional.
As we mentioned earlier, this update is all about non-security issues. If you’ve been facing any quirky behaviour with your system, KB5041582 might be the fix you need. For instance, there was this annoying memory leak issue when a combo box had input focus, and you closed that window. Well, consider it gone.
And for those using certain mobile operators, your COSA profiles are now current. Bluetooth issues? They’ve looked into that, too. Plus, a few more technical tweaks here and there to keep things running smoothly.
However, it’s worth mentioning that there are still a couple of known issues in KB5041582. Have you ever tried changing your user account profile picture and got slapped with an error message? Yeah, that’s one of them. They’re on it, though, promising a fix in an upcoming release. Windows 11 also had the problem.
And for the dual-booters, here’s a heads-up: this update might mess with booting Linux. There’s a bit of a hiccup with the Secure Boot Advanced Targeting (SBAT) setting, but only if you’ve got a specific setup. They’ve got a workaround on the Windows release health site, so check that out if you’re in a bind.
If you want to get KB5041582, head over to Settings > Update & Security > Windows Update. You’ll find it waiting in the Optional Updates available area. If you’re more of a manual update kind of person, the Microsoft Update Catalog is your go-to.
This update is worth a look if you want to keep your Windows 10 experience as smooth as silk. Remember those known issues, especially if you’re juggling more than one operating system.
Microsoft released the latest Edge Dev Channel update to 129.0.2792.10, and it’s pretty exciting stuff. The Redmond-based tech giant has just rolled out this update, and it’s packed with improvements that will make your browsing experience smoother.
First, they’ve added a handy ‘x’ button at the bottom of the sidebar. Plus, new toggles for launching the Edge Bar and setting it to auto-start are tucked away in the sidebar settings page.
Now, onto the fixes. If you have ever had your browser crash when you pinned a site pane or tried opening something in the sidebar, then you should know that they’ve resolved that issue. And for those who like to live on the edge with InPrivate or guest windows, you’ll be happy to know that closing the last tab won’t crash your browser anymore.
Did you activate Gamer Mode and find that the toggle didn’t sync? Microsoft fixed it this time. Notice that adding a favourite sometimes triggered a message even when you hadn’t entered any data? Also fixed. And for those who use screen readers, the experience got smoother with unnecessary extra information being cut out when expanding or collapsing items under ‘recently closed’.
Android and iOS users, you haven’t been forgotten. On Android, they’ve tackled issues with the ‘Earn more rewards’ link, annoying blank spaces at the bottom of webpages, and navigation hiccups when your history is empty.
iOS users will see improvements, too, like the ability to change appearance settings even when dark mode is on, better sharing and downloading of PDFs, and fixes for search box content overflow and the ‘Read Aloud’ function.
If you often participate in virtual meetings, conferences, and collaborations on a platform like Microsoft Teams, you should have a good webcam to ensure you are seen and heard at your best. Many options are available in the market; therefore, choosing the best webcam for Microsoft Teams can be difficult. Worry not! We have listed some of the best webcams to help you enhance your video calls.
The Insta360 Link PTZ 4K Webcam is designed to elevate your video communication experience with its 4K resolution and a high-performance 1/2″ sensor that captures lifelike images.
It comes with an advanced AI tracking feature combined with a gimbal design, which allows the lens to automatically follow your movements, ensuring the focus is on you.
Precise zooming and framing adjustments enhance the video call and live-streaming video quality.
The Insta360 Link also offers versatile modes for various communication needs, including Whiteboard Mode, DeskView Mode, Overhead Mode, and Portrait Mode.
These modes are complemented by dual noise-canceling microphones that minimize background noise, ensuring crisp and clear audio
Logitech Brio 501 is a full HD 1080p webcam that provides superb image quality, allowing you to be seen clearly during meetings.
The webcam comes with RightLight 4 video lighting technology, which automatically adjusts to the lighting of your surroundings.
With the Auto-framing feature, the webcam ensures you are always in the frame, whether you stand or move during meetings.
You can pair it with Logi Tune to customize the settings, such as muting the microphone, zooming in or out, adjusting color and image resolution, managing auto-frame, etc.
Logitech Brio also has a Privacy cover, so you can rotate the integrated webcam privacy shutter to block the camera.
The Logitech C920e/C920 HD webcam offers Full HD 1080p video calling and recording, ensuring clear and sharp visuals in meetings and streams. It also supports HD 720p streaming for gaming on services like Switch TV.
The webcam has dual microphones on either side of the camera, which can capture rich and natural stereo audio while filtering background noise.
It is ideal for recording rich and polished content for YouTube and other streaming services. The webcam is compatible with Windows 7, 8, 10 or later, Mac OS 10.10 or later, Android, and Chrome OS.
It works seamlessly with various applications such as Skype, Microsoft Teams, Google Hangouts, FaceTime, OBS, and XSplit.
Logitech C920e/C920 HD webcam allows one-click HD uploads (1080p) to Facebook, Twitter, YouTube, and other social media platforms, making sharing your content with friends and family easy.
The Logitech HD webcam C310 delivers sharp and smooth video calls with its 720p resolution at 30 frames per second, ensuring clear communication in your video meetings.
Its widescreen format and 60-degree diagonal field-of-view offer a broad and engaging perspective, making your video calls more immersive.
The RightLight 2 technology enhances your appearance by automatically adjusting to different lighting conditions, producing brighter images even in low-lighting environments.
The webcam features a sturdy universal mounting clip designed for versatility and convenience. It can be securely attached to various devices, such as LCD monitors, laptops, and other screens.
Furthermore, the built-in mono noise-reducing microphone captures your voice clearly from up to 1.5 meters away, reducing background noise and enhancing audio clarity.
The NexiGo HelloCam 1080P webcam stands out with its seamless integration with Windows Hello, which allows you to unlock your computer via facial recognition.
The webcam has a full HD 2-megapixel CMOS image sensor, which delivers clear and sharp video quality at 1080p resolution and 30 frames per second.
Its 3.5 mm fixed-focus lens can be optimized for distances ranging from 12.4 to 47.2 inches, making it versatile for various setups.
HelloCam’s automatic exposure function allows it to adapt to different lighting conditions, adjusting the video’s exposure to maintain a clear picture regardless of the environment.
The inbuilt noise-canceling microphones enhance the user experience by effectively minimizing ambient noise, ensuring your voice comes through clearly during online sessions and video meetings.
The Logitech Brio 505 has 4K resolution, which delivers sharp and detailed images to enhance the clarity of video calls.
With RightLight 3 technology, the BRIO 505 can adjust to different lighting conditions, ensuring your images are always well-lit, even in challenging lighting environments.
It also provides multiple field-of-view settings, ranging from 65°, 78°, to 90°, which allows you to customize the camera’s perspective to fit your needs.
The webcam has built-in privacy shutters; you can close them when the camera is inactive, providing a sense of privacy and security.
It also supports Windows Hello facial recognition, a secure and convenient method for logging into your computer with facial authentication.
Anker PowerConf C200 2K is one of the best budget-friendly webcams for Microsoft Teams. Its 2K ultra-clear resolution brings sharp clarity to all your meetings.
It has various field-of-view options. The AnkerWork software allows you to choose from 65°, 78°, or 95° to decide what you want to show on camera.
When you are not using the webcam, you can slide the built-in privacy cover to shield your view, giving you peace of mind and security.
The larger aperture size captures more light, so the Anker PowerConf C200 webcam can make you look bright and professional even without a ring light in a low-light environment.
It has dual mics, which use AI to pick up your voice while minimizing background noise for crystal-clear audio.
At least have 1080p (Full HD) resolution, providing clear images essential in a professional setting.
Have 30 FPS or 60 FPS, which are higher frame rates that contribute to smoother videos. This is important for capturing fast movements and making your video look more natural.
Have features like automatic low-light correction as they are crucial for improving visibility in dim environments and maintaining video quality in various lighting conditions.
Autofocus is crucial for keeping you or the subject in sharp focus as you adjust your position, ensuring the image remains clear without any manual adjustments.
Field of view (around 65 to 90 degrees) so that it can capture more of your background and surroundings.
A built-in microphone or headset is convenient for capturing clear audio during calls. A mic with noise-canceling features is a plus.
Be compatible with Microsoft Teams, Zoom, or other video conferencing software you use
These features will help you select a webcam that meets your needs and enhances your video conferencing experience on Microsoft Teams.
D3dramp.dll is a Dynamic Link Library (DLL) file developed by Microsoft that is essential for Windows. It’s part of Microsoft Direct3D and ensures visual and graphical processing applications run smoothly. Many media players and various video games need this file to run.
As with all .dll files, d3dramp.dll can, too, go missing or become corrupted; in that case, things get a bit dicey. You might encounter error messages like “d3dramp.dll is missing” or “d3dramp.dll error loading”. These errors can pop up for various reasons, including registry issues, malicious software, or file corruption.
How to Fix the d3dramp.dll Missing Error?
1. Update drivers to restore the d3dramp.dll file
Depending on where the d3dramp.dll Missing Error arises, you might want to look at your drivers and update them as soon as possible. By updating them, Windows will automatically fix or replace the corrupted/absent d3dramp.dll file, and your applications/games should work.
To do that, you’ll need to:
Type in Device Manager in the Windows Search Box, and click it.
Open the Device Manager and right-click on the preferred device to update its drivers.
Click on Update Driver.
Select Search automatically for drivers and let Windows take care of it.
Eventually, repeat this process with all other devices and update them if possible.
2. Scan your PC for malware
D3dramp.dll can also become missing or corrupted due to malware or viruses. Another way to solve the issue is to scan your device using the built-in Windows Security or your preferred anti-virus.
To scan your PC with Windows Defender, you’ll need to:
Type in Windows Security in the Search Box, and select it.
Once there, click on Virus and Threat Protection.
Select Quick Scan, and let Windows scan your device.
3. Use the System File Checker to fix the corrupted d3dramp.dll file
Performing a System File Checker (SFC) scan usually repairs corrupted Windows files, and if you’re running into the d3dramp.dll missing error, you might want to try this solution, as well.
Open Command Prompt as Administrator.
Type the following command: sfc /scannow
Press Enter to execute the command.
Wait for the repair process to complete. This might take a while, so do not interrupt the process.
After completing the SFC scan, the Command Prompt might state, “Windows Resource Protection found corrupt files and successfully repaired them.” If that’s the case, restart Windows. If there are no errors, you can close the console.
4. Perform System Restore on your Device to return to a point when d3dramp.dll wasn’t missing
Performing System Restore on your Windows device will take you back to a moment when d3dramp.dll was uncorrupted; however, it should only be used after all other solutions have been followed.
To start the process, you’ll need to:
Press Win + R to open the Run dialogue box.
Type in rstrui and then click OK.
Follow all the next steps: choose a version of Windows that you know has the d3dramp.dll file, and restore your device to that point.
One very straightforward approach is to download the d3dramp.dll file and place it in the game or application folder that’s giving you the missing error dialogue box.
You can do so simply by searching for the d3dramp.dll on the Internet and downloading it from a trustworthy source. Microsoft currently doesn’t have a list of the .dll files to download.
However, ultimately, we discourage you from doing it because it requires manual work to find and get the correct version for your system, and it’s not reliable.
While encountering the d3dramp.dll missing error can be frustrating, this issue can be easily solved with minimal effort.
Let us know below which of these solutions worked for you.
Encountering Ticketmaster error code 0002 can be frustrating, especially when you’re trying to secure tickets for an event. This error often stems from account issues, payment problems, or connectivity glitches. Let’s dive into some straightforward solutions to get you back on track.
How can I fix Ticketmaster error code 0002?
1. Verify your account information
Open the Ticketmaster website or app and log in to your account.
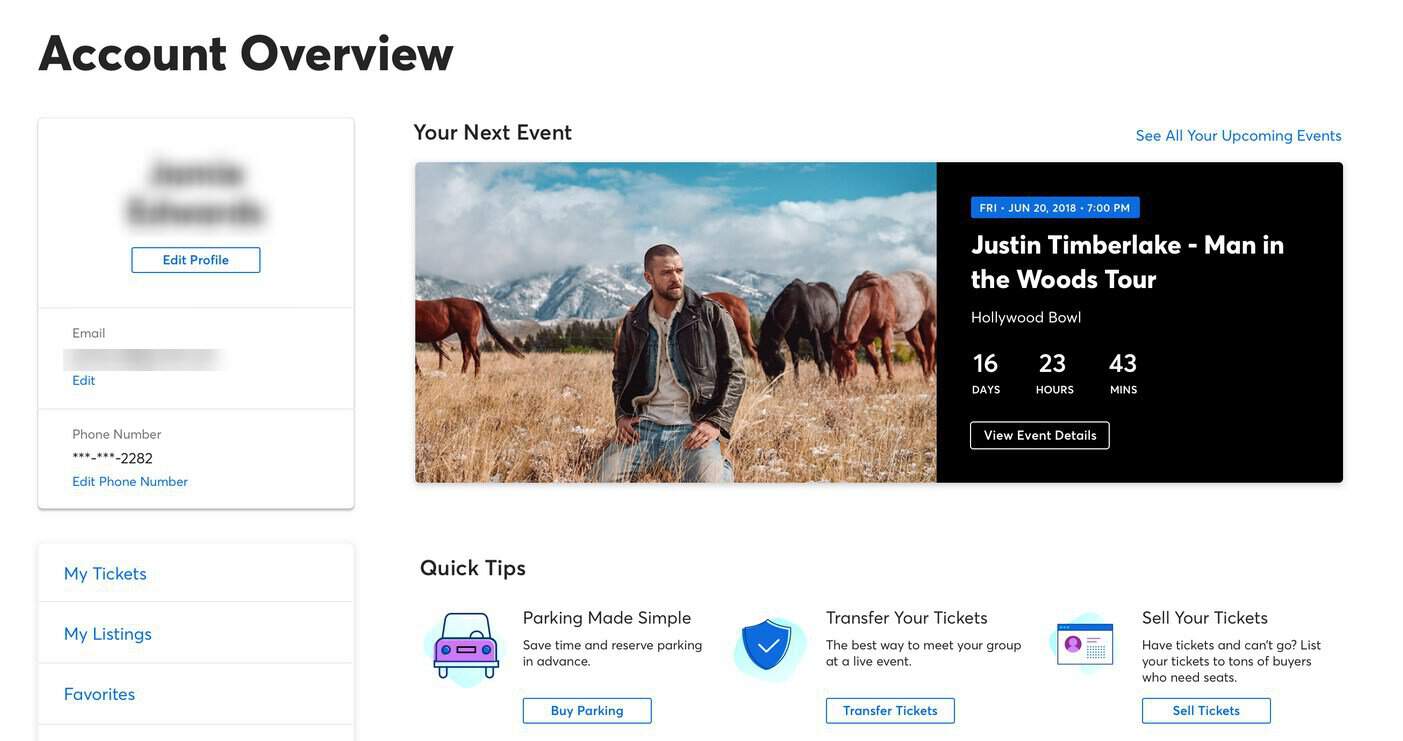
Navigate to the My Account section.
Review your account details, ensuring all information, like email and payment methods, is correct.
Verify that your payment details, especially the CVV and expiration date, are correct.
If any information is incorrect or outdated, update it accordingly and save the changes.
Attempt a new purchase to see if the error persists.
2. Avoid multiple devices and browsers
Sign out from all devices and browsers where you are logged into Ticketmaster.
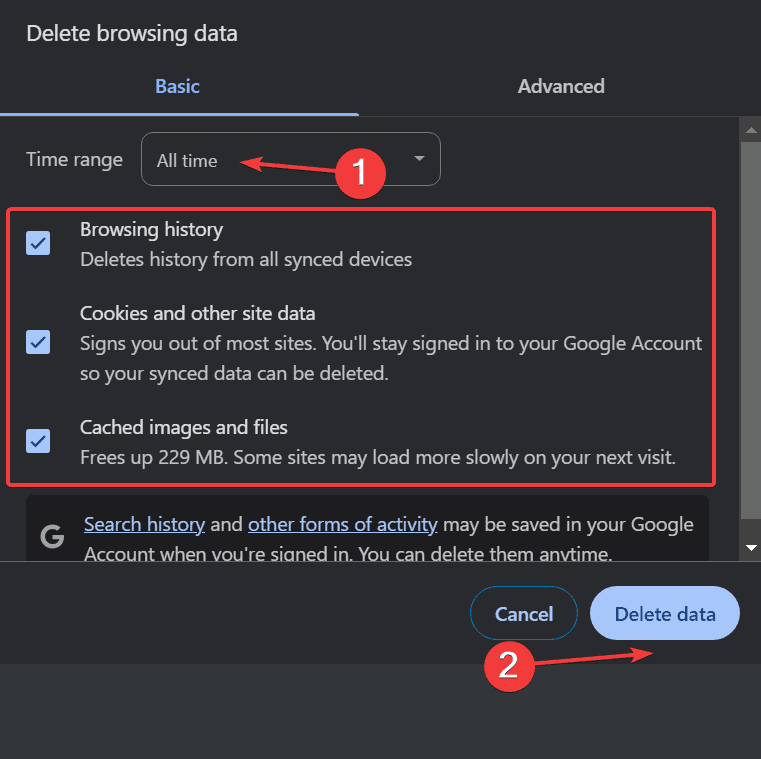
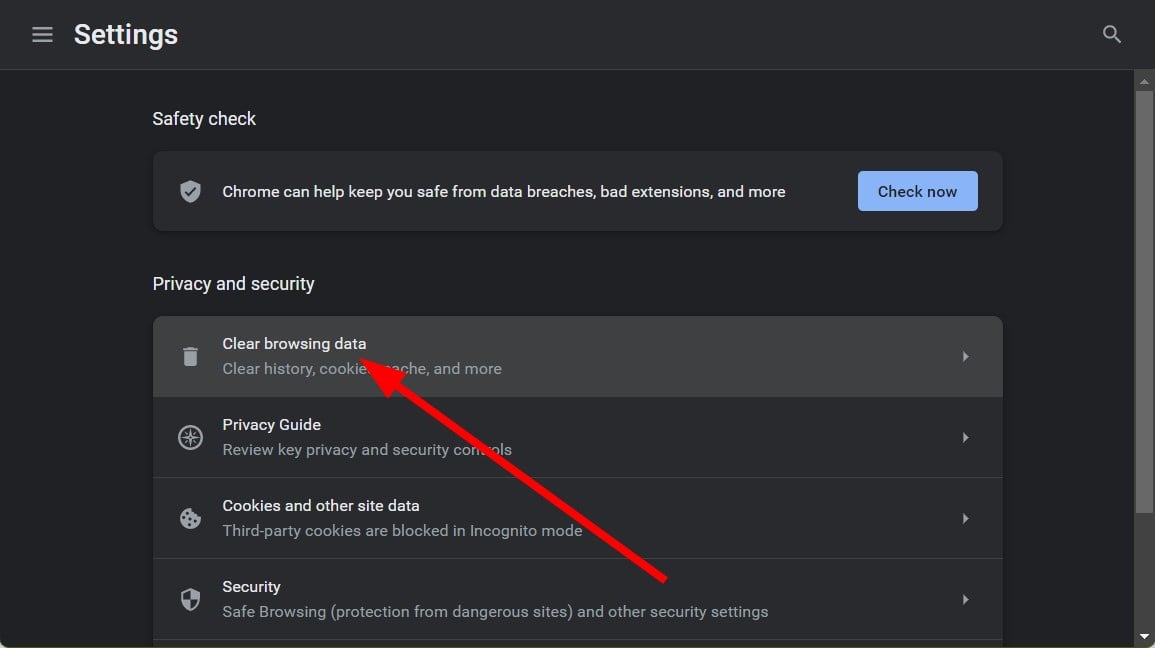
Clear your browser’s history and cookies. In Chrome, click the three dots > More tools > Clear browsing data > Choose All time > Clear data.
Restart your browser and sign into Ticketmaster on only one device.
Try to make your purchase again using a single browser tab.
Using multiple devices or browsers can trigger bot-like behavior, causing Ticketmaster to block your activity temporarily.
3. Disable VPN and proxy
If you are using a VPN, turn it off temporarily.
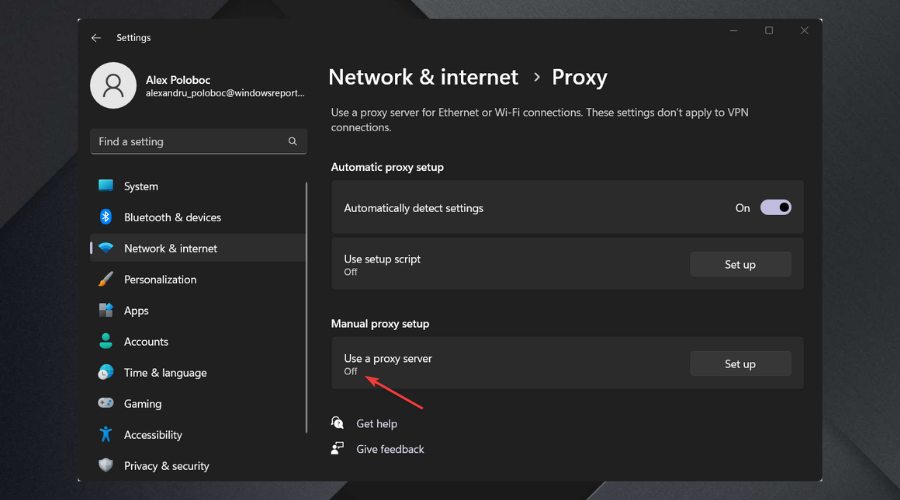
Disable any proxy settings on your computer. In Windows, go to Settings > Network & Internet > Proxy > Toggle off Use a proxy server.
Restart your browser and internet connection.
Log into Ticketmaster and try your purchase again.
By following these steps, you can resolve the Ticketmaster error code 0002 and enjoy a smoother ticket-purchasing experience.
Knowing how to create a shortcut on the Google Chrome homepage will streamline access to your favorite websites. You can pin your go-to news site, social media platform, or a work tool to save time and improve your browsing experience.
I’ll show you how below, so let’s get into it!
How To Create a Shortcut on the Google Chrome Homepage
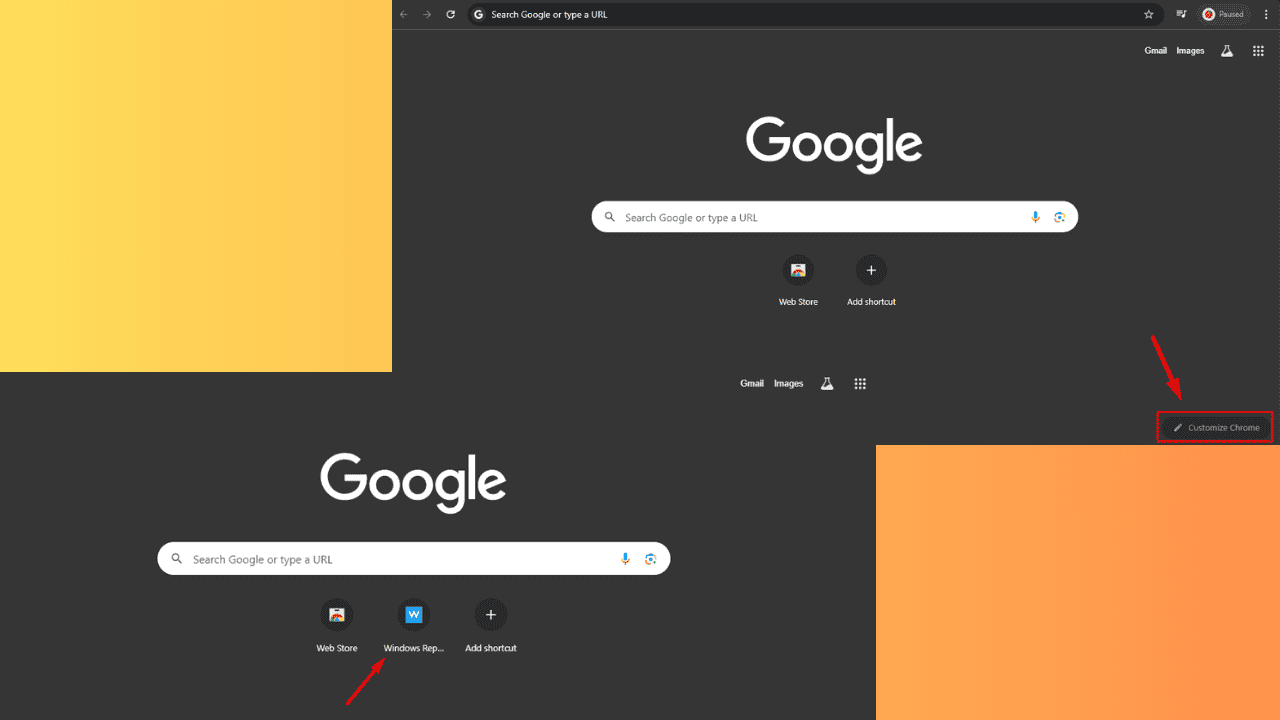
If you want to create your own shortcuts, select My Shortcut. Alternatively, you can pick the most visited sites. For this example, I’ll use My shortcuts.
Close the tab, then go to a website you want to create a shortcut for. Right-click on the address bar and copy the URL.
Go to Chrome’s home page and tap the Add shortcut icon.
Add the name, paste the URL, and then hit Done.
Your shortcut will appear on the Google Chrome homepage.
That’s it!
However, you can only create up to 10 shortcuts. If you need more, use the bookmark bar. Here’s how:
Open Google Chrome and click on the three dots in the top-right corner.
Tap “Bookmarks and lists” and select “Show bookmarks bar” to ensure the bar is visible. Alternatively, press Ctrl + Shift + B.
Visit the website you want to add. Click on the star icon in the address bar (next to the website URL).
A pop-up will appear, allowing you to name the bookmark. Choose a name and select “Bookmark bar” as the folder for the shortcut. Click “Done“:
The shortcut will appear on the bookmark bar.
So, now you know how to create a shortcut on your Google Chrome homepage or bookmark bar. With quick access to your favorite sites, you’ll save quite a bit of time. Set up your shortcuts today and make your browsing more convenient!
Running into the PowerPoint couldn’t write to Microsoft Word error can be incredibly frustrating, especially when you’re on a tight deadline. This guide will walk you through several solutions to help you resolve this issue and get your presentation exported smoothly.
Why couldn’t PowerPoint write to Microsoft Word?
This issue appears due to your export settings. Large images in your presentation can sometimes cause this problem.
What can I do if PowerPoint couldn’t write to Microsoft Word?
Before trying anything else, restart your PC, close any nonessential applications, and check if that helps. Ensure that the Office is up to date to prevent any bugs from appearing.
1. Adjust PowerPoint export settings
Open your PowerPoint presentation.
Click on the File menu in the top-left corner. Select Export from the left pane.
Click on Create Handouts under the Export options.
Choose Create Handouts in Microsoft Word.
In the Send to Microsoft Word box, click the page layout that you want.
Select either Paste to keep the content unchanged or Paste link to reflect updates.
Click OK to start the export process.
2. Compress images to reduce file size
In your PowerPoint presentation, click on an image to select it.
Go to the Format tab that appears when an image is selected.
Click on Compress Pictures in the Adjust group.
Uncheck Apply only to this picture to apply the changes to all images.
Choose a resolution that reduces the file size of images (e.g., Web (150 ppi)).
Creating a duplicate of a Word document is a common task that can save you from accidentally altering the original file. Whether you’re working on a project or just need a backup, here are some simple methods to make a copy of your Word document.
How can I make a copy of a Word document?
1. Copy and paste
Locate the Word document you want to duplicate on your computer.
Select it, right-click, and choose Copy. You can also press Ctrl + C on your keyboard.
Navigate to the folder where you want to store the copied document.
Right-click the empty space and choose Paste. You can also press Ctrl + V on your keyboard. The document will appear, usually called something like Document Name (2).
2. Save the document under a different name
Open the Word document you want to duplicate.
Locate the File option in the top-left corner and select Save As.
Enter a new name for the document, like Document Name Copy, and choose the folder where you want to save it.
The document will now be saved as a new file, separate from the original.
Locate the document on the list, right-click it and choose Open a copy.
This will open a new document named something like Copy(1) of DocumentName.
Save the new copy to your chosen location with an appropriate name.
4. Open a copy from the file itself
Find the document you want to duplicate.
Right-click on it and select New.
A copy of the document will now open without a name.
Click File and Save As to name and save the document.
This method allows you to quickly create a new document based on an existing one without opening the original document.
By following these steps, you can easily create duplicates of your Word documents. Always remember to keep your files organized and regularly back up important documents to avoid data loss.
Themsstdfmt.dll file is an important dynamic link library (DLL) for specific applications in Windows. If this file is missing, corrupted, or improperly registered, it can cause various errors. It’s usually due to accidental deletion, malware infection, or issues with the Windows registry.
If you’re encountering this problem, don’t worry. I’ll take you through six possible fixes to restore the missing DLL file and get your applications running smoothly again. But before we begin, try these quick fixes:
Run a virus scan for your system. Press Windows + S > Type Windows Security> Open > Virus & threat protection > Scan options > Full scan > Scan now.
Update Windows. Press Windows + I > Windows Update > Check for updates > Download and install.
If these didn’t work, check out the rest of the guide for more in-depth solutions.
6 Ways To Fix Msstdfmt.dll Is Missing Error
Simply follow these steps:
Run an SFC Scan
System File Checker (SFC) is a built-in Windows utility that scans and repairs corrupted or missing system files, including DLLs like msstdfmt.dll. To use it:
Press Windows + X and select Windows PowerShell (Admin).
Type sfc /scannow and press Enter.
Wait for the scan to complete, restart your PC, and confirm whether the error has been solved.
Use System Restore
If the msstdfmt.dll problem started after a recent system change, System Restore could revert your computer to a previous state where everything worked fine. Here’s how to do it:
Press Windows + R, type rstrui, and hit Enter to open the System Restore tool.
Click Next.
Select a restore point from the list, then tap Next.
Click Finish. Your computer will automatically restart to begin the restoration process.
After the reboot, check to see if the issue is resolved.
Update the Drivers
Outdated or corrupted drivers can lead to DLL errors. Ensuring that your drivers are up to date might resolve the msstdfmt.dll issue. Follow the below steps:
Expand the relevant category. For example, right-click the display adapters driver category and tap Update driver if you get an error when playing a 3D video game.
Choose Search automatically for drivers and follow the onscreen instructions.
Roll Back a Driver
If updating drivers doesn’t solve the problem or the error appears after an update, rolling back to a previous version might help. Here’s how to do it:
Press Windows + X, then tap Device Manager.
Right-click the affected device and select Properties.
Go to the Driver tab and click Roll Back Driver.
Reinstall the Application
If the msstdfmt.dll error is specific to a particular program, reinstalling the application might restore the missing DLL file. Here’s what to do:
Press Windows + I to open Settings and go to Apps.
Find the problematic application, select it, and click Uninstall.
Download the latest version of the application and reinstall it.
Copy the DLL File and Register It
If you still encounter issues with a missing msstdfmt.dll file, copying and registering it manually can resolve it. Here’s how:
Copy the msstdfmt.dll file from a working computer.
Paste it to C:\Windows\System32 for 32-bit systems or C:\Windows\SysWOW64 for 64-bit systems.
Press the Windows icon + R, type “cmd,” and press Enter to open Command Prompt as Administrator.
Type regsvr32 c:\windows\system32\msstdfmt.dll for 32-bit versions or regsvr32 c:\windows\syswow64\msstdfmt.dll for 64-bit versions in the Command Prompt and tap Enter to register the DLL file.
Restart your computer to apply the changes and check if the issue is resolved.
Overall, the msstdfmt.dll missing error can be frustrating but you can resolve it with the right approach. By following the steps outlined above, you can restore the file and get your programs running smoothly again. Remember also to perform regular virus scans and updates to prevent similar issues in the future.
Microsoft is rolling out a new preview function called TRIMRANGE for its Excel platform and a set of nifty trim references designed to simplify data and spreadsheet work. This capability will help users clean their files faster and more easily.
In a blog post, Microsoft says TRIMRANGE is all about efficiency. Imagine you’re working with dynamic array formulas or trying to boost the performance of lambda functions. This function removes those pesky empty rows from the edges of a range. That means no more unnecessary calculations running on every cell and trailing zeros messing up your data.
But how does it work? Let’s say you’re calculating the length of text entered into column A. Without TRIMRANGE, you’d get a result for every cell, including a bunch of zeros you didn’t ask for. With TRIMRANGE, it zeroes in on just the cells with text, making your formula more efficient and your spreadsheet cleaner.
TRIMRANGE is based on trim references similar to shortcuts or cheat codes. By tweaking the classic colon range operator (the A1:E5 thing), you can specify whether you want to trim blanks from the start, end, or both sides of a range. There are three types: trailing trim ref (:.), leading trim ref (.:), and full trim ref (.:.).
Trim refs are a game-changer for those who love diving into full-column references but hate how sluggish they can be. They let you focus on just the part of the column that has values, making your formulas faster and more efficient.
This shiny new function and its companions are now available to Beta Channel users running Version 2409 (Build 18020.2000) or later. If you’re not seeing it yet, don’t worry. The Redmond-based tech giant is gradually rolling them out.
TRIMRANGE and trim references in Microsoft Excel are poised to be a big deal. Like the recently announced Python editor, they promise to make our data cleaner, our formulas faster, and our lives easier. And who couldn’t use a bit more of that?
Outlook’s work hours and location capability, which tracks every employee’s activity and presence at the office, will soon be accessible in the My Day pane.
According to the roadmap, this small but significant change will be added to the new Outlook for Windows and Web. This way, your team will know when you are available for offline and online collaboration even quicker.
You can also check your workmates’ work hours by clicking on their profile photo. This will automatically give you an overview of their status and other details such as Outlook calendar slot, local time, and work location.
The feature is expected to be released in October. Here’s what the entry says:
Work Hours and Location information will now be available in My Day pane in Outlook when using agenda view. Users will be able to update their Work Hours and Location information from My Day and also see who is coming to Office. This feature will be available in the new Outlook for Windows and web. #newoutlookforwindows
Teams will also suggest a new working time
If, for example, your profile has a scheduled working time, and your activity panders outside of that schedule, Teams will suggest a new working time for you to update on your profile.
But there is good news, too. You can easily turn off this suggestion. It concerns Viva Insights, an app Microsoft is tagging along with Teams. To do so, scroll down to your Viva email, go to Settings, and uninstall the Viva insights add-in. Then, the suggestions will stop.
Are you using Microsoft Teams at work? What do you think about these features? Let us know in the comments.
Encountering the Error_Driver_Cancel_Timeout issue can be incredibly frustrating, especially when it interrupts your workflow or gaming sessions. Fortunately, there are several effective solutions to tackle this problem and get your system back on track.
How can I fix Error_Driver_Cancel_Timeout?
Before we try anything else, make sure that your chipset and GPU drivers are up to date. You can also try updating BIOS to the latest version. Also, try different RAM configurations and check for overheating.
Open Search and type choose a power plan. Select Choose a power plan.
Select High Performance.
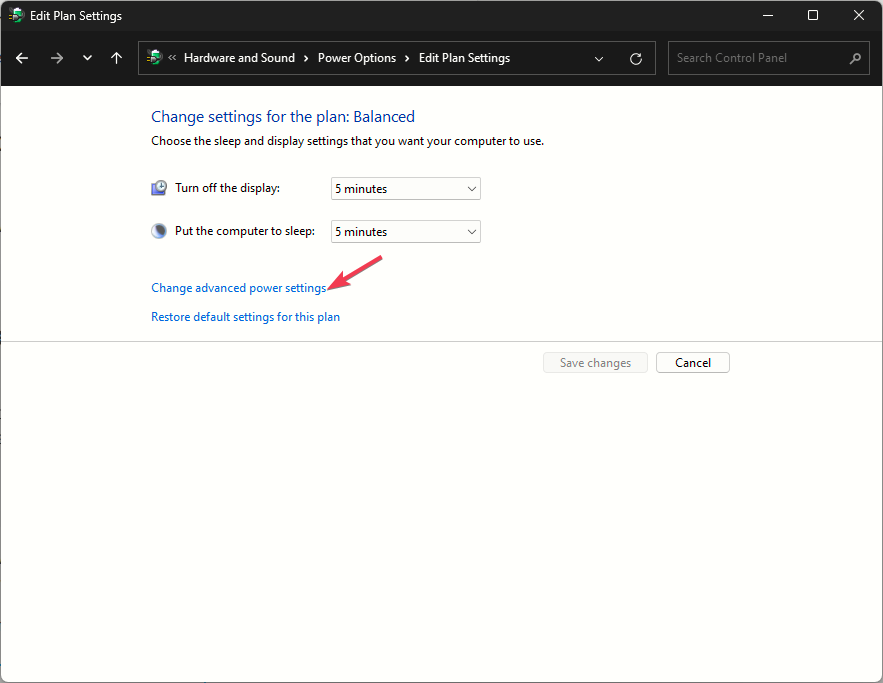
Click on Change plan settings -> Change advanced power settings.
Under PCI Express, turn off Link State Power Management.
This ensures that the PCIe slots are not entering low-power states, which can sometimes interfere with GPU performance and cause driver timeouts.
5. Reset AMD Adrenalin settings
Open AMD Adrenalin Software.
Go to Settings and click on Reset Settings.
Confirm the reset.
By following these steps, you can address the Error_Driver_Cancel_Timeout issue effectively.
For further investigation, you should know that this error has the following description: 594 (0x252) {Cancel Timeout} The driver %hs failed to complete a canceled I/O request in the allotted time.
As you might already know, AMD’s Ryzen 9000 series offers better performance on Linux than Windows 11 24H2. According to tests done by Phoronix and the German publication PCGamesHardware, Linux’s lean architecture is often cited as a critical factor in its performance edge. Unlike its resource-intensive counterparts, Linux offers a streamlined environment tailored to users’ needs, minimizing unnecessary background processes.
This customization capability allows users to create a setup optimized for their specific workload, whether gaming, content creation, or software development. The benefits of switching to Linux can be particularly pronounced for those wielding the power of AMD’s Ryzen 9000 series. Benchmarks have shown that certain Linux distributions, optimized for gaming and productivity, outperform Windows 11 24H2 in both arenas.
Linux doesn’t just squeeze out a few extra frames per second in the latest games; it offers a smoother, more responsive experience. Productivity tasks, such as file compression and decompression, also see a notable boost, highlighting Linux’s superior resource management capabilities.
But what about compatibility and ease of use, two areas where Windows has traditionally held an advantage? Linux has a steeper learning curve, and compatibility with specific software and games can be difficult.
However, with the latest KB5041587 to Windows 11, the Redmond-based tech giant unlocks the operating system’s capabilities to embrace AMD’s Ryzen 9000 series with better performances. Although we don’t know if they match the Linux ones, it’s clear that Microsoft has been observing what’s going on and acting accordingly.
The best news is that AMD’s Ryzen 9000 series’ performance on Windows 11 is now backtracked, so if it was available on Windows 11 24H2, it is now available on Windows 11 23H2, as well.
Either way, the decision to switch to Linux should not be taken lightly. You should take into consideration all the apps you already use on Windows, and if it ultimately serves your needs. However, for those ready to leap, the rewards can be substantial.
Not only could you see improved performance on your AMD Ryzen 9000 series CPU, but you’ll also be entering a world of unparalleled customization and control over your computing experience.
It’s worth mentioning that 2024 has been a great year for Linux. It has gained a significant market share, reaching 4,03% a few months ago, and has been growing ever since. Plus, over 2% of Steam users access the platform from Linux.
Windows 11 was updated with a new patch, KB5041587, rolling out for versions 22H2 and 23H2. While optional, it’s full of improvements, changes, and enhancements that will make the operating system faster and more stable.
First, the patch massively changes Windows 11’s taskbar. Remember when we told you that the Redmond-based tech giant was considering changing the layout of the taskbar in Windows 11 and previewing the change in the Insider Program?
Well, that change is now live. According to Windows enthusiast, @phantomofearth, installing KB5041587 also sets up the new layout, where the widgets taskbar position is moved next to the system tray, as you can see in the post below.
The latest optional update for Windows 11 v23H2/22H2 (KB5041587) enables the new widgets taskbar button position – next to the system tray – on taskbars with left aligned icons. First update released outside of the Insider Program to do so, it seems. pic.twitter.com/dkq9lmF54t
The patch also brings dozens of improvements to File Explorer. Pressing Ctrl + F to start a search should no longer crash; the navigation pane will also work. This update aims to smooth out these kinks, making your file navigation experience as smooth as silk.
For those who love sharing content between devices, something is exciting, too. You can now share content directly to your Android device from the Windows Share window. Just make sure your devices are paired, and you’re good to go.
For the visually impaired, the KB5041587 update makes scan mode in Narrator respond quicker, which is a boon when reading large documents or browsing the web with Microsoft Edge. Voice access gets a boost, too, with faster dictation and more editing commands.
Similar to the update for Windows 11 24H2, KB5041587 also focuses on the Widgets Board. It’s getting an update to enhance security and the APIs for creating widgets and feeds, especially for users in the EEA regions.
Some of these changes are rolling out gradually, so don’t fret if you don’t see them immediately after updating.
For the tech-savvy, there are under-the-hood improvements and fixes, from addressing memory leaks with the Input Method Editor (IME) to updating COSA profiles for mobile operators. For those using Bluetooth or dealing with hibernate stop errors, this update has something for you, too.
It’s worth mentioning that KB5041587 contains a known issue regarding dual-boot configurations with Linux that might give you a headache. However, there’s a workaround available.
To get this update, go to Settings > Windows Update and check for the latest updates. Alternatively, you can download it directly from the Microsoft Update Catalog.
Microsoft introduced an update for Xbox Insiders that allows them to connect directly to their Discord friends and channels from the Xbox app. The feature is now live for all Xbox users. Previously, it was previewed in the Xbox Insider Program.
According to Xbox Wire, connecting your Microsoft and Discord accounts is easy. After you link them, your buddies from Discord will appear in the Xbox Friends list.
It’s now easier to see when one of your Discord friends is playing, chatting, or streaming, and you can jump into voice chat with them or watch their stream – all on your Xbox console, without having to use the Discord app on PC or mobile.
You can scroll through the list of friends on Xbox, but that’s not all—there is also the ‘Happening Now’ area, where you can find all of your active Discord friends whenever they’re chatting, gaming, or streaming.
If your Xbox and Discord accounts are linked, you can opt-in to have your Discord friends included in your Friends list on the Xbox guide by re-linking your accounts. Once you relink your Xbox profile and Discord account, head to the Friends list of the Xbox guide.
Xbox Insiders can stream their play directly to Discord friends from their consoles. The new feature will allow you to see when your friend is streaming, and if you want to join the stream, there will be a ‘View Stream’ option that will take you directly to it.
This merging is not a hasty move from Microsoft. It has been one year since they partnered with Discord, seeking to link console and PC gamers. Although no fixed date is mentioned for when these features will be made available to all Xbox users, it’s evident that the responses received from Insiders will mould the future relationship between Xbox and Discord.
Running into the Error Not_Safe_Mode_Driver issue can be a real headache, especially when you need to troubleshoot your system in Safe Mode. Let’s dive into some effective solutions to get your drivers working smoothly in Safe Mode.
How can I fix the ERROR_NOT_SAFE_MODE_DRIVER error?
1. Update or Reinstall the Driver in Safe Mode
Press Win + R, type msconfig, go to the Boot tab, check Safe boot, and select Minimal. Restart your PC to boot to Safe Mode.
Once you enter Safe Mode, press Win + X and select Device Manager.
Find your driver under the appropriate category, right-click, and choose Update or Rollback.
Go back to msconfig uncheck Safe boot, and restart your PC.
2. Use NtLoadDriver for error diagnosis
Press Win + R, type cmd, and press Shift + Ctrl + Enter.
Use a tool that employs NtLoadDriver() to load your driver manually.
If the command returns 0xC000035F STATUS_NOT_SAFE_MODE_DRIVER, it confirms the Safe Mode restriction issue.
The returned NTSTATUS code can help diagnose why the driver fails.
Go to HKEY_LOCAL_MACHINE\SYSTEM\CurrentControlSet\Control\SafeBoot\Minimal
Right-click Minimal and choose New > Key. Give the key the driver name (e.g., Driver64.sys) and set the default value to Driver.
Go to HKEY_LOCAL_MACHINE\SYSTEM\CurrentControlSet\Control\SafeBoot\Network
Repeat adding your driver name key and setting the default value.
Ensure the driver file (e.g., Driver64.sys) is in C:\Windows\System32\drivers
4. Ensure driver signature compliance
Ensure your driver is signed with an Extended Validation (EV) SHA-256 certificate.
Submit your driver for Microsoft co-signing through HLK or attestation.
Ensure that the driver does not contain an outdated SHA-1 signature.
Temporarily disable SecureBoot in BIOS to test driver loading.
By following these steps, you should be able to resolve the Error Not_Safe_Mode_Driver issue effectively. It’s important to mention that this error comes with the following description: 646 (0x286) The driver was not loaded because the system is booting into safe mode.
Google Chrome’s Reading List on the desktop is about to get even more convenient with the addition of toasts and notifications.This new feature is designed to provide users with timely updates and feedback, making it easier to manage and interact with saved articles.
Chrome allows you to save and read articles offline with a simple click. Your reading list is synced across all your Chrome devices, so you can access your saved articles from anywhere.
Google is working to add toasts to the Reading List in Chrome as WindowsReport Spotted respective flag, commit message, and a meta bug.
. “Enables the use of toasts to present confirmation of user actions” the “Top Chrome Toasts” flag description reads.
Top Chrome Toasts flag. Image Credit: WindowsReport.Image Credit: WindowsReport
In case you don’t know, toasts are small, temporary notifications that pop up on your screen. They’re often used to provide quick feedback or confirmations.
In the context of Chrome’s reading list, toasts could be used for the following:
When you add current page to reading list
When a user copies a link or image from a saved article, a toast will appear with a visual highlight, confirming that the link or image has been copied successfully.
When you save an article to your reading list, a toast could appear briefly to let you know it’s been saved successfully.
If you’ve subscribed to certain websites or feeds, toasts could alert you when new articles are available in your reading list.
Toasts could also display information such as the number of unread articles, recent additions, or other relevant details.
Page added to reading list toast. Image credit: WindowsReport
How to enable Toast Notifications for Reading List in Chrome
Launch the latest Chrome Canary
Visit chrome://flags/#top-chrome-toasts in address bar
Select “Enabled” from the dropdown
Restart Chrome for the changes to take effect.
Toasts will include buttons that allow users to take immediate action or dismiss the notification. As you can learn from the flag, the company is testing to show toasts for reading lists for 8 seconds, 10 seconds, and 12 seconds.
For instance, when you have the side panel open with the reading list and you copy a link or image while reading a story, Chrome will likely display a toast notification to confirm the action.
In this Insightful review, I got hands-on with the productivity and monitoring software to see if it creates a more efficient and work environment.
Insightful uses advanced analytics to provide insights into employee performance and time management, and creates a unified system for managing tasks, shifts, workflow, and more. It’s suitable for both remote and hybrid workforces but requires physical installation.
Here’s everything you need to know:
Insightful Review – Key Features
Some of the most notable features and solutions Insightful offers include:
Employee Monitoring
Insightful digs deep into your team’s day-to-day productivity to uncover eye-opening patterns and trends. With this data in hand, you can fine-tune your managerial approach and improve your team’s overall performance and output. With the employee monitoring software, you can view activity logs, the apps and websites being accessed, get auto screenshots if suspicious activity is detected or take them yourself. There is even a stealth tracker, so workers are unaware of monitoring.
Automation is where Insightful really shines. Time and attendance can be tracked automatically, and you can view all activity in real-time. Plus, the timekeeping data is stored for up to two years.
I like that you can stay up to date with email reports scheduled daily, weekly, or monthly. Meanwhile, alerts can be set for important triggers like security breaches or simple idling or absences, based on your criteria.
Insights
While Insightful provides valuable insights into employee activity, it’s not intended to micromanage.
The software can reveal behavioral patterns and trends that can help identify both potential risk factors and opportunities within your workforce. Based on the data, you can spot signs of employee burnout, see whether locations or certain tasks or apps are hurting performance, and discover other indicators that help you optimize work and improve overall productivity.
One standout feature is Automatic Time Mapping, which tracks how users spend their time throughout the day, without requiring manual input. They can switch tasks and work on projects without updating anything or manually stopping timers, for example.
Call Center Monitoring
Insightful’s call center quality assurance software is designed to elevate the quality and efficiency of call center operations. Unlike most call center screen recording software which—as the name suggests—are often limited to call center screen recording, Insightful provides more comprehensive behavioral insights into agent performance.
The feature tracks every minute of an agent’s time on or off calls, giving you a clear picture of efficiency metrics. Insightful’s call center screen capture software shows exactly how time is allocated across tasks and projects, highlighting areas where productivity can be optimized.
The platform’s advanced real-time monitoring capabilities are what set it apart from the average call center recorder. The detailed activity logs reveal bottlenecks, excessive task lengths, and wasted time, allowing you to iron out any inconsistencies.
With instant feedback on individual and team performance, it’s much easier to manage resources, track the overall output, and ultimately enhance the call center’s service quality.
Financials
Time tracking is also important from a budgeting and payroll perspective and Insightful offers a comprehensive set of features and insights to that end.
For example, accurate billable hours tracking helps ensure your invoices are on point and that there’s no revenue leakage. Moreover, the time tracking logs provide an accurate representation of labor costs and the time and resources invested in specific projects.
You can track the income from an entire project and how this breaks down per employee. And, all the info can be exported for payroll.
All this lays a solid foundation for better budgeting and forecasting, as well as evaluating your profitability. Plus, it gives basis for resource allocation and staffing needs.
AI
AI is a welcomed addition to Insightful. It’s definitely a new approach to data analysis that sets Insightful apart from similar platforms.
InsightfAI simplifies the process of data analysis by letting you ask direct questions about your workforce. The AI-powered chatbot then analyzes your data and automatically generates relevant insights. This makes it easier to uncover valuable insights, spot trends, and ultimately, make informed decisions quicker.
What’s more, the data is displayed visually and tailored specifically to your organization’s goals and challenges.
Groups
You get full control over your employees and departments, applying different features and settings to individuals, groups, or those working on specific projects.
For example, a particularly important project might need to be monitored closer than a team working on something lighter.
Integrations
Chances are, your company’s got a whole suite of tools they rely on, so you want a tool that can fit easily in your existing ecosystem. Luckily, Insightful offers more than 50 integrations, including everything from Clickup and Asana to GitHub and Google Workspace.
Most of these fall under project management, data, and employee/HR tools. And from what I can tell, they roll out new integrations pretty regularly.
Other Features at a Glance
Other features worth noting include:
Employee clock-in and clock-out logging
Shift scheduling
Project and task assigning
Project and task time tracking
Workflow and bottleneck analysis
Insurance department tools
Support team tools
File sharing and collaboration tools
Screen Recording
Interface
The dashboard is super easy to navigate, and it gives you a clear picture of what’s going on with your team. You can customize the settings to fit your company, structure, teams, etc.. The onboarding wizard is straightforward, and it walks you through everything step-by-step.
For on-premises monitoring, the computer software must be installed on at least one admin machine to access the dashboard.
Pricing
If you want to take the product for a spin, Insightful offers a 7-day free trial. You don’t have to hand over any billing information during this time.
Once you subscribe, you can choose to be billed monthly or annually. If you commit to a yearly subscription, you get to save up to 20%.
Right now, there are four different pricing plans available:
Productivity Management: $76.80/yr or $8/mo – No user minimum
Time Tracking: $96/yr or $10/mo – No user minimum
Process Improvement: $144/yr or $15/mo – For over 50 users
Custom Quote Enterprise Solution – For over 100 users
The pricing plans are based on the specific needs of different teams. For example, the Productivity Managment is aimed at organizations who want to track employee productivity and identify areas for improvement.
Most features are also available as addons, such as:
On-Demand Screenshots
Security Alerts and Threat Detection
Increased Screenshot Frequency
Full Screen Recording
Data Warehouse Integrations – BigQuery
Customer Support
Insightful offers a ton of resources to help you get started and navigate the platform. There’s a helpful knowledge base, along with webinars, demos, and other useful materials to guide you through the process.
You can get in touch with the support staff via a 24/7 live chat. It might take a few minutes to get through the chatbot but you’ll reach an actual member of staff soon enough.
Customers can also reach out with an email or website contact form (support ticket). For Enterprise customers who prefer to speak with a representative directly, there’s also a phone number.
Overall, there are plenty of ways to get help, depending on your preferences. I also found the support team to be really helpful and knowledgeable which is always a plus.
Time to wrap up my Insightful review! All in all, the software is quite comprehensive and surprisingly easy to use.
The platform is perfect for organizations in need of more than run-of-the-mill employee monitoring and require deeper insights to streamline productivity.
If I had to nitpick, I’d say that since Insightful is a computer-based software, companies that rely heavily on field operations may need to look for different solutions.
Other than that, there’s not much to dislike. Insightful is a digital Swiss army knife for managing time, tracking productivity, and making data-driven decisions.
The Netflix nses-500 error is mostly a server error and can occur mid-watch. Since it’s majorly a server-side issue, you’ll have to wait it out as you refresh the page but you can also try another device or the web version.
If waiting it out is not an option or you’ve verified that the Netflix service status is up and running, you can try some basic troubleshooting steps and see if the page will be back up. Netflix connection errors like the error-code-nw-3-16 are common so one may just resolve the issue.
How do I fix Netflix error NSES-500?
1. Sign out of Netflix on all devices
Launch your browser on another device and open Netflix.
Click the profile button at the top right of the Netflix browser tab.
Select Account to open further options.
Scroll down to Settings, and click the Sign out of all devices link there.
Click the Sign Out button shown directly below.
Wait for a few minutes then sign back into Netflix and see if the error persists.
Alternatively, you can try logging in from a different device since Netflix tends to lag on some PCs. You can try the Android or TV version and see if the error nses-500 persists.
2. Clear app cache
2.1 TV cache
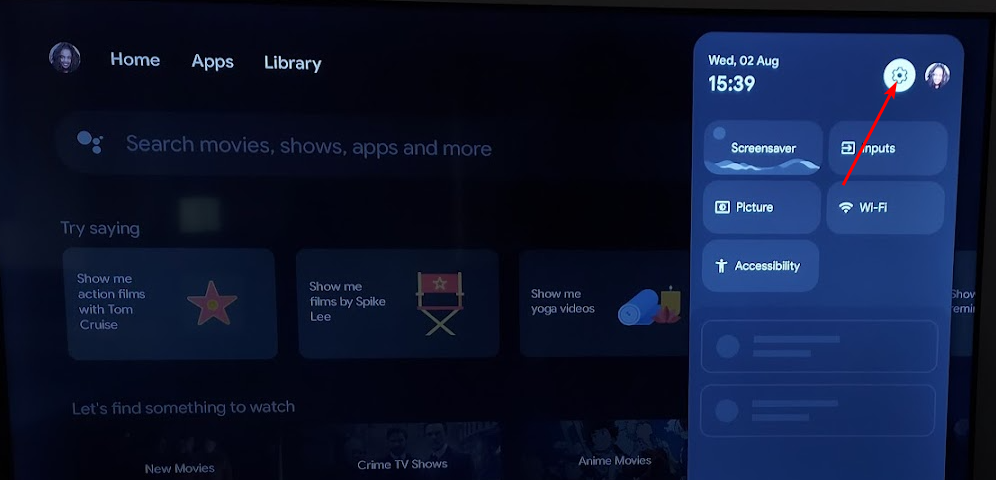
On your TV, find your Settings.
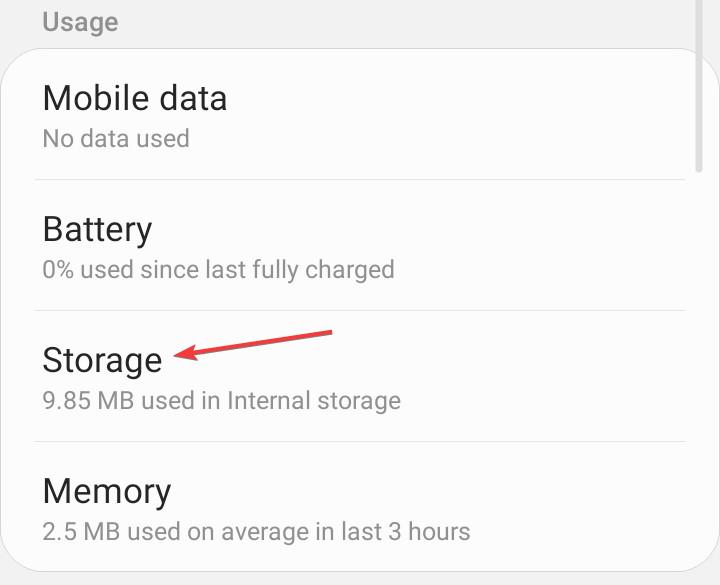
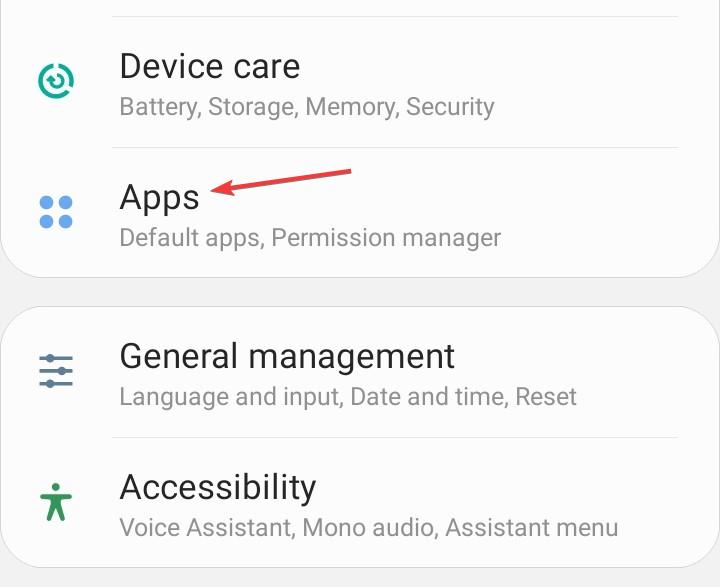
Go to Apps and select Netflix.
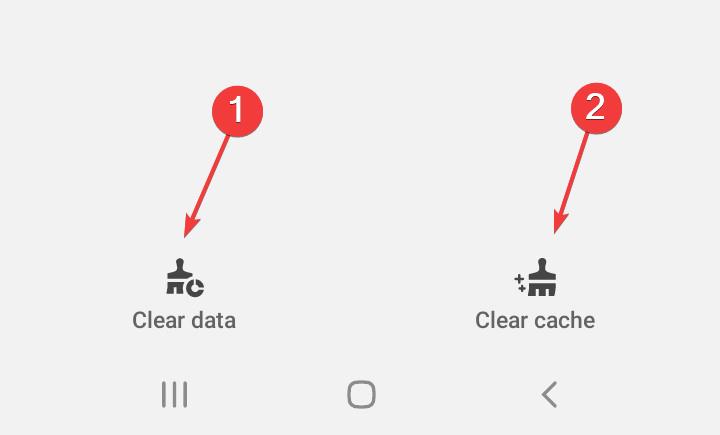
Scroll down and hit Clear data and Clear cache.
2.2 Windows app
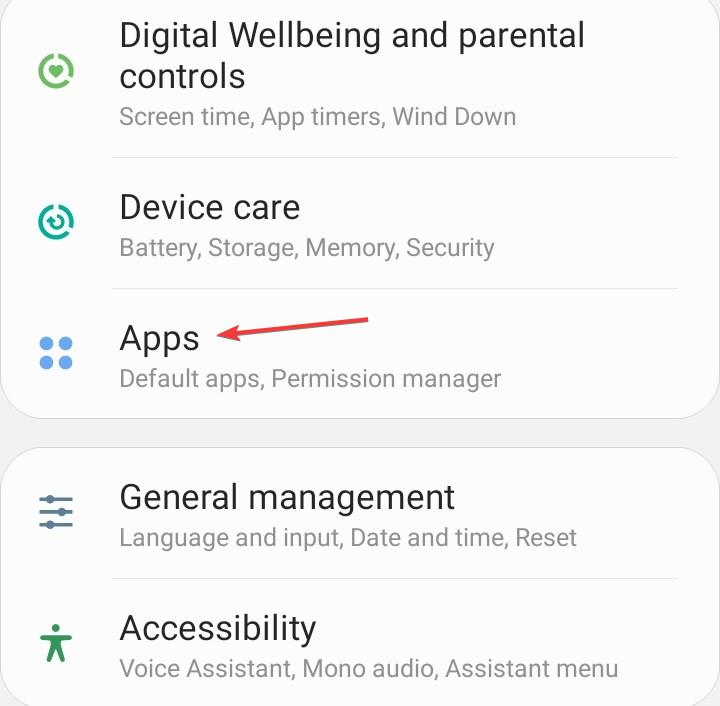
Hit the Windows key and click on Settings.
Click on Apps on the left pane then Apps & features on the right pane.
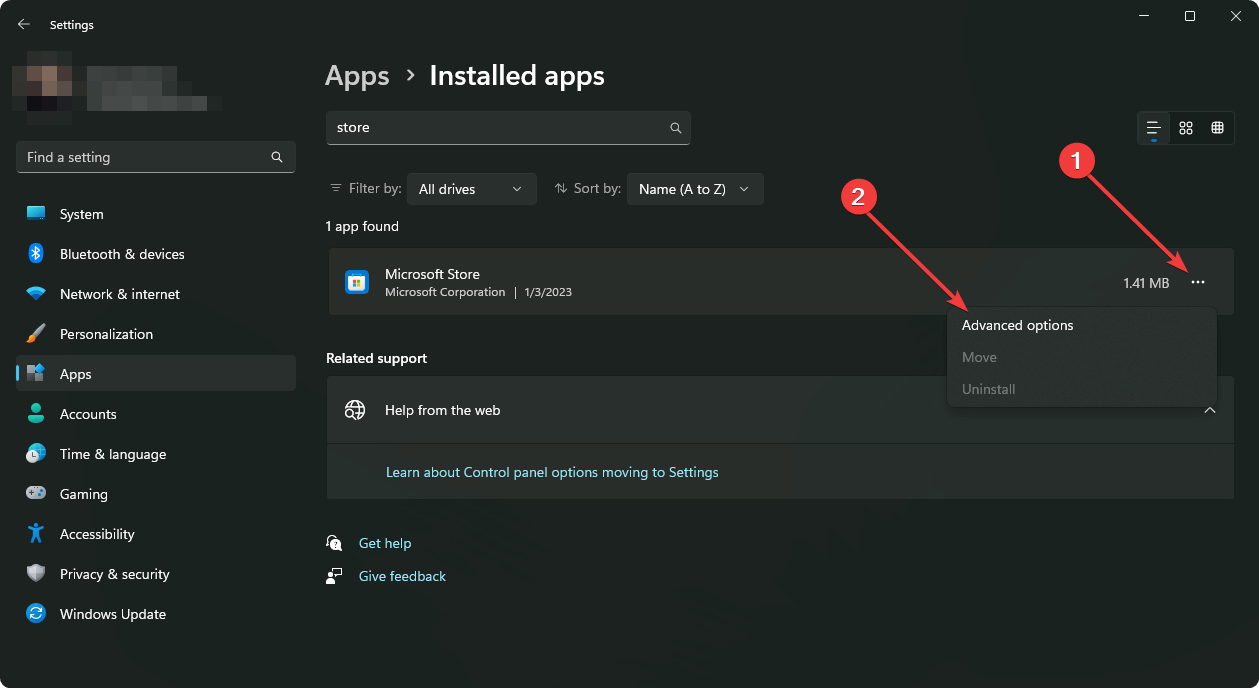
Locate the Netflix app, click on the three vertical ellipses, and select Advanced options.
Click on Repair.
Go back and click on Reset if the repair option failed.
If all the above fail to get you back to your watching, try contacting customer service. Some errors like nses-uhx are browser-related so try the app. In the meantime, feel free to explore Netflix alternatives and discover more fun content to watch.
If you’ve been in the same boat before and encountered the nses-500 Netflix error, share with us some tips you think we should know in the comment section below.
The Asus ROG Ally X can be turned into a Steam Deck, which works better. However, Windows 11 is not the best friend of the former handheld console when it comes to power and battery life.
According to Tom’s Hardware, using a custom Linux image to run the Steam Deck’s OS decreases frame rates by 15% in games such as Cyberpunk 2077, Tetris Effect, and Forza Horizon 5. It increases battery life by 22% compared to a standard Linux image. This stark difference in performance and efficiency highlights a critical issue with Windows 11 in portable gaming.
Setting up a dual boot with the Steam Deck’s OS is not easy, but using the ROG Ally X with SteamOS could be the better choice despite the challenges. It seems that the change not only offers a user-friendly interface designed for gaming, but the SteamOS offers a streamlined experience, focusing on what’s essential for gamers: system customization, a comprehensive game library, and an integrated game store.
While the Windows 11’s standby battery drain is a well-known issue, for the ROG Ally X, switching to SteamOS significantly reduced this drain, many gamers don’t seem impressed by the 15% increase in frame rates and longer battery life.
The drawbacks are the lack of freedom, the lack of Game Pass, and the SteamOS’s sturdy and hard interface, which could be frustrating for Windows users, and many seem to agree and adhere to this.
I mean duh? I still prefer Windows over SteamOS because most of my gaming is on GamePass and a little bit of Steam on the side. Dual boot would be good for those who go in between enough.
Why would you buy an Ally over a Steam Deck if you’re OK with being restricted to just your Steam library? I bought the Ally because of Windows, not in spite of it.
i dont understand why people glaze steamos so much, my time with the steam deck was spent googling how to get half the games I wanted to play and running sudo codes. in windows I just download and click.
Ultimately, the choice between Windows and SteamOS for the ROG Ally X is up to the gamers. SteamOS’s performance, battery life, and user interface might be hard to ignore, but Windows 11 has its fair share of benefits.
Even though Xbox has been in the news lately (and by lately, I mean the last years), the console is still not big enough to surpass PlayStation or Nintendo as the definitive gaming device. Even though it rules in some regions, such as the US, in other regions, Microsoft struggles to keep up the pace with the other consoles in terms of sales.
However, Xbox is doing something the other consoles aren’t: it’s slowly gaining praise and popularity among hardcore gamers, not only for its industry-standard gaming subscription model, the Game Pass, but for another thing. Are you ready to hear it? Inclusivity. And by that, I mean video game inclusivity, especially the once-popular but now-forgotten RTSs or Real-Time Strategy games.
These games, such as the Age of Empires franchise (with its beloved Age of Mythology spin-off) or the popular Starcraft and Warcraft franchises, were very popular in the early 2000s. But they were also very PC-coded, in the sense that they were made to be played on PCs.
Well, Microsoft saw a spark of opportunity. The Redmond-based tech giant took it: it brought RTS classics, such as Age of Empires and the more recent Age of Mythology: Retold (which is now available to play), to Xbox, as well. This allowed console gamers to try their hands on the classic RTS titles and genre, not with the usual mouse and keyboard but with Xbox controllers, and it worked.
The console is now being praised. In a Reddit post, the gaming community has come together to praise Xbox’s determination to keep the dying RTS genre alive.
For years RTS games have been in a decline. The “golden age” of RTS was over and no one really developed new RTS games. And yes I know that RTS games are not for everyone and that’s totally okay. But Microsoft/xbox continues to support and update games like the AGE OF franchise. Starting with releasing divinitive editions of the first three Age of Empires, then doing a completely new game, years after the last one (Age of Empires IV) and then they thought “hey we might figure out how that could work well with a controller” and released AGE 2 and 4 on Xbox without any compromises and with amazing controller support. Now they are soon releasing Age of Mythology again on PC and Xbox simultaneously in a couple of days. Even though the original from 2002 (I think) didn’t even sell that well. For RTS players it’s really one of the best things Xbox has done. Instead of focusing on the 500th uncharted or Batman Arkham “clone” they look to other directions and see what they can do.
Could Xbox be the answer for the RTS resurgence? Well, it seems so: Microsoft is releasing Age of games one after the other, not only on PC but also on Xbox. and many more are coming; the hotly-anticipated Age of Mythology: Retold is another classic that wasn’t so big (but it was really popular within the RTS community and often cited as one of the best games of the genre) at the beginning of the 2000s, but it might get big now thanks to its availability on the console.
The best thing is that RTS support is the biggest reason for many PC gamers to use Xbox as their main console.
Microsoft Teams is set to introduce new rules for security and certification information for apps and extensions that should make the platform not only more phishing-resistant but also more secure and safe, even for those who might not be aware of cybersecurity,
In the latest entry to the Microsoft 365 Roadmap, the Redmond-based tech giant says the new security policies will be released in October 2024. Admins will have tools to evaluate apps and copilot extensions to ensure their safety before deploying them in organizations.
Microsoft says the information provided will include results from individual M365 certification tests and evidence submitted by ISVs during Microsoft’s audit of their app or copilot extension.
Here’s what the entry says:
This feature will equip administrators evaluating apps and copilot extensions for deployment with extensive security and related certification data to help those admins more quickly evaluate that an app and/or extension complies with their tenant security requirements. Initially, the information provided will include results from individual M365 certification tests and evidence submitted by ISVs during Microsoft’s audit of their app or copilot extension. Additionally, for non-certified apps, admins will receive details on data handling, security, and compliance as self-attested by the ISV.
In other words, administrators can check if apps and Copilot extensions are safe and meet their security rules. This tool gives them detailed security and certification information to speed up this process.
At first, the information will include results from specific Microsoft 365 (M365) security tests and proof provided by the app creators (ISVs) during Microsoft’s review. For apps that aren’t certified, admins will get information about how the app handles data, its security, and compliance based on what the app creators say.
This is Microsoft’s latest effort to increase security in all of its platforms, especially Teams. The Redmond-based tech giant is known to be a top target for cybersecurity attacks, and hackers are even using AI to get inside.
inZoi, the upcoming life sim that is set to give Sims a run of its money, is coming later this year, and if you want to play it on your Windows PC, then you should know the game has some pretty high system requirements.
There is a good reason: inZOI is not just about creating and controlling digital lives but doing so with unprecedented detail and realism, thanks to the power of Unreal Engine 5. If you’ve ever fancied playing god with ultra-realistic digital humans, inZoi’s upcoming demo might be what you’ve been waiting for.
For starters, inZoi does not play around with system requirements. You’ll need at least an Intel i5 10400 or AMD Ryzen 3600 processor coupled with 12 GB of RAM to get in the game. Graphics-wise, an NVIDIA RTX 2060 or AMD Radeon RX 5600 XT will be the minimum to get your foot in the door. And make sure you have at least 60 GB of free space on your hard drive. This setup is quite a leap from the more modest requirements of its closest competitor, The Sims 4, indicating just how much more graphically intensive inZoi is.
But what if you want to crank everything to the max and see this beautiful game in all its glory? Well, you’re going to need a beefier setup. Think of it as an Intel i7 12700 or AMD Ryzen 5800 processor with 16 GB of RAM. An NVIDIA RTX 3070 or AMD Radeon RX 6800 XT will do the trick for graphics. And you’ll need a bit more space, with 75 GB available. inZoi aims to set a new standard for visual fidelity in life simulation games.
However, there is something you should know ahead of its release, especially if you plan to play it on your PC. Krafton recently released a demo for the game for a few days, and during this time, many inZOI enthusiasts were stunned to find out they couldn’t access the game on Windows PCs due to a very frustrating bug related to DirectX.
To make sure you meet inZOI system requirements, you’ll have to check to see if your device has the DirectX 12 Feature Level 2. To do this, you’ll need to:
Open the Run command box by holding down the Windows + R keys on your keyboard or searching for Run in your system.
Type dxdiag in the dialogue box.
Click OKor press Enter.
Change to the Display tab inside the Diagnostic Tool, and check out the Feature Levels, as you can see below.
As we said, it asks demanding system requirements because the game’s character creator alone is a testament to its ambition. With over 250 options for customizing body types, clothes, age, accessories, and more, plus the ability to apply AI-generated textures and create unique poses and backdrops, it’s a playground for creativity. iPhone owners even get a special treat; they can use facial recognition to transfer their expressions onto their avatars, known as Zois. And with the ability to share and download creations on Canvas, the game’s social platform, the community aspect is vital with this one.
The game promises a deep and engaging life simulation experience. Players can direct their avatars through various occupations and lifestyles and even customize the cities and buildings they inhabit. For those who love to tweak and mod, inZoi will support user mods through Overwolf at launch, opening up endless possibilities for customization and new content.
What’s your opinion on inZOI’s system requirements? Is it worth getting a new Windows PC just to play this life sim or not?
Windows Terminal Preview 1.22 and its stable counterpart, version 1.21 (the preview was made available earlier this year), are now available to users and developers. Buckle up because you’re in for a ride: these patches are enormous and bring dozens of new features, changes, and improvements.
For example, one of the standout additions is the support for Sixel graphics. Imagine viewing images directly in your terminal without popping open a new window. This feature, primarily driven by community feedback and contributions, is a game-changer for anyone who works with graphics or data visualization. Whether you’re plotting a graph with matplotlib or want to display a cute panda image, Sixel support has got you covered.
Grapheme Cluster Support is another hero feature. It tackles the annoying issue of emojis and complex characters not displaying correctly. With this update, that frustrating cursor dance happens when you enter an emoji is history. This means your polar bear emoji will appear just as intended without breaking into its bear and snowflake components. A slight quality-of-life improvement makes a big difference in daily use.
The Snippets Pane is like having a cheat sheet built right into your terminal. This feature is a lifesaver for anyone who’s ever been on call and had to scramble to remember the exact command to troubleshoot an issue at 3 AM. You can save frequently used commands and access them with a click, making your workflow smoother and reducing the chance of error when under pressure.
Quick Fixes in CMD and the New Cooked Read Popup aim to make the command-line interface more intuitive and helpful. If you mistype a command or try to run something that isn’t installed, Windows Terminal now offers suggestions on how to fix it. This intelligent feedback can save time and frustration, especially for beginners.
The new hosting subsystem is this update’s unsung hero. It’s designed to improve everything from terminal applications’ speed and reliability to resizing and text reflow handling. This foundational change might not be immediately visible but will enhance the user experience.
Usability and UI updates make the terminal more customizable and easier to navigate. From saving snippets directly from the command line to searching with regular expressions, these improvements are all about tailoring the terminal to fit your needs and making it more powerful and user-friendly.
In essence, these updates to Windows Terminal are about bridging the gap between power and usability. Whether you’re a developer, a system administrator, or a tech enthusiast, there’s something in these updates for you.
If you want to explore what Windows Terminal 1.22 Preview and version 1.21 offer, you might want to check the official blog post.
Microsoft released its latest update, KB5041865, which enhances the Windows Widgets for Windows 11 version 24H2 users. This version is tailored for Copilot+ PCs, including devices like the Surface Pro 11 and the Surface Laptop 7.
First, the update introduces significant improvements to the Widgets Board, focusing on security enhancements and the APIs for creating widgets and feeds, especially for users in the EEA regions. Microsoft is leveraging the Microsoft Start Experiences app to power the Microsoft Start widget and feed experiences. However, it’s worth noting that this update will also see some existing widgets being removed or modified, which might temporarily affect their functionality.
KB5041865 also addresses a few key issues. For instance, there’s a fix for a scenario where the browser would ignore the value in the “HKLM\SOFTWARE\Microsoft\Internet Explorer\Main” registry key. Also, a deadlock issue in the domain controller during startup in the DNS client has been resolved. For those waiting, this update will prompt you when turning on OpenSSH using the Server Manager UI.
Interestingly, this update doesn’t include some parts, like the File Explorer improvements found in KB5041587, which was released earlier for Windows 11 versions 22H2 and 23H2. And if you’re wondering about any known bugs, Microsoft claims none are in KB5041865.
KB5041865 updates are optional, but you can head to Settings > Windows Update and toggle on the “Get the latest updates as soon as they’re available” option to get them. Or, for a more manual approach, KB5041865 is also available from the Microsoft Update Catalog.