Microsoft recently released a new cumulative update for Windows 10 21H1 preview; it contains several bug fixes, among them a few ones that address high CPU usage.
This new cumulative update, KB5000842, makes for the bigger update that Microsoft has launched for those who are part of their Insider program.
Notable improvements in this new build that any Windows user can benefit from are being brought to the performance of File Explorer processes.
Namely, the developers have addressed issues where the Explorer search froze or where the program used too much memory.
Toward a more reliable File Explorer experience
Being an important component of the Windows 10 OS, File Explorer has been constantly improved via the latest Windows updates. The newest addition is a faster search bar.
However, Explorer has also been underperforming for many users, and with this update, Microsoft seems to have fixed several issues:
We fixed an issue with a heap leak that might cause explorer.exe to consume high amounts of memory.
We fixed an issue that might cause File Explorer and other applications to stop responding for several minutes. This issue occurs after a client reconnects to the corporate network and attempts to use mapped drives to access file shares on the corporate network.
We fixed an issue that causes multiple instances of explorer.exe to run on a system when AppLocker is enabled and the system is not on the internet.
The update also fixes an issue where the Explorer column header gets stuck with a Computing Filters message appears or the program simply freezes when you click on filters.
In case you’re still experiencing problems with File Explorer, checking for malware or removing temporary files are a few useful basic steps to troubleshoot the situation.
The cumulative updates notes also mention the recent BSoD printer fix that was caused by the latest Patch Tuesday files.
The full release note are available in the Insider Program resources so if you’ve experienced trouble with your OS lately, be sure to check them out.
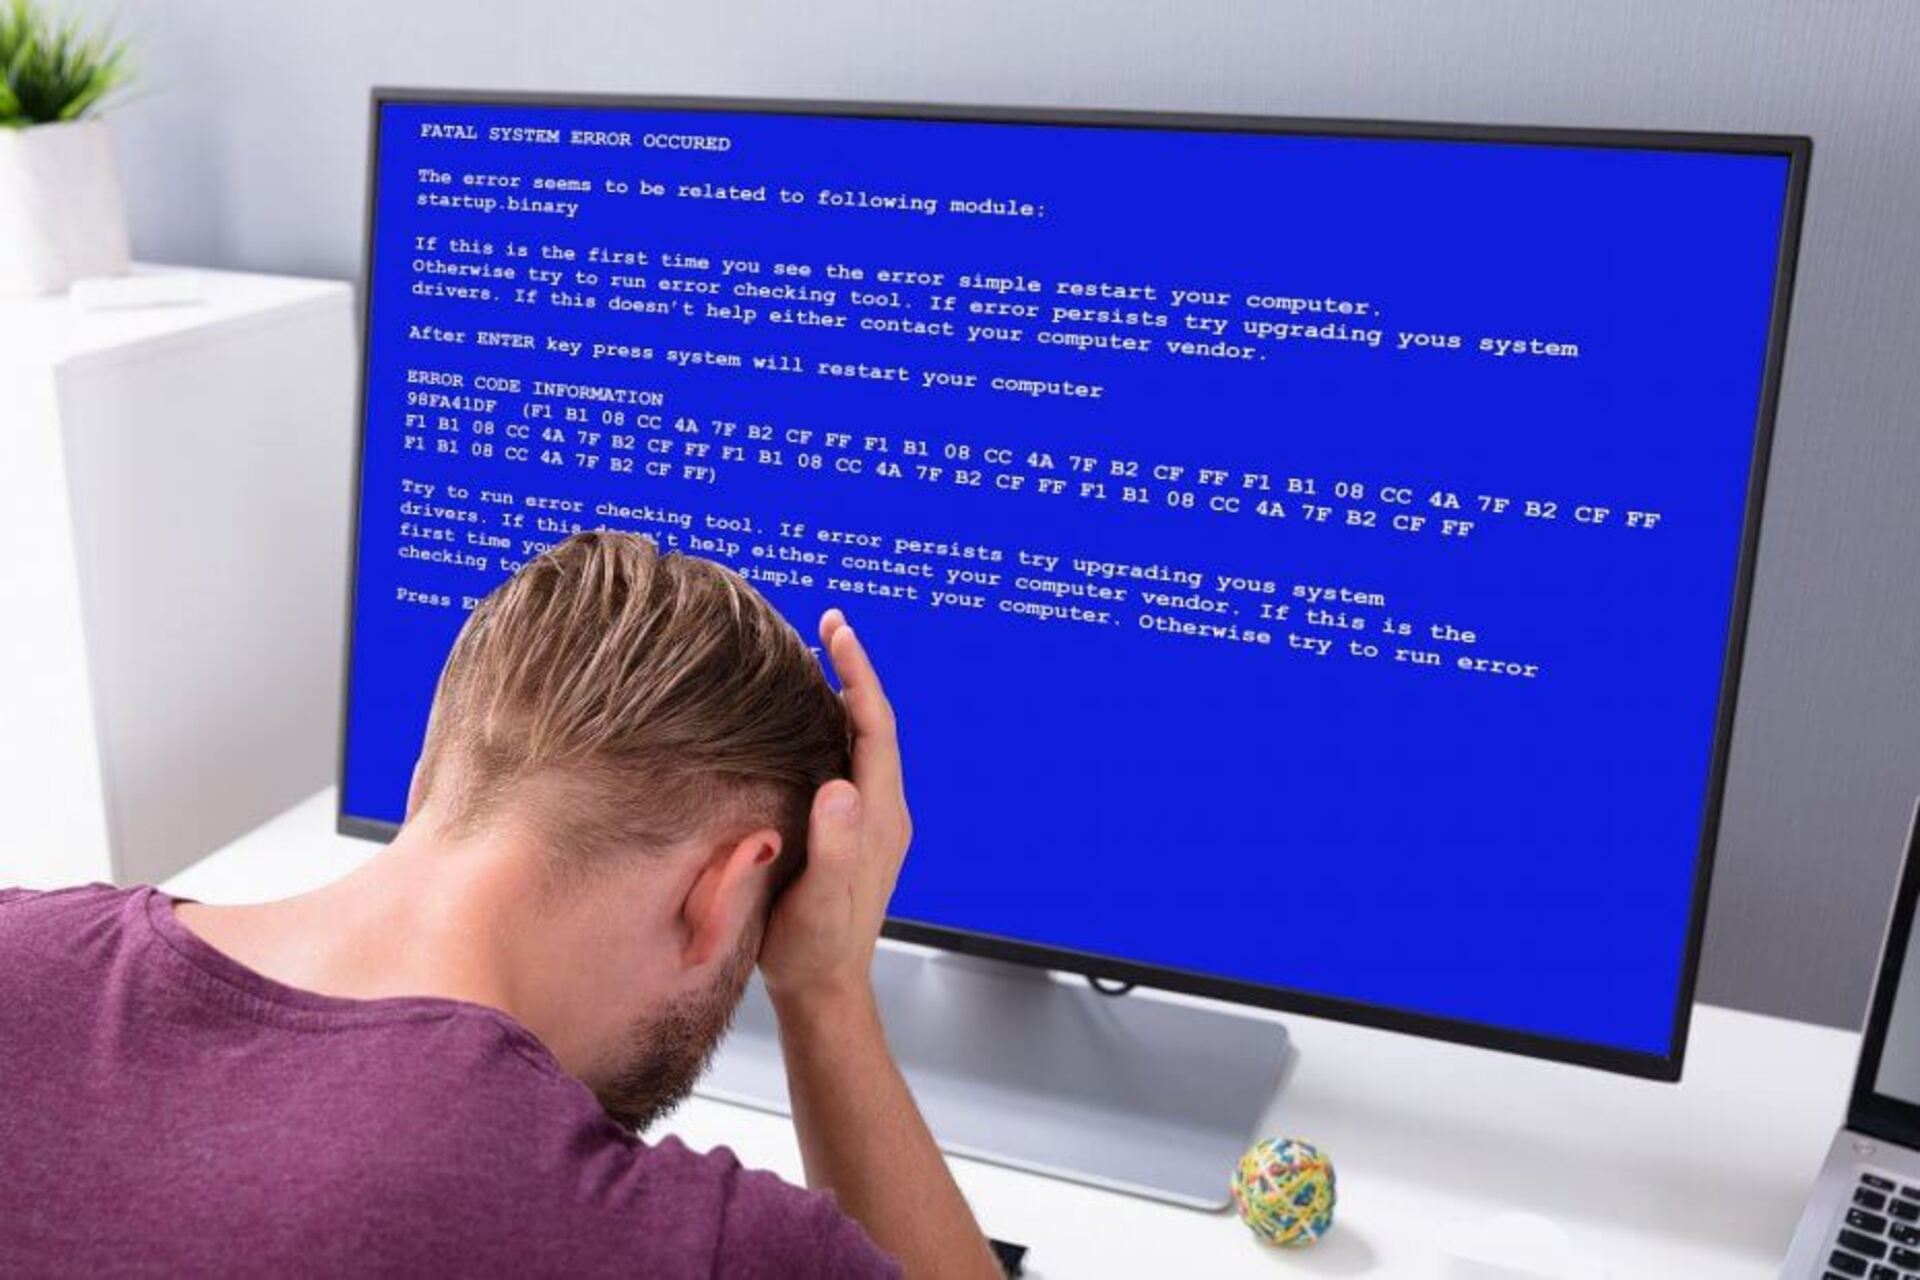
Windows BSoD ( Blue Screen of Deaths) errors can occur due to multiple reasons and often shows different error messages.
Intelppm.sys error is one of Windows 10’s driver system files (for Intel architecture). There are a few BSoD error messages that can include intelppm.sys.
How is this error displayed and how does it impact the PC?
The PAGE FAULT IN NONPAGED AREA STOP 0×00000050 intelppm.sys error is just one example of the numerous related errors messages.
The error sometimes also reads kmode_exception_not_handled intelppm.sys. This is how some affected users were affected by the error:
I am frequently getting BSOD errors with error code that intelppm.sys has stopped working. Alternate black and white boxes like a chess board appear on my screen then my computer freezes and BSOD is displayed. It happens 3-4 times a week.
Fortunately, there are a few ways to solve the PAGE FAULT IN NONPAGED AREA STOP 0×00000050 intelppm.sys error, which is why we recommend you carefully read our guide below.
How do I fix the intelppm.sys BSOD error in Windows 10?
1. Edit the Registry
Press the Windows key + R.
Enter regedit in the Open box, and clickOK to open the Registry Editor.
Then open this registry path: HKEY_LOCAL_MACHINE\SYSTEM\CurrentControlSet\Services\Processor
Double-click Start DWORD to open the Edit DWORDwindow.
Enter 4 in the Value data box, and click OK.
Next, browse to this path in the Registry Editor: HKEY_LOCAL_MACHINE\SYSTEM\CurrentControlSet\Services\Intelppm
Select the Intelppm subkey, and double-click the Start DWORD.
Delete the current value in the Value data box, and then enter 4 as the replacement value.
Click the OK button.
Thereafter, restart Windows.
2. Run a BSoD troubleshooter
To fix BSoD errors, we recommend repairing your operating system and restoring it to a previous state of health with the help of dedicated advanced software.
Relying on this kind of tool, you can repair damaged files that are sometimes responsible for BSoD errors, as well as remove any other errors from your PC.
3. Uninstall the problematic driver
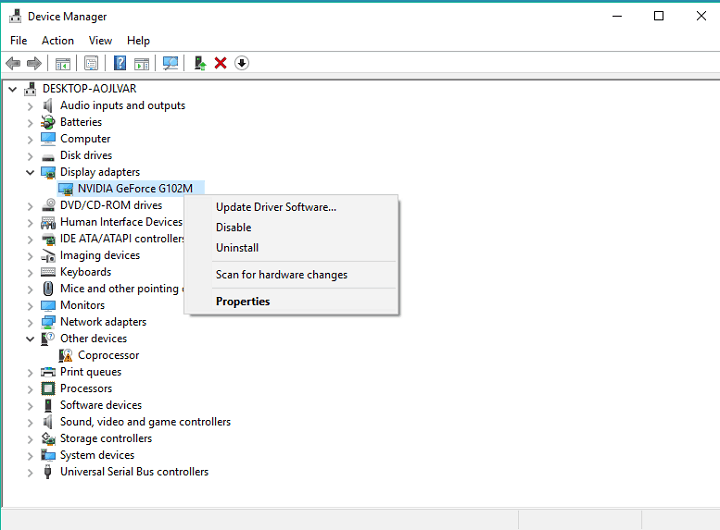
Press the Windows Key + X to open the menu, and select Device Manager from the list.
When Device Manager opens, locate the problematic driver, right-click it and choose Uninstall device from the menu.
A confirmation dialog will now appear. Click on Uninstall to remove the driver.
Optional: You can click on the Scan for hardware changes icon or restart your PC, and Windows will install the default driver.
Sometimes the PAGE FAULT IN NONPAGED AREA STOP 0×00000050 intelppm.sys error can appear due to problematic drivers, and in order to fix it, you need to find and remove the problematic driver.
Keep in mind that almost any driver can cause this problem to occur, so you’ll need to do a bit of research before you find the problematic driver.
4. Run System Restore
Open the Run accessory.
To open System Restore, enter rstrui in Run, and click OK.
Select Choose a differentrestore point if the System Restore window includes that option, and press the Next button.
Click the Show more restore points checkbox.
Choose a restore point.
Press the Scan for affected programs button to check what software gets removed for a restore point.
Click the Next button, and select theFinish option.
5. Run System File Checker
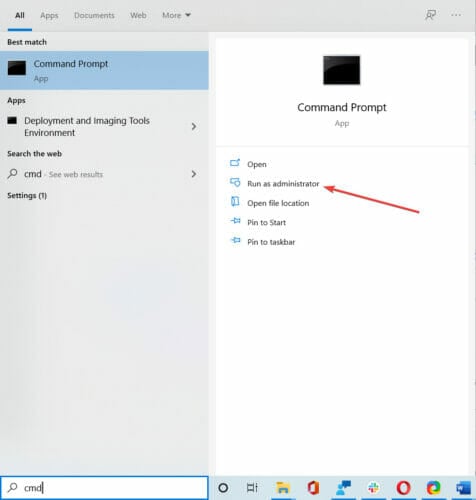
Press the Windows key and type cmd.
Click on Run as Administrator for Command Prompt.
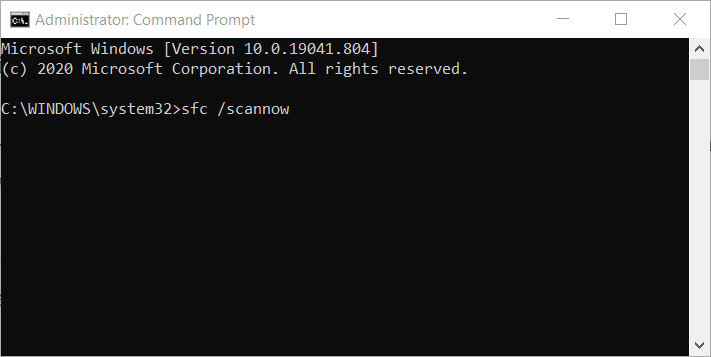
In the Command Prompt, enter the following command and hit Enter: sfc /scannow
Wait for the system file checker tool to scan, and validate the system files.
The tool will fix missing or corrupted files in the system if required.
Once the scan is 100% complete, reboot the computer and check if the error is resolved.
The SFC scan is a command-line tool that will scan your system for potential errors and resolve them on the way. So, it can also fix the PAGE FAULT IN NONPAGED AREA STOP 0×00000050 intelppm.sys error.
Open Windows 10’s Search box by pressing the Windows key + S.
Input the keyword reset in the search box, and select Reset this PC to open Settings as shown directly below.
Click Get started to open the window in the shot directly below.
Select the Keep my files option.
Press the Next button, and select the Finish option to confirm.
Useful tips for users
The Blue Screen of Death errors are critical errors that the operating system was unable to repair automatically, and there are many reasons why BSOD errors occur.
Among other reasons, these may occur due to outdated operating systems, so be sure to always keep your OS updated to the latest version.
Another common cause for Blue Screen of Death on Windows 10 is your drivers. That’s why you can use a reliable tool to take care of drivers in the background, without you even knowing about it.
Malware can damage certain registers of your PC, and this leads directly to BSoD errors. Fortunately, there are plenty of powerful antivirus programs that destroy and keep viruses off your PC.
By following the above solutions, you should be able to use your PC again normally, and no longer have to deal with errors like the PAGE FAULT IN NONPAGED AREA STOP 0×00000050 intelppm.sys error.
We would like to know which of these solutions is the most efficient, so it would help if you let us know which ones you used by leaving us a message in the comments section below.
Microsoft has just released the Windows Insider build 21337 for Dev Channel Insiders and it’s a pretty big one. There’s a new Auto HDR feature for PC games, several improvements to Windows Virtual Desktops, and even a new layout for File Explorer.
Let’s start with Auto HDR for PC, which will bring enable HDR visuals on over 1,000 DirectX 11 and DirectX 12 games. Auto HDR was introduced on Microsoft’s new Xbox Series X and Series S consoles, and it’s a feature that uses an algorithm to apply an HDR treatment to SDR images. The results can be quite impressive, and it’s nice to see this technology makes its way to Windows 10.
“While some game studios develop for HDR gaming PCs by mastering their game natively for HDR, Auto HDR for PC will take DirectX 11 or DirectX 12 SDR-only games and intelligently expand the color/brightness range up to HDR. It’s a seamless platform feature that will give you an amazing new gaming experience that takes full advantage of your HDR monitor’s capabilities,” the DirectX team explained in a separate post.
if your PC monitor is already configured to use HDR, Auto HDR will be enabled by default, but you can turn it off in the Windows HD Color Settings page. It’s also possible to enable a split-screen mode showing both the SDR and HDR images side by side using an admin command prompt, and we invite you to check the DirectX developer blog post for more details.
If you use Virtual Desktops for multitasking on your PC, the build 21337 will allow you to reorder and customize the backgrounds for each of them. In Task View (Win + Tab), you can reorder Virtual Desktop by using drag and drop with your mouse, doing a right-click on a Virtual Desktop thumbnail, or using ALT + Shift + Left / Right Arrow on your keyboard to move them around.
The Windows 10 File Explorer is also getting a new layout in this build with additional padding between elements. “The level of padding is designed for better consistency with modern (XAML) experiences. This should also make it easier to work with File Explorer when using a touch screen,” the Windows Insider team explained.
This is a minor change overall, but the classic layout can be restored by clicking on “Use Compact mode” in the View Options Menu. The team said that the UX for switching between the new and classic layouts isn’t final, so make sure to share your feedback about these changes in the Feedback Hub.
Other minor updates in the build 21337 include the rollout of the addition of Power Automate Desktop and Windows Terminal as inbox apps that will ship with the OS. The Notepad app will also be updated via the Microsoft Store going forward, and it has also been removed from the Windows Accessories folder to have its own place in the Start Menu. There’s even a new icon inspired by Microsoft’s Fluent Design language.
You can find below a list of other changes, fixes, and known issues in the build 21337 for Dev Channel Insiders:
Changes and Improvements
We are now rolling out the new IME candidate window design to all Windows Insiders in the Dev Channel using Japanese, Chinese Traditional, and Indic IMEs. We’ll let you know once the rollout for the remaining IMEs increases.
We’re updating the emoji panel (WIN + Period) to support searching in more languages, including Amharic, Belarus, Cherokee, Filipino, Faroese, Icelandic, Khmer, Mongolian (Cyrillic script), Burmese, Sindhi, Serbian (Cyrillic script), Serbian (Latin script), Swahili, Thai, Turkmen, Tonga, Uzbek (Latin script), and Cantonese (Traditional). Please continue sharing feedback about the emoji search results in the Feedback Hub under Input and Language > Emoji Panel.
Live previews for websites pinned to the taskbar from Microsoft Edge are now rolling out for all Insiders.
Fixes
We fixed a DWM memory leak impacting Insiders in recent flights.
We fixed an issue resulting in errors for some Insiders when trying to launch Settings via URI, including when using the Display Settings and Personalization options when right clicking the desktop.
We fixed an issue where if you click on the Advanced Options page under Settings > Update & Security > Windows Update would crash Settings in the previous flight.
We fixed a set of issues causing crashes in many x64 apps on ARM64, particularly in scenarios involving video or DRM content. Examples of x64 apps no longer crashing include Microsoft Translator, BlueJeans, The CW, Alexa, Astroneer, and Epic Games Launcher.
We fixed an issue that could result in the Windows Security icon in the taskbar saying an action was needed, but the app had no actions to take.
We fixed an issue that could result in the Windows Security icon in the taskbar being unresponsive.
We fixed an issue in recent flights that could result in some games freezing after locking and unlocking your PC while the game was in full screen mode. This issue may also have resulted in freezes after ALT + Tab.
We fixed an issue in recent flights resulting in flickering when hovering over icons and buttons in certain apps.
We fixed an issue in recent flights for some Insiders with domain joined devices where their credentials for apps and websites would unexpectedly be lost on upgrade.
We fixed an issue resulting in some Insiders noticing that System File Checker (SFC) tool would erroneously saying it found corrupt files the first time it was run after each upgrade.
We fixed an issue causing certain UPS to show up in Device Manager with error code 43.
We fixed an issue that could result in werfault.exe crashes.
We fixed an issue in recent builds resulting in some insiders not being able to resume their devices from sleep or experiencing a bug check with the error IRQL_NOT_LESS_OR_EQUAL.
We fixed an issue resulting in some Insiders unexpectedly seeing a Bitlocker recovery screen after upgrading to recent Dev Channel builds.
We fixed a ctfmon.exe crash impacting the reliability of voice typing (WIN + H).
We fixed a ctfmon.exe crash that could occur if you switched to a Microsoft IME while in a 3rd party IME reconversion session.
We fixed an issue in recent builds that could result in Search not opening after clicking the search box in the taskbar.
Known issues
We’re looking into reports of the update process hanging for extended periods of time when attempting to install a new build.
We’re working on enabling the new taskbar experience for existing pinned sites. In the meantime, you can unpin the site from the taskbar, remove it from the edge://apps page, and then re-pin the site.
[News and interests] We’re addressing an issue where news and interests may not be available when signing into Windows without internet access but returns when online.
[News and interests] Sometimes the news and interests flyout cannot be dismissed with pen.
[ARM64] Insiders who installed the preview version of the Qualcomm Adreno graphics driver on the Surface Pro X may experience reduced brightness of the display. This issue is fixed with an updated version of the preview graphics driver at https://aka.ms/x64previewdriverprox. If you are experiencing this issue, please see the feedback collection for more information.
We’re working on a fix for an issue where some devices with Realtek network adapters running driver version 1.0.0.4 may experience intermittent loss of network connectivity.
We are working on the fix for an issue where on some high-refresh-rate monitors, games will only run at 60Hz. Variable-refresh-rate monitor scenarios may also result in tearing.
The network flyout on the login screen doesn’t open on this build, which will prevent you from connecting to a new network before logging in. If your account is in a state that requires internet to log in, you can work around the issue by plugging in Ethernet, getting the device in range of a previously configured Wi-Fi network, or logging in with any other available account first.
We are working on the fix for an issue Insiders reported in the previous flight where devices with certain NVMe drives may experience disk resets or WHEA_UNCORRECTABLE_ERROR bugchecks. If you were impacted by this on Build 21332, you may want to pause updates.
We’re investigating reports of an issue with some devices receiving DPC_WATCHDOG_ERROR bugchecks. If you were impacted by this on Build 21332, you may want to pause updates.
Following several builds focusing on bug fixes and UI changes for news and interests in the taskbar, it’s nice to get a new flight with several new features to play with. Auto HDR coming to PC games is probably the biggest news today, and it’s definitely interesting to see some synergies between the Xbox and PC universes. HDR monitors are still pretty rare in the PC world, but a feature like Auto HDR could really help to change that in the coming years.
It’s been quite some time since we last heard of Age of Empires IV, but we’re about to get some news on April 10 during the just-announced Age of Empires: Fan Preview event. After Microsoft unveiled the first trailer at its X019 event back in November 2019, the Age of Empires team has teased “a new look at gameplay, civilizations, campaigns, and more for you to enjoy” at the upcoming event.
The Age of Empire Community has remained pretty active in recent years thanks to the release of the Definitive Editions of Age of Empires, Age of Empires II, and Age of Empires III. We reviewed the latter last year and really liked the various efforts to enhance an old classic, but as the RTS franchise is celebrating its 20 anniversary this year, fans are definitely hungry for more Age of Empires IV news.
Back in December, Shannon Loftis, Studio Head of World’s Edge, said that the teams working on Age of Empires IV were making “great progress” and playing the game every day. She added:
RTS development is funny: it takes a while to build the separate systems (AI, economy, sim, rendering, etc), and then it takes a while for them to come together. But when they do, you suddenly have a game—a game that needs debugging and balance and polish— but the core of the game that you know you’re going to ship. And the best part is that it feels like an Age of Empires game.
We’re looking forward to seeing more of Age of Empires IV next month, but this Age of Empires: Fan Preview event will bring some news for Age of Empires II: DE and Age of Empires III: DE as well. The event will kick off at 9AM PT on April 10, and it will be live-streamed on the Xbox channels on YouTube and Twitch.
Microsoft Forms has released a new update that adds an option for designers to shorten the URL of their survey for collecting responses. The feature is beginning to roll out to all enterprise users starting this week, and it will be available soon to worldwide customers.
Microsoft Forms allows users to create a survey or quiz and share it with their colleagues or students to get instant feedback. Thanks to this update, form designers can now choose to generate a short and simple URL that is more memorable than a long and complicated link. The feature was spotted by Michel Mendes, a Microsoft 365 consultant, who shared a screenshot of the Shorten URL option on Twitter yesterday.
To get started, open the form, and click the Share button. Now, in the Share pane, choose from whom you want to collect responses, and then select the “Shorten URL” option. Finally, click the “Copy” button to copy the link and share it with respondents.
Keep in mind that this option is currently unavailable for GCC, GCC High, and DoD customers, and it doesn’t work with personal Microsoft accounts. The team will be listening to feedback on the UserVoice forum to improve the experience for Microsoft Forms users. You can learn more about how to create a survey and collect responses on this support page.
Microsoft has started testing a new feature that will allow gamers to suspend an Xbox game that’s currently running so that games downloading in the background will do so at full speed. This should be a good alternative to closing any running games to increase download speeds, as suspended games will remain resumable on Xbox One or Xbox Series X|S consoles.
Hey Xbox Insiders! Did you notice these changes rolling out now? Suspend in the queue will let you download at full speed while making sure your game remains resumable (or quick resume-able on Series X|S). New banners in the Full Library will take you to more useful categories! pic.twitter.com/L49winRpM0
As of today, the Xbox OS automatically throttles background download when a game is running to provide the best gaming experience. To remove download constraints, gamers need to either wait for the console to suspend running games, or to close games manually by pressing the Menu button and selecting Quit. Again, you don’t really want to do that if you want your game to be resumable, especially if you have an Xbox Series X|S console that can suspend several games in a “Quick Resume” State.
This new “Suspend My Game” feature is currently being tested with Xbox Insiders, and it’s accessible in My & Games and apps with a new button above the download queue. We don’t know yet when the feature will roll out to the public, but it should be another nice quality of life improvement following the recent addition of Auto HDR and FPS Boost toggles for back compat games in the Xbox March 2021 Update.
Suspending games in the queue isn’t the only new feature currently being tested with Xbox Insiders, as Microsoft also introduced a new game recommendation feature for Xbox Game Pass subscribers. If you’re an Xbox Insider, you should now see a new “Because you played” category in the Xbox Game Pass app alongside other categories highlighting new games to discover in the ever-growing catalog.
One of the most common issues upon the release of the latest NVIDIA GPU drivers is the recurrence of the Blue Screen of Death error on Windows 10.
Most users claim that once they installed the new patches for the Nvidia drivers they get the BSoD right after they restart their computer.
The latest update from NVIDIA is also aimed at the gaming community, and it’s meant to provide the best experience regarding a variety of games including the ones developed on VR technology.
This Game Ready driver includes the latest GameWorks VR tweaks, errors, bug fixes, and optimizations to ensure your gaming sessions go smoothly.
What can I do if the NVIDIA driver update failed?
1. Roll back drivers in Safe Mode
1.1. Roll back drivers manually
Press Windows + R hotkeys at the same time to open the Run dialogue box
Type devmgmt.msc and click OK, this will open Device Manager.
In the Device Manager menu click Display adapters and right-click Nvidia graphics card device, select Properties.
Click the Driver tab. Then click Roll Back Driver.
A pop-up message box will appear asking if you want to roll back the Nvidia drivers to a previous version, click Yes.
Restart PC.
A user who had driver-related problems in Windows 10 reported the BSoD errors right after they updated the drivers and they needed to restart their device.
One solution is to downgrade the drivers in Safe Mode to a previous version and you can do this easily by following the steps above.
1.2. Uninstall and reinstall drivers automatically
Download Display Driver Uninstaller and make sure that you have the latest NVidia driver pack downloaded onto your computer.
Go to the DDU icon on your desktop and run the installation wizard on your computer.
When you are required to choose the Launch Option, select Safe Mode and click Reboot to Safe Mode.
Upon restart you may get an error that says This app can’t open, click close.
On the DDU menu that appears on your screen select deleting your NVidia drivers. Afterward, select Clean and Restart.
Click on the NVidia drivers icon on your desktop and select Uninstall.
Go to the NVidia site and perform a clean installation of the graphics drivers.
If you encounter the BSoD error after the NVidia driver update in Windows 10, performing a Clean Graphic Cards Drivers installation will definitely help you solve it.
Start off by uninstalling all of your graphics drivers with the Display Driver Uninstaller tool, and after rebooting download the latest version of the NVIDIA drivers as we’ve shown you above.
If you can’t download your graphics card drivers, you might need to perform certain actions like the ones presented in this user-friendly guide on what to do if you can’t download NVIDIA drivers on Windows 10.
2. Update drivers automatically
After you finish uninstalling the driver, the system will automatically install a default one, but when it comes to graphics drivers, you want the exact driver for your device.
You can start looking for drivers on the NVIDIA website but that can be time-consuming and tricky if you don’t get things exactly right.
You may as well update your device with professional software that will start updating your device as soon as you install it. With this excellent tool, you can be sure you’ll never miss any other important updates.
This solution has a large daily-updated driver database, so it will propose the most recent drivers available after scanning your system.
You will also receive a comprehensive report detailing the exact condition of your Windows 10’s missing, damaged, or obsolete drivers. You may rely on Outbyte Driver Updater to make such changes to ensure a proper update with the most recent graphics card drivers.
Launch the UEFI’s firmware update tool and create a backup of your existing firmware to your flash drive. (just in case something goes wrong)
Use the UEFI utility to select the new firmware image you saved on the flash drive.
Run the firmware update utility. Once the update process is over, restart your PC.
Certain users also stated that installing the latest version of BIOS helped solve the issue they had with the occurrence of the BSOD error after the NVidia driver update failed.
Which solution turned out to be the best for you? We’d like to hear more from you on this matter, so leave us a comment in the dedicated section below.
Who doesn’t love movies? If you own a Windows 10, Windows 8 or Windows 8.1 tablet, then you’re probably searching for some of the best movie apps to download from the Microsoft Store.
Look no further than this article as we have just what you need!
For all of you who have installed the new Microsoft operating system, Windows 10 is always in the search for the best apps to personalize your computer or tablet.
These apps promise to vastly improve your Windows 10 experience and make your device resemble an Android or iOS smartphone. We only hope that the Microsoft Store will be able to rise to the level of its competitors.
We hope that these movie apps for Windows 10 will help you achieve that. An important aspect of mobile devices is the multimedia capabilities they possess, and it does not get more important than video playback.
Movies are at the forefront of entertainment media, and thanks to this, app developers are struggling to give your Windows 10 device some of the awesome apps and programs that are available on other platforms.
We’ve gathered some movie and video apps because they basically share the same purpose – fulfill the needs of film fans.
What are the best Windows 10 movie applications?
It’s true, there are not many good apps on the Microsoft Store right now, and some are less than perfect, but remember that the other app markets started the same way, and so, we must be patient with the developers and encourage them.
Each update will give the apps more functionality and more features, and so, an app market similar to the other is just around the corner.
Also, don’t forget to rate these apps in the store, so other users like you could know if they are of any use or not.
This helps the community overall, that is if you care for it, but we hope you do, because it will also help you know if an application is good or not, right before trying it out.
Our top is purely personal and subjective, indeed, so don’t judge us too hard if we don’t meet your own personal criteria. We’ll be updating this article with fresh movie apps for Windows 10 if we find any.
We have listed 2 categories, because the second one can also be used for videos, not only movies. For now, let’s see what we have in matter of movie applications for Windows 10.
If you have kids, or you want to reconnect with your inner child, Disney+ is a must for your home entertainment list of options.
However, Disney+ is not all about cartoons nowadays. You can watch all the content from Disney Channel and more like, for instance, some exciting Star Wars series and movies, or the titles from the X-Men franchise.
One of the latest instant success stories signed by Disney + is The Mandalorian short series that had blazing success from all the Start Wars fans and not only.
Disney +
Disney + is a must if you have kids, but you can also enjoy its exclusive mature content.
Hulu is a well-known service that allows you to watch your favorite shows online, with great picture quality and without any interruptions.
Although limited to the US, you can still access this service from other countries if you use the latest version of Chrome or Firefox with the use of a great extension.
Keep in mind that the service is not free, so must pay a fee for watching a movie online via Hulu Plus.
There’s one awesome feature that film and TV show fans will appreciate – you can watch videos while you’re working (if your boss doesn’t mind).
Hulu Plus
Hulu is an awesome on-demand video service that will bring all the family together for a great experience.
Paramount + is a movie application that will stream, that’s right, movies only from the Paramount production company.
It doesn’t have such a great rating, maybe because it doesn’t allow users to purchase movies, as they have to have purchased the movie on their Paramount account.
So, basically, the Paramount Movies application in the Microsoft Store serves as a mirror to the movies that you have purchased on your Paramount account. Works well for Paramount users, but that’s just it.
Paramount +
If you’re a fan of Paramount videos in particular, This app will bring their world into your home.
Audials is not an on-demand service, it’s a huge entertainment software that will aggregate all your on-demand accounts like Netflix, Hulu, HBO but also add a lot of other streaming content, video podcasts and more.
For instance, you will benefit from over 300 streams from English and international TV channels and over 25,000 high-quality video podcasts from around the world and subscribe to the ones you prefer.
And not only that you can view all this content at your own pleasure, but you can also record them. This way you will be able to create your personal video library complete with descriptions to all recordings.
If you’re a sports fan, you’ve hit the jackpot with fubotv, one of the best streaming platforms focused mainly on sports.
All American sports league transmissions will come straight to your home whether it’s NFL, NBA, MLB, NHL, NCAA, or even college football, fubotv will bring everything but the beer and chips.
You will have to choose from the 30 live sports broadcast channels including soccer from Europe or MLS and from over 100 live streaming channels.
However, this is not all about sports. You can also watch CBS, TNT, NBC, FOX, and many more because they are constantly adding new content and channels.
If documentaries are your thing, Curiosity Stream is the pinacle of content in that area. Available in HD or 4K, the service offers a high quality and wide selection of documentaries structured in distinct themes.
Its library features over 3,000 titles but the future plans include expending that number to over 11,000 documentaries. The categories cover every possible theme including lifestyle, science, technology, history, nature etc.
Right now, there are over 900 exclusive documentaries on the platform which makes, once again, Curiosity Stream, the place to go for original and new documentaries.
US citizens have enjoyed this service for quite some time now, and it’s no surprise: Netflix offers a wide variety of movies and episodes for users to enjoy.
Now, you can use this service on your Windows 10 computer via the free app available in the App Store. After installing and logging in, you will see how great the app is designed, but sadly, it still lacks some features.
Maybe with the next updates, Netflix will get more features and will become an even more complete movie application for Windows 10. For now, it’s pretty well-crafted with a great reddish design.
Vudu is an app which on you can buy or rent movies. You can join this service for free without subscription. It allows you to stream directly to your Windows 10 PC so you can enjoy movies anywhere.
You can find there the latest movies before they are out on DVD. It also supports TV shows so you can watch episodes the day after broadcast.
This app does not support Windows phones and tablets but it does for Android and iOS mobile devices. You can download it from the store for free and give it a try.
Just like the other Xbox apps, the Video section is pretty good. Although, as a video player it needs lots of work to be done to it before it can be compared to other players.
However, it does give you nice features and integration with your other devices, such as your Xbox console and SmartGlass technology.
For now, better stick to other players, but keep this app in mind if you are in need of information about a movie.
You don’t even have to look for it in the Microsoft Store, as it comes pre-installed in your Windows 10 system under the Video name.
It also allows you to put your video in the same place where your movies and TV shows are.
By now, you’re probably used to the common layout of movie apps for Windows 10. Popcorn Time follows it by slightly changes it.
You now have a long column with 2 rows of movies, all of them being Box Office Blockbusters. There’s also a special spot for a movie from 2011, which currently is the last year.
But don’t worry, you can change the genre and there are quite a lot there actually. You’ll find such unusual genres as Film Noir, Disaster, Education, Indie, Neo-noir, Road movie and many others.
There’s also the possibility to change categories, from Box Office to In Theaters and Up Coming. Basic and very nippy movie application.
Movie ShowTime is a movie application that will display the movies that are available in your location.
So, when you first open the application, you will be asked to input a location so that the system could find movies that are near you.
Sadly, it won’t work for all the countries in the world, so there’s a chance that if you’re not living in rich or known countries, the application won’t be able to find the show time for movies in your location.
Another drawback is that some movies might not have thumbnails. If you select a movie, you will be showed the list of theaters where it is played and a trailer. Pretty neat. Other than that, serves you great.
Local Movie database is a totally different movie application for Windows 10 that will be highly appreciated by movie fans and picture-goers from all over the world.
We’ll spill the beans and say the following – this is our favorite movie application from this whole big list. Why? Well, because it’s made in a geeky way.
First of all, you can search for movies and they are not simply presented to you as many other apps do. This one is an application for those that are really passionate about movies.
Basically, you’re selecting the movies that you like, for example and then you’ll have your own database. Something like a watchlist, but with extended functionalities.
Also, another neat feature allows you to import movies from your hard drive.
So, if you have your HDD packed with movies, a good way to make some extra storage space would be to import their names and delete them, as you can always download them later.
The creators of this app have done a good job, that’s all I must and will say.
A video sharing service, very similar to Google’s YouTube that can be of great use. Just like its counterpart, you have the possibility to watch videos in HD format.
You can upload your own videos to this service (within a 500MB/week limit) and share them with the rest of the world just as you would do on YouTube.
Just like YouTube and other apps presented here, this is more a video-oriented app than a movie one, but you can also find movies in chunks, if you search good enough.
This is one of the best designed movie applications in the Microsoft Store at the moment. Sadly, it’s only available in Romanian language, so those speaking that language will greatly appreciate it.
So, this app will work for those living in Romania, Moldova, and generally, for those that speak Romanian. I decided to include it in this post because it has an awesome design and great functionality.
Just like Cinemagia, Kino Poisk is an application that is available only in Russian language, and the reason why it made this top is that I am sure there are English speaking persons that can speak Russian, as well, and will find it very useful. I hope Russian readers will find it pretty useful for their needs.
As you can see, there are enough apps available for Windows 10, that will help you watch videos and movies.
Also, these movie and video apps will give you much more than the possibility to watch movies, but also, they will provide information about movies, releases, and much more.
Give them a try and see how they can help your Windows 10 become much more functional and gain new features. Share your thoughts in the comments section below.
Encountering errors in Windows is a common occurrence. We all do! But the Blue Screen of Death errors are intricate and indicate a severe underlying problem. One such is the Bugcode USB Driver blue screen error in Windows.
A BSOD crashes the OS, followed by a blue screen that lists the error code and any other relevant information, which in most cases doesn’t turn out to be helpful, as is the case with USB blue screen in Windows 10. So, let’s find out how you can fix things.
What is a Bug code USB driver?
The Bugcode USB driver is a critical error in Windows, which usually appears automatically but could also be triggered by recent changes to the PC. As the name suggests, it’s linked to the USB device or a relevant driver. Here are a few reasons you might be getting the error:
Outdated or incompatible drivers: In most cases, it was an incompatible or outdated driver that led to the blue screen error. If you recently updated the driver, check whether the correct version was installed.
A Malfunctioning USB device is connected: A problematic or malfunctioning device can cause a range of BSODs in Windows.
Third-party antivirus: Your third-party antivirus, if using an unreliable one, can conflict with the effective functioning of the OS and trigger the Bugcode USB Driver error.
A dead USB port: Often, insufficient power supply to the USB port, or it is dead altogether, can cause the error to appear.
How can I fix Bugcode USB Driver Windows 10 error?
Before we head to the slightly complex solutions, perform these quick checks and tricks first:
Restart the computer.
Unplug all non-critical peripherals from the PC, including any connected controllers, printers, or wired webcams.
If you can identify the device triggering the error, connect it to a USB 3.0 port on the computer instead of USB 2.0.
If you have overclocked the PC, revert the settings to the default.
Solid system health tools are an effective way to repair the Blue screen of Death driver error. You can fully scan your Windows system and detect the problems that cause this error.
With specialized software, you may resolve system crashes and optimize your PC to run efficiently without recurring BSoD errors.
2. Check for Windows updates
Press Windows + I to open Settings, and click on Update & Security.
Click on Check for updates.
If an update is listed after the scan, click on Download and install to get it.
In some cases, it was a bug in the current version of the OS that triggered the Bugcode USB Driver error, and simply updating Windows got things running.
3. Update the installed drivers
Press Windows + X to open the Power User menu, and select Device Manager from the list.
Expand the USB Serial Bus controllers entry, right-click on the USB Root Hub device, and choose Update driver.
Select Search automatically for drivers and let Windows install the best available version.
Outdated drivers are just as likely to affect the functioning of the device and trigger the Bugcode USB Driver in Windows. So, it’s best that you update the drivers. Also, if Windows can’t find one, you can always manually install the latest driver.
4. Change the USB selective suspend setting
Press Windows + S to open Search, type Control Panel, and click on the relevant search result.
Click on System and Security.
Click Change battery settings under Power.
Now, click on Change plan settings next to the currently active power plan.
Click Change advanced power settings.
Expand USB Settings, then USB selective suspend setting, and choose Disabled from the dropdown menu.
Finally, click on Apply and OK to save the changes.
Press Windows + R to open Run, type devmgmt.msc, and hit Enter.
Double-click on Universal Serial Bus controllers, right-click on USB Root Hub, and then select Properties.
Navigate to the Power Management tab, untick the checkbox for Allow the computer to turn off this device to save power, and click OK to save the changes.
The Power Management settings for the USB hub, when set to turn off devices to save power, can cause the Bugcode USB Driver to appear. Simply disabling the setting should do the trick for most.
6. Perform an in-place upgrade
Go to Microsoft’s official website, and click on the Download tool now button to get the Media Creation Tool for Windows 10.
Run the setup, click Yes in the prompt, and wait for things to get ready.
Click Accept to agree to Microsoft’s license and terms.
Choose Upgrade this PC now, and click Next to proceed.
Wait for the download to complete and follow the on-screen instructions to complete the upgrade process.
An in-place upgrade should help fix things when encountering the Bugcode USB Driver error on the PC, but it will take a few hours to complete. The best part, you won’t lose any installed apps or stored files in the process.
Tip
In case of the solutions here don’t work, it’s likely the hardware at fault, and we recommend you contact the manufacturer or take your PC to a repair shop.
Windows cannot find the Microsoft license software terms error can sometimes appear while trying to install Windows.
How do I fix the Microsoft license software terms issue?
1. Disconnect the installation media during the installation
Follow the installation steps until you reach the Install Now screen.
Disconnect your installation media and click the Install Now button.
Continue the installation as you would do normally.
Once the setup is ready to start copying files, it will ask you to reconnect your installation media, so be sure to do so.
After you connect the installation media, follow the instructions on the screen to complete the installation.
This solution might sound a bit counter-intuitive, but some users claim that you can fix the Windows cannot find the Microsoft license software terms message simply by removing your installation media.
2. Use a third-party tool to create an installation media
Many users prefer using the Media Creation Tool for creating installation media.
The Media Creation Tool lets you download a Windows 10 installation file to a flash drive for use in reinstalling Windows 10.
This backup option is essential in the event that something goes wrong with your computer. Furthermore, having a physical copy of the operating system is helpful.
After you download the ISO file, add it to the dedicated software and create the installation media.
3. Try using a different flash drive
If you keep getting Windows cannot find the Microsoft license software terms message, perhaps there’s an issue with your flash drive.
Your flash drive can sometimes be a problem, and in order to fix this issue, you might want to try replacing it.
If you have an extra USB flash drive, use it to create an installation media and boot Windows from USB. This isn’t the most reliable solution, but it might work for you, so feel free to try it.
4. Check your hardware
According to users, sometimes Windows cannot find the Microsoft license software terms message can appear due to hardware issues on your PC.
Several users reported that their hard drive was the issue, but after replacing it, they were able to install Windows 10 without issues.
Another cause can be your CPU, and few users reported that the problem was resolved after replacing their CPU, so you might want to check your processor as well.
If your PC is under warranty or you don’t know how to do fix hardware errors properly, perhaps you should contact a professional.
5. Use Diskpart to clean your drive
NOTE
By using this solution you’ll remove all files from your hard drive, so be sure to back up important files.
Boot your PC using the installation media.
Once you get to the Install Now screen, click Repair your computer.
Navigate to Advanced Options, selectTroubleshootand then Command Prompt.
When Command Prompt starts, run the following commands:
DISKPART
list volume
You’ll now see a list of all drives on your PC. Now you need to locate the correct drive. This step is crucial and if you select the wrong hard drive you’ll erase all files from it. Simply replace the # symbol with the number of your hard drive. Once again, double-check everything and make sure that you’re selecting the correct drive in order to avoid permanent file loss. After you find your drive, run the following commands:
select disk #
clean
convert mbr
partition primary
active
format quick fs=ntfs
exit
exit
Make sure that you select I will install operating system later option in the virtual machine wizard.
Now select the version of Windows that you want to install and click Next.
Now click the Customize Hardware button.
Select the DVD drive and in the Connection section select Use ISO image file. Now select the Windows ISO file.
After doing that, you can start your virtual machine and the Windows installation should work without any problems.
If you’re getting Windows cannot find the Microsoft license software terms message while installing Windows on a virtual machine, then your settings might be an issue.
To fix the problem, you just need to create a new virtual machine and make a few changes. To do that, follow the steps above.
If you need reliable virtual machine software we recommend getting the one below. It’s the most popular among coders and it’s great for running under Windows 10.
Click on Security under the Hardware settings from the left pane and click on Enable Secure Boot from the right (make sure that the virtual machine is not running because otherwise, the option will be greyed out, like in our example).
Some users claim that this error is caused by the fac that the Secure Boot option is disabled in Hyper-V. Therefore, you can enable it by using the simple steps above to fix the problem.
8. Increase the amount of RAM and remove the floppy drive in the virtual machine
Sometimes Windows cannot find the Microsoft license software terms error can occur on a virtual machine due to your settings.
To fix the problem, many users are suggesting that you remove the floppy drive from your virtual machine, so be sure to open the hardware settings and remove it.
In addition, some users are suggesting disabling Dynamic RAM feature and instead setting the fixed amount of RAM that the virtual machine will use, so be sure to try that as well.
Some users are suggesting increasing the amount of RAM that the virtual machine is using, so feel free to try that as well.
If you’re unable to install Windows due to this error message, perhaps the problem is your ei.cfg file. To fix the problem, create a new ei.cfg file with the following values:
[Channel]
OEM
Now open the installation media and navigate to the sources folder. Paste the ei.cfg file to it. If asked to replace a ei.cfg file, be sure to choose Yes.
Alternatively, you can open ei.cfg file on the installation media and make sure that it has the same values as above.
Once you overwrite or modify the ei.cfg file, try to install Windows again and the error message shouldn’t appear anymore.
One of our readers managed to fix this problem by disabling the floppy drive in the virtual machine so make sure you try that too.
Windows cannot find the Microsoft license software terms message can be quite problematic, but we hope that you managed to fix the problem using one of our solutions.
If you have other solutions, we haven’t already covered, don’t hesitate to leave us your suggestions in the comment section below.
Dungeons and Dragons: Dark Alliance, the upcoming video game based on the popular Dungeons and Dragons roleplaying game, has been given the new release date of June 22nd for Microsoft’s Xbox One and Xbox Series X consoles. The game will also release on Sony’s PS4 and PS5 consoles and PC on the same day.
Dungeons and Dragons: Dark Alliance is a third-person action role-playing title set within the world of D&D and will feature real-time combat and dynamic co-op gameplay. The game was originally expected to launch in 2020 but, like many other projects due for release last year, was delayed.
The episode in a new behind-the-scenes series, Making Dark Alliance Episode 1, debuted today which delves into the early stages of the title’s development. Check it out below.
Are you excited for Dungeons and Dragons: Dark Alliance? Will you play it on PC or console? Share your thoughts with the community in the comments below and then follow us on Twitter and Facebook for more gaming news.
In an age where phones can take photos in 4K, and their storage capacity has been widely expanded, it goes without saying that your first impulse is to take as many pictures as possible.
The only problem is when you overdo it and end up with duplicates or tens of pictures that are incredibly similar, and that is when you need some extra storage space.
Well, if you too have encountered this issue, we recommend that you try out Duplicate Photo Cleaner, an easy-to-use software utility that, as you can probably guess from the name, identifies and deletes image duplicates, or even images that are too similar between each other.
A great tool for Windows, Mac, and mobile devices
While most of you probably take photos using your phone, the bulk of them will eventually be backed up on some cloud service or your PC’s HDD.
That is precisely why Duplicate Photo Cleaner was designed to work on Windows PCs, Macs (including Mac Photos albums), and mobile devices (although the latter still requires a PC connection).
Additionally, Duplicate Photo Cleaner can be used to declutter your Lightroom catalog to manage your photos more effectively.
Speaking of which, here are the system requirements to run this program efficiently:
OS: Windows XP/ Vista/ 7/ 8/ 10
CPU: 400 MHz or higher
RAM: 128 MB or more
Hard Drive: 5 MB of free space
All you need to do is launch the program, and then connect the external device to your PC, and it will be automatically identified, and you will also be prompted whether to add this new media to the scanning list or not.
Specify exactly which directories need scanning
When it comes to many duplicate finders and cleaners, one big drawback is that few offer you the chance to customize which directories get scanned for duplicates instead of preferring full system scans.
While this may sound like the scans will be more thorough, it is overkill in terms of time, especially when you know you don’t have too many duplicates, and you also know exactly where they might be.
On that note, Duplicate Photo Cleaner lets you manually add and remove folders from the scan list, and even entire directories, removable or otherwise. There’s also an Ignore List where you can add the folders you never want to scan. By default, the Ignore List contains important system folders.
You can further narrow down the search by specifying exactly what image formats the program should be looking for, as well as the minimum and maximum file size.
Scan for both duplicates and similar photos that take up space.
When it comes to photos, the real problem isn’t the number of duplicates, because let’s face it, creating duplicates isn’t that easy, but rather photos that are incredibly similar to one another that add no real value.
That’s another reason why you should try out Duplicate Photo Cleaner, since it lets you set a similarity threshold so that it will find both duplicates and photos that are quite alike.
In addition to that, resized, cropped, converted, and an average duplicate finder will never detect otherwise edited images because technically they’re not 100% identical.
This feature is a huge space-saver, especially if you use professional or semi-pro cameras and store both RAW and JPG photos on your hard drive.
While this particular tool may take some time to get used to, it will end up being the biggest variable in terms of how many dupes are found and removed.
Multiple scanning modes
Once you’ve determined which locations on your HDD you want to scan and what parameters the scanned images should meet, the next step is to determine what type of scan you want to run.
Duplicate Photo Cleaner currently supports 9 different scanning modes:
Standard scan
As you can tell from the name, this is your typical scan where all specified directories will be scanned for duplicates.
Sector Detail Scan
This lets you look for a specific detail found in one photo and look for the same element in other photos. This is particularly useful when you have a boat or, say, a car in a photo and you want to find the rest of the photo containing that element
Folder Comparison
This next scanning mode lets you select a source folder that contains your originals and compare other folders against it. This way you will never delete your original files by accident.
Same Subject Scan
The Same Subject Scan mode lets you select a photo and find all other images that feature the same subject.
This mode is particularly useful not only when you want to delete duplicates and similar shots, but when you want to sort your photos by subject: photos of your cat, sunsets, etc.
Mobile SmartScan
Mobile SmartScan is exactly like the Standard Scan, but it only targets removable media devices like phones connected to your PC.
Lightroom Scan
DPC’s Adobe Lightroom scan mode makes it easy for Lightroom users to organize their Lightroom catalog by deleting duplicates and managing similar images.
Your Lightroom catalogs are added to the scan automatically, which saves you the trouble of adding them manually.
Picasa Scan
Just as the name suggests, DPC’s Picasa Scan will help you manage duplicate and similar photos in your Picasa albums.
Corel PaintShop Pro Scan
If you use Corel PaintShop Pro to manage your photos, then you can use Duplicate Photo Cleaner to get rid of pesky duplicates and similar – choose the Corel PaintPro scan mode from the menu.
Photos Scan (Mac only)
For Mac users, Duplicate Photo Cleaner offers a really handy scan mode that will find and remove duplicates from Photos albums.
Try before you buy
One great thing about this tool is that you can download and test it out for free, although the free version will only let you preview the photos that were found as duplicates or too similar without letting you remove them.
However, this is more than enough since you can see how good it is at identifying the extra wasted space, with cleanup being just one purchase away.
Speaking of which, the developers offer multiple purchasing plans, each more efficient than the previous ones:
1 PC, 1 year: $39.95
3 PCs, 1 year: $49.95
5 PCs, 1 year: $59.95
10 PCs, 1 year: $69.95
Duplicate Photo Cleaner
Scan your PC, Mac, or mobile devices for photos that are duplicates or too similar, and remove them with this amazing tool
Lets you easily add or remove scanning directories
Can be used on Windows PCs, Macs, and mobile phones
Cons
Scanning large directories with thousands of pictures can take a while
All in all, if you’re the type that takes hundreds of photos a day, be it professionally or simply because it is fun, you know the pain of having to free up space because of duplicates.
If you no longer want to deal with this, go ahead and try out Duplicate Photo Cleaner, and see just how useful it can be in the long run.
A laptop with a touchscreen is the best option if you need a versatile and portable device, with both tablet and laptop features.
Budget laptops are not meant to be used for high intense tasks like gaming or video editing. They have enough performance for video conferences, browsing, watching movies, and more other lighter tasks.
In this guide, we will present you with the best touchscreen laptops under $300 you can buy.
If you’re looking for the best touchscreen laptop under 300$, perhaps you want to consider HP 14. This is a 14-inch device and it comes with a 1366 x 768 touchscreen display.
The device is powered by AMD 3020e processor and AMD Radeon Graphics. Regarding the memory, there’s 4GB DDR4-2400 SDRAM and 64GB eMMC for storage.
HP 14 comes with Windows 10 Home, and it should be more than capable to handle basic everyday tasks with ease, so be sure to consider this model.
Lenovo Chromebook Duet is a stylish, sleek 2-in-1 device that has a great performance and design.
It is 360 convertible, so you can use it in many modes, like a tent, tablet, laptop, or stand mode. It is also less than 1-inch thin and about the weight of a hardback book.
Lenovo Chromebook comes with an 11-inch touchscreen display that’s perfect for day-to-day computing and multimedia, both online and offline.
If you want a portable and convertible laptop, but with a bigger display, HP Chrombook is the best choice for you.
It runs Chrome OS and has an 14 inches HD WLED display of 1366 x 768 resolution. Even if it has a bigger display size, it weighs 3.4 lbs. and measures 0.7″ thin, which makes it very portable.
The HP Chromebook 14 is a good choice if you want an inexpensive Chromebook for doing simple tasks, like browsing the web, sending emails or watching YouTube videos.
Acer Chromebook Spin 311 is one of the best convertible laptops that you can find on the market.
It runs Chrome OS, an operating system by Google. All the Google apps you know and love come installed on every Chromebook. This means you can edit, download, and convert Microsoft Office files in Google Docs, Sheets, and Slides.
Acer Chromebook Spin comes with built-in virus protection, automatically updates, and boots within seconds, making it a good option.
Another great touchscreen laptop is the HP Chromebook x360. This is a 14-inch device and it uses 1366×768 resolution. The laptop is powered by Intel Celeron N4000 dual-core 1.1-2.6 GHz CPU.
As for the memory, this device has 4GB LPDDR4-2400 SDRAM that can be upgraded. Regarding the storage, it’s using a 32GB eMMC.
It’s worth mentioning that this model has a 360-degree hinge, so you can use it in a laptop, tablet, or tent mode. Lastly, stylus support is also there, which is another plus.
When buying a device, there are many factors to consider and plenty of models from all the known brands, with different features and capabilities. Because of this, choosing a touchscreen laptop isn’t as easy as it might seem.
In this article, you can find the best 2-in-1 portable devices with a focus on price without neglecting the performance.
Xbox achievements are finally coming back to the Xbox apps for iOS and Android. Microsoft announced the good news earlier today on Twitter, though be aware that this will be a gradual rollout that could last a couple of weeks, according to Xbox Social Media Manager Josh Stein.
FYI: This is will be a rolling update so keep eyes out over the next few weeks as it rolls out across iOS and Android. https://t.co/QGpHzBDXoC
Microsoft redesigned its Xbox mobile apps last fall ahead of the release of the Xbox Series X and Series S, but the apps dropped support for Achievements as well as many social features such as Xbox Live Clubs, and Looking for Group posts. Since Microsoft basically invented game achievements with the Xbox 360, omitting them from its new Xbox mobile apps was quite surprising, to say the least.
Even though the new Xbox apps for iOS and Android are still a bit barebones right now, they do support new features such as Xbox Remote Play, which allows players to stream any games installed on their consoles. Another cool addition in the app is the ability to start downloading on your console any game from the Xbox Store, and that even works for games you don’t own yet.
If you have yet to download Microsoft’s Xbox mobile apps, you can do so using the links below. On Android, there’s also a beta version of the app that you can install alongside the regular Xbox app if you want to get early access to new features.
Upgrading to a new version of Windows isn’t always simple, and many users reported The language or edition of the version of Windows is not supported message.
This can be a big problem, but there’s a way to fix it. And we will show you how to go about it in this guide.
What does The language or edition of the Windows version currently installed not supported by this tool mean?
The language or edition of the version of Windows currently installed is not supported by this tool might occur due to multiple factors. Below are some of them:
Interference from third-party apps: Sometimes, third-party apps can interfere with the upgrade process, leading to an error message. To prevent this, you need to perform a clean boot and probably uninstall the faulty app.
Issues with the upgrade method: Some users have found this error have found this issue to be limited to a specific upgrade method. It would be best if you tried other ways to be sure the problem is not with your PC.
Speaking of this error message, below are some of its variations as reported by users:
This tool cannot upgrade your PC the language or edition – If this issue occurs on your system, perhaps your registry is the cause. To fix the problem, make a few minor changes in the registry and check if that helps.
Windows 10 Media CreationTool language not supported, different language – This problem can sometimes appear due to your antivirus. To fix the problem, disable your antivirus and check if that helps.
The language or edition of the version of Windows currently installed on your PC isn’t supported – Various causes can lead to this issue. However, you should be able to fix this problem with one of our solutions.
How can I fix the language or edition of the version of Windows currently installed is not supported by this tool?
Below are some preliminary troubleshooting steps you need to perform before delving into the solutions in this section:
Disable your antivirus temporarily
Disconnect your PC from the internet and try again
Disconnect additional USB devices
1. Modify your registry
Press the Windows key + R, type regedit, and click OK.
Before making any changes to your registry, it’s advised to create a backup and use it to restore your system if anything goes wrong.
Now, navigate to the path below in the left pane: HKEY_LOCAL_MACHINE\SOFTWARE\Microsoft\Windows NT\CurrentVersion
Double-click EditionID in the right pane.
Next, change its value to Professional and click OK.
Double-click ProductName in the right pane again.
Finally, change its value to Windows 10 Pro and click OK.
After that, close your registry and check if the problem is resolved.
If you’re getting The language or edition of the version of windows is not supported message while trying to upgrade Windows, perhaps the issue is your registry.
According to users, they managed to fix this glitch simply by making a few changes in their registry by following the steps from this solution. It should solve the language or edition issue.
Click the Accept button on the Agreement and license page.
Choose Create installation media (USB flash drive, DVD, or ISO file) for another PC and click the Next button.
Select your language, PC architecture, and other important information, and click the Next button.
Next, insert a USB flash drive (at least 8GB).
Choose the USB flash drive option, select your flash drive, and follow the onscreen instruction to complete the process.
Finally, insert the USB flash drive into the PC you want to upgrade and run the media creation tool on it.
If you encountered the language or edition of the version of Windows is not supported error while trying to upgrade your PC directly, it might be because of some issues with the file you downloaded.
The solution is to create a media tool on another PC and run it on your device.
3. Use an ISO file
Go to the official Windows 10 download page to download the Media Creation tool.
Repeat steps 2 to 5 in solution 2.
Select the ISO file.
Now, choose a location to save the ISO file and wait for the process to complete.
Finally, double-click the ISO file to upgrade your PC.
If you are still getting the language or edition of the version of Windows is not supported error while using the USB media creation tool, try using an ISO file instead.
This should help you upgrade your PC without any errors.
4. Perform a Clean boot
Press the Windows key + R, type msconfig, and click OK.
Select Services, check the Hide all Microsoft services box, and click the Disable all button.
Now, click the Startup tab and select Open Task Manager.
Right-click each of the apps there and select Disable.
Next, go back to the System Configuration window and click Apply, followed by OK.
Finally, restart your PC.
Once your PC restarts, check if the problem is still there. If the issue doesn’t appear, it means that one of the disabled applications was causing the problem.
Once you upgrade Windows, be sure to enable the startup applications and services in batches to know the one causing the problem.
6. Reset Windows Update components
Press the Windows key, type cmd, and select Run as administrator under Command Prompt.
Now, type the following commands and press Enter after each: net stop wuauservnet stop cryptSvcnet stop bitsnet stop msiserverren C:/Windows/SoftwareDistribution SoftwareDistribution.oldren C:/Windows/System32/catroot2 Catroot2.oldnet start wuauservnet start cryptSvcnet start bitsnet start msiserver
After running all these commands, restart your PC and check if the problem remains.
If you want to speed this process up and don’t want to run the commands manually, you can always create a Windows Update reset script and use it to reset the problematic components quickly.
If you’re getting The language or edition of the version of Windows is not supported error, perhaps the issue, you should be able to fix it using the solutions above.
Feel free to let us know the solution that helped you fix this issue in the comments below.
Microsoft has started testing a new Xbox feature that will help gamers find new Xbox Game Pass games to play based on their previous gaming activity. The feature was introduced in a recent preview update for Xbox Insiders in the Alpha Skip-Ahead and Alpha rings, and it could be released as soon as next month with the next system update for Xbox consoles.
After installing the update, Xbox Insiders will notice a new “Because you played” category in the Xbox Game Pass app alongside other categories highlighting new games to discover in the catalog. With Xbox Game Pass getting new games all the time, it can be quite difficult for subscribers to find new games to play, and it’s nice to see Microsoft trying to do more on that front.
As you may know, Microsoft already added a “Surprise Me” button in the My Games & Apps section of the Xbox OS, which can suggest gamers new games to try in their personal gaming collection. This button is also available in the Xbox Game Pass, Games with Gold, and EA Play catalogs, though game suggestions appear to be quite random.
If SVOD services like Netflix already do a pretty good job at suggesting new content to subscribers, it remains to be seen if Microsoft’s game recommendation engine will be able to match that. Unlike Netflix, Microsoft doesn’t ask Xbox Game Pass members to rate the games they’ve been playing, so the company may only take into account the time spent by gamers on certain game genres.
We haven’t tried this “Because you played” feature on our Xbox consoles yet, though we think a Netflix-like recommendation engine would probably make Xbox Game Pass subscribers very happy. If you’re an Xbox Insider who already has access to it, we’d love to know what you think in the comments below.
There’s a rumor going around that Microsoft could be holding a “What’s new for gaming” Xbox event on March 23, and cloud gaming is expected to be one of the main themes. While Microsoft has yet to officially announce the event, Xbox head Phil Spencer has apparently started doing some teasing on the Twitter account of Xbox marketing exec Aaron Greenberg.
Following their trip to Bethesda’s headquarters in Rockville, Maryland, Greenberg offered some behind-the-scenes details in a long Twitter thread, with one of the pictures showing Phil Spencer playing the cloud-enabled Xbox version of Destiny 2 on a Surface Pro X tablet. “If you ever wonder what Phil does while waiting for his plane, he is always streaming his Xbox games to whatever device he has with him on the go,” wrote Greenberg.
11/ If you ever wonder what Phil does while waiting for his plane, he is always streaming his Xbox games to whatever device he has with him on the go! #XBOSS ????????????♂️???? pic.twitter.com/6zP2WgAXER
— Aaron Greenberg ????????♂️????U (@aarongreenberg) March 15, 2021
It’s been known for a while that Microsoft has been internally testing a Project xCloud app for Windows 10, as well as a web-based version of the cloud gaming service. If Microsoft were to indeed hold an Xbox event next week, it would make sense for the Windows 10 and web versions of xCloud to be announced there. After all, it’s believed the event is for Microsoft to discuss the future of Xbox, and Xbox Cloud Gaming is a big part of this.
Given that Xbox Game Pass has now passed 18 million subscribers, and Microsoft just acquired Bethesda Studios, it would be great if we can finally get xCloud on Windows 10 and other devices. Currently, Xbox Cloud Gaming is only available on Android devices, which severely limits its scope compared to other game streaming services like Amazon Luna, or Google Stadia.
Microsoft is bringing a new customization option to Edge, allowing users to personalize the look of their browser. Microsoft Edge Canary is rolling out custom color themes as a server-side change (version 91.0.826.0), and the update appears to be a part of A/B testing by the company (via Edge Insider forums).
Microsoft started testing the color theme picker option in Edge Canary and Dev channel with an experimental flag last year in December. The personalization feature lets users apply custom accent colors to the title bar, toolbar, and the browser’s new tab page. It supports both dark and light themes.
Interestingly, there are a handful of pre-set accent color options for the users to choose from, and the list includes Morning Fog, Cool Breeze, Mango Paradise, Mystical Forest, and more. To try out this new feature, Edge Insiders will need to head to Settings, click the Appearance section, and then select any Theme option from the list.
For those who are interested, there is an option to download and use third-party themes from the Edge Add-ons store and Google’s Web Store as well, and it’s available below the color palette.
It is worth noting that Microsoft is testing this update with select Edge Insiders, and it’s gradually rolling out to more users on the Canary channel. However, it will be a while till it shows up in the Dev builds and eventually in the Stable channel.
Microsoft has just revealed the second wave of new Xbox Game Pass games coming to the game subscription service in March. The headliner is Yakuza 6: The Song of Life, which will be available next week alongside Octopath Traveler, Narita Boy, and more.
Five Yakuza games are already available on Xbox Game Pass including Yakuza Kiwami 1 and 2 and Yakuza 3, 4, and 5 Remastered, and it looks like Microsoft wants the full series to be available on Xbox Game Pass. It wouldn’t be surprising to see Yakuza: Like a Dragon, the latest episode which was a launch title for Microsoft’s Xbox Series X|S consoles to be next in line.
Two new Xbox Game Pass games were previously announced yesterday with Undertale (available today) and the upcoming Outriders, which will launch on Xbox Game Pass on its launch day, April 1st. You can find the full list of new Xbox Game Pass games with their respective platforms and release dates below:
Undertale (Cloud, Console, and PC) – Available today
Empire of Sin (Cloud, Console, and PC) – March 18
Nier: Automata (PC) – March 18
Star Wars: Squadrons (Console) – March 18
Torchlight III (PC) – March 18
Genesis Noir (Console and PC) – March 25
Octopath Traveler (Console and PC) – March 25
Pillars of Eternity II: Deadfire – Ultimate Edition (PC) – March 25
Supraland (PC) – March 25
Yakuza 6: The Song of Life (Cloud, Console and PC) – March 25
Narita Boy (Cloud, Console and PC) ID@Xbox – March 30
Outriders (Cloud and Console) – April 1
March 2021 is shaping up to be one of the biggest months ever for Xbox Game Pass as we’ve already seen NBA 2K21, Madden NFL 21, Football Manager 2021, and 20 Bethesda games coming to the game subscription service. It’s likely not the end of the good news as Microsoft is now rumored to be holding a digital gaming event next week, likely on March 23. The company is expected to discuss its progress on Xbox Cloud Gaming, and Xbox head Phil Spencer was recently teasing playing the cloud-enabled Destiny 2 on his ARM-powered Surface Pro X.
Microsoft’s Xbox Game Pass service crossed 18 million subscribers last fall, and this number could rise rapidly once cloud-enabled games become playable on Windows 10 PCs, iOS devices via the web, and smart TVs. Now that Microsoft completed its acquisition of ZeniMax Media/Bethesda, 8 new studios have joined Microsoft’s Xbox Game Studios division to bring even more quality exclusive games to Xbox Game Pass subscribers on Xbox consoles, PCs, and any devices that can access Xbox Game Pass.
Today, Microsoft acquired The Marsden Group, a leader in industrial technology innovation and rapid prototyping, for an undisclosed amount. Microsoft’s acquisition is to help customers build more quickly vertical solutions using Microsoft Azure cloud, edge-computing, and AI services, in particular. The Marsden Group is a Microsoft Gold Partner member and will help Microsoft bring more industrial customers to use Azure cloud services to transform their businesses.
“The Marsden Group has earned a unique reputation as a powerful and trusted partner among industry leaders who seek to quickly identify business needs, ideate technology solutions and build high-quality prototypes tailored to individual customer needs. The Marsden Group has helped its enterprise customers rapidly envision, prototype and implement solutions that drive meaningful value to their businesses, employees and customers. We know that in asset-intensive industries, such as manufacturing, automotive or logistics, companies face unique challenges in adopting new technologies, for example connecting industrial equipment safely and securely to the cloud, overcoming data silos and supporting interoperability across modern and legacy systems. Through recent projects, I’ve seen firsthand what The Marsden Group and Microsoft can do, what’s possible when we bring together our cloud, edge, IoT, digital twin and AI capabilities with The Marsden Group’s speed, agility and technical creativity.”
The Marsden Group is a three-year old, U.K.-based company that specializes in rapid prototyping in industries including manufacturing, automotive, and logistics.
Microsoft has taken an important new step to help customers protect themselves against the “Hafnium” Exchange vulnerability with the release of a new one-click mitigation tool. This follows the release of a previous update for its Exchange Server platform aimed at patching four critical vulnerabilities that have been exploited by hackers.
This new Mitigation Tool has been designed for customers who don’t have dedicated security or IT teams to apply these on-premises Exchange security updates. “This tool is not a replacement for the Exchange security update but is the fastest and easiest way to mitigate the highest risks to internet-connected, on-premises Exchange Servers prior to patching,” the company explained.
The Microsoft Security Response Center team has tested its new one-click mitigation tool across Exchange Server 2013, 2016, and 2019 deployments. “The Exchange On-premises Mitigation Tool is effective against the attacks we have seen so far, but is not guaranteed to mitigate all possible future attack techniques,” the MSRC team said. The tool is available download from this page, and additional resources are available on this GitHub page.
Microsoft takes these attacks against on-premises Exchange servers very seriously, and the company believed that what began as a “nation-state attack” has evolved into something exploited by other criminal organizations using the vulnerabilities for new ransomware attacks. “This is now what we consider a broad attack, and the severity of these exploits means protecting your systems is critical,” the Microsoft Security team emphasized.
After updating Windows 10, you may find that some of your Microsoft Excel documents do not open and you receive the following error:
Excel Protected View Office has detected a problem with this file. Editing it may harm your computer. Click here to view more details.
Therefore, the file is opened in protected mode. The Office Protected View is a read-only mode which no longer contains most of the editing functions you are used to working with.
In the following lines, you will find proper solutions to resolve this annoying Microsoft Excel issue.
How to fix Office has detected a problem with this file?
1. Disable the Protected View option
Open the Microsoft Excel app, and click on the File tab.
Go to the Excel Option window, and select Trust Center.
Click the Trust Settings button, and choose Protected View in the next window.
Disable the Enabled Protected View for files originating from the Internet option.
When the Excel files are opened from a network drive (used with SMB directories of Synology and QNAP NAS devices), they are opened in protected view. This is very useful for unknown sources (via email).
However, in the product environment, this Protected View in Excel is also very annoying when it is done from the central data server (NAS).
That’s why you can always disable it and continue your daily work.
2. Update Microsoft Excel application
Open the Microsoft Excel app, and click on the File tab.
Go to Product Information, and select Update Options.
Click the Update Now button.
Microsoft Office is normally updated automatically. However, if this doesn’t work, you can also update it manually. Otherwise, errors may occur when you are opening Excel documents, for instance.
3. Repair Microsoft Excel
Open Control Panel, and click the Uninstall Program.
Select Microsoft Office Suite, and double-click it.
Choose Change from the pop-up menu, and click Repair.
Various malfunctions can only be remedied with repair installations.
It is not always necessary to hire some expensive IT specialists to repair the Microsoft Office, because you can do it yourself if the program no longer works properly.
Microsoft Excel is probably the most widely used spreadsheet application on Windows computers and is a part of the Microsoft Office.
Excel’s extensive calculations with formulas and functions, including commercial, statistical and date functions make the program irreplaceable in today’s office.
3. Add a trusted location for the file
Open your Office app.
Click on File and select Options.
Go to Trust Center, select the Trust Center Settings and click on Trusted Locations.
Click Add new location.
Click Browse to find the folder with the problematic file and then click OK.
This solution works for all the latest Office products including Word, Excel, Access, Powerpoint and Visio.
We hope that you managed to clear the Office detected a problem with this file error by using our solutions.
A number of users have reported that they encountered an error message saying Amdkmdap stopped responding on Windows 10. This issue seems to be caused by either a faulty video driver or incompatibility of the AMD drivers with the latest Windows 10 update.
Here is what one of the users who have encountered this issue had to say about it on Microsoft Answers:
So I bought a new PC a month ago and whilst playing many games the PC will stop responding and crash. When I checked the event viewer it said that the Display driver amdkmdap stopped responding.
This issue can become extremely frustrating, as the results are sudden black screens. In order to fix these issues, in today’s article, we will discuss the best troubleshooting methods available.
Please follow the steps presented in this article carefully to avoid any other complications.
How do I fix display driver Amdkmdap not responding?
1. Check Windows for available updates
Click on the Cortana search box and type Update.
Select the first option from the top.
Inside the Windows Update window, click on Check for updates.
Wait for Windows to check for any available drivers, and install them if any updates are available.
Restart your PC and check to see if the issue persists.
2. Uninstall the AMD video driver and re-install it
2.1 Update the driver manually
Right-click the Start button and select Device Manager from the list.
You will see the list of all your hardware.
Expand the Display adapters section, right-click on the AMD video adapter, and select Update driver.
If a driver update is available, the wizard will automatically install it.
To check for driver updates in Device Manager, do as described above. This is the most popular method of checking for driver updates in Windows 10
2.2 Re-install the latest AMD drivers:
Manually updating drivers is OK if you have the time and the skills, but sometimes, the default driver installed by the system is not the best.
You will need the exact driver for your graphics adapter and a dedicated solution like the one recommended below will do the job automatically, in no time si try it.
Press Windows+R keys on your keyboard, type Regedit, and press Enter.
Inside the Registry Editor window -> navigate to the location: HKEY_LOCAL_MACHINE\System\CurrentControlSet\Control\GraphicsDrivers
Right-click the right-side tab and click New.
Select DWord (32 bit) Value. Name it TdrLevel and set it to 0.
Restart your PC.
In this guide, we explored some of the best methods to deal with the Amdkmdap stopped responding error message on Windows 10. We hope the steps presented here managed to help you solve this annoying issue.
If you would like to let us know if this fixed your issue, or if you have any suggestions, please feel free to let us know by using the comment section below.
Minecraft is a popular sandbox video game, but many users reported Fatal error in Minecraft. The Minecraft Fatal error can occur due to several reasons, and the error message can vary depending on the issue.
Irrespective of the reason, here are a couple of solutions to fix the Minecraft fatal error on Windows computers.
How can I fix Minecraft fatal error connection terminated?
Type Device Manager in the search bar and open it.
From the Device Manager, go to Display Adapter > Intel UHD Graphics.
Right-click on Intel UHD Graphics and Update driver.
Select Search Automatically for updated driver software.
If an update is found, download and install the driver.
Restart your PC and check for any improvements.
Minecraft fatal error can occur if the game is unable to use your dedicated graphics card or if the old video card drivers are creating conflict with your version of the game.
If you are wondering how to update the drivers for Minecraft, the simple solution here is to update the graphics card from the Device Manager (in case of Intel HD graphics).
Use a third-party driver updater
Alternatively, you can update all your drivers automatically using a specialized tool. The software will scan your computer for newer compatible drivers and installs them for you.
This way, you’ll make sure that any driver-related error will get solve quickly. Thus, you won’t have to stress about your drivers anymore.
2. Disable the antivirus and firewall
To disable Firewall, type Firewall in the search bar.
Open Windows Defender Firewall.
From the left pane, select Turn Windows Defender Firewall On/Off.
Turn off the Firewall for both Private and Public network settings.
Click OK to save the changes.
Try to download the Minecraft update again and see if the error is resolved.
Make sure to enable the Antivirus and the Firewall after the update is installed.
If you are facing Minecraft fatal errors while updating the game to the newest release, your antivirus might be at fault. Antivirus and firewall usually block any suspicious connection to and from the PC.
However, at times even genuine connections might get blocked for various reasons. The simple solution here is to disable your antivirus temporarily along with the firewall.
Alternatively, you can also add some programs to whitelist in your antivirus. If your antivirus is the problem, perhaps this is a good time to consider switching to a different antivirus.
3. Update Minecraft
Open the Minecraft launcher.
Wait for the Launcher to update.
Click the arrow to the left of the play button and select Latest Release.
If prompted, download and install the update.
Developers frequently release new updates to keep their game bug free and to add new features. If you are running an older version of Minecraft, try to update the game to the latest version to see if any new fixes are available.
Minecraft constantly checks for new updates and automatically notifies the user if an update is available. However, in case you don’t have any notifications, check for new updates manually.
4. Check for Java updates
Minecraft being a Java-based game requires you to install Java on your computer. At times, some technical bugs related to the game can be fixed by updating Java on your computer.
Apart from fixing technical glitches, Java updates also bring performance improvements.
Some users have reported the problem to have occurred after installing the latest version of Java. In such cases, downgrade to the older version where the game was working without the fatal error.
The modern laptops and PCs come with decent hardware that is fully capable of running Minecraft on medium settings since it is not a demanding game and most people should run it on integrated graphics.
However, if you have an old PC, the lack of hardware resources may cause a fatal error in Minecraft leading to a system crash.
By lack of hardware resources, we mean RAM. To check the RAM usage, use the Task Manager and check the Performance stats.
If the RAM usage is at 100% all the time, you probably need to buy more RAM to fix the issue.
6. Other common fixes
Don’t rely on Windows for graphics driver updates. Download drivers manually from Intel’s website.
Download OpenGL manually as Microsoft uses DirectX instead.
Reduce memory amount in Java to 512 MB.
Minecraft fatal error is a common problem and can affect any user. Try to follow the solutions given in this article to resolve the issue.
Make sure to leave any working solutions in the comments below so that we can update the article with new solutions.
The latest entry in the long-running R.B.I. Baseball video game series, R.B.I. Baseball 21, is now live and ready to play on Microsoft’s Xbox One and Xbox Series X consoles.
R.B.I. Baseball 21 should look familiar to those who have played previous entries in the franchise though it does boast 4K Ultra HD support, visual improvements when played on an Xbox Series X console, improved customization options, and an all-new play-by-play commentary feature.
Here’s the official video game description for R.B.I. Baseball 21:
PLAY YOUR WAY. Create a legacy and make a statement. The world of MLB awaits in R.B.I. Baseball 21. R.B.I. is the fast-paced, easy-to-learn baseball franchise perfect for anyone who wants to pick up and play, and R.B.I. Baseball 21 brings new features including create-a-player, play-by-play commentary, immersive time-of-day, and incredible visual improvements. Step up to the plate, crush home runs, and take your club to a World Series title in R.B.I. Baseball 21.
R.B.I. Baseball 21 supports Microsoft’s Smart Delivery initiative which is essentially cross-buy support for both Xbox One and Xbox Series X versions. AKA, buy the game on one console generation and get it for free on the other.
Over the years Microsoft released many amazing tools, but unfortunately, some of these tools had to be discontinued. One of them is Windows Photo Gallery.
Since this was such a popular tool, today we decided to show you how to download it and install it on Windows 10.
What is Windows Photo Gallery?
Windows Live Photo Gallery for Windows 10 is an image optimizer and photo editing application. The first version was included with Windows Vista, designed as a Windows Picture and Fax Viewer replacement.
The first version was developed in December 2001 as a Photo Library and it was released under the Digital Image Suite 9 on June 3, 2003. The last Photo Library branded software was released on April 22, 2005.
After that, Windows Photo Gallery took over and it came with all the versions of Windows Vista.
When Windows 7 was released, Windows Photo Gallery was removed and added to the Windows Live Essentials suite.
At the same time, Microsoft changed the name of this application to Windows Live Photo Gallery and the first version of this software was released in 2007.
Over the years this tool saw some big changes and new features such as facial recognition, image stitching, batch people tagging and geotagging.
Windows Photo Gallery allows you to organize photos by adding titles, ratings, captions, and custom metadata tags, and there’s also support for XMP metadata standard for categorizing your photos more efficiently.
Windows Photo Gallery also supports basic photo editing, thus allowing you to quickly resize, crop, adjust shadows, sharpness, or reduce noise. Another feature is its batch resize that allows you to quickly resize multiple photos.
As for supported formats, Windows Photo Gallery supports the most popular image and video formats.
How to install Windows Photo Gallery on Windows 10?
Fortunately, you can download all the necessary components from here. After installing the necessary components you should be able to use Photo Gallery without any problems.
After you start the application you’ll see list of thumbnails from your Pictures folder, but you can easily add any other folder to Photo Gallery.
You can also double click the thumbnail to view an individual image. From here you tag people, add geotags, captions and descriptive tags.
In addition, you can choose between several colour and exposure presets, or you can fine tune all of these options manually.
After you’re done with changes, you can save the edited image as a copy and preserve the original image.
You can set your edited image as a desktop, or share it online on social media websites right from the Photo Gallery.
We have to mention that you can easily apply effects such as colour correction and exposure to multiple images simply by selecting them and clicking the desired effect.
Of course, if you aren’t satisfied with changes you can easily revert back to the original version.
In addition to adding effects, you can create panoramas, auto collage and photo fuse right from the application itself.
As you can see, Photo Gallery works on Windows 10 without any major problems.
The only issue that we had was the lack of Microsoft SQL Server 2005 Compact Edition, but after installing the necessary tools the application worked without any problems.
Note: Do not forget that Windows Photo Gallery has been discontinued and Microsoft no longer offers support for it. If you have any issues with the app, you’ll have to solve them on your own.
If you are interested in a more capable image editing tool that can help you with all your projects, check out this awesome list.
This concludes our article today. We hope that we managed to show you all the important information you needed.
Feel free to tell us in the comments below which photo editor you use and if Windows Photo Gallery still has a place on your computer in 2019 or not.
Despite a very public and rather harsh uncoupling between the Nokia and Microsoft brands following the failed Windows Phone experiment, it appears the two are ready to collaborate on a different venture now.
The collaboration will combine Nokia’s Cloud RAN (vRAN) technologies with Microsoft Azure cloud-based services and developer ecosystem to drive end-user functionality via new business cases. The initiative supports Nokia’s strategy of partnering with best-in-class public cloud providers to drive end-user business outcomes essential for monetizing 4G/5G deployments.
Once again, Microsoft has signed another big name to its Azure platform and will play the cloud backbone to future development, specifically Nokia will run its Cloud RAN, Open RAN, Radio Access Controller (RIC), and multi-access edge cloud (MEC) atop Azure’s Private Edge Zone.
What is Azure Private Edge Zone you ask?
Azure Private Edge Zone is a low latency solution that enables developers to leverage 5G for use in fields such as real-time robotics, immersive mixed reality, and gaming. According to Nokia’s press release, the company will integrate its own 5G RAN with Azure 4G/5G core to “demonstrate interworking to support enterprise use cases required by Microsoft’s customers.”
If all goes to plan, Nokia is already entertaining a possibility of expanding its agreement to eventually host its Nokia Airframe Open Edge server on Azure which would help the company distribute 5G computing capacity across its network. Unlike its previous smartphone partnership, Nokia is keeping the door wide open for multiple vendor partnerships and not going exclusively with Microsoft for its public cloud expansion efforts.
Keeping photographic memories in your home isn’t as common as it used to be, and many users are using a battery-powered digital photo frame to store their photos.
The Nixplay frame gives you the chance to share photos or 15 seconds videos directly from your phone, laptop, or email, in a safe and private manner.
One of the most awesome features is the fact that you can create a photo-sharing network with your family and friends that respects the GDPR and CCPA regulations.
With this frame, you benefit from an excellent display quality of 1280×800 HD IPS, that adjusts itself to portrait or landscape images.
This frame comes with a beautifully customized 14-inch display with a 1920×1080 high resolution LED screen, that can also support HD videos, with a 16:9 aspect ratio.
You’ll be delighted with the motion sensor that allows you to switch on light up the photo as soon as you walk into a room from a distance of 2.5 meters.
For those photos you take with your phone, you have the Auto-Rotate Function that lets you flip the photos depending on the position of the frame.
This digital frame comes with 10.1-inch display touchscreen with 1280×800 resolution and a 16GB memory that will be more than enough to store all your memories.
The device has 4000mAh battery that can last up to 5 hours. The device accepts SD cards and USB drives, so you can easily expand its storage.
As for additional features, the device can play music, show the calendar, weather, videos or even work as a alarm clock, so it’s a multi-functional device.
A 10-inch digital frame with a display of 1280×800 IPS and a viewing angle of 178 degrees is a great choice if you want to have a special memory placed in your home office or workplace.
It is very user-friendly because it doesn’t require a set-up or special software you just need to send your photos from an SD card of a maximum of 32 GB.
A feature that will really make your photos come to life is the fact that you can add music to play in the background, and actually save an entire playlist for your photos. The frame provides an excellent sound quality so you really get a special experience with this device.
This is 10.1-inch device and it comes with amazing 2048 x 1536 resolution, and it can display images in 4:3 aspect ratio.
The device has 16GB of storage, which should be more than enough for most users. As for image transfer, you can use the dedicated mobile app to easily transfer the photos.
We have to mention the built-in battery, and with 2000mAh, it might not be the best, but it should provide you with decent battery life.
As we have shown you in this article, battery powered digital photo frames offer more than the classical way of displaying photos in your home. These devices allow you to enrich your picture with elements such as your favorite music, creating a special piece of decor.
We hope that we gave you all the necessary info so you can choose the digital frame that fits you the best.
The best solution for a stable Internet connection is a DSL modem that basically functions like a landline phone, and in this guide we’ll help you choose the best DSL modem.
Most popular modems these day are the ADSL type, meaning Asymmetric DSL modems, which implies that the download and upload speeds are have different values.
That’s why when you’re considering getting a modem some important aspects are the maximum speed and the ability to increase Internet speed.
If you’re looking for a new model, keep on reading to find out about our top picks.
CenturyLink introduces a DSL modem that features automatic network configuration and a 300 Mbps 802.11n access point.
Thanks to these characteristics you can be sure that your Internet connection will function smoothly at any time, whether you’re focusing on work or streaming your favorite game or TV show.
Another great perk of this modem is the fact that it comes with 802.11n technology and 2T x 2R antennas, which means you’ll benefit from great Internet speed and extended coverage.
This device offers compatibility with various services such as VDSL, ADSL, ADSL2+ and Prism TV. The modem includes a standards-based WPS feature that simplifies the setup procedure of securing a WLAN connection.
Without a doubt, this is one of the best DSL modems for CenturyLink, so be sure to try it out.
Another great choice on our list is this TP-Link modem that comes with 24Mbps downstream bandwidth, a one Phone line port and a one 10/100M Ethernet port.
An element you’ll definitely find extremely useful is the incorporated firewall that is meant to protect your Internet connection from various cyber threats.
When it comes to this DSL modem we mustn’t forget about a very important feature, the 6KV lightning protection function that is of great help in protecting against any thunderstorm damage.
Overall, it’s a great modem and one of the best DSL modems for Frontier.
The Netis DSL is a lightweight modem that offers a unique 3 in 1 combination that includes the features of a high-speed ADSL2+ modem, a 4-port NAT router, and wireless N access.
This means that you can easily connect multiple devices at the same time without any hassle while benefiting from a high Internet speed of up to 24Mbps downstream.
Don’t miss out on the the DL4323 technology that ensures a far superior speed than the traditional dial-up connections.
Some other awesome characteristics you’ll definitely love are the Port Mapping feature for IPTV, the Ethernet WAN connection, and many more.
This is one of the best DSL modems for AT&T, so we encrouage you to try it out.
Having a good Internet connection plays a major role in today’s world and in order for it to function at optimal capacity, you need a great DSL modem that can provide you with excellent speed.
We hope we provided you with some clear information that you can definitely use when you decide to search for a high-quality DSL modem.
Don’t be a stranger and share with us your experience and recommendation by accessing the comment section below.
Ever since the explosive Facebook and Cambridge Analytica scandal played out before the world, the concern over how secure the private data of millions of internet users really is continues to raise more questions, than answers.
Wi-Fi, today, is almost like a basic need in itself, as the demand for internet connectivity and convenience in communication continues to surge.
Public spaces such as coffee shops, malls, hotels, schools, colleges, universities, and even transport vehicles have Wi-Fi connections, which most people, especially millennials can’t do without.
However, the use of public WiFi by others doesn’t necessarily make it safe, so you need to ensure you and your devices are protected as you surf in public places.
Similarly, there are many myths that we’ve held as truths in terms of the right precautionary methods to stay safe online, which in fact put us in more risk than we can perceive or imagine.
Here are some of the top five myths about privacy that we all believe, the real truth about them, and tips to deal with each to protect our privacy and surf safely on the web.
Don’t fall for these online privacy myths
1. Public Wi-Fi is safe because everyone uses it
Most people jump at the thought of being in a public place that has free Wi-Fi connection, which to them is a free way of downloading stuff or streaming their favorite media, or just the ease of doing things on the go.
However, for the provider, such as a hotel, school, or coffee shop, this is an easier way of getting your information for marketing purposes like promoting their brands and loyalty programs.
Such information will also be very useful if it lands in the hands of third parties as they profit from selling consumer information to companies and other clients. This is why public Wi-Fi is not just popular, but it is also very risky to use.
Most people have fallen prey to using rogue public Wi-Fi which they believe is for the building they’re in, but in the real sense, a hacker has set up a rogue network nearby and is using the middle-man approach to access your information.
The browser is also important. If you are using the Google browser for instance, you can install these recommended privacy extensions for Chrome.
Whether the network requires a password or not, and usually the establishment will give one to you when you need to use it, this doesn’t make it any safer if it is also shared with other people in the same building.
Solution: Use a VPN
When joining a new network, always choose No if you get the Allow your device to be visible on the network for sharing purposes prompt.
Get a powerful VPN like the one recommended below and don’t worry about any kind of Wi-Fi network.
If you are connected to the VPN, nobody from the network will be able to see the content of your online activity.
You can freely check your email and connect to any account that you have, safely, because the data transmitted is kept private from any prying eyes. It gives you a great advantage and peace of mind.
So, using a VPN will help you a lot, especially if you choose this one, owned by Kape Technologies. This is a very well-known and respectable service provider.
This VPN has a long tradition in protecting the privacy of its users and offering a high-quality service.
These are the main reasons we recommend this solution:
Huge number of servers available to connect anywhere you are
OpenVPN and WireGuard support on all servers for increasing security and speed
Easy to use client that you can install and use on 10 different devices
No-logs policy to keep you private
PIA MACE is a technology that blocks ads while browsing making your experience better
Private Internet Access
Use PIA VPN to protect yourself while using a public Wi-Fi and to keep yourself anonymous while browsing.
This is one of the biggest and long-held misconceptions about privacy online. Whether you’re using an incognito window, or you’re in private mode or private browsing, this feature is actually meant to keep your online activity hidden without leaving a trail of your sensitive information such as passwords, or your browsing history.
According to Paige Hanson, Norton’s chief of identity education, your activity is still available and visible to your ISP and the provider of the Wi-Fi you’re connected to (if at a public place), as it is saved and easily shareable or sellable to third parties.
Solution: Instead of using ‘private browsing’ or ‘Incognito window’, install a solid VPN (virtual private network) for anonymous browsing, plus a strong security suite to keep you away from online snoops (including marketers and advertisers), and hackers. Moreover, you can see this guide of using a VPN with the Torch Browser for extra-security.
3. Using the same password for everything
While using one password is easy for you to remember so that you don’t easily get shut out of your commonly used accounts like email and social media, the fact that it isn’t easy to guess so you can replicate it on all your accounts is a big myth – it doesn’t work!
In fact, using one password for all your activity online exposes you to a higher risk of getting hacked if just one of the services is compromised and leaks your password.
When this happens, hackers or cybercriminals will try it on all your other accounts, and that is the beginning of disaster for you – this applies to everyone – whether you’re famous or not.
Solution: Use different and strong passwords for all your accounts. You can use a genuine and trusted password manager app to remember each, or use a passphrase with different characters, symbols, numbers and letters. This makes it more difficult for people to access your data.
Adding two-factor authentication also helps because only you will receive a one-time code on your preferred platform, whether email or mobile phone and once you key that in, you can access your account.
This method involves having both a password and passcode, or biometrics sign in.
4. Once deleted, my personal data is gone for good
Simply deleting files or emptying the Recycle Bin on your computer doesn’t mean those files are gone forever from the system. Similarly, formatting your hard drive or other storage devices still leaves traces of your files in them, and these can be retrieved using online recovery tools, which cybercriminals are familiar with.
Solution: Get software that can erase your hard drive and wipe it clean, properly. Don’t sell your drives or computer unless you are sure it is squeaky clean.
5. My Facebook is set to Private so no one but my Friends can see me
This may be true, but not entirely, because as much as you can share information to select friends only, your private profile still shows your name, photo, and more to other people on Facebook. Additionally, apps that you download may have access to your friends list.
Solution: Check the apps and/or sites and even games you grant access to your profile. Carefully read the privacy and security settings on Facebook, and do some research on what they really mean, so that you understand what your choices mean. Disregard any third-party apps as these are hungry to feed on your data, so if you have any right now, uninstall them.
What other myths have you believed about privacy and how did you deal with them? Share with us in the comments section below.
When you have no broadband Internet connection available in your area, the best option is to use a 4G router, and in today’s article we’ll going to show you the best 4G LTErouter with sim card slot that you can get.
This article shows routers for all price ranges, so you should be able to find something that suits your needs.
What are the best LTE routers with a SIM card slot?
The Netgear LB1120 model is a good router to be used as a back-up. You can use it as the primary Internet connection in areas that do not have strong broadband service.
It comes with a micro-SIM slot that is unlocked and can be used very well with AT&T and T-Mobile.
This device features Gigabit Ethernet WAN port for connection pass-through. You can connect it to an additional router and share the mobile connection with it. In this way, you can connect multiple devices, even those that have only Ethernet adapter.
If you need a router for downloading games and videos, you should think of buying the NETGEAR Nighthawk M1 router.
Unlike the model LB1120 that provides an Internet speed of up to 150 Mbps download, this device reaches a maximum speed of 1 Gbps. That’s fast enough for uninterrupted HD streaming, gaming, and video calls.
The battery can be charged via a universal USB port. Its capacity of 5040 mAh will last you for up to 24 hours on a full charge. Furthermore, one USB port can be used to stream content live from the internet through any of your mobile devices.
The Huawei B310s-518 model from Huawei, a well-known company that produces various electronics, is one of the best 4G routers that you can get.
You can use it on virtually any mobile network. It is not tied to any specific service provider and it can carry any standard SIM from whichever GSM network you are using. Thus, you don’t have to be a Verizon or T-Mobile subscriber to use this device.
For a better Wi-Fi coverage, Huawei B310s-518 comes with 2 antennas in the pack.
If you need a router to connect your devices not only to the Wi-Fi network but also via Ethernet cable, KuWFi 4G LTE CPE is the best option.
It features 4 Ethernet ports where you can connect computers without a Wi-Fi adapter. If you have broadband Internet, you can plug the WAN cable into one of the ports and configure the PPPoE connection.
If you have a large home with a floor, you can use this router as a Wi-Fi repeater so you can have internet all over the house.
Another excellent choice for a home where you have to connect to Internet devices without a broadband network is the D-Link DWR-921_E router.
This device has dual-active firewalls (NAT/SPI) to control traffic and prevent exploits and intrusions. The WPA/WPA2 wireless encryption maintains the security and safety of your wireless networks.
If you decide to use it with the SIM card, from the web management page you can send and receive SMS. In addition, you can use it with a broadband connection.
If you have a vacation house or just need a back-up solution for the Internet access, an LTErouter with a SIM card is the best choice.
This solution will also help you if you move a lot. Don’t worry about things like transferring your broadband connection to another place. Just take your LTErouter with you and stay connected.
All of the above devices come with a SIM card slot and are compatible with 4G thus providing you with great speed.
If you’ve wondered what is the best DVD player software to download on Windows 10, you came to the right place.
It is true that Windows 10 doesn’t have any native DVD player. The people at Microsoft decided to terminate Windows Media Player.
Instead of that free option, they released a paid app called Windows DVD player, which you can buy from the Microsoft Store.
In some cases the DVD drive will not be able to read the disc, in other cases, a region error message appears when playing a UK DVD in the USA for example.
Fortunately, there is a wide range of DVD player software online, and our team has scoured the Internet to find the five best software for you. Read on to find out more details.
WinX DVD Ripper Platinum is a handy program that allows you to convert any DVDs including region-locked/damaged DVDs, ISO image, DVD folder on Windows 10 with ease. It converts your DVDs to MP4 so you can watch the videos with 5KPlayer on Windows fluently.
Regarded as the must-have for DVD owners, this software is well-known for some impressive features:
Converts region-locked/protected/homemade and even damaged DVDs to videos for watching on Windows.
Rips DVD to MP4, H.264, FLV, AVI, MPEG, M2TS, and 350+ output profiles
Converts a DVD to MP4 in 5 minutes with the support of GPU acceleration
1:1 clone DVD to ISO image, DVD folder, backup DVD to MPEG2.
Free lifetime technical support via e-mail, guaranteed reply within 24 hours.
Offers support for bookmarks, multiple file formats, screenshots, subtitles, etc.
If you’re using a Windows PC, WinX DVD Ripper Platinum is the best choice!
WinX DVD Player
Play and convert DVDs into multiple file formats and enjoy your videos in high-quality playback on Windows, Apple, Andorid.
GOM Player is a veteran media player software, and for good reason. The capabilities offered by this free DVD player software for Windows 10 are top range, even after more than 10 years of existence.
This software can play any sort of video and audio files – DVD, AVI, MP4, CD, MKV, FLV, WMV, MOV, etc.
What makes GOM Player stand out is its link with OpenSubtitles.org and its vast Subtitle Library, which comes in very useful when trying to search for a subtitle online.
Even though GOM Player is a versatile and useful software option for playing DVDs, the fact that the free version displays ads makes GOM Player end up in the second position in this top 5.
Here are some other useful features found in GOM Player:
Great 360° VR Playback
Wide range of built-in codecs – Vorbis, FLAC, ADPCM, XVID, MP41, MP42, MP43, H263, etc.
Ability to play damaged video files
Great subtitle library
GOM Player
Experience the number 1 media player that supports all major video formats, absolutely free of charge.
5K Player is another excellent software option. This tool occupies the third position in our best free DVD player software for Windows 10, thanks to its user-friendly interface and rich options.
This software has a great set of features. You can play high definition videos, online radio stations, and can also be used as a multimedia file streaming tool.
You can use 5K Player to stream audio/video wirelessly by using AirPlay and DLNA (Digital Living Network Alliance).
Here are the key features of 5KPlayer:
DXVA2 hardware acceleration
Play a variety of formats – 4K, HEVC, HDR, H.264 8K, etc.
Video cutting abilities
DTS multichannel surround sound
TrueTheater technology – automatically chooses the best available quality of the specific format
VLC Media Player is one of the most versatile and powerful media players available on the market this year. It’s one of our top picks when it comes to the best free DVD player software for Windows 10.
This software option is completely free to use and offers you the possibility to experience a seamless DVD playing experience on any kind of device.
Beyond being able to play DVDs, VLC Media Player also allows playing audio CDs, ISO images, and also DVD folders.
VLC gives you all the capabilities of a fully paid professional video player software and comes tightly packed in a small installer.
The installation process is as straight-forward as you might expect from software designed to be easy to use and understand.
Here are the key features of VLC Media Player:
No ads and user tracking
Plays most codecs without the need to install codec packs – MPEG-2, MPEG-4, H.264, MKV, WebM, WMV, MP3, etc.
Hardware decoding allows your GPU to get help from the software
Advanced control options – video and subtitle synchronization, video and audio filters, etc.
In today’s article we explored some of the best DVD software to download for Windows 10.
At the top of the list, you will find the powerful WinX DVD Player. This software offers you an incredible array of features and customization options, excellent video and audio quality.
We would love to know what software option you chose from the list presented here. You can easily let us know by using the comments section below.
After announcing earlier today that Outriders would launch day one on Xbox Game Pass on April 1st, the Xbox team has now followed up with more exciting Xbox Game Pass news. Undertale, a critically-acclaimed indie game already available on PC, PS4, and Nintendo Switch will launch on Xbox consoles tomorrow, and it will be available on Xbox Game Pass on its launch day.
For those unfamiliar, Undertale is a 2D RPG with retro-looking graphics that was released first on Windows back in 2015. The game received praise for its unique characters and combat system, where players can react to enemy attacks by fighting, acting, healing, or using mercy.
“In Undertale, every monster is an individual and every interaction is unique; you can choose to fight, or you can choose to show mercy — and how you play and what you choose will affect the outcome of the story. With a hilarious and heartwarming cast of endearing characters, an incredibly catchy soundtrack, and truly standout RPG gameplay, it’s no surprise that the game continues to surprise and delight new players to this day,” wrote John Ricciardi, Executive Director, 8-4.
If Undertale was previously released on the Windows 10 Microsoft Store for PCs, the Xbox version of the game that will launch tomorrow will introduce some console-specific enhancements. “Because of these, progress and save data between the two versions are unfortunately not compatible,” explained Ricciardi, who also teased “some exclusive content to look out for” in the Xbox version of the game. If you don’t have Xbox Game Pass, Undertale will be priced at $14.99 on the Xbox Store, with physical editions to be available on fangamer.com.
The Fast_eresource_precondition_violation error in Windows 10 error, usually comes with a Blue Screen of Death and can occur suddenly. The Windows 10 BSOD errors can be addressed easily with the right tool and usually, the most common cause has to do with outdated drivers.
We will show you in this article the exact steps you need to make to solve this BSoD error quickly.
What is the meaning of Fast Eresource Precondition Violation error?
What is the meaning of Fast Eresource Precondition Violation also comes with the 0x000001C6 error code.
The BSoD means that the current thread is performing an invalid call to a fast resource routine and it usually occurs after a critical system crash. Here are some of the most common causes for this error:
Corrupted system files –
Besides, corrupted system components, wrongly coded software programs, outdated OS, and the existence of malware are highly responsible to cause the blue screen of death. There might be other reasons too such as damaged registry, buggy Windows update, software conflict, and incompatible BIOS version. As this particular BSOD is hard to recover, you might need to try out all probable workarounds listed below.
How can I fix the blue screen error fast eresource precondition violation?
1. Boot in safe mode
in the search box, type advanced startup and hit Enter,
In the right pane, locate and click on Restart now.
Next, select Troubleshoot and click on Advanced options.
Here, select Startup Settings and click on Restart.
When the system starts, press 5 or F5 to enable the Safe Mode.
2. Disable random shutdown
Press the Windows key and type in advanced system settings.
Under the Startup and recovery, click on the Setting option.
Deselect the checkbox placed before Automatically restart.
Click Ok and close the System Properties window.
3. Use a specialized software
Considering that the BSOD errors are rather complex, using software that will help you scan the entire device and fix the cause of the Blue Screen error is indicated.
To repair this kind of error you should best use automated repair software capable of scanning the PC and replacing damaged files accordingly.
These tools come with repositories of files that you can use to replace malfunctioning software files and clean up your system efficiently.
4. Uninstall Windows 10 update
Press the Windows key and type in view update history.
Click on the Uninstall updates option.
Locate the Microsoft Windows section and click Uninstall.
Follow the instructions on the screen and reboot the device once finished.
5. Fix hard disk error
Open the command prompt as an administrator.
Enter the following command: chkdsk C: /f /r /x
Wait for the process to finish and follow the instructions.
Reboot once the scan is completed.
6. Free up disk space
In the search bar, type in cleanmgr.
Click OK in the next window and go to Clean up system files.
In the Files to delete segment check all boxes and hit OK.
Wait for the process to end, and reboot your device.
One of the presented solutions above will help you successfully solve the fast_eresource_precondition_violation error in Windows 10.
Please share with us in the comments section below, which of the presented solutions helped you fix the error.
Microsoft announced a fix for users who, after last week’s Patch Tuesday updates faced a stop error with the message APC_INDEX_MISMATCH.
Last week’s updates came with important system fixes, but also caused serious problems for those using their network printers. As a result, Microsoft decided to roll back certain updates and to recommend that those affected uninstall them.
And now Microsoft also found a solution that should allow everybody to install the updates and prevent the error.
The idea is that before installing the updates, you should check which printerdrivers your system is running. The fix should be applied if they are Type 3 only.
How do I fix the APC_INDEX_MISMATCH issue?
Press the Windows key+R to open the Run command.
Type printmanagement.msc and press Enter.
If Print Management opens, continue to step 6. If you receive the error Windows can not find printmanagement.msc. then select Start and type manage optional features and select it.
Select Add a Feature and type print.
Select the check box next to Print Management Console and select install. You will now need to start at step 1 again.
Expand Print Servers, expand your computer’s name, and select Printers.
You can now see the Driver Type for each of your installed printer drivers.
As mentioned, the latest updates affect only Type 3 printer drivers. In this case, you should either skip the updates or, if already installed, continue with the following steps.
Check if the driver settings are available by running the following command and press Enter: rundll32 printui.dll,PrintUIEntry /Xg /n "your printer driver name"
In the printer user interface, the printer attributes field might not say direct.
Consequently, run the following command and press Enter: rundll32 printui.dll,PrintUIEntry /Xs /n "your printer driver name" attributes +direct
Run the first command again to make sure that the direct attribute has been added.
Microsoft mentioned that this is just a workaround and that they are still working on a final fix. The release date is yet to be known.
Note: If you’re looking for more solutions on how to fix the APC_INDEX_MISMATCH BSoD, we’ve written a detailed guide covering the subject, so that a look at that as well.















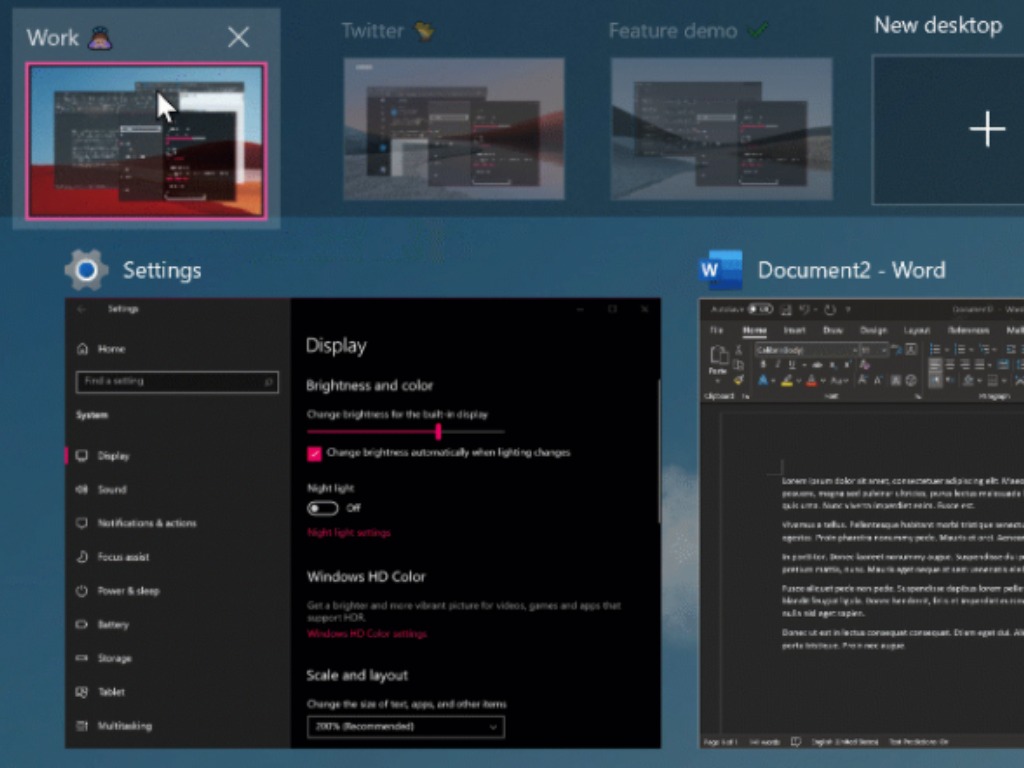
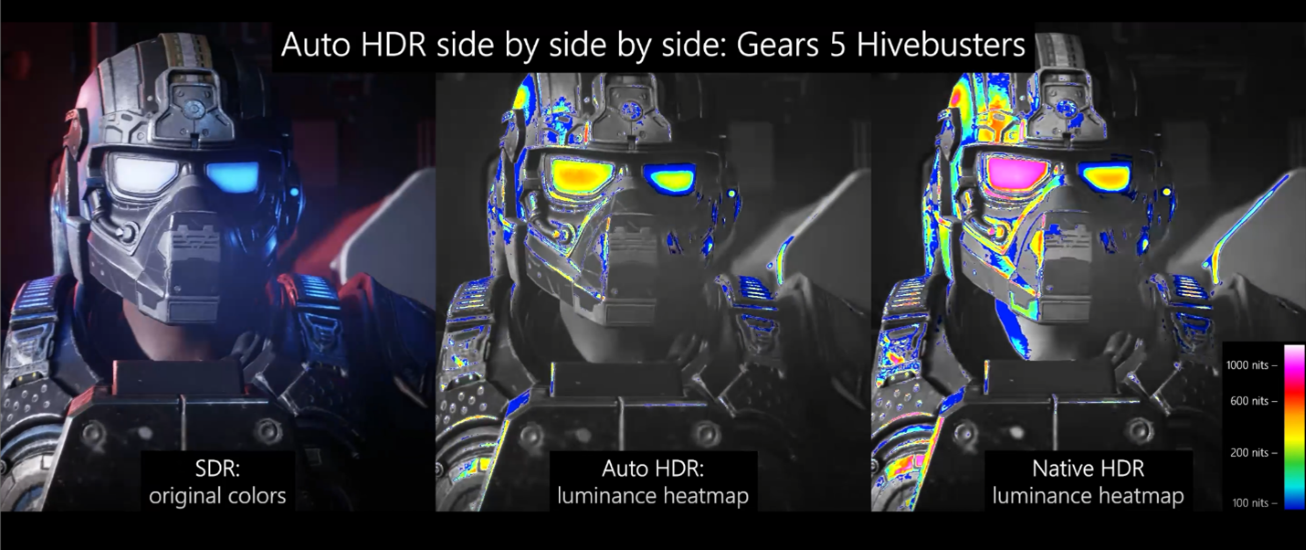




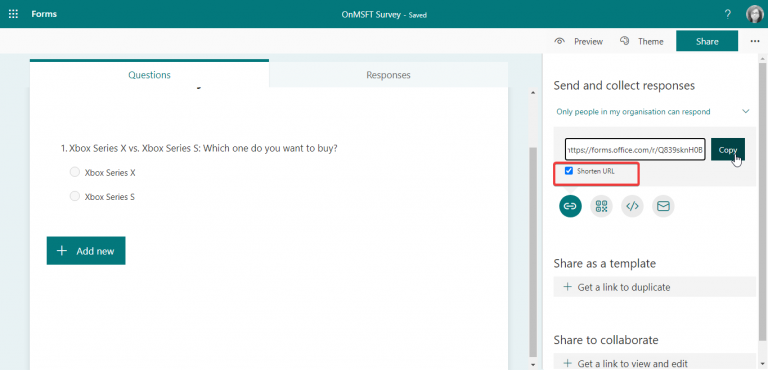
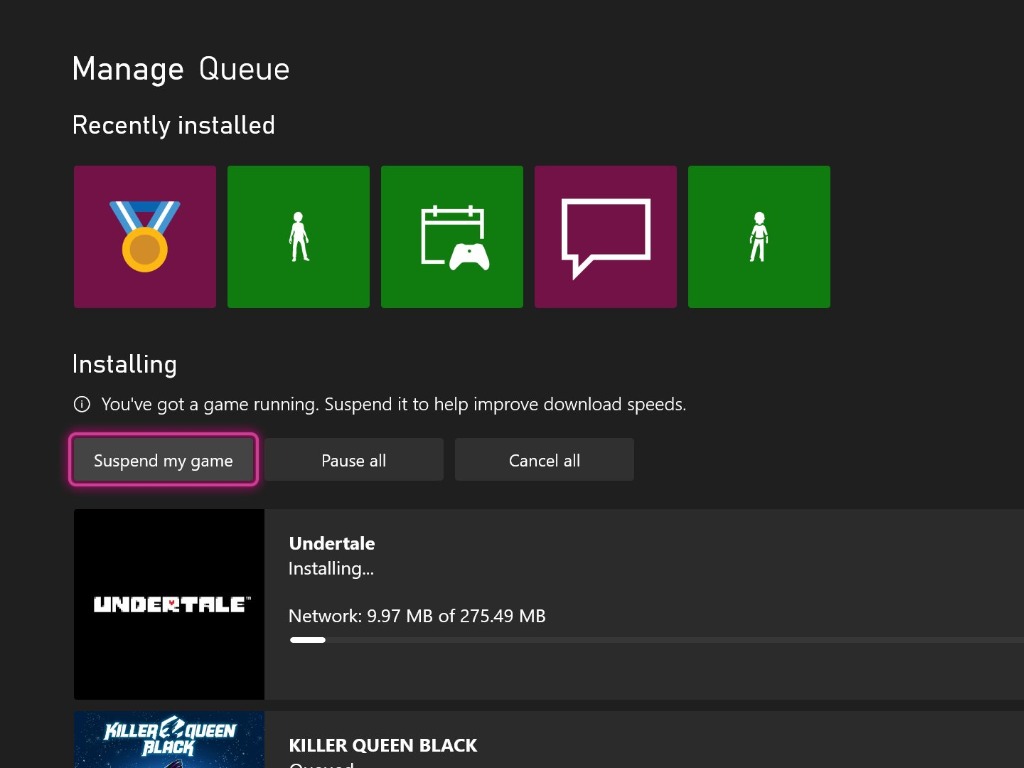
![NVIDIA driver update failed / BSoD error [Complete Fix]](https://windowsreport.com/wp-content/uploads/2021/02/Fix-NVIDIA-high-definition-audio-not-plugged.jpg)












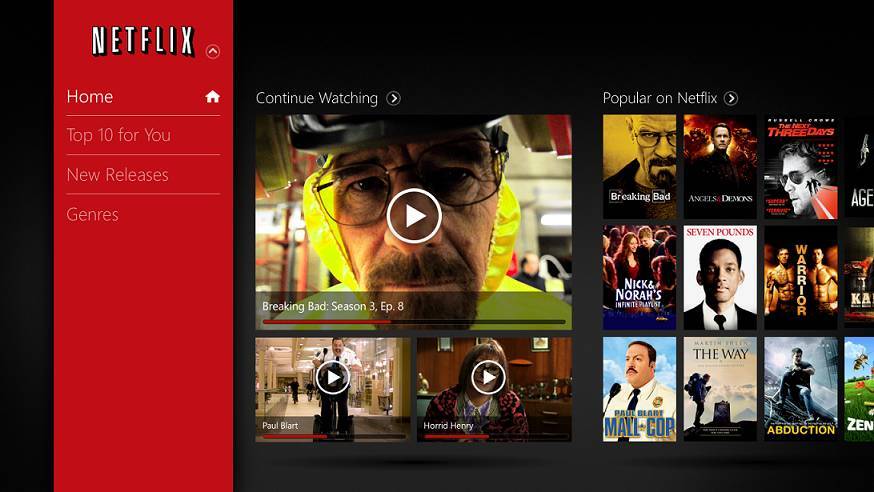


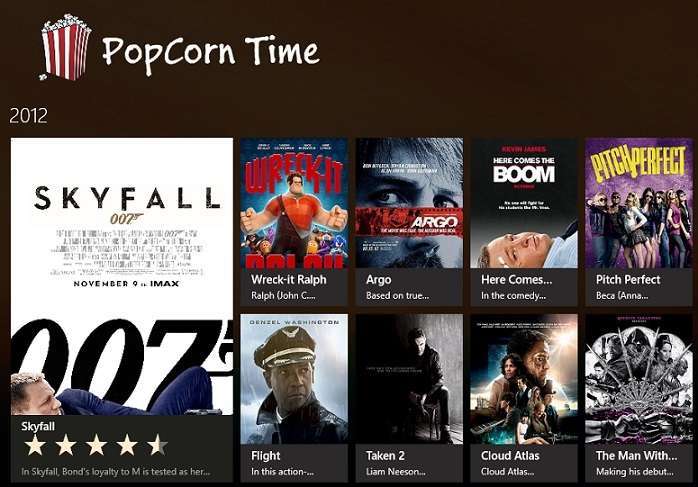

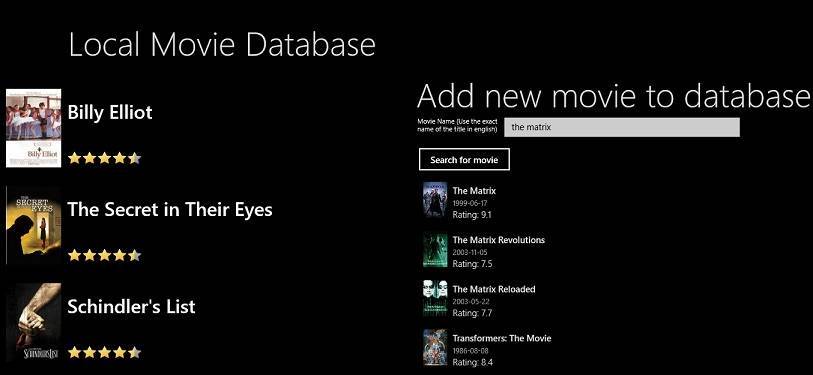
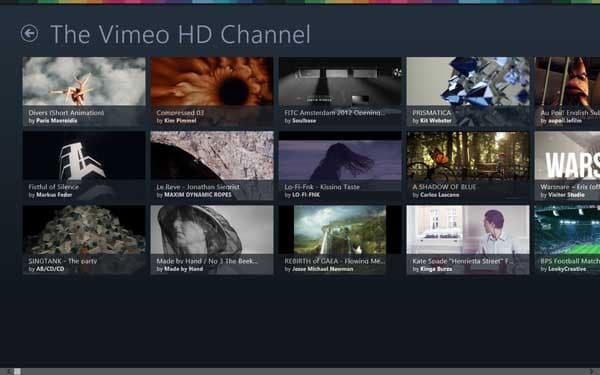
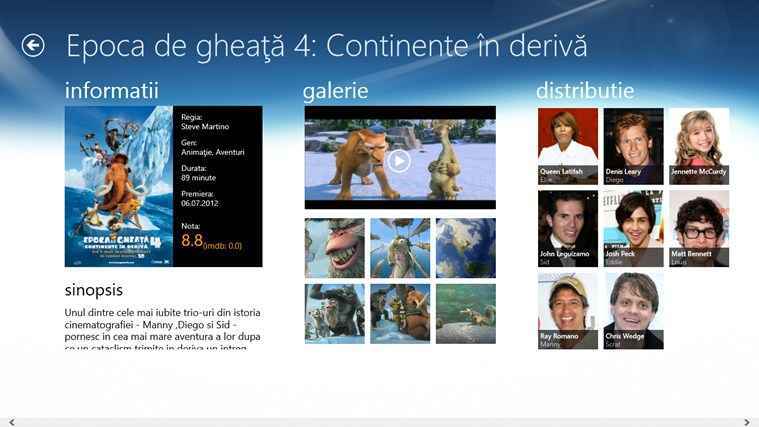

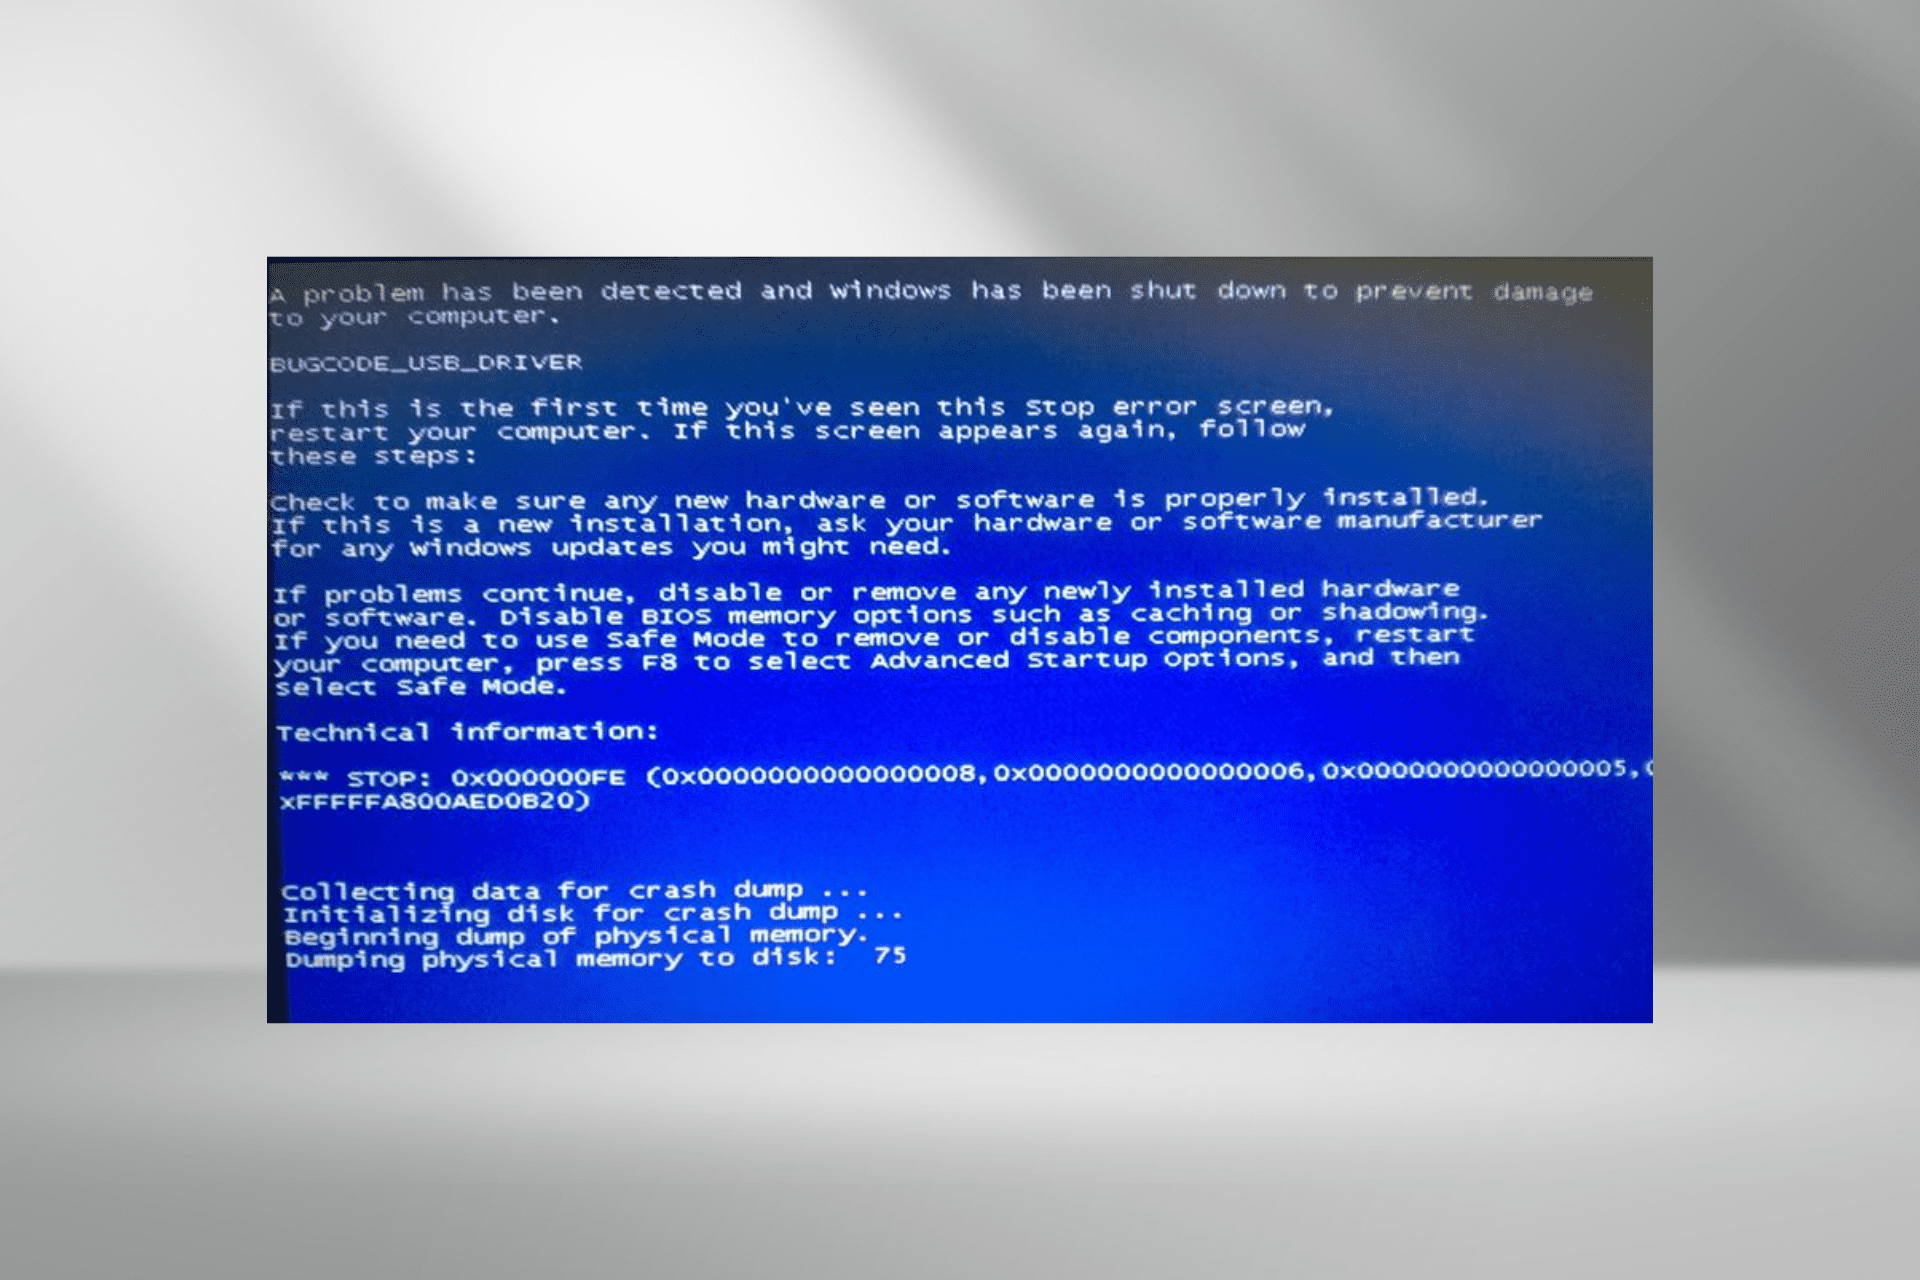


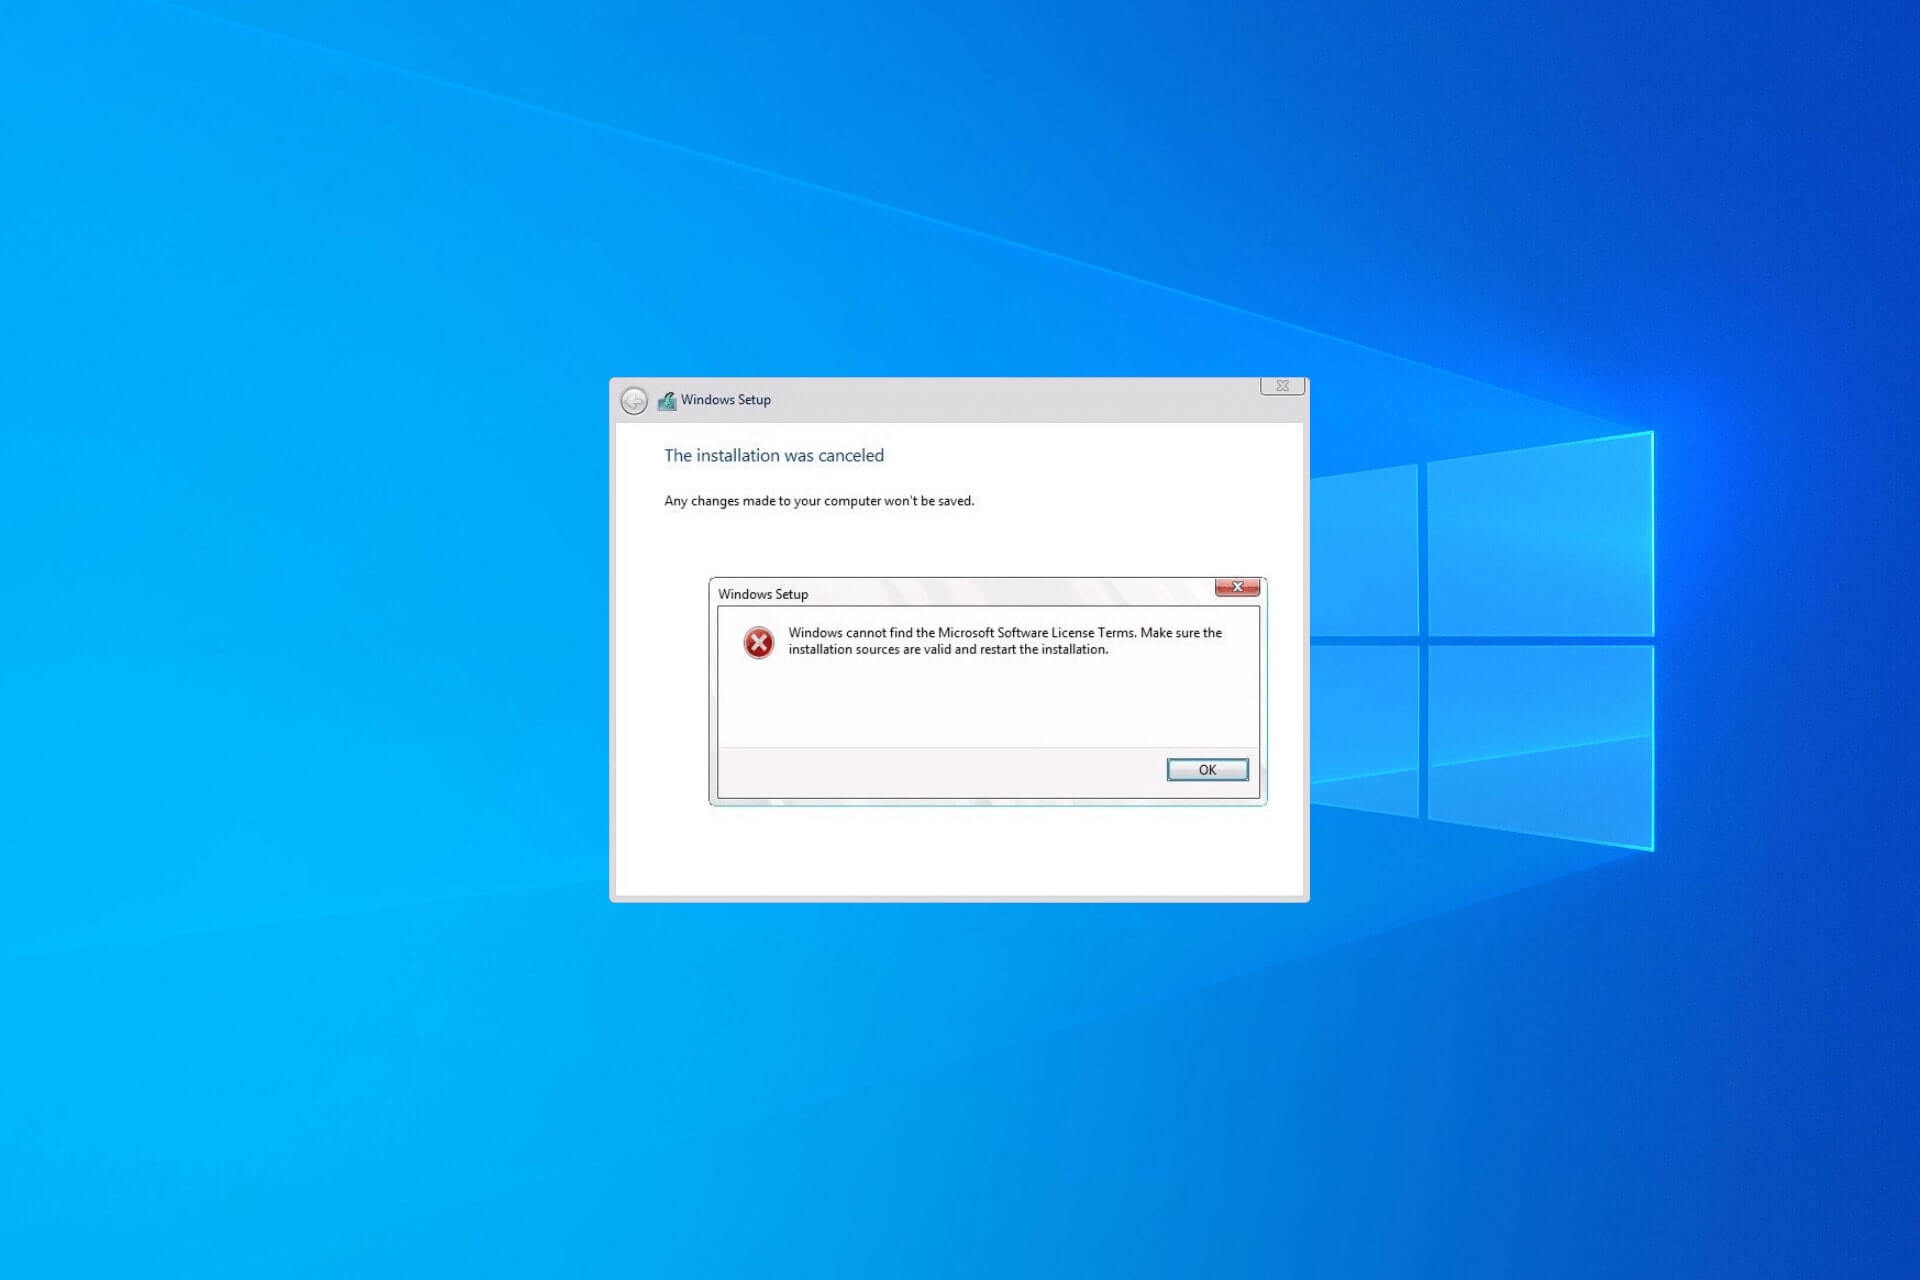


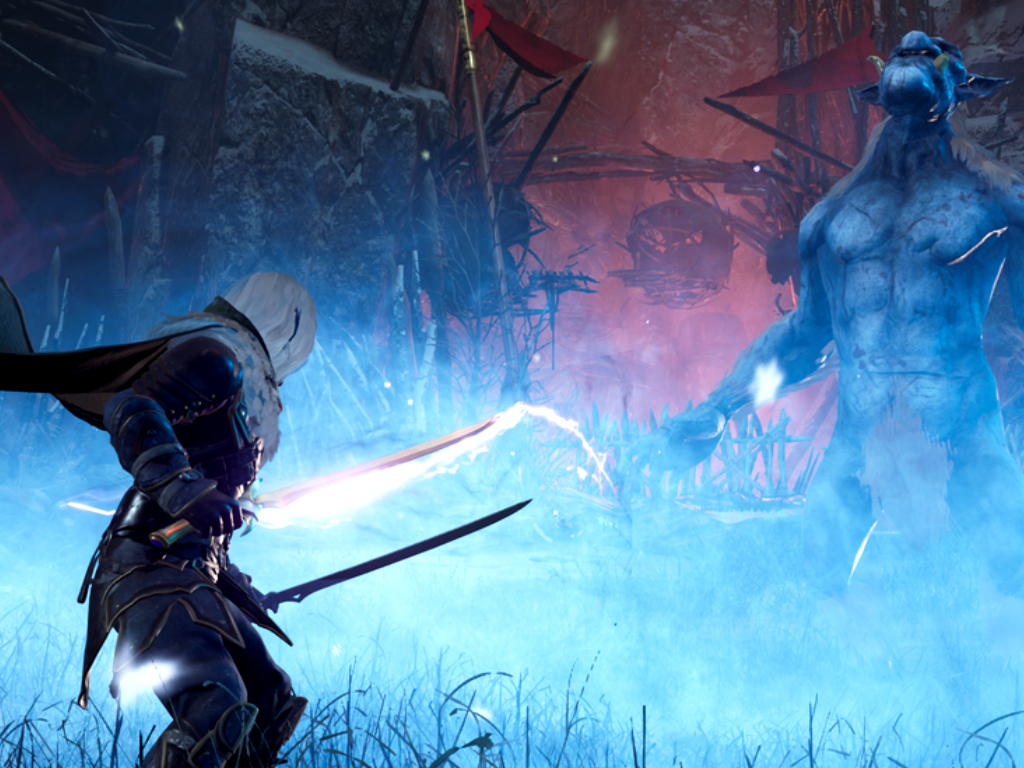

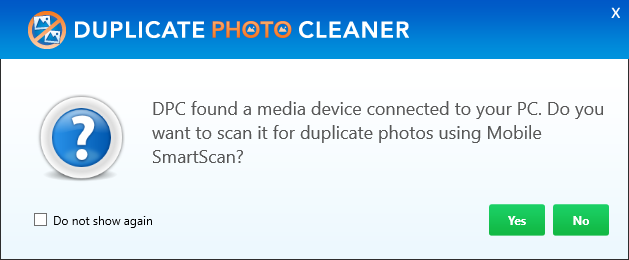




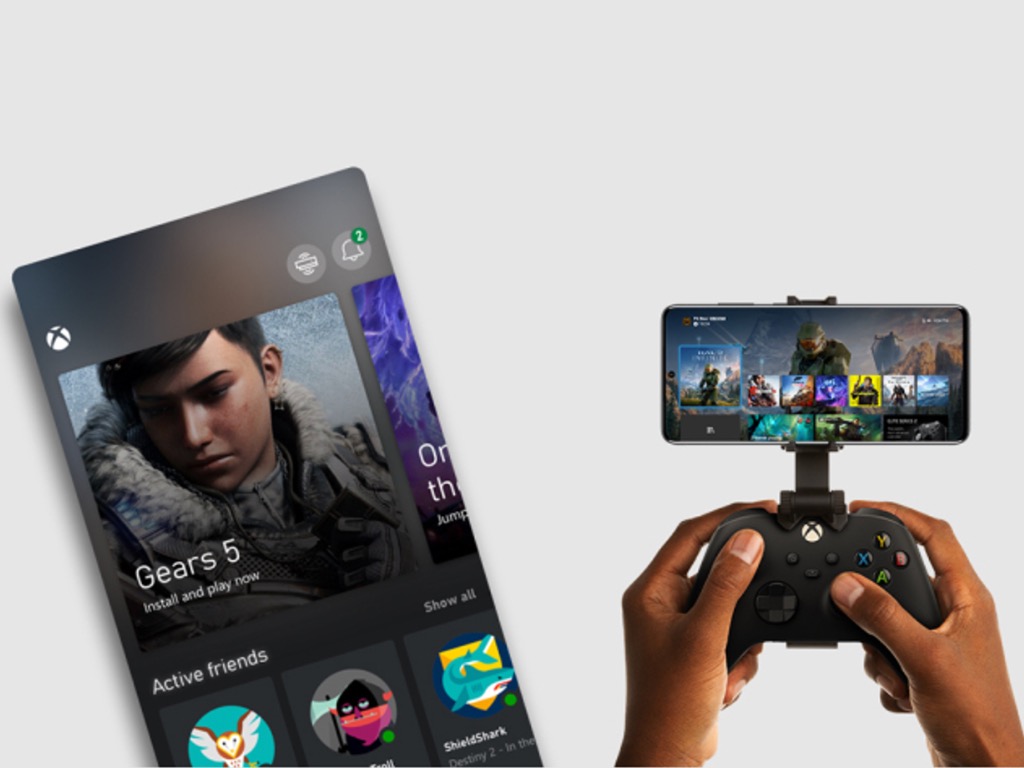



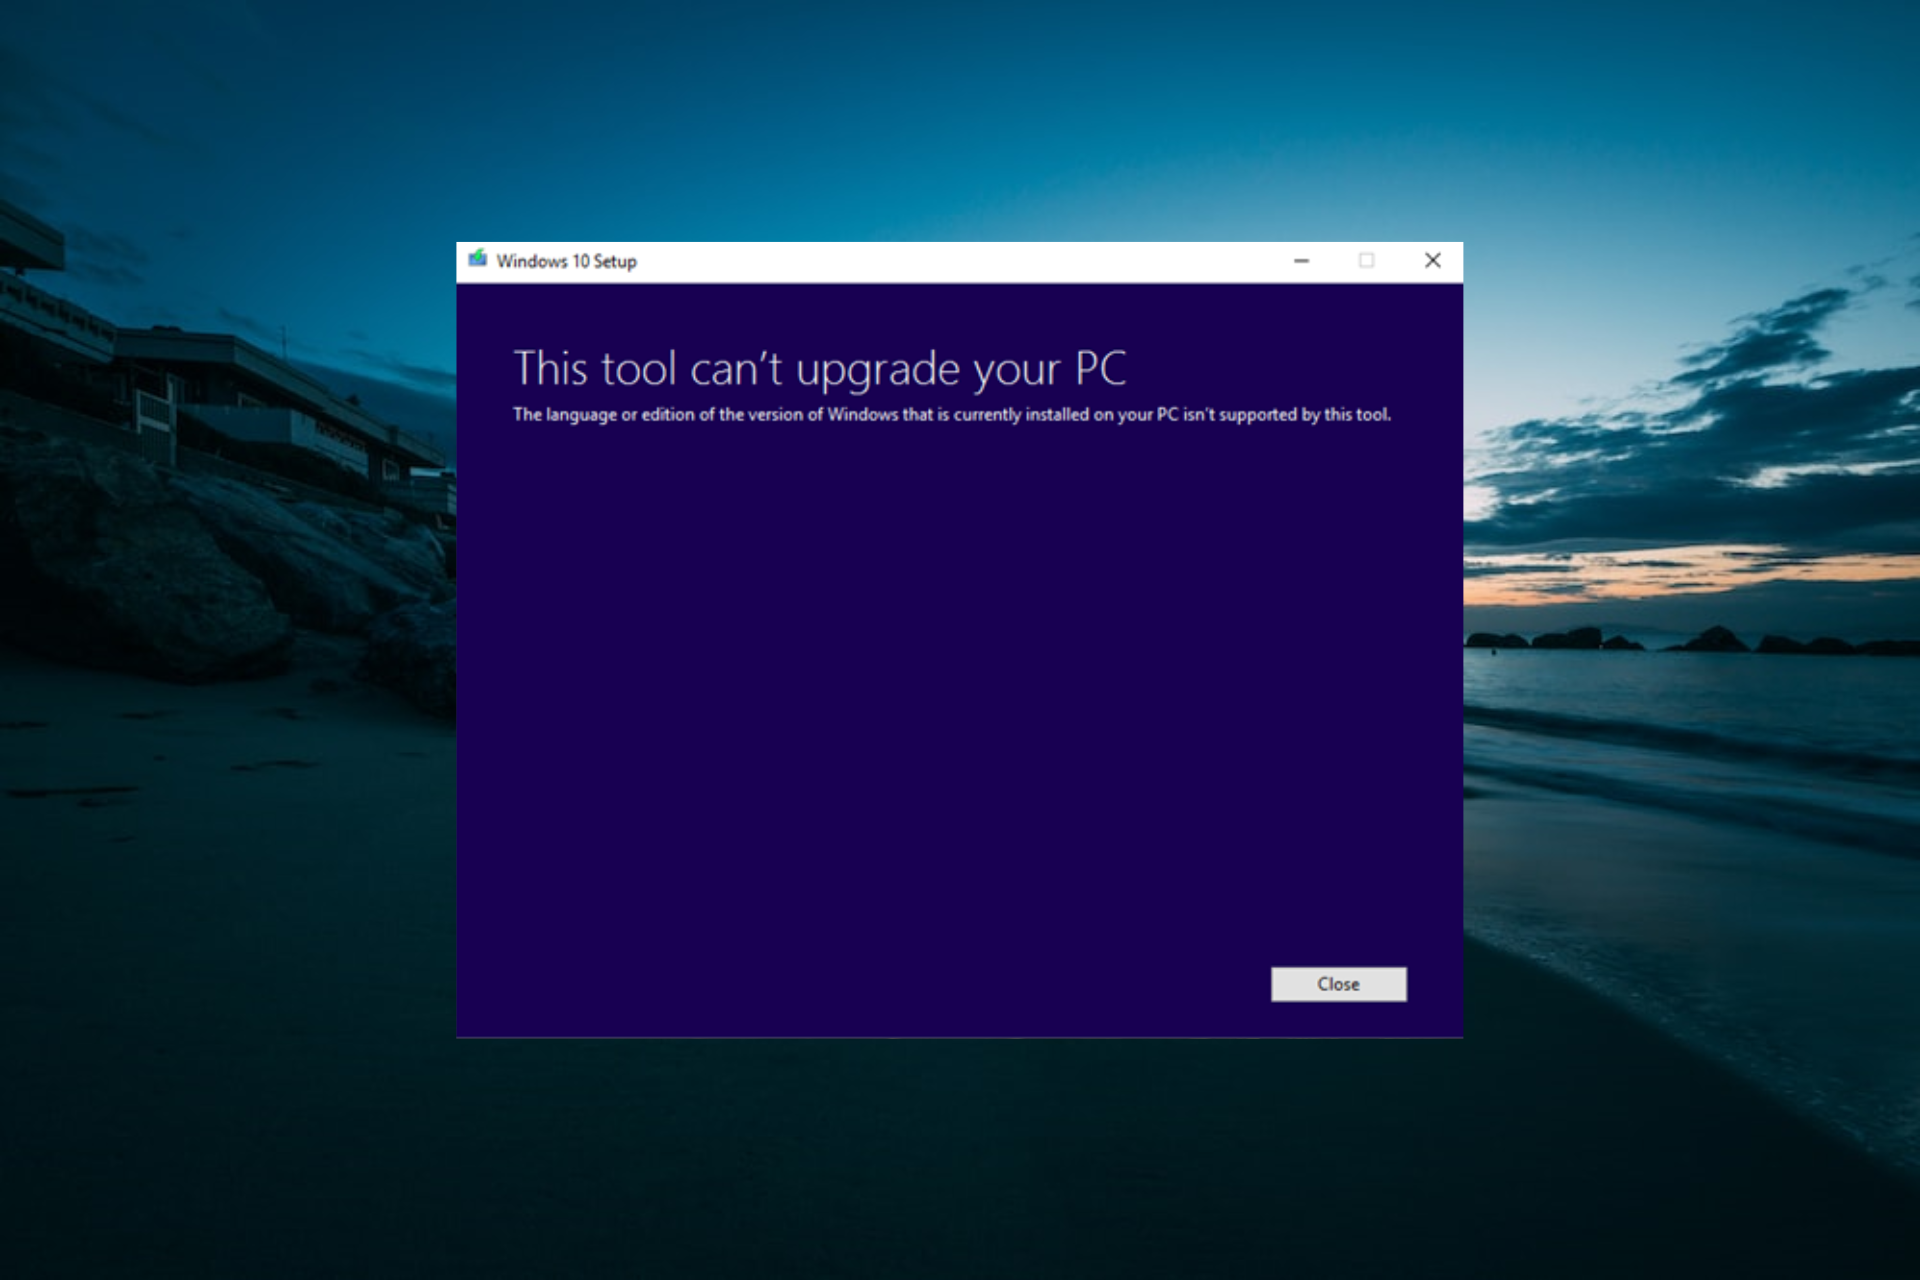



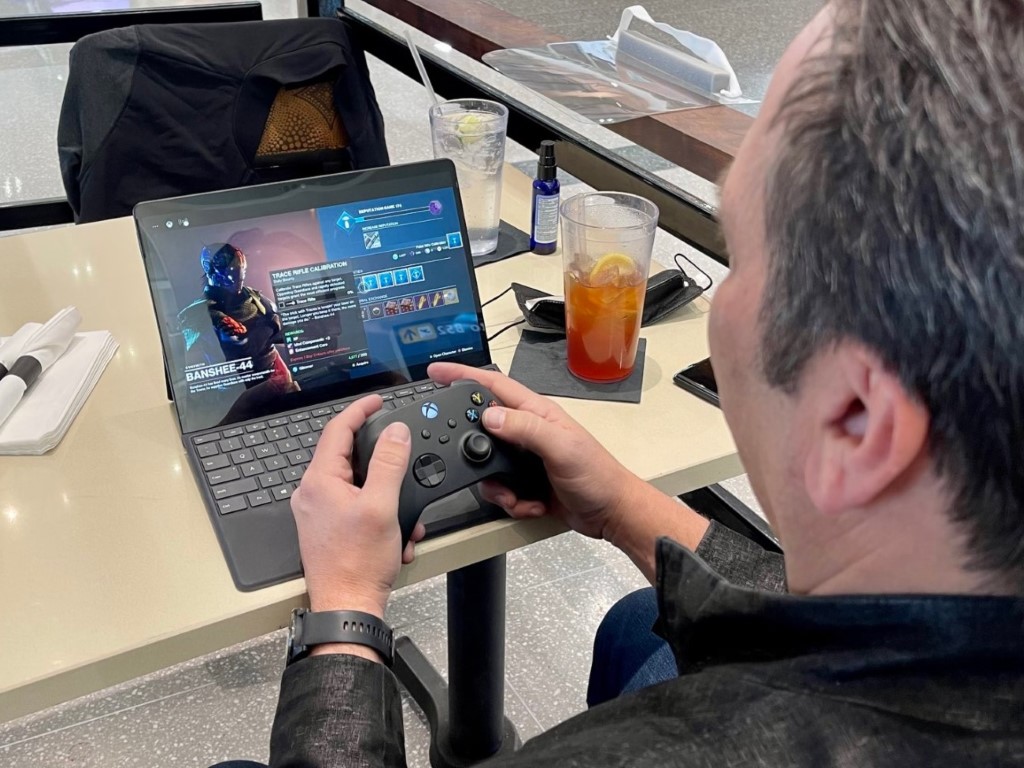
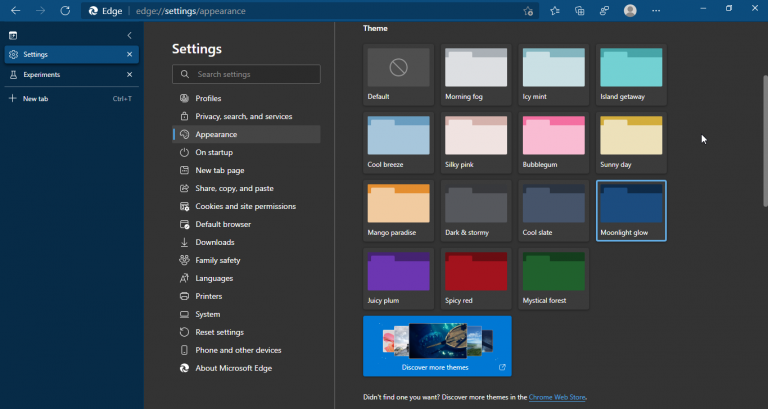
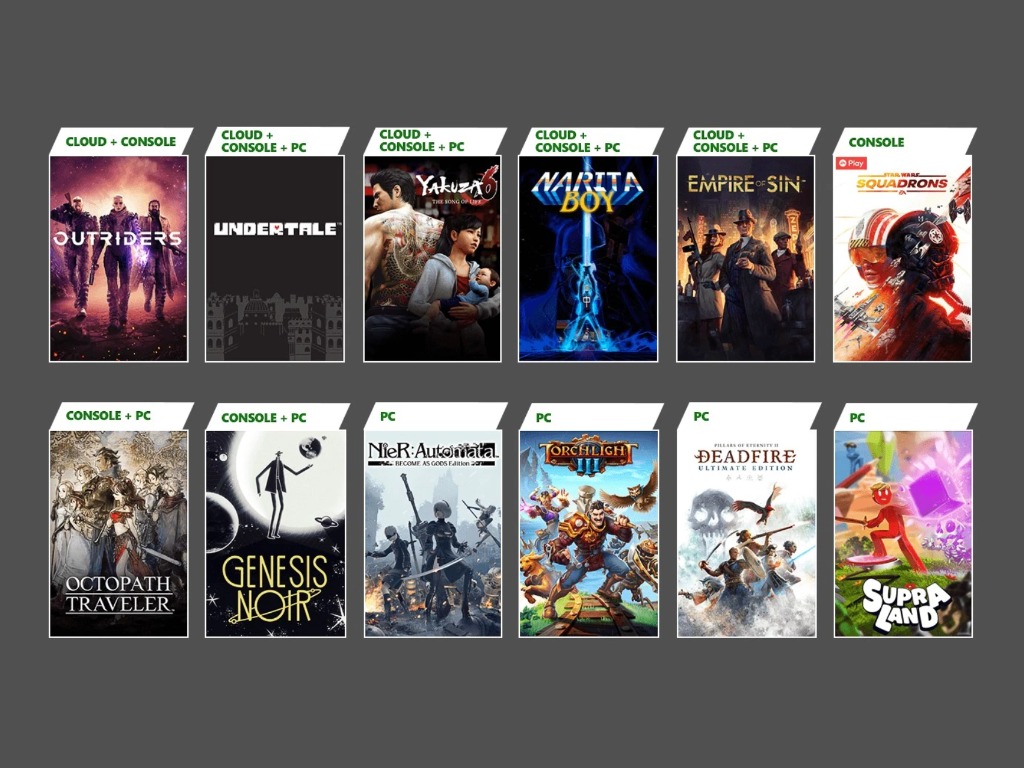


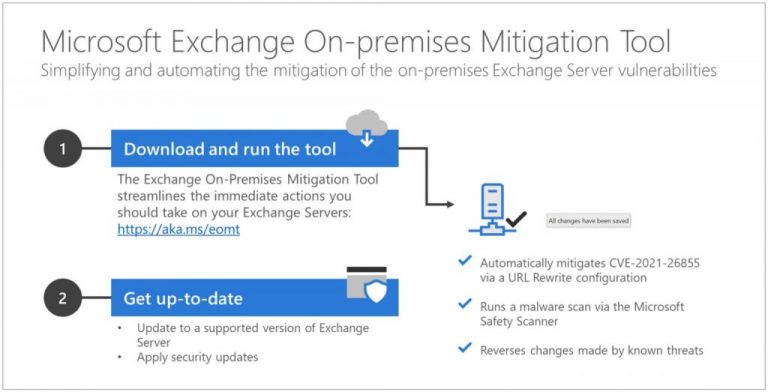
![Office detected a problem with this file [Protected View]](https://windowsreport.com/wp-content/uploads/2020/07/Office-has-detected-a-problem-with-this-file.jpg)

![Update Excel Office detected a problem with this file [Protected View]](https://windowsreport.com/wp-content/uploads/2020/07/Update-Office-detected-a-problem-with-this-file-Protected-View-e1594809833104.jpg)
![How to repair Office detected a problem with this file [Protected View]](https://windowsreport.com/wp-content/uploads/2020/07/Repair-Office-detected-a-problem-with-this-file-Protected-View-e1594810142459.jpg)

![Amdkmdap Stopped Responding Error On Windows 10 [FIXED]](https://windowsreport.com/wp-content/uploads/2019/07/Windows-10-AMDKMDAP-stopped-responding.jpg)

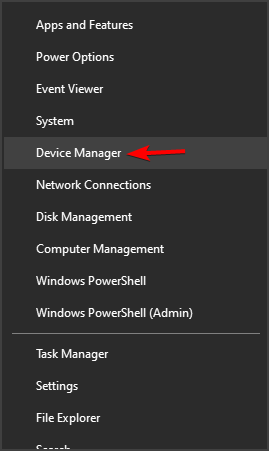

![FIX: Minecraft fatal error on Windows 10/11 [Full Guide]](https://windowsreport.com/wp-content/uploads/2019/04/minecraft-1.jpg)






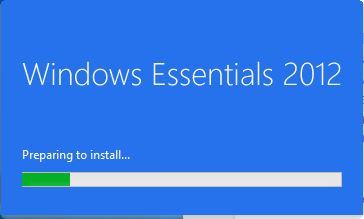


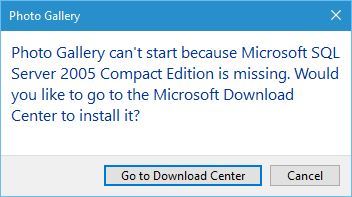













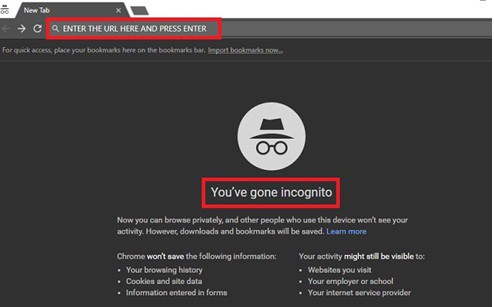


![5 Best 4G LTE Routers with Sim Card Slot [Popular Picks]](https://windowsreport.com/wp-content/uploads/2020/11/best-4g-lte-router-with-sim-card-slot.jpg)