How To Install The Windows 10 October 2020 Update

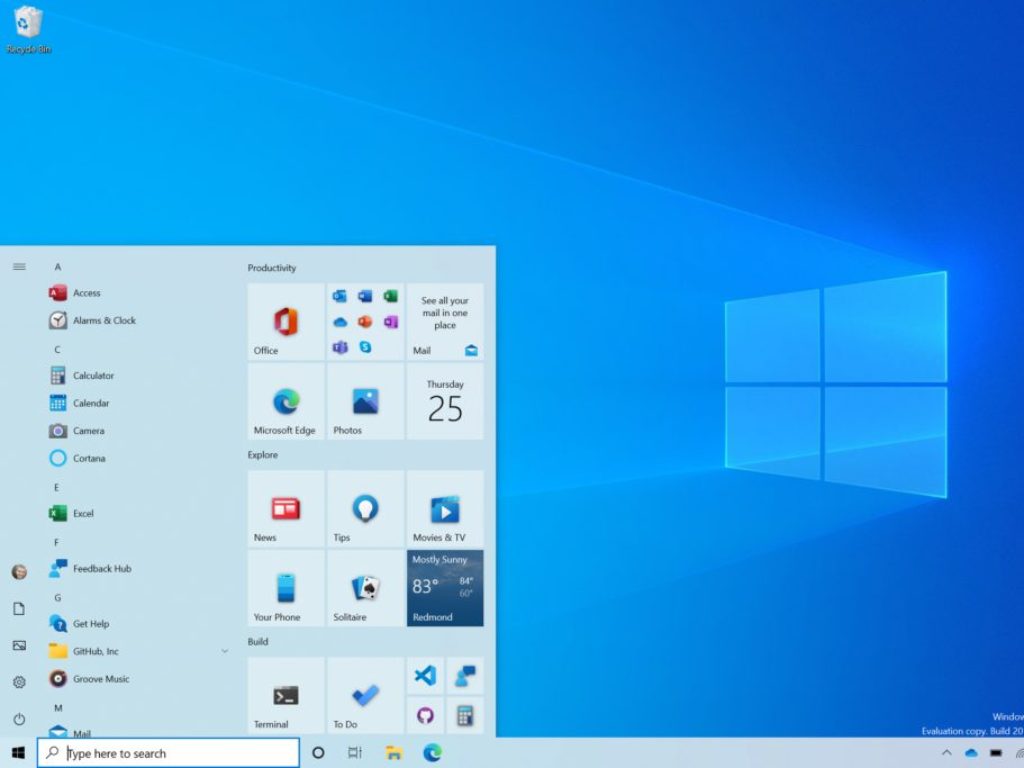
Microsoft just released the second major feature update of the year 2020, and it is called the Windows 10 October update, Windows 10 20H2, or Windows 10 v2009.

Unlike the last major feature update called Windows 10 v2004, this one brings fewer new features, and it is more of a major utility update that fixes more of the mistakes from the past.

At first, the update is now available for devices running Windows 10, version 1903 or later, and it is mostly aimed at users who are interested in experiencing the latest feature updates and are ready to install this release on their device.


How do I get the Windows 10 October 2020 update?

Because this update is very important for the stability of your PC, Microsoft itself expressed an interest in showing users exactly how they can get the latest feature update on their PC.

In fact, they went ahead and created a step-by-step video where they explained exactly how you can get the latest update, and what you can do if it isn’t available yet in your region.

Here’s how to get the latest feature update:

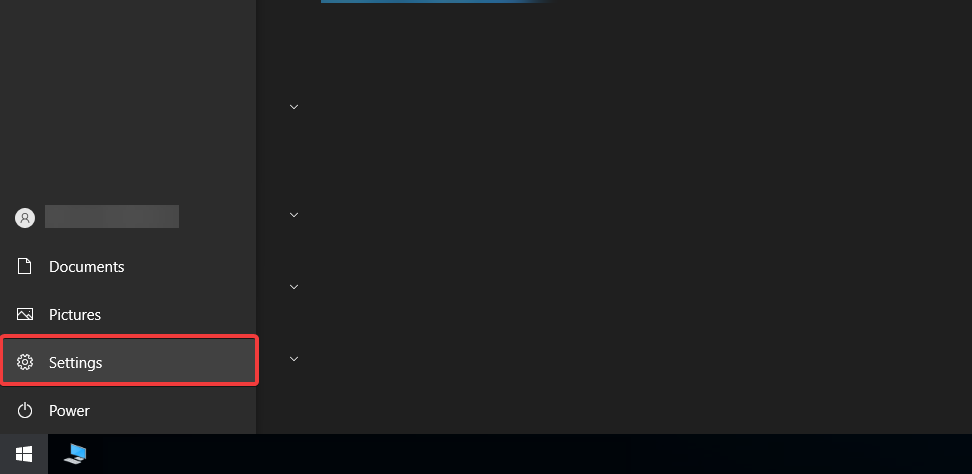
  1. Press Start
  2. Go to Settings
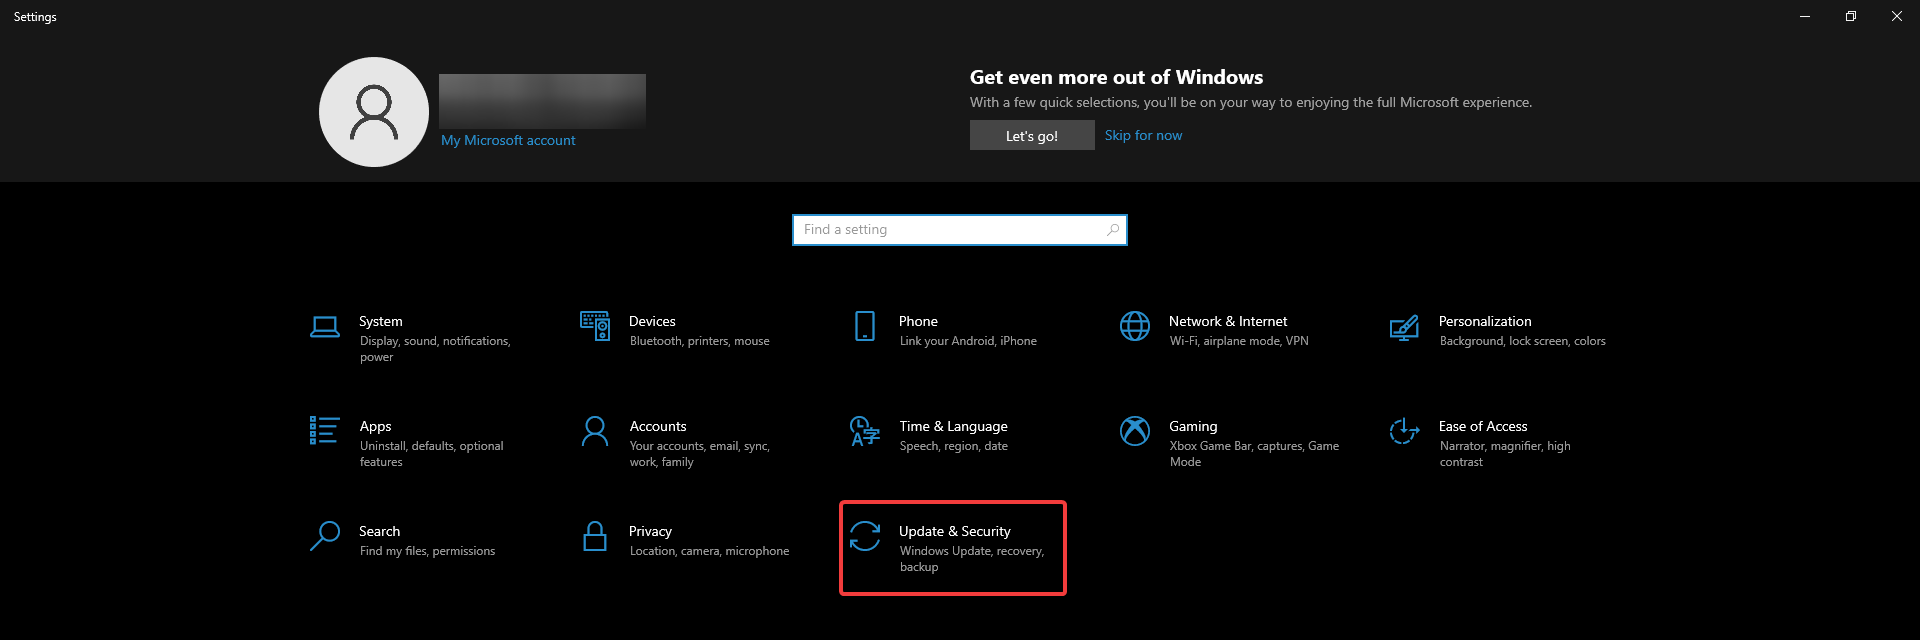
  3. Select Update & Security
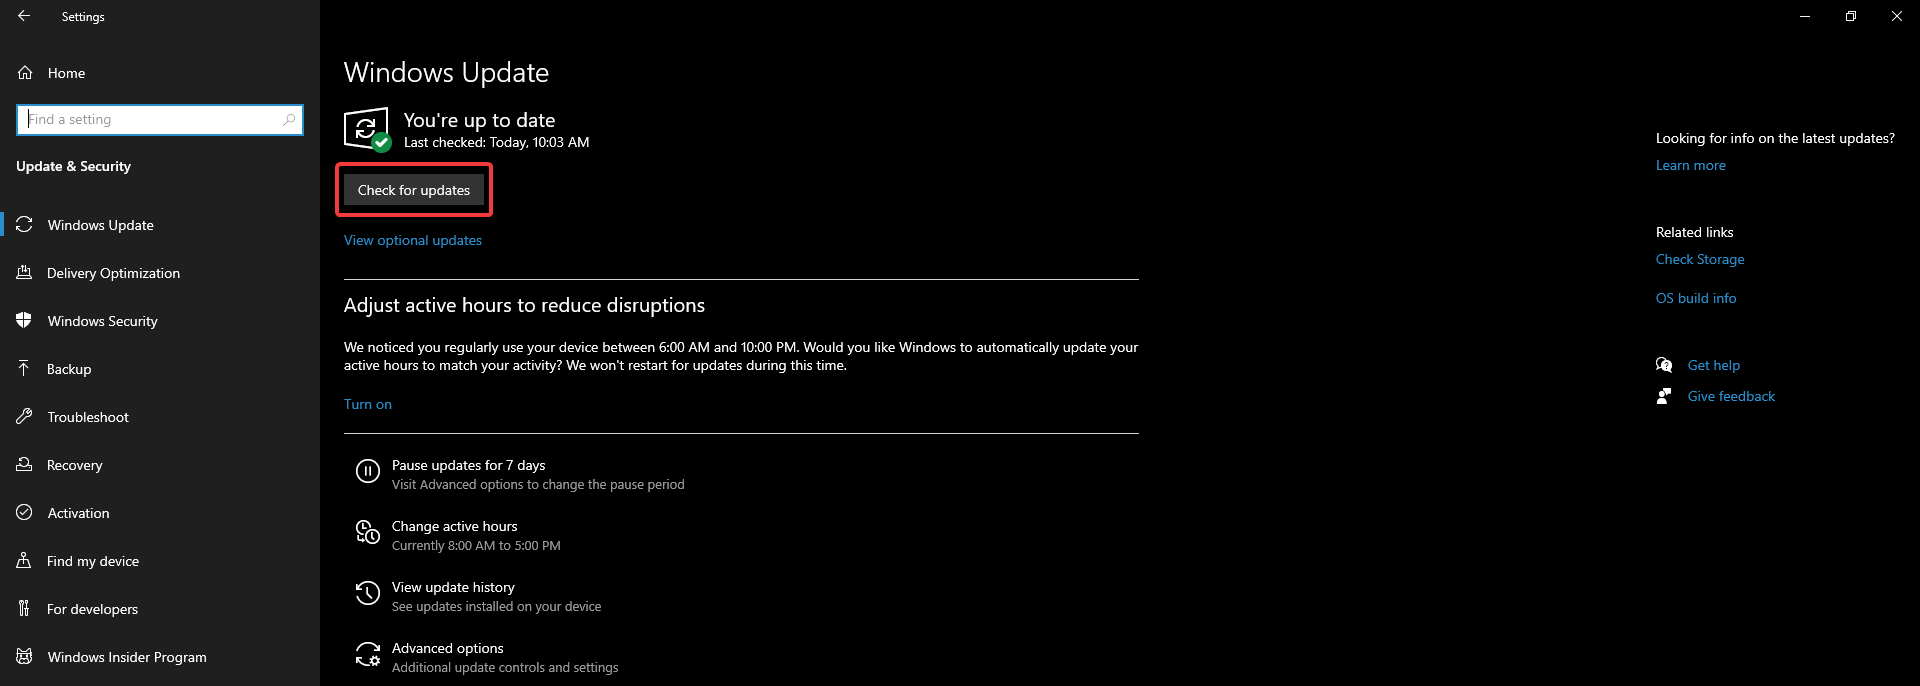
  4. On the Windows Update page, click on Check for updates

If the update appears, and you are running Windows 10 v 1903 or later, you can simply select Download and install to get started. 

Once the update has been downloaded and installed, simply reboot your device to apply the changes, and you’re all done.

One aspect that Microsoft wanted to emphasize regarding the update is that not everyone may see it available to download as of now.

That is because the company is now taking extra precautions so that the latest update is indeed 100% compatible with your current system.

According to the video:

If one or more compatibility safeguard holds have been identified on your device, we may need to delay your move to version 20H2.

To speed up the process, Microsoft even provided a link for the users to check what what compatibility safeguards they may still be having, so that they can fix them faster, and get Windows 10 v2009 right away.

Lastly, those of you that have the Windows 10 May update, also known as Windows 10 v2004, you should know that the update to Windows 10 v2009 should be faster and more seamless than it is for the other versions.

This is because, similarly to Windows 10 v1903 and V1909, the two OS versions share the same core operating system.


That pretty much wraps up our guide on how you can get the Windows 10 October update on your PC.

What’s your take on this latest OS update? Let us know if you installed it already and what your thoughts about it are by leaving us your feedback in the comment section below.


[wl_navigator]

Windows 10 Insider build 202141 is out with theme-aware splash screen for some UWP apps

Microsoft has just released the Windows 10 preview build 20241 for Windows Insiders in the Dev Channel, which brings support for theme-aware splash screens for some UWP apps, as well as an enhanced defrag experience. After Microsoft introduced theme-aware tiles in the Start menu in the Windows 10 October 2020 Update, the splash screen color of select UWP apps will now match your default app mode.

Insiders using the light theme on their PC will now see a light theme splash screen when launching apps like Settings or the Microsoft Store, while Insiders using the dark theme will see a dark theme splash screen instead of the previous blue color. You can see an example in the GIF below:

Settings splash screen before and after in light theme.

For now, only 14 stock UWP apps will support theme-aware splash screens, and the list includes Settings, the Microsoft Store, Calculator, Maps, Movies & TV, Microsoft To Do, and Office. This feature will only roll out to a subset of Insiders installing this build, and more apps will support theme-aware splash screens over time.

The second new feature in this build is related to the Optimize Drives page (Settings > System > Storage > Optimize Drives) in the Settings apps. Microsoft has added a new “Advanced View” checkbox to list all volumes including hidden ones, though this checkbox may not be entirely functional for now. Moreover, Insiders can now see more details in the “Current status” column when volumes are not available for defrag, and hit F5 to refresh the Optimize Drives page.

The Windows Insider team has also mentioned a minor change for the Narrator, as well as a long list of fixes and known issues. You can find the full details below:

Changes and Improvements

  • To help ensure Narrator users are aware of notifications on the screen, if a high priority notification appears while the computer is locked and stays on the screen, we will now also read it out when unlocking your PC and not just at arrival time.
  • We’re removing the Japanese Address and Rinna candidate suggestion services from the Japanese IME – thank you Windows Insiders who’ve shared feedback on them.

Fixes

  • We fixed an issue resulting in some Insiders experiencing APC_INDEX_MISMATCH bugchecks in recent builds.
  • We fixed an issue where scrolling and pinch to zoom were not working correctly on devices with touch such as the Surface Pro X, Surface Pro 7 and others.
  • We fixed an issue where selecting an IME candidate or hardware keyboard text prediction candidate was sometimes inserting the candidate adjacent to the one selected.
  • We fixed an issue where new applications will fail to install with a Windows Installer service error on x86 systems.
  • We fixed an issue where when attempting to perform a Reset this PC using the Keep My Files option will fail with the error, “There was a problem resetting your PC. No changes were made”.
  • We fixed an issue where robocopy wouldn’t preserve the directory dates when using the move command.
  • We fixed a high hitting dwm.exe crash from the last few flights.
  • We fixed an issue resulting in the System Information window (msinfo32) crashing on launch.
  • We fixed an issue resulting in the System Information window (msinfo32) unexpectedly having a blank icon in the taskbar.
  • We fixed an issue that could result in Bitlocker encryption failing with error 0x803100b2.
  • We fixed an issue resulting in flickering in certain apps when the media controls pop-up was visible on screen and you moved your mouse.
  • We fixed an issue resulting in the screen flickering on certain devices when accessing the power options on the login screen.
  • We fixed a recent issue where closing a tab in Microsoft Edge while Task Manager was up and running could result in Task Manager crashing.
  • We fixed an issue resulting in some Insiders seeing a “Sorry, something went wrong” message when running through the workflow to improve recognition for Windows Hello Face.
  • We fixed an issue from recent builds where if Settings was open when the PC went into hibernation, connected pens may fail to reconnect until Bluetooth was toggled off and back on.
  • We fixed an issue that could result in Windows Sandbox showing a 0x80070003 error.
  • We fixed an issue where a non-functional link to Rename your PC was displaying for non-admin users on the Projecting to this PC page in Settings.
  • We fixed an issue where the Activation page in Settings would crash if you navigated to it recently while not connected to the internet.
  • We fixed an issue in Printers & Scanners Settings, where clicking the Get App button available for some printers was resulting in Settings crashing recently.
  • We fixed an issue where clicking the Copy button under “View hardware and connection properties” in Network Settings would result in extraneous lines saying “Proxy Auto Detect” appearing on the settings page.
  • We fixed an issue impacting certain VPN connections, where clicking the entry in the Network flyout wasn’t doing anything.
  • We fixed an issue that could result in Windows updates failing with error 0xc0000005.
  • We fixed an issue that could result in windows.old being expectedly large for some Insiders.
  • We fixed an issue resulting in the new gesture to control the text cursor position using the spacebar on the touch keyboard wasn’t working for some Insiders.
  • We fixed an issue that could result in Internet Explorer crashing when typing certain combinations into websites with the Dayi IME.
  • We fixed an issue where incorrect characters were being inserted into passwords fields when typing using the Japanese IME in Kana mode.
  • We fixed an issue where when using the previous version of the Japanese IME, if you set the IME to off mode during a composition, then immediately starting typing, it could result in the underlying app crashing.

Known issues

  • We’re looking into reports of the update process hanging for extended periods of time when attempting to install a new build.
  • Live previews for pinned sites aren’t enabled for all Insiders yet, so you may see a grey window when hovering over the thumbnail in the taskbar. We’re continuing to work on polishing this experience.
  • We’re working on enabling the new taskbar experience for existing pinned sites. In the meantime, you can unpin the site from the taskbar, remove it from the edge://apps page, and then re-pin the site.
  • We’re working on a fix for an issue causing some devices experiencing a KMODE_EXCEPTION bugcheck when using certain virtualization technologies.
  • We’re looking into reports where some devices are still experiencing a DPC_WATCHDOG_VIOLATION bugcheck after taking build 20236.
  • We’re investigating reports that some devices are receiving a DRIVER_IRQL_NOT_LESS_OR_EQUAL bugcheck on tcpip.sys.
  • We’re working on a fix where after taking build 20236 devices running Malwarebytes Web Protection are no longer able to connect to the network. Users can roll back to 20231 and pause updates or disable Web Protection as a workaround.
  • We’re investigating an issue reported by some Insiders wherein the taskbar is obscuring the Power button in the Start menu. If this is happening on your PC, you may need to use the Windows key plus X menu to shutdown for the time being.
  • We’re investigating GPU Compute scenarios, such as using CUDA and DirectML, not working inside of the Windows Subsystem for Linux (WSL).
  • Windows Insiders on ARM PCs such as the Surface Pro X will notice that Windows PowerShell will fail to launch on this build. As a workaround, please use “Windows PowerShell (x86)” or “Windows PowerShell ISE (x86)” from the Start menu if you need to use PowerShell. Or download the new and modern PowerShell 7 which takes advantage of ARM by running natively. Plus the icon is prettier.

Overall, this is another build with very minor changes, and we hope that exciting new features will land soon in the Dev Channel. With the October 2020 Update now rolling out to all Windows 10 users, the Windows Insider team can now focus on the next major Windows 10 Update (21H1) which will ship in the first half of 2021.

Sims 4 Video Card Error: 6 Expert-Tested Fixes

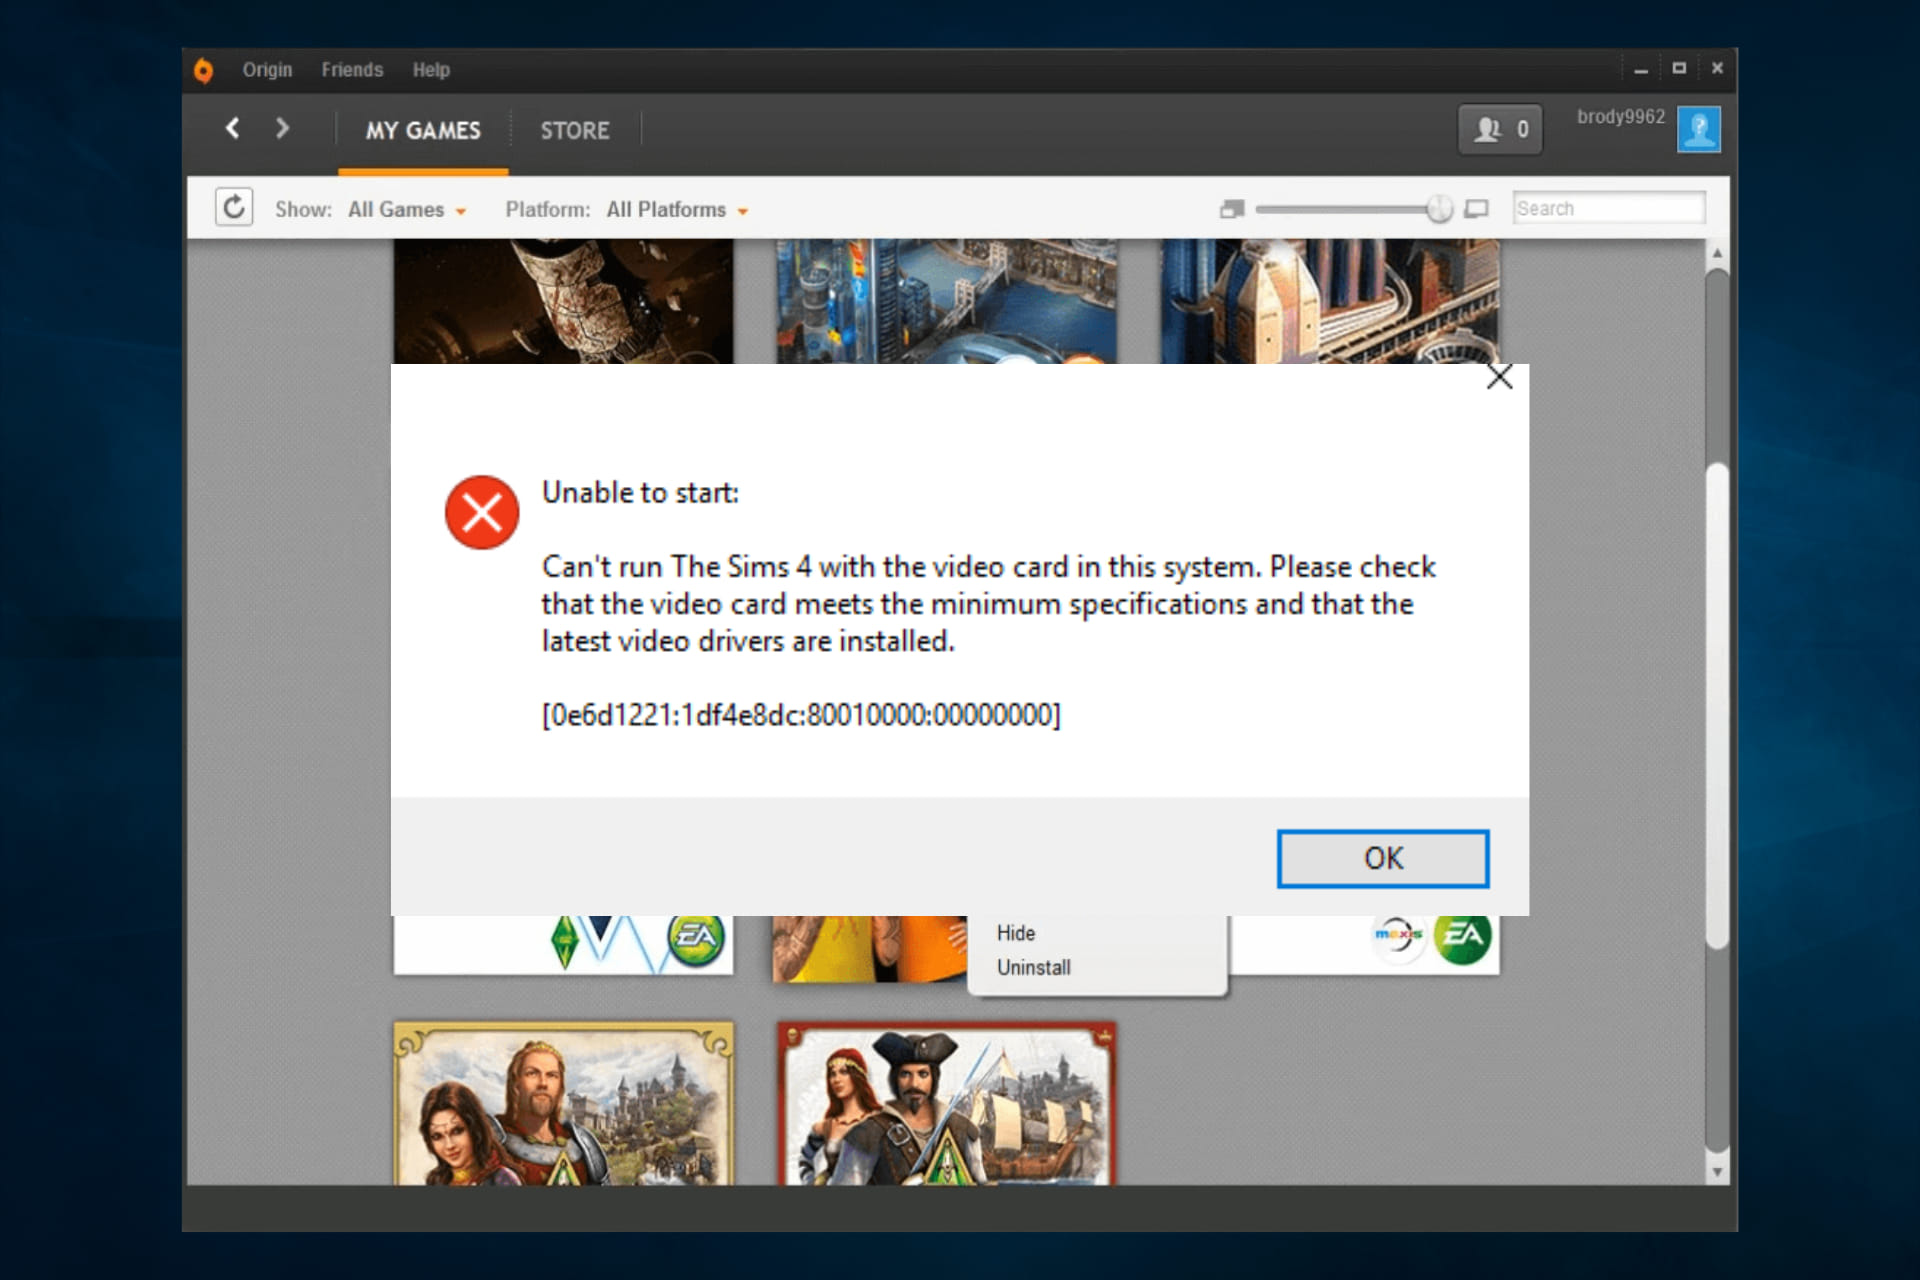
Some players have posted about an unrecognized video card Sims 4 error on EA’s forum. It can occur for some players when they try to launch the game. The full error message reads:

Can’t run The Sims 4 with the video card in this system.

What causes the Sims 4 video card not supported error?

This Sims 4 video card error is usually caused by an incompatible GPU card that doesn’t meet the game’s minimum system requirements. Make sure to check the requirements before installing the game.

However, the issue can occur even when players have a graphics card that meets the game’s system requirements. In that case, read on to find out how to fix this issue and get back to playing your favorite game in no time.

How do I fix the unsupported video card Sims 4 error?

1. Update the video card driver

The Sims 4 video card error might be due to an antiquated or corrupted graphics card driver.

Therefore, make sure that your graphics card driver is up to date by using a dedicated tool such as Outbyte Driver Updater for a quick scan.

You simply need to download the software, open it and it will start scanning for the latest drivers.

Outbyte Driver Updater automatically update drivers

Outbyte Driver Updater is very fast and efficient at finding specific updates for your system. When using this great software, you’ll be able to use your time in a more time-efficient manner and also avoid researching online for drivers manually.

The software starts by analyzing your system’s driver requirements, and then it compares the results with a thorough database filled with the latest releases for each of your drivers.

Check out the amazing capabilities of Outbyte Driver Updater for yourself, by clicking the button below.

Outbyte Driver Updater

Outbyte Driver Updater

With just a few clicks of the mouse, this amazing software ensures that your PC's drivers will always be up to date.
Free trial Visit website

2. Use the Repair option in Origin

  1. Open the Origin game client software.
  2. Then click My Games.
  3. Right-click on Sims 4 to open its context menu.
    Repair Game options sims 4 video card error
  4. Then select the Repair game context menu option.

3. Disable Origin in-game

  1. Open the Origin window.
  2. Click the My Games library option.
  3. Next, right-click the Sims 4 game and select Properties.
    Enable Origin in Game option sims 4 video card error
  4. Deselect the Enable Origin in Game for Sims 4 option on the General tab.

4. Run Sims 4 in compatibility mode

  1. Right-click the Sims 4 shortcut or .exe file, and select Properties.
  2. Select the Compatibility tab.
    Compatibility tab sims 4 video card error
  3. Click the Run this program in compatibility mode for option.
  4. Then select Windows 8 on the OS drop-down menu.
  5. Select the Apply option to save settings.
  6. Click OK to exit the window.

5. Open Sims 4 in windows mode

  1. Right-click a desktop shortcut for Sims 4 and select Properties. (If you don’t have a shortcut for the game, add one to the desktop.)
  2. Add a -w to the end of the target path box as shown directly below. (Alternatively, you can also add the -window switch to the end of that path.)
    Shortcut tab sims 4 video card error
  3. Then click the Apply and OK buttons.
  4. Click the Sims 4 shortcut to launch the game.

Alternatively, you can right-click Sims 4 in Origin to select Game Properties. Then enter -w in the Command line arguments box on the Advanced Launch options tab, and click the Save button.


6. Disable mods for Sims 4

  1. Open File Explorer (press the Windows + E hotkeys).
  2. Open the Sims 4 folder.
  3. Then, look for Sims 4’s Mods folder.
  4. Select the Mods folder, and click the Move to button.
    Move to button sims 4 video card error
  5. Select Desktop inside the Move to menu.
  6. Next, restart Windows.
  7. Then try running Sims 4 again.

The above resolutions should fix the Sims 4 video card error for lots of players. Feel free to tell us which solutions worked for you, using the comments section below.

FIX: Pinnacle Driver Check Detected Problems

Incorrectly configured system settings or irregular entries in the Windows registry could be the cause of the Pinnacle Driver Check Problems.

The usual cause for getting this error is a failure to correctly run one of Windows registry normal operations by a system or application component.

There are many users reporting to get a message error concerning the Pinnacle Driver every time they restart the PC.

Some of them report getting this error only after updating their device to Windows 10.

Regardless of the cause, there are some easy ways to fix this issue and in this article we will show you exactly what you need to do.

Make sure to follow our presented steps in the exact order you will find them in this article.

How can I fix the Pinnacle Driver Check detected problems?

1. Give Outbyte Driver Updater a try

Most of the time, these kinds of errors, have to do with some faulty or missing drivers.

The best way to solve it is to update the Pinnacle drivers either manually or automatically.

Updating the drivers manually could become an issue, in case you will install the wrong ones. This could cause some almost irreversible damage to your device.

In order to avoid this from happening, we recommend that you use dedicated software that will do exactly that.

After we tested all of them, we recommend that you use Outbyte Driver Updater.

This software is reliable and very efficient. It will scan your PC in no time and find any faulty or missing driver.

Once this is done, then Outbyte Driver Updater will compare all the scan results with its built-in database and install the latest versions on your device.

Upon the scan completion, you will also get a detailed report on all your up-to-date or out-of-date drivers.

However, a program like Outbyte Driver Updater not only downloads and installs drivers, but also manages them by troubleshooting, backing up, and restoring them.

Of course, there is the option to select all the drivers and update them all at once, or simply select the ones you want to be updated now.

All in all, this is great software that you can use to keep your device updated at all times and ensure that it works at its highest performance.

⇒ Get Outbyte Driver Updater

2. Start Windows in Clean Boot mode

  1. Click Start and in the Search programs bar type msconfig.
  2. Go to Services tab and check Hide All Microsoft Services.
  3. Next, click the Disable All option.
  4. Switch to the Startup tab and then click Disable all.
  5. Next, click OK and restart your device.

There you have it. By following the steps described in any of the solutions above you should be able to fix the Pinnacle Driver Check Problems.

You can either use a dedicated tool and scan for your drivers, making sure they are up to date and working properly.

Or, simply start Windows in clean boot mode and follow our indicated steps.

If you’ve fixed this issue with an alternative resolution, feel free to share it below.

FIX: Windows has recovered from an unexpected shutdown

Several users have posted on forums about an unexpected shutdown error in Windows: the system shuts down unexpectedly.

More specifically, after the restart, an error message pops up stating:

Windows has recovered from an unexpected shutdown.

If the issue becomes a recurring error, you should definitely address it. So here are some of the potential fixes for the Windows unexpected shutdown error.


How can I fix the unexpected shutdown error?

1. Scan device drivers with a dedicated tool

Outbyte Driver Updater automatically update drivers

  1. Download Outbyte Driver Updater (a third-party tool that is extremely efficient in finding corrupted or outdated drivers that might cause system errors).
  2. Use the installer and set up the tool.
  3. Launch Outbyte Driver Updater.
  4. The software will start scanning right away.
  5. Scan the list of problematic drivers that the tool process returns and decide on the next action (updating the drivers).

Afterward, monitor your device to see if the shutdown error occurs again.

Outbyte Driver Updater

Outbyte Driver Updater

Keep your drivers up-to-date and avoid unexpected system shutdowns when you least expect it.
Free trial Visit website

2. Clean boot Windows

  1. Open Run by pressing the Windows key and R at the same time.
  2. Enter msconfig in Run’s text box.
    The General tab windows has recovered from an unexpected shutdown error
  3. On the General tab, select the Selective startup radio button.
  4. Select the Load system services and Use original boot configuration options if they aren’t selected.
  5. Uncheck Load startup items so that option isn’t selected.
  6. On the Services tab, select the Hide all Microsoft services option.
    The Services tab windows has recovered from an unexpected shutdown error
  7. Click the Disable all option.
  8. Select the Apply option, and click the OK button.
  9. Click Restart to initiate the clean boot.

If that fixes the issue, you can leave the startup configuration as it is. Alternatively, you can try to figure out what startup program or service was triggering the error by re-enabling one at a time until the issue returns.

That will help identify which one is triggering the error.


3. Run a system file scan

  1. Type cmd in the home screen search box.
  2. Right-click Command Prompt within the search tool to select its Run as administrator option.
  3. Before initiating the system file scan, input the following and press Enter: DISM.exe /Online /Cleanup-image /Restorehealth
  4. Next, enter the sfc /scannow command; and press the Return button.
    sfc /scannow command windows has recovered from an unexpected shutdown error
  5. When the scan is done, the Command Prompt might tell you that it repaired system files. If so, restart Windows.

4. Restore Windows to a restore point

  1. Launch the Run accessory.
  2. Next, input rstrui in the blank box; and click the OK button.
  3. Click Next to proceed.
  4. If it isn’t greyed out, select the Show more restore points setting.
    System Restore window windows has recovered from an unexpected shutdown error
  5. Select a restore point that will roll Windows back to a time that predates the unexpected shutdown error on your desktop or laptop.
  6. Check what software will get deleted for a restore point by clicking the Scan for affected programs button.
    The scan for affected programs window
  7. Press the Next button, and then click Finish to restart.

The above resolutions have fixed the unexpected shutdown error for many users.

Let us know which of the troubleshooting steps did you use to get rid of this error by leaving us a message in the comments section below.


[wl_navigator]

New file sharing experience is now rolling out in Microsoft Teams

Microsoft Teams now has a new file sharing experience that’s currently available across OneDrive, Outlook, and Office. According to the Microsoft 365 Admin center, the feature is rolling out now, and it should be generally available by the end of November.

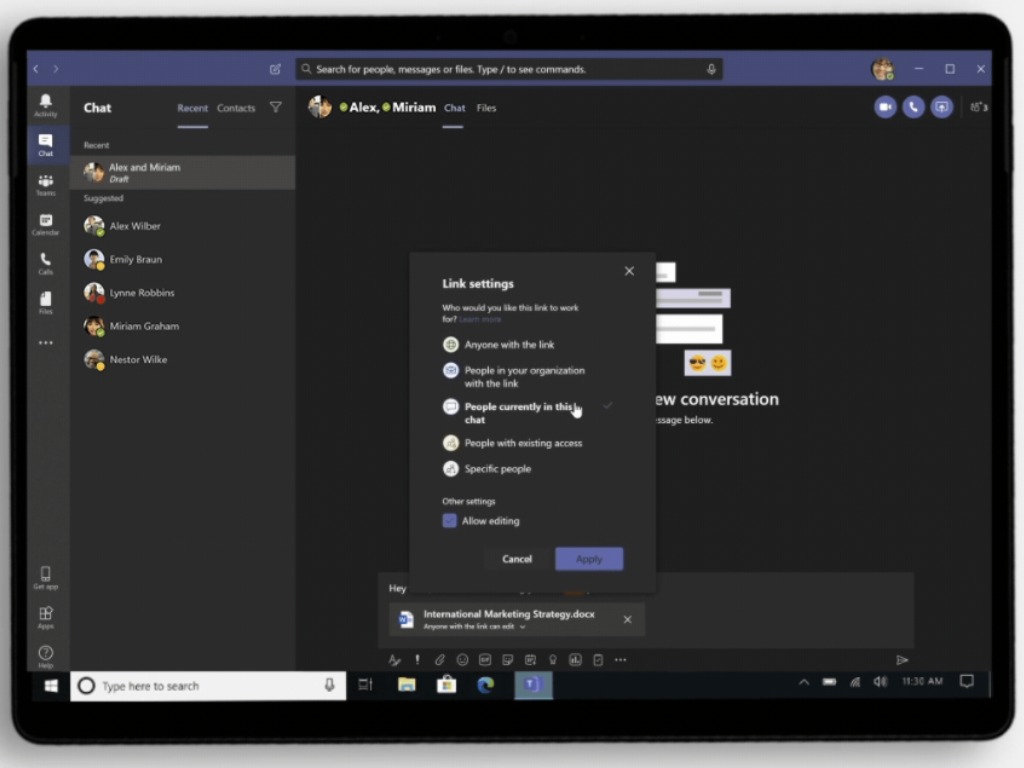
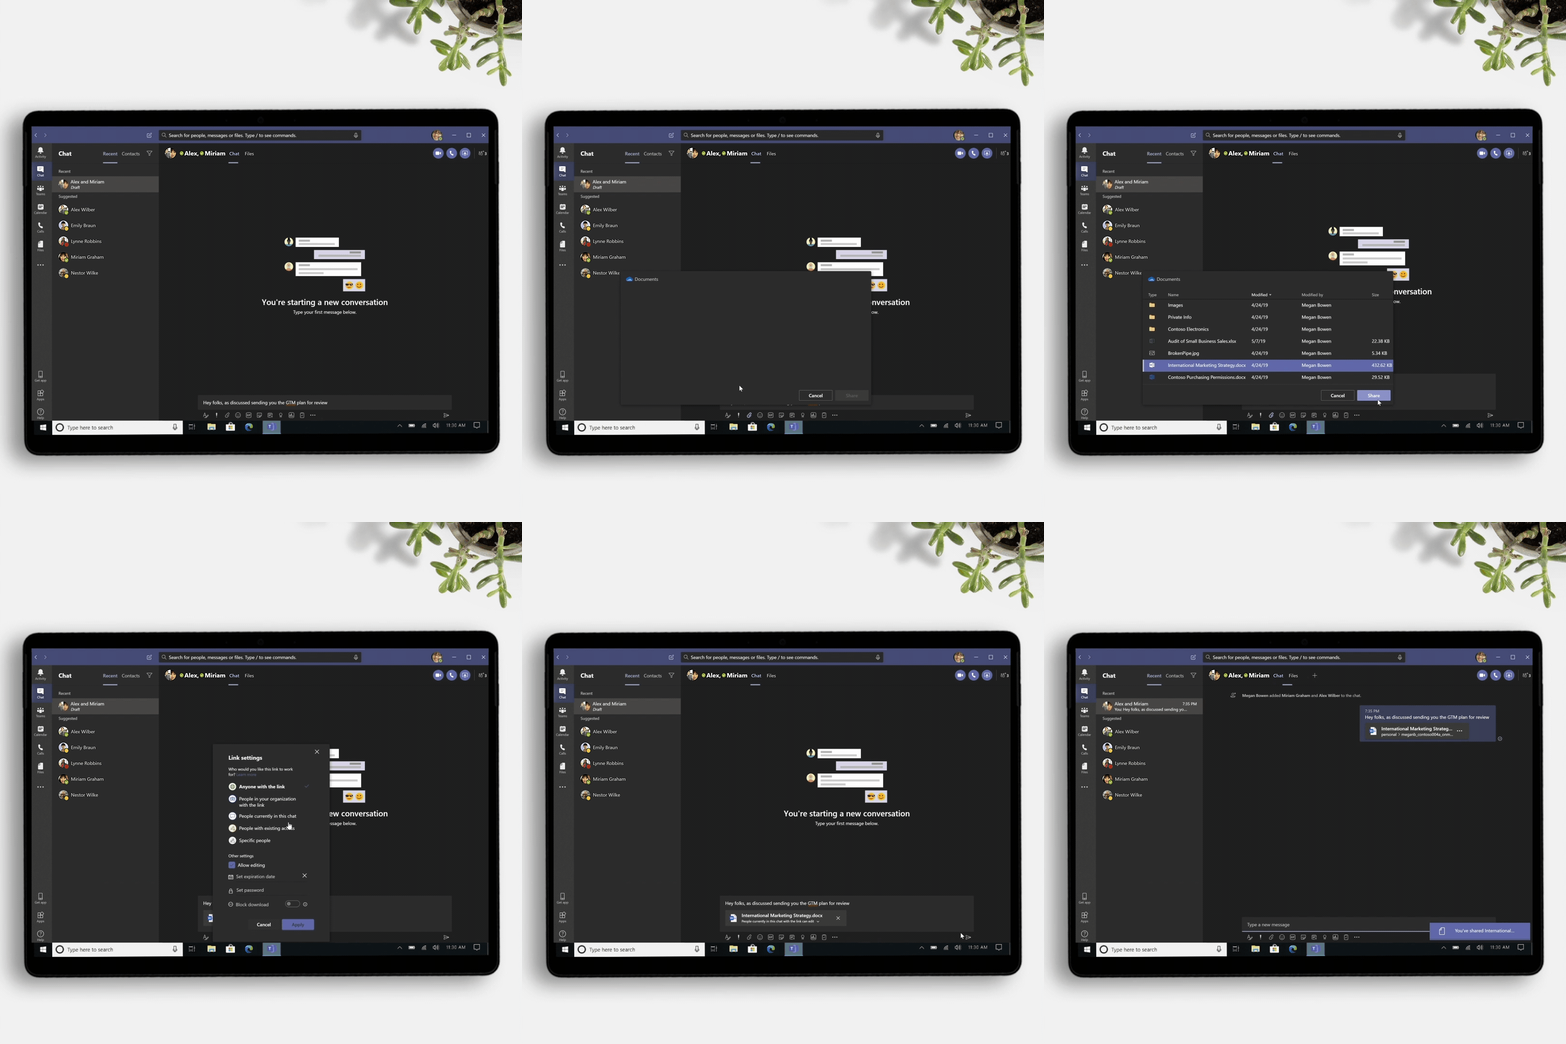
As a recall, the new file sharing experience was initially announced in July 2020. The company began rolling out this feature in August before pausing it to make some additional code changes. With the new file sharing experience, Microsoft Teams now gives users the option to create different sharing links while composing a private chat or starting a channel conversation.

Animated image of Teams sharing integration.

The link allows users to specify who can access the file and configure the appropriate permission (edit or read-only) directly in the chatbox. When users share a file from within Teams, they will have the option to create a sharable link which will give access to one of the following audiences; Anyone, People in their organization, People with existing access, or Specific people, including those in a 1:1 chat, group chat, or channels.

When the chat participant uploads a file, it is automatically saved in the Teams chat files folder in their OneDrive for Business account. To be clear, all the chat participants will have view-only access to the newly uploaded file. The sender will have to manually add people to the permissions list who join the chat later.

This change is a part of Microsoft’s effort to better streamline the file-sharing process in Teams. In other words, Office 365 now has a consistent file sharing experience across all its major apps. Just keep in mind that if external sharing is disabled within SharePoint, it’ll be automatically disabled within Microsoft Teams as well.

FIX: No bootable device found [Acer, Dell]

The No bootable devices found (or No bootable device) problem is a startup issue that can arise on Acer, Dell, and other PC models.

When this error arises, your PC can’t find its hard drive (or device) to boot from. Consequently, Windows doesn’t boot up.

As Windows doesn’t boot up, fixing the No bootable devices found the issue isn’t especially straightforward. Users will usually need to enter the BIOS (Basic Input Output System) or open the Command Prompt from Windows 10’s Advanced Startup Options menu to resolve the issue.

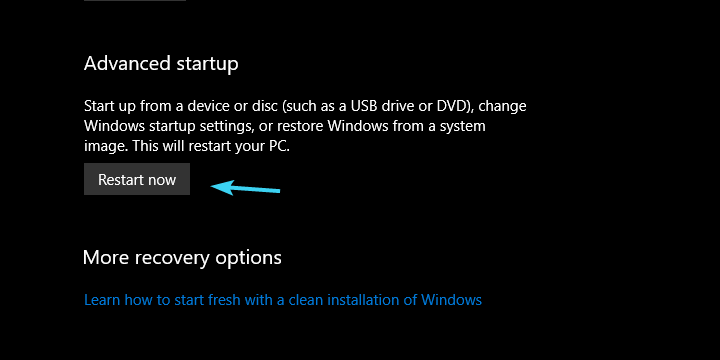
You can access the Advanced Startup Options menu with a Windows 10 installation disk or recovery drive on USB stick. On some PCs, you can also access that menu by pressing the F11 key just after turning them on.

How can I fix the No bootable devices error on Acer and Dell PCs?

1. Enable Legacy Boot

  1. Turn on your PC.
  2. You can enter the BIOS setup on most Acer and Dell PCs by pressing the F2 hotkey just after turning them on. However, you might need to press the Delete key to enter BIOS on some Acer and Dell PCs.
  3. Select the Main tab in BIOS.
  4. Enable the F12 Boot Menu setting if it’s disabled.
  5. Then select the Boot tab shown directly below.
  6. Change the Boot Mode setting to select Legacy.
  7. Press the Enter key to confirm.
  8. Press F10 to save the settings and exit BIOS.
  9. Press the Enter button again to confirm.

2. Reset the primary boot partition

  1. Insert a Windows 10 installation disk or recovery drive into a USB slot on your PC.
  2. Then power on your desktop or laptop.
  3. If you inserted a Windows 10 installation disk, you’ll need to select a language setting and click the Repair your computer option to access the Advanced Startup Options menu shown directly below.
  4. Select Troubleshoot and Advanced options to open the menu in the snapshot directly below.
  5. Select Command Prompt to open the command-line utility.
  6. Input these separate commands into the Prompt, pressing Enter after each one:
    lit disk
    select disk 0:
    list partition
    select partition 1:
    active

Note: Your PC won’t boot from USB drives if not configured to do so. To boot from a flash drive, you’ll need to change the boot order for it on the PC’s Boot tab in BIOS or UEFI settings. USB flash drive must be placed first in the boot order priority on the Boot tab.

Also, note that the No bootable device error can arise when your hard drive isn’t first in the boot order. For example, the issue would arise on a PC configured to boot from CD drive that includes a blank DVD. Ejecting the DVD or selecting your hard drive as the first boot device would then fix the issue.


3. Run a Check Disk scan

  1. Open the Advanced Startup Options menu with your bootable media or F11 hotkey as outlined for the first three steps of the second resolution.
  2. Go to the Advanced options menu by selecting Troubleshoot > Advanced.
  3. Select Command Prompt to open its window.
  4. Then type this command into the Prompt’s window: chkdsk c: /f /x /r
  5. Press the Enter key.

4. Fix corrupted MBR

  1. Open the Command Prompt from the Advanced Startup Options menu as outlined for resolutions two and three.
  2. Then type the following separate commands (press the Return key after each one) in the order they’re listed:
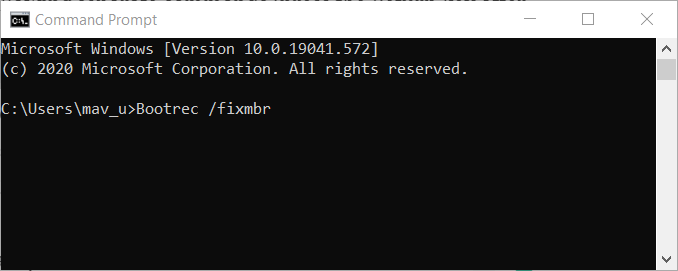
    Bootrec /fixmbr
    Bootrec /fixboot
    Bootrec /scanos
    Bootrec /rebuildbcd

  3. Thereafter, restart your PC.

Those are some of the more probable fixes for the No bootable devices found error.

If these fixes don’t resolve the error, however, there might be a hard drive hardware issue. In which case, you might need to check your HDD’s connection or get a replacement drive.

You can learn more about resolving missing boot drive problems by checking our Boot Device Not Found guide.

[wl_navigator]

Microsoft Cloud powers at-home COVID-19 test study

Microsoft yesterday announced that it is now offering its new self-swab kits to help people collect their coronavirus (COVID-19) samples at home, and then mail them for testing to labs. The company has collaborated with Stanford University, Gates Ventures, and other private and public institutions to develop this system, now it testing in the San Francisco Bay area.

The service leverages the power of the Vera Cloud Testing Platform to aggregate test results and data about symptoms submitted by the participants. Specifically, Vera includes a self-swabbing kit, a customizable enrollment and testing system, as well as a participant portal for test results reporting and follow-up. It’s completely scalable and customizable. In the past few weeks, Stanford Medicine has conducted a pilot study called CATCH (Community Alliance to Test Coronavirus at Home) to test the new platform initially.

“Being able to do that by sending kits to your home is a very powerful way of ensuring that you can actually have a much better understanding of the pandemic, and also do it in a much more equitable way,” said Vikram Dendi, general manager of Microsoft Health NExT. “The design of CATCH as a study intends to try to overcome those kinds of inequities and really develop a very clear and comprehensive picture of how things are evolving,”

A hand holds a blue envelope

To no surprise, the researchers have used Microsoft’s cloud, including the Microsoft Healthcare Bot, Azure, Power BI, and Power Platform, for creating both Vera and CATCH. Furthermore, the company’s Microsoft’s AI for Good program has also helped the project team in the scale-up process. Microsoft believes that the new testing kit could have a broader impact on providing testing not only for coronavirus but also for other diseases.

How to install Microsoft Edge Dev on Linux

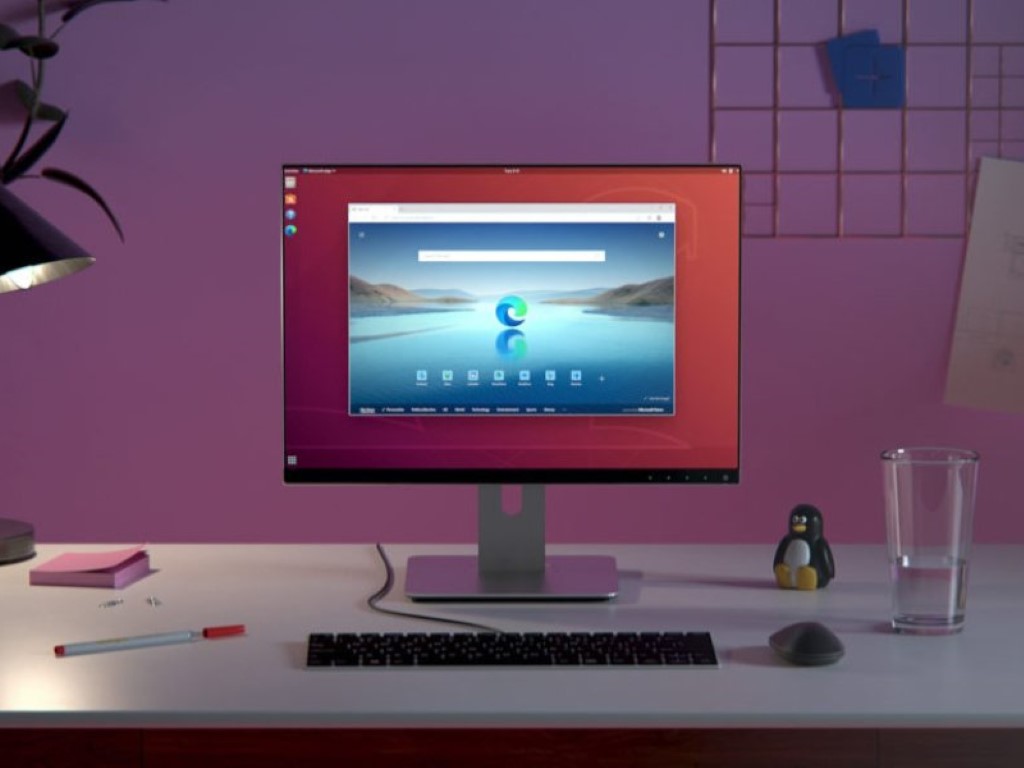
Microsoft’s Chromium-powered Edge browser is now available on Linux. Although yet to reach general availability, you can install Edge from the “Dev Channel” today, giving Linux desktop users a new browsing option.

Microsoft is currently packaging Edge for Ubuntu, Debian, Fedora and OpenSUSE. The Microsoft Edge Insider site contains up-to-date download links for the prebuilt .deb and .rpm packages. Package manager installation is also supported via Microsoft’s Linux Software Repository.

Installing from downloaded packages

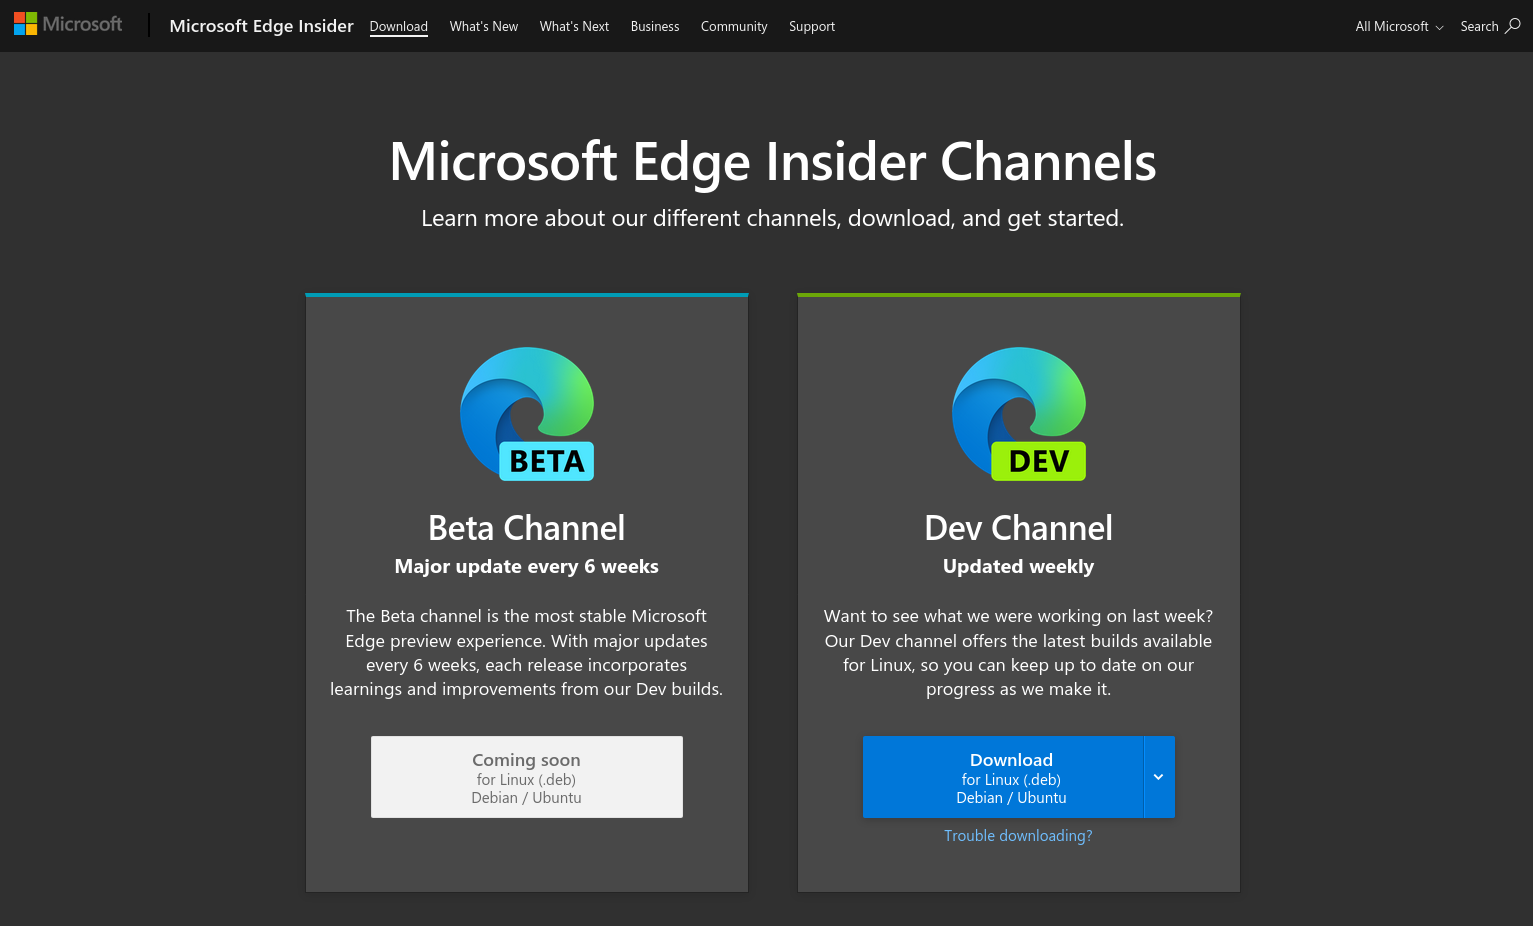
This is given as the quickest way to get up and running. Head to the Microsoft Edge Insider site and grab the right package for your system – the .deb for Ubuntu/Debian, or the .rpm for Fedora/OpenSUSE.

Screenshot of Microsoft Edge Linux download links

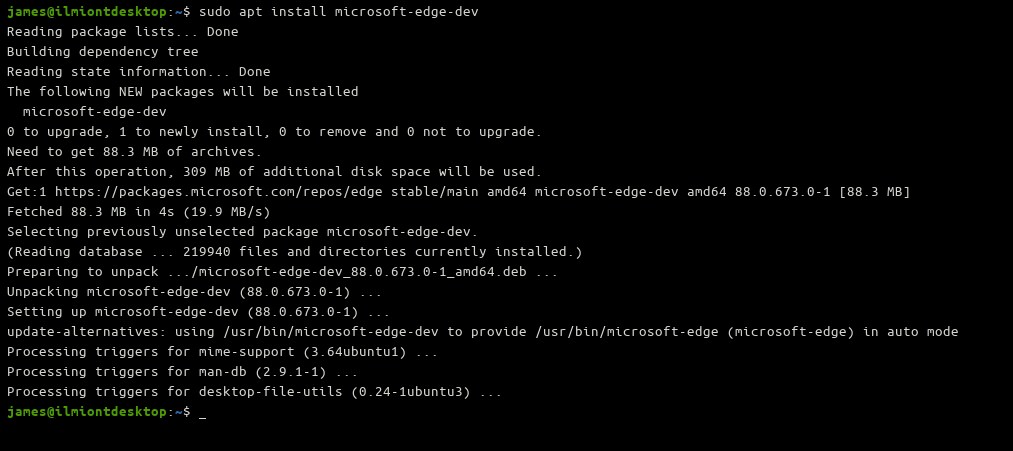
You’ll usually be able to double-click the downloaded file to begin the installation. Alternatively, you can use the dpkg -i edge.deb command on Ubuntu/Debian, or rpm -i edge.rpm on Fedora, replacing edge with the path to the downloaded package.

Once installed, Edge will automatically configure your system to download browser updates as they’re released. You’re now ready to start using Edge.

Installing from Microsoft’s Linux Software Repository

As an alternative to the manual download, Edge packages are published in Microsoft’s Linux package repository.

Screenshot of installing Microsoft Edge Dev on Ubuntu

You’ll need to install Microsoft’s package signing key and add the repository to your package manager. Refer to the Microsoft Edge Insider site for detailed instructions.

Once you’ve added the repository, you’ll be able to install the microsoft-edge-dev package using your distribution’s package manager (e.g. apt install microsoft-edge-dev on Ubuntu/Debian, dnf install microsoft-edge-dev on Fedora, or zypper install microsoft-edge-dev on OpenSUSE).

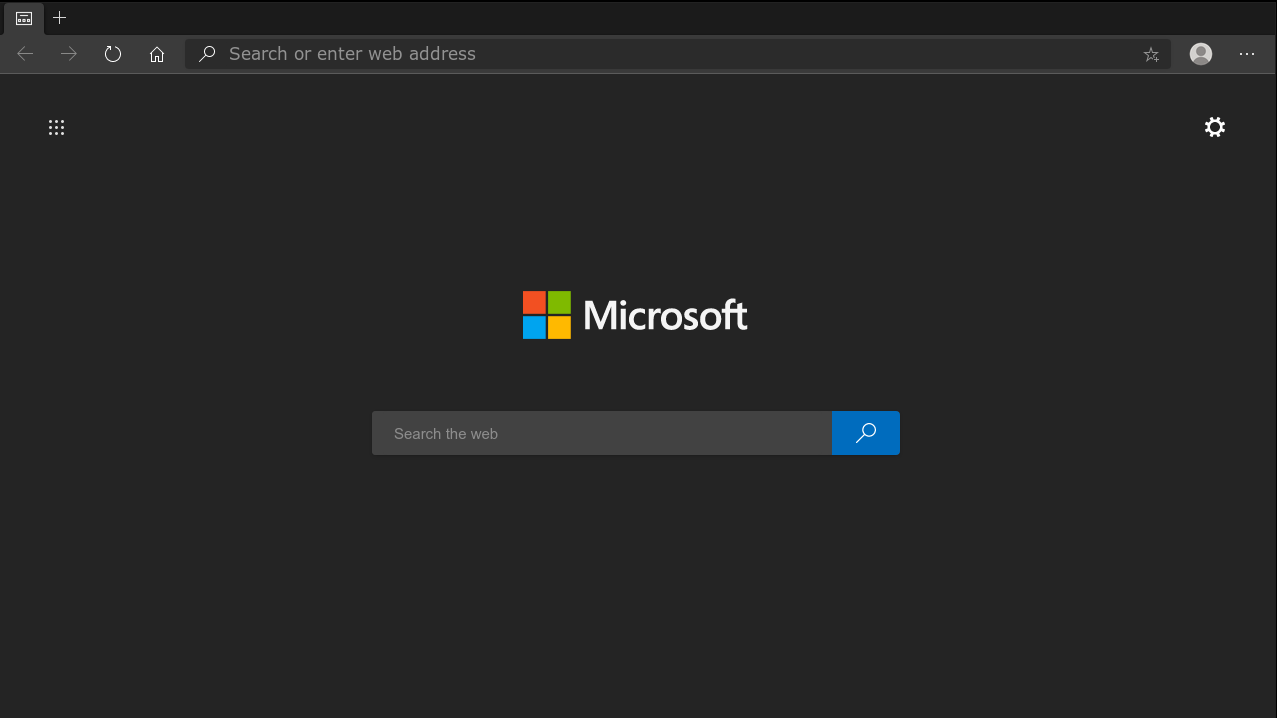
Screenshot of Microsoft Edge Dev on Linux

Microsoft Edge will now be installed from the Dev channel on your Linux machine. Updates will be released weekly and may be unstable. The Linux Dev build will correspond with the Dev channel build for Windows and macOS. More stable Beta and eventually Release builds will be made available in the future.

Windows 10 versions 1909 and 1903 get Meet Now button in the Taskbar with new optional patch

Microsoft is starting to bring its new Meet Now Taskbar button to older versions of Windows 10 this week. Yesterday, the company released new optional patches yesterday for the Windows 10 November 2020 Update (version 1909) and the May 2019 Update (version 1903) which will add this new Meet Now button to the system tray.

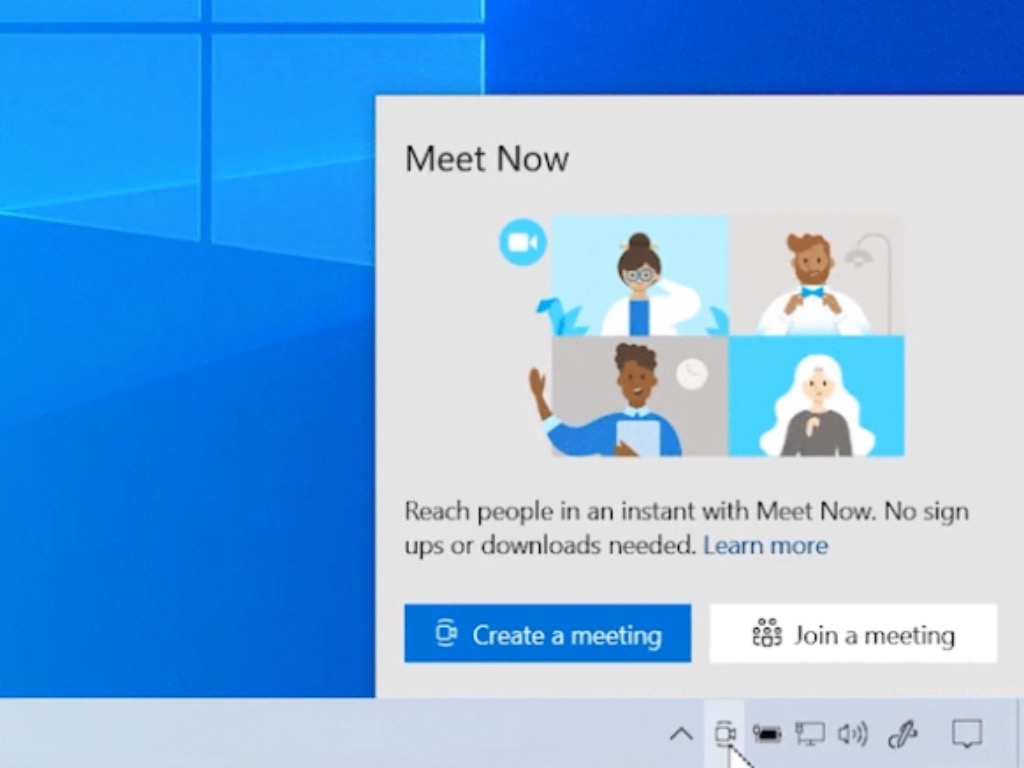
For those unfamiliar, Meet Now is a new Skype feature that makes it easy to set up a video call with other people without requiring to download or sign up for Skype. Microsoft first tested this new Meet Now button with Windows Insiders last month, and the company is now getting ready to bring it to regular Windows 10 users. It’s a relatively unobtrusive feature that can help Windows 10 users stay in touch during this ongoing pandemic.

Here are the changes Microsoft highlighted for this optional update (KB4590836) for Windows 10 versions 1909 and 1903:

Introducing Meet Now in the Windows 10 Taskbar

Earlier this year we introduced Meet Now in Skype. Meet Now makes it easy to connect with anyone in as little as two clicks for free and each call can last up to 24 hours. Today, we’re excited to share that we will be extending this capability in Windows 10 by bringing Meet Now right to the taskbar. In the coming weeks, you will be able to easily set up a video call and reach friends and family in an instant by clicking the Meet Now icon in the taskbar notification area. No sign ups or downloads needed.

  • Updates an issue that might prevent a Microsoft Xbox Game Pass user from playing certain games that are eligible for play.
  • Updates a reliability issue that causes the screen to flash constantly.
  • Updates an issue that causes a USB printer port to disappear after restarting when the printer device is turned power off.

As usual, all the changes included in this new optional patch will end up in next month’s Patch Tuesday. We expect this new Meet Now button to also make its way to the Windows 10 May 2020 Update (version 2004), which could get it with an optional patch before the end of the month. The October 2020 Update, which started rolling out yesterday, also doesn’t have this new Meet Now Taskbar button yet.

Fix: The Volume is too Fragmented to Complete This Operation

If you see, The volume is too fragmented to complete this operation, it’s a system error caused by storage problems.

This can happen when you try to convert your disk from FAT32 to NTFS or even when performing other operations. Keep reading to find out how to reduce the fragmentation and get things running!

What can I do when the disk is too fragmented to complete operation?

Before we start with the slightly complex solutions, try these quick ones:

  • Many system errors can occur due to bugs and glitches. Windows 10 has a couple of bugs and compatibility issues, but if you want to keep your system free from errors, it’s advised to keep your Windows updated.
  • Disable any third-party antivirus installed on the PC.
  • According to users, navigate to Web Publishing settings in ISA server, and tick the Send the original host header to the publishing server instead of the actual one (specified above) checkbox
  • Try connecting to a different network and check if that solves the problem. Use a guest network, if there’s one.

If none work, head to the fixes listed next.

1. Recover your files with a specialized tool

First, you can fix this problem by recovering your files to another hard drive. To complete this process, we recommend using a specialized tool such as Stellar Data Recovery.

Stellar Data Recovery is the go-to solution for recovering lost or deleted files in any format (documents, emails, photos, videos, and more) across multiple Windows devices and storage media.

You can even use it on severely corrupted or formatted drives or RAW drive volumes, and it will still work like a charm.

So, if you’re looking for data recovery software that is both reliable and efficient, this Stellar-powered solution is your best bet.

Let’s quickly look at its key features:

  • Retrieve any file format from all Windows-running devices and external media
  • Scan an entire hard drive or a specific location (Deep Scan and Quick Scan modes available)
  • Recover data from severely corrupt hard drives and formatted partitions
  • Native support for all storage media, including mobile or camera memory cards, Flash cards, SD cards, hard disks, and more

Stellar Data Recovery

Recover deleted files in any format from any Windows device or storage media be it corrupted, encrypted or formatted.
Try it now Visite website

2. Perform a Clean boot

  1. Press Windows + R, type msconfig, and press Enter.
  2. Navigate to the Services tab and check Hide all Microsoft services. Then, click on Disable all.
  3. Navigate to the Startup tab and click on Open Task Manager.
  4. Select the first item on the list and click on the Disable button. Now repeat the same steps for all entries on the list.
  5. After you disable all entries on the list, close Task Manager. Now go back to the System Configuration window and click on Apply and OK to save changes.

Third-party applications can often start automatically with your PC and cause this and other errors to appear.

To fix this issue, many users suggest performing a Clean boot. To do that, you need to disable all startup applications and services.

After doing that, you need to restart your PC to apply changes. When your PC restarts, check if the problem still appears.

If not, one of your startup apps or services was certainly causing the issue. To find the problematic application, you need to repeat the same steps and enable apps and services one by one or in groups.

Keep in mind that you need to restart your PC after enabling each group of apps or services to apply changes. After you find the problematic app, you need to disable it or uninstall the program.

Alternatively, you can try to update the application to the latest version and check if that solves the problem.

3. Run the chkdsk scan

  1. Press Windows + X and choose Command Prompt (Admin).
  2. Paste the following command, replace X: with the affected drive letter, and hit Enter: chkdsk /f X:
  3. Wait for the scan to complete.

If you’re still getting The volume is too fragmented to complete this operation error message, it’s possible that your files are corrupted. File corruption can occur due to malware or power loss, but you might be able to fix your files using the Check Disk scan.

4. Perform an SFC scan

  1. Open Command Prompt as administrator.
  2. When Command Prompt starts, execute the following command: sfc/scannow

The scanning process will now start. The scanning process can take a while, so don’t interrupt it. After the scanning is complete, check if the problem still persists.

5. Format your removable storage

  1. Connect your removable storage and go to This PC.
  2. Locate the removable storage, right-click it and choose Format from the menu.
  3. The format window will now appear. Select the desired formatting options and click on Start.
  4. Wait for the formatting process to finish.

If The volume is too fragmented to complete this operation message appears while using removable storage, you might be able to fix it by reformatting it.

You should know that formatting your storage will remove all your files from it, so be sure to back them up in advance.

6. Defragment your drive

  1. Press Windows + S and enter defragment. Select Defragment and Optimize Drives from the menu.
  2. You’ll see a list of all your drives. Select the problematic drive and click on Analyze. Windows will now scan your drive and check its fragmentation.
  3. After the scanning is finished, select the same drive and click Optimize.

If you’re getting this error, you might want to try defragmenting your hard drive. Defragmentation is a useful procedure that optimizes all your stored data allowing you to access it faster.

Defragmentation can take a while, depending on the size of your hard drive, so don’t interrupt it. After the process is finished, check if the error message still appears.

If you want, you can also use a third-party defragmentation software instead. Many users prefer third-party tools because they offer more features, so feel free to use one of these tools if you want.

7. Use System Restore

  1. Press Windows + S and enter system restore. Choose Create a restore point from the menu.
  2. Click on System Restore button.
  3. Select Choose a different restore point and click on Next.
  4. Check Show more restore points option and select the desired restore point. Now click on Next.
  5. Follow the instructions on the screen to complete the restoration.

Another way to fix The volume is too fragmented to complete this operation error is to use System Restore. Windows usually creates restore points automatically. So if this error started appearing recently, you might be able to solve it by restoring your PC.

8. Reset Windows 10

When nothing else works, you have no option but to reset Windows to the factory defaults.

This will wipe all the data on the PC but should help get rid of The volume is too fragmented to complete this operation error.

Before you leave, find out how to speed up Windows 10.

Let us know what worked for you by reaching for the comments section below.

Doom Eternal’s first campaign expansion is now live on Microsoft’s Xbox One consoles

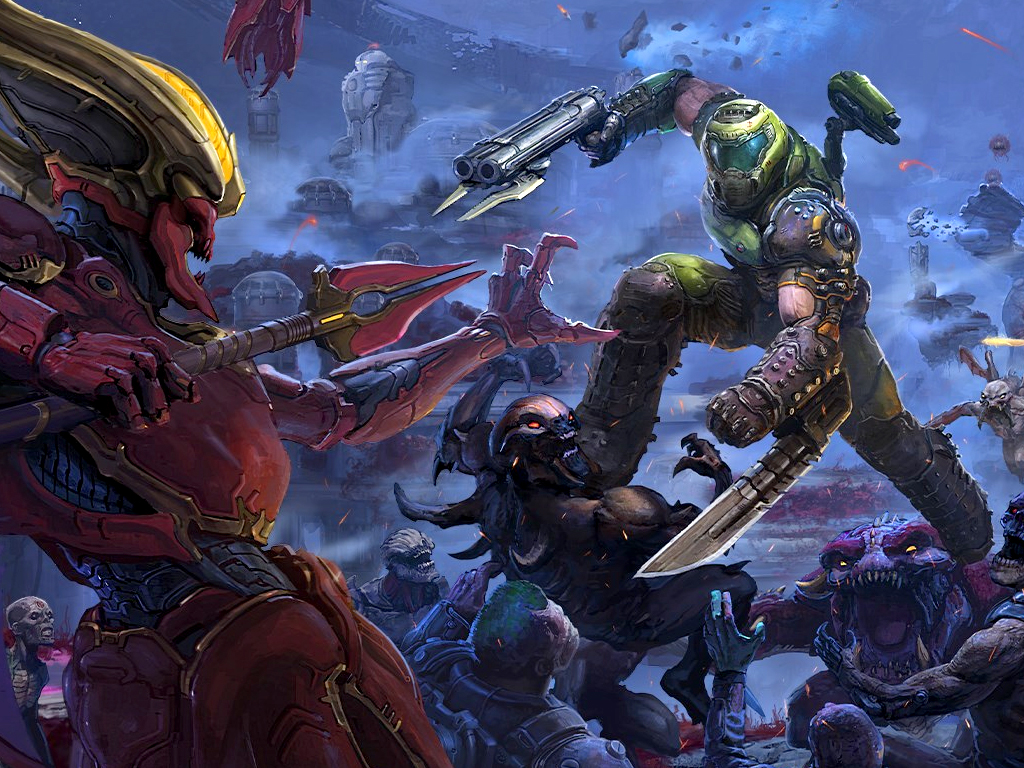
The Ancient Gods: Part One, the first expansion for Doom Eternal’s campaign, is now available to play on Microsoft’s family of Xbox One consoles and, once released, the Xbox Series X and Xbox Series S as well.

The Ancient Gods: Part One adds a host of new single-player story content in addition to new enemies and locations to experience for owners of the main game. Here’s the official description and trailer:

The Ancient Gods – Part One is the first campaign expansion for the critically acclaimed DOOM Eternal. Your war is not over… The legions of Hell have razed the heavens, threatening to expand across dimensions. Battle your way back to Urdak and decide the fate of the cosmos. Your mission is now your own.

  • NEW MISSION: Experience a new mission in your eternal fight against evil. Unleash your vengeance and face your greatest test; restore order to the heavens and unearth the corruption that has thrown the universe into chaos.
  • NEW LOCATIONS: From the decks of the UAC Atlantica on Earth to the Blood Swamps of Hell to the demon-infested Urdak, you will visit epic new locations to battle the armies of Hell.
  • NEW ENEMIES: Change your tactics as you face Hell’s newest threats that add more depth and challenge to combat. Face the demon buffing Spirit and the deadly Blood Maykr.

Doom Eternal came to Xbox Game Pass earlier this month which means that subscribers of the subscription service can now play the base game for free. Subscribers wanting to play The Ancient Gods: Part One can also grab it with a $2 discount as all Game Pass users can buy it for $17.99 instead of the usual $19.99.

Are you a fan of Doom Eternal and are you going to play this new DLC? Let us know in the comments and then follow us on Pinterest and Facebook for more Xbox gaming news.


DOOM Eternal: Year One Pass

Fix: The Wizard Could not Start Microphone on Windows 10

Some users have discussed the wizard could not start the microphone on Windows 10 error on Microsoft’s support forum.

This error often happens when a user tries to set up a Microphone on their device. Consequently, users can’t utilize the Microphone Setup Wizard when that issue arises.

Let us go through some common causes; then we will show you the best solutions.

Why is my microphone setup wizard not detecting my mic in Windows 10?

From our findings, there could be a few reasons for this error. The following are the most common triggers:

  • Connection issues – In the case of wired microphones, you may be dealing with a loose connection.
  • Microphone muted or off – Many users will get this error message if the microphone they need to connect to is not switched on.
  • Driver issues – Most users may be battling incorrect or outdated computer drivers.
  • Poor settings – A few settings on the computer are known to trigger this problem. One example is when the microphone is not set as the default recording device.
  • Bad hardware – There is also the chance that your microphone has been damaged; in this case, you may consider looking for a compatible mic replacement. So, if the wizard could not start, ensure your audio hardware is working properly.

Now let us show you what to do if the Microphone wizard could not launch on Windows 10.

What can I do if the wizard could not start the microphone on Windows 10?

1. Reinstall the microphone driver

  1. Launch Run with the Windows key + R hotkey.
  2. Type devmgmt.msc in the open box and click OK to open Device Manager.
    the wizard could not start microphone windows 10
  3. Expand Audio inputs and outputs, right-click your microphone, and select Uninstall device.
  4. Restart Windows after uninstalling the driver for the microphone. After restarting, Windows will initiate an installation service to reinstall a microphone driver.

Alternatively, you could use a dedicated driver solution, as this method is much faster, more reliable, and requires less input.

Simply download and install it, let it run, and it will scan your hardware for old, broken, or missing drivers.

2. Run the Recording Audio troubleshooter

  1. Press Start, type troubleshooting, and select Troubleshoot settings.
    the wizard could not start microphone windows 10
  2. Select the Recording Audio in Settings, and click the Run the troubleshooter button.
    the wizard could not start microphone windows 10
  3. Then select the Microphone option and click Next.
    the wizard could not start microphone windows 10
  4. Finally, click Apply Fix if the troubleshooter provides a resolution.

3. Turn on Allow apps to access your microphone

  1. In the Start menu, type microphone and click Microphone privacy settings.
  2. Toggle on the Allow apps to access your microphone option if it’s off.
    the wizard could not start microphone windows 10
  3. Lastly, restart Windows.

Turning on the Allow apps to access your microphone setting is among the most widely confirmed fix for the Wizard could not start microphone error.

4. Check if the microphone is enabled

  1. Right-click the Speaker’s Taskbar icon and select Open sound settings.
    the wizard could not start microphone windows 10
  2. Scroll to Related Settings and click Sound Control Panel.
    the wizard could not start microphone windows 10
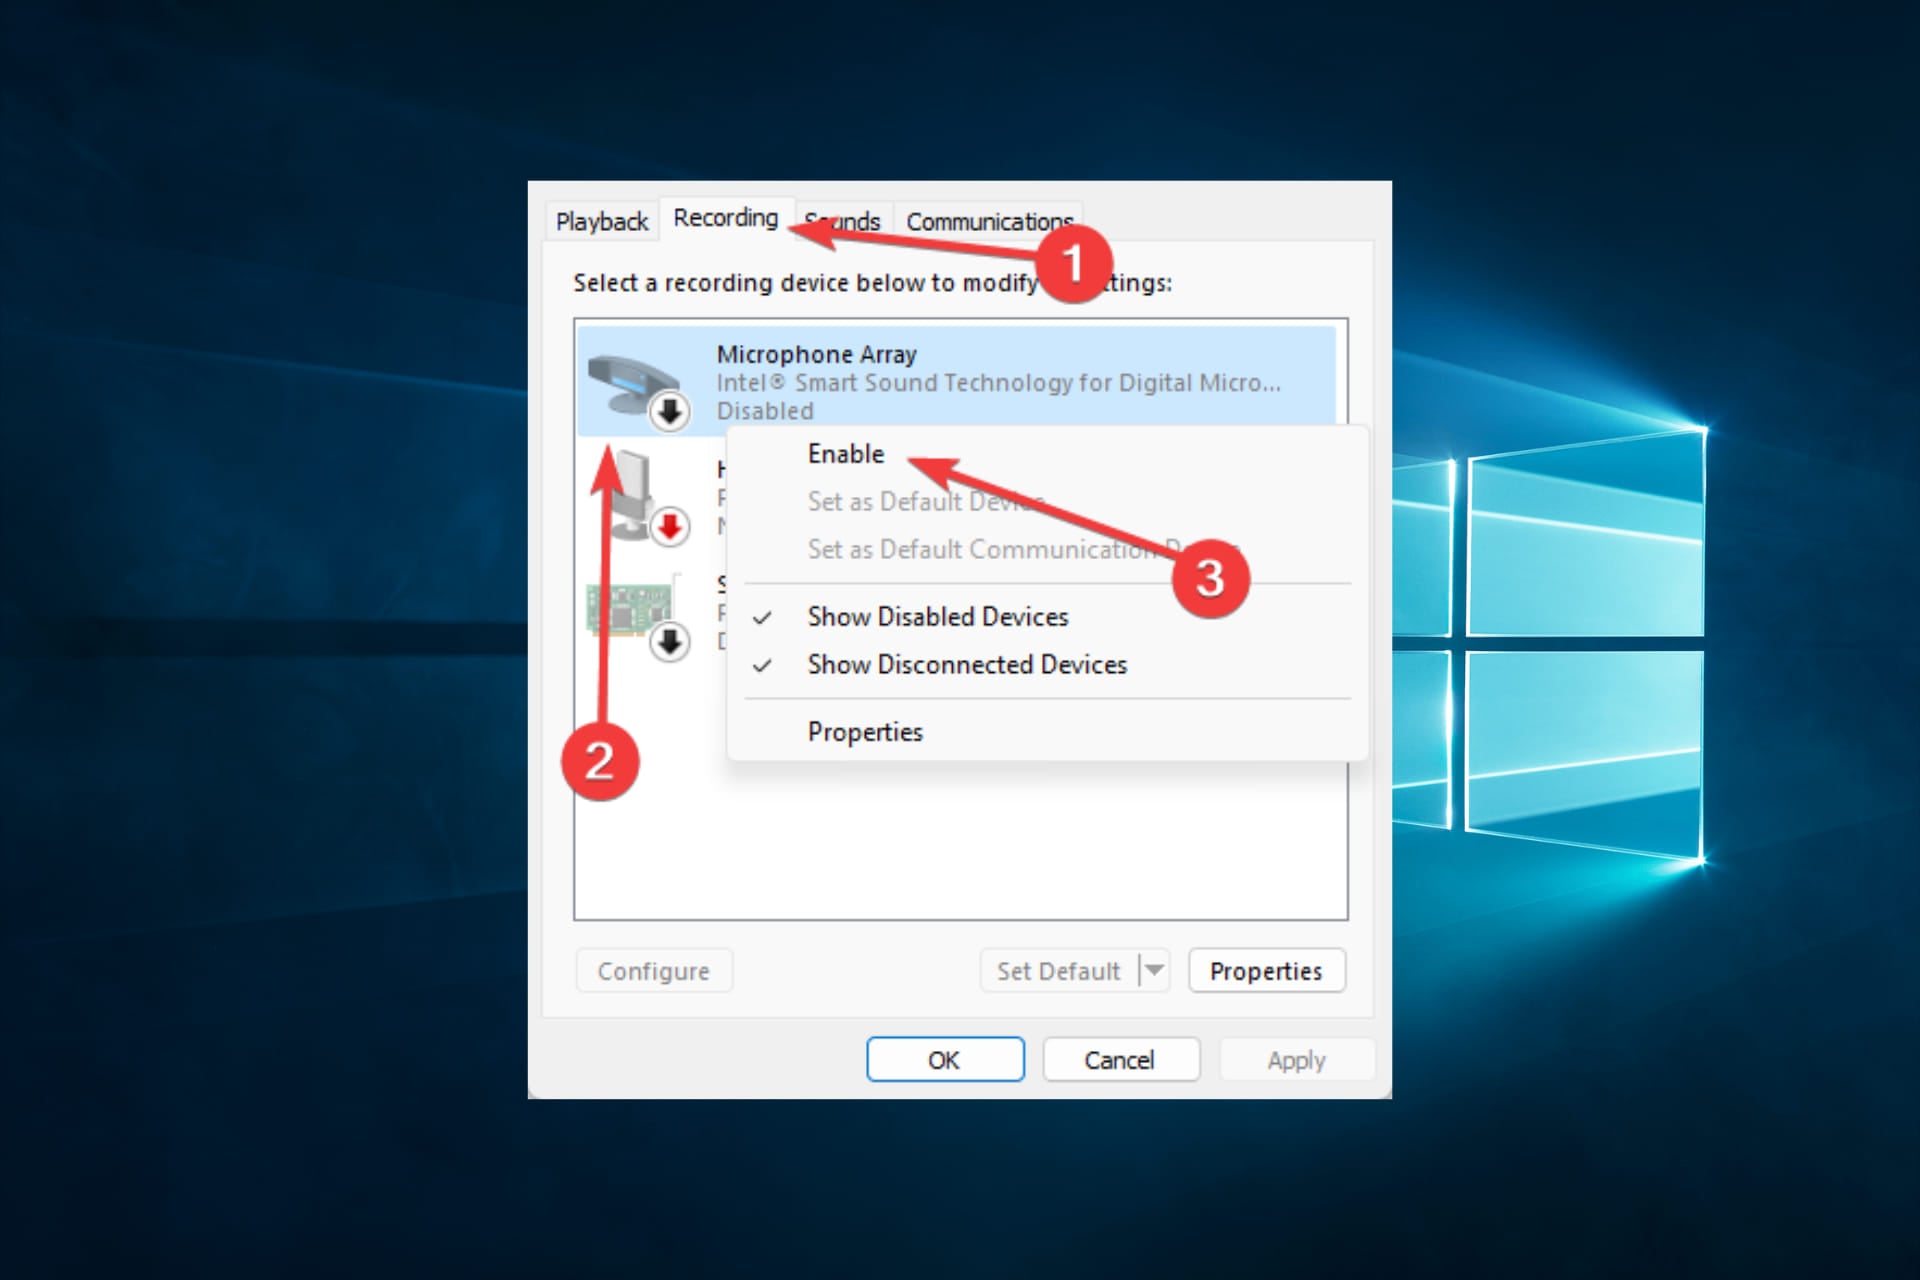
  3. Select the Recording tab, right-click the microphone you need to be enabled, and select Enable.
    the wizard could not start microphone windows 10
  4. Make sure it is Set as default.
  5. Click the Apply option.
  6. Finally, click OK to exit the Sound window.

Many users have confirmed these resolutions to fix the Wizard could not start microphone error. With the error fixed, you can configure your microphone with Microphone Setup Wizard.

Let us know in the comments section below what worked for you.

FIX: Fallout 3 doesn’t work in Windows 10/11

Fallout 3 is the third addition to the Fallout series that Bethesda released in 2008. Therefore, the game predates both Windows 7 and 10 and was primarily designed for Vista.

So, Fallout 3 doesn’t always work when some players try to play it in Windows 10. For some players, the game crashes when they click New in Fallout 3.

How do I make Fallout 3 run on Windows 10?

1. Check if you need to update your graphics card driver

Games are GPU-intensive apps, so any problems with your video drivers will translate into bad gameplay experiences or even errors during gameplay.

That being said, if you experience any of the above while playing Fallout 3, proceed to update your graphics drivers as soon as possible.

The fastest way to do so is with a dedicated driver updater like Outbyte Driver Updater, as it will guarantee the latest drivers for your current hardware.

Outbyte Driver Updater automatically update drivers


This product is extremely lightweight and will find all of your outdated, broken, or missing drivers within seconds of scanning your PC.

You can then opt to install the latest drivers either automatically, manually, or semi-manually.

Outbyte Driver Updater

Outbyte Driver Updater

This lightweight and portable tool will detect all of your missing drivers by itself, and update them as soon as possible.
Free trial Visit website

2. Run Fallout 3 in compatibility mode

  1. Open File Explorer with the Windows key + E hotkey for it.
  2. Open Fallout 3’s Steam folder within File Explorer.
    • The default path for Fallout 3’s Steam folder will be:
    • C: Program Files (x86)SteamsteamappscommonFallout 3.
  3. Then right-click the Fallout 3 EXE file to select Properties.
  4. Next, select the Compatibility tab on the game’s properties window.
    Compatibility tab fallout 3 windows 10
  5. Select the Run this program in compatibility mode for the setting.
  6. Then select Windows XP (Service Pack 3) on the platform drop-down menu.
    • You can try selecting other Windows XP service pack platforms and Windows 7 if the XP Service Pack 3 option doesn’t do the trick.
  7. In addition, select the checkbox for the Run this program as an administrator option.
  8. Click Apply to save settings.
  9. Click the OK button to exit.

When Fallout 3 doesn’t work in Windows 10, it’s often a compatibility issue that can be resolved with compatibility mode.

3. Edit the Falloutprefs.ini config file for Fallout 3

  1. Editing the game’s Falloutprefs.ini file can also fix Fallout 3 not working in Windows 10. Open File Explorer.
  2. Click My Documents > My Games > Fallout 3 to open that folder path.
  3. Double-click the falloutprefs.ini file to open it in Notepad.
  4. Next, look for the bUseThreadedAI=0 setting in the falloutprefs.ini file.
  5. Change the bUseThreadedAI=0 setting to bUseThreadedAI=1.
  6. If the bUseThreadedAI=0 isn’t in the file, enter bUseThreadedAI=1 on a new line within the file.
  7. Then add iNumHWThreads=2 to another new line within the falloutprefs.ini file.
  8. Click File and Save to save the new settings within the file.
    Save As window fallout 3 windows 10
  9. Thereafter, try running Fallout 3 again.

4. Install Windows Game Live

Fallout 3 needs the antiquated Games for Windows – Live software to run.

  1. Enter Games for Windows Live in Google as in the shot directly below.
    Games for Windows Live search fallout 3 windows 10
  2. Then click the GWFL – Microsoft link near the top of the search results.
    • Doing so will download the installer for Games for Windows Live.
  3. Open the folder Games for Windows Live downloaded to.
  4. Then click gfwlivesetup.exe to open the installer for that software.
  5. Go through the setup wizard to install Games for Windows Live.
  6. Launch the Games for Windows Live software when you’ve installed it.
    • Then it will start downloading some files.

Those are some of the more likely resolutions that will kick-start Fallout 3 so that you can play the game in Windows 10. Our How to Play Old Games article also provides further tips for running antiquated games in Windows 10.

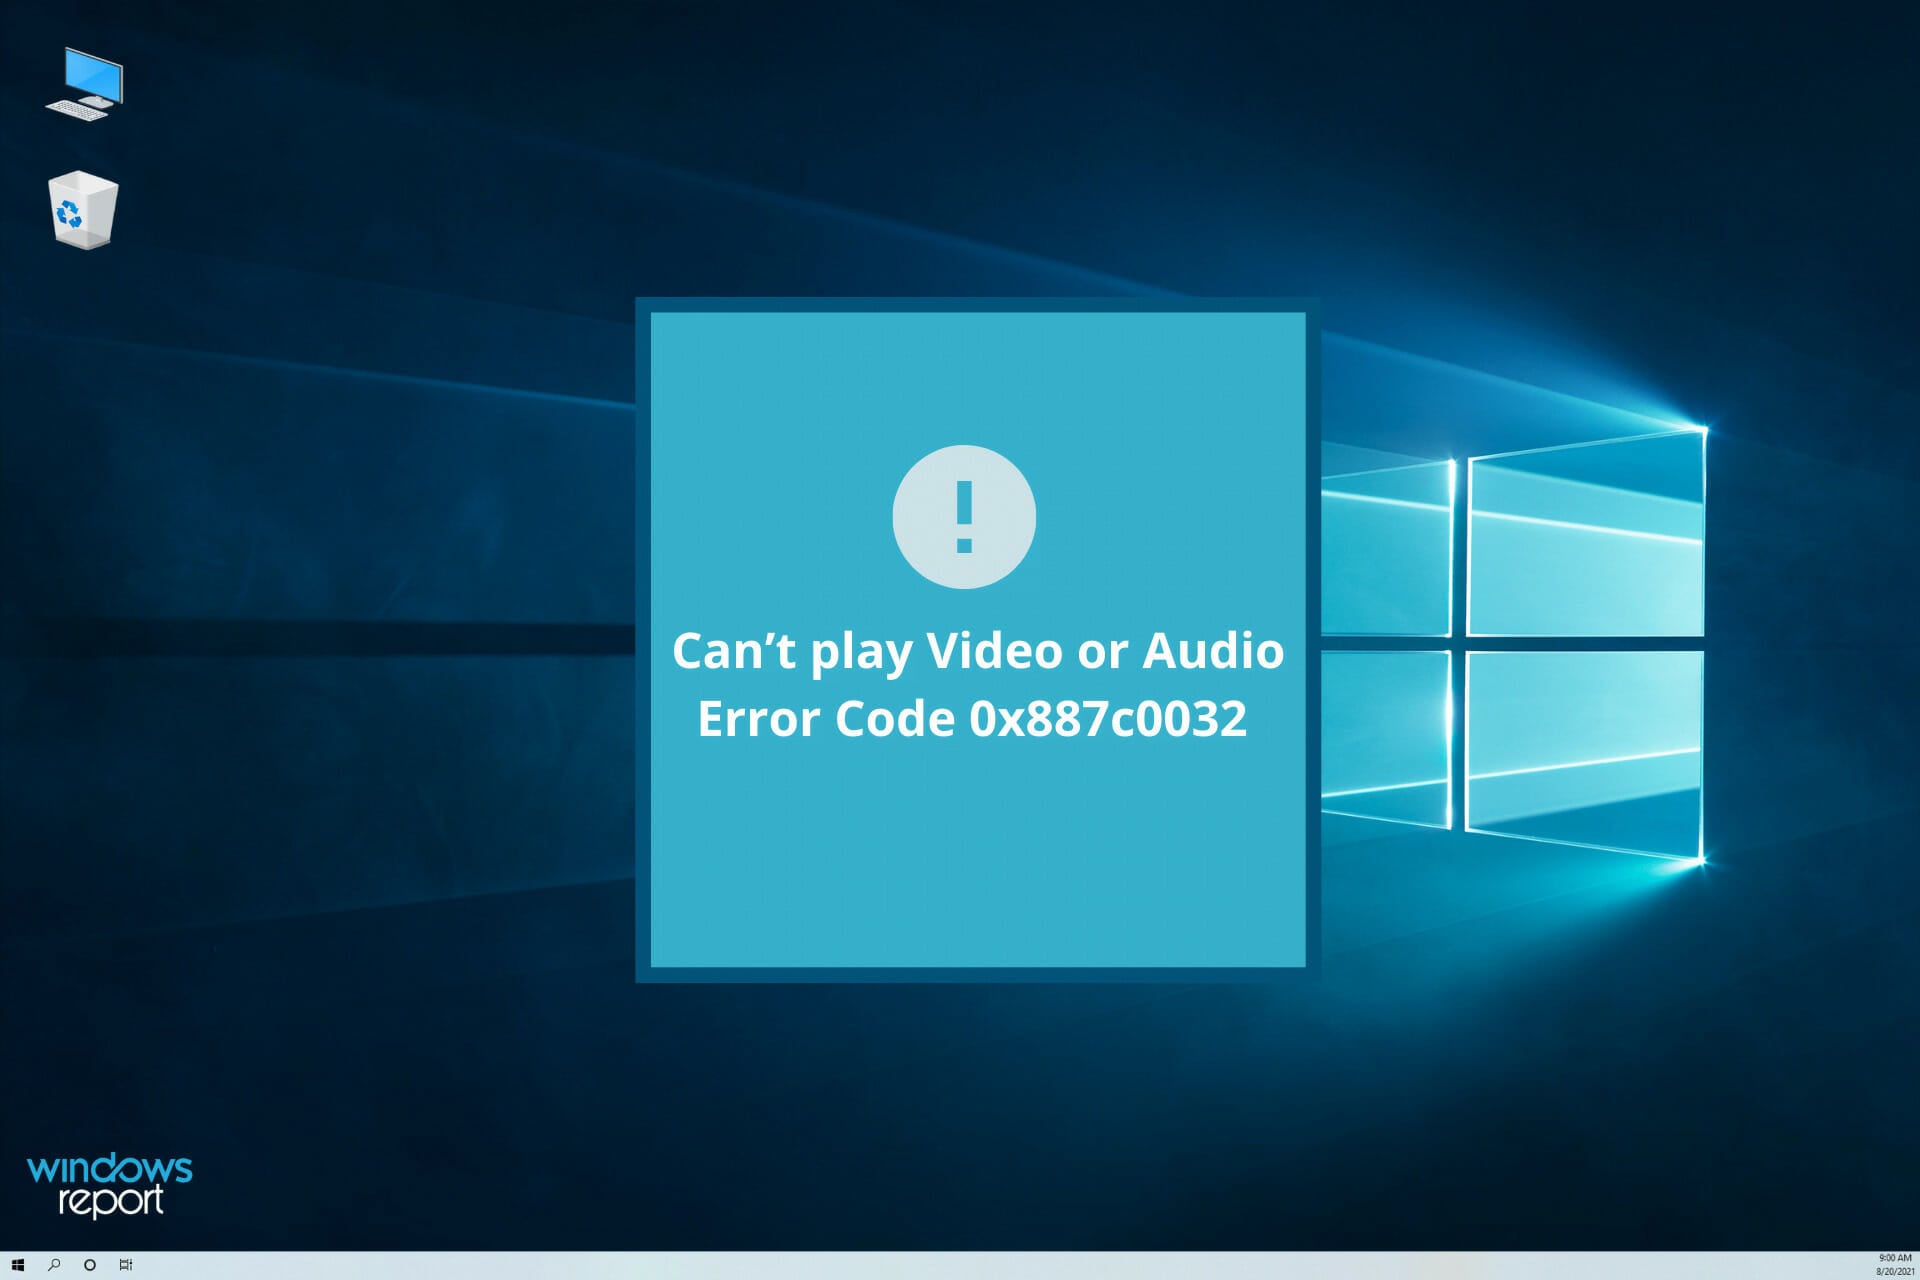
How to fix the can’t play video or music 0x887c0032 error

The 0x887c0032 error arises for some users when they try to play media files in Movies & TV or Groove Music.

In one MS forum post, a user stated:

For the past few days, whenever I try to play video on the Movies and TV app, and music on Groove app, it says CAN’T PLAY and shows an error code 0x887c0032 for every MP4 and MP3.

So, users can’t play media content in those apps when that error arises. These are some of the potential 0x887c0032 error resolutions for those who need to fix them.

In addition, this media error type can be encountered on more Windows versions, including older platforms such as Windows 7 or 8.1 versions.

To discover valuable insights on how to resolve this video and audio issue on your PC, follow along with practical guides from this article.

What causes the Can’t play error code 0x887c0032?

Before getting into the solutions, you probably need to be aware of the causes that determine the 0x887c0032 error on your PC.

It’s worth mentioning that such types of media errors can be generated by specific factors that come around unavailable media files, not working services, or outdated GPU drivers.

For example, it may happen that your file is no longer available due to renaming or moving it to another location.

Another factor causing this problem may be the Windows Audio Endpoint Builder service. If this essential service is blocked or not working properly, it’s most likely you will encounter this error.

This problem occurs as well due to corrupted apps, in case it only shows up when you try to use UWP (Universal Windows Platform) applications like Media Player or Groove.

The last but surely not least factor should be outdated or wrong GPU card driver on your computer. If that’s the case, you can resolve it by getting the latest driver version using Windows Update or another dedicated software.

How can I fix error 0x887c0032?

1. Update video card drivers

  1. Type in Device Manager in the Windows Search bar.
  2. Right click on Display adapters and then select Update the driver.
  3. Select Search automatically for update driver software option.
  4. Restart your PC to complete the process of updating your driver.

Error 0x887c0032 could be caused by a corrupted or antiquated video card driver that needs replacing. Thankfully, we’ve got the best solution for that.

We are talking about a tool that can automatically scan your PC and look for outdated device drivers. Then, Outbyte Driver Updater provides a detailed report of all identified issues.

At this point, the choice is all yours. You can simply update the video card driver or see the bigger picture here and download and install all of your out-of-date device drivers.

Outbyte Driver Updater has a generous database of no less than 18 million driver files, so accuracy is guaranteed. Moreover, it discovers all the outdated drivers in mere seconds.

⇒ Get Outbyte Driver Updater

2. Check out the video and audio troubleshooter

  1. To open those troubleshooters, click the Type here to search button.
  2. Next, input troubleshoot as the search keyword.
  3. Click Troubleshoot settings to open the window directly below.
  4. Select Video Playback and click Run the troubleshooter to open the window directly below.
  5. To open Playing Audio, select that troubleshooter and click its Run the troubleshooter button.
  6. Then you can go through those troubleshooter’s suggested resolutions.

As Movies and TV and Groove are Windows 10’s default media apps, the platform’s video and audio troubleshooters might come in handy for fixing error 0x887c0032.

3. Reset the Windows Audio Endpoint service

  1. Open Windows 10’s search tool.
  2. Enter services as the keyword.
  3. Next, click Services to open the window in the image directly below.
  4. Then double-click the Windows Audio Endpoint Builder to open the properties window directly below.
  5. Select the Automatic startup option if that’s not the current configuration.
  6. If the service isn’t already running, click the Start button.
  7. If the service is running, however, click the Stop button.
    • Then click Start to restart the service.
  8. Select the OK option to exit the properties window.

Restarting the Windows Audio Endpoint service is a potential remedy for error 0x887c0032. Don’t hesitate to refer to the above procedure in that regard.

4. Reset the app

  1. Open the search utility in Windows 10.
  2. Enter apps to search for Apps & features.
  3. Click Apps & features to open Settings as in the snapshot directly below.
  4. Select the app error 0x887c0032 arises for.
  5. Click Advanced options to open further options.
  6. Press the Reset button.
  7. A dialog box window will open. Click Reset on that window to provide confirmation.

You might need to fix a corrupted Movies & TV or Groove Music app to resolve error 0x887c0032. Just complete the above procedure in that regard.

5. Use another media player

In case the above answers didn’t work out for you, we suggest that you approach more efficient media player applications.

Using such media tools will offer you great advantages such as playing different files without installing codecs, streaming or downloading YouTube videos, or a straightforward interface with organized tools.

A performant media tool is VLC Media Player because it will provide you with error-free support for playing video or audio files for free.

Otherwise, if you prefer to look further for a media player that works smoothly on your PC, we advise you to consider the most reliable media player software.

Those resolutions might fix error 0x887c0032 for some users. If not, however, you can always try playing videos and music in some great third-party media player software tools.

For more information about the topic, don’t hesitate to visit this Groove Music section as well. If you need help with other app errors, simply check out our PC Software Troubleshooting Hub.

Massive July Twitter hack aided by stolen VPN credentials

Reportedly, the infamous Twitter hack that took place in July was made possible with the help of stolen VPN credentials. Reportedly, the perpetrators targeted a few Twitter employees with a phishing attack.

The attackers created a page that was identical to the genuine VPN login page that home working Twitter employees used to connect to the work systems. After successfully retrieving the employees’ VPN credentials, the hackers used them to connect to the Twitter network.

Twitter’s security took a serious blow

What happened during the Twitter hack in July?

The notorious Twitter hack that occurred earlier this year in July targeted approximately 130 high-profile Twitter accounts, including those of Elon Musk, Joe Biden, Apple, Barack Obama, and Jeff Bezos.

The hackers managed to steal VPN credentials from Twitter remote working employees and use them to infiltrate the Twitter network.

Once in, they started to post on verified accounts, suggesting that donations worth $1,000 in Bitcoin transferred to specific wallet addresses would be doubled in a 30-minute timeframe. Needless to say, some of the followers got scammed.

microsoft edge phishing protection results

Despite Twitter‘s repeated attempts to remove the malicious messages, many more would appear on several other accounts. Reportedly, the attack managed to rake nothing short of $118,000 in Bitcoin.

Cybersecurity, a real reason for concern

Given the current situation and the steadily increasing number of work-from-home employees, companies might need to consider enforcing even stricter policies regarding permissions and privileges.

Business VPNs open previously unavailable opportunities to hackers, which are getting more dangerous by the day. Without proper cybersecurity awareness, just about anyone could fall for hackers’ increasingly creative schemes.


Do you believe remote working without proper training can turn big companies into easy targets for hackers? Tell us what you think in the comments section below.

[wl_navigator]

FIX: Function address caused a protection fault error

Some MS Office users have discussed a Function address caused a protection fault error on software forums.

This is a printer error that arises when they try to print from within MS Office. The error can arise on the Windows 10, 8, and 7 platforms.

Luckily, there are some confirmed fixes for the mentioned error.

How can I fix the function address protection fault error?

1. Update the printer driver

Outbyte Driver Updater automatically update drivers
  1. To update the printer driver, download Outbyte Driver Updater.
  2. The tool will download for free.
  3. Install the software following the setup wizard.
  4. Launch Outbyte Driver Updater and it will start scanning automatically.
  5. You’ll get a list of outdated or faulty drivers that need replacing. If there are any printer drivers listed, update them on the spot.

You can rest assured that Outbyte Driver Updater will only recommend new compatible software for your device.

Outbyte Driver Updater

Outbyte Driver Updater

Tired of vague printer errors? Make sure your printer driver is up to date and tick one possible cause off the list.
Free trial Visit website

2. Change the default printer

  1. Press the Windows key + R hotkey.
  2. Enter control /name Microsoft.DevicesAndPrinters in the Run box, and click OK.
    Devices and Printers printer properties function address caused a protection fault error
  3. Right-click the printer you need and select Set as default printer.
    Set as default printer printer properties function address caused a protection fault error
  4. It might also be a good idea to deselect the Allow Windows to manage my default printer option in Windows 10:
    • Open Run.
    • Input ms-settings:printers in the Run box, and press the Enter key.
    • Deselect the Allow Windows to manage my default printer option if applicable. Allow Windows to manage my default printer option printer properties function address caused a protection fault error
  5. Then open the MS Office application, and try to print a document.

3. Roll Windows back to a System Restore point

  1. Open Run’s window.
  2. Input rstrui in the text box and click OK to open System Restore.
  3. Press the Next button to open a list of restore points.
  4. Select the Show more restore points checkbox.System Restore utility printer properties function address caused a protection fault error
  5. Select a restore point that will roll Windows back to a time when MS Office didn’t return the error. (If in doubt, just select the earliest restore point you can).
  6. Restoring Windows to a previous date will remove software installed after the selected day.
    • To check what software gets removed for a restore point, click the Scan for affected programs button.System Restore software removal list printer properties function address caused a protection fault error
  7. Click Close to exit the Scan for affected programs window.
  8. Click the Next and Finish options to roll back Windows to the restore point selected.
  9. Restart Windows.

If the error is caused by corrupted system files, a System Restore could fix it by rolling the platform back to an earlier time.

By following these steps you will fix the Function address caused a protection fault error and resume printing from MS Office.

If you have fixed the same issue with an alternative resolution, feel free to share it in the comments section below.

[wl_navigator]

Overwolf Not Recording [Easy Fix]

Overwolf is software that provides users with various apps and enhancements for their games. A lot of users utilize Overwolf recording apps, such as Replay HUD, to record gaming clips.

However, those recording apps might not always record games as players expect. Overwolf users can’t get any recorded output when recording error messages pop up.

Here are a few troubleshooting tips for fixing Overwolf recording error messages.

How can I fix Overwolf recording errors?

1. Update graphics and sound drivers

Some users might need to update their graphics and sound card drivers to fix Overwolf recording issues. That’s might be your case as well.

The most straightforward way to update drivers is to use a specialized driver updating software. You just need to download and install it.

Upon installation, the tool will automatically scan your PC for missing and out-of-date device drivers.

2. Check the minimum system requirements

First, check that the laptop or desktop meets the minimum system requirements for Overwolf recording. Users will need PCs with at least four GB RAM.

NVIDIA and AMD graphics cards that support NVENC or AMF beta encoders are another requirement. Furthermore, an Intel i3 processor that supports Intel QuickSync is the minimum CPU required for Overwolf recording.

Users can upgrade desktops that don’t meet the minimum system requirements for Overwolf recording. Add a new graphics card that supports NVENC or AMF encoding to the desktop.

In addition, desktop users can expand their RAM with new RAM modules.

3. Check that Overwolf supports the game

Recording will only work for games that Overwolf supports. So, check that Overwolf supports the game you’re trying to record.

Users can check what the supported games are at the Overwolf Supported Games page.

Overwolf's supported games page overwolf not recording

4. Check that the Replay HUD app is enabled

Some users might need to enable their Overwolf recording apps to record with them. To enable the Replay HUD, open the Replay HUD app to adjust its settings.

Then, simply toggle the Replay HUD and Auto launch Replay HUD settings on if they’re off.

Replay HUD options overwolf not recording

5. Select Lower Video Settings

  1. If the Selected video settings are too high error message pops up, try reducing the Overwolf recording settings by clicking the arrow beside the wolf head button at the top left of the Overwolf window.
  2. Then, just click Settings on the menu.
  3. Click Capture on the Settings window.
  4. Select a lower resolution setting.
  5. Then select a lower frame rate option.
  6. In addition, check that the right graphics card codec is selected in the Codec drop-down menu. For example, users with NVIDIA graphics cards should select the NVIDIA NVENC option.

6. Reinstall Overwolf

  1. Reinstalling Overwolf might also fix some of the software’s recording errors. To open the Windows uninstaller, launch Run with its Windows key + R hotkey.
  2. Enter appwiz.cpl in Run and click OK.
  3. Select the Overwolf software.
  4. Then click the Uninstall button.
  5. Select the Yes option to confirm and remove the software.
  6. Before reinstalling Overwolf, restart the desktop or laptop.
  7. Thereafter, click Download on Overwolf’s Softpedia page to add the latest software version to Windows.

The above resolutions might fix Overwolf recording errors for some users. If necessary, you can also get further fixes by contacting Overwolf support at its contact page.

Microsoft’s new Edge browser officially lands on Linux in preview, now runs on all the major platforms

After a tease earlier this year at Ignite 2020, Microsoft is officially rolling out Microsoft Edge Dev to Linux. This marks a big moment for the web browser, as, with Linux included, it now runs on all the major desktop and mobile platforms, including Windows, Android, iOS, and MacOS.

This initial Edge Dev release on Linux will support the Ubuntu, Debian, Fedora, and openSUSE distributions. According to Microsoft, this Linux release is also designed for web developers. The company wants to provide the same web platform and developers tools as macOS or Windows, but on Linux. This is so that developers can “can build and test in the preferred environment and be confident in the experience customers will have on other devices.”

As a result, this version of Edge on Linux lacks some consumer features. The initial release doesn’t support signing into Edge via a Microsoft Account or an Azure Active Directory Account. It also doesn’t support the syncing of favorites or settings. Microsoft says this will be coming in a later preview.

Just like on Windows, Edge Dev on Linux will get weekly builds. You can install Edge today on Linux by going to the Edge Insider website and downloading a .deb or .rpm package. Of course, you also can download the packages manually too via the terminal after setting up Microsoft’s repository, as Microsoft explains step by step, here.

In other news, if you’re running Edge Dev on Windows 10 and the other desktop platforms, you’ll see a new build today, too. Coming in at version 88.0.673.0, this week’s release adds a few things. New is the ability to take a screenshot of a webpage and add ink to it. New is extra error information to tabs when they crash due to sandbox conflict. There are also some new management policies, too. You can learn more about everything that’s changed here, at Microsoft.

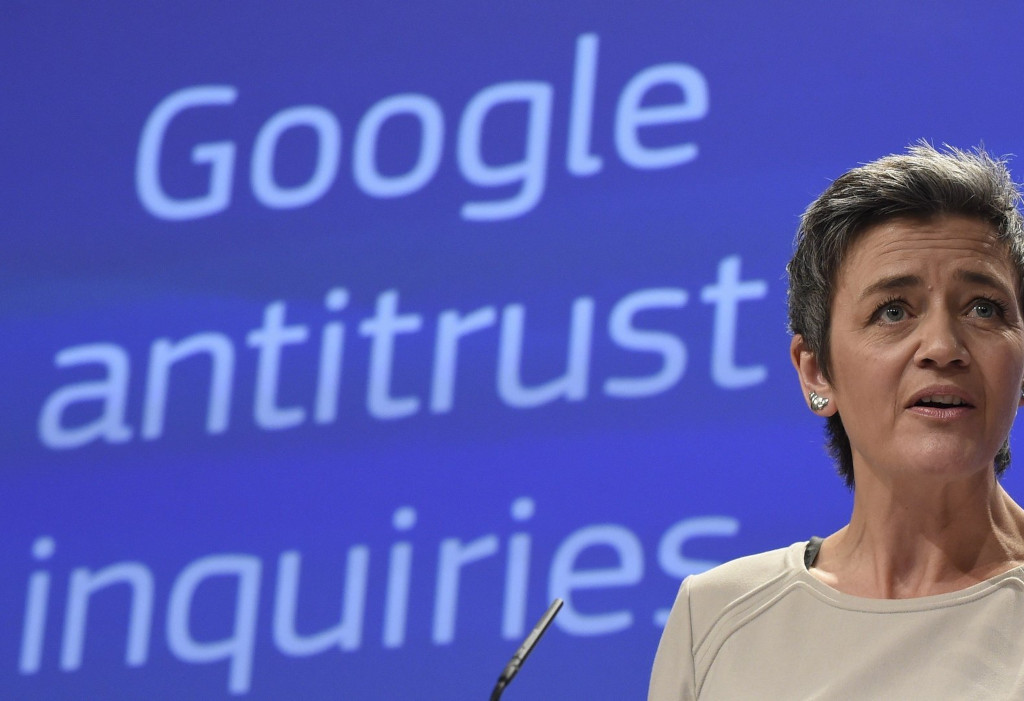
Google’s antitrust complaint response compares itself to Microsoft’s Bing

While the US Department of Justice may be expediting its antitrust case against Google based on a dubiously applied timeline, Google’s latest defense can arguably be viewed as just as questionable.

The US Justice Department, led by handpicked Trump appointee William Barr, has formally brought its antitrust case against Google and today the defendant offered a rebuttal via its public policy blog.

Today’s lawsuit by the Department of Justice is deeply flawed. People use Google because they choose to, not because they’re forced to, or because they can’t find alternatives.

This lawsuit would do nothing to help consumers. To the contrary, it would artificially prop up lower-quality search alternatives, raise phone prices, and make it harder for people to get the search services they want to use.

As predicted, Google dismisses the complaint by referencing that it’s business as usual for not only itself but every other business in the industry. In an effort to defend its current business model Google pairs its own service funnel against other known quantities in the industry such as Apple, Samsung, and Microsoft.

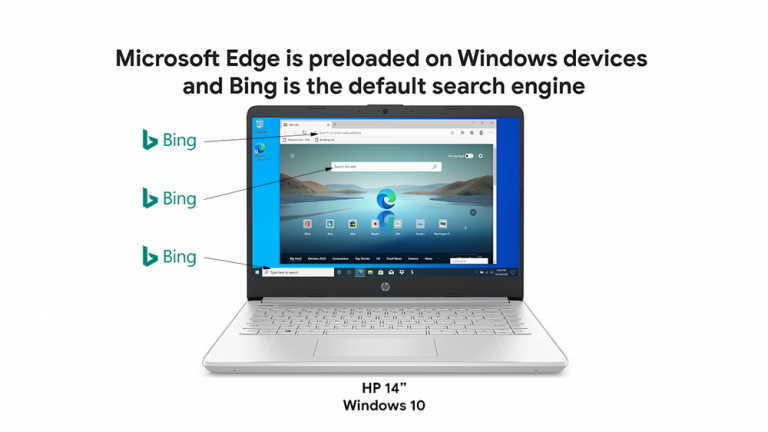
While Google points to its prominent search engine status on the iPhone as a measure of its competitive industry standing, the company takes more of a shot at Microsoft’s Windows business and the pre-bundled Edge explorer and default Bing search engine.

Google doesn’t come preloaded on Windows devices. Microsoft preloads its Edge browser on Windows devices, where Bing is the default search engine.

Edge Default Search 022x With Bing Twitter.max 1000x1000Google pointing out the Bing and Windows 10 relationship is a valid observation by Google, it’s only a cursory evaluation that the company doesn’t explain or delve into regarding concessions already made by Microsoft which have brought the company to where it is today with service bundling. The EU recently flagged Microsoft’s browser ballot option again, relitigating its 2004 ruling and fined the company $731 million for failing to fully comply with its previously ruled decision.

As Google was promptly tossing other businesses under the bus as part of its defense, the company managed to steamroll Firefox as an example of its “superior” alternative services that people are “choosing” to engage with versus being forced to as the DoJ partially claims.

The data shows that people choose their preferred service: take Mozilla’s Firefox browser as an example. It’s funded almost entirely by revenue from search promotional agreements. When Yahoo! paid to be the default search engine in Firefox, most Americans promptly switched their search engine to their first choice—Google. (Mozilla later chose Google to be its default search provider, citing an “effort to provide quality search” and its “focus on user experience.”)

Google sums up its argument by pointing to the trivially easy ways people could avoid its services but opt not to. What Google fails to disclose in this public rebuttal is its Android licensing lock-in and its zero-cost entry to competitor industries by leveraging its extremely profitable Search business. Google claims to stand by its promise to “remain absolutely focused on delivering the free services that help Americans every day. Because that’s what matters most.”

Debug File Was Created Automatically: How to Delete it

Many reported that debug file was created automatically on their PC. The file is usually created by your browser, and many are wondering how to remove it.

While this file isn’t harmful, it can be used to diagnose issues if Google Chrome is not opening. However, it’s not that useful if your browser is working properly, so let’s see how we can get rid of it for good.

What is debug log file?

  • This is a log file associated with your Chromium browser.
  • It provides useful debug information that allow you to troubleshoot various issues.
  • Using it you can view when errors in your browser occurred and what process caused them.

You can troubleshoot browser problems with a debug log file, but you can also record detailed network activity using a HAR file, which helps you understand how each page loads and where errors occur.

What do I do if debug file was created automatically?

Manually delete the Crashpad directory

  1. In the Windows search bar, paste the following path and click on it from the results: %LocalAppData%\Google\Chrome\User Data
  2. Find a folder called Crashpad.
  3. Right-click the folder and select Delete.

This sounds like a minor glitch, and we’re certain that Chromium developers will fix this issue in the upcoming release.

In case you’re having issues with Chrome, you might want to check our Failed to load response data error guide.

We hope that the trick mentioned above helped to get rid of the debug.log file. Your feedback is welcome, so be sure to use the comments sections below.

FIX: ETD Control Center not responding error in Windows

The ETD Control Center is a Microelectronics program that’s required for ELAN Smart-Pads.

The ELAN Smart-Pads are touchpads that some laptops include just below their Space keys. The touchpads enable users to move the mouse cursor with their fingers.

However, few users ever utilize touchpads as alternatives to mice on their laptops. Thus, the ETD Control Center is a somewhat superfluous program.

Some users have also posted on the Microsoft forum about an ETD Control Center not responding error that arises in Windows. Those users spot an ETD icon on their taskbars that displays a not responding error when they click it.

If that is your case as well, this is how to fix the ETD not responding error.

How can I fix ETD Control Center’s not responding error?

1. Update the touchpad driver

Users who actually prefer to keep the ETD Control Center in system startup should try fixing the ETD error by updating the touchpad’s driver.

On this note, we recommend using Outbyte Driver Updater. You can easily download and install the tool by visiting the webpage (as shown below).

Outbyte Driver Updater automatically update drivers

Upon launch, Outbyte Driver Updater will automatically scan your device and return a list of outdated drivers, plus all the compatible fresh software it can find in its huge database.

From there, you’ll have the option to update either only the touchpad driver or all essential drivers.

Moreover, the process of updating your drivers is pretty plain and does not require any expertise. You only have to select the drivers you need to update and let the software find the latest versions.

After you install the drivers individually or at once, the system will also be optimized and run at maximum capacity.

⇒ Get Outbyte Driver Updater

2. Remove ETD Control Center from the system startup

  1. Press the Windows key + X hotkey and select Task Manager.The Win + X menu ETD Control Center
  2. Click the Start-up tab.The Start-up tab ETD Control Center
  3. Then select the ETD Control Center, and press the Disable button.
  4. Optional: You can click Enable to re-enable ETD Control Center in the system startup if you ever need the touchpad.

This solution applies if you rarely use the touchpad (which is the case with the majority of users).

On the other side, if you know that you’ll never use it, you can uninstall the problematic program completely, as shown in the following solution.

3. Uninstall the ETD Control Center

  1.  First, press the Windows key + R keyboard shortcut to open the Run accessory.
  2. Input appwiz.cpl in Run and click OK.The Windows uninstaller ETD Control Center
  3. Then select ETD Control Center in Programs and Features.
  4. Click the Uninstall button, and select the Yes option to provide further confirmation.

4. Uninstall ASUS Smart Gesture

The ETD not responding error can also be due to the ASUS Smart Gesture driver.

ASUS SG is for more precise touchpad gestures, but it’s hardly essential to keep. So you can uninstall the app much the same as the ETD Control Center as outlined above.

Alternatively, try repairing ASUS Smart Gesture by selecting the Repair option for it after clicking Uninstall/Change in the Programs and Features Control Panel applet.

Uninstall/Change option ETD Control Center

The above resolutions should fix the ETD not responding error in Windows 10.

Overall, it’s a relatively straightforward issue to fix, but you can drop us a line using the comments section in case you didn’t manage to do it.

FIX: Radio switch device has a driver problem error

Finding out that some of your operating system devices, such as sound or Wi-Fi are not working properly can be really frustrating. Especially if there is no indication of what happened.

Users are getting the message that the radio switch device has a driver problem error without any additional suggestions on what to do next.

Solving this error sounds like a tedious process but don’t worry, we’ve got you covered.

Today we’re going to show you how to fix the radio switch device driver problem in Windows 10, with just a few easy steps.

How can I fix the Radio switch device driver error?

1. Use a dedicated tool

In most cases, in order to fix this issue, you simply need to update the drivers. In order to do that you can either download them manually or use a dedicated tool.

In using a dedicated tool you will avoid causing some irreversible damage to your device, caused by downloading the wrong driver for your hardware.

There are many tools out there that you can use in order to automatically update your drivers. We have tested them all and we would like to recommend that you use Outbyte Driver Updater.

All you need to do is download and install din software on your device. Once the drivers are up to date, the issue should be permanently solved.

Simply run the tool, allow it to scan your device, and let it download and update all the drivers for you.

Outbyte Driver Updater is portable, reliable, and very easy to use. It has an intuitive interface and the scanning process usually lasts a few minutes.

You don’t need to have extensive knowledge or experience with updating the drivers in order to use this tool. It really simplifies the process to the maximum.

Afterward, once the system scan is completed, Outbyte Driver Uppdater will compare all the drivers with its built-in database and make sure to fix the ones that are broken or corrupted.

The tool will help you avoid any driver-related issues in the future. You can set it to automatically scan and fix your drivers on a regular basis. Due to its light footprint, you can let it run in the background with no worries.

All in all, this amazing tool is the perfect one to use for updating your drivers fast and error-free.

⇒ Get Outbyte Driver Updater

2. Reinstall the drivers

  1. Right-click on the Start button and open Device Manager.
  2. Next, navigate to Network adapters.Network Adapter inside Device Manager
  3. Right-click on the Wireless LAN driver and Uninstall device.
  4. Connect the LAN cable to a router or modem.
  5. Install the driver again and restart your device.

3. Check the BIOS settings

  1. Press Windows key + I to open Settings.
  2. Next, open Update & security.
  3. From the left pane, choose Recovery.
  4. Go to Advanced Startup and click on Restart now.
  5. Next, choose Troubleshoot and select Advanced options.
  6. Choose UEFI Firmware Settings and then Restart.

Now, your PC should boot into BIOS and, from there, you should be able to solve the issue completely.

With this last step, we will conclude our list of suggestions.

In case you have some questions or additional recommendations regarding the radio switch device, make sure to post them in the comments section below.

In our Wi-Fi section, you can find even more in-depth articles and guides written by our tech experts.

Make sure to bookmark our dedicated Errors Hub and learn about the easiest solutions to the most common Windows 10 errors.

No audio after video conversion with VLC [Fixed]

VLC is a great multimedia player, but many users don’t know that VLC also has a video conversion feature available. The video conversion feature offers basic features, but it usually gets the job done.

Many users reported that there’s no audio after video conversion in VLC and this can be a problem. However, there are several ways to fix this issue, and today we’re going to show you how to do it.

What can I do if there’s no audio after video conversion in VLC?

1. Change the sample rate in VLC

  1. Open the video that you want to convert to VLC.
  2. Now press Ctrl + J or go to Tools, and click on Codec information.
  3. Check the sample rate. In our example it’s 48000Hz.
    same rate no audio after video conversion vlc
  4. Go to Media and click on Convert / Save.
    convert video no audio after video conversion vlc
  5. Add the file that you want to convert, the same one from Step 1.
  6. Now click on the Convert / Save button.
    convert/save button no audio after video conversion vlc
  7. Click the wrench icon.
    wrench icon no audio after video conversion vlc
  8. Navigate to the Audio codec tab and set the Sample Rate to the value from Step 3. In our case, it’s 48000Hz.
    audio codec tab no audio after video conversion vlc
  9. Save changes and try to convert your video again.

Few users reported that they fixed the problem simply by using MPEG 4 Audio codec. To do that, follow steps 5-8, and in the Audio codec section, set it to MPEG 4 Audio.

mp4 audio codec no audio after video conversion vlc

2. Modify strict standard compliance value

  1. In VLC, go to Tools, and click on Preferences (Ctrl + P).
  2. In the Show settings field select All.
    all settings no audio after video conversion vlc
  3. In the search field in the top type strict and select FFmpeg. In the right pane, set the Strict standard compliance to -2 and save changes.
    ffmpeg settings no audio after video conversion vlc
  4. Now try to convert the video again.

3. Use video repair software

Stellar Video Repair software is designed to fix videos that got corrupted during recording, transferring or editing, but it also works with videos that got damaged during the conversion process.

The software works with a wide array of storage devices, including SD cards, flash drives, HDDs, but it can also recover media from camcorders, drones, DSLR cameras, phones, and other devices.

Regarding the supported video types, Stellar Video Repair works with 4K, 8K, 12K, HD, UHD, Full HD, 360, VR, and other video types. Regarding the supported formats, about 15 most popular video formats are supported.

The software can fix various issues, including choppy or blurry videos, and it can even repair multiple videos simultaneously. Of course, you can preview repaired videos before you save them.

Stellar Video Repair offers great features, and if you’re having any issues with video files, this will be the right tool for the job.

⇒ Get Stellar Video Repair

No audio after video conversion in VLC can be a problem, but we hope that you managed to fix this issue by using the solutions from this article.

Are you interested in more thorough information on the VLC player? Check out our dedicated VLC article.

Having problems with more applications? Be sure to check out PC Software Hub for more articles like this one.

Halo: MCC to get 120 FPS support on Xbox Series X/S, other next-gen upgrades with November 17 patch

Microsoft may have delayed Halo: Infinite to next year, but the company will still have a next-gen Halo experience for the launch of its Xbox Series X and Series S consoles next month. That’s right, Halo: The Master Chief Collection will get a new patch on November 17 that will bring next-gen upgrades for all titles in the anthology released on Xbox One six years ago.

A tweet from the official Halo Twitter account earlier today mentioned 120 FPS support for the Campaign and Multiplayer modes, split-screen improvements for all games and up to 4K graphics on the Xbox Series X. Xbox marketing chief Aaron Greenberg also confirmed the addition of adjustable Field of View sliders, a feature currently exclusive to the PC version of Halo: MCC.

Halo: The Master Chief Collection was originally released back in November 2014 on Xbox One, and it took years for developer 343 Industries to finally fix the matchmaking issues that plagued the different titles since launch. All Halo games in the collection are already enhanced for the Xbox One X with support for 4K at 60 FPS, but the ability to play both the campaigns and multiplayer modes at 120 FPS on Series X|S consoles (on compatible TVs/gaming monitors) is very exciting.

Last week, Microsoft shared a list of 30 games that will be optimized for the Xbox Series X|S at launch, including existing games like Gears 5, Borderlands 3, Forza Horizon 4, as well as new games such as Assassin’s Creed: Valhalla, DIRT 5, Gears Tactics, and Watch Dogs: Legion. Despite the glaring absence of Halo: Infinite, Microsoft claims to have “the largest launch lineup in Xbox history,” and adding Halo: MCC to the list of Xbox Series X|S enhanced titles is definitely great news for Halo fans.

Microsoft to be technology partner for 2021’s all-digital CES

As with most in-person events in 2020, The Consumer Technology Association (CTA) alongside Microsoft is announcing an effort to take the Consumer Electronics Expo digital.

According to the Official Microsoft Blog, Microsoft and the CTA are partnering to transition CES into its first-ever, all-digital event scheduled for January 11 through 14, 2020.

It is an extreme honor for Microsoft to be selected as CTA’s technology partner for CES, the world’s most influential technology event. It won’t surprise you to hear we’re bringing Microsoft Cloud solutions, including Microsoft Azure, Microsoft Teams and Microsoft Power Platform, together with partner solutions to create the technology platform for the all-digital event that will bring together the entire global tech community and be the CES 2021 experience.

For now, the details of how Microsoft plans to implement its digital-first strategy to help CES 2021 are vague.  However, having already produced a dozen major digital company events, hosting fan and user engagement for the NBA finals, and the current NFL season as well as several events for iHeartMedia, the company has more than enough experience and scale to leverage for CES 2021.

New Meeting pre-join experience is now rolling out in Microsoft Teams

Microsoft has started the rollout of the new pre-join experience that makes it easier for users to configure their environment before entering a Teams meeting. According to the Microsoft 365 Roadmap, the updated experience for Teams is gradually rolling out to the Teams desktop client on Windows.

Announced in August, the new Microsoft Teams meeting pre-join experience features a more modern look, and it provides useful, clear, and easy to follow instructions. The updated pre-join screen offers easier discovery for video/audio and device selection configurations for the meeting. Most importantly, users will now be able to select their background filter before they enter a Teams meeting.

Needless to say, this improved UI has been designed to unify settings and streamline the experience based on user feedback. It should help meeting participants ensure that their audio and video work properly when a meeting is in full flow. The feature is expected to be generally available by the end of November 2020.

USB Mass Storage Device has a driver problem

We use USB drives to transfer files all the time, but sometimes issues with USB storage can occur. Many users reported USB Mass Storage has a driver problem error, and this can prevent you from transferring files.

Fixing this problem is relatively simple, and in today’s article, we’re going to show you the best methods that you can use to get your USB storage device working again.

How can I fix USB Mass Storage has a driver problem error?

1. Use a dedicated driver updater program

This error is usually caused by outdated or corrupted drivers, and this is where a dedicated tool can be helpful. The software is will perform a quick scan and give you a list of all drivers that are out of date.

To fix the driver issues, you just need to select the drivers that you want to update, and the latest version of the drivers will be downloaded automatically.

2. Reinstall the driver

  1. Press Windows Key + X and select Device Manager from the list.
    device manager usb mass storage has a driver problem
  2. Click on View and check Show hidden devices.
    show hidden devices usb mass storage has a driver problem
  3. Now go to the Universal Serial Bus controllers section and expand it.
  4. Right-click USB Mass Storage Device and choose the Uninstall device.
    uninstall device usb mass storage has a driver problem
  5. When the confirmation dialog appears, click on Uninstall.
    USB mass storage device uninstall usb mass storage has a driver problem
  6. Do this for all USB Mass Storage Device entries on the list.
  7. After removing the driver, restart your PC.

After your PC restarts, the removed driver will be installed automatically and the USB Mass Storage has a driver problem error should be fixed.

3. Check your registry

  1. Press Windows Key + R and enter regedit. Press Enter or click OK.
    regedit run window usb mass storage has a driver problem
  2. Navigate to the following path in the left pane:
    HKEY_LOCAL_MACHINE\SYSTEM\CurrentControlSet\Services\UsbStor
  3. Locate the Start value in the right pane. If it’s not set to 3, make sure to change it to 3.
    registry editor usb mass storage has a driver problem

4. Change power settings

  1. Open the Device Manager.
  2. Expand the Universal Serial Bus controllers section and double click on USB Root Hub.
    USB root hub usb mass storage has a driver problem
  3. Navigate to the Power Management tab and uncheck Allow the computer to turn off this device to save power.
    power management settings usb mass storage has a driver problem
  4. Click OK to save changes.

USB Mass Storage has a driver problem message will prevent you from using USB storage devices, but you should be able to fix this problem by reinstalling or updating your drivers.

Fix: Logitech G930 Headset Driver Problems [Windows 10/11]

If you enjoy multimedia, it’s important to use a quality headset, and Logitech G930 is one such headset. However, many users reported various Logitech G930 driver problems on their PC.

Driver problems can prevent your headset from working properly, but there’s a way to fix that, and in today’s article we’re going to show you how to do it.

How can I fix Logitech G930 driver problems?

1. Use Outbyte Driver Updater

If you’re having driver problems, the fastest and simplest way to fix them is to use Outbyte Driver Updater software. The software is incredibly simple to use, and it will scan your PC for outdated drivers.

Once the scan is finished, you’ll see a list of all outdated drivers, and you can choose which drivers you want to update, or you can update all drivers at the same time.

The update process is fully automated, and the required drivers will be downloaded automatically, but if you want, you can monitor the download progress.

Other useful features:

  • Ability to quickly detect outdated drivers
  • Online database of over 18 million driver files
  • Download manager
  • Driver backups
  • Driver update/scan scheduling

⇒ Get Outbyte Driver Updater

2. Try connecting the device to another USB port

  1. Disconnect the headset.
  2. Now connect it to a different port.
  3. Repeat the previous steps until you find the port that works.

Users reported that using the front ports on their PC fixed the problems, so you might want to try that. Keep in mind that this is just a workaround, and it might not be a permanent solution.

3. Reinstall your drivers

  1. Press Windows Key + X and select Device Manager.
    device manager logitech g930 driver problems
  2. Locate the Logitech headset on the list, right-click it, and choose Uninstall device.
    uninstall device logitech g930 driver problems
  3. When the confirmation dialog appears, click on Uninstall. If available, be sure to check the option to remove driver software as well.
    uninstall device confirmation
  4. After the software is removed, restart your PC and install the driver again.

Some users reported that installing the older driver version such as version 8.45 or even 8.35. You might have to experiment with several different versions until you find the one that works for you.

Note: Few users reported that they fixed the problem by removing Universal Serial Bus controller driver or by reinstalling Realtek Audio drivers.

Even if you don’t use Realtek Audio, you can try reinstalling audio drivers and see if that solves the problem.

4. Remove Logitech Gaming Software

  1. Press Windows Key + I to open the Settings app and go to the Apps section.
    settings apps logitech g930 driver problems
  2. Select Logitech Gaming software and click on Uninstall.
    uninstall software logitech g930 driver problems

After uninstalling the Logitech software, the issue should be resolved. Keep in mind that certain features might not be available after you uninstall the software.

Logitech G930 driver problems can affect your multimedia experience, but you should be able to fix them by updating your drivers or by reinstalling them.

Microsoft’s Xbox app updates on iOS and Android with remote play and a fresh new look

The newly revamped Xbox app is now available on both Android and iOS smartphones and tablets after the rollout of the latest app update this week.

The new Xbox app features a completely new design that better matches the current Xbox One and Xbox Series X console UI and is generally much more visual than the previous version. The main attraction with this update is the addition of the ability to stream gameplay footage from an Xbox console on the same Wi-Fi network, essentially turning any smartphone or tablet into a second screen.

The app’s icon has also been updated with a softer shade of green.

Here’s the full release notes:

All new!

  • Set up new consoles and queue games
  • Play remotely from your console
  • View and share game clips & screenshots
  • Party chat with friends across devices

Have a look around the new app. More awesomeness is on the way!

Do you like the look and functionality of the new Xbox app? Let us know why (or why not!) in the comments below and then follow us on Twitter and Pinterest for more Xbox news.

‎Xbox
‎Xbox
Price:
Free


Xbox
Xbox
Price:
Free

Fix: Windscribe slow speed / slowing internet [Best solutions]

Windscribe is an excellent VPN service that’s gained a lot of traction, probably thanks to its generous free version. We all enjoy a good bargain, and Windscribe doesn’t cease to deliver, giving that its free version is still alive and kicking.

However, some users have reported excessive slowdowns of their Internet connection when using Windscribe. The worst part is that this slowdown apparently affects premium users as well as ones who enjoy Windscribe without paying a dime.

Does Windscribe slow down computers?

Naturally, any additional process running on your PC slows it down, albeit some of them do so by very little.

Windscribe is actually one of those programs that don’t take a huge chunk out of your PC’s performance while running.

Does Windscribe slow down your Internet speed?

Windscribe

It’s in every (trustworthy) VPN’s quintessence to protect your Internet connection by any means. Most VPNs, including Windscribe, do so by encrypting your traffic before passing it through its secure tunnel.

If you want to find out more about how VPNs affect Internet speed, check out our guide.

This, in turn, can slow down your Internet connection, but it shouldn’t be too noticeable.

As we’ve previously explained in greater detail, factors that may weigh in to slow down your Internet include encryption, distance, VPN server quality bandwidth limitation, and the number of servers.

However, your VPN is rarely the only thing that’s bringing your Internet speed close to a halt.

How to fix Windscribe slow speed

1. Run a speed test

First and foremost, it’s very important to know what you’re dealing with. If you have a lightning-fast connection and Windscribe seems to slow it down greatly, run a speed test, and see how much slower it gets.

Having a 50 Mbps connection that gets slower with ~ 10 Mbps (while using nearby servers) is perfectly fine. You can probably notice this amount of slowdown while using other services, as well.

Naturally, selecting a server that’s located at a greater distance will increase the slowdown percentage even further.

2. Choose a different protocol

Windscribe has a wide selection of protocols, so if one of them seems to be kind of slow, just switch to another one. For instance, if you’re using OpenVPN, you may want to give IKEv2 a try, as well.

Furthermore, if your ISP/network is restrictive, your connection may be throttled. Therefore, you may want to try changing to various other ports, and even enable give the Stealth protocol a shot.

The Stealth protocol disguises VPN traffic as regular traffic, thus reducing the chances of your ISP detecting and actively limiting your VPN connections.

3. Configure your router properly

Check your router’s configuration page for anything resembling VPN pass-through. If you see this setting, make sure it’s enabled to circumvent any hardware limitations on your side.

Also, if you have a router firewall, make sure it doesn’t block or restrict any of the ports you’re using with Windscribe.

4. Choose another server

Due to VPN server congestion or distance, you may experience speed loss. Luckily for you, both of these issues can be easily solved in the same manner.

All you have to do is disconnect from the Windscribe VPN server you were using and connect to another one. If you can choose one that’s even closer to you it might get even better.

It’s widely known that distance plays a great part when it comes to connection speed. Thus, it goes without saying that servers that are far away will tend to be much slower than the ones nearby.

5. Check your security software

Certain antivirus/antimalware/firewall software on your PC could have a negative impact on your Internet connection speed, especially if you’re using a VPN such as Windscribe.

Try pausing your security software for a short while, run a speed test and check if there’s any improvement. If that doesn’t work, try quitting the programs altogether, and try again.

It’s worth mentioning that you should check if your firewall software doesn’t have any rules for blocking traffic on ports that Windscribe is using, or even restricting the app itself from communicating with the Internet efficiently.

Final thoughts on fixing Windscribe’s slow speed

All things considered, if you notice that Windscribe slows your Internet connection more than it should, you may want to try our suggested fixes. Most of the time, a simple server switch can work wonders.

However, you should know and understand that any VPN other than Windscribe can slow down your Internet speed, as well.

Last, but not least, make sure your non-VPN connection is in top-notch shape before attempting any VPN-related fixes.

SATA SSD not listed as boot option [Quick Fix]

Having an SSD is a great way to improve your PC performance and reduce the boot time, but what if SSD is not listed in boot options?

This can be a problem and prevent you from using your SSD as a boot device. Fortunately, there’s a way to fix this problem, and in today’s article, we’re going to show you how to do it properly.

What can I do if SATA SSD is not listed as boot options?

1. Check your BIOS settings

  1. Enter BIOS. Keep in mind that different devices use different shortcuts for accessing BIOS.
  2. Enable the CSM option.
  3. Now set the SATA mode to AHCI.

After doing that, you should be able to see your SSD in the boot options. To see how to locate and change these settings, be sure to check your motherboard manual.

2. Try starting the system with only SSD connected

  1. Disconnect your computer case from the power outlet and open it.
  2. Now disconnect all drives except your SSD.
  3. Try to boot again.
  4. If your system boots, connect other drives and check if the problem is resolved.

Keep in mind that this solution might void your warranty if your computer is prebuilt.

Note: Some users reported that connecting the SSD to the SATA port 0 and hard drive to the SATA port 1 fixed the problem for them, so be sure to try that as well.

Also, make sure that your SSD drive is tightly connected to both data and power cable.

3. Use a third-party software

If your SATA SSD is not listed in boot options, it’s possible that you didn’t clone your disk properly. To avoid these types of issues, it’s advised to use reliable backup software such as AOMEI Backupper.

The software offers system backup, so it will be able to create an identical system backup and move it to your SSD. Of course, you’re not limited just to system backup, and you can back up both disks or partitions.

AOMEI Backupper also supports file sync and file backup, and you can even schedule backups or create event-triggered backups. Of course, incremental and differential backups are available as well.

The application has a hot backup feature, so you can create backups in the background without disrupting your other tasks.

Overall, AOMEI Backupper is great software if you need to clone your operating system to a new SSD drive, so be sure to try it out.

Other great features:

  • Ability to store backups on external storage, optical disks, NAS, or the cloud
  • Command-line support
  • Selective file restore from image files
  • Flexible disk cloning
  • Bootable rescue media

⇒ Get AOMEI Backupper

4. Upgrade or reinstall your BIOS

  1. Download the latest version of BIOS for your motherboard.
  2. Now upgrade to a new version of BIOS.
  3. After upgrading to a new version of BIOS, check if the problem is still there.

Note: BIOS upgrade is an advanced procedure, and if you fail to upgrade BIOS, you might cause permanent damage to your motherboard.

To ensure that the BIOS upgrade is performed properly, download the correct version of BIOS and follow the instructions from your motherboard manual carefully.

In some instances, users reported that reinstalling their BIOS fixed the problem, so if you’re an advanced user and you know how to do that properly, you might want to consider it.

If your SATA SSD is not listed as a boot option, the problem might be your settings, but we hope that this article helped you fix this problem for good.

Xbox app not getting party invites / notifications issues

Xbox app is a great addition to Windows 10 that allows you to stay connected with the Xbox community while you’re on your PC.

Sadly, many Windows 10 users reported that Xbox app is not getting party invites, and this can be a problem. Today we’re going to show you how to fix this issue once and for all.

Fix Xbox Windows 10 app not getting party invites

How do I accept a party invite on the Xbox app?

xbox party xbox windows 10 app not getting party invites
  1. Once the party invitation is sent, you’ll get a notification in the Action Center.
  2. Now select the notification and choose the option to join the party.

This is the only way to accept party invites, but if your Xbox app is not getting party invites, we have a couple of solutions that might help you fix this problem.


1. Reset the Xbox app

  1. Press Windows Key + I to open the Settings app.
  2. Go to the Apps section.
    apps settings app xbox windows 10 app not getting party invites
  3. Locate the Xbox app on the list and click on Advanced options.
    advanced option xbox windows 10 app not getting party invites
  4. Scroll down and click the Reset button.
    reset app xbox windows 10 app not getting party invites

This is a simple solution, but many users reported that it helped them fix the problem with Xbox app notifications not working on Windows 10.


2. Make sure that your notifications are enabled

  1. Open the Settings app and go to the System section.
  2. Select Notifications & actions, and enable Get notifications from apps and other senders.
    get notifications from apps and other senders xbox windows 10 app not getting party invites
  3. You can also check the list of individual apps and make sure that the Xbox app is allowed to send you notifications.

After doing that, the issue with Xbox app not getting party invites should be fixed.


3. Use Xbox app in windowed mode

xbox app windowed xbox windows 10 app not getting party invites
  1. Start the game you want to run in Xbox app.
  2. Now move your mouse to the top of the screen.
  3. A menu will appear. Click the diagonal arrows button.

The app will now switch to windowed mode and the issue should be resolved. Keep in mind that this is just a workaround, but it has worked for some users.


4. Disable and uninstall Game Bar

  1. Open the Settings app and go to the Gaming section.
  2. Disable the Game Bar.
    disable game bar xbox windows 10 app not getting party invites
  3. Now press Windows Key + X and choose PowerShell (Admin) from the list.
    powershell win + x menu xbox windows 10 app not getting party invites
  4. Run the following command:
    get-appxpackage *gamingoverlay* | remove-appxpackage
  5. Open the Xbox Companion App.
  6. Go to Settings > Notifications and enable Party & game invitations.
    enable party invitations xbox windows 10 app not getting party invites

Keep in mind that Powershell is an advanced tool, so it wouldn’t be a bad idea to create a backup before removing built-in components such as Game Bar from your system.

This isn’t the only problem that you can encounter, and we wrote about Xbox app 0x89231806 in our latest article, so don’t miss it.

If Xbox app notifications aren’t working, make sure that your notifications are enabled. If that doesn’t help, try resetting the Xbox app or use our other solutions.

FIX: Windows 10 Error c1900101-4000d When Upgrade Fails

Some common blockers that prevent Windows 10 setups from working or installing properly include processors, incompatible BIOS, HDD controllers, and booting from VHD or from Windows to go.

Another blocker can be the running user in audit mode, running an upstaged build or host build is staged, or the availability of a NIC card.

One of these problems is the Windows 10 fails c1900101-4000d error, which happens when your installer is unable to pick up the installation files while performing an upgrade on your PC.

This error has the 4000s suffix which almost always means faulty drivers, but some reports show a USB drive could also cause the error.

Some of the drivers that are associated with Windows 10 failing c1900101-4000d error are NVIDIA driver and antivirus and security-related software.

How can I fix the c1900101-4000d error?

1. Disable the antivirus software

Sometimes having multiple firewalls, antivirus or malware programs, may at times prevent you from performing certain tasks or running processes on your PC.

If this is the cause of the issue, turn either of the three off temporarily and then try to log in again.

Ensure you turn these programs back on immediately after you’re done to prevent hackers, viruses, and worms from damaging your system.

Try to use an alternative security solution that won’t cause any errors in your system. Many Windows 10/11 compatible antiviruses are proven to be very stable and provide top-level protection.

We recommend you use a security tool with a strong privacy policy, a powerful firewall, and a good threat database. On top of that, make sure to get an antivirus with low CPU usage.

The background programs that start with Windows operating system could cause the Windows 10 fails c1900101-4000d error by preventing a successful installation.

You can best utilize Windows 10 cleanup software. These tools can remove junk files, but they also offer a plethora of other features.

2. Run the troubleshooter

  1. Go to Settings.
  2. Head over to Updates & Security and select Troubleshoot. 
  3. Scroll to Additional Troubleshooters and click on Windows Store Apps.
  4. Click Run the Troubleshooter. Follow the on-screen instructions and let the process finish.
  5. Restart your PC.

The Windows Update troubleshooter automatically detects, and fixes most incorrect settings on your PC that brings the message there were some problems installing updates, but we’ll try again later.

The Windows 10 fails c1900101-4000d error usually occurs when your installer isn’t able to pick the installation files while upgrading.

So running the built-in troubleshooter resolves any issues that prevent you from updating your OS.

3. Perform a clean boot

  1. Press the Windows key + R, type msconfig, and click OK.
  2. Go to the System Configuration dialog box, and select the Services tab.
  3. Check the Hide all Microsoft services box.
  4. Click on Disable all.
  5. Select the Startup tab, and click on Open Task Manager.
  6. You will see a list of startup items relevant to your PC. Select each and click Disable.
  7. Close Task Manager after you are done with each startup item, and click OK.
  8. Restart your PC.

A clean boot eliminates any software conflicts that may be causing the Windows 10 fails c1900101-4000d problem.

These conflicts can be caused by applications and services that start up and run in the background whenever you start Windows normally.

You will have a clean boot environment after following these steps.

4. Disconnect multiple hard disks and any devices attached

Sometimes hardware may interfere with the normal Windows boot and installation process as Windows tries to detect and install them.

In this case, unplug all devices connected to your computers such as a printer, scanner, digital camera, USB device, CD/DVD, mp3 player, media card reader, and any other external devices you have plugged in.

Keep only your mouse, monitor, and keyboard (if using a PC). Disconnect multiple disks installed on your computer except for the target hard disk in which you will install Windows 10 OS.

If you have RAID configuration, disable the controller, and other devices attached as they confuse the Windows 10 setup.

Once you do this, unplug the computer from the power outlet on the wall, remove the laptop battery, hold the power button down for 10-15 seconds, then plug back the power outlet and restart.

5. Use Command Prompt (Admin)

  • Press the Windows key + R, type cmd, and hit enter.
  • Right-click on Command Prompt and select Run as administrator.
  • Type the following command, and press Enter: rundll32.exe pnpclean.dll.RUNDLL_PnpClean /DRIVERS /MAXCLEAN
  • Exit Command Prompt, and restart your PC.

Power down your PC, and wait for about 10 minutes then start it again. The setup will automatically restore the previous Windows 10 build or previous Windows version on your PC.

6. Remove or reduce RAM

Sometimes, Windows 10 fails c1900101-4000d error can be caused by bad memory modules which in turn affect Windows 10 installation.

In this case, you can try and remove or reduce the RAM installed on your computer to a single stick.

7. Create new user profile

  1. Hold the Windows Key + S.
  2. Type Settings in the search box, and click on it.
  3. Go to Accounts, and select Family and other users.
  4. Click on Add someone else to this PC.
  5. Fill in the form with the username and password. Your new user account will be created.
  6. Click on Change account type.
  7. Click the drop down arrow, and choose Administrator to set the account to administrator level.
  8. Restart your PC.
  9. Login to the new account you just created.

If the issue goes away, then it may mean your other user profile is corrupted.

You can try the following in case of a corrupted user profile:

  1. On your new account, use it to downgrade your usual account.
  2. Click Apply or Ok.
  3. Raise back your old account to its default admin level.
  4. Rinse and repeat a few times as this will help to remove any corruption.
  5. Leave your account on as Administrator.

You can create a new user profile then change settings to administrator privileges.

Check whether Windows 10 fails c1900101-4000d error goes away when using the newly created account. If it does, then you can either fix the old user account or migrate to the new account.

Did any of the above solutions fix the Windows 10 fails c1900101-4000d error on your PC? Share with us in the comments section below.

Check out our Windows 10 Hub for the latest news and updates from our trustworthy tech experts.

Take a look at our Fix section for complete guides on troubleshooting tech issues.

Don’t install KB4579311 to avoid PC crash, freeze & more

Almost a week ago, Microsoft pushed the Patch Tuesday cumulative updates that were supposed to fix various issues known in several Windows OS versions.

As known, Windows 10 updates, although necessary, tend to cause several issues, however, users certainly didn’t expect the multitude of errors they experienced after installing update KB4579311 (applied to version 2004).

KB4579311 caused more issues than it should have fixed

During the weekend, the cries for help during or after installing this update kept rising.

The most common problem is that the cumulative update won’t install and the process displays common error codes such as 0x800f0802, 0x800f0988 or 0x800f0922.

On the other hand, if the update managed to install successfully, it led to even more trouble. As a result, some systems kept crashing, while with others, hardware drivers, apps, or programs stopped working.

Here are some of the complaints extracted from both the Microsoft community and Reddit:

This morning I got some windows updates KB4579311. I don’t know if the update is the reason, but suddenly my Windows says that it isn’t activated anymore.

I’ve been having an issue with Windows Update KB4579311. When it gets installed it causes the Explorer to crash repeatedly until it eventually logs me in, at which point I can use it as normal. BUT, the crashing increases time it takes to log in and load everything up.

KB4579311 locked up my taskbar, made my CPU incapable of passing 20-ish percent, crashed my SSD from amount of read-write, took 3 hours to uninstall, and cost me time of reinstalling most of my applications from corrupting all of it with the crashed SSD.

How do I fix issues caused by update KB4579311?

The short answer is that there’s no clear fix, unfortunately. At least for now. Moreover, since this is a critical update, Microsoft will install it automatically on any compatible device.

The good news is that Microsoft is expected to take action soon, with all the clamor around this update.

The bad new is that, for now, one can only turn to workarounds.

A user specifically asked for a clear fix, not a workaround, and it’s understandable, considering that this always happens with cumulative updates as somebody pointed out on the forums.

In this particular case, the solutions the following:

  1. In the Settings menu, got to Update & Security.
  2. Choose Windows Update, the Pause update for 7 days.pause update for 7 days
  3. Then, open Control Panel.
  4. Go to Programs and Features and View Installed Updates.
  5. Right-click on KB4579311 and choose Uninstall.unistall kB4579311

Another workaround is to perform a System Restore, choosing a restore point at a date prior to the installation of KB4579311.

Hopefully, you won’t have to go to the latter solution and that the former is enough, until Microsoft pushed a fix to the problematic cumulative update.

Let use know how you managed to solve the issue, in case your device also started to behave erratically after installing the mentioned update.

[wl_navigator]

New redirect virus is pushing Bing to Microsoft Edge users

Users describe encountering a similar situation in the past few days – their Microsoft Edge browser tries to redirect them to Bing.

They see messages such as Connecting to, Processing request or Waiting for in the browser status bar. Instead of blaming the browser itself, users should take into consideration the following scenario.

It is perfectly normal for a site to redirect a browser to another location. However, if your web browser is constantly redirected to Bing, then you are most likely infected with some sort of a browser redirect virus.

For security reasons, you should better act fast and rid of this browser hijacker virus. The purpose of this redirect to Bing is obvious; here’s what one user said:

It sounds like you have a redirect virus that gets money by making you use Bing.

How to remove redirect virus?

Vipre Antivirus

Web browser redirects are typically caused by adware programs, browser extensions, addons, as well as various types of malware.

These unwanted programs are either installed manually or come bundled with free programs that you happen to download from the Internet.

To terminate such programs that may redirect you to Bing from Microsoft Edge, you should give a try to Vipre Antivirus.

This award-winning security tool will search your computer for active malware infections and attempt to terminate them so that they won’t interfere with your browsing activities any longer.

If you deal with a stubborn malware that intends to stay, do note that Vipre is known for more than just malware scanning and removal.

This antivirus includes real-time threat intelligence and free customer support for malware remediation into the package as well.

Vipre Antivirus Plus

Vipre Antivirus Plus

In addition to making your forget all about your browser redirect virus, Vipre includes free support and it's simple to use!
Free trial Visit website

Moreover, since you’re using Microsoft Edge, another quick solution involves returning to the original settings. Do so instead of letting the malware developers receive huge commissions.

Have the above tips worked for you? Don’t hesitate to share your experience of constantly being redirected to Bing in the comments area below.

[wl_navigator]