This Sekiro: Shadows Die Twice Xbox One console is stunning and up for grabs

The official Xbox Twitter account revealed a stunning custom Xbox One console inspired by the new video game, Sekiro: Shadows Die Twice, earlier today.

The Sekiro: Shadows Die Twice Xbox One console features a wooden design that gives it the appearance of a box. On top of it sits a replica of a sword from the video game. The Xbox controller that comes with the console is also customized with a wooden appearance and features the name, Sekiro, written in Japanese writing.

To win the Sekiro: Shadows Die Twice Xbox One console and controller, all you need to do is retweet the original tweet before March 24th.

The competition is open to residents of the United States and Canada (excluding Quebec). The full competition rules can be read here.

Sekiro: Shadows Die Twice launched on Xbox One consoles today and is already getting a positive response from press and players with many praising its visuals, gameplay, and storytelling.

Are you excited for Sekiro: Shadows Die Twice and are you going to enter this competition? Let us know in the comments below and then follow us on Pinterest for more Xbox gaming content.

DirectX 12 now supports VRS to increase GPU performance

The Redmond giant has recently announced the Variable Rate Shading feature for DirectX 12. This new feature helps developers to increase graphics quality, enhance performance and reduce system requirements for gaming. 

VRS improves performance, increases graphics quality and lowers the system requirements for games.

How does VRS Work?

One of the sides in the picture below is 14% faster when rendered on the same hardware, thanks to a new graphics feature available only on DirectX 12.

Those who are not aware of VRS (Variable Rate Shading), the developers are able to take advantage of this powerful and latest API so that they can efficiently use the GPU.

The shading rate actually determines the color of every pixel on your screen.

Game developers are now able to prioritize shading quality for some specific parts of the images where it is required the most. The prioritization process allows us to be able to save resources.

The resolution at which shaders in an image are called is basically determined by the shading rate. The quality of the shader will be high with a higher shading rate. However, more system resources will be consumed in this way.

In VRS various shading rates are applied to different areas of a specific image. So, reducing the shading rate on areas where the visual fidelity is not affected can simply enhance PC performance and save resources. 

Big names are interested in VRS

Most of the big names are now interested to take the most benefit out of it, keeping in mind the features offered by the VRS technology.

Some of those names are Playground Games, 343 Industries, Activision, Massive Entertainment, Epic Games, and Unity. 

Furthermore, at the Game Developers Conference (GDC) 2019 that is scheduled this week, Microsoft plans to conduct sponsored sessions on VRS.

The tech giant will upload a getting started guide along with a sample for the developers, in case you do not plan to attend the Conference. 

If you are interested to find out more about the variable rate shading in DirectX 12, you can check out Microsoft’s official blog. 

RELATED ARTICLES YOU NEED TO CHECK OUT:

Getting Something went wrong Netflix error? Here’s how to fix it

Netflix is one of the foremost movie-streaming services that users can utilize within browsers or with its app. However, Netflix also throws out Something went wrong error messages for some users. Those error messages can vary slightly, but users can’t watch Netflix files when the errors occur. Netflix’s Something went wrong” error messages might state:

  • Oops, something went wrong. An unexpected error has occurred.
  • Whoops, something went wrong (F1)
  • Whoops, something went wrong… Unexpected error.
  • Sorry, something went wrong. Please try again later.

The above error messages can appear for both Netflix browser and app users and have alternative codes. So, there are various alternative fixes for them. These are some of the resolutions that might fix the Something went wrong error messages quoted above.

How can I fix Something went wrong Netflix error?

  1. Is Netflix Down?
  2. Clear the Browser’s Cache
  3. Reset the Browser
  4. Update the Browser
  5. Reinstall the Netflix App
  6. Add Netflix to Trusted Sites for Internet Explorer
  7. Reset Windows 10

1. Is Netflix Down?

First, check if Netflix is down. Netflix isn’t down very often, but there was a global Netflix outage in 2018. Then Netflix returned the following error message: Sorry, something went wrong. Please try again later. However, it didn’t take long for the usual service to be resumed.

Users can check if Netflix is down at Downdetector.com. Enter the keyword ‘Netflix’ in that site’s search box, and press the Return key. That will open a page that tells users if Netflix is generally down or not. If Netflix.com is down, users will need to wait for Netflix Inc. to fix things.

Something went wrong Netflix downdetector


2. Clear the Browser’s Cache

The Whoops, something went wrong… Unexpected error Netflix error message highlights that users need to reset their browser data. Therefore, clearing browser cache is among the best resolutions for that specific error message. Chrome users can clear that browser’s cache as follows.

  1. Click the Customize Google Chrome button at the top right of its window.
  2. Click More tools > Clear browsing data to open the window shown directly.
    clear data Something went wrong Netflix
  3. Select the Advanced tab.
    Something went wrong Netflix advanced tab
  4. Select the All time option on the Time range drop-down menu.
  5. Select the Cached images and files check box.
  6. Then click the Clear data button.

3. Reset the Browser

Resetting browsers is another way to clear their caches and other browser data. That will also restore the browsers to their default settings and at least turn off additional extensions. So, refreshing a browser is another potential resolution. Users can reset Google Chrome as follows.

  1. Input chrome://settings/ in Chrome’s URL bar, and press the Enter key.
  2. Click Advanced at the bottom of the Settings tab.
  3. Scroll down to the Restore settings to their original defaults option shown directly below.
    restore settings to the original defaults Something went wrong Netflix
  4. Then press the Reset settings button.

4. Update the Browser

Something went wrong error messages can often be due to antiquated browser versions. So, some users might need to update their browsers. This is how users can update Google Chrome.

  1. Press the Customize Google Chrome button.
  2. Select Help > About Google Chrome to open the tab shown below.
    about chrome Something went wrong Netflix
  3. Then the browser will automatically check for updates. Press the Relaunch button after the update.

5. Reinstall the Netflix App

Reinstalling Netflix might fix the Something went wrong (F1) issue for those who utilize the app for movie streaming. That error message can be due to data or settings on Windows 10. Follow the guidelines below to reinstall Netflix.

  1. Open Cortana’s search box by pressing the Windows key + Q hotkey.
  2. Input the keyword apps in Cortana’s text box to find Apps & features.
  3. Click Apps & features to open that part of Settings as in the shot below.
    apps and features Something went wrong Netflix
  4. Then select the Netflix app, and press its Uninstall button.
    uninstall button Something went wrong Netflix
  5. Click Uninstall again to provide further confirmation.
  6. Next, open Netflix’s MS Store page.
  7. Click the Get button to reinstall Netflix.

6. Add Netflix to Trusted Sites for Internet Explorer

This is a resolution more specifically for fixing the Something went wrong issue (error code:H7361-1253-80070006) in Internet Explorer. Explorer users can fix that error code by adding Netflix to trusted sites. Follow the guidelines below to add Netflix to IE’s trusted websites.

  1. Open the Internet Explorer browser.
  2. Press the Tools button on IE’s toolbar.
  3. Select Internet options to open the window in the image directly below.
    internet properties Something went wrong Netflix
  4. Select the Security tab.
  5. Click Trusted Sites, and press the Sites button.
    Something went wrong Netflix trusted sites
  6. Deselect the Require server verification option if it’s selected.
  7. Enter *.netflix.com in the text box, and press the Add button.
    trusted sites netflix Something went wrong Netflix
  8. Click the Close option.

7. Reset Windows 10

Some users have also confirmed that they’ve fixed the Something went wrong Netflix error (code W80072EE4) by resetting Windows 10. Resetting Windows reinstalls the OS. That might seem a little drastic for fixing a movie-streaming service error, but users have confirmed that resetting Windows does the trick.

  1. To reset Windows 10, input the keyword reset in the search box.
  2. Click Reset this PC to open the window directly below.
    recovery settings app Something went wrong Netflix
  3. Click Get started to open the Reset this PC window directly below.
    chose an option reset Something went wrong Netflix
  4. Select the Keep my files option.
  5. Select the Next and Reset options to reinstall Windows 10.

Those are a few of the resolutions that can resolve Something went wrong errors so users can enjoy Netflix movies once more. Netflix users who have found other fixes for the above error messages are welcome to share their resolutions below.

RELATED ARTICLES TO CHECK OUT:

KB4489890, KB4489888 and KB4489889 bring many issues of their own

Microsoft rolled out a new series of cumulative updates for three Windows 10 versions: v1709, v1703 and v1607.

The updates don’t come with any security fixes this time.  Instead, they fix some major bugs that have been affecting the functionality of the OS.

Apart from the bug fixes, the cumulative updates come with a long list of known issues.

KB4489890, KB4489888 and KB4489889 known issues

1. Stop error prompts

Those users who have installed kb4489890 can come across a stop error while stating the Secure Shell (SSH) client program from Windows Subsystem for Linux (WSL).

Microsoft suggests the users have to disable forwarding of the authentication agent connection. It can either be done with the help of a configuration setting or a command line switch (ssh –a).

2. IE 11 authentication issues

The installation of the KB4489889 update might trigger authentication issues for IE 11. The issue arises if the same account is being used by two or more users on a Windows Server system.

Some of the issues that you might face after the installation are:

  • Keyboard shortcuts fail to work
  • Zero or empty location and cache size
  • File download issues
  • Credential prompts bugs
  • Webpage loading issues

Microsoft stated that if you are using a Windows Server machine, the problem can be resolved by creating a unique user account. Furthermore, you also need to disable multiple RDP sessions for an account.

This is a temporary workaround, and Microsoft has promised to release a bug fix with the next Windows Update.

3. Cluster service fails to start

The cluster service does not start following the installation of KB4489889. If the users configured the Minimum Password Length of the group policy with more than 14 characters, you might encounter the error  “2245 (NERR_PasswordTooShort)”. 

Microsoft said that a temporary solution to fix the problem is to set a value of less than or equal to 14 characters as the minimum password length. 

4. Applications not responding

Microsoft acknowledges the fact that the installation of the KB4489888, KB4489889, and KB4489890 update triggers a bug in MSXML6. This bug further forces different applications to stop responding and throw an exception error. When a user attempts to edit a Group Policy Object (GPO), the Group Policy editor may stop responding. 

Microsoft is currently working to resolve the bug and promises to release a fix in the next release.

Maybe the following troubleshooting guides could help you fix the problem:

5. Device start-up issue

The kb4489889update brings another bug for the users when a Windows Deployment Services (WDS) server’s device that uses Variable Window Extension is started with the Preboot Execution Environment (PXE).

As a result when the user attempts to download an image the WDS server connection might terminate prematurely. However, those devices or clients that are not using Variable Window Extension does not have to tackle the bug.

The tech giant is currently working on the bug and for the time being, it can be resolved by following one of these solutions:

  • Solution 1
    Open an Administrator Command prompt and type the following:

    • Wdsutil /Set-TransportServer /EnableTftpVariableWindowExtension:No
  • Solution 2
    • Use the Windows Deployment Services UI.
    • Open Windows Deployment Services from Windows Administrative Tools.
    • Expand Servers and right-click a WDS server.
    • Open its properties and clear the Enable Variable Window Extension box on the TFTP tab.
  • Solution 3:
    • Set the following registry value to 0:
    • HKLMSystemCurrentControlSetServicesWDSServerProvidersWDSTFTPEnableVariableWindowExtension.

Keep in mind that the WDSServer service needs to be restarted following the Variable Window Extension is disabled.

6. Blue screen bug

Microsoft warns the users that they will have to face a system failure and a startup blue screen bug if they enable per font end-user-defined characters (EUDC).

The particular setting needs to be avoided by those users who are currently residing in the non-Asian regions and have installed the latest updates.

The company suggests the users refrain from enabling per font EUDC till a bug fix has been released.

Let us know in the comments section below if you have experienced any issue apart from those mentioned in the article.

RELATED ARTICLES  TO CHECK OUT:

How to fix common Stellaris bugs on PC

Stellaris is a spectacular space-exploration game. As a player, you’ll explore the Universe, discover, interact and learn more about the species you will encounter. The game challenges you to forge your galactic empire, colonize remote planets and subdue alien civilizations.

Unfortunately, Stellaris is sometimes affected by various technical issues, limiting the gaming experience. In this article, we’re going to show you how to fix the most common Stellaris issues reported by players.

How to fix frequent Stellaris bugs

  1. Stuttering
  2. Stellaris crashes
  3. Re-run Redistributables
  4. Stellaris won’t start/ launch
  5. Low FPS issues
  6. Not getting any achievements

1. Stuttering

Install the latest game patch and disable your gamepad. Gamepads seem to cause stuttering problems for some players. Also, verify your game cache:

  1. Go to your Steam Library
  2. Right click > Properties on Stellaris
  3. Click the “Local Files” tab
  4. Click on the “Verify Integrity of Game Cache…” button

2. Stellaris crashes

  1. Try disconnecting your controller > launch the game again
  2. Run the game in windowed mode
  3. Try running Steam as an administrator:
  • Go to c:program filessteam
  • Right click >Properties on steam.exe
  • Click the Compatibility tab
  • Check “Run this program as an administrator
  • Go to c:program filessteamsteamappscommonstellaris
  • Right click >Properties on stellaris.exe
  • Click the Compatibility tab
  • Check “Run this program as an administrator.

3. Re-run Redistributables

Perform this action even if you have DirectX installed. Run the following files and then restart your computer:

  • Steamsteamappscommonstellaris_CommonRedistDirectXJun2010DXSetup.exe
  • Steamsteamappscommonstellaris_CommonRedistDotNet4.0 Client ProfiledotNetFx40_Client_x86_x64.exe
  • Steamsteamappscommonstellaris_CommonRedistvcredist2010vcredist_x64.exe
  • Steamsteamappscommonstellaris_CommonRedistvcredist2010vcredist_x86.exe

4. Stellaris won’t start/ launch

1. If this happens after you’ve changed some video settings, go to My DocumentsParadox InteractiveStellarissettings.txt and just delete this file. The game will then create a clean video settings file.

2. Disable any user made mods

3. Verify the game cache: right click Stellaris in Steam > Properties > Local Files > Verify integrity of game cache”

4. Install the latest video card drivers and then restart your computer. Follow the links below to download and install a specific driver:

5. Low FPS issues

  • Install the latest graphics drivers on your computer
  • Break our empire into smaller sectors.
  • Reduce in-game graphics settings.

6. Not getting any achievements

You must play in Ironman Mode to get achievements. This requires you to log on Steam and have Steam Cloud enabled.

If you’ve encountered other issues, check out this forum thread for more information.

RELATED STORIES YOU NEED TO CHECK OUT:

Posted in Fix

Friday the 13th bugs: Database Login Failure, mouse sensitivity issues, and more

Friday the 13th: The Game brings Jason back. As a player, you’ll take either on the role of Jason Voorhees, or that of a Camp Crystal Lake counselor. Then, together with six other innocent souls, you’ll try to stay alive while the most well-known killer in the world tracks you down.

Gamers report that Friday the 13th is affected by a series of technical issues, ranging from server connection issues to DLC key problems.

Friday the 13th: The Game reported bugs

  1. Database Login Failure on the server connection
  2. Mouse sensitivity issues
  3. The game won’t work on the latest Windows 10 build
  4. Profile data won’t save
  5. The controller randomly turns on players’ voices
  6. Savini and clothing DLC Key Issues

1. Database Login Failure on the server connection

Many players report that they can’t connect to the game’s servers due to the “Database Login Failure” error. It appears that this error occurs because servers are overloaded.

Database login failure – Verify your internet connection?
My internet is on and working and I couldn’t get the game to get online the entire day.

If you’ve encountered this error, use the following two workarounds to fix the problem:

  • Go to your anti-virus/firewall and turn off all scanning of the network traffic for the game.
  • Reinstall the game and the anti-cheat program

Some players reported that these two solutions helped them connect to Friday the 13th’s servers. Hopefully, they’ll do the trick for you as well.

2. Mouse sensitivity issues

its either super slow or super fast, super fast sometimes on .01 sens and super slow somtimes on the highest sens. i play at 600 dpi so nothin crazy, wtf is going on.

3. The game won’t work on the latest Windows 10 build

Players running Windows 10 build 16199 can’t launch Friday the 13th due to the “Invalid Game Executable” error.

I am experiencing the same issue on this build of Windows. Launching the game throws an error “Invalid Game Executable…” and then the path to SummerCamp.exe

4. Profile data won’t save

Whenever I unlock and place a grab kill for jason it gets stuck while saving every time. I can only get out by joining a friend’s game through steam tray but other than that only solution is Alt+F4 ing the game and when I open it once more all my kill grab slots are emptied. Any help would be appreciated..

5. The controller randomly turns on players’ voices

For some reason if I use my controller it just has my voice turned on all the time.

For the time being, there is no workaround available to fix this problem. You can try repairing the game with the Steam client. We can’t say with certainty whether this will help.

6. Savini and clothing DLC Key Issues

Some players can’t access the Savini skin and clothing packs. When they click the “Login to claim” option, the game takes them to the full game DLC code.

[…] Something is funky with the Savini skin and clothing packs. Those backers that got those items; we are working on trying to figure out what the issue is.  Literally working on it at this moment, should know soon! Keys should be downloading…but for some reason the content is not showing in-game.

If you’ve come across any workarounds to fix these issues, feel free to list the troubleshooting steps in the comment section below.

RELATED STORIES YOU NEED TO CHECK OUT:

Can’t adjust screen brightness on Surface Pro 4? We have the fix

Surface Pro 4 has been affected by a series of screen issues ever since its launch. We’re sure that most users still have vivid memories of all the annoying screen problems that they encountered.

Fortunately, there are many solutions available for most of these issues. However, there’s one bug that’s affecting screen brightness settings which is pretty difficult to fix.

If you can’t adjust screen brightness on your Surface Pro 4 device, you’re in the right place. In this article, we’ll show you how to quickly fix this problem so that you can customize your device the way you want.

How to fix Surface Pro 4 screen brightness adjustment issues

  1. Detach the keyboard
  2. Update your drivers
  3. Discharge the device

You can use this fix on all Windows 10 versions, including the Fall Creators Update. Indeed, Windows 10 version 1709 fails to fix this issue, forcing users to find a fix themselves.

1. Detach the keyboard

  1.  Turn on your Surface device and wait until the bootup process is completed the desktop or such alike.
  2. Detach the keyboard.
  3. Use the touch screen in order to perform a reboot.
  4. When at the desktop again, bring out the notification center. You can do that by swiping the screen from the right. Then use the touch screen to change the brightness level.
  5. Connect the keyboard and check if the issue persists.

If the option is still not available after you detach the keyboard, unplug all the other peripherals that you may have connected to your Surface Pro 4. Disable all peripherals connected via Bluetooth as well.

It seems that this issue often occurs when you close your Surface Pro without the keyboard attached and then attach it while in hibernating mode or after waking up the device.

2. Update your drivers

  1. Go to Start > search for ‘drivers’ > select ‘Update device drivers‘
  2. Go to Display Adapters > select Intel HD Graphics 520update surface pro 4 display driver
  3. Click the Driver tab > Update the driver.

Your device will install the latest display drivers and the brightness button should be fully functional now.

Moreover, you have the alternative to update any drivers on your PC, with the help of expert tools that can do it automatically.

So if you need to update your device driver individually or install the latest version of all drivers at once, you can simply perform this using the Fortect Driver Updater solution.

3. Discharge the device

Finally, there might be a hardware issue and we suggest discharging the device. Just power off your Surface and remove the adapter and battery. Press and hold the power button for approximately 60 seconds. Re-attach everything and power up Surface Pro 4. After that, the problem should be resolved.

If you used other troubleshooting methods to fix this screen brightness adjustment issue, you can list the steps to follow in the comment section below.

Microsoft and UW demo automated data storage in fabricated DNA

Microsoft has, with the help of researchers from the University of Washington, successfully created its very first automated system for storing data within DNA strands. The company had previously purchased 10 million strands of DNA for the purpose of research and testing, and today marks some of the first is successful results in their experiments.

According to the company’s blog post, the researchers were able to successfully encode the word “hello” into the fabricated DNA strands, then retrieve the data and convert it back to digital information using their fully automated end-to-end system. This is especially interesting given the fact that DNA is capable of storing data in a much more compact size than current digital devices, and could potentially last much longer, too.

In the words of Microsoft’s principle researcher Karin Strauss:

“Our ultimate goal is to put a system into production that, to the end user, looks very much like any other cloud storage service — bits are sent to a datacenter and stored there and then they just appear when the customer wants them. To do that, we needed to prove that this is practical from an automation perspective.”

The process is somewhat complicated. It involves taking the 1’s and 0’s of digital information and converting them into the A’s, T’s, C’s, and G’s that DNA is made of by using the required liquids and chemicals that are used to manufacture the snippets and store them in a storage device. Retrieval also involves preparing the DNA with more chemicals ejected from the system, then using a microfluid pump to push the liquids into a device that can read the information and translate it into digital data. The blog post has all of the details for those wishing to read this in depth.

While it’s not exactly a cost-effective method just yet, it does serve to prove that automation is possible for data storage and retrieval within DNA strands. Perhaps with a little more research and development, it could serve to innovate in in a much broader sense than anything we’ve seen.

Microsoft releases patch to notify Windows 7 users about upcoming end of support

As we have already reported, Microsoft is getting ready to end support for the almost 10-year-old Windows 7 operating system. As spotted by TechCrunch, the company has already pushed its first patch which includes the popup informing users of the deadline on January 14th, 2020. However, users should begin receiving notifications on April 18th, giving them plenty of time to consider other options.

Should they continue using the operating system after that time, he or she will be forgoing on security updates and will be at a much greater risk of malware and cyberattacks. Microsoft strongly recommends them to buy a new PC with Windows 10 pre-installed, but those who already have computers that work fine should be able to upgrade relatively easily.

For businesses, Microsoft will also provide them an option to continue receiving security updates and technical support after the expiration date for an annually fee, which will gradually increase overtime. That said, upgrading to Windows 10 would likely be more cost effective, and the company is even willing to assist businesses in upgrading and making sure that all applications work just fine.

Interestingly, Windows 7 still holds a major cut of the desktop market according to Net Applications, as noted by TechCrunch. With the operating system quickly becoming obsolete, it shouldn’t be long before that number begins to rapidly shrink.

Microsoft launches Windows Virtual Desktop and Microsoft Defender ATP for macOS in public preview

Microsoft has announced several Microsoft 365 updates this morning that should help IT Pros reduce costs and increase security. First of all, Windows Virtual Desktop, the company’s new cloud-based desktop and app virtualization service is now available in public preview.

“Windows Virtual Desktop is the only service that delivers simplified management, multi-session Windows 10, optimizations for Office 365 ProPlus, and support for Remote Desktop Services (RDS) environments in a shared public cloud. With Windows Virtual Desktop, you can deploy and scale your Windows desktops and apps on Azure in minutes, with built-in security and compliance,” explained Jared Spataro, Corporate Vice President for Microsoft 365.

You can sign up for the Windows Virtual Desktop preview on this page, and you can also find more information about the requirements on this support page. Microsoft didn’t say today when Windows Virtual Desktop will be generally available, but the company will use the public preview to scale its new cloud-based service. With the upcoming end of support for Windows 7 in January 2020, it’s also worth noting that Windows Virtual Desktop will provide IT Pros Windows 7 virtual desktops with free extended security updates through January 2023.

The other big announcement Microsoft made today is the public preview of Microsoft Defender ATP for macOS. The extension of the Microsoft 365 advanced endpoint security platform to non-Winds devices actually led Microsoft to rename Windows Defender Advanced Threat Protection (ATP) to simply “Microsoft Defender ATP.”

The public preview of Microsoft Defender ATP for Mac is only available for business users, and Microsoft didn’t say if a consumer version would be available at some point. The macOS client will provide anti malware protection on macOS Mojave, macOS High Sierra, or macOS Sierra, and it will be updated though Microsoft’s AutoUpdate service that the standalone Office for Mac apps also use.

Microsoft Defender ATP customers can now apply for preview here, and the company shared more details on this separate blog post as well as the video below:

Other announcements Microsoft made today include the Microsoft Teams app now shipping with Office 365 PRoPlus, as well as the general availability of the Microsoft 365 admin center. The latter can be accessed on admin.microsoft.com and provides a common entry point for managing all Microsoft 365 services.

Xbox One S All Digital Edition will reportedly come with a 1TB hard drive and three games, with a possible May 7 launch

Microsoft is launching a disc-less version of its Xbox One S console this Spring which could be the most affordable Xbox One console ever. Windows Central previously revealed that the console would be named “Xbox One S All-Digital Edition,” and the reputable blog is reporting today that the console could be announced in April with a possible May 7 launch.

Windows Central has also seen the box for the new Xbox One S All Digital Edition, and they published the following mockup today. “The product shots we received seem to indicate that it will come with a 1TB HDD and with Forza Horizon 3, Sea of Thieves, and Minecraft digital codes bundled into the box. It doesn’t look as though it will be bundled with Microsoft’s Netflix-like subscription service for games, Xbox Game Pass,” the report says.

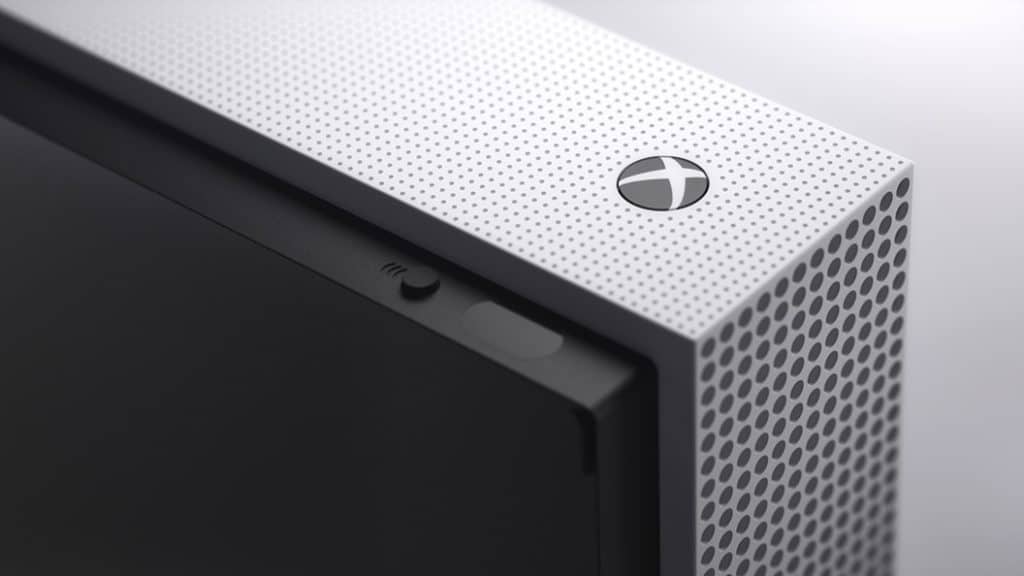
If this mockup is accurate, it looks like this disc-less version of the Xbox One S will keep the same design but in a slightly smaller form factor. The Xbox One S is already one of the best-looking consoles on the market, so Microsoft is probably right not to deviate from a winning formula.

Pricing for the Xbox One S All Digital Edition is still unknown, but Microsoft may well use the next Inside Xbox episode in April to officially announce the new console. That’s not the only new Xbox hardware that the software giant could reveal this year, as the next-gen “Scarlett” consoles could also be a big part of Microsoft’s E3 2019 conference.

Edge’s Personal Shopping Assistant just updated its icon to the new Microsoft design aesthetic

The Microsoft Personal Shopping Assistant browser extension for the Windows 10 Microsoft Edge browser is the latest Microsoft property to update its icon to the new design aesthetic the company revealed back in November of last year.

While the original icon for Microsoft Personal Shopping Assistant was a fairly basic outline of a shopping bag, the new icon (see above image) features two shades of blue, that add the illusion of depth, and a white down arrow.

This new look for Microsoft apps and services has been rolling out gradually rather than one massive launch, which is admittedly unusual. Office.com began using the new icons last month and the Outlook app for Apple’s iOS devices updated with its new look icon just a few days ago.

We actually liked the new design aesthetic so much that we even revamped this site’s social media icons to match it. (Give them a click!)

Microsoft Personal Shopping Assistant is a free extension for Microsoft Edge that lets users add products from stores to a built-in collection board. After an item is added, the extension compares its price across online retailer websites and can actually tracks price changes and notify the user.

Do you use Microsoft Personal Shopping Assistant? Do you like the new icon? Share your thoughts with the community in the comments below and then follow us on Pinterest for more Microsoft content.

Microsoft’s Office desktop apps are now available on Windows Store

Microsoft’s Office desktops apps just reached the Windows Store, coinciding with the launch of the brand new Surface Laptop running Windows 10 S.

The Office suite was brought to the Windows Store by Microsoft’s Project Centennial desktop app bridge and is available to all the Surface Laptop users who are part of a preview install and update process. The news was brought to the public via an Office on Windows 10 S FAQ which was originally spotted by Microsoft enthusiast and leaker known as the WalkingCat.

Available apps for the Surface Laptop owners running Windows 10 S

Microsoft made it very clear that even if the install and the update processes are still in preview, the apps themselves are not. Here are the applications that are currently available:

  • Excel
  • Word
  • PowerPoint
  • OneNote for Windows 10
  • Outlook, Access, and Publisher (which are not available in preview for Office 365 Education plans)

The apps are the 32-bit versions and the 64-bit versions are still not available in the Windows Store.

Regarding the Office Mobile apps, they were previously the only versions of the Office apps available on the Windows Store. Now, the company repositioned them in tablets and smartphones featuring screens under 10.1-inches. If we take into consideration Microsoft’s Mobile designation for the apps, this probably makes more sense.

It’s important to note that the preview period limits the Office apps to Surface Laptops running Windows 10 S. The apps will become available for purchase and installation on other Windows 10 devices after the end of this preview.

Microsoft is offering Surface Laptop owners a cool bonus, consisting of a year of free Office 365 Personal for laptops that arrive during the preview period.

RELATED STORIES TO CHECK OUT:

Microsoft Teams gets customized backgrounds, live subtitles and more

Microsoft rolled out new features to Microsoft Teams — an enterprise chat-based collaboration solution.

Enterprise users will find there is a new Microsoft Whiteboard integration option during meetings, customized backgrounds during video call, and secure private channels among with others.

Migration to Microsoft Teams

The Redmond giant surprised its users by announcing its transition from Skype for Business to Microsoft Teams within four months. About 180,000 employees and vendors have been successfully migrated to the platform within a short span of time.

Currently, all the meetings, calls and chat communication are currently being conducted via Teams.

The software is currently available to the users 181 countries and supports 44 languages.

The company also plans to release support for nine additional languages including Filipino, Hindi, Tamil, Gujarati, Malayalam, Bengali, Marathi, Kannada, and Telugu.

New features added to Microsoft Teams

1. Customized backgrounds for video chat

That user who is working from home has to attend a video call or a meeting can set a custom background. It is possible with the latest intelligent background blur technology introduced by Microsoft.

This feature is expected to be released later this year. It aims to minimize the distractions and definitely enhances the effectiveness of remote meetings.

2. Content cameras and Intelligent Capture support

Most of the users are interested to capture tricky content like the information on analog whiteboards. The good news is that you can capture this type of content with an additional camera offered by Microsoft Teams Rooms.

The technology makes use of the latest Intelligent Capture processing in order to focus, capture, enhance and resize the whiteboard images and text. The whiteboard brainstorming sessions can be improved to a great extent specifically for the remote attendees.

This feature is also expected to arrive later this year.

3. Microsoft Whiteboard Support

This feature allows the participants to use an infinite digital canvas so that they can directly work in teams. Furthermore, the contribution from the in-person attendees is possible with the whiteboard support in Microsoft Teams Rooms.

Surprisingly, you won’t have to recreate the content from scratch by directly adding content from a physical whiteboard onto the Whiteboard canvas.

The active participation by the participants is possible either remotely or from the meeting room via Whiteboard in Teams.

The public preview is currently available for Windows 10 users.

4. Live captions & subtitles available

The participants who either have different levels of language proficiency, deaf or hard of hearing or they are connecting from a loud location can actively participate in Team meetings.

They will be able to read real-time speaker captions. The English preview will be rolled out in the next few months.

5. Protect private channels

Microsoft is currently testing a highly requested feature that is going to be launched this year. The customization feature for each team member now lets you provide them access to the files and conversations.

You will no longer have to limit the visibility of the channel as the channel participation and exposure can be restricted as per your requirements.

6. Avoiding conflicts with Information barriers

Another feature in Microsoft Teams allows you to limit the communication and collaboration to avoid organizational conflicts of interest.

This feature is releasing soon with the aim to control the communication among the colleagues by limiting the disclosure of information.

In this way, the organization will be able to stick to their industry standards and regulations.

7. Data Loss Prevention (DLP) in chats and conversations

The customers will be able to detect, automatically screen and protect the sensitive information during channel and chat conversations. The sensitive information can no longer be unintentionally leaked or shared within or outside the organization with the DLP policies.

The feature has been rolled out to all Office 365 and Microsoft 365 plans that are equipped with Office 365 Advanced Compliance.

8. Microsoft 365 Live and on-demand events

Organizations can encourage compelling communications between partners, customers, and employees, by creating live and on-demand events. The interactive and video-based discussions can be conducted across Stream, Teams and Yammer through Live events.

The feature allows the real-time participation of up to 10,000 participants. Moreover, the automatic transcription and other powerful artificial intelligence (AI) features allow the participants to catch up later. The feature is available to the general public.

As a matter of fact, the Microsoft Teams has successfully completed its two years as it was announced in March 2017. Its extreme popularity is encouraging more and more enterprise users to skip Skype for business.

RELATED ARTICLES YOU NEED TO CHECK OUT:

Dark Souls 3 Issues: How to Fix Them All in One Go

Dark Souls III is an action role-playing game that takes players into a universe filled with colossal enemies and hostile environments, with fast gameplay and intense combat. But issues tend to affect Dark Souls 3 more than you would imagine.

This ranges from low FPS to controller bugs in Dark Souls 3. Today, we’re going to list a series of workarounds that will help you fix some of the most frequent Dark Souls III bugs.

How do I fix common Dark Souls III issues?

1. FPS drops on NVIDIA

  1. Install the latest NVIDIA driver updates.
  2. Edit the Dark Souls 3 profile on NVIDIA’s control panel, disable all FXAA and Texture filtering options
  3. Choose the maximum performance on every option, enable only triple buffering, VSync, segmented optimization, max of pre-rendered FPS = 4, VR pre-rendered FPS = 1.
  4. In the NVIDIA Control Panel, go to Manage 3D Settings, select your Dark Souls 3 profile, and change the Power Management Mode to Prefer Maximum Performance.prefer max performance to fix dark souls 3 issues
  5. Change your OS power management settings to maximum performance as well.

These changes will fix FPS drops and other performance-related Dark Souls 3 issues in no time.

2. FPS drops on AMD or Intel

  1. Install the latest driver updates.
  2. Start the game, press Ctrl + Shift + Esc to open the Task Manager, right-click on Darksouls3.exe, hover the cursor over Set priority, and select High from the menu.high
  3. Increase the FPS of the main thread, go to your computer’s BIOS, and disable the Intel H.E.I.S.T or SPEEDSTEP, or in the case of AMD, the Cool & Quiet option.
  4. If you’re using a quad-core, hexacore, or octa-core CPU, disable Hyper-Threading.
  5. If you’re using a CPU with dual-core CPUs, enable Hyper-Threading.

3. Dark Souls 3 crashes

  1. Go to the game’s settings, and put the Effects, Shadow, and Light quality on Low.
  2. Disable Steam Overlay. To do that, go to the Steam menu, choose Settings, select the In-Game Settings tab, and uncheck the box next to Enable the Steam Overlay while in-game, then click OK.overlay
  3. Uninstall the game and then download it all over again.

4. Fix game stutters in Dark Souls 3

Move the GameOverlayRenderer.dll and GameOverlayRenderer64.dll from the Steam installation folder to another folder, and transform GameOverlayRenderer.log into a read-only file.

Also, consider updating your GPU drivers. Alternatively, in the dual-GPU configurations, we suggest disabling the onboard graphics.

5. Dark Souls 3 controller won’t work

  1. Update the controller drivers. When doing so, make sure you also check the official website for the latest version.
  2. If you’re using a DS4 controller, go to the DS4 Windows settings, and check the first option to Hide DS4 Controller. Then,  launch the game. The controller should now work.

This should fix most Dark Souls 3 issues in no time. Also, it’s bound to improve the PC’s performance in general.

Before you leave, do check some quick tips to improve the gaming performance in Windows.

If you’ve come across various solutions to fix other Dark Souls III bugs that we didn’t mention in this article, list the troubleshooting steps in the comment section below.

Microsoft Solitaire error 102: Use these 3 solutions to fix it

We all love to unwind from time to time, whether between breaks or just honing our card skills. Let’s face it, we all tried Solitaire every once in a while. But when we receive error code 102, the card are off the board.

The problem with this error is most the time it’s related to a pending update or the game‘s internal connection to the internet.

You should check Microsoft Updates and see if there are updates pending for installation. Follow up with installing those updates and restart your computer once you’re done. But sometimes, that won’t do the trick.

Steps to fix Microsoft Solitaire error 102

Before going ahead with these steps, try clearing your Windows Store Cache by typing wsreset.exe into the Run window and pressing Enter.

1. Launch the Windows App Troubleshooter

  1. Run the Windows App Troubleshooter and then installing any missing required, recommended, or optional updates.;
  2. Restart and see if that works;
  3. If that doesn’t work, try running the Windows App Troubleshooter.windows apps troubleshooter

2. Create a new user account

This easy solution involves you creating a new user account, and logging in with that account.

  1. Select the Start button, then select Settings, then Accounts , and next click on Family & other people
  2. Click Add someone else to this PCadd someone else to this PC limited access
  3. Type a user name, password, password hint, and then select Next
  4. Login with this new account and see if the problem is solved.

3. Reinstall Solitaire

If the issue persists, we suggest you uninstall and re-install the Microsoft Solitaire Collection app from the Windows Store .

Steps to uninstall Microsoft Solitaire

  1. Go to the Start menu and search Microsoft Solitaire Collection
  2. Right-click on it, then select Uninstall.uninstall microsoft solitaire collection

Reinstalling Microsoft Solitaire

  1. Go to the Store and search for Microsoft Solitaire Collection and press Enter
  2. Click on Microsoft Solitaire Collection tile to visit its official page on the Store
  3. Click the Free button to download and install the game.

In the event that none of these steps work, there may be a more serious issue with your Store. Try contacting Windows Store support.

In the meantime what are your solutions to this issue and what’s your all-time highscore in Solitaire?

RELATED GUIDES TO CHECK OUT:

Write to Disk Error in uTorrent: 3 Ways to Fix it

There are many great torrent clients available, and uTorrent is the most popular choice. However, even popular software has issues, and many reported Write to disk errors in uTorrent.

This can be a problem since you won’t be able to download anything, so today we’re going to show you the best ways to fix this problem on your PC.

Why am I not able to download from uTorrent?

  • You don’t have the necessary privileges to access the save directory.
  • Your hard drive might be damaged, and that’s causing the issue.
  • Antivirus or firewall might be blocking uTorrent and preventing downloads.

How do I fix the Write to disk error in uTorrent?

Before we start fixing this issue, there are a few preliminary checks that you can perform:

  • Check HDD health using Disk Repair to ensure your hard drive is working properly.
  • Make sure that your download location is properly set because you might not have permission to save to certain locations.
  • Disable the antivirus or make an exception for uTorrent to ensure that it doesn’t interfere with the download.

1. Run the software with administrative privileges

  1. Right-click the uTorrent shortcut on the desktop and choose Properties.
  2. Open the Compatibility tab.
  3. Check the Run as Administrator box.
  4. Confirm the selection and look for changes.

2. Check the firewall settings

  1. Press Windows key + S and type windows firewall. Select Windows Defender Firewall.
  2. Now click on Allow an app or a feature through Windows Defender Firewall.
  3. Click on Change settings.
  4. Click on Allow another app and select uTorrent.
  5. Locate uTorrent on the list and make sure that both Private and Public checkboxes are checked.

After doing that, check if the Write to disk error uTorrent is gone.

3. Delete update files

  1. Press Windows key + R and enter %appdata%.
  2. Open the uTorrent directory.
  3. Delete the updates.dat file.

These steps should help you address the Write to disk error uTorrent. For more solutions, perhaps our System cannot write to the specified device guide can help you.

That should do it. If you have any questions or suggestions, well look forward to hearing from you. The comments section is just below.

How to fix Something went wrong Cortana error message

Cortana is a virtual assistant app that’s an integral part of Windows 10. Yet, some users have said that they can’t set up Cortana after upgrading to Win 10. One user stated: “I’m trying to set up Cortana on Windows 10. Every time it wants to log in to my Microsoft account, it loads and then says Something went wrong.” Consequently, those users can’t fully utilize Cortana.

The above error is actually linked with a Something went wrong sign up error for Microsoft accounts. It occurs when Windows 10 can’t establish a connection with Microsoft servers. Thus, fixing that issue can also resolve Cortana’s Something went wrong error. Here are a few resolutions for fixing the Something went wrong error in Windows 10.

Here’s how to fix Cortana’s Something went wrong error

  1. Reinstall Cortana
  2. Check the Microsoft Account Sign-in Service is Enabled
  3. Set Up a New Admin Account
  4. Update Windows 10
  5. Reset Windows 10

1. Reinstall Cortana

  1. Users have confirmed that they’ve fixed the Something went wrong error by reinstalling Cortana with PowerShell. To do that, press the Windows key + R keyboard hotkey.
  2. Then enter powershell in Run, and click the OK button.
  3. Input Get-AppXPackage -AllUsers | Foreach {Add-AppxPackage -DisableDevelopmentMode -Register “$($_.InstallLocation)\AppXManifest.xml”} in the PowerShell window as shown directly below.
    Something went wrong powershell
  4. Press the Enter button.

2. Check the Microsoft Account Sign-in Service is Enabled

Some users might need to enable the Microsoft Account Sign-in Assistant service. Cortana can’t log in to MS Accounts with that service off. Users can turn on the MS Account Sign-in Assistant service as follows.

  1. Open the Run text box with the Windows key + R keyboard shortcut.
  2. Input services.msc in the Open box.
  3. Double-click the Microsoft Account Sign-in Service to open the window in the snapshot directly below.
    microsoft account sign-in assistant service Something went wrong
  4. Press the Start button if required.
  5. Then click the Startup type drop-down menu and select Automatic.
  6. Click the Apply button. Select the OK option to close the window. Thereafter, restart Windows.

3. Set Up a New Admin Account

The Something went wrong error is often due to a specific user profile issue. Thus, the “Something went wrong” error message might not pop up within an entirely new account. Users can set up a new user account with the Command Prompt as follows.

  1. Press the Windows key + X hotkey.
  2. Select Command Prompt (Admin) to open the Prompt’s window.
  3. Input net user <user name> <password> /add in the Command Prompt, and press the Enter key. Remember to replace <user name> with an actual user account title.
    net user add command prompt Something went wrong
  4. Then input net localgroup Administrators <username> /add and press Return to turn the new user account into an admin one.
    net localgroup administrators Something went wrong
  5. Thereafter, restart the desktop or laptop; and log back in with the new admin account just set up.
  6. Set up Cortana within the new user account.

4. Update Windows 10

Some Microsoft updates include fixes for Cortana issues. Users have also stated that Windows updates fix the Something went wrong error. So, check that Windows 10 isn’t missing any updates as follows.

  1. Click Settings app on the Start menu.
  2. Select Update & Security to open the options shown directly below.
    check for updates Something went wrong
  3. Then click the Check for updates button.
  4. Press the Download button if there are updates available.

5. Reset Windows 10

Resetting Windows 10 is the last resort for fixing the Something went wrong error. That will reinstall the platform without deleting your files. Users can reset Windows 10 as follows.

  1. Press the Settings button on the Start menu.
  2. Click Update & security > Recovery to open the options shown directly below.
    recovery Something went wrong Cortana
  3. Click Get started to open the window shown directly below.
    reset this PC window Something went wrong Cortana
  4. Select the Keep my Files option.
  5. Click Next > Reset to reinstall Windows 10.

Some of those resolutions might fix the Something went wrong error so that users can sign in to Microsoft account to set up Cortana. Users who have discovered other fixes for the error message are welcome to share them below this post.

RELATED ARTICLES TO CHECK OUT: 

Windows 10 20H1 build 18860 ships to Skip Ahead Insiders with 39 new SwiftKey languages, more bug fixes

The 20H1 development branch for Windows 10 is getting another minor update today. Windows Insiders on the Skip Ahead ring can now download the 20H1 build 18860, which brings support for the following 39 new languages in the built-in SwiftKey touch keyboard:

Afrikaans (South Africa),  Albanian (Albania),  Arabic (Saudi Arabia),  Armenian (Armenia), Azerbaijani (Azerbaijan), Basque (Spain), Bulgarian (Bulgaria), Catalan (Spain), Croatian (Croatia), Czech (Czech Republic), Danish (Denmark), Dutch (Netherlands), Estonian (Estonia), Finnish (Finland), Galician (Spain), Georgian (Georgia), Greek (Greece), Hausa (Nigeria), Hebrew (Israel), Hindi (India), Hungarian (Hungary), Indonesian (Indonesia), Kazakh (Kazakhstan), Latvian (Latvia), Lithuanian (Lithuania), Macedonian (Macedonia), Malay (Malaysia), Norwegian (Bokmal, Norway), Persian (Iran), Polish (Poland), Romanian

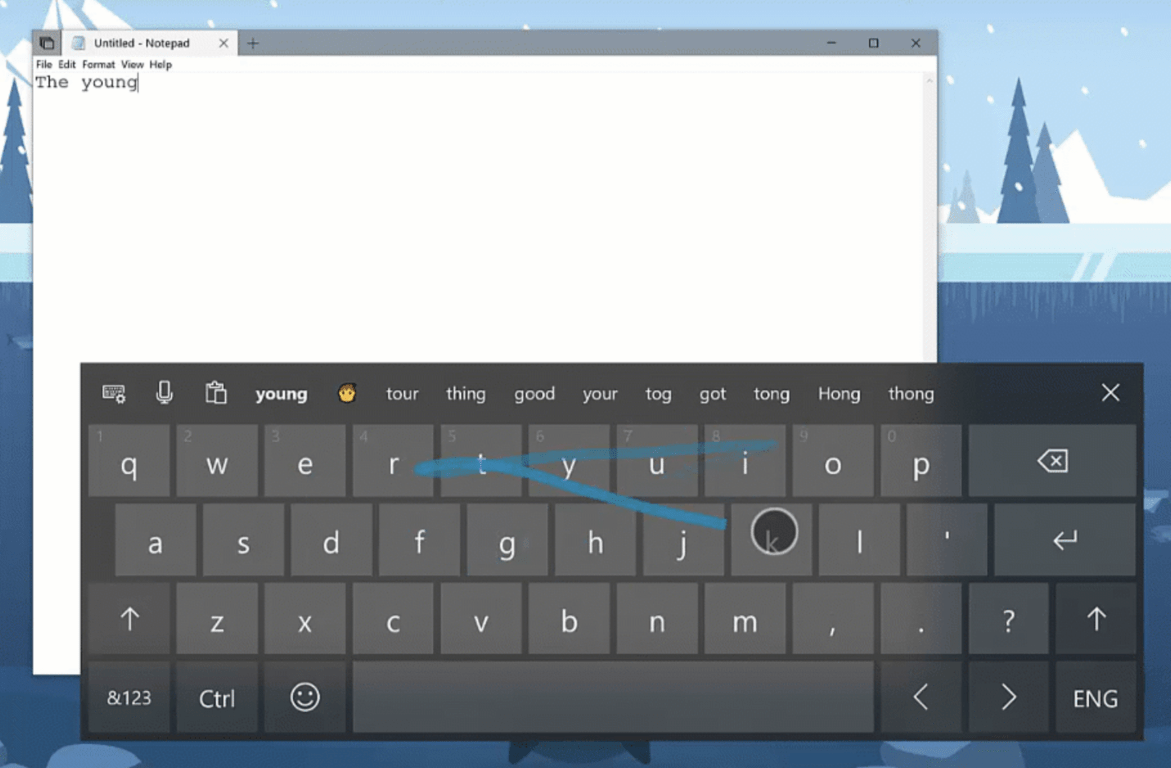
Microsoft’s SwiftKey keyboard uses AI to improve the accuracy of autocorrections and word predictions, and it replaced the previous touch keyboard in Windows 10 version 1809. The new supported languages is the only new features coming in this new 20H1 build, though the new bits also bring the following list of bug fixes and improvements:

General changes, improvements, and fixes for PC

  • We fixed a Microsoft Edge crash encountered when interacting with combo boxes in PDF forms.
  • We fixed an issue that could result in night light being on after an upgrade, even though all the settings showed that night light should be off.
  • We fixed an issue where using the slider to adjust the night light strength could result in night light getting stuck on.
  • We fixed an issue where night light was skipping the fade transition when it was turned off (manually or scheduled).
  • We fixed an issue resulting in increased battery drain while the screen was on in recent builds.
  • We fixed an issue resulting in the “…” menu contents being clipped for certain apps like Voice Recorder and Alarms and Clock when the app was full screen.
  • We fixed an issue resulting in some Insiders experiencing bugcheck green screens citing a KERNEL_SECURITY_VIOLATION error.
  • We fixed an issue preventing certain VMs from being able to install or update Windows Insider Preview builds – the VM would hang on the black screen with the Windows logo.

Known issues

  • Launching games that use anti-cheat software may trigger a bugcheck (GSOD).
  • When performing Reset this PC and selecting Keep my files on a device that has Reserved Storage enabled, the user will need to initiate an extra reboot to ensure Reserved Storage is working again properly.
  • Some Realtek SD card readers are not functioning properly. We are investigating the issue.
  • Creative X-Fi sound cards are not functioning properly. We are partnering with Creative to resolve this issue.

Known issues for Developers

  • If you install any of the recent builds from the Skip Ahead and switch to either the Fast ring or the Slow ring, optional content such as enabling developer mode will fail. You will have to remain in the Fast ring to add/install/enable optional content. This is because optional content will only install on builds approved for specific rings.

Microsoft has yet to introduce a major new feature in the 20H1 development branch, and this may wait until the company is finally done with the 19H1 update. In the meantime, Skip Ahead Insiders can also enjoy cool app updates like the latest version of Sticky Notes with multi-desktop support.

Cuphead arrives on the Nintendo Switch with Xbox Live integration to follow

Microsoft and Nintendo are becoming a bit cozier these days as they walk hand in hand advocating cross platfom gaming and are now ready to start sharing exclusive titles.

Nintendo just announced an Xbox exclusive headed to its wildly popular Switch platform. According to Xbox Wire, the details of the exchange are as such:

Growing out of these recent discussions, we are partnering with StudioMDHR to investigate bringing Xbox Live features beyond Xbox and PC to Nintendo Switch. Yes, this means that fans will now have the opportunity to experience StudioMDHR’s award-winning debut game on Nintendo Switch with Xbox Live! We’ll be working with StudioMDHR to implement Xbox Live features into Cuphead on the Nintendo Switch in the coming months. Given the early stage of our work with StudioMDHR, the Xbox Live features will appear in a post-launch update to Cuphead on Nintendo Switch. We’d like to thank Studio MDHR and Nintendo for their help in this investigation!

Seems as though Microsoft’s gambit with expanding Xbox Live beyond the Xbox console could be paying off for game developers soon. While the release date for Cuphead on the Switch is slated for April 18, 2019, Microsoft’s Xbox Live integration may be a ways off from that date and come via an additional update to the game.

Microsoft and Cuphead studio MDHR have obvious incentives to work deligently on getting the Xbox Live integration pushed out as quickly as possible as both a proof of concept but also keep players engaged with the game as the move across a growing list of potential gaming devices in the near future.

Microsoft releases Windows 10 SDK build 18356 and Windows Server vNext build 18356.1

Microsoft has just announced the release of the Windows 10 SDK Preview Build 18356, which developers can now use in conjunction with Windows 10 19H1 build 18356 or higher. This new version of the SDK brings more bug fixes and API changes, and we invite you to check the full blog post for more details.

In addition to this new SDK build, Microsoft also released yesterday the build 18356.1 for Windows Server vNext. The release notes mentioned no new features, but that’s not completely surprising as this Semi-Annual Channel release of the Server OS is near.

As usual, you can download the new preview SDK from developer section of Microsoft’s Windows Insider website, and the new Windows Server build is available from this page. Stay tuned to OnMSFT as there will probably be more news coming from the Windows Insider team this week, including new Windows 10 builds and maybe the new Chromium-Edge browser.

Leonardo drawing app comes to the Windows 10 Microsoft Store

If you are the proud owner of a Surface tablet, or any other Windows 10 tablet for that matter, the Leonardo drawing app has made its way to the Microsoft Store. It has been available for Windows 10 users via the development company’s website for some time now, but now that it’s on the Microsoft Store, it should be easier to discover for new Surface artists.

The app normally runs at $79.99, but if you decide to go ahead and get it today, you can get it for half off at $39.99. It comes with all the same features as the desktop version of the app available on its website, including the infinite canvas, the same user interface, and all the same tools and performance that other Leonardo users get.

Leonardo screenshots

If you’re interested in downloading the app, you can go ahead and buy it from the link below. The developers have also promised to update the app just the same as it does the third party download version of it, so there should be no risk involved in getting it from the Microsoft Store.

Leonardo
Leonardo
Developer:
Xade Software AB
Price:
$39.99

Post nuclear-war survival game Vigor will be free to play this weekend on Xbox One for Xbox Live Gold members

Subscribers of Xbox Live Gold can play Vigor for free this weekend, as the game will be available starting tomorrow (March 21st) and ending March 24th. The game offers “shoot ‘n’ loot” style of play, and players must survive by gathering resources and building a shelter in the post-war Norway.

The game development company, Bohemia Interactive, mentioned that the free trial weekend will give players a chance to try the recent 0.8 “Signal” beta update of the game. It adds numerous features such as new player lobby, gestures system, as well as other new content and various improvements to enhance the overall experience in the game.

The development company is also planning to release the full 1.0 version game later this year, which will use a free to play model as opposed to making players by the game. However, the developers also encourage those wishing to play the game immediately to go ahead and buy the game now, which will give them access to exclusive in-game items not available in the free version. Keep in mind though that when the game is officially released, all progress that was in the beta will be erased.

Something that also might be worth mentioning, Vigor was one of the Xbox One games that recently received keyboard and mouse support. This gives users the full advantages that keyboard and mice offer, and the Razor Turret that will be released at the end of this month could make the experience all the better.

Konami Anniversary Collection series will bring all classic games to Xbox One this year

Japanese video games company Konami is celebrating its 50th anniversary this year, and for the occasion several classic Konami games will be re-released on PC, Xbox One, PS4 and Switch. The first game in the Konami Anniversary Collection series will be the Arcade Classics collection, to be released on April 18.

This $19.99 bundle will includes 8 arcade classics from the 80s: Haunted Castle, Typhoon (A-Jax-, Nemesis (Gradius), Vulcan Venture (Gradius II), Life Force (Salamander), Thunder Cross, Scramble and TwinBee.

Coming in early summer 2019 are the Castlevania Anniversary Collection and the Contra Anniversary Collection. Several Castlevania and Contra games have been previously ported on the Xbox 360, and some of them are currently available on Xbox One via backward compatibility, but it’s certainly a good to bring back these old classics to the spotlight. In case you missed it Square Enix is doing the same this year with its Final Fantasy series, with several old episodes being ported on Xbox One and Nintendo Switch.

The Konami Anniversary Collection series will only be available digitally, and Konami will also offer in-game bonus books showing concept sketches from the development of these games.

Latest Minecraft Bedrock update brings crossbows and lanterns, adds new Xbox Achievement

The next major update of the Minecraft Village and Pillage series of upgrades is already out now for the Bedrock Edition of the game. Several note-worthy new features have been added, including Shields, which have long been in the Java edition Minecraft since version 1.9 more than 2 years ago.

The crossbow is now also fully available in the game. Previously, it was an experimental feature that had to be manually turned on in the game settings. Now, it appears that the weapon’s development is finally complete, as anyone can enjoy the feature without having to turn it on.

Additionally, for all those Xbox One users out there, a new achievement can be earned in the game. Titled Fruit of the Loom, a player can earn 20 Gamerscore points for creating a banner using at the Enchanted Apple Stencil.

There are also many other new features in the update, such as the new cat skin which has been named Jellie by the developers. The new skin was part of a contest in which players voted before the best one, and Jellie proved to be the winner in the end.

Other noteworthy new features include Lanterns (which have also been removed from the Experimental Gameplay settings), Looms for additional banner pattern creation, Lecterns for allowing multiple players to read the same books, and the new hostile mob called the Pillager (which strangely is only available in creative mode for the time being).

The update is available today and will roll out to all the operating systems that the Bedrock Edition is available on, including the Xbox One, Windows 10, Android, iOS, and the Nintendo Switch. For users on mobile devices, the devs recommend not using any HD textures right now, as there is presently a bug in the game that causes it to crash when using them.

Minecraft
Minecraft
Developer:
Mojang
Price:
$6.99


‎Minecraft
‎Minecraft
Developer:
Mojang
Price:
$6.99+


Minecraft
Minecraft
Developer:
Mojang
Price:
$6.99


Minecraft
Minecraft
Developer:
Microsoft Studios
Price:
Free+


Minecraft for Windows
Developer:
Microsoft Studios
Price:
Free

Xbox One consoles to add spatial sound functionality to basic TV sets

Microsoft’s Xbox One consoles have been supporting spatial audio since 2017, with more and more games like Forza Horizon 4 or Shadow of the Tomb Raider coming with Dolby Atmos mixes providing a much more immersive experience. Unfortunately, not all consumers want or can afford an expensive home theater or sound bar, but an upcoming Xbox One update will soon make it possible to add spatial sound functionality to any TV speakers.

Microsoft revealed some details about its spatial sound for TV speakers technology at the Game Developers Conference this week. Here’s the information, via Forbes:

Apparently this process is broadly similar to the feature delivered to Windows 10 last year enabling spatial audio via built-in laptop speakers.

Microsoft can’t or won’t say at the moment which of the audio systems on the Xbox One’s common spatial audio API (Windows Sonic, Dolby Atmos, or DTS:X) will carry the new TV speakers utility. It has confirmed to me, though, that it has already got an implementation up and running in internal demos.

We’re looking forward to see how effective this spatial audio technology will be on basic TV speakers, though you probably shouldn’t expect any miracle. Microsoft hasn’t officially announced this new functionality yet, but it will likely ship first to select Xbox Insiders.

Anyway, it’s worth reminding that Xbox One consoles already make it possible to enjoy spatial audio using any pair of headphones. Microsoft has built its own Windows Sonic audio technology for Xbox One and Windows 10 PCs, but you can also set up Dolby Atmos for headphones after installing the Dolby Access app from the Windows Store.

New Alliance Intelligent Cloud will bring the power of Azure to Renault, Nissan and Mitsubishi cars

The Renault-Nissan-Mitsubishi alliance has released its new Alliance Intelligent Cloud, a service that will use the cloud, artificial intelligence, and Internet of Things technologies to power connected vehicles from the three automotive companies. As a result, the automotive alliance will use the Azure to power these services, which Microsoft says will allow them to capture and analyze the data in a secure manner, and use it to deliver intelligence services. Additionally, with Microsoft infrastructure, the alliance will be able to provide diagnostic services, firmware update, and infotainment services.

Microsoft says that the new Renault Clio along with the Nissan Leaf will not only be the first cars to use the Alliance Intelligent Cloud technology, but will also be the first vehicles powered by the Microsoft Connected Vehicle platform available immediately to consumers at sale. The vehicles in question will be sold in either Japan or Europe, but hopefully it won’t be long before these services reach the other 200+ markets where the vehicles are sold. Microsoft’s EVP and president of Global Sales, Jean-Philippe Courtois, stated that:

“Renault-Nissan-Mitsubishi is a longstanding partner and our first strategic partner for the Microsoft Connected Vehicle Platform. Today’s production release of the Alliance Intelligent Cloud enables a new generation of connected services powered by Microsoft Azure to come to market.”

In addition to this smart the benefits that we just mentioned, Microsoft says that multiple vehicles across the automotive companies in the alliance will be able to benefit from the same shared technologies. These might include monitoring, connected navigation and assistance, remote services, as well as firmware updates and other services.

While the partnership is certainly interesting, it isn’t exactly new for the automotive companies. A couple years back, Renault and Nissan signed a global multiyear contract to use Azure services to power it’s connected vehicles.


Fix Windows 10/11 error code 0xc0000034 with these solutions

Most of us often encounter the annoying Blue screens of death problems on our different versions of Windows.

You will see that the screen will simply turn blue or the system will completely fail to boot. 

What causes error 0xc0000034?

1. Bad sectors on Hard drive

All the critical system files will not be readable if you have bad sectors on your hard drive.

2. Corrupted Windows installation

You might have a corrupted installation of Windows as your OS crashed due to a malware or other reasons.

3. Missing boot files

Damaged BCD is a possible cause of the 0xc0000034 error. It occurs because your boot-related files are either corrupt, missing, misconfigured and damaged.

4. Compatibility Issues

Some of the users face the error because the recently changed hardware or software has compatibility issues with their PCs.

If you are a Windows 10 user you will see the following error message on your blue screen:

Recovery. Your PC needs to be repaired.
The Boot Configuration Data file is missing some required information.
File: \BCD
Error code: 0xc0000034
You’ll need to use the recovery tools on your installation media. If you don’t have any installation media (like a disc or USB device), contact your system administrator or PC manufacturer.
Press ESC for UEFI Firmware Settings.

How to get rid of  Windows 10 error code 0xc0000034?

  1. Run Windows automatic repair
  2. Manually repair the error
  3. Refresh Your PC

1. Run Windows automatic repair

automatic repair error code 0xc0000034

Windows provides an Automatic Repair tool that uses the Windows installation media (DVD, CD or USB drive) to fix the issue in a few steps. Here are some simple steps that you need to follow:

  1. Insert the Windows 10 DVD or USB stick and restart your system.
  2. Make sure to boot your system using the Windows installation media instead of your hard drive. You need to constantly press the specified key (F8 or F11 key depending upon your system) and choose the correct boot device.
  3. You will be navigated through the startup menu, select Next > Repair your computer.
  4. On the next screen select Troubleshoot and then click Automatic Repair.
  5. You will see a list of operating systems, select the one you currently have. A repairing process will start to check your Windows for problems and fix them.
  6. Wait patiently until the end of the process.

If the first solution fails to fix the error, try the next solution. 


2. Manually repair the error

error code 0xc0000034 command line

This method requires a Windows 10 setup bootable media, so you can fix the error by following these steps.

  1. First, plug in Windows 10 DVD or USB stick after starting your PC. The system will prompt you to select your keyboard and language settings.
  2. Select the Repair your computer option.
  3. On the next screen select Troubleshoot and then click Advanced Options.
  4. You will now see a Command Prompt option.  Click on it.
  5. As soon as you see a Command Prompt window, enter the following commands and press Enter key after entering each of them.
    • bootrec /fixMBR
    • bootrec /fixBoot
    • bootrec/scanos
    • bootrec /rebuildBCD
  6. At this step add the installation to the boot list by typing A and pressing the Enter key.
  7. Finally, exit the setup by closing the Command Prompt window and click the Continue button.
  8. In the end, you will proceed to the Windows 10 home screen.

As you have finished the entire process the Windows 10 Error Code 0xc0000034 should be fixed and your system should boot normally. If the problem still persists try the next solution.


3. Refresh Your PC

When you are unable to repair your PC using any of the above-mentioned solutions you can use Windows Recovery Environment (WinRE) to perform Automatic repair.

Please follow the following steps to refresh your Windows 10 PC:

  1. At the first step, you have to Reboot your PC.
  2. Next, you need to hit the F8 or F11 key (depending upon your system) to open Advanced boot options.
  3. On the next screen select Troubleshoot and then Refresh your PC. 
  4. Follow the instructions to complete the process.

How can I avoid the error in the future?

You have to care about the health of your Windows OS if you want to avoid this error in future. You should avoid downloading any suspicious programs that can be potentially harmful to your system. In case your system gets infected with any malware, scan your PC with antivirus software.

Most importantly, regularly updating your PC is the best solution to keep your system bug-free. Microsoft regularly releases updates including bugs and fixes to protect your PC. Following these simple steps can protect your PC from unnecessary damage and future issues. 

RELATED ARTICLES YOU NEED TO CHECK OUT:

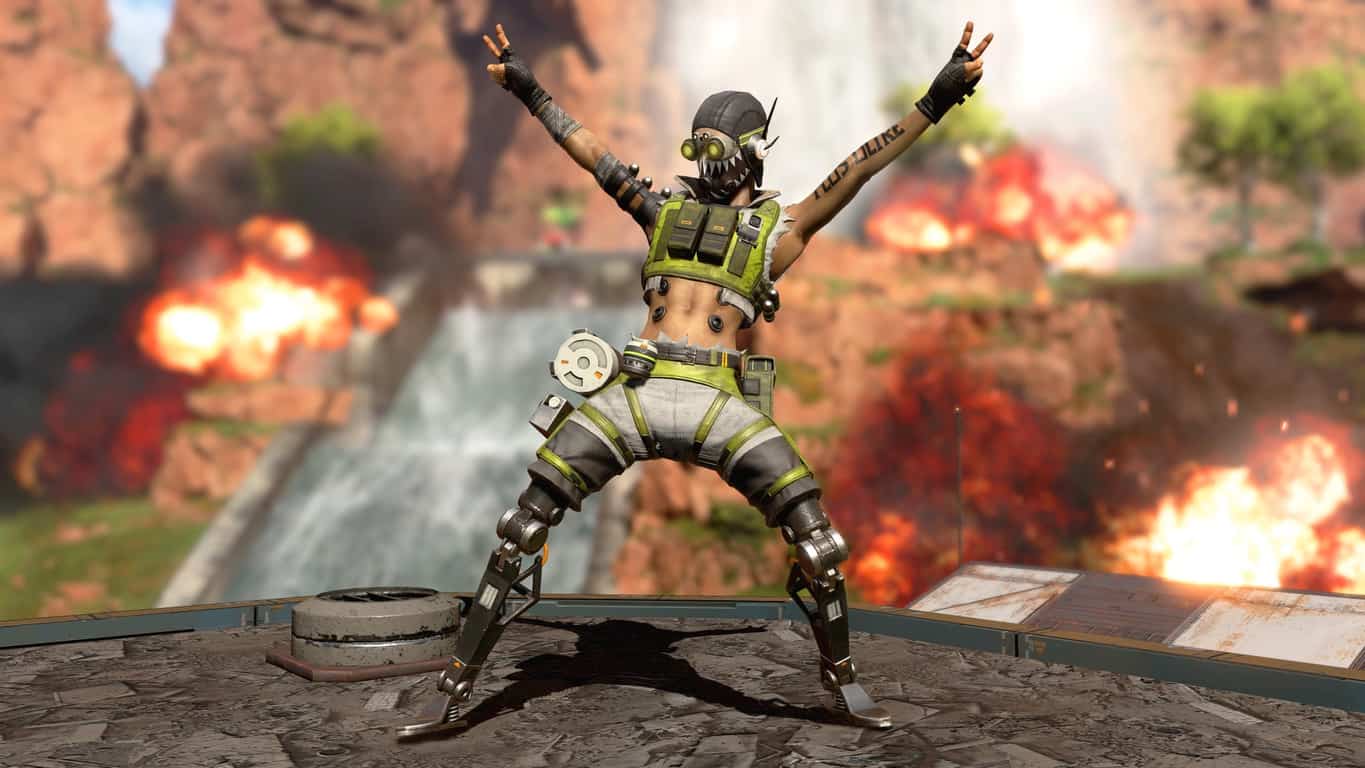
Apex Legends’ first season is now live on Xbox One consoles

The first season event for the hit Apex Legends video game, Wild Frontier, is now live on Microsoft’s family of Xbox One consoles.

Apex Legends is a free-to-play video game which means that some of this Season 1 content is available to free players while other content needs to be unlocked through gameplay after purchasing the Season 1 Battle Pass. It’s similar to how Fortnite’s events work.

Free players will be able to unlock one Wild Frontier Legend skin, five Apex Packs, and 18 stat trackers during Season 1 in addition to the new Legend, Octane who launched alongside the event.

Players who buy the Battle Pass (which costs 950 Apex Coins) will continue to unlock new items each time they level up during the course of the event. Up to 100 items can be potentially unlocked including skins, banner frames, and XP boosts. A purchase of the Battle Pass will also immediately unlock 3 Wild Frontier-themed Legend skins, no gameplay required.

Apex Legends has been a massive success story. Launching with next to no pre-launch promotion, the game managed to reach 50 million players in its first month online and has also been well-received by gamers and critics alike.

Are you playing Apex Legends and will you buy the Season 1 Battle Pass? Let us know in the comments below and then follow us on Pinterest for more Xbox gaming content.

Disney Magic Kingdoms video game updates on Windows 10 with new characters and more

The Windows 10 video game, Disney Magic Kingdoms, received an update today that added a variety of new characters, several new attractions, and some new land for players to use for all of their unlocked content.

The main focus of this update was the addition of Dumbo, Timothy Q. Mouse, and The Ringmaster from the classic Dumbo Disney movie. These three characters will now be part of the game’s main continuing story mode which means that players can work towards unlocking them with no time restrictions. The Dumbo-related attractions and concessions such as the Dumbo the Flying Elephant ride, The Barnstormer, Western Arcade, Dumbo Hat Stand, and Peanut Concession are also permanent content additions.

Beauty and the Beast’s LeFou was added to the game with this update, however he’s a limited time character that can only be unlocked in the new Tower Challenge event which begins tomorrow.

Here’s the full official list of all of the new content that was added to Disney Magic Kingdoms:

Characters

Dumbo

Timothy Q. Mouse

The Ringmaster

LeFou

Attractions

Dumbo the Flying Elephant

The Barnstormer

Western Arcade

Concessions

Dumbo Hat Stand

Peanut Concession

Slushies Stand

Cup of Tea Stand

Decorations

Choose Your Costume

Circus Banner

Great Goofini Cannon

Float

Dumbo Float

Disney Magic Kingdoms is a fairly popular Windows 10 game that’s frequently spotlighted in the Microsoft Store and is often pre-installed on new Windows 10 devices in many regions. It’s a free-to-play video game that tasks players with clearing an evil curse from the Disneyland theme park and welcoming new characters from classic and modern Disney films.

Do you play Disney Magic Kingdoms? Let us know what you think of this new content in the comments below and then follow us on Pinterest for more Windows 10 content.

Disney Magic Kingdoms
Developer:
Gameloft SE
Price:
Free

Mozilla Firefox browser adds Windows Hello authentication support

The Mozilla Firefox internet browser updated to Version 66.0 and, with this update, added support for Microsoft’s Windows Hello authentication. This means that after installing the latest update, Firefox users on a compatible Windows 10 device will be able to use their face, fingerprint, and external security keys for authentication on supported websites.

Other noteworthy changes made with the update to Version 66.0 include a new setting that disables autoplay sound on websites, improvements to search, better scrolling on web pages, redesigned certificate error pages, and general performance improvements.

Here’s the full release notes:

New

  • Firefox now prevents websites from automatically playing sound. You can add individual sites to an exceptions list or turn blocking off. To learn more about block autoplay, which will be rolled out gradually to all users, visit the Mozilla blog.
  • Improved search experience:
  • Find a specific webpage faster when you have a lot of tabs open: You can now search within all of your open tabs from the tab overflow menu
  • Easier search via a redesigned new tab in Private Windows
  • Smoother scrolling: Scroll anchoring keeps content from jumping as images and ads load at the top of the page
  • Improved performance and better user experience for extensions:
  • Extensions now store their settings in a Firefox database, rather than individual JSON files, making every site you visit faster
  • A redesigned keyboard shortcuts section in about:addons makes it easier to view and adjust default shortcuts
  • Redesigned certificate error pages help you better understand and resolve issues, including identification of certificate issuers for anti-virus software
  • Added basic support for macOS Touch Bar
  • Experimenting with an improved Pocket experience in New Tab with different layouts and more topical content
  • Improved performance and reduced crash rates by doubling web content loading processes from 4 to 8
  • Easier, passwordless security: Added support for Windows Hello on Windows 10, allowing you to use your face, fingerprint, or external security keys for website authentication

Fixed

  • The Dark and Light Firefox themes now override the system setting for title bar accent color on Windows 10
  • Linux users: Resolved an issue that caused Firefox to freeze when downloading files
  • Various security fixes

Changed

  • System title bar is hidden by default to match Gnome guideline for Linux users

Developer

  • DevTools Inspector is now fully usable when the Debugger is paused
  • Lowered priority of setTimeout and setInterval during page load to improve overall page load performance
  • Fixed: <button> element is no longer special cased in event dispatch, per latest specifications

Do you use Firefox on your Windows 10 device and will you take advantage of Windows Hello? Share your thoughts with the community in the comments below and then follow us on Pinterest for more Windows content.

KB4489890, KB4489888 and KB4489889 bring tens of bug fixes

If you’re running older Windows 10 OS version, you may want to check for updates. Microsoft released new updates for Windows 10 v1709, v1703 and v1607: KB4489890, KB4489888 and KB4489889, respectively.

These three updates bring tens of bug fixes and improvements to the table, fixing some major technical issues affecting the OS.

You can download these patches automatically from Windows Update. Alternatively, you can get the stand-alone update package from the Microsoft Update Catalog website.

Update changelog

These three update share many common fixes and improvements. We’ll list some of them below:

  • Addresses an issue with a Microsoft Access 97 database that stops a requested operation when a table or column has custom properties.
  • Updates time zone information for Buenos Aires, Argentina, Kazakhstan,  São Tomé and Príncipe. 
  • Addresses an issue with Microsoft Office Visual Basic for Applications that fails to use the Japanese Era registry settings for dates in the Japanese format.  […]
  • Addresses an issue with the Group Policy, “Turn off app notifications on the lock screen”. 
  • Addresses an issue that may prevent users from signing in and cause account lockouts when using the App-V client to start applications. […]
  • Addresses an issue that prevents App-V applications from starting and generates error “0xc0000225”. […]
  • Addresses an issue that prevents the authentication credentials dialog from appearing when an enterprise web server attempts to connect to the Internet. […]
  • Addresses an issue that removes the ALLOWCLSIDS policy from the policy XML file when you run the Add-SignerRule for Windows Defender Application Control. 

For more information, you can check out the complete update changelog pages listed below:

Keep in mind that these updates also bring issues of their own. Make sure to check the support pages first before hitting the check for update button.

KB4489894 fixes update install issues and black screen errors

If you’re running Windows 10 v1803, you can now install cumulative update KB4489894 in order to fix a plethora of issues affecting your system.

Windows 10 KB4489894 fixes the annoying Microsoft Office update issues that may prevent you from installing the latest patches on your machine.

At the same time, the update fixes the black screen issues that may occur after you wake up your device from Sleep mode.

It is worth mentioning that KB4489894 also addresses the lock screen issues that may be preventing your from unlocking your device.

Without further ado, let’s see what are some of the most important changes that this update brings.

KB4489894 changelog

  • Addresses an issue with a Microsoft Access 97 database that stops a requested operation when a table or column has custom properties.
  • Addresses an issue that prevents Microsoft Office updates from downloading from the Microsoft Store. […]
  • Addresses a reliability issue that may cause a laptop screen to remain black after resuming from Sleep if you close the lid when disconnecting from a docking station. 
  • Addresses an issue with the Group Policy, “Turn off app notifications on the lock screen”.
  • Addresses an issue that may prevent users from signing in and cause account lockouts when using the App-V client to start applications. […]
  • Addresses an issue with the Windows lock screen that prevents users from unlocking a device after multiple smart card users have used the same device. 
  • Addresses an issue that prevents the authentication credentials dialog from appearing when an enterprise web server attempts to connect to the Internet. […]
  • Adds a new Group Policy setting called “Enable Windows to soft-disconnect a computer from a network”. This determines how Windows will disconnect a computer from a network when it determines that the computer should no longer be connected to the network. […]
  • Addresses an issue that prevents the “Turn off app notifications on the lock screen” policy from working. The path is “Computer Configuration\Administrative Templates\System\Logo”.

These are only some of the most important improvements brought by the latest Windows 10 v1803 update. For more information about the full changelog, you can check out KB4489894’s support page.

Download KB4489894

You can automatically download KB4489894 on your computer via Windows Update. If you want to download the stand-alone package, go to Microsoft’s Update Catalog website.

Have you download KB4489894 on your Windows 10 computer? Tell us more about your experience in the comments below.

RELATED STORIES TO CHECK OUT:

Windows was unable to create a required installation folder [SOLVED]

System Update is an important task that should be done by all Windows users on a regular basis. It is the best way to fix potential vulnerabilities in your Windows OS.

You might have encountered an error that often appears during Windows Updates and is generally caused due to the lack of permissions of file or registry. The full error message you get looks like “Error: 80070005 – Windows was unable to create a required installation folder“. 

If you tend to ignore the error you might have to face system slow down or even crashes. You can easily troubleshoot the issue through these simple solutions. 

What to do if Windows was unable to create a required installation folder

  1. Allow user full control
  2. Use a third-party system repair tool
  3. Configure Windows Update Settings
  4. Windows Update Troubleshooter
  5. Reset the Permission Settings (Windows 7)

1. Allow user full control

Folder permissions might be the reason behind the error if it’s being caused by a specific application.

You can follow the following steps to get rid of the error on your system.

  1. Press Windows key + R to open the Run dialogue box.
  2. Now type the following command and click OK.
    • C:\Users\USERNAME\AppData
      appdata Windows was unable to create a required installation folder
  3. You need to replace USERNAME with the username of your account and replace C: with the letter of your Windows installation drive. 
  4. Find the Local folder right click on it and click Properties.
    local folder Windows was unable to create
  5. Navigate to Security > Edit > Add and then type Everyone in the textbox provided below.
    security permissions Windows was unable to create a required installation folder
  6. Click the Check names button that is available on the right side and click OK.
  7. Click Everyone and set its permissions to allow Full control.
    full control Windows was unable to create a required installation folder
  8. Now just save the changes by clicking OK.
  9. Finally, you have to restart the computer to apply the recent changes.

2. Use a third-party system repair tool

A specialized repair program that scans your PC and repairs your Windows OS without harming the user data is recommended.

This type of software identifies Windows files in critical condition and fixes them right away. Moreover, in case the files have been severely damaged and affect the stability of your system, the program will replace them with healthy ones from an online database. 

These tools can significantly improve the performance of your PC. They come with additional features such as registry repairing utilities, DLL file restore, and more.

You can even use these tools to clean your browser and remove junk files that may slow down your PC.

3. Configure Windows Update Settings

One of the easiest ways to fix the error is to allow automatic updates on your system.  You can configure Windows Update settings by following these steps.

  1. Open the Start menu and type update in the search box.
  2. You will see a list search results below, click Windows Update from the list. It will open Windows Update in the Control Panel.
  3. Now click Change Settings that on the left-hand side. 
  4. You will be navigated to the Choose your Windows Update Settings window. Head towards the Important updates section and select Install updates automatically (recommended). 
  5. You can also set a schedule to install these automatic updates by clicking Updates will be automatically installed during the maintenance window.
  6. Finally hit the OK button to save the changes.

You might face the error if your Windows Firewall Settings are not allowing Windows Update settings to take effect. You can adjust the Windows Firewall Settings by following these steps:

  1.  Click the Start menu and type Firewall in the search box.
  2.  You will see a list of search results, select Windows Firewall from the list.
    firewall Windows was unable to create
  3. On the left-hand side, you will find Allow a program or feature through Windows Firewall click on it and select Allow another program.
    allow another application Windows was unable to create a required folder
  4. Next, click the Browse button and you have to locate the svchost.exe file on the disk.
    browse application Windows was unable to create a required installation folder
  5. After locating the file click the following buttons Open > Add.
  6. Now you will be able to see a new program in the list called Host Process for Windows Services. 
  7. Finally, save the changes by clicking the OK button.

4. Windows Update Troubleshooter

Windows Update Troubleshooter is a handy tool that helps to automatically fix various issues while running Windows Updates. Microsoft offers two separate versions for Windows 7 & 8 and Windows 10. You need to download the version that is compatible with your PC. 

You have to run the downloaded troubleshooter file on your PC. It will automatically perform some fixes and finally, you will have to restart your device. If required, you can again run the troubleshooter to fix some additional issues.

5. Reset the Permission Settings (Windows 7)

This solution is specifically for those who are running a Windows 7 OS. This tool is used to reset the Permission Settings on Windows machine. 

  1. Download the subinacl.msi file on your Desktop and open the downloaded file. 
  2. Once the installation process starts you need to select C:\Windows\System32 as the destination folder. 
  3. Open Notepad by pressing Windows + R key on your keyboard and typing notepad.
    notepad Windows was unable to create a installation folder
  4. After pasting the following commands in your Notepad file and Save it on your Desktop with the name reset.bat.
    • @echo off
    • subinacl /subkeyreg HKEY_LOCAL_MACHINE /grant=administrators=f
    • subinacl /subkeyreg HKEY_CURRENT_USER /grant=administrators=f
    • subinacl /subkeyreg HKEY_CLASSES_ROOT /grant=administrators=f
    • subinacl /subdirectories %SystemDrive% /grant=administrators=f
    • subinacl /subkeyreg HKEY_LOCAL_MACHINE /grant=system=f
    • subinacl /subkeyreg HKEY_CURRENT_USER /grant=system=f
    • subinacl /subkeyreg HKEY_CLASSES_ROOT /grant=system=f
    • subinacl /subdirectories %SystemDrive% /grant=system=f
    • @Echo =========================
    • @Echo Finished.
    • @Echo =========================
    • @pause
  5. Now head to the Desktop,  right-click the reset.bat and select Run as administrator.
  6. It will open a window processing similar to the DOS.
  7. You will wait to wait for a few mins until you see the following message Finished, press any key to continue. 

If the issue is not resolved yet you need to use the Built-in Administrator to run the upgrade.

  1. Navigate to the Start button and locate Command Prompt.
  2. You have to right-click the Command Prompt, select Run as administrator and click Continue. 
  3. Press the Enter key after pasting the following command net user administrator /active:yes.
  4. Now login to the Administrator Account by restarting your system.
  5. Finally, run Windows 7 Upgrade and it is expected to successfully run without any issues. 

If the error still persists, you need to disable your antivirus program for a specified time period. By the end of this post, you must have resolved “Error: 80070005 – Windows was unable to create a required installation folder” by correctly following each step. Let us know in the comments section below if you still face any issues. 

New Sticky Notes version brings multi-desktop support

Last year, Microsoft released an update to Sticky notes (version 3.0). The tech giant introduced various features in that update including an ‘always on top’ option, Microsoft Launcher support and a web client.

Recently, Microsoft launched a new major update to enhance the existing capabilities of the app. The update bumps the current version to 3.6 and brings Image and Multi-Desktop Support.

In other words, the update comes with support for multiple desktops and image embedding. Currently, only the users running the Windows 10 Insider build 18855 and higher can install the update.

Photo embedding support

The photo embedding feature aims to target those Windows users who are interested in importing screenshots, mind-maps and similar important information.
Furthermore, users need to navigate to the Sticky Notes toolbar and right click on the image icon. They will now be able to select the image in Windows Explorer.

Multi-Desktop support

You might not have heard about the multiple desktop feature of Windows 10. If you have multiple desktops. Sticky Notes now reminds you about incomplete tasks by sharing notes across multiple desktops.

In order to use the feature, you need to head towards the Task View to select the note and check the show on all desktops option.

Secondly, the Sticky notes app now supports various hotkeys so that the users can switch to their notes. While using a different application, you can either use Win + Tab or Alt + Tab keys to switch to a specific note.

The multi-desktop support now allows the users to efficiently organize their activities. While toggling between different desktops, they can use the feature to separate personal and work applications.

Microsoft has introduced a couple of other improvements and fixes. Users can enjoy a smoother experience as a result. You will now find icons in the context menu and the text selection is now a lot faster. 

Most of the Windows users find the Sticky Notes to be a pretty useful application. It seems like it will take some time until the update goes live to the Windows 10 users.

RELATED ARTICLES YOU NEED TO CHECK OUT:

How to fix common The Division 2 bugs and errors on PC

Fans of the original title, we’ve got some good news for you. Tom Clancy’s The Division 2, has been freshly launched by Ubisoft.

The game didn’t have a flawless launch, requiring constant internet connection optimization as it makes use of Easy Anti Cheat.

Many players have reported various bugs and technical issues along their playthroughs.

We hope to see Ubisoft addressing them as soon as possible.

Meanwhile, we compiled this list of common bugs and errors and their corresponding workaround to help you out.

How can I to The Division 2 bugs?

1. Game freezes

Many users have reported their game freezing while in the middle of the action, with threads dedidcated to this issue on reddit.

Reporting no sound in the actual game after CC and have trouble completing the prologue due to freezes, occasionally only will unfreeze when alt tab. Very disappointed Ubisoft and not impressed.

How to fix The Division 2 game freezes

With reports coming in on game freezing even on high-end machines, a solution is to reduce your overall graphics settings for the game.

Also keep in mind to have the latest GPU drivers installed. Until the issue is fully addressed it seems that this could work for the time being.

We have a small guide for Nvidia users to tweak their settings to avoid the game freezing up. Here are the steps to follow:

  1. Open Nvidia Control Panel;
  2. Click on Manage 3D settings, and go to Program Settings and locate TheDivision2.exe;
  3. Set Max Pre-Rendered Frames to 1;
  4. Set Monitor Technology to G-Snyc (only if available);
  5. Enable Threaded Optimization;
  6. Set Power Management to Highest Performance;
  7. Set Multi-Display/Mixed GPU Acceleration to Single display performance mode.

2. No In-Game Sound

We all love the kick from a good soundtrack or just avoiding the chaos of gunfights. But when there’s no sound to begin with, we can’t stick to the subtitles alone.

Various users on Ubisoft forums have reported this issue, mostly being associated with Logitech headsets.

My 2 friends that had the problem changed their windows sound standard away from logitech (if you don’t have another device try pluggin out your headset) and it worked for both. So it seems there is definitly something wrong with logitech and the game.

How to fix sound issues in The Division 2

With so many users pointing out to Logitech headsets being the culprit here, we can only suggest testing out different manufacturers.

For good measure, go to the settings of The Division 2 and look for the Audio menu. Switch the Voice Chat option to anything that isn’t related to your Logitech headset and this could do the trick.

Also, we’re gonna leave this tiny tip for disabling Logitech services:

  1. Start Task Manager, select Processes, press the L key, find Logitech Surround Service, and end this process;
  2. In the event this doesn’t work, end the Logitech Game Software process for safe measures;
  3. Restart your PC.

3. The Division 2 Error Messages

Issues related to Echo, Delta, Bravo, are closely tied to connection issues that Uplay faces.

Ubisoft advises re-connecting to your account after you restart your internet connection. With no other fixes being discovered so far, we can only wait.

In the meantime, how do you like The Division 2 so far? We’d like to know.

Have you experienced any bugs or glitches? And what is your solution to them? Let us know.

RELATED STORIES TO CHECK OUT: