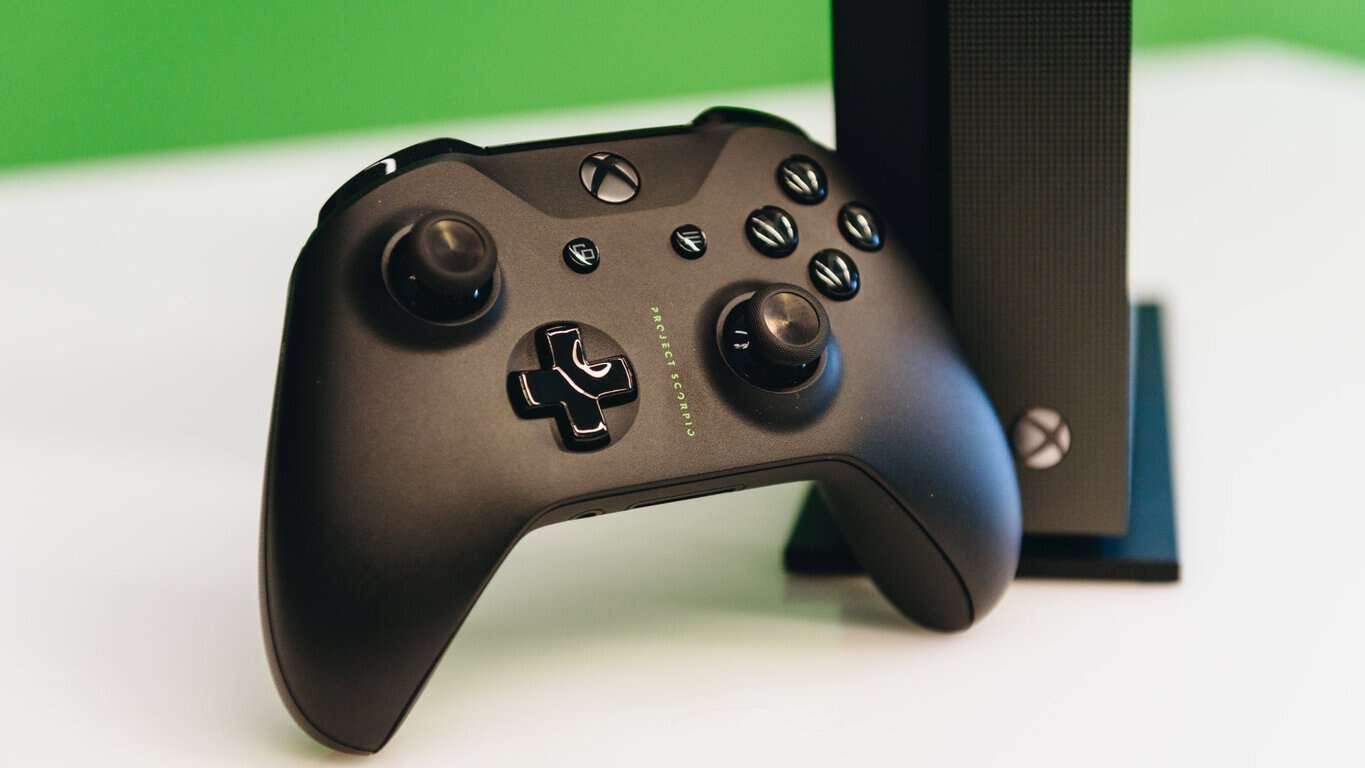
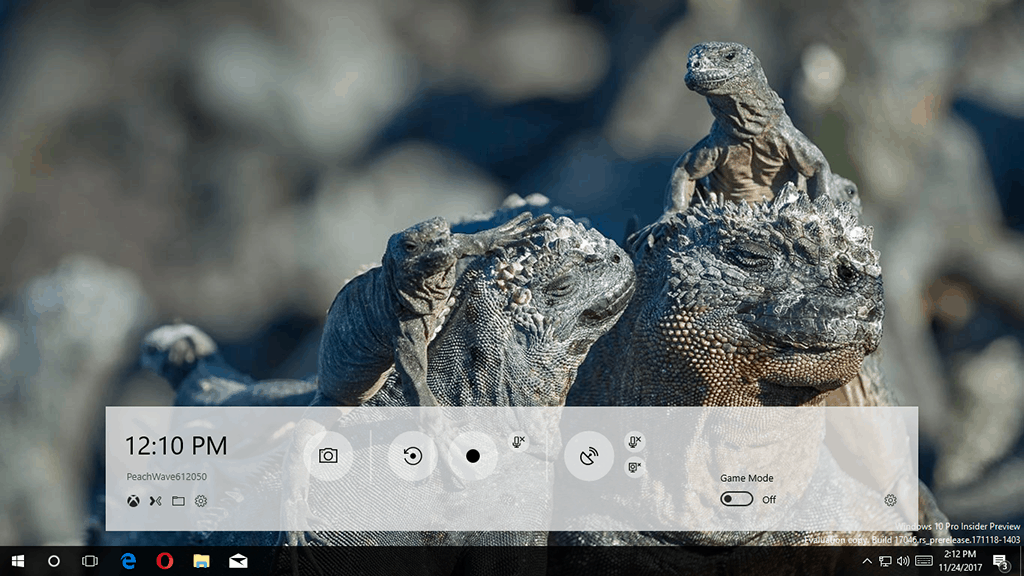
Warhammer: End Times Vermintide and Child of Eden are now free with Xbox Live Gold

Today is the December 1st, which means that Xbox Live Gold subscribers now have two new games to add to their game library for free. This month, the first Games with Gold titles are the online FPS Warhammer: End Times – Vermintide and the Kinect-enabled game Child of Eden. The first one is already enhanced for the Xbox One X with support for 4K graphics. You can find more details about both games below.

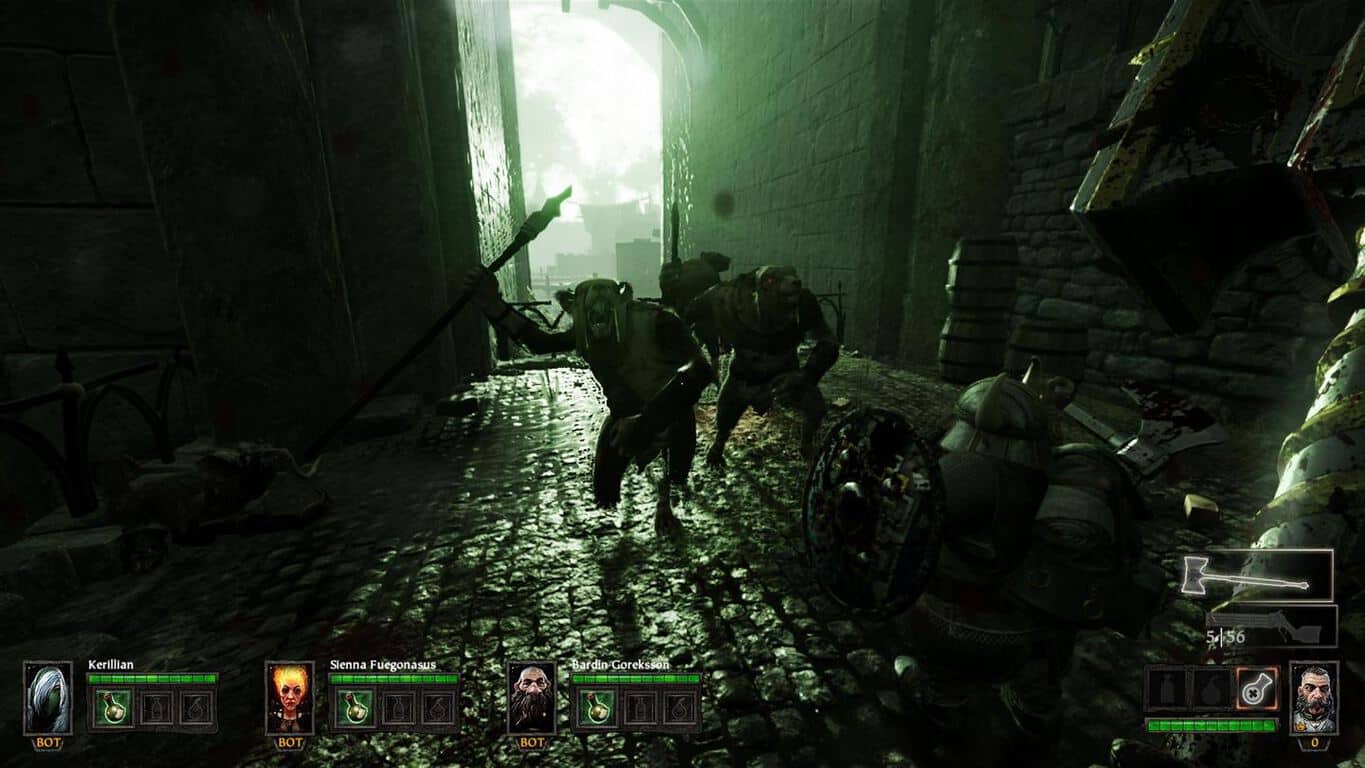
Warhammer: End Times – Vermintide ($39.99 value):

The world is ending… though few believe it. The once proud city of Ubersreik now stands in ruin at the hands of the dreaded Skaven army. Few have survived their ruthless invasion. Team up with 3 friends and work together to thin out the ratmen’s forces and drive them out of the city. Assume the role of one of five heroes, and hack, slash, smash, burn and pierce the vile Skaven using a multitude of weapons. Fight your way through the city of Ubersreik, from the top of the Magnus Tower to the bowels of the Under Empire. This is our last stand and only you can stem the Vermintide.

Child of Eden ($29.99 value):

One of the most anticipated games of 2011 for Kinect. Winner of 9 awards at E3 for innovative graphics, music, and gameplay. Child of Eden is the “multi-sensory shooter” that will send players diving into a visual matrix of synchronized music and mind-blowing visuals. It will usher forth yet another landmark game experience from the mind of renowned game designer Tetsuya Mizuguchi.

As a reminder, the two other Games with Gold titles to be available starting December 16 are Back to the Future: The Game and Marlow Briggs and the Mask of the Death. Anf If you haven’t done it yet, you can still download the excellent Tales from the Borderlands Complete Season for free through December 15.

Microsoft tests a redesigned Windows 10 People app with Fast Ring Insiders

Windows Insiders on the Fast Ring can now test a redesigned version of the Windows 10 People app, which now looks slightly more consistent with the native Mail and Calendar apps (via Aggiornamenti Lumia). The big headers for “Contacts,” “What’s new” and “Groups” are gone, replaced with a hamburger menu with Acrylic transparency effects.

Clicking on a contact will open a card on the right where you can see contact details, recent conversations and upcoming events with this contact. There is also a pin button to add contacts to your taskbar (next to the My People shortcut) or your Start Menu.

We’re not seeing the update on Windows 10 Mobile yet, but the new desktop app is quite an improvement over the previous version. If you’re on the Fast Ring, the version 10.3.3241.0 of the People app is what you’re looking at, let us know in the comments if you like this new design.

Spotify Windows 10 app picks up Live Tile support with latest update

When Spotify launched in the Microsoft Store earlier this year, it was ported using Microsoft’s Desktop Bridge tool. Though still a solid option for fans of the service who also own a Windows 10 PC, the app did not include support for some of Windows 10’s unique features such as Live Tiles or notifications.

Well, Spotify has finally delivered, and a recent update to the app finally introduces support for Live Tiles (via Windows Central.) The Live Tile support is still a minor addition, but it’s appreciated nonetheless. Turned on by default, it is available in three tile sizes (medium, wide, large) but will only show suggested playlists and songs, and not what is currently playing. As usual, the user can also turn the Live Tile off by right-clicking and choosing “Turn live tile off.” from the “more” sub-menu.

The three sizes of the Live Tile

This is still a very far way from the native Groove Music app, but also a small step forward, opening up hope for additional features in later updates to come. You should be seeing this update now in the Microsoft Store. If you’re not seeing it, you can manually trigger the update by clicking the link below and opening the Microsoft Store on your PC.

Spotify Music
Spotify Music
Developer:
Spotify AB
Price:
Free+

Play The Escapists 2 Special Edition right now on Xbox One

Looking for a new strategy game? Something a little different than the usual run-n-gun, hack-n-slash action? The Escapists 2: Special Edition is now available on Xbox One, giving you all access to a pretty solid strategy sandbox game on your favorite console. The special edition includes the base game, the season pass, and the “Wicked Ward” add-on. In other words, it gives you about as complete of an experience as you can get.

The Escapists is a pretty storied franchise of games at this point, having built up a dedicated following after the first game’s release. Now, after being a relatively successful series on consoles, the creators at Team 17 are enjoying a thriving franchise across all platforms. If you’re interested in picking up the special edition, it’ll run you about 30 dollars.

Samsung clears up the mystery behind the Microsoft Edition S8 and S8 Plus

Despite a handful of publicly announced partnerships, it seems Samsung would like its customer to know it’s still fully committed to the big G and that rumored Galaxy S8 Microsoft Edition phone is nothing more than a rumor.

According to Windows Central, the often whispered Galaxy S8 and S8 Plus Microsoft Edition phones were never an actual product. In hindsight, it seems a bit obvious that Samsung would not go out of its way to produce a phone with specific Microsoft software onboard, but for many, the idea of a Microsoft Edition phone conjured up those exact expectations.

As we, along with Windows Central reported back in the day, the concept of a Microsoft Edition phone was a fairly straightforward affair where employees at the company’s retail outlets would sell a purchased Samsung Galaxy S8 or S8 Plus running Android and then walk customers through the process of Microsoftizing it by downloading items such as Arrow Launcher, Microsoft Apps, and Bing Search.

Galaxy S8+ with Lumia 950 XL

Samsung was in enough agreement with the idea that when issuing its clarification about the non-existent S8 and S8 Plus Microsoft Edition phones, they detailed experiences as such.

Samsung Galaxy S8, Galaxy S8+, and Galaxy Note8 devices are available in the Microsoft online and retail stores with a unique Microsoft experience which ensures their customers, particularly small-to-midsize business owners and entrepreneurs, a best-in-class productivity experience. There is not a ‘Microsoft Edition’ brand of any Samsung Galaxy products.

So, long story short, there is not and perhaps never will be a Microsoft Edition branded phone coming from Samsung and as far as we know, was never officially announced to have been. What Microsoft fans and Windows Phone converts can look forward to, is turning every Android phone into a Microsoft Edition phone thanks to a handful of applications and tweaks.

Get a free engraving with any Xbox Design Lab controller

As if customizing your very own Xbox controller with your whatever wacky color combination your hearts desires isn’t enough, Microsoft is now offering free engravings to make sure your friend’s Cheetos-laden fingers never mistake your controller for theirs.

What used to cost an additional $9.99 for anyone visiting the Xbox Design Lab website looking to brand their controller with whatever quip or signature they could come up with is now free for what we believe is a limited time.

Further sweetening the pot, Microsoft is also claiming early takers of this deal should get their custom controllers in time for Christmas.

For those interested, head over to the Xbox Design Labs website to try out a few customizations and engraving options before dolling out the $79.99 for that personalized piece of hardware. Anecdotally, I tried out several options to actually match the decor in my living room straight from the website and the results were awesome.

Share with us below in the comments your ideal customized controller.

Defend the Earth, play Sonic Adventure 2 with today’s Xbox One Backward Compatibility titles

Earth Defense Force 2017 and Sonic Adventure 2 are the latest Xbox 360 games you can play on your Xbox One console. These two titles follow the addition of Peggle 2 and Marlow Briggs and the Mask of the Death to the Backward Compatibility list two days ago.

For those unfamiliar, Earth Defense Force 2017 is a futuristic third-person shooter developed by Japanese developer Sandlot, and the first game in the series to be released in North America. As for Sonic Adventure 2, it’s a remastered version of the platform game originally released on the Sega Dreamcast back in 2001. You can find more details about both games below.

Earth Defense Force 2017 ($14.99)

Earth Defense Force is a shooting action game and follow-up to “The Earth Defense Force” and “The Earth Defense Force 2”, released in Japan. In this game, the player becomes a soldier of an international army, the EDF, trying to defeat an alien army that suddenly arrives on Earth. The PS2 predecessors have sold over 350,000 copies in Japan, and now the popular series has made its way to the XBOX 360. To take advantage of the console’s high definition capability, the graphics and gameplay have been improved, while the design and game world have been completely revamped.

Sonic Adventure 2 ($9.99)

In the fight between heroes and villains, will you choose to save the world or conquer it? The hunt for the Chaos Emeralds is on and battle lines have been drawn between Hero and Dark. Experience two unique adventures featuring both long-time heroes and new and returning villains as they battle for the fate of the world! Sonic Adventure™ 2 makes its return on Xbox LIVE Arcade with a full cast of playable heroes and villains, exciting two-player competitive modes, Chao Gardens, and more than 30 action-packed stages, all remastered in HD!

Overall, nine new Xbox 360 games have been added to the Xbox One Backward compatibility list this month, and we’re looking forward to see what’s in the pipeline for December.

Dead Space 3 is now available in EA Access on Xbox One

There’s another Xbox backward compatibility game title available for EA Access subscribers. This time it’s Dead Space 3, an Xbox 360 exclusive, released in 2013.

EA Access subscribers can now play Dead Space 3 on the original Xbox One, Xbox One S, Xbox One X. Dead Space 3 on EA Access has all of the Season Pass content, including Dead Space 3: Awakening.

If you don’t already have one, I suggest getting an EA Access subscription. It’s a cheaper option if you want to play some of the best EA game titles without buying each one individually. EA Access is just $30 for the year, a 50% savings over the $5 monthly plan.

Right now, EA Access subscribers can play games like Mass Effect: Andromeda, Titanfall 2, NHL 17, and more. EA Access also allows players to play new Xbox One games (on a trial basis) before you buy and you get an additional 10% off any EA games you decide to buy. Join EA Access today.

Dead Space 3 is currently available to buy for $19.99 from the Microsoft Store.

Dead Space™ 3
Dead Space™ 3
Developer:
Electronic Arts
Price:
Free

Microsoft adds four new members to Board of Directors, announces quarterly dividend

Microsoft yesterday held its annual shareholders meeting, where CEO Satya Nadella discussed the future direction of the company and how Microsoft is helping customers and partners thrive. Four new Board of Directors members were voted on and added during the meeting, and the company also announced its quarterly dividend.

The Microsoft Board of Directors now sees the addition of Reid Hoffman, Hugh Johnston, Penny S. Pritzker, and Arne Sorenson. Hoffman is a partner at Greylock Partners and was a co-founder of LinkedIn, Johnston is the CFO of PepsiCo Inc, Pritzker was a former US Secretary of Commerce, and Sorenson is president and chief executive officer of Marriott International.  Other proposals were acted on by the company’s shareholders can be seen below.

  • Approved, on a nonbinding advisory basis, the fiscal year 2017 compensation of the company’s named executive officers. The advisory measure received more than 95 percent of votes cast.
  • Approved a yearly advisory vote on executive compensation. The advisory measure received more than 90 percent of votes cast.
    Ratified the selection of Deloitte & Touche LLP as the company’s independent auditor for fiscal year 2018, with over 98 percent of votes cast.
  • Approved material terms of the performance goals under the Microsoft Corporation Executive Incentive Plan, with a vote of more than 98 percent of votes cast.
  • Approved the Microsoft Corporation 2017 Stock Plan, with a vote of 96 percent of votes cast.

In addition, the Microsoft Board of Directors declared a quarterly dividend of $0.42 per share, payable on March 8, 2018 to shareholders of record on Feb. 15, 2018, with an ex-dividend date on Feb. 14, 2018.  Appearing front of the same board members, Satya Nadella also discussed Microsoft’s pursuit of a $100 billion gaming industry and Windows 10 reaching 600 million monthly active devices.

No files on desktop: Use these quick fixes for Windows 10/11

aNothing can be more frustrating than turning on your computer, logging in then you get no files on your desktop.

It is even worse when you have no idea where they could have disappeared to, or how to restore them back to your screen and get back to your work.

Well, we have just the solutions you need when you get no files on desktop Windows 10, especially after you performed an upgrade or recently installed it on your computer then this happened.

This article looks at the quick solutions you can use, some simple, some with longer steps to take, but at the end of it all, we hope you will get sorted and the files are restored to your desktop.

Steps to take when you get no files on desktop Windows 10

  1. Check Windows.old folder
  2. Show hidden files, folders and drives
  3. Run Microsoft Safety Scanner
  4. Run a System File Checker scan
  5. Perform a Clean Boot
  6. Check if your settings are on tablet or desktop mode
  7. Create new user profile
  8. Perform a System Restore
  9. Reset the Windows explorer
  10. Boot in Safe Mode

1. Check Windows.old folder

If you get no files on desktop Windows 10, especially after an upgrade, which doesn’t cause data loss but instead creates a Windows.old folder in the operating system on local drive. In this case, check for that folder, open it and restore the files back to your desktop.

Here’s how to do this:

  • Click Start
  • Select File Explorer

get no files on desktop Windows 10

  • Click This PC

get no files on desktop Windows 10

  • Open Local C: drive
  • Open Windows.old folder

get no files on desktop Windows 10

  • Click Users

get no files on desktop Windows 10

  • Select your User name

get no files on desktop Windows 10

  • Go to Desktop folder and find which data was saved on your desktop, then copy and paste it to your desktop

get no files on desktop Windows 10

Did this help? If not, try the next solution.

2. Show hidden files, folders and drives

Here’s how to do this:

  • Click Start
  • Select File Explorer

get no files on desktop Windows 10

  • Click This PC
  • Click Desktop

get no files on desktop Windows 10

  • Click Organize
  • Select Folder and Search Options
  • Click View and look for Hidden files and folders
  • Select Show hidden files, folders and drives

get no files on desktop Windows 10

  • Click OK

Did this work for you? If you still get no files on desktop Windows 10, try the next solution.

3. Run Microsoft Safety Scanner

Microsoft Safety Scanner is a tool designed to locate and remove malware from Windows PCs. It only scans when manually triggered, then you get to use it 10 days after you download it.

This means you need to download the latest version of the tool before you perform each scan on your computer.

However, the Microsoft Safety Scanner tool doesn’t replace your antimalware program. It helps remove malicious software from your Windows 10 computer that could cause you to get no files on desktop Windows 10.

Here’s how to run Microsoft Safety Scanner:

  • Download the tool
  • Open it
  • Select the type of scan you want to run
  • Start the scan
  • Review scan results on the screen, which lists all malware identified on your computer

To remove the Microsoft Safety Scanner tool, delete the msert.exe file by default.

Check if the issue persists. If so, try the next solution.

4. Run a System File Checker scan

A System File Checker scan checks or scans all protected system files, and then replaces the incorrect versions, with the genuine, correct Microsoft versions.

Here’s how to do this:

  • Click Start
  • Go to the search field box and type CMD
  • Select Command Prompt

get no files on desktop Windows 10

  • Right click and select Run as Administrator

get no files on desktop Windows 10

  • Type sfc/scannow

get no files on desktop Windows 10

  • Press Enter
  • Restart your computer

If you still get no files on desktop Windows 10, try the next solution.

5. Perform a Clean Boot

If you manage to boot in Safe Mode, perform a clean boot to eliminate any software conflicts that may be causing you to get no files on desktop Windows 10.

Performing a clean boot for your computer reduces conflicts related to software that can bring up the root causes of the problem. These conflicts can be caused by applications and services that start up and run in the background whenever you start Windows normally.

How to perform a clean boot

In order to successfully perform a clean boot on Windows 10, you have to be logged on as the administrator, then follow these steps:

  • Go to the search box
  • Type msconfig

get no files on desktop Windows 10

  • Select System Configuration
  • Find Services tab

get no files on desktop Windows 10

  • Select Hide all Microsoft services box

get no files on desktop Windows 10

  • Click Disable all
  • Go to Startup tab
  • Click Open Task Manager

get no files on desktop Windows 10

  • Close Task manager then click Ok
  • Reboot your computer

You will have a clean boot environment after all these steps are carefully followed, after which you can try and check if your files are restored.

6. Check if you’re settings are on Tablet or Desktop Mode

Sometimes you can get no files on desktop Windows 10 simply because of the display settings mode on your computer.

In this case, check if the settings are on Tablet mode and turn it off by doing the following:

  • Click Start
  • Select Settings

get no files on desktop Windows 10

  • Go to System
  • Click Tablet Mode

get no files on desktop Windows 10

  • If it is ON, toggle it to OFF

get no files on desktop Windows 10

  • Check if your desktop is showing the files

If this doesn’t help, try the next solution.


7. Create new user profile

You can create a new user profile then change settings to administrator privileges, and check if you still get no files on desktop Windows 10.

Here’s how you can create a new user profile:

  • Click Start
  • Select Settings

get no files on desktop Windows 10

  • Select Accounts
  • Click Add someone else to this PC

get no files on desktop Windows 10

  • Fill in the form with the user name and password. Your new user account will be created.
  • Click on Change account type
  • Click the drop down arrow and choose Administrator to set the account to administrator level
  • Restart your computer
  • Login to the new account you just created

If the issue goes away, then it may mean your other user profile is corrupted.

You can try the following in case of a corrupted user profile:

  • On your new account, use it to downgrade your usual account
  • Click Apply or Ok
  • Raise back your old account to its default admin level
  • Rinse and repeat a few times as this will help to remove any corruption
  • Leave your account on as Administrator

Check whether you still get no files on desktop Windows 10 when using the newly created account. If it persists, then you can either Fix the old user account or migrate to the new account.

If you have different user accounts, log in to each and check if you can find the files and folders that were there after the upgrade to Windows 10.

You can also disable the Built-in administrator account by doing the following:

  • Right click Start
  • Select Command Prompt (admin) to open Command Prompt

get no files on desktop Windows 10

  • Type the command: net user administrator /active: no
  • Press Enter

Did this fix the chop? If not, try the next solution.

8. Perform a System Restore

If you get a PC status at risk warning on your computer, use System Restore to create restore points using the steps below and see if it helps:

  • Click Start
  • Go to the search field box and type System Restore
  • Click Create a restore point in the list of search results

get no files on desktop Windows 10

  • Enter your administrator account password or grant permissions if prompted to
  • In the System Restore dialog box, click System restore

get no files on desktop Windows 10

  • Click Next
  • Click a restore point created before you experienced the problem
  • Click Next
  • Click Finish

Restoring doesn’t affect your personal files. It however removes apps, drivers and updates installed after the restore point was created.

To go back to a restore point, do the following:

  • Right click Start
  • Select Control Panel
  • In the control panel search box, type Recovery
  • Select Recovery

get no files on desktop Windows 10

  • Click Open System Restore

get no files on desktop Windows 10


  • Click Next
  • Choose the restore point related to the problematic program/app, driver or update
  • Click Next
  • Click Finish

Still get no files on desktop Windows 10? Try the next solution.

9. Reset Windows Explorer

Here’s how to do this:

  • Press CTRL+SHIFT+ESC to open Task Manager

get no files on desktop Windows 10

  • Right click on Windows Explorer

get no files on desktop Windows 10

  • Click End Task
  • On the top of Task Manager, click File
  • Click Run new task

get no files on desktop Windows 10

  • Type explorer.exe
  • Press Enter

Does this fix the problem? If not, try the next solution.

10. Boot in Safe Mode

Safe mode starts up your computer with limited files and drivers but Windows will still run. To know whether you’re on Safe mode, you’ll see the words at the corners of your screen.

If the issue of programs disappearing persists, check whether it occurs while your computer is in Safe mode.

Follow these steps to start your computer in Safe Mode:

  • Click on Start button
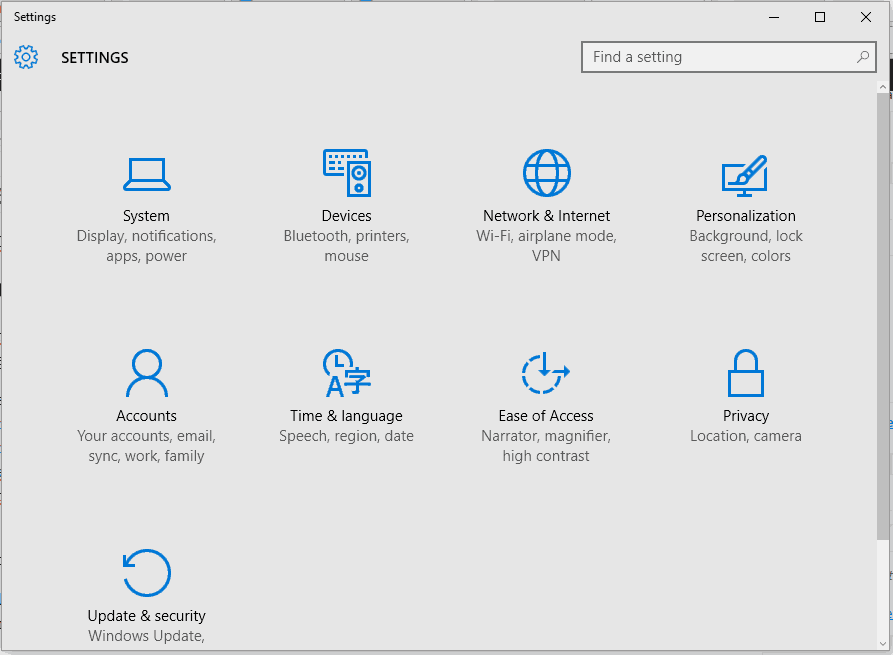
  • Select Settings – the Settings box will open up
  • Click Update & Security

get no files on desktop Windows 10

  • Select Recovery from the left pane

get no files on desktop Windows 10

  • Go to Advanced startup
  • Click Restart now
  • Select Troubleshoot from the choose an option screen
  • Click Advanced options
  • Go to Startup Settings and click Restart
  • Once your computer restarts, a list of options will come up.
  • Choose 4 or F4 to start your computer in Safe Mode

A quicker way to get into Safe Mode is to restart your computer then do the following:

  • From the Choose an option screen, select Troubleshoot>Advanced options>Startup Settings>Restart
  • Once your computer restarts, a list of options will come up.
  • Choose 4 or F4 to start your computer in Safe Mode

If the issue isn’t there while in Safe mode, then your default settings and basic drivers are not contributing to the issue.

Did any of these ten solutions help you get your files back on your desktop? Let us know by sharing with us your experience in the comments section below.

RELATED STORIES TO CHECK OUT:

Install Windows 10 KB4051033 to fix app launch issues and print bugs

Microsoft rolled out a new Windows 10 version 1607 update, addressing a series of issues affecting the OS. Windows 10 KB4051033 brings a long list of fixes to the table making the Anniversary Update more stable and reliable.

The update fixes the issue where some Epson SIDM and TM (POS) printers failed to print on x86 and x64-based systems. This problem affects KB4048953.

Another example is the issue where a service fails to start when two or more services are using the same built-in account. When this issue occurs, the following error messages appear on the screen “The service did not start due to a logon failure“, or, “A specified logon session does not exist. It may already have been terminated.”

Additionally, KB4051033 also fixes the issue where screen tearing and scrambled content appear when a computer is connected to three or more USB 3.0 display devices.

For more information about the full changelog, you can check out Microsoft’s Support page.

Download KB4051033 now

Unfortunately, this update also brings two issues of its own:

  • Internet Explorer 11 users who use SQL Server Reporting Services (SSRS) may not be able to scroll through a drop-down menu using the scroll bar.

The good news is that the scroll wheel on a mouse still works as expected and the issue only applies to document mode 11. Loading the page with document mode 10 may temporarily solve this issue. Here’s how to do that:

  1. Select F12.
  2. Select the Emulation tab.
  3. In the Document mode drop-down menu, select 10. Reload the page in the new document mode.
  • The error “CDPUserSvc_XXXX has stopped working” may appear. Additionally, Event ID 1000 is logged in the Application event log noting that svchost.exe_CDPUserSvc_XXXX has stopped working and the faulting module name is “cdp.dll”.

Microsoft is working on a permanent fix for both issues.

RELATED STORIES TO CHECK OUT:

You can now download Microsoft Office on Chromebook for offline use

Google revealed that it would bring Android apps to Chrome OS back in 2016 to provide their laptops and hybrid devices with increased versatility. Microsoft also stated that it’s currently working to improve its own Chrome OS support.

The apps turned out to only be available on Google’s Pixelbook and a bunch of other devices.

Microsoft’s strategy remains the same

According to Microsoft, the company’s strategy remained the same. This means that Office for Android is currently supported on Chrome OS devices via the Google Play Store.

Google Play on Chrome OS is still in beta, and it seems that Microsoft is teaming up with Google in order to deliver the best experience for Chromebook users. They are planning to make their apps available on all compatible devices and to make them generally available.

Microsoft’s full Android Office Suite, now available for all Chromebooks

It looks like Microsoft’s complete Android Office Suite has become available for all Chromebooks and you can now download Microsoft Office on Chromebook for offline use.

Chromebooks are mainly used by a vast majority of the K-12 students at least in the US, so this move was quite a significant one. Without Office is was much more comfortable for many to just use Google Apps. The sales of mobile PCs into the K-12 sector developed a lot in 2016 with annual shipments growing 18% year-on-year in 2016.

During 2017, the market shipment growth was still significant. This constant growth in the education sector highlights the reason for which PC OEMs and the major OS providers keep focusing hard on the education market.

This whole experience is not as exquisite as using the full desktop Office in Windows 10, but for the K-12 level, it is likely more than enough, you can find the apps by heading to Google Play Store.

RELATED STORIES TO CHECK OUT:

Windows 10 Skype app gets first Fluent design touches in latest Insider update

Microsoft has just updated its Skype UWP app for Fast Ring Insiders, delivering subtle touches of Fluent design to the messaging app. Though a bit small of a feature, the update brings it visually up to speed with some of the other stock apps in Windows 10.

Seen in the featured image above, the 12.10.534.0 update introduces Fluent Design’s reveal effects to the sidebar of the Skype app, where conversations are listed. Again, still a minor change, but it’s an indication that Microsoft has not forgotten about the UWP Skype app, and might be adding more Fluent Design UI enhancements soon. However, we’ve not seen any traces of Fluent Design on Windows 10 Mobile so far.

This update also introduces some changes to the profile page. The toggles for ” Do Not Disturb” and  “Do Not share my presence” are replaced with a simple “Status” field, which is more consistent with how status management now works on other platforms. There also is a change in the green status dots, which are now slightly larger.

The Status Page

You can expect this update to roll out to a wider audience soon. For now, though, Windows Insiders can bask in all the Fluent Design glory by heading to the Microsoft Store and updating the Skype app.

Select to choose what happens with: Disable/configure this AutoPlay feature

Windows 10 is pre-loaded with various useful features and most of these built-in capabilities can be easily personalized based on your own preferences. Well, among these features we can detail the AutoPlay engine. Thus, during the lines from below we will learn how to enable, disable and configure this specialized Windows 10 option.

AutoPlay is a default Windows 10 app which is usually initiated automatically when you attach an external device to your computer. The program will recognize the external gadget and will ask what you want to do next – in most situations you will be prompted with the ‘select to choose what happens with…’ message along with a list of options such as: import photos and videos; get your stuff on your PC, tablet and phone; open device to view files; or take no action.

Now, if receiving the ‘select to choose what happens with…’ message each time you want to use an external device is starting to get annoying, you need to smartly configure the AutoPlay software as explained during the following guidelines.

Easily configure the Windows 10 AutoPlay feature

  1. Press the Win+I keyboard hotkeys and from System Settings click on the Devices entry.fix update and security not working windows 10
  2. From the left panel of the main window, click on AutoPlay.
  3. Now, you can choose how to personalize this feature.configure autoplay windows 10
  4. You can disable this option by switching the check button displayed under ‘Use AutoPlay for all media and devices’.
  5. You can also set certain AutoPlay settings for each external device that was or will be connected with your Windows 10 PC.
  6. Just extend the dropdown menu displayed under each entry and choose a certain action that will then be automatically initiated each time you will connect that device with your computer.
  7. When done, save your changes and reboot.

ALSO READ: Windows Media Player disappeared after update? Here’s how to get it back

You can also configure the AutoPlay option by using Control Panel as explained:

  1. Click on the Windows search icon – it’s located near the Windows Start button (it’s the same button with the Cortana icon).
  2. In the search icon type autoplay and click on the result with the same name.
  3. Now, from Control Panel you will be able to access all the settings that can be used for customizing the AutoPlay field – you can choose what to do with each type of media, you can choose the camera storage partition, you can customize the DVDs section and so on.

So, there you have it; that’s how you can access the AutoPlay feature on Windows 10 in order to decide how to customize and personalize this built-in functionality.

Therefore, you can now choose to configure the ‘select to choose what happens with…’ message and the options that follow. If you still cannot customize this feature or if you need further explanations, don’t hesitate and contact us – you can do it easily and quickly by filling out the comments field from down below.

RELATED STORIES TO CHECK OUT:

Want the best USB-C hub for Windows? 6 great picks with multiple connectivity

The use of multiple devices has brought with it an increased need for more power and connection ports, not just for devices like your phone or tablet, but also hardware like keyboards, mice, and printers.

For such a demanding task, there is need for either more cables to connect each device or hardware, or you can simply get one hub to manage all these and keep your work space free from clutter.

This is why USB hubs were created – to extend your system’s functionality to cater for multiple connections for USB-compatible devices, and hasten the share and transfer of files from these devices through expanded USB slots.

If you’ve noticed, most modern computers and laptops come with a very limited number of ports, at most two, and if you’re lucky, three.

One of these is a USB-C port, which is increasingly taking over from its type-A and type-B predecessors.

For you to effectively operate all your devices and hardware simultaneously, without the need for many cables and still do your work, you need the best USB-C hub for Windows.

Our top picks for the best USB-C hub for Windows are described in this article, and these meet more than just the need to power up your devices.

USB-C hubs for Windows

  1. Letscom
  2. CharJenPro
  3. Anker
  4. Astronia
  5. Letscom
  6. Dodocool

1. Letscom

best USB-C hub for Windows

Letscom is one of the big names you’ll come across while looking for the best USB-C hub for Windows.

This particular one is a 6-in-1 USB-C hub with which you can expand your computer’s ports as it comes with a USB-C port (only for data transfer, not video output or charging), 2 USB 3.0 type-A ports, an SD and TF card slot. The type-A port on this hub supports a charging output of up to DC5V/900mAh but isn’t recommended for charging.

Features include PowerDelivery and data transfer, all at the same time so you can charge your computer while connecting all peripherals for transferring your files. It also has a sleek and slim aluminum, alloy design, plus it is about the size of a chocolate bar, so it is very compact and portable.

It is also plug and play so there’s no need for any software, drivers, or complicated installation – it is ready to go soon as you get it.

For the best performance, however, the devices you connect to this hub shouldn’t exceed a total current of 900mA, otherwise the current may become unstable or get disconnected. Check the current on your devices before connecting to the hub.

It comes in silver and gray colors.

⇒ Get Letscom USB-C hub for Windows

2. CharJenPro

best USB-C hub for Windows

This is a premium multi-port hub or adapter that works for all laptops and USB-C ports, making it not just ideal, but the best USB-C hub for Windows you can get in the market.

It has an array of 7 connectivity ports, with a HDMI port that supports up to 4K video output, three USB 3.0 (3.1 gen 1), SD and micro SD card reader slots, USB-C PowerDelivery port, all in a sleek, slim metal body construction.

Like most USB-C hubs, this one is also plug and play so you don’t need any installation for software or updates. However, the PowerDelivery port must be plugged in if more than 1 high powered device is connected to the hub.

If you have any issues with this gadget, you can easily get tech support from the CharJenPro customer care team, which takes utmost pride and care in everything they do, including the engineering, design and packaging of the product.

This hub compliments your laptop or computer to streamline a consistent design language throughout your workspace.

Note: it can only support one external hard drive at a time due to power requirements.

It comes in Rose Gold, Silver and Gray colors.

⇒ Get CharJenPro USB-C hub for Windows

3. Anker

best USB-C hub for Windows

This is one of the top names as well in the tech gadget industry.

When looking for the best USB-C hub for Windows, it pops up with amazing reviews from its many users.

With this hub, you can expect USB-C compatibility with the latest computers and devices that have type-C ports, get extra ports by turning one USB-C port into 4 USB 3.0 ports, super speed data of up to 5Gbps (you can easily transfer an HD movie in seconds), a sleek and ultra-compact aluminum design, plus an 18-month warranty with friendly customer service.

Enjoy faster and safer charging due to Anker’s advanced technology. It is also compatible with Windows XP or higher versions.

Note: for a stable connection, avoid using high power consumption devices with this hub such as external hard drives. It may also not support 2.4GHz wireless devices, MIDI devices, and some USB 3.0 devices.

⇒ Get Anker USB-C hub for Windows

4. Astronia

best USB-C hub for Windows

This bus-powered USB-C hub comes in a stylish design with advanced heat management, and multi-system support plus a high strength cable for additional durability.

Other features include support for hot-swapping and multi-platform, plug and play, HDMI port for maximum resolution so you can mirror your laptop display to a HDMI-enabled device, SD/TF and micro SD slot, and 3 USB 3.0 ports with up to 5Gbps transfer speeds, and to top it up, you get a high speed RJ45 Ethernet port.

This is the best USB-C hub for Windows that lets you quickly upload or download your digital media files, connect external storage and other hardware devices such as your keyboard, mouse, optical driver or headsets and many others.

It also has a PowerDelivery port for charging laptops and other devices, while transmitting data at the same time. Each of its ports support over-current protection so your computer and devices as well as the hub are kept safe from power surges.

⇒ Get Astronia USB-C hub for Windows

5. Letscom 8-in-1

best USB-C hub for Windows

From the image, this hub looks like a Swiss Army knife, and it actually is, but for your computer and devices.

This 8-in-1 USB-C hub, also expands computer ports into an HDMI output port, Gigabit Ethernet (RJ-45) port, USB-C charging port, two USB 3.0 PORTS, one USB 2.0 port, and an SD/TF card slot – everything in one place.

It is slim, compact, and portable so it can fit in your bag when you’re traveling or commuting. It’s also plug and play so there’s no need for software installations before using it – it is ready to use once you get it.

For a stable connection, avoid using it with high power devices such as an external hard drive. Its USB-C female port is for charging USB-C laptops with ports that support USB PowerDelivery, so it doesn’t support data transfer.

⇒ Get Letscom 8-in-1 USB-C hub for Windows

6. Dodocool

best USB-C hub for Windows

This is a 6-in-1 USB-C hub that can extend into three super speed USB 3.0 ports, one USB PowerDelivery type-C charging port, one HD output port, one RJ-45 Gigabit Ethernet port, without the need for driver installations so it is plug and play.

It also supports hot swapping, and you can connect up to 3 USB-A peripherals and transfer data with up to 5Gbps speed.

If you need a HD video adapter, you can use it to extend the display of your laptop to your monitor, projector or TV in up to 4K UHD resolution using the HD output port.

⇒ Get Dodocool USB-C hub for Windows

Factors to consider when looking for the best USB-C hub for Windows

Unlike the usual USB-A and USB-B ports found on most PCs and laptops, the USB-C port is gaining more popularity because it enables faster data transmission, and quick charge for different devices.

When it comes to a USB hub, most users look for the following:

  • Ports that work whenever anything is plugged into them (and an indicator that shows they’re working)
  • Well-arranged ports that keep the desk organized and do not suck up much space
  • Minimum of three data ports
  • Speeds that do not drop off
  • Multiple functionality such as USB type A or B ports, Gigabit Ethernet adaptability, and ability to power itself (that is the hub should be a powered hub as this means it has higher power supply for all your devices and hardware)
  • A good price

It is important to note that not all devices can run from USB hubs, so you’ll have to plug it directly to your laptop’s ports. However, your laptop will give you a warning message prompt in such a case, and recommend what to do when this happens.

Like a Swiss Army knife, a multi-port hub has several extended ports that offer a variety of functions to help you fulfill tasks such as:

  • Charging your phone
  • Fast data transfer
  • Charging your laptop (if you have a type-C connector)
  • Connect hardware such as your keyboard, mouse, flash drive or hard disk
  • Stream HDTV using the HDMI port
  • Read SD and Micro SD memory cards

The compact design of multi-port USB hubs effectively take up little desk space, and support high power devices, when connected to an external power source.

Have you found the best USB-C hub for Windows from these six? Let us know your favorite pick, or if you’re using one that you feel should make the list, let us know by leaving us a comment in the section below.

RELATED STORIES TO CHECK OUT:

Skyrim and Fallout 4 get the 4K treatment with today’s Xbox One X update

Earlier today, Bethesda Studios updated a number of titles in its game collection, including Elder Scrolls V: Skyrim and Fallout 4, to use all the power of the Xbox One X. Skyrim and Fallout 4 now support 4K resolution, dynamic range, and a number of other updates. Fallout 4 contains an extensive list of updates across all platforms, that’s available on Bethesda’s website.

Besides Skyrim and Fallout 4, Bethesda updated their other game titles too. Here’s a list of the other games and their updates:

Wolfenstein II: The New Colossus

  • Supports 4K Resolution
  • Dynamic Resolution

Dishonored 2 & Dishonored: Death of the Outsider

  • Supports 4K Resolution
  • Dynamic Resolution
  • Improved framerate stability
  • 4K textures
  • Improved geometry/draw distances
  • Improved anti-aliasing
  • Improved shadows quality

The Evil Within 2

  • Upgraded resolution
  • Higher framerate
  • 30 fps lock removal

The Elder Scrolls Online (ESO)

  • Supports Native 4K Resolution and HDR
  • Increased view distance
  • Upgraded shadows with Screen Space Ambient Occlusion
  • Upgraded water reflections

All these updates are live today, with the exception of ESO (details here), which will get its update for Xbox One X tomorrow, November 29. Bethesda also added that “Fallout 3 and The Elder Scrolls IV: Oblivion are also joining the Xbox One X Enhanced catalog.” Bethesda gave no update as to when we will see the updates, so stay tuned.

Destiny 2 gets free trial on Xbox One, PS4, and PC

Seems as though the developers behind the Destiny franchise are looking to increase their gamer adoption numbers this holiday season by offering a free trial of their latest installment, Destiny 2.

For gamers who are home on school break, working relaxed winter hours or simply have more free time in December, they can now try out Destiny 2 free on both Xbox One, PC and PlayStation 4 starting November 28th.

The trial will consist of both a single player campaign and a player vs player mode and progress gained from during the trial will thankfully be carried over if and when a full purchase of the game is done.

The timing of the trial seems a bit strategic not only in luring more buyers during the holiday gift-giving season but also precedes a highly anticipated expansion pack that might just be the tipping point for fans to convenience their friends and fellow combatants to buy the full version of the game.

Bungie, the studio behind Destiny and Destiny 2 have not publically stated how long players will have with the free trial which makes downloading after November 28th a priority to get as much time with the game before potentially plopping down $59.99.

As with Black Friday, we imagine Destiny 2 will continue to see on-again, off-again discounts from major retail outlets well into next year. So, if you’ve always wanted to try out Destiny but not at the steep asking price of $60, head over to your Xbox One, PlayStation 4, app or webpage and download the game to your console immediately.

Only a part of ReadProcessMemory or WriteProcessMemory was completed [FIX]

The ReadProcessMemory is one of the tricky error messages. Unlike other errors, this one keeps popping out of the blues and this makes it hard to diagnose.

I have personally come across the “Only part of a ReadProcessMemory or WriteProcessMemory request was completed” message quite a few times. Speaking from my experience it usually happens when my Windows machine is running a bunch of apps in the background. The error message also pops up while opening applications and installer files.

As I said earlier,it’s pretty evident that the error is closely linked to the memory issue. The error message also hints at the possibility of the operating system failing to read or write the request. As with most of the error messages, we need to troubleshoot the problem and see if it goes away.

Let’s start with the most obvious stuff and then move on to the ones that are slightly advanced (please ensure that you create a System Restore point before trying out the troubleshooting steps).

How to fix ReadProcessMemory or WriteProcessMemory issues

1. Restart

Yes, the restart is like one drug for all the problems. Invariably most of the problems vanish with a restart and the ReadProcess Memory is no exception. Also, try restarting the Explorer and see if the error persists. On a related note try disabling your antivirus/firewall and see if it makes a difference.

2. Recheck File Permissions

The “Only part of a ReadProcessMemory or WriteProcessMemory request was completed” error can also be caused when the user doesn’t have sufficient permissions. In this case, try taking ownership of the file.

3. Run Check Disk Utility

One can unearth disk errors by running the Check Disk Utility. In order to run the scan follow the steps below

  • Right Click on the Drive
  • Select Properties
  • Select check button under the Tools Tab and choose “Scan Drive” option
  • Please keep in mind the scan option will not be shown if the disk doesn’t has any errors
  • Once the disk check is done restart the computer and see if the problem persists

4. Clean Boot

Clean boot is somewhat similar to the safe mode, during the clean boot the Windows will start with a limited set of drivers and startup programs. Here’s how to perform a Clean Boot:

  1. Go to Start > Search and type “msconfig”
  2. Once the System Configuration is open, go to the General and choose “Selective Startup.”
  3. In the next menu select Hide All Microsoft Services and click on Disable all.
  4. Click on OK and with this, your PC is started in Clean Boot mode.

5. Problem with optical drive

In some cases, the “Only part of a ReadProcessMemory or WriteProcessMemory request was completed” error message has been linked to an issue with the optical drive. If you are using a pen drive or a portable hardisk try copying the files to the local drive before giving it another try.

6. Bad files in the “Temporary Internet Files folder”?

A couple of users have reported that the issue was caused by a bad temporary file that required an Administration access to delete. The chances are that even if you clear the temporary files with this program the file causing the problem will not be deleted since it requires an elevated access.

In order to trace the rogue file one needs to install and run the Process Monitor, the path of the file would look something like the one mentioned below,

D:\\\Users\\\Default\\\AppData\\\Local\\\Microsoft\\\Windows\\\Temporary Internet Files\\\SQM\\\iesqmdata_setup0.aqm

On an ending note, the “Only part of a ReadProcessMemory or WriteProcessMemory” issue should be resolved by following one or all of the above step. If nothing works (it should, ideally) try diagnosing the hard disk for error or perhaps a faulty storage connector.

RELATED STORIES TO CHECK OUT:

Poll: The Windows Insider Program changed yesterday – is that ok with you?

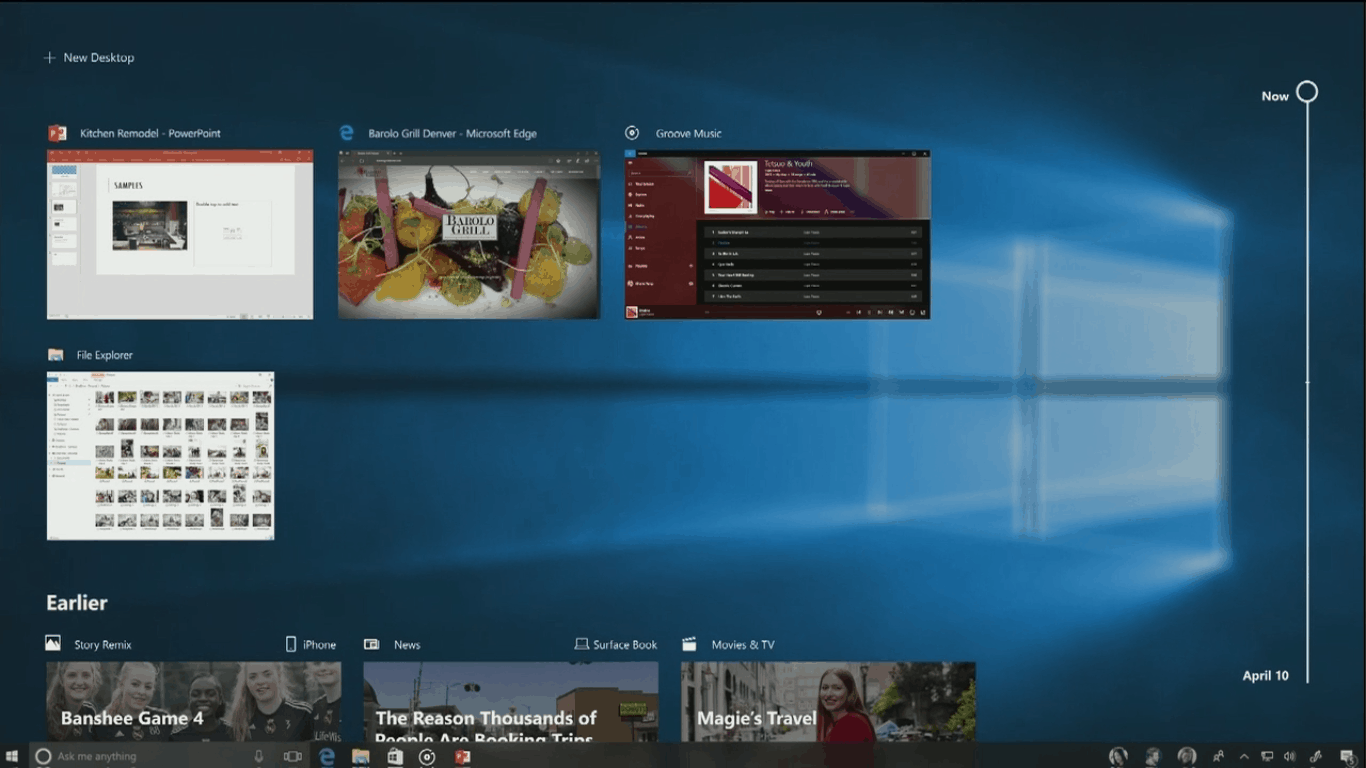
Yesterday, Microsoft took an unusual step in pre-announcing two new features that will soon be included in Windows 10 Insider RS4 builds, Timeline and Sets. Timeline will allow users to go back to a previous point in time in their workflow, re-opening files, apps, and webpages. “Sets” is the not-yet-final name for Tabs in UWP apps, and what sounds to be a useful but perhaps not as earth-shaking a change as Timeline.

But what got some Insiders fired up on Twitter yesterday was mention of what we think is a fundamental change to the way the Windows Insider Program works. Dona Sarkar wrote this:

Second – we’re going to start doing controlled studies with some of new features for Windows 10 we’re working on. We’ve been doing this on a smaller scale – like trying out different Hub icons in Microsoft Edge to see which one people like more. Now we’re going to start doing these with entire features. This means that a smaller percentage of you will initially get certain new features in builds and others may not get these new features for a while, as we compare the usage and satisfaction of these features versus people who don’t. Eventually everyone will get these features—but it just could be awhile. With this approach, it also means that we will make these features broadly available when they are ready, not necessarily tied to the next major feature update of Windows 10. (italics ours)

We had fun yesterday debating the significance of the change on Twitter, which boils down to this: are Insiders in the program to be helpful testers for Microsoft, or are they looking to gain early access to builds and features? Of course for many/most of us, it’s probably some of both, but up until yesterday, if you were on the Windows Insider Fast Ring, you were ensured first access to new features. With the changes, this is no longer the case, and a percentage of us may have to wait days or weeks to try out features that we’re only able to read about in the tech press.

Anyway, I contended on Twitter that some/most testers join the Insider for early access more than to test whatever comes their way, is that true? Why did you join the Windows Insider Program, and what are your expectations? Let us know in the poll below:


While we don’t doubt for a minute that doing A/B testing on Insiders will yield results for Microsoft that may well ultimately make Windows better, we can’t help but feel that something significant was taken away yesterday. Do you agree or disagree? Let us know in the comments below

Microsoft announces significant extension of its Redmond campus

Microsoft announced today a massive extension project for its Redmond-based campus, which has been the company’s home since 1986. The company plans to expand its 500-acre campus with “18 new buildings, 6.7 million square feet of renovated workspace, $150 million in transportation infrastructure improvements, public spaces, sports fields and green space.”

The refresh project will kick off next fall and should take up to seven years, with the goal to create more room for up to 8,000 additional employees. “Our new campus will be more open and less formal, divided into a series of “team neighborhoods” while capturing more natural light and fostering the type of creativity that will lead to ongoing innovation to advance the industry and benefit our customers,” explained Microsoft President and Chief Legal Officer Brad Smith.

The construction of the new campus should require 2,500 construction and development jobs, and Smith explained that it should be a boon for the Puget Sound area. “It’s an investment that’s good for our employees, good for the Puget Sound community, and makes good sense for our shareholders,” said Smith. “We are not only creating a world-class work environment to help retain and attract the best and brightest global talent, but also building a campus that our neighbors can enjoy, and that we can build in a fiscally smart way with low environmental impact.”

The extension of Microsoft’s Redmond campus is a reflection of the company’s recent growth, and it also follows other redevelopment projects at Microsoft’s offices in Vancouver BC and London. Following the opening of Apple’s new spaceship campus in Cupertino, it seems that it also was an opportunity for Microsoft that it represents one of the best workplaces in the tech sector. “As Microsoft continues to create the tools and services that are shaping the future of work, we can’t think of a better time to modernize our campus into a model of ingenuity and innovation,” explained Smith.

Can’t update spyware protection on your computer?

Spyware is simply any software that gets into your system and tries to pick up as much information about you, or your company, without your knowledge.

Once the information is gathered, it sends it out without your consent, to a different unknown entity, and when this is done in a hidden manner, it is for malicious purposes.

This kind of rogue software comes in four types: adware, tracking cookies, Trojans, and system monitors.

Others include keyloggers which captures your key strokes from usernames to password combinations, Trojans, rootkits, webcam spyware and web beacons, used for tracking and storing your movements on the internet, besides serving annoying popup ads.

If you’re worried about keyloggers, check out this list of the best anti-keylogger software that you can use to obliterate this type of threat.

If you have an antivirus in your computer system, but it cannot update spyware protection, then there’s a problem, because it means your computer’s security and that of your data may be compromised.

There are ways to prevent your system from breaches brought about by spyware and here are some solutions you can use.

How to update spyware protection on your computer

  1. Use Bitdefender
  2. Run Windows Update troubleshooter
  3. Perform a Clean Boot then install updates
  4. Disable your antivirus program
  5. Manually reset Windows Updates components

Solution 1: Use Bitdefender antivirus

update spyware protection

This is the quickest and fastest solution to update spyware protection on your computer.

Unsecured devices are potential breeding grounds for spyware, and hackers. Although you may not have the time or resources to install antivirus on each of your connected devices, you can keep track of what is in your network.

Bitdefender, a top of the line antivirus and security suite, offers the best range of security solutions against all forms of threats, including spyware.

What makes this antivirus stand out is its strong features that literally get rid of and monitor your system, so all you have to worry about is whether you’ve accomplished your goals for the day.

These features include:

  • Continuous updates
  • Continuous protection to save you time and reduce the risk of infections by automatically renewing your subscription
  • Manual security scans using the virus and spyware removal service where a Bitdefender tech expert connects remotely to locate and destroy viruses and malware
  • Advanced threat defense through behavioral detection to closely monitor your active apps and take instant action against infections
  • Webcam protection to keep your privacy intact and prevent webcam leaks. It also notifies you when apps are trying to access your webcam, so you can block unauthorized access
  • Multi-layer ransomware protection
  • Anti-phishing, anti-fraud, and anti-theft solutions
  • Rescue mode to remove sophisticated malware before Windows starts, then reboots the computer in Rescue mode for cleanup and restoration.
  • Bitdefender Autopilot that runs cyber-security by itself on your system, and Bitdefender Photon that saves you computing resources and improves speed and performance

We recommend you to install Bitdefender on your PC to keep spyware at bay. However, if you want to use other solutions, check out the suggestions listed below.


Solution 2: Run Windows Update troubleshooter

The Windows Update troubleshooter automatically detects, and fixes most incorrect settings on your computer when you cannot update spyware protection.

Running Windows Update troubleshooter resolves any issues that prevent you from updating Windows, so follow these steps to run Windows Update troubleshooter:

  • Click Start
  • In the search field box, type Troubleshooting
  • Click Troubleshooting

update spyware protection

  • Click View all in the left pane

update spyware protection

  • Select Windows Update

update spyware protection

  • Run Windows Update Troubleshooter and follow the instructions on the screen

update spyware protection


Solution 3: Perform a Clean Boot

If you still cannot update spyware protection after running the Windows Update troubleshooter, perform a clean boot to eliminate any software conflicts that may be causing the issue.

Performing a clean boot for your computer reduces conflicts related to software that can bring up the root causes of the update spyware protection failure. These conflicts can be caused by applications and services that start up and run in the background whenever you start Windows normally.

How to perform a clean boot

In order to successfully perform a clean boot on Windows 10, you have to be logged on as the administrator, then follow these steps:

  • Go to the search box
  • Type msconfig

update spyware protection

  • Select System Configuration to open the box

update spyware protection

  • Find Services tab

update spyware protection

  • Select Hide all Microsoft services box

update spyware protection

  • Click Disable all
  • Go to Startup tab
  • Click Open Task Manager

update spyware protection

  • Close Task manager then click Ok
  • Reboot your computer

You will have a clean boot environment after all these steps are carefully followed, after which you can try and check if the problem is gone.


Solution 4: Disable your antivirus program

Firewalls and your antivirus program software may prevent you from being able to update spyware protection.

It isn’t recommended to permanently turn the security software off, but doing this temporarily will check if it is the actual cause preventing you from updating the spyware protection. If your computer or device is connected to a network, the network’s policy settings may prevent you from turning off your firewalls and antivirus software.

If you disable your antivirus program, do not open any email attachments or click links in messages from unknown people.

Immediately after you’re done fixing connection error, re-enable your antivirus and firewall.

  • Privacy firewall, and quick risk checker that scans for security holes and vulnerabilities.

Solution 5: Manually reset Windows Updates components

Disclaimer: this solution contains steps that are part of modifying the registry. Please note that serious problems may occur if you do this incorrectly. Ensure you follow these steps correctly, and carefully.

Back up the registry before you modify it, then restore it if a problem occurs.

Follow these steps to manually reset the Windows Updates Components:

  • Right click Start
  • Select Command Prompt (Admin)

update spyware protection

  • Click Yes when asked for permissions, then the box below will pop up

update spyware protection

  • Stop the BITS, Cryptographic, MSI Installer, and Windows Update Services by typing the following commands at a command prompt:
  • net stop wuauserv
  • net stop cryptSvc
  • net stop bits
  • net stop msiserver
  • Press Enter after each command you type
  • Rename the SoftwareDistribution and Catroot2 folder by typing the commands below in the Command Prompt then press Enter after each command you type:
  • Ren C:\Windows\softwareDistribution\SoftwareDistribution.old
  • Ren C:\Windows\System32\catroot2\Catroot2.old
  • Restart the BITS, Cryptographic, MSI Installer, and Windows Update Services by typing the following commands in Command prompt:
    • net stop wuauserv
    • net stop cryptSvc
    • net stop bits
    • net stop msiserver
  • Type Exit in the Command Prompt to close it

Try running Windows Updates again to check if update spyware protection issue has been resolved.

Note: It isn’t recommended to uncheck the Give me updates for other Microsoft products when I update Windows update option. Windows Updates downloads and installs updates required to run Windows efficiently.

Tips to protect your computer from spyware

  • Encrypt your sensitive files
  • Use an antivirus such as Bitdefender, which comes with Secure deletion to prevent your original files from being erased beyond the possibility of forensic recovery.
  • Destroy unnecessary files from your computer to free up space and enhance its performance

Did any of these solutions work for you? Let us know in the comments section below.

RELATED STORIES TO CHECK OUT:
Xbox teams up with Highsnobiety to launch livestream show

Highsnobiety is a website dedicated to its namesake, and as a tech fan, you’d be forgiven not knowing much about the lifestyle focused blog. For the most part, Highsnobiety and the world of tech remained seemingly in suspended states with one another until the iPhone X debut and brought the two into a very public collision course, with former Apple insiders finding themselves on the outs in favor of writers of the fashion and lifestyle publication.

Continuing its courtship with mainstream technology, Highsnobiety will now find itself hosting a livestream show called Pushing Buttons with some help from Xbox community.

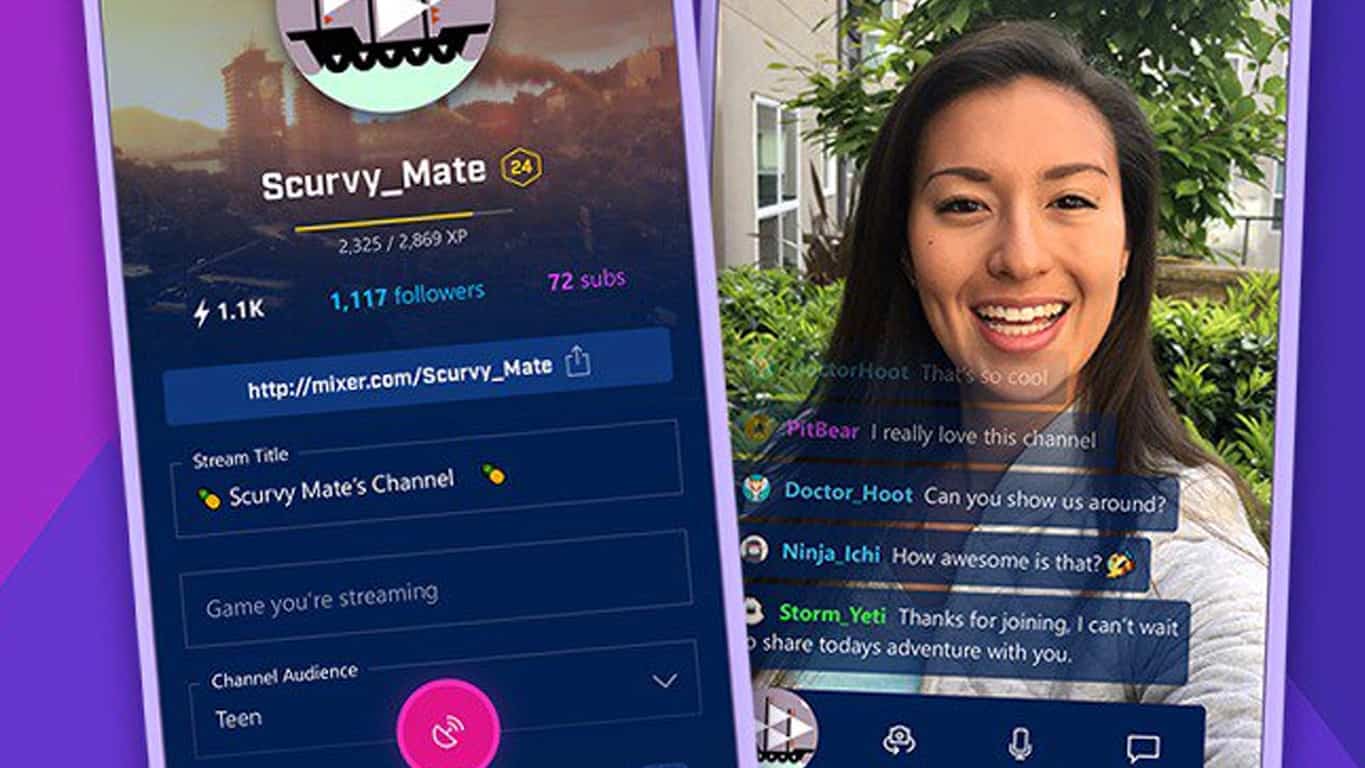
Gaming fans rejoice because we’ve teamed up with Highsnobiety, the online publication covering forthcoming trends and news in fashion, art, music, and culture, to bring you a brand-new interactive livestream show on Mixer. Starting this Friday, December 1 at 2 p.m. PT / 5 p.m. ET, “Pushing Buttons,” will feature a range of celebrities and influencers as special guests.

To celebrate the new livestream the Xbox team will be offering gear from partner Raised by Wolves which will include totes, jackets, jerseys, and hats in limited quantities on top of an Xbox One S 1TB Minecraft Limited Edition Bundle giveaway each week.

For those interested, the guest for the livestream includes:

Feel free to visit Highsnobiety’s social media pages for details on the schedule, giveaways, and additional contest throughout the rest of the year.

Peggle 2, Marlow Briggs come to Xbox One Backward Compatibility

Microsoft today added two new games to the Xbox One Backward Compatibility Catalog. Gamers with an Xbox One, Xbox One S, or Xbox One X can now enjoy Peggle 2, and Marlow Briggs on their systems (via Neowin.) As usual, we’ve included the trailers, download links, and details for both these titles below.

Marlow Briggs and the Mask of the Death: $14.99

A new breed of WARRIOR returns, committed to destroying the enemies of FREEDOM! No-nonsense hero Marlow never shied away from danger or trouble. But now he faces his ULTIMATE challenge. Blasting into Central America, he has an industrial evil to defeat whilst bound to an ancient Mayan Death Mask who’s had no-one to talk to for 2000 years. With cliffhanger over the top action and cinematic gameplay, Marlow Briggs takes inspiration from the best of blockbuster films, comic book heroes, and action games with its focus on relentless high-octane combat, exotic and danger filled environments and epic set pieces.

Peggle 2: $11.99

Everything is better with Peggle! Catch the fever now on Xbox 360 with Peggle 2, where you’ll master over 120 new levels and trials in the sequel to one of the most engaging puzzle-action games of all time. Unleash amazing magic powers as you learn from Peggle Master Bjorn, and 4 all-new masters like the dark and mysterious Luna, while you shoot balls at colorful, challenging boards of pegs to reach Extreme Fever. But there’s more! Unlocked costumes allow you to dress up the various masters for laughs and for multiplayer fun. And try four-player Peg Party mode or two-player Duel mode, which let you deploy your Peggle skills to the utmost against friends and family. Peggle 2 is a game for our age, and, indeed, all ages!

The last titles to be added to the catalog were Cars: Mater-National, Persona 4 Arena, Tecmo Bowl Throwback, and Jewel Quest. As always, if you own a disc version of these games, you can insert it into your console, and your Xbox will begin downloading the game to your hard drive, though you will still need the disc to play. If you own digital copies, they will show up in the Ready to Install” section on your Xbox One console.

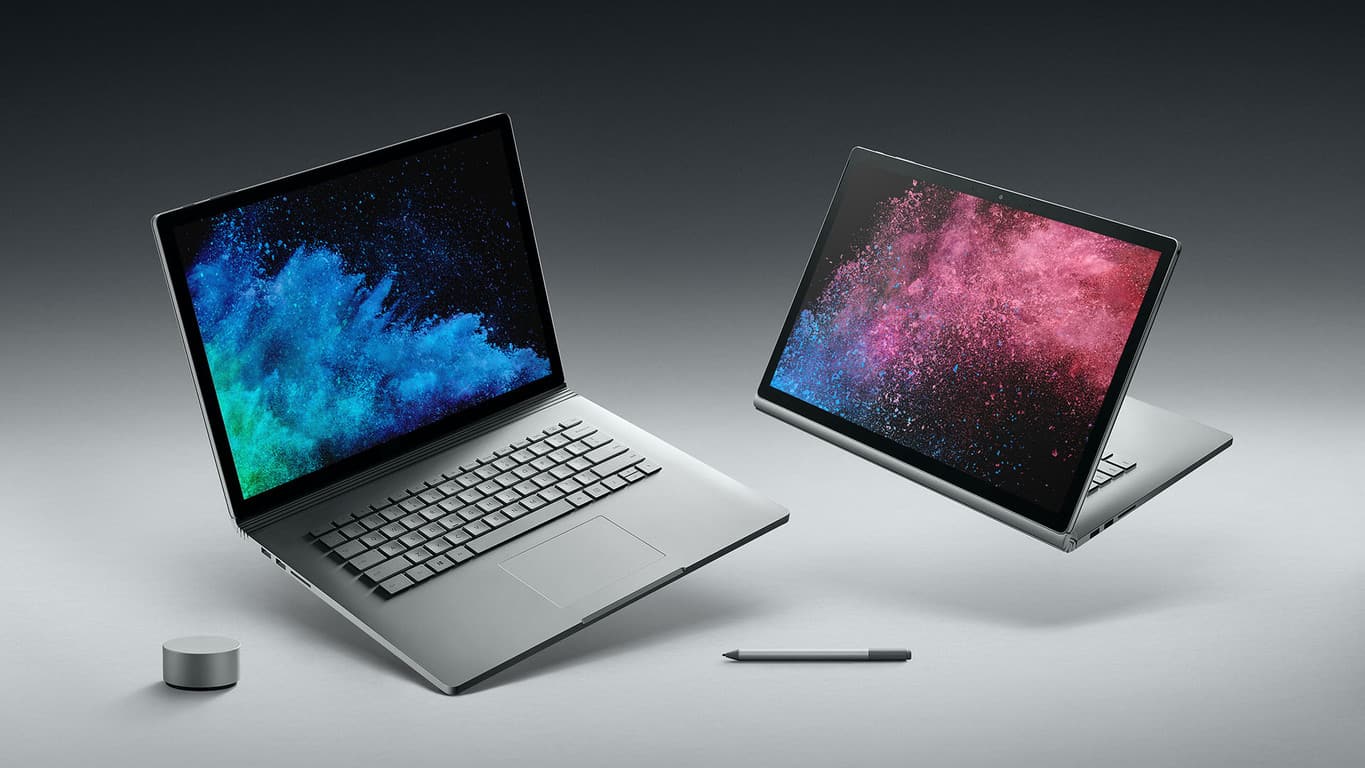
Save $400 with the Surface Book 2 and Windows Mixed Reality Headset bundle

Along with the Surface Book 2, Windows Mixed Reality headsets might as well be the next big thing for Microsoft this shopping season. So, if you’re in the market for both a new Surface Book 2, and a Mixed Reality headset, you’re in luck, as you can now bundle the two together and save up to $400.

The bundle offer includes any flavor of the 13.5 inch Intel Core i7 Surface Book, your choice of Windows Mixed Reality headset, and a free 3-month trial of Adobe Creative Cloud Photography plan plus 1TB of cloud storage. Keep in mind, though, that Surface Book 2 requires a USB-C to HDMI adapter for use with Windows Mixed Reality headset.

There are many Windows Mixed Reality headsets to choose from, including the Lenovo Explorer headset which we recently unboxed and reviewed. It’s the perfect pairing, really, as the Surface Book 2 is powerful enough for a premium Mixed Reality experience, with high-speed Intel processors and up to 1060 NVIDIA GeForce GTX graphics.

Feel free to check out the deal via the links above. If you so happened to take advantage of the offer, let us know your thoughts in the comments below.

FileBrick: Explore Files in Windows 10, Windows 8 in a stylish manner

It’s surprisingly rare that I get to see an app so useful that it makes me think: “How could I have lived without this app for so long!”. Well, this is exactly what happened when I tried FileBrick. This Windows 8, Windows 10 file explorer is probably the best and most useful app I have found so far in the Windows Store. To make an analogy, it’s like SearchAll, although not for search engines, but for files.

The app is free to download from the Windows Store, and it can also be upgraded for $2.5. By upgrading, you can benefit from some extra features, as we will see in a few moments when we will delve in the app’s inner workings.

FileBrick file explorer for Windows 10, Windows 8

FileBrick for Windows 8, Windows 10 app Review

filebrick-file-manager-windows 10

The first time you open the app it will give you information on how to set it up so that you can benefit from all its features. The process is very simple and only takes a few minutes, and after you are done, you will benefit from the best possible file explorer that you could ever want.

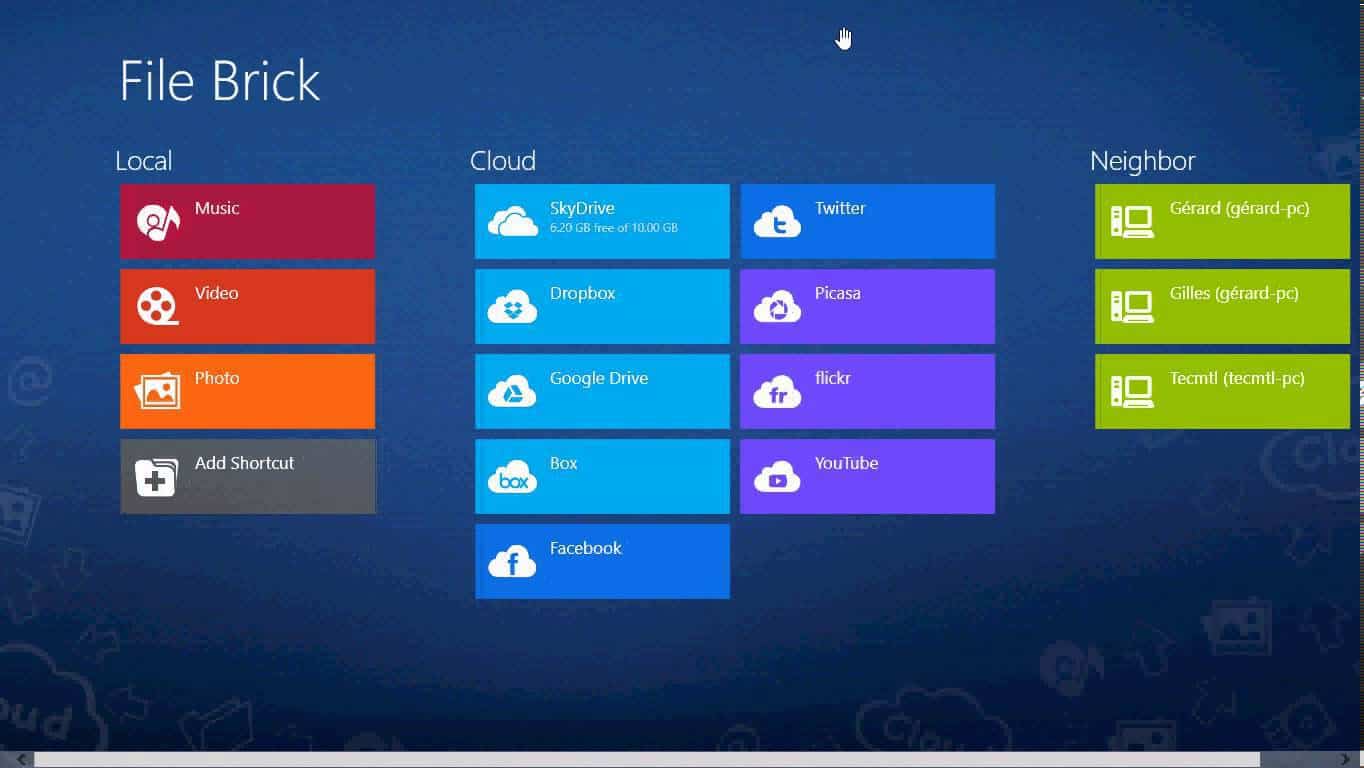
The app integrates seamlessly with your computer, allowing you to add as many shortcuts as you like to whatever folders you choose. Also, in addition to local storage, you have the option of linking your online storage accounts as well as Facebook, Twitter, Picasa, Flickr and YouTube.

Note: In order to integrate with the last 4 mentioned, you will have to upgrade to the full version of the app.

filebrick-file-manager-windows-10 app review

After the setup is complete, the app will function as a normal file explorer, and for your online storage accounts it will show you how much space you have available. In the Facebook folder you will be able to see your photos, friends and likes. Also, you have the possibility to manage them by creating or deleting folders and moving pictures and videos around.

The app is capable of uploading photos and videos to your Facebook account, and to your cloud storage accounts as well, and when there are multiple files in one folder, you have the option to filter them by name and search for a specific file.

Last but not least, the app allows you to browse other computers connected to your network, a feature that facilitates sharing between computers on the same network, but it can also share via email when opening the “Share” option in the Charms bar.

file-brick-file-manager-windows-8

One annoying thing about the app is the always present add on the bottom of the screen, but for those who want a more clean interface, know that the paid version is ad-free and it gives you the mission features as well. We hope to see other cloud storage features in the next versions of the app, such as Box.com and YouSendIt. Also, email integration could be something to look forward to in the future.

Nevertheless, FileBrick is one app that should not miss from any Windows 8, Windows 10 machine and thanks to its awesome features, great looks and seamless integration with so many services, we think it is one of the best apps that the Windows Store has to offer.

Update: Unfortunately, FileBrick has been removed from the Windows Store, and you can download it anymore. However, you can check out our list of the best alternative file managers for Windows 10 for some more options.

Microsoft celebrates #GivingTuesday by matching youth-serving nonprofit MS Rewards points donations

Today marks #GivingTuesday, a global movement to help others through the gift of your time, donations, goods or your voice, fueled by the power of social media and collaboration. To celebrate the occasion, Microsoft is matching youth-serving nonprofit MS Rewards points donations through December 31.

Word on Microsoft’s matching of donations was spread on the Giving Tuesday blog in a post penned by Microsoft Vice President, Laura Clayton McDonnell. She explains that Microsoft has stood with the movement since 2012, and will be matching MS rewards points donations for youth-serving nonprofits to help the generosity go even further.

If you are in the U.S., simply select Boys & Girls Clubs of America, City Year, Code.org, FIRST or Teach for America, and we’ll double your impact through December 31 – details. Not a Microsoft Rewards member? We’ll give you a free $1 to donate. If you are in the U.K., we’ll double your impact through November 30 when you donate your points to Special Olympics, UK Youth, and AbilityNet.

The Microsoft Store will also be recognizing the commitment by 92Y, Boys and Girls Clubs of America and City Year by contributing grants and Microsoft products to these organizations. The company also invites people to visit the Microsoft Wish Machine at any Microsoft Store and share inspiring wishes through December 31 for the chance for a selection of wishes to come true.

Microsoft Philanthropies donated more than $1.2 billion in software and services to nonprofits last year, and every bit counts. Consider doing your part, too, as your gift and donation only helps build a better future for everyone.

Space Invaders for Windows 10, Windows 8: A Classic Game worth playing

Space Invaders is one of those games that are never going to die and in Windows 8, Windows 10 you can find multiple apps that make the game enjoyable on tablet or desktop – have a look at one of the best that we have found

If you didn’t play Space Invaders when you were little, I’m sad to say that you have had a pretty boring childhood. Space Invaders is one of the best known games of all time, having a place right there alongside other prolific titles, such as Pac Man or Tetris, a real classic and a name that everyone is familiar with.

Read also: Play Chicken Invaders 5 Christmas Edition and save the holiday season

I’m glad to say that this awesome game has arrived in Windows 8 and Windows 10, and it is free to download from the Windows Store and play to your heart’s content! Now, get ready to save the Earth from the nasty space invaders and their 8 bit spacecraft! Also, for other lovers of classic games, we previously featured the new and improved Minesweeper, a game that Microsoft totally re-invented, but also the other classic Windows games that users loved.

Space Invaders for Windows 8, Windows 10 10

The game is pretty much how you remember it from back in the day. It has the same graphics and sounds, the control of your spaceship is simple, done with the arrow keys and for shooting those irritating aliens, you use the space bar. The developers have managed to keep the game as simple as we knew it, and for this, they deserve our gratitude.

download space invaders windows 10

In terms of features, there is not much to say about the app, you have a leaderboard where the top scores are shown, a life counter, score and personal best, and is pretty much all there is to say about it. The app loads in no time and you can start playing in only a few seconds, although, for you to see the leaderboard, you will have to right click on the screen, which will pause the game.

Of course, we must warn those who play this game that it tends to become quite addictive, and not before long, you realize that several have passed since you have started, at at least this is what happened to me.

space invaders windows 10

Update – Space Invaders alternatives

If you are look for some other games, you can go ahead and try the following, as well:

For those of you with HoloLens, try Holo Space Invaders. It’s a whole new level of the game. Basically, you’ll have to ‘defend’ the room where you are playing the game from invaders. You even have a radar system implemented to detect enemy ships in 3D space. You can see al its features and download it on Windows Store.

Update 2 – Download Space Invaders for Windows 10

Unfortunately, the game we were talking about in this article got removed from the Windows Store. However, there’s a new Space Invaders game that you can play on your Windows 10 computer. Download it here.

Marvel Heroes Omega suddenly shuts down, Xbox One users get refunds

As quickly as they come, some leave even quicker. The studio behind Marvel Heroes Omega is dolling out a bit of bad news for fans and customers as it’s closing up shop and no longer supporting the Xbox One and PlayStation 4 platforms.

According to Rock Paper Shotgun, Gazillion Entertainment and the makers of Marvel Heroes has closed its doors for good which is unfortunate for those of us who were getting used to the character-heavy free-to-play action RPG. Marvel Heroes most closely resembled the old Marvel Alliance games with its top-down view and environment destruction gameplay.

Seems as though Disney is undergoing some internal property licensing as it breaks partnerships with previous software companies (Microsoft) and now gaming studios (Gazillion).

“It is with great sadness that we announce the closing of Gazillion Entertainment. As a result, we are no longer able to operate Marvel heroes Omega until December 31 as originally planned. Instead, Marvel Heroes Omega will be sunset immediately on all platforms and will no longer be available as this process is completed. The company would like to sincerely thank its fans and employees for all the support over years of development and live service.”

Perhaps, even sadder is the notion that Gazillion relied almost solely on the licensed Marvel property as its main source of revenue. Without Marvel or Disney’s partnership, the entire studio shut down.

Seems, the only silver lining here is that a Reddit thread popped up discussing the Xbox teams efforts to refund customers who spent money on in-game purchases.

On November 27, 2017, the Xbox One subreddit page claims that “Marvel Heroes Omega has officially shut down. Microsoft support has stated all purchased content will be automatically refunded.”

Reading through the thread it doesn’t appear that the refund is automatic and customers looking for one will have to reach out to Microsoft support. Another nugget of information found in the thread is the level of difficulty some PlayStation 4 gamers are having with trying to obtain a refund for the game.

Next Windows 10 Insider builds to include Timeline, Sets, says Microsoft

Windows Insiders have had many leaks to examine over the past few weeks, including both the new Cortana and some hints of Windows Timeline features. Today, though, Microsoft made things more official, revealing that the next Windows 10 Insider builds will include both Windows Timeline and a new feature called Sets.

Microsoft’s Microsoft’s Terry Myerson penned an email on the subject, explaining both of the features to Windows Insiders. Importantly, he detailed that the eagerly awaited Windows Timeline will be coming to the next Windows Insider Fast Ring build.

Earlier this year at Build, we showed you Timeline, which allows you to jump back in time, making it easier to find the files you’re looking for. A visual timeline is integrated directly into Task View so you can easily move back into files, apps, and sites as if you never left. We’ve heard strong interest in this feature, and we’re pleased you’ll see it in the next WIP build going out to the Fast Ring.

Secondly, Myerson revealed “Sets,” a new feature for Windows 10, similar to the UWP tabbed experience which leaked last week. The EVP of Windows and Devices dubs the feature as an “easier way to organize your stuff and get back to what you were doing.” The naming of the feature is not yet final, and according to Dona Sarkar, it will be A/B tested in “controlled studies” with Windows Insiders, meaning not everyone will see the feature right away.

With Sets, what belongs together stays together — making it easier and faster to create and be productive. The concept behind this experience is to make sure that everything related to your task: relevant webpages, research documents, necessary files and applications, is connected and available to you in one click.

Definitely some fun times ahead, as both of these features will bring new experiences to Windows 10 for Windows Insiders now, and all Windows 10 users come the Spring. Be sure to check the email linked to your Windows Insider account for the full details on Sets and Windows Timeline, and be sure to keep it locked right here to OnMSFT for all your Windows 10 news and information.

Microsoft and SAP announce partnership to use each other’s tech internally

Microsoft just added another bell and whistle to its Azure offering for enterprises looking to take advantage of a fully integrated cloud solution upgrade.

Recently announced, Microsoft and leading application management software company SAP have partnered to give enterprise customers a cloud solution that is both expansive in flexibility as well as robust in product support. SAP is the market leader in application software management that enables businesses to find efficiencies in their everyday workloads that include back office, warehouse, storefront, internal and external program optimizations to list a few.

Perhaps, as a show of good faith or a bit of dogfooding, both SAP and Microsoft Azure will internally fuse their respective solutions, the result should be the better guidance of reps when presenting architecture integration and deployment options for both SAP and Azure solutions. Starting soon, Microsoft will be using the new SAP S/4HANA platform in a secure and managed cloud, in part, to transform the company’s internal financing systems, AI analytics and a few other business-critical applications. 

“As technology transforms every business and every industry, organizations are looking for the right platforms and trusted partners to help accelerate their digital transformation,” said Satya Nadella, CEO of Microsoft. “Building on our longtime partnership, Microsoft and SAP are harnessing each other’s products to not only power our own organizations, but to empower our enterprise customers to run their most mission-critical applications and workloads with SAP S/4HANA on Azure.”

To their credit, SAP has over 365,000 businesses and public sector customers it’s bringing to the table to accompany Microsoft Azure’s ballooning portfolio. The combined efforts of Microsoft and SAP already have big names such as Costco Wholesale, The Coca-Cola Company, and Columbia Sportswear Company excited at the new level of cloud integration proposed by the partnership.

Microsoft drops Windows 10 Delve app, to be replaced with improved taskbar search experience

Delve, the Office 365 data visualization and discovery tool that incorporates elements of social networking and machine learning, recently was removed from the Windows 10 Store. Noted by ZDNet, it turns out that Microsoft is planning on replacing the app by integrating Delve into the Windows 10 taskbar search.

A statement on the Delve support page does not explain why and when the Delve app was removed from Windows 10, instead urging those who are looking for the app to use the Web version instead. A Microsoft spokesperson also did not explain when the Delve app was removed but gave a more interesting explanation of what may be the replacement for it.

“As we announced at Ignite, we continue to enhance the search and discovery experiences across Microsoft 365. As part of this, we’re focusing our efforts on the Windows taskbar search experience which includes content and people inside your organization, as well as content on your local device, and on the rich web search experience including Delve and other search bars within Office 365.”

Combined with Microsoft looking to make Cortana more like Apple’s macOS Spotlight feature, and Cortana soon supporting searching contacts and emails, it’s apparent that Microsoft is looking to revamp the way searches work in Windows and Office 365. Definitely interesting, so best to keep tuned for more in the months ahead.

Xbox One X owners are getting a free movie from Microsoft

If you’re one of the Xbox One X early adopters out there, you may well get a freebie from Microsoft as a thank you for purchasing the company’s new console. Indeed, it seems that Microsoft is currently offering the Lego Batman movie to select Xbox One X customers, as recently reported by Reddit user ster1ing:

Just got a free movie for buying a One X. Anyone else get one? from xboxone

According to comments on the Reddit thread, Microsoft may be sending the codes in waves as some people who pre-ordered the Xbox One X Project Scorpio Edition have yet to receive one. Additionally, it seems that you don’t need to have purchased your console from the Microsoft Store to get the chance to get the free movie.

Microsoft is offering the 4K HDR version of the Lego Batman movie ($29.99 value), which is great if you already have a TV that supports both technologies. If you recently purchased an Xbox One X, let us know in the comments if you also received this message in your Xbox Live inbox.

How to Change Windows 10, 8 or 7 Logon Screen

Lots of Windows 8, Windows 10 users are complaining about the lack of customization options that are offered by default. However, Windows 8, Windows 10 does have some notable features that allow users to customize their devices. Changing the Windows 8, Windows 10 logon screen is one of these features, and because many are not quite clear on how to do this, today I’ll show your exactly how you can change your logon screen on any Windows 8, Windows 10 device.

Apart from the classic lock screen, Windows 8, Windows 10 does have some other methods of authentication, like picture passwords. We’ll be taking a look at all of these changes you can make to your Windows 8, Windows 10 computer.

Want to change your Windows logon screen? Here’s how to do it on Windows 10 and Windows 8

Changing logon screen settings is rather simple in Windows 10 and 8.1, and in this article we’re going to cover the following topics:

  • Windows logon screen background, picture – If you want to change your logon screen background, you can do that easily from Windows 10. You can choose one of many available backgrounds or you can use your own custom background.
  • Windows logon screen blank – Many users reported that their logon screen is blank. This can be a big problem and prevent you from logging in to Windows.
  • Windows logon screen upside down – This is an unusual problem that can appear on some PCs. If you have this problem, the cause is most likely your display driver.
  • Windows login screen not appearing – Sometimes your logon screen might not appear at all. We already wrote a guide on how to fix a missing Windows 10 login screen, so be sure to check it out.
  • Windows login black screen with cursor – According to users, some of them are getting black screen with cursor while trying to login to Windows 10. We already covered this issue in the past, so you should be able to fix it.
  • Windows logon screen remove – Some users don’t want to see a login screen while starting Windows. You can’t remove the login screen, but you can always remove your password or set your PC to automatically log in.
  • Windows logon screen takes a long time, stuck – Sometimes you might get stuck on Windows logon screen. In one of our previous articles we explained what to do if Windows 10 is stuck on a Welcome screen, so be sure to check it out.
  • Windows logon screen flashing, disappears – Several users reported that their logon screen keeps flashing. In some cases, the logon screen can completely disappear. This is most likely caused by a bad driver or a corrupted Windows 10 installation.
  • Windows 10 login screen loop – In some rare cases you might get stuck in a Windows 10 login screen loop. This is an unusual problem, but you should be able to fix it by creating a new user account.

Changing the default logon screen on Windows 8

If you’ve recently installed, Windows 8, you will probably have the simple picture lock screen that shows you different apps. This screen ca be customized by adding other pictures and other apps, as well as adding a completely new logon screen.

Windows logon screen background

If you want to change your Windows 8 logon screen picture to another one, you just have to follow these steps:

  1. Open the Settings charm and click or tap on Change PC Settings.
  2. From here, navigate to the Personalize tab.

There you will find the option to choose another logon image or browse your computer for a custom picture. In the same window, you have the Start Screen tab, which allows you to change the background style and color of the Modern UI screen.

Windows logon screen blank

If you want to change your Windows 8 logon screen to a picture password, all you need to do is to the Users window and click or tap on Create a Picture Password.

From here, you will enter a wizard where you have to browse your computer for the picture you wish to set as your picture password, then add the three actions that will unlock your computer.

Windows logon screen upside down

These actions can be a line, a point or a circle, and you have to input them in the same order and direction as you originally made them, otherwise it will not allow you to log on to your computer.

As you can see, the process of changing the Windows 8 logon screen is pretty easy. It does not require the users to waste too much time on this task, and it also adds to the feel of the device, making it reflect the user’s personality better.

Windows login screen not appearing

Another thing you can do is delete the password from your computer. While I strongly advise you to not do this, some users want their computers to open without needing a password. Nevertheless, here’s how you do it:

  • Open the Settings Charm
  • Click or tap on Change PC Settings
  • Click on Users
  • Switch to a Local Account

Note: Removing your computer’s password is not possible when using the Microsoft account, therefore you need to use a local account

  • Click on Change Password
  • After you input your current password, it will prompt you for the new one
  • Leave the Password field black and click OK
  • Now, you log on to your computer, you will have the Windows 8 logon screen that you’ve modified earlier and in the User screen, you won’t be prompted for a password.

Change the default logon screen on Windows 10

On Windows 10 changing the logon screen process is slightly different. If you want to change the background picture on your login screen, you just need to do the following:

  1. Open the Settings app. You can do that quickly by pressing Windows Key + I shortcut.
  2. Now navigate to the Personalization section.
    Windows logon screen stuck
  3. In the left pane, select Lock screen.
    Windows logon screen disappears

Now you can customize the appearance of your lock screen. For example, you can choose a background image that you will use for your lock screen. There are several pictures available to choose from, but you can also browse your PC for your own pictures.

Windows login black screen with cursor

In addition to a single picture, you can also have a slideshow on your PC while your PC is locked. Or if you always want a different picture on your lock screen, you might want to use Windows spotlight feature.

If you want, you can enable fun facts and tips from Windows and Cortana. This is just an optional feature but it might provide you with some interesting information once in a while. Of course, you can see detailed status from certain apps right on your lock screen which is useful if you need to check your calendar or email.

The lock screen also allows you to see quick status of your apps, so you can easily check the number of new emails or missed messages. Speaking of quick statuses, you can see quick statuses from up to 7 different apps on your lock screen.

In addition to visual customization, Windows 10 allows you to change how you sign in to Windows 10. To access these settings, you need to do the following:

  1. Open the Settings app and go to Accounts section.
    Windows logon screen remove
  2. From the left pane, select Sign-in options.
    Windows logon screen takes a long time

From here you can change various sign-in settings. For example, you can set your PC to automatically lock if you’re away. This feature is rather useful if you want to protect your PC from unauthorized access. By using this feature you’ll prevent your coworkers or roommates from using your PC when you’re not around.

Windows 10 also supports Windows Hello feature, and if you want to configure your PC to sign in with your fingerprint, you can do that from here. In addition to fingerprint, you can also sign in by scanning your face. Keep in mind that in order to use Windows Hello you need to have appropriate hardware.

Windows logon screen flashing

You can also easily change your account password right from this section. If you want, you can set up a PIN and use it instead of your password to sign in to Windows.

You can also use your PIN to sign in to other applications on your PC. Using a PIN has its advantages, and if you don’t want to memorize your password or if you want to quickly sign in to Windows 10, PIN might be the right choice for you.
Windows logon screen picture

Of course, picture password feature is still there and you can unlock your PC by performing gestures on the lock screen.

Windows 10 login screen loop

You can also use a Dynamic lock feature and pair your PC with your smartphone or any other Bluetooth device. By enabling this feature, your PC will automatically lock itself whenever your phone moves out of the Bluetooth range.

This is a great feature because it will automatically lock your PC once you step away from it. Keep in mind that different phones and Bluetooth adapters have a different range, so your PC might not get locked as soon as you move away from it.

Lastly, there’s a privacy option available. If you want to hide your account details, such as your email address, from the lock screen be sure to disable this feature.

As you can see, the process of changing the Windows 8, Windows 10 logon screen is very simple and anyone can do it with next to no effort.


READ ALSO:

Vivaldi Browser update improves tab management and download

Vivaldi just launched v1.13 of the company’s customizable third-party browser that brings a bunch of new features designed to make organizing the tabs much easier.

The browser brings along Windows Panel which will offer a superior tab management. You will see that now, the panel opens to the side of your browser and it provides you a tree-style view of the tabs.

You’ll be able to navigate them using your keyboard and group them into Tab Stacks. The list will show all tabs without also compacting their size. You will notice that sorting or tracking down a tab becomes much more comfortable than ever.

Vivaldi browser v1.13 new features

Here’s what you’ll be able to perform in the latest version of Vivaldi browser:

  • You can drag tabs to change their order.
  • You will be able to group tabs by topic in order to save space.
  • You can Tile Tab Stacks to compare several web pages side by side.
  • You can put unused tabs or Tab Stacks to hibernation for enhanced performance.
  • You can pin tabs to make sure that they always remain open.
  • You will be able to mute sound in particular tabs.

Improved downloads and new download-related features

vivaldi browser

The latest version of the browser also enhances downloads, and you will be able to try out the following new features:

  • You will see a warning dialogue box when you are closing the browser before a download is complete.
  • You will get the ability to pause and then resume downloads.
  • You can see the download speed in the download progress bar.
  • All these new features and functionalities come together with the usual performance improvements and bug fixes for the browser.

Download the latest version of the Vivaldi browser from Vivaldi official website.

RELATED STORIES TO CHECK OUT:
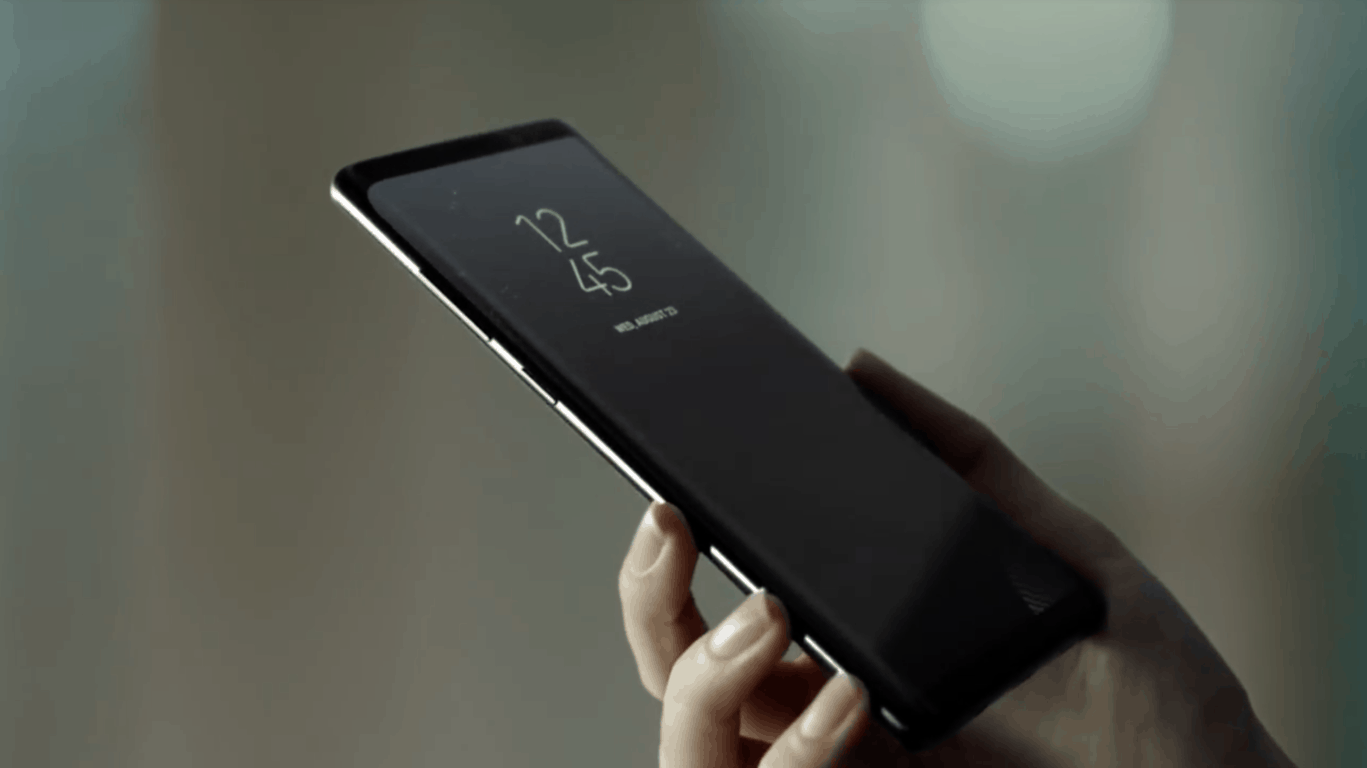
Xbox news recap: Xbox users warned against using power strips, Gears of War 4 heading to Xbox Game Pass and more

Welcome to our weekly Xbox news recap series, where we go over the top stories of the past week in the world of Xbox. Let’s get started.

Xbox users warned against using power strips

If you’re like most people, you’re probably using your Xbox One plugged into a power strip. It’s a super common thing to do in a world where you need several power outlets for your entertainment center. Surprisingly, according to the Xbox team, this is not something you’re supposed to do. Apparently, the Xbox One (and this is everything in the Xbox One family, up to and including the X) is meant to be plugged into a wall, since there’s a surge protector built in. If you’re using a surge-protected power strip, you run the risk of hurting your console.

Gears of War 4 heading to Xbox Game Pass

Simple but big news here – Gears of War 4 will be among the games arriving to the Xbox Game Pass this December. The game is relatively recent and a pretty great time, so it’s a pleasant surprise to see it coming for free to people who are Game Pass members. Joining Gears of War 4 is Mass Effect (the original) and a plethora of other titles that you’ll be able to enjoy at no additional cost so long as you’re subscribed to the Game Pass.

Microsoft, Xbox, Gears of War, 4K

Improving social sharing is a top priority for the Xbox team

Apparently, sharing gameplay on social media is a big priority for the Xbox Team. Jason Beaumont, the experience lead for Xbox, has recently tweeted about upcoming improvements to sharing when grilled about it by some fans. He says that details have come when “we’ve planned it out and talked to our partners.” Specifically, this addresses a request to add in a “quick share” feature, and give users a way to share clips and screenshots to Facebook and Twitter without too much thought.

Man uses Xbox One X on a CRT TV

When’s the last time you saw a CRT TV? Whether it was 5 years ago or earlier this week when you visited your older family members for Thanksgiving, I can guarantee you didn’t see it running an Xbox One X. One person on YouTube actually managed to make the Xbox One X run on one of these ancient TV sets using a series of adapters, and it looks… Relatively okay. It’s definitely not something that you’re going to want to do for any reason other than “because you can,” but it’s fun to watch nonetheless.

Thanks for joining us. To keep up to date with all the latest Xbox news, keep a close eye on our Xbox One tag.


Windows 10’s Game Bar is being reworked in Redstone 4

Microsoft looks to be focusing some attention to Windows 10’s Game Bar feature in Redstone 4. Game Bar is a feature built for those who play games on PC, with it supporting features such as game recording.

In Redstone 4 build 17046, some code has been found (via Thurrott) that shows some of the changes that Microsoft is making to the Game Bar. Changes include removing the Xbox Live avatar and replacing it with the players’ Gamertag, as well as the addition of shortcuts to areas such as the Xbox app, Mixer and settings, support for light and dark themes, improved animations, and more.

The new and improved Game Bar aims to take advantage of Microsoft’s Universal Windows Platform (UWP).

Are these the changes you’ve been wanting? Let us know in the comments!