Microsoft has rolled out a new feature in its Teams for Education platform to help nervous speakers become talented public speakers. Dubbed Speaker Progress, this tool is now available worldwide and promises to be a game-changer in education.
Speaker Progress in Microsoft Teams uses AI to offer real-time coaching and feedback on public speaking. Imagine having a personal coach who guides you on everything from your speaking pace to the pitch of your voice, ensuring you’re not monotonously droning on.
It even catches those pesky filler words we often don’t realize we’re using. Thanks to this feature, “Um,” “uh,” and “like” can now be a thing of the past. Plus, it advises on body language, ensuring students face the camera directly, which is crucial for engaging with your audience, even in a virtual setting.
In a blog post, Microsoft says teachers can easily set up Speaker Assignments within Teams for Education, allowing students to dive in and start their speaking journey.
The AI then monitors aspects like speech rate (did you know the ideal is between 100 to 165 words per minute?) and offers suggestions on picking up the pace or slowing down. Microsoft plans to add more features to Speaker Progress this fall, including additional language support and the ability to record speeches. This means students can practice and improve, share their content, and receive feedback, making it a comprehensive tool for mastering public speaking.
So, whether you’re a student looking to conquer your fear of public speaking or an educator seeking innovative tools to support your pupils, Speaker Progress in Microsoft Teams for Education might be the solution you’ve been searching for.
You can learn more about the capability, including its requirements and how it works, in this blog post.
These best Noise Gate settings for OBS will help you capture crisp and clear audio for all recordings.
OBS Studio has advanced software-based modifications for tweaking audio recording. For example, you don’t need to set up a music recording studio and buy a studio microphone. You can eliminate most background noise by configuring the Noise Gate filter.
I’ve tested different settings for various content types and have outlined my recommended modifications below. Try them out now!
What Is the Noise Gate Setting for OBS?
Noise Gate is an audio filter for theAudio Input Capture source in the OBS Studio app. Professional streamers and content creators use this setting to prevent background noise and static hum from entering the audio stream when not speaking to the microphone.
Once activated for an audio source, it lets you customize the following audio input parameters:
Close Threshold: At this value, OBS will cut off the input audio stream and disallow unwanted noise. You can set it between -96.00 dB to 0.00 dB.
Open Threshold: When the audio stream captured by the mic is above this value, OBS opens the gate so sound can be recorded. Like the Close Threshold, its range is also within the -96.00 dB to 0.00 dB levels.
Attack Time: This value tells OBS how fast it should open the sound gate to capture the audio stream above the Open Threshold. If you set it too low, you might hear artifacts, like unusual manifestations of your voice in the stream. Contrarily, if you set it a bit high, voice or instrumentals will fade in and feel more natural. You can enter values in milliseconds.
Release Time: This value defines how soon the sound gate should be closed when the input audio level reaches the Close Threshold. It takes inputs as milliseconds.
Hold Time: This is the actual time the sound gate stays open between the values of the Open and Close Threshold values. It also accepts modifications in milliseconds.
How To Set Up a Noise Gate Settings for OBS
For the uninitiated, here are the quick steps to activate it:
Open the OBS Studio app.
Locate the Sources card to the right of the Scenes card in the bottom left corner.
Click the Add Source button or the plus sign (+).
Select the Audio Input Capture item from the context menu that pops up.
On the Create/Select Source dialog, name the source, and click OK to add it.
Select OK on the dialog box for the Properties for ‘Audio Input Capture’ source. It should be already set to Default.
Now, right-click on the Audio Input Capture source and select Filters from the context menu.
The Filters for ‘Audio Input Capture’ dialog will pop up.
Hit the plus sign (+) in the bottom left corner and select Noise Gate from the context menu.
Click OK on the Filter name dialog to customize the name or save it as is.
You should now see the Noise Gate calibration tool within the Audio Filters dialog box.
Click the plus sign (+) again and add the Noise Suppression filter.
That’s it! You’re all set to reduce background noise in your audio streams.
12 Best Noise Gate Settings for OBS
Here are the most appropriate Noise Gate configurations you can use to record different genres:
General Recording (Default)
If you’re not looking to create any specialized recorded content you can use the default Noise Gate settings.
Firstly, when you install the app, it’ll show the Auto-Configuration Wizard. Here, you can choose the “Optimize just for recording. I will not be streaming” option.
If you missed the initial profile selection step, no worries. You can simply add the Noise Gate filter to your audio source and OBS will apply the default values as outlined below:
Open Threshold: -32.00 dB
Close Threshold: -26.00 dB
Attack Time: 25 ms
Hold Time: 200 ms
Release Time: 150 ms
Podcast Interview
This configuration reduces unwanted noise so you can capture clear conversations between two people. It also prevents abrupt cuts to allow for naturally flowing dialogue.
Open Threshold: -40.00 dB
Close Threshold: -50.00 dB
Attack Time: 10 ms
Hold Time: 200 ms
Release Time: 100 ms
Podcast Group Discussion
It maintains continuous noise reduction by accommodating multiple speakers with a slightly lower open threshold.
Open Threshold: -45.00 dB
Close Threshold: -55.00 dB
Attack Time: 15 ms
Hold Time: 300 ms
Release Time: 150 ms
Voiceover for Tutorials
If you’re recording a training video or audio containing instructions with different levels of pauses and speaking pace, try the following configuration:
Open Threshold: -55.00 dB
Close Threshold: -60.00 dB
Attack Time: 5 ms
Hold Time: 150 ms
Release Time: 100 ms
Webinar
Webinars have the potential to become highly noisy. Hence, here you must use a much lower Close Threshold and Attack Time. On the other hand, the Hold and Release Time should be set longer to accommodate different paces of transitions and pauses.
Open Threshold: -40.00 dB
Close Threshold: -65.00 dB
Attack Time: 10 ms
Hold Time: 150 ms
Release Time: 100 ms
Informative YouTube Video
Informative video content with a single narrator must focus on clarity. So, the Open Threshold should be low to capture softer speech. However, you should also use aggressive noise reduction for adequate pauses in script narration.
Open Threshold: -50.00 dB
Close Threshold: -65.00 dB
Attack Time: 5 ms
Hold Time: 100 ms
Release Time: 50 ms
Live Streaming
Live gameplay or music streaming events may consist of additional noise sources. So, you should use the following configuration to block unwanted sound:
Open Threshold: -35.00 dB
Close Threshold: -55.00 dB
Attack Time: 5 ms
Hold Time: 100 ms
Release Time: 50 ms
Gaming Commentary
This OBS Noise Gate setting allows for recording dynamic gameplay sounds and commentary. When you pause, the configuration actively allows gameplay audio but prevents ambient noise.
Open Threshold: -35.00 dB
Close Threshold: -60.00 dB
Attack Time: 5 ms
Hold Time: 150 ms
Release Time: 50 ms
ASMR Recording
For ASMR video or audio content production, you can use the following configuration:
Open Threshold: -60.00 dB
Close Threshold: -65.00 dB
Attack Time: 2 ms
Hold Time: 100 ms
Release Time: 80 ms
Vocal Music Production
Here, the focus should be on capturing nuances of vocal performance by controlling background noise during pauses. So, faster attack and release times are set to allow for dynamic vocals recording.
Open Threshold: -40.00 dB
Close Threshold: -70.00 dB
Attack Time: 5 ms
Hold Time: 100 ms
Release Time: 30 ms
Field Recording
You must be willing to capture a wide range of sound levels during field recording with as much low background noise as possible. Also, to preserve natural ambient sound, you should allow for longer hold and release times.
Open Threshold: -45.00 dB
Close Threshold: -70.00 dB
Attack Time: 10 ms
Hold Time: 300 ms
Release Time: 150 ms
AI-Powered Noise Reduction
You can also use third-party noise reduction software with an AI noise-blocking algorithm like Krisp AI. It creates an advanced and automated noise-canceling configuration for the computer microphone. Then, you can import that virtual audio input hardware to OBS Studio.
So, you no longer need to manually set up a Noise Gate. The AI noise-blocking app will learn from your usage and adjust itself.
You can sign up and download Krisp AI for free from its official website.
Once installed, you’ll see the following widget in the Windows System tray area:
You can choose the appropriate microphone on your PC using the Krisp microphone drop-down menu.
Now that you’ve selected the audio input device, Krisp will apply its proprietary AI background noise reduction processing at the system level.
You simply need to create a new Audio Input Capture source in the OBS Studio app. When you see the Properties dialog, click the Default drop-down menu and choose Krisp Microphone from the list.
Krisp AI has been optimized heavily to integrate with OBS.
Expert Tips for the Best Noise Gate Settings for OBS
Overall, your ideal configuration will depend on the exact recording environment you’re currently in. The values I’ve mentioned above are for general studio settings with enough heavy curtains. I kept a ceiling fan running to create ambient noise.
If you’re in a crowded area or in a professional music studio, you’ll have to slightly adjust these numbers according to your scenario.
Follow these steps to experiment:
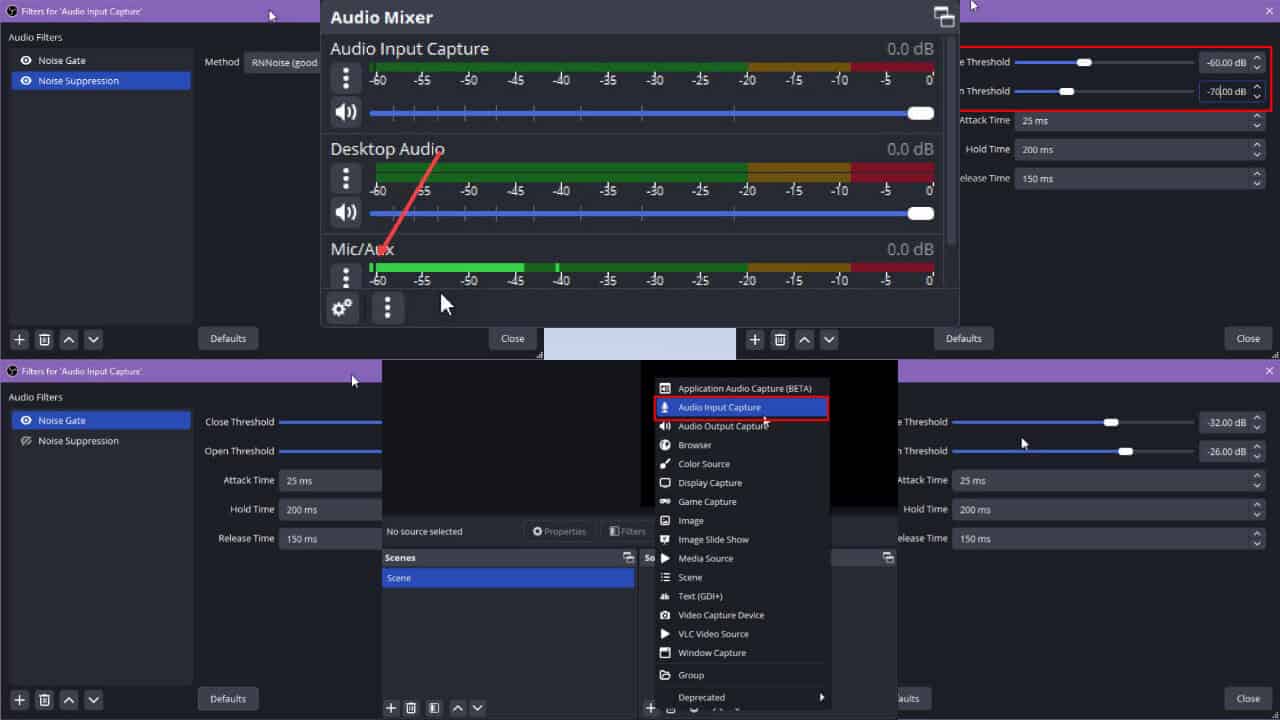
Look at the Audio Mixer visualizations, especially the Mic/Aux levels.
Notice the minimum dB value in the Mic/Aux section when you’re not speaking.
That should be the value for Close Threshold. For example, -60.00 dB in this example.
Now, add 8 to 10 to that value to get the Open Threshold. For instance, -70.00 dB in my case.
To fine-tune the Attack, Hold, and ReleaseTime, you can set different values at the lowest, middle, and highest levels, and record sample audio for each level.
Closely listen to your recorded content for any distortions or artifacts.
Again, make some changes to the Attack, Hold, and Release Time values and record more samples.
Through trial and error, you’ll find the best settings for these three items.
You also need to use the Noise Suppression filter for continuous noise cancellation. Click the Method drop-down menu and select the RNNoise option.
Summary
So far, you’ve learned about the best Noise Gate settings for OBS for different audio recording purposes.
You can try these values to begin with and do your own fine-tuning for even better results.
Microsoft has rolled out new regex modes for XLOOKUP and XMATCH functions in Excel for Windows and Mac users. Regex, or regular expressions, are sequences of characters that help define search patterns. Imagine looking for a needle in a haystack; regex is the magnet that makes the needle light up.
In a blog post, Microsoft says you can use regex within XLOOKUP and XMATCH functions by setting the [match_mode] = 3 and using a regex pattern as the lookup_value. This means you can now match parts of text in a cell or any other text pattern that can be described with regex.
For those who might be new to this, standard tokens include “[0-9]” for any numerical digit, “[a-z]” for a character in the range of a to z, and “.” for any character, among others. And if you’re feeling stuck, Microsoft suggests trying out Copilot for regex patterns.
Before diving in, it’s important to note that these functions are currently in the Beta channel. Windows users will need Version 2408 (Build 17931.20000) installed, while Mac users should have Version 16.89 (Build 24080715).
As with all things in the beta phase, Microsoft advises against using these functions in critical workbooks until they are generally available. It’s a bit like testing the waters before taking the plunge.
So, what do you think? Are you ready to give these new regex modes a whirl and see how they can transform your Excel experience? Whether you’re a data analyst, a student, or just someone who loves organizing data, this update could be a game-changer.
You can read more about Microsoft Excel’s new Regex modes here.
Often, your Sandisk Cruzer Blade or Glide USB is not recognized on a Windows PC. Sometimes, it works on other devices, like a MacBook, or the LED indicator keeps flashing. All of this points to a minor misconfiguration preventing your Sandisk Cruzer from working.
If you are wondering why the SanDisk drive is not detected, it usually has to do with malfunctioning or non-supported ports, a missing drive letter, a disabled Plug and Play service, outdated or corrupt drivers, conflicting third-party apps, or incorrect driver format.
Before you begin troubleshooting, connect the Sandisk Cruzer USB flash drive to another port without a USB hub or plug it into another system. If Sandisk Cruzer is still not showing up, try the fixes listed in the next section.
What can I do if Sandisk Cruzer is not recognized?
1. Assign a new drive letter
Press Windows + S to open Search, type Create and format hard disk partitions, and click on the relevant result.
In the Disk Management utility, right-click on the removable Sandisk Cruzer flash drive, and select Change Drive Letter and Paths.
If a drive letter is not assigned, click on Add.
Now, with the default settings in place and the automatically chosen drive letter, click on OK to save the changes.
Press Windows + E to open File Explorer, and verify whether the Sandisk Cruzer is now recognized.
When a flash drive like Sandisk Cruzer is not recognized in the File Explorer but appears in Disk Management and Device Manager, it’s the missing drive letter to blame.
Also, if the drive already has a letter, change it because such issues also arise when two drives are auto-assigned with the same drive letter.
To do that, right-click on the flash drive > select Change Drive Letters and Paths > click on Change > pick another drive letter from the dropdown menu (one not assigned to another volume) > click OK.
2. Re-enable the Plug and Play service
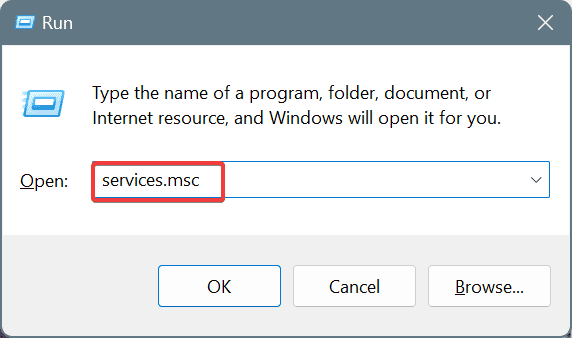
Press Windows + R to open Run, type services.msc in the text field, and hit Enter.
Scroll down, right-click on the Plug and Play service, and select Properties.
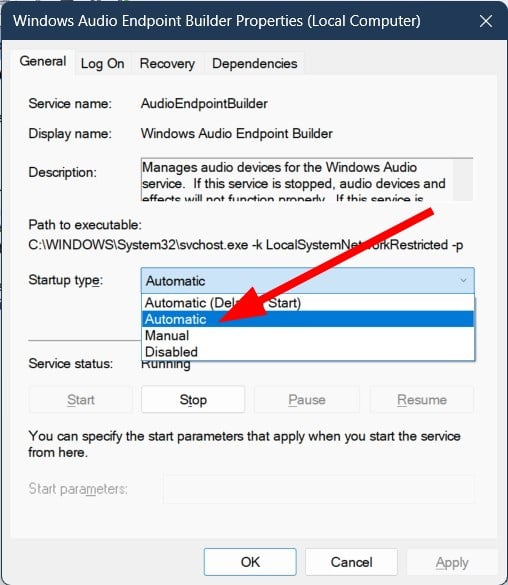
Choose Automatic from the Startup type dropdown menu, click on the Stop button if the service is already running, wait for it to stop running, and then click on Start.
After the Plug and Play service is re-enabled, click on Apply and OK to save the changes, and check for improvements.
3. Reinstall the Sandisk Cruzer’s driver
Press Windows + X to open the Power User menu, and select Device Manager.
Expand the Disk drives entry, right-click on the Sandisk Cruzer flash drive, and then select Uninstall device.
Now, click Uninstall in the confirmation prompt.
Once done, expand the Action menu, and click on Scan for hardware changes to automatically reinstall a fresh copy of the driver.
Verify whether the Sandisk Cruzer flash drive is still not recognized or if it now appears in the File Explorer.
4. Update Sandisk Cruzer’s driver
Press Windows + R to open Run, type devmgmt.msc in the text field, and hit Enter.
Double-click on Disk drives, right-click on the Sandisk Cruzer device, and choose Update driver.
Now, click on Search automatically for drivers and let Windows install the best locally available driver version.
When Sandisk Cruzer is not showing on your computer, updating the flash drive’s driver may do the trick. Outdated drivers often prevent devices from being recognized or working effectively.
Press Ctrl + Shift + Esc to open the Task Manager, and then go to the Startup apps tab.
Select any non-critical app(s) from the list that read Enabled under the Status column, and click on Disable.
After disabling them all, restart the computer and verify whether the Sandisk Cruzer Glide 16 GB is still not recognized or working in Windows 11.
6. Uninstall the driver for any unknown USB drives
Press Windows + S to open Search, type Device Manager in the text field, and click on the relevant result.
Click on the View menu, and select the Show hidden devices option.
Now, expand Universal Serial Bus controllers, right-click on any Unknown device entry, and then select Uninstall device.
Again, click Uninstall in the confirmation prompt.
Similarly, remove all other unknown devices under Universal Serial Bus controllers, reboot the PC, then connect the Sandisk Cruzer flash drive, and check for improvements.
7. Format the Sandisk Cruzer USB drive
Tip
If the Sandisk Cruzer works on another PC, even a MacBook, plug the flash drive into it, and move all the files to another storage because the steps below will delete data on the affected USB drive.
Open the Disk Management utility, right-click on the Sandisk Cruzer flash drive, and then select Format.
Enter a name for the flash drive in the Volume label field, choose exFAT from the File system dropdown menu, leave the remaining settings as they are, and click OK.
Again, click OK in the confirmation prompt.
In a few cases, formatting the flash drive is the only option when your Sandisk Cruzer is not recognized or showing up in Windows. Although, it will delete all the data, you will at least have the Sandisk Cruzer working on both macOS and Windows, given the exFAT file system.
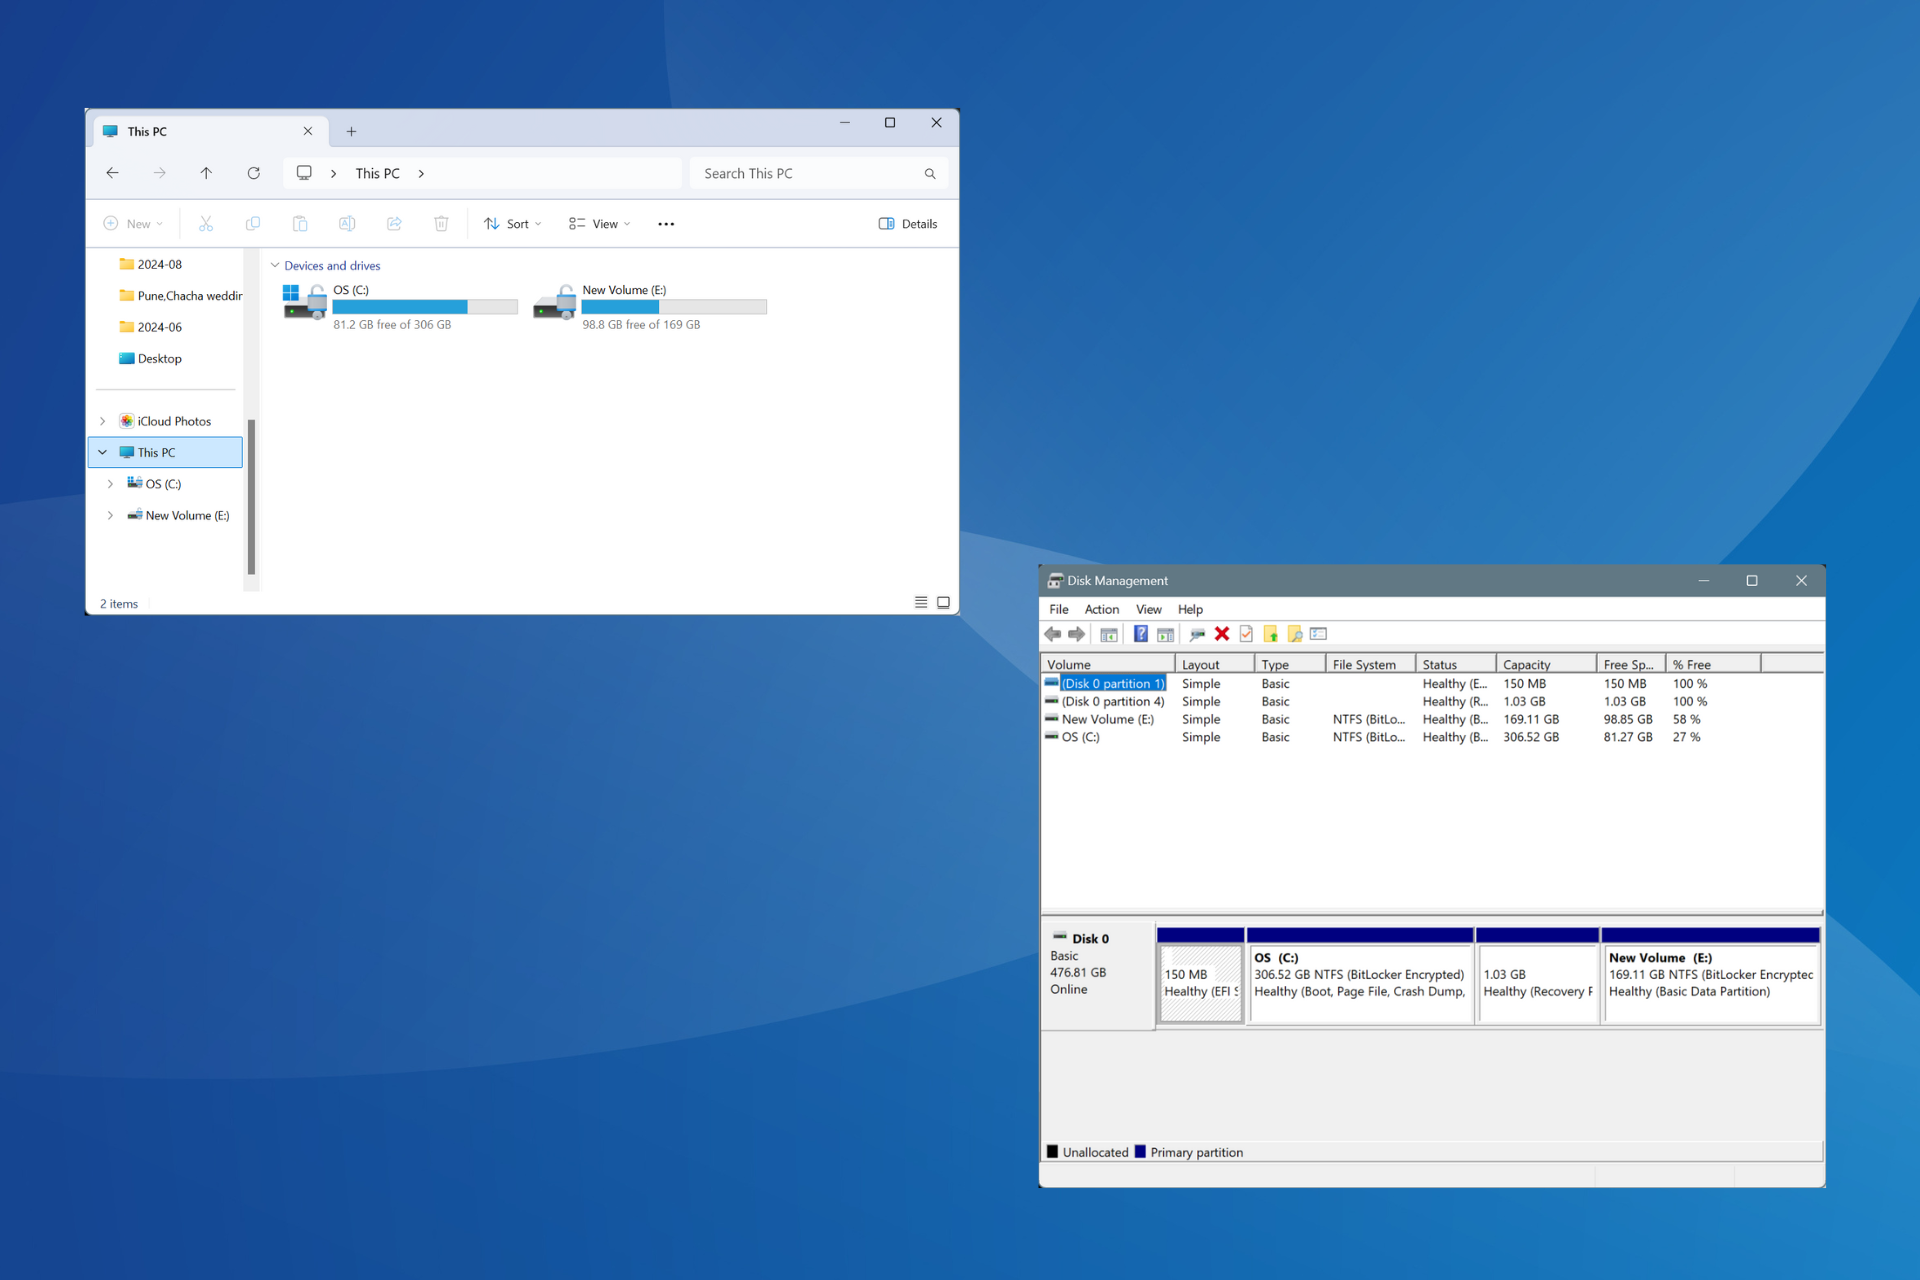
Microsoft has decided to pull the plug on the problematic KB5034440 and KB5034441 updates, which were notorious for their installation failures. These updates were infamous for causing a specific error code (“0x80070643 – ERROR_INSTALL_FAILURE”), especially on devices lacking sufficient space in their system’s recovery partition.
This issue had been a thorn in the side of Windows 10 and 11 users, leading to significant frustration and manual workarounds. But now, alongside the new Patch Tuesday updates for Windows 11 and 10, Microsoft has introduced KB5042321 and KB5042320 as replacements, effectively fixing the annoying issue.
The problem with the original updates was that they could not be installed due to insufficient space in the system’s recovery partition. This led users down the rabbit hole of manually resizing their recovery partition by following a detailed guide provided by Microsoft or using a PowerShell script. The updates were initially released to address a BitLocker Secure Boot bypass vulnerability.
After months of user complaints and manual fixes, Microsoft said there would be no solutions for these patches. However, the company released KB5042321 and KB5042320, moving the content from the retired updates to these new ones, hopefully offering a smoother installation process.
For those curious about the technical side, these updates aim to apply a Safe OS Dynamic Update to the Windows Recovery Environment (WinRE) on a running PC, improving Windows recovery features. Yet, there’s a catch – the update requires 250 MB of free space in the recovery partition to install successfully.
For those affected by the KB5034440 and KB5034441 rollout, it’s worth checking out the official support articles on Microsoft’s website for KB5042321 and KB5042320 for detailed information and guidance.
If you wish to enable, disable, or troubleshoot the translucent selection rectangle on Windows, read this in-depth guide until the end.
Windows OS uses the translucent selection rectangle feature to show you the items or areas you’ve selected on the PC screen. It’s a semi-transparent and blue-tinted overlay indicating the boundaries of the selected content.
Luckily, Windows allows you to customize this feature to suit your usage. I’ll show you how to activate and deactivate it and troubleshoot it if it’s not working.
How To Enable the Translucent Selection Rectangle in Windows
This feature is activated by default in all Windows 10 and 11 PCs. However, if it’s for some reason disabled, here’s how to turn it on:
Using Performance Options
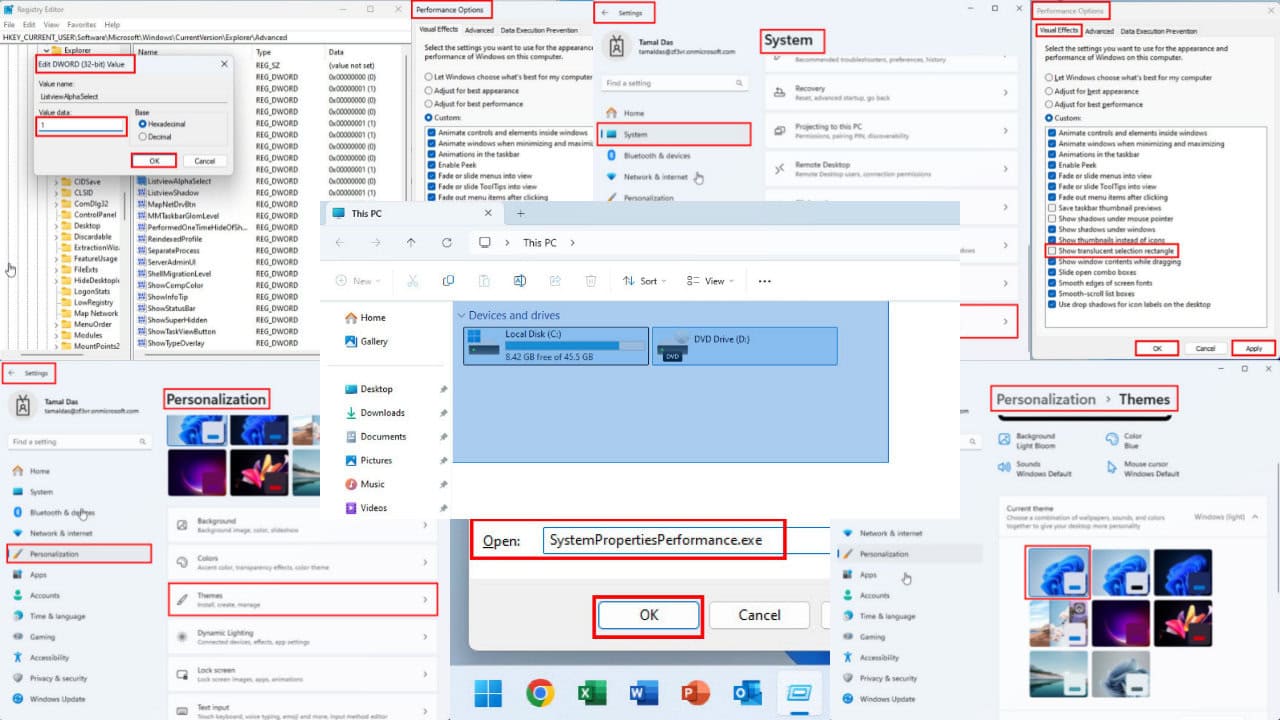
Press the Windows + I keys together to open the Windows Settings app.
Navigate to the System menu from the Home menu on the left side navigation panel.
Now, on the right side, below the System menu, scroll down to the bottom and click on the About button.
On the About menu, click on the Advanced system settings hyperlink. You should find that in the Related links section, below Device specifications.
You should now see the System Properties dialog box.
Go to the Advanced tab and click on the Settings button for the Performance section.
Checkmark the box for the Show translucent selection rectangle feature.
Hit the Apply button and click OK.
You’ll also need to click Apply and OK on the System Properties dialog.
The feature should start working instantly.
If it doesn’t work, restart the PC.
Using the Registry Editor
If you’re a power user and don’t mind going through Registry editing, you can follow these steps:
Press the Windows + R keys to get the Run command dialog box.
Type in the regedit command in the Open field and hit Enter.
You should see the Registry Editor tool.
Copy and paste the following Registry key address in the address bar on the top:
Now, you need to restart the Windows File Explorer tool.
To do so, execute this script in the terminal app:
Stop-Process -Name explorer -Force Start-Process explorer
You might see a warning dialog box as shown below. Click Paste anyway to continue.
You should now see the semi-transparent selection rectangle when selecting items.
How To Disable Translucent Selection Rectangle in Windows
You can simply reverse the steps performed in the Performance Options dialog box. If that doesn’t work for you, try any of these methods:
Using the System Properties Shortcut
Press the Windows + R keys to launch the Run command.
Type in the following command into the Open field and hit Enter:
SystemPropertiesPerformance.exe
You’ll instantly see the Performance Options dialog box.
There, uncheck the box for Show translucent selection rectangle.
Click Apply and OK.
Restart the PC to apply the changes.
Using the Windows 11 Terminal
Follow all the steps mentioned previously in the PowerShell-based method. Just replace the previous script with the following to deactivate the feature:
The script for rebooting the File Explore will remain the same as outlined above.
How To Fix Translucent Selection Rectangle in Windows
If this feature works intermittently or doesn’t work at all, try these troubleshooting ideas in the order they appear. I organized the methods based on complexity.
Perform Basic Troubleshooting
Disconnect and reconnect the mouse: Your mouse could be faulty, so you should try reconnecting it. If that doesn’t work, try a different one that you know it works.
Refresh the PC: Press the F5 button a couple of times to refresh the CPU.
Restart: It’s likely that your PC got stuck due to heavy processing needs and needs resetting.
Update Windows: Press Windows + I to bring up the Settings app, choose Windows Update, and select Resume updates, or Check for updates.
Disable and re-enable the feature: Follow the steps mentioned earlier to deactivate the feature. Then, reactivate and restart the device and test again.
Use the Default Windows 11 Theme
Did you customize the Windows 11 theme to increase device performance? If so, undo those changes.
Here are the default settings:
Press Windows + I to bring up the Settings app.
Go to the Personalization menu by clicking on it in the left-side navigation panel.
Scroll down on the right to find the Themes menu. Click on that.
Below the Current theme section, you should see a few built-in themes.
Select the first one named Windows (Light.
Now, go back to the main menu of Personalization.
Click on the Colors button and enable the Transparency effects if not activated already.
Reboot Windows Explorer
Press Ctrl + Shift + Esc to bring up the Task Manager.
Type Explorer in the top search bar.
Right-click on the Windows Explorer process icon and choose Restart from the context menu.
The PC screen might blink once.
Restart the GPU
The translucent selection rectangle is a graphics processing-dependent feature. If the GPU isn’t working appropriately, it also won’t work.
To fix this, close all open apps on your Windows PC. Now, press the Ctrl + Shift + Windows + B keys altogether.
You might hear a beep sound and the screen might go dark once or twice. However, in most PCs, you won’t see any changes.
Now, test if the selection rectangle is working or not.
Summary
So far, you learned how to enable or disable the translucent selection rectangle feature in a Windows 11 PC. If you have a Windows 10 PC, you can still use the same steps.
You’ve also seen how to troubleshoot this Windows Aero feature if it isn’t working.
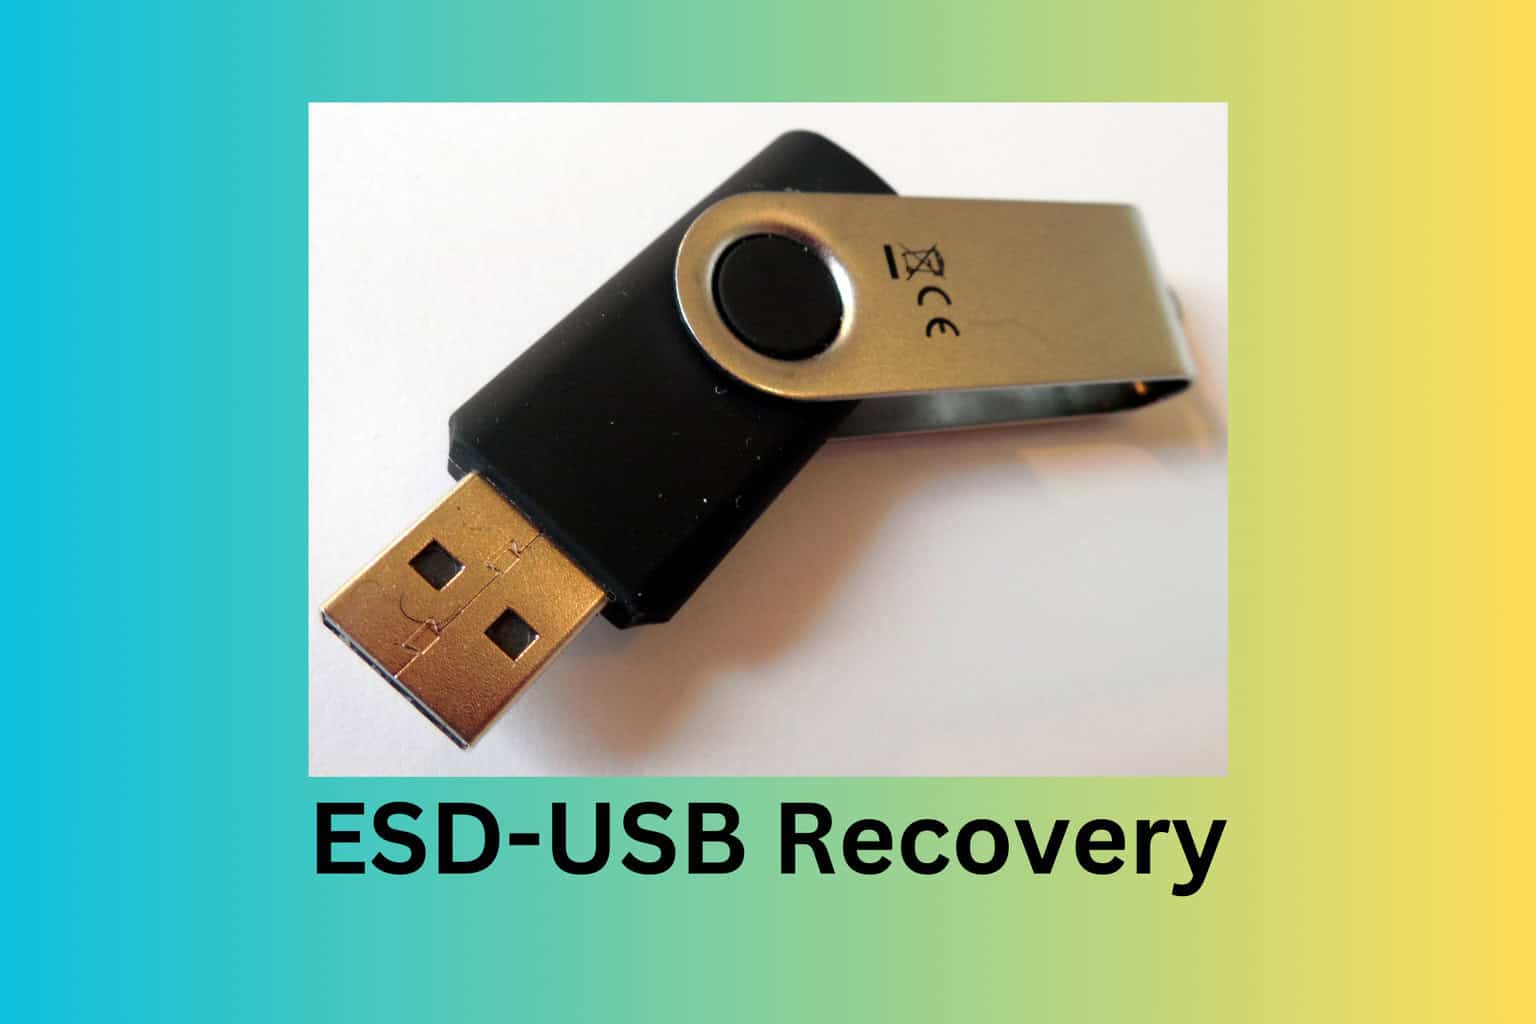
Accidentally converting your external hard drive to an ESD-USB can be a real headache, especially if you lose important data in the process. The bad news is that you can’t actually undo the process, but you may still recover your files and reformat the drive after so you can use it for other purposes. However, you will definitely need a data recovery software for this.
How do I recover my lost files?
1. Restore all lost files with data recovery software
Install a reliable file recovery software. Luckily, we have a list of the best data recovery software to choose from.
Once installed, open the software.
Choose the ESD-USB drive or the external hard drive that has been converted to ESD-USB.
Click on the Scan button to start scanning for lost files.
Use the file format filter to narrow down the search results.
Preview the files you want to recover by clicking Preview or double-clicking on them.
Select the files you want to restore and click Recover. Save the recovered files to a safe location other than the ESD-USB drive.
By using data recovery software, you can easily scan your converted ESD-USB for lost files and recover them without much hassle. However, note that no such software will recover 100% of the lost data, so don’t expect miracles.
2. Delete the existing ESD-USB partition and create a new volume
Connect your external hard drive or flash drive to your computer.
Right-click the Start menu and select Disk Management.
Locate and right-click on the ESD-USB 32GB partition.
Select Delete Volume and click OK to confirm.
Now, find the unallocated space from the deleted ESD-USB partition.
Right-click on the unallocated space and select New Simple Volume.
Follow the New Simple Volume Wizard. Set the size, file system (NTFS), and label.
Click Finish to complete the process.
Deleting the ESD-USB partition allows you to create new partitions and revert your hard drive back to its full capacity.
3. Format the ESD-USB via File Explorer
Right-click the Windows icon and select File Explorer.
Find the ESD-USB drive, right-click it, and select Format.
Set the file system to NTFS and check Quick Format.
Click Start to begin the formatting process.
Formatting the ESD-USB using File Explorer is straightforward and can quickly convert your drive back to NTFS.
How do I avoid losing important data?
Always create backups of important data on another device or cloud storage.
When creating Windows installation media, use a blank USB or external drive.
Regularly scan your devices with antivirus software to prevent data corruption.
Use BitLocker or other encryption software to protect your data securely.
By following these preventive measures, you can minimize the risk of data loss and avoid converting your drives to ESD-USB by mistake.
Hopefully, by using our guide, you’ve managed to salvage your data from the ESD-USB drive and reformat it for other purposes.
Now, you can try creating a Windows 11 bootable drive using the highlighted guide. But this time, make sure you back up any data before using it for this purpose.
Did our guide help you? Let us know in the comments below.
Microsoft released another update to the Edge Dev Channel, enhancing the 129 version just days after the most recent one. Version 129.0.2766.0 has fixes and features that make the browser more stable.
First, Android users are getting a treat with a new Rewards Campaign. Then, the update’s improvements and bug fixes include fixing annoying issues with NordVPN. For instance, after installing NordVPN on Android, the browser would have crashed when switching from an InPrivate tab to a standard tab. Not anymore.
Have you ever reopened your browser to find your carefully organized Tab Groups jumbled up? Frustrating. However, Microsoft is working on restoring the correct collapsed state of Tab Groups when relaunching the browser.
Plus, they’ve cleared up some visual clutter in the Browser Essentials ‘Thank you!’ message popup and fixed a size mismatch issue when splitting the screen right after opening the browser for the first time.
Good news for Android enthusiasts: The ‘Enjoying Microsoft Edge so far’ feature page should now appear as expected in the feedback section. Microsoft also removed a pesky grey summarize icon that was showing up in the overflow menu when signing into AAD on Android.
When it comes to iOS users, the update relieves several irritating issues. Ever notice the red triangle icon overlapping the leaked password text on the Password Monitor page? Or how about the translation bar becoming narrow and elongated when clicking the ‘Show original’ button? Both of these issues have been addressed.
Plus, they’ve fixed the problem where NTP weather data wouldn’t load without a network connection and the issue with the keyboard staying fixed on the NTP page, refusing to be dismissed.
Microsoft has rolled out an exciting update for Xbox Insiders, especially for handheld PC gamers: the Compact Mode for the Xbox Game Bar. This new feature aims to make the gaming experience smoother and more intuitive, especially on smaller screens.
In a blog post, the Redmond-based tech giant says this is a game-changer for those who love diving into their favorite titles with a controller, as the new Compact Mode offers a more streamlined navigation just a few clicks away.
For those eager to try out Compact Mode, it’s as simple as hitting the Win + G shortcut, diving into the Settings widget, and flipping the switch under the General section. Microsoft says handheld PC gamers might find it handy to remap this shortcut to a physical button or pin it to the taskbar for easier access.
Once Compact Mode is activated, the clutter disappears, leaving you with a simplified interface where everything you need is at your fingertips. Whether you’re looking to jump back into a recently played game or launch a new adventure from your favorite game launcher, Compact Mode has got you covered. And when you need to exit a game quickly, it’s now possible to do so directly from the Game Bar, saving you the hassle of navigating multiple menus.
We are excited to announce that Compact Mode is now available in Game Bar for Xbox Insiders. Compact Mode is a new experience that simplifies Game Bar, making it more intuitive and easier to navigate on small screens, Windows handhelds, and when playing with a controller. To use this feature, open Game Bar, go to the Settings widget, under General, and turn on the “Compact Mode” toggle.
But what about when you suspect that pesky background apps are hogging your device’s resources? Compact Mode has a solution for that, too. The Resource Widget becomes your best friend, allowing you to monitor performance usage and quickly shut down resource-intensive applications.
Plus, with the Widget Store at your disposal, expanding your Game Bar’s capabilities is just a few clicks away.
Compact Mode is a welcome addition for gamers who are always looking for ways to enhance their gaming experience.
If you’re part of the Xbox Insider Program, diving into this new feature is straightforward. Microsoft is all ears regarding feedback, so don’t hesitate to share your thoughts on Compact Mode through the Xbox Insider Hub app or the Game Bar’s Feedback section.
Could this be a clue that Xbox might prepare a handheld console of its own? The truth is, it might be, as the handheld community is getting larger, and gamers seem to enjoy having these devices. It would be time for Xbox to put out its own spin on the concept. We have some ideas on how it might look, though. However, Xbox might announce it as soon as the end of this year.
Dealing with Seagate Dashboard not working on Windows can be incredibly frustrating, especially when you rely on it for your backups. Let’s dive into some practical solutions to get your Seagate Dashboard back on track.
What can I do if the Seagate Dashboard is not working?
Before we start, try running Seagate Dashboard as administrator and check if that helps. Restarting the app and backup process can also help. Lastly, try disabling your antivirus temporarily and check if that helps.
1. Install prerequisites before installing Seagate Dashboard
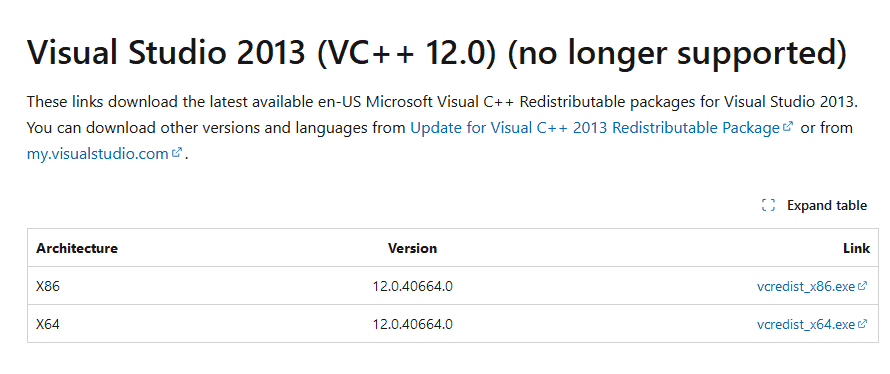
Open your preferred web browser and download the necessary Microsoft Visual C++ Redistributable packages for your Windows version (32-bit or 64-bit) from the Microsoft website.
For 64-bit Windows:
Microsoft Visual C++ 2005 Redistributable (x86)
Microsoft Visual C++ 2010 SP1 Redistributable (x86)
Microsoft Visual C++ 2010 SP1 Redistributable(x64)
Microsoft .NET 4.0
Windows Installer 3.1
For 32-bit Windows:
Microsoft Visual C++ 2005 Redistributable (x86)
Microsoft Visual C++ 2010 SP1 Redistributable (x86)
Microsoft .NET 4.0
Windows Installer 3.1
Download and install these packages.
Verify that you have administrative rights on your computer.
Right-click the Seagate Dashboard installer, and select Run as Administrator.
Verifying and installing these prerequisites ensures that your system has the necessary components to run Seagate Dashboard smoothly.
2. Reinstall Dashboard
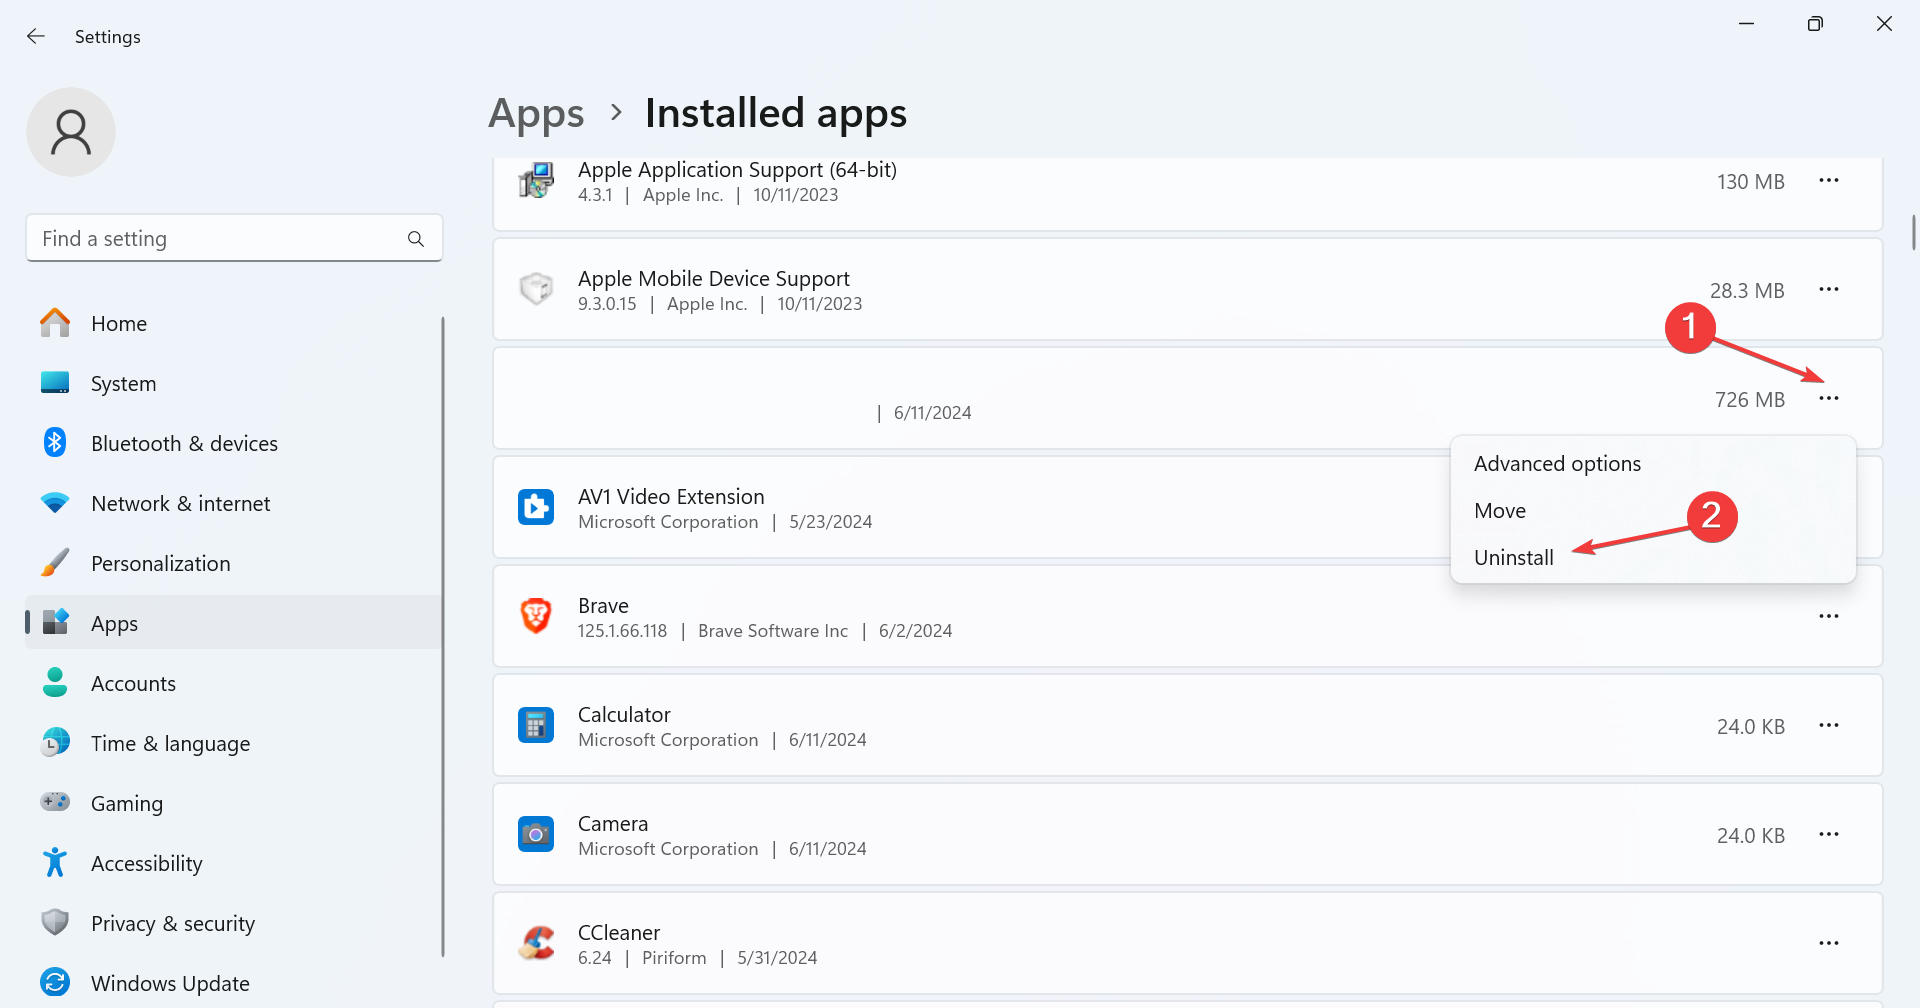
Press the Windows key + X and choose Apps and Features.
Locate the Seagate Dashboard, click the three dots next to it, and choose Uninstall.
Once you remove it, install it again and check if the issue is gone.
3. Reschedule the backup task
Open File Explorer and navigate to C:\Users\YourUserName\AppData\Roaming\Seagate\Seagate Dashboard 2.0\Files
Verify that a file with your username (UserName.nji) exists.
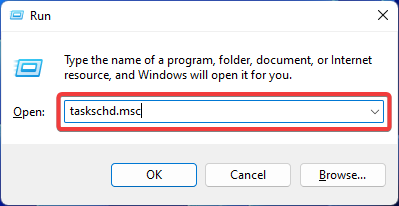
If the file exists, press the Windows key + R and type taskschd.msc.
Go to Action > Create Task.
Under the General tab, provide a name for your task.
In the Actions tab, click New.
Set Program/script: "C:\Program Files (x86)\Seagate\Seagate Dashboard 2.0\NBCore.exe"
Lastly set Add arguments: C:\Users\YourUserName\AppData\Roaming\Seagate\Seagate Dashboard 2.0\Files\UserName.nji
Follow the steps on the screen to complete the configuration.
The 0x00000045 INSUFFICIENT_SYSTEM_MAP_REGS error is a critical issue that can cause your system to crash and display a blue screen. It often arises due to problems with your system’s registry, insufficient memory allocation, or conflicts with hardware drivers. Corrupted system files or recent Windows updates may also trigger this error.
Scan for viruses. Click the Start menu and type Windows Security > Open > Virus & threat protection > Quick scan.
Update Windows. Press Windows + I > Windows Update > Check for updates > Download and install.
If these didn’t work, it’s time to move on to more detailed methods:
Start Windows in Safe Mode
Booting your system in Safe Mode can help isolate the problem by loading only essential drivers and services. This makes it easier to identify whether third-party software or drivers are causing the issue.
Press the Windows logo key + R to open the Run dialog box. Type msconfig, tap OK, or press Enter.
In the System Configuration window, go to the Boot tab.
Under Boot options, check the Safe boot option.
Select Minimal for standard Safe Mode or Network for Safe Mode with Networking.
Click OK and then Restart when prompted.
Your computer will restart and go directly into Safe Mode.
Restore Windows to a Previous State
Restoring your system to an earlier version can undo recent changes that caused the error and revert it to a stable state. Here’s what to do:
Press the Windows icon + I to open Settings, then tap System.
Scroll from the left pane and tap About, then select System Protection.
In the System Protection tab, click System Restore.
Click Next in the System Restore window.
Choose a restore point from the list. If available, select Show more restore points to see older ones. Then click Next.
Click Finish to confirm and begin the restoration process.
After completion, your Windows will return to the state you selected.
Confirm if the INSUFFICIENT_SYSTEM_MAP_REGS error was resolved.
Run Check Disk Command
Running the Check Disk (chkdsk) command scans your hard drive for errors and fixes any corrupted files that might be contributing to the problem. Here’s how to do it:
Type Command Prompt on the search button beside the Windows Icon and tap Run as administrator.
Type chkdsk /f /r and press Enter.
You may be prompted to schedule the scan on the next restart. Type Y and press Enter.
After restarting your computer, the scan will automatically fix any detected errors.
Run DISM and SFC Command
The Deployment Imaging Service and Management (DISM) and System File Checker (SFC) commands are powerful tools that can repair corrupted system files and restore stability. Follow the below steps:
Open Command Prompt as an administrator.
Type DISM /Online /Cleanup-Image /RestoreHealth and press Enter.
Once DISM is complete, type sfc /scannow and press Enter.
Allow the scan to complete, and then reboot your PC.
Uninstall Corrupted Drivers
Corrupted or incompatible drivers can cause system errors like INSUFFICIENT_SYSTEM_MAP_REGS. Uninstalling and reinstalling them can help fix the issue. Follow the steps below:
Find the device with the problematic driver (it may have a yellow exclamation mark). Right-click it and select Uninstall device.
Restart your computer, and Windows will try to reinstall the driver automatically.
Uninstall Recent Windows Updates
Recent Windows updates may introduce bugs or conflicts with existing drivers. If the error began after an update, uninstalling the most recent one could resolve the issue. Here are the steps:
Type Control Panel using the search button beside the Windows icon, then tap Open.
Click Uninstall a program under Programs.
Click View installed updates.
Select the latest program and tap Uninstall.
Reset Windows
Resetting Windows can also help you solve the INSUFFICIENT_SYSTEM_MAP_REGS error. Here are the steps:
Press the Windows logo key + I to open Settings and tap Update & Security.
Select Recovery from the left pane.
Under the Reset this PC section, click Get started.
You can choose to Keep my files or Remove everything. Pick the option that suits your needs.
Next, choose whether to reinstall Windows from the Cloud or do a Local reinstall, then click Reset to begin the process.
The INSUFFICIENT_SYSTEM_MAP_REGS error can be frustrating. However, with the right approach, you can troubleshoot and resolve this issue easily. Start with the quick fixes, and if needed, proceed with the more in-depth solutions. These steps will help you restore your system and prevent future occurrences.
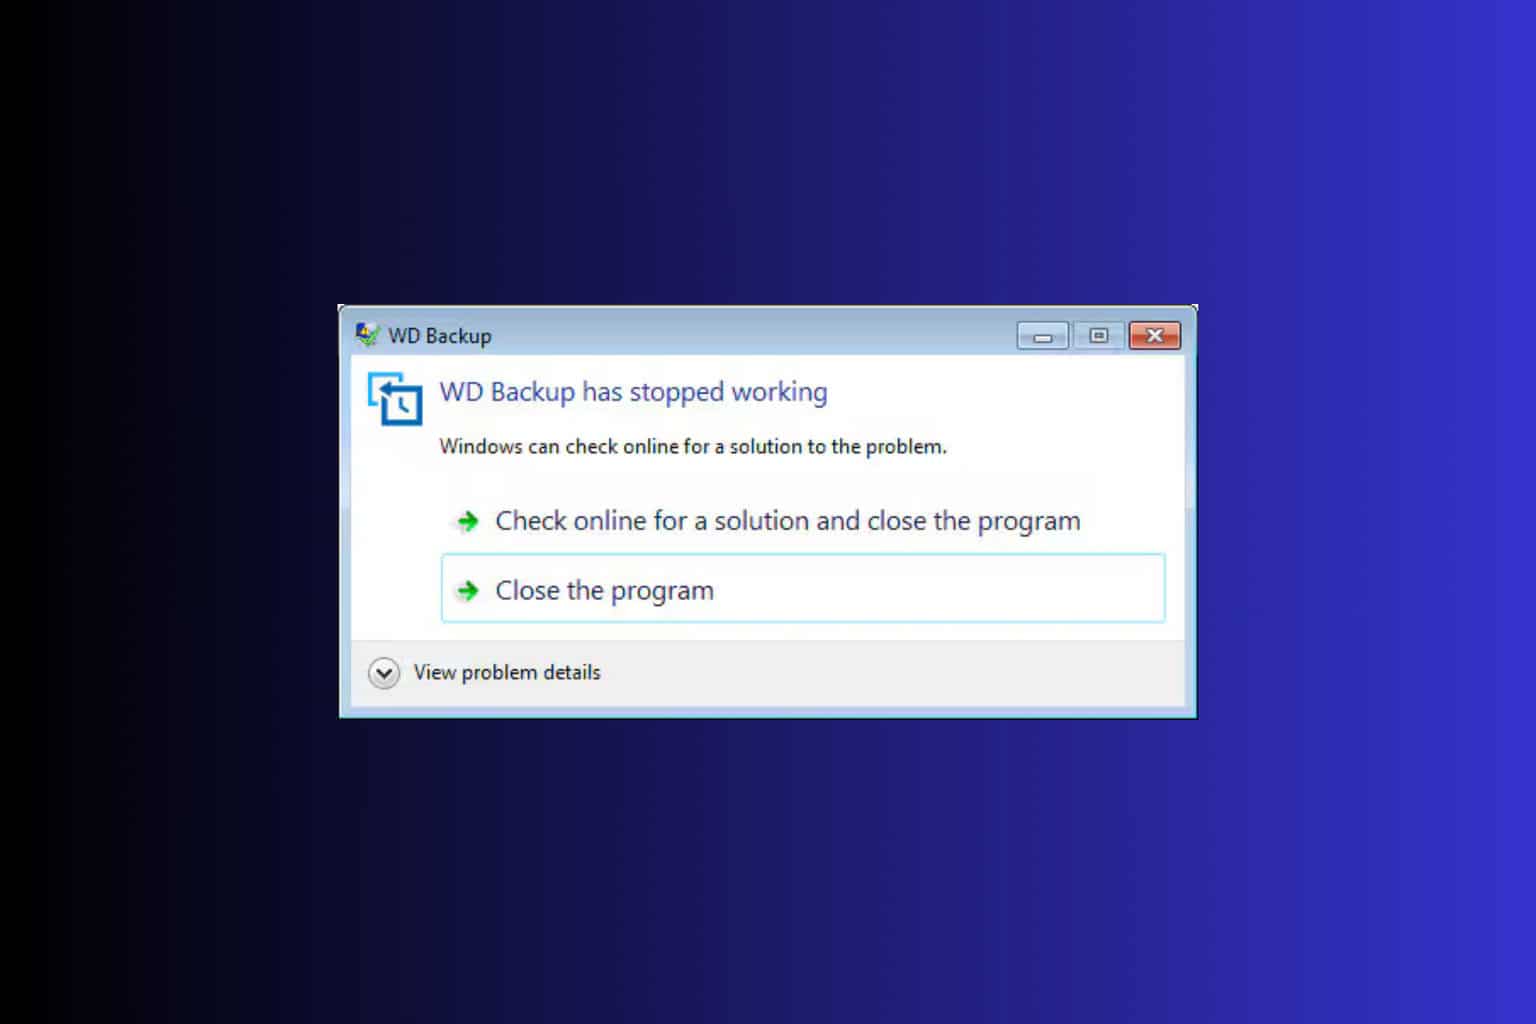
Dealing with WD Backup not opening can be incredibly frustrating, especially when you rely on it for safeguarding your important files. This issue is most likely due to the scheduling feature malfunctioning. Here’s how to fix it quickly!
What can I do if WD Backup is not opening?
1. Delete the .schedule file
Open File Explorer by pressing the Windows + E keys.
Navigate to the WD Backup folder (type the actual user name or change the path to where you installed the app): C:\Users\[Your User Account]\AppData\Roaming\Western Digital\WD Backup\
Delete the .schedule file(s) located in this folder.
Restart WD Backup and check if it operates correctly.
Removing the .schedule file can resolve issues with WD Backup not starting by eliminating corrupted scheduling configurations. This solution has helped many users regain functionality without losing backup settings.
2. Enable File History Service and Windows Search
Press the Windows + S keys to open the Search bar, type Services and open the app.
In the Services window, locate File History Service and Windows Search.
Double-click on each service and change the Startup type to Automatic.
Click Apply and then OK.
Restart your computer and attempt to run WD Backup again.
Enabling these services ensures that necessary functions are running, which can help WD Backup perform backups without issues.
3. Install WD Backup as administrator
Disable your firewall and antivirus temporarily.
Right-click the WD Backup installation file you downloaded (usually named WD Backup.exe).
Select Run as administrator.
Follow the prompts to complete the installation.
After installation, right-click the WD Backup desktop icon, select Properties, navigate to the Compatibility tab, and check Run this program as administrator.
Click Apply and OK.
Set up your new backup plan and run it.
Running the installation with administrative privileges can bypass permission issues that hinder the backup process.
4. Use alternative backup software
When WD Backup continues to fail, consider using alternative software for this task. Luckily, we have a list of the best local backup software to safeguard your most important files.
They are easy to use and they work seamlessly on Windows.
5. Verify WD Drive Helper Service
Press the Windows + S keys and type Services.
In the Services window, find WD Backup Drive Helper.
Double-click it, and set the Startup type to Automatic.
Ensure the service is running. If not, click Start.
Ensuring that the WD Drive Helper Service is running and set to automatic can resolve issues related to the WD Backup software not recognizing the drive.
Follow the instructions to install the firmware on your drive.
Keeping your drive’s firmware updated ensures compatibility and smooth operation with WD Backup software.
7. Shorten file names and paths
Locate files and folders with long names or paths.
Rename these files or move them to a directory with a shorter path.
Try running WD Backup again.
Long filenames or paths can cause issues with the backup process. Simplifying these can help WD Backup operate correctly.
By following these steps, you should be able to resolve the issue of WD Backup not opening. To prevent future problems, regularly update your software and firmware, and always ensure that your backup paths are simplified.
The REF_UNKNOWN_LOGON_SESSION BSOD error crashes Windows at startup and leads to a blue screen displaying the 0x00000047 error code. According to Microsoft, it’s extremely uncommon, and even I could find only a few reported cases on the web!
The error is caused by problematic drivers, a corrupt user profile, issues with the disk and RAM, buggy Windows updates, and conflicting third-party programs.
Before you start troubleshooting, install all available Windows updates, including the optional ones, make sure all the connections are in order, and disconnect non-critical peripherals from the PC.
How can I fix REF_UNKNOWN_LOGON_SESSION?
1. Reinstall the corrupt drivers
Press Windows + X to open the Power User menu, and select Device Manager from the list.
Look for any devices with a warning sign at the corner of the icon, right-click on them, and choose Uninstall device.
If available, tick the checkbox for Attempt to remove the driver for this device, and click Uninstall.
Similarly, reinstall other corrupted device drivers, then reboot the PC, and Windows will automatically install a fresh copy of each driver.
2. Update all the drivers
Press Windows + S to open Search, type Device Manager in the text field, and click on the relevant result.
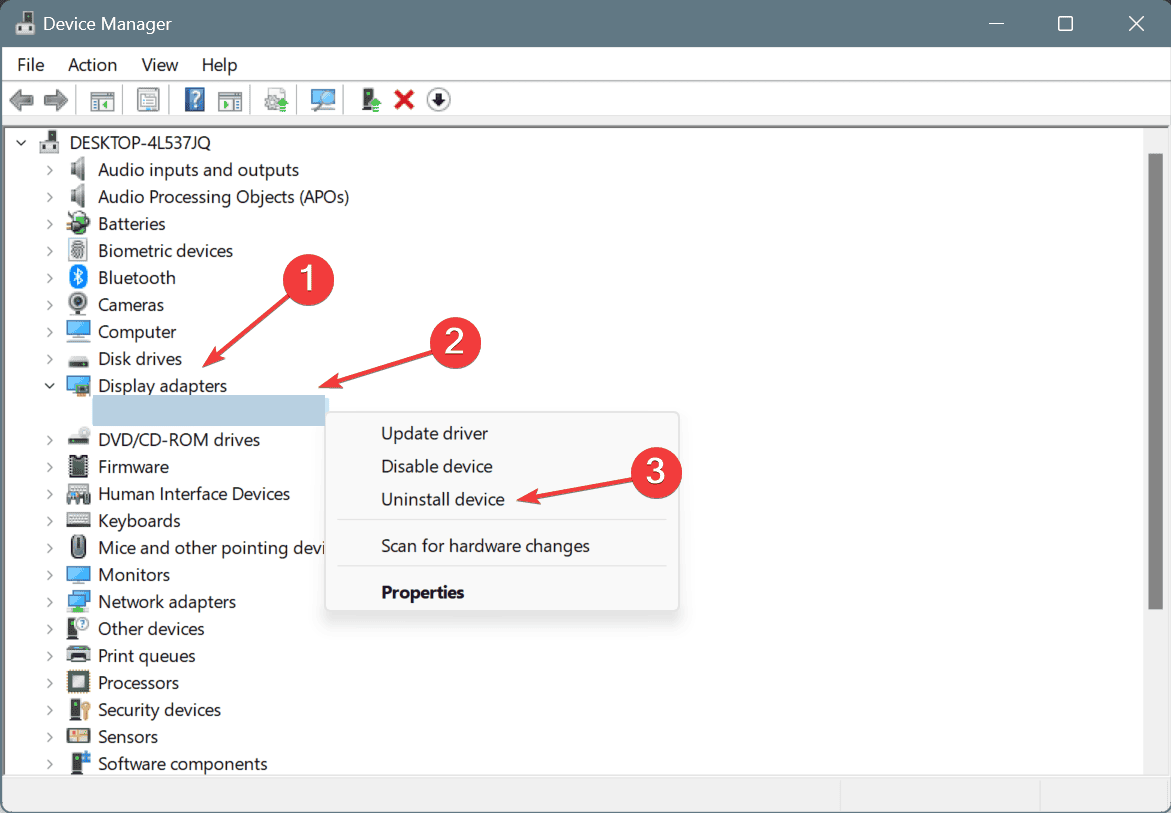
Expand the different entries here, right-click on the device(s) underneath, and select Update driver. I am updating the graphics driver.
Now, click on Search automatically for drivers and let Windows install the best locally available version.
Similarly, update the other drivers, especially the critical ones.
If Windows can’t find a better version while updating the drivers, head to the manufacturer’s website, locate the newest release, and then manually install the latest driver. Because in 2 out of 5 cases, it’s the drivers to blame for the REF_UNKNOWN_LOGON_SESSION error!
3. Repair the corrupt system files
Press Windows + R to open Run, type cmd, and hit Ctrl + Shift + Enter.
Click Yes in the UAC prompt.
Paste the following DISM (Deployment Image Servicing and Management) commands initially and hit Enter after each: DISM /Online /Cleanup-Image /CheckHealthDISM /Online /Cleanup-Image /ScanHealthDISM /Online /Cleanup-Image /RestoreHealth
Now, execute this command to run the SFC (System File Checker) scan: sfc /scannow
Reboot the PC and check for improvements.
4. Uninstall conflicting programs
Press Windows + R to open Run, type appwiz.cpl in the text field, and hit Enter.
Select any recently added application(s), and click on Uninstall.
Follow the on-screen instructions to complete the process, and then restart the computer.
If the REF_UNKNOWN_LOGON_SESSION bug check reappears, uninstall other apps that might be conflicting with Windows.
5. Create a new user profile
Press Windows + R to open Run, type netplwiz in the text field, and hit Enter.
Click the Add button.
Select the Sign in without a Microsoft account option.
Click on Local account.
Now, enter the new user profile name and password (not mandatory), then click on Next, and finally confirm the account creation.
Choose the new user profile from the list, and click on Properties.
Go to the Group Membership tab, select Administrator, and click OK to save the changes.
Next, sign in with the new user profile, and check for improvements.
If the REF_UNKNOWN_LOGON_SESSION error with code 0x47 is fixed, you can move files from the affected profile to the new profile using an external hard drive. As for the programs, you can reinstall them or make apps available to all users in Windows.
6. Repair disk and RAM issues
6.1 Inspect and repair the disk
Press Windows + S to open Search, type Command Prompt, and click on Run as administrator.
Click Yes in the UAC prompt.
Paste the following Check Disk command and hit Enter: chkdsk /r
If asked to schedule the scan for the next time you restart the computer, press Y, then hit Enter and, finally, reboot the PC to let Check Disk run.
The Check Disk utility includes different repair options, each accessible via a different command parameter. So, if /r doesn’t work, try the other ones until the disk issues are detected and repaired.
6.2 Inspect the RAM
Press Windows + R to open Run, type mdsched.exe in the text field, and hit Enter.
Click on Restart now and check for problems, and let Windows Memory Diagnostic detect problems with the RAM.
If no issues are found, I recommend you try MemTest86+, an open-source tool that runs a wide array of tests on the individual RAM modules and detects almost every problem. Since it takes several hours, let the tool run overnight for the best results!
7. Reset Windows
As a last resort, you can reset Windows to factory defaults. Remember, while you can keep the files during a reset, it’s best to remove everything. The latter is more likely to solve the REF_UNKNOWN_LOGON_SESSION BSOD!
When nothing works, get the PC inspected by a professional for hardware malfunction, loose connections, or damaged cables. Because, at this point, one of these is likely to be the underlying cause!
Microsoft’s latest Patch Tuesday for August 2024 addressed 90 vulnerabilities, including six zero-day exploits. Fortunately, the six actively exploited vulnerabilities were neutralized just in time.
Among the patched vulnerabilities, a mix of elevation of privilege, remote code execution, and information disclosure issues were addressed. The elevation of privilege flaws is particularly sneaky, allowing attackers to gain unauthorized access and control over a system, escalating from a mere visitor to having the same rights as the house owner. Remote code execution vulnerabilities, on the other hand, are like allowing someone to remotely control your computer, turning it into a puppet to perform malicious activities.
One of the zero-days, CVE-2024-38178, involved the Microsoft Edge browser in Internet Explorer Mode, a setting that brings users back to the days of Internet Explorer for compatibility reasons. This flaw could let attackers run malicious code on a victim’s computer just by visiting a compromised website.
Another critical issue, CVE-2024-38213, allowed malware to bypass Windows’ Mark of the Web security feature. This feature is like the digital equivalent of a “Beware of Dog” sign, warning users about the potential danger of files downloaded from the internet. Bypassing this could trick users into thinking a malicious file is safe, leading to trouble.
The updates didn’t stop at just fixing vulnerabilities. Microsoft also addressed issues in various products, including Office, .NET, Visual Studio, and Azure. It’s like conducting a full-scale operation to ensure every nook and cranny of your digital home is safe and secure.
Below is the complete list of all the vulnerabilities addressed with the Patch Tuesday, August 2024 pack:
Encountering a FATAL_UNHANDLED_HARD_ERROR on your Windows system usually comes with the value of 0x0000004C. This error often signals deeper issues within your system, ranging from registry problems to software incompatibilities or even hardware failures. First, perform a physical inspection of the hardware components and check for any signs of overheating or malfunctioning coolers.
1. Scan the system for errors in Safe Mode
Restart your computer and press F8 (or Shift + F8) before Windows starts loading.
Select Safe Mode from the Advanced Boot Options menu.
After the system reboots in Safe Mode, press Windows + R to open the Run dialog.
Type cmd and press Ctrl + Shift + Enter to open Command Prompt as an administrator.
In Command Prompt, type sfc /scannow and press Enter.
Wait for the scan to complete and restart your PC normally to see if the FATAL_UNHANDLED_HARD_ERROR persists.
Scanning your system for corrupt files is the first thing you can do in this case. Fortunately, the system will get back to normal.
2. Restore your system to a previous state
If your PC doesn’t boot normally, boot in Safe Mode, as instructed in the first 2 steps of the previous solution.
After booting, press Win + R to open the Run console.
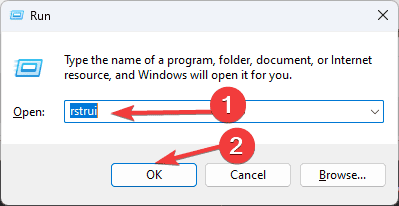
Type rstrui.exe and press Enter to open System Restore.
Pick a restore point that will bring your system to a previous state before this BSoD occurred and follow the prompts to restore your system.
Using System Restore will bring your system back in time, before the BSoD occurred. This also means that any software you installed after that point will be uninstalled.
3. Run Hardware Diagnostics
Restart your PC and enter the BIOS/UEFI settings by pressing the appropriate key (usually F2, F10, Delete, or Esc).
Navigate to the diagnostics or tools section.
Run the built-in diagnostics for your hard drive and memory.
However, you may also download and install dedicated hardware diagnostic tools that are more user-friendly and more precise in their assessments.
Follow the instructions to run tests and check for hardware failures.
Running diagnostics can help identify hardware issues that might be causing the FATAL_UNHANDLED_HARD_ERROR, such as failing RAM or hard drives. If the software detects any problems with your hardware, try to install them on another PC and see if they behave the same.
4. Update or reinstall device drivers
Press Windows + X and select Device Manager.
Expand each category and see if any of them has a yellow exclamation mark next to it. Right-click on the device, then select Update driver.
Choose Search automatically for drivers.
If updating doesn’t work, you may need to uninstall and reinstall.
Right-click on the device and select Uninstall device.
Restart your computer, and Windows will attempt to reinstall the driver automatically.
Updating or reinstalling drivers ensures you are using the most stable and compatible versions, reducing the chance of encountering driver-related errors.
5. Use Driver Verifier
Press Windows + R, type verifier, and press Enter.
Select Create custom settings (for code developers) and click Next.
Check the options for Standard settings and click Next.
Select Automatically select unsigned drivers or Automatically select all drivers installed on this computer based on your needs.
Click Finish to apply the settings and restart your computer.
Driver Verifier helps identify problematic drivers by stressing them, leading to a more accurate diagnosis of which drivers might be causing issues.
By following these steps, you can tackle the FATAL_UNHANDLED_HARD_ERROR effectively. To prevent future occurrences, regularly update your drivers and run system diagnostics to catch potential issues early.
As our guide on the causes of BSoD errors brings up, these bug checks often point out hardware errors so it’s not recommended to ignore them. We also recommend checking the crash logs to get more data you can provide to professionals.
You may also leave any questions you have in the comments below if you encounter any problems with this guide.
Tired of seeing the Add to Windows Media Player list option cluttering your context menu? You’re not alone. Here’s a quick guide to help you remove the Windows Media Player context menu entries and keep things tidy.
How do I remove Windows Media Player from the context menu?
1. Disable Windows Media Player Features
Click on the Start button and then select Settings (gear icon).
In the Settings window, click on System, then select Optional features.
Scroll through the list to find Windows Media Player.
Click on the down arrow next to Windows Media Player, then click the Uninstall button.
Keep in mind that this method will uninstall Windows Media Player, so you’ll be removing it from the context menu and your PC.
Go to HKEY_CLASSES_ROOT\WMP11.AssocFile.3G2\shell\Enqueue
Right-click on the Enqueue key and select Delete.
Repeat this for each file extension you want to remove the context menu item from.
Alternatively, you can create a script to do this for you:
Open Notepad.
Paste the following script: Windows Registry Editor Version 5.00 [-HKEY_CLASSES_ROOT\WMP11.AssocFile.WVX\shell\Enqueue] [-HKEY_CLASSES_ROOT\WMP11.AssocFile.3G2\shell\Enqueue] [-HKEY_CLASSES_ROOT\WMP11.AssocFile.avi\shell\Enqueue]
Save the file with a .reg extension (e.g., remove_wmp_context_menu.reg).
Double-click the saved .reg file.
Click Yes in the prompt to apply the changes.
Keep in mind that you need to add the file types that you don’t want to have Media Player in their context menu.
This is an advanced solution, and if you’re not careful you can cause issues on your PC, so use it at your own risk.
By following one of these solutions, you can effectively remove the Add to Windows Media Player list context menu item, keeping your context menu tidy and efficient.
Microsoft released the latest Patch Tuesday update, KB5041571, for Windows 11 24H2 on Copilot+ PCs, and it’s packed with crucial changes and improvements.
First, this update enhances security on your Windows operating system, so it’s important to install it as soon as possible. KB5041571 also includes fixes from a previous update (KB5040529, released in July), so if you missed that, you’re now all caught up.
Now, into the details. One of the critical issues addressed with KB5041571 is related to the lock screen. Specifically, the update tackles CVE-2024-38143 (it also affects the other Windows 11 versions), which means you won’t find the “Use my Windows user account” checkbox for Wi-Fi connections on the lock screen anymore. It’s a small change, but it’s all in the name of security.
Another interesting point is the removal of the NetJoinLegacyAccountReuse registry key. This might ring some bells for the tech-savvy, but for the rest of us, it’s enough to know that it’s a move towards tightening security protocols during domain joins.
For those who love dual-booting with Linux, there’s an important note. The update applies Secure Boot Advanced Targeting (SBAT) to prevent vulnerable Linux EFI (Shim bootloaders) from running. However, don’t worry if you’re a dual-boot user; this update won’t affect your setup. But, if you’re using older Linux ISO images, you might face boot issues, so it’s wise to check in with your Linux vendor for an updated ISO image.
DNS server security is also getting a boost to fend off CVE-2024-37968. If your domain configurations aren’t current, you might encounter a SERVFAIL error or experience timeouts. This is a heads-up to ensure your settings are current to avoid any hiccups.
However, it’s not all smooth sailing. With KB5041571, there’s a known issue where Arm device users might struggle to download and play Roblox via the Microsoft Store. You can still grab the game directly from Roblox’s website.
Getting this update is easy: it will automatically download and install via Windows Update. For those who are offline, there’s always the option to download it from the Microsoft Catalog.
The LM_SERVER_INTERNAL_ERROR BSoD on your Windows system has the value 0x00000054. This error often points to underlying issues with your system’s resources, drivers, or software. Let’s dive into some practical solutions that can help you resolve this error and get your system back on track.
How do I fix the LM_SERVER_INTERNAL_ERROR BSoD?
1. Free up disk space
Press Windows + I to open the Settings app.
Go to System > Storage.
Click on Local Disk (C:) or your main drive.
Review the storage usage under various categories like Apps & games, Temporary files, etc.
Click on each category and select files you do not need.
Click Remove files to delete them.
Freeing up disk space can prevent LM_SERVER_INTERNAL_ERROR by ensuring your system has enough resources to operate smoothly.
2. Update device drivers
Press Windows + X and select Device Manager.
Expand the categories and look for devices with a yellow exclamation mark.
Right-click the device and select Update driver.
Choose Search automatically for drivers.
Restart to apply changes.
Updating drivers ensures compatibility and can fix bugs that cause system errors like LM_SERVER_INTERNAL_ERROR. To automate the process, we recommend using driver updater software that will identify and update the PC drivers seamlessly.
3. Run SFC (System File Checker)
Press the Windows button, type cmd and select Run as administrator from the results.
Type sfc /scannow and press Enter.
Allow the scan to complete. This may take a while.
Restart your computer after the scan finishes.
The SFC command repairs corrupted system files, which can resolve the LM_SERVER_INTERNAL_ERROR.
4. Check the disk for errors
Press the Windows button, type cmd and select Run as administrator from the results.
Type chkdsk C: /f and press Enter. If your system drive has another letter, replace C with the actual one.
If prompted, type Y to schedule the check on the next restart.
Restart to allow the disk check to run.
Checking your disk for errors can identify and fix file system issues causing the LM_SERVER_INTERNAL_ERROR.
Keeping your system regularly updated and maintaining sufficient disk space can help prevent such errors in the future. If you encounter persistent issues, don’t hesitate to reach out for professional help.
Our guide on the causes of BSoD will provide more information on this matter. If you want to go even deeper, you can study the BSoD crash log to get more data regarding this bug check.
We also covered another server error in our latest ERROR_LOGON_SERVER_CONFLICT article, so don’t miss it for more information.
You can also ask for additional help in the comments section below.
As part of the monthly Patch Tuesday updates, Microsoft has released patches for Windows 10, ensuring users are equipped with the latest security and performance enhancements. This time around, the KB5041580 cumulative update is taking the spotlight. It is explicitly designed for Windows 10 versions 22H2 and 21H2.
This update has 14 fixes and security updates, addressing various issues to ensure a smoother and more secure user experience.
The installation process is straightforward for those keen on keeping their systems up-to-date. You can dive into the Settings, click on Windows Update, and hit the ‘Check for Updates’ button. But don’t worry if you’re not one to check for updates manually; this one is mandatory and will find its way to your system automatically, ensuring you’re not left behind on the security front.
Once installed, users on Windows 10 22H2 will see their system updated to build 19045.4780, while those on 21H2 will move to build 19044.4780.
KB5041580 tackles a pesky issue that caused systems to boot into the BitLocker recovery screen, a problem that also happened with Windows 11 devices, regardless of the version. It also addresses a vulnerability, CVE-2024-38143, making changes to the lock screen to enhance security. KB5041580 also removes outdated elements, such as the NetJoinLegacyAccountReuse registry key, and applies Secure Boot Advanced Targeting (SBAT) to Windows systems to prevent vulnerable Linux EFI (Shim bootloaders) from running.
A known issue persists: users might encounter an error (0x80070520) when attempting to change their account profile pictures. But Microsoft is on the case and promises a resolution in an upcoming release.
For those who like to investigate the specifics or need to download the update manually, the Microsoft Update Catalog is the go-to destination.
It’s that time of the month again: Microsoft has rolled out its Patch Tuesday updates for Windows 11 versions 23H2, 22H2, and 21H2. Windows 11 23H2 and 22H2 users will see their systems updated through KB5041585, while those on 21H2 will receive KB5041592. Post-update, your build versions will be 22621.4037, 22631.4037, and 22000.3147, respectively.
The updates include quality improvements for both 23H2 and 22H2 versions that were part of a previous update (KB5040527) released in July. For those curious about the specifics, these updates tackle everything from BitLocker recovery issues to ensuring your device doesn’t boot up into a recovery screen unexpectedly.
[BitLocker (known issue)] A BitLocker recovery screen shows when you start up your device. This occurs after you install the July 9, 2024, update. This issue is more likely to occur if device encryption is on. Go to Settings > Privacy & Security > Device encryption. To unlock your drive, Windows might ask you to enter the recovery key from your Microsoft account.
[Lock screen] This update addresses CVE-2024-38143. Because of this, the “Use my Windows user account” check box is not available on the lock screen to connect to Wi-Fi.
[Secure Boot Advanced Targeting (SBAT) and Linux Extensible Firmware Interface (EFI)] This update applies SBAT to systems that run Windows. This stops vulnerable Linux EFI (Shim bootloaders) from running. This SBAT update will not apply to systems that dual-boot Windows and Linux. After the SBAT update is applied, older Linux ISO images might not boot. If this occurs, work with your Linux vendor to get an updated ISO image.
For the 21H2 crowd, this update is your ticket to enhanced security, with additional protection against the latest threats. It also addresses some known issues, like BitLocker recovery screens popping up after the July update and tweaks to the lock screen functionality.
But here’s something you might not have expected: a servicing stack update (SSU). Both 23H2 and 22H2 versions get KB5041584, which aims to make the update process smoother and more reliable. There are no known issues, so users should have trouble installing the patch.
KB5041585 and KB5041592 should automatically download and install via Windows Update. But if you’re eager to get them immediately or need them for offline installation, you can grab them from the Microsoft Catalog website: KB5041585 can be downloaded from here, while KB5041592 can be grabbed from here.
Also, a heads-up for 22H2 users: Microsoft has announced that the Home and Pro editions of Windows 11, version 22H2, will reach their end of service on October 8, 2024. This means you’ll only be getting security updates until then. No more feature updates or non-security fixes. You might want to update your device to the latest 23H2 to keep it safe and secure.
You can read more about the latest Patch Tuesday updates for Windows 11 in the official blog post.
The INTERRUPT_UNWIND_ATTEMPTED BSOD, with an error code 0x0000003C, although rarely encountered, can prove challenging to fix, given the absence of any reliable information. Even Microsoft’s official website doesn’t say anything!
When looking at the reported cases, the INTERRUPT_UNWIND_ATTEMPTED error 0x3C was caused by outdated or buggy drivers, corrupt system files, conflicting third-party apps, low RAM availability, or recent changes to the PC.
Before we start troubleshooting, install all pending Windows updates, check the cable connection, look for failing hardware and disconnect it, and fix overheating issues.
How can I fix the INTERRUPT_UNWIND_ATTEMPTED blue screen error?
1. Update all the drivers
Press Windows + X to open the Power User menu, and select Device Manager.
Expand the Display adapters entry, right-click on the graphics adapter, and select Update driver.
Choose Search automatically for drivers and wait for Windows to install the best locally available version.
To update all the drivers automatically in one go, you can get a top-rated driver updater tool for Windows, which will auto-fetch the latest driver version for every device and install them.
2. Roll back recent driver updates
Press Windows + R to open Run, type devmgmt.msc in the text field, and hit Enter.
Expand the entries here individually, right-click on the device(s) underneath, and select Properties.
Go to the Driver tab, and click on Roll Back Driver.
Now, pick a reason for rolling back the update, and click on Yes to confirm.
If the Roll Back Driver option is greyed out, check other devices, identify the ones that recently had a driver update, and proceed with the rollback.
3. Repair the corrupt system files
Press Windows + S to open Search, type Command Prompt in the text field, and click on Run as administrator.
Click Yes in the UAC prompt.
Paste the following DISM commands individually and hit Enter after each: DISM /Online /Cleanup-Image /CheckHealthDISM /Online /Cleanup-Image /ScanHealthDISM /Online /Cleanup-Image /RestoreHealth
Now, run the SFC scan using this command: sfc /scannow
Press Windows + R to open Run, type appwiz.cpl in the text field, and hit Enter.
Select any recently added app(s) that might conflict with Windows, and click on Uninstall.
Follow the on-screen instructions to complete the process, then reboot the PC and check for improvements.
If the BSOD reappears, uninstall more of the recent apps.
5. Increase the virtual memory
Press Windows + S to open Search, type View advanced system settings, and click on the relevant result.
Click on Settings under Performance.
Go to the Advanced tab, and click on Change under Virtual memory.
Now, untick the checkbox for Automatically manage paging file size for all drives, select the No paging file option, and click on Set.
Now, pick the Custom size option, and fill out the fields underneath using the following formula (based on the available physical memory):
Initial size (MB): 1.5 x Physical memory x 1024
Maximum size (MB): 3 x Physical memory x 1024
For instance, if your PC has 4 GB RAM, the virtual memory (paging file size) becomes:
Initial size: 6144 (1.5 x 4 x 1024)
Maximum size: 12288 (3 x 4 x 1024)
Finally, click on Set and OK to save the changes, and then reboot the PC.
6. Perform a system restore
Press Windows + R to open Run, type rstrui.exe in the text field, and hit Enter.
Select the Choose a different restore point option and click Next.
Pick the oldest restore point from the list and click Next.
Verify the restore details and click on Finish to start the process.
A system restore will roll back all changes on the PC after the creation of the restore point without affecting the personal files. Picking the oldest restore point gives us the highest chance of fixing the INTERRUPT_UNWIND_ATTEMPTED blue screen error in Windows 11.
7. Take your PC to a repair shop
If nothing else works, it could be a malfunctioning or failing hardware to blame. Disconnect all the non-critical external devices and check for improvements. In case this, too, doesn’t work, contact the manufacturer’s support team or visit a repair shop to get the internal components inspected.
Often, loose connections and damaged cables trigger the BSOD and are easy to fix. Or, if it’s hardware failure, you can always get the affected component repaired or replaced!
But in the end, the INTERRUPT_UNWIND_ATTEMPTED bug check with error code 0x0000003C will get fixed. Also, advanced Windows users can check the BSOD logs to identify what’s causing the error and take the necessary measures.
Dealing with the Sticky Notes Preview app on Windows 11 can be a bit of a hassle, especially if you didn’t intend to use it. If you’re looking to remove it, there are several methods you can try, and this guide will show you the best ones to use.
How can I remove Sticky Notes Preview on Windows 11?
1. Use the Settings app
Open the Start Menu by clicking on Start on the taskbar.
Click on Settings (gear icon).
In the Settings window, click on Apps and then Installed apps.
Click on the three dots next to Sticky Notes from the list of installed apps.
Click on Uninstall and follow the on-screen instructions.
2. Use PowerShell
Open the Start Menu by clicking on the Start button on the taskbar.
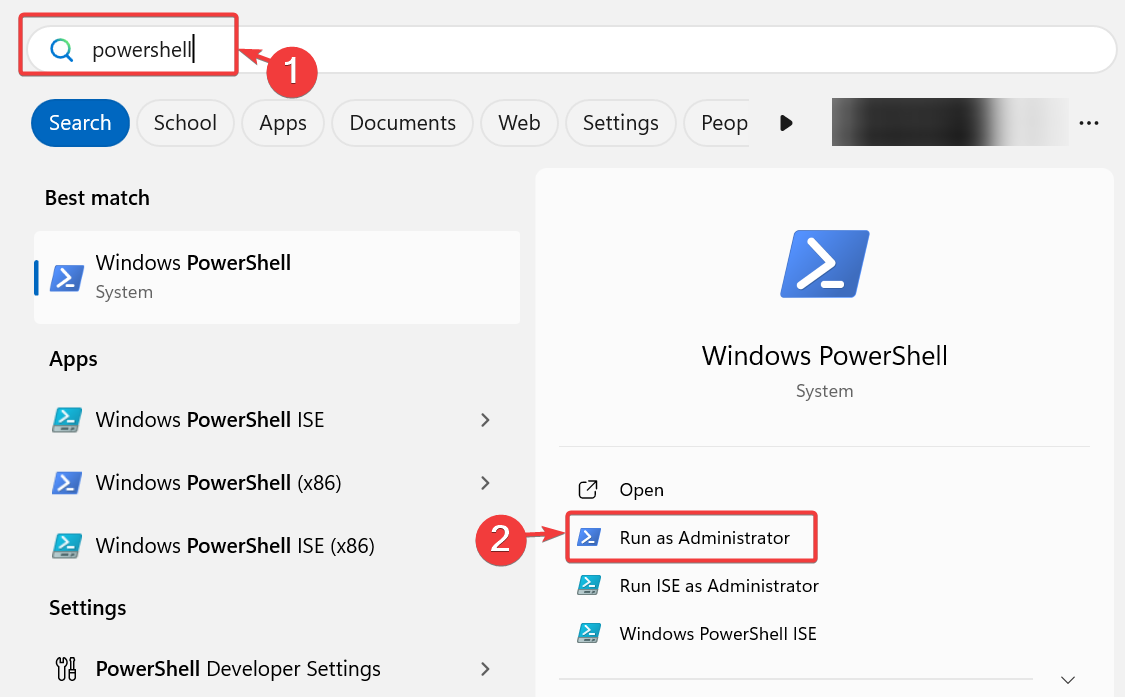
Type PowerShell in the search bar.
Right-click on Windows PowerShell from the search results and select Run as administrator.
In the PowerShell window, type the following command and press Enter: Get-AppxPackage MicrosoftStickyNotes | Remove-AppxPackage
As you can see, it’s pretty simple to remove Sticky Notes Preview on Windows 11, and you can remove it just like any other app.
Keep in mind that few users reported issues with this feature, and we already wrote a guide on what to do if Sticky Notes aren’t working on Windows 11, so don’t miss it.
Sharing folders on your private network can make file management and collaboration much easier. Whether you’re working from home or managing a small office network, these steps will guide you through the process of sharing folders seamlessly.
How do I share folders on a private network?
1. Enable File and printer sharing
Open Settings by clicking the Start menu and selecting the gear icon.
Click on Network & Internet.
Scroll down and click on Advanced network settings.
Next, click on Advanced sharing settings.
In the the Private networks section, toggle to on Network discovery and File and printer sharing.
Also check the box for Set up network connected devices automatically.
Click on Save changes.
This solution ensures that your computer is discoverable on the network and can share files and printers. Enabling network discovery and file sharing is crucial for communication between devices on the same network.
2. Share a folder
Open File Explorer by clicking on the folder icon on the Taskbar or pressing Windows + E.
Navigate to the folder you want to share.
Right-click on the folder and select Properties.
Click on the Sharing tab.
Click the Share button.
In the Network access window, either type in the username you want to share with or select Everyone.
Click on the Add button.
Choose the permission level (Read or Read/Write) from the drop-down menu next to the username.
Click on Share, and then Done.
Sharing a folder this way makes it accessible to other devices on the network, allowing them to read or modify files based on the permissions you set. We also have a helpful guide on how to add a new user on Windows 11 so you can share the folder locally.
4. Check network classification
Open Settings by clicking the Start menu and selecting the gear icon.
Click on Network & Internet.
Click on your network connection, e.g., Wi-Fi or Ethernet.
Now, click on the network properties.
In the Network window, ensure that the network is classified as Private.
Ensuring that the network is classified correctly (as Private network) allows Windows to treat it securely but also permissibly, providing necessary access to shared resources.
5. Mapping a network drive
Press Win + E to open File Explorer.
Right-click on This PC and select Map network drive.
Choose a drive letter from the drop-down menu.
In the Folder field, type the shared folder path in the form \\ComputerName\SharedFolder.
Check Reconnect at sign-in if you want the drive to be mapped automatically each time you log in.
Click Finish.
Mapping a network drive creates a persistent link to the shared folder, making it convenient to access it as if it were a local drive.
6. Access a shared folder from another computer
Open File Explorer by pressing Windows + E keys.
In the left pane, click on Network.
If prompted to turn on Network discovery, click to enable it.
Locate the computer name of the shared folder you need to access.
Double-click on the computer name and navigate to the shared folder.
Accessing a shared folder this way allows you to browse files and folders shared from another computer within the same private network. In other words, only computers that are connected to the same private network can access the shared folders.
When someone will attempt to access the shared folder, this will require the owner PC password. If you want to disable the Password protected sharing, follow the highlighted link for detailed instructions.
By following these steps, you can efficiently share folders on your private network. To prevent future issues, regularly check your network settings and ensure your sharing preferences are up to date.
Whether you are managing a PC or administering a network of multiple computers, MMC, or Microsoft Management Console, provides a unified framework for managing and configuring various system components and services. In this guide, we will discuss what Microsoft Management Console is and the basics of navigating the MMC interface and adding and configuring snap-ins.
What is Microsoft Management Console?
Microsoft Management Console, or MMC, is a framework that hosts administrative tools known as Snap-ins. These snap-ins are designed for system maintenance, monitoring, and configuration tasks. MMC is like a control panel that combines various management utilities in a single, easily accessible interface.
If you are getting an MMC.exe application error while launching the MMC window, it could be due to issues with the disk, missing permissions, or corrupted system files; read this detailed guide for fixes.
How can I launch the Microsoft Management Console?
1. Using the Run command
Press Windows + R to open the Run window.
Type mmc and click OK to launch the Microsoft Management Console window.
2. Using the search box
Press the Windows key and type mmc in the search box.
Now, select the first result and click Open to launch it.
3. Using the Command Prompt
Press the Windows key, type cmd in the search box, and click Run as administrator.
In the cmd window, type mmc and hit Enter to launch the Microsoft Management Console window.
Use any of the methods mentioned above to launch Microsoft Management Console.
From the menu bar, click File.
Next, from the drop-down menu, click Add/Remove snap-in. Alternatively, you can press Ctrl + M to launch the Add/Remove Snap-ins window.
From the list of Available snap-ins, click on a snap-in to select it, then click Add.
In the following window, select the snap-in you want to configure or manage for this computer or another one.
Also, place a checkmark next to Allow the selected computer to be changed when launching from the command line.
Click Finish, then OK to close the window.
If you are unable to create a snap-in, it could be due to corrupt system files or broken registry entries. Check out this guide for quick solutions.
2. Remove Snap-ins
Use any of the methods mentioned above to launch MMC.
From the menu bar, click File, then click Add/Remove snap-in. Alternatively, you can press Ctrl + M to launch the Add/Remove Snap-ins window.
From the list of Available snap-ins, click on a snap-in.
Select the one you want deleted from Selected snap-ins, then click Remove.
3. Edit Snap-in extensions
Use any of the methods mentioned above to launch MMC.
From the menu bar, click File, then click Add/Remove snap-in. Alternatively, you can press Ctrl + M to launch the Add/Remove Snap-ins window.
From the Add/Remove Snap-ins window, click Edit Extensions.
On the following window, select Enable only selected extensions.
From the box below, click on the items in the list to select or unselect, then click OK.
Click OK again.
How can I use Snap-ins to manage my PC?
Go to the Console Root folder from the left pane in the MMC window.
Click the drop-down arrow next to it to expand, then click the Snap-in you want to open in the Microsoft Management Console.
You can now perform the actions related to the snap-in right in the MMC window.
Use the Actions bar from the right pane to perform other necessary actions.
To conclude, Microsoft Management Console, or MMC, lets you access most administrative settings in a single window. It also enables you to create personalized management consoles with snap-ins.
Many readers have complained about getting the blue screen error SCSI_DISK_DRIVER_INTERNAL with error code 0x0000002D. It could appear due to an outdated version of Windows, faulty hardware, or bad memory.
To begin with, check for Windows updates and recall the last action you performed before encountering the error to understand it better. Next, remove all unwanted external peripherals and restart your PC before moving to the advanced steps.
How can I fix the SCSI_DISK_DRIVER_INTERNAL 0x0000002D error?
1. Update the outdated drivers
Press Windows + R to open the Run window.
Type devmgmt.msc and click OK to open the Device Manager app.
Inspect all the categories by clicking and expanding them. If you find a yellow triangle with an exclamation mark on any of the components in a category, right-click it to open the context menu and select Update driver.
On the next page, select Search automatically for drivers.
Follow the on-screen instructions to complete the process.
If you encounter BSoD errors after an upgrade, updating the drivers on your PC is a good way to fix the problem. Read this guide to learn more.
If your system didn’t start correctly, and you get the Automatic Repair blue screen, click Advanced options. Next, select Troubleshoot>Advanced options> Command Prompt to launch CMD on your PC.
Press the Windows key, type cmd in the search bar, and click Run as administrator.
Type the following command and hit Enter:chkdsk /f
Click Y if prompted and wait for the process to complete.
Restart your computer to save the changes.
3. Remove unwanted apps
Press Windows + I to open the Settings app.
Go to Apps, then click Installed apps.
You will see a list of apps. To remove an unwanted app, click the three-dot icon, then select Uninstall.
Follow the on-screen instructions to complete the process.
4. Run an offline scan using Windows Defender
Press the Windows key, type windows security, and click Open.
Click Virus & threat protection, then select Scan options.
Select the Microsoft Defender Antivirus (offline scan), then click Scan now.
If nothing works for you, you can contact Microsoft Support, explain the problem, and provide the steps you took to get more help.
To conclude, to fix errors related to SCSI_DISK_DRIVER_INTERNAL, run the CHKDSK scan, turn off fast startup, uninstall Windows updates, update outdated drivers, or perform a system restore.
Many readers have complained about getting the blue screen error SYSTEM_UNWIND_PREVIOUS_USER with error code 0x0000003A. It could appear due to an outdated version of Windows, corrupted drivers, faulty hardware, or bad memory.
To begin with, check for Windows updates and recall the last action you performed before encountering the error to understand it better. Next, unplug all unwanted external peripherals and restart your computer before proceeding to the below steps.
How can I fix the SYSTEM_UNWIND_PREVIOUS_USER (0x0000003A) error?
1. Update the outdated drivers
Press Windows + R to open the Run console.
Type devmgmt.msc and click OK to launch the Device Manager app.
Go to all the categories, click on them, and expand one by one. If you find a yellow triangle with an exclamation mark on any of the components in a category, right-click it to open the context menu and choose Update driver.
On the next window, select Search automatically for drivers.
Follow the on-screen instructions to complete the installation process.
Updating the drivers on your PC is a good way to fix the BSoD errors after an upgrade; read this guide for detailed solutions.
Locate Advanced Startup and click the Restart now button.
Your computer will restart, and on the blue screen, click Troubleshoot.
On the Troubleshoot screen, select Advanced options.
Choose Startup Settings from the following page.
On the next window, press the number next to Safe mode with networking to select it, then click Restart.
5.2 Uninstall Windows Updates
Press Windows + I to open Settings.
Go to Windows Update, then select Update history.
On the next page, scroll down and click Uninstall updates.
Locate the latest update, then click Uninstall and follow the on-screen prompts.
6. Perform a system restore
Press Windows + R to open the Run console.
Type rstrui and click OK to launch the System Restore window.
On the System Restore window, click Next.
Select the restore point from the list before your computer works fine, then click Next.
Click Finish to initiate the process.
If you see the System Restore did not complete successfully message after your PC restarts and your system was not able to restore to the previous version, check out this guide for quick solutions.
In case nothing worked for you, you can contact Microsoft Support, explain the problem, and provide the steps you took to get more help.
In conclusion, to fix errors related to SYSTEM_UNWIND_PREVIOUS_USER, run an offline malware scan, turn off fast startup, uninstall Windows updates, update outdated drivers, or perform a system restore.
If you have any questions or suggestions about the SYSTEM_UNWIND_PREVIOUS_USER issue, feel free to mention them in the comments section below.
Transferring programs from your C drive to your D drive can be a lifesaver when you’re running out of space. Whether you’re looking to free up some room or simply want to organize your files better, here are six effective methods to help you achieve this effortlessly.
How can I transfer programs from C drive to D drive?
1. Use the Settings app
Click the Start button and select Settings.
In the Apps section, select Installed apps.
Click the three dots next to the app you want to move and choose Move.
Select the new drive (D:) where you want the application to be moved and confirm by clicking Move.
Keep in mind that this feature will only work for Universal apps.
Choose the option to move the install software from one drive to another and follow the steps on the screen.
This type of software should help you move any installed application with ease. Do keep in mind that this type of software might not be 100% successful, so you’re using them at your own risk.
Windows has a built-in feature that can move Universal apps with ease. However, moving Win32 applications isn’t as easy since almost all of them add their entries to the registry and those entries need to be modified as well so the software could work properly.
By following these solutions, you can effectively manage and transfer your programs from the C drive to the D drive, ensuring better performance and more efficient use of your storage space.
Keep in mind that moving Win32 apps might not be successful and you may end up with additional problems, so it’s always a better option to reinstall them from scratch.
Microsoft is apparently rolling out new policies for OneDrive Business users, and they’re not good news. Starting January 27, 2025, the tech giant will begin freezing unauthorized accounts for over 90 days. The Microsoft argument? Unauthorized accounts are a security and compliance headache.
So, what does “unlicensed” mean in this context? We’re talking about accounts that haven’t been activated, expired or are not associated with an organization’s Microsoft or Office 365 subscription.
According to reports, IT managers can license these accounts and give them new life, hide them, or suspend and delete them. If nothing is done, Microsoft will automatically take over the accounts.
Organizations can access archived data for $0.05 per gigabyte per month and an additional $0.60 per gigabyte. Administrators will begin to be billed for these services in April 2025.
For admins looking to get ahead of the game, Microsoft suggests heading to the SharePoint Admin Center. You can create a report about unauthorized OneDrive users and download it as a CSV file there. And if you care about user-friendliness, Microsoft is on top of it. An interactive UI for user monitoring and other information is planned to be released by January 2025.
Microsoft’s move indicates that the company is improving security and compliance by releasing these OneDrive for Business policies. But it also raises questions. Is this the best way to deal with unauthorized accounts? More importantly, how will this affect organizations?
Looking for a safe Win32 Disk Imager download? It’s an essential tool for creating bootable USB drives or backing up data. It makes it easy to prepare a USB stick for a new operating system or transfer disk images.
I’ll walk you through the Win32 Disk Imager installation procedure, so let’s get into it!
How To Download and Install Win32 Disk Imager
You can get the tool from its official source (which I recommend) or a third-party website.
Using the Official Website
Follow the below steps:
Go to the official Win32 Disk Imager website, tap the installation executable file, and the download will start automatically.
Click the download icon on the top right corner of your window and select the file to start the installation process.
Accept the licensing agreement, then tap Next.
Pick a destination location and hit Next.
Select Start menu folder and then Next.
Tick the Create a Desktop shortcut box and click next.
Click Install.
Wait for it to complete the installation, then tap Finish.
Select the Image file you want to use and your USB drive under the device, then tap Write. Click YES on the pop-up.
Once the file transfer is complete, you can safely remove the USB flash drive. It’s all done!
Using a Third-Party Website
You can also get Win32 Disk Imager from a reliable third-party website like SourceForge. However, I recommend you get the app from its official source to avoid infected or outdated software. Once you’ve downloaded it, follow the same steps listed above to get started.
Win32 Disk Imager download from the official website ensures a safe and up-to-date version. Follow the steps outlined above to get started, and you’ll be ready to create and manage disk images quickly.
Rememeber the Work Hours and Location capability that Microsoft added to Outlook a while ago? Well, it seems that the Redmond-based tech giant is making good use of it by allowing managers and admins to check it to see who is in the office.
According to the latest entry in the Microsoft 365 Roadmap, the feature, which will be released in October, will introduce a pinned ability to always see who is in the office based on Work Hours and Location.
Microsoft says it will be available to check out the top-right corner of the calendar surface in the new Outlook for Windows and Web.
This introduces an “always on” ability to see who is in the office based on Work Hours and Location. This information will be pinned (available) on the top-right corner of the Calendar surface in the new Outlook for Windows and web. #newoutlookforwindows
As you can see, those who assign their work hours and the location of their working schedule in Outlook will appear in this list for quick, simple, and efficient management.
The capability will be pretty helpful to managers, admins, or team leaders who want to schedule meetings or gatherings, as it will allow them to see who is online or offline.
In other news, Outlook will automatically generate meeting artifacts for all users participating in a meeting. They will include a meeting summary, the most critical points, and additional suggestions and recommendations.
The MUST_SUCCEED_POOL_EMPTY blue screen error, with a value (bug check) of 0x00000041, is usually caused by driver issues, conflicting applications, corrupt system files, and problematic Windows updates!
After assessing previously reported cases of MUST_SUCCEED_POOL_EMPTY, I identified driver problems as the underlying cause in 4 out of 5 cases. And while Microsoft’s official website mentions driver as the cause, it fails to list any reasonable solutions.
Before you begin troubleshooting, install all available Windows updates (including the optional ones) and scan the PC for malware using the built-in Windows Security or a top-rated third-party antivirus solution.
How do I fix the MUST_SUCCEED_POOL_EMPTY blue screen error?
1. Update all the drivers
Press Windows + X to open the Power User menu, and select Device Manager.
Expand the different entries individually, right-click on the device(s) underneath, and select Update driver. I am updating the graphics driver.
Now, choose Search automatically for drivers and let Windows install the best locally available version.
A simpler option is to use a dedicated driver update software, which will auto-detect connected devices, fetch the latest drivers for each, and install them!
2. Reinstall the corrupt drivers
Press Windows + S to open Search, type Device Manager, and click on the relevant result.
Identify any devices with a warning sign beside the icon. The categories for these devices auto-expand when you open the Device Manager.
Right-click on the device with a corrupt driver, and choose Uninstall device.
If available, tick the checkbox for Attempt to remove the driver for this device, and click on Uninstall.
Once done with all such devices, reboot the PC, and Windows will automatically install a fresh copy of the device-specific drivers.
3. Roll back recent driver updates
Press Windows + R to open Run, type devmgmt.msc, and hit Enter.
Expand the different entries individually, right-click on the device(s) underneath, and choose Properties.
Go to the Driver tab, and click on Roll Back Driver.
Pick a reason for the rollback, and click on Yes to confirm.
Similarly, uninstall any other driver updates downloaded recently.
Press Windows + R to open Run, type appwiz.cpl in the text field, and hit Enter.
Select any recently installed application(s) that might be triggering the BSOD, and click on Uninstall.
Follow the on-screen instructions to complete the process.
Reboot the PC and check for improvements.
Experts suggest that having two or more apps that perform the same function can cause conflicts, which, subsequently, leads to the MUST_SUCCEED_POOL_EMPTY BSOD. In this case, identify the additional ones, and uninstall the apps.
If a quick removal doesn’t work, get an effective uninstaller software to clear any app-related leftover files and Registry entries that might still be causing issues!
5. Repair the corrupt system files
Press Windows + S to open Search, type Command Prompt, and click on Run as administrator.
Click Yes in the UAC prompt.
Paste the following DISM (Deployment Image Servicing and Management) commands and hit Enter after each: DISM /Online /Cleanup-Image /CheckHealthDISM /Online /Cleanup-Image /ScanHealthDISM /Online /Cleanup-Image /RestoreHealth
Next, run this command for the SFC (System File Checker) scan: sfc /scannow
Finally, restart the PC and check for improvements.
6. Uninstall recent Windows updates
Press Windows + I to open Settings, go to Windows Update from the left pane, and click on Update history.
Scroll down and click on Uninstall updates.
Now, click on Uninstall next to the recently downloaded update.
Again, click Uninstall in the confirmation prompt.
Restart the PC and check for improvements. If the error message reappears, uninstall a few other recent updates until you find the problematic one.
7. Perform an in-place upgrade
NOTE
The steps listed below are for Windows 11. If you are using the previous iteration, check our dedicated article explaining repair upgrade on Windows 10.
Right-click on the ISO file, choose Mount, and click Open in the confirmation prompt.
Run the setup.exe file.
Click Yes in the UAC prompt.
Click on Next to proceed.
Now, click Accept to agree to Microsoft’s license terms.
Finally, verify that the setup reads, Keep personal files and apps, and click on Install.
Wait for the process to complete. It can take anywhere between 1-3 hours.
An in-place upgrade is pretty much the same as reinstalling Windows, except that your stored files and apps remain unaffected. And it’s capable of fixing most issues, including the dreaded MUST_SUCCEED_POOL_EMPTY blue screen error if it’s caused by the software components!
If this, too, fails, contact a professional. At this point, fixing the error requires checking the BSOD log files, identifying the faulty driver or component, and eliminating issues with it.
Microsoft Teams is set to introduce a new Block User API that effectively bans and blocks malicious users from resending messages to victims.
In the latest entry to the Microsoft 365 Roadmap, the Redmond-based tech giant says the Delete API, which removes access to a chat for the user, is insufficient, as it doesn’t entirely prevent the malicious user from resending messages.
Instead, the tech giant developed the Block User API to address the limitation, which completely blocks any suspicious user inside an organization. This API can also be used to block that user from the entire organization, not just the individual chat.
With the availability of the delete API (removeallaccessforuser API), it does not stop the malicious user from resending the message to the same victim. To help prevent that, a block user API will allow the admin to block the malicious user from reaching out again. To make this even more effective, we will utilize a similar feature as the allow/block list in federation to block the malicious user from the entire organization.
The new API will be available in Microsoft Teams on all platforms, including Desktop, Android, Mac, and iOS, and it’s set to be released in October 2024,
In other news, the platform will also get an expanded gallery view, allowing users to take additional actions directly, including muting all the background noise.
Are you looking for the best website builder for your small business? Keep reading!
If you want to expand the customer base for your small business online, you’ll need a website. However, designing, hosting, and maintaining it is a time-consuming process. Not to mention the overhead expenses incurred.
So, to let you focus on your business and put the online presence part on autopilot. I’ve created a list of effortless website builders that stood out during my research. Furthermore, I tested these recommendations for many hours by creating landing pages and web portals using real-world examples.
Let’s get started!
Best Website Builder for Small Business – Top 7 Tools
Here are my top picks together with their pros and cons, so let’s check them out:
Unbounce is a premium platform for developing landing pages for existing or new business sites. It’s suitable for niches, like e-commerce, SaaS, Agency, B2B marketing, professional services, email marketing, social ads, etc.
Furthermore, it offers popular online marketing resources to boost the product or service page visibility. For example, you can use A/B testing, discount or sale pop-ups, calls to action as sticky bars, lead generation templates, AI optimization, AI copywriting, and more.
Pricing: Starts from $74/month. However, you can get a 25% discount if you choose yearly billing.
Pros
Cons
Good for active marketing.
The free trial requires a credit-card-based sign-up.
A/B testing helps you to create different web pages for alternative marketing strategies.
Its services are costly for page-building and meant only for aggressive marketing.
Free to use professional landing page templates.
Expert implementation support is limited to the top subscription package, Concierge.
Integrates with business tools, like Hubspot, Mailchimp, etc.
Allows migrating your landing pages to any hosting provider.
You should go for WordPress if you’re looking for a super affordable web portal for your small business. Firstly, its free plan allows anyone to develop and host a functional online portal. Secondly, the free trial is free forever with a few constraints, like you can’t monetize the website for advertisements.
However, you can use the WooCommerce plugin to create an online store and start accepting payments from customers or patrons.
Furthermore, you can build a site from scratch or start developing from a professional-looking template. Also, you can install free and paid plugins from its curated library to add more functionalities. An interesting fact about WordPress is that you don’t need to write code to add more functionalities. You can make all modifications visually.
The site builder supports SEO, technical SEO, brand marketing, and social media engagements. Also, you can choose from a range of WordPress hosting plans or take your web portal to a third-party hosting provider.
Pricing: The Personal subscription starts from $9/month. However, you can get up to 55% discount if you subscribe for the whole year.
Pros
Cons
Offers a free trial.
Popular SEO plug-ins, like Yoast SEO, aren’t available in the free plan.
Many developers actively develop plug-ins for WordPress sites.
Cloud storage costs are a little bit higher than competitors.
Supports integration with inventory management tools, marketing tools, and more.
The block editor doesn’t support many keyboard shortcuts.
There are many business-grade site templates to begin with.
The block-based content editing often slows down the whole editor, especially for long-form content or content-heavy pages.
Allows you to use your own domain or export a website to a different host.
Shopify is the popular choice for many small businesses that want to set up a dynamic website to sell products or services online or offline. Its e-commerce portal is suitable for content, product, and service-based businesses. Also, it lets you create an online portal and migrate that to another hosting solution if you need it.
Often visual site builders offer restricted customizations. However, Shopify has many customizations. Here, you can add plenty of elements to your web page to make it SEO and user-friendly. Also, you can select from endless modular features, like checkout cards, product videos, 3D models of products, product search and filtering, language selection, currency selection, product recommendations, etc.
Furthermore, its e-commerce stores adjust automatically according to the device your customers are using.
Pricing: Its paid subscriptions start from $39/month. Also, there’s a 25% discount if you subscribe for the entire year.
Pros
Cons
Suitable for starting an e-commerce business quickly.
The free trial requires a credit card.
Offers various tools and apps to visually represent products, services, pricing, etc.
There’s an intermediate-level learning curve.
It comes with a modular website-building experience.
Shopify imposes many Transaction Fees, Subscription Fees, and App Costs.
Supports multiple sales channels for your small business site.
There are no built-in email marketing tools. You must rely on third-party plugins or integrations.
Its site analytics tool is simpler than Google Analytics.
If you’re looking to start a small business to provide professional services in the form of content, books, documents, designs, and more, Gumroad is a good option. It lets you create a responsive website to publish your service offerings online. Also, you can host as many pages as you want. Furthermore, it charges you 10% of every sale, which is a flat rate, with no hidden fees.
Setting up and launching your storefront requires you to complete two steps. You need to add your product and choose a checkout format. Gumroad takes care of the rest.
Also, all of its editing processes are visual and modular. For example, you enter the inputs for sections like Product, Collaborators, Checkout, Emails, Workflows, and Sales. Then, Gumroad transforms those into a professional-looking site.
Additionally, the Workflow feature lets you automate various website-related tasks, like managing abandoned carts, reaching out to a member canceling your subscription, and so on. Setting up such a workflow is super-easy with the text and visual flow-maker. Workflows include processes, like Purchase, New subscriber, Member cancels, New affiliate, and Abandoned cart.
Pricing: Flat 10% commission on all checkouts.
Pros
Cons
Free site builder.
It’s not suitable for selling physical products.
Visual and text-based web designing.
The commission might sound excessive if you’re just starting a business.
Simple online portal designs and content make business portals highly accessible.
If you’re looking for modern graphics and high-tech web elements, Gumroad isn’t the appropriate choice.
BigCommerce Essentials is the affordable version of the BigCommerce Enterprise solution, a business site builder used by organizations. So, if you’re planning to scale up, you can start with this platform at the bootstrap level.
Like other web development platforms, it offers a modular and no-code approach for site setup. For example, you can select elements like Orders, Products, Customers, Storefront, Marketing, Apps, Tax Rates, Discounts, etc. Also, it’ll guide you through adding the necessary content and text with enhanced descriptions.
Furthermore, BigCommerce Essentials offers site analytics if you host your store using its built-in solution. The analytics interface lets you choose different storefronts and customize the monitored website metrics from many options like Visits, Conversion rate, Orders, Revenue, Customers, AOV, etc.
Pricing: Its subscription plans start from $39/month for three storefronts with an expected online revenue of $50K. However, if you go for an annual subscription, you can get a 25% discount.
Pros
Cons
Recommended for small businesses planning to scale up.
It has an intermediate-level learning curve.
Setting up local and global taxes is effortless.
You must pay an overage fee if you plan to create additional storefronts than the allowed quota.
If your business requires additional financing, it connects you to the appropriate lenders.
An abandoned cart saver isn’t available in the starter subscription plan.
Simple web analytics compared to Google Analytics.
Your store gets deleted if you don’t upgrade to a paid plan after 90 days.
Offers a credit card-free trial.
You can’t export the website to a third-party hosting provider.
If you’re planning to launch a small business website without a database linking feature, check out Google Sites. This is a no-code online site builder with mostly static elements. Also, you can host the portal on Google and link the storage to your Google Drive for free.
Alternatively, you can take the site to a different hosting provider. However, the new Google Sites can store content independent of your Drive account. In this case, storage will be limited to 100 MB per website per free Google Account.
Furthermore, all Google Sites pages adjust to the device screen size due to its responsive source code. Needless to say, you can visually add various elements to enhance the looks and functionality of your website without editing any HTML or CSS code.
Moreover, you can add modern elements like Facebook badges, mouse-over buttons, RSS feeds, slideshows, videos, Twitter feeds, and more. There’s also a library of templates for various professional and business needs.
Pricing: Google Sites is free for paid and free users of Google Workspace.
Pros
Cons
It supports SEO optimization of the site and content.
It’s not suitable for high-volume e-commerce operations online.
Its completely free to use for individual and commercial needs.
Google Sites isn’t compatible with database-driven website coding languages, like PHP.
The Apps Script feature allows you to customize Google Sites at the source code level.
Templates are paid.
Good for informative or static online portals.
You can add a pay now button to create a simple storefront.
GoDaddy Website Builder is an intuitive platform to build business sites for products, services, and content. It offers a wizard-based online portal creation flow. Then, you start with a set of easy questionnaires, like whether you need an online store, appointment feature, products you’re willing to sell, the name of the website, and a brief introduction.
Once completed, GoDaddy will generate a default web page with many elements, like About, Photo Gallery, Social Links, Subscribe, Online Appointments, etc. Also, you can customize the section you want to add or remove. Once done setting up the default site, Godaddy takes you to the online editor where you can customize shapes, texts, content, colors, buttons, headlines, etc. Furthermore, you can change the theme of the basic website.
Pricing: GoDaddy’s subscriptions start at $16.99/month. However, you can get up to 35% discount if you pay for the whole year.
Pros
Cons
Offers a payment method-less free trial.
There’s a moderate-level learning curve. You might need a developer.
You can add a custom domain to the website.
Recurring appointments aren’t available in the Basic package.
Includes an email marketing quota of 100 to 100,000 per month depending on the subscription plan.
Social marketplace linking and selling works only with the Commerce package.
If you’re considering using Microsoft Copilot but don’t know where to start, you should know that the Redmond-based tech giant will enhance the AI model with prompt suggestions in the Copilot Chat.
Every time you open Copilot, the AI model welcomes you with prompts based on your previous interactions. This is especially useful for those who have never tried AI before.
Get started in Copilot chat quickly with automatic prompt suggestions that enhance your productivity by providing relevant and context-aware prompts based on your previous interactions.
The Roadmap says this feature will be out in September. on desktops, web, and Mac versions of the Microsoft Copilot app.
Microsoft 365 will also recommend Copilot candidates to admins, meaning organizations can most effectively track all the employees using the AI model. For those professionals looking to keep in touch with their organization’s AI policies, the new prompt suggestions from Microsoft Copilot could help them use the tool more.
Microsoft 365 Insiders, good things are coming your way: Microsoft Teams has rolled out an expanded gallery view for the small meeting window to improve the experience for both speakers and listeners.
According to a blog post, Teams’ minimized meeting window shrinks to a small box at the top of the app, letting users monitor the meeting while they juggle other tasks. You can view more participant videos, spot any raised hands, and even catch a glimpse of your video.
If before, you could see who was talking in a single box, now, you can have an expanded Microsoft Teams gallery that shows up to four people, plus a box for you.
In the minimized view, users will need to click the view switcher and pick the “Show participant gallery” option. For presenters, the default is the extended gallery view, but you can change it to focus on just the active presenter if you need to.
This expanded view has many benefits. You can see more faces, handle participant actions like raised hands or reactions, and even mute any background noise without any trouble. Also, when you’re sharing your screen, the presenter window uses this expanded gallery view, which keeps the meeting lively and interesting.
This feature is available if you’re in the Teams Public Preview or Microsoft 365 Targeted release using the new Teams client for Windows or macOS.
IT admins can turn this on for users by adjusting the update policy to display preview features. If you’re in the Targeted release, your global admins can give access to specific people or the whole organization.
In other news, Microsoft Teams is now letting users move freely across breakout rooms, and the platform will finally allow them to personalize their notification sounds. It’s worth mentioning that the Redmond-based tech giant also recently introduced emoji customization, so now you can create your own emojis.
Amongst the wide array of different blue screen errors, the SERIAL_DRIVER_INTERNAL bug check with a value of 0x00000038 is extremely uncommon. So far, there have only been a handful of reported encounters, with BSOD often coupled with other similar errors!
The SERIAL_DRIVER_INTERNAL blue screen error in Windows is usually caused by outdated or buggy drivers, corrupt system files, issues with the disk or RAM, malware infection, and hardware problems.
Also, if it sounds too complex, simply get a top-rated driver update tool, which will automatically identify the connected devices, fetch the latest drivers for each, and install them!
2. Roll back recent driver updates
Press Windows + R to open Run, type devmgmt.msc in the text field, and hit Enter.
Expand the entries individually, right-click on the devices here, and select Properties.
Go to the Driver tab, and click on the Roll Back Driver button.
Select a reason for the roll back, click on Yes to confirm, and wait for the process to complete.
If the roll back option is greyed out, move to the next device and check for recent driver updates.
3. Check for RAM and disk issues
3.1. Inspect and repair problems with disk
Press Windows + S to open Search, type Command Prompt in the text field, and click on Run as administrator.
Click Yes in the UAC prompt.
Paste the following Check Disk command and hit Enter: chkdsk /r
If asked to schedule the scan for the next reboot, hit Y and press Enter to confirm.
Finally, restart the computer and let the scan complete.
For disk-related problems triggering the SERIAL_DRIVER_INTERNAL BSOD, you can run the built-in Check Disk utility to automatically identify issues and repair the simpler ones. After running it, always look through the Check Disk log for a better understanding of the problems, if any are found.
3.2. Inspect problems with RAM
Press Windows + S to open Search, type Windows Memory Diagnostic, and click on the relevant result.
Click on Restart now and check for problems.
Let the built-in utility run and identify RAM-related issues.
If the utility didn’t find any issues, I recommend you go with MemTest86, an open-source tool that runs a wide array of tests on individual RAM modules and identifies even the smallest of problems. Since the tool takes 4-8 hours to perform the tests, it’s best that you let MemTest86 run overnight!
4. Repair the corrupt system files
Press Windows + R to open Run, type cmd, and hit Ctrl + Shift + Enter.
Click Yes in the UAC prompt.
Paste the following DISM commands individually and hit Enter after each: DISM /Online /Cleanup-Image /CheckHealthDISM /Online /Cleanup-Image /ScanHealthDISM /Online /Cleanup-Image /RestoreHealth
Once done, execute this command to run the SFC scan: sfc /scannow
Press Windows + S to open Search, type Windows Security in the text field, and click on the relevant result.
Click on Virus & threat protection.
Click on Scan options.
Choose the Full scan option and click on Scan now.
Wait for Windows Security to detect and eliminate active threats.
6. Perform a system restore
Press Windows + R to open Run, type rstrui.exe in the text field, and hit Enter.
Select the Choose a different restore point option and click on Next.
Pick the oldest restore point from the list, and click on Next.
Verify the restore details and click on Finish to start the process.
A system restore will, as the name suggests, revert your PC to an earlier state where the error didn’t exist. The best part is that your personal files remain unaffected during the process!
7. Contact support or visit a repair shop
If none of the fixes so far have worked, it’s most likely a hardware issue triggering the SERIAL_DRIVER_INTERNAL error in Windows. In this case, it’s best that you contact the device’s support team or visit a local repair shop.
They will be better able to identify and rectify the underlying cause, whether it’s a hardware or software-based problem.
If the SERIAL_DRIVER_INTERNAL blue screen error appears alongside a series of other similar errors, you could check the BSOD error logs to discover what’s triggering it and take the necessary measures.