Error Analyzing in ChatGPT: 5 Ways to Fix it

ChatGPT’s Data Analysis often throws an error for users, with the most common being Error analyzing. It is seen for even simple text files and spreadsheets (Excel files) that are only a few KBs in size. Since the error affects paid subscribers, forums are filled with similar reports but not any effective solutions!

You encounter ChatGPT’s Error analyzing when the servers are overloaded, a recent update broke things, the file is too complex to analyze, the browser cache is corrupt, or there is an issue with the current session.

Before we start with the solutions, press Ctrl + Shift + R to reload the page while ignoring the cache and check for improvements. Also, re-login to your ChatGPT account. Do not forget to check the ChatGPT server status on the official website. Besides, you can use a real-time monitoring platform like Downdetector to check for outages.

How can I fix Error Analyzing in ChatGPT?

1. Use another device

Based on my experience with ChatGPT, you can get rid of the Error analyzing messages with file types like PDF, CSV, and TXT by switching to another device, say from a laptop/desktop to a mobile phone.

This is by far the simplest solution and wouldn’t take more than a minute. All you need to do is install the ChatGPT app on iOS or Android, and you can get started with data analysis!

2. Clear the browsing data

Tip icon Tip
The steps listed here are for Google Chrome, although the process to clear the browsing data remains similar across browsers, especially the ones based on Chromium.
  1. Launch the browser and press Ctrl + Shift + Del.
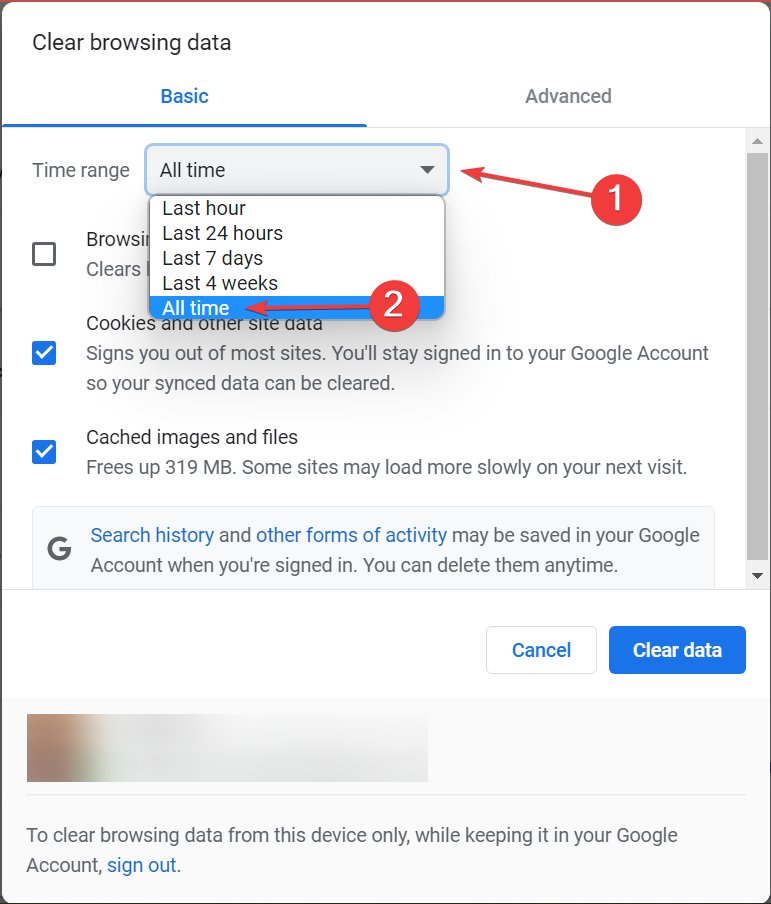
  2. Now, select All time from the Time range dropdown menu, tick the checkboxes for Cookies and other site data and Cached images and files, and then click the Delete data button.clear data to fix chatgpt error analyzing
  3. Relaunch the browser, sign in into ChatGPT, and check for improvements.

If the ChatGPT’s Error analyzing files appears again after a few days, clear the browsing data once more. You don’t necessarily have to clear the browsing history, so your experience remains largely unaffected!

3. Use a prompt for improved data analysis

According to several experts and ChatGPT users, providing a prompt along with the file can fix ChatGPT’s Error analyzing while using data analysis.

All you need to do is command ChatGPT to use the Python sandbox environment and not OCR. Say something like, Use your Python sandbox environment to extract text from the PDF (specify file type) file using plain text methods and not the OCR code, followed by the other instructions.

prompt to fix chatgpt error analyzing
(Image source: OpenAI Forum)

Of course, you will have to modify the prompt based on the uploaded file type and the kind of analysis to be performed. But you will soon get a hang of it!

4. Switch to UTF-8 encoding (for text files)

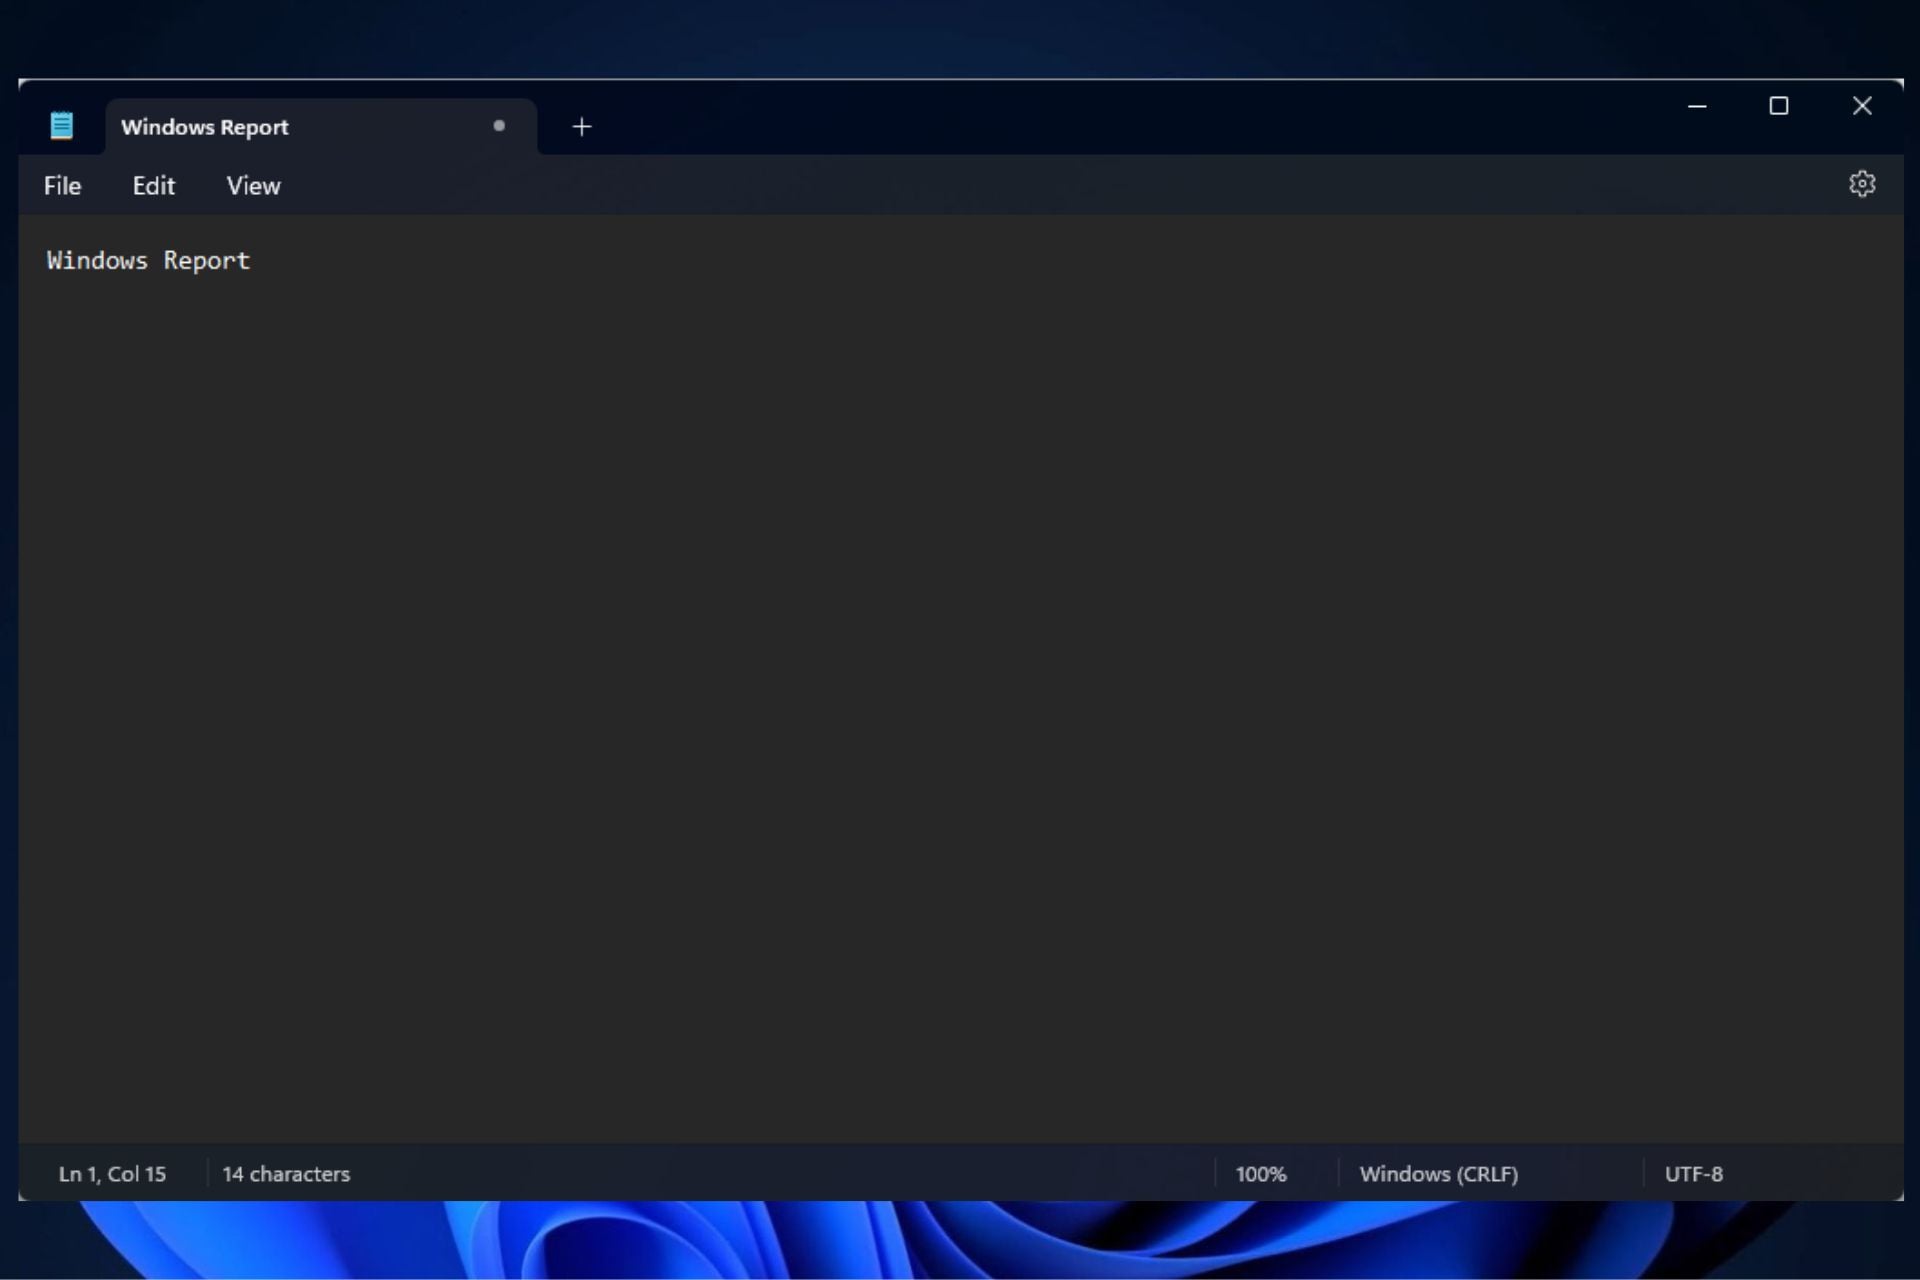
For text files, changing the encoding to UTF-8 and then re-uploading it should do the trick when you get ChatGPT’s Error analyzing with ANSI encoding.

To do that, open the .txt file > click the File menu > select Save as > set a storage location (preferably the desktop for quick access) > choose UTF-8 from the Encoding dropdown menu > click on Save > re-upload the file for data analysis in ChatGPT.

change encoding
Changing encoding for a text file

5. Clear all existing conversations in ChatGPT

If there are far too many past conversations saved on your profile, these might be putting a strain on the already-overloaded servers. For many users, deleting all past conversations and then re-uploading helped fix the ChatGPT’s Error analyzing with Excel (.csv) files.

Deleting all the saved conversations also helps with AceInternalException error in ChatGPT-4 and can improve the speed of data analysis, saving you crucial time.

If nothing else works, the best option is to contact OpenAI support and raise a ticket via the support bot.

Remember, in most cases, the ChatGPT’s Error analyzing message with data analysis resolves on its within 24-72 hours. But if it’s recurring in your case, our solutions will fix things for good!

While you are here, discover the steps to install the ChatGPT app locally on your PC. This isn’t the only error you can encounter, we recently wrote about an Unknown error occurred in ChatGPT during PDF upload, so don’t miss it.

Which fix worked for you? Share with our readers in the comments section.
Best IncrediMail Alternatives – 5 Email Clients for Easy Migration

Looking for the best IncrediMail alternatives? You’re in the right place then.

Since IncrediMail was discontinued on March 20, 2020, many users have searched for reliable email clients with similar features and functionality. After using over ten similar tools, I selected five apps with strong email management features and integrations. Let’s check them out!

5 Best IncrediMail Alternatives

Here are my top picks:

Microsoft Outlook – Best Overall Performance

Microsoft Outlook

Microsoft Outlook is a reliable email client that integrates with Microsoft Office applications. One of its standout features is its strong email organization capabilities. You can also easily transfer emails from IncrediMail.

Users can create folders and subfolders, apply rules to sort incoming mail, and use categories to label and group messages automatically.

Create folders and subfolders

Another standout feature is Outlook’s integration with Microsoft Office. This means users can easily share and collaborate on documents, spreadsheets, and presentations directly from their email clients. 

Integration with Microsoft Office

Outlook also excels in calendar and task management. The built-in calendar allows you to schedule meetings, set reminders, and view colleagues’ availability.

Built-in calendar

But that’s not all.

The Focused Inbox feature automatically prioritizes important emails, reducing clutter and helping users focus on what matters most. It also allows you to join Skype calls using the Meet Now feature.

Focused Inbox

Pros:

  • It integrates with Word, Excel, and OneDrive.
  • Offers folders, rules, and categories for efficient email management.
  • Integrated scheduling and task tracking.
  • Offers advanced security.
  • Has a customizable interface and extensive add-ins.

Cons:

  • Requires a subscription for full features.
  • It can be overwhelming for new users.
  • It may be slower on older devices.

Get Microsoft Outlook

eM Client – Highly Compatible Alternative 

eM Client

eM Client is a versatile and user-friendly email client, positioning it as a strong alternative to IncrediMail. Its user interface is clean and intuitive, so it’s easy for new users to navigate and customize it.

It also handles calendar and contact management well. Like Outlook, the calendar lets you schedule events, set reminders, and manage tasks. Users can sync their calendars with Google Calendar, iCloud, and other services.

Calendar

Moreover, security is a top priority for eM Client. It offers PGP encryption to protect sensitive information. The client also includes an advanced anti-spam system, reducing the clutter of unwanted emails.

PGP encryption

Additionally, eM Client supports third-party integrations, including cloud storage services like Dropbox and Google Drive. This makes it easy to attach and share files directly from your email client without switching between applications.

Pros:

  • Has an intuitive and customizable interface.
  • Comprehensive email management. 
  • Integrates with Google Calendar and other services.
  • Supports popular messaging services.
  • Has PGP encryption and an anti-spam system.

Cons:

  • Some features are restricted to the paid version.
  • Limited customer support for free users.

Get eM Client 

Mailbird – Highly Customizable Option

Mailbird

Mailbird is another valid alternative to IncrediMail, known for its modern interface and customization options. You can connect your email clients with popular apps like Slack, Skype, Messenger, and WhatsApp. This level of integration is useful for users who want to stay connected across multiple platforms without switching between different applications.

Mailbird integration

Its Speed Reader tool helps you read and process emails faster. Moreover, the built-in calendar allows for easy scheduling and management of appointments. It also has an Email tracker to help you follow up on every message.

Email tracker

EAdditionally, Mailbird offers an easy migration tool, making it simple for users to import emails, contacts, and other data.

Pros:

  • Manages multiple accounts from one interface.
  • Has a sleek and customizable interface.
  • It offers productivity tools like Speed Reader and a built-in calendar.
  • Connects with social media and productivity apps.
  • Simple import tool from IncrediMail.

Cons:

  • Full features need a paid plan.
  • Less advanced compared to some competitors.

Get Mailbird

Thunderbird – Best Free Alternative

Thunderbird

Thunderbird, developed by Mozilla, is a free, open-source email client that offers a powerful alternative to IncrediMail. One of its key features is its flexibility through add-ons. It also supports Windows, macOS, and Linux.

Thunderbird compatibility

Furthermore, it includes robust spam filtering, phishing protection, and support for S/MIME and PGP encryption so your communications remain private and secure. Regular updates from Mozilla help keep Thunderbird secure and up-to-date with the latest features and fixes.

Thunderbird encryption

The built-in calendar and task manager allow you to manage your schedules and tasks without needing a separate application. This integration helps you stay organized and on top of other commitments.

Built-in calendar

It also has a search feature for finding emails quickly and efficiently. The client supports advanced filtering and message tagging, making categorizing and locating important messages easier.

Search feature

In addition, Thunderbird offers an import tool for transferring emails, contacts, and other data for users migrating from IncrediMail. You can customize it with several themes and extensions and tailor the email client to your needs.

Customization

Pros:

  • Free and open-source.
  • Allows extensive add-ons and themes.
  • Has strong spam filtering, phishing protection, and encryption support.
  • Manages multiple email accounts efficiently.
  • Stay updated with news and content.

Cons:

  • Customization options can be overwhelming.
  • Less modern design compared to others.

Get Thunderbird

Postbox – The Best User-friendly Interface

Postbox

Postbox is an IncrediMail alternative that lets you create custom folders, use tags to categorize emails, and apply filters to sort incoming messages automatically. The Quick Bar feature allows users to perform common actions, such as moving or archiving emails with a single keystroke.

Create custom folders

Another standout feature is its advanced search capabilities. Using its reliable search button, you can quickly and accurately find emails, attachments, and other data. The feature includes customizable search operators and filters, making it easy to locate specific information.

Search button

It also supports encryption and includes features to protect against spam and phishing. Regular updates ensure that Postbox remains secure and up-to-date with the latest security enhancements.

Moreover, Postbox supports third-party add-ons and extensions. This flexibility makes it a powerful tool for users with specific needs and workflows.

Pros:

  • Powerful and customizable search tools.
  • Has several organizational tools.
  • Social media integration.
  • Strong security features.

Cons:

  • No free version.
  • Advanced features may be unnecessary for casual users.

Get Postbox

How I Chose the Best IncrediMail Alternatives

Here’s how I selected the top alternatives:

  • User interface: I looked for clean, intuitive designs that were easy to navigate.
  • Email organization: I evaluated features like folders, rules, and categories for managing emails efficiently.
  • Integration capabilities: I considered how well the client integrates with other tools and services.
  • Security measures: I checked for strong encryption, spam filtering, and other security features.
  • Migration ease: I ensured a smooth transition by testing import tools for transferring emails and contacts.
  • Cost: I prioritized services that are cheap or free.

So, now you have the best IncrediMail alternatives at your disposal. Look for features that help you organize your emails, integrate with other tools, and secure your information. Choose the best fit for your needs to make your email management smooth and efficient.

PUA:Win32/Presenoker Removal Guide: 5 Quick Methods

Dealing with the PUA:Win32/Presenoker can be a real headache, especially when it starts affecting your system’s performance and security. In this guide, we’ll walk you through several effective methods to remove this pesky potentially unwanted application (PUA) from your Windows system.

How do I remove PUA:Win32/Presenoker for good?

1. Delete the Detection History Folder in File Explorer

  1. Press the Win + E keys to open the File Explorer.
  2. Navigate to the following path: C:\ProgramData\Microsoft\Windows Defender\Scans\History\Service
  3. Inside the Service folder, press Ctrl + A keys to select all files and folders, and then press the Delete key.
  4. Navigate to the following directory and open the CacheManager folder: C:\ProgramData\Microsoft\Windows Defender\Scans\History\CacheManager
  5. Select all files and folders in the CacheManager folder and delete them.
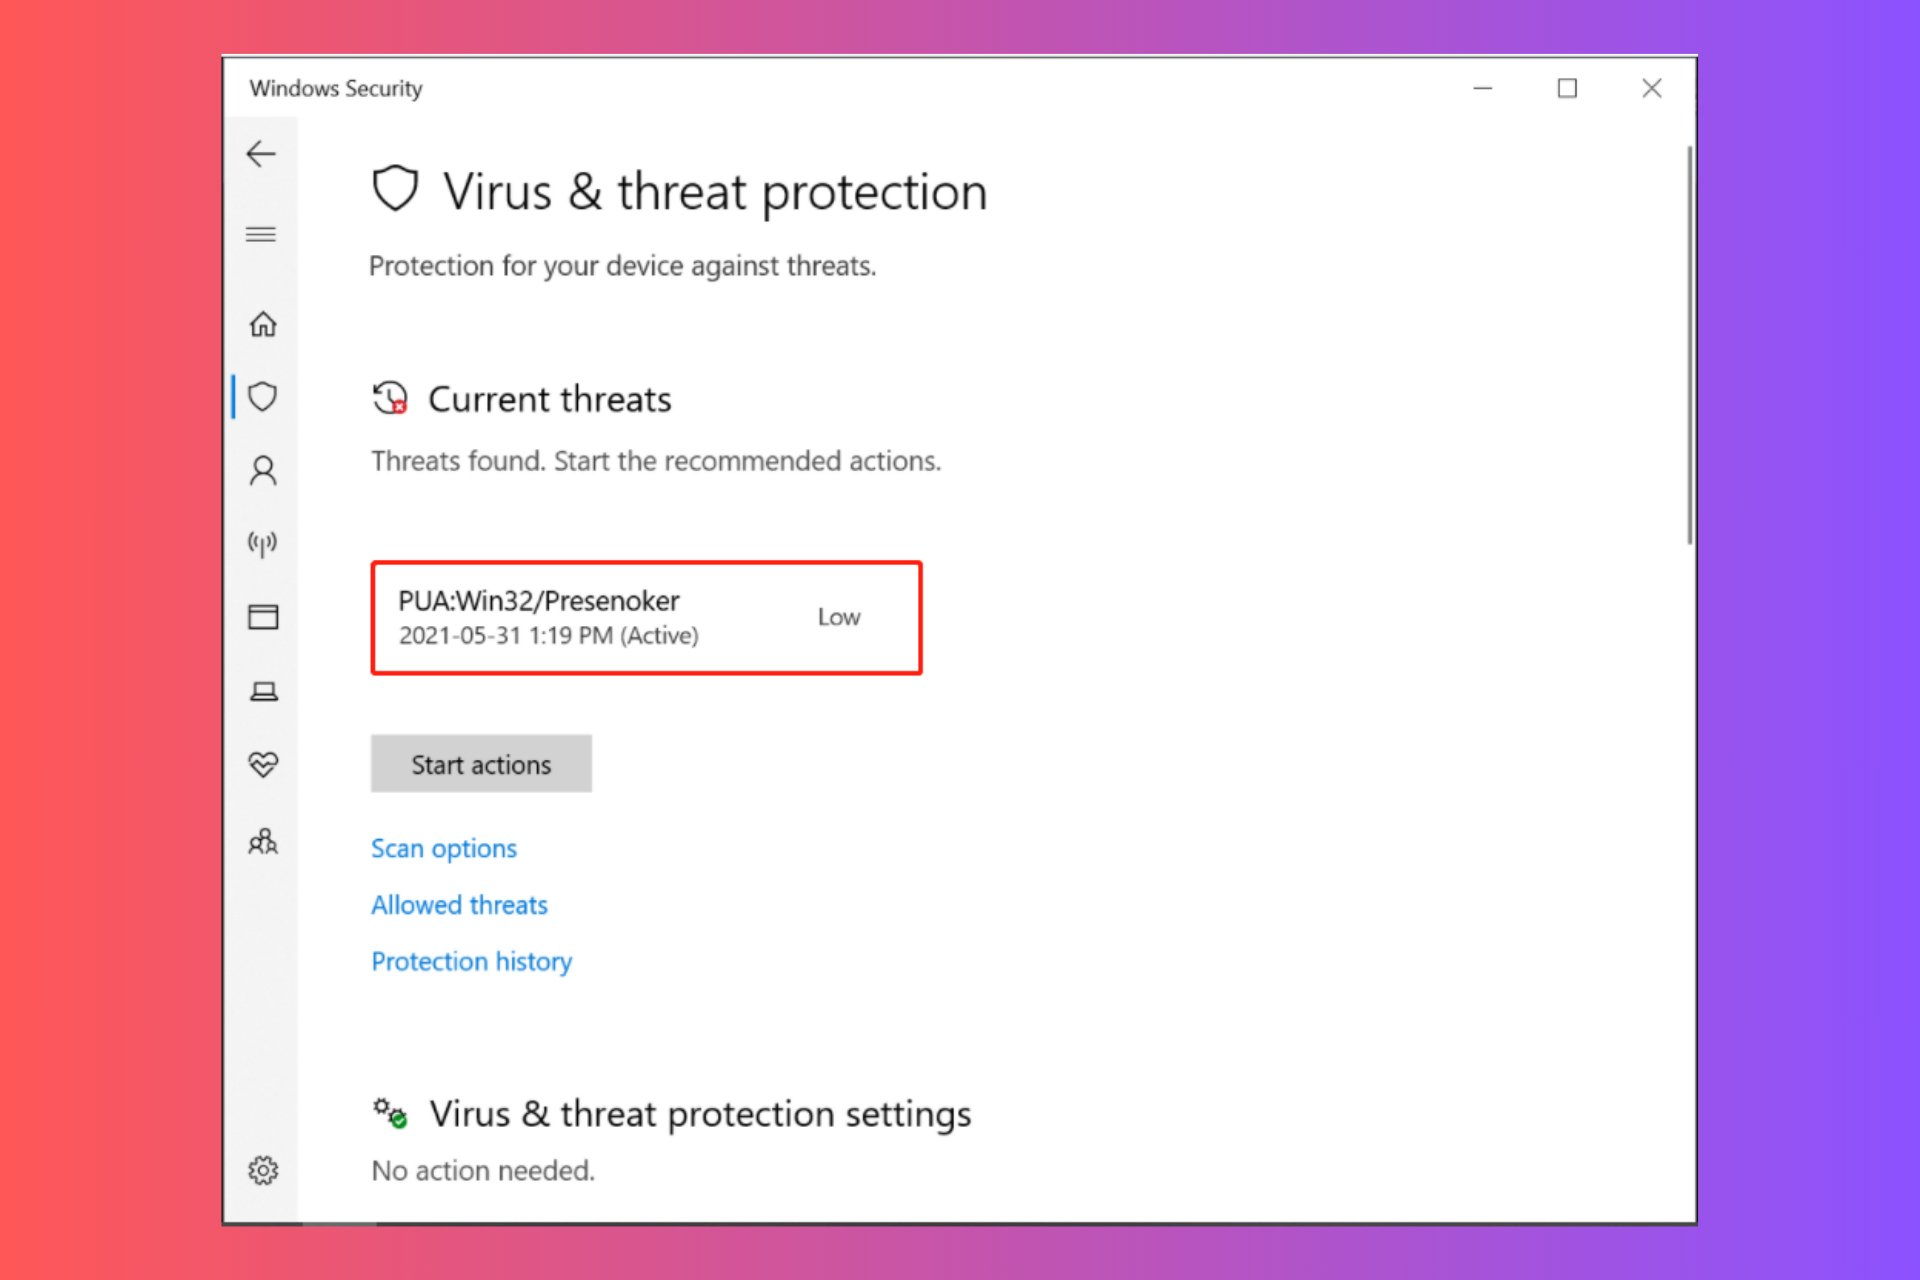
  6. Type virus in the Windows search box and click the Virus & threat protection app from the top result.
  7. In the Virus & threat protection window, scroll down to the Current threats section. If it shows No current threats status, then the PUA:Win32/Presenoker has been removed successfully.

This solution helps by manually clearing the residual files left by the PUA:Win32/Presenoker, ensuring that Windows Defender no longer flags these items during scans.

2. Reset the browser settings to default (Google Chrome Example)

  1. Launch Google Chrome and click on the three vertical dots at the upper right corner, then select Settings.
  2. Scroll down and click on Advanced at the bottom of the Settings screen.
  3. In the Reset and clean up section, click on Restore settings to their original defaults.
  4. Confirm by clicking on Reset Settings in the pop-up dialog.

Resetting your browser settings helps remove any changes made by PUA:Win32/Presenoker, such as malicious extensions and altered settings, restoring the browser to its default state.

3. Use a trusted antivirus software

  1. Download and install a trusted antivirus software, like TotalAV, as it is ideally fit for PUA removal.
  2. Open the antivirus software and perform a full system scan.
  3. Follow the on-screen instructions to quarantine or delete any detected threats.

Using TotalAV as reliable antivirus software ensures that any hidden or residual malicious files related to PUA:Win32/Presenoker are identified and removed from your system, providing an added layer of security.

4. Uninstall suspicious programs from Control Panel

  1. Press the Windows key + I to open Settings.
  2. Navigate to Apps, then Apps & features.
  3. Scroll through the list of installed programs to find any suspicious or unknown entries.
  4. Click on the three dots next to the suspicious entry and select Uninstall.
  5. Follow the prompts to complete the uninstallation process.

Uninstalling suspicious applications prevents any potentially unwanted programs (PUAs) from running on your computer, reducing the risk of infections and performance issues.

5. Manually remove malicious extensions from browsers

For Google Chrome:

  1. Open Chrome and go to Settings > Extensions.
  2. Find the suspicious extension and click Remove.
  3. Restart Chrome.

For Firefox:

  1. Open Firefox and go to Preferences > Extensions & Themes.
  2. Locate any suspicious extensions and click Remove.
  3. Restart Firefox.

For Microsoft Edge:

  1. Open Edge and go to Settings > Extensions.
  2. Remove any suspicious extensions.
  3. Restart Edge.

Removing malicious extensions manually ensures that your browser is free from components that may have been installed by PUA:Win32/Presenoker, enhancing your browsing security.

As a bonus, we recommend using Microsoft’s Malicious Software Removal Tool which is pretty good on removing PUA. Click on the highlighted link to learn how to install and use it.

By following these steps, you should be able to effectively remove PUA:Win32/Presenoker from your system.

We also have a complete guide on how to block PUAs from Windows 11 and prevent this situation in the future.

If you have any suggestions or questions, the comments section below awaits for your input.

Windows 11 24H2 will address many of the operating system’s sluggish animation issues

If Windows 11 feels slow and sluggish, you should know that it is. Microsoft plans to address all these issues with the release of the 24H2 update later this year.

According to Windows Latest, the Redmond-based tech giant knows about these particular problems dragging Windows 11 down. The company even took steps to uncover its source back in June when it released Build 26100.994 to the Release Preview Channel.

This update addresses an issue believed to be the underlying cause of some Insiders noticing stutters in some animations recently (dropping frames), particularly with Task View.

Microsoft

The bugs in Windows 11 are truly irritating, making using this operating system a difficult experience. However, with the upcoming Windows 11 24H2 update, these problems are hoped to be resolved finally. Microsoft’s approach addresses these problems by making cumulative updates available to improve Windows 11’s performance.

This includes fixing and enhancing the animations that annoy many users. If you have been experiencing irritation with how the Quick Settings interface opens partially or loads slowly, this problem could soon be solved. The 24H2 update pledges to open Quick Settings quicker and with better speed, showing a big advancement from earlier versions.

If Microsoft wants Windows 11 to gain market share (and it seems the operating system is finally experiencing a surge), then the company needs to address these issues. With the upcoming 24H2 update, Microsoft is working towards refining the OS to be more user-friendly and effective.

For those waiting, the Windows 11 24H2 update is planned to start in September/October. Until then, ensure you update to 23H2, as Windows 11 21H2, and 22H2 will reach their EOS this October.

In case you forgot: Windows 11 21H2 and 22H2 expire in 90 days, and here’s what you need to do

In case you’ve forgotten, Microsoft will shut down support for Windows 11 versions 21H2 and 22H2 in 90 days. If you are thinking about why, this is quite common. Microsoft wants to maintain safety and modernity in its ecosystem, so it must bid farewell to previous iterations.

October 8, 2024, is the end of the road for these versions. No more security patches or fixes will be sent out after this date. Think of it as similar to the last call at a bar but for your computer’s safety. And let’s be honest, no one wants to be left vulnerable.

On October 8, 2024, Windows 11, version 21H2 (Enterprise, Education, and IoT Enterprise editions) and Windows 11, version 22H2 (Home and Pro editions) will reach end of servicing. The upcoming October 2024 security update, to be released on October 8, 2024, will be the last update available for these editions. After this date, devices running these editions will no longer receive monthly security and preview updates containing protections from the latest security threats.

Microsoft

But don’t worry—Microsoft is not abandoning you. If your device does not have an IT department managing it, it will be automatically updated to version 23H2. This latest version, which is available now, keeps your device in the safety zone and ensures protection from the newest security dangers.

Regarding the most recent, Windows 11 version 23H2 is new and will be supported until November 11, 2025. Windows 11 24H2, which is already out for Copilot+ PCs, will arrive on regular PCs under the name of Windows 11 2024 Update later this year, around September-October.

If you are using Windows 11 versions 21H2 or 22H2, you need to consider an update now. Your device already supports 23H2, and it shouldn’t take more than 30 minutes to 1 hour to download and install the update.

You can now play Xbox games with Amazon Fire TV 4K

In today’s fast-growing technology that consistently offers fresh comforts and experiences to our living rooms, a new partnership between Microsoft and Amazon has given the gaming community joy. Picture yourself exploring the wide galaxy of Xbox games without requiring a classic console. That dream is now possible for those with Amazon’s Fire TV 4K or Fire TV 4K Max streaming sticks.

Microsoft officially lists the Xbox app on these devices, which means that cloud gaming has become possible for many people who might not have considered it before. This creative collaboration allows users to play hundreds of Xbox games from their streaming sticks. But, before you get excited about this gaming journey, you must have a suitable Xbox wireless controller (we have some recommendations) and pay for an Xbox Game Pass Ultimate subscription.

    Also, you’ll need a vital internet connection with a download speed of 20Mbps or more. Although there are requirements first, the total expense is much less than buying an Xbox console: the Fire TV 4K stick is quite affordable.

    This partnership could only increase the popularity of cloud gaming, which has already been gaining ground lately. It also shows how streaming devices could potentially evolve into a central base for different forms of entertainment, not just limited to conventional video content.

    The obstacles to experiencing good-quality gaming are being broken down, making it possible for more people to access and enjoy it. Whether you are an experienced gamer or new to this world, accessing Xbox’s large library without needing a console is quite thrilling and difficult to notice.

    Snapdragon X Elite Gaming: How Well Can it Play PC Games?

    Snapdragon X Elite CPUs are making a big impact on the market, but how well does Snapdragon X Elite handle gaming? In today’s guide, we’re going to answer that.

    How does gaming on Snapdragon X Elite work and is it viable?

    Being an ARM processor, Snapdragon X Elite does have a few limitations, and it can’t run games that use kernel-level anti-cheat drivers.

    In addition, games that use the AVX instruction set won’t work since the CPU doesn’t support them.

    Gaming performance

    Snapdragon Elite X is capable of handling older titles without too many issues in full HD resolution, but issues arose with Cyberpunk which is expected.

    Do keep in mind that other users had different results, but again Snapdragon X Elite was able to handle e-sports titles without too many issues while struggling a bit with newer single-player games.

    The CPU can handle older games as long as you lower your graphics settings to the minimum and use 1080p or 720p resolution. As for indie games, unless there’s a driver issue, you should be able to run most of them without issues.

    What games don’t work on Snapdragon X Elite?

    PUBG: Battlegrounds wasn’t able to start on this CPU, simply because there’s no support for kernel-level anti-cheat. Apex Legends and Fortnite are also on the list since there’s no support for ARM architecture.

    Helldivers 2 is another game that can’t run due to a lack of AVX. If you’re a Call of Duty player, you should know that the game is also unable to run.

    The following games experienced issues and are unplayable:

    • Counter-Strike 2
    • Warframe
    • Diablo IV
    • Valheim
    • Street Fighter 6
    • Doom Eternal

    Conclusion

    Snapdragon X Elite is a great CPU, and while it’s suited for everyday tasks, it can handle some light gaming thanks to the emulation.

    It’s worth mentioning that this affects both the performance and stability of the games, but that will be improved in the future, especially if developers start optimizing games for the ARM platform.

    Regarding compatibility, not all games are compatible with this CPU, but the WorksOnWOA project has an extensive list of all compatible games, so be sure to use it.

    To learn more about different models and their performance, we have a great guide on Snapdragon X Elite comparison, so don’t miss it. If you plan to use this CPU for gaming, check our Snapdragon X Elite vs Z1 Extreme guide for more information.

    For everyday users, you might be wondering how Snapdragon X Elite compares to M4, and we have an article that answers this question.

    We didn’t forget Intel users, and we have a special Snapdragon X Elite and Intel Core Ultra 7 comparison guide just for them.

    Sysdm.cpl is Not a Valid Win32 Application: 4 Quick Fixes

    Sysdm.cpl is an executable file that will open System Properties in Windows, but if you run into the Sysdm.cpl is not a valid Win32 application error this signals a problem with your OS. The error typically indicates a compatibility issue or a problem with the file itself. Here’s what you need to do!

    1. Verify the program compatibility and scan the system for errors

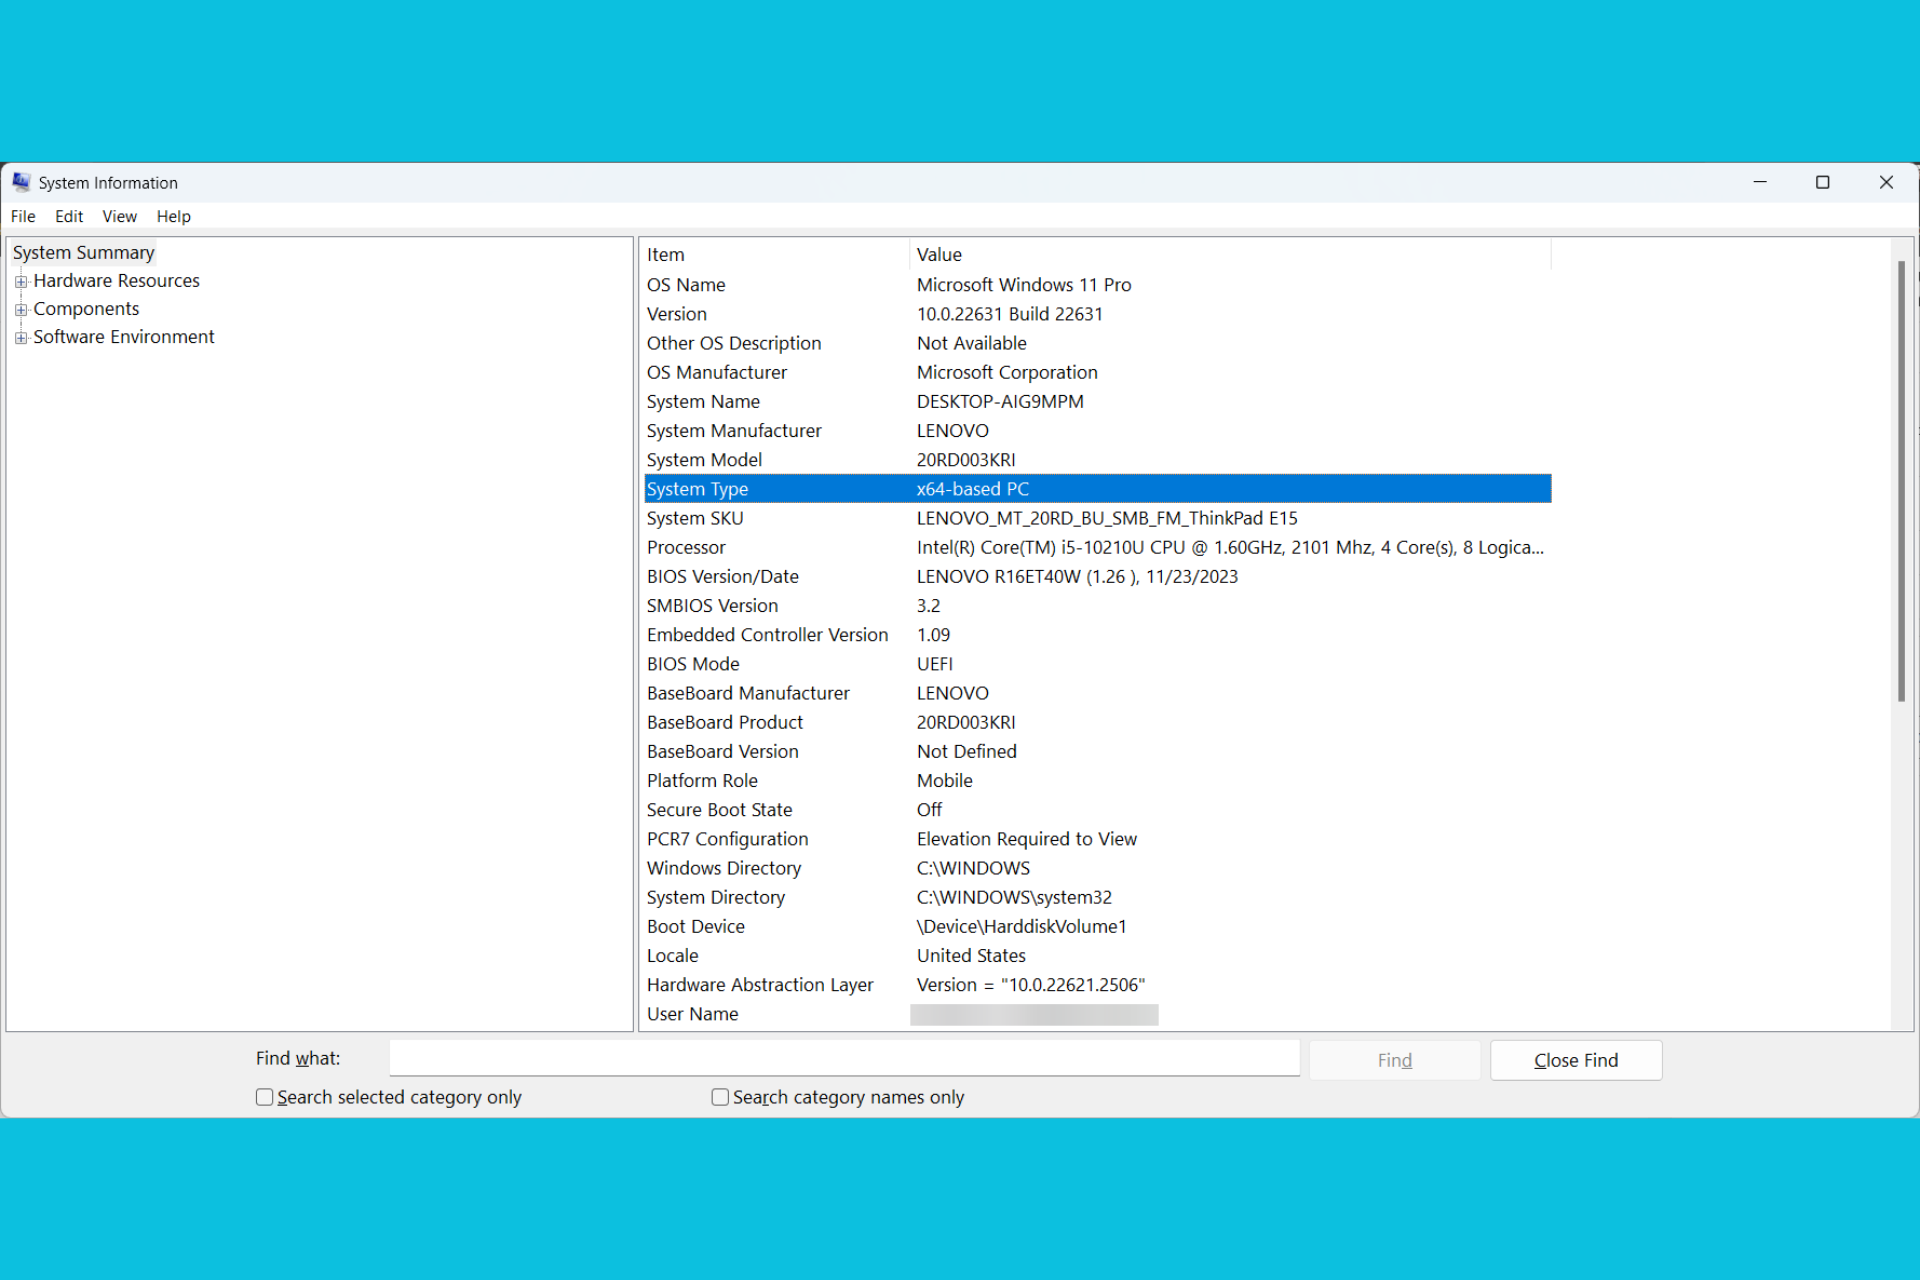
    1. Press Windows key + R to open the Run dialog, type msinfo32 and press Enter.
    2. Check the System Type in the right pane. If it shows x64, you’re using a 64-bit system. If it shows x86, you’re using a 32-bit system.
    3. Ensure that the version of sysdm.cpl you are trying to run matches your system type. Download the correct version if necessary.
    4. To do that, type cmd in the Windows search box and select Run as administrator from the results.
    5. Now, type or paste the following command and press Enter to run it: sfc /scannow
    6. The SFC tool will correct any problems with the system files, including Sysdm.cpl.

    Running the SFC scanner is the quickest way to fix system files and most of the time, it also fixes the Sysdm.cpl issue.

    2. Run the program as administrator

    1. Navigate to the location of sysdm.cpl (Usually in the Windows>System32 folder).
    2. Right-click on sysdm.cpl and select Properties.
    3. Go to the Compatibility tab.
    4. Check the box for Run this program as an administrator.
    5. Click OK to save the changes.

    Running the program with administrative privileges can provide the necessary permissions it might need to execute correctly, bypassing some of the errors that can occur due to insufficient permissions.

    3. Scan for virus or malware

    1. Open Windows Security by typing it in the Start menu.
    2. Go to Virus & threat protection.
    3. Click on Scan options, select Full scan and click Scan now.

    The Sysdm.cpl is not a valid Win32 application may be caused by a virus that is messing up your system files. That’s why running a full scan on your PC will hopefully identify such a problem. If you installed a third-party antivirus, run a full scan using that application instead.

    4. Use System Restore or Reset

    1. Press Windows key + R, type rstrui, and press Enter.
    2. Follow the prompts to restore your system to an earlier date when sysdm.cpl was working correctly.
    3. Reset Your PC (as a last resort):
      • Go to Settings > Update & Security > Recovery.
      • Select Reset this PC and follow the prompts.

    Using System Restore can revert your system to a state where the problem did not exist, while resetting the PC can be a last resort to resolve persistent issues.

    By following these steps, you should be able to resolve the Sysdm.cpl is not a valid Win32 application error. Users are also complaining that a DLL is not a valid Win32 application. Follow the highlighted guide for tested solutions.

    While you’re at repairing your PC, check our guide on how to fix file system errors in Windows 11.

    For any questions of suggestions, feel free to leave a comments below.

    Microsoft 365 introduces updated permissions UI into Word, Excel, and PowerPoint for Windows

    Microsoft has introduced an updated permissions UI into Word, Excel, and PowerPoint for Windows—a feature made especially to simplify things for users. This fresh user experience, known as user-defined permissions (UDP), is presently being tested with Microsoft 365 Insiders.

    In a blog post, Microsoft says it makes setting permissions easier. The company has added pre-defined permission levels, such as Viewer, Restricted Editor, Editor, and Owner. You can now assign these easily to people or groups without any hassle. Additionally, if you enjoy making adjustments to suit your preferences exactly, there is a “More Options” part available for tailoring permissions according to particular requirements.

    We all know how important it is to protect your documents from unauthorized access or misuse, especially if you work with sensitive or confidential information. That’s why Microsoft 365 enables you to encrypt your documents and assign access permissions to specific people or groups. This feature, known as user-defined permissions (UDP), lets you easily control who can view, edit, print, copy, or take other actions with your files, regardless of where they are stored or shared.

    Microsoft

    The update has a fresh “people picker” element. This useful feature lets you look for people or groups and give them permissions within your organization or outside domains. It guarantees that the system will work faster and better, ensuring appropriate individuals have correct access without any problems.

    Microsoft is adopting its Fluent Design System in terms of design. This system makes the permissions UI visually attractive and easy to use. It also includes support for high-contrast modes and screen readers, ensuring that all users can interact with it smoothly.

    It’s also worth mentioning that the way you activate UDPs can vary slightly depending on your organization’s setup. If you use sensitivity labels, apply a configured label to your file. Those who utilize standalone Information Rights Management (IRM) should look for the option under File > Info > Protect Document > Restrict Access.

    Once you have all the essentials ready, you can explore the Permissions dialog box in Word, PowerPoint, and Excel for Windows. By clicking on Apply, you can give permission to domains or particular persons. For those who pay attention to details, More Options allows them to arrange advanced functions such as permit ending time and confirmation needs.

    However, the new permission UI box in Microsoft 365 is not yet compatible with dark mode. It’s also worth mentioning that this feature can be used by Microsoft 365 Insiders running Version 2406 (Build 17630.20000) or later. If you can’t see it now, don’t worry. These things need time to reach everyone.

    In other news, the Redmond-based tech giant has also updated Microsoft Designer to support generating invitations to events with AI. This means you’ll be able to generate greetings for birthdays and parties in seconds.

    Roblox Error Code 112: How to Fix it on Xbox and PC

    Roblox finds a place amongst the top gaming and development platforms, but it has its fair share of problems. One such issue you will have a hard time fixing is Roblox error code 112!

    You encounter the error while trying to play a game or signing in. The Roblox error code 112 appears across platforms, including Windows, Xbox, PlayStation, iOS, and Android. As for the underlying causes, the error is usually triggered by network issues, server downtimes, corrupt app cache, and installed apps blocking connection to the Roblox server.

    Before you start troubleshooting things, check the Roblox server status on the official website and verify that all the servers are operational. You can also use Downdetector to check for outages in real time. If the servers are up and running, switch the network type, say Wi-Fi to Ethernet (or mobile hotspot) and vice-versa, and disable any active VPNs.

    How do I fix Roblox error code 112?

    Tip icon Tip
    The steps listed here are for a Windows PC. However, the equivalent measures will do the trick on Xbox, PlayStation, iOS, and Android.

    1. Use a VPN

    If you weren’t using one earlier, setting up an effective VPN solution now can help get rid of the Roblox error code 112. Perhaps you can try a top-rated free VPN if you are unsure about a paid subscription!

    A VPN helps bypass regional restrictions and localized issues by connecting you to a server based in another region. So, try that!

    An excellent choice for this task is ExpressVPN. With a multitude of servers all over the world and amazing connection speeds, it is easy to bypass any restrictions that will stop you from playing Roblox in your region.

    ⇒ Get ExpressVPN

    2. Clear Roblox’s cache

    1. Press Windows + E to open File Explorer, paste the following path in the address bar while replacing Username with the active user account name and hit Enter:C:UsersUsernameAppDataLocalRoblox
    2. Press Ctrl + A to select all the files here and hit Delete.clear cache to fix roblox error code 112
    3. Click Yes in case a confirmation prompt appears, then restart the computer, launch Roblox, and check for improvements.

    3. Switch to Google’s DNS server address

    1. Press Windows + R to open Run, type ncpa.cpl in the text field, and hit Enter.
    2. Right-click on the active network adapter, be it Wi-Fi or Ethernet, and select Properties.network adapter
    3. Select Internet Protocol Version 4 (TCP/IPv4) from the list, and click on Properties.
    4. Select the Use the following DNS server addresses option, and enter the following in the fields underneath:
      • Preferred DNS server: 8.8.8.8
      • Alternate DNS server: 8.8.4.4
    5. Tick the checkbox for Validate settings upon exit, and click OK to save the changes.Google's DNS to fix roblox error code 112

    While I used Google’s DNS to fix Roblox error code 112 on both Xbox and PC, you could go with the fastest DNS server near you as long as it works.

    4. Whitelist Roblox in the firewall

    1. Press Windows + S to open Search, type Windows Defender Firewall in the text field, and click on the relevant result.
    2. Click on Allow an app or feature through Windows Defender Firewall in the left pane.allow through Windows Firewall
    3. Click the Change settings button.
    4. Now, click on Allow another app at the bottom.allow app
    5. Click on Browse, locate the Roblox Player, select it, and then click Open.roblox in firewall
    6. Click on Add.
    7. Now, make sure both the Private and Public checkboxes are ticked for Roblox Game Client, and then click OK to save the changes.whitelist in firewall to fix roblox error code 112
    8. Restart the computer, launch Roblox, and check whether you still get Error Code 112.

    5. Reset the network settings

    1. Press Windows + I to open Settings, go to Network & Internet from the navigation pane, and click Advanced network settings on the right. advanced network settings
    2. Click on Network reset.
    3. Now, click the Reset now button.reset network to fix roblox error code 112
    4. Click Yes in the confirmation prompt and follow the on-screen instructions to complete the process.

    Often, a network reset in Windows is a quick fix against Roblox error code 112, as confirmed by many of the affected users. The fix worked for me, too!

    6. Reinstall Roblox

    1. Press Windows + R to open Run, type appwiz.cpl in the text field, and hit Enter.
    2. Select Roblox from the list of applications, and click on Uninstall.reinstall to fix roblox error code 112
    3. Follow the on-screen instructions to uninstall the app and then restart the computer.
    4. Now, go to the official website, download the Roblox setup, then run it to reinstall the app, and check for improvements.

    If the Roblox Unable to join error code 112 persists, I recommend you use an effective uninstaller software to delete any leftover files and Registry entries that might be triggering the issue, and then install Roblox again.

    7. Contact Roblox support

    When nothing else work, the only option is to contact Roblox support. In case it’s an unreported server outage to blame, the support team will be able to provide you with a maintenance timeline.

    For the majority of the affected users, the Could not connect to Roblox Error Code 112 fixed on its own within 12-36 hours on PC and Xbox Series X.

    While you are here, find out how to allocate more RAM to Roblox to improve its performance and enjoy a better gaming experience!

    Which fix worked for you? Share with our readers in the comments section.

    Microsoft Designer now lets users create personalized invitations to events

    Now, through Microsoft Designer, everyone can produce lovely and unique tailored invitations because of AI’s help. This feature is a great helper for everyone who wants an invitation that feels like them but doesn’t want to spend hours on the design before sending it out.

    The most recent update from Microsoft Designer enables users to produce custom invitations. According to the blog post, you must provide details about an event, such as the occasion, when it will happen (date and time), and where it takes place. All this input data gets combined with artificial intelligence-generated artwork to make attractive invitations. These special invites are for sharing on mobile devices, so you can easily send them out to your guests.

    You can use Invitations to create invitations for a wide range of events, such as birthdays, anniversary parties, baby showers, graduation parties, holiday gatherings, and more. It’s also great for creating invitations for less traditional events like team lunches, happy hours, talent shows, sports tournaments, and virtual meetups. With Invitations, you can add a special touch to any occasion, making it feel more memorable and significant.

    Microsoft

    For creative enthusiasts, it’s a direct and enjoyable process. You go to the Microsoft Designer site and click on Invitations. You can use pre-made designs or type in your text prompts. The AI model will work for you. It creates a special invitation that can be adjusted precisely according to your preferences.

    Microsoft Designer has also been busy introducing features for making greeting cards, stickers, and even restyling images in fresh ways. If you want to put a frame around your image, form a collage of photos, or even design AI images in landscape and portrait styles, Microsoft Designer is the right choice for all these needs.

    What gives this feature a unique edge is its inclusivity and simplicity. Whether you are highly skilled in technology or simply seeking a fast method to generate lovely invitations, Microsoft Designer’s AI assistance is for all kinds of people. Moreover, you can download your invite in different formats, which makes it very convenient to share with others.

    The capability is now available to all Microsoft 365 users out there with a Microsoft account in English.

    Chromebook’s new accessibility feature helps you disable the Trackpad easier

    Chromebooks, known for their affordability, simplicity, and Chrome OS, have become increasingly popular and their marketshare continues to grow. To further improve user experience, Google is introducing a new accessibility feature for Chromebooks: the ability to disable the built-in trackpad. This feature will be implemented through a feature flag, allowing users to easily turn off the trackpad when it interferes with their experience by visiting accessibility settings.

    How do I disable the trackpad in Chromebooks?

    Right now, disabling the trackpad in Chromebooks is pretty complicated.

    You need to visit chrome://flags, find and enable chrome://flags/#ash-debug-shortcuts, restart the Chromebook, and then use the shortcuts <Search> + <Shift> + P and <Search> + <Shift> + T to toggle the touchpad and touchscreen on or off.

    Well, the great news is that Google will soon make this process a lot easier.

    As the new commit and flag spotted by us, Google will soon offer a new setting under Accessibility in Settings to disable the trackpad. It will first be available behind a flag called Accessibility disable trackpad which, when enabled, adds a setting that allows the users to disable the built-in trackpad.

    Image Credit: Windows Report

    Accessibility: Add a flag for the disable trackpad feature, Google notes.

    Image Credit: Windows Report.

    Why would I want to disable the Chromebook’s trackpad?

    External mouse users: Many prefer the precision of a mouse, and disabling the trackpad eliminates accidental touches while using one.

    Touchscreen users: Some users who prefer touchscreens find the trackpad accidentally interferes with their workflow.

    Palm resters: For those who rest their palms on the Chromebook while typing, accidental trackpad touches can be frustrating. Disabling it solves this issue.

    In addition to offering a new accessibility setting to disable the trackpad in ChromeOS, Chrome is gaining several new features including an improved Windows Hello sign-in experience, performance notifications, and HTTPS-First Balanced Mode. Google also plans to deprecate the data breach password leak warnings feature.

    What do you think about disabling the trackpad in Chromebooks? Let us know in the comments below.

    The future of Xbox might not include any other Xbox console. Here’s why

    At this point, we’re all thinking about the future of Xbox. Why? Well, Microsoft, which owns and operates Xbox, seems to be at an important moment when the focus on gaming services is more significant than just having traditional console hardware.

    The Xbox console is troubled due to massive investments by its parent company, Microsoft, in game development studios and a clear shift towards gaming as a service. The past five years have shown mixed results for Xbox, with significant acquisitions and some setbacks.

    The approach of making exclusive games available on other platforms has sparked some doubts. People wonder about the console’s role in Microsoft’s bigger picture, which is mostly focused on cloud computing, Windows, and AI.

    Physical media’s fall is yet another milestone on the path to the death of the Xbox console. The Xbox Series S, without a slot for optical discs, signifies progress towards digital and streaming services. Microsoft’s focus on Game Pass and cloud streaming to deliver a gaming experience that covers all screens shows this change in direction.

    However, even with all these actions, the number of Game Pass subscribers does not reach lofty goals. So many gamers do not see a future in this model, and why: ultimately, you don’t own the game; you pay a subscription to access it.

    The world of gaming is also shifting towards portable experiences. Many handheld gaming consoles are available to gamers, such as the Nintendo Switch, Steam Deck, or Legion Go, with a couple of new ones announced last month (MSI Claw and XPG NIA), which mirrors a wider trend that Microsoft wants to explore. A concept about an Xbox device that can be carried in hand has been circulated, indicating where the brand might head next.

    However, the Xbox has not retained its past grandeur with these changes. The initial problems of Xbox One and how Microsoft handled its game studios have made fans and viewers wonder about their dedication to gaming over a long period. The changing understanding of what Xbox means might result in the console being retired, which would match with industry patterns and Microsoft’s strategic focus.

    The question isn’t whether the Xbox console will disappear from gaming history but when it will happen. Digital downloads, subscription services, and mobile gaming are reshaping the scene. Microsoft must face these changes as it also carries a brand that previously changed the definition of home entertainment.

    Potentially, Xbox’s future might appear very different from its past; however, it will certainly contribute to an important chapter in interactive entertainment’s tale for games and culture.

    How to Install and Use Hyper-V on Snapdragon X Elite Laptops

    Setting up Hyper-V on Snapdragon X Elite laptops can significantly enhance your virtualization capabilities, especially if you’re looking to run ARM64 Linux distributions. Let’s dive into the steps to get Hyper-V up and running, troubleshoot common issues, and explore integrating Windows Subsystem for Linux (WSL) with Hyper-V.

    How do I use Hyper-V on Snapdragon laptops?

    1. Installing Hyper-V on Snapdragon X Elite laptops

    1. Enable Hyper-V:
      • Press the Start button, type Turn Windows features on or off and select the app from the results.
      • In the list that appears, check the box next to Hyper-V and click OK.
      • Reboot your computer if prompted.
    2. Configure Hyper-V Manager:
      • Open the Hyper-V Manager by pressing the Windows key, typing Hyper-V Manager, and selecting it from the search results.
      • In the right panel, click on Quick Create to start setting up a new virtual machine. This step ensures you have the managerial console to create and manage your virtual machines.
    3. Download and Convert Linux Distros:
      • Download the ARM64 version of the preferred Linux distro from their official website.
      • Use qemu-img to convert the downloaded image to vhdx format: qemu-img convert -f raw -O vhdx linux-distro.img linux-distro.vhdx
      • To run this command, you need to have WSL (Windows Subsystem for Linux) installed.
      • Converting the image to vhdx ensures it is compatible with Hyper-V.
    4. Create and Setup VM in Hyper-V:
      • In Hyper-V Manager, click on New > Virtual Machine…
      • Follow the wizard and specify the name and location of the VM.
      • Choose Generation 2 for the VM generation.
      • Allocate the desired amount of memory (at least 2GB for a smooth experience).
      • Attach the network adapter by selecting a virtual switch.
      • Select the vhdx Linux image you converted earlier as the virtual hard disk.
      • Complete the wizard and click Finish.
      • Ensures your VM is correctly set up to run the ARM64 Linux distro.
    5. Start the VM:
      • Right-click the newly created VM in Hyper-V Manager and select Connect…
      • Click Start in the toolbar.
      • By following these steps, you should see the Linux bootloader and proceed with the installation.

      This solution will help you get Hyper-V running on your Snapdragon X Elite laptop, allowing you to use it for virtualizing ARM64 Linux distributions efficiently.

      2. Troubleshooting Hyper-V boot issues

      1. First, ensure that your Snapdragon X Elite device supports all features required by Hyper-V. This can be verified in the BIOS/UEFI settings or the device specifications.
      2. Open Hyper-V Manager, right-click your VM and select Settings.
      3. Navigate to the Security tab, and disable Secure Boot. Disabling Secure Boot can solve issues related to Linux boot failures.
      4. Additional Configuration with qemu:
        • If using ARM64 Linux distros, additional configurations might be needed.
        • Modify VM settings for processor compatibility in Hyper-V Manager.
        • Add virtual CPUs to match the number of physical CPUs. This ensures that the virtual machine settings are optimized for ARM64 architecture.
      5. Use Alternate Boot Manager:
        • If your Linux distro hangs at the bootloader, consider using an alternate boot manager.
        • Download and set up UEFI firmware for ARM64, such as AAVMF.
        • Using an alternate boot manager can resolve compatibility issues with the EFI firmware.

      By addressing common boot issues, this solution helps ensure that your ARM64 virtual machines run smoothly on Hyper-V.

      3. Running Windows Subsystem for Linux (WSL) with Hyper-V

      1. Enable WSL and Virtual Machine Platform:
        • Open PowerShell as Administrator by right-clicking the Start Menu and selecting Windows PowerShell (Admin).
        • Type the following commands to enable WSL and the Virtual Machine Platform:
          • dism.exe /online /enable-feature /featurename:Microsoft-Windows-Subsystem-Linux /all /norestart
          • dism.exe /online /enable-feature /featurename:VirtualMachinePlatform /all /norestart
          • Restart your computer. After these commands, WSL and virtualization support are enabled.
      2. Install a Linux Distro:
        • Open Microsoft Store and search for your preferred Linux distribution (e.g., Ubuntu, Debian).
        • Click Install and follow the on-screen instructions to set up the Linux environment.
        • Provides a lightweight Linux environment without needing a full VM.
      3. Integrate with Visual Studio Code:
        • Install Visual Studio Code from the official website.
        • Open VS Code and install the Remote – WSL extension.
        • Open WSL terminal by pressing Ctrl +  (backtick) in VS Code.
        • This will enable seamless development integration between Windows and Linux environments.
      4. Run Docker within WSL:
        • Install Docker Desktop for Windows from Docker’s official website.
        • Enable the WSL 2 based engine in Docker settings. This allows for containerized applications within the WSL environment.

      Using WSL with Hyper-V offers a seamless integration of Linux tools and applications within Windows, catering to developers and users needing both environments.

      By following these solutions, you can effectively run Linux on Snapdragon X Elite laptops using Hyper-V, overcoming any compatibility or performance issues.

      Wondering how to change the resolution in Hyper-V? Click on the highlighted link to learn all about that.

      You might also get more information on the Windows 11 requirements for VMWare and Hyper-V.

      If you have trouble, don’t hesitate to leave a comments in the dedicated section below.

      How to Fix Escape From Tarkov Low FPS on High End PCs

      Experiencing low FPS in Escape from Tarkov on a high-end PC can be incredibly frustrating, especially if you own a powerful PC. First of all, go to Task Manager and close any unnecessary processes to free up some memory.

      How do I improve Tarkov FPS on a high-end PC?

      1. Update the graphics driver and verify the system requirements

      1. Right-click the Start button and select Device Manager from the list.
      2. Expand the Display Adapters section, right-click on your graphics card and select Update driver.
      3. Choose Search automatically for updated driver software and follow the prompts to install any available updates.
      4. Next, visit the official Escape from Tarkov system requirements page and compare them with your PC’s specifications to ensure your system meets the game’s minimum and recommended requirements.

      We also included the recommended requirements from the game developer for a quick reference.

      ComponentRecommended Requirements
      Operating SystemWindows 7/8/10 (64-bit)
      ProcessorQuad-core processor 3.2 GHz (Intel i5, i7) or 3.6 GHz (AMD FX, Athlon)
      RAMAt least 16 GB
      Graphics CardDX11 compatible with 2 GB or more of memory
      SoundDirectX compatible audio card
      NetworkPermanent Internet connection
      Disk SpaceAt least 19 GB

      Keeping your graphics drivers updated and verifying that your system meets the game’s requirements ensures that your PC has the necessary components to handle the game efficiently, minimizing chances of FPS drops.

      2. Adjust the in-game graphics settings

      1. Launch Escape from Tarkov and go to the Settings menu.
      2. Click on the Graphics tab.
      3. Turn on Fullscreen mode: This reduces the overhead caused by the windowed mode.
      4. Turn off VSync: This can reduce input lag and potentially increase FPS.
      5. Set Overall Visibility to 1000 (400 for a more significant boost if visibility isn’t a concern).
      6. Set Shadow Visibility to 100 to reduce performance drain caused by long shadow distances.
      7. Set Object LOD Quality to 2 for a noticeable FPS boost.
      8. Turn off Noise, Grass Shadows, HBAO, SSR, HDR, Z-Blur, and Chromatic Aberrations.

      Adjusting these settings helps in allocating system resources more efficiently, leading to a more stable and higher FPS during gameplay.

      3. Use a game booster app

      1. Download and install a game booster like Game Fire or LagoFast.
      2. Open the booster app and search for Escape from Tarkov.
      3. Click on the game from the search results.
      4. Select the server you need from the list provided.
      5. Click on the Boost button and monitor the real-time ping and packet loss rates.

      Game booster programs can optimize your internet connection and prioritize game traffic, potentially reducing lag and boosting FPS. We have a list with the best game booster software so check for all the available options.

      4. Optimize Windows for gaming

      1. Press Win + I to start Settings.
      2. Click on System.
      3. In the left-hand menu, select Power & Sleep.
      4. Click on Additional Power Settings under Related Settings.
      5. Select the High Performance power plan.

      Using the High Performance power plan ensures that your PC prioritizes performance, providing more resources for your game.

      5. Disable high DPI scaling behavior

      1. Navigate to the folder where Escape from Tarkov is installed.
      2. Right-click on EscapeFromTarkov.exe and select Properties.
      3. Go to the Compatibility tab.
      4. Check the box for Override high DPI scaling behavior.
      5. Select Application from the dropdown menu.
      6. Click Apply and then OK.

      Disabling high DPI scaling can resolve performance issues caused by improper scaling of the game, leading to a smoother gameplay experience.

      By following these steps, you should see an improvement in your Escape from Tarkov FPS, even on a high-end PC. Each solution targets specific potential bottlenecks, ensuring a comprehensive approach to optimizing your gaming experience.

      Many gamers complained about the Tarkov backend error. If you’re facing the same issue, click the highlighted link to fix it. We also have a comprehensive guide on how to fix packet loss in Tarkov.

      For future reference, always keep your system and drivers updated and periodically check for any new game patches or updates.

      Snapdragon X Elite Vs. M3: A Close Competition?

      With all the hype created by Qualcomm’s new upcoming processor, Snapdragon X Elite, with Geekbench listings, everyone has a lot of expectations from the hardware component. Another popular player in the arena proving its supremacy is M3. Here, we have compared Snapdragon X Elite vs. M3 to help you understand which is the superior choice.

      Snapdragon X Elite vs. M3: Which is best?

      Snapdragon X Elite vs. M3: Specifications

      Snapdragon X Elite
      X1E-80-100
      M3
      CPU cores12
      (dual-core boost)
      3 clusters of equally powerful cores, 12 threads
      8
      (4 performance cores, 4 efficiency cores)
      It supports 24 GB unified memory
      Instruction Set ARMv9ARMv8
      CacheL2: 12MB (shared)L1: 192K (per core) || L2: 16MB (shared)
      Frequencies4.0GHz boost
      3.4GHz base
      3.7GHz performance
      2.4GHz efficiency
      Memory (as tested)16GB16GB
      TransistorsNA25 billion
      Fabrications process4 nm3 nm
      GraphicsQualcomm Adreno GPU
      Up to 3.8 TFLOPs
      Apple M3 GPU
      Up to 4.1 TFLOPs
      10 or 12 cores
      NPU
      Qualcomm Hexagon NPU
      Up to 45 TOPS
      10 cores
      Up to 18 TOPS
      RAMLPDDR5x
      Up to 64 GB
      8448 MT/s transfer rate
      135 GB/s bandwidth
      LPDDR5
      Up to 24 GB
      6400 MT/s transfer rate
      100 GB/s bandwidth
      TDP23 W
      20 W
      PCIe version4.04.0
      ConnectivityWi-Fi 7
      Bluetooth 5.4
      Wi-Fi 6E
      Bluetooth 5.3

      CPU performance

      The CPU that comes with Qualcomm’s new hardware component looks fairly better than its predecessors. With 12 performance cores, it is superior to Apple M3, which has 4 performance cores and 4 efficiency cores. However, when it comes to base frequency, Apple M3 is the clear winner.

      Qualcomm has released the Snapdragon Elite X, which comes in three variants with slight differences in terms of multithread frequency, TFLOPS, and Dual-core boost. The variants are X1E-84-100, which has 23405 multithread and 3876 single thread, X1E-80-100, which has 22653 multithread and 3350 single thread, and X1E-78-100, which has 23595 multithread and 3195 single thread.

      The Apple M3 has no variant and comes with an ARMv8 instruction set, which is lower than Snapdragon Elite.

      Graphics performance

      The Graphics performance looks promising with the Qualcomm Adreno 750 integrated GPU. For Apple M3, the GPU comes with Dynamic caching, which enables the use of local memory in hardware in real-time.

      On the D Mark WildLife Extreme benchmark, which focuses on short-term performance, the Snapdragon X Elite got 6,260 points, while the Apple M3 scored 8,284 points. This indicates that Apple M3-powered computers have better GPU performance than Snapdragon X Elite.

      NPU performance

      Regarding NPU performance, Snapdragon X Elite can deliver up to 45 TOPS while M3 delivers only upto 18 TOPS. So, for AI-enriched features, X Elite is the go-to.

      Gaming performance

      Matt Talks Tech, when testing both processors while gaming, Apple M3 maintained higher average frames per second (FPS) in all tested games. This means you will have a better gaming experience on a device powered by M3 than a Windows computer with Snapdragon X Elite.

      Battery Life

      Qualcomm claims to give twice the battery life on a laptop powered by Snapdragon X Elite than Intel  Core Ultra 7 155H.

      Also, when Dave2D, a popular YouTuber, used the Asus Vivobook S15 powered by Snapdragon newest processor with a 70 Wh battery pack and tested it under light load, they found out that the device lasted to 10 hours and 26 minutes, which is close to the MacBook Air M3 (11 hours and 18 minutes).

      Overall performance

      Regarding power and efficiency, Snapdragon Elite X delivers a well-balanced performance. With a Neural Processing Unit (NPU) of 45 TOPS, it can be considered an AI powerhouse.

      Apple M3 is the first chip built on an industry-leading 3-nanometer process, and it features technology that allows 25 billion transistors to be fitted into a smaller space.

      GeekBench v6 results

      Here are the GeekBench v6 results when common operations used in real-world apps were performed:

      Snapdragon X Elite (X1E-84-100)Apple M3 
      Single core score28803009
      Multi-core score1521111815
      Operating SystemMicrosoft Windows 11 Pro (64-bit)macOS 14.1 (Build 23B2073)
      ModelQualcomm CRD
      iMac (24-inch, 2023)
      Name
      Snapdragon X Elite – X1E84100 – Qualcomm Oryon CPU
      Apple M3
      Topology 1 Processor, 12 Cores
      (12 performance cores)
      1 Processor, 8 Cores
      4 Performance and 4 efficiency cores
      IdentifierARMv8 (64-bit) Family 8 Model 1 Revision 201Apple M3
      Base Frequency4.20 GHz4.05 GHz
      Cluster 18 Cores4 Cores
      Cluster 24 Cores4 Cores
      Size16 GB16 GB

      Single- Core & Multi-Core performance

      Tasks performedSnapdragon X Elite (X1E-84-100) Single-CoreM3 Single CoreSnapdragon X Elite (X1E-84-100) Multi-Core PerformanceM3 Multi-Core Performance
      File Compression2569
      369.0 MB/sec
      2876
      413.0 MB/sec
      8183
      1.15 GB/sec
      8964
      1.26 GB/sec
      Navigation2308
      13.9 routes/sec
      2799
      16.9 routes/sec
      15240
      91.8 routes/sec
      12579
      75.8 routes/sec
      HTML5 Browser3188
      65.3 pages/sec
      3051
      62.5 pages/sec
      16542
      338.7 pages/sec
      12920
      264.5 pages/sec
      PDF Renderer2924
      67.4 Mpixels/sec
      13610
      313.9 Mpixels/sec
      18059
      416.5 Mpixels/sec
      13610
      313.9 Mpixels/sec
      Photo Library2902
      39.4 images/sec
      2704
      36.7 images/sec
      20575
      279.2 images/sec
      13858
      188.1 images/sec
      Clang3461
      17.0 Klines/sec
      3711
      18.3 Klines/sec
      29422
      144.9 Klines/sec
      19233
      94.7 Klines/sec
      Text Processing2724
      218.2 pages/sec
      2863
      229.2 pages/sec
      3354
      268.6 pages/sec
      3708
      297.0 pages/sec
      Asset Compression2768
      85.8 MB/sec
      2818
      87.3 MB/sec
      25006
      774.8 MB/sec
      14596
      452.3 MB/sec
      Object Detection2998
      89.7 images/sec
      2515
      75.3 images/sec
      12511
      374.4 images/sec
      9374
      280.5 images/sec
      Background Blur2852
      11.8 images/sec
      2790
      11.5 images/sec
      16355
      67.7 images/sec
      12119
      50.2 images/sec
      Horizon Detection2967
      92.3 Mpixels/sec
      3605
      112.2 Mpixels/sec
      17891
      556.7 Mpixels/sec
      15987
      497.5 Mpixels/sec
      Object Remover2578
      198.2 Mpixels/sec
      3742
      287.7 Mpixels/sec
      15765
      1.21 Gpixels/sec
      12145
      933.8 Mpixels/sec
      HDR3515
      103.1 Mpixels/sec
      3390
      99.5 Mpixels/sec
      17346
      509.0 Mpixels/sec
      13768
      404.0 Mpixels/sec
      Photo Filter3434
      34.1 images/sec
      3672
      36.4 images/sec
      11852
      117.6 images/sec
      11573
      114.8 images/sec
      Ray Tracer2457
      2.38 Mpixels/sec
      2457
      2.38 Mpixels/sec
      25819
      25.0 Mpixels/sec
      13341
      12.9 Mpixels/sec
      Structure from Motion2858
      90.5 Kpixels/sec
      3070
      97.2 Kpixels/sec
      18590
      588.6 Kpixels/sec
      13532
      428.5 Kpixels/sec

      The Conclusion: Snapdragon X Elite vs. M3

      Qualcomm has 50% more cores, including 12 performance cores, compared to 4 performance and 4 efficiency cores in Apple M3. However, it is only 21% faster.

      Also, it is still behind in single-core performance from Apple M3 but has proven to be better in multi-performance, which makes the Qualcomm processor a strong contender for tasks that benefit from parallel processing.

      Apple M3 comes with a powerful GPU that delivers superior graphics performance and is better for gaming as well. When it comes to battery efficiency, Snapdragon X Elite appears to be promising, as it can be used for longer operational times compared to its predecessors.

      So, if you want a processor with better multi-core capabilities, Snapdragon X Elite should be your go-to. However, if you are looking for a processor efficient in single-core tasks and a better gaming experience, Apple M3 is the best option.

      We have also compared Qualcomm against other brands, so for more information, check out our guides on Snapdragon X Elite vs. Z1 Extreme and Snapdragon X Elite vs. M4.

      If you are wondering about the hardware differences, don’t miss out on our guide on Snapdragon X Elite versions to know more about each CPU.

      To learn how Snapdragon X Elite and Plus compare, we have a guide that covers both series in detail.

      What do you think about these new chips by Qualcomm, are they ready to beat Apple M3? Share your thoughts in the comments section below.

      4 Simple Ways to Recover Skype Deleted Messages

      Deleting a message whether intentional or subconsciously can happen to anyone but if you ever wanted to recover your deleted Skype messages, there’s a way out.

      If you have a backup system, all is not lost for your Skype messages. Your device also stores these messages locally in your recycle bin.

      How do I recover deleted Skype messages?

      1. Restore the previous version

      1. Hit the Windows + E keys to open File Explorer.
      2. Next, navigate to the following location: C:\Users\YourWindowsUsername\AppData\Roaming\Skype\YourSkypeUsername
      3. Find the name of the chat or user you deleted the Skype message, right-click on the file and select Properties.
      4. If you can’t find it, click on View>Show>Hidden, and ensure the tick is not there. This will reveal the AppData folder since it’s normally hidden.
      5. Click on the Previous versions tab, select all versions you’d like to restore then hit the Restore button.

      2. Retrieve from Skype cloud

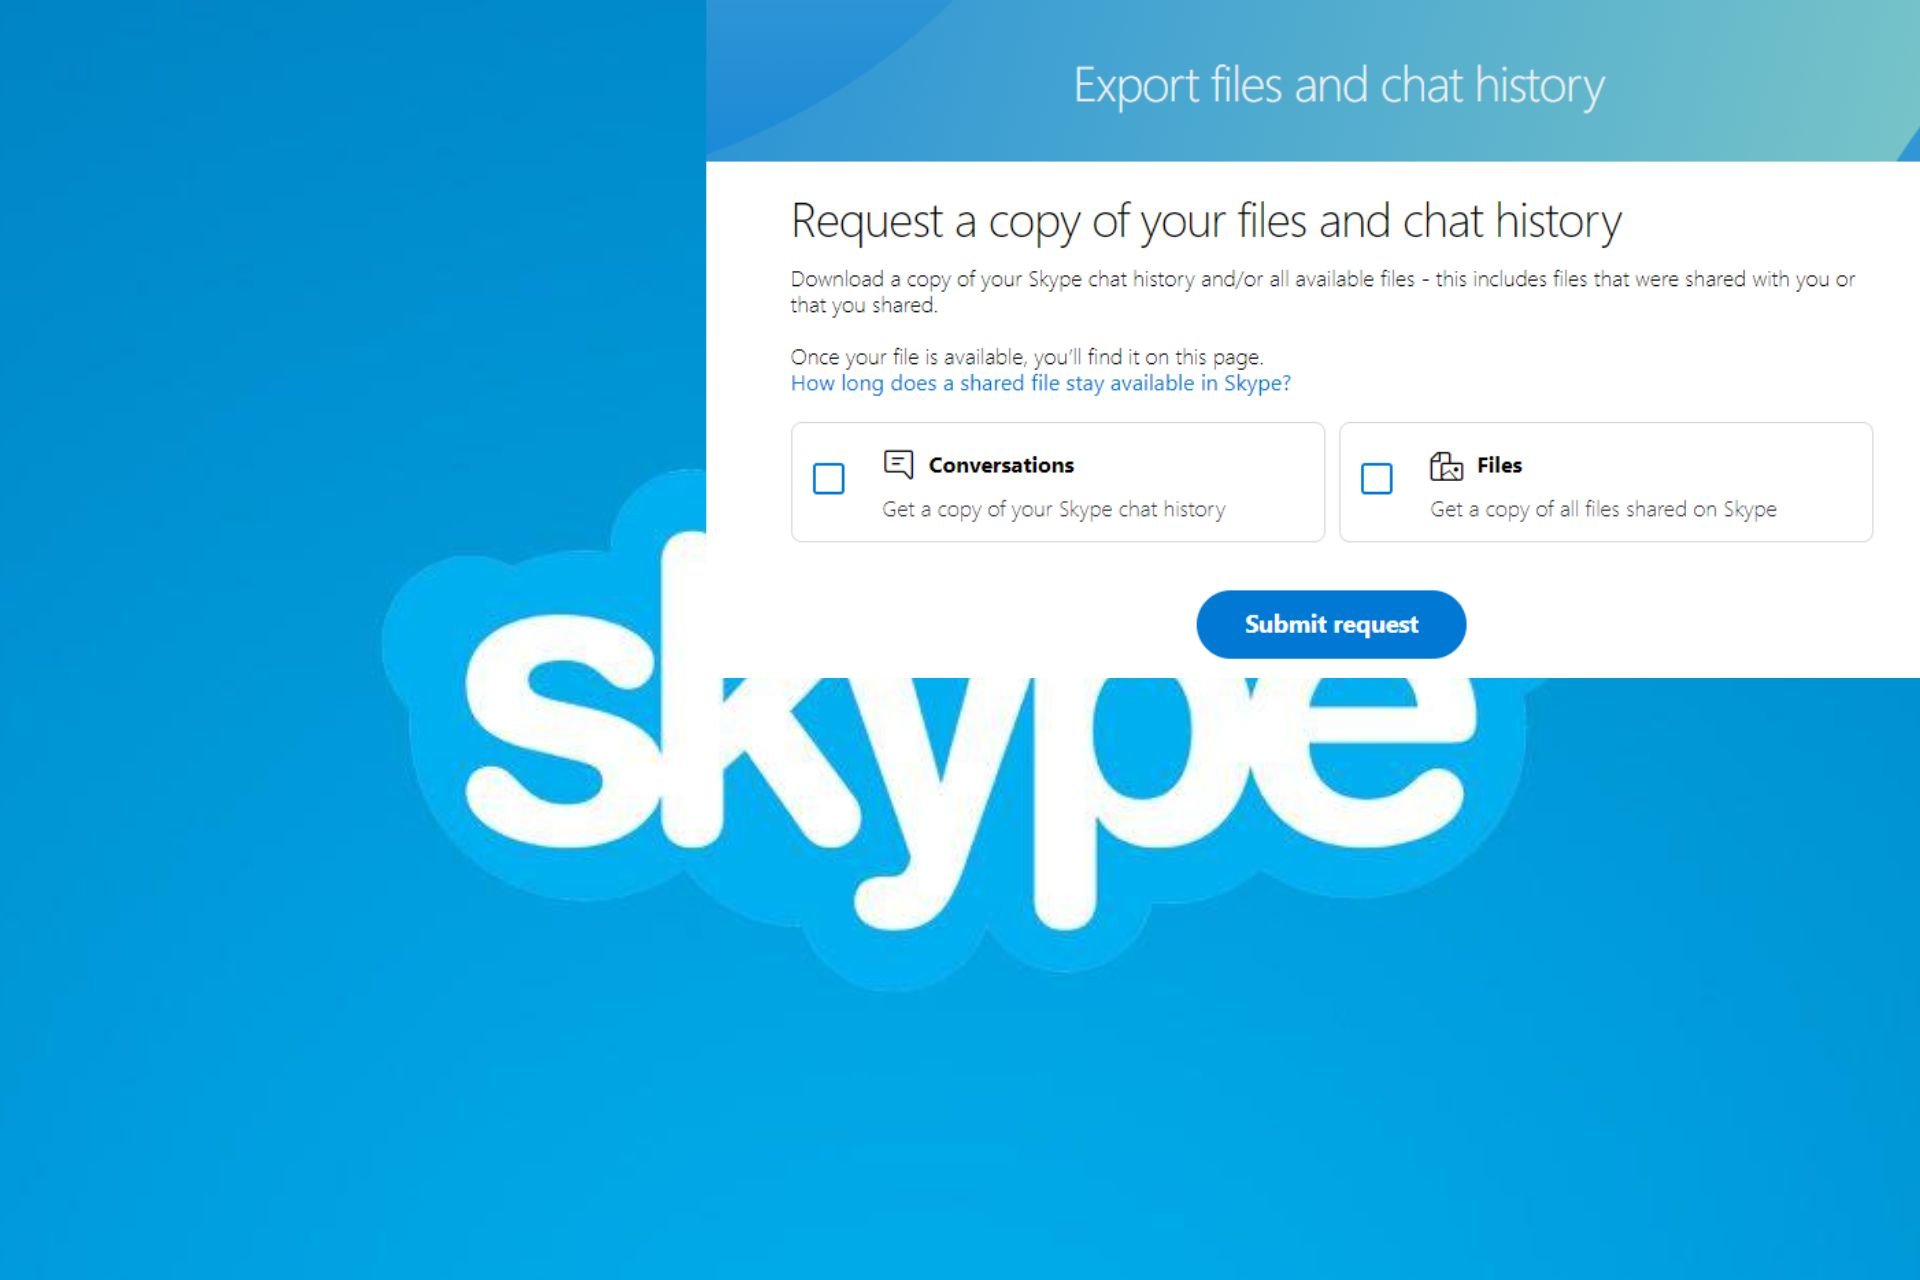
      1. Navigate to your browser and go to Skype’s export chat page.
      2. Select the Conversations option and click on Submit.
      3. Click on Continue as your export is being prepared. The export time will be dependent on the size of the file.
      4. The progress will be on top of the page as pending and when it’s ready, you’ll see a Download button.
      5. The file format will be in JSON. We have an article on how to open JSON files in Windows 11.

      Note that this chat history will only date back to Skype messages that you deleted in the last 30 days.

      3. Retrieve from the DB file

      1. Close Skype and any other instances running in the background from Task Manager.
      2. Now press the Windows + R keys and enter %appdata%. Press Enter or click OK.
      3. Navigate to the Skype folder and then open the folder that represents your Skype username related to your account.
      4. Locate main.db file and copy it to your desktop.
      5. Download SkypeLogView to open the main.db file then search for the deleted messages.
      Note icon NOTE
      WindowsReport is not affiliated with Softonic.com. Do your due diligence before downloading software.

      4. Use a data recovery tool

      If you’ve hit a dead end with the above methods, try an automatic tool. Data recovery software, such as Stellar Data Recovery, are highly reliable and can restore any data.

      This tool is very thorough and reduces the chances of data corruption, as it can recover lost messages from Skype and many other types of files with its extensive engine.

      ⇒ Get Stellar Data Recovery

      If you’re using Skype on your iPhone, you can also use some of the iOS data recovery tools. Android users can also use Android data recovery apps to recover their deleted Skype messages.

      For further assistance, you can contact Skype support to find out if they have any other ways to recover your deleted messages.

      Best practices for preventing message loss on Skype

      • Backup – We’ve reiterated a couple of times how creating backups is important to prevent data loss so ensure you do so on every app.
      • Enable 2-FA – If you’re worried about unauthorized parties accessing your Skype messages, enable 2-FA or use multi-factor authentication to secure your data and avoid deleting important messages.
      • Configure chat history – Skype has an option for configuring your chat history. Basically, you choose whether to keep deleted messages for a certain period.

      While we’re still talking about recovery, you can also recover deleted messages on your Teams account, or recover deleted emails from your Gmail account.

      Still on messages, here’s what to do if Skype messages delay in being sent. Hopefully, one of these solutions help you recover your deleted messages. If not, feel free to try out other video conferencing software. Moreover, if you want to block someone on Skype, we have just the guide for that.

      Let us know in the comment section which solution worked best for you.

      Copilot in Microsoft Forms will generate step-by-step solutions for quiz questions

      Microsoft Copilot is coming to aid teachers in Forms by allowing them to easily design and generate quizzes with step-by-step solutions for each question.

      According to the latest entry in the Microsoft 365 Roadmap, the new capability will be added to Forms in August, just in time for the new school year of 2024-2025.

      With Copilot, teachers will be able to generate self-examining tests that will allow students to check out their results right after they finish the test.

      Here’s what the entry says:

      With Copilot in Forms quizzes, teachers can easily generate step-by-step solutions for each question. Teachers have the option to allow students to immediately view their results so they can see what they’ve mastered and where they need further studying using the step-by-step solutions supported by Copilot.

      Microsoft

      This is not the first time Copilot has been a great help to teachers using Forms. Microsoft updated it a while ago to generate forms, quizzes, and tests in seconds using information provided by the teachers.

      What do you think about this new capability? If you are a teacher, will you use it to design tests for your students? Let us know in the comments section below.

      Microsoft Store introduces a new Recommended for You section, and it’s full of ads masked as recommendations

      If you feel like there are way too many ads in Windows 11, Microsoft would like to have a word: there are never way too many ads because it looks like Microsoft Store will be getting another batch of them in the new “Recommended for you” section coming to the platform, soon.

      Microsoft’s approach is to put the new “Recommended for you” section directly inside the store’s search box, which is currently being tried on Windows 11’s Canary channel. The new feature was spotted by the popular insider @phantomofearth, and it will most likely be introduced to all Windows 11 users in the following weeks.

      However, it is not only happening within the Microsoft Store. Ads, such as Xbox Game Pass recommendations and even Copilot AI responses, also appear in other places. It’s quite disappointing, particularly for individuals who believed they would be free from advertisements with their paid subscriptions.

      Now, you may be thinking, “Do we need it?” Microsoft appears to be enthusiastic about ensuring its ads get noticed—no matter what. A recommendation card is even included on the Settings app’s home page. Also, this is not just for now; everyone should experience this change after some weeks of inside examination.

      But it’s not all bad news. Microsoft added a search box on the Library page of the Store so users could find and update their apps without having to scroll endlessly. It is a combination of both aspects. On one side, we are seeing new features that are truly helpful. On the other hand, more ads might not be liked by everyone.

      What do you think about this new section? Are these ads a fair trade-off for the easy access provided by the Microsoft Store, or is it going too far in our ad-filled digital space?

      Microsoft Sway is Lagging: How to Fix it

      Many reported that Microsoft Sway is lagging, and this makes the service almost unusable. However, there are a few ways to fix the problem, and this guide will show you how to do it.

      How can I fix Microsoft Sway if it’s lagging?

      Before we try anything else, try switching to a different browser and check if that helps.

      Clear the browser cache

      1. Click the Menu icon in the top right corner and choose Delete browsing data.
        delete browsing data
      2. Set the Time range to All time and click Delete data.
        clear browsing data in google chrome
      3. Restart the browser and check if the problem is resolved.

      Is Microsoft retiring Sway?

      Currently, Microsoft has no plans to retire Sway.

      What can I use instead of Sway?

      There are many great alternatives, with Canva being the most popular one. Prezi and Adobe Creative Cloud Express are also great alternatives.

      Why use Sway instead of PowerPoint?

      PowerPoint usually requires a presenter that will give the presentation. Sway on the other hand can create interactive presentations that don’t need a presenter.

      Can I turn a PowerPoint into a Sway?

      Yes, Sway supports various documents such as Word or PDF files, but it also works with PowerPoint presentations.

      As you can see, if Microsoft Sway is lagging, try clearing your cache or using a different browser. If that doesn’t help, Sway may be having server issues.

      This isn’t the only problem, many reported that Microsoft Sway is not working as well as Microsoft Sway error.

      We covered these errors as well This Sway is unavailable error in our previous guides, so don’t miss them.

      Microsoft patents tech that allows Edge to display and summarize information by just hovering over tabs

      If you’re one of those internet hermits who loves to keep tens of tabs open in the browser but often forget which tab is which and frustratingly open them all to look for that one tab, what if you could click on a tab and see a menu next to it? This menu would provide tools and choices linked with what is on that particular webpage and even summarize information for you.

      If you think that is a cool idea, then you should know Microsoft is actually working on making it a real piece of technology. According to the patent published recently, the company has thought of a system that gives you a user interface with tabs, which lets users interact with many kinds of electronic content without needing to move from their present tab—it’s not just about making things easier but also about improving how good our user experiences are by saving time and making them more straightforward.browser tabs

      This is how it goes: you choose a tab, and when the system senses this action, it starts to get menu content that matches the subject matter of what you are viewing. It produces menu items, creating a tab menu beside your chosen tab and filling it up with choices and tools related to what you are looking at.

      It could be about sharing the content with another user or finding more related items, maybe even creating new material linked to what is shown on your screen. One nice thing about the system is that it lets you choose these options without leaving your existing tab, so it keeps your workflow smooth and continuous.

      The system intelligently provides various menu items according to different browser tabs. The menu items are not just content-dependent but also rely on the context of each tab. For example, when you see travel details, the menu might provide choices to send a brief email about it. If you change to another tab with a different topic—like a cooking recipe—the menu changes and shows options suitable for that content.

      The system does not need extra software or browser extensions, making it very user-friendly. The functionality has been built into the tabbed user interface, which means that this feature is readily available and easy to use for everyone without needing additional installation. Also, the system can work with web-based applications already in your browser.

      Currently, Chromium-based browsers (Google Chrome and Microsoft Edge, the most used browsers in the world right now) have a thumbnail preview of the current tabs, which is quite useful as it can give you a fair idea of what’s going on there. browser tabs

      However, they don’t provide additional information besides the name and the website section, alongside memory usage, so ultimately, there aren’t many options around. But with technology like the one Microsoft patented, you could have many options to deal with that tab without even accessing it.

      You can read the full paper here.

      Snapdragon X Elite Comparison: Performance Analysis

      Snapdragon X Elite series is becoming rather popular, but how do different models compare? To learn that, join us in our Snapdragon X Elite comparison to find out which model offers the best performance.

      Snapdragon X Elite comparison: What’s the difference?

      CPU performance

      According to CPUBenchmark the X Elite series achieved the following results:

      • X1E-84-100: 23405 multithread and 3876 single thread
      • X1E-80-100: 22653 multithread and 3350 single thread
      • X1E-78-100: 23595 multithread and 3195 single thread

      We were surprised by these results, and it seems that X1E-78-100 outperformed X1E-84-100 in multithread results with a minor difference while performing worse in single-thread tests.

      CPUBenchmark Snapdragon X Elite results

      The Cinebench 2024 results paint a slightly different picture:

      • X1E-84-100: 1085 Multi Core and 128.5 Single Core
      • X1E-80-100: 895 Multi Core and 123 Single Core
      • X1E-78-100: 935 Multi Core and 105.4 Single Core

      X1E-78-100 surprised us once again, by beating X1E-80-100 in multi-core tests.

      Cinebench 2024 Snapdragon X Elite results

      GPU performance

      All models use Qualcomm Snapdragon X Adreno X1-85 GPU, however, the X1E-84-100 uses the one with 4.6 TFLOPS while the other two use a 3.8 TFLOPS model.

      At the time of writing, only the Qualcomm Snapdragon X Adreno X1-85 (3.8 TFLOPS) benchmark results were available, and the results are impressive:

      • 3DMark Time Spy Score: 1862
      • 3DMark Time Spy Graphics: 1673
      • 3DMark Cloud Gate Score: 18704
      • 3DMark Cloud Gate Graphics: 29343
      • 3DMark Fire Strike Standard Score: 5772
      • 3DMark Fire Strike Standard Graphics: 6066
      • 3DMark Wild Life Extreme Unlimited: 6302

      These are solid results, and the GPU outperforms older mobile GPUs such as NVIDIA GeForce GTX 1050 Mobile, but it can’t compare with the newer models.

      The 4.6TFLOPS version offers even better performance, but don’t expect any major difference.

      Hardware differences

      As for the hardware specs, all models have the following:

      • 12 cores,
      • 42MB of cache
      • Support for LPDDR5x 8448MT/s memory
      • 45 TOPS NPU

      As for max multithread frequency, X1E-84-100 can achieve 3.8GHz while other models are limited to 3.4GHz.

      Dual Core Boost also differs with X1E-84-100 having 4.2GHz and X1E-80-100 having 4.0GHz. Unfortunately, the X1E-78-100 doesn’t support this feature.

      To learn more about the hardware differences, don’t hesitate to check our guide on Snapdragon X Elite versions to learn more about each CPU.

      To see how the Snapdragon X Elite compares to the Plus version, we have a dedicated guide that analyzes both models.

      Conclusion

      According to benchmarks, X1E-84-100 is the champion, but X1E-78-100 surprised us with several of its results. If you’re interested in gaming, we have a guide on Snapdragon X Elite gaming performance, so don’t miss it.

      To see how this model compares against other brands don’t miss our guide on Snapdragon X Elite vs Z1 Extreme and Snapdragon X Elite vs M4 for more information.

      If you’re a fan of Intel, don’t miss our Snapdragon X Elite and Intel Core Ultra 7 comparison guide for more details.

      PowerToys is testing New+, which lets Windows users customize their context menu

      Windows 11’s context menus might soon be entirely customizable to handle detailed files and folder management. PowerToys, which recently got updated to 0.82 and introduced a new PowerRename feature that allows users to rename their files and folders, is now experimenting with a new capability called PowerToys New+.

      The feature changes how we engage with context menus by allowing us to generate tailor-made templates. Picture reaching a “Daily to-do list” or a “Folder for documents” directly from your right-click menu. It sounds useful.

      Developed by the team behind PowerToys, PowerToys New+ aims to address the somewhat controversial “New” submenu of Windows 11’s context menu. The goal is to have an abundance of templates, sync them across devices, and even introduce a marketplace for user-created templates.

      For now, there is no definite time for when this new capability will be released. The developers are currently testing it, and you can track their progress in the PowerToys GitHub storehouse. They have also released an informative document that explains more about the project if you are interested.

      For now, PowerToys is showing its latest features that use AI technology. This shows why it’s so popular with people who love Windows. If you are a developer, someone who likes to use the computer a lot, or just want an easier way to handle your digital work area, PowerToys New+ could be what you are excited about in the changing world of Windows 11.

      Wscsvc.dll is Missing or Not Found: How to Download the DLL

      The wscsvc.dll (short for Windows Security Center Service.dll) aids the Windows Security Center Service in running Windows Security, the built-in antivirus solution, and protecting the PC. If the wscsvc.dll file is missing, you will get an error that reads, The Windows Security Center service can’t be started!

      The DLL file is crucial to the overall security of the PC, and if you are seeing any wscsvc.dll errors, fix the problems right away, which, in most cases, involves getting a new copy of the wscsvc DLL.

      How can I download the wscsvc.dll file?

      1. Use a DLL repair tool

      The easiest way to fix all DLL-related issues, be it with built-in DLLs like wscsvc.dll or third-party ones, is to use a specialized DLL repair tool.

      These tools automatically scan the PC for missing DLLs, and if any are not found, a fresh copy of the DLL is downloaded to the PC from the tool’s vast library.

      2. Get a copy of wscsvc.dll from another PC

      If you have another PC running the same Windows architecture, move a copy of the DLL from the device to a USB storage and then transfer it to the affected PC.

      As for wscsvc.dll’s location, it’s stored in: C:\Windows\System32

      The System32 folder is the location you have to copy the DLL from on the other device device, and move it to on the affected device. Once done, press Windows + R > paste the following command and hit Enter: regsvr32 wscsvc.dll

      register DLL using command
      Registering wscsvc.dll

      When you reboot the PC the next time, the Windows Security Center Service should run fine!

      3. Update Windows

      1. Press Windows + I to open Settings, go to Windows Update from the left pane, and click on Check for updates.check for updates
      2. If a newer Windows version is listed, click on Download & install to get it.
      3. Reboot the PC and check whether the wscsvc.dll has been downloaded.

      4. Run the SFC and DISM scan

      1. Press Windows + S to open the Search menu, type Command Prompt in the text field, and click on Run as administrator.command prompt
      2. Click Yes in the UAC prompt.
      3. Paste the following DISM commands individually and hit Enter after each: DISM /Online /Cleanup-Image /CheckHealth DISM /Online /Cleanup-Image /ScanHealth DISM /Online /Cleanup-Image /RestoreHealth
      4. Now, execute this command to run the SFC scan: sfc /scannowsfc scan to get wscsvc.dll
      5. Once done, reboot the PC to apply the changes.

      If it’s the corrupt system files to blame for the missing wscsvc.dll, running the DISM commands and SFC scan should re-download the DLL in the System32 folder.

      5. Scan the PC for malware

      A virus or malware can often delete system files or move them to another location and introduce instability on the PC. So, if wscsvc.dll keeps disappearing by itself after you download it, you know that the PC is infected with a virus or malware.

      Since the built-in option, Windows Security, isn’t working in this case, I recommend you get another top-rated antivirus solution and scan the PC for malware or virus. For some of you, even a free antivirus will do the trick!

      6. Perform an in-place upgrade

      Tip icon Tip
      The steps listed here are to perform an in-place upgrade on Windows 11. If you are running the previous iteration, an in-place upgrade on Windows 10 is just as simple.
      1. Go to Microsoft’s official website, choose the OS edition and product language, and then download the Windows 11 ISO.download ISO
      2. Right-click on the downloaded ISO file, choose Mount, wait for a few seconds, and then click on Open in the confirmation box.
      3. Run the setup.exe file. setup.exe
      4. Click Yes in the UAC prompt.
      5. Click on Next to proceed with the repair upgrade.
      6. Now, click Accept to agree to Microsoft’s license terms.
      7. Make sure the setup reads Keep personal files and apps and click on Install to perform an in-place upgrade.in-place upgrade to fix missing wscsvc.dll
      8. Wait for the process to complete. It may take 1-3 hours.

      An in-place upgrade is very similar to reinstalling Windows, with the exception that all your files and apps remain safe. Remember, whenever a DLL that ships alongside Windows is corrupt or missing, an in-place upgrade will fix things!

      One of these solutions should have helped download the missing wscsvc.dll on Windows. If the issue with the Windows Security Center Service persists, I would recommend you create a bootable Windows USB and reinstall Windows 11 from scratch.

      Before leaving, don’t miss our latest guide on ygpsvc.dll since this is another important Windows file.

      Which fix worked for you? Share with us in the comments section.

      6 Quick Ways to Fix Trusted Sites Greyed Out

      If you have an overzealous antivirus, then you must also have a trusted sites section. However, as you try to add more sites, you may find this option greyed out.

      Trusted sites being greyed out is mostly a permissions issue. You’re either running a user account with no administrative privileges or using a work/school account managed by your organization that has enforced access policies.

      It is also possible that your security software is blocking you, your user profile is corrupt or the issue is browser-specific. Before any troubleshooting, ensure you’re using an administrator account or try with another browser.

      How do I enable trusted sites when it is greyed out?

      1. Change your Internet options

      1. Press the Windows + I keys and enter Internet options. Select Internet Options from the list of results.
      2. When the Internet Properties window opens, go to the Security tab and click on the Custom Level button.
      3. A list of settings will appear. Locate Launching applications and unsafe files and select Enable. Now click OK to save changes.

      2. Reset your browser

      1. Open your browser, in this case, Microsoft Edge and click on the three horizontal ellipses at the top right corner.
      2. Click on Settings.
      3. Select Reset settings and hit Restore settings to their default values.
      4. Confirm Reset in the dialog box that appears.

      If you’re using any other browser, the steps to reset it are somewhat similar. You can also reinstall the browser if your trusted sites option is still greyed out.

      3. Disable your antivirus/firewall temporarily

      1. Hit the Start menu icon, type Windows Security in the search bar, and click Open.
      2. Click on Firewall & network protection, then select Public network.league of legends black screen after champion select
      3. Locate Microsoft Defender Firewall and toggle the off button.turning off Microsoft Defender Firewall Windows

      4. Adjust the Group Policy settings

      1. Hit the Windows + R to launch the Run command.
      2. Type gpedit.msc in the dialog box and hit Enter to open the Group Policy Editor.GPEDIT MSC RUN -Your Virus and threat protection is managed by your organization
      3. Navigate to the following location: Computer Configuration\Administrative Templates\Windows Components\Internet Explorer\Internet Control Panel\Security Page >> Site to Zone Assignment List
      4. Double-click on Site to Zone Assignment List, check the Enabled button to activate the options then click on Show more under Enter the Zone assignments here.
      5. Enter the corresponding values in their respective boxes then click OK.
      6. Finally, click on Apply and OK to save the changes.
      7. Next, refresh the Group Policy settings by hitting the Windows key, type cmd and select Run as administrator.windows 10 slow after system restore
      8. Type in the following command and press Enter: GPupdate/force

      Adding the trusted sites zone to the Group Policy settings opens the access doors and when you go back to your Internet options, the trusted sites option should be active. Forcing a Group Policy update ensures the policy is applied throughout especially if you’re on a domain.

      5. Create a new user profile

      1. Press Windows + R to launch the Run console, enter netplwiz in the text field, and click OK.
      2. Click Add in the User Accounts window.
      3. Select Sign in without a Microsoft account (not recommended).
      4. Click on Local account button.
      5. Enter a username and password (optional) for the new user account, and a hint, in case you set a password. Once done, click on Next.
      6. Click on Finish to create the Local account.

      Once you’re done, make yourself the administrator of this account then try accessing the trusted sites option and see if it is still greyed out. If not, you can conclude that your previous user profile was corrupt.

      6. Perform a clean boot

      1. Hit the Windows key, type msconfig, and open System Configuration.
      2. Switch to the Services tab and select Hide all Microsoft services.
      3. Click on the Disable all button, then hit the Apply button to save the changes.
      4. Go back and click on the Startup tab, select Open Task Manager then click OK.
      5. In the Startup tab of the Task Manager, Disable all the Enabled startup items.
      6. Close Task Manager and restart your PC.

      Other important settings like your IE security settings may be greyed out but we’ve already addressed how to bypass such errors in our detailed article.

      Trusted sites are important for enhancing the security of your system and preventing malicious sites from taking over and sneaking in malware. They may be restrictive in some situations and even prevent you from downloading files but ultimately, they’re for the overall protection of your system.

      If the restrictions are cumbersome, you can disable the website not trusted message within your browser if you’re sure the sites you’re visiting are safe. For an extra layer of protection, we recommend you familiarize yourself with some of the browser security settings for your online safety.

      That’s a wrap from us but we truly hope if the trusted sites option was greyed out, one of our solutions has reactivated it. Also, if you have any other solution that we may have missed out, feel free to drop us a comment down below.

      Microsoft unveils the list of Windows on Arm limitations on Windows 11, and Windows 10

      The Snapdragon-based Windows Copilot+ PCs were recently released, and while they excel in performance and battery life, they have specific limitations, which Microsoft acknowledges in a new document (spotted by Windows Latest).

      The document specifies that certain drivers, games, and apps only work if they’re designed to work for Windows on Arm. This means many such products won’t work on Copilot+ PCs, even if they seem to qualify. Other software, such as apps that customize the Windows experience or third-party anti-virus software, won’t work either.

      Drivers for hardware, games and apps will only work if they’re designed for a Windows 11 Arm-based PC. For more info, check with the hardware manufacturer or the organization that developed the driver. Drivers are software programs that communicate with hardware devices—they’re commonly used for antivirus and antimalware software, printing or PDF software, assistive technologies, CD and DVD utilities, and virtualization software.

      Microsoft

      Plus, functions such as Windows Fan and Scan may not be available because they are incompatible with ARM technology.

      Windows Fax and Scan isn’t available. This feature isn’t available on a Windows 11 Arm-based PC.

      Microsoft

      How can Microsoft deal with the Windows on Arm limitations?

      Firstly, it’s worth mentioning that these devices might not be your first choice, especially if you are a serious gamer. Yet you can still handle many games—offering up to 30 frames per second for most situations. This may cause some people to query how it impacts the usual user and whether this is a breaking point for these constraints. However, give Microsoft a few years, the company has already stated that Windows Arm is the future of gaming, and it has taken steps toward it.

      Still, Windows 11 24H2 has fewer limitations than Windows 10 on ARM and provides superior compatibility for applications and games. However, there are still obstacles that need to be dealt with. For example, running older games or using apps that rely on particular drivers not created for ARM might present. This could slow down certain users, especially if their preferred game or application is in this group.

      Now, you might ask, what about other functionalities, such as antivirus or customization apps? The answer is mixed. Most peripherals and devices are compatible with Windows 11 24H2 on ARM, but there is limited support for some antivirus applications and customization tools.

      Yet, it’s not all bad news. These Snapdragon Copilot+ PCs have strong points that make them an appealing option for certain people—particularly those who care more about battery life and overall performance than needing a laptop for gaming or applications. And we should remember that Windows Defender is present to provide security that many users perceive as adequate.

      That said, there are still a few rough spots, but the progress shown in Windows 11 on ARM with the Copilot+ PCs indicates an encouraging path for upcoming computing. Whether these restrictions will cause you to avoid them depends on your requirements and usage habits.

      If you need a device that can do everything well and balance power with long battery life, these devices could be what you’re looking for. But if you’re searching for a PC to game or utilize particular apps, waiting for AMD and Intel PCs to come up later this year could be good.

      ChatGPT Error Saving Draft: 6 Solutions to Fix

      Facing the Error saving draft message in ChatGPT GPT Builder shows up often when you try to add files to your project. This problem is usually triggered by going over the upload limit, but it’s also often related to server-side issues. So, first, visit the OpenAI Status Page to see if there are ongoing issues. Also, undo the last change you’ve made and try saving again.

      How do I fix Error saving draft in ChatGPT?

      1. Check the file upload limit

      1. Navigate to the area where you upload files in GPT Builder.
      2. Check how many files you have uploaded. If you have more than 10 files, this might be causing the issue.
      3. Delete any files that are not essential by selecting them and clicking on the Delete button.

      The GPT Builder has a limit of 10 files per session. Exceeding this limit will result in an Error saving draft message. Ensuring you have no more than 10 files should resolve this issue.

      2. Combine files

      1. If you have many small files, gather them together.
      2. Use online tools such as Adobe Acrobat or other PDF merging software to combine multiple files into one.
      3. Replace the multiple small files in the GPT Builder with the combined file.

      By merging your files, you reduce the number of files the GPT Builder needs to handle, thus staying within the 10-file limit and preventing the error message.

      3. Upload as messages

      1. Navigate to the section where you configure your GPT.
      2. Open the chat interface.
      3. Paste the file content directly into the chat and give instructions like Please use the information included in this message when answering queries.
      4. Continue to configure your GPT as needed.

      Uploading files directly in the message section rather than the Configure section allows the GPT to access the information without hitting the file upload limit.

      4. Use a different browser

      Some users have found that certain browsers handle file uploads better within the GPT Builder. Using a different browser might resolve the issue. Try Opera or Edge instead of Chrome.

      This may also be caused by using too much bandwidth with multiple tabs in the browser so closing the ones you don’t need will lead to a better upload speed.

      5. Reduce the file size

      1. Check if any of the files you’re trying to upload are particularly large.
      2. Use online PDF compressors to reduce file size. Ensure each file is below 10MB.
      3. Replace the large files with the compressed versions in the GPT Builder.

      Large files can sometimes cause upload errors. Compressing them makes it easier for the GPT Builder to handle the uploads.

      6. Use Developer Tools

      1. Right-click on your browser and select Inspect or press F12.
      2. Look for any error messages related to file uploads.
      3. If the console indicates a specific file causing the problem, delete this file.
      4. Try uploading the file again, ensuring it is not corrupted.

      Some errors might be specific to certain files that failed to upload correctly. Using developer tools helps identify and rectify these issues.

      By following these solutions, you should be able to address the Error saving draft issue in the ChatGPT GPT Builder efficiently.

      If ChatGPT is not working at all, check the highlighted guide to fix it quickly. You may also check our guide on how to fix the ChatGPT bat gateway error.

      Before you go, don’t miss our latest Unknown error occurred in ChatGPT during PDF upload for more information.

      For any questions or suggestions, feel free to check the comments section below.

      Microsoft Notepad finally makes its spellchecking and autocorrecting capabilities available to all users

      Microsoft, which has kept its Notepad app unchanged for 41 years, has quietly added modern features like spellchecking and autocorrecting to the app in Windows 11. The Redmond-based tech giant says these features will improve users’ experience of maintaining error-free notes and scripts.

      The features were teased in the Windows Insider Program a while ago. Now, all Windows 11 users can use them, too. It’s a significant change because Notepad has remained nearly identical for over four decades. Yes, there were some modifications, like adding dark mode, automatic saving, and tabs on the screen to manage various files, but nothing as big as checking spelling and autocorrection until now.

      From now on, Notepad will underline in red words with wrong spelling, and when you click, tap, or use a keyboard shortcut, you can see suggestions for corrections. It is also possible to include new words in the dictionary so they no longer get marked as incorrect. There’s no need to worry if someone is concerned about having this feature interfere with coding files. Spellchecking is not enabled by default for log files and files related to coding. But you can turn it on or off in the app settings as desired.

      Microsoft is bringing its leading apps into the 21st century. Notepad, a tool lots of people use for fast notes or to write code, is now getting more focus on it. With the new spellchecking, Microsoft Notepad is not just a simple text editor anymore; it’s turning into something powerful and easy to use, and it can be used as an easy and free way to proofread text.

      The Redmond-based tech giant is making the native Windows apps valuable and practical. If Paint can generate images with AI, and Windows Photos can properly organize images using the same capabilities, then it’s no wonder Notepad is becoming so versatile.

      Windows 11 Default DVD Player – How To Set It Up Easily

      Are you looking for the Windows 11 default DVD player?

      Unfortunately, this OS doesn’t come with a default tool, but I’ll show you a workaround. It allows you to play the DVD through AutoPlay or manually from the Windows File Explorer.

      Below, I’ll explain how to set it up step-by-step, so let’s get into it!

      Does Windows 11 Have a Default DVD Player?

      No, the Windows 11 operating system doesn’t come with a default DVD player. Microsoft has stopped including the service for free with the latest iteration of Windows.

      The latest Microsoft Support portal for DVD playback options also confirms that from Windows 8.1 onwards, there’s no built-in DVD playback support. You’ll have to get an app from the Microsoft Store or third-party developers.

      For example, you can set up the Windows Media Player Legacy app as the default DVD player.

      Windows 11 Default DVD Player

      However, you should know that Windows Media Player suffers from compatibility issues. Mostly, the tool has been designed to access data DVDs so you can create your own music or movie show libraries.

      When you insert a multimedia DVD, it might not recognize the AutoPlay instructions (AutoRun on Windows 10) and open the disc’s contents in Windows File Explorer.

      How To Get Windows Media Player in Windows 11

      The Windows Media Player Legacy app should be present on your Windows 11 PC if it’s the Pro variant. Look up the app in the Start Menu by typing Windows Media.

      Start menu

      If it’s not on your PC, follow these steps to activate it:

      1. Press the Windows + I keys together to launch the Settings app.
      2. Click on System in the left-side navigation panel.
      3. Now, scroll down the System settings menu on the right side to find Optional features at the bottom. Click on that.
      Optional features
      1. Click on the View features button near the Add an option feature on the right side menu.
      View features
      1. Now, you’ll see the Add an option feature overlay with a search field.
      2. There, type in Windows Media Player.
      3. Only one selection should show up below the search field.
      4. Hit the checkbox for the Windows Media Player Legacy (APP) near the app size information.
      5. Click Next and then select Add to start installing the feature.
      Next
      1. You should see the progress below the Recent actions section.
      Installing
      1. This might take a while, so wait until it finishes.
      2. If the progress bar looks stuck, close the Settings app. Then, come back to Optional features again to update the screen.
      update

      Look up the app again in the Start Menu. If it’s there, you’ve successfully added it.

      How To Set Up Windows Media Player as the Default DVD Player

      You’ll have to make a few manual configurations before Windows Media Player can function as a built-in DVD player. These are as outlined below:

      Enable Windows AutoPlay System

      1. Open the Windows Settings app by pressing the Windows + I keys.
      2. Click on the Bluetooth & devices option on the left-side navigation panel.
      3. Now, scroll down to the bottom of the right-side menu to find the AutoPlay settings card. Click on that.
      4. If the feature is disabled, click on the toggle button to enable it.
      5. On the Choose AutoPlay defaults section, click on the Take no action drop-down and choose Ask me every time.
      Ask me every time
      1. Close the window.

      Map Key DVD Files

      The IFO and VOB files are the DVD’s key data in the VIDEO_TS folder. So, you must set Windows Media Player Legacy as the default app for these files. Here’s how:

      1. Open the Settings app and go to the Default apps screen from Apps on the left-side navigation panel.
      Default apps
      1. Into the Enter a file type search field, type IFO.
      2. Click on the .ifo search result.
      3. The present default app would show below the file type. Click on that.
      4. On the overlay dialog, select the Windows Media Player Legacy option.
      5. Click Set default.
      Windows media player select
      1. Repeat the step for the VOB file type.
      2. Close the Default apps dialog.
      VOB

      Now, insert the DVD. Once the PC reads the DVD metadata, the AutoPlay system should take it from there. It should automatically open the Windows Media Player Legacy app for content playback.

      Playback Disc Contents From Explorer

      1. Open the Windows File Explorer or This PC.
      2. Right-click on the DVD drive and choose Open in new window from the context menu.
      right click on DVD
      1. In the DVD directory, enter the VIDEO_TS folder.
      2. You’ll see multiple VIDEO_TS and VTS files.
      3. You should notice that these files are already showing the Windows Media Player icon.
      4. Find the largest one in the folder and double-click to open it in Windows Media Player.
      open VTS
      1. Once you’re done playing this file, open the second largest one, and so on.

      For DRM or copyright errors during playback, see how to fix protected content not playing in Windows 11.

      Windows 11 Default DVD Player – Alternatives

      If you’re not finding Windows Media Player convenient enough for DVD playback, check out these alternative choices:

      Windows DVD Player

      windows dvd

      This is the official DVD player for Windows 8.1 and later operating systems. The app is available for free for 7 days. Downloading and buying are only available through the Microsoft Store platform. During this free trial period, you won’t be able to run long-form movies and TV shows.

      You can only play short videos on a DVD. Also, the tool will show the Buy Now ribbon on the screen, which is pretty annoying. So, you’ll either have to buy the full version for distraction-less playback or move on to the free alternatives.

      Price: $14.99 one-time fee for lifetime usage.

      Get it on the Microsoft Store.

      VLC Media Player

      VLC

      This is the best option for convenient playback of DVDs and VCDs on any Windows PC. It’s open source, so you can utilize it personally or in a commercial setup without giving credit to VideoLAN or buying a license.

      It integrates seamlessly with the Windows 11 AutoPlay system. Also, it shows up as the default DVD player on the right-click context menu. The app is available on the Microsoft Store and VideoLAN’s official website.

      Price: Free.

      Get it on VideoLAN.

      Kodi

      Kodi

      Kodi is popular as a multimedia aggregator. It collects content automatically from all sources, like HDD, SSD, USB-stick, DVD, network storage, and the internet. So, if you’re looking to consolidate all entertainment content in one app, go for Kodi. Like VLC Media Player, it’s open-source. Therefore, it’s suitable for both commercial and individual usage.

      Price: Free.

      Get it on Kodi.

      So, you should now be able to set Windows Media Player as the Windows 11 default DVD player. Alternatively, you can give the above third-party tools a try if the built-in app seems inefficient.

      Which one did you choose in the end? Feel free to share your thoughts in the comments below!

      ChatGPT Error Code 111: What Does it Mean and How to Fix

      The ChatGPT error code 111 is due to a network connection issue. Most of the times, this problem is triggered by the OpenAI server being down or under maintenance. However, it may also be caused by problems with your browser or the local network connection. So, first, check if you can open any other pages in your browser and verify the ChatGPT server status. If both are working fine, go through with the solutions below.

      How do I fix the ChatGPT Error Code 111?

      1. Clear the browser cache and cookies

      1. Open your browser (e.g., Chrome, Firefox).
      2. Click on the three dots (or three lines) in the top right corner to open the menu and go to Settings.
      3. Under Privacy and security, click on Clear browsing data.
      4. Choose Cookies and other site data and Cached images and files.
      5. Click Clear data.
      6. Restart your browser and try logging in to ChatGPT again.

      Clearing the browser cache and cookies can resolve issues caused by outdated or corrupted data stored in your browser, making it smoother to log in again.

      2. Turn off the VPN and browser extensions

      1. If you are using a VPN, disable it by:
        • Going to your VPN application and clicking Disconnect.
        • Or, if using a browser extension, click on the extension icon and turn it off.
      2. Disable browser extensions that might interfere with how ChatGPT identifies your browser:
        • Open the browser menu and go to More tools.
        • Click on Extensions.
        • Toggle off any extensions that might be causing issues, such as User-Agent spoofing extensions.

      Sometimes, VPNs and certain browser extensions can alter your network conditions or browser behavior in ways that interfere with ChatGPT’s login process.

      3. Use a different browser

      1. Download and install a different browser. If you are using Chrome, try Opera, for instance.
      2. Open the new browser.
      3. Navigate to the ChatGPT login page.
      4. Attempt to log in to see if the error persists.

      Using Opera as a different browser can help determine if the issue is browser-specific. Some browsers may handle certain web applications more reliably than others.

      4. Update your browser

      1. Open your browser.
      2. Click on the menu (three dots or lines).
      3. Go to Help and select the About section.
      4. Your browser will check for and install updates if available.
      5. Restart the browser and try logging in again.

      Updating your browser ensures that you have the latest features and bug fixes, which can help resolve compatibility issues with ChatGPT. Usually, most of the browsers update automatically, but remember to restarting them after an update to benefit from the changes.

      5. Report the issue to OpenAI

      1. Go to the OpenAI Help Center
      2. Click on the chat icon in the bottom right-hand corner.
      3. Select the Messages section.
      4. Click Send a message to report your issue.

      Reporting the issue directly to OpenAI can help them identify and fix the problem more quickly. You might also receive specific advice tailored to your situation.

      Following these solutions will help you troubleshoot and resolve the ChatGPT error code 111 effectively. To avoid similar issues in the future, keep your browser updated and regularly clear your cache and cookies.

      You may also be interested in what to do if ChatGPT is not working. We also have a guide that will help you fix ChatGPT if it’s not loading the conversation.

      For any suggestions about this guide, leave a message in the comments section below.

      Valorant Error Code VAL 62 [Solved]

      Every few weeks, we have a spate of reports about Valorant’s VAL 62 error code, with a message that reads, There was an error connecting to the platform. Please restart your game client. This has been going on for years, and there’s no single solution that works for all. It all comes down to the underlying cause!

      As for the causes of Valorant error 62, it’s usually issues with the Internet/network connection, misconfigured firewall settings, missing services, or a corrupt DNS cache to blame.

      Before you start with the solutions, check Valoran’t server status and make sure it’s not down. Also, you can switch to Ethernet if currently on Wi-Fi, and vice versa, to fix Valorant’s Error Code 62 on Xbox, PS5, and PC. For many, connecting to a mobile hotspot did the trick. Besides, restart the router, and if that doesn’t work, reset it, and then check for improvements!

      How can I fix the VAL 62 error in Valorant?

      1. Use a VPN to play Valorant

      The easiest way of bypassing Valorant error 62 is to use an effective VPN solution like ExpressVPN while playing the game. This will allow you to get rid of any localized restrictions blocking access to the game’s servers.

      With ExpressVPN you’ll get fast, reliable, and secure connections, as it runs servers at 163 locations in 105 countries around the world.

      ⇒ Get ExpressVPN

      2. Set the VGC service to run automatically

      1. Press Windows + R to open Run, type services.msc in the text field, and hit Enter.services.msc
      2. Scroll down, right-click on the VGC service, and select Properties.
      3. Choose Automatic from the Startup type dropdown menu, and then click the Start button under Service status if it’s not already running.vgc service to fix valorant error 62
      4. Click on Apply and OK to save the changes.

      One of the common reasons you are getting Valorant Error Code: VAL 62 is that the VGC service is not running. Once you set the service’s startup type to Automatic, Valorant should launch, and you should be able to play the game!

      3. Clear the DNS cache

      1. Press Windows + S to open Search, type Command Prompt in the text field, right-click on the relevant result, and select Run as administrator.
      2. Click Yes in the UAC prompt.
      3. Paste the following command and hit Enter: ipconfig /flushdnsflush DNS to fix valorant error 62
      4. Once done, reboot the computer and check for improvements.

      4. Switch to Google’s DNS

      1. Press Windows + R to open Run, type ncpa.cpl in the text field, and hit Enter.
      2. Right-click on the active network adapter, whether Wi-Fi or Ethernet, and select Properties.properties
      3. Choose Internet Protocol Version 4 (TCP/IPv4) from the list, and click on Properties.
      4. Select the Use the following DNS server addresses and input the following in the fields underneath:
        • Preferred DNS server: 8.8.8.8
        • Alternate DNS server: 8.8.4.4
      5. Tick the Validate settings upon exit checkbox and click OK to save the changes.Google's DNS

      If it’s a DNS-related issue, you can switch to Google’s DNS and resolve things in no time. Or you could even choose the fastest DNS server near you and not compromise on the Internet speed!

      5. Whitelist Valorant and Riot Client in Windows Firewall

      1. Press Windows + S to open the Search menu, type Windows Defender Firewall in the text field, and click on the relevant result.
      2. Choose Allow an app or feature through Windows Defender Firewall from the left pane.firewall
      3. Click the Change settings button.
      4. Now, click on Allow another app at the bottom.all app through firewall
      5. Click the Browse button.
      6. Go to the location where Riot Client’s launcher is stored, select the Riot Client.exe file, and click on Open.add app
      7. Click on Add.
      8. Make sure both the Private and Public checkboxes are ticked for Riot Client.whitelist Riot Client to fix valorant error 62
      9. Similarly, whitelist Valorant in the Windows Defender Firewall.
      10. Finally, click OK to save the changes, reboot the PC, and launch Valorant again.

      Many who faced Valorant error code 62 found out that their firewall blocked the app, Riot Client, from establishing a connection to the game server. It could be due to the strict firewall configuration.

      While I don’t recommend disabling the firewall, you can always whitelist Riot Client and Valorant to get rid of all such issues!

      6. Reinstall Riot Vanguard and the VGC service

      1. Press Windows + R to open Run, type cmd and hit Ctrl + Shift + Enter.
      2. Click Yes in the UAC prompt.
      3. Now, paste the following commands individually and hit Enter after each: sc delete vgc sc delete vgkdelete service
      4. Next, press Windows + R to open Run, type appwiz.cpl and hit Enter.
      5. Select Riot Client from the list of applications, and click Uninstall.uninstall
      6. Follow the on-screen instructions to complete the uninstall process, and then restart the PC.
      7. Finally, reinstall Riot Client from the official website, download Valorant and verify whether Error Code 62 is fixed.

      If things don’t work out after a reinstall, I recommend using an effective uninstaller software to get rid of any leftover files or Registry entries that might be triggering issues.

      7. Use Cloudflare’s Warp app

      Note icon NOTE
      Windows Report is not associated with Cloudflare, but I am recommending the solution since the WARP app has helped many fix the VAL 62 error code in Valorant.

      Though not the most ideal solution, countless users have reported that downloading the WARP app, developed by Cloudflare, and then securing your connection fixes Valorant error 62 on both Windows and macOS.

      All you have to do is download the WARP installer from Cloudflare’s official website > run the setup to install the app > then launch Cloudflare WARP from the system tray > enable the toggle > launch Valorant, and it should now run without throwing any errors.

      WARP
      Cloudflare WARP

      One of these solutions should have helped you with Error Code: VAL 62 on Valorant. If the error persists, I recommend contacting Valorant support, as they will be able to better identify and eliminate the underlying cause.

      Also, while you are here, find out some quick tips to optimize your PC for gaming and get the best performance!

      Which fix worked for you? Share with our readers in the comments section.

      Intel N200 vs Core i5 CPUs: Comparison and Benchmarking

      Intel Core i5-1135G7 and Intel N200 have pretty close tech specs, although N200 is a small form factor CPU created for mini-PCs and portables and i5-1135G7 was designed for laptops. However, if you’re choosing between the Intel N200 and the Intel Core i5 CPU, here is a detailed comparison and benchmarking results to ease your decision.

      What are the differences between Intel N200 and i5-1135G7?

      Intel N200Intel Core i5-1135G7
      Socket Type FCBGA1264BGA1526
      CPU Class Mobile/EmbeddedLaptop
      Clockspeed3.2 GHz2.4 GHz
      Turbo SpeedUp to 3.7 GHzUp to 4.2 GHz
      No of Physical Cores4 (Threads: 4)4 (Threads: 8)
      CacheL1: 384KB, L2: 2.0MB, L3: 6MBL1: 320KB, L2: 5.0MB, L3: 8MB
      TDP6 W15 W
      GPUIntel UHD GraphicsIntel Iris Xe Graphics
      No of Samples1366195
      Single Thread Rating (% diff. to max in group)1923 (-28.4%)2686 (0.0%)
      CPU Mark (% diff. to max in group)5152 (-47.4%)9799 (0.0%)

      1. CPU speed comparison

      1. CPU Cores and Threads: The Intel Core i5-1135G7 has 4 cores with 8 threads, while the Intel N200 has 4 cores with 4 threads.
      2. Base and Turbo Clock Speed: The i5-1135G7 operates at a base speed of 2.4 GHz and can turbo boost to 4.2 GHz. In comparison, the N200 runs at a base speed of 1 GHz and can turbo boost to 3.7 GHz.
      3. Performance in Benchmarks: The i5-1135G7 significantly outperforms the N200 in various performance metrics. For example, in the PassMark benchmark, the i5-1135G7 scores 9799, while the N200 scores 5152.

      Understanding that the Intel i5-1135G7 has higher base and turbo speeds means it can handle more demanding tasks and deliver better performance during intensive applications.

      2. Integrated Graphics performance

      1. GPU Clock Speed: The GPU in the i5-1135G7 operates at a base clock speed of 400 MHz and can boost up to 1300 MHz. The N200’s GPU runs at a base clock speed of 450 MHz and can boost to 750 MHz.
      2. Graphics Units: The i5-1135G7 features Intel Iris Xe Graphics with 80 execution units, compared to the N200’s Intel UHD Graphics with 32 execution units.
      3. Supported Displays: The i5-1135G7 can support up to 4 displays, while the N200 supports up to 3.

      The superior GPU specs of the i5-1135G7, including higher clock speeds and more execution units, make it better suited for graphics-intensive applications and multitasking with multiple displays.

      3. Memory compatibility and performance

      1. Maximum RAM Speed: The i5-1135G7 supports RAM speeds up to 4267 MHz DDR4, while the N200 supports up to 4800 MHz DDR5.
      2. Memory Channels: The i5-1135G7 supports dual-channel memory, compared to the single-channel support in the N200.
      3. Maximum Memory: The i5-1135G7 can handle up to 64GB of RAM, whereas the N200 is capped at 16GB.

      Dual-channel memory support and higher maximum memory capacity in the i5-1135G7 allow for better multitasking and memory-intensive applications, making it more efficient and powerful in handling large datasets or multiple applications simultaneously.

      4. Power consumption and thermal design

      1. Thermal Design Power (TDP): The i5-1135G7 has a TDP of 15W, compared to the N200’s significantly lower TDP of 6W.
      2. CPU Temperature Management: The i5-1135G7 has a maximum operating temperature of 100°C, whereas the N200 can operate up to 105°C.

      The lower TDP of the N200 makes it a better choice for battery-powered devices like tablets or small form-factor PCs where power efficiency and thermal management are crucial. The i5-1135G7’s higher TDP might require more robust cooling solutions but provides higher performance. This is actually the only chapter where N200 surpasses the i5 CPU.

      5. Additional features and capabilities

      1. Instruction Sets and Extensions: The i5-1135G7 supports a wider range of instruction sets including SSE 4.2, AVX, AVX2, and more, while the N200 supports basic instruction sets like SSE 4.1 and AVX.
      2. PCI Express Version: The i5-1135G7 supports PCI Express 4.0, compared to PCI Express 3.0 in the N200.
      3. Security Features: The i5-1135G7 includes enhanced security features like Intel’s vPro technology, which is not available in the N200.

      Advanced instruction sets, support for newer PCI Express versions, and additional security features in the i5-1135G7 enhance its capability to handle advanced computing tasks securely and efficiently.

      By evaluating these key aspects, you can make an informed decision on which processor meets your needs better, whether it’s for high performance or cost efficiency.

      Conclusion

      Intel Core i5-1135G7 is superior in all aspects to Intel N200 except for power consumption. However, all this is understandable because the CPUs are in different classes altogether.

      We hope that our Intel N200 vs Core i5 comparison helped you decide easier which one is better for an overall configuration. You might also be interested in how Snapdragon X Elite and Intel i7 processors compare to each other. We also have an in-depth comparison between Snapdragon X Elite and Apple M4.

      If you’re an AMD user, then don’t miss our guides on Ryzen 5700X vs 5600X and Ryzen 5900X vs 7900X for more information.

      If you have any questions, feel free to write them in the comments below.

      AADL3inscription2026.dz: What is it & Should I Remove it?

      There are many unknown files on our PC, and while some are harmless, others might be malware in disguise. Speaking of which, today we’ll try to find out what is AADL3inscription2024.dz and how it works.

      What is AADL3inscription2024.dz and how to remove it?

      What is AADL3inscription2024.dz?

      Not much is known about AADL3inscription2024.dz. We know that the DZ extension is an archive format and is associated with Dzip software.

      AADL3inscription2024.dz can also be associated with a website in Algeria and its housing program, so if you used any Algerian websites recently, it’s possible you downloaded this file.

      Is AADL3inscription2024.dz dangerous?

      So far, information about this file is extremely scarce, and we can’t confirm if it’s dangerous, however, you can always perform a system scan to check it out.

      To do that follow these steps:

      1. Press Windows key + S and type windows security. Choose Windows Security from the menu.
        Windows Security open Windows key
      2. Go to Virus & threat protection and click on Scan options.
        scan options windows security
      3. Select Custom scan and click on Scan now.
        custom scan windows security
      4. Select the directory in which this file is located and wait for the scan to finish.

      If you use a different software, the process might be different.

      Is AADL3inscription2024.dz needed?

      To determine if this file is needed on your PC, check its location. If it’s located in temporary files or in some obscure folder, it’s probably not needed and you can delete it.

      How can I remove AADL3inscription2024.dz?

      You should be able to remove this file just like any other file, simply by right-clicking it and choosing the Delete option from the context menu.

      The information on AADL3inscription2024.dz is extremely limited, but it can be associated with housing websites in Algeria. If you haven’t used such website and haven’t downloaded anything from it regarding AADL3, then go ahead and remove this file.

      This isn’t the only unusual file type that users reported and we already have great guides on TAG files as well as TAB files that you shouldn’t miss.

      Also, we have a great guide on how to open RTP files, so you might want to check it out as well.

      Mozilla Firefox will be supported on Windows 7, 8, and 8.1, after all

      In an interesting turn of events, Mozilla is apparently bringing back Firefox support for Windows 7, 8, and 8.1. Mozilla has thrown down the gauntlet, challenging Chrome and Edge’s monopoly by providing additional backing for these previous Windows versions. This move is more than just an act for sentimental reasons; it’s about giving a helping hand to those who are not prepared or eager enough yet (for various reasons) to upgrade their OSs significantly.

      A while ago, Mozilla announced that Firefox will no longer be supported on Windows 7, 8, and 8.1. You might wonder why the company is doing this. This is because, even though technology keeps progressing, many users still use Windows 7, 8, and 8.1 happily without any problems.

      So, Mozilla has made a thoughtful decision to help these people out even more—they will keep offering support for Firefox on all three of these platforms (Windows versions) mentioned earlier. The decision was made modernly through an AMA (Ask Me Anything) session on Reddit last month when the Firefox leadership team disclosed their plans to extend aid not just for a longer time but also to offer improved migration options when users decide it is necessary.

      Comment
      byu/AutoModerator from discussion
      infirefox

      We’re planning to extend support for Windows 7 users past the currently planned date and give them better options for migrating to a new PC when they choose to. It does include 8 and 8.1, I should have said that earlier.

      Mozilla employee

      In the bigger picture, this could appear as a tiny action. Yet, for those using older Windows versions, it gives them hope. Now that Google Chrome and Microsoft Edge have decided to no longer support these older operating systems, Firefox is the only browser that provides updates and security fixes, which helps make your browsing experience safer.

      And yet, the inquiry of “how long?” goes unanswered. The Mozilla team has vowed to extend their assistance, but they are taking things one step at a time, waiting for future usage patterns. It’s a smart move, keeping their options open while closely monitoring the landscape.

      The honest answer is that we don’t know right now, but on the surface it makes sense for us to support it while usage is still high there.

      Mozilla employee

      At the start, it may appear like a significant exertion for an audience that is getting smaller. But here’s the twist: by locking in these users’ loyalty, Mozilla doesn’t just keep its current user base intact and sets up Firefox as a caring and user-centric option among other browsers. This is a typical example of choosing quality instead of quantity, emphasizing user needs and not merely chasing numbers.

      So, if you still have Windows 7, 8, or 8.1 and are not prepared yet to completely part ways with them, don’t worry. Firefox is here for your support.

      This Dell Inspiron 15 makes for an excellent back-to-school laptop, and it’s just $300

      Did you know about the Dell Inspiron 15 laptop deal? It seems like a back-to-school present for students from the universe, cutting its price to $300 instead of $450. That’s good – a big reduction of $150! Now, you may be thinking, “What’s the catch?” Well, there isn’t one. It’s just a sweet deal ready for you to grab.

      Why should you care about this deal? First and foremost, the Inspiron 15 laptop is not an ordinary one. It has an AMD Ryzen 5 7520U CPU and integrated Radeon Graphics. Simply put, this laptop is designed to handle your academic tasks without difficulty. Moreover, it is very roomy inside with 8GB of RAM, a large 512GB for keeping your tasks and work, and an extensive media collection.

      The laptop has a 15.6-inch IPS FHD display, giving clear and vibrant visuals for your binge-watching or late-night study sessions. Its peak brightness makes it ideal for indoor use; however, the anti-glare coating is an added benefit that will help lessen eye strain when staring at screens over extended periods.

      This laptop has a mix of USB-C and A, HDMI, and an SD card slot for ports. It is very flexible for your devices and accessories. Also, it has a stylish Carbon Black look that will catch your attention in the classroom or when working at your preferred coffee place.

      So, if you’re looking for a trustworthy and budget-friendly student laptop, this Dell Inspiron 15 deal cannot be ignored. Keep in mind that opportunities like these are not always available, so it might be wise to take action quickly. You never know—the time could be just right for finding yourself a great companion on all your academic adventures and more.

      You can get it from here. But if you’re looking for something more suited for desktop setup, you might want to check out this LG monitor, now at a huge discount.

      Microsoft Rewards points can soon be spent in Overwatch 2, presumably for rare items

      Overwatch 2 fans out there, we have some good news: if you’re also part of the Microsoft Rewards program, expect something special soon. Since Microsoft took over Activision Blizzard in October 2023, much talk has been about how this big merger could affect the gaming world. Now, those who have been busy collecting their Microsoft Rewards points might be able to spend them well in the game.

      The Microsoft Bing Dev X account recently shared a post that caused speculation. It suggests there could be something very significant for Overwatch 2 players who are also members of the Microsoft Rewards program.

      Although we don’t have full information, the guessing game grows wilder than ever. Are we talking about special in-game items, cosmetics, or something else? It’s a mystery that only time will unfold, but one thing is certain: the moment to begin saving those points if you haven’t been doing so has arrived.
      However, there is also a twist: while we wait for more news, there’s a rumor that Amazon Prime Gaming and Blizzard could end their special agreement about Overwatch 2 content. The Overwatch Cavalry X account said Amazon has chosen not to renew many promotions, such as those for skins in Overwatch 2, so Constable Tracer skin might become the final one under this deal.

      It may be possible that Microsoft is coming in to take Amazon’s place, as they have hinted at a Rewards program for Overwatch 2. Though we can only guess what this program will offer, the enthusiasm is clear. Could this be the dawn of a new era for Overwatch 2 rewards? Speaking of the dawn of a new era, Microsoft Rewards will soon introduce notes as a new way to let those enlisted in the program know all the changes and improvements coming to it.

      Whether you are a dedicated follower of Overwatch 2 or enjoy gathering Microsoft Rewards points, there seems to be much to anticipate. Now, what do you believe this big surprise will be? So, let’s cross our fingers and save up those points for what’s next in Overwatch 2.