FIX: Skype translator is not working

If you constantly Skype your family, friends, colleagues, or clients overseas, you would know how helpless it feels when Skype translator is not working.

Skype translator stopped working for many users in November 2019, when Microsoft broke the news of them discontinuing the Translator bot. However, Microsoft revamped it and brought it back better than ever.

When the translate function first appeared on the stage in 2015, it was a standalone application, but Microsoft integrated it into Skype the next year, making it now a built-in feature. If the Skype translator is not working in 2020 for you, here’s what to do.


How do I fix the Skype translator if it doesn’t work?

1. Refresh Skype

  1. Sign out of your Skype client and Quit the application.
  2. Reboot your PC after signing out of Skype.
  3. When the computer boots successfully, re-launch the Skype client.
  4. Sign in to your Skype application now and retry the translator function.

If the Skype Translator is not working still, then your next course of action should be to rebuild your Skype client. If it doesn’t , continue to the next solution.


2. Rebuild Skype

rebuild skype translator not working 2020

  1. Uninstall the Skype client from your computer.
    • Do that by navigating to Start > Settings > Apps > Apps & Features.
  2. From the list, click on Skype and select
  3. Open the Run dialog box by pressing the Start button and R.
  4. Next, in the Run dialog box, enter the following string: %appdata% and press Enter.
  5. From the directory you are taken, look for the Skype folder and rename it to Skype_old.
    • If the Skype folder is missing from the list, skip this step.
  6. Next, restart your machine.
  7. Finally, download the latest version of Skype from its website and re-install the client on your computer to check if Skype translator is not working still.

Tired of Skype issues? Check out this article for some great alternative tools


3. Set up Skype Translator correctly

  1. Open the Skype client and navigate to Chats.
  2. Right-click on a contact head and select View profile.
    • You could also click on the contact to open the chat window and then click on their profile.
  3. Next, enable the translation function by clicking on Send translation request.
    • Also, configure the languages and other translation settings.send translation request if skype translation is not working
  4. Skype will now send a translation request to this contact.
  5. The user at the other end will have to accept this request to use Translated Conversations.
  6. If the other party accepts your translation request, you will be able to translate your messages to your chosen language.

With the improved Skype translator, you no longer need to add the Translator bot as a member of your chats whenever you discuss business with your overseas clients. When Skype translator is not working in 2020, the function disappears entirely.

Other times, it only works for specific languages or only one participant, but it’s nothing serious. You can fix this issue by refreshing Skype or rebuilding it entirely.

By following these methods, you should be able to get rid of any Skype translator-related issues that you may be having.

let us know which methods worked best for you by leaving us a message in the comments section below.


[wl_navigator]

FIX: The custom error module does not recognize this error

Some users have discussed a custom error module does not recognize this error on Microsoft’s support forum. That error arises for some users when they try to log in to, or open, the Outlook web app within a browser.

In one forum post, a user said:

I am trying to sign in to: https://outlook.live.com/mail/inbox, but get the following error message: The custom error module does not recognize this error.

If the same thing happens when you try to log in to the Outlook web app, check out some of these resolutions.


How do I fix the custom error module in Outlook?

1. Is the Outlook.com service down?

It might be the case that the Outlook.com service is down for a maintenance period. To check, open Microsoft’s service page in a browser. That shows users a current status for Microsoft services.

If that page doesn’t display a green tick for the Outlook.com service, then you might need to wait a bit for that service to get up and running again.

Microsoft service page custom error module does not recognize this error


2. Delete corrupted Outlook cookies

The custom error module does not recognize this error is often due to corrupted browser cookies.

  1. To fix that in Chrome, open the Outlook mail URL the issue arises for in a browser (or your Microsoft account login page).
  2. Then click the View site information padlock button at the left of the URL bar.
    View site information menu custom error module does not recognize this error
  3. Select the Cookies option.
  4. Delete live.com, microsoft.com, login.live.com, and support.microsoft.com by selecting them and pressing the Remove button.
    Cookies in use window custom error module does not recognize this error
  5. Thereafter, restart Google Chrome.

You can delete Outlook cookies in browsers like Opera and Mozilla Firefox much the same. Open the Outlook.com URL in those browsers. Click the information buttons on the left of their URL bars.

Then select to delete all the Outlook cookies in the Cookies in use windows.


Tired of Outlook issues? Check out this guide for some great software alternatives.


3. Delete cookies in Edge

If the custom error module does not recognize this error arises in Edge, however, you’ll need to clear all the browser’s cookie data.

  1. To do that in Edge, click the browser’s Settings and more button.
  2. Then click Settings to open a General sidebar.
    General sidebar custom error module does not recognize this error
  3. Select the Privacy and Security tab.
  4. Click the Choose what to clear button.
    Clear browsing data options
  5. Select the Cookies and saved website data option.
  6. In addition, select the Cached data and files check box.
  7. Click the Clear button.

4. Open Outlook in an alternative browser

As the custom error module does not recognize this error is often a browser cookie issue, try opening Outlook.mail in an alternative browser to the one you’re utilizing.

The issue often arises within Chrome and Opera. You might find that you can sign in to Outlook.com ok with the likes of Edge or Firefox.

Bing search engine custom error module does not recognize this error
Those are a few of the confirmed resolutions that have fixed the custom error module does not recognize error for some users. This error usually pertains to browser cookies.

So, clearing browsers’ data or resetting them are probable fixes.


The Program Used to Create This Object is Outlook [Fix]

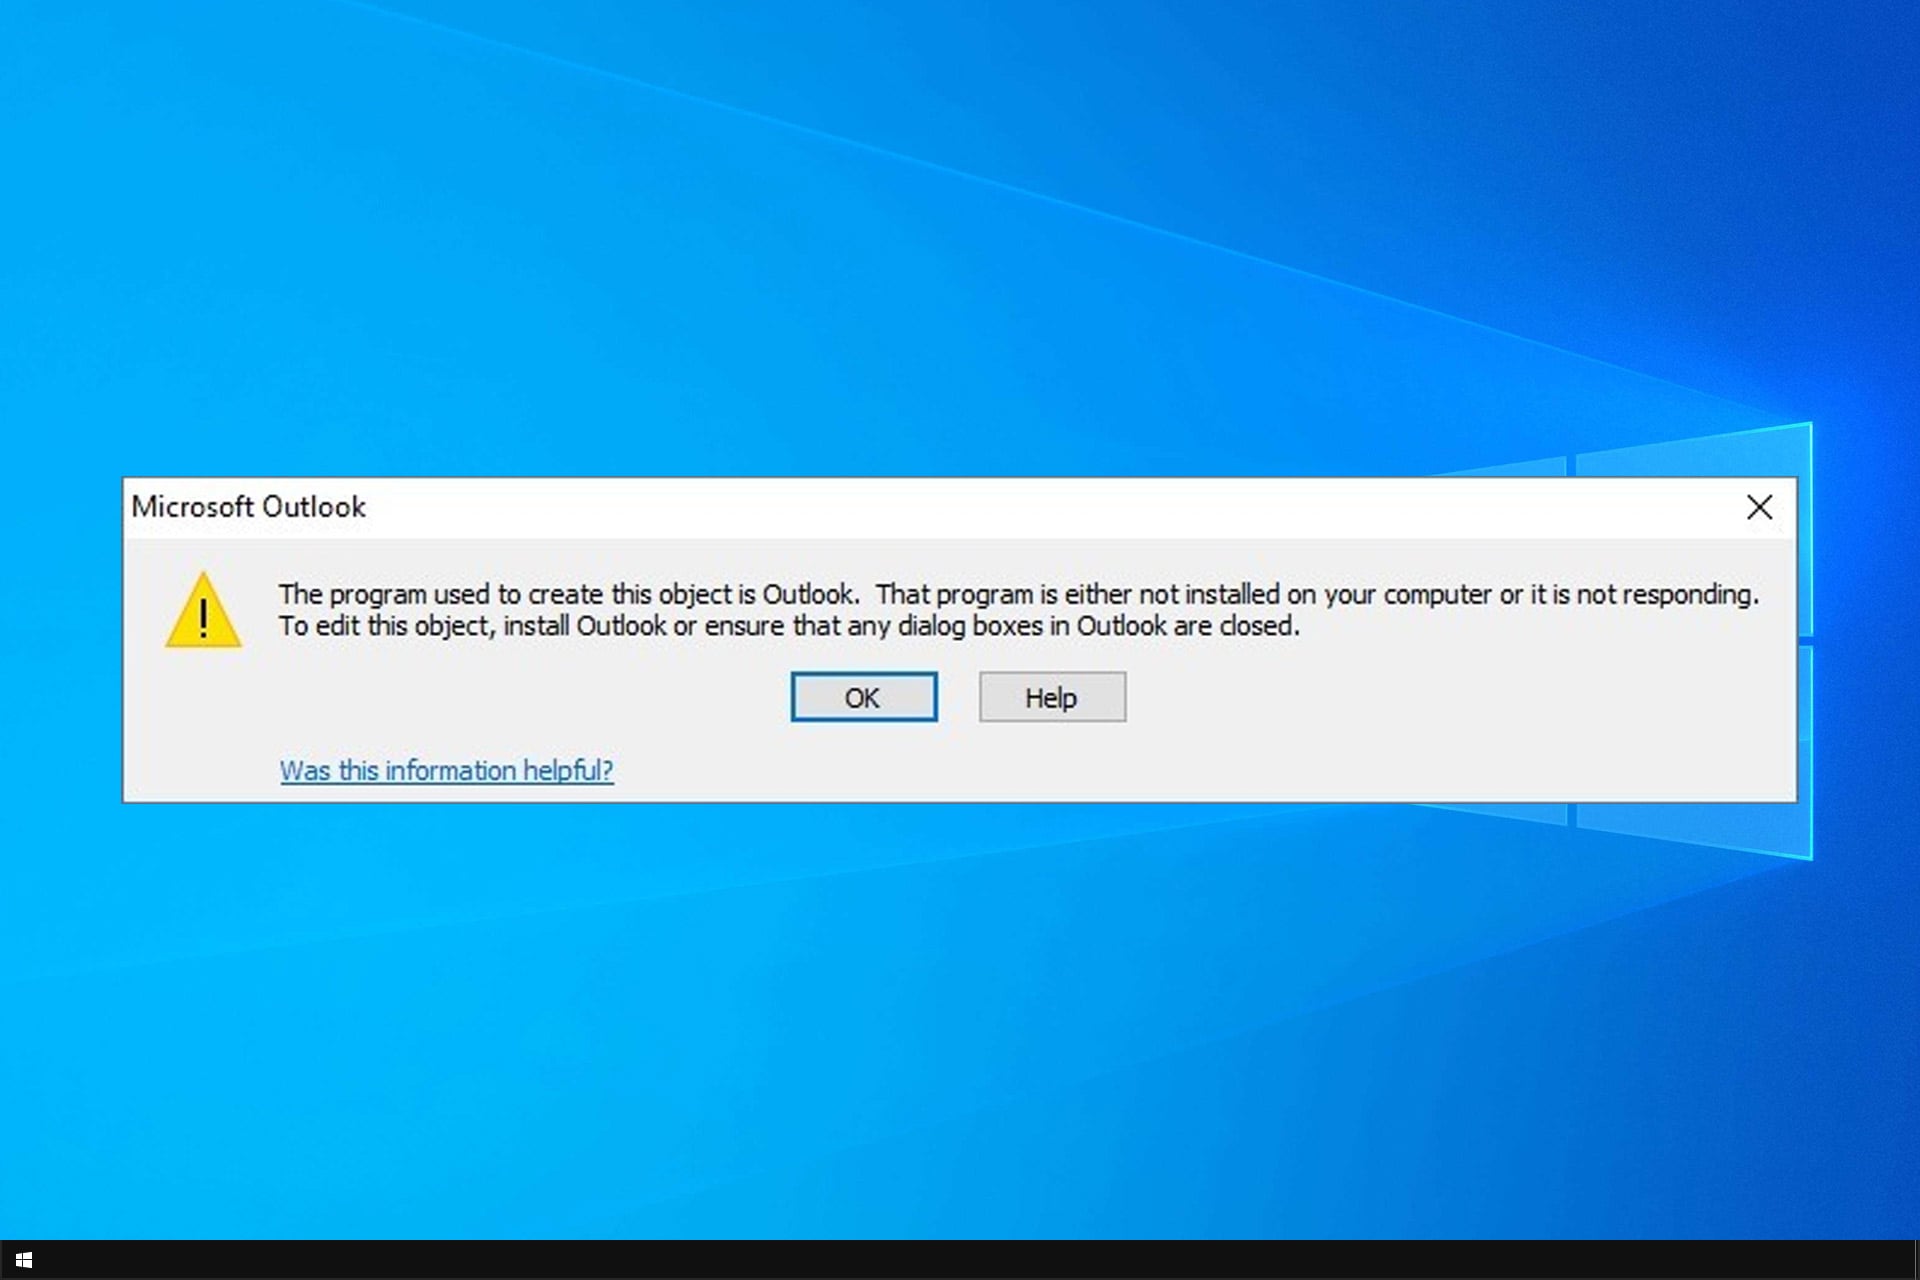
Numerous users have posted on Microsoft’s forum about a The program used to create this object is Outlook, that program is not installed on your computer error message.

As a consequence, users can’t open the attachments. This isn’t the only issue, and many reported that Outlook is not attaching files, so these two errors can be related.

Luckily, there’s a way to fix it, and today we’re going to show you how to do it.

Why am I getting The program used to create this object is Outlook?

  • The email message format isn’t correctly set, and it’s causing the issue.
  • You don’t have the latest Outlook or Windows update installed.
  • In some rare instances, a specific Windows update can cause this issue.

How do I fix the program used to create this object is Outlook?

1. Change the email message format to plain text

  1. First, try changing Outlook’s email message format to plain text. Select Outlook’s File tab.
  2. Click Options on the File tab.
  3. Click Mail on the left of the Outlook Options window.
  4. Select Plain Text on the Compose messages in this format drop-down menu.
    Outlook Options window the program used to create this object is outlook Outlook
  5. Click the OK button.

2. Uninstall Windows updates

  1. Press the Windows key + R hotkey to open Run.
  2. Then input appwiz.cpl in the Open box and click OK to open the uninstaller.
  3. Click View installed updates to open a list of installed updates.
  4. You can remove updates listed there by selecting them and clicking Uninstall.The Windows update list the program used to create this object is outlook
  5. Restart Windows after uninstalling updates.

According to users, the following updates can cause the problem: KB3203467, KB3191932, KB3191938, KB3203467, and KB3191898.

3. Update Outlook

  1. Microsoft has updated Outlook to fix the program used to create this object is Outlook error.
  2. Click Office Account on the left of Outlook’s window.
  3. Click the Update Options to open a drop-down menu.
    Update Options button the program used to create this object is outlook
  4. Then click the Update Now option.

Alternatively, you can manually download the specific patch updates for Outlook that fix the program used to create this object error. Microsoft released four patch updates to fix the issue for the various Outlook versions.

4. Check for Windows updates

  1. Updating Windows might also fix the issue. Press the Windows key + S hotkey.
  2. Input updates to search for the Windows Update tab in Settings.
  3. Click Check for updates to open the Windows Update tab.
  4. Press the Check for updates button.
    Check for updates button the program used to create this object is outlook
  5. Restart Windows when you’ve installed available updates.

These are the confirmed fixes for the program used to create this object is Outlook error. In addition to those fixes, try forwarding the emails that include the attachments to your own email address. Then open the attachments from the forwarded emails.

We hope that this guide helped you fix your problem. Unfortunately, there are other errors you can encounter, one of them being drag and drop attachments not working in Outlook.

Did you find a different solution for this problem? If so, share it with us in the comments section below.

How to fix Netflix errors 10002, 112, and 0013

Netflix errors 10002, 112, and 0013 are similar issues that can arise for users when trying to watch Flix content. Those errors typically arise for users utilizing Netflix with Apple or Android streaming devices.

Users usually need to refresh data on their streaming devices to fix those errors.


How do I fix Netflix errors 10002, 112, and 0013?

1. Restart your router and streaming device

  1. First, try restarting your streaming device along with an Internet router.
    • Turn off the streaming device, and unplug it if it’s plugged in.
  2. If you’re utilizing a streaming device with TV, turn off and unplug the TV.
  3. Power off your router.
  4. Unplug your router for about one minute.
    A router netflix error 10002, 112, 0013
  5. Plug the router back in, and turn it on.
  6. Plug the TV back in if required, and turn it back on.
  7. Wait for about five minutes, and then try streaming Netflix content again.

2. Sign out of Netflix on all devices

  1. Some users might be able to fix errors 112, 10002, and 0013 by signing out of Netflix.
    • To sign out of Netflix on all your devices, open Netflix.com in a web browser.
  2. Click the profile button at the top right of the Netflix browser tab.
  3. Select Account to open further options.
    The Account link netflix error 10002, 112, 0013
  4. Scroll down to Settings, and click the Sign out of all devices link there.
    Sign out of all devices link netflix error 10002, 112, 0013
  5. Click the Sign Out button shown directly below.
  6. Wait for a few hours. Then sign back into Netflix on the device the issue arises for.

3. Reinstall the Netflix app

Android device

  1. Reinstalling the Netflix app is among the more probable fixes for the 10002, 112, and 0013 errors.
    • To reinstall the Netflix Android app, open Google Play on the mobile.
  2. Enter Netflix in the search bar of Google Play.
  3. Tap the Netflix app to open its page.
  4. Tap the Uninstall option.
  5. Select OK to confirm.
  6. Then return to the Netflix app page, and tap Install to reinstall it.

The Netflix page netflix error 10002, 112, 0013

Apple device

  1. On an Apple mobile, tap and hold the Netflix app to shake it.
  2. When the Netflix app starts to shake, tap the X at the bottom left of its icon.
  3. Select the Delete option.
  4. To reinstall the app, open the Netflix page in the App Store.
  5. Tap the Free button, and select the Install option.
  6. Select the Use Existing Apple ID option if you’re not signed in.

4. Give your Wi-Fi signal a boost

  1. If connected with Wi-Fi, try boosting your Wi-Fi signal.
    • One way you can do that is by moving the router to a central and open position in the room.
  2. Place your router in an elevated position.
    • For example, place it on a high shelve or desk.
      A router netflix error 10002, 112, 0013
  3. Make sure that your router’s firmware fully updates.
    • You can update your router’s firmware via its browser settings page.
  4. Keep the router away from wireless devices.

5. Clear the Netflix app’s data

  1. Users can also try clearing their Netflix apps’ data on Android mobiles.
    • To do that, tap Settings in Android.
  2. Next, tap Apps to open an app list.
    Settings in Android netflix error 10002, 112, 0013
  3. Select the Netflix app listed.
  4. Tap Storage to open data and cache options.
    Clear data button netflix error 10002, 112, 0013
  5. Select the Clear Data option.

So, the resolutions for Netflix errors 10002, 112, and 0013 are usually straightforward. Reinstalling the apps, signing out of Netflix, and simply restarting streaming devices and routers can often resolve the issue.

If you still need further potential fixes, however, click Start Live Chat on the Netflix Help Center page.


[wl_navigator]

How to restore Kodi when your library is currently empty

Kodi is one of the best media centers for Windows, and other platforms, with which users can organize and open all their media.

A lot of Kodi users install builds, which are basically pre-configured Kodi setups that come with their own themes, add-ons, and even electronic program guides. Some builds give Kodi a very different look and feel.

However, Kodi might revert to its default Estuary skin for some users when they start the software, which displays a your library is currently empty message. Kodi goes back to its original default state with an empty library when that happens.

In such circumstances, users who installed builds need to restore them.

The Estuary skin kodi your library is currently empty

If you’re new to Kodi, note that the your library is currently empty message is not a software error. Some new users might expect Kodi to automatically scan for media content in their folders when they first launch it.

However, Kodi doesn’t automatically scan for media files. Thus, new users need to manually add their media content within the media center’s default Estuary skin.

The Media sources page on the Kodi wiki provides details for how users can add media sources.


How can I restore Kodi when my library is empty?

1. Select the skin that holds your build

  1. If, however, you need to get a Kodi build back, there’s a quick way you can restore it.
    • Click the cog button at the top of Kodi’s left sidebar.
  2. Click Interface to open the options shown directly below.
    Interface options kodi your library is currently empty
  3. Click Skin to open a window from which you can select numerous skins.
    Skin window kodi your library is currently empty
  4. Select the skin that houses your Kodi build.
  5. Click Yes on the dialog box that asks, Would you like to keep this change?

2. Reinstall the Kodi build

Kodi build kodi your library is currently empty

However, some users might still need to reinstall their builds if Kodi has been completely wiped clean. Thus, you’ll need to start from scratch by turning on the Unknown sources setting so that you can install the third-party build.

Then add the build’s source link via Kodi’s file manager, and select to install the package from the zip file.


3. Back up Kodi

  1. Users who keep backups can restore their Kodi configurations whenever they need to.
    • To back up Kodi, select Add-ons.
  2. Select Download > Install from repository > All repositories to open a list of repositories as in the snapshot directly below.
    The All repositories list kodi your library is currently empty
  3. Select Program add-ons to open the add-ons shown directly below.
  4. Click the Backup add-on to open options for it.
  5. Click the Install button.
  6. If a Select version window opens, select the Kodi Add-on repository option to download.
  7. Select Add-ons > Program add-ons on the sidebar.
  8. Then select the Backup add-on listed.
    The Backup - Mode kodi your library is currently empty
  9. Click the Open Settings option.
  10. Click the Remote Dir button.
    Settings - Backup window kodi your library is currently empty
  11. Select Browse Remote Path > External storage, and then choose a folder path to save backup.
  12. Click the File Selection tab.
  13. Select all the options there to ensure you back up everything for your build.
  14. Click the OK button.
  15. Click OK again to close the Backup add-on.
  16. Open the Backup add-on again.
  17. Press the Backup button.

Note that the above guidelines are for Kodi‘s Estuary skin. What you need to click on to install the Backup add-on might be a little different for a third-party build skin.

Nevertheless, when you’ve saved a backup with that add-on, you can restore your Kodi build setup when needed.

To restore it, open the Backup add-on in Kodi, click Open Settings, click Browse Remote Path, and select the folder that includes the backup. After closing Backup, open the add-on again and click its Restore option.


As a conclusion, it is recommended that you keep a Kodi back up to ensure you can always restore your build. When you don’t have a Kodi backup, try selecting the skin for the build as outlined for the first resolution.

If Kodi gets completely wiped clean, however, you should have kept a backup as you’ll need to reinstall the build!


[wl_navigator]

FIX: Failed to install dependency error on Kodi

If you’ve been a long-time fan of Kodi media player, you must have encountered the Failed to install dependency error message at least once, because this is a very common problem.

One of the best things about the Kodi media player is that it uses third-party add one precisely to offer all that content, from all around the world.

If add-ons and their dependencies fail to install – hence the Failed to install dependency error – you can’t get the desired content.

So in this article, we’ll try to cover several ways to fix this error or to force-install dependencies.


How do I fix Kodi failing to install dependencies?

1.Clear Kodi Cacheclear kodi cache

For Windows / Mac / Linux, it is recommended to clear cache via a dedicated add-on such as Ares Wizard. If you’ve been using Kodi for some time, you surely heard of Ares Wizard as the ideal tool to keep Kodi streaming smoothly.

The tool includes a maintenance option that allows you to delete thumbnails, delete packages, and delete cache/temporary files. You can download the .zip file from here or just install it directly from your Kodi using as file source the URL https://areswizard.co.uk/.

For Adroid devices, open Settings >Apps > Kodi > Clear Cache > click and confirm.

For smart TV/ Fire TV Stick, go to Settings > Applications > Manage Installed Applications > Kodi > Clear Cache.


2. Force-install dependency from log filesinstall kodi dependency

  1. Open the Settings menu.
  2. Go to System Settings > Logging.
  3. From the right menu select Show event log. There you should see exactly what dependency failed to install.
  4. Click on it > click on the Install button.

This might do the trick and separately install the dependency and then allow you to install the add-on.

Alternatively, you can Google-search the dependency and you’ll most likely find the .zip file online (on GitHub). Download it, then install it from the .zip file on your device.


3. Remove the Kodi database

  1. Open the Settings menu.
  2. Go to File manager > Profile Directory.
  3. Double click on Database.
  4. Find Addon27.db > righ-click and select Delete > Yes.

Then close Kodi and relaunch it. You will have to re-enable your add-ons from Add-ons > My add-ons and reactivate the ones you find there.

Also, try again to install the add-on you initially wanted to get. If you’re still having problems, let’s move on to the next solution.


4. Install TVAddons Repositoryinstall kodi add-ons

  1. Open the Settings menu.
  2. Go to File manager > Add source.
  3. Click on <None> and insert the URL https://fusion.tvaddons.co, give a name to this source, then click OK.
  4. Then, from the home screen, go to Add-ons > clock on the box icon > Install from zip file.
  5. Look for your source and click on it > select kodi-repos > english > repository.xbmchug-3.0.0.zip.
  6. Repeat step 5 for both files in the kodi-scrips source.

Afterward, go back and try to install the add-ons that you wanted.


5. Uninstall and re-install Kodi appunsintall kodi app

This is just as a last resort, but most likely there’s no need for you to go this far because the problem should have been fixed by now.

If, however, you are here, the Kodi application can be uninstalled from the Settings and Applications/Apps menu of any device, desktops included. Then you can download the web version or the app that you find in the Play Store/ App Store.


If you have any other suggestions on how to fix the Failed to install dependency on Kodi, please drop us a line in the comments section below.


[wl_navigator]

Instagram: An unknown network error has occurred [Fixed]

If you use Instagram daily you might experience Instagram unknown network error occurred. Truth be told you have nothing to worry about.

This error usually comes up as a result of poor internet reception or an outdated Instagram application version and affects only Instagram mobile apps.

Follow the methods shown in this article to quickly resolve this Instagram common error, and start making use of your app once more.


How to fix Instagram unknown network error has occurred

1.Restart your Instagram session fix-instagram-network-error-open-instagram

  1. Logout of Instagram and restart your mobile device
  2. Launch your Instagram application when your device is done restarting.
  3. Type in your correct login credentials.instagram-unknown-network-error-login-instgram
  4. When you login checks to see if the problem still exists.

The very first method you use when trying to resolve Instagram unknown network error occurred, is by starting a new login session.


2. Clear Data & Cache to fix Instagram unknown network error

Most times, cache files saved on the  Instagram application will cause this error, in this scenario, the best way to solve this error is by clearing Instagram cache files.

On Android

  1. Navigate to Settings, then Applications,
  2. Check for the Instagram app, and tap on it.
  3. A few options will display, select the Clear Cache button.
  4. This simple action clears the Instagram cache for android.
  5. Now open Instagram again, and Log in into your account.

On iPhone

  1. Open Settings on your iPhone.
  2. Under  Settings scroll down to General and click to open.Instagram-unknown-network-error-code-occurred-delete-cache
  3. Next click on iPhone Storage.fix-instagram-unknown-network-error-delete-cache-&-data
  4. In the iPhone Storage you will find all apps currently installed on the device.
  5. Scroll down till you see the Instagram app.instgram-unknown-network-error-iphone-storage
  6. when you seel the Instagram application, tap on that, and choose the Delete option.fix-Instagram-unknown-network-error-delete-cache
  7. Reinstall the app from iOS App Store, you will find all of the cache and junk files have been removed.

Loggin into the Instagram app, and check if you still get Instagram unknown network error occurred.


3. Check the date & time of the device

When the time and date aren’t set properly, you will experience the Instagram unknown network error occurred issue, on your Instagram application.

  1. Open Settings on your device and verify the Date & Time option that has been set.Instagram-unknown-network-error-occurred-verify-date-&-time
  2. Set Date & Time choice to automatic so it’s in line with your current timezone, and remember to save your choice.Fix-Instagram-unknown-network-error-occurred-set-timezone-automatic

4. Check Network Connection

  1. The quick fix would be to log in using another internet connection.
    • In other words Change your internet connection.
  2. If you are using a wifi network, switch off your internet router, and restart after 10 minutes.
  3. After the restart, go to your Instagram app and input your username and password to log in.

In most cases, this error will occur as a result of poor network coverage. If you have a slow or short network coverage then there’s the prospect that you just can find yourself facing this issue.

You know the error is resolved when you are logged in successfully, and no longer get Instagram unknown network error occurred.


5.Update the app to stop Instagram unknown network errorInstagram-unknown-network-error-occurred-update-instgram

On your mobile device open App Store for IOS device, and open Play Store if you make use of an Android device.

  1. Type Instagram in the search bar.
  2. The Instagram icon will display click on it to expand.
  3. Look to the right to find the update button and click it to update your application.
  4. When the app is done updating, open it, and log in with your correct Instagram credentials.

The methods in this article will definitely fix Instagram’s unknown network error. If you have any questions whatsoever, feel free to leave comments below.

Praventure the methods don’t fix the Instagram error,  then this may be too much for you to handle. You should reach out to Instagram support in this case.


[wl_navigator]

How to fix Tinder error 40303

Tinder error 40303 is its way of saying that you’ve been banned from the platform. This error normally comes when you violate Tinder‘s Terms and Conditions while using the app. However, it could be purely done in error.

In this article, we’ll discuss the reasons for this error, how to avoid Tinder bans, and what you can do to get back your Tinder account.


How do I fix Tinder error 40303?

1. Appeal to Tinder support

contact-support-tinder-error-40303

Send an email to [email protected]. If you remember the reason for the ban, explain what happened and why you think you were banned. In your appeal, it’s helpful to give as much detail as possible on the events around your account getting banned and the Tinder error 40303.

Tinder‘s support will reply to your email with useful insights into your problem. If you’re fortunate, they’ll realize that the ban was made in error, and they’ll reactivate your account.

Otherwise, Tinder will only tell you the cause of the Tinder error 40303. In this case, you have to create a new Tinder profile.


2. Create a new Tinder profile

Unfortunately, most times, appealing your case to Tinder doesn’t fix the issue. When you get a Tinder error 40303, you’ll most likely make a new account. But first, try as much as possible to avoid using the exact information from the banned account.

On your new Tinder profile, try to avoid violating Tinder‘s Terms and Conditions. You wouldn’t want to get the Tinder error 40303. If you do, and you get reported up to four times, you risk getting the ban once again.


Tips to avoid the Tinder error 40303

tinder-safety-tips-tinder-error-40303

  • Don’t harass other users.
  • Avoid sending private NSFW media.
  • Never threaten anyone.
  • Don’t reset your Tinder account.
  • No discussion about scams, politics, or similar sensitive topics.
  • Never make hate speech on the platform.

Visit the Tinder Safety page to find out the complete Tinder terms of use.


The majority of users who get the Tinder error 40303 are people who were reported multiple times by other users due to their conduct. If your account was blocked in error, then you have a chance of getting your profile back.

However, if you really are guilty of the reports, you’d most likely not recover your account. But it’s worth giving it a go.


[wl_navigator]

How to enable browser pop-ups

Pop-ups are windows that suddenly open while browsing, and they usually show all sorts of unwanted ads. However, few websites actually use pop-ups for non-advertising purposes.

If you need to enable pop-ups in your browser, in today’s article we’ll show you how to do that, so let’s get started.

How do I enable browser pop-ups?

1. Opera One

  1. Click the Opera menu and choose Settings.
    • Alternatively, use Alt + P
  2. Navigate to Site Settings > Pop-ups and redirects.
    pop-ups and redirects opera browser enable pop ups
  3. Check Allowed to allow all popups or click the Add button and choose on which websites you want to allow pop-ups.
    allow pop-ups opera browser enable pop ups

In addition to blocking pop-ups, Opera One will also block ads thanks to the built-in adblocker. The browser also has tracking protection so it will block tracking scripts and cookies.

A built-in VPN is also available, and it’s completely free while offering unlimited bandwidth. As for additional features, there’s built-in AI and a modular AI-ready design for other AI’s integration.

The browser is light on your resources, and it should handle any website with ease, so you might want to consider trying Opera One out.

Opera One

Look at websites with better control over pop-ups by using one of the world’s fastest and most efficient web browsers.
Free Download Visit website

2. Chrome

  1. Click on the Menu icon and select Settings.
  2. In the Privacy and security section select Site settings.
  3. Now click on Pop-ups and redirects.
  4. Make sure that pop-ups are set to Allowed.

You can also allow pop-ups only from a specific site by doing the following:

  1. In the address bar click on the Pop-up blocked
  2. Click the link for the pop-up you want to display.
  3. Now select Always allow pop-ups and redirects from (site name).

3. Firefox

  1. Click the Menu icon and select Options.
  2. In the left pane, navigate to Privacy & Security. In the left pane, uncheck Block pop-up windows option.
    block pop-up windows browser enable pop ups

Alternatively, you can click the Exceptions button and allow pop-ups from only specific websites.

4. Edge

For older versions of Edge:

  1. Click the Menu icon and choose Settings.
  2. Go to Privacy & security and disable Block pop-ups option.
    block pop-ups edge browser enable pop ups

For newer versions of Edge:

  1. Click the Menu icon and select Settings.
  2. Go to Site Settings > Pop-ups and redirects.
  3. Now allow popups or add exclusions for certain websites.

Pop-ups can be a problem on certain websites, but sometimes you need to enable them in order for a website to work properly. If you found this guide useful, let us know in the comments section.

How to use PowerPoint’s Presenter Coach in a few easy steps

PowerPoint is one of the best presentation applications. With it, you can set up great slideshow presentations. You can also utilize PowerPoint’s web apps without the MS Office software suite installed.

In 2019, Microsoft introduced a Presenter Coach feature for the PowerPoint web app. That’s a utility which enables you to rehearse your PowerPoint presentations before presenting them.

When you’ve recorded a presentation’s narrative, the Presenter Coach provides a rehearsal report.


How can I use the PowerPoint Presenter Coach?

1. Set up an MS account and log in

  1. You’ll need a Microsoft account to utilize the PowerPoint web app. Open the Microsoft account page to set up an MS account.Office.com page How to use PowerPoint Presenter Coach
  2. Then sign in to your MS account.
  3. Open the Office.com page in Edge, Google Chrome, or Firefox. Make sure you’re utilizing an updated browser version.

2. Open the Presenter Coach Preview

  1. Click PowerPoint to open that web app.
  2. Click Upload and open to select a presentation to open in PowerPoint. Press the Open button.
  3. Alternatively, you can set up a new presentation with the PowerPoint web app by clicking New blank presentation or a template.
  4. When you have a final slideshow open in PowerPoint, click the Slide Show tab shown directly below.
    The Rehearse with Coach button How to use PowerPoint Presenter Coach
  5. Click the Rehearse with Coach button.
  6. Thereafter, a Welcome to PowerPoint Presenter Coach preview will open as in the snapshot directly below.

Start Rehearing button How to use PowerPoint Presenter Coach3. Rehearsing the presentation

  1. Click the Start Rehearing button.
    • Thereafter, a microphone pause button at the bottom right of the presentation preview highlights that the mic is recording.
  2. Start speaking to record some narrative for the presentation.
    • At the bottom left of the preview, there’s a small toolbar with left and right arrows on it.
    • Click the right and left arrows to flick through the slides in the presentation.
      Presenter Coach toolbar How to use PowerPoint Presenter Coach
  3. Click the pen button on the toolbar to open annotation options.
    • Then you can select Pen to add some text annotation notes.
      The annotation options How to use PowerPoint Presenter Coach
  4. Click Highlighter to add highlights to the presentation.

4. The Rehearsal Report

  1. When you’ve finished the presentation rehearsal, press the Esc keyboard key.
    • Thereafter, the Your Rehearsal Report (Preview) window will open.
      Rehearsal Report window How to use PowerPoint Presenter Coach
  2. The summary report provides suggestions for pace, originality, pitch, and fillers.
    • You can click Learn more links to open a Suggestions from Presenter Coach page that provides further details.
  3. You can click Rehearse Again to do another rehearsal.
  4. Click the X button at the top right of the report window to close it.

5. Enable the microphone for apps

Microphone options How to use PowerPoint Presenter Coach

If you can’t record anything for the presentation rehearsal, your microphone might be disabled for apps.

To enable a microphone, press the Windows key + S hotkey. Enter microphone in the search box, and click Microphone privacy settings. Then toggle the Allow apps to access your microphone option on. In addition, turn on the Allow desktop apps to access your microphone setting.


Overall, PowerPoint’s Presenter Coach is a handy and straightforward utility. With it, you can rehearse your PowerPoint slideshows to give better presentations.

If you found this guide helpful don’t hesitate to share your experience with us by using the comment section below.


[wl_navigator]

What is 5xx server error on Instagram [Explained & Fixed]

Sometimes, like any other Internet service, Instagram can be down, and users who open the app get an error saying Couldn’t refresh feed on the app and 5xx Server Error if you check it on a browser.

This outage can happen pretty often, but it doesn’t take too long until the servers get up and running again. This is normally a general problem that’s not peculiar to a single user.

Before going on to fix the 5xx server error, let’s first have a better understanding of the issue.

What is a 5xx server error on Instagram?

The 5xx server error on Instagram comes up when the app has a problem that the server knows about.

Mostly, the problem can arise from an over-congested server, a network error, a problem with the webserver, or an error executing HTTP requests. Either way, this guide applies to both scenarios.

These errors are of twelve types, and the error messages range from a 500 server error to a 511 server error.

Although all 5xx server error codes point to similar server problems, the numbers give you an insight into the problem with the server.

The various 5xx server errors on Instagram include the following:

  • 500 Internal Server Error
  • 501 Not Implemented
  • 502 Bad Gateway
  • 503 service unavailable
  • 504 Gateway Timeout
  • 505 HTTP Version Not Supported
  • 506 Variant Also Negotiates
  • 507 Insufficient Storage
  • 508 Loop Detected
  • 509 Bandwidth Limit Exceeded
  • 510 Not Extended
  • 511 Network Authentication Required

The most common 5xx server errors are the 501, 502, and 503. You now know the various 5xx server errors on Instagram and their causes. Next, we’ll look at the troubleshooting solutions for this issue.

How do I fix the 5xx server error on Instagram?

1. Wait for the Instagram technicians to solve the problem

As one of the most popular social media platforms, Instagram‘s servers must be online 24/7.

However, thanks to server/network challenges, the unexpected can happen. If Instagram encounters a serious issue, it will be taken down briefly for maintenance.

This also applies when the platform needs updating. If Instagram is offline due to maintenance or a glitch, and a user attempts to access the app, they are likely going to get this dreaded error.

The 503 error code indicates that the admins are currently fixing an issue with or upgrading the servers.

Unfortunately, if you are this user, and you are shown the error, you cannot do anything to fix it yourself except wait on the admins of the platform’s server.

The reason for this is that the issue does not originate from your setup – your app, device, or Internet connection. However, if you hate waiting, you can do some tweaking to fix any general issues.

2. Log in and out of your account

  1. Go to your account and click on Profile.
  2. Click on the icon with three lines and select Settings.
  3. Select Log out.
  4. Log in again into your account.

If there is a blockage caused by your account login, this might solve the problem so you can try it out.

3. Update or reinstall Instagram

Whether you’re using the mobile app or the Windows 10 app, make sure you have the latest version installed.

For the mobile version check the Google Play Store and Appstore and for Windows 10, you can get the app from the Microsoft Store.

You can also try to uninstall and reinstall the app on your mobile or PC. This might refresh and unlock the potential blockage.

4. Check your connection

If the error is 5xx, you shouldn’t be bothering with any connection problems from your side.

But just in case, you may reset your network connection and, if you’re on a mobile, try to disable your Wi-Fi connection so you can switch to mobile data.

By a long shot, if the problem is from your side, this might get you through and connect to Instagram.

You also have another way of troubleshooting your connection and that is by installing a network monitoring app for your PC or mobile.

We hope this guide answers your question of What is a 5xx server error on Instagram? You’ve probably faced the 5xx server error on Instagram if you make use of the platform.

As we’ve discussed in this article, these error codes originate from the server-side, and so you cannot do anything about it but wait until the problem is resolved.

If you have any suggestions or you experienced this problem before, tell us your story in a comment on the dedicated section below.

Windows 10 Slack app updates with increased security for all web content

The official Slack app updated to Version 4.6.0 this past week on Windows 10 devices. This latest app update features a rather significant change with the activation of app sandboxing for all web content which means that accessing online content within the app will now be a lot more secure than before.

Also included within this update is the added option for a save location for downloads and the usual bug fixes and improvements.

Here’s the full release notes:

What’s New

  • Batten the hatches! The app sandbox is now enabled for all web content. This is a fancy way of saying we’ve dialed up the security of the app. It wasn’t unsafe before, but it’s double safe now.
  • A preference that allows you to choose a unique save location per download, instead of choosing a folder for all of them. For the choosy types.

Bug Fixes

  • Your notifications should be tidily grouped by workspace when shown in the Action Center.
  • A tricky case where some users were unable to get to the browser to add their first workspace.
  • The Launch on login preference showing the wrong value, when the app was installed from the MSI package.
  • If you found yourself, in some distant past, trying to start a song on Spotify with your keyboard’s play button, and it did not respond to your command while Slack was front and center, pesky hardware media keys were the problem. And this version is the cure.
  • The app should be less spicy to your CPU when you’re viewing certain network error pages.
  • When a download completes, we’ll show an in-app prompt rather than a bothersome system notification.

Slack is a popular collaboration and communication tool for individuals and businesses though it’s recently been faced with stiff competition from Microsoft Teams. Which service do you prefer? Let us know in the comments below and then follow us on Pinterest and Twitter for more Windows app news.

Slack
Slack
Price:
Free

FIX: Couldn’t format the selected partition error 0x8004242d

Error 0x8004242d is one that arises when users try to format drive partitions with Windows installation media. Users are trying to install, or reinstall, Windows platforms when that error arises.

For example, some users might be trying to upgrade from Windows 7 to 10. The full error message states: Failed to format the selected partition. (Error 0x8004242d). As a consequence, users can’t format the drive partition and install the platform.


How can I fix error 0x8004242d?

1. Convert a dynamic disk to basic disk

  1. Some users might need to convert their drives to basic disks to fix error 0x8004242d. To do that, first back up the dynamic disk volumes you need to convert to basic (you’re going to delete them).
  2. Press the Windows key + R hotkey that opens Run.
  3. Enter diskmgmt.msc in Run’s Open box, and click the OK option.
    Disk Management Failed to Format the Selected Partition (Error 0x8004242d)
  4. The Disk Management window shows you if volumes are basic or dynamic in the Type column. Right-click each dynamic volume there and select Delete Volume.
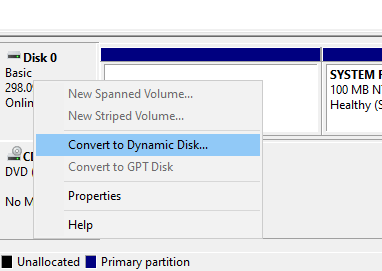
  5. Then right-click the disk drive and select Convert to Basic Disk.
    Convert to Dynamic Disk option Failed to Format the Selected Partition (Error 0x8004242d)

Users can also convert dynamic disks to basic disk with drive partition software without data loss. However, few freeware drive partition versions include their dynamic to basic disk conversion features. Nevertheless, you might be able to find some freeware drive partition software that do enable users to convert dynamic disks to basic.


2. Clean the drive with Diskpart

  1. Cleaning the drive with Diskpart can resolve error 0x8004242d (but also erases drive data). To do that, open the Command Prompt by entering cmd in Run and pressing the Ctrl + Alt + Enter hotkey.
  2. Users can open the Command Prompt from the Windows Setup window by clicking Repair your computer > Troubleshoot > Command Prompt.
  3. Input diskpart in the Command Prompt, and press the Return key.
    Diskpart utility Failed to Format the Selected Partition (Error 0x8004242d)
  4. Enter list disk in the Prompt and press Return to display a list of disks.
    List disk command Failed to Format the Selected Partition (Error 0x8004242d)
  5. Input select disk x (replace the x with an actual disk number) into the Command Prompt, and press the Enter key. Make sure you select the right disk drive as cleaning it will erase its data.
  6. Enter clean all in the Prompt, and press the Return key.

3. Disable UEFI boot support

Error 0x8004242d can also arise when UEFI Boot Support is enabled on systems that support both legacy BIOS and UEFI boot modes. To fix that, you’ll need to press BIOS Setup key (such as F2, F4, F6, etc) just after turning on your desktop or laptop. Select the Boot tab when you’re in the BIOS settings. Then select a UEFI/BIOS Boot Mode option to select Legacy (BIOS) instead of UEFI.

BIOS settings Failed to Format the Selected Partition (Error 0x8004242d)

Those are a few of the confirmed methods for fixing the error 0x8004242d partition error. Do be careful with resolutions one and two as both will erase selected disk or volume data.

[wl_navigator]

Fix: HBO Now /HBO Go not working [TV, Chrome, Roku]

HBO Now and Go offers one of the largest catalogs of popular TV shows and movies on the go. However, at times the service may stop working. Several users have reported the HBO Now not working on TV, Chrome, and Roku devices.

The service can stop working due to several reasons, including incorrect login details, issues with your internet connection or streaming device, or glitches in the app.

In this article, we have listed a couple of troubleshooting tips to help you resolve the HBO Now not working issue on your streaming devices.


What to do if HBO Now or HBO Go stops working?

1. Force Close the app

For Android TV

HBO Now Not Working

  1. From the home screen, scroll down and open Settings.
  2. Select Apps.
  3. Select the HBO Go app from the list.
  4. Press the Force Stop button to close the application.
  5. Relaunch the HBO Go app and check for any improvements.

For Apple TV

HBO Now Not Working

  1. Press the home button on your remote twice.
  2. Highlight the HBO Go app and swipe up to close.
  3. Relaunch the app from the home screen.

For Roku TV

HBO Now Not Working

  1. Press the home button on your Roku remote to close the application.
  2. Relaunch the HBO Go app from the channel list.

Clear Chrome browser cache

HBO Now Not Working

  1. Click the menu icon (…) and select Settings.
  2. Open the Privacy and security.
  3. Click on Clear browsing data.
  4. Open the Advanced tab.
  5. For the Time range, select the Last 24 hours.
  6. Check all the items that you want to clear, including Cookies and other site data.
  7. Click the Clear data button.
  8. Relaunch Google Chrome and check if the issue is resolved.

Additionally, try accessing HBO using any other web browser. If the service works fine when using other browsers, try reinstalling Chrome to see if that helps you resolve the issue.

2. Perform a power cycle

HBO GO Not Working

  1. Power off your TV and other streaming devices like Roku.
  2. Unplug the cables connected to the TV and the power outlet.
  3. Leave the devices unplugged for a few minutes.
  4. Reconnect the required cables and connect your streaming device to the TV.
  5. Power on the devices and check if the HBO Now service is working.

Check for internet issues

HBO GO Not Working

  1. Check if your Internet connection is stable. Streaming HBO content requires a fast and stable internet connection.
  2. You can use a third-party internet speed testing tool to check the internet speed.
  3. If the issue persists, turn off your Modem and WiFi router.
  4. Pull the power cord from the wall outlet.
  5. After a few seconds, power on your Modem.
  6. Try connecting your streaming device to the network and streaming HBO Go app.

3. Reinstall HBO Go app

For Android TV

HBO GO Not Working

  1. From the home screen, launch Google Play Store.
  2. Click the menu icon in the top-left corner and choose My Apps and Games.
  3. Select the HBO Go app from the list and select Uninstall. Select OK to confirm.
  4. Return to the Google Play Store home screen and search for HBO Go or HBO Now app.
  5. Select Install and wait for the installation to complete.
  6. Launch the app and check if the error is resolved.

For Roku TV

HBO GO Not Working

  1. From the home screen, highlight HBO Go.
  2. Press the Star * button on your Roku TV remote.
  3. Select Remove Channel and then select OK to confirm.
  4. To reinstall, search for HBO Go and select Add Channel.

The HBO Now/Go Not working issue can occur due to internet issues, app glitches as well as device issues. Follow the steps provided in the article one by one to fix the problem.

If you have any tips that helped you resolve the issue, leave it in the comments below.

Got the HBO Go too many devices error? Fix it in a few steps

When HBO Go says too many devices are using your profile simultaneously, it doesn’t mean that the service doesn’t support multiple devices. However, only a limited number of devices can stream at once from a single account.

You could only stream from one device at a time, but the limit is now increased to two. When you connect a third device, HBO Go‘s too many devices error pops up. Here, we will show you just what to do when you can’t stream because of this error.


How do I fix the HBO Go too many devices error?

1. Stop streaming on the other devices

  1. On a web browser, visit the HBO Go website on hbogo.com.
  2. Next, hit the Sign In button on the menu bar of the web page.
  3. Choose your TV provider now.choose-tv-provider-hbo-go-too-many-devices
  4. Now, log in with your TV provider’s credentials.
  5. When you successfully log in, go to your Profile page.
    • On a PC, the Profile icon is at the top right area of the screen.
    • On a mobile, select the Profile icon, and then tap the Settings icon in the upper right area.
  6. After getting into your Profile page, click on Manage Devices to view all the computers, mobiles, tablets, and other devices that you have signed in with recently.
  7. You can now sort the devices by their Last Used time.
  8. Since HBO Go says too many devices simultaneously, what you need to do now is to stop streaming from any of these devices.

2. Use sub-accounts from your TV provider

The first solution above is the proper procedure to take in order to reduce the number of simultaneous streams from your account.

Now, there may be no device to disconnect if they’re all really in use. Also, when you switch from device to device, you can get the HBO GO too many devices issue, whether or not you disconnect one.

In this case, where you cannot disconnect devices, a walkaround that lets everyone enjoy streaming simultaneously is by using sub-accounts. Some TV providers allow your users to create accounts under yours.

These accounts have their own usernames and passwords, and this is wonderful. It’s great because, with these secondary accounts, everyone can stream HBO Go without it warning you of too many devices connected.

To get started with this solution, you first need to get in touch with your TV provider via this link to see if they let you create and use secondary accounts on HBO Go.

contact-tv-provider-hbo-go-too-many-devices

If HBO Go says too many devices are streaming simultaneously, it’s clear that you’ve reached the limit. Hence, troubleshooting this error is quite straightforward – simply stop streaming on one or more devices.


However, if you absolutely need to stream on all three or more devices, this guide has also shown you how to do that. Hopefully, you have fixed the HBO Go too many devices problem. If not, let us know in the comments below.


[wl_navigator]

HBO Go not letting you sign in? Fix is easily in 5 steps

A lot of users complain HBO GO is not letting me sign in. The usual solution is to attempt to sign in with credentials for your TV provider. They should also be quite happy to help you reset your login.

Refreshing the HBO Go web page from which you are getting the HBO Go authentication problems. If this quick fix fails to resolve the issue, then follow the steps in the solutions below.


How do I fix HBO Go not letting me sign in?

1. Hard refresh your browser

hbo-go-not-letting-me-sign-in-refresh-web-browser
As hinted earlier, a refresh could repair the problem when HBO Go won’t let you sign in. However, refreshing, in this case, is not merely hitting the Refresh button.

Browsers typically let you perform hard reloads using different key combinations. On most browsers, you can do a hard refresh by holding down the CTRL key while hitting Refresh.


2. Log in with the website of your TV provider

  1. TV providers obviously have different websites. If you are not sure of that of your TV provider, you go perform a quick Google search. When you find it, head over there.
  2. Look for the Sign in button on the site. It’s usually on the home page.
  3. Click on the Sign-in button and enter your username and password. The credentials you use here should be those of your TV provider.

You should be able to sign in here. If it doesn’t work, then contact your TV provider to reset your password or continue to the second solution below.


3. Update your web browser

update-browser-hbo-go-not-letting-me-sign-in
The next step in troubleshooting the issue when HBO Go is not letting you sign in is to update the internet browser you’re using. A quick way of getting this done is to perform a Google search.

Visit Google and type in the search field the name of your web browser and the word update. Most browsers would also provide easy ways to update the application via the website settings page.

Once you update your browser, it is advisable to restart your computer before retrying HBO Go. If HBO Go was not letting you sign in due to an outdated browser, then the issue would be resolved.


4. Clear your browser cookies and cache

clear-cache-cookies-hbo-go-not-letting-me-sign-in
Chrome:

  1. Click on the more options button (three dots) at the top right of your browser page to reveal a dropdown menu.
  2. Next, go to More tools > Clear browsing data.
  3. Here, mark the Cookies and other site data checkbox and select the period range.
  4. Finally, hit the Clear data button.

Firefox:

  1. First, click on the Settings button in the top right-hand corner of the Firefox page.
  2. Next, select the Library.
  3. Click on History.
  4. Next, click Clear Recent History, and a new popup window will launch.
  5. From the popup, choose the date range and mark the Cookies box.
  6. Finally, click on Clear Now.

Safari:

  1. Select the Safari option on the menu. You can find that besides the Apple icon.
  2. Next, simply click on Clear History.
  3. Select the date range that you want to clear.
  4. Finally, click Clear History.

Microsoft Edge:

  1. Click on Settings in the top right-hand area of the window and then select Settings from the resulting list.
  2. Next, navigate to the Clear browsing data area and click on Choose what to clear.
  3. Make sure that you check the Cookies and saved website data option.
  4. Hit the Clear button.

5. Try logging in with a different browser

use-another-browser-hbo-go-not-letting-me-sign-in
Users who complained about HBO Go authentication problems have also resolved the challenge by switching browsers. Now, we don’t recommend that you try logging in to HBP Go using any random browser.

The latest versions of the following browsers are recommended for using HBO Go hitch-free:

  • Opera
  • Google Chrome.
  • Mozilla Firefox.
  • Microsoft Edge.
  • Safari (version 10 and above).
  • Internet Explorer 11 (only on Windows 10 computers).

Note: For more information about HBO Go’s web browser requirements, you should check out this guide.


Apart from the recommended browsers, HBO Go may not let you sign in if your internet speed is slower than 5.0 Mbps. The above solutions are recommended by the company for solving HBO Go authentication problems.

You no longer have to worry about HBO Go not letting you sign in if you follow these steps closely. However, if all fail, you can reach out to HBO Go and submit a request.

If these still not working, we recommend Disney+. It relies on technology developed by Disney Streaming Services a technology subsidiary of The Walt Disney Company. Here you can watch original Disney movies and shows.
⇒ Get Disney+


[wl_navigator]

Cricut that can not read sensor marks? Fix it easily

If you get an error saying that Cricut can not read sensor marks, you probably set your machine to Print then Cut. When in this mode, Cricut looks for the cut sensor marks to be able to cut your design correctly.

We will begin the troubleshooting by listing general tips that can fix the problem. If the fixes do not work, you can then continue to the next section, where we configure the Cricut to only print without cutting.

How do I fix Cricut not reading sensor marks? (reasons included)

1. Troubleshooting the Cricut cannot read sensor marks error

general troubleshooting for cricut not reading sensor marks
  1. Ensure that you place the cutting mat under the guides before loading or unloading Cricut. Also, a cutting mat with blots can cause the Cricut cannot to read sensor marks in errors.
  2. Change the print material. Patterned or colored materials may not print correctly or bring up the error.
  3. Light bulbs, sunlight, and other natural and artificial lighting sources can interfere with the sensors of your Circuit machine. Place Cricut away from direct lighting.
  4. The correct way to place the printable materials is in the upper right-hand corner of the mat. Also, ensure that you place it without any wrinkles.
  5. Adjust the size of your image so that the height is less than 6.75 inches and not more than 9.25 inches.
  6. If the sensor light is not dirty, clean it with a dry paintbrush.
  7. Set your paper size to Letter and unselect Shrink to Fit and Fit Page.

Since we know that the Print and Cut mode is the cause of this error, we fix it by changing the image’s line type to the Cut Linetype. We begin troubleshooting, the Circuit cannot read sensor marks by changing this Linetype.

2. How do you just cut and not print on Cricut?

change the linetype to fix cricut cannot read sensor marks
  1. Select your Cricut type by clicking on the dropdown menu in the top right-hand corner.
  2. Import the design or image to Canvas.
  3. Next, click the Linetype
  4. Chose the Cut This will make your uploaded design to adjust to match the selected Linetype.

You will be asked to insert the correct tool when you send the design to Cricut. After changing the Linetype, retry and see if you still get the Cricut cannot read sensor marks error.

The Cricut Explore features a mode called Print then Cut. This feature lets you carve out a design or image you printed from your home printer.

When Cricut can not read sensor marks around the image, the Print then Cut feature is usually the culprit. The guide on this page will walk you through the repair process and help you get your Cricut back up and running.

AOL Email Not Showing Images: 4 Ways to Enable Them

With AOL email not showing images, it is easy to miss important messages and not identify the sender quickly. It either happens to specific contacts or all your contacts.

This isn’t the only issue, and many reported that AOL Mail won’t open PDF attachments at all. All these problems can cause issues and prevent you from using your email properly.

Fixing this issue is easier than you think, and in today’s guide we’re going to show you the best ways to do it.

Why are my emails not showing images?

  • Your email might be configured not to show images at all.
  • Images might have been sent as attachments.
  • Issues with browser cache or other browser-related problems.

How do I view photos in AOL Mail when they are not showing?

1. Determine the scope of the issue

If AOL is not displaying images from specific contacts.

  1. Open an email from the contact form whom AOL images are not showing.
  2. Find and click the link labeled, Don’t block images.
  3. Save changes.

AOL email images are not showing for all contacts.

  1. Log in to AOL email at mail.aol.com.
  2. Hit Settings.
  3. Select Options and navigate to the General
  4. Uncheck hide images in the mail from unknown persons.
  5. Hit Apply.

2. Check the attachments

  1. If the images were not embedded but sent as attachments, then you might not be able to view it online with the email.
  2. Download attachments first to your computer
  3. Then open it with your local image viewer/editor.

3. Clear browser cache

How to clear browser cache in Chrome

  1. In Chrome, click the more options icon (three dots) on the top right-hand corner.
  2. Click on More tools and select Clear browsing data.
  3. Next, set the period. To clear all-time data, choose All time
  4. Finally, uncheck irrelevant boxes but check the Cookies and other site data and Cached images and files

  5. Hit the Clear data button to delete the cache and fix AOL , not displaying images.

How to clear browser cache in Microsoft Edge

  1. In Microsoft Edge, open History and select Clear browsing data.
  2. Select data you want to clear and click on Clear now.
  3. Confirm that you want to clear the data.

How to clear browser cache in Firefox

  1. Open Properties.
  2. Go to Privacy & Security and click on Clear Data.
  3. Select the data you want to clear, and click on Clear.

After clearing the cache, refresh the email and confirm if AOL images not showing still. If removing the browser cache fails, our next move will be to reset the web settings.

4. Reset web settings

How to reset web settings on Chrome

  1. Open Chrome.
  2. Next, click the more options icon and select Settings.
  3. Scroll down and hit Advanced.
  4. Navigate to the Reset and Cleanup section and click Reset settings to their original defaults.
  5. Then, hit Reset settings.

How to reset web settings on Firefox

  1. Open Firefox and go to the Troubleshooting Information page here: About and then Support.
  2. Finally, click on the big Refresh Firefox button and hit Finish.
  3. After that, Firefox will be reset to the default.

How to reset web settings in Microsoft Edge

  1. Go to Settings page.
  2. Select Reset settings.
  3. Select Restore settings to their default values.

As mentioned earlier, AOL not displaying images could be as a result of several issues, ranging from blocked senders, AOL settings, to web and internet configuration.

To learn more about AOL mail, we have a guide on AOL Mail not syncing, and we encourage you to check it out.

Feel free to leave a comment if AOL email is still not showing images after following these guides.

Wasteland 2: Director’s Cut is now an Xbox Play Anywhere game

Wasteland 2: Director’s Cut, the post-apocalyptic RPG from inXile Entertainment has received support for Xbox Play Anywhere this week. This means that you can purchase the game once and play it on both Xbox One and PC, and your saves and achievements will also be shared across both platforms.

Previously, the PC version of Wasteland 2: Director’s Cut on the Microsoft Store didn’t support Xbox Live achievements and Xbox Live cloud saves. If you’ve been playing this version of the game on your PC, you’ll need to install the new Xbox Play Anywhere version which will prompt you to import your saves at launch. You can get more details about transitioning to this new Xbox Play Anywhere version of the game on this FAQ.

Wasteland 2: Director’s Cut is currently priced at $29.99 on the Microsoft Store, but you can play it for free with Xbox Game Pass. If you haven’t played it yet, now is a good time to check it out ahead of the release of Wasteland 3 on August 28, 2020. This upcoming sequel won’t support Xbox Play Anywhere, but it will be available on Xbox Game Pass for Console and PC on day one.

Getting the printer error 123? Here’s how to fix it fast

Windows error codes give out clues about the origin of the problem, and the printer error 123 indicates the presence of misconfigured, corrupt, or damaged Windows files. The cause of the corrupt files can be a broken printer installation or an incomplete uninstall of a printer or its software.

To fix the printer error 123 code, you must bear in mind that the files can corrupt the Windows registry and file system. Hence, the solutions on this page will be centered on finding and eliminating corruption in the Windows system.

How do I fix the printer error code 123?

1. Restore the computer manually

  1. Restart your computer and log into Windows as an Administrator.
  2. When Windows loads, press the Start button and enter system restore.
  3. Click on Create a restore point to open the System Properties window.
  4. Next, navigate to the System Protection
  5. From the list under Protection Settings, select your system drive, and hit Configure.
  6. Select Turn on system protection next and save the settings by clicking Apply.

The above steps configure system restore and automatically creates a restore point. Next, we will proceed to how to perform the actual system restore.

  1. Still, on the System Protection tab, click System Restore and hit Next.
  2. Select the restore point you just created.
  3. Click Scan for affected programs to be sure of the programs that you might lose to the system restore.
  4. Close the window, and lastly, click Next and Finish to save.

2. Disable startup processes

  1. Press Start and search for MSConfig.
  2. Next, choose the Selective Startup under the General tab.
  3. Next, check the Clear the Load Startup
  4. On the Services tab, check the Hide all Microsoft services box at the bottom.
  5.  To the left, click Disable all and hit OK to save and close the window.
  6. Restart your computer.

3. Clean up your disk

  1. Search for disk cleanup on the Start menu and select the Disk Cleanup utility when suggested.
  2. Mark the checkboxes of the items you can spare to delete and hit OK.
  3. On clicking OK, a window will pop up on your screen asking if you are sure you want to delete the items you selected. Click Yes to confirm the operation.
  4. Next, close the window.

4. Scan the computer with Microsoft Security Essentialsscan with microsoft essentials to fix printer error 123

  1. Search for Microsoft security essentials on the Start menu and open it.
  2. In Microsoft Security Essentials, check the Full box.
  3. Hit Scan Now to begin the scanning.
  4. On completion of the scan, close Microsoft Security Essentials.

After completing these steps, try to print again and see if you still get the printer error 123.


5. Check for system disk corruption with the CHKDSK utilitychkdsk utility to clear printer error 123

  1. Search for cmd in the Start menu and select Command Prompt.
  2. In the command prompt, input chkdsk /f and hit Enter to trigger the CHKDSK utility.

This check scans for hard drive corruption. If it detects issues, then it would be easier to troubleshoot the printer error 123.


To recap, we have seen that corrupt files are the culprits of the printer error 123. These corrupt files are usually residues of deleted/uninstalled hardware and software, as well as damaged installations.

Solving printer error 123 could be a little complicated for non-technical users. However, if you follow the step-by-step solutions on this page, you will clear this error in no time.

Update your drivers, scan your hard drive for corrupt sectors, disable autorun processes, or perform a system restore. If anything here is unclear, do not hesitate to leave a comment and let us know. We love hearing from you.

[wl_navigator]

Seeing the Canon Printer error 1003? Follow These 3 Steps

If you keep getting an error saying printer error 1003: No paper, even when you have paper loaded in the printer, then read this guide. The error you get most likely means that you are attempting to carry out a print job on a printer with dirty pinch rollers.

Basic troubleshooting steps for this error involve cleaning the dirty components with cotton and isopropyl alcohol; this usually solves the problem but not always.

After cleaning the components thoroughly, restart the printer and retry the printing. If you still get the printer error 1003: No Paper error, then this two-part guide will help you fix it.

How do I fix the Canon printer error 1003?

1. Update your printer drivers

The error might be caused by outdated printer drivers and a proper update can fix this issue. We recommend using a third-party program that performs this action automatically and safely.

An automated tool such as Fortect Driver Updater will securely install the best printer driver version available. It can detect your hardware, thus removing the risks that may come with installing a mismatched driver.

The software is very easy to use. Just let it scan your PC or pick the specific driver you want to scan, then allow it to download and install the best corresponding driver version.

⇒ Get Fortect Driver Updater

2. Run the printer troubleshooter

  1. Press the Start button and search for troubleshooting.
  2. Click on Troubleshoot Settings to open a new window.
  3. Here, under Get up and running, click Printer and hit Run the troubleshooter.
  4. From here, follow the instructions presented on the wizard to troubleshoot the printer.

3. Re-install driver in compatibility modeinstall driver in compatibility mode to repair printer error 1003

  1. Find the installation file for the printer. It will be an executable file (.exe).
  2. Next thing to do after you find it is to right-click on this EXE file and select Properties.
  3. When the Properties bar opens, switch to the Compatibility
  4. Mark the checkbox labeled Run this program in compatibility mode for and then select a different Windows version, preferably Windows 7.
  5. Click OK to save the settings.
  6. Launch the installer now by double-clicking on the executable file.

4. Drain the power

Finally, if all of these solutions fail to clear the printer error 1003, then disconnect the power cable. Next, press and hold the Power On button for around 20 seconds while the printer is off to drain out the power completely.

This solution may not work on the first try, but a lot of people have succeeded after carrying out these steps three times.

The printer error 1003 is most likely caused by a mechanical problem, but you cannot rule out software issues also. To clear this error, begin by cleaning the pinch rollers and blowing out particles from the internals.

If those fail, then head over to your computer and run the printer troubleshooter. Another method that fixes the printer error 1003 is to completely re-install the printer on your PC in compatibility mode.

Is Cricut not cutting your materials? Fix it in 6 easy steps

If your Cirut machine is not cutting through your material or the Circuit is not cutting at all, you can repair it with some simple troubleshooting. So many times, you attempt to use Cricut for a design, but the machine completely messes it up.

A lot of users have had the challenge of Cricut not cutting through the material, so we will explore the solutions for this problem here. Let us go through troubleshooting tips for when Cricut is not cutting or when it does not cut all the way through.

How do I fix my Cricut not cutting correctly?

1. General troubleshooting tips

  1. Ensure that the blade depth is deep enough to cut cardstock. In most cases, five is perfect.
  2. Increase the pressure to the highest setting.
  3. Make use of a Circut brand blade.
  4. Remove the blade and reinsert it the correct way – the cone point end should not be the side sticking out.
  5. The material you intend to cut must match the one you selected in the material setting.
  6. Try using a different web browser.
  7. Clean the mat to remove debris and create some clearance in the front and back of the machine.

The tips above are the general troubleshooting steps to take when you notice that Circut is not cutting correctly.

If you attempt 1 to 7, and the machine is still malfunctioning, then proceed to the specific solutions that follow.

2. Install the green/gold assembly into the cutting arms correctly

install the green/gold assembly into the cutting arms if cricut is not cutting

Always insert the green/gold assembly in the middle groove area. Users mistakenly put it in the lower groove area, and this can be why the Cricut is not cutting.

If you install the assembly correctly, there will be no space between the bottom of the machine and the blade.

3. Determine why Cricut is not cutting using an assembly test

assembly test to fix cricut not cutting all the way through
  1. Remove the blade and reinsert it slowly.
  2. While reinserting the blade, check how it enters. Make sure that the blade goes in naturally.
  3. If the blade is not inserted correctly, it would look like it does not fit or stick while going in.

4. Check blade height setting

check blade height settings when cricut is not cutting

Without additional external testing, you can confirm if the blade extends out of the green/gold blade assembly. If it does, then you need to adjust the blade height settings.

It is tough to estimate the correct height. So, change the blade height to around 6 (1 mm) and adjust it from there.

5. Determine why Cricut is not cutting using an arm buoyancy test

  1. Turn on the machine and flick the assembly arm gently.
  2. When flicking the assembly arm, see if it is bouncy or only goes up and down.
  3. Also, confirm that there were no obstructions when the arm is pushed down.

6. Adjust the sizes

  1. Increase the image size and retry.
  2. If there are texts, increase the font size and try again.adjusting font size can solve cricut not cutting
  3. Bolden the font.
  4. If you can afford to, delete the section of the design.

Images and texts may be too small to cut. Changing the size of the fonts and images can fix this issue of Cricut not cutting.

Several factors can be the reason for Cricut not cutting all the way through, and we have explored the solutions. Begin the troubleshooting with the tips in the first section, as these are sufficient for most cases.

What is HDCP and how to fix the HDCP error on HBO Go?

Before troubleshooting HDCP error on HBO Go, it is essential to understand what HDCP is. HDCP (High-brandwidth Digital Content Protection) protects digital HBO’s HD content from unauthorized duplication.

For HDCP to work, your TV, drivers, cable, and adapters must be HDCP compliant. If not, you will get the HDCP error on HBO Go. Here, we will explore this and other solutions to tackle this error.


How do I fix HDCP error on HBO Go?

1. Confirm that your setup is HDCP compliant


Before troubleshooting the HDCP error on HBO Go, you must know that the error can arise if your HBO Go setup is not HDCP compliant. Non-HDCP compliant gear will not only show the HDCP error on HBO Go, but the following will happen also:

  • You will be limited to viewing only content in standard definition.
  • You may get only audio or video if a standard definition video is unavailable.

How do I tell if my setup is HDCP compliant?

Generally, newer HDMI and DVI cables are HDCP compliant. The same goes for new models of HDTVs. However, older televisions, HDMI, DVI, VGA, and similar cables would probably not be HDCP compliant.

If your setup is alright, but you still get the HDCP error on HBO Go, then proceed with the troubleshooting steps that follow.


2. Update your internet browser

An out-of-date browser can cause the HDCP error on HBO Go. Different browsers have their unique updating steps, but they are all similar. For this solution, we will be updating the Google Chrome browser.

  1. Launch the Google Chrome browser on your computer.
  2. Next, click on the More icon, which is an ellipse at the top right-hand corner of the Chrome window.
  3. From the options, go to Help >  About Google Chrome.
  4. The first section of this page is where the updating happens. If your browser is up to date, you will see a blue tick and some text saying Google Chrome is up to date.update-chrome-HDCP-error-hbo-go
  5. Otherwise, if your browser needs updating, the text there becomes Update Google Chrome. Also, you will see an arrow beside this text. A green arrow indicates that the update has been available for more than a day.
  6. Finally, click on Update Google Chrome, and the process commences.

On successful completion of the Google Chrome updating, the browser will restart. Now, try HBO Go once again and see if you still get the HDCP error.

3. Disable/remove internet browser addons and plugins

Here also, we’ll only go through the steps of disabling or removing addons and plugins on Google Chrome. The procedure is similar in most browsers.

  1. Open the Google Chrome browser.
  2. Click on the More options icon (three dots) at the top right-hand corner of the screen.
  3. Next, select More tools, and from the options, choose Extensions.
  4. On the Extensions page, toggle the switch beside the extensions to disable them.disable-chrome-extensions-HDCP-error-hbo-go
  5. If you wish to uninstall an extension entirely, hit the Remove button.
  6. After uninstalling an extension, go back and see if the HDCP error on HBO Go persists. If it does, disable another and retry.
  7. Next, we head over to the plugins. Search for chrome://plugins in the address bar of Google Chrome.
  8. Under a plugin, hit the Disable link to disable it.
  9. Like you did with the extensions, retry HBO Go after disabling a plugin until you find the problematic one.
  10. If you discovered that the HDCP error on HBO Go was from a bad plugin or extension, disable it and restart your browser.

If these solutions fail, another tip is to stream from your primary monitor for HBO Go. Further, you can try a different browser and see if the HDCP error on HBOGois peculiar to one browser.

Moreover, you can try a different streaming service, such as Disney+. It has a generous library that includes Disney’s movies and shows for all ages.

⇒ Get Disney+

We hope those solutions help you with your issue. Let us know in the comments.

How to Fix Netflix Error Code M7353-5101 in a Few Easy Steps

Netflix might be the world’s foremost movie-streaming service, but it’s not perfect. There are a few Netflix-streaming error codes.

Error M7353-5101 is one of those streaming issues. The M7353 error code has an Oops, something went wrong message that halts movie playback.

How do I fix the Netflix error code M7353-5101?

1. Turn off browser extensions

Google Chrome

  1. Netflix error code M7353-5101 can often be due to browser extensions. To turn off Google Chrome’s extensions, type chrome://extensions/ in that browser’s URL bar and press Enter.
  2. Then click all the blue toggle buttons on the extensions to disable them.
    Chrome's Extensions tab netflix error code m7353-5101
  3. Or you can click the Remove buttons to delete extensions.

Firefox

  1. To disable Mozilla Firefox add-ons, press the Ctrl + Shift + A hotkey.
  2. Click Extensions on the left off the Add-ons Manager tab.
    Add-ons Manager tab netflix error code m7353-5101
  3. Click the blue toggle buttons to turn off their add-ons.

2. Clear your browser’s cookies

Google Chrome

  1. Try clearing your browser’s cookies and cache data. In Google Chrome, press the Ctrl + Shift + Del hotkey.
    Clear browsing data options netflix error code m7353-5101
  2. Select the All Time option for the time range.
  3. Select the Cookies and Cached data options.
  4. Click the Clear data button.

Firefox

  1. Enter about:preferences#privacy in Firefox’s URL bar, and press the Enter key.
  2. Click the Clear Data button.
  3. Select the Cookies and Cached Web Content check boxes.
    Clear Data window netflix error code m7353-5101
  4. Click the Clear button.

3. Turn off third-party antivirus software

The Avast Antivirus utility's context menu netflix error code m7353-5101

Some users might need to disable third-party antivirus software to fix the M7353 Netflix error. To do so, right-click the system tray icon for your third-party antivirus utility to open its context menu.

The antivirus utility’s context menu will probably include a disable option of some kind you can select to turn it off temporarily. Select to disable the antivirus utility until restart if you can. Then, try watching a Netflix movie with the antivirus software disabled.

4. Disable proxy server

If you have the Use a proxy server setting enabled, try disabling it. Press the Windows key + R hotkey for the Run accessory.

  1. Input inetcpl.cpl in Run, and press the Enter key.
  2. Click the Connections tab on the Internet Properties window that opens.
    Internet Properties window netflix error code m7353-5101
  3. Click LAN settings to open the window in the shot directly below.
    Local Area Network (LAN) Settings window netflix error code m7353-5101
  4. Deselect the Use a proxy server option there.
  5. Click OK to exit the window, and press the Apply button.

5. Update Chrome’s Widevine Content Decryption Module

  1. Google Chrome has a Widevine Content Decryption Module that some users might need to update to fix Netflix error code M7353-5101. To do that, enter chrome://components/ in Chrome’s URL bar; and press the Return key.
  2. Then click the Check for update button for Widevine Content Decryption Module.
  3. Restart Google Chrome if that module gets updated.
  4. Alternatively, you can update Chrome to get that module updated. Input chrome://settings/help in the browser’s URL bar, and press the Enter key.
    The Widevine module netflix error code m7353-5101
  5. Then you can click Relaunch if the browser updates.

6. Update Windows 10

  1. Check that your Windows 10 is fully updated. Press the Windows key + S hotkey to open the platform’s search utility.
  2. Type updates in the search box so that you can click Check for updates.
    Check for updates button netflix error code m7353-5101
  3. Press the Check for updates button for patch updates.
  4. If there’s a build update available, click Download and install to upgrade to the latest Windows 10 version.

7. Don’t utilize secondary displays

Dual monitors netflix error code m7353-5101

If you’re utilizing dual monitors, disconnect the secondary display. Then try playing the Netflix stream again without any secondary VDU.

The above fixes might resolve Netflix error code M7353-5101 for most users. However, users who still need more potential fixes can contact Netflix support.

In case you have more problems like this one, we have a guide on how to address Netflix M7362 1269 issue, so don’t miss it.

Click the Start Live Chat button on Netflix’s Help Center page to discuss the M7353 error with a support agent. Before you go, don’t miss our latest guide and learn what to do if Netflix is not working on Firefox.

Registry Editor Could Not Set Security Key or Some Subkeys

Registry Editor could not set security key currently selected or some of its subkeys the error message you get when you work with protected registry keys or subkeys. The protection of the Windows Registry is not a fault; it is protected by default and only editable by the Windows system itself.

To resolve this issue, we will change the security permissions for the Windows registry keys and subkeys. This guide deals with the Windows Registry Editor. Follow the steps carefully to avoid complications.

How do I fix the Registry Editor could not set security key currently selected error?

Note: An error in the Registry Editor can break important system functions. Therefore, before taking any steps in troubleshooting the registry editor could not set security in the key selected error message, it is advisable to first create a system restore point.

1. Start your computer in Safe Mode

  1. Go to Settings on your computer by pressing the Windows logo key and then I on your keyboard.
  2. Click on Update & Security and choose Recovery.
  3. Next, hit Restart now under Advanced startup.Registry Editor could not set security key currently selected or some of its subkeys safe mode
  4. On clicking Restart now, the computer goes off and comes on to greet you with the Choose an option
  5. Here, go to Troubleshoot.
  6. On the next window, select Advanced options.
  7. Next, click Startup Settings.
  8. Finally, hit Restart.
  9. This restarts the computer. When it comes back on, this time, press the F4 key or choose 4.

This puts the computer in Safe Mode and troubleshoots the registry editor could not set security in the key selected error. To exit Safe Mode after fixing this error, restart your machine or follow the steps below:

  1. Press the Windows logo key and then R on your keyboard. This opens the Run box.
  2. In Run, enter msconfig and hit
  3. Click on Boot tab.
  4. Finally, uncheck Safe boot. This you can find in the Boot options.

2. Enable the built-in Admin user account

enable built in admin Registry Editor could not set security key currently selected or some of its subkeys

  1. Press the Windows logo key to open the Start menu.
  2. Search for cmd. Right-click on Command Prompt and choose Run as Administrator.
  3. In the Command Prompt window, enter the command below and hit Enter:
net user administrator /active:yes
  1. Next, type exit in command prompt and press Enter to close the window.
  2. Now, log out of the Administrator user account.

3. Set registry key permissions

  1. Open the Run dialog box by pressing the Windows logo key and R on your keyboard.
  2. Enter regedit in the box and hit OK to open Registry Editor.
  3. In Registry Editor, navigate or enter the path to the relevant key.
  4. Next, right-click on the key and choose Permissions.
  5. On the ensuing dialog box, click Advanced.
  6. Now, you will be in the Advanced Security Settings dialog box. Beside the Owner label, click Change. change key owner Registry Editor could not set security key currently selected or some of its subkeys
  7. To claim ownership of the key and its subkeys, type in your user account name and hit Check Names.
  8. The name you entered now changes to the official username. Mark the Replace owner on subcontainers and objects checkbox.
  9. Finally, click Apply but leave the dialog box open.click apply to save registry owner settings Registry Editor could not set security key currently selected or some of its subkeys

You have successfully claimed ownership of the registry key. However, you have to also change the permission of the keys to remove the registry editor could not set security in the key selected error.

3.1 Change registry key permissions

  1. On the dialog box, you will see a button labeled Disable inheritance, click it.
  2. Next, hit the Add button to include yourself.
  3. Click on the Set a principal.
  4. Next, enter your name in the field provides and hit Check Names. When the official username displays, click OK.
  5. In Basic permissions, Mark the Full Control checkbox and hit OK.
  6. You are then returned to the Advanced Security Settings dialog box. At the bottom of the screen, check to Replace all child object permission entries with inheritable permission entries from this object.
  7. Finally, click OK and OK again to close the out dialog box.

The Windows registry is a sensitive space because it contains files that control the working of everything on the computer. Because of this, strict restrictions are in place to prevent modification, deleting, or even accessing the keys and subkeys.

To fix the Registry Editor could not set security key currently selected or some of its subkeys error you get on the system, you have to assign yourself rights to it using the guides here. Lastly, remember to either back up the keys or create a system restore point before attempting this fix.

[wl_navigator]

How to use the WiFi printer driver for Chromebooks

Even with all the online access across multiple devices and platforms out there, sometimes having a hard-copy of certain documents or information is all you need.

Printing from a Chromebook is easy once you connect your printer to the device correctly. Chromebook supports most printer brands, but depending on the method you choose, some printers need extra capabilities.

How do I connect my Chromebook to a wireless printer?

Connect your printer to WiFi

  1. Turn your printer on.
  2. Connect the printer to an internet network. Settings are different, depending on the model.
  3. Turn your Chromebook on and connect to the same network (if this is not done by default).

Next, we’ll be looking at some ways in which you can set up the connection between your Chromebook and your printer.

1. Use the WiFi printer driver extension

You can find a WiFi printer driver extension for Chromebooks in the Chrome Web Store. This is an extension that, once installed, automatically recognizes your printer which is already connected to WiFi.

There’s no need for you to install other programs. The only setback of the extension is that it doesn’t support any printer and you have to contact the developer to tell them to add a certain printer model.

2. Use the Google Cloud Print systemadd printer chromebook

  1. Open a Chrome browser.
  2. Type chrome://devices in the address bar and press Enter.
  3. Under New devices, find your printer > Manage.
  4. In the Confirm registration box that appears, click Register.
  5. Follow the steps to finish registering.

Google Cloud Print is a service available mostly for cloud-ready printers, that connects your printer to the web. Similarly to the previous method, while you’re logged in to the same network as the printer, you should be able to see it and print any document.

Unlike the Chrome printer extension, Google Cloud Print includes a wider selection of compatible printers. Your printer must have the Google Cloud Print feature for you to be able to use this service.

If your printer is not cloud-ready and you want to use this method, you will have to contact your manufacturer for help.

3. Directly connect your wireless printer to Chromebookadd wireless printer chromebook

  1. Open the Settings menu from the Quick Quick Settings Panel at the right lower side of your screen.
  2. Type print into the search box.
  3. Select Printers > Add Printer.
  4. Click on your printer’s name in the list that appears > Add.

If your printer is older and does not appear in the mentioned list, do the following additional steps:

  1. Click the Add Manually button.
  2. Give the printer any name you want.
  3. Type its IP address into the Address box. (It’s shown somewhere in the printer’s display menu, or in its network or wireless configuration settings) > click Add.
  4. Then type in your printer’s manufacturer and model > click Add again.

That’s it! Now you can just hit Ctrl-P from any browser tab or document to get the hard copies you wanted.

Your suggestions on this topic are always welcome and you can use the comments section below to get in touch with us.

How to fix CBS All Access not working on Amazon Firestick

Encountering the message An error has occurred. Please try again later. (Error UVP-1011), can cause you a lot of stress. But rest assured that this guide will help you.

This is a common error with the CBS All Access on-demand video service, that subscribers have reported time and time again.

It occurs mostly with Amazon Fire TV and Amazon Firestick users. The app works fine on other devices – iOS, Android, Roku. Also, the users mentioned that the error occurs mainly when pausing or exiting the app in the middle of the program.


How do I fix CBS All Access not working on Amazon Firestick?

1. Perform a power cycle

A complete power cycle should put your media devices, internet connection, and CBS All Access app back on track.

So, switch off your devices (including modem and router), unplug them, wait for a few minutes, then plug them back in.

Hopefully, this solves the problem. If otherwise, continue with the next solutions.


2. Clear cookies & cache

  1. In the Fire TV menu, select Settings.
  2. Go to Applications >Manage Installed Applications > CBS All Access.
  3. Select Clear Cache, and then Clear Data.

If you continue to experience this issue, try to uninstall and reinstall the app.


3. Reset Firestickcbs all access error on firestick

  1. In the Fire TV home screen > Settings.
  2. look for My Fire TV > Reset to Factory Defaults.
  3. Click Reset.

Note that this process will delete all personal data made to your device.


Error code 1011 is known by the team at CBS All Access, yet they did not provide other solutions. If you used another trick to get the service going, please share it in the comments section below.


[wl_navigator]

Is Raspberry Pi causing fsck errors? Fix it in 3 easy steps

If you are using a USB drive or SD card to boot your Raspberry Pi, you may encounter the fsck error. Several users have reported the Raspberri Pi causing fsck error resulting in a corrupted SD card.

I have experienced several instances of data corruption on the SD card on my Pi. I am still investigating the root cause of this. At the moment to correct filesystem errors I shut down the pi and put the card into my laptop to fsck the root filesystem.

To avoid USB or SD card corruption make sure you use a USB power hub to connect your USB flash drives. If your boot SD or USB drive is corrupted, try fixing the drives by following the steps in the article below.

How do I fix Raspberry Pi causing fsck errors?

1. Use trusted third-party PC software

Fsck errors and other similar issues can lead to system malfunctioning and affect your files. Installing the latest drivers will prevent these problems and help your hardware to function properly.

For an in-depth diagnosis and an effective solution, we recommend installing a PC repair tool that keeps all of your PC driver software healthy and recovers important files that have been damaged during the process.

With a simple click, this type of tool can scan external memory devices such as SD cards and USB ports and enables you to protect specific files and folders by retaining metadata in case of unintended deletions.

⇒ Get Disk Drill

2. Fix the SD card using a Windows computer

Raspberry Pi causing fsck errors
  1. Remove the SD card from the Raspberry Pi slot.
  2. Connect it to a Windows computer. Since the process won’t take more than a couple of minutes, borrow a Windows system if you don’t have one yourself.
  3. Once connected to your Windows computer, the PC will automatically detect that there is a problem with the card.
  4. When the Do you want to scan and fix Removable Disk dialog appears, click on Scan and fix.
  5. Wait for Windows to scan the drive for errors and fix them.
  6. Once fixed, eject the SD card and insert it into your Raspberry Pi device.
  7. Reboot the device and check if the error is resolved.

Using a Windows computer to fix the SD card issue is a much simpler solution than using the Ubunto terminal commands. However, if the issue persists and Windows fails to fix the drives, proceed with the next set of steps.

3. Use Linux terminal to repair the drive

Raspberry Pi causing fsck errors
  1. Eject the SD card or USB drive from your Raspberry Pi.
  2. Connect it to a Linux system using a card reader or USB port.
  3. Press Ctrl + Alt + T in Ubuntu to open the terminal.
  4. Type mount and hit enter to find your pen drive or SD card letter.
  5. Type the following command and hit enter. Make sure to replace the sdc1 in the below command with the pen drive or SD card letter applicable to your drive.
    sudo dosfsck -w -r -l -a -v -t /dev/sdc1
  6. The dosfsck will scan the drive for errors and fix them.
  7. Once finished, eject the SD card and insert it into Raspberry Pi to see if the error is resolved.

In the above command:

  • -w means write to disk immediately.
  • -r run the performs disk check interactively.
  • -l means to list the filename processed.
  • -a asks the tool to fix any errors if found.
  • -v means verbose mode.
  • -t means mark unreadable cluster. You can skip the -t switch if the scanning and repairing process is taking too much time.

The Raspberry Pi can cause fsck error if the boot drive that is your SD card is corrupted. The error can be fixed using the Windows USB drive troubleshooter or using the dosfsck tool in Linux.

Follow the steps in the article and let us know which method helped you resolve the issue in the comments.

Bothered by the Netflix error H403? Fix the problem fast

Not being able to access your Netflix account when you need it can cause issues, and it can get annoying. Especially if the error persists for a long time.

Here is what one user had to say about this issue:

My Netflix app on Windows 10 does not open and shows me an error: Sorry, there was a problem in communication with Netflix. Please try again. (H403).

Thus, the Netflix app for Windows 10 doesn’t start when that error occurs.


How can I resolve the Netflix error H403?

1. Run the Windows Store Apps troubleshooter

  1. The Windows Store Apps troubleshooter can provide fixes for UWP apps that don’t start. To open that troubleshooter, click the Type here to search button on the taskbar.
  2. Input troubleshoot in the Type here to search box.
  3. Click Troubleshoot Settings to open that tab.
    The Troubleshoot tab netflix error h403
  4. Next, select the Windows Store Apps troubleshooter listed there.
  5. Click Run the troubleshooter to open the Windows Store Apps troubleshooter.
    Windows Store Apps troubleshooter
  6. Try any resolutions suggested by the troubleshooter.

2. Sign in to Netflix on an alternative device

  1. Try signing in to Netflix on a mobile device with the same internet connection. First, open Netflix in a browser on the Windows PC error H403 arises on.
  2. Click the Sign out option on the profile menu at the top right of the Netflix page.
  3. Next, turn on a mobile device you can sign in to Netflix on.
  4. Add the Android or Apple Netflix app to the mobile if it’s not already on it.
  5. Make sure the mobile device is connected to the same network as the Windows PC. So, disconnect it from a VPN if required.
  6. Open the Netflix mobile app to sign in to it.
  7. Stream a Netflix movie within the mobile app.
    A movie in mobile netflix error h403
  8. Thereafter, sign out of the Netflix mobile app.
  9. Open Netflix within a browser on the Windows 10 PC.
  10. Sign back into Netflix on the Windows 10 PC.

3. Reset the UWP Netflix app

  1. Users have confirmed resetting the Netflix app for Windows can fix error H403. Open the search utility in Windows 10.
  2. Type apps in the search box.
  3. Click Apps & features to open the Settings window as in the shot directly below.
    Apps & features tab netflix error h403
  4. Select the Netflix app, and click Advanced options to open further settings.
    Reset button netflix error h403
  5. Press the Reset button to open a confirmation box.
  6. Click Reset on the confirmation box.

4. Undo recent Windows updates with System Restore

  1. Restoring Windows to an earlier date will undo recent updates and remove recently installed software that might be conflicting with Netflix. First, right-click the Start button and select Run on the Win + X menu that opens.
  2. To open System Restore, enter rstrui in the Open box and click OK.
    System Restore window netflix error h403
  3. Select the Choose a different restore point option (which isn’t always there), and click the Next button.
  4. Select the Show more restore points option, which will display all restore points.
    Show more restore points option netflix error h403
  5. Choose a restore point that predates Netflix error H403 on your desktop or laptop. If in doubt, select the restore point that goes the furthest back.
  6. Click the Next and Finish options to confirm and restart Windows.

5. Reinstall Netflix in Windows 10

  1. Reinstalling Netflix will ensure you have the latest app version. To do that, open the Apps & features tab in Settings as covered within the third fix.
  2. Next, click the Uninstall button for the Netflix app.
    The Uninstall button netflix error h403
  3. Restart Windows before reinstalling Netflix.
  4. Open the MS Store page for the Windows Netflix app, and click the Get button there.

The fixes above will probably kick-start the Netflix app for most users. Remember, however, that you can always watch Netflix content in a supported web browser instead. So, the Netflix UWP app isn’t entirely essential.


[wl_navigator]

CBS All Access not working on Roku? Here’s how to fix it

Roku media players and smart TVs are compatible with most of the popular on-demand streaming services available on the market today.

Generally, one should be careful that either the equipment provider or the service supplies mention what version of devices is compatible with a specific streaming platform.

This and updated device are essential aspects to make sure that you fully enjoy the streaming experience.


How do I get CBS to work on my Roku?

1. Fully restart you Roku devicefix cbs all access

For Roku player:
Go to Settings > System > System restart. 

For Roku TV: 
Go to Settings > System> Power > System restart. 

Also, unplug your Roku device, wait for a few minutes, then plug it back in and switch it on to see if the problem was solved.


2. Check for Roku updatesroku player update to access cbs

  1. Press the Home button on the Roku remote.
  2. Scroll to Settings > System.
  3. Select System update.
  4. Click the right button > Check Now.

3. Check Roku device requirements

Although the service provider might mention compatibility with Roku devices (generally speaking), it is very possible that older versions of Roku TVs or media players are not supported.

To clear out this aspect, you should drop a question to either CBS or Roku support services.


If you managed to get your  CBS All Access subscription to work using other solutions, please share it with us in the comments section below.

[wl_navigator]

YouTube TV Family Sharing not Working? Fix it in 2 steps

Similar to other video streaming services like Netflix, Hulu, or Amazon Prime, YouTube TV subscribers can share their accounts with family members and/or friends.

One YouTube TV membership covers up to 6 accounts, the main account (Family Manager) included. Each member can have their own login account, DVR space, and simultaneous streaming on up to 3 devices.

Issues can nevertheless occur when family members try to join the group and we’re going to discuss here how to fix this.

How do I share YouTube TV with my family?

Family members account for prerequisites

  • Age 13 or older and have a Google Account
  • Live in the same household as the family manager
  • Live in the same house/country/region as the family manager
  • Not be part of another family group

When inventing family members or friends to join your YouTube TV account, make sure they meet these requirements.

Having said these, users have reported two situations when they could not join the family account, as the YouTube TV app kept directing to payment details or suddenly signed them out.

1. Check location details


Being part of a family account implies that members live in the same household so that they can share the same location details.

When this is not the case, to continue streaming YouTube TV you have to bring the device to the home network where the Family Manager lives and connect to that network at least once, so that the app inherits the location details.

Even so, the app will work for some time, after which it is possible that it signs you out again.

2. Sign out of any other Google family group

When you are trying to join the family group, make sure that you are not already part of another family group; perhaps an older group or a group related to a brand account, with the same Google account.

To sum up, if you’re having some trouble with the YouTube TV family sharing option, make sure you meet the account sharing requirements.

If you’ve encountered another situation, please let us know in the comments section below.

Edge receives fix for escalation of privilege vulnerability

Microsoft takes Edge security and privacy seriously, which is necessary to stand a chance of catching on to the levels of Chrome and Firefox. Toward that end, the tech giant shipped a fix for an escalation of privilege vulnerability in its Chromium-based browser.

The security patch is part of the Edge update 83.0.478.37 that is currently rolling out in the Stable channel. The non-security updates include features like automatic profile switching.

Escalation of privilege vulnerability

Microsoft calls the security risk in question CVE-2020-1195. The exposure stems from the tendency of the Feedback extension in Edge to incorrectly validate input.

Therefore, if an attacker managed to take advantage of the loophole, they could move files to arbitrary memory locations. Doing that could also give the hacker higher system privileges.

An elevation of privilege vulnerability exists in Microsoft Edge (Chromium-based) when the Feedback extension improperly validates input. An attacker who successfully exploited this vulnerability could write files to arbitrary locations and gain elevated privileges. This vulnerability could be used in conjunction with one or more vulnerabilities (for example a remote code execution vulnerability and another elevation of privilege vulnerability) to take advantage of the elevated privileges when running.

Microsoft assigned the vulnerability an exploitation assessment index of 2. It means that users of the latest version of Edge are less likely to be a target for this kind of attack.

The escalation of privileges vulnerability, in itself, does not amount to an attacker executing illegal code. But a hacker can use it to pave the way for a more serious breach.

For example, after illegally attaining elevated privileges, they could exploit a remote code execution (RCE) loophole. An RCE attack could in turn allow them to steal data, spy, or even stage a denial of service attack.

However, the escalation of privilege vulnerability in Edge should be no cause for alarm. Microsoft has not received any evidence of its exploitation in the wild.

If you have any questions or suggestions regarding Microsoft Edge security, you can always leave them in the comments section below.

[wl_navigator]

Sling TV Authorization Error? Try These Simple Solutions

The Sling TV authorization error can occur due to many reasons and can be content or device-specific. While most of the authorization errors typically resolve themselves after 24 hours, some may require some troubleshooting.

The authorization error if content specific can occur when watching a channel or show that was available for a free preview. The error means the user has no longer access to the channel.

If you are also troubled by this error, here are a couple of troubleshooting tips to help you resolve the Sling TV authorization error.

How do I fix the Sling TV authorization error 8-393227?

1. Check for content-specific issues

Sling TV authorization error 8-12
  1. If you are receiving an 8-2 authorization error when watching a channel or show, check if the program was available as a free preview.
  2. The error indicates that the user does not have access to the program or channel anymore.
  3. You can check the Sling TV Free Preview page to see if the preview for the selected content has ended.

2. Check for device-specific issues

Log out of Sling TV

Sling TV authorization error 8-12
  1. Launch the Sling TV app on your streaming device. If you are using a browser, open the Sling TV web page.
  2. Click on your profile and select log out.
  3. Sign in again with your Sling TV account and check for any improvements.

3. Update your Sling TV app or browser

Amazon Fire TV

Sling TV authorization error 8-12
  1. From the home screen, scroll down to Apps.
  2. Locate and open the Sling TV app.
  3. If an update is available for the app, you will see an Update button.
  4. Click the Update App Now option to download and install the updates.
  5. Once installed, relaunch the app and check if the error is resolved.

Android TV/AirTV Minir /AirTV Player

Sling TV error
  1. Close the Sling TV app.
  2. Launch Google Play Store.
  3. Go to My Apps and open Sling TV app.
  4. Click update to bring the update process.

LG TV

Sling TV error
  1. Press the Home button on your TV remote.
  2. Select Settings > All Settings.
  3. Choose the General tab.
  4. Scroll down and select About this TV.
  5. Make sure the Allow automatic update is checked.
  6. Click on Check for updates.

If you are watching Sling TV using a web browser, make sure the browser is up to date and has the latest version installed. You can update the browser by going to Menu > About.

4. Perform a power cycle

Sling TV error
  1. Power off your streaming device. Skip these steps if you are using a smartphone.
  2. Turn off your WiFi router and modem.
  3. Disconnect the cords from the power outlet.
  4. Leave the devices idle for a few minutes.
  5. Reconnect the cables and power on the devices.
  6. Launch the Sling TV app and check if the error is resolved.

Additionally, check for the service outage. Most of the time, authorization errors are resolved automatically after 24 hours. If you are unable to resolve the issue even after trying all the steps listed in this article, contact Sling TV support.

Another viable solution would be to try another streaming service to watch the TV show or movie you want. A program with a responsive design and modern capabilities that allow you to access the content from multiple devices might prevent this type of error.

⇒ Get Disney+

The Sling TV authorization error can occur due to temporary issues and typically resolves in 24 hours. Sadly, this isn’t the only service with issues, and many reported F1 TV BM1300 error on their devices, but we have a fix for that.

However, if the issue persists, follow the steps provided above to see if that helps you resolve the error.

FIX: Netflix HDCP unauthorized content disabled

While playing Netflix content on streaming services devices like Amazon Fire TV/Stick, Roku and Roku Streaming Stick, you may encounter ‘HDCP unauthorized. Content Disabled’ error.

This error typically points to a hardware problem where your device cannot play protected content.

If you are also troubled by this issue, here are a couple of troubleshooting tips to help you resolve HDCP Unautorized, contend disabled error. We have covered troubleshooting tips for both Amazon and Roku streaming devices below.


How do I fix Netflix HDCP unauthorized, Content Disabled’ message?

1. Perform a power cycle 

HDCP unauthorized, Content Disabled

  1. Unplug your Amazon Fire Stick from your TV along with the power source. Leave the device idle for a minute.
  2. Additionally, you may also want to turn off and turn on your TV.
  3. Plug the Fire TV back in.
  4. Turn on the devices using the device’s remote.
  5. Open Netflix and check for any improvements.

Sometimes, performing a quick power cycle can help you resolve connection related issues with your streaming devices. If the issue persists, try other steps below.


Best Free (trial) VPNs that work with Netflix [2020 Guide]


2. Check for HDCP issues

HDCP unauthorized, Content Disabled

  1. Make sure you are using an HDMI cable and check for any loose connection.
  2. Make sure the device directly connected to the TV. Bypass any receivers or stereo equipment.
  3. Try reversing the HDMI cable and plugin again.
  4. If your TV has multiple HDMI ports, try connecting to a different HDMI port.
  5. If you have multiple TVs, try connecting the device to another TV via HDMI. If the device works, the issue can be with your TV’s HDMI port.
  6. In case the device does not work on both the TVs, try changing the HDMI cable.

The Nextflix HDCP Unauthorized. Content Disabled error mostly occurs due to hardware issues. In more than one case, replacing the HDMI cable has resolved the issue for the users. However, at times it can also happen if the TV’s HDMI port is faulty.


3. Disable Auto-adjust display refresh rate

HDCP unauthorized, Content Disabled

  1. Press the Home button on your Roku remote.
  2. Select the Settings option.
  3. Next, go to the System and select Advanced System Settings.
  4. Select the Auto-Adjust Display Refresh Rate.
  5. If the option is set to Enable, select it again, and choose Disable.
  6. Close the Setting page and check for any improvements.

The Auto-adjust display refresh rate feature optimizes the content to provide the highest picture quality. However, enabling the feature can lead to the aforementioned error.

Note that this feature is only available on Roku players with 4K option. If you have a standard streaming device, you can skip this step.


4. Configure your TV for HDR

Samsung HDR TVs

Netflix Ruku error

  1. Press the Menu button on the remote.
  2. Go to Picture and select Picture Options.
  3. Select HDMI UHD Color.
  4. Set it to On and then restart the TV.

LG HDR TVs

Netflix Ruku error

  1. Press the Hom button and select HDMI.
  2. Go to Settings > Advanced.
  3. Select the Picture option.
  4. Set HDMI Ultra DEEP COLOR to On.
  5. Restart the TV.

Sony HDR TVs

Netflix Ruku error

  1. Press the Home button on your remote.
  2. Go to Settings > External Inputs > HDMI Signal Format.
  3. Select HDMI and choose Enhance Mode.
  4. The TV will automatically reboot.

The Netflix HDCP unauthorized, Content Disabled error can occur due to multiple reasons. Try following all the steps in this article one by one to resolve the HDCP problem with your streaming device.

If it’s still not working, we suggest switching to Disney+, one of the biggest streaming services nowadays that provides unlimited streaming of exclusive movies, TV shows and original content for one monthly subscription fee.

⇒ Get Disney+

Do let us know which method helped you resolve the issue in the comments.

[wl_navigator]

Netflix error code U7361-1253-C00D6D79? Fix it fast

The U7361-1253-C00D6D79 error is a streaming issue that can arise for the Windows 10 Netflix app.

The U7361-1253-C00D6D79 error message states: Whoops, something went wrong… We’re having trouble playing this title right now. Consequently, users can’t play selected Netflix movie titles when that error arises.

In today’s guide, we will explore some of the best methods to try out in this situation. Read on for more details.


How can I fix the Netflix error code U7361-1253-C00D6D79?

1. Open the Windows App Troubleshooter

  1. The Windows App Troubleshooter might come in handy for fixing Netflix error code U7361-1253-C00D6D79. First, click the Type here to search taskbar button.
  2. Then type troubleshoot in the search box.
  3. Click Troubleshoot settings to open that Settings tab.
    The Troubleshoot tab netflix error code u7361-1253-c00d6d79
  4. Select Windows Store Apps within Settings.
  5. Click the Run the troubleshooter button to open the Windows Store Apps window.
    Windows Store Apps window netflix error code u7361-1253-c00d6d79
  6. Go through the potential fixes the troubleshooter might provide.

2. Check for pending Windows 10 updates

  1. Some users might need to install pending Windows 10 updates to fix Netflix error code U7361-1253-C00D6D79. To do that, open the search box.
  2. Then enter update to search for Check for updates.
  3. Click Check for updates to open that Settings tab.
    The Check for updates option netflix error code u7361-1253-c00d6d79
  4. Click the Check for updates button to download and install pending updates.
  5. Restart Windows 10 after updating it.

3. Update the Netflix app

  1. Make sure your Netflix app is the most update version. To check for Netflix updates, click Microsoft Store on the Start menu.
  2. Click the See more button to open the menu shown directly below.
    The See more menu netflix error code u7361-1253-c00d6d79
  3. Next, select Downloads and updates on the menu.
    Downloads and updates netflix error code u7361-1253-c00d6d79
  4. Click the Get updates button to check for and download available app updates.

4. Reset Netflix

  1. The app Reset option might resolve Netflix error code U7361-1253-C00D6D79. Enter apps in Windows 10’s Type here to search box.
  2. Click Apps & features to open Settings as shown directly below.
    The Apps & features tab netflix error code u7361-1253-c00d6d79
  3. Select the Netflix app, and click its Advanced options link.
  4. Press the Reset button.
    The Reset option netflix error code u7361-1253-c00d6d79
  5. Click Reset again to clear the app’s data.

5. Reinstall Netflix

  1. You can also try reinstalling Netflix instead of resetting it. To do so, open the Apps & features tab as outlined for resolution four.
  2. Select the Netflix app, and click its Uninstall button.
  3. Next, restart Windows.
  4. Open the Netflix app’s MS Store page.
    The Netflix app page netflix error code u7361-1253-c00d6d79
  5. Click Get to reinstall Netflix.

6. Delete the downloaded move title

  1. It might be the case that the movie title error U7361-1253-C00D6D79 arises for has not downloaded correctly. To delete the downloaded movie title, open the Netflix app.
  2. Click the app’s Menu button.
  3. Select My Downloads to open a list of downloaded Netflix movie titles.
    The My Downloads option netflix error code u7361-1253-c00d6d79
  4. Select the edit button at the top right corner of the app.
  5. Select the movie title error U7361-1253-C00D6D79 arises for.
    My Downloads netflix error code u7361-1253-c00d6d79
  6. Click the Delete (bin) button to erase the downloaded movie title.
  7. Thereafter, try streaming the movie title again.

The resolutions above will probably fix Netflix error code U7361-1253-C00D6D79 for the majority of users.

However, you can also get further fixes from a Netflix support agent. To do so, click the Start Live Chat button on the Netflix Help Center page.


[wl_navigator]

How to fix Netflix error code U7121-3202 in a few easy steps

Some users have posted on Microsoft’s support forum about Netflix error code U7121-3202. That error arises when users try to play downloaded Netflix movies.

The U7121-3202 error message states, Whoops, something went wrong… We’re having trouble playing this title at the moment. This error typically arises on Windows 10 for users utilizing Netflix with its UWP app or within a browser.


How can I fix the Netflix error code U7121-3202?

1. Run the Windows Store Apps troubleshooter

  1. If error U7121-3202 arises when utilizing the Netflix UWP app, try running the Windows Store App troubleshooter. Click the Type here to search button on your Windows 10 taskbar to open its search utility.
  2. Next, enter the keyword troubleshoot in the Type here to search box.
  3. Select Troubleshoot settings to open Settings as in the snapshot directly below.
    Windows Store App troubleshooter netflix error code u7121-3202
  4. Select Windows Store Apps and click its Run the troubleshooter button.
  5. Go through the troubleshooter’s suggested resolutions.

2. Delete and download the move file again

  1. Netflix error code U7121-3202 is usually due to movie titles now downloading right. To fix that, click the Menu button at the top left of the Netflix app.
  2. Click My Downloads to open a list of downloaded movie titles.
    My Downloads netflix error code u7121-3202
  3. Click the edit (pencil) button at the top right of Netflix.
  4. Then select to delete all the movie titles.
  5. Click the Delete (bin) button to erase selected movies.
  6. Thereafter, click the Menu button and Available for Download.
    Available for Download option netflix error code u7121-3202
  7. Then you can select the movies you deleted to download them again.

3. Undo a recent Windows 10 build update

  1. Some users have confirmed they’ve fixed error U7121-3202 by rolling back their Windows 10 build updates. To do that, press the Windows key + S hotkey.
  2. Type the keyword recovery in the search box.
  3. Click Recovery options to open the Settings tab as in the snapshot directly below.
    The Get started option netflix error code u7121-3202
  4. Users can roll back to a previous build version within 10 days of updating to it. Click the Get started button under the Go back to the previous version of Windows 10 subheading.

4. Reinstall the Netflix UWP app

  1. Some users might need to reinstall their Netflix apps to fix the U7121-3202 error. Open the search box in Windows 10.
  2. Type app in the search utility.
  3. Click Apps & features to open the Settings tab shown directly below.
    The Apps & features tab netflix error code u7121-3202
  4. Select your Netflix app listed there.
  5. Click the Uninstall button.
  6. Restart Windows before reinstalling Netflix.
  7. Click Get on the Netflix app page.

5. Update Silverlight for Internet Explorer 11

Silverlight installer netflix error code u7121-3202

If Netflix error code U7121-3202 arises when utilizing Internet Explorer 11, try updating Silverlight. Click Install for Windows on the Silverlight webpage. Then open the Silverlight installer to install the latest version.


The above resolutions are the most likely fixes for Netflix error code U7121-3202. If you still need more potential fixes, check out the Netflix Help Center. There you can click Start Live Chat for live assistance.

[wl_navigator]