Windows users are probably already aware that Windows 7 is at the end of its life. Thus, they are forced to either get Extended Support for Business or upgrade to Windows 10.
However, a newer OS means that many users are concerned about their hardware. While Windows 10 has been around for some time now, those that have very old PCs or laptops are wondering whether or not they can handle Windows 10.
In theory, a newer OS always comes with higher system requirements, which leads some to eventually change the hardware for the sake of the software.
However, this doesn’t seem to be the case with Windows 10, as you will see in the article below.
What OS is better for my low-end PC?
First of all, you need to define what exactly “low-end” PC means. If you are talking about a PC that is more than 10 years old, more or less from the Windows XP era, then staying with Windows 7 is your best bet.
However, if your PC or laptop is new enough to meet Windows 10’s system requirements, then the best bet is Windows 10.
Tests revealed that the two Operating Systems behave more or less the same. The only exceptions were the loading, booting, and shutdown times, where Windows 10 proved to be faster.
On the flip side, you need to understand that if your hardware is too old, the drivers that come with it may not be compatible with Windows 10.
Older hardware sometimes works better with legacy programs, so downloading older releases can help you maintain stability on a slow PC. You can use trusted sources such as old version software archives when newer builds feel too heavy or incompatible.
If that is the case, Windows 10 will simply replace the missing drivers with generic ones developed by Microsoft. While they may not be the best choice out there, they are better than having no drivers at all.
More so, take into consideration that Windows 10 has been proven to handle updates much more efficiently and faster. If that doesn’t convince you, keep in mind that even with Extended Support you will still have to upgrade to Windows 10 at some point.
Technology is evolving, and we as users need to evolve alongside it. This includes upgrading our hardware and software.
However, if circumstances force you to remain with older hardware for longer periods of time, going from Windows 7 to Windows 10 is a safe bet. Speaking of safe, the improved security features alone should be enough of an incentive to upgrade.
Do you prefer Windows 7 or Windows 10 or your older hardware? Let us know in the comment section below.
Windows 7 has reached the end of its life, and as such, everyone is advised to move on to the next better OS: Windows 10.
It goes without saying that such a migration is for the better since Windows 10 has better security features, better support, and more.
Of course, if you want to stay with Windows 7, you could always opt for the Windows 7 Extended Support, although you should know that this too can only be done for an extra 2 years.
Audiophiles, however, might be interested in knowing that there are differences between how the two OSes handle sound, and how one may provide overall better sound quality than the other.
Thus, if you too are interested in pristine sound quality and clarity, you should continue reading the article below.
How does Windows 10 affect sound quality?
In theory, audio quality should not change if the only thing you do is switch the Operating System. As such, Windows 7 or Windows 10 per se will not affect the audio experience.
Windows 10 makes listening to music easier and better
One thing you should remember is that Windows 10 does come with a set of changes that indirectly affect the way you will listen to music. These include:
Improved audio stack performance
An Opt-in dedicated audio core
This allows you to move audio processing to a dedicated processor core
WASAPI enhancements
AudioGraph, which is a new API, built on WASAPI, offers ‘higher-level constructs’ for working with audio
New Codecs, namely FLAC and ALAC
Web Audio, which is included in Microsoft Edge
Bluetooth MIDI
Lower audio latency
Audio aggregation and routing
MIDI routing
These are just one of the many improvements that affect your audio experience more or less directly.
Additionally, because of the universal app development changes, more users can now develop more and better apps, for all devices that support Windows 10.
Why Windows 7 may seem the better option
If you just upgraded from Windows 7 to Windows 10 and the audio seems inferior, it may be due to the driver. Those of you that have older PCs may have been using drivers that were optimized for WIndows 7.
However, not all developers bothered making further optimizations for the newer OS. As such, you may end up using the generic audio drivers provided by Microsoft.
Conclusion
As you can see for yourself, there are differences in audio quality and response rate between Windows 7 and Windows 10. However, these are extremely subtle and hard to notice.
In fact, the only ones that can truly tell the difference are those that work in audio player development or those that have home recording studios.
For the rest of the consumers, a 128 kbps song will still sound like a 128kbps sound regardless of the OS.
Do you think Windows 10 is superior as far as audio goes? Let us know in the comment section below.
Astronomy chart software programs are incredibly attractive for people of all ages, because you don’t have to be an astronomer to understand the appeal of celestial objects and visualizing astronomy elements, in general.
Therefore, we have selected the 4 best astronomy chart software tools that you can use to immerse yourself in outer space, freely roam the universe, discover planets and stars that you never heard about, and ultimately gain new knowledge on astronomy.
What are the best astronomy chart software tools that I can get?
Celestia
Celestia is a free and open-source 3D space simulator. It gives you the possibility to freely explore planets, stars, moons, galaxies, asteroids, comets, spacecrafts, constellations, and nebulae. The software tool can also display astronomy charts.
Navigating space in 3D in Celestia feels like playing an open-world game, especially since you use mouse and keyboard controls to move, change the camera orientation, orbit around objects, look behind, track objects, control time, toggle labels, and perform additional actions.
To get a better idea of the program, you can run a demo that takes you on a tour to Earth, the moon and sun, Jupiter, and a star system. We suggest switching to fullscreen mode first.
And, if your hardware supports it, turn on anti-aliasing, maximize the texture resolution, and increase the ambient light to obtain the best graphical conditions.
You can take screenshots and record videos, get more information on solar systems and stars, find eclipses in the universe, select the type of celestial bodies to render, as well as increase or decrease the number of visible stars with the press of a key.
Celestia also lets you add bookmarks to later review your favorite parts from outer space.
And, if you’re interested in more interactive tours like the demo integrated in the program, you can find other scripts online made by the Celestia community, complete with subtitles.
The only thing missing is an audio feature, which would’ve worked great with deep space music or educational voice recordings.
Stellarium is another free and open-source Windows application that provides you with a 3D planetarium for your PC. It can also be used as an astronomy chart software solution.
The program takes a unique approach, allowing you to watch the sky from Earth in 3D and in full screen, as if you were using a telescope or binoculars, or just observing with the naked eye.
It has more than 600,000 stars, 80,000 deep-sky objects, and 20 constellations registered in its standard catalog, together with nebulae images. But you can access over 177 million stars and 1 million deep-sky objects in an extra catalog.
A search tool is put at your disposal to help you easily identify celestial objects. You can also change coordinates, switch to a different location and time zone, and perform various astronomical calculations.
Stellarium shows a realistic representation of the Milky Way, sunrise and sunset, the planets with their corresponding satellites, comet tails, star twinkling, equatorial and azimuthal grids, eclipses, and various 3D sceneries.
It can also simulate novae and supernovae, as well as show you the sky at day or during the night, thanks to atmosphere settings. And, if you are interested in extra functionality, you can take advantage of the application’s plugin system.
For instance, you can add ocular simulation, telescope configuration, new solar system objects, landscapes, artificial satellites, and constellation images.
SpaceEngine has more in common with Celestia than Stellarium, but it takes everything to a whole new level. It’s a 3D space simulator that’s more a game than a program. And it includes astronomy chart software solutions, too.
Featuring an interactive 3D planetarium, SpaceEngine is science-based and goes to great lengths to accurately portray the entire universe. The most interesting aspect is that it uses procedural generation for rendering the uncharted areas of the universe.
You can freely roam orbital landscapes, planets and moons, the deep space, photo-realistic celestial objects, and even spaceships. The scenery is actually breathtaking.
And you can also apply mods, such as galaxies and nebulae, HD close-up textures of planets, spaceship models, or custom-made solar systems. It’s even possible to build your own star or planet.
Using exploration tools, you can get complete information on celestial bodies and surroundings, navigate a map of stars, find out the composition of each planet, and get an overview of the planets, sorted by size.
The newest edition of SpaceEngine has VR support and must be purchased through Steam. However, you can download and install older versions for free.
Solar System Scope isn’t as feature-rich as other astronomy chart software solutions on this list. But it’s still entertaining. It facilitates a 3D simulated environment of the solar system and night sky, complete with celestial bodies.
You can freely roam our solar system and get technical information about any planet or star, including composition, distance, galaxy, and structure, along with convective and radiative zone.
When exploring the encyclopedia of a body, you can switch to night sky mode to see where you would have to look to locate the body and how it is positioned compared to known planets.
A simple catalog is put at your disposal for exploring the solar system, night sky, planets, stars, Messier objects, and nearby star systems. Sound effects and background music are included, but you can turn them off.
As far as viewing options are concerned, you can control what you wish to display in the map when it comes to stars and their names, Messier objects and their names, star position lines, scale grid, as well as distance names and lines.
The online version of Solar System Scope is free to use. There’s an offline mode, too, which comes with a free demo. The main difference is that the offline version has superior graphics.
You can also download new high-resolution textures for free, which are based on NASA elevation and imagery data.
Pros:
Great 3D design and navigation
Great for calculating the trajectory of celestial objects
With Celestia and SpaceEngine, you feel that you joined a sandbox video game, where you can freely roam the universe.
Stellarium gives an accurate representation of the sky as seen from Earth, while Solar System Scope focuses on objects from our own solar system and the neighborhood, too.
Whether you need to work on an important astronomy project for school or just take a break and lose yourself in outer space, you can look into the astronomy chart software tools on this list.
Silhouette software solutions simplify your job when it comes to designing and printing various materials that can be used with die-cutting machines, such as paper, vinyl, or metal.
There are many types of electronic die-cutting machines available, but perhaps the most popular one is Silhouette. With a stylish look, it plugs into your computer and awaits your command to print stunning designs. And all you have to do is come up with the artwork, whether you create it yourself or get inspired by others.
That is why we’ve decided to compile a list of the best Silhouette software tools that you can buy right now.
What are the top 4 Silhouette software for Windows 10?
The prime choice of users is Silhouette Studio Basic Edition, a free-to-use software application that features standard functions for design and text, enabling you to create printing tasks for Silhouette die-cutting machines.
Wrapped in a rather intuitive interface, it gives you the possibility to work with move, rotate, scale, align and replicate tools, along with weld, crop, divide and subtract utilities. These are pretty basic functions found in photo editing software.
Thanks to PixScan technology, you can cut around any printed picture with precision, or place the cut lines on the right spots of your material using a scanner, in order to import the image into Silhouette Studio and continue designing it.
In addition to including all features of the free version, the Designer Edition of Silhouette Studio permits die-cutting machine enthusiasts to import artwork from SVG format.
For example, you can use Adobe Illustrator to create stunning designs for Silhouette machines. After saving it as an SVG file, you can then import it into Silhouette Studio Designer Edition and pick up where you left off.
Pros:
Plenty of online tutorials are provided on how to use it
As you can imagine, Silhouette Studio Designer Edition Plus contains all features available in Silhouette Studio Designer and makes room for new ones.
More specifically, you are free to import embroidery artwork from PES, EXP, JEF, DST or XXX files. A more enhanced version of the Rhinestone feature can be used here so that you can create and print more elaborate designs.
Silhouette Studio Business Edition is the richest version out of the four. Suffice it to say, it supports new features aside from the previously mentioned options and configuration settings.
The business version is dedicated to helping you put together large-scale projects at the highest possible quality. The goal is to reduce the time it normally takes you to cut huge chunks of material that will be used with the Silhouette die-cutting machine.
For instance, the software solution gives you the possibility to import AI, CDR and EPS files that you have created using tools like Adobe Illustrator or CorelDraw.
Die-cutting machines are incredibly useful for creating and personalizing objects made of various fabrics. And the beauty of Silhouette software solutions is that they can help you turn your dreams into reality.
Microsoft is kicking off the new year with its first Free Play Days in 2020. This weekend, the company is offering DiRT Rally 2.0 to Xbox One owners subscribed to Xbox Live Gold, or those that get Gold benefits though Xbox Game Pass Ultimate.
DiRT Rally 2.0 was released not even a year ago, so the free trial period this weekend could give many gamers the opportunity to try something somewhat new. The game features more than 50 cars that can be raced in six real life rally locations—the U.S., Australia, New Zealand, Argentina, Spain, and Poland—all with realistic driving physics.
If you decide you’d like to own the game after the trial period which ends on Sunday, it’s also receiving a steep discount for a limited time. Those in the U.S. can get it for up to 70% off, for instance, which brings the Standard Edition and Digital Deluxe Edition to $18 and $24, respectively.
If you’re new to Xbox Live Gold or Game Pass, it might be worth noting that Game Pass Ultimate, the subscription that combines both for consoles and PC, is on sale for three months for $1 for new members. It’s definitely worth it if you’re into free games each month.
During a meeting in Microsoft Teams, you might want to take notes. For some people, that might mean opening-up another program like Microsoft Word or even the Sticky notes app in Windows 10. But, did you know that Teams has a meeting notes feature to help you capture and share your thoughts during your important calls? In our latest Microsoft Teams guide, we’ll show you how you can use the feature to your advantage and perhaps even multitask.
Important notes on Notes
Before getting into the experience of taking notes in Teams, there are some important points to note. Currently, only people from within your organization will be able to start or access meeting notes. That means guests won’t have the feature. It’s also important to note that there is a 20 person limit for notes access. If your meeting has more than 20 people, only the first 20 will be able to access your notes. You also need to know that only people who have been previously invited to join a meeting before notes are created will have access to notes. If you joined later, you won’t have access.
Taking Notes before the meeting
In Teams, you can take notes before the meeting, during the meeting, and after the meeting. In this step, we’ll explain how you can take notes before the meeting.
You’ll want to go to the Calendar section in Teams, and then select your meeting from the list. Next, click Chat with participants, and select the Meeting Notes tab. You can then select Start taking meeting notes. If you want, you can also add to the agenda @mention people, or assign action items. However, please be aware that you’ll only see pre-meeting notes if you’re in a meeting that doesn’t take place in a channel.
Taking notes during the meeting
Once you’re in a meeting, you can get to your notes by selecting More Options at the bottom of the screen and choosing Show meeting notes in the meeting controls. You might also notice an option to Start taking meeting notes if you haven’t already.
Once you select that option, you’ll be able to start typing notes. You can use controls at the top of the panel to format and layout your text. You can also add new notes by choosing to Add a new section here. If you want, you even can get someone’s attention by assigning an action item.
Once a meeting is complete, you can access notes in a few ways. If you want to access notes from a channel meeting, all you need to do is to head to where the meeting occurred and find it. You can then select show notes in fullscreen. For finding notes in a private meeting, you can go to Chat and find the meeting, and select Show notes in fullscreen. Notes will show up in a Wiki tab, and you can read, edit, or add more notes.
Meeting Notes are just the beginning
Taking notes during meetings is just the beginning of what you can accomplish. You also can schedule meetings, use keyboard shortcuts, blur your background, and much more. We’ve got a guide which explains how to get the most out of meetings. We’ve also previously given a look at where Teams is heading into the future and explained some incoming features which will help boost your experience.
Are you using Teams? Share your tips and tricks or frustrations in the comments below.
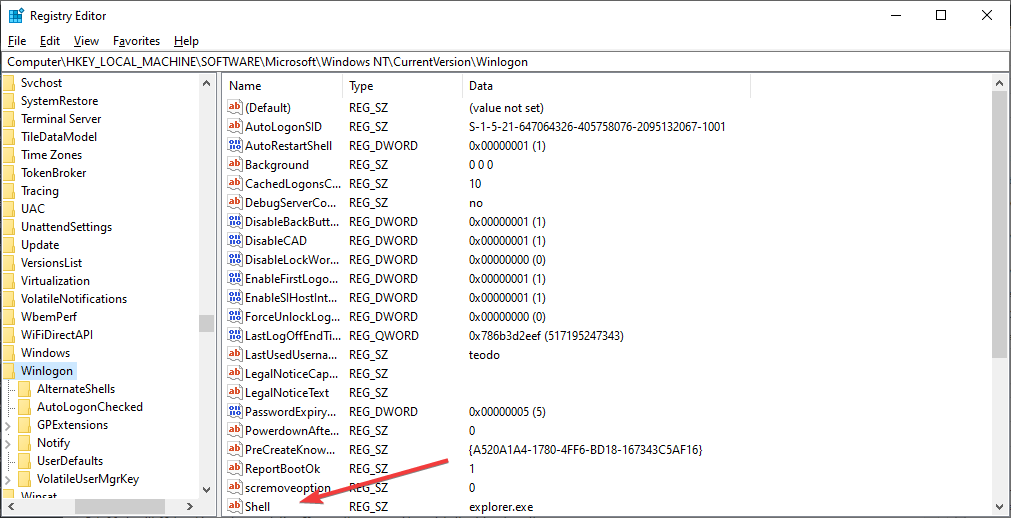
However, those of you that have your PCs joined in a domain may not receive the upgrade notifications as everybody else.
While this doesn’t mean that you can’t upgrade, you won’t be reminded to do it as soon as possible.
Keep in mind that no support means that your windows 7 PCs will no longer receive any more security updates. This translates into an increased risk from cyberattacks, which can be especially devastating to joined-domain PCs.
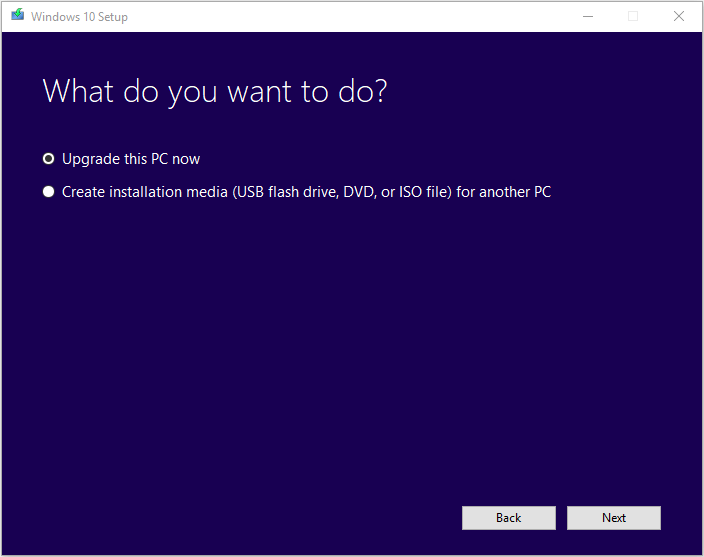
Thankfully enough, the upgrade process is fairly simple, especially since all you need is Microsoft’s provided Media Creation Tool. additionally, you’ll need to have a valid Windows 10 license for each of the domain-joined PCs that you own.
How do I upgrade my domain-joined PCs to Windows 10?
As such, if you want to upgrade your domain-joined PCs to Windows 10, simply follow these steps:
Repeat the process with each PC until all the PCs in your domain have been upgraded.
Keep in mind that you need to create a backup of all of your data on each PC before proceeding with the upgrade since there is no guarantee that there won’t be any data loss.
Additionally, if you are upgrading an OEM Windows 7, make sure you know you know the license key before the upgrade, or else you won’t be able to activate your version of Windows 10 Pro.
If you want to learn how you can migrate from Windows 7 to Windows 10 without any data loss, check out this in-depth guide.
Admittedly, the entire process can take a lot of time, depending on how new the PCs are, and how many of them there are. Other than that, there should be no inconveniences, neither from a functionality or from a performance point of view.
Do you know of any other way of upgrading your domain-joined PCs? Let us know in the comment section below.
For those of you that are more Mac users than Windows users, Apple has been able to support Windows 10 on Bootcamp for some time now.
Now that Windows 7 is no longer officially supported, you’ll probably need to learn how to upgrade to Windows 10.
Of course, those of you that have purchased the Windows 7 Extended Support can postpone this for another 2 years. However, the vast majority of you will probably choose to upgrade to windows 10.
Thus, we’ve created this guide on how you can upgrade from Windows 7 to Windows 10 in Bootcamp on a Mac.
How do I upgrade from Windows 7 to Windows 10 on Bootcamp?
Before proceeding with the upgrade, you need to make sure you have all the necessary items and made all the preparations:
A Mac PC
Windows 7 Service Pack 1
A 64-bit edition of Windows
Keep in mind that Bootcamp only allows the installation of 64-bit editions of Windows
A valid Windows 10 license key
The final step that you need to take before actually upgrading your Windows is to make sure that your version of Mac is updated to the latest version.
In order to do this, follow these steps:
Boot your Mac into the OS X system
Log in
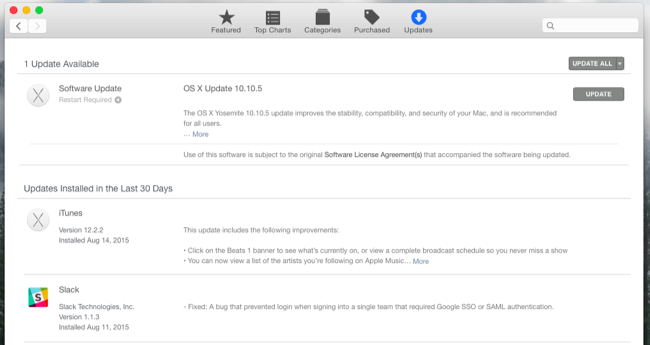
Open the App Store app
Go to the Updates tab
Install any available updates
Boot into Windows
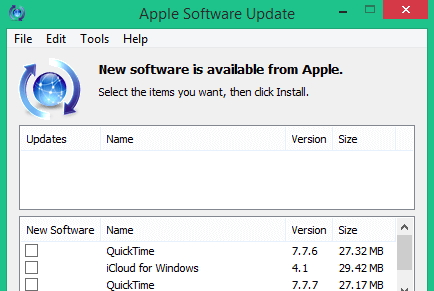
Launch the Apple Software Update application
Install any available updates from here
Once you’ve made these preparations, you can proceed with the actual upgrade from Windows 7 to Windows 10.
Follow the on-screen instructions as if it were a regular Windows PC
Once the upgrade process is finished, run the Apple Software Update application again and install any available updates
By following these steps, you should be able to successfully upgrade your Bootcamp Windows 7 to Windows 10 efficiently.
Also, remember that this process will register your Mac hardware to Microsoft and that any future installs of Windows 10 on that PC will be made much easier.
Remember that since Windows 7 is no longer supported, you won’t be able to benefit from new security updates. This makes upgrading extremely important and should be mandatory to those that want to keep their data safe.
Did you find this article useful? Let us know in the comment section below.
Windows 7 is nearing the end of support, and more and more users are preparing to migrate to the more advanced Windows 10. The problem is that when it comes to migrating to a new OS, you may want to take all of your files and folders along with you.
These include user profiles, documents, games, pictures, etc. Thankfully enough, there are plenty of ways you can backup your Windows 7 PC and prepare for migration towards Windows 10.
That is why we’ve compiled this step-by-step guide that will run you through all the methods so that you can backup all of your data and prepare for the new OS.
How do I backup Windows 7 documents?
1. Use Windows 7’s Backup and Restore feature
The default method of performing a Windows 7 backup is through the Windows Backup and Restore feature. However, keep in mind that you will need 3 items before proceeding with these steps:
Your Windows 7 PC
An external storage device
The PC you will install Windows 10 on
If you do have these items, then you can proceed with the Backup and Restore procedure.
1. Create a Windows 7 Backup
Press Start
Go to the Control Panel
Select System and Security
Choose Backup and Restore
Select Set up backup
Connect your external storage device to the Windows 7 PC
Under Backup Destination, select your external storage device
Click Next
Select Let me choose
Click Next
Normally, all files under Documents, Music, Pictures, and Videos will be backed up.
You can choose to add other files to the list as well during this stage.
Unselect Include a system image of drives
Click Next
Choose Change schedule
Unselect Run backup on a schedule
Click OK
Select Save settings
Run backup
2. Restore files on a Windows 10 PC
Connect the external storage device where you backed up your files to your Windows 10 PC
Press Start
Go to Settings
Select Update & Security
Select Backup
Go to Backup and Restore (Windows 7)
Choose Select another backup to restore files from
Select the backup created from your Windows 7 PC
Click Next
Choose Select all files from this backup
Click Next
Select Restore to start restoring files to the Windows 10 PC
This is the default method used to backup and restore data from a Windows 7 PC to a Windows 10 PC while using Windows’s proprietary backup tools.
However, if you find these steps to be too complicated or too redundant you can always choose third-party backup tools that can do the work for you.
2. Use a third-party backup tool
There are plenty of backup-tools out there that can finish the job fast and quicker than Windows 7‘s Back and Restore feature. These tools will either finish the job faster, require fewer steps, or a combination of both.
While each of these tools has different steps to follow, suffice it to say they are simple enough that they do not require their own guides.
Here are a few examples of good third-party backup tools that can prepare your Windows 7 PC for a Windows 10 upgrade:
By using any of the methods listed above, you will be able to successfully backup all of your personal files and documents and migrate them for your Windows 7 PC to your Windows 10 PC.
What method do you prefer when backing up your Windows 7 PC? Let us know in the comment section below.
Windows 7 users are most likely aware that their OS is at the end of its life, and that they will need to upgrade sooner or later to Windows 10.
The same thing can also be said about their Windows 7virtual machines that they are running on their Mac in Parallels, which will also need an upgrade soon enough.
While not many users need virtual machines, those that do will definitely benefit from knowing how to upgrade.
That is precisely why we’ve decided to compile a step-by-step guide on how to upgrade Windows 7 to Windows 10 in Parallels Desktop for Mac.
How do I upgrade Windows 7 to Windows 10 in Parallels?
Create a snapshot of your VM
This step is only needed if you’ve done any work on a Windows 7 VM and need to save it for the upgrade
You can back up the entire virtual machine by copying its .pvm file somewhere on your hard drive
Update your Windows 7 VM until it is the latest version
By following these steps, you will be able to successfully upgrade Windows 7 to Windows 10 in Parallels Desktop for Mac.
Keep in mind that in order to prepare for these steps, your PC should have enough processing power to run the two operating systems in parallel.
Additionally, make sure you have at least 10 GB of hard disk space for the upgrade from Windows 7 to Windows 10. If you do meet these criteria, then the upgrade process should go flawlessly.
Do you use Parallels to run a Windows VM on a Mac too? Tell us what other articles you might be interested in reading in the comment section below.
Speaker calibration software tools are practical for audio engineers and other types of users who wish to improve the sound of their loudspeakers. Audio fidelity can be maximized by eliminating unwanted noise and correcting the balance.
The way it works is that the program sends test tones to your loudspeakers and performs an analysis of the results using your computer’s microphone. The acoustics of your room are equally important, especially when it comes to music production.
Unfortunately, Windows has basic options and configuration settings dedicated to speaker and room calibration. However, you can explore and take a look at the best speaker calibration software tools we handpicked for you.
What are the best speaker calibration software tools?
Sonarworks Reference
Sonarworks Reference is an intuitive software application designed to correct the sound of your speakers and headphones by adjusting the bass, middle, and high levels. Its goal is to obtain a more neutral sound by measuring your room’s acoustics.
Wrapped in a sophisticated-looking graphical interface, the program guides you every step of the way, starting with checking the compatibility of your microphone. To measure the room’s acoustics, you must have an omnidirectional condenser measurement microphone.
It evaluates speaker size and position in the room, noise floor, along with the speaker and room frequency response. All this info is used to build your calibration profile that will be later used in Reference.
When it comes to audio enhancement features, you can check out the initial frequency response of the perceived acoustic power, the actual frequency response, and the current correction of the signal frequency response.
The frequency response curves can be viewed in a color-coded chart. Additional options are available for changing the signal phase response, limiting the correction curve, and viewing the target frequency response. During this time, you can toggle the left and right channels.
Pros:
Intuitive interface
Efficiently measures a room’s acoustics
Efficient color chart display
Cons:
Cannot be used without a condenser microphone installed
Waves TRACT System Calibration is a plugin that integrates with the Smaart audio software suite. It’s made for specialists who need to automatically repair speaker equalization issues to create a perfectly balanced system for audio mixing.
According to the developer, the program can be used live or in the studio and can operate with any well-known DAW software tool. If it’s not used with Smaart, then Waves TRACT System Calibration can be turned into a top-quality equalization tool with 8 bands.
Using information acquired from Smaart, Waves TRACT System Calibration is able to determine the corrective FIR equalization curve as well as time alignment corrections. Up to 8 system measurement snapshots can be captured and merged, in order to set the baseline for EQ adjustments.
Moreover, there are 4 standard reference curves supplied by the plugin, but it’s possible to create and save custom presets. Multiple IIR filter shapes can be explored and applied.
Dirac Live is an advanced audio processing tool that can be used to calibrate speakers and correct room acoustics. It supports ARCAM, StormAudio, miniDSP, Lexicon, NAD, and AudioControl devices.
Available in a stylish and clear-cut interface, Dirac Live includes an enhanced phase correction feature that fixes frequency timing problems and delivers superior audio fidelity results.
With the aid of a microphone, the speaker calibration software solution is granted access to measure the audio system and spatial conditions, in order to put together an acoustic profile and automatically identify any sound-related shortcomings.
After the analysis is over, Dirac Live removes the sound coloration by fixing the timing and tweaking the amplitude levels. As a result, your speakers will deliver clearer sound and deeper bass that’s not altered by the room’s reflections.
Instead of figuring out what’s wrong with your loudspeakers and constantly changing their position in the room to get better sound quality results, you can just resort to a specialized tool that can do all of this on your behalf.
All aspects considered, speaker calibration software solutions are a huge ally for audio engineers and enthusiasts alike.
Since support for Windows 7has ended, many users are now forced to upgrade to the next best alternative: Windows 10. There are many advantages to Windows 10, and unless you’ve bought Extended Support, you’ll need to learn how to upgrade from one to another eventually.
However, some users have been reporting problems with the upgrade process. It would seem that they re getting a black screen when trying to upgrade from Windows 7 to Windows 10.
[…] I upgraded my Windows 7 netbook to Windows 10, but sadly, it did not work, only a black screen keeps on appearing whenever I restart it. […]
There are many reasons why this black screen may occur, that is why we’ve compiled a list of solutions that address each of these problems.
When you upgrade from Windows 7 to Windows 10, the driver for your display adapter may no longer be supported by the newer OS. This is especially the case if you have an older PC.
More so, it can simply be a case of your driver being outdated. Since you cannot update the driver without actually seeing the screen, your only option is to try booting your PC in Safe Mode with Networking or low resolution. You can then proceed to update the driver from there.
Turn off your PC 3 times in a row while booting
The PC should go to the Recovery Environment because of the failed boot attempts
Select Troubleshoot
Select Startup Settings
Restart
When it restarts, choose Safe Mode with networking or try Low-Resolution Video
Open the Device manager once you’ve booted
Select the Display adapter
If you have multiple display adapters, try disabling them one at a time, and look to see if that fixes the problem
If you only have one display adapter, uninstall the display driver and then reboot
Go to the manufacturer’s website, get the latest driver, and follow the on-screen instructions to install it.
3. Issues with the peripherals
If you upgrade from Windows 7 to Windows 10 and you get a black screen but can still see the cursor, remove all peripherals from the PC.
If the screen remains black and you can see the cursor, repeat the steps written in the previous solution.
If that works, plug them back in one at a time, and then proceed to update all peripheral drivers if available.
4. Issues with the driver for your display adapter
When upgrading from Windows 7 to Windows 10, your pc may change where it sends the signal from the display adapter. These include changes such as from HDMI to DVI, or DisplayPort to VGA.
Thus, if you have a desktop PC and have multiple ports, try them all or use adapters to see if that fixes the issue.
By following these steps, you should be able to get rid of any black screen issues when upgrading from Windows 7 to Windows 10.
Did you too encounter a similar problem? tell us about it in the comment section below.
If you keep seeing the SMB file not founderror message on your Windowsserver, you are not the only one experiencing this issue.
A good number of people have discussed this issue on a wide range of computer-related forums, and we took the time to research some of the best answers given by people and compiled them into a very useful troubleshooter article.
Server Message Block, or SMB for short, is a protocol used for network communication that allows your PC to share access to a variety of files, serial ports, printers, or even the network itself.
Because the error message mentioned above involves your server not being able to find the SMB file, this can cause a lot of issues with your shared network and can stop you from accessing important information.
For this reason, in today’s guide, we will look at some of the best troubleshooting steps that you can try to get your system up and running once again. If you would like to know more, please read on.
How to fix the SMB file not found error on my server?
1. Check your network configuration
It is recommended that you check your network configuration for any issues that could be causing the server not to work properly.
For example, if you’re using a 2012 R2 server, this problem could be caused by transferring data over SMB by using certain network adapters with RDMA capability. It is known that the RDMA connections can failback to TCP.
2. Patch your server with the latest updates
Depending on the exact server version that you’re using, the exact steps that you need to follow to get the latest updates will vary.
Having the latest updates is extremely important, especially if you’re using your server to manage a big network with a large number of nodes and connections.
3. Turn on the Remote Direct Memory Access (RDMA)
RDMA is a type of memory access that enables your computer to access others by the use of the network they are both connected on, and beyond this performs all the operations without the usage of the operating system.
Enabling this option will allow your server to perform networking tasks with great speeds, and is extremely useful in big networks.
Please make sure to follow the steps presented here carefully to avoid causing any issues:
RDMA on the network adapter
Press Win+X on your keyboard -> choose PowerShell (Admin).
Inside the command prompt -> type or copy/paste the following command: PS C:\> Enable-NetAdapterRdma -Name"MyAdapter"
Press Enter to run the command.
The network automatically restarts after the process is completed.
RDMA on all RDMA-capable adapters
Press Win+X to launch the Start sub-menu.
Select PowerShell (Admin) from the list to run it.
Inside the command prompt -> copy-paste this command: PS C:\> Enable-NetAdapterRdma -Name"*"
Press Enter to start the process.
4. Reboot the server
Even if this method might seem to simple, some users have had success by simply rebooting the server. This method seems to work as the server re-configures the settings and setup, allowing you to avoid any unnecessary error messages.
If all the above-mentioned methods have failed to solve your problem, please follow the next method.
5. Re-install the server
This method will probably seem exaggerated in intensity, but considering none of the above-mentioned solutions worked in your case, it is now recommended that you re-install the entire server.
It is recommended that you keep the same GPOs, same OU, and also the same configuration.
Users have had success doing this, even though it is a time-consuming process. Waiting for a while beats not being able to use your server tho, so this is a viable solution.
In today’s fix guide we discussed the best troubleshooting steps if you find that your Windowsserver shows you an error saying that the SMB file can’t be found.
Please make sure to follow the steps we presented in the order that they were written. This allows you to make sure that you’re not jumping over a possible solution.
Please feel free to let us know if this guide managed to help you better understand the situation and ultimately fix it. You can do so by leaving a comment in the section found below this article.
As you already know, support for Windows 7has ended, and that means that users will no longer be receiving security updates to their OS. Because of this, It is a good idea to update to Windows 10 as soon as possible or get the windows 7Extended Support.
Staying with an older OS is generally a bad idea, since the reduced level of security makes you extra vulnerable, especially when your PC contains sensitive data.
One good example is not upgrading when using accounting software since it usually contains data that can be easily exploitable, such as Social Security number and bank account information.
For example, there are plenty of things that you should remember if you have Windows 7 installed, and are using a program like Quickbooks.
What happens to QuickBooks if I stick to Windows 7?
1. If you don’t upgrade to Windows 10
Regardless of the version of QuickBooks that you have, the main idea is that Windows 7 will no longer be receiving security updates. Thus, this change also impacts QuickBooks Desktop Plus products
If you do decide to stay with Windows 7, you will need to use an older version of QuickBooks Desktop. However, you will still be at risk of exposing your sensitive data, and that of your customers and employees.
To be perfectly clear, you can use any version of QuickBooks Desktop version 2019 and earlier.
2. If you buy the Windows 7 Extended Support
Normally, those of you that are using the Windows 7 Extended Support feature will continue to receive security updates from Microsoft.
This means that despite having Windows 7, you will be able to use all of the newer QuickBooks Desktop versions.
However, keep in mind that the program’s notification system cannot distinguish between those that have bought the Extended Support and those who haven’t.
Thus, you will receive the occasional notification prompting you to upgrade your OS, despite being covered.
if you do decide to upgrade to Windows 10, you should make sure you backup your data, or use an efficient migration tool, so that you won’t have any compatibility issues after the upgrade.
Additionally, you should check to see if your PC meets the system requirements for Windows 10. If it does, it will be able to run the latest versions of QuickBooks without any issues.
Conclusion
Working with sensitive data such as bank information or credit card numbers is extremely important. As such, the computers running accounting software should always be covered from a security point of view.
As such, if you want to continue using QuickBooks efficiently, either buy the Windows 7 Extended Support or upgrade to Windows 10 for maximum protection.
Do you work with accounting software as well? Tell us what you prefer to do as far as the OS is concerned in the comment section below.
As you may already know, Windows 7 is at the end of its life, and will no longer be receiving any updates from Microsoft.
Of course, those of you that still use the OS and plan on using it for the foreseeable future can always opt to get the Extended Support.
However, as you may already know the Extended Support is not without its cons, especially the financial ones, so not everyone will be able to get it.
That is why it is important to remind everyone how much longer will their Windows 7 be valid and secure. Thus, many websites have been created to act as simple countdowns until the last day of Windows 7.
Why are these Windows 7 end support countdown clocks useful?
While many of you may now about the impending end of Windows 7, fewer are aware of what the end of support actually means for the OS.
First of all Windows 7 will no longer be receiving any security updates, which will make it a prime target for hackers, spammers and more of the such. Additionally, Windows 7 will no longer be getting any improvements.
This means that if you want any new features, you’ll need to opt to user-created content that is not always all that reliable and secure.
But more importantly, the countdown clock is most useful for those that do plan on upgrading to Windows 10 but need to know how much time they have at their disposal in order to make all the necessary arrangements.
Admittedly, they could have upgraded at any time since Windows 10‘s release, but now at least they will be reminded just how little time is left.
What can I do until the last day of Windows 7?
You can use the time in several useful ways, such as:
Despite no longer receiving support from Microsoft, unless you’ve bought Extended Support, Windows 7 is still holding strong on the market.
However, mixed work environments do exist, where some users have Windows 7, while others use Windows 10. That being said, file sharing between the two systems is something that occurs commonly.
Unfortunately, some users have been reporting having issues sharing between the two operating systems:
I have 3 computers networked, 2 are desktops with windows 7 pro (updated) and then a laptop with window 10 pro (1803). […] Now I can access the 2 desktops (windows 7 pro) from the Laptop (windows 10 pro) but neither of the desktops can access the laptop.
Since this problem is one that seems to be very common, we’ve compiled a list of methods you could make file sharing between Windows 7 and Windows 10 easier.
How do I fix Windows 7 to Windows 10 sharing problems?
1. Set your Network Profile to Private
File sharing between two PCs that are in the same network is only possible if you’ve set your PC Network Profile to Private. That being said, follow these steps to switch your Network Profile from Public to Private:
Press Start
Click on Settings
Choose Network & Internet
Select Ethernet or Wi-Fi
Go to the Network Profile section
Select the Private option
2. Adjust your Firewall settings
It is common for the Windows Firewall to sometimes block access to shared folders. Thus try disabling it for a set amount of time and see if you can share anything.
Press Start
Type in Windows Security
Choose the first result
Select Firewall & Network Protection
Choose Private Network Option
Slide the Windows Defender Firewall toggle to Off
Try sharing a file. If it works then it means that the Firewall was to blame all along, and you’ll need to open a specific network port:
Slide the Windows Defender Firewall toggle
Press Start
Type in Windows Security
Choose the first result
Select Firewall & Network Protection
Select Allow app through Firewall
Go to the Allowed app section
Click the Change Settings option
Choose File and Printer Sharing
Check the box marked Private Network Option
Click OK
By following these steps, other networks will now be able to access your shared files and folders even when the Windows Defender Firewall is turned on.
Did these solutions help you overcome the file-sharing issue between Windows 7 and Windows 10? Let us know in the comment section below.
As you may know, Windows 7 is no longer receiving any security updates from Microsoft. Because of this you either have to upgrade to Windows 10 or keep Windows 7 by getting the Extended Support for business.
There are many reasons why you should upgrade to Windows 10, some of which are the improvements to the various features of the Windows 7 counterparts.
One good example is the difference between Windows 7‘s Favorites vs Windows 10‘s Quick Access feature
Favorites vs Quick Access: Which is better?
From a functionality standpoint, the two features are pretty much the same. However, everything else about them is different from then on out.
1. Visual differences
Despite serving a similar role, the two features look and act a bit differently. as far as looks are concerned, the first thing you’ll notice is that:
Favorites list folders only in list form
Quick Access features a pin icon next to some folders listed underneath it.
The second difference can be seen from the moment you actually access the features:
Favorites list the same folders that are listed underneath it
Quick Access lists folders as well but also recent files
2. Content differences
The Favorites list remains the same most of the time. Quick Access changes based on your PC habits, and you can even see changes from one hour to another.
However, if you want a folder or file to be accessible all the time, you can also pin it to always stay on display, even if you don’t use it for a while.
3. Functionality differences
Not only is Quick Access more dynamic based on user habits, but it is also much easier to customize. For example, you can remove items from the Quick Access list by simply right-clicking them and clicking Remove from Quick Access from the context menu.
Adding items to the list is even easier. You can simply do it by dragging and dropping them onto the list, and you can even reposition them using the same method.
4. Make Quick Access behave like Favorites
Another neat Quick Access features is the ability to make it behave exactly like Favorites. To do this, all you need to do is click on File in the File Explorer, and select Change Folder and Search Options.
There you will find several options that change the way Quick Access acts. If you want to have the exact same functionality of windows 7‘s Favorites, simply do the following:
Disable Show recently used files in Quick Access
This will remove the file listing when you click on it in File Explorer.
Disable Show recently used folders in Quick Access
This will remove the dynamic component of the feature
Conclusion
As you can see, Windows 10‘s Quick Access feature is much more flexible than Windows 7‘s Favorites. However, if you prefer the latter, you can always make Quick Access act the part.
This is just one of the many reasons why you should upgrade to Windows 10 as soon as possible.
Do you know of any noticeable differences between Favorites and Quick Access that we have missed? Let us know in the comment section below.
Microsoft is always improving on Windows 10 with twice a year updates, but over the past few releases, the operating system has not seen many major visual changes. Asides from touches in the user interface like a brightness slider, a new light theme, and many other subtle under the hood bug fixes, Windows 10 has kept the same clean look. One Windows 10 fan, though, has a new vision for the operating system, and it is just downright gorgeous-looking (via Reddit.)
While it is obviously easier to mock up a concept in photoshop than it is to re-code an entire operating system and put this vision to action, the concept image from Reddit user u/MrZombieKiller is still quite interesting. In the concept, we get a peek at a custom version of a revamped Start Menu that we know is coming in Windows 10X. It features some of the redesigned static Windows 10 icons, as well as a Search Bar and area for recommended documents. Even the Start button has been tweaked in the concept and it now sports the multi-colored Microsoft Logo.
In other areas, the Start Menu in this concept no longer has any user information, links to documents, a profile icon, or the option to power off the PC. Instead, this has all been moved to the Action Center with what appears to be a “lever” which could let users pull it up when needed. The Action Center icon itself also is tweaked in this concept and is now summoned by the user’s profile picture. Accordingly, other elements from the system tray have been removed, and pushed up into the Action Center “lever.” Notifications in the Action Center, though, largely remain the same, and we still have the “toast” tiles” which have been Windows 10’s hallmark feature.
This concept might offer up a brave vision for what one fan’s version of Windows 10 20H1 will look like, but it is obviously just a concept and will never come to life. Microsoft is still beta testing the Windows 10 20H1 update, and we do know that with Windows Insider builds becoming smaller in scope, it is almost close to being final. This all means a major UI change like this is never likely to happen, but there could be hope. Microsoft has changed the way the Windows Insider program — and the Fast Ring — works, so new features and Windows Shell elements could be coming plenty in the future.
Bridge engineering software solutions are oriented toward professionals and students looking for powerful civil engineering tools to help them analyze, design, and generate bridge models.
With the aid of these programs, engineers can turn their dreams into reality, in order to deliver fully functional bridge structures that have a unique design and pass all safety tests.
In this article, we handpicked the 4 best bridge engineering software tools, which are suitable for both beginner and advanced users.
What are the best bridge engineering software solutions?
MIDAS Civil
MIDAS Civil is an elaborate bridge engineering software solution wrapped in a user-friendly graphical interface. It has modeling and analysis features that give you the possibility to create large-scale structure designs from start to finish.
As far as modeling tools are concerned, MIDAS Civil has a cable-stayed bridge wizard that allows you to quickly produce complete bridge models, set up the construction stage models, and analyze alternatives.
Additional wizards can be used to evaluate 2D Transverse, rail track, and suspension bridge models. The whole procedure needed for analysis and design can be automatically generated by MIDAS Civil, based on standard data input.
Download Midas Civil (free trial)
When it comes to analysis, you can experiment with tools for measuring composite girder bridges, integral and pre-stressed concrete box-girder bridges, as well as specific stages in the construction project.
The post-processor found in MIDAS Civil takes into account specific design standards to auto-generate load combinations. And it can show animated output such as static or dynamic analysis results. Reports and tables can be created, too, which can be further imported into Microsoft Excel or Word.
CSiBridge
CSiBridge contains engineering tools for modeling, analyzing, and designing bridges. It’s powered by the same team behind SAP2000, the comprehensive software solution dedicated to all-purpose structural analysis and design.
CSiBridge provides a unified graphical interface for modeling, design, analysis, load rating, scheduling, and reporting tasks. It includes several templates to help you get started with bridge structures.
Model properties can be edited in a table view to swiftly make model adjustments, as well as to import and export tables to Microsoft Access and Excel.
Based on this data, the bridge engineering software solution generates shell, spine or solid object models. Any changes made to the model properties are automatically updated in the designs.
Furthermore, bridge engineers can tinker with familiar substructure elements, such as bents, bearings, post-tensioning, layout lines, and abutments.
Additional components include foundation springs, restrainers, parametric variations, lanes, joints, frames, tendons, cables, links, and hinges. You can also define vehicle loads and classes, parametric loading, and load patterns.
The most recent enhancement of CSiBridge is a Bridge Modeler component, which allows you to define the parameters for girder-type bridge systems. It can create multiple pairs of braces, necessary for cross-frames made of steel.
Autodesk Structural Bridge Design
Structural Bridge Design from developer Autodesk presents an integrated bridge engineering software solution. It’s not as complex as Midas Civil or CSiBridge, but it’s designed for small to medium-sized bridges.
Students and educators can get it free for 3 years. The program features tools to help you design bridge models, analyze variables, and check the code.
It’s possible to define the geometrical properties and materials used to calculate all the necessary parameters for bridge sections or girder components.
Thanks to a built-in workflow, you can load and analyze the bridge conditions, as well as make sure that the code is compliant with AASHTO, EUROCODES, and other standards. Moreover, the properties of every bridge section can be calculated, such as the shear and torsion.
When it comes to the project stage, you can pick the right type of analysis from grillage, line beam, and finite element. Calculation reports are automatically compiled and produced by Structural Bridge Design.
LARSA 4D Bridge Series
LARSA 4D Bridge Series is a software suite specially made for bridge analysis and design. It can be used in modeling advanced bridges supported by cables, steel girder, concrete segments, and precast elements.
The entire package relies on a state-of-the-art analysis engine, a graphical user interface for data processing, together with numerous design functions.
For example, you can take advantage of a finite library of elastic and non-linear elements, such as multi-node super cables, non-linear grounded spring, friction pendulum, or beam with inelastic connection.
As far as analysis goes, you can choose between standard and advanced mode. The standard analysis type covers linear static, basic moving load, and staged construction, among others. Meanwhile, the advanced analysis type supports moment curvature, non-linear time history, along with non-linear pushover, progressive collapse and buckling.
The LARSA 4D Bridge Series can run integrity checks to identify typical bridge modeling errors and suggest solutions. You can generate graphs and project reports, use spreadsheets, and extend the software functionality with the help of macros.
Conclusion on bridge engineering software
Whether you’re a professional looking for a reliable software program or just someone passionate about bridge engineering designs, you can turn to the comprehensive applications on this list.
Wrapped in intuitive graphical interfaces, Midas Civil, CSiBridge, Autodesk Structural Bridge Design, and LARSA 4D Bridge Series come with the necessary design, analysis, and reporting tools to help you breathe life into your bridge modeling projects.
Trying to login to your Salesforce account but it’s not working? This is a common issue and can occur due to several reasons. Many users have reported similar sign in issues.
The Salesforce admin for your organization sets the password policies. These policies determine how many times you can attempt to login and other properties. If you are troubled by Salesforce sign-in related issues, here is how to fix them in Windows 10.
What can I do if Salesforce won’t login in Windows 10?
1. Check your security programs
If you are using Salesforce desktop client, it is possible that a third-party security program like your antivirus software is blocking the connection.
To find the issue, try to disable all the active firewalls on your system and try again.
If you’re locked out due to repeated login attempts, wait until the lockout period expires and try again. You can also contact your Salesforce admin to resolve the issue.
Make sure the login credentials are correct. According to Salesforce, many issues occur due to incorrect spacing in the password and username.
Contact your admin in case the password has expired. Your admin may set the password to expire for security reasons.
Make sure you are using the Salesforce client inside the trusted UP range. If you are using a new device or after a fresh installation, make sure you verify your identity.
When you try to access the service using a new device, you may require a new security token. You can get the security token by resetting it.
Once the security token is reset, you can update your token in Salesforce Outlook client.
If you get Use Custom Domain message, then make sure you are using the domain name provided by your administrator.
Make sure you grant login access to your administrator get your issue resolved.
Many of the Salesforce login issues occur due to security programs blocking the connection or due to incorrect login credentials. In any case, you should contact the Salesforce when the issue is not resolved.
Follow the steps in this article and let us know which fix helped you resolve the issue in the comments. Also, leave there any other questions or suggestions that you may have and we’ll be sure to check them out.
In the latest grab at making the mobile browser more modern, Microsoft is introducing somewhat of a new “Control Center” element. This experience essentially combines multiple settings menus in one simple hub and allows you to customize controls for the browser to your own liking. We’ll be taking a look at it in this post.
The changes, and accessing the “Control Center”
To access this new Control Center, you’ll want to make sure you’re enrolled to test out the beta version of Edge on Android. You can enroll by visiting the Google Play Store listing and choosing the Join the Beta option. You’ll then need to update the app to the latest version, which is currently at 44.11.24.4109.
Once you’re on this version, you should have a new UI by default, which was previously only in A/B testing for some users. You’ll notice that things have changed a bit. The search box is now more rounded, and the continue on PC button is gone from the middle of the bar on the bottom. Instead, it has been replaced with a new ellipsis button, which has now gives you access to the new “Control Center”
You’ll also see that the profile icon has moved to the left side of the screen and is no longer buried under a menu. On the beta version, you’ll also see the addition of a share button, to help make sharing webpages easy. We’ve included a visual look at some of these changes below.
A look at the “Control Center”
Much like Google’s Android 10 mobile operating system, the new “Control Center” on Edge Beta on Android is a bit reliant on gestures. As pointed out by our friend Rich at Windows Observer, once you summon the settings menu by tapping on the ellipsis (the …) in the bottom of the screen you’ll have this new “Control Center.” There are then some gesture-based controls here that you can leverage. You’ll notice a little bar atop the new “control center.” You can then “pull” it up with your finger to see additional options and customization.
You currently can’t change the top row of buttons for Favorites, History, Downloads, Shopping, or Settings, but the others can be changed. You can do this by clicking the Change Menu option on the bottom right corner of the screen. Once clicked, you can drag around your shortcuts and icons, so you can access them by just swiping up on the “control center” rather than navigating a bunch of menus. Your options include find on page, voice search, desktop site, download page, print, add to screen, image search, read aloud, continue on PC, and exit browser. You can tweak these to your own liking.
A step towards a modern Edge browser
These changes are a bit small, but they help make the Edge mobile browser a bit more reliable. Accessing quick settings and functions of the mobile browser is now easier, and everything you need is front and center, rather than hidden in multiple menus. This is a bit similar to the experience in Windows 10, where one settings button lets you search for all the functions you need. It’s great to see these improvements, and you can expect them to roll out to the standard version of Edge on Android once beta testing is complete. Are you on Android and using the Edge beta? Let us know what you think of these changes in the comments below.
As MSPoweruser points out, this is quite a significant moment. Since Gmail is included on most Android phones by default, the milestone suggests a large group of users could prefer Outlook over Google’s solution. In fact, when compared to Gmail over the past few years, Microsoft has continuously improved on the app. Some new features include dark mode support, suggested replies, and even a completely new search experience and navigation bar.
Still, while 100 million seems like a big number, it is still a far cry from some of Microsoft’s other Android apps. Swiftkey, a very popular third-party keyboard on Android, recently hit the 500 million install mark. Skype, meanwhile, hit the 1 billion download club in October of 2017, at the time joining both WhatsApp and Facebook Messenger.
Other Microsoft on Android milestones include Microsoft Launcher hitting 10 million downloads, and Edge hitting the 1 million download mark. Clearly, Microsoft is having much success on Android, and with the release of the Android-powered Surface Duo on the horizon, things can only get better from here on out.
With the end of support that has come to Windows 7, many users, especially gamers, have been wondering what will happen to their precious game collection.
These include the games that they bought, such as Steam titles or Origin titles, as well as the default games that came with Windows 7. These include Spider Solitaire, Chess Titans, Mahjong Titans, and Purble Place.
As far as Windows 7-specific games go, many users have been asking on official forums whether the transfer is possible:
Does anyone know how to import the games (solitaire, spider, hearts, free-cell) from Windows 7 to Windows 10? The ones that come with Windows 10 are so lame.
Unfortunately, there is no official way of transferring these titles to your Windows 10 PC, as stated by Microsoft:
Please be informed that there is no way to run Windows 7 games in Windows 10. If you want, you can do a rollback to Windows 7 for the games.
The good news is that there are a few workarounds that you can use in order to get these Windows 7 games on your Windows 10 PC. Since this is a problem you will be facing eventually once you too make the transition, we’ve compiled a guide on how to efficiently transfer your games from Windows 7 to Windows 10.
How do I get my games from Windows 7 to Windows 10?
1. Windows 7-specific games
As mentioned, there are only workarounds to get these games onto your Windows 10 PC. One of these involves simply installing the custom game setup files.
Launch the setup file once it has finished downloading
Follow the on-screen instructions
The games should now be installed and you should be able to play them as you would on a Windows 7 PC
2. Games that you have bought
When it comes to the games that you own, transferring them from Windows 7 to Windows 10 can be a bit trickier. It cannot be done directly and it involves the use of third-party tools.
One such third-party tool isLaplink PCmover, which not only lets you transfer all of your games from one PC to another without the need to reinstall, it lets you transfer all of your programs, user settings, and profiles.
The program is extremely easy to use, and if you want more details about it, check out this in-depth guide.
Conclusion
By following any of the two mentioned methods, you should be able to transfer your gaming library from a Windows 7 PC to a Windows 10 PC without any issues.
That being said, you should be able to continue gaming without ever having to feel like you’ve changed the OS at all.
Did you find this article useful? Let us know in the comment section below.
The Collections feature is a special option in Microsoft Edge, so we bet that you’re eager to find out how to enable and use it. Collections is there to let you store websites, images, and other webpage content for later reference.
Even more, you can rearrange items, add notes, or highlight specific content. The bottom line is that you may use this to ease work on a research document, without having to copy-paste between Word and the browser since Collections can be exported to both Excel and Word.
The feature is now available in the Edge Insider Canary and Dev channels. Just get ready to enable it manually, using the steps detailed below.
How can I enable and use Microsoft Edge Collections feature?
Click the Collemictions button next to the address bar.
Up next, select Start new collection.
Type a meaningful name.
Press Enter.
Start visiting websites that you want to collect.
Feel free to add any desired web page to your collection by selecting Add current page at the top of the pane.
You can also add text to the collection. Just highlight it on the page and drag it into the collections pane.
This procedure works for images as well.
If you happen to like a link, drag and drop it to add it to your list.
When you add content to Collections, Microsoft Edge creates a visual card for a quick recognition of the content. Revisit content by clicking on the visual card in the Collections pane.
After completing the steps, you can also move your content around. Just click an item and drag and drop it in the position you prefer.
To add your own notes directly to a collection, select the Add note icon from the top of the Collections pane.
If you want to remove content, hover over the item, select the box that appears in the upper-right corner, and finally select the Delete icon.
Click the Share button in the top-right of the pane if you wish to export everything to an Excel spreadsheet or Word.
Is this feature making you think of the old Internet Explorer-powered Linked Notes feature from OneNote desktop apps? Back in the good old days, this feature also automatically linked passages of text to webpages in the browser.
While still in development, Collections looks promising. Whatever you are doing on the web, it tries to help.
If you’re planning a trip, it will help you gather and pull together trip information. If you’re organizing your weekly shopping list, then use it to collect and compare desired items.
No other browser provides a similar built-in experience for now, so why not giving it a try?
Gmail remains a reliable e-mail platform, but you may later decide to migrate from Gmail to Office 365. Making such a choice shouldn’t be permanent, right?
This migration guide will help you import your mailboxes and their associated data from Gmail to Office 365, but keep something important in mind. Users tend to say that such manual procedures are time-consuming and look for solutions to automatically move their data to Office 365.
It’s up to you to decide whether to migrate fast or simply for free. You know which method works for you. This article discusses the manual process of transferring your data from Gmail to Office 365, which involves a few major steps.
Read them below and discover everything you need to know to complete the migration.
Choose the plan you want to sign up for. Multiple choices are available for you: Office 365 Business Premium, Office 365 Business Essentials, Office 365 Business, or Office 365 Education. We’re recommending to go with Business Essential and you may later add other things on top of it.
Follow the steps to sign up for an Office 365 business plan.
Note: The first account that you create will be an admin account.
From here, click on the Admin tile from the home page.
You are now directed to the Admin center. This will say Your office 365 setup is incomplete.
Click on Go to setup from here.
3. Create and add Users to Office 365
Now, from the Admin center, click on Users.
Click Active Users > More button.
Hit the Import Multiple Users option.
For Single User entry, click on Add a user.
If you just have only few users, feel free to enter the values manually.
Create an excel sheet and use Import Multiple Users in case of having to add multiple users.
The fields of the file should include the following: User Name, First Name, Last Name, Display Name, Job Title, Department, Office Number, Office Phone, Mobile Phone, Fax, Address, City, State or Province, ZIP or Postal Code, Country or Region.
After compiling the excel sheet with, click on Browse from the Create and upload file screen.
Click on Verify.
Click on Next when getting the confirmation message: Your files look good.
4. Create Migration Endpoints with Gmail IMAP
Click on Admin centers > Exchange.
From the Exchange Admin center, click on Recipients from the left panel.
Up next, click on the migration link located on the top bar.
From here, click Migration endpoints.
Click New +.
Select IMAP on the next page.
On the IMAP migration configuration page, enter the following details: MAP server: imap.gmail.com Settings: default
Click Next.
The Enter general informationpage should now open.
Once you’ve created a migration endpoint, it should look like this:
Note: Migration endpoint is a terminology that encompasses the settings used to connect to Gmail and migrate emails from Gmail to Office 365.
5. Migrate Mailboxes by creating Migration Batch
From Exchange Admin center, navigate to Recipients > Migration.
Click on the first “+” icon.
Then, click on Migrate to Exchange Online.
Select IMAP migration > Next.
Click on Browse.
Select Users screen.
Just select the file you created in the previous steps with the username and password for the Gmail account that you’d like to migrate.
Click on Next.
After validation, Office 365 displays the Gmail mailboxes.
Now, you need to click on Next.
On Set the migration endpoint screen, select the migration endpoint.
Click on Next once again.
On the IMAP migration configuration window, continue with the default values, then click Next.
After that, on the Move configuration page, type the name of the migration batch in the box.
On the Start the batch page, click on New.
This will create this migration batch and start migrating the email automatically.
While the emails are getting migrated, you may click on View details. This will display how many emails have been migrated for every single mailbox.
6. Point your MX record to Office 365
Go to the Admin Center.
Here, click on Settings on the left panel.
Click on Domains.
Click Select your domain name.
This will say: Setup in progress. You might also see this line here: Setup completed.
Click on the default domain name. It should now display the Setup your online services screen.
To pass this, you have two options: Add records for me and I’ll manage my own DNS records.
Click on the second option. This lets you insert a list of DNS entries (MX record values).
For every domain, the MX record value will be different.
Email systems normally employ a DNS or MX record to look for the exact email delivery address. To complete the procedure, you have to point your MX record in DNS from Gmail to Office 365.
Matter resolved now. Once you update your DNS with the appropriate values, you’ll receive the new emails to your Office 365.
If you are planning a Gmail to Office 365 migration, things no longer need to be confusing. On the other hand, migration from Hotmail to Outlook is seamless, and it takes just a couple of moments.
We’ve walked you through the steps you need to follow. Undoubtedly, there might be a few hiccups along the way, yet we’re here to answer any questions.
If you’ve ever had a situation where you need to run an internal poll or questionnaire amongst coworkers, then you’ve likely turned to tools like Google Forms or Survey Monkey. Well, as covered as part of most Office 365 subscriptions, Microsoft also has a tool known as Forms which can help you do the same.
As the name suggests, Forms is a simple to use lightweight tool that can help you quickly create forms, collect responses in real-time, and view charts to help you visualize your data. Best of all, it works from any web browser, and there’s no need to install a dedicated app. As we continue to dive into each of the Office 365 apps or services, we’ll now be taking a closer look at Microsoft Forms.
Creating forms
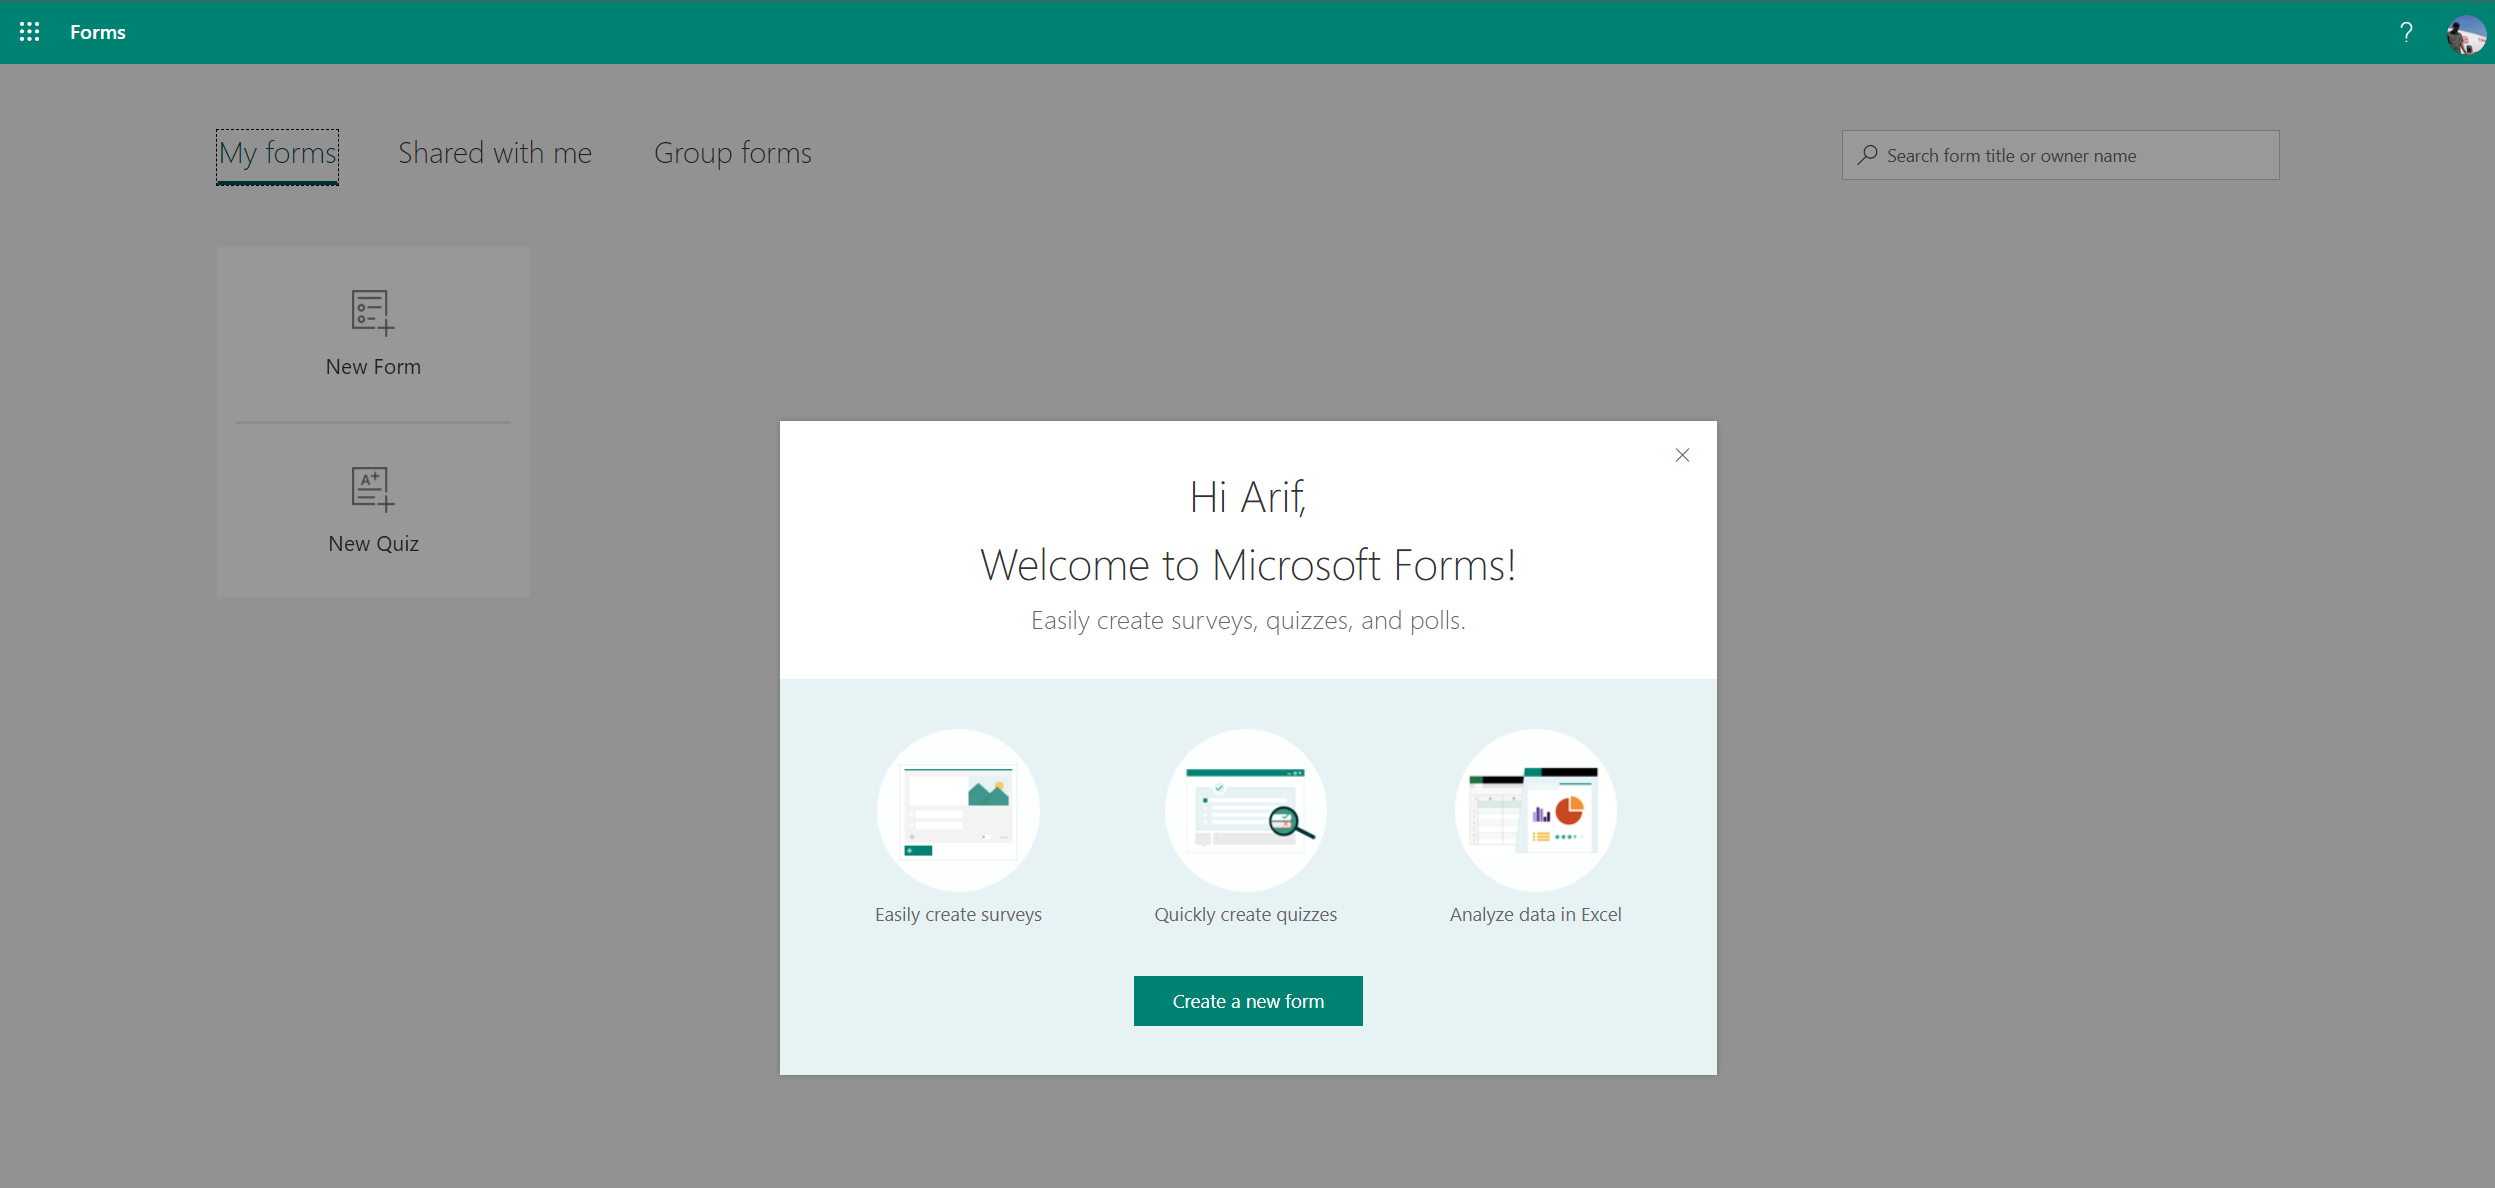
Once you open the Forms experience from the Office 365 launcher, you’ll notice two options. You can create either a new form or a new quiz. You can then enter in a name for your new form or quiz, or choose an optional subtitle. Next, there are options to choose to add Choices, Text, Ratings, or Date questions. If you choose a choice option, you’ll need to enter the text you want to display for each question.
When creating a quiz specifically, you have options to assign each quiz a certain amount of points. You also can add options for multiple answers, or switch the question to required. And, if you want to spice up the look of the quiz, you can click the Theme option, and choose one of the preset options.
In some cases, Microsoft Forms is smart enough to know what you’re writing about and will suggest some templates for you when creating forms. For further customization when you’re filling out a form, you can choose a theme to make the form look a bit more stylish. There are a few preset options to choose from, be it balloons, office, or art. Once you’re finished, you can click the Preview button to have a peek at what the form or quiz will look like.
Sending forms
Once you finish creating a form or a quiz, you can select the Share button on the top of the screen. From there, there are a few options. You can choose if you want only people in your organization to respond, or if you want to allow anyone with the link to response. There are also options where you can share a QR code for the person to scan, so they can visit the form. And, there’s even an embed code, which will let you embed it in a blog or website. For simplicity’s sake, you also can invite others to the form via email.
If you want, you also can share the form as a template, so anyone with the link can duplicate it. And, if you’re really up for collaboration, there’s an option to share a link that will let others edit the form too.
Viewing Results
After a form is shared, you’ll be able to view the results. To do this, head back to the main Microsoft Forms dashboard. You’ll be able to click the form, and then click the Responses tab along the top. If you click, you’ll be able to see individual details for each responder, such as the time it took for them to finish the form, and which option was selected. If you really love numbers, you also can click the option to open in Excel, which will give you a deeper dive into the data.
Try out Microsoft Forms Pro!
Much like free solutions from Survey Monkey and Google Forms, Microsoft Forms is a bit limited in scope. Microsoft, however, does offer a premium version of the service known as Microsoft Forms Pro. This service is more designed for the enterprise and can help you act on customer and employee feedback. It has features like an ability to automatically send surveys, identify sentiment, and Develop customized, on-brand surveys with your company’s look and feel using AI-assisted suggested questions. Is Microsoft Forms something you’ll be interested in? Let us know in the comments below!
When it comes to cloud storage, there are plenty of options for users to choose from nowadays.
These services are getting better and better as time passes, but in the end, only a few seem to remain effective and trustworthy.
One such service is Microsoft’s OneDrive, which offers great cloud storage services at some of the lowest prices. Of course, OneDrive has a business variant called OneDrive for Business that caters more to organizations than towards individuals.
However, those of you that want to migrate from OneDrive for Business can always opt to move towards SharePoint.
How do I migrate from OneDrive to SharePoint?
Before you start this process, you should remember that this can only be done through the OneDrive website, and not the desktop client.
You should keep note that you can only move up to 500 MB of data in a single copy session. If you don’t want to waste time copying data over and over, you can use the File Explorer.
Another thing worth remembering is that there may be situations when you don’t see the Move to command. If that is the case, then you’re probably using classic OneDrive for Business or an on-premises instance of OneDrive for Business.
Additionally, you can only move the latest version of a file, as the older version already present in SharePoint will be overwritten during the copying process.
Finally, if you don’t see any other sites listed when trying to choose a destination, then your organization doesn’t allow moving across sites.
Do you think SharePoint is an efficient alternative to OneDrive? Let us know what your opinion is in the comments section below.
As it is with all operating systems, one cannot be supported forever by Microsoft. That is why upgrades and new versions are constantly being rolled out so that users can enjoy the best that technology has to offer.
Such is the case with Windows 7 and how Windows 10 is supposed to replace it. Even if you do buy the Extended Support for it, sooner or later you will still have to perform the upgrade.
More so, maintaining the Extended Support can become extremely costly, so doing it as soon as possible is recommended.
Of course, the first thing that pops into everyone’s mind is how can they upgrade to Windows 10 without losing any of their precious data.
Since this is a very highly discussed subject, we’ve decided to list the options that you have for when you need to upgrade from Windows 7 to Windows 10.
How do I upgrade to Windows 10 without losing my data?
1. Use dedicated third-party software
When migrating to a new operating system but still wanting to save all of your personal and work files and folders, the best way to do it is to use a data transfer utility.
There are migration programs available to transfer data, folders, and user profiles from a Windows 7 to a Windows 10 OS. While upgrading the operating system on the same computer, files and application settings can be maintained.
In our scenario, you will be able to migrate all data from your PC while switching the operating system, which will be done automatically thanks to great utilities that are available at any time.
Laplink PCmover is a neat software tool that is made specifically to help you upgrade from Windows 7 to Windows 10.
It automatically transfers, restores, and upgrades all selected files, folders, settings, user profiles, and even applications from an old PC to a new PC or operating system, including Windows 10.
Since most applications are installed ready-to-use on the new PC, you won’t need to find old CDs, previously downloaded programs, serial numbers, or license codes.
The user interface is extremely simplistic, and you are guided through the process in a wizard-like fashion.
2. Use the Microsoft Media Creation Tool
The Media Creation Tool is a proprietary tool developed by Microsoft, and it is used to upgrade your current OS to the latest available version.
For those that still have Windows 7, you must know that you must first buy Windows 10, or have a valid Windows 10 serial number.
If you don’t have your own copy of Windows 10, you should check out the links below:
In the What do you want to do menu, select Upgrade this PC now
Select Next
Input your Windows 10 license key
Select Next
Agree with the licensing terms and conditions
Select Keep personal files and apps
Click on Install
By following these steps, you should be able to upgrade your PC from Windows 7 to Windows 10 while keeping all personal files and user profiles.
One thing you need to remember is that, unlike the first method, using the Media Creation Tool has proven to be a bit less efficient as far as data migration goes.
While this doesn’t mean that you will lose any data, using Laplink is generally the preferred solution.
How do you plan on upgrading to Windows 10? Let us know in the comment section below.
If you ever needed to create a text document, then you probably used a text editor, such as Microsoft Word or WPS. However, these usually come with a heavy subscription price that not everyone can afford.
As such, cheaper or even free alternatives need to be used, such as Google Docs.
Google Docs is a web-based office suite that is part of the Google Drive service, and one of the centerpieces of this suite is the eponymous Google Docs.
It features all the tools that you could expect from a standard text editor.
This being said, arranging the page layout from portrait to landscape is also possible. However, not everyone knows how to do this, so we’ve compiled a step-by-step guide to show you how easy it is.
How do I change the Google Docs page to landscape?
Before starting off, you should remember that you need a Google account in order to use any of the Google Drive services, which includes Google Docs.
Once you’ve created an account or logged in with your already existent one, you can start following these steps:
Create a new Google Docs document by clicking on a Blank slate
You can also do this to an already existent Google Docs document
Go to File
Select Page setup
Check the box next to Landscape
If you want Landscape to be set as the default state of every new document, select Set as default
Press OK
One thing you should remember is that there is no way to set each individual page to be a certain way, and once you’ve set one page to Landscape mode, all other pages before and after it will be changed as well.
Additionally, remember that changing the layout will also change the way the text and images will fit inside the page. As such, it is good to start off in landscape mode before adding text and images, so you won’t waste time rearranging after the layout change.
Closing thoughts
As you can see, changing the page layout in Google Docs is done pretty similarly as with other editors. Thus, if you are transitioning from any other office suite to Google Docs, at least you know you’ll be somewhat familiarized with the UI.
More so, page layout changes made in Google Docs is compatible with other text editors as well, allowing you to add the finishing touches using any other text editor, without messing with the original formatting.
Did you find this document to be useful? Let us know in the comment section below.
If you own or are at least part of a large-scale enterprise, then you most likely had an enterprise resource planning software product backing you up at one point or another.
Such products are rather a niche, so it was easy to choose the good ones from the bad ones.
One such product was Microsoft Dynamics AX, one of Microsoft‘s enterprise resource planning software products that was part of the Microsoft Dynamics family.
What does Microsoft Dynamics AX do?
This powerful ERP solution helps global enterprises organize, automate, and optimize their processes. More so, Microsoft Dynamics AX is simple and intuitive to use and is quick to provide you with a return od investment after implementation.
Thorugh better organization, it can help improve your company’s overall performance by doing the following:
1. More efficient expansion
It lets you expand your company’s financial performance by centralizing the workflow in a single processing center. This is all while adapting to regional particularities, such as the regulations of the various countries you are expanded to or planning to expand to.
2. Increased productivity
The various tools in Microsoft Dynamics AX help your employees make better decisions by automating certain tasks and utilizing smart AI and prioritizing certain solutions over the others in the most efficient manner.
3. It grows with your company
A company is meant to grow, and the Microsoft Dynamics AX toolset adapts to a growing enterprise. IT takes into account the increased workflow, the changing number of employees, the increased needs of the company, the expanded business possibilities, and more.
4. Better in-company reporting
While efficiency can never reach 100% except in theoretical systems, getting as close to its is a surefire way of decreasing losses. Microsoft Dynamics AX allows you to get better assessments of your company’s resources, allowing you to have fewer losses and more gains.
The evolution of Microsoft Dynamics AX
However, times change, and Microsoft Dynamics AX has evolved and has been rebranded to Dynamics 365 for Finance and Operations.
This was then further separated into two services:
Dynamics 365 Finance
Dynamics 365 Supply Chain Management
This change came as a response to make the program a bit more approachable. This is because while the original program did have all the tools a business may need to evolve, it seemed too overwhelming for some.
As such, the toolset was split and grouped, and the two programs can be used separately.
Closing thoughts
Everyone in the world is evolving, some faster than others. This leads to a visible imbalance between those using AI-assisted software for business and those that don’t.
Old-fashioned management can be more efficient in small-scale companies. The problem is that they become an obsolete approach ones your enterprise reaches a national or international scale.
Do you think using computer-assisted guidance is good for business? Let us know what your opinions are in the comment section below.
When we created computers we wanted to make it so that we can solve complex operations faster and more efficient. Once we’ve accomplished that, it was only a matter of time until someone thought that making the machines think for themselves would be a good idea.
While we are still far from the pop-culture depictions we see in the media, baby steps are taken each day, and we are using it to make the world a better place.
One such step in that direction is the development of MicrosoftAI program, which is described as follows:
MicrosoftAI is a robust framework for developing AI solutions in conversational AI, machine learning, data sciences, robotics, IoT, and more.
What can Microsoft AI do?
Currently, MicrosoftAI can be used in a wide variety of applications, such as natural language understanding, sentiment analysis, speech recognition, image understanding, and machine learning.
Basically it is any complex process where it can do what a human can but without human assistance or supervision.
How does Microsoft use AI?
Microsoft is currently focusing on using their AI technology for the overall betterment of the world:
Protecting wildlife
Transforming healthcare
Better brewing
Feeding the world
Preserving history
How can I learn Microsoft AI?
Since Microsoft‘s AI program is still in its early stages, it goes without saying that the company is eager to implement it in as many areas as possible and make it evolve as fast as possible.
Microsoft describes the program on its website as follows:
Whether you’re completely new to AI or a seasoned professional looking to stay on top of your game, AI School is quite simply the best place to find the information, learning materials and resources you need to start building intelligence into your solutions.
Keeping their word, Microsoft made AI School available to anyone that wishes to apply. They even offer you a tailored experience on how to take the course after you complete a small survey.
However, the main centerpieces of the entire AI School are the AI Houses, each of which concentrates on certain aspects of AI. These are the following:
AI Business School
Conversational AI
AI Services
Machine Learning
Autonomous Systems
Responsible AI
What is the Microsoft AI fellowship?
Since MicrosoftAI is currently being implemented in a wide variety of fields of study, funding the research necessary to make this implementation faster and more efficient needed to be made in a more organized and centralized fashion.
As such, the Microsoft Research Ph.D. Fellowships came to be. They are basically like a scholarship program for anyone that wants to implement MicrosoftAI in their field of study.
Of course, only those that have proven themselves with great results throughout the years can apply for these fellowships.
Microsoft AI products
There aren’t any MicrosoftAI products per se, but one application that can be considered a MicrosoftAI product is the Microsoft AI Platform.
It is a place where both beginners and veterans in the field of AI can learn or hone their skills.
The platform provides you with all the tools you may ever need to get better at using MicrosoftAI. These include the AI Lab where you can explore, learn, and code the latest breakthrough AI innovations by Microsoft.
Closing thoughts
It is always great to see how AI can be used for the betterment of the world, and Microsoft seems to be very proud of being part of that movement.
Whatever the future may hold for AI, one can only hope that it will continue to be implemented in more and more fields, and allow us to make the world a better place.
Do you think Microsoft did a great job with their AI School and AI platform? Let us know what you think in the comment section below.
Working as an electrical engineer can be a challenging, yet rewarding profession. However, nowadays, even this field can benefit from an easier burden thanks to specialized tools. These include cable calculation software or electrical simulation utilities.The software solutions listed below are not only useful for electrical engineers, or professionals. On the other hand, they can be trustworthy allies for struggling students who want to explore the practical side of their soon-to-be profession.
These also spare them from having to make contact with actual, potentially hazardous, hardware equipment.
Cable-Mate, ProDesign, ElectricalOM, and ETAP Cable Sizing are some of the best cable calculation software solutions available. You can download and use them on your Windows computer if you find yourself in the situations depicted above.
What are the best cable sizing software solutions for Windows?
ETAP Cable Sizing
ETAP Cable Sizing can be a real life-saver for electrical engineers who are in need of assistance in calculating the exact amount of cable that is required to design an effective electrical network.
The study module of ETAP Cable Sizing can calculate optimal and alternative cable sizes for phase conductors by basing its calculations on various criteria, including voltage drops, load current value, short circuits, motor minimum starting voltage and even protective device requirements.
It is also worth mentioning that ETAP Cable Sizing also applies multiplication factors to the ampacity value based on the cable application that’s currently selected.
Pros:
Calculation of cable parameters and results of said operations
Its interface is grid-based, and optimized for filtering, searching and sorting
Updating in bulk using library data
Selecting in bulk using library models
Several selection filters
Ability to generate consolidated or individual reports
Cable-Mate’s name might be pretty suggestive already, but it’s worth mentioning that this cable calculation software solution has a lot in store for electrical engineers, students or DIY enthusiasts who are eager to learn a thing or two about how to design an electrical network in a cost-effective manner.
Cable-Mate can perform its complex calculations on a wide array of cable types, making it highly suitable for various situations.
You can perform multiple operations on cables such as multicore or single-core PVC or thermosetting, Twin & Earth, Armoured (SWA), SY-flex, YY-flex, CY-flex, Flexishield, Tri-rated, Split-Concentric, or H07RN F-flex cables, depending on your needs.
Amtech ProDesign is a cable measurement software solution that was developed to help professional electricians and engineers develop complex solutions regarding electrical wiring without having to be anywhere near the equipment they’re designing.
Usually, a lot of time is spent creating the ideal version of an electrical network, and this can be quite a bump in the road, especially if a deadline is involved.
However, ProDesign can take care of that by letting you create accurate simulations before you get to the actual assembly part of your project.
ProDesign encompasses a broad range of devices, such as fuses, relays, and circuit-breakers, all of which are configured with parameters that are approved by the manufacturer, thus boosting further the accuracy of your projects.
Any network component, along with its specific data, can be accessed in a timely manner from within the program, by simply selecting it from the GUI (Graphic User Interface).
ProDesign also enables you to specifically select items that you want to be displayed (while skipping all the others, of course), so that your workspace can suit your needs in a better way.
ElectricalOM is a specialized cable measurement software solution designed to help advanced users such as electrical engineers design electrical networks and calculate the necessary materials and component values without having to deal with the actual, physical devices.
The tool displays the electrical network in a tree-like manner so that users can copy, paste, drag and drop circuits or other components in their projects without significant efforts.
ElectricalOM can and will perform necessary calculations and checks according to the BS7671 standards, which is harmonized with HD 384 and IEC 60364.
After you’ve successfully completed your project, this program allows you to generate various calculation reports, as well as a bill of quantities with user-defined prices, so that you can estimate the cost of the electrical network that you’re modeling before you start building it.
It’s well-known and widely accepted that working as an electrical engineer can be a rewarding, yet challenging and potentially hazardous profession, but it doesn’t have to be that way.
Specialized tools like cable calculation software and electric network designers can play a huge role in lifting the burden, if only for a bit.
If you’re considering letting your computer handle some of the most difficult calculations, designing and measurement tasks, you can rely on software solutions such as ElectricalOM, Cable-Mate, ProDesign, or ETAP Cable Sizing.
2019 has been a pretty exciting year for Microsoft fans. One of the biggest news of the year was definitely the introduction of the Surface Neo and Duo, especially with Microsoft opting for Android for the smaller dual-screen device the company doesn’t want to call a “phone.” If some details leaked about the bigger Surface Neo, the software giant finally unveiled Windows 10X, the new lightweight version of Windows that Surface Neo and other devices will be running in late 2020.
On the hardware front, we also got the Surface Pro X this Fall, which is Microsoft’s first Windows 10 on ARM PC powered by a custom-designed chip from Qualcomm. The company also announced other new products including the Surface Earbuds and the Xbox Series X, with the latter set to go head to head with Sony’s PlayStation 5 next year.
Microsoft ended the year on a high note with the Xbox Series X.
Microsoft clearly has a lot in the pipeline for 2020 with new Surface and Xbox hardware, the launch of a new platform with Windows 10X, and hopefully a couple of surprises. However, I think the company still has a lot of work to do on Windows 10, which four years after launch remains an incoherent combination of multiple design languages. The app situation also remains a hot topic, with the Windows 10 Microsoft Store still in need of a serious makeover.
Over the years, the Windows Insider program has also become a very intricate machine, and it may be time for some simplification ahead of the launch of Windows 10X. I think 2020 should also be a year where Microsoft simplifies its Surface lineup, and pay more attention to its various consumer services, especially on mobile devices.
This is my personal wish list of things I’d like Microsoft to focus on next year, and I really hope all of them are already a priority for the company.
A more coherent design language
Microsoft has made progress on “Fluent Design” this year, but I’d say there’s still a ton of work to do on Windows 10. I’m well aware that the desktop OS still has lots of legacy components that can’t be easily updated, but the inconsistencies are really apparent when you use the dark theme on Windows 10. This is especially true when using File Explorer,
If it’s still too easy to find to Windows XP-style UI elements in Windows 10, it also seems that the different teams at Microsoft building apps for the OS don’t always agree about what a stock Windows 10 app look like. We did see some progress this year when the company introduced redesigned app icons for its most popular apps, but the contrast between Microsoft’s pretty design videos and the reality remains quite striking.
More than 20 years ago, Steve Jobs famously said in an interview that “Microsoft has no taste”. Since then, much water has flowed under the bridge, but I’m still amazed that Apple managed to really nail dark mode in macOS Mojave, while the Windows 10 dark mode is still in need of changes.
Shut down the “UWP apps are dead” rumors for good
In recent years, “UWP apps are dead” has pretty much become the new “Windows Phone is dead” in the Microsoft scene. Rumors about the death of UWP apps may have been exaggerated, but this ongoing perception problem is clearly the result of a lack of clarity for Microsoft.
When we thought the company was all in on universal apps that could run on PC, phones, Xbox One, HoloLens, or Surface Hub, the truth is that legacy Win32 apps are here to stay. Now, the company wants to help developers bring some UWP technologies to their legacy apps, and Microsoft itself recently announced that it was in the process of merging the codebases of its OneNote 2016 and OneNote for Windows 10 apps.
The Microsoft Store, which is probably the most important UWP app on Windows 10, is also responsible for the general distrust that consumers feel about UWP apps: It’s still filled with low-quality apps, it’s not always reliable when downloading big apps or games, and Microsoft is apparently changing its design every year or so. Overall, the whole experience is so bad that it’s also preventing the Store to be taken seriously as an alternative to Steam or the also much-criticized Epic Games Store.
There’s still a lot of junk in the Microsoft Store.
There’s also some confusion caused by the recent talk about Progressive Web Apps, which Microsoft is now supporting on Windows 10. At some point, the company explained that it would start automatically scanning the web to add legitimate PWAs to its Microsoft Store, but the company apparently changed its plans at some point (probably for the better). Anyway, the fact that an app like OneDrive, a not so great UWP app to begin with, was replaced by a basic web wrapper earlier this year wasn’t exactly reassuring.
I’m not sure what Microsoft can do to improve the perception about the Microsoft Store and UWP apps, but the company recently hired well-known UWP developer Rudy Huyn. “UWP is far from dead, it’s one of the keystone of the future for Windows,” Huyn wrote in a blog post about the state of UWP apps in 2019.
Simplify the Windows Insider program
The Windows Insider program has definitely become a very important source of news for Microsoft-focused websites, but I have the feeling that this stuff is becoming increasingly hard to understand, even for us who follow Microsoft news every day. Again, the contrast with Apple’s beta testing programs for macOS and iOS, which are pretty straightforward, is pretty striking.
This year, we saw Microsoft start testing the first major Windows 10 Update for 2020 (20H1) before the second update for 2019 (19H2). Importantly, the company didn’t use the Fast Ring to test 19H2, it used the Slow and Release Preview Rings to do that, though not all Insiders in these rings received the same builds.
The testing process for Windows 10 1909 was more complex than ever.
For the first time, the company experimented with what it called a “throttled delivery approach,” shipping new 19H2 features only to select Insiders who downloaded the new builds. The whole process was quite confusing, to say the least, and it’s not clear if this really helped the team ship a better version Windows 10 1909 in the end. Indeed, this latest version of Windows seems to be plagued by persisting Windows Search issues, though the company has yet to acknowledge them.
Last week, we were quite surprised to see the Windows Insider team announce some important changes for the Fast Ring: Going forward, Fast Ring Insiders will be testing the latest Windows 10 features (even more so now with the demise of Skip Ahead), though these features won’t necessarily be tied to a specific release.
However, Microsoft’s Brandon Leblanc confirmed to us that the Windows Insider team will still do some A/B testing in that revamped Fast Ring. In other words, there’s still no way to opt in to test all new Windows features, which remains quite frustrating.
We will still do A/B testing in all the rings. Changes today is specific only to builds.
It’s not clear why the company won’t allow early adopters to test every new feature if they really want to. Again, we don’t know if A/B testing is really helping the team to ship better updates, but the company could certainly use more Insiders who clearly know what they signed up for.
It remains to be seen if the upcoming release of Windows 10X leads to a more complex Windows Insider program. While the new OS will only ship on new machines, Microsoft may well start testing new Windows 10X features with select Insiders. Hopefully, we should get more details early next year. The recent discovery of a “Windows Feature Experience Pack” on the Microsoft Store also suggests that Microsoft could start pushing out shell operating features independent of core OS development, which is definitely an interesting perspective for us.
Streamline the Surface line
Microsoft really deserves credit for transforming Surface into a respectable and beloved brand in the past couple of years. However, the recent release of the ARM-powered Surface Pro X had me a bit worried, as I don’t think there is anything really “Pro” about this device. Actually, my own colleague Arif Bacchus, who bought one with his own money, found the Windows 10 ARM limitations so infuriating that he ended up returning it without any regrets. All in all, I think the Surface Pro X should have been the successor to the Surface Go, especially if better battery life and built-in LTE connectivity are the tablet’s killer features.
To be frank, I think Microsoft has been misusing the “Pro” adjective for many years. With their dedicated GPUs, the Surface Book 2 and Surface Studio are true “Pro” devices, something I wouldn’t say about the Surface Pro 7 or even the new 15” Surface Laptop 3. I think shipping this bigger version of the Surface Laptop without a dedicated GPU was a real missed opportunity for the company, especially since many pros are probably interested in a “Surface Laptop Pro” as powerful as the Surface Book 2, without the device’s signature hinge that makes it much thicker.
Hey Panos, we need a Surface Laptop Pro.
Microsoft is known for not being great at branding, and I doubt anything will change in the near future. Still, AdDuplex’s stats consistently show Surface Pro tablets being the most popular products in the lineup, and these 2-in-1 devices clearly aren’t used mostly by professionals. On the other hand, true pro devices like the Surface Book and Surface Studio are lagging far behind in AdDuplex’s stats, which isn’t surprising at all.
The Surface family devices can only get more complex once the Surface Neo and Surface Duo launch next year, especially since these two dual-screen devices won’t be running full Windows 10. It will be interesting to see how Microsoft is going to educate consumers about these Surface Neo and Duo next year, and I really hope these devices won’t tarnish the Surface brand like Surface RT did back in the day.
More Surface/Xbox-branded accessories
By announcing new Surface Earbuds back in October, Microsoft is following the footsteps of Apple and its popular AirPods wireless headphones. Headphones is a great market to be in, as these devices provide some sort of status symbol. Microsoft’s Surface Headphones was an exciting first step, but the company has now delayed its Surface Earbuds to next year. That’s probably a good thing, as the current circular design doesn’t look as good as Apple’s AirPods. Importantly, the Cupertino company really stepped up its game this Fall with its new AirPods Pro, which bring a new noise-cancellation technology that Microsoft’s Surface Earbuds lack.
Microsoft can certainly do better than the Surface Earbuds we saw back in October.
Microsoft is obviously very interested in wireless headphones, which makes me wonder why the company has yet to release a pair of Wireless Xbox headphones. As you may know, Microsoft has created its own Xbox Wireless protocol used by many manufacturers of wireless controllers and headphones for Xbox One. I’m sure an official Xbox Wireless headset with a nice design would sell like hotcakes, probably even more than the Surface headphones ever will.
While we’re talking about Xbox, Microsoft also let Razer create the first Xbox-branded keyboard and mouse for Xbox One, and the gaming hardware manufacturer also recently launched its Junglecat dual-sided mobile controller that looks just perfect for Project xCloud. Again, I’m not sure why Microsoft didn’t come up with its own accessories in the first place, but I hope this will change with the next generation of consoles. If the Xbox Elite Wireless Series 2 controller is any indication, Microsoft can design truly great gaming accessories, and the company can certainly do so while making a profit.
The Joycons-like Razer Junglecat look tailored for Project xCloud.
Last but not least, another Microsoft accessory I’d really like to see is a monitor version of the Surface Studio. Surface Chief Panos Panay first hinted at a modular Surface Studio in an interview last year, and I hope we won’t have to wait too long to see a monitor version of the 28-inch all-in-one PC come to market.
Bring Microsoft Photos and Movies & TV to iOS and Android
We first heard that Microsoft could bring its Movies & TV app to iOS and Android last year, but the mobile apps are still nowhere to be seen. Granted, it’s not hat much of a problem for US consumers now that the service integrates with Disney’s Movies Anywhere platform, but consumers in other markets still have no way to watch their movies and TV shows on mobile devices. Unfortunately, I guess that’s enough of a reason for completely ruling out purchasing digital content on the Microsoft Store for many.
Microsoft Photos is another app I’d really like to see coming on iOS and Android. The OneDrive mobile app is currently a poor replacement for this, and the app is really not great for browsing a huge pictures collection. It would certainly be hard for Microsoft to compete with Google’s excellent Photos app for iOS and Android, but I still do think the Windows 10 Photos app is desperately in need of a mobile counterpart.
Bring Project xCloud and Mixer to more platforms
The public beta for Microsoft’s Project xCloud game streaming service kicked off in October in the US, UK, and South Korea, and more than 50 games are already playable for free during the beta period. That’s more games than what Google has available for its competing Stadia cloud gaming service, which many have been judging it should have shipped with a “beta” tag.
As of today, the public beta for Project xCloud is only available on Android devices, but Microsoft announced last month that it will be available next year on iOS as well as Windows 10. That’s really good to know, but Microsoft needs to make it cloud gaming service on many more platforms if it wants to grab some mindshare. That includes the company’s Xbox consoles, as well as macOS and Linux, TV platforms like Android TV and tvOS, and more.
Project xCloud needs to be available on any device.
The same thing can be said about Mixer, Microsoft’s Twitch competitor that’s currently only available on Xbox One, the web, and iOS and Android. According to recent data from Streamelements and Arsenal.gg, Mixer accounted for just just 3% of hours watched in 2019, lagging far behind Twitch (73%), YouTube Gaming (21%). In what appears to be a questionable move, Microsoft also removed the built-in Mixer streaming feature from the Xbox Game Bar on Windows 10, meaning that PC gamers now have to use dedicated third-party apps to start streaming on Mixer.
A gaming-focused live streaming service like Mixer probably won’t be able to take off until it’s available on PlayStation 4, as well as the Nintendo Switch. This should be a top priority for Microsoft for the next-gen, but we also need Mixer apps on the same TV platforms we mentioned above for Project xCloud.
Can Microsoft deliver in 2020?
Just like Apple, Microsoft is a company that slowly iterates. We had to wait until this year to see an USB-C port on all new Surface devices, but Microsoft is still not interested in adding Thunderbolt 3. Microsoft’s big Fluent Design push has also been years in the making, and it all looks like this could be a very long journey.
I do think that we have a very busy year ahead of us, and the launch of new platforms with Windows 10X and Xbox Series X should be very interesting to watch. However, I hope the company will be able to keep its focus on Windows 10 and its various software efforts, which have millions of users. If all goes well, 2020 should also be the year where Windows 10 reaches 1 billion users, as we recently crossed 900 million users back in September.
What are the things you would like Microsoft to focus on in 2020? Let us know what you think in the comments below!
After Windows 10 engineers revealed the next phase of Fast Ring Insider testing and update releases would allow the production of Windows 10 to be a bit more modular in delivery, it now seems the team is setting up the building blocks to deliver both more routine feature updates and bi-annual core maintenance separately.
Microsoft sleuth Walking Cat, aka @h0x0d on Twitter, has uncovered some information that raises speculation that the Windows team could be set to deliver on a notion conceived years ago during Windows 10 development where engineers could push out shell operating features independent of core OS development.
Based on this discovery and the timing of the update, it seems the Windows 10 team has finally figured out a way to split shell features from Windows CoreOS and funnel new experiences and features through this updated Windows Feature Experience Pack app.
The new Windows Feature Experience app remains a placeholder app for now but has seemingly been updated since the last Fast Ring release and sports an independent version number from the watermarked Insider label. This Windows Experience version number is also showing up in the About section of Windows System settings on the latest Fast Ring builds.
As many have speculated recently, Walking Cat also believes that since Microsoft’s major Windows reorg earlier this year, Windows 10 engineering is split and could follow two paths, where Windows 10 Core OS follows more of an Azure development roadmap while Windows 10 Shell development can now begin working at a quicker clip.
What this could mean in a practical sense, is that Microsoft is or has finally come up with a way to develop its barebones and streamlined OS. A new process from Microsoft that allows it to deliver a more locked-down version to businesses while allowing both enterprise and consumers the ability to (presumably pay/ subscribe for enabling) extra functionality or features rather than having to engineer and development one messy spaghetti plate of code to everyone.
In essence, Microsoft could finally usher in the presumed Windows 10 Software-as-a-Service model, that many have predicted was coming over the past few years. Customers can buy the basic Windows Core OS and eventually subscribe to various versions with different feature sets based on their needs.
Again, this is all speculation and has been a pipe dream of many Windows users for decades, but with this new features app being able to seemingly update independent of the core OS release, the Windows team could be that much closer to finally delivering a better process for users in the future.