Windows 10 KB4482887 blocks Spectre malware, fixes a plethora of bugs

Microsoft is planning to rollout Cumulative Update KB4482887 for Windows 10 version 1809 next week. For the time being, the update is available only for Preview Ring Insiders.

The Preview Ring updates are not available for the general public. They are available just for the insiders to make sure that the update KB4482887 is working properly without any issues or faults. Once its credibility has proven, then it will be launched to the general public.

Although the Microsoft has not released any official changelog about the update, Insiders already noticed the patch made their computers more stable.

KB4482887 will install automatically through Windows Update. Once it is installed, restart your PC and your Windows will be updated to Windows 10 17763.346.

KB4482887 changelog

Update: Microsoft recently published KB4482887’s changelog. The update brings a plethora of bug fixes and improvements. Some of the most important changes are the following:

  • Enables “Retpoline” for Windows on certain devices, which may improve performance of Spectre variant 2 mitigations (CVE-2017-5715). For more information, see our blog post, “Mitigating Spectre variant 2 with Retpoline on Windows”.
  • Addresses an issue that may cause the Action Center to suddenly appear on the wrong side of the screen before appearing on the correct side.
  • Addresses an issue that may fail to save some inked content in a PDF in Microsoft Edge. […]
  • Addresses a performance issue when establishing a Remote Desktop connection from a web Remote Desktop client to Windows Server 2019. 
  • Addresses a reliability issue that may cause the screen to remain black after resuming from Sleep if you close a laptop lid while disconnecting the laptop from a docking station. 
  • Addresses an issue that causes the overwriting of file on a shared folder to fail because of an Access Denied error.
  • Enables peripheral role support for some Bluetooth radios. 
  • Addresses an issue that may cause printing to PDF to fail during a Remote Desktop session. 
  • Addresses an issue that displays a black screen and causes a Remote Desktop session to stop responding when using certain VPN connections. […]
  • Addresses an issue that fails to register USB cameras correctly for Windows Hello after the out of box experience (OOBE) setup. […]
  • Addresses an issue that may prevent some applications from displaying the Help (F1) window correctly. […]
  • Addresses a compatibility issue with parsing and playback of certain MP4 content. […]
  • Addresses an issue that may cause the new Miracast connection banner to remain open after a connection is closed.

You can read the original report below.

Although there is no official statement from Microsoft regarding the latest update, it is expected that KB4482887 is mainly focusing to remove the bug in Action Center/Notification Center.

The Action Center collects notifications from all applications present in your device. After collecting notifications it displays them. The bug was reported a long time ago by Windows 10 users. Normally the Action Center show up from the right side of the screen.

Because of the bug in the old update, the Action Center showed up from the left side. So it might be possible that this new update fixes this error and retrieves the action center to the right side.

But, as stated earlier, these are the just expectations from this new update and we know the real story next Tuesday when the update will be officially published. It is possible that apart from these potential fixes, the upcoming update would also introduce further changes to the Windows 10.

What are your expectations for this new update? Why not let us know in the comment below?

RELATED STORIES TO CHECK OUT:

How to enable or disable Colorblind Mode in Windows 10

Are you someone who has one of several different types of color blindness? Do you face difficulties while using your Windows operating system? Those who are not aware of the fact that the Windows 10 Fall Creators Update aims to ease your life by bringing tons of new features and settings. 

Some specific types of colorblindness are generally common around the world that are listed below:

  • Protanopia or Deuteranopia (red-green color blindness)
  • Tritanopia (blue-yellow color blindness)

Microsoft has clearly worked very hard to offer a better computer display options to those people. Obviously, we can not perceive its value but it definitely means a lot for the colorblind users.

If you are not a colorblind user, you might have accidentally applied greyscale mode on your screen while working diligently on your system. You must be wondering why your entire screen has turned into a blank and white TV. Don’t worry!

You have not gone to the 90s era, probably you have turned on Windows 10’s built-in color filters with a key combination on your keyboard.  

If you are a Windows 10 users, we will guide you about “How to Enable (or Disable) Colorblind Mode in Windows 10“.

How to use Colorblind Mode in Windows 10

Let’s have a look at each of them in detail.

Solution 1: Use Keyboard Shortcut To Turn/Off Colorblind Mode

  1. The keyboard shortcut is one of the handy ways that you can use to Turn On/Off Colorblind mode. You can always use  Win+Ctrl+C keys to Turn On/Off your current filter.

Solution 2: Use Settings To Turn/Off Colorblind Mode

  1. Navigate to the search box and type “color filter“. 
  2. You will see a list of search results, click Turn color filters on or off from the top.
  3. Now you have to use the toggle button to “Turn on color filters” that is available under Use color filters.
  4. You will see a list of color filters and color blindness filters, select the one that is suitable for you.

Note: You can use the same process to Turn off color filters using the same toggle button.

Solution 3: Tweak your Registry To Turn/Off Colorblind Mode

If you don’t want to use the solutions that are listed above, use the REG file to switch between both options. The DWORD and string values that are available in the registry keys will be modified using the .reg files. 

1. Press Window+R keys and type notepad in the currently opened dialogue box.  This will open a blank Notepad file on your screen.

2. Enter the following values and save the files for each mode with a .reg extension on your desktop.

  • Turn On Greyscale Filter
Windows Registry Editor Version 5.00

[HKEY_CURRENT_USER\Software\Microsoft\ColorFiltering]
"Active"=dword:00000001
"FilterType"=dword:00000000

[HKEY_CURRENT_USER\Software\Microsoft\Windows NT\CurrentVersion\Accessibility]
"Configuration"="colorfiltering"
  • Turn On Invert filter
Windows Registry Editor Version 5.00

[HKEY_CURRENT_USER\Software\Microsoft\ColorFiltering]
"Active"=dword:00000001
"FilterType"=dword:00000001

[HKEY_CURRENT_USER\Software\Microsoft\Windows NT\CurrentVersion\Accessibility]
"Configuration"="colorfiltering"
  • Turn On Greyscale Inverted Filter
Windows Registry Editor Version 5.00

[HKEY_CURRENT_USER\Software\Microsoft\ColorFiltering]
"Active"=dword:00000001
"FilterType"=dword:00000002

[HKEY_CURRENT_USER\Software\Microsoft\Windows NT\CurrentVersion\Accessibility]
"Configuration"="colorfiltering"
  • Turn On Color Filters using Deuteranopia filter
Windows Registry Editor Version 5.00

[HKEY_CURRENT_USER\Software\Microsoft\ColorFiltering]
"Active"=dword:00000001
"FilterType"=dword:00000003

[HKEY_CURRENT_USER\Software\Microsoft\Windows NT\CurrentVersion\Accessibility]
"Configuration"="colorfiltering"
  • Turn On Protanopia filter
Windows Registry Editor Version 5.00

[HKEY_CURRENT_USER\Software\Microsoft\ColorFiltering]
"Active"=dword:00000001
"FilterType"=dword:00000004

[HKEY_CURRENT_USER\Software\Microsoft\Windows NT\CurrentVersion\Accessibility]
"Configuration"="colorfiltering"
  • Turn On Tritanopia Filter
Windows Registry Editor Version 5.00

[HKEY_CURRENT_USER\Software\Microsoft\ColorFiltering]
"Active"=dword:00000001
"FilterType"=dword:00000005

[HKEY_CURRENT_USER\Software\Microsoft\Windows NT\CurrentVersion\Accessibility]
"Configuration"="colorfiltering"
  • Turn Off Color Filter
Windows Registry Editor Version 5.00

[HKEY_CURRENT_USER\Software\Microsoft\ColorFiltering]
"Active"=dword:00000000

[HKEY_CURRENT_USER\Software\Microsoft\Windows NT\CurrentVersion\Accessibility]
"Configuration"=""

3. Double click on the respective .reg file to use the filter option. Click Run and click Yes from the User Account  Control dialogue box.

4. Again click Yes and OK when prompted on your screen.

5. Finally, you will have to Restart/Logoff your PC to apply the changes.

As soon as you use any of these methods to switch to these color filters, the colors will immediately change. In this way, you can choose the one that perfectly works for you. 

This handy feature is applied at the system level to all your windows and programs. Moreover, if you are not a Windows 10 user or you have not upgraded your machine yet, you can only enjoy browsing using a similar feature using a Chrome extension.

Let us know in the comments section below if you have any other tips and tricks that can enhance your display experience on your Windows PC. 

RELATED POSTS TO CHECK OUT:

KB4487011 and KB4487006 fix unresponsive app issues

Microsoft recently released Windows 10 cumulative updates KB4487006, KB4487011, KB4487021, and KB4487029  addressing non-security bugs in the operating system. The company aims to enhance the reliability of the OS with bug fixes, stability enhancement and quality improvements. 

KB4487011 improvement and fixes

KB4487011 offers four major improvements and fixes that we’ll list below:

1. IE Fails To Load Images Bug Fix

The update addressed the problems related to loading images having a backslash () in their relative source path. The issue was reported in the previous releases. 

2. Microsoft Access Bug Fix

The Microsoft Access bug was responsible for randomly stopping those apps that are using Microsoft Jet database along with the Microsoft Access 95 file format. Just like the previous issue, this bug was also reported in KB4487044.

3. Application Not Responding Bug Fix

This issue was reported by the users that the issue arose when the same input queue is used by its two threads.

4. Device Compatability Issue Fix

This fix addresses a bug that existed in the evaluation of the compatibility status of the entire ecosystem of Windows. It is done to ensure device and application compatibility for all Windows updates. 

KB4487011 Known Issues

As of now, Microsoft has not acknowledged any known issues in the update. The blog post will be updated if the tech giant confirms any potential bugs.

KB4487006 Improvement & Fixes

Apart from the device compatibility and issues and Microsoft Access bug fix, the update comes along with a series of bug fixes. Some of the major features are discussed below.

1. Remote Desktop Protocol (RDP) Client Bug

The release of KB4487006 resolved a major issue that existed in the previous build. The users got black screen at the login in the Remote Desktop Protocol (RDP) client application. 

2. win32kfull.sys Reliability Issue

The update fixes a reliability issue with win32kfull.sys, that existed in the previous versions. The bug was initially introduced in KB4487026. 

3. Microsoft Outlook “The operation failed” error

When a user tried to open the Microsoft Exchange Address Book, “The operation failed” used to appear. The issue was introduced after the installation of  KB4457127 on Active Directory domain controllers.

KB4487006 Known Issues

1. Startup Issues in Specific Laptops

Specific Lenovo and Fujitsu laptops that currently have less than 8 GB RAM may face startup issues. The bug is created as a result of KB4467691 installation.

One of the easiest ways to resolve the issue is restarting your machine with the help of Unified Extensible Firmware Interface (UEFI). Make sure to disable Secure Boot before restarting the device. 

2.  Cluster Service Start Fail

If the “Minimum Password Length” of the group policy uses more than 14 characters then the users can face cluster service start fail error. The following error message is displayed to the user “2245 (NERR_PasswordTooShort)”. The installation of  KB4467684 triggers the error. 

Microsoft is currently working to resolve the issue and the workaround is expected to be available in the coming weeks. Till now the company suggests the users to set the default minimum password length policy to equals to or less than 14 characters.

3. IE 11 Authentication Issues

Some authentication issues are reported in Internet Explorer 11 right after the installation of IE11. As soon as the same account is used by two or more users for various concurrent login sessions on the same Windows Server machine. 

Microsoft recommends the users to create unique user accounts. Moreover, multiple RDP sessions should be disabled for each user account.

System Center Virtual Machine Manager (SCVMM) fails to manage the logical switches that have been deployed on the host that is managed by SCVMM. Also, a stop error is raised in vfpext.sysif you fail to follow the best practices. 

A quick workaround is to access the affected host machine to run mofcomp files for running two mof files named as Scvmmswitchportsettings.mof and VMMDHCPSvr.mof. Microsoft recommends that users can avoid a stop error by following the best practices.

Download KB4487011/KB4487006 for Windows 10

The KB4487011/KB4487006 patch can be automatically downloaded through the Settings menu. If you have not yet received the update you need to open the Settings menu by pressing Win+I. Now you need to navigate to Update & Security >>Windows Update >> Check for updates. 

You can enhance the consistency of the update process by installing the latest servicing stack update (SSU) just before installing the LCU KB4487011. 

Microsoft has followed its tradition to specify third Tuesday of the month for the release of the non-security cumulative update. Although these updates are termed as non-security, it is yet not clear that either security components are included in the update or not. 

Comment down below if you have faced any pre and post-installation issues while installing KB4487011 and KB4487006.

RELATED ARTICLES:

ExxonMobil to use Microsoft technologies including Azure and Dynamics 365 for its Permian Basin operations

ExxonMobil is upping its cloud technology game with a new partnership that’s being steward by none other than Microsoft itself.

As of today, February 22, 2019, Microsoft and ExxonMobil are working together to optimize the oil company’s Permain Bain operations through an amalgamation of Microsoft Azure, Machine Learning and Internet of Things solutions.

ExxonMobil’s partnership with Microsoft includes an integrated cloud environment that securely and reliably collects real-time data from oil field assets spanning hundreds of miles. The data will enable ExxonMobil to make faster and better decisions on drilling optimization, well completions and prioritization of personnel deployment. Importantly, leak detection and repair response times could be further reduced with enhanced access to emissions data, strengthening XTO’s voluntary actions to manage methane emissions.

ExxonMobil’s Permain Bain operations represents the a large sedimentary basin in US southwest region as well as the largest-ever oil and gas acreage to deploy the use of cloud technology.

Covering over 86,000 square miles, ExxonMobil is projecting that its use Microsoft cloud technologies to optimize the operations could be beneficial to the company to the production tune of 50,000 oil-equivalent barrels a day that could translate into billions in net cash flow by 2025.

More specifically, ExxonMobil plan to make use of Azure Data Lake for rapid incorporation of third-party solutions for production at scale as well as Microsoft’s intelligent business applications to enable end-to-end insights and opportunities on best efficiencies across the Permian operations.

The details regarding the length of the collaboration or the price of the contract are unknown, but in the US, ExxonMobile is a rather big fish that Microsoft has seemingly managed to snare from the grips of Amazon and its behemoth AWS competitor.

How to Control a 3D Printer with a Raspberry Pi

For the uninitiated, 3D printing can seem like a daunting hobby. However, once you figure out how everything works, 3D printing can become fun and enjoyable. For beginners, it might be tempting to just buy a plug-and-play 3D printer to use with Windows 10. Some examples include the Monoprice Select Mini Pro ($250) or the Snapmaker 3-in-1 3D Printer ($800), which offers laser engraving and CNC milling capabilities in addition to 3D printing. Both printers are good entry-level choices but they have a smaller 3D printing footprint and you will quickly find yourself looking to buy a bigger printer when you need to print bigger parts.

If you are interested in finding a 3D printer for beginners, I recommend the Creality 3D Ender 3. It is a good-sized 3D printer that offers consistent quality prints. In addition, the Ender 3 is a self-replicating printer, meaning the printer is capable of printing its own upgrade and replacement parts. Moreover, the printer comes as a DIY kit, which in my opinion is the best way to learn about 3D printing.

Microsoft, Linux, 3D printing

I received the Creality 3D Ender 3 as a gift from my wedding registry. I did not know what I was going to print, but I had some general ideas. I researched the web to find the best mid-range 3D printer and came up with the Ender 3. It does take a bit of a learning curve, so if you think you will buy this and be printing perfect 3D prints in no time, you are in for a rude awakening. This YouTube video gives a thorough Ender 3 review as well as some basic 3D prints and printer upgrades.  Hovering around $200-$250, the Ender 3 is a great choice for the money, although some assembly is required.

Since I use the Ender 3, I have run into some issues being able to start and stop 3D printing when I am not in front of the printer. The problem with most 3D printers is that the 3D printing companies have not made an effective interface to interact with your 3D printer via your computer. In order to 3D print something, you need to go through a rather arduous process. Here’s what you do when you 3D print items using just the printer.

  1. Create or download an item from Thingiverse
  2. Edit the item so that it will successfully print using your printer (temperature settings, scale volume, etc.)
  3. Transfer appropriate file from your computer to microSD card
  4. Remove microSD card from the computer and put the microSD card in the printer
  5. Start print using the printer control menu

This process is frustrating because if there is an issue with the printer settings of the item you want to print, or the temperature settings are off, or something else goes wrong, you have to stop the print manually and begin the process all over again. Everything important is on that microSD card. This proved to be the most frustrating things with my 3D printer and it drove me insane until I found OctoPrint. After that, everything changed.

Microsoft, Linux, Raspberry Pi

OctoPrint is an open-source web interface for your 3D printer. OctoPrint allows you to drag and drop files on your 3D printer, change printer temperature settings at will and start and stop print jobs. It’s the best and most intuitive.  In order to use OctoPrint, all you need is a Raspberry Pi and you will be able to access your 3D printer via your Wi-Fi connection. Here is what you need to do to get OctoPrint up and running: a Raspberry Pi 3B or 3B+, minimum 8 GB microSD card, and OctoPi, a Raspbian-based microSD card image for the Raspberry Pi that includes OctoPrint plus all the dependencies you need to run it. More information is available on the OctoPrint download page.

While it is possible to install OctoPrint on Windows, OctoPrint does not run as consistently using Windows and you may experience unexpected bugs and crashes. The recent news that you can install Windows 10 on ARM on a Raspberry Pi is great, but in my opinion Windows 10 on ARM is not the best OS for the Raspberry Pi. You can just as easily install Windows IoT Core or Windows 10 on ARM, but the Raspberry Pi works best running Raspbian, which is a Linux-based operating system built specifically for the Raspberry Pi. I use a Raspberry Pi 3B and OctoPrint runs well on Raspbian without any issues.

With OctoPrint, you need to download this OctoPrint image file, and follow the instructions on the download page to extract and flash the disc image file to your microSD card, configure your wifi SSID and password, and then boot the Pi from the microSD card. Once you get your Raspberry Pi recognized on your WiFi network, you can connect it to your 3D printer and control your 3D printer’s settings and print projects from any device, and depending on your OctoPrint settings, even control your 3D printer remotely. Personally, I don’t use the mobile access feature because I have fire safety concerns for running my 3D printer unattended.

Microsoft, Raspberry Pi, 3D printing

In my opinion, OctoPrint is the best interface for 3D printing. Octoprint provides an easy interface that offers me control over almost every aspect of my 3D printer through a web browser. I wish I could say that you can use OctoPrint with Microsoft Edge, but OctoPrint works much better using Google Chrome. OctoPrint allows me to control the temperature, see the remaining time left on the print, and stop the print to make adjustments in temperature and printer speed if needed. Overall, I have been very happy with the quality of my 3D prints. Here is an example of my 3D print quality.

Microsoft, Raspberry Pi, 3D printing
Creality 3D Ender 3 Pug

The 3D print (Creality 3D Ender 3 Pug) seen above was a larger project that I was able to print after printing smaller pieces consistently. In the beginning, there was a lot of trial and error to find the best temperature and other printer settings to get consistent prints. After I got more consistent prints like the one above, I started printing bigger and larger projects.

The Raspberry Pi is such a capable single-board computer that allows me to add other extras, including a webcam to watch my 3D prints live in OctoPrint. In addition, OctoPrint allows me to add a variety of plugins to enhance the capabilities of my 3D printer through the OctoPrint browser interface. Overall, using OctoPrint with the Raspberry Pi to control my 3D printer via my Windows 10 PC is very convenient. Now, you won’t be printing things perfectly from the start, but once you figure out what works well for your 3D printer, you will find that 3D printing is a rewarding hobby. You can find more ideas on Thingiverse for what you can create.

Santorini, Centaurus, Pegasus – codenames provide clues to Microsoft’s plans for the future of Windows and beyond

Microsoft has been working for years on the modularization of its flagship operating system. Over many years, various fixes and shortcuts to gain performance made it difficult if not impossible to separate bits out again, but the idea of a modularized Windows, with a single “core OS” with basically interchangeable modules has been a holy grail at the company for quite some time.

Recently there’s been a lot of talk about “Windows Lite,” a new look operating system to compete with Chromebooks, especially for the education market. This week, both Mary Jo Foley and Windows Central revealed some news on “Santorini,” the code name they say is now being used for “Lite,” or “Windows Lite.” According to Foley, Santorini will be one shell running on top of Windows Core OS (WCOS), providing a fast and light operating system for Chromebook like devices. The new OS, while still running on a familiar core, will look different enough from what we’re used to with Windows to be considered a new operating system. In his podcast today, Brad Sams, saying that he’s seen Windows Lite, described it this way:

“It does get rid of Live Tiles, flat accent colors are mostly gone. Windows Lite looks familiar… but it does not explicitly recall Windows. Think about Chrome OS, and how you would make it a Microsoft look. It’s pretty close.”

Sams promises more on Santorini/Windows Lite next week, but for now, you can think of the new approach this way. Microsoft plans to build a number of new devices and device types on top of WCOS, including Centaurus, the dual-screen laptop type device, Pegasus devices, which may be “Windows 10 laptops running Lite,” according to Foley, the HoloLens 2, which is set to be unveiled this Sunday at MWC, and the Surface Studio 2, revealed at Ignite last year. For those of you still pining for Microsoft return to mobile, there apparently still is hope for the long rumored Andromeda, too:

Both Windows Central and Sams are expecting to hear more about Windows Lite/Santorini at Microsoft’s Build developer conference slated for early May, with Sams predicting that we’ll see hardware at the event. As for what to expect of this new experience, Windows Central’s Zac Bowden explains:

Windows Lite isn’t a lesser version of Windows; it’s an entirely new OS experience designed for lightweight computing. It probably won’t even be called Windows because of this.

As of now, Santorini isn’t being positioned as a replacement for Windows, in fact it will be running on the Windows Core OS, but will, like HoloLens and Surface Studio 2 and even Centaurus, bring new experiences to Microsoft based products, moving them beyond Windows. Should be exciting times, beginning as soon as this Sunday at MWC, be sure to stay tuned to OnMSFT for all the latest.


Resident Evil: Code Veronica X, 4 Lost Planet video games gain Xbox One backward compatibility

As promised, Microsoft has added more titles to the list of Xbox 360 games that are now backward compatible with the newer Xbox One series of consoles. As pointed out by Xbox’s Larry Hryb on Twitter, four of the Lost Planet titles—games 1, 2, 3, and Odyssey—are now on the backward compatibility list. This means those who have enjoyed playing the first-person shooter / survival series developed by Capcom can now play those games on the Xbox One.

Also from Capcom and now backward compatible is the Resident Evil – Code: Veronica. The game was the first Resident Evil title for Microsoft’s Xbox 360 console, although it was fourth in the series as a whole, and centers around Claire Redfield three months after the destruction of Racoon City in Resident Evil 3.

It’s definitely nice seeing Microsoft’s work on bringing more games to the backward compatibility list. The Xbox One is a completely different device from the 360 and thus can’t natively run its games. However thanks to the implementation of hardware emulation, many of the games that long-time Xbox fans have grown to enjoy can now be played on the newest generation system.

Microsoft brought more than 100 titles to the backward compatibility list last year, ending with almost 550 total games. While it’s hard to understand the technical challenges to bringing new titles to the list, the company is taking suggestions from users as it works on making more of them available.

Want to be more productive in Outlook? Microsoft’s CVP for Time Management shares some tips

Microsoft Outlook is a solid email client that many users, whether basic consumers or corporate enterprises, can use to stay informed and in touch with others. It competes with a major product of Google, Gmail, which is regarded as the most popular of email platforms. While the Mountain View, California tech giant might have the advantage of having its 2.7 billion users with Android phones likely pre-installed with Gmail, Outlook sets it apart by its unique feature set.

To help inform new users, and to remind those who have been using it for some time, Microsoft’s Corporate Vice President of Communication and Time Management, Guurav Sareen posted an article online detailing what many people might find useful within the app. These tips can help safe time for consumers and increase productivity for business users. Here are his main points:

  • For high priority emails that seek quick responses, users can @ mention others within a message to help get their attention. The unread message will be marked with an @ symbol, and the recipient will be able to see his or her name mentioned with the same symbol, informing them that they were mentioned. It works on the desktop app, on the web, and on mobile phones, too.
  • Document collaboration is easy in Outlook, as those attached within an email can be edited by both the sender and recipient(s) if the editing settings allow. It’s certainly easier than repeatedly sending new revisions to each other and saves a lot of time. However, this is a unique feature to Outlook on the web.
  • Office Lens integration in Outlook make it easy to scan items such as business cards which will be straightened and saves it to OneNote as a fully searchable page. And since OneNote can understand the information saved, opening it will allow the contact info to be saved either in Outlook on desktops, or in the contacts in phones.
  • Outlook is integrated with LinkedIn, a company that was acquired by Microsoft a few years back. For those with Office 365, people can view profile and contact information by hovering over People Cards from within Outlook, thanks to the integration with LinkedIn. Additionally, users will be able to see insights about people on their Outlook calendar, and also lets you share your documents to other LinkedIn users for easy collaboration of Office documents.
  • Both desktop and mobile users can plan calendar events and manage availability easily from within their apps. Outlook Mobile makes it easier, allowing anyone to insert the calendar events directly within the email.

These features are likely welcomed by many, but are only a small part of the big picture. The fact is, Outlook definitely has no shortage of other nice tools, and Microsoft is always improving it.

Both Halo Wars video games to be free to play this weekend on Xbox One

Halo Wars: Definitive Edition and Halo Wars 2 will both be free to play on Microsoft’s Xbox One consoles this weekend for Xbox Live Gold subscribers.

Both games will be free to download from February 21st at 12:01 am PT and will remain playable until February 24th at 11:59 pm PT.

Here’s the official game description for each Halo Wars title:

Halo Wars: Definitive Edition

Supports Xbox Play Anywhere: yours to play on both Xbox One and Windows 10 PC at no additional cost. Halo Wars: Definitive Edition is an enhanced version of the real-time strategy classic, Halo Wars, updated to run natively on Xbox One and Windows 10.

Set early in the iconic war between the Covenant and UNSC – made famous by the Halo FPS games – Halo Wars: Definitive Edition provides a unique angle on the war while bringing new heroes to the battlefield. Control large Halo armies and direct them in action-packed warfare. Halo Wars: Definitive Edition includes improved graphics, new achievements and all the DLC from the landmark game. Re-live the epic campaign or compete in online multiplayer battles with armies of powerful Halo forces at your command.

Halo Wars 2

It’s the Halo experience you’ve dreamed of – controlling entire armies of Marines, Warthogs, Scorpion tanks, and Spartans on the battlefield from the Commander’s point of view. Halo Wars 2: Complete Edition is the comprehensive version of the real-time strategy hit that includes ALL content for Halo Wars 2. And now you can play in native 4K Ultra HD graphics with HDR on the Xbox One X and Windows 10!

Halo Wars 2 includes an epic story taking place after the events of Halo 5, told across 12 campaign missions with ultra-realistic cinematics. Once you’ve honed your skills as a commander you can jump into a variety of multiplayer modes against the computer and play online with Xbox Live.

As with all Free Play Day promotions, any progress made in both Halo Wars games will save to the cloud and can be accessed in the future should the player choose to purchase them outright. Players will also be able to access all aspects of the full games during this period in addition to being able to unlock Xbox Achievements.

Are you a fan of the Halo Wars series and will you play either of these titles this weekend? Let us know in the comments below and then follow us on Pinterest for more Xbox gaming content.


Halo Wars 2: Complete Edition

Anthem video game is now live on Microsoft’s Xbox One consoles

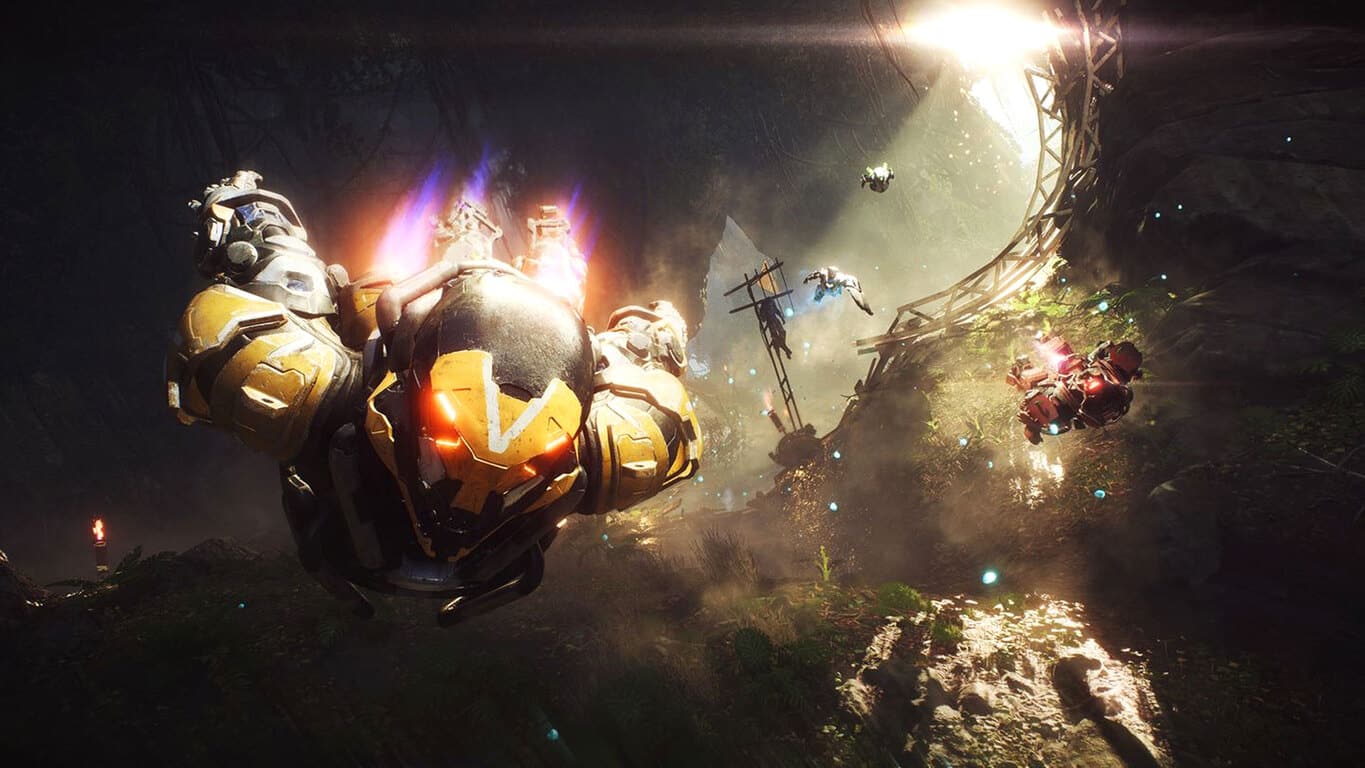
One of the most-talked about video games of the past few months, Anthem, is now live and ready to play on Microsoft’s Xbox One family of consoles.

The game is an online multiplayer action title set in a futuristic alien world filled with monsters and advanced tech. Players can join up with three other teammates online and the game 4K Ultra HD when played on the Xbox One X.

Here’s the official game description and launch trailer:

On a world left unfinished by the gods, a shadowy faction threatens all of humankind. The only thing that stands between these villains and the ancient technology they covet are the Freelancers.

Join with up to three other players and assemble high-tech, hand-crafted, uniquely powerful suits of armor. Explore vast ruins, battle deadly enemies, and claim otherworldly artifacts. With every mission, you and your Javelin grow in power. Fight the dangers of an ever-changing world. Rise united to defeat evil. Triumph as one.

Anthem invites you to experience a co-operative Action-RPG set in a new and mysterious world from BioWare and EA.

Anthem is available in a regular edition and a Legion of Dawn Edition which comes with the base game, Legendary Legion of Dawn Armor Packs, a Legendary Weapon, a Legendary Ranger Gear Piece, and the official Anthem Digital Soundtrack.

Have you played Anthem yet on your Xbox One? Let the community know what you think of it in the comments below and then follow us on Pinterest for more Xbox gaming content. Would you recommend Anthem to others?

Anthem™
Anthem™
Developer:
Electronic Arts
Price:
Free


Microsoft Search adds Bookmarks and People autosuggest in Edge

The Bing search bar is getting a bit of a functionality boost for Windows enterprise users.

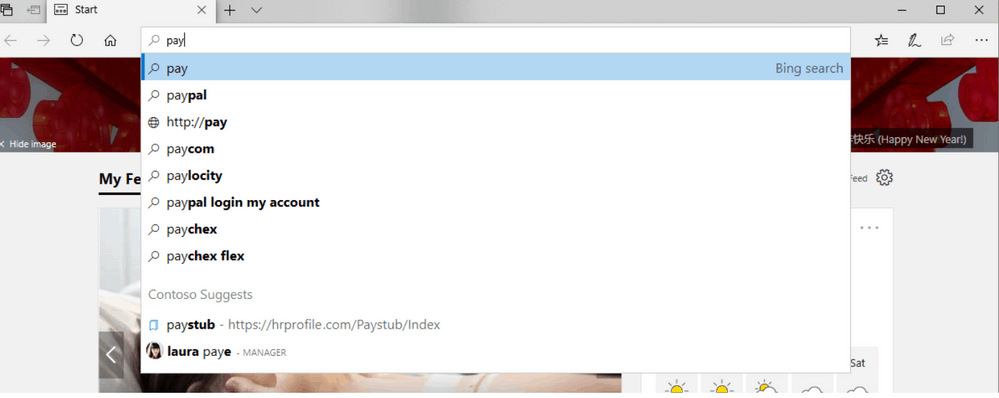
As of yesterday, February 20, 2019, The Bing.com autosuggest feature found in the search bar can now surface saved browser bookmarks and contact suggestions.

Similar to the functionality of the Windows 10 Search, the Bing.com search bar is becoming a more robust and multifaceted tool that’s shortening the gaps between functionality and productivity.

As much as consumers could benefit from this added ability in the regular version of Bing.com, the new functionality is even proving difficult to come by for enterprise users.

According to Microsoft, there are several hoops users will need to jump through to enable the update, presumably for security reasons.

Requirements:

To see bookmark and people suggestions in Edge, users need to meet these requirements:

  • Be a member of a MSB public preview tenant
  • Signed in to a Windows machine with their AAD credentials
  • Edge version 1709 Fall 2017 Creator’s update or newer installed
  • Bing is set as the default search provider in Edge

In the name of transparency, the Bing team offered a rationale for its inclusion of bookmarks and contacts surfacing in the search bar. Rather predictably, the Bing team plans to use the new functionality to help its algorithm determine prioritization of the additional information based on queries.

As a team, we are always striving to help users find what they are looking for in the most efficient way possible. As users click on these suggestions, we can better rank which bookmarks and people show up for which queries within a tenant. This also helps users to “stumble on” MSB organically by surfacing relevant suggestions where they’re searching and enticing them to learn more about it. We’ll continue to add these autosuggestions across various endpoints to meet users where they are.

The Bing team also plans to incorporate support of other data points that include Q&A, locations and more. As Microsoft hones in on a newer browser experience as well as creating a lightweight Chrome OS-like competitor, I can see a not too distant future where a robust search bar in a new browser becomes as vital as the File Explorer in Windows.

How to add Google Chrome activities to any version of Windows 10’s Timeline

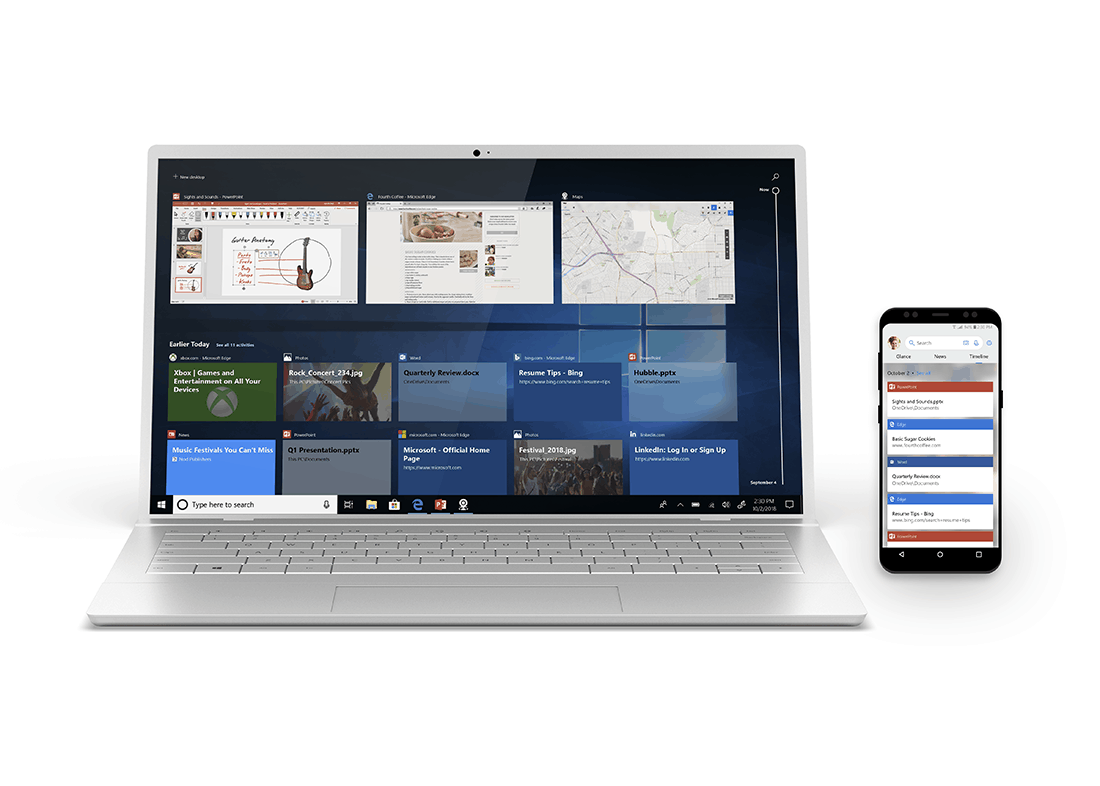
Windows Timeline is a handy feature introduced with the Windows 10 April 2018 Update that logs the activities you perform on your PC. Websites you visit, Office documents you edit and songs you play will all show up in chronological order within the Task View interface, accessed from the taskbar or the Win+Tab keyboard shortcut. Your Timeline is synced across your devices, including to Android phones via Microsoft Launcher.

Web Activities Chrome extension

This week, Microsoft announced a new Chrome extension which lets you bring your Chrome browsing history into Timeline. Published as “Web Activities” in the Chrome Web Store, it was announced alongside Windows 10 Insider Preview Build 18342 but is already available for download. We’ve found it’s compatible with every version of Windows 10 that supports Timeline.

Web Activities Chrome extension

To get started, make sure TimeLine is enabled on your PC, and then download the extension from the Chrome Web Store. Click the blue “Add to Chrome” button to install it in your browser. You’ll need to acknowledge the confirmation prompt, which warns the extension is able to access your entire browsing history. This is necessary so your visited websites can show up in Timeline.

Web Activities Chrome extension

After a few moments, you’ll be notified that the extension has been installed. Its icon will show up in the Chrome toolbar; click it to get started. Press the blue “Sign in” button” and follow the prompts in the popup window to login with your Microsoft account.

Chrome tabs syncing to Timeline

That’s all there is to it. Once you’re signed in, the extension will start recording your Chrome browsing history and feeding it through to Windows Timeline. We’ve found there’s usually a short delay but after a few seconds websites you visit should appear within Windows.

Web Activities Chrome extension

If you ever need to logout, just click the extension’s icon and press the blue “Sign out” button. The extension’s menu also includes the option of choosing whether to open Timeline web browsing activities in your default browser or Microsoft Edge. Thankfully, it’s “Default Browser” that’s selected by default. To remove the extension entirely, right-click its icon and choose “Remove from Chrome.”

Headlander is now playable on Xbox One with Xbox Game Pass

The Xbox One video game, Headlander, is now playable for Xbox Games Pass subscribers. The game is 2D platformer with a strong retro Sci-Fi vibe aesthetic and a futuristic robotic world to explore.

Here’s the official game description:

You are the last known human in the universe, and all that’s left of you is a disembodied head. Seeking clues to your fractured past, you must travel through a hostile world of machines using a special helmet that allows you to dock into and take control of any robotic host body. As you launch from one body to the next, you’ll start to discover that things are not quite what they appear to be, and the fate of humanity has yet to be decided…

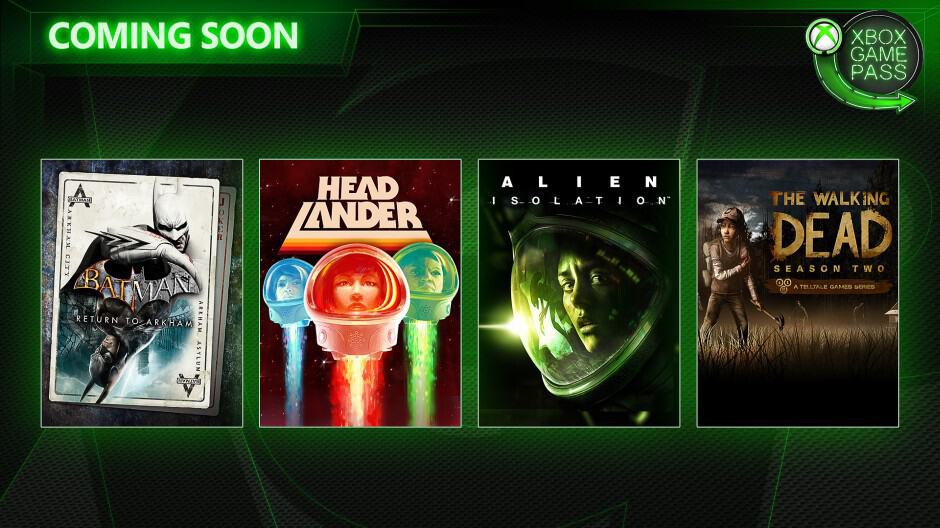
Headlander was one of several video games that were announced this morning to be coming to Xbox Game Pass in the near future. The three other games that are soon to join Xbox Game Pass are  Batman: Return to Arkham, The Walking Dead: Season Two, and Alien: Isolation.

Xbox Game Pass is a monthly subscription service not dissimilar to Netflix. In place of TV shows and movies though, subscribers gain access to around 100 Xbox, Xbox 360, and Xbox One video games to play in full. Titles are added and removed on a very regular basis to keep the library fresh.

Are you an Xbox Game Pass subscriber and are you going to play Headlander? Let us know why or why not in the comments below and then follow us on Pinterest for more Xbox gaming content.

Headlander
Headlander
Developer:
Adult Swim Games
Price:
$19.99

Windows was unable to install your Android [FIX IT NOW]

Installing Android drivers on a PC should be a walk in a park. You connect your handset with the PC via the USB cable and, usually, the installation commence immediately. The generic driver provided automatically by Windows should be good enough for storage access.

The majority of users don’t need anything else, to be perfectly honest. However, what happens if Windows prompts you with the “Windows was unable to install your Android” prompt? How to make it work if a generic driver just won’t install? Find out below.

How to successfully install your Android device drivers

  1. Install  OEM USB drivers manually
  2. Enable USB Debugging on your Android
  3. Switch the USB port
  4. Use Android SDK Generic driver

Solution 1 – Install  OEM USB drivers manually

There are so many devices which don’t require manual driver installation and Android phones are not on that list. Especially if you want to use your device with the ADB and Android SDK.

Now, Windows 10 is usually able to install the device for the simplest of features (data transfer) automatically, but this doesn’t apply to earlier Windows iterations. That’s why we suggest installing drivers manually.

In order to find the best driver for your device, we’ll be looking at the OEM’s official support website. Say, Huawei device won’t do much with the Samsung driver. Therefore, make sure to find the appropriate driver. But, before that, let’s try and install the driver within the Device Manager.

  1. Connect your Android handset via the USB cable to a PC.
  2. Open Device Manager.
  3. Expand the Portable Devices (or Other devices).portable devices device manager
  4. Right-click on your handset and choose Update driver.
  5. Search automatically for the driver.

If that doesn’t work, google your OEM and download drivers. Install the driver manually. If the problem is persistent, move to additional steps.

— RELATED: Huawei brings Windows 10 to Android with its new Cloud PC app

Solution 2 – Enable USB Debugging on your Android

Another important thing a lot of people ignore is related to Android permissions. In order for a PC to have access to your device (usually not necessary for storage access), you should enable USB Debugging in handset’s Developer options.

These are not accessible by default so you’ll need to follow through with a bit gimmicky step in order to unlock Developer options on your device.

Once there, you should be able to enable USB Debugging with ease. Firstly, let’s uninstall the failed driver from the Device Manager:

  1. Open Device Manager.
  2. Click on the View in the Main Menu and toggle on “Show hidden devices“
  3. Expand the Portable Devices (or Other devices).
  4. Right-click on your android device and uninstall it.

Here’s how to enable USB Debugging mode on your Android handset:

  1. Open Settings.
  2. Choose System > About phone.
  3. Tap 7 times on the Build number.
  4. Enter your Password or PIN to access the Developer options.
  5. You’ll find Developer options in the System section.
  6. In the Developer options menu, enable USB Debugging.
  7. Connect your device to your PC via USB and allow USB Debugging when prompted.
  8. Wait until the device’s driver is installed and reboot your PC.

Solution 3 – Switch the USB port

Simple but often so efficient solution. Sometimes a certain USB port won’t work and switching to an alternative one should do the job. In addition, make sure to reboot both your handset and PC after switching the port.

In addition, if you have an alternative Micro USB-to-USB or USB-C– to-USB cable, give it a try.

These are small and easily neglected things but can invoke the issue at hand. On the other hand, if these hardware tweaks are not helping, we advise you to try the last step.

— RELATED: Best apps to transfer Android/ iOS files to Windows 10, 8

Solution 4 – Use Android SDK Generic driver

Finally, there’s a chance you have an older device which isn’t supported by either official nor generic drivers. What to do if that’s the case? The only remaining solution we can suggest is going for Android SDK generic driver.

They are usually required in order to run ADB and they might help your PC establish the initial connection with your device before installing a functional MTP driver.

Here’s how to install Android SDK Generic driver on your device:

  1. Download and install Android SDK, here.
  2. Connect your Android handset via the USB cable to a PC.
  3. Open Device Manager.
  4. Expand the Portable Devices (or Other devices).
  5. Right-click on your device and choose Update driver from the contextual menu.
  6. Select “Browse my computer for driver software“.browse my computer for driver software
  7. Choose “Let me pick from a list of device drivers on my computer“.
  8. Double-click All devices.
  9. Choose MTP USB device if available. install MTP driver
  10. If not, click “Have disk…“.install generic android sdk mtp driver
  11. Navigate to this path: C:Program Files (x86)Androidandroid-sdkextrasgoogleusb_driver.
  12. Install driver and you should be good to go.

With that said, we can conclude this article. In case you have any questions or suggestions, feel free to tell us in the comments section below. We look forward to hearing from you.

If you’re an advanced user, we have a great article on how to install Fastboot drivers for Windows 11 in order to customize your phone, so don’t miss it.

How to have baby girls in The Sims 4: Parenthood DLC

The Sims 4 recently received a new DLC focusing on family life. Titled The Parenthood game pack, it challenges players to become better parents through real-life family situations such as sibling rivalries, school projects, bad behavior, and more.

However, many players are complaining that their families have had more boys than girls:

Between 2 different families my sims have had a total of 12 baby boys and no baby girls. This has happened ever since the latest patch and the newest Parenthood GP. Anyone else have this problem?

In this article, we’re going to show you what you can do to influence the gender of your baby in The Sims 4: Parenthood DLC.

Steps to have a baby girl in The Sims 4

Eating carrots or listening to alternative music can lead to having baby boys. So, make sure that your Sims don’t engage in these kinds of activities prior to conceiving a baby.

To increase their chances of having a baby girl, Sims should eat strawberries and listen to pop music.

On the other hand, some players have been luckier and even managed to conceive triplets:

I had triplets just last night and it was two boys and one girl. i feel blessed to get one girl usually but to get one right off was amazing. I do have seven to ten boys to one girl.

Keep in mind that several attempts may be necessary to achieve the results you want. But we guess that’s another manner the game stays faithful to real life events.

Another way to influence the gender of your child in The Sims 4 is to use cheats.

Have you downloaded the Parenthood DLC? Did you encounter the same baby gender issue? Use the comment section below to tell us more about your experience as a parent!

RELATED STORIES YOU NEED TO CHECK OUT:

Download Windows 10 KB4487021 to fix major region-specific bugs

Microsoft announced a bunch of cumulative updates for various versions of Windows 10. The updates were rolled out to all the Windows 10 Enterprise editions version 1607 and 1703  on February 19, 2019. 

These updates do not deal with security and this time they have been released to fix stability and other issues that existed in the previous versions. Just like KB4487021, this time KB4487021 also brings quality improvements and bug fixes.

Microsoft states that this update resolves at least 13 errors have existed in the previous versions. Most of the issues affected users of Japanese devices. 

KB4487021 improvements and fixes

The clock and the calendar flyout Issue

The update fixes a bug that involves user settings being ignored by the clock and the calendar flyout for date and time formats for Japanese era. The problem was first reported in KB4469068. 

Japanese era name problem

A bug was reported in Microsoft Office Visual Basic applications during the previous releases. It was causing the first character of the Japanese era name to be broken down. 

Furthermore, the following fixes and improvements have been listed in the detailed changelog:

  • Updates time zone information for Chile. 
  • Addresses an issue with evaluating the compatibility status of the Windows ecosystem to help ensure application and device compatibility for all updates to Windows. 
  • Adds a new group policy called “Policy Details”. This policy will immediately disconnect any wireless connections when a wired connection is detected and “Minimize simultaneous connections” is configured.
  • Addresses an issue that causes the clock and the calendar flyout to ignore user settings for Japanese era date and time formats. For more information, see KB4469068.
  • Addresses an issue that can overwrite gan-nen support behavior for the Japanese era with a newer update. For more information, see KB4469068.
  • Enables the 元年 character for the first year in the Japanese era. For more information, see KB4469068.
  • Addresses an issue that fails to display the correct Japanese era name in Microsoft Office Visual Basic for Applications. For more information, see KB4469068.
  • Addresses an issue that fails to recognize the first character of the Japanese era name as an abbreviation and may cause date parsing issues.
  • Addresses an issue that may prevent Internet Explorer from loading images that have a backslash () in their relative source path.
  • Addresses an issue that may cause applications that use a Microsoft Jet database with the Microsoft Access 95 file format to randomly stop working.

KB4487021 Known Issues

The OS build number is increased to 16299.1004 in KB4487021. It is worth mentioning that it seems like Microsoft is working hard this time on these cumulative updates. As of now, no bugs have been reported. Therefore, no errors are expected during the installation of the updates.

RELATED ARTICLES YOU SHOULD CHECK OUT:

Fix: This Version of System Recovery is not Compatible

System recovery is one of the easiest remedies if your Windows 7 installation has failed. Sadly, it doesn’t always work due to seemingly random issues such as this version of system recovery options is not compatible error.

When it occurs, your PC may not be able to recover its correct boot settings and might show a black screen. While this issue can look scary, the solutions in this guide will help you fix it quickly.

Why am I getting the version of system recovery options is not compatible error?

  1. Compatibility issues: This hitch can occur when your installed version of Windows is incompatible with the Windows image you are using for recovery. For example, it could be an OEM while you have installed a retail edition. You could also be running a 64-bit recovery disk on a 32-bit Windows.
  1. Wrong Boot Settings: Adjusting the system boot settings in BIOS during repair could confuse the boot process and cause this problem.
  2. Disconnected Drives: You can also expect this challenge if you’re attempting a system restoration when one drive is disconnected (for PCs installed with multiple hard drives).

Long story short, the error arises due to a faulty system repair setup.

How can I fix this version of system recovery is not compatible error?

1. Modify Your Boot Settings

1.1. Disable all other disks but your Windows system disc

If you disable your second hard disk (and every other extra disk) in BIOS and leave the Windows system disc (primary hard drive) only when recovering, the compatibility hiccup may not occur. This should then allow the Windows 7 recovery to proceed normally.

1.2.  Set the System Disk to be accessed from a lower channel

Alternatively, you may have to look into which ports the various drives – system, DVD/Blu-ray drives, and secondary disks are installed on the motherboard.

You then rewire the system drive into a lower channel/slot, for example, SATA slot #0(channel 0). Connect the rest into the other slots. For instance, the Blu-ray can go to SATA slot #1, RAID on SATA slot #2, and so on.

not compatible with this version of windows

In addition, switch boot sequences and ensure that the system disk will be number 1 in the system boot priority list. Lastly, reboot from your recovery disk.

2. Disconnect and reconnect the drives

If your Windows repair option won’t work, try disconnecting and then reconnecting your hard drives, including any existing RAID disks.

You would need to access their ports by removing the system case. Remember to unplug the PC from the power source before opening the case.

Retry the recovery soon after reconnecting the power cables and see if this will fix this version of system recovery options is not compatible problem.

3. Disable UEFI

  1. Open your PC’s BIOS menu. You press the correct key during boot sequence, for example, Esc, F1, F2, or F12.
  2. Locate the Secure Boot settings, and change it to Disabled. You can find this option under either Authentication,  Security, or Boot.
    this version of system recovery options is not compatible windows 7 ultimate
  3. Save the changes and exit.
  4. The PC reboots.

UEFI Secure Boot helps to ensure that your computer boots using trusted firmware only. But it occasionally triggers this version of system recovery options is not compatible issue.

Disabling Secure Boot can hence remove the unwelcome setback. If all is well, it will re-launch recovery and run the steps to completion.

4. Create a fresh recovery disk

  1. From another EFI partitioned machine, click the Start button (insert a USB flash drive/DVD first).
  2. Select Control Panel from the menu.
  3. Select System and Maintenance.this version of system recovery options is not compatible windows 7 usb
  4. Choose Backup and Restore.bootmgr is missing windows 7 this version of system recovery options is not compatible
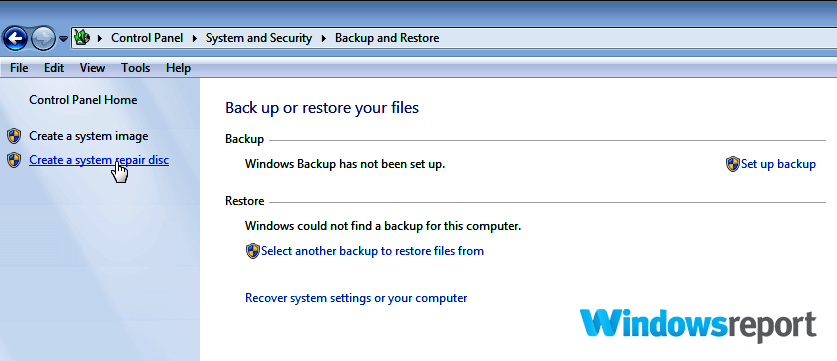
  5. Click Create a system repair disc from the left pane.this version of system recovery options is not compatible usb
  6. Follow the steps as directed.
  7. Insert the new Windows 7 recovery disk, then restart your PC and run the usual steps to recover your Windows 7 image.

It can be that you’re attempting to recover your Windows installation using an outdated Windows 7 recovery DVD.

This happens especially in newer machines that come with UEFI enabled instead of the conventional BIOS firmware interface.

5. Boot in UEFI Mode/ legacy BIOS-compatibility

  1. Insert the Windows installation DVD/USB key.
  2. Boot your PC to this DVD/USB key again by clicking any key at bootup.
  3. Go through the installation wizard until you come to choose an installation type. Here you select Custom.
    windows 7 repair incompatible version
  4. The Where do you want to install WindowsWindow pops up. Do this:  Select each partition shown on the drive, and choose Delete.This Version Of System Recovery Options Is Not Compatible
  5. The drive will now show one huge unallocated space/area. Select this unallocated space and press Next.
  6. Windows will automatically detect that the computer has booted into the UEFI mode and will reformat the drive and begin the installation.
  7. Don’t install. Instead, Click X to halt the process (after deleting the partition), then choose repair.
  8. Check if the System Recovery options are now working fine. 

Another way to beat this error is by booting in UEFI mode.

That’s because booting into this mode when recovering Windows eliminates any compatibility conflicts from your USB/DVD.

With the solutions in this guide, you should now be able to fix this version of system recovery options is not compatible with the version of Windows error. Similarly, if you are dealing with a Window recovery loop error, check our detailed guide to fix it.

Feel free to let us know the solution that helped you fix this error in the comments below.

Download KB4487029 to fix bugs from previous updates

Windows 10 is all set for another round of updates, just after the Patch Tuesday updates that were rolled out to users last week.

Update KB4487029 upgrades the current Windows 10 v1803 build number to 17134.619. 

KB4487029 improvements and fixes

Some quality improvements have been included in this recent update. This update does not include any new operating system features.

The changelog brings the following changes:

  • Enables media content to play e-learning content with plug and play USB adapter cables on Microsoft Edge.
  • Addresses an issue that causes app-specific registry keys to be deleted after updating an application.
  • Addresses an audio compatibility issue when playing newer games with 3D Spatial Audio mode enabled through multichannel audio devices or Windows Sonic for Headphones.
  • Addresses an issue that prevents some users from pinning a web link to the Start menu or the taskbar.
  • Addresses an issue in which the desktop lock screen image set by a group policy will not update if the image is older than or has the same name as the previous image.
  • Addresses an issue with evaluating the compatibility status of the Windows ecosystem to help ensure application and device compatibility for all updates to Windows.
  • Addresses an issue that prevents a user from deleting a wireless network profile in some scenarios.
  • Addresses an issue in the Timeline feature that causes File Explorer to stop working for some users.
  • Addresses an issue that causes the Photos app to stop working when it’s used from the Mail app.
  • Addresses an issue that may prevent Internet Explorer from loading images that have a backslash () in their relative source path.
  • Addresses an issue that may cause applications that use a Microsoft Jet database with the Microsoft Access 95 file format to randomly stop working.

Keep in mind that just before installing the latest cumulative update, you should have the latest servicing stack update (SSU) for your operating system. 

This is an optional update and it will be available to all users through Windows Update. You can also manually download the update from Microsoft Update Catalog.

KB4487029  known issues

Microsoft has not confirmed any known issues.

Have you experienced any issues in KB4487029? Let us know in the comments section below.

RELATED ARTICLES TO CHECK OUT:

Chrome won’t let websites know you’re using incognito browsing

Google is reportedly planning to give a tough time to the sites so that they won’t be able to figure out that you are using Incognito mode. The feature is expected to arrive in as early as April 2019. 

Currently, the websites are able to block the visitors so that they are not able to access the content of the websites. If the users have to view the contents of the page they have to switch out of the Incognito mode. While the developers can use the “FileSystem” API to see that you are using that mode. 

How Is Chrome Planning To Close The Loophole?

Chrome follows a very simple step in this regard. When a user is using the Incognito mode, FileSystem API is disabled by Chrome. The FileSystem API basically stores the application files.  Basically, this API is being checked on page load by the websites that are interested in blocking private browsing.

Google has got a quick workaround as it creates a virtual file system in RAM. The missing API is not identified by the websites in that case.

The browser ensures the safety of the data in a way that whenever the user leaves the Incognito mode, the virtual system is automatically deleted. In fact, the company is working to completely remove the FileSystem API from the browser.

What Is The Incognito Mode?

When a user uses the incognito mode, he/she is able to browse the internet privately. One of the major benefits of this mode is that the browsing history and data is not being saved by the browser in any way. Moreover, the websites are not able to use cookies to track visitors in Incognito mode.

As the browser is not tracking the search history, the users can easily get rid of the advertisements. While if he is visiting the subscription-based websites, it’s a handy tool to get around article limits.

Google is all set to use an opt-in feature with Chrome 74 in order to close the loophole. The change is expected to be rolled out to all the users in April 2019.

It is worth mentioning that the search giant has taken a huge step in the right direction. It will not only ensure the privacy of the users but also help them to get rid of advertisements.

RELATED ARTICLES TO CHECK OUT NOW:

Download Windows 10 Timeline extension for Google Chrome

Microsoft recently announce the availability of the Windows 10 Timeline extension for Google Chrome. The newly announced extension is officially called Web Activities and is an official extension that syncs Chrome browsing activities in Timeline.

Launched in 2018, Windows Timeline keeps a record of the browsing activities and apps history by synchronizing the activity into the task view feature of Windows.

Previously, only Microsoft Edge had supported this feature. However, the users who wanted to run Timeline for Chrome could extend this feature to Chrome via the unofficial extensions which were announced last year.

This new extension is available in Chrome Web Store. According to the Microsoft, the Timeline extension for Chrome had been a top request by the build insiders. This new extension is easy to use. It only requires installing it, sign in with Microsoft account and that’s it.

Before this new extension, Google had its plans to sync browsing history for Chrome. However, this extension simplifies the activity by directing the browsing history into the Task view which can be accessed from the desktop.

web activities timeline chrome extension

Web Activities coming to more apps

Besides integrating Timeline to Chrome, Microsoft also plans to introduce this feature for more apps in the coming weeks.

As we move into planning for future development, we are focusing on yet another Insider request: add support for more apps in Timeline. Browser support was especially high on our Insider’s wish list – which lead to the recent introduction of our Chrome extension. Now, Timeline can now bring together even more activities.

Furthermore, the extension’s description on Chrome Web Store also tells that the Web Activities will sync the browsing history in Microsoft Launcher as well that runs on Android devices.

Here’s the description for Android:

With this extension, your browsing history will appear across all your devices in surfaces such as in Windows timeline and Microsoft Launcher for Android. Just sign in with your Microsoft account, select a site you’ve recently visited, and pick up where you left off.

This release by Microsoft is a step towards the company’s goal of expanding the Timeline across other apps.

At the moment, no official extension of Windows Timeline is available for Firefox. However, unofficial extensions do exist to integrate Timeline in Firefox.

Firefox might be the next target of the Timeline? What do you say about it?

RELATED POSTS YOU NEED TO CHECK OUT:

New Xbox One 1904 build brings ability to restart console after holding down Xbox button

Xbox Insiders on the Preview Skip Ahead and Preview Alpha rings can download a new Xbox One 1904 build today with one new feature. Microsoft is making it easier to restart your Xbox One console by adding a dedicated button to the Power menu, which appears when you hold down the Xbox button on your controller.

As of today, restarting the console requires users to open the Xbox Guide, navigate to the “System” tab and then choose “Restart console.” Adding a restart button to the Power menu will definitely save time, and it’s another neat usability change after the addition of the floating mini keyboard and the reprogrammable OneGuide button on the Xbox Media Remote.

This new Xbox One 1904 build also brings several fixes for Mixer and Twitch broadcasting, Messaging, and My Games and Apps. For those of you using the new Xbox skill for Alexa, you can now use “Alexa tell Xbox to pair my controller” or “start controller pairing” to pair your controller to your console.

The Xbox One 1904 update is expected to ship to all Xbox One owners in April, which should give some time for Microsoft to test new features with Insiders. Let us know in the comments if you have any special requests for the Xbox team.

Xbox Live is still down for many due to scheduled maintenance

Microsoft scheduled major maintenance works for Xbox Live on February, 19 but the effects are still visible today. The maintenance was scheduled between 2:00PM UTC and 6:00PM UTC (9:00AM ET and 1:00PM ET). This means that over 360 titles and services were affected all over the world. 

Microsoft has sent an alert to all the Xbox users who might be disconnected from Xbox Live, if they had plans to play Xbox 360 games during the maintenance period.

Furthermore, all backward compatible Xbox 360 games on the console were also affected for Xbox One users around the world —  while both Xbox Live and Xbox One games were expected to work normally.

Notably, Xbox 360 titles & services were affected only for an hour and a half during scheduled maintenance that was done last year in July. You can check out the Xbox Live service status for the latest information during the maintenance period. 

Xbox Live is still unavailable for some

xbox live issues

At the time of writing this article, some issues were reported in Xbox Live Core Services. The users were having difficulties in signing in, creating, managing, or recovering an account.

Some of the users have also reported an issue in using the search feature. As of now, the issue has just affected Xbox 360 platform. 

As far as the resolution is concerned Microsoft stated that:

Our engineers and developers are actively continuing to work to resolve the issue causing some members to have problems signing in to Xbox Live. Stay tuned, and thanks for your patience.

Apart from that, the company confirmed that all the other all the other services, games, website and apps should be operating normally after maintenance work was completed. These services include:

  • Buying items, redeeming codes, or downloading purchases
  • Live TV; Groove or Movies & TV video store, including browsing, purchasing, downloading, and streaming
  • In-game matchmaking, cloud storage, finding friends, Game DVR, leaderboards, avatar editing, or pictures
  • Web search, forums, help content, or Xbox.com are available 
  • All apps and games are operating normally

Let us know in the comments section below if you are still experiencing any other issues after the maintenance period.

RELATED ARTICLES:

Xbox and Paradox to allow user-created mods without pre-approval for the first time ever

Microsoft and Paradox are partnering to enable custom mods created by other users to be shared and applied to games developed by the gaming company. To make this possible, the company is releasing Paradox Mods, a library of mods build within the game and supports custom uploading of them, as well. In an interview with GamesIndustry.biz, the company’s project owner of Paradox Mods, explained its reasoning saying that,

“The problem with that solution was that you could not submit any mods to us, because they were part of the validation that we had with Microsoft. It was incredibly limiting, and also very time consuming and expensive for us to publish new mods. They needed to go through individual validation, which is pretty much a deal-breaker.”

Paradox is starting this new feature out with their Surviving Mars title today, and will expand to their other games at some point in the future. The library come with 30 pre-approved mods to start with, allowing players on the Xbox platform to experience many of the new buildings, features, and changes that are available with mods that PC users have grown to enjoy. Additionally, players on the latter platform will also get the same library in the future as well, giving mod developers a single place to upload them for Xbox and PC users.

And of course, while the mods won’t receive moderation before being published, they will still be subject to the company’s policies that developers will need to follow. That means if a users does upload a mod that violates policy, it will get removed after it is available instead of being rejected beforehand.

Bethesda also did something similar with their Fallout 4 title in 2016, allowing users on the Xbox One to download mods from directly within the game, as well as upload them on the company’s website.

It’s definitely an interesting move from Paradox, which will no doubt get a lot of attention from Xbox One gamers. Hopefully, if it does well, perhaps we could see many other game developers following their lead and bringing mods to other Xbox One titles.

Surviving Mars
Surviving Mars
Developer:
Paradox Interactive
Price:
$29.99

Alien: Isolation, The Walking Dead: Season 2 and more are coming to Xbox Game Pass to end February with a bang

Microsoft’s Xbox Game Pass subscription service already picked up five new games in February including Shadow of the Tomb Raider, The Walking Dead: The Complete First Season, and the Xbox One/Windows 10 exclusive Crackdown 3, tomorrow, February 21, Disney Epic Mickey 2: The Power of Two and the metroidvania-style game Headlander will be free to play for Game Pass subscribers, in addition to the previously announced Batman: Return to Arkham.

The Xbox team apparently wanted to end February with a bang as two more games will come to the catalog on February 28. First of all, The Walking Dead: Season Two from Telltale Games will join the first season of the game that was added earlier this month. Last but not least, Microsoft will be adding the survival horror classic Alien: Isolation, a game that received praise for its artistic direction and stealth mechanics.

Overall, that’s 10 new games arriving on Xbox Game Pass in February, which is quite impressive considering this is the shortest month of the year. Unfortunately, 10 games will also leave the catalog at the end of the month including Shadow Warrior, Aven Colony and the first episode of Resident Evil: Revelations 2.

Xbox One’s Crackdown 3 video game just got a free bonus pack of DLC

Crackdown 3, which just launched on Xbox One and Windows 10 last week, received a completely free pack of downloadable content (DLC) today that’s available to all players.

This free DLC pack contains one free weapon, a free suit, and a free vehicle for use in-game. Here’s the official description of each.

  • Quackhammer Launcher – Take a BOOM out of crime with this multi-rocket launcher that puts the QUACK in attack with exploding ducks instead of rockets.
  • Commander Jaxon Ultimate Suit – Boost the rate you earn Strength and Explosives XP by 10% with Commander Jaxon’s Ultimate Suit upgrade.
  • Linebacker Vehicle – Smash through or roll over smaller vehicles with the Linebacker. This heavily-armored Agency truck also has a machine gun turret for added firepower.

After downloading this pack onto an Xbox One console or Windows 10 PC, gamers will need to follow a few steps to unlock each item. Here’s the instructions for each one.

  • To look Boom-tastic in Commander Jaxon’s Ultimate Suit: Create a new Agent or head to a Supply Point with an existing Agent, choose Agent Jaxon on the Agent selection screen, and then use the toggle to switch between regular and Commander Jaxon.
  • To drive in style with the Linebacker vehicle: Get to a Supply Point with a vehicle pad and select the Linebacker from your available inventory.
  • To equip the Quackhammer: Access any Supply Point, open the Loadout screen, scroll to the very bottom of the left hand column and select the Quackhammer.

Crackdown 3 is a sandbox action game with a single-player campaign and a heavy emphasis on its multiplayer modes. The game supports crossplay between the console and PC versions and is also available as part of the Xbox Games Pass service to play for free (after the monthly subscription fee of course).

Have you played Crackdown 3 since it launched? Have you downloaded this free pack yet? Let us know in the comments below and then follow us on Pinterest for more Xbox gaming content.

Crackdown 3 Bonus Pack
Developer:
Xbox Game Studios
Price:
Free

4 solutions to fix HP Connection Manager fatal errors

One of the issues that affect the otherwise awesome HP Connection Manager utility is the HP connection manager fatal error problem.

The program, created to help you easily manage all your wireless, mobile, Bluetooth, and broadband connections has actually been praised for its efficiency in controlling internet connectivity in HP machines.

Nevertheless, some Windows 10 users have been encountering the HP connection manager fatal error sometimes immediately after startup or in the midst of using their HP PCs.

HP Connection Manager Fatal Error Windows 10

The error also appears when the computer is trying to open the Connection Manager from time to time.

Here are other problems connected to the HP fatal error in Windows 10:

  1. HpConnectionManager.exe, Fatal error
  2. HP Connection Manager Service has stopped responding. Please exit and restart the application.
  3. A fatal error occurred; check the HP Connection Manager in Event Viewer for more details (error 80070422).
  4. Service is not available

The best bit is that these errors are a result of minor setup problems on the side of the utility and are not that difficult to do away with.

Let’s go through some of the working fixes:

How can I fix HP Connection Manager Fatal Errors?

Fix 1: Activate or Download and Install The .NET Framework 3.5 On Your Windows 10

The various .NET Framework 3.5 components are required to run a number of the tools that depend on Windows 10 on the target HP machine architecture.

Activating (where applicable) or downloading and installing it could thus resolve the HP connection manager fatal error windows 10.

Option 1: Activate The.NET Framework 3.5  via the control panel

Note: Before starting, make sure that your internet connection is on.

Steps:

  1. On your keyboard, press on the Windows key.
  2. Now type Windows Features, then press Enter.
  3. The dialog box Turn Windows features on or off
  4. Proceed to select the checkbox next to the .NET Framework 3.5 (includes .NET 2.0 and 3.0)hp connection manager install
  5. Now select OK.
  6. Reboot your computer when prompted to effect the changes.

Option 2: Download the .NET framework 3.5 From Microsoft’s Website

hp connection manager service not installed

Where the above method is not available, just download the .NET 3.5 Framework (Windows 10) directly from Microsoft’s website.

You are then required to run through the simple.NET 3.5 framework download process.

Fix 2: Install HP Software Framework Windows 10

The HP Software Framework delivers a stable set of app. interfaces that consolidate and simplify access to BIOS, hardware, and HP-specific drivers needed in Windows 10.

Once installed, these interfaces sometimes eliminate the annoying HP connection manager fatal error windows 10 problem.

Steps:

  1. Click on this link and follow the steps.
  2. Restart the computer.

Fix 3: Uninstall, Download and Install The Latest HP Connection Manager Version

The most recent version of the HP Connection Manager software is more enhanced and works seamlessly with Windows 10.

Uninstalling then reinstalling the upgraded edition could thus get rid of the error.

Uninstalling HP Connection Manager 

Steps:

  1. Click on the Start
  2. From the menu, select Settings then Apps.
  3. Locate the HP Connection Manager from the list of programs, right-click it, and select Uninstall.

Installing HP Connection Manager 

Steps:

  1. Click on this HP Connection Manager link  and follow the steps.
  2. Reboot the computer.

Alternatively, we recommend using third-party software that initiates complex scans and performs the updating procedure in a fast and safe way.

This type of program has robust features that aim to identify and repair issues like the connection manager fatal error.

In addition, you can take advantage of this driver managing tool for installing the latest version of your devices in a few simple steps.

The process will go automatically after a complete scan of your system, and you just have to select which drivers need an update. After this, the software will install the newest ones in a short time.

⇒ Get Fortect Driver Updater

Fix 4: Run Windows Update

In some instances, the solution for the HP connection manager fatal error windows 10 lies in Updating Windows.

This may solve any conflict between Windows 10 and the HP connection manager because as a result of one being ahead of the other in terms of updates.

Such an update also upgrades the installed .NET 3.5 Framework.

Remember that Windows 10 automatically checks and installs any new updates and security patches so this process is only necessary when auto-updating is not working.

Steps:

  1. Click on the Start
  2. Go to Settings.
  3. Select Update & Security.
  4. ChooseWindows Update.
  5. Select Check for updates and let the process run to completion.how to repair hp connection manager

Looking for a solution to fix high CPU usage on Cisco routers?

The high CPU usage on a Cisco router is rather uncommon. If you’re configuring routers frequently, you’ll know that CPU utilization will rise when transferring files between segments.

However, what happens if the usage is at skyrocketing at all times? Well, we can provide you with some initial information, but for the sake of troubleshooting, check the Cisco official support side or try your like with the community experts.

How to reduce CPU usage on the Cisco routers

First of all, make sure that your router is capable of handling multiple ports before going for any troubleshooting steps. If you’re positive that it can deal with the workload, you can try some of the common steps.

Even though initially sounds like a good idea, we suggest avoiding the half-duplex communication.

What you can do is drop down the load interval to 30 seconds and downgrade the configuration from 100 MBps to 10 MBps.

If that doesn’t help, here’s the list of possible culprits for high CPU usage:

  • Inappropriate switch path
  • All load of alignment corrections falls on CPU
  • Traffic overload
  • Bug in Cisco IOS
  • Configured voice ports
  • ATM interfaces are active on the router
  • Too many packets are being punted from PXF to RP.

These are usually causing the problem with CPU utilization and we can’t say with certainty what is the exact problem. What you need to do is follow through with the thorough inspection until you find the problem.

If you’re still unable to locate the problem, we suggest contacting the official support and asking for some assistance.

Moreover, if you’re aware of a certain solution, feel free to share it in the comments section below with the rest of our readers.

RELATED STORIES YOU SHOULD CHECK OUT:

What can I do if my laptop mousepad is not working?


10 quick solutions to fix laptop mousepad issues

  1. Update mousepad or touchpad drivers
  2. Uninstall and reinstall mouse drivers
  3. Use Windows generic mousepad driver
  4. Run an System File Checker scan
  5. Run Hardware and Devices troubleshooter
  6. Roll back the driver
  7. Check your keyboard
  8. Get drivers form manufacturer’s website
  9. Install mousepad drivers in compatibility mode
  10. Disconnect all peripherals

One of the benefits of owning a laptop is its built-in mousepad. This works especially where you’re constantly moving about, and your physical mouse device has failed you.

The mousepad, however, can also be frustrating especially when it’s not working because it isn’t a plug and play device, like its predecessor, the USB mouse device.

Why is my touchpad not working in Windows 10?

This issue can be as a result of a missing or outdated driver.

In order to fix your mousepad when it’s not working, you’d have to check on a number of troubleshooting resolutions before you can resolve the issue. Here are solutions that can help you work around this issue.

What to do if your mousepad won’t respond

1. Update mousepad or touchpad drivers

Follow the steps below to do this:

  • Right click Start
  • Select Device Manager
  • Click on Mice and other pointing devices to expand the list
  • Right click on the mousepad driver
  • Click Update Driver Software
  • Follow on-screen instructions to update the mousepad driver

If the issue persists, try the next solution.


2. Uninstall and reinstall mouse drivers

Here’s how to do this:

  • Right click Start
  • Select Control Panel
  • Double click System
  • Click Hardware tab
  • Select Device Manager
  • Expand Mice and other pointing devices to open the list

device manager drivers

  • Right click the mouse device you want to remove
  • Click Uninstall
  • Click Yes when you get a confirmation message
  • Restart your computer. Windows automatically detects the change in your hardware.
  • Install the mouse driver
  • Check for its functionality

Note: contact your device’s manufacturer for the latest mouse drivers.


3. Use Windows generic mousepad driver

  • Right click Start
  • Click Device Manager
  • Right click your mousepad driver
  • Click Update driver software
  • Click Browse my computer for driver software
  • Choose Let me pick from a list of device drivers on my computer</li>

  • Select HID compliant mouse
  • Click Next
  • Follow the prompts to install it

In case you tried changing your driver and it didn’t help, there is probably a problem with the mousepad itself, so you need to contact your computer’s manufacturer for further assistance.


4. Run an System File Checker scan

Here’s how to do this:

  • Click Startg
  • Go to the search field box and type CMD
  • Select Command Prompt

game crash

  • Press Enterong
  • Right click and select Run as Administrator

  • Type sfc/scannow
  • Press Enter
  • Restart your computer

If your mousepad still won’t work, try the next solution.

ALSO READ: SteelSeries QcK Prism dual-surface RGB gaming mousepad costs only $59.99


5. Run Hardware and Devices troubleshooter

If you’re experiencing problems with your computer’s mousepad, then run the Hardware and Devices troubleshooter to resolve the issue. This checks for commonly occurring issues and ensures any new device or hardware is correctly installed on your computer.

Here’s how to go about it:

  • Right click Start
  • Select Control Panel
  • Go to View by option on the top right corner
  • Click the drop down arrow and select Large icons

DTS

  • Click Troubleshooting
  • Click View all option on the left pane
  • Click Hardware and Devices
  • Click Next

Follow the instructions to run the Hardware and Devices troubleshooter.  The troubleshooter will begin detecting any issues.


Solution 6: Roll back the driver

  • Right click Start
  • Select Device Manager
  • Expand Mice and other pointing devices
  • Right click Properties
  • Go to Driver tab
  • Click Roll Back Driver

mouse pointer disappeared

  • In the Driver Package rollback dialog box, select Yes
  • Restart your computer

Does the mousepad problem persist? Try the next solution.


7. Check your keyboard

  • Right click Start
  • Select Device Manager
  • Go to Mice and other pointing devices
  • Click Mousepad or touchpad drivers
  • Double click on it to check its status
  • Go to Driver tab
  • Click Update Driver and follow the instructions

ALSO READ: 7 best mini wireless keyboards for PC


8. Get drivers form manufacturer’s website

You can download the latest mousepad drivers from the manufacturer’s website, and then install it on your computer and see if it works.


9. Install mousepad drivers in compatibility mode

Follow these steps to install in compatibility mode:

  • Download the latest mousepad/touchpad driver from the manufacturer’s website
  • Save it on your local disk
  • Right click on the set up file of the downloaded mousepad driver
  • Click Properties
  • Click Compatibility tab
  • Check the box next toRun this program in Compatibility mode

  • Select the Operating System from the drop down list
  • The driver will install, then check its functionality.

10. Disconnect all peripherals

Some peripherals may automatically disable the mousepad function. Fortunately, you can quickly fix this problem by disconnecting all the peripherals. Then reboot your computer and test to see if the problem persists. You can then plug the peripherals back in one by one to identify the culprit.

We’d love to hear from you if these solutions helped. Let us know your experience by leaving your comment in the section below.

RELATED STORIES TO CHECK OUT:

How to Fix The Sims 4 Update Issues: Tested Solutions

If The Sims 4 won’t update, whether nothing happens or an error pops up—start with a few quick fixes.

Restart your PC, run the EA app as admin, turn on Safe Mode downloading, repair the game, and disable any firewall, antivirus, or VPN.

If that doesn’t solve it, move on to more advanced steps.

1. Clear your Origin Cache

  1. Close all Origin process running on the PC.
  2. Press Windows + R to open Run, paste the following paths individually, and hit Enter:%appdata% %localappdata%appdata to fix sims 4 won't update
  3. Now, locate the Origin folder under both these locations and clear all the files within these.
  4. Log in to the Origin client and see if the latest Sims 4 updates install now.

When Sims 4 won’t update on Origin, clearing the local files should get things running. Also, if you find that Sims 4 won’t update on the EA app, clear the files in the EA folder instead.

2. Reset The Sims 4 to default

  1. Create a backup of the Sims 4 folder to a flash drive from the following path: Documents\Electronic Arts 
  2. Rename The Sims 4 folder on the PC to The Sims 4_Backup.
  3. Start the game. Keep in mind that there will be no save games, and your options will be reset to factory settings
  4. A new Sims 4 folder will be available in the EA folder. Copy back all the user files.
  5. Start a new game and install the latest game updates available.

3. Run the EA app as administrator

  1. Close the EA app completely.
  2. Right-click the EA app icon on your desktop or Start menu.
  3. Select Run as administrator.run ea app as administrator
  4. Try updating The Sims 4 again.

4. Repair The Sims 4

  1. In the EA app, go to Library.
  2. Right-click The Sims 4.
  3. Select Repair.sims 4 repair
  4. Wait for the process to finish, then try updating.

Warpping up

If you’re having trouble updating The Sims 4, start with basic fixes like restarting your PC and running the EA app as administrator.

For other common issues, such as the game not starting, language settings, mods not working, lag, or loading problems with households, check out our detailed guides on fixing Sims 4 startup errors, changing language, mod troubleshooting, improving lag, and household loading issues.

Recycle Bin is Gone: How to Restore it [Fix]

Recycle Bin is an important component of Windows, but many reported that recycle bin is gone on their PC.

This can be a problem since you won’t be able to recover deleted files from it or permanently delete them. Luckily, there are ways to fix that, so keep reading to learn more.

Why did the Recycle Bin disappear?

  • Your Recycle Bin is gone, most likely because personalization settings hide it.
  • In certain instances, damaged installation or user profile can cause this problem.

How do I restore my Recycle Bin in Windows 10?

1. Check Desktop icon settings

  1. Right-click on the desktop and choose Personalize.recycle bin windows 10 missing
  2. From the left pane, select Themes.recycle bin windows 10 missing
  3. Choose Desktop Icon settings from the far right corner.recycle bin windows 10 missing
  4. Check the box beside the Recycle Bin.recycle bin windows 10 missing
  5. Optional: Uncheck the box beside the Allow themes to change desktop icons. Some of them might remove (or already have removed) the Recycle Bin icon.
  6. Confirm changes.

2. Use Run

  1. Press Windows + R to open Run.
  2. In the command line type the following path and press Enter: C:\$Recycle.Binrecycle bin windows 10 missing
  3. After that, the Recycle Bin will open.

This is just a workaround, but it can be useful if you need to quickly restore certain files.

3. Create a Recycle Bin shortcut

  1. Launch File Explorer and go to View.
  2.  Select Options and choose Folder Options.
  3. Select the View tab and choose Show hidden files, folders and drives.disable show hidden files
  4. Uncheck Hide protected operating system files (Recommended).Hide protected operating system files file explorer folder options
  5. Hit Apply and OK.

Now you need to create a shortcut:

  1. Navigate to your C drive.
  2. Look for $Recycle.Bin directory.
  3. Right-click it and choose Create shortcut.
  4. Move the shortcut to the desktop.

This is also a workaround, but it’s highly effective if your Recycle Bin is gone, so be sure to try it.

There you go. From there, you can manipulate the deleted files and restore them if needed. In addition, don’t forget that the desktop icons are disabled for tablet mode by default.

In case the problem is still there, we have a great guide on how to hide Recycle Bin that might give you some additional insight into this issue.

To learn more about Recycle Bin, check our guide on how to use Recycle Bin on Windows 10 for more information.

That should do it. Don’t forget to share your thoughts on the subject with us or reveal some additional solutions. You can do it in the comments section below.

What to do if FIFA controller doesn’t work on PC

FIFA is a soccer simulation with some of the most immersive online modes available in the sports genre. The real-time changes and FUT draft make it more realistic and competitive for the vast population of players. Moreover, there is a wide variety of offline modes that received improvements this year.

However, while we all enjoy good online brawls with players around the world, FIFA 17/18/19 is affected by a lot of issues, especially the PC version of the game. One of the most frequent problems concerns controller input.

Since playing with a keyboard is not a viable option, controllers are a must-have. But what if they don’t work as intended? In case you’re facing this type of issue, we’ve prepared some solutions for 17/18/19 controller problems.

How to fix FIFA controller issues on PC

1. Delete your Profile

We are aware this is a harsh method since you’ll lose all your settings. However, it’s your best bet for restoring your controller’s previous state as FIFA 17/18/19 isn’t optimized for controllers on PC, a serious problem for all. So, because of that, different mode settings can get corrupted and can lead to all kinds of controller issues.

  1. Start the game.
  2. Go to preferred mode where issues occurred.
  3. Move on to Customize.
  4. Select Profile.
  5. Delete it.
  6. Start a New game mode and go to Controller settings.
  7. You should see that the issue is gone.
  8. Move on until you are able to load an old game.

Keep in mind that you’ll lose settings but not game progress since it can be loaded later on.

2. Uninstall generic drivers and use emulation tools drivers

On the other hand, controller issues can be related to a third-party software you use to emulate controllers. Make sure that you’ve installed it correctly and move on to drivers.

Since Windows installs drivers on its own, once you plug in the device, it can cause interference with emulator drivers.

  1. Plug in your controller.
  2. Let the Windows automatically install drivers.
  3. Right-click This PC/My Computer and open Properties.
  4. Select Device Manager.
  5. Find Sound, video and game controllers.
  6. Uninstall the generic driver for your controller.
  7. Open the emulation tool and use it to install the drivers.

You can use various emulation tools but these are the most used:

While generic USB PC controllers should work with the PnP feature, you can use the emulators mentioned above with them, too.

You can also use dedicated driver software such as Fortect Driver Updater. This tool keeps your drivers up-to-date and can fix damaged or missing drivers. It is very lightweight and easy to use.

⇒ Get Fortect Driver Updater

3. Use buttonDatasetup from previous FIFA games

Additionally, you can try using key binding files from previous games. If you have played (or still playing) older editions of FIFA and your controller runs without issue, this is a viable workaround. Of course, you’ll have to use the same controller with both games.

  1. Go to Document/My Documents.
  2. Open older version folder from FIFA 14 to FIFA 16).
  3. Copy buttonDataSettup.ini
  4. Open FIFA 17/18/19 folder in Documents.
  5. Paste over its buttonDataSettup.ini
  6. Launch the game.

If you haven’t played any of the previous versions, we are sure you can find the proper configuration file online with a quick Google search.

4. Grab a new controller

If nothing worked, maybe your controller is faulty. In this case, you can either repair it or simply purchase a new one. Before you get a new controller, make sure that the device is compatible with your FIFA version.

If you’re don’t know what controller to purchase, you can check out our list of the best controllers for PC. Read the product description and buy the device that best suits your needs.

Conclusion

We hope that you’ll be able to sort out your issues with these workarounds. However, we all hope that EA will address issues in the upcoming patch and provide a permanent solution.

Do you have any advice or suggestion related to this subject? If you do, be sure to tell us in the comments.

Windows 7 SHA-2 Update: Everything You Need to Know

Secure Hash Algorithm 1 (SHA-1) has become less secure for Windows 7 code signing. So, Microsoft advises users to promptly upgrade to SHA 2 for the code signing of Windows updates.

In an official document, Microsoft reports that

Customers running legacy OS versions (Windows 7 SP1, Windows Server 2008 R2 SP1 and Windows Server 2008 SP2) will be required to have SHA-2 code signing support installed on their devices by July 2019.

Windows updates are dual-signed in the latest versions of Windows. However, Windows 7 only uses SHA 1. So, it is compulsory for Windows 7 devices to upgrade to SHA 2 by July.

If you don’t install SHA 2, you won’t get any updates

Microsoft has already announced to wrap the Windows 7 from the market in June 2020. However, if users do not upgrade to SHA -2, they would be deprived of the updates for their OS six months earlier than it would be officially ceased by the Redmond tech company.

Both the SHA-1 and SHA-2 are the code signing algorithms for Windows updates. These algorithms ensure that updates installed in OS come directly from Microsoft and are not tempered. But now, the company says that SHA 1 has security issues due to which it can’t be further trusted for the code-signing.

According to the officials, the new architecture features increased processor performance and cloud computing support. So, a stronger alternative SHA 2 is suggested to users to not suffer the same issues.

The company will provide a patch to users to upgrade to SHA 2 on 12 March.

Any devices without SHA-2 support will not be offered Windows updates after July 2019.

Furthermore, it is reported that the company will also release support for SHA-2 signing in 2019. The migration process to SHA-2 support will occur in stages, and support will be delivered in standalone updates. Microsoft also shares the schedule to offer SHA-2 support.

RELATED GUIDES YOU NEED TO CHECK OUT:

Windows Admin Center Preview 1902 is now available

Microsoft has just announced the release of Windows Admin Center Preview 1902, which follows the preview version 1812 that the company shipped to testers in January. This new version of the browser-based remote server management experience brings support for Shared connections lists, as well as several new tools for Software Defined Networking (SDN) environments.

“This preview release builds on the previous 1812 version and adds new functionality including all-new software defined networking tools in the HCI solution, and one of the top-requested customer features: shared connection lists. For folks that use RDCman, we have published a small script that you may use to export your saved RDCman connections to a .CSV file which you can then import with PowerShell to maintain all your RDCman grouping hierarchy using tags.”

As usual, registered Insiders can find this new Windows Admin Center Preview from the Windows Server Insider Preview download page. Since its launch last year, Windows Admin Center has been evolving pretty fast and you can sign up for Insider testing on this page.

Google plans big gaming news at GDC, will Microsoft respond?

Google is apparently planning to make some big gaming announcements at the upcoming Game Developers Conference in San Francisco in March. The company sent media invites today for a press event on March 19, and it all seems like the keynote will be about Google’s new Project Stream game streaming platform (via Gameindustry.biz).

“All will be revealed at the Google Keynote,” the invitation says, and Google also included a mysterious GIF showing a bright light at the end of a dark hallway. Google previously tested Project Stream last fall, allowing select Google Chrome users to play Ubisoft’s latest Assassin’s Creed game right in the web browser. The service made quite a good impression at the time, and it looks like Google seems well positioned to compete with Sony’s Playstation Now service as well as Microsoft’s Project xCloud.

Microsoft will also have a big presence at GDC next month, with a session dedicated to Project xCloud. “This talk will go deeper on how developers can get their console games to adapt to a mobile world,” the session description reads. Last year, the Redmond giant previously explained that its game streaming platform will be able to bring all existing Xbox games to mobile devices without developers having to modify game code.

Project xCloud is expected to launch in public beta this year, but maybe Google’s obvious interest in game streaming will force to accelerate rollout plans. A true Netflix-like service for video games is probably years away, but this competition between tech giants should be very good for consumers and the video games industry.

Lenovo Yoga C630: A promising future on an interesting evolution

In a world where smartphone usage is encroaching on the certain feature set that used to insulate PC manufacturers from the worries of cross-blend computing cannibalization, it’s become paramount that OEMs find a successful pivot that will allow them a softer landing as the industry floor continues to seemingly eroded from underneath them.

Enter Windows on ARM and the push for Always Connected PCs.

The zero-sum narrative bandied about by some tech journalist that pits smartphone adoption and consumption against the productivity aspects of laptops and workstations has some teeth, but the reality is that a large majority of people prefer to make use of a smartphone in conjunction with a dedicated PCs of sorts, whether that be an iPad Pro, Surface Pro, or a more traditional laptop or gaming tower.

However, there appear to be telemetry OEMs are seeing that indicate that people would like their PCs to behave more like their smartphone and other mobile devices. The demands for longer battery life, instant-wake functionality, speedy startups, and a steady and consistent connection to the internet regardless of location are at the impetuous of the Windows on ARM hardware and the new Lenovo Yoga C630, not to be confused with the C630 Chromebook.

The Pitch

While I like to put out reviews in succession similar to an episodic TV series, I actually reviewed the Lenovo Yoga C630 before I did the Lenovo Ideapad 730S. I got the C630 late last year in December 2018, but it has taken me some time to put my thoughts into a review that best describes the what and the why of this device.

As most laptops come with the standard array of feature sets and trimmings these days, I like to review units based on the company’s own pitch to the customer. The Lenovo Yoga C630 actually makes several pitches in its marketing efforts such as All-day battery life—and more, Constantly connected and WiFi with a capital whoosh!

To Lenovo’s credit, it delivered on one of the three claims consistently in so far as All-day and more battery life.

However, being constantly connected and its superior WiFi claims fell short more often than I would like.

All-day battery life

The Lenovo Yoga C630 was my favorite PC to use in 2018 simply on its battery life alone. While PC OEMs like to inflate their battery claims, and the C630 is no exception, this laptop consistently provided all-day battery life for me. My day starts roughly at 5:30 am with some light web browsing as I check Google AdWords and CRM tools for metrics from the previous day.

I then, move into casting podcasts onto my Invoke (I know, I’m one of two people who have one) for roughly an hour as I get ready. I then close my laptop for 30-40 mins while I make my way to the train, where I then open it up to check news, social media and YouTube for the duration of my 28 mins train ride.

Close it again as I make my way to my office. For the next eight hours, I used the laptop non-stop for work consisting of Skype meetings, Teams communication, various Office 365 applications multiple Chrome and Edge tabs, PWA Twitter app and Pocket Casts.

It wasn’t until my ride on the train home that I had to worry about the dimming screen and the laptop slipping into battery mode, and while that’s not literally all-day, in the world of Windows-powered PCs, 14 hours of steady use is about as close as it gets.

Constantly Connected

Here is where the laptop began to falter a bit. My test unit graciously came with a Verizon 4G LTE sim that I intended to put through the paces. To its credit, the C630 did a relatively seamless job of switching to from Wifi to LTE, not so much on the switch back.

My daily train commute offers me a chance to jump onto public wi-fi to get some last minute note taking or account management done, but I am at the mercy of poorly concocted implementation. Often the wi-fi drops out and I’m forced to hotspot from my Note 8. With the C630, the connection process was a bit better.

Perhaps,= it was just Verizon’s coverage along the Tri-Rail route going from Pompano Beach to Hollywood FL that was the culprit, but often I found that the SIM had connected to LTE but produced relatively weak connections resulting in a hampered Always Connected PC experience. When I was work, I attempted to ‘cold turkey’ work using only the LTE sim and the results were mixed. The experience proved not as fast as my work’s wireless solution but better than not having any option at all; files downloaded slower, web pages took an extra tick to load and there were several troubleshooting prompts that cluttered my Action Center throughout the day.

Again, I don’t believe this is all Lenovo’s fault, but a confluence of how Windows handles LTE as well as Verizon’s coverage of the Pompano Beach, Ft. Lauderdale, and Hollywood areas.

As much of the sale of the Lenovo C630 depends on it being a device that is Always Connected, it’s a buyer-beware instance rather than a foregone conclusion. While the C630 may suffer from inconsistency, it’s offering an option that few PCs on the market do.

WiFi with a capital whoosh!

It seems like a corny marketing claim to push but I’m sure its one Lenovo’s Qualcomm partner would like to seed to the industry. Much of my review of this claim is tied to the Always-Connected pronunciations from earlier where Lenovo champions it 4G/LTE experience and the Qualcomm 850’s ability to produce connectivity speeds of up to 1.2Ghz or roughly 7x average broadband.

The C630 was able to connect to 4G/LTE near and around my house relatively well and on a trip to Orange County California, the internet connections were decent. However, I’m not sure it’s Verizon or the Snapdragon that would throttle connective performance, and I often would drop from a relative five bars to two and three. In turn, my productivity would take a hit whenever those instances of degraded connectivity would occur and they happened more often than I would like.

Other intangibles

As I mentioned earlier the margin between design and feature sets is becoming slimmer as user preferences have settled on grey-slabbed 12-14 inch boxes. There are iterative design changes that help inch the industry forward such as thinner bezels, options of 1080p or 4K resolution screens, minute keyboard tweaks, speaker, and port availability and the C630 splits much of that check down the middle.

The C630 is another refinement on the Lenovo’s cast grey slab offering with a cool to the touch aluminum brushed chassis and impossibly thin design. At just 12.4 mm/ .5″ it’s one of Lenovo’s thinnest designed laptops and weighs just hair over 2 and a half pounds. The C630’s design inspires mobility and travel as it fits comfortably in all the laptop sleeve and backpack compartments I tested.

As a multi-fold converting laptop, the minimalist weight offered the most natural implementation of large-screen tablet use outside of the iPad Pro, Surface Pro and Surface Book I’ve experienced yet.

The screen on the C630 unit I had got plenty bright but lacked any jaw-dropping characteristics with its FHD multi-touch display.

However, a cool little kicker to the modest screen tech is the support of Microsoft’s N-Trig technology which allowed me to test pen input despite not having one come with the unit. There was some lag but for note taking or webpage edits, it serviced rather well.

There is a two-stage lit keyboard centered in the C630 that offers relatively shallow key travel but a familiar feel with its chiclet-style key design.

Top firing speakers on the Lenovo C630 are a pleasant surprise and give the device a sort of MacBook fill as the speaker grills flank at 2/3 length of the keyboard.

As is becoming customary with most Lenovo’s there is a shallow finger printer reader off to the right of the keyboard that did a decent job of authenticating. There were times when the sleep/wake state of the laptop threw off the reader and I found myself jumping to pin rather than fight the system asking for me input my fingerprint, over and over.

As there are no real games in the Microsoft Store designed to push the limits of a Qualcomm chipset, I saved the gaming review portion of the Lenovo C630, for perhaps the third iteration.

Perhaps, the best physical feature of the Lenovo C630 is the one users may overlook. The C630 is absolutely quiet. However the fans or ventilation is designed in the chassis, they render the computer ninja-like quiet, even when pushing up against Chrome usage and the 32-bit version of Microsoft Teams.

Starting price: $756.79

Windows on ARM

I’m not going to prescribe all of Lenovo’s marketing shortfalls on the company alone, I believe the legacy engineering of Windows has something to do with how the operating system handles on ARM. There need to be several caveats put in place here when addressing this laptop and the Windows on ARM architecture.

  1. Most traditional (hi powered) Windows programs are not native ARM coded. Chrome for Windows comes to mind
  2. To help support the new chipset architecture, the Lenovo C630 ships with Windows 10 S out of the box
  3. Unlike the Surface Laptop, switching out of Windows 10 S only nets you access to 32-bit apps which are inherently slower by design
    UWP apps such as Mail, the Microsoft Store, and Edge were written for native ARM support and their optimizations result in faster app processes.

The C630 makes use of Qualcomm® Snapdragon™ 850 Mobile Compute Platform and while it’s perhaps one of the most powerful architectures to-date for the company, the reality is that it powers the C630 to comfortably to the heights of a Surface Go on a Pentium Gold CPU.

What this amounts to is a device that performed admirably at the basic to moderate computing demands I put it through such as web browsing, Skype, Microsoft Teams on the web, Office docs, downloading/uploading content and viewing YouTube or Netflix.

Unfortunately, the C630’s Qualcomm 850 boosted speed improvements from the previous iteration of the 830 are a bit hamstrung by the USF SSD used for Android smartphone rather than the m.2 SSD more traditionally used. The use of the USF SSD means it’s optimized for speed transfer of media that is usually found on smartphones such as pictures, music in MP4 format and videos in H.264 and H.265, venture anywhere beyond those and you’re looking a slower upload and download process.

Summary

When all is said and done about the processing power of the Lenovo C630, its overall design and the inclusion of Windows 10 S out of the box, the initial assessment is that this is a good second try from Microsoft, Lenovo and Qualcomm. The Lenovo Yoga C630 won’t win over ThinkPad users, it’s not going to convert the Surface Pro with LTE crowd and it’s not going to move the needle for MacBook Pro converters.

However, what the Lenovo Yoga C630 does is offer individuals going to college for the social sciences, history, business, writing or the traveling executive who needs access to secure internet connections and limited documentation and web services, a viable option.


The C630 sits in the uncanny value of almost, but not quite there. Limitations of the processor and operating system are holding the C630 back from being the default Windows device, for now as well as being the poster boy for Windows on ARM.

Perhaps, when Microsoft finishes its Chromium switch and includes native for ARM engineering it could help to mitigate some of the issues with 32/64 bit compatibility with a much more robust web browser application store and allow the Qualcomm chipset to shine.

Right now, the Lenovo Yoga C630 sits in the shadows of its predecessors eagerly awaiting the engineering and technology to catch up to its future promise.

LEGO video games and more heavily discounted this week on Xbox One

A variety of Xbox 360 and Xbox One video games are discounted this week due to a combination of sales.

Of note is a franchise sale which has discounted almost all LEGO video games by 50% on the Xbox One and 70% on the Xbox 360. Games discounted include LEGO DC Super-Villains, LEGO Jurassic World, LEGO Marvel Superheroes 2, and LEGO Star Wars: The Force Awakens.

The LEGO Movie Videogame received a 40% discount on Xbox One and a 70% discount on Xbox 360 while The LEGO Ninjago Movie Video Game was reduced by 40% on Xbox One.

Video games significantly discounted with this week’s spotlight sale include Dead Alliance (70% off), Extinction (70%), and Lords of the Fallen: Complete Edition Bundle (80%).

Members of Xbox Live Gold also gain access to the usual Deals With Gold discounts this week with Ben 10 (70% off), Farming Simulator 17 Premium Edition (70%), INDIE BUNDLE: Shiness And Seasons After Fall (75%), Madden NFL 19 Hall Of Fame Edition (75%), and Stick It To The Man (80%) standing out for those on offer.

Have you bought any discounted Xbox video games this week? Let us know what you picked up in the comments below and then follow us on Pinterest for more Xbox gaming content.