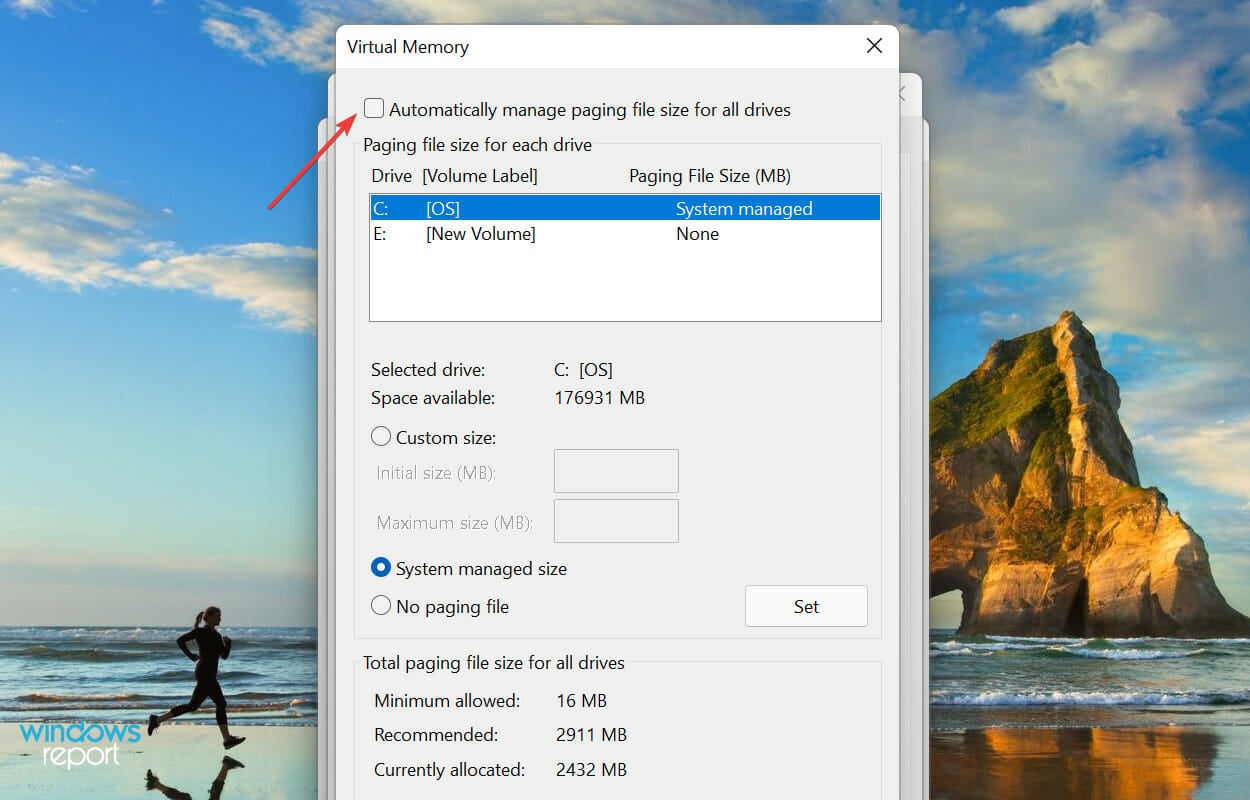
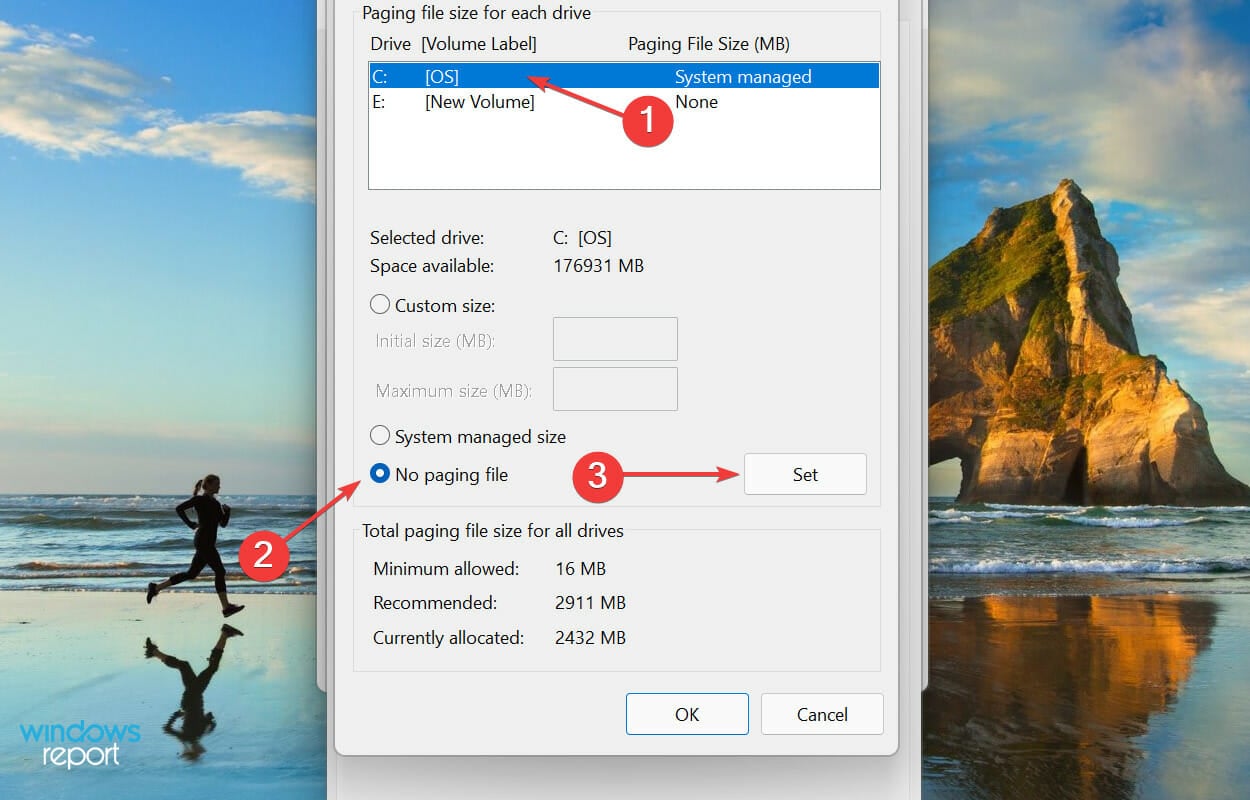
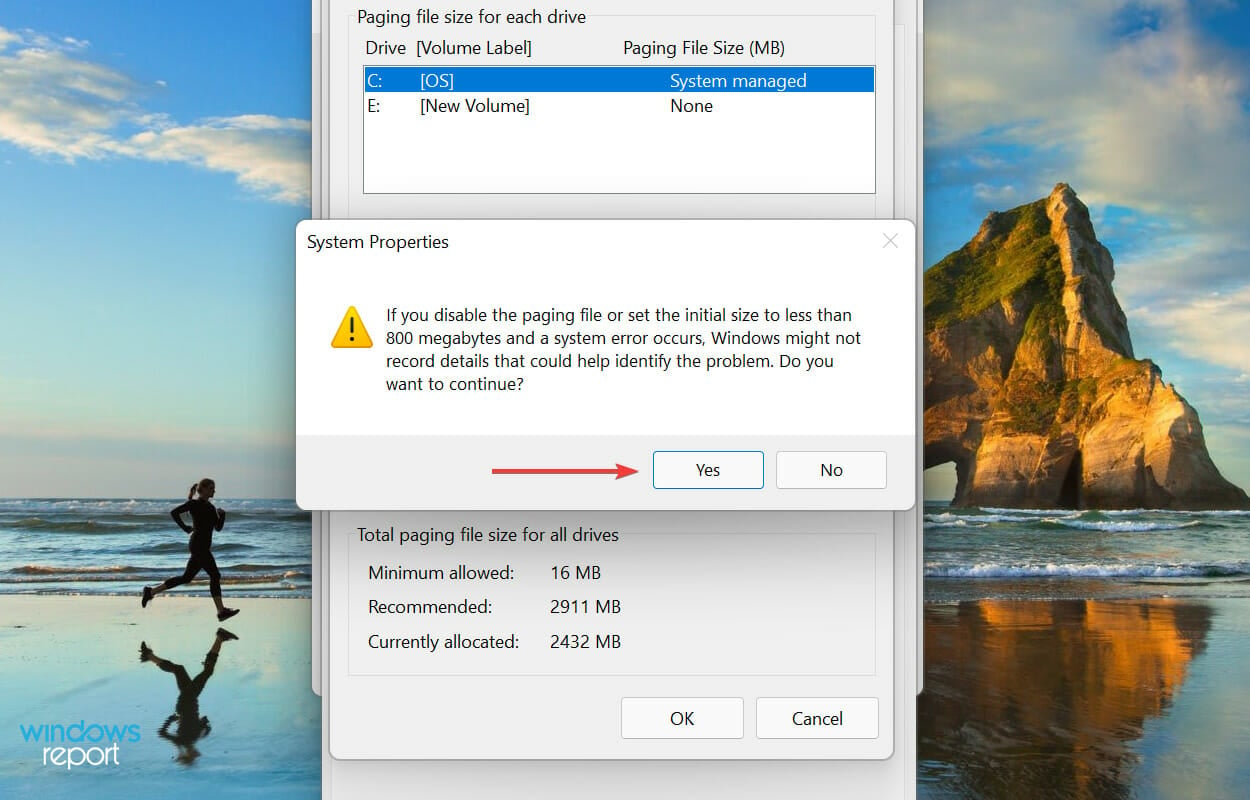
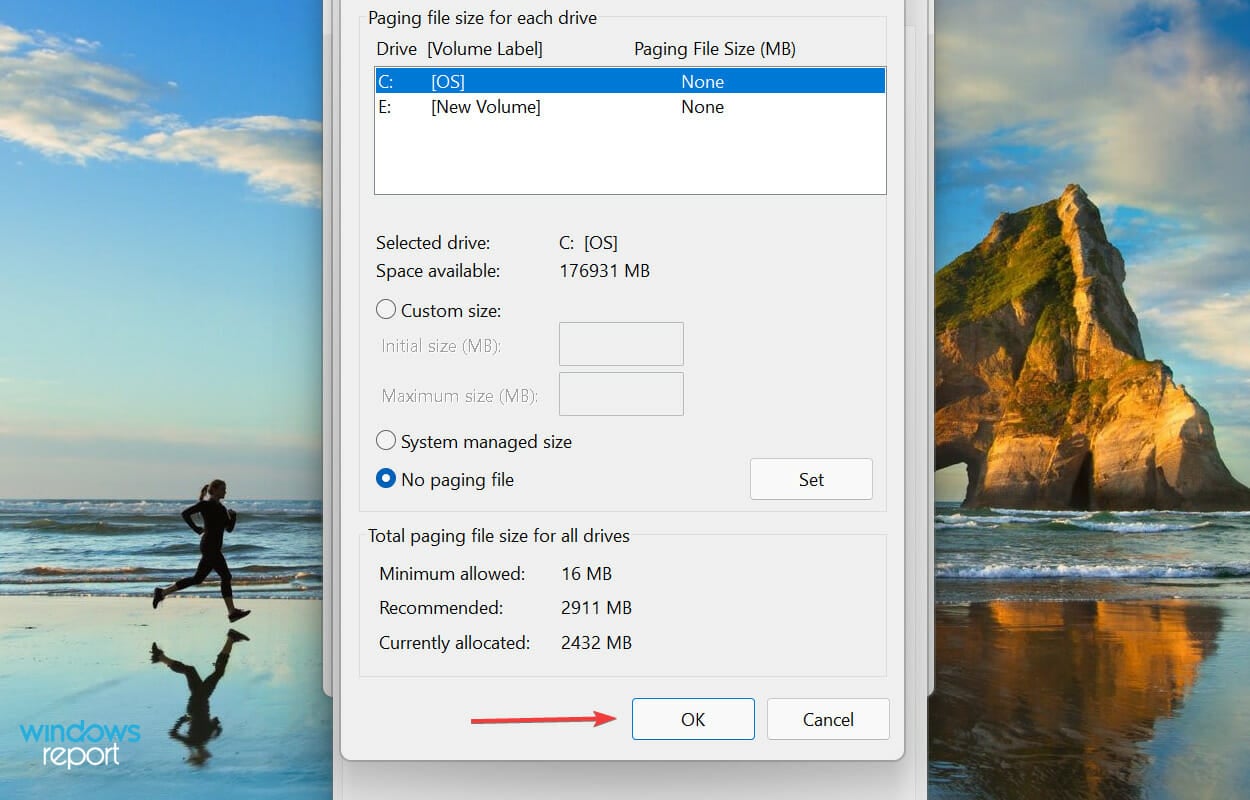
Fix WASAPI/ MME/ DirectSound Windows 10 update issue

Another day, a new problem. This seems to be the best description of the Windows 10 update.

We already compiled a list of the most common Windows Update issues, but we’ve got a new one to add and a lot of audio bugs are involved.

Many users, especially gamers, recently reported problems with WASAPI, MME, and DirectSound problems after updating Windows 10.

Their sound is either muted, they experience crackling sounds, or the microphone is unresponsive or muted.

Why is the WASAPI causing problems after a Windows update?

This issue is mostly caused by changes in the WASAPI settings but it can also be triggered by the system shutting the device down to conserve power.

Also, after the update, the access rights of your devices might have been altered so you will have to go through the settings and verify that.

Don’t worry because we have solutions for all these problems and we also included a fix if the sound of your microphone is not picked by your sound app.

We also have an extensive list of solutions on how to fix computer sound problems in minutes and you might also find some more solutions there.

How can I fix audio issues on Windows 10?

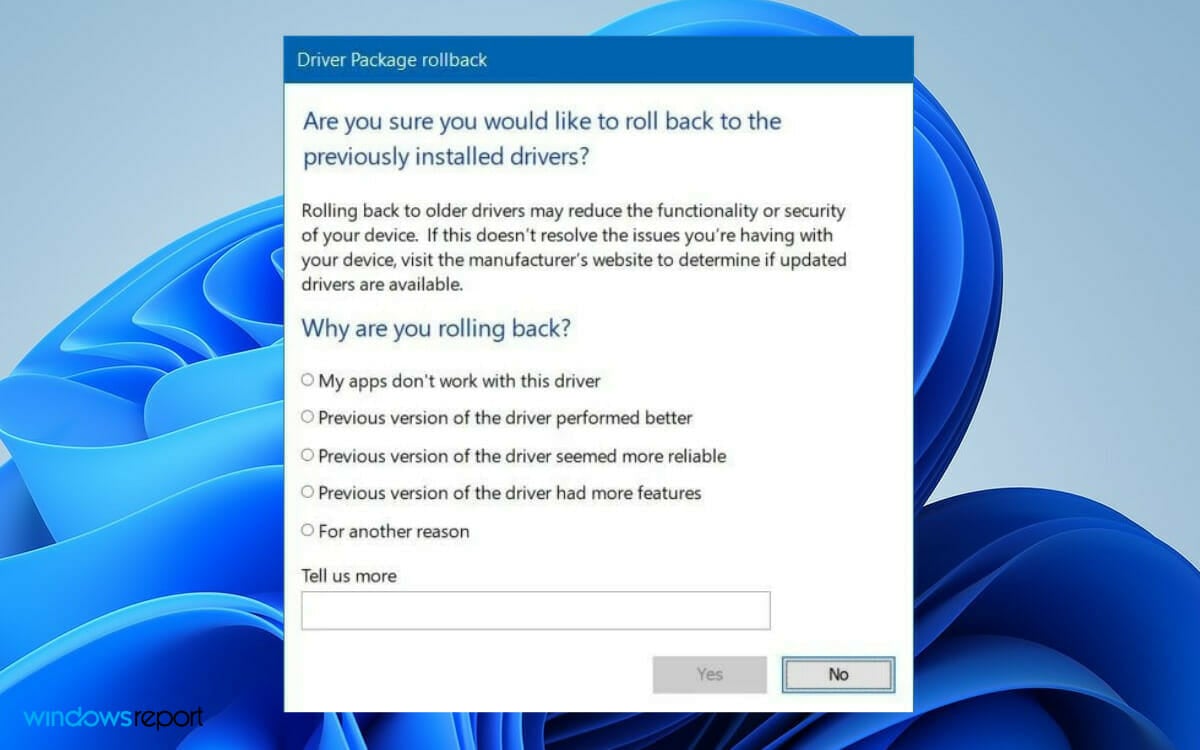
1. Rollback Windows to a previous update

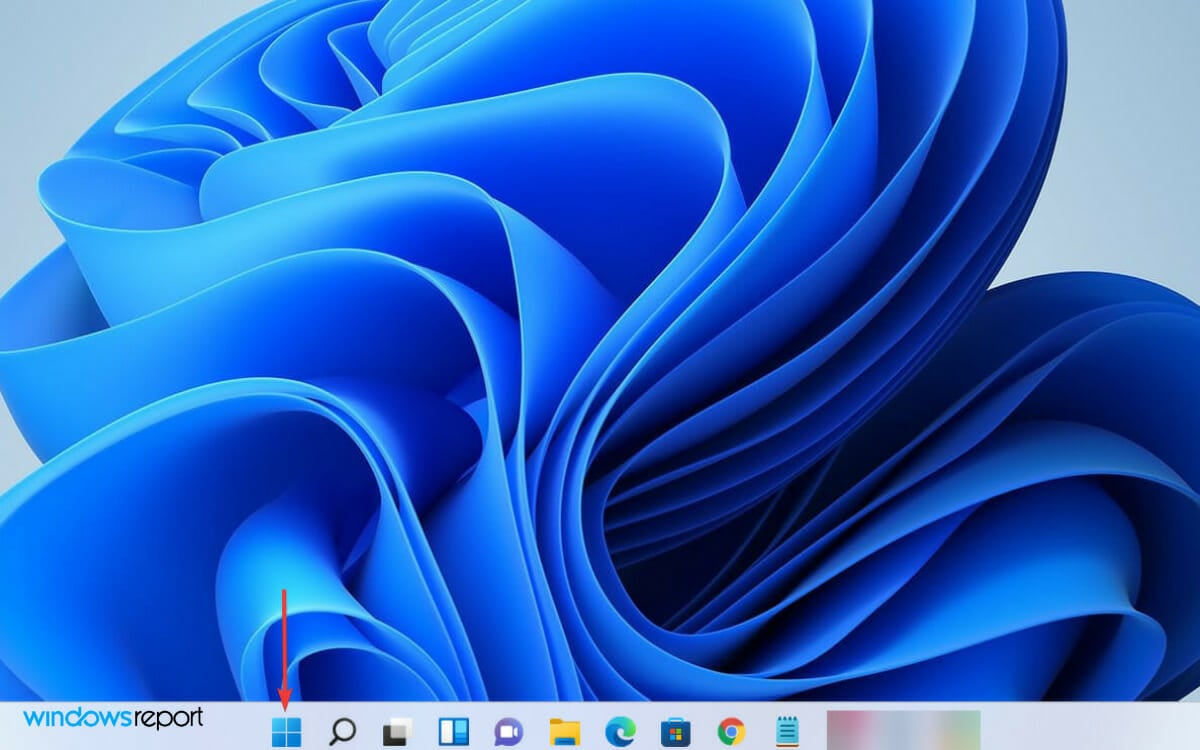
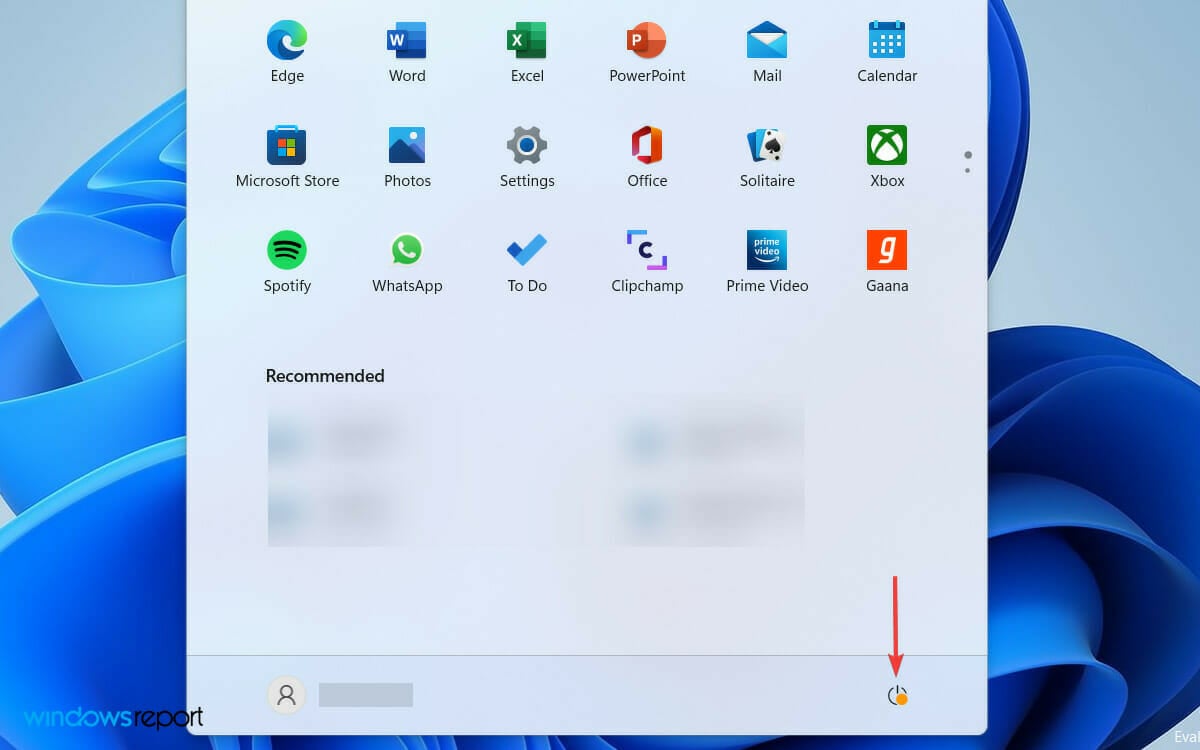
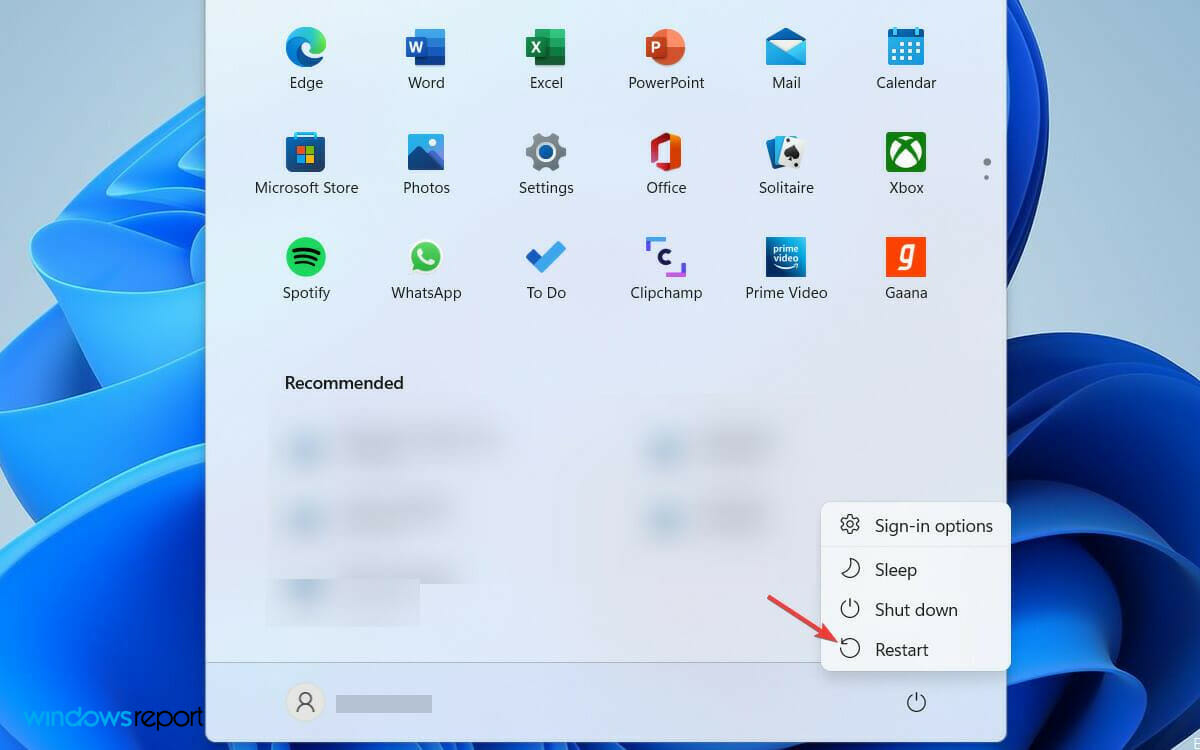
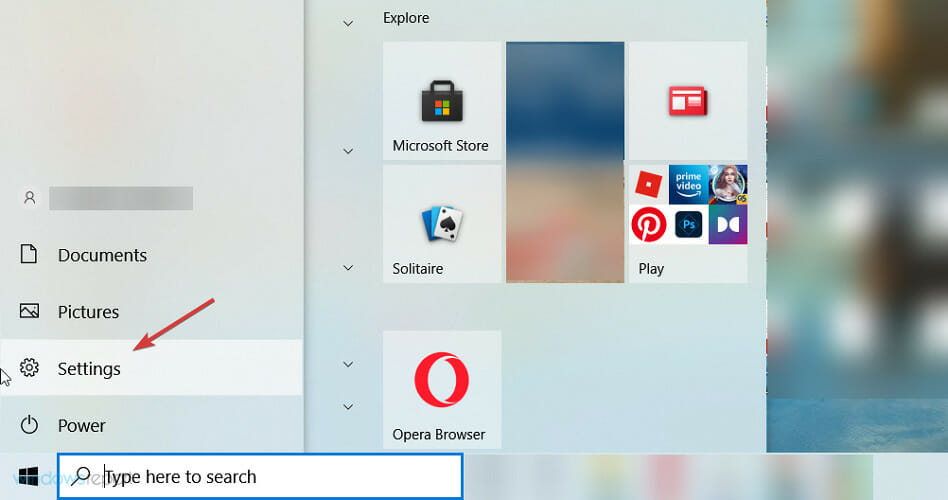
  1. Click the Start button and select Settings.
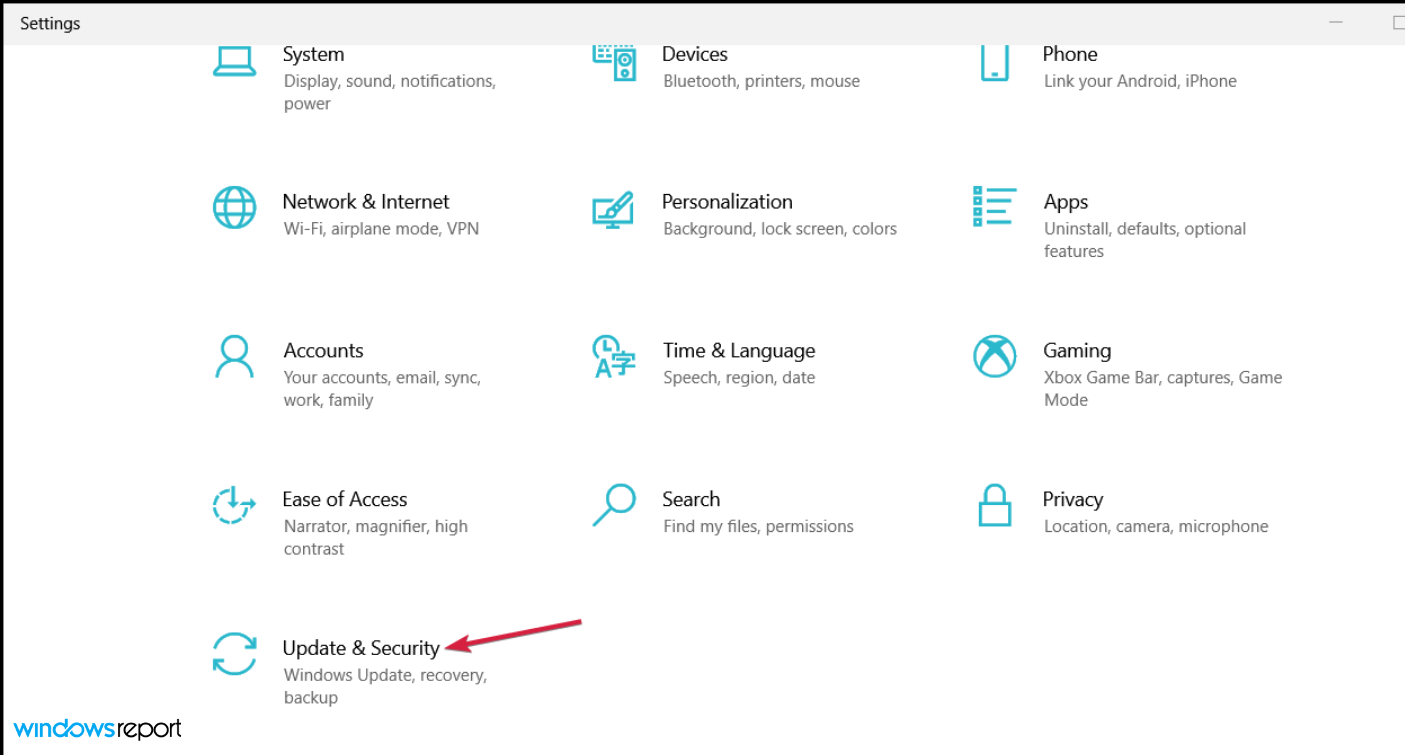
  2. Choose Update & Security from the list of options.
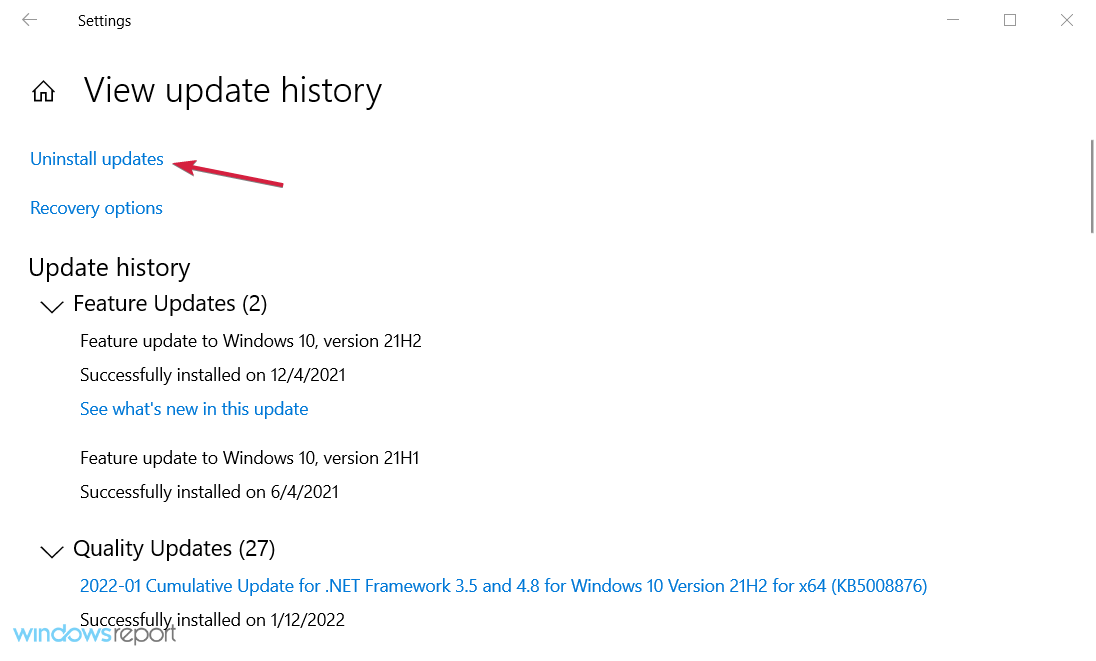
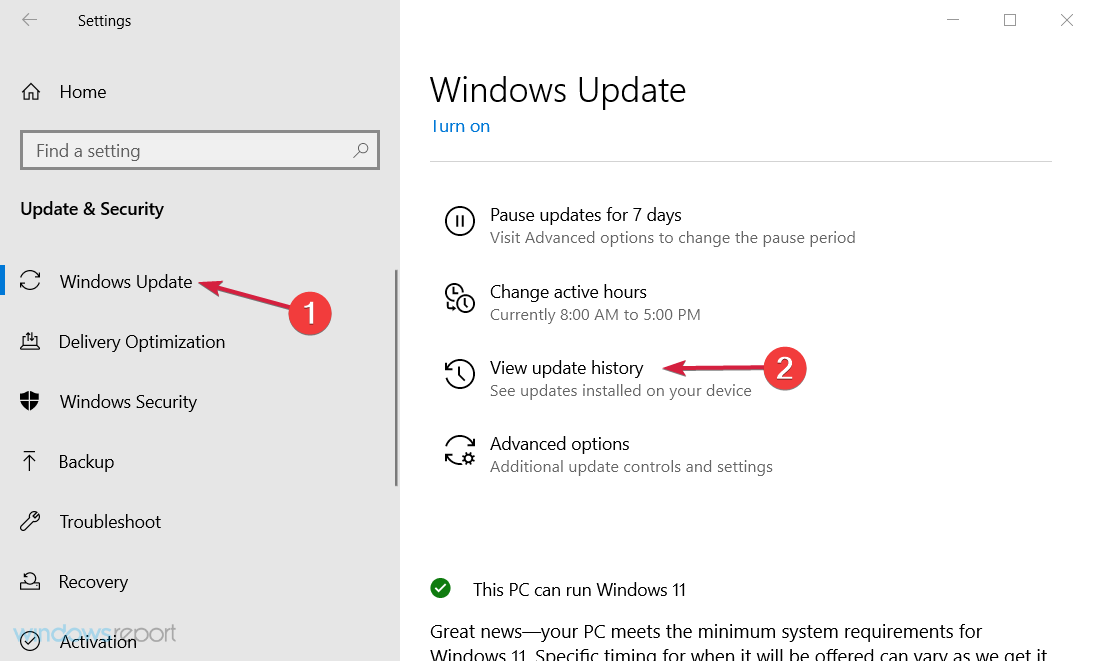
  3. Click on Windows Update from the left pane, hit View update history from the right.
  4. Now select Uninstall updates.
  5. Pick the latest update that caused the audio problem and click on Uninstall from the top.
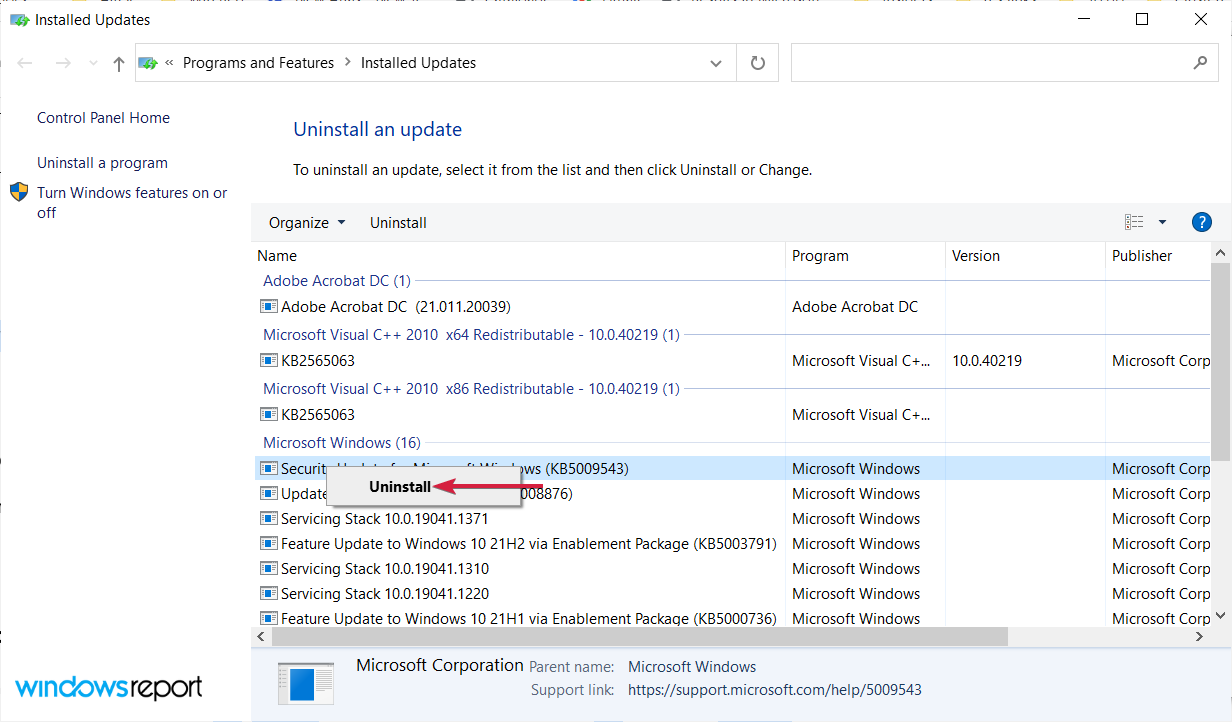
Although we always recommend keeping your system up to date, sometimes, until Microsoft addresses some bugs with the latest one, it’s a valid option to roll back.

However, this can only be a temporary solution and you should definitely try to keep your system updated after the problem has been addressed.

2. Change the audio Power settings in the Registry

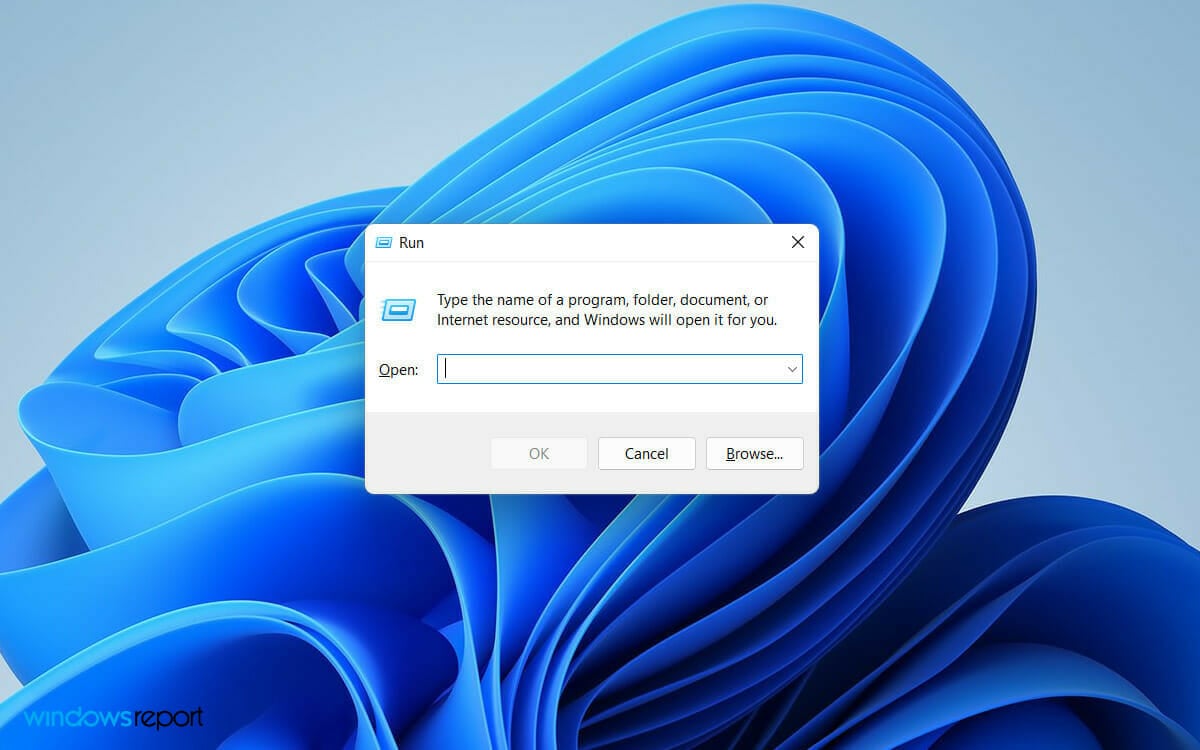
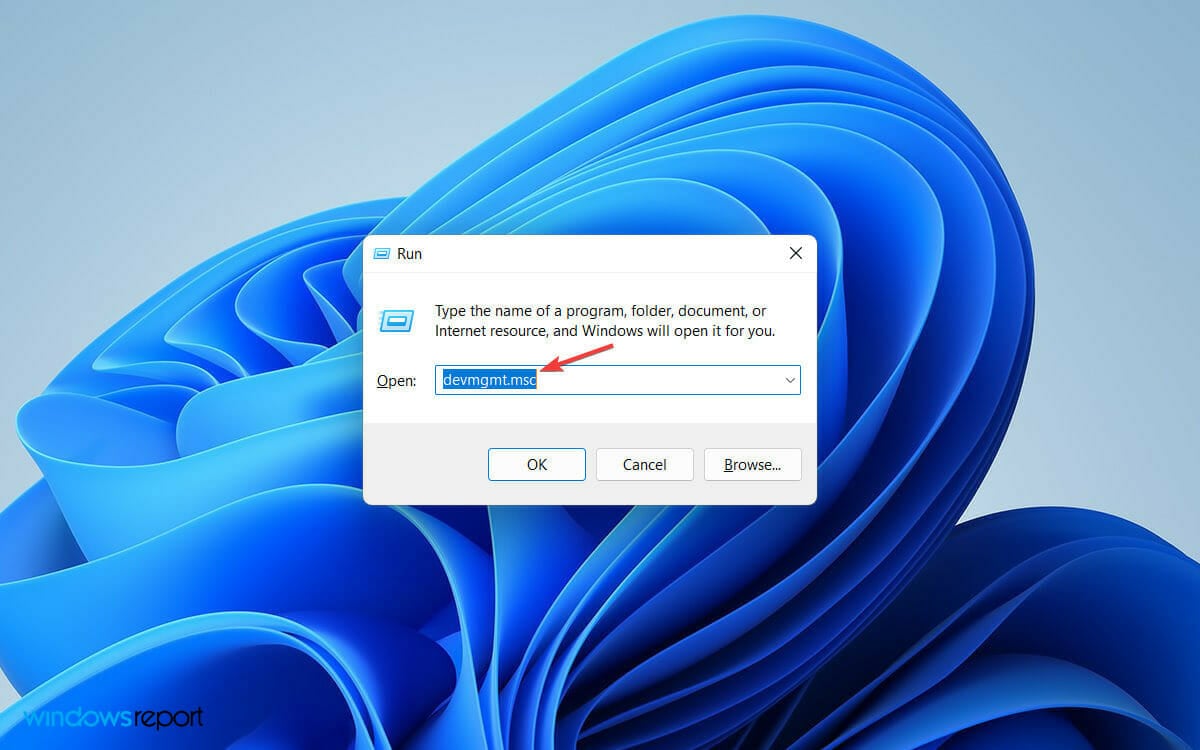
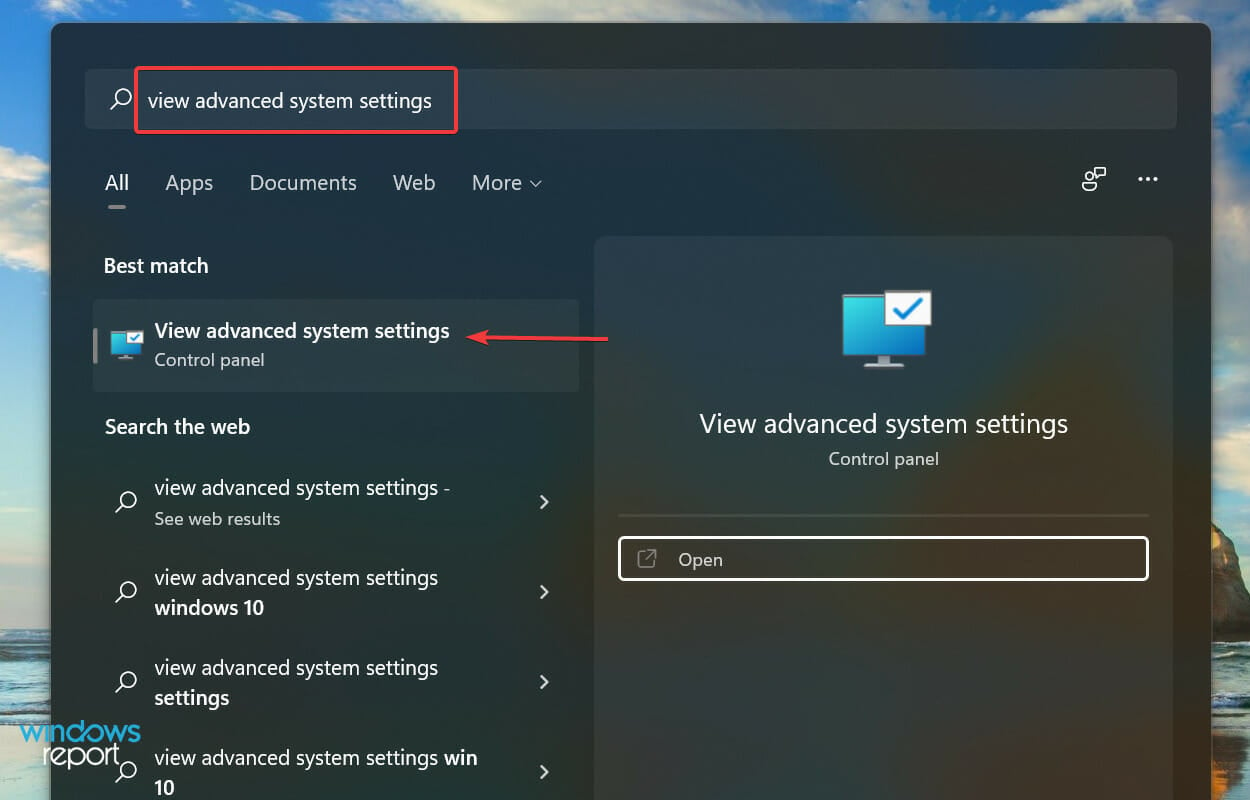
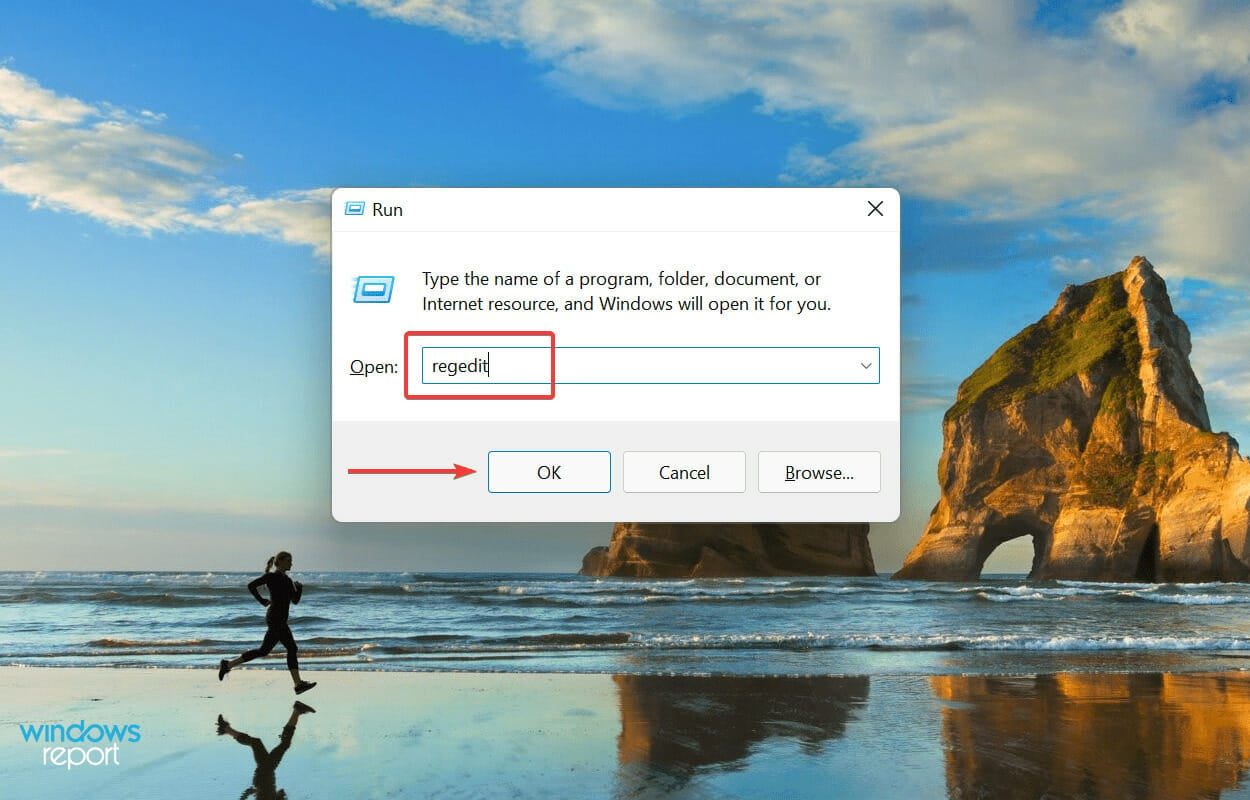
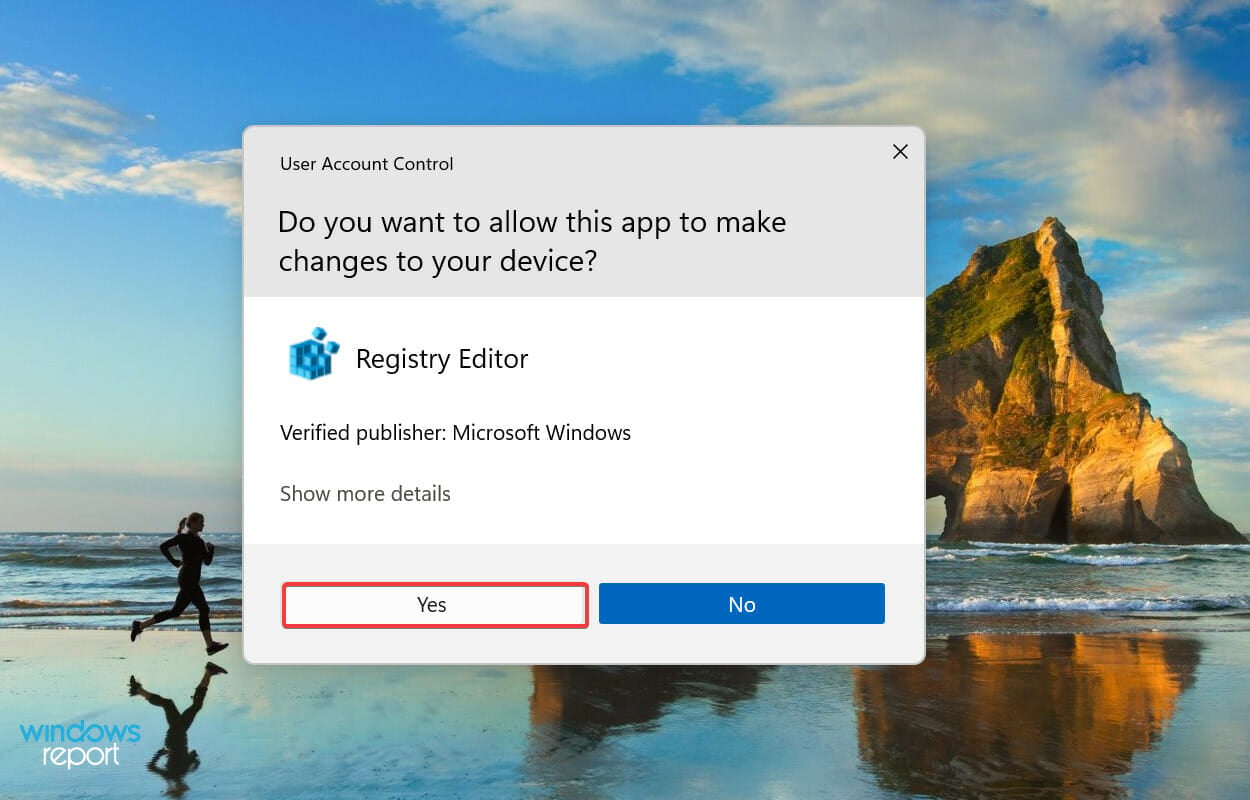
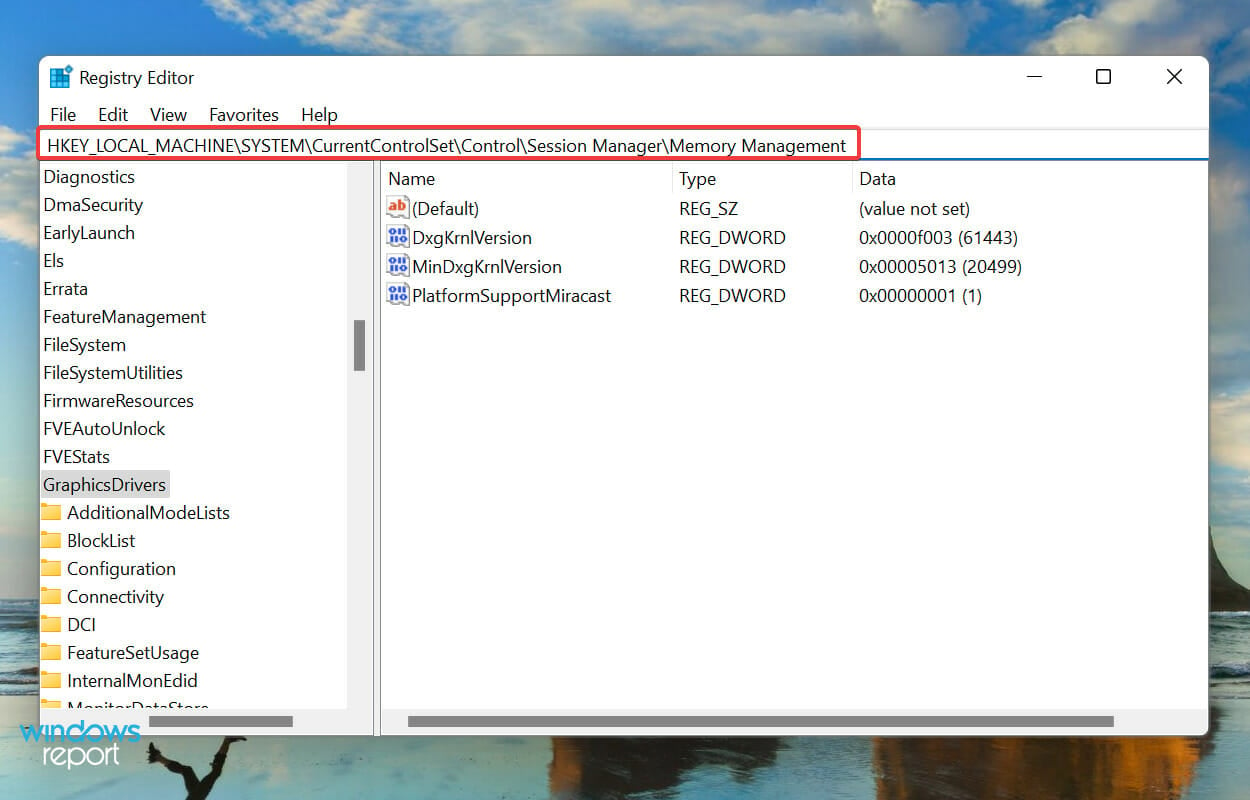
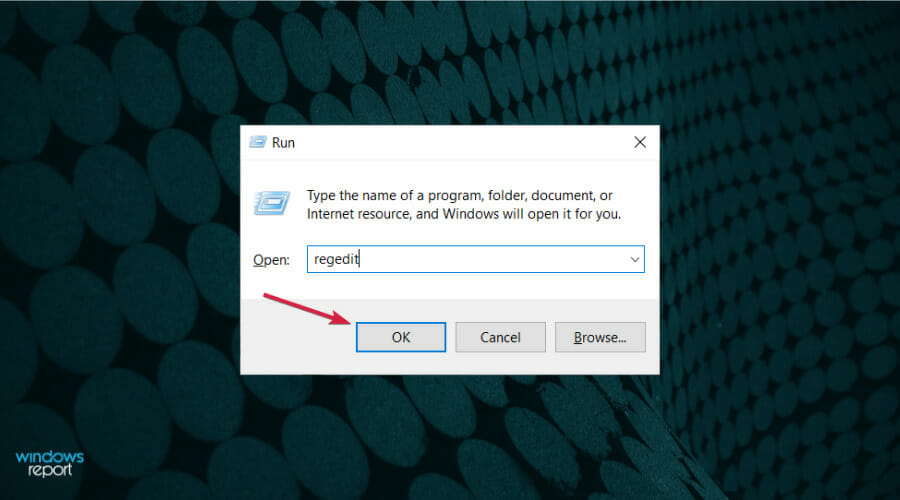
  1. Press the Windows key + R to start a Run window, type regedit, and press Enter or click OK.
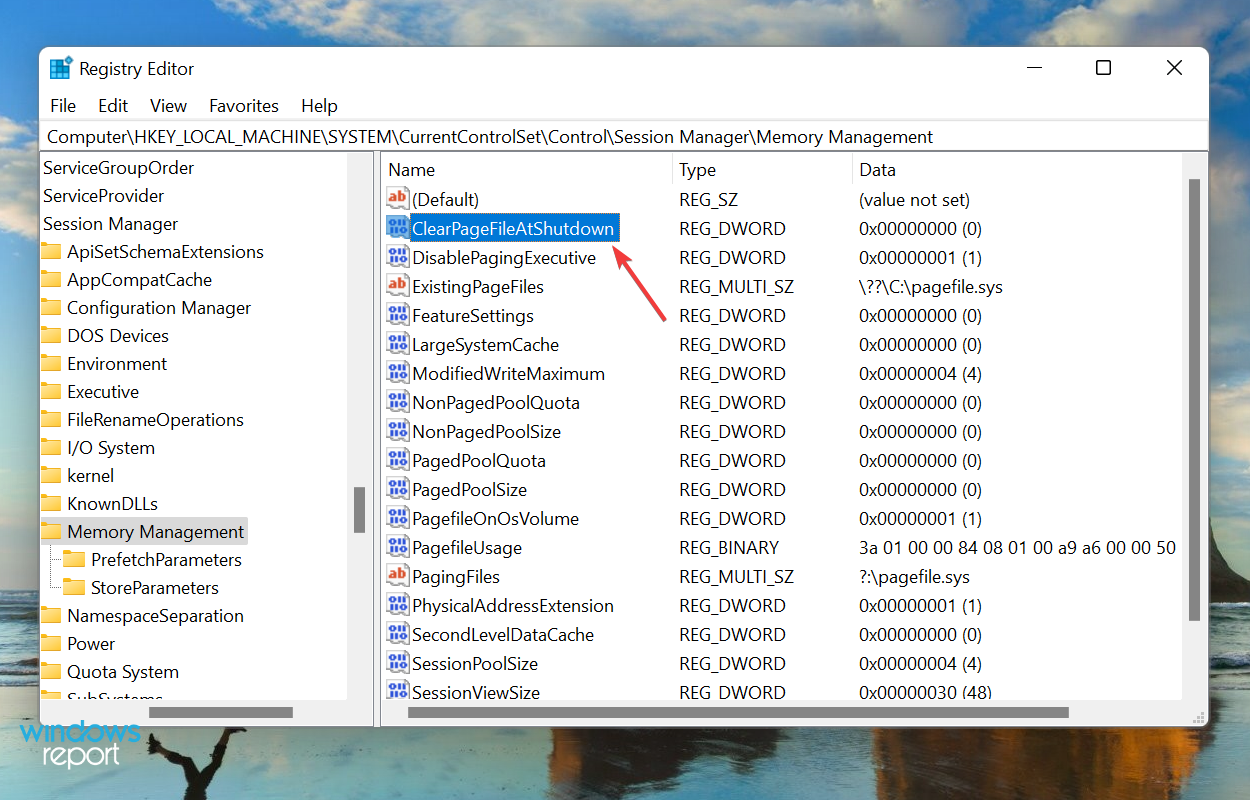
  2. Go to the following key: HKEY_LOCAL_MACHINE\SYSTEM\CurrentControlSet\Control\Class
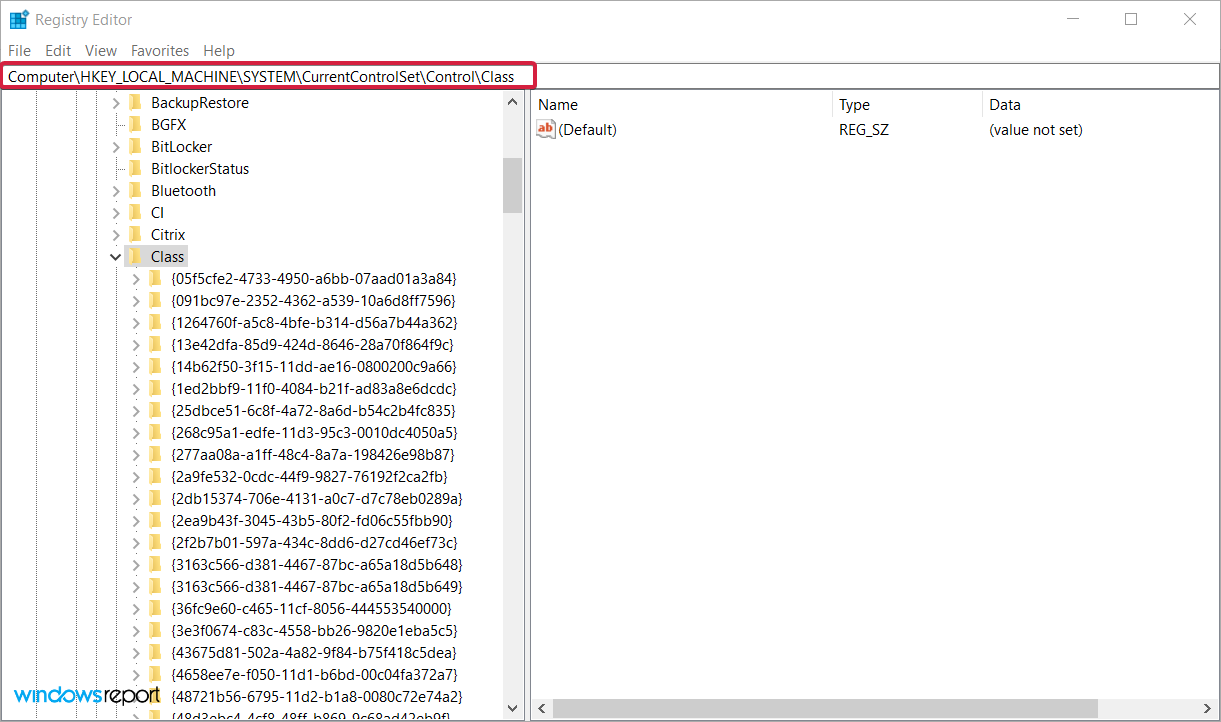
  3. Select the following key: {4d36e96c-e325-11ce-bfc1-08002be10318}
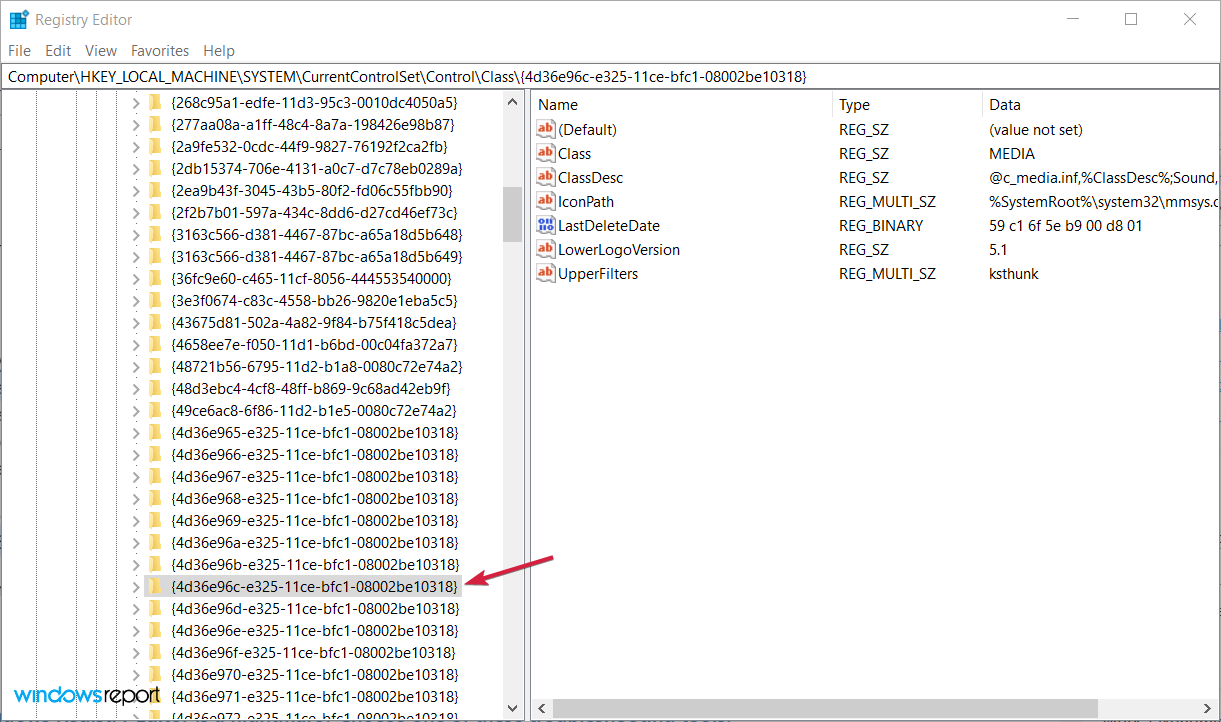
  4. If you find a series of keys such as 0000, 0002, 0005, open them one by one in order to locate a key called PowerSettings.
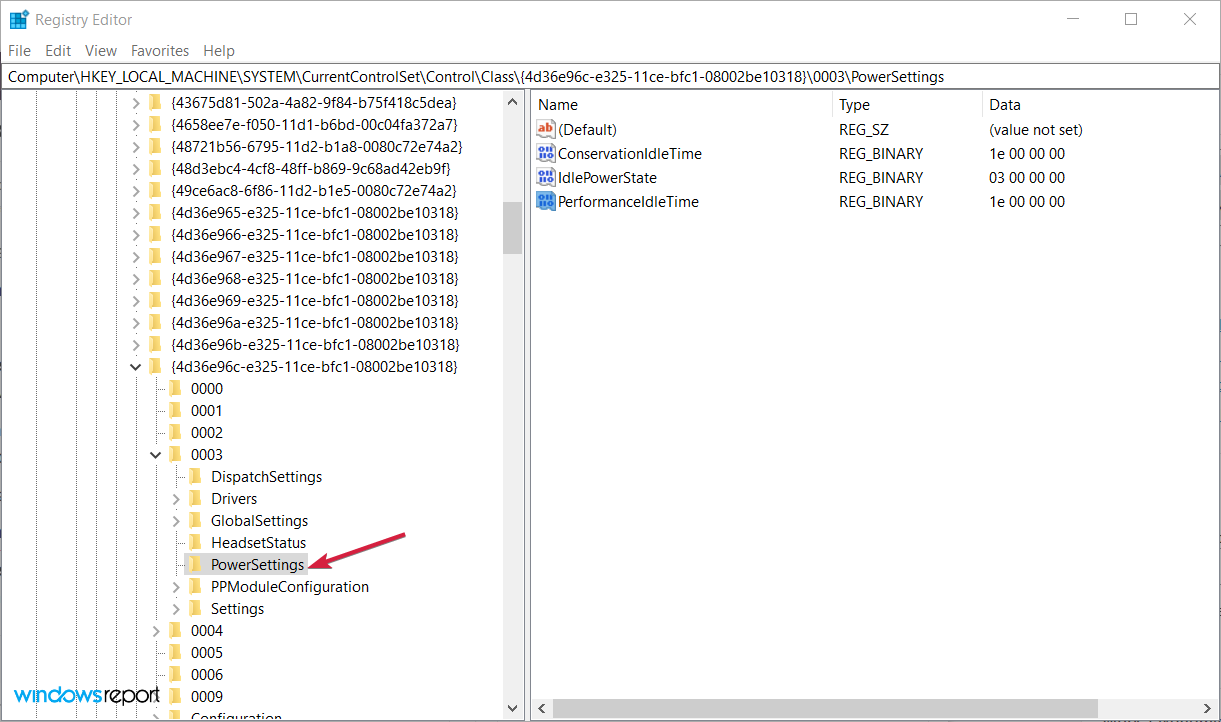
  5. Select ConservationIdleTime and change its value to 00 00 00 00.
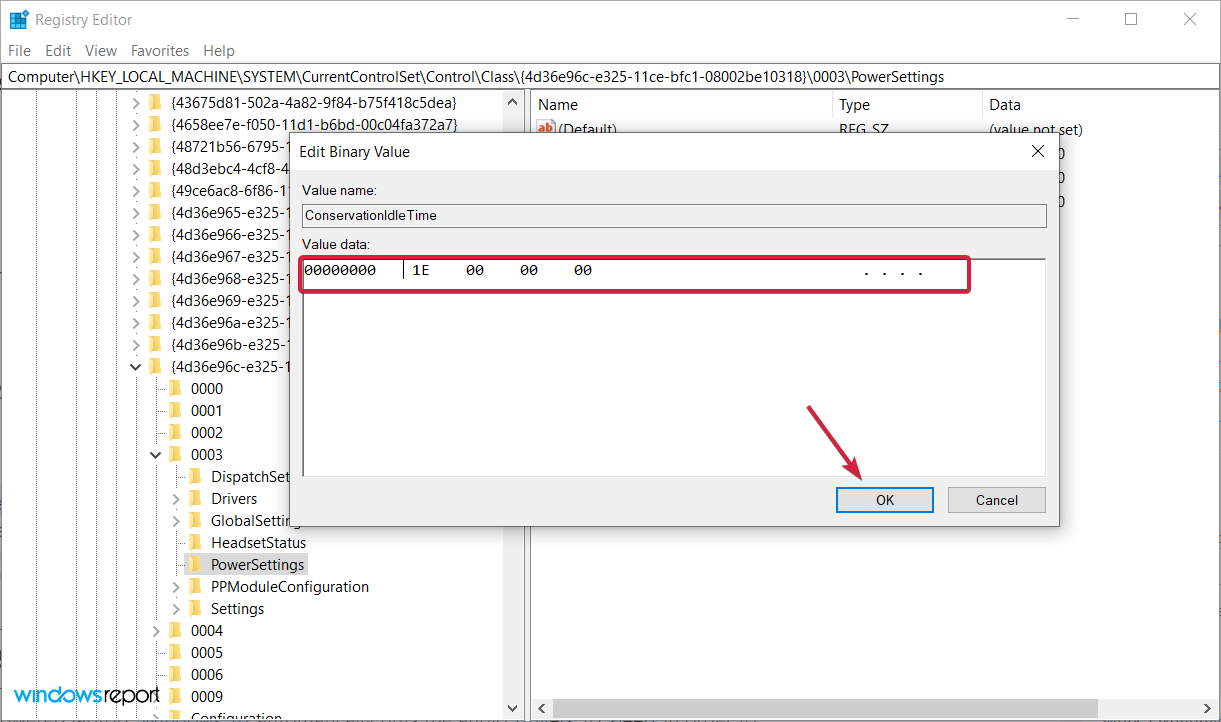
If you’re using a battery-powered laptop, Windows 10 automatically puts the audio drivers to sleep in order to extend battery life. The OS then wakes the drivers only when audio is played.

Unfortunately, when this happens, you’ll hear a pop or crackle sound when audio is played which irritates many users. To fix this minor problem, you need to tweak the Registry.

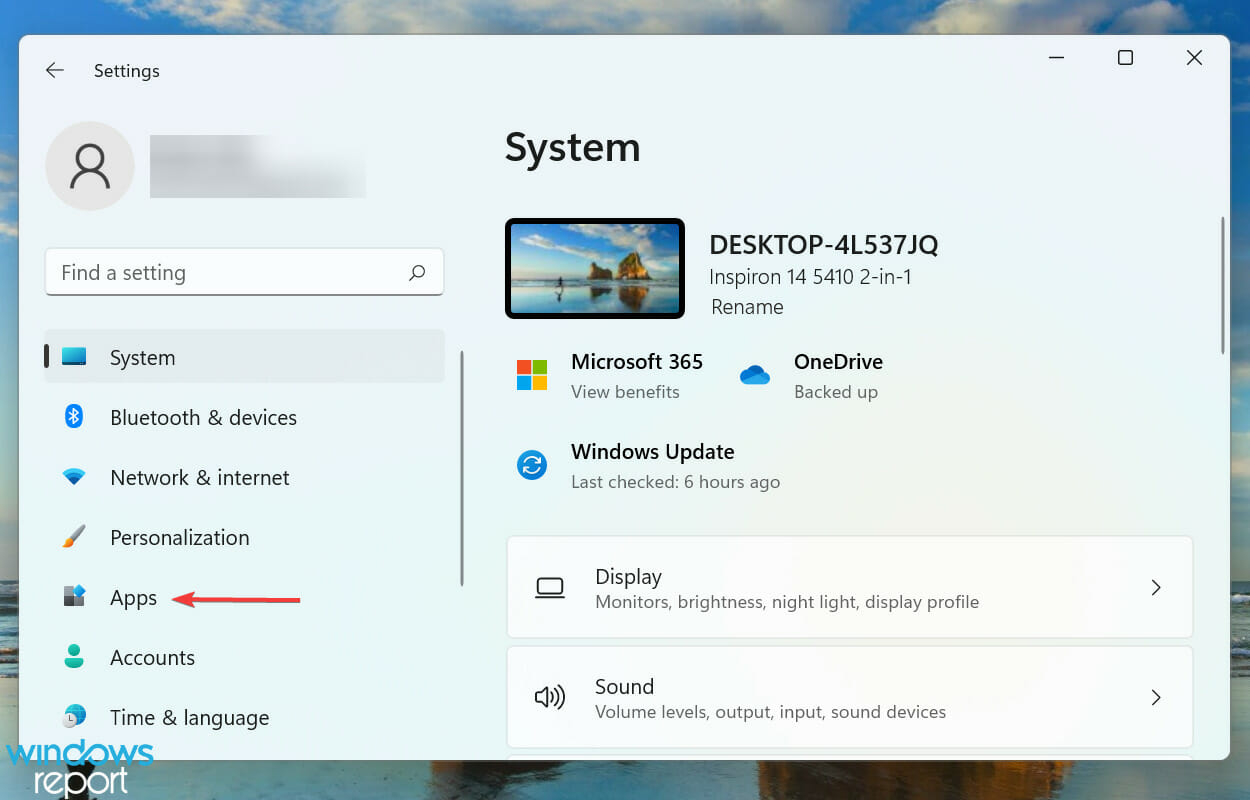
3. Disable audio programs from Startup

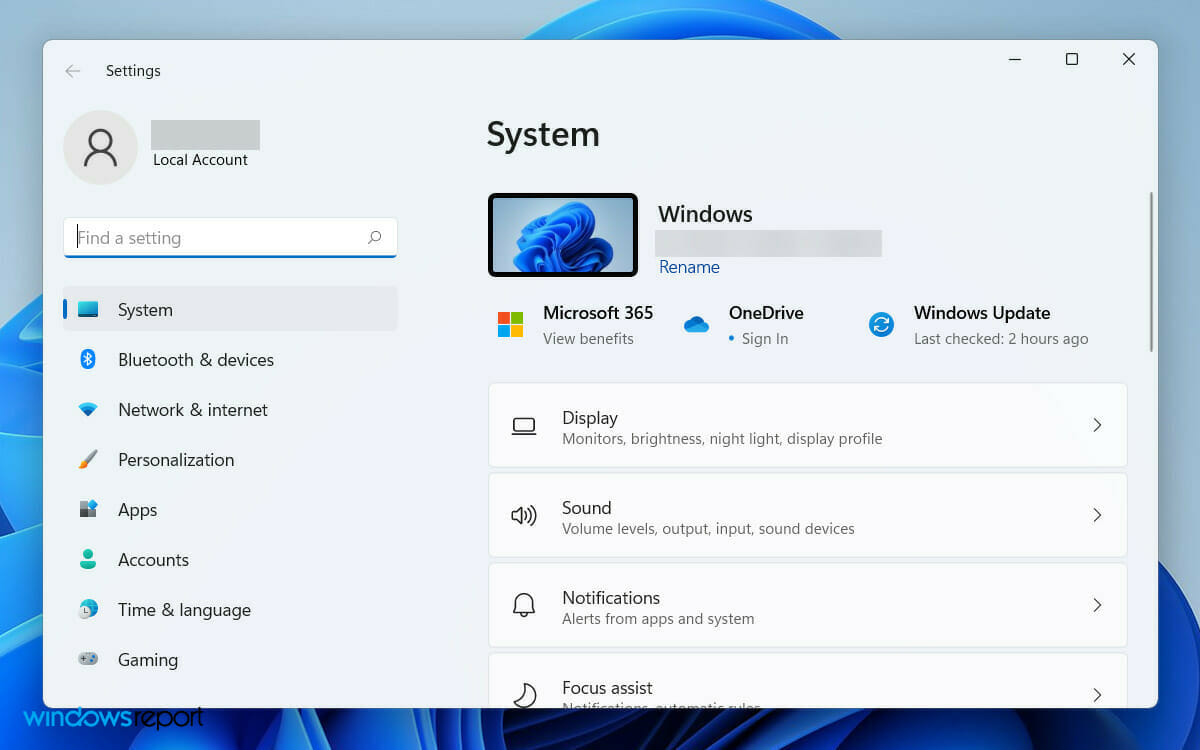
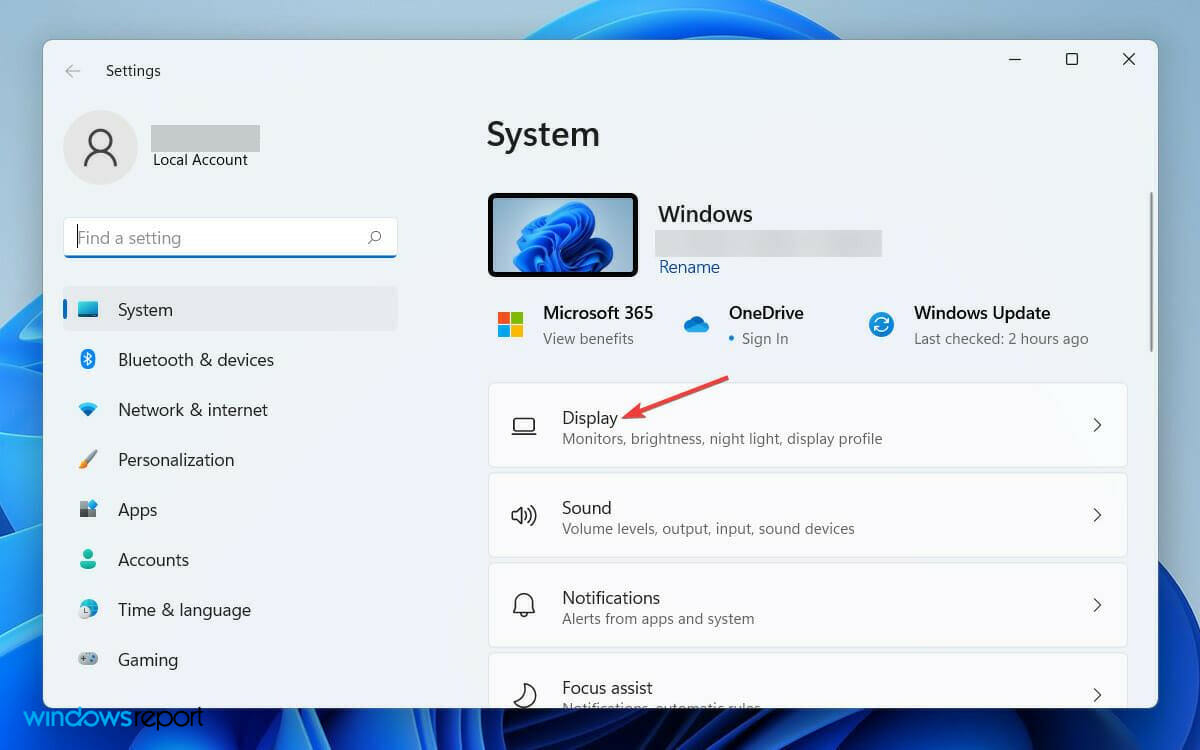
  1. Press the Start button and choose Settings.
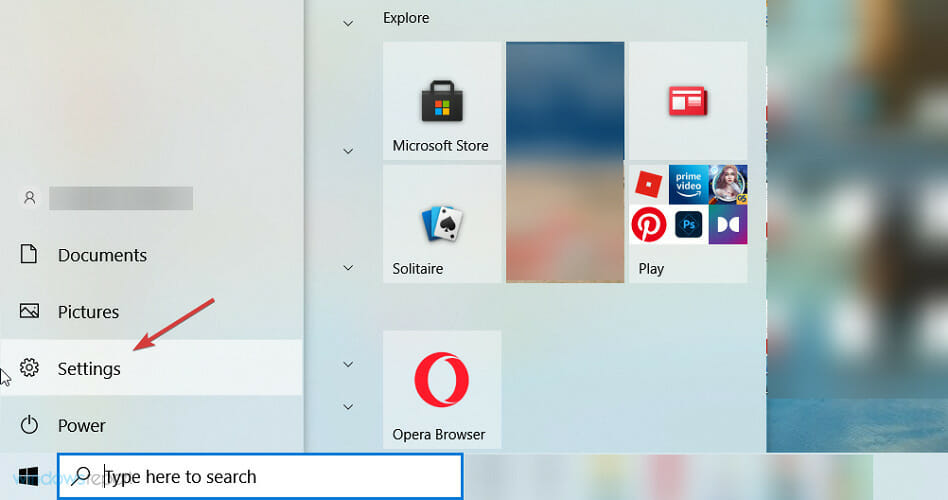
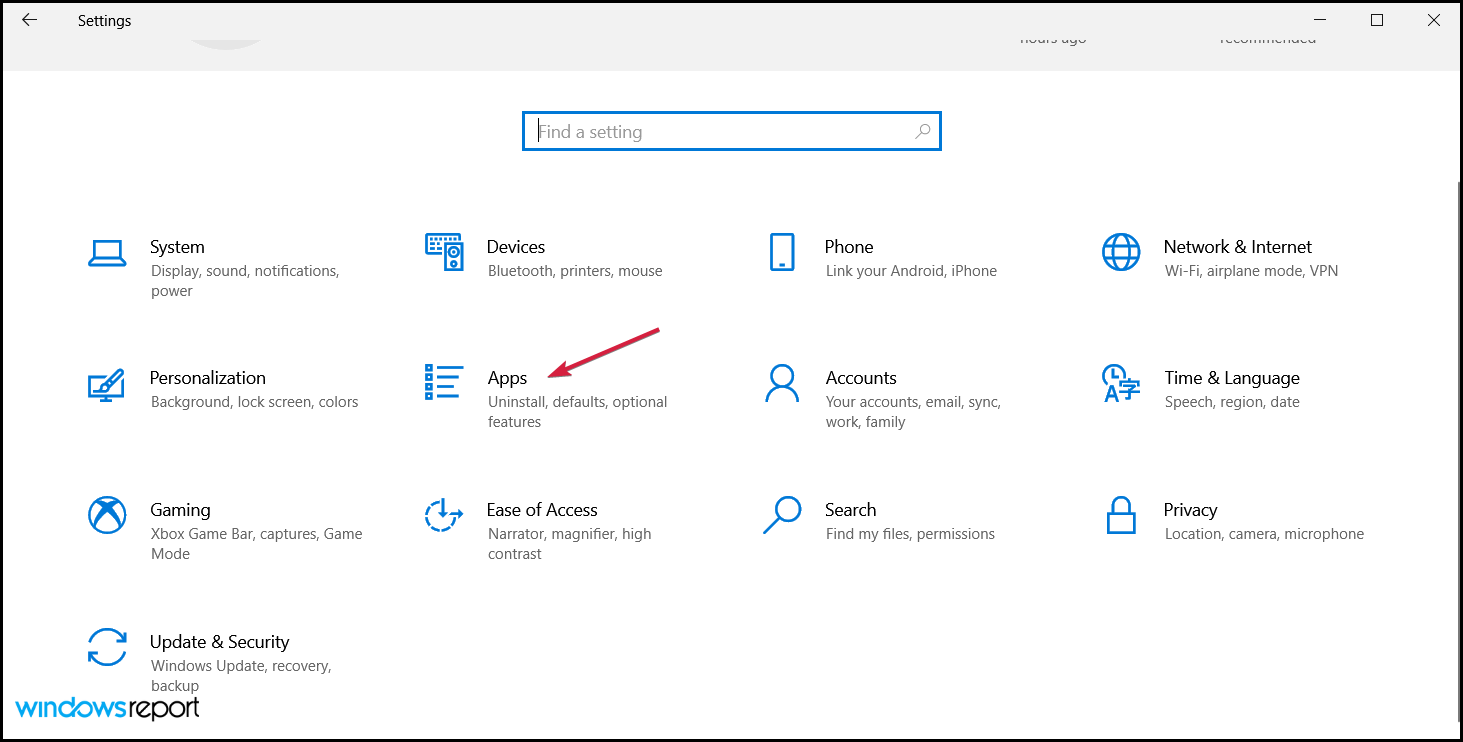
  2. Click on Apps.
  3. Select Startup from the left pane, then disable or turn off any apps that use audio, including browsers.
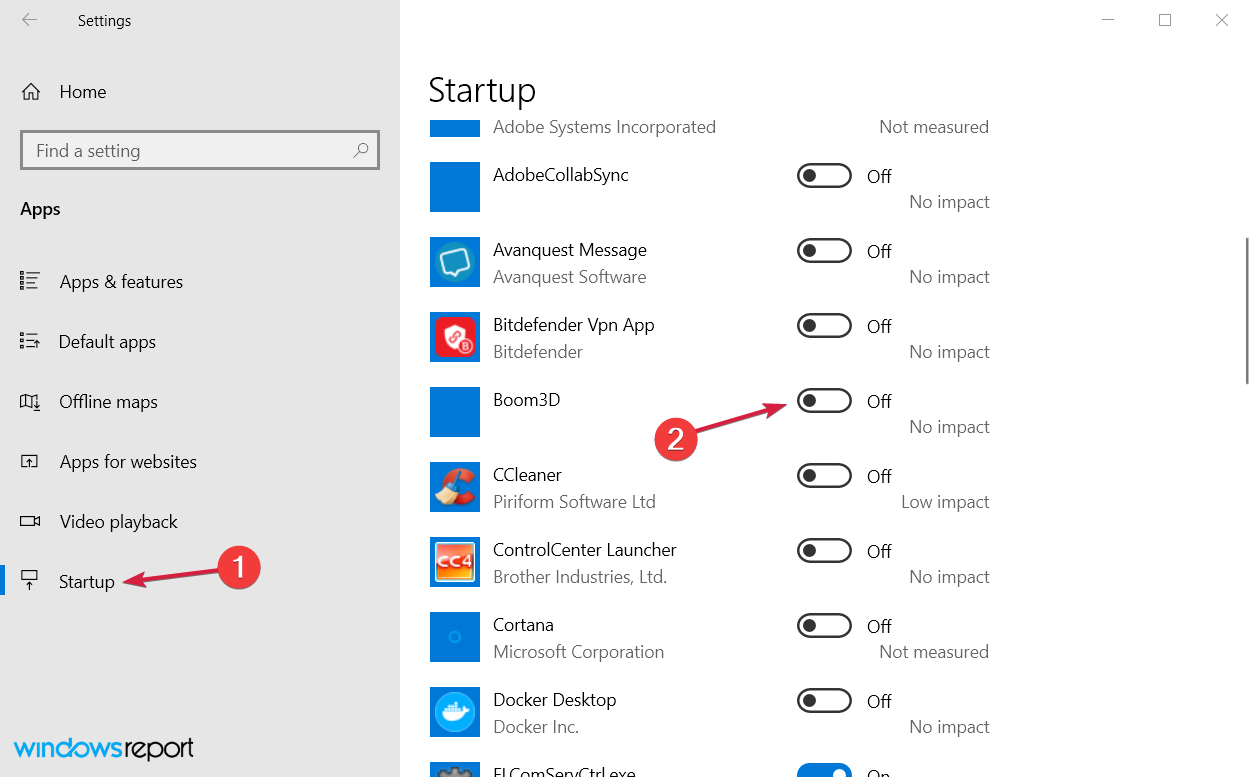
  4. Restart your PC and see if the problem has been solved.

4. Change your laptop Power mode to High performance

Note icon NOTE
This solution is only dedicated to laptop users.
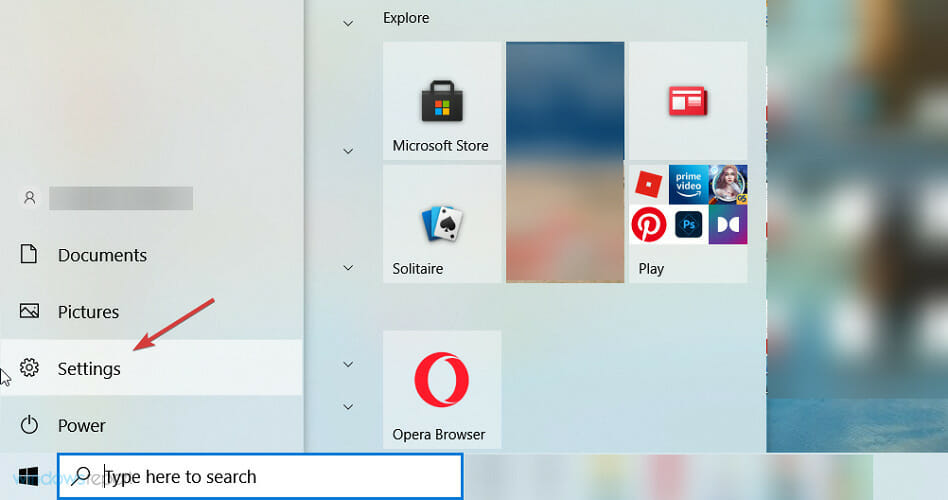
  1. Select the Start button and then click on Settings.
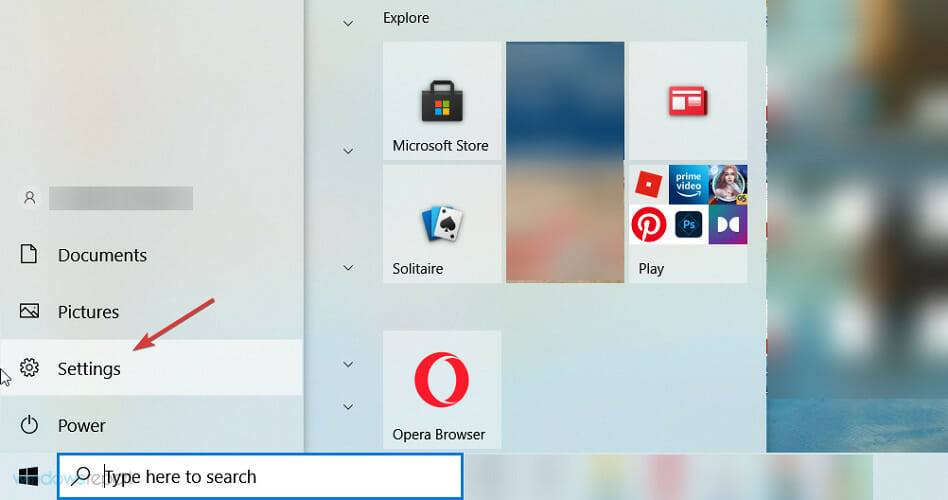
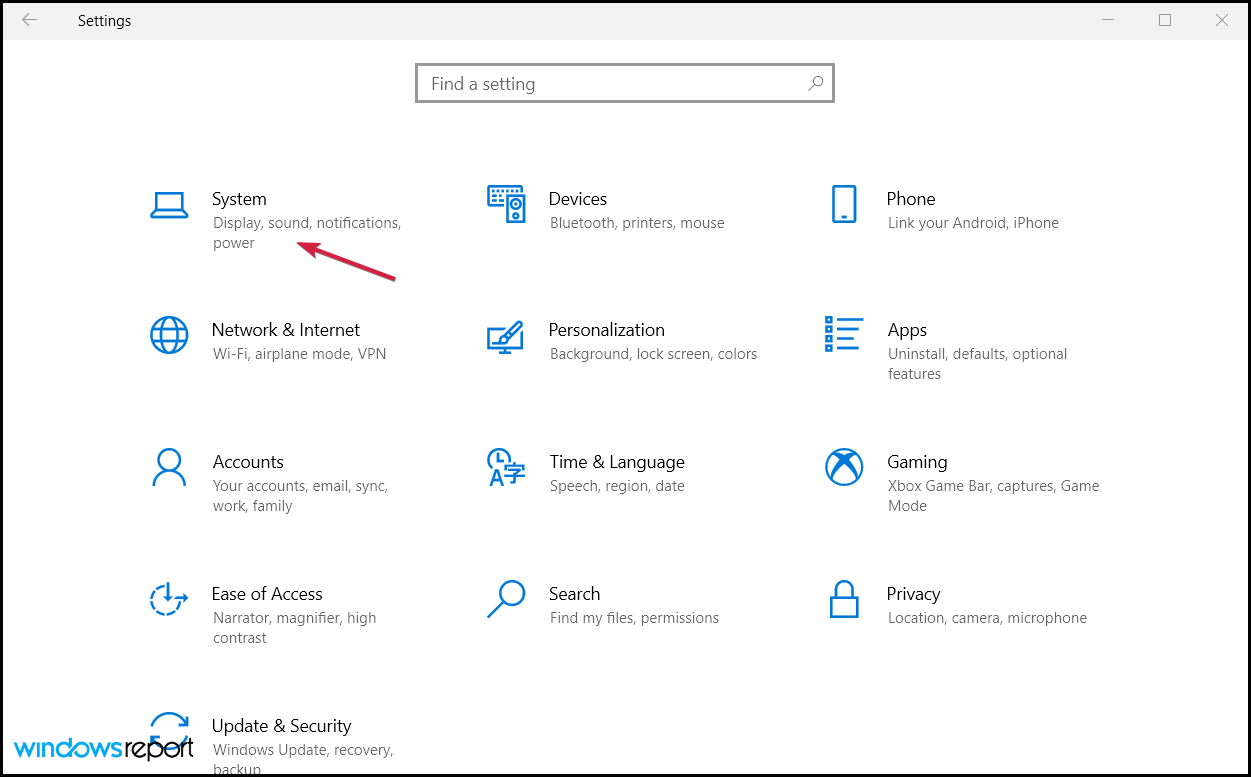
  2. Now, choose System from the list of options.
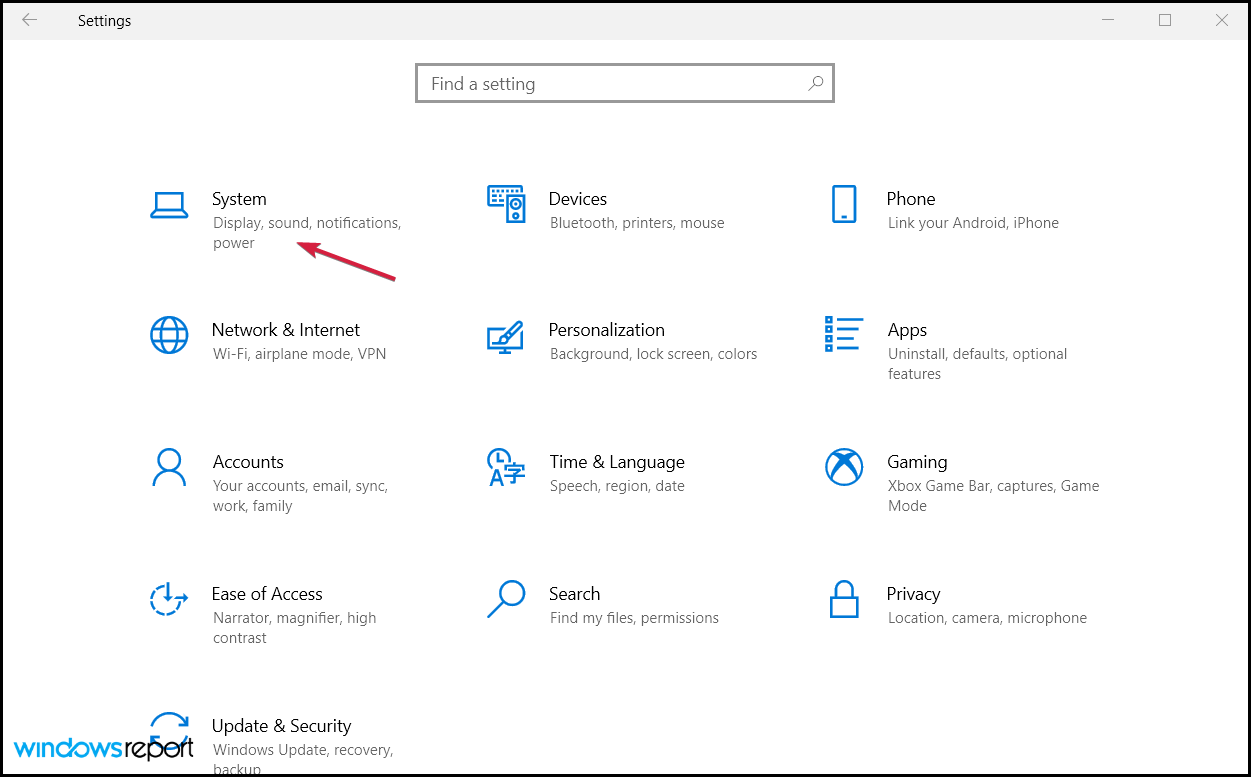
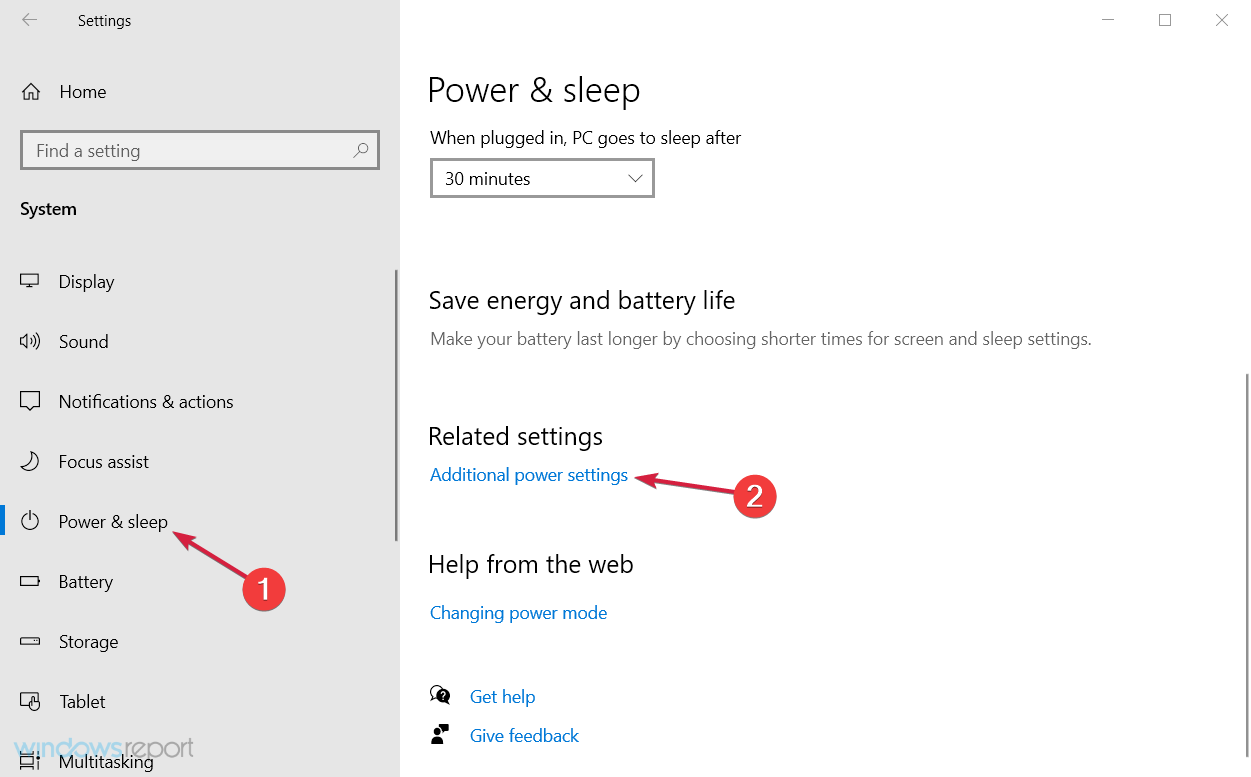
  3. Click on Power & sleep from the left pane and select Additional power settings from the right.
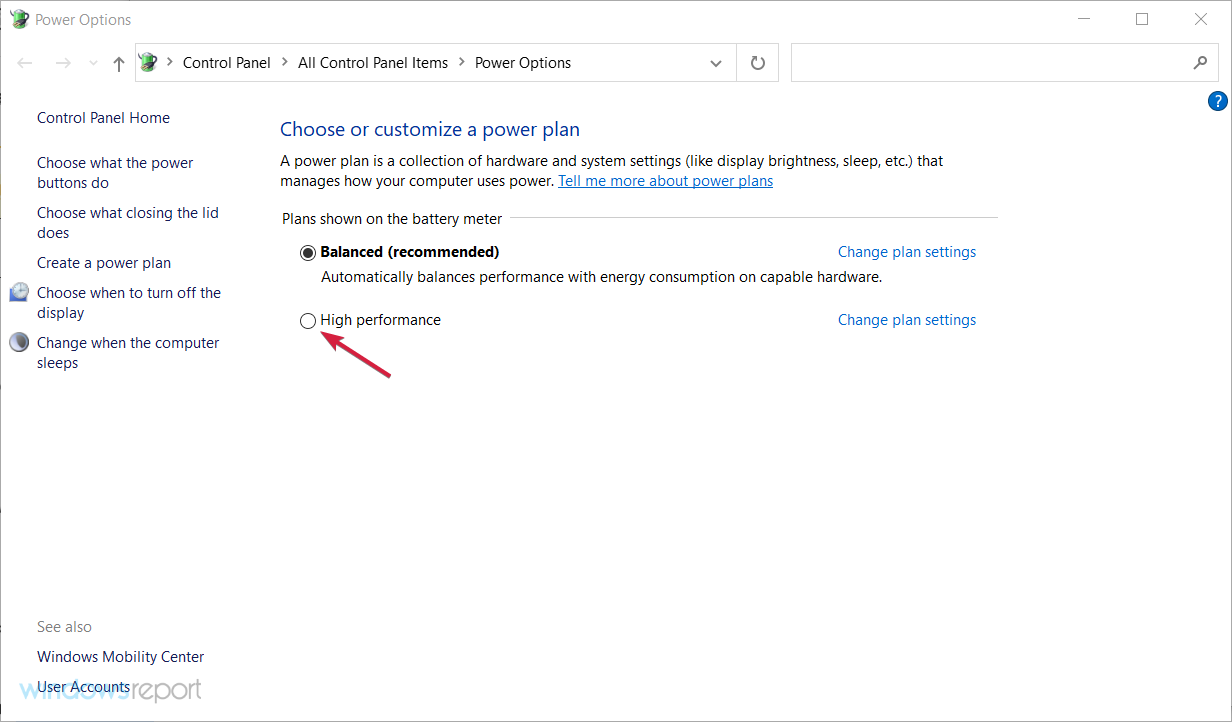
  4. Now, select the High performance plan. You can also adjust its settings by clicking on the Change plan settings from its right but it shouldn’t be necessary.
5. Provide your audio device with exclusive properties

  1. Select the Windows button and click on Settings.
  2. Choose System from the possible options.
  3. Select Sound from the left, then pick the output device from the drop-down menu on the left and click on Device properties.
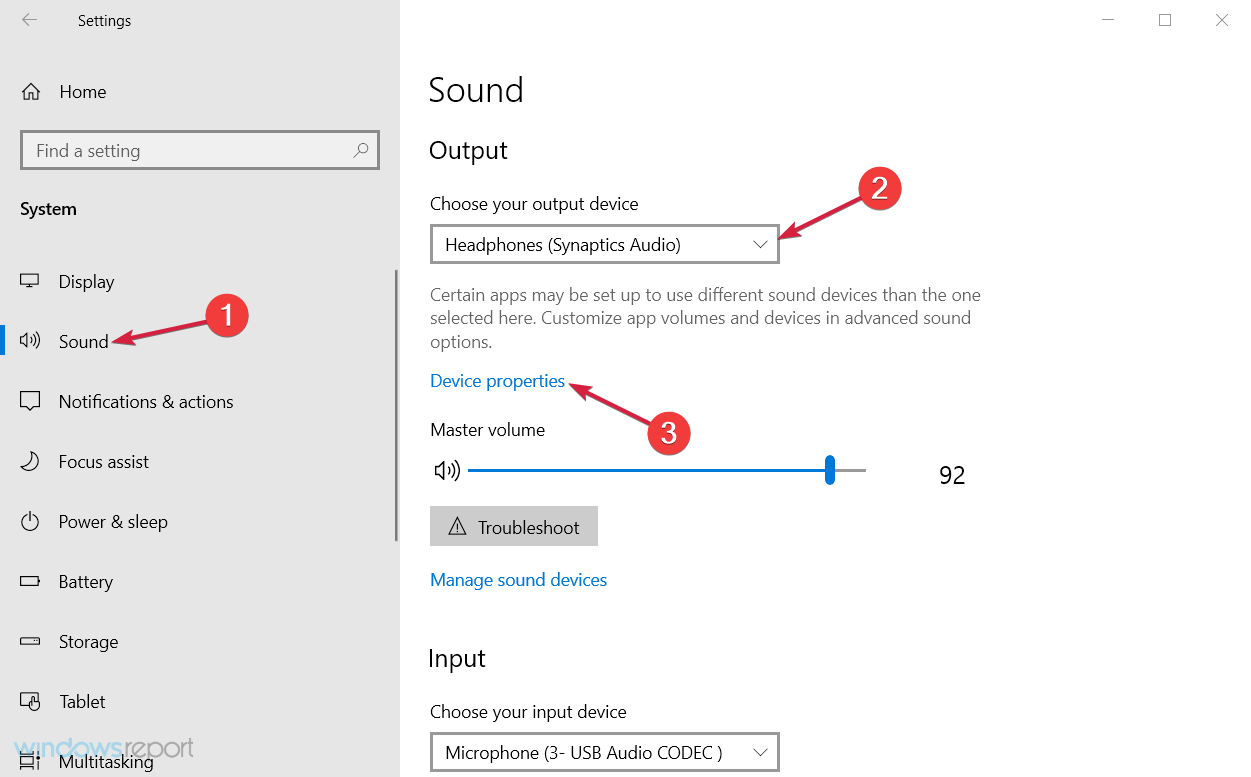
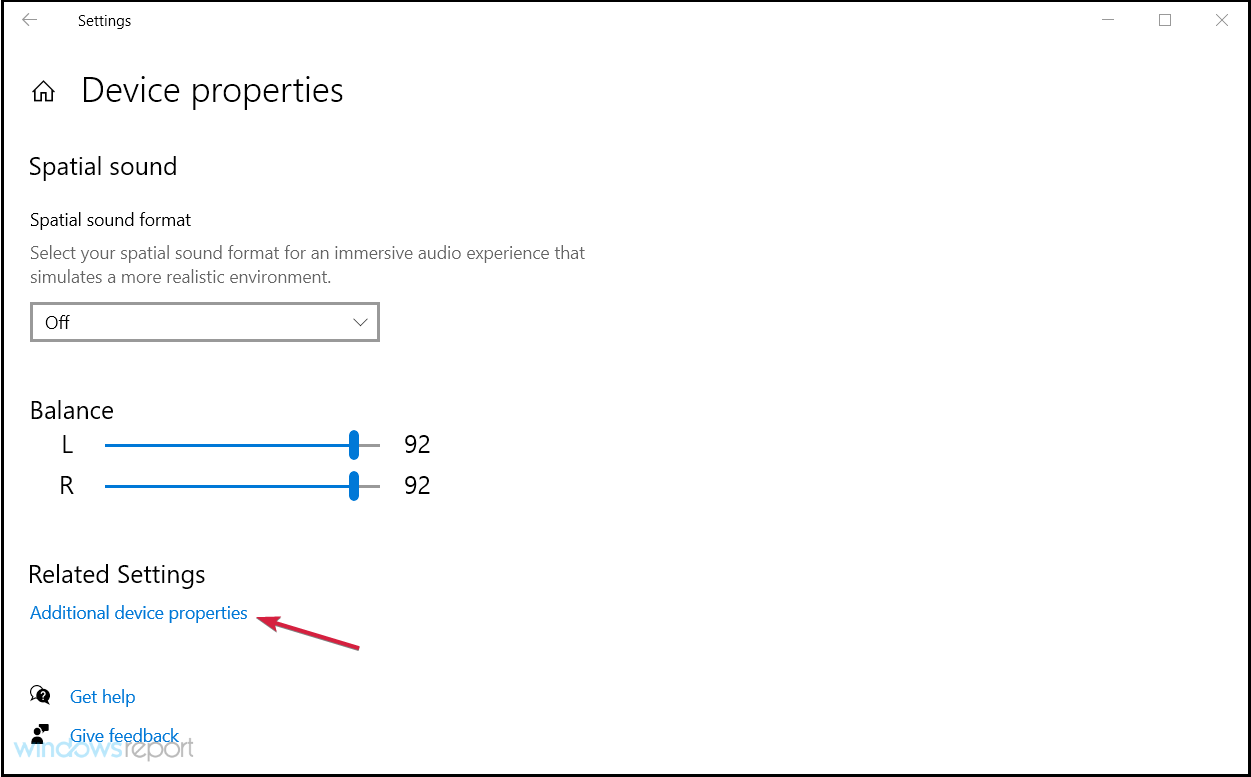
  4. Scroll down and select Additional device properties.
  5. Select the Advanced tab, check both boxes from the Exclusive Mode section, then hit Apply and OK to acknowledge the settings.
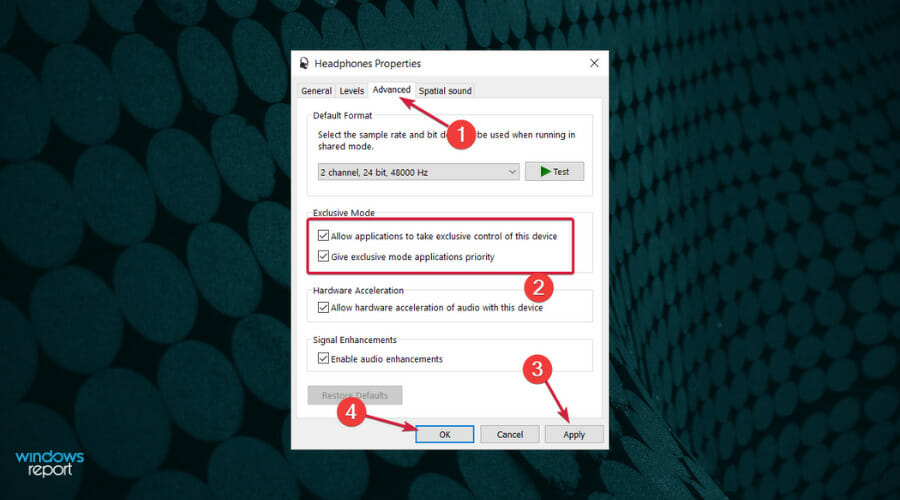
If the Exclusive Mode options are greyed out, that means that an app already has priority in using that device and you need to disable it from Startup.

In solution 3 of this guide, we explained how to disable a program in Startup so all you need to do is to check if you have any other audio apps there and disable it, then reboot your PC.

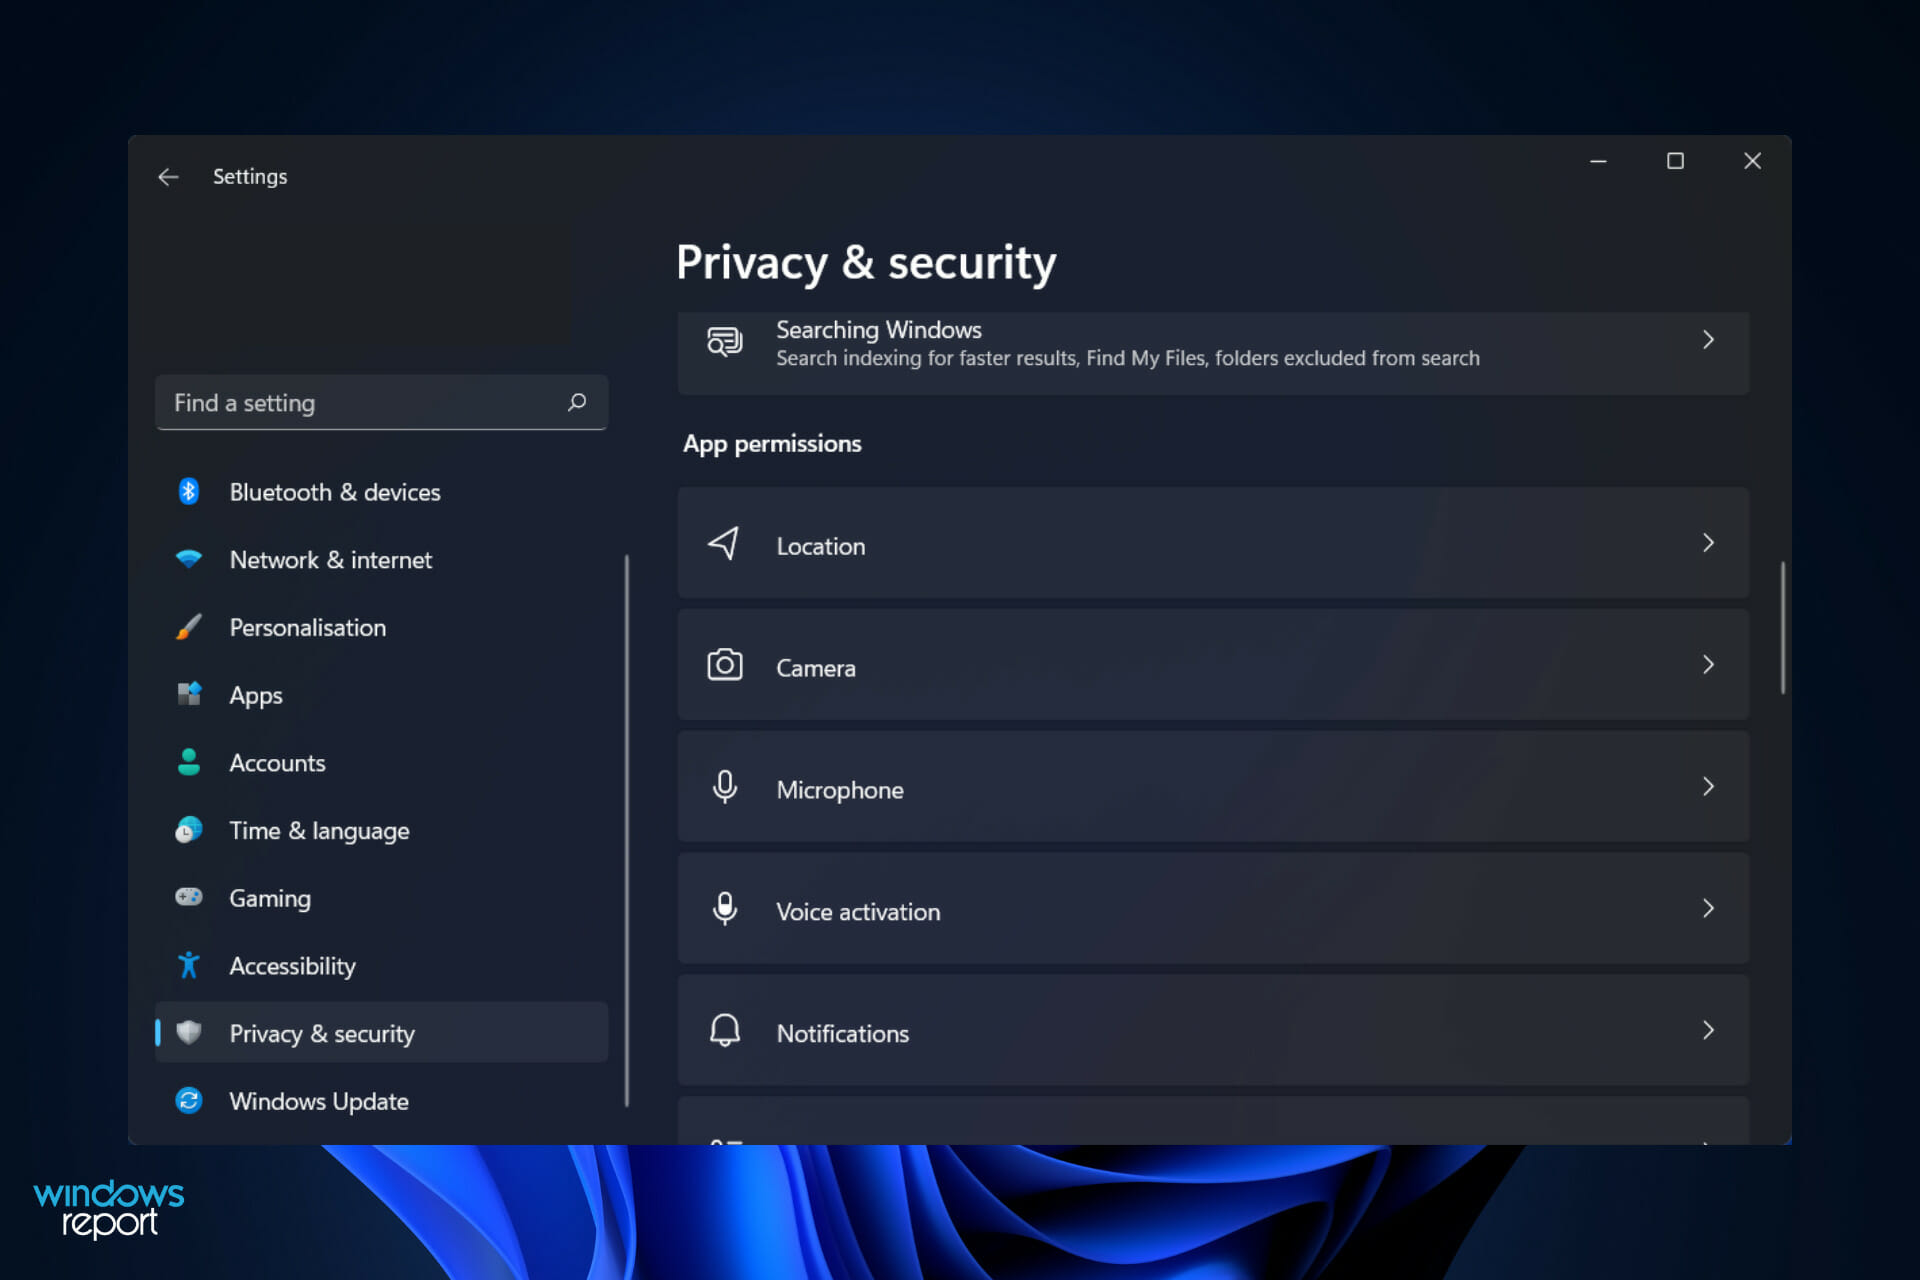
6. Allow the apps to use your microphone

  1. Click on the Start button and select Settings from the menu.
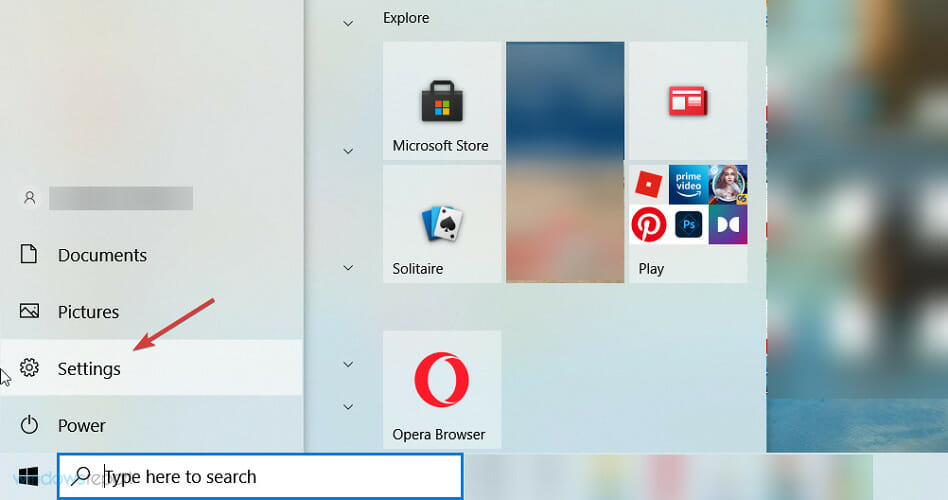
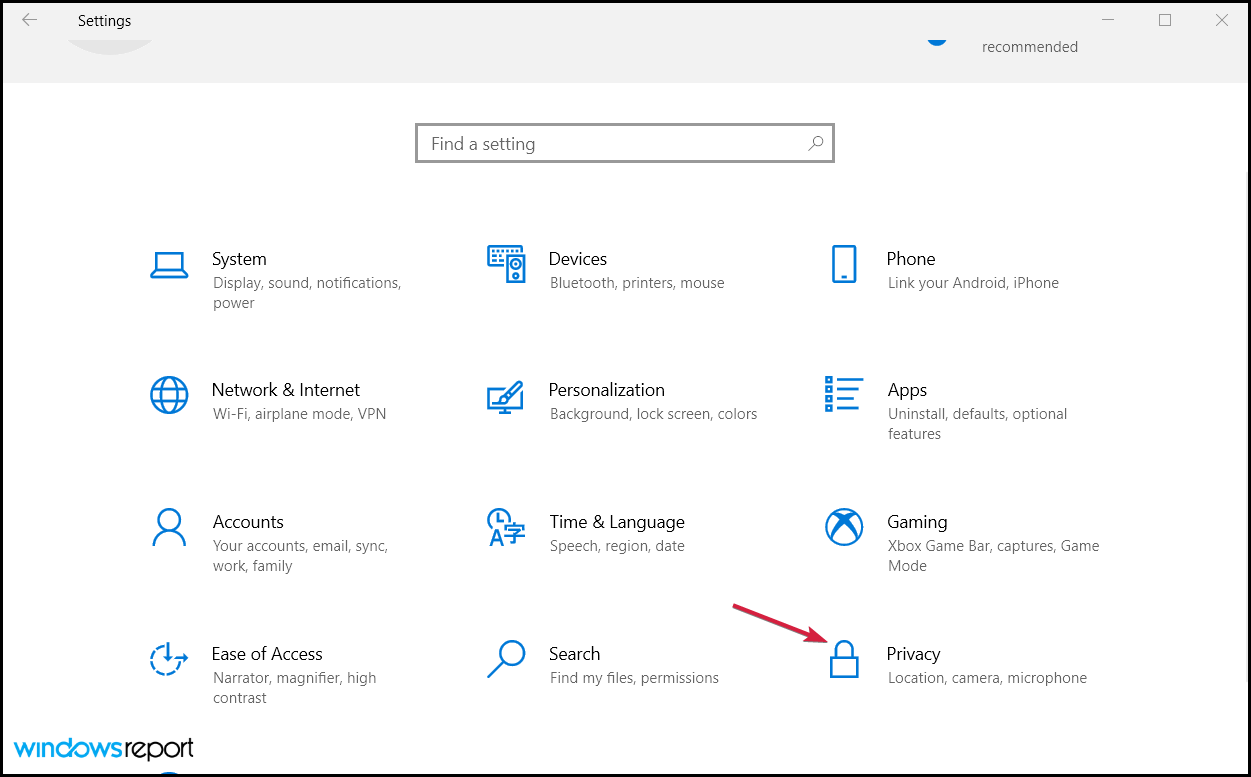
  2. Select Privacy.
  3. Scroll down and select Microphone from the left pane, then make sure that the Allow apps to access your microphone and Allow desktop apps to access your microphone options are both On. Then, you can scroll down and verify if the audio app that cannot use the microphone is also set to On.
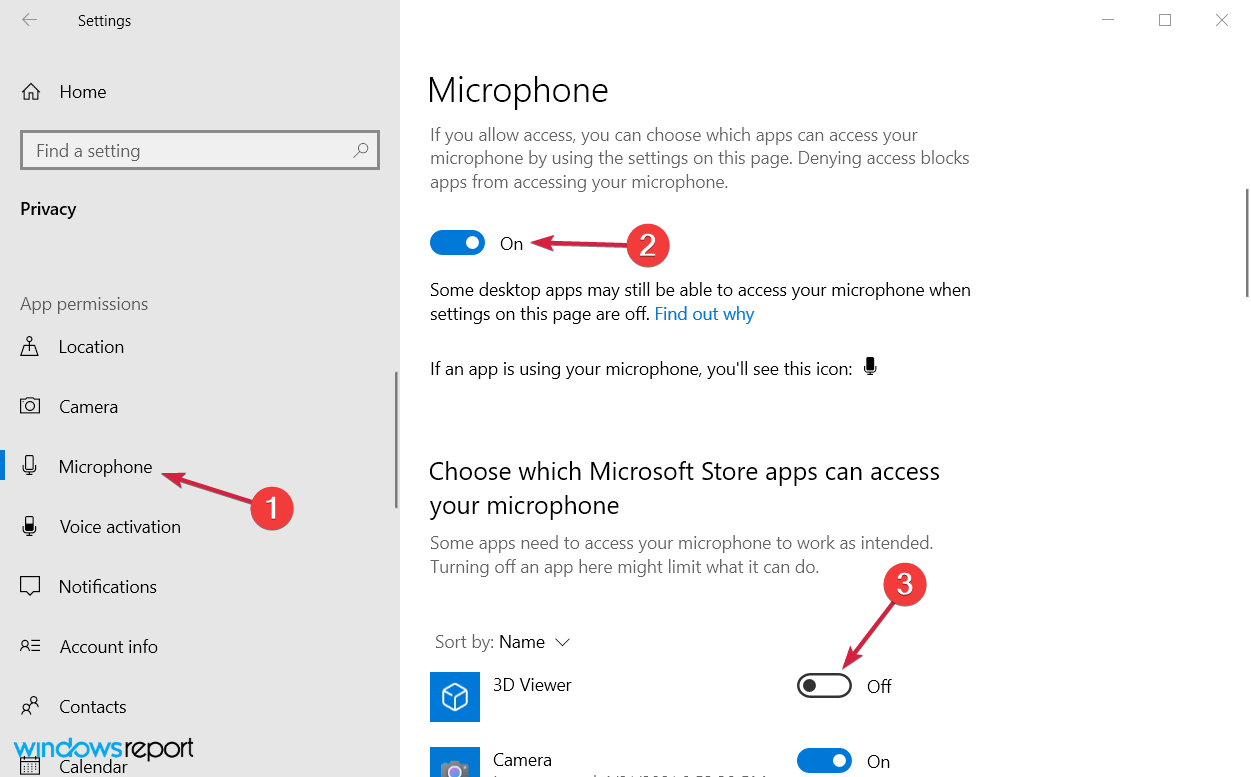
If your microphone won’t pick up any sound, make sure you allowed apps and programs to use it.

There you go, these are a few solutions that should help you fix the audio issues affecting the WASAPI, MME, and DirectSound issues after a Windows Update.

How to adjust the WASAPI audio settings in your software?

  1. Start the DAW you’re having audio problems with and check the Audio settings.
  2. For instance, in Reaper, check if WASAPI is set in Exclusive mode.
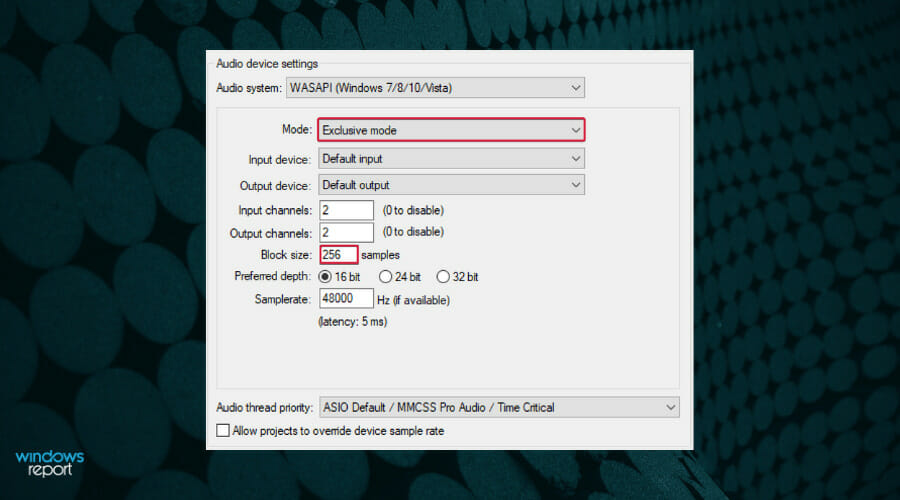
  3. Also, try a lower Block size. That may also fix any latency problems you might encounter.

We offered Reaper as an example but it goes for any DAW that you can set the audio system for.

We also have a very comprehensive article on how to fix sound problems in Windows 10 & 11 after an update and you may also find some useful solutions there.

For any suggestions or further problems, don’t hesitate to contact us via the comments section below and we will get back to you as soon as possible.
Microsoft is making its Xbox subscription practices more transparent for consumers

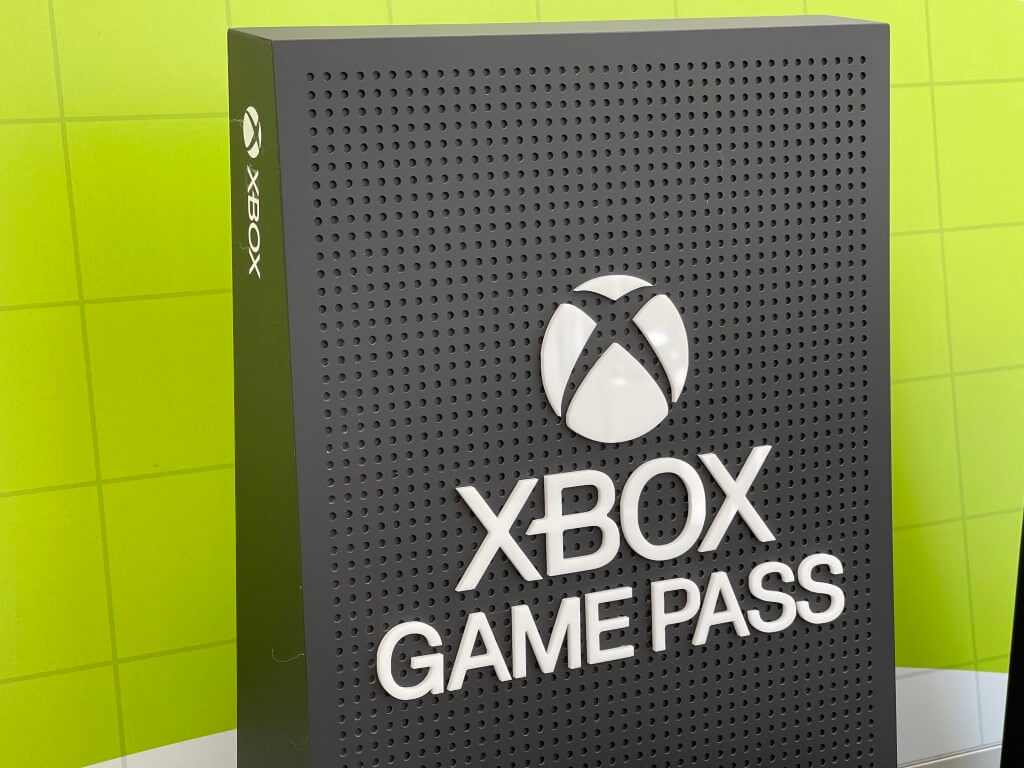
Following an investigation from the UK’s Competition and Markets Authority (CMA), Microsoft has agreed to change its Xbox subscription practices to increase transparency for consumers (via Eurogamer). The changes will apply to Xbox Live Gold as well as Xbox Game Pass, Microsoft’s game subscription service that recently crossed 25 million subscribers.

The issue raised by the CMA is that Microsoft’s Xbox Live Gold and Xbox Game Pass subscriptions are often offered to consumers on an auto-renewal basis, something that not all new subscribers may not be aware of. Overall, the CMA estimated that it’s probably too easy for consumers to forget how to turn off automatic renewal, or too difficult to find how to do it.

In accordance with the CMA, Microsoft has agreed to introduce the following changes to make its Xbox subscription practices more transparent:

  • Microsoft will better explain to new customers that their subscription will carry on unless they turn off auto-renewal.
  • For consumers who opted for a recurring 12-month subscription, Microsoft will offer them the option to cancel their subscription and get a pro-rata refund.
  • If Microsoft notices that consumers aren’t actively using their subscription, the company will remind them about cancellation options and even stop the subscription (and payments) if consumers continue not to use it actively.
  • Microsoft will also better inform subscribers about price increases and inform them about how to turn off auto-renewal to avoid paying more.

The CMA launched its consumer law investigation into the auto-renewal practices of Xbox, PlayStation, and Nintendo back in 2019, and Microsoft was the first company to agree to make a series of improvements. “Other companies offering memberships and subscriptions that auto-renew should take note, and review their practices to ensure they comply with consumer protection law,” said Michael Grenfell, Executive Director of Enforcement at the CMA.

Fix: Axie Infinity Something Wrong When get Profile

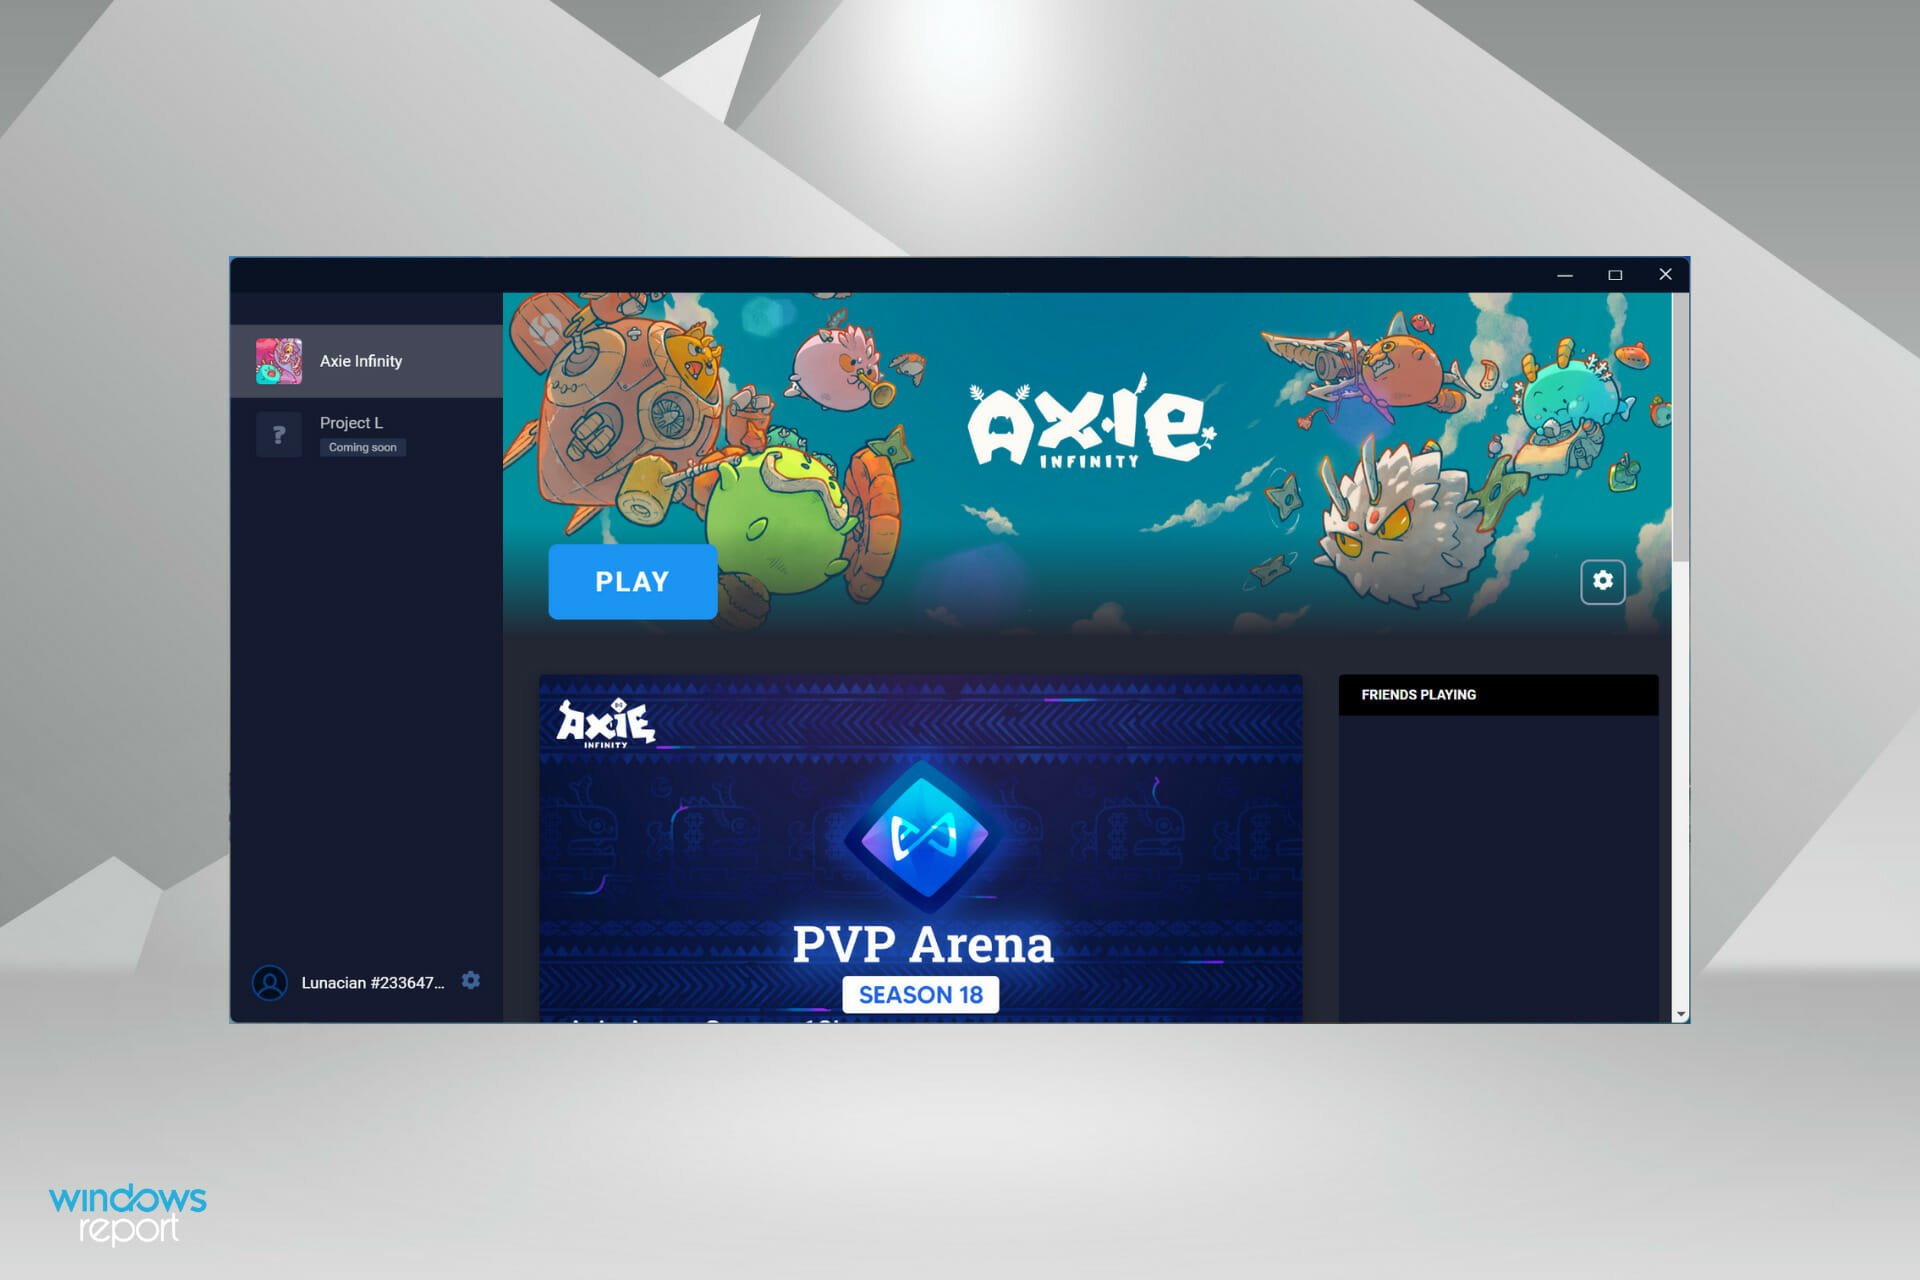
Axie Infinity is one of the most popular NFT-based crypto-games, with over 2 million users as of October 2021. However, several users have reported that Axie Infinity often throws a Something wrong when get profiles error.

The following sections will discuss the underlying causes and the most effective fixes.

Why am I getting Axie Infinity Something wrong when get profile message?

This error may be caused by a variety of factors, including the following:

  • Server load – The error will likely get triggered more when too many users simultaneously try to use the servers.
  • Technical issues – A few technical issues, like glitches and bugs on the application, would trigger the error.
  • Connectivity issues – Slow or unsteady networks will also increase the chances of the Axie Infinity Something wrong when getting profile message.
  • Problems with the account – Incorrect credentials and other account problems may trigger the fetch issue.

How can I fix Axie Infinity Something wrong when get profile error?

1. Delete the Axie Infinity folder

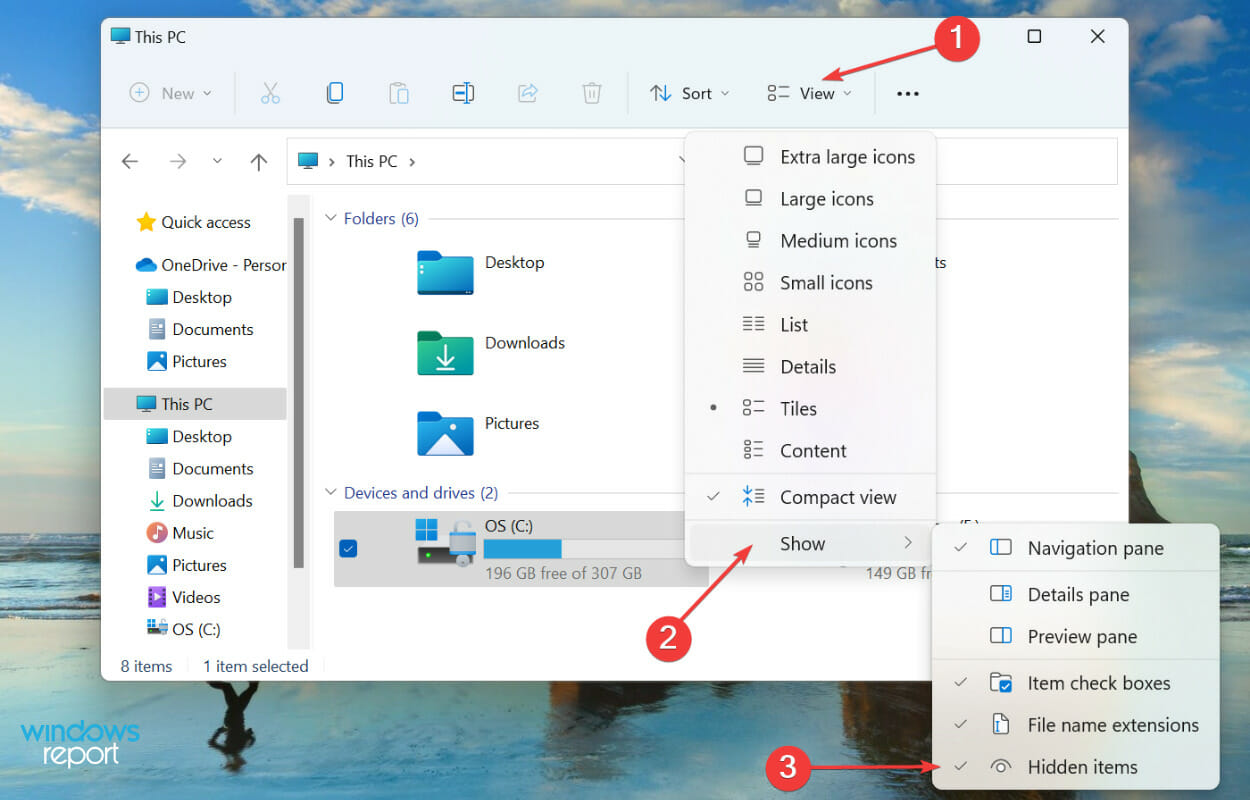
  1. Press Windows + E to launch the File Explorer, click on the View menu at the top, hover the cursor over Show in the dropdown menu, and select the Hidden items option.View hidden items to fix axie infinity not working
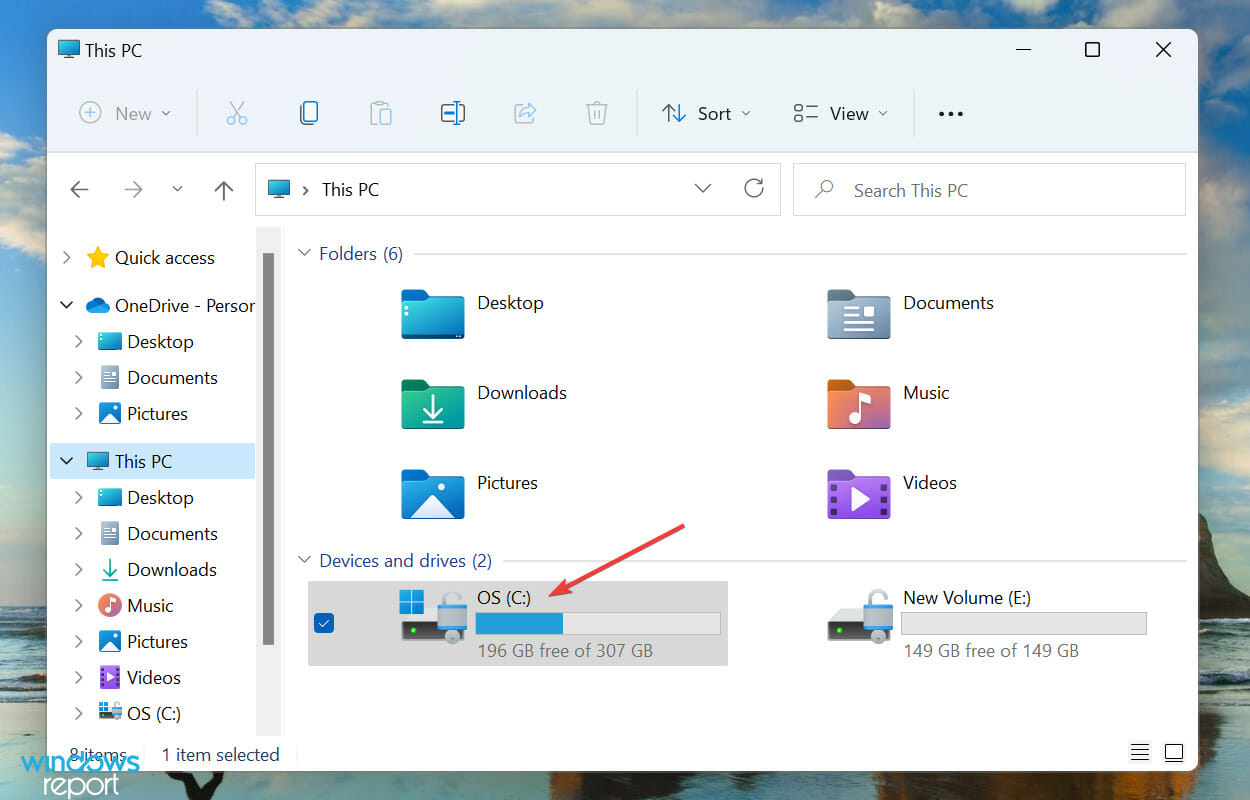
  2. Next, double-click on the C: drive.C drive
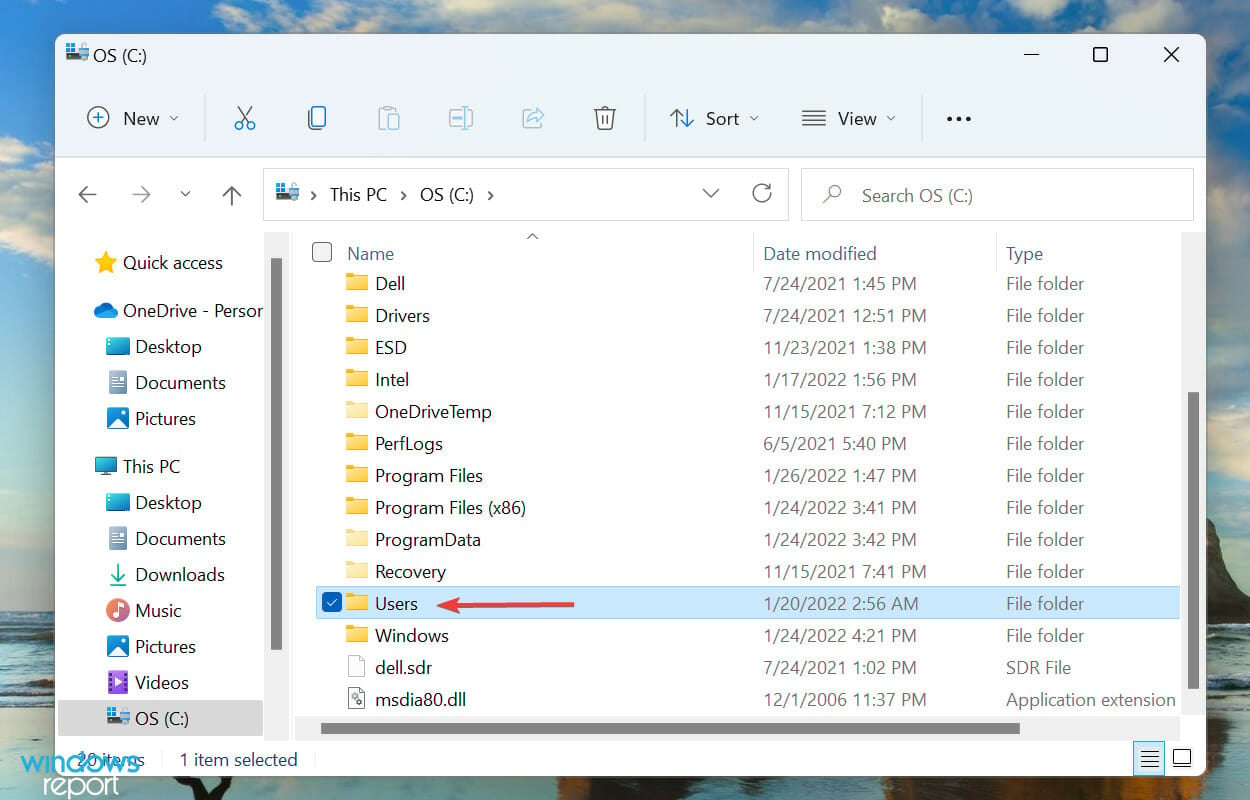
  3. Open the Users folder.Users to fix axie infinity not working
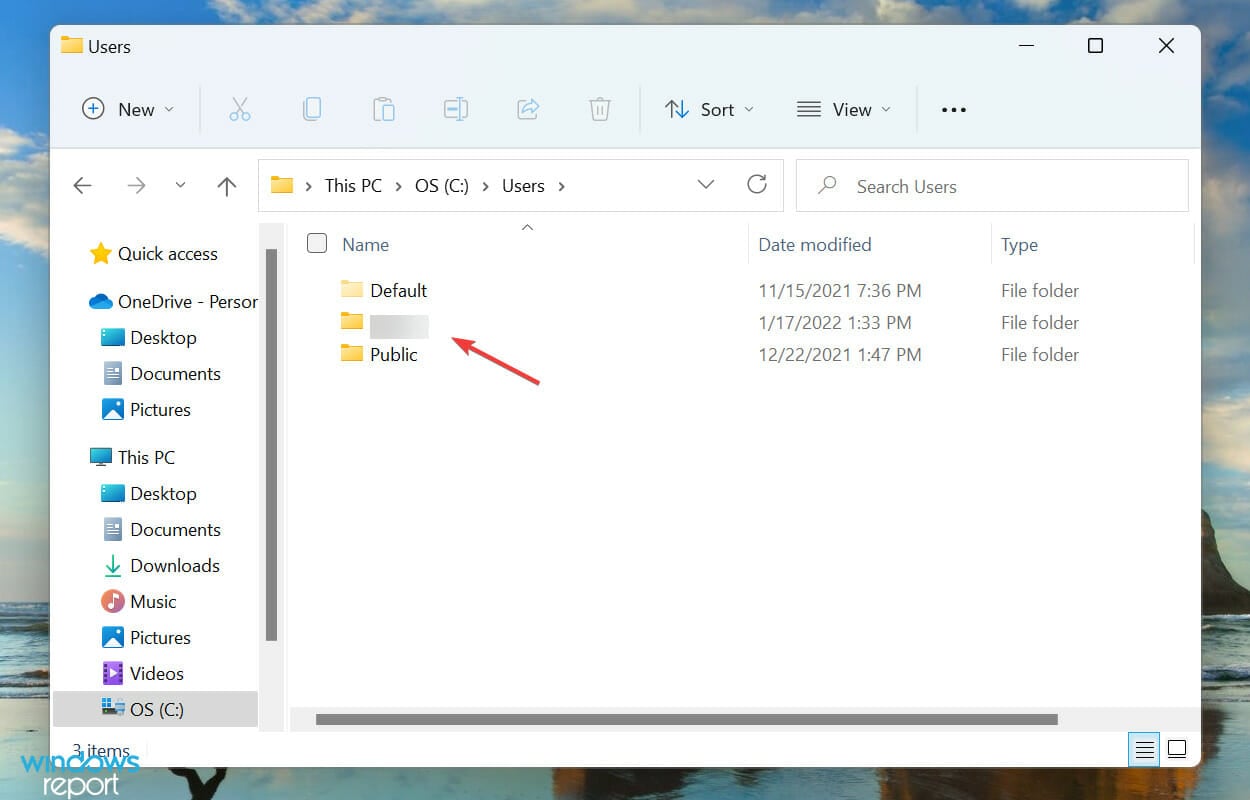
  4. Double-click on the current user account to open it.User account
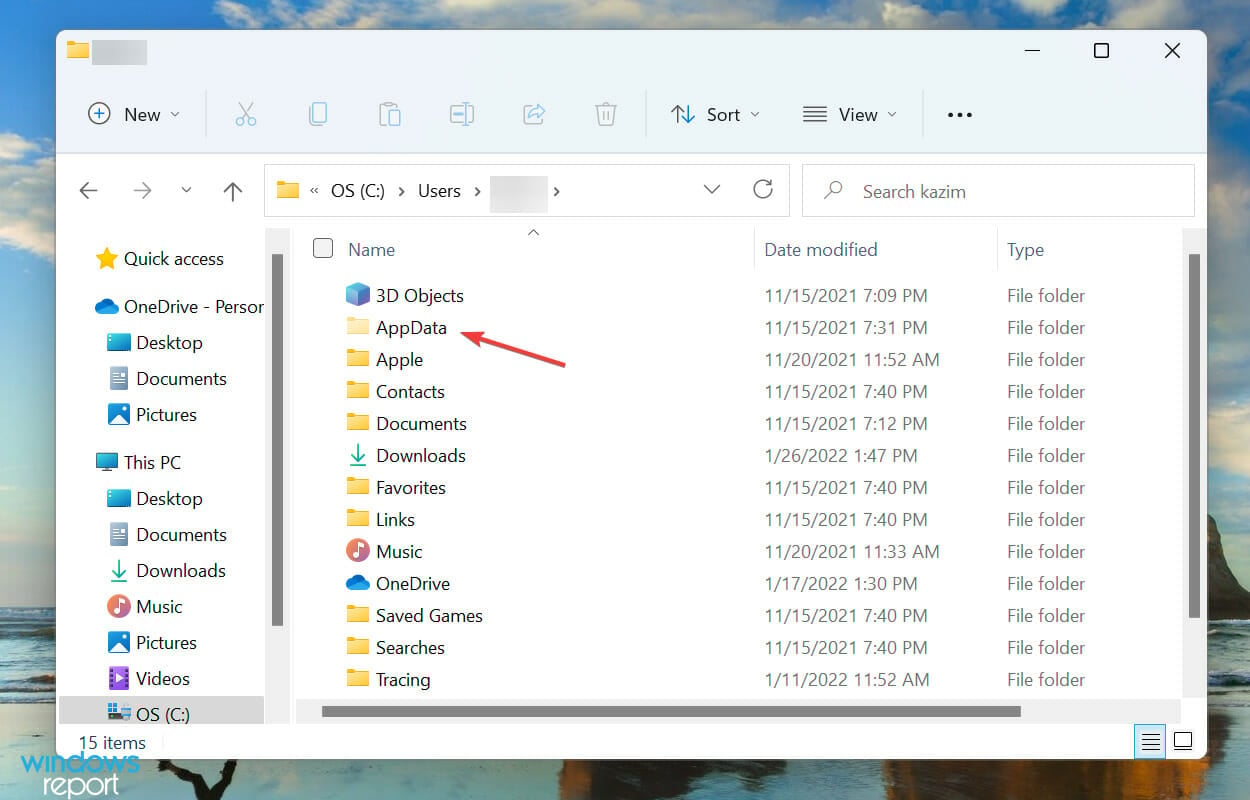
  5. Open the AppData folder.App data to fix axie infinity not working
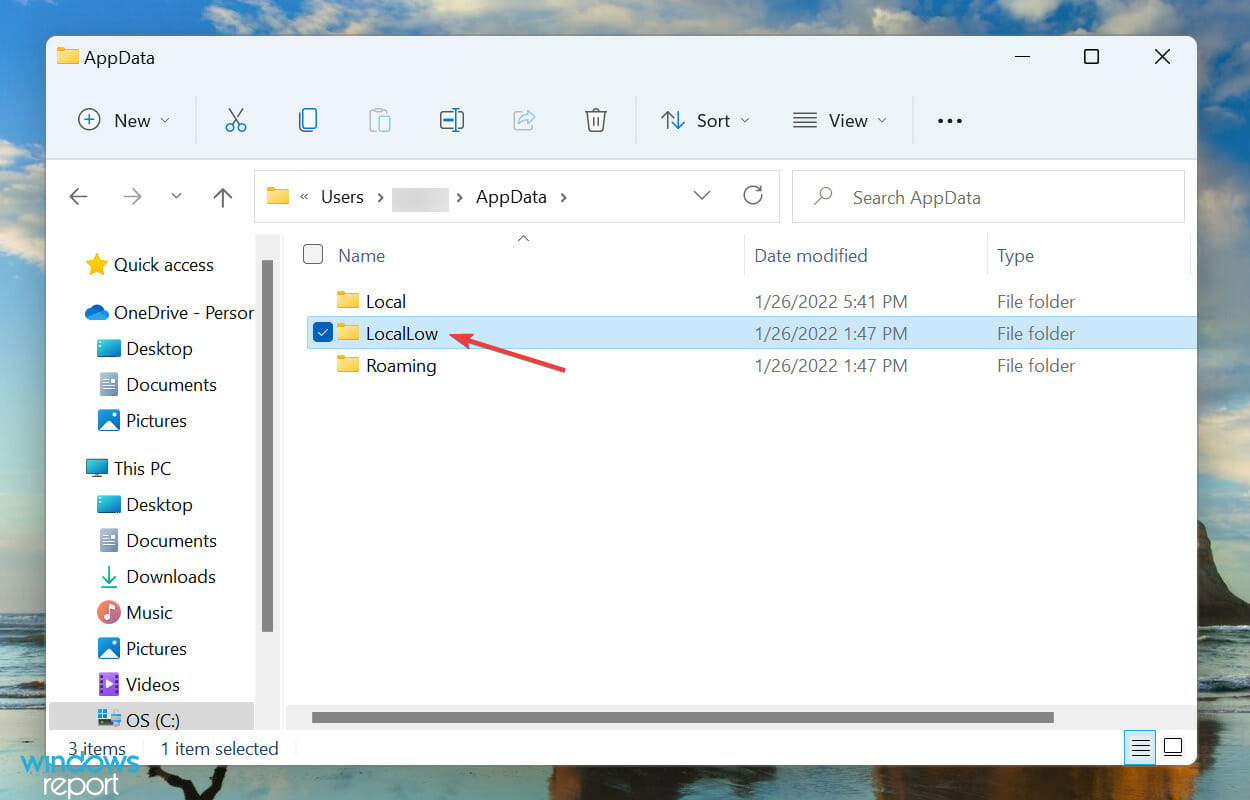
  6. Double-click on LocalLow to view the content of the folder.LocalLow
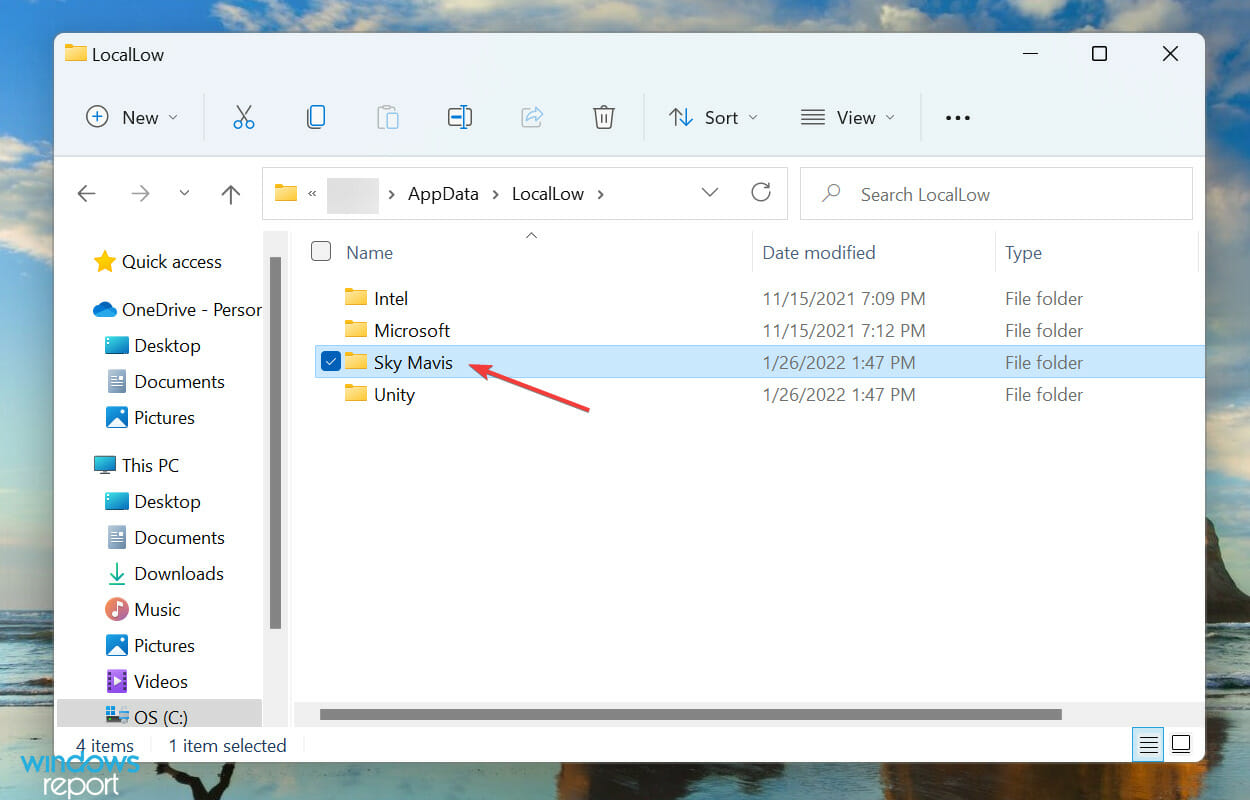
  7. Locate and double-click on Sky Mavis.Sky Mavix to fix axie infinity not working
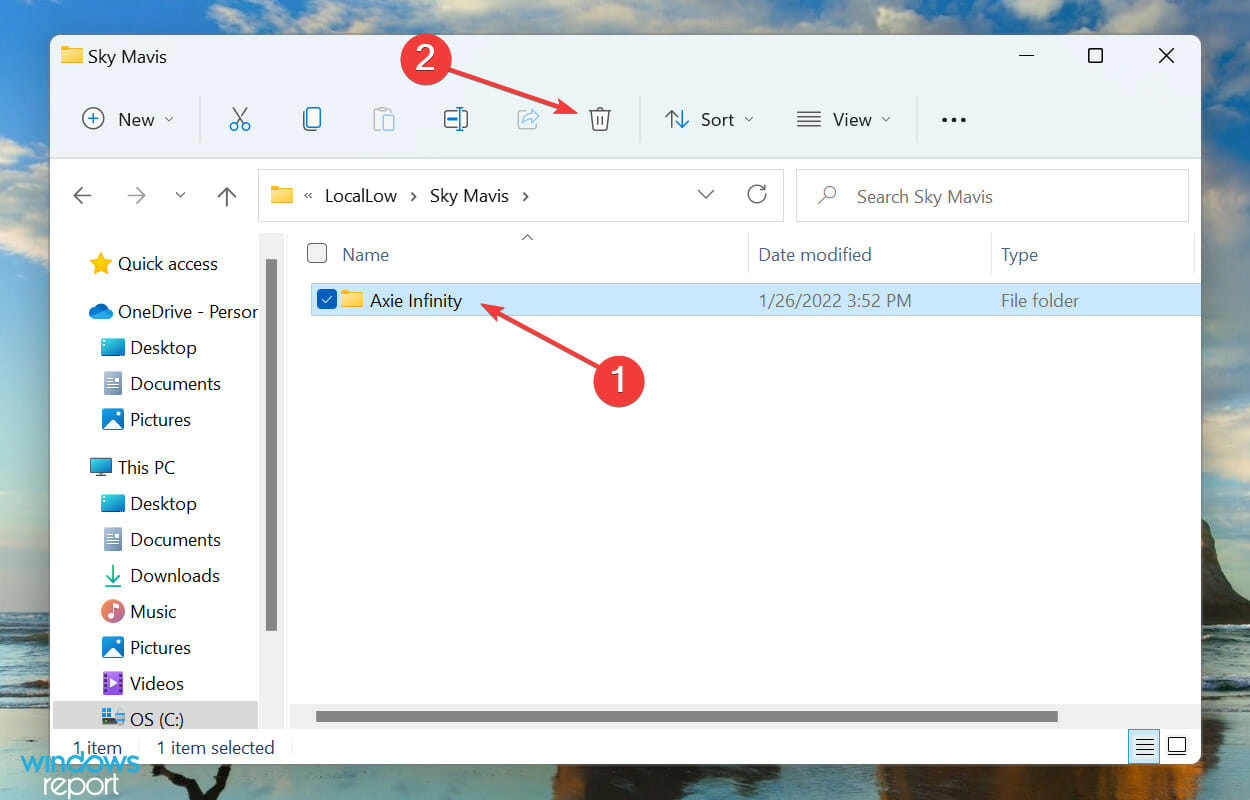
  8. Now, select the Axie Infinity folder, and click on the Delete icon in the command bar at the top. Alternative, you can select the folder and hit the Del key.Delete Axie infinity folder to fix axie infinity not working
  9. Choose the appropriate response in case a confirmation prompt pops up.

2. Re-login to all platforms

  1. Go to the official Axie Infinity marketplace, click your user icon, and select Logout.axie infinity something wrong when get profile
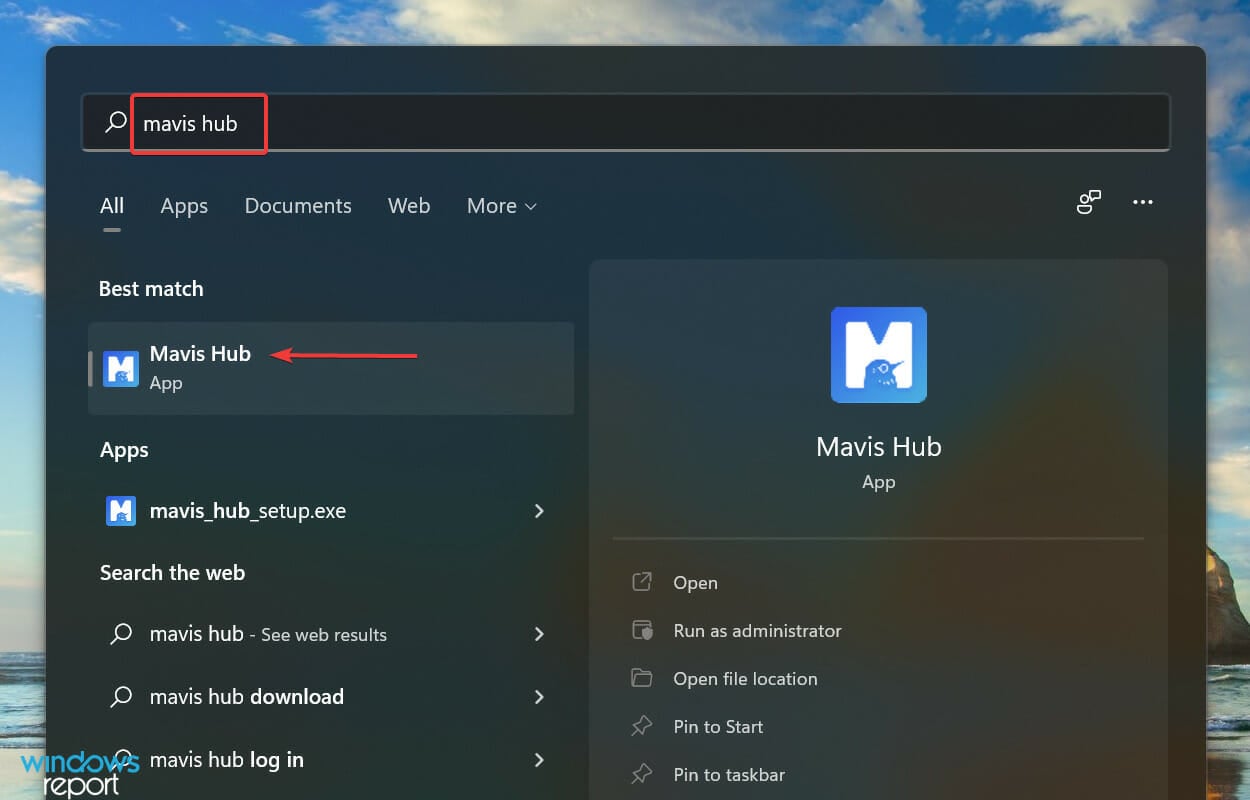
  2. Press Windows + S to launch the Search menu, enter Mavis Hub in the text field at the top, and click on the relevant search result that appears.launch Mavis Hub
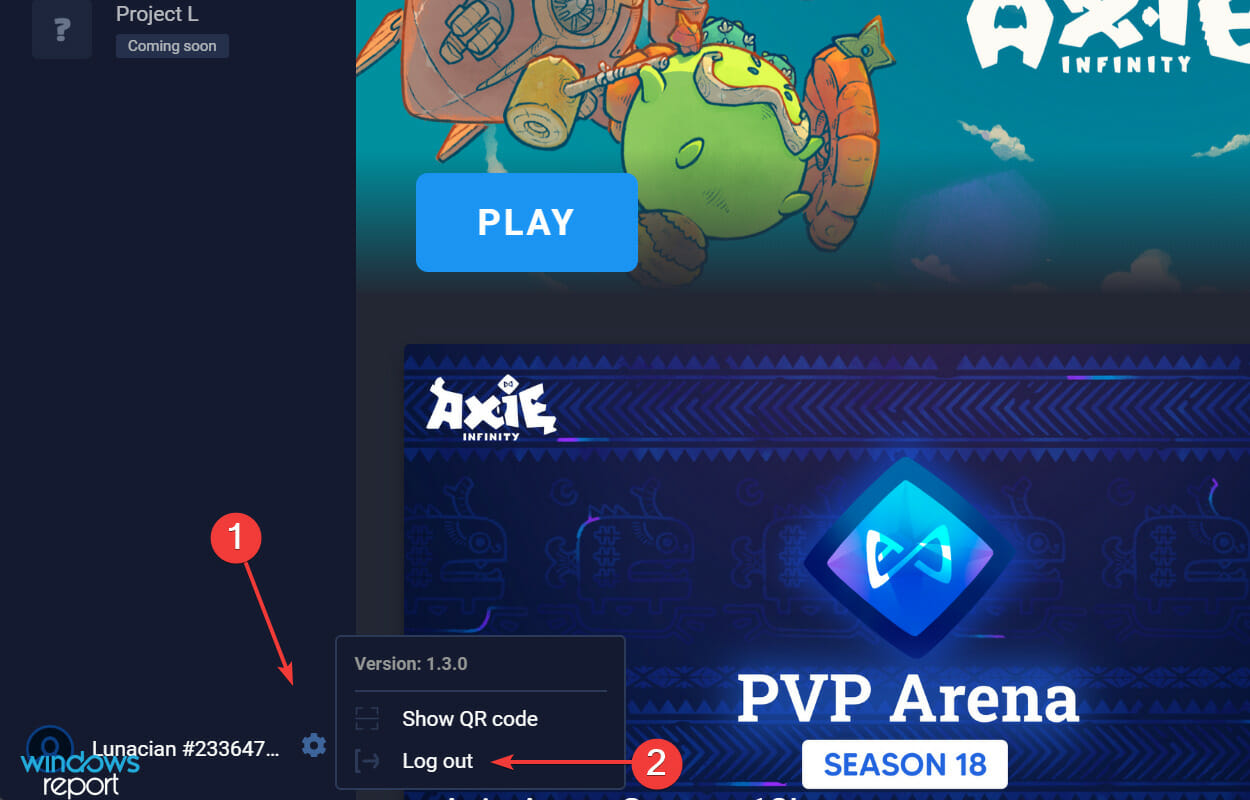
  3. Next, click the Settings (gear) icon near the bottom-left corner and select Logout from the menu.Logout from Mavis Hub to fix axie infinity not working
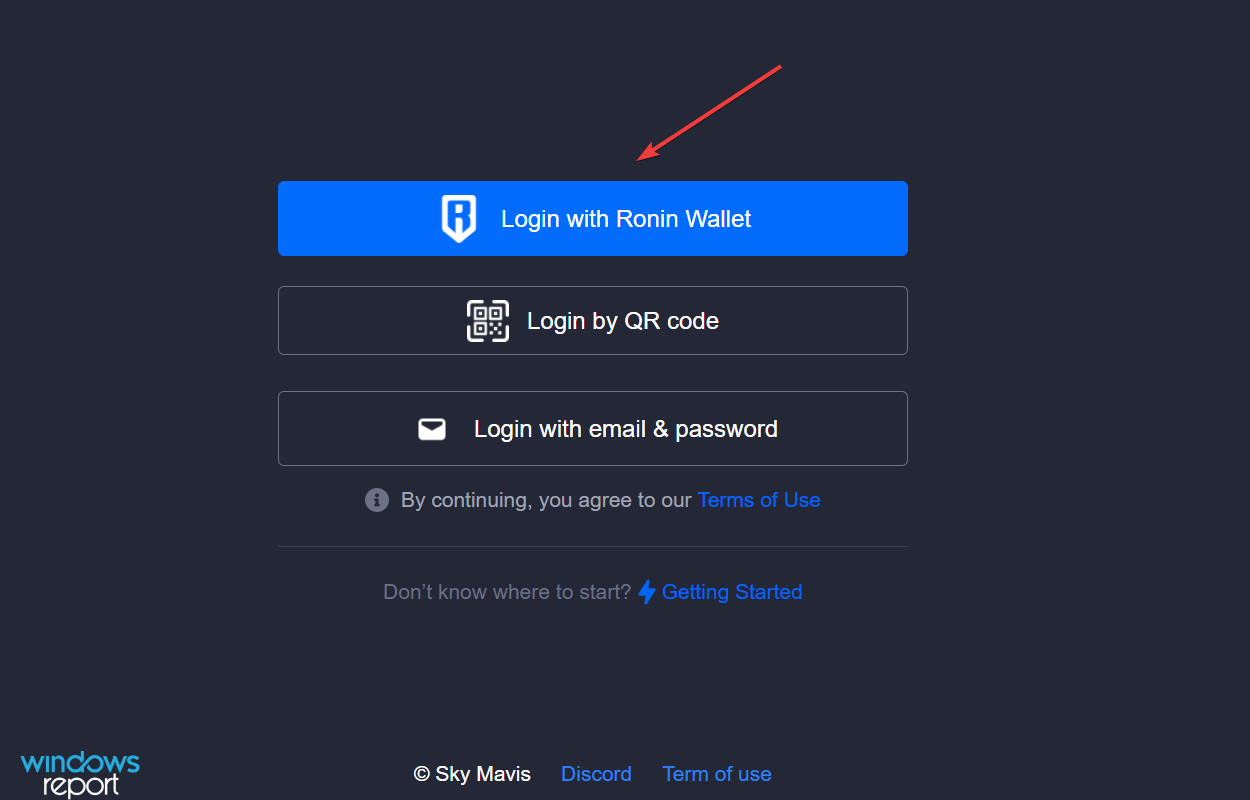
  4. Once you have logged out from both platforms, return to Axie Infinity Marketplace and click on the Login with Ronin Wallet option.Login with Ronin Wallet to fix axie infinity not working
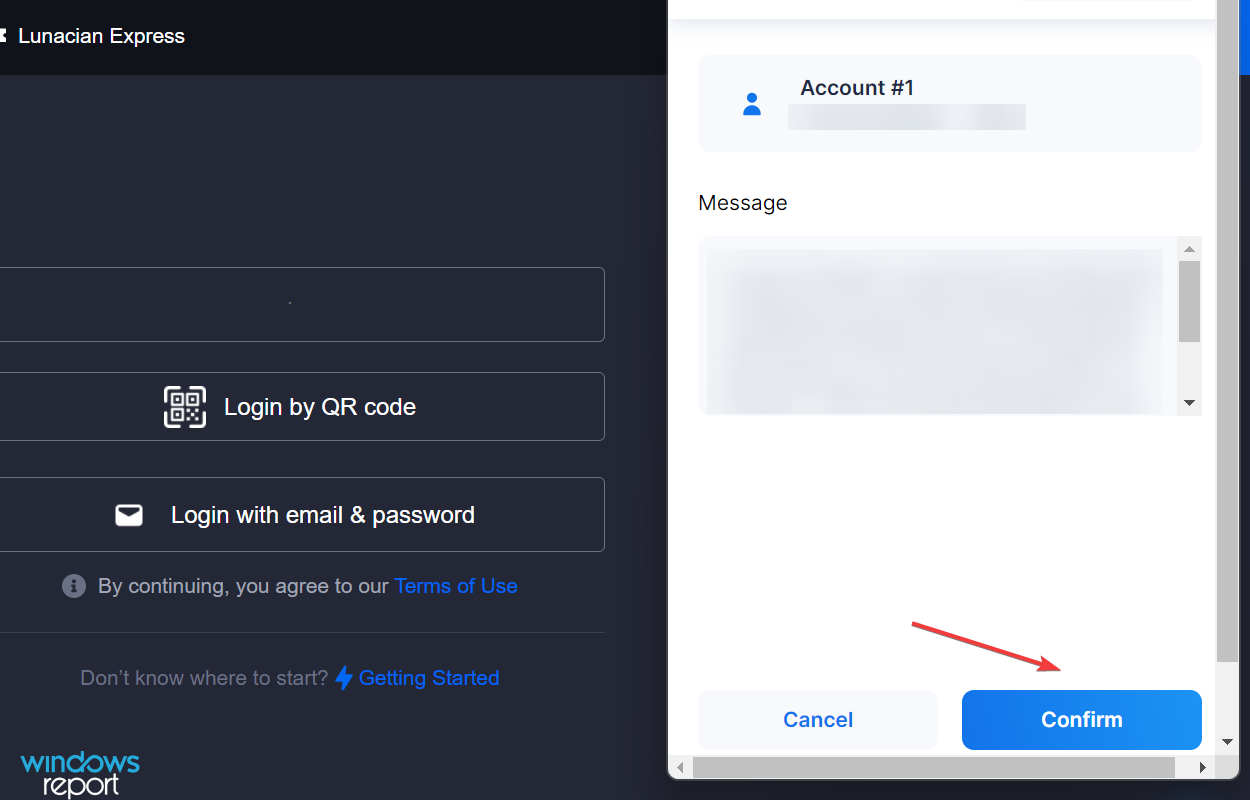
  5. Now, click on Confirm in the box that appears near the right.Confirm Login
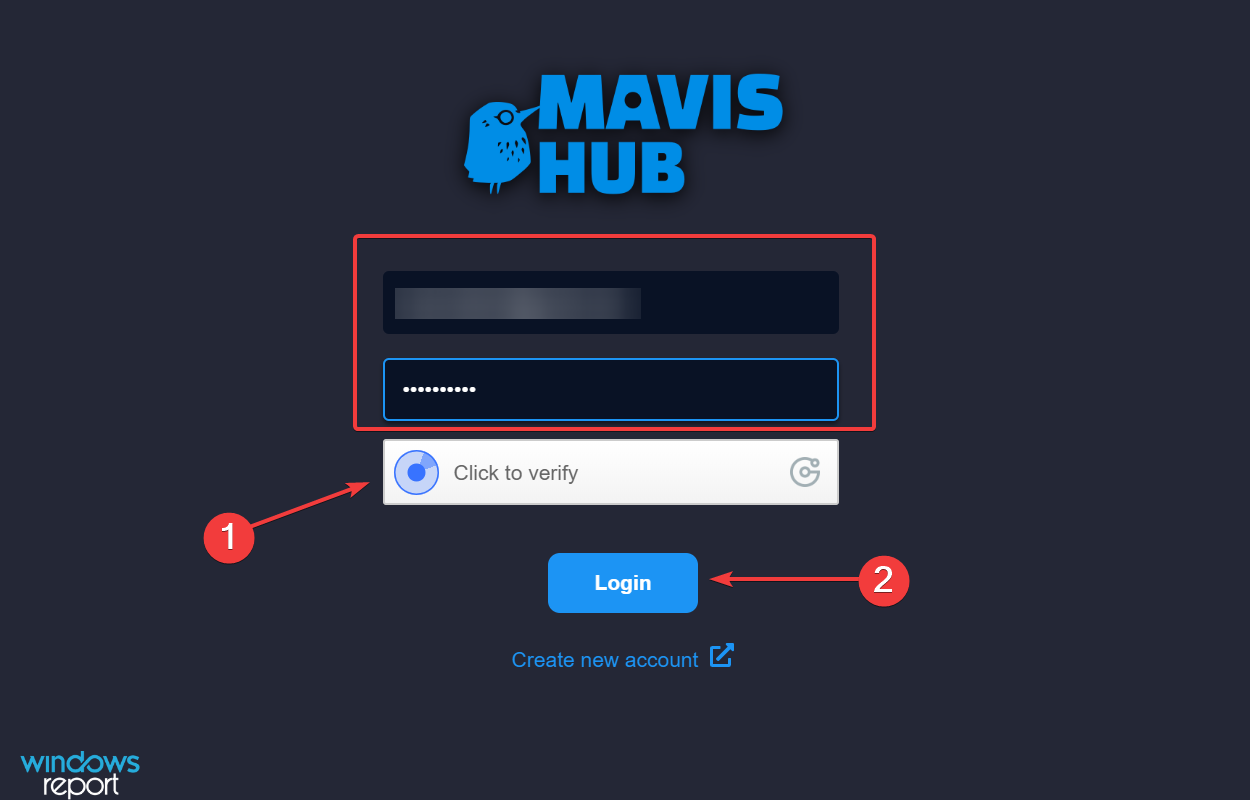
  6. Launch the Mavis Hub app, enter your login credentials, click on Click to verify, and once done with the verification, click on the Login button.Login to mavis hub to fix axie infinity not working
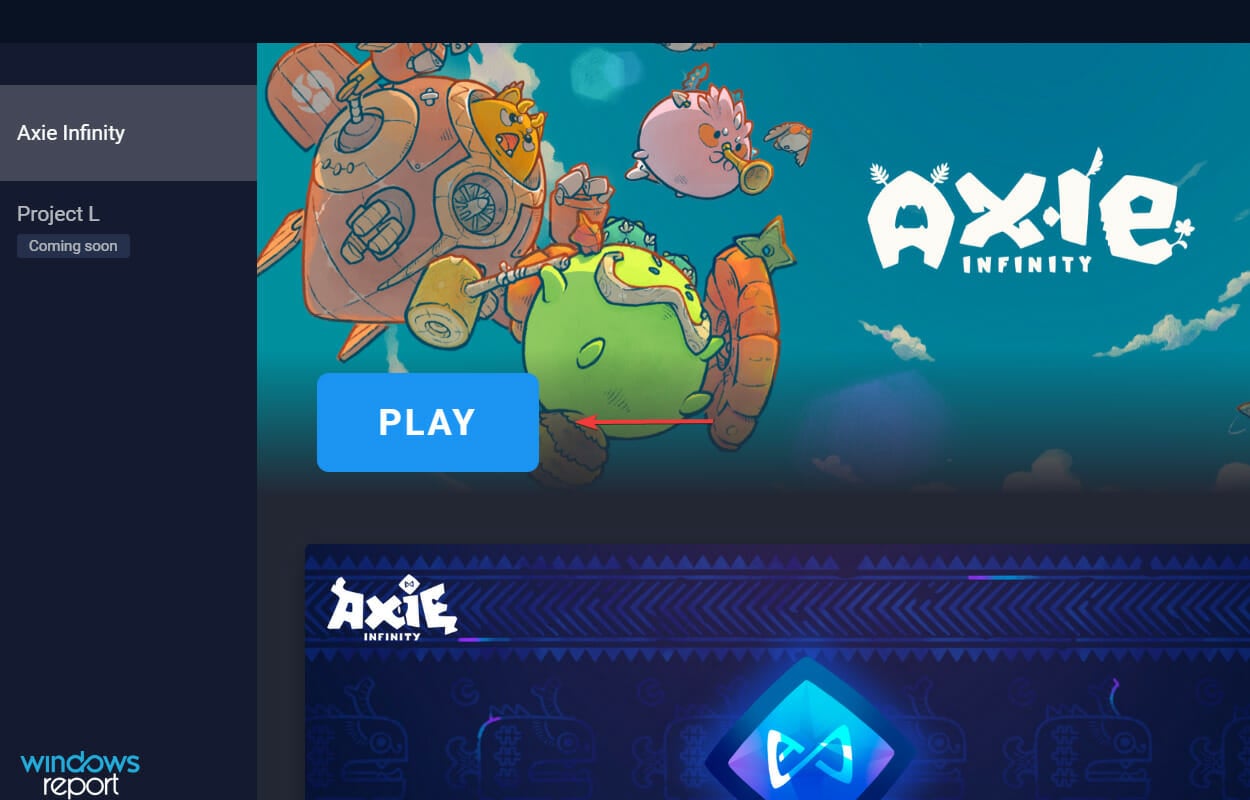
  7. After logging in to both platforms, click the Play button.Play to check if axie infinity not working error is fixed

Often, it’s an issue with the login preventing Axie Infinity from working. Simply logging out and re-logging to both platforms should help fix the problem.

3. Reinstall Axie Infinity

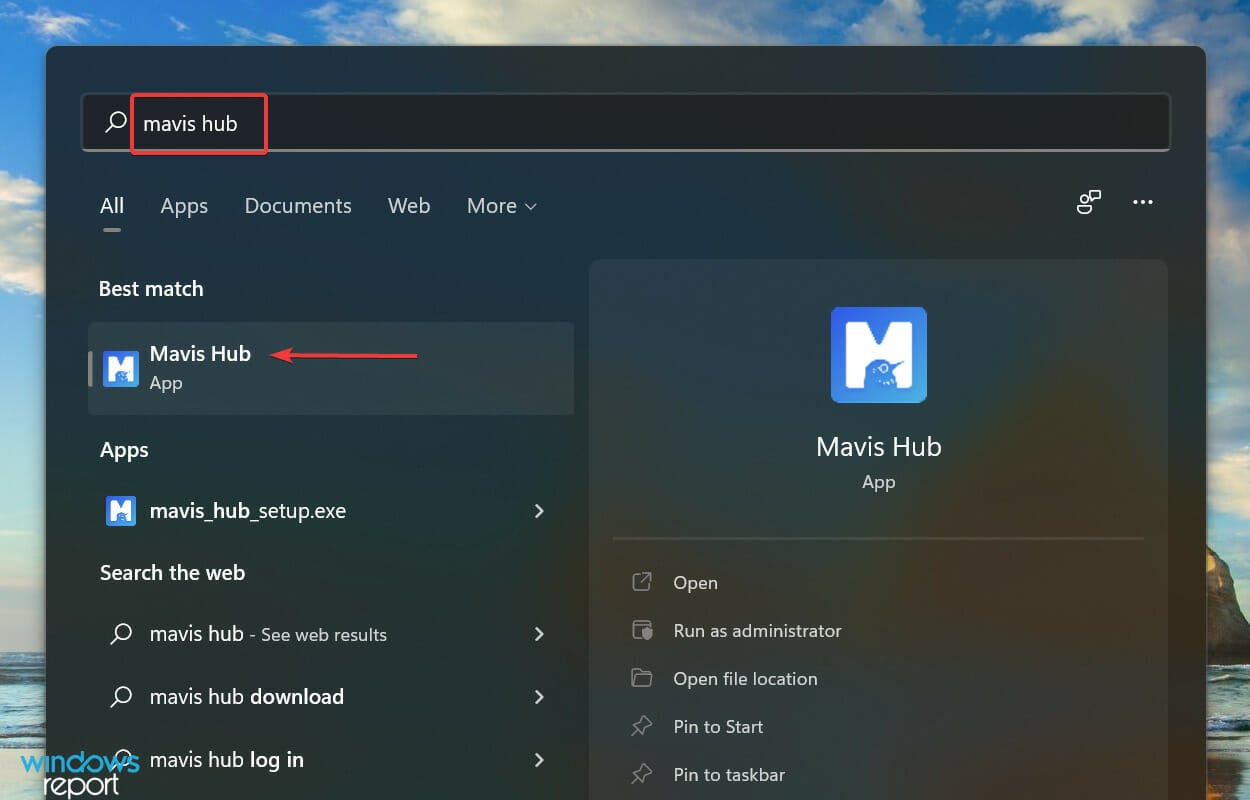
  1. Press Windows + S to launch the Search menu, enter Mavis Hub in the text field, and click on the relevant search result that appears.Mavis Hub
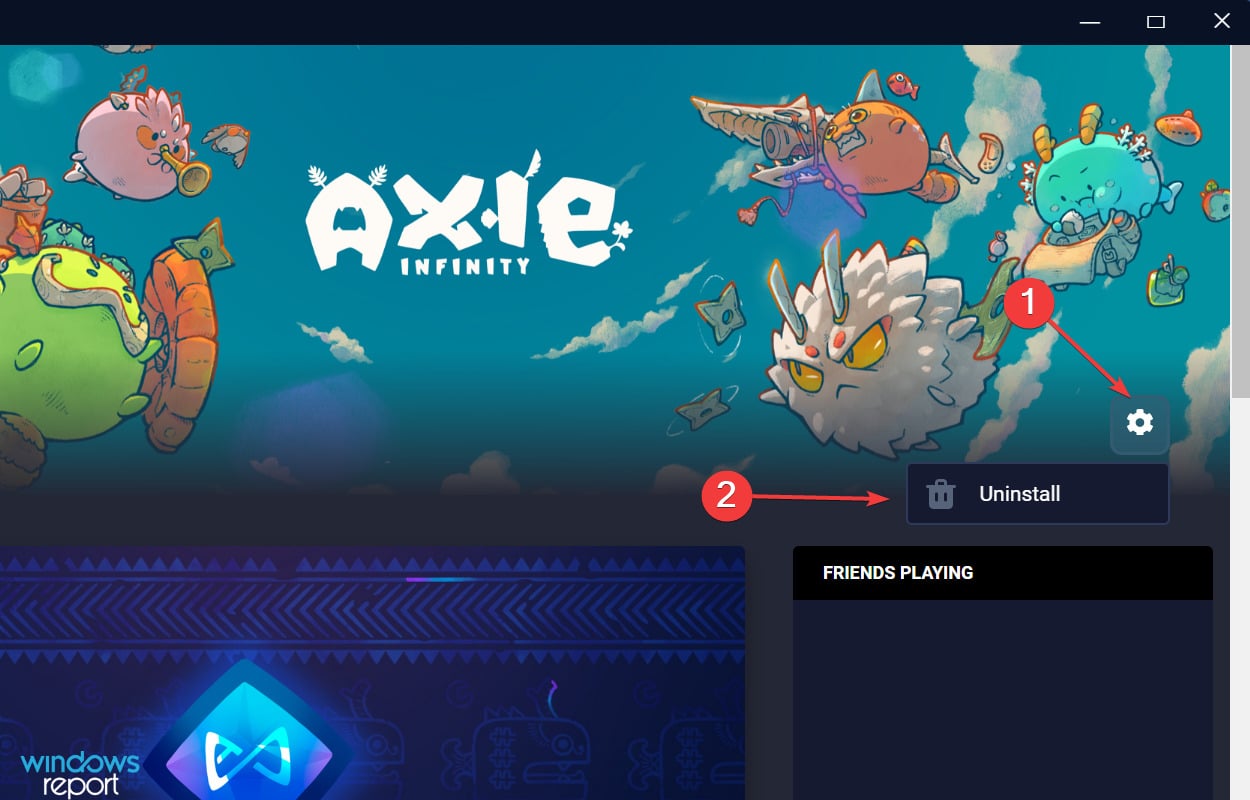
  2. Click on the Settings icon for Axie Infinity and select Uninstall from the menu.Uninstall game to fix axie infinity not working
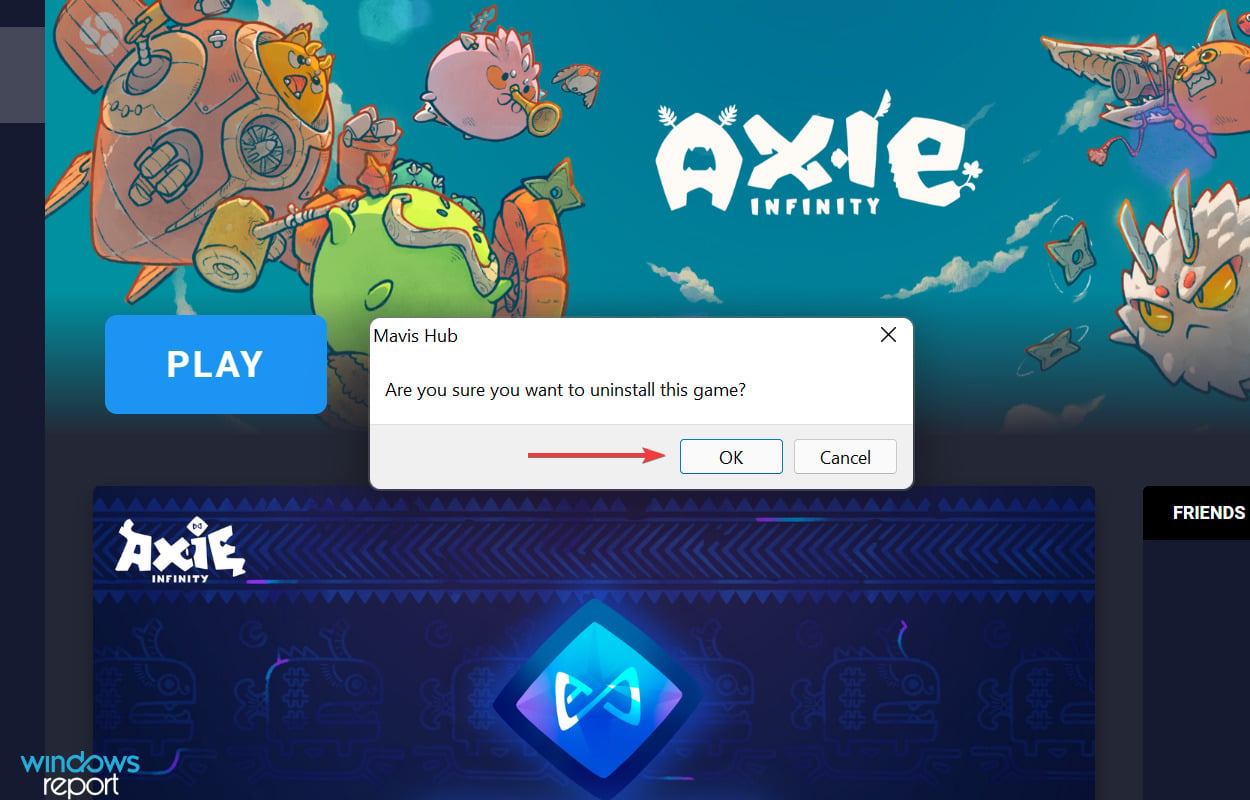
  3. Click on OK in the confirmation prompt that pops up.Confirm Uninstall
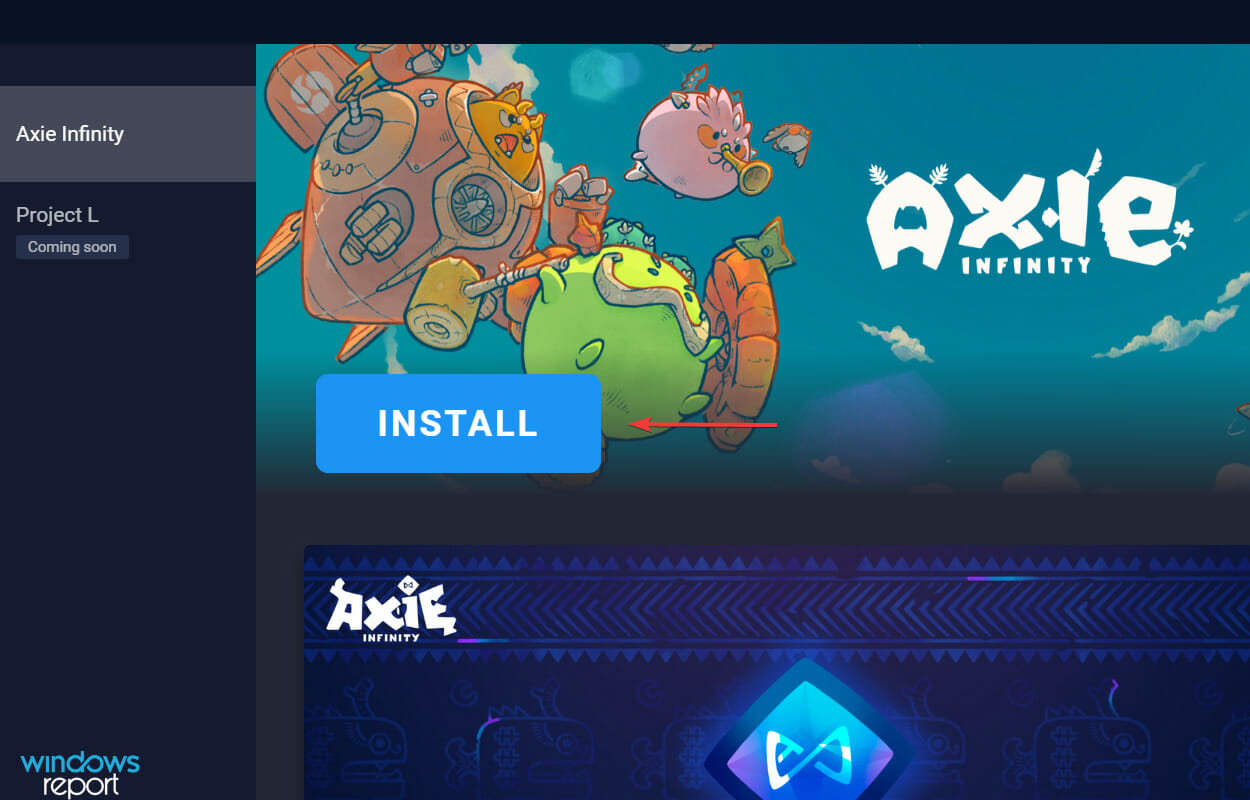
  4. After Axie Infinity is uninstalled, click on Install to reinstall it.Reinstall Axie Infinity to fix axie infinity not working
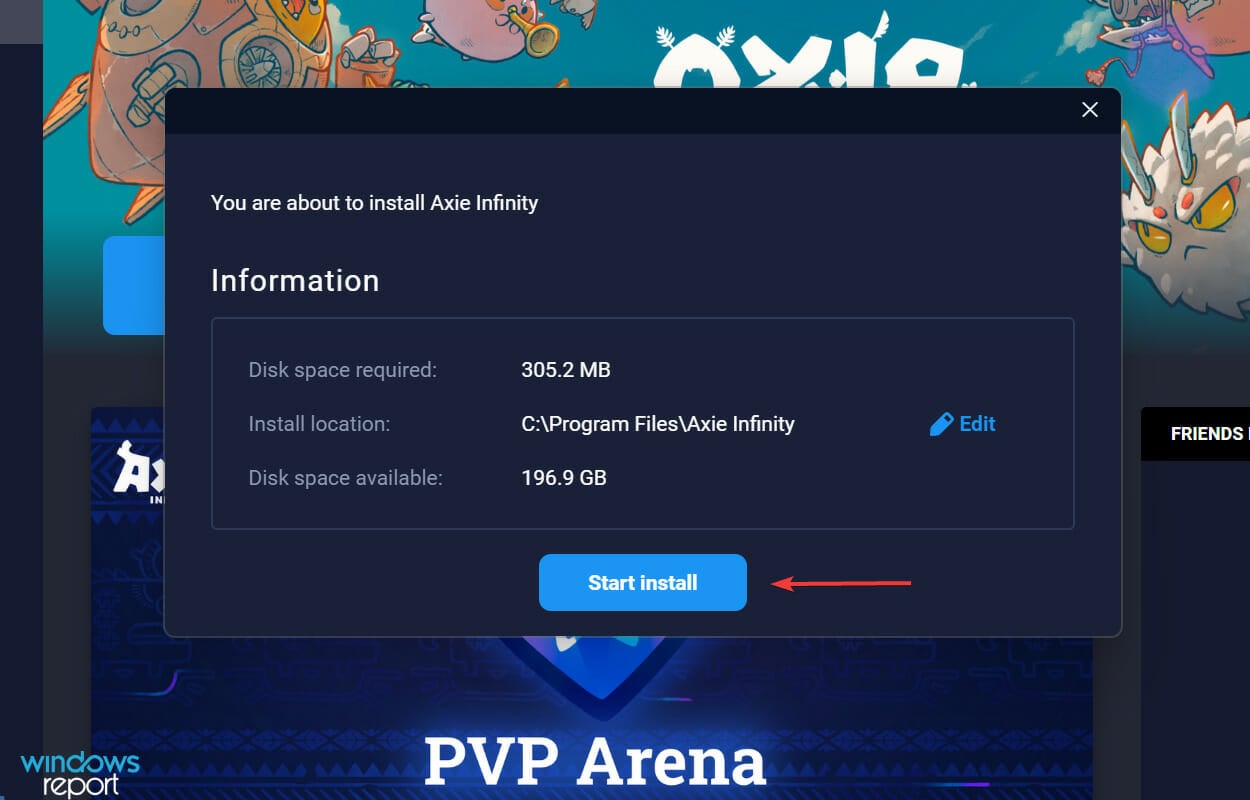
  5. Click the Start Install button to initiate the process.Start Install

If the problem lies with the installation itself, reinstalling the game will fix it. If it was a problematic installation behind the error, you wouldn’t have been able to launch the game after installation the first time or must have encountered the problem in the early days.

But after reinstalling the game, Axie Infinity should now be working fine.

4. Reinstall Mavis Hub

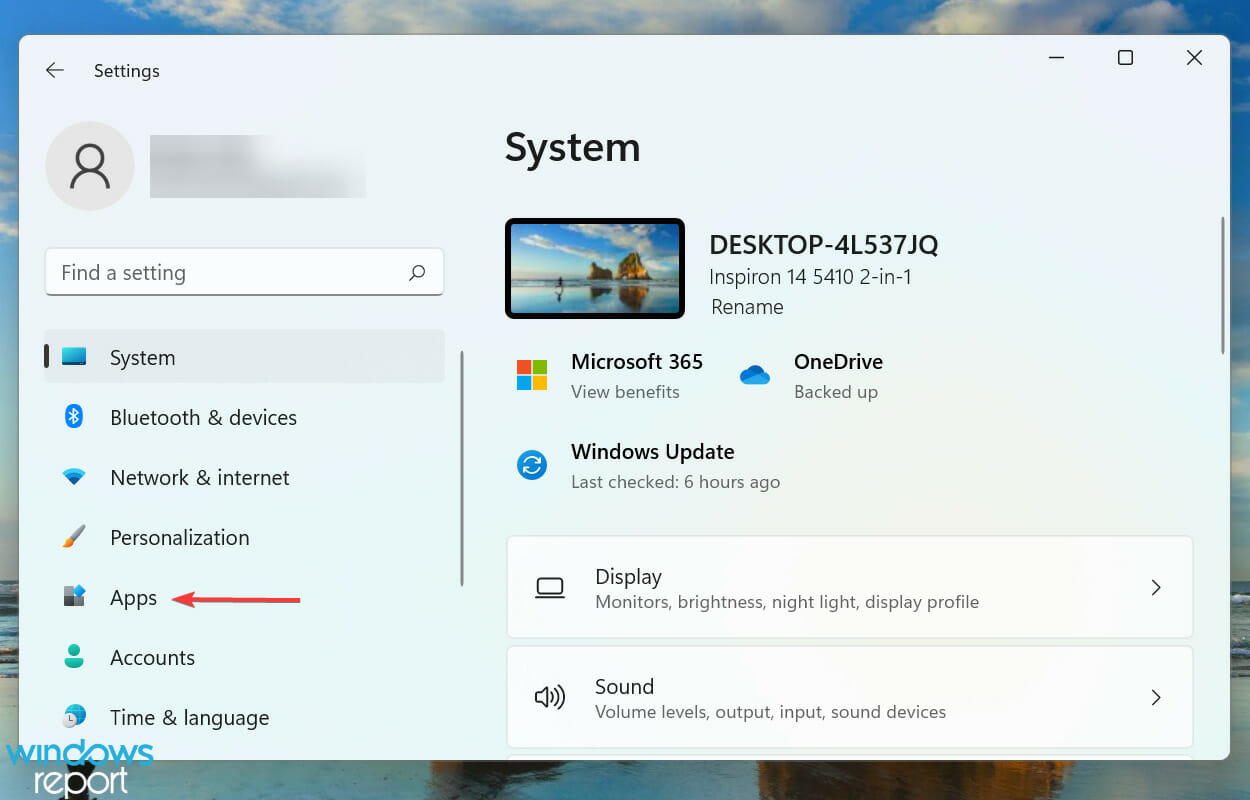
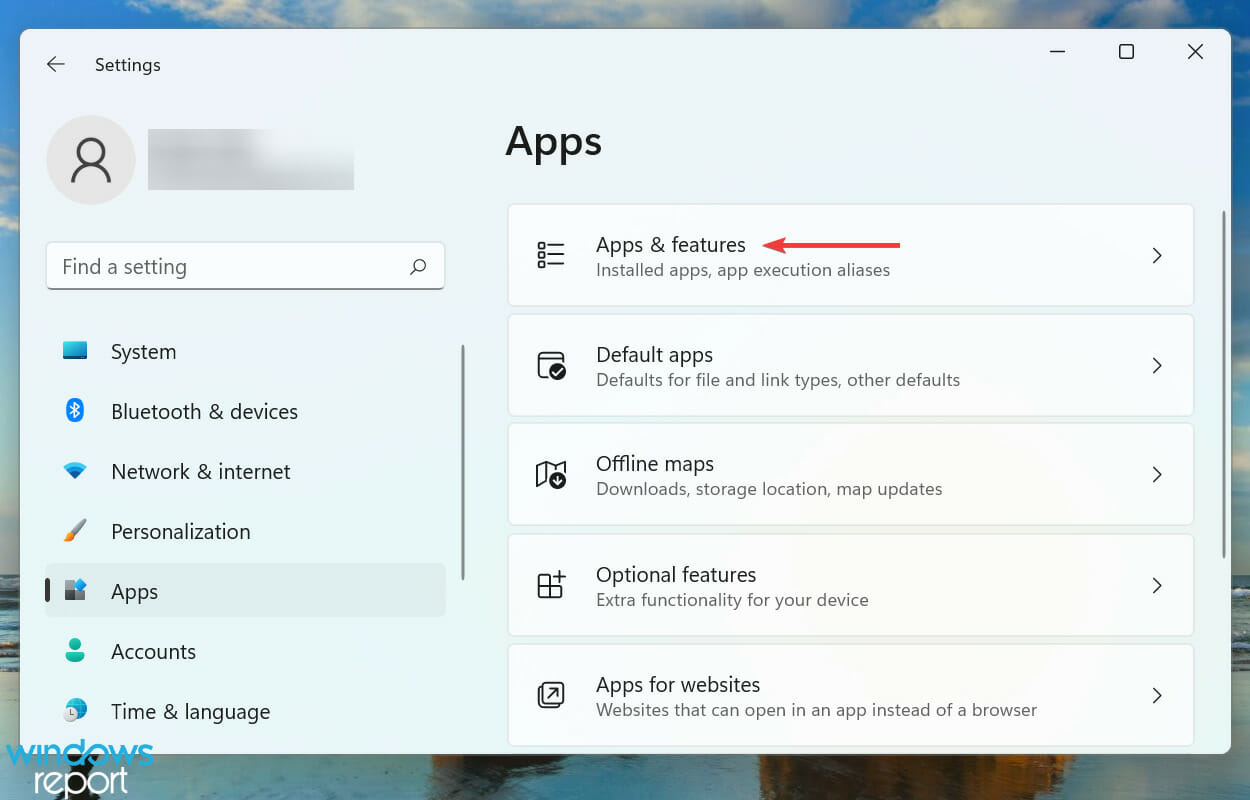
  1. Press Windows + I to launch Settings, and select Apps from the list of tabs in the navigation pane on the left.Apps tab to fix axie infinity not working
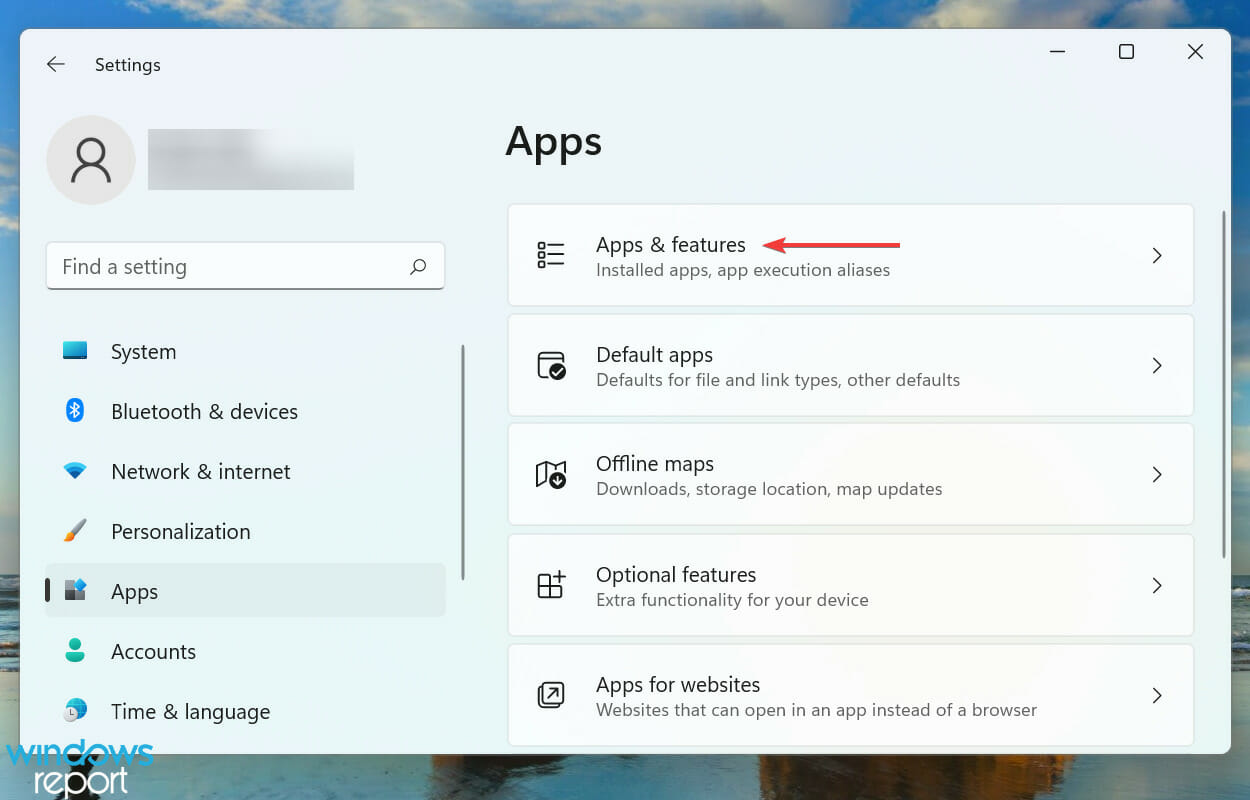
  2. Click on Apps & features on the right.Apps & features
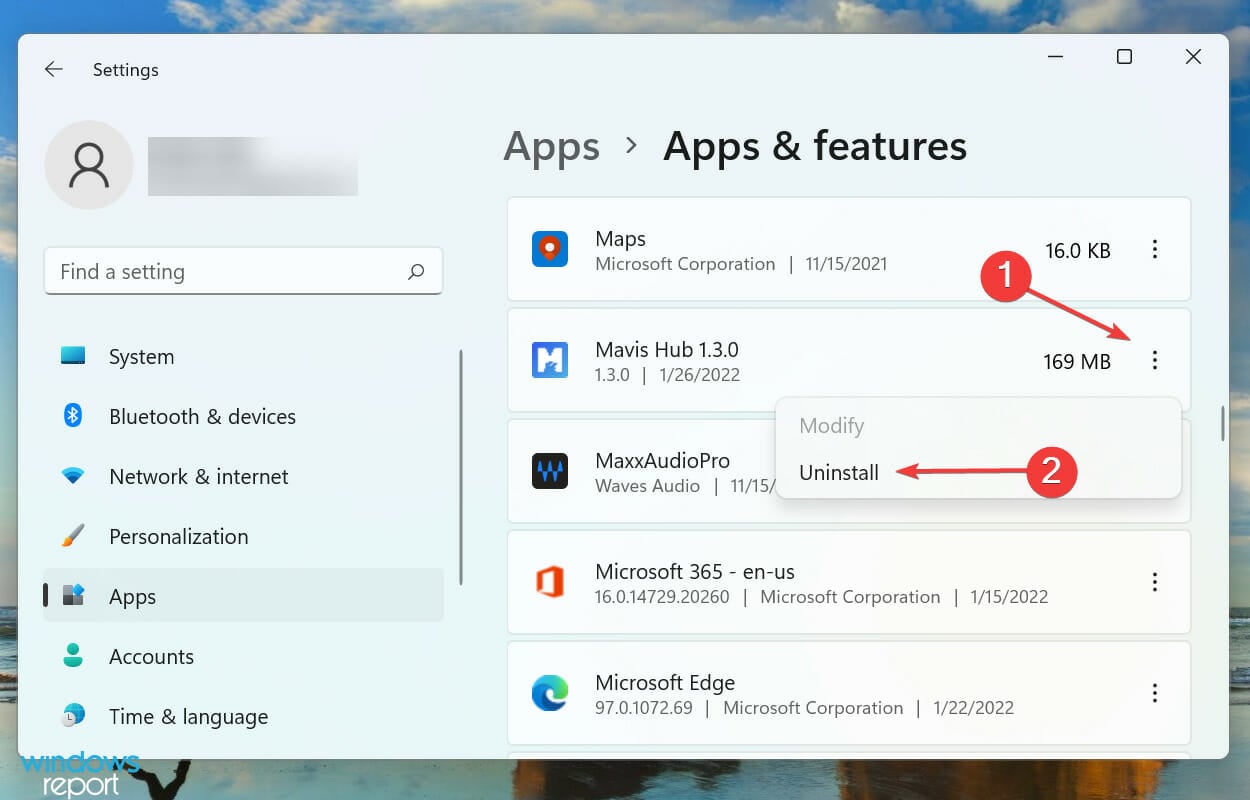
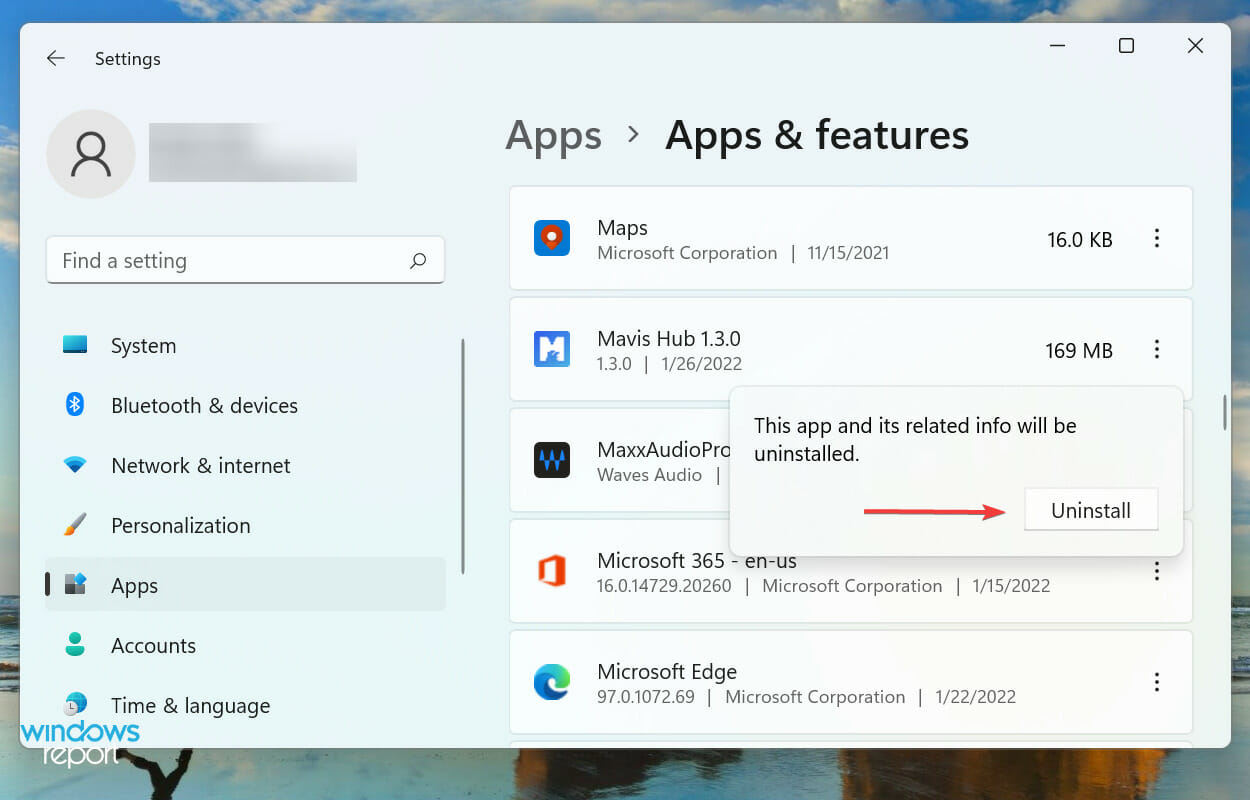
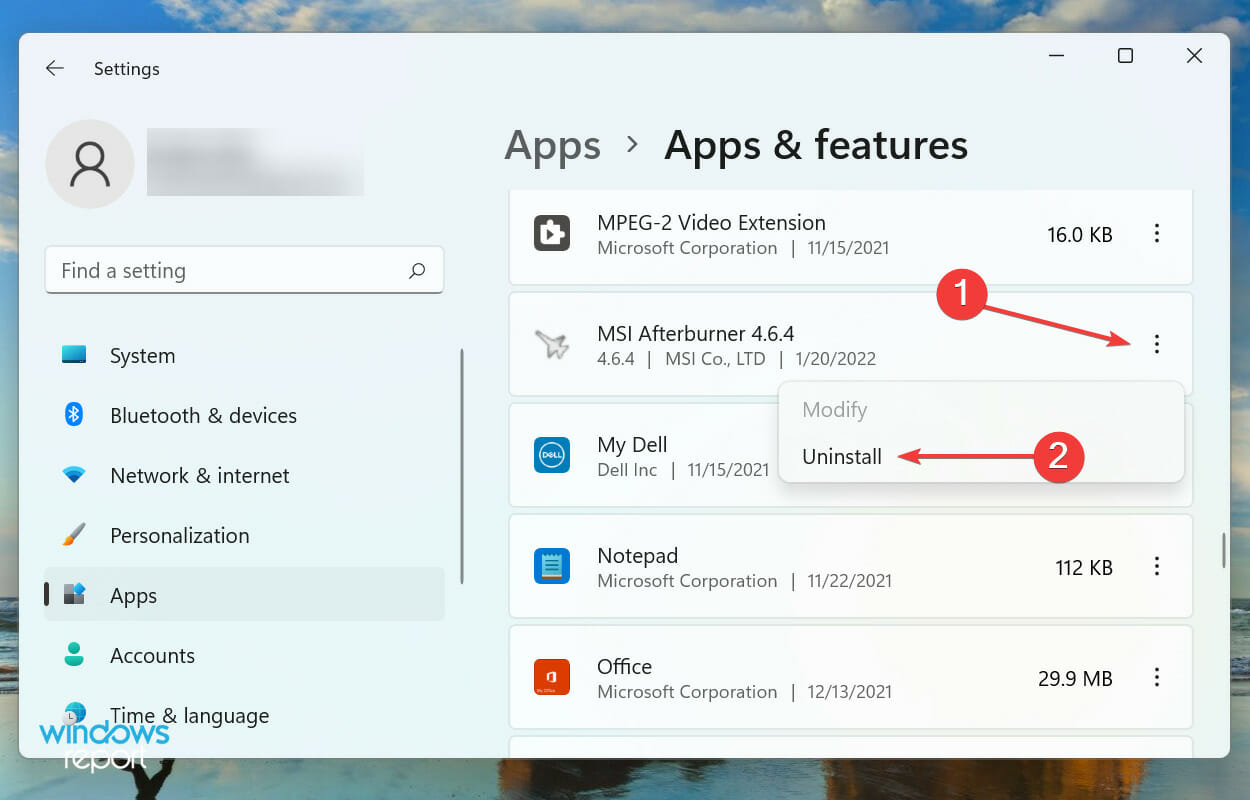
  3. Now, locate the Mavis Hub app, click on the ellipsis next to it, and select Uninstall from the menu.Uninstall Mavis Hub to fix axie infinity not working
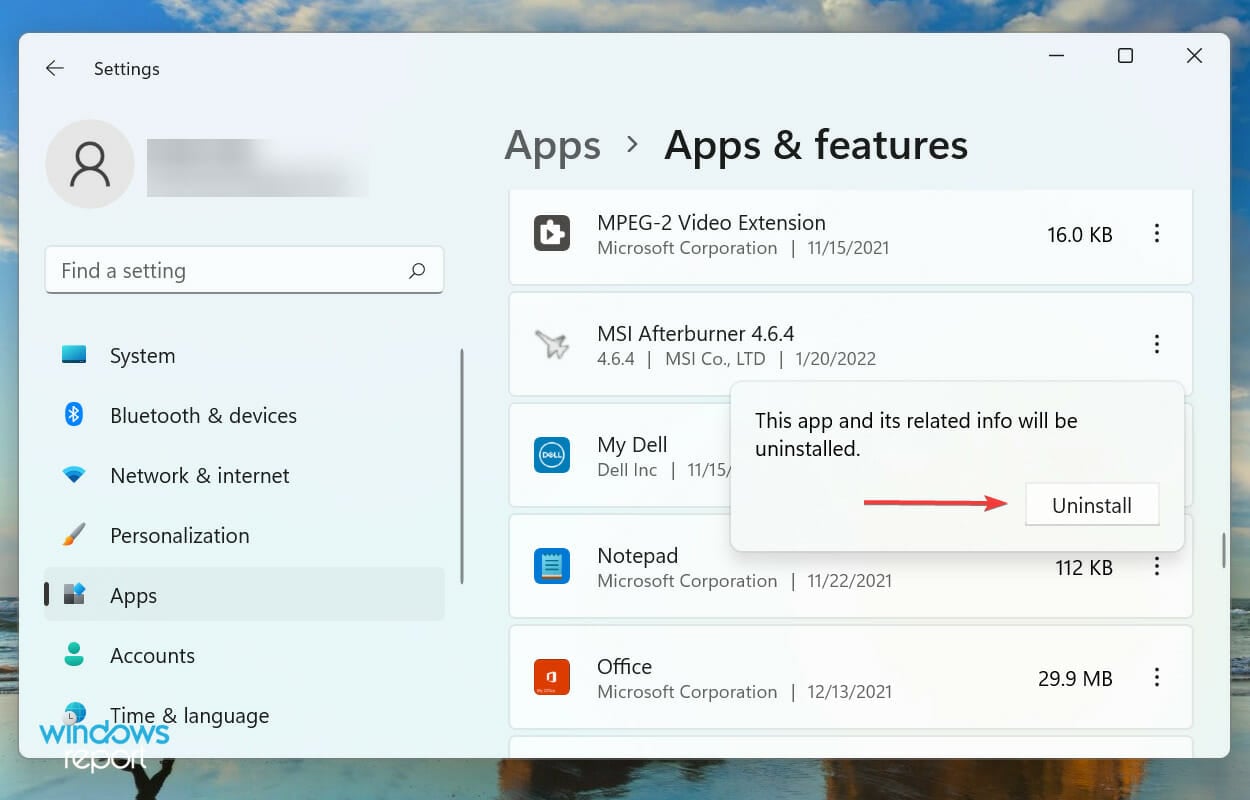
  4. Click Uninstall in the confirmation prompt that pops up.Confirm Uninstall
  5. Now, download the Mavis Hub app from the official website of Axie Infinity.

If nothing else has worked, you are left with no option but to reinstall the Mavis Hub app. Most users were able to eliminate the issues preventing Axie Infinity from working using this fix.

After reinstalling the Mavis Hub app and signing in, Axie Infinity will work fine.

These are all the ways you can fix problems leading to the Axie Infinity not working issue in Windows. If you plan to create your own NFT, check how to choose the best size and resolution. Also, find out the best apps to monitor the live prices of different cryptocurrencies.

Tell us which fix worked and your experience with Axie Infinity in the comments section below.

How to Create a SCR File Format in Windows 10

To display your photos or designs as a screensaver, you have to create an SCR file. Although screensavers don’t serve the same function of preventing burnt images on the screen as they once did, they’re still fun.

In this guide, we’ll tell you all there is to know about the .SCR file format and walk you through the steps to create your personalized screensaver.

How can I create and set up a .scr screensaver on Windows?

1. Setting up via File Explorer

  1. On the home page, click on the magnifying glass icon to bring up the search bar.
  2. Type in screensaver and click the first entry you see.
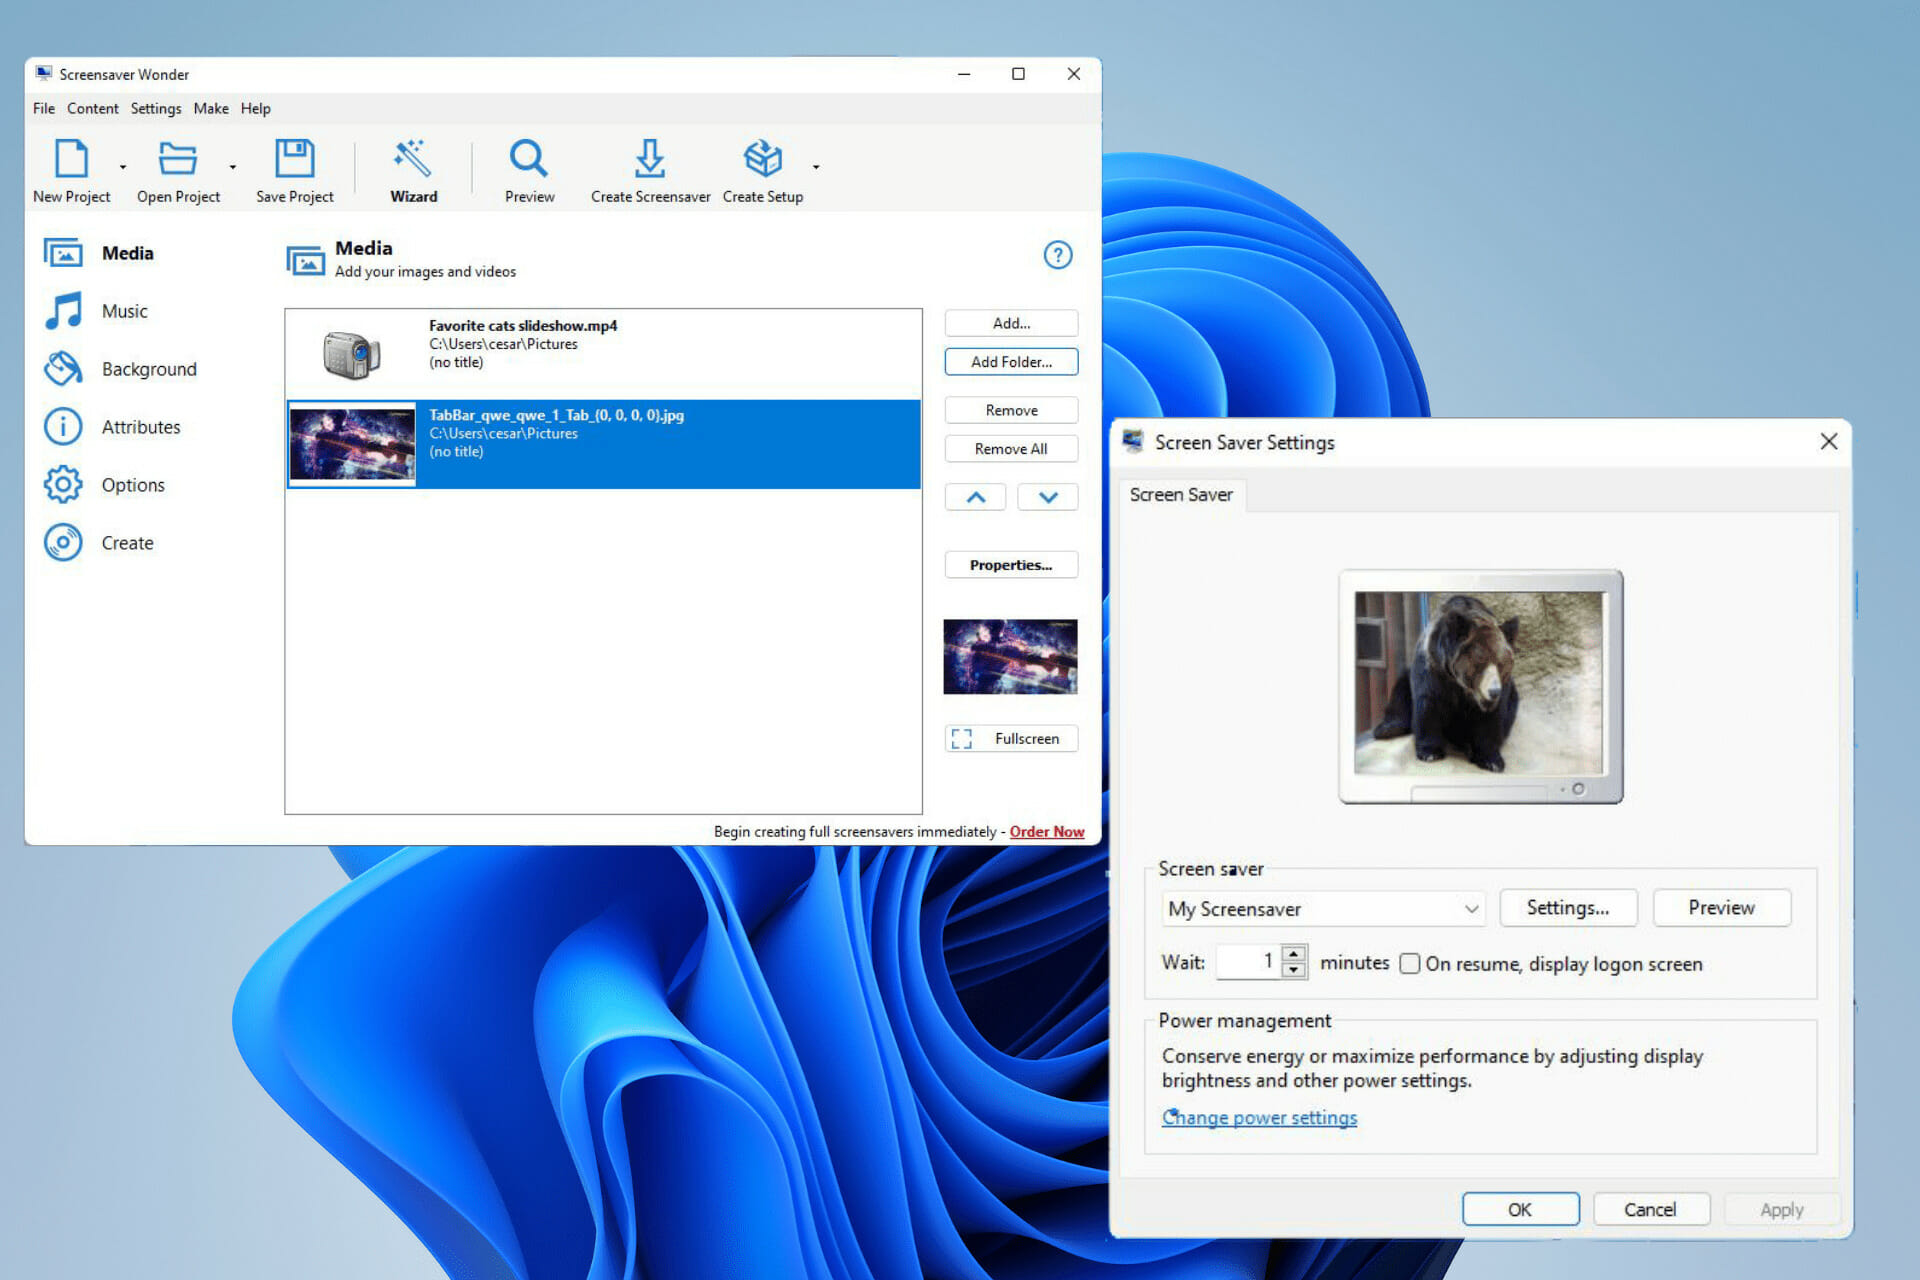
  3. The Screen Saver settings window opens. Click the drop-down menu under Screen saver.
  4. Select one of the default screen saver options available.
  5. Once you’ve made your selection, you can change the screensaver’s configuration by clicking Settings. However, not all options will have settings to alter.
  6. The Photos options does, however. The Settings window allows to choose which Pictures to use, the slide show speed, and the ability to shuffle them.
  7. Use the box next to Wait to set the slideshow delay in minutes.
  8. Check the box next to On resume, display login screen to lock the computer when the screensaver ends.
  9. Click Apply, then OK.
  10. The screensaver begin after the time you specified as long as your computer receives no keyboard or mouse input until that time.

You can learn more about using your pictures with the Photos screen saver in our dedicated guide on setting Photos as your Windows screen saver.

2. Create .scr file with Screensaver Wonder 7

  1. Download Screensaver Wonder 7.
  2. After downloading the file, locate it wherever it was downloaded to.
  3. Double-click to begin installation. A window may appear asking if you want to make changes. Select Yes.
  4. Proceed through the installation wizard.
  5. After installing, the wizard asks you to read some important information. Click Next when done.
  6. Select Finish to open Screensaver Wonder.
  7. In Screensaver Wonder, start by clicking on New Project.
  8. Under the Media tab, you can start by click either the Add… or Add Folder… buttons to the right. This guide will select Add Folder…
  9. A small window will appear where you will select the folder of photos you want to make up your screensaver. Once you’ve selected the Folder, click OK.
  10. Now all the photos in the folder will appear under Media.
  11. If you want add music to your screensaver, select the Music tab.
  12. Click the Add… button on the right-hand side.
  13. Locate the music file you want to add. Click it and then hit Open.
  14. You can preview the track with the button on the right hand side.
  15. In Background, you can change the background color of the slideshow and select the gradient fill. Or you can randomize everything by clicking the buttons on the side.
  16. Attributes allows you to give the Screensaver a title, write down your name, and include your website.
  17. The Preview Image tab gives a preview of the slideshow before it starts, which you can switch out.
  18. Options allows the most in depth customization. The General allows you to choose how the image is positioned and in what order the slideshow comes out in.
  19. Image Effects allows you to configure which transition effects you want in the slideshow and how fast you want them.
  20. Image Adjustments optimize the image size to fit the screen.
  21. Behavior configures the exit conditions, how the screensaver ends. You can select which ones work or don’t.
  22. Once you’re done configuring, select Create on the left hand side.
  23. You can preview the screensaver by selecting Preview Screensaver.
  24. The screensaver previews as you intended to. View it and make any changes as you see fit.
  25. Then click Create Screensaver.
  26. Give the screensaver a name.
  27. Immediately after creating the screensaver, the window for the Screen Saver Settings appears.
  28. Click on the Settings button and you can make many of the same changes found in Screensaver Wonder 7.
  29. After making changes, click Apply then OK.
  30. After a brief moment, the screensaver that you created will appear.

Wrapping up

With the steps above you should be able to create a screensaver on your Windows PC. Keep in mind that some savers require Flash Player, or they won’t work.

You can also create a 3D screensaver using dedicated software. Adding the QT TabBar app is also a nice idea, as it enables multiple tabs to be used on the File Explorer.

Feel free to leave a comment below if you have any questions on other Windows 11 apps. Also, leave comments about other guides that you’d like to see or information on other Windows 11 features.

8 Best Blu-ray Players for Windows 11

A Blu-ray Disc is a high storage disc that plays movies in 1080p and 4K resolutions. Dual-layer Blu-ray Disc storage amounts to 50 GB of data compared with a DVD’s 8.7 GB data.

As such, Blu-ray discs provide better quality video and audio playback than DVDs. Furthermore, they can also include more additional bonus content on their menus.

To play Blu-ray Discs on your Windows desktop or laptop, you’ll need a Blu-ray optical drive (unless you’ve ripped content from the disc). You’ll also need Blu-ray media player software that fully supports the disc format.

Why do we need Blu-ray player software?

Blu-ray players are software tools designed to play Blu-ray movies when you insert them into an optical drive.

They directly support the Blu-ray format and include all the playback options you’ll need for watching videos.

Therefore, it’s not enough to have the physical drive on our PC but it’s more important to have the software to play them.

In fact, as we mentioned above, you don’t even need a BD drive to do that if you downloaded or ripped the video from an existing disc beforehand.

With this information in mind, here are some of the best Blu-ray players for Windows 10 to play your movies with.

What are the best Blu-ray players for Windows 10?

PowerDVD 21 – Enhancing lighting and optimizing color

CyberLink’s website boasts that PowerDVD 21 is the world’s No. 1 movie & media player, and the publisher’s marketing hype doesn’t lack substance.

PowerDVD 21 clearly is one of the world’s best Blu-ray players at least as it supports both 4K Ultra HD and Full HD Blu-ray Disc. 

The latest version enables users to play Blu-ray movies at full screen on wide-screen TVs on a 21:9 aspect ratio.

Furthermore, the software’s TrueTheater enhancement tech further boosts Blue-ray and HD playback quality by enhancing lighting and optimizing color.

PowerDVD 21 also supports the latest Dolby and DTS sound formats that provide cinematic audio quality.

Aside from its stellar Blu-ray playback, PowerDVD 21 includes a great feature set. PowerDVD 21 users can cast videos to their TVs with the Roku, Apple TV, Chromecast, and Amazon FireTV digital media players.

The software supports VR and 360-degree content, and it includes a unique VR mode for the HTV Vive and Oculus Rift headsets.

PowerDVD is also one of the best media players for watching online video as its users can play HDR, 360 degrees, Full HD, and 4K YouTube videos and pin them to watch offline.

With a media library thrown in for good measure, PowerDVD 21 pretty much includes everything you’ll require from a media player.

Here are some of the perks of using PowerDVD 21:

  • You can link it to your home network to cast videos on any device
  • The best media center and video player in the world
  • Comes in multiple price plans, base don your needs
  • Can support all video file formats used
PowerDVD 21

PowerDVD 21

Play your Blu-ray discs in an unparalleled manner using an app as a movie player or media center bundled up into one.
Free trial Visit website

GOM Player – Intuitive interface

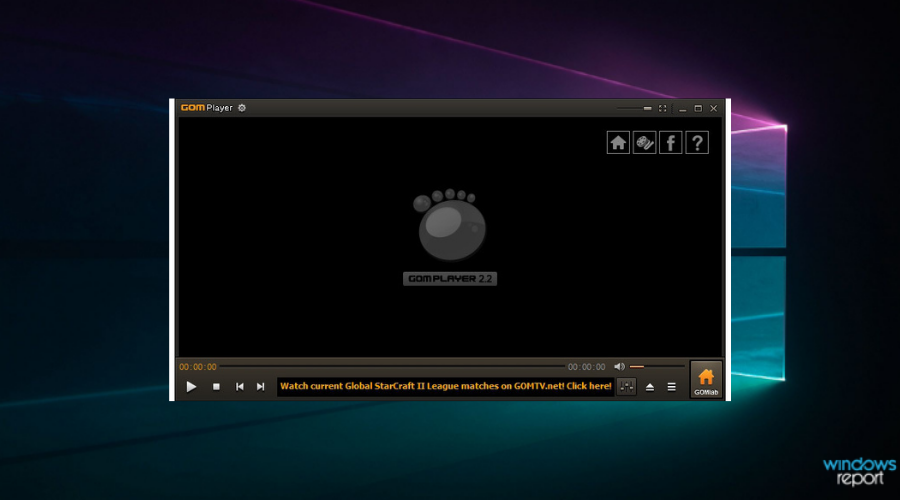
The second entry on our list is a very popular media player among users, most probably because it also comes in a free variant that pretty much anyone can use without any kind of restriction.

GOM Player is also popular because it has a very intuitive and familiar interface, and anyone that ever used another video player can easily work around this one as well.

It is very versatile in terms of what formats it can support, and it even comes with a built-in subtitle library, so anyone anywhere can enjoy any movie.

As far as resources are concerned, GOM Player is extremely lightweight, even when playing formats, you’d expect to be very taxing, in this case being Blu-ray disks.

In addition, this software provides a 360-degree video experience to catch all the details and upgrade your photos. But there is more, you can benefit from immersive features with 360° VR playback.

If you consider this option, you should also check out the Pro version to enjoy high-end services like no ad playback environment or 4K movies without buffering.

Here are some of the perks of using GOM Player:

  • Has no issue with Blu-ray disk video playback
  • Can handle most video formats
  • Lightweight and very portable
  • Comes in a free form as well
  • Intuitive interface
GOM Player

GOM Player

Enjoy an amazing video playback experience with Blu-ray videos using this amazing video player.

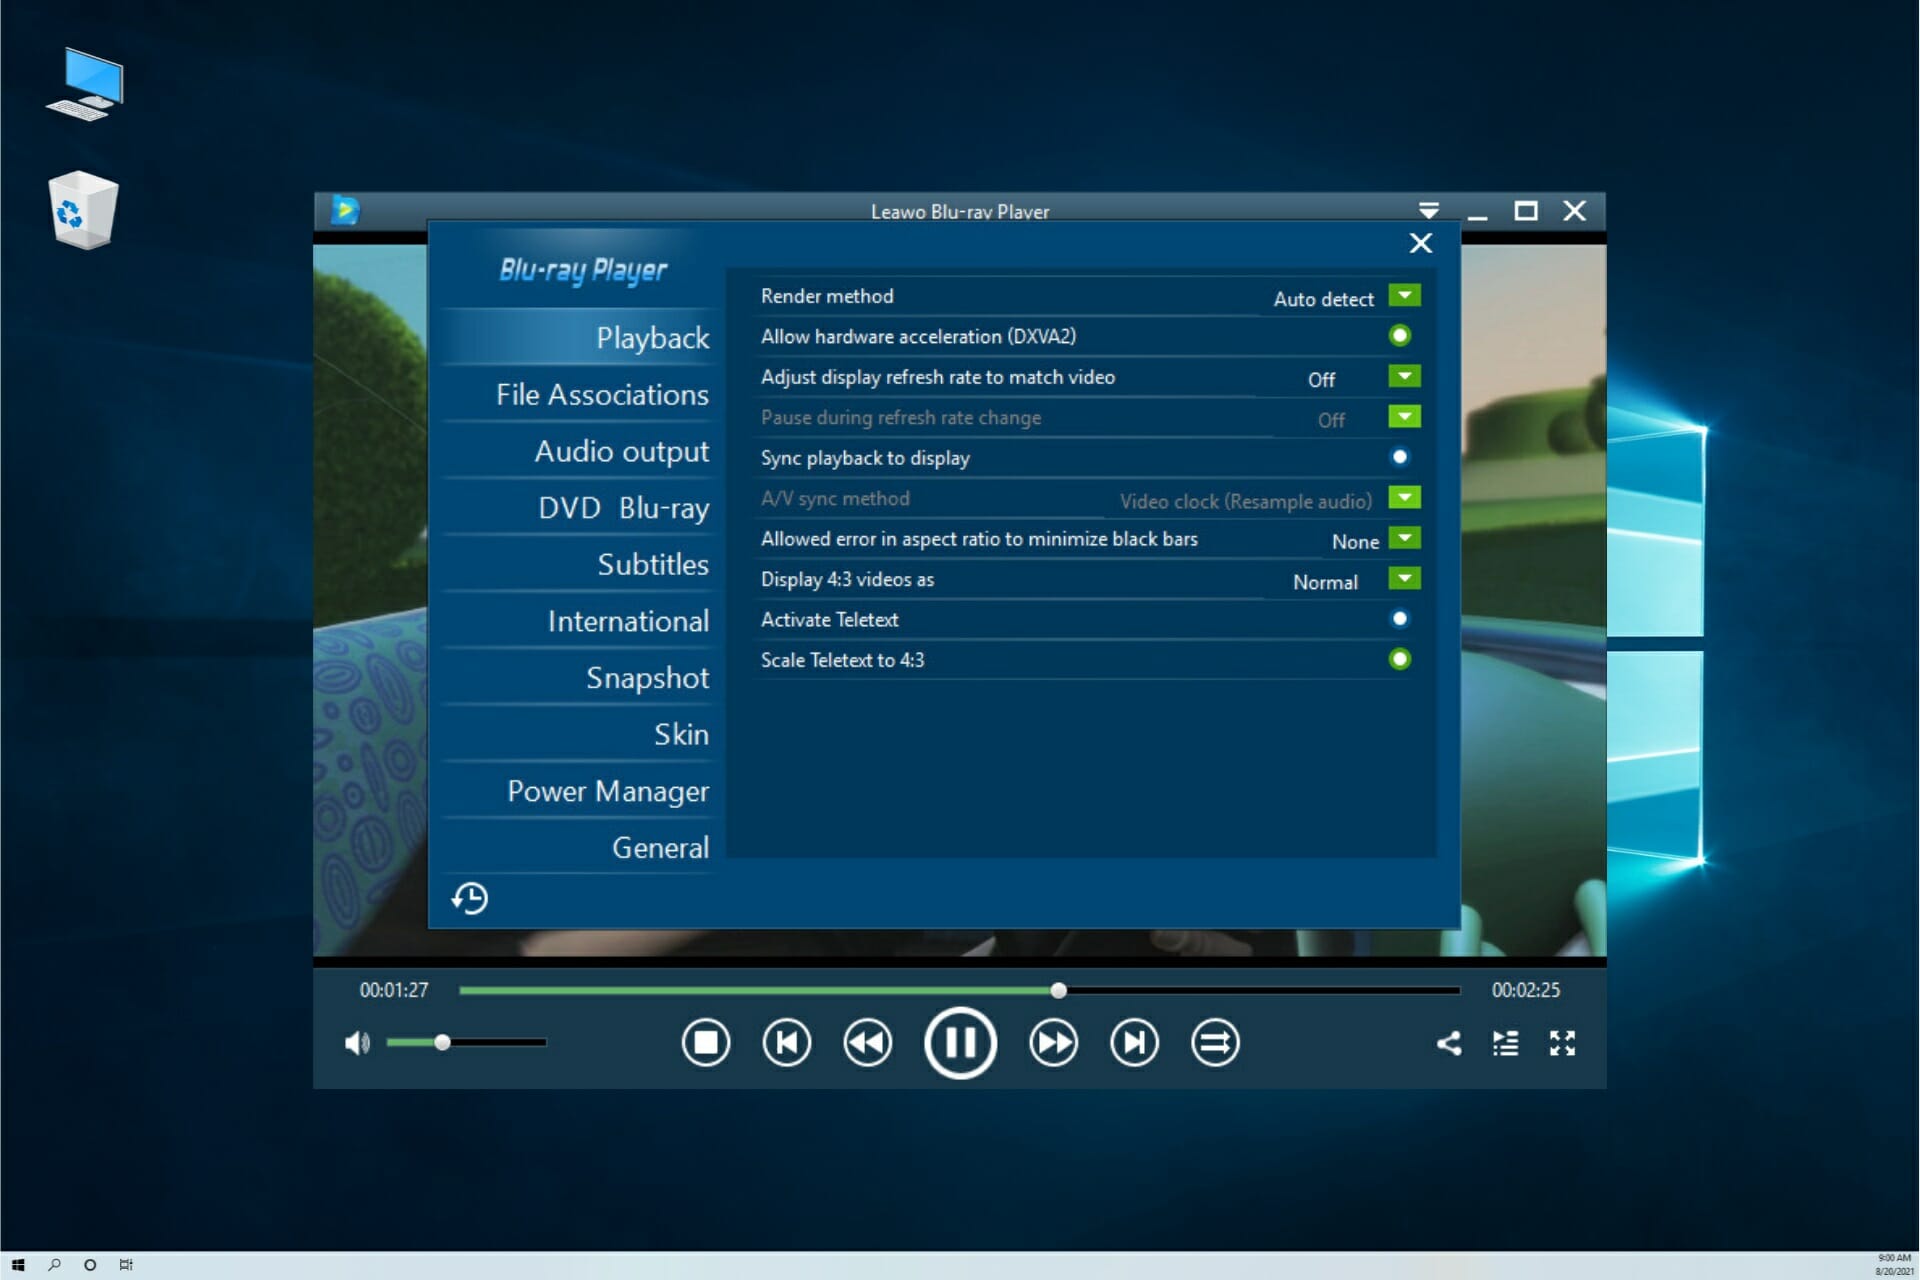
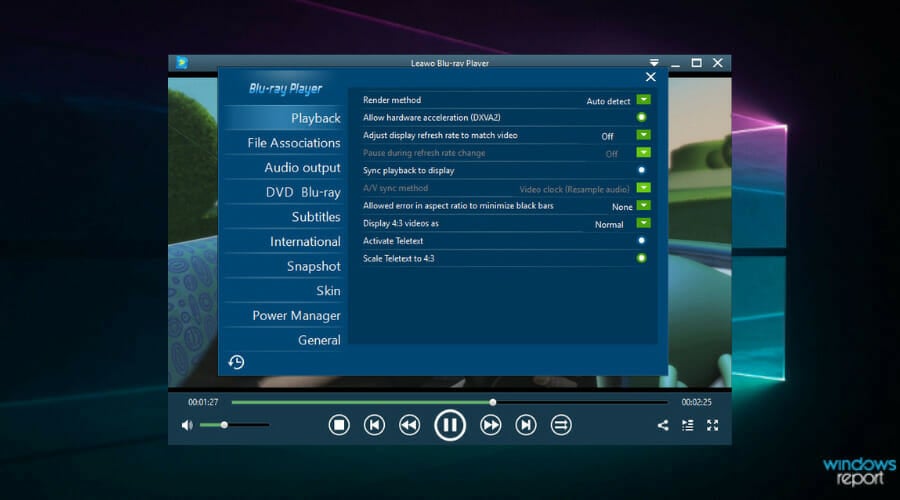
Leawo Blu-ray Player – Great audio and video playlist management

Leawo Blu-ray Player comes with all the media playback solutions for a good movie-watching experience with your friends and family.

It’s as if you’re having a Blu-ray disc player in your living, except it’s completely free and ready for 4K UHD Blu-ray videos.

Of course, you can still watch DVDs or most HD videos you will throw at it, even ISO files if that’s your choice of entertainment.

And when you’re not watching movies, it can still act as a perfectly good audio player to enjoy your music.

We told you that it plays Blu-ray videos but it also supports BDAV movie folders regardless if they are commercial or homemade.

It has impressive file format support: 4K videos in MKV, MP4, and TS, 1080P videos in HD MP4, HD MKV, HD MOV, etc., 720P videos in MP4, AVI, MKV, and other formats.

Camcorder recordings, online videos you downloaded or streamed video, you name it, and this great tool will play them.

Let’s see what are its best features:

  • Impressive support for a wide array of file formats
  • Completely free, without ads
  • Great audio and video playlist management
  • BDAV movie folder and ISO playback
  • Online video download features
Leawo Blu-ray Player

Leawo Blu-ray Player

This free Blu-ray player has all the ingredients for a great movie experience with your dear ones!

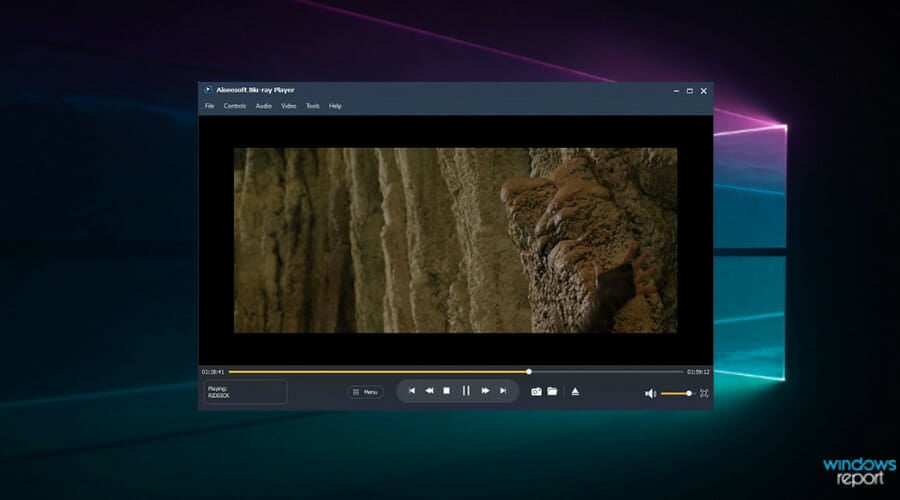
Aiseesoft Blu-ray Player – Region-free player

The Aiseesoft Blu-ray Player is a good value media player that you can utilize to play a range of video and audio formats.

Aiseesoft Blu-ray Player is compatible with Windows platforms from XP up and macOS Mojave and High Sierra. Plus, it is a straightforward and easy-to-utilize video player with a sleek and stylish UI design.

The best thing about this software is that it supports 4K playback for MP4, MKI, MOV, FLV, H.265, TS, and FLV formats so you can play videos in one of the highest resolutions.

Note, however, that it is restricted to 1080p Blu-ray playback. Aiseesoft Blue-ray also boasts top-notch audio quality as it supports Dolby TrueHD lossless audio and DTS-HD surround sound.

This software doesn’t include a huge number of configuration options, but its users can still adjust some playing effect settings for videos.

Additionally, this versatile tool helps the user to watch favorite movies regardless of the source, from Blu-ray discs, folders, or ISO files. Also, it can play any disc released in other regions.

Hence don’t hesitate to try this full-featured tool that is capable of satisfying any Blu-ray movie requirements, assuring an amazing quality of your video.

Let’s review some of its best features:

  • 4K playback support
  • Dolby TrueHD lossless audio and DTS-HD surround sound
  • Region-free player
  • Compatible with Windows and macOS
  • Simple configuration and playback
Aiseesoft Blu-ray Player

Aiseesoft Blu-ray Player

Assure your needs in terms of Blu-ray movies and classic media players with this complex software.
Check price Visit website

AnyMP4 Blu-ray Player – Friendly and modern UI

If you really want to enjoy your 4K and Blu-ray content, AnyMP4 Blu-ray Player is one of the best you can get right now.

That’s because thanks to its advanced technology this player will get you the best image quality from your videos.

The GPU hardware acceleration helps the app load and play any video quickly and smoothly every time.

You are able to customize video effects such as hue, holiness, contrast, saturation, and gamma for fantastic home theater entertainment when playing Blu-ray movies.

It supports surround sound 5.1 (Dolby Digital, DTS) so with the right audio system, you can enjoy sound quality just like in the cinema.

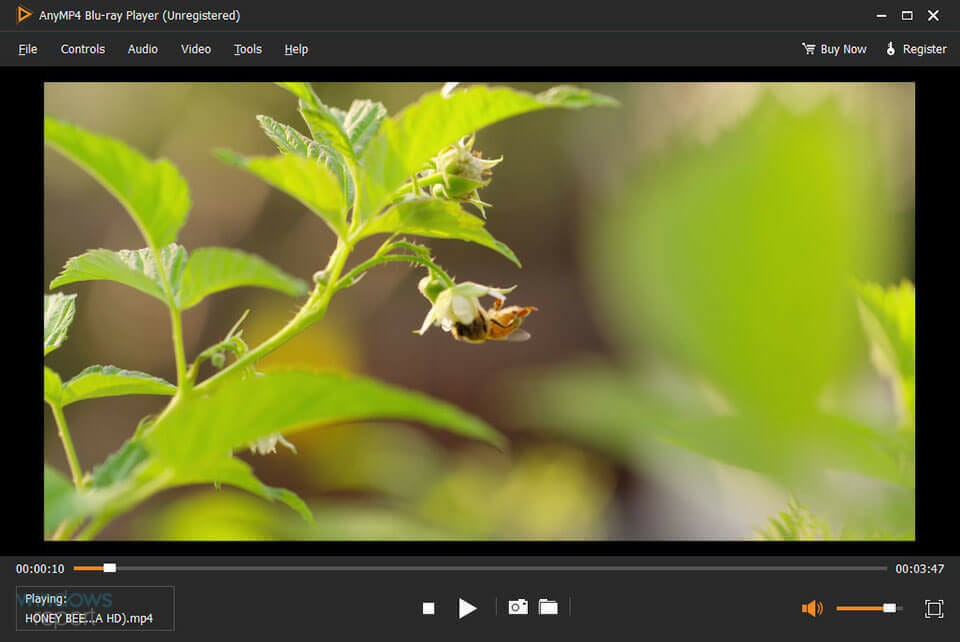
AnyMP4 Blu-ray Player has a modern user interface, easy to manage, with a great playlist for any media, including DVDs, music, and video files.

Before playing a video, you can easily select subtitles and audio tracks. During playback, if you find a memorable scene, the player allows you to take screen captions with one click.

Let’s see some of its best features below:

  • Blu-ray, 4K, DVD and digital video support
  • Friendly and modern UI
  • Dolby Digital and DTS 5.1 surround sound
  • Customize video effects for complete home entertainment experience
  • Insert subtitles and audio tracks easily
AnyMP4 Blu-ray Player

AnyMP4 Blu-ray Player

Get the best home cinema experience with one of the best Blu-ray and 4K players with customizable video effects.
Free trial Visit website

DVDFab Player 6 Ultra – Top-notch lossless audio output

The DVDFab Player 6 is a media player that has had some rave reviews. This is a Blu-ray player that supports 4K Ultra HD Blu-ray Disc playback as well as DVD, BDAV, and AVCHD.

Note that the freeware version doesn’t support Blu-ray Disc, and you’ll need the Ultra version for 4K Blu-ray playback.

You can add the freeware DVDFab Player 6 to Windows 10, 8.1, 8, and 7 by clicking the Free Download button for the software on the link below.

DVDFab Player 6 might not be the most economical media player, but it enables you to watch Blu-ray Disc and DVD on both PCs and TVs at top-notch 4K picture quality and includes an HDR10 playback mode.

Furthermore, DVDFab Player 6 is one of few media players that supports 3D Blu-ray Disc for 3D films with four 3D output modes included.

The media player also supports Dolby TrueHD, DTS-HD, or Atmos for top-notch lossless audio output.

Aside from supporting the latest video and audio tech, DVDFab Player 6 includes some handy features. Users can select a TV Mode or PC Mode to optimize playback for TVs or VDUs.

The media player supports Blu-ray menus, and users can select a Menu Mode to play the disc with menus or a Simple Mode just to play the film.

Let’s see what are its most important features:

  • Set up movie playlists with ease
  • Dolby TrueHD, DTS-HD and Atmos lossless audio output
  • 4 video 3D output modes
  • Free version available but without 4K Blu-ray support
  • New, modern UI design
DVDFab Player 6

DVDFab Player 6

Watch your favorite blockbusters in 4K and HDR playback mode with this premium player.
Check price Visit website

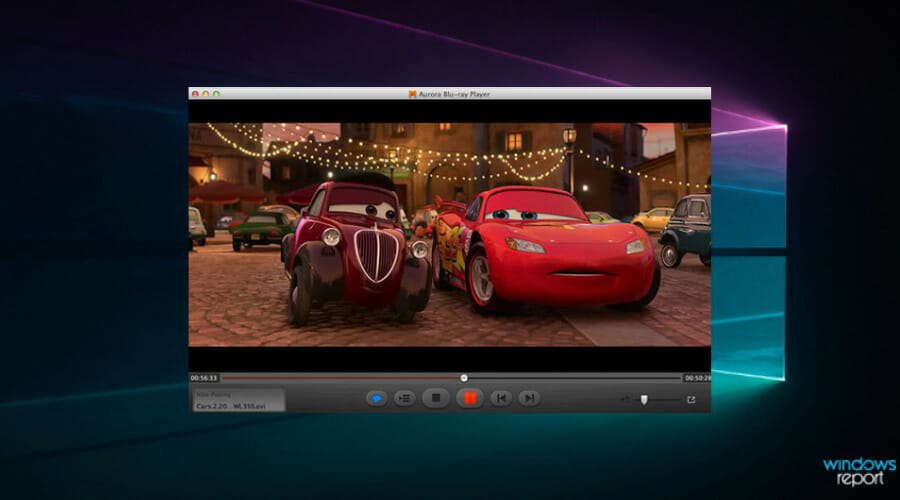
Aurora Blu-ray Media Player – Custom video subtitle text

Aurora Blu-ray Media Player is a straightforward and convenient video player that supports a wide range of media formats. The software is compatible with Windows 10 to Windows XP and Mac platforms.

You can try out the software with its unregistered version, which adds a watermark to Blu-ray playback, by clicking Download on the link provided below.

Few video players can match Aurora Blu-ray Media Player’s diverse media playback support. Aside from Blu-ray Disc, it plays VCD, DVD, CD, and a multitude of video and audio file formats.

The software includes contrast, saturation, gamma, hue, and other adjustment options with which users can enhance the picture.

Aurora Blu-ray Media also provides handy track synchronization controls with which users can keep images, audio, and subtitles in sync.

In addition, users can customize video subtitle text via the software’s Preferences window.

So, Aurora Blu-ray Media Player is a no-nonsense Blu-ray player with which you can play almost any media format and optimize video, pictures, and audio.

Take a look at this player’s best features:

  • Diverse media playback support
  • Track synchronization controls
  • Subtitle customization options
  • Compatible with DTS HD 7.1, DTS/AC3 5.1 and TrueHD 2.1 outputs
  • Plays Blu-ray ISO files

⇒ Get Aurora Blu-ray Media Player

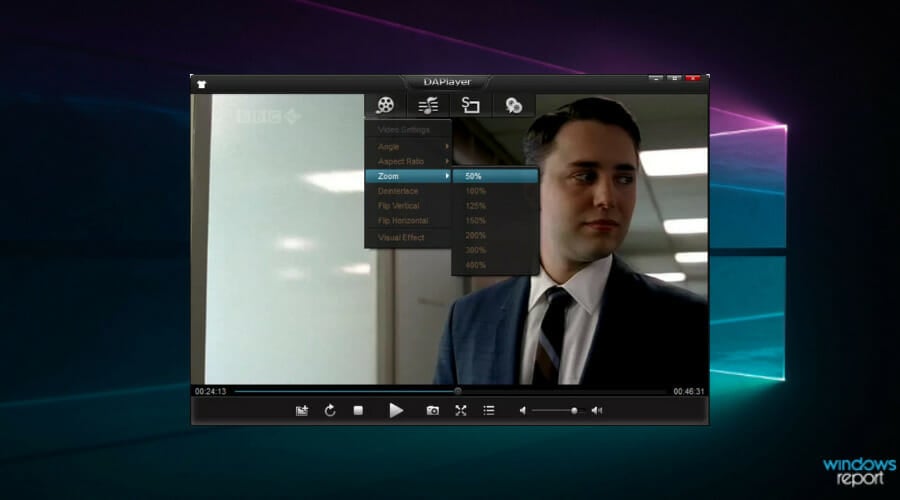
DAPlayer – Minimal CPU utilization

DAPlayer is a free media player for 1080p video playback that’s freely available. It supports commercial Blu-ray Disc playback and can play both AACS-protected and BD+ discs.

5KPlayer is a revamped version of DAPlayer mentioned on the software’s website, but that’s limited to playing Blu-ray content ripped from the disc.

To play Blu-ray straight from the disc, DAPlayer is a better bet. Note that it plays most media file formats as it incorporates 320 video and 120 audio codecs.

The software has an intuitive UI, which includes a customizable playlist, within which users can import video and music either with its browser tree or by dragging and dropping the files.

DAPlayer is among the more system resource-efficient Blu-ray players with minimal CPU utilization.

In addition, the media player includes numerous video, audio, and subtitle settings with which users can adjust hue, contrast, aspect ratio, saturation, deinterlacing mode, stereo mode, equalizer, zoom and angle, audio device, subtitle text, and more besides.

As it’s freeware software, DAPlayer is definitely worth a look before you check out some of the other alternatives.

It’s time to review a few of the best features of this app:

  • Doesn’t use too many of your system resources
  • 320 video and 120 audio codecs included
  • Compatible with AACS-protected and BD+ discs
  • Plenty of video audio and subtiles settings to choose from
  • Friendly interface with easy controls

⇒ Get DAPlayer

Does Windows Media Player play Blu-ray?

Apart from the fact that Windows Media Player is not part of the OS anymore, the app doesn’t play Blu-ray files or discs.

Otherwise, you can still enable and use it on your Windows PC. We have an excellent guide on how to get and use Media Player in Windows 10 that will definitely help you do that.

Although it doesn’t play Blu-ray, it can still do a great job with a lot of video files, CDs, and DVDs if you’re not set on watching 4K content.

So, take your pick from any of those Blu-ray players for Windows 10. They provide some of the best Blu-ray Disc playbacks at 4K or 1080p resolutions.

Even if you don’t need to play Blu-ray content, they’re still great media players that you can utilize for DVD, video, and music files.

The entries mentioned above are also useful if you were interested oh how to play Blu-ray on Windows 10. All of the apps listed here work perfectly well on Windows 10 and have no issues playing back Blu-ray videos.

Have you tested any of the software solutions on our list? Leave us your feedback in the comments section below.

How to disable DVR in Windows 11 and turn off the Game Bar

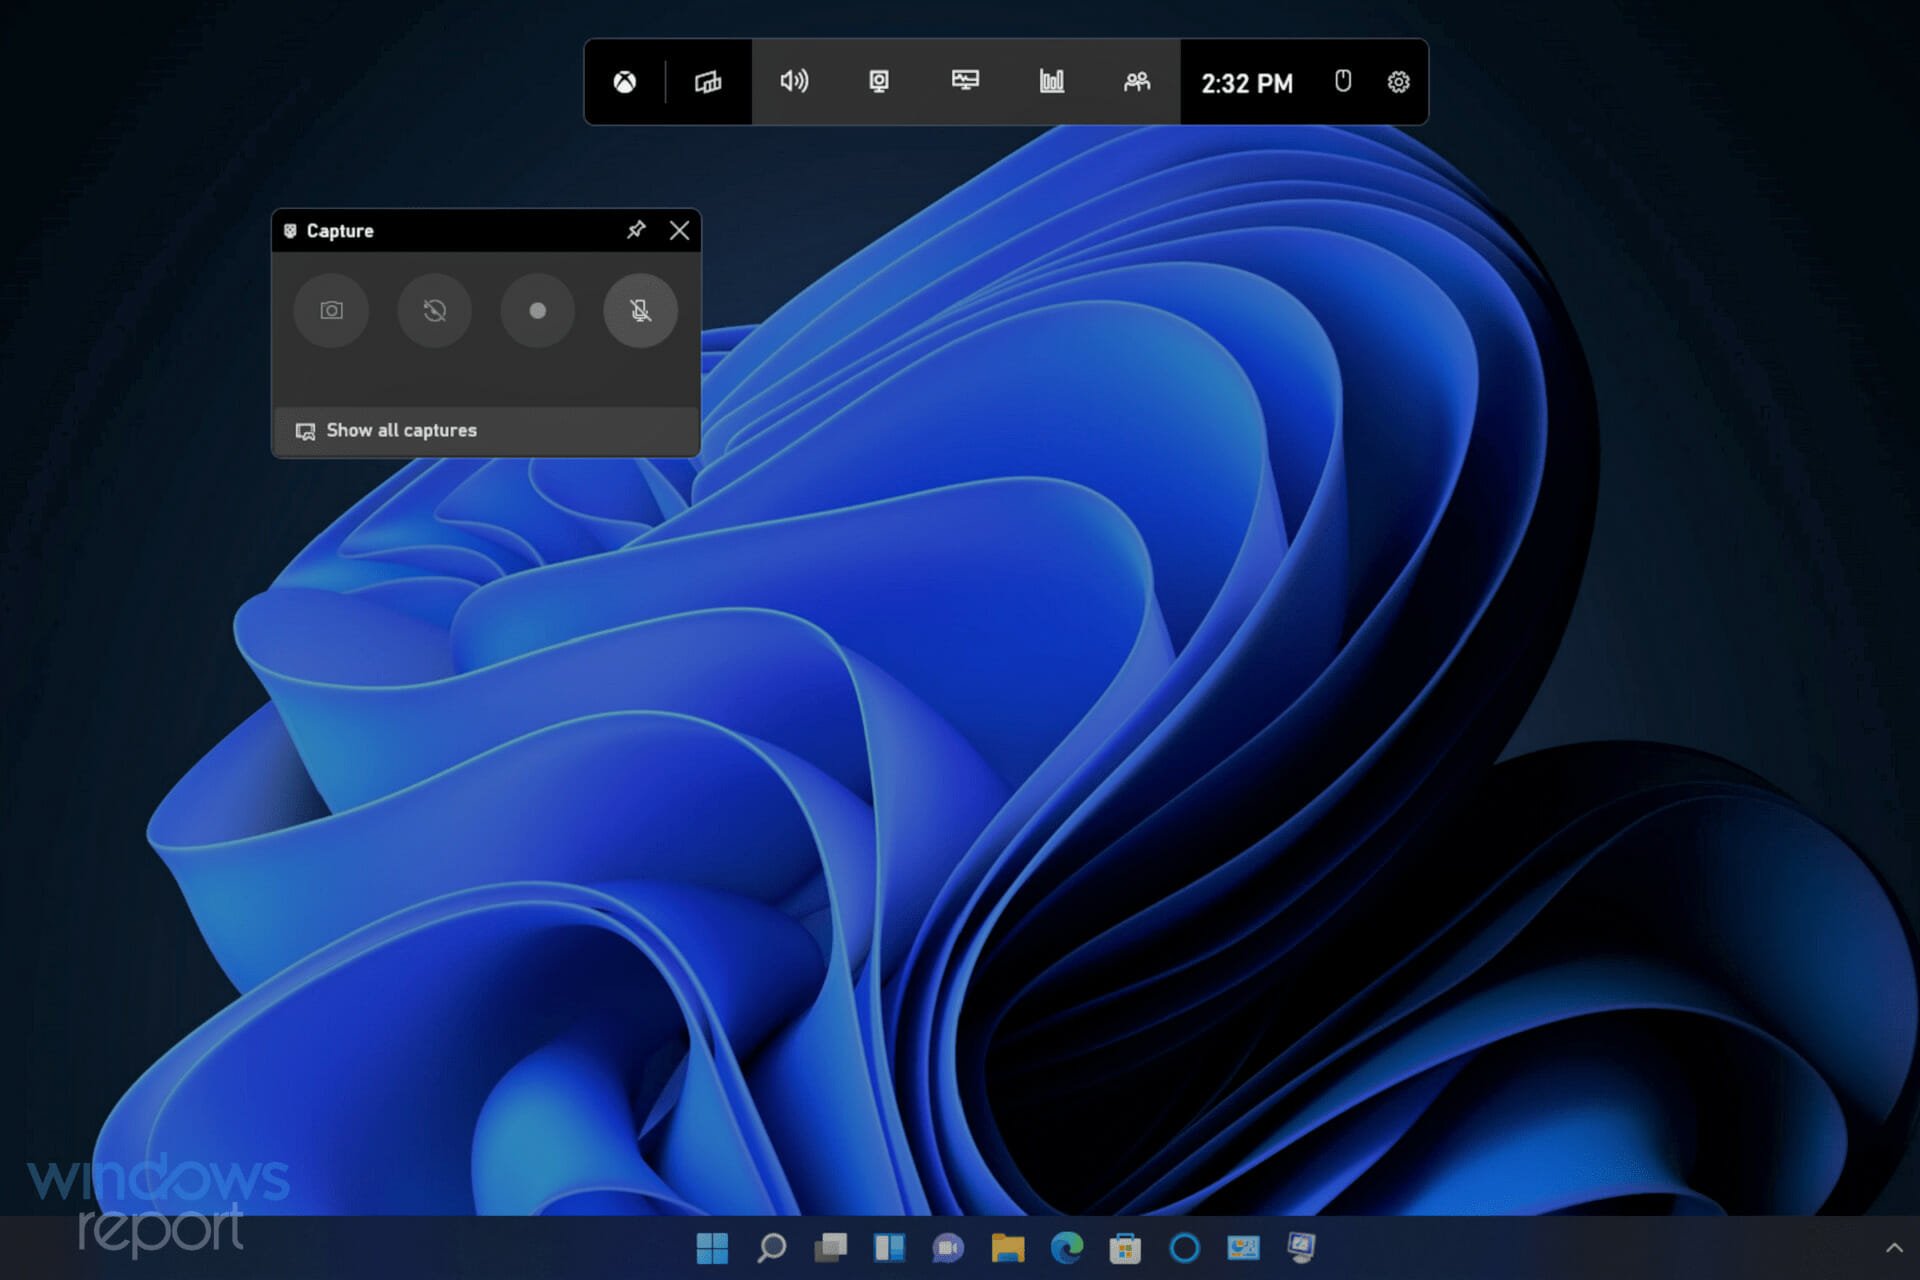
Windows 11 includes a few gaming features. The Game Bar app provides access to many of that platform’s game tools. When Game Bar is enabled, players can press a Win + G hotkey to open it and access performance, widget, and capturing features.

The Xbox Game Bar is a most welcome addition to Windows 11 on gaming PCs. However, users who don’t play any Windows games on lower-spec productivity PCs don’t need the Game Bar and its recording features. If you don’t need it, the Game Bar is a waste of system resources.

Therefore, productivity users who don’t need Game Bar’s features will no doubt prefer to disable it entirely. Although some Game Bar controls from Windows 10 are missing in 11, you can still turn it off in Microsoft’s latest desktop platform.

What is Game DVR?

Game DVR is the Game Bar’s recording feature. That option enables the background recording of gameplay to help players capture more spectacular gaming moments. It’s a popular feature for players who share gaming clips with friends or on YouTube.

You can improve your captured gameplay moments by following the steps in How to Edit Xbox Clips on PC, which shows you how to adjust and save your recordings with clear instructions.

However, not all users appreciate Game DVR. It can have a notable impact on gaming performance on some Windows 11 PCs. So, users who don’t need to record anything might prefer to disable that feature. This is how you can both disable DVR and turn off the Game Bar in Windows 11.

How do you disable DVR in Windows 11?

1. Disable DVR via the Game Bar

  1. Open the Game Bar by pressing the Windows + G hotkey.
  2. Then click the Settings button on the right side of the Game Bar.
    Game Bar's Settings button disable dvr windows 11
  3. Click the Capturing tab.
    The capturing tab disable dvr windows 11
  4. Then deselect the Record in background while I’m playing game checkbox.
    Record in the background option disable dvr windows 11

2. Disable Xbox Game DVR by editing the registry

  1. Click the search tool’s taskbar button shown in the screenshot directly below.
    The search taskbar button disable dvr windows 11
  2. Enter regedit to find the Registry Editor.
  3. Select the Run as administrator option for the Registry Editor search result.
    Run as administrator option disable dvr windows 11
  4. Open this key path within Registry Editor: HKEY_CURRENT_USER\SOFTWARE\Microsoft\Windows\CurrentVersion\GameDVR
    GameDVR key disable dvr windows 11
  5. Double-click the AppCaptureEnabled DWORD to open its Edit DWORD window.
    Appcaptured enabled DWORD disable dvr windows 11
  6. Delete 1 in the Value data box, and enter 0 to replace it.
  7. Then click OK to exit the Edit DWORD window.
    Edit DWORD window for appcapturedenabled disable dvr windows 11
  8. Open this key path: HKEY_CURRENT_USER\System\GameConfigStore
    Gameconfigstore registry key disable dvr windows 11
  9. Double-click the GameDVR_Enabled DWORD in the snapshot directly below.
    gamedvr enabled dword disable dvr windows 11
  10. Erase the current value, and then input 0 in the Value data box.
  11. Select the OK option to confirm.
    Edit DWORD window for gamedvrenabled disable dvr windows 11
  12. Thereafter, click the Power and Restart Start menu buttons.
    Restart option disable dvr windows 11

How do I disable the Game Bar in Windows 11?

1. Disable the Game Bar and DVR in Windows 11 via Settings

  1. Open the Start menu by pressing the Windows taskbar icon.
  2. Click Settings within the Start menu’s pinned app section.
    Pinned Settings app disable dvr windows 11
  3. Select the Gaming tab.
  4. Click the Xbox Game Bar navigation option.
    The Xbox Game Bar option disable dvr windows 11
  5. Then click the toggle button off for the Open Xbox Game Bar using this button on a controller option.
    The Open Xbox Game Bar setting disable dvr windows 11
  6. Next, select the Apps tab.
  7. Select the App & features option shown directly below.
    The Apps & features option disable dvr windows 11
  8. Click the three-dot button for the Xbox Game Bar app.
    The three-dot button disable dvr windows 11
  9. Select Advanced options on the menu.
    Advanced options disable dvr windows 11
  10. Next, choose the Never option on the Background apps permissions menu.
    Never option disable dvr windows 11
  11. Press the Terminate button.
    Terminate button disable dvr windows 11
Note icon NOTE
You can disable Game DVR auto-capture by clicking Captures on the Gaming tab in Settings. Then you can select to turn off a Record what happened option from there.

2. Remove the Game Bar from Windows 11

  1. Right-click Start and select the Windows Terminal (Admin) option that’s on the Win+X menu.
    The Win+X menu disable dvr windows 11
  2. Input this command within the Windows PowerShell tab: Get-AppxPackage Microsoft.XboxGamingOverlay | Remove-AppxPackage
  3. Press the Return key to remove the Game Bar.
    Remove Xbox Game Bar command disable dvr windows 11
  4. Wait for the uninstall process to finish before closing Windows Terminal.

Should I turn Windows Game Mode off as well?

Windows Game Mode is a different feature that optimizes games. That can be a beneficial gaming feature for playing games on low-spec PCs. However, many players have also reported that disabling that feature can fix stuttering, FPS loss, and freezing gaming issues.

So, maybe you should turn it off if Windows 11 games frequently stutter or freeze when you play them. You can turn it off in Settings. Our How to disable Game Mode guide provides the full low-down for how you can turn off that feature in Windows 11/10.

The Game Bar is great for gaming, but it wastes system resources. If you don’t need Game Bar at all, you might as well remove that app from Windows 11 altogether. You can always reinstall it later by downloading that app from MS Store.

If you only want to disable background Game DVR recording, deselect the Game Bar’s Record in the background setting or edit the registry. Note that you’ll still be able to manually record with that feature disabled.

So, choose whatever method you prefer for disabling Game Bar or its DVR feature in Windows 11. You can also discuss the Game Bar and its DVR feature in the comments section below. Feel free to add any questions about disabling Game Bar/DVR.

TrackingTime adds support for Microsoft’s To Do task management tool

The productivity tool, TrackingTime, added support for Microsoft’s To Do service this week. This new integration, which just works with the web version of Microsoft To Do for now, allows users to track the time spent on individual tasks by selecting a new timer icon that gets automatically added to the To Do web interface once the appropriate account connections are made.

The time tracking feature for Microsoft To Do is made possible via a new browser extension which is available for Google Chrome, Mozilla Firefox, and Microsoft’s own Edge browser. Best of all, this functionality is available to all TrackingTime users including those on the free plan.

TrackingTime is a workload and time reporting tool that supports integration with a massive number of popular productivity apps and services. It supports several Microsoft tools such as Azure DevOps, GitHub, Microsoft Planner, Outlook.com, and Microsoft Teams. TrackingTime can be used for free though those wanting to collaborate with more than three users will need to upgrade to the $5 monthly plan.

Want more Microsoft app news? Follow us on Twitter, Pinterest, and Facebook.

Disney Magic Kingdoms’ Mulan event begins today on Windows devices

A special Mulan-themed Lunar New Year event is set to begin in just a few hours in the Disney Magic Kingdoms video game on Windows 10 and Windows 11 devices and all other supported platforms.

The Mulan event will be a Tower Challenge type of mission that will give players the chance to unlock Khan (the villain of Mulan) by completing regular tasks from today until February 11th.

Mulan’s horse, Shan Yu, will also unlock in the game and be available to purchase for 500 gems, Disney Magic Kingdoms’ in-game currency that can be earned in-game or bought with real-world money.

“Celebrate the year of the tiger with Mickey, Minnie, and more as they once again dawn their beautifully festive Lunar New Year and Lunar New Year – Hong Kong costumes,” the event’s official description reads. “Discover our new tapper event and enjoy the fireworks!”

An update for Disney Magic Kingdoms rolled out to all platforms earlier this week. This update is needed to play the Mulan event. It also makes some important changes to the parade feature and Merlin’s shop.

The full release notes for the app update and the event can be read here.

Disney Magic Kingdoms is a free-to-play app that comes pre-installed on many Windows devices, such as Microsoft’s Surface products, in several major regions. The main purpose of the game is to unlock characters from Disney, Pixar, and Star Wars films and TV series, design a Disney theme park, and defeat Maleficent who has cursed the play area.

Want more Windows app update news? Follow us on Twitter, Pinterest, and Facebook.

Disney Magic Kingdoms
Developer:
Gameloft SE
Price:
Free

New optional Windows 11 KB5008353 update released

Microsoft has released new optional updates for a variety of Windows versions, including Windows 11 and Windows 10 version 20H2 and newer.

As you may be aware, the previous patch Tuesday updates released have been problematic forcing Microsoft to recall and reinstate them

The problematic updates were first removed from the server and then later restored once the Redmond giant was able to work out the issues.

What’s new?

  • The update addresses an issue that caused the audio service to stop responding on some devices that support hardware-accelerated Bluetooth audio.
  • The update fixes an issue that might cause icons for apps when the apps are not running to display as active. The icons are displayed on the taskbar as if they’re running.
  • A new Your Microsoft Account page has been added in the Accounts category under Windows Settings for both Home and Professional editions.
  • The issue where the volume icon displayed on the taskbar as muted has now been fixed.
  • The issue where a device stopped working after connecting to multiple devices has been addressed.
  • The auto-hide feature was affected and would not be consistent when you hovered around the mouse. This issue has since been addressed.
  • The issue where icons were not appearing on the taskbar of a secondary display has been addressed.
  • Auto-brightness has been enhanced for better light quality under low light conditions.
  • Daylight savings time has been updated to start in February 2022 instead of March.
  • The issue where outdated battery percentages were displayed for connected Bluetooth devices in settings has been resolved.
  • Some image editing programs had issues rendering the correct colors on HDR displays and significantly affected white colors. This issue has now been addressed.
  • The HelpWith feature that uses Microsoft Bing technologies to suggest relevant topics has been added to the settings page.

Known issues

  • Microsoft has confirmed that there is an issue with the Outlook desktop app that may prevent it from displaying recent emails. As a temporary workaround, users are advised to disable Windows Desktop Search.

It’s important to note that this is an optional update, meaning it is not mandatory at all and you can let it be if you don’t need it. But if you do need it, you’ll get notified with a pop-up dialogue box in the system tray. If you agree to install it, the system will download and install the update automatically.

However, these fixes will still be part of the February Patch Tuesday release.

Will you be updating the optional fixes or will you be waiting to see how they perform? Let us know in the comment section below.

AMD fTPM Stuttering: How to Easily Stop it

It’s time to discuss the dreaded system requirement that rendered many users unable to upgrade to the latest Microsoft operating system.

On AMD systems, TPM is also referred to as fTPM, which is a type of security module implemented in system firmware instead of a dedicated chip.

Furthermore, fTPM can be easily enabled on AMD systems, but for some configurations, enabling this feature seems to be causing performance issues.

However, a recent bug is making AMD users want to throw their setups out the window while they wait for AMD to fix yet another Windows 11-related issue.

Windows 11 AMD users have to deal with a new bug

Needless to say, the TPM implementation is generally straightforward and a ton of Intel folks are using it.

But, there are some issues with AMD’s implementation, most notably a problem with audio glitches and stuttering frame rates.

We can all understand how that can drive even the calmest user insane, and something clearly needs to be done as soon as possible.
Users were quick to flag this issue and share it with the rest of the community, in hopes of warning others and also getting the attention of the manufacturer.

Many of the respondents actually confirmed that they are struggling with the same issues, on AMD setups.

However, it’s important to note that this bug doesn’t affect all PCs and it seems to have been noticed on certain devices when upgrading to Windows 11 from Windows 10.

Judging from the reports, it looks like the issue won’t make your machine unusable as these stutters last a few seconds only, and happen randomly.

How can I stop this from happening?

Although there is no official fix for the problem, tech-savvy users have come up with a way to stop it from happening until it is fixed by either AMD, Microsoft, or both.

If you too are dealing with this annoying issue, the recommendation is to uninstall Windows 11 and turn off fTPM on Windows 10, and it’s certainly worth trying this to see if it addresses the stuttering.

And even though you can turn off fTPM on Windows 11 too, it can have adverse effects as some games, such as Valorant, won’t run on the new OS without TPM.

There is also the possibility that a bug in Windows 11 could potentially be a cause, so if you’re getting stuttering while playing games, you should consider reinstalling Windows 10 or wait for a fix from Microsoft and AMD.

Remember that you can always report issues directly to Microsoft via Feedback Hub, and Microsoft might come up with a fix if you best describe the problem you are having.

Have you also been struggling with this issue on your AMD setup after upgrading to Windows 11? Share your experience with us in the comments section below.

What is the best resolution and size for NFT

You may have heard of NFT from friends or read about it on social media and wanted to create one. But, do you know what is the ideal resolution or size for an NFT and the limitations set by various platforms.

Most people don’t, and they just go around aimlessly trying to make a fortune only to realize these important aspects later. Apart from that, it’s also necessary that you choose the right platform.

In the following sections, we will tell you how to create an NFT, the resolution and size for it, along the other relevant information. By the time you reach the end of this article, you should have a fair understanding of the whole process and the intricacies involved.

Why are NFTs so popular?

NFTs have become a rage in recent years with more and more people joining the wagon. Both the number of creators and buyers have swelled in recent years.

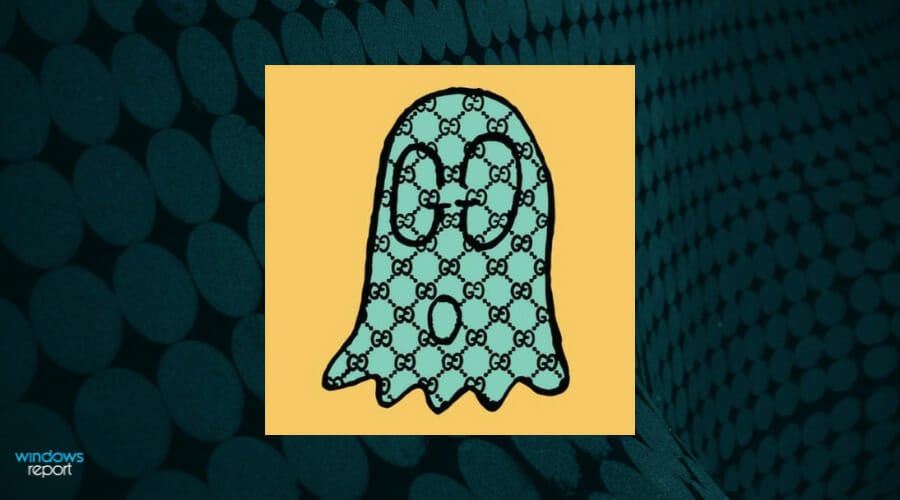
Some purchase NFTs to support budding artists, many for investment, and others as a hobby. The increase in demand led to a surge in prices. As an example, an NFT GucciGhost was initially listed at $200 about a year ago, the current owner is demanding $16,300 for it.

GucciGhost NFT (Source: NiftyGateway)

But, one of the reasons why people are actually buying NFTs is the craze around it. It’s new, something we have never seen before, it’s an art, which attracts a lot of buyers. Besides, you must remember the hype around cryptocurrency during its initial years.

Whether NFTs will be a success, only time will tell! But one thing that can be said for certain is that it’s already a rage worldwide.

What resolution and size should I choose for the NFT?

Generally speaking, there’s no fixed size or resolution but it all depends on the platform that you are using for creating NFTs. Each of these have a separate maximum file size, a list of compatible formats, and in some cases, resolution as well.

Though after going through several forums and blogs, we were able to identify what users, both creators and buyers, generally prefer.

A creator typically aims to keep the file size well under the maximum limit and to facilitate faster upload. On the other hand, buyers tend to purchase NFTs with high picture quality.

We have listed some of the common platforms, along with the compatible formats and maximum supported size for NFT:

PlatformSupported FormatsMaximum File Size
OpenSeaJPG, PNG, GIF, MP3, MP4, SVT, WebM, GLTF, WAV, GLB, OGG100 MB (50MB recommended)
MintableAll image and video formats are supported3 GB
RaribleJPEG, PNG, WebP, GIF, MP3, MP4, 10 MB
KnownOriginJPG, PNG, GIF, SVG, WebP, MP 4, WebM, GLB75 MB

The above table lists out the maximum file size and supported formats, however, how do you choose the best resolution and size for NFT?

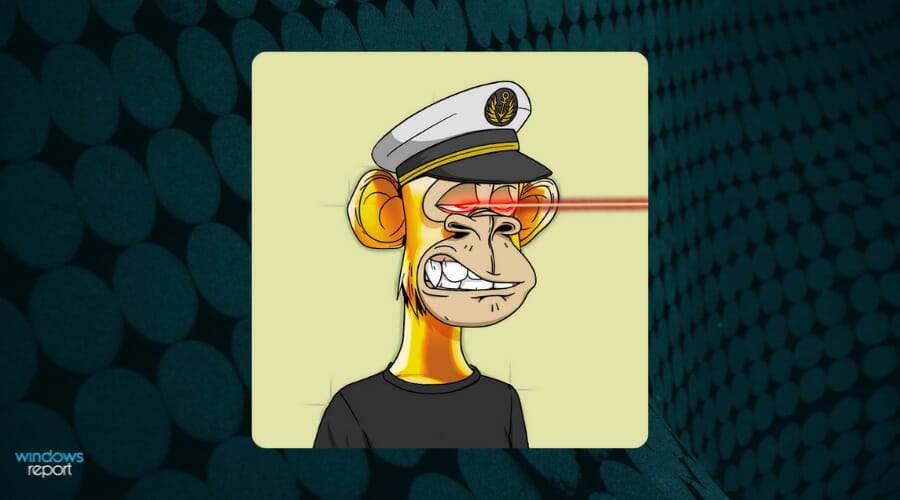
While some of the popular ones have kept the resolution to as low as 336 px square (for CryptoPunks), or at 631 px square (for Bored Ape Yacht Club), one of the costliest NFT to be ever sold by Beeple had a resolution of 21,069 px square.

Everydays: The First 5000 Days by Beeple sold for a whopping $69.3 million (Source: Twitter)

But, keeping the NFT resolution at 1080 px square and lower should do the trick for most without affecting the picture quality. Even if you go for higher resolutions, do make sure that it meets the maximum size criteria.

When it comes to size, try to maintain a proper balance between it and the picture quality. Also, do keep in mind that the lower is the size, the quicker will be the upload process.

Though, a common misconception amongst many is that larger size NFTs require the user to pay a higher gas fee. The gas fee depends on the traffic and the size of the contract. The file size only affects the gas fee when its metadata is stored on-chain.

What do I do if the file size of NFT is large?

Many users have faced this dilemma where the size of the file is large and compressing it affects the quality. This happens especially with the videos.

To combat this problem, several platforms allow users to add unlockable content to their NFT which can be accessed once a user makes the purchase. The hidden unlockable content is only available to the buyer and not the others.

This way, though the clarity is not exceptional for the displayed one, the buyer will get the downloadable link to the high-quality NFT file. This strategy will help users who create NFT files in video formats, or in some cases images and GIFs as well.

But, not all platforms offer this feature. So make sure to check that the platform you are using has an unlockable content option available.

Can I create an NFT for free?

One of the most common questions asked by users is whether or not they can create an NFT for free? And, the answer is Yes.

There are various platforms that allow users to create and list NFTs for free, though you will be charged a fee when it’s sold. One such is the lazy minting process by OpenSea, one of the oldest and most popular platforms for minting, listing, and selling NFTs.

Bored App Yacht Club sold at $1.3 million (Source: NFT’S STREET)

Earlier, users had to pay a gas fee due to the involvement of high-energy consuming computers at work. These systems verify every transaction happening on the blockchain.

This posed a major challenge to those creating NFTs for the first time since it also charged them for failed transactions. But, with the option to create NFTs for free, many more are expected to follow suit.

In the above sections, you found out the best size and resolution for NFTs along with some popular platforms. The process may seem intricate at the moment, but once you start creating NFTs, you are expected to learn a lot of things along the way.

In case you invest or trade in cryptocurrency, check out the best apps to monitor their live prices.

Tell us what size and resolution you choose for your NFT in the comments section below. Also, do drop in a comment if you have any recommendations.

Windows 11 Pro for Workstations: Differences & Requirements

Microsoft announced Windows 11 on June 24, 2021, and it was available for download and upgrade in late 2021.

It is available in three different editions: Home, Pro, and Enterprise. The Home version is built for consumer users as it possesses all the features and comfort one can expect from this new OS. This includes Windows Hello, Windows Security, Secure Boot, device encryption, parental controls, and more.

On the other hand, the Professional version of this OS has all the features that the Home one has with additional features that are mostly specific for professional environments.

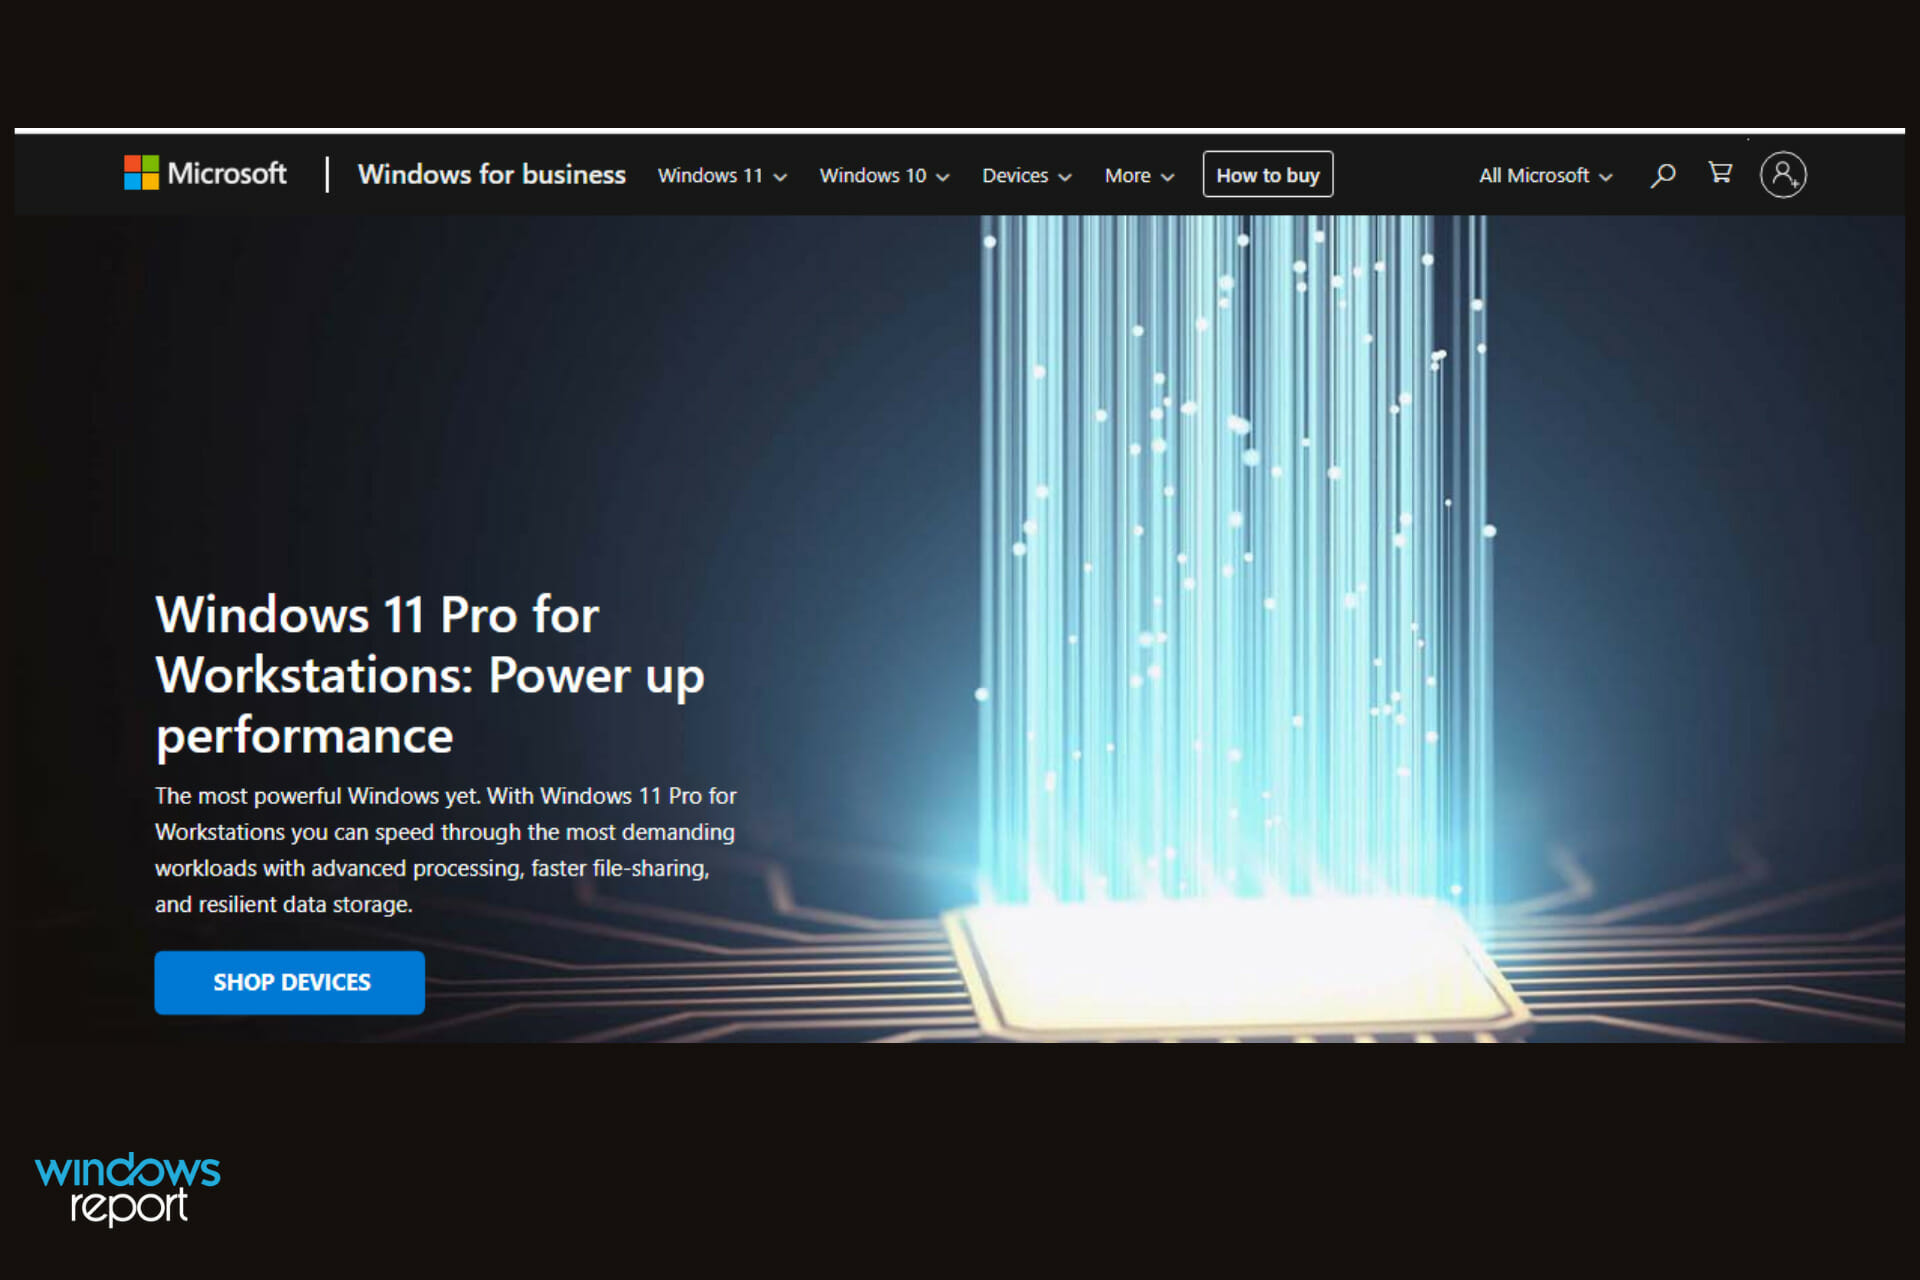
The Enterprise version of the OS is for organizations with advanced security and management needs. At the same time, the 11 Pro has different variants and one of these variants is the 11 Pro for Workstations. By using it, you can speed through chunky workloads and be more efficient.

Windows 11 Pro vs. Windows 11 Pro for Workstations

There are a couple of similarities between these two. In fact, there are features that you can find across all Windows 11 versions. Snap Layouts, Snap groups, Custom desktops, and many others are all cool features you get to enjoy.

According to Microsoft, Windows 11 Pro was designed for a hybrid workplace and possesses business and management features that let your teamwork more efficient.

The Pro version for Workstations, on the other hand, was specifically designed for individuals with advanced workloads and data needs such as data scientists, CAD professionals, animators, graphics designers, researchers, and media production teams.

This goes to show that the 11 Pro for Workstations is like an upgrade of the standard 11 Pro. Where this might mean nothing for the average Windows user – for a data scientist, for instance, it means a great deal for them and their work.

FeaturesDescriptionWindows 11 ProWindows 11 Pro for Workstations
BiometricsWindows 11 powers the advanced biometric features of modern devices. This includes fingerprints, scanners, and special IR cameras for face recognition.
Device EncryptionDevice encryption has been made available for an extensive range of Windows devices. This aids in data protection by encrypting it. Turning on your device’s encryption will allow only authorized individuals to be able to access your device and data.
Persistent MemoryThe most demanding apps and data get to be supplied with the performance that they need. This is done with non-volatile memory modules (NVDIMM-N) hardware.
SMB DirectProvides support for the use of network adapters with RDMA to perform at full speed, with really little latency, while using minimum CPU for faster file sharing.
Resilient File SystemRecognizes when there’s corrupt data on one of the mirrored drives and then uses an uncorrupted copy of your data on other drives to rectify and protect data.
Windows 11 Pro vs. Windows 11 Pro for Workstations

What are some of the benefits of Windows 11 Pro for Workstations?

Microsoft has crowned this version as the most powerful Windows yet. The 11 Pro version for Workstations is particularly built to be able to perform heavy loads of work faster, giving users the best experience.

Easy, flexible management

Enjoying Windows Autopilot – Source: Microsoft

You can save yourself a whole lot of time and effort by using your familiar Windows management tools. These tools include the zero-touch deployment with Windows Autopilot.

Deploying new devices can be quite time-consuming and challenging. But this can be changed. Windows Autopilot simplifies the entire deployment process and this benefits both users and partners. Do not hesitate to read more about Windows Autopilot.  

Data protection

You get to enjoy a robust and all-rounded built-in protection for your devices and personal data. With this version, you have the option of replacing passwords with face or fingerprint sign-in and protecting sensitive information even on your lost or stolen devices.

This is thanks to the BitLocker and BitLocker To Go that will put everything on lockdown so that nobody else will have access to your data.

Powered performance

You can greatly improve your productivity with the advanced configurations and processing capability that come with this version. Note that it supports up to 4 CPUs and 6TB of memory to speed through demanding workloads.

This particular quality is what makes the workstation ideal for certain professions like Graphic designing, and game building. This is thanks to its ability to provide non-volatile memory modules to the most demanding apps

Undisturbed workflow

Furthermore, due to its high-performance rate, this particular OS allows you and your colleagues to enjoy a seamless workflow.

You get to comfortably use the most demanding applications with no fear of lags.

Minimum hardware requirements for Windows 11 Pro for Workstations

There are a few checks you should make before you go on ahead to order this version. One of the most important things for you to do is to understand the system requirements needed to run this OS.

To install or upgrade to the new OS, your system must meet the following minimum hardware requirements:

  • Processor: Your computer’s processor should be 1 gigahertz (GHz) or faster with two or more cores on a compatible 64-bit processor or system on a chip (SoC)
  • RAM: The computer’s ram size should be 4 gigabytes (GB) or greater
  • Storage: The requirement to install is a 64GB storage or greater
  • Users might require additional storage space to download updates and enable specific features
  • The Graphics card should be compatible with DirectX 12 or later, with a WDDM 2.0 driver
  • System firmware: UEFI, Secure Boot capable
  • TPM: Trusted Platform Module (TPM) version 2.0
  • Display: High definition (720p) display, 9″ or greater monitor, 8 bits per color channel

Also, it is important to note that for the best upgrade experience, eligible devices should be running Windows 10, version 2004 or later.

Why does Microsoft have such strict requirements for Windows 11?

Well, the answer to this lies in the fact that there’s enhanced security for the operating system. The software company has stated that the latest operating system was designed to keep security as the main focus.

They have crowned this version of Windows as the most secure version of Windows ever. This helps you understand why this recent OS has such strict system requirements.

In other news, if you’re PC does not meet some of the minimum requirements, there’s still a way around it. Microsoft has approved methods to install the recent Windows on an unsupported laptop.

You can read our articles on how to install Windows 11 on an unsupported CPU and how you can install Windows 11 without TPM.

Feel free to leave us a comment to let us know if our solution was helpful, or if you have other tips that you feel should be added to the list.


Windows 11 security feature causing performance issues on some devices

With the launch of Windows 11, Microsoft released an operating system that no longer supports many processors and has limited support for hardware with TPM 2.0 capability.

Contrary to the controversy over its processor requirements, the TPM 2.0 specification is actually not a big deal for most users because most modern devices have this security feature.

The fTPM or Unified Extensible Firmware Interface (UEFI) is a relatively new standard that can be found on some computer systems that are based on AMD processors. It works alongside the BIOS and can be enabled by simply following a series of instructions provided by the manufacturer, but this feature may cause performance issues for some configurations.

Though it is straightforward to implement, the Trusted Platform Module has some problems with AMD’s technology that include audio glitches and stuttering frame rates. It is worth noting that, this issue occurs because of compatibility problems between AMD’s fTPM and Windows 11.

Major setbacks

Based on information gathered, it indicated that enabling the firmware Trusted Platform Module (fTPM) could reduce performance and cause stuttering when you’re playing games on either Windows 10 or Windows 11.

The bug does not affect all devices, rather the issue has been reported to affect users with specific machines. It looks like the problem will not render your device unusable, but users have noticed stutters on certain models when upgrading to Windows 11 from Windows 10.

Recommended workaround

Windows Latest reported on the problem, and suggests uninstalling the latest version of its operating system, Windows 11, and turning off the company’s new fTPM security feature on Windows 10, both of which might help address the stuttering issues.

If you are experiencing stuttering while playing games with your AMD graphics card on Windows 11, you should consider reinstalling Windows 10 or waiting for a patch from Microsoft and AMD.

Have you experienced any stuttering issues with your device while gaming? Share your experience with us in the comment section below.


What is Steam Common Redistributables [Complete guide]

Steam is a cloud-based game distribution service, also known as a gaming library, that was built by Valve Corporation. It enables customers to download and play their purchased games on any device they choose, as well as on several PCs simultaneously.

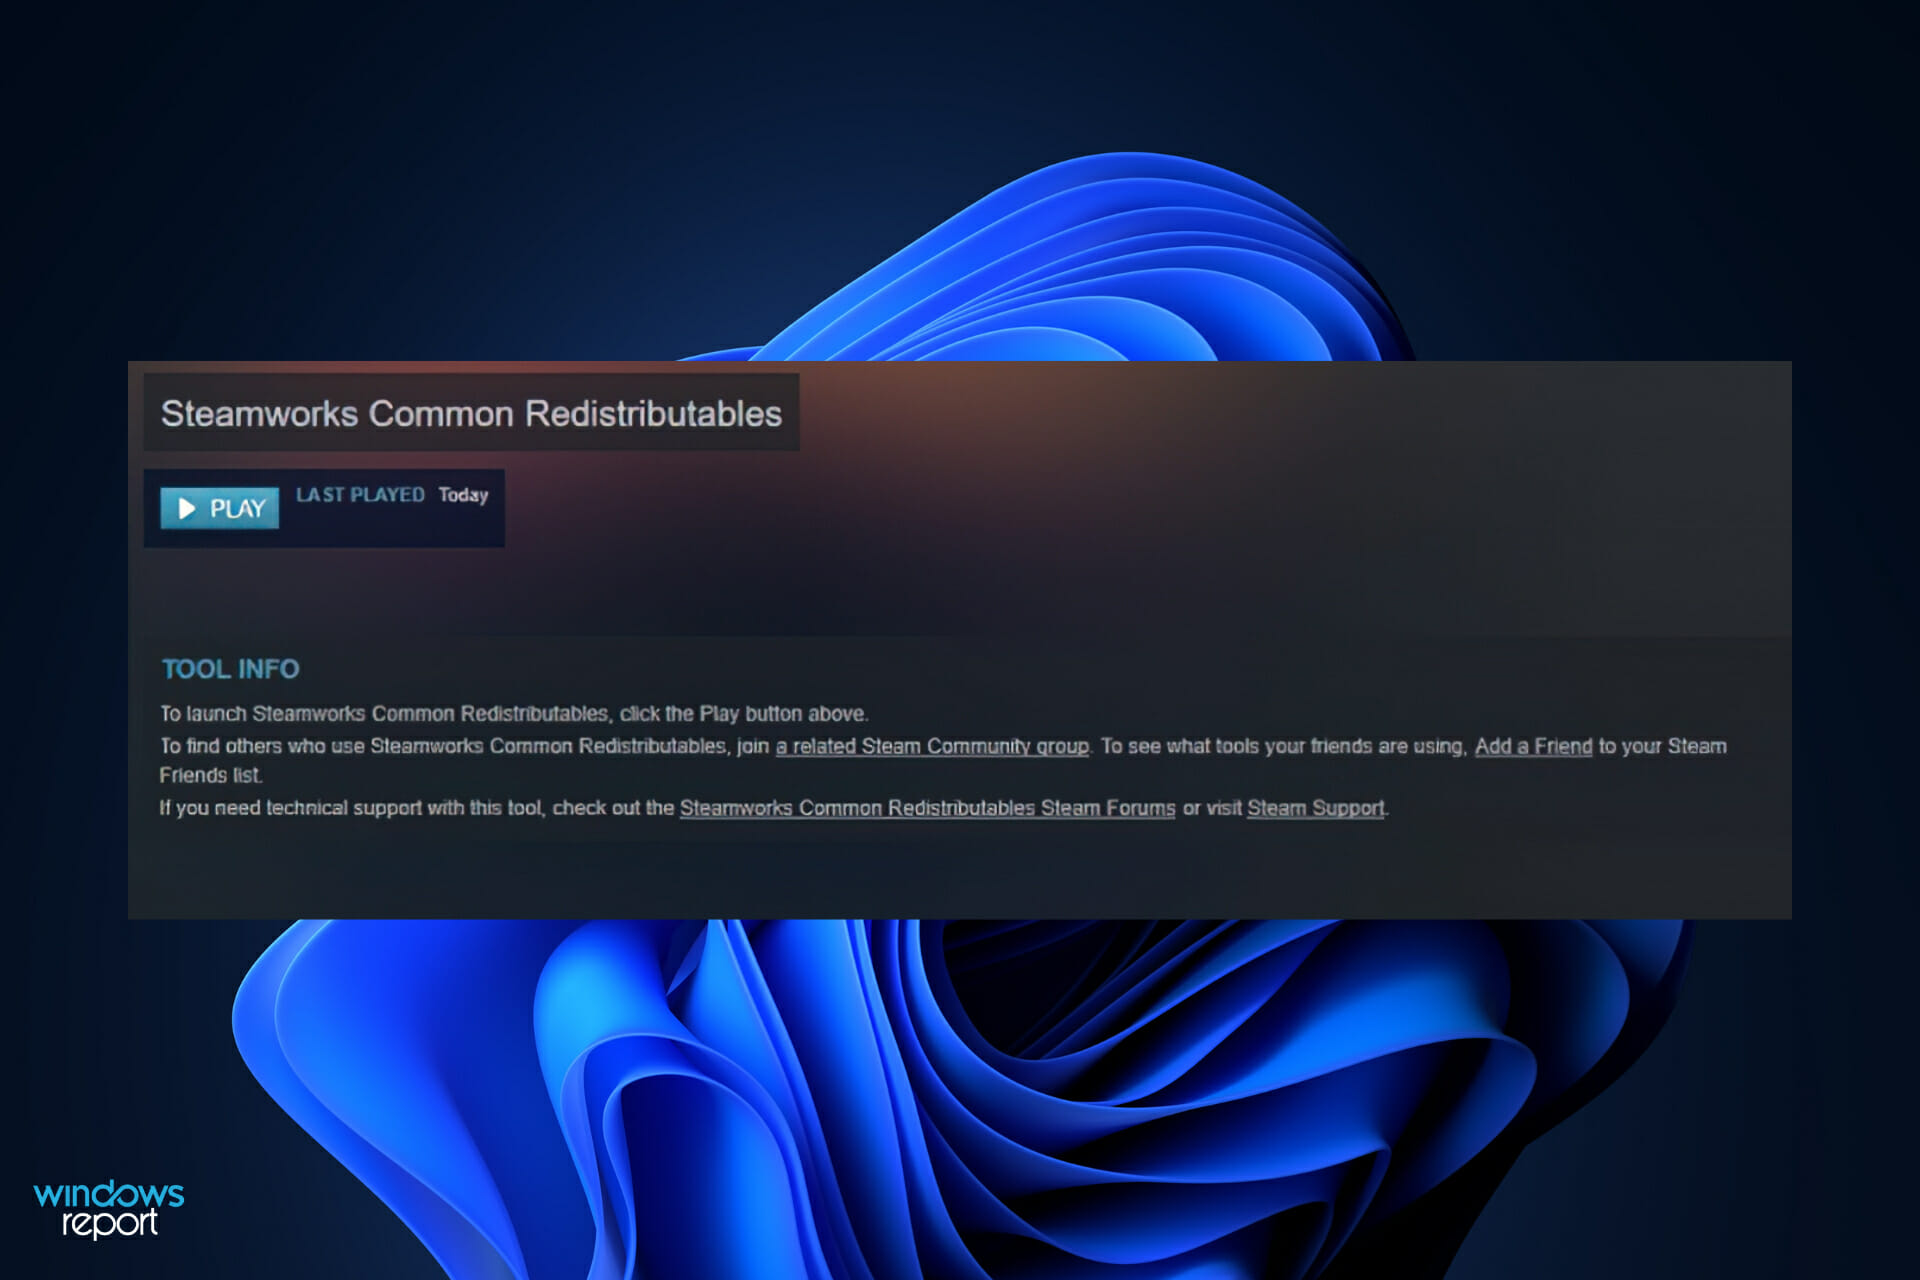
Have you ever noticed the phrase Steamworks Common Redistributables in your Steam library and wondered what it was or where it came from? If so, you’re not alone.

Follow along as we will show you how you can use and why you shouldn’t delete them, right after we see what they do for you more specifically. Keep up with us!

What do Steam Common Redistributables do?

Games require specific components to be installed on your computer in order to function properly, such as DirectX, Microsoft Visual C++,.NET Framework, and so on. Furthermore, these components are required by a number of games in order for them to work properly on your computer.

It wasn’t long ago that, when installing games, users were required to run installers for these components (known as redistributables) on each and every new one that they downloaded and installed.

As you might guess, this resulted in duplication of effort and increased workloads for both the developers and the end-users alike.

steamworks common red steam common redistributables

During the development of their software, every game developer was required to include installers for all of these components, and when installing several of them, users were required to execute these installers at each stage of the installation process.

However, with the addition of Steamworks Common Redistributables, all of the necessary and shared features will be installed whenever a game that requires them is installed for the first time on a computer.

As a result, the redistributables are nothing more than a collection of one-time-install applications that are required by apps in order for them to function correctly. The install scripts for them are generated and managed by Valve, which ensures that they are up to date.

This set of Steamworks Common Redistributables includes the following programs, which are available for both 32- and 64-bit versions of the operating system: DirectX 9, Microsoft Visual C++, .NET Framework, XNA, OpenAL and PhysX.

How can I use Steam Common Redistributables?

1. Use the Steamworks App Admin panel

  1. If you’re a developer and want to opt in to the common redistributables, you will need to open your Steamworks App Admin panel.
  2. Now go to the Installation tab, followed by Redistributables.
  3. Then check the checkboxes for the redistributables that your game or app requires, and publish your changes.

It is important to note that you do not need to be concerned with changing or otherwise interfering with the Steamworks Common Redistributables files. Steam optimizes and updates them automatically, allowing you to save storage space in the process.

It is not recommended to delete the common redistributables folder. It contains files that are required for the proper operation of games; if you do not have them, your games may fail to launch or may crash completely.

2. Hide the Steam Common Redistributables

  1. Open your Steam Library and right-click on the Steamworks Common Redistributables folder followed by Manage.steam-manage steam common redistributables
  2. Now you will see the option to hide the game which you will have to select in order to do so.steam-hide steam common redistributables

Should I get rid of Steam Common Redistributables?

No, do not remove the Steamworks Common Redistributables from your computer. Unless you have those files, any game you download will crash during its initialization phase. They, on the other hand, allow you to save space and time when you download a new one.

As soon as you download a new game, it will search through the available common redistributables files for the components it needs to integrate with its files in order for it to function properly. It is possible that removing these files can cause you trouble in the future.

Although you may have deleted the common redistributables files, it will still attempt to download them from Steam in the background so that it may continue to function. So, in essence, you won’t be able to completely remove the files from your computer.

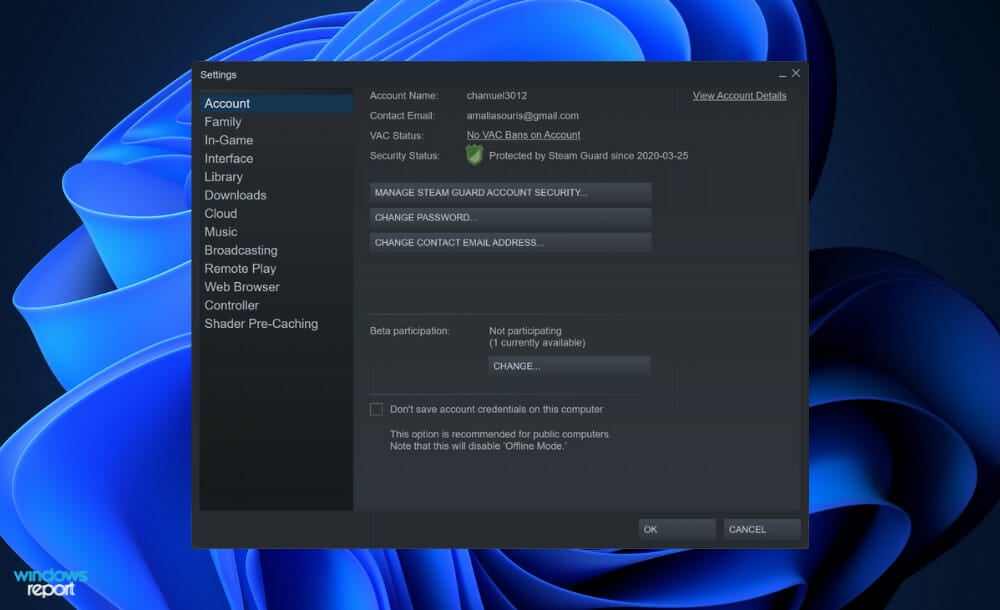
 settings steam common redistributables

Steam has made it a priority to optimize their files, as well as any subsequent upgrades, for all games running on Windows-based computer systems.

You won’t have to worry about running out of space or manually updating them. The presence of this ubiquitous redistributables folder can be a little inconvenient, to say the least. Initially, Steam would conceal the folder, and everything would continue to function normally.

But, after a recent upgrade, they began displaying this folder, which was met with displeasure by many. There is, however, a solution that allows you to conceal the folder so that it does not appear in your Steam library.

You should now understand what Steam Common Redistributables are and how vital they are for any games that you purchase through the platform.

Remember that the folder is there to assist you in saving space and time, so there is no need to delete it completely. You have the option of hiding it and allowing it to continue working in the background.

You will be pleasantly surprised to find out that you can run old games on Windows 11. Make sure to take a look at the article linked to learn how you can do it as well.

Users have benefited from reading our post on how to install a Windows 11 skin on your Steam app, so you might want to check it out too.

Alternatively, if you encounter some bugs in Steam, we have prepared a guide on what to do if Steam is not signing in to Friends on Windows 11.

We hope that our guide helped you out in the end. Let us know in the comments section below what you think of it. Thanks for reading!

Microsoft was busy last quarter, here’s everything new in Windows, Microsoft 365, and Xbox

In releasing their FY 22 Q2 earnings, Microsoft also pushed out a new document detailing some of the product changes between quarters. We’ve given the document a look, and have a look at everything new in Windows, Office, and Xbox these past few months. It covers Windows 11, the launch of games like Forza Horizon 5, the launch of Office 2021, and so much more.

Windows

Of course, we start first with Windows. The biggest story? Between Microsoft’s financial quarters, Windows 11 launched with a new look for the Start Menu, and new tools, ways to connect. In addition, Microsoft also launched Windows 11 SE, a special edition of Windows purpose-built for education and grades K-8 users.

Other Windows highlights include the launch of Windows 365, the new Microsoft Store, and changes to store policies to welcome other storefronts like Epic Games and Amazon. Oh, and let’s not forget the launch of the Windows 10 November 2021 update, which is focused on adding some enterprise features.

Office, Microsoft 365, Edge

As far as Office goes, Microsoft announced Office 2021, which comes with new co-authoring inking tools, data types, functions, and more. With Microsoft 365, meanwhile, Microsoft launched Viva Connections, Insights, Learning, to help ensure employees can stay connected to their organization’s culture. We’ll also include Edge here, too, which picked up features like Efficiency mode, new shopping, and security features, and inking features for PDFs.

Teams

Teams is always big for Microsoft, and in between financial quarters, there were a ton of announcements. Microsoft launched Teams Essentials, updates for Whiteboard in Teams, a Standout presenter mode, and tons of capabilities for Teams Phones. Also included is the ability to purchase third-party Teams app subscriptions through the Teams store, and end-to-end encryption in 1:1 calls on Teams.

Xbox

On the Xbox side, things were very busy. Between quarters, Microsoft launched titles like Age of Empires IV, Forza Horizon 5, Halo Infinite Campaign, and even Microsoft Flight Simulator: Game of the Year Edition. Other moments include the celebration of 20 years of Xbox with special controllers, a docu-series. And let’s not forget Minecraft becoming the first property on YouTube to pass one trillion views. And while not mentioned in the document as the deal won’t close until next year, we have to mention too the blockbuster acquisition announcement that Microsoft is buying Activision / Blizzard.

Other highlights

We’ve just hit the major products most people care about, but Microsoft also launched new Surface devices between its quarters. That includes Surface Duo 2, Surface Laptop Studio, Pro 8, Slim Pen 2, Laptop SE. There were a ton of Azure announcements, too, centered around data centers, IoT, AI, and more. It definitely was a big quarter for Microsoft, and with the news that Windows 11 is gaining momentum, things can only get better from here on out.

Crusader Kings III is coming to Xbox Series X|S and PlayStation 5 on March 29, 2022

Crusader Kings III, the latest installment in the popular PC grand strategy RPG franchise, is coming to Xbox Series X|S and PlayStation 5 consoles on March 29, 2022. The game was initially released on Windows, macOS, and Linux back in September 2020, and this will be the first time that the decades-old IP makes its way to consoles.

For those unfamiliar with this franchise, Crusader Kings III is a complex strategy game where players need to lead their dynasty to glory throughout the Middle Ages. The gameplay options include everything from wars, spying, strategic alliances, to royal marriages, and the PC version previously received critical acclaim.

Developer Paradox Development Studio has done a lot of work to make the menu-heavy game playable with a controller. This new console version will have the exact same content as the base PC game at launch, with existing PC DLCs coming to consoles at a later date. However, the PC and Xbox Series X|S versions of the game won’t support cross-saves at launch.

If the PC version of Crusader Kings III is already available with PC Game Pass, the Xbox Series X|S version hasn’t been confirmed for Xbox Game Pass for Console yet. However, the game is now available for pre-order on the Microsoft Store where it’s priced at $49.99.

NFT vs screenshot: All about having the certificate of ownership

NFT, or Non-Fungible Token, is a form of digital art that can be sold and purchased on a dedicated platform. But, what if you click a screenshot of an NFT? You are most likely wondering if it is as valuable as the original. Let’s find all about NFT vs screenshot in this article.

Note that NFTs can be anything digital, be it artwork, an image, a video, or even an article. People usually trade these using cryptocurrency, though that’s not always the case. There are various websites that sell NFTs, OpenSea being one of the most popular.

So let’s delve into the concept and understand the whole NFT vs screenshot debate, along with how sustainable the whole idea of NFT is.

What is the difference between a fungible and non-fungible token?

When you say something is fungible, it basically means that it can be traded for another similar item. For instance, a $10 bill can be traded for another $10 bill, or a bitcoin can be traded for another since both these items have the exact same value.

In blockchain technology, cryptocurrencies are the prime example of fungible items. For non-tech readers, stocks, are a good example.

On the other hand, non-fungible tokens are those that cannot be exchanged since each have their own intrinsic value. The NFTs fall under this category. Even a baseball card or anything that’s collectible doesn’t have an identical item to be exchanged with.

But, being non-fungible in no way indicates that these cannot be sold or resold. All it means is that these are unique and there’s nothing like them out there.

Also, there can be copies of NFTs. If there are just 10 copies, it could be a rare one and fetch a good price, while those with thousand or so copies certainly won’t be as valuable. These copies that we are referring to have nothing to do with the NFT vs screenshot thing.

What is the craze around NFTs?

By now, you already know that an NFT carries a certain value since it’s unique or one of a kind. But, anyone could copy the image or video. What actually makes it unique and valuable is the proof of ownership.

Anyone who buys an NFT gets a certificate of ownership that can be stored in a digital wallet. Along with that, the exchange is recorded on the blockchain. Though make sure that your wallet supports NFTs before going ahead with the purchase.

Many believe that NFTs are a great way of purchasing digital art. Many do it to support young talents, some as a hobby, while others take it as an investment.

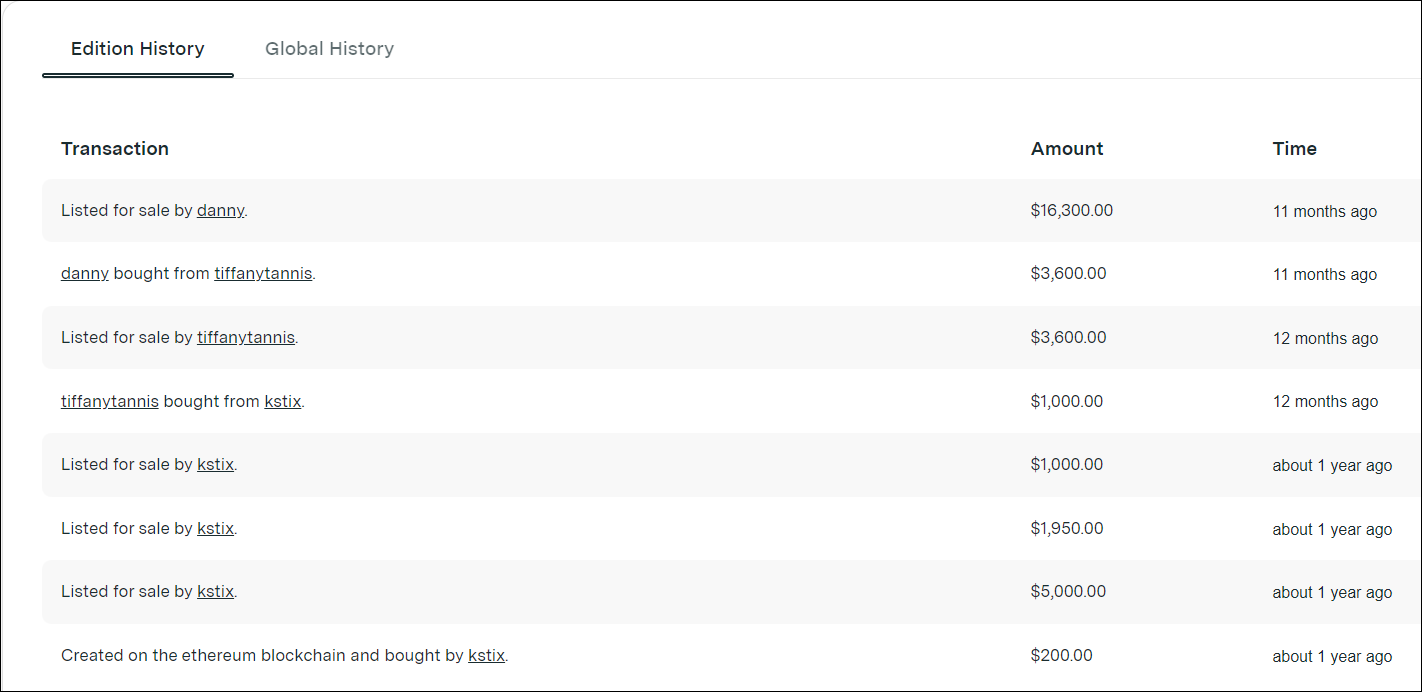
For instance, an NFT that goes by the name Gucci Ghost was initially listed at $200 and after passing through several owners, it was last purchased at $3600 and is currently available for $16300.

Gucci Ghost NFT (.jpeg) – Source: NiftyGateway

The costliest NFT to be sold to date remains at $69.3 million, created by an artist who goes by the name Beeple. It’s a collection or collage of no less than 5000 digital images, one created each day from 2007 to 2021.

Apart from that, buyers also put these NFTs on their social media, usually as avatars.

You should now have a fair understanding of how the whole NFT thing works, and the craze for it amongst people. Let’s now walk you through the main topic, NFT vs screenshot, and if the latter is as valuable as the former?

Is a screenshot as valuable as the NFT?

Honestly, it’s not really difficult to screenshot an NFT or make a copy of it. In just a few clicks, you can have the costliest ones on your computer, upload it wherever you feel like, and flex amongst your peers.

But, here’s the catch! While you have the screenshot or a copy of the digital art, you don’t have the certificate of ownership. And, that is what matters.

You can’t really sell a screenshot since any buyer would demand the ownership proof as well. Also, how an NFT has been traded in the past can be checked on multiple websites. So anyone can easily distinguish a screenshot from the original NFT.

Trade history of Gucci Ghost available at NiftyGateway

Think of it this way, while you can click a picture or take a screenshot of any famous painting, it wouldn’t fetch you a penny in the market. It’s simply a copy of the original, and many such exist. Similarly, a screenshot of the NFT is not of any value.

That should put an end to the NFT vs screenshot debate and help clear the air around the subject.

Can I create my own NFT?

Yes, you can! Anyone can create an NFT, list it on any of the specialized platforms, and sell it. But there’s a fee involved here, also referred to as gas.

Every interaction on a blockchain has to be verified and it’s done by some high-powered systems which cost you a small fee. Be it minting the NFT, purchasing, or selling it on the blockchain, each of these will require you to pay a certain fee, which is variable.

Besides, there’s no guarantee that your NFT would actually be purchased, and you might end up just spending without any returns. So, make sure you do thorough research before you get into creating, selling, or buying NFTs.

However, there are some platforms that allow you to create as well as list an NFT for free, and only charge you when it’s sold. Do check out those as well.

That’s all there is to NFT vs screenshot, and now you know why the latter has almost no value when compared with the former.

Also, if you are into cryptocurrency, check out the best security software for safer crypto-trading.

Tell us your views on the NFT vs screenshot discussion in the comments section below.

Microsoft invokes metaverse when describing future for Teams, Xbox and devices to investors

After a relatively blockbuster-like Q2 earnings performance, Microsoft CEO Satya Nadella veered into metaverse talk as he prepares investors for the company’s future in gaming, devices and communication.

During the hour-long call with investors, Nadella and chief financial officer Amy Hood tag-teamed a combo of talking points for investors that included how many businesses use the company’s Cognitive Services, access GitHub and Visual Studio or Azure PaaS services, how many employees are connected to Dynamics 365, the increase in PC demand, the explosion of cybercrimes and even how 3rd party titles underperformed expectations for Game Pass.

However, through the morass of numbers and highlights for the quarter it was the five times Nadella mentioned the metaverse that will have investors ears perk up over the coming years as they seek explanations for future expenditures from Microsoft.

Nadella mentioned metaverse when talking specifically about bringing Azure IoT, Digital Twins and Mesh to help businesses analyze and visualize processes. Nadella then went on to mention the metaverse again when strictly talking up Teams, as a way to “have watercooler-type conversations and even whiteboarding sessions.” Nadella’s last specific example of metaverse inclusion came when discussing the recent Activision Blizzard acquisition where the company plans to make gaming physically more accessible to players can “play great games wherever, whenever, and however they want.”

Satya Nadella
Satya Nadella

Nadella caps his entire conceptualization of Microsoft’s proposed metaverse in a response from a question posed by investor Mark Moerdler who asked blankly, with all the hype around the phrase, what are the key components to a metaverse and how many does Microsoft currently have. Tom Warren from The Verge captured the metaverse portion of the earnings call:


Up the stack, I would say. Dynamics, Dynamics 365 Connected Spaces, that’s a solution that’s in preview today. That’s about really being able to take a retail space or a connected factory or a building and essentially create a complete new software category, which is about managing physical processes. Just like CRM and ERP and supply chain management, we now have a suite which is all driven by Connected Spaces, which is going to automate physical processes.

Teams is going to have Mesh meetings or these immersive meetings, which will start first of all on 2D screens, whether it’s PCs or phones, and then lead up to even immersive experiences if you wear your VR or AR goggles. That’s another place.

And then, of course, gaming, that will be a natural place for us. And today, if you think about the activity, when I talked about the Forza numbers, right, that’s a place where you could say already people are investing in their avatars, people are building Minecraft worlds. And so very naturally, you can see us extend gaming as the metaverse evolves.

On the devices side, one of the things we’re very excited to be doing is what we’re doing with HoloLens and all the experience we’re gaining on the optics, on the silicon side, and all the way to the cloud in terms of some of the foundational services, driven by all the HoloLens use cases in the enterprise.

That’s the broad portfolio. We’re going to invest across the entire tech stack. The demand will come in different forms for different categories, but we feel very well-positioned to be able to catch what I think is essentially the next wave of the internet, right? Just like the first wave of the internet allowed everybody to build a website, I think the next wave of the internet will be a more open world where people can build their own metaverse worlds, whether they’re organizations or game developers or anyone else.

Microsoft has many of the components to realize its own metaverse currently, the burden now rests on the company to execute a successful transitioning of businesses, customers and consumers to integrating and creating a sense of dependency on future metaverse.

How to See What App is Using Your Camera in the Background

In the digital age, privacy is the most pressing issue to be concerned about. We may have observed or come across individuals who have taped their cameras or disabled the microphones on their computers.

Consider the following scenario: you are working on your laptop when you notice that the web camera light is flashing. Wouldn’t it be nice to know which program is using your webcam and be able to identify it?

The software in question could be legitimate (such as Skype), or it could be malicious (such as ransomware). It is critical that you look into this further, especially if this occurs more than once.

Our discussion today will cover how to determine which application is using your webcam in the background on Windows 11, as well as how to pick which applications can utilize or access your camera right after we see some of the scenarios in which we could get spied on.

Can I know if someone is spying on me though the camera?

You may be familiar with the term Zoom Bombing, which refers to when hackers interrupt online meetings with a barrage of junk emails. Whether this has happened to you or someone you know, your computer’s webcam has never been more important than it is now.

However, webcams, like any other technological gadget, are susceptible to hacking, which can result in significant and unprecedented exposure of personal information.

A webcam hacker does not require much in order to gain control of your webcam. All that is required is the development of malware that hijacks a webcam, remotely installs it into your computer, and then begins taking films and photographs of you without your awareness.

camera folder app using camera in background windows 11

Always keep an eye out for signs that the camera is moving or rotating without your permission. Observe for any strange movement, as this could be an indicator that someone is spying on your every step.

In the event that a hacker uses your webcam to record video or audio, such video or audio recording will be preserved among your other existing storage items. That means that if a file appears out of nowhere, it would be considered a red flag by the system.

Look for files you did not create, especially in your webcam recordings folder, and delete them if you find them. You can’t completely rule out the possibility that the hacker has moved some of their files and some of your files to new directories or to a location.

Is your webcam’s indicator blinking oddly or turning on by itself without your prompting? Then someone could be in control of your computer without your knowledge or consent.

Maintain a constant state of alertness. Malware can sometimes be disguised as legitimate software and installed on your computer. This is especially true if you have a habit of downloading programs from untrusted sources, which allows a malicious app to gain access to your OS.

How can I find out which app is using my camera in the background on Windows 11?

Access Privacy & security

  1. Press the Windows key + I to open the Settings app, and navigate to Privacy & security in the left panel followed by Camera from the right side.privacy-camera app using camera in background windows 11
  2. Here you will find a list of apps that have or don’t have access to your camera. If you want to change the permission to a certain app, simply click on the toggle next to it.let-apps-access-camera app using camera in background windows 11

Finding out which application is using your PC’s camera is a straightforward process. Detailed information can be found in the Privacy & security settings of your computer.

In the same way, you may view the usage of Location and Microphone services and disable access to them at any time.

We recommend that you check which apps have access to your peripherals regularly to make sure no malware has gained access to them in the meanwhile.

Sometimes camera settings or updates can remove your default photo directory. You can easily restore it by following this Camera Roll recovery guide for Windows 11.

What is malware and how can I protect myself?

Malware infection is software that infects your computer in order for cybercriminals to gain access to, or harm, your system or device, including accessing your camera.

Note that malware is an abbreviation for malicious software which is used to steal information and carry out malicious operations on the Internet.

It is most commonly spread through the download of programs into your computer or mobile device. For example, you can unknowingly download a software application that appears to be genuine but is actually malware designed to compromise your computer’s security.

However, direct downloads while surfing websites aren’t the only way to install malware onto your computer. You may infect your computer or device by opening or downloading attachments or by clicking on links in emails or text messages that have been sent to you.

Installing antimalware software solutions is one of the most effective methods of protecting oneself from malware. The use of it adds an extra layer of protection when you are downloading something.

It is possible to configure the software to run automatically, allowing files to be inspected while they are being downloaded. Alternatively, you can configure your antimalware software to run scheduled scans of your computer system.

When downloading something from the Internet, it is vital to be cautious about your actions. You and your machine are both safer when harmful software is stopped at the source. Downloading programs, upgrades, and customizations should be done through legitimate app stores.

We recommend that you use professional and legitimate antivirus and antimalware software for your PC. Alternatively, if you really want to disable the Windows 11 antimalware service executable, check out the article linked.

And lastly, for those out there who got their virus and threat protection compromised on Windows 11, take a look at what to do in order to fix them.

If other apps are using your camera, you can encounter Webcam JS error, so it’s important to ensure that your camera can be accessed properly.

Many encountered Camera reserved by another app error, but we have a dedicated guide that should help you fix it.

Was this guide helpful for you? Don’t hesitate to tell us in the comments section below. Thanks for reading!

How to up your emoji game in Microsoft Teams

Communication is never easy. Nowhere does this fact hold more water, than when you have to express yourself in written format. Thankfully, as far as online communications are concerned, we’ve emojis to fall back on.

And if you’re a Teams user, you’ll be spoiled with options; especially since the time Microsoft revamped all existing emojis of the Teams app. In what follows, we’ve covered everything and anything you can do with emojis on your Teams app and keep those conversations alive. So let’s jump right in.

Sending sticker in Teams

Like many other messaging platforms today, Teams has made using emojis feature a simple affair. Here’s how you use emojis in Teams:

  1. When you are sending a message, click on Emoji.
  2. You’ll then get a list of emojis to choose from.
  3. Pick a specific emoji that best describes your emotions.
  4. Click on it to add it to your message.

microsoft teams app

The emoji will be added to your message. All you now have to do is press Send for the emoji to appear along with your message.

React to Chats and Messages

Apart from sending different emojis in your text messages, you also have an option to react to text from your teammates. Liked the opinion shared by colleague? Hover over the text until you get a host of default emojis to pick from. It will be a series of most commonly used Smilies and the thumbs up sticker.

Click on a single emoji and your reaction will appear instantly for everyone to see. Also, the sender of the text will get notified about your reaction.

emoji reaction in teams

A lot to choose from

In our opinion, what makes Teams interesting are not only the emojis you can send—almost all apps have this feature, but the fact that you get a dearth of options to select from.

In the step 1 above, when you click on Emoji you’ll get the list of options to select from. There are Smilies, as shown above. But there are quite a few other emojis as well: Hand gestures, People, Animals, Food, Travel and Activities, are some of the categories that make up the emoji feature of Teams a success.

emojis about foodemojis about travelemojis for people

Wrapping it all up

Expressing your feelings through the written word is hard. By using the emojis provided by the Teams app, you can ease the process (and possibly) make your interactions more satisfying. We hope that these pointers helped you in getting the most of the Microsoft Teams. However, don’t stop here; we’ve covered a lot of ground on making the most out of Teams.

Second Monitor Not Detected in Windows 11: 4 Tested Solutions

If your second monitor is not detected in Windows 11, the issue can be caused by incorrect settings, cable problems, or hardware compatibility issues. Fortunately, Windows offers multiple built-in methods to help you connect and extend your display successfully.

What do I do if Windows 11 is not detecting my second monitor?

1. Restart your PC

  1. Open the Start menu from the left side of your taskbar.
  2. Then click on the Power icon from the right.
  3. Select Restart from the list of options to restart your PC.

Restarting your PC is the easiest solution to apply if the second display is not detecting. It can be a temporary problem, and a simple restart of Windows is enough to fix it. In fact, the resolution has worked on Windows 10 PCs as well. 

If you are using a laptop connected to an external monitor for a better viewing experience, then simply closing its lid is said to work for many users.

Often the reason behind the error can be a conflicting program that is running in the background. However, when you restart the computer, the program running gets closed, and you may get away from the issue.

2. Update the display driver

  1. Press the Windows key + R to open the Run dialog box.
  2. Type devmgmt.msc on the search field and hit the Enter button.
  3. Locate and expand the Display Adapters tab on the Device Manager window.
  4. Right-click on your graphics card, and from the list of options, select Update driver.
  5. Select the Search automatically for drivers option as the Update driver window opens.
  6. Now, wait until Windows completes the search for the latest driver.
  7. Finally, follow the simple on-screen process to update your display driver to its latest version.

An outdated display driver can cause conflicts between the software and hardware components of your PC.

Thus, if you haven’t updated the display driver recently, following the steps above will update it and fix the issue.

You can also opt for driver update software tools to keep your display driver updated automatically and fix every driver on your PC.

⇒ Get Fortect Driver Updater

3. Change the display frequency

  1. Press the Windows key + I to open Settings on your PC.
  2. Then, click on the Display tab under System settings.
  3. Now, scroll down and click on the Advanced display option.
  4. Then, from Select a display to view or change its settings tab, choose the display for which you want to change the frequency.
  5. Finally, from the Choose a refresh rate tab, select a refresh rate that both the displays support.

Having a different refresh rate on the second monitor can cause a temporary software conflict on your system.

Eventually, that may lead to Windows not detecting the monitor. However, you can resolve the issue by changing the display frequency settings.

4. Roll back the graphics card driver

  1. First, click on the Search icon on the toolbar and type Device Manager.
  2. Now, open Device Manager from the search result.
  3. Then, locate and expand the Display adapters tab from the list in the Device Manager window.
  4. Right-click on your graphics card driver and select Properties on the list.
  5. On the Properties window, click on the Driver tab and select the Roll Back Driver option.
  6. On the warning pop-up, select the option Previous version of the driver performed better.
  7. Finally, click on the Yes button below.

Occasionally, an updated driver version comes with bugs. Rolling back to the previous version will resolve the problem in that case.

6. Check physical connections

Ensure the cable is firmly connected to both your PC and the monitor. If possible, test with another cable or port type (HDMI, DisplayPort, USB-C) to rule out hardware issues. A loose or damaged cable is one of the most common reasons for a monitor not detected in Windows 11.

7. Use the Detect Displays option

Windows can manually search for connected displays. To do this:

  • Press Windows + I to open Settings.
  • Go to System > Display.
  • Scroll down and click Multiple displays.
  • Click the Detect button next to “Detect other display”.

This forces Windows to recheck connected hardware and may make your external monitor appear.

8. Set the correct input source on the monitor

If the monitor is on the wrong input channel, Windows will not be able to display an image. Use the monitor’s on-screen menu to ensure the selected input matches the cable type you’re using (e.g., HDMI, DisplayPort, USB-C).

9. Check projection mode settings

Sometimes the display is connected but not configured to extend or duplicate. To check:

  • Press Windows + P to open the projection menu.
  • Select either Duplicate or Extend.

If it’s set to “PC screen only,” the second monitor will remain inactive.

How do I customize my second monitor?

While using a second monitor with your PC, Windows offers four different options. Depending on your need, you can select one and start working with it.

Here is an overview of how to customize your second monitor as per your work requirement.

As you connect the second display with your computer, Windows 11 will mirror your primary display on it. If you need to change the usability, follow the steps below.

  1. Press Windows key + P on your keyboard.
  2. Then from the list of following options, choose the one that suits your purpose.
  • PC screen only will allow you to see things on a single display
  • The Extend mode will let you see your desktop across multiple screens where it’s possible to use two displays for different activities
  • The Duplicate option comes by default, as it mirrors the primary display on the second one
  • With The Second screen only feature, you can see everything only on the second screen

There are various dual monitor tools for Windows 11 available that may help improve your experience in a dual monitor setup. Third-party dual monitor solutions allow you to customize a lot more than you can usually do on Windows.

Hope the workarounds were helpful to you. Do not hesitate to use the comments section below to tell us which method worked for you.

How to pin a file in Microsoft Teams

Since the outbreak of Covid-19 pandemic, dealing with apps providing online team collaboration—and Microsoft Teams in particular—has become a crucial aspect of the job for most white-collar professionals. In fact, as those of us enmeshed in the Microsoft ecosystem have realized, if your work involves any sort of communication, Teams is one of those tool that you simply can’t work without anymore. Apart from a host of handy features, the Teams app lets you share important files with your colleagues.

If there are some files that you’ve to access regularly, it’s better if you pin them in the Teams app, so you can get instant access to the essential files; moreover, this will also help you organize things in a neat and easy manner.

Let’s get started.

How to pin a file in Microsoft Teams

You can easily stick a file at the top of your Teams app. After you’ve launched the Microsoft Teams app, follow the steps below for pinning your file in Microsoft Teams:

  1. Head to the File tab. From there, pick the document you’d like to pin and click on the circle at its left.
  2. A host of options will pop up; choose the Pin to top in the toolbar.

microsoft teams file tab

That’s it; you’ve just successfully pinned a file in Teams. To unpin it again, select the file and click on the Edit from the top. Then click on Unpin. Note that you can only pin three files at any given time.

Also, if you’ve pinned multiple files at a time, you can also move them around rather easily. Just click on Edit Pin, and select Move Left or Move Right to shuffle them around.

Pinning files in Microsoft Teams

And that’s all, folks. If you use some files frequently, pining them to the top of Teams apps is a suitable approach to workflow organization. Hopefully, following the above steps helped you pin your files in Teams without any hassles. But that’s not all; Microsoft Teams has a lot to offer, so make sure you’re making the most of it.

There are now 1.4 billion monthly active Windows 10 or Windows 11 devices

Among some of the interesting tidbits from Microsoft’s latest earnings call are some new numbers on the Windows front. The company’s CEO Satya Nadella reported that there are now 1.4 billion monthly active Windows 10 or Windows 11 devices.

The new milestone, which seems to now consist of all types of devices running modern Windows (Hololens, Xbox consoles, and also Windows 11 devices themselves,) is just a small uptick from Microsoft’s last report. Back in April 2021, the company said there were 1.3 billion monthly active Windows 10 devices. However, at that time, Windows 11 was not released and wasn’t in that figure.

Even with the uncertainty of the “Windows 11 difference” in the numbers, this hints that Windows is still key in Microsoft’s profits despite the pandemic slowing down the PC industry. Windows OEM revenue was up 25%, and Surface revenue increased 8% overall this quarter for Microsoft.

Windows 11 was released back in October of 2021, and it’ll be four months since then this February. Reports have said that Windows 11 adoption is approaching 10%, which could be seen as quite low, but enthusiasts have shown a positive reaction to the new OS.

WinRAR 6.1 improves support for Windows 11 and drops it for Windows XP

RARLAB, which if you didn’t know is the developer of the archiving software WinRAR, just released WinRAR 6.1 this month.

This totally fresh version of WinRAR changes the system requirements, and therefore support for Windows XP has been totally and permanently dropped in 6.1.

So, if you still haven’t decided to move on from this obsolete Windows version, we strongly recommend you do, for safety reasons, and also to be able to keep using your favorite software.

Windows XP loses support for the latest version of WinRAR

This shouldn’t come as a surprise, as many developers have already ended support for Windows XP and will pretty soon end it for other versions of the OS as well.

For the time being, the minimum required operating system for WinRAR 6.1 is Windows Vista, which by the way is not supported by Microsoft anymore, and Windows 7 and Windows 8.1 are supported until January 2023.

As a matter of fact, WinRAR 6.1 is the first version of the application that supports Windows 11’s new context menus, as Microsoft changed the File Explorer right-click context menu in its Windows 11 operating system.

The tech giant added a newly designed context menu to File Explorer but kept the classic context menu as one of the options so that users can open it if required.

As a result, numerous third-party application entries are not displayed in the new context menu right now as companies need to publish updates to support it.

However, one of the limitations of the context menu is that programs are allowed a single top-level entry or menu item only, thus the new WinRAR context menu on Windows 11 lists all WinRAR commands when selected.

Keep in mind that users can change the functionality in the Cascaded context menus section of the Preferences, option which determines whether a submenu with all WinRAR commands is displayed.

Disabling the option changes the context menu items to a single extraction or archiving command, which users may select under Context Menu Items.

Also worth mentioning is the fact that the new Legacy context menus option may be used by WinRAR users if menu items are missing from the legacy context menu of Windows 11 or in the context menus of third-party file managers.

And before you get the wrong idea, we need to clarify that the setting is only available on Windows 11 devices.

WinRAR 6.1 introduces several other changes and improvements. The archiver supports the extraction of .zst and .zipx archives now.

The option to create RAR5 recovery records has a new maximum limit; it is now 1000%, which means that the recovery volumes size can be up to 10 times larger than the actual size of the RAR volumes.

A recovery file size larger than 99% of the archive is only supported by WinRAR 6.1 or newer, and the same is true if the number of recovery volumes is greater than the number of protected RAR volumes.

If you want to use this latest version of WinRAR you don’t have to go to extreme lengths to get it, just download it from the official page.

Microsoft addresses Windows 11 audio and taskbar issues in new optional patch

Microsoft has just released the KB5008353 update for Windows 11, a new optional patch that fixes various issues related to audio devices, app icons in the taskbar, as well as multi-monitor setups. As usual, this patch is part of Microsoft’s non-security preview “C” releases for all supported versions of Windows, and all bug fixes included in these optional patches will roll out to all users with next month’s “Patch Tuesday” updates.

Today’s KB5008353 patch includes a fix for an issue causing some devices to stop working when connected to multiple displays, and Microsoft has also addressed the bug preventing some apps from rendering colors correctly on select HDR displays. You can find a detailed list of bug fixes and quality improvements in the KB5008353 patch below:

  • Updates an issue that causes the audio service to stop responding on some devices that support hardware-accelerated Bluetooth audio.
  • Updates an issue that affects icons for apps when the apps are not running. On the taskbar, these icons might display as active as if the apps are running.
  • Adds a new Your Microsoft Account page to the Accounts category in Windows Settings for Home and Professional editions.
  • Updates an issue that incorrectly shows the volume icon in the taskbar as muted.
  • Updates an issue that causes a device to stop working when it’s connected to multiple displays.
  • Updates an issue that affects the auto-hide feature of the taskbar. The taskbar might not reliably appear when you hover over the primary or secondary display.
  • Updates an issue that might prevent icons from appearing on the taskbar of a secondary display.
  • Improves auto brightness to provide a better response under low light conditions on all the supported systems.
  • Updates daylight savings time to start in February 2022 instead of March 2022 in Jordan.
  • Adds the HelpWith feature, which uses Microsoft Bing technologies to suggest Help topics that are relevant for each Settings page.
  • Updates an issue that displays outdated battery percentages for connected Bluetooth devices on the Bluetooth and other devices page in Settings.
  • Updates a known issue that might prevent some image editing programs from rendering colors correctly on certain high dynamic range (HDR) displays. This frequently affects white colors that might display in bright yellow or other colors.

You can download this optional patch from Windows Update right now, though be aware that Microsoft has acknowledged an issue causing recent emails that are stored locally to not appear in the search results of the Microsoft Outlook desktop app. It’s possible to mitigate this issue by disabling Windows Desktop Search, which will force Outlook for Windows to use its built-in search feature. However, Microsoft is already working on a more permanent fix that will come in a future Windows 11 patch.

Published Microsoft document hints at next major Windows 11 update

Whether you moved on from Windows 10 and upgraded to the new operating system or not, you might want to know that something is stirring behind Microsoft’s gates.

Thus, Windows 11 testers could soon begin receiving near-final bits from the next major feature update codenamed Sun Valley 2.

Do you remember Sun Valley? Everyone was talking about it last summer when we thought that Windows 10 was in for a major revamp.

However, it turned out that the Redmond-based tech company was actually working on Windows 11, instead of the Sun Valley update for the previous OS.

And, it appears that we’re about to learn what this project is all about really soon.

Windows 11 22H2 is on its way to our PCs

For the time being, Windows 11 is receiving early builds from the active development channel (rs_prerelease) which ultimately is expected to be designated as the Sun Valley 2 or Windows 11 22H2 release.

Insiders are constantly getting new builds from the Dev Channel, but Microsoft officials have confirmed that current releases are not tied to a specific feature update.

What this technically means is that the current and upcoming preview features or improvements may or may not ship with the final version of Windows 11 22H2.

We have to keep in mind that Microsoft could take some, all, or none of the features in the existing rs_prerelease builds and move them into any Windows 11 release, in October 2022, October 2023, or later.

A new document has appeared online suggesting that the main base of Windows 11’s current development branch will be declared Feature Complete internally by March 4.

This doesn’t mean Microsoft will stop adding features to preview builds in Dev Channel, so don’t be alarmed if you haven’t seen some of your favorite features added yet.

On April 4, Windows 11 Nickel release will be declared Config complete, and no other major changes will be introduced.

Microsoft has confirmed that it is focusing on bug fixes and under the hood improvements for Windows 10 rather than any new features, which will be reserved for Windows 11.

Excited about Sun Valley 2 for Windows 11 and all of its new features? Share your thoughts with us in the comments section below.

Use wedding slideshow software to create unique presentations

The wedding slideshow is the only photo album that will serve as a lasting reminder of your special day after the vows have been said and rings have been exchanged.

Despite the fact that having an album with printed images is unquestionably more romantic, you are most likely eager to share the wonderful news with the entire world, or at the very least with the entire Internet.

By using IceCream Slideshow Maker, you can build a slideshow presentation using your wedding images and use it to help spread the news about your event. Continue reading to find out how to create one right after we see what the advantages of using this software are. Follow along!

What are the advantages of using IceCream Slideshow Maker?

Being able to keep up with the quick pace of technological advancement can be difficult on occasion. Our occupations require a great deal of us, such as the acquisition of new abilities that we must learn. In order to create a professional-looking presentation, it is necessary to possess a wide range of abilities.

It’s a good thing that IceCream Apps was able to find a solution. They offer a large number of software solutions for beginners. The IceCream Slideshow Maker is one of the applications they developed that stood out from the rest.

The second edition of the app starts off with a bang, as it includes a slew of significant enhancements, such as the ability to create slideshows more easily, the ability to upload photos more quickly, photo shuffle, drag and drop, and an improved graphic user interface, as well as several bug fixes.

download icecream wedding slideshow software

Making a slideshow with Adobe Premiere or Corel VideoStudio necessitates extensive knowledge of the software and necessitates a significant investment in other applications. However, to use the IceCream Slideshow Maker Pro, you do not need to have advanced technical abilities.

More than that, you can quickly and easily create a professional slideshow that will make you stand out from the competition. The program includes intuitive controls that allow you to perform miracles and exhibit ordinary photographs in a visually amazing manner.

Before pressing the last button, we made a point of double-checking everything. When it comes to playing back the transitions, this slideshow video generator is really user-friendly. An included media player allows you to preview the transition effects and the complete slideshow.

IceCream Slideshow Maker Pro provides its users with a plethora of transition options, with over 26 different transitions to choose from. You may also adjust the display time of each photo in the slideshow by selecting the type and duration of transition effects, as well as the time between each shot.

How can I create a wedding slideshow in Windows 11?

1. Use IceCream Slideshow Maker

  1. First and foremost, you will need to download the IceCream Slideshow Maker software. You can later upgrade to the PRO version if you wish to have more options.download-icecream wedding slideshow software
  2. There are two ways to add files to the program. The first one suggests adding single files by clicking the Add photo option or Add file to start your photostory button, or you can add more files with the Add Folder button. JPG, JPEG, BMP, or TIFF formats are supported.icecream-button-add wedding slideshow software
  3. When the files are added, the main window is divided into two sections: file queue at the left and preview zone with settings at the right. First and foremost, decide on the duration of the slides. You can choose the values from 1 to 20 seconds in the Time section.time-icecream wedding slideshow software
  4. The program offers over 20 transition effects (Pixelate, Zoom, Wipe), and also the Random and None options. Preview them by pressing Play on image’s thumbnail in the queue. icecream-transition wedding slideshow software
  5. You can move the items in the queue by selecting one of them and using the arrows at the side. Alternatively, just drag and drop it to a desired position in the queue. You can delete certain files from the queue by clicking on a recycle bin icon in front of it.icecream-delete wedding slideshow software
  6. Find the Resolutions option under the preview zone and choose a necessary resolution from the dropdown menu. Then, configure the Transition duration setting in the same way. Check the Scale to fit box if you want all your images to fit the screen.icecream-res wedding slideshow software
  7. A romantic piece of music should be playing in the background of your wedding slideshow. To include a song in the slideshow, select Add audio from the settings panel. You can set the audio offset or fade options right below, or even loop the song.audio-icecream wedding slideshow software
  8. Before making a wedding slideshow, click on the Preview button to make sure the presentation looks good. Finally, hit the Create button in the bottom right corner to start the process.create-slide wedding slideshow software
  9. While the slideshow is being constructed, you can use the buttons at the bottom right to pause, resume, or cancel it at any time. stop-slide wedding slideshow software
  10. When the project is completed, a popup window will appear immediately following the completion of the project. Click on the Open folder option in this window to see the slideshow. And finally, simply click on the YouTube button, and the video will be uploaded to your channel immediately.youtube-slide wedding slideshow software

2. Use Promo Online Slideshow Maker

  1. Head to Promo Online Slideshow Maker’s official website then click on Start now.promo online slideshow wedding slideshow software windows 11
  2. Next you will need to sign up for free. To ease the process use your google account.sign up promo wedding slideshow software windows 11
  3. Now type wedding slideshow in the search bar and make sure that the Videos option is selected.search-promo wedding slideshow software
  4. From the list of templates you can choose any you want, for now we will choose Beautiful Wedding #2. Note that to use an existing template you will have to upgrade to the Premium version.wedding-template wedding slideshow software
  5. From the left side you can click on Text to customize it, Media to add new pictures or videos or even use existing ones, and Music to change the background audio and edit it.media-text wedding slideshow software
  6. If you hover over the video on the bottom side you will find that an Edit button will show up. Here you can choose to change the Color filters, Trim, Duplicate or Replace the video.edit-video wedding slideshow software
  7. Next, you can click on the play button to see what the video looks like so far, and lastly click on the Save & Preview button to finish your slideshow. That’s it!save-preview wedding slideshow software

What are some alternatives to a wedding slideshow?

A priority for the majority of couples is figuring out an innovative approach to preserve their wedding photographs in perpetuity for years to come.

Both you and your photographer put a lot of effort into planning. However, while wedding albums or slideshows are unquestionably the tried-and-true tradition and are unquestionably sufficient, they are not your only option for keeping your precious memories.

Even if you have a large book filled with every beautiful image from your wedding day or a short slideshow video, consider how often will you actually look at it. When you’re celebrating an anniversary, when guests come to visit, and when you’re feeling nostalgic, but what about other times of the year?

Probably not on a regular basis. If you don’t want to keep your wedding images hidden away and only look back on rare occasions, we enjoy the concept of presenting them in creative ways that you can view on a regular basis, if not every day.

A lovely wooden box to hold all of your wedding memories should be found or made. It’s even possible to include your invitations and dried flowers from your bouquet in the box, which will help to bring the box to life.

Instead of a static album, your heritage box is organic and can alter and develop together with you as your family grows. We adore the idea of showcasing your wedding images as original artwork in a gallery setting.

Also, a Blog Wall Collage for the bride and groom is a wonderful way for couples who want to tell the tale of their wedding rather than just show a single photo to do it.

If you however wish to add some audio to your slideshow, we have prepared a guide for you to find out how you can add music.

In the case that you enjoyed the software and want to discover what other related apps are there, take a look at our article on IceCream PDF Converter.

Alternatively, in case you didn’t enjoy the IceCream app that much, here are five of the best slideshow makers for Windows 11, so you can choose an alternative software.

Let us know in the comments section below if you found the guide helpful. Thanks for reading!

Chrome is expected to get a major picture-in-picture mode update

Wondering what goes on behind closed doors at Google? Well, the company is planning to make a big change to Chrome’s picture-in-picture mode that will allow users to open non-video content.

And, this new version of picture-in-picture might even support interactive media contents such as images or certain types of embedded content like audio while you continue to browse the web.

Google Chrome’s existing picture-in-picture feature can only play videos. However, soon, it will be possible to play interactive HTML content in the picture-in-picture mode, making multitasking easier for users.

This new project is currently called PIP 2.0 and it aims to enable interactive HTML content in the PiP window.

Keep in mind that interactive content is a subjective term, so we don’t how the search engine giant is planning to upgrade picture-in-picture mode, but you can expect support for audio, embed, iframe, img, and more.

This is part of a series for the new picture-in-picture v2 feature that allows always-on-top windows with arbitrary content.

The CL introduces the new window subtype and sets the Z layer to show it on top of other content, and Followup CLs will add additional behavior changes.

All this information was provided by Google, as they updated one of the latest posts on Chromium.

There’s even another Chromium post stating that a new code in Chrome will hide the window frame and location bar (after a timeout) when the [PiP] window loses focus and add it again when the focus is regained.

The promise will allow a clearer async API and would offer a way to expose that interactive isn’t supported by the platform.

Google also mentioned the fact that it will disable permission prompts and autofill or similar sensitive features and also remove regular keyboard events to reduce the attack surface of the Picture-in-Picture window.

In addition to upgraded picture-in-picture, Google is also believed to be working on additional design improvements for Chrome on Windows.

Excited about this new feature for the Chrome browser? Share your thoughts with us in the comments section below.

Dark Souls 3 Online bug leaves you exposed to cyber attacks

Dark Souls players out there will surely agree that the game is already difficult enough, without any bugs or glitches transforming into literal hell, as some users so elegantly put it.

And, as if the difficulty alone hasn’t deterred tens, maybe hundreds of users from playing it, it turns out that playing it online could open up your computer for malicious third parties.

Furthermore, cybercriminals can swoop in, steal sensitive data, and brick it completely if that’s what they choose to do.

Dark Soul online servers are currently down

Dexerto reports that playing the popular game online comes with a Remote Code Execution (RCE) vulnerability.

As you might know, RCEs are usually considered among the most dangerous vulnerabilities, as they allow third parties to run any code on the affected device, which includes ransomware, malware, and infostealers.

This vulnerability was demonstrated on a live stream from The__Grim__Sleeper, who was playing the game for his 70,000+ viewers on Twitch when the game crashed.

Much to his surprise, immediately after, a Microsoft PowerShell opened up by itself, and the text-to-speech feature was triggered, causing Microsoft’s robotic voice to start criticizing the streamer’s performance.

The actual story here is, believe it or not, that delivering the message was the whole point of the whole Twitch demonstration.

Apparently, the hacker responsible for the attack first tried to contact FromSoftware, Dark Souls developers, to raise awareness about the issue, but wasn’t taken seriously.

Thus, FromSoftware has now shut down its servers for Dark Souls, Dark Souls 2, and Dark Souls 3, which all seem to be vulnerable to the flaw. 

Fans are even worried that the premiere of upcoming game Elden Ring could also be vulnerable, but creators did promise that they will look into it.

There is, allegedly, an anti-cheat mod for Dark Souls 3, called Blue Sentinel, which was developed by the game’s community, and was patched to protect endpoints against the vulnerability.

Bandai Namco, the game’s publisher, took to Reddit to thank the community for drawing their attention to the flaw. The servers are expected to come back online once the issue is permanently fixed.

U.S. president Joe Biden backs right to repair, mentions Microsoft changing policies

In a January 24 Tweet, U.S. President Joe Biden indicated his support for the right for consumers to repair their own devices. The President also specifically mentioned Microsoft by name, right alongside Apple, indicating that both companies are now changing their policies.

It’s likely that Biden is referring to Microsoft’s recent decision to hire a third-party organization to study the environmental and social impacts of increasing consumers’ options to repair their devices. Additionally, there’s the fact that Microsoft also highlighted the repairability of the Surface Laptop SE and partnered with iFixit on Surface repair tools for authorized repair technicians.

On the political side, President Biden has long been tough on this issue which was first raised under the administration of former President Trump. Back then, the FTC looked into how device makers are restricting the rights of consumers to fix products. Under Biden’s administration, the FTC published a report, indicating that it has the right to take action against groups who stop end-users from fixing products. Biden himself also signed an executive order which enforces the FTC rule.

It’s important to note, though, that Biden sees the right to repair as a competitive issue since reduced repair options could increase costs for end-users and shut down smaller repair shops. On Monday, Biden mentioned both tractors, as well as smartphones when talking about right to repair.

As for the Apple side of the story, Apple recently detailed how it would make it easier to repair iPhones at home. In November, the iPhone maker launched a Self Service Repair program, which allows tech-savvy customers to complete iPhone 12 and iPhone 13, and even M1 Mac repairs on their own using official genuine Apple parts and tools.

Youtube Banner Maker for PC: 10 Best to Use in 2026

There are many ways a business can market itself online, and in this day and age having an online presence for your business is critical.

The look and feel of your web page or YouTube channel can severely impact the way you are perceived and that can mean losing or gaining customers/subscribers.

Your YouTube channel should represent who you are and the types of videos you want to make. Your channel art should represent everything you want to do and people should see it too.

In order to properly represent your YouTube channel, you will need specialized software that allows you to create interesting banners that fit your channel and personality perfectly.

In this article, we will explore some of the best software and web options that allow you to achieve professional results.

Best YouTube banner software to grow your audience

Adobe Creative Cloud Express (formerly Adobe Spark)

Adobe Creative Cloud Express is the best online YouTube banner, maker. This app helps you create a good-looking banner for your YouTube channel with ease.

You can pick the YouTube channel art option when visiting the site. Having this option at your disposal allows you to create the YouTube banner in the right format.

This tool is very useful and has easily customizable features that allow you to easily modify the background of images, and try different styles before applying them to your banner.

Anything from original backgrounds, photos, text, music, videos, and voice content to make your banner truly stand out from the crowd.

Adobe Creative Cloud Express is available for free on the official website.

Adobe Creative Cloud Express

Make your channel stand out from the crowd with this efficient and feature-rich software!
Check price Visit website

Canva

Canva is one of the well-known YouTube channel banner creator software that comes loaded with a wide range of designer layouts, colors, fonts, and images.

One of the best features of Canva is that it contains millions of stock images and also about 100 professional layouts and lots of stunning filters.

Plus, you can add numerous graphic elements like icons, graphics, shapes, and even audio or video features. So, it’s likely to finish your banners in minutes with this platform.

The free version of Canva offers a comprehensive range of features that enables you to create YouTube banners and the paid version allows you to upload your brand elements and access additional ones.

Canva

Acquire greatly expressive YouTube banners using this free online editor with thousands of graphics and templates.
Check price Visit website

Fotor

Fotor is one of the best professional tools for banner creation for your YouTube channel. This software became popular because of its advanced features and ease of use.

This program is a little difficult to use for beginners but it still is a powerful free tool. The wide range of one-click filters in this tool makes it easy to create banners.

Fotor has a wide range of image-enhancing tools and filters that allow you to customize every part of your channel banner. It supports the most popular file formats and even allows you to process RAW images.

You can use artificial lighting, sunset, portrait, landscape, and theater to enhance your pictures based on the conditions in which they were taken.

Fotor

Make your graphic projects effortlessly with this visionary editing app that offers valuable banner or poster products.
Check price Visit website

Visme

With Visme you can create beautiful distinctive projects using professional tools for making various graphics, including YouTube banners.

The software will help you design YouTube banners immediately, with drag and drop features and professionally designed banner templates.

Thus, you can customize your images with resize and crop tools and choose the perfect icons, graphics, shapes, or texts to express the message you need on your YouTube profile.

That being said, using this editing tool you will decorate your entire channel using self-created banners or thumbnails.

⇒ Get Visme

Photovisi

Photovisi - Yt banner

Photovisi is a web-based tool that allows you to easily create banner art for your YouTube channel. You can easily design, save, and share your customized banner.

This app automatically adjusts the size of your banner to the right size, allowing you to skip trying to fit your artwork in the format requirements.

Hence, you will be all ready to create the most expressive and eye-catching banners with this famous banner editor. That way you can get the results you desire, grow your YouTube community, and more.

⇒ Get Photovisi

Bannersnack

Bannersnack is another great website option that allows you to create wonderful YouTube banners and has an easy-to-use interface. You can create animated and static HTML5 with ease.

You have the option to choose from a wide range of templates or you can create your own banner from scratch.

This tool allows you to add texts, shapes, images, and animations to create unique banners. You can save a banner design as JPG, PNG, MP4, HTML5, and even as GIF.

You can choose from a wide range of templates, or if you’re feeling creative, you can design everything from scratch.

⇒ Get Bannersack

BeFunky

BeFunky allows you to create meaningful banners for YouTube business and is simple enough to be used by beginners as well.

This platform consists of numerous options for banner designs and one of the best features is the fact that you can easily drag and drop images in it.

All you have to do is select one of their banner templates, then upload the image you want in your banner to BeFunky. After the upload is completed, you can customize the image to fit your needs.

⇒ Get BeFunky

Picmonkey

PicMonkey is a browser photo editing software that offers a very simple interface that enables you to easily create banner art for your YouTube channel.

PicMonkey offers a toolbar with a good range of editing features, such as cropping and rotating your picture. This web-based photo-editing software allows you to add text, overlays, and frames to pictures.

PicMonkey also gives you the features needed so you can transfer images to your smartphone via Bluetooth.

⇒ Get Picmonkey

iPiccy

iPiccy - YT banners

iPiccy is a free online photo editor that can help you create YouTube banners easily. This tool has a Designer feature that has layer support and includes the option to create vector images.

You will find lots of interesting and useful layouts and templates, and also the option to share the photo created on Facebook or download it to your computer in either the JPG or PNG file format.

Take your photos to a new dimension or at least to the size you want with these 5 best image resizer tools for Windows PC users.

⇒ Get iPiccy

Fotojet

Fotojet is another great tool for creating customized Youtube banners. The templates offered on Fotojet are categorized by topics, giving you an easier way to find and choose the best option.

Fotojet offers you over 700+ templates that you can make full use of to create the best designs for your youtube banners.

You simply need to choose a template, edit it by adding photos and other customizations you want, and then save it to your PC or share the banner online.

⇒ Get Fotojet

The tools we’ve covered in this guide will help you design YouTube banners fast. The features included in this list of options offer you high-quality templates, along with a wide range of customization options.

You can also choose from a large number of layouts appropriate for YouTube banners. This feature allows you not to worry about the size details of your banner.

What software do you use to create YouTube banners? Let us know in the comment section below.

How to save your Outlook emails using OST to PST Converter

Outlook is still the main email client for Windows, mainly in the business sector, but the app crashes often, resulting in email loss. But it’s important to know that you can retrieve the information using an OST to PST converter.

If you have a Microsoft account, it’s free to use but it’s also available together with Microsoft 365 if you want the desktop version.

However, Outlook is not always the most comfortable app to work with and it’s riddled with all sorts of bugs that prevent you from using it or accessing your Inbox folder.

We have plenty of guides to fix the program. For instance, you can learn how to recover deleted/archived Outlook messages if you’re having such problems.

But lately, we discovered OST to PST Converter, an app and online tool that helps you repair your Inbox by converting the data storage files in Outlook.

If you use Microsoft Exchange Server or use IMAP mail protocol in Microsoft Outlook, OST files are created on the disk imperceptibly for you.

An OST file is simply a buffer between the mail server and the local Outlook. Generally, you would never need to know about the existence of this file on your computer.

But sometimes there is trouble and only converting OST to PST will help you save your e-mails, contacts, appointments, notes, files, and others from Microsoft Outlook.

Let’s look at some situations when you might urgently need an OST to PST converter tool:

  1. Microsoft Exchange Server Enterprise is unavailable or not working.
  2. Corporate Windows Domain Controller is unavailable or not working. As a result, you cannot log in to the corporate network.
  3. The corporate network is not available.
  4. Gmail/Outlook/Hotmail and/or other mail server is unavailable or cannot be authorized, or the account has been deleted or the account has been hacked.
  5. You were fired from your job and deprived of access to corporate mail.
  6. Synchronization with the mail server via IMAP fails.

In these or other similar situations, you have a local version of the emails and contacts stored in the OST file.

But Microsoft Outlook does not allow you to just open this file without authorization on the mail server or Windows Domain Controller.

In all these cases, the conversion of OST to PST will allow you to open your data in Outlook and continue using them.

How can the Online / Offline OST to PST Converter help you?

As we’ve mentioned above, the OST and PST files are Outlook’s data storage files. The OST files store the offline data while the PST covers the information stored on your local disk.

When you can’t access your emails, you basically can’t access these databases even if the messages are still there.

That’s where this OST to PST Converter ingenious tool comes into play that helps you convert a possibly damaged OST file into PST, MSG, EML, VCF, and TXT files.

Basically, with this OST PST conversion tool, you recover all the content from your Outlook, including the messages, contact details, and more, even if they are encrypted.

This tool can be used online, but the desktop version has no limit for the number of OST files, or their size and you don’t have to upload your database on the web.

Long story short, how to convert an OST to PST file and how to repair your Outlook emails easily.

How can I fix Outlook emails using OST to PST Converter?

1. Download and install OST to PST Converter

  1. Go to the OST to PST Converter website and click on the Download button to get the offline version.
  2. Select the language and hit OK.
  3. Read the agreement, check the box if you accept it and click the Next button.
  4. Select the folder where you want to install the program (we recommend leaving the default selection) and hit Next.
  5. Set the folder for the Start menu and click Next again.
  6. Check the boxes if you want to create additional shortcuts and select Next.
  7. Finally, hit the Install button.
  8. After the process is done, click on the Finish button.

2. Repair your OST files

  1. The OST 2 PST converter app should start automatically after the installation but if it doesn’t, you can just click on the app from the Recently added list.
  2. Now, you can either click on the folder icon to indicate the location of the file or select the Search button right below. We opted for the latter to help you find the OST files if you don’t know where they are.
  3. Indicate a folder on your drive. We picked the Users folder because that where you will most likely find the OST files. Click on Search Now.
  4. As you see in our screenshot, we found the OST file from our Outlook email client. Click on it and select OK.
  5. You will return to the previous window and with the OST file selected, click on Next.
  6. Now, you have three options:
    • Recovery mode will try to restore as much as possible from the damaged database
    • Converter mode can be used to transform your OSF file into PST or extract data from the OST
    • Scan for deleted data is self-explanatory; if you’ve deleted some emails by mistake, this is how you retrieve them
  7. We chose the second one, clicked Next and the app started to scan all the content of the OST file. The process will take a few minutes, depending on the size of the file.
  8. Now, you can simply check the folders or emails that you want to recover and hit Next.
  9. Click the folder icon to indicate the folder where you want to save the data and select Next.
  10. Again, you have two options, you can either save the data as PST files or as separate files. We picked the second option.
  11. Next, choose the format of the saved files and click Save in the end.
  12. In the free version, you may only save 5 objects per folder. If you click Buy now and get a license, that will be unlimited.

3. Recover your OST files with the online version

  1. Go to the online version of the OST to PST Converter, and click on Select OST file.
  2. After the file is uploaded, enter your email address and select Next Step.
  3. The online app will start analyzing and converting your OST file and you will be able to retrieve your files. However, we remind you that this way, you will be limited on the size and number of the files.

You’ve seen how to convert OST files to PST files easily and transform the catastrophe of losing some important emails into the triumph of recovering them in only a few minutes.

The tool is fast, it does the job perfectly and you don’t need to be an expert to use its friendly interface and menus. The app practically guides you to the end result.

How to import the recovered data back to Outlook?

  1. Open Outlook, click on File, then select Account settings and choose the first option called the same.
  2. Select the Data Files tab, select the existing OST file and choose Remove.
  3. Now go back to the File menu and select Open & Export.
  4. Next, use the available options to import the files you retrieved earlier back into Outlook.

Other important advantages of using OST to PST Converter

First of all, if you download the desktop version, you won’t be needing any Internet connection for any of the procedures.

The tool can even convert OST in UNICODE format (Outlook 2007 or higher) and can even read password-protected OST files.

With the desktop version you are not limited to a certain size of the files and, as you’ve seen in our guide above, you are able to preview the contents of the files, even if they are damaged or encrypted.

You will not need any authentication from a Microsoft Exchange Server or a Windows Domain Controller to retrieve the content.

The only catch of the whole operation is that you need to have Microsoft Outlook installed on your PC in order to operate with the OST file.

Final notes

We know all about the panic and frustration of losing precious emails that contain important information for you or your business.

That is why we’re excited to share this information on how to get them back using this simple tool called OST to PST Converter.

In our test, it performed excellently and we managed to recuperate all the files and folders from our email in a matter of minutes, including the installation process.

This tool is extremely small, doesn’t put any pressure on the system resources and it’s clearly very easy to use even if you’re inexperienced.

And it has a decent price compared to other solutions out there. A license for personal use is only $50 and the one dedicated to businesses is only $75.

The price for Online OST to PST conversion is $10 per 1Gb of source *.ost file.

That being said, we invite you to read another guide on how to recover deleted/archived Outlook messages that will help you retrieve your data.

We hope that this piece provided you with all information on how to repair your emails using OST to PST Converter and you managed to get back your information.

If you have any suggestions or advice, we invite you to leave your notes in the comments section below.

Microsoft Defender for Business to begin rollout in Preview

Microsoft Defender for Business, a new endpoint security solution for enterprise customers will soon roll out to organizations with a Microsoft 365 Business Premium plan. The new security offering was first announced at Microsoft’s Ignite conference in November, and it became available in preview for select customers a month later.

As small and medium-sized businesses are facing an increasing number of cyberattacks, Microsoft has designed Microsoft Defender for Business as a straightforward and cost-effective enterprise-grade endpoint security solution for organizations with up to 300 employees. For bigger organizations, Microsoft offers two separate Microsoft Defender for Endpoint plans with different security features.

Microsoft Defender for Business (preview) features and capabilities.

The core pillars in Microsoft Defender for Business include antimalware and antivirus protection, Automated investigation and remediation, as well as integrations with the Microsoft 365 Lighthouse admin portal and third-party security tools. If Microsoft Defender For Business will be included as part of Microsoft 365 Business Premium ($20/user per month), it’s also available as a standalone offering ($3/user per month). The solution also supports customers having their email and productivity apps on-premises.

Microsoft expects to start rolling out Microsoft Defender for Business to companies with a Microsoft 365 Business Premium plan in late February, and all customers should have it by early Match. If you want to participate in the public preview, you can learn more about how to get your organization on board on this page.

How to try Microsoft’s Super Duper Secure Mode in Edge on Windows 10, Windows 11 and other operating systems

Despite Microsoft’s numerous annoying tactics to push Edge, it is a solid browser. Did you know that there is a Super Duper Secure Mode on Microsoft Edge? In an attempt to lure more security-conscious users, Microsoft offers a new “Super Duper Secure Mode,” or SDSM, on Edge.

What is Super Duper Secure Mode?

“Super Duper Secure Mode” is not the official name of the feature, as it is still in testing. Super Duper Secure Mode is a temporary term that Microsoft engineers use for this feature as it is the name of the feature flag in edge://flags too.

What does it actually do though? Microsoft’s security team discovered that the V8 JavaScript engine can be exploited for its many security vulnerabilities. The JavaScript engine uses “Just-In-Time Compilation” (JIT) to help speed up JavaScript code on web pages, which exposes a few vulnerabilities in Edge at the same time.

JIT exists to speed up your browsing experience, but Microsoft says disabling it doesn’t always have negative effects on performance. SDSM also enables Control-flow Enforcement Technology (CET), an Intel hardware-based security exploit prevention tool to bring more security for the browser.

How to enable Super Duper Secure Mode

Turning on Super Duper Secure Mode is super simple. This method works on Windows 10, Windows 11, Mac and Linux.

1. Open up Microsoft Edge on Windows 10, Windows 11, Mac or Linux and click the three-dot menu in the top-right corner of Edge and go to Settings.
super duper secure mode
2. Go to the Privacy, Search, and Services.
3. Scroll down to “Enhance your security on the web” and toggle the switch on. In older and other versions of Edge, the section is titled “Enable security mitigations for a more secure browser experience.”
super duper secure mode

Now that you know how to turn it on, you may be interested to know that the “Balanced” security level is enabled by default and is the recommended option. The Balanced security level adds security mitigations for sites you don’t visit frequently, most sites work as expected and blocks security threats.

If you are not happy with that level of security, you can also opt in for the Strict option. The Strict option adds security mitigations for all sites, parts of sites might not work and blocks security threats.

One of the last options in this section is Exceptions. In Exceptions, you can indicate which specific websites you want to be exempt from security mitigation. So if you use a handful of websites and you need every feature on the website to work flawlessly, it’s probably a good idea to add your most frequently visited websites to Exceptions so that the websites will work as they are intended.

Interested in learning more about Edge? Be sure to check out all our Microsoft Edge coverage, including Microsoft Edge on other operating systems! Did you know you can use Edge Canary on Mac and you can also install Edge Dev on Linux.

Let us know what security features you use on Microsoft Edge in the comments!

How to Use All RAM In Windows 11: 7 Tested Ways

Windows 11 not using all RAM can have a serious impact on performance. You need this memory to tempoarily store your in-progress files and if you don’t have enough, you’ll run into errors and possibly lose progress.

To help you prevent that, we’ll explain how to use all RAM in Windows and give you a glimpse into the most common causes of it.

Let’s get started.

How to use all RAM in Windows

1. Run the Windows Memory Diagnostic tool

  1. Press Windows + S to launch the Search menu, enter Windows Memory Diagnostic tool in the text field at the top, and then click on the relevant search result that appears.Run Windows Memory Diagnostic to fix windows 11 not using all ram
  2. Now, select Restart now and check for problems (recommended) from the two options listed here.Restart now and check for problems

Windows Memory Diagnostic identifies problems with the RAM and automatically eliminates them. Before you run it, save any open files to avoid data loss, because your computer will restart.

2. Check page file

  1. Press Windows + S to launch the Search menu, enter View advanced system settings in the text field at the top, and click on the relevant search result that appears.View advanced system settings to fix windows 11 not using all ram
  2. Click on Settings under Performance in the Advanced tab.Performance settings
  3. Navigate to the Advanced tab in the Performance Options window.Go to Advanced tab to fix windows 11 not using all ram
  4. Click on Change under Virtual memory.Change virtual memory
  5. Untick the checkbox for Automatically manage paging file size for all drives.Disable Automatically manage paging file size for all drives to fix windows 11 not using all ram
  6. Select the drive, check the No paging file option and then click on the Set button.No paging file to fix windows 11 not using all ram
  7. Click Yes on the warning box that appears.Yes
  8. Repeat the process for all drives if they have a page file, and then click on OK at the bottom to save the changes.Click OK windows 11 not using all ram
  9. Finally, restart the computer for the changes to come into effect.

The page file is a set space on your storage drive that is used to store data temporarily when the RAM (memory) starts to fill up. If there are problems with it, you may notice that Windows 11 is not using all the RAM.

If disabling the page file doesn’t fix the problem, revert the changes you made earlier, and continue with the next fix.

3. Modify the usable RAM

  1. Press Windows + S to launch the Search menu, enter System configuration in the text field at the top, and click on the relevant search result that appears.System configuration to fix windows 11 not using all ram
  2. Now, go the Boot tab and click on Advanced options.Boot tab
  3. Tick the checkbox for Maximum memory, enter the installed RAM on your system in the text field underneath, and then click on OK at the bottom.Change maximum memory to fix windows 11 not using all ram
  4. Again, click on OK to save the changes and close the System Configuration window.Save changes
  5. Restart the computer, if prompted.
  6. In case it doesn’t work, uncheck the Maximum memory checkbox in BOOT Advanced Options window, and save the changes.

To calculate the value in the text field earlier, check the installed RAM in your system, and multiply it by 1024 to find the value in MB (Megabyte). For instance, your computer has 16 GB RAM, so the value to be entered becomes 16 x 1024 = 16384 MB.

4. Modify the registry

  1. Press Windows + R to launch the Run command, enter regedit in the text field, and either click on OK or hit Enter to launch the Registry Editor.Launch Registry to fix windows 11 not using all ram
  2. Click Yes on the UAC (User Account Control) prompt that pops up.Yes
  3. Now, enter the following path in the address bar at the top and then hit Enter. Alternatively, you can navigate the path using the pane on the left:HKEY_LOCAL_MACHINE\SYSTEM\CurrentControlSet\Control\Session Manager\Memory ManagementNavigate path
  4. Locate and double-click on the ClearPageFileAtShutdown DWORD to modify its value data.ClearPageFileAtShutdown to fix windows 11 not using all ram
  5. Enter 1 under Value data and click on OK to save the changes.Change value data to fix windows 11 not using all ram
  6. Close the registry, and restart the computer.

5. Enable memory remapping in BIOS

Note icon NOTE
The method to enter the BIOS and its interface are different for every manufacturer. Therefore, we recommend that you check the FAQ or Support section of your OEM’s website for the exact steps. The steps listed below you should give you an idea though.
  1. Restart the computer, hit the F12 key as soon as the diplay lights up to enter the BIOS, navigate to the Advanced tab, and then select the System Agent Configuration option.System agent configuration
  2. Now, select the Memory Remap Feature and Enable it. Enable memory remap feature to fix windows 11 not using all ram

Enabling memory remapping is known to increase the available RAM to Windows on the system. But, the feature is not available on all devices, so do check if you have it before proceeding with the method.

Once done, check if Windows 11 now uses all the available RAM.

6. Rearrange the RAM modules

If you have multiple slots available, rearranging the RAM modules could help. To do that, turn off the computer, open the back panel, remove the memory modules and change their slots.

Check if that fixes the issue.

Also, some systems require you to arrange the RAM in a certain order when all the slots are not being used. For instance, if you have four slots available but are using only two memory modules, you may be required to use the first and third slots.

7. Take your PC to a repair center

If you have reached this part of the article after executing the methods listed above and the issue persists, it’s likely an issue with the hardware itself.

It could be broken or malfunctioning slots, issues with the connections, or other similar problems.

In such cases, we would recommend taking your PC to a repair center since the components we are dealing with here are fragile and the connections intricate. Any lapse on your part can severely damage the system.

Why isn’t Windows 11 using all RAM on my PC?

First of all, your computer would never use all the available memory or RAM. For instance, the Dell Inspiron laptop that is being used to write this article has 16 GB of installed RAM while only 15.7 GB of it is usable.

But if you notice that the OS isn’t able to utilize even the available RAM, it could be due to misconfigured settings, problems with the slot, or the RAM itself.

Apart from that, certain devices, say the graphic card, are also known to reserve a certain amount of RAM/memory.

By now, you are fairly acquainted with the concept and in a far better position to troubleshoot the problem. Let’s now walk you through the most effective fixes to eliminate the Windows 11 not using all the RAM issue.

If the installed RAM is low or you are using too many too programs at once, there’s a chance that the RAM usage becomes high, which will likely be evident through the poor system performance. The programs may lag or freeze, or the system may crash altogether.

That’s all there’s to eliminating issues preventing Windows 11 from using all available RAM. Once you are done executing these, the system performance will most likely be a lot better.

In case you are facing the same problem on the previous iteration, check what you should do if Windows 10 is not using all the available RAM.

High memory usage can seriously slow down your system, especially if you’re dealing with Windows 11 high RAM usage or hardware issues like when only one RAM slot works.

Tell us which fix worked for you in the comments section below.

MSI Afterburner Not Working on Windows 11? Fix it in 7 Steps

MSI Afterburner is an overclocking tool that works with most graphic cards. Along with that, you can also use it to monitor the system’s performance. However several users have reported that MSI Afterburner is not working in Windows 11.

This could be due to several reasons, and we have discussed them in the following sections. However, when this situation arises, it prevents you from altering or monitoring the performance while playing a game.

As expected, this poses a major challenge to gamers. This is why we have dedicated this guide to help you understand the issue, and walk you through the most effective fixes for the MSI Afterburner not working in Windows 11 problem.

Why is MSI Afterburner not working in Windows 11?

While it works seamlessly for most users, those who cannot get it up and running generally have misconfigured settings, NVIDIA or Steam overlay, problems with the compatibility, amongst other issues.

Also, several users have reported that using an outdated version of MSI Afterburner caused the issue in their case, which is easily fixable. Also, issues with the driver are found to affect its functioning.

Now that you understand the underlying causes fairly, it’s time we head to the fixes. Execute them in the listed sequence to quickly and effectively troubleshoot the error.

What can I do if MSI Afterburner isn’t working in Windows 11?

1. Disable Steam overlay

  1. Press Windows + S to launch the Search menu, enter Steam in the text field at the top, and click on the relevant search result that appears.Launch Steam
  2. Now, right-click on the game you are facing trouble with and select Properties from the context menu.Game properties
  3. Untick the checkbox for Enable the Steam Overlay while in-game.Disable Steam Overlay to fix msi afterburner not working windows 11

Overlay of any program may affect the working of MSI Afterburner in Windows 11, and Steam is commonly found to be the culprit. Therefore it’s recommended that you disable the overlay and check if that fixes the issue. If not, head to the next method.

2. Disable NVIDIA overlay

  1. Launch the NVIDIA GEFORCE EXPERIENCE panel, and click on the Settings (gear) icon near the top-right corner.Settings to fix msi afterburner not working windows 11
  2. Next, disable the toggle for IN-GAME OVERLAY.Disable NVIDIA overlay to fix msi afterburner not working windows 11

3. Run MSI Afterburner with administrative priveleges

  1. Press Windows + E to launch the File Explorer, paste the following path in the address bar at the top, and hit Enter:C:\Program Files (x86)\MSI AfterburnerPaste address
  2. Next, right-click on the MSIAfterburner.exe file, and select Properties from the context menu. Alternatively, you can select the file and hit Alt + Enter.Properties to fix msi afterburner not working windows 11
  3. Navigate to the Compatibility tab in the Properties window.Compatibility
  4. Now, tick the checkbox for Run this program as an administrator, and click on OK at the bottom to save the changes and close the window.Run this program as an administrator to fix msi afterburner not working windows 11

If the MSI Afterburner lacks the permissions to run with administrative privileges, you may encounter problems while using it when playing games, as is the case with other apps as well.

4. Manually select detection level to high in RivaTuner

  1. Press Windows + E to launch the File Explorer, paste the following path in the address bar at the top, and hit Enter to navigate to it:C:\Program Files (x86)\RivaTuner Statistics ServerNavigate path
  2. Double-click on the RTSS.exe file to launch the RivaTuner tool.Open RivaTuner to fix msi afterburner not working windows 11
  3. Click Yes on the UAC (User Account Control) prompt that pops up.Yes
  4. Next, click on the Add button at the bottom.Add program to fix msi afterburner not working windows 11
  5. Navigate to the location where the game is saved, select its executable (.exe) file, and click on Open.Select problematic game
  6. Now, select High under Application detection level.Set Application detection level to high to fix msi afterburner not working windows 11

The RivaTuner Statistics Server is a tool bundled with MSI Afterburner that helps monitor hardware and overclock the graphics card.

If MSI Afterburner is not working in Windows 11 on a specific game or a bunch of them while it works on the others, changing the application detection level to high in RivaTuner might help.

In case this resolves the issue, apply the same changes to all the games you are facing trouble with.

5. Run MSI Afterburner in compatibility mode

  1. Press Windows + E to launch the File Explorer, type/paste the following path in the address bar at the top, and then hit Enter:C:\Program Files (x86)\MSI AfterburnerNavigate path
  2. Right-click on the MSIAfterburner.exe file and select Properties from the context menu.Properties to fix msi afterburner not working windows 11
  3. Now, navigate to the Compatability tab from the top.Compatibility tab to fix msi afterburner not working windows 11
  4. Tick the checkbox for Run this program in compatibility mode for and select each option one at a time from the dropdown menu under it, until the error is fixed.Run program in compatibility mode to fix msi afterburner not working windows 11
  5. Finally, click on OK at the bottom to save the changes and close the Properties window.Save changes

If the methods listed above have not worked, you may try running MSI Afterburner in compatibility mode with an older version of the OS. This has been found to fix the problem for a lot of users.

6. Disable the integrated graphics card

  1. Press Alt + F4 to and select Restart from the dropdown menu in the Shut Down Windows box.Restart PC to fix msi afterburner not working windows 11
  2. Click on OK to restart the computer.Ok
  3. As soon as you see the manufacturer’s name on the screen, hit the F12 or Del key (or other relevant key for your system) to enter the BIOS. Since you will have just a few seconds here, hit the key multiple times to be on the safe side.
  4. Once in the system BIOS, navigate to the Advanced tab from the top.Advanced tab to fix msi afterburner not working windows 11
  5. Click on Chipset from the options listed here.Chipset
  6. Next, click on SouthBridge Configuration.SouthBridge configuration to fix msi afterburner not working windows 11
  7. Select the Primary Graphics Adapter option.Primary Graphics Adapter
  8. In the box that pops up, make sure you select the option that has PCIE listed first and the IGP (Integrated Graphics Processor) at the last.select correct option to fix msi afterburner not working windows 11
  9. After making the changes, navigate to the Exit tab, and click on Exit & Save Changes.Save changes

If you have both the external and integrated graphics card enabled, there are chances of MSI Afterburner not working in Windows 11. In which case, it’s best that you disable the integrated graphics card.

The method to do it will differ for every computer since the BIOS interface is different. But, the steps listed above should provide you with a basic understanding of the process.

Also, it’s recommended that you do not make any other changes to the BIOS unless you are fully aware of its effects, since it could prove detrimental to the functioning of the computer.

7. Reinstall the MSI Afterburner app

  1. Press Windows + I to launch Settings, and select Apps from the tabs listed in the navigation pane on the left.Uninstall MSI Afterburner to fix msi afterburner not working windows 11
  2. Click on Apps & features on the right.Apps & features
  3. Now, locate the MSI Afterburner app, click on the ellipsis next to it, and select Uninstall from the menu that appears.Uninstall to fix msi afterburner not working windows 11
  4. Again, click Uninstall in the prompt that pops up.Confirm uninstall

In many cases, it is a problem with the MSI Afterburner app itself that prevents it from working in Windows 11. Also, if you are using an outdated version of the app, there’s a possibility of encountering similar issues.

In this case, a simple fix would be to uninstall MSI Afterburner and then install the latest version of it. If you are not sure how to do the latter part, check the next section to find out.

How can I download MSI Afterburner in Windows 11?

If you have been planning to get your hands on this amazing tool but are unsure about the download process and its functioning, check our guide that details every aspect of MSI Afterburner along with the steps to download it.

The file will most likely be compressed (Zip format), and you will have to extract it before proceeding to the installation. Once done with these steps, MSI Afterburner is ready for use, and you can both monitor and overclock the GPU.

These are all ways to fix issues preventing MSI Afterburner from working in Windows 11. In most cases, you wouldn’t have to execute them all, since the problem would be fixed within the first few methods.

Some users also faced Failed to start scanning in OC scanner, a few quick changes will do the trick!

In case you are unable to control the fan speed using MSI afterburner, learn how to resolve the issue.

Tell us which fix worked along with your experience of MSI Afterburner in the comments section below.