Microsoft’s new Falcon and Winter Soldier Xbox Series X ad features a fun MCU character return

Microsoft released a fun new commercial for the Xbox Series S and Xbox Series X video game consoles this week that features Anthony Mackie’s Sam Wilson (aka Falcon) from the upcoming Disney+ series, Falcon and the Winter Soldier.

In it, Sam enters a video game store and explains to the clerk that he’s behind in gaming and pop culture since being blipped for the past five years. The clerk then points to a pair of Xbox Series S and X consoles behind him, implying that they’re both the hottest thing in gaming right now and that Sam should buy one.

While the ad itself is really just a bit of fun marketing and cross-promotion between Microsoft and Disney, it also features a fun Easter egg that many Marvel fans quickly spotted. The clerk talking to Sam is actually the same one that spoke to Steve and Natasha in the Apple Store scene in Captain America: The Winter Soldier. It’s unclear if he was blipped as well but it definitely looks like he’s switched jobs. Maybe Apple had to close a few stores after half of the population disappeared?

Speaking of the blip, Falcon and the Winter Soldier, like most post-Endgame Marvel series and films, is set in or after the year 2023 which means that both Xbox consoles are surprisingly still pretty hot stuff in the MCU several years after they were released. We’re probably not supposed to overthink the ad this much though.

Certificate issues still continue during March Patch Tuesday

Windows 10 is the best Windows OS for a reason, and that is the frequent updates that it benefits from, regardless of the version that you are running.

These updates can be more or less significant, with the most important of them being the monthly Patch Tuesday updates.

Speaking of which, the March Patch Tuesday updates are here, and they bring a whole world of changes to the Windows OS, although not all versions of Windows 10 receive the same treatment.

However there are times when some issues persists throughout updates, such as the certificates issues from Windows 10 v20H2/v2004, and Windows 10 v1903/v1909.


Loss of certificates still present even after this month’s updates

All the way back in January 2021, Microsoft reported that their cumulative updates for Windows 10 v20H2/v2004, and Windows 10 v1903/v1909. were plagued by an issue that could lead to a loss of certificates:

System and user certificates might be lost when updating a device from Windows 10, version 1809 or later to a later version of Windows 10.

Devices will only be impacted if they have already installed any Latest cumulative update (LCU) released September 16, 2020 or later and then proceed to update to a later version of Windows 10 from media or an installation source which does not have an LCU released October 13, 2020 or later integrated.

This primarily happens when managed devices are updated using outdated bundles or media through an update management tool such as Windows Server Update Services (WSUS) or Microsoft Endpoint Configuration Manager.

This might also happen when using outdated physical media or ISO images that do not have the latest updates integrated.

Note Devices using Windows Update for Business or that connect directly to Windows Update are not impacted. Any device connecting to Windows Update should always receive the latest versions of the feature update, including the latest LCU, without any extra steps.

Unfortunately, 2 month’s worth of updates was not enough for Microsoft to patch this issue up for good. More so, they failed to provide a workaround for the issue as well, so users are left to update on their own risk.


That being said, it is up to you whether you update your PC with the latest cumulative update or not.

If you decide on the latter, you could always try postponing the Windows Update process of your PC for up to 35 days, although that isn’t something that we recommend, strictly for security reasons.

For example, not updating your Windows 10 PC leaves you vulnerable to Exploit Wednesday or Uninstall Thursday.

More so, there’s also the fact that this month alone 97 CVEs were discovered in Microsoft and Adobe products, so if you use a lot of them, there’s a high chance that your system may by at risk as well.

Will you update your PC now that you know what the cons of the cumulative update are?

If not, let us know what you will do instead by leaving a comment in the section below.

KB5000803 improves network traffic during Windows Updates

Patch Tuesday is one of the highlights of every month, especially if your a tech enthusiast, and a fan of keeping your Windows 10 updated with the latest features.

Well, the March Patch Tuesday updates are here, and they bring a how of improvements, tweaks, and fixes that will make your PC a lot more reliable.

One great example would be KB5000803 for Windows 10 v1607.


KB5000803 fixes stop errors, vulnerabilities, and more

According to the official Microsoft homepage that covers KB5000803, installing this cumulative update should improve the following:

Addresses an issue that causes an increase in network traffic during update detection for Windows Updates. This issue occurs on devices that are configured to use an authenticated user proxy as the fallback method if update detection with a system proxy fails or there is no proxy.

Once installed, this cumulative update should make updating yoru OS to be more stable, and with fewer errors.

More so, the reduction in network traffic will make updating your Windows 10 PC go faster.

Of course, this is just one of many changes included in this update, since it also addresses sever vulnerabilities, fixes an issue that resulted in stop errors, and more.


Now that you have a better understanding of the benefits of updating your Windows 10 PC, you can go ahead and download and install the latest cumulative updates.

However, if you’re still not convinced, you can always opt not to update, and you can even postpone any update notifications for up to 35 days.

However, this may leave your PC vulnerable to CVEs, especially since this month alone 97 were discovered, affecting Microsoft and Adobe products.

Whichever the case, know that getting the latest cumulative updates is extremely easy, as there are multiple mediums toa quire them:

  • The Windows Update menu
  • Manually downloading from the Windows Update Catalog
  • Via the Windows Server Update Service (WSUS)
  • Using a Group Policy if part of a company network.

Whichever the case, your PC will benefit from the latest changes and improvements, so go for it.

What are your opinions about the changes brought by KB5000803?

Let us know whether you’ll update your PC by leaving us a message in the comments section below.

97 CVEs discovered during the March Patch Tuesday updates

The digital world is in a continued arms race between software, malware, and the tools used to keep us safe from malware.

Well, another round of this war has been concluded now that the March Patch Tuesday updates are here, as new reports of discovered CVEs have been brought to light.

So far, 2021 has been quite abundant in CVEs, with the following numbers being discovered each month:

Well, it seems that the month of March is quite abundant as well, with 97 CVEs discovered, all of which will be discussed in greater detail in the article below:


The March CVE report includes 97 identified CVEs

Vulnerabilities found in Adobe products

Of the 97 CVEs found this month, only 8 belonged to Adobe programs, more precisely Adobe Connect, Creative Cloud Desktop, and Framemaker.

Of the 8 identified CVEs, 4 were rated as being Critical while the other 4 were rated as Important.


Vulnerabilities found in Microsoft products

As always, Microsoft products hold the bulk of identified CVEs, with 89 found this month alone.

These CVes affected multiple Microsoft services, including Microsoft Windows components, Azure and Azure DevOps, Azure Sphere, Internet Explorer and Edge (EdgeHTML), Exchange Server, Office , and more.

4 of these vulnerabilities were considered under active attack, so a smaller patch to fix them right away was released before the regular Patch Tuesday schedule.

Of these 89 bugs, they were rated as follows:

  • 14 are listed as Critical
  • 75 are listed as Important in severity.

Which were some of the most severe CVEs?

While all CVEs should be deemed as noteworthy, there were some that stood out due to their severity, or the way they behaved:

All other identified CVEs are listed in the table below:

CVE

Title

Severity

CVE-2021-26411 Internet Explorer Memory Corruption Vulnerability Critical
CVE-2021-26855 Microsoft Exchange Server Remote Code Execution Vulnerability Critical
CVE-2021-26857 Microsoft Exchange Server Remote Code Execution Vulnerability Critical
CVE-2021-27065 Microsoft Exchange Server Remote Code Execution Vulnerability Critical
CVE-2021-26858 Microsoft Exchange Server Remote Code Execution Vulnerability Important
CVE-2021-27077 Windows Win32k Elevation of Privilege Vulnerability Important
CVE-2021-27074 Azure Sphere Unsigned Code Execution Vulnerability Critical
CVE-2021-27080 Azure Sphere Unsigned Code Execution Vulnerability Critical
CVE-2021-21300 Git for Visual Studio Remote Code Execution Vulnerability Critical
CVE-2021-24089 HEVC Video Extensions Remote Code Execution Vulnerability Critical
CVE-2021-26902 HEVC Video Extensions Remote Code Execution Vulnerability Critical
CVE-2021-27061 HEVC Video Extensions Remote Code Execution Vulnerability Critical
CVE-2021-26412 Microsoft Exchange Server Remote Code Execution Vulnerability Critical
CVE-2021-26876 OpenType Font Parsing Remote Code Execution Vulnerability Critical
CVE-2021-26897 Windows DNS Server Remote Code Execution Vulnerability Critical
CVE-2021-26867 Windows Hyper-V Remote Code Execution Vulnerability Critical
CVE-2021-26890 Application Virtualization Remote Code Execution Vulnerability Important
CVE-2021-27075 Azure Virtual Machine Information Disclosure Vulnerability Important
CVE-2021-24095 DirectX Elevation of Privilege Vulnerability Important
CVE-2021-24110 HEVC Video Extensions Remote Code Execution Vulnerability Important
CVE-2021-27047 HEVC Video Extensions Remote Code Execution Vulnerability Important
CVE-2021-27048 HEVC Video Extensions Remote Code Execution Vulnerability Important
CVE-2021-27049 HEVC Video Extensions Remote Code Execution Vulnerability Important
CVE-2021-27050 HEVC Video Extensions Remote Code Execution Vulnerability Important
CVE-2021-27051 HEVC Video Extensions Remote Code Execution Vulnerability Important
CVE-2021-27062 HEVC Video Extensions Remote Code Execution Vulnerability Important
CVE-2021-27085 Internet Explorer Remote Code Execution Vulnerability Important
CVE-2021-27053 Microsoft Excel Remote Code Execution Vulnerability Important
CVE-2021-27054 Microsoft Excel Remote Code Execution Vulnerability Important
CVE-2021-26854 Microsoft Exchange Server Remote Code Execution Vulnerability Important
CVE-2021-27078 Microsoft Exchange Server Remote Code Execution Vulnerability Important
CVE-2021-27058 Microsoft Office ClickToRun Remote Code Execution Vulnerability Important
CVE-2021-24108 Microsoft Office Remote Code Execution Vulnerability Important
CVE-2021-27057 Microsoft Office Remote Code Execution Vulnerability Important
CVE-2021-27059 Microsoft Office Remote Code Execution Vulnerability Important
CVE-2021-26859 Microsoft Power BI Information Disclosure Vulnerability Important
CVE-2021-27056 Microsoft PowerPoint Remote Code Execution Vulnerability Important
CVE-2021-27052 Microsoft SharePoint Server Information Disclosure Vulnerability Important
CVE-2021-27076 Microsoft SharePoint Server Remote Code Execution Vulnerability Important
CVE-2021-24104 Microsoft SharePoint Spoofing Vulnerability Important
CVE-2021-27055 Microsoft Visio Security Feature Bypass Vulnerability Important
CVE-2021-26887 Microsoft Windows Folder Redirection Elevation of Privilege Vulnerability Important
CVE-2021-26881 Microsoft Windows Media Foundation Remote Code Execution Vulnerability Important
CVE-2021-27082 Quantum Development Kit for Visual Studio Code Remote Code Execution Vulnerability Important
CVE-2021-26882 Remote Access API Elevation of Privilege Vulnerability Important
CVE-2021-27083 Remote Development Extension for Visual Studio Code Remote Code Execution Vulnerability Important
CVE-2021-26880 Storage Spaces Controller Elevation of Privilege Vulnerability Important
CVE-2021-26886 User Profile Service Denial of Service Vulnerability Important
CVE-2021-27081 Visual Studio Code ESLint Extension Remote Code Execution Vulnerability Important
CVE-2021-27084 Visual Studio Code Java Extension Pack Remote Code Execution Vulnerability Important
CVE-2021-27060 Visual Studio Code Remote Code Execution Vulnerability Important
CVE-2021-27070 Windows 10 Update Assistant Elevation of Privilege Vulnerability Important
CVE-2021-26869 Windows ActiveX Installer Service Information Disclosure Vulnerability Important
CVE-2021-27066 Windows Admin Center Security Feature Bypass Vulnerability Important
CVE-2021-26860 Windows App-V Overlay Filter Elevation of Privilege Vulnerability Important
CVE-2021-26865 Windows Container Execution Agent Elevation of Privilege Vulnerability Important
CVE-2021-26891 Windows Container Execution Agent Elevation of Privilege Vulnerability Important
CVE-2021-26896 Windows DNS Server Denial of Service Vulnerability Important
CVE-2021-27063 Windows DNS Server Denial of Service Vulnerability Important
CVE-2021-26877 Windows DNS Server Remote Code Execution Vulnerability Important
CVE-2021-26893 Windows DNS Server Remote Code Execution Vulnerability Important
CVE-2021-26894 Windows DNS Server Remote Code Execution Vulnerability Important
CVE-2021-26895 Windows DNS Server Remote Code Execution Vulnerability Important
CVE-2021-24090 Windows Error Reporting Elevation of Privilege Vulnerability Important
CVE-2021-26872 Windows Event Tracing Elevation of Privilege Vulnerability Important
CVE-2021-26898 Windows Event Tracing Elevation of Privilege Vulnerability Important
CVE-2021-26901 Windows Event Tracing Elevation of Privilege Vulnerability Important
CVE-2021-24107 Windows Event Tracing Information Disclosure Vulnerability Important
CVE-2021-26892 Windows Extensible Firmware Interface Security Feature Bypass Vulnerability Important
CVE-2021-26868 Windows Graphics Component Elevation of Privilege Vulnerability Important
CVE-2021-26861 Windows Graphics Component Remote Code Execution Vulnerability Important
CVE-2021-26862 Windows Installer Elevation of Privilege Vulnerability Important
CVE-2021-26884 Windows Media Photo Codec Information Disclosure Vulnerability Important
CVE-2021-26879 Windows NAT Denial of Service Vulnerability Important
CVE-2021-26874 Windows Overlay Filter Elevation of Privilege Vulnerability Important
CVE-2021-1640 Windows Print Spooler Elevation of Privilege Vulnerability Important
CVE-2021-26878 Windows Print Spooler Elevation of Privilege Vulnerability Important
CVE-2021-26870 Windows Projected File System Elevation of Privilege Vulnerability Important
CVE-2021-26866 Windows Update Service Elevation of Privilege Vulnerability Important
CVE-2021-26889 Windows Update Stack Elevation of Privilege Vulnerability Important
CVE-2021-1729 Windows Update Stack Setup Elevation of Privilege Vulnerability Important
CVE-2021-26899 Windows UPnP Device Host Elevation of Privilege Vulnerability Important
CVE-2021-26873 Windows User Profile Service Elevation of Privilege Vulnerability Important
CVE-2021-26864 Windows Virtual Registry Provider Elevation of Privilege Vulnerability Important
CVE-2021-26871 Windows WalletService Elevation of Privilege Vulnerability Important
CVE-2021-26885 Windows WalletService Elevation of Privilege Vulnerability Important
CVE-2021-26863 Windows Win32k Elevation of Privilege Vulnerability Important
CVE-2021-26875 Windows Win32k Elevation of Privilege Vulnerability Important
CVE-2021-26900 Windows Win32k Elevation of Privilege Vulnerability Important

January and February 2021 already started off with an ascending trend in terms of the number of CVEs, but March seems to have brought fewer for a change.

Remember that if you use any of the Microsoft or Adobe products and services mentioned above, you stand a greater risk because of the aforementioned vulnerabilities, so remember to download and install the latest Patch Tuesday updates.

It could also help to use third-party antivirus tools, but that means spending some more, while the Patch Tuesday updates are, and will always be free.

What’s your take on this month’s CVE report?

Let us know whether CVEs should be a concern for the general public by leaving us your feedback in the comments section below.

Windows 10 March Patch Tuesday [DIRECT DOWNLOAD LINKS]

The 9th of March is now here, and that means that the Patch Tuesday updates delivered by Microsoft are here as well.

As always, these monthly updates are meant to improve all versions of the Windows OS with tweaks and new features, as well as fix whatever might have ended up broken in previous updates.

These updates vary in importance from one version of Windows 10 to another, and that is precisely why we’ve created this guide that will act as a detailed changelog for the month of March.

As an added bonus, we will also be including direct download links for all the cumulative updates, so that you can get them immediately, even if they haven’t become yet available in your Windows Update menu.

Remember that you can update your Windows 10 Pc by using the following methods:

  • The Windows Update menu on your OS
  • The WSUS (Windows Server Update Service)
  • Group Policies set up by your admins if you’re part of a larger network.

Changes included in the March Patch Tuesday Updates

Windows 10, version 20H2

As of the writing of this article, Windows 10 v20H2 is the latest major version of Windows 10, and as such has the most experimental features on it.

Fortunately, most bugs that were first present when it was first made available have been weeded out, and this version of Windows 10 is far more stable.

That being said, you should upgrade to this version as soon as possible if your hardware allows it (the system requirements are the same as with Windows 10 v2004).

If you haven’t updated to Windows 10 v20H2, know that it is easiest to update if you already have Windows 10 v2004. Check out this in-depth guide on how to get Windows 10 v20H2 as fast as possible.

Cumulative update name:

Improvements and fixes:

  • Addresses an elevation of privilege security vulnerability documented in CVE-2021-1640 related to print jobs submitted to “FILE:” ports. After installing Windows updates from March 9, 2021 and later, print jobs that are in a pending state before restarting the print spooler service or restarting the OS will remain in an error state. Manually delete the affected print jobs and resubmit them to the print queue when the print spooler service is online.
  • Security updates to the Windows Shell, Windows Fundamentals, Windows Management, Windows Apps, Windows User Account Control (UAC), Windows Virtualization, the Windows Kernel, the Microsoft Graphics Component, Internet Explorer, Microsoft Edge Legacy, and Windows Media.

Known Issues:

  • System and user certificates might be lost when updating a device from Windows 10, version 1809 or later to a later version of Windows 10. Devices will only be impacted if they have already installed any Latest cumulative update (LCU) released September 16, 2020 or later and then proceed to update to a later version of Windows 10 from media or an installation source which does not have an LCU released October 13, 2020 or later integrated. This primarily happens when managed devices are updated using outdated bundles or media through an update management tool such as Windows Server Update Services (WSUS) or Microsoft Endpoint Configuration Manager. This might also happen when using outdated physical media or ISO images that do not have the latest updates integrated.
    • Note Devices using Windows Update for Business or that connect directly to Windows Update are not impacted. Any device connecting to Windows Update should always receive the latest versions of the feature update, including the latest LCU, without any extra steps.

[DIRECT DOWNLOAD LINK]


Windows 10, version 2004

Windows 10 v2004 shares the same core system as Windows 10 v20H2, so all updates, fixes, and improvements applied to one are the same as the other.

Cumulative update name:

  • Same as Windows 10 V20H2

Improvements and fixes:

  • Same as Windows 10 V20H2

Known Issues:

  • Same as Windows 10 V20H2

[DIRECT DOWNLOAD LINK]


Windows 10, version 1909

Windows 10 v1909 shares a core structure, core operating system, and an identical set of system files with Windows 10 v1903.

Because of this, all cumulative updates that apply to one version are available to the other as well.

Cumulative update name:

Improvements and fixes:

  • Addresses an elevation of privilege security vulnerability documented in CVE-2021-1640 related to print jobs submitted to “FILE:” ports. After installing Windows updates from March 9, 2021 and later, print jobs that are in a pending state before restarting the print spooler service or restarting the OS will remain in an error state. Manually delete the affected print jobs and resubmit them to the print queue when the print spooler service is online.
  • Security updates to the Windows Shell, Windows Fundamentals, Windows Management, Windows Apps, Windows User Account Control (UAC), Windows Core Networking, Windows Hybrid Cloud Networking, Windows Virtualization, the Windows Kernel, the Microsoft Graphics Component, Internet Explorer, Microsoft Edge Legacy, and Windows Media.

Known Issues:

  • System and user certificates might be lost when updating a device from Windows 10, version 1809 or later to a later version of Windows 10. Devices will only be impacted if they have already installed any Latest cumulative update (LCU) released September 16, 2020 or later and then proceed to update to a later version of Windows 10 from media or an installation source which does not have an LCU released October 13, 2020 or later integrated. This primarily happens when managed devices are updated using outdated bundles or media through an update management tool such as Windows Server Update Services (WSUS) or Microsoft Endpoint Configuration Manager. This might also happen when using outdated physical media or ISO images that do not have the latest updates integrated.
    • Note Devices using Windows Update for Business or that connect directly to Windows Update are not impacted. Any device connecting to Windows Update should always receive the latest versions of the feature update, including the latest LCU, without any extra steps.

[DIRECT DOWNLOAD LINK]


Windows 10, version 1809

According to Microsoft, users that still have the Home, Pro, Pro for Workstation, and IoT Core editions of Windows 10 V1809 should know that it reached End of Service back in November 2020.

That is why it is advised that you update your OS to a newer, supported version.

Cumulative update name:

Improvements and fixes:

  • Addresses an elevation of privilege security vulnerability documented in CVE-2021-1640 related to print jobs submitted to “FILE:” ports. After installing Windows updates from March 9, 2021 and later, print jobs that are in a pending state before restarting the print spooler service or restarting the OS will remain in an error state. Manually delete the affected print jobs and resubmit them to the print queue when the print spooler service is online.
  • Security updates to the Windows Shell, Windows Fundamentals, Windows Management, Windows Apps, Windows User Account Control (UAC), Windows Core Networking, Windows Hybrid Cloud Networking, the Windows Kernel, Windows Virtualization, the Microsoft Graphics Component, Internet Explorer, Microsoft Edge Legacy, and Windows Media.

Known Issues:

  • After installing KB4493509, devices with some Asian language packs installed may receive the error, “0x800f0982 – PSFX_E_MATCHING_COMPONENT_NOT_FOUND.”

[DIRECT DOWNLOAD LINK]


Windows 10, version 1803

Microsoft first announced that Windows 10 v1803 will reach the end of mainstream support, and starting with July there wouldn’t be any more optional, non-security releases for this version of Windows 10.

Because of the current global pandemic, as well as user feedback, Microsoft decided to extend the support for Windows 10 v1803 up until 2021.

Cumulative update name:

Improvements and fixes:

  • Addresses an elevation of privilege security vulnerability documented in CVE-2021-1640 related to print jobs submitted to “FILE:” ports. After installing Windows updates from March 9, 2021 and later, print jobs that are in a pending state before restarting the print spooler service or restarting the OS will remain in an error state. Manually delete the affected print jobs and resubmit them to the print queue when the print spooler service is online.
  • Security updates to the Windows Shell, Windows User Account Control (UAC), Windows Fundamentals, Windows Core Networking, the Windows Kernel, the Microsoft Graphics Component, Windows Graphics, Internet Explorer, Microsoft Edge Legacy, and Windows Media.

Known Issues:

  • Microsoft is not currently aware of any issues with this update.

[DIRECT DOWNLOAD LINK]


Windows 10, version 1703

Note: Windows 10, version 1703 has reached the end of service for  Home, Pro, Pro for Workstation, and IoT Core editions.

In order to continue receiving quality and security updates, Microsoft recommends that you get the latest possible version of Windows 10 installed.

Cumulative update name:

Improvements and fixes:

  • Addresses an elevation of privilege security vulnerability documented in CVE-2021-1640 related to print jobs submitted to “FILE:” ports. After installing Windows updates from March 9, 2021 and later, print jobs that are in a pending state before restarting the print spooler service or restarting the OS will remain in an error state. Manually delete the affected print jobs and resubmit them to the print queue when the print spooler service is online.
  • Security updates to the Windows Shell, Windows User Account Control (UAC), Windows Fundamentals, Windows Core Networking, the Windows Kernel, the Microsoft Graphics Component, Internet Explorer, Microsoft Edge Legacy, and Windows Media.

Known Issues:

  • Microsoft is not currently aware of any issues with this update. 

[DIRECT DOWNLOAD LINK]


Windows 10, version 1607

Note: Windows 10, version 1607 has reached the end of service for all of its available editions. Update to the latest version of Windows 10 in order to keep your system protected.

Cumulative update name:

Improvements and fixes:

This security update includes quality improvements. Key changes include:

  • Turns off token binding by default in Windows Internet (WinINet).
  • Addresses an issue in the Windows Management Instrumentation (WMI) service that causes a heap leak each time security settings are applied to WMI namespace permissions.
  • Addresses an issue with extra dereferencing that causes a server to stop working.
  • Addresses an issue in which a principal in a trusted MIT realm fails to obtain a Kerberos service ticket from Active Directory domain controllers (DC). This occurs on devices that installed Windows Updates that contain CVE-2020-17049 protections and configured PerfromTicketSignature to 1 or higher. These updates were released between November 10, 2020 and December 8, 2020. Ticket acquisition also fails with the error, “KRB_GENERIC_ERROR”, if callers submit a PAC-less Ticket Granting Ticket (TGT) as an evidence ticket without providing the USER_NO_AUTH_DATA_REQUIRED flag.
  • Addresses an elevation of privilege security vulnerability documented in CVE-2021-1640 related to print jobs submitted to “FILE:” ports. After installing Windows updates from March 9, 2021 and later, print jobs that are in a pending state before restarting the print spooler service or restarting the OS will remain in an error state. Manually delete the affected print jobs and resubmit them to the print queue when the print spooler service is online. 
  • Addresses a reliability issue in Remote Desktop.
  • Addresses an issue that might cause stop error 7E in nfssvr.sys on servers running the Network File System (NFS) service.
  • Adds a new dfslogkey as described below:
    • Keypath: HKEY_LOCAL_MACHINE/SOFTWARE/MICROSOFT/dfslog.
    • The RootShareAcquireSuccessEvent field has the following possible values:
      • Default value = 1; enables the log.
      • Value other than 1; disables the log.

        If this key does not exist, it will be created automatically. To take effect, any change to
        dfslog/RootShareAcquireSuccessEvent in the registry requires that you restart the DFSN service. 

  • Addresses an issue that causes an increase in network traffic during update detection for Windows Updates. This issue occurs on devices that are configured to use an authenticated user proxy as the fallback method if update detection with a system proxy fails or there is no proxy.
  • Security updates to the Windows Shell, Windows User Account Control (UAC), Windows Fundamentals, Windows Core Networking, Windows Hybrid Cloud Networking, Windows Kernel, Windows Virtualization, the Microsoft Graphics Component, Internet Explorer, Microsoft Edge Legacy, and Windows Media.

Known Issues:

  • After installing KB4467684, the cluster service may fail to start with the error “2245 (NERR_PasswordTooShort)” if the group policy “Minimum Password Length” is configured with greater than 14 characters.

[DIRECT DOWNLOAD LINK]


Windows 10, version 1507

Note: Windows 10, version 1507 is the oldest version of Windows 10 still active, and it has reached the end of service for some time now.

If your hardware allows it, update to a much newer version of Windows 10.

Cumulative update name:

Improvements and fixes:

  • Addresses an elevation of privilege security vulnerability documented in CVE-2021-1640 related to print jobs submitted to “FILE:” ports. After installing Windows updates from March 9, 2021 and later, print jobs that are in a pending state before restarting the print spooler service or restarting the OS will remain in an error state. Manually delete the affected print jobs and resubmit them to the print queue when the print spooler service is online.
  • Security updates to the Windows Shell, Windows User Account Control (UAC), Windows Fundamentals, Windows Core Networking, the Microsoft Graphics Component, Internet Explorer, Microsoft Edge Legacy, and Windows Media.

Known Issues:

  • Microsoft is not currently aware of any issues with this update.

[DIRECT DOWNLOAD LINK]


This concludes our article covering this month’s Patch Tuesday updates.

We hope that by reading the changelog, you’ll make a more informed decision on whether to download the latest updates or not.

If you do decide to to apply the updates, go ahead and use our direct download links, since the lead straight to the official Windows Update Catalog.

However, remember that the Patch Tuesday updates are extremely important and should be applied, especially if you express any concerns regarding your PC’s security.

This is especially the case, considering this month over XYZ vulnerabilities were found.

As a general note, Patch Tuesday updates should be applied as soon as they become available in your region, that is unless you want to become a target during Exploit Wednesday or Uninstall Thursday.

[wl_navigator]

What is AppVShNotify.exe? Malware, Virus, or Safe process?

Windows 10 is full of background services that most users have never heard of it. Users can view somewhat obscure Windows EXE components listed on the Processes tab in Task Manager.

AppVShNotify is among the curious processes some users spot in Task Manager.

What is AppVShNotify?

AppVShNotifyis is an EXE (executable) file in Windows 10, 8, and 7 that stands for Microsoft Application Virtualization Client Shell Notifier. It’s a file for the Microsoft Application Virtualization background service in Windows. Some users can find that file in one of these folder paths:

C:Program FilesCommon Filesmicrosoft sharedClickToRun
C:Program Files (x86)Microsoft Office (for users with MS Office installed)

What does AppVShNotify do?

The Microsoft Application Virtualization service makes software available via virtualization, which enables apps to run within virtual environments.

Its AppVShNotify.exe file is utilized by App-V to integrate virtual apps and make them available to end-users.

Is AppVShNotify safe?

The real AppVShNotify.exe is a Microsoft file that’s entirely safe. However, some unscrupulous programmers might proliferate viruses and malware disguised as the AppVShNotify.exe.

Thus, some users might discover fake AppVShNotify.exe malware on their PCs that cause error messages like:

Failed to initialize properly
AppVShNotify could not be installed

The real AppVShNotify.exe should be in a subfolder of Program Files like the paths shown directly above. If you discover an AppVShNotify.exe in a path outside Program Files, you’ve probably found malware on your PC.

How can I uninstall AppVShNotify?

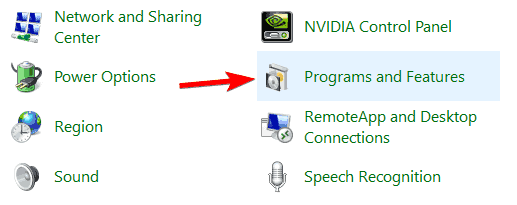
  1. Yes, you can uninstall the real AppVShNotify.exe via the Programs and Features Control Panel applet. To do so, press the Windows and R keys at the same time.
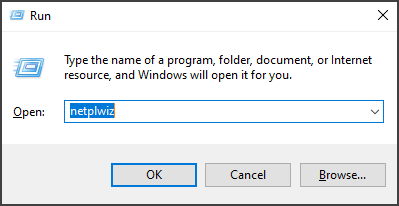
  2. Then input this run command for Programs and Features within the Open box: appwiz.cpl
  3. Click the OK option to open the Windows uninstaller.
    The Programs and Features applet AppVShNotify
  4. Enter Microsoft Application Virtualization in the Programs and Features search box.
  5. Select the listed Microsoft Application Virtualization.
  6. Click Uninstall for the Microsoft Application Virtualization, and Yes on confirmation prompts, to uninstall it.
  7. Thereafter, turn off your desktop or laptop to restart Windows.

Removing the software is one way to disable Appvshnotify on your PC.

You can also remove software listed within Programs and Features with third-party uninstaller utilities. Some third-party uninstallers will remove leftover files and registry entries Windows’ uninstaller might leave behind.

So, if you need to entirely uninstall this software file with no leftovers files that remain stuck in your PC, the most ideal way is with effective uninstaller software.

How can I remove AppVShNotify malware?

  1. You can run an antivirus scan to purge AppVShNotify malware. To do so with Windows 10’s built-in antivirus utility, click the Windows Security icon on the system tray.
    Windows Security system tray icon AppVShNotify
  2. Click the shield button on the left side of Windows Security to open the Quick scan option.
    The Quick scan button AppVShNotify
  3. Click Scan options to open the settings shown directly below.
  4. Select the Full Scan option there.
  5. Press the Scan now button.

There are some dedicated third-party malware scanner utilities you can utilize that can be more efficient for purging malware than Windows Security.

⇒ Get Malwarebytes

However, most users need not be alarmed by the AppVShNotify.exe process. Don’t try to uninstall/disable the AppVShNotify.exe process if you utilize software virtualization.

If you don’t need it though, you can free up some HDD storage by uninstalling MS Application Virtualization.

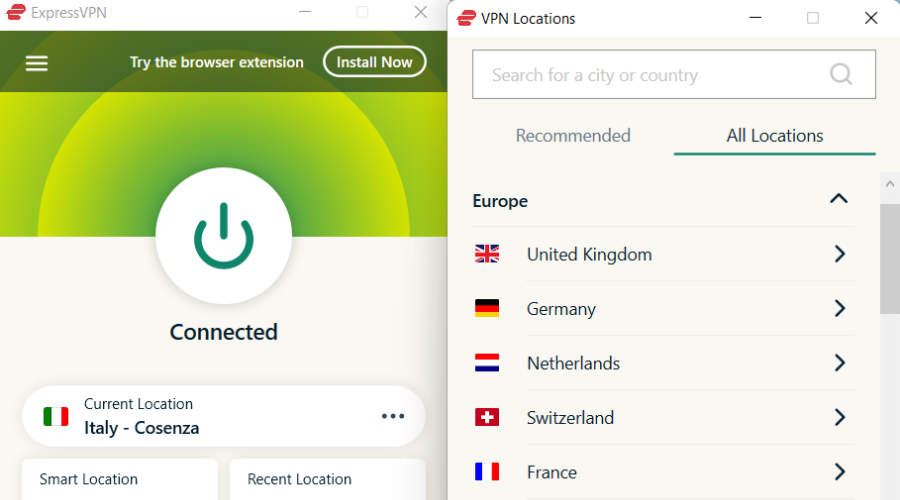
Full Fix: VPN does not work over 3G

If your VPN does not work over 3G, this post is meant for you. As a quick reminder, 3G, short for the third generation, is the third generation of wireless mobile telecommunications technology.

In addition, it is the upgrade for 2G and 2.5G GPRS networks, for faster internet speed. Some Windows users reported that they were unable to use their VPN service over 3G.

This may be due to several reasons such as blockage by telecom operator, unsupported protocols, low speed, etc.

However, if your VPN does not work over 3G, Windows Report has compiled the following solutions for you.

What can I do if the VPN does not work over 3G?

1. Change your VPN provider service

Stop struggling to find a fix for your VPN that simply doesn’t work over 3G when you may choose one that will never make you worry about such issues.

Owned by Kape Technologies, the VPN recommended below has quite a few features that are ideal for those interested in finding an error-free solution this time.

With zero IP and DNS leaks on the record, consistent speeds for P2P torrenting, and an unmatched precision to unlock any protocol filters, it exceeds expectations.

Even more, this VPN gives you the desired freedom to customize your encryption algorithms and protocols for secure 3G connections.

Private Internet Access

Private Internet Access

Let us assure you that Private Internet Access works over 3G. Enjoy a major discount right away!
Check priceVisit website

2. Check your Internet connection

A quick fix for the VPN does not work over 3G problem is to check your Internet connection. Windows users reported that limited/inactive Internet connection can cause a VPN problem.

Hence, you need to test your Internet connection. In order to test your Internet connection, disconnect from the VPN service, and try to access any website on your web browser using the 3G Internet connection.

If you are unable to access the Internet while disconnected from the VPN, then you may need to consider changing your Internet connection mode to 4G, LAN, broadband, or Wi-Fi connection.

3. Reinstall the 3G stick software (modem)

  1. Go to Start > Control Panel.
  2. Right-click Start and select Programs and Features.vpn does not work over 3g
  3. Find your 3G software from the list of programs and select Uninstall.
  4. Follow the prompts to complete the uninstall of the 3G software.
  5. After the uninstall, insert the modem stick and follow the prompts to install the 3G software.
  6. Hence, connect to the internet and try to use the VPN afterward.

If your 3G connection mode is via a modem, then you may need to reinstall the stick software. This method is noted to have fixed the VPN does not work over the 3G problem.

Follow the above steps to reinstall your 3G software. Alternatively, you may also reinstall the VPN client on your PC, and then access the Internet afterward.

4. Manually configure DNS settings

Manually configuring your computer with other DNS server fixes the VPN does not work over 3G issues and helps you enjoy faster connection speeds.

Some computers may not automatically connect to the VPN DNS servers; hence you need to configure it with your VPN DNS servers’ IP addresses, manually. Here’s how to do it in Windows:

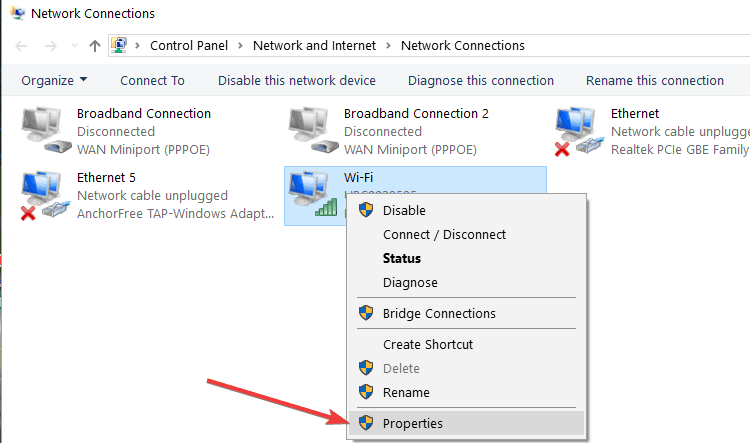
Open Network Connections settings

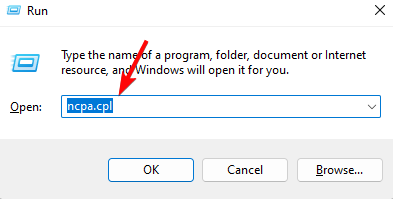
  1. Right-click Start and select Run.
  2. Type ncpa.cpl and click OK.
  3. In the Network connections window, find your usual connection.
  4. Right-click the connection and select Properties.
no internet over 3G

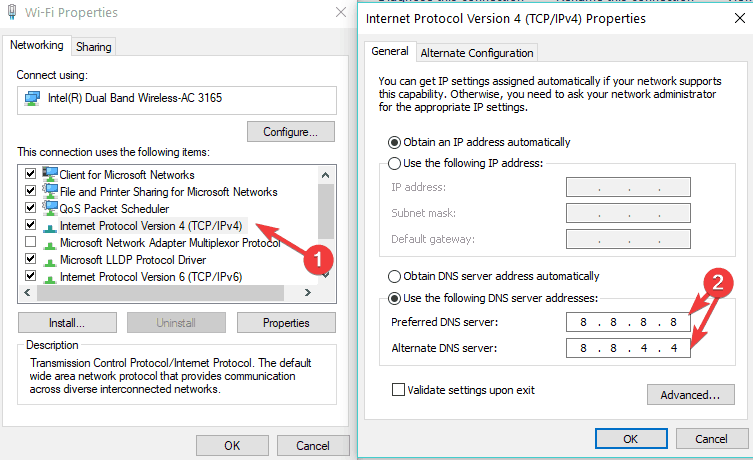
Set the DNS server addresses

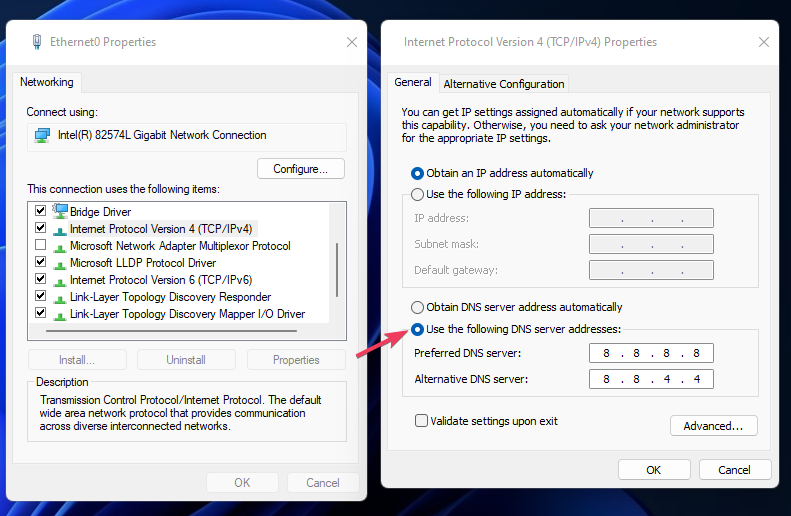
  1. Double click Internet Protocol Version 4 (IPv4) or just Internet Protocol.
  2. Select Use the following DNS server addresses.
  3. Type these Google DNS server addresses: Preferred DNS server 8.8.8.8 and Alternate DNS server 8.8.4.4.DNS settings

If Google DNS is blocked, try the following: Neustar DNS Advantage (156.154.70.1 and 156.154.71.1) enter and press OK and Level3 DNS (4.2.2.1 and 4.2.2.2) enter and press OK.

5. Change your telecom operator

Some telecom operators in some countries do restrict usage of VPN most especially when you use it over 3G. However, not all telecom operators would exercise this strict restriction.

Hence, you may need to change your telecom operator to another one with lesser restrictions.

Meanwhile, if your VPN does not work over 3G after changing your telecom operator, you may need to contact your telecom operator customer service and ask for help in fixing the problem.

Let us know if any of these solutions helped fix the VPN does not work over 3G problem, by leaving a comment in the section below.

Final major Microsoft Edge Dev version 90 build improves the Collections and autofill features

Right on schedule, a new Microsoft Edge Dev update is here. This week’s release is a little minor, and it will be the final major version 90 release, according to Microsoft. That said, it does bring some improvements to Collections as well as autofill. Here’s a look at what you need to know.

First off, we’ll start with the new features. It’s now possible to sort overall Collections. It’s also possible to drag and drop downloaded files from the list in the Downloads popup into webpages or folders. Other new features are below.

  • Added the ability for users to manually search through their autofill data by pressing the / key.
  • Added an option to the Disable Developer Mode Extensions popup to stop showing it. Note that this popup only appears in Beta and Stable.
  • Finished rolling out the new Downloads popup

Now, for the usual reliability fixes, changed behaviors, and known issues. For reliability fixes, you should notice that Microsoft fixed an issue where using an extension that has a popup menu in a PWA or website installed as an app causes the browser to crash. They also fixed a crash when opening the Web Widget, and issues where webpages might crash upon loading. See below for everything else you need to know. The list is shorter than usual this week!

  • Fixed an issue where Edge may be unusable the first time it is opened after an update, but closing and re-opening it fixes it.
  • Fixed a hang when uninstalling a PWA or website installed as an app.
  • Fixed an issue where interacting with the Web Widget when the browser is using a Guest session sometimes leads to a crash.
  • Fixed an issue where some webpages crash upon loading.
  • Fixed an issue where some videos appear black but audio plays fine.
  • Fixed an issue where images don’t display properly on certain websites.
  • Improved the Site Information popup.
    Fixed an issue where the Profiles Settings page sometimes shows a broken image with the message “HIDE_HEADER”.
  • Fixed an issue where focus automatically moves into the Downloads menu when it appears to ask users what to do with a pending download.
  • Fixed an issue where adding notes to a Web Capture causes the captured image to go blank.
  • Fixed an issue on Mac where the Tab menu has a duplicate option to Select Next Tab.
  • Fixed an issue where tabs forget they’re supposed to be horizontal after exiting fullscreen.
  • Fixed an issue where some webpages appear too wide and can’t be scrolled to see all their content.
  • Fixed an issue on Linux where scrolling the vertical tabs pane switches the active tab instead of scrolling the pane.
  • Fixed an issue where the “See more in sidebar” link in dictionary definitions in PDFs doesn’t work.
  • Fixed an issue where changing the browser’s zoom settings also incorrectly affects the Web Widget.
  • Fixed an issue where installing a PWA or website as an app sometimes results in the app having no favicon even though the website did before it was installed.
  • Deprecated the management policy to control the SSL Version Min

To end, there’s a new known issue we want to note. Microsoft says users of certain VMWare software may run into an issue where Edge will no longer open. Known issues from last week and prior releases are still the same and have not changed.

Outside of Edge Insider news, there’s still a lot to report this week. The legacy version of Microsoft Edge is no longer being supported, and Microsoft is bringing the new Chromium-based Edge to Xbox. As always, you can check out all these stories over at our Microsoft Edge news hub.

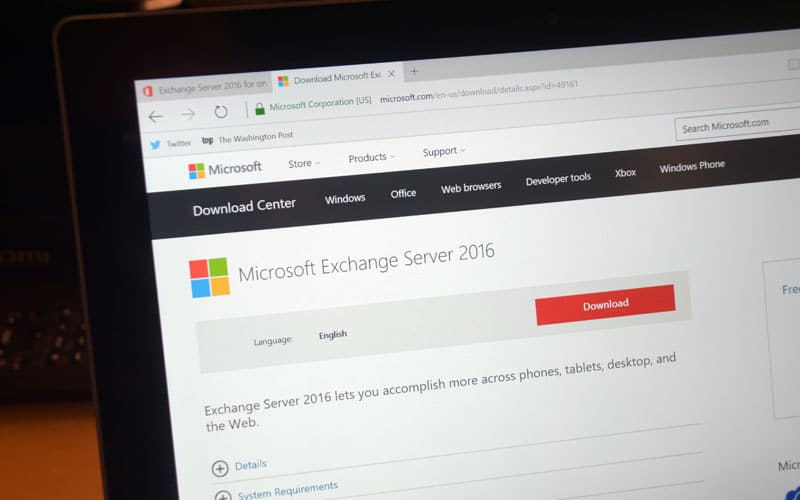
Microsoft releases new patches to fix Exchange flaws currently used by hackers

Microsoft issued an update to its recent March Cumulative Update for its Exchange Server platform aimed at patching four critical vulnerabilities that have recently become exploits.

Today’s March 9, 2021, update follows a previously issued emergency patch for its 2013, 2016, and 2019 Exchange Server products that have become the recent targets of cyberattacks from a presumed nation-state. Internally, Microsoft is tracking CVE-2021-26855, CVE-2021-26857, CVE 2021-26858, and CVE-202-27065 as the four identifiable flaws within its various Exchange Server platforms for on-premise setups.

Microsoft’s community support forum details the steps admins can use to temporarily patch the vulnerabilities within their systems against the latest cyberattack.

  • These updates must be installed from an elevated command prompt:
    1.      Download the update but do not run it immediately.
    2.      Temporarily disable file-level antivirus software
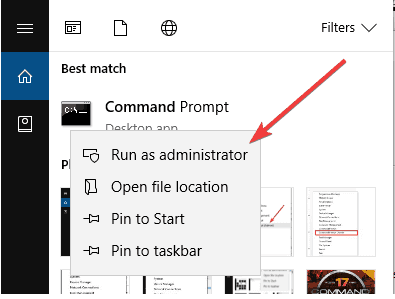
    3.      Select Start, and type CMD.
    4.      In the results, right-click Command Prompt, and then select Run as administrator.
    5.      If the User Account Control dialog box appears, choose Yes, and then select Continue.
    6.      Type the full path of the .msp file, and then press Enter.
    7.      After the installation is finished, re-enable the antivirus software, and then restart the computer. (You might be prompted by the installer to restart.)

Among the additional crucial bits of protection, the community support blog also hosts information that includes the limitations to Microsoft’s support of affected Exchange Servers. Embedded within Microsoft’s community support blog is the company’s explanation on why it’s currently racing to patch and protect previously unsupported platforms as well as the distinction that these new updates should not infer future support.

These update packages contain only fixes for March 2021 CVEs (CVE-2021-26855, CVE-2021-26857, CVE-2021-26858, CVE-2021-27065); no other product updates or security fixes are included. Installing these updates does not mean an unsupported CU is now supported.

Today’s update comes as an acknowledgment by Microsoft that its on-premise Exchange Server has become the highlighted target of malicious online attacks twice within a year or so. While not the scale of SolarWinds, the Hafnium cyberattack has been running for some time and is in its own right has the potential to be crippling.

An estimated 18,000 organizations worldwide are potentially affected by the Hafnium cyberattack. The list of vulnerabilities for the affected Exchange servers includes Server-Side Request Forgery for HPPT requests that don’t require authentication, insecure decentralization at the SYSTEM level, and write paths to post-authentication arbitrary file writes.

Back in late February, Microsoft was brought before Congress to answer questions regarding the massive SolarWinds cyberattack, and it stands to reason the company will be questioned about this most recent attack and what steps it’s going to take going forward to mitigate this level and occurrence of cyber-attacks to its older on-premise Exchange Servers.

VPN One Click not working / not connecting [Fixed]

Some users have reported that their version of VPN One Click has suddenly stopped working. This can be extremely frustrating if you need to access the VPN service.

You may want to visit specific websites, or just to protect your online privacy. In this article, we will explore the best troubleshooting methods to deal with this issue.

To start browsing privately using VPN One Click as soon as possible, read on to find out how to do it.

What to do if VPN One Click is not connecting?

1. Uninstall and then reinstall the latest version of VPN One Click

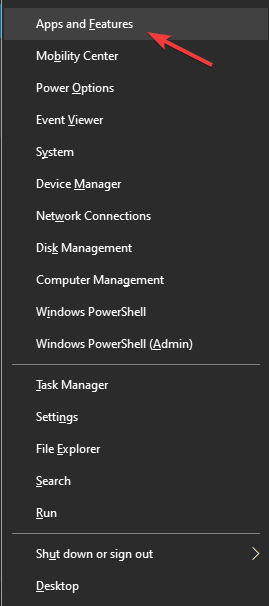
  1. Press Win+X keys on your keyboard -> select Apps and features.Apps and features - VPN One Click stopped working
  2. Search for VPN One Click inside the programs list -> select it -> press Uninstall.
  3. Follow the on-screen instructions to finish the removal process.
  4. After the application is removed, visit the official website to download the latest version of the software.

2. Give a try to a different VPN solution

use-a-vpn

If you happen to lack the patience needed for fixing this VPN connection issue, why not using a more reliable alternative?

Other than keeping you away from such errors and impeccable Windows compatibility, this tool is also a very capable unblocker of geo-locked streaming services including Netflix, Hulu, and HBO Go.

Moreover, do keep in mind that it has countless security options at your disposal and a zero-logs policy, which is ideal considering it is a US-based business.

Private Internet Access

Private Internet Access

Use PIA and you’ll never worry about connections issues. Now available at a major discount!
Check priceGet it now

3. Make sure your firewall service is not blocking VPN One Click

firewall service
  1. Click on Cortana search box -> type firewall -> select the first option from the results.
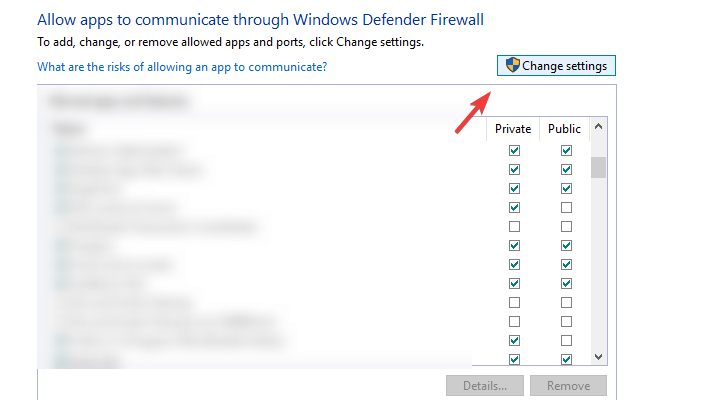
  2. Inside the Firewall settings -> select the option Allow an app or feature through Windows Defender Firewall.
  3. Search for VPN One Click on the list and make sure to allow all connections (both incoming and outgoing).
  4. Save the settings and try to see if this solved your problem.
  5. If this method didn’t resolve the problem, follow the next method.


4. Try a different server inside your VPN One Click

VPN One Click servers
  1. Even though this might seem like an obvious solution, some people managed to get their VPN working again by simply choosing another server to connect to.
  2. You can choose any of the servers presented in the Server list inside the program. Try a few of the options to see if this fixes your issue.
  3. If all of the above methods failed to solve your issue, follow the next method.

5. Contact the official VPN One Click support

Contact page screenshot - VPN One Click has stopped working

You can easily send an email to the address [email protected] and ask for help. In order for the VPN One Click team to be able to help you, you will need to provide the following information:

  • A copy of your proof of payment.
  • The description of your problem.
  • The location from which you’re trying to use their services.
  • The activation code (you can find it by launching the VPN One Click software and clicking the menu icon at the top left side of your screen.

In this article, we explored some of the best troubleshooting methods to deal with the issue caused by VPN OneClick not working anymore.

Please feel free to let us know if this guide helped you solve your issue, by using the comment section found below.

10 Best coding browser extensions [Dev tools]

Many PC users use different types of browser extensions. They are small software modules you can use to customize your browser.

There are many browsers that use coding extensions, so this type of software is not limited to Firefox, Google Chrome or Opera One, for example.

The first program that supported browser extensions was originally Internet Explorer starting in 1999. After that, other popular browsers started to contain this feature.

Thus, after Internet Explorer, people could also use browser extensions with Mozilla Firefox, Opera One, Google Chrome, and Safari. The last software for Internet browsing that supports browser extensions in Microsoft Edge.

Quick Tip:

If you want to get the most from your coding experience then you should try Opera One. It uses less from your computer’s resources and offers faster loading times thanks to its integrated ad blocker.

Opera One ensures your privacy as its integrated VPN will reduce online tracking, and offer you safe browsing while also enabling you quick access to your messaging apps and it’s native AI.

Opera One

Use Opera One to take advantage of faster loading times and great features that will offer you an enhanced coding experience!
Free Download Visit website

What are the best coding browser extensions?

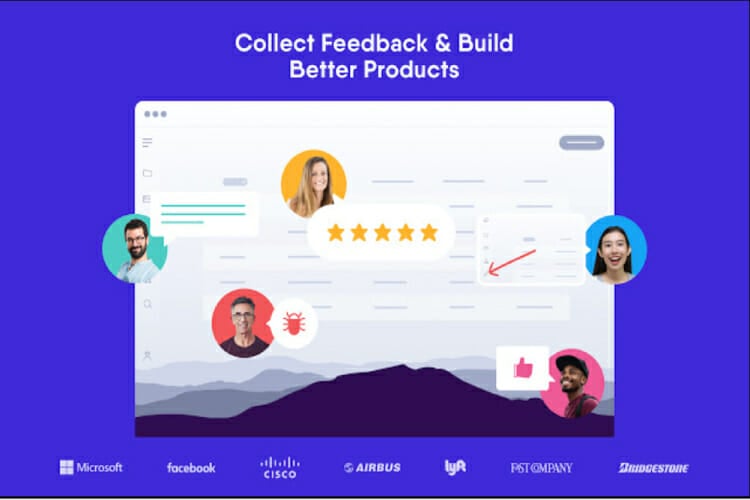
Usersnap

Usersnap is an extension for Google Chrome that allows you to capture and annotate web pages directly in your browser. Use it to offer visual feedback regrading prototypes or to report bugs.

After you have taken screenshots about the different issues you may have encountered, they will be stored directly in your project dashboard. This makes using Usersnap a pleasant work for bug tracking and feedback.

As a tool used for bug tracking and feedback, Usersnap is the best in the coding browser extensions category. This software was also mentioned in various media articles such as Huffington Post or Forbes.

Big Tech companies have tested this top coding browser extension. Now, Usersnap is used on a daily basis at Facebook, Google or Microsoft.

If you’re interested in getting Usersnap for Firefox, it is available on the official download page.

⇒ Get Usersnap for Chrome


Web Developer

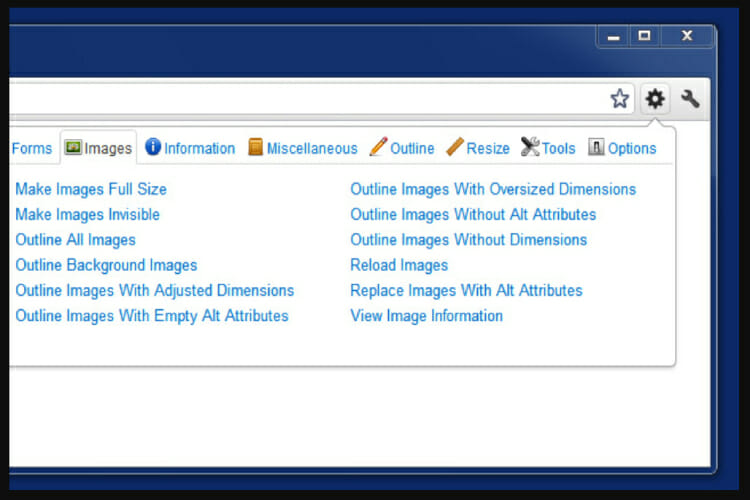
This extension for Google Chrome is useful when you want to add a toolbar with different useful tools.

This is one of those coding browser extensions that can be used by both developers and programmers as well.

Using the web developer, you can add outlines to elements with just a click, display rulers, and finding the broken images on an entire page. These are only a few examples of the variety this tool can offer you.

To take advantage of the Web Developer’s features on Firefox, check out the official download page for this browser.

You can also easily get the same extension on Opera One by checking the Web Developer download page.

⇒ Get Web Developer for Chrome


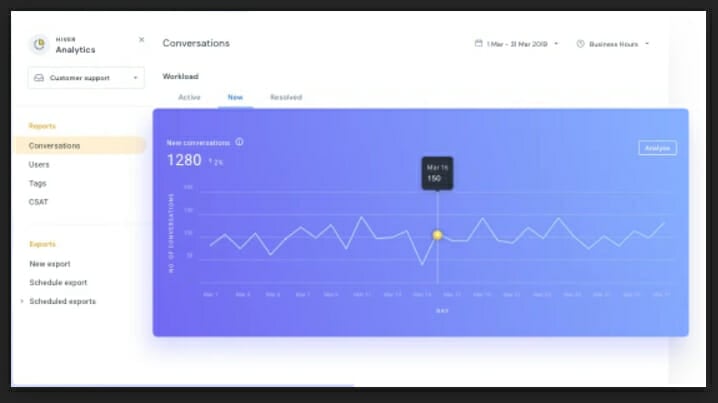
Hiver

If there are coding browser extensions that are team-based, then Hiver is one of them.

If you work with a team, then all of you can use this great tool to manage group inboxes right from your Gmail.

If you encounter critical emails about support escalation or other technical bug isssues, use Hiver.

It will help you assign them to individual developers and keep track of them in real-time.

In other words, Hiver is great for assigning critical issues to developers and keeping track of them from the beginning until they are solved.

In case you’re a Firefox user, you can download Hiver from the official addons page.

⇒ Get Hiver for Chrome


F19N Obtrusive Live Test

The f19N is one of the best coding browser extensions, more specifically an extendable Webpage Testing Framework.

Developers can use this software to test pages using predefined best practices using criteria such as web performance or SEO.

Use this tool to create these tests yourself, obtain direct visual feedback, and have access to browser processes when the pages are loading.

⇒ Get F19N Obtrusive Live Test


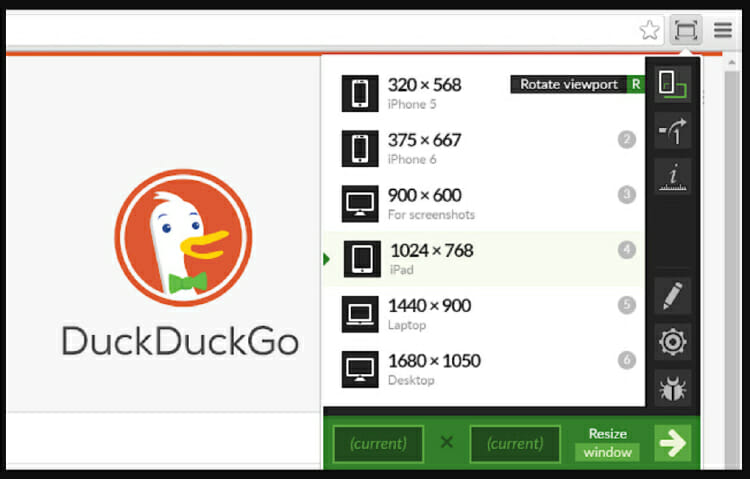
Window Resizer for Developer

This extension allows you to resize your browser window fast. After you click the icon in the menu bar, this will activate a menu composed of window sizes.

These sizes are customizable and this app also offers you the option to use it as a pop-up. Windows Resizer is one of those coding browser extensions you may consider as an resolution emulator.

Use it to verify different screen resolutions to check if the media settings are functioning as you expect them to. This tool also offers you the option to rotate the screen and customize the available presets.

To easily download the same extension to your Firefox browser, download it from the official addons page.

⇒ Get Windows Resizer on Chrome


ColorPick Eyedropper

Among many different coding browser extensions, ColorPick Eyedropper is a tool for color choosing. Use it to choose color values from any web page by controlling a color chooser feature.

Many users that tried it have been satisfied with this option and consider the ColorPick Eyedropper easy to use, simple, and very intuitive.

In case you’re using the Firefox browser, you can download the extension for it on the official download page.

If you’re using Opera One, the addons page will help you download it easily.

⇒ Get ColorPick Eyedropper for Chrome


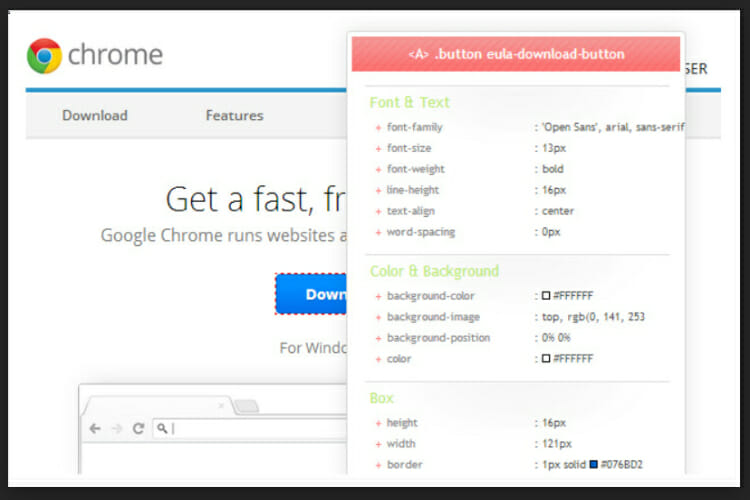
CSSViewer

If you seek a property viewer for CSS, then choose CSSViewer from the variety of coding browser extensions available. Built user-friendly, this software contains a detailed floating panel.

You can use this feature to obtain details on the section on which the mouse cursor is. You will obtain valuable information such as font, color, positioning, background, box and effects attributes.

Use CSSViewer to gain quick access to information. You can do so even if you’re using Firefox by visiting the official addons page.

⇒ Get CSSViewer on Chrome


Lorem Ipsum Generator

Just as its name states, the Lorem Ipsum is one of the coding browser extensions that allow you to create text fast and easily. Use it to enhance your design by adding default text.

Just after you have installed it, you can use Lorem Ipsum Generator with its default settings. You can fine-tune the text you wish to use with this extension by customize those settings.

The Lorem Ipsum was designed so that every sentence will be randomly generated to look like real text. Choose to use 1-5 paragraphs, each one containing between 1 to 20 sentences.

This extension will also provide you with an optional paragraph encasing and different line breaks.

⇒ Get Lorem Ipsum Generator on Chrome


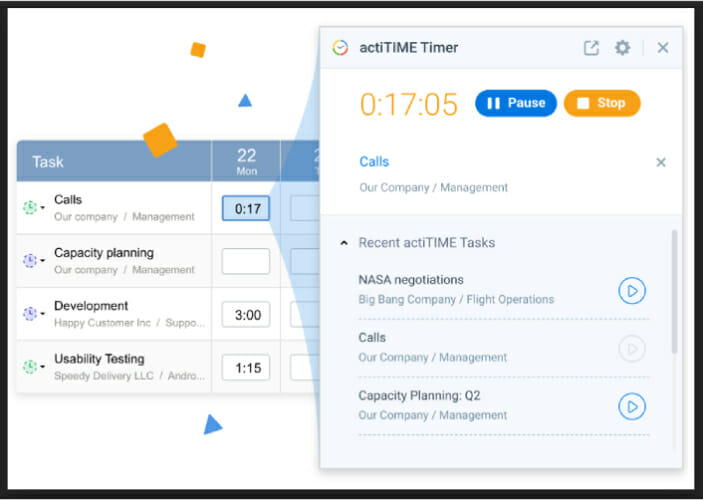
actiTime

If you seek a browser extension useful for time management, then actiTime Timer is just what you need. Many developers will find this tool very useful to monitor working hours from browser or from web apps.

For example, actiTime is one of the coding browser extensions that is compatible and works well with Jira. This extension has proven very useful for companies and freelancers alike.

Both professional categories use actiTime to analyze performance and control two fundamental metrics of a project: progress and profitability.

⇒ Get actiTime on Chrome


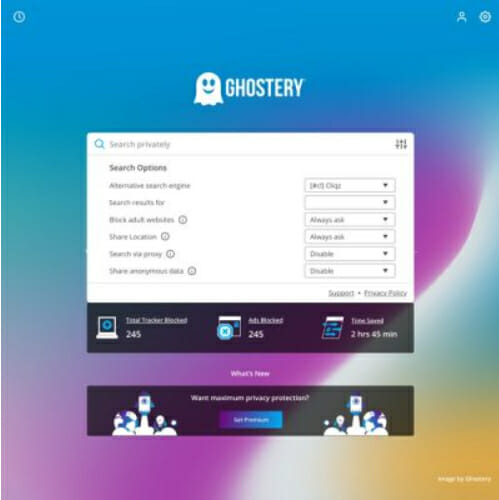
Ghostery

If you want something special from the great variety of coding browser extensions available online, Ghostery is the answer.

An extension for Chrome, Ghostery will immediately detect pixels, trackers, and any embedded snipets available on websites.

In other words, right after visiting a page, this extension will show you which trackers and plugins are installed on that page.

The good news do not end here, because Ghostery offers even more. This coding browser extension will protect your privacy as well.

If your preferred browser is Firefox, you can download the app from the official extensions store.

In case you prefer Opera One, this addon can be found on the official addons page, and can be easily installed.

⇒ Get Ghostery


The average extensions for your browser are useful to offer you additional features, and improve your computing experience.

There is also the coding browser extensions category, available for IT professionals.

If you are a web developer, a web designer or just share a strong passion for IT, then this guide is for you.

This article will briefly inform you about extensions for browsers and recommend you 10 top such software for Developers.

How to activate dark mode on Avast Secure Browser

Avast Secure Browser is an ultra-secure Chromium-based browser that incorporates various blocking tools.

This browser doesn’t include a built-in dark mode feature. However, you can still activate dark mode in Avast Browser by using Chrome’s themes and extensions and a Windows 10 setting.

Quick tip:

Some alternative browsers such as Opera, support the dark mode out of the box. The browser also has a wide array of other features.

Those features include ad blocker, video pop-outs, as well as a Speed Dial that lets you access your favorite websites easily.

Opera built-in media player, instant messenger, Twitter and Instagram integration, and a free and unlimited VPN.

Opera

Opera

Opera browser offers secure and fast web browsing, as well as a built-in dark mode.
Get it freeVisit website

How can I activate a dark mode on Avast Secure Browser?

1. Select the Dark default app mode

  1. To activate a dark mode in Avast Secure Browser without themes or extensions, press the Windows + S hotkey.
  2. Type the keyword dark in the search utility.
  3. Click Turn on dark mode for apps to open Settings as in the shot directly below.
    Choose your default app mode option avast browser dark mode
  4. Select Custom on the Choose your color drop-down menu.
  5. Click the Dark option for the Choose your default app mode setting to turn the Settings app, and others, black.
  6. Now open Avast Secure Browser to check out its new dark mode.
    Dark Settings tab avast browser dark mode
  7. You can revert to a light theme for apps by selecting Light for the Choose your default app mode setting.

After doing that dark mode will be enabled in Avast Browser and all other applications on your PC.


2. Add the Morpheon Dark theme to Avast Secure Browser

  1. Open Avast Browser.
  2. Click the green Security button on that browser’s toolbar.
  3. Turn off the Extension Guard setting, which is shown in the screenshot directly below.
  4. Then check out the Morpheon Dark theme on its Chrome Web Store page.
  5. Click the Add to Chrome button to add that theme to Avast Secure Browser.
Morpheon Dark theme avast browser dark mode

That theme applies black coloring to the tab bar, URL toolbar, and bookmarks bar.


3. Add Dark New Tab to Avast Secure Browser

  1. To add a black New Tab Page to ASB, check out the Dark New Tab extension page.
  2. Click the Add to Chrome button there to add that extension to Avast Secure Browser.
  3. Then click + New tab button to open the browser’s start page, which will now have a dark background as in the shot below.
    Dark New Tab avast browser dark mode
  4. You can click the Toggle Dark/Light button on that page to switch between a dark and light New Tab page.

This isn’t an actual dark mode for Avast Browser, but it’s a decent workaround.


4. Check out the Dark Lunar extension

  1. If you want to extend the darkness in Avast Secure Brower to webpage backgrounds, open the Lunar Reader extension page.
  2. Press the Add to Chrome button to add that extension to ASB.
  3. Thereafter, open the Google search page in a browser. It should now have a dark background as in the screenshot directly below.
    Dark Google search avast browser dark mode
  4. Click the Lunar Reader button on Avast Secure Browser’s toolbar.
    Lunar Reader avast browser dark mode
  5. You can toggle the dark mode off/on for a page by clicking the Dark Mode setting there.
  6. To adjust the dark background on pages, drag the Contrast and Brightness bars to the left and right.
  7. Click the Night Shift button to apply a night mode.
  8. You can exclude dark backgrounds for certain websites by clicking the Site List tab.
    The Site List tab avast browser dark mode
  9. Select Blacklist Mode on that tab.
  10. Then enter the URLs of websites you prefer to exclude dark backgrounds on.

So, that’s how you can activate an Avast Browser dark mode. If you don’t care about all your other apps having dark themes, you might as well select Windows 10’s Dark default app setting.

Users who just want ASB to be dark can add the aforementioned themes and extensions instead.

Report: New Microsoft webcam could launch alongside Surface Laptop 4 this Spring

Microsoft is reportedly planning various digital events this year, starting with an Xbox event rumored for March 23. A Surface event is also in the cards for this Spring, where Microsoft is expected to announce the new Surface Laptop 4 alongside other accessories.

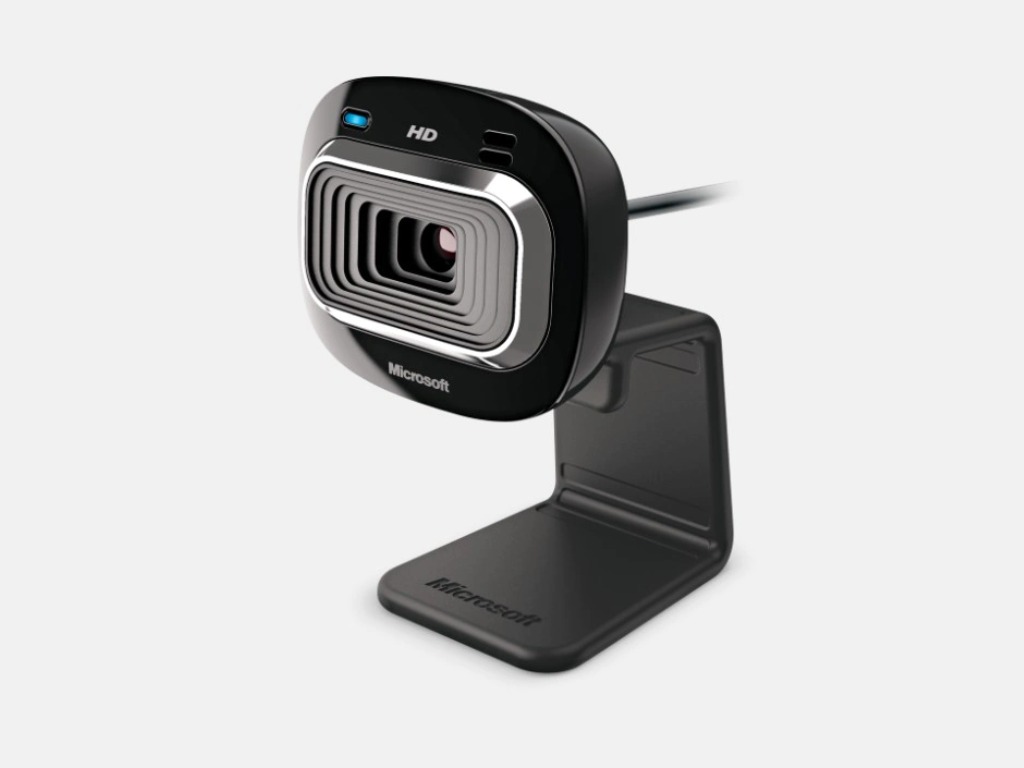
A new Microsoft webcam could be announced at this Spring Surface event according to a new report from Brad Sams. This new webcam could include a privacy cover and support HDR video, though it may not come with a 4K sensor. According to the report, Microsoft could also use this Spring Surface event to announce some new audio accessories that could work in tandem with this new webcam.

Microsoft has been selling webcams and other PC accessories for quite some time now, and you may remember the company’s series of LifeCam cameras that you can still find today. In recent years, though, the company let other manufacturers such as Logitech and Lenovo sell cameras that support the same Windows Hello sign-in technology available on Surface devices.

Since there are already many excellent webcams on the market, it remains to be seen how this new Microsoft webcam could stand out from the competition. Microsoft accessories can sometimes be quite expensive, though the company recently surprised us with its $99 Xbox Wireless headset to be released on March 16.

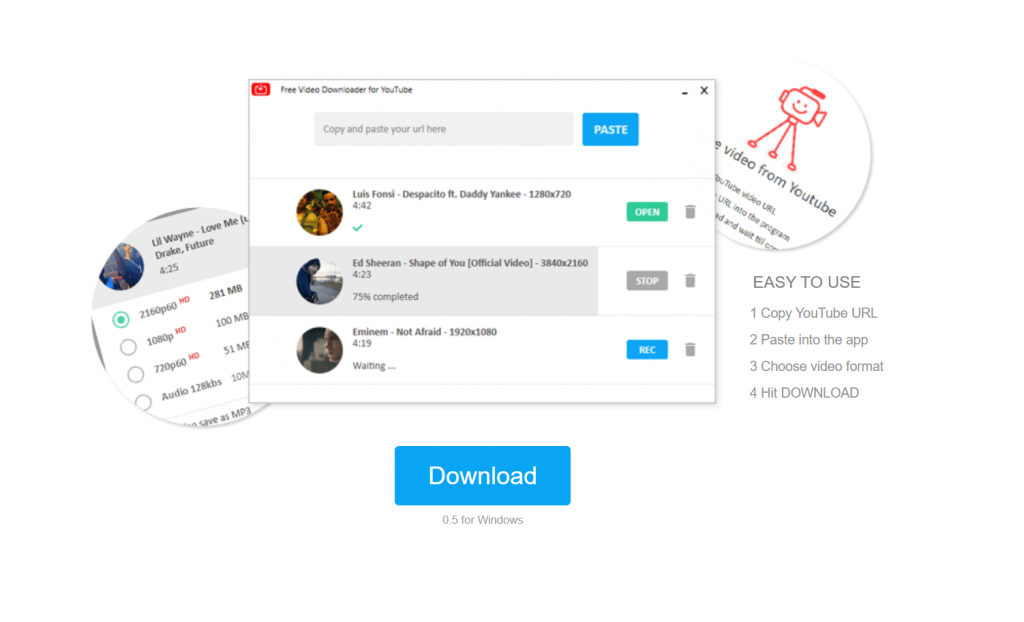
A chat with NotMP3’s Mike Tomson: The story behind one of the best YouTube to MP4 converters

Recently, I reviewed NotMP3, and I proclaimed it as one of the best ways to download YouTube videos on Windows 10. I mentioned the simplicity and the design of the app as reasons why use it so much in my production of the OnPodcast. However, I also had the chance to chat with the person behind the app, Mike Tomson.

In a series of emails, we talked about the inspiration for this app, what makes it so different from the many others in the market, and what makes his app so great. Here’s his story.

What was the inspiration for NotMP3?

Not Mp3

One of the first questions I had for Mike was about the inspiration for the app. I was curious, in a crowded market of conversion apps and services, why and how NotMP3 wanted to breakthrough. I also questioned him about the legality of downloading from YouTube — knowing that copyright violations are often a thing in the online world. In the words of Tomson.

“The high-profile dispute over the legality of downloading from YouTube, that was erupted in 2017, engaged us to find a new legal way to extract MP3 audio from YouTube. Thus, we created our first program – Free MP3 Recorder for YouTube which is the implementation of a new stream-recording approach to saving YouTube audio.”

On copyright issues, Tomson says NotMP3 spent a lot of time in meetings with lawyers. They examined YouTube’s Terms of Service in detail and came up with two different approaches. This is the key to the way their products are implemented. He tells me:

“All our products were implemented according to 2 different approaches: stream recording and stream-ripping methods. The first one is absolutely legal because the stream recording software does not download any content. Our recorders for YouTube and SoundCloud let us play audio tracks in real-time and record audio straight from the sound card of a computer. The second method is legal for personal use. If users download videos exclusively for personal and private use they are unlikely to face responsibility for their actions.”

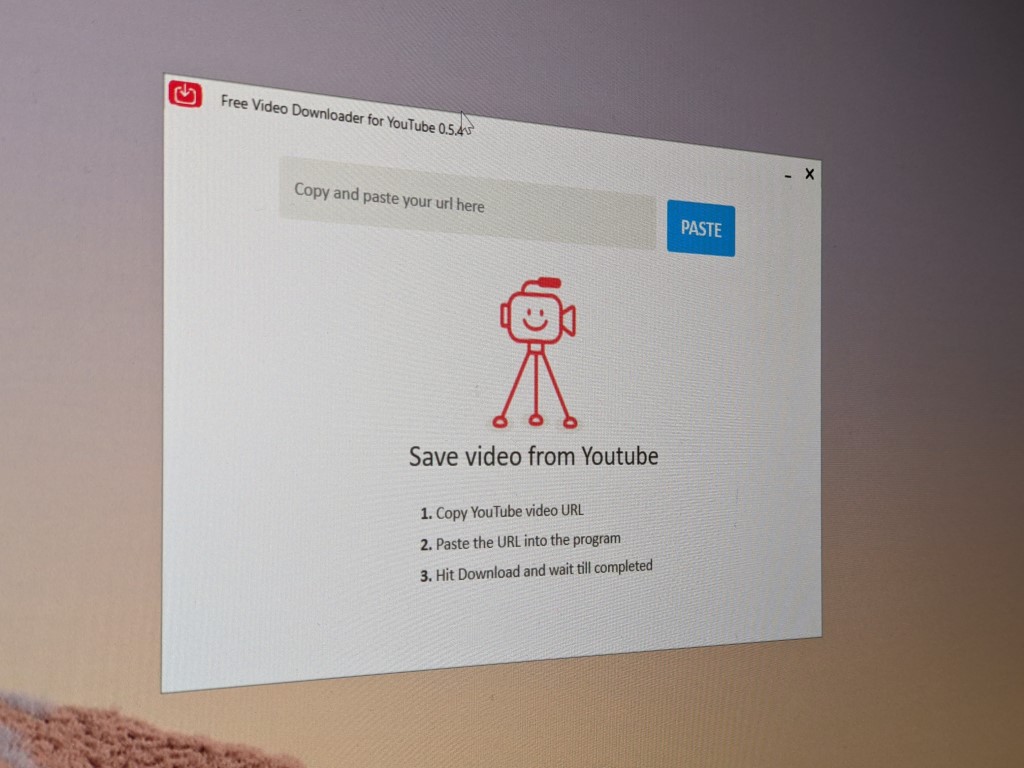
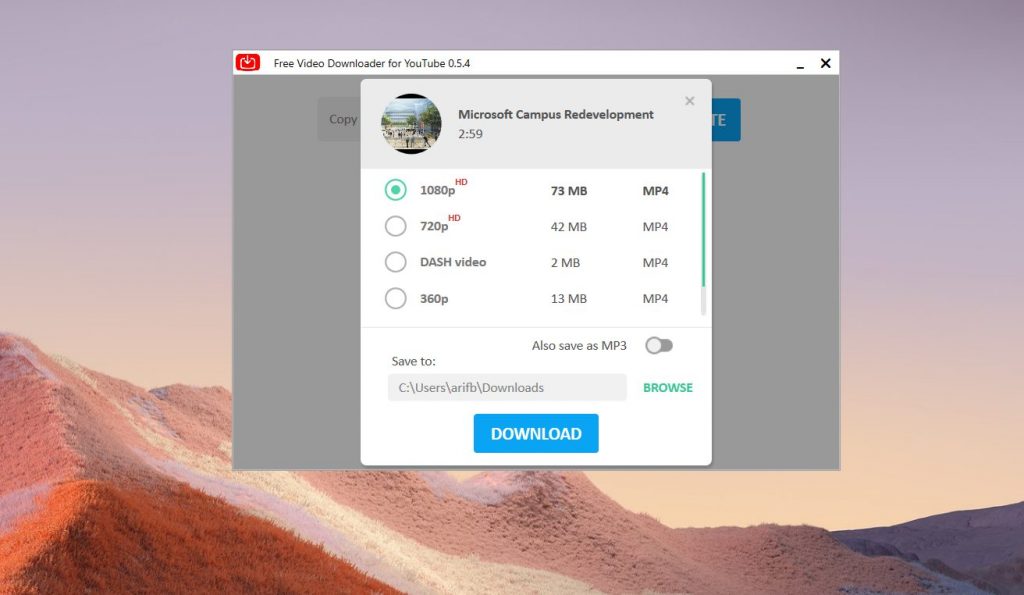
He also went on to mention how NotMP3 expanded its reach. Over time, the service became quite popular, and he tells me that NotMP3 listened to users’ requests for the expansion of the NotMP3 toolset. “Later, at the requests of our users, we extended the list of our free tools by adding Free MP3 Recorder for SoundCloud, Free Video Downloader for YouTube, Free YouTube to MP3 Converter, Free Music Downloader for SoundCloud,” said Tomson.

What was it like developing this app? Was it an easy task?

Features

App development isn’t an easy task, which is something I learned a lot about when I spoke to Windows app developer Joe Finney in episode 16 of the OnPodcast. There are a lot of challenges involved With that in mind, I wondered how Tomson developed the app. He tells me it’s all about user feedback and what the user wants and needs.

“It is not a secret, that the way from a creative idea to a viable product is never short and easy. Our case was no exception. But the most important thing is to live up the user`s expectations. We hope that we have succeeded. Besides, we remain open to the users’ requests and keep on implementing new features and developing new programs.”

Tomson pointed me back to his app and promised that new tools could be coming soon. It’s something that NotMP3 promises on its website —free updates and staying up to date. “Stay tuned for new free straightforward tools,” he told me.

Are you planning a Microsoft Store version of the app?

Microsoft Store Windows 10

With OnMSFT being a Microsoft-centric publication, another question I had for Tomson had to deal with a Microsoft Store version of the app. With there being 1 billion Windows devices in the world, it seemed to me like a store version of the app would be a no-brainer, but Tomson told me it wasn’t quite easy dealing with the Microsoft Store.

“Quite frankly, we already tried to submit our app to the Microsoft Store, but it was refused. Then we decided to ensure the development of our own site, and therefore, we don`t plan to make a new attempt to add our program to the Microsoft Store.”

This surprised me, as there is indeed a YouTube converter in the Microsoft Store already, but it is a hit-and-miss experience where sometimes it works and sometimes it does not. As a Win32 application, NotMP3 always works, and it never fails out and refuses to download videos. That’s what makes it so great. Tomson even pointed back to me the many reasons why I already love NotMP3. There are no ads or bundled software, there’s a simple user interface, fast downloading, unlimited downloads, batch downloading, support for 4K videos, and more.

What makes NotMP3 so different?

Not Mp3 Info

The final question I had for Mike had to relate about what makes NotMP3 so great and different from all the other converters on the web. I already touched on no ads, limits, and the fact there are no restrictions, but there’s still a bit more. Tomson mentioned that NotMP3 programs are always available and work 99% of the time, with the 1% only being when YouTube makes changes and the software needs to be adjusted.

“NotMP3 software is faster at converting and downloading than browser-based tools. In addition, it doesn’t require any registration with an email address, and therefore there is no risk to receive spam,” he told me.

Are you a developer? Email us, we’d love to chat!

If you’re a Windows app developer, we’d love to chat with you, just like how we spoke to Mike Tomson and previously, Joe Finney. Have a new Windows app? Just getting into development? We’d love to chat and have you join us on the OnPodcast. Send us an email at [email protected]. And remember to watch us every Sunday at 9 AM PT/12 PM ET on YouTube!

The Code Execution Cannot Proceed Because msvcp140.dll [Fixed]

A malfunction of the msvcp140.dll file can cause a lot of issues with the associated programs, meaning that they will not run properly.

Users report getting the msvcp140.dll is a missing error when trying to open a specific program.

What is msvcp140.dll?

The msvcp140.dll is an essential file for the operating system, responsible for the proper running of C++ applications built using Visual Studio 2015.

Users report that when trying to start the PUBG game on their PC they received the error message Pubg msvcp140.dll is either not designed to run on windows.

However, though, this error can be easily fixed by following the steps indicated in this guide.

Other message errors regarding the msvcp140.dll can vary:

The program can’t start because msvcp140.dll is missing.

The code execution cannot proceed because MSVCP140.dll was not found. Reinstalling the application may fix this problem.

Cannot find msvcp140.dll

We will explore in this article the easiest ways to solve the msvcp140.dll error, so make sure to keep on reading.

How can I fix the msvcp140.dll errors?

1. Use a specialized software

Restoring the msvcp140.dll file is one of the first things to try since the associated error can occur due to the file missing.

It’s important to ensure that the msvcp140.dll is restored properly which is why using specialized software.

A specialized tool will successfully repair this corrupted DLL file and find other ones that need to be fixed. Plus, the process is rather simple and the automated technology will cover it.

2. Re-Install the application

In the process of reinstalling the application, the missing DLL file is also in the installation package.

What this means is that once your reinstall the associated software, the DLL file will be automatically installed as well.

This should do the trick and make the program run smoothly again.

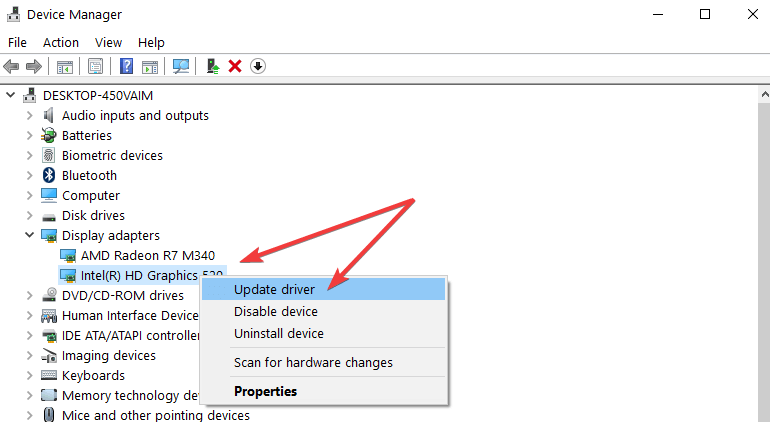
3. Update Windows drivers

  1. Go to the taskbar and type in Device Manager.
  2. Press Enter and right-click on the device that needs an update.
  3. Select Search automatically for updated driver software.
  4. Choose Update driver.

It’s important to be really careful when updating the drivers and ensure you are selecting the correct ones.

Using specialized software is usually indicated since it avoids any of the manual errors. For that, we recommend a driver updater software that will find the right driver versions automatically for you.

⇒ Get Outbyte Driver Updater

3. Launch System File Checker

  1. Type in Command Prompt in the taskbar box and right-click on the result.
  2. Select Run as administrator and type in sfc / scannow
  3. Press enter and wait for the scan process to complete.

Recover the corrupt files, following these steps:

  1. Press the Windows key and choose Settings,
  2. Select the Update & Security option.
  3. Click on Recovery and go to Advanced startup 
  4. Now, click on the Restart Now option.
  5. Close Command Prompt and restart the computer.

4. Use System Restore

  1. Launch Run pressing Windows key + R, and type in rstrui.
  2. Next, click OK and select Choose a different restore point.
  3. Click Next and check the box from Select more restore points for the list with dates.
  4. Choose a date to restore Windows 10, one before the dll error appeared.
  5. Finally, click Next and then Finish.

We hope that the above solutions have helped you successfully solve the msvcp140.dll error message.

Please share with us in the comments section below if you have additional recommendations or suggestions.

Microsoft to replace UserVoice feedback websites with first-party tools throughout 2021

Microsoft has been using the third-party service UserVoice for many years to collect feedback about its own services, but this partnership is about to end. After users noticed the closure of the Office 365 Uservoice website last week, the company has now confirmed that it will be gradually replacing these sites with in-house tools starting this year.

“We will be moving away from UserVoice feedback sites throughout the 2021 calendar year on a product-by-product basis. We will leverage 1st party solutions. Customers can continue to communicate with Microsoft and provide feedback through a number of different channels,” the company says on a new support page.

A Microsoft spokesperson also told us “We are always striving to better serve our customers, including how we can improve the tools and processes for collecting feedback. We are leveraging 1st party solutions and are evaluating enhancements and standardizations to improve and streamline how we communicate with customers and collect their feedback.”

As of today, users of Microsoft services have various ways to submit feedback to the company including in-app feedback modules, the Windows 10 Feedback Hub, or the Microsoft Community and Microsoft Tech Community websites. However, all these different channels work differently, this is apparently something Microsoft wants to address. “We are evaluating enhancements and standardizations to improve and streamline how we communicate with customers and collect their feedback,” the company said in the support page.

For now, customers can also continue to submit feedback through existing Microsoft UserVoice sites while they remain active. As an example, the UserVoice sites for Microsoft Teams and OneDrive are still available, and they can be a great source of information about upcoming features. It doesn’t seem that all this content will be transferred to Microsoft’s first-party solutions, though we hope the transition will eventually make it easier for users of Microsoft services to share their feedback with the company.

Microsoft completes its acquisition of Bethesda and confirms some upcoming games will be exclusive to Xbox

It’s official, Microsoft has finally completed its acquisition of ZeniMax Media, the parent company of Bethesda Softworks. The Redmond giant now owns 8 more talented video games studios including Bethesda Game Studios (Fallout 4), id Software (Doom), MachineGames (Wolfenstein), Arkane Studios (Dishonored), and all of their future games will be available on day one on Xbox Game Pass.

“With the addition of the Bethesda creative teams, gamers should know that Xbox consoles, PC, and Game Pass will be the best place to experience new Bethesda games, including some new titles in the future that will be exclusive to Xbox and PC players,” Xbox head Phil Spencer said today. If Microsoft will respect the timed-exclusivity deals for Deathloop and Ghostwire Tokyo that will ship first on PlayStation consoles, Spencer made it clear today that some future Bethesda games will be exclusive to Xbox consoles and Windows.

The head of Xbox also reiterated today that Bethesda will continue to operate independently while benefiting from Microsoft’s vast resources. “We look forward to empowering Bethesda’s creative teams to reach even more players around the world, helping make future Bethesda titles the biggest and most popular games in their history,” the exec said, adding that Xbox and Bethesda will have more to share about what’s next later this year.

In a new report from VentureBeat, video games journalist Jeff Grubb explained that Bethesda’s usual summer game conference should still happen this year, independently from Microsoft’s big Xbox conference. However, the Redmond giant may want to hold the two events back-to-back for maximum exposure. We’ll see what happens, but in the meantime, additional Bethesda games will be coming to Xbox Game Pass later this week. There are no more details yet, though it wouldn’t be surprising to see classic games like Fallout 3 and 4 come back to the game subscription service.

How to fix sleep mode on Windows 10/11

If you use Windows 10, the Sleep Mode feature allows you to keep your Laptop or Desktop PC on a minimum power consumption mode.

In this manner, you’ll reduce the time you wait for the computer to start up every time you want to watch a movie or play a game.

Sleep mode for Windows 10 is a very good app to have around when you’re going out to buy groceries or you have something else to do for a couple of hours.

If you activate this feature on your Windows operating system, then the power consumption will be greatly lowered without having to turn off your PC and wait for it to start up again when you come back.

Seeing that a lot of Windows 10 users are having trouble enabling this feature, I have decided to show you exactly how to use Sleep Mode in a few quick steps.

There are several methods on how to fix sleep mode and make it run as it should on your Windows 10.

How do I fix Windows 10 sleep mode problems?

1. Enable the Balanced power scheme

  1. When the PC starts up, we will need to press and hold the Windows logo key button and the X button (Windows+E).
  2. In the menu, we need to click on Command Prompt (Admin).
  3. Now we need to restore all your power schemes to the default Windows State by running the command below: powercfg -restoredefaultschemes
  4. Let’s reboot the PC now.
  5. Click on the Seach bar situated on the right of the screen and in there we need to click Settings.
  6. Click the Control Pane icon.
  7. In the upper right of the window showed right next to View by we need to select Small icons.
  8. Now let’s click on Power options in the All control panel items window.
  9. In the new window, we need to double-check that the option that says Balanced is checked.
balanced power plan windows 10

Enabling the Balanced Power Scheme can be an excellent method to fix sleep mode on Windows 10. Start by accessing the Comand Prompt as an Administrator, and follow our instructions.

2. Enable hybrid sleep

  1. Launch Control Panel.
  2. In the upper right corner of the window, select View by and select Small icons.
  3. Now let’s click on Power options in the All control panel items window.
  4. Right next to the plan you have selected, it should be Balanced, click on Change Plan settings situated on the right of the Balanced plan.
  5. Let’s click on Changed advanced power settings.change advanced power settings
  6. Click (left click) on Change settings that are currently unavailable.
  7. Let’s look at Allow hybrid sleep in the window we opened and make sure this feature is set to ON.
  8. Let’s look at USB Selective suspend in the window we opened and make sure this feature is set to ON as well.enable hybrid sleep windows 10
  9. We will need to reboot the computer and see if the issue is fixed.

Users claimed that they fixed their issue with the sleep mode feature on Windows 10 by enabling the Hybrid sleep option.

Once you access the Changed advanced power settings panel you’ll be able to easily enable the Hybrid Sleep feature.

3. Leave HomeGroup

  1. Launch Control Panel again.
  2. In the upper right of the window, right next to View by we need to select Small icons.
  3. Let’s click on HomeGroup in the All control panel items window.home group control panel windows 10
  4. Click on Leave HomeGroup.
  5. Reboot the PC.

Another tested solution for fixing the sleep mode on Windows 10 is to leave the HomeGroup and then reboot your device. This procedure should allow you to use the Sleep Mode function.

4. Update your display drivers

  1. Go to Start, type device manager, double-click on the first result to launch Device Manager.
  2. Locate your display driver, then right-click on it and select Update driverupdate display driver windows 10
  3. Restart your computer and check if the issue persists.

Sometimes, outdated display drivers may prevent you from using Sleep Mode on your computer. The quickest and safest solution to fix this issue is to install the latest display driver updates.

One of the factors that cause Sleep Mode to not function on your Windows 10 is that your drivers are out of date. Choose a professional tool that can help you update your device.

Regular updates are crucial if you want your Windows system to function at its optimum capacity and prevent errors. Graphics card drivers are extremely advanced and difficult to grasp.

They are in charge of managing fan speeds, understanding CPU commands, caching data from various sources, decoding and encoding video, and other things. Driver updates shorten the pathways that the graphics card takes to complete its tasks by eliminating unnecessary operations or better dividing the workload.

A professional tool like Outbyte Driver Updater is an excellent choice for this task. It has a clean interface and is simple to use, even for computer newbies. The driver updater program is handy for automatically upgrading Windows drivers. Otherwise, doing it manually takes time and needs extensive knowledge of the drivers you’re looking for.

5. Disable network connections

  1. Launch Control Panel.
  2. In the upper right of the window, right next to View by we need to select Small icons.
  3. Let’s click on Network and sharing center in the All control panel items window.network sharing center control panel
  4. Click on Change adapter settings.
  5. Click on the adapters and click Disable.disable network adapter windows 10
  6. Now we need to check if the PC will go to sleep mode.
  7. If it goes to sleep mode then the problem is with one of the network adapters –  in this case, we will need to update it.

In order to fix the sleep mode on Windows 10, you should disable network connections. Access the Network and sharing center then follow the steps we mentioned above.

6. Unplug your USB peripherals

  1. Try to unplug any USB devices that might be on your PC like for example USB stick, printer, and so on.
  2. After you unplug these USB devices try to put your Windows 10operating system to sleep mode and see if it will work.

Solving the sleep mode on Windows 10 can also require you to unplug your USB devices such as printers, speakers, and so on.

Users claimed that after performing this operation the Sleep mode feature began to function.

7. Run the Power Troubleshooter

  1. Launch Control Panel, type troubleshoot in the search bar, select Troubleshooting.
  2. Click on View all to list all the troubleshooters.
  3. Select Power and follow the on-screen instructions to launch the tool.
power troubleshooter windows 10

Windows 10 features a series of dedicated troubleshooters that help you fix general issues affecting the OS. If the sleep mode problem persists, you can try to run the Power Troubleshooter.

These are several tutorials on how you can fix your Windows 10PC sleep mode issues. If you have anything else to add to this or any opinions on this matter, please let us know in the comments below.

FIX: VPN not working with Kodi

If you are experiencing a situation where your VPN is not working with Kodi, then read on.

Kodi is a popular open-source media center for Windows PC. Furthermore, Kodi enables you to stream music, TV series, movies, etc.

In addition, you can stream the latest media content by using any of the available Kodi add-ons. When Kodi is used with VPN, it enables users to bypass geo-restrictions and stream media effortlessly.

In spite of that, plenty of VPN users experience several issues where the VPN is simply not working with Kodi.

Meanwhile, Windows Report has compiled the following fixes applicable in solving the VPN not working with Kodi problem

What can I do if the VPN is not working with Kodi?

1. Change your VPN

grab Private Internet Access

Great VPN providers like Private Internet Access (PIA) work best with Kodi. With over 3200 servers in 46 countries, you can access Kodi, whether the services are blocked or not where you reside.

Its Unblock Streaming feature also lets you access other popular streaming services such as Netflix or Hulu.

This Kape Technologies VPN solution not only lets you stream Kodi remotely, but also surf anonymously, secure web sessions at hotspots, and protect your online privacy.

PIA is the most trusted VPN to access Kodi or other blocked websites, with fast service and consistent speeds, so give it a try.

Private Internet Access

Private Internet Access

Private Internet Access easily works with Kodi. Don’t hesitate to claim the best deal right away!
$2.69/mo. Buy it now

2. Check your Internet connection

Windows users reported that a limited/inactive Internet connection can cause the Kodi problem you are currently facing.

Hence, you need to test your Internet connection. In order to do so, disconnect from the VPN service, and try to access any website on your web browser.

If you are unable to access the Internet while disconnected from the VPN, then you may need to consider changing your Internet connection mode to the modem, broadband, or Wi-Fi connection.

3. Restart your PC

Another way to resolve the VPN problem is simply by restarting their PC. This method is a quick fix that can possibly resolve your VPN connection, hence making it work with Kodi.

Alternatively, you can shut down your PC and wait for a few minutes before restarting your PC.

4. Check your Date and Time Settings

Some VPN won’t work with Kodi because of the incorrect date and time settings on your PC. Check the date and time settings to ensure they are correct.

Disable automatic update of date and time using the Internet, and set the date/time parameters manually.

In addition, you should also consider changing your region/location to reflect the selected server location on your VPN settings.

However, if you still get the error after trying this fix, you may proceed to the next step.

5. Check your IP address

If the VPN is not working with Kodi, check your IP address for information such as your city or region (country) next to the location you selected in the VPN windows.

You can use a web service such as IPLocation and WhatIsMyIPAddress to check your IP address location. However, if you are not connected to the VPN server’s location, try connecting again.

Alternatively, you may consider connecting to other VPN server locations and then access the Kodi service again.

6. Disable your security software

  1. Go to Start > Type Allow a program through Windows firewall and then hit the Enter key.vpn not working with kodi
  2. Click on Change Settings options.
  3. Now, click on Allow another program.
  4. Select the program you want to add or click Browse to find the VPN software, and then click OK.
  5. Check if you can connect again and try to access Kodi.

Some antivirus programs may block your VPN connection hindering you from accessing Kodi. Hence, you may need to temporarily disable your antivirus or firewall so as to be able to access Kodi.

However, some antivirus programs have a temporarily disable protection option which you can use while others do not.

Furthermore, if you have the option to reinstall the security software or program blocking the VPN connection, install it after the VPN software has been installed so that it allows the VPN to connect.

Hence, uninstall the VPN software followed by the security program blocking the connection, then install VPN software again, and then reinstall the security program on your PC.

Alternatively, you can also enable the VPN software in the Windows firewall. However, if this does not work, proceed to the next step.

7. Manually configure DNS settings

Open Network Connections settings

  1. Right-click Start and select Run.
  2. Type ncpa.cpl and click OK.
  3. In the Network connections window, find your usual connection, either LAN or Wireless network connection.
  4. Right-click the connection and select Properties.

Set the DNS server addresses

  1. Double click Internet Protocol Version 4 (IPv4) or just Internet Protocol.
  2. Select Use the following DNS server addresses.
  3. Type these Google DNS server addresses: Preferred DNS server 8.8.8.8 and Alternate DNS server 8.8.4.4
  4. If Google DNS is blocked, try the following: Neustar DNS Advantage (156.154.70.1 and 156.154.71.1) enter and press OK, and, Level3 DNS (4.2.2.1 and 4.2.2.2) enter and press OK.

Manually configuring your computer with other DNS server addresses helps you access Kodi, and enjoy faster connection speeds.

Some computers may not automatically connect to the VPN DNS servers; hence you need to configure it with your VPN DNS servers’ IP addresses, manually.

8. Run Windows Update

  1. Go to Start>type update in the search box and then click on Windows Update to proceed.
  2. In the Windows Update window, check for updates and install the available updates.vpn not working with kodi
  3. After the update is complete, restart your Windows PC.

Another way of fixing the VPN not working with Kodi problem is by updating your Windows Operating System to the latest version.

The latest Windows updates improve the system’s stability and fix various issues you may encounter most especially VPN related. However, you can follow the above steps to update any Windows OS.

9. Flush the DNS/Clear Cache

Flush the DNS

  1. Go to Start > All Apps > Accessories.
  2. Right-click Start and select Command Prompt (Admin).vpn not working with kodi
  3. Type ipconfig /flushdns and press Enter. You should get a confirmation that says: Windows IP Configuration Successfully flushed the DNS Resolver Cache.vpn not working with kodi

Clear Web Browser Cache

  1. Launch your web browser e.g. Microsoft Edge.
  2. Press Ctrl + Shift + Delete to access the Clear recent history dialog box.
  3. Under the Time range to clear drop-down menu, select Everything.
  4. Make sure to check the Cache box. Click on Clear Now.

Note: Ctrl + Shift + Delete can also be used to clear the cache on other web browsers such as Google Chrome, Internet Explorer, Opera, Microsoft Edge, etc.

Another way of fixing the VPN won’t work with Kodi problem is by flushing your DNS and clearing your web browsers cache.

DNS entries from your Internet Service Provider may be wrong and probably utilized by Kodi to block your VPN from accessing their service.

Hence, you need to flush your DNS and clear your web browser’s cache afterward.

10. Manually configure proxy settings

A proxy server is a server (a computer system or an application) that acts as an intermediary for web requests.

A proxy server releases its static/dynamic I.P address for you so that you can access other websites using their location.

In addition, you can change the I.P address on your browser whether Firefox, Chrome, Opera or Internet Explorer using the following methods.

Firefox: Tools > Options > Advanced > Settings > Manual proxy configuration.

Chrome: Settings > Network > Change proxy settings > LAN settings > Use proxy server > Advanced > HTTP.

Opera: Tools > Preferences > Advanced > Network

Internet Explorer: Tools > Internet options > Connections > LAN settings > Use proxy server > Advanced > HTTP.

Once you have entered the IP address and port appropriately you obtained from the VPN service, check your IP address to confirm that your IP address has really been changed.

11. Reinstall the VPN client

  1. Right-click Start and select Programs and Features.
  2. Find your VPN from the list of programs and select Uninstall.
  3. In the Setup Wizard, click You’ll get a notification after a successful uninstall, so click Close to exit the wizard.
  4. If your VPN is still listed as available after uninstalling it, right-click Start and select Run.
  5. Type ncpa.cpl and press Enter to open the Network Connections window.
  6. Under Network Connections, right-click on the WAN Miniport labeled your VPN.
  7. Select Delete.
  8. Click Start and select Settings.
  9. Click Network & Internet.
  10. Select VPN. If you see your VPN as available, delete it.

In addition, if any other fixes above did not resolve your VPN not working with Kodi problem, you should consider uninstall and reinstall your VPN client.

After complete uninstall, proceed to install the VPN client on your PC, and then access Kodi afterward.

Let us know if any of these solutions helped fix the VPN not working with Kodi problem, by leaving a comment in the section below.


Geoblock: How to Circumvent Geoblocking?

Sometimes, certain online services might become restricted to a select few countries. This usually happens with experimental services or products that need to gauge their popularity internally before hitting the large market.

However, if it’s popular enough, word of its existence might slip past the country’s boundaries. Outsiders might want in on some of the action, but there seems to be no way to reach it since the geographical restrictions are in place.

What is geoblocking?

Geoblocking is the practice of forbidding users who live in certain countries from accessing a product or a service. Geoblocking can work by whitelisting the regions that are granted access or, in more delicate cases, blacklisting specific countries from even attempting to access the product.

Regardless of restriction mode, geo-restricted content can feel much like the forbidden fruit. Much so that people devised various ways to bypass it. Some providers have even started banning users attempting to circumvent geo-restrictions.

The most foolproof method would be physically relocating to one of the regions where the service is available. But since that’s no longer a viable option, we’ll shift our focus to some stay-at-home methods.

In the following sections, we will explain a few ways that you can bypass geo-restrictions without significant efforts.

How to bypass geoblocking?

1. Use a VPN

  1. Download and install ExpressVPN.
  2. Launch the app.
  3. Select a server in the location you’re interested in.
  4. Access the geo-restricted content.

ExpressVPN is a reliable VPN service with many servers you can connect to. It can help you bypass geographical restrictions quickly and without significant effort.

ExpressVPN

If the services or products you want to access are not available, you can easily unlock them with this powerful VPN solution.
Check Price Visit Website

You just launch it and choose a server that’s located someplace convenient (choose a US server if you want to watch US Netflix). It’s that easy. Even if the server you chose doesn’t seem to work, you can easily disconnect from it and try another one.

2. Use a Proxy

Use a free proxy server to bypass error 451 unavailable due to legal reasons

Since the uprising of VPNs and other similar services, proxy servers have lost a bunch of their former popularity. They’re not exactly secure since they don’t encrypt any Internet traffic data.

A proxy server is only good at masking your IP address. Furthermore, if you’re behind a proxy server and use HTTP connections, the owner of the proxy can see your real IP address. Not good, right?

Also, a lot of service providers (yes, the ones who are geoblocking everything) can easily detect proxy traffic and block it.

The final nail in the proxy’s metaphorical coffin is low speed. Most, if not all proxy servers have limited bandwidth, so they can accommodate a larger customer beach.

Thus, users’ connection speed gets quite a hit due to the large number of users combined with the bandwidth restrictions.

So maybe don’t use a proxy. Most definitely, don’t invest in one. It’s quite outdated, and most service providers will probably figure it out and block you anyway.

3. Use a Smart DNS

If you don’t care much about security and online privacy, you can opt for a Smart DNS. This type of service is, quite frankly, the best way to access geo-restricted content.

Unlike VPN services, a Smart DNS doesn’t encrypt any traffic. Although you can use a VPN without encryption sometimes, it’s not recommended. But a Smart DNS solution is built differently.

Thus, you can access geo-restricted content, but your traffic data is pretty much exposed. On the other hand, the lack of encryption also means that your Internet speed won’t (or shouldn’t) drop even one bit.

This type of service works by replacing your true DNS with another one bound to a valid region. Let’s say, for instance, that you’re located in Germany and want to see USA Netflix. Obviously, you can’t do it all by yourself.

In this situation, a Smart DNS would replace your original DNS with USA-approved ones. That way, Netflix would think that you’re, in fact, on American soil. Thus, you’ll be able to enjoy US Netflix in no time.

Additionally, any connection requests are automatically intercepted by the Smart DNS and any data that would reveal your real location is stripped from the requests and replaced with spoofed information.

4. Use Tor

Browse the web anonymously with Tor

Tor, which stands for The Onion Router, is a popular free service that can hide your IP. However, it faced a series of challenges in the last few years, mostly because Tor is used to access hidden web services, which are subsequently used to distribute illegal content.

However, in essence, Tor is a service that can anonymize your online identity by hiding your IP address and routing your traffic through several relays. These relays are actually nodes hosted by other Tor users all around the world.

This service might seem like a great way to unblock geo-restricted content. However, its relays can be very easily blocked by ISPs, and the speed will be downright awful. You’d be lucky to reach a full MB on sunny days, so you might want to reconsider.

You can get around geoblocking easily with the right tools

Geoblocking, geo-blocking, or geo-blocking, call it what you may, its endgame is still the same. A bunch of content you might be interested in is not available in your region, and without the right tools, there’s pretty much nothing you can do about it.

Fortunately, you can bypass geo-blocking by using the methods we’ve listed above. Some are free at the expense of speed, and others provide you with excellent geo-unblocking but do nothing for your security, so ultimately, it’s a matter of choice.

We strongly believe that using a VPN to bypass geo-restrictions is definitely the best all-around solution that boasts great speed, security, privacy, and overall reliability.

What to do if VPN freezes on verifying username and password

Users often face a rather frustrating error when trying to log in to a Virtual Private Network. The VPN freezes during the verifying username and password stage itself.

Some have reported getting the error all of a sudden with no likely reason to explain it. Others said they had this login issue resolved on its own without them doing anything.

Weird as it might sound, this happens to be the nature of this error. For those not fortunate enough to have their issues resolved on their own, we have some solutions.

How can I fix my freezing VPN?

1. Choose a well-known VPN solution

get PIA
If you are using a free VPN or a pirated/cracked version, don’t act surprised when facing such errors. Best for those on a tight budget, Private Internet Access is a safer choice.

With a built-in malware, adware, and tracking blocker, along with an automatic kill switch and server-grade firewalls, Private Internet Access makes your browsing sessions 100% secure.

The system also allows up to ten connections at a time. It’s significantly better than most competitors that only support five devices connected to the same network.

Besides the fact that this Kape Technologies VPN won’t empty your bank account, you even get a 30-day money-back guarantee for extra peace of mind.

Private Internet Access

Private Internet Access

Private Internet Access never freezes while verifying username and password. Currently available at a major discount!
$2.69/mo. Buy it now

2. Use this Registry fix

  1. Launch the Run dialog box by holding both the Windows key and R button of the keyboard. Type regedit and press Enter to launch Registry Editor.
  2. Expand
    HKEY_LOCAL_MACHINESystemCurrentControlSetServicesRasManParameters
  3. Check to see if the following entry is already present:
    • Name: AllowPPTPWeakCrypto
    • Value type: DWORD
    • Value data: 1AllowPPTPWeakCrypto regedit
  4. If yes, it’s fine. If not, create a new registry entry that should reflect the above.
  5. You create a new registry entry by right-clicking on the black portion in the right and selecting New. Follow on-screen instructions.
  6. Exit Registry Editor.
  7. Restart your PC for the change to take effect.

3. Change the VPN configuration

  1. Right-click on the VPN connection and select Properties.
    cyberghost properties
  2. In the Properties dialog box, select the Security tab.
  3. Select No encryption allowed.
  4. Change the protocol to CHAP from MS-Chap v2.
  5. Under Services, ensure the IKE service has not stopped. Restart the service.
  6. Alternately, set the protocol to PPTP besides making sure both MS-Chaps are checked too.

Have the above solutions helped you out? Do not hesitate to share your opinion by using the comments area below.

Microsoft’s Surface Laptop 4 reportedly won’t use AMD’s latest Ryzen CPUs

The reporting on Microsoft’s latest Surface Laptop 4 has been a rollercoaster of speculation and the latest tidbits about the device seemingly contradict a crowd favorite hope for the laptop.

A couple of weeks ago, we reported that the Surface Laptop 4 could be coming with the latest AMD Ryzen 5 chipset, thanks in large part to some Geek Bench sleuthing. However, it now appears Microsoft is doing what it always seems to do with Surface hardware and cautiously opting to power its AMD variant laptop with the Ryzen 5 4680 U and Ryzen 7 4980 U Surface Edition chips rather than the newer Ryzen 5000U series we previously speculated.

In addition to the potential chipset coming with the Surface Laptop 4, there are some more specs that have been reported that include Iris Plus Graphics 950 rather than the Evo Iris Xe Intel support newer devices are getting as or simple Radeon Graphics for AMD variants. The rest of the reported specs are pretty standard fare for the Surface Laptop such as RAM configurations starting at 8GB and SDD storage options up to 1TB for both variants.

Category 13.5-inch 15-inch
Display 13.5-inch, 2256 x 1504 pixels, 3:2 format, 10-point multitouch, PixelSense display, 201 ppi 15-inch, 2496 x 1664 pixels, 3:2 format, 10-point multitouch, PixelSense display, 201 ppi
CPU
11th Gen Intel Core i5-1145G7 11th Gen Intel Core i5-1145G7
11th Gen Intel Core i7-1185G7 CPU 11th Gen Intel Core i7-1185G7 CPU
AMD Ryzen 5-4680U AMD Ryzen 5-4680U
Ryzen 7 4980U CPU Ryzen 7 4980U CPU
Graphics Iris Plus Graphics 950 Iris Plus Graphics 950
AMD Radeon Graphics Radeon Graphics
RAM
8 8
16 16
(32 GB Intel only) (32 GB Intel only)
Storage
128GB 128GB
256GB 256GB
512GB 512GB
1TB (1TB Intel only) 1TB (1TB Intel only)
Connectivity Surface Connect, USB A, USB C, Wi-Fi AX, Bluetooth Surface Connect, USB A, USB C, Wi-Fi AX, Bluetooth
Battery 6513 mAh, 49 Wh 6513 mAh, 49 Wh

Perhaps, more importantly, it’s being reported that the Surface Laptop 4 could be announced as early as next month, April 2021. If true, having the Surface Laptop 4 revealed in April chips away at a potentially significant Fall hardware event for the company.

Microsoft Edge Canary now lets users import passwords from CSV files

Microsoft is introducing a new password import option that will allow Edge users to import their passwords from CSV files. The feature was recently added to Microsoft Edge Canary (version 90.0.817.0) and is currently hidden behind an experimental flag (via Windows Central).

Edge and Microsoft Authenticator users were previously able to import CSV files via Authenticator, which then could sync those passwords to Edge, but this new feature will import without the need for Authenticator.

Currently, the Stable version of Edge only supports exporting passwords to CSV files, and there is no way to import them back natively from these files. Users need to use the sync capability to synchronize passwords between multiple devices. However, this will change soon with the addition of the new “Import passwords” option, which is already available for Edge Insiders.

To use the feature, Insiders will need to enable it using edge://flags on Microsoft Edge Canary. To do this, follow the steps listed below:

  1. Go to edge://flags through the address bar, search for “Password Import” through the search bar, and enable it.
  2. Once done, restart the web browser.
  3. Head to edge://settings/passwords in the Edge address bar to open the Passwords settings.
  4. Select the three-dots menu next to the “Saved passwords” option and click Import passwords from the list.
  5. Finally, select the CSV file to import passwords.

Microsoft is constantly experimenting with new features in Edge, and the company has recently announced several improvements coming soon to the browser. The list includes improvements in the password manager, the built-in PDF reader, Collections, and more. If you’re interested, be sure to check out the What’s Next page here.

FIX: Your browser does not support video playback

The error message Unfortunately your browser does not support video playback appears while trying, as the message suggests, to play a video file.

Many users report getting this video playback error message in the Firefox browser.

Fixing this playback error message is quite simple and in this article you will see the exact steps you need to make.

How can your browser does not support video playback error?

1. Use a specialized browser

Opera One is one of the most reliable and error free browser out there which is confirmed by the good reviews it has been getting.

With this browser you will not encounter any error related to it not being able to support video playback. Moreover, thanks to the video pop feature you can watch videos in a separate floating window.

Opera One also comes with a lot of features that will improve your browsing overall, such as built-in VPN, Ad blocker, AI and many more.

Opera One

Watch videos in a separate floating window and enhance you experience with this error-free browser.
Free Download Visit website

2. Refresh your page

This is one of the most basic fixes for when you get the This browser does not support video playback error message in Firefox.

You can either press F5 or locate the refresh button, in the menu bar and press on it.

Either way is perfect and after performing the refresh, you should see if the video playback issue has been solved.


3. Clear temporary files

  1. Open your Firefox browser.
  2. Click on the menu button and select Options.
  3. Next, select the Privacy and Security panel.
  4. Go to Cookies and Site data and click on Clear data.
  5. Check the Cached Web content option and press on Clear.

4. Enable the media autoplay option

  1. Open Firefox browser and click on the menu button.
  2. Select Options and go to Privacy and security.
  3. Locate the Permissions section and in Autoplay click on Settings.
  4. From the dropdown menu select Allow audio and video.

  5. Finally, click OK to save changes.

After enabling this feature, check if This browser does not support video playback is gone from Firefox.


5. Enable software rendering

  1. Open the search box by hold pressing the Windows Key + the S button.
  2. Type internet options in and click on the first result from the search.
  3. Go to the Advanced tab option and click on Use software rendering instead of GPU rendering option.
  4. Finally, restart your computer and check if the error still persists.

6. Check the browser configuration

  1. Open Firefox browser and type in about:config in the address bar.
  2. Locate the media.mediasource.enabled configuration.
  3. Set its value as true and restart your browser.

Error message Unfortunately your browser does not support video playback is not uncommon occurrence and it can appear on your Firefox browser.

Thankfully, as you could see in this article, the solutions are easy and you can fix this issue with just a few simple steps.

Another issue that many reported is No valid sources are available for this video, but we tackled it in another guide.

Before you go don’t miss our guide on HLS.js error: NetworkError – fatal: true error since it can provide you with more useful information.

If you have additional recommendations or suggestions, we would love to read them in the comments section below.

Microsoft releases new cumulative update with no changes for Dev Channel Insiders

Microsoft has just released a new cumulative update for Windows Insiders in the Dev Channel to test its service pipeline. This is the build 21327.1010 (KB5001277), which includes no new features or changes compared to the original build 21327 released last week.

As a reminder, last week’s build 21327 refreshed the design of News and Interests in the taskbar, though the new experience remains only available for a subset of Insiders in the Dev Channel. This new build also brought new system icons inspired by Microsoft’s Fluent Design style, and that’s hopefully an appetizer for the “Sun Valley” design update expected for later this year.

Microsoft has been testing its service pipeline more regularly in recent weeks and months, but the process for installing these cumulative updates with no new features is pretty quick. We hope to see another flight with more substantial changes for the Dev Channel later this week.

Microsoft Teams adds Live Transcription with speaker attribution for meetings

Back in July 2020, Microsoft announced a bunch of updates for Teams, including a new Live Transcription capability and Video Filters. The company has recently updated the Microsoft 365 roadmap to indicate that the Transcription experience is currently rolling out in the Windows and macOS desktop apps.

The new accessibility feature allows users to view a live transcription of speech with speaker attribution during a video call or meeting in real-time. The text appears alongside the meeting video, including the name/avatar of the speaker and a timestamp to specify who is speaking. This works for organizers, presenters, and attendees, making it easier to follow along with the conversation during remote meetings.

Users will be able to record these transcripts along with the meeting and download them in a Word file after the meeting. However, the meeting organizer can delete the saved transcript with the Teams desktop client. There are also some admin controls to allow for these settings.

Chat window

Overall, it is a great feature for people that are deaf, hard of hearing or working in a noisy environment. It is important to note that attendees need to be running the desktop version of Teams to use it, and it doesn’t work on the Web version of the app. In addition, Live Transcription is currently limited to English-speaking users who have their default language set to English in Teams.

Top five tips and tricks for using the new Microsoft Edge at work

If you didn’t already know, Microsoft has a new web browser. Though still named Microsoft Edge, the new version of Edge is a lot better than the old one. Based on Google’s open-source Chromium engine (the same that powers Google Chrome) it has a ton of cool new features — especially if you’re using the browser in a business or at work. Today, we’ll be taking a look at how Edge fits in at work, and our top five tips and tricks for using it in enterprise, business, or work scenarios.

Tip 1: Multiple profiles

Our first tip is one of the most simple. With the new Microsoft Edge, you can add multiple profiles to the web browser (that is if it is not disabled by a group policy by your IT admin in a larger enterprise.) This is useful if a computer is being shared at work, or in point-of-sale with a single account. You can separate your web browsing sessions, without having to use different web browsers. You even can add a personal account to Edge, right alongside a work account, if your workplace allows it.

To add multiple profiles to Edge, all you need to do is tap the profile picture icon at the top right side of the browser. Then, choose Add Profile. From there, you can sign into work or personal account, and add different users to a single instance of Edge. You can revisit this menu at any time to switch back between profiles.

Tip 2: Search your Microsoft 365 information the Microsoft 365 tab

If you’re signed into Edge with a Microsoft 365 account (and the feature is enabled by your IT admin in a larger enterprise,) then you’ll notice that you have some special feature in Microsoft Edge catered just for work and Microsoft 365 subscription service. On the new tab page in Edge, you’ll see a special “Office 365” section on the bottom left of your screen. If you tap into this, you should see that you’ll get a hub with your day at a glance. They’ll be access to today’s events, recommended files, frequent SharePoint websites, and recent, pinned, or “shared with me” documents.

In addition, you also can use the search bar in Edge on the New Tab page to search for things across your company. This includes people, documents, internal websites, and a lot more. It’s powered by Microsoft Search, which we previously covered in another article.

Tip 3: Use Internet Explorer Mode in Microsoft Edge

This third tip is for businesses and enterprises that might still need to use Internet Explorer for legacy websites. The new Edge has an “Internet Explorer mode.” With this mode, it is easier to use all the sites your organization might need in a single browser. Edge will use the Trident MSHTML engine from Internet Explorer 11 (IE11) for legacy sites. Again, this feature might be disabled by IT admins in larger enterprises, but if you’re a small business, it should not be a problem for you.

You’ll notice that Edge is in IE mode when the IE mode logo shows on the left side of the navigation bar. Just keep in mind that IE mode doesn’t work with Internet Explorer toolbars. group policies for the navigation menu, or developer tools.

You can enable Internet Explorer Mode in Microsoft Edge by clicking the three dots at the top right of the screen. Then, choose Settings. After that, you can click Default Browser and toggle the switch for Allow sites to be reloaded in Internet Explorer Mode. You’ll then have to reload the browser.

Tip 4: Put yourself in control of your web browsing

When browsing the web on a work computer, or with a work profile, you’ll need to be extra careful. The internet is a dangerous place, and you want to keep your company and yourself safe from potential viruses, phishing attacks, popups, and more. Larger enterprises already likely have group policies to help with this, but for small businesses without IT pros, Microsoft Edge has its own built-in tools to help. This section will look at some of those tools.

First off, you can check out Edge’s tracking prevention. Just click the three dots at the top of the screen, then choose Settings, and then click Privacy, search, and services. These tools can help prevent websites from tracking your behavior and your clicks as you browse. It’s best to set tracking prevention to Strict. For even more security, you can set Edge to clear the cache, history, and other items when you close it. Other tools here include setting Do not Track requests, managing certificates, services, and more.

Tip 5: Browse safely with Application Guard

In addition to the controls which we previously mentioned, you also can check out Edge’s built-in Application Guard window feature. This helps lock down the web browsing session you’re doing in the window, in a virtualized container environment separate from the rest of Windows. According to Microsoft, Hardware isolation helps enterprises safeguard their corporate network and data in case users visit a site that is compromised or is malicious.

You can enable Microsoft Edge’s Application Guard Window if you’re running Windows 10 Pro or Enterprise. From the Start Menu, just search for Turn Windows Features on or off. Then search for Windows Defender Application Guard and make sure the box is checked. You’ll then have to click OK and reset your computer. After that, on the restart, open Edge, and then visit the menu next to your profile picture, and choose New Application Guard Window.

Keep tuned for more on Microsoft Edge!

These are just some of our tips and tricks for using Microsoft Edge at work. We’ve got a new series on Microsoft Edge planned. So far, we’ve looked at 5 things Microsoft Edge can do that Google Chrome can’t. We’re also planning tips and tricks for the new Microsoft Edge, and a look back at some things that are still missing from Microsoft’s newest web browser. Keep tuned to OnMSFT for more, and be sure to let us know your thoughts in the comments below.

Best Emulator for Epic Seven [Out of 15 Tested in 2026]

If you are a fan of anime or Manga, you must have heard of Epic Seven. It is originally a Manga series which is now available as an RPG game for the mobile platform. Epic Seven with its eye-catchy anime-inspired graphics and an excellent story has become a popular mobile game among iOS and Android users.

Epic Seven is addictive, to say the least, which also means you would like to play it not only on your phone but also on your PC to see your favorite characters on a big screen which also enhances the gameplay experience.

Unfortunately, Epic Seven is an exclusive mobile title hence not available for PC users. Now, what if you want to play Epic Seven on PC?

The best way to run Epic Seven game on PC is to install an Android emulator which allows you to play Android games on PC. With Android emulators, you can almost run any kind of Android app on PC just like you do it on your Android phone.

Running Android games on PC has its own perks. To start with, you get to play mobile games on a large screen. You are not limited by your mobile hardware which can make games slow or sluggish at times and last but not least offers the best controls through a gamepad or keyboard.

Now that you all are excited to play your favorite game on PC let us introduce you the best emulator to run Epic Seven on PC.


What are the best Epic Seven emulators?

LDPlayer

LDPlayer is the newest kid in the block. It is an Android emulator focused on gamers and allows you to play android games on PC.

LDPlayer claims to offers a smooth gaming experience on PC. It comes with all the essential features of an Android emulator for gaming including keyboard mapping features for game control customization, and multi-instance Mode for playing multiple games simultaneously by creating multiple LDPlayer accounts.

You can use the Google Play store app in LDPlayer to download and install any games from the Play Store, or you can download games and apps apk and move it to LDPlayer window to start the installation.

It comes with support for 2K resolution gameplay with HDR graphics quality but requires a dedicated graphics card greater than GTX960. You can customize the screen resolution settings in the Game settings tab from 720p to 2K.

The user interface of LDPlayer is similar to other android emulators making it a familiar tool in case you are switching from other emulators.

LDPlayer is not perfect; there are occasional crashes and lags while playing games, but the developers push new updates consistently. If you are looking for a new Android emulator, give LDPlayer a shot.

LDPlayer

LDPlayer

It doesn’t matter what mobile game you are playing on PC, LDPlayer will offer the best experience.
Get it freeVisit website

BlueStacks

BlueStacks is one of the front-runners in the Android emulator for PC market. BlueStacks started the trend of offering a fully packed Android experience to the PC users without having to deal with the nuts and bolts of running the Android release on PC.

BlueStacks is focused on mobile gamers, and it comes with all the essential features to offer a solid gaming experience on PC.

To download and install Android apps and games BlueStacks comes with Google Play service and Google Play store installed out of the box.

To run Epic Seven on PC, you need to install BlueStacks from the official website. You can search the game and apps using the search bar inside BlueStacks menu. Just like NoxPlayer, you can install any game and app that is not available in the PlayStore using the apk.

The user interface of BlueStacks is simple and offers multiple modes to choose from. You can disable all the unnecessary add-on features like the BlueStacks Store, Quests, etc during gameplay to make better use of the hardware resources during the gaming session.

The Game Controls Windows allows you to manage and customize key controls. BlueStacks supports both keyboard and Gamepad for game controls.

Other features in BlueStacks includes multi-instance mode allowing to play multiple games or a single game with multiple accounts simultaneously and BlueStacks’s in-house reward system to win some cool accessories.

The latest version of Bluestacks offers a distraction-free mobile gaming experience on PC with memory and CPU usage problems being taken care of, it should significantly improve the gaming experience.

Bluestacks

Bluestacks

Epic Seven will run flawlessly if you choose to use Bluestacks as your Android emulator. Get it now!
Get it freeVisit website

NoxPlayer

NoxPlayer is among the most popular emulator available for both Windows and Mac users. It is fast, reliable and developed keeping mobile gamers in mind.

NoxPlayer is based on Android 4.2.2 and Android 5.1.1 and is compatible with Intel and AMD chips. NoxPlayer allows you to play Android games with high FPS and without any lag issues on PC.

To enhance your gaming experience, NoxPlayer supports both keyboard and Gamepad for game controls. The multi-instance feature allows you to play a single game using multiple accounts simultaneously. Or you can play multiple games on a single screen with a split window.

To install any game on NoxPlayer, you need to install the emulator first. Once installed, run the emulator. Open and sign in to Google Play store if needed and search for Epic Seven game.

Alternatively, you can also download the Epic Seven apk from any third-party source and then move it to NoxPlayer for installation. If you want to share your gameplay with friends and family, use the script recording feature to capture the gameplay live.

NoxPlayer is an excellent emulator that offers smooth gameplay, great compatibility and exclusive skins for greater customisation.

⇒ Get NoxPlayer

Memu Play

Memu Play

If you didn’t like BlueStacks or NoxPlayer for some reason and looking for something fresh, try Memu Play. Memu Play is a relatively new android emulator that is focused on mobile gaming on PC.

However, the new tag doesn’t mean it is low on features.

Memu Play claims to offer superb android gaming experience on PC. The working of Memu Play is similar to that of NoxPlayer. The user interface is simple and clean as well.

To install any game (in this case Epic Seven), you first need to download and install Memu Play on PC. Memu Play comes with a built-in Google Play Store and Google Play Service installed.

Type the game or app in the search bar and start installing.

All the installed games will appear on the home screen and in the apps tab. To control the gameplay, you can use either keyboard and mouse combo or control the character using the gamepad for a console-like feel.

In the settings tab, you can further change screen resolution, FPS, hotkeys and other aspects of the game.

If any game or app is not available in the Play Store, download the apk of the app and move it to Memu Play screen and proceed with the installation.

Just like other Emulators, the multi-instance feature is supported by Memu Play as well. It helps if you want to play one game with multiple accounts at the same time or if you’re going to run multiple games in a split window simultaneously.

⇒ Download Memu Play 


KOPLAYER

Ko Player - HD Image - featured

KOPLAYER (Ko Player) is a free android emulator for PC that allows you to play Android games like Epic Seven on PC. It is rather an old emulator and may not be as sophisticated as BlueStacks or NoxPlayer, but it gets the job done.

KOPLAYER comes with all the bells and whistles of an Android emulator to run android games and apps smoothly on PC. It offers multi-instance mode which can help you to run multiple accounts or game instances simultaneously on a single PC.

It also offers crisp and smooth gameplay, and we did not notice any major gaming issues as well. You can streamline game controls using the Keyboard mapping feature allowing you to customise the controls as per your preference.

KOPLAYER also comes with gameplay recording feature in case you want to show off your gaming talent in social media group or simply upload it to YouTube for your online gaming community.

The basic working principle of KOPLAYER is identical to other emulators. You can either use the integrated Google Play Store to download apps and games and run them on PC.

Or you can download apk from third-party sources and move it to KOPLAYER for installation.

If you decide to install via apk, KOPLAYER offers a huge collection of apks on its official website apk.koplayer.com.

KOPLAYER is not the latest of the lot, nor it receives any major update these days; however, it is still stable and runs Android games on PC without squeezing every bit of power from your PC.

⇒ Download KOPLAYER 


Epic Seven is an epic game, and these android emulators will help you to play the game on PC. Apart from enhancing your gaming experience, having an android emulator PC has other advantages as well.

If you are an Android app developer, you can test your apps in a virtual environment before pushing out the public release for your users. It also allows you to access mobile-only apps on PC.

So, what’s your emulator pick to play Epic Seven game on PC? Do let us know in the comments below.

4 Best Decentralized Social Networks to Use in 2026

Social networks have been so popular because they appeal to a basic human need, namely the need to belong to a group and socialize.

Unfortunately, many claim that social platforms have turned into spying and ad-serving tools. As a result, many users are looking to join social networks that respect their privacy.

So, if you uninstalled all social apps and programs from your Windows 10 computer but you still want to connect online with your friends, family, and peers, you still have quite a few interesting alternatives.

In this article, we’ll list the best decentralized social networks that you can use in 2021 highlighting their main features and advantages.

Quick Tip:

Protecting your privacy must be one of our main concerns right now and the best way to do that is by using a VPN solution. A VPN reroutes all your traffic through an external, safe service and this way, your IP and identity remain anonymous, even from your ISP.

So, if you want to enjoy social networks without worrying about anybody invading your private life or hackers stealing your data, start using an excellent VPN like the one recommended below.

Private Internet Access

PIA will bring back the privacy protection you deserve when using social networks.
Check price Visit Website

What are the best user owned social networks to join?

Diaspora

diaspora social network

Diaspora is one of the most popular decentralized social networks in the world. It has over one million users and relies on a group of independently owned nodes which work together to form the social network.

Diaspora’s developers refuse to bring ads to the platform or sell it to major corporations.

Rest assured, your social life is not sold to advertisers. As a user, you retain 100% ownership of your data.

Diaspora relies on three main principles:

  • Decentralization — The social network runs on independently run servers, instead of using huge central servers owned by a corporation.
  • Freedom — You can use a pen name if you don’t feel comfortable revealing your true identity.
  • Privacy — As stated above, you as a user, own your data. You can choose who you want to share this information with and how. You own your content.

If you’ve used Twitter before, transition to Diaspora will be a smooth one. You can use and follow #tags according to your interests. Use #tags to help other users find your content quicker.

Also, new users can make their presence noticed by using the #newhere tag. Simply write a few lines about yourself to introduce yourself and you’re ready to go.

⇒ Join Diaspora


Minds

minds social network

Minds is a very interesting social network that offers a series of useful features that you can find on today’s major corporate-owned social platforms.

Yes, you read that right: Minds is similar to Twitter, YouTube, and Facebook. This social network has one of the fastest growing adoption rates among alternative social platforms.

It has over 2 million users and its code is owned and supported by the community. In other words, the code is publicly available for review and contribution, and everyone can improve it.

Minds promotes freedom of speech. It has zero censorship. Now, if you want to earn some money online, then Minds is a great place to start.

The platform uses peer-to-peer advertising allowing your to monetize the content that you put out. Users can pay you using cash, Bitcoin, credit cards, and more.

Minds’ networking focuses on four areas:

  • NewsFeed where you can find out what’s new on Minds
  • Discovery — you can use this feature to find content that might interest you
  • Blogs — use this section to share your thoughts and ideas with the community
  • Groups — this section reunites community members interested in the same topic

⇒ Join Minds


Mastodon

mastodon social network

Mastodon is a an open-source decentralized micro-blogging network. It’s similar to Twitter, but the main difference in terms of privacy is that it’s operated on servers running open source software.

This platform allows you to post messages withing a 500-character limit. Your messages are called toots and you can control who can see them.

There are no ads inserted into your timeline. As a matter of fact, there is no advertising whatsoever on the network. Donations only fuel this crowd-funded project.

Putting the user first
You’re a person, not a product. Mastodon is a free, open-source development that has been crowdfunded, not financed.

All instances are independently owned, operated, and moderated. There is no monopoly by a single commercial company, no ads, and no tracking. Mastodon works for you, and not the other way around.

It is worth mentioning that Mastodon actively uses anti-abuse tools to protect its users. Moderators can quickly step in if any issues arise.

Mastodon currently has around 800k users.

⇒ Join Mastodon


Sola

sola social network

Sola is the next-gen decentralized social network, as the official description reads.

Unlike today’s major social platforms, Sola doesn’t rely of the concepts of following or followers. Instead it uses AI algorithms and user reaction to spread information.

In this manner, the network identifies quality content and makes sure that it reaches users who are indeed interested in that type of content.

Sola uses node architecture to fuel its existence.

Any user can host Sola node on their computer; they’ll receive a reward for each post delivered to the end user.

Decentralized architecture makes Sola nearly immune to blocking and censorship, while keeping costs low. Without a central authority, once launched, the network cannot be shut down.

It is worth mentioning that just like Minds, Sola allows its users to earn money by using the platform.

It generates revenue from ads, user payments and partnerships that it then splits with users. As usual, quality content translates into revenue increase.

Over 700,000 users are already monetizing their content on the platform.

⇒ Join Sola

So, if you’re looking for a reliable alternative to the current social media platforms, you can join one of the decentralized social networks listed above.

There has been a recent trend of people shutting down and deleting their Facebook accounts. Many perceive it as a sign of social network failure and predict this is the beginning of social networking as we know it.

Privacy concerns is one of the main reasons why people are deleting their social media accounts. Users want to feel safe and they need a guarantee no private information is collected without their consent.

The only problem is that today’s social networks fail to meet these needs. And this is where decentralized blockchain-based network come into action.

If you already have an account on Sola, Mastodon, Minds or Diaspora tell us more about your user experience in the comments below.

Windows 10 news recap: Alarms & Clock app gets redesigned, Microsoft Store gets design tweaks, and more

Welcome back to our Windows 10 news recap, where we go over the top stories of the past week in the world of Microsoft’s flagship operating system.

Twitter begins adding Fleets and Revue newsletters to its web and Windows 10 apps

Updates are arriving for Twitter’s web and Windows 10 apps, which have started adding Twitter’s Fleets feature and Revue newsletters.

Twitter and Revue logos

Microsoft releases PowerToys 0.33.1 with a new onboarding experience and localization improvements

PowerToys version 0.33.1 has been released which brings a new onboarding experience, as well as localization improvements. The new onboarding experience is designed to make it easier for new users to get started with the suite of tools.

Microsoft’s Windows 10 Alarms & Clock app just updated with a whole new look

The Alarms & Clock app on Windows 10 has received a design overhaul this week. Of particular note is the larger font, as well as the addition of a fullscreen mode.

Windows 10’s Alarms & Clock app

Latest update to the Microsoft Store brings hints of ‘Sun Valley’ design

Design tweaks have been made to the Microsoft Store on Windows 10, with hints of Microsoft’s “Sun Valley” design being included, though the internet was thinking Microsoft was building a whole new store experience, which doesn’t appear to be the case.

That’s it for this week. We’ll be back next week with more Windows 10 news.

Here’s how to fix IPVanish error 1200 pops-up

A couple of years ago, the choices in the VPN market were scarce, but that changed quickly. In the light of recent events, lots of VPN services managed to get their piece of the pie.

One of those that is well-known is IPVanish VPN, which is a US-based VPN service. This service has a lot of good things going for it and, like so many others, it’ll rarely leave you hanging.

However, there’s no software without issues. A commonly reported error that plagues IPVanish VPN users goes by code 1200.

This error appears in multiple instances, but most of the symptoms point towards a connection problem.

We enlisted some solutions for the error below and for IPVanish install failed error, so if you’re keen on fixing it on your own before reaching to a support team, check them out.

How can I fix error 1200 in IPVanish VPN?

1. Try logging in again

All network-related VPN issues have a large spectrum of possible culprits. The complex resolution isn’t always the one you should follow through with.

At least, not until you’ve tried out the simpler ones. The first solution we can suggest is to just sign in and sign out. Now, in addition to that, we also encourage you to check your status on the official customer site.

If everything is fine and you’re able to access the web-based IPVanish hub without any problems, but the error reappears, continue with the enlisted steps.


2. Try another VPN solution

When time is of the essence, we come with a great alternative. The VPN recommended by us was developed by Kape Technologies and it is a hidden treasure.

Privacy and user-friendliness are booth part of the package. Chances are you’ll appreciate from the very start its dashboard that’s so easy to navigate.

You’ll be able to set up your VPN in no-time and no tricky menus will appear out of the blue to make you question your decision of choosing this VPN over IPVanish.

If you’re still undecided, just take advantage of the 30-day money-back guarantee to test it out for yourself.

Private Internet Access

Private Internet Access

Private Internet Access should be your new VPN choice too. Currently available at a major discount!
Check priceVisit website

3. Repair the driver installation

  1. Open the IPVanish VPN client.
  2. Choose Settings from the left pane.
  3. Select Connection.
  4. Click Install/Repair.

If you’ve made some critical system changes, like Windows 10 upgrade or refresh, there’s the chance that the IPVanish integration is broken. Or, to be exact, the VPN driver is broken.

This can be addressed by simply repairing the installation. Now, instead of relying on the system resources, IPVanish offers the repair function inside the VPN client.

Once run, this dedicated tool should fix the VPN driver. If you’re not sure how to run this integrated tool, follow the instructions above.


4. Change the server

  1. Open the IPVanish VPN client.
  2. Select the Server list from the left pane.
  3. Choose a different fitting server from the list and connect.

If the client fails to connect and the error appears, we suggest switching the server. There’s always the chance that a certain server is down and thus the connection cracks.

IPVanish offers lots of servers based all around the world, so if one won’t work (overcrowded or temporarily out of reach), you can always try an alternative.

Follow the steps above to change the server on IPVanish to a different one.


5. Select a different VPN protocol

  1. Open the IPVanish VPN client.
  2. Choose Settings from the left pane.
  3. Select the Connection tab.
  4. Under the Active protocol section, expand the drop-down menu and choose a different protocol from the list.
  5. Restart the client and look for improvements.

Besides the server selection, there’s also the option of choosing what VPN security protocol you want to use. Some offer faster traffic while others offer better encryption and are more secure.

Either way, due to various reasons (your IPS blocking certain protocols is the most common), the more secure protocols might stop working.

The OpenVPN protocol is the middle ground, but we suggest trying out various protocols until you find the functional one. That will, at least, give you a better insight into the problem.


6. Check the firewall and antivirus

  1. In the Windows Search bar, type Allow and open Allow an app through Windows Firewall.
  2. Click Change settings.ipvanish error 1200
  3. Locate IPVanish and check both Private and Public boxes.
  4. Confirm changes.

Another possible reason for an IPVanish failure lies in the Windows Firewall or a third-party antivirus with a dedicated firewall.

Those tend to block VPNs on a regular basis. Some antivirus solutions do so more than others. Thus, what you need to do is make sure IPVanish is allowed free access without limitations.

In order to do address the antivirus problem, you can either disable the firewall temporary or whitelist IPVanish. On the other hand, to tweak the Windows Firewall, follow the steps detailed above.

There’s also a remote chance that your router has an active built-in firewall. Make sure to disable it and look for changes, as well.


7. Reinstall IPVanish

Finally, if none of the steps proved useful, we can only suggest reinstallation as the last resort. Of course, this is what we can advise as a third-party side to an end-user.

The best way to deal with any issue related to VPN lies in customer support. This is a specific niche and has a fair share of issues.

But, if you choose a premium service with great customer support, they can make it work and enrich the experience. IPVanish, based on reviews, has mixed ratings. But, it should be good enough either way.


With that said, we can conclude this article. In case you have any additional questions or suggestions, feel free to tell us in the comments section below.

Orbi router won’t turn on: No light / power LED flashing red

Orbi is known for being a great solution for fast and reliable WiFi Internet connection, but some users are complaining that Orbi router won’t turn on.

This can be a big issue and prevent you from accessing the Web, but there’s a way to fix it, and today we’ll show you how to do it.

What do I do if Ethernet light on router won’t turn on?

1. Try using a different power outlet

  1. Disconnect the router from the power outlet.
  2. Connect it to a different power outlet.
  3. Start the router and check if the issue is still there.

This is a simple solution, but it might help you if Orbi satellite is not working for you.

2. Check cable connectivity

  1. Check the cable connectivity between the router and the modem.
  2. Insert one of the cables from your device into one of the modem ports labeled Ethernet or Data.
  3. Make sure the Ethernet cable you’re using is not damaged.

3. Reset your router

  1. Locate the reset button on your router.
  2. Press and hold it for 15 seconds.
  3. After doing that, check if the problem is gone.

This method can help if power LED is flashing red on your router, so try to reset it properly and check if that helps.

4. Change the router’s configuration

  1. On the router configuration page, enable the AP mode.
  2. Disable Wi-Fi radios on your modem.
  3. After doing that, check if the issue is still there.

This issue occurs if you have another router or modem in front of your Orbi router. You can also fix this issue by enabling the Bridge mode on that modem/router.

5. Update firmware via TFTP Client

  1. Start the TFTP Client. It’s advised to use the Windows built-in TFTP Client.
  2. Use the software to update your router’s firmware via LAN.

For detailed instructions, be sure to check your router’s manual.

6. Contact Netgear support

If you’re still having issues with the router, it’s possible that it’s damaged, so it would be best to contact Netgear support.

If the router won’t turn on after power outage, it’s rather likely that it’s damaged, so you might have to replace it.

As you can see there are various issues that can disrupt your Orbi router from functioning properly.

If your Orbi router won’t turn on, be sure to follow the instructions from this guide carefully, and hopefully you’ll be able to fix the problem.

We’d like to hear about your experience so let us know if you managed to fix this issue on your own.

How to Fix VPN Error 812 in Windows 10/11

The VPN Error 812, unlike many other issues,  is not a very common VPN error code. Very few users will actually encounter it as it mainly affects server connections.

However, it does not necessarily mean that it cannot be resolved. This error may be encountered after the April Windows upgrade or as a result of an issue between clients and the Network Policy Server (NPS).

Here’s the complete VPN error 812 message: 

The connection was prevented because of a policy configured on your RAS/VPN server. Specifically, the authentication method used by the server to verify your username and password may not match the authentication method configured in your connection profile. Please contact the Administrator of the RAS server and notify them of this error.

The problem effectively prohibits you from reconnecting to the VPN once it has been disconnected in Windows 10.

The problem is definitely tied to the RAS/VPN server’s policy setup, as indicated by the message, and a Windows remote access service error may also be present here.

Why does VPN error 812 appear?

The VPN Error 812 seems to appear for several reasons:

❌When the Server Network Policy and Client Connection Profile don’t match the Authentication Protocol.

❌When NPS does not update the value added to Tunnel Type Condition in Network Policy. This is a more complex situation.

❌A new Network Policy is set with Day and time restrictions, Operating system, Windows group, and Tunnel type Conditions

❌Tunnel Type is valued with PPTP only and when you are trying to connect to their VPN client, error 812 appears.

✅Preliminary checks

Before you attempt anything else, make sure you do some basic troubleshooting:

→ Rebooting the RRAS server may solve the problem. The kb5014746 VPN issue usually occurs after a Windows update.

  1. From the command prompt, you may stop and restart RRAS. cmd administrator black screen after sleep windows 11
  2. The sc start rasman & sc config rasman start= auto command will take action after you restart your PC.

→ After that, wait an hour and then reconnect your VPN.

→ Finally, double-check that your connection profile matches the authentication, which means that your username and password are accurate.

How do I fix VPN error 812 on Windows 10/11?

1. Change DNS settings

  1. In the Windows search box, type ncpa.cpl and press Enter. run ncpa.cpl command
  2. The network connections will be visible. Right-click the VPN connection you’re using and select Properties. Right-click on VPN in Network Connections and select Properties
  3. Access the Secondary DNS to configure the External DNS.
  4. Change the Primary DNS range to 8.8.8.8.
  5. Save your changes, then restart your VPN.

2. Check Tunnel type settings

  1. Select the additional value to Tunnel type Condition, like L2TP to obtain value L2TP or PPTP;
  2. Apply and close the Network Policy.
  3. Connect VPN client.
  4. Revert the Network Policy to the good value for Tunnel type Condition, here it is PPTP only;
  5. Apply and close the Network Policy;
  6. Connect VPN client, it works and your Network Policy is now well set.

3. Create a different authentication protocol

Some users suggested that error 812 occurs when using an Authentication protocol set via NPS (Network Policy and Access Services).

The solution suggested involves configuring a different authentication protocol (more secure), such as  MS-CHAPv2 or EAP in order to match the settings on the client side.

4. Choose a VPN with a wide server array

If you use a free VPN, it is possible that you will encounter VPN error 812 on a regular basis.

To maximize the VPN connection and eliminate these errors, we recommend that you switch to a VPN client with a better server response.

During peak times, VPN servers can become overloaded with users, resulting in a slowdown that makes a connection impossible if the VPN is low in numbers for servers.

A top-tier service, such as ExpressVPN, has over 3000 servers in its global network, allowing you to quickly switch connections.

Remember that the closer you are to the server, the faster the connection will most likely be. It will not only reduce the likelihood of these errors occurring, but it will also provide access to a more stable and secure VPN connection.

ExpressVPN

More servers result in a better routing of the network traffic thus avoiding error 812 while connected to VPN.
Check price Visit website

4. Contact your network administrator

Error 812 may also occur due to insufficient access rights. In this case, the safest approach is to simply contact your network administrator in order to update your permissions and make sure that all the protocol and network authentication permissions are correct.

5. Contact your VPN provider

If Error 812 still appears, you should contact your VPN service provider. Every VPN developer has a list of the most common issues affecting their products as well as the corresponding solutions.

If you come across other workarounds to solve VPN error 812, do let us know in the comments below.

FIX: PIA no Internet access in Windows 10/11

A VPN connection is meant to help the user protect his or her privacy while using the web or other services online, as well as providing security for sensitive data.

Connectivity issues thus can be brought about by a myriad of issues like the port being used by the application being restricted or blocked on your network.

PIA or Private Internet Access VPN is one of the most popular applications that provide security with its generous features list.

We are referring to P2P support, ad-blocking, malware blocking, multiple gateways, unlimited bandwidth, no traffic logging, and over 3200 servers in 46 countries across the world.

The VPN is easy to use and even set up, but sometimes with VPNs, you may have issues connecting to the Internet even when the VPN shows that it is connected.

When you get no Internet access while using the PIA VPN, try the solutions below to fix it.

How can I fix no Internet access while using PIA?

1. Reinstall Private Internet Access

get Private Internet Access

  1. In the search box on the taskbar, type Control Panel and select it from the results.
  2. Go to Programs and Features.
  3. Search for PIA inside the programs list and select it.
  4. Press Uninstall.
  5. A pop-up window asking if you’re sure you want to uninstall this program should appear next. Click Yes.
  6. Follow the on-screen instructions to finish the removal process.

You’re most likely used to this Kape Technologies VPN service. So, take action by reinstalling PIA from the official site instead of imaging the worst scenario.

Then, reactivate it with your original license code. Once you’re successfully logged in, it should immediately connect to the VPN server closest to your current location.

Private Internet Access

Private Internet Access

No Internet access errors should prevent you from using Private Internet Access!
$2.69/mo. Buy it now

2. Check your connection

To do this, disconnect from PIA VPN and try accessing without the application. If you manage to access it, connect the VPN again, and try the next solution.

If you can’t access the Internet with the VPN disconnected, then the problem is with your Internet connection. Restart your device and check your network settings.

3. Connect to a different server location

Since PIA has so many server locations, you can pick a different one and connect to it. Are you able to access the Internet with the new server location?

If so, this means there may be a temporary issue with the server location you were using before.

4. Flush your DNS

  1. Click Start and select All Apps.
  2. Select Accessories.
  3. Type CMD in the search box and then right-click Command Prompt and select Run as Administrator.
  4. Type ipconfig /flushdns and press enter. A confirmation saying Windows IP configuration successfully flushed the DNS Resolver Cache will display.

5. Change your VPN protocol

The VPN uses protocols so as to connect to a server, and some of the protocols include L2TP, PPTOP, OpenVPN TCP, and UDP.

Sometimes, the protocol may be blocked in some countries, so to resolve the internet access issue, select the protocols in order from OpenVPN TCP, L2TP, and then PPTP.

6. Change proxy settings

  1. Click Tools and select Internet Options.Windows Defender is not removing Trojan
  2. In the Connections tab, click LAN settings.
  3. Uncheck all options except the automatically detect settings.
  4. Click OK and close your browser.
  5. Open your browser again and try connecting to the Internet.

7. Change the port being used by the VPN

  1. Right-click on the PIA VPN icon in the menu bar or system tray.
  2. Disconnect from the VPN.
  3. Right-click on the icon again and click Settings.
  4. Click Advanced.
  5. Set the connection type to UDP.
  6. Change remote port to 1194.
  7. Click Save and reconnect.
  8. If the issue persists, disconnect from the VPN and change the remote port to 8080 and reconnect. If it still doesn’t help, change to 9201, or 53 and Save then reconnect and try again.
  9. If you still don’t manage, go back to Advanced settings.
  10. Disconnect the VPN and change the connection type to TCP.
  11. Change remote port to Auto then click Save and reconnect.
  12. If the issue persists, change remote port to 443, then Save and reconnect.
  13. If you still cannot access the Internet, change the remote port to 110, or 80, or enter 53 in the local port box and try the settings again.

8. Check DNS settings

  1. Click Start.
  2. Search for View network connections.
  3. Right-click your WiFi adapter.
  4. Select Properties.
  5. Select Internet Protocol Version 4.
  6. Select Properties.
  7. Change the preferred DNS address to 8.8.8.8 and the alternate to 8.8.4.4.change DNS settings
  8. Reboot your computer and try accessing the Internet again.

If you’re using a VPN like Private Internet Access, you can easily change PIA SOCKS5 proxy settings.

Let us know if you found a working solution from this list by leaving a comment in the section below.

How to use Google translate offline [PC Guide]

Google Translate is a popular online service that can translate any text or web page to any language. The service is more than useful and many are wondering if Google Translate can be used offline.

This is a complex issue, and sadly, Google Translate isn’t available as a desktop application, so you can’t download it and run it offline on your PC. However, there’s still a way to install it on your PC, and in this guide, we’ll show you how to do that.

How can I use Google Translate offline?

1. Use an Android emulator

LDPlayer is a powerful Android emulator that is intended for gaming, but it can also work with a wide array of Android apps, including Google Translate.

Once you install this software, you just need to visit the Play Store and download Google Translate just like any other Android app.

Google Translate isn’t natively available for desktop computers, so the only way to run it is to use a reliable Android emulator. Choosing the finest one, then, is dependent on what you want to use it for.

The market is overflowing with Android emulators that will meet your basic translation needs, to go for a complete, well-rounded experience.

Aside from being superior for customization and efficiency, those emulators are sometimes more intense to games because they run on a newer form of Android.

2. Download language files

  1. Access the Google Translate on Android emulator.
  2. Select the languages: Translate from and Translate to.
  3. Pick the language you want to use offline.
  4. Tap on the Download button that appears right next to the language.
  5. Click Download from the pop-up window.

What to do if the translate package download failed?

1. Clear the data from the download manager

  1. Access Settings.
  2. Tap Applications.
  3. Go to Download manager.
  4. Select Clear data.

2. Reinstall Google Translate app

  1. Uninstall Google Translate app.
  2. Close the Android emulator and start it again.
  3. Visit the Play Store and download Google Translate again.

As you can see, Google Translate isn’t available for desktop computers, and the only way to use it offline on your PC is via Android emulator.

We hope that our guide helped you and if you found an alternative way to run Google Translate on your PC, let us know in the comments section below.

How to disable auto-login Windows 7 [Temporarily / Bypass]

Having to enter a user password on each log in can be tedious, and many users choose to disable this feature. This isn’t advised from a security standpoint, and in this guide, we’ll show you how to disable auto login on Windows 7.

Although this guide focuses on Windows 7, these solutions are universal, and they should work in newer versions of Windows as well.

How do I disable automatic login/logoff in Windows 7?

1.Enable or disable manually

  1. Press Windows Key + R and enter netplwiz. Press Enter or click OK.
  2. Check the Users must enter username and password to use this computer.
  3. Click on Apply and OK to save changes.
  4. If asked to enter the user password, be sure to do so.

By doing so, you’ll disable auto login on Windows 7. After changing these settings, users will be required to enter their passwords to log in to Windows.


2. Use Microsoft Autologon

  1. Download Autologon.
  2. Click on the file you downloaded, since it doesn’t require installation.
  3. Fill in the password in the empty box.
  4. Click on Enable or Disable.
  5. Hit Enter, then click Ok.

Microsoft Autologon is a software developed by Sysinternals, specially made for those who want to customize their login parameters.

The software allows you to easily configure the built-in login settings and disable auto login on Windows 7.


3. Disable logon from Redgedit

  1. Press Windows Key + R, enter regedit and press Enter.
     
  2. After the Registry Editor opens, navigate to the code path HKEY_LOCAL_MACHINE\SOFTWARE\Microsoft\Windows NT\CurrentVersion\winlogon
  3. Find AutoAdminLogon and change its value to 0.

Note: This solution only works for those who already used Regedit to enable automatic Windows logon.

You should find the newly created AutoAdminLogon string, and change the value from 1 to 0 to disable auto login on Windows 7.

Keep in mind that working with Regedit is not recommended since it contains crucial strings and commands that will change the way your system works.


Auto login feature can be useful, and we have an in-depth guide on how to enable auto login on Windows 7, if you want to try it out.

This article showed you different ways in which you can disable auto login on Windows 7. Keep in mind that this solutions work on newer versions of Windows as well.

Feel free to give us any feedback regarding the subject in the comment section below.