Microsoft Edge is getting a new built-in tool that will help users in solving complex maths problems on a web page. As highlighted by Reddit user Leopeva64-2, the “Maths Solver” feature is now rolling out to select Insiders running Canary channel builds, and it is part of a Controlled Feature Roll-out (CFR).
This powerful tool is apparently powered by the Microsoft Maths solver app and Bing search, which help users with various mathematical problems, including trigonometry, algebra, arithmetic, statistics, calculus, and more.
Currently, there are two ways to use this feature in the browser. Firstly, users can manually type out an equation with the keyboard in the textbox. Alternatively, they can also use the selection tool to select a formula or equation available on a web page. Regardless of the method, Math Solver will use OCR to read the problem and then provide an appropriate solution to users.
If you’re a Microsoft Edge Canary Insider, you should be able to access the new Maths Solver tool by heading to Settings >> Appearance and then clicking the “Show Math Solver” option. If you choose to enable it, the browser will add a dedicated button on the toolbar.
The new Edge already allows users to sort items within Collections, but the company is now testing another update to make it easier for users to organize their Collections. Indeed, the latest Canary build 90.0.815.0 has added a new option to sort them by name, date created, and recently used.
Of course, both these features are still being worked on, and this could be a very early implementation. There is a chance that the Edge Insider team may improve the functionality before making them available to the general public. Have you spotted these changes on your PC? Let us know in the comments down below.
Web cookies are small text files that save user-specific data. Tracking cookies are those that track user browsing activity pertaining to websites’ ads.
Those types of cookies are primarily for retargeting advertising on pages, and in time can prove to be a security liability.
Internet Explorer users can, like other browser users, clear and block tracking cookies.
Although IE is getting a tad dated, this old warhorse of a browser still includes sufficient tools to purge cookies with.
This is how you can remove tracking cookies for Internet Explorer 11.
Quick Tip:
To ensure that your identity online is protected at all times, and that no third-parties are tracking your activity, you should consider using a browser with great security features like Opera.
Opera not only protects you online, but offers you amazing loading speeds, and an extremely useful sidebar with customizable shortcuts to all your social media accounts and messengers.
Opera
Ensure that your privacy is protected at all times by using the built-in features in this software, including a VPN service.
To block IE’s tracking cookies, press the Alt + X hotkey in Internet Explorer.
Select Internet options to open that window.
Select the Privacy tab shown directly below.
Then click the Advanced button to open the window in the snapshot directly below.
Select the Block radio buttons for third and first-party cookies.
Click the OK button to confirm your new settings.
Then press the OK button in Internet Options to exit that window.
3. Remove tracking cookies with a cookie manager utility
You can also erase Internet Explorer, and other browser cookies, with a handy cookie management utility from developer Matinez Perez.
That utility is a freeware program that lists all your Internet Explorer cookies within a single window. It also works with most other popular browsers.
Mr. Perez’s cookie management utility provides folder path and expiration date details for all listed IE cookies. Its users can delete all or selected cookies by selecting its Eat Cookies button.
This program also enables users to preserve some cookies within a protected panel. That’s what makes Cookies Monster worthy of your attention.
So, you can clear Internet Explorer’s tracking cookies with that browser’s Delete Browsing History tool or cookie management software.
To ensure you don’t have to keep on deleting tracking cookies, you’ll need to block them as outlined within the third resolution.
Reinstalling DirectX on your Windows 11 will solve issues such as missing DLL errors, graphical glitches, and game crashes, so you can get back to gaming without interruption.
If you need to properly reinstall DirectX 12, you can check for Windows updates with the simple steps presented below.
1. Open the Start menu and select Settings.
2. Select Update & Security.
3. Click Check for updates.
Usually, Windows is updated automatically. But if any updates are missing, this action should solve the problem. Wait for the process to finish and make another attempt to see the DirectX version.
Check once again for updates and see if the problem is fixed. If you’re still having trouble with a proper installation for the graphics component, take a look at this dedicated article that lists a few alternative options.
3. Use the SFC tool for missing files
Type Command Prompt in the taskbar and click on Run as administrator.
Type sfc /scannow and hit Enter.
Wait for the results.
This scan might take some minutes. SFC is a built-in tool that should repair any corrupted files in the system or install missing ones, after faulty OS installation.
4. Perform a clean boot
Type System Configuration in the taskbar and select Run as administrator.
On the Services tab, select Hide all Microsoft services, and then select Disable for all.
On the Startup tab, open Task Manager, and Disable all items.
Close the Task Manager and click OK in the System Configuration window.
Restart your device and reinstall DirectX using the DirectX End-User Runtime Web Installer download link as mentioned before and see if it helps.
To completely uninstall a program, you can use a third-party uninstaller solution to make sure no leftovers remain in your system.
The above solutions will help you for use to install the latest DirectX on your computer. To learn more about DirectX, we have a great guide on how to enable DirectX 12 Ultimate, so don’t miss it. And if DirectX 12 throws a black screen when launching games, we have the answers.
If you have any suggestions or questions, please write us a comment below.
If you followed all the steps above but still can’t get DirectX working properly, you might want to check out how to download DirectX 12 on Windows 11 safely and manually. It can sometimes offer better results than relying solely on updates or runtime installers. A
lso, if you’re seeing any installation or runtime issues, our guide on fixing DirectX errors in Windows 11 covers specific error messages and what they really mean—plus how to get around them.
Google Chrome users will soon receive new major updates every month, the company announced yesterday. Starting with Chrome version 94 to be released in Q3 2021, Chrome updates will be released every four weeks instead of the six-week release cycle that’s been the norm for more than a decade.
“As we have improved our testing and release processes for Chrome, and deployed bi-weekly security updates to improve our patch gap, it became clear that we could shorten our release cycle and deliver new features more quickly,” the Chrome team explained yesterday. Last year, Mozilla Firefox also adopted a faster four-week release cycle to bring new features to users more quickly.
Google is likely aware that enterprise customers generally don’t want a fast update cadence, and that’s why the company announced that will introduce an Extended Stable option that will receive milestone updates every eight weeks instead of four. “Security updates on Extended Stable will be released every two weeks to fix important issues, but those updates won’t contain new features or all security fixes that the 4 week option will receive,” the company explained.
As Chrome releases follow the update cycle of the Chromium open source project, it remains to be seen if other Chromium-based browsers such as Microsoft Edge will also switch to a faster release cycle. As of today, Edge receives major updates every six weeks just like Google Chrome, and Microsoft Edge 89 was released just yesterday with support for Vertical Tabs, with a new Startup Boost feature to roll out very soon.
There are multiple desktop note-taking applications for Windows and other platforms. However, having to open a desktop app every time you want to take a quick note is not ideal.
Notebook browser extensions can make the task easier as they are available just a click away and sit on the bookmark toolbar.
When looking for a notebook browser extension, it is important to look for apps that can help you take creative notes and are supported by a reputable company, thus improving its sustainability.
In this article, we have compiled the list of best browser notepad extensions Chrome, Firefox, and popular browsers. These add-ons should be available irrespective of the platform you are using.
Quick Tip
If organizing tab groups in a separate customizable workspace, taking snapshots, editing and sharing your screenshot from webpages and sending files, links and notes between your devices is something you are looking for in a notebook browser extension, try Opera One browser.
Opera One browser comes with some must-have features built into the browser for faster, smoother and distraction-free browsing. Additionally, it comes with a built-in Ad blocker, free VPN and native AI.
Opera One
Take advantage of a browser that contains most of the elements that you would only get as extensions in any other software option.
Zoho Notebook Web Clipper may not be as feature-loaded as the Evernote alternative, but if you don’t need too many features, it is a good extension to consider.
Clipping content from the web to your Notebook, saving as Note Cards, and immediate synchronization across your devices are some of the handy features offered by the extension.
Using the Meeting Notes feature, you can take quick notes on an online meeting using Zoom and other apps.
You can also convert any links to Smart Card, add tags, reminders to note cards and even annotate images and screenshots before adding them to your Notebook.
Google Keep Extension for Chrome and other supported browsers is a browser notepad extension that offers similar functionalities as its Android app and web app.
It is a basic note-taking app with a simple user interface that can help a lot.
Users can add a web page, image or quote and sync across the devices of all the platforms that you use.
You can also add additional details and labels to categorize your note for later retrieval.
Scrible Toolbar Extension is another lightweight browser notebook extension that offers the best way to annotate, tag or share online articles and webpages.
You can save the content to your Scrible account as well, which makes it extremely portable.
Furthermore, you can add sticky notes that anchor to particular parts of the article, categorize your annotations with a dynamic legend or share your saved articles on social media and via email.
Having to track sources manually when collecting for research can be a tedious tak.
With Citable, you can save quotes and notes from the web into Google spreadsheets.
All the notes saved in a spreadsheet in your Google Docs account to enable collaboration with colleagues and friends. It also includes a printing template to simplify printing notes directly onto sticky notes.
Instead of capturing screenshots, you want to save text from a web page, use Beanote.
It allows you to highlight any text and then save it in multiple formats. You can also color-code notes for better organization, write comments, and create sticky notes anywhere on the web page.
Remindoro is a Chrome productivity extension. You can set one-time/repeatable reminders to receive notifications for links to read, notes and activities.
Alternatively, you can also use this extension as just a note-taking app. Use the save pages to read later feature to save the current web page to the Remindoro.
Microsoft has released a new update for PowerToys, bringing version 0.33.1 for all Windows 10 users. This release packs plenty of notable features and changes, such as a new “onboarding experience” to help new users get started with the PowerToys suite of tools.
In addition, there are some bug fixes, localization improvements, and a new plugin manager for the PowerToys Run utility. The File Explorer is also getting some enhancements for SVG previews.
Here’s the full list of improvements and fixes in PowerToys version 0.33.1:
General
Updated overview links to be language agnostic to the docs site.
‘First time load’ experience. The hope is a quick, light way to learn about basic functionality. We have some more work to do and want to also use the same framework for teaching about updates as well.
Localization corrections
FancyZones
Adjusted editor UX based on feedback. Thanks @niels9001!
New options to change zone activation algorithm.
File Explorer
Improved how SVG images are previewed in the preview pane, thanks@Drakula44!
@Aaron-Junker has created a proof of concept for using Monaco editor for previewing dev files. This will enable over 125+ file types.
PowerToys Run
Plugin Manager now is in settings. You can directly turn on / off, include items in general search, and change the action key! Thanks @htcfreek for the great feedback!
Improved support for additional window managers by abstracting out shell process calls. Thanks @davidegiacometti!
Fix for PT Run registering the hotkey on non-supported OS versions.
~ will now act as the user home directory in Folder plugin. Thanks @davidegiacometti
Service plugin has adjusted status messages
Video Conference Mute (Experimental)
Adjust video muting to leverage DirectShow.
Goal is to have 0.34 experimental release week of March 8th.
Settings
When restarting as admin, the settings now will reopen. Thanks @davidegiacometti!
ARM64 Progress
Investigation on how we’ll accomplish Settings with the XAML Island and WPF app.
For those who are waiting for the Video Conference Mute tool, which is currently in preview, the wait will be slightly longer. The firm noted that it is expected to launch in the upcoming experimental release at some point next week.
“We’ll be doing a 0.34 experimental release week of March 8th. We feel we are near ready to add in Video Conference mute into the stable release pending feedback from the pending 0.34 experimental release,” said Clint Rutkas, Program manager lead on PowerToys.
As usual, the latest version of PowerToys should automatically be downloaded, or you can also download this update from GitHub if you prefer to download the tool manually.
After replacing the problematic cartridge, check if the problem is resolved.
2. Remove and clean your printhead
According to users, error B200 can occur due to problems with your printhead, and one thing that you can try is to remove your printhead and clean it.
For detailed instructions on how to remove your printhead, we strongly suggest that you check your printer manual.
After you clean your printhead, make sure that it’s completely dry before you put it back in your printer.
Some users are also suggesting to clean printhead connectors with cue tips and alcohol, so you might want to try that.
Before powering on your printer, be sure that the connectors are completely dry.
Users are also suggesting to press the power button rapidly to start the reboot mode on the printer, so you might want to try doing that.
3. Reseat your printhead
One way to fix B200 error is to reseat your printhead. After reseating the printhead, turn off your printer and leave it turned off for a couple of minutes.
After that, turn your printer back on and check if the problem is resolved.
4. Check for obstructions
Sometimes there could be obstructions in your printer that cause this problem to occur.
To fix this problem, you need to power down your printer, remove the paper, and check for any obstructions.
If any obstructions are found, remove them and turn the printer back on.
This is an unusual solution, but it works according to some users. First, you need to turn off your printer.
After that, open the print cover and turn the printer back on. Cartridges will start moving to the left.
Before the cartridges reach the left side, close down the printer cover and leave the printer turned on.
Be sure to close the print cover after the cartridges pass the half way to the left side.
After doing that, the printer will start working normally. This solution might be a bit tricky to perform, but you should be able to do it after a few tries.
6. Replace the tank holder
Sometimes you can fix the problem simply by replacing the tank holder. Just purchase a new one and replace your current tank holder.
Before replacing the tank holder, check the instruction manual for detailed instructions.
7. Press the Power and Copy buttons
Few users reported that you can fix this problem simply by pressing the Power and Copy buttons simultaneously a couple of times.
After doing that, the printer should start and you just need to perform a nozzle check, deep cleaning and printer alignment.
It’s not necessary to perform these steps, but you can do them if you want to.
8. Unplug your printer
Several users reported that they fixed this problem simply by unplugging their printer.
Now this might not work for everyone, but it does not hurt to try it out.
Steps to fix error B200 on Canon MX850
If you’re experiencing this error code on this particular printer model, here’s how you can fix it.
1. Move the printhead to the left
According to users, you can fix this problem simply by moving the printhead to the left.
Users reported that they moved the printhead to the left manually and then they pressed the power button several times until the printer started working.
We don’t know if this solution works, but you could try it, just be careful while doing it.
2. Keep pressing On and Home buttons
Users reported that they fixed the B200 error on the MX850 printer simply by pressing the ON and Home buttons.
After pressing the buttons about 10 times, the printer started working again.
3. Turn off your printer and try to print
Few users reported that they fixed this problem simply by turning off the printer and trying to print again.
After trying to print, you’ll get a message that your printer is offline and asked if you want to resume.
Press Resume, turn on your printer and it will start printing. We don’t know if this is a permanent solution, but you can at least give it a try.
Cannon error B200 can prevent you from printing, but you should be able to fix it by using one of our solutions.
Which one worked for you? Feel free to share your experience with us via the comments section below.
Have accidentally deleted or lost your most precious photos from your memory card or hard drive? Luckily there is enough data recovery software on the market to make things right.
On the other hand, when you recover your lost or deleted JPG pics, there’s a slight chance that they are damaged or corrupted.
This usually happens if new data has been overwritten or if that particular area of the card or drive has bad sectors. Fortunately, this issue has a fix as well.
As a matter of fact, specialized software can help you fix corrupt JPG images. There are a few JPG repair tools available out there that can successfully fix corrupted photos.
We gathered five of the best software to fix corrupt JPG files. So make sure you take a close look at their sets of features and choose the best one for you.
Stellar Repair for Photo is a DIY tool that is able to repair corrupt or damaged JPG and jpeg photos.
If your images appear distorted, blurred, spit, pixelated, or with other problems, this handy software will help you resurrect your precious memories by fixing your photos.
More than that, this tool also supports extracting and repairing the selected JPG files.
Let’s quickly look at its key features:
Preview the repaired photos before you decide whether you want to take them back
Fix entirely unreadable JPG files and open them using any popular image viewers
Fix corrupt files that have been recovered from corrupted storage media
Repair multiple files in a batch at the same time
Optimized scanning built-in engine to improve the repair performance process
Precise results really fast, much faster than expected
Flexible saving options (save the photos at any location, and the thumbnails of the repaired pics will be saved to a separate folder)
Stellar Repair for Photo
Fix all the photos and images on your PC, regardless of the format, without any effort.
Photoshop is synonymous with photo editing for a good reason – it’s simply the best imagery software to deal with if you’re after results that never fail to impress.
But its amazing functionalities go beyond cosmetic adjustments, you can also use the almighty Photoshop to repair severely damaged photos and to reduce digital noise.
Many more details and benefits come packed into this software allowing you to fix distorted photos and make them look better despite any flaws in the technicalities of the craft.
Let’s quickly look at its key features:
Fix grainy, blurry, or dark images in just a few clicks
Adjust color, brightness, and other noise in your damaged pictures
Specialized photo retouching & repair tools that can fix severely corrupted and distorted images (including RAW files)
Raster graphics editor to correct flaws such as red-eye, blemishes, spots, and more
Noise reduction filters and Lab Color Mode
Clone Stamp tool to select the area of the photo you want to repair
Healing Brush tool to fix imperfections (it matches the texture, lighting, transparency, and shading of the sampled pixels)
Spot Healing Brush tool to remove spots, blemishes, circles, and anomalies in your photos
Adobe Photoshop
Repair and retouch even severely distorted images with the world’s best imaging and graphic design software.
Kernel Photo Repair is a tool that will help users repair their broken images in a JPG/JPEG format. This software is straightforward to install and simple to use as well.
It works with files that cannot be opened, corrupted heads, corrupted data, and all kinds of invalid structures.
You will get a free service to verify if the affected files can be restored or not. After the software checks out if the data can be restored, the files’ restoration will have to be paid.
This is a great piece of software that is only supported in Windows, unlike the tool below.
Kernel Photo Repair
A lightweight image and photo repair tool that users of all experience levels can master.
Wondershare is one software developer that never ceases to amaze its users. Delivering products to cover each and every one of your needs, it’s now time to tend to your JPG file repair necessities.
Since it’s common to get corrupt or damaged files, the need for photo repair software has become more stringent than ever.
Recoverit is just what you need for that. Obviously, its repair capacities extend to more than just JPEg files. As a matter of fact, you can pretty much fix any corrupted Office files with this tool and more.
File Repair is another great solution for fixing your corrupted photos.
The software is fast and reliable, and it’s not going to bother you with various beg screens compared to other similar tools that you can currently find on the market.
This piece of software is ideal for repairing your damaged or corrupted JPG files.
It is able to scan the corrupted file and fix an impressive number of flaws.
Let’s quickly look at its key features:
Repair a variety of different types of files that cannot be opened/are not in a recognizable format
It scans the corrupted files and extracts the recovered data into a new file
A straightforward interface that even beginners will be able to use effortlessly
Repair a variety of different types of files that are not in a recognizable format
These are five of the best tools that can fix your damaged or corrupted JPG photos and they all come with complex and unique sets of features that include lots of handy functionalities.
That’s why we recommend that you analyze their advantages cautiously before deciding which one is the best for your needs. Good luck!
Run the installer and follow on-screen instructions to complete the installation.
The oops something went wrong Snapchat Bluestacks error might be due to Snapchat blocking the access of its app on anything other than smartphones.
This error seems to occur only on the newer Bluestacks 3 version. The simple workaround for this issue is to use the older version of Bluestacks.
Once installed, launch Bluestacks player and try reinstalling Snapchat. The app should work fine as it was working earlier.
Use an older version of Snapchat
If the issue persists, and the workaround doesn’t work, try using the older version of Snapchat. You can download the older version of Snapchat from APK Pure website.
This trick, in theory, should work if Snapchat does not force the users to update their app before using it when new updates are available.
If you don’t want to waste any time troubleshooting the existing emulator, the quickest way is to change it.
Our recommendation is to go for a free and popular alternative instead. How about an Android emulator with over 100 million installs and 2 million daily active users?
Perhaps these numbers say enough, however, you should know that LDPlayer allows for easy and even multi-instance gameplay, using either the mouse, the keyboard, or the gamepad.
Some of the key features of this emulator are game optimization options, high FPS, multi-instance sync, and script addition to automatize game management.
Scroll down and select the Join Snapchat Beta option.
Scroll down to the Advanced section.
Tap on Join Snapchat Beta.
Tap on Count me in!
Close the Snapchat app on your phone.
Launch Bluestacks on your PC. Download and install the Snapchat app. Bluestacks will install the Beta version of the app by default as you have opted to try Snapchat Beta.
Click on the three dots beside the Installed Apps tag.
Select Install apk.
Select the Casper apk file from the download folder.
Click on Open and Bluestacks will install Casper.
Casper is an alternative Android client for the popular messaging app Snapchat. With Casper, you can save snaps, send snaps from your gallery and do almost everything the app does.
Since Snapchat developers are blocking Snapchat on Android emulators, using Snapchat via Casper is a clever workaround if you are okay with the extra effort that you may have to put into getting the app working.
The Oops something went wrong error on Bluestacks Snapchat is most likely to occur due to the incompatibility of the app with Android emulators.
However, if you really need to use Snapchat with Bluestacks, check the workarounds listed in the article.
Are you a novice at computer programming? Do you want to learn programming? Today, Windows Report will be showing you some of the best software for learning programming.
The world has changed since the turn of the century with more emphasis on information technology.
However, over the past few years, the process of learning programming has been made easier with the advent of software learning programs or online web applications.
Which coding language should a beginner learn first?
You may begin with any language you choose as long as you’re prepared to learn and study the documentation. Having said that, Python is a fairly easy language and is where many coders begin.
There are certain practical difficulties, such as the fact that the language whitespace has some reading issues, but it is simple to discover a dozen quite different languages that are adequate for use as a first language.
Languages that are understandable, have nice tools, an accessible collection of libraries, a read-eval-print loop, and a pleasant, vibrant user community are all things we would recommend.
What is just as important as the first language that you learn is the second, third, and more languages you learn.
Each language teaches you to think differently, and to approach problems differently. The more you learn, the better a programmer you will get to be.
This enables beginners or novice programmers to grasp the fundamentals of coding.
This post gives you some of the best software for learning programming.
Meanwhile, all the software listed below has a user-friendly interface and integrated curriculum; this guides you through levels of programming with various supports for several computer languages.
What is the best software for learning programming?
DataCamp focuses on delivering fully distinct programming courses authored by various people, with a primary focus on novices.
DataCamp is intended for those who do not utilize any other learning resources, which we feel is their target demographic.
This online programming course includes an interactive approach to test the concepts provided, as well as certain subjects offered by the developers of the package used in the lectures.
You may view over 120 courses that have already been prepared but bear in mind that there is no workout schedule so you can pick up where you left off, for example.
It’s a great place to start studying Python, R, and other programming languages. It is more likely that you will test such tools to determine whether you wish to move into the domain of programming.
The interactive training and guided activities make the study materials extremely useful. As new courses are added on a regular basis, this takes into account every minute element of your learning experience.
When you subscribe, you will have access to the whole website for the duration of your subscription which is free at the start. You will also be able to download all of the content, including videos and slides.
Rather than offering classes in all aspects of computer science, the website focuses on Data Science.
Overall, we recommend DataCamp if you want to change jobs in computer science but don’t have a formal degree in the field. It’s excellent and highly informative for beginners and those searching for somewhat intermediate-level Data Science information.
DataCamp
Performs an excellent job at teaching you a class about Python and SQL.
As the name implies, Programming! is an ideal software for learning programming. This software provides code snippets and important algorithms most especially the commonly utilized ones.
Also, this software enables users to learn in over 15 computer languages namely Java, SQL, C, C++, C#, JavaScript, PHP, & MATLAB in a comprehensive way.
In addition, the curriculum used by the program has been prepared by experts as you start from the basics to the complex aspects of a particular programming language.
Hence, Programming! is an excellent software for learning programming, especially for beginners. Also, it serves as an excellent reference for professional programmers as well.
Programming!
A great entry tool created by experts for those who want to learn coding.
When it comes to learning programming, you are limited by two things:
How inclined you are towards learning it
The quality of the material you’re learning from.
Well, with Educative, this will no longer be the case, since it brandishes itself as being a service that caters to beginners, medium, and advanced users as well.
In fact, they provide you with hands-on tutorials where you can create some basic features, such as Discord chatbots, or learn basic Scala, Dart, or Rust.
Not only that, Educative offers materials that can prepare its graduates for future job interviews as well, thus giving you a complete crash course, from a fledgling developer to a full-time paid developer.
The service is available as a web service, and it works from any browser, allowing you to access it from anywhere, as long as you have Internet connectivity.
Educative
Learn coding faster and more efficiently by using this amazing educational tool.
Looking for a dedicated website for learning programming? SitePoint is a website that offers books, courses, and articles for web developers.
Membership access may seem like a waste of money. However, the contents you gain access to are worth more than the money spent.
You get a huge library of materials and video tutorials on various topics concerning programming.
Also, you get a well-detailed curriculum for each course offered by the program. There are over 14 languages available to learn including HTML, CSS, Python, and JavaScript.
There is also a nice forum where you can get and share information with other participants.
SitePoint
Learn over 14 different programming languages with the help of SitePoint.
Moreover, you can learn programming on the go with their mobile app versions on your mobile devices. Meanwhile, Khan Academy is an excellent software to use, after all, you have nothing to lose as it is free to use.
Ranked as one of the best software for learning programming, this award-winning programming learning software is one of the best premium software available on the market.
Treehouse offers the highest number of coding classes in this list with users able to pick from the vast database of information.
The program has an easy-to-use interface and you can easily find your personal information on the dashboard.
The forum also has large membership where various topics are discussed; also, you would find many solutions to your programming questions there.
However, the cost of paying $25 monthly for this program may seem expensive. However, Treehouse is an ideal web application for learning programming.
This web application is known for its comprehensive features in programming. Udacity helps you to grasp several facets of programming with its detailed courses.
Moreover, you can easily identify any programming language you want to learn. Some of the languages supported include HTML, JavaScript, Python, and CSS.
Another unique feature of Udacity is the app offers courses that have been detailed into bits by programming experts from reputable software organizations.
You can also take advantage of some of their free courses; however, you would need to go premium for some courses.
Also, the premium course enables you to get feedback from professionals and exchange information with other students around the world.
Lastly, Udacity is a web application; hence, you need access to the internet in order to use it for learning programming easily.
This web application is extensive in what it offers to beginners for free. Free Code Camp has many tutorial videos for novice programmers to learn from.
These tutorials are divided into different timeframes from 5 minutes videos to 3 hours of advanced tutorial videos.
Also, the major programming languages such as HTML and CSS are properly detailed and include lecture material to give more information.
The topics are divided into individual lessons which enable you to grasp the main points of each tutorial.
The depth and variety of topics provided by Free Code Camp make it a valuable program for learning programming. You can check out their services as it is free to use.
These are the best software for learning programming. However, this list is exhaustive; hence, we only shared a few that we highly recommend.
The programming language and tools you will use will be limited by the project you choose. If you want to create an iOS app, for example, you’ll need to learn Objective-C and Xcode. You’ll need to learn Java and Eclipse if you want to create an Android app.
You’ll need to master HTML, CSS, and JavaScript if you want to create web apps. Study the tutorials and introductory books for that language/tool. You only need to learn enough to write a basic program that works. Learn what you need to know as you go along; this is how professional programmers develop.
You can also use these apps to cover the basics so you can apply for Microsoft Leap.
Best of luck, and leave us a comment telling us about your programming experience. Have you used any of the software for learning programming which we mentioned above?
Microsoft Picture Manager for Windows 10 will let you edit your pictures once more. It’s certainly a handy application for organizing photos and basic image editing.
This tool didn’t have lots of editing tools, but its Resize, Crop, Rotate, Red Eye Removal, AutoCorrect, and Color options still came in handy. Even if Microsoft discontinued it, you can still use the software.
As always, if you have any other suggestions or questions, don’t hesitate to leave them in the comments section below and we’ll be sure to check them out.
The Descenders and Going Under video games are currently free to play for all Xbox One and Xbox Series X (and S) console owners with an active Xbox Live Gold subscription as part of this week’s Free Play Days campaign.
As is usual with Free Play Days, gamers will be able to play both titles in full as if they owned them outright until 11:59 p.m. PST Sunday night. Any progress made will be saved to the cloud for continuing at a later time and Xbox Achievements can be unlocked.
Both games have also been discounted with Going Under getting a 33% discount and Descenders having its price cut by 40%.
Here’s the official launch trailer for Descenders:
And here’s the launch trailer for Going Under:
Are you going to play either of these titles this weekend? Let us know which ones in the comments below.
Java is always working to improve security and protect the systems on which it is installed. While its use on computers is decreasing, some programs still require Java to run.
As a result, when you run such a program, you may receive a Java security warning. Because it isn’t a typical security warning, you might be unsure what to do if you see it, which is why we created this post.
Many users reported that after the installation of their VPN client as well as the required components, their VPN software got blocked by Java security.
Most browsers now block Java by default, and it is gradually disappearing from the web. Despite this, the programming language is still available in browsers that support Java and it remains functional.
Why is my VPN application blocked by Java Security?
Java’s main vulnerability is that, unlike most other programs, it does not automatically update itself.
It is up to you to update it, which could result in a vulnerable program going unpatched for weeks or months at a time. This is the reason why the VPN app is blocked by Java security.
It will notify you when an updated version is available, but it will then leave you alone. It will then be entirely your responsibility to update and manage it.
However, it is not without its own safeguards, which is why you may encounter Java security warnings.
Meanwhile, when you attempt to connect the VPN, you get the Application blocked by Java Security prompt.
Therefore, we have enlisted the best workarounds to solve the VPN blocked by Java security problem.
How do I fix Java Security blocked VPN?
1. Add an exception in Java
Sometimes, VPN users get blocked within web browsers such as IE, Mozilla Firefox, and Google Chrome most especially when they want to access Java web content.
Therefore, it is necessary to add such websites to the exception list in Java.
Here’s how to do this in Java’s Control Panel:
Go to Start> type Java control panel and hit Enter key.
Alternatively, double-click on the Java icon at the taskbar to get the Java control panel dialog box.
Now, go to the Security tab.
If the Security Level is set to Very High, reduce it to High.
Click on the Edit Site List button.
Click Add to type in the site URL.
In the highlighted line, type the URL, and then click the OK button.
After launching your web browser and attempting the URL, the Do you trust prompt will come up, tick the Always trust boxes, and then click OK.
Note: If the Java control panel dashboard did not come up, that means Java is incorrectly set up on your Windows PC, thus you may receive a Java runtime error if you have older JRE software.
2. Clear Java cache
Another way of fixing VPN blocked by Java security problems is by clearing the Java cache.
Go to Start> type Java control panel and hit Enter key.
Navigate to the General tab, and click Settings under the temporary internet files section.
Click Delete Files on the temporary files settings dialog box.
Click OK on the Delete Files and Applications prompt and follow the prompts.
Afterward, launch your VPN.
3. Reinstall your VPN
Sometimes, your VPN client software may be installed incorrectly; therefore, you may have to reinstall it.
Go to Start > Control Panel.
Select Uninstall a program under the Programs menu.
Find your VPN from the list of programs and select Uninstall
In the Setup Wizard, you’ll get a notification after a successful uninstall.
Click Close to exit the wizard.
Restart your PC.
Download the latest version of the VPN you have and reinstall it.
When uninstalling apps like a security tool VPN some of the directory files and local files may remain and can cause some conflicts with other fresh installs.
To make sure this does not happen, we recommend using a third-party uninstaller. You can use IObit Uninstaller or any other third-party uninstaller to clean all software leftovers and registry entries the VPN has made.
4. Try a VPN that prevents WebRTC leaks
A WebRTC leak is a significant security risk because it can reveal your true IP address when you’re connected to a poor VPN that doesn’t protect you from WebRTC leaks. This results in Java blocking your VPN.
ExpressVPN includes a feature that protects you from WebRTC leaks. Your public IP addresses will not be leaked if you open new web pages while connected to ExpressVPN.
If you have a tab open from before you connected to the VPN, the browser may have cached your real IP address in memory.
These IPs can remain even after you refresh the tab, putting your privacy at risk, thus triggering a security risk in Java Security.
The ExpressVPN browser extension addresses this issue by allowing you to completely disable WebRTC from the settings menu, ensuring that you are not vulnerable to caching issues.
ExpressVPN
No more false positives with WebRTC leak protection from a VPN that stands out in the crowd.
Some VPN users reported success in fixing the VPN blocked by Java security simply by clearing their web browser cache.
Meanwhile, DNS entries from your Internet Service Provider may be wrong. So, you need to flush the DNS and clear your web browser’s cache subsequently.
Here’s how to do this:
5.1. Flush the DNS
Right-click Start and select Command Prompt (Admin)
Type ipconfig /flushdns and press Enter.
You should get a confirmation that says: Windows IP Configuration Successfully flushed the DNS Resolver Cache
5.2. Clear Web Browser Cache
Launch your web browser.
Press Ctrl + Shift + Delete to access the Clear recent history dialog box.
Under the Time range to clear drop-down menu, select Everything.
Make sure to check the Cache box.
Click on Clear Now
Note:Ctrl + Shift + Delete can also be used to clear the cache on all web browsers such as Internet Explorer, Opera, Google Chrome, Microsoft Edge, and Mozilla Firefox.
Latest Windows updates improve the system’s stability and fix various issues you may encounter, and especially the situation where your VPN got blocked by Java security.
Nevertheless, you can follow these steps to update your Windows OS:
Go to Start>type windows update in the search box and then click on Windows Update to proceed.
In the Windows Update window, check for updates and install the available updates.
After the update is complete, restart your Windows PC.
7. Reinstall Java
Meanwhile, Java may have been installed incorrectly on your Windows PC. Therefore, in order to bypass the VPN blocked by Java security problems, you may have to uninstall Java from your Windows PC.
Here’s how to uninstall Java from the control panel:
Go to Start > Control Panel > Uninstall a program
In the list of installed programs, select all Java-related programs, and then click the uninstall menu.
Follow the prompts to complete uninstall process.
However, because Java is required by some applications, then you have to reinstall Java on your Windows machine.
Hope this would help solve VPN blocked by Java security issue. If you are facing other difficulties with java language don’t hesitate to leave us a comment so we can help you with that matter.
Hide.me is a well-designed VPN client that offers good privacy security and performance, with a 2GB/month free plan and great speeds.
The VPN is owned by a Malaysia-based company that claims a strict no-logging policy, no data sharing with third parties, and allows you to connect with one click to its servers.
Its design is compact and has a Limit Connectivity feature that disables local network connectivity, albeit optionally, while the VPN is connected. Overall, its service stands out as a solid and reliable VPN.
But what do you do when you install Hide.me VPN, and it won’t connect? Here are some causes and solutions to remedy the Hide.me VPN won’t connect problem.
What do I do if Hide.me VPN won’t connect?
1. Check that you entered the correct user name
A wrong user name can mean that Hide.me VPN won’t connect. Instead of entering your user information by copy and pasting it, key in each character so that you’re sure of the spacing as well.
Check date and time settings on Windows
Click the status area of the taskbar
Click Settings.
Scroll to the bottom of the Settings page and click Show advanced settings
Use the Date and time section of the Settings page to change the settings
Check if you can connect Hide.me VPN again
2. Disable firewall
If Hide.me VPN won’t connect, the issue could be with your firewall, like the port filter rules and other underlying causes. To resolve this, disable the software firewall and try connecting again with the VPN’s server.
Once you establish a connection, then that means the firewall may be blocking the network traffic from the VPN tunnel.
To fix the firewall issue, do this:
Allow PPTP and L2TP connections if the computer is behind a router
Allow IPsec IKEv1/IKEv2 connections if the computer is not behind a router
Create a firewall rule that allows traffic to the Hide.me site
Note: We recommend Private Internet Access as a VPN tool that is highly compatible with Windows systems and has great functionalities.
PIA is developed by Kape Technologies and has 3300 servers around the world in over 46 countries, allowing you the best conditions to secure yourself.
It protects your PC from attacks while browsing, masks your IP address, and blocks all unwanted access.
More so, you won’t have to worry about breaking the bank with buying it, since we offer a special discount that will make it more worthwhile than buying any other VPN service.
Right click Command Prompt from the search results and select Run as administrator
Type the command: ping nl.hide.me (this is an example if using Netherlands server)
Note: This will help you check if you can reach the server through ping.
4. Check router settings
Some routers can deliberately block VPN connections or by default. To resolve this, open the web interface or your router’s control panel and check whether it allows VPN connections.
Some of the commonly used formulations for configuring these settings include PPTP/IPsec/L2TP passthrough.
5. Check that Hide.me is correctly set up
Sometimes the Hide.me VPN won’t connect due to an error in some individual steps when installing the VPN on your device. Check whether you followed each step properly, and if not, do it again exactly as the instructions are given.
If you still have an issue with installation, contact their support team.
6. Incorrect VPN logoff
When Hide.me VPN won’t connect, it could be because your previous connection wasn’t logged off or closed properly. Usually, only one established conn ection can be used on Hide.me servers per account simultaneously.
Check the members area for an overview of the active connections and any existing ones and log off properly then try connecting again.
7. ISP blocks
Sometimes your internet service provider (ISP) can block some Internet protocols making it hard for VPN connections to be established. If this is your case, test all the possible protocols and check with your ISP for further troubleshooting.
8. Geo-restrictions and blocks
Certain countries like China, and others, are known for filtering internet traffic and specific protocols, thereby causing VPN connections not to be established.
This happens mostly where there are geo-restrictions (location-based), but Hide.me usually provides most protocols to counter these barriers.
9. Uninstall and reinstall the application
If all else fails and you’re still unable to connect Hide.me VPN, do a reinstall of the application. You can go to the download section and click install on the set up file instead of having to download it all over again. Or get a fresh download and install it.
Were you able to fix the Hide.me VPN won’t connect issues using these troubleshooting points? Let us know in the comments section below.
VPN connections can be blocked for several reasons, such as geo-restrictions, network administrator settings, or even your security settings, such as firewalls, antivirus, and/or anti-spyware programs.
Usually, VPN clients require specific ports and protocols in order to function as they should, and these should be allowed for this to happen successfully. Otherwise, you may encounter VPN blocked connection errors.
You may contact your VPN vendor for a complete list of ports necessary for your VPN client, or you could create relevant exceptions in your security settings.
At the same time, different users reported such issues with the VPN that caused this error message:
This failure is likely the result of a firewall, extension, or VPN setting blocking the request. please check your settings for more help with the resolution.
If none of this helps, try some of the solutions below and see what works.
What is blocking my VPN connection?
There are various elements that can block your VPN connection, including your firewall blocking the VPN or antivirus program. However, other factors that generate VPN blocking are:
License and copyright rules for restricted content
So before going to our descriptive solutions, be sure you fully understand the reasons for blocking VPN usage.
What to do if security or firewall settings blocked VPN connection
1. Disable your security software
Configure your firewall settings to allow your VPN.
Change the security level depending on the program, and you can choose from High to Medium and grant an exception to your VPN. (Set it to Trust your VPN. Check with the instructions for your own security software).
If you can reinstall the program blocking your VPN, install it after your VPN is already installed as this will let it allow your VPN to connect.
This is how to allow VPN through Firewall on Windows 10. Try and disable your firewall, antivirus, or anti-spyware program and see if your VPN connection unblocks.
Do this by uninstalling your VPN and the security software that is blocking your VPN. Then install the VPN and the security program again.
2. Add an exclusion
Go to Windows System and Security.
Under Virus & Threat protection settings, select Exclusions.
Click Add or remove exclusions.
Click Add an exclusion.
Add your VPN client.
Note: Usually, ports 500 and 4500 UDP are used by VPNs, while port 1723 is used for TCP. If you find these not working, add a new rule or exception to allow them in Windows Firewall Advanced Settings.
3. Change your VPN software
If you find that your Security or Firewall settings might be blocking your VPN connection, the first thing that you should try is an effective VPN called ExpressVPN.
Unlike other VPNs, the auto-configuration feature makes it easier than ever to avoid conflict between software, thus eliminating the possibility of encountering this same issue.
This VPN was created by Kape Technologies with speed and efficiency in mind, and the result speaks for itself.
What makes ExpressVPN stand out, even more, is the fact that the company doesn’t keep any logs of your app usage, and offers private DNS for each server from 94 different regions.
ExpressVPN
Use this compatible VPN to navigate privately without any security settings blocking.
To allow your VPN to pass through your security settings, open the following ports: IP Protocol=TCP, TCP Port number=1723, and IP Protocol=GRE (value 47).
Ensure that these ports are allowed on Windows Firewall with the corresponding network profile.
Note: if you are running on the same server RRAS-based NAT router functionality, Do Not configure RRAS static filters, because they are stateless and NAT translation requires a stateful edge firewall like ISA firewall.
5. Create a new inbound rule
Open Windows firewall and click inbound rules.
Right-click and select New rule.
Click Custom rule.
Specify the programs then specify ports (you can leave them as all programs or all ports).
Click These IP addresses under the remote IP.
Click This IP address range.
Type From 10.8.0.1 to 10.8.0.254.
Close and click Next, then leave as Allow the connection.
Apply to all profiles, then give your profile a name and click Finish.
6. Change Allow app settings
In the search bar, type Windows Defender Firewall, and select it from the search results.
Click Allow an app or feature through Windows Firewall.
Click Change Settings.
Find your VPN from the list of programs/apps.
Check Public or Private to select the network type to run your VPN on.
Click Allow another app if your VPN isn’t on the list.
The instructions to do this depend on which VPN you are using. However, here are the steps you can take if you’re using NOD32 or Kaspersky:
NOD32:
Click on Setup.
Select Advanced Setup.
Click Antivirus and antispyware.
Choose Web access protection.
Click HTTP, HTTPS > HTTP scanner setup, and set HTTPS filtering mode to Do not use HTTPS protocol checking.
Note: If HTTPS filtering mode is greyed out, set Antivirus and antispyware > Protocol filtering > SSL to Always scan SSL protocol. Restore the previous setting after changing the HTTPS filtering mode.
Kaspersky
Click Settings.
Click the Traffic Monitoring panel.
Go to Port Settings or settings.
Choose Network.
Click on the Port Settings and uncheck the box for port 443/SSL
8. Change Adapter Settings
Go to Start and select Control Panel.
Click Network & Internet.
Click Network and Sharing center.
Click Change adapter settings.
Click on File.
Select New incoming connection and click on the users you want to access your VPN.
Check the Through the Internet box and click Next.
Mark the Internet Protocols you want your VPN to connect to.
Double-click on Internet Protocol Version 4 (TCP/IPv4).
Open Control Panel again.
Select Windows Firewall.
Click Advanced Settings.
Right-click Inbound Rules and click New Rule.
Choose Port and click Next. Click Next again after selecting the ports.
Select Allow the connection and click Next.
When asked ‘When does this rule apply?’ select all options (Domain, Private, Public) and apply the rule to all.
Choose a name and description to fill in the Name Description and click Finish.
9. Enable rule for PPTP
If your VPN requires PPTP, you can perform this process:
Click Start and select Control Panel.
Select Windows Firewall.
Click Advanced Settings.
Find ‘Routing and Remote Access‘under Inbound Rules and Outbound Rules.
For Inbound Rules, Right-click ‘Routing and Remote Access (PPTP-In)’, select Enable Rule.
For Outbound Rules, Right-click ‘Routing and Remote Access (PPTP-Out)’, and select Enable Rule.
10. Reset your firewall or reinstall your VPN
If security settings block the VPN application, you may need to reset your firewall, and if that doesn’t help, reinstall your VPN.
If you’re using Norton firewall, reset it by clicking Settings > Firewall > General tab > Reset beside Firewall Reset, then restart your computer, and the firewall rules will be created again as you use your VPN or programs that access your network/internet.
A virtual private network is specifically designed to keep your network safe and protected, hence the private part.
Yet, some VPN users look for services that provide VPN servers that are not protected.
Either that or they look for ways to disable the encryption on protected VPN servers. These people usually think that a VPN without encryption will run faster.
Can a VPN without encryption really run faster?
The truth is, while encryption is a vital part of a great VPN service, it barely affects the speed of your VPN.
In other words, if you are trying to download or upload something at a faster rate through a VPN service, disabling its encryption will not affect the rate your data is transferring.
Therefore, it is only logical to not look for a VPN without encryption, but instead look for a VPN provider that offers fast servers.
What are the VPNs with the fastest servers?
There are quite a few providers out there that offer fast servers. Mudfish, WTFast, and OutFox – are all designed specifically to reduce ping and lag in online games.
Naturally, they will need to offer fast and reliable servers. However, most of these gaming dedicated VPN providers only work with online games.
In other words, you cannot use them to download, upload, browse the Internet, etc.
Therefore, if you are looking for a fast VPN that is also easy to use and versatile, then you should check out both PIA and CyberGhost.
Private Internet Access (PIA) offers most of the attributes found in what we’d call a powerful and fast VPN these days.
Firstly, it has a platform based on the open-source OpenVPN protocol. That’s a promising start, yet not the only proof of a strong VPN solution.
Besides the fact that it adheres to a transparent no-logs policy, the incredibly high number of servers – which is over 3200 and still growing – is another major bonus.
This reveals how reliable the service and how easy is for you to pick any server in the world for your next quick connection.
No less important, the Kape Technologies VPN solution here in the spotlight offers custom clients for Windows, Mac, iOS, Android, and even Linux.
Keep in mind that the Linux app actually is one of the few GUI-based apps available for the Linux platform.
Here’s a quick list of key features you’re about to enjoy:
Fast connection speeds
Uses the highest grade encryptions available
Protects up to 10 devices at the same time, including routers
Kill switch protection
Anonymous payment options (gift cards, Bitcoin, and more)
Great 30-day refund policy
Private Internet Access
Private Internet Access is your top VPN choice when speed is of the essence. Currently available at a major discount!
When using this VPN solution, you can fully encrypt your Internet activity with AES 256 bit technology. After all, it is serious about your protection.
It can also hide your IP, which will make it next to impossible for other people to track your online activity or find your location.
Without an encrypted VPN, it is far too easy for third parties to discover your IP.
Taking extra steps to ensure you have a safe and protected journey while surfing the Internet, CyberGhost also screens the websites you visit.
This helps you significantly reduce the chance of downloading a virus, spyware, or other malicious content from the internet.
All of this protection also means that your next Bitcoin, PayPal, or other online transactions will have another layer of security.
To top it off, if you get the premium plus subscription, then you can share your account with seven other devices.
So, theoretically, you can have seven people using the same account simultaneously. Finally, you get lightning-fast connections with CyberGhost and unlimited bandwidth.
The premium versions offer both top-of-the-line encryptions as well as some of the fastest servers found on a VPN service.
CyberGhost VPN
Looking for a fast VPN that will protect your privacy like a pro? Check out CyberGhost VPN.
Many users have expressed their wish of being able to see Facebook in the dark mode in their Windows 10 browser.
Spending hours on Facebook, at night, with a bright white display can definitely be a nightmare for anyone.
Thankfully, all this has changed and now there are several options on how you can active the Facebook dark mode into your browser.
We’ve put together a list of the steps you need to make in order to activate it, so keep on reading.
How can I use Facebook Dark Mode on my browser?
1. Use a different browser
Let us start by telling you the easiest way to use Facebook’s dark mode. It’s all related to the browser you’re using, so maybe it’s time to make some changes.
When it comes to Opera One, you should know that it brings you advanced tab management, ad blocker, free VPN, and a native AI.
Additionally, it’s quite intuitive to achieve your goal with Opera One. All you have to do is access the easy setup button, next to your address bar, and choose dark mode.
Opera One
Take advantage of the unique Opera One extension and display Facebook in dark mode anytime you want, with this fantastic browser.
Go to the arrow icon from the right corner of the menu bar.
Next, click on Display & Accessibility.
In the Dark Mode section, click the On option.
After following these steps, Facebook dark mode will be activated in your browser.
3. Force the Dark Mode
In the Google Chrome address bar type the following: chrome://flags/#enable-force-dark
Go to the ForceDark Mode for Web Contents drop-down menu and select the Enable option.
Note: In case you want to return to the previous settings, all you need to do is to retype the same as above, in the address bar and select the Disable option.
4. Use the extensions
For Chrome
If Chrome is the browser you are using, then we have great news for you.
Dues Ex: Invisible War is an older game, and as such, it has some issues running on Windows 10. However, you can easily fix that.
In this guide we’ll show you how to play Deus Ex: Invisible War on Windows 10, and how to run the game without any issues.
How can I run Deus Ex Invisible War on Windows 10?
1. Run the game in Compatibility Mode
Right-click the game’s exe file and choose Properties.
Go to Compatibility tab.
Enable Run this program in compatibility mode for and select older version of Windows.
You might want to experiment with different settings, but many reported that using Windows XP compatibility mode let them run Deus Ex Invisible War on Windows 10.
2. Adjust your resolution
Adjust the game’s resolution and try to start it again.
Switch to the windowed mode and try to run the game again.
These are a couple of useful tricks that have worked for some users, so we suggest that you try them out.
3. Run the game with a single core
As soon as you start the game, minimize it and open Task Manager. You can do that with Ctrl + Shift + Esc shortcut.
Go to the Details tab, right-click the Deus Ex process and choose Set affinity.
Make sure that only CPU 0 is checked and click OK.
Keep in mind that this is just a workaround, so you’ll need to repeat it every time you want to play Deus Ex Invisible War on Windows 10.
4. Download the game from GOG or Steam
Good Old Games is an online community that created a digital distribution platform for older PC games. They adapt older games such as those from the 90’s to and let them work on modern operating systems.
Deus Ex: Invisible War won’t run properly on Windows 10 in native version, and if you have any issues with it, we suggest getting the gaem from GOG Games.
Clear everything in the input field. Usually, only say will be displayed.
Enter one of these commands: "Set Human bCheatsEnabled True" "Set DeusEx.JCDentonMale bCheatsEnabled True"
Now the cheats will be enabled. You can use the following cheats:
Command:
Effect:
allcredits
Get 10,000 credits
iamwarren
Activate EMP field
augadd
Installs a specific augmentation
set CurrentLevel
Set specific skill to a certain level
allaugs
Get all basic augmentations
allskillpoints
Get all skillpoints
allskills
Master every skill
allweapons
Get all weapons
legend
Opens a secret menu
playersonly
Freezes everything expect player
allenergy
Full energy
allhealth
Full HP
allammo
Full ammo for all weapons
tantalus
Kill current target
killall [name]
Kills specific NPC
open
Open specific level
summon
Create specific object
spawnmass [amount]
Spawns multiple objects
god
God mode
invisible
Invisibility
behindview
Toggles between first and third person view
fly
Flying mode
ghost
No-clip mode
walk
Disable fly and no-clip
setjumpz
Set jump height
amphibious
Breather under water
opensesame
Unlock door or panel
setfriction
Sets friction
slomo
Slow motion
Deus Ex: Invisible War is a great game that many users wish to play on Windows 10. Since it’s an older game, it suffers from certain issues, but hopefully this guide helped you fix those issues.
If we missed any solution that worked for you, share it with us in the comments section.
Lenovo sent me a ThinkPad C13 Yoga Chromebook last week and after 7 days of playing with it, I can immediately see the appeal of the operating system for the average computer user and, I have already found some problematic threads that I’ve already started to pull at in ChromeOS.
Out of the box, Lenovo delivers a solid piece of computer hardware that feels like a mesh of its other Yoga lines. Where the consumer version of Lenovo’s Yoga line makes use of aluminum chassis and reduced I/o support while ThinkPads opt for their flagship carbon fiber casings and robust connectivity, the C13 actually uses an aluminum build but with the design prowess and port support of a ThinkPad. The C13 comes with the ThinkPad Kensington Lock, two USB-C 3.2, two USB-A 3.2, and a mini-SD card slot.
Due to its aluminum construction, it’s got relative weight to it at around 3 pounds, which makes it as heavy as any other Yoga or ThinkPad offerings from 2020. The other things that were immediately notable were the speaker placement which led to poor sound experience during my initial testing.
The particular model I received is sporting 8GB of RAM, an AMD Ryzen 5 Pro 3500C chipset, and 256GB of SSD storage, so it’s meeting my standard Windows 10 usage on paper. The screen is a bit muddled and doesn’t get as bright as I would like, but it gets the job done, especially when the scaling out the box is a bit over the ‘larger’ setting which takes up unnecessary screen real estate.
Aside from familiar hardware, the Lenovo C13 Yoga is also being marketed as a lightweight enterprise tool powered by ChromeOS. When going through the signup process for ChromeOS for the first time, I was met with several more windows than the last time I checked out ChromeOS, but it was a pleasant walkthrough of some new features in Chrome.
Perhaps, it’s just the system getting used to downloading and processing a bunch of new caches, but the fan on this thing kicks in pretty quickly and loudly for a lot of things I’ve been doing. As a Chromebook novice, I’ve noticed the fans kicking in on this Chromebook fairly early into my review seems a bit troubling, but we’ll see.
As a Pixel user, the C13 feels like an extension of my phone in both good and bad ways right now. I love that most of my apps were automatically loaded on the device but it’s very apparent that the app experience on ChromeOS needs a lot of tweaking. Some apps can’t be reshaped – looking at you Instagram, and I’m without some of my often used .exe apps such as Gimp, Google, and Microsoft Ads editors that I need for bulk edits to marketing efforts. I’m sure I’ll find some workaround through extensions or PWA’s but right now, it’s been a hassle as I’ve started to move my workflow over to this new device.
As of right now, I’m enjoying getting used to the Chrome operating system more so than the hardware it’s on, and that’s in large part because Lenovo is providing a solid mid-range enterprise experience, I believe a large portion of office workers have experienced at some time in the last seven years.
Despite the spotlight being on Google regarding anticompetitive business practices here in the US and abroad, Microsoft felt it was time to step back in the antitrust arena to offer its two cents on the matter. According to Axios reporting, Microsoft president Brad Smith will be appearing before a House antitrust subcommittee next week to answers questions about tech and the evolution of antitrust legislation.
The House Judiciary antitrust subcommittee has been holding hearings for over a year on how to best address the blending of direct and indirect monopolies and their inherent anticompetitive effects on markets. Inviting Smith, who has been a vocal advocate of more stringent legislature to address antitrust behavior, is another step by the House subcommittee to draft relevant laws going forward.
Axios reporting also points out something we’ve been reporting on for years: Smith’s appearance next week may not be a straightforward advocacy project but also serves as a lobbying effort to subtly undermine its search engine rival’s current market dominance. Microsoft and its Bing search engine have the luxury of being in the minority position in search, and legislature guided by Microsoft would seemingly help benefit the company as it continues to compete against Google.
Interestingly enough, committee members are also keeping an eye on how Google, Facebook, and Australia sort out their revenue sharing efforts for news, search, and social media sites as a possible tent pole for future legislation in the US.
Maxthon is a customizable Chromium browser with some novel features.
The latest Max 6 version, released near the end of 2020, is one you can utilize Chrome’s dark mode extensions and themes on.
However, you can also turn Maxthon darker with some of its built-in settings.
Quick tip:
Opera One is undoubtedly one of the most customizable browsers, which is jammed packed with handy browsing features and allows you to easily switch to the dark mode.
You can discover more of Opera One’s features on its sidebar. There you can access built-in WhatsApp and Facebook messengers, and other incredible features, such as the built-in AI.
Opera One
Easily transform this browser to dark mode while also keeping your privacy intact while exploring the web at great speeds!
First, click the Customize and control Marathon button near the top right corner of that browser’s window.
Click the Settings options to open that tab.
Select Appearance to open the options in the snapshot directly below.
Then click the Dark theme option to add black color to Maxthon’s tab bar.
To add a dark color to Maxthon’s New Tab page, click the + button on its tab bar.
Click the cog button to open wallpaper options in the shot directly below.
Then select the black color to apply a dark background to the New Tab page.
2. Add the Just Black theme to Maxthon
Alternatively, you can add the Just Black theme to Maxthon, which will also apply a black color to the browser’s bookmarks and URL address toolbar.
Open the Just Black theme page on the Chrome Web Store in Maxthon. Then press the Add to Chrome button there to apply the theme shown directly below.
3. Activate dark webpages with Super Dark Mode
To apply a dark mode to webpages in Maxthon, open the Super Dark Mode extension page.
Click the Add to Chrome button to add the Super Dark Mode extension to Maxthon.
Open the Google search engine in a browser.
Then click the Super Dark Mode extension button on Maxthon’s URL toolbar to turn on its website dark mode, which will add a black background to Google as shown in the screenshot directly below.
Right-click the Super Dark Mode button and select Options to open the tab shown directly below.
You can change the dark brightness for pages by dragging the Adjust contrast bar to the left and right.
To schedule the dark webpage mode, click the Auto ON/OFF checkbox.
Then click the clock icon on the right side of the From box to select a start time.
Click the click button for the To box to choose an end time for the dark webpage mode.
To exclude a website from the dark mode, right-click a page on the site and select the Disable Super Dark Mode on this site option.
You can re-enable the dark mode for an excluded website by right-clicking a page on it and selecting Enable Super Dark Mode.
So, that’s how you can apply a dark theme to the Maxthon browser and websites open in it. Doing so will give you an extra dark browsing experience that can save battery on laptops.
Microsoft is tweaking the Bing search experience in a lot of big ways. In a March 4 blog post, the company detailed some steps and new changes for how it is “evolving” its Bing search experience so that it is much more “intuitive and engaging.”
As seen in the video below, a lot of the changes are centered around making Bing more visually rich, so that you can find information quicker, without sorting through a lot of text. Indeed, that means the biggest change would be making search pages less static and more adaptable.
Microsoft says you can see these improvements when looking for recipes, as Bing now aggregates the content of the most relevant recipes and presents it in a single view on the search results page. You’ll see recipe pictures as well as calories per serving and user review, or even a how-to video on a hover of your mouse.
An expanded view will also show more information like ingredient lists or nutritional information. A similar experience will also pop up for DIY projects, and creative projects, with the addition of visual search, to search an image for certain things.
In addition, Microsoft is also tweaking Bing so that the carousel experience now has a “hover over” feature. The company says this should help you see more high-level information to avoid crowded results. Hovering over carrousel results will expand it out for more detailed information, especially when searching for books or documentaries.
Capping out the changes is what Microsoft is calling “infographic-inspired experiences.” This means that Bing will now provide both style and information when you search for broad topics or local experiences and answers. You won’t see text results and blue links, but rather a more detailed view and infographic of broader topics like “Kenya” or “Giraffe.”
All these features are now available on Bing here in the United States, and there could be more on the way soon. Microsoft is promising that you should “stay tuned in the coming months for more visually immersive experiences across the web.” Check these features out now and let us know what you think in the comments below.
It’s been almost a year since Microsoft unveiled a new consumer experience in Microsoft Teams during a Microsoft 365 digital event on March 30, 2020. Teams is still one of the fastest-growing Microsoft apps in recent years, and its growth has been accelerating since the beginning of the COVID-19 pandemic which led to the rise of remote work.
Microsoft first started rolling out personal features in Microsoft Teams on iOS and Android last year, but the consumer experience is now available on the web and it’s currently rolling out in the Windows and macOS desktop apps. I noticed the option to log in with my personal account in the Microsoft Teams app this week, though my colleagues at OnMSFT have yet to see this option.
Microsoft Teams for Consumers should not be confused with Microsoft Teams free, which Microsoft launched a couple of years ago to compete with Slack. Both experiences require a personal Microsoft account, though, and I think there will definitely be some confusion.
With Microsoft Teams free, you get the same Teams experience as Microsoft 365 commercial customers, with your own organization that can welcome up to 500,000 members. Microsoft Teams for Consumers has a very similar UI, but the experience focuses on chats, video meetings, and shared calendars, leaving the channel system out of the picture.
I already tried Microsoft Teams for Consumers on mobile and the web, the desktop experience is pretty much identical. The left panel has shortcuts for notifications, chats, and apps, though Calendar is the only app that is showing for me. I’ve been able to chat with friends that also logged in in Teams with their personal Microsoft account, and video meetings are also available.
You can see separate taskbar shortcuts for Microsoft Teams Personal and the “regular” Teams app.
Microsoft Teams for Consumers is a pretty solid messaging app, with support for group messages, message reactions, GIFs, and you can also start a group chat with friends who haven’t downloaded the app yet. But it can also do much more than that, with the possibility to edit shared calendars, assign tasks to people, access cloud storage right from your group chats, and more. Every group comes with a dashboard where you can see everything shared within a group.
On mobile, Microsoft Teams for consumers lets you find your friends on Teams by syncing your phone contacts, and people will be able to find you on Teams by using your phone number or email address associated to your personal Microsoft account. However, using the same app Teams with both your Office 365 account and your personal Microsoft account is a hassle. Switching accounts is done by clicking your profile picture on the top left corner of the app, and this nowhere near as seamless as having different email inboxes in Outlook.
On mobile, you need to switch between your Office 365 and your personal Microsoft account.
Using Microsoft Teams personal features on the desktop is much more convenient as the app will actually open a separate window for your personal Microsoft account. On Windows, you can pin Microsoft Teams Personal on your taskbar, so you can use the app with your personal Microsoft account without opening the regular app with your Office 365 account. It’s similar to how you can pin shortcuts to your different Edge profiles, but macOS currently doesn’t support this.
Overall, Microsoft Teams for Consumers is pretty solid, and I find it currently easier to use on the desktop or the web than on mobile devices. I understand why Microsoft would like Teams to become that’s not just for work, and I’m sure some users will be happy to have a single app to interact with colleagues, friends, and family, but that’s not me. Apps like WhatsApp, Facebook Messenger, or Instagram already have over 1 billion users, and teenagers and young adults certainly won’t replace them with Microsoft Teams.
Make sure not to confuse Microsoft Teams for Consumers (left) and Microsoft Teams “free” (right).
In some way, I wish Skype evolved into a consumer version of Microsoft Teams. This could have prevented the confusion I mentioned before between Microsoft Teams free and Microsoft Teams for consumers (pictured above), which both work with a personal Microsoft account. Anyway, that won’t be happening.
Skype went through several redesigns in recent years, and it’s no longer the juggernaut it once was when Microsoft acquired it. The software giant seems to believe that Skype and Microsoft Teams for consumers can coexist, and it will be interesting to see if personal features in Teams will take off. For now, though, I think Teams will remain an enterprise-focused platform that is getting more and more complex as times goes on.
Have you already tried Microsoft Teams for consumers? If so, let us know in the comments if you’re excited to be able to use Teams to chat and collaborate with friends and family.
Microsoft’s annual IT and developer conference officially ended today on March 4, and it was a busy couple of days. Microsoft used the all-digital event as the stage to announce several updates for Teams, Outlook, and other Microsoft 365 apps and services. They even announced Mesh, a brand new social mixed reality platform. We’ve been keeping up with the news all week long, and here’s a look at what you might have missed.
We’ll begin our recap by starting with Microsoft Teams. Since Teams has been on the boom due to the pandemic, Microsoft is bolstering up the collaboration service with lots of new features. The first of those are improvements for Live Events in Teams, where Teams can now be used to create interactive webinars for up to 1,000 attendees. Teams Live Events will also support webinars with up to 20,000 attendees later this month. You can have a look below for the other new features coming to Teams, as announced at Ignite 2021.
PowerPoint Live is now generally available in Teams. The feature combines slides, notes, and meeting chat in a single view to help make presentations easier for speakers and presenters.
Dynamic View for Teams meetings is coming next month. The feature makes meetings more engaing and adjusts elements of meetings, such as the ability to display different modes such as charts, chats, etc next to video feeds.
Teams is getting improved security thanks to invite-only meeting controls. Also coming is end to end encrupion in one to one calls.
It is becoming possible to share channels outside of an organization, through a feature known as Microsoft Teams connect.
Microsoft Lists is getting custom list templates in Teams, as well as rich-test editor, the ability to add comments or @mentions and create rules, and other new features.
The final of the new Teams feature is the ability to export webinar contacts, useful for Dynamics 365 marketing. Also coming to Teams are some of the new Microsoft Viva modules, such as Viva Connections, which should be rolling out more broadly now.
Windows 10 usually gets a backseat at Microsoft Ignite, but this year, there was a bit of news about the operating system which we want to recap. First off, there’s the big news about Power Automate becoming free for Windows 10 users. This tool comes with 370 prebuilt actions that help you build flows across different applications. As our own Benjamin Akhigbe explained, it “enables you to build your own scripts to automate time-consuming repetitive tasks.”
In addition to the Power Automate news, Microsoft also announced that Windows 10 in cloud configuration has been integrated into Microsoft Endpoint Manager, which will make it even easier to provide a secure device configuration tailored for worker needs. The news comes after Windows 10 in cloud configuration overview and setup guide was made available for download on Feb 2. That allows administrators to apply a uniform, secure and easy-to-manage cloud-based configuration of Windows
10 Pro or Enterprise devices.
We’ll end the Windows 10 section with a look a what’s ahead for the operating system. Indeed, Surface and Windows Chief Panos Panay appeared to “tease” the upcoming versions of Windows. In a fireside chat session at Ignite, he hinted that he has not “talked about the next generation of Windows” and that he is “so pumped” for it. He even mentioned that “it’s going to be a massive year for Windows.”
To be fair, though, his session was mainly about current Windows features, but the exec did appear to slip his tongue about the future a bit, though not confirming any rumors we’ve heard so far about Sun Valley or Windows 10X.
Next up are the changes for Outlook as announced at Ignite 2021. The first is the introduction of Outlook Board view in Outlook Calendar. This is designed to help make your calendar easier to manage. The feature is now available for everyone, and has a free-form view, combining calendars, files, reminders, and to-do lists in one place. Microsoft also rolled out what it is calling “suggested times” in Outlook for iOS and Android, too. The feature is all about AI and finding times for meetings. Finally, Outlook on Mac is getting support for more email account types and shared calendars.
For most people, Microsoft Mesh was the biggest news out of Microsoft Ignite 2021. This was one of the more unique parts of Ignite, as this portion of the keynote could have been viewed in AltSpace VR in Mixed and Virtual Reality. Indeed, featuring Alex Kipman, Microsoft used Ignite 2021 as the stage to unveil Mesh. It is Microsoft’s new Mixed Reality Platform designed to allow people in different physical locations to join collaborative and shared holographic experiences across many kinds of devices.
Mesh is designed for companies and businesses to let their teams joined shared virtual spaces for collaborative meetings, where everyone will appear as virtual avatars. The target audience is enterprise and commercial users, too. Mesh is coming as a HoloLens app, but it can also be accessed through a new version of AltSpace VR, which is Microsoft’s VR platform. Alex Kipman detailed that solutions built through Mesh by developers could come to Windows Mixed Reality, PCs, Macs, Smart Phones, and Oculus, too.
Azure Power Platform, and more
Of course, Ignite is all about the Cloud and Azure, so there were several other news stories around these Microsoft products, too. With Power Platform, Microsoft announced Power Fx, which is their new first low-code programming language. They also announced new AI capabilities for Power Virtual Agents, updates for Power BI Premium, Power Automate Desktop. With Azure, Microsoft announced a new hardware and software platform called Azure Percept, which should make it easier for Microsoft’s customers to develop AI solutions.
Of course, we covered Ignite 2021 in-depth, so check out our hub for all the other stories you might have missed! And be sure to watch the OnPodcast this Sunday, as we’ll be recapping Ignite once more!
You are a small business owner or an employee of an organisation just getting started with Power Automate Desktop on Windows 10? Microsoft announced on Tuesday at it’s Ignite 2021 summit that it is making it’s Power Automate Desktop free for all Windows 10 users.
This article focuses on getting started with Microsoft Power Automate Desktop for your Windows 10 machine, that enables you to be a console and flow designer for those first time users. The console enables you to create and handle flows, while you are in the development environment of the platform as a flow designer. Let’s learn how user friendly, low code application empowers coders and non-coders alike to optimize their workflows by automating repetitive and time consuming manual tasks in Power Automate Desktop.
Interacted interface of Power Automate Desktop on Windows 10 – Courtesy of Microsoft.
Automate everyday tasks and free up time for more important efficient work
Power Automate Desktop using low code RPA (Robotic Process Automation) with no coding required that gives users their time back for more important efficient work by automating “busy work “of repetitive manual, time consuming tasks that typically consumes the finite hours in each workday.
RPA makes it possible to automate workflows across modern and legacy applications on your desktop by recording the actions such as the mouse and keyboard clicks on the desktop environment. It works like Macros work on Microsoft Office, recording the repetitive actions on desktop across multiple apps such as SharePoint, Excel, Outlook, and many third party apps as well as websites that enables users to replay the automation whenever is needed.
In a common scenario we see the need to scale and automate large scale creations of weekly, monthly, quarterly, and annual reporting in business operations. With Power Automate Desktop, you can automate the consolidation of data across multiple sources such as database, webpages, Excel files, PDFs, and more to auto generate a report based on requirements.
Start automating everyday tasks with no coding required
It’s easy to get started and around with Power Automate Desktop and build first desktop flow the series of steps that automate a specific action or task using either prebuilt drag and drop actions or recording desktop flows to run later. An intuitive drag and drop visual designer provides more than 400 actions that runs on your desktop environment, a recorder that capture the clicks and mouse actions, as well as robust authoring experience to edit and modify recordings.
Extend automation further with Power Automate
In addition to capabilities with what users get with the free Power Automate Desktop for Windows 10, Microsoft enables to extend it one step further with even more capabilities in the Power Automate per user with the Attended RPA plan. With this, enables automation across an organisation, which suits medium to large businesses that share and collaborate across flows. That even has access to even more than 400 built in connectors through cloud flows, that can identify bottlenecks in the business processes with process advisor which is in preview. That extract data from documents in AI Builder, and manage and control flows with a centralized governance concept.
In order to take advantage, with the RPA adoption, Microsoft has introduced a limited time offer. Starting on April the 1st 2021 and available till September 30th 2021, Power Automate per user plan with attended RPA will be available for $15 per user per month. Limited time offer would be only available to eligible customers in commercial large businesses, US government and governments across the globe through volume licensing (VL), cloud solution provider (CSP) and web direct channels etc.
Large and established companies like Coca-Cola Bottling Company United (Coca-Cola United) are taking advantage of additional RPA capabilities in Power Automate today to reduce the errors and streamline their order management.
Summary
The Power Automate Desktop platform consists of the two core components, the console and the flow designer. These core functions provide all the essential tools to manage and develop flows. It enables users to pass data to and from the Power Automate platform, creating unlimited automation potentialities by using the input and output variables feature.
Although there are a few pretty good photo editing apps for Windows 10, the undisputed photo editor king is Abode Photoshop.
If you want to get the job done properly, then this program will help you. However, as many of you know, Photoshop is not the easiest program to use, and even experts have not discovered all its secrets yet.
But, if you want to benefit from some of the features that Adobe Photoshop offers, and at the same time have an easier time using the program, then you should use the Adobe Photoshop Express app for Windows 10.
If you are looking for a free photo editing software for Windows 10, know that this awesome app brings the best of Photoshop in an easy to use and free package.
Adobe Photoshop Express app for Windows 10
What is Adobe Photoshop Express?
Adobe Photoshop Express is the best free photo editor for Windows 10. Although it does lack features compared to its older brother, Adobe Photoshop, it still packs a punch when it comes to photo editing.
First off, you might want to know how much you have to pay for this app. After all, Adobe’s products are at the top end of the price spectrum.
Well, you’ll be delighted to know that the Adobe Photoshop Express app for Windows 10, is free to download from the Windows Store, and it comes with most of the features.
Users who want to edit their photos more thoroughly and add some premium effects will have to buy the premium features such as the Reduce Noise feature or the Looks gallery.
Nevertheless, even with the free tools at your disposal, you will be able to do some editing, although not even close to the extent that the desktop version of Photoshop offers.
This Windows 10 app is more suited for simple color adjustments, contrast, or adding certain effects to the picture.
We highly suggest checking out Adobe Photoshop, the industry-leading photo editor on the market. If you love the Express version of this app, you’ll adore the other one.
Moreover, you don’t even need to pay a dime for it. The software has a free trial period, so you can actually test it and decide for yourself if it’s worth your money. So give it a go and dive into its plethora of features.
Adobe Photoshop
Create the most astonishing photos and edit images in every way you can think of with Adobe Photoshop!
The app is pretty simple and straightforward to use. In its main menu, users will see three main options:
They can open images from their local folders and edit them.
They can open their Adobe Reveal account, where they can upload photos and share them via Facebook or Google+.
They can take a picture with their in-built camera device and edit it.
In terms of editing tools, Photoshop Express for Windows 10, has quite a few for its users to work with.
The first tools you see are:
Crop pictures
Correct colors,
White balance
Change exposure
Image autocorrect.
More awesome features
The editor has another feature called Looks, which consists of different filters that give images a certain effect.
Another feature of the app is to remove Red Eye from pictures, which is a great tool for those who take lots of pictures with their phones or tablets, as they can remove those imperfections directly on their device.
Last but not least, there is an Auto-Fix option that calculates all the parameters of the image and applies all the features to make the image look more presentable.
After the editing process is complete, users will have the option to save their work either to a local folder or share it on social networks.
The app allows saving to a device in jpeg format, but there is no option to save files as PSD, so they can later be edited in the desktop version of Photoshop.
We hope that future versions of Photoshop Express will have this option so that further editing can be carried out on a full version of the program.
Note: You can click on the View Original button at any point during editing to see how your image has evolved and to compare them in case you want to see the improvements.
Overall, the Adobe Photoshop Express provides users with some much-needed photo editing options that will allow everyone to correct photos and add effects.
The best part of the Windows 10 Photoshop app is that it is very easy to use and with only 1 or 2 taps, your photos will look better than ever.
Drones are the latest fad among the videographers. Be it a wedding video shoot or for your personal Vlog on YouTube and Facebook, audience and clients highly prefer drone videos these days.
But, just having a drone to capture 4K footage is half the job. To make the most of the drone footage, you need to polish it using a video editor before making it live.
A videographer may have different requirements from a video editor than a video logger – as a result, it is safe to assume that no one video editor may cater to the needs of different people.
Which is why we have had a look at the best video editors that can help you produce stunning video footages captured from your drone.
In this article, we present you the best software to edit drone footage that can be used by both professionals and beginners.
Adobe Premiere Pro is the industry standard for video editing and is one of the well-known software from Adobe.
The Premiere Pro does not offer a perpetual license for the copy, and you have to rely on the monthly or yearly subscription plans to use the tool.
This means if you don’t plan to renew the subscription you will certainly lose access to your older edits and projects within the cloud.
Other than that, Adobe Premier comes equipped with all the basic and advanced video editing features that are essential to creating a stunning video from drone footage.
Adobe supports multiple-monitors which allows you to hookup up to 3 monitors easily making it easier to preview the videos before the rendering process.
From 8K resolution to virtual reality, Adobe Premiere Pro can handle any footage without any issues.
The latest version of Premiere Pro comes with precise and simple color grading tools for accurate color touches along with an improved audio function embedded into the Essential Sound panel that lets you remove background noise and reverb for professional-grade results.
The new Motion Graphics templates let you add infographics with drag and drop functionality to make an informative video.
There is also end-to-end VR 180 support to create a more immersive experience for your VR headsets and online platforms.
Despite its non-linear workspace, Adobe Premiere Pro is among the best video editors used by TV studios to YouTube creators alike.
Download the free trial that works for seven days but offers all the features without any limitations to test the software.
Pros
Easy to learn and use
Multi-platform support
8K video support
Excellent color grading options
Cons
No perpetual license
Adobe Premiere Pro
Premiere Pro is the industry-leading video-editing software for social sharing, TV, and film.
PowerDirector is among the most popular drone footage video editors available today. Cyberlink, the developer of PowerDirector, has added new tools to the video editor over the years, and today it is equipped with a huge arsenal of editing tools that can compete with other industry grade video editors.
The user interface is not the easiest of the lot and that is one part where we think it can improve. Apart from that, PowerDirector offers all kind of editing tools that includes support for 4K and 3D videos, tons of effects, multicam editing features and motion tracking tools.
PowerDirector comes in three version – PowerDirector Ultra, Ultimate and 365. The last one is a subscription-based model and costs around $48.99 for a year.
Cyberlink has included a feature called Express Projects that let’s you pick ready-made templates with effects, transition, animation, and music and add it to your drone footage.
It also has tools to edit action camera footage, color adjustment tools, one-click color correction, Color Match feature to standardize color through different clips, and other color grading options.
It also comes with tools to customize text, theme designer for animated slideshows, ability to add subtitles, ability to add a hand-drawn overlay, animated objects as overlays and Green Screen removal feature.
PowerDirector is an excellent video editor and the fact that it offers the fastest preview and rendering options makes it an ideal choice to edit drone footage.
PowerDirector 365
PowerDirector 365 allows you to create compelling content with useful new effects, streamlined interface, and best-in-class editing tools.
Just like all the other Corel multimedia software, the VideoStudio Pro also offers excellent set of required tools for video editing while keeping the user interface clean and simple.
It comes equipped with multicam editing, motion tracking support, 4K, and 360-degree video support as well as video masking feature. You name it, and VideoStudio Pro has it.
Corel has equipped the video editor with over 1500 filters and effects for video enhancement. You can begin with the ready-made templates or start from the scratch by editing on the timeline and add photos, videos, and audio to your drone footage or simply combine them in a video.
The latest version of VideoStudio Pro comes with resize and crop video tools, split screen video templates that can be used to create promotional videos, new lens correction tools, stop-motion animation to capture animation frame by frame and Pan and zoom feature.
The earlier mentioned 360-degree video support means you can import videos from a 360 camera to the editor and later upload it to YouTube directly.
Just like the previous version, file formats are not an issue for VideoStudio Pro, but the latest version comes with XAVC-S so that you can export the video onto the SD card and play it directly on your camera.
Corel VideoStudio is a well-designed and powerful video editing software that comes with support for 4K and 360-degree video combined with an affordable price tag makes it a top choice for professional and home users alike.
Pros
Intuitive user interface
Support for 4K Ultra HD videos
360-degree video and Motion tracking support
Excellent set of editing tools
Cons
Average performance
Limited video overlay tracks
Corel VideoStudio Pro
Loaded with easy to use tools and with lots of fun features, Corel VideoStudio is your editor for everyday adventures.
Magix Movie Edit Pro is a complete video editing package that comes with essential and advanced video editing tools while offering an intuitive user interface allowing for better productivity and an easy learning process.
Magix Movie Edit Pro can be used to create intros and outros for the videos using the ready-made templates. There is a new title animation feature that lets you add finishing touches to the videos and also add slow motion and fast motion effects by modifying speed.
The tools offer over 1500 effects and music tracks to select from. For green screen addicts, Movie Edit Pro supports the Chroma keying feature to make it all possible.
Magix has also improved the workspace with new controls offering precise editing tools. You can rearrange, delete and reorder the tracks on the timeline with ease as well.
Besides, you can match colors for multiple videos in the same group with match color option. For the export, Movie Edit Pro supports multiple formats including support for direct upload to YouTube, Facebook, and Vimeo.
Magix Movie Edit Pro comes with tons of effects and music tracks while offering an excellent set of editing tools. The beginners can learn to use the basic editing functions quickly; however for the difficult procedure, one needs to spend a good amount of time to learn all the tricks it has on offer.
Pinnacle Studio is our last recommendation in this list, but that doesn’t mean it is the least of the lot. Pinnacle Studio offers a great combination of usability, performance and essential video editing that can be used and mastered by even beginners while the advanced users will figure out the working in no time.
Pinnacle Studio offers ready-made templates if you want to render a video without putting much effort into editing quickly. Or you can edit the raw footage on the multi-track timeline and experiment with included 1500+ filters and effects.
You can work with features like multi-camera video editing and split-screen video feature. The built-in MultiCam feature enables you to record the screen as well as webcam simultaneously for creating tutorial videos.
The selective color feature lets you highlight a single-colored object from a picture while keeping everything else in black and white.
Other features in this tool include stop-motion animation, green screen (Chroma keying) feature, time remapping for slow and fast motion video effects as well as an audio editor.
Pinnacle Studio has one of the best rendering speed among the video editors. When combined with its price tag and the features like MultiCam screen recording, it can be used for more than just video editing.
For professionals content creators it is important to have a good drone but what’s equally important is to have a powerful video editor that is easier to use yet offer all the effects and templates that will help you produce a studio-grade video.
We have tried to find the most accessible yet affordable tools for this guide that can help both the professionals as well as home users who use drones to capture fun and family moments and wants to make it special with adding some cool effects.
What do you think? Which is your preferred software for editing drone footage? Do let us know in the comments below.
Video editors worldwide have had a reputation for being hard to master, costing a lot of money, and being hardware-intensive software that will melt budget PCs.
Putting that aside, we would like to perform a short review on Wondershare, the latest version of a critically acclaimed video editing software, now with more tools than ever before.
We will be looking over the software to see what it has to offer, what new updates version 11 brings, and whether or not investing in it is truly worth it, so continue reading below to find out more.
The improved Filmora 11 comes with many cool options like new FX, Speed Ramping, Instant Mode, Audio Beat Sync Masking, a myriad of templates, over 10 million stock media files, and more.
What are the new features of Filmora 11?
1. FX Plug-ins
Filmora has new cooperation with Boris FX and NewBlue, so you can use the professional add-on video effects from them like 3D title, and motion blur to your videos in Filmora 11.
That will make editing cinematic videos a breeze and will certainly add that wow factor to your creations.
2. Speed Ramping
Slowing down or speeding up frames in a video is a really complex stunt for any video editing software, but with Filmora 11, you can achieve it with just a few clicks.
You get six presets for Speed Ramping that cover pretty much all the situations, but you may adjust them or create your own presets in a fraction of the time needed for other software.
When you alter the speed of the clip, most video editing software will also affect the sound behind it. The neat trick is that Filmora 11 can maintain the audio pitch throughout the duration of the effect, leaving the sound intact.
3. Instant Mode
Instant Mode is a Windows-only feature that allows you to produce a video complete with all the elements, including titles, highlights, effects, and more, in less than 5 minutes.
All you need to do is to pick one of over 115 templates available, and add your media, and the software takes care of everything automatically.
4. Auto Beat Sync
Filmora 11 has a new great feature called Auto Montage Maker, which uses the Auto Beat Sync tool to match the video footage with the music clips, analyze beat points, and then add video effects or switch the view.
The technology also detects any bad frames of the footage, which are too dark, overexposed, or with jitter, and deletes them automatically to quickly get a video matched music.
We also need to mention the Auto Synchronization feature that is used to align the audio and video captured by different cameras in the same scene.
5. Masking
Maybe you don’t want everyone to see all the objects in a frame or a part of the video. That’s where Filmora 11’s masking feature or the many overlays available come in handy.
Choose from the many shapes available, including rectangles, triangles, hearts, and more to hide the elements you don’t want in the video.
You can move the mask around the frame, and adjust its size and orientation with simple mouse movements.
Other new features include access to a library of over 10 million stock videos, an increased number of templates, and the Wondershare Drive.
The latter will allow you to upload and share project documents, templates and export videos. That also helps you access your projects from another PC and continue your work.
What are the other key features of Filmora?
Back in 2020, we had our hands on Wondershare Filmora X, and back then they managed to make an amazing impression with what their product had to offer.
Given the high standards posed by version X, Wondershare Filmora 11 really had to reinvent itself if they wanted to stay on top of their game, which they did with flying colors.
1. Motion Tracking
This neat feature lets you attach an element to a moving object in your video without making it look unnatural.
We all know how videos can look cheap when you see objects moving around that obviously don’t belong to the original background. That’s why it’s the most crucial element added in Filmora X.
Filmora made this tool extremely easy-to-use, although there are current limits to how efficiently you can use it, as objects that have a high contrast compared to their background will be tracked better.
2. Keyframing
Keyframes can now be used to edit videos so that you can change their position, rotation, scale, and opacity, and add animation effects to liven up the videos.
You’ve probably seen a lot of keyframing especially in YouTube videos, and while we did spend a little time getting the hang of the feature, we found ourselves working with the tool just for fun.
Currently, keyframing can be used to take video elements and rotate, scale, move or alter their transparency. We await to see what future updates will bring.
3. Color Match
Color matching is yet another new feature brought in version 10, and in terms of importance, it goes somewhere near motion tracking, since this effect can mean the difference between an amateur and a professional video.
Stitching together several clips together will now seem seamless once you use this new feature to match the colors accordingly.
There are plenty of color parameters that can be fine-tuned, like white balance, color enhancement, and 3D LUT.
Thankfully enough, you get to preview every single change you make, which is indeed a time saver as the tool does need a bit of practice getting used to.
4. Audio Ducking
If you want to create videos where dialogue is an important element, then this tool will let you automatically fade music so that the words will be easier to comprehend.
This neat tool will probably make social media users flock towards Filmora X, since their videos are usually ones that consist of them talking into the camera, with the occasional background music causing disturbance.
The tool itself was very easy to use, and I managed to reduce background music from a video with 2 clicks and by moving a slider.
There are, however, some limitations from what we saw, since audio ducking doesn’t seem to be all that efficient if the background music is very lyric-predominant, such as rap or hip-hop, but the difference is minor.
5. Silence Detection Add-on
This tool is something we were really interested in trying once we read about it in the changelog, especially since awkward moments of silence are especially bad for presentation videos.
In simple terms, this tool lets you automatically cut out moments of silence or low volume of videos.
All you need to do is select a video that has audio, and then input the parameters that need to be followed, such as minimum silence duration, the volume threshold for the silence to be considered silence, and the softening buffer for transitioning between cropped segments.
Wondershare Filmora 11 – a price plan for every pocket
Filmora 11 is available in a free version as well, and while many of you may be used to free versions of video editors that are full of restrictions in terms of access time or available features, this doesn’t apply here.
The free version of Wondershare Filmora 11 is available for an unlimited amount of time, grants you access to all of its features and tools, and there is no limit to how big the videos can be when using it.
The only limitation, which is quite understandable (and amazing for being just the one) is the fact that all exported videos will have a watermark applied to them.
This unlimited access to all the power that Filmora offers is a great way of letting users know what they can truly do with the product and also lets them better judge whether the investment is worth it or not.
Reference:
Speaking of investment, Wondershare Filmora 11 is available starting from $49.99 USD per year. For those who are interested in advanced effects, plug-ins, and Wondershare Drive, the subscription is $18.99 USD per month.
Wondershare Filmora 11
Powerful for advanced users, and accessible to beginners, Wondershare Filmora X has it all!
Once you are done installing the program, using it will be a piece of cake, since the interface is optimized in such a way that even beginners will get a hang of it in no time at all.
Of course, this can still prove challenging for some, and Filmora comes with plenty of built-in tutorials that are meant to show the user around the interface, familiarizing him with all the tools that are at his disposal.
In fact, Wondershare took extra steps in creating these tutorials, to the point where they designed them to be interactive, engaging, and even rewarding, by designing them to look and feel like challenges with rewards at the end.
These challenges cater to users of all levels, and they are separated based on their difficulty in different categories:
Get Started
Grants you a free video effect pack
Advanced Challenge
Grants you 7 days of access to the Filmstock Standard Library
Get Creative
Not exactly a set of challenges, but it grants access to their online libraries of tutorials.
Completing these challenges is actually quite rewarding, so even if you know how to use the program already, not taking advantage of the extra freebie would be a shame.
Once you’ve passed this phase and have truly accustomed yourself to what Filmora can offer, you can finally appreciate what a vast toolset it provides users.
Not only does the smooth interface keep the elements and buttons to a minimum, but one can also appreciate the responsiveness of the program itself.
Besides, you have an entire library of elements that you can use to enhance your videos, such as:
Audio samples
Title editing
Transition effects
Video effects
Graphical elements
Split-screen templates
All of these assets total in the hundreds, and the only true limits of what you can do with the videos is strictly tied to your imagination.
Of course, you also have access to the more basic tools, such as video trimming, cropping, and resizing, but these have become somewhat standard to all video editors.
Closing thoughts on Wondershare Filmora
Pros
Available as a free version with pretty much no restriction
Great for both beginners and advanced users
Constantly updated with new effects
Interactive tutorials with rewards
Smooth and intuitive interface
Cons
The cost of their subscription make the Perpetual plan seem like the obvious choice
As far as we’re concerned, Wondershare Filmora 11 does justice to its previous incarnations, and the program did manage to reinvent itself in a way that makes buying it worthwhile.
Of course, you don’t need to take our word for it, go and download the free version, try it, and see for yourself whether the program truly has everything you need or not.
Have you tried Filmora 11 yet? If so, let us know what you think about it by leaving us your feedback in the comments section below.
Windows 10’s Alarms & Clock app, the free one that comes pre-installed on all Windows 10 devices, updated this week with one of its biggest updates in a while.
This update, which brings the app up to Version 10.2101.28.0, refines the overall design allowing for much larger font and adding a fullscreen option for the Timer and Stopwatch functions.
The World Clock also gain some improvements with the addition of weather icons and current date for each city location which should come as a relief to those who still get confused by time differences when traveling or planning a meeting.
The Alarms & Clock app menu was also moved to the left side of the screen and the app now better adjusts when resized.
Many users are using PDF format for document sharing, but sometimes PDF files can be protected or in read-only mode.
To edit these files you’re going to need a read-only PDF converter, and in this guide we’re going to show you the best tools for the job for both Mac and Windows.
Being the most popular and used tool for Portable Document format files, Adobe Acrobat allows users to perform advanced file management.
Thus, using this solution from Adobe, you will be able to view, create, manage, manipulate and print different files.
Using Adobe Acrobat repeatedly, you will be able to save your PDF file as read-only file with ease. You can also easily convert from PDF and to PDF format.
Adobe Acrobat has more useful features, such as extensive editing, text recognition, and much more. If you want to make PDF read only, this is the right tool for the job.
Icecream PDF Converter is a great tool for converting different files into the PDF format. Now you can use any Word, jpg or epub and quickly convert it into PDF.
Another feature of this read only PDF converter allows you to take different files and join them into a single document. The Icecream PDF Converter contains a built-in PDF reader that supports files that are password-protected.
We also have to mention Icecream PDF converter’s OCR feature that recognizes text, allowing you to create editable Word documents.
When it comes to file conversion, Icecream PDF Converter is one of the best tools for the job, so be sure to try it out.
A performant read-only PDFconverter, Nitro PDF your ideal tool for converting PDF files into Word, Excel or PowerPoint formats, and vice versa.
Nitro PDF will also retain the format of your files by maintaining the aspect of your images, fonts and formatting.
Also, when using an Outlook plugin, you are able to convert emails, attachments, and email folders into PDF, and archive important files for future usage.
Wondershare PDFelement is an PDF software that allows you to create PDF forms and documents. Edit, create forms, annotate, convert and protect your files with ease.
This software is available on multiple platforms, so it’s a great option if you want to make PDF read only on Mac or Windows.
If you need a PDF editor that works on multiple platforms, supports PDF forms and annotations, then PDFelement might be the right choice for you.
Mac PDF Converter Ultimate is another great tool that can make PDF files read only on Mac. It was designed to convert PDF files into editable text documents.
Using this software you can easily convert PDF files to ePub, text, Excel, HTML and other file formats.
You can also use MacPDF Converter Ultimate to convert a PDF file into image-related formats such as jpg, png or gif.
The software also has advanced OCR technology, so ti works with scanned PDF files that are image-based.
If you’re looking for the best read-only PDF converter, Adobe Acrobat is the best tool you can use for this purpose.
However, other entries on our list aren’t too far behind in terms of functionality, so be sure to consider them as well.
Before leaving, don’t hesitate to check our latest guide on the best fill & sign PDF tools that you can use.
Many Windows users reported that their VPN was blocked by Webroot antivirus. If you experienced the same issue, Windows Report will show you how to fix this problem.
The VPN blocked by Webroot problem prevents VPN users from making a VPN connection whereby anytime they attempt to switch on their VPN service, they get halted in the process.
Founded in 1997, Webroot is one of the powerful antivirus programs with excellent web filtering capabilities.
Although there are several antivirus programs on the market as well, some antivirus tools come with VPN services, while others are overprotective such as Webroot, and block VPN connections.
Windows Report has enlisted the best workarounds to fix the VPN blocked by Webroot issue. You can try out any of the solutions so as to fix the problem.
What can I do if Webroot blocked the VPN?
1. Temporarily disable Webroot
Locate the Webroot SecureAnywhere icon in your system tray.
Right-click on the system tray icon and then click on the Shutdown Protection option.
Follow the prompts to shut down the Webroot protection.
You need to consider temporarily disabling Webroot in order to use your VPN service. This should enable your VPN to bypass the VPN blocked by Webroot issue.
Note: After using your VPN, it is essential that you repeat these steps and activate Webroot protection afterward. This will protect your system from malware and viruses.
Alternatively, you can also disable SSL port (443) monitoring which is what some VPN services use to initiate the connection.
Webroot might block this port as a security measure. Therefore, you should disable SSL monitoring for the port exclusion.
Meanwhile, you can do this by disabling the Web shield & Filtering option in the Webroot program.
2. Change your VPN
While there are numerous VPN service providers out there; some of them are not compatible with Webroot. This is due to technicalities involved with the applications’ processes; therefore, you need to change your VPN.
Our recommendation goes to the best VPN, a world-class solution that is renowned for its versatility as it is for its well-rounded, comprehensive security, and privacy-oriented features.
This highly flexible VPN solution is perfectly suited to blend in seamlessly with multiple systems, devices, browsers, and software such as Webroot.
And its adaptability stretches beyond apps compatibility all the way to its impressive network of servers.
Boasting 22,228 gateways with global coverage, this tool routes your traffic through encrypted VPN tunnels, making sure that your data is secured and inaccessible to prying eyes.
This generous server pool also means that buffering, latency, or slow, faulty connections are left in the past.
Instead you get to enjoy lag, ISP throttling, and geo-restrictions free connections to fast and reliable servers anywhere in the world regardless of your physical location.
Speaking about speed, you also benefit from unlimited bandwidth and lightning-fast download speeds to get the most of your web experience and never worry about snoops, hackers, or unwanted attention.
Your browsing is anonymous, your IP address hidden and your online identity protected by multiple layers of privacy.
Private Internet Access
Don’t let overprotective Webroot compromise your online privacy – team up with PIA!
Select Add an exclusion and add your VPN client software.
You need to exclude your VPN software from Webroot protection settings. This automatically resolves the VPN blocked by Webroot issue.
Normally, this should resolve the VPN blocked by Webroot problem; however, some VPN software use the port 1723 for TCP, and ports 4500 UDP and 500.
Therefore, you need to add your VPN in Windows Firewall Advanced settings. See how you can do that in the next solution.
4. Add Exception in Windows Firewall
Go to Start, type Allow a program through Windows firewall and then hit the Enter key.
Click on the Change Settings option.
Now, Click on Allow another program.
Select the VPN software you want to add or click Browse to find the VPN software, and then click OK.
Check if you can connect to your VPN.
However, if you still experience the VPN blocked by Webroot problem, you proceed to the solution.
5. Reinstall the VPN client software
Type Control Panel in Windows search and press Enter.
Select Programs & Features.
Find your VPN from the list of programs and select Uninstall.
In the Setup Wizard, click you’ll get a notification after a successful uninstall, so click Close to exit the wizard.
If the VPN is still listed as available after uninstalling it, press Windows key + R to start the Run app.
Type ncpa.cpl and press Enter to open the Network Connections window.
Under Network Connections, right-click on the WAN Miniport labeled with your VPN.
Select Delete
Go to Start, type Network Connections, and press Enter. Right-click a VPN connection and use the Delete option.
Select VPN. If you see your VPN as available, delete it.
Some Windows users reported that they were able to resolve the VPN blocked by Webroot issue simply by reinstalling their VPN client software.
After completing the uninstall operation, proceed to install the VPN client software afresh using the executable file provided for you by the VPN service provider.
6. Add Rule for PPTP
Start Control Panel as indicated in the previous solution.
Now, go to Windows Firewall and select Advanced Settings.
Search for the Routing and Remote Access (under Inbound Rules and Outbound Rules)
Another way of resolving the VPN blocked by Webroot issue is by enabling the PPTP rule.
For Inbound Rules: right-click Routing and Remote Access (PPTP-In), select Enable Rule.
For Outbound Rules: right-click Routing and Remote Access (PPTP-Out), select Enable Rule.
7. Change Antivirus
Webroot antivirus might be incompatible with your VPN software thereby resulting in the VPN blocked by Webroot problem.
In order to resolve this issue, you can consider replacing Webroot with another antivirus that is compatible with your VPN.
The antivirus recommended below offers the best protection but it is also less prone to any errors or interference with your system or any other software, including your VPN.
If you are still experiencing a VPN blocked by Webroot issue, then we highly recommend that you should contact either your VPN service provider or Webroot for advanced troubleshooting procedures.
Conclusively any of the aforementioned solutions should be able to fix VPN blocked by Webroot problems. So, ensure you try out any of the workarounds in order to fix the VPN problem.
We do appreciate it if you share your experience with us. Let us know how it worked in the comments section below.
Bitdefender originally focused on dedicated antivirus software and later decided to also offer a VPN in their software package.
Some of their current antivirus packages include Bitdefender Antivirus Plus, Bitdefender Total Security, and Bitdefender Internet Security.
The company recently added the VPN feature to its current antivirus packages.
Bitdefender VPN is spectacular, although, there are lots of things to improve on as a standalone VPN service. However, it is ideal for users with existing Bitdefender packages as it gives you secure and anonymous browsing.
Here’s what to expect from Bitdefender VPN:
Support for OpenVPN, L2TP/IPsec, and IKEv2 (new) VPN protocols
Secured Wi-Fi, especially on public networks
Compatible all major OS
Unblock geo-restricted content
Hide your IP address
Decent encryption
Bitdefender VPN
Encrypted traffic and IP hiding for complete Bitdefender-powered online anonymity. (Subscription plan includes antivirus as well).
Once you’ve downloaded and installed Bitdefender VPN, nobody will have access to your online activity logs.
In other words, advertising agencies won’t be able to profile you so as to serve you personalized ads. Your ISP won’t be able to spy on you and then sell your browsing history to third-parties, as most of ISPs do.
Bitdefender VPN servers
Bitdefender VPN offers a limited amount of servers for subscribers to access. This could be because they are relatively new in offering VPN services.
Yet in our view, this is a disadvantage depending on where you are; the available servers are far away and this can make the speed of the VPN connection much lower.
In addition, there could be congestion of servers which could cause a drop in performance. Notwithstanding, BitDefender servers did quite well on testing offering decent speeds for streaming and browsing.
Privacy and security
It is quite unclear what the privacy and security measures are of the Bitdefender VPN service. For instance, it is unclear what encryption is utilized by Bitdefender or what privacy policy Bitdefender uses.
When we checked the terms and conditions, it was stated that the VPN does not forward users’ contact data or internet data to third parties.
But it is unclear to us whether users’ internet usage logs are stored. However, for the sake of simplicity, we assume that Bitdefender VPN does not keep logs.
As a service that guarantees the privacy of its users, we believe that this information must be transparent. This applies both to openness in the encryption that is used and openness in the logging policy that is used.
The fact that Bitdefender does not do this ensures that low points are scored in this review.
Bitdefender is available for all known operating systems most especially Windows OS. If you want to use Bitdefender VPN on other devices, such as a router, it is not possible despite the OpenVPN protocol that is used.
The necessary data to set up a connection with the Bitdefender OpenVPN servers is missing; hence, it is advisable to get the Bitdefender Box to secure these devices.
Installing BitdefenderVPN is simple when you install it on its own or install any BitDefender package; the VPN functionality is automatically added.
Windows Installation
If you are an existing Bitdefender customer, the appearance of the software will not be unknown to you. In the main screen, you can choose privacy on the left side.
In that overview, there is then the option to select VPN. Meanwhile, if you use either the free or premium VPN, you have the option of connecting to any VPN on the server list.
In the Bitdefender settings screen, you also have the option to automatically start the VPN connection when Windows starts up. This is an easy and convenient option.
Bitdefender Premium VPN Pricing
The free version of Bitdefender VPN can be used if you have a subscription to a Bitdefender software package such as Bitdefender Total Security suite.
However, there are many restrictions applied to this free VPN. Hence, you do not have a free server choice in the free version.
In addition, there is also a 200MB data limit. This data limit is virtually unworkable, as it is easily consumed when browsing.
The free version of Bitdefender VPN is sufficient if you want to use it, for example, to check your mail at the airport or for safe internet banking.
To access Bitdefender premium VPN package you will need to upgrade to an extra package. The price for using the VPN servers is in itself very reasonable.
It is true that you have already paid for other features in the main package of Bitdefender; hence, if you need only the VPN service, then this is a costly service.
At the time of writing, the extra costs for the Premium VPN package are $ 49.99 every 12 months. But due to the cost of the Bitdefender package, you pay at least $ 73.98. This is still a reasonable price for a total security package.
Bitdefender VPN and geo-restricted sites
Sometimes, people want to stream media, watch online TV/radio, play online games, and even browse on some websites but they get restricted.
This may be due to geo-restrictions locks placed by the website owners. However, the only way to bypass this restriction is by using a VPN.
For example, it is not possible to watch the American version of Netflix in the Netherlands normally but with a VPN, you can easily spoof your location.
Because Netflix is trying to block VPN connections, it is always important to know whether your chosen VPN provider can indeed unblock access to the American version of Netflix.
Bitdefender can bypass imposed geo-restrictions on such major streaming sites.
Bitdefender is still just starting up which is seen in the number of servers offered and their server speed. The cost of upgrading to the service is high considering the features they currently offer.
You are still obliged to purchase other Bitdefender suite packages before you can use the VPN services.
However, it is still a good service to use if you have an existing BitDefender subscription and want more privacy and anonymous browsing.
Valheim is an incredible fast-trending survival game with a 95% approval rate on Steam which is great for an early access title.
But we can see how that can happen because the gameplay is great and the graphics helps a lot too.
However, like any other starting game out there, Valheim came with its share of bugs and one of them is that users’ games are not saving after logging out and that translates into hours of lost play.
I’m not sure why but whenever I log out of Valheim my game does not save. It goes to a black screen and does not do anything.
When on the black screen it shows that I am still in the game and I’ll still get the notifications that I can eat more and other related alerts.
The only fix for this for me is to go into cheat mode and manually save. Does anyone have a fix for this problem? I lose many gameplay hours because of this issue.
The Valheim not saving error is really frustrating because sometimes you spend a lot of time and effort to get a special item only to find out in the next session that all was for nothing.
So, it seems that this issue mostly occurs in single-player mode when you are offline. When you play online, the game server saves the state periodically.
There is no official fix for this issue yet, but we have found a few solutions that can get you over this problem until the next update.
How can I fix the Valheim not saving problem?
1. Save the game from your console
Press F5 to open up the game console.
Type save (all lower case letters) and press Enter.
That will save your game so do that before logging out.
That’s it! Next time you open your game you will have your progress saved but you need to remember to do that every time before logging out.
Navigate to the following folder: C:/Users/Username/AppData/LocalLow/IronGate/Valheim/characters
Locate the charactername.fch.old file (replace charactername with the actual name of the character).
Right-click the file and select Properties.
Uncheck the read-only attribute and click OK.
It seems that this problem is caused by the fact that a file named charactername.fch.old (replace charactername with your actual character name) somehow gets the read-only attribute.
This means that the game cannot overwrite it with new data and that’s why your game is not being saved. The solution is to remove the read-only attribute from the file.
However, this trick doesn’t work every time because some users complained that the read-only attribute comes back after a while.
Unfortunately, this is by far not the only Valheim bug out there. For instance, many gamers complained about screen shaking but you can fix that issue easily.
You should also consider installing the latest Valheim mod that can fix a lot of other issues with the game.
Buggy or not, Valheim is among the top 5 most popular games in Steam so a few issues won’t stop you. Anyway, it would be excellent to have an official copy by hitting the button below.
Valheim
Valheim is one of the most popular games on Steam so get on with this incredible survival adventure.
Have you succeeded in fixing your Valheim not saving issue using our solutions? Do you have any other tweaks that can also help other fellow games? Leave us a comment in the section below.
Roundcube is a free and open-source solution for webmail that is based on a desktop-like interface. Unfortunately, many users reported Roundcube connection to storageserverfailedmessage.
What does connection to storageserverfailed mean?
This error message is related to Dovecot, and if you see it, it means that Dovecot isn’t running on the server.
However, this issue can be resolved by using one of the solutions bellow.
How can I fix Roundcube connection to storage server failed error?
This solution is useful if the index files are for older versions of this software. As a result, they don’t work together with new Dovecot versions.
This solutions can come in handy if you’ve updated Dovecot recently and you are encountering issues.
After deleting all Dovecot index files, the software will notice they are missing, and create them again. Before doing anything, be sure to create a backup.
This is a simple solution, and it should help you with Connection to storage serverfailed in Roundcube on Ubuntu.
2. Add commands to Dovecot’s .conf file
Locate the following file: /etc/dovecot/dovecot.conf
Add the following lines: mail_max_userip_connections = 15 remote 127.0.0.1 { mail_max_userip_connections = 40>; }
You must apply this solution if Dovecot has reached his per-IP limit. You will be able to recognize this situation if you receive the following message:
imap-login: Maximum number of connections from user+IP exceeded (mail_max_userip_connections=10)
Try this solution if you encounter Roundcube connection to storage serverfailed error in Debian.
3. Increase imap process limit
Edit the following file: /etc/dovecot.conf
Navigate to the section service imap-login{
Set a higher limit in that section.
You will view the following error message that requires to use this solution and increase the imap process limit:
master: Warning: service(imap-login): process_limit (100) reached, client connections are being dropped
After making these changes, check if the Roundcube connection to storage server failed message is gone.
4. Verify logs
Verify Apache logs
You must search for the following lines that show the error:
Ensure that you have the following command: dovecot=1
Run the following commands: cd /usr/local/directadmin/custombuild ./build todovecot /etc/init.d/directadmin restart
If the /etc/virtual/domain.compasswd is not in the right format, this will cause the Roundcube connection to storage server failed error. This file should have 7 columns that are separated by colons.
When you notice the /etc/virtual/domain.compasswd file has only 2 columns and 1 colon, it will be necessary to input the ./buildtodovecot command.
Roundcube connection to storage serverfailedis an error related to Dovecot, but hopefully, you should be able to fix it with our solutions.
Did you find a solution on your own? If so, feel free to share it with us in the comments section.
CyberGhost is a highly reliable VPN service that gives you an easy way to hide your internet activity and personal information.
It is a well-known provider that offers different subscription plans, perfectly tailored to cater to every audience, from long-term commitment seekers (we are talking about the 3-year ultra-advantageous plan) to a 1-month subscription.
One thing is for sure though, all editions of CyberGhost offer VPN ultra-fast servers without bandwidth limitations.
CyberGhost isn’t exactly a small VPN provider, as of 2017 they have over ten million users. Also, the VPN service supports Android, iOS, Mac OS, and Windows devices. But routers, gaming consoled, and smart TVs are not to be left out either.
Unlike other VPN clients, CyberGhost does not ban P2P sharing on its servers. When it comes to torrenting, P2P, and streaming, it’s hard to get your hands on a more performant tool to access geo-restricted content and unblock websites, streaming services, gaming, and more.
Why do I need a VPN like CyberGhost?
There are many ways you can make use of a reliable VPN service like Cyber Ghost. Below are some of the major advantages of using a VPN service.
1. Enhanced Security
Typically, people turn to VPN services as a way to use the internet in a safe matter. In other words, encrypted VPN servers will prevent prying eyes from stealing your personal information, bank account number, passwords, etc.
Your computer is especially vulnerable to hackers when you use WiFi at an airport, coffee shop, etc. WiFi in public areas tends to have poor security, allowing hackers to hijack your PC and steal valuable information.
Speaking of Wi-Fi security, we have a dedicated article on how to protect your computer when using public Wi-Fi. Check it out and apply the recommendations listed there.
However, a VPN service is a great tool to ward off hackers. And CyberGhost is one of the best services on the market to provide this type of protection. The reason behind this is that the company offers some of the best encryption technologies a VPN service can provide.
All subscription plans from this provider offer AES 256-bit level of encryption, which means that you do not have to worry about hackers when transferring or downloading sensitive personal or business information.
CyberGhost VPN
Enhanced security, supreme privacy, and unlimited entertainment, that’s what you get with Cyberghost!
Geo-targeting delivers advertisements or content on a website or program based on the user’s location. Take, for example, Netflix, the movie streaming application, it shows different content based on which country you are in.
For instance, Netflix users in the United States may have more content than Netflix users in China. However, if you use a VPN service like CyberGhost, you can access Netflix content from any country as long as the provider has servers there.
This feature does not just work for Netflix. Some websites like Facebook and Google are blocked in countries like China. However, if you use a VPN, then you can bypass these location restrictions.
There are certain types of VPN services that are specifically built for gamers. A VPN can reduce ping, which in turn improves reaction time, by avoiding congested pathways to the server of the game you are playing.
If a game does not have servers located in your area, then you most likely will want to get a VPN.
A good VPN provider like CyberGhost can literally make a previously unplayable online game, playable. We recommend CyberGhost because they are well known to be one of the fastest providers available.
4. Unlimited Bandwidth
Unlimited bandwidth means that you can upload or download as much data or information as you want on a VPN server, at any given period of time.
Now not all VPN services provide unlimited bandwidth. But all plan types from CyberGhost do.
Why choose CyberGhost over other VPN providers?
CyberGhost provides everything you need in a VPN, including top-of-the-line security, numerous servers, and reduced ping. While the interface is fairly basic, there are advanced options that will satisfy more experienced users.
If you have little or no experience with VPN servers, you can always start by using one of the free-trial servers. Once you get an idea of how beneficial a CyberGhost VPN service can be, you can move on to a more complex plan.
If you decide to upgrade, you will be glad to know that CyberGhost offers highly competitive pricing, especially if you purchase a three-year plan at once. You can refer to the picture below to see how much the premium subscription costs.
What are the differences between the plans from CyberGhost?
There are 4 different types of plans offered by CyberGhost, starting with 1 month up until a 3-year subscription. The information below will help give you a better idea of the differences between each version.
All billing plans include great VPN features such as access to over 6479 servers spread across 90+ countries worldwide, ultra-fast speeds, and unlimited bandwidth that guarantees to take buffering out of the picture.
Moreover, all editions have a great advantage allowing you to protect up to 7 devices simultaneously with just 1 subscription. Of course, excellent, 24/7 live support is available for all users at all times.
However, if you want to get more bang for your buck, the 3-year plan grants the biggest savings and is fully refundable for 45 days.
Unlike its competitors, CyberGhost offers a whopping 45-day money-back guarantee to allow you to thoroughly test the VPN’s features and be 100% convinced this is the right VPN for you.
That is how sure they are that they’re on to a great product, and we couldn’t agree more.
Cyberghost VPN compatibility
Cyberghost VPN is compatible with the following Windows versions:
Windows Vista
Windows 7
Windows 8.1
All Windows 10 versions
It is worth mentioning this tool comes with a series of pre-configured profiles that are fully optimized for most usage scenarios.
For example, if you’re in a hurry, you can select the streaming or downloading mode, and the VPN will automatically take care of the rest.
If you are looking for the best VPN service without bandwidth limits, unrivaled fast servers, and high-end encryption, then we highly recommend CyberGhost.
It has several features that set it apart from other providers. In addition, they have a great support system and versatile plans. What’s there not to like?
At Microsoft’s Ignite 2021 yesterday, the company announced that its enterprise level tool Power Automate Desktop is now free for all Windows 10. Power Automate Desktop is what Microsoft defines as an “attended Robotic Process Automation” solution which is a macro recorder on steroids. It comes with 370 prebuilt actions that help you build flows across different applications and the best part is that it enables you to build your own scripts to automate time consuming repetitive tasks which saves time and money.
Last September, Microsoft launched Power Automate Desktop based off Softomotive technologies which the company acquired back in early 2020. Since, the acquisition Microsoft has extended the technology and deeply integrated it into its own stack.
Those who want to give Power Automate Desktop a try can download the tool from Microsoft in the coming weeks under Microsoft Insider Builds for Windows 10 first. Then, eventually it will be generally rolled out to Windows 10 built in, all the way to the standard cheaper Windows Home version. Until now, a license per user for the tool would typically set you back at least $15 per month.
“We’ve had this mission of wanting to go democratize development for everybody with the Power Platform,” Charles Lamanna, the CVP of Power Platform engineering at Microsoft, told me. “And that means, of course, making products which are accessible to anybody — and that’s what no-code/low-code is all about, whether it’s building applications with Power Apps or automating with Power Automate. But another big part of that is just, how do you also expand the imagination of a typical PC user to make them believe they can be a developer?”
This move Microsoft has made which Lamanna believes reduces the licensing friction and sends a message to Windows users that they can build bots and automate tasks as well.
““The way we’ve designed it — and the experience we have, particularly around the recording abilities like a macro recorder — makes it so you don’t have to think about for loops or what is this app I’m clicking on or this text box — you can just record it and run it,” he said.”
Learn more about the now free Power Automate for Windows 10 here and let us know what you think about this move from Microsoft making Power Automate Desktop free for users in the comment section below!


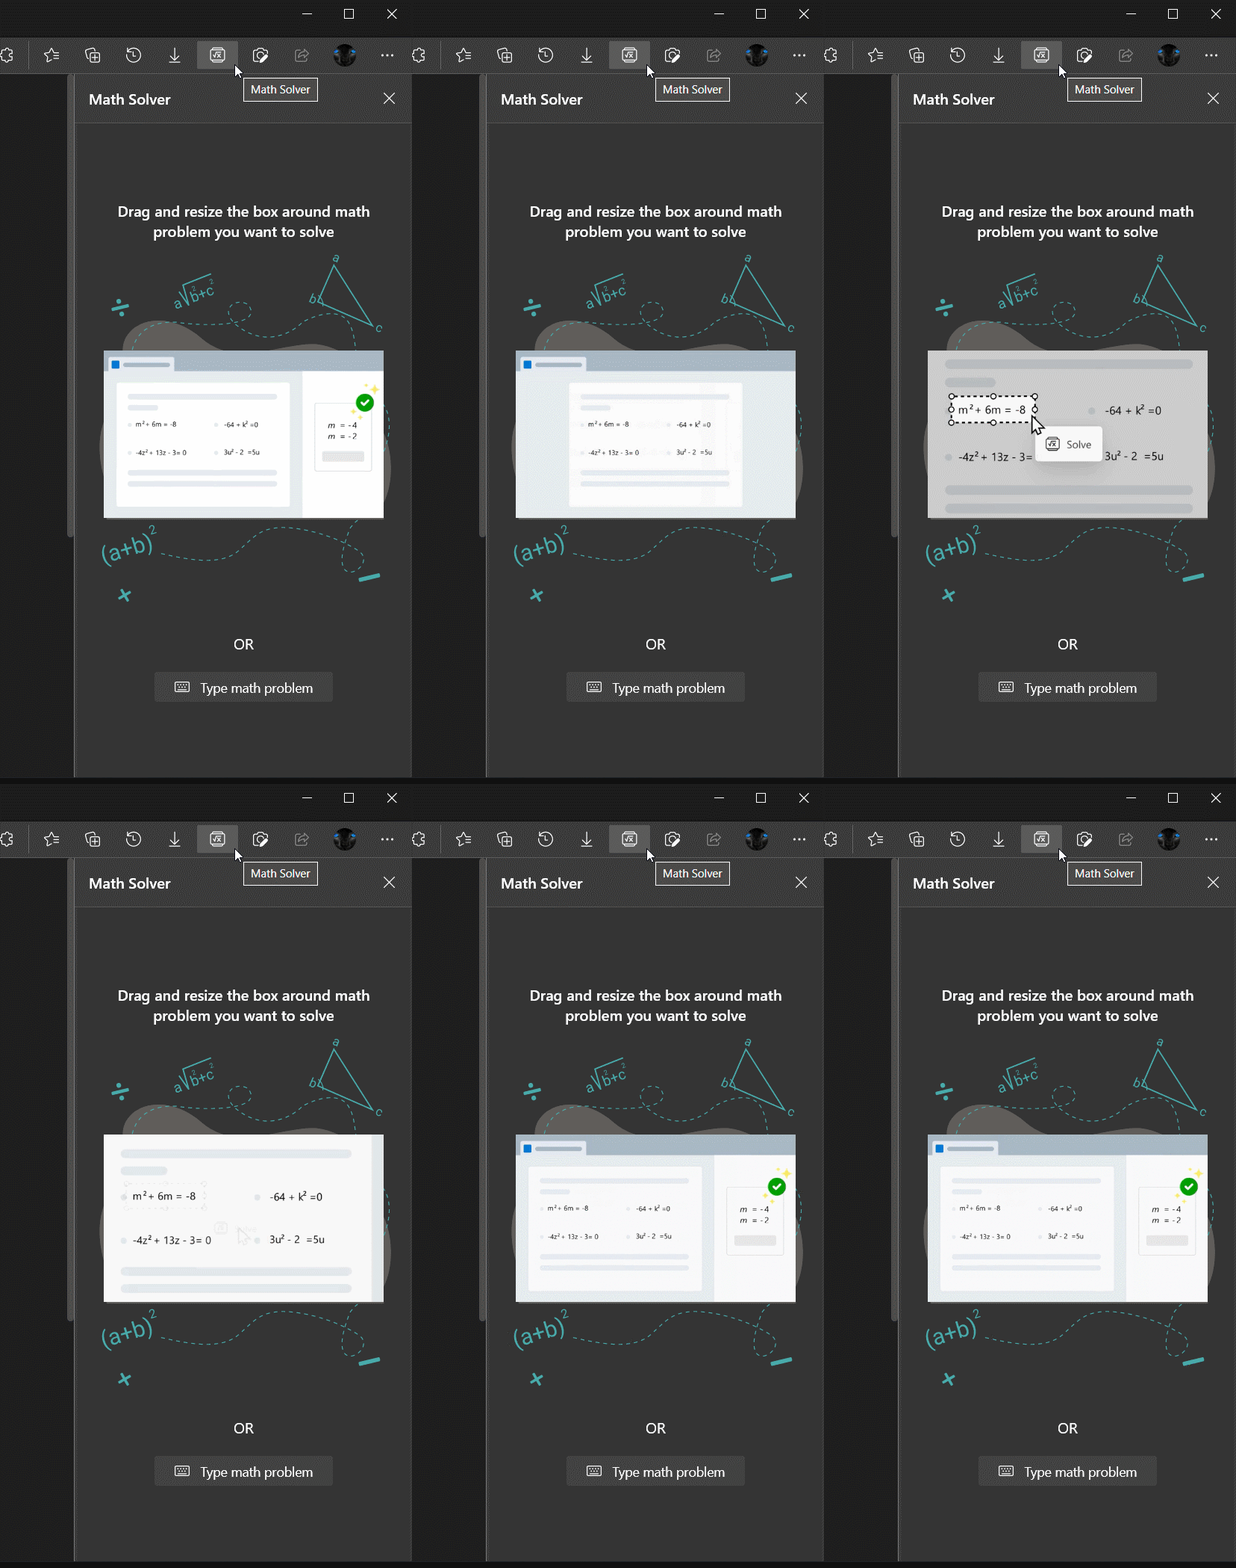


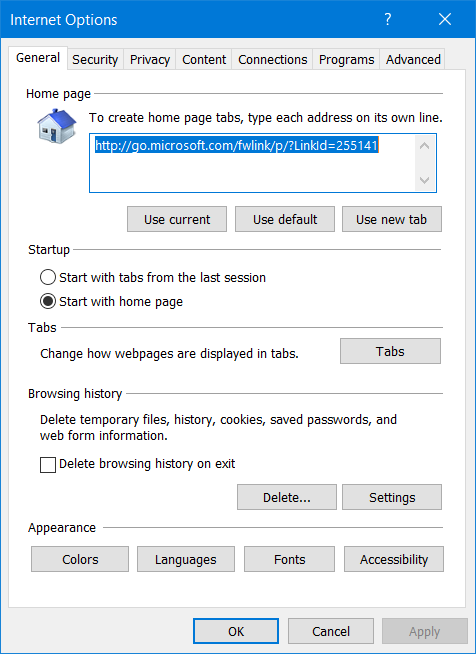
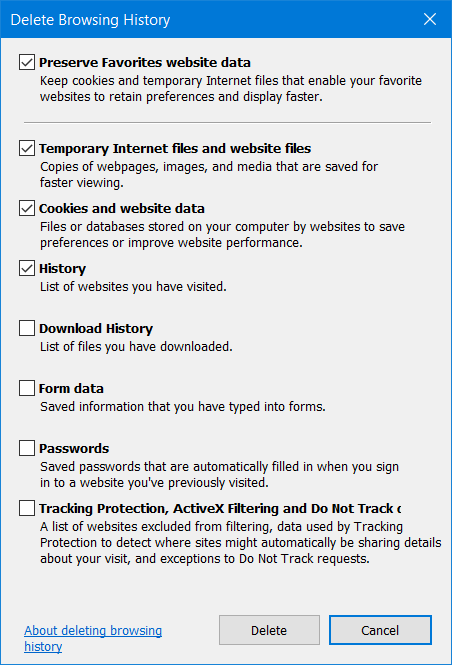
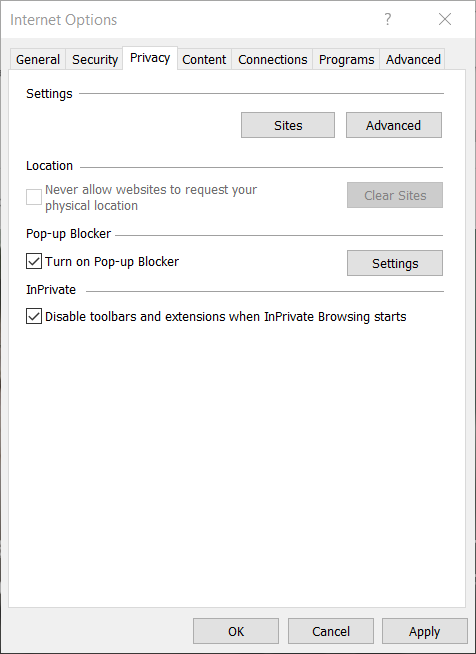
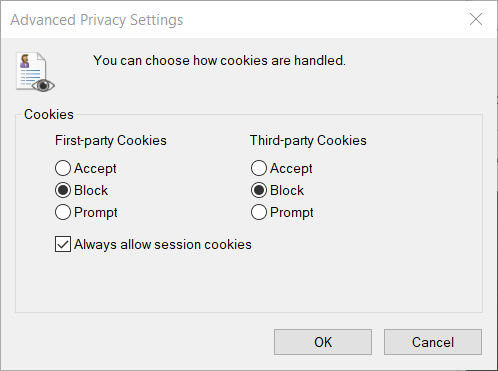
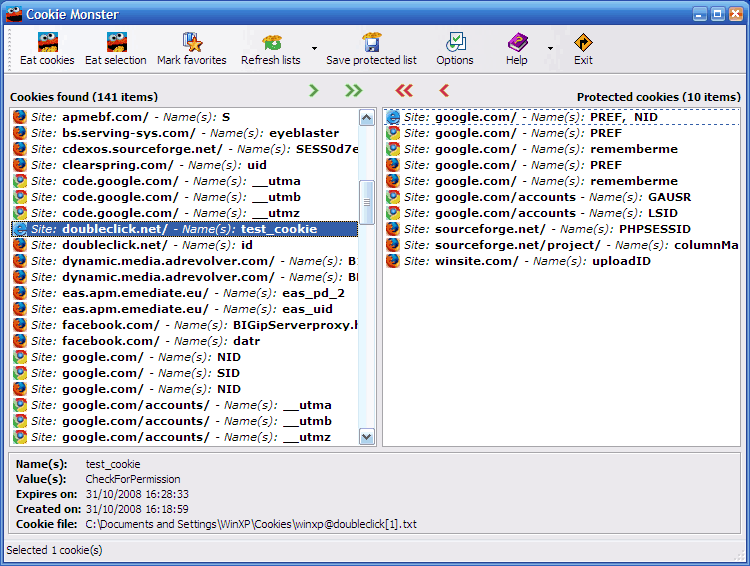


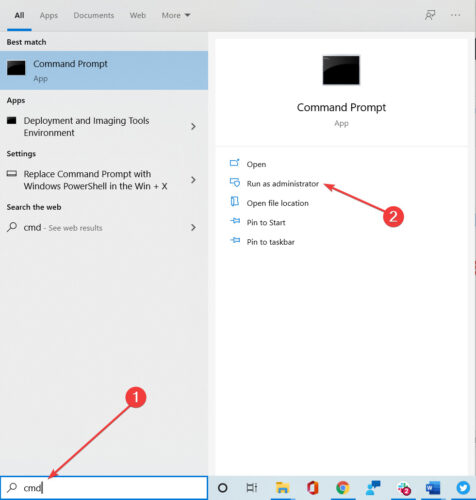

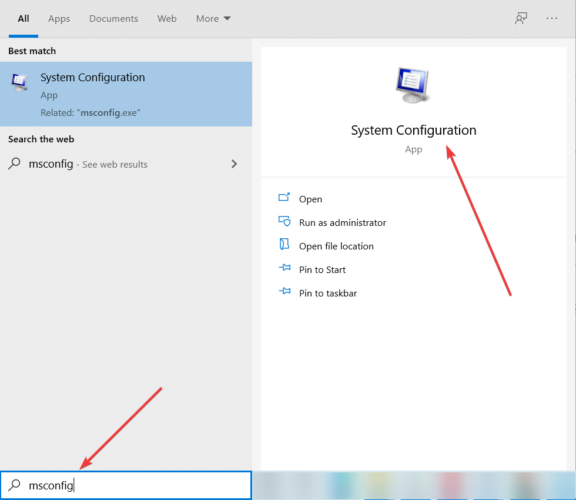


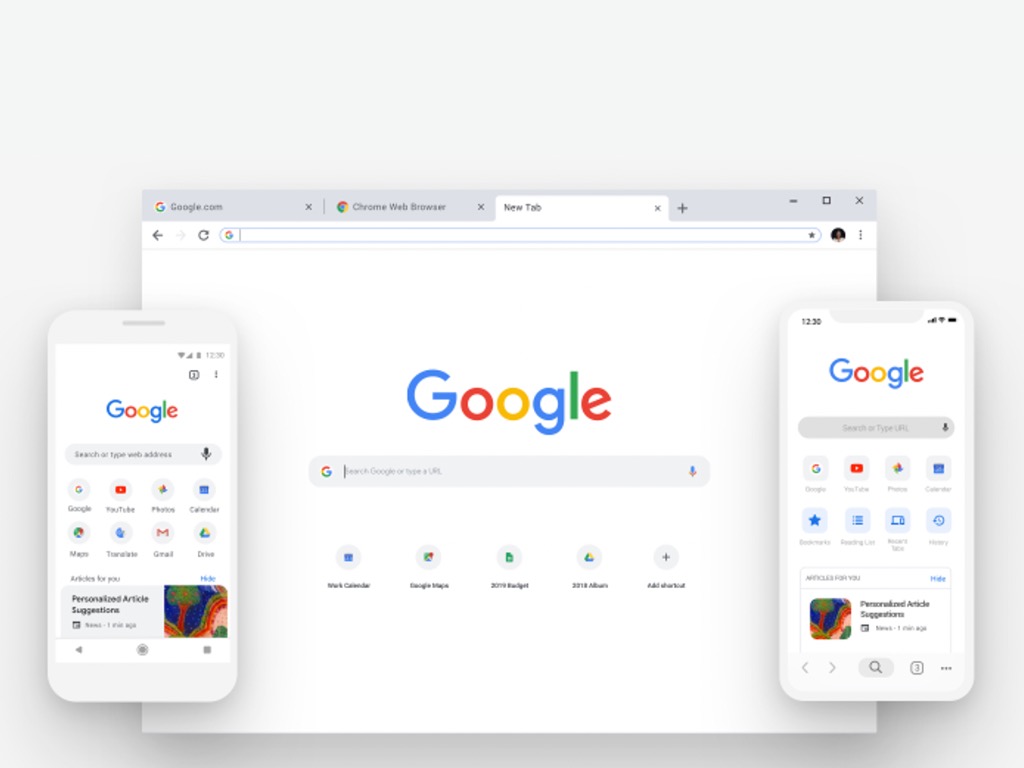
![10 most useful notebook browser extensions [Productivity Guide]](https://windowsreport.com/wp-content/uploads/2021/03/10-most-useful-notebook-browser-extensions-Productivity-Guide.jpg)



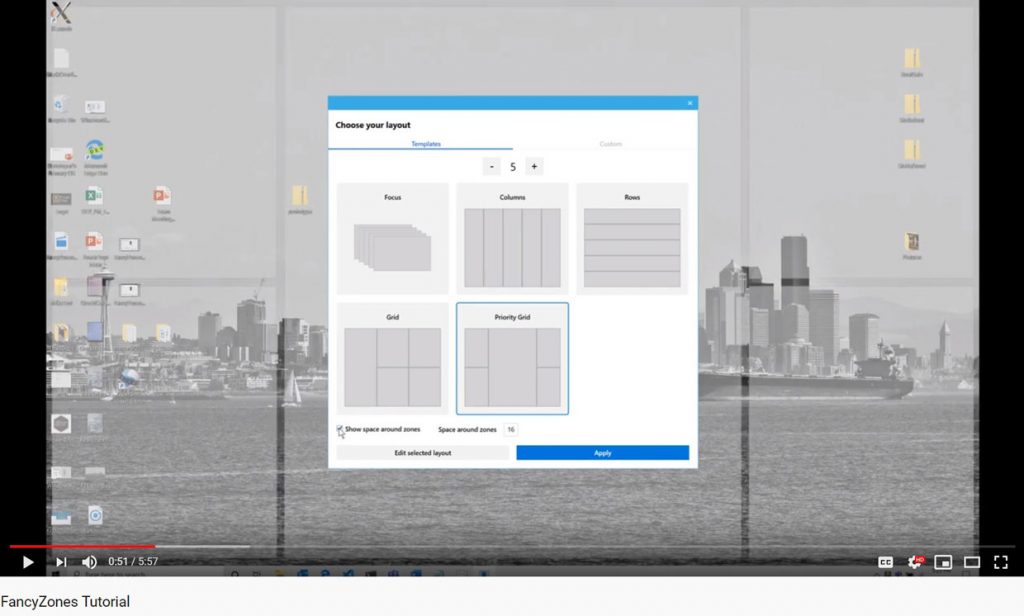





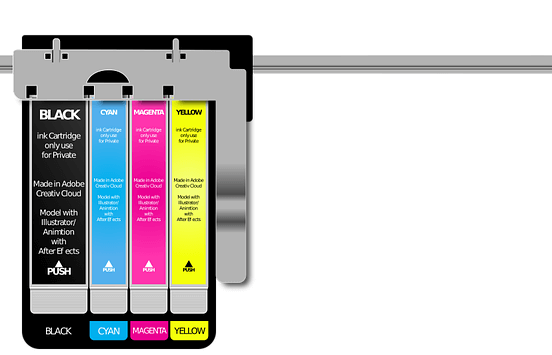
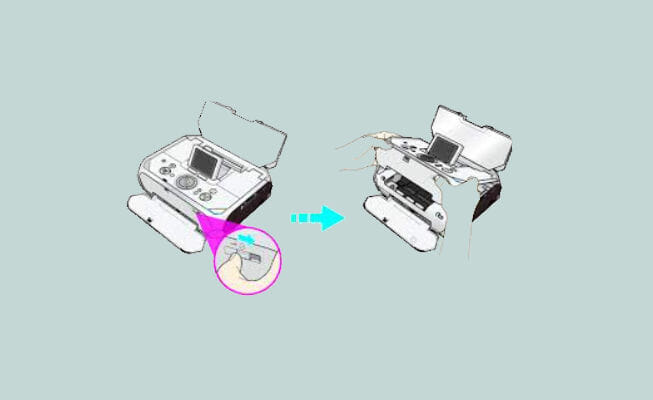





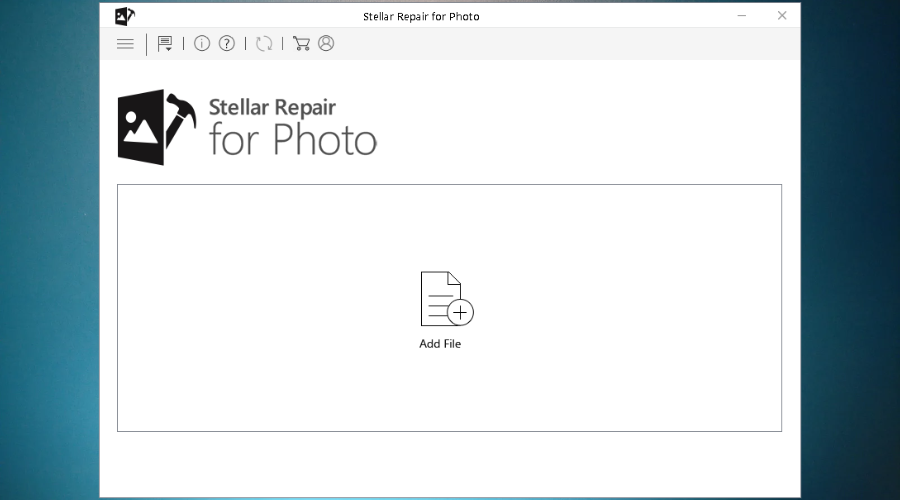

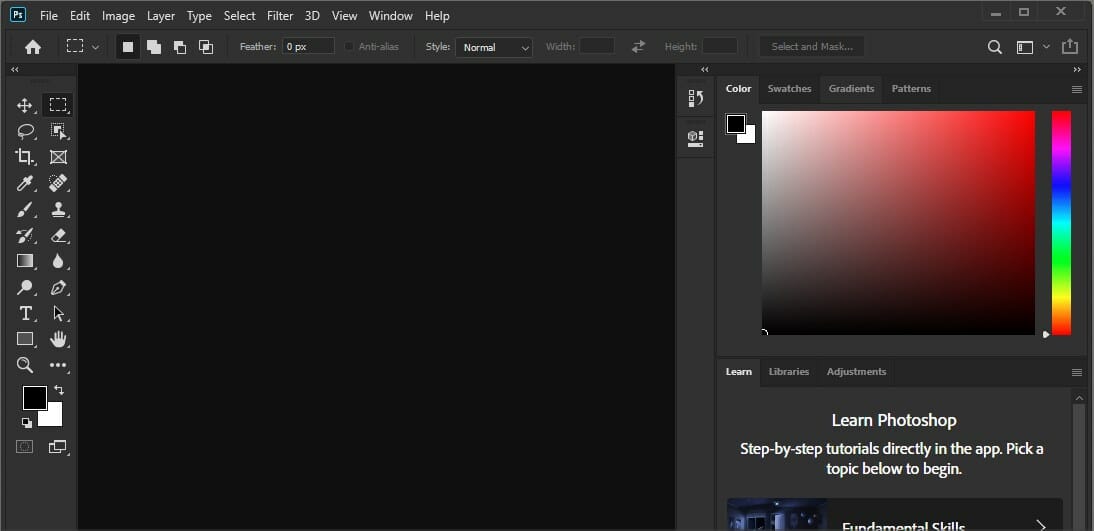



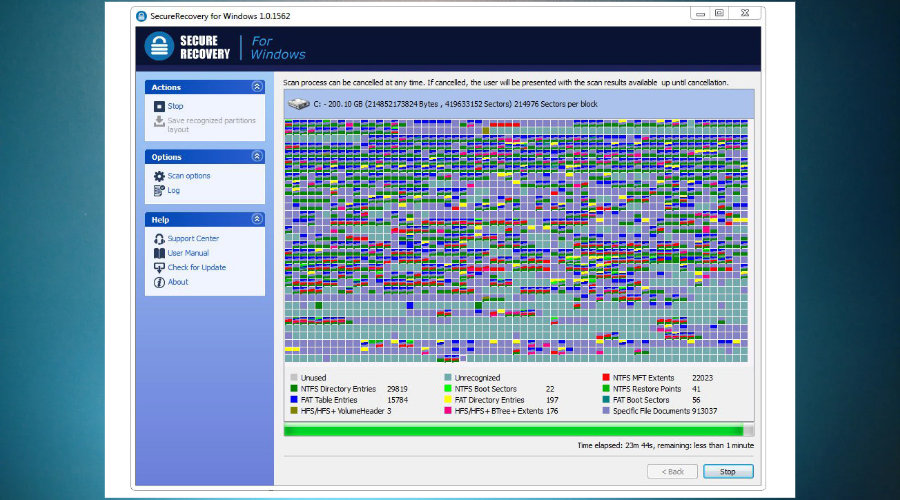



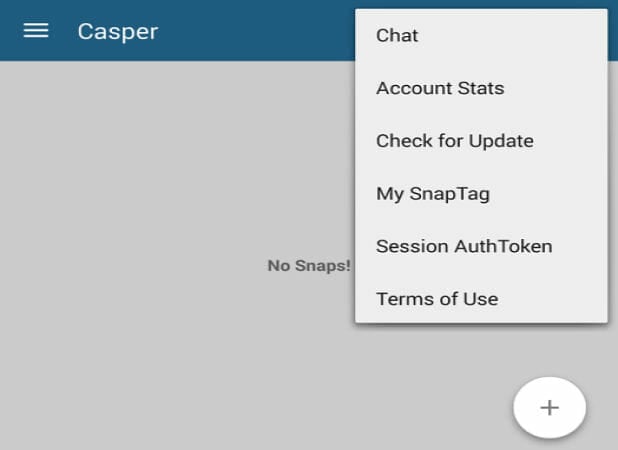





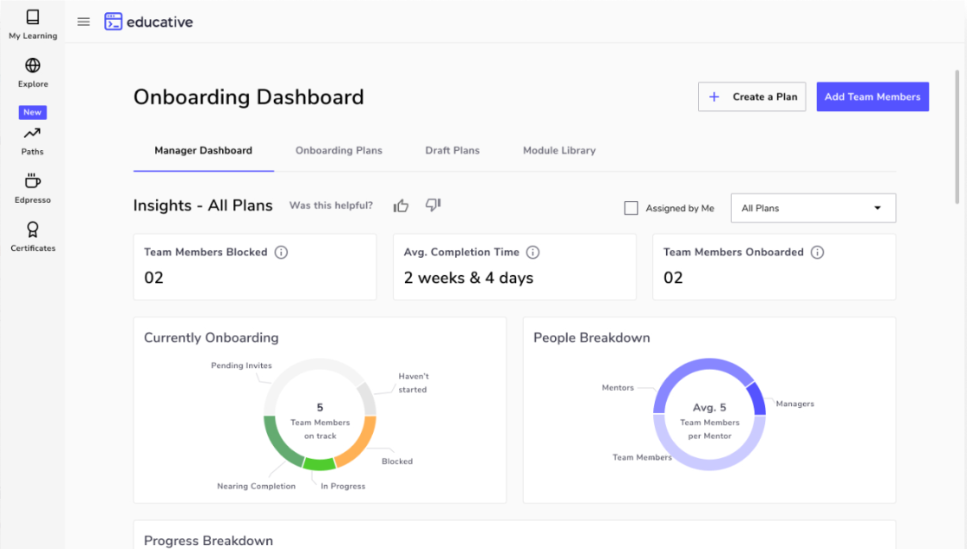




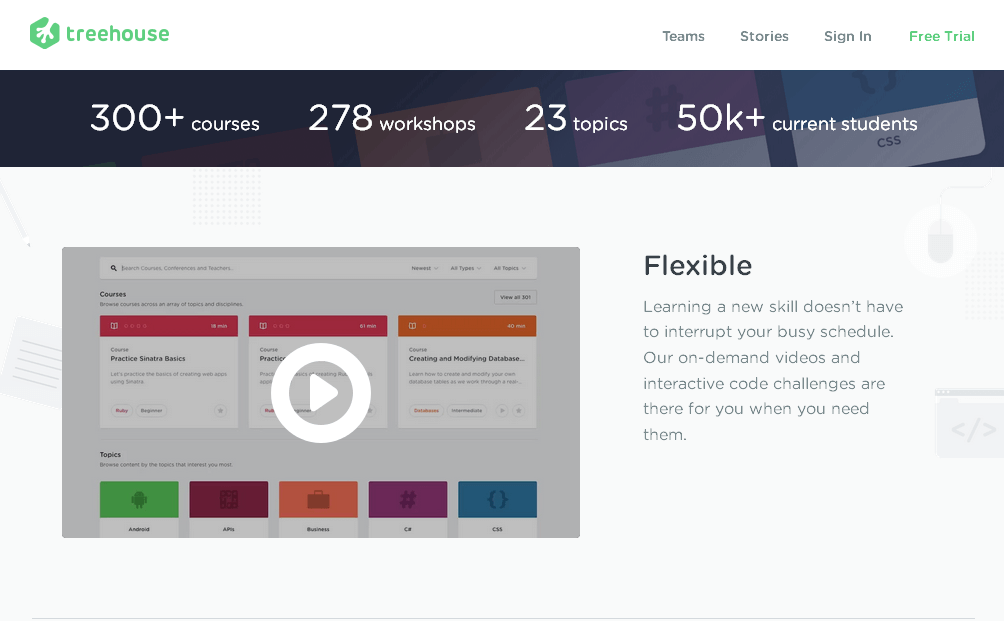








![VPN blocked by Java security on PC [Easy Fix]](https://windowsreport.com/wp-content/uploads/2022/10/VPN-blocked-by-Java-security-on-PC-featured.jpg)
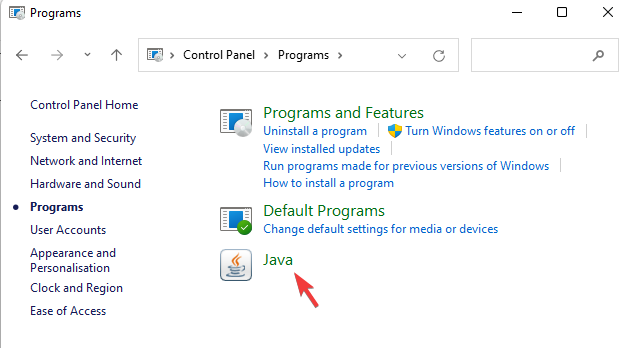







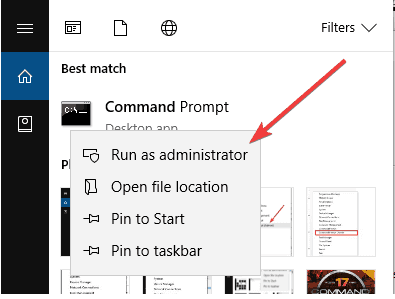
![VPN Application Blocked by Security Settings [Solved]](https://windowsreport.com/wp-content/uploads/2022/10/VPN-Application-Blocked-by-Security-Settings.jpg)
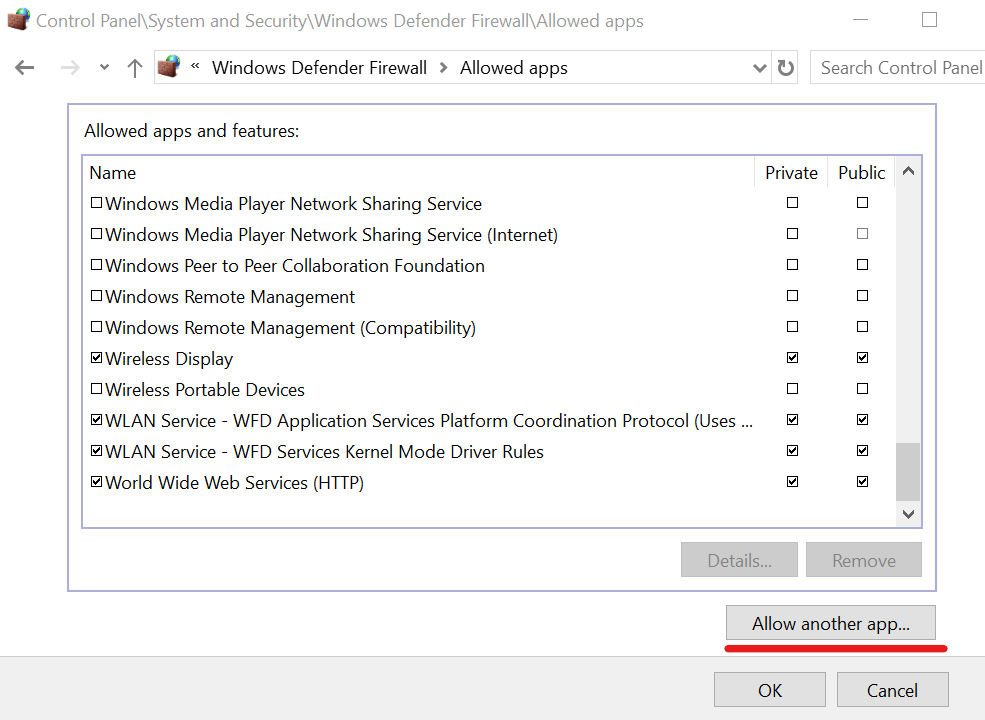
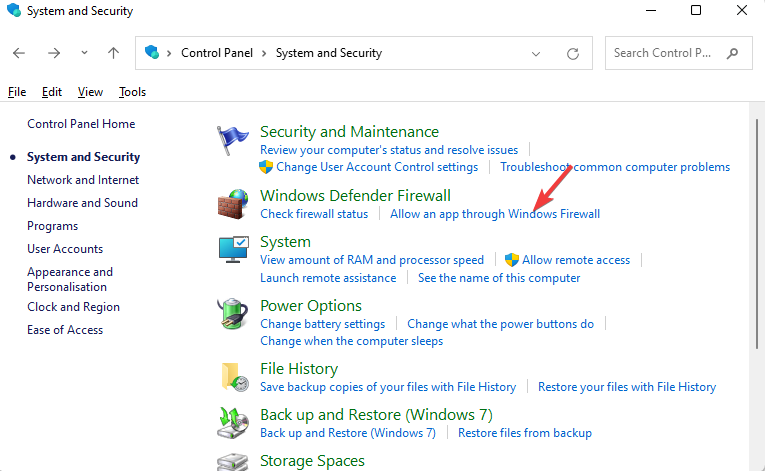
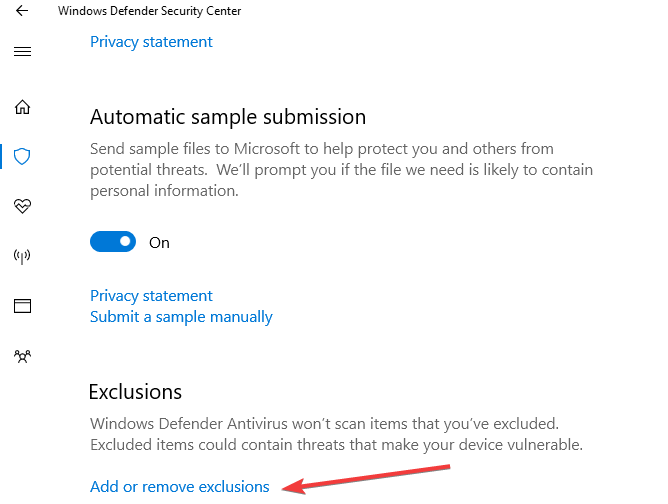
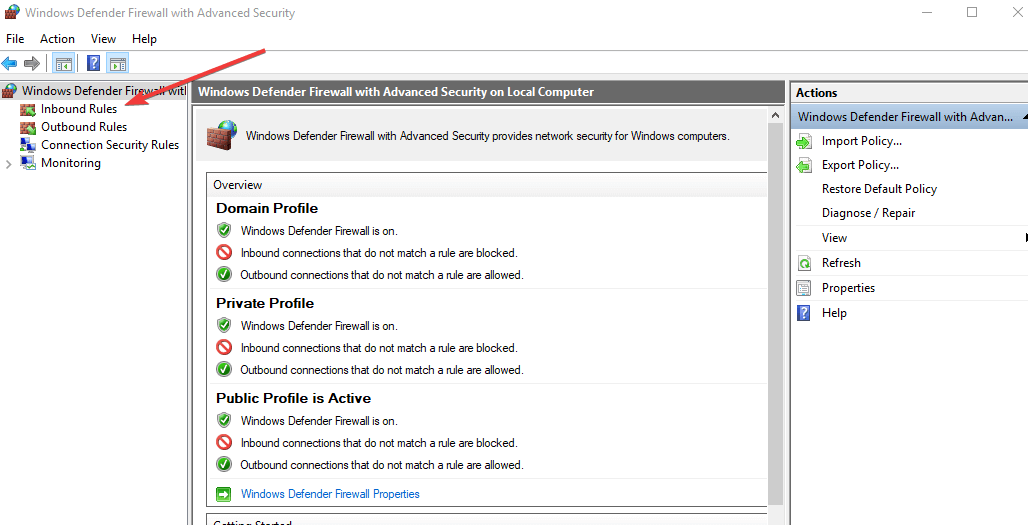
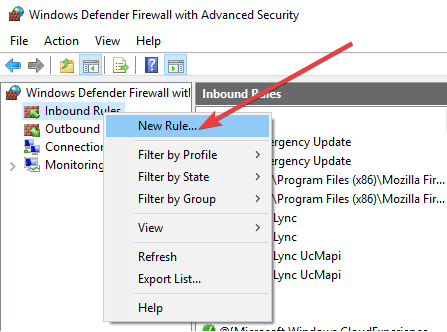
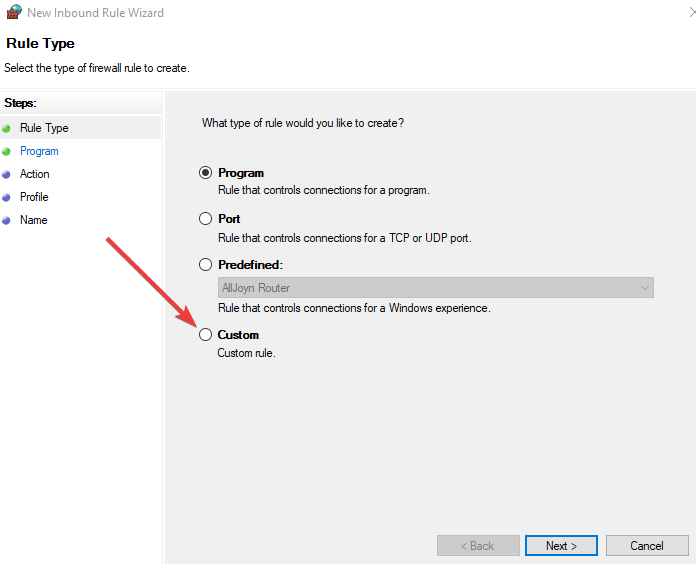
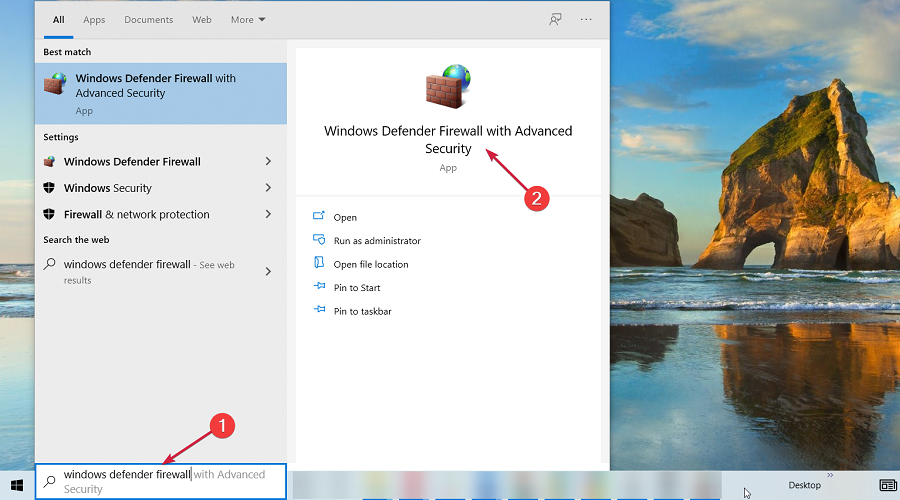
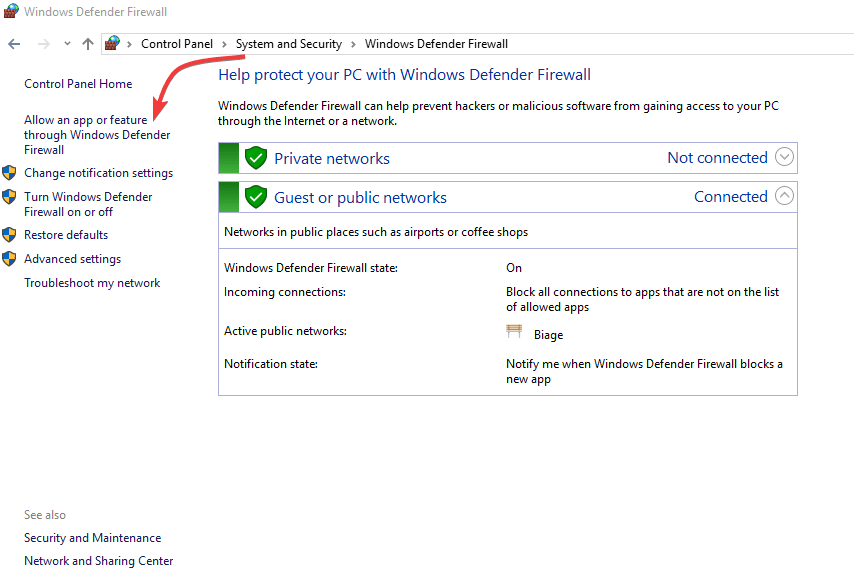
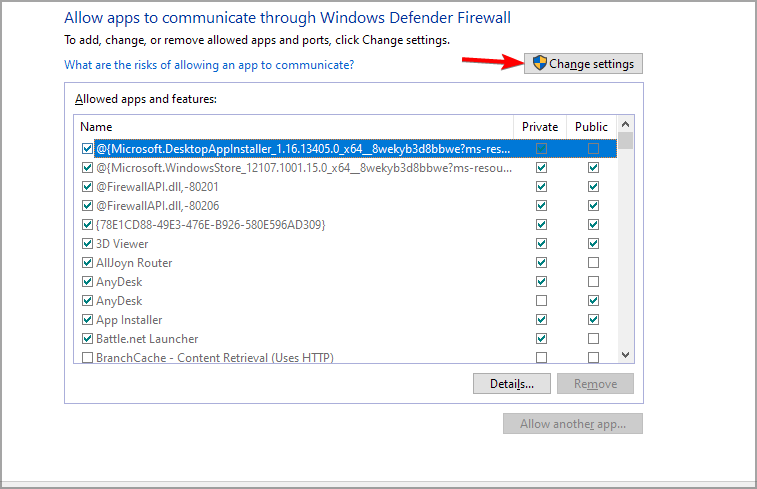
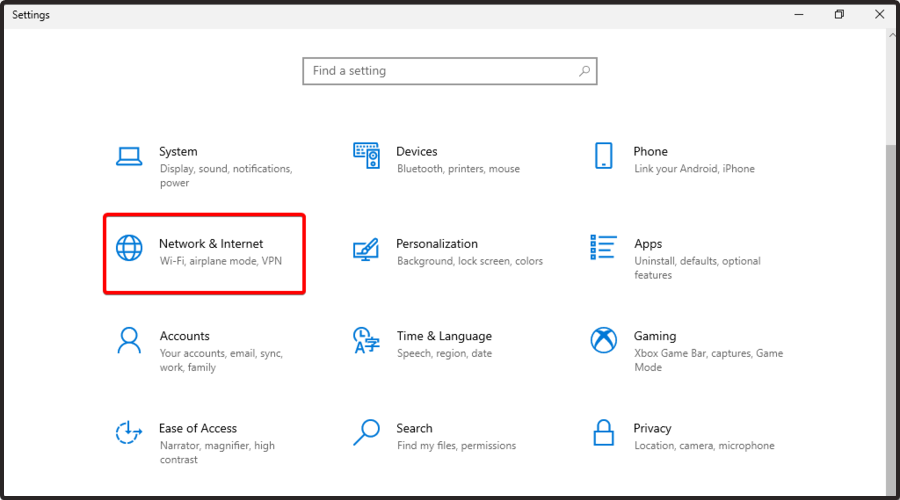
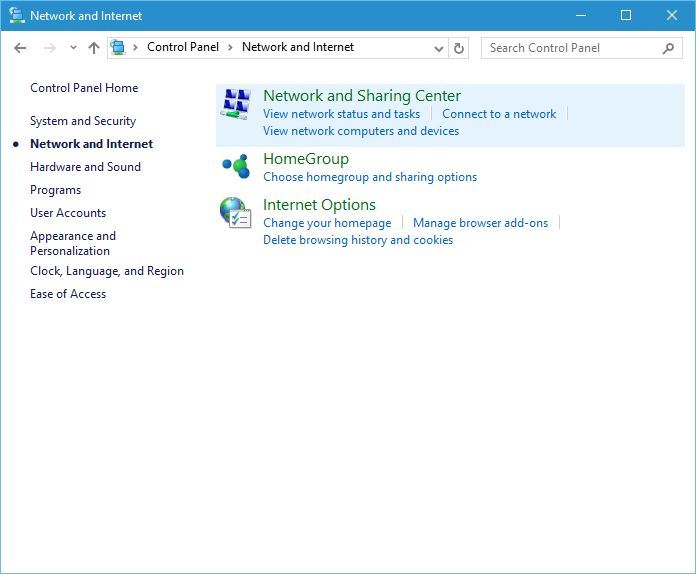
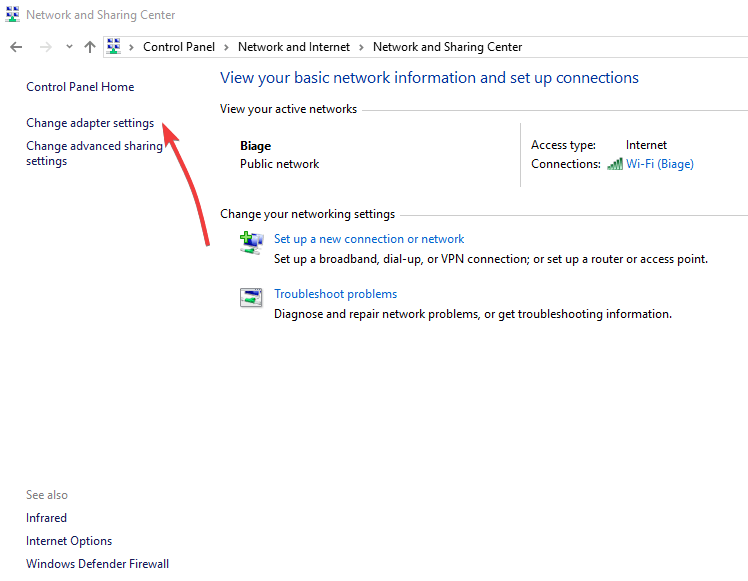
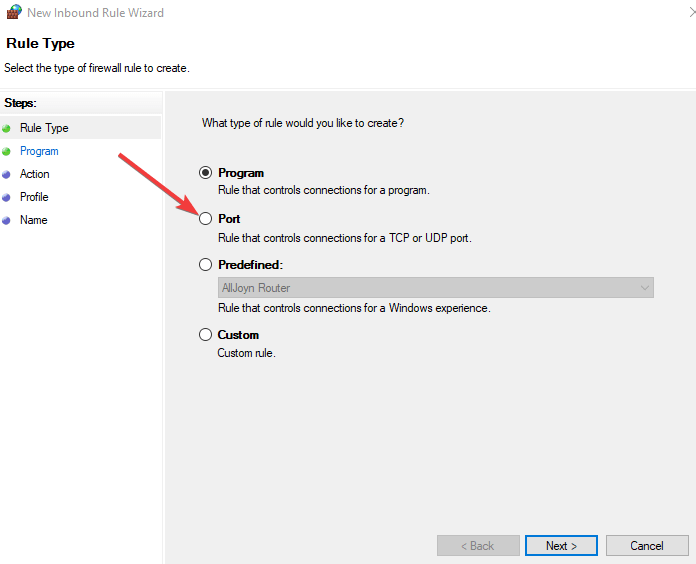
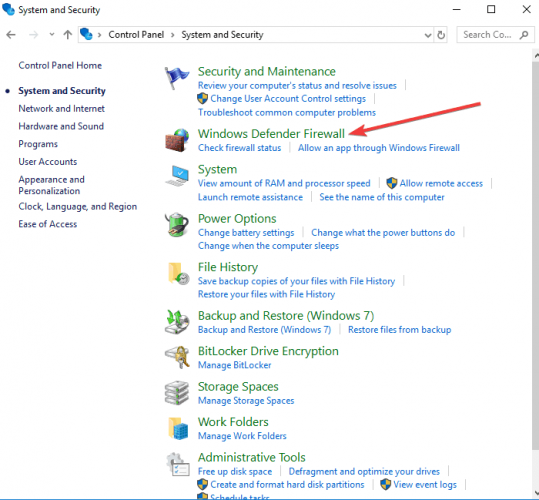
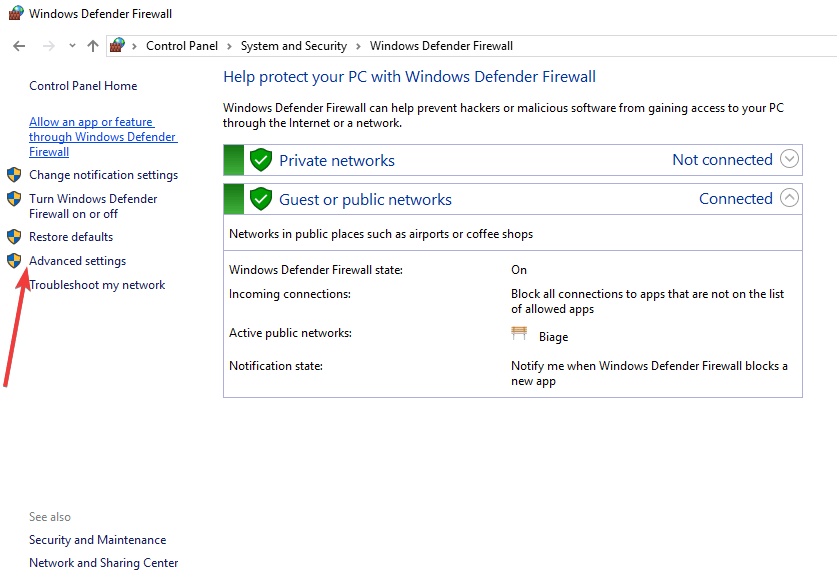
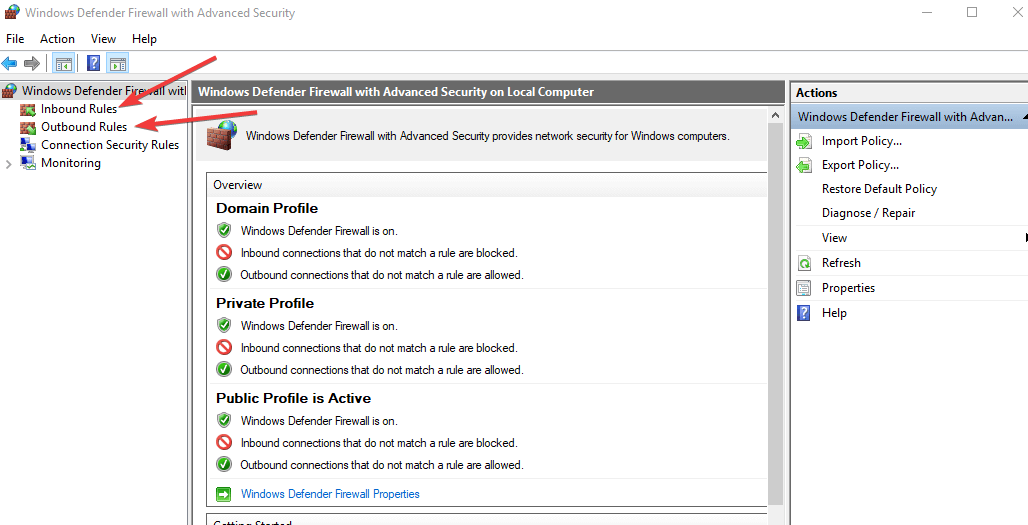
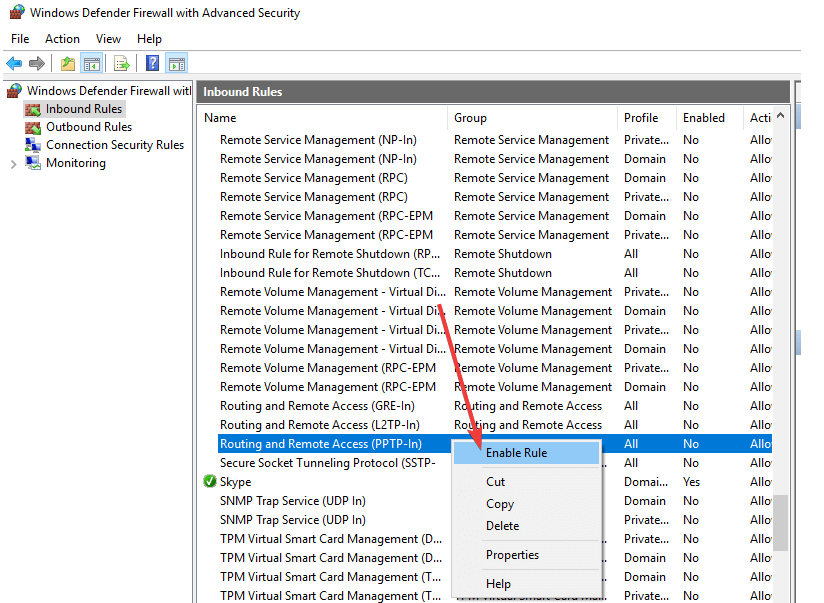
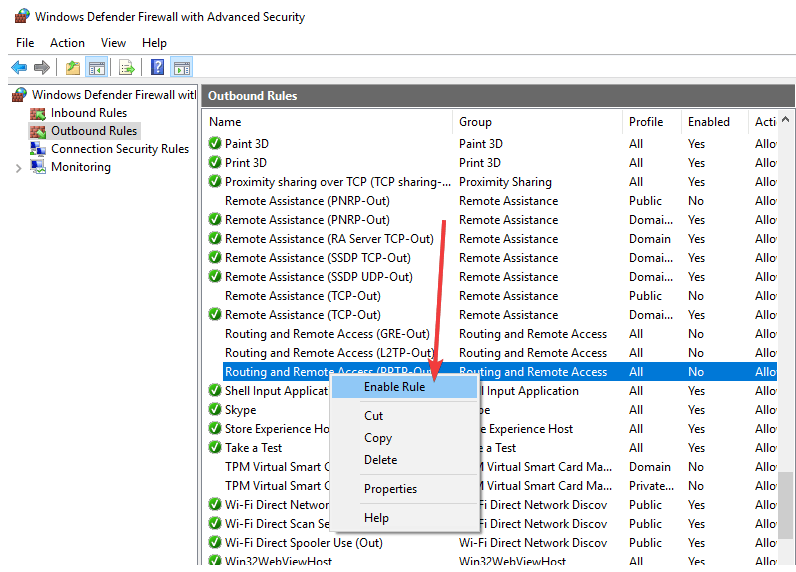






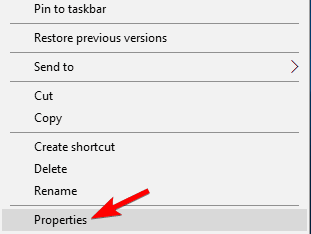



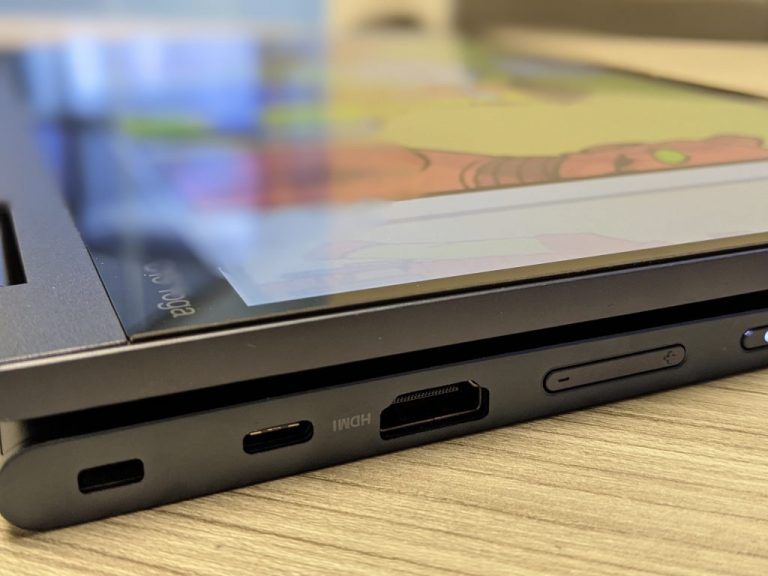

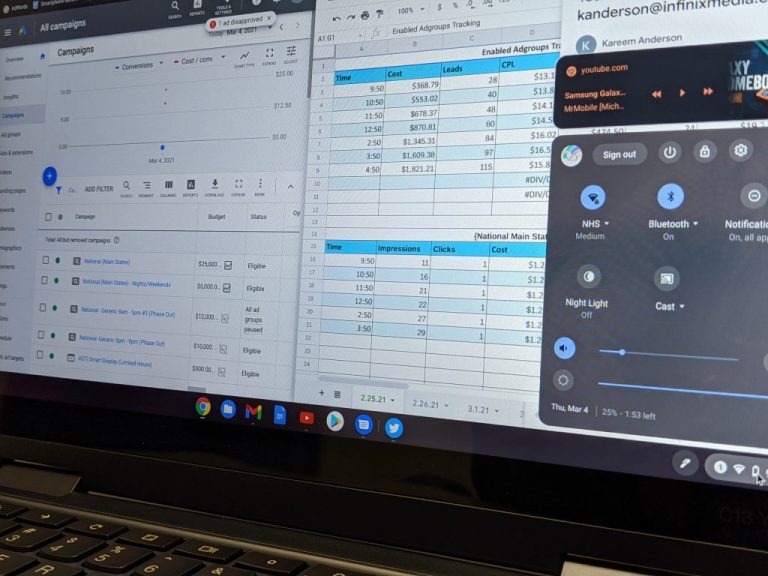


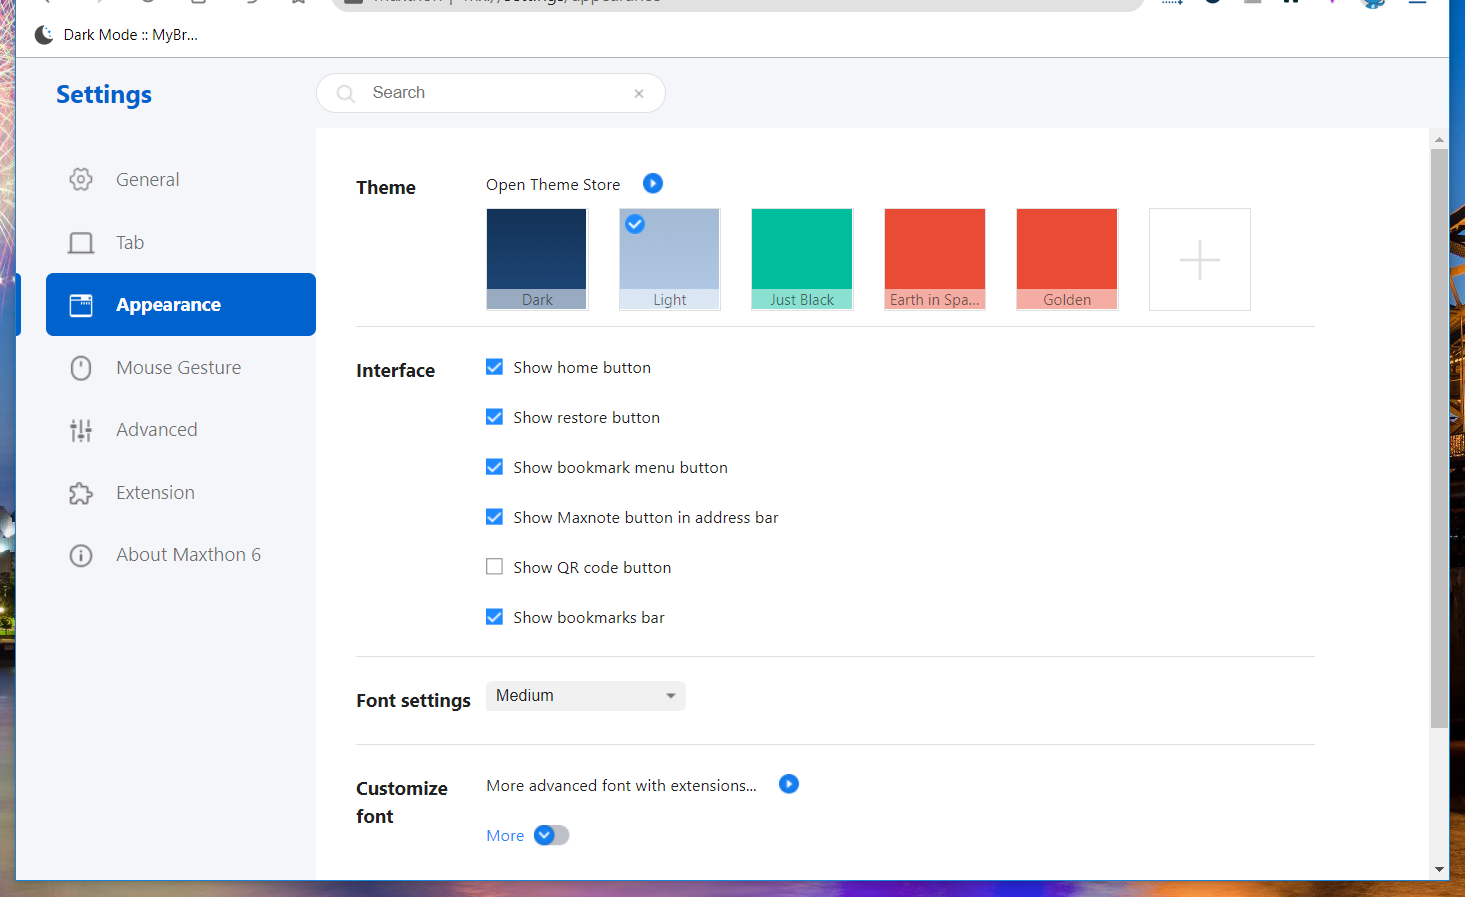
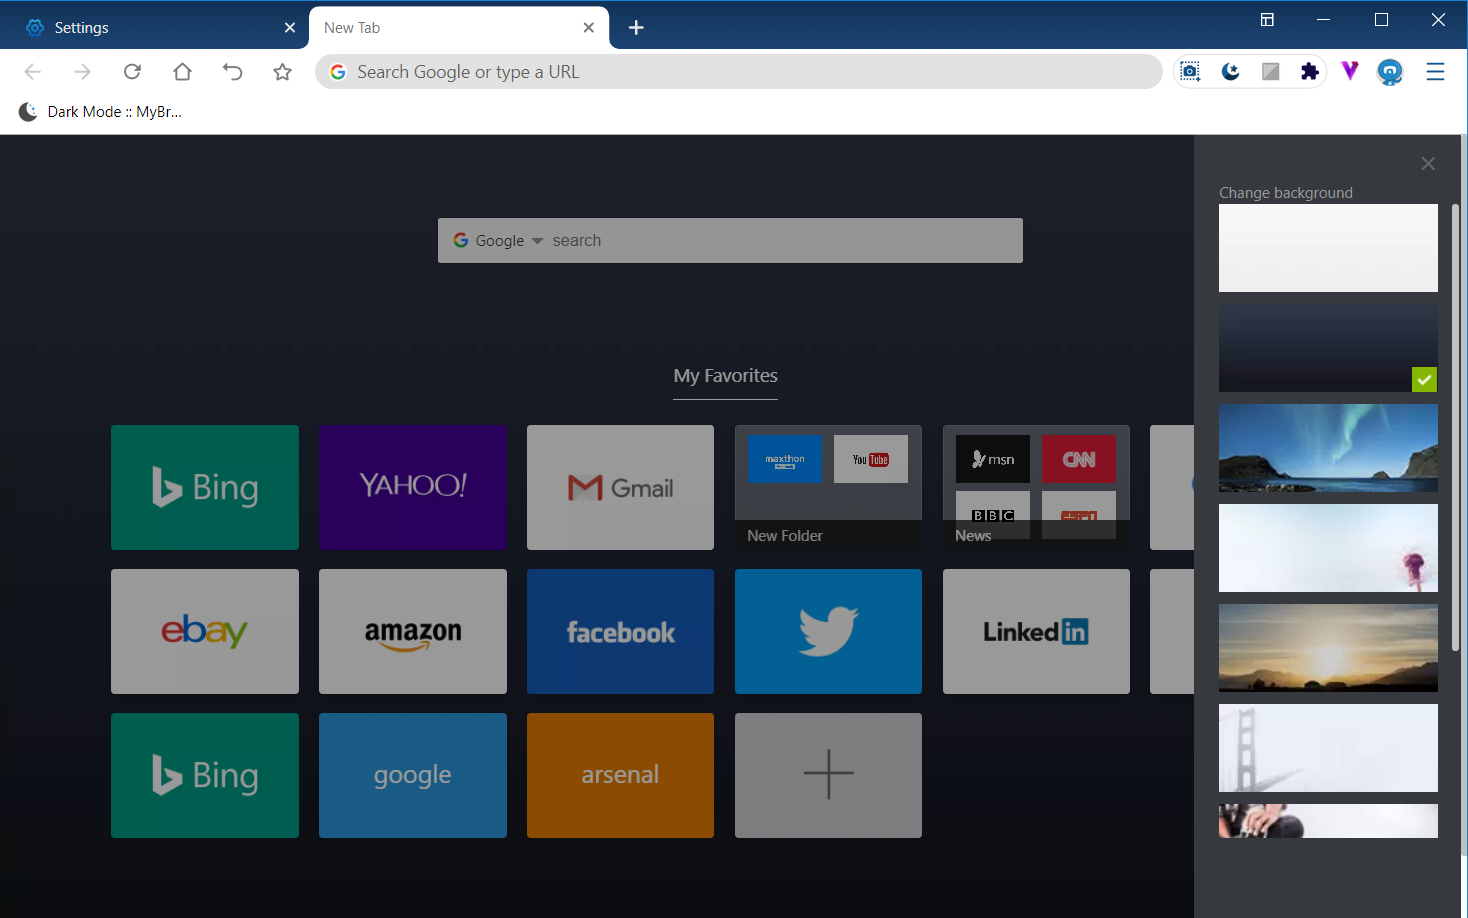
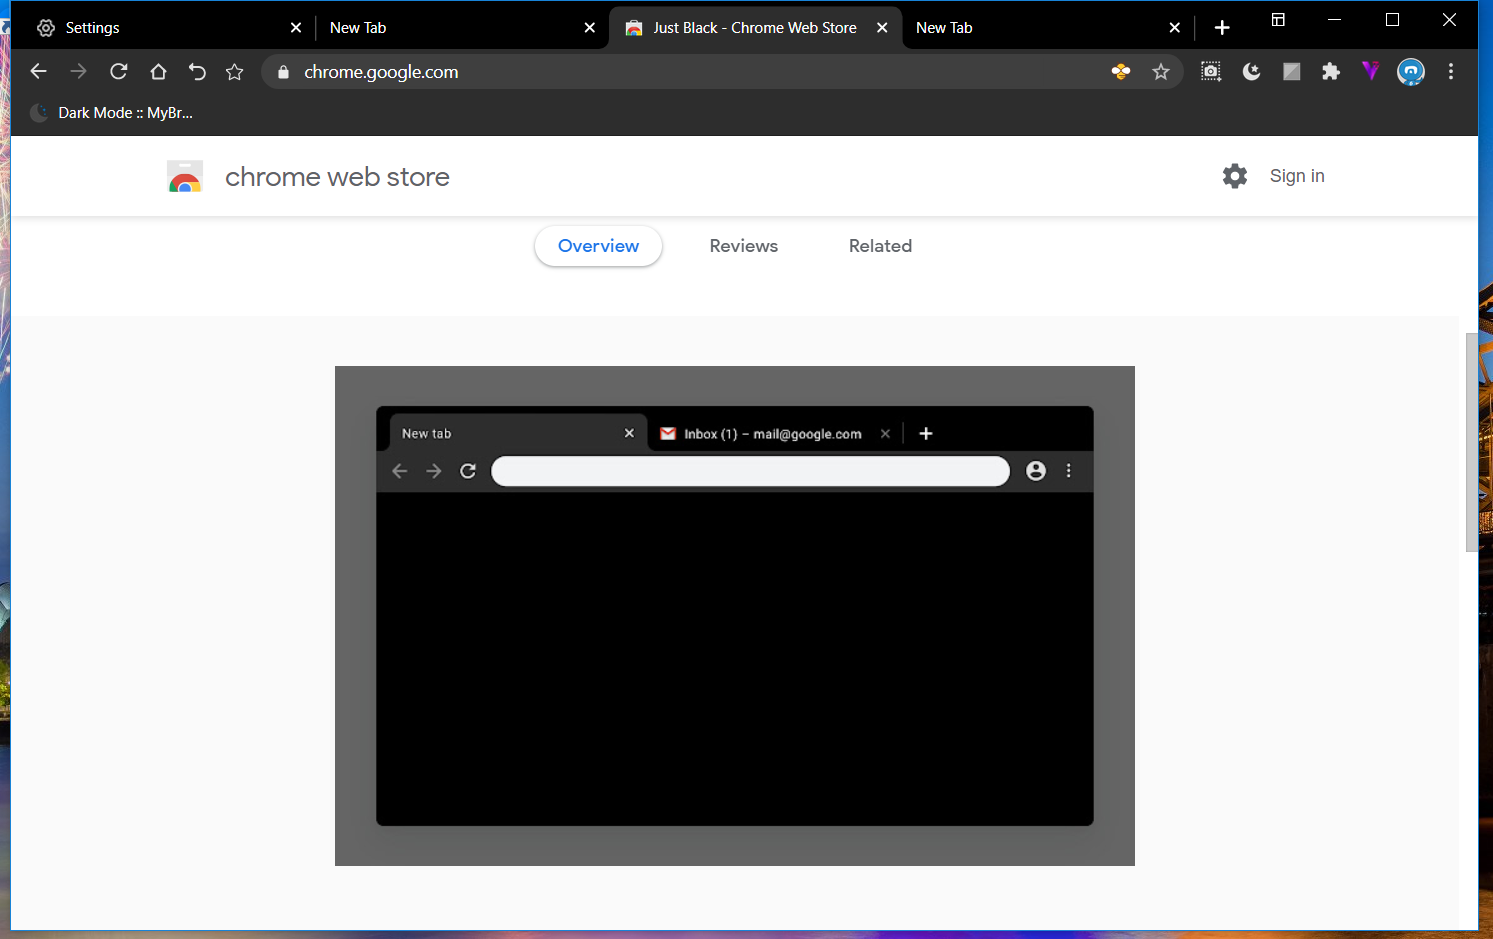

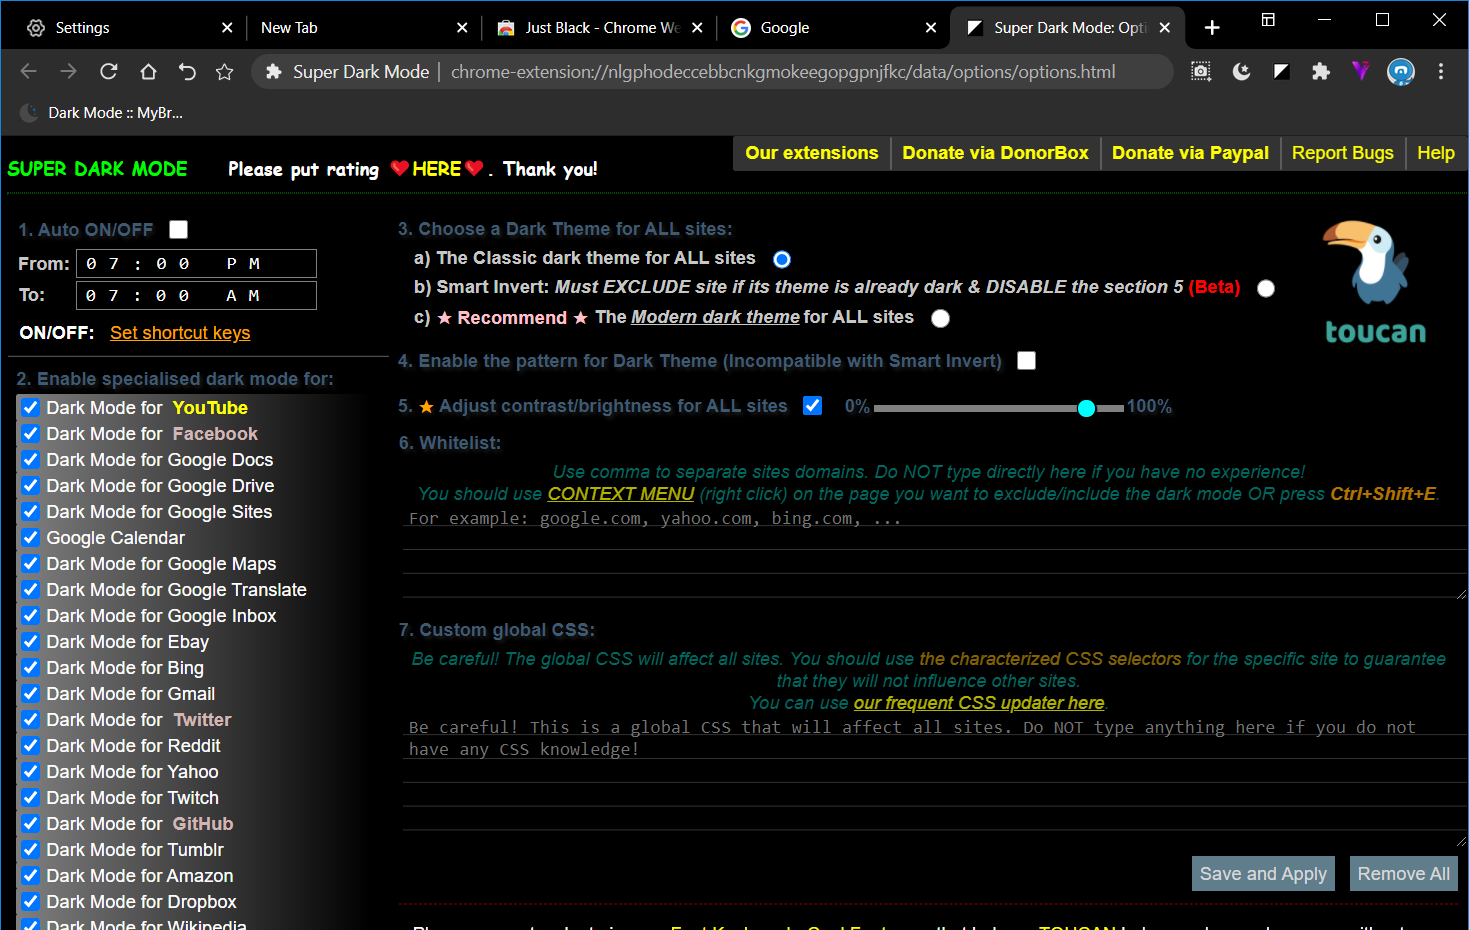
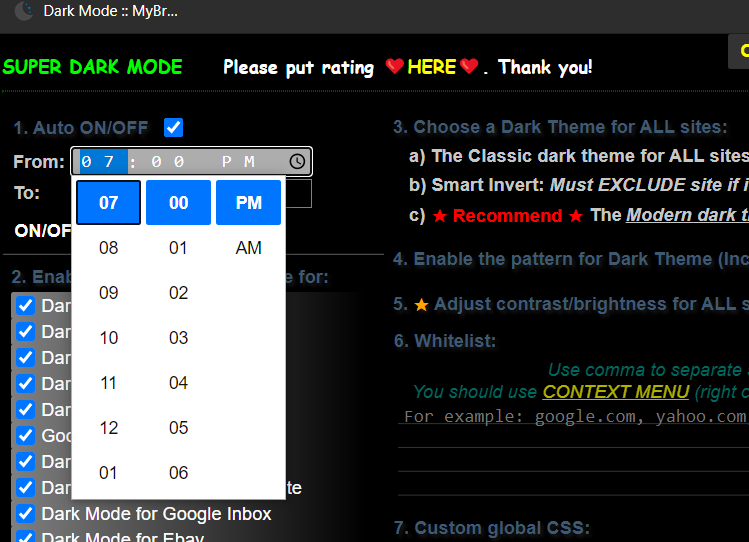
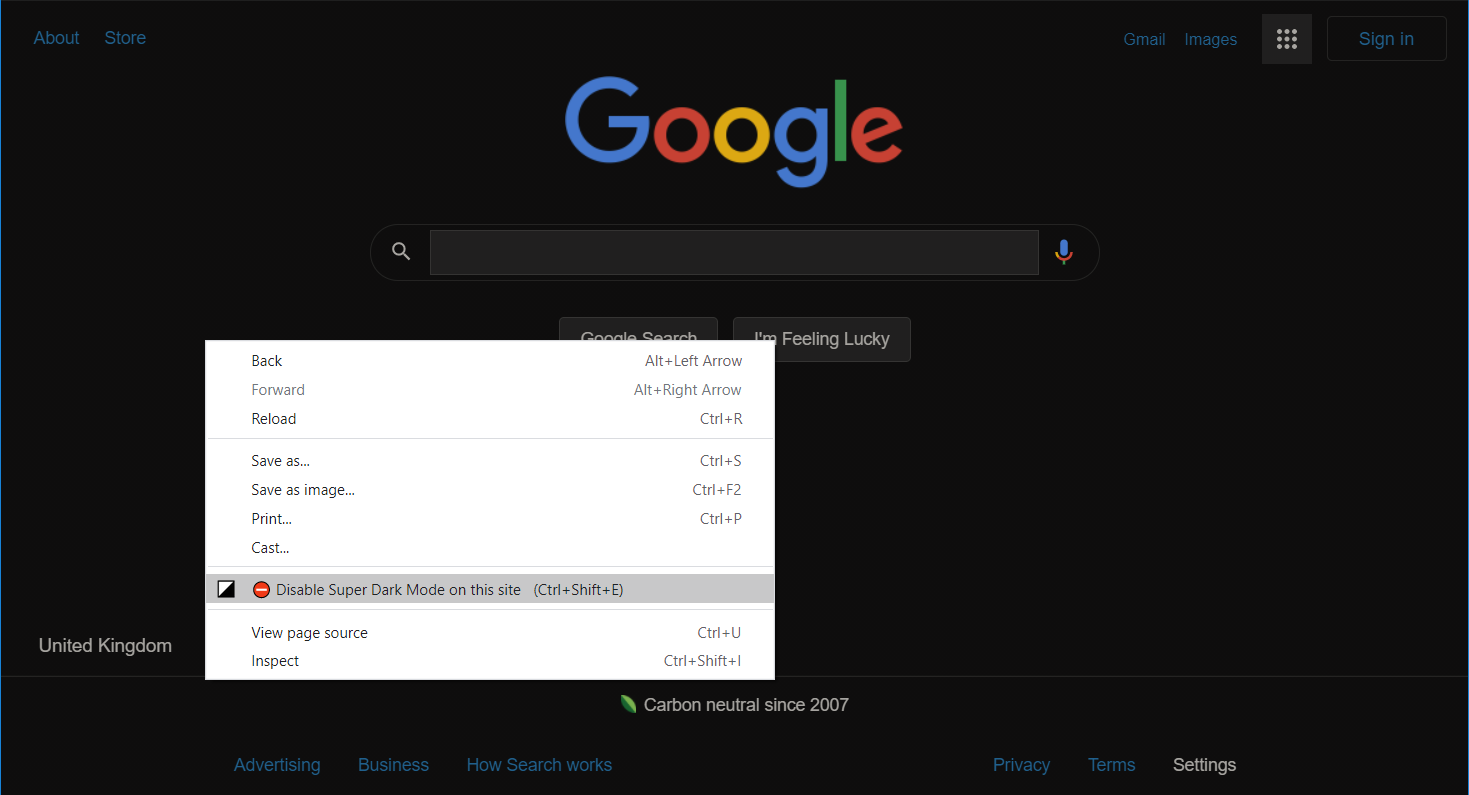



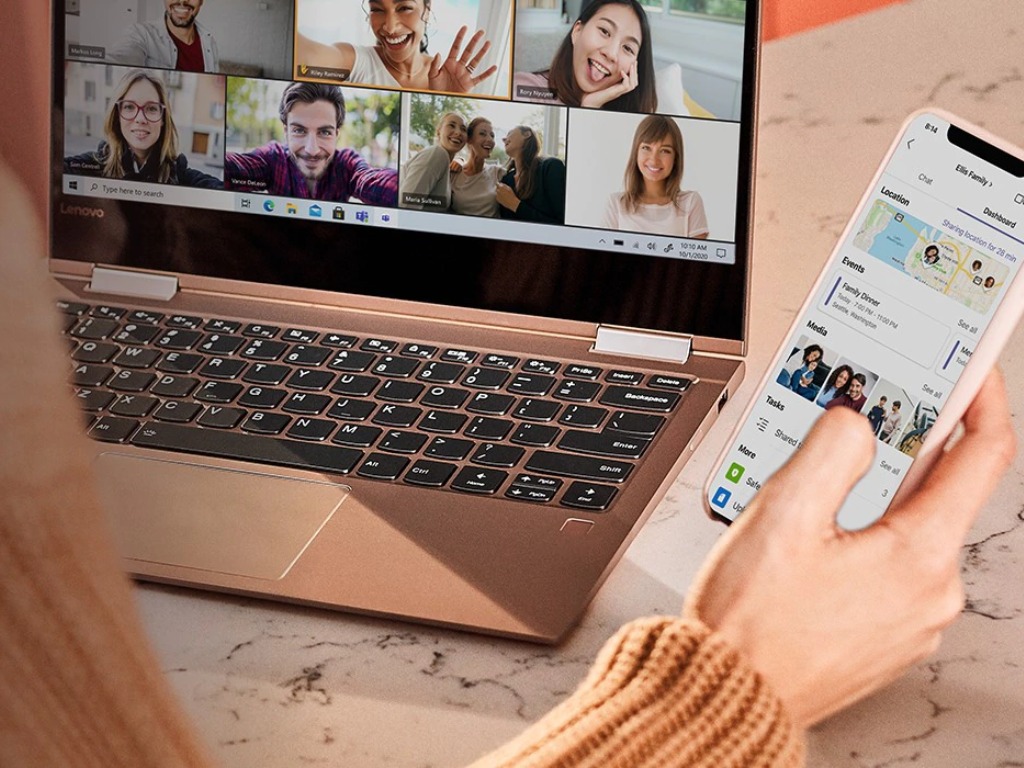
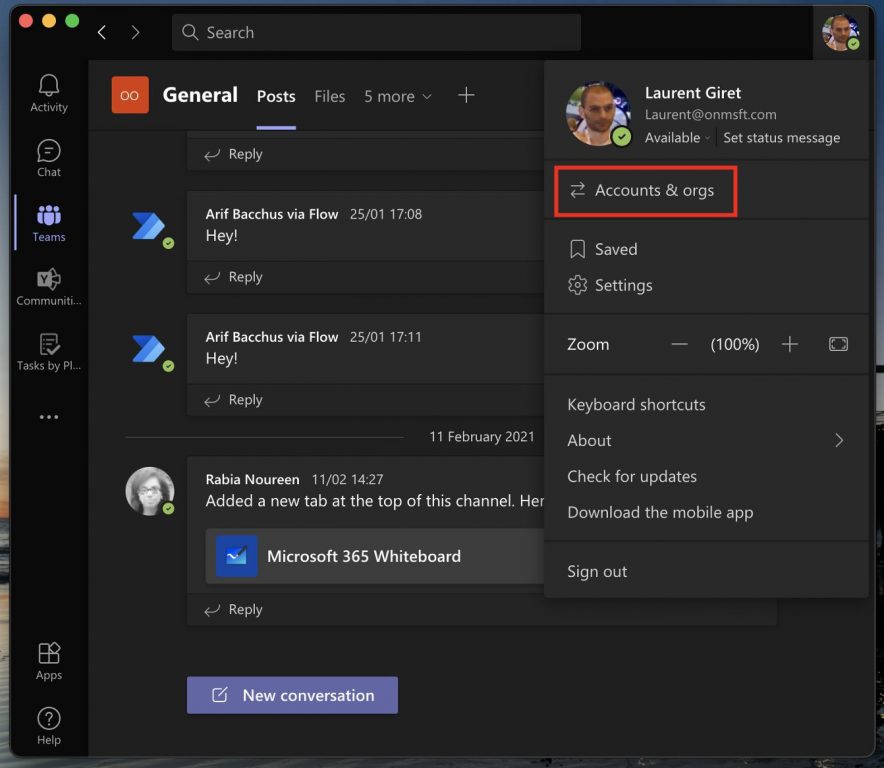
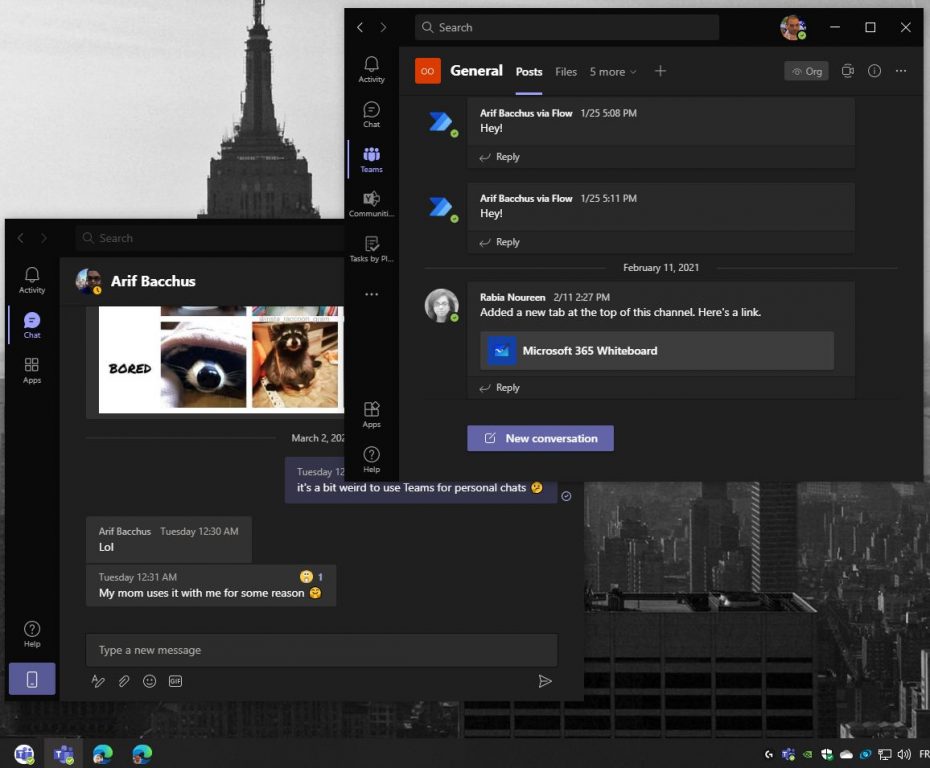
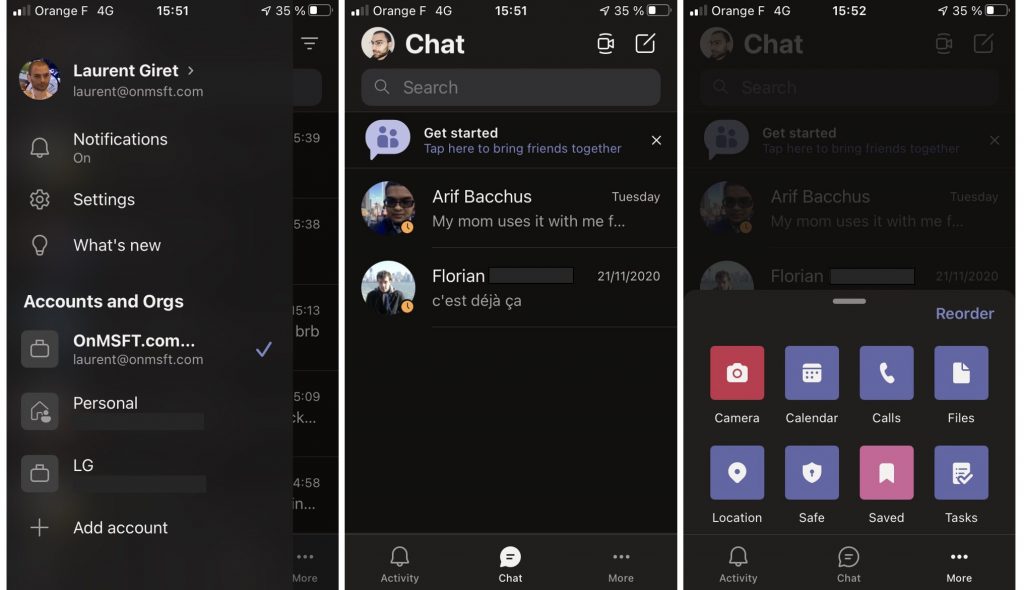
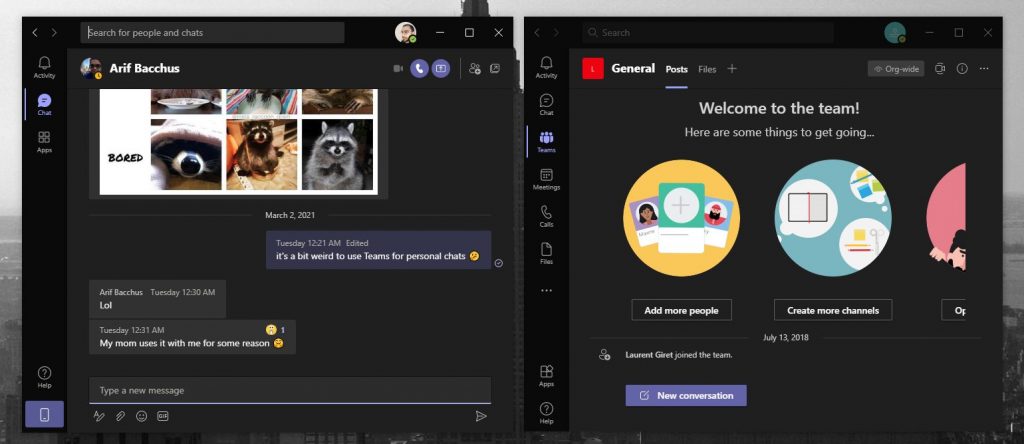



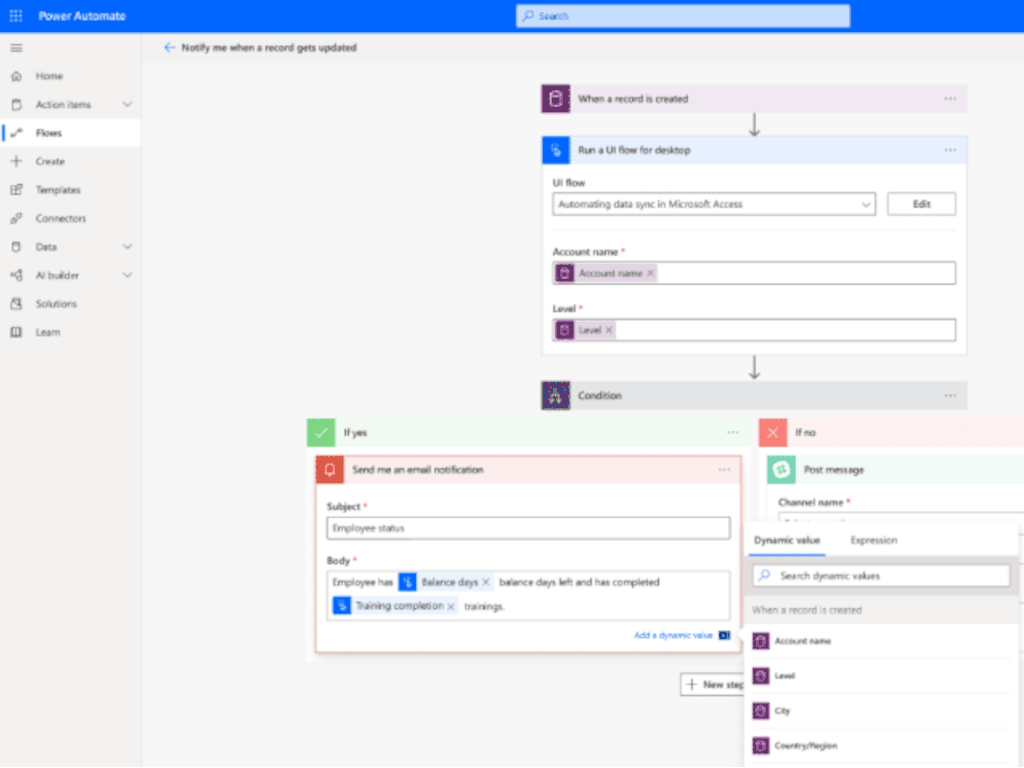
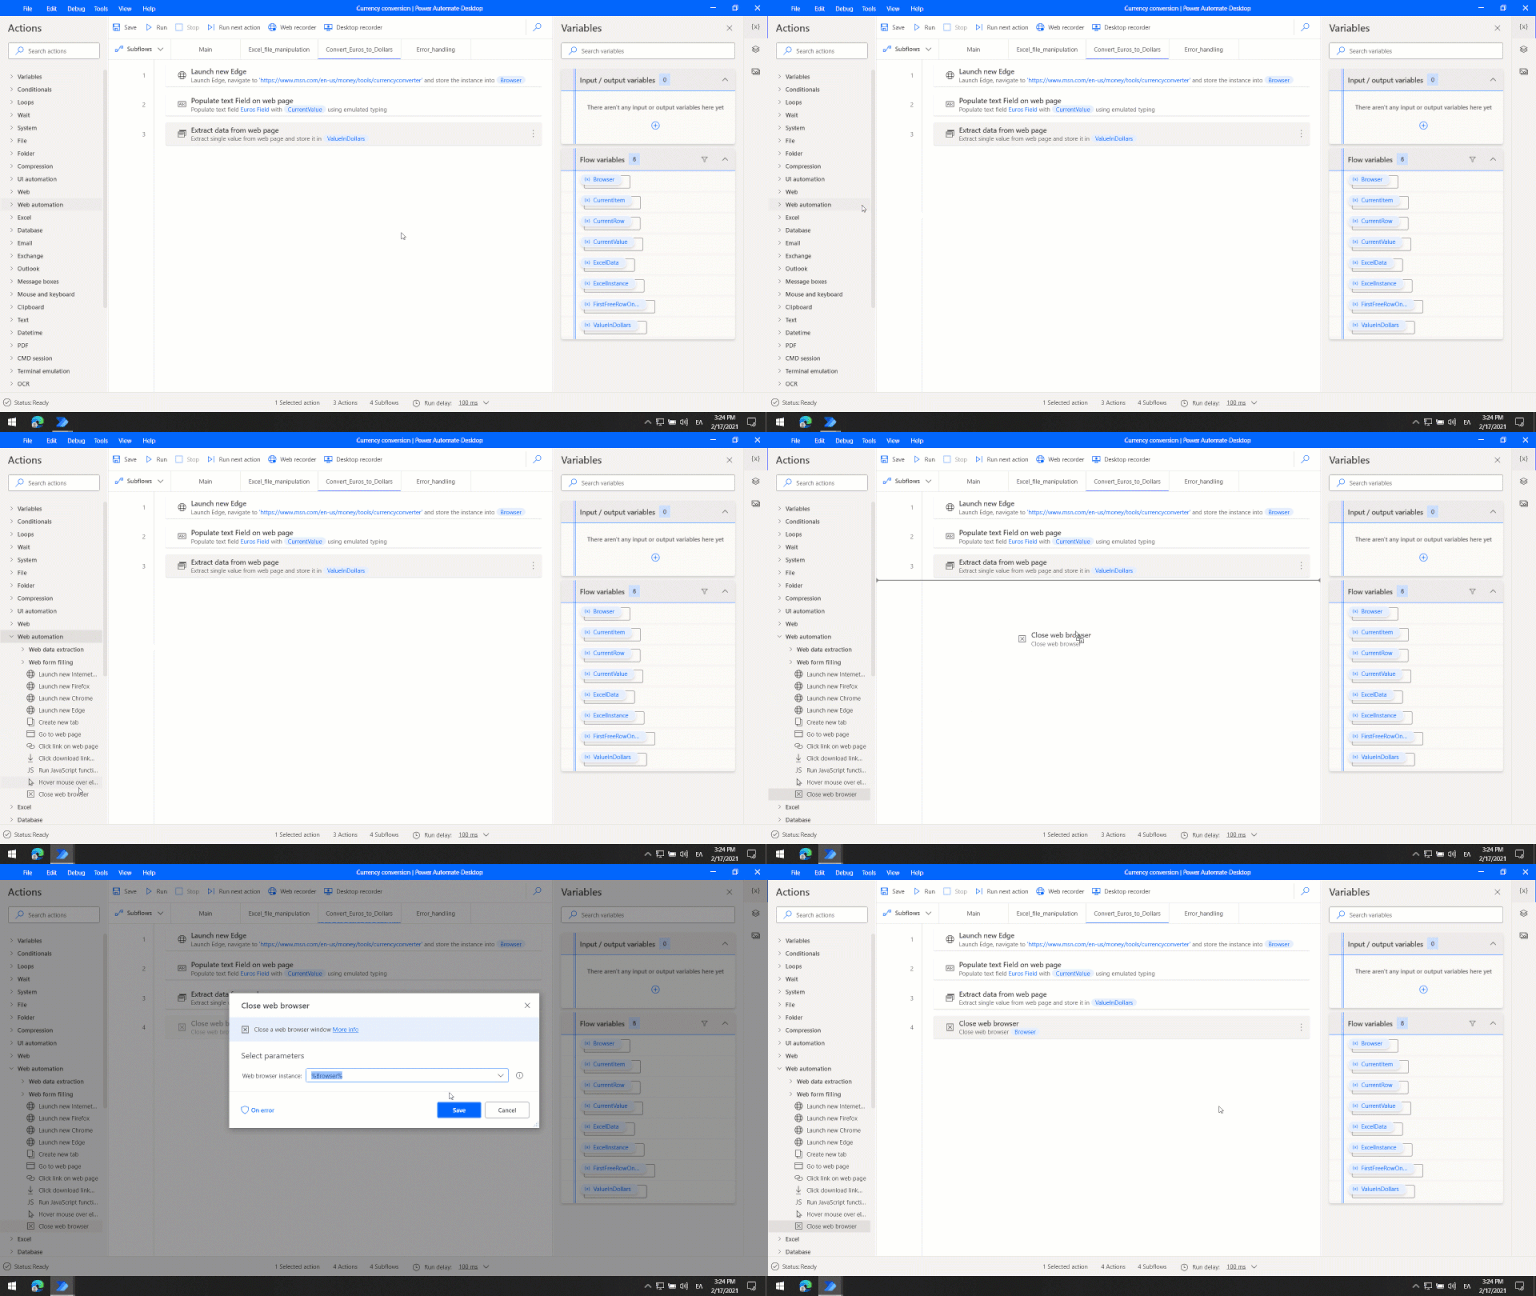









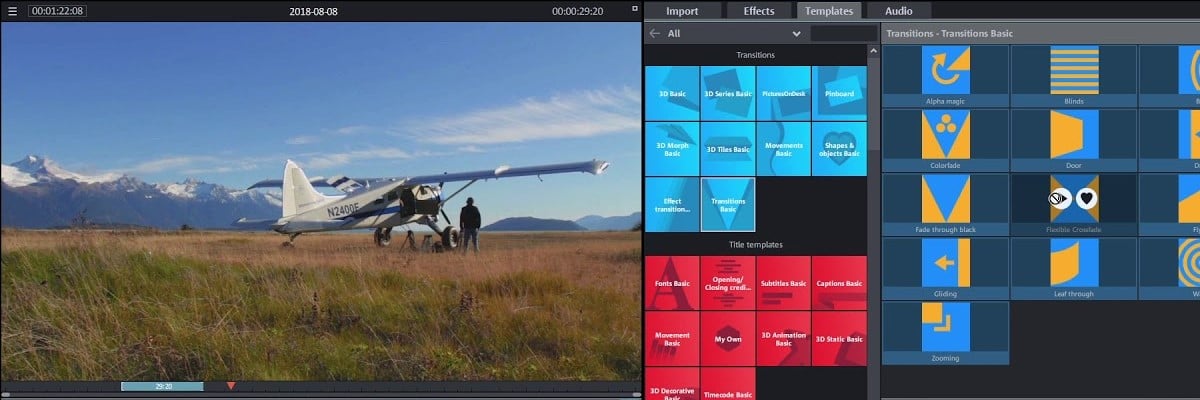
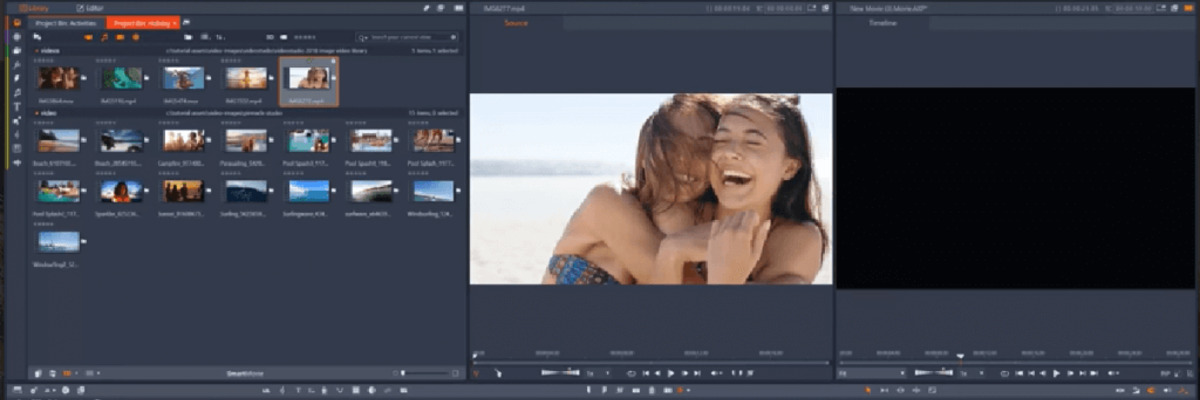
![Wondershare Filmora 11 Video Editor Review [2026 Honest Hands-On]](https://windowsreport.com/wp-content/uploads/2021/03/Wondershare-Filmora-11-video-editor-review.jpg)
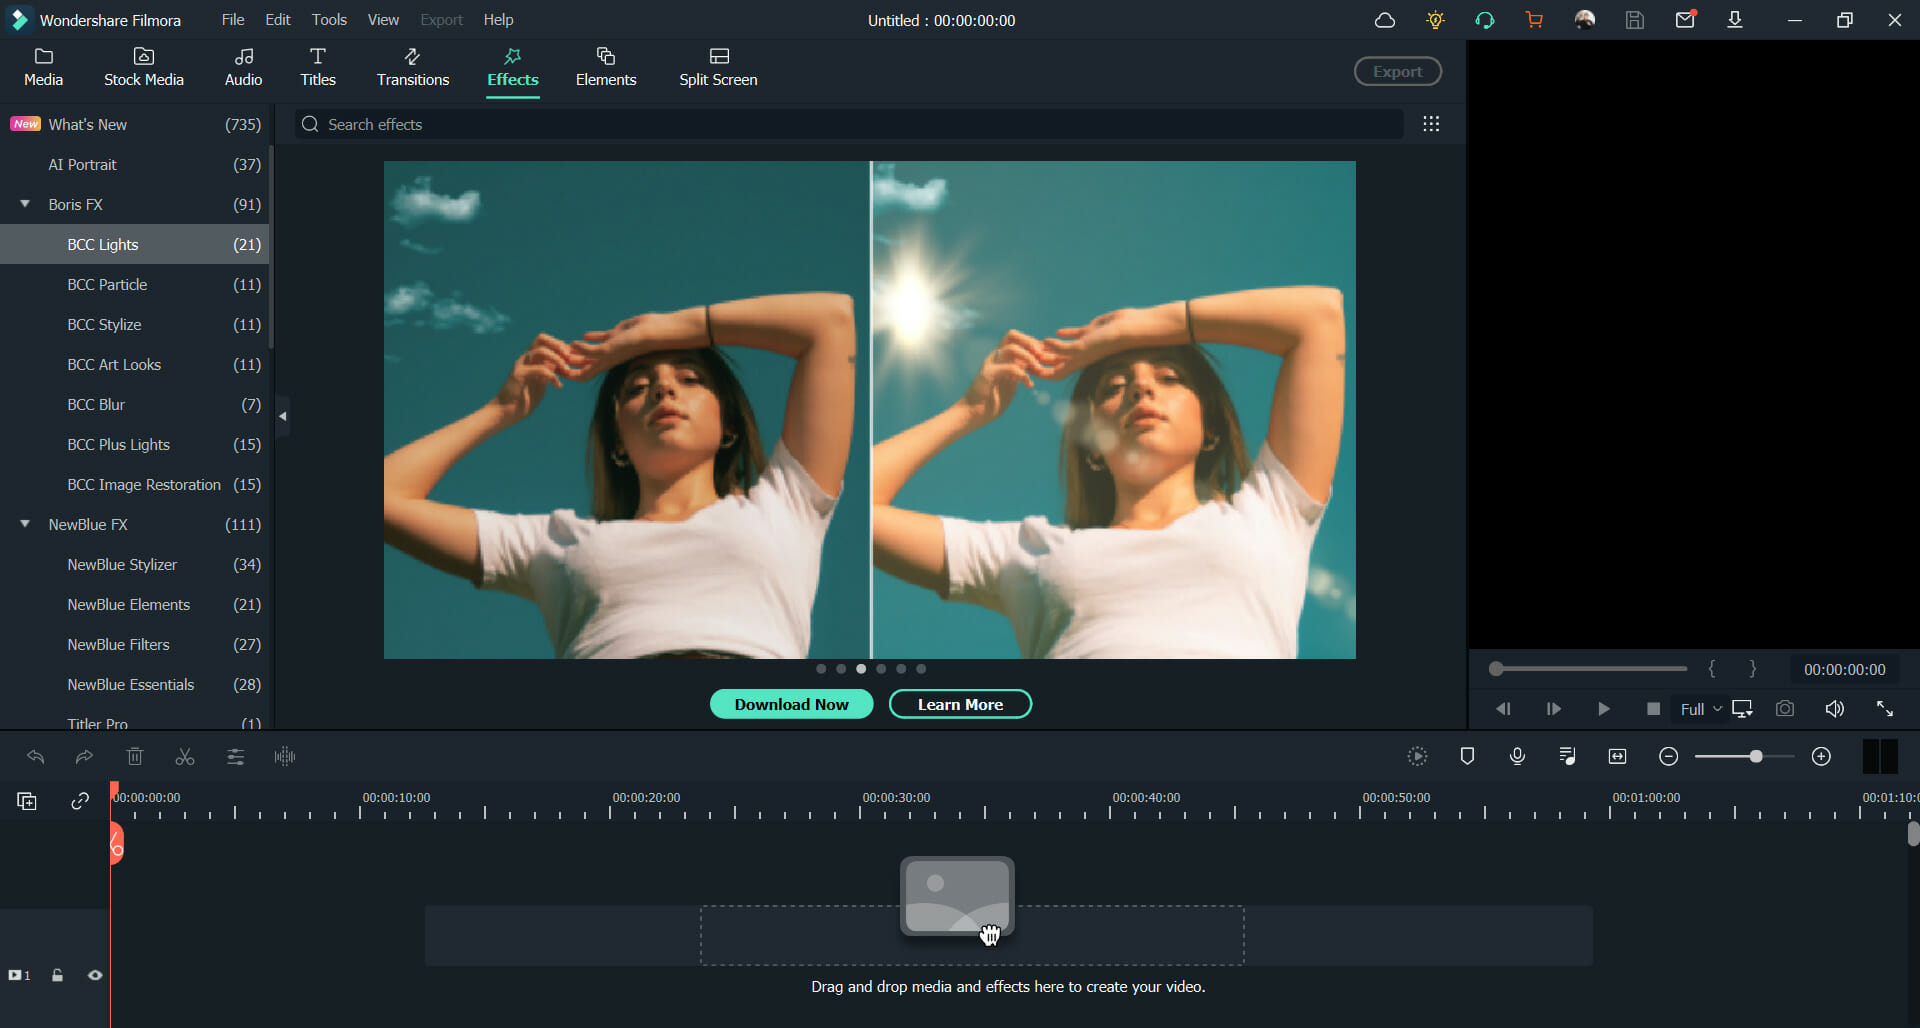
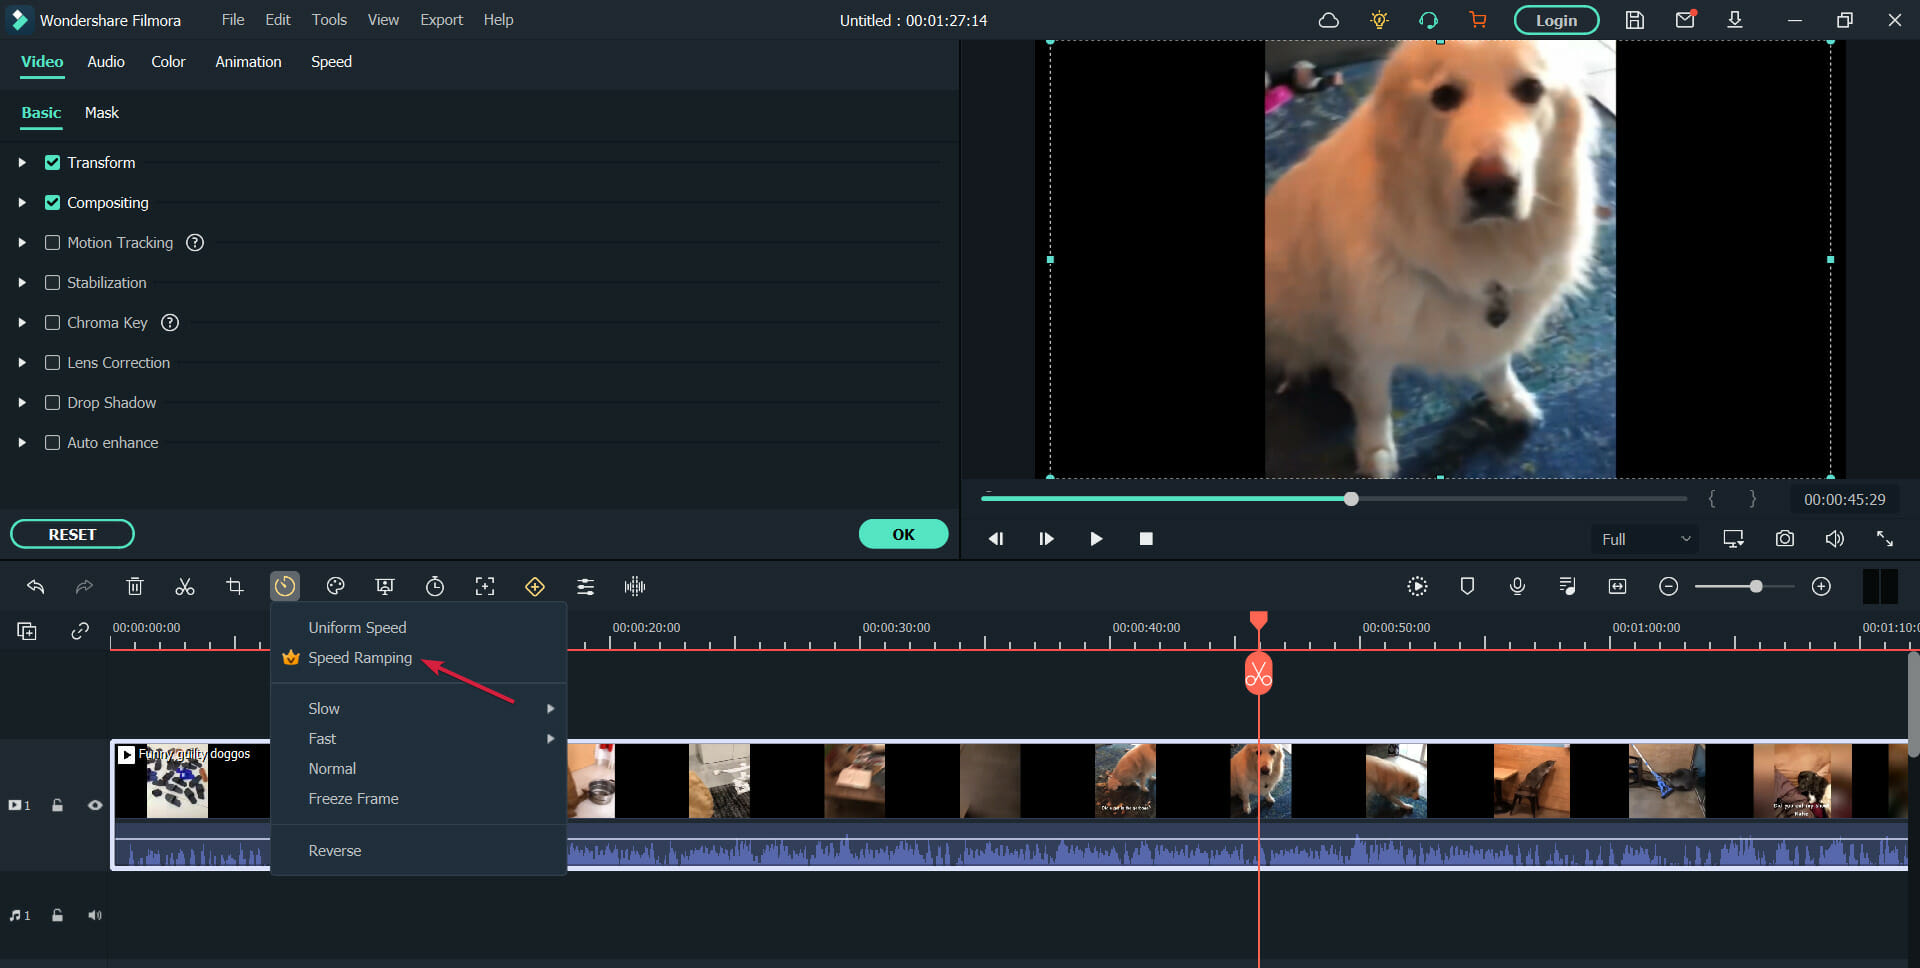

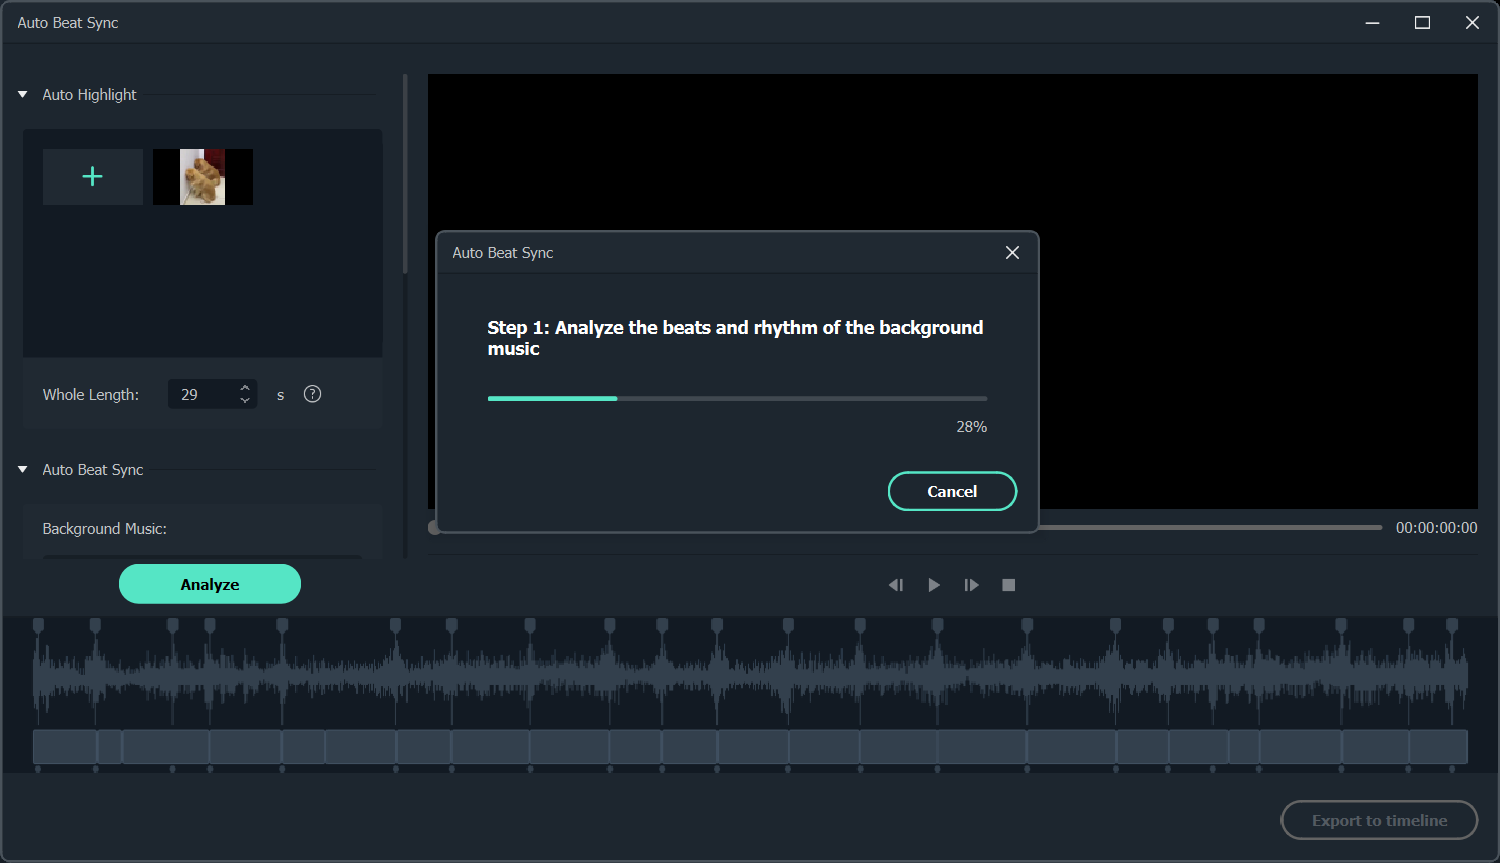
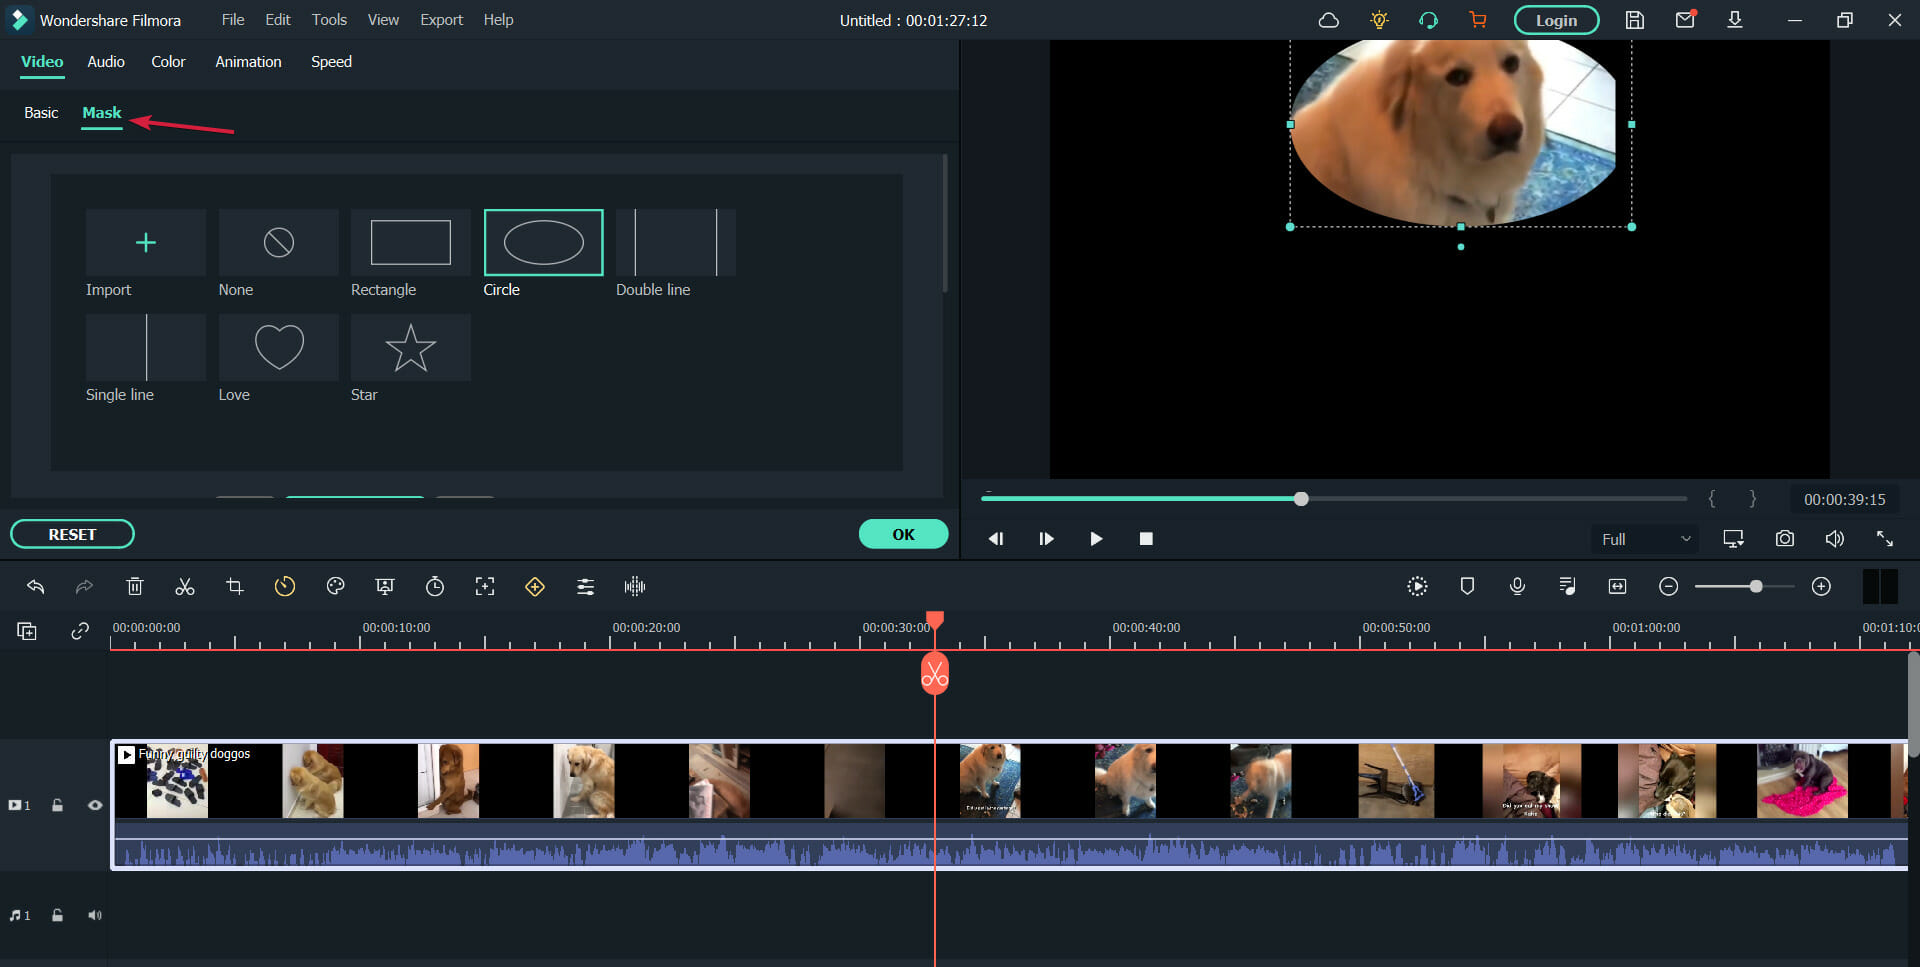


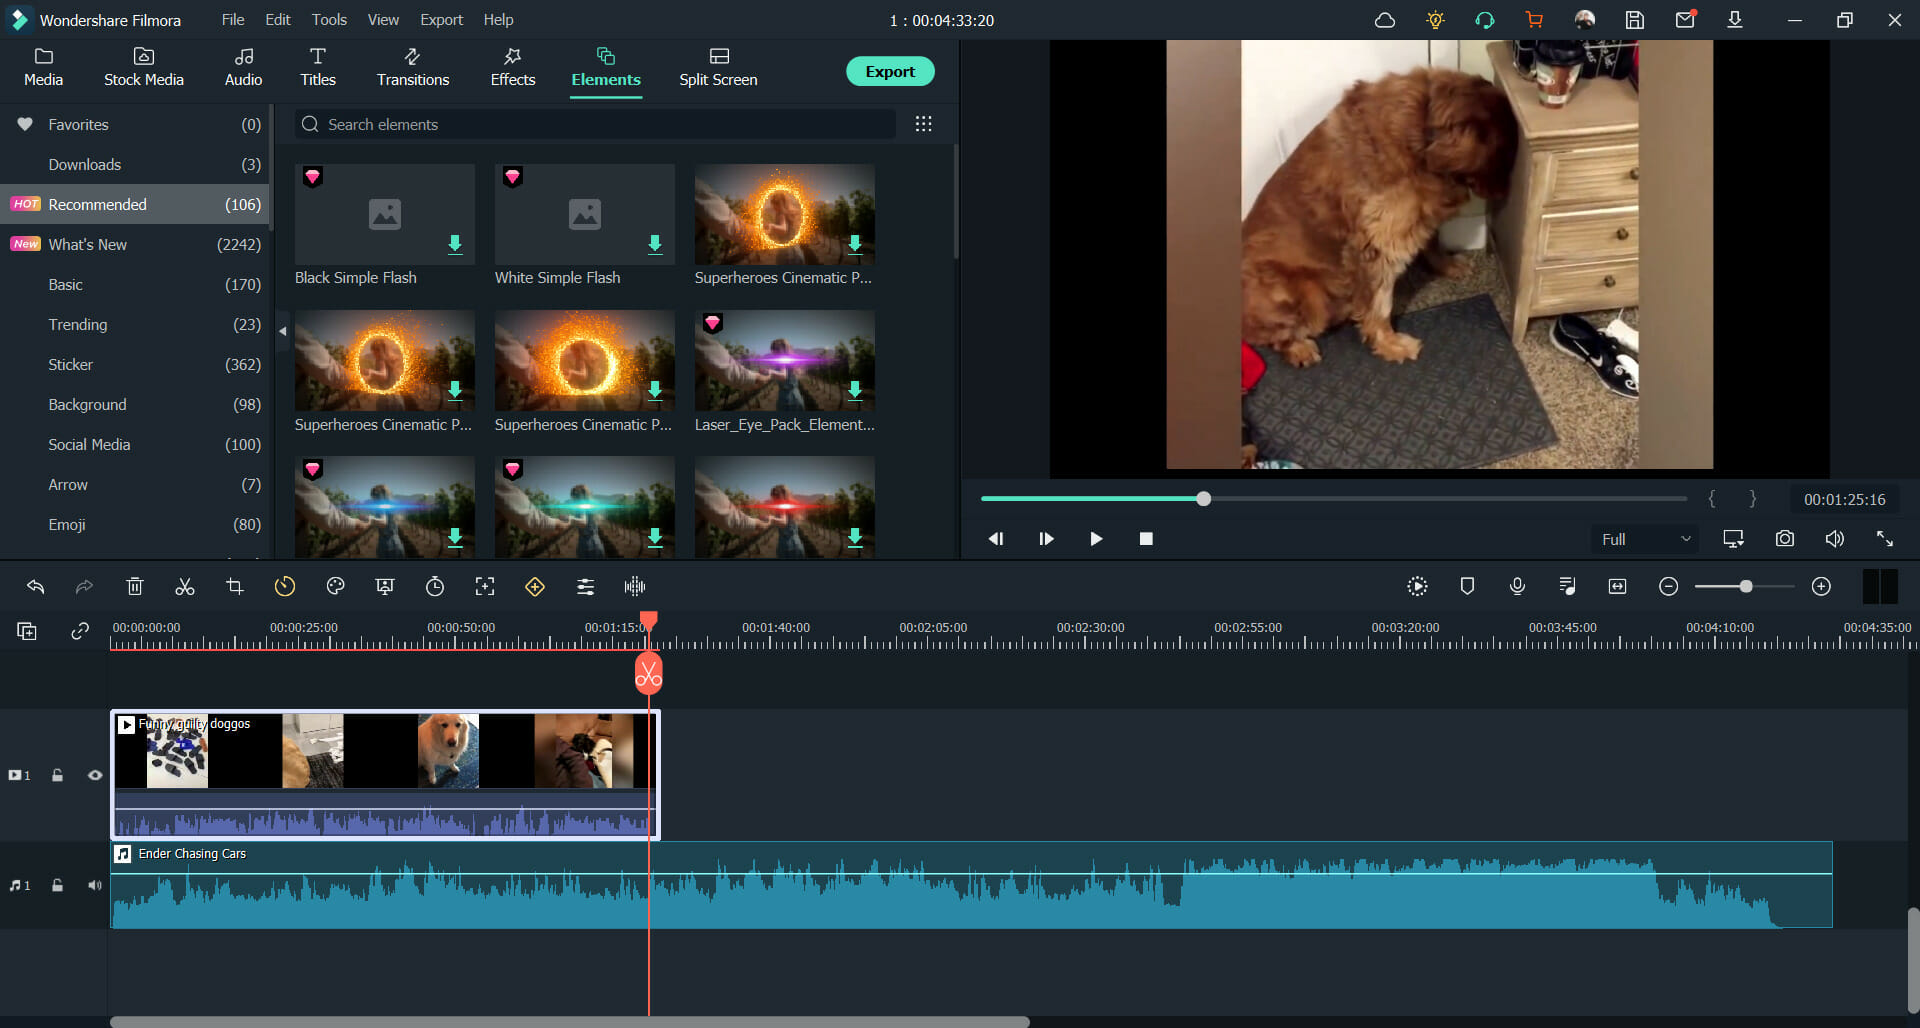
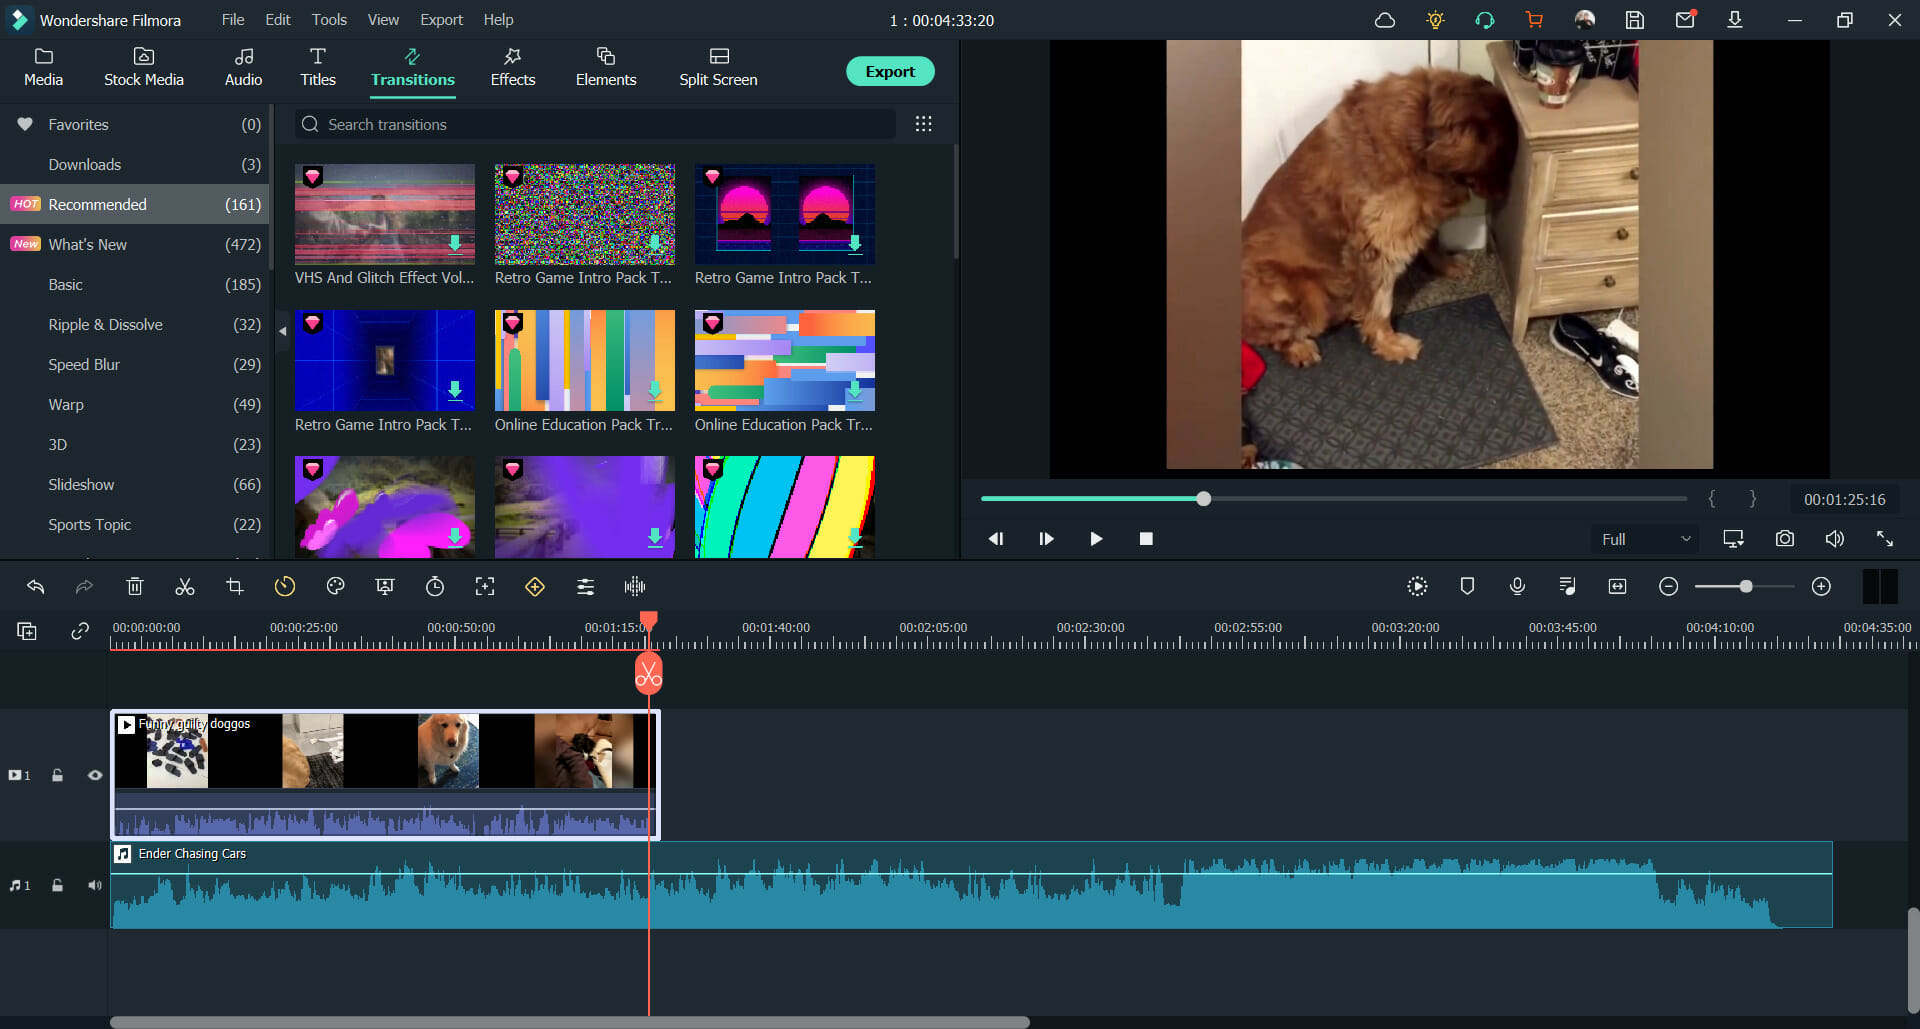
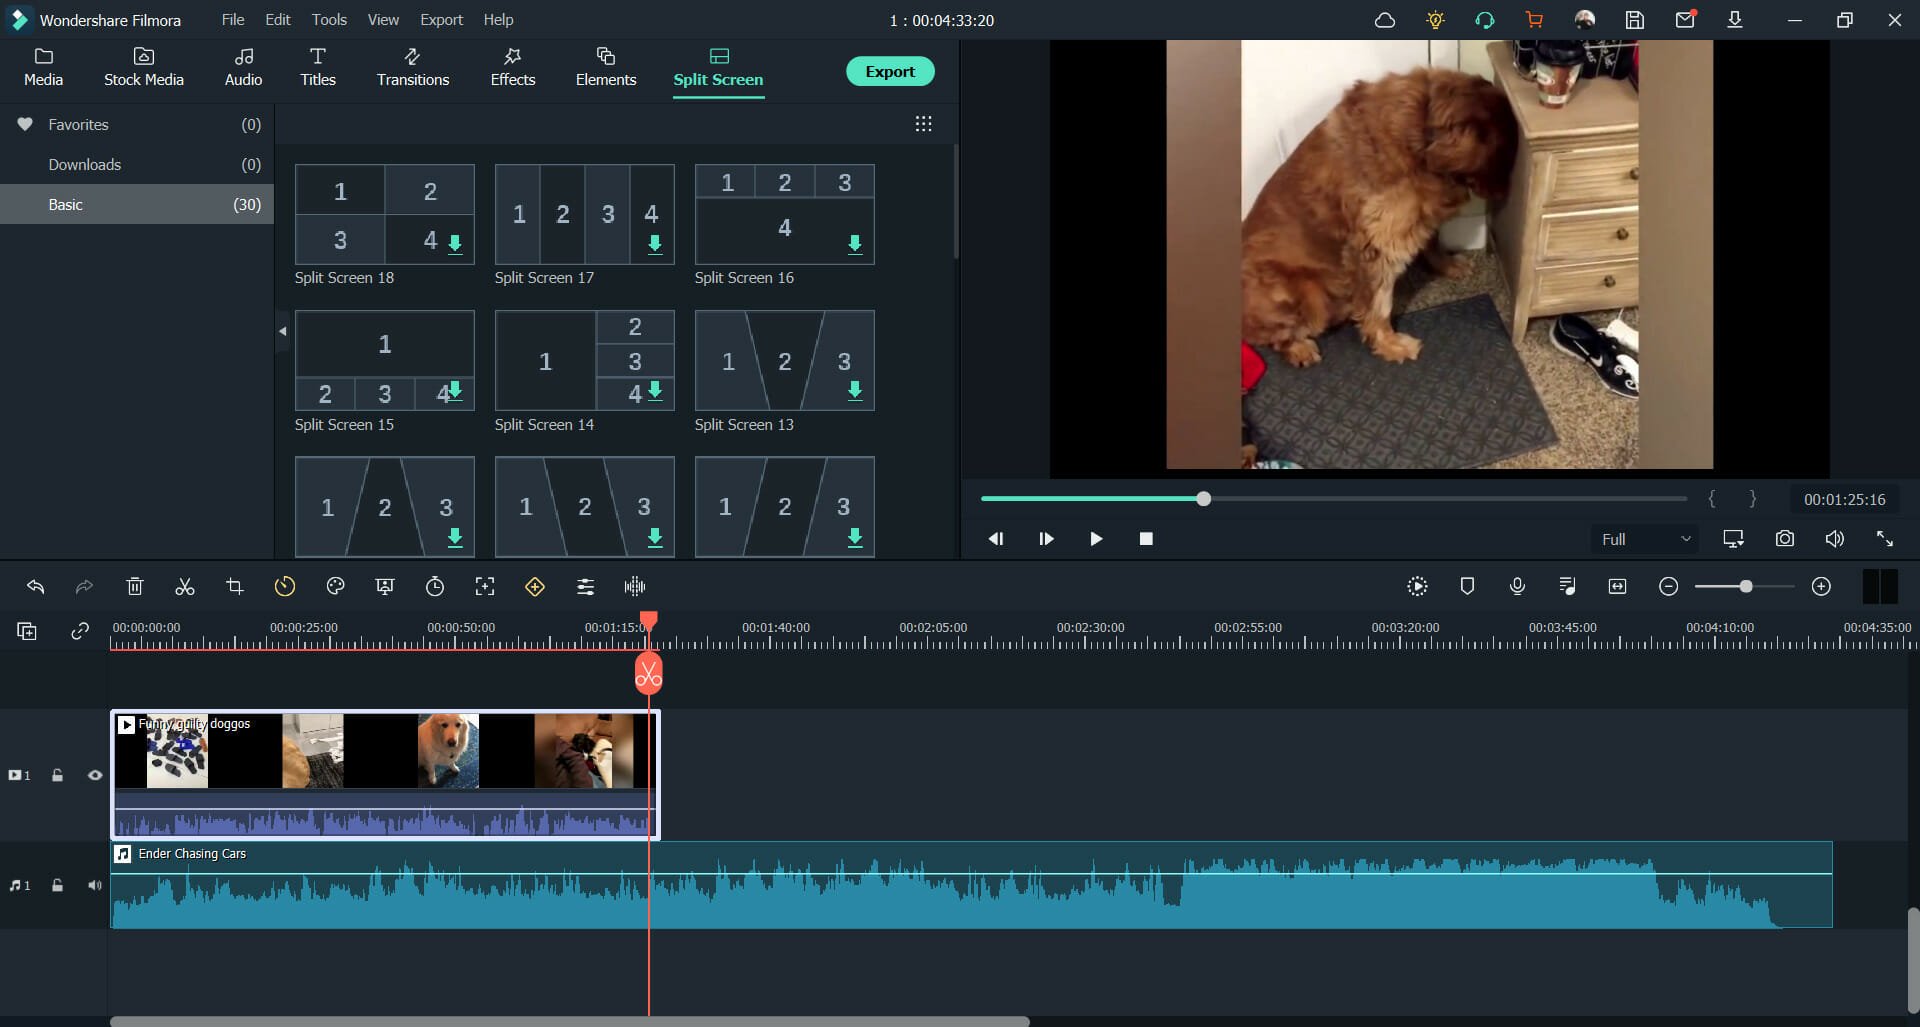


![5 best read-only PDF converters [Windows & Mac]](https://windowsreport.com/wp-content/uploads/2021/03/read-only-pdf-converter.jpg)



![FIX: VPN blocked by Webroot [8 Easy Solutions]](https://windowsreport.com/wp-content/uploads/2020/05/VPN-4.jpg)




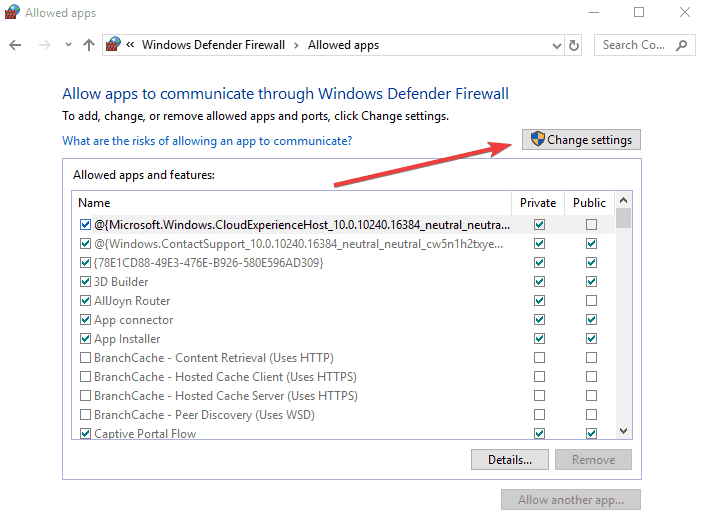
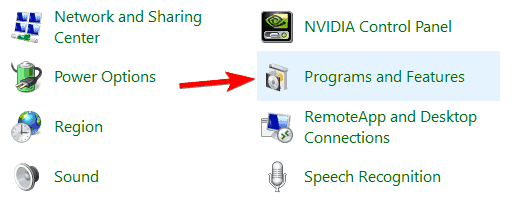
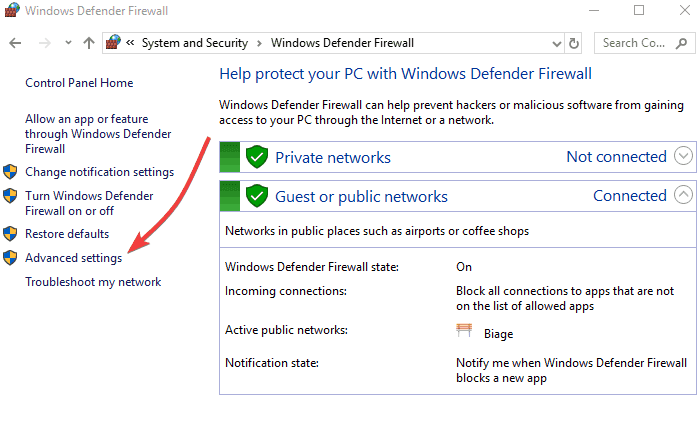







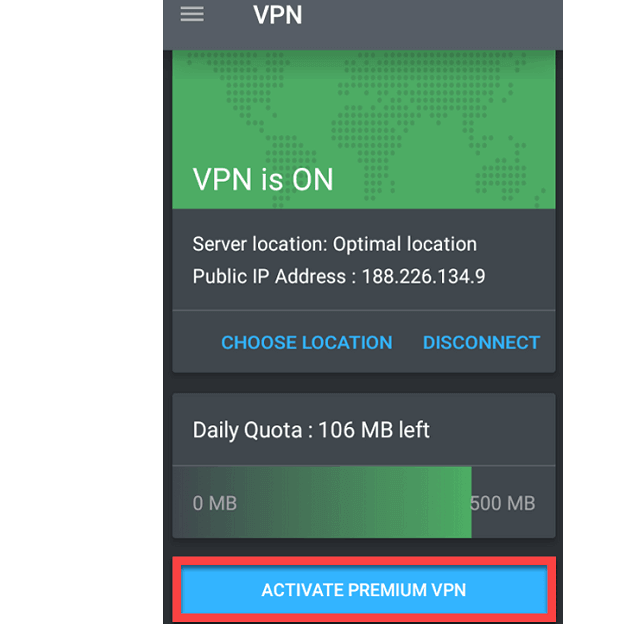




![Roundcube connection to storage server failed [Fixed]](https://windowsreport.com/wp-content/uploads/2021/03/roundcube-connection-to-storage-server-failed.jpg)