Many web browsers use auto-fill data feature that shows you all your recent inputs. This allows you to see all your previous inputs and to choose them from a menu, thus speeding up the entire process.
Although this feature is useful, it will list sensitive information such as your email address. Fortunately, there’s a way to protect your sensitive data, so today we’re going to show you how to remove auto-fill data in Chrome.
How do I delete auto-fill data in Chrome on Windows 10? The quickest way is to clear the browsing data from Chrome‘s settings. Chrome uses autofill to help you save time when you insert credentials and other personal data.
After that, you can delete specific auto-fill data or use the Manage Passwords option. To learn how to do that, check the steps below.
Quick Tip:
If you need to clear your auto-fill data because of security reasons, then maybe you should replace your browser entirely with a more secure alternative.
Here comes Opera, a web browser built using the same Chromium engine as Chrome, but with more emphasis on security.
This comes in the form of an ad-blocker, a tracking-blocker, and most importantly a VPN that has no traffic limit.
With these tools, you don’t even need to worry about cryptojacking or having to delete your auto-fill data, since everything will be safe.
”Opera”
”Visit
How do I remove auto-fill data in Chrome?
- Clear browsing data
- Delete specific auto-fill data
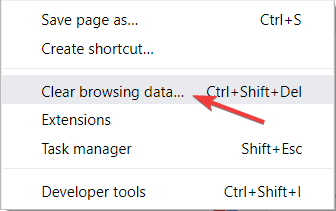
- Use keyboard shortcut
- Use the Auto-fill Passwords option
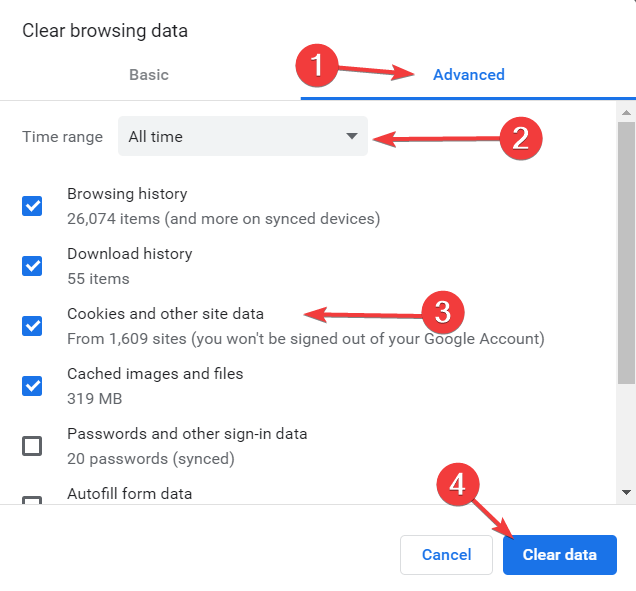
1. Clear browsing data
- Click the Menu button (3 vertical dots) in the top right corner and choose Settings from the menu.
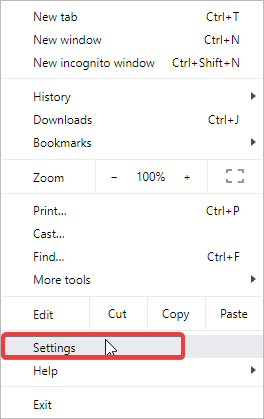
- Scroll all the way down and choose Show advanced settings.

- Navigate to the Privacy section and click the Clear browsing data button.
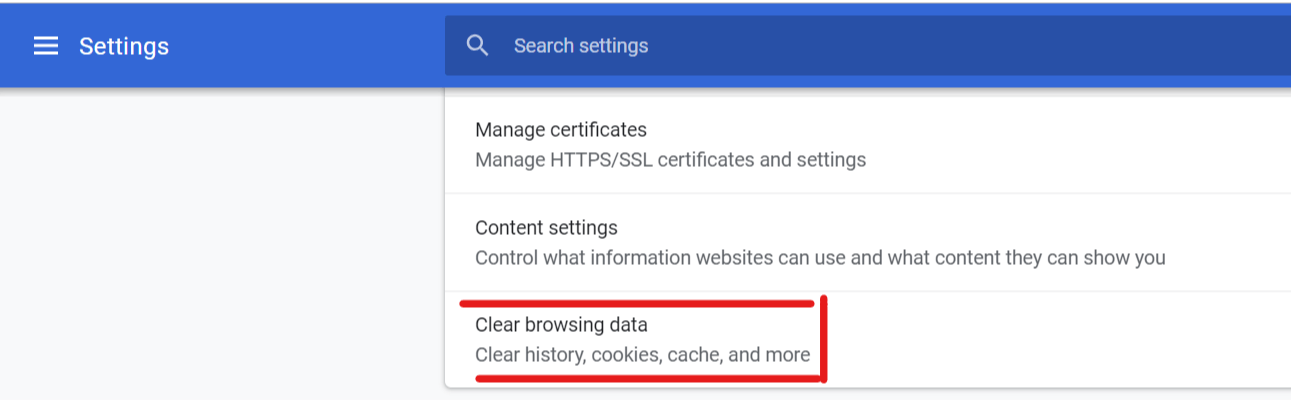
- Be sure to only check Auto-fill form data option, under Advanced.
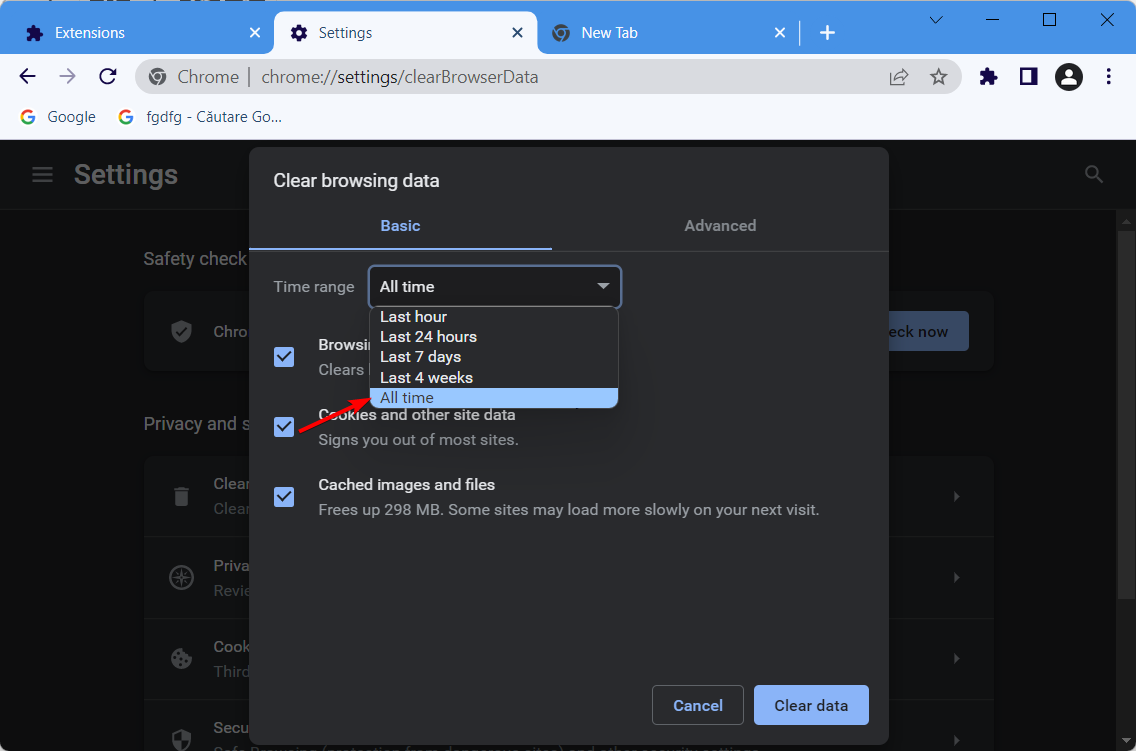
- In the Obliterate the following items from menu select the desired time period. If you want to delete all auto-fill data, select the beginning of time option.
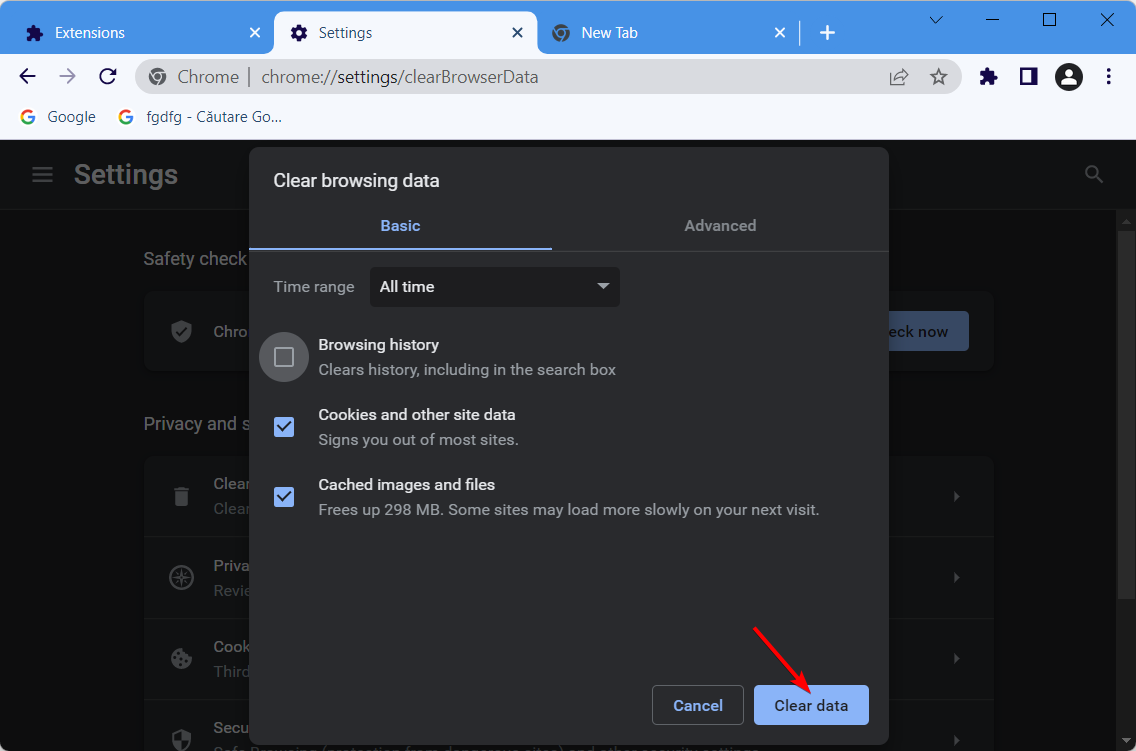
- Lastly, click the Clear browsing data button to completely remove auto-fill data.
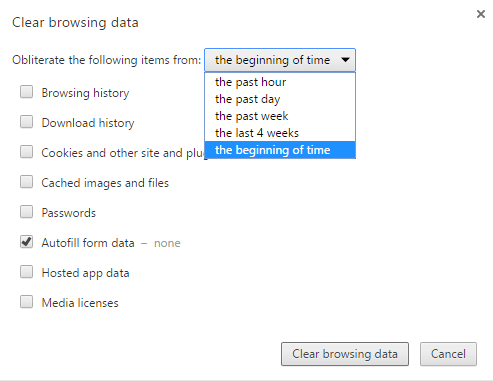
Removing auto-fill data in Chrome is quite simple, and you can do it by clearing your browsing data. We have to mention that this method will remove all auto-fill data, so keep that in mind.
As you can see, removing auto-fill data from Chrome using this method is quite simple. Although this method is simple, it offers very limited options.
You can’t delete specific auto-fill data, and you can only delete auto-fill data from the past hour, day or week. There’s also an option to delete auto-fill data from the last 4 weeks or all auto-fill data.
This method is useful, but it offers limited options when it comes to data removal.
2. Delete specific auto-fill data
- Open the Settings tab. For more instructions on how to do that, follow steps 1 and 2 from the previous solution.
- Once you open settings, navigate to the Auto-fill section.
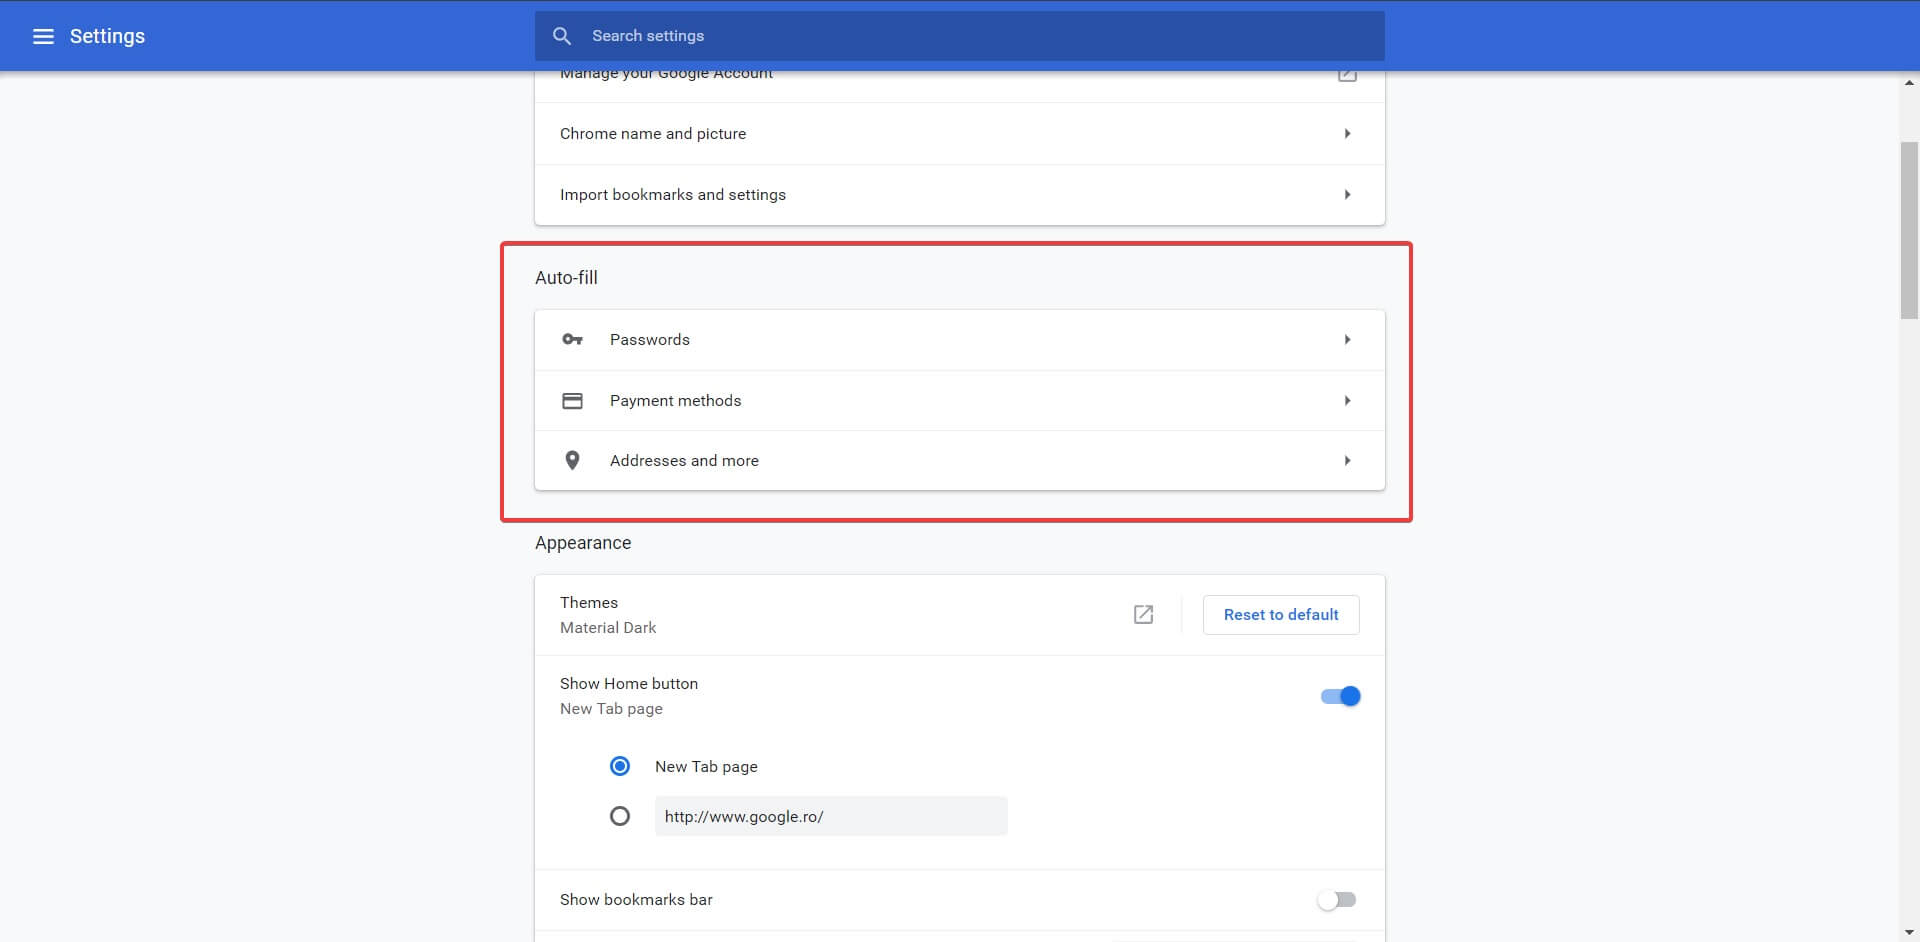
- Now you should see your auto-fill information.(Passwords, Payment methods, and Addresses).
- In each section, each entry has 3 vertical dots at the end. Click on them and choose Remove.
- Repeat the previous step for all autofill entries that you want to remove.
Although the previous method is simple and fast, some users prefer a more advanced approach. If you want to see your auto-fill data and choose which entry you want to remove.
As you can see, this method allows you to see specific information before you remove it. This is quite useful if you only want to remove certain entries from auto-fill settings.
However, if you want to remove all auto-fill entries quickly, we suggest that you use the previous method.
3. Use keyboard shortcut

- Go to the website that gives you auto-fill suggestions.
- Click the input field and start typing your input.
- After a suggestion appears, use the arrow keys to select the input that you want to remove.
- Now press Ctrl + Delete or Shift + Delete shortcut. By doing so you’ll delete that entry from auto-fill suggestions.
- Repeat the previous step for all entries that you want to remove.
One of the easiest ways to remove certain auto-fill entries from Chrome is to use a keyboard shortcut. This method is rather simple since it doesn’t require you to change any settings.
We have to mention that this solution is quite simple, but it requires you to delete autofill entries manually. In addition to manual deleting, you’ll have to visit a specific website to delete auto-fill entries for it.
This isn’t a problem if you want to delete entries for a website or two, but if you have multiple websites and multiple entries, you might want to use a more advanced solution.
4. Use the Auto-fill Passwords option
- Open Chrome‘s Settings.
- Go to Auto-fill section.
- Click on Passwords.
- List of all saved passwords will now appear. Select the desired auto-fill entry that you want to remove and click the 3 dots at the end of the entry to get details about it or to remove it.
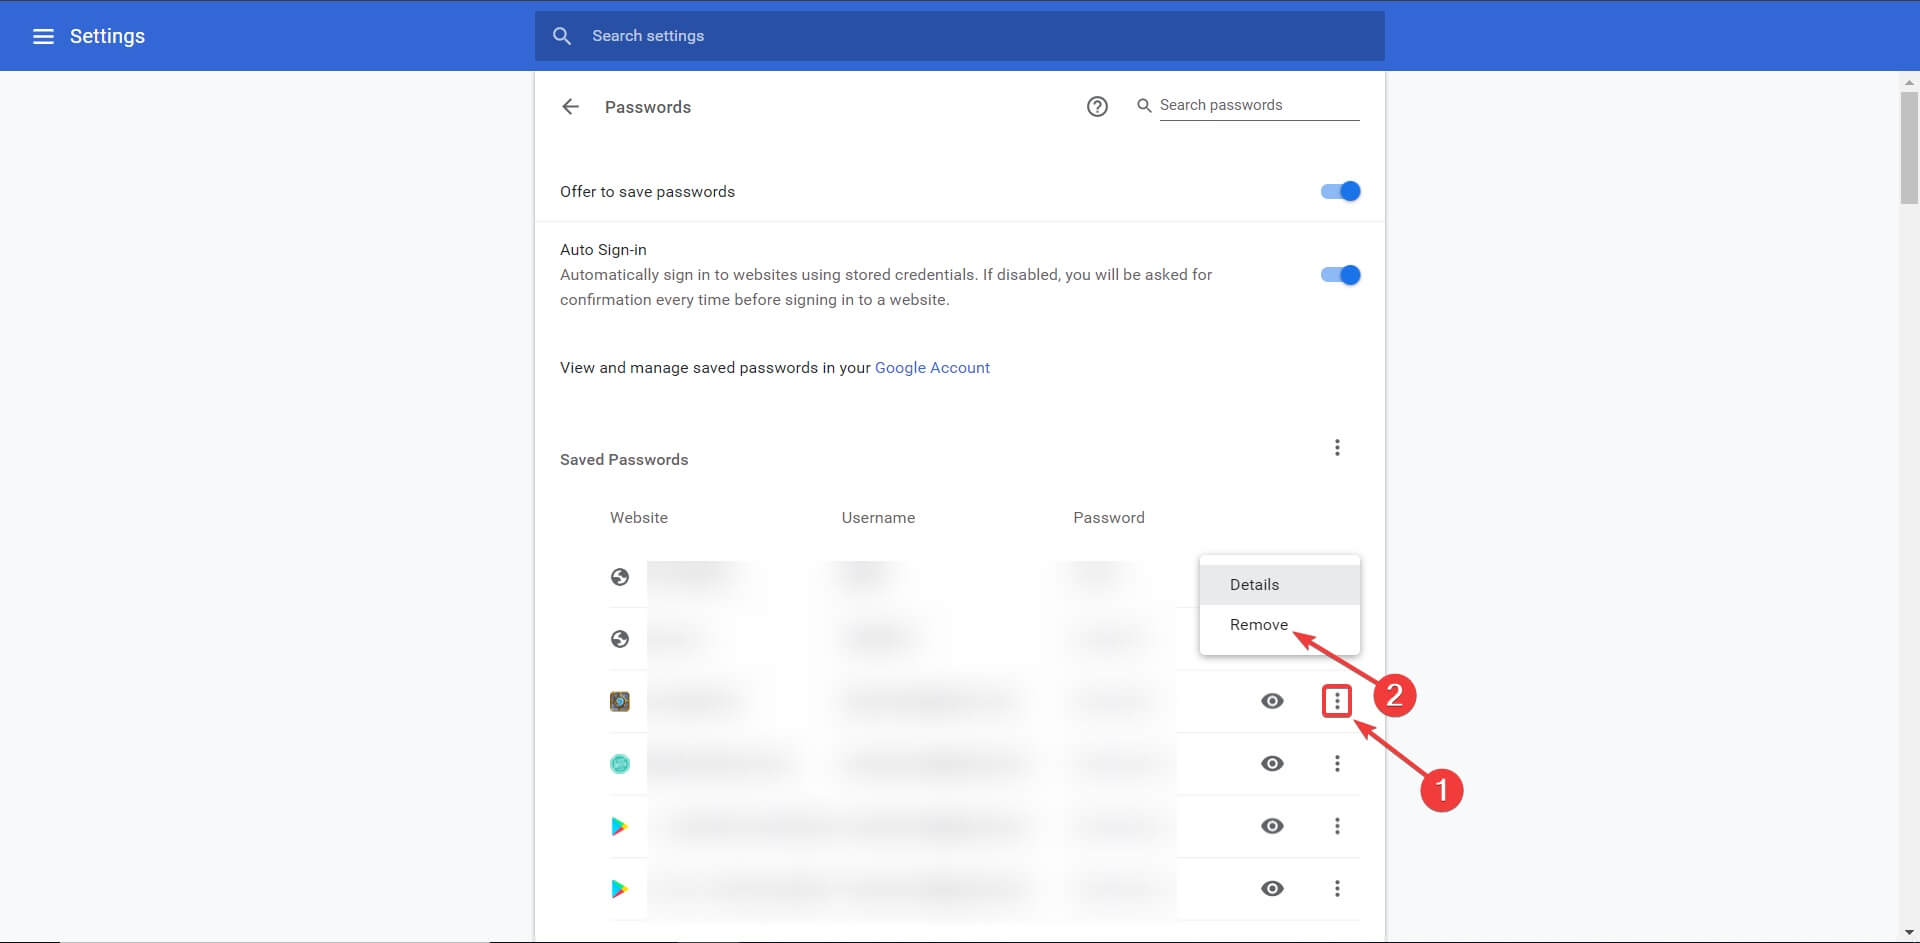
- Repeat the previous step for all auto-fill entries that you want to remove.
Just like many other browsers, Chrome can save your passwords and allow you to log in to your favorite websites quickly. This is quite useful if you don’t share your Windows 10 PC with others.
If you share it with your roommates or friends, you might want to remove your auto-fill data. This is a simple process, and you can do it by following the above steps.
Also, you have the option to choose if Chrome saves passwords or not, or even if you get auto-signed on websites that have your auto-fill information.
This method is quite simple, and it allows you to see the list of passwords and accounts that you have stored in Google Chrome.
This is quite useful if you want to remove certain accounts such as your Facebook or bank account from Chrome thus preventing unauthorized access to it.
Autofill data in Chrome on Windows 10 can be useful if you want to perform certain searches again, or if you want to quickly enter your address or login information.
If you’re sharing your Windows 10 PC with anybody else or if you’re concerned about your privacy or safety, you can easily remove autofill data by using any of our solutions.
Don’t forget lo leave any other questions or possible solutions in the comments section below.












































![How to Hide Your IP Address in Windows 7 (3 Tested Methods]](https://windowsreport.com/wp-content/uploads/2020/04/hide-ip-address-software.jpg)