How to search emails by date in Gmail [Easy Steps]

Gmail is one of the biggest webmail apps for sending and receiving email.

One of the good things about Gmail is its flexible search utility that enables users to search for emails by date in various ways.

This is how you can find your Gmail emails with date searches.

How can I search by date in Gmail?

1. Search for emails before or after specified dates

To start this process, first open your Gmail account inside your preferred browser, and click on the Inbox/Outbox button from the left side of the screen.

After, simply click the Search box, and follow the steps described below depending on your task:

Search through emails before a specific date

  1. Enter before:YYYY/MM/DD in the search box and press Enter to find emails dated before the specified date.
  2. Replace YYYY/MM/DD in that search with an actual date.

For example, entering before:2020/02/23 would find emails received/sent after February 2, 2020.


Search through emails after a specific date

To search for emails after a specified date, enter after:YYYY/MM/DD in the search box, and press the Enter key, after replacing the date format with the actual date you’re interested in.

For example, entering after:2020/02/23 would find emails received/sent after February 2, 2020.


Search through emails before and after a specific date

Type after:YYYY/MM/DD before:YYYY/MM/DD in the search box.

For example, entering after:2020/01/01 before:2020/05/01 would find emails dated between January 1, 2020, and May 1, 2020.

Note: You can also combine those date searches with keywords by adding search keywords to the end of them. For example, entering after:2020/01/01 football would find emails received after January 1, 2020, that include the football keyword in them.


2. Search for emails older or newer than a specified period

  1. Select your Gmail Inbox or Sent to search for emails.
  2. Click within the search box at the top of Gmail.
  3. Enter older_than:3m to search for emails received more than three months ago. To search for emails received more than three days or years ago, you would need to input older_than:3d or older_than:2y.
  4. To search for emails received or sent less than three months, enter newer_than:3m in the search box. Replace the M in that search query with Y or D for years and days.
  5. You can also combine the newer_than and older_than search queries with the after and before ones. For example, entering after: 2019/8/01 older_than 3 months would find emails received after August 1, 2019, that have been in your inbox for more than three months.

3. Search for emails with Epoch times

  1. Open the Epoch converter page in a web browser.
  2. Enter a specific date and time within the human date to timestamp boxes shown directly below.
    The Epoch timestamp conversion tool search emails by date
  3. Click the Human date to Timestamp button.
  4. Copy the epoch timestamp for the date and time entered with the Ctrl + C hotkey. You can paste that timestamp in Gmail searches with the Ctrl + V hotkey.
  5. Next, open your Gmail page.
  6. Now you can include your epoch timestamps in your search queries for time searches. For example, entering after:1599831840 before:1599846240 in Gmail’s search box would find emails received between 1.44 p.m. and 5.44 p.m. on 9/11/2020 (GMT).

4. Search emails by date with the filter menu

  1. Click the small arrow on the right of Gmail’s search box to open the filter menu shown directly below.
    Gmail filter box search emails by date
  2. Click the Date within the box to select a period for an email search to fall within.
  3. Then select a calendar button to choose a date for the search to be based on. For example, selecting 6 months and 2020/09/11 would search for emails that are dated within six months of September 11, 2020.
  4. Click Search to select All Mail. Alternatively, you can select the Inbox or Sent Mail options.
    The filter calendar option search emails by date
  5. If you’re searching for emails that include a specific phrase, enter a keyword in the Include the words text box.
  6. Select the Has attachment option if you’re searching for files with attachments.
  7. Enter an email address in the From box if you’re searching for emails from somebody.
  8. Click the Finish button to search.

So, Gmail includes a few handy operators to search for emails by date. Alternatively, you can search for emails by date with Gmail’s filter menu.

You can quickly find your Gmail emails with either method.

[wl_navigator]

How to update AMD Radeon drivers [full guide]

AMD drivers make up a software application written to the hard drive to allow communication between the video card and the computer.

Without the graphics driver, the system would lack instructions on how to interact with the graphics card.

You need to keep the graphics driver updated at all times to improve performance and avoid compatibility issues.

How do I update AMD video and audio drivers?

1. Update the driver automatically using a program

The easiest way to update your AMD drivers is by doing it automatically with a specialized tool called Fortect Driver Updater. If you do it manually, you risk installing the wrong drivers or introducing malware into your system.

We strongly recommend Fortect Driver Updater because it scans your machine and matches the devices with their latest drivers from its extensive database.

You can pick the drivers to update and perform the operation one at a time or in batches, all in two or three clicks.

Fortect Driver Updater also offers the following features:

  • The scans are really fast. In seconds, it shows you all your outdated drivers.
  • The entire process is done within the program, and you need no additional tools.
  • Fortect Driver Updater has a massive online library of updated driver files.
  • You can monitor the download progress of your drivers.
  • Lets you schedule updates easily.

Additionally, Fortect Driver Updater also provides a straightforward way to back up your drivers and download them in a ZIP archive to restore them if need be.

⇒ Get Fortect Driver Updater

2. Update the drivers in the Device Manager 

  1. Invoke the Run dialog box with the Windows key + R combination.
  2. Type in devmgmt.msc and hit ENTER.
  3. Expand the Display Adapters section.
  4. Locate your AMD Radeon Graphics Card from this section.
  5. Right-click on your graphics card.
  6. Choose Update Driver.
  7. Search for the updated driver.
  8. Follow the on-screen directions.
  9. Restart your computer after successfully updating the driver.

 3. Update using the AMD Radeon Update tool

amd radeon

  1. Go to the AMD support page.
  2. Download the autodetect tool for Radeon Graphics.
  3. Double-click on the downloaded file to begin the installation.
  4. Install the application following the instructions you are shown.
  5. Launch the program.
  6. AMD will locate the latest drivers for your system.
  7. Install and update your drivers with the on-screen instructions.

The recommended Fortect Driver Updater is the safest way to update your AMD drivers.

If you prefer to download the updated drivers manually, then do so from the aforementioned AMD support page only.

It provides you with all the legitimate drivers. Drivers hosted on other external sources can be buggy or come bundled with malware.

Google Photos: Original vs High Quality [Quick Explanation]

The Google Photos web app provides 15 GB of free storage space for your favorite photographs and images. With this app, you can edit photographs and set up slideshow albums for them.

Google Photos includes two alternative upload options for photos. And this can confuse some people.

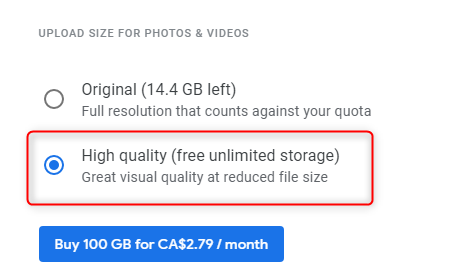
You can select an Original or High Quality setting for uploading images.

If you’re wondering what the difference is between those settings, you’ve come to the right page!

High quality vs. Original Google Photo upload options

What’s the difference between the Original and High Quality upload settings?

The primary difference between the two upload options is that the High Quality setting compresses photographs. Selecting that option can reduce both the resolution and file size of uploaded photos and videos.

In contrast, the Original option doesn’t compress snapshots. Thus, uploading them with that setting will ensure they are saved with their original resolutions.


What should I choose to preserve the original picture quality?

The Original setting is certainly the best for preserving original picture quality as no compression is applied to photos or videos. That’s especially the case for photos that eclipse 16 MP as the High Quality option will reduce them to exactly a 16 MP resolution.

Selecting High Quality won’t have so much impact on lower resolution images. However, photos with resolutions less than 16 MP might still be scaled down when uploaded to Google Photos with this option selected.


What’s the best option to select for saving storage space in Google Photos?

High Quality is the best option for saving storage space in Google Photos. Its compression will always reduce the file size of photographs uploaded to Google Photos

High quality is even better for saving storage space as it comes with unlimited with free storage. That means photographs and videos uploaded with that setting selected won’t consume any of your Google Photos storage space at all.

In that respect, the High Quality image compression might seem a little pointless.

However, remember that your image files will still be the same reduced file size when you download them to your hard drive.


How can I change the photo upload setting in Photos?

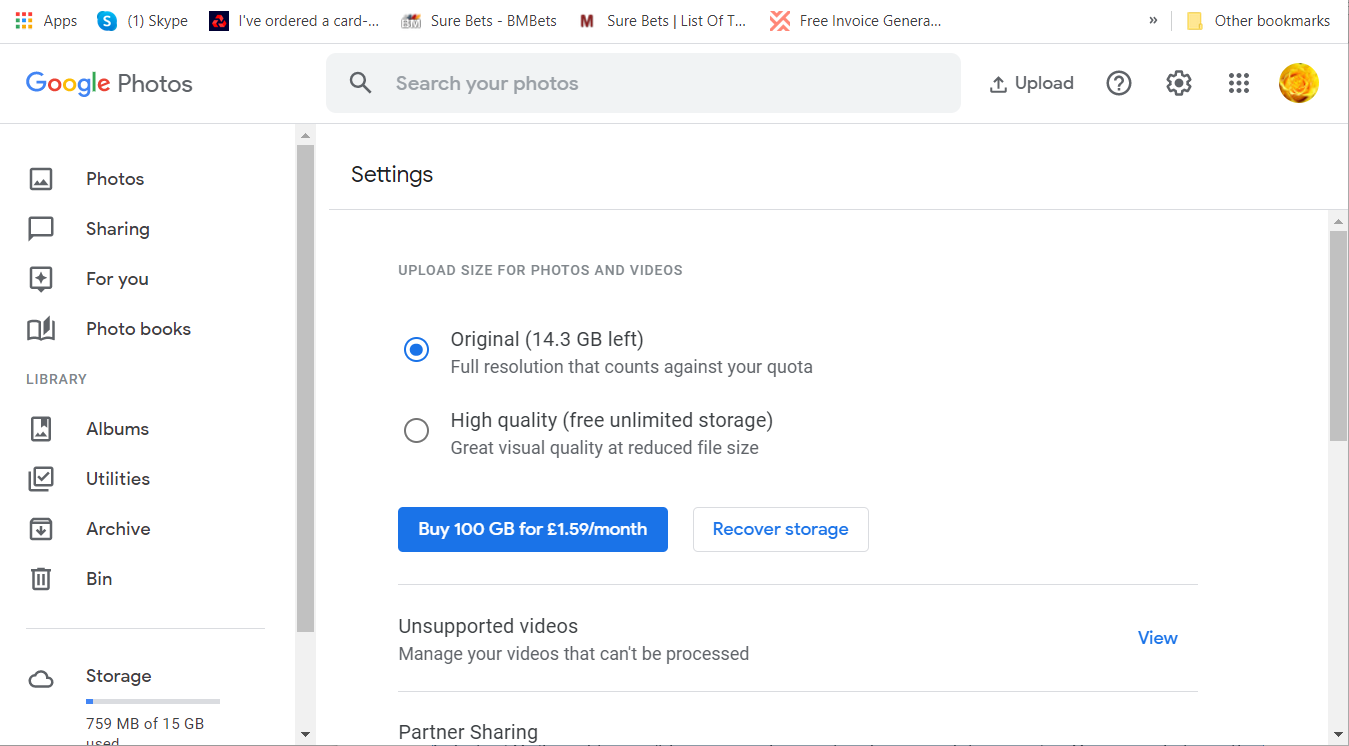
  1. Open Google Photos in your browser.
  2. Click the Settings button to open the options shown directly below.
    The Original option google photos high quality vs original
  3. Select the High Quality or Original radio button.
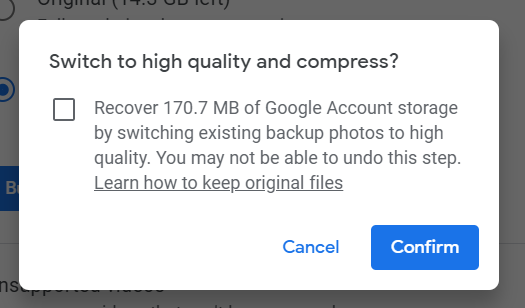
  4. If you select the High Quality option, the dialog box shown directly below might open, which includes an option to recover account storage. Select the checkbox on the dialog box to recover the specified amount of storage space.
    Recover option google photos high quality vs original
  5. Then click the Confirm button.

So, select the Original option if you need to retain the original picture quality of your photos and photos.

The High quality setting will impact picture quality primarily by reducing image resolutions, but it will save you a lot of storage space in Google Photos.

[wl_navigator]

How to fix Windows Media Player Server execution failed

Some Windows Media Player users have posted on Microsoft’s forum about a Server execution failed error.

When those users try to play media files with WMP, it displays a Server execution error message.

There are a few potential factors behind Windows Media Player’s Server execution failed issue. The issue can arise due to corrupted a Network Sharing Service, corrupted DLL files, or conflicting third-party software.

No matter what the exact reason for this error appearing is in your case, this guide will provide you with a quick and efficient fix, so make sure to read on.

How can I fix the Server execution failed error?

1. End the Windows Media Player process via Task Manager

  1. Right-click your taskbar and select the Task Manager option.
  2. Select the Processes tab within Task Manager.
    Processes tab windows media player server execution failed
  3. Select Windows Media Player if it’s listed under Apps.
  4. Click the End Task button.

2. Repair the Network Sharing Service for Windows Media Player

  1. Press the Windows key + R keyboard shortcut.
  2. Input services.msc in the Open box and click OK.
    Services window
  3. Double-click the Windows Media Player Network Sharing Service to open its properties window.
    network sharing service properties window windows media player server execution failed
  4. Press the Stop button if the service is running.
  5. Select Automatic on the service’s Startup type drop-down menu.
  6. Press the Start button to restart the service.
  7. Click Apply and OK to save changes and exit the window.


If an error message pops up when you try to restart the service, follow these steps:

  1. Select the Log On tab on the Network Sharing Service Properties window.
    Log On tab windows media player server execution failed
  2. Click the Browse button there.
    Select User window windows media player server execution failed
  3. Enter your system name, listed on the System Information window, within the object name box.
  4. Press the Check Names button, and click Ok.

3. Register the vbscript and jscript DLLs

  1. Open the Run accessory as outlined for resolution two.
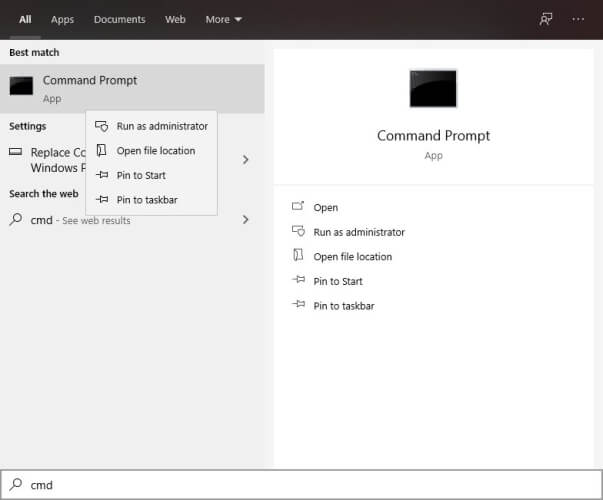
  2. Input cmd in the Open box, and press the Ctrl + Shift + Enter hotkey.
  3. Click Yes on any User Account Control dialog window that opens.
  4. Then input regsvr32.exe jscript.dll in the Command Prompt, and press the Return key.
    regsvr32.exe command windows media player server execution failed
  5. Next, type in the regsvr32.exe vbscript.dll command; and press the Enter keyboard key.
  6. Close the Command Prompt, and restart Windows 10.

4. Reinstall Windows Media Player

  1. Open the Run window.
  2. Type appwiz.cpl in the Open text box and click OK to open the Programs and Features window.
    The uninstaller window windows media player server execution failed
  3. Click Turn Windows features on or off to open the window in the snapshot directly below.
    Windows Features window windows media player server execution failed
  4. Double-click Media features to expand it.
  5. Deselect the Windows Media Player check box.
  6. Click the OK option.
  7. Restart Windows after turning Windows Media Player off.
  8. To reinstall Windows Media Player, open the Windows Features window again.
  9. Then select the Windows Media Player option, and click the OK button.

5. Clean boot Windows

  1. Launch Run with the Windows key + R hotkey.
  2. Type msconfig into Run, and press the Enter key.
  3. Click the Selective startup radio button on the General tab if it’s not selected.
    General tab
  4. Deselect the Load startup items checkbox.
  5. The Load system services and Use original boot configuration settings must be selected.
  6. Next, click the Services tab.
    Services tab
  7. Select the checkbox for the Hide all Microsoft services option.
  8. Press the Disable all button, which will deselect third-party services.
  9. Press the Apply button.
  10. Click the OK option.
  11. Select the Restart option to restart Windows.

Those resolutions will likely resolve the Server execution issue for many users. However, remember that there are plenty of good alternatives to Windows Media Player you can play your media files with instead.

[wl_navigator]

FULL FIX: Disk usage lockups in Windows 10

Sometimes, your PC can run slowly even if you only have a few programs running. And when you check the Task Manager to find out what’s wrong, it might show you disk usage at 100%.

Fortunately, this is not the hardest issue to fix. Check out some solutions below.

High disk usage can be problematic and cause your system to freeze and experience other issues. Speaking of disk issues, here are some related issues that users reported:

  • Disk usage spikes to 100 Windows 10 – Many users reported that their disk usage goes to 100 on Windows 10. This can be caused by your antivirus, so be sure to disable it or try switching to a different antivirus software.
  • HP laptop 100 disk usage Windows 10 – This issue can appear on laptops as well, and if you encounter this problem on your laptop, be sure to try all solutions from this article.
  • Windows 10 100 disk usage freeze – According to users, sometimes your PC might freeze once your disk usage reaches 100. This can be a big problem, and in order to fix it, it’s advised to disable certain services and check if that helps.
  • Disk usage stuck at 100 – If you’re having this problem, you might have to reinstall or update your SATA driver and check if that solves the issue for you.

How do I fix disk usage lockups on Windows 10?

1. Reinstall the SATA AHCI driver

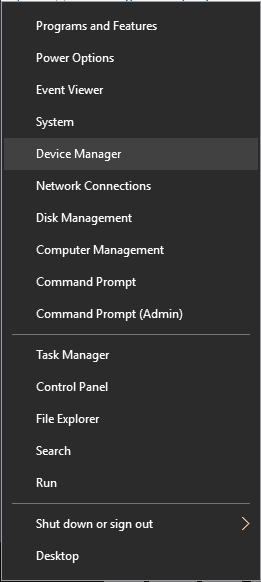
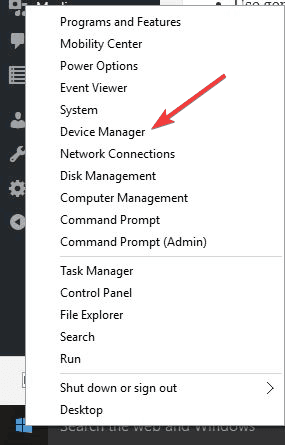
  1. Open Win + X menu and choose Device Manager from the list.
    Disk usage spikes to 100 Windows 10
  2. In the Storage controllers section locate your current controller, right-click it and choose Update driver.
    Disk usage spikes to 100 Windows 10
  3. Select Browse my computer for driver software.
    HP laptop 100 disk usage Windows 10
  4. Now choose Let me pick from a list of available drivers on my computer.
    Windows 10 100 disk usage freeze
  5. Select Standard AHCI Controller from the list and install it.

Many users reported that the standard driver caused the issue for them, so if you want to permanently solve the problem, it’s advised to download the latest driver from your motherboard manufacturer.

Downloading drivers manually can be a tedious task, but if you want to update all your drivers with just a single click, we recommend trying out software like Fortect Driver Updater.

Oftentimes, it’s hard to find the SATA driver but this professional tool will compare yours with a cloud database and it will install the proper one in seconds.

It’s extremely fast because after you run Fortect Driver Updater, it starts scanning your PC automatically. And it doesn’t just update your old driver but it also takes care of broken or even missing drivers.

After the scan, you just have to select which drivers you want to install or just install updates for all of them.

2. Stop Windows Search

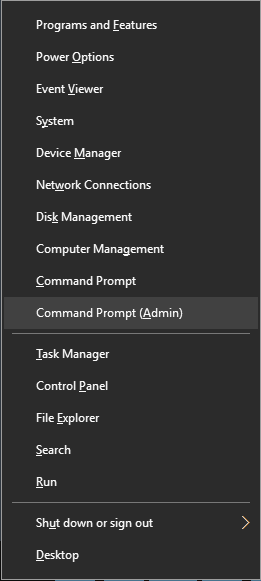
  1. Press Windows Key + X and select Command Prompt (Admin) from the menu.
    Disk usage stuck at 100
  2. Type net.exe stop Windows search and press Enter.

Note: The service should be stopped and the issue with high disk usage should be resolved. Keep in mind that this is just a temporary solution, so you’ll have to repeat it every time you start your PC.

3. Disable the BITS, Superfetch, and Windows Search services

  1. Press Windows Key + R and enter services.msc. Now click OK or press Enter.
    HP laptop 100 disk usage Windows 10
  2. When Services window opens, locate Background Intelligent Transfer Service and double-click it to open its properties.
    Windows 10 100 disk usage freeze
  3. Set Startup type to Disabled and click the Stop button to stop the service.
    Disk usage stuck at 100
  4. Do the same for the Superfetch and Windows Search services.
  5. restart your PC and check if the problem is still there.

Note: Keep in mind that certain features might not work anymore after disabling these services, so if you encounter any new issues, you might want to go back end enable these services.

4. Check your antivirus

According to users, disk usage lockups can occur due to your antivirus software. Your antivirus can be demanding on your resources and that can cause issues to appear.

To fix this problem, try disabling certain antivirus features and check if that helps. Alternatively, you can also completely disable your antivirus and check if that helps.

If the issue is still there, you might have to remove your antivirus and switch to a different antivirus solution.

There are multiple choices of lightweight antivirus that will not require much system resources, therefore it’s advised to check and find the best antivirus software compatible with Windows 10.

5. Make sure that your system is up to date

  1. Press Windows Key + I to open the Settings app.
  2. Now navigate to Update & Security section.
  3. Click Check for updates button.

If any updates are available, they will be downloaded automatically in the background and installed as soon as you restart your PC. Once your PC is up to date, check if the problem with disk usage still appears.

6. Switch to High Performance mode

  1. Press Windows Key + S and enter power settings. Select Power & sleep settings from the menu.
    HP laptop 100 disk usage Windows 10
  2. Now select Additional power settings.
    Windows 10 100 disk usage freeze
  3. Select the High performance power plan.
    Disk usage spikes to 100 Windows 10

Note: Keep in mind that using the High-performance power plan will increase your power consumption and affect your battery life.

7. Reset the virtual memory

  1. Press Windows Key + S and enter advanced. Select View advanced system settings from the list of results.
    Disk usage stuck at 100
  2. Click the Settings button in the Advanced section.
    Disk usage spikes to 100 Windows 10
  3. Go to the Advanced tab > choose Change in the Virtual Memory category.
    HP laptop 100 disk usage Windows 10
  4. Make sure the box before Automatically manage paging file size for all drives is off.
  5. Select the windows drive, set the number as you wish, then press Set and OK.
  6. Clear all files.

8. Try a different drive

Sometimes disk usage lockups can occur due to your hard drive. Your hard drive might not be compatible with the controller driver and that can lead to this issue. If trying out different controller drivers doesn’t work, you might want to consider getting a different drive.

Several users reported that getting an SSD or different hard drive fixed the issue for them, so you might want to try that.

Disk usage lockups can be a big problem, but we hope that you managed to solve this issue using one of our solutions.

Mass Effect Trilogy Remastered spotted with an October release date set for Xbox One consoles

A re-release of the iconic first three Mass Effect video games has been rumored for a while and it now looks like we have confirmation after a store listing for a Mass Effect Trilogy Remastered title was spotted in an online store’s catalog.

The listing was first spotted by Twitter user, Nibellion, who shared a screenshot of a Portuguese retailer website showing listings for Mass Effect Trilogy Remastered on Xbox One, PS4, and the Nintendo Switch. All three were set for an October 2020 release.

The listing has since being removed and it’s unclear if it was created in error or if it was an accurate listing of a true upcoming title.

No info on Mass Effect Trilogy Remastered is known of course but it is safe to assume that it features all three games and at least some visual upgrades. Fingers crossed for 4K and HDR support.

Would you buy Mass Effect Trilogy Remastered if it ever came out? Do you think this listing was legit? Let us know in the comments and then follow us on Pinterest and Twitter for more Xbox gaming news.

FIX: Windows Hello not working after update [Driver Issues]

Microsoft introduced a few useful additions to Windows Hello with each new update. Users are now able to use Windows 10’s face recognition feature in Microsoft Edge and from companion devices.

However, the latest update for Windows 10 might actually cause a few problems to Windows Hello, as it caused the majority of the system’s features.

In case you encountered any issue with Windows Hello upon installing updates, don’t worry, because we prepared a few solutions that might help you to solve the problem.

Various factors can actually cause the problem with Windows Hello, and we tried to cover most of them.

So, without any further ado, here are a few solutions for Windows Hello issues in Windows 10.

How do I fix Windows Hello problems after updates?

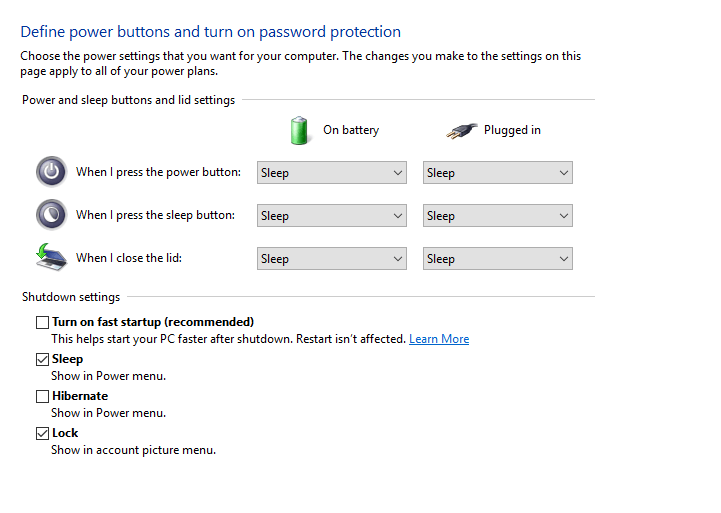
1. Turn off Fast Startup

  1. Type power options in the Search box, and open Power Options
  2. Select Choose what the power buttons do
  3. Click on Change settings that are currently unavailable
  4. Uncheck the checkbox next to Fast Startupturn off fast startup windows hello

According to reports from users who experienced issues with Windows Hello even before you performed an update, having the Fast Startup turned on can actually disable this feature, or cause it to crash.

So obviously, the first thing you need to try when noticing any problem with Windows Hello is to turn off the Fast Startup.

Although this option is actually recommended to be enabled, if you use Windows Hello to log in to your system, it’s better to have it disabled.

However, if turning the Fast Startup off didn’t get the job done, try some of the solutions listed below.

2. Make sure your camera drivers are compatible

This solution is similar to the previous one, only it involves a different piece of hardware.

Since Windows Hello uses your camera, if its driver is outdated, or incompatible with any newer updates, Microsoft’s face-recognition software probably won’t work.

So, use the same method as in the solution above, and make sure your camera driver is up to date.

If your camera driver is outdated, update it to the latest version, and you should be able to run Windows Hello again.

We also strongly recommend using a specialized tool to automatically download all the outdated drivers on your PC.

3. Reinstall Windows Hello drivers

  1. Go to Search, type device manager, and open Device Manager
  2. Find your Windows Hello driver, right-click on it, and select Remove driver software
  3. Restart your computer
  4. One the next startup, Windows 10 should automatically detect Windows Hello, and install the latest driver for it
  5. Once Windows 10 installs the driver again, try running Windows Hello to see if the issue is resolved

Some users around the Internet reported that reinstalling Windows Hello drivers helped solve the problem.

But before you re-install the driver, make sure it’s updated first, by going to the Device Manager.

If your Windows Hello driver is out of date, update it, restart your computer, and try running Windows Hello again.

On the other hand, if your Windows Hello driver is up to date, try reinstalling it, as we originally said.

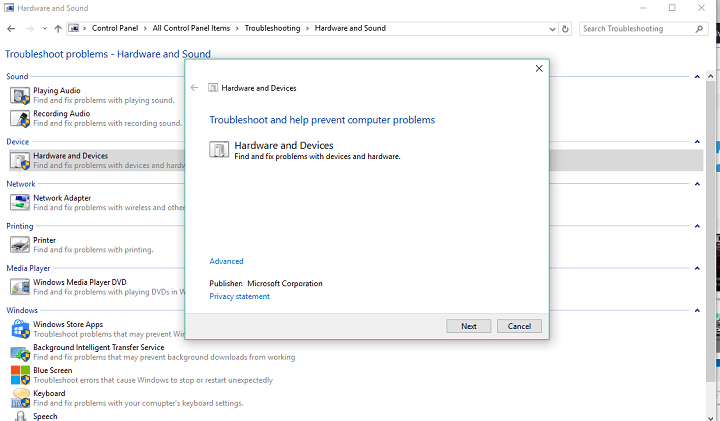
4. Run Windows 10 Troubleshooter

  1. Go to Search, type troubleshooting, and open Troubleshooting
  2. Go to Hardware & sound section of the troubleshooter
  3. Now, click on Hardware & devicesWindows 10 hello anniversary update troubleshooter
  4. The troubleshooter will start, so wait for the process to finish, and follow further on-screen instructions
  5. If the troubleshooter found a problem with Windows Hello, it will automatically fix it
  6. Restart your computer

If none of the solutions listed above managed to solve the problem with Windows Hello caused by your most recent update try a universal solution, that could work for more than one Windows 10-related problem.

That solution is Windows 10‘s built-in diagnostic and troubleshooting tool, Windows Troubleshooter.

So, run the Windows Troubleshooter, and see if it can solve the problem for you.

That’s about it, we hope this article helped you to solve potential issues with Windows Hello caused by a Windows update.

In case you have any comments, questions, or suggestions, just let us know in the comments below.

5 best VPNs for Nvidia Shield to watch unlimited streaming

Using a VPN for Nvidia Shield, you can unblock Netflix US, UK, and other libraries anywhere in the world to enjoy unrestricted streaming. But you can also protect your home router from hackers by encrypting all Internet traffic.

However, not all VPNs work with Nvidia Shield TV. We know it’s really tempting but you should be careful when using free VPNs, especially when the Google Play Store is filled with shady apps.

Instead of spending countless hours online looking for the best VPN for Nvidia Shield, check out what we selected below.

We rated these products based on the following criteria:

  • Compatible with Nvidia Shield TV
  • Unblock Netflix, Hulu, and other streaming services
  • Secure browsing and powerful encryption
  • Excellent connection speed and no buffering
  • A zero-logging policy
  • Exclusive DNS servers
  • No IP or DNS leaks
  • Easy to use
  • 24/7 live chat support
  • Money-back guarantee

What’s the best VPN for Nvidia Shield TV?

Private Internet Access

Private Internet Access is the best VPN for LG Smart TV

Created by Kape Technologies, Private Internet Access (PIA) is one of the best VPNs for Nvidia Shield TV. It has excellent security features and speedy VPN servers to ensure a buffer-free experience on your smart TV.

PIA has a native app for Android TV, but you can also sideload the APK version if you want to use its malware blocker. It’s a great choice for unblocking Netflix US, Hulu, and other streaming services.

The VPN service offers the highest level of encryption to secure your data: 256-bit AES military-grade encryption through OpenVPN. It also supports WireGuard, Shadowsocks, SOCKS5, private DNS, and a kill switch.

More about PIA:

  • +3,300 VPN servers in 48 countries
  • 10 simultaneous connections
  • No logs or leaks
  • 24/7 live chat support
  • 30-day money-back guarantee (no free trial)
Private Internet Access

Private Internet Access

Get this reliable VPN for Nvidia Shield to enjoy unlimited streaming.
$2.69/mo. Buy it now

NordVPN

use NordVPN for LG Smart TV

Developed by Tefincom & Co., NordVPN is an ideal virtual private network solution for security-concerned users. It brings some of the best safety features to the table, such as obfuscation mode, Double VPN, Onion-over-VPN, and dedicated IP addresses.

You can redirect your entire network traffic using OpenVPN, set up an emergency Internet or app kill switch, as well as install its Android APK for Nvidia Shield TV quickly and easily. It’s wrapped in a user-friendly interface.

Besides Android, you can install NordVPN on Mac, Linux, Windows, and iOS. It’s actually one of the top-ranked VPNs for Windows 10 PC.

More about NordVPN:

  • +5,100 VPN servers in 59 countries
  • 6 simultaneous connections
  • No logs or leaks
  • 24/7 live chat support
  • 30-day money-back guarantee (no free trial)
NordVPN

NordVPN

Protect Nvidia Shield from hackers and unblock streaming with this VPN.
$3.71/mo. Buy it now

Surfshark

use Surfshark for LG Smart TV

Published by Surfshark LTD, Surfshark is a privacy-concerned VPN that works great on Nvidia Shield. It offers a free trial for Android and gives you the possibility to watch Netflix US, UK, and other libraries, no matter where you’re located.

The tool features support for OpenVPN with 256-bit encryption, an emergency kill switch, multi-hop VPN connections, and obfuscated servers to conceal your VPN traffic and help you access websites that typically reject VPN connections.

You can set up Surfshark on Android, iOS, Mac, Windows, and Linux. It also comes with Shadowsocks proxy, an integrated ad and malware blocker for secure browsing, along with split tunneling mode.

More about Surfshark:

  • +1,700 VPN servers in +63 countries
  • Unlimited simultaneous connections
  • 24/7 live chat and email support
  • 30-day money-back guarantee
  • 7-day free trial for Android and iOS

Surfshark

Set up this trustworty VPN for Nvidia Shield to watch unlimited streaming.
Free trial Visit website

CyberGhost VPN

use CyberGhost VPN for LG Smart TV

CyberGhost VPN is one of the top free VPNs for Nvidia Shield because it offers a limited free trial for Android. Made by Kape Technologies, the app does an amazing job defending your home router from hackers.

Furthermore, you can use CyberGhost VPN to unblock the best Netflix catalogs, including US, UK, Canada, and Japan. It supports OpenVPN with 256-bit encryption, exclusive DNS servers, trusted Wi-Fi networks, and an emergency kill switch.

You can set up CyberGhost VPN not only on Android but also Windows, Mac, iOS, and Linux. It’s one of the best VPNs for video streaming.

More about CyberGhost VPN:

  • +6,500 VPN servers in 89 countries
  • 7 simultaneous connections
  • No logs or leaks
  • 24/7 live chat support
  • Up to 45-day money-back guarantee
  • 1-day free trial for Windows and macOS
  • 7-day free trial for Android and iOS
CyberGhost VPN

CyberGhost VPN

Take advantage of the best free VPN for Nvidia Shield at a great price.
Check price Buy it now

ExpressVPN

use ExpressVPN for LG Smart TV

Developed by Express VPN International LTD, ExpressVPN is another excellent VPN for Nvidia Shield since it features high-speed VPN servers and advanced security features. It also has a MediaStreamer feature you can use to watch streaming media on devices without VPN support. Instead, you just have to change the DNS servers.

ExpressVPN comes packed with 256-bit OpenVPN, split tunneling, a Network Lock, and zero-knowledge DNS servers. It does its best to maintain your online anonymity and shield your router from hacker interceptions.

You can install ExpressVPN not only on Android but also on other devices, including Windows, Mac, iOS, and Linux. It’s one of the safest VPNs for Windows 10 laptops.

More about ExpressVPN:

  • +3,000 VPN servers in 94 countries
  • 5 simultaneous connections
  • No logs or leaks
  • 24/7 live chat and email support
  • 30-day money-back guarantee
  • 7-day free trial for Android and iOS
ExpressVPN

ExpressVPN

Unblock Netflix US on your Nvidia Shield TV with the aid of this dependable VPN.
$8.32/mo. Buy it now

To conclude, you can set up any of the reliable VPN solutions above on your Nvidia Shield TV if you want to unblock streaming services, safely navigate the web, access restricted content, bypass ISP throttling, optimize your gaming experience, and more.

Fall Guys Packet Loss: How to Fix It Easily?

Fall Guys: Ultimate Knockout, or just Fall Guys for friends, is a popular game that took the world by storm. It’s a lovely chaotic game that makes you compete with 59 other players in a knockout, battle-royale kind of environment.

Some challenges include balancing on a moving cylinder, jumping on spinning circles, smashing through fake walls, or collecting tails from other players. Hey, we already said it’s chaotic; what did you expect?

This game is enjoyable because even if you lose, you can jump right back into action. You’ll hardly notice defeat, but emerging victorious out of a game will make you feel like a rockstar.

Anyway, we’re not here to discuss Fall Guys’ awesomeness. In fact, it’s quite the opposite. Given that this game can only be played online, it’s bound to face some connection issues every now and then. For instance, packet loss, jitter, or high ping.

What is packet loss in Fall Guys?

Packet loss is the destroyer of world when it comes to online gaming. It’s similar to high ping (which you probably know oh-so-well), but it’s actually way worse than it.

With high ping, data packets may take a tad longer to reach their destination. Packet loss is exactly what it sounds like packets get lost and never reach their destination.

In response to such events, the remote server may panic and throw some delay, de-sync, or even disconnect your way.

During a packet loss episode, it’s not uncommon to experience sluggish movement, unresponsive menus, or sudden connection drops.

So why is it so wrong to get it in Fall Guys? Well, we didn’t mention that in each round, only several players qualify for the next level, which puts much pressure on you.

Furthermore, you get collision damage, and respawning can slow you down really bad.

So, while falling off a platform multiple times because of packet loss and unresponsive controls might sound fun, we can guarantee it’s rage-inducing.

What causes packet loss in Fall Guys?

Regardless of where you encounter it, packet loss has a huge list of potential causes.

For instance, if you’re using poor-quality Ethernet cables, you might unknowingly reduce the quality of your connection dramatically, which subsequently translates into a higher chance of leaking packets.

But bad cables aren’t the only reason (by far) why you’d experience packet loss in Fall Guys. Here’s a more complete list, although this one also barely scratches the surface:

  • Network congestion (arguably one of the most common causes)
  • Using Wi-Fi instead of Ethernet connections
  • Server-side issues (nothing you can do about them)
  • ISP bandwidth throttling
  • Improper ISP traffic routing
  • Outdated drivers on your system
  • Subpar Internet subscription plan
  • Running other bandwidth-consuming apps (such as VoIP apps, and torrent clients)

As you can see, there are quite some reasons that might trigger packet loss in Fall Guys. Upon closer inspection, you’ll notice that the issue can occur anywhere between you and the game server (endpoints not excluded).

This is mainly why diagnosing and efficiently troubleshooting packet loss can be tricky sometimes. If there’s no immediately obvious cause, there’s no surefire fix.

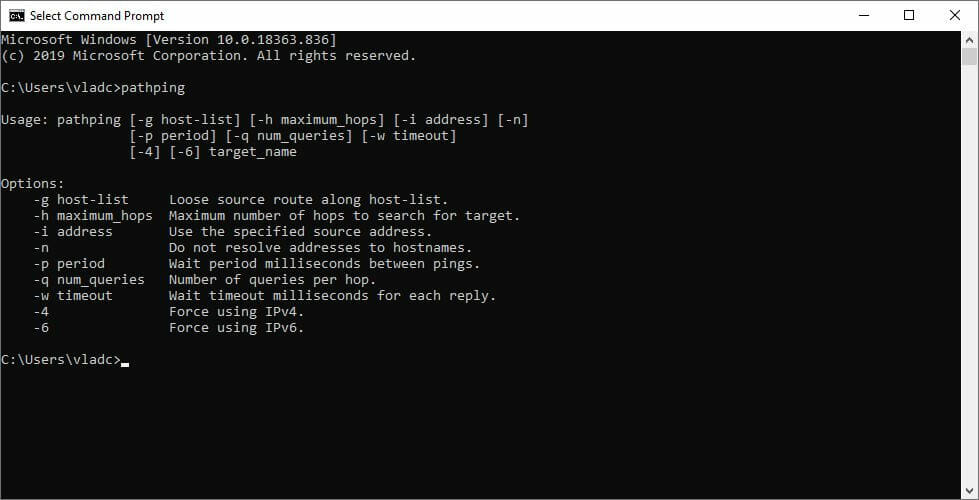
How to detect packet loss in Fall Guys?

  1. Use WireShark (or any other method) to extract the game server IP address
  2. Run an elevated CMD instance on your PC
  3. Type pathping x.x.x.x (replace x.x.x.x with the IP address you extracted earlier)CMD pathping
  4. Wait for the test to finish
  5. Check each hop for packet loss values

Note that you can also run a packet loss test against any other host, but it won’t be as relevant. For instance, you can choose to run it against Google.

However, the test results will show you whether or not there’s any packet loss between you and the Google remote server.

How to fix Fall Guys packet loss?

1. Use a VPN service

  1. Download a VPN Service (We highly recommend Private Internet Access)
  2. Install it on your PC
  3. Launch the VPN client
  4. Log into your account using your PIA credentials
  5. Connect to an optimal server (servers that are closer to you tend to be faster)
  6. Launch Fall Guys
  7. Check if you’re still experiencing packet loss

Kape Technologies offer Private Internet Access and is one of the few VPNs that offer 24/7 customer chat support. You can use it to reduce packet loss quickly and without too much hassle.

Private Internet Access

Getting packet loss in Fall Guys? PIA could help you fix it without effort.
Check Price Visit website

On the downside, this fix will only work if your ISP is the one causing the packet loss issue, to begin with. As we’ve established above, your ISP can contribute to packet loss occurrence by routing traffic improperly or limiting your bandwidth.

2. Flush your DNS

  1. Launch an instance of CMD on your PC
  2. Type the following commands, one by one, in this exact order:

ipconfig /flushdns
ipconfig /registerdns
ipconfig /release
ipconfig /renew
netsh winsock reset
exit

Now restart your computer, launch Fall Guys, and check if the problem still persists. It’s not uncommon that cached data can slow down your connection and even cause issues such as packet loss.

Thus, flushing your DNS and resetting Winsock settings can improve your connection’s quality.

Optionally, you can switch to free public DNS instead of using your ISP-assigned addresses. Two of the most popular choices are Google’s Public DNS and Cloudflare. Using the public DNS can also fix other issues like error code 200_2147483647.

3. Perform some manual troubleshooting

  • Check your home network carefully for any malfunctioning/old component
  • Replace any troublesome component on your home network (especially cables)
  • Update your system drivers to their latest version (network adapter drivers)
  • Make sure your router’s firmware is at its latest version (update your router’s firmware)
  • Use Ethernet instead of Wi-Fi connections whenever possible (Wi-Fi packet loss happens more frequently)
  • Restart Fall Guys
  • Check Fall Guys’ server status to see if everything works as it should
  • Call your ISP and inform them if there’s something wrong on their end of the connection (after running pathping)
  • Restart your PC, router, and/or modem
  • Make sure you’re not running any bandwidth-heavy apps or services in the background
  • Close any stream/VoIP/torrenting clients on your PC
  • Avoid peak hours if your network is prone to experience network congestion symptoms (or use a VPN)
  • Upgrade your Internet plan if possible, or change your provider

Granted, some of these suggestions aren’t exactly easy to perform, especially ones regarding spending extra money (upgrading your Internet plan, changing your provider, or buying better cables).

However, it goes without saying that a high-quality, well-maintained network connection is less likely to experience issues such as packet loss.

Final thoughts on fixing Fall Guys packet loss

If you’re experiencing packet loss while playing Fall Guys, there might be some ways to bypass this issue.

One of the most popular fixes is using a VPN, but that’s been proven to work only in certain circumstances (ISP bandwidth throttling, for instance).

However, sometimes, even simply restarting the game, your PC, router, and/or modem can do wonders.

Last but not least, remember that keeping your connection in top shape will guarantee you fewer packet loss issues, at least on your side.

Among Us Request Timeout: Why and How to Fix

Among Us is an awesome multiplayer party game trending on Steam, which you can play with 4-to-10 friends online or in LAN.

The goal is to prepare your spaceship for launch. However, one or more players from your crew are secret impostors, so it’s up to you to uncover them.

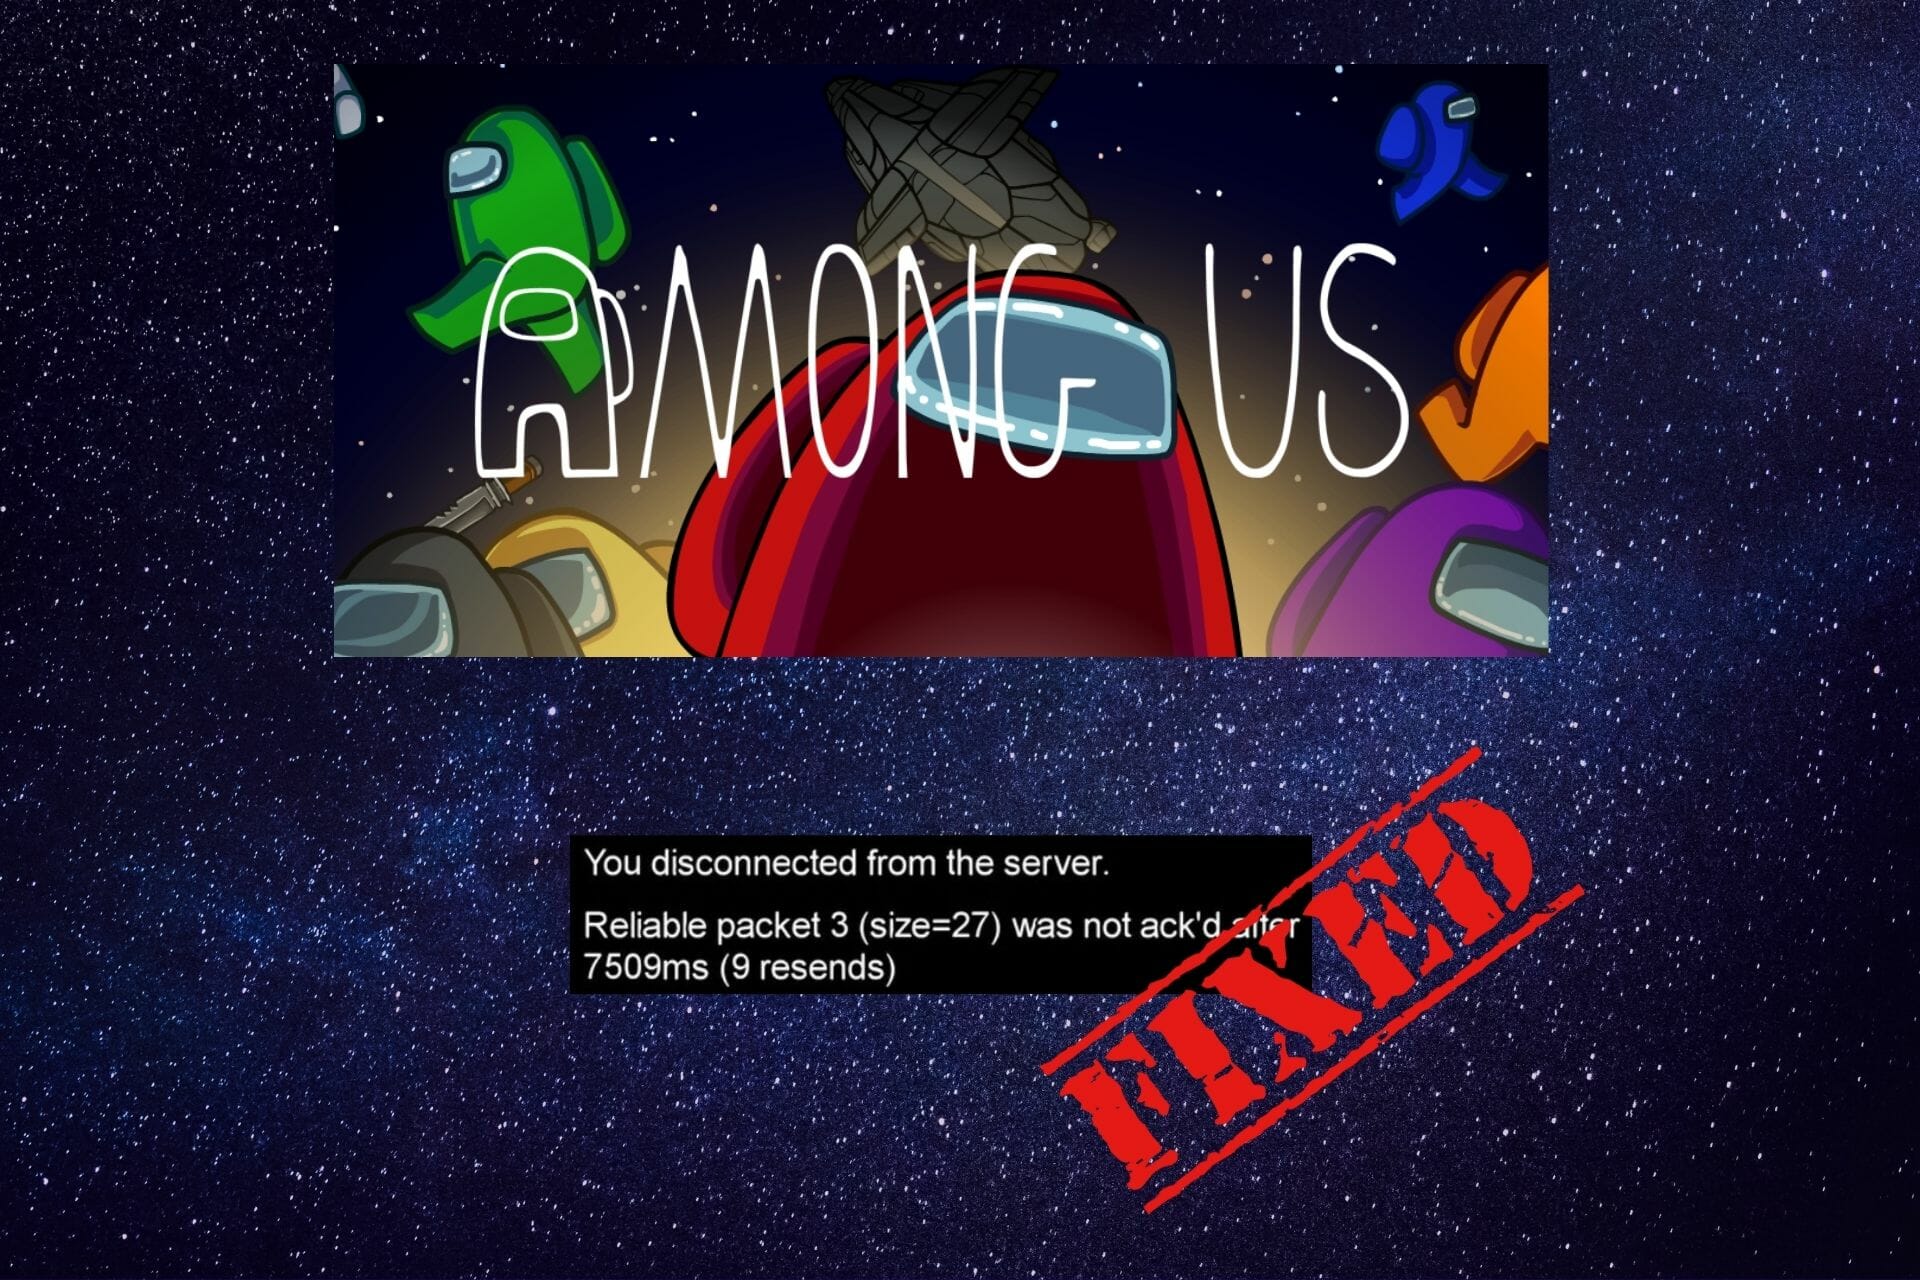
Regrettably, many users encounter server connection errors, like getting disconnected from the Among Us server.

Others can successfully connect but experience Among Us high ping and latency. If you’re one of these unfortunate users, here’s what you can do about it.

How do I fix Among Us server connection errors?

Update the game to the latest version

Among Us receives software updates all the time, so make sure to always keep it updated to the newest version, whether you’re playing it on Steam, Android, or iOS.

If your Steam updates are stuck or not downloading, try running Steam as admin, clearing the download cache, deleting the Package folder, and other possible solutions.

Update your OS to the newest edition

Just like Among Us, your operating system requires the latest updates, too, so make sure to make this happen on Windows, Android, or iOS.

However, it might also be a good idea to check if the latest update has any problems that might interfere with multiplayer games.

In that case, it might be a good idea to roll back to a previous, stable OS version that allows you to play online games without any issues like Among Us server connection errors.

Pick a different in-game server

If you can’t connect to an Among Us server or have high ping, it might be because there are simply too many people using the same server.

You can usually tell this is the cause if the error typically occurs in the evening or at the weekend when most people play.

To test this theory, change Among Us game servers from the settings panel. If your ping is still too high, keep switching servers until you find one that works for you.

Test your Internet connection

More often than not, Among Us connection problems exist on the client side, not the server side. Simply put, there might be something wrong with your Internet connection.

Make sure to close any unnecessary background processes that take up your bandwidth, such as torrenting clients, download managers, or web browsers.

Furthermore, you can run a speed test, restart your router, or switch from Wi-Fi to wired mode.

If you can’t use a cable connection, check out our tips to fix slow Wi-Fi.

Use a VPN

PIA
  1. Subscribe for a Private Internet AccessVPN plan.
  2. Download and set up the VPN client on your device.
  3. Open the app and sign in using your credentials.
  4. Connect to a VPN server*.
  5. Play Among Us.

*If you want to join an Among Us server from a specific region (North America, Europe, Asia), make sure to connect to a VPN server in the same region.

Using a VPN is ideal for fixing game server multiplayer errors. We suggested Private Internet Access (PIA) because it’s the best VPN for gaming.

You can use it to not only fix Among Us server connection issues but also to host game servers for you and your friends.

That’s because PIA has native support for port forwarding, which means that you don’t have to set up your router to forward ports.

Created by Kape Technologies, the VPN app has more than 3,300 servers in 48 countries, which cover North America, Europe, and Asia.

Plus, PIA is compatible with all major platforms, including Windows, Android, and iOS, so you can use it to play Among Us anywhere.

It can protect your device from DDoS attacks as well as fix packet loss if you get disconnected from the server on Among Us.

What else you must know about PIA:

  • 10 simultaneous connections
  • No logs or leaks
  • 24/7 live chat support
  • 30-day money-back guarantee (no free trial)

Private Internet Access

Use this fast and reliable VPN to fix Among Us server connection issues.
Check price Visit website

In conclusion, the five solutions above should help you fix any Among Us server connection issues you might be experiencing, which prevent you from playing the game online or in LAN with your friends.

FIX: Microsoft Word has stopped working in Windows 10

Probably one of the most popular Office applications is Microsoft Word. The text editor has millions of users, despite the fact that the application also has a few issues.

A common, and at the same time very vague error message, is, for instance, Microsoft Word has stopped working.

Today we’re going to focus on it and show you how to fix this problem on Windows 10.

What can I do if Word stops working on Windows 10?

How do I fix Microsoft Word (Office suite)?

1. Repair the Office installation

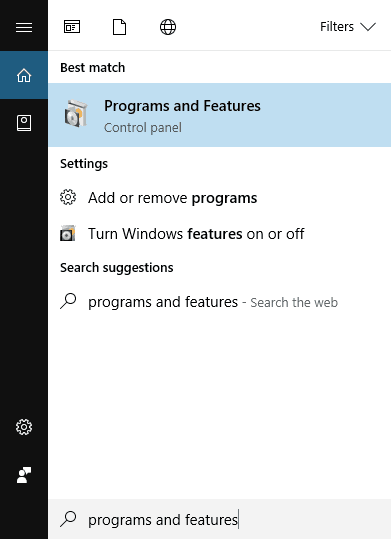
  1. Press Windows Key + S and enter programs and features. Select Programs and Features from the list of results.
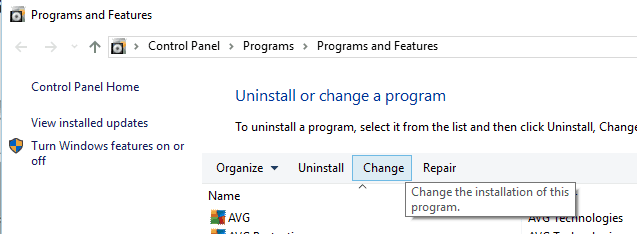
  2. Locate your Office installation on the list and select it.
  3. In the top menu click the Change button.
  4. Select the Repair option and click Continue. Bear in mind that newer versions of Office might have Online Repair or Quick Repair options instead.
  5. Follow the instructions to repair your Office installation.

This solution should work for all versions of Office. After repairing your Office installation, check if the error appears again. This also helps when you are faced with the msosync.exe error.

2. Install the latest updates

Outdated versions of Word and Office might have a few bugs or incompatibility issues, so it’s recommended that you always update them.

To download Office updates, do the following:

  1. Open any Office application and click File in the top left corner.
  2. Navigate to Account / Product Information / Update Options.
  3. Select Update Options.
  4. Choose to Enable Updates option. If this option isn’t available, it means that automatic updates are enabled.
  5. Select Update Options again and choose Update Now from the menu. Wait for Office to download and install the necessary updates.

If you have Office 2010 or older, you can check for updates by following these steps:

  1. Start any Office application.
  2. Go to File / Help.
  3. Select Check for Updates or Install Updates option.

Windows 10 performs updates automatically, but you can also check manually for updates. To do that, follow these steps:

  1. Press Windows Key + I to open the Settings app.
  2. Go to the Update & security section.
  3. Go to the Windows Update tab and click Check for updates.

Update drivers

After updating the apps, make sure to also check your drivers. Windows usually update drivers in the background or with certain updates, however, glitches are possible.

So we recommend updating the drivers using reliable third-party tools to automatically install the newest one.

Downloading and installing drivers manually is a process that carries the risk of getting the wrong driver installed, which may lead to serious malfunctions of your system.

That being said, if you are not sure what kind of software to choose for driver administration, discover here the best driver update software on Windows 10. Otherwise we recommend using Fortect Driver Updater.

⇒ Get Fortect Driver Updater

3. Reinstall Office completely

Reinstalling Office will get you a new, updated copy of the program, with no glitches, cache, or temporary files that might have affected the program’s functionality before.

To uninstall Office 2013, 2016, or Office 365 from your PC, you’ll need to download Microsoft’s Office removal tool. It will remove all files and registry entries associated with Office.

After downloading the tool, start it and follow the instructions on the screen to complete the uninstall. Now you just need to restart your PC and install the same version of Office.

If you have Microsoft Office 2010 or older, we recommend that you download the appropriate removal tool from Microsoft’s website.

More so, to efficiently uninstall Office apps from your computer, without letting file leftovers behind, it’s advised to use the best uninstaller software today.

4. Disable Add-ins

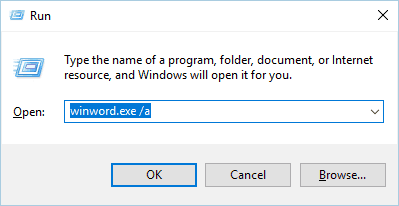
  1. Press Windows Key + R to open the Run dialog. Enter winword.exe /a and press Enter or click OK. (In addition to winword.exe /a command, you can also use winword /safe to start Word in Safe Mode).
  2. Microsoft Word should now start. Click on the Office button and select Word Options.
  3. Select the Add-Ins tab and then disable all add-ins.
  4. After doing that, try to start Word again and check if the problem is resolved.

In order to enhance their functionality, Word and many other Office tools support add-ins. These little applications allow you to expand the functionality of Word or any other Office tool with new features.

Unfortunately, not all add-ins are compatible with Windows 10 or with your version of Office and that can lead to the issue discussed here.

To find a problematic add-in you’ll need to repeat previous steps and enable add-ins one by one. Keep in mind that after enabling an add-in you have to restart Word again. Repeat this process until you find the add-in that is causing this problem.

It’s worth mentioning that some users reported that ABBYY FineReader 9.0 Sprint add-in was problematic for them on Word 2016.

However, it appears that updating ABBYY FineReader can resolve the issue for good.

Besides, Microsoft reported that KingSoft’s PowerWord and Dragon Naturally Speaking add-ins also have problems with Office 2013 and 2016. The Bluetooth add-in also caused some trouble.

In all instances, disabling the ad-ins restored access to Word.

5. Modify your registry

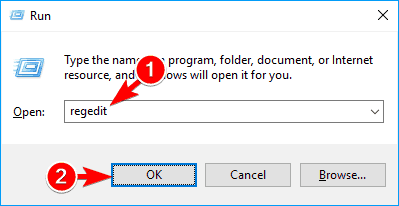
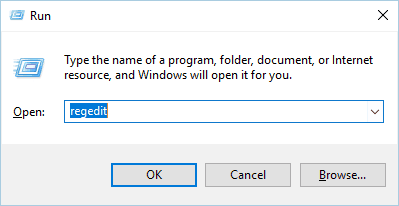
  1. Press Windows Key + R and enter regedit. Press Enter or click OK.
  2. Once Registry Editor opens, go to the following location (your key might be different depending on the version of Office that you have): HKEY_CURRENT_USERSoftwareMicrosoftOffice15.0Word
  3. Locate Data subkey. Right-click it and choose Delete from the menu.
  4. After deleting the key, close Registry Editor and try to start Word again.

Word will automatically recreate the deleted key, and the problem should be resolved. We have to mention that this solution should work with almost any version of Word, so be sure to try it out.

6. Remove the old printer driver

  1. Press Windows Key + X to open Win + X menu. Choose the Device Manager from the list.
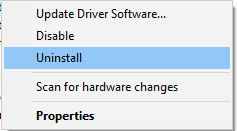
  2. Locate your printer, right-click it, and choose Uninstall.
  3. Click OK to confirm that you want to remove the driver.

After deleting the driver, restart your PC and check if the issue is resolved. If removing the driver solves the problem, download and install the latest driver for your printer from the manufacturer’s website.

7. Remove any recently installed software

Third-party applications can interfere with Word and cause errors. To fix this problem, you’ll need to uninstall any recently installed software.

If you added any new hardware to your PC, such as a printer or scanner, you might want to try removing its driver and software and check if that solves the issue.

Or you might want to remove any tools that you installed in the past few weeks.

8. Insert your document into another file

  1. Open the File menu and then select New / Blank Document.
  2. Go to the Insert tab and click on Object in the Text group. Now select Text from File.
  3. Select the desired file and click Insert.

The Microsoft Word has stopped working error can sometimes appear while trying to open previously saved documents. If that’s the case, this step might help.

9. Delete the Word Options registry key

Keys in your registry can get corrupted, and if that happens, you’ll need to remove them manually. Removing keys from the registry can lead to instability issues, therefore we advise you to create a backup of your registry, just in case.

To delete this key from the registry, do the following:

  1. Open Registry Editor. (For detailed instructions on how to do that be sure to check the forth solution above.)
  2. In the left pane navigate to the following key (it might look different on your device, depending on the Office version): HKEY_CURRENT_USERSoftwareMicrosoftOffice16.0WordOptions
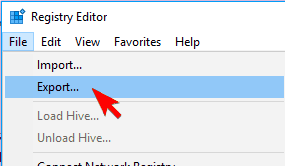
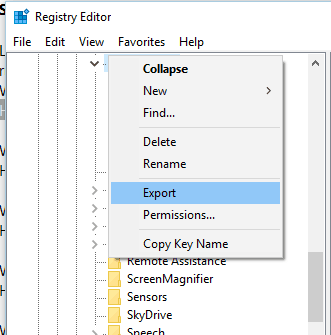
  3. Right-click the key and choose Export from the menu.
  4. Save the file as Wddata.reg and save it on your Desktop.
  5. Now go back to the Registry Editor, right-click the Options key, and choose Delete from the menu.
  6. Close Registry Editor.

After doing that, try to start Word again and check if the problem is resolved. If the problem still persists, run Wddata.reg on your Desktop to restore the deleted key.

10. Replace the Normal.dot global template file

  1. Make sure that all Office programs are closed.
  2. Press Windows Key + X and select Command Prompt (Admin).
  3. When Command Prompt starts, enter the command below and press Enter to run it: ren %userprofile%AppDataRoamingMicrosoftTemplatesOldNormal.dotm Normal.dotm
  4. Wait for the command to finish and then close Command Prompt.
  5. After that, try to start Word again.

Word stores formatting and macros in a global template file, and if your global template file is corrupted you’ll get this error message. So renaming the Normal.dot file should work.

Note that by altering this file you can lose your customization options such as styles, macros, etc. If you want to preserve those settings, we highly recommend that you copy the customization from one global template to another by using the Organizer.

11. Disable Startup folder add-ins

  1. Locate the Office installation directory on your PC. By default, it should be something like this (depending on your Office version): C:Program FilesMicrosoft Officeoffice16
  2. Navigate to the Startup folder.
  3. A list of files should appear. Rename one file by adding .old at the end. Be sure to remember the original file name because you’ll need to revert the changes later.
  4. Try to start Word again. If the issue appears again, repeat Step 3. Rename a different file this time. After that, try to start Word again. Repeat this step until you rename all files in the Startup directory.
  5. If you manage to start Word after renaming one of the files, it means that the last renamed file was causing this error.
  6. Rename all files except the problematic one to their original names and check if Word still works. If so, you’ll need to update the problematic add-in or remove it.

If the problem still persists, you need to do the following:

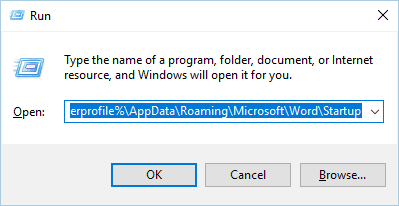
  1. Press Windows Key + R and enter the following command and press Enter: %userprofile%AppDataRoamingMicrosoftWordStartup.
  2. After the folder opens, repeat steps 3-5 from above.

12. Delete COM add-ins registry keys

  1. Close all Office programs and start the Registry Editor.
  2. In the left pane navigate to this key: HKEY_CURRENT_USERSoftwareMicrosoftOfficeWordAddins
  3. Right-click on Addins and choose Export. Save the file to the desired location.
  4. Right-click Addins key again and choose Delete from the menu.
  5. In the left pane navigate to: HKEY_LOCAL_MACHINESoftwareMicrosoftOfficeWordAddins 
  6. Export the key as we showed you in Step 3.
  7. Delete the Addins key.
  8. Close Registry Editor and start Word again.

If the problem is resolved, it means that COM add-ins are causing this issue. To fix the problem, you need to find and disable the problematic COM add-in. First, you need to restore the deleted keys by running the exported .reg files. After that, follow these steps:

  1. Click the File menu and choose Options.
  2. Click Add-Ins.
  3. In the Manage list click COM Add-Ins and then click on Go.
  4. If a certain add-in is listed in the COM Add-Ins dialog box, clear the checkbox next to its name. (If you have multiple COM Add-Ins available, repeat this step and disable a single add-in at a time in order to find the problematic one.)
  5. Click OK.
  6. Now select File / Exit.
  7. Start Word and check if the problem is resolved. If the issue still persists, repeat the steps until you find the problematic add-in. After finding it, disable it or try to download the latest version.

13. Change the default printer

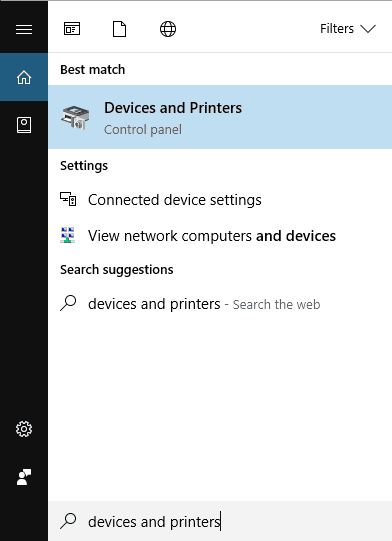
  1. Press Windows Key + S and enter devices and printers. Select Devices and Printers from the list of results.
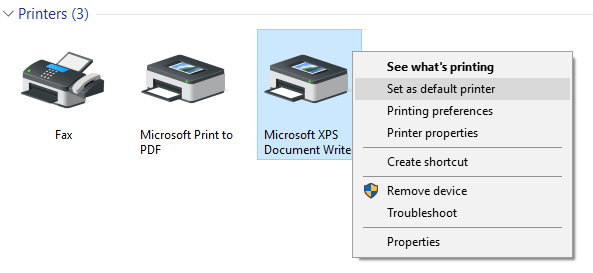
  2. In the next window, Go to the Printers section.
  3. Right-click Microsoft XPS Document Writer. Select Set as a default printer option.
  4. Close Devices and Printers window and try to start Word again.

If the error message doesn’t appear, it means that your printer was causing this problem.

To fix the problem, we advise that you update your printer drivers using Fortect Driver Updater, as mentioned in the first solution, and check if that solves the issue.

14. Create a new Windows profile

  1. Press Windows Key + I to open the Settings app.
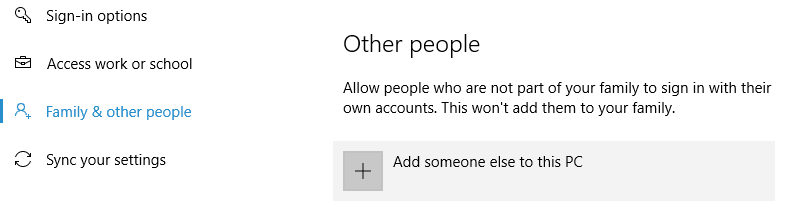
  2. Go to Accounts > Family & other people.
  3. In the Other people section click the Add someone else to this PC button.
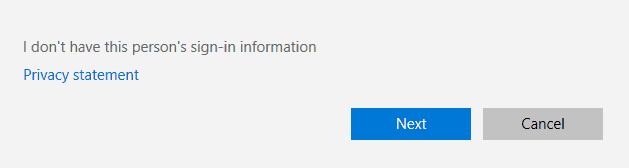
  4. Select I don’t have this person’s sign-in information.
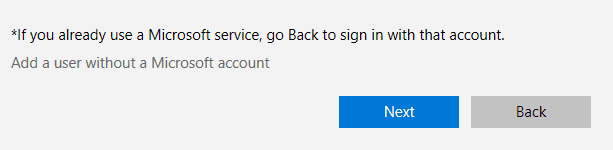
  5. Now select Add a user without a Microsoft account.
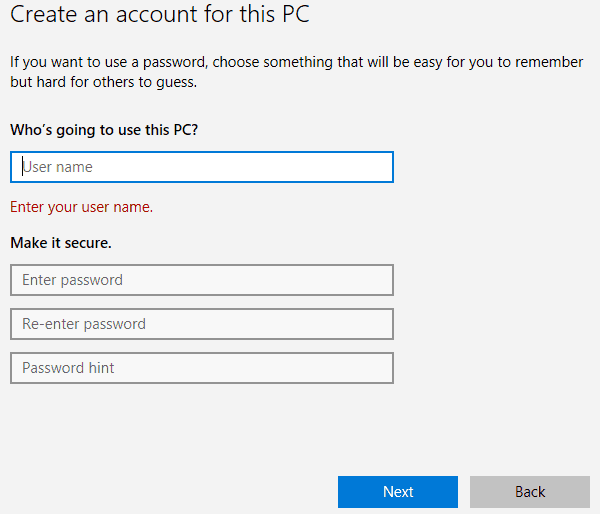
  6. Enter the username and password for the new user account and click on Next.

After making a new user account, switch to it and check if the problem is resolved.

If Word is working properly, you might have to continue using the new user account if you don’t manage to find another working solution.

How do I fix Microsoft Word 2013 issues?

1. Set Word to Power Saving mode

Users reported Word 2013 being set to High-Performance mode surely causes functionality issues.

So go to your switchable graphics control panel and set Word 2013 to work in Power Savings mode. After doing that, try to run Word and check if the problem is resolved.

2. Check your graphics card driver

This issue can sometimes appear due to problems with your graphics card driver. Users reported that they had problems with Nvidia drivers, and they fixed them by renaming the NVWGF2UM.DLL to NVWGF2UM.old.

Renaming the driver files isn’t the best solution, especially since it’s hard to find the problematic driver file.

So we advise you to update your graphics card driver and check if that solves the issue. If the problem still persists, you might want to remove your driver and use the default driver from Microsoft.

Solution 3 – Disable your dedicated graphics card

Many laptops and some desktop computers have both integrated and dedicated graphics cards. According to users, they experienced Microsoft Word has stopped working error because Word 2013 wasn’t compatible with their AMD graphics card.

To fix this problem, you need to temporarily disable the dedicated graphics card from the switchable graphics menu. After doing that, try to start Word 2013 and check if the problem is resolved. If the issue is fixed, you’ll need to download the latest drivers for your dedicated graphics card and check if that solves the problem.

4. Disable Hardware Acceleration

  1. Open any Office application.
  2. Select File / Options / Advanced.
  3. Locate the Hardware Acceleration option and disable it.
  4. After doing that, try to start Word 2013 again.

If you can’t open Word 2013 at all, you can disable hardware acceleration using Registry Editor. To do that, follow these steps:

  1. Open Registry Editor.
  2. In the left pane navigate to this key: HKEY_CURRENT_USERSoftwareMicrosoftOffice15.0Common
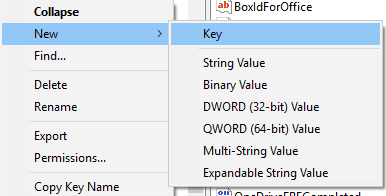
  3. Right-click the Common key and choose New > Key from the menu.
  4. Enter Graphics as the name of the new key.
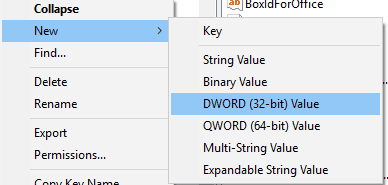
  5. Now right click Graphics key and select New / DWORD (32-bit) Value. Name the new value DisableHardwareAcceleration.
  6. Double click DisableHardwareAcceleration value and set its Value data to 1. Click OK to save changes.
  7. Close the Registry Editor and check if the problem is resolved.

We have to mention that modifying the registry comes with certain risks, so we strongly advise you to create a backup of your registry before making any changes.

Hardware acceleration can be useful to achieve maximum performance with certain apps, but it seems that with Word 2013, there’s an opposite effect.

5. Delete any add-in leftover files

Sometimes when you delete a certain add-in, its files might remain in the Office Startup folder.

Users reported that this is what happened with the Mendeley add-in after they removed it.

Keep in mind that almost any leftover file from add-ins can cause this problem to appear, so be sure to check the Office Startup folder.

We already explained how to enter the Office Startup folder in one of our previous solutions, so be sure to check that solution for detailed instructions.

How do I fix  Microsoft Word 2010 issues?

Users reported issues with the Bluetooth add-in in Office 2013 and Office 2010. If you can’t disable the Bluetooth add-in, you might have to uninstall the Bluetooth driver or update it.

If you use Bluetooth frequently and you don’t want to uninstall the driver, you might be able to fix the problem by renaming two files.

On this note, users suggested renaming btmoffice.dll and btmofficea.dll. You can simply add .bak and the end of the file name to safely rename your files.

To find the files easier, use the search bar in File Explorer.

So these were our solutions to get Work running again. If you need to further investigate how to repair a Word document, we’ve got a dedicated article specifically on this topic.

If any of our recommendations worked for you, we’d like to hear that, so please use the comments sections below.

Terraria packet loss: fix it with these easy steps

Terraria is an excellent PC game that many strongly believe it’s a 2D version of the famous Minecraft. In fact, the two games aren’t that similar, as the building part is probably the only thing that may make you think otherwise.

In Terraria, you can build houses, populate them with various citizens, and explore the vast world that this game has to offer.

This game drops you in a procedurally generated world, so there’s no way of knowing what you’ll get before doing any exploring yourself.

The best part is that you can play solo, or share the experience with other players. You can either play with or against others, as Terraria also features PVP modes.

Now for some bad news: if you prefer the multiplayer experience of Terraria, you might experience connectivity issues occasionally. These include high ping, jitter, and even packet loss.

What is packet loss in Terraria?

No matter where you encounter it, packet loss is no fun. It occurs whenever data packets that travel through your connection never make it to their destination.

This is definitely not the same situation as with high latency. With high latency, the data packets may take a little longer to arrive, but with packet loss, they just get dropped along the way.

The symptoms are somewhat similar, as you’ll notice sluggish menus, slow movement, reduced framerate, unresponsive commands, and even sudden disconnections from the Terraria game server.

Although Terraria is not exactly fast-paced, it definitely has some moments where packet loss could ruin everything. For instance, discovering a mob-ridden cavern, entering a dungeon, summoning a boss, or engaging in PVP battle.

What causes packet loss in Terraria?

Truth be told, packet loss can be triggered by a whole lot of things, from using old Ethernet cables to host server network congestion. The severity of the packet loss can be affected by the complexity of the cause.

For instance, if the problem is caused by a cached data build-up, you may solve it by simply restarting your PC.

However, the list of possible causes is rather large and varied. Here are a few examples of obvious factors that may trigger packet loss:

  • Network congestion (arguably one of the most frequent causes)
  • Low-quality Ethernet cables
  • Using Wi-Fi instead of Ethernet
  • Outdated drivers on your system (especially network adapter drivers)
  • Cache data build-up on your system
  • Outdated router firmware version
  • Terraria server-side issues
  • Bandwidth throttling (ISP-related)
  • Improper traffic routing (ISP-related)

As you can see, the packet loss issue can take place anywhere on the connection, whether it’s on your side, on the server host’s side, or on your ISP’s infrastructure.

How to detect packet loss in Terraria?

  1. Locate the IP address of the game server
  2. Open a CMD instance on your computer
  3. Type pathping x.x.x.x (replace x.x.x.x with IP address you collected earlier)CMD pathping
  4. Wait for the pathping test to come to an end
  5. Check each hop for packet loss value

First and foremost, Terraria has no official servers, so it’s up to players to create their own servers. You can find certain communities that rely on hosting companies to create dedicated servers that are always online.

By default, user-created servers shut down whenever the host exits the game.

Public dedicated servers have connection details, and you can also use the host address (without the port number) instead of the IP address while running the pathping test.

As a rule of thumb, the first hop is always your PC (the device you’re running the test from) and the last one belongs to the game server.

How to fix Terraria packet loss?

1. Try a VPN

  1. Buy a subscription plan from Private Internet AccessTerraria PIA VPN
  2. Download the VPN installer on your PC
  3. Install PIA on your computer
  4. Launch the VPN client
  5. Log into your account
  6. Connect to a fast server of your choice (servers that are closer are generally faster)
  7. Launch Terraria
  8. Connect to the server of your choice
  9. Check if you still have packet loss issues

Kape Technologies’ Private Internet Access is an excellent VPN service that can help you curb packet loss without significant efforts. You just install the app, connect to a suitable server and the issue should diminish, if not vanish altogether.

Private Internet Access

Private Internet Access

Experiencing packet loss in Terraria? PIA could help you fix this issue.
$2.69/mo. Buy it now

However, there’s a catch: the packet loss must be triggered by your ISP for this VPN fix to work. For instance, if your ISP throttles your bandwidth or routes traffic in a poorly fashion, using a VPN will circumvent these limitations.

2. Flush your DNS

  1. Launch an elevated CMD instance on your PC
  2. Run these following commands, one by one, in this order:

ipconfig /flushdns
ipconfig /registerdns
ipconfig /release
ipconfig /renew
netsh winsock reset
exit

Make sure you restart your PC right after you run the last command successfully. Sometimes, your PC builds up on cached DNS data, which might trigger various connectivity issues, such as packet loss.

Flushing your DNS proved to be a worth-trying fix many times. Optionally, you can also try using alternative DNS addresses, other than the ones your ISP assigned you. Two such examples of free public DNS are Google’s and Cloudflare’s.

3. Perform manual troubleshooting

  • Carefully check your entire connection for any malfunctioning component
  • Replace any old/worn out/broken component you may find (especially old cables)
  • Use Ethernet instead of Wi-Fi whenever possible (Wi-Fi packet loss occurs more frequently)
  • Update drivers on your system to their latest version
  • Make sure your router’s firmware is up-to-date
  • Call your ISP if there’s something wrong on their side of the network
  • Switch servers (Terraria lets you use your characters on different servers)
  • Try to avoid peak hours if possible (or use a VPN to dodge network congestion)
  • Restart your PC, router, modem

Final thoughts on fixing Terraria packet loss

All things considered, it’s worth mentioning that even in Terraria packet loss is likely to be intermittent. In fact, many packet loss episodes pass before players even notice them.

However, if you experience packet loss on a regular basis, try narrowing down the list of potential causes. Once you establish the cause, try using an appropriate fix to alleviate the issue.

You may try to use a VPN, but note that it will only work if your ISP triggers the packet loss by either limiting your connection or routing traffic improperly.

[wl_navigator]

Beats Studio3 vs Solo3: The difference and which one to buy?

The premium headphone brand Beats offer Studio3 and Solo3 headphones with a hefty price difference, where the Solo3 is a more affordable choice.

So, what’s those extra $$$ getting you over Solo3?

Well, to begin with, it offers better comfort, ANC (Active Noise Cancelling), and overall better build quality.

So, should you pay the premium or save it by taking home the almost identical Solo3 headphone? We answer all the questions in this quick comparison guide.

In this article, we compare the Beats Studio3 with its younger sibling Solo3 to find the differences and help you buy the best of the two.

Beats Solo3 vs Studio3 – Which headphone should I buy?

Beats Solo3 and Studio3 both are excellent headphones from the company. However, there are some key features that set them apart and it can be substantial for some users.

In this article, we take a look at the build quality, battery life, and sound signature to find the best of the two.

Quick Overview

Beats Studio3

Beats Studio3 vs Solo3

Pros

  • Excellent battery life with ANC.
  • Fast Fuel support for quick charging
  • The over-ear design offers more comfort and better isolation

Cons

  • Build-quality not the best for the price
  • Micro USB charging port

⇒ Get Beats Studio3

Beats Solo3

Beats Studio3 vs Solo3

Pros

  • Excellent battery life up to 40 hours
  • Fast Fuel charging support
  • Better color options

Cons:

  • Flat sound signature
  • Sub-par build quality
  • High clamp force

⇒ Get Beats Solo3


Build Quality

Beats Studio3 vs Solo3

Studio3 definitely has an edge over Solo3 when it comes to the overall build quality of the device, even if it not the best in the segment. The headphone feels good in-hand and is made out of soft matte plastic.

Solo3 on the other hand features a hard-plastic shell which is also a fingerprint magnet depending on the color you opt for. While the plastic construction seems durable for the most part, you might want to be gentle with hinges and the headband flexibility.

The clamping force on both the headphones seems to be on equal footing with not so great headband comfort. Both headphones can also be easily folded when you travel.


Sound Quality

Beats Studio3 vs Solo3

Studio3 is heavy on bass and is made for bass heads. However, it certainly does not perform very well when it has to differentiate between a main and secondary melody in some songs.

With an added advantage of Active Noise Cancelling, Studio3 seems to take an edge even in the sound quality department as well. This pair can offer a more balanced audio profile which is also helped by the fact it is an over-ear design that’s more comfortable.

Solo3 features an on-ear design which is not the best when it comes to isolation and comfort. The headset supports AAC for high-quality streaming on iOS devices.

On the audio front, Solo3 Wireless has a fewer emphatic bass response. However, this can be easily overshadowed by the fact that the dynamic driver struggles to differentiate between the different instrumental sounds. That said, if you are a hip-pop head, you will most certainly like the sound signature.


Connectivity

Beats headphone comparison

Both headphones feature Apple’s last-gen W1 chip with Bluetooth connectivity for wireless connectivity. The last-gen chip still offers up to 100 feet coverage while allowing to pair the headphone with a simple tap.

On the connectivity front, both the headphones feature identical technology yielding identical results.


Battery Life

Beats headphone comparison

Apple says both the headphones can last up to 48 hours depending on the use. However, the Studio3 can only last 22 hours with the ANC turned on.

In real life testing, Studio3 could keep the lights on for just over 10 hours with 100% volume and ANC turned on. So, you could easily push it over 18 hours with moderate usage.

The Solo3 on the other hand offers an incredible 40+ hours of battery life. However, it is important to consider the fact that Solo3 does not feature ANC (Active Noise Cancelling), hence lasts longer.

On the bright side, both the headphone features the fast fuel technology that gives up to 3 hours of playback time charge with 10 minutes of charging. So, battery life shouldn’t be a problem.


Which One Should I buy?

Both the headphones offer excellent battery life and connectivity features. However, Studio3 is arguably a better choice with its over-ear design for comfort, better sound signature, and ANC support.

If you are someone who takes calls on the go and listens to music while traveling, ANC will help a great deal by preventing the noises from creeping in.

If you are on a budget and can look over ANC and flat sound signature, Solo3 will make more sense due to its long battery life.

[wl_navigator]

5 Best VPNs to fix Fall Guys: Ultimate Knockout Lag

Fall Guys: Ultimate Knockout is a platformer battle royale game that has taken the world by storm. Available for Windows and PlayStation 4, it’s praised for its colorful theme, chaotic gameplay, and incredible entertainment value.

You can join up to 60 other players to compete in various crazy contests, in which you must run, jump, grab, and intelligently plan your moves to cross the finish line and advance to new levels. It’s also available on Steam.

Unfortunately, a lot of users experience Fall Guys: Ultimate Knockout lag, which could be fatal to their gameplay. Since every move and action counts in this platformer battle royale, it’s crucial to eliminate any lag spikes, high ping, and FPS issues.

In addition to minimizing graphic settings, you can use a VPN to improve your gameplay if the Fall Guys: Ultimate Knockout lag issue persists. By rerouting your gaming traffic through VPN servers, you can significantly reduce ping and enhance your Internet connection quality.

You can also use a VPN to fix packet loss, protect your router from DDoS attacks, bypass ISP throttling, eliminate Internet restrictions, and more.

However, not all VPNs are fit for this role, so it’s essential to examine your options to determine the best VPN for gaming. You can also use a virtual private network solution for streaming, torrenting, secure browsing, and website unblocking.

What’s the best VPN for Fall Guys: Ultimate Knockout?

Private Internet Access – Best VPN for Fall Guys: Ultimate Knockout

use Private Internet Access to fix all Guys Ultimate Knockout lag

Developed by Kape Technologies, Private Internet Access (PIA) is the best VPN to fix Fall Guys: Ultimate Knockout lag and reduce high ping, thanks to its numerous servers optimized for gaming: more than 3,300 in 48 countries.

Depending on your preferences, PIA encrypts your network traffic using OpenVPN or WireGuard. It can also connect to a second VPN location through Shadowsocks. The tool has a kill switch, split-tunneling mode, and exclusive DNS servers.

Plus, PIA is the only VPN on this list with native port forwarding support, which is ideal for hosting game servers for you and your friends. It’s compatible with all major platforms and allows 10 simultaneous device connections.

More about PIA:

  • A no-logging privacy policy
  • No IP or DNS leaks
  • 24/7 live chat support
  • 30-day money-back guarantee (no free trial)

Private Internet Access

Use this reliable VPN to easily fix Fall Guys: Ultimate Knockout lag.
Check Price Visit website

NordVPN – A zero-logging policy

use NordVPN for Fall Guys Ultimate Knockout

NordVPN is ideal for users who want to enhance their gaming experience and take advantage of online security features. It’s made by Tefincom & Co., providing access to more than 5,100 VPN servers in 59 countries.

The app supports Double VPN, Onion-over-VPN, and obfuscated servers to maximize your security level when browsing the web, torrenting, or gaming. It protects your data using OpenVPN, private DNS servers, a kill switch, and an anti-malware feature called CyberSec.

You can set up NordVPN for Windows, PlayStation 4, and other platforms if you’re using it on up to 5 devices. Plus, the tool can be used to fix packet loss.

More about NordVPN:

  • A zero-logging policy
  • No IP, DNS, or WebRTC leaks
  • 24/7 live chat support
  • 30-day money-back guarantee (no free trial)

NordVPN

Get this super-secure VPN to fix Fall Guys: Ultimate Knockout lag spikes and stay anonymous online.
Check Price Visit website

Surfshark – No identifying logs

use Surfshark for Fall Guys Ultimate Knockout

Surfshark is a budget-friendly solution that can help you improve ping in Fall Guys: Ultimate Knockout, access blocked websites, defeat government censorship, and more. It was created by Surfshark LTD and covers more than 1,700 VPN servers in over 63 countries.

The VPN service supports OpenVPN with up to 256-bit military-grade encryption, multi-hop VPN connections, and obfuscation mode to help you bypass VPN blocks. It’s one of the safest VPNs for your laptop, mobile, and gaming console.

You should also know that Surfshark can protect any number of devices since there’s no limit to the number of simultaneous VPN connections, which makes it great for sharing your VPN account with all household devices.

More about Surfshark:

  • No identifying logs
  • No IP or DNS leaks
  • 30-day money-back guarantee
  • 7-day free trial for Android and iOS

Surfshark VPN

Get this affordable VPN solution to not only fix Fall Guys: Ultimate Knockout but also enjoy total Internet freedom.
Check Price Visit website

CyberGhost VPN – Up to 7 devices at the same time

use CyberGhost VPN for Fall Guys Ultimate Knockout

CyberGhost VPN is the best free VPN for Fall Guys: Ultimate Knockout. That’s because you get a 1-day free trial on Windows to try it out, without using your credit card. Kape Technologies makes it and offers more than 6,500 VPN servers in 89 countries.

You can easily connect to the Best Location provided by CyberGhost VPN to use the nearest and fastest VPN server. The app has OpenVPN, split tunneling, private DNS servers, and trusted Wi-Fi networks. It’s great for fixing network congestion, too.

You can set up CyberGhost VPN on all popular devices, including routers, if you want to use the VPN on PlayStation 4 to play Fall Guys: Ultimate Knockout. The tool can protect up to 7 devices at the same time.

More about CyberGhost VPN:

  • No logs or leaks
  • 24/7 live chat support
  • Up to 45-day money-back guarantee
  • 1-day free trial for Windows and macOS
  • 7-day free trial for Android and iOS

CyberGhost VPN

Significantly improve Fall Guys: Ultimate Knockout by using this VPN to lower your ping time.
Check Price Visit website

ExpressVPN – Fastest VPN for PlayStation 4

use ExpressVPN for Fall Guys Ultimate Knockout

ExpressVPN is a virtual private network service that we can’t overlook, given its popularity in the VPN industry. And it dramatically reduces high ping and fixes latency issues in Fall Guys: Ultimate Knockout. Published by Express VPN International LTD, it provides over 3,000 VPN servers in 94 countries.

Unlike the other VPNs on this list, ExpressVPN has a cool feature called Speed Tester, which you can use to determine the latency of all VPN servers. You must pick the one with the lowest latency to improve your Internet connection quality.

Additionally, ExpressVPN supports OpenVPN, split tunneling, a Network Lock, and zero-knowledge DNS servers. You can set it up for all popular devices, including Windows and PlayStation 4.

More about ExpressVPN:

  • No traffic logs
  • No IP, DNS, or WebRTC leaks
  • 24/7 live chat and email support
  • 30-day money-back guarantee
  • 7-day free trial for Android and iOS

ExpressVPN

Fix Fall Guys: Ultimate Knockout lag using one of the fastest VPNs.
Check Price Visit website

How to use a VPN for Fall Guys: Ultimate Knockout

  • Get a VPN subscription plan (we recommend PIA).
  • Download and set up the VPN client on Windows.
  • Open the app and connect to a VPN server*.
  • Launch Fall Guys: Ultimate Knockout.

*You can connect to the server recommended by the VPN provider since it’s the closest one to your location. However, if that doesn’t fix in-game lag, experiment with multiple VPN servers from various countries until you fight the right one.

In conclusion, you can fix Fall Guys: Ultimate Knockout lag spikes and lower your ping by getting equipped with a trustworthy VPN. It can also protect you from DDoS attacks.

If you are facing issues like Fall Guys error code 200_2147483647, it could be due to server issues or weak network connection; check this guide to learn more.

How to connect Surface Pro to TV?

The ultra-light Surface Pro is a 2-in-1 device, highly praised for its versatility, since one can use it both as a laptop or as a tablet.

Among its amazing features is the stunning PixelSense Display that supports Surface Pen and touch, its long battery life of up to 13.5 hours, plus razor-sharp and brilliant color resolution.

But even with all these exciting features, there are still moments when you’ll experience technical issues, like when the Surface Pro won’t connect to a TV.

If you’ve been in this situation, try the solutions below to pinpoint and resolve the issue.

What can I do if Surface Pro won’t connect to TV?

  1. Preliminary checks
  2. Uninstall and reinstall the Surface Wi-Fi driver
  3. Check video input settings
  4. Remove and reinsert video adapter
  5. Check video cables
  6. Extend/Duplicate the display to your TV
  7. Change TV screen resolution settings
  8. Try the TV adapter
  9. Troubleshoot wireless display connection
  10. Update the adapter’s firmware and restart the adapter
  11. Reset the adapter
  12. Allow adapter to communicate through the firewall
  13. Reinstall graphics driver

1. Preliminary checks

Ensure your TV is plugged into a working power outlet and turned on. if you use a power strip, ensure it is plugged in and turned on as well.

Make sure that the USB-C, HDMI and DisplayPort connections can transmit audio and video signals, so if you use these to connect to a TV, you can play audio from your Surface over the TV speakers.

VGA connections only transmit video, so if you use a VGA adapter to connect to your TV, the audio won’t play on the Surface speakers unless connected to external ones or to a headset.

If your Surface is waking from sleep, it may have issues reconnecting to an external display like your TV. To resolve this, unplug the video cable from the USB-C or Mini DisplayPort and plug it back in again.

You can also install the latest updates. In most cases, this helps when Surface Pro won’t connect to a TV.

2. Uninstall and reinstall the Surface WiFi driver

  1. Right-click Start and select Device Manager.
  2. Select the arrow to the left of Network adapters and press and hold (or right-click) Marvell AVASTAR Wireless Network Controller.Surface Pro won't connect to TV
  3. Select Uninstall.
  4. Go to Start, and select Power / Restart.
  5. After your Surface restarts, go to Start, and select Settings.
  6. Select Devices / Connected devices.
  7. Select Add a device to connect your Surface and the Microsoft Wireless Display Adapter.

If the default W-iFi drivers don’t work after manually downloading and installing them, you can also try updating your drivers automatically and check if that helps.

To help you with this process, we strongly recommend using a third-party driver updating tool such as Fortect Driver Updater. It’s the safest and quickest way to automatically update your drivers, while also making sure that you download the right software.

Driver updating can be a bit of a fuss, sometimes, since it involves looking around for compatible software.

However, a dedicated tool like Fortect Driver Updater includes a massive database of software and will recommend just what it’s best for your device.

⇒ Get Fortect Driver Updater

3. Check video input settings

If you’re trying to connect to your TV and cannot see the video output from your Surface Pro, the issue may be with the video input settings on the TV.

If you’re using a VGA connection to your TV, the screen must be set to recognize VGA as the video input signal. So check and change the video input settings in the instructions’ manual or on the manufacturer’s website.

Note: Common video input settings include VGA, DVI, HDMI, Line In, Input, AUX, and Source.

If this doesn’t work, try the next solution.

4. Remove and reinsert video adapter

If you’re using a video adapter like the Surface video adapter, USB-C to HDMI adapter or USB-C to VGA adapter check to confirm that it is securely connected to your Surface Pro.

Remove it and reinsert firmly to confirm this. Avoid using a Y or dual-link adapter as this splits the signal between two or more screens.

If you’re using a Mini DisplayPort adapter, plug it in correctly so that it works, with the connector’s flat side aligned with the flat side of the Mini DisplayPort.

If Surface Pro won’t connect to the TV even after reinserting the video adapter, go to the next solution.

5. Check video cables

A video cable of maximum 6 feet is good enough as anything longer affects video quality.

Check that all the video connections are secure, from the USB-C port, Mini DisplayPort on your Surface Pro, or your docking station, and any video adapter you are using, as well as the connection on the TV’s video port.

Use the cable that came with your TV or check that the cable supports video. This is recommended for Surface Pro devices with USB-C ports. If the cable isn’t responding, use a different one to connect and see if the cable is the issue.

If you’re using a video extension cable or video converter, remove it from your setup and see if it is causing the problem. If the video adapter is from a different company, check with the manufacturer for further assistance.

6. Extend/Duplicate the display to your TV

On your keyboard, press Windows Key + P, or select the Action center icon on the taskbar and select Project, then choose one of the options below:

  • If you want to see the same things on your Surface Pro and TV, choose Duplicate;
  • If you want to move what is on the Surface Pro screen display to your TV, choose Extend. This also lets you drag and move items between the screens and select a different resolution for your TV;
  • If you only want to see everything on your TV, select Second Screen only.

7. Change TV screen resolution settings

  1. Click Start and select Settings.Surface Pro won't connect to TV
  2. Select SystemSurface Pro won't connect to TV
  3. Select Display.Surface Pro won't connect to TV
  4. Under Scale and layout, check the setting under Change the size of text, apps, and other items. Use the recommended percentage.Surface Pro won't connect to TV
  5. If that doesn’t solve your problem, under Resolution, select a new value. It is advisable to stick to the recommended value.Surface Pro won't connect to TV

When you connect your Surface Pro to your TV, the Surface always tries to set the best resolution based on the connector and your TV’s resolution. However, tweaking the settings manually might work some miracles.

If the resolution was fine and recently changed, you need to update your graphics driver.

To do this, run Windows update and get the latest driver or use Outbyte Driver Updater, as suggested in the second solution above. If it is only the size of text and other things on your desktop that changed, press CTRL+0 to return the zoom level to 100 percent.

8. Try the TV adapter

If you want to check whether your video adapter is working, connect your Surface Pro to a different TV.

If you cannot get the display on your Surface Pro to show on a different screen, you may have to replace your adapter.

9. Troubleshoot wireless display connection

Surface Pro can connect wirelessly to compatible displays via Miracast, or to an HDMI-compatible display via a Microsoft Wireless Display adapter.

If you are using one of these and you have issues wirelessly connecting your Surface Pro to the TV display, try the following solutions.

  • Ensure the display supports Miracast. You can check your TV manufacturer’s website to see if it is compatible.
  • Restart your Surface and TV to resolve the issue.
  • Install the latest updates for Windows and your Surface.
  • Turn off Bluetooth on your Surface as this can interfere with Miracast.
  • Keep your Surface within 23 feet of the TV for best performance.
  • Before pairing your Surface with the adapter, connect your Surface to a wireless network.

Note: The adapter can only connect to one TV at a time

10. Update the adapter’s firmware and restart the adapter

If Surface Pro won’t connect to TV, the adapter’s firmware may be out of date. Check the settings and firmware updates for the adapter, or install the Microsoft Wireless Display Adapter app and check for updates.

Restart the adapter by disconnecting from your TV, then restart the Surface Pro and reconnect the adapter.

11. Reset the adapter

This helps especially if you forgot your password. To reset the adapter, do this:

  • On the adapter next to the wired connection, press and hold the reset button for 10 seconds. The LED light on the adapter will blink.
  • When the message Ready to connect appears on your second screen, swipe in from the right edge of your Surface screen or select Action Center in the taskbar.
  • Select Connect, and in the list of displays, select the name of the Microsoft Wireless Display Adapter.

12. Allow the adapter to communicate through firewall

  1. In the search box in the taskbar, enter allow firewall.
  2. From the search results, select Allow an app through Windows Firewall.Surface Pro won't connect to TV
  3. Under Name, find Wireless Display and make sure Private and Public are selected.Surface Pro won't connect to TV
  4. Select OK. If you can’t select anything in the Allowed apps and features box, you’re not signed in as an administrator.
  5. Select Change Settings, enter your administrator password and select Yes. Your administrator password should be the same as the password you used to set up your Surface.
  6. Then, make sure Private and Public are selected and select OK.

13. Reinstall the graphics driver

  1. Right-click Start and select Device Manager.Surface Pro won't connect to TV
  2. Select the arrow to the left of Display adapters and press and click the Intel HD Graphics driver.
  3. Select Uninstall.
  4. Go to Start, and select Power / Restart.
  5. After your Surface restarts, go to Start, and select Settings
  6. Select Devices / Bluetooth & other devices.
  7. Select Add Bluetooth or other devices.
  8. Click Wireless display or dock to reconnect your Surface and the Microsoft Wireless Display Adapter.

In conclusion, these were our solutions. Did any of them help? Share with us in the comments section below.

DIRT 5, a next-gen Xbox launch title, gets new gameplay video running on Xbox Series S

DIRT 5, a new racing game that will launch on November 10 alongside Microsoft’s next-gen Xbox consoles has a new gameplay video showing recorded on Xbox Series S. Microsoft made its second next-gen console official last week, and the $299 Xbox Series S will target 1440p at 60FPS.

This new gameplay video only last a little more than a minute, and we recommend to watch it in 1080p60. Unfortunately, the footage isn’t long enough to really see what the Xbox Series S is capable of, but the game’s performance look really good with a smooth 60FPS.

“PS5 and Xbox Series X versions of DIRT 5 include a 120 frames per second option for even more immersive gameplay,” the YouTube video description reads. Microsoft announced that the Xbox Series S will also support 120FPS gameplay, but DIRT 5 apparently won’t be able to run at 120FPS on the Series S.

DIRT 5 will support Smart Delivery on Xbox consoles, meaning that Xbox gamers will only need to buy it once to automatically install the version that’s optimized for their console. The game will be released on Xbox One, Xbox Series S, and Xbox Series X on November 10, and you can already pre-order it on the Microsoft Store.

DIRT 5 Pre-Order
DIRT 5 Pre-Order
Developer:
Codemasters
Price:
Free

Windows Insiders in the Dev Channel get dark theme search results, bug fixes with preview build 20215

Microsoft has just released the Windows 10 preview build 20215 for Insiders in the Dev channel, which includes a couple of bug fixes but no new features. The Windows Insider team also announced that all Dev Channel Insiders using the system-wide dark theme will now see dark theme search results in Windows Search.

“This change will make the transition between Start and search results easier on the eyes now that both support dark theme,” the team said. Again, this is a server-side change and you won’t need to install the latest Dev Channel build to see it.

Showing Windows Search in dark theme.

As for today’s flight, it includes a couple of fixes for minor issues affecting the Start Menu, Voice Typing, and the Windows Security app. You can find all details about quality fixes and known issues in the build 20215 below:

Fixes

  • We fixed an issue that could result in the Windows Security app hanging.
  • We fixed an issue that could result in the Windows Security app crashing when navigating to the Exclusions page when there were a large number of exclusions.
  • We fixed an issue where using a restore point that had been created prior to a Microsoft Edge update to do a system restore could result in Microsoft Edge not launching after the restore was finished.
  • We fixed an issue resulting in the text cursor unexpectedly moving to the beginning of a text field when typing with the Korean IME in certain apps.
  • We fixed an issue impacting Voice Typing reliability.
  • We’ve fixed an issue where on a small subset of devices the Start menu did not reflect when an update was pending restart and scheduled restarts are cancelled.

Known issues

  • We’re looking into reports of the update process hanging for extended periods of time when attempting to install a new build.
  • We’re working on a fix to enable live preview for pinned site tabs.
  • We’re working on enabling the new taskbar experience for existing pinned sites. In the meantime, you can unpin the site from the taskbar, remove it from the edge://apps page, and then re-pin the site.
  • We’re investigating reports of some Office applications crashing or missing after updating to a new build.
  • We’re working on a fix for an issue resulting in Settings crashing for some Insiders when opening Manage Disks and Volumes.
  • We’re investigating reports of some devices experiencing a KMODE_EXCEPTION bugcheck when using certain virtualization technologies.
  • We’re working on a fix for the Linux kernel not being installed when using the `wsl –install` command in the Windows Subsystem for Linux. For an immediate workaround run `wsl –update` to get the latest kernel version.
  • We are investigating an issue affecting Windows Subsystem for Linux 2 distros where users can receive the error: “The remote procedure call failed” on startup.
  • We’re investigating a bug where the vEthernet adapter in Windows Subsystem for Linux 2 distros becomes disconnected after a period of use. For full details please follow this Github thread.
  • We’re working on a fix for seeing generic errors when using `wsl –install` in the Windows Subsystem for Linux.

If today’s build brings no new features, the Dev Channel build 20211 released last week brought the ability to search the Default Apps pages in Settings, as well as a Windows Subsystem for Linux 2 update allowing Insiders to attach and mount a physical disk inside of a WSL2 distro. We invite you to check our previous post for more details.

Top five tips for getting the most out of Your Phone in Windows 10

If you have an Android phone, did you know that your phone can pair up nicely with your Windows 10 PC in the same way that iPhones pair up with Apple products? Thanks to the Your Phone app, first introduced back in 2018, you can get your Android phone’s texts, photos, notifications, and a lot more right on your Windows 10 PC. While we’ve already spent a lot of time talking about individual Your Phone features as Microsoft adds them, today, we’ll gather up a look at some of our favorite tips and tricks for the Your Phone app on Windows.

Tip 1: Have a newer Android phone? You might not need to download the Your Phone app on Android

Link To Windows Settings

To use Your Phone with any Android device running Android 7 or higher, it is required to download the Your Phone app in the Google Play Store. Then, from there, follow the on-screen setup instructions to pair your Android device with your Windows 10 PC. However, if you have a newer Android phone from Samsung, (which is any device on this list,) or the Surface Duo, this step isn’t actually required. Instead, you need to use Link to Windows.

If your Android device supports Link to Windows, Your Phone integration is actually built right into it. You just need to pull down from the notification shade, click Link to Windows, and then sign in with a Microsoft Account, then open Your Phone on Windows 10 to finish the setup. This integration is seamless, allowing you to skip out on downloading an extra app. And, each time you want to connect to your PC, you have manual control from the notification shade. You also can allow Your Phone to sync over your mobile data, too, when you’re away from WiFi.

Tip 2: Own multiple phones? Choose a default device

Link To Windows Default Your Phone

If you own multiple Android phones, you can technically connect them all to Your Phone in Windows 10, as long as you’re using the same Microsoft Account. Currently, you only can use one device with Your Phone at a time, but you’ll actually be able to see all your Android phones in the app if you swap out to a different default phone in Your Phone settings. Just click the Settings icon, and then under Device choose one from the list and then click Apply. When finished, you can restart the app.

Your Phone will start using the phone you choose as the default phone. This is quite useful if you’ve got multiple phone numbers or multiple devices. You only can use one at a time with Your Phone, but the choice of a default phone means you can switch between them if you want to.

Tip 3: Turn on cross-device copy and paste

Clipboard History

Third on our list is a cool feature known as cross-device copy and paste. Again, not all Android phones will support this (only the newer ones from Samsung, and the Surface Duo) but it’s still a pretty cool feature. With it, you can share the clipboard from your Android phone with your Windows 10 PC. This allows you to share URLs images, and more between devices.

To set this up, there’s a couple of things you need to do. First off, visit the Your Phone app. Click Settings and then Cross-device copy and paste and then toggle the switch to On. You’ll also have to make sure you can share your clipboard on your PC, too. To do this, head into Windows 10 Settings and search for Clipboard. Toggle the switches for Clipboard history and Sync across devices to On, and you’ll be able to see your clipboard history from your phone. Just hit the Windows Key and V.

Tip 4: Personalize the Your Phone app to your liking, and Pin the app for quick access

Link To Windows Your Phone Music.

Next up are some personalization settings. There are more than a couple of settings available which can change the way that your Your Phone experience feels. We suggest turning on the option to make the app background the same as the one on your Phone. We also suggest turning on the toggle switch for showing audio on your phone, too. This allows you to control your phone’s audio right from your PC (Say, if you’re listening to a song on Spotify).

Some of the other toggle switches in the personalization section of the Windows 10 Your Phone app are critical to its functions. You’ll be able to control toggles for text messages, MMS messages, notification banners, and more. As another suggestion, it’s best to pin Your Phone to the Taskbar. This gives you quick access to it and will let you see a peek at how many notifications you have, too.

Tip 5: Try Calls, Your Phone Apps, or your Phone screen

Windows 10 Your Phone Phone Screen Surface Duo

Final on our list are some suggestions related to the other core functions of Your Phone. While it is true that you can send and receive texts and also see your photos and notifications on your PC, the app goes well beyond that. You also can use it to stream your phone’s screen to your PC (if it’s supported) as well as place phone calls (if paired to your PC via Bluetooth.) You can set this up easily, by clicking that section of the Your Phone app. It’ll guide you through the process.

The Phone Screen and the Calling features are one of the best things about Your Phone. You’re able to keep your phone in your pocket and control it from your PC. Very handy if your phone is charging and you’re unable to touch it. But, if you own a newer Samsung Phone, then the Phone Screen feature goes one step further for you. You’ll be able to stream your apps over to your PC and run them in Windows 10 as if they were native.

Do you like Your Phone? Let us know

We’ve just given you a quick look at some of our tips and tricks for Your Phone in Windows 10. A little while ago, we compared Your Phone to Dell Mobile Connect, and the two are very similar. Do you like Your Phone? Or, do you have tips of your own? Let us know in the comments below.

FIX: No Sound from Cortana in Windows 10/11

Cortana is definitely one of the most useful features of Windows 10, but various problems with this handy virtual assistant could occasionally occur.

This time, we’re going to show you what to do if you can’t hear any sound from Cortana in Windows 10.

How can I fix the No Sound Cortana problem in Windows 10?

1. Update your drivers

  1. Press Windows Key + X to open Win + X menu. Now select Device Manager from the list.
    Cortana doesn't speak
  2. When Device Manager opens, locate your audio driver, right-click it, and choose Update driver from the menu.
    Cortana doesn’t have sound
  3. Choose Search automatically for updated driver software and wait while Windows updates the driver.
    Cortana voice not working Windows 10

If there’s no sound from Cortana on your Windows 10 PC, the problem might be your drivers. Outdated drivers can cause this problem to appear, but you can easily update them right from Device Manager.

In that regard, you can choose to follow the steps detailed above. After updating your driver, check if the problem is resolved.

We also recommend updating your speaker drivers, so if you’re using USB speakers you might want to try that.

If Device Manager can’t update your drivers, you might want to try downloading them manually from your sound card’s manufacturer.

Do keep in mind that all drivers must be updated for your system to work properly.

1.1 Update drivers automatically

Therefore, in order to prevent PC damage by installing the wrong driver versions,  we suggest doing it automatically by using the Fortect Driver Updater tool.

That’s a solution that requires minimum effort on your part. Long story short, you just need to install Outbyte Driver Updater and complete this quick procedure:

  1. Download Fortect Driver Updater and install it into your PC.
  2. Once installed, Fortect Driver Updater will start scanning your computer for outdated and faulty drivers. Just wait for the scan to complete.
  3. Upon scan completion, you can see a detailed list of all driver-related problems found on your PC. Select which of these issues you want to solve – a single one or all at once. Outbyte Driver Updater will download and install them.
  4. Finally, restart your PC for the changes to take place.

⇒ Get Fortect Driver Updater

2. Disable Digital Output

  1. Right-click on the sound icon on the right side of your taskbar and go to Playback devices.
    Cortana makes no sound
  2. Disable the Digital output that you’re not using.
    Cortana speaker not working
  3. Restart your computer.

Another simple solution for sound problems with Cortana is disabling the digital output in your sound settings.

This is a problem that usually occurs when you have two playback devices enabled on your computer, and one conflicts with Cortana.

This doesn’t have to be the case, but sometimes the second output device just blocks Cortana.

Most people reported that this workaround actually solved their sound problems with Cortana, but if you still can’t hear anything from your virtual assistant, maybe you can try one of the solutions below.

3. Remove IDT High Definition audio

As we previously mentioned, third-party audio managers can interfere with your system and cause problems with Cortana. Users reported that IDT High Definition Audio is often responsible for this problem.

In order to fix the issue, you just need to remove it. There are several ways to remove an application, but the best way to do it is to use a dedicated PC cleaning utility.

More specifically, we talk about CCleaner. This software has an easy-to-use uninstaller feature where you can find and remove your apps in just one click. When you are done with that, head to the registry cleaner and remove any trace of the app.

4. Reset Cortana

  1. Open Cortana and go to Settings.
  2. The first button allows you to disable Cortana, so just disable Cortana with that button. It says: Turning off Cortana clears what Cortana knows on this device, but won’t delete anything from the Notebook. After Cortana is off, you can decide what you’d like to do with anything still stored in the cloud. Cortana speaker not working
  3. Restart your computer and enable Cortana again.

Maybe resetting Cortana to its default settings can solve the problem. Use the above steps to completely reset Cortana in Windows 10.

This will make Cortana completely forget about all your settings, so it would act like you just installed Windows, so maybe the solution for the sound problem with Cortana lies in this method.

If you also use Google Assistant on your phone and run into similar issues, follow our Hey Google not working guide for quick fixes.

5. Make sure that you don’t have Quiet hours turned on

  1. Open Action Center. You can do that quickly by pressing Windows Key + A shortcut.
  2. Look for the Quiet hours option. If it’s not available, click Expand.
    Cortana speaker not working
  3. Now click on Quiet hours to disable it.
    Cortana makes no sound

Windows 10 comes with a useful feature that will prevent notifications from appearing.

The feature is called Quiet hours and if you turn it on, you might not be able to hear Cortana. However, you can easily disable this feature by doing as described above.

After doing that, your notifications will start appearing and you’ll be able to hear Cortana again.

If the Action Center fails to open in Windows 10, use the steps in this quick guide to easily solve the issue.

6. Uninstall all hidden sound drivers

  1. Start Command Prompt as administrator. To do that, press Windows Key + X and choose Command Prompt (Admin) from the menu. If Command Prompt isn’t available, you can use PowerShell (Admin) instead.
    Cortana has no voice
  2. When Command Prompt starts, run the following commands:
    • set devmgr_show_nonpresent_devices=1
    • cd %SystemRoot% System32
    • start devmgmt.msc
  3. When Device Manager opens, go to the View tab and click on Show hidden devices.
    Cortana doesn't speak
  4. Expand Sound, video, and game controllers, right-click the grayed out driver , and choose Uninstall device from the menu.
    Cortana doesn’t have sound
  5. The confirmation menu will now appear. Click Uninstall to confirm that you want to remove the driver.
    Cortana voice not working Windows 10
  6. Repeat the last two steps for all hidden sound devices.

If you can’t hear Cortana, the issue might be related to hidden sound drivers. This isn’t a big problem, and you can fix it simply by removing the hidden sound drivers.

This is relatively simple, and you can do it by following the above steps. After doing that, restart your PC and check if the problem is resolved.

If you’re having trouble accessing Command Prompt as an admin, then you better take a closer look at this handy guide.

7. Disable HD Audio Background Process and Realtek HD Audio Manager

  1. Start Task Manager. You can do that by using Ctrl + Shift + Esc shortcut.
  2. When Task Manager starts, go to the Startup tab. Now look for HD Audio Background Process and Realtek HD Audio Manager. Right-click these applications and choose Disable from the menu.
    Cortana has no voice

Your Windows starts with many third-party applications, and sometimes these applications can interfere with Windows and cause issues with Cortana.

If you’re getting no sound from Cortana, the problem might be your startup applications. However, you can easily fix this problem by disabling these applications. To do that, just follow the above procedure.

After disabling these applications, restart your PC and check if the problem still appears.

Several users reported that these two applications caused the problem, so if you have either of them, be sure to disable them.

8. Configure audio in your audio manager

According to users, you might be able to fix this problem simply by configuring audio properly in your audio manager.

If you’ve downloaded and installed audio drivers from your sound card manufacturer, it’s possible that you installed a new audio manager.

If that’s so, the default audio manager and third-party manager can come into conflict. To fix the issue, you need to configure your audio properly in the third-party audio manager.

After doing that, the problems with Cortana should be resolved.

Since this is a sound problem, maybe something else from your system prevents Cortana from playing sound.

Therefore, you should check our article about other sound problems in Windows 10, and maybe you’ll find the solution (if none of the above worked, of course).

Many users use Cortana on daily basis, however, some users reported sound issues with Cortana.

Speaking of sound issues, these are some of the most common problems that users reported:

  • Cortana has no voice – This is a relatively common problem with Cortana. This issue occurs if you have Quiet hours turned on, so be sure to disable this feature.
  • Cortana doesn’t speak – Many users reported that Cortana doesn’t speak on their PC. It’s worth mentioning that Cortana will only speak to you if you use your microphone to send voice commands.
  • Cortana doesn’t have sound – This issue can occur due to problems with your drivers. If your audio drivers are outdated, you might experience this problem, so be sure to update them.
  • Cortana voice not working Windows 10 – Several users reported that Cortana’s voice isn’t working in Windows 10. This problem can be caused by the third-party application, so remove them from startup or uninstall them.
  • Cortana speaker not working – Several users claim that the Cortana speaker isn’t working. This can be a problem, but you should be able to fix it using one of our solutions.
  • Cortana makes no sound – According to users, sometimes you might encounter sound issues with Cortana. However, you should be able to fix that problem by removing hidden audio devices.

Let us know which Cortana tip worked in your case. Feel free to use the comments area below in that regard.

Microsoft Teams will soon let users pin posts and replies in channels

Microsoft Teams is about to get a new feature, which will give users the ability to pin chat messages and replies to the top of a channel. According to a Microsoft representative on the Teams UserVoice forum, the company is actively working to bring pinning support to Teams channels.

Right now, there is no option for Team owners to highlight important announcements that are usually pushed out of view by newer messages. With this new pinning experience, Microsoft aims to keep vital information easy to access, even weeks after a message has been sent. Team owners will be able to pin a message on top of the channel window when there’s an important message in a conversation that Team members have to lookup. Clicking the pinned message should point users to the specific message in the channel.

For now, we don’t have an ETA as to when the new option is supposed to go live, but we should expect Microsoft to roll out an official announcement in the coming weeks. In the meantime, if you are looking for something specific, Teams has a powerful search function. We invite you to check out our explainer post for more information.

Digital pre-orders open on Xbox One for the first proper sequel to the hit CastleStorm video game

Digital pre-orders are now live for CastleStorm II on Microsoft’s family of Xbox One consoles ahead of its September 23rd release later this month.

CastleStorm II is the first proper sequel to the original CastleStorm video game which first launched way back in 2013 on the Xbox 360. Like the first game, CastleStorm II is kind of a blend of classic platforming and tower defense video games wrapped up in a cartoony medieval setting.

Here’s the official game description:

Aim your catapults! Command your troops! Bloody the battlefield! CastleStorm II levels up gaming’s greatest genre mishmash with ruthless destruction powered by Unreal 4, plus a whole new metagame of strategic, tactical conquest. The heroes of the Kingdom confront the vile forces of the Undead, and you’ll plot your path to triumph for both sides in two epic story-driven campaigns. But not without some hands-on chaotic carnage and delightful devastation!

CastleStorm II returns to a classic fantasy land of medieval madness, rife with heroic knights, enchanting sorceresses, glorious griffins…and sheep. But a new threat rises – literally…as in, from the grave. Walking corpses. Headless horsemen. ZOMBIE sheep. All-around nasty necromancy. You get the picture. Build an entire empire through gameplay that engages your inner hardcore strategist…then command – even CONTROL – your soldiers en route to triumph!

Are you a fan of the original CastleStorm title and will you be picking up its sequel? Share your thoughts with the community in the comments below and then follow us on Pinterest and Twitter for more Xbox gaming news.

CastleStorm II
CastleStorm II
Developer:
Zen Studios
Price:
$19.99

FIX: The directory name is invalid in Windows 10

System errors such as ERROR_DIRECTORY can occur on any PC and they can prevent you from opening certain directories or files.

This error usually comes with The directory name is invalid message and today we’re going to show you how to fix it on Windows 10.

How do I fix the ERROR_DIRECTORY issue?

Fix – ERROR_DIRECTORY

1. Reinstall the audio driver

  1. Open Device Manager.
  2. Locate your DVD drive on the list, right click it and choose Uninstall device.
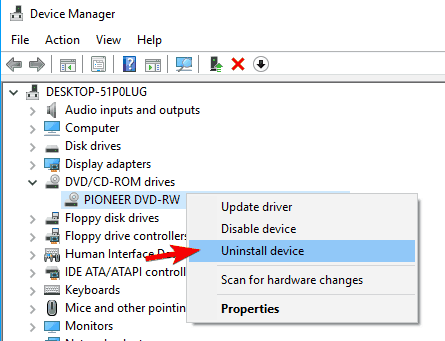
  3. Confirmation dialog will now appear.
  4. Click on Uninstall to remove the driver.
  5. After removing the driver, click on Scan for hardware changes icon.
  6. Windows will now scan your system and install the missing drivers.

If you’re having this problem while trying to play optical discs you might be able to fix it by reinstalling your DVD drive drivers. Once the default drivers are installed, check if the issue still persists.

Update drivers automatically (suggested)

Downloading and installing drivers manually is a process that carries the risk of getting the wrong driver installed, which may lead to serious malfunctions of your system. We strongly recommend Fortect Driver Updater.

It automatically identifies each device on your computer and matches it with the latest driver versions from an extensive online database.

The program is almost fully automated to do the entire job for you, and with a stable Internet connection you know you’ll always have the latest drivers as soon as they appear.

More so, the UI is made to be extremely easy to understand by users of all levels, making it very accessible.

⇒ Get Fortect Driver Updater

2. Check your antivirus

An antivirus tool is a necessity, but certain antivirus applications can cause this error to appear and prevent you from running certain apps. If you’re having this problem, we advise you to check your antivirus settings.

Sometimes certain settings can interfere with your apps and cause this and other errors to appear. To fix the problem, you need to check your antivirus settings and try disabling certain features.

If you’re not familiar with PC security, you might have some issues finding the problematic setting.

On the other hand, you might be able to solve the problem by disabling your antivirus entirely. After you disable your antivirus, check if the issue still appears. If disabling the antivirus fixes the problem, you might want to use that as a temporary workaround.

If the problem still appears, you should try uninstalling your antivirus software.

On the other hand, this would leave you exposed to malware threats, so you should try installing a better antivirus tool.

You can find very powerful antivirus software with low resource/CPU usage that will certainly not interfere with other processes or apps on your system.

3. Disable your DVD drive

  1. Press Windows Key + X to open Win + X menu.
  2. Choose Device Manager from the list.
  3. Once Device Manager opens, locate your DVD drive, right click it and choose Disable device from the menu.
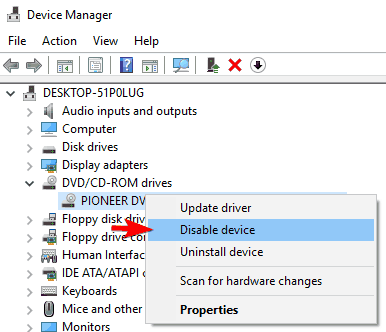
  4. A warning dialog will appear.
  5. Click on Yes to confirm.
  6. Locate your DVD drive once again, right click it and choose Enable device.
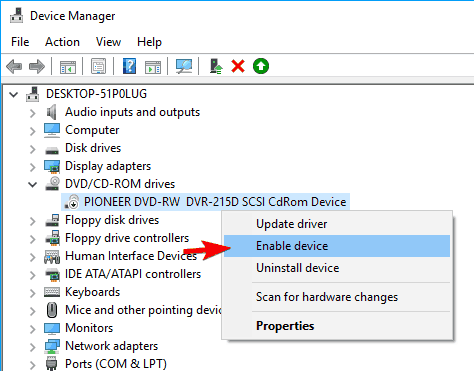
Alternatively, you can re-enable your DVD drive by doing the following:

  1. Locate your DVD drive in the Device Manager and double click it.
  2. Go to Driver tab and click on Disable Device.
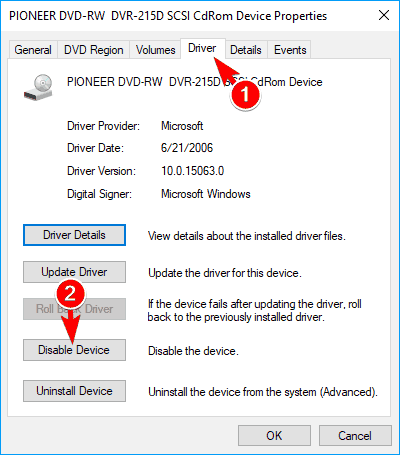
  3. When the warning message appears, click on Yes.
  4. Now click on Enable Device to enable your DVD drive again.
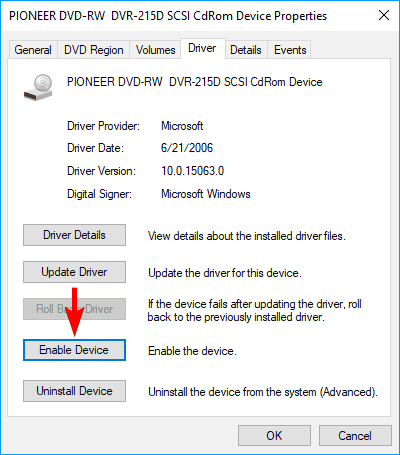
  5. Optional: Navigate to DVD Region tab and select your region from the list on the bottom.
  6. Now click on OK to save changes.

According to users, this problem usually appears when trying to play a DVD disc on your PC. To fix the problem, you need to disable your DVD drive from Device Manager and enable it again.

After enabling your device again check if the issue still persists. According to users, this is a useful solution, but unfortunately, it’s just a temporary workaround so you’ll have to repeat it every time this error occurs.

4. Connect your DVD drive to a different port

If you’re getting The directory name is invalid message while trying to play a DVD disc, you might be able to fix the problem by connecting your DVD drive to a different port. To do that you need to open your computer case and connect the DVD drive to a different SATA port on your motherboard.

After doing that, the problem should be completely resolved. Keep in mind that this solution requires you to open your computer case, so if your PC is still under warranty you might want to skip this solution.

5. Repair / remove Windows Essentials

  1. Press Windows Key + I to open the Settings app.
  2. Once the Settings app opens, go to Apps section. List of installed applications will appear.
  3. Select Windows Essentials on the list and click the Repair or Uninstall button.
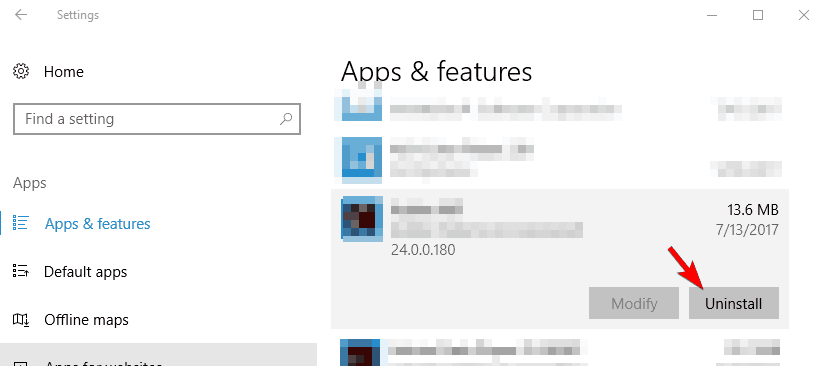
  4. Follow the instructions on the screen to repair or uninstall the application.

According to users, this error can be caused by Windows Essentials. This is a useful set of tools but it has compatibility issues with Windows 10 that can cause this problem to appear.

To fix it, users are suggesting to remove or to repair Windows Essentials.  Alternatively, you can remove or repair Windows Essentials installation by doing the following:

  1. Press Windows Key + S and enter control panel.
  2. Select Control Panel from the list.
  3. When Control Panel opens, click on Programs and Features.
  4. List of installed applications will now appear.
  5. Select Windows Essentials from the list and choose the desired option from the menu on the top.
  6. Follow instructions on the screen to remove or repair the application.

Even though Windows Essentials can cause this problem to appear, you should know that other apps can cause it as well.

If you still have this problem on your PC, try removing any recently installed or updated applications and check if that solves the issue.

6. Copy the problematic file to the root directory

If you can’t run a certain application due to The directory name is invalid message, you might be able to fix the problem simply by copying the problematic file.

To do that, move the file to the root directory such as C: and try to run it from there. In some cases you might not have the necessary privileges to run files from specific locations causing this error to appear.

To fix the issue, simply move the problematic file to any root directory and the error should be fixed.

Several users also reported this problem while installing software from DVD discs.

According to them, they were unable to install the software and copying the installation files to the hard drive didn’t solve the problem.

However, after moving all files to the Program Files directory they were able to start the setup without any problems.

7. Install the latest updates

  1. Press Windows Key + I to open the Settings app.
  2. Go to Update & security section and click on Check for updates button.
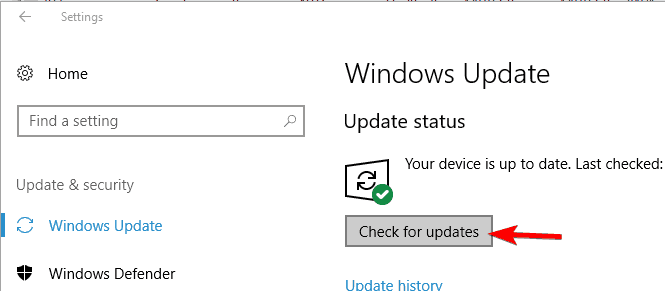
Windows 10 is a great operating system, but certain bugs can cause this and other errors to occur. To fix the error, it’s advised to download the latest Windows updates.

By default, Windows 10 automatically downloads the necessary updates in the background. However, sometimes you might miss an important update by accident.

Windows will now check for any new updates. If updates are available they will be installed automatically in the background. After installing the necessary updates check if the problem still appears.

8. Remove Adobe Reader

Sometimes this problem can occur with Adobe Reader. According to users, if you have two different versions of Adobe Reader installed that can lead to certain problems including this one.

Users reported The directory name is invalid message, and according to them, you can fix the problem by removing all versions of Adobe Reader from your PC.

After doing that, you need to reinstall Adobe Reader once again and check if that solves the issue.

9. Change the drive letter

  1. Open Disk Management tool.
  2. Locate your DVD drive, right-click it, and choose Change Drive Letter and Paths.
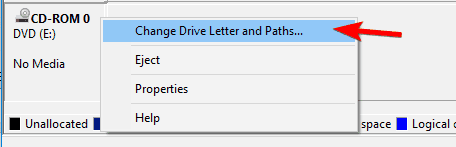
  3. Select the drive letter and click on Change.
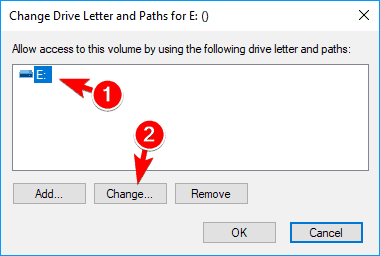
  4. Select the desired drive letter and click OK.
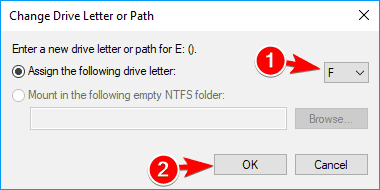
According to users, sometimes this problem can occur with your DVD drive. This error message will prevent you from burning discs, but you can fix it by changing the drive letter.

Save changes and check if the problem still persists.

10. Disable User Account Control

  1. Open Control Panel and select User Accounts.
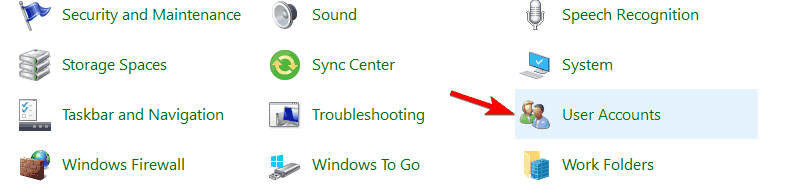
  2. Click on Change User Account Control settings.
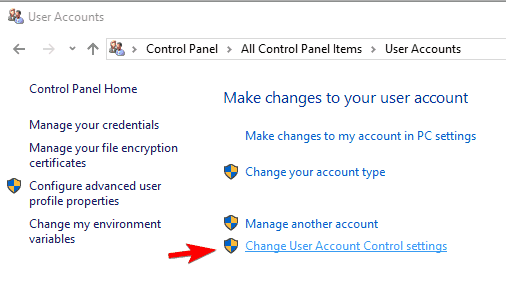
  3. When the User Account Control Settings window opens, move the slider all the way down.
  4. Now click the OK button to save changes.
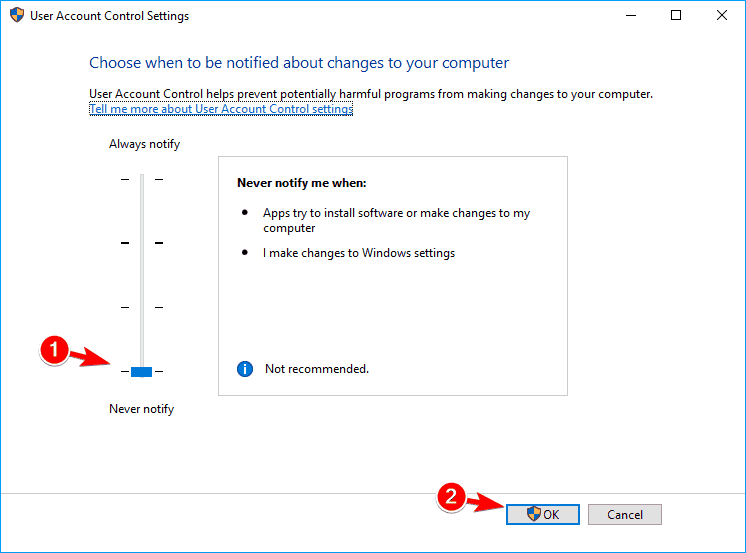
  5. Restart your PC to apply the changes.

User Account Control is a useful security feature of Windows, but sometimes it can prevent you from installing certain applications.

This feature will prevent users and apps from making changes to the system that require administrator privileges. Thanks to it, you’ll be sure that all your applications aren’t using administrative privileges to make any system-wide changes.

Even though this feature is rather useful, in many cases User Account Control can interfere with Windows and cause The directory name is invalid message to appear while installing certain applications.

To fix the problem, it’s advised to completely disable User Account Control. After doing that, User Account Control will be disabled and you should be able to install the desired application without any problems.

Keep in mind that disabling this feature will slightly reduce your security. If you’re worried about your security, go back to User Account Control Settings and move the slider to the default position to turn this feature back on.

11. Create a Temp folder

Many applications move the necessary files during the installation to the Temp folder. This folder stores the temporary files and deletes them once you install the application.

Temp folder is necessary when installing certain apps, and if this folder is missing you might encounter this error.

According to users, they are experiencing this problem because Temp folders are missing from their PC. By default, there are two Temp folders on every computer.

The first one is located in this directory:

C:Windows

The second one is located in this directory:

C:Usersyour_usernameAppDataLocal

If any of these Temp folders are missing, you need to recreate them and check if that solves the problem. If that doesn’t help, you can try creating new Temp folders in different locations.

Before you start you need to create two folders that will work as Temp folders. After doing that you need to set environment variables by doing the following:

  1. Press Windows Key + S and enter environment.
  2. Select Edit the system environment variables.
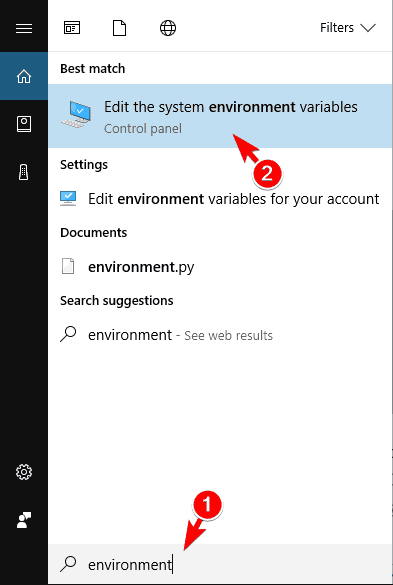
  3. System Properties window will appear.
  4. Click on the Environment Variables button.
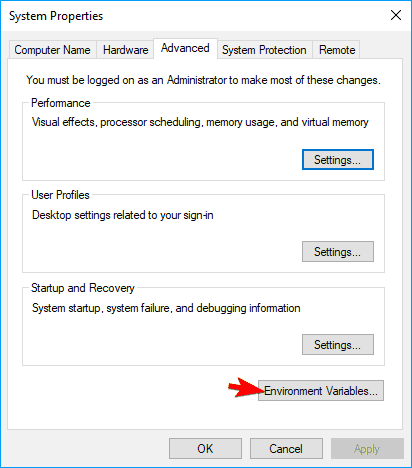
  5. Environment Variables window will now appear.
  6. In the User variables section select the TEMP variable and double click it to edit it.
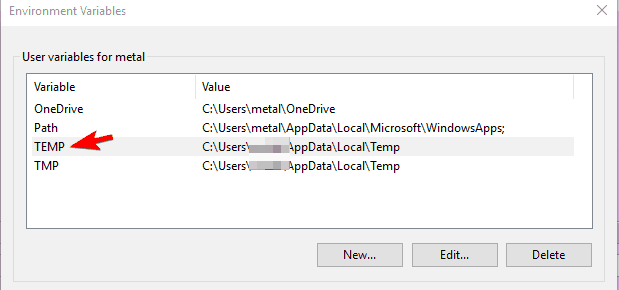
  7. Set Variable value to the desired folder that you want to use as a Temp folder.
  8. Once you’re done, click OK to save changes.
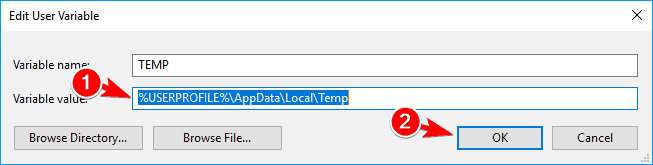
  9. Repeat the same steps for the TMP variable and be sure to use the same folder as in the previous step.
  10. In the System variables section select the TEMP variable and double click it.
  11. Choose the desired folder that you want to use for storing temporary files.
  12. Repeat the same steps for the TMP variable and be sure to choose the same folder.
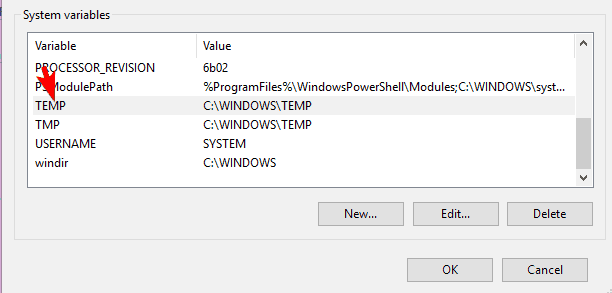
  13. Once you’re done, click OK to save changes. Restart your PC and check if the problem is resolved.

Setting up new temporary folders is an advanced procedure, so use extra caution while doing that.

12. Enter Safe Mode

  1. Open the Start Menu and click on Power button.
  2. Press and hold the Shift key and choose Restart from the menu.
  3. Choose Troubleshoot > Advanced options > Startup Settings. Click the Restart button.
  4. After your PC restarts, you’ll see a list of options.
  5. Select any version of Safe Mode by pressing the appropriate keyboard key.

This problem can sometimes be caused by your drivers or third-party applications, and the best way to fix it is to enter Safe Mode.

Safe Mode is a segment of Windows that runs with default drivers and applications, so it’s perfect for troubleshooting. To enter Safe Mode, do the following:

Once you enter Safe Mode, check if the problem still appears. If the problem doesn’t appear in Safe Mode, it’s possible that a third-party application or a bad driver is causing this error.

To fix the problem, you need to find and remove the problematic software or driver.

13. Use System Restore

  1. Press Windows Key + S and enter system restore.
  2. Choose to Create a restore point from the menu.
  3. System Properties window will now appear.
  4. Click on System Restore button.
  5. When the System Restore window opens, click on Next. A list of all restore points will appear.
  6. Check Show more restore points option if available. Select the desired restore point and click on Next.
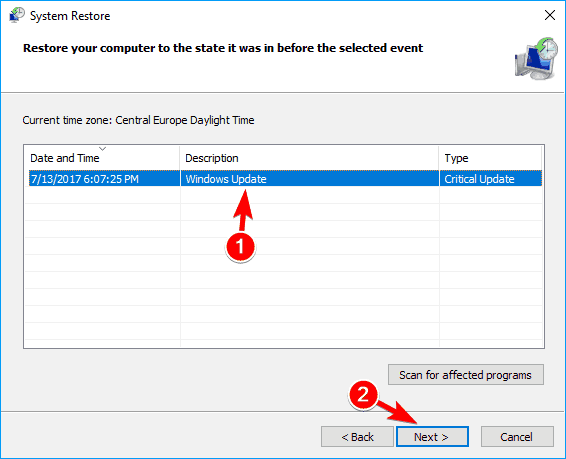
  7. Follow the instructions on the screen to restore your PC.

If this error started appearing recently, you might be able to fix it by performing System Restore. This is a useful feature that allows you to restore your PC and fix any problems.

After restoring your PC, check if the problem still persists.

Fix – The directory name is invalid USB

1. Create a new simple drive

  1. Press Windows Key + X and click on Disk Management.
  2. Locate Unallocated space, right-click it, and choose New Simple Volume.
  3. A new window will now appear.
  4. Click on Next.
  5. Select the desired size of the volume. In most cases, it’s best to use the maximum size.
  6. After setting the volume size, click on Next.
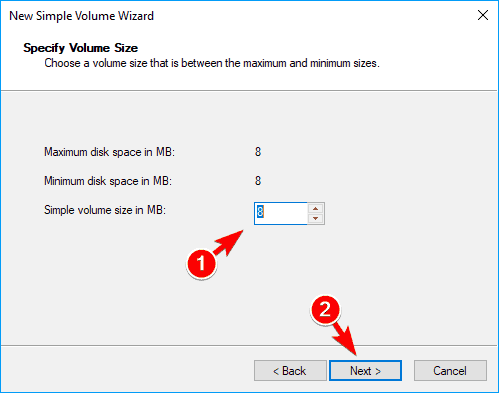
  7. Set the desired letter for the new drive and click on Next.
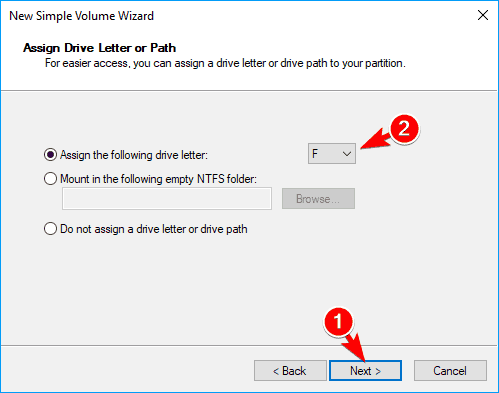
  8. Choose the desired formatting options and click on Next.
  9. If you have important files on your flash drive, you might want to choose Do not format this volume option.
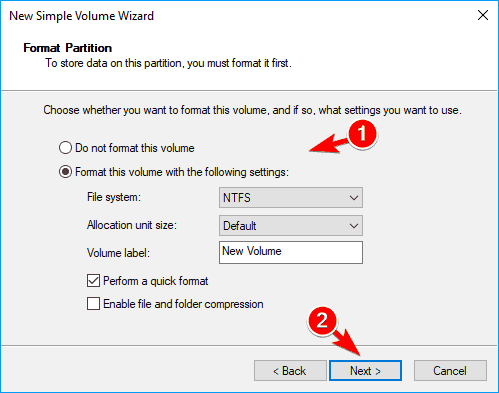
Sometimes this type of error can occur while trying to access a USB flash drive. According to users, you can fix this problem simply by creating a new simple drive.

After doing that, you should be able to access your flash drive without any issues.

2. Use a third party software

Several users reported this problem while trying to remove directories from their USB flash drives. According to them, it seems that directories on your USB flash drive can get corrupted and that will cause The directory name is invalid message to appear.

To fix the issue, users are recommending using IObit Unlocker application to unlock the folder and delete it, so be sure to try it out.

⇒ Get IObit Unlocker

3. Modify your registry

  1. Open Device Manager.
  2. Locate the problematic device and double click it to open its properties.
  3. Navigate to Details tab, set Property to Class Guid.
  4. Write down the value for this device because you’ll need it for future steps.
    • In our example, the value was {4d36e965-e325-11ce-bfc1-08002be10318}, but it can differ depending on the problematic device.
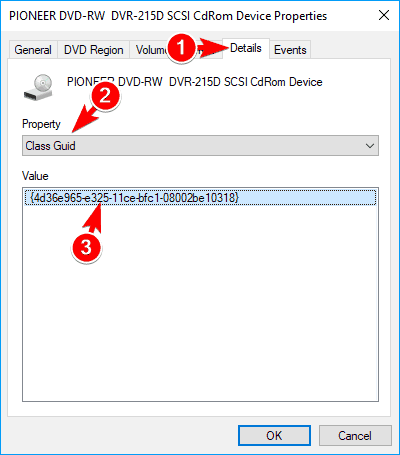
According to users, you might be able to fix this issue simply by changing a few values in your registry. Before you can use this solution, you need to find the ID of the problematic device.

After you find out your device’s ID, you need to find it in Registry Editor. To do that, you need to do the following:

  1. Press Windows Key + R and enter regedit.
  2. Press Enter or click OK.
  3. Optional: Before making any changes to your registry it’s advised to create a backup.
  4. To do that, simply click on File > Export. Select All as Export range, enter the desired name, and choose a safe location for the file.
  5. Now click the Save button to save it.
  6. Once Registry Editor opens, in the left pane navigate to this key and expand it:
    • HKEY_LOCAL_MACHINESYSTEMCurrentControlSetControlClass
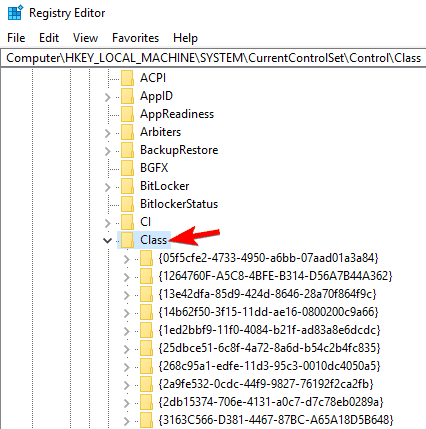
  7. You’ll see a list of subkeys. Navigate to the key that represents the problematic device.
    • In our example it’s {4d36e965-e325-11ce-bfc1-08002be10318}, but it should be different on your PC.
  8. In the left pane, locate and delete UpperFilters and LowerFilters values.
    • To do that, simply select the problematic value, right-click it and choose Delete from the menu.
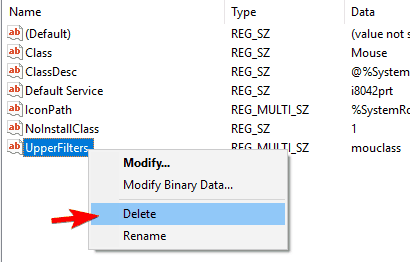
After removing the problematic values, restart your PC and check if the problem still persists. If UpperFilters or LowerFilters aren’t available, you can skip this solution since it doesn’t apply to your PC.

Fix – The directory name is invalid SD card

1. Remove your SD card

If this error message appears while using an SD card, you might want to try removing it. This is a temporary workaround, but few users reported that removing and reinserting the SD card fixed the problem for them, so be sure to try that.

2. Reinstall your drivers

According to users, this issue appears due to problems with your drivers. Sometimes issues with SD card reader drivers can occur and to fix the problem you need to reinstall the drivers.

To do that, simply navigate to Device Manager and remove your drivers. After doing that, scan for hardware changes and Windows 10 should automatically install the missing drivers.

We already showed you how to do this in one of our previous solutions, so be sure to check it out for detailed instructions.

Fix – The directory name is invalid Task Scheduler

Remove the quotes from the folder path

If you’re having this problem with Task Scheduler, it might be due to your file path. According to users, Start in (optional) field doesn’t support quotes, so if you have quotes in your file path be sure to remove them and save changes.

After doing that, the problem should be resolved and everything will start working properly.

ERROR_DIRECTORY and The directory name is invalid message usually appear while trying to install certain applications or while trying to play optical media.

This error can cause some problems on your PC, but you should be able to solve it by using one of our solutions.

Windows 10 Twitter app gets new Quote Tweet labelling and improved emoji picking

The official list of changes that have been made to the Twitter web app, and thus the official Windows 10 Twitter app, over the past month or so has been published.

Many would have noticed by now the long overdue rebranding of “Retweets with comments” as “Quote Tweets” that’s happened during the past few weeks on all platforms. “Quote Tweets” has been a phrase used by Twitter users for many years now to refer to a retweet that has a comment above it.

For some reason, Twitter has been resistant to using the phrase in an official capacity but, after the social network recently started displaying “Retweets with comments” as a separate retweet stat on tweets and the majority of users having no idea what that meant, the company finally began using “Quote Tweets” and the service is all the better for it.

Other changes mentioned include improvements to the media upload button on the DM screen, conversation card previews, and improvements to the native emoji picker box.

Here’s the full notes:

New

  • DMs: The media upload buttons in the DM composer will now dynamically show and hide on smaller screens to give you more space for composing messages.
  • Quote Tweets: “Retweets with comments” are now known as Quote Tweets! This change has been rolled out globally for Web. Look for Quote Tweets between Retweets and Likes on the Tweet detail screen, and the Quote Tweet option in the Retweet dropdown menu.

Updated

  • Composer: Clicking a conversation card will now show a preview of the card within the composer after opening.
  • DM Drawer: Opening a link for a Tweet or Event from a DM on the Messages screen will now navigate you to the correct page, and open the DM Drawer to the conversation you opened the link from.
  • Emoji Picker: The Emoji Picker’s performance should now be a lot smoother and snappier when opening and scrolling through categories.
  • Tweet Detail: All timestamps on the Tweet Detail screen will now link to the Tweet’s URL location.

Fixed

  • Accessibility: Improved carousel accessibility. Tab focus and keyboard shortcuts should no longer cause the carousel layout to break on Safari. Voiceover will now properly announce the current carousel position.
  • Accessibility: The Tweet Detail should now be properly accessible via keyboard shortcuts on Safari.
  • Composer: The Tweet composer should now properly focus when opened from menus such as the Retweet dropdown.
  • Conversations: Muting a user on the conversation screen will now hide their Tweets.
  • DMs: When blocking a user in the message requests inbox, you will now still have access to the conversation for historical purposes.
  • DMs: When blocked by another user through DMs, navigating to the user’s profile page will no longer display an error state.
  • Events: When sharing an Event, the title will now properly populate in the Tweet composer.
  • Notifications Screen: Navigating to twitter.com/mentions will now take you to your Mentions tab on the Notifications Screen instead of displaying an empty profile page.
  • User Picker: Selecting a user with a long display name should no longer cause the selection pill to extend beyond the picker container when tagging users in media, or adding them to DMs.
  • Video: The docked video player will now accurately show elapsed time.
  • Video: The video preview image will no longer display under the “Watch again” overlay.
  • Who to Follow: Fixed an issue where the Who to follow module on the sidebar wouldn’t display.

Being a web app, changes are made to Twitter on a continuous basis rather than with a single app update that must be pushed out to devices. Many changes, such as the new use of “Quote Tweets,” are quickly spotted by users while others remain unnoticed until they’re announced via release notes like the ones above.

Are you happy with the recent changes to the Twitter app? Let us know in the comments below and then follow us on Twitter for more Windows app news.

Twitter
Twitter
Developer:
Twitter Inc.
Price:
Free

5 best FTP backup server software

Backing up your files is important, and many users choose to back up their files online. There are many tools that can do that, but the most convenient ones are the ones with FTP support.

FTP protocol is widely used, and this is why today we’re going to cover the best FTP server backup software, so let’s get started.

What is the best FTP server backup software?

Handy Backup

handy backup backup for FTP

If you’re looking for a simple FTP server backup software, then you should consider Handy Backup. The software can back up all sorts of files, and it even has support for e-mail backup.

Using this software you can back up files to a local hard drive, external hard drives, and cloud storage. There’s even support for FTP backup, backup to NAS, and support for WebDAV protocol.

Handy Backup allows scheduling, and it can create full, incremental, or differential backups. Of course, you can compress data in ZIP archives and there’s also support for strong encryption.

It’s worth mentioning that the software has an activity log, so you can monitor your backups, and there’s also support for email notifications.

Handy Backup offers great features, and it’s a perfect tool if you need to back up your computer over FTP, so be sure to consider it.

Handy Backup features:

  • Support for FTP and cloud backups
  • Support for local, external, and NAS backups
  • WebDAV protocol support
  • Full, incremental, and differential backups
  • Backup compression and encryption
Handy Backup

Handy Backup

Handy Backup is a versatile backup software that offers full support for cloud and FTP backups.
Check priceVisit website

Iperius Backup

iperius backup backup for FTP

Iperius Backup is a could backup software, and it also allows you to perform backups to SFTP servers, Amazon S3, Microsoft Azure Storage, Google Drive, Dropbox, and OneDrive.

The software supports Incremental FTP backup and synchronization, and it offers full compatibility with any FTP/FTPS/SFTP server.

Iperius Backup offers great protection, and thanks to the SSL and AES 256-bit client-side encryption you can rest assured that your files are safe at all times.

The software also allows you to copy files that are in use or locked, and there’s even an FTP backup to NAS available.

Overall, Iperius Backup offers great features, and it will be perfect if you’re looking for FTP server backup software.

Iperius Backup features:

  • Support for FTP backup and synchronization
  • Compatible with any FTP/FTPS/SFTP server
  • Support for Amazon S3, Microsoft Azure Storage, Google Drive, DropBox, and OneDrive backup
  • SSL and AES 256-bit encryption
  • FTP to NAS

⇒ Get Iperius Backup

AceBackup

AceBackup backup for FTP

Another great backup software with FTP support is AceBackup. The software offers backup to FTP servers, which can be extremely useful.

It’s worth mentioning that the application supports encryption, so all your data will remain safe. As for supported standards, it supports Rijndael 128/192/256, Blowfish 128, and Triple-DES 128.

The software supports scheduling, and you can back up your data in specific intervals in order to ensure that all your files are safely backed up.

It’s important to mention that the software supports ZIP compression, and by using it you’ll ensure that you save precious storage space.

AceBackup is a simple to use backup software, and if you need a simple software with FTP support, this might be the right tool for you.

AceBackup features:

  • Completely free
  • FTP backup
  • Rijndael 128/192/256, Blowfish 128, and Triple-DES 128 encryption
  • Support for backup scheduling
  • Built-in ZIP compression

⇒ Get AceBackup

Leo Backup

Leo Backup backup for FTP

If you need backup software with FTP backup support, then Leo Backup might be just what you need. The software supports backup to local drives, local networks, and via FTP.

Regarding backup, there’s support for Amazon S3, Google Drive, and One Drive. It’s worth mentioning that your files will remain safe at all times thanks to the AES-256 encryption.

There’s also built-in support for Zip64 compression, so your backups won’t take too much space. To ensure that your data is safely backed up, there’s full support for backup scheduling.

As for advanced features, there’s SQL database backup, as well as registry backup, but keep in mind that some of these features are available only in Pro and Enterprise versions.

Leo Backup features:

  • FTP backup
  • E-mail notifications
  • Backup scheduling
  • 256-bit encryption and compression
  • Cloud storage backup
  • Database backup (in Enterprise version)

⇒ Get Leo Backup

Duplicati 2.0

Duplicati 2.0 backup for FTP

Another great FTP backup software for your PC is Duplicati 2.0. The software has AES-256 encryption, so your files and folders will be protected at all times. If you don’t prefer AES, you can also use GPG encryption.

The software is designed to save space, so it fully supports incremental backups and data deduplication. Duplicati 2.0 has a web interface, so it can run in any web browser, and you can access it from anywhere.

The application supports FTP, SSH, and WebDAV, and it can work with popular services such as Backblaze B2, Tardigrade, Microsoft OneDrive, Amazon S3, Google Drive, BOC, Mega, and others.

The software is optimized for online backups, and even if the backup process is interrupted, it can be resumed easily at any time.

Duplicati 2.0 is completely optimized for online backup, and with FTP, SSH, and WebDAV support, it will be a perfect tool for professionals.

Duplicati 2.0 features:

  • Completely free and open source
  • Supports FTP, SSH, and WebDAV protocols
  • Compatible with Microsoft OneDrive, Amazon S3, Google Drive, and many other services
  • AES-256 and GPG encryption
  • Web interface

⇒ Get Duplicati 2.0

There are many great FTP backup server applications, and we hope that you found what you’re looking for on our list.

Sea of Thieves packet loss explained: How to fix it?

Sea of Thieves is an awesome game where you can live your childhood fantasies of becoming a pirate without actually harming anyone. Unless you’re that type of gamer.

If you’re a sociable gamer, you’ll love to hear that Sea of Thieves is online-exclusive. Even if you don’t enjoy teaming up and shipping around the world in a crew, you’ll still encounter other players along the way.

However unlikely, there’s a downside to this whole multiplayer-only situation. Like any other online service, Sea of Thieves can experience connectivity issues from time to time.

Among the most severe ones, we remind of high ping, jitter, and the dreaded packet loss.

What is packet loss in Sea of Thieves?

Let’s put it this way: you’d rather have another player loot your ship than face heavy packet loss. Just kidding, getting looted is not fun. But neither is packet loss, and you’ll soon understand why.

This phenomenon occurs whenever packets that are transmitted through your connection never reach their targets. As a result, the server might panic and throw a delay your way, or a desync, which is way worse.

If you ever experienced lag so bad that you started teleporting randomly across the map (rubberbanding), the culprit might’ve actually been packet loss. And if you’re unfortunate enough to get it during an encounter, well…

Other symptoms include:

  • Sea of Thieves constant connection loss
  • Frame rate loss on Sea of Thieves
  • Sluggish menus
  • Inability to communicate with your crew in real-time
  • Sudden random disconnections

What can cause packet loss in Sea of Thieves?

Anything awry with your connection can be a potential trigger for packet loss. For instance, if you use Wi-Fi instead of Ethernet, you might as well point signs your way reading Packet loss welcome.

The same goes for not using high-quality Ethernet cables or logging into the game during peak hours when the network is close to being overloaded. Therefore, it’s not exactly easy to identify a surefire cause.

Here’s a list of potential reasons for experiencing packet loss in Sea of Thieves:

  • Network congestion (without a doubt the most common one)
  • Improper network routing (your ISP’s fault, you have nothing to be blamed for)
  • Bandwidth throttling (still your ISP’s fault)
  • Subpar Ethernet cables (using CAT 5 instead of CAT 6, for instance)
  • Using Wi-Fi instead of Ethernet (Wi-Fi packet loss happens more frequently)
  • Outdated network adapter drivers
  • Using high-quality game settings that your connection can’t back
  • Running other bandwidth-heavy programs such as VoIP (TeamSpeak, Skype)
  • Poor Internet subscription plan (capped at low bandwidth usage or speed)
  • Problems with the game server (which again, you can’t be blamed for)

As you can see, the list is quite varied. We can safely conclude that packet loss can occur anywhere on the connection: on your side, on your ISP’s side, or even on the game server host’s side.

This is why it’s so difficult to troubleshoot leaking packets most of the time.

How to fix packet loss in Sea of Thieves?

1. Try using a reliable VPN service

  1. Buy a Private Internet Access subscription plan
  2. Download the VPN client and install it on your PC
  3. Launch PIA and log into your account
  4. Connect to a suitable, fast server (closer ones are faster)
  5. Launch Sea of Thieves
  6. Check if you still experience packet loss

More often than not, a VPN such as Kape Technologies’ Private Internet Access will fix your packet loss problem. However, in order for this fix to work, the issue should be caused by your ISP (bandwidth throttling, improper routing).

Private Internet Access

Experiencing packet loss in Sea of Thieves? PIA can fix it for you.
Free Trial Visit Website

Therefore, if you or the game server host are what’s causing the packet loss, this method won’t work.

2. Flush your DNS

  1. Open an elevated CMD instance on your PC
  2. Type the following commands:

ipconfig /flushdns
ipconfig /registerdns
ipconfig /release
ipconfig /renew
netsh winsock reset
exit

Now all you have to do is restart your PC, launch Sea of Thieves and see if there’s any improvement. Alternatively, you could switch your ISP-assigned DNS addresses to free, public ones.

  • Google Public DNS: 8.8.8.8 and 8.8.4.4
  • Cloudflare Public DNS: 1.1.1.1 and 1.0.0.1
  • OpenDNS: 208.67.222.222 and 208.67.220.220

Just look up alternative public free DNS and you’ll probably find one that suits you better. Just make sure to back up the ISP-assigned DNS in case they’re not set to be obtained automatically.

3. Manually troubleshoot your connection

  • Check and replace any outdated/broken component on your network (such as cables)
  • Update your router’s firmware to the latest version
  • Make sure your drivers are up-to-date (especially network drivers)
  • Always use Ethernet instead of Wi-Fi when possible
  • Call your ISP and ask them if they can look into it
  • Run a pathping test and check where the packet loss occurs (if it’s your, your ISP’s or the game server’s fault)
  • Contact Sea of Thieves’ customer support if there’s something wrong on their side
  • Close any bandwidth-heavy apps on your computer
  • Try lowering the quality settings and see if there’s any improvement
  • Avoid peak hours whenever possible if your network faces network congestion on the regular

Final thoughts on Sea of Thieves packet loss

All things considered, fixing packet loss in Sea of Thieves can be a hassle. However, most of the time this issue is kind enough to fix itself without us even noticing.

In the unfortunate event that you experience packet loss regularly, then you must dig deeper and isolate the cause of this event.

If your ISP is what’s causing it, then the fix is quite straightforward: either talk to your ISP or use a VPN to circumvent their limited connection.

On the other hand, if the underlying issue is on your side, you might want to buckle up and start troubleshooting, because it’s not likely to go away by itself.

Dying Light packet loss: what is it and how to fix it?

If you’re not new to the gaming scene, you might’ve heard about Dying Light at least once before. It’s your classic FPS survival game where you have to avoid dying at all costs by defending against flesh-eating zombies.

Yes, you’ve heard it all before, but the game is quite awesome, to be honest. Especially if you choose to play it in LAN or online co-op mode. You’ll have to synchronize and work as a team if you want to stand a chance against the mindless hordes.

However, Dying Light can quickly take a turn to the bad at times. As if running from horrific creatures who want to devour you wasn’t bad enough, playing with others also means you’ll experience connectivity issues, such as packet loss or jitter.

What is packet loss in Dying Light?

Sometimes, data packets that are transmitted through the connection can’t reach their destination. In turn, the remote server might artificially delay the connection, waiting for packets that will never arrive.

Most modern servers are configured in such a way that they won’t delay the connection indefinitely, which almost always ends in the server crashing. Instead, they skip the lost packets and receive the next incoming ones.

In more than just one way, packet loss resembles in-game lag, as the symptoms are quite similar. However, there’s a huge difference between the two.

High latency means that the packets need more time to reach their destination. Packet loss means that some packets simply don’t make it.

What can cause packet loss?

Truth be told, anything from an old Ethernet cable to server-side problems could cause packet loss. That’s why this issue is so hard to deal with because it has a lot of possible causes.

This, in turn, means that there’s more than one possible fix, which is also hard to pinpoint since it depends on what caused packet loss in the first place.

We’ve collected a few possible causes for packet loss:

  • Network congestion (most common cause)
  • Poor-quality Ethernet cable
  • Using Wi-Fi instead of Ethernet
  • ISP bandwidth throttling
  • Improper ISP network routing
  • Game server difficulties
  • Outdated drivers on your system
  • Not using the latest firmware version for your router
  • Subpar Internet subscription plan
  • Outdated cached data on your PC

And trust us, these ones are the most obvious ones that we could think of. In reality, the list of potential causes is far greater.

How to fix packet loss in Dying Light?

1. Use a VPN

  1. Buy a Private Internet Access subscription plan
  2. Download the VPN client on your PC
  3. Install PIA and launch it
  4. Use your credentials to log into your account
  5. Connect to a fast server (the closer it is to you, the better)
  6. Launch Dying Light
  7. Check if you’re still experiencing packet loss

Kape Technologies’ Private Internet Access is one of the best VPNs that can help you reduce packet loss in Dying Light. It also offers 24/7 customer chat support in case you experience any difficulties while using it.

However, note that using a VPN won’t improve your packet loss if the issue lies on your side, or if it’s the server host’s fault. VPN can only decrease packet loss if it’s caused by your ISP (e.g. bandwidth throttling, or improper routing).

Private Internet Access

Experiencing packet loss in Dying Light? PIA can help you fix this issue.
Free Trial Visit Website

2. Flush your DNS

  1. Hit the Win key on your keyboard
  2. Type CMD
  3. Right-click the Command Prompt
  4. Select Run as Administrator
  5. In the CMD window, type the following commands:
    1. ipconfig /flushdns
    2. ipconfig /registerdns
    3. ipconfig /release
    4. ipconfig /renew
    5. netsh winsock reset
    6. exit
  6. Restart your PC
  7. Relaunch Dying Light
  8. Check if you’re still leaking packets

3. Troubleshoot your connection

  • Check and replace broken/worn off network components (cables, for instance)
  • Use wired connections instead of Wi-Fi whenever possible (Wi-Fi packet loss happens more often)
  • Update drivers on your system
  • Restart your PC/router/modem
  • Avoid peak hours if your network is prone to congestion (or use a VPN)
  • Contact your ISP and ask them if they can fix the situation
  • Close any background apps or services that are heavy on bandwidth usage
  • Try lowering the quality settings in the game
  • Make sure your router’s firmware is up-to-date

Final thoughts on fixing Dying Light packet loss

All things considered, like any online service out there, Dying Light can also be affected by packet loss. Fortunately, this situation often fixes itself without any assistance on your side whatsoever.

However, at times you might notice a pattern when it comes to packet loss occurrence. This means that the problem has an underlying cause and until that cause gets dealt with, you’ll keep experiencing packet loss.

Using a VPN proves to be quite an efficient solution, but unfortunately, it only works if your ISP triggers the packet loss events by limiting your bandwidth or managing the network poorly.

Does Windscribe work with Netflix? [Streaming Guide]

Windscribe is a VPN service created by Windscribe Limited, a Canadian company. It provides both a free and premium VPN service so that you can fully take advantage of Internet freedom.

However, many VPN users are only interested in unblocking Netflix. If you’re one of them, you probably want to know if Windscribe works with Netflix.

Can I use Windscribe VPN with Netflix?

Yes, you can definitely use Windscribe VPN with Netflix if you’re living or traveling to a foreign country and can’t watch your favorite movies and TV series. The VPN service supports Netflix US, UK, Canada, and Japan. However, there’s a catch.

Although you can use Windscribe for free, it comes with some limitations. And some of them are that you can’t use the VPN servers dedicated to unblocking Netflix, called Windflix US, UK, CA, and JP.

How can I watch Netflix with Windscribe VPN

use Windscribe

  • Get a premium Windscribe subscription plan.
  • Download and set up the VPN client on your device.
  • Open Windscribe and log in with your credentials.
  • Connect to a Windflix VPN server*.
  • Start watching Netflix.

*Make sure to connect to a Windflix VPN server in the same location as the Netflix library you’re trying to unblock. For instance, if you want to watch Netflix US, connect to Windflix US.

Windscribe has servers in more than 63 countries and 110 cities, giving you unrestricted access to the best Netflix catalogs. It uses OpenVPN with up to 256-bit AES military-grade encryption to keep you safe on the Internet.

You can even change your GPS location with this VPN. Furthermore, Windscribe comes with split tunneling, port forwarding, a kill switch, double-hop VPN connections, and obfuscation mode.

It also protects your browsing sessions from ads and malware using R.O.B.E.R.T. And, if you need to turn your PC into a secure Wi-Fi hotspot, you can use a built-in feature.

More about Windscribe:

  • No identifying logs
  • ScribeForce for team accounts
  • Works with Mac, Windows, Chrome, Firefox, iPhone, Linux
  • 3-day money-back guarantee

Windscribe

Windscribe

Unblock Netflix US, UK, Canada, and Japan and watch unrestricted streaming with this VPN.
$4.08/mo. Buy now

Windscribe not working with Netflix

  • Update the Windscribe app to the latest version, but don’t use beta editions.
  • Connect to a different Windflix server.
  • Use the Stealth protocol with port 443 to hide VPN traffic.
  • Make sure your system’s date and time settings are correct.
  • Add an exception for Windscribe in the Windows firewall.
  • Get the newest Windows updates and security patches.
  • Reset Internet settings by flushing DNS and resetting Winsock.
  • Clear browser cache if you’re not using a Netflix app.
  • Use Windscribe’s customer support to ask for help.

Switch to a better VPN for Netflix

use CyberGhost VPN to unblock Netflix

If you can’t get Windscribe to work with Netflix or if it often fails to unblock it, consider dropping this VPN service and switching to a more suitable tool for Netflix, such as CyberGhost VPN.

Made by Kape Technologies, CyberGhost VPN can unblock more Netflix catalogs than Windscribe, including Netflix US, UK, Canada, India, France, and Germany. It has a special category of VPN servers dedicated to streaming, which you can quickly access.

The app supports exclusive DNS servers and DNS leak protection, OpenVPN with 256-bit encryption, split tunneling, a kill switch, along with an ad and malware blocker. It has an impressive network of over 6,500 servers spread across 89 countries.

More about CyberGhost VPN:

  • No traffic logs
  • Works with Windows, Mac, Linux, Android, iOS, Chrome, Firefox
  • Up to 45-day money-back guarantee
  • 1-day free trial for Windows and Mac
  • 7-day free trial for iOS and Android

CyberGhost VPN

CyberGhost VPN

Use a more reliable VPN to unblock the best Netflix catalogs and enjoy unlimited streaming.
$2.75/mo. Buy it now

To summarize, you can use Windscribe to unblock Netflix but only if you get the premium version of the VPN app. If you encounter connection issues with Netflix, there are ways to troubleshoot them.

However, if you don’t feel that Windscribe is good enough for the popular streaming service, consider using a better VPN for Netflix, such as CyberGhost VPN.

[wl_navigator]

Catalyst Control Center Won’t Open: 6 Ways to Force It

A few users have complained that the AMD Catalyst Control Center is not opening. We focus on it in this guide and give you some quick resolutions.

Advanced users mainly use this app for all sorts of things, such as color adjustment or display management, but when this great program bugs in Windows 10, it becomes frustrating.

Before we talk about fixes, let us explore some common triggers.

Why is my Catalyst Control Centre not opening?

When the control center is no longer opening, our interactions with users show that it could be because of any of the following:

  • Driver-related issues – These could be corrupt or outdated, especially your graphics card driver.
  • Software conflicts – Conflicts with third-party tools or drivers on your PC is a huge factor that triggers this problem among users.
  • Bad system files – Users have encountered problems when system files are missing or damaged.
  • Compatibility issues – While third-party apps may be an issue with some users, the main problem is often compatibility with the operating system.
  • Virus – Malware or virus infections on your device also trigger a few programs not to launch, which often affects the AMD Catalyst Control Center.

So, if the Catalyst Control Center won’t open, we recommend you take the steps we list in the section below.

What can I do if AMD Catalyst Control Center is not opening?

1. Start Catalyst Control Center from the installation directory

  1. Navigate to the path below:
    C:\Program Files (x86)
    amd catalyst control center not opening
  2. Open the ATI Technologies folder, select ATI.ACE, then Core-Static and choose amd64.
  3. Double-click on CLIStart.exe to run.

In addition, you can create a shortcut on your desktop so you won’t have to navigate through folders each time you want to run CCC.

2. Close all Catalyst tasks

  1. Press Ctrl + Shift + Esc to open the Task Manager.
  2. Go to the Processes tab.
    amd catalyst control center not opening
  3. Search for any task related to Catalyst, and click End task.
    amd catalyst control center not opening
  4. Return to your desktop and launch AMD Catalyst Control Center.

3. Update your display drivers

Specialized driver updating software will show precisely what drivers need updating. You can update several drivers at once or select just the one you need.

Plus, these tools are designed to do the whole driver downloading and installing job instead of you. The best way to avoid permanent damage to your PC is by getting the right driver versions.

4. Run an SFC scan

  1. Press Windows + R, type cmd, and hit Ctrl + Shift + Enter.
    amd catalyst control center not opening
  2. Input the command below and hit Enter.
    sfc /scannow
    amd catalyst control center not opening
  3. Wait until the scanning process finishes and restart your computer.
  4. Launch AMD Catalyst Control Center again.

5. Update your computer

  1. Press Windows + I to go to Settings.
  2. Open Update & Security.
    amd catalyst control center not opening
  3. Click on Windows Update and check for updates.
    amd catalyst control center not opening

Ensure you’re running the latest Windows 10 updates on your machine. This means installing all the available critical, recommended, and optional patches.

6. Run a scan

  1. Type Windows Security in the Search bar, and click on the relevant search result.
    amd catalyst control center not opening
  2. Now, click on Virus & threat protection.
    amd catalyst control center not opening
  3. Click on Scan options.
    amd catalyst control center not opening
  4. Now, select Full scan and click on the Scan now button at the bottom.

That’s it; if the AMD Catalyst Control Center is not opening, you should find success using any of the solutions in this guide.

Let us know what worked for you using the comments section below.

Rocket League is becoming free to play on Xbox One and other platforms on September 23

Starting September 23, 2020, Rocket League will be free-to-play on Xbox One, Windows 10 PC, Nintendo Switch, and PS4. As noted on Xbox Wire, Rocket League will also receive a new update to get the game ready for its free-to-play debut.

In Rocket League, you play a fast-paced game of soccer with a super-sized ball and rocket-powered cars. Rocket League supports cross-platform play, so Xbox One, PS4, Nintendo Switch, and PC players can play in matches head-to-head. Starting tomorrow, Rocket League will also enable cross-platform progression and provide Legacy Status items for current game owners, and also introduce revamped Tournaments, game-wide Challenges, as well as streamlined Seasons and new Ranks.

Rocket League will also be available for free in the Epic Games Store for PC starting on September 23, 2020. If you add Rocket League using your Epic Games Store library between September 23, 2020, and October 23, 2020, you will get an Epic Games Store coupon for $10 off any game or add-on $14.99 or higher.

Rocket League®
Rocket League®
Developer:
PSYONIX LLC
Price:
Free

[Solved] Fortinet VPN Locks Out User After 1 Failed Attempt

Fortinet offers a VPN called FortiClient, which companies can set up to provide remote access to their work-from-home and traveling employees. This way, they can access office network shares just as if they were physically at work.

Unfortunately, many system admins receive complaints from users that the Fortinet VPN locks them out after 1 failed attempt. If you’re looking for a quick fix to this problem, we’re here to help.

How do I fix Fortinet VPN user lockout after 1 failed attempt?

Enter the next command lines:

config user setting
set auth-lockout-duration <seconds>
set auth-lockout-threshold <failed_attempts>
end

For example, if you want to allow 5 login attempts and keep users locked out for 10 minutes, use:

config user setting
set auth-lockout-duration 600
set auth-lockout-threshold 5
end

However, you should keep in mind that too many failed login could indicate that someone with unauthorized access is trying to access your company’s network through the Fortinet VPN, like a former employee whose credentials you didn’t revoke.

To prevent this security breach, make sure to set a low number of login attempts and a lengthier lockout duration. Also, you should have email notifications enabled so that you get alerted as soon as a user account gets locked out.

Choose a more reliable VPN solution for your business

use Perimeter 81

If you regularly have to fix Fortinet VPN issues like user lockout after 1 failed attempt, consider switching to a better VPN service for your organization, like Perimeter 81. It offers cloud management, easy network deployment, and user-friendly tools for your employees.

Perimeter 81 supports dedicated global gateways, two-factor authentication, and always-on VPN. It also comes with shared gateways in 35 locations, site-to-site interconnectivity, policy-based segmentation, and activity audits and reports.

What else you must know about Perimeter 81:

  • 3 subscription plans for all-sized businesses
  • Integrates with AWS, Azure, Google Cloud, Salesforce, and others
  • 24/7 chat support
  • 30-day money-back guarantee (no free trial)

Perimeter 81

Don’t let errors affect your business with this robust VPN solution.
Free Trial Visit Website

To sum up, you can easily fix the Fortinet VPN locks out user after 1 failed attempt issue. You just have to enter a few lines of code in the command-line panel for FortiClient VPN. Similarly, with the CLI, you can fix the all FortiGuard servers failed to respond error.

However, if you’re looking for an alternative VPN solution for your company, keep Perimeter 81 in mind since it’s superior in every way.

Your account privacy settings are being applied [Excel Help]

Microsoft has promised to give users more control over the data that is processed when they are using Microsoft Office.

Therefore, they already adjusted the privacy settings around Microsoft Office apps several times and made them more transparent.

But still, many users have complained that when are trying to open a Microsoft Excel document, a yellow bar occurs stating the following error message:

Privacy settings applied. Your account privacy settings are being applied to this device.

Down below, you will find quick solutions to solve this annoying Microsoft Excel problem.

How can I fix Your account privacy settings are being applied?

1. Turn off some Privacy Options

How to fix Your account privacy settings are being applied

  1. Open the Microsoft Excel app, and click on the File tab.
  2. Select Options, and click on Trust Center.
  3. Go to Trust Center Settings, and scroll to the bottom to Privacy Options.
  4. Uncheck the Get designs, information, recommendations, and services by allowing Office to access and make product improvements based on Office content on my device box.
  5. Click OK and exit the Microsoft Excel document.
  6. Restart the app.

Microsoft analyses user behavior within the Office applications and displays tips, advertisements or product recommendations based on this user behavior.

If you don’t want to receive any other error messages because of this option, then you can always turn it off.


2. Repair Microsoft Excel

Hot to Repair Excel your account privacy settings are being applied to this device excel

  1. Open Control Panel, and click Uninstall Program.
  2. Select Microsoft Office Suite and double-click it.
  3. Choose Change from the pop-up menu, and click Repair.

Can’t open Control Panel on your Windows 10 PC? Follow the steps in this guide to fix the issue quickly


3. Update Microsoft Excel

How to update Excel your account privacy settings are being applied to this device excel

  1. Open Microsoft Excel, and click on the File tab.
  2. Go to Product Information, and select Update Options.
  3. Click the Update Now button.

Microsoft Office is normally updated automatically. However, if this doesn’t work, you can also update it manually. Otherwise, errors may occur when you are opening Excel documents, for instance.


You can always use the built-in Repair tool, by opening Control Panel to repair Microsoft Excel if any other error messages are encountered.

Microsoft Excel is probably the most widely used spreadsheet application on Windows computers and is part of Microsoft Office.

Excel‘s extensive calculations with formulas and functions, including commercial, statistical and date functions make the program irreplaceable in today’s office.

If you have any more questions or suggestions, be sure to let us know by using the comments section below.

[wl_navigator]

Unlicensed Product & activation errors [Outlook, Office 365]

You want to start your Outlook or Office as usual, but as soon as you open the software the error message Unlicensed product appears at the top of the screen.

This message in Outlook or Office 365 usually indicates a problem with the activation of the software. To restore all Office features, you must solve the issue that caused the activation to fail.

Usually, Outlook and Office activation errors are pretty common. Users have encountered these problems even if they had their product activated for a long time.

The most likely reason for this error may be due to new regulations and security measures that are constantly being implemented.

These can cause the servers that deal with subscriptions to be reset, thus creating a chain reaction when it comes to the activation of your product.

Following the solutions below will enable you to solve the Unlicensed product error quickly, so make sure to follow the steps described here closely, and test your product after each of them.

How can I fix Unlicensed Product activation errors?

1. Sign in with the correct account

Try signing in with all your private email addresses, in case you purchased Office under a different email address.

If you’re at work or school, you might need to sign in with your business, school, or college account instead of your private email account.

To verify that your Microsoft account is associated with Office, sign in the services and subscriptions.

Your Office product or Office 365 subscription should be listed there. If it’s not, your email address will not work for Office sign in.


2. Check if multiple copies of Office are installedHow to uninstall Office unlicensed product error

  1. Open Control Panel, and then select Programs and Features.
  2. Search for Office, select it, and click Uninstall.
  3. Restart your PC.
  4. Open Outlook and log in when prompted.

Can’t open Control Panel in Windows 10? Follow the steps from this handy guide to resolve it


3. Check the status of your subscription

services and subscription office unlicensed product error

  1. Close all the Office apps.

  2. Go to your Services and Subscriptions page.
  3. Select Sign in, and enter the email address and password of the Microsoft account.
  4. Check the details under the Subscriptions or Cancelled subscriptions heading. If your subscription has expired, you can renew it, and restart Outlook if necessary.

As you can see, dealing with activation errors in Outlook and Office 365 is not that hard. Keep in mind that using the correct account and making sure that you have a valid subscription can easily solve your problem.

To ensure a speedy and effective recovery from the issue described in this guide, please make sure to follow the steps presented here exactly.

If you have more questions or suggestions, leave them in the comments section below, and we’ll be sure to check them out.

[wl_navigator]

There is no email program associated to perform the action

When you open Outlook, sometimes you receive the following error message:

No email program is assigned to perform the desired action. Install an appropriate e-mail program, or create an assignment in the Control Panel under Default Programs if a program is already installed.

When this error occurs, it is also no longer possible to transfer files to the Outlook system. And that can be pretty annoying especially if you have something urgent to send.

If you’re also having this problem with Outlook on your Windows 10 PC, you can try the steps mentioned below and resolve it by yourself.

How do I fix no email program associated to perform the action?

1. Set an email program as default

set default email there is no email program associated to perform the requested action

  1. Press the Windows key + I, and select Apps.
  2. Choose the Default Apps, and select the application under the Email section.
  3. Select Mail (Or an application of your choice) from the newly appeared list.
  4. Restart your PC.

If you don’t have an email program, then you can download any email program of your choice and then follow the above steps to set it as default.

By default, Windows 10 comes with a simple Mail client. Keep in mind that this application is a very down basic version compared to Outlook, and the automatic insertion of BCC email addresses can not possible with it.


2. Delete the Outlook registry keys

Delete registry keys there is no email program associated to perform the requested action

  1. Press the Windows key + R.
  2. Type regedit to open Registry Editor.
  3. In the left pane navigate to: HKEY_LOCAL_MACHINESoftwareClientsMailMicrosoft Outlook
  4. Right-click over Microsoft Outlook.
  5. Select Delete and confirm any additional prompts.
  6. Close Registry Editor.
  7. Press the Windows key + I.
  8. Open the Settings app, go to System, and select Default apps.
  9. Choose the application under the Email section.
  10. Select Mail as the default email client.

One of the possible reasons for the already mentioned Outlook error message is the corrupted registry keys. This can lead to several problems whenever a program tries to connect to the Outlook Simple MAPI interface.

Therefore, you will have to first delete the corrupted Outlook registry keys and then you can repair the Outlook.


If you bump into any errors while trying to access Registry Editor, fix them quickly with this guide


3. Repair the Outlook system

Windows settings apps button - Sedlauncher.exe fix high cpu usage

  1. Right-click on the Windows symbol.
  2. Select Settings, and go to Apps.
  3. Choose Office, and press on Change.
  4. Select the Repair function.

The longer you use Outlook, the more emails, and appointments you manage with it, and so increases the possibility that problems like the error message No email program is assigned to perform the desired action will occur.

Under certain circumstances, Outlook may even crash regularly while you are working, or your profile may no longer open at all. In such cases, you have to repair the Outlook system with the solutions above.

[wl_navigator]

Microsoft releases new firmware updates for Surface Go and Surface Go LTE

Microsoft has just released new firmware updates for the Surface Go and its LTE variant. In addition to the stability enhancements, the new bits should improve the Smart Charging reliability, a feature that helps reduce battery deterioration.

Moreover, there are several refinements for the camera experience, as Microsoft has included new updates in this batch to resolve various issues. If you are using a Surface Go/LTE device with Windows 10 version 1903 or newer, you will see the following updates:

  • Surface UEFI – Firmware: 1.1.18.0 *Improves battery Smart Charging reliability, and addresses security updates.
  • Intel AVStream Camera 2500 – System devices: 30.18305.6.12414 Improves camera experience and resolves associated system bugcheck.
  • Intel Microsoft Camera Front -System devices: 30.18305.6.12414 Improves camera experience and resolves associated system bugcheck.
  • Intel Microsoft Camera IR – System devices: 30.18305.6.12414 Improves camera experience and resolves associated system bugcheck.
  • Intel Microsoft Camera Rear – System devices: 30.18305.6.12414 Improves camera experience and resolves associated system bugcheck.
  • Intel Camera – Control Logic -System devices: 30.18305.6.12414 Improves camera experience and resolves associated system bugcheck.
  • Intel Camera – CSI2 Host Controller Driver – System devices: 30.18305.6.12414 Improves camera experience and resolves associated system bugcheck.
  • Intel Camera – Imaging Signal Processor 2500 -System devices: 30.18305.6.12414 Improves camera experience and resolves associated system bugcheck.
  • Intel® iCLS Client – Software components: 1.60.155.0 Addresses security updates and improves system stability.
  • Intel® Management Engine Interface -System devices: 1952.14.0.1470 Addresses security updates and improves system stability.
  • (Firmware update extension) – no Device Manager notes: 5.5.0.0 Improves Surface Dock 2 reliability and addresses system bugcheck.
  • Surface System Telemetry Driver -System devices: 1.29.137.0 Facilitates power and thermal related data analysis.
  • Surface Dock Firmware Update – Firmware: 2.49.139.0 Improves Surface Dock 2 reliability and addresses system bugcheck.
  • Surface ME – Firmware: 11.8.77.3664 Addresses security updates and improves system stability.

Just as a reminder, firmware updates for Surface devices are released in stages, which means that not everyone gets them on day one. It could take a while until it shows up on your PC, so don’t worry if you’re not getting these updates on your Surface Go yet.

Microsoft Teams will let users turn off message previews in desktop notifications next month

In July, we first heard that Microsoft is working on a new privacy feature that will allow users to turn off message previews in toast notifications in Microsoft Teams. Now, the company has announced via the Microsoft 365 Admin Center that the change will begin rolling out in early October. 

With this new functionality, users will get better control over privacy by changing their settings to disable chat notification previews during Teams meetings. When the feature rolls out, users will be able to access the new setting “Show message preview” under the Notifications section. Keep in mind that it will be an optional feature, and the users’ setting will be respected across all notifications on Teams clients.

Teams notification settings

Moreover, Microsoft Teams users will be able to configure native OS notifications on Windows and macOS next month. According to a new message in the Microsoft 365 Admin Center, the company has postponed the release date for the new notification experience from the end of September to mid-October 2020. Microsoft has quietly updated the Microsoft 365 Roadmap item earlier this month to reflect the updated timeline. In case you missed, it the feature is currently in preview, and you can check out our separate post for more details. 

FIX: Showbox server connection error [Explained & Fixed]

Showbox was initially created exclusively for Android and is a beloved online streaming application by users. The interface is user-friendly and it does not require a login account.

But, as expected, this application has endured various errors over time. Thereby, many people have encountered this server connection error while trying to watch a movie.

If you want to watch your favorite shows and movies on PC with Showbox, then you should know that you need an Android emulator for Windows 10.
In the following lines, you will find an explanation and sure ways to solve this annoying server connection problem for Android devices.

How can I fix the Showbox connection error while connecting to the server?

1. Check if your Showbox application is outdated

outdated version on Showbox server connection error

  1. Go to Google Play.
  2. Search for Showbox App.
  3. Click on Install.

If you have an old version of the application, then you will definitely run into this connection error.

You need to make sure that you download the latest Showbox version, and thus you can have access to the latest movies.


2. Clear the App Data and Cache

  1. Go to Settings on your PC, and open the Apps.Showbox server connection error clear data and caches
  2. Find Showbox App and open it.
  3. Under Storage, you will find the space you used. Now you can Clear Data and Cache.clear app data and cache on Showbox server connection error

By deleting App Data and Cache all previously downloaded series or movies won’t be automatically deleted.

The advantage is that the application will work as if it had been installed again. However, the movies remain on your device’s internal Storage.


3. Make sure that your Internet connection is stable

stable Internet connection on Showbox server connection error

If the application fails to establish an Internet connection, you will not be able to stream your favorite movie or series. Therefore, the application becomes useless for you.

You can try to use a Virtual Private Network to protect your Internet connection. In this way, you will be able to use Showbox despite any problems that you may encounter with your ISP.

The server issue while trying to connect on Showbox is a common matter for most users. With an upgraded version of the application and a stable Internet connection, you will be able to enjoy your favorite movies and shows anytime.

If you have more questions or suggestions, leave them in the comments section below, and we’ll be sure to check them out.