Microsoft will finally enhance the new Windows 11 File Explorer context menu with an option that has been erased from the operating system but was present in earlier versions of Windows.
We’re talking about the ‘New’ option, which allows users in Windows 10 or earlier to create new folders, files, or similar documents. The option was a staple of Windows up until Windows 11, when Microsoft decided to erase it from the File Explorer context menu. However, the option is still there when accessing the old menu in Windows 11.
Spotted by tech enthusiast @phantomofearth, the option is currently hidden by default in the latest Canary, Dev, and Beta Insider Channels. However, as always, it can be enabled with the third-party app ViveTool using a special command.
Small File Explorer change: modern context menus will soon show the "New" entry when right clicking a folder in the navigation pane, previously only present in the older menu. Lets you make a folder. (present in Canary, Dev and Beta, disabled by default.) pic.twitter.com/ZjVjfs1Our
Enabling it will allow the ‘New’ option to appear in the new Windows 11 File Explorer context menu, without having to access Show more option.
Even though it can be enabled, the feature is still being tested, and there’s no definitive answer on whether it could make it to the Stable channels, but there is always hope. If it does, though, it should be live with the next month’s updates or maybe even earlier.
It’s a pity that Microsoft took more than two years to update the File Explorer context menu in Windows 11 with it, but it’s always appreciated.
How can you fix the Excel YEAR function when it’s not working?
It’s one of the easiest ways to extract a year component from a long or short date in Microsoft Excel. However, this function is prone to many errors especially if the source data value isn’t in the right Date format.
So, I’ve recreated some Excel YEAR function issues that you may face. Here are the fixes that worked out for me the best!
How To Fix Excel YEAR Function Not Working
Before you start troubleshooting, ensure you’re using a supported Windows, Mac, or web app. The function is only available in Excel 2016 for Windows and Macand newer, and the web version. If you’re using any earlier desktop editions, unfortunately, it won’t work.
Choose the Right Function Syntax
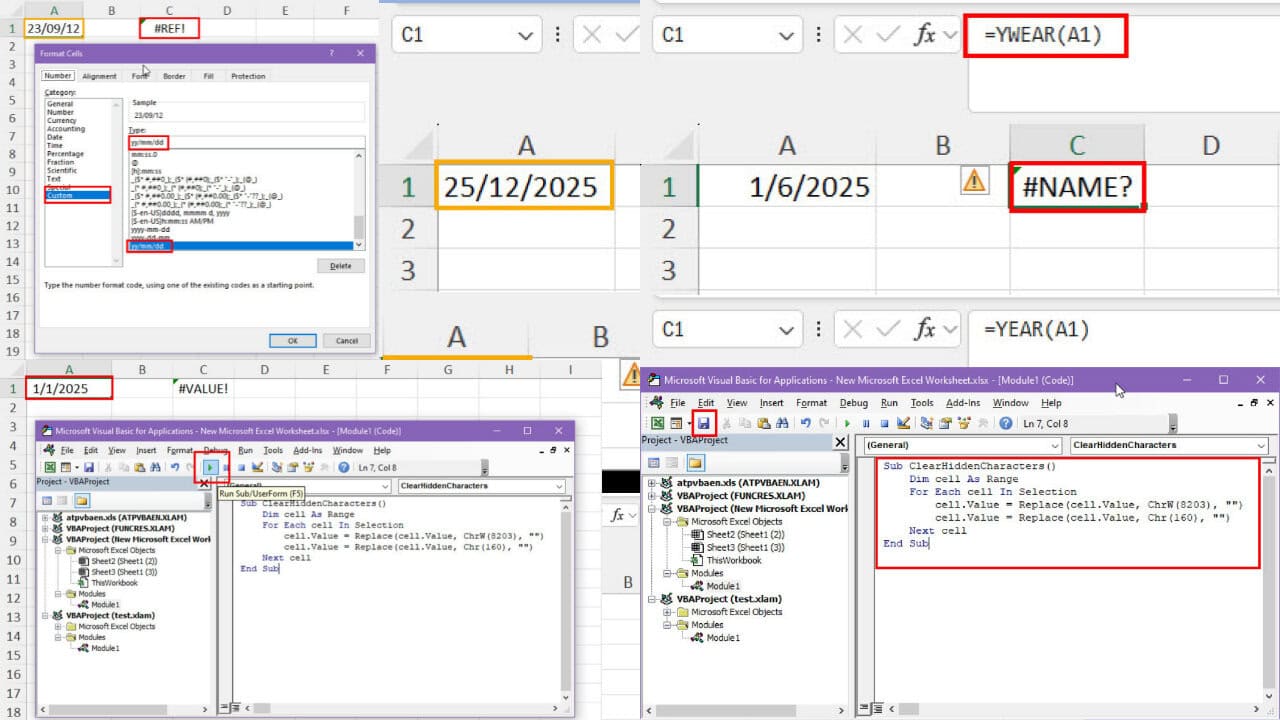
The most common mistake is not spelling the function syntax correctly. This causes the entire formula to break down. The Excel warning you get in this situation is the#NAME? error.
To avoid spelling issues, you must use the function suggestion as shown on the cell when you type initials after the equals sign.
You can scroll down or up to find the one you need and simply double-clickto add it along with the opening parenthesis.
You can now type the rest of the formula arguments. Refer to the contextual suggestions for the valid arguments just below the cell where you’re typing to avoid flaws in argument construction.
Value Isn’t in the Date Format
Here are the possible slip-ups you might make while using the YEAR function:
Non-date text values: When the input argument is a text string that Excel can’t recognize as a valid date, you’ll see an error.
Blank cells treated as text: If Excel treats a blank cell as a text string, the function will show the #VALUE! error.
Date in an invalid format: If you use an unsupported date format, like “21/06/2025,” you’ll get the #VALUE! error.
Logical values or arrays: This mistake can happen mostly when the input cell reference of the YEAR function is derived from other Excel basic formulas. If the input is an array that doesn’t contain supported date values or these are logical values, like TRUE or FALSE, you’ll see an error.
Non-numeric date values: If you use two thousand twenty-five instead of 2025 as an input, Excel will show the #VALUE! error.
The cell contains an error: In this case, the YEAR function shows the #VALUE! error.
For example, this function has broken down because there’s a tilde sign in the referenced cell.
When I remove the accent sign, it works just fine.
Custom Date Formats
Another pressing problem with YEAR is its inability to appropriately detect the year value from a custom-formatted date. For example, it’ll work with popular date conventions, like YYYY/MM/DD or MM/DD/YYYY.
However, when you place the function with a DD/MM/YYYY or YYYY/DD/MM format, it fails to isolate the year.
Another way to get the same error is by using the Custom formatting category from the Format Cells dialog box.
If you select a cell and press the Ctrl + 1 keys, the Format Cells dialog box will show up. Now, go to Custom and enter any of the following date formats in the Type field:
yy/dd/mm
yy/mm/dd
If you now type any date in the custom-formatted cell, you’ll get an error for the YEAR function.
So, avoid the above custom date formatting instances.
Date Entries Formatted as Numbers
When you convert a date entry to the Number formatting style, the YEAR function shows an error.
Look at the screenshot below. When it’s in its correct form, like the Date format, the function can properly extract the year in cell C1.
However, changing the date to a Number format shows the #REF! error message.
Another scenario when you might experience the same issue is deleting the old entry and typing in a new value.
When you delete the previous entry in A1, Excel hard codes the YEAR function in the following syntax:
=YEAR(#REF!)
Now, if you update the referenced cell with a new value, Excel can’t detect that because it has automatically added the #REF! error to the YEAR function by replacing A1, which was the blank cell.
You can fix this issue by editing the arguments again. For example, replace #REF! in the formula syntax with A1.
The YEAR function will calculate the year value again.
Hidden Characters or Spaces
Hidden characters, like non-breaking spaces, change the appropriate formatting of date entries. When you refer your YEAR function to any such cells, you’ll get a #VALUE! error.
To clear these unwanted characters from your dataset, press Alt + F11 to launch Excel VBA Editor.
Right-click on the current workbook in the left-side navigation panel of the VBA Editor. Hover the cursor over Insert and select Module from the context menu.
A blank module will open on the right.
There, copy and paste the following VBA script:
Sub ClearHiddenCharacters()
    Dim cell As Range
    For Each cell In Selection
        cell.Value = Replace(cell.Value, ChrW(8203), "")
        cell.Value = Replace(cell.Value, Chr(160), "")
    Next cell
End Sub
Hit the Save button on the toolbar.
Now, select the worksheet dataset from which you wish to remove hidden characters.
Click on the Run button on the toolbar or hit F5 on the keyboard.
Excel VBA macro will clean the dataset automatically.
The YEAR function also instantly calculates the cell and shows the year value.
Dates Beyond Excel’s Supported Range
The YEAR function is only effective within a year range of 1900 and 9999. If you refer to an input cell containing a year below or above the given range, the function will either show an error message or an incorrect value.
For example, I entered 01/01/1899 in A1 and used the =YEAR(A1) syntax in C1.
I got the #VALUE! error.
The same error will show up when the input date is 01/01/10000.
So, check if the input has a year value outside the given range to fix the issue.
Regional Settings Mismatch
If the region settings in the PCand Microsoft 365 Admin Center don’t match, Excel might process date formats incorrectly.
First, ensure your PC is set to the desired region configuration by clicking the ENG icon in the System tray.
English (United States) should be on the top of any other input languages if you’re in the US or following the US input format.
If you don’t see the US option, click on the Language preferences option.
Click on the Add a language button below the Preferred languages section.
Find and select English (United States). Click Next.
Type Region in the top search field and select My settings and privacy.
You’ll now arrive on the Settings & Privacy page. Navigate to the Language & Region tab on the right.
Now, click on the Region format option and select Change regional format button.
Select the English (United States) format from the list.
You’ll see a sample date confirming that you’ve successfully selected English (United States) as the region.
Now, restart the Excel desktop app.
Try using the YEAR function and this time it should be able to extract the year from the date.
Negative or Non-Gregorian Dates
The YEAR function works well with Gregorian calendar dates. Even if you refer to a non-Gregorian calendar date, it’ll try to show the equivalent year.
For example, the following screenshot shows that the argument is referencing cell A1 which has a date from the Hijri calendar. Therefore, the function can’t extract the year value appropriately and shows the #VALUE! error.
Moreover, if the input date value comes with a minus sign, the YEAR function won’t be able to calculate the year entry because Excel converts the source data into a negative fraction.
So, ensure there are no negative dates in the input dataset.
Use YEARFRAC for Fractional Year Values
If you’re trying to extract the number of years from a start and end date, you’ll get an incorrect result with the YEAR function.
It’ll process it as an input value and derive the corresponding year if possible, but not the actual calculated value.
For instance, if you subtract the end date 12/10/2024 from the start date 6/10/2025 in Excel, it returns 1643. Now, the YEAR function converts 1643 to 1904 instead of 4.5 years.
Here, you can use the following formula with the YEARFRAC function to quickly get the calculated year.
=YEARFRAC(A2,B2)
In the above formula, A2 is the start date and B2 is the end date.
Excel will calculate and extract the number of years elapsed, which is 4.5.
Summary
Now you know what to do when the Excel YEAR function is not working.
Did any of the above methods work for you? Do you know of a better approach? Share your thoughts below.
Windows 11 24H2, released a week ago, is causing a huge problem with NVIDIA’s Digital Vibrance. Many users reported that the operating system keeps resetting the capability in the NVIDIA Control Panel to default every restart.
Others have reported that the issue doesn’t only happen when restarting but also when turning the monitor off.
If you’re experiencing the issue, know that updating your device to Windows 11 24H2 is not the problem.
There is no solution in sight for now. Until NVIDIA releases a fix—which will most likely be released this week with a patch—the only thing you can do is roll back to the previous version of the NVIDIA drive, Version 561.09, and wait for the upcoming patch to fix the issue.
To roll back, you’ll need to:
Open Device Manager.
Go to Display Adapters.
Right-click your NVIDIA Drivers. and select Properties.
Go to the Driver section and select Roll Back Driver.
Wait for the process to finish, and restart your Windows 11 PC.
Installing the Windows 11 24H2 update must have triggered the driver update process, which included your NVIDIA drivers.
However, it’s best to roll back and wait for a fix.
Click on Select file or drag and drop your Excel file.
Next, click on Convert.
Once the process is finished, click on Download.
Excel to JPG online converter is a great option if you need to convert multiple sheets to images. However, many of these services might store your files, at least temporarily, so they might not be the best option for sensitive files.
Copilot, the popular AI model, will be enhanced with a new capability called UX Transparency for Web Queries. This capability will allow users to see how the model gathers information about the prompts.
When Copilot needs to provide information, it often searches the web for the most accurate and up-to-date data. This process of searching and using web information is called web grounding.
With this enhancement, users can see the specific search terms or phrases that Copilot uses when it looks for information online. For example, if you ask about the latest cricket match, you might see that Copilot searched for “India vs Australia last cricket match.”
Users will also see which websites Copilot checked for information along with the search terms. This could include news sites, official pages, or other reputable sources. This helps users understand where the information is coming from.
With UX transparency of web grounding in Copilot, users will now be able to see the exact queries sent by Copilot in response to a user’s prompt to the web for grounding, along with the list of websites being queried, enhancing their awareness over the process.
By showing both the search queries and the list of websites, users gain a clearer picture of how Copilot works. This transparency can build trust, as you can see if the information is based on real, verifiable sources.
This, in turn, will ensure that Copilot is not used to spread misinformation, fake news, and similar content.
UX Transparency will be previewed in Copilot this month, followed by a rollout in November.
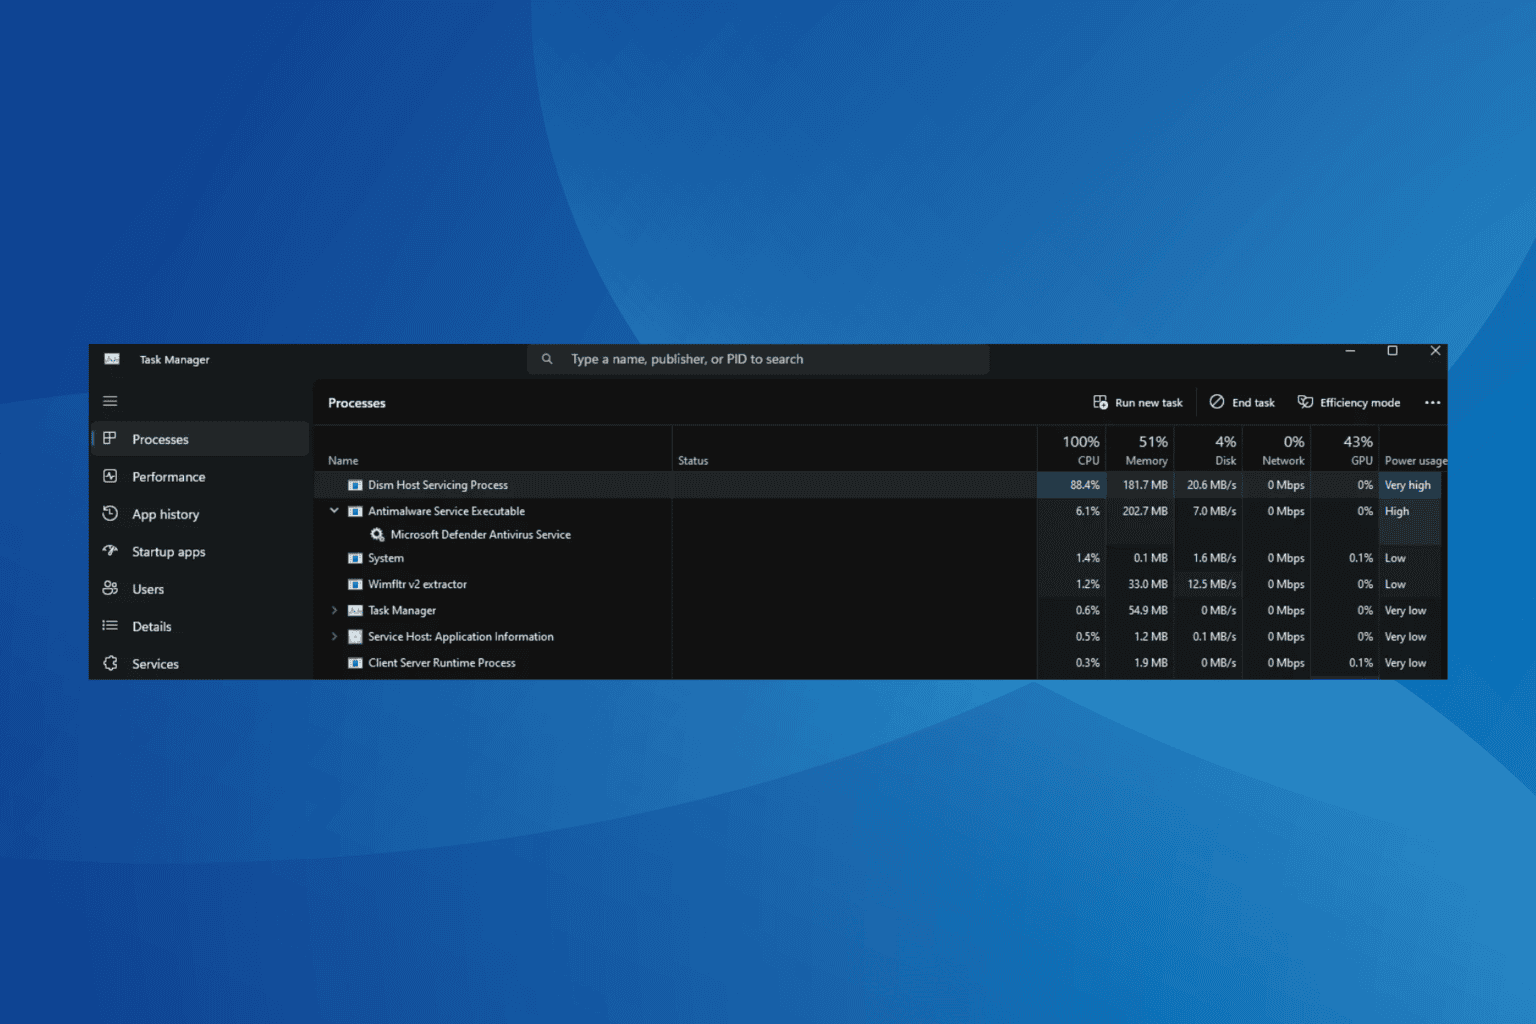
High resource consumption causes the PC to slow down, and one such task that often causes this situation is the Dism Host Servicing Process (DismHost.exe).
While DiskHost.exe is a built-in process related to DISM (Deployment Image Servicing and Management), there’s a lot of confusion about its origin. To clear that, DismHost.exe is completely safe as long as your PC is not infected by a malware disguising the process, which can be verified through a quick scan.
Before we start fixing 100% CPU usage by Dism Host Servicing Process in Task Manager, make sure to install all pending Windows updates. Because high CPU usage by DiskHost.exe commonly arises when there’s a pending OS update.
How can I fix high CPU usage by Dism Host Servicing Process?
1. Disable the BITS and SysMain services
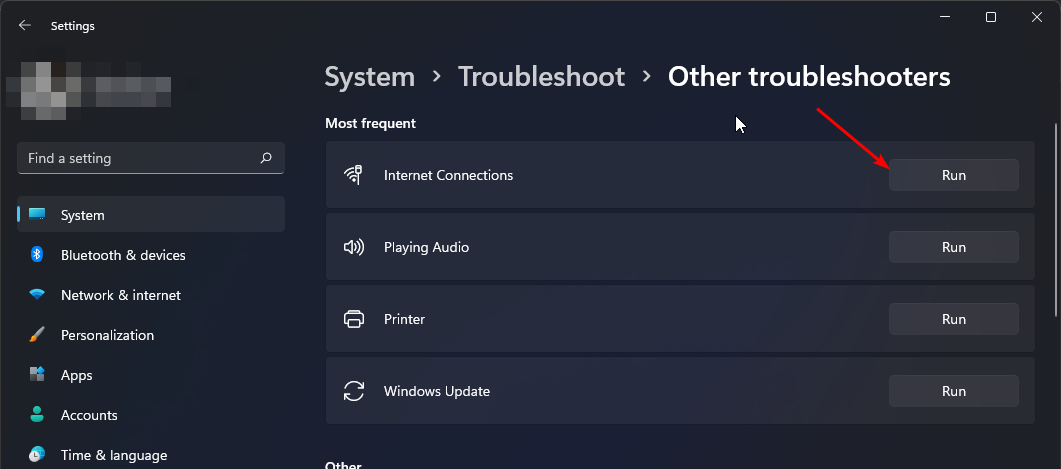
Press Windows + R to open Run, type services.msc in the text field, and hit Enter.
Scroll down, right-click on the Background Intelligent Transfer Service, and select Properties.
Choose Disabled from the Startup type dropdown menu, and click on Stop under Service status.
Click on Apply and OK to save changes.
Similarly, disable the SysMain(previously SuperFetch) service.
Finally, reboot the PC and verify whether high CPU or RAM usage by the Dism Host Servicing Process is fixed.
2. Run the DISM and SFC scans
Press Windows + S to open Search, type Command Prompt in the text field, and click on Run as administrator.
Click Yes in the UAC prompt.
Paste the following DISM commands individually and hit Enter after each: DISM /Online /Cleanup-Image /CheckHealthDISM /Online /Cleanup-Image /ScanHealthDISM /Online /Cleanup-Image /RestoreHealth
Now, execute this command to run the SFC scan: sfc /scannow
Once done, restart the computer to apply the changes.
When your PC has corrupted system files, certain functions will fail to work properly. In this case, running the DISM (Deployment Imag Servicing and Management) and SFC (System File Checker) scans will replace all such corrupted files with their cached copy, fixing things when the Dism Host Servicing Process has stopped working!
3. Update all the drivers
Press Windows + X to open the Power User menu, and select Device Manager from the list.
Expand the individual entries listed here, then right-click on the device(s) underneath, and select Update driver.
Click on Search automatically for drivers and wait for Windows to install the best available version.
Similarly, update all the device drivers and then restart the PC.
In a few cases of high disk usage by the Dism Host Servicing Process, it was the outdated or corrupt drivers to blame. For one user, a Realtek LAN card turned out to be at fault. So, it’s recommended that you update all the drivers.
If Windows can’t find a better version, head to the manufacturer’s website, locate the latest release, and then manually install the driver!
4. Run a malware scan
Press Windows + S to open Search, type Windows Security in the text field, and click on the relevant result.
Click on Virus & threat protection.
Click on Scan options.
Now, select the Full scan entry and then click on Scan now.
Wait for the scan to complete. It usually takes 10-30 minutes.
If the Dism Host Servicing Process is malware or virus, a full system scan should make that evidently clear. In case Windows Security can’t detect threats, I recommend you use a top-rated antivirus solution for Windows to run advanced scans!
5. Rename the DismHost file
Press Windows + E to open File Explorer, paste the following path in the address bar, and hit Enter: C:\Windows\System32\Dism
Right-click on the DismHost.exe file, select Rename, and then name it DismHost1.exe.
Once done, reboot the PC, and the high CPU, disk, or memory usage shouldn’t come up again.
6. Restore the PC
Press Windows + R to open Run, type rstrui.exe in the text field, and hit Enter.
Select the Choose a different restore point option and click on Next.
Pick the oldest restore point from the list, and click on Next.
Verify the restore details, click on Finish, and then confirm the change.
Wait for the restore to complete. It may take 15-20 minutes.
7. Perform an in-place upgrade
Tip
The steps listed below are for Windows 11. In case you are running the previous OS iteration, learn how to perform an in-place upgrade on Windows 10.
Go to Microsoft’s official website, select product language and OS edition, and then click on Download Now to get the Windows 11 ISO.
After it’s downloaded, right-click on the ISO file, select Mount, and then click Open in the confirmation prompt.
Run the setup.exe file.
Click Yes in the UAC prompt.
Click Next to proceed.
Read Microsoft’s license terms and click on Accept.
Make sure the setup says, Keep personal files and apps, and then click on Install.
The in-place upgrade will take 30-90 minutes to complete.
In case an in-place upgrade also fails to resolve the Dism Host Servicing Process high CPU usage, you will have to reinstall Windows. Remember, since it’s an OS-based conflict, a reinstall is guaranteed to fix things!
Besides, if you repeatedly run into performance-related issues, discover expert tips to make your PC faster than ever.
If you know of more fixes for the issue, share them with our readers in the comments section.
Microsoft has unveiled a new interface for Copilot and new voice options, gradually rolling out worldwide. The new interface adopts a sleek, intuitive, and good-looking style similar to the MacOS and iOS designs.
Alongside the new look, Microsoft has also added a new feature called Copilot Daily that provides news and information in a way that’s supposed to be more engaging to the user.
The AI model will allow users to read news from different sources, with Microsoft looking to position Copilot as the go-to news aggregator. The feature can be accessed by saying “daily news” to Copilot or tapping a button in the new UI.
The Redmond-based tech giant is also introducing four new voices: Canyon, Wave, Meadow, and Grove. This is similar to the recent improvements of Chat GPT’s Advanced Voice Mode, which were released not too long ago.
Each voice has a unique pattern and way of speaking to users. However, we don’t know yet if they will provide a different perspective when explaining topics—as you might know, Copilot has various modes, from creative to balanced.
Microsoft also wants users to access settings with the new interface in Copilot easily. By clicking on the profile, you’ll be greeted by many options to customize your new Copilot experience, as you can see below.
You’ll have the option to Sign In, but you can also type in your Name and select your preferred Voice, language, and theme—Day/Night (Light/Dark theme). Regarding languages, Copilot is now accessible in an array of new languages, as you can see below.
The new Copilot should now be available to all users globally on the web, and the new voice features will soon roll out to the Copilot app on iOS and Android. As far as we’ve noticed, they’re available only in certain countries and for a limited time.
However, those who have access to it agree that the new UI is heavily bugged, and many of its capabilities, including plugins, notebook mode, sharing, downloading, or image generation, don’t seem to work properly.
I think this overhaul of copilot is a complete ruined mess. There’s a choice of four voices. I hate the selection!! Copilot sounds under the influence speaking with pauses and slurred words. The ui is ruined. I won’t use it like this. And, it is like loosing a good friend you can’t associate with.
It’s worth mentioning that Microsoft is still rolling Copilot’s new UI out, so until it becomes widely avaialble, the interface might be riddled with issues. Meanwhile, when we tried to test it, it was unavailable.
SSDs have slowly taken over traditional HDDs for their speed and efficiency and Samsung being one of the top manufacturers, it’s only right to download the Samsung Magician tool for your Windows 11 PC to ensure you get the most out of your SSD.
What does Samsung Magician software do?
Performance optimization – Your SSD can slow down but with the Samsung Magician software, it will check its performance metrics and optimize it when necessary to maintain peak performance.
Health monitoring – You can check the health status of your SSD using Windows built-in tools but the results are usually vague. With Samsung Magician, you get a detailed report such as the temperature and lifespan remaining so that you can plan ahead to acquire a new SSD.
Firmware updates – Samsung Magician updates your SSD whenever ne firmware updates are available to ensure it remains compatible with your system and minimize errors.
Data migration features – If you’re looking to transfer data from your old drive to a new one, Samsung Magician facilitates this process allowing you to migrate your data and clone your drive.
Secure settings – Samsung Magician includes secure erase in case you want to delete data from your SSD without the possibility of restoration. You can also set up a fingerprint or password to enhance your data security and keep it from unauthorized parties.
The Samsung Magician software does what majority of SSD management software do. The only difference is that this is tailored specifically for Samsung SSDs and may come with additional features.
How do I download Samsung Magician for Windows 11?
The software only supports Samsung SSDs with MBR and GPT partition systems. You can convert MBR to GPT or vice versa if your SSD allows.
Some functions like secure erase may not work on older OSes and SDDs.
A firmware update will automatically shutdown your PC.
If you’d like to try out this software, we recommend getting the best Samsung SSDs for optimal performance. The software is particularly handy especially if you’re using second-hand SDDs and want to estimate its remaining lifespan.
Have you used Samsung SSDs before and what do you think of its dedicated SSD management software? Is it comprehensive enough? Share your thoughts with us in the comment section below.
Microsoft OneDrive is about to make searching for specific files across a large number of documents easier and quicker. The company is launching many features to help users narrow down and quickly find the needed files.
In a blog post, the Redmond-based tech giant introduced File Type Filter Pills, which allows users to narrow search results by specific file types such as documents, spreadsheets, and presentations.
A date filter lets you find files modified within a certain period, and a new location column in the search results shows you where your files come from, be it a specific site or another user’s OneDrive.
The search results page will also show who created a file and who last updated it, making it easier to track changes and coordinate with your team.
Lastly, Microsoft is adding the ability to switch between “All Files,” “My Files,” “Current Folder,” and “Current Library” on the search results page.
The new features will be available to OneDrive customers soon, and Microsoft says it plans to add more enhancements in the future.
Microsoft is also hosting an event on October 8th to detail its vision for OneDrive in the future. If you’re interested, you can find out more details about the event on Microsoft’s blog.
Windows 11 24H2 has been out for about a week, but Microsoft says it only runs at its best on new PCs. As Windows 11 is the most current version of the popular operating system, the Redmond-based tech giant recommends upgrading to this version by purchasing a new PC.
Recommended: New PC with Windows 11 – Windows 11 is the most current version of Windows. If you have an older PC, we recommend you move to Windows 11 by buying a new PC. Hardware and software have improved a lot, and today’s computers are faster, more powerful, and more secure. View Windows 11 PCs
It’s not that your current Windows 11 device cannot run it, but the company says your current PC might require a newer version of drivers for the hardware to run Windows 11, and not all hardware components might be compatible with the system.
Installing Windows 11 on your current PC – You can also see if your current PC meets the minimum system requirements for Windows 11. If it does, you can purchase and download a full version of Windows 11 Home or Windows 11 Pro or buy from a retailer. If you do choose this path, you’ll need to reinstall your apps. In some cases, a newer version of the app may be required. You also need to transition files, data, and settings. The installation overwrites the contents of your existing hard drive. It may be easier for you to first upgrade to Windows 10 and then upgrade to Windows 11.
To avoid such an issue, the best solution is to buy a new PC, as per Microsoft.
The company states it in an updated support page about Windows 11, where it recommends even more actions.
One such is to use OneDrive, its cloud storage service, to back up and protect your files and then sync them with your new PC. However, the hardware alternative (USB stick or external hard disk) is also a good option.
Windows 11 just reached its 24H2 version, and truthfully, with so many AI capabilities and changes to the OS, it might start to become laggier on older devices.
However, it’s worth mentioning that the Redmond-based tech giant’s recent Copilot+ PC devices might be a significant factor in the company’s provision of such updates.
If you’re a tutor or someone who creates guides often, the Scribe extension on your Chrome browser is a must-have. It takes away all the manual work of taking screenshots, uploading and coming up with a writeup to constitute a step-by-step guide.
What does the Scribe Chrome extension do?
The Scribe extension is supposed to make your work easier by automating tasks and saving your time. Once you install the Scribe Chrome extension, all you have to do is switch it on and continue with your process.
For instance, if you’re creating a how-to guide on using Google Docs, all you have to do is open the site and proceed as you would having turned on the Scribe extension.
Once you’re done, click on the Scribe extension again and stop recording. You can then retrieve the recorded training video and export it to your storage drive. If you don’t have enough space, Scribe integrates seamlessly with Google Drive where you can share it directly to other users.
How do I install the Scribe extension on Chrome?
Launch your browser.
Type chrome.google.com/webstore in the address bar and hit Enter.
Next, type Scribe in the search bar and from the results, hit the Add to Chrome button.
Confirm installation in the next dialog box then restart your browser.
You will see the Scribe icon on your top right corner. Click on it and select Start capture whenever you’re ready to start recording.
Additional tips for effective usage
Ensure you have a fast and stable internet connection if you want the Scribe extension to work effectively.
Scribe is meant to be used on the Chrome browser. You may find a workaround and install it on other browsers but this will limit its functionality due to compatibility issues.
Some advanced Scribe features require a subscription to access them. This may limit its usage in certain environments.
Looking for a reliable iTunes download method on Windows 11?
iTunes lets you sync your iPhone, iPad, iPod, and Apple Watch with your PC for backing up or transferring audio, photos, and videos. Without it, you won’t be able to access the internal storage of your Apple devices.
If you’re new to Windows 11 or unable to find a compatible app for your PC, you’ve reached the right resource. Here’s how to get it for free and set it up for file transfers in just a few steps.
Is iTunes Available for Windows 11?
iTunes is officially available for Windows 11 and 10 PCs. You can get it from an installer package or directly download it from the Microsoft Store.
However, it requires some manual configuration after installation.
Click on the Download iTunes for Windows now (64-bit) button.
Once the download is over, go to the Downloads directory on your Windows 11 PC.
Double-click on the iTunes installer to start the installation process.
Follow on-screen instructions.
If you’re using the above steps to get iTunes on a Windows 10 32-bit PC, use the download link in the Looking for Windows 32-bit? section on the portal.
This method is also suitable if you’re installing from a low bandwidth network area, provided you’ve downloaded the setup already.
Using Microsoft Store
Open the Start menu and look up Microsoft Store.
Click on it to open it.
Type iTunes in the Search apps… field.
The iTunes icon should show up in the search suggestions. Click on that.
Click the Get button.
The latest iTunes Windows 11 app on the Microsoft Store is about 230 MB.
Once downloaded and installed, you should see the Open button.
This approach is more beneficial than the package installer-based one as you don’t need to manually install anything. Microsoft Store automatically does that for you. However, you’ll need a reliable and fast internet connection to use the store app.
Setting Up iTunes Download on Windows 11
Here’s how you can configure iTunes for the first use:
Syncing an iPhone/ iPad/ iPod
Open the iTunes app from the Desktop or Start menu.
Click on the Agree button to continue.
Select Account on the iTunes menubar and click on the Sign In option.
Enter your Apple ID and Password to log in.
You might need to authenticate this log-in using an Apple device.
You can now view your iTunes account from the Account > View My Account option.
Connect a compatible Apple device using the Lighting or USB-C cable.
Authorize the sync between Windows 11 and an iPhone using your iPhone screenlock password.
You should now see a tiny device icon near the Music drop-down menu in the top-left corner. Click on that.
Congratulations! You’ve successfully set up iTunes on Windows 11. You should now see the device details, update options, backup options, etc.
Authorizing Windows 11 for iTunes
If you wish to access purchased content from Apple, you must authorize the Windows 11 PC. Follow these steps:
On the iTunes app, navigate to Account, and hover your cursor on the Authorizations menu.
Click on the Authorize This Computer option.
Enter the password for the already logged-in Apple ID.
If you wish to change the Apple ID, enter the username and password for that account.
You should see a message box confirming that the authorization has been successful.
Summary
Now you know the best approaches for iTunes download on Windows 11. You can follow the same steps to set up iTunes on a Windows 10 PC. We also have a guide on how to get iTunes for Windows 7, so don’t miss it.
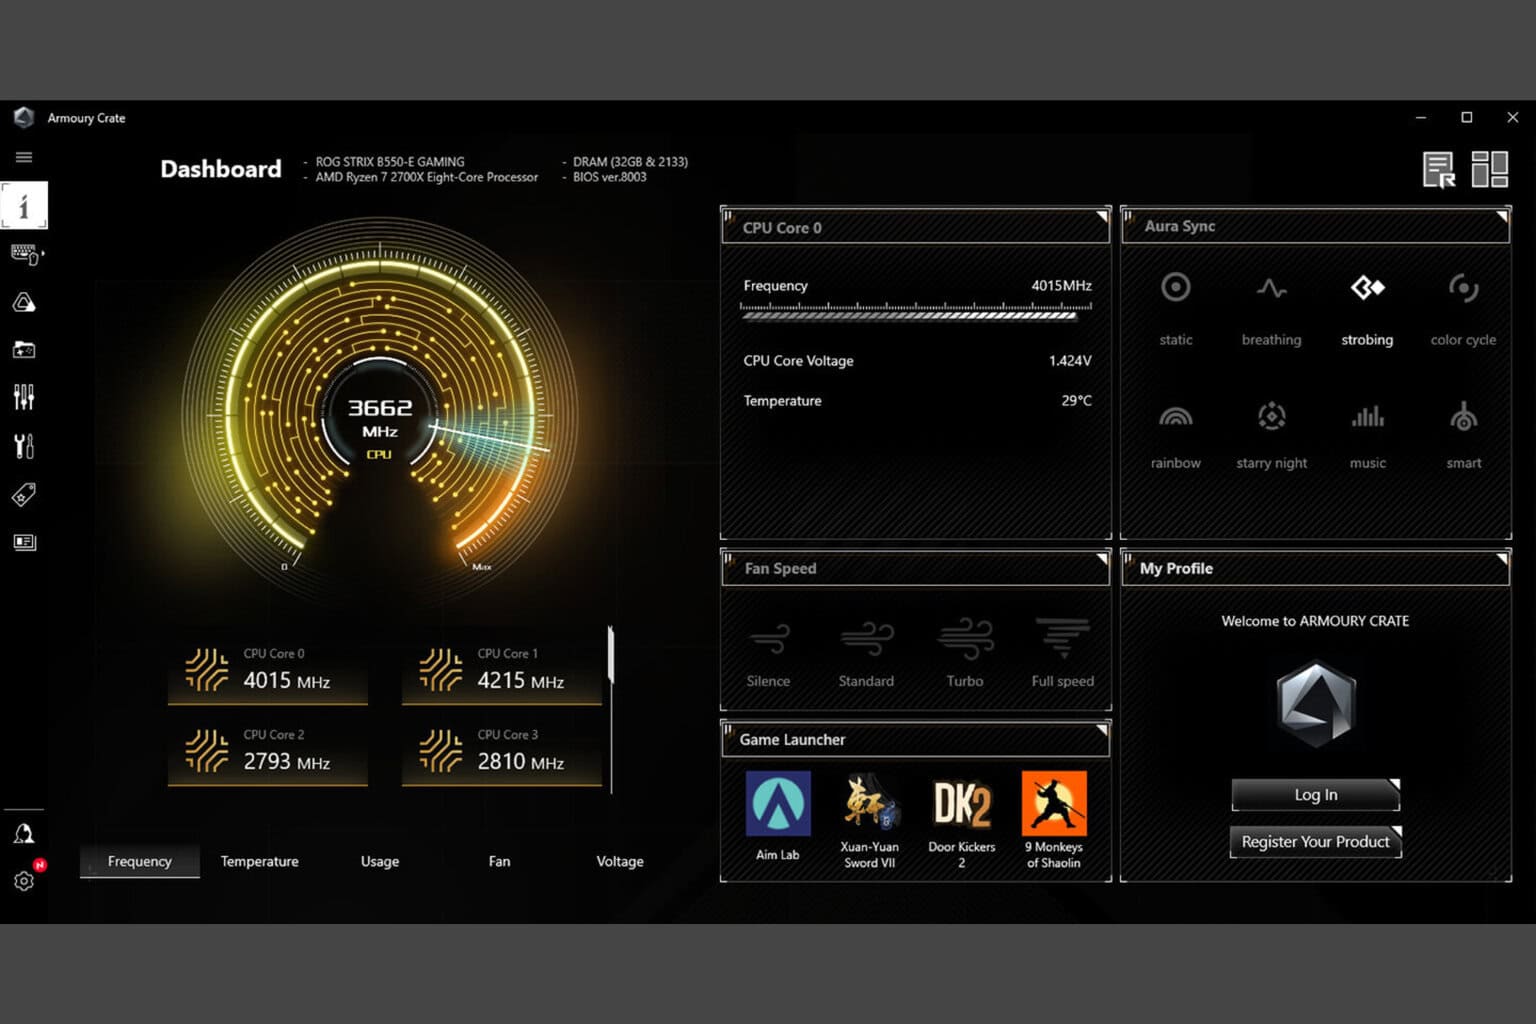
If you want to download Armoury Crate on Windows 11, it means you have an ASUS ROG or TUF gaming laptop or desktop. Armoury Crate has an extensive set of features so here’s how to download and install it.
Select your OS from the top (although it will be detected automatically), then click the Download button to get the latest version of the driver and app.
Once the download finishes, run the installer to get the app on your computer.
You may also install Armoury Crate from the official ASSUS ROG website. Here, you will also have the option of installing only the installer, or get the full package of approximately 3 GB and configure it manually, even if you’re offline.
Is Armoury Crate actually bad?
Armoury Crate was designed for those who want to tweak their ASUS ROG or TUF rigs, but it’s not necessary.
There is a Reddit thread full of comments from the users who consider it full of bloatware, or who are complaining that the tool consumes a lot of resources.
As we’ve highlighted in the beginning of this article, Armoury Crate comes preinstalled on certain ROG or TUF machines, but you can simply uninstall it from Settings > Apps > Installed apps if the software is causing any issues.
The problem is that some users claim that Armoury Crate is not fully uninstalling, leaving residual files behind. However, you can look and delete the files manually, or employ the help of a dedicated uninstaller.
FAQs
How do I download Armoury Crate on Windows 11?
You can get Armoury Crate from the official ASUS support site. Go to the Drivers & Utility page for your model, select Windows 11, and download the installer package.
Is Armoury Crate compatible with Windows 11?
Yes, Armoury Crate works on Windows 11. Make sure your system firmware and drivers are updated for the best performance.
Why won’t Armoury Crate install on Windows 11?
Installation may fail due to corrupted files, antivirus conflicts, or missing updates. Re-download the setup, run it as administrator, and disable antivirus temporarily if needed.
Can I update drivers using Armoury Crate on Windows 11?
Yes, the tool includes automatic updates for ASUS drivers, utilities, and even BIOS updates where supported.
How do I fix Armoury Crate not opening in Windows 11?
Use the official ASUS uninstall tool, restart your PC, then reinstall the latest version from the support website to resolve most issues.
Microsoft has released a new Insider Preview Build for Windows 11, KB5044386, to the Beta Channel. This build introduces “All” instead of “All apps” on the Start menu. It also brings a new Chinese font, security enhancements in Windows Search, and bug fixes.
KB5044386 brings a simplified Chinese font (Simsun-ExtG), which includes 9,753 ideographs supporting Unicode Extensions G, H, and I. Microsoft says the font consists of the highly requested character for Biangbiang noodles, which is said to be the most complicated Chinese character. However, Microsoft notes that some applications may not be able to display these new extension characters yet.
The company also says Windows Search runs IFilters in Less Privileged App Containers (LPAC) in the new build. LPACs are similar to app containers but deny even more permissions by default. The intention is that a process running in an LPAC has access only to the resources it needs, which helps minimize the potential damage a compromised process can cause by limiting its access to sensitive system components and data.
As for the fixes in the new Windows 11 Build 22635.4300, Microsoft has addressed a high-impact explorer.exe crash that affected Insiders while using their PC in the last few Beta builds. It also addresses an issue that was causing the items in the navigation pane in File Explorer to become very spread out (with unexpected padding between each item) for some people.
The new Windows 11 build, however, has several known issues, including:
After installing the new build, you may find that the Start menu’s all apps list has an unexpected spacing between items.
Live captions will crash if you try to use it.
Alongside the new Windows 11 build, Microsoft is rolling out an update for the system Clock app that includes two new clock widgets: countdown and timer. To get the new widgets, you’ll need to have the latest Clock app update from the Microsoft Store (version 11.2408.9.0 and higher).
Excel functions can be incredibly powerful, and many are wondering if it’s possible to use Excel XLOOKUP with multiple criteria. In this guide, we’re going to answer this question.
How can I use the Excel XLOOKUP function with multiple criteria?
1. Use concatenation
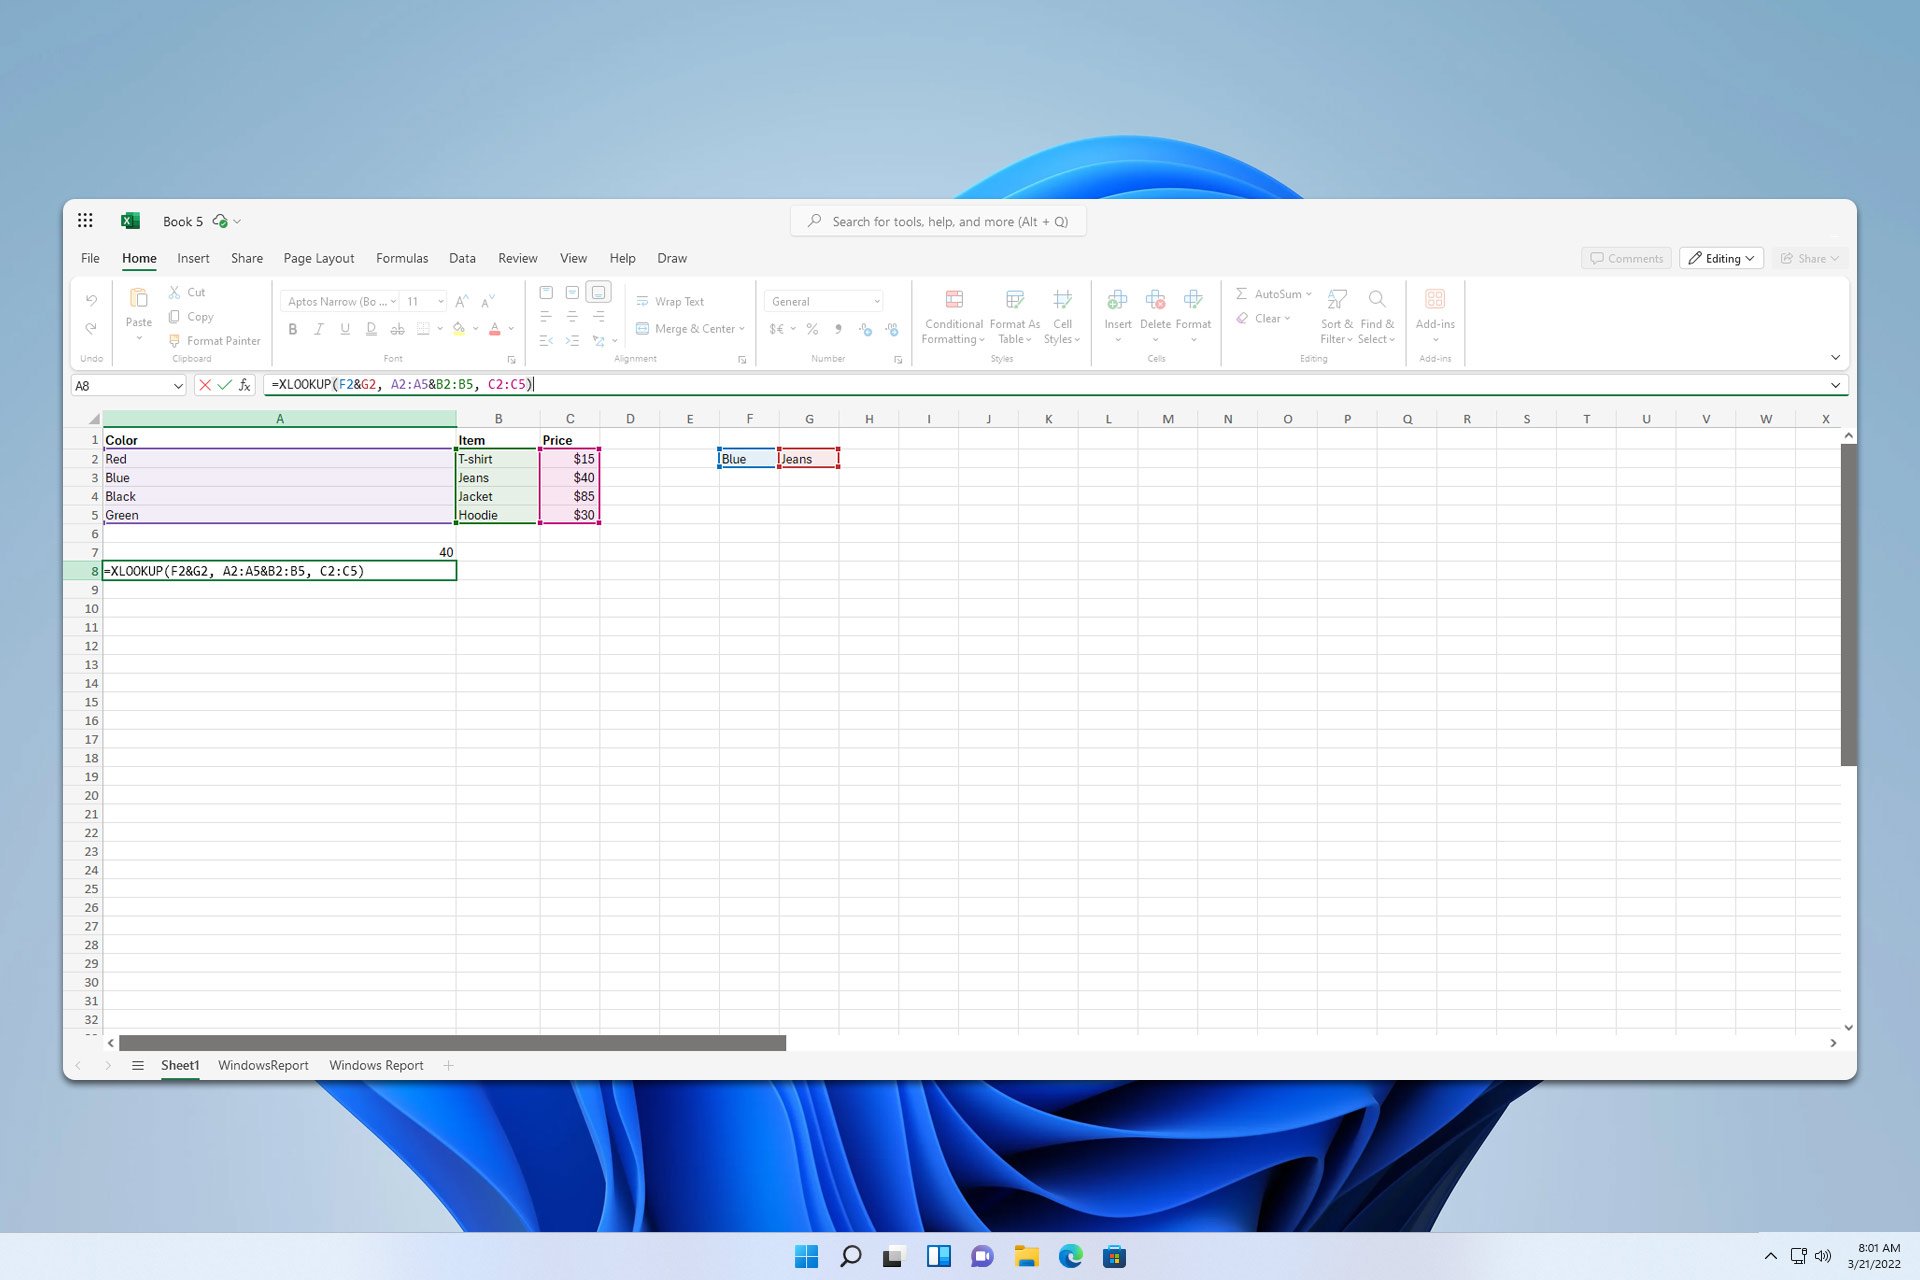
Create a table with multiple columns, like this. We’ll use F2 and G2 as lookup values.
Click the cell where you want to have your data and type the following: =XLOOKUP(F2&G2, A2:A5&B2:B5, C2:C5)
Press Enter.
Let’s explain what this formula does:
F2&G2 – Represents cells that we use for lookup values. Cells are separated by & indicating that we’re looking for multiple values.
A2:A5&B2:B5 – These are the ranges we’re searching for these two values. In this example, we’re searching columns A and B and rows 2 to 5 in each of these columns.
C2:C5 – Represents the range that will give us the return data.
Since Blue and Jeans are located on row number 3, the return value is 40.
2. Use Boolean expressions
We’ll use the same table from the previous example.
Select the cell where you want to show the data and paste the following: =XLOOKUP(1,(A2:A5=F2)*(B2:B5=G2), C2:C5)
Press Enter.
Let’s explain the formula:
1 – Indicates that the formula will run if the following statement is true.
(A2:A5=F2)*(B2:B5=G2) – Searches column A from rows 2 to 5 for a value that matches data from cell F2. It does the same in column B for the G2 value. * indicates that both conditions need to have a match to proceed.
C2:C5 – Returns the value from C from rows 2 to 5 that matches both values.
How does XLOOKUP work if there are multiple matches?
If there are multiple matches, XLOOKUP will always return the first match.
No, this function can only return a single value. If you want to return multiple values, you might want to try using the FILTER function.
Is XLOOKUP better than VLOOKUP?
Yes, XLOOKUP is superior to VLOOKUP in almost every way. To learn about the difference between the two, head to our XLOOKUP vs VLOOKUP guide.
How to apply XLOOKUP on multiple columns?
As shown in the solutions above, you need to use the & or * operator to scan multiple columns.
It’s pretty simple to use XLOOKUP with multiple lookup values as long as you follow the steps from this guide. To learn more about Excel, we have a guide on how to use INDEX and MATCH functions in Excel, so don’t miss it.
Now that you’re familiar with formulas, did you know that you can quickly apply a formula to the entire column in Excel? That’s right, and we have a guide that shows you how to do it.
Microsoft has announced the latest Windows 11 Insider Preview Build 26120.1930 (KB5044388) for the Dev Channel. The update, released on October 4, 2024, brings a host of new features, improvements, and fixes. Some upgrades are gradually being rolled out to Dev Channel insiders, while others are available immediately.
The new build includes many new features and fixes that offer a preview of the 24H2 update for Windows 11.
A new Clock app version with a countdown and timer widgets: The Clock app for Windows 11 is getting a new update with two new widgets, a countdown and a timer, which you can add to the widgets board to keep track of time. Microsoft says that the latest version of the Clock app (11.2408.9.0 and higher) will be rolling out to Dev Channel insiders over the coming days.
Windows Sandbox Client Preview available to all Dev Channel insiders: Microsoft announced the Windows Sandbox Client Preview feature in Build 26120.1843 last week, but it was only available to a subset of Dev Channel insiders.
Now, however, Microsoft says that all Dev Channel insiders should be able to try it out.
A new set of general improvements and fixes should improve Dev Channel insiders’ overall Windows 11 experience. A new simplified Chinese font called Simsun-ExtG contains 9,753 ideographs supporting Unicode Extensions G, H, and I.
Microsoft says the font includes a “highly requested” character for Biangbiang noodles, which the company says is the most complicated Chinese character. However, Microsoft notes that some applications might not be able to display the new extension characters yet.
With KB5044388, the Redmond-based tech giant has also allowed users to customize the Copilot Key, enhancing it with MSIX packaging and signing. This means it can offer extra protection when dealing with sensitive data.
This new setting can be found via Settings > Personalization > Text input, and enabling it on devices where Copilot is unavailable will not affect it.
Known issues in this build include an installation error (0x800f0983) and a bug that could cause the Start menu’s All Apps list to break.
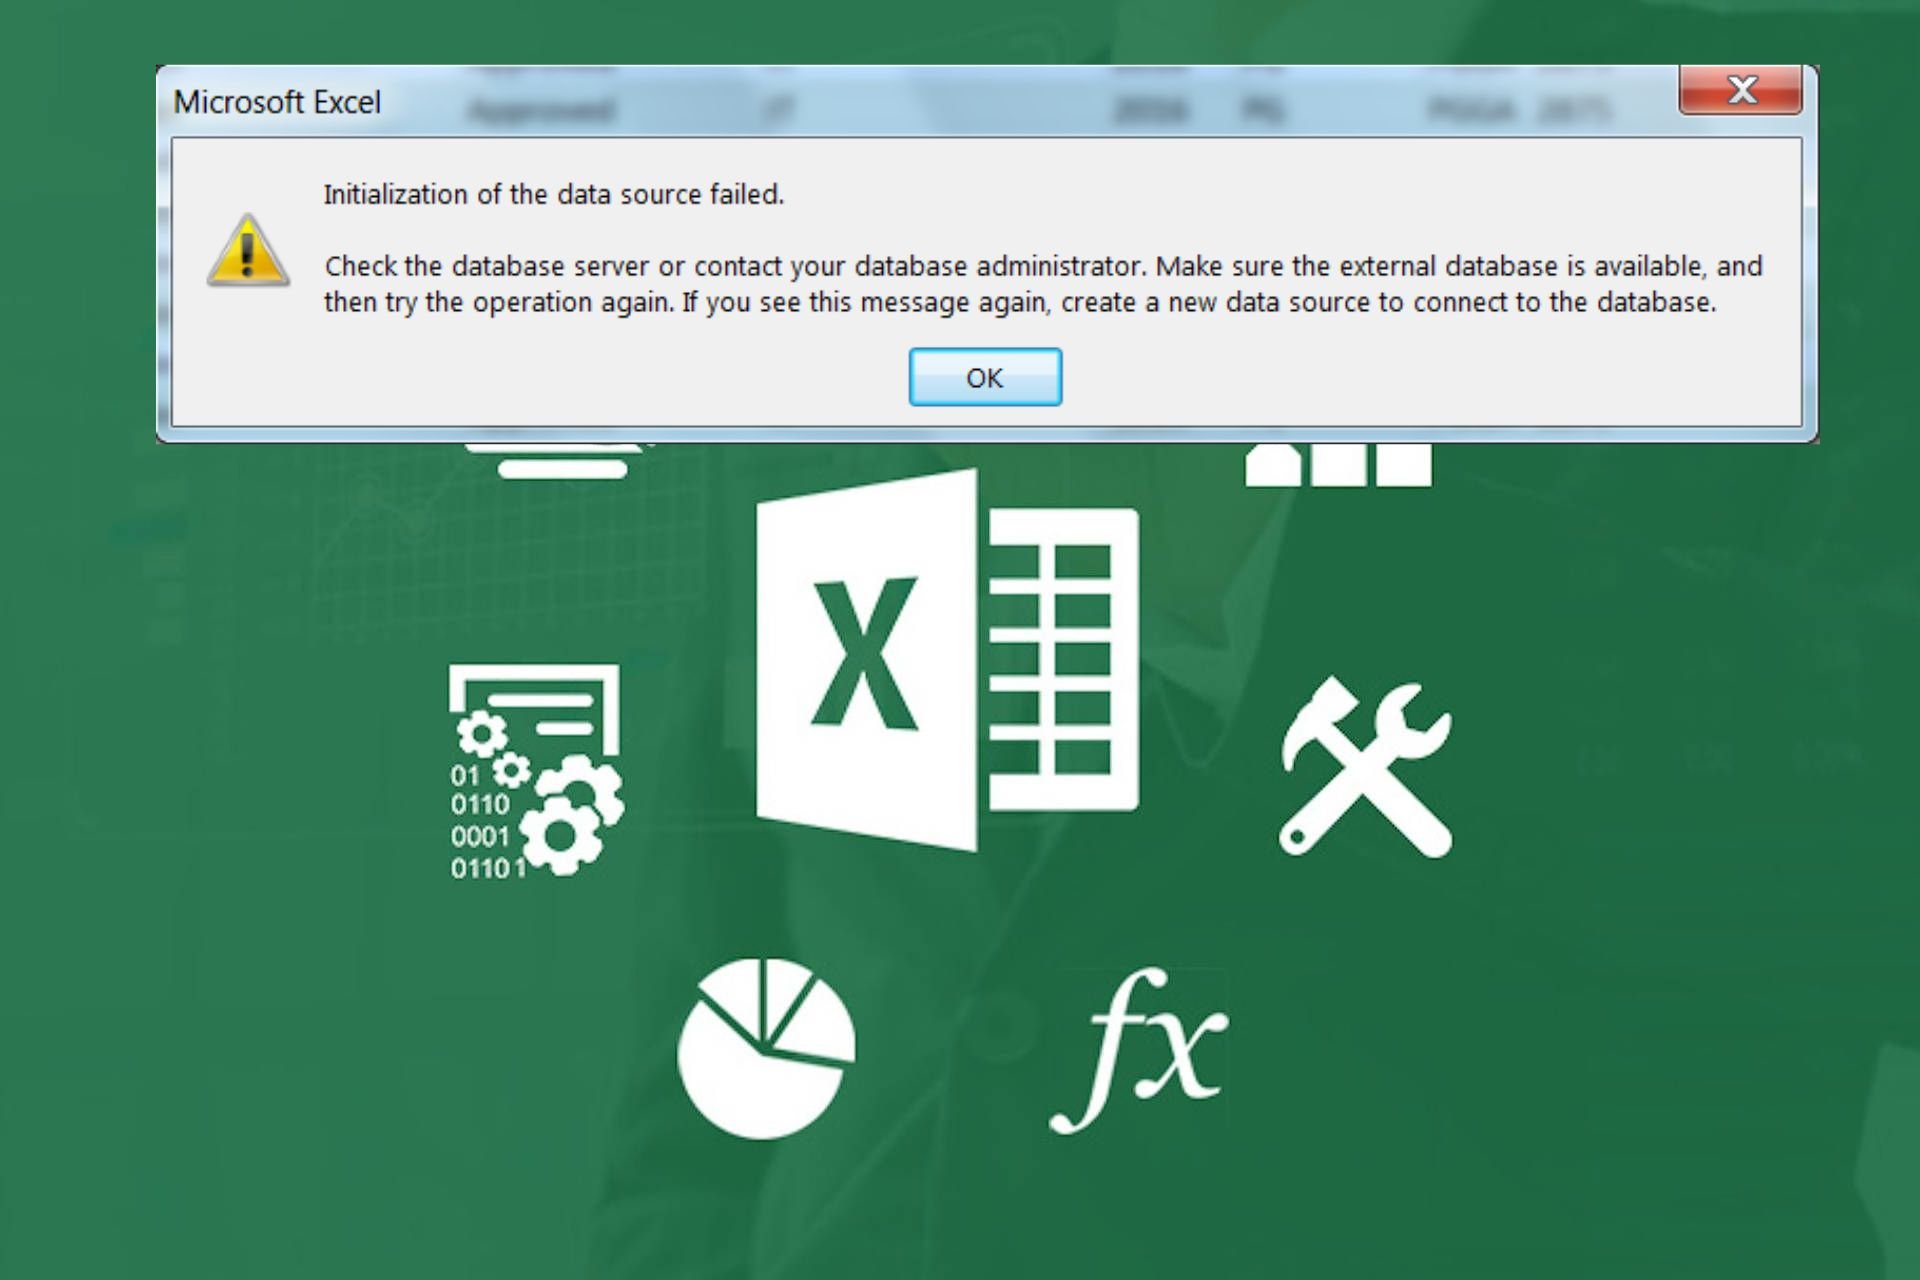
If you’ve shared your Excel file but one user gets the initialization of the data source failed error, they may be unable to download the shared data.
Excel allows you to leverage its Power Query add-in feature to combine data from various sources then using SharePoint, you can invite other users to collaborate on that document and make changes. The major cause behind this error is a mismatch in the Excel versions.
If one of the users is on an outdated version of Excel, compatibility issues are likely to arise preventing you from importing any data.
How do I fix the Excel error initialization of the data source failed?
1. Download the latest updates for Excel
Right-click the Start button and select Task Manager from the menu.
Navigate to the Processes tab, select the Excel app from the list, right-click on it, then click End Task from the drop-down menu. If there is more than one instance, end all of them.
Click on OK to confirm. Open Excel again and click on Files in the top-right corner.
Click on Account from the menu on the left, select the Update Options, then click on the Update Now option.
Restart your PC and go to the file location on your drive.
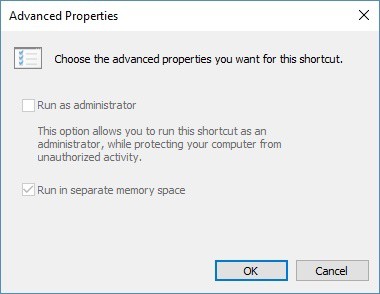
Right-click on it, select Properties on the menu and click on Shortcut.
Next, click on Advanced.
Select the box that says Run As Administrator and click on Apply.
Try opening the Excel file and check if the initialization of the data source failed error appears.
2. Map to the same drive on SharePoint
Press Windows + E, right-click on Network in the left pane, then Map network drive from the drop-down menu.
Check the drive letter from the Drive drop-down menu for the SharePoint site and ensure other users’ drive matches, then click on the Connect using different credentials checkbox. Then enter your SharePoint credentials when prompted.
Click on the Finish button.
3. Reinstall the Power Query add-in
Open the Outlook application, click the File tab, and select Options on that tab.
Select the Add-ins tab on the window that opens.
Under the Manage drop-down menu, go to COM Add-ins and press the Go button.
Select the Power Query add-in and then click the Remove button.
Select the SharePoint list listed within the window.
Press the Clear Permissions button.
Select the Close option.
Then users can re-enter the credentials for the SharePoint list.
5. Repair the Excel app
Click on the Start menu icon and select Settings.
Type Control Panel in the search bar and click Open.
Go to Programs and select Uninstall a Program.
Now, click Microsoft Office and select Change.
Finally, click Online Repair, then select Repair.
Alternatively, you can click on Windows Settings, select Apps, then click on Apps & features.
Locate Microsoft Excel/Office, click on the three ellipses, and select Advanced options.
Next, click on Repair.
Once the repair process is complete, restart your computer and check whether the issue still occurs.
6. Reinstall Microsoft Office
Hit the Windows key and click on Settings.
On the right pane, click on Apps, then on the left, Apps & features.
Scroll to Microsoft Office, click the three ellipses, and select Advanced options.
Click Uninstall under the Uninstallmenu.
Confirm your choice and follow the wizard to complete the process.
Download a fresh copy of Microsoft Office.
You can also check whether your Excel file is corrupted and take the necessary steps to repair it before resharing. As a rule of thumb, avoid importing large data sets in Excel as this can trigger this and the download did not complete error.
If none of these solutions work, consider exploring other ways to get data from other Excel files. It may not work the same as using the Power Query add-in but it can help with basic documents. For complex and advanced data, consider Excel alternatives.
While you’re doing all this, ensure you have a back up of your data. Data manipulation is a risky process and you may end up with a corrupted Excel file.
That’s it from us but do let us know if any of the solutions have helped you get rid of the Excel error initialization of the data source failed. Consequently, if you have any other tip that you think we should know about, drop us a comment down below.
Press Ctrl + Plus (+) several times to zoom in until you get your desired zoom level.
Press Ctrl + Minus (-) multiple times to zoom out to your preferred level.
If you want to return to the default view, press Ctrl + 0.
Via Discord Settings
You can also zoom in and out on Discord through its settings. Here’s how:
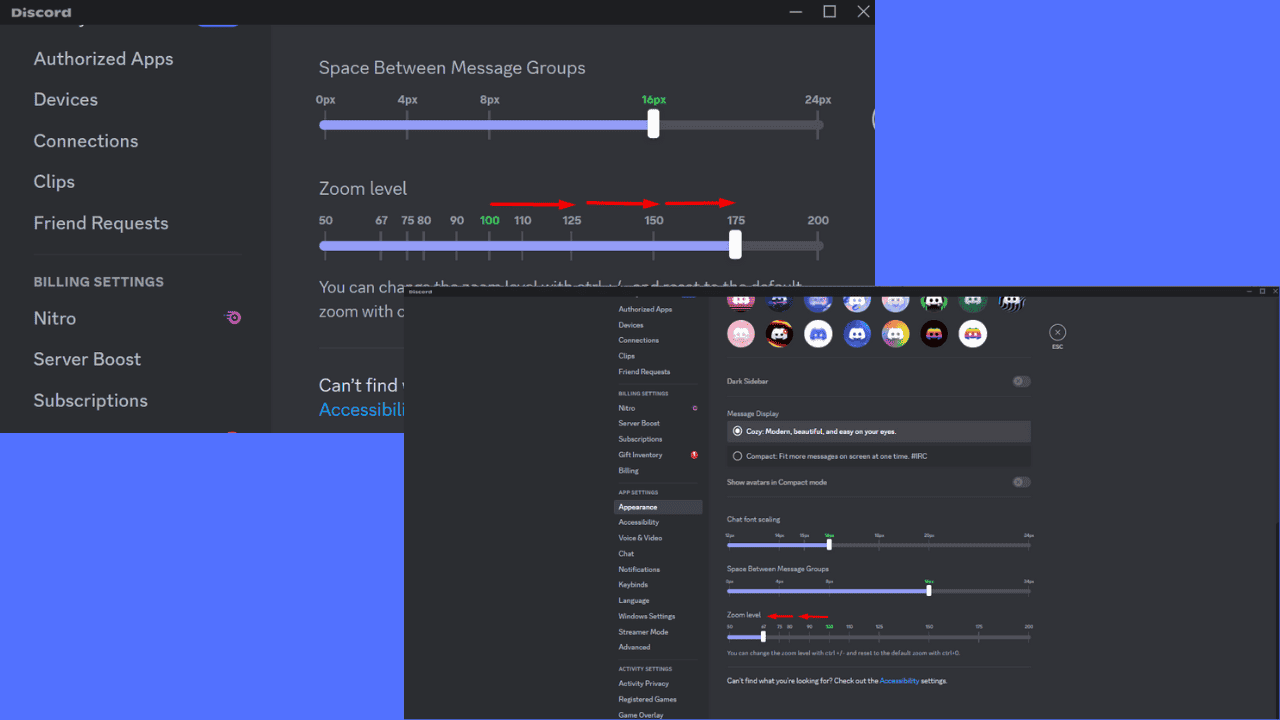
Log into your Discord account and tap the settings gear beside your username.
Click Appearance from the left panel.
Scroll the right panel to locate the Zoom level section.
Adjust the button by moving it to the right to zoom in.
To zoom out, move the button to the left.
Discord lets you zoom in and out to adjust your display for optimal readability and comfort. You can use keyboard shortcuts or settings. Also, learn to hide text, fix the grey screen, and turn off automatic emojis on Discord.
You can also explore new Discord tools by reviewing your activity recap through this guide on how to check Discord Checkpoint.
If you recently got a new MSI monitor or have reinstalled the OS and certain functionalities and features are not available, it could be the missing or incompatible monitor driver to blame!
Remember, under ideal an scenario, you don’t have to manually install the monitor drivers. The need only arises when features like HDR or refresh rate are not working. And the entire process shouldn’t take more than a few minutes.
Before you proceed, make sure to install all pending Windows updates!
How can I install the MSI monitor driver?
1. With a top-rated driver tool
The easiest option to download and install the MSI monitor driver is to use a reliable driver update software. It won’t just get you the latest driver now but also keep updating the driver when another version is released, ensuring seamless performance.
Such tools auto-scan the PC for installed drivers and then download any missing ones or update the outdated drivers automatically.
2. Use MSI Driver Utility Installer
When you first turn on a new PC (or one where Windows has just been reinstalled), check for pending Windows updates. This will launch the MSI Driver Utility Installer.
In the MSI Driver Utility Installer, tick the checkbox for I have read and agree to MSI Terms of Use, and then click Next.
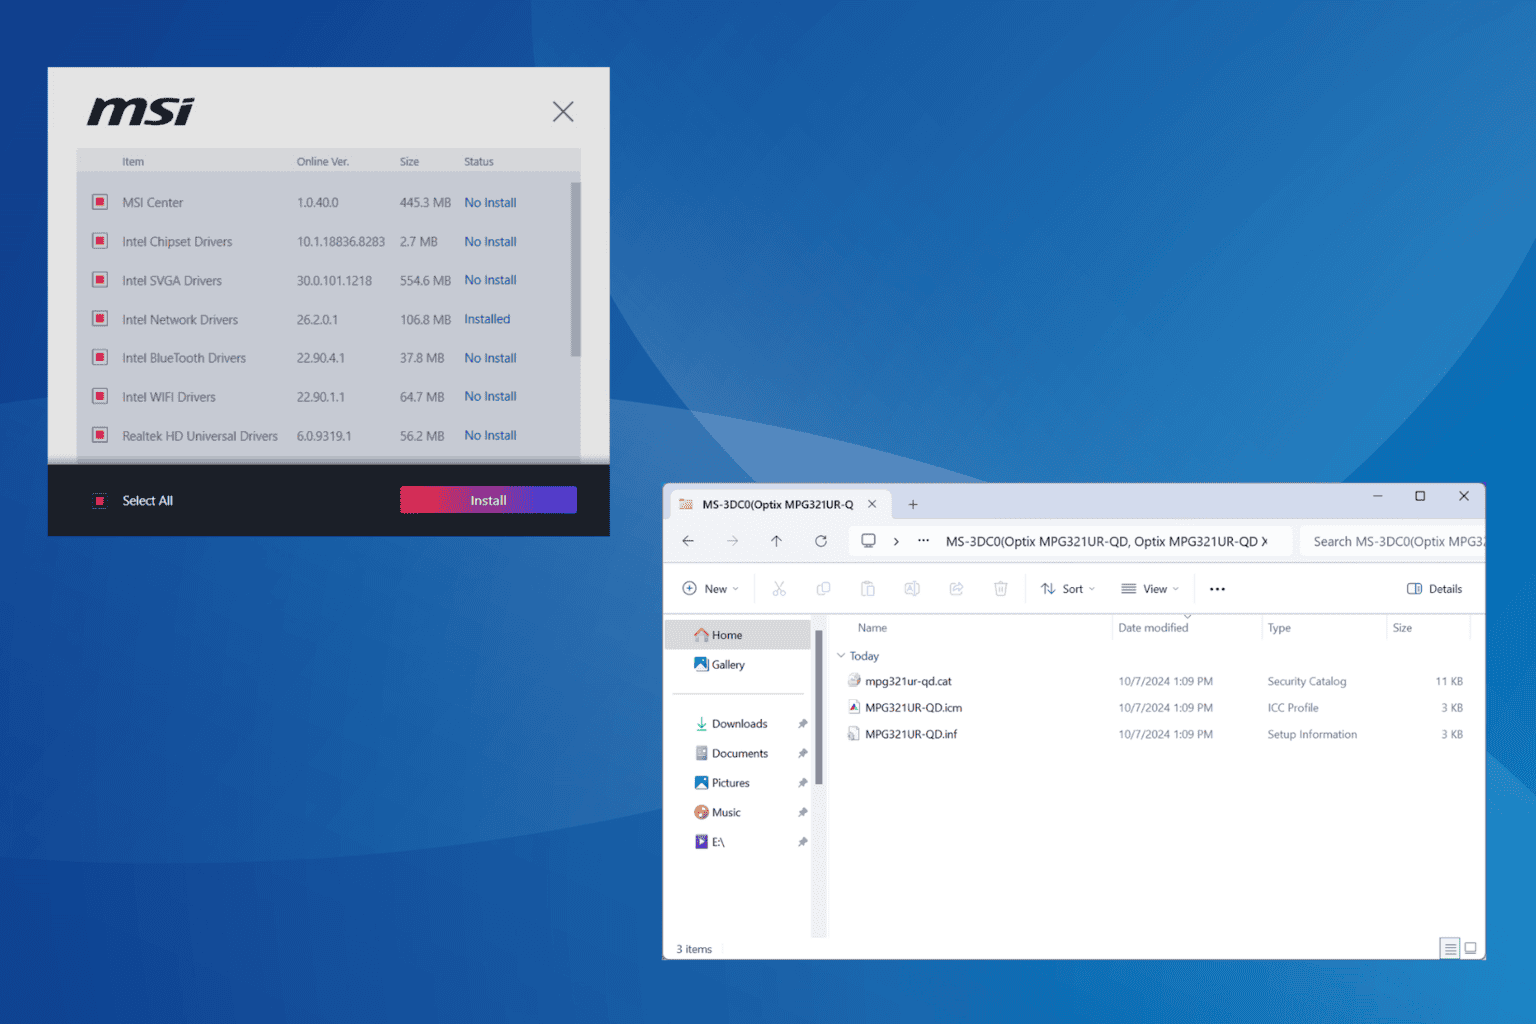
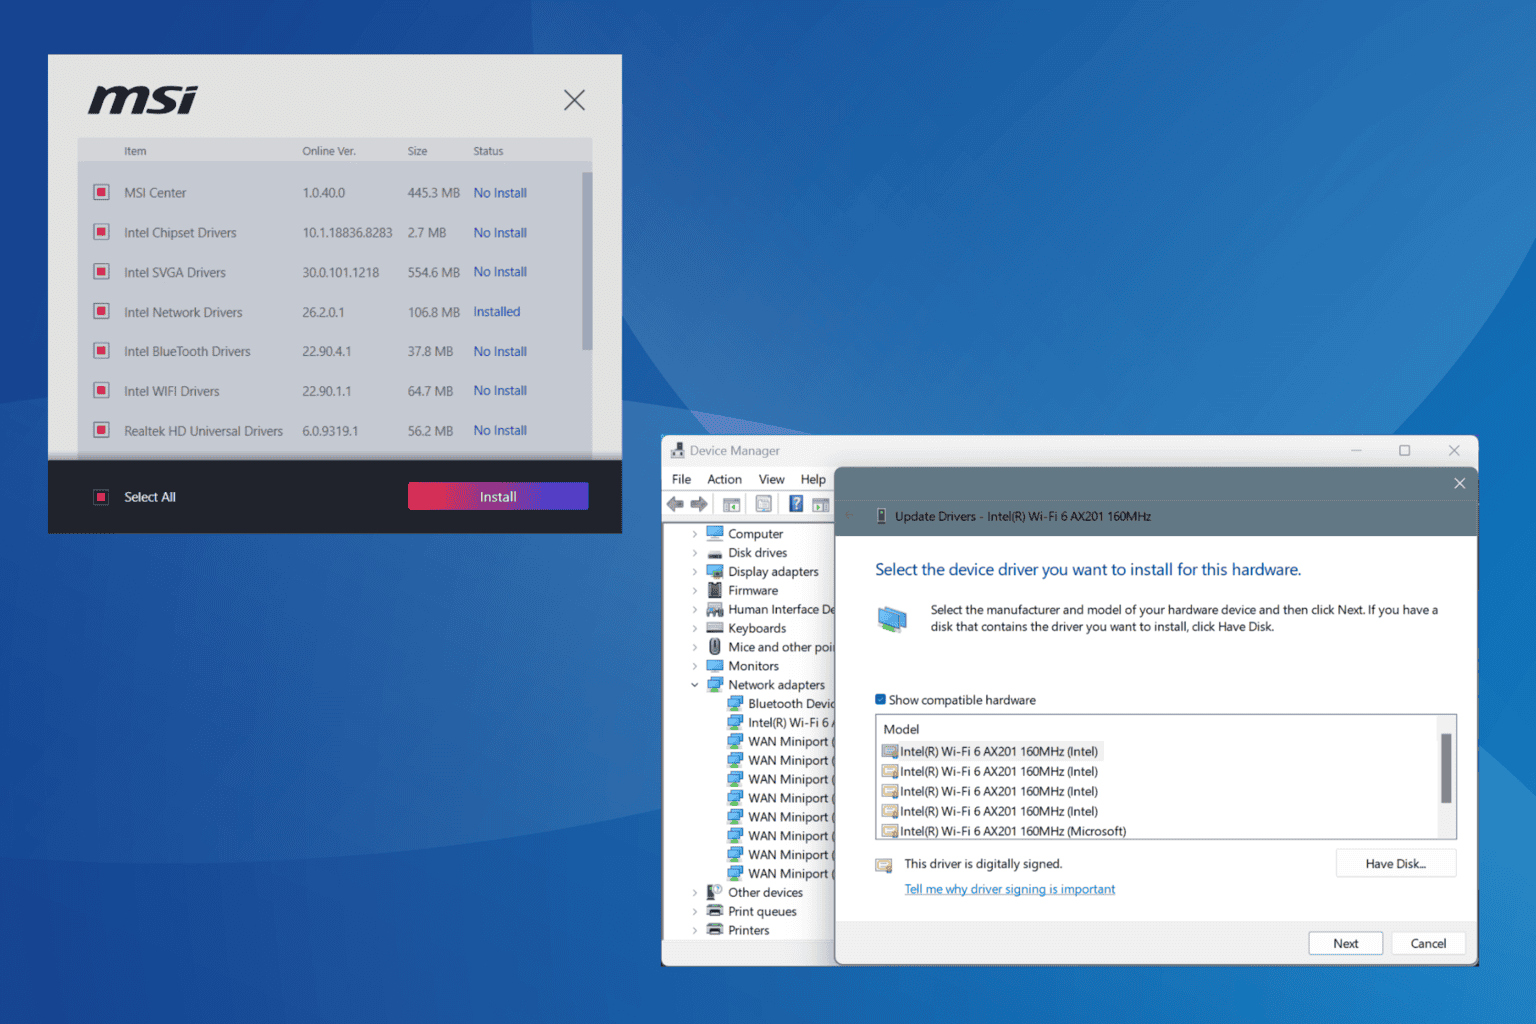
Now, tick the checkbox for Select All and then click on Install to download all the device drivers, including the MSI monitor driver for Windows 11.
Once done with the installation, click on Finish, and then reboot the PC.
The MSI Driver Utility Installer only launches during the first boot on a new PC or after reinstalling Windows.
If you terminate the process, it won’t launch again unless you make complex changes to the Registry. In that case, the methods listed next will help!
In the MSI Center, go to the Support tab, and click on Live Update.
Click the Scan button.
If the MSI monitor driver is listed, tick the checkbox for it, and click on Install.
Once done, restart the computer to apply the changes.
Even if you want to update the MSI monitor driver in Windows 11, using the MSI Center will get you the latest version from the manufacturer.
4. From MSI’s official website using Device Manager
Go to MSI’s official website and enter the product name in the top field or choose it from the dropdown menus.
In the Driver section under Drivers & Downloads, select your iteration of Windows from the dropdown menu, and then click on Download next to the driver.
Right-click on the download folder and select Extract all.
Set the extraction path, tick the checkbox for Show extracted files when complete, and click on Extract.
When the new File Explorer window opens, right-click on the address bar and select Copy Address as Text.
Now, press Windows + X to open the Power User menu, and select Device Manager.
Expand the Monitors entry, right-click on the MSI monitor, and select Update driver.
Click on Browse my computer for drivers to proceed.
Next, paste the path for the extracted driver files in the text field, and click on Next.
Once the driver installation is complete, reboot the PC for the changes to fully come into effect.
With Device Manager, you can manually install a new MSI monitor driver or update an existing one when running into issues. Remember, the latest monitor driver will improve the gaming experience!
5. Using Windows updates
Press Windows + I to open Settings, go to Windows Update from the navigation pane, and then click on Advanced options.
Click on Optional updates.
If a new MSI monitor driver is available, tick the checkbox for it, and click on Download & install.
Finally, reboot the computer.
Windows update is an easy way to update the drivers, but you don’t always get the latest version. Drivers here have to be first verified by Microsoft, which is a time-consuming process. So, manufacturers often upload the latest version on their website or offer these through dedicated apps.
With these methods, you can quickly download, install, and update the MSI monitor driver on Windows 11 or Windows 10. If you are installing drivers on an even older iteration of the OS, the ones for Windows 10 should work. And if they don’t, run the setup in compatibility mode!
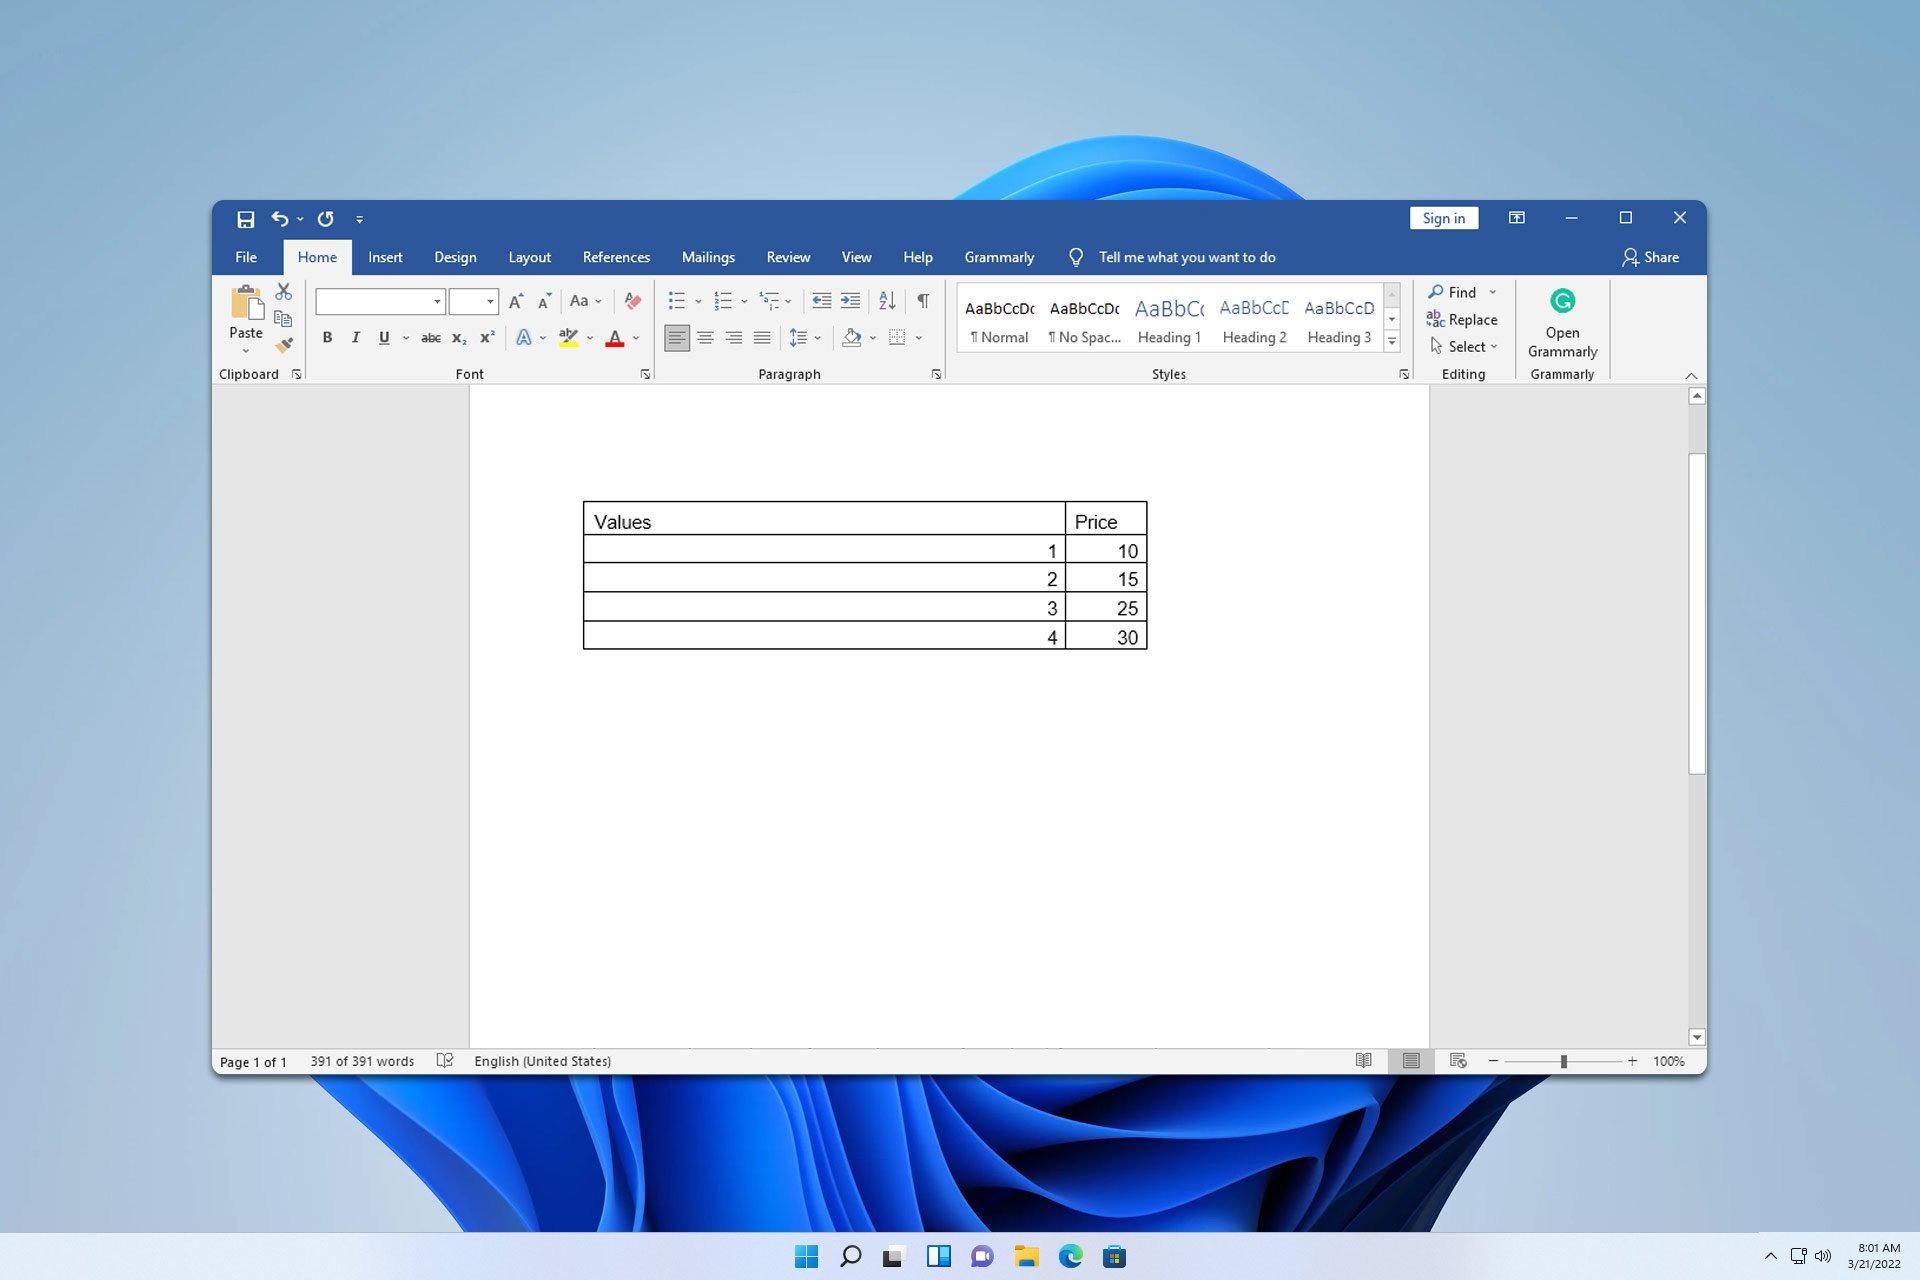
Did you ever want to move your Excel data to a Word document? If so, we’re pleased to inform you that this process is fast and simple, and in this guide, we’ll show you how to do it.
How do I import Excel into Word?
1. Copy the data manually
Open both Excel and Word.
Select the data you wish to copy, right-click it, and choose Copy.
Go to Word, right-click the document and choose Paste or press Ctrl + V.
The table will now appear in Word.
2. Insert table as an object
Go to the Insert tab and click on Object. Select an Object from the list.
Next, go to Create from the File tab and click on Browse.
Click on Convert and wait for the service to convert Excel to Word docx format.
Lastly, click on Download to download the file.
Keep in that this isn’t the only Excel to Word converter, but you might get different results depending on the service you use. Note that third-party services will store your files, at least temporarily, so it might not be a good idea to share any sensitive documents.
As you can see, it’s easy to import Excel data to Word, but if want to convert an entire document quickly, you might have to rely on one of many free Excel to Word converter tools.
To learn more about Excel, we have a great guide on XLS vs XLSX files, as well as a great guide on how to convert Excel to CSV, so don’t miss it.
If you want, you can also convert Excel to JPG, and we showed how to do that in our latest guide, so don’t miss it.
Many users want to learn how to make a Chrome extension and upgrade the capabilities of their browser. If you’ve got the coding part covered, it’s not so hard to create a Chrome extension.
How do I create a Chrome extension?
1. Create a manifest file
Create a new folder on your computer. This folder will contain all the files for your extension. Name it something like MyFirstExtension.
Inside your project folder, create a file named manifest.json. This file tells Chrome about your extension and its capabilities.
Add the following code to manifest.json: JSON{ "manifest_version": 3, "name": "My First Extension", "version": "1.0", "description": "A simple Chrome extension.", "action": { "default_popup": "popup.html", "default_icon": { "16": "icon.png", "48": "icon.png", "128": "icon.png" } }, "permissions": [] }
2. Create the popup HTML
Create a file named popup.html in your project folder. This file defines the structure of the popup window that appears when you click the extension icon.
Add the following code to popup.html: HTML<!DOCTYPE html> <html> <head> <title>My First Extension</title> </head> <body> <h1>Hello, World!</h1> </body> </html>
3. Add styles and JavaScript functionality (Optional)
If you want to style your popup, create a file named popup.css and link it in popup.html: HTML<link rel="stylesheet" type="text/css" href="popup.css">
Add your CSS styles in popup.css.
If you need JavaScript functionality, create a file named popup.js and link it in popup.html: HTML<script src="popup.js"></script>
Add your JavaScript code in popup.js.
4. Add an icon and load your extension
Add an icon image to your project folder and name it icon.png. This icon will be displayed in the Chrome toolbar.
Open Chrome and go to chrome://extensions/.
Enable Developer mode by toggling the switch in the top right corner.
Click the Load unpacked button and select your project folder.
5. Test your extension and publish it (Optional)
Your extension should now be loaded in Chrome. Click the extension icon in the toolbar to see your popup.
We hope this helps you get started with creating your own Chrome extension! Let us know if you have any questions or need further assistance in the comments below.
Normally, you don’t need to download Snipping Tool on Windows 11 because it’s preinstalled on your OS. However, if for some reason you are missing the app or uninstalled it, here’s how to get Snipping Tool for Windows 11.
How do I download Snipping tool on Windows 11?
1. Get Snipping Tool from Microsoft Store
Click on the Microsoft Store icon on the taskbar or type microsoft store on the Search app to find and run it.
In Microsoft Store, type snipping tool in the search bar and click the Get button to download the app.
You may also open the Snipping Tool page from the Microsoft Store online page in a browser. You will be redirected to open the Microsoft Store app on your PC.
2. Use PowerShell to download Snipping Tool
Click the Start button, type powershell and click on Run as administrator from the results.
Type or paste the following command and press Enter to install Snipping Tool: Add-AppxPackage -register "C:\Program Files\WindowsApps\Microsoft.ScreenSketch_11.2209.2.0_x64__8wekyb3d8bbwe\appxmanifest.xml" -DisableDevelopmentMode
If that doesn’t work, try reinstalling all preinstalled apps by running the following command: Get-AppxPackage -allusers | foreach {Add-AppxPackage -register “$($_.InstallLocation)\appxmanifest.xml” -DisableDevelopmentMode}
If the above command for reinstalling Snipping Tool doesn’t work, check the Snipping Tool’s ID. Make sure your command includes the full and exact Snipping Tool ID specified in the app list. You can view that list by executing this command: Get-Appxpackage –Allusers
You can also find the Snipping Tool kit online on third-party websites, but we don’t recommend using that method because those sources may not be always trusted.
The personal.xlsb is an important but hidden file that helps you automate some tasks and saving macros but you may encounter an error that it is locked for editing when you attempt to launch an Excel file.
Also, if you’re not using an administrator account and don’t have requisite permissions to access these files, you may experience this error.
How do I fix the Excel error personal.xlsb is locked for editing?
1. Hide the preview pane
Open File Explorer from the taskbar.
Click View on the command bar, and select the Show submenu.
Make sure that Previewpane is disabled here by removing the checkmark against it.
2. Enable the DDE feature
Right-click the Start button and select Task Manager from the menu.
Navigate to the Processes tab, select the Excel app from the list, right-click on it, then click End Task from the drop-down menu. If there is more than one instance, end all of them.
Click on OK to confirm. Open Excel again and click on Files in the top-right corner.
Launch the Excel and go to Options.
Click on the File menu > select Options.
Go to the Advanced tab > scroll down to the General section > check Ignore other applications that use Dynamic Data Exchange (DDE). If this option is already unchecked, you should first enable it, restart Excel, and then disable the option.
Save the changes and restart Excel.
The DDE feature allows data to be shared between Excel files so enabling it allows other Excel instances that may be using the personal.xlsb workbook to be shared and get rid of the it is locked error.
3. Save file with a different extension
Press the Win + E keys to open the File Explorer.
Duplicate the file in case of any errors.
Launch the Excel file and click on File in the top menu bar.
Click on Save as from the menu on the left to prompt the available locations.
Try saving the file with a the .XLSM format and check if it works.
Alternatively, right-click on the target file and select Rename. You can alternatively, click on the file and press F2 to rename it.
Change the file extension from XLSM and hit Enter.
Select Yes in the warning prompt that appears, and the file format will be changed.
The idea behind this is that the XLSM format is already macro-enabled so the personal.xlsb is locked for editing error won’t be triggered because File Explorer does not support the preview of such workbooks due to security concerns.
4. Recreate the Personal.xlsb file
Quit all Excel processes and locate the personal.xlsb file location usually in: C:\Users[UserName] \AppData\Roaming\Microsoft\Excel\XLSTART
If you can’t see the file, hit the Windows + E keys to open File Explorer.
Locate the parent folder, right-click on it, and select Properties.
Navigate to the General tab, uncheck the Hidden box, click Apply, then OK.
In the next dialog box, check the Apply changes to this folder, subfolders and files option box, then hit OK.
Go back to File Explorer, click on View>Show>Hidden, and ensure the tick is there.
Cut it and move it to a different location. You can also delete it. but just ensure you have a back up of your files.
Open your Excel sheet and see if the personal.xlsb is locked for editing error persists.
Note that its storage location also plays a part in this error so if it is not in its rightful folder, you may be locked out from editing. Moving the personal.xlsb file to another location will force it to be recreated the next time you restart Excel.
Click on Unprotect Worksheet and Unprotect Workbook.
Go back and click on the Review tab.
Under the Protect section, click on Unshare workbook option.
Next, start Excel in Safe Mode by clicking the Search button from the taskbar, type excel, then right-click on it and select Open file location.
Press and hold the Ctrl key and double-click the Excel file.
Click Yes when you’re prompted if you want to open Excel in safe mode.
6. Repair the Excel app
Click on the Start menu icon and select Settings.
Type Control Panel in the search bar and click Open.
Go to Programs and select Uninstall a Program.
Now, click Microsoft Office and select Change.
Finally, click Online Repair, then select Repair.
Alternatively, you can click on Windows Settings, select Apps, then click on Apps & features.
Locate Microsoft Excel/Office, click on the three ellipses, and select Advanced options.
Next, click on Repair.
Once the repair process is complete, restart your computer and check whether the issue still occurs.
If you’re out of luck with any of our recommended solutions, try opening the Excel sheet with an Excel alternative. These offer a higher compatibility scale so the probability of your files failing to open is almost zero.
This Microsoft Word vs Pages comparison will help you choose the best personal and professional productivity tool. If you find yourself often juggling between the two, read on.
I’ve tested both software for over a week to compare their features head-to-head. Let’s find out which one suits your needs more!
Microsoft Word vs Pages: Overview
Find below a quick summary of both of these products:
Microsoft Word
Microsoft Word is the leading document editing software. It’s been a standalone tool for many years, then included in various iterations of workplace productivity products, like Microsoft Office, Office 365, and now Microsoft 365. It’s also available as a web app for browsers and a mobile app for Android and iOS devices.
You can try out its features for free for 30 days as a part of the Microsoft 365 trial subscription package. However, the web and the mobile apps are free for all users. Hence, it has become an indispensable document-processing software in most business workstations and personal PCs.
Pros
Cons
Many reputable publishers accept Word documents over any other format.
Word has a moderate learning curve.
Its basic version is available for free as a web app.
It can be challenging to find the right formatting tools.
Microsoft 365 offers affordable subscription plans for individuals, home users, and small businesses.
It’s resource-heavy when considering standalone desktop usage.
It’s available for various operating systems, like Windows, macOS, Android, and iOS.
It’s often challenging to align tables and other non-text objects.
MS Word offers a wide range of document authoring, editing, and formatting tools.
Word doesn’t allow saving the document in other formats like PAGES, except for PDF.
It can sync documents between devices via OneDrive.
Sharing documents from the offline app is a bit complicated.
Apple Pages
Conversely, Apple Pages is the word processing app of the iWork productivity tool package. It’s the native document creation and editing software for most Apple devices. However, there’s an online version delivered through iCloud that’s open for everyone for free.
It’s less popular than Word due to the restrictions of its standalone usage on Apple devices.
Pros
Cons
Free for all Apple device users as well as iCloud account owners.
Its usage is limited to organizations and individuals who prefer Apple.
It’s a lightweight desktop app.
You won’t find many publishers who specifically prefer the PAGES file format over DOC or DOCX.
Pages comes factory-installed with all compatible Apple devices.
The standalone app isn’t available to non-Apple device users.
It shows all relevant formatting tools contextually so you don’t need to search for them.
It has fewer templates compared to Word.
You can convert PAGES files to Word, PDF, EPUB, and other popular document formats.
Pages isn’t available on Android smartphones and tablets, unlike Word.
It has an intermediate-level learning curve compared to Microsoft Word.
Integration with third-party apps and systems is limited.
User Interface and Experience
Microsoft Word’s iconic UI includes an elaborate ribbon menu on the top. Its tabbed menus, like File, Home, Insert, Draw, etc., take you to more granular options.
The actual document editor is in the middle with default rulers on the top and left side of the canvas. When you select non-text objects, like pictures, shapes, tables, additional tabbed menus open on the ribbon. If you right-click on such an object and select Format Shape, Picture, or other options, a right-side navigation panel opens for visual customization.
For text editing, the most commonly used tools show up on the right-click context menu for quick access.
However, the user experience has much scope for improvement. For instance, Microsoft has overburdened the software with so many features that it might take months for you to explore them all. Also, remembering all the standard document formatting features is a challenge.
Meanwhile, working on Pages is a cakewalk. It mainly focuses on authoring and editing space. It opens a larger canvas compared to Word. There’s no ribbon menu on the top to distract you.
Instead of the ribbon menu, Pages analyzes the content or object you’ve selected on the editor and accordingly shows the tools you’ll probably use.
However, if you need more options, you can access them from the sleek menubar on the top. It shows fixed menus, like Insert, Table, Chart, etc., and doesn’t change with the content you select on the canvas.
Also, these menus don’t open another bulky toolbar as it does on the Word app. Instead, Pages menus open as a context box so you can quickly go through all the available commands.
Various visual formatting functions aren’t visible by default. You can expand the right-side navigation menu, Document, by clicking on it. It gives you options like Printer & Paper Size, Page Orientation, Header, Document Body, Headers & Footers, Bookmarks, and more.
Features
Now, let’s go through the main features together.
Ready-to-Use Templates
Microsoft Word offers a wide variety of templates for professional and personal needs. For the standalone app, you’ll need an internet connection to explore and download them.
You can easily access them from the File > New menu. They’re organized in the following niches:
Business
Cards
Flyers
Letters
Education
Resumes and Cover Letters
Holiday.
All these sections contain over 50 templates.
You can either go to any of the above menus and look up the template you need or simply search for a document type name, like Resume in the Search for online templates field.
If you need access to more options, you can visit the Microsoft Create portal for more free pre-made Word formats.
Compared to MS Word, the number of templates in Pages is limited. However, most are truly helpful compared to hundreds in the Word app.
Accessing them is also easier. You simply need to hit Command and N to instantly go to the template library. Now, you can scroll down to explore the document types and premade formats within those sections. You can also find a list of the document genres in the left-side navigation panel.
Here are the niches you can explore on the Pages app:
Reports
Books – Portrait
Books – Landscape
Letters
Curricula Vitae
Flyers & Posters
Newsletters
Cards
Envelopes
Business Cards
Certificates
Miscellaneous.
Overall, the premade documents look a bit more polished compared to those in Word.
Cloud Storage and Syncing
Microsoft Word uses OneDrive cloud storage. However, the process is a bit challenging. You must sign in to the standalone desktop app using the same account you use for OneDrive online.
Then, you must also turn on the Autosave feature on the offline document. Now, here comes the first challenge. Often, your PC fails to register and show the logged-in account in the Word app’s Connected Services section of the Info menu.
Even if it does show up, the online syncing isn’t user-friendly at all. You might end up creating multiple editions of the same document.
Consequentially, you’ll get confused about which one to continue with. However, online syncing works better between the Word web version and the Android or iOS app.
On the other hand, syncing and collaborating with Pages is a breeze thanks to iCloud. You don’t need to manually add any accounts to sync content to iCloud.
As you sign on to a Mac using your Apple ID, it automatically syncs the Pages data to iCloud. The synced document appears instantly in the Open Recent menu.
Integrations and Extensions
Microsoft Word is highly popular for its extensive integration options. Installing third-party apps is also easy through the Developer tab’s Add-Ins command. It takes you to a curated store of safe extensions.
Contrarily, Pages is very limited when it comes to integrations. Since it isn’t popular with cross-device users, there isn’t a marketplace for integrations either.
You can, however, use the Shortcuts app of Mac to create triggers and actions-based integrations. You can put various Pages actions, like editing a paragraph, formatting a table, formatting a picture, editing a graph, etc., in the actions field and trigger it with an app or input in the trigger box. However, this requires in-depth knowledge of Apple Shortcuts.
Automation Capabilities
MS Word is highly regarded for its support for various automation methods. The first and foremost is the Word VBA Editor. You can write VBA scripts directly in the Word app to create macros. Then, save these macros in your Microsoft Office installation directory for future use.
For example, you can create a VBA macro that will automatically create a new document, insert a title in bold and centered, add a paragraph of text, and save it.
Besides VBA, you can also use Microsoft PowerAutomate, Quick Parts, Building Blocks, Mail Merge, and Microsoft Graph API for advanced automation.
On the other hand, automating tasks in Pages is only for advanced users and developers. You’ll need to learn tools like AppleScript, macOS Automator, JavaScript (JXA), etc.
Pricing
If you wish to use Microsoft Word to its fullest potential, you’ll need a paid subscription. However, you can’t just buy Word these days. You must get the whole Microsoft 365 subscription which comes in the following tiers for home and business users:
Home:
Microsoft 365 Personal: Costs $6.99/month for up to five devices, including PC, Mac, iPad, etc.
Microsoft 365 Family: Pricing starts at $9.99/month for similar services as the first one, but you get 6 TB of OneDrive storage.
Business:
Microsoft 365 Business Basic: This is the most affordable option costing $7.20 per user/month.
Both Business and Home options come with discounted prices for annual subscribers. Everything renews automatically.
However, Apple Pages is free for everyone who owns a compatible Apple device or an iCloud account.
User Support
You can get help from Microsoft experts as a home or business user via the Microsoft 365 support portal.
You may find different support channels depending on your region. US, CA, and UK users can count on email, chat, and phone support.
Apple offers a phone support channel. You simply need to visit the Get Support Devices portal. Choose the device you’re using right now to access Pages and the phone option will show up at the bottom.
Microsoft Word vs Pages: The Verdict
Hopefully, this in-depth Microsoft Word vs Pages comparison has helped you make up your mind.
Overall, Microsoft Word is better than Pages in most use cases because of its popularity, platform support, and automation. Though its editing tools and ease of use aren’t the best, you can still learn the tool gradually.
You can get MS Word on Mac, iPad, and iPhone, so syncing and collaboration shouldn’t be any challenge.
However, if you only prefer Apple products, you should stick with Pages.
Which one do you prefer? Comment below to let everyone know.
When working in Excel, sometimes it’s necessary to reference another sheet to get specific data from it. If you’re not familiar with this feature, today we’re going to show you how to use it.
How do I reference another sheet in Excel?
1. Manually select the sheet
Select the cell in which you wish to reference another sheet.
Type = and switch to the desired sheet.
Select the values you wish to use.
Go back to the original cell. You should now see that the formula field and cell have changed to include the formula.
Press Enter.
2. Enter the sheet name
Select the cell you wish to use.
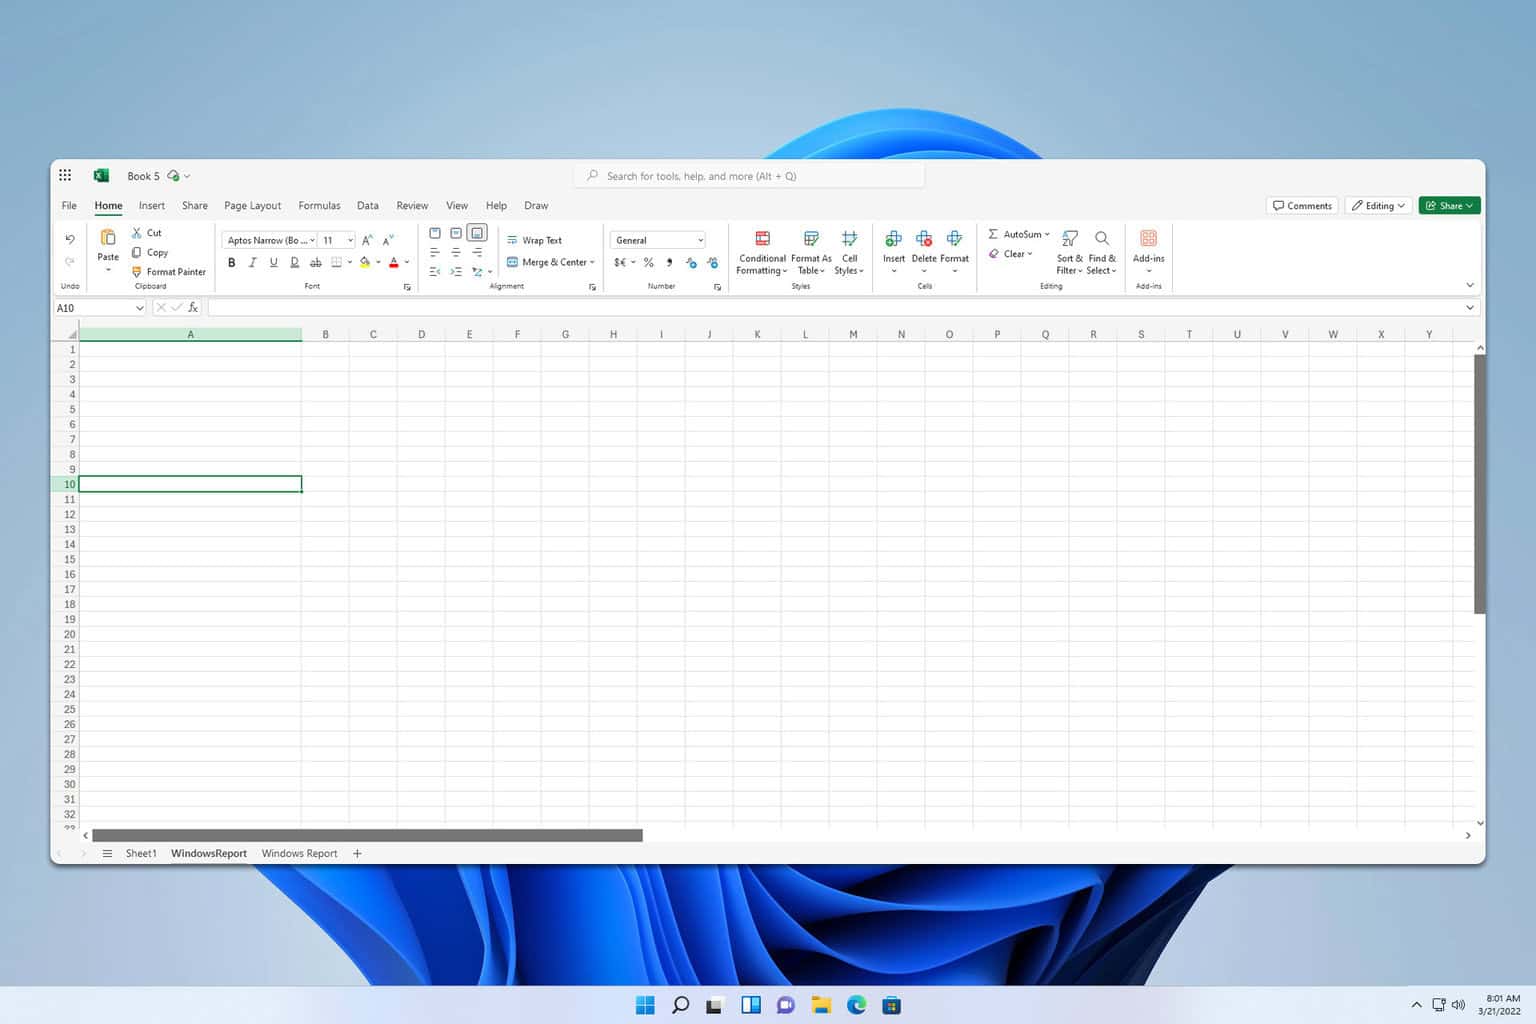
Type =WindowsReport!A1 or if your sheet has a space in its name use the following formula =’Windows Report’!A1
Press Enter.
This method is useful if you know the sheet name and the cells that you’ll be using.
How do I reference another sheet in the Excel workbook?
Ensure both workbooks are open.
Select the cell you want to use.
Type = and switch to the second sheet.
Select the field you want to use.
Go back to the original sheet and press Enter.
You can also use the following formula to access an open xlsx file:=[WindowsReport.xlsx]Sheet1!A1
If the file isn’t currently open, use =C:\Documents\[WindowsReport.xlsx]Sheet1!A1
As you can see, it’s easy to reference another sheet in Excel, and the best way to do that is manually. However, you can also do that with a formula if you know the cell numbers and sheet names.
To learn more about this subject, we have a great guide on how to get data from another sheet in Excel that shows you how to use different functions.
Bluetooth drivers are a critical part of any healthy PC, allowing effective relay of commands between the OS and the Bluetooth adapter. So, it’s recommended to have the latest drivers. But how do you download and install the latest version of the MSI Bluetooth driver?
There are several ways, some automated while others requiring a manual approach. Automated methods are also preferred due to lower risks, primarily the reduced likelihood of installing incompatible drivers. Let’s get straight to the methods, and you can choose one that works best!
How can I download MSI Bluetooth drivers on Windows?
These auto-scan the PC, identify any missing or outdated drivers, and then install the latest available version. The key benefit of using such a tool instead of dedicated utilities from device manufacturers is that these can fetch a larger set of drivers.
2. Download using MSI Driver Utility Installer
Turn on the PC, check for available Windows updates, and wait for the MSI Driver Utility Installer to launch.
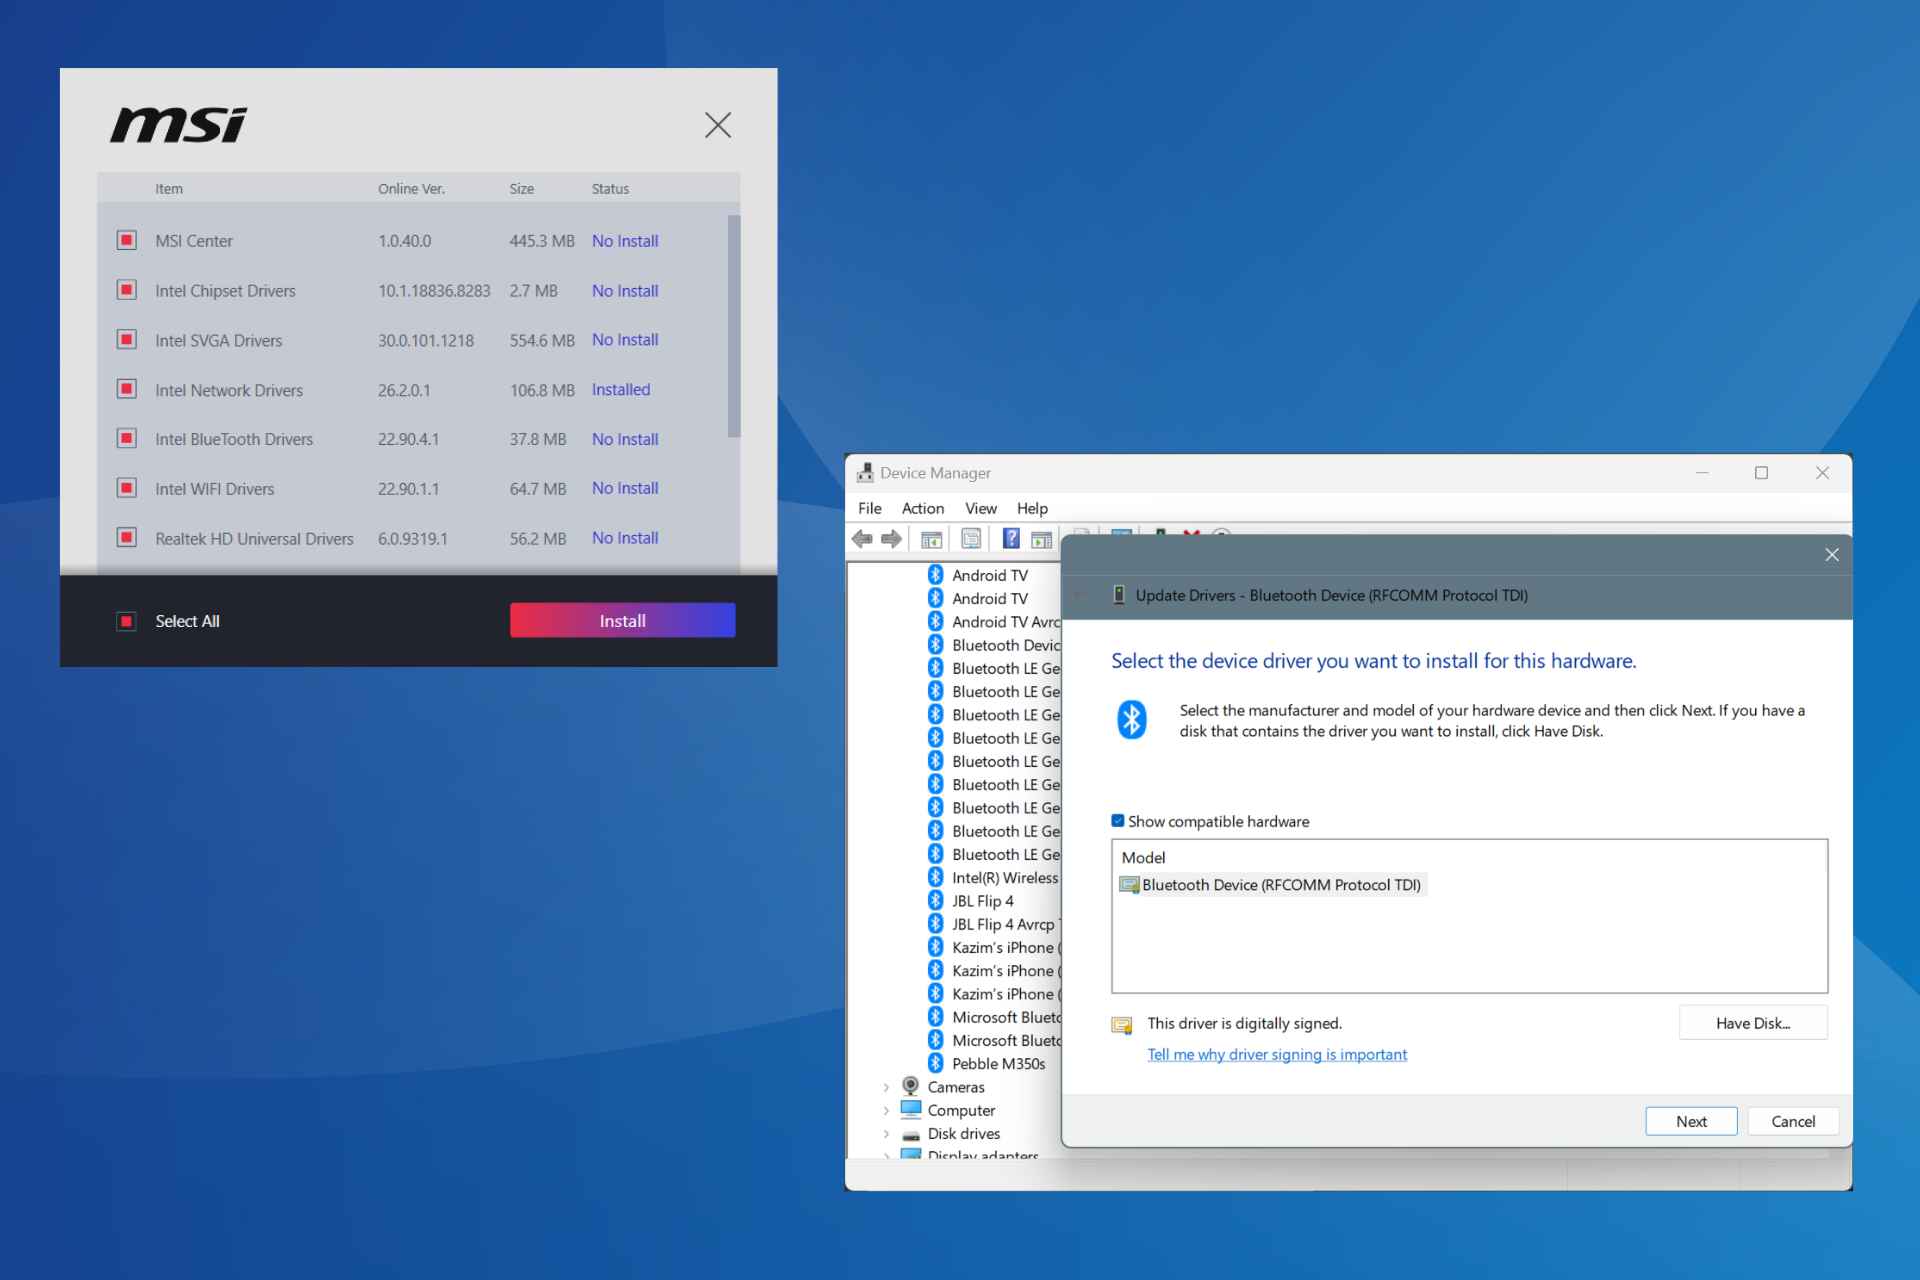
In MSI Driver Utility Installer, tick the checkbox for I have read and agree to MSI Terms of Use and click on Next.
Now, tick the checkbox for Select All or manually pick the drivers and software, and then click on Install.
Wait for the installation to complete, then click on Finish and restart the PC.
Remember, the MSI Driver Utility Installer only appears the first time you turn on the computer after installing Windows. If the process is terminated at that point, you can’t run it again without making complex changes to the Registry.
3. With MSI Center
Download MSI Center from the official website if it’s not already installed, and then run the software.
Click on Support near the top and click on Live Update.
Click the Scan button at the bottom.
If the MSI Bluetooth driver appears after the scan, tick the checkbox for it, and click on Install.
Finally, reboot the PC to apply the changes.
4. From the official website of MSI
Go to MSI’s download page, select your PC from the dropdown menu, and click on Search.
Now, pick the PC’s model from the list.
In the Driver tab, select your OS from the dropdown menu, then choose Bluetooth and click on the Download button next to the driver.
Now, right-click on the downloaded (ZIP) folder, and select Extract all.
Set the desired extraction path, tick the checkbox for Show extracted files when complete, and then click on Extract.
Once done, locate the driver’s setup (.exe) in the extracted files and run it.
Follow the on-screen instructions to complete the installation.
Finally, reboot the PC to apply the changes.
While downloading the MSI Bluetooth driver from the official website, make sure you select the correct product and model. Installing an incompatible Bluetooth driver will lead to Bluetooth not working.
5. Via Device Manager
Press Windows + X to open the Power User menu, and select Device Manager from the list.
Expand the Bluetooth entry, right-click on the Bluetooth adapter, and select Update driver.
Click on Browse my computer manually for drivers.
Now, click on Let me pick from a list of available drivers on my computer.
With the Show compatible hardware checkbox ticked, select the most recent driver version, and click on Next.
After the MSI Bluetooth driver is installed, click on Finish and then restart the PC.
If you want to explore more available drivers on the PC, untick the Show compatible hardware checkbox, browse through the different manufacturers, and pick a driver that works with your Bluetooth adapter. The last part is critical, as you don’t want to install an incompatible MSI Bluetooth driver.
Also, if you are facing connectivity issues, simply reinstalling the Bluetooth driver will do the trick, and you don’t necessarily have to install it from scratch!
Which method seems the easiest to you? Share with the readers in the comments section.
If you see the Accessibility: Investigate error on your Excel workbook, it means there are issues in your workbook that need your attention. In this guide, we will discuss what Accessibility: Investigate error means and how to avoid getting it.
What is Accessibility: Investigate error in Excel?
Microsoft Excel, Word, and PowerPoint come with an Accessibility checker that shows you the accessibility issues with your documents. This ensures your content is easier for people with disabilities to read and write.
Therefore, it is also suggested that you run the Accessibility Checker before you share your document with others. If it says Accessibility: Good to go, you can save the document and share it as you like. However, if you see Accessibility: Investigate, this indicates that there are issues that you need to address.
How can I fix the Accessibility: Investigate error in Excel?
To fix the Accessibility: Investigate error, click on it from the bottom pane to open the Accessibility Assistant.
The inspection results are divided into categories like Color and Contrast, Media and Illustrations, Tables, Document Structure, and Document Access.
You can go through each category to check where the issues are, expand the category with a number beside it, or press the Tab key to move between categories with issues, and press Enter to view the error and possible fixes.
Once you have located the error, click it to see the description. It will take you to the area of the document where the problem is and suggest steps to fix it within the Accessibility Assistant. For example, in my workbook, I found issues under Media and Illustrations> Missing alt text; when I clicked it, it navigated me to an image with the problem and asked me to enter the image description to fix it.
If multiple errors exist in the same sub-category, you can use the arrow buttons next to it to check and resolve them.
If you want to learn more about the issue and the importance of fixing it, choose the Learning Tip link from the bottom of each drill-down pane.
What are the Accessibility best practices with Excel?
1. Avoid common accessibility issues
Choosing low-contrast colors and missing alternative text can reduce your document’s accessibility. To fix it or avoid such issues, go to Review> under Accessibility> select Check Accessibility > Check Accessibility from the drop-down menu.
It will flag issues detected in your sheet and remind you in the status bar. You can make the changes to ensure the spreadsheet is readable for everyone.
2. Use a simple table structure
If you want a table with data only, use a simple table structure and specify the column header information. You can use the Accessibility Checker to ensure no split cells, merged cells, or nested tables. Furthermore, you can also scan your tables visually to spot blank rows and columns.
In addition, you should always specify column header information and format the table using styles that make the data stand out, as this will help the reader identify rows and columns.
While creating a table, you should avoid blank cells, columns, and rows; if you see any of these, delete them. However, if you can’t avoid a blank cell, column, or row, you should consider mentioning that it is blank.
3. Add text to cell A1
Make sure there is text in cell A1 on every sheet of your workbook, especially if you have a table on it. You can add the title of the table in the cell.
If your sheet is long or complex, you can use cell A1 to add instructions or an overview, which can help people understand what is being presented in your worksheet. The instructional text should match the background color.
4. Add alt text with visuals
Visual content includes SmartArt graphics, charts, ink, shapes, pictures, groups, pivot charts, embedded objects, and videos.
Alt text is vital with visual content for those who can’t see the screen to understand what’s important in visual content as it describes the image and mentions its intent.
While writing the visual content, you should ensure that the content and purpose of the image are conveyed concisely and unambiguously.
5. Add meaningful hyperlink text and ScreenTips
Once the workbook is complete, you should visually scan it to ensure that the hyperlink text makes sense as standalone information and provides accurate information about the destination target. For example, you should avoid using link texts like Click here,” “See this page,” “Go here,” or “Learn more. Instead, it would be best if you mentioned the full title of the destination page.
This can benefit those who use screen readers to scan a list of links. You can also use ScreenTips, which appears when you hover the cursor over text or images that include a hyperlink.
6. Use sufficient contrast for text and background colors
Once you are done with the workbook, you can go through the text in your spreadsheet to find the one that’s hard to read or to distinguish from the background.
If the workbook is long, you can use the Accessibility Checker to find insufficient color contrast. The high contrast between text and background ensures that people can see and use the content easily without slowing their reading speed. For example, white and black schemes make it easier for people who are colorblind to distinguish text and shapes.
You can reduce the reading load and use familiar sans serif fonts such as Arial or Calibri. However, you should avoid using all Capital letters, excessive italics, or underlines. Furthermore, for headings, use bold or larger font.
7. Create accessible charts
You should consider adding charts to your worksheets as they make complex information easier to understand. To make the charts accessible, use clear and descriptive language for the chart elements, including data labels and axis titles, and make their formatting easier.
Choose the chart element you want to format, then select the Format tab. Under the Current Selection group, select Format Selection. Now, choose the formatting options to improve the chart element.
8. Give different names to all worksheets, and delete blank worksheets
You can use the Accessibility Checker to ensure all the workbooks with content have a descriptive name and no blank sheets. To delete blank sheets, right-click on them and choose Delete.
This can be helpful for screen readers, as the sheet names provide information about the content on the worksheet and help users navigate through it. By default, the Sheet names are Sheet1, Sheet2, and Sheet 3; you can double-click them and rename them according to your preferences.
9. Name cells and ranges
Before sharing the workbook with anyone, visually scan it to check which cells and ranges need a name. This will help screen reader users quickly identify the purpose of cells and ranges in Excel worksheets.
You can use the Go To command (press Ctrl+G) to open a window; it will help people navigate in sheets.
By keeping these things in mind, you can easily ensure that you don’t encounter the Accessibility: Investigate error in Excel.
If you can’t turn off Windows 11 Narrator, you might have to get full permissions for the narrator.exe file, disable its execution, or rename it.
In case you want to learn more about Accessibility Assistant on 365 apps and how it can help you make your content better, we have a separate guide for you.
If you have any questions or suggestions about the Accessibility: Investigate error in Excel, please mention them in the comments section below. We’re happy to help!
Many developers reported that libgcc_s_dw2-1.dll is missing on their PC, and that can create various problems, especially when developing, so today we’re going to show you how to fix this issue.
What can I do if libgcc_s_dw2-1.dll was not found?
1. Add parameters to your compiler
Configure the MinGW C++ Linker to run with the following parameters: -static -static-libgcc -static-libstdc++
Save changes.
Try to run the compiler again.
Keep in mind that the exact process varies depending on the software you’re using for the development. Few users reported that just using -static or -static-libgcc worked for them.
A few users reported that they used QMAKE_LFLAGS += -static so try it as well.
2. Copy the missing DLL to the right directory
Locate the libgcc_s_dw2-1.dll on your PC. If you don’t have it, download it from a reliable source.
Move it to the following directories: C:\MinGW\bin C:\Program Files\CodeBlocks\MinGW\bin
The file needs to be in the same folder as the .exe.
If the libgcc_s_dw2-1.dll is missing, you won’t be able to compile the code properly, but in most cases, you can use different flags to bypass this issue.
Collaboration on Excel documents makes syncing easier but if someone else is working in it, you may be unable to edit and get an error.
Even though multiple users can access and edit the workbook simultaneously, you may receive this error message. This means that other users cannot access it until the one who is editing is done making changes.
Other reasons could stem from compatibility issues especially if each user is on a different version of Excel. Also, if the Excel file closes unexpectedly or crashes, the temporary files may get corrupted and only the original file will be accessible to the first user.
How do I fix the Someone else is working in… error in Excel?
1. Troubleshoot Internet connection issues
1.1 Run the Internet connections troubleshooter
Press Windows + I to launch Settings.
Select System then click on Troubleshoot.
Navigate to Other troubleshooters.
Click the Run button next to Internet Connections.
Select Troubleshoot my connection to the Internet in the pop-up window and wait for Windows to identify the problem and recommend a fix.
1.2 Run the network adapter troubleshooter
Press Windows + I to launch Settings.
Click on Troubleshoot on the right in the System tab.
Select Other troubleshooters.
Locate the Network Adapter troubleshooter and click on the Run button next to it.
Right-click the Start button and select Task Manager from the menu.
Navigate to the Processes tab, select the Excel app from the list, right-click on it, then click End Task from the drop-down menu. If there is more than one instance, end all of them.
Click on OK to confirm. Open Excel again and click on Files in the top-right corner.
Click on Account from the menu on the left, select the Update Options, then click on the Update Now option.
Restart your PC and check if the Someone else is working error appears.
3. Save file with a different name and in a different location
Launch the Excel file and click on File in the top menu bar.
Click on Save as from the menu on the left to prompt the available locations.
Try saving the file with a different name and in a different location and check if it works.
Saving in a different location allows you to bypass any access restrictions that may have been present. It also creates another instance of the same document which means you can edit it without the Someone else is working in.. error showing up.
Locate the Excel file in question, right-click on it, and select Properties.
Navigate to the Security tab and look for You must have Read permissions to view the properties of this object. This will let you know you have insufficient permissions to open the file. Go to the bottom of the screen and click on Advanced.
Hit Continue in the next window that pops up.
Click on Add in the Permissions tab.
In the Permissions Entry window, click on Select a principal, enter the information required in the listed entries, and click on Advanced at the bottom.
Click on Find New, select Authenticated Users then press OK to generate a list of all users at the bottom.
Check all the checkboxes to grant permissions then click on OK to save the changes.
Try opening the file and see if the error persists. Some PCs may require a reboot to effect the changes.
Read-only rights are limiting and you need full access to make changes to the document. In the same breath, ensure you enable the hidden admin account and see if this resolves the error.
Type Control Panel in the search bar and click Open.
Go to Programs and select Uninstall a Program.
Now, click Microsoft Office and select Change.
Finally, click Online Repair, then select Repair.
Alternatively, you can click on Windows Settings, select Apps, then click on Apps & features.
Locate Microsoft Excel/Office, click on the three ellipses, and select Advanced options.
Next, click on Repair.
Once the repair process is complete, restart your computer and check whether the issue still occurs.
If none of these solutions, work, try using Excel for web. Working on the desktop has some limitations and may cause conflicts on the file versions unless resolved. The other workaround is to wait until the user is done.
If waiting is not an option for you, try other Excel alternatives especially tools like Google Sheets where you can give access to multiple users who can make edits simultaneously. The only drawback is that these programs may not offer the same advanced features as Excel.
That brings us to a close but do let us know which solution worked for you in the comment section below.
If you have just set up a PC or are facing issues with network connectivity, installing the latest MSI Wi-Fi driver won’t just connect you to the Internet but might also boost the connection’s speed.
There are several ways to install MSI Wi-Fi drivers, both through the official website and locally on the PC. Of course, the dedicated MSI Driver Utility Installer is the simplest of all, but it only runs when you first turn on the PC for setup or after a Windows reinstall, necessitating the need for other methods. So, let’s learn them all!
How can I download the MSI Wi-Fi driver on Windows?
1. Use the MSI Driver Utility Installer (for first-time installations)
Turn on the PC, connect to the Internet, check for Windows updates the first time, and MSI Driver Utility Installer will pop up.
Tick the checkbox for I have read and agree to the MSI Terms of Use, and then click on Next.
Now, tick the Select All checkbox at the bottom or manually select the drivers and software you want to download, and click on Install. Make sure to select the MSI Wi-Fi driver.
Once done, click on Finish and then reboot the PC.
Remember, the MSI Driver Utility Installer can only be used one time after installing Windows. If you terminate the process or restart the PC again, it won’t reappear. In that case, you will have to use the MSI Center or other manual driver update methods.
2. Use the MSI Center
If you don’t already have it, download MSI Center from the official website.
Run MSI Center, go to the Support tab from the top, and select Live Update.
Click the Scan button.
When the MSI Wi-Fi driver appears, tick the checkbox for it, and click on Install.
Finally, reboot the PC to apply the changes.
3. Download manually from the official website
Go to MSI’s download page, select your product using the four dropdown menus, and then click on Search.
Pick your computer’s model from the dropdown menu.
Go to the Driver tab under Drivers & Downloads, then select Wireless LAN, and click the Download button next to the driver.
Right-click on the downloaded (ZIP) file, and select Extract all.
Select the path for the extracted files, tick the checkbox for Show extracted files when complete, and click on Extract.
In the extracted folder, run the Setup.exe file.
Click Yes in the UAC prompt.
Follow the on-screen instructions to complete the MSI Wi-Fi driver installation.
Finally, restart the PC for the changes to fully come into effect.
Manually installing or updating the Wi-Fi driver using the setup file will always get you the latest version. But you also have to be careful and not download an incompatible MSI Wi-Fi driver. Because in that case, your Wi-Fi may stop working!
4. Install a driver already available on your PC
Press Windows + X to open the Power User menu, and select Device Manager from the list of options.
Expand the Network adapters entry, right-click on the wireless adapter, and select Update driver.
Click on Browse my computer for drivers.
Click on Let me pick from a list of available drivers on my computer to proceed.
With the Show compatible hardware option ticked, select a suitable driver from the list, click on Next, and wait for the installation to complete.
Finally, click on Finish and then reboot the PC.
If the driver you want to install isn’t listed, untick the checkbox for Show compatible hardware, then select it, and proceed with the installation.
However, I recommend that you avoid this, given that Windows considers it as an incompatible driver, and post-installation, the Wi-Fi may stop working!
Alternatively, you can make sure you have the right driver with a specialized driver updating software which can install all your drivers automatically after a short scan of your computer.
5. Install via Windows updates
Press Windows + I to open Settings, go to Windows Updates from the left pane, and click on Advanced options.
Scroll down and click on Optional updates.
Now, if an MSI Wi-Fi driver update is listed here, tick the checkbox for it, and click on Download & install.
After installation, reboot the PC to apply the changes.
That’s how you can easily download, install, and update Wi-Fi drivers on any MSI device. And the entire process shouldn’t take more than a few minutes!
Although, I must again caution you against downloading incompatible drivers because it can trigger a wide array of issues. So, to be on the safe side, create a restore point before installing new drivers.
Which method worked best for you? Share with our readers in the comments section.
In a recently published patent, Microsoft is developing an Artificial intelligence model for composing audio scores that can create music or audio that matches videos, text, PowerPoint presentations, virtual realities, or even video games in development.
The paper, titled suggestively, “Artificial intelligence model for composing audio scores,” discusses the methods this Copilot would use to create music.
First, it sets off to collect data, gathering a large amount of training data, which includes many audiovisual datasets containing both video and audio components.
Each of these datasets is analyzed to extract different types of features. For example, it would look at the video’s visual features and elements, such as colors, shapes, movements, and scenes. Any text that appears in the video, such as subtitles or on-screen text, would also be extracted. Lastly, in-video audio features, such as sounds and music, are already present in the video and not part of a musical score.
After extracting them, Copilot would analyze them and find a correlation between these features. For example, certain scenes (like a sunset) often have specific types of music (like calm, soothing tunes).
Copilot would be trained with these features, and using the correlation system, it would generate appropriate audio scores matching new videos’ visual and textual features.
In real life, this technology can be used in various applications, such as:
Film and Video Production: Automatically generating background scores for movies, TV shows, or online videos.
Advertising: Creating music that perfectly fits the mood and message of commercials.
Gaming: Producing dynamic soundtracks that change based on the game’s visuals and actions.
Virtual Reality: Enhancing immersive experiences with audio that adapts to the visual environment.
With the ability to compose music, Copilot could also save time and ensure that the audio perfectly complements the visual content by automating the process of composing audio scores.
However, an improvement of that plugin would be more than welcome. It would allow creators to pin down their product’s music concept before pitching it to an actual music composer.
While the issue of actually replacing a music composer should be considered, ultimately, giving Copilot the ability to compose music would only streamline productivity down the line. But what are your thoughts on this?
There are several methods to unhide all rows in Excel if you forgot about them or mistakenly hidden them. First, make sure to disable sorting or allow the sorting to select all rows. At the same time, make sure that no rows are frozen.
How do I unhide all rows in Microsoft Excel?
1. Use the Unhide all option
Click on the upper left-hand corner of the spreadsheet to select all rows and all columns.
Now, go to Format, hover with your mouse over Hide & Unhide and click on Unhide all rows or Unhide all Columns.
This is the most simple way to unhide all rows or columns in Excel. If you prefer using shortcuts, press Ctrl + A to select all the cells, then press Ctrl + Shift + 9 to unhide all the rows.
Again, make sure that no cells are frozen and the sheet is not locked.
2. Unhide rows or columns using the contextual menu
Click on the first row of your sheet, then scroll down, press Shift and click on the last row. This will select all the rows.
Now, right-click on any row and select Unhide Rows.
You can use exactly the same method for columns.
This is another quick way to unhide rows or columns in Excel. However, the option will appear in the context menu only if you have actual hidden rows or columns in your selection. If not, it will not appear at all or it will be grayed out.
3. Unhide specific rows or columns
Look through the numbers or letters in the row or column list and identify the row or column which you want to unhide.
When you hover your mouse cursor over it, a small dialogue will appear, clicking it will unhide that specific row or column.
Obviously, this method is not so efficient as the first two if you have a long and wide spreadsheet. However, it can be pretty useful if you only want to unhide a certain row or column and leave all the others hidden.
This concludes our guide on how to unhide all rows and columns in Excel using different methods. If you want more guides, we have an article about the basic Excel formulas that will help you be more efficient. We also have a must-know list of Excel shortcuts that may come in handy.
Having trouble with the Excel error green triangle? It indicates an error or inconsistency in the data entered into that cell. Common reasons include numbers stored as text, formula errors, unused or incomplete formulas, or inconsistent formulas within a range.
Although it doesn’t always indicate an issue, Excel uses it as a prompt for you to review content in the cell. Luckily, you can fix or disable it. I’ll show you how.
Let’s begin!
How To Fix the Excel Error Green Triangle
Here are the steps to resolve it:
Convert Numbers Stored as Text
One of the most common reasons for the green triangle is that the numbers are stored as text. This can cause problems when performing calculations or sorting data. Here’s how to fix it:
Click on the cell with the green triangle.
Click on the yellow warning icon beside the cell after clicking it.
Select “Convert to Number” from the drop-down menu.
This will convert the text to a number format, and the green triangle error will be solved.
However, this method will remove the first zero(s). If you want to keep them, try the next fix.
Ignore the Error
You can ignore the error if the green triangle appears, but no issue affects your calculations. Follow these steps:
Tap on the cell with the green triangle.
Tap the yellow warning icon that appears.
Select “Ignore Error” from the menu.
The green triangle error will disappear and maintain the zero(s).
Apply Consistent Formulas Across a Range
Inconsistent formulas in a range of cells can trigger the green triangle. Excel will alert you if some formulas in a column or row are different from the rest.
Click the cell with a green triangle and confirm the formula.
For this example, the formula is =SUM(B3:E3), meaning the F3 cell has been omitted.Select all the cells, including F3.
Tap formulas, then click AutoSum.
The error will be solved, and the total will change, indicating that the omitted cell has been factored into the formula.
How To Disable Error Checking
You can also disable the feature if you find the green triangle distracting and want to prevent Excel from showing these errors:
Click the File menu on the top left corner of the screen.
Select Options.
Click on Formulas.
Under Error Checking, uncheck the box labeled “Enable background error checking.” Click OK to save the changes.
The green triangle error will be solved.
This will stop Excel from displaying the green triangle, but be cautious, as it might hide real issues in your data.
So, the Excel error green triangle is a useful alert that helps identify potential issues with your data. Whether it’s a simple formatting problem or a formula inconsistency, the steps above should help you quickly resolve it. You can ignore or disable the feature if it doesn’t impact your work.
The Cannot open shared object no such file or directory usually affects developers that are using Linux or WSL on Windows. This error will prevent you from adding libraries to your project, so it’s important to fix it.
How do I fix Cannot open shared object no such file or directory error?
1. Install the missing library
Look at the error message. You should see the name of the library that is missing.
Install it by running the following command: sudo apt-get install your_library_name
Wait for the process to finish.
A few users reported using sudo apt install –reinstall for libraries that are already installed, so try that as well.
If you’re getting this error while installing Qt, run the following command to install its dependencies:
In the command line run the following: sudo strip --remove-section=.note.ABI-tag /usr/lib/x86_64-linux-gnu/libQt5Core.so.5
Wait for the process to finish.
Check if the problem is gone.
Keep in mind that this solution works only for libQt5Core.so.5, so be sure to change the library name in Step 1 name according to your error.
5. Manually add the library to the library path
Run the following command to find the path of your library: sudo find / -name the_name_of_the_file.so
Next, run the following to display the value of LD_LIBRARY PATH: echo $LD_LIBRARY_PATH
If LD_LIBRARY_PATH is empty, run LD_LIBRARY_PATH=/usr/local/lib
Next, add the library path from Step 1, like this: export LD_LIBRARY_PATH=$LD_LIBRARY_PATH:/my_library/
The Cannot open shared object no such file or directory error will give you problems while developing, but luckily, you can fix this by installing the missing packages by following these steps.
Microsoft is taking Windows 11’s File Explorer to the next level by enhancing its ability to display which Microsoft account recently opened the file.
Spotted by Windows Insider @phantomofearth in the Windows Insider Channels, File Explorer will also display the so-called live persona cards, which are profile cards that appear when hovering on the profile.
File Explorer is getting more changes – in addition to the shared files tab, profile icons will soon be displayed next to names for recent activity on the Home page and in the details pane. There's more to this. ? pic.twitter.com/fY6PYlq1aR
These cards are very similar to the ones Outlook displays within the platform and will allow Windows users to chat, text, or even call the person. Like Outlook, once you click on the card, it will expand, but according to Insider, this is not working yet.
A related feature coming soon is "live persona cards", – pretty much profile cards, these appear on hover and display the person's name, as well as some options such as calling the person. pic.twitter.com/YBPKPzWu0e
These features are hidden in the various channels of the Windows Insider Program, mainly Canary, Dev, and Beta. At the moment, they are hidden, but they can be uncovered using special commands with the third-party app ViveTool.
Clicking on a profile icon will bring up a more detailed card, this doesn't work properly yet. pic.twitter.com/5YuYQaBCC9
If you’re looking to enable them, here are the commands (thanks to @phantomofearth):
Profile icons: vivetool /enable /id:48895801 – works in Canary, Dev and Beta Live
Persona Cards: vivetool /enable /id:46702397, 51848093 – works only in Beta.
These new capabilities would definitely make Windows 11’s File Explorer far more versatile than it already is, especially for shared devices or those Windows devices that use a Shared Folder application, such as OneDrive. Users will be able to see the document’s owners, the ones who have opened it recently, and even contact them to discuss document changes.
It could potentially make Windows 11 a more versatile OS due to improved efficacy, streamlining collaboration, and productivity.
As Windows 11 24H2 has already been out for a few days, these updates will most likely be released in the following months,
Often, when you open Excel files on a PC shared via Teams or SharePoint, it throws an error that reads, Refresh Recommended A newer version of this file is available on the server. You then have two options, Save a Copy or Discard Changes. While the former isn’t feasible, the latter results in an endless loop!
This error only appears when the file is loaded in Excel’s desktop app and never the web version for files shared amongst multiple users. In most cases, the Refresh Recommended Excel error is caused due to a corrupt cache, incorrect path, misconfigured settings, or a problem with the Office installation.
Before you proceed to the fixes, check the network connectivity for slow Internet speed. If possible, switch to another network, preferably a wired connection.
How can I fix the Refresh Recommended Excel error?
1. Clear the OfficeFileCache folder
Press Windows + E to open File Explorer, paste the following path in the address bar, and hit Enter: %userprofile%\AppData\Local\Microsoft\Office\16.0\OfficeFileCache\0\0
Now, individually go into all folders listed here.
Press Ctrl + A to select all the files and then hit Delete to clear them.
Choose the appropriate response in case a confirmation prompt appears.
Relaunch Excel and check whether the file still throws the Refresh Recommended error.
You could also delete the Office file cache from Excel > File > More > Options > Save > Delete cached files.
But doing so manually has proven more effective with Excel Refresh Recommended error and when Discard Changes is not working.
2. Rename the affected file(s)
Changing the file name helped as a workaround for 2 out of 5 users. All you have to do is add a character to the file’s name.
For instance, if the file is currently named, WindowsReport, rename it to WindowsReport1 or WindowsReportA, and that should fix the Excel Refresh Recommended error.
3. Change Excel’s cache settings
Open Excel, go to the File menu, then select More from the bottom left, and choose Options.
Navigate to the Save tab from the left pane, and tick the checkbox for Delete files from the Office Document Cache when they are closed.
Finally, click OK to save the changes, then reboot the PC and check for improvements.
4. Repair Microsoft Office
Press Windows + R to open Run, type appwiz.cpl in the text field, and hit Enter.
Select Microsoft 365 from the list of programs, and click on Change.
Click Yes in the UAC prompt.
Choose Quick Repair and then click the Repair button.
Once done, verify whether Excel’s Refresh Recommend issue is resolved.
If not, open the Excel repair tool again, and this time, run the Online Repair.
If you keep getting Excel or SharePoint Refresh Recommended A newer version of this file is available on the server error, it could be an issue with the Office installation, and repairing it will fix things!
5. Create a new copy of the file
If the Refresh Recommended error is limited to an individual or a few Excel files shared via Teams or SharePoint, you can simply recreate them.
To do that, open the problematic Excel file and a new file in your browser > copy the contents from the former to the latter > save the changes > then open the new file on your PC.
Remember, this is a workaround, feasible only when a limited number of files are affected. When it’s on a much larger scale, you must identify and fix the underlying cause behind the Excel error Refresh Recommended.