Is Your Master Boot Record Missing? Here’s What To Do

The simplest thing you may ever try to do with a PC is turning it on, but however unlikely it may seem, even this operation can be met with some issues.

If you’ve ever tried booting your PC and were met with an error message stating that the BOOTMGR is Missing. Press Ctrl+Alt+Del to restart then you should know that this is quite a common issue.

The MBR (Master Boot Record) is what controls where the PC boots off of, and is thus essential for a computer’s well-being.

That is why we’ve compiled a list of solutions for you to try that will fix your missing MBR issue, so be sure to read on.

What can I do if my MBR is missing?

1. Restart your PC

Sometimes the fact that your PC can’t detect your MBR may be just the result or a random mishap.

As such, when the error message appears, simply follow the instructions to perform a restart. If this doesn’t work, you should proceed to the next solution.

2. Remove all of your removable media

Because the MBR determines where the PC boots from, removing all removable media will force the PC to boot from its hard drive.

This includes removing all CDs, DVDs and removable flash drive, and connecting them after the boot is finished.

3. Change your Boot order in your BIOS

  1. Boot your PC, and enter the BIOS.
  2. Go to the Boot tab, and change the boot order so that the hard drive containing the MBR is set as the first choice.
  3. Save the changes, and press Exit.

4. Repair your Master Boot Record

  1. Use MiniTool Partition Wizard to build a bootable USB flash drive or CD/DVD.
  2. Insert the removable media in the PC.
  3. Change the Boot order so that the PC will launch off of the removable media.
  4. Launch the Partition Wizard.
  5. Select the damaged disk, and click Rebuild MBR from Check Disk.
  6. Select Apply, and let the program run its course.

Sometimes the missing MBR error can be caused by a severely damaged MBR. If that seems to be the case, then you will need to repair it.

You could try to use a professional third-party tool named MiniTool Partition Wizard, and then follow the above steps.

5. Mark the partition as active

  1. Repeat steps 1-3 from the previous solution.
  2. Select the wrong active partition, and click on Set Inactive.
  3. Choose the partition that you need, and click on Set Active.
  4. Press Apply, let the program run its course.

6. Test the hard drive

  1. Follow the steps mentioned above to enter the MiniTool PE Loader interface.
  2. Select the Surface Test feature, and let the program run its course.
  3. Restart the PC.

One common reason for the missing MBR error is the presence of too many bad sectors on that drive.

Once more MiniTool Partition Wizard. come to the rescue, as it also comes with tools that allow the testing of a drive’s disk surface.

7. Perform a Windows Startup repair

  1. Create a bootable USB flash drive or CD/DVD containing your OS.
  2. Use it to enter the Advanced boot options menu.
  3. Go to Troubleshoot, and select Advanced Options.
  4. Choose Startup Repair.

8. Check your cables

Something as simple as old, damaged or improperly plugged cables can also cause the missing MBR error.

As such, turn off your PC, and make sure all cables are plugged, or even try to replace them with new ones (especially the IDE cable).

9. Update your Motherboard’s OS

Sometimes an old BIOS version can also lead to a missing MBR error.  Thus, it is always good to update your BIOS to the latest available version. If you don’t know how to do this, check out our detailed guide.

10. Perform a clean Windows install

If none of the other 9 solutions seemed to work, then your only choice is to perform a clean Windows install.

Keep in mind that this will remove everything from your PC, so it is a good idea to back up all of your data before proceeding with this solution.

Also, if you need to back up your PC professionally, take a closer look at our comprehensive guide of the best backup software for Windows 10.

11. Replace the hard drive

If the missing MBR error seems to be caused by a combination of too many bad sectors, and not even a clean Windows install can fix it, then it is time to retire your hard drive and replace it with a new one.

While this is the most costly solution, it is surely the one that will definitely get rid of any missing MBR errors.

Because the investment is quite serious, you should look for the best hard drive that your budget can afford.

If you’re looking for a good hard drive replacement, you should check out our detailed article for some good suggestions.

Did you find this article useful? Let us know what you think of the missing MBR error in the comment section below.

Posted in Fix

Power BI Windows 10 app gets new home page and improved performance

The Power BI Windows 10 has been updated this week with a new home page design that’s currently in beta. During the preview period, the new design can be turned on and off by clicking on the “New look” toggle at the top right corner of the app.

According to the team, the new home page serves as a centralized hub for all Power BI content, with frequently accessed items sitting at the top of the home page. By clicking on the ellipsis menu available on every item in the Frequent strip, users can access quick actions such as open, pin, or favorite.

A Quick access table is also available at the bottom of the home page, giving users access to recent, favorite, shared, and other items. A shortcut to this new homepage has also been added to the left navigation pane, making it easy for users to access it from anywhere within the app.

This new update should also bring some performance improvements to the Power BI app for Windows 10. “As part of building the new look we also built some of the app’s infrastructure for caching, background processing and more,” the team explained. You can download the app on your PC with the link below.

Power BI
Power BI
Price:
Free

Dell XPS 13 9310 (OLED) review: The perfect laptop gets better with a vibrant display

The XPS 13 has always been one of the best Windows 10 laptops you can buy for your money. With its signature Infinity Edge display and a woven glass and carbon fiber interior, it has been hard for other laptop makers to beat. But how can Dell make it even better? By introducing an OLED model, that is.

With a new OLED model, the perfect laptop is now even more perfect. Dell was kind enough to send us the new OLED model of the XPS 13 9310 for review, and it is quite the laptop to drool over. Here’s a look at why this new XPS model with a bright and lively display has us so excited.

Specs, pricing, and ports

Our review unit is one of the higher-end models. It comes configured with the 11th generation Intel Core i7-1185G7 processor, 16GB of RAM, and a 512GB solid-state drive. The 3.5K (3456 x 2160 resolution) display is also touch-enabled, though it doesn’t work with a pen. If you want that pen functionality, you’ll have to go for the XPS 13 2-in-1, which we previously reviewed.

Anyway, this specific configuration is available for $1,950 over at Dell.com. If you’re hoping to buy the OLED model you’ll have to pay $400 extra (included in that listed price above.) The OLED also only comes in the 3.5K resolution option, so you’re getting extra pixels for the $400, helping make multitasking on the screen a bit easier.

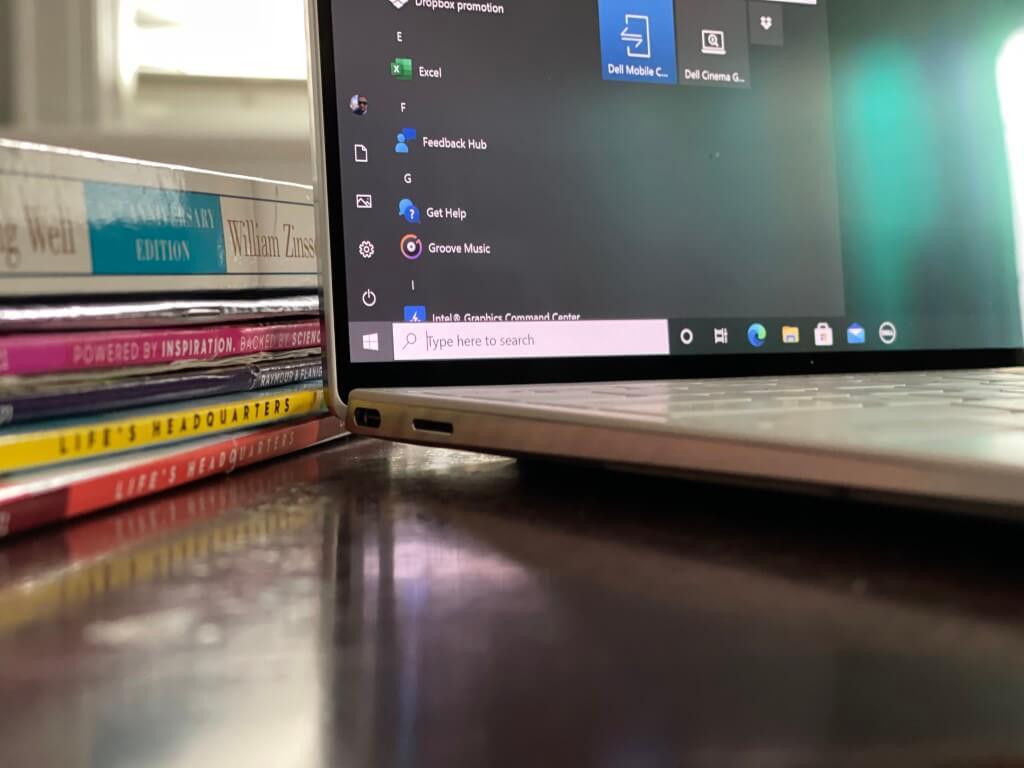
The ports on the OLED model as the same as all other versions of the XPS 13 9310. The only big difference is the display. This means that you’ll still find two Thunderbolt 4 ports, a microSD card slot, and a headphone jack. Those Thunderbolt 4 ports will be handy if you’re planning to use an external GPU, for a boost beyond the integrated Iris Xe graphics on the XPS.

For such a thin and light laptop, this has actually become the new standard. Other publications point out the lack of USB-A or HDMI as a bummer for the XPS 13 lineup, but with a laptop so thin, it’s hard to include full-size ports as it is. Dell gets that and includes a USB-C to USB-A dongle in the box for you.

As is routine in most laptop reviews in 2021, we’ll also touch on the webcam, microphone, and audio setup here, too. This laptop comes with a widescreen HD 720p 2.25mm webcam. It also sports a dual-microphone array powered by Waves, as well as stereo speakers professionally tuned with Waves MaxxAudio Pro.

The experience of all that is the same as the XPS 13 2-in-1, down to the Windows Hello support in both the webcam (for face logins,) as well as the fingerprint reader in the power button. 1080p webcams are rare in laptops, and with the webcam living in the tiny bezel up the top of the laptop, it probably would have been tricky for Dell to upgrade the sensor as it is.

We wished the quality was better, but it still is good. We had no complaints about the webcam or audio quality in our workflow of Teams calls, and video chats with family on Skype. If anything, the OLED screen only makes everything feel more realistic, but more on that later.

Design

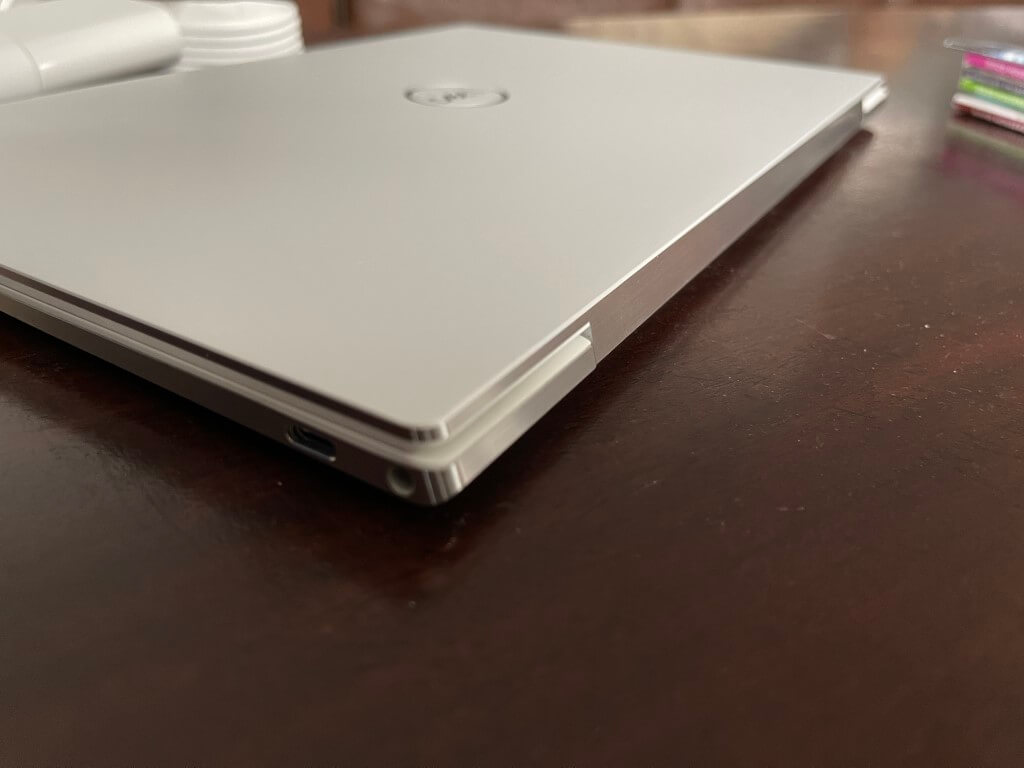
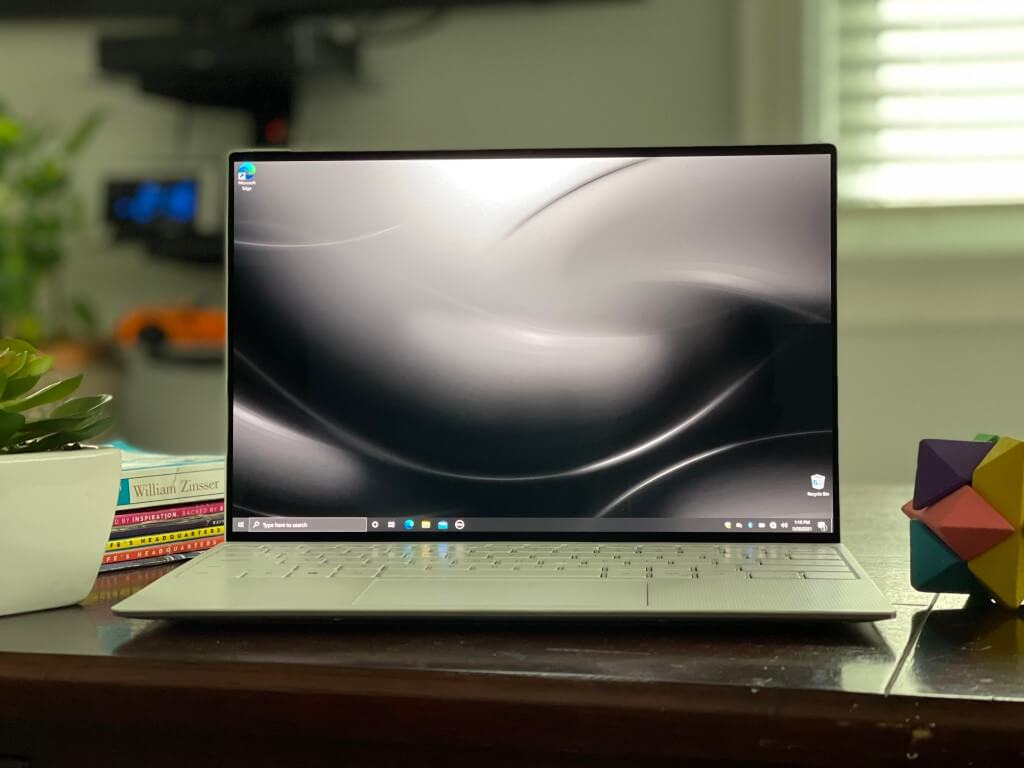
The minute you take the XPS 13 out of its box, you’ll be wowed by its design. There’s nothing new here over the other models, but first-time XPS 13 buyers who opt for the OLED option should be prepared to be amazed.

While other laptops sport magnesium, aluminum, or even titanium, Dell goes for a hybrid of materials that make the XPS 13 stand out at a coffee shop or anywhere you go. It also makes the laptop worth the pretty penny you’re paying for it.

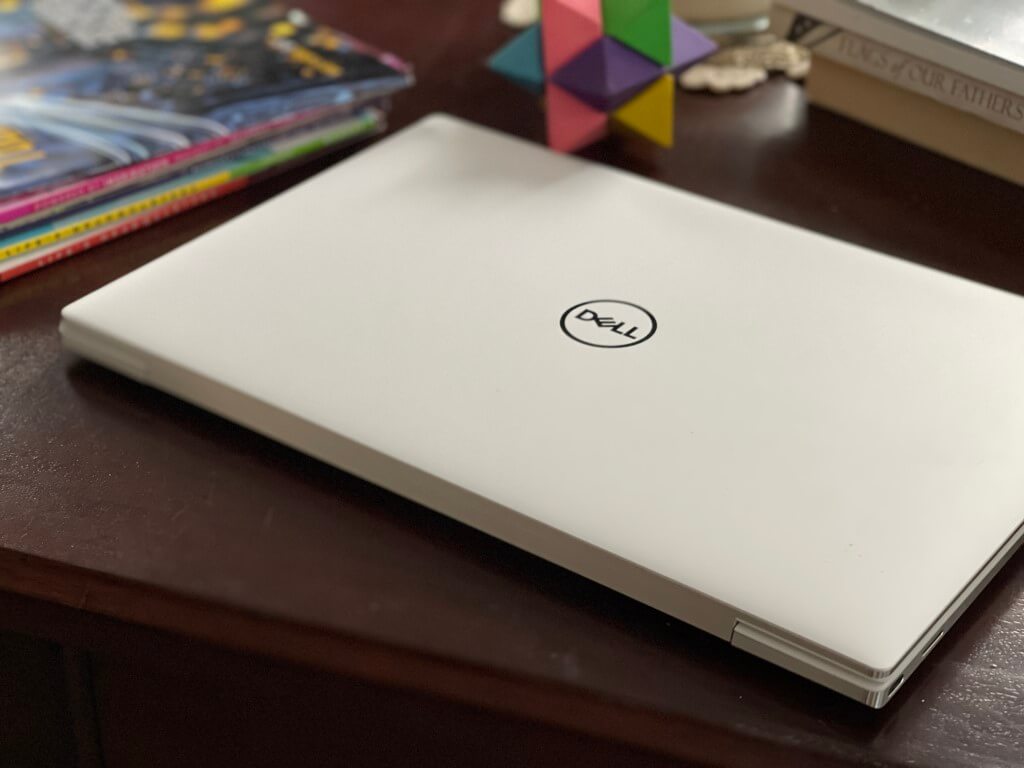
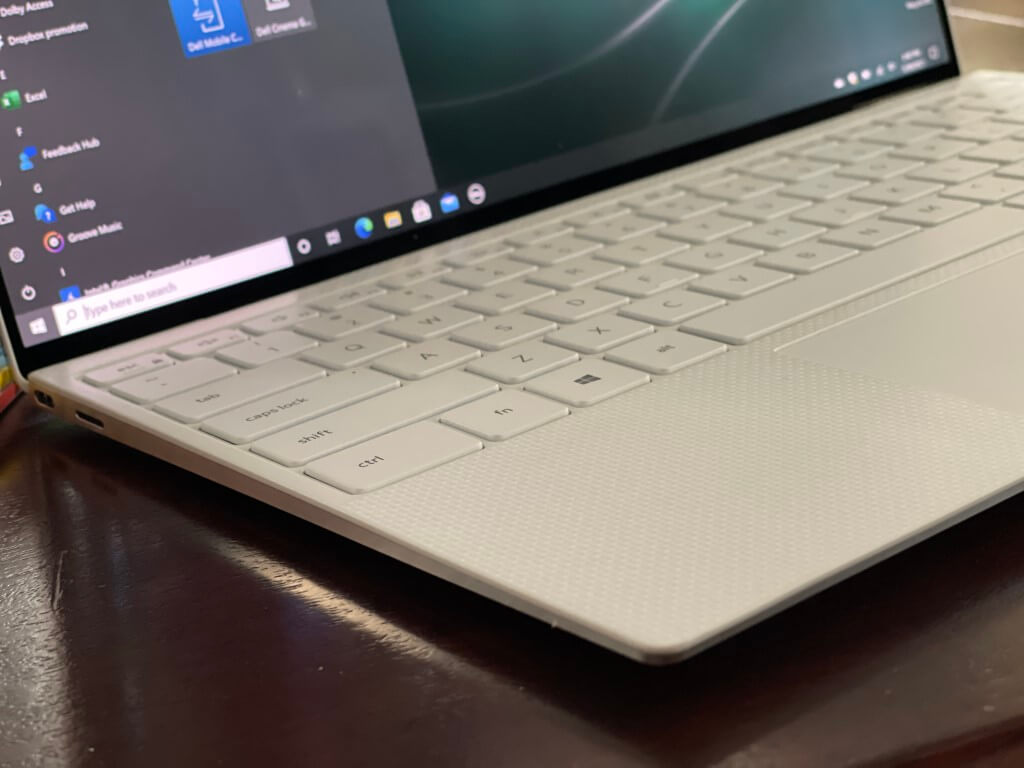
The XPS 13 is cut from a block of aluminum in two pieces, so it’s more durable than a laptop that’s pieced together with one. On the outside of our review unit, you’ll find a frost-colored aluminum lid. Then, on the inside, the stunning “Arctic White” finish with a luxurious-feeling glass-coated carbon fiber material on the palm rests.

This XPS definitely looks different from the silver-on-silver, and the black-on-black laptops that we’re used to here at OnMSFT. The diamond-cut sidewalls only top it off, shining bright as we slid our fingers through it after our initial unboxing. Plus, since these are premium materials, there is no flexing, bending, or creaking to deal with. This is a premium laptop that is the real deal.

Much like we found with the XPS 13 2-in-1, Dell’s design choices keep this XPS model quite thin and light. It weighs in at 2.8 pounds and is 0.58 inches thick. That’s pretty much standard across what most laptop makers offer these days.

You’ll probably barely feel any difference over a MacBook Pro, an HP Spectre, or a Surface Laptop 13-inch. It’s light enough to carry around with one hand, and the lid is even easy to open with one hand.

Touchpad and keyboard

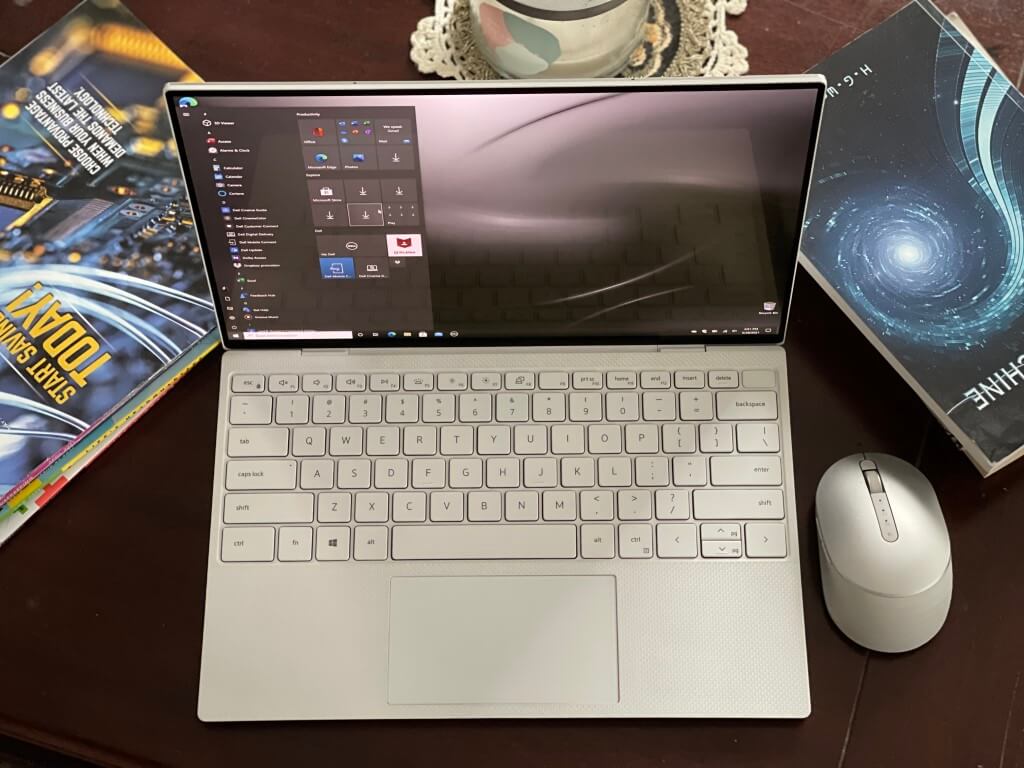
We had some complaints about the keyboard when we reviewed the XPS 13 2-in-1, but thankfully, the standard XPS 13 is much better on this front. It features a regular traditional keyboard and not the Macbook-like Maglev keyboard found on the 2-in-1 version.

The keyboard is soft, and our fingers easily skated between keys without harsh clicking feedback as we sped our way through Bing’s typing test. We got to around 80 words per minute. Basically, this is super comfortable to type on. Dell says you’ll get 1.0mm of travel, which is pretty good for a laptop this small.

We just have one complaint, and it is about the backlighting. Since the keycaps are white, and the keyboard letters black, the letters might be a bit hard to see when the backlighting is turned on. It will wash out the black with the white LED lighting in some conditions.

The Trackpad, though, is great. We can’t complain about that. It is large, smooth, and supports Microsoft’s precision drivers for gestures and more. It is also slightly offset from the center, leaving our palms more place to rest when typing.

Display

As we hinted at the top of our review, the OLED screen is what makes this XPS laptop different. Sure, you can find other laptops with OLED displays (we reviewed an HP Envy with one last year,) but most aren’t as immersive as Dell’s.

Other laptops are flanked by an ugly bottom bezel, or thick side and top bezels. The displays also are in the boxy 16:9 aspect ratio, which isn’t good for multitasking. The rare exception is the HP Spectre x360, which has a 3:2 aspect ratio OLED option. But again, that’s a convertible and not a traditional clamshell laptop like the XPS.

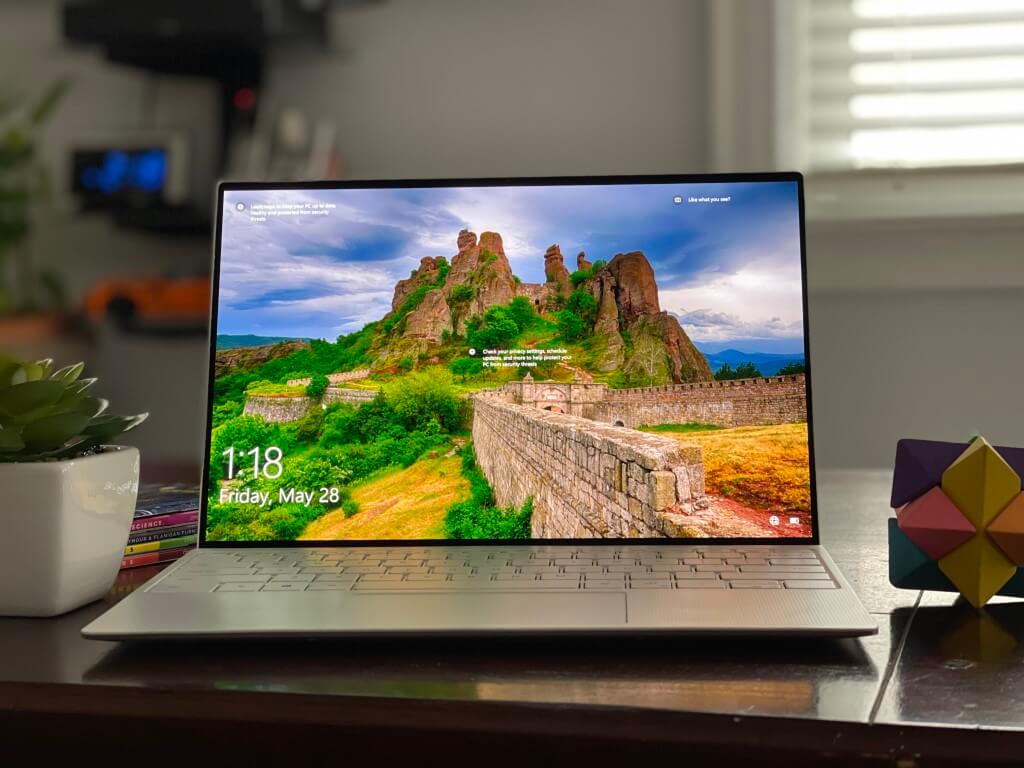
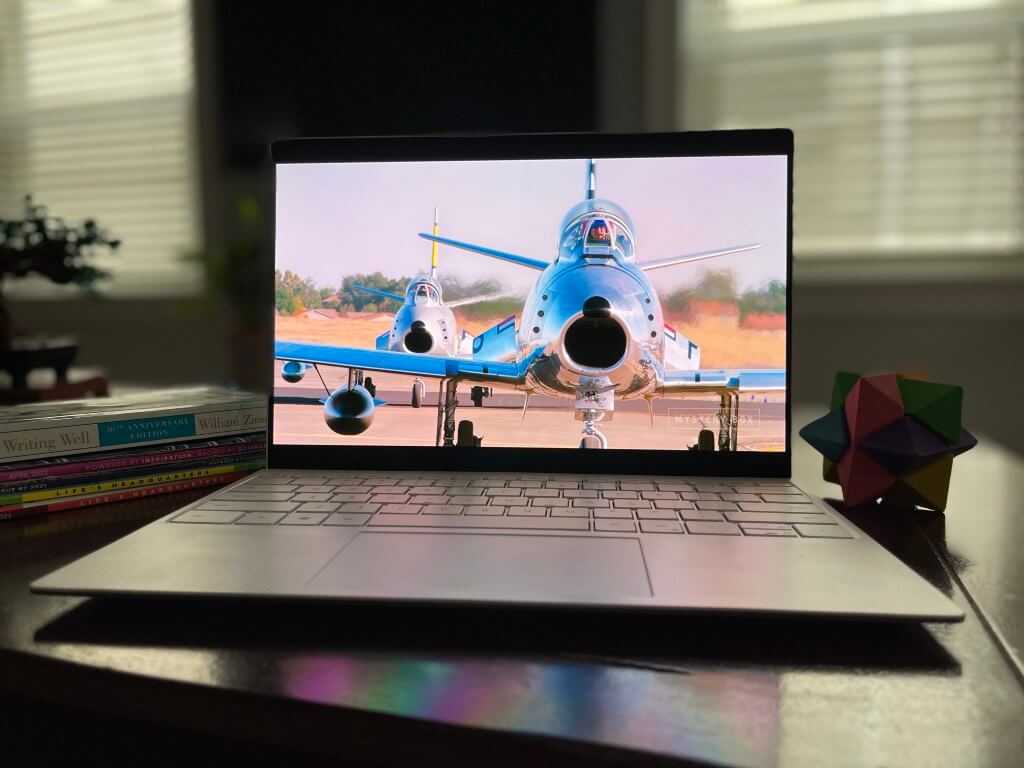
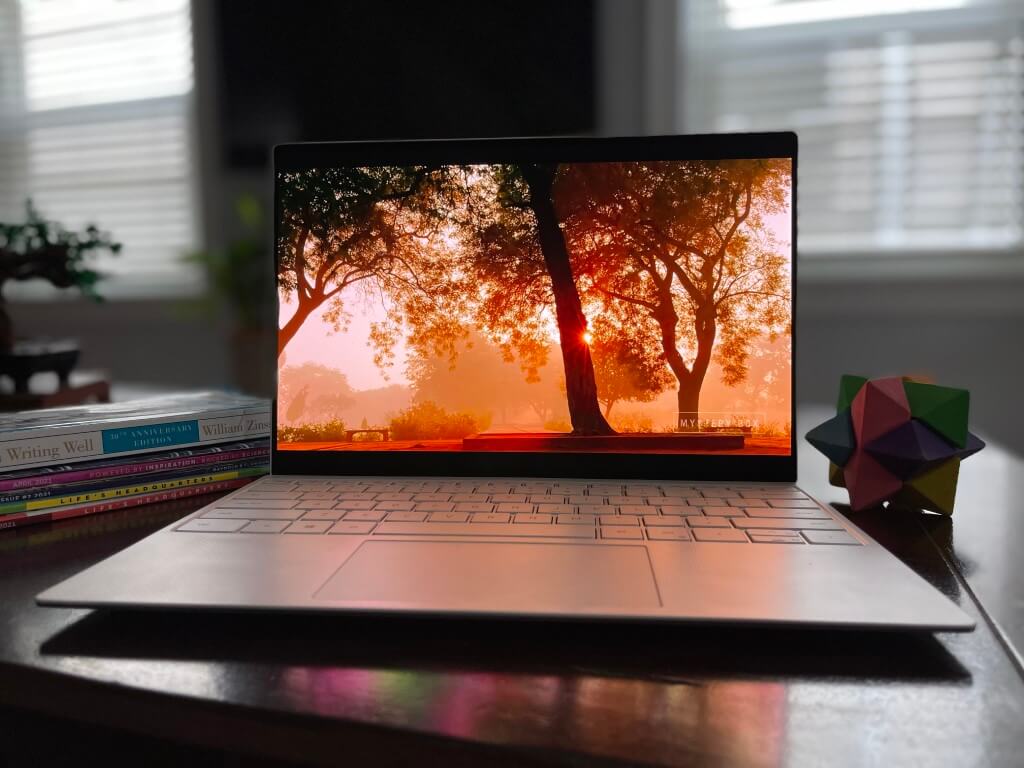
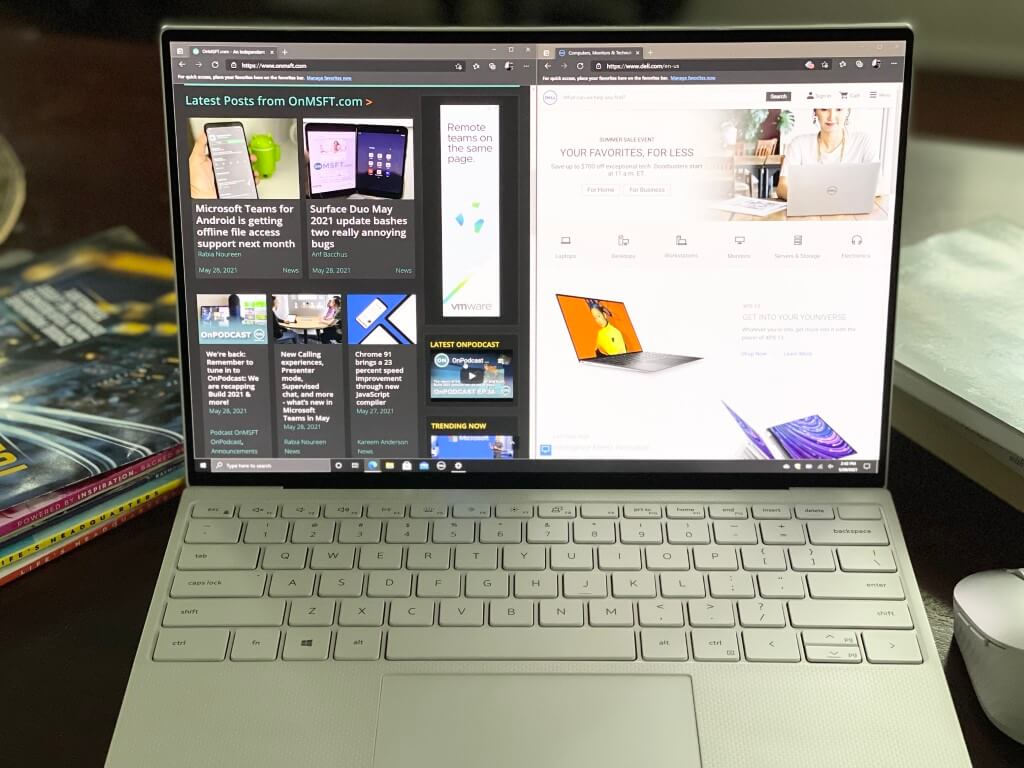
On the XPS, things are different. Dell managed to squeeze a 13.4-inch  “Infinity Edge” display in an 11-inch size, for a 91.5% screen-to-body ratio. It’s also formatted in the 16:10 aspect ratio, which is taller and allows more room to stack windows side by side.

As we’ve explained before, that makes multitasking, watching movies, and consuming media quite immersive. The OLED panel only improves on that and makes for a really breathtaking experience that you need to see to believe.

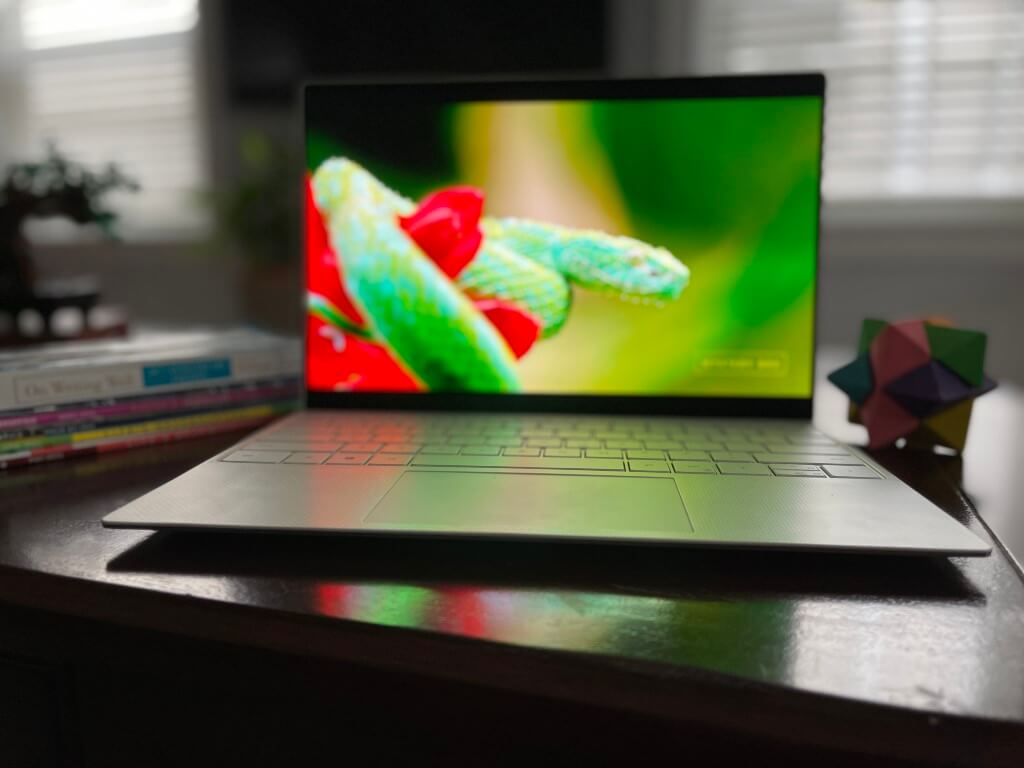
Compared to the standard LCD panel you’ll get on the regular XPS models, there are a lot of benefits. The panel has a 100,000:1 contrast ratio and covers 100% of the DCI-P3 color gamut. It even is VESA Display HDR 400 certified, and brightness can get to around 380 nits in our testing.

These numbers are all common for OLED panels found in other laptops. For you, it will mean that colors are more vivid and lively especially when it comes to black colors.

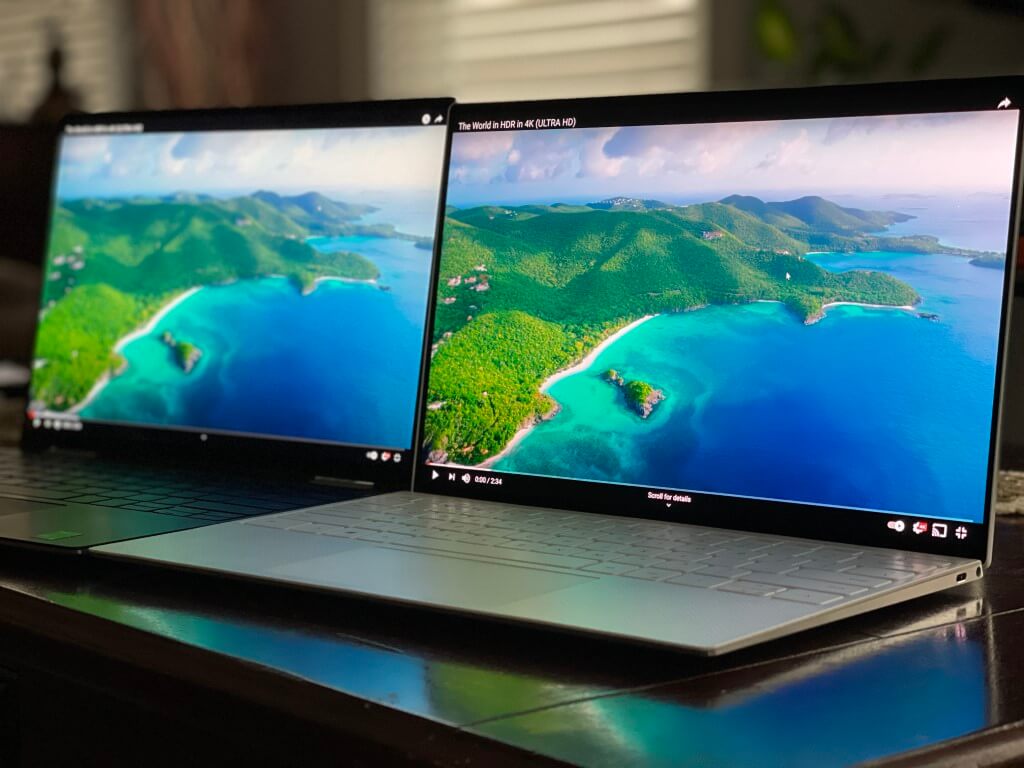
But enough of the numbers. To test this OLED panel, we went to YouTube and searched up for nature videos. The results had us surprised when we put the XPS 13 2-in-1 right alongside the OLED XPS 13.

In scenes with a forest and water, the greens and blues looked more life-like and colorful on the OLED XPS. In a scene with a sunset in a forest, the oranges popped right out against the black of the leaves on a forest floor. We asked our readers if they could tell the difference between the OLED XPS and the regular XPS 2-in-1 based on just a single photo, and indeed they were. OLED is really noticeable when the two are side by side.

We also enabled HDR (off by default in Windows 10 to save battery) and watched episodes of NBC’s Science Fiction Drama Debris and the results were stunning. In such a dark-themed show, the faces of the characters were true to real life. We could make out the fine details in the makeup and fake scar on one character’s face.

Outside of multimedia, the OLED panel makes typing in our CMS and browsing the web quite pleasing. Text looks more clear, and images on web pages are more vibrant. Going back to the LCD on the XPS 13 2-in-1 was hard, and we instantly noticed the lack of colors and contrast on the regular XPS.

Performance

Configured with the 11th generation Intel Core i7-1185G7 processor, 16GB of RAM, and a 512GB solid-state drive, this XPS OLED model is no joke. We like to talk about this in real-world use. There is one word when it comes to performance on this laptop — amazing.

Intel’s 11th generation Core i7 processor makes a lot of gains in terms of graphics and productivity. The XPS was able to handle our daily flow of 20+ media tabs in Edge just fine. It also outputted a 47-minute long (3 GB worth of data) and 1080p podcast video in Filmora in just 22 minutes. That’s double the time on our dedicated gaming laptop and video editing machine, but considering there is no GPU inside the XPS, that’s quite the feat.

There’s also no fan noise here either, and the XPS stayed cool and quiet throughout day-to-day use, and only got hot when encoding videos. Dell is using dual fans to spread heat over a larger area and a single heat pipe with a single evaporator and dual condenser. Hidden exhaust vents in the hinge also help with airflow and a slight ramp aids in lifting more heat out. This all definitely does the job and keeps the laptop at a manageable temperature.

As for gaming, in Fortnite, the XPS punched out around 25-32 frames per second, which is perfectly playable on medium settings. If you’re looking for more dedicated benchmarking tests, we point you to notebookcheck.org, which runs the full suite of paid benchmarking software, out of our typical range. But trust us, this is a beast of a machine for something that doesn’t have a dedicated GPU inside.

Battery Life

XPS 13 OLED

With an OLED panel and 3.5K resolution touch screen, you can expect the XPS 13 to take some big hits to battery life. This XPS has to spend a lot of power to fulfill the needs of all those pixels. Generally speaking, for productivity, which includes web browsing, working on Word, and other apps, we got to around 7.5 hours of battery life. It’s a big difference from our XPS 13 2-in-1, which pushed past 10 hours in our previous review.

We got to these numbers with our settings put the way Dell-recommended us (dark mode turned on in Windows 10 along with a dark wallpaper, HDR disabled when not needed.) We also had the brightness turned down, to a still viewable percentage of around 20 during these tests.

These settings are also chosen because of how OLEDs handle blacks by shutting power off to pixels to save energy. Switching things to light mode only worsened battery life a bit, kicking things down a couple of minutes to nearly 6.5 hours in our tests.

For multimedia, meanwhile, the XPS 13 OLED managed to push us through a binge-watching session of NBC’s Debris. We got through three and a half one-hour episodes of the show before the XPS 13 died on us.

In this case, we had HDR turned on, and the brightness was pushed up past 30% for the best viewing pleasure. Turning HDR off pushed us through another 4 episodes on a single charge.

All in all, there are some expected sacrifices with the OLED display. It’s not a Dell problem either, as we had a similar hit in battery life when we reviewed the OLED HP Envy 15.

Buy if you’re into color accuracy and details

If you’re into either light photo or video editing, or just really love watching movies and streaming content on your laptop, then this XPS 13 with OLED is a must-buy for you. There will be some sacrifices when it comes to battery life, but it will be overall worth it for you.

This laptop punches out some incredible-looking images and videos that will feel quite immersive thanks to the near bezel-less design. The $400 upcost also means that you’ll get more pixels, too, which not everyone might need, but this is one beautiful laptop to look at.

Satellite Imaging Software: 5 Best to Use in 2026

There are lots of websites from all kinds of agencies all over the world that equip you with high-quality satellite imagery of all sorts of places from our planet.

There are both free and paid software that provide satellite data, and we gathered five of the best sources.

Just take a look at our top picks and after you check out these tools’ sets of features decide for yourself which one is the best choice of eyes from the sky that you would like to use.

What are the best satellite imagery tools for your PC?

Google Earth

We beat that everyone has heard about Google Earth and it’s excellent that recently it has been redesigned in order to offer users a better overall experience.

Google Earth was designed to offer a beautiful and user-friendly experience.

Check out more features and functionalities that come with this fantastic program and get Google Earth from the official website to give it a try for yourself.

There, you will find Google Earth for Chrome and older versions as well. In case you encounter any issues while using Google Earth on PC, this troubleshooting guide will help you fix them in no time.

Take a look at the most impressive features that are packed in this popular software below:

  • You will be able to discover new content and visualize 3D imagery of cities and more places on Earth
  • You will have access to Street View imagery, and you will be able to share links to specific Street Views
  • The speed that you can move around with is enhanced, and the program’s performance is comparable to the Classic GE
  • There a feature called Feeling lucky? that will randomly fly you to an exciting place on Earth to provide you data about it
  • The Voyager is a brand-new way to explore lots of content with extensive information available
  • You will be able to experience interactive stories from all over the world in Voyager

⇒ Get Google Earth

Maptitude Mapping Software

Maptitude Mapping Software is another excellent satellite imagery program. The pictures and images enhance the maps and expand the type of data that you are able to use.

This software allows you to use one or more photos, satellite images, aerial photographs, and scanned docs as layers to create maps.

Maptitude Mapping Software offers you a few OpenGIS web Map Services by default, and you will also get full control over which servers are listed.

If you have installed at least version 4.0 of Google Earth and later versions and you have access to the Internet, you will be able to use the Google Earth toolbox as well.

Check out more exciting functionalities and features that are included in this program:

  • The features included in Maptitude Mapping Software can improve the appearance of your maps
  • You will be able to add more information to your maps
  • The program provides a basis for editing and updating your map files as well
  • Using this software, you will be able to access free imagery from the Internet for various locations in the world
  • Maptitude Web Map offers you access to satellite and imagery from all kinds of Internet sources
  • The tool automatically updates the image resolution and location
  • There’s also the WMS Image toolbox included, and this lets you download aerial photos, maps, and more effortlessly
  • You will be able to enjoy the Google Earth toolbox as well which will let you use Google Earth images for your maps
  • Using this program, you will be able to download imagery from anywhere on Earth with a single click of a button

⇒ Get Maptitude Mapping Software

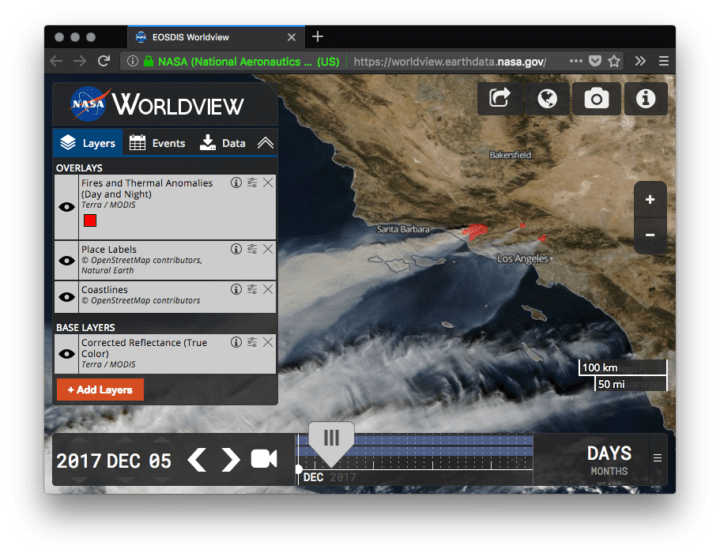
Worldview from NASA Software

Worldview is a satellite imagery browsing and downloading tool that comes packed with awe-inspiring features.

With Worldview, you will be able to pan and zoom quickly through space and time in order to find the most cloud-free and relevant data that is currently available.

Check out the best ones below:

  • This tool is designed for interactive browsing and downloading imagery from NASA’s own Earth-observing satellites
  • The software is building upon a set of open-source mapping and user interface libraries
  • Worldview provides an environment to visually discover really interesting phenomena just as it is observed by NASA’s satellites
  • You will get the chance to download the data for further analysis
  • This program was initially designed in order to offer relevant data for time-critical scenarios such as flood and wildfire management
  • Satellite imagery is now available in this program to view it within four hours of observation
  • You will be able to view the imagery in the highest and the native resolution

⇒ Get Worldview

TerrSet

TerrSet is a Geospatial Monitoring and Modeling Software. This is an integrated geospatial system for monitoring and modeling the Earth system for sustainable development.

You can check out the complete features that are included in this amazing tool on the TerrSet official website.

Take a look at the most important features that are packed in TerrSet:

  • It incorporates the IDRISI GIS Analysis and IDRISI Image Processing tools along with a vast constellation of apps
  • You will get the most extensive set of geospatial tools in just one package
  • You will not need to buy all kinds of expensive add-ons in order to extend your search capabilities
  • The IDRISI GIS tool provides more than 300 analytical tools for manipulating the geospatial datasets for the exploration of our world
  • You will be able to use a vast set of procedures for image restoration, transformation, enhancement, and classification of remotely sensed imagery
  • The Habitat and Biodiversity Modeler is a vertical app targeted at habitat assessment, biodiversity modeling, and landscape pattern analysis
  • This software comes with a tool called GoOSIRIS that is able to quantify and map the impact of national-level REDD projects on carbon emissions, deforestation, agricultural revenue, and carbon payments as well
  • The Ecosystem Services Modeler is a support system that will access the value of natural capital for sustainable development
  • The software also includes an Earth Trends Modeler which is a set of tools for analyzing image time-series data associated with Earth Observation remotely sensed imagery
  • There’s also a Climate Change Adaptation Modeler that includes a set of tools for modeling climate and assessing its impact on sea level rise, species distribution and crop suitability

⇒ Get TerrSet

Geomatica

Geomatica is another excellent satellite imagery tool that comes with an extensive set of features and functionalities.

Overall, Geomatica offers user everything they need for accurate and fast results. The image thumbnails and the background reference layers make the project set up effortless.

There are lots of efficient editing tools included, and the image deactivation functionality and detailed reporting feature allow you to get a flawless job quickly.

More features are worth checking out, so it’s best to head over to Geomatica’s official website and take a look at all of them there.

You can check out the best features below:

  • This is an easy-to-learn and effortless to use software with Object Analyst add-on that guides you through image segmentation, feature extraction, and training site creation
  • By segmenting images into discrete shapes, relationships, and boundaries, it can be easier to see and analyze data
  • With this software, you will be able to shape manipulation and accuracy, and this will allow quick image processing and results as well
  • Geomatica comes with an automatic GCP feature and tie-point collection
  • You will also be able to use a multi-way point selection, and you can calculate relative, absolute, and combined models

⇒ Get Geomatica

These are five of the best tools that provide satellite imagery, and we recommend that you pay a visit to each official website to check out their complete sets of features before you make your final decision.

You might also be interested in one of the best Windows 10 maps apps to use on your PC and find your landmarks.

Did you use one of the tools above? Tell us more about your experience in a comment from the se

FIX: Windows needs more disk space to print

A great number of users have encountered the operating system needs more disk space to print this document error message when trying to print stuff using Microsoft Word.

It seems that this issue occurs on a large array of operating systems and versions of MS Word. Even though the error says something about needing more disk space, that is not actually the case.

This issue can be caused by a variety of elements – from add-ins installed to your MS Word application, to a broken registry entry.

Considering all of this, we know how important it is for you to be able to use Word, so in today’s article, we will explore a few troubleshooting methods to deal with this issue.

How can I fix Windows needs more disk space to print error?

1. Update MS Word to the latest version

  1. Open MS Word by double-clicking on the icon.
  2. Select File from the upper part of your screen then click on Account.
  3. Click on Product Information and select Update options, then Update now.
  4. Wait for the process to complete and check to see if the issue persists.

The first thing you should do to fix the Windows needs more disk space to print this document error is to update your MS Word. Once you hit the update button, all of the MS products will update.

Is your printer only finishing half the page? This useful guide about fixing the printer if it’s printing only half the page will surely help out.

2. Start MS Word in Safe Mode using the /a command

  1. Press Windows Key +R keys on your keyboard to start a Run dialog box.
  2. Inside the Run dialog box then type winword /a and press Enter.
    winword a command in run window - Windows needs more disk space to print
  3. This will open MS Word without loading any of the add-ins installed.
  4. Try to print your document.
  5. If it works, then it means that the issue was caused by one of your add-ins.
  6. Disable each one of them and restart Word to spot the specific problem add-in.
  7. Remove the add-in causing the issue.
  8. If the problem seems to persist, follow the next method.

3. Delete the Word Data registry subkey

  1. Close all Office software.
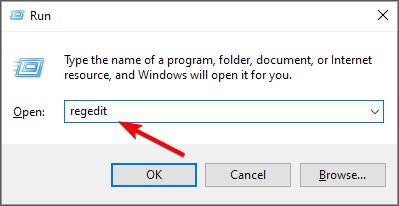
  2. Click on the Cortana search box and type regedit, then press Enter
    regedit command in run window - Windows needs more disk space to print
  3. Locate the specific registry subkey depending on what version of MS Word you’re using:
    • Word 2016: HKEY_CURRENT_USER\Software\Microsoft\Office\16.0\Word\Data
    • Word 2013: HKEY_CURRENT_USER\Software\Microsoft\Office\15.0 \Word\Data
    • Word 2010: HKEY_CURRENT_USER\Software\Microsoft\Office\14.0\Word \Data
    • Word 2007: HKEY_CURRENT_USER\Software\Microsoft \Office\12.0\Word\Data
    • Word 2003: HKEY_CURRENT_USER\Software\Microsoft\Office\11.0\Word\Data
  4. In File menu, click on Data, then Export.
  5. Name the file Wddata.reg and save it to your desktop.
  6. Right-click the Data key, then click Delete and click Yes.
  7. Exit Registry Editor and start MS Word.
Note icon NOTE
Performing this method will also reset the ‘most recently used file’ list and setting made inside Options. Please follow the steps in this method carefully to avoid creating any other issues.

If you’d like to use something other than MS Office products, here’s a nice list of the best Office alternatives that you can find at the moment.

We hope this guide helped you solve your Windows needs more disk space to print Microsoft Word error. Don’t forget to let us know by using the comment section found below.

FIX: Windows Defender security center has a red X [Solved]

Following the Windows 10 Anniversary Update, many users have reported that after doing a full scan, the Windows Defender shield changes.

The antivirus switches from all-white to a red circle containing a white X overlaying the lower right quadrant of the shield. The next question is: what does this new icon mean?

For the time being, no one can answer this question, the red circle with the white X overlay is as mysterious as the Bermuda triangle. The good news is that Windows Defender appears to be up and running.

All the status indicators are normal: the antivirus indicates the PC is being monitored and protected, real-time protection is on, and the virus and spyware definitions are up to date.

Quick Tip:

While Windows Defender is great antivirus software, completely integrated into Windows, it is not the best one there is. There are better options on the market.

We suggest installing a third-party security tool that specializes in protecting your system from the newest harmful software, phishing attacks, and data theft.

TotalAV

Protect your data, keep your identity private, and browse the Internet freely thanks to TotalAV.
Check Price Visit Website

The Windows Defender shield overlay puzzles users

One user stated the following:

After the Windows 10 Anniversary update and after doing a full scan, the Windows Defender shield switches from all white to the following image (a red circle containing a white X overlaying the lower right quadrant of the shield.)  What does it mean?

All the Insiders who joined the conversation on a forum thread have confirmed they have never seen this overlay before.

Some even said the overlay is certainly an interesting anomaly. However, we wouldn’t haste to say that, taking into account that Windows Defender appears to be running normally.

Perhaps, this Windows Defender firewall red x is a new part of the overlay that Microsoft forgot to introduce.

How do I get rid of the Windows Defender overlay problem?

1. Restart Windows Defender

  1. Click on the Windows Defender icon from the System tray.
  2. Next, click on the Gear icon.
  3. Then, click on Windows Defender.
  4. It may appear to be On. Turn it Off, then On again.

If this strange Windows Defender shield overlay really annoys you, simply turn off the antivirus and then turn it back on. According to users’ reports, this simple action makes the mysterious overlay disappear.

I also had this issue. Here was my solution. Click on the Windows Defender icon in the system tray. Click on the gear (settings) icon. Click on Window Defender. It may appear here to be “On”. Turn it “Off” and turn it “On” again. Worked for me. Good luck all!

2. Run a System Scan

  1. Press the Windows Key + S and type in Command Prompt.
  2. Right-click on it and choose run as administrator.
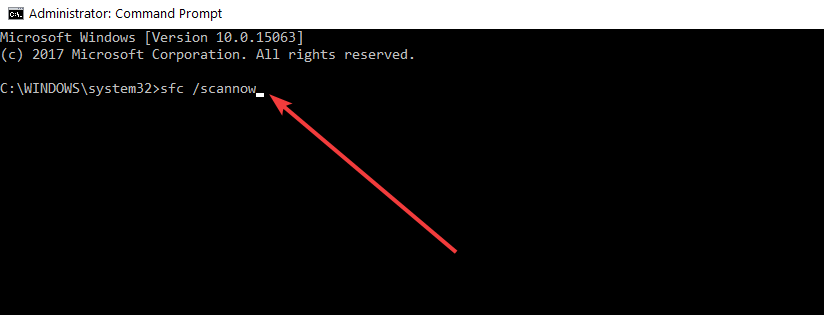
  3. Type the following and press Enter: sfc /scannow
  4. Wait for the process to finish.

Running a System Scan will solve most system problems, and seeing as the Windows Defender is integrated into the system, it should solve the Windows Defender shield red cross problem.

3. Run a DISM scan

  1. Press the Windows Key + S and type in Command Prompt.
  2. In Command Prompt, type in DISM /Online /Cleanup-Image /CheckHealth
  3. You can also type: DISM /Online /Cleanup-Image /RestoreHealth
  4. You can then run the following command again: sfc /scannow
  5. Wait for the process to finish.

4. Restart your device

This might be just a visual bug, due to some conflicting software. If your Windows Defender is actually running fine even if the icon is different, you should be safe.

Restarting your device might solve this issue, although it’s not guaranteed. Most likely, this is a problem from Microsoft’s end and it will fix itself in time.

This concludes our article. We gave you an overview of this strange behaviour from Windows Defender.

Have a look at this thorough list of the best antivirus software with a lifetime license and choose one to protect you from any dangerous software.

If you know what this Windows Defender icon overlay means, you can tell us more about it in the comment section below.

5 Best Fan Speed Controllers To Buy [2026 Guide]

Building a gaming PC is always exciting, especially when you add multiple RGB lights.

While the use of RGB lighting is a debatable topic, it is important that you have plenty of case fans to keep your PC cool all the time.

That said, adding multiple fans can become problematic if the motherboard does not have enough connectors to accommodate all the fans. This is where the fan speed controllers come in handy.

In this article, we have listed the best fan speed controllers to keep your PC cool while providing greater control over the case fans.

What are the best fan speed controllers to get?

GIM KB-23 RGB

  • Beautiful RGB lighting effect
  • No less than 3 Music Modes
  • Wireless control.
  • Synchronizable RGB Lighting via motherboard
  • Reliable customer service
  • Limited motherboards compatibility

Haven’t you heard of the GIM KB-23 RGB case fans? The GIM RGB case fans give you the chance to enjoy the unique RGB lighting effects in 16.8 million color.

Even more, the fans are designed with 3 different music modes and each music mode has its own lighting mode, which creates some visual and audio effects that enhance your gaming experience.

When it comes to the included RF wireless remote, keep in mind that it is perfect to adjust fan speed (S/M/H)/lighting effects/brightness/LED speed without even opening the case.

Noctua NA-FC1

  • Highly-flexible model
  • Affordable fans speed controller for 4-pin PWM fans
  • Can control up to 3 fans simultaneously
  • No stop mode to avoid BIOS errors
  • Extended 6-year manufacturer’s warranty
  • No mounting adhesive included

Another great controller on this list is Noctua NA-FC. That’s a compact and highly flexible controller for 4-pin PWM fans.

The device works as a manual speed reducer or in tandem with the automatic motherboard fan control.

The built-in No stop mode prevents the fans from falling below the speed of 300rpm, which is crucial to avoid BIOS errors.

Even more, the Noctua NA-FC1 controller also includes a 3-way splitter cable for controlling up to 3 fans.

Kingwin Performance FPX-008

  • Controls up to 4 RGB case fans
  • LCD display to view fan speed and temperature
  • Basic fan controller setup
  • Dial Control
  • Affordable price tag
  • Poor quality knobs

Kingwin Performance is an affordable RGB fan control solution. It is a 4 channel fan controller with easy to use dial controls.

The built-in Wide LCD display shows fans’ speed and temperature for individual fans. The device is easy to install and fits any 5.25” front bay.

So, if you’re a tinkerer with your computer, this is definitely some equipment you’ll want to look into.

NZXTAC-2RGBC-B1

  • Two NZXT RGB lighting channels
  • No less than 80 LEDs total
  • Three fan channels with max 10W per channel output
  • Built-in noise detection module
  • NZXT CAM application
  • Only works with NZXT RGB

The NZXTAC-2RGBC-B1 RGB & fan controller is also worthy of your attention. it comes with two NZXT RGB lighting channels and up to 40 individually addressable LEDs per channel.

As for the three fan channels with max 10W per channel output and built-in noise detection module, they are also top-notch.

Even better, feel free to look for NZXT RGB LED accessories within each channel, including NZXT Underglow, LED strips in various lengths, and Aer RGB fans while syncing all lighting accessories across different channels.

Thermaltake Commander FT

  • Bright 5.25” touch screen display
  • Controls up to 5 RGB fans simultaneously
  • Comes with all necessary cables to connect up to 5 fans
  • Performance Mode
  • Silent Mode
  • Expensive

Thermaltake Commander FT is a touchscreen-based 5 channel Single bay cooling fan controller. You can control up to 5 RGB case fans with a touch.

It boasts a 5.25” touch screen display. The users can either use the auto mode to let the controller decide the fan speed or manual mode to take full control of your RGB fans.

Even more, Thermaltake Commander FT offers 3-Pin and 4-Pin connectors and supplies 10 Watts per channel.

As expected, fan speed controllers play a crucial part in keeping your gaming rig cool all the time.

Although we have listed from very basic to premium fan controllers here, pick a fan controller that suits your gaming rig’s needs. Then, let us know your choice in the comments area below.

Microsoft and Morgan Stanley team up to boost cloud transformation

Morgan Stanley and Microsoft announced an interesting cloud partnership earlier today, that is mainly aimed at accelerating the firm’s digital transformation, as well as the future of innovation in the financial services industry.

The two giants will build a collaboration to unlock the opportunities that Microsoft’s cloud provides, with a more concentrated and niche view toward the challenges of financial services.

This initiative will therefore enable Morgan Stanley to boost the modernization of its IT environment, in order to enhance client, employee, and developer experiences.

Microsoft will help boost cyber security

As we all know, the financial services industry is in a constant battle to satisfy evolving customer needs, as well as dynamic markets, a complex regulatory landscape, and especially increasing cyber threats.

This partnership could also be the result of the increased number of malicious cyberattacks that have been registered lately, attributed to the Nobelium hacker group.

Achieving such feats, of course, requires secure and upgradable solutions that can empower businesses, and clients altogether, to better manage complex data tasks and growing risks.

Big innovation plans for the future

So, basically, with these two companies joining forces, the engineering power of Microsoft Azure, along with Morgan Stanley’s Technology teams, important changes and solutions are bound to quickly arise.

Microsoft will help Morgan Stanley with a secure and compliant platform. with data privacy at the center. that will fuel the firm’s cloud transformation and scale across natively integrated platforms to dramatically improve developer experience to drive innovation.

During the period in which the two companies will collaborate, the main goals that whey will be focusing on are:

  • Developing and co-designing new application infrastructure meeting the key requirements for financial services and informing product innovations including for Microsoft Cloud for Financial Services, bringing together common data models, cross-cloud connectors, workflows, APIs, and financial industry-specific components and standards.
  • Accelerating Morgan Stanley’s digital transformation aligned with the firm’s cloud- first and multi-cloud strategy, resulting in a modern, more flexible and scalable environment with the transition of workloads onto Microsoft Azure; improved employee experience with Microsoft 365 and collaboration tools; higher developer effectiveness and innovation power with cloud-native services; and better service, insights and connectivity to clients.
  • Enhancing the employee and developer experience by building innovative solutions with cloud-native services for faster implementation of apps. The companies’ engineers will also collaborate on requirements and capabilities across the latest technology to drive client- and business-centric innovation in financial services in faster and more flexible ways by leveraging Morgan Stanley’s deep engineering and domain expertise.

This is an interesting outcome of the needs that big companies are having in this ever-hazardous online era.

Not totally unexpected, but all in all a logical solution for Morgan Stanley, considering Microsoft is a world-class tech company, and an obvious choice when it comes to these matters.

What is your opinion on this partnership’s potential? Tell us all about it in the comments section below.

5 Best USB Network Adapters to Improve Internet Connectivity

When you’re getting a USB network adapter, knowing a thing or two will go quite a long way to fit your setup.

Finding a USB network adapter that will work best for your laptop, desktop, tablet, and router, is the primary objective.

There are a couple of things that are very important to know with Wi-Fi today, and we’ll browse through them all for you.

Every wireless adapter will be different from the other ones, but one thing that they all have in common is the fact that you can use them as a replacement of your dead internal card.

You can also use a USB wireless network adapter in case you really want to boost your network’s wireless speed.

In the guide below we’ve compiled the best choices and reasons why you should choose a USB wireless network adapter, so read on.

What are the best USB wireless network adapters?

TP-Link AC600 USB WiFi Adapter

  • Large coverage around the house
  • Dual-band 2. 4 GHz and 5 GHz band
  • Comes with a 2-year warranty
  • Can cause issues with other USB ports

This is very good, and it works pretty well, being compatible with Windows machines. It supports Windows 10, 8. 1, 8, 7, XP/ Mac OS X 10. 9-10. 14,

It features 200 Mbps speeds on the 2.4 GHz band and 433 Mbps speeds on the 5 GHz band. The unit connects to PCs via USB, and it features a compact design and 3ft. cable for easy desktop placement.

It has a high-gain external antenna for increased coverage, that rotates and it can be adjusted for optimal user experience and performance.

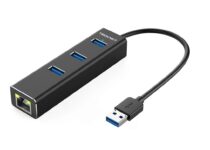
TECKNET Aluminum 3-Port USB

  • Compact, lightweight, portable
  • Supports IPv4/IPv6 protocols
  • Comes with an 18-month warranty, free lifetime technical support
  • At times can have massive lag

This one is a small and convenient wireless unit, and it supports IPv4/IPv6 protocols and dual-channel transfer mode. The unit allows you to have the farthest range with the widest coverage.

The built-in feature surge protection will keep your devices safe and data protected against the most common malware attacks.

This unit is also perfect as an external extension solution. The Tecknet USB 3.0 hub ensures a good arrangement of all connections making sure that plugs and cables do not interfere with each other.

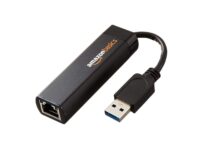
AmazonBasics USB 3.0

  • Supports IPv4/IPv6 pack
  • Compatible with Windows 10/8/7 and Mac O
  • Connects a USB 3.0 device (computer/laptop) to a router, modem, or network switch
  • Does not support Chrome OS, Windows RT, Linux or Android.

This one is a small low-cost unit that is perfect for users on a budget. It will not break any speed records, but it’s a pretty good unit for people who are looking for a low-cost wireless adapter.

During the testing processes, it featured a 101 Mbps download speed, and this is an excellent one for such a small wireless adapter.

Using it is very simple and all you have to do is plug it in, install the drivers, and that’s it. It works on every device running Windows 10/8/7 and Mac OS.

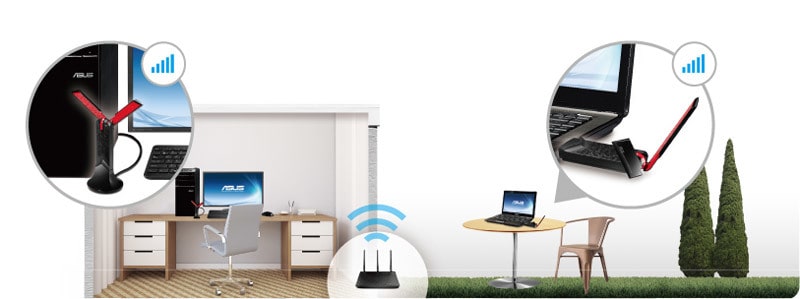
ASUS USB-AC68 Dual-Band AC1900 USB 3.0

In case you are looking for the fastest wireless dongle than this one is really worth your attention.

First of all, you should know that this does not come cheap, so if all you need is to simply get online, then you might want to consider some more affordable devices.

Having the fastest adapter is not a thing that is needed by most users so unless you really need a fast wireless USB adapter for a desktop or upgrading a laptop, it’s best to choose cheaper units.

This unit is for anyone who is looking for the fastest USB Wi-Fi adapter available on the market. It uses the Realtek RTL8814Au chipset which features the latest tech, 3×4 MIMO, and AirRadar beamforming.

Its theoretical speed is 1900 Mbps which is split between 2.4 GHz (600 Mbps) and 5 GHz (1300 Mbps) frequencies.

It instantly upgrades laptops and desktops to dual-band AC1900 Wi-Fi foe extended coverage and higher output.

It features a cradle that provides additional placement options for optimizing coverage for desktops, and it increases the Wi-Fi speeds by up to 300%.

⇒ Get ASUS USB-AC68

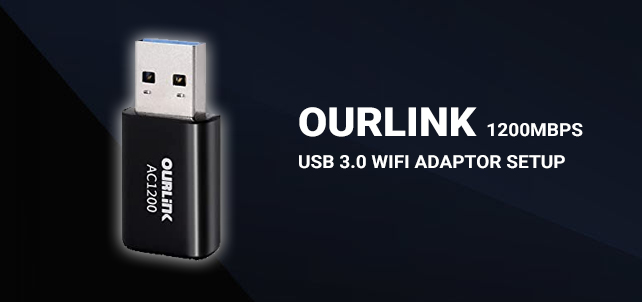
Glam Hobby 1200Mbps USB 3.0 Wireless Network Adapter

This one is a low-cost 802.11ac dual-band unit from Glam Hobby called Ourlink.

During the testing processes, the tool worked pretty good with Windows 10, and it ran at a solid 100Mbps download speed.

The adapter upgrades PCs to 802.11ac using the latest and the most powerful Wi-Fi technology out there. It is three times faster than wireless N speeds.

It is ideal for gaming online and also for seamless HD video streaming.

The dual-band reduces interferences for great connections to more Wi-Fi devices, and it should offer up to 1200Mbps Wi-Fi speeds on 5GHz (867Mbps) and 2.4GHz (300Mbps) bands.

It also features super speed USB 3.0 Port up to ten times faster than USB 2.0. The device can boost speed, reliability and range and it’s designed especially sharply in 5 GHz.

It has an innovative mini design, and it is compatible with Windows 10, 8.1, 7, and XP.

⇒ Get Glam Hobby

Discover all about network adapters

From dial-up to wireless

The days of dial-up are now long gone, and we’re living the era of wireless.

With so many companies offering their customers the option of a wireless modem or router, the temptation to upgrade an already existing wired connection is huge.

But, for most consumers, receiving a wireless signal is much more complicated than it seems.

Most modern computers come with an internal wireless network interface controller (WNIC), but others don’t. If a machine is built from scratch, here may lack a wireless card.

There are plenty of reasons for which to go for a USB Wi-Fi adapter and for switching to a wireless network, and we’ll discuss them all below.

Reasons for choosing Wi-Fi

Even if many consumers are still relying on a wired connection in their homes, the popularity of a wireless network option has been continuously increasing for quite a while now.

The wireless Internet subscriptions have decreased in cost very much, and the variety of devices that can connect wirelessly to the Internet has really grown.

Long story short, here are the reasons for which you should definitely switch to a home Wi-Fi network:

You can get immediate network support for MP3 players, cell phones, netbooks, tablets, game systems and more devices with Wi-Fi capabilities.

Satellite and cable providers and Internet-based movie rental businesses as well usually provide a customer the option to stream movies straight to an appropriately equipped TV set via Wi-Fi.

As a consumer, you will be able to wirelessly serve multiple computers in different areas of the house without having to get Ethernet cables installed.

You can offer your guests the opportunity to connect to the Internet via the Wi-Fi connection.

VoIP telephone services can be chosen instead of more expensive landlines.

You can also send faxes via the Internet.

Most home Wi-Fi networks feature a range of about 65 ft, so you can choose to work whenever you want to, even in outdoor areas.

Modern Wi-Fi networks are very reliable, and the small losses in download speed will definitely not be an issue.

High-speed signals are usually offered by hybrid coaxial and fiber lines, so the initial connection rate will be rapid.

The USB wireless adapter

USB Wi-Fi adapters have been developed as a response to the advancing rate of wireless network expansion, in comparison with the smaller numbers of PCs with inbuilt wireless network interface controllers (WNICs).

Lacking a way to access the new technologies, some consumers were just not upgrading.

The development of the USB adapter has made it possible for computer owners to justify setting up a wireless home network.

These cool gadgets also allowed laptop owners to work in Wi-Fi hot spots.

The number of prefabricated systems without integrated WNICs has significantly dwindled, but there are still lots of reasons for the growing popularity of the USB Wi-Fi adapter:

Some users with robust, custom-built systems predating the wireless era may choose to expand and to upgrade their existing system rather than to purchase a new one.

Consumers who use their computers rarely may be satisfied with their older unit, and this makes the addition of a USB device preferable to a new system.

Users whose integrated network interface cards fail may choose to replace the faulty components with a USB alternative.

Some users may feel that it is safer to unplug their systems from their home networks when they are not using them.

Selecting the right kind of USB Wi-Fi adapter for your computer and network

Which adapter is best for you? Which one will work correctly with your device?

How can you get the highest speeds without wasting your money on lots of capacity that you don’t really need or buying something that will not work on your machine?

To make the best decision you must take into consideration three main factors – the 3Cs: compatibility, capacity, and cost.

First, you have to make sure that the adapter you decide on purchasing is compatible with your system and your network.

Everyone desires the fastest possible network access whether it’s for connecting to the Internet or for downloading files from an office server.

But you should keep in mind the fact that there is no point in spending money on extra capacity that you will not use.

Also, remember that getting a faster adapter will not make your network faster if its speed is limited by the Internet connection or some hardware from the network.

The speed at which data can be transferred over the network usually varies depending on lots of factors.

For instance, if there are many systems connected to the network, or is any of the computers is infected with some kind of virus, this will definitely lead to degraded speed.

Generally, for a home network, the most important is the speed you have contracted for with your Internet service provider (ISP).

Distance, 802.11 protocols, and antennas – these are three more important aspects you should take into consideration.

Distance

2.4 GHz used to be the frequency used for Wi-Fi until back in 2013 when the 5 GHz band was opened up for wireless devices.

What you should know is that the higher the frequency, the less distance it can travel reliably. Therefore, using the good old 2.4 GHz will go farther than the new 5 GHz dangles.

In case you are asking yourself why to use the new 5 GHZ band, we will answer your question right away.

There are simply too many devices talking in the old frequency, and now it has become overcrowded, and the result is the fact that everyone trying to get a signal is slowed down.

On the other hand, the new 5 GHz even if it’s not able to send a signal as far as the old band, it is not that crowded.

As a simple conclusion, if you live in a crowded city, your best option is to use a 5 GHZ dongle. In case you live outside a city, and you only have a few neighbors, you should go for the 2.4 GHz dongle.

802.11 protocols

802.11 is the thing that sets the standards for the manufacturers and device makers to create their products.

Most modern devices are 802.11, and they’re also called Wireless-N. This can work on both the 2.4 GHz and the 5 GHz frequency ranges. Dongles that work with both are called Dual Band.

In 2013 there was introduced a new protocol, the 802.11ac, and it can transfer information faster than the wireless N. why not choose this one then?

Well, because it only works in the 5 GHz range which as we already said it doesn’t travel as far as the 2.4 GHz.

Antennas

You should know the fact that internal antennas are good for keeping a low profile, but they will not transmit as far as external ones.

The dongles that come with an external antenna will use an SMA connector that allows for easy screw-on attachments of antennas of different sizes.

This will allow for cheap solutions to distance and connectivity issues.

Installing a USB Wi-Fi adapter on your Windows 10 PC

In case your PC does not have a built-in Wi-Fi feature, or if your PC’s or laptop’s internal Wi-Fi adapter is not working anymore, your best bet is to use a good-quality USB Wi-Fi adapter.

After you purchased it, you also need to know exactly how to install it to boost the Wi-Fi signals.

In case your system features the required drivers

Most of the USB Wi-Fi adapters come as plug and play devices for Windows 10 PCs.

The latest operating system from Windows already contains the minimal drivers for most of the devices, and so do all other Windows systems.

When you have all the built-in drivers, you can just use the Wi-Fi directly without having to download more drivers for the adapter separately.

In case your system needs to update its drivers, you can simply go to the manufacturer’s website,  or you can do it from the Windows Device Manager.

One of the main advantages of having the drivers installed on PC is that you can directly use the wireless network via the Wi-Fi adapter.

You can just choose the Wi-Fi 2 as the secondary network and this will be shown to you due to the new wireless adapter.

You will see this option being displayed at the top of the wireless network list in the taskbar. After doing this, you can reconnect to the network, and you are ready to go.

If you don’t have any wireless networking device installed on your PC running Windows 10, then your system will automatically conduct the plugged USB adapter as your primary choice.

In case your system lacks the needed drivers

Unlike the previous versions of the operating system, there should be any chances that your Windows 10 machine doesn’t come with all the drivers installed.

But in the exceptional case in which this happens, you have a few ways to install the drivers correctly. Here they are:

Download the drivers on a separate machine

Ideally, your machine should come with a functional internal wireless adapter that will allow you to go online and to look for all the required drivers.

But if it’s not the case, you can download the drivers by using a separate computer.

In order to get this done, you have to go to the manufacturer’s website and navigate to the Support page or the Drivers page.

You have to find the package which contains the necessary drivers for setting things up.

After you download the needed drivers, you have to transfer the file to a USB drive and then plug it into the PC or your laptop you want to use the Wi-Fi adapter for.

Then drag the files into the local folder and finally extract them.

Now, open the Windows Device Manager and find the name of your adapter in the list. You will find it in the Network adapters section; right-click on it and then select the update driver software.

After a Driver Update Wizard will open, choose Browse my computer for driver software from the options that will appear displayed on your screen.

You have to click on Browse and then select your local folder where you have previously copied and extracted the drivers.

Now you can just stay put and watch how Windows 10 installs the drivers by itself. After the installation is complete, the adapter will start looking for available wireless networks.

Use the installation CD

This method is probably the most popular and the most obvious solution for installing the drivers on your own.

You will see that most of the USB Wi-Fi adapters come with a driver CD.

You have to insert the CD into your machine, and it will display a window for driver installation and third-party wireless tool for searching networks.

We hope that these recommendations from our list were helpful. For more suggestions and other questions, please access the comments section below.


5+ emulators for Surface Pro 3 and 4 to run Android games

Microsoft Surface line revolutionized the portable computer market, and with the Surface Pro series, the software giant targeted the power users who needed power with portability.

The Microsoft Surface Pro lineup is capable of running all the Windows applications just like your big bulky laptop or desktop does.

Apart from being compatible with native Windows applications, an advantage of extremely portable computers like the Surface Pro is that you can use it to run the mobile application using emulators.

The best way to run mobiles apps on PC is to use the Android emulators. Android emulators allow you to run all the Android games and apps on your Surface Pro laptop and make use of the powerful desktop level hardware to offers enhanced and lag-free gaming experience.

Now if you are a using a Microsoft Surface Pro device and looking for the best emulators to run Android apps on your laptop, we have got you covered.

In this article, we take a look at the best emulators for Surface Pro 3 and Surface Pro 4 to run android apps and games to make the most of your portable workstation.

What are the best emulators to install on Surface Pro 3/4?

LDL Player

LD Player is a great emulator that is relatively new in the game and it doesn’t have so many features as others, but it’s very good at what it does.

Namely, it offers great compatibility to play mobile games on your PC without any problems. And a very convenient feature is that it comes with both Google Play Store and its own LD Store.

And if, by any chance, you don’t find the game or app in those two stores, you can always install it from your own apk file.

Performance wise, the LD Player offers an Android OS platform with maximum 4K resolution and a 60 FPS refresh rate.

You can also record your gameplay to share it on your website or YouTube channel later and you can even play more games at once from different accounts if you have a potent PC configuration.

Another useful feature is the ability to block the mouse cursor so you don’t make any accidental clicks on the interface.

LD Player is very easy to use, thanks to its simple and friendly interface so you should try it right now so see if it matches your requirements.

⇒ Get LDPlayer

Nox Player

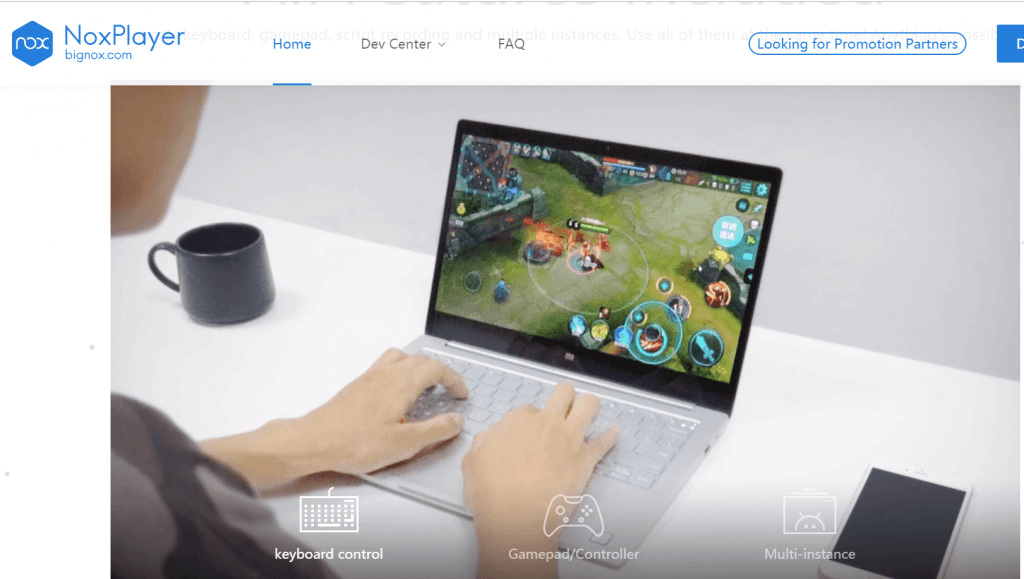
NoxPlayer

Nox Player is an easy to use Android emulator and is compatible with both Surface Pro 3 and 4 devices. It is compatible with Windows XP to Windows 10 running devices.

There are no special requirements to run this tool; hence you should comfortably run the player even on the base model of the Surface device.

The user interface is simple and clean. You feel like using a large screen Android device looking at the UI.

All the apps and settings are exactly like it on any Android device except some modifications made to offer a better experience on a PC.

Nox Player runs on the forked version of Android 4.4.2 and 5.1.1. It is compatible with X86 and AMD chipsets out of the box.

If you want an emulator for playing Android games, Nox Player comes with some essential feature developed keeping gamers in mind.

The emulator supports high-FPS (up to 60 FPS) gameplay along with keypad control and smart-casting feature to a name a few.

You can use the keyboard controls to manage the apps and games. For games, Nox Player supports Gamepad controls.

The multi-instance feature allows you to play multiple games simultaneously or multiple instances of the same game at a time.

Nox Player is completely ad-free and is an excellent Android emulator for your Surface Pro device.

⇒ Get Nox Player

BlueStacks

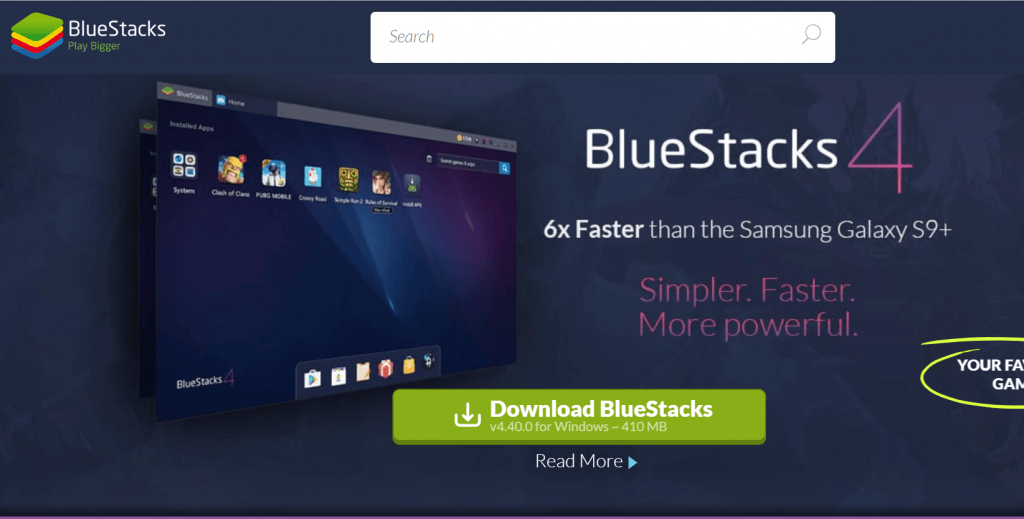
BlueStacks

You probably must have seen this coming or at least wondering where the most popular Android emulator in this list is? BlueStacks is one of the oldest and among the most successful Android emulators in the market today.

From installing apps to playing Android games, BlueStacks has been consistently receiving new updates improving performance while reducing CPU and memory usage to an extent.

What give BlueStacks an upper hand in the emulator game when compared to Memu Play and Nox Player is the fact that it runs on Android 7.1.2 Nougat with Oreo version being in development.

The other Emulators still run on the relatively older version of Android 5.1 Lollipop. For a developer, this can be of advantage as you test your Android apps on the new version of Android with ease.

On the flip side, BlueStacks loses a point for the sponsored ads that can be annoying at times. Nox Player and Memu Play are relatively clean offering great user experience.

For gaming and navigation, BlueStacks comes with keypad and gamepad control support. It also has the trendy Multi-Window feature that lets you play multiple games simultaneously through the split window.

BlueStacks also has a reward program where the user can collect points by using apps and games and redeem them for gaming accessories etc.

⇒ Get Bluestacks

Memu Play

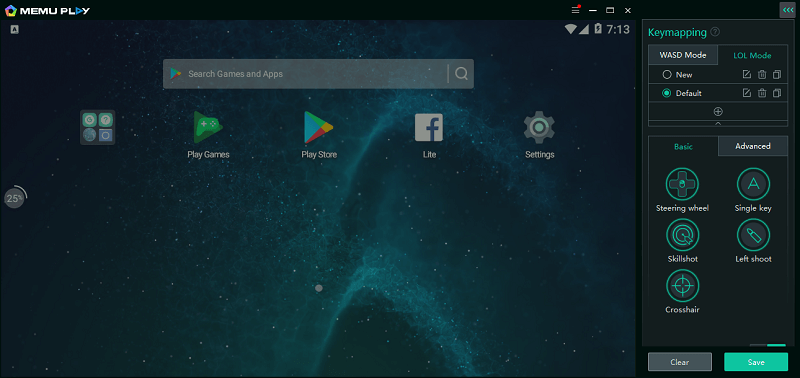
Memu Play

  • Price – Free

Whether you want to install WhatsApp on your Surface Pro or play PUBG Mobile, Memu play offers a decent gaming and Android experience on any Windows compatible devices.

The focus of Memu Play is on mobile gamers. However, it can run any Android app just fine.

If you want to run WhatsApp to reduce the mobile usage during working hours, install it on PC using Memu Play and all the message will come to your surface device.

Just like Nox Player, Memu Play also has some features to enhance the gaming experience of the users.

For instance, you have the multiple Instances feature that allows you to use multiple accounts for same or play multiple games at the same time on the single computer.

The gaming control options include support keyboard and gamepad controllers. You can also use your mobile as the joystick if needed.

To install apps and games, Memu Play offers two options. You can use the built-in Google Play Store app to download and install apps, or you can download the app apk and move it to Memu Play screen to proceed with the installation. The second option is beneficial for installing non-Google Play Store apps.

Memu Play is a relatively new emulator, but it has made a quite bit of name for itself for all good reasons. If you have used Nox Player before, give Memu Play a shot to see if it is any different.

⇒ Get Memu Play

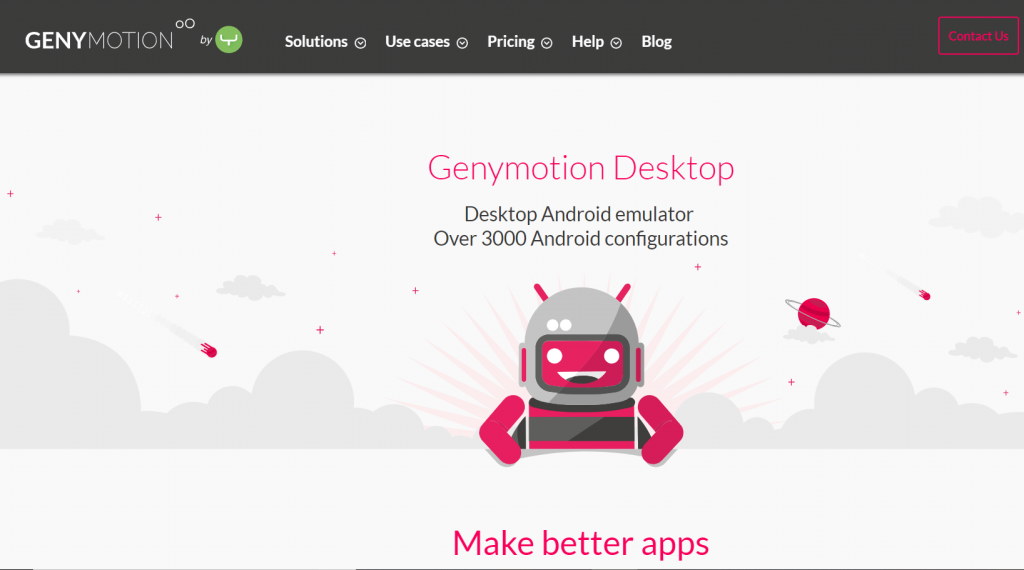
Genymotion Desktop

Genymotion

Genymotion not your standard emulator but is developed for Android app developers. It is a premium emulators that comes with seven days of free trial. The single user license for a year costs $136.

Genymotion offers the emulator for Desktop and Cloud.

Apart from exclusive features for Developer, Genymotion comes with all the feature offered by other Android emulators. You can install apps using Google Play Store or by downloading app apk.

Genymotion allows you to emulator over 3000 virtual Android device configuration for testing the app with a different version of Android, screen size, hardware etc.

Genymotion Cloud offers a cloud-based Android virtual device to run your app in your website without the user needing to download it or use it for app test automation.

It also offers broader virtual device test coverage from Android 4.1 and 8.0, API and CLI support and scaling capabilities.

Genymotion is a cross-platform emulator. The premium tag means it is developed for serious Android developers looking to automated the testing process without spending a fortune on infrastructure.

⇒ Get Genymotion

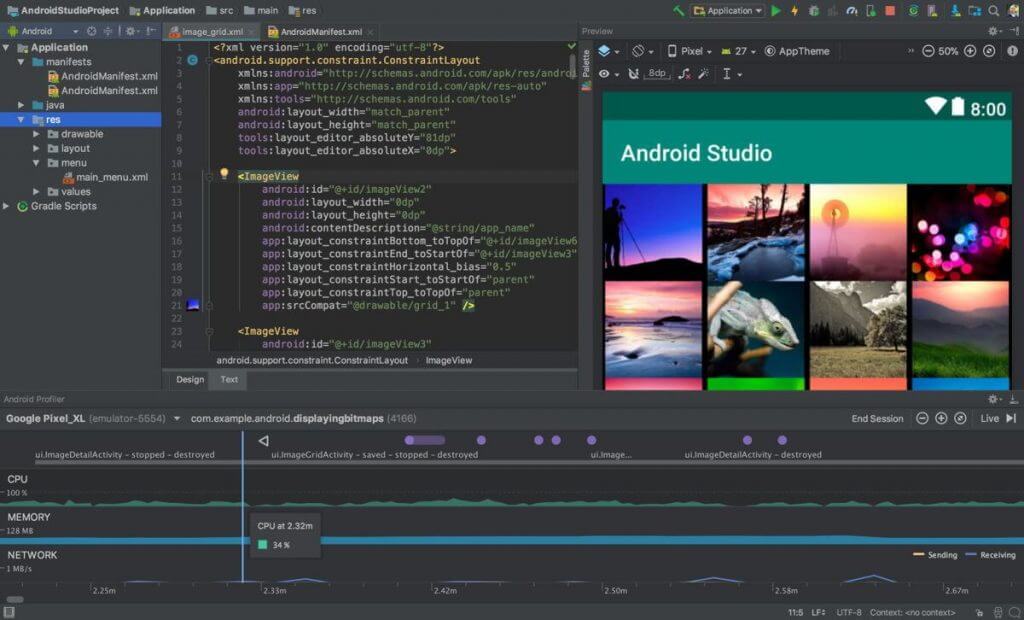
Android Studio

Android-Studio

Android Studio is the official Android IDE that allows you to test android apps on your PC. The core aspect of Android Studio is to help the android developers, but it also comes with a built-in emulator.

The user interface is not the most user-friendly and is definitely not meant for casual users looking to play PUBG Mobile on PC.

It always supports the latest version of Android OS which is a plus for the developers. You can also test the apps for the older version of Android.

Since it doesn’t come with a built-in Google Play Store, users need to use the apk to install any games or apps.

⇒ Get Android Studio 

Android x86

Android_logo_2 -featured emulators for low end pcs
  • Price – Free

Android x86 is a free open source project that allows you to run Android release on your Surface Pro device using a virtual box or a boot using a USB flash drive.

Android x86 has been forked to work with Intel and AMD chipsets. While the project itself is extremely efficient, what robs it of the charm is the fact that it is not the easiest of the lot when it comes usability and user interface.

Installing Android x86 requires some know-how to experience with Virtual Box. If you have a virtual box installed, you can download the Android x86 ISO image file and install it.

The user interfaces as I said is not the most polished one despite it running the relatively new Android 7 Nougat out of the box. You can use it to test your Android apps and probably run a few Android games and apps using the apk.

Some of the features Android x86 includes WiFi support with GUI, better disk installer, power suspend and resume option, battery status, support for keyboard and mouse controls and debug mode with busybox.

⇒ Get Android x86

Android emulators are not just for enthusiasts who want to play their favorite apps and games on Surface devices. But, it also brings a large screen real estate and better hardware resources for the mobile app developers.

With so many options on offers, it can get confusing as to which Android emulators is best for you? I believe it is a matter of preference. While emulators like BlueStacks offer the latest Android versions to the users, Nox Player’s ad-free user experience makes it a non-nonsense emulator.

For development and testing work, you can use premium emulators like Genymotion and Android Studio.

Microsoft Surface Pro 3 & 4 is well capable of running all the Android emulators listed in this guide. Do let us know your pick for the best emulator in the comments below.

How to turn off the narrator in Biomutant with a few easy steps

According to the game developers, Biomutant will receive more changes and tweaks, based on the complaints received from the gaming community.

Fans open this initiative with open arms, as they are the ones that get to enjoy the game, and would like a few modifications that will enhance their gameplay.

And speaking of enhancing gameplay, you can check out our article about how you can boost Biomutant graphics to a whole new level, with a cool new mod.

No more narrator, after installing the new patch

Previous to the launch of this new update, developers at Experiment 101 stated that, based on community feedback, they were about to perform some pretty intense surgery on the Biomutant patient.

Basically, creators said they were sorting out the pacing of dialogues, narrator settings, difficulty settings, video settings like depth of field and motion blur, loot and enemy tuning as well as sound and combat.

So, now, players that are not really fans of the built-in game narrator, can actually turn it off and resume their gameplay.

All you have to do in order to achieve this is:

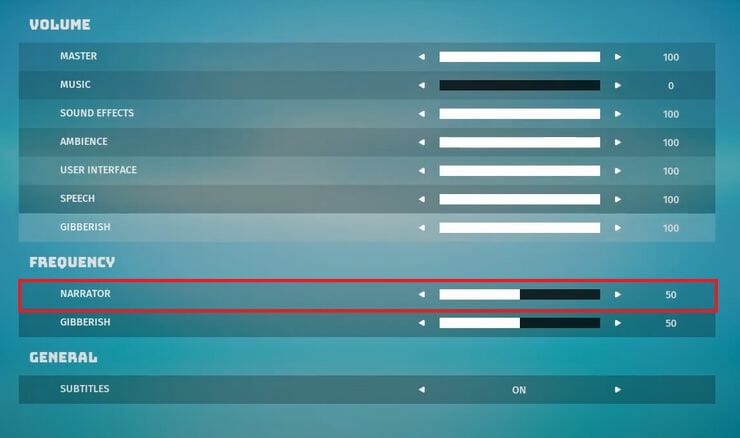
  • Pause the game.
  • Navigate to the Audio settings.
  • Find the Frequency section.
  • Toggle the Narrator setting to 0.

Keep in mind that this almost entirely silence Biomutant’s narrator, but he’ll still make appearances during cutscenes and when important events are happening in the world around you. 

In the same Frequency section, you can also turn down the amount of Gibberish you hear in Biomutant. This represents the weird and, sometimes obnoxious, language spoken by the game’s NPCs.

More new features available with latest update

Apart from the narrator settings, there is now a new slider for motion blur intensity. This was amongst the first batch of player requests, since the game was released.

Developers have rethought the whole idea of the loot system so that you’ll get more stuff appropriate to your level, less junk from high-level containers, and fewer random healing items.

Also, the people from Experiment 101, responsible for Biomutant, had something to say about the Tutorial version, as well.

In order to improve the pacing of the early parts of the game, we’ve edited dialogues to be shorter. We’ve also added more enemies and loot to these areas to better represent the experience later in the game.

Overall, the amount of tweaks that Biomutant went through vast, and you can get a better idea of the complete set of changes by reading the patch notes.

5 best interactive guitar learning software for beginners

As an alternative to teaching yourself to play the guitar from the book, you can also get a similar experience of having guitar lessons with interactive guitar learning software.

Such programs can listen you play, and they can give you real-time feedback and help you master the playing techniques and theory as well.

The best guitar learning programs come with well-structured lessons that offer you a strong basis to make progress effortlessly.

Great software will make good use of songs and practice tools to help you master even the most advanced techniques. It will also provide real-time feedback when you connect your guitar to your computer.

We compiled a list of the five best tools to learn how to play the guitar, so make sure to check out their sets of features to see which one you can relate more to.

What are the best interactive tools to learn playing the guitar?

eMedia Guitar Method

This is one of the most complete guitar instruction software that is available on the market today. eMedia interactive feedback technologies make understanding the guitar lessons much easier and faster.

eMedia Guitar Method offers Instant Feedback and Performance Evaluation while you play both melodies and chords.

Check out the best features included in this software below:

  • You will be able to enjoy chord recognition technology, ear training exercises, progress tracking, dozens of play-along Jam Tracks and more.
  • The software comes with more than 190 guitar lessons for beginners by Kevin Garry, award-winning guitarist and Professor of music.
  • You will get over 80 guitar songs with new play-along Jam Tracks.
  • The program offers over 50 videos with a split-screen view and close-ups of both hands showing you the techniques required for learning how to play the guitar.
  • The integrated guitar software tools include the Automatic Tuner for guitar, Chord Dictionary, Recorder, and Metronome.
  • The Note Tracker and Finger Tracker tools display the notes that you are playing in staff notation and on the Animated Fretboard as the guitar software hears you playing via your computer’s microphone.
eMedia Guitar Method

eMedia Guitar Method

Learn to play guitar in your own home at your own time!
Visit websiteCheck price

ActionTab

ActionTab is a virtual fretboard that easily shows you how to play guitar while you are at your own pace.

This program is suitable for total guitar novice users so that they can take a look at it and understand things immediately.

After you find your favorite song, ActionTab will play it for you and then teach you how to play it yourself.

You can check out more features of this cool tool for learning to play guitar and try ActionTab for yourself on its official website.

Check out the best features that are included in this great tool for learning to play guitar:

  • The program comes with a simple concept and interface so that 10-year-old kids can also use it.
  • You will not have to struggle with all kinds of guitar jargon or abstract and complicated theories.
  • This program does all the hard work so that the users can learn to play guitar while having fun at the same time.
  • Using ActionTab, you can play your favorite songs and also compose your own songs in no time at all.
  • All you need for being able to play the guitar smoothly is a bit of practice, and the program will do all the rest.
  • ActioTab can teach you to play guitar most efficiently and concisely.

⇒ Get ActionTab

Jamorama

Jamorama is another interactive tool that will teach beginners to play guitar and improve the more advanced users’ skills.

You can check out the pricing structure of Jamorama and more exciting features that are included in this software for learning guitar on its official website.

Just take a look at the most impressive features that are packed into this interactive software:

  • Jamorama’s interface is clean and easy to navigate, so you will find that it’s pretty straightforward to get a grip on this program.
  • It allows students and not only to start playing guitar with minimal efforts.
  • The lesson page comes with a few elements such as a sidebar with full course contents list and a course progress bar.
  • You will also get a button to mark the lesson as complete and an easy to use video player.
  • The lessons are watchable, and they’re filmed in high quality.
  • Some tutorial videos have a chord chart on the side and scrolling chords at the bottom, and this is really intuitive, making the lessons easy to follow and understand.
  • Jamorama specializes in lessons for novice users, and it comes with a Beginner Guitar Method Course.

⇒ Get Jamorama

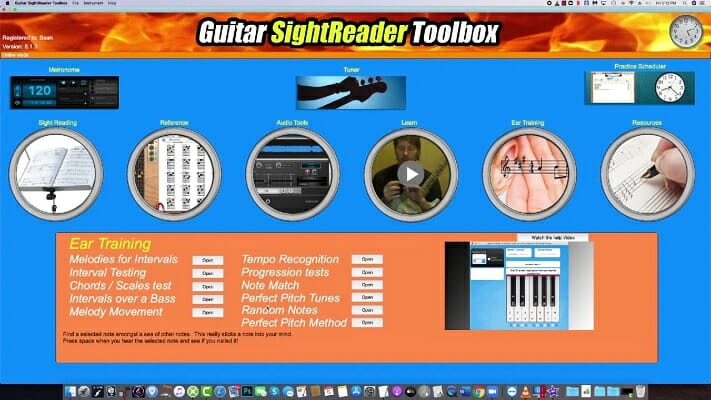
Guitar SightReader Toolbox

The actual developer of Guitar SightReader Toolbox is Pro Level Guitar, and this is another excellent program for learning to play the guitar for novice users.

Check out the best features that are included in this program below:

  • The software will help you get guitar sight-reading notes as well.
  • You can get access to 25 different ways to play any chord using Quick Chords, and you can also see what the scales that match the chord look like.
  • There are other tools included in this program such as ear-training, playing through progressions and more.
  • The installer that’s available for download requires 289.1 MB on your disk, and it’s scanned with some of the best antivirus software.

⇒ Get Guitar SightReader Toolbox

Guitar Pro 7

With Guitar Pro 7 you can enjoy all kinds of tools that will help you learn how to play guitar and create songs that can become real masterpieces.

Guitar Pro 7 is easy to use for novice users, and it supports creativity and easy learning. Check out more of its features and get it from the official website.

Take a look at some of the most impressive features included in this software:

  • The software’s interface is straightforward to use, and the toolbar comes with the main functionalities of this program.
  • There’s also an inspector that simplifies choosing the song and track settings.
  • The software startup and file loading have been enhanced since the older versions of this program.
  • The zooming and scrolling features are smooth, and the install/update process is enhanced.
  • This program is compatible with hi-res screens and touch screens as well.
  • The score-display engine has been rewritten since older versions, and now it provides a realistic and professional sheet music.
  • In addition to fretted instruments such as guitars, the standard notation will get automatically transcribed into tablature.
  • You will be able to plug your guitar into an external sound card connected to this software, and you can apply it to the effects just as you have modeled them for any tune in a given file.
  • You can choose between mono and stereo for the acoustic guitar.
  • You will get the opportunity to choose and modify the sound from over 100 presets that combine a soundbank and an effects chain.

⇒ Get Guitar Pro 7

These are the best tools for interactive guitar learning that are compatible with Windows systems that will turn out really useful for both beginners and more advanced guitar enthusiasts.

You might also be interested in our selection with the best guitar tuning software to set up your instrument easily.

Just head over to their official websites to check out their entire sets of features before you decide which one is the best for your skills and needs.

Which one did you choose? Leave your feedback in the comments section below because it might be valuable for other users.

5 Best Digital Photo Frames that Play Videos

Digital photo frames are frames that display multiple pictures as well as videos from cloud or a USB flash drive.

They are a great option for people looking to maximize the space within their houses and minimize clutter.

These photo frames are only designed to display pictures. However, there are some that can play videos as well.

The ability to play videos makes them the ultimate acquisition and could be a great present to get for your loved ones for the holidays.

All you need to make it work is cloud storage, a USB drive, or a Wi-Fi connection to get the videos on the digital photo frame.

Some photo frames are also able to display pictures from your Instagram account by simply logging in and granting permission.

Of course, there are factors such as aesthetics, storage capacity, as well as safety to consider before getting a digital photo frame.

That’s why we have compiled a short list of our favorite digital photo frames so far, so be sure to keep reading.

What are the best digital photo frames that play videos?

  • Plug and play
  • 360 degrees viewing angle
  • Seamless on/off process
  • Does not come with instructions

The Digital Picture Frame 10.1 Inch provides a high-resolution IPS screen that allows you to view your photos clearly.

It is capable of displaying both photos and videos and does not require any additional software installation.

It comes equipped with built-in speakers, so you can freely watch movies and listen to your favorite music.

It also has other functions like play music and photos at the same time, a motion sensor, and others.

10 Inch Digital Picture Frame – HD IPS Display

  • Built-in rechargeable battery
  • Cordless
  • User-friendly interface
  • Built-in storage
  • Offline and online image and video viewing
  • Touch screen for browsing
  • A bit expensive

The 10 Inch Digital Picture Frame comes with a 1024×768 high resolution, 10-inch display.

With this picture frame, you can share your photos and videos with your family and friends anywhere in the world.

The cutting-edge smart frame automatically formats your photo in order to be suitable for the HD display as well as automatically excluding blurry photos from the display.

  • 16 GB of internal storage
  • Share media remotely via AiMOR app
  • 1280*800 IPS HD Display
  • 128GB extended SD card slot 
  • The resolution is not Full HD

The Anna Bella digital frame has a 10.1-inch screen and a classy frame design that will fit in any environment.

Although it only has 16 GB internal memory, with a 128 GB SD card, you will be able to add at least another 40K photos.

The digital photo frame can also play videos and you can share them from a smartphone via a free app.

Humblestead 32GB WiFi

  • 15.6 Inch IPS display
  • 1920*1080 Full HD touchscreen
  • Share photos and videos Instantly
  • Wi-Fi 6 connection
  • Not compatible with all flash drives

This 15.6-inch digital frame from Humblestead is big enough to be hung on any wall and feast your eyes with the photos and videos you load it with.

We’re talking about a touchscreen with Full HD resolution that will display your content with crisp details.

The frame also comes with the latest Wi-Fi 6 technology so you can upload any media straight from your laptop or smartphone as fast as you can say cheese.

Feelcare 10.1

  • 800×1280 IPS LCD panel
  • Portrait & landscape autorotation
  • Secure Device Grid (SDG) encryption
  • 10.1-inch screen
  • The outer frame looks bulky

The Feelcare digital photo frame has a 10.1-inch display and a modern, black design that can fit into any setting of your home.

Forget about bulky buttons because you can make any adjustments with the touch of your finger on the screen.

And when it comes to sharing content, the Wi-Fi connection will help you upload photos and videos straight from your smartphone by using a dedicated free app.

Irrespective of the quality of the photo frames or the style you want, we’re certain there’s something listed here for everyone.

The best of the high-quality products as well as the most budget-friendly products have been chosen and included, so this article is a one-stop-shop for all.

We hope that our recommendations were helpful. For more suggestions or other questions, please access the comments section below.

Windows Media Player Does Not Recognize Blank CD? Fix it Now

Windows OS comes pre-installed with Windows Media Player, but sometimes the program doesn’t recognize a blank CD. The problem can be with your disc or your PC.

So, in this article, we have listed all the possible solutions to fix this problem.

What can I do if Windows 10 Media Player won’t recognize CD?

1. Fix corrupted registry entries

  1. Press the Windows key + R keyboard shortcut to open Run.
  2. Type regedit and press Enter or click OK (you will need administrative privileges to run the Registry Editor).
  3. Navigate to the following subkey: HKEY_LOCAL_MACHINESYSTEMCurrentControlSetControlClass{4D36E965-E325-11CE-BFC1-08002BE10318}
  4. Select UpperFilters, and select Delete from the Edit menu.
    • If you can’t find the UpperFilters key, you will need to also delete the LowerFilters registry key.
  5. Exit the Registry Editor and restart the PC.
Note icon NOTE
You need administrative privileges to perform the steps above. Also, this is a method dedicated to advanced users only.

Some corrupt registry entries may cause this problem. Follow the steps above to use Registry Editor to delete the corrupted Registry entries.

Back up your registry before starting the procedure above to ensure your system will not be affected.

You should also know that after deleting the registry key, some CD or DVD recording software can start malfunctioning so you might need to uninstall and reinstall them.

2. Use a different CD-burning software

Another alternative, for CD veterans, is to use some different burning software to burn the disc. In this case, we strongly suggest that you try out Ashampoo Burning Studio.

It is a simple to use tool to copy CD, DVD, and Blu-ray discs, modify existing discs or create your own video discs.

Despite the multitude of multimedia features, the tool is quite intuitive to use, since everything can be done with just a few clicks. So, no particular multimedia software knowledge is necessary.

Ashampoo Burning Studio is compatible with Windows 7, 8, or 10, so you really have no compatibility excuse not to try it out. Besides, it also has a freeware version, with fewer features, the CD burning one is included.

Ashampoo Burning Studio

Ashampoo Burning Studio

Burn, rip, or create CDs, DVDs, Blue-ray disc and design their covers and labels with this versatile editor.

3. Change AutoPlay settings

  1. Go to Settings and open Devices.
  2. Scroll down to AutoPlay tab.
  3. From Removable Drive, select Ask me every time from the drop-down menu.
    AutoPlay Windows 10 Windows Media Player does not recognize blank CD
  4. Close the Settings window. Insert the CD again and see if the player recognizes the disk.
  5. If you get the AutoPlay window, you can drag and drop any files to the CD to burn it.

The AutoPlay settings can be the culprit for this problem so changing them can solve it right away. Check the steps above to get it done quickly.

4. Run the troubleshooter for Media Player

  1. Press Windows Key + R, type control, and hit Enter. This will open the Control Panel.
  2. In the search field, type Troubleshoot and click on Troubleshooting.
  3. Click on Hardware and Sound.
    troubleshooting window Windows Media Player blank CD issues
  4. Scroll down and click on Windows Media Player DVD then click Next to proceed.
  5. Windows will scan the PC for optical drive issues and suggest any fixes accordingly.
  6. If you get an error showing No DVD Playback device detected, the problem can be with your optical drive.

If Control Panel not opening, we have the answers to help you get it up and running again.

5. Update the optical drive driver

  1. Type Device Manager in the Search bar and hit Enter.
  2. Scroll-down to DVD/CD-ROM drives and expand it. Right-click on the drive and select Update Driver.
    update driver Windows Media Player does not recognize blank CD
  3. Select Search automatically for updated driver software option.
    search automatically for updated driver software Windows Media Player does not recognize blank CD
  4. Wait for Windows to search for any driver updates. Windows will automatically download and install any new drivers.
  5. Restart your PC and check for any improvements.

Alternatively, you can use third-party tools to automatically update all outdated drivers on your system with just a couple of clicks.

⇒ Get Outbyte Driver Updater

6. Remove and reinstall IDE/ATAPI driver

  1. In the Device Manager, expand IDE ATA/ATAPI controllers.
  2. Right-click on Standard SATA AHCI Controller and select Update. Do this for any other SATA driver under this section.
  3. If no updates are found for this driver, right-click on the Standard SATA AHCI Controller and select Uninstall.
    uninstall device Windows Media Player blank CD can't read
  4. Restart your PC. Windows will automatically reinstall the uninstalled drivers after the restart.

Usually, you don’t need to update IDE/ATAPI drivers manually as it is handled by the OS automatically. However, you can try reinstalling the driver if you suspect that this causes the system to not recognize CDs.

7. Check your CD / Optical Drive

If you have an internal or external optical drive, your CD drive may be at fault here. This is the last way to resolve this problem, but if nothing works, you might want to consider the hardware failure as the cause.

For an external CD drive, try connecting to another PC. You may have to send it for repair if it doesn’t work.

8. Disable the CD write function

  1. Hit the Windows + R keys to open the Run command.
  2. Type regedit in the dialog box and hit Enter.
  3. Navigate to the following location: HKEY CURRENT_USER\Software\Microsoft\Windows\CurrentVersion\Policies\Explorer
  4. Double-click on the NoCDBurning entry and set the Value data to 0.DVD not playing Windows 10
  5. Close the Registry Editor and restart your PC.

If the entry is missing or not in the DWORD registry value format, you’ll have to delete it and create one. Remember to back up your registry or create a restore point before making any changes.

These are some solutions you can try if Windows Media Player doesn’t recognize a blank CD. If any of these solutions worked for you, let us know in the comment section below.

Microsoft Edge Canary adds new flag to improve font rendering

Microsoft today announced a few new improvements coming to the font rendering system in the Edge browser, including contrast enhancement, gamma correction of text, and more. These updates are currently available for Edge Insiders in the latest Edge Canary builds.

“Today we are excited to announce improved font rendering in the latest Canary builds of Microsoft Edge on Windows. We have improved the contrast enhancement and gamma correction to match the quality and clarity of other native Windows applications. Font rendering will also now respect user ClearType Tuner settings when applying text contrast enhancement and gamma correction,” the Edge Insider team explained.

This update is currently hidden behind an experimental flag and can be enabled by searching for “Enhance text contrast” in edge://flags. Once found, users will need to enable the feature and relaunch the web browser. Finally, head to the Start menu and then search for “Adjust ClearType text” in order to experiment with different contrast and gamma settings to choose the one that works best for their monitor.

Screen capture of ClearType Text Tuner

The improved font rendering experience is now rolling out in preview in Microsoft Edge Canary version 93, though users need to manually opt-in. Microsoft noted that it will soon be enabled by default in Edge 92, which is expected to hit the stable channel in July 2021. The firm is planning to bring these changes to all Chromium-based browsers to provide a “consistent font rendering experience “ on Windows. Let us know in the comments below if this update has improved the reading experience in Microsoft Edge.

11 Best Windows 10 Tablets [High-Rated Picks]

Since Windows 10 is a cross-platform operating system, it is present on a lot of tablets and 2-in-1 devices. Not to mention that a lot of new Windows 10 devices will be released in the years to come.

So, if you decided to buy a Windows 10 tablet this year, you’ve come to the right place. This is our list of the best Windows 10 tablets to get today.

This list focuses on Windows 10 tablets, as well as 2-in-1s. Honestly speaking, standard Windows 10 tablets are not really the best Windows 10 devices in the market.

If you want to find out what are the most powerful Windows 10 tablet devices, check out our in-depth list of the best hybrid devices.

Best Windows 10 Mobile tablets

Besides regular Windows 10 tablets that run the same system version as PCs, there are a few tablet devices powered by Windows 10 Mobile as well.

So, in case you want to get a Windows 10 Mobile device with a bigger screen, you might decide on one of these. Without further delay, let’s jump to our list of the best Windows 10 tablets to own this year.

What are the best Windows 10 tablets to buy today?

Microsoft Surface Pro X

  • 16GB of RAM and 256GB SSD
  • 13 inch screen
  • LTE Advanced Pro connectivity
  • Microsoft SQ1 processor
  • The price is pretty high

If you want only the latest and the greatest, you can go straight for the best, and that’s the Microsoft Surface Pro X.

With a great 13-inch PixelSense Display and only 7,3 mm in thickness, this Windows 10 tablet can make you forget about carrying that heavy laptop in your bag.

The Microsoft SQ1 processor powered by Qualcomm provides long battery life and faster LTE and Wi-Fi connectivity.

Yes, you can also stay away from unsecured hotspots and only use the high-speed mobile network if you’re away from home.

Other powerful features of this tablet are the 16 GB of memory and the 256 SSD, excellent for a laptop, let alone for a tablet PC. The only downside is the price.

CHUWI UBook X Tablet

  • Intel N4100 Quad-core processor
  • 2K IPS Touchscreen
  • 8GB RAM plus 256GB SSD
  • Triple connectivity (USB Type-C, Dual Wi-Fi, BT5.0)
  • Keyboard connectivity is rather unstable

The CHUWI UBook X Tablet brings you a bit more of everything starting with unrivaled processing power fueled by the Intel N4100 Quad-core processor.

Its generous memory allows you to take full advantage of this snappy device: you can download all your favorite apps, play music, watch videos, and much more, fast.

Speaking about video watching, the stunning 12-inch wide IPS display will render the most beautiful images at 2160 by 1440 resolution.

With expandable storage space up to 128GB via micro SD slot, numerous ports to cover all your needs, and a lightweight, portable design, this is the perfect companion for your travels.

Of course, it is just as great as the device to support your daily tasks at home or at the office.

Microsoft Surface Pro 7

  • 10th gen Intel Core i5 processor
  • Touch-Screen support
  • 8GB memory plus 128GB SSD
  • Bluetooth and Wi-Fi compatible
  • The battery life is not so great

This highly versatile product can turn itself into pretty much any device from a studio to a tablet in order to perfectly suit your needs.

It’s no wonder that solving daily tasks or even more complex tasks is so fast. Equipped with the 10th generation of Intel Core processor, the tablet is quick and responsive, just as you want it.

The dual connectivity (USB-C and USB-A ports) opens up a whole new world of possibilities, all elegantly wrapped in an ultra-slim, lightweight, and portable device that you can take with you anywhere.

Fusion5 FWIN232 Plus S1 Ultra Slim

  • Intel Quad-core processor
  • 4GB of RAM
  • Ultra-slim stylish design
  • A comfortably wide 10-inch screen
  • The battery doesn't last very long

If you were looking for a device that can deliver good performance without straining your budget, this might just be the best budget Windows tablet you can find.

This tiny device will tick all your boxes in terms of CPU and GPU thanks to the powerful Intel Quad-core Processor and beautiful graphics, not to mention the 4GB of RAM.

Storage space and performance are also privileged and we know for sure you will put the full-size USB 3.0 port to good use.

You may think that all this technology must surely result in a bulky thing that adds to the clutter on your desk, but we are here to tell you otherwise.

All these modern enhancements are neatly wrapped up in an ultra-slim and stylish looking tablet that is quite a sight for sore eyes.

Microsoft Surface Pro 6

  • Built-in kickstand to turn the device into a laptop/tablet/portable studio
  • Fully customizable hardware
  • Ultra-slim and light design
  • Built-in gyroscope
  • The laptop bag is sold separately

Microsoft Surface Pro 6 is perhaps the best Windows 10 tablet that you can purchase in 2021.

The Redmond giant officially introduced this ultra-thin and highly versatile device in October 2018. Its modern design will definitely help you stand out in the crowd and attract people’s attention.

The Surface Pro 6 is equipped with a 8th-gen Intel Core processor that still delivers lightning-speed performance. The device is perfect from office and business tasks to home usage tasks.

Surface Go

  • Equipped with a USB Type-C 3.1 port
  • No USB-C adapter is needed
  • Intel Pentium Gold processor
  • 8GB RAM, 128GB
  • Software installation may be a bit tricky

We simply cannot add the Surface Pro 6 to this list without also mentioning the amazing Surface Go.

This affordable device may be the best Windows tablet under $500 that you can get. Of course, you can add other pieces of hardware, such as a stylus pen and keyboard and the price tag will go up a bit.

The Surface Go is powered by an Intel Pentium Gold processor that clocks in at 1.6 GHz.

As far as its storage capacity is concerned, it varies from 64 GB to 256 GB, depending on your needs.

Speaking of specs, the device supports 4-8 GB of RAM depending on the configuration you choose. The display resolution reaches 1,800 x 1,200.

10-inch Windows 10 Fusion5 Ultra Slim Windows Tablet

With powerful CPU and GPU alike and ultra-slim and stylish design, this tablet will take care of all your needs and even exceed your expectations.

Its snappy reactivity is guaranteed by the Intel Quad-core processor, 4GB of RAM to which you add a whopping 128GB memory.

With beautiful graphics displayed on a 10-inch widescreen, Bluetooth 4.0, and USB 3.0 compatibility, and a 12-month full warranty, you are in for the ultimate tech treat!

⇒ Check price on Amazon

Jumper EZpad Go PC Tablet

This tablet boasts a unique combo of power and discretion so you should take into consideration for an office tablet.

Fueled by an Intel N3450 Quad-Core processor that clocks at 1.1GHz-2.2GHz with 8GB RAM and 128GB ROM to support multitasking, this tablet is as responsive and as performant as you could wish.

The interesting part is that it does all that and even more while keeping a low-profile, quiet. Power-efficient and distractions performance, that is the best way to describe this feature-rich device.

⇒ Check price on Amazon

Samsung Galaxy TabPro S

Powered by an Intel Core M3 Processor that clocks at 2.2Ghz, this smart tablet is all about boosting up productivity.

To further accelerate your workflows and help you save time, you can 4GB RAM plus 128GB SSD – more storage, more memory, more responsiveness to quickly execute your commands.

Connectivity is also privileged for your convenience to help speed up things even more.

⇒ Check price on Amazon

Vanquisher Windows 10 Pro

Ergonomic, ultra-thin, and compact, this tablet will ease your load in more than one way. Of course, its portability makes it easy to carry around and its glass panel makes it sturdy enough to resist the journey time and again.

But its advanced features will also contribute to lighting up your burden via an Intel 14nm Atom X5-Z8350 Quad-core processor with speed up to 1.92GHz, 2G RAM, 32G ROM, and up to 128GB expandable memory through SD slot.

To top it all, you can add a stylus pen or go fully tactile thanks to its 8-inch touch screen.

⇒ Check price on Amazon

Samsung Galaxy Book 12

Samsung released a very interesting 2-in-1 tablet in 2018. The Galaxy Book 12 is a Windows 10 Home device that’s powered by a 7th-gen Intel CPU. It’s also equipped with a 4GB/128GB SSD.

If you own a Samsung smartphone, then this is the perfect Windows 10 tablet for you. You can connect the tablet to your smartphone is less than one-minute thanks to the Samsung Flow feature.

You can type on this tablet using the on-screen keyboard or the physical keyboard. You can quickly switch from touch to type just by pressing a key on your physical keyboard.

Moreover, the S Pen is very responsive and it’s a very useful tool for image and video editing.

⇒ Check price on Amazon

How to choose the best tablet for your needs

First, it’s really important to know what you will use the tablet for. If you’re getting a tablet for leisure, to browse the Internet ant to stream a movie, you will need a good screen.

However, you won’t need very high-tech specs for that. Just 4 GB of RAM will do, and you also don’t need too much internal memory.

But if you want to use it for work, or to replace your laptop with a more portable solution, you will need a tablet with high specifications and big screen.

You will also need a keyboard. Usually, Microsoft Surface tablets have an included or optional keyboard because they are designed to be used as laptop replacements.

You can add a Bluetooth keyboard on any tablet, but you will have to check the Bluetooth version before buying the keyboard.

You should also consider the wireless connections. If you’re going to use the tablet at home or at the office, a Wi-Fi connection will suffice but if you’re travelling a lot, think about a mobile connection.

This is our selection with the best tablets to get right now. Check the specs carefully to match your requirements and usage needs.

If you want to pick a tablet for work or you simply travel a lot, check our selection with the best tablets with long battery life.

Tell us what tablet you chose and why. Also, if you have any other suggestions, you can leave them in the comments section below.

Ashampoo Home Design 6 lets you plan and design your house in 3D

Ashampoo Home Design 6 is a powerful and versatile 3D planning tool to design, extend and furnish buildings.

With the help of this software, you can design your dream house in 3D by creating professional-grade blueprints on your PC and become the architect of your own home.

In this article, we will detail its design features and benefits so you can decide whether it’s right for your needs.

What is Ashampoo Home Design 6?

Ashampoo Home Design 6 has everything you need to start building your dream house. The tool offers you access to multiple new objects through Google Sketchup and Collada model import.

Precise 3D previews are available for every planning step so that you can get a better picture of the entire house.  

The previews feature furniture, lights, and surroundings as well. You can even plan roof-mounted photovoltaic installations.

The Ahampoo software has over 20 million downloads from 160 countries around the world and that can tell you a lot about this trusted software.

The tool supports loading, editing, and saving of 3D object formats. And moreover, you will have access to millions of 3D objects from its library.

However, the top advantage of this solution is the fact that it’s extremely easy to learn and use thanks to its ribbon toolbar that hosts all functions logically and thematically.

It’s also optimized to make the best out of your system resources. Even if it’s a complex program that uses a lot of graphics, it can run the most calculations in just a few seconds.

Ashampoo Home Design 6 features

Here’s a list of all key-features that Ashampoo Home Design 6 brings to the table:

  • Mirror objects and 2D symbols with ease
  • Native 64-bit support – more speed, more stability
  • More intuitive with multifunctional ribbons
  • Smart, well-structured open and save dialogs with details view
  • Keyboard shortcuts for frequently used features
  • Advanced project diagnosis tool: Find and fix errors with ease
  • Design views: 2D, 3D, Cross-section
  • 3D constructions: 7 primitives, extrusion/rotation/sweep/subtraction solids
  • Building components: Walls, ceilings, windows, doors, openings, slots, skylights, solar elements, chimneys, beams
  • Measurements: Metric and imperial with precise dimensions
  • Input aids: Customizable reference points, construction aids, angle grid
  • Exterior lighting simulation
  • Freely positionable camera and viewing angles

Design and construction tools

Here are some of the most important design and construction tools that you will benefit from:

  • 3D raster elements for huge spaces
  • Ingenious 3D area processing
  • Roofing Wizard: Various material, cladding, rafters, eaves and gables settings, 7 dormer types
  • Stair Generator: 3 solid and wooden types (straight, geometrical, landing), handrails, wellholes
  • Topography Designer: 6 forms (hill, swale, plateau, wall, trench, slope)
  • Topography Designer: 4 terrain elements (bed, way, terrace, water course)
  • Customizable contours

Catalog (Object Library)

You will have access to millions of objects, including appliances, labels, symbols, and more:

  • Access to multiple new objects through Google Sketchup and Collada model import
  • Over 380 new symbols for electrical, gas, water, and security appliances
  • Construction elements: Doors, profiles, windows, solar elements, constructions (e.g. balconies, carports)
  • Objects: 2D (cars, people, plants, animals)
  • Objects 3D: Exterior (e.g. garages, garden appliances)
  • Components (windows, doors, columns, tiles, girder)
  • Interior (e.g. kitchen and bathroom appliances), people, basic forms, signboards
  • Textures: Exterior (grounds, grass, etc.)
  • Building (wood, metal, plaster, etc.)
  • 2D Symbols: Various symbols from different areas including appliances, building elements, and others

System requirements:

  • Operating system: Windows 10, Windows 8, Windows 7
  • RAM: Minimum 4 GB
  • Hard drive space: 1.34 GB
  • Other: VS 2015 Redistributables
Ashampoo Home Design 6

Ashampoo Home Design 6

You don’t have to be an architect to design your dream home with this awesome software.
Check priceVisit website

We hope that you managed to get your copy of Ashampoo Home Design 6 and you’re already happily designing your masterpiece.

You might also be interesting in one of the best piping design software tools to get the functional network done in no time.

If you have any other questions or if you have more solutions, don’t hesitate to drop us a line in the comments section below.

Microsoft to discuss what’s next for Windows at June 24 event

It’s official, Microsoft will talk about the future of Windows at a dedicated event on June 24 featuring CEO Satya Nadella and Chief Product Officer Panos Panay. The Microsoft CEO previously teased “the next generation of Windows” at the company’s annual Build developer conference last week, and we won’t have to wait much longer to see what’s in the pipeline for Windows 10.

In the past couple of months, we’ve written quite extensively about the big “Sun Valley” design update expected to ship later this year with Windows 10 version 21H2. We’ve seen some traces of Sun Valley in recent Windows 10 preview builds, but the company has yet to officially discuss its new design choices for the desktop OS.

With Surface inventor Panos Panay now overseeing Windows development at Microsoft, it’s probably time for the designer to leave its mark on the OS, just like what Jony Ive did at Apple in the past decade for iOS and macOS. Even though Windows 10 is nearly six years old, there are still many design inconsistencies across the OS as well as some legacy components that have yet to be fully replaced by modern apps.

Microsoft’s big Windows 10 event will kick off at 11 AM ET on June 24 and it will be live-streamed, but you can already add it to your agenda. This is probably going to be a big moment for the history of Windows, especially after Microsoft recently announced that it had shelved Windows 10X to integrate its various innovations into the regular Windows 10 OS.

Microsoft acquires IoT security provider ReFirm Labs

Microsoft announced this morning that it has acquired ReFirm Labs, a US-based provider of IoT security solutions, for an undisclosed amount. The company is known for developing new methods for detecting security flaws in IoT devices, and its Binwalk (formerly Centrifuge) platform has become a popular tool for extracting firmware.

Microsoft plans to use ReFirm Labs’ expertise to bolster its Azure Defender for IoT platform, which helps secure customers from the chip to the cloud at a time where attacks against cloud-connected devices are on the rise. In a recent survey of 1,000 security decision-makers commissioned by Microsoft, 83% of them had experienced some level of firmware security incident, but only 29% were allocating resources to address firmware security issues.

How Microsoft's new acquisition, ReFirm Labs, will help customers.

“ReFirm’s firmware analysis technology will advance Microsoft’s existing capabilities to help secure IoT and OT devices via Azure Defender for IoT which was recently enhanced with technology from our acquisition of CyberX. Together, we will provide device builders and customers the ability to both discover, protect, and assess device risk both at the firmware and network level and then patch devices with an easy-to-use cloud-based solution, explained David Weston, Director of Enterprise and OS Security at Microsoft.


How to install the TWAIN driver on Windows 10

There’s an error making the rounds on forums regarding the TWAIN driver installation on Windows 10. Users get this message There is no TWAIN-compliant device installed while using their scanners or printers.

Because the TWAIN software acts as a bridge between the scanner hardware and graphic software, it needs to allow an imaging device to acquire an image, and then proceeds to save that image directly into a TWAIN-compliant imaging software application.

If any kind of imaging device is installed without a TWAIN driver, the device will either not work at all, or the OS will freeze or crash.

Continue reading and find all the possible ways to successfully install the TWAIN driver on your OS.

How do I install the Twain driver on Windows 10?

1. Download and install the driver

  1. Go to the manufacturer’s official website and search for the latest drivers matching your printer or scanner.
  2. Locate and download the driver.
  3. Follow the on-screen installation instructions.
  4. Restart your computer after the installation process is complete.

2. Remove and reinstall the printer/scanner

  1. Go to Start and click on Settings.
  2. Go to Devices.devices
  3. Select Printers & scanners.printers and scanners
  4. On the right-hand pane, under Printers & scanners, locate your device.
  5. Click on it and then select Remove device.remove device
  6. To reinstall it, select Add a printer or scanner from the same window, Printers & scanners.add a printer or scanner
  7. Wait for your device to find it, then select Add device.
  8. You may be asked to select a name for your printer and enter your Wi-Fi password in order to sync it to your PC.

3. Use an automated software

To this day, the best way to deal with any kind of installation, especially when it comes to a driver, is with the help of third-party software.

No risk involved, safe and easy, all is automated so you don’t even need any computer skills. This know-it-all software will install any outdated, broken, or missing drivers for you.

Even if something goes wrong with installing or fixing the drivers you can perform driver backup to restore the previous version and start from the beginning. However, these are rare cases so you are covered regarding drivers’ matters.

Moreover, using such a tool will help your system to be more optimized and have the latest driver versions running without any difficulties.

⇒ Get Outbyte Driver Updater

4. Update your OS

  1. Go to Start and click on Settings.
  2. Go to Update & Security.Update & Security
  3. Select Windows Update and click on Check for updates.check for updates
  4. If you see any Windows updates are available, install them.
  5. Now, install the previously downloaded driver and check if it’ll work.

5. Use the Printer Driver Selection

  1. Go to Start and click on Settings.
  2. Go to Devices.
  3. Select Printers & scanners.printers and scanners
  4. On the right-hand pane, scroll down to Related Settings, select Print server properties.print server properties
  5. Go to the Drivers tab.drivers
  6. Click on Add.
  7. In the Welcome to the Add Printer Driver Wizard, select Next.next
  8. In the Processor Selection dialog box, select your device’s architecture, and then click on Next.
  9. In the Printer Driver Selection dialog box, select your printer manufacturer from the left and your printer driver from the right.
  10. Click on Next, then Finish, and follow the on-screen instructions to add your driver.

There you have it, 5 possible methods to successfully install the TWAIN driver on your Windows 10. Let us know in the comment section below which method worked out best for you.

Also, if you have any suggestions, questions, or just want to say a quick thank you, feel free to write it below, and be sure we’ll get back to you.

How to fix Warframe’s display driver crashes

Plenty of Warframe players have said in forum posts that their PCs’ display (GPU) drivers randomly crash their favorite game.

Warframe displays a blank screen for some players when this annoying display driver crash issues arises.

Others describe getting the Display driver stopped responding error message when a GPU driver crashes Warframe. In both cases, rest assured that a few simple fixes are waiting for you.

How can I fix Warframe display driver crashes?

1. Update your GPU’s driver

A Warframe display driver crash might be caused by an outdated display driver. You can quickly remedy that by scanning your computer with driver updater software, which will tell you if your PC’s display driver is outdated.

Keep in mind that can download and install the latest display driver with the best driver updater software.

2. Lower Warframe’s graphical settings

  1. Launch the Warframe game.
  2. While playing the game, press the Esc keyboard key to open options.
  3. Select the Display tab shown directly below.
    The Display tab warframe display driver crash
  4. Next, select a lower Preset graphical option than your current one.
  5. Click the Display Mode setting arrows to select Borderless Fullscreen.
  6. It’s also recommended to disable the Dynamic Resolution setting.

3. Reinstall your PC’s display driver

  1. First, press the Windows and X keys simultaneously.
  2. Select Device Manager on the Win + X menu that opens.
  3. Double-click the Display adapters category shown directly below.
    Device Manager warframe display driver crash
  4. Right-click your PC’s graphics adapter and select Uninstall device.
  5. Select the Delete the driver checkbox on the confirmation dialog box that opens.
  6. Then click the Uninstall option.
  7. Thereafter, click the Action menu.
  8. Select the Scan for hardware changes option to reinstall the display driver.

You’ve seen that the above steps involve using the Win+X menu. If you happen to experience any issues, check out this guide dedicated to Win+X menu not working.

4. Roll back your PC’s display adapter driver

  1. Open Device Manager as outlined for the first two steps of the previous resolution.
  2. Next, double-click Display adapters to expand that device category.
  3. Right-click your graphics card and select Properties.
  4. Select the Driver tab shown directly below.
    The Roll Back Driver option warframe display driver crash
  5. Press the Roll Back Driver button there if it’s not grayed out.
  6. Then click OK to confirm.
Note icon NOTE
This resolution is recommended if Warframe starts crashing after installing a new display driver. A new driver might have a compatibility issue with the game. Rolling a display driver back will restore the previous one you had installed.

5. Disable third-party antivirus software

If you have installed third-party antivirus software on your PC, temporarily disable that utility before playing Warframe.

To do so, right-click the antivirus utility’s system tray icon and select a disable option for it. Choose to disable your antivirus software for a few hours while playing Warframe.

The Avast shield control settings warframe display driver crash

6. Disable Vertical sync for NVIDIA GPUs

  1. Right-click the NVIDIA Settings system tray icon to open its context menu.
  2. Select the NVIDIA Control Panel option.
  3. Next, select Manage 3D Settings on the left of the NVIDIA Control Panel.
    NVIDIA Control Panel warframe display driver crash
  4. On the Global Settings tab, click the Vertical sync drop-down menu.
  5. Select the Off option on the Vertical sync drop-down menu.
  6. Next, click the Power management mode drop-down menu and select the Prefer maximum performance option.

7. Clean boot Windows 10

  1. First, right-click the Start button and select to open Run from the menu that opens.
  2. Next, type in this command and click OK: msconfig
  3. Click Selective startup on the General tab, and deselect Load startup items.
    The General tab warframe display driver crash
  4. Make sure you have both the Load system services and Use original boot configuration checkboxes selected.
  5. Click the Services tab, and select the checkbox for Hide all Microsoft services.
    Services tab warframe display driver crash
  6. Press the Disable all button.
  7. Select the Apply option, and click OK to exit.
  8. Then select Restart to reboot your desktop or laptop.

If this potential fix works, there was probably a conflicting program. Or your PC might have previously been running more background software than its GPU can handle with Warframe.

You’ll need to identify a conflicting program or disable startup items with the original boot configuration restored.

If the above resolutions aren’t enough to solve Warframe’s display driver crashes, there might be a hardware issue with your graphics card.

In this case, you can send a support ticket to Warframe Support via the Zendesk Page for further troubleshooting suggestions.

Besides all these, keep in mind that it’s essential to back up your drivers in order not to lose any of your data. Make sure you use only the best driver backup software for Windows 10 in that regard.

So, those are some of the most probable ways to fix Warframe’s display driver crashes. Let us know which one worked for you in the comments area below.

Xbox doesn’t have a two years console exclusivity on Dolby Atmos and Dolby Vision for Gaming after all

Yesterday, a now-deleted post on the official French Xbox Wire website claimed that Microsoft had a two years console exclusivity for Dolby Atmos and Dolby Vision for Gaming. Even though the post was quickly deleted, the information has been picked up by several websites but Microsoft has since confirmed to us that it was inaccurate.

“A blog post was mistakenly published by a local Xbox team that included inaccurate information regarding exclusivity of Dolby Atmos and Dolby Vision on Xbox Series X|S. There is no exclusivity agreement of either tech on Xbox. We are proud to partner with Dolby to offer Dolby Atmos and Dolby Vision to gamers on Xbox and will have more to share about the general availability of Dolby Vision on Xbox Series X|S soon,” a Microsoft spokesperson told us.

Dolby Atmos has been supported on Xbox consoles for many years now, and Dolby Vision for Gaming is currently being tested with Xbox Insiders. The exclusivity deal that was mistakenly announced in the French Xbox Wire blog post would have meant that Sony’s PlayStation 5 consoles wouldn’t be able to immediately integrate these technologies, but that’s apparently not the case. Sony’s PlayStation 5 does not currently support either Dolby Atmos or Dolby Vision for Gaming.

Dolby Atmos is a great spatial audio technology that can really elevate your gaming experience, though not all Xbox games come with a Dolby Atmos mix. As for Dolby Vision, Xbox One consoles have been supporting the superior HDR format for media content for a couple of years now, but Dolby Vision for Gaming will require an Xbox Series X or Series S console.

How to install the USB driver on Windows 10 [Easy Guide]

Drivers are the most important software components of our computer. So, installing them optimally represents the main step we should consider.

If you want to easily install the Windows 10 USB driver, you can choose from a wide range number of alternatives. Fortunately, you don’t need to be trained to perform them.

This article will show you some of the best options you should try to install your USB driver on Windows 10.

How can I easily install the USB driver on Windows 10?

1. Use Device Manager.

  1. Open Device Manager.
  2. Expand Universal Serial Bus controllers, right-click on the option you need, then select Properties.
  3. Select the Driver tab, then click on Update Driver.
  4. Select Browse my computer for driver software.
  5. Click on Let me pick from a list of available drivers on my computer.
  6. Select your needed option, then click on Next.
  7. Once the installation is completed, restart your PC.

2. Try Hardware Update wizard

  1. Press Windows key + R keyboard shortcut.
  2. In the pop-up window, type hdwwiz.exe, and click on OK.
  3. Select Browse my computer for driver software and click on Next.
  4. Click on Browse, then locate the USB driver folder.
  5. Finally, click on Next to install the USB driver.

In case of not being able to complete the first step due to Windows button errors, we are here to help you. You simply need to take a look at this guide dedicated to Windows Key not working issues.

If your issue involves devices that need serial-to-USB communication, you might also require the FT232R USB UART driver, which ensures proper connectivity for many hardware peripherals.

Similarly, boards that rely on the CH340 chip will need the correct CH340 driver for Windows 10 to establish a stable connection.

3. Use third-party software

While the USB driver installation on Windows 10 can be done manually, using third-party software allows you to perform it automatically, by following some easy steps.

The recommended alternatives above are useful and efficient, but can also be time-consuming. On the opposite, the support of dedicated driver updating software is able to save you much more time.

With such tools, you can update all your drivers in just a few clicks.

The suggestions listed above are some of the best you can find. Not only that any of them will prove efficient, but they are also easy to use.

Also, if your USB device is not recognized in Windows 10, feel free to check a full fix guide and apply the presented tips. You’ll most likely be able to solve your issue in no time.

Because your opinion is important to us, don’t hesitate to leave a comment in the section below, letting us know which option worked best for you.

Microsoft posts screenshot of redesigned and as yet unreleased Outlook for Windows app

Microsoft may have mistakenly shared a screenshot of a redesigned version of its Outlook for Windows email client. The image currently appears In the release notes for the latest Beta channel update for Office for Windows (via Windows Latest) where the company detailed the new Org Explorer Outlook feature that was announced at Build last week.

However, after installing this latest beta version of Outlook for Windows on one of our PCs, this redesigned Outlook app and new Org Explorer feature are nowhere to be found. It’s possible that the Office team announced the feature too early and published the screenshot by mistake, but this redesigned Outlook app looks like nothing we’ve seen before. The image could also well be a mockup as the Outlook app doesn’t even appear in the taskbar at the bottom of the screenshot.

Overall, this new client looks like a mix of the current Outlook app with its familiar ribbon and the new PWA-based “One Outlook” app that Microsoft is currently working on. The left panel with the hamburger menu, app shortcuts, and email folders look to be coming straight from the Outlook web app, and you can also notice icons for settings, notifications, and more in the top right corner of the app bar.

If you pay attention, you can also see that the redesign Outlook app in the background has slightly rounded corners, while the Org Explorer window on top of it still has the regular square corners. Microsoft is rumored to be experimenting with rounded corners for the upcoming “Sun Valley” design update planned for Windows 10 version 21H2 later this year, though we hope that more visible changes are in the card.

Microsoft CEO Satya Nadella himself teased “the next generation of Windows” at the company’s annual Build developer conference last week, and the company is expected to share more details during a dedicated digital event that could be announced later this month. In the meantime, a new Windows 10 Floating Taskbar menu has been spotted in recent Windows Insider builds.

SharePoint and OneDrive for Business users and can now open Word files into Immersive Reader

In March, Microsoft announced its plans to bring Immersive Reader support to SharePoint and OneDrive for Business. The Microsoft 365 roadmap listing suggests that the feature is now rolling out globally to all Office 365 subscribers.

The new Immersive Reader integration will let users access the tool in Word documents and other text files stored in the OneDrive storage service. It’s been a top request from customers, and the feature should help improve the reading experience for people with Dyslexia.

thumbnail image 3 of blog post titled Immersive Reader comes to PowerPoint for the web, OneDrive, SharePoint and MakeCode

To use this feature in OneDrive, simply select the Word document you want to open and then click Open from the horizontal toolbar. Finally, select choose the “Open in Immersive Reader” option from the dropdown menu. This feature is only available for Microsoft Word documents, and it doesn’t support PDF documents.

As for SharePoint, Immersive Reader is now available as a toolbar-based option for reading SharePoint pages. This means that users will need to click on the Immersive Reader option available in the menu bar to open the page in the tool.

thumbnail image 2 of blog post titled Immersive Reader comes to PowerPoint for the web, OneDrive, SharePoint and MakeCode

It is important to note that the Immersive Reader integration is rolling out gradually to all OneDrive for Business and SharePoint users, and it may not be available for everyone just yet. The deployment of this update is expected to complete by the end of this month. Let us know in the comments down below if you have already spotted this functionality on your PCs.

Streaming Requires Additional Driver Installation [Fixed]

If you have tried to stream your laptop, only to get the error message Streaming requires additional driver installation, you are not alone.

It seems as though this error message has been received by many users, as they reported in the streaming community. The complete error message is:

Stream launch failed. Streaming requires additional driver installation. Please follow prompts on the remote computer

Although the error message mentions the need to follow the prompts displayed, users are mentioning that there is no such thing appearing, which leaves them in the dark completely on what to do next.

Luckily there is are a few easy steps that you can do in order to solve the streaming error message, and we will explore them in the following lines so make sure to keep on reading.

How can I easily fix the streaming error message?

1. Update drivers

As we all know, having the latest version of drivers can avoid a wide range of issues, including the dreaded additional driver required appearence.

To make things considerably easier and also risk-free, using a specialized software can make a huge difference.

2. Rollback to a previous driver

  1. Click on the search bar, and type Control Panel, then open it.
  2. Click Performance and Maintenance and then System (in Category view) or System (in Classic view).
  3. Click on Device Manager.
  4. Toggle the Display Adapters option.
  5. Double-click on your GPU.
  6. Finally, select the Driver Tab and click on Roll Back Driver.

Note: You can use this steps to roll back your driver only if you have installed the current one without first uninstalling the previous one.

3. Uninstall the current driver

In case you have first uninstalled your previous driver and only after that you have installed the current one, the you cannot roll back.

In this situation you will have to follow the same steps for uninstalling your driver and once the process finishes you can download and reinstall the recommended driver.

That is about all. We hope that one of the presented solutions will help you fix the streaming issue. If you have additional recommendations or suggestions, let us know in the dedicated section below.

Dona Sarkar gets a new role leading Accessibility tech for Microsoft

We first came to know Microsoft engineer Dona Sarkar when she took over the role of head of the Windows Insider program back in June of 2016, taking over from Gabe Aul. Since then, she moved on to work on the Azure team as an advocate for the Power Platform, Microsoft’s foray into low-code / no-code programming.

Now, Sarkar is taking on a new role, this time leading Accessibility tech for Microsoft internally:

As Sarkar explains in the Twitter thread, she will be “cajoling, err *influencing* all of our product teams to keep making #AssistiveTech that’s more accessible, usable and innovative than ever.”

We’ve always enjoyed our interactions with Dona, and Microsoft couldn’t have a better person to lead its product teams to make all of its products more accessible and assistive. Microsoft is no stranger to accessible tech, launching the Xbox Adaptive Controller in 2018, for example, and working make its products more usable for everyone, but there’s always more work to do. We wish Dona Sarkar all the best in her newest adventure!

For Honor, Darkest Dungeon, and Backbone are coming to Xbox Game Pass in June

Microsoft has revealed this morning the first new Xbox Game Pass games coming to the catalog in June. First of all, the medieval fighting game For Honor will be available on Thursday, June 3. The ID@Xbox title The Wild at Heart, which was already available on Xbox Game Pass for Console, is also available on Xbox Cloud Gaming starting today.

Two new games will follow next week with the PC game Backbone on June 8 and the rogue-like turn-based RPG Darkest Dungeon. You can find a summary of the latest Xbox Game Pass additions below:

  • The Wild at Heart (Cloud) ID@Xbox – Available Today
  • For Honor (Cloud and Console) – June 3
  • Backbone (PC) ID@Xbox – June 8
  • Darkest Dungeon (Cloud, Console, and PC) ID@Xbox – June 10

This selection of games is obviously not great, but the Xbox team is likely planning to announce new Xbox Game Pass titles during the Xbox & Bethesda Games Showcase on June 13. Last week, Xbox marketing exec Aaron Greenberg confirmed that the upcoming event will have a segment about “upcoming releases on Xbox Game Pass.”

Unfortunately, five games will also leave the Xbox Game Pass catalog in the middle of the month. If you have yet to play them, Ace Combat 7: Skies Unknown, Night Call, West of Dead, Wizard of Legend, and Observation will leave Xbox Game Pass on June 15, but subscribers can purchase them with up to 20% discounts until that date.

Twitter updates on Windows 10 and web with improved Spaces, Fleets, and Topics functionality

Twitter’s new voice chat feature, Spaces, has finally come to the web version of the social network which powers the Twitter web experience and the Windows 10 desktop app.

The feature still appears to be in its early stages on the web when compared to its implementation on the iOS and Android Twitter apps as there’s still no visible bar of active Twitter Spaces, Fleets, or livestreams along the top of the app’s UI to aid discoverability. Twitter Spaces is live and functional, however, but users will have to access rooms via mentions in individual tweets for now, similar to how Fleets are live but can only be viewed within DMs.

Testing of Twitter Spaces on the web was first noticed as recently as this past April so development of the public voice chat feature does seem to be progressing at a rather speedy pace. It’ll be interesting to see just how close to the mobile app experience the developers can get the web experience to look over the next few months as there’s almost feature parity between the various versions.

A host of other new improvements were also made to the Twitter web experience over the past month or so such as the rollout of the Topics link in the left menu, improved functionality for Fleets, and better DM search.

Applications for Twitter account verification were also opened last week but the process has now been temporarily paused due to the influx of applications.

Here’s the full release notes of recent Twitter changes:

New

  • DM Search: There have been a number of improvements made to DM search, allowing you to search across all conversations instead of ones you’ve recently viewed. Read more here.
  • Fleets: You can now navigate across Fleet threads in the Fleet viewer screen. Whenever you view a Fleet that’s part of a larger thread, you’ll have access to the whole thread. We’ve also enabled the ability to navigate to embedded entities like Tweets, and the reporting flow for Fleets.
  • Spaces: You can now listen to Spaces on Twitter.com! Start listening by hopping in from the Spaces shared in Tweets. See more here.
  • Topics: The Topics to follow sidebar is now available for everyone. This will give you more visibility into Topics you may be interested in.
  • Verification: We’re relaunching the ability to request verification on Twitter.com! Look for the new flow from within the “Settings and privacy” and “Your account” menus. You can read more about the relaunch and process here.

Updated

  • Accessibility: Improved the structure of the keyboard shortcuts menu so that it’s more easily understood by screen readers.
  • DMs: We’ve made improvements to how we handle DM search terms that are empty, and improved the alt-text for the close search button.
  • DMs: The DM search results will now properly paginate instead of returning a maximum number of results.
  • Fleets: Interstitials will now playback instead of pausing all playback.
  • Internationalization: Resolved inconsistencies in translations when using “Tweet” as either a noun or a verb.
  • Push Notifications: Improved the handling of navigation for certain push notifications.
  • Search: Your most recent saved searches will now be listed at the top instead of the bottom, preventing needing to scroll to see them.
  • Tweets: Updated social context styling for unsent Tweets to match what will ultimately be rendered in timelines.
  • Video: We’ve added keyboard shortcut controls for video playback. Use space to play/pause when the scrubber has focus, “k” to play/pause anywhere when the video has focus, and “m” to mute/unmute anywhere when the video has focus.

Fixed

  • Accessibility: The “Clear all” button for recent searches should now be properly selectable with voiceover turned on.
  • Accessibility: Focus navigation across the DM search bar will no longer automatically display recent searches, and you’ll instead be able to navigate through your DM conversations properly.
  • Accessibility: Navigating across pages in the Quick Promote flow with a screen reader will cause focus to reset to the buttons at the top of the flow instead of the closest element.
  • Accessibility: Icons without an explicit label will now be properly hidden.
  • DMs: Fixed flickering issues when navigating between DM search results and the conversation inbox.
  • DMs: Pull-to-refresh will now properly requery the provided search.
  • DMs: Hitting return in the DM composer on iOS will no longer send the message and will properly add a line break.
  • DMs: Fixed issues with the DM composer expanding before text has actually reached the end.
  • Lists: The error screen will no longer flash if data is taking a bit longer to load.
  • Quick Promote: Swapping your selected gender via the radio buttons will no longer leave your selection empty.
  • Topics: The Topics to Follow sidebar will no longer display when empty or when in an error state.
  • Tweets: Fixed instances where removing your like from a Tweet wouldn’t decrement the count immediately.

Have you used Twitter Spaces yet? Let us know if you like the feature in the comments below and then follow us on Twitter for more tech news.

How to get the best graphics in Biomutant [Maximum Beep Boop]

In their never ending quest to make games that actually look really good, look even better, some users are developing new ways of bringing graphics to a whole new level.

Trying to correct some of the graphics decisions taken by Experiment 101, Xayjyn developed a new mod for Biomutant that is now available for players who want sharper, more accurate details.

So lets take a closer look at this mod and see exactly how it alters and enhances the pre-existing game settings.

Maximum Beep Boop fine-tunes Biomutant graphics

Basically, the mod removes some of Biomutant’s graphics settings that, normally, you wouldn’t be able to alter in the game menu.

It removes some of the visual effects, such as chromatic aberration and the intense depth of field, based on the idea that this is a game and not a movie.

Other graphics elements like the smudgy temporal anti-aliasing were also removed from the game, along with motion blur and film grain settings as well.

Instead, this mod adds ACES Tonemapping, in order to achieve a far more naturalistic color correction, which gamers will be able to observe, at its peak, on screens that support high dynamic range.

Some other new additions that come with the Maximum Beep Boop mod are the enabling of color correct bloom and, also, subsurface scattering. This will ensure a more subtle fur color in a direct light source, but it’s not very noticeable.

The fade distance, along with the level of detail settings have been maxed out, to ensure high detail even at maximum draw distances. Even ambient occlusion will kick in at the max distance, as well.

Shadow resolutions have been cranked up to as high as they can get, and the true volumetric fog setting will use its full volume density instead of being a hazy fall back transparency.

Where can I get this mod and how will this impact my PC?

If you also want to try out this new mod, you are going to want to head over to Nexus Mods and download it from there.

You will also find tips and tricks about .ini files to adjust if your game crashes or you encounter other issues.

In order to install this mod for Biomutant, follow these steps:

  1. Download the .ini files from the location mentioned above.
  2. Place the files in:
DRIVE:\Users\USERNAME\AppData\Local\Biomutant\Saved\Config\WindowsNoEditor

After you completed the steps above, restart your PC and run the game.

We know that you’ve probably been also wondering about the impact that running Biomutant with this mod will have on your PC. Well, it mostly depends on your GPU, among other small factors.

Some users have admitted that they are finding it difficult to maintain 60 FPS after they installed this mod.

I tried it, I encountered 0 bugs, but I have a huge drop in FPS (from ~80 to 45 for a 2560 x 1080 screen) on my RTX3060ti. Maybe a 3080 can handle a constant 60FPS.
I tried to tweak down some features and got some results (Texture stream feature removal led to a small improvement) but not enough to keep the game fluid. Maybe it could be interesting to release some king of intermediate version (keeping volumetric fog and global shadows with features and counterbalancing with standard setting for LOD/distances/resolution)

The mod author has responded to all of the comments and has tips and solutions to all of the questions that other users have raised.

Have you also tried this mod for Biomutant? Tell us if you enjoyed it in the comments section below.

FIX: This Windows 10/11 pop-up bug makes gaming impossible

If you’re one of the many users running Windows 10, you may have noticed that a popup window launched every day on your screen – or even more often than that.

Usually, this pop-up window is spawned and is immediately closed again. Due to its nature, it’s difficult to understand what generates it and whether this issue is something you should be concerned about.

When it happens, it can possibly throw a user out of a currently full-screen app, and with some Windows 10 users experiencing this every hour, it can turn playing games into a nightmare.

The file that’s executed is called officebackgroundtaskhandler.exe band and can be found under C:\Program Files (x86)\Microsoft Office\root\Office16\officebackgroundtaskhandler.exe

If you log processes on your system, then you may notice this is the case on your Windows device.

In the case Microsoft Office runs on the Windows 10 machine, two tasks are scheduled to run OfficeBackgroundTaskHandler:

  1. OfficeBackgroundTaskHandlerLogon, which runs when the user logs on to the system.
  2. OfficeBackgroundTaskHandlerRegistration, which runs every hour.

Check out our guide below to discover the quickest solutions to easily solve this annoying problem.

How can I fix the Windows 10 pop-up bug?

1. Disable the task

  1. Press the Windows key, type Task Schedule, and hit Enter.
  2. Select the Task Scheduler app, then choose the Task Scheduler Library.
  3. Go to Microsoft, and then to Office.
  4. Locate the task OfficeBackgroundTaskHandlerRegistration.
  5. Right-click on the task, and the select the Disable option.

To make sure you get rid of the bug problem and can enjoy gaming, you need to make sure you disable the OfficeBackgroundTaskHandlerRegistration running every hour.

Follow the above steps to disable the right task that is scheduled to run OfficeBackgroundTaskHandler.

2. Run under System Account

  1. Press the Windows key, type Task Schedule, and hit Enter.
  2. Select the Task Scheduler app, then choose the Task Scheduler Library.
  3. Go to Microsoft and then to Office.
  4. Right-click on the OfficeBackgroundTaskHandlerRegistration.
  5. Select Properties, type System, and then click OK.

3. Perform a System Restore

  1. Press the Windows Key and type system restore.
  2. Select the Create a restore point option.
  3. Click on the System Restore button.
  4. Check the Show more restore points option.
  5. Select the available restore point and click Next.
  6. Follow the on-screen instructions to perform the restore.

System Restore is a recovery feature in the Windows OS that allows you to restore your PC to an earlier state, helping you to get rid of the annoying pop-up bug.

Users can usually roll back Windows 10 by a month. System Restore will undo system changes after the selected restore date.

Getting a pop-up window on your screen constantly is frustrating and can prevent you from enjoying your favorite activities, especially gaming.

If you don’t have the time to follow all the procedures every time you encounter problems with your PC, then check out our guide to the best Windows PC troubleshooting tools.

As an alternative, it’s also advised to consider dedicated tools for repairing corrupted operating systems. You will thus protect your PC from broken system files or dangerous viruses.

One of these two solutions should work for you, so try them out in case you experience this issue in Windows 10. For more suggestions, please access the comments section below.

Windows 10 Can’t Add a New User: How to Fix it

Managing users on a PC is essential, but if you can’t add a new user on Windows 10, you might be dealing with file corruption.

This can be a significant issue, especially on shared PCs or in the business environment, so let’s see how we can fix this issue.

Why can’t I add another user on Windows 10?

  • Bugs on the system caused by missing updates can prevent you from adding users.
  • File corruption can cause problems while adding users.
  • Issues with your account or registry can also cause this issue.

What to do if I can’t create a new user account in Windows 10?

Before we start fixing this issue, there are a couple of checks you can perform:

  • Log out of your Microsoft account and log back in. After doing that, check if the problem is resolved.
  • Clean your registry with registry cleaner software to remove any corrupted entries.

1. Update your computer

  1. Press the Windows key + I and go to the Settings app.
  2. Under the Update & Security section, select Windows Update.
  3. Hit the Check for updates button.

Installing the latest Windows 10 updates may help you fix a bevy of general issues affecting the OS.

If one of the Windows 10 features or apps is unavailable, make sure that you’re running the latest OS version available.

2. Run SFC scan

  1. Go to Start, and type cmd.
  2. Right-click on Command Prompt, and run it as administrator.
  3. Type the command sfc /scannowSFC scan
  4. Wait until the scanning process is complete and all the problematic files are placed.
  5. Restart your PC and try to add a new user account.

System corruption issues may also block certain Windows 10 features and functionalities. You can quickly repair or replace corrupted files by using the System File Checker tool, or a trusted repair tool to make the process even easier.

3. Create a new user account from User Accounts

  1. Go to Search, type run, and double-click on the first result to launch Run.
  2. Type control userpasswords2, and hit Enter to launch User Accounts.control userpasswords2
  3. Go to the Users tab, and select Add. add new user account
  4. A new window will appear asking you How will this person sign-in.
  5. Select Sign in without a Microsoft account (not recommended).create new user account
  6. On the next window, go to Local Account, select a username for the new account, click Next and Finish.create new local account
  7. Choose the newly created user, and go to Properties to select Group Membership.
  8. Select Administrator from the drop-down menu, hit Apply, and OK.

If Windows 10 can’t add a new user, check our guide on managing users and groups for more information.

To learn more about user accounts, visit our What is WDAGUtilityAccount article for more information.

There you go. These five quick tips should help you fix the problem. Let us know which solution worked for you. For more suggestions, please access the comments section below.

How to update your Surface Duo to get rid of the screen bugs

After previously reassuring users that the Surface Duo will also receive system updates on a monthly basis, in order to keep everything working as it should, Microsoft delivers the May update.

This patch features an assortment of the monthly Google security updates for Android, and the expected OS fixes and optimizations for Surface Duo.

Important fixes and improvements with the May update

According to Microsoft, through this update, the build number goes from 2021.314.91 to 2021.419.70 (for US), and to 2021.419.72 (for EU).

Also coming via this patch are a set of important fixes and improvements that tackle some of the know issues.

  • Addresses scenarios outlined in the Android Security Bulletin – May 2021.
  • Improves device stability and UI stability.
  • Improves scenario when one screen would turn black while using Surface Duo in book mode.
  • Fixes scenario when a “Double-tap to switch screens” message was appearing when in book mode.
  • Fixes the scenario when using the TalkBack with 3-button navigation where the list of recent apps was showing on the left screen when invoked from the right screen.

Note that the May update is considerably smaller than the one from the previous month, scaled down from 338 MB to just 197 MB.

How can I download and apply this update?

Performing this action will prove to be even more easier than some might have expected, and also pretty straight forward, as in the case of PCs.

All you have to do is:

  1. Connect to a Wi-Fi network.
  2. Select Settings on your Surface Duo’s home screen.
  3. Select System.
  4. Select System Update.
  5. Select Check for update.
  6. Select Restart now.

Are you one of the proud users of the Microsoft Surface Duo device? If so, tell us all about your experience in the comments section below.
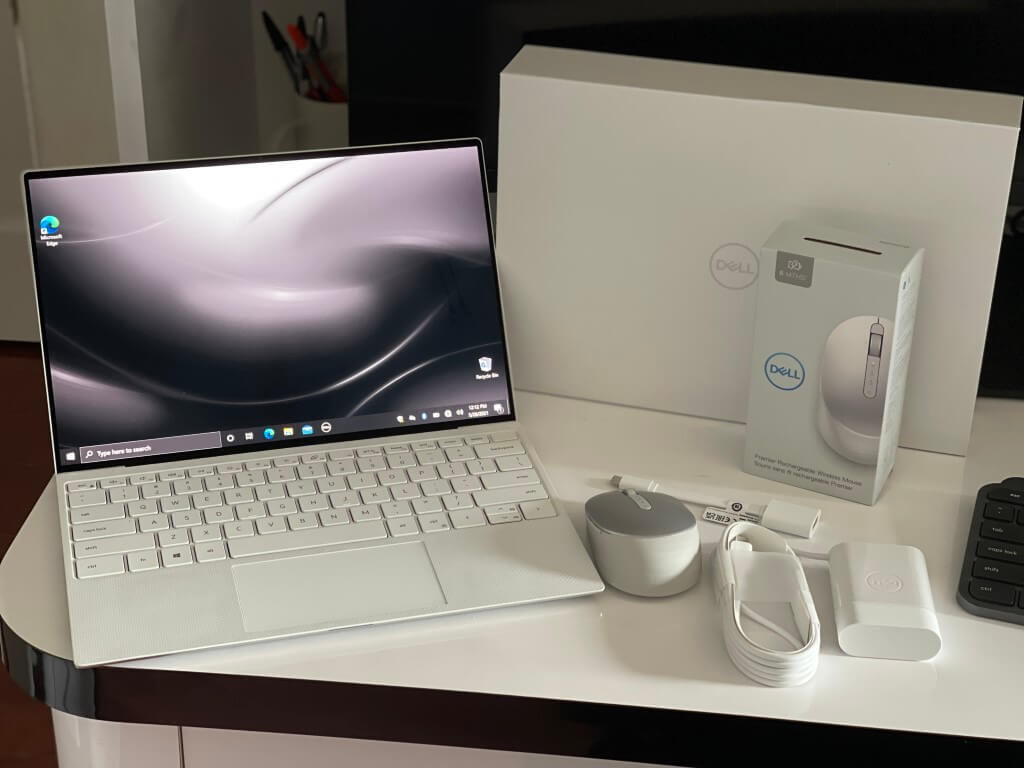
Disney Plus login not working? Try these solutions

Disney Plus, despite its entry into the video streaming niche in 2019, already made a name for itself as preferred by Disney, Pixar, Lucasfilm, or Marvel brand fans.

There are plenty of reports of glitches and errors experienced by subscribers, including the Disney Plus login button not working.

When you click Log in nothing happens. It simply turns gray and no loading occurs. And that can be pretty annoying to say the least.

In other words, the Disney Plus login is not working or the login page is not loading but don’t let this ruin your experience.

In this guide, we will share a few tips and solutions which we have found to have worked for making the Disney Plus login button function again.

What can I do if I can’t log in to Disney Plus?

1. Reinstall the app

To fix this you could also try uninstalling and then reinstalling the Disney Plus app. This generally helps to reduce the storage that it takes up, but also loosens up any unpleasant errors you might be facing.

For example, on Android devices, tap Play Store, then tap the Menu. Hit My Apps, tap on Disney Plus, then on Uninstall and confirm.

You can now go back and look up for Disney Plus in the Google Play Store and proceed to reinstall it once again.

Lastly, log back into your Disney Plus account using the same email and password registered with it.

Disney Plus

Reinstall Disney Plus to get rid of many of the possible issue you might encounter with the app.
Check price Visit website

2. Quick nifty trick

In case of experiencing this issue on your computer, apply this nifty trick first. Just scroll down a bit until it also gives you the option to sign up.

After that, just click login and it should allow you to click the button again. It worked for some users so try it out now.

3. Look out for Disney Plus updates

  1. Launch the Mac App Store by using Finder.
  2. Next, click on Updates from the left-hand side menu.
  3. Finally, click on the Update button next to the Disney Plus app if there is a pending update.
  4. You could also click Update All to update all apps in the queue.
Note icon NOTE
Note: Apply the above steps on Mac computers.

The next thing to look at is a potential new update to install. This streaming platform is not very stable and it needs the security patches that keep it from being a target of data breaches.

That’s why you should expect frequent updates that are released to patch up bugs like the login button not working.

4. Clear your account from other devices

  1. Go to your account holder profile.
  2. Select your Character.
  3. Go to Settings.
  4. Select Device Management or Registered Devices.
  5. Select the Remove All Devices option to kick everybody off your Disney Plus account.

Did you use your Disney Plus account on other devices that you don’t own? Then it’s time to clear your account from those devices as that can be a problem.

Like any other online service, from time to time, Disney Plus is having issues and the service is unavailable.

To check if there are any known Disney Plus outage issues, go to the official Twitter page of Disney Plus and check if there are any tweets acknowledging any issues.

If you tried these steps and the Disney Plus login button is still not working, please reach out to customer service on one of the contact channels provided by the service.

We have written extensively about this streaming service so if you run into other problems with the app, read our article on how to fix the most common Disney Plus errors.

Many reported that Disney+ is not working on Firestick, but we have a guide that addresses that issue.

Should you have any other recommendations or advice, feel free to use our comments section below to tell us about them.

Wondershare Recoverit: Find any File and Recover It [Review]

Information and data are important not just because of what they can do, but also because of how easily they can be misplaced and lost, which applies to digital data.

Photos, videos, documents, and program files can be easily lost due to various factors, including accidental deletions, system crashes, malware, full system resets, and more.

However, whatever you lost can still be found as long as you have the right tools for the job, and we will be looking over one such tool in today’s review, which is called Wondershare Recoverit.

We will be looking over its features, what it can do, how well it can do its job, its price plans, and overall whether it is worth the investment or not in the long run, so continue reading below.

What is Recoverit?

Wondershare Recoverit is a simple data recovery tool that helps users recover their lost data from a wide variety of supported media, bringing it back in pristine condition to be used again.

The UI is made to be as simplistic as possible, to the point that all you need to know is how to read the interface’s text, and you’re pretty much 90 prepared to use the tool fully.

What are Recoverit’s system requirements?

Unlike resource-intensive tools such as image or video editors that need monster PCs to run smoothly, Recoverit and other similar tools have minimal to non-existent system requirements, since their purpose is to be readily available to as many users as possible.

To that end, here’s what your PC needs to run Recoverit properly:

  • Operating System: Windows 10/ 8.1/ 8/ 7/ Vista/ XP and Mac
  • Storage: ~350 MB of hard disk space to store Recoverit
  • Others: 
    • Enough reserved space to store all recovered data
    • Internet connection to download and update Recoverit

How do I use Recoverit?

As previously stated, using Recoverit is extremely easy, with more time needed for the program to scan your system for lost data than actual time spent doing anything.

On that note, here’s how you can use Recoverit to restore any lost data:

  1. Download Recoverit
  2. Log into your Wondershare ID
  3. Select your location to start recovering files
  4. Press Start
  5. Wait for Recoverit to scan your PC for lost information
  6. Select Recover
  7. Browser for a location on your PC to store the recovered data
  8. Save the recovered data

What type of data can Recoverit bring back?

One of the biggest plies a data recovery tool can have is being able to recover information from all kinds of media, and Recoverit showcases that from the moment you launch it.

You will be greeted by an intuitive UI that tells you exactly what kinds of media you can recover your data from, namely:

  1. Hard disk drives
  2. External devices
  3. Select locations:
    • Recycle Bin
    • Desktop
    • Select folders
  4. Advanced Recovery:
    • Recover from Crash Computer
    • Video Repair
    • Advanced Video recovery

As for how long it takes Recoverit to bring back the files, it all depends on how big the media is, and how much data there is to recover.

For example, during our tests, we tried recovering the data from the PC’s Recycle Bin, and it only took about 2 minutes.

On the other hand, we also made Recoverit scan an external 2 TB hard drive, and that took almost 13 minutes.

Tip icon Tip
Keep in mind that these values will vary from case to case and in no way reflect what your own experience with Recoverit may be.

You can’t put a price on recovered data

Everyone can benefit from the capabilities of a solid data recovery tool, from individuals to large companies, and that’s precisely why Recoverit features several accessible pricing plans that will suit everyone’s needs.

The tool is available in 3 major price plans:

  • Individual
    • Essential – $69.95/year
    • Standard – $79.95/year
    • Advanced – $89.95/year
  • Team & Business
    • For Team – In increments of 5, 10, 15, and 20 PCs per license
      • Standard 
      • Advanced
    • For Business – the price plans are custom-made based on your needs
  • Students & Teachers
Recoverit

Recoverit

Recover what you value but lost with the help of Wondershare Recoverit. Try it today!
Free trialVisit website

Closing thoughts

Pros
Offers a free version
Advanced video recovery
Simplistic and welcoming user interface
Supports a wide variety of media for recovery
Cons
Scanning large media take stime

We strongly believe that any type of software, be it a data recovery tool, video player, or photo editor needs to meet 2 criteria to be considered good:

  • It needs to be easy to use by users of all levels or at least have an acceptable learning curve.
  • It needs to be efficient at what it does

On that note, Wondershare Recoverit meets both criteria without any drawbacks, and we wholeheartedly recommend that you try it as soon as possible, especially since you can download it for free and test it out.

Tip icon Tip
While the free trial of Recoverit will scan your PC for lost data, you can only preview the data that can be recovered and not actually recover it.

This concludes our brief overview of Wondershare Recoverit, and we hope that after you’ve read this article, you make a more informed decision when it comes to what tool you use to recover the data that you have lost.

Go ahead and test the product out and let us know what you think by leaving us your feedback in the comments section below.
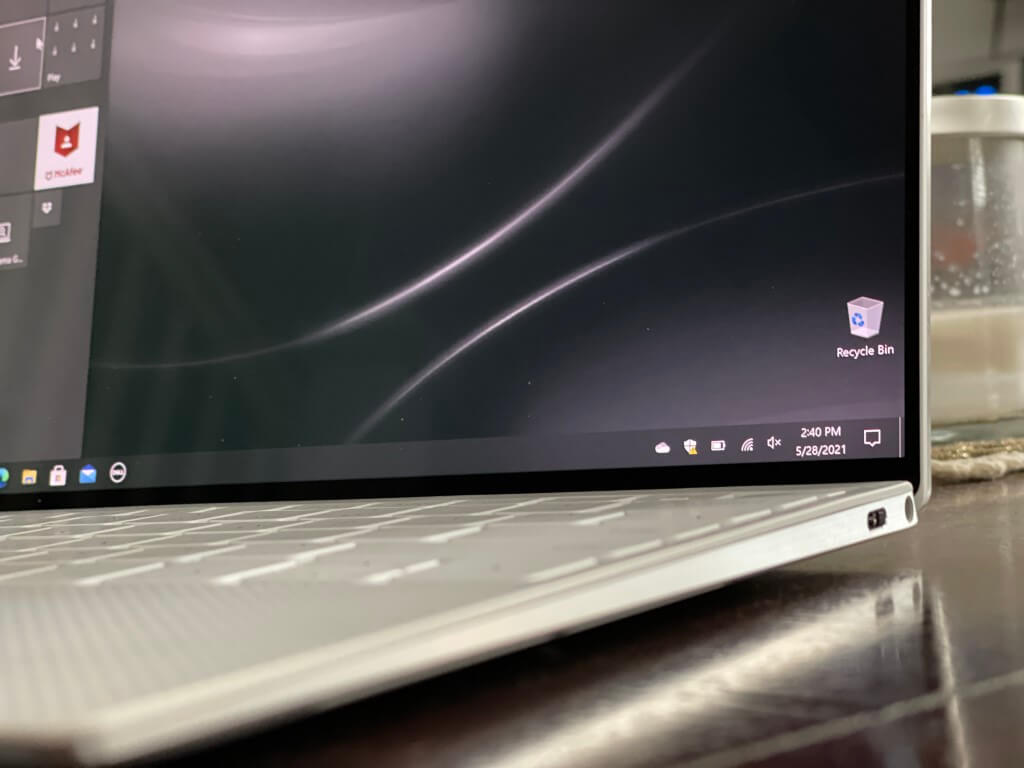
Don’t install KB5003214 if you want to avoid taskbar errors

As with every update that Microsoft brings forward for its operating system, some issues are expected to surface and break the system one way or another.

Windows 10 is now dealing with new problems, after the KB5003214 update for May 2021 Update (21H1), October 2020 Update (20H2), and May 2020 Update (2004) has been applied.

KB5003214 causes major taskbar errors

It seems that this issue is affecting users that are running Windows 10 May 2020 Update (version 2004), as well as newer versions, after KB5003214 was installed.

Interestingly enough, some users reported that when the News and Interests feature is enabled, their taskbar icons are appearing as blank and are totally unresponsive, according to the Microsoft answers post.

Also, with the same new feature turned on, some users pointed out that the notification center, as well as network icon stopped working, after this cumulative update was applied.

Another issue that Windows 10 users were upset about is that the system tray icons would randomly move, disappear or hide, after the installation of KB5003214.

Some users have flagged other problems that started after the patch, such as the search box not appearing on the taskbar, while others have flagged display scaling issues, which could also be related to the system tray bug.

How do I fix the taskbar issues?

Unfortunately, for the moment, the only way that users can totally eliminate these taskbar errors is to roll back the cumulative update in question.

For those of you who still want to keep the update, the only known workaround is to disable News and Interests feature from the settings. Or you could try the quicker way, which is right-clicking on the weather icon, and select Disable.