Dragon Age: Inquisition is a very popular game, which received numerous praises for story, graphics, etc.
But at the same time, the game also received numerous critics from users and testers for its various technical issues.
Users are constantly complaining about the problems in Dragon Age: Inquisition, and we’re going to try to solve at least some of them.
So if you’re also experiencing problems with Dragon Age: Inquisition on your Windows 10 PC, we hope this article will be at least of some help.
How do I fix Dragon Age: Inquisition errors on Windows 10?
1. DirectX crashes while playing game
If you receive an error which says that DirectX causes problems, just simply reinstall it. Also, if you didn’t update your graphics card drivers, DirectX might conflict with it.
The first solution is to check if your graphics card driver is up-to-date. For that, we recommend you a great tool to automatically download all the outdated drivers on your PC.
2. World state saves from the Keep are not importing
This error might occur if you’re not properly signed to servers. So make sure you’re properly connected to both Origin and BioWare servers, and try to import your saves once again.
Also, there’s a possibility that your antivirus software is blocking the access, so go to your antivirus program, and exclude antivirus protection from Origin.
Since Origin is a certified platform, you should not fear about your security, even if the antivirus is disabled for it.
3. Graphics card issues in Dragon Age: Inquisition
Go to Origin, select the Application settings.
Navigate to the Origin In-Game tab, and disable it.
Disable other programs that have a game overlay.
A lot of issues in the game could be caused by the graphics card, like stuttering, freezing, hitching, crashing, terrible FPS, and more.
Some users suggest that using Origin in game can cause the problem with graphics. So, try disabling it, and check if the problem still appears.
If you’re using an NVidia GPU, maybe your graphics card is overheating, and that causes problems with the game.
So, check out your GPU temperature with programs like GPU Temp, and if the temperature is higher than 65-70 degrees, try increasing a fan speed.
4. Black screen issues in Dragon Age: Inquisition
Some users suggest that the problem with black screen can be solved by toggling the game into windowed mode.
To do so, just press Alt + Tab, and after that, switch the game back to full screen mode, and the black screen problem should be solved.
5. Players spawning under the world in multiplayer
This is another commonly reported issue that often bothers players of Dragon Age: Inquisition.
EA still doesn’t have a proper solution for this problem, as it advises players to just exit the match, and try to log in again. Although the company promised a fix, users are still facing this bug.
6. Avoid Patches
Open Origin.
Go to the Applications settings, and then to the Application tab.
Uncheck the Automatic gameupdates option.
Restart Origin.
Go to offline mode (Origin, select Go offline).
This might sound unreasonable, since patches are being released to actually solve bugs and issues, but many users reported that certain issues occurred after installing a patch.
So sometimes, the best option is to actually avoid a patch. To prevent Dragon Age: Inquisition from installing a patch, just follow the above steps.
Next time you launch the game, you will be able to play it without installing updates.
However, if you have already installed a patch, you can try to roll back to the original version of the game, and see if the error that bothered you when the patch was installed still occurs.
To roll back to the original version of Dragon Age: Inquisition, do the following:
Before you start, make a backup of your saves, just in case.
Repeat steps 1-3 from above.
Uninstall the game (go to Control Panel, select Programs and Features, and uninstall it from there).
Restart your PC.
Reinstall the game.
Repeat steps 3-5 from above.
If a patch was indeed a cause of the problem, running the unpatched version of the game might eliminate all the issues, so you’ll be able to play the game normally, again.
If you encountered some other issue while playing Dragon Age: Inquisition, feel free to write us in the comments section below, it will surely help other players to solve their problems with this game.
Have you tried to install Avast Antivirus on your new Windows 10 computer? Sometimes users may encounter some serious issues with the software Windows 10.
The most annoying of them is the fact that this tool does not recognize the Windows system files as part of the operating system and tries to delete them.
This article will show you how to fix Avast issues on Windows 10 and what version of the antivirus to install.
Avast is one of the most popular antivirus programs out there. Many users who were using it on previous versions of Windows installed it on Windows 10, as well.
But even if this antivirus solution is fully compatible with Windows 10, some errors may still occur. In this article, we’ll list the most common issues reported by users as well as their corresponding solutions.
It is worth mentioning that oftentimes users experience BSoD errors after installing the latest Windows 10 version on their computer.
This problem occurs due to incompatibility issues between Avast drivers and some CPU models. To avoid this problem, install the latest antivirus version before upgrading your PC to the latest OS version.
For other Avast issues, follow the instructions listed below. We hope these solutions will be helpful to you.
What can I do if Avast is not running on Windows 10?
In the Command Prompt type the following command and hit Enter: winmgmt /verifyrepository
If you get WMI repository is consistent -no problems detected, type the next command and press Enter: winmgmt /resetrepository
If you get WMI repository is inconsistent -problems detected, type another command and press Enter: winmgmt /salvagerepository
If you get WMI repository has been salvaged – WMI repository has been successfully rebuilt, continue to the last step.
Now reset your PC.
One of the most frequent issues with Avast on Windows 10 is when the Action Center doesn’t recognize Avast.
If that happens, you’ll probably receive a pop-up message saying: Windows Defender and Avast Antivirus are both turned off, or Windows did not find an antivirus program.
Fortunately, there’s an easy solution for this. You just need to follow the steps above to rebuild the WMI repository.
2. Avast causes black screen in Windows 10
Click on the Avast icon in the taskbar and open Avast user interface.
Go to Settings tab, and then to General.
Go to the Exclusions options, click add and add the following address to exclusions:
Some users also reported that installing Avast on Windows 10 caused black screen issues. This is not a common issue, but if you experienced it, you can try the above solution.
After that, you shouldn’t face the issue anymore. But if you do, maybe the problem is not related to Avast, so I recommend you to check our dedicated article for additional solutions.
3. Process Trust error during Avast installation
This error message sometimes appears when you’re trying to install Avast on Windows 10.
Namely, you’ll get Process Trust fatal error pop-up message saying Avast doesn’t trust Avast Installer. This means that you cannot install Avast on your computer.
The error appears due to a conflict between Avast and your current antivirus program. So, just disable your current antivirus (in most cases this is Windows Defender) and try to install Avast again.
This time, you shouldn’t experience any problems. This error will remind you that having two antivirus programs installed on your computer is not a good thing.
In Task Manager select all items, and click Disable.
Close theTask Manager.
On the Startup tab of the System Configuration dialog box, click OK.
Restart your PC, and try to update Avast.
This solution allows you to start Windows 10 using a minimal set of programs and drivers. Software conflict may also block Avast updates.
Sometimes, Avast may fail to update its virus definitions. This is quite a major issue, but you can use our detailed guide to fix the problem.
5. Avast won’t start
Go to Start and type control panel.
Launch Control Panel and go to Programs.
Choose Uninstall a program.
Select Avast, then Repair.
If Avast fails to load, you can try to repair the software. When the process is completed, you can restart your computer and check if the issue persists.
That’s all, we hope this article covered all the major Avast errors that you may get in Windows 10, and that it helped you solve them, as well.
If you have additional questions regarding this subject, drop us a line in the comments section below, and we will help you further as soon as possible.
Load balancing refers to the process of spreading a network service load among multiple servers/systems.
A software-based load balancing tool is able to make sure that you get the maximum service availability by offering network traffic distribution services.
For instance, if your business has a primary business domain, you will want your website to be available to your current and potential customers 100% of the time.
We gathered five of the best load balancers for Windows 10 that you will be able to use for your servers or your home network.
Check out their sets of features to make a well-informed decision.
What are the best load balancing tools for Windows?
Load balancing allows network loads to be split between multiple Network Interface Cards based on various algorithms.
Each one of the IP sessions will be treated individually before deciding the path, and this means that a single IP connection is not able to be split during the process. Only multiple connections can be separated.
Each network adapter in Windows 10 comes with two metric values that are automatically assigned to it by the operating system.
This depends on the connection’s performance, interface metric, and also the default gateway metric. The network adapter with the smallest route metric will get all the traffic.
It’s also important to note that if multiple network adapters are manually configured using the same route metric, the connections will go through the one which has less traffic load.
You can find more about load balancing in Windows using Network Manager, and you can try this yourself to see how it works.
Here’s how you configure identical cost metrics on more NICs Network Manager:
You have to click on the Control Panel button in the gadget
Click on Tools and then Load Balancing
Click on the Windows tab
Enter the metrics value that you want to use; you can also leave the default values and then click on Apply
Wait for the program to refresh, and you are good to go
The SafeKit farm cluster from Evidian can implement a network load balancing cluster among several servers.
This will offer users one of the most straightforward solutions to critical application scalability and high availability.
In a network, the same app runs on each server, and the distribution of network activity will balance the load.
SafeKit software can save the cost of complicated load balancers making things easier for the users. It will not require any specific servers above the farm to implement the network load balancing cluster.
Check out more in-depth details about the network load balancing cluster on Windows and on how the SafeKit farm cluster works by heading over to Evidian’s official website and taking a look over there.
Here are some essential features that are included in SafeKit:
SafeKit offers a generic farm module on Windows and Linux in order to build a network load balancing cluster
You will be able to write your own farm module for your app starting from the generic farm module
You can also implement a mirror cluster that offers real-time replication and failover
Using NGINX and NGINX Plus, you will be able to scale out your applications and distribute the workload evenly across multiple servers. If we’re referring to a web app, HTTP requests are load-balanced across more app servers.
If you did not know, there are two primary advantages that come packed with load balancing.
One of them is to scale out and handle more users than you would be able to do with a single server.
And the other benefits refer to redundancy – if a server fails, there will be others left available to make sure that the app stays online.
To find out more details about NGINX software we recommend that you head over to the official website because there are lots of data and information listed for users to better understand how things work.
But for now, take a look at the main features and benefits that come with using NGINX/NGINX Plus:
Both open source NGINX and NGINX Plus are able to load balance HTTP, UDP, and TCP traffic
NGINX Plus extends the open-source NGINX with enterprise-grade load balancing that includes active health checks, session persistence, additional metrics and more
For managing your home network, we recommend using the open source NGINX because it will be enough
NGINX Plus can automatically apply a wide range of enhancements to an HTTP transaction, and these optimizations include HTTP upgrades and transformations such as response caching and content compression
KEMP’s Free LoadMaster is an advanced application delivery controller. KEMP offers this free LoadMaster in order to help small companies and developers as well by providing them with a compelling load balancing option.
If their load balancing needs growing and expanding, users will get the chance to upgrade to a commercial version after they get the hang of how LoadMaster works.
On the official website of KEMP, you will be able to find a comparison between the Free LoadMaster and the Commercial LoadMaster’s features just to find out which one works best for your needs.
Take a look at the main features and benefits that you will be able to enjoy if you choose LoadMaster:
This is a tremendous free load balancer that is created by a well-established company
It will enable lots of start-ups and QA/Dev teams to focus on their tasks at hand without having to worry about addressing the trade-off between quality, cost, and upgradeability that are usually associated with some other open source and app-embedded load balancing solutions that you can currently find
Snapt is a load balancer and web accelerator that will definitely help you supercharge your network. This is one of the best application firewall options for DevOps, cloud and also virtualized deployments.
Check out more great features that are packed in Snapt by heading over to its official website.
Take a look at the best features that are included in Snapt:
Snapt was built because its developers felt that the application delivery software solutions which were already on the market were just not good enough
Snapt develops high-end solutions for app delivery, and this excellent software is designed to solve various needs of the users
Using Snapt, you will be able to accelerate your website with the robust HTTP/S web accelerator
You can offload your servers and enhance page load times
You will also be able to stay online under pressure using the load balancer and at the same time enjoy high visibility, reporting, alerts and more
You can also use the Snapt GSLB to rout traffic intelligibility throughout the world
Using Snapt, you will be protected against SQL injections, leaks, and more thanks to its Snapt WAF feature
As of now, while there’s lots of speculation, no one outside of Panos Panay’s team really knows what’s going to happen. That doesn’t stop us (or you!) from taking some guesses on what June 24th will bring. Take the poll, and sound off in the comments below – what are you expecting from the June 24th Windows event?
(note, due to an unintentional glitch here at OnMSFT, some of the comments on our original announcement post and our follow-up 10 questions post were lost, please sound off again if we lost your comment!)
Microsoft Teams is getting a new attendee reporting dashboard that will allow organizers to view webinar registration and meeting attendance data in a separate tab. Last week, Twitter user Rannei spotted that the feature is currently rolling out in the public preview version of Teams.
The reporting dashboard provides a snapshot of important data to meetings and webinar hosts in a dedicated tab within the detail section. These details include attendance data for meetings as well as registration and attendance information for Webinars. This change will enable meeting organizers to view the attendance report without downloading the CSV file in the app.
Keep in mind that this feature will be disabled by default, and Office 365 admins will be able to enable it manually by turning on the AllowEngagementReport policy. To do so, IT admins will need to run the following command in PowerShell:
The new attendance dashboard experience could help organizers to understand attendee participation during webinars and meetings. The feature is rolling out gradually to all desktop users, and it is expected to be generally available by the end of August 2021. Let us know in the comments down below if you have already received this update on your PCs.
The Fortnite Chapter 2 Season 7 update has rolled out to Xbox One and Xbox Series X consoles, Windows 10 PCs, and all other supported platforms and matchmaking has now begun.
This new season of content follows through with the recent Fortnite UFO teasers and revolves around a full on alien invasion on Fortnite’s Battle Royale island. The new Battle Pass features a variety of wacky and cool characters but of note is the addition of Rick (from the popular Rick and Morty cartoon series) and Superman (available in both his traditional red and blue outfit and the fan-favorite black style).
Season 7 sees the return of Battle Stars, a feature from Chapter 1 that was eventually phased out. In Chapter 2 Season 7, they can be earned by levelling up and can then be redeemed for Battle Pass rewards. This allows for a more personalized experience for Fortnite players as they’ll now be able to unlock rewards out of order as opposed to a level-by-level structure seen in recent seasons.
Players will have a while to unlock everything with Fortnite Chapter 2 Season 7 currently set to run until September 12th.
There are many various errors related to Windows 10and in the past, we have covered similar errors related to SD cards not being recognized by Windows 10. Here are some fixes for Micro SD Card problems.
There are many Windows 10 users complaining about various errors and now we’re trying to come up with a fix for issues related to Micro SD Cards not being recognized.
Here’s what one of the affected users has been saying:
“Having the same issue after reinstalling win 8 because of the scorpion virus that I was unable to remove. Now I don’t recognize SD cards from my camera. Not sure that the drivers are right for the device but I haven’t figured out what they should be. Does anyone know where I would find the SD reader in device manager?”
What to do if my SD card is not recognized in Windows 10?
How do I fix the micro SD card if it’s not recognized by Windows 10?
1. Run the Troubleshooter
Press the Windows Key + S and type in Troubleshooting.
Click on Troubleshooting under Settings.
Afterward, go to Additional troubleshooters.
Search for the one you need, then click on it.
2. Update drivers
Download the drivers from the Manufacturer’s website and install them in compatibility mode.
Right-click on the driver Setup file and select Properties, then select the Compatibility tab.
Select Run this program in Compatibility mode and select the previous version of Windows supported by the software from the drop-down list.
After that click on Apply and Ok, and install the driver.
Then restart your computer and check if it works.
Updating drivers manually might be very annoying, so we recommend a third-party tool that can update your drivers automatically. Thus, you will prevent file loss and even permanent damage to your computer.
Not only will this software keep your drivers up to date, but it will also constantly scan for newer versions by itself, so you don’t have to worry about doing it.
Press the Windows Key + S and search for Settings.
Click on Updates & Security.
Then, select Windows Updates, and Check for updates.
Allow the system to scan and install any necessary updates.
Sometimes all you have to do is to install the latest Windows Updates since they usually patch bugs and deal with issues.
4. Change the drive letter
Go to Computer Management then Disk Management, where you will find the Card Reader.
Go to Control Panel, then System and Security, and Administrative Tools.
Click on Administrative Tools, then click on Computer Management.
In the left panel, under Storage, click on Disk Management.
Your SD card reader should show up there, so you will have to Right-click on it.
Now, from the pop-up menu choose Change Drive Letter and Paths… or Add Drive Letter.
Then assign it a drive letter.
Your SD card reader should show up when you double-click the computer icon.
However, be careful, you may lose data from the SD card.
5. Check your SD card on another PC
In case you do not manage to fix the SD card not detected error on your PC, try to plug it in other PCs.We would strongly recommend trying it on a different OS, like Mac OS or Linux.
This will make sure that the problem lies within your PC, not the reader itself. If the SD card is to blame, it will not work on any device whatsoever.
If you can detect it there, then the problem lies in a conflict between your Windows version. In this case, you might need to take more complex actions in order to fix this issue.
Windows 10 provides numerous capabilities and is in no doubt one of the best operating systems ever invented.
But some users – especially those familiar with Windows 95 seem to dislike its appearance and would rather stick to the ‘old school’ but nostalgic Windows 95 desktop backgrounds.
And because Microsoft did not include a Windows 95theme for Windows 10 during the operating system release, passionate users have been frantically searching for a solution with mixed results.
One of DeviantArt users named Kizo2703 came up with a Windows 95 like theme (Free) and most nostalgic users seem satisfied with the results.
Let’s look at the theme download and installation process below, so keep reading.
How do I install Windows 95 theme on Windows 10 PCs?
1. Use a third-party desktop customization suite
Whenever you get tired of the generic Windows 10 look and want to give it a more distinct look, be it with a Windows 95 theme or an ultra-futuristic space-ship theme, a third-party desktop customization tool can definitely come in handy.
Our recommendation software suite is made up of multiple tools that can give your PC a complete overhaul in terms of how it looks.
For example, It includes a great software which allows you to install live wallpapers and screensavers on your PC that you can create yourself.
In the case at hand, you’ll probably like how it comes with another product included, which basically can be used to give your PC an entirely new theme.
With a little bit of tweaking, it can even make it look like it is running Windows 95.
This tool can also make your PC sound like Windows 95 as well, allowing a full nostalgia package to be included in the deal.
Object Desktop
Give your Windows 10 a complete upgrade (or downgrade) in the visuals department with this complete software suite!
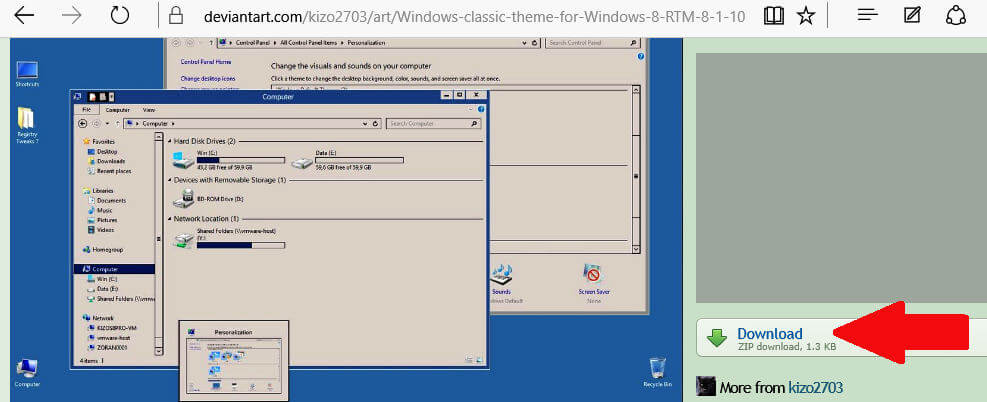
Click the Download button at the right-hand side to initialize the download.
Extract the downloaded to your C:WindowsResourcesEaseofAccess Themes folder.
Go to the desktop, and right-click on an empty space.
Click on Personalize and choose Theme settings.
Click on the classic theme as seen under the high-contrast themes.
Your Desktop now changes to look very close to a Windows 95 classic desktop, despite missing the sentimental Windows 95 logo.
And you can even customize the background colors further instead of sticking with the traditional blue. Here are the steps to follow:
Right-click on an empty space on your desktop.
Click on Personalize.
Under Background, double-click your preferred background color. Your Windows 95 desktop background color will change to your new choice.
Now, the taskbar in Windows 10 is no longer associated with the theme function so applying the new classic theme will not impact how the taskbar looks like and the only option is playing with the high contrast settings.
How do I uninstall the Windows 95 theme from Windows 10?
Navigate to the following folder: C:WindowsResourcesEaseofAccessThemes
Select the classic theme.
Press delete to erase it.
You delete the theme since you cannot uninstall it like conventional programs. You can now revert to the usual Windows 10 Themes.
We hope that these recommendations were helpful. What method do you prefer when you want to give your modern PC a more nostalgic feel?
Let us know which method you prefer by leaving us a message in the comments section below, and also if you have any questions or other suggestions.
It’s always interesting to see how much time people are willing to spend analyzing certain pieces of information, and how far they will go in trying to prove that it was actually meant as a sign.
The same happened with the photo that Microsoft released to the public a few days ago, which shows the Windows logo with light strategically coming through it, creating an advertisement for Windows 11, some say.
The Windows 11 photo is now available as wallpaper
The photo, that looks somewhat like its showing number 11, created by the light shining through the window, is making some Windows users hunt for clues about the future of the operating system.
Therefore, people around the internet have started analyzing every pixel of Microsoft’s image, leading many to believe that it teases that the next version of the OS will be called Windows 11.
Various hypothesis arose, in which users would say that the image teasing the next generation of Windows lacks the shadow in the middle, making the blocks of light look more like the number 11.
You can imagine that, from here, it was just a small step towards internet hysteria. Now everyone is on the edge, waiting for Microsoft to release Windows 11 and blow their minds.
Will it be so? Is this a codified image purposely released just to tease the future of the OS? Or are fans a little bit too eager and see signs everywhere? We will all find out on the 24th of June, at the unveiling event, that’s for sure.
NOTE
We held an exclusive Windows 11 survey which has been compiled from the opinions of 6056 readers. They’ve completed it over the course of seven days and that’s your chance to find out how many of them are eager to fully embrace the new OS.
Where can I get this wallpaper from?
Needless to say that, since the teaser, many users have downloaded and made this image their new official wallpaper for Windows.
If you also want the image, you can now download it now from Wallpaper Hub, a website dedicated to Windows and Microsoft-related wallpapers.
Everyone is excited about the big news and the curiosity will still lead to some pretty impressive theories before it’s all played out, of that, we can all be sure.
Let’s not forget that Windows 10 is also due to receive the Sun Valley update, software changes that will give the OS a complete visual makeover. This could also be the change that the company keeps referring to.
Have you already downloaded your Windows 11 wallpaper? What is your opinion on this whole matter? Be sure to share it with us in the comments section below.
Microsoft has released today a new cumulative update with no changes for Windows Insiders in the Dev Channel. The build 21390.1000 (KB5004071) is just another servicing pipeline test, and the Windows Insider team explained today that more will come in the coming weeks before we go back to regular build flights.
“We have been testing our servicing pipeline with Cumulative Updates to the builds released to the Dev Channel. Each week, we would release a new build and then follow up with a Cumulative Update on top of that build before moving to the next build. However, we need to test the process of releasing multiple Cumulative Updates on top of each other on top of the same build. As a result of this, over the course of the next several weeks, our focus will be on releasing multiple Cumulative Updates on top of Build 21390. Having Insiders in the Dev Channel test this will be immensely helpful, and we’ll be back to flighting normally again soon,” the Windows Insider team explained today.
With Microsoft expected to unveil the next generation of Windows on June 24, it’s no surprise that Windows Insiders aren’t going to see major new features before that event. The software giant likely doesn’t want to spoil the “Sun Valley” reveal, even though traces of the design changes have already been spotted in recent Insider builds.
Microsoft has announced that PowerPoint for Windows is dropping support for the Office Presentation Service in favor of new web-based Live Presentations. The company has posted a message on the Microsoft 365 message center notifying that Windows users will no longer be able to broadcast their presentations from the PowerPoint desktop app starting this month.
“We will be retiring the feature ‘Office Presentation Service’ from the Windows version of PowerPoint (starting with build 16.0.14122.100000). We will be removing the ‘Office Presentation Service’ option/button from the “Present Online” menu under SlideShow ribbon in PowerPoint for Windows. Instead we recommend the utilization of “Present Live” in PowerPoint for the Web which is where we will continue to invest,” the company explained.
The soon to be unsupported Office Presentation Service was released around nine years ago. The service is freely available and requires a free Microsoft account. It allows users to present their PowerPoint presentations online to a remote audience by creating a temporary web address.
People who use the Office Presentation Service will now be able to use the new Live Presentations feature in PowerPoint for the web when presenting their content to others. The tool was announced back in June last year, and it makes it easier for the participants to engage with a presentation at their own pace. The audience can use a smartphone, laptop, or tablet to connect to the presentation and send live reactions, give feedback, or navigate back to review previous slides. They can also enable live captions and subtitles in their preferred language.
Microsoft has stated that this change is gradually rolling out to customers in the Current Channel as part of the monthly updates for PowerPoint (build 16.0.14122.100000). PowerPoint Live Presentations are supported on Microsoft Edge, Google Chrome, Mozilla Firefox on both Mac and Windows, and you can find more information on our detailed hands-on guide.
Hola! This is probably the one word most people know in the Spanish language, but technology has made it possible for anyone to know it better.
Our top picks for the best software to learn Spanish looks into the content type and quality, ease of use, tools like tracking and progress reports, mobile apps, and communities for further support.
Moreover, we looked at how versatile it is for you to brush up your skills or get talking like a native in no time.
This is perhaps the most popular and recognizable name when it comes to the best software to learn Spanish.
Its courses, games, and exercises are all in Spanish with no English translations acting as a guide, so you’re forced to learn words, syntax, and grammar through association, rather than using lists and drills.
Its speech recognition algorithms ensure you get pronunciations correct, plus the core lessons are coupled with fun and exciting games, a mobile app, and online tutors for a truly immersive experience.
Lessons are based on flashcards, an image-word association such that you match images to words and phrases like you did in kindergarten.
They have initial easy level lessons, and gradually you advance to harder lessons with grammar, conjugation and syntax.
Rosetta Stone also rewards you as you complete the core courses, by unlocking your ability to play BuzzBingo and Picari games which let you actualize what you’ve learned.
You can also play with other learners, read stories, and much more. To use it, you’ll need a USB headset with a microphone.
A bonus feature of this software is the Audio Companion, which has MP3 lessons you can use with any media player, sync to your smart device, and listen on the go.
The downside of this software is you don’t get to turn on subtitles or translations in English, plus you cannot change the speed with which the words and phrases are played.
The good thing is you can always schedule an online tutoring session with a native Spanish speaker for about 30 minutes and get personal help.
Rosetta Stone
Learn how to speak Spanish in a fun and creative way with this interactive software!
This comes in a collection of five, or individually. The 5-in-1 Ouino Spanish system has individual programs that focus on different Spanish elements with vocabulary, grammar, conjugation, verbs, pronunciation and conversation.
Each of these programs has customizable features to help you adjust your own learning level, plus games and Spanish narrators to help you with the exercises.
The good thing is that, unlike Rosetta Stone, you can adjust reader speeds, the number of hints with each exercise, and the timer length for speed games.
It is also flashcard-based for vocabulary, with clear images per word, which you can always repeat or skip to your liking.
Vocabulary games like Fluency Sprint also help you answer quick fire questions with a timer, so you can test yourself like a pop quiz.
There are other games like Click-a-Pic and multiple-choice games so you can learn more nouns, verbs, and others, though these can be challenging to first-time learners.
But the software has color and voice coded answers, plus male/female speakers who read the masculine or feminine nouns to help you learn better.
Grammar lessons cover language differences between English and Spanish, so you can learn speech mechanics and how to connect words. You get hints, sound playback, multiple-choice and scrambled letters for better learning.
For conjugation, which is one of the most challenging phases, Ouino’s program helps you retain knowledge using quizzes and games so you can easily remember what you have been taught.
That also includes conversation lessons so you can call a cab, or order something in a hotel or ask for directions.
It may not have live tutors, but it has plenty of interactive lessons, audio and visual cues to help you learn Spanish fast.
There’s a mobile app if you want to learn on the go, which also saves your progress, and you can pick up from where you left off.
Ouino
Improve your Spanish vocabulary skills with this customizable and versatile software!
Fluenz covers much ground when it comes to lesson content, except for cultural lessons and etiquette.
Some of the lessons you can expect include travel, shopping, or how to order for something in a restaurant, with conversation-like teaching so you can learn grammar, reading, and writing, plus proper pronunciations.
Each lesson begins with your virtual guide, Sonia Gil, who sets the expectations then introduces what will be the framework for the lesson as you go along, through a conversation.
Specifically, she gives context to what you hear, gives instructions you must listen to, but you only get English subtitles once, then Spanish, then no subtitles after that.
So, you learn to hear and see words in the language that will help throughout the course.
You’ll come across matching, dictation, and speech recording, but the software gives you hints when you’re stuck, so you also need to have a pen and paper close to write what you hear.
You can even record yourself and listen to the audio so you can tell whether you’re close or completely off.
With this best software to learn Spanish, you can adjust the difficulty level so you have a variety of words to learn from, plus you can enjoy audio, visual and interactive exercises, which can be downloaded as MP3s to save on your phone or media player.
Fluenz also gives you progress reports at the end of the lesson, and you can see how you’re fairing on. You can also get support by chatting up a representative live online, but not by phone.
This language learning program delivers quality courses in 13 languages, exposing its learners to much vocabulary at once, which can be quite overwhelming, but it also thoroughly reviews the words and phrases.
The lessons are taught through listening and writing, compared to speaking and reading, but its downside is it makes learning a language more challenging than it already is.
However, the material is top quality, though not an impressive interface, but it still ensures that concepts are enhanced and reinforced as you learn them.
Overall, the structure is good plus it has progress markers to track your work, and you know where to pick up where you left from.
Another plus is you are not locked into sequential learning – you can jump around the lessons, so if you start at the beginning, you can pick up a few words and move to the next lessons to your satisfaction.
Individual exercises focus more on writing, spelling and listening, with a voice-recognition system to tell if you’re repeating words accurately when prompted. It also keeps track of your progress, but if you quit, you have to start over.
Lessons take anywhere from 4 to 12 minutes to finish, but this depends on how well you know the material, but there’s a chance to repeat if you didn’t do very well.
There’s also a review manager to go over words you’ve already learned and master them.
Babbel’s flaws stem from the fact that it has no offline content or downloadable MP3 files, and to use it, you have to be online. Also, there’s no e-tutoring or live classes in webinar style. It’s a good software to start with though.
Windows Virtual Desktop, Microsoft’s Azure-based solution for running virtualized versions of Windows and Office is being rebranded to Azure Virtual Desktop. The name change reflects Microsoft’s broader vision for its cloud virtual desktop infrastructure, which is also getting new capabilities and pricing options for remote app streaming tailored for the hybrid workplace.
“To help our customers and partners meet these new hybrid work demands, we are expanding our vision to become a flexible cloud VDI platform for nearly any use case—accessible from virtually anywhere, explained Kam VedBrat, Partner Group Program Manager at Microsoft. “A modern VDI platform needs to be secure, scalable, and easy to manage, while delivering a seamless, high-performance experience to end users. It should also empower organizations with the flexibility to customize and build solutions with its core technology.”
Starting today, Azure Virtual Desktop customers can test managing Windows 10 Enterprise multi-session virtual machines with Microsoft Endpoint Manager. Enhanced support for Azure Active Directory is also coming soon in public preview, as well as a new QuickStart experience that will offer a streamlined onboarding experience to customers.
Microsoft is also introducing next year a new per-user monthly pricing option for organizations interested in providing remote app streaming to external users. The new per-user access pricing option will officially launch on January 1, 2022, and pricing will be $5.50 per user per month for apps, and $10 per user per month for apps plus desktops.
Organizations will be able to use Azure Virtual Desktop for streaming first-party or third-party applications to external users at no additional cost for a promotional period that will last from July 14, 2021, to December 31, 2021. However, organizations interested in using this new offering will need to keep paying for the underlying Azure infrastructure.
Bridge is a technical and complex game, with learning taking time and effort. Most of the effort, however, is to communicate with your partner correctly.
Windows Report has compiled this list of software that provides great resources and instructions for users who are willing to learn and devote time to understand the mechanics of the bridge game.
What are the best tools to learn how to play bridge?
If you want a unique software to learn to play bridge game, this software is a great start.
Learn to Play Bridge with Audrey Grant has over 20 interactive quizzes and a progress chart to track your results.
The tutorial steps are easy to use and interactive gameplay with a computer is helpful in gaining experience.
However, this software runs only on Windows XP, Vista, 7 and 8. Meanwhile, you get useful insight into the workings of the game with tests coming immediately after every tutorial session.
This software is in two parts, as its name implies, which are devised to give premium knowledge of bridge. The programs were developed by Fred Gittelman, a world-class player and programmer.
Learn to Play Bridge I provides a detailed course on bridge. This helps users with no prior knowledge of the game to understand the game. The program starts from scratch with simple explanations and gameplay.
However, Learn to Play Bridge II- the second program elevates a beginner to an intermediate level with more complex learning package.
This explores tactical aspects of the game with major emphasis on the technical aspects of bridge.
Furthermore, both programs use excellent graphics and various quizzes to engage users in accelerating learning. The program adds a fun and detailed way of learning bridge game.
Another learn to play bridge software worthy of mention is Pat’s Introduction to Bridge.
The software which is in form of an instructional CD won the American Bridge Teacher’s Association’s Software of the Year Award far back in 2009 and 2010.
If you prefer to learn at your own pace, then you can play the lesson used in the Beginner classes. Also, extra practice deals on each topic were selected from the popular Bridge Baron computer bridge program.
Meanwhile, the user-friendly app will guide you through new bidding and play techniques. In addition, end of lesson quizzes enables you to check your progress in your bridge game adventure.
Communication and expressing oneself has never been more accessible than nowadays. You can simply take pictures of anything and upload them to Facebook, Twitter, or any other social media.
If our lives are so heavily connected to these apps, making us share media with each other all the time, we need some tools to help us do this.
Therefore, people install many programs that let you create videos, collages, and montages from your favorite photos and memories.
Today we’re going to take it one step further and show you some awesome online video editors that will do all of those awesome things mentioned above without having to download anything!
Fastreel is a handy online video maker and editor software created by Movavi. Unlike other similar apps, Fastreel focuses mostly on enhancing your videos with a wide variety of tools.
First, we have to mention that Fastreel was not meant for editing pictures. You can freely upload image files and make a slideshow out of them, but you won’t be able to edit the photos and save them as JPEG or PNG and other such formats.
These tools include compression, cut, crop, merging, muting and adding music, rotating, resizing, flipping images, and the addition of text, filters, watermarks, and subtitles (from SRT files)
Additionally, Fastreel has some awesome special effects like changing the speed and reversing your video, creating loops, splitting the screen, and using stop motion.
The software lets you create slideshows and movies from scratch by uploading images in different formats, or videos, and applying music, transitions, or adding text to them. The result can be exported as MP4.
Enjoy 30+ video templates like intros, ads, movie trailers, family videos, SSM-related videos, and many others. These templates can be customized by adding scenes and changing the image order.
Unfortunately, you can’t change the template’s color scheme, but you can upload the video directly to YouTube after it’s done.
Fastreel comes in a limited free version that lets you save videos in 480p quality and having a watermark and an unlimited version with higher quality videos and full features.
You can choose to be billed per video, monthly, or annually. Simply log in via Google, Facebook, or create your own Movavi ID and get started.
Let’s see some of Fastreel’s core features:
Diverse template gallery
Create movies and slideshows from scratch
Automated tools for muting, compressing, and reversing
Full video tutorial toolkit
No required download or installation
Fastreel by Movavi
This is a great online video editor tool that will help you create the best photo montages with professional features.
Adobe Creative Cloud Express is a great editing tool for mobile and web that makes it easy to create web pages, short videos, social graphics, and other awesome graphics-related things.
With Creative Cloud Express, you’ll get full access to a plethora of premium templates, fonts, backgrounds, and much much more. That’s not all. You can add your own brand and style to make everything unique.
Turn your texts and photos into awesome collages and montages you will remember, and share them with your friends through social media.
You can create your own web story for everyone to see with the multitude of options and customization tools that will help you tell it.
The software is available as a standalone subscription or as part of the plentiful Adobe Creative Cloud plan which gives you access to lots of graphic design and editing apps.
Let’s have a look at Adobe Creative Cloud Express key features:
Create posts in a matter of seconds
Upload your creations on social media
Make moving statements
Create branded stories
Adobe Creative Cloud Express
This Adobe product is a great web-based or software-based graphic design app that will help you create awesome video montages.
Thanks to Canva, you can make high-quality videos without having a professional background in video editing. You will find that the software is easy to use and lots of fun as well.
Making videos every day will be bliss thanks to the simple drag-and-drop tool that makes everything so easy to do, from uploading photos to inserting titles and other text.
The result will be a compelling video made in a matter of minutes that will tell your story, the way you want it to be told and seen. You can choose from one of the tool’s pre-made templates.
What’s cool about Canva is that it’s a free online video editor, so it doesn’t require any download or money to use it. It is available to you anytime, anywhere, from any device.
Their library is stocked with thousands of templates, animated graphics, music tracks that you can add to your videos, even other free stock videos, all for you to use and create stuff.
After creating the video, you can download it without any watermarks and post it online on social media or do whatever you want with it.
When we talk about Wevideo, we talk about an online editor that is easy, fast, and flexible. This web-based software lets you create awesome videos like a pro in no time.
Add awesome features like a green screen for big-budget looks without having to deal with the cost of difficulty, or edit your videos without having to worry about upload time.
Additionally, you can choose from one of the multiple file formats or templates to stand out on social media by bringing your own character into the videos and making them unique.
All of these are available from a multitude of devices. You can use the app from any browser, and you can create videos that are compatible with any type of display, be it web, mobile, laptops, or giant smart TVs.
You don’t have to worry about stock content anymore! Wevideo lets you go copyright-free with a wide selection of stock templates, photos, and graphic content.
These include over 1 million pieces of videos, images, and music tracks included in the Essentials stock library that is commercially licensed, royalty-free and included in the WeVideo’s business plans.
Moovly is another great online video maker tool. You can make videos from scratch or choose one of the many available templates that they offer.
Choose one of the professionally created templates from Moovly’s growing list. You will surely find one that fits your needs.
Thanks to Moovly, you don’t have to be an expert to use professional features and create professional-looking work! You can add voice-overs using one of the artificial voices, or automatically generate and translate subtitles.
Moreover, you can apply stunning and epic visual effects to your text and photos with just a few clicks of the mouse.
Moovly is a powerful, cloud-based editor that works with any browser, so it is compatible with all devices, without having to download and install anything. All you need is an internet connection and a creative spirit.
Besides the in-built templates and other visual and audio additions, you can also add your own photos, sounds, and music to use in the videos.
If you still feel like you don’t have enough content at your disposal, know that you can purchase 100 million additional media from the immense iStock library of Getty Images.
When using free resources such as software and online services to manage and edit video clips, you are not always free to work as you see fit.
In most cases, these tools have obvious limitations. Oftentimes, you also get a watermark included in the package.
Essentially the watermark is nothing more than a digital mark (usually the logo) that identifies the author or the product of a given file, video or photo.
So, are there any online tools that allow you to edit and format videos that do not forcefully insert their own watermark? Read on to learn more.
Adobe Creative Cloud is an extremely polished video editing software tool that makes all your worries about dreadful watermarks added to videos go away.
Its excellent user interface is intuitive, and straightforward, and requires zero experience to use it. Even so, you may create visually stunning graphics with ease.
Start by clicking the plus button on the web or in the iOS app, then take your time to add interesting media content to your slides.
You have infinite options in terms of images, icons, logos, video clips, and not only. They are all waiting to be used if you want to create something truly unique.
The pre-designed layouts give you a professional look, that’s for sure. As for that final touch, select one of the free songs or add music/voice by uploading your own track to send the right message.
Adobe Express includes several useful features that will help you enhance your design as desired.
These include a wide range of professionally designed fonts, pre-built video themes and layouts, social media optimization solutions, and more.
Its versatility shows in the fact that it is available for multiple platforms, with an automatic sync option. Your work is automatically synced across the web and the iOS Creative Cloud Express Post, Spark Page, and Spark Video mobile app.
Adobe Creative Cloud
Adobe Express truly helps you create visually stunning graphics with ease, so give it a try!
When it comes to intuitive, but very effective video editing, it does not get much better than Canva.
Canva is a full-featured editor for all sorts of visual content, including social media posts, photo editing, presentations, and of course, videos.
This online video editing tool makes your job way easier with its built-in video templates. It has a wide range of templates for various styles.
Start off with that, and then you can build your project with your own video footage. The whole process is based on drag and drop, so you can easily make any adjustments in terms of placement, size, and even color.
Canva also includes a lot of free-to-use stock images and videos, along with many useful objects like graphs, and arrows. These will make your videos easier to follow and probably more engaging.
Once you finished up your video, you can add an audio backtrack or integrate Canva’s pre-set audio effects.
This is one of the simplest video editors you can use online, both in the browser and on mobile. It offers handy solutions for collaboration and is the way to go if you plan to create other types of visual projects.
Note that Canva’s free version does have some limitations. While it doesn’t place watermarks on your video per se, some of the elements in its gallery are premium-only and get watermarked if you use them with the free version.
Canva
Use this online drag-and-drop editor to integrate everything you need to make your videos stand out!
The next tool on the list is ClipChamp. This solution also offers an advanced editor in which there is an extensive library of images you can use in your projects (premium version).
To create your own videos, just upload the photos and distribute them on the timeline.
You can also apply filters and effects to the entire clip or to every single image. You also got a few options to manage the saturation and exposure of the photos.
The only flaw of the free version is that you can download SD videos (480p) only.
Have you ever heard of the Hippo Video? Although the name of this website may seem like a joke, in reality, it is not. In fact, this is a useful tool that allows you to create and edit videos online.
Its features are very similar to those of ClipChamb.
The difference is that you can upload videos from a PC directly to Hippo Video, record another video using your webcam, and insert music tracks via cloud services such as Google Drive.
This platform is definitely worth giving it a try.
Movie Maker Online lets you create videos from personal photos, which can be loaded on the platform and sorted according to your preferences.
You can easily add filters and effects to get a great result. As soon as you arrive at the homepage of the service, we will immediately understand that it is a very simple resource to use.
So, it is also suitable for those who do not have extensive knowledge of video editing.
If you are looking for a resource that allows you to edit or create a personal video without a watermark, then you must try out Movie Maker Online.
Create your user account to access the full range of options.
Movavi created an awesome online video editor software called Fastreel, which focuses on video enhancement tools such as image cropping, cutting, merging, compressing, rotating, resizing, and flipping.
Do not mistake Fastreel for an image editor, because it is not. The software can create slideshows and modify the images in the context of the video, but it does not edit the photos and save them as JPEG or PNG.
Additionally, you can add sounds and music to the background or mute existing ones, as well as add text, filters, watermarks, and even subtitles (SRT files).
Create slideshows and movies from nothing by uploading your own images, and videos, choosing the right transitions, applying some fitting music, and adding text when it’s needed.
Fastreel has more than 30 video templates, trailers, family videos, intros, advertisements, and much more. All of these are also customizable, meaning you can remove, add, and change the order of the scenes.
One thing you can’t do, however, is to change the template’s color scheme. The final result can be exported in MP4 format and uploaded directly to YouTube.
You can enjoy the service freely, but with limited conditions, or buy one of the many price plans that have all the features.
It has some smart automated tools and useful features like a split-screen, stop-motion support, and more.
You can also change video speed, reverse it, or create loops. It’s easy and fast to get started. You just have to sign up for an account, no download or installation is required.
Many users complain that their Logitech F710 wireless gamepad is not working properly and although the gamepad is detected in Windows 10, it appears with a yellow mark in Windows Device Manager.
Moreover, there are some users stating that their Wireless gamepad F710 returned no driver found error message which is causing a lot of frustration.
We will explore in this article what are the exact steps you need to make in case your Wireless gamepad F710 is not working or the driver is unavailable, so make sure to keep on reading.
How can I install wireless gamepad F710 driver?
1. Use Device Manager
Press Windows Key and R simultaneously to open the Run box.
Type in devmgmt.msc and press OK.
Next, locate the Other devices option and double click on it.
Now right click on the Wireless Gamepad F7 and tap on Update Drivers.
Finally, click on the Search Automatically for Updated Driver Software.
Allow for the process to finish and restart your device.
In the search bar type F710 and then select Wireless Gamepad F710.
Next, locate on the page the Downloads section and click on Download now.
Save the file on your device and run it.
Once the process is finished make sure to restart your device.
3. Use a third party software
As it is already known, having updated drivers can avoid a wide range of issues, from improper malfunction of the software to a total lack of responsiveness.
To make things easier and more efficient, using dedicated and reliable third-party software that will help update all necessary drivers is the recommended approach.
With this last recommendation, we will conclude our article. As you can see, updating the wireless gamepad F710 Windows 10 driver is not difficult at all.
Additionally, you can also check out this guide of the best Windows 10 gaming controllers and choose the one that best meets your gaming expectations.
You can update the drivers manually although in order to avoid any mistakes that can happen in the process, using a dedicated tool is recommended.
As always, don’t hesitate to leave us a comment in the dedicated section below if you have additional suggestions.
Using the touchpad is one of the primary actions during our day-to-day work. Unfortunately, some Acer Nitro 5 users complain that their touchpad is not working.
This takes away an essential ease-of-use feature on their PCs. Fortunately, the issue can be easily fixed, as shown in this guide’s ensuing sections.
Why won’t my Acer laptop touchpad work?
A series of potential causes for the Acer Nitro 5 touchpad not working, from software to hardware problems. Below are some of them:
Faulty touchpad drivers: Sometimes, this issue is to an outdated or corrupt touchpad driver. You need to reinstall or update your driver to solve this problem.
Disabled touchpad: At times, this Acer Nitro 5 touchpad problem can occur simply because the touchpad is disabled. The solution to this is to enable it with the required shortcuts.
Outdated PC: Windows updates are important for keeping your PC running smoothly. Hence, you need to update your PC if it is outdated to prevent issues such as this.
What can I do if Acer Nitro 5 touchpad is not working?
1. Re-enable the touchpad
Sometimes, the Acer Nitro 5 touchpad might not be working because it has been somehow disabled knowingly or accidentally. To fix this, press the Fn key + F6 or F7 (or any function key that works for the touchpad) to enable it.
With this, the issue should be fixed for good.
2. Check for Windows updates
Press the Windows key + I to open the Settings app and select Update & Security.
From the left side, select Windows Update, then click on the Check for updates button from the right side.
An outdated PC is prone to different issues, including this Acer Nitro 5 touchpad not working problem. So, you need to keep your operating system updated at all times.
Expand Mice and other pointing devices, right-click on the touchpad driver you need, and select Properties.
Click on the Driver tab, then on Update Driver.
Select Search automatically for drivers.
Unlike the manual option presented above, you can use a dedicated driver updating tool to automatically scan and fix any driver you need. Thus, you’ll always keep your components safe with much less effort.
Not only will it keep your driver’s troubles away, but the operating system will be constantly updated to the latest software version.
Moreover, a dedicated driver updater allows you to work with an extremely easy-to-use interface.
4. Uninstall the touchpad driver
Press the Windows key + X and select Device Manager.
Expand Mice and other pointing devices, right-click on the driver you need, and select Uninstall device.
Click Uninstall for final confirmation.
After the driver uninstallation is complete, restart your PC.
NOTE
Windows will automatically restore your deleted driver.
The solutions above are the best options you can find to fix the Acer Nitro 5 touchpad not working issue.
With Chromecast users can watch internet streamed video content a lot easier, all is needed is for the platform app to be supported by Google cast technology.
As many users have reported, it can happen sometimes, for the Chromecast device to not being able to connect to Wi-Fi, and there are a few reasons for this.
Most of the time, it can have something to do with a faulty internet connection, the distance where the Chromecast is located, and even Wi-Fi issues.
We will guide you in this article through the exact steps you need to make in order to ensure that Chromecast will start connecting to Wi-Fi once again.
How can I fix Chromecast not connecting to Wi-Fi?
1. Use the extender cable
In general, Chromecast can work without having to use the extender but since you are having trouble connecting it to the Wi-Fi we would recommend you try this first.
It can happen that the signal is not really good, therefore we would suggest that you connect your digital media player to the back of the TV.
Luckily you do not need to purchase an extender cable considering that Chromecast already comes with one, and you can use it.
2. Change the Dual band frequency
Next, if you have already tried the first recommend step and Chromecast still cannot connect with Wi-Fi, then we would suggest you check the dual-band frequency of your router and make the adjustments needed.
Make sure that you have your digital media player device on 2.5 GHz or 5 GHz and see if anything changes and if you are able to connect now.
If you have a TP-link router, here’s how you do it:
Open your router’s control panel.
Choose Advanced, and then click on Wireless Settings.
Click the 2.4GHz option from the top of the window, and change the values in the Channel and Channel Width drop-downs.
Click Save.
Open the 5GHz option from the top of the window and perform the same steps as before.
Activate the Save button to save your settings.
3. Restart your router
Although it may seem like a simple solution, most often it comes with amazing results, and it’s also an easy step to perform.
In order to reboot your router all you need to do is turn it on and off, but make sure to wait for 10 seconds before putting the router back on.
This should reset any faulty settings and once the router is on again try to connect Chromecast and see if it works this time.
4. Perform a hard reset
Our next recommendation, if none of the above steps worked, will be to perform a hard reset that will format the device, restoring it to the factory settings.
This action will delete all data and will revert the settings along with user preferences, offering a clean start so to speak.
You can format your device in the Google Home app from the Settings menu or through the reset button by pressing it gently for 25 seconds.
After the 25 seconds you should see a sharp LED light turned into a blinking red one. Once you release the button, the Led light will become flash white and the device will start to reboot.
Once the process is finished you can perform once again the same initial settings and try to connect your device to Wi-Fi.
This is about all. As you can see solving the connectivity Chromecast issues with your Wi-Fi router is easy to solve by following the steps indicated in this article.
If you have additional recommendations or suggestions, don’t hesitate to let us know in the dedicated section below.
Developed by Jays2Kings, DS4Windows is an easy-to-use program allowing users to play PC games using a DualShock 4. A few users have, however, run into the error, and could not open DS4 exclusively.
Without any question, DS4 is the best controller to play games, and the best way to play games is in the exclusive mode, so what do you do if DS4Windows can’t open exclusively?
This mode has particular requirements regarding the connection between the DS4Windows tool and other applications, and if they’re not met, the log file will show you the message Failed to enable exclusive mode.
Why are DS4Windows not opening?
We figure that a few elements may cause the DS4Windows program not to open. At the top of the list are the following:
Controller connection – Users have encountered this problem when their DS4 controller is incorrectly connected.
User privilege – You may be required to have administrative privileges, and in cases when you do not, you can expect this issue.
Firewall or antivirus – Sometimes, the issues is triggered because your firewall or antivirus blocks out the program.
System requirements – Generally, you should only use programs that match your computer because falling short of system requirements is often a recipe for bugs and computer issues.
How can I fix the Could not open DS4 exclusively error?
Several Mac users take advantage of iCloud Drive to sync their important work and personal files and folders. However, after the recent update, several users have reported that the iCloud Drive is not in Finder.
This problem seems to be a common affair with macOS beta updates. The Beta version of the OS allows the enthusiast to test and try new features before being released to the public.
However, the beta updates usually consist of bugs that can break some functionalities. Fortunately, in this case, you can recover and fix the iCloud Drive not in Finder issue by following a few quick troubleshooting steps.
What can I do if the iCloud Drive is not in Finder?
1. Make sure the sync is complete
After installing an update, iCloud Drive will sync all the data from the cloud to your computer. Depending on the file size, the sync may take a long time to complete.
This holds even if the iCloud Drive content existed on your Mac before. You can verify if the iCloud Drive sync is still in progress from the Finder.
Open Finder and check if there is a circular loading bar present next to the iCloud Drive tab. A circular bar indicates the files are still syncing. So, wait for it to complete the process before you look for the folder in Finder.
You may also want to check if your Internet connection is working. If there is no loading bar or sync has completed, and you still can’t find the iCloud Drive in Finder, make sure it is enabled to show in Finder.
2. Check if iCloud Drive is enabled in Finder Preferences
Open Finder on your Mac.
Next, click go to Finder and choosePreferencesfrom the menu bar.
Open theSidebartab in the top left corner.
Under the Show these items in the sidebar section, check theiCloud Driveoption.
Close the Finder window to apply the changes. Open a new window and check if the iCloud Drive is now visible in Finder.
While the iCloud Drive app is enabled to show in Finder by default, a buggy update can tweak or reset the setting without user interference.
One way to fix this issue is to recheck and enable the iCloud Drive option to appear in Finder, as described above.
3. Sign out of iCloud and then sign in
Open SystemPreferencesand chooseApple ID.
Click theOverviewtab from the left pane.
At the bottom, click the Sign Out button. You will be prompted to download data before signing out. You can ignore this message and proceed to sign out.
Once you have logged out, open System Preferences again and open the Apple ID tab.
Enter your Apple credentials and log in to your Apple account.
If a glitch is preventing the iCloud Drive from syncing, try to sign out and sign in again to sync the folder and files. While none of your data will be lost, you may have to wait till iCloud retrieves and syncs with your computer.
4. Recover deleted iCloud Drive folder
From the Dock, open Trash.
Look for any files or folders that you may want to restore.
Right-click on the file or folder and choose Put Back. This will restore the file to its original location.
If you are looking for missing folders or files in your iCloud Drive, it is possible that the macOS update may have moved or deleted them. Fortunately, you can restore deleted files and folders in the Trash.
5. Rollback to the previous version of macOS
It is possible that the macOS beta or even the public may have bugs resulting in the disappearance of iCloud Drive in Finder. As a last resort, you can revert to an earlier version of macOS.
This can be cumbersome, but you will be able to restore your computer to normal working condition. Before performing a rollback, make sure to back your computer for new data.
Next, delete the macOS update, and reinstall the earlier version of the OS.
6. Access content directly from the iCloud Drive
Go to iCloud.com and log in with your Apple credentials.
Open the iCloud Drive section and search for the missing file or folder.
After locating the file, you can manually download the files to your computer. Select the file and click on Download. However, manual downloading is not possible for folders.
As a last resort, you can access the files and folder from iCloud Drive directly from the iCloud website. This is handy if you find the iCloud Drive on your Mac is missing any important file or folder.
The iCloud Drive not in Find problem is often reported on MacBooks with the latest beta or public release installed. Make sure iCloud Drive is allowed to show in Finder from Preferences.
Additionally, try to log out and log in, check for pending sync or revert to an earlier macOS version to resolve the issue.
These are some of the solutions that are confirmed to work when iCloud Drive is not in Finder. If you happen to know other tips too, let us know in the comments section below.
Borderlands 3 is a decent Windows game, but it can still have occasional hiccups. One hiccup Borderlands 3 players have reported on forums is a Video driver crash error message.
That issue arises when players try to start Borderlands 3 or shortly after they start playing it. The full error message says:
Video driver crashed and was reset. Make sure your video drivers are up to date. Exiting…
Assuming that you’re no stranger to this problem, don’t hesitate to take a closer look at the below tips and apply them one by one.
How can I fix Borderlands 3 video driver crashed error?
1. Update your graphics card’s driver
Well, the above error message says it all when it suggests, Make sure your video drivers are up to date. You can do that by scanning your PC’s devices with driver updater software.
That software will tell you if your graphics card has an outdated driver and enable you to quickly update its driver.
2. Reinstall your GPU’s driver
Right-click the Start button to open the Win + X menu that incorporates various shortcuts.
Click Device Manager to open that utility’s window.
Next, expand the Display adapters category by double-clicking it.
Right-click your PC’s graphics card to select an Uninstall device option.
Then you’ll need to select the Delete the driver software for this device checkbox.
Select the Uninstall option to confirm.
Thereafter, Windows will reinstall a GPU driver when you restart your PC. You can also click Action, then go to Scan for hardware changes in Device Manager to reinstall a graphics card’s driver.
Note: Windows won’t necessarily install the latest driver for your PC’s graphics card after restarting. This resolution is recommended if your PC already has the latest driver for its graphics card.
3. Delete Borderlands 3’s Config folder
First, open the Explorer window by clicking the File Explorer taskbar button.
Next, open this folder in File Explorer: This PC\Documents\My Games\Borderlands 3\Saved\
Select the Config subfolder in the Saved folder.
Click the Home tab shown directly below.
Press the Delete button on that tab to erase the selected Config subfolder.
Then try playing Borderlands 3 after deleting that folder.
Right-click the listed Borderlands 3 game and select Properties.
Click the Set Launch Options button on the General tab of the window that opens.
Enter the following text in the Launch Options window: -USEALLAVAILABLECORES -sm4 -d3d10 -nomansky -lowmemory -novsync
Press the OK button on the Launch Options window.
Restart Steam, and try playing Borderlands 3 again.
5. Extend GPU processing time
Open Run from the Windows Systems folder on the Start menu.
To launch the Registry Editor, input this Run command in the Open text box and clickOK: regedit
Browse to this key in the Registry Editor: Computer\HKEY_LOCAL_MACHINE\SYSTEM\CurrentControlSet\Control\GraphicsDrivers
Select the GraphicsDrivers key.
If you can’t see a TdrDelay DWORD for the GraphicsDrivers key, right-click a space on the right side of Registry Editor to select the New and DWORD options.
Enter TdrDelay as the title for the GraphicsDrivers key’s new DWORD.
Double-click TdrDelay to open an Edit DWORD window for it.
Delete the current number in the Value data box.
Enter 8 in the Value data box.
Click the OK button to close the Edit DWORD window.
Restart your desktop or laptop after editing the registry as outlined above.
6. Turn Borderlands 3 back to DirectX 11
Open File Explorer in Windows 10.
Then browse to this folder path in File Explorer: This PC\Documents\My Games\Borderlands 3\Saved\ Config\WindowsNoEditor
Double-click the GameUserSettings.ini file in that folder to open it in Notepad.
Scroll down the file until you see the PreferredGraphicsAPI=DX12 setting.
Delete DX12 from that setting and replace it with DX11. Then the setting should be PreferredGraphicsAPI=DX11 as in the screenshot directly below.
Click the File menu button in Notepad.
Finally, select the Save option.
Players have confirmed the above resolutions for Borderland 3’s Video driver crashed and was reset error to work. That doesn’t necessarily mean those potential fixes are guaranteed to work for everybody, but they’re certainly worth a shot.
If you still need further potential fixes, your best bet is to check out the Borderlands 3 help page on the 2K Support site.
Click the Submit a ticket button there. Then you can fill out a support form for the Borderlands 3 game and send it. Even more, we’ve got the perfect guide if Borderlands 3 is crashing.
Which of the above solutions worked for you? Just let us know in the comments area below.
Removing certain applications can be a tedious task, especially since many apps tend to leave leftover files and registry entries that can interfere with your system.
Therefore, it’s always better to use a dedicated uninstaller software that can remove any application and all its files with just a couple of clicks.
Today we want to show you one of those applications, so without any ado, let’s take a closer look at the Ashampoo Uninstaller 10 and see what does this software have to offer.
What is Ashampoo Uninstaller 10 and should you use it?
Usability
Quick and simple installation without unwanted applications
The setup process for Ashampoo Uninstaller 10 is pretty straightforward, and you can install the software and start running it in less than two minutes.
Once you start the setup, the only thing that you need to configure is the theme that you’ll be using. There are only two themes available, but that should be enough for most users.
It’s worth mentioning that the software doesn’t come with any additional or unwanted applications, so you won’t get any offers to install anything except the core software.
This also means that there are no hidden settings that you need to disable to avoid installing any potentially unwanted software.
Clean and easy to use interface
As soon as you start the software, you’ll be presented with a system overview. In the left pane, you can see all the features listed so you can access them quickly.
The left pane is designed to access all other features of the app, and you can expand each section for more information about apps or more features.
In the right pane, you can see recently installed applications, as well as a quick overview of all the installed applications and plug-ins on your PC.
Overall, the interface is pretty simple to use, and you won’t have any issues while using Ashampoo Uninstaller 10, even as a first-time user.
Features
Easy application removal
The main feature of the Ashampoo Uninstaller is its ability to remove applications. You can see the list of all installed applications on your PC alongside information such as file size, rating, and installation date.
It’s worth mentioning that the software has a powerful search feature that you can use to easily find any application that you want.
The filter feature is available as well, allowing you to hide redistributables, frameworks, and Microsoft applications. You can also choose to show only the applications that are installed on a specific drive, which will surely come in handy.
To uninstall an application, you just have to select it from the list and click the Uninstall button and choose if you want to perform an in-depth uninstall and create a restore point.
Once the software is removed, you need to confirm that the original uninstallation is confirmed and the software can proceed with the removal of files and registry entries.
Once the process is done, you can see the list of files and registry entries that were removed in the log file.
It’s important to mention that you can enable the option to hide the original uninstaller from the settings, which can come in handy if you don’t want to deal with uninstall dialogs.
With Ashampoo Uninstaller, you can select and uninstall multiple applications, which makes the uninstalling process more convenient and faster.
In case any leftover files are detected, the Ashampoo Uninstaller will alert you about them, and you can take a look at these files and choose to leave them, remove them or wipe them permanently from your PC.
The software also allows you to view all large applications or the ones that have been rated negatively which can come in handy if you want to free up space or just remove problematic applications.
Log files are also available, allowing you to view the list of all removed applications, along with the detailed log that shows each removed file and registry entry.
Logging for all installed applications
Ashampoo Uninstaller has a powerful installation logging feature that will monitor all your installed applications and each created file.
This feature isn’t enabled by default, but you can enable it easily with just a single click in the Overview tab.
If you don’t want to enable this feature, you can install applications simply by dragging and dropping the setup file to the Installation tab.
By doing so, the software will index all files thus ensuring that all of them are removed when you want to uninstall the application.
When you try to install certain software, you’ll get a window on top of your screen, and once the installation is finished, you just need to click the Installation completed button.
Once the software is installed, you can find it in the Logged section, and you can view its log file to see which files and registry entries were created during the installation.
While the installation logging feature is useful, we found the notification window to be a bit large, and we hope that this will change in future versions of the software.
Windows Universal apps removal
In addition to standard applications, you can use Ashampoo Uninstaller to remove Windows Universal apps.
All installed Universal apps will be listed, and you can delete them just like any regular app. Keep in mind that you can delete the preinstalled Windows apps as well, which can be useful if you want to keep only the essential apps.
If you have multiple user accounts, you’ll be pleased to hear that you can delete preinstalled applications for all accounts simultaneously, which can come in handy.
Of course, you can restore all default Windows Universal apps with just a single click of a button if you need to.
The performance impact to monitor the resource usage
The Impact section lets you have a quick overview of the resource usage on your PC, and it will list the applications that are using most of your CPU or RAM.
In addition, you can see the boot time of certain autorun applications, as well as the number of entries and services associated with a certain application.
You can click on each application for more information, and you’ll be able to see all the application processes, related services, and autorun entries.
While this feature is useful in providing information such as related services, autorun entries, and resource usage, we found it a bit lacking in terms of functionality.
Our main complaint is that the feature only shows you apps that have the most impact on your system and not all currently open applications. This is just a minor complaint, and it doesn’t affect this feature too much.
Browser plug-in removal
Another welcome feature that Ashampoo Uninstaller 10 offers is the ability to remove browser plug-ins and extensions.
Using this software, you can see all installed plug-ins and extensions for all browsers on your PC. Removing a plug-in is simple and you can remove it from any browser without starting the browser.
Although this feature is useful, we wish that there was a way to filter or at least separate extensions from plug-ins. Currently, all plug-ins and extensions are bundled into a single category, which makes navigation harder than it needs to be.
This can also lead to removing some of the essential plug-ins, and we wish that those plug-ins were somehow labeled and made easier to differentiate from the rest.
Snapshots and in-depth file comparison
Using the Snapshot feature, users can easily compare all the changes made to their system. Thanks to this feature, you can see every modified file or registry entry.
Keep in mind that to use this feature, you need to create snapshots manually. First, you need to create your original snapshot and after a while, you need to create the other one for comparison.
All this is done through a built-in wizard, and even if you’re creating snapshots for the first time, you won’t have any problems using this feature.
This is an advanced feature, and while basic users won’t have too much use for it, the advanced users that want to keep track of individual files will find it more than useful.
Drive cleaner, registry optimizer, and other additional features
Drive Cleaner, Registry Cleaner, and Internet Cleaner
Ashampoo Uninstaller offers a Drive Cleaner feature that will scan your system for any unwanted files and help you remove them.
Using this feature you can easily find and remove temporary files, log files, history files, search files, etc. All these files are nonessential and in most cases, you can just remove them.
Of course, you can view a detailed log and see individual files that you will remove using the Drive Cleaner feature.
We wish that this feature could as well detect large files or folders, but hopefully, that functionality will be added in the future versions of the software.
Registry Cleaner works similarly to the Drive Cleaner, and it will detect all incorrect or corrupted registry entries that you have in your registry.
To make sure that you don’t delete an important registry path, you can always view a detailed log and see exactly which registry entries will be deleted.
Browser Cleaner feature allows you to easily clear your browser cache from all installed browsers on your PC, simultaneously.
Before you had to open each browser and choose the option to delete the cache, but with Ashampoo Uninstaller 10, you can clear the cache on all your browsers in a matter of seconds, without even opening your browser.
StartUp Tuner and Service Manager
StartUp Tuner and Service Manager are a couple of features that advanced users might appreciate. With StartUp Tuner, you can easily manage your startup applications.
Unlike with regular Startup manager in Windows, with this one you can even add startup entries along with startup arguments for each entry.
Service Manager works similarly to the Services window in Windows and it allows you to stop the services or change their startup type.
All the startup settings are available at your fingertips, so you won’t have to open any additional windows to change the startup type or stop a specific service.
Undeleter, File Wiper, and File Associator
Ashampoo Uninstaller can also help you restore files with its Undeleter feature, but the feature that we want to focus on is File Wiper.
With this feature you can permanently delete files from your hard drive by using four different deletion methods, thus making your files irrecoverable.
This is extremely useful if you need to delete sensitive files for good. The feature also lets you delete files from the empty space on your hard drive thus making already deleted files unable to recover.
Registry Defrag and Unlocker
Lastly, the two remaining features are Registry Defrag that will scan your registry for any fragmentation and help you optimize it to run better.
The last feature is the Unlocker, and with it, you should be able to unlock protected folders and files on your PC.
You can see the list of locked files along with the application that is using it. To unlock the file, simply select it and choose one of the many available options from the Unlock menu.
Conclusion
Ashampoo Uninstaller 10 is a great application if you need to remove any application or multiple applications permanently from your PC.
The software can remove Win32 applications as well as Windows Universal apps, so it’s perfect if you want to remove any built-in Windows apps in just a couple of clicks.
To top it off, the software has some great additional features such as Impact overview or Snapshot manager that should help you keep a close eye on your PC and your files.
There are few minor drawbacks, and in our opinion, a couple of features could be expanded with additional functionality.
We had some complaints with certain user interface elements, such as the Installation log window that felt too cumbersome at times.
Pros
Easy to use
Can completely remove applications
Ability to remove leftover files and registry entries
Can remove built-in Windows apps
Browser plug-ins and extensions removal
Cons
Certain UI elements felt too big
Overall, these aren’t any real dealbreakers and we’re positive that the software will keep improving in the future.
If you require powerful uninstaller software, then Ashampoo Uninstaller 10 is a perfect choice, it’s simple, easy to use, and it packs a lot of great features.
Have you tried Ashampoo Uninstaller 10 or any other uninstaller software? What did you think of it? Let us know in the comments below.
Computer errors are bound to appear, and one issue that many users reported is AppModel-Runtime Event ID 69.
This error usually appears in the Event Log and it doesn’t cause problems on your PC, but it can affect Windows Store applications or some of the default Windows apps in some rare cases.
In this guide, we’re going to show you the best methods that you can use to fix this problem once and for all on your Windows 10 PC, so let’s get started.
Once the process is finished, check if the AppModel-Runtime Event ID 69 error is gone.
2. Run the built-in troubleshooter
Press Windows Key + I to open the Settings app.
Navigate to the Update & Security section.
From the menu on the left, select Troubleshoot. In the right pane, choose Additional troubleshooters.
Select Microsoft Store Apps and click on Run the troubleshooter.
This is a simple solution, but several users reported that it helped them with this error, so be sure to try it as well.
3. Reinstall the app that is giving you this error
Check which Windows app is giving you this error. You can do that from the Event Log. In our example, it’s Windows Photos, but it might be a different one for you.
Press Windows Key + X and choose Windows PowerShell (Admin).
Now enter the following command: get-appxpackage *Microsoft.Windows.Photos* | remove-appxpackage
After the command is successfully executed, open the Microsoft Store and download the removed app again.
NOTE
4. Check for missing dependencies
Navigate to the following directory: C:\Program Files\WindowsApps
After gaining access to the WindowsApps directory, start PowerShell as administrator.
Run the following command: Get-AppxPackage Microsoft.WindowsCalculator
Pay close attention to the names of the listed dependencies.
Go to the WindowsApps directory and make sure that all dependencies directories exist in the WindowsApps folder.
Create a new folder in WindowsApps directory and name it: Microsoft.WindowsCalculator_10.1510.13020.0_neutral_split.scale-100_8wekyb3d8bbwe
Go to the following directory: C:\Program Files\WindowsApps\Microsoft.WindowsCalculator_10.1510.13020.0_x64__8wekyb3d8bbwe
Locate the AppxManifest.xml file and paste it to the directory that you created in Step 6.
Go back to PowerShell and run the following command: Remove-AppxPackage Microsoft.WindowsCalculator_10.1510.13020.0_x64__8wekyb3d8bbwe
Once the app is successfully removed, download it again from the Microsoft Store.
This is an advanced solution, and the commands that we used might not work for you and help you fix the AppModel-Runtime Event ID 69 error.
In our example, we used the Calculator app and its file paths, but on your PC remove the app that is shown in the Event Log as the cause of this error.
Error AppModel-Runtime Event ID 69 shouldn’t cause any problems on your computer, and you’ll only notice it if you open the Event Log.
In most cases, you can leave this error be, but if it starts interfering with your PC, be sure to try some of our solutions. You can also use one of these great repair toolkits and you’ll see the difference.
Don’t hesitate to let us know which solution worked for you. Feel free to use the comments area below in that regard.
Is it possible to install a printer driver without admin rights? This guide will answer this question, so keep on reading.
How do I install a printer driver without admin rights?
Before trying anything else, try using type 4 drivers or preload the drivers via config management.
1. Change Security Options in GPO
Press theWindows + R shortcut to open Run.
In the Run box, type gpedit.msc and click OK to open Group Policy Editor.
In Group Policy Editor, navigate to the following location: Computer Configuration > Policies > Windows Settings > Security Settings > Local Policies > Security Options
Next, in the right-pane, look for Device: Prevent users from installing printer drivers option. By enabling or disabling this policy, you can control whether to allow or reject non-administrator printer driver installs.
Select and right-click on the option and choose Properties.
In the Properties window, choose the Disabled option.
Click OK and Apply to save the changes.
Next, navigate to the following location: Computer Configuration > Policies > Administrative Templates > System > Driver Installation
Make sure you have selected the Driver Installation folder. In the right pane, locate the following policy: Allow non-administrators to install drivers for these device setup classes.
Right-click on the policy and choose edit. Set it to Enabled.
In the same policy, you need to specify the device class GUIDs corresponding to printers. So, click the Show button under the Options section.
In the Show Contents window, enter the following GUIDs one by one: Class = Printer {4658ee7e-f050-11d1-b6bd-00c04fa372a7} Class = PNPPrinters {4d36e979-e325-11ce-bfc1-08002be10318}
Click OK and Apply to save the changes.
Close Group Policy Editor and restart your computer.
By disabling the Devices: Prevent users from installing printer drivers policy, you have allowed non-administrators to install printer drivers when connecting a shared network printer.
2. Disable Point and Print Restrictions
Launch Group Policy Editor by pressing the Windows key + R, type gpedit.msc and click OK.
In Group Policy Editor, navigate to the following location: Computer Configuration > Policies > Administrative Templates > Printers
In the right-pane, right-click on Point and Printer Restrictions, choose Edit.
Set it to Disabled. Click Apply and OKto save the changes.
Next, navigate to the following policy path: User Configuration > Policies > Administrative Templates > Control Panel > Printers
Locate and open the Print and Printer Restrictions policy and set it to Disabled as well.
Close the Group Policy Editor and try to install the printer without admin rights.
A few users suggested changing the Package Point and Print – Approved Servers policy by following these steps:
One Group Policy Editor.
Follow the steps from above, but this time enable Package Point and Print – Approved Servers policy.
Add the FQDN of your print server and save changes.
This is how you can use Group Policy to install printer driver without admin rights.
However, this prevention feature can become annoying when installing a printer driver on a work computer without admin rights. The driver download may fail. To fix the problem, try using the driver software updater to install the printer without admin rights.
If that does not work, take the bit complicated way of disabling a few group policies using the GP Editor. And you won’t face issues downloading Dymo printer drivers without permission.
Biomutant is a great, open-world, RPG action game that brings you to a post-apocalyptic, luxuriant scenery that could excite all genre players across the board.
However, being a pretty new addition to the gaming lore, it has its share of issues and one of them is that players can suffer FPS drops even with excellent configuration PCs.
A user on Reddit explains the situation in detail:
The game always just started, I play it without problems +100 fps in 1080p and high settings, but after a while (generally 5-10 minutes) and passing through certain areas where there is a lot of volumetric fog there are generally FPS drops to a minimum of 25 FPS and looking at the MSI Afterburner, The GPU in those areas lowers its performance from 100% to 55% more or less.
Even under the resolution (720p) and all the settings on low, it continues in the same amount of FPS and the GPU working at 50-55%. It is the only game that happens to me, I doubt that it suffers a bottleneck, I wanted to know if one has happened and solved it, thank you.
Others have described similar issues even if they have powerful computers with plenty of resources.
This is a new problem that was just discovered and there are no official fixes or patches but we will try to help you with some possible solutions.
How can I fix Biomutant FPS issues on Windows 10?
1. Update the drivers for your controller
Right-click the Start button and select Device Manager from the list.
Click on the Sound, video and game controllers section to expand it.
Right-click on your controller driver and select Update driver.
Select the first option, Search automatically for drivers.
The system will find a default driver online and install it.
A user discovered that he solved this FPS problem after updating the drivers to his Bluetooth controller so you will need to perform the steps above to get this done.
2. Run the game in high priority
Right-click the Start button and select Task Manager.
Click on the Details tab.
Find Biomutant and right-click on it.
Then click on Set priority and select High.
Running the game in high priority will force the sistem to favor the game to any other unnecessary processes and the performance should improve.
We hope that our solutions helped you fix this annoying FPS problem with Biomutant in Windows 10.
You might also be interested in our guide on how to get the best graphics in Biomutant and have the best possible experience.
If you know about any other solutions or you have any advice, leave us a line in the Comments sections below.
According to a post on Reddit, the YouTuber ACG hinted during his Defining Duke podcast that Xbox is planning to purchase some existing IPs and announce that at E3.
Microsoft is clearly expanding its gaming realm, and the acquisitions of Bethesda and id Software are exactly on that line of development for the Redmond giant.
So, it wouldn’t surprise anyone if we would see some nice and surprising IP acquisitions from Xbox during the next E3 that is due soon.
At this point, everybody’s looking at Phil Spencer’s shelf to look for any hidden surprises that might give away a hint for that news.
What are the IPs that Microsoft might buy?
As for the titles that Microsoft might get, your guess is as good as ours although we might have some interesting suppositions.
For instance, it might be The last of Us, a title that made some great friends on the rival console. Other rumors bring EA’s Army of Two into question.
Other gamers ar praying to see a reiteration of Dead Space by Coalition although some work on sequel is already underway.
The fan list continues with titles like Blinx, Alpha Protocol, Legacy of Kain, Deus Ex, and even Gex the Gecko.
Other rumors say that it could also be a title from Konamy as the Japanese already said that they are willing to outsource IPs.
According to the Microsoft 365 roadmap, announcement, the IT managers will have full control over this VoIP encryption feature:
Teams will support an option to use end-to-end encryption (E2EE) for ad hoc 1:1 Teams VoIP calls, providing an additional option for conducting sensitive online conversations. To support customer security and compliance requirements, IT will have full control of who can use E2EE in the organization.
What is the new encryption feature for Microsoft Teams?
The E2EE feature is configurable by the IT managers who will also decide to which users will use it.
The end-to-end encryption will be a welcomed extra layer to secure the VoIP calls in an enterprise environment but it has its downside.
The users who benefit from this option will no longer be able to use some of the features, including the transcription and the recording that would void the whole point of securing the connection.
After the feature gets activated by the IT administrator, the user will also have to activate it on its endpoint PC within the Privacy menu from Settings in Microsoft Teams.
What is the new E2EE used for?
Of course, the new encryption feature will come in handy when you will need to send sensitive information across your organization or your business partners or officials.
We should also note the fact that its less business-oriented competitor, Zoom, already installed end-to-end encryption on meeting with up to 200 participants since last year.
The benefits for this option are unquestionable and it will be generally available beginning with July.
Last month, we reported that Microsoft plans to add support for apps in external meetings and chats in Teams. The Redmond giant has recently updated its Microsoft 365 roadmap to indicate that this feature has started rolling out and will be available soon for all Microsoft 365 subscribers.
The launch of apps in external meetings and chats will let users add apps while hosting meetings/chats with people from another organization. Specifically, users from the host organization will be able to manage (install, delete or update) these shared apps. However, external users who have been invited to the group chat or meeting will only be allowed to interact with the apps installed by host users. You can find more details about managing external access in meetings on this support page.
To install an app during a meeting, click the “Chat with participants” icon and select the ( … ) menu. Now use the search box to find the app (e.g., Microsoft Forms) you want to add to the meeting and finally click the “Send” button to create a poll. The meeting participants will instantly get a poll notification that appears in the middle of their meeting screen.
Similarly, Microsoft Teams users will be able to add apps to group chats by clicking the ( … ) menu available at the bottom of the screen. The rollout of apps in external scenarios will honor the data policies of the host organization and it will not change any previous organizational settings.
Overall, the new apps experience could be beneficial for business customers to gather feedback and seek approvals from partners. Microsoft Teams has recently introduced support for adding external users to group chats, and this new feature should eliminate the need to jump back and forth between windows during meetings.
If you need to keep a log of your driving, fortunately, there’s specialized software that can do this for you. There are both apps and online tools that can keep track of various data regarding your driving.
Mileage tracking apps are able to automatically detect when you go for a drive and thanks to the mobile devices’ built-in GPS.
It’s also essential that such an app does not impact your battery very much. Online mileage calculator software can do the same thing and provide you with the same data.
Here are the best tools, apps, and online calculators, for your mileage and we advise you to check out their sets of features carefully just to see which one fits your needs and preferences best.
What are the best mileage calculators for Windows 10?
MPG Tracker is a great mileage calculator app that is able to conveniently track your vehicle consumption right on the go.
Overall, this is one of the best mileage calculator apps that you can find out there.
And to find out more about its features and to get this app we advise you to head over to the Microsoft Store and grab the MPG Tracker from the Microsoft Store.
Users find this app extremely handy, and one of the most appreciated features is that it allows you to see the value of lower speed and less aggressive acceleration.
The app comes packed with various useful features and functionalities, so take a look at the key ones below:
MPG Tracker is easy to use, and it allows fast data entry, while at the same time providing plenty of statistics about the vehicle’s fuel consumption.
The app also supports distance input based on trip meter reading and odometer reading.
The History view feature will show you all the fill-up records, and they will be sorted by the most recent date, allowing you to edit all entries.
The various graphs that are included in the app show how your MPG progresses and how the gas price changes over time.
The advanced reports allow you to compare fuel grade, brand, and also to view the monthly expenses and mileage as well.
The application supports multiple vehicles, and it allows you to back up your data to OneDrive, this way allowing you to restore the data if your mobile device is broken.
You can also export to Excel for more report customization and share the MPG info via email, social networks, and SMS.
The app provides support for both metric and imperial system.
If you have even been in a situation in which you have no idea whether you have enough fuel to reach a particular destination, well this is another solution that allows you to calculate the fuel.
This is a handy app for tracking your mileage. Fuel Calc Free is an easy way to find the average consumption of your vehicle’s fuel.
This app also allows you to share the results with your buddies. Check out the main features that are packed in this app:
Besides calculating the fuel, this app is also able to calculate the cost of your travel and also divide it between the passengers.
Fuel Calc Free can see what the cost of driving to a specific place will be as well.
This app can successfully calculate the time and distance in which LPG installation will be paid to.
It’s also important to note that the app supports both imperial and metric units.
Fuel Calc is a free app, and it’s available on most mobile devices.
The application is straightforward to use even for people who have never used such a tool before.
Fueleconomy.gov is an online mileage calculator tool. It’s the official U.S. government’s source for fuel economy information, so it’s definitely worth trying out its features and functionalities.
Among its other benefits, you will find out that with the help of Fueleconomy, you can save money and you can also support climate change.
Check out a few of them below:
Using Fueleconomy, all you have to do is select one or more vehicles and then add, edit, and remove more vehicles any time you want
You will be able to edit the vehicles to personalize the MPG and the fuel price as well
Using this online tool, you will be able to make driving more efficient, and also keep your car in shape
It allows you to plan and combine trip and even choose a more efficient vehicle
Using this tool, you will get various tips for hybrids, plug-in hybrids, and electric vehicles as well
You can enjoy fuel economy in both cold and hot water
This tool will help you with the fuel calculations
GasBuddy’s Trip Cost Calculator is another online tool for calculating the mileage.
With the help of GasBuddies across North America reporting prices of fuel from various local stations, the tool is also to find the cheapest stations along your road trip.
Check out more important features that you will be able to enjoy using this online tool:
All you have to do is enter the start city and the end city.
You also have to select the trip type (one way or round trip) and the measurements that you want to use (US or metric).
You will also have to add some vehicle information such as the year, make and model, tank, fuel and more.
Squawkfox’s Gas Mileage Calculator is our last, but definitely not least choice for an online mileage calculator tool.
You will be able to effortlessly use the Gas Mileage Calculator even if you have never used such a program before. It will help you determine just how much fuel your vehicle consumes.
Check out a few steps that you need to accomplish before getting a result:
You have to enter some gas data at first such as the distance that you have to drive.
You also have to add the amount of gas that you used.
The tool asks you to add the price of the gas that you have used as well.
All you have to do after entering the requested data is to press the Calculate button, and you’re good to go.
The results will be the gas mileage and the cost per distance.
These are our five recommendations for the best mileage calculator that you can currently find on the market.
Both the online tools and the downloadable apps will do a great job, and it’s best to check out their entire sets of features and advantages before making the final decision.
If you happen to know other great tool for gas mileage calculations, don’t hesitate to write us about them in the comments section below.
Is Windows 11 upon us? Two days ago, Microsoft announced a June 24th event to unveil “what’s next for Windows.” So far, we don’t know much more than that, but of course there’s rampant speculation. Let’s take a look at what we know so far and what we might hear on the 24th. First, some quick history:
News of a “new version” of Windows first started filtering out with leaks about something called Windows 10X: a lightweight, refreshed version of Windows first slated for the Surface Duo and the unreleased Surface Neo. Windows 10X was at first going to be limited to dual screens only. Continuing problems getting Windows to run reliably (meaning with full Win32 app support) on ARM chips, something necessary for a smartphone like the Duo, changed those plans, and Microsoft announced that Windows 10X would first come out for single screens only, that Duo would run Android instead (?!), and the Neo just faded away.
Could the Surface Neo run “Windows 11?”
Windows 10X, even on single screens was never meant to be a “replacement” for Windows 10: it was going to come out on new hardware only, and be positioned to compete with Chromebooks in Edu (just a note here: Chromebooks are doing *very* well in Edu, and while it’s not a huge market, losing those young hearts and minds to Google has been and continues to be a concern for Microsoft).
But as it turns out, Windows 10X was not to be. Microsoft apparently reversed course, announcing that there would be no 10X launch, and that instead many of the mostly UI and UX features would be instead incorporated into Windows itself.
Windows 10 “Sun Valley,” the code name for UX changes, would serve as the revisioning of Windows 10X, with new icons, a new Start menu, and a more consistent UI.
So that leaves us with the announcement yesterday. As usual, there are a lot more questions than answers. Let’s dive in:
1. What’s in a name?
Much has been made of the “Windows 11” shadow in yesterday’s teaser GIF, and it’s obvious to call “the next version of Windows” Windows 11. Others are leaning toward just calling it “Windows.” And of course, even with all the speculation, we still could end up with some variant of “Windows 10.” It was supposed to be the last version of Windows, right? (Still, it was only one guy at a session at Ignite 2015 who said “last version”).
The hints are coming hot and heavy that we’re in for “a new generation of Windows,” but how much change should we expect? A job listing spotted last week promises “a multi-year journey to revolutionize the Windows UX platform,” and while Microsoft is making a big deal about this June 24th announcement, it seems far fetched to think we’ll have a completely new and different Windows in the 21H2 timeframe (read: this Fall). Everything we’ve heard so far about Sun Valley is that while it carries a new, refreshed look, it’s still very much Windows 10 under the hood.
Sun Valley should hit the high points, with a fresh clean look born out of Windows 10X, but can we really expect a fully cohesive UI/UX makeover? This has the earmarks of a “multi-year journey,” indeed.
3. What about the enterprise?
Microsoft has long held to a mantra of staying true to legacy Windows, and there’s good reason for that. Enterprise generally hates change, because there’s real financial pain involved in having to rework training materials, help desks, and IT management to accommodate changes in Windows.
As consumers, we all want the latest, freshest look, but that’s exactly what enterprise *doesn’t* want.
4. A new path, or a fork in the road?
On their regular Windows Weekly podcast this week, Mary Jo Foley and Paul Thurrott had lots to say about the just released news of an upcoming June 24th announcement. In particular, though, one thing Mary Jo said stood out: After saying that “this is going to be a lot of smoke and mirrors, plus a new store,” she also said (while noting that she was just guessing, with no insider knowledge) that she’s expecting to see 21H2 *plus* a new Windows “11” this fall. Her reasoning is that enterprise doesn’t care about any of this UI stuff (see above), and will want to stick with Windows 10.
A French blog, Frandroid, posted a screenshot of what it says is the Windows 11 System menu, and also postulates that Windows 11 should be a free update while Windows 10 continues to be supported in the future. Since we know Insiders will get to test this new version (see #8 below), one possibility is that it ships with new devices (see #6), but that it’s also available to “seekers,” as an opt in, with everyone else remaining on Windows 10.
5. Is a Feature Experience Pack the answer?
Of course Daniel Rubino and Zac Bowden were also talking Windows “11,” and on their new “Ask Windows Central” feature, Zac Bowden noted that while technically the current Windows Insider Dev Channel is gearing up toward Sun Valley, Microsoft is trying hard to keep the new UX features a “secret.” These features, Bowden says, could come as part of a Windows Feature Experience Pack, allowing the company to keep the new stuff under wraps for as long as possible.
What this also might mean, however, is that the Sun Valley / Windows 10X / Windows 11 features that Insiders and consumers are clamoring for, but that enterprise is almost sure to hate, could come as part of a modular Windows. Want the latest and greatest? Install this Feature Experience Pack and here you go. Need to go stuffed shirt to keep your enterprise IT department happy? Just don’t install the Pack (or indeed, install an Enterprise Features Pack perhaps, making the core of Windows less bloated).
— Aggiornamenti Lumia (@ALumia_Italia) June 1, 2021
6. Can Windows “11” sell?
One thing almost everyone agrees on: a new naming scheme for Windows is going to be a boon for OEMs trying to sell new devices. OEMs are going to love being able to put “New: Windows 11!!!” (or whatever) on their marketing and packaging, and with PC sales enjoying a pandemic fueled resurgence, having something new and shiny to sell is going to make OEMs *very* happy.
7. Will Sun Valley turn Teams integration up to 11?
Mary Jo Foley mentioned that Microsoft had told Bloomberg a bit more about what to expect on June 24th. Here’s the quote: “The new software will include changes to the design, added opportunities for creators and developers via the Windows app store, and ways to more easily build connections between users and communities they care about, the company said.” (Italics ours). This sounded to Mary Jo, Thurrott and Leo Laporte like Teams built into Windows, and we have to agree, although like everything else, we’ll have to wait until the 24th to find out.
8. Will Windows Insiders get to test the new Windows? And when?
Again, Microsoft provided Bloomberg with some hints, saying “The software will be rolled out to so-called Windows Insiders who sign up to test new products after the event, and is likely to be released widely this fall.” Whether this means that Insiders will be able to test a potential new “Windows 11” channel, or just that some new features will start showing up in Dev channel builds, we’re not sure. Anyway, be prepared to mash some refresh buttons if Microsoft does open up “Windows 11” to new testing. Fair warning.
9. (Just like Windows, we skipped 9 ? )
10. Oh and one more thing, what’s this about a new Store?
Sure, you can read this as “one of the most significant updates to Windows of the past decade,” but it sure sounds like Nadella was talking specifically about changes coming to the Microsoft Store. Back in April, Microsoft announced that it was dropping its cut on game sales in the Store from 30% to just 12%, and more information has surfaced about changes coming to the Store, far more than just a Sun Valley UI refresh. According to Zac Bowden, the new store will:
Allow developers to submit unpackaged Win32 apps to the Store
Allow developers to host apps and updates on their own content delivery network (CDN)
Allow developers to use third-party commerce platforms in apps
Now Microsoft has tried to reinvent the Store model before, most notably with Windows Phone, and we know how that went. It has also tried recently to push, without much success, PWAs as a way to break through the walled gardens of the Apple and Google Play stores. Even without a new selling model, however, the Microsoft Store is in desperate need of a revamp, so this can only come as good news.
We can’t wait until June 24th (or whenever the leaks start showing up before then) to find out what all the commotion is about. What do you think will happen? Is the next generation of Windows “Windows 11,” or something else entirely? Let us know what you’re expecting in the comments below.
Exchange Servers and Exchange Databases play an important part when it comes to data security and secure reliable access to emails, and contacts in modern-day companies.
Keeping them safe, secure, and always working will greatly help a company make better revenue and manage things easily.
However, things don’t always go as planned, and unforeseen events will make you wish you had some means of recovering your data from corrupt Exchange Database files (EDB files), and that is why we would like to talk about one of the best Microsoft Exchange recovery tools called Stellar Repair for Exchange.
What is Stellar Repair for Exchange?
As the name of the product suggests,Stellar Repair for Exchangeis a dedicated third-party Exchange Server data recovery tool that boasts powerful recovery of data tools and a simplistic user interface.
Not only will it recover the server data, but it will also help to Export EDB files directly to live Exchange and Office Server databases, and it doesn’t matter if it was an Exchange server crash, power failure, or vulnerability exploitation without any risk of data loss
Regarding its compatibility, you can use Stellar Repair for Exchange on Microsoft Windows Servers and Microsoft Windows even more, since it supports recovering data from EDB files of Exchange servers 2019, 2016, 2013, 2010, 2007, 2003, 2000, and 5.5
It also works with the latest versions of Microsoft Office as well, as it has the ability to export complete EDB files directly to live Exchange and Office 365
In fact, Stellar Repair for Exchange can be used in a wide variety of other cases, including:
Dirty shutdown errors
Exchange Server crashes
Failing to mount Exchange databases
Not just a bulk recovery tool
It does a great job not only at scanning your PC for missing or corrupt EDB files, but it also lets you customize your search in mail items as per the combination of search criteria.
You can perform this operation based on different search criteria, such as To, From, Subject, the contacts you’ve Cc-ed, Attachment Name, etc.
All Mail items that you then find can then be exported to PST, MSG, EML, HTML, RTF, or PDF format.
Manage your mailbox data to a greater degree
If recovering contact is your main concern, Stellar Repair for Exchange helps with that as well, as it helps to save the contacts of repaired mailboxes in CSV format which can later be viewed and edited in Excel or Google Sheets.
Stellar Repair for Exchange also recovers calendars, journals, and tasks with multiple formats to choose from when saving them.
More so, if the mailboxes you are trying to recover are incredibly large, holding tens of thousands of emails in a folder, then you should know that Stellar Repair for Exchange will split these folders upon recovery or repair so that managing them can be easier.
The Split is based on the number of emails in a folder. After saving a specific number of emails, the application splits the folder into smaller sub-folders, but one common practice is for the program to split your recovered data based on the date of the sent or received messages.
For example, if you have a mailbox with 100.000 emails, rather than recovering one large and hard-to-read file, you will instead get smaller subfolders based on the month of the sent or received message.
An Exchange recovery tool for all PCs
Because of the fact that Stellar repair for Exchange can even help Exchange 22003 and Exchange 2007, it was designed to run even on older PCs, since there is a high possibility that older versions of Exchange may be due to older hardware.
That being said, here are the minimum system requirements for your PC to run Stellar Repair for Excel efficiently:
Processor: Intel-compatible (x86, x64)
Operating System: Windows 11, 10, 8.1, 8, 7 & Windows Server 2016, 2012, 2008
Memory: 4 GB minimum (8 GB recommended)
Hard Disk: 250 MB of free space
3 different versions based on your particular needs
Stellar Repair for Exchange is currently available in 3 different versions:
Corporate
Technician
Toolkit
Each subsequent version has all the features of the previous one and a few extra tools that will prove useful
Here’s a precise rundown of what each version can do:
Supports Parallel processing for faster mailbox recovery
✓
✓
✓
Set-Mailbox priority as per importance while saving
✓
✓
✓
Export the recovered mailboxes & Public folders to Live Exchange, Office 365 or PST
✓
✓
✓
Save the repaired file as PST, MSG, EML, RTF, HTML, and PDF
✓
✓
✓
Extract offline mailboxes from corrupt Exchange backup file
X
X
✓
Convert EDB file to PST format
X
X
✓
Convert inaccessible OST to PST
X
X
✓
Reset lost password of Windows Server
X
X
✓
Try it before you buy it
When it comes to recovery or repair tools, one of the biggest problems is that a lot of them lack any kind of free version, or at least a trial or demo for users to test out and assess the program’s efficiency.
However, this doesn’t seem to be the case with Stellar Repair for Exchange, since you can opt to download a free version of the product so that you can see just how good it is at recovering the mailboxes from your EDB files.
Tip
Note: The free trial version of Stellar Repair for Exchange can only scan and preview your recoverable mailboxes.
Stellar Repair for Exchange
A database recovery tool that has never been more powerful and more easy-to-use like now.
In a world where security vulnerabilities are on the rise and the struggle to keep them at bay becomes harder and harder, keeping a good recovery tool at hand can always be helpful.
Such would be the case with EDB files, and the recent attacks detected by the Microsoft Threat Intelligence Center where multiple zero-day vulnerabilities on on-premises versions of the Exchange server were detected.
These vulnerabilities were caused and exploited by the Hafnium group, and through them, they managed to gain remote access to Exchange servers so that they could steal critical data from a variety of organization networks.
The vulnerabilities being exploited are the following:
As a response to these attacks, Microsoft has released several Exchange Server updates, so have them installed as soon as they become available.
How can I protect Exchange Servers from Hafnium attacks?
1. Run the Microsoft On-Premises Mitigation Tool
The Exchange On-Premises Mitigation Tool (EOMT) is a tool released by Microsoft that is meant to combat common vulnerabilities exploited by the Hafnium group, and it works with MS Exchange 2019, 2016, and 2013.
The main purpose of this tool is to check whether your Exchange Server is vulnerable to CVE-2021-26855, and you can use it as follows:
Extract the content of the Security folder to a location of your choosing
Press Windows and open PowerShell with administrator rights
Via PowerShell, go to the extracted folder location
Run the EOMT.ps1 script to check if your server is vulnerable : .EOMT.ps1
2. Update your Exchange Servers
If you’ve run through the previous solution and noticed that your Exchange servers are indeed vulnerable, you can help prevent any possible future attacks by simply updating your Exchange servers, which is a solution that even Microsoft recommends.
Exchange 2007 and 2003
While these versions are believed to be safe from Hafnium attacks, they no longer receive any updates from Microsoft, so you need to upgrade them anyway.
Exchange 2010
This particular version of Exchange server was affected by CVE-2021-26857, so you’ll need to update it with the latest security patches, and you can also run the EOMT script mentioned above just to be sure.
Exchange 2019, 2016 & 2013
These versions of Exchange Server were the primary target of the Hafnium attacks, so if your company is using any of them, install the latest security updates and use the EOMT script as soon as possible.
3. Restore your Exchange server mailboxes data via a backup
If the preventive measures came too late and your company’s Exchange servers were already attacked, damaged, and rendered useless by Hafnium, you can use the RecoverServer switch to get all of the data back.
Tip
Note: This solution only works if the Windows Server and Exchange versions are the same as the new server or else there may be compatibility issues.
4. Use Stellar Repair for Exchange
The solution mentioned above in the 3rd point is only usable if you have a backup stored somewhere, but if you don’t your only solution is to use third-party Exchange Server recovery tools, and Stellar Repair for Exchange is one of the best on the market.
You can now browse your PC for the location of Exchange Server databases using two methods:
Press Browse to find them manually
Press Find to let Stellar Repair for Exchange detect them for you
Choose the damaged EDB file and click on Next
You can now select one of two scanning modes to proceed with this operation:
Quick Scan – the scans will be faster, but they may not yield all the results you may be looking for
Extensive Scan – the scans will last a lot longer, but all the data will be presented to you thoroughly
Press OK to start the scan
Once the scan is complete, all mailboxes that can be repaired will be listed as you can see below:
Choose a mailbox(es) or any item(s) of any specific one that you want to recover, and click on Save
Choose a format in which the mailbox will be saved, and select Next
Browse for a location where the mailbox file will be stored, and select OK
This concludes our brief overlook of Stellar Repair for Exchange, and we hope that we made it easier for you to understand why having such a tool at hand is important, especially if you hold sensitive information on your Exchange Server databases.
Let us know what you think about this tool by leaving your thoughts in the comments section below.
Yes, the title reads “4-minute review” but rest assured I spent more than 4 minutes reviewing the ThinkBook 14s Yoga. My intention is to try and deliver a hyper concise review that you can read, digest and enjoy in as few as four minutes. Now having wasted 15 seconds, let’s get on with the review.
Lenovo sent over its ThinkBook 14s Yoga 2-in-1 convertible a while back and I’ve been using it off and on for the past month and half to get a genuine feel for its everyday usefulness versus the marketing jargon the company was looking to hand feed customers.
Plainly put, the 14s Yoga is a business computer that’s intended to be bought in bulk to replace currently aging and clunky SMB workstations from 2013 or older. Starting at under $1,000 ($922.35) an “everyday joe” customer can snag the entry level configuration or move up to the $1,110.85 Abyss Blue model I tested that houses:
Specs
Processor
Up to 11th Generation Intel® Core™ i7-1165G7 Processor (2.80 GHz, up to 4.70 GHz with Turbo Boost, 4 Cores, 8 Threads, 12 MB Cache)
Operating System
Windows 10 Pro
Display
14” FHD (1920 x 1080) IPS, glossy, touchscreen with Corning Glass, 100% sRGB color gamut, 300 nits
Battery
Up to 8.4 hours* with 60Wh (MM18)
Rapid Charge technology available with 65W AC
Storage
Up to 1 TB PCIe SSD
Graphics
Integrated Intel® Iris® Xe Graphics
Camera
720p HD
Webcam privacy shutter
Memory
Up to 24 GB DDR4 3200MHz
Connectivity
Wi-Fi 6 802.11AX (2 x 2)
Bluetooth® 5.1
Security
Default Smart Power On (touch fingerprint reader integrated with power button)
Touch Fingerprint Reader integrated with power button
The ThinkBook 14s Yoga looks and feels like other Lenovo Yoga branded devices. The brushed aluminum helps keep the device cool to the touch as well as a moderately lightweight carry. As with most 2-in-1 convertibles, the 14s Yoga is only comfortable in its tablet mode for minutes at a time due to its 3lb weight and exhaust vents that get covered by the lid when folded backwards.
Aside from a familiar chassis, the keyboard of the 14s Yoga is also reminiscent of other ThinkPad and Yoga lines with a sunken island style key placement and clickily responsiveness from the U-shaped chiclet keys and nifty fingerprint sensor on the side of the deck.
The touchpad is responsive enough, some gestures, strokes or selections may have to be reregistered depending on where you rest your finger on the surface.
The normal Lenovo accoutrement of ports make an appearance for the dongle adverse, that include two USB-C, HDMI connector, one USB-A, and MicroSD care slot and pen holster.
Couple all of this with Lenovo’s new update color for the 2021 models that includes a very vibrant and notice Abyss Blue that puts a stunning exclamation point on the whole review.
Performance and Productivity
The 14s Yoga has an Intel 11th gen chip in it, but strangely does not meet the bar for EVO qualification this year. Between the weight and battery performance the 14s falls short of EVO status in 2021. Speaking of battery, the 14s pushes 11 hours during benchmark test but only got me on average 9 hours of real-world use.
Most things done on the 14s Yoga were snappy. The Iris Xe graphics are onboard and help edge out the 14s’ performance from last year in things like Photoshop, Filmora, Lightroom, AutoCAD and multiple instances of Edge and Chrome. Items cached in memory restarted relatively smooth, it was when opening new apps that the system would struggle to keep everything from becoming unresponsive or jittery for seconds at a time.
When running benchmark test, the 14s scored relatively high placements. I say relatively because with an 11th gen Intel chip in inside the laptop is sparring in a different weight class but is not alone. In Geekbench 5 the 14s Yoga’s single score peaked at 1549 and a 4783 on the multicore equivalent whereas the Intel Surface Laptop 4 managed a close 1533 single core score and an impressive 5785. Against its cousin the Yoga Slim 7i Carbon the 14s is barely edged out at 1564 for single but roundly trounced in multicore with a 5588 score. As for benchmarking the overall system performance with PCMark 10, the 14s scored a 5242 compared to the Surface Laptop 4’s 4879.
While it scores pretty well, most of that comes at the expense of fan noise and battery performance. As I mentioned earlier, the battery performance ranges from average to slightly disappointing depending on the task, and the fan noise was louder than any other device I had in my testing stable.
Summary
The ThinkBook 14s Yoga is not as much a consumer play as it is a modernization of the company’s workstation profile. As some people continue to or push for more work-from-home dynamics, the 14s satisfies an itch of basic convenience. It’s light enough to port around in most circumstances and its 2-in-1 nature and included pen offer greater flexibility for document signing (for those of us who ran out of ink early in the pandemic) as well as note taking or finer tuned graphics editing.
I don’t expect this device to fly off the shelves like an M1 Mac or even a Dell XPS but for those in the know, it’s definitely a recommendation to the IT department when asked, “do you have an upgrade within budget, in mind?”
After installing a fresh copy of Windows 10 for the general public, you might want to install a couple of additional tools.
One of the essential tools for your system is a codec pack. In this article, we’ll show you the best multimedia codecs for Windows 10 and how to install them.
Before we tell you where to find and download the latest codecs for Windows 10, we have to say that Windows 10 comes with a huge variety of codecs, so maybe there’s no need to install any additional ones.
Windows 10 natively supports AMR, MPC, OFR, DIVX, MKA, APE, FLAC, EVO, FLV, M4B, MKV, OGG, OGV, OGM, RMVB, and XVID formats, which can be loaded into Windows Media Player seamlessly.
What is a codec?
A codec is like a password to compress and decompress songs and videos. All media players, including Windows Media Player, use codecs to play and create media files.
There are two parts to a codec, one that encoder that compresses the file and a decoder that decompresses the file. Some include both components while others have only one of them.
If you’ve never downloaded a codec pack on your computer, don’t worry, we’ve got your back. In this guide, we listed all the steps you need to follow in order to install codec packs on Windows 10.
And now, let’s see what are the safest codec pack sources that you can use.
How can I download codec packs for Windows 10?
Use Shark007
But if you accidentally deleted some of your codecs files or you want to add some more codecs to your system, you can download a full codecs pack from Shark007.
This site is one of the most reliable and most popular source of codecs that have been online for a very long period of time. And it provides all sorts of audio and video codecs for Windows users.
Use K-Lite Codec Pack
Of course, there’s another popular source of codecs, K-Lite Codec Pack. K-Lite updates its codec pack on the regular basis, so it will feature all necessary codecs for watching movies or listening to music in Windows 10.
Installing codecs in Windows 10 is as simple as on older versions of Windows.
Use X Codec Pack
The X Codek Pack, formerly known as the XP Codeck Pack goes a long way back are it’s one of the most complete packs out there, covering all major audio and video formats.
And when you download it, you will also get a Media Player Classic Home Cinema if you don’t have it allready.
You just have to decide whether you want to use codecs from Shark007, K-Lite Codec Pack or X Codec Pack, download it, and let the installer do everything for you.
Download the Windows Media Player Codec Pack
Many Windows 10 users download codec packs for Windows Media Player. With the help of these packs, they can run new video format files on their player.
One of the most popular codec packs for the Media Player is the one that allows users to play AVI files more smoothly.
As a quick reminder, Microsoft doesn’t offer support for AVI codec in the Windows Media Player. For this reason, you need to install the codec from a third-party source.
For more information on how to install the AVI codec pack for Windows Media Player, you can use this step-by-step guide.
How can I identify the codecs on your PC?
Use Windows Media Player
Start Windows Media Player.
Press the Alt + H shortcut to open the Help menu and select About Windows Media Player.
Now click on Technical Support Information.
Scroll down to find all the audio and video codecs installed on your system.
This way, you can easily find out what are the codecs installed on your system and thus find out if you’re missing a needed one.
Use a dedicated tool
If the steps from the previous solution seem too complicated or you don’t have Windows Media Player installed, you can also use a dedicated software to find that out.
The tool recommended below is a small, free, piece of software that will display all the codecs installed on your PC and all their characteristics.
Not only that, but you will also be able to disable any codecs by selecting them from the list and clicking on the disable icon like in the screenshot below.
The tool also comes with a search function to find a codec from the hundreds installed so you don’t need to look for it alphabetically.
Also, right-clicking any codec will display a list of options including the one to open it in the Registry Editor to check its values or delete it.
Usually, if a video can’t be played because of a missing codec, any player will display an error that will also contain the name of the missing codec.
Then, it can be fairly easy to look for it online and install it. However, process can take some time and we don’t recommend downloading it from a random website as it can contain malware.
Another solution is to use the tool below that will not only what codecs you have installed on your system, but it can also analize a video and tell you exactly which codecs you need to play it.
And moreover, you will also be able to download the necessary codecs by clicking on their corresponding Download button.
You will be directed to a search page on your browser where you will be able to get that exact codec.
In an age where web apps are replacing downloadable software with each passing day, not only is your browser a gateway to the Internet, but it is also your main means of accessing pretty much any software that you need.
Unfortunately, accessing a lot of web apps at the same time means opening a lot of tabs simultaneously, and that can be a real headache to handle, especially when you get mixed in them or it takes forever to close them up.
It can be also very time-consuming and after a while you can lose focus on what you were doing.
We know that this is a rising problem, and that is why we’ve shifted our focus onto another great tool, one that lets you clear, save, and better manage all of your browser tabs, and that software is called tabExtend.
What is tabExtend?
In a nutshell, tabExtend is a browser tab manager that lets you manage a large number of tabs in a more efficient manner.
This includes letting you save entire sets of tabs and reopen them in a single click, the ability to close all tabs with just one click, and more.
Besides, tabExtend changes the way you view tabs from a visual standpoint, allowing you to organize them and see a preview of their contents at the same time.
It also gives you an always, close by notepad that you can use to quickly write down your ideas and to-dos. And the notes can be paired with specific websites.
Organize your tabs and never look for websites ever again
In simple terms, tabExtend is your average browser’s bookmark manager, only better in every single way.
Not only will you gain access to a new menu where all of your tabs will be grouped together based on your preferences but adding websites to the tab menu is much easier as well.
Add as many tabs as you want to a single group, rename the groups so that finding them is easier, and more, all thanks to tabExtend’s clever functionality.
These groups can be further rearranged via drag-and-drop to the point where organizing your tabs seems more like a fun activity rather than a chore.
You can further make tab groups easier to identify by adding notes and comments to each of them, such as adding Have a great time to a group of game-related tabs.
Everything you do in tabExtend can be done either via dragging and dropping or by simply left or right-clicking once, allowing you to save, switch between, open and close tabs faster than ever before.
Give your groups emojis to easier scan and find what you are looking for. Groups can be organized into different categories for different purposes.
Another advantage is that all the date is stored in the cloud, giving you the ability to access your data from different devices.
What browsers support tabExtend?
As of the writing of this article, tabExtend is currently available as extensions for the following browsers:
Note: Those of you that use other Chromium-based browsers can go ahead and see if tabExtend works on them as well, although there is no guarantee that they are optimized to do so.
All aspects included, we definitely recommend you try out tabExtend on your browser if you’re the type that works with tens of tabs opened at a time, or if you love keeping things organized.
Give tabExtend a try and let us know what you think about it by leaving your feedback in the comments section below.
Microsoft Yammer is getting a new feature that will allow approved users to post on behalf of someone else in their organization. The feature is currently in development, and it is expected to start rolling out globally later this month.
This update will enable any Yammer user to assign other people in their network as their delegate or delegate manager. These delegates will be able to start a new conversation or respond to an existing one on behalf of the delegator in the Yammer integrated experience in Microsoft Teams, SharePoint, and Outlook. However, the delegate will not be allowed to send private messages.
The new delegation experience can be helpful for team leaders who can’t post regularly to engage with their followers or communities. The feature will be enabled by default, and Office 365 admins will not be able to turn it off in their network.
Microsoft’s Yammer has seen a number of new features and integrations added over the past few months, including new Yammer experiences in Teams and the ability to share SharePoint pages with Yammer communities. Additionally, the enterprise social networking service now provides real-time insights to organizers during Live Events.




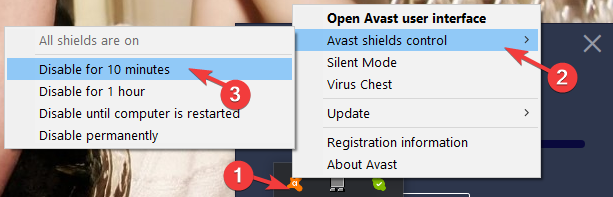
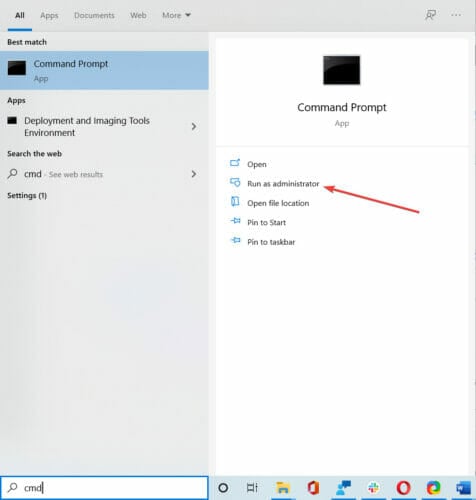


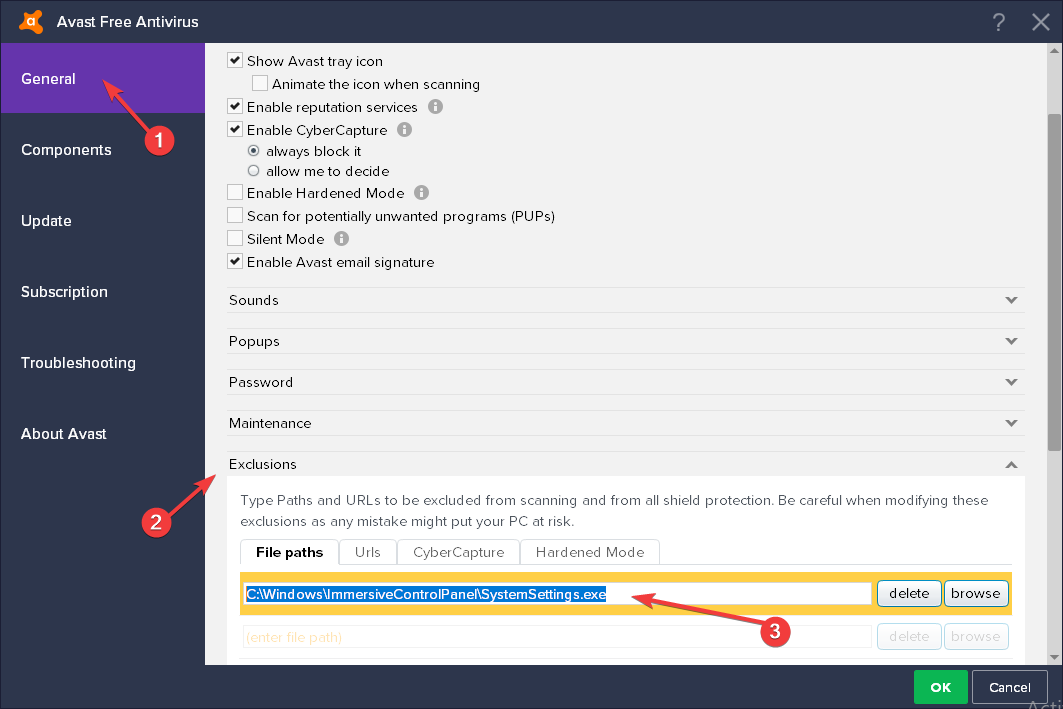
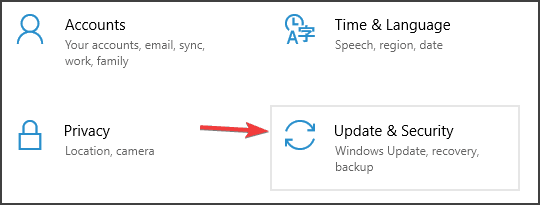
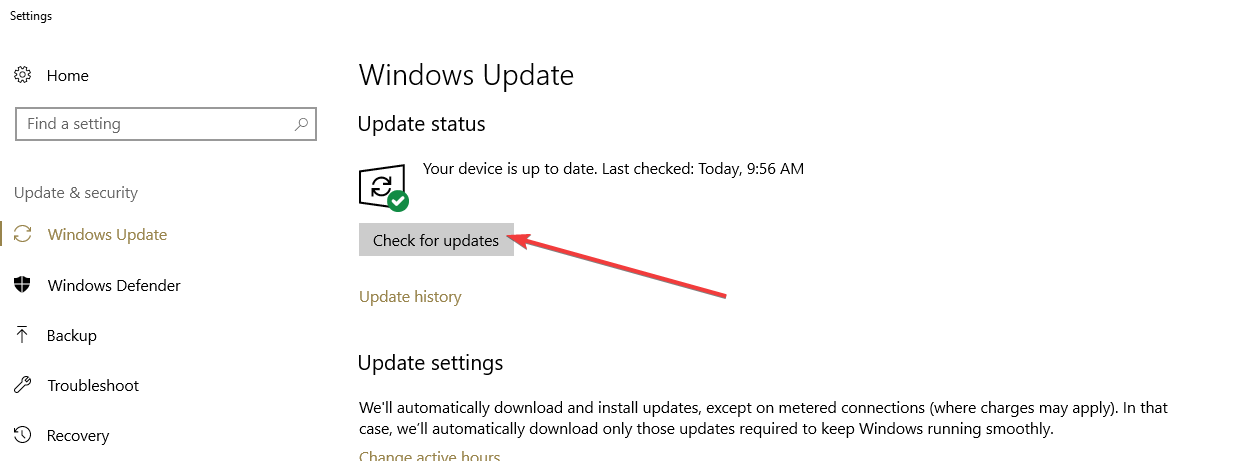
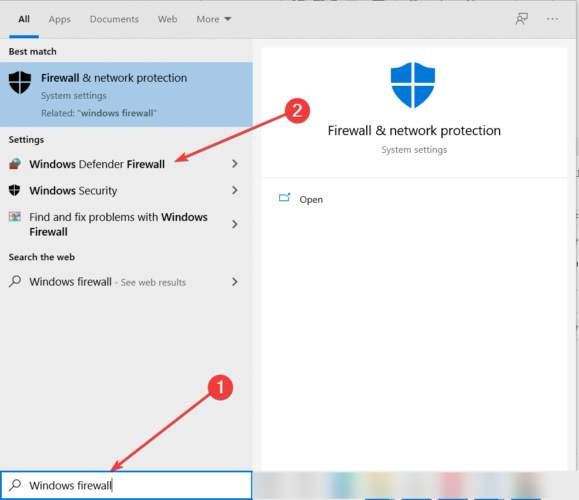
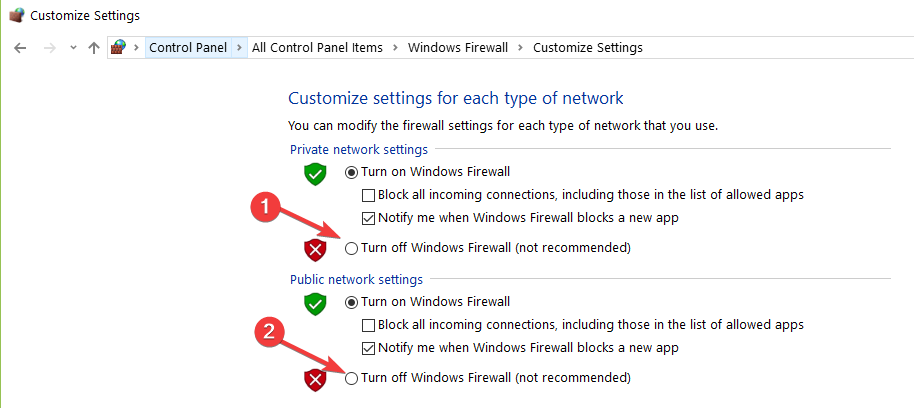


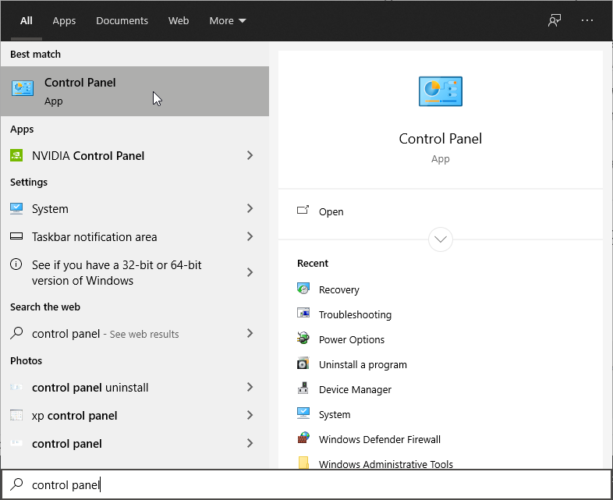








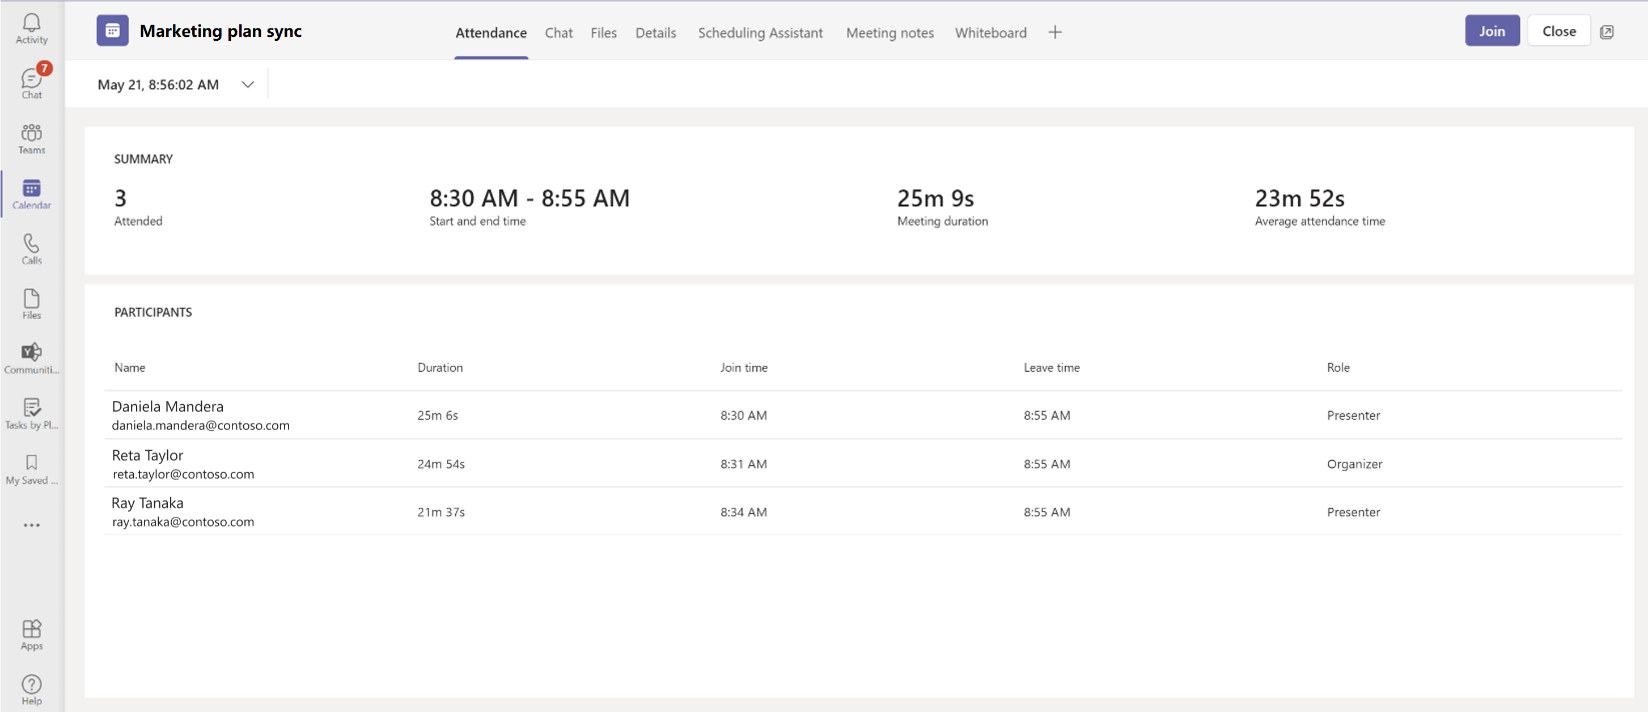






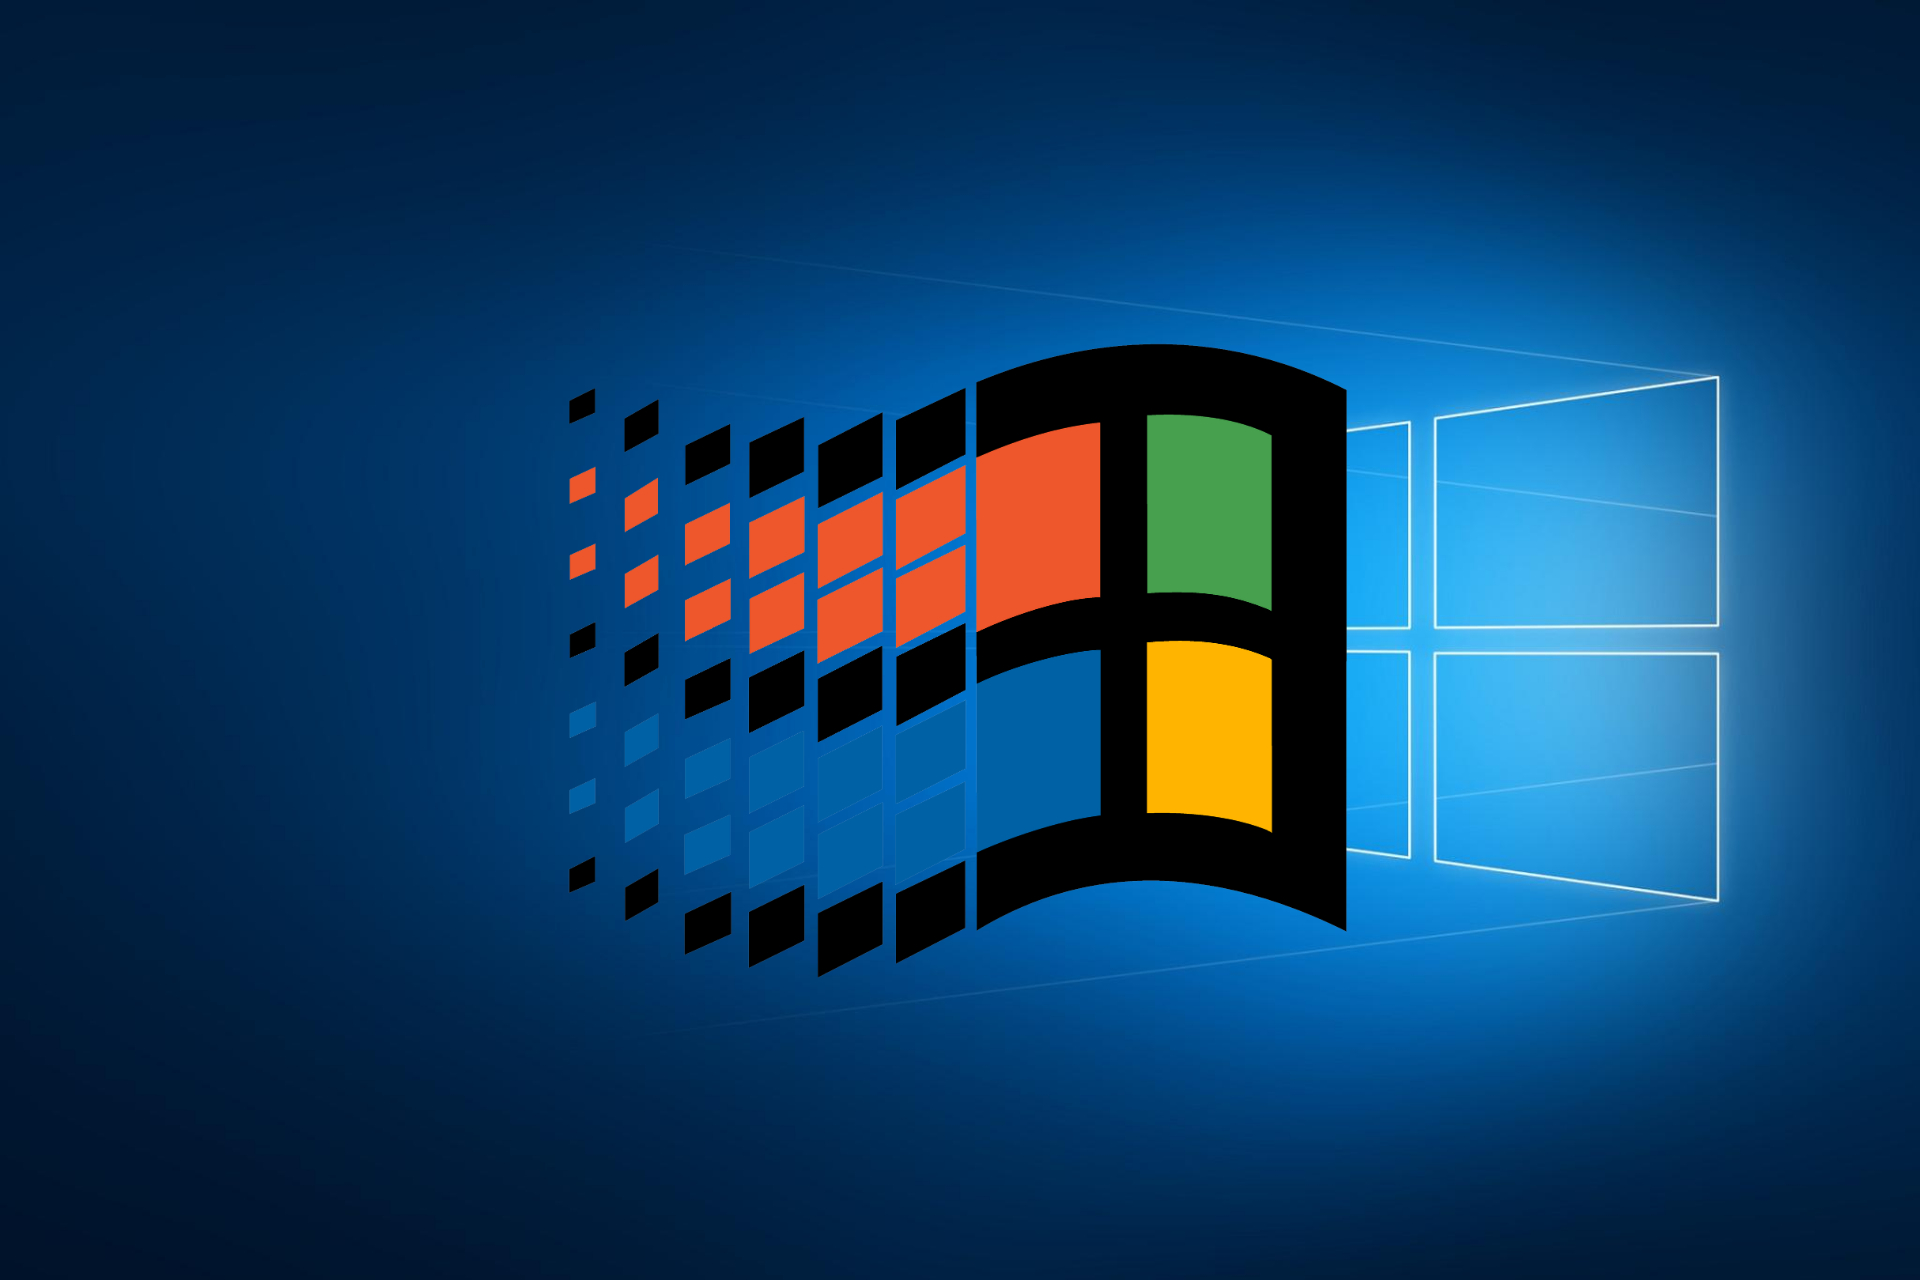



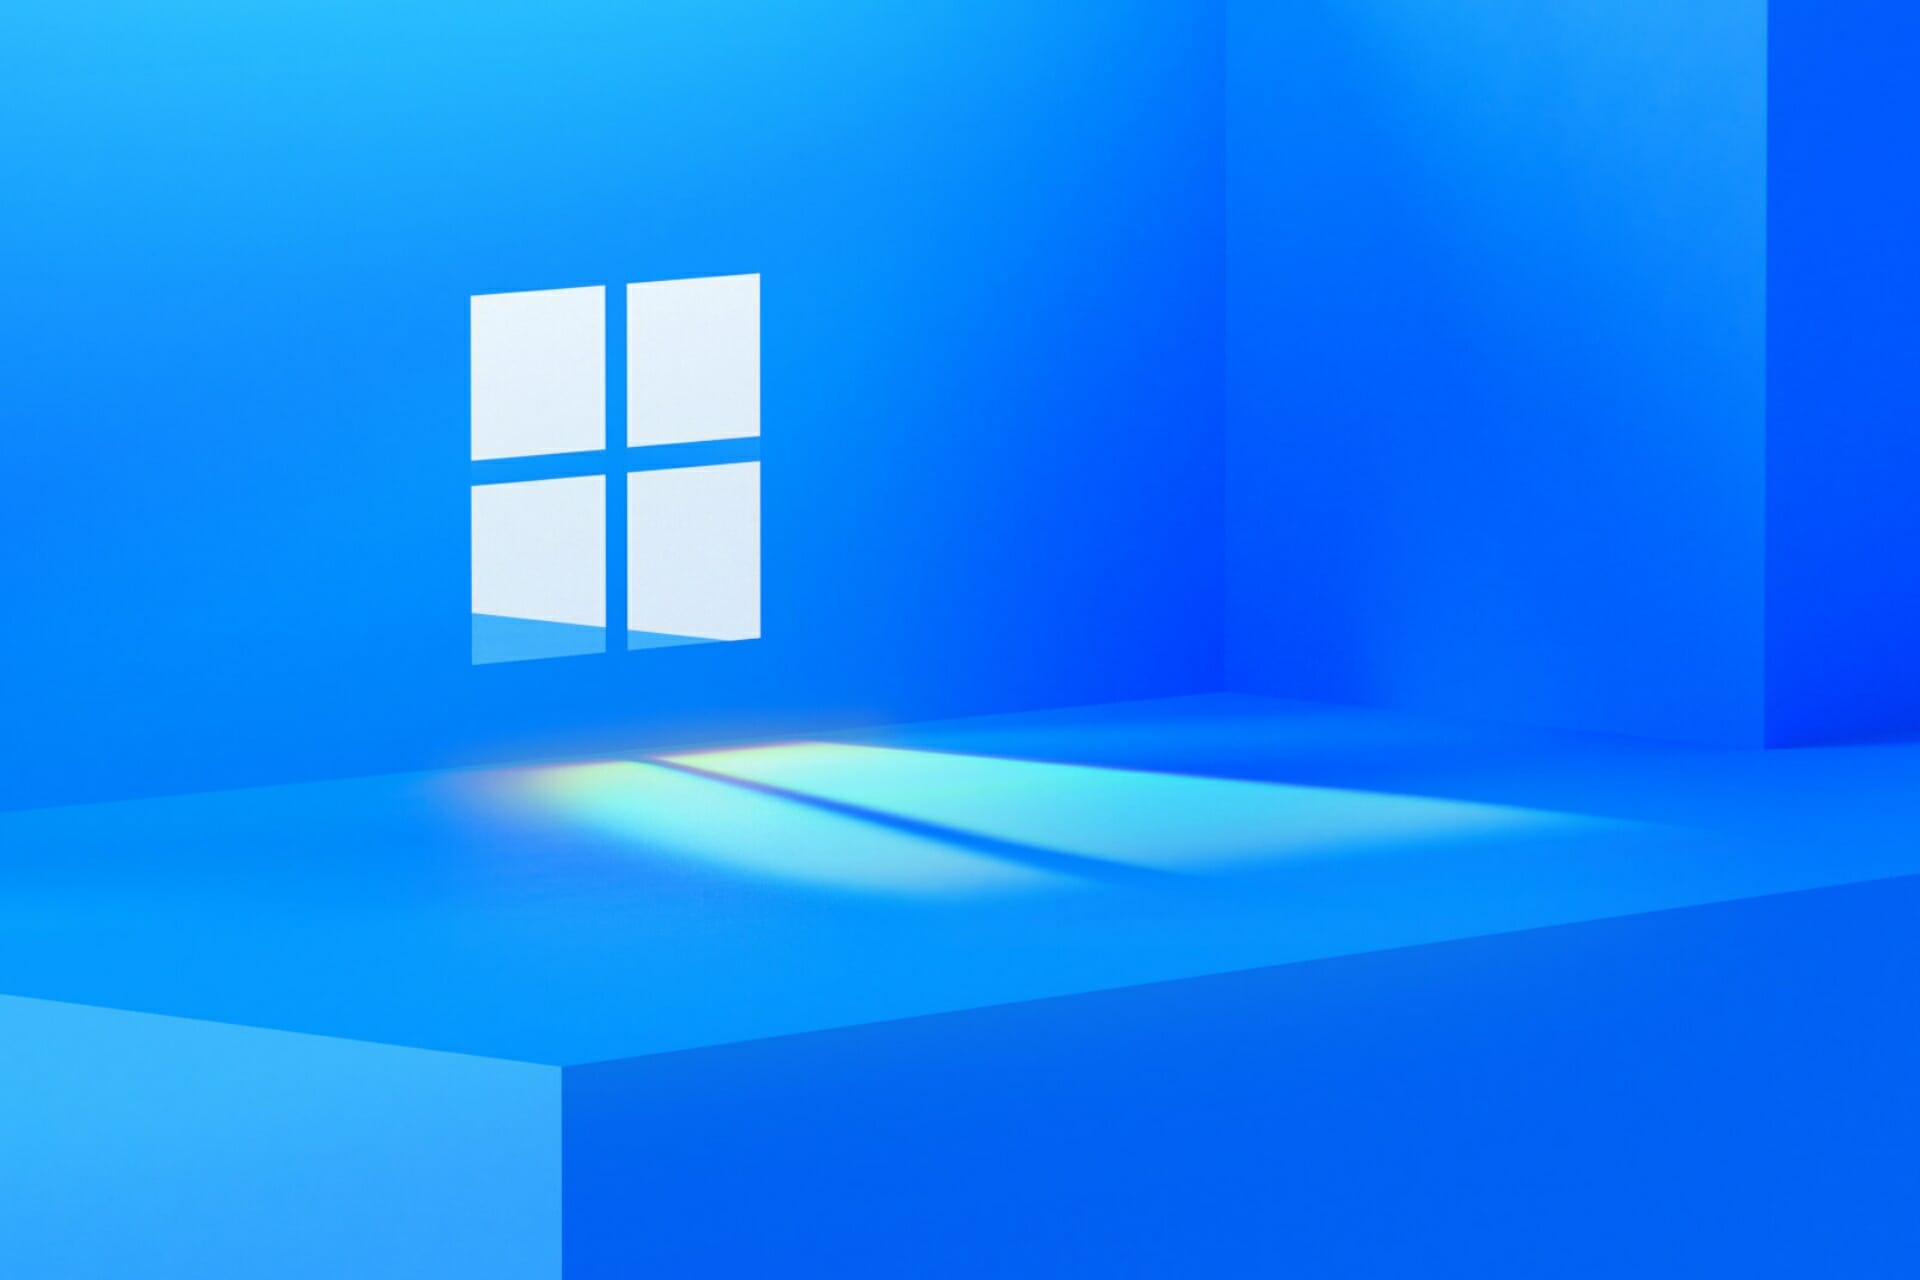


![4 Best Software to Learn Spanish [2026 List]](https://windowsreport.com/wp-content/uploads/2021/06/4-best-software-to-learn-Spanish-like-a-native.jpg)












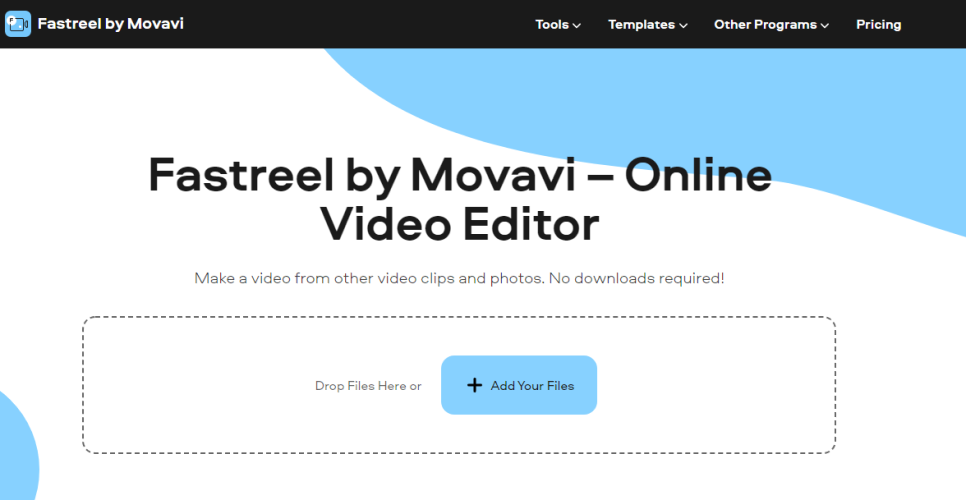

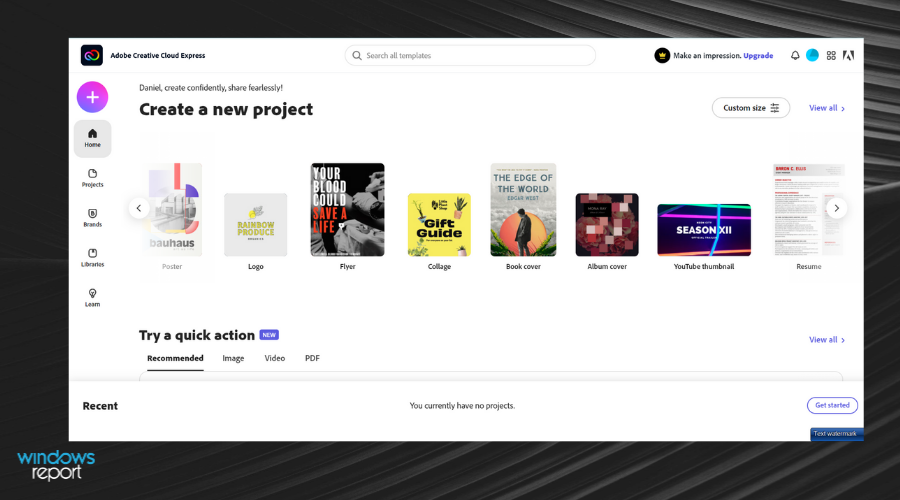












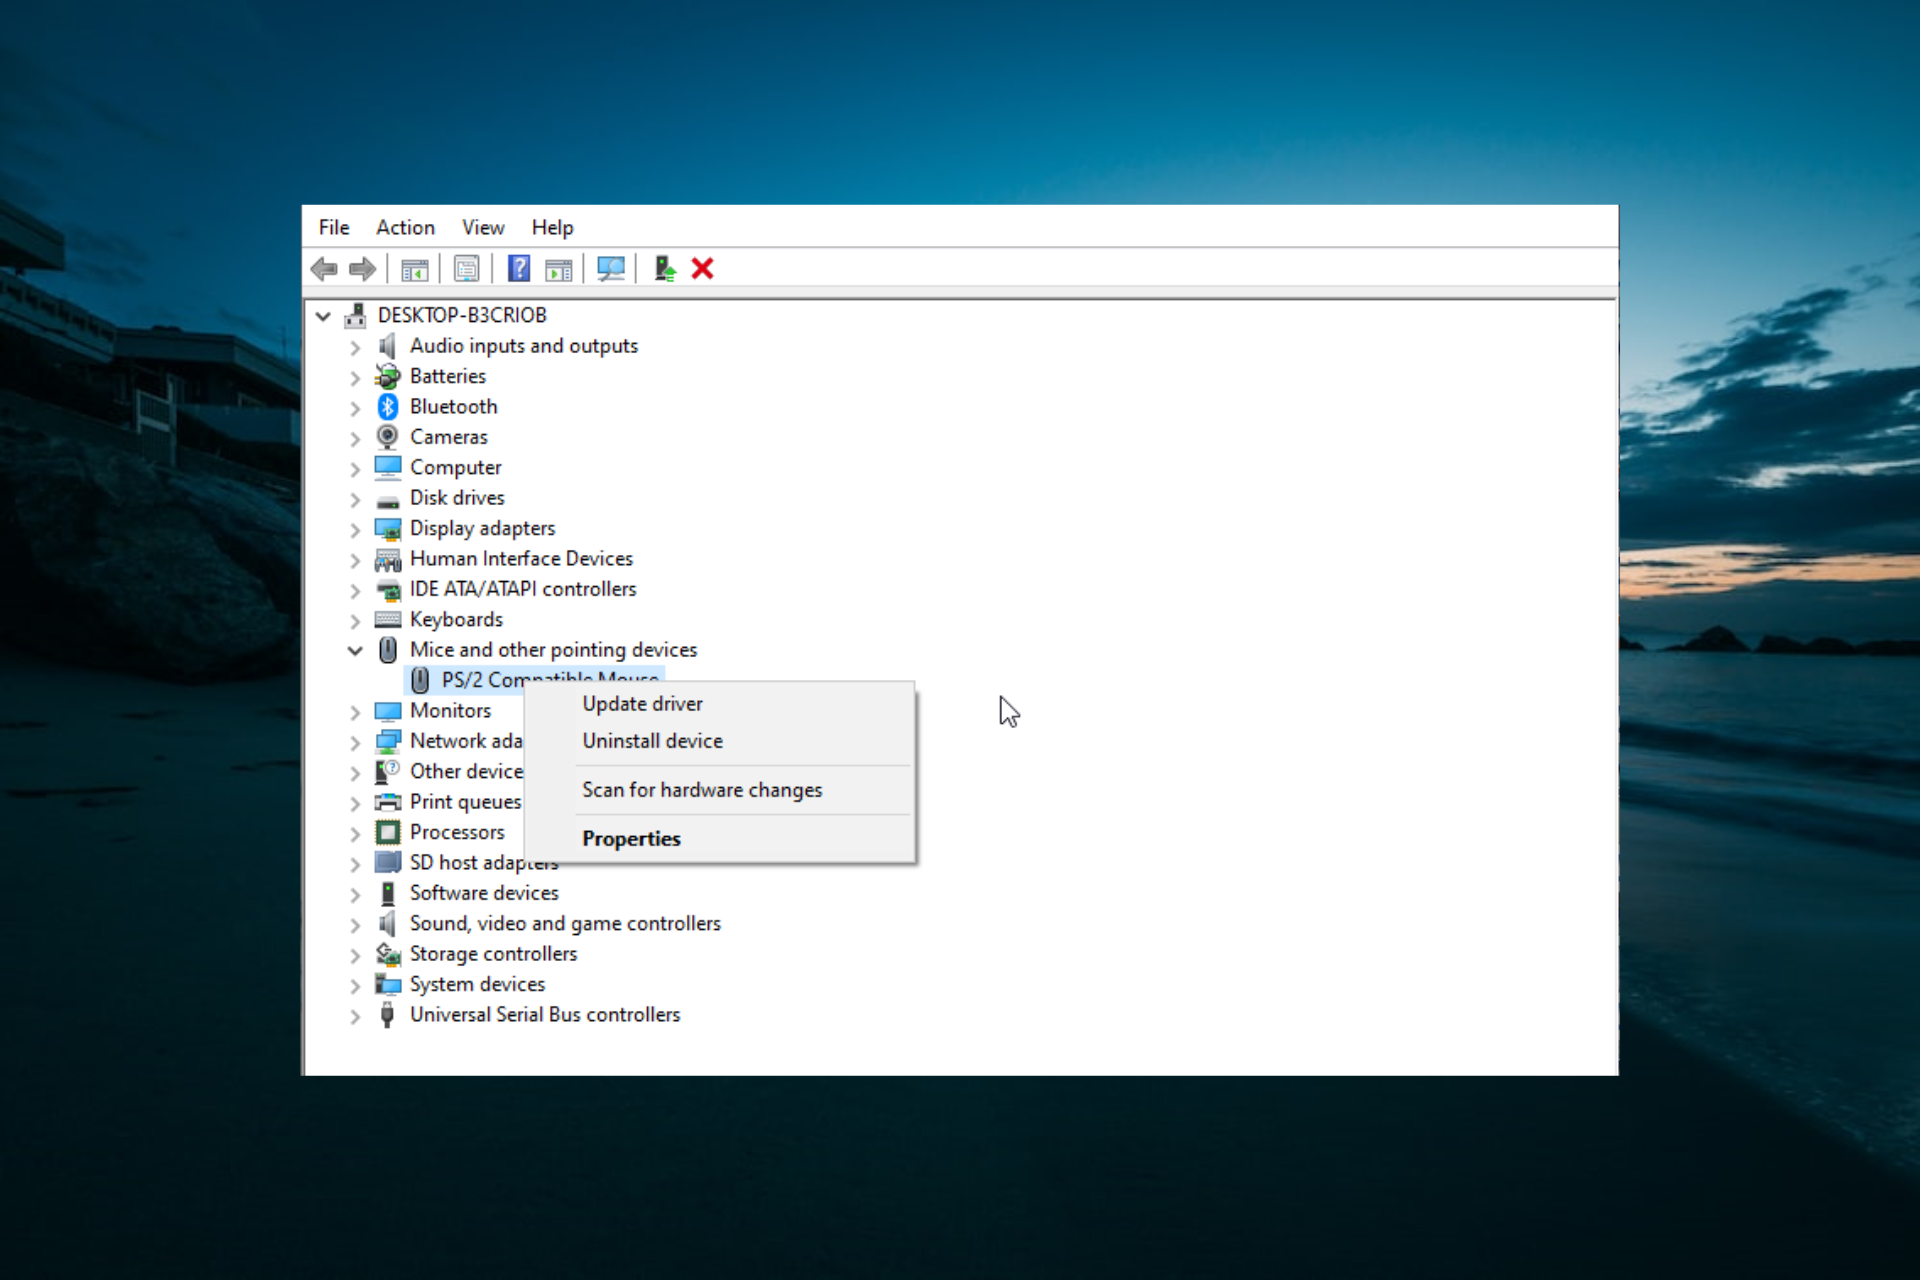


![FIX: Chromecast not connecting to Wi-Fi [Full Guide]](https://windowsreport.com/wp-content/uploads/2021/06/Chromecast-not-connecting-to-Wi-Fi.jpg)



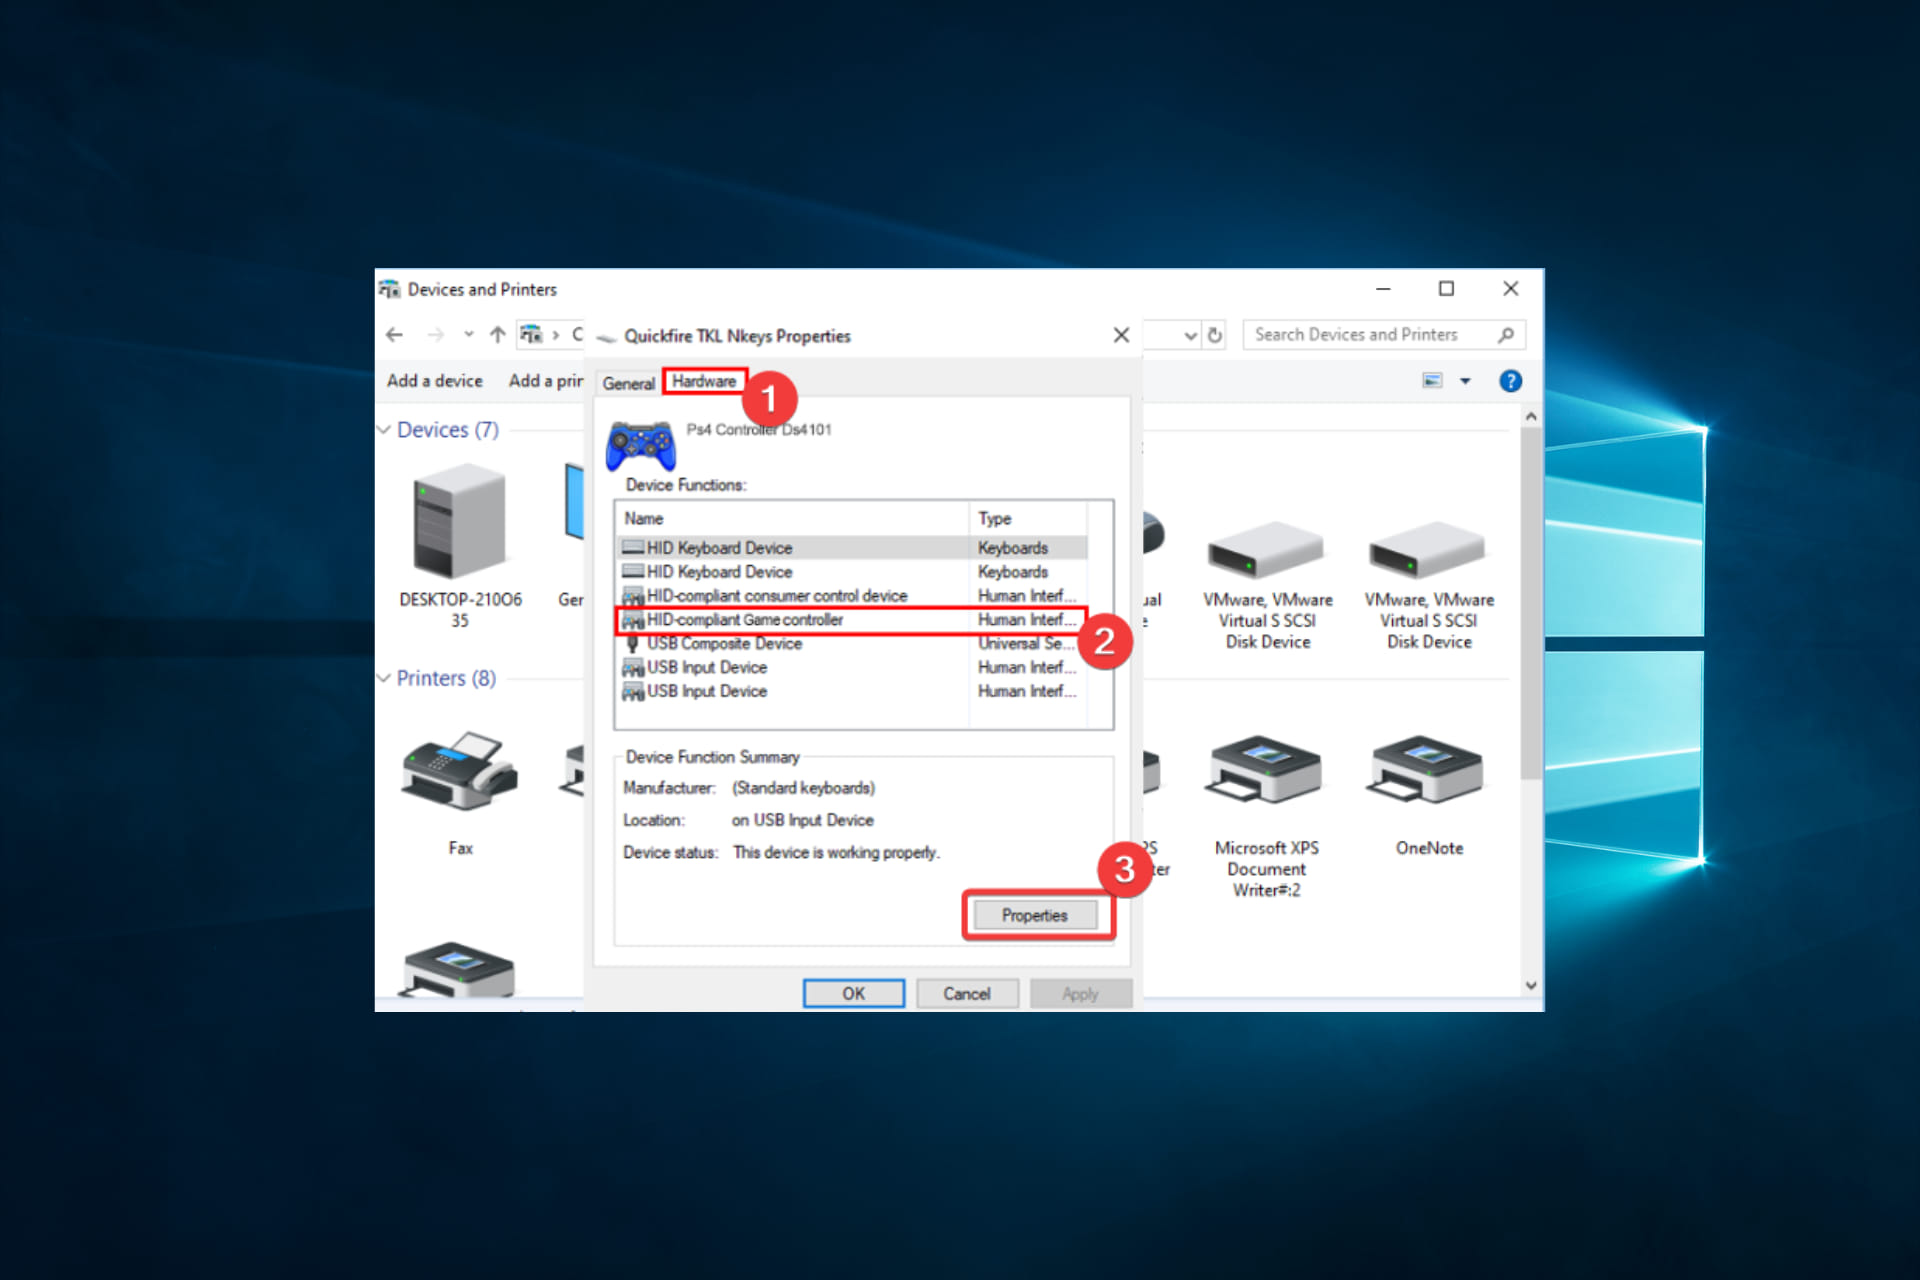


![iCloud Drive not in Finder [Quick Solutions]](https://windowsreport.com/wp-content/uploads/2021/06/icloud-drive-not-in-finder.jpg)
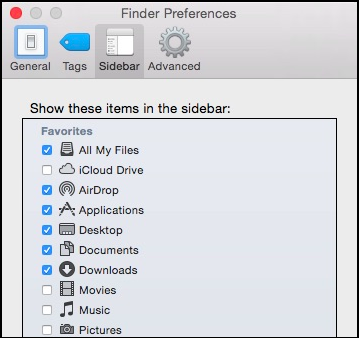
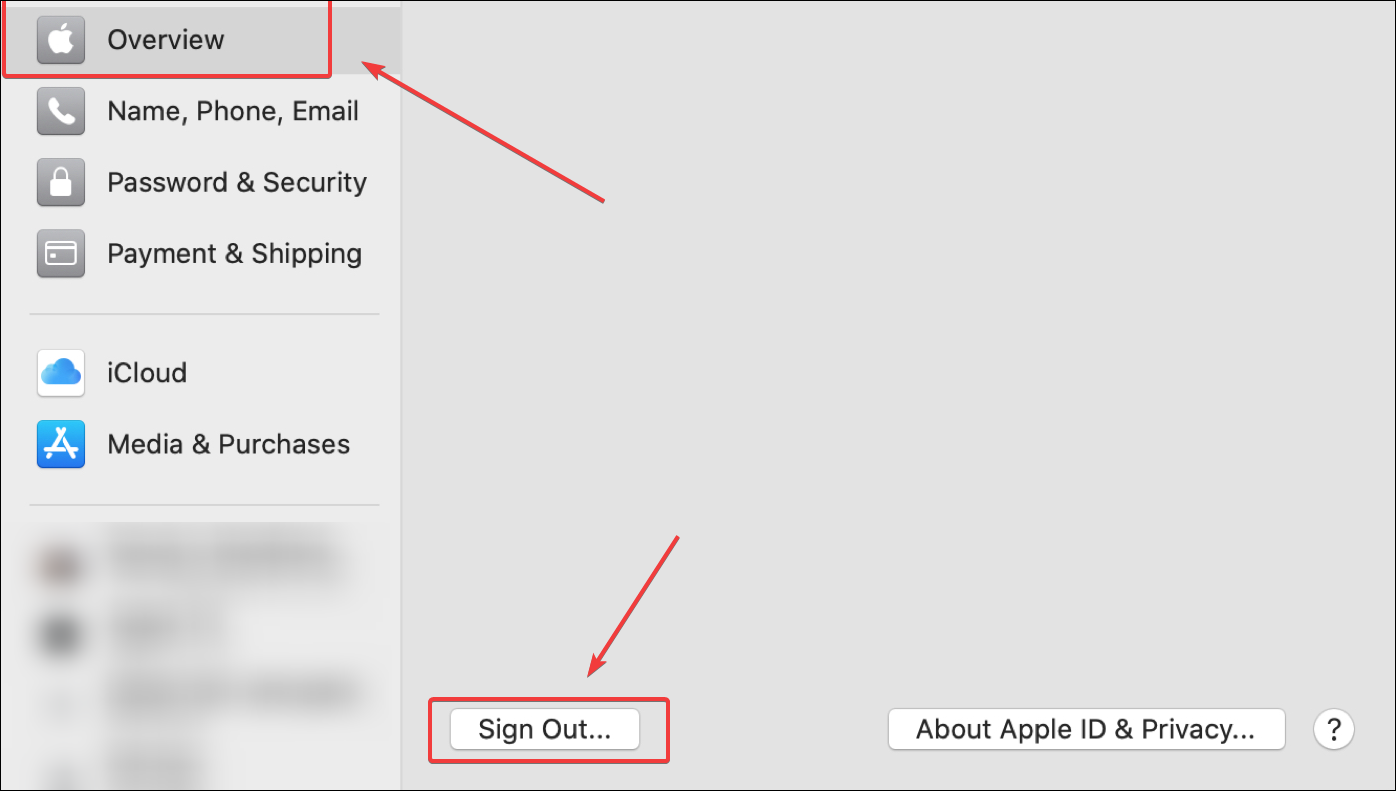
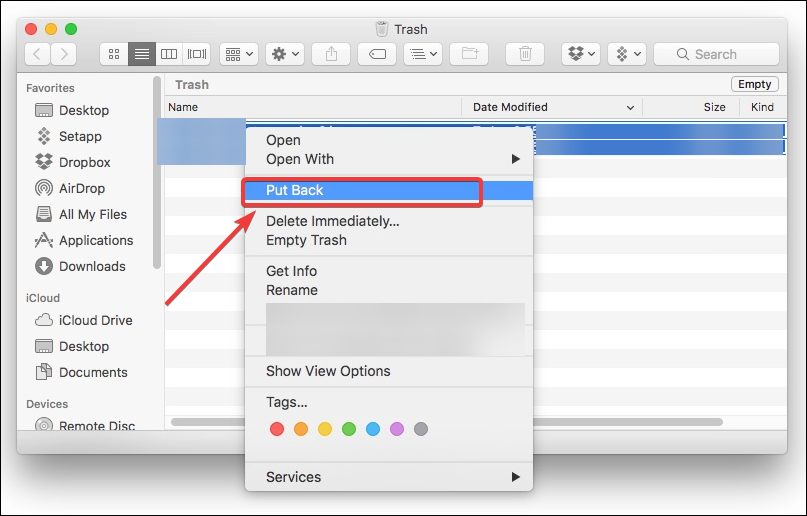

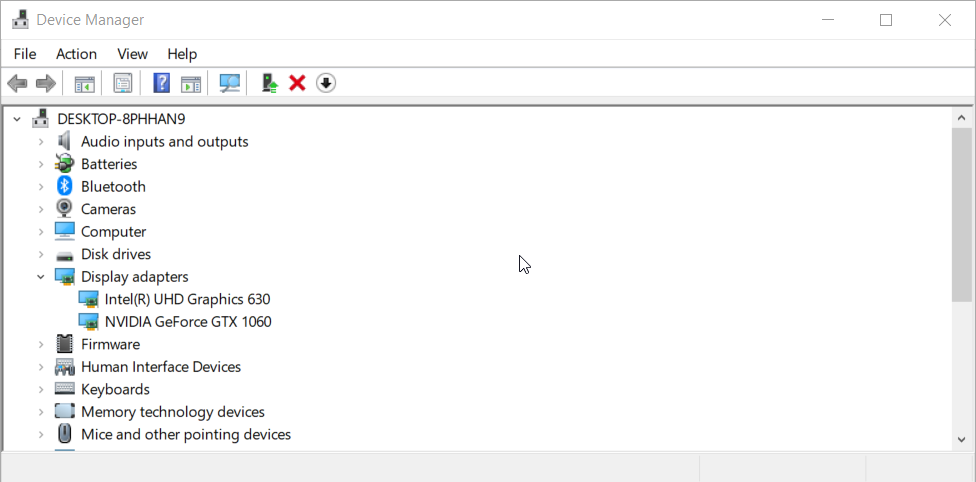

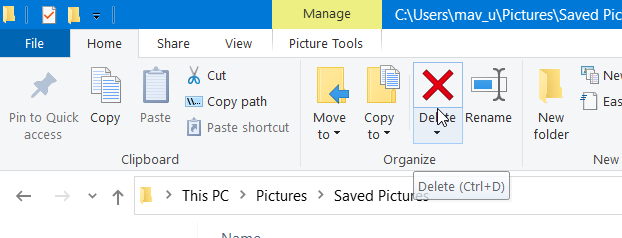
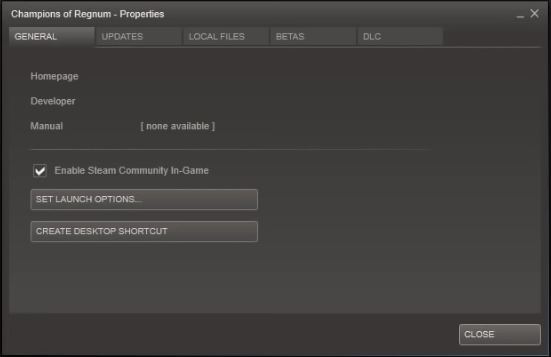
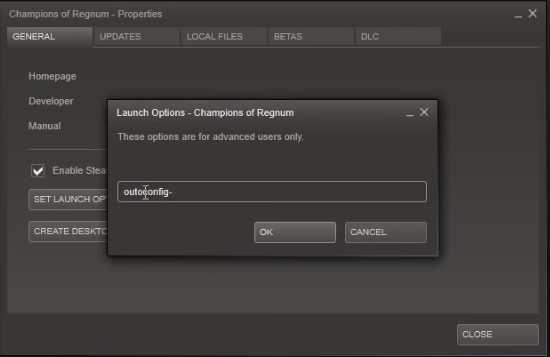
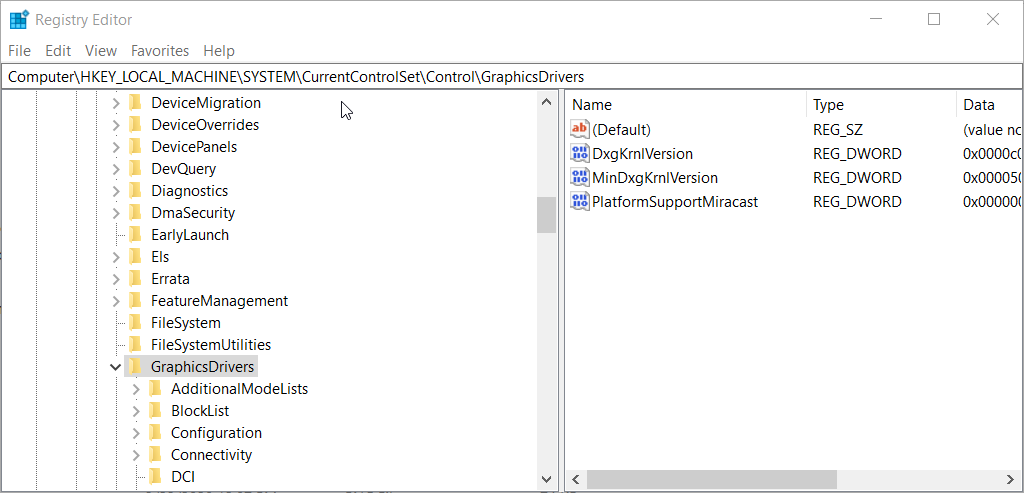

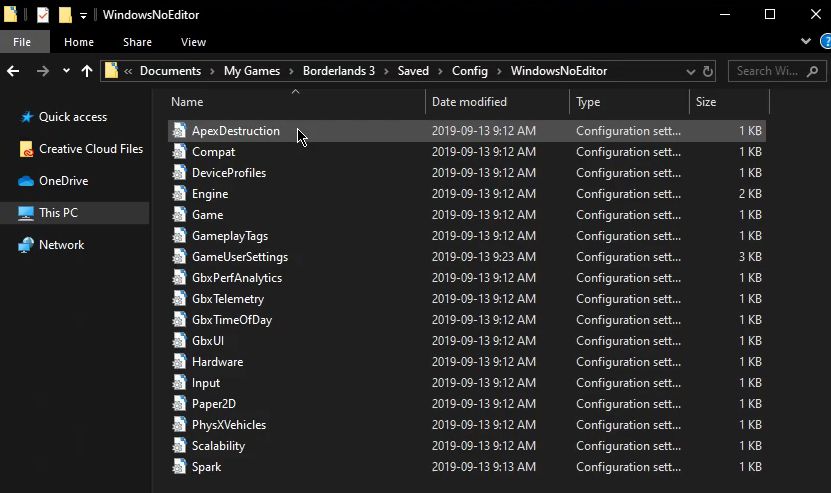
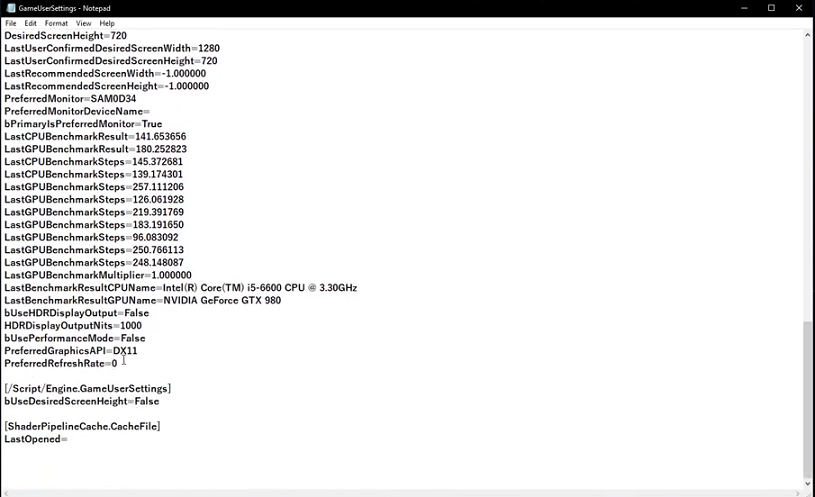
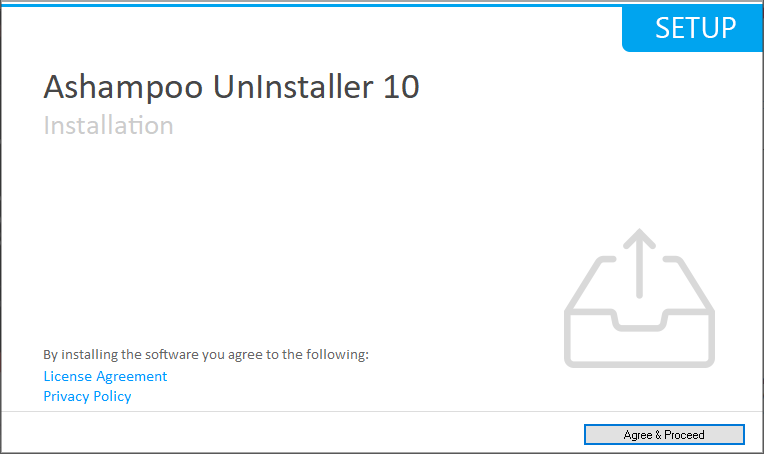
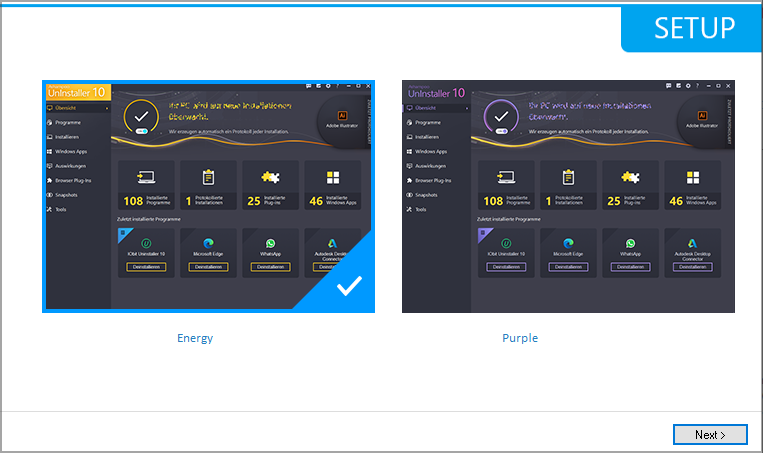
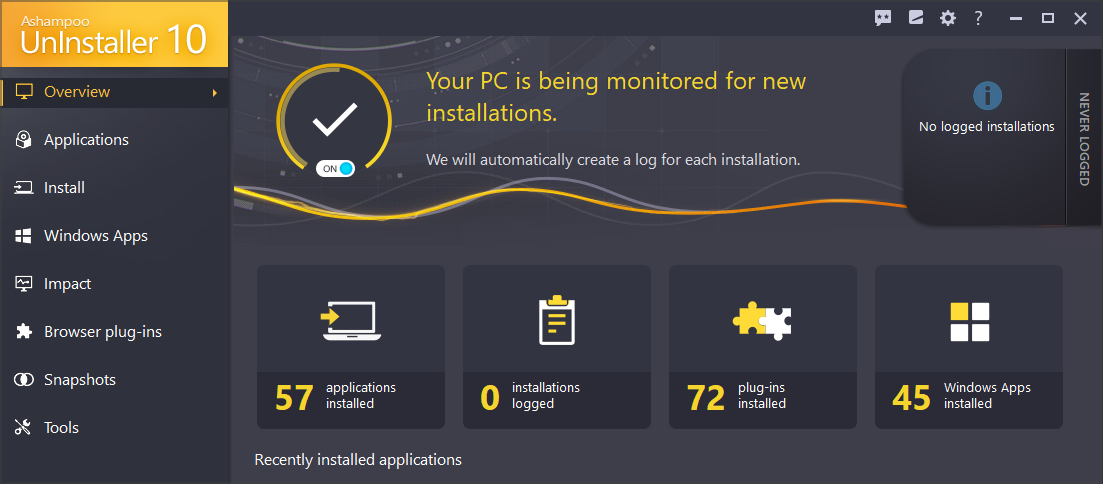
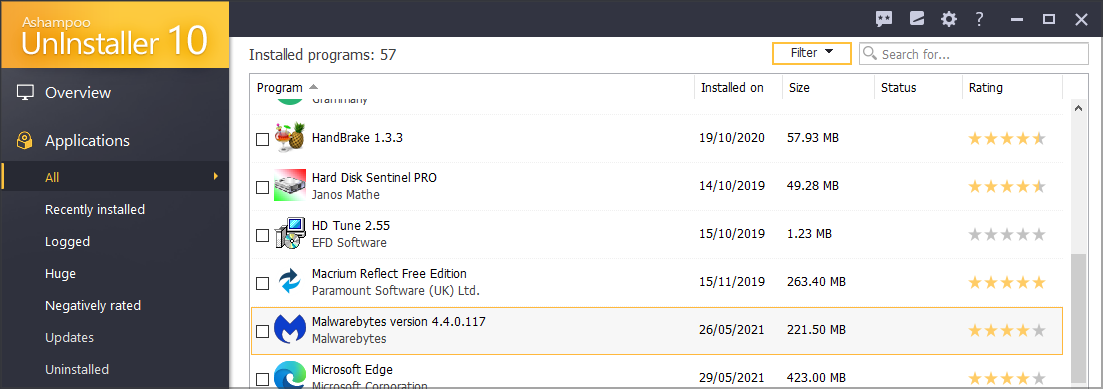
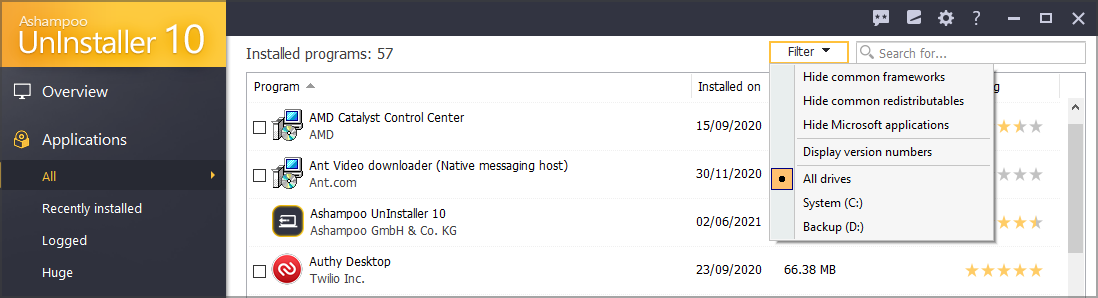
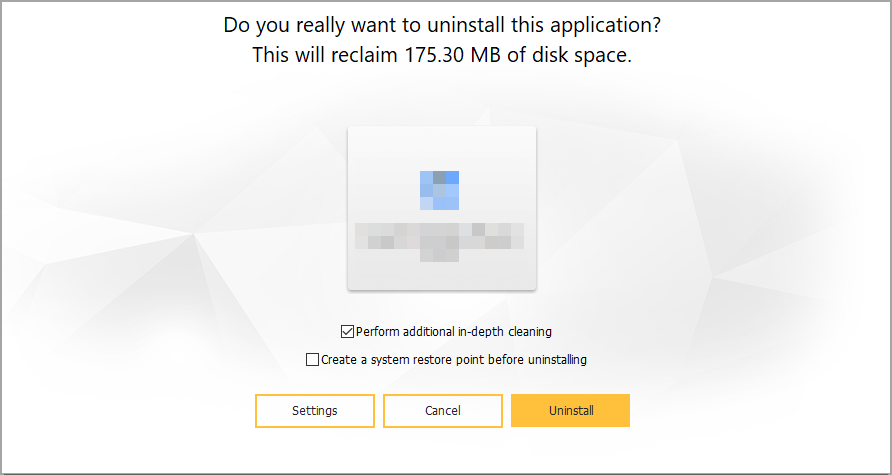
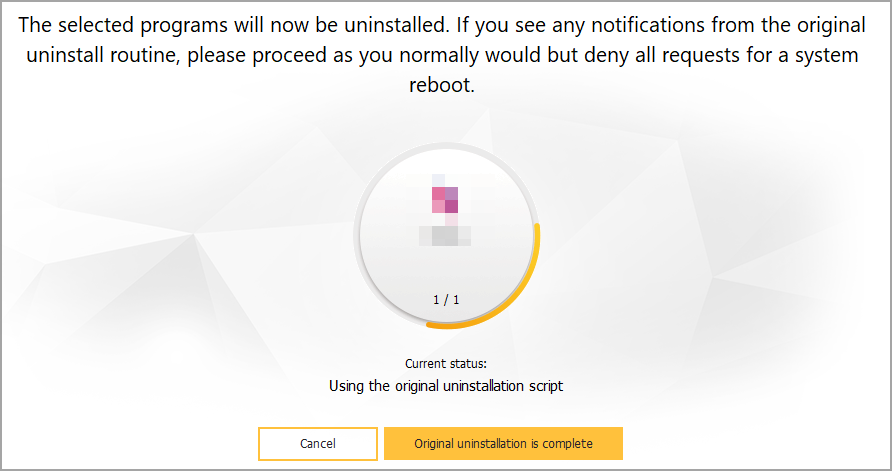
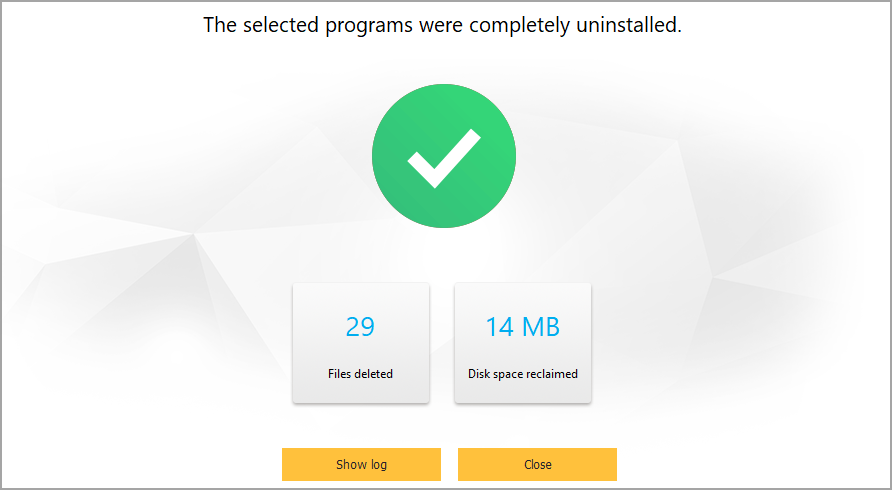
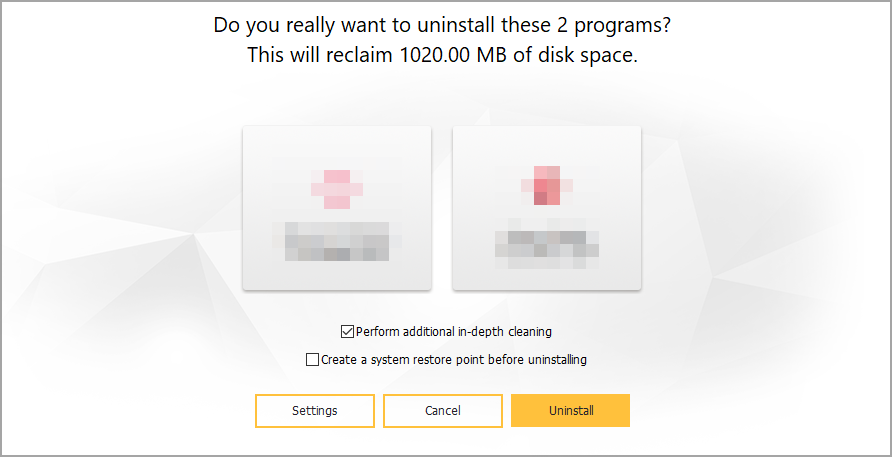

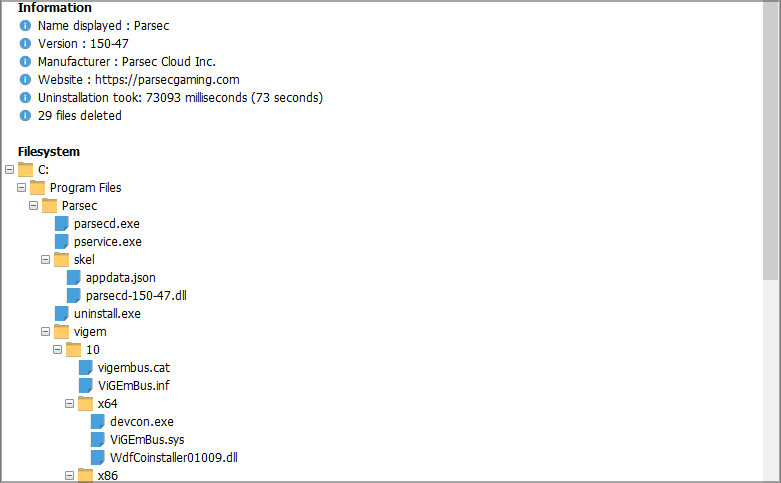
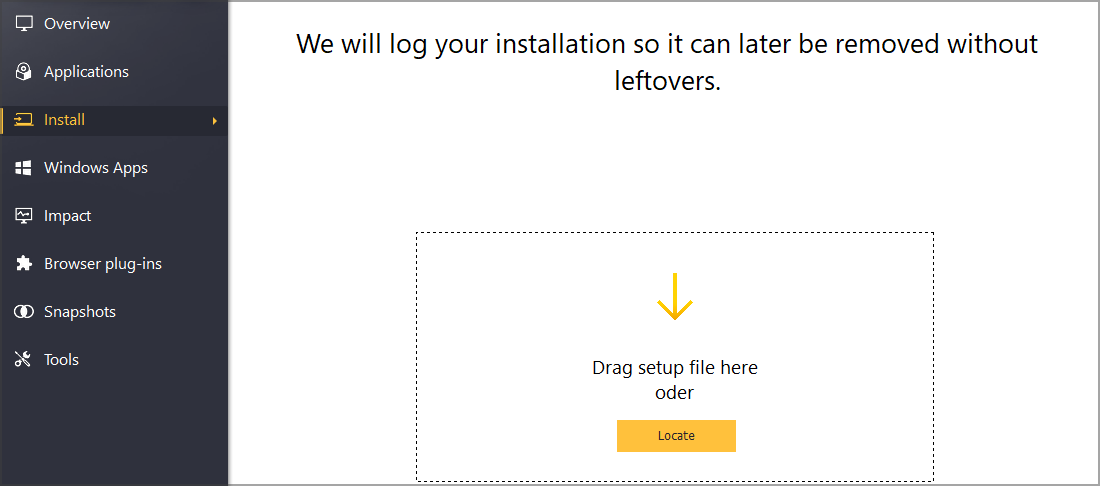
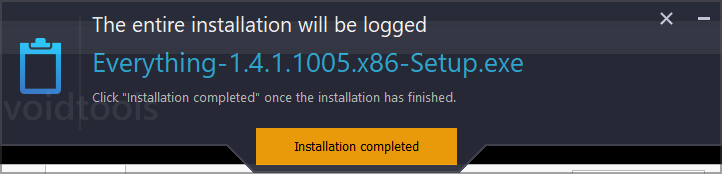
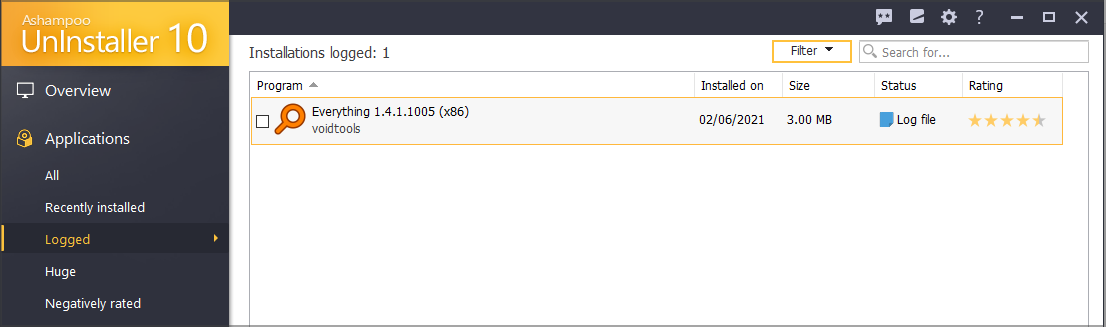
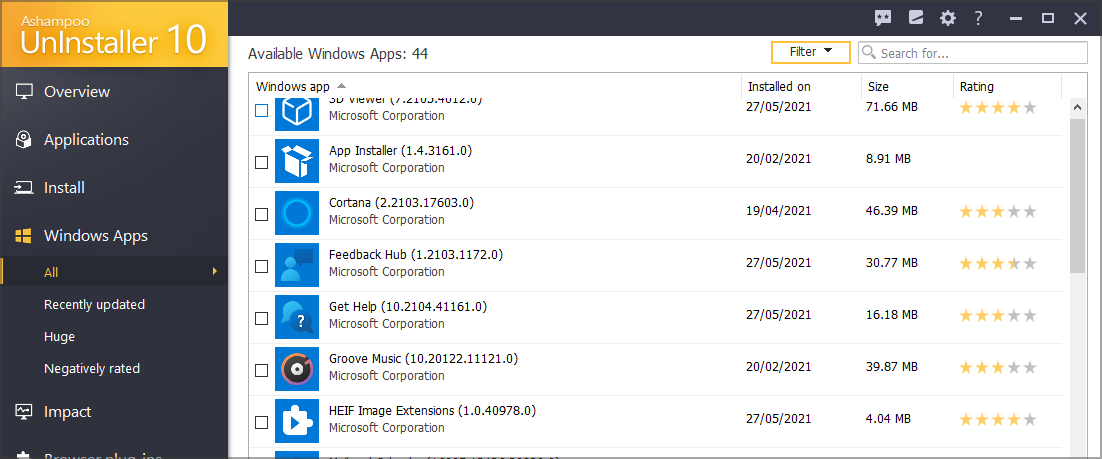
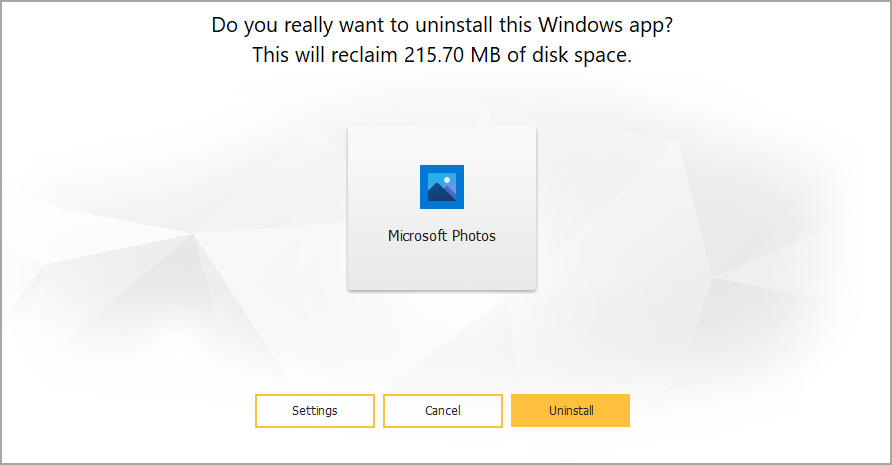
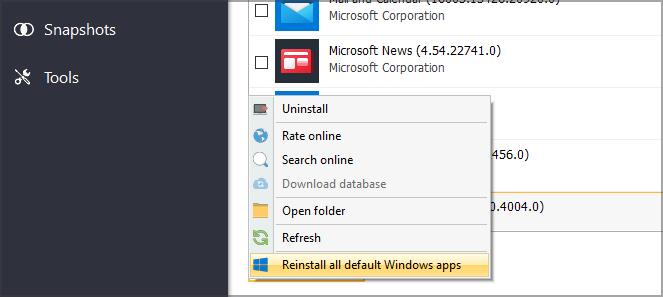
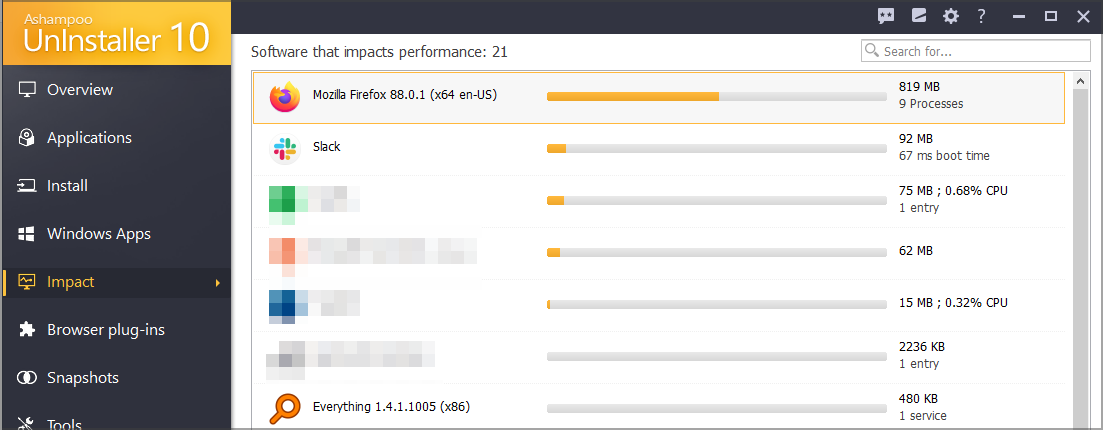
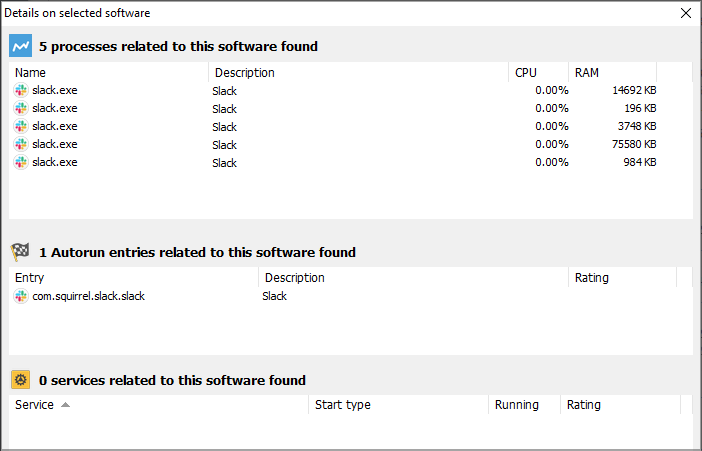
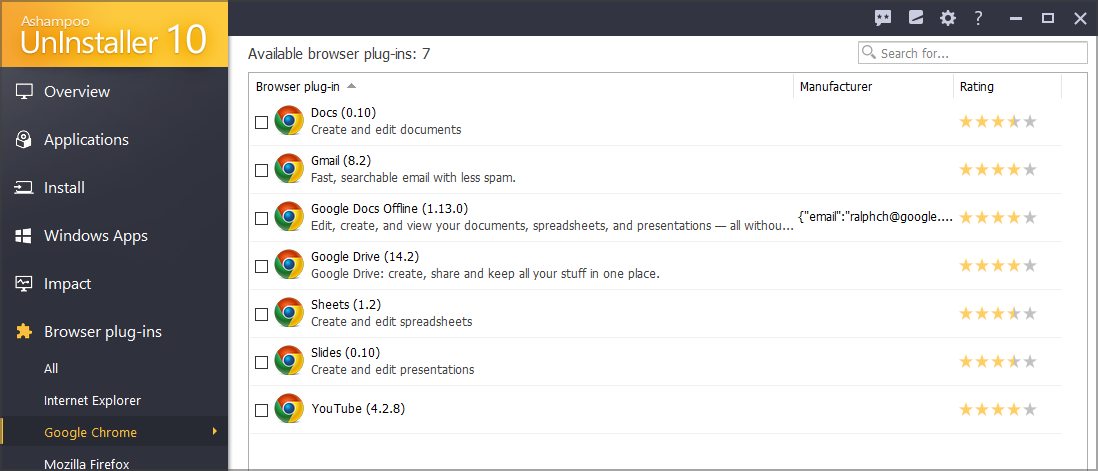
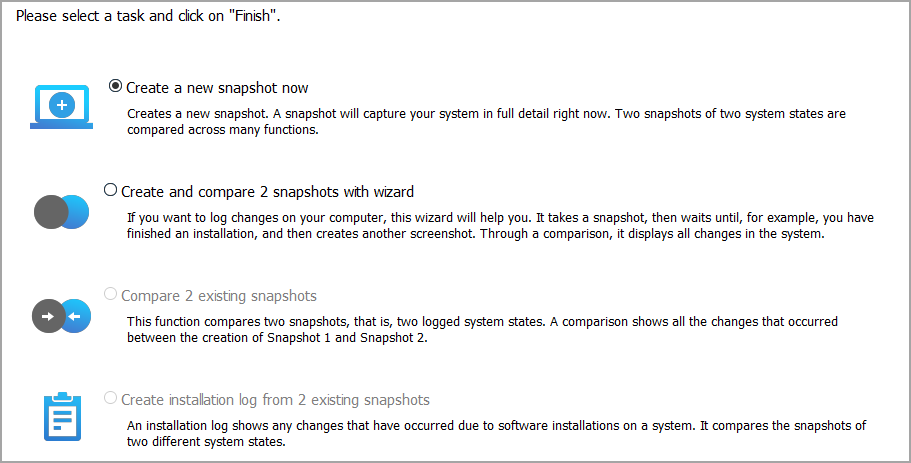
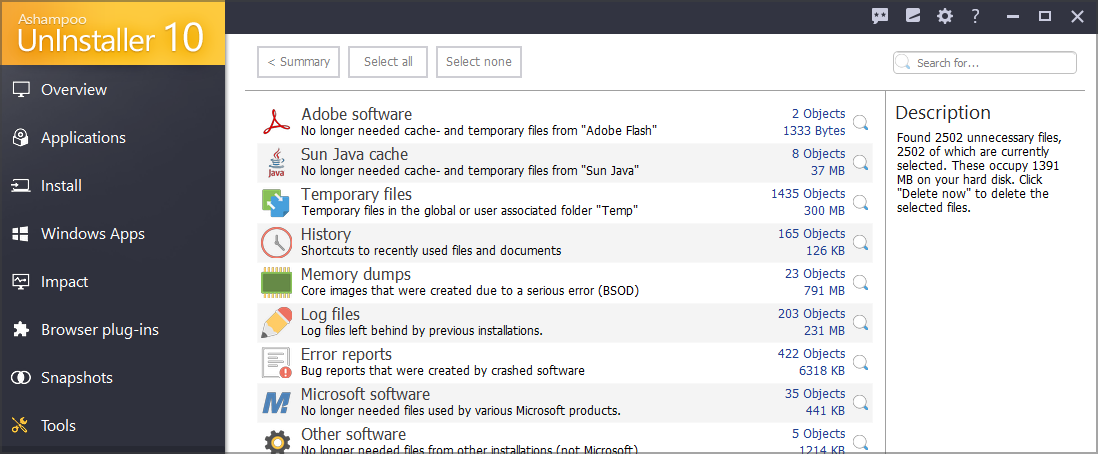
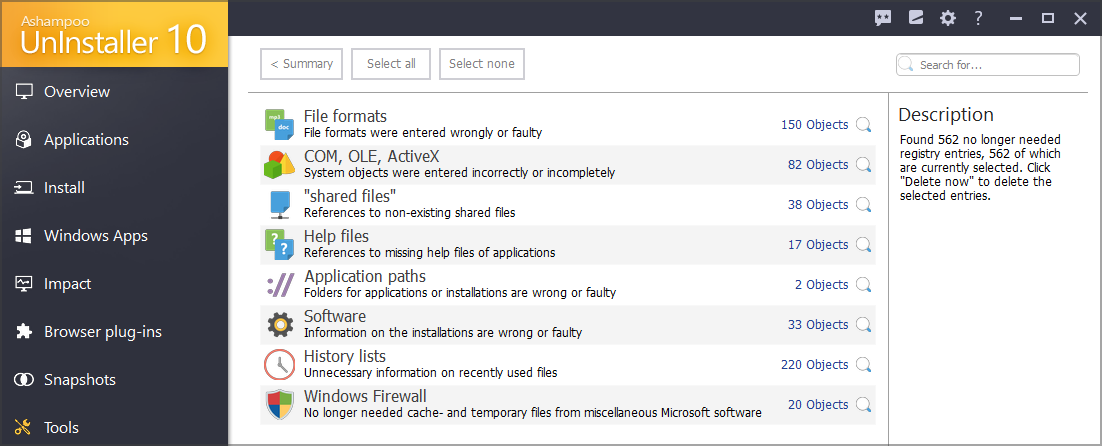
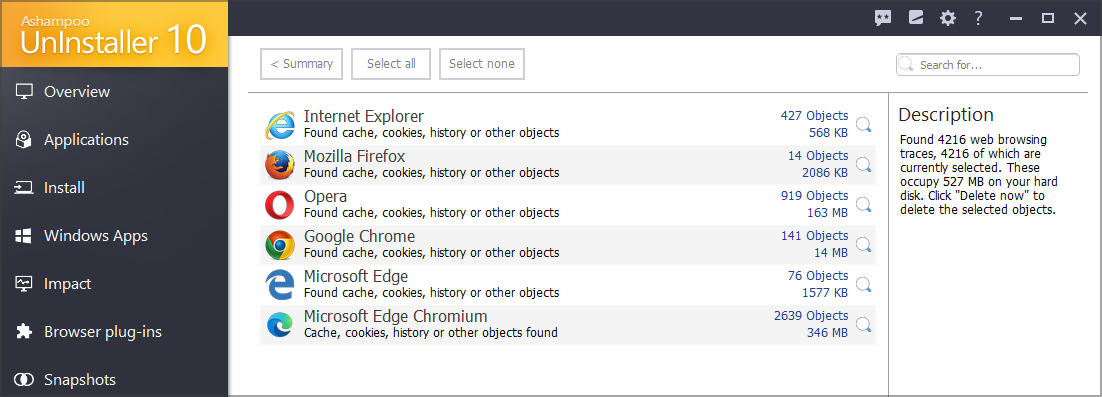
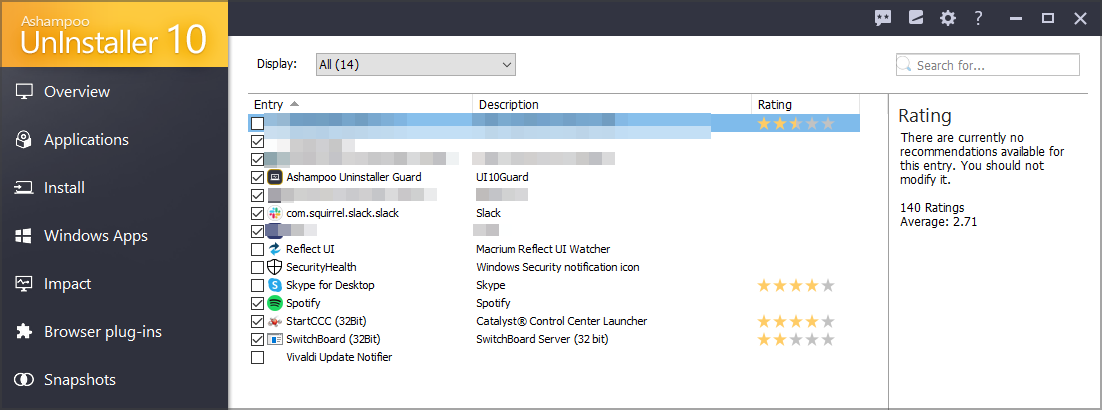
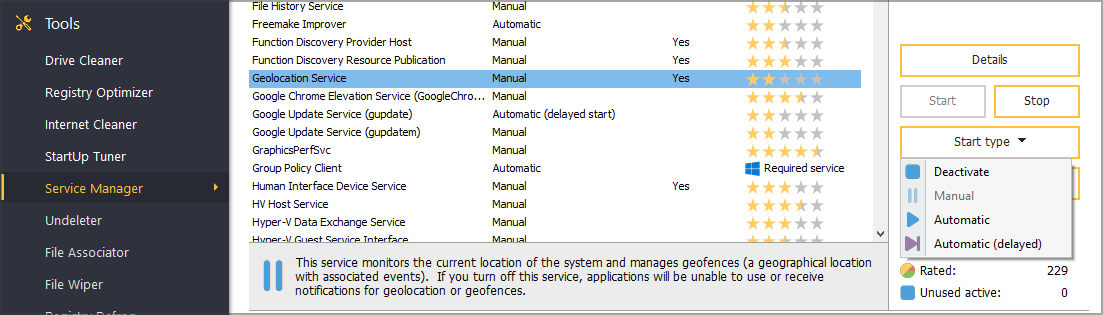
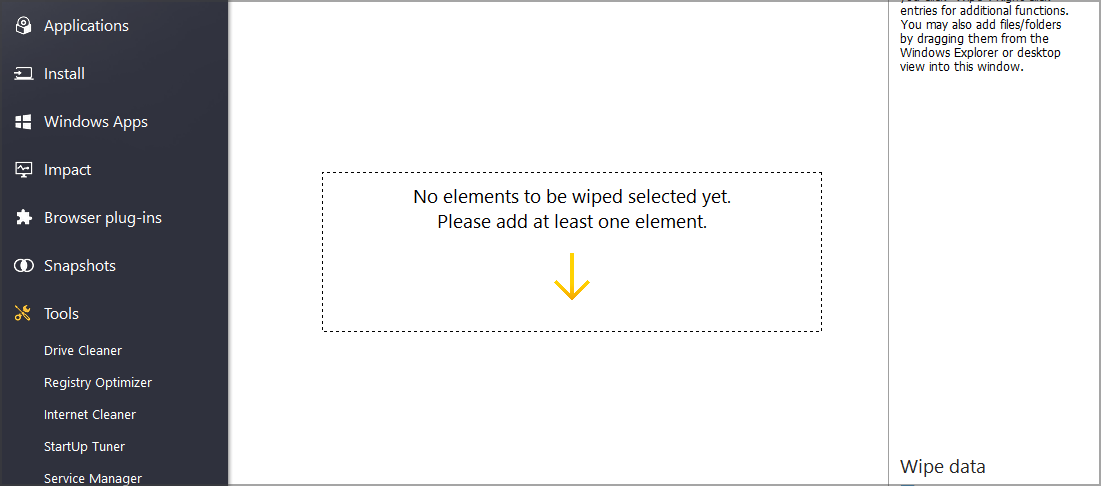
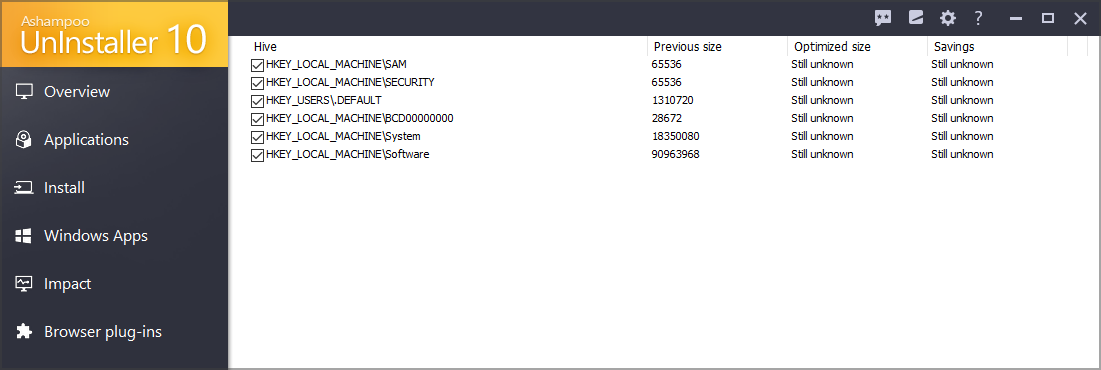
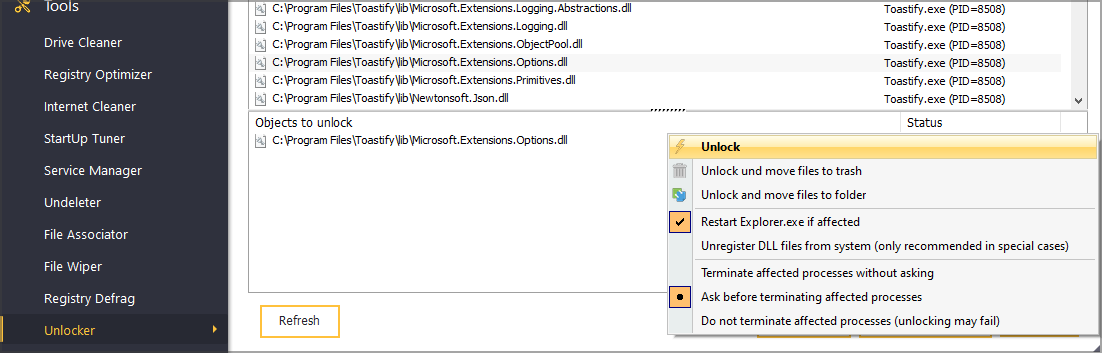

![FIX: AppModel-Runtime Event ID 69 [Full Guide]](https://windowsreport.com/wp-content/uploads/2021/06/AppModel-Runtime-Event-ID-69.jpg)

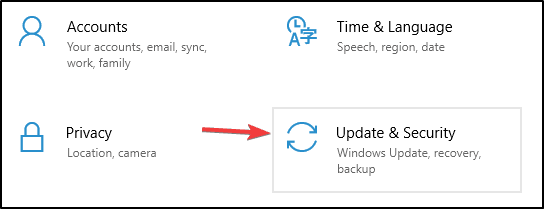
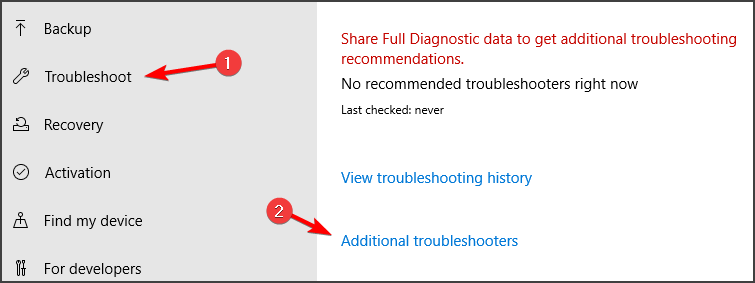



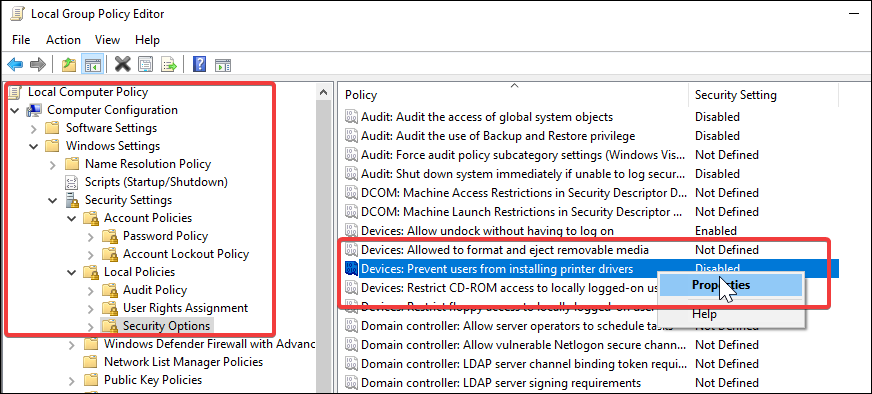
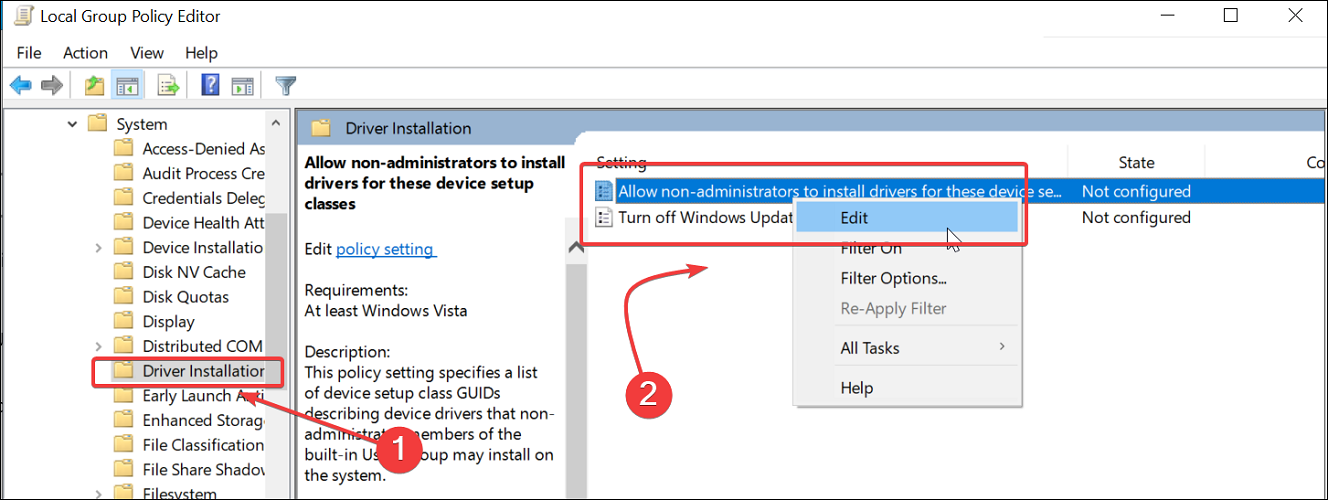
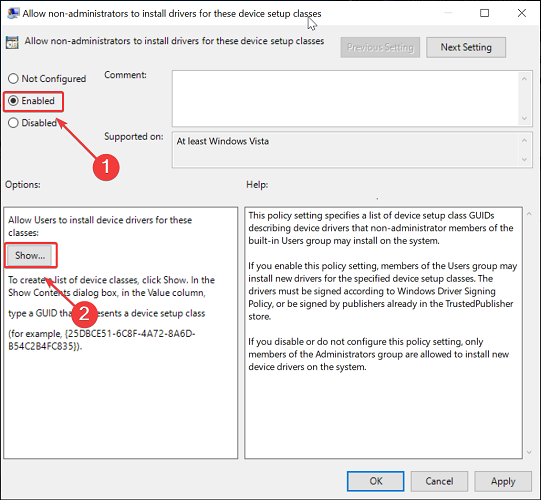
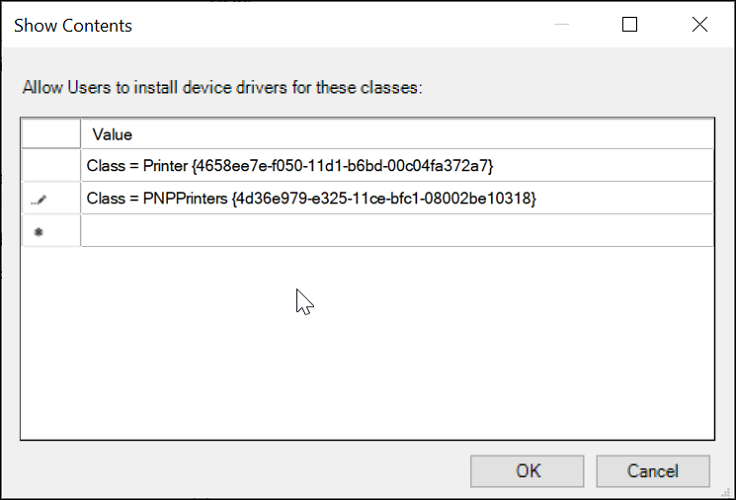
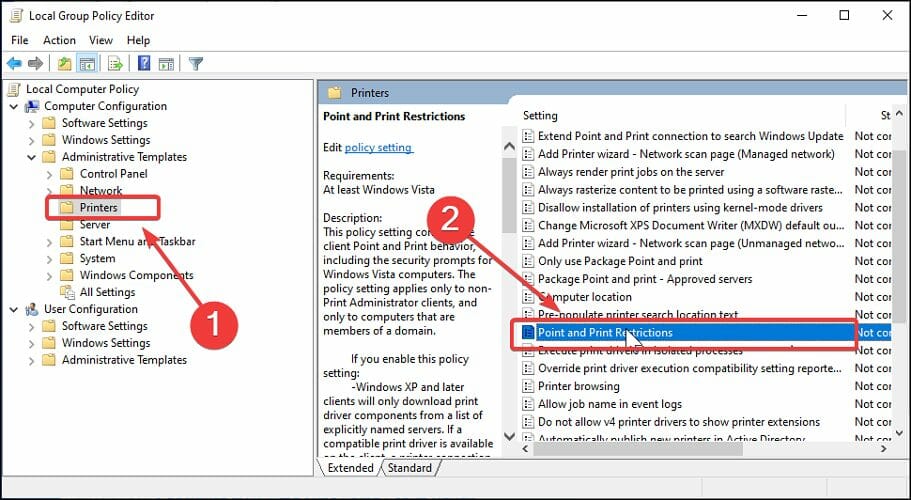


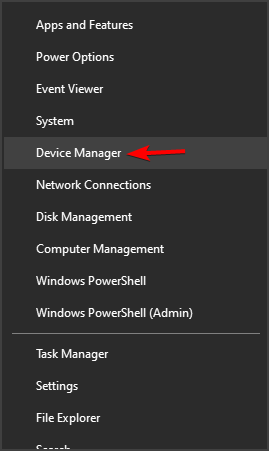











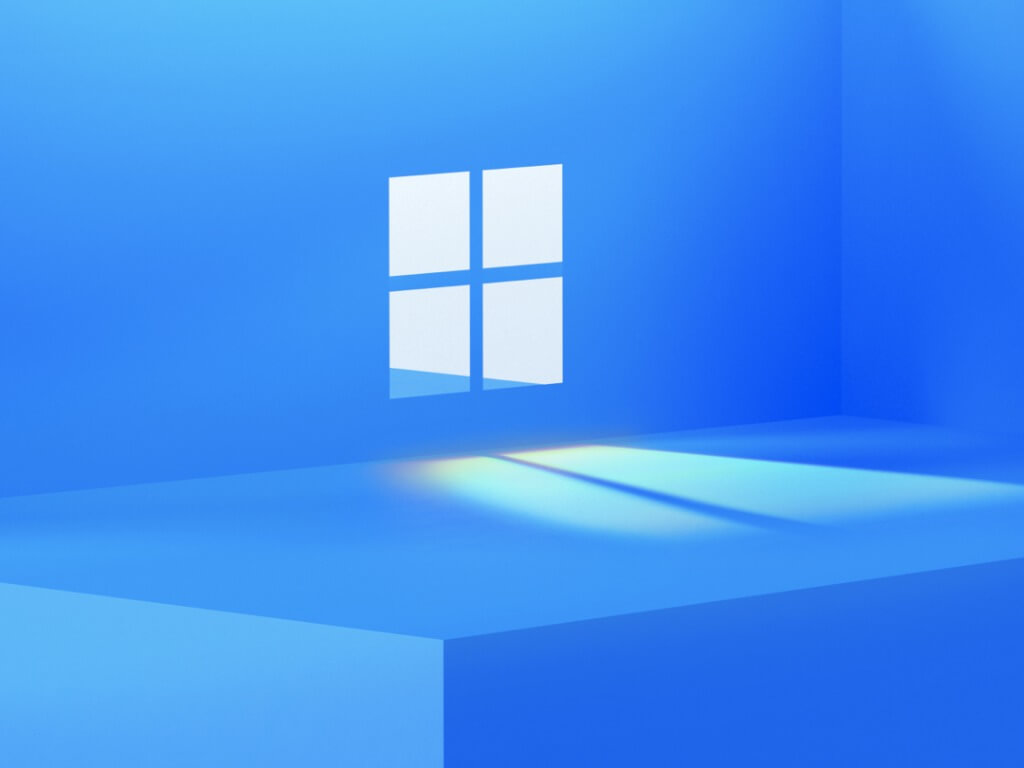
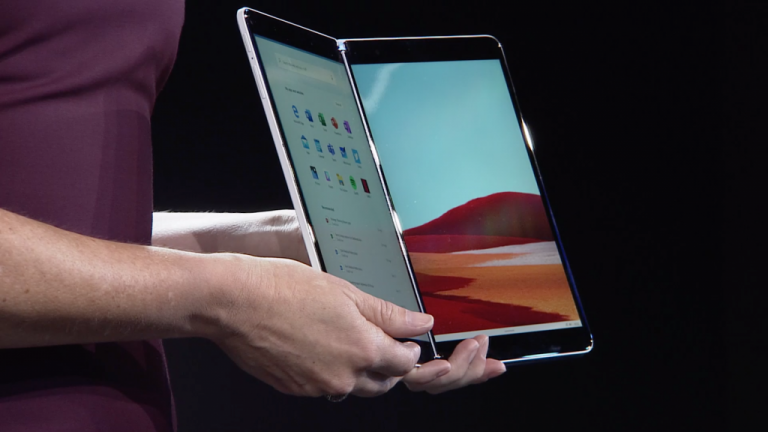
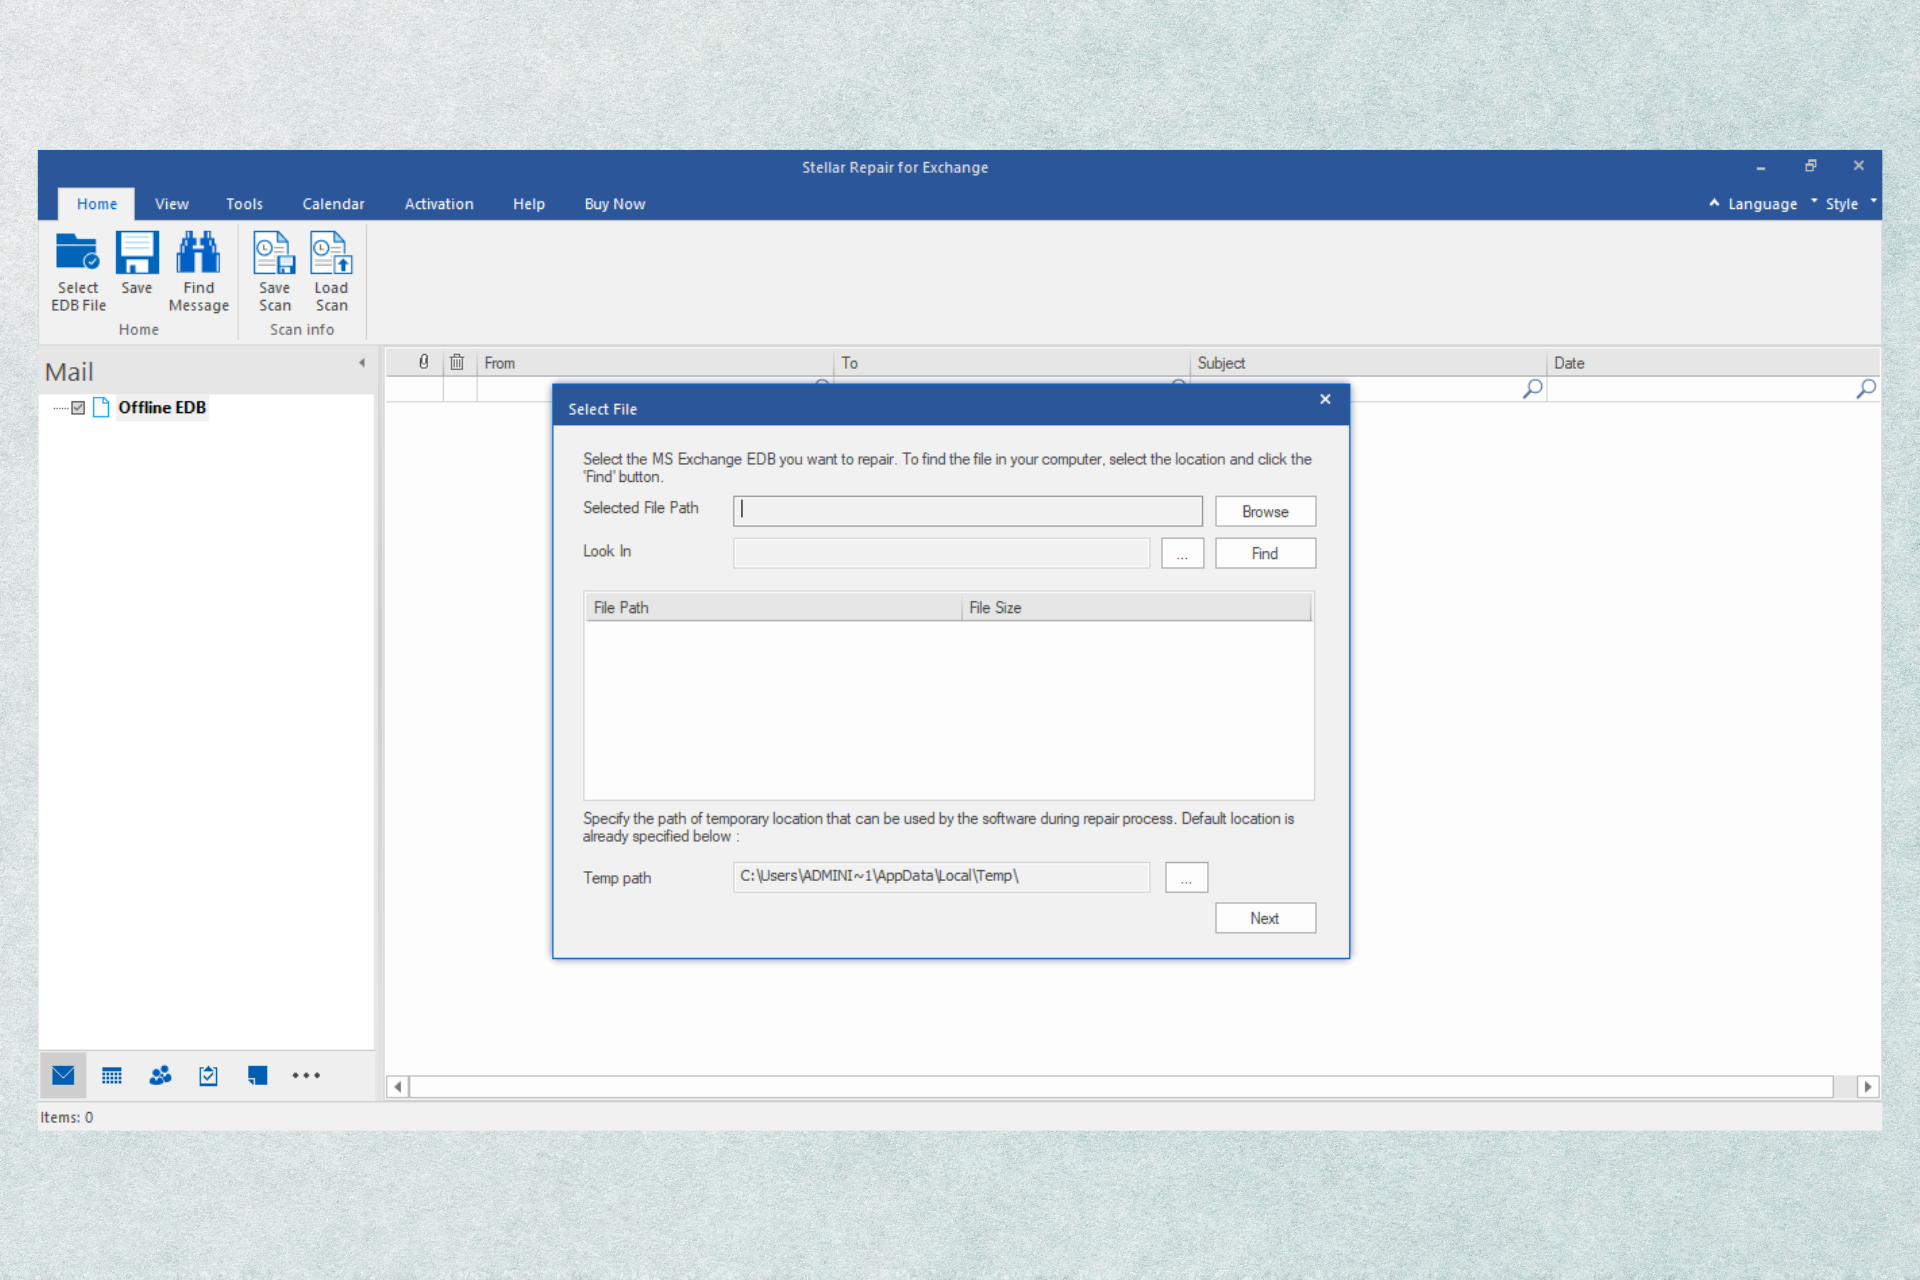


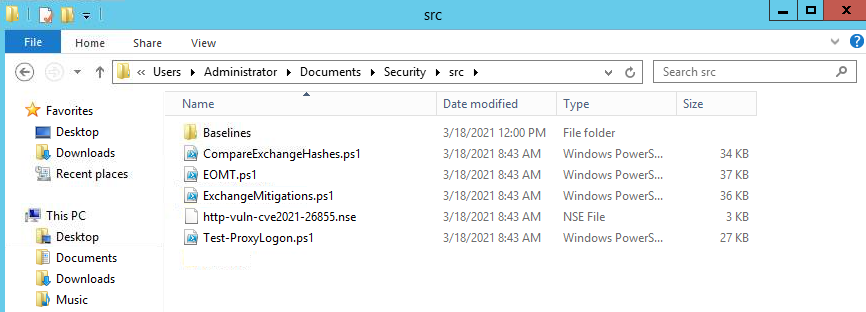
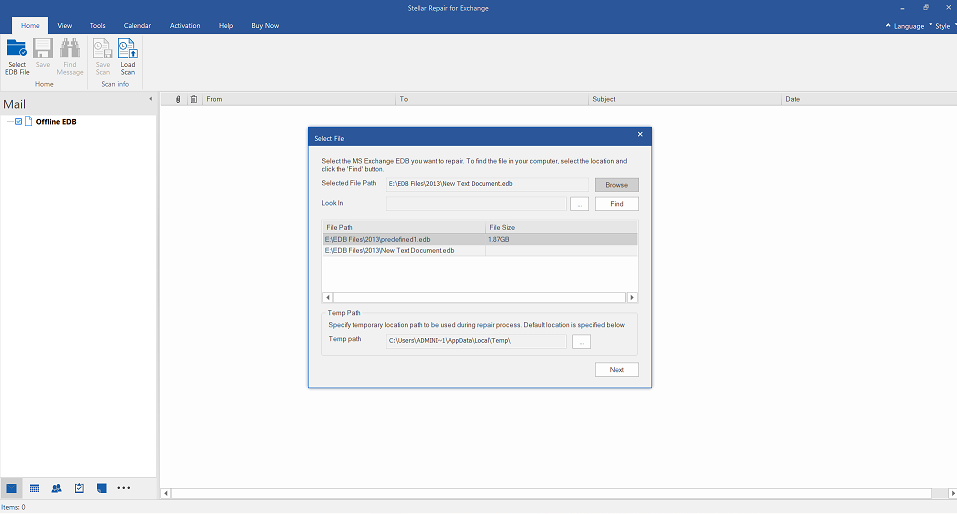
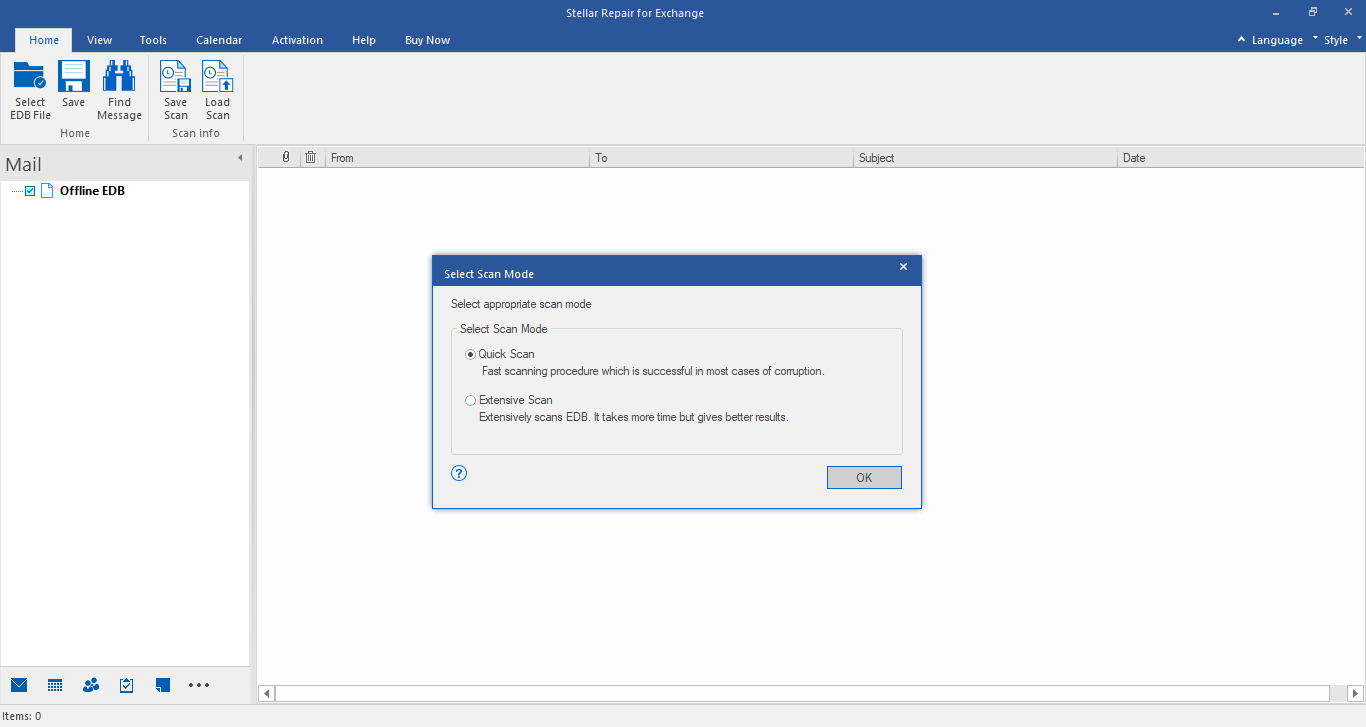
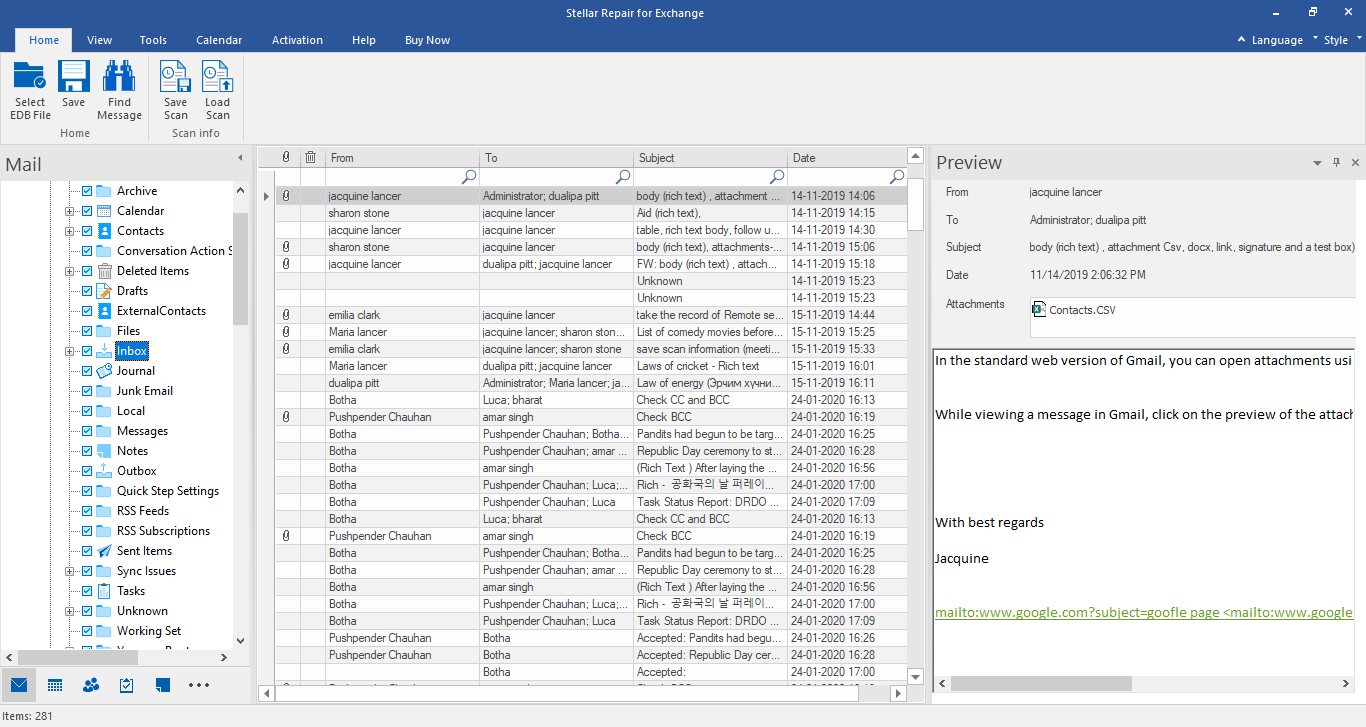

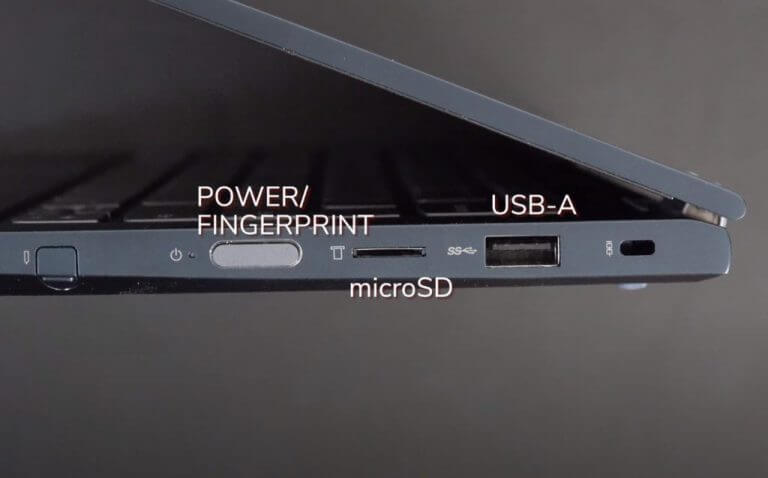
![How to install Codecs in Windows 10 [Download Links]](https://windowsreport.com/wp-content/uploads/2018/10/Codecs.jpg)