How to Get Xbox Game Pass Ultimate for Just 1$

Console players who love bargains and the Xbox console are probably well aware of the Xbox Game Pass. Of course, there are multiple types of Xbox Game Pass subscriptions:

  • Xbox Live Gold
    • Price – US $9.99/month
    • Allows online multiplayer along with free games every month through Games with Gold.
  • EA Play
    • Price – US $4.99/month
    • Library of older games published by EA, with new games being added within 6 to 9 months after release.
  • Game Pass for PC/Console
    • Price – US $9.99/month
    • Game subscription service providing access to over 200 Microsoft and third-party games.
  • xCloud
    • Price – N/A
    • Cloud game streaming service for mobile access to select Game Pass titles.
  • Game Pass Ultimate
    • Price – US $14.99/month
    • Includes Xbox Live Gold, EA Play, Game Pass for PC, Game Pass for Console, and xCloud in one package.

However, for a limited time only, you can now enjoy the benefits of getting Xbox Game Pass Ultimate for just $1.

How do I get Xbox Game Pass Ultimate for just $1?

The main idea is that Microsoft lets you convert your Xbox Live Gold time and Game Pass for PC or Console time to Game Pass Ultimate time at a 1:1 ratio.

However, the catch here is that you can only do it for up to 36 months, paid in advance, and it only applies for $1 or $14.99 payments.

It revolves around buying 3 years’ worth of Xbox Live Gold, redeeming it to your Microsoft account, and converting it to Game Pass Ultimate time.

Without further ado, here’s how you can get Game Pass Ultimate for the least amount of money:

  • Go to your Microsoft account
  • Turn off any existing recurring billing for Game Pass or Xbox  Live
  • Purchase 3 12-month Xbox Live cards
    • You don’t have to buy 3 years worth of game time, but this way you save the most money
  • Go to redeem.microsoft.com and redeem each Xbox Live card.
    • Remember to  turn off the recurring billing toggle before you click Submit
    • This applies to each key individually
  • Double-check to see if your account has least 36 months of both Xbox Live and Game Pass time
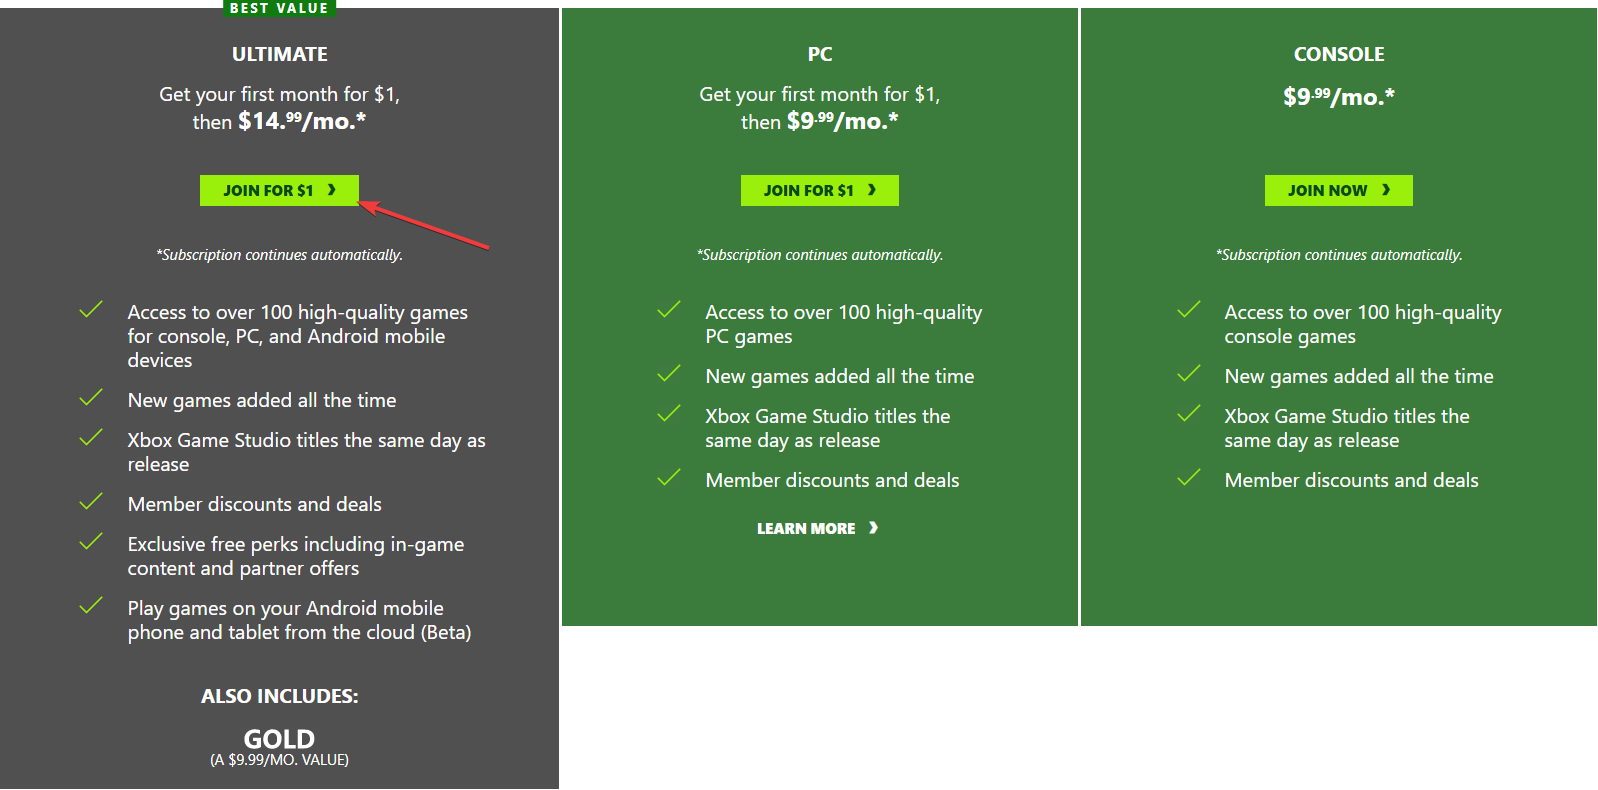
  • Go to the Xbox Game Pass page for your region and click Join Now
  • Click Join for $1 under Ultimate
  • Follow the instructions and fill in the payment forms
  • Your Game Pass and Xbox Live time now says upgraded to Game Pass Ultimate in your Microsoft account.

Note: Using the method listed below, the conversion process should help you save an estimated ~$360 in the long run.

Take advantage of this offer while it still stands and enjoy monthly games, free titles, member discounts, and more at just $1 a month. Once the offer expires, we have a great guide on how to cancel Xbox Game Pass on PC that can help you end your subscription.

Elsewhere, if you’re online shopping, but your Novafam2023 coupon code is not working, refer to our article on what to do.

If you want more details about this process, leave us a message in the comments section below, and we’ll answer.

How to merge & split zip files using WinZip [Easy Guide]

Having the ability to merge and split zip files can be crucial if you’re getting ready to present a large number of files at work, or if you want to share those vacation pictures effectively with your family and friends.

The best tool for this job is by far the powerful WinZip, offering you unprecedented conversion speed and efficient file compression with a few clicks of the mouse.

Splitting zip files can be very effective if you’re planning on sharing a large file.

Users might encounter download issues when trying to download a big file from a server, but if it is split into a number of archives, the entire process becomes easier.

On the other hand, merging zip files allows you to reverse the process of splitting the file, thus giving you access to its entirety.

In today’s guide we will explore how to merge and split zip files by using this software, so make sure to read on.

How can I merge and split files by using WinZip?

Split zip files

Split an existing file into smaller pieces

  1. Open the file in WinZip.
  2. Click on the Settings tab.
  3. Select the Split dropdown box and choose the size of the pieces (choose Custom Size if you want to set a specific size).
  4. Open the Tools tab.
  5. Click the Multi-Part Zip File option.
  6. Inside the Split window, choose the output location of your file.
  7. Choose a name for your file, and click OK.

Create a new split zip file

  1. Select the files or folders you want to add to your split zip file.
  2. Right-click them and choose the Create a Split Zip File option from the submenu.
  3. Select the file name and destination of your output file.
  4. Click Create.

Note: If you want to choose a specific file size for each of your zip pieces, follow steps 2 and 3 from the solution presented previously.


Merge zip files

With a zip output

  1. Navigate to the location of the split zip files.
  2. Select the zip files you want to merge.
  3. Right-click the selection, and choose Add/Move to Zip file.
  4. Wait for the process to complete.

To extract the file/files found in the zip archives

  1. Scroll down and find the file with the WinZip Type like in the image below.
  2. Double-click it to open it in WinZip (if you have another archiver as a default, use Open with, and choose WinZip).
  3. Choose the option that best suits your needs from the window that appears.
  4. Wait for the process to complete, and then access your files.

As you can see, the process of splitting and merging files in WinZip is straight forward and easy to understand.

After finishing your file management tasks, you might decide to remove the program from your device. Learn how to uninstall WinZip safely on Windows 11 with our detailed step-by-step guide.

Feel free to let us know if you managed to perform this task successfully by using the comment section found below this guide.

[wl_navigator]

How to fix 7-Zip Add operation is not supported error

Want to add a new file to a zipped archive, just to get the 7-Zip error message Operation not supported? You try to complete a basic procedure, so things should work smoothly.

Adding new files to an archive with the help of a file compression software is a very common practice to keep your data organized, so what should you do next?

In this article, we will go through all the reasons as to why this Add Operation is not supported error occurs in the first place, along with the tips you can apply to solve it right away.

How can I fix the 7-Zip Add Operation is not supported error?

1. Try out an error-free file archiver

download WinZip
7-Zip was your choice at one point when looking for a zipper/unzipper, file archiver, or compression/decompression program.

Regardless of all these names, it’s clear that you have a specific goal in mind when using it and the Add Operation is not supported error stops you from completing the action.

Before moving on with the actual troubleshooting tips, let us remind you that WinZip is leading the file compression market for almost 30 years.

Well, it supports an array of archive files and it packs great key-features such as advanced file-sharing options, banking-level encryption, watermarking, and splitting of zip files to fit different media.

In addition to these, it can integrate itself into Dropbox, OneDrive, and not only, which further allows you to work on any of your documents directly from a ZIP file.

Such features make it suitable for both beginners and professionals, being flexible enough to work in any way that suits you best.

As for adding new files to a zipped archive, rest assured that we’re talking about a basic WinZip procedure that can be completed with ease all the time.

”WinZip”

”WinZip”

”Worried
”Free
&aff_sub2=Native” current_url=”true” button_text=”Get it now” image=”https://windowsreport.com/wp-content/uploads/2020/09/winzip-logo-210×160.png”]

2. Make sure to select the file first

try to select the file first

  1. Start 7zFm.exe.
  2. Up next, open the archive you want to add the file to in one panel.
  3. In the other panel, just navigate to the specific file.
  4. Select it and click onto 7-Zip’s toolbar with the target archive already opened.
  5. The file will be immediately added to the archive in the appropriate panel.

As simple as it may sound, the issue often arises when the user has not selected a file before trying to add it to the archive. Could this be your case as well?

Long story short, you need to first select it, then add it, or else you risk getting the same Operation is not supported error countless times.

If you need additional help, just refer to the above procedure.


3. Change file permissions

change file permissions
The issue may simply be related to the permissions of the file. In order to confirm this possibility, right-click the file, choose Properties, then Security.

While here, make sure that you have the permissions to modify this file. You might also verify that you have the necessary permission on the directory.

That’s mandatory too since 7-Zip needs to create a new archive to complete the requested operation.


Don’t have permission to save changes to this file? Count on us to solve the problem.


4. Make sure that you drag and drop an unzipped file

drag and drop the unzipped file
You may encounter the Add Operation is not supported error when trying to transfer your favorite’s mod pack to the jar file using 7-Zip.

Let us remind you of a nifty trick. Dragging and dropping the files from inside a zip file isn’t possible. You just need to unzip it first and continue to be able to start the actual transfer.


5. Check format compatibility

check format compatibility
The program that you use does support a few compression algorithms including Bzip2, PPMd, Deflate64, and LZMA, yet it doesn’t do the same thing for write operations on all formats.

Unfortunately, there are plenty of formats for which it provides the Unpacking only options. More specifically, 7z, BZIP2, GZIP, TAR, XZ, ZIP, and WIM are marked as Packing/unpacking-compatible.

However, AR, ARJ, CAB, CHM, CPIO, CramFS, DMG, EXT, FAT, GPT, HFS, IHEX, ISO, LZH, LZMA, MBR, MSI, NSIS, NTFS, QCOW2, RAR, RPM, SquashFS, UDF, UEFI, VDI, VHD, VMDK, WIM, XAR, and Z can be used for Unpacking only.

These are some solutions that you might want to try when getting the 7-Zip Add Operation is not supported error.

Be sure to let us know in the comments area below which one fixed the problem for you.

[wl_navigator]

Lenovo ThinkPad T14s: AMD easily replaces Intel

Starting at $917

With a substantial portion of the world working from home these days, the Venn diagram of “professional” work devices and personal computing hardware is becoming overwhelming a singular circle in most instances.

With that being said, Lenovo has been evolving its ThinkPad line to meet the rigors of day-in and day-out commercial productivity with a bit of consumer-friendly sleekness to the lineup. Over the past, five or so years, many of Lenovo’s ThinkPad offerings have lost their customary bulk, slim down their screen bezels, beefed up their battery capacities, and began supporting Dolby Audio and Display, in an effort to me the shifting needs of personal computing road warriors or the now stay-at-home productivity champion.

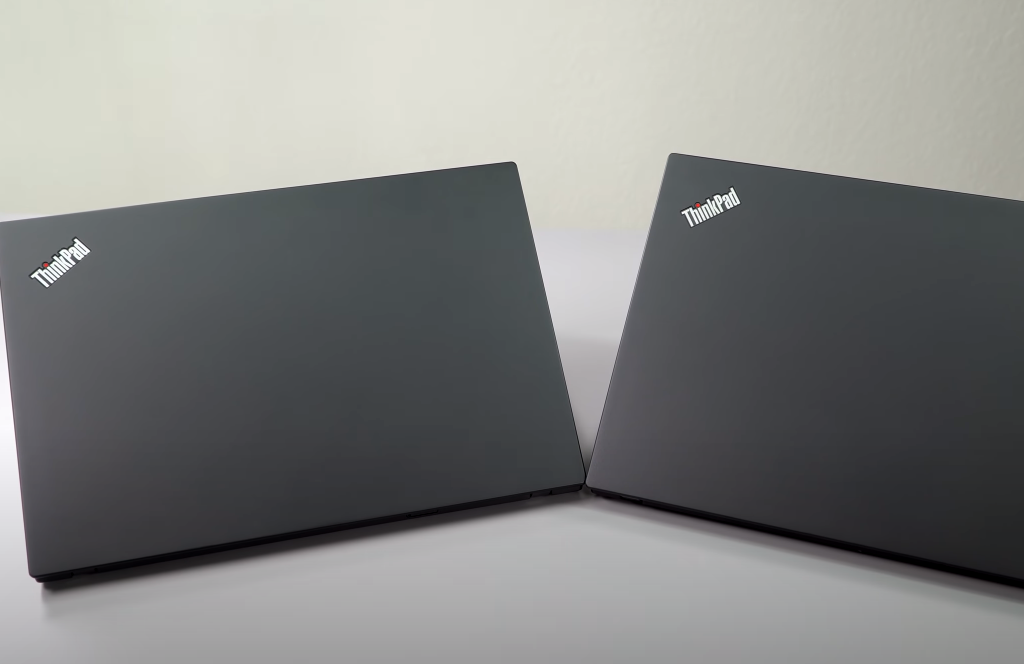
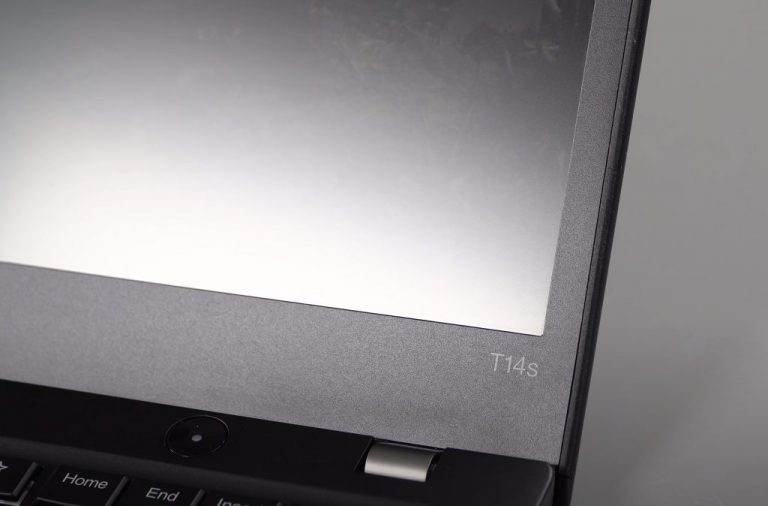
Thinkpad T14s Logo View

Lenovo’s latest ThinkPad T14s continue the meshing of work-life worlds with some subtle refinements and one big processor play that exemplifies the merging of office hardware with consumer technology interest.

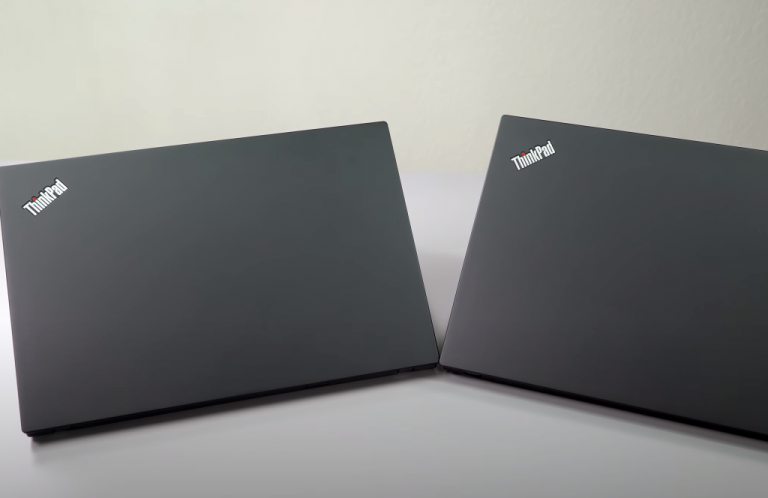
In mid-summer 2020 Lenovo released a pair of ThinkPad T14s’ that were nearly identical in every way to one another with the only difference being, the company’s willingness to dump a new Pro-level AMD chip into one of the chassis.

The Hardware

Lenovo shipped OnMSFT two ThinkPad T14s variants (configured at around $1,700 for both) that not only mirror one another almost identically but float very similarly to their 2019 predecessors, as far design and specs are concerned.

Both the AMD Ryzen 7 PRO and 10th Gen Intel Core i5 4750U shipped with 16GB of DDR4 RAM, 512GB’s of M.2 PCIe SSD’s, and 57Wh battery capacities.

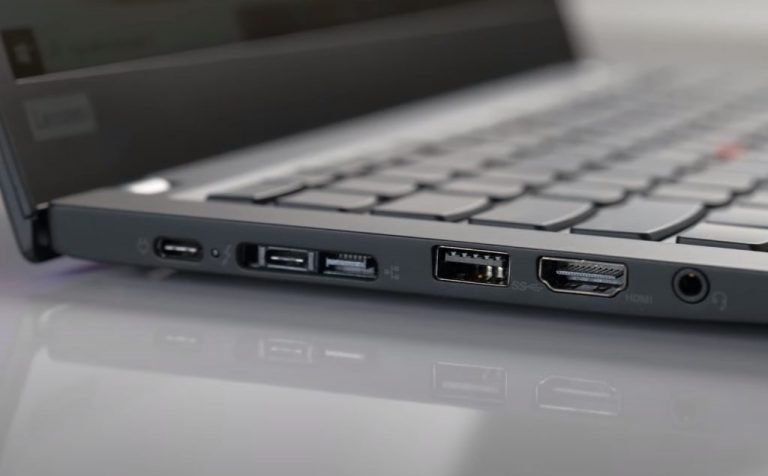
Other 2020 specs for the two T14S include 14-inch FHD and UHD panel with either anti-glare matte finishes or glossy glass options. The T14S’ also have the latest connectivity options such as Bluetooth 5.0, Wi-Fi 6 at 802.11AX (2 x 2), dual USB 3.2 ports as well as two USB-C ports that respectively support display out, data transfer, power delivery, and Thunderbolt 3.

Thinkpad T14s Port View

There are some “old school” niceties such as a headphone jack and mic combo and full-size HDMI 1.4 port for easier home monitor setups.

For all intents and purposes, the T14S is really just a rebrand of the T490s from last year, down to the weight, dimensions, and port selections. The 2020 ThinkPad T14s comes in two color options, classic ThinkPad Black and for the Intel-powered chassis’ a secondary aluminum silver variant.

The now infamous ThinkPad shutter is available for both T14s models as well as fingerprint reader, there are options available to include an IR camera for greater Windows Hello security, and the AMD powered testing unit did have this bio authentication onboard. Despite the high-fidelity IR camera, both units still ship with 720p webcams which continue to put Skype and Zoom calls through a mashed potato filter when conferencing. Fortunately, interaction with either are brief and works without glitches.

AMD vs Intel

The real story here is how AMD’s new Ryzen PRO 7 stacks up against the latest from Intel, and in two words, surprisingly well.

With a previous generation practically fumbling on all competitive metrics against Intel, I wasn’t expecting much from this year’s AMD release. However, when testing the AMD Ryzen PRO 7 on this ThinkPad T14s I found myself reaching for it more often than the Intel variant.

Thinkpad T14s Dual Front View

In my day to day usage, the AMD model ran practically silent, less heated, and performed most of my tasks quicker than the Intel version. The Ryzen PRO 7 chipset seemed to off just greater raw performance over the Intel model and in most instances outlasted it by the end of the day, admittedly, I didn’t run super thorough side-by-side battery tests. My battery test mostly consisted of loading my Microsoft account and apps onto both, picked one up at the start of my day, and noted how long it ran until needing to be plugged in again.

My daily tasks didn’t differ all that much, a bit of light photo editing using Affinity Design, a ton of office document creation, light HTML and .PHP manipulation, and the use of several web tools such as Google Ads, Analytics, Microsoft Dynamics, etc. While I personally preferred the AMD option over Intel, there are some items of note you lose when making this decision such as Thunderbolt 3, the option of a 4K resolution panel, and the occasional Intel-specific app support built-in some older programs.

But for general purpose use, the Ryzen PRO 7 outperforms in most instances, even in a rudimentary benchmarking test. PCMag.com ran all the simulated benchmarking tests that I don’t normally adhere to, but to see just how categorically different the two processors were versus how they felt, I ratified my own impressions with a second opinion.

The AMD variant posted higher PCMark 10 scores than its twin and the top contenders from Acer, Asus, and Dell simulating web browsing, videoconferencing, and word processing tasks. I haven’t been using CAD software as of late but 3DMark graphics tests also show the AMD outperforming its Intel rivals just shy of a dedicated gaming PC. The specific 3D Mark test measures “relative graphics muscle by rendering sequences of highly detailed, gaming-style 3D graphics that emphasize particles and lighting.”

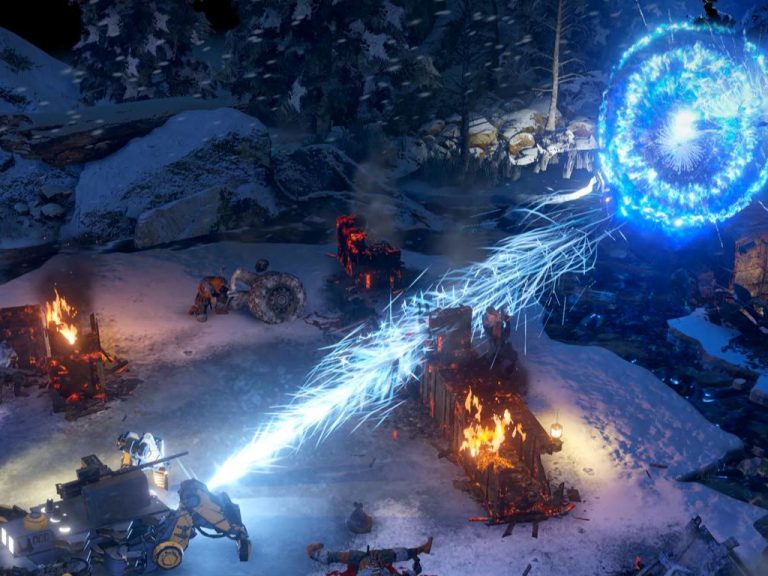
Wasteland 3 Vehicle Fight Review

The result was AMD’s Ryzen PRO 7 rocketing off the charts at 10,538 versus similarly configured Intel models that all set sub 5,000, where the higher the numbers translates to better. The Ryzen PRO 7 isn’t a substitute to a gaming PC despite the 3D marks and attempting to run State of Decay 2 at even medium specs proved so. However, games such as Wasteland 3 were played with relative ease, albeit a lot less demanding.

Summary

Lenovo’s ThinkPad T-lineup is a great thin business laptop and with the addition of AMD’s Ryzen PRO chipsets, businesses looking to skimp a few pennies are now being served options that are almost $500 less expensive than its Dell competitor.

While some executives and graphic designers in the office may bemoan the lack of 4K clarity and questionable temperature output from this year’s model, there is no denying that AMD came to play in 2020. Between the Intel and AMD options, I would recommend most people opt for the AMD variant to not only save money but get some top-notch performance from a device that will run quieter and cooler than many in its class. Hopefully, Microsoft wizen ups and tosses one of these bad boys into several of its Surface offerings coming up.

Keyboard is typing numbers instead of letters

Windows 10 is a great operating system, but some users reported that their keyboard types numbers instead of letters.

This is a peculiar and annoying problem, but in today’s article, we’ll show you a couple of solutions that might help you fix this problem.

I have a HP Pavilion DV9000 entertainment PC.
When the num lock button is on certain keys on my keyboard types numbers instead of letters.
I have tried pressing the FN+num lock and FN+Shift+num lock and the problem still persists.
The letters that are typeing numbers with num lock on are U, I, O, P, J, K, L, and M.
Any help with this problem would be greatly appreciated.

What can I do if the Keyboard types numbers, not letters?

1. Update drivers

  1. Open Device Manager.
  2. Now expand the category with the hardware you want to update.
    keyboards device manager keyboard types numbers instead of letters
  3. Right-click the device, and select Update Driver.
  4. Click the Search automatically for updated driver software option.
    search automatically for updated driver software keyboard types numbers instead of letters

Alternatively, you can use third-party tools such as Fortect Driver Driver Updater to automatically update all outdated drivers with just a couple of clicks.

It will look for driver problems and after a couple of minutes, you will receive a report with the recommended drivers to install.

The easiest thing to do is to click on the Select All box to install all of them in a single step. If you have reasons not to install some of them, you can select them individually.

Just click the checkbox corresponding to each driver you want to install and click on the installation button from their right.

⇒ Get Fortect Driver Updater

2. Update Windows

  1. Firstly, open your Start menu and select Settings.
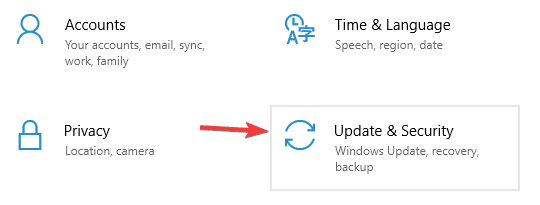
  2. Click on Update & Security, and then on Windows Update.
    update & security keyboard types numbers instead of letters
  3. Click the Check for updates button.
    check for updates keyboard types numbers instead of letters

3. Uninstall the keyboard drivers

  1. From your Start Menu, select Device Manager.
    device manager keyboard types numbers instead of letters
  2. Select Keyboard, right-click its driver and choose Uninstall.
    uninstall device keyboard types numbers instead of letters
  3. Restart your PC

4. Scan your machine for malware

In case you don’t have a reliable antivirus, we strongly recommend checking out TotalAV, because it provides both great speed and protection from all types of malware.

The Bitdefender security solutions are installed in over 500 million devices all over the world and that speaks a lot about its reliability.

And this solution protects you against malware, spyware, adware and it has, among other functions, multi-layer ransomware protection.

Ransomware is one of the top concerns these days but TotalAV can identify even the latest ransomware families so you can rest assured that you’re safe.

5. Run the Windows Troubleshooter

  1. Open the Settings app and go to Update & Security, then click on Troubleshoot.
    windows troubleshooter keyboard types numbers instead of letters
  2. Select Hardware and Devices from the list and click Run the troubleshooter. You can run the Keyboard troubleshoot as well.

We hope that these solutions were helpful and that you managed to fix your keyboard problems. Feel free to let us know in the comments section which solution worked for you.

FIX: Joystick not working / recognized in Windows 10/11

If you’re a gamer, you need a good joystick, but sometimes the computer doesn’t recognize it.

This can be an issue and force you to play your favorite game with mouse and keyboard. However, there’s a way to fix this problem.

Pls help, I don’t know why but all of the sudden i can’t use my joystick anymore. i’ve tried plugging it into another pc,and it worked juz fine.and I also realize that i’m having the device descriptor request failed problem and i have no idea how to fix it.

What can I do if the USB joystick isn’t recognized?

1. Update your drivers

  1. Download the latest driver for your joystick from the manufacturer’s website.
  2. Right-click the setup file and choose Properties.
    properties context menu computer doesn't recognize joystick
  3. Now, click on the Compatibility tab and check Run this program in compatibility mode for.
  4. Select the desired version of Windows from the drop menu.
    compatibility computer doesn't recognize joystick
  5. Start the installation. Once you install the required drivers, restart your PC and check if the issue is solved.

If you want to update all drivers on your PC with a single click, you can try using a third-party tool to update outdated drivers automatically.

2. Troubleshoot your device

  1. Open Control Panel and go to the Troubleshooting section.
  2. On the top corner of your screen, choose View All.
    view all computer doesn't recognize joystick
  3. Select the Hardware and Devices option then follow the instructions on the screen on your PC to run the troubleshooter.

3. Remove the duplicated devices

  1. Right-click the Start button and select Device Manager.
    device manager computer doesn't recognize joystick
  2. Expand the Video and Game Controllers list and remove any duplicate devices on the list.
  3. Go to the Universal Serial Bus Controllers list and remove any duplicated entries.
  4. Close the Device Manager and restart your computer.

4. Perform a Clean Boot

  1. Sign in to your computer as an administrator.
  2. Open the Run window and type msconfig.
    run window computer doesn't recognize joystick
  3. Then, browse to Services tab of the System Configuration dialog box, click Hide all Microsoft services check box, then Click Disable all.
    disable all services can't recognize PC joystick
  4. On the Startup tab of the System Configuration dialog box, open Task Manager.
  5. Right-click each startup item, and select Disable.
  6. Close Task Manager.
  7. On the Startup tab of the System Configuration window, click OK.
  8. Restart your computer and see if the issue still persists.

There you go, these are few simple and easy steps that can help you if your computer doesn’t recognize the joystick. Be sure to try all of our solutions and let us know in the comments box which solution worked for you.

How to fix Local Area connection adapter driver errors

Did you try to connect to your Wi-Fi or PPPoE network and couldn’t do it due to There might be a problem with the driver for the Local Area connection adapter error?

As you may know, this error can be caused by faulty network adapter settings, or by your VPN software.

In this article, we will explore the best methods that will fix this issue and allow you to connect to the Internet once again.

How can I fix the Local Area connection adapter error?

  1. Update the network driver manually
  2. Update the network adapter driver automatically
  3. Reset your network connection
  4. Check the WLAN AutoConfig dependency services

1. Update the network adapter driver manually

  1. Right-click on the Start button, and choose Device Manager.device manager There might be a problem with the driver for the Local Area connection adapter
  2.  Expand the Network adapters tab and try to update all drivers from that section.network adapters There might be a problem with the driver

Uninstall the Network adapter driver

  1. Select your Network adapter, and select Uninstall.
  2. After the process is complete, restart your PC.
  3. After reboot, re-open the Device Manager by following the steps mentioned above and click on the Action menu.
  4. Select Scan for hardware changes and after the process completes, choose Install missing drivers automatically. scan for hardware changes There might be a problem with the driver

Note: If the problem still persists, visit the official site of the manufacturer and download the drivers manually.

2. Update the network driver automatically

Many times, the error message can be pretty cryptic but this time, the reason is pretty clear and it is pointing out a problem with the driver for the Local Area Connection adapter.

That means we have to try and update the network adapter driver and there’s no easier way of doing that than using a specialized tool.

Using a dedicated tool to update the network drivers is very easy and it will prevent damaging your computer by downloading and installing the wrong driver.

3. Reset your network connection

  1. Click on the Start button, then click on the cog wheel icon (Settings)settings app Ethernet error
  2. Choose Network and Internet option from the new window.network and internet There might be a problem with the driver for the Local Area connection adapter
  3. Scroll down to the bottom and choose Network reset.
  4. Choose Yes, and hit Reset Now.

4. Check the WLAN AutoConfig dependency services

  1. Press the Windows key + R, type in services.msc, and press Enter.services run window Local Area connection adapter driver problem
  2. Right-click on WLAN AutoConfig and select Properties.
  3. Select the Dependencies tab and check if you have the elements listed below.dependencies tab There might be a problem with the driver
  4. If all looks good, click on the General tab, and set the Startup type to Automatic.startup type automatic There might be a problem with the driver for the Local Area connection adapter
  5. Restart your computer and check if the issue was solved.

In this article, we explored some of the best methods to fix There might be a problem with the driver for the Local Area connection adapter error on Windows 10.

We hope this guide helped you with your Ethernet problem. Please feel free to let us know in the Comments section below.

How to fix Mafia: Definitive Edition bugs [PC, Xbox & PS4]

Mafia: Definitive Edition was launched on the 25th of September 2020, and it took the gaming community by storm.

Not only was it a complete remake from the ground up of the 2002 game that bears the same name, but it came with the same story and mechanics, but with 2020 technology powering it.

However, everyone remembers how Mafia II Definitive Edition faired, and how riddled with bugs it was. Well, Mafia: Definitive Edition seems to be not too far away in that department.

The issues found by players so far are not too many, and we will be listing them all below, along with solutions for each of them wherever they were available.

  • An excellent remake of a classic.
  • Experience a breathtaking cityscape.
  • Realistic recreation of Prohibition-era USA.
  • Plenty of Trophies and easter eggs to collect.
  • You need a beefy PC to run it


What are the most frequent issues in the Mafia remake?

1. Game locked 60 Hz on 144hz screen

Many PC owners reported that their game lacks a refresh rate option in-game, only a resolution selector.

Additionally, it seems that their monitor can only run at 60 Hz inside the game, which can be frustrating for those that have powerful gaming monitors.

Solutions:

You can try disabling fullscreen optimizations on the .exe’s file properties.

It seems that setting the game to Windowed mode, then enabling borderless gameplay fixes the issue, albeit it is mostly a workaround.

If you own the Steam version of Mafia: Definitive Edition, you can launch the game in windowed mode by following these steps.


2. Mafia Definitive Edition doesn’t support HDR on PC

Many players were reported that they were disappointed to see that Mafia: Definitive Edition lacked a High-Dynamic Range option despite it being a feature heavily marketed in the promotional material.

Additionally, they were disappointed to learn that their console counterparts didn’t have this issue.

Solutions:

Unfortunately, there is no current solution to this problem available. As such, simply wait until a new patch fix is available and try running it again.


3. Mafia: Definitive Edition black screens

This particular issue seems to be targeting Steam users more than Epic Games users, and it is pretty self-explanatory: the game always launches with a black screen hang.

Steam users stated that it didn’t matter whether they launched the game with or without the launcher, they would still be getting a black screen hang.

Solutions:

Unfortunately, no one is currently aware of why this issue happens, and your only choice so far is to just wait until some patch fixes are released.


4. Random freezes

Many players have reported that under certain conditions, they would experience game freezes when entering new vehicles.

[…] in my case, the game doesn’t stutter much but occasionally freezes for a minute or two, it’s damn irritating.

This issue is pretty common, as many other users said that they were experiencing the same issues. They all have different system specs, and this happened to both Epic games and the Steam versions of the game.

Solutions:

Unfortunately, no one is currently aware of why this issue happens. that being said, players will need to wait until the game gets patched.


5. Randomly spawning NPCs

As you can see from this GIF posted on Reddit, NPCs have a tendency to spawn randomly at times. This can be extremely frustrating, especially if, like in the case of the GIF, this happens during a firefight, as they can block your line of sight.

Solutions:

Unfortunately, this type of issue is related strictly to the game’s coding and has nothing to do with the user’s installation or hardware.

As such, a patch fix is the only solution.


6. Issues with pre-loading Mafia: Definitive Edition

This particular bug targets Xbox One users, and it is mostly an inconvenience.

Many users reported that they are having difficulties pre-loading Mafia: Definitive Edition, especially if they have some of the previous titles in their gaming libraries.

This is not necessarily a bug related to the game itself, but rather the way your console’s game store handles game purchases.

For example, a lot of times right after you buy a game it starts auto-downloading, but this may not always be the case.

Solutions:

If you purchased Mafia: Definitive Edition and it didn’t pre-load, go to your Ready to install list and check if it’s there.


7. Mafia Trilogy PS4 owners find Mafia: D.E. at the end of the results

A PlayStation 4-exclusive bug and it is more of an inconvenience than a game breaker, users reported that if you already own the trilogy in your gaming library, searching for Mafia: Definitive Edition will make it appear at the end of your searches.

This is a bug since usually any game you would be looking for would be among the first results, especially if you already own entries from that franchise or series

Additionally, those that own Mafia 1 reported that Mafia: Definitive Edition is labeled as unavailable for purchase.

Solutions:

According to users, there is a workaround that they can try:

Be sure to search for mafia definitive edition and select the option that does not say “pre-order” afterward, there are two options for some reason.

It will ask you to “choose version” asking you to pick to pay for the game or to pick “free”, obviously choose free and boom, workaround.


That pretty much wraps up our list of common bugs and issues found in Mafia: Definitive Edition. However, keep in mind that the games have barely been launched and that new bugs are bound to appear.

Patches are sure to come as well, and we’ll be updating this list with both issues and solutions as they appear, so stay tuned.

What’s your experience playing Mafia: Definitive Edition so far? Let us know what you think about this long-awaited remake by leaving us a message in the comments section below.


[wl_navigator]

How to fix 7-Zip Not implemented error [Easy Guide]

7-Zip is an open-source file compression software tool praised for its high compression ratio. Despite this obvious advantage, users often face the Not implemented error.

Some of them describe their attempts to make a TF2 custom hud to work. They try to move the file folder containing the scripts to the appropriate Steam location in vain.

As expected, they get an error message that states either Not implemented or Operation not supported. Others describe the very same issue.

This occurs when they intend to compress some files into a 7-Z split archive from the command line. One case or another, don’t let this 7-ZIP problem affect your workflow for too long.

We’ve got a few nifty tricks that you can apply right away, so take a closer look at the lines below.

How to fix system error Not implemented on 7-Zip?

1. Try WinZip

try out WinZip
When 7-Zip fails to meet your expectations and constantly puts your patience to a test, let us remind you that WinZip is a similar utility tool that you can try out.

Why should you choose it over 7-Zip from the very start? It’s clear that it supports all major archive formats and can easily handle surprisingly large archive files or else it wouldn’t be here.

While 7-Zip offers integration with Windows Shell, WinZip allows you to connect multiple cloud storage accounts, including OneDrive, Google Drive, and Dropbox.

Best of all, if your priority is to avoid being bugged by the Not implemented message again and pretty much any other system error, WinZip should be your choice.

”WinZip”

”WinZip”

”If
”Free
&aff_sub2=Native” current_url=”true” button_text=”Get it now” image=”https://windowsreport.com/wp-content/uploads/2020/09/winzip-logo-210×160.png”]

2. Switch to .tzip/.zip instead of .t7z

.tzip or .zip instead of .t7z
One of the highlight features of 7-Zip is that it can easily self-extract .7z file formats. However, in reality, even the simple file compression into a 7-Z split archive fails to work properly.

Certain users do confirm that switching to .tzip/.zip instead of .t7z makes the command line work again.

Their action is a sign of the fact that the 7-Z archive format does not support it, in spite of the fact that 7-Zip doesn’t explicitly state so.

If you need to stick to the .7z format, then try to create a single archive and use a file splitter.

However, the file segments should be recombined before the archive can be accessed, which is rather unpleasant.


Don’t know how to split files in Windows 10? Find out how it’s done right here!


3. Click the Info button that accompanies the error message

click the Info button
If by any chance the Not Implemented 7-Zip error is accompanied by a simple Info button, don’t hesitate to click it and find further answers.

It often happens to discover header error lines as being the culprit. More precisely, if the 7-Zip tool sees some header errors in the archive, it automatically disables update features for that archive.

This leads to a bunch of new issues, as you can clearly see, so correct that right away. Unfortunately, this method may not apply to all users.

If the solutions 2 and 3 haven’t worked for you, then keep in mind that 7-Zip does some checks when it updates any archive.

Therefore, it might be an error in that archive, and 7-Zip sees it only at the update stage. You can also consider that there is a bug in the 7-Zip code.

The tool is simply tricked into seeing it as an error, but there’s actually none. One again, let us remind you of something of great importance.

A different open-source file compression software could help you avoid encountering such issues from the very start.

No matter which of the above solutions you decide to apply, let us remind you that it’s easy to share your experience. Simply use the comments area below in that regard.

[wl_navigator]

FIX: 7-Zip There is not enough space on the disk error

Countless users describe the same scenario: they try to back up a folder, let’s say, using 7-Zip or split a large folder into chunks to burn them onto a DVD, and they know that free space isn’t a problem.

Well, when they start the backup, an error message is indeed immediately displayed – System Error: There is not enough space on the disk.

Experiencing this issue is rather frustrating, so if you’re on the same boat too, then it’s time to find out that 7-Zip usually creates a temp file in the Toucan folder.

That’s most likely the culprit, so do not hesitate to take immediate action. We are here to guide you through the detailed steps of solving this disk storage issue with ease.

How to fix There is not enough space on the disk 7-Zip error?

1. Try an alternative file compression tool

Let’s start with the root cause of your current issue. File compression tools are supposed to be handy if you’re running low on disk space, not interrupting you with disk errors.

Therefore, instead of sticking with 7-Zip and looking for time-consuming troubleshooting tips, our suggestion is to see things from a different perspective.

More exactly, it’s more beneficial to search for suitable compression tools capable of resizing the files that take too much of your disk storage.

If you need to archive lots of files or manage large folders without taking up all storage, then consider the best file compression software and get rid of disk space errors.

Hence, if you already have low space on your disk and you strongly need to manage files more easily, the recommended software is of great help.

2. Move the Toucan program folder to the backup drive

As said before, 7-Zip has the bad habit of creating a temp file in the Toucan folder. That’s usually found on the system drive of your backup machine.

Sonner that you can imagine, such temp files end up filling up the supposedly empty system drive. Therefore, all you need to do is to quickly move the Toucan program folder to the backup drive.

You most likely have enough space left there and chances are to solve the issue in no time.

3. Avoid dragging and dropping to Explorer

You may also encounter the annoying There is not enough space on the disk error when dragging and dropping from the 7-Zip window to Explorer.

As strange as it may initially sound, that’s a bug confirmed by countless affected users. Therefore, you know to stay away from dragging and dropping as well.

However, if this is your preferred method, do keep in mind that the problem is exclusively related to Internet Explorer.

It was replaced by Microsoft Edge as the default Windows 10 browser, so don’t be surprised to encounter all sorts of glitches if you intend to keep on using it.

4. Change the temp extraction folder

  1. First of all, open 7-Zip.
  2. Find the way into Tools > Options.
  3. While here, select the Folders tab.
  4. Under the Working folder, make sure to choose Specified.
  5. You are no free to browse to the external HDD.

The temp folder is once again in the center of attention. You may encounter the error at hand due to the same folder that we’ve talked about, so feel free to change the temp folder settings.

Apply the above steps in that regard and confirm that the issue is finally solved.

If you have any suggestions, along with other solutions, don’t hesitate to let us know by using the comments section below.

Other readers will be thankful for your intervention.

Redesigned Xbox app launches in beta on iOS with Remote Play support

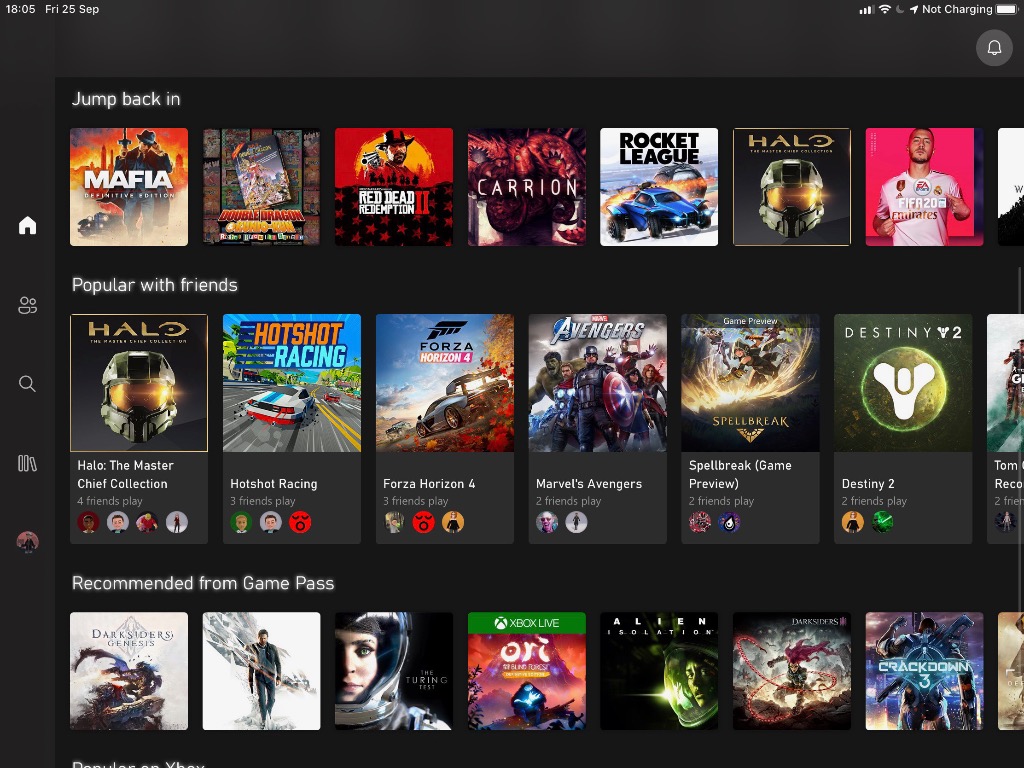
Microsoft has released today a new Xbox beta on iOS, which follows the release of a similar app on Android earlier this week. These new Xbox apps introduce a revamped design language inspired by the Xbox Game Pass app for mobile, as well as the ability to install any games remotely, to set up new consoles and queue games, and to share game clips and screenshots right from your phone

The biggest new feature in this Xbox beta app is Xbox remote play, which allows iOS and Android users to play any games installed on their Xbox One console when it’s on or configured with the Instant-on standby mode. The fact that this feature is available on the iOS beta app is quite interesting, especially since Microsoft has been unable to bring its Project xCloud game streaming service to iOS devices so far.

Unfortunately, Apple’s Testflight app only accepts up to 10,000 beta testers for a single app, and as of this writing, the beta for the Xbox app is full. Inactive testers are removed from the program from time to time, so you may want to bookmark this link in case new seats are freed up. There are no such restrictions for the Android app, which you can get from the link below.

Xbox beta
Xbox beta
Price:
Free

Games for Amazon’s Luna cloud gaming service will run from Windows servers

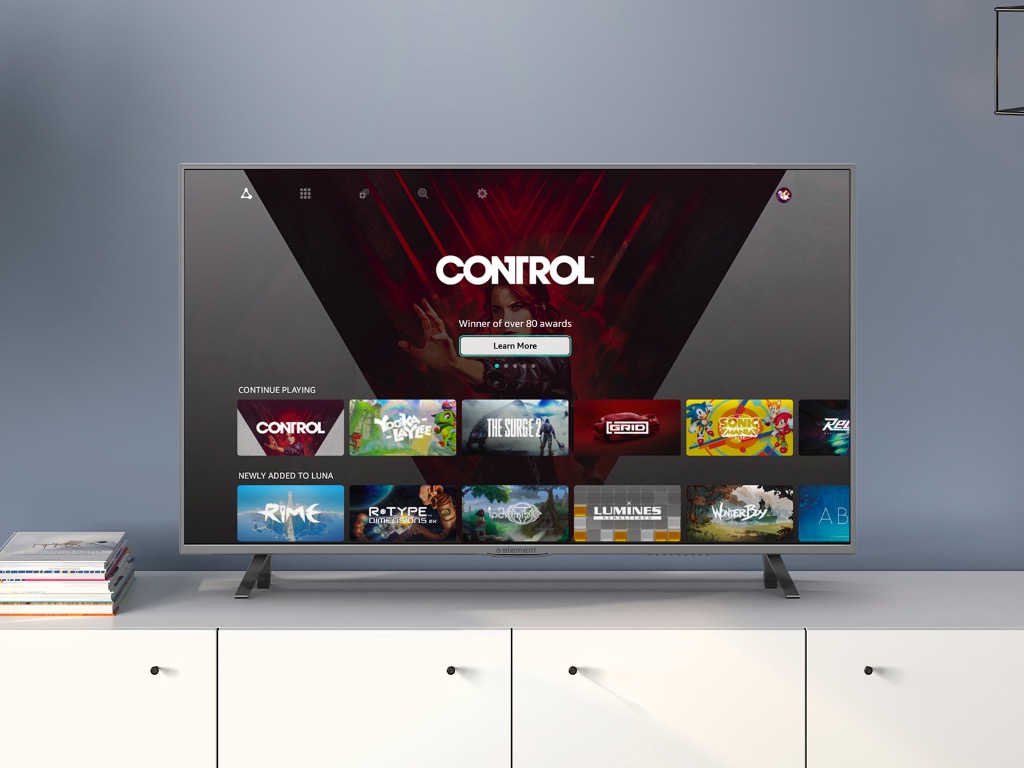
Amazon announced its new cloud gaming service named Luna yesterday, which will launch first in limited preview in the US. For $5.99, a Luna+ subscription will provide access to a catalog of games on Amazon’s Fire TV devices, Windows PCs and Macs, as well as iPhones and iPads through the web.

At launch, the Luna+ catalog will include some pretty great games such as Control, Metro Exodus, Resident Evil 7: Biohazard, or A Plague Tale: Innocence. A separate Ubisoft channel will provide access to the upcoming Assassin’s Creed: Valhalla, Watch Dogs: Legion, and more Ubisoft games.

It wasn’t clear yesterday how Amazon managed to get all these games available on Luna at launch, but we’ve since learned that the game streaming service will use Windows servers, which should make it easy for game developers to bring their existing and upcoming Windows games to the service.

As a reminder, Google chose a completely different approach with its Stadia platform, which is based on Linux and requires game developers some work to port their games on this new platform. So far, Google managed to convince big publishers such as Ubisoft, Square Enix, Bungie, and Rockstar Games bring their games to Stadia, but overall the catalog of games on Google’s platform remains pretty small.

Google also chose a different business model for Stadia with a Stadia Pro subscription that provides a couple of new free games every month, but other Stadia games need to be purchased separately. Amazon Luna is much more similar to Microsoft’s Cloud Gaming service (Project xCloud), where users pay a monthly subscription to enjoy a frequently updated catalog of games.

Earlier this year, Xbox head Phil Spencer said that Amazon and Google were Microsoft’s true rivals in the gaming space, not Sony or Nintendo. Thanks to its Windows environment, aggressive pricing, and Twitch integrations, Luna could well force Google to make some serious changes to its Stadia platform.

Microsoft is also probably feeling some heat today as its own Cloud gaming service remains only available on Android devices, while Stadia and Luna both have a PC and TV presence. Amazon also managed to bypass Apple’s restrictive App Store rules by making Luna available on Apple’s Safari mobile browser, something that may well give Microsoft and Google some ideas.

Amazon Luna will be only available in the US at launch, and you’ll need to register here to get early access to the service. Do you think Amazon has what it takes to become an big player in the cloud gaming space? Let us know in the comments below.

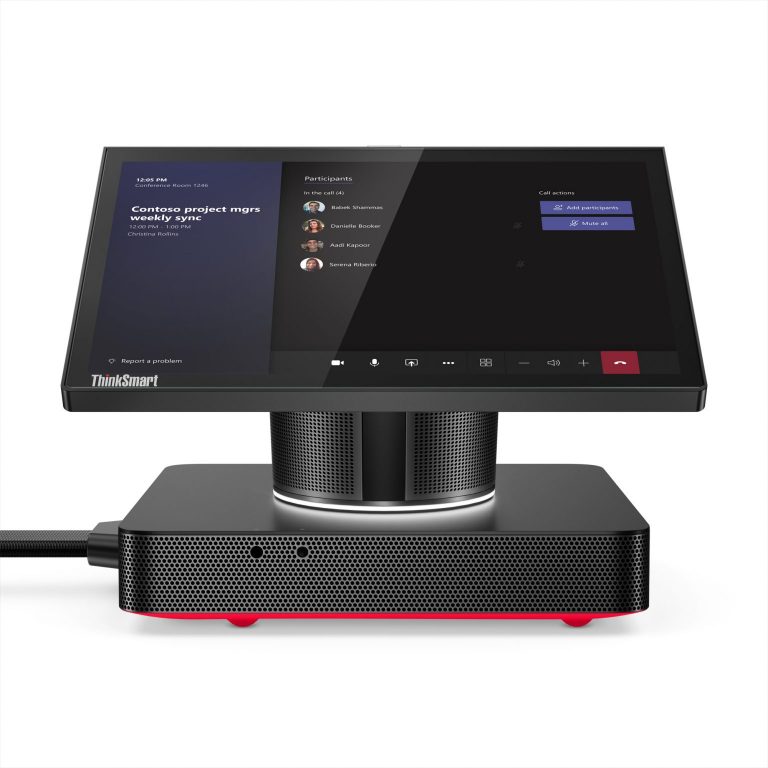
Lenovo unveils new ThinkSmart Hub collaboration solution available for Microsoft Teams Rooms

While the phrase “meeting room” may still be kind of taboo to say amid the global COVID-19 pandemic, Lenovo is still pushing through with trying to modernize the experience with its latest ThinkSmart Hub solution. While the release of this new device may be a bit of a head-scratcher for some, Lenovo has done its homework, and according to a recent company survey, “52 percent of the global workforce expects to continue to work from home more than previously, and 63 percent feel they are more productive”.

In the spirit of the “new normal” Lenovo is looking to help in a potential workplace evolution that involves more flexible hybrid working models with the Lenovo ThinkSmart Hub. “The Hub includes four improved, integrated speakers and microphones for a superior audio experience and a 10.1-inch Full HD, 360-degree rotating touch display for easy access to Microsoft Teams Rooms meeting controls. It also comes with a single cable mechanism that streamlines power, ethernet, USB, and display connections, reducing desk clutter,” the company explained.

Lenovo Thinksmart Hub


Lenovo is showing off the Hub’s collaborative prowess by highlighting its integrated Microsoft Teams experience, and that comes on the heels of Microsoft’s Ignite digital conference where several other Teams-dedicated hardware have been shown off. According to Lenovo, the latest ThinkSmart Hub is 20% smaller than the previous-gen, has more visible LED indicators, and powered by an Intel Core i5 processor with vPro technology. The ThinkSmart Hub will be available in October 2020, starting at $1,799.

FIX: Thread stuck in device driver error in Windows 10

Blue Screen of Death comes with a certain error code and name, and some Windows 10 users have reported Thread stuck in device driver issue.

This error can cause a lot of problems, so you might want to have a closer look at our solution in order to fix this problem.

Your graphics card usually causes THREAD_STUCK_IN_DEVICE_DRIVER. This error can prevent you from playing your favorite video games, or enjoying multimedia by causing frequent restarts.

Fortunately for you, this error can be fixed, and as far as we know, the AMD graphics card driver causes it. In order to fix this error, you need to follow the next troubleshooting steps.

How can I fix the Thread stuck in device driver error?

  1. Uninstall the display driver and update it
  2. Repair your registry using SFC scan
  3. Check if your computer is overheating
  4. Update the BIOS
  5. Replace the video/sound card

1. Uninstall the display driver and update it

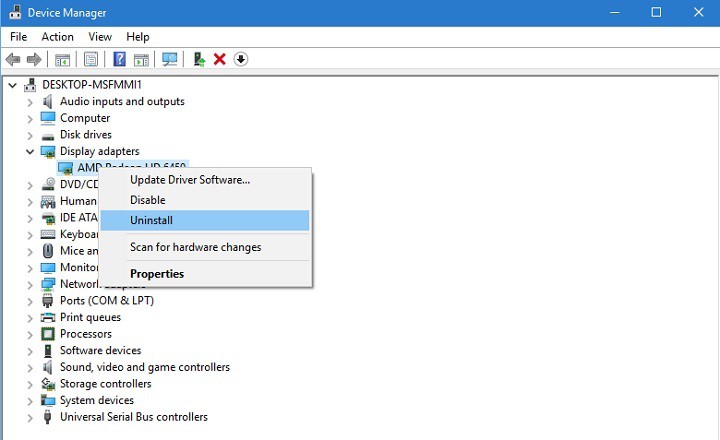
  1. Right-click the Start button and select Device Manager.
  2. Locate your display driver, right-click it, and choose Uninstall.THREAD_STUCK_IN_DEVICE_DRIVER
  3. Check the Delete the driver software for this device option and click OK.

Note: Now you should install the default display driver. To do this, you’ll need to find your graphic card model, go to your graphic card manufacturer’s website, and download the latest drivers.

Update drivers automatically

Downloading drivers manually is a process that carries the risk of installing the wrong one, which may lead to serious malfunctions.

Also, the safer and easier way to update drivers on a Windows computer is to use an automatic tool such as Fortect Driver Updater.

However, a tool like Fortect Driver Updater not only downloads and installs drivers, but also helps you manage them by resolving problems, backing up, and restoring them.

In addition, this program automatically identifies each device on your computer and matches it with the latest driver versions from an extensive online database.

⇒ Get Fortect Driver Updater

2. Repair your registry using SFC scan

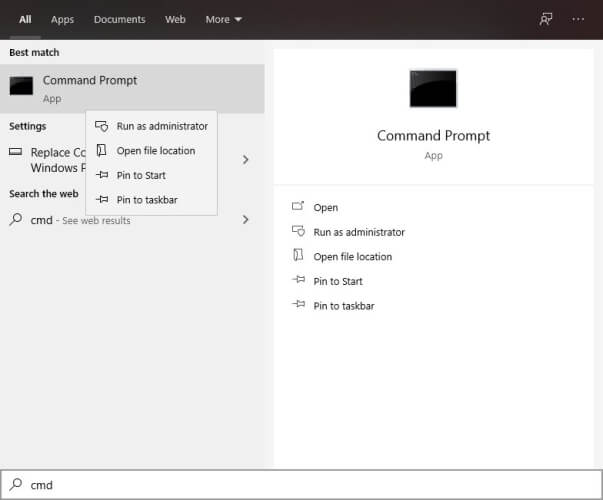
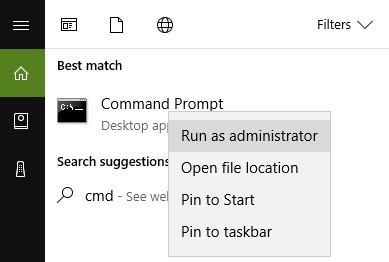
1. Click on Start, type cmd, right-click Command Prompt and select Run as administrator

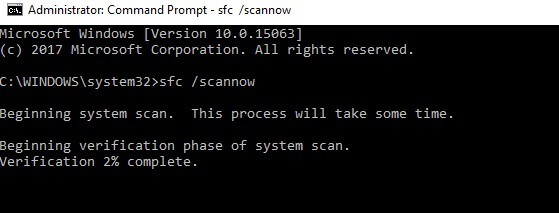
2. Type the sfc /scannow command

3. Wait for the scanning process to complete and then restart your computer.

3. Check if your computer is overheating

If your computer is overheating, this may explain the THREAD STUCK IN DEVICE DRIVER error.

Check if there are any particular apps and programs that may be causing the high CPU usage and high temperature and disable them as soon as possible.

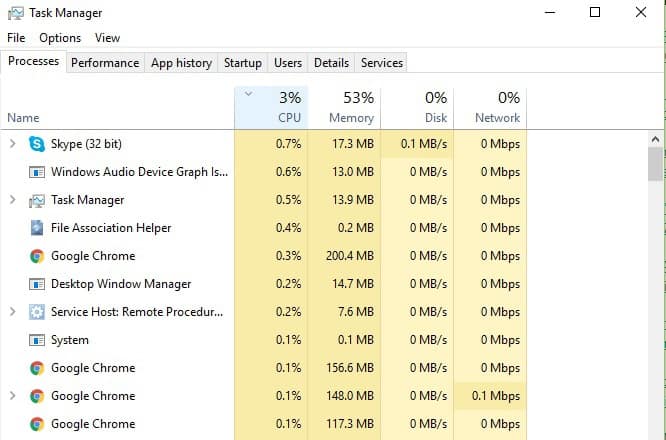
You can install dedicated software to monitor your CPU’s temperature. Also, you can use the Task Manager to identify which programs are putting too much pressure on your processor.

To check the CPU temperature open Task Manager and click on the CPU column to filter the results.

high CPU

To keep your computer’s temperature in check, we recommend that you install cooling software and use a cooling pad to quickly dissipate heat.

4. Update the BIOS

Many Windows 10 users confirmed that updating BIOS helped them fix this driver error. For more information on how to update BIOS depending on a computer model, check out the official guides below:

5. Replace the video/sound card

If none of the solutions listed above helped you fix the THREAD STUCK IN DEVICE DRIVER error, try to replace your video or sound card.

Faulty video/sound cards may also trigger this error and if none of the troubleshooting steps available in this article helped you, chances are that these pieces of hardware are no longer working properly.

As you can see THREAD_STUCK_IN_DEVICE_DRIVER isn’t a big problem and it can be easily resolved by installing the default drivers or by updating your display drivers to the newest version.

So far we don’t know if NVIDIA users are affected by this issue, but it has been confirmed that updating drivers resolves the issue for AMD users.

If you’ve come across other solutions to fix this annoying driver error, don’t forget to list the troubleshooting steps in the comment section below.

If you want to learn more about drivers, make your way to our Drivers section.

Our Windows 10 Hub is a universe of information about our most popular OS.

World of Warships packet loss issues: How to fix them

World of Warships is a popular free-to-play naval warfare multiplayer game published by Wargaming. You might know them from other great releases such as World of Tanks, which took the world by storm a few years back.

The concept is quite simple: you can build a crew and use it to commandeer one of the many warships that the game has to offer. Of course, you’ll get to battle other commanders, considering that this is a war game, after all.

The game is worth playing and can be a nice place to hang your hat for a few hours every now and then. Although it’s free-to-play, you’ll have to grind a lot to unlock the higher-tier ships.

That’s maybe why many consider the game is a bit unfair, as it gets harder the more you progress through the higher tiers. Some would even argue that it’s rigged.

However (and this is a big however), like any other multiplayer game, World of Warships may face connectivity issues. More specifically, we’re talking about packet loss, which is by far one of the worst connection problems.

What is packet loss in World of Warships?

While you’re connected to the Internet, whether you’re playing World of Warships or not, you’re transmitting packets through your connection. The purpose of these packets is to reach their destination intact and as quickly as possible.

Whenever some of the packets simply vanish on the way, we call it packet loss. It’s quite self-explanatory, come to think of it. Due to some malfunction, data packets can’t reach their destination, which can create stability issues within the connection.

Some symptoms of packet loss you may notice in World of Warships include, but are not limited to:

  • Sluggish movement of your units
  • Unresponsive menus
  • Delayed text chat messages
  • Rubberbanding (freezing and suddenly teleporting to another place on the map)
  • Missing your opponents when firing
  • De-synchronization
  • Sudden disconnections
  • Game crashes

These are also why people mistake packet loss for high latency. The two are somewhat similar, but they’re in fact very different. High latency means that the packets take a little longer to reach their destination.

Packet loss means they never make it, which makes it way worse than high latency.

What can cause packet loss in World of Warships?

The reasons why packet loss occurs are numerous and varied, ranging from improperly configured networks to server-side issues and ISP throttling. This makes it difficult to find a silver bullet fix for our issue.

Check out our list of common causes of packet loss:

  • Network congestion is without a doubt the most common cause of packet loss
  • Subpar network equipment, including but not limited to modems, routers, cables, adapters
  • Slow Internet connection (cheap subscription)
  • ISP throttling or improper traffic routing
  • Choosing WiFi connections over Ethernet
  • World of Warships server-side issues
  • Using ISP-assigned DNS which might be slower than Google’s public DNS (for instance)
  • Running several background apps on your PC that might consume a lot of bandwidth
  • Setting the quality settings too high (the connection probably can’t handle them)

As you can see, not only the reasons are many and varied, they can also happen at any point throughout the entire connection, whether it’s on your side, on the ISP’s infrastructure, or even on the game server’s side.

How to detect packet loss in World of Warships?

  1. Head over to this Wargaming support page 
  2. Scroll down to the Target Addresses section
  3. Note the IP address of the World of Warships server
  4. Launch a CMD instance on your PC
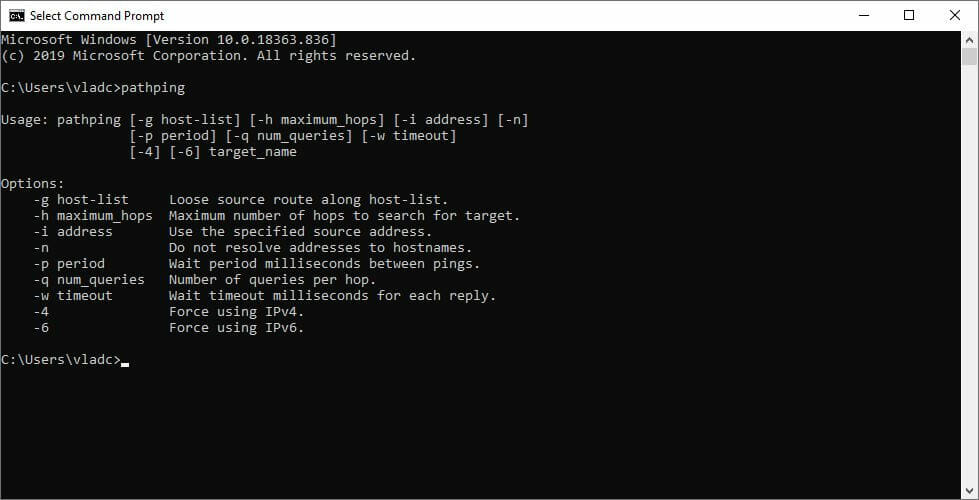
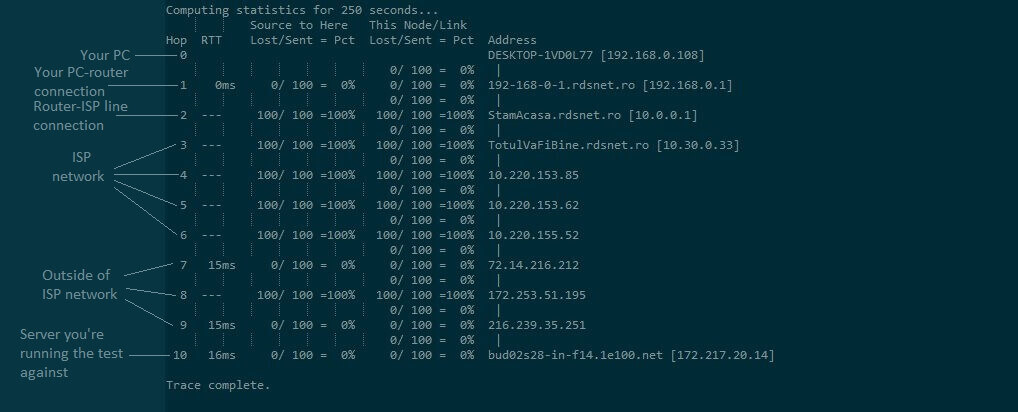
  5. Type pathping x.x.x.x (replace x.x.x.x with game server)CMD pathping
  6. Check if there’s any packet loss and where it occurs
Results of pathping

Based on your findings, the packet loss could occur on your end of the connection, on your ISP’s infrastructure, or on the game server. Of course, it can happen anywhere in between, so make sure to pay attention.

Locating a node that leaks packets can also help you choose the right course of action in fixing the problem.

How to fix World of Warships packet loss?

1. Use a VPN

  1. Buy a premium VPN plan (we recommend Private Internet Access)
  2. Download and install the VPN on your PC
  3. Launch it and connect to your account
  4. Connect to a VPN server of your choice (nearby servers are generally faster)
  5. Launch World of Warships
  6. See if you’re still leaking packets

Note that this fix can only work if the packet loss occurs on your ISP’s side, or if your Internet provider limits your connection by means of throttling bandwidth or routing traffic improperly.

Private Internet Access

Private Internet Access

Getting heavy packet loss in World of Warships? Private Internet Access could fix it without great efforts.
$2.69/mo. Buy it now

Kape Technologies’ PIA has an outstanding network of servers (over 11,000), so even if a server doesn’t seem to be working great, just select another one and try again.

2. Flush your DNS

  1. Launch CMD as administrator
  2. Type the following commands, one by one:

ipconfig /flushdns
ipconfig /registerdns
ipconfig /release
ipconfig /renew
netsh winsock reset
exit

Restart your PC, then launch World of Warships and check if you’re still leaking packets. Often times flushing your DNS can have a great effect on improving the quality of your connection.

3. Troubleshoot the connection

  • Inspect your home network closely and check for any malfunctioning component
  • Replace any component that’s old, worn-out, broken, or otherwise in a bad shape
  • Make sure you’re using appropriate Cat Ethernet cables (for instance, Cat 6 is better than Cat 5)
  • Use Ethernet instead of WiFi whenever possible (WiFi packet loss occurs frequently)
  • Contact your ISP and ask them if they can take a look at your issue and probably even fix it
  • Reach out to Wargaming’s customer support and tell them if you notice something odd on their side
  • Try to avoid peak hours if you want to steer away from network congestion (or use a VPN, it’s easier)
  • Upgrade your Internet plan if possible
  • Try not to run many bandwidth-heavy programs such as torrenting clients, VoIP apps, and such
  • Lower the quality settings of the game and try again (your connection might not support high-quality settings)
  • Update the firmware on your router
  • Check if your system drivers are up-to-date, especially network adapter drivers

Keep in mind that these suggested troubleshooting fixes may not eliminate packet loss from World of Warships altogether. However, they will definitely help you increase the quality of your connection.

It’s worth mentioning that having a good, well-maintained connection can help you curb a lot of issues, and packet loss is just one of them.

Final thoughts on World of Warships packet loss

All things considered, if you notice packet loss in World of Warships, it’s probably not a big deal. Most of the time it fixes itself and all it needs is just a bit of patience.

However, if you notice a pattern starting to develop, it may be time to set your foot down and take action.

You can use a VPN if you’re sure that your ISP causes packet loss issues or if you want to avoid network congestion. It’s also great if you can perform regular maintenance on your connection, to curb packet loss and other connectivity issues on your side.

4 Best Ways to Improve MP3 Sound Quality [Windows 10/11]

MP3 is the most used audio file format, but despite being a popular format, MP3 has its flaws, such as the loss of original audio quality.

If you’re a music enthusiast, this can be a problem for you, but in today’s article, we’re going to show you the best ways to improve MP3 quality on your computer.

How can I improve MP3 quality?

1. Normalize the audio

  1. Download MP3Gain.
  2. Start the application and add files that you want to normalize.
  3. Set the desired target volume. 89.0dB is set as a default, so it’s safe to use it, but you can also experiment with other values.
  4. Now click the Track Gain icon and wait for the process to finish.

Keep in mind that this method works only if you have MP3 files with varying and noticeable volume differences.

2. Always use the best-quality audio

To check the bitrate of a file, do the following:

  1. Locate the MP3 file that you want to check, right-click it, and choose Properties.
  2. Navigate to the Details tab and look for Bit rate field.
  3. You can also check this information from various music player software.

MP3 is a lossy file format, which means that the sound quality won’t be identical to the CD. However, you can somewhat preserve the sound quality by setting a higher bitrate.

The maximum bitrate that MP3 can support is 320Kbps, so for maximum quality, you should always convert/save files using 320Kbps bitrate or download MP3 files that are encoded using the 320Kbps bitrate.

This bitrate offers quality similar to CD quality, and it’s the maximum quality that you can get from an MP3 file.

Keep in mind that if your MP3 file is using a 128Kbps bitrate, for example, you can’t convert it to 320Kbps and improve its quality.

When a file is converted at a lower bitrate, for instance, opening OPUS files as MP3, much of the original quality is lost, and reconverting it to a higher bitrate doesn’t do anything.

3. Use audio editing software

audio editing software How to improve mp3 quality
  1. Download and install Adobe Audition audio editing software.
  2. Use the software to remove any noise or cracks from your audio.

Keep in mind that this solution requires some extensive knowledge of audio editing, so it’s not for everyday users.

Adobe Audition is perfect for this task, as it is a powerful audio editing software. Just like the more known tools from Adobe, this professional software will give you complete control over your audio files.

With this tool, you can improve the quality, change their format, repair any broken files, or recover corrupted ones.

⇒ Get Adobe Audition

4. Invest in better equipment

  1. Purchase a sound card.
  2. Optional: Consider getting a better pair of speakers/headphones.

A good sound card will enhance your overall sound quality, even the quality of your MP3 files, so if you want to enjoy multimedia a good sound card is a must.

Your computer’s sound card is good enough only for the most basic needs, and it can output a decent sound quality, but for a better experience, it’s advised to use a dedicated sound card.

The same applies to your speakers and headphones. Better speakers will give you better sound quality overall, so you might want to consider an upgrade.

We also have a great article on how to trim MP3 files on Windows 10, so don’t miss it for more information.

When it comes to improving the quality of MP3 files, there’s not much you can do, but you can get the most out of your sound and MP3 files by following the instructions from this article.

5 best music production websites with high quality samples

Music creation is a complicated process that requires specialized software, but that’s not the case anymore. Just like with many other applications, many audio applications are moving to the Web.

In fact, there are many web apps that can help you produce music, and in today’s article, we’re going to show you the best music production websites.

Which is the best online music production website?

LANDR

  1. LANDR music production websites

LANDR is a music production website, and the service utilizes AI mastering that analyzes your production style and adjusts all the parameters so you can get the most out of your tracks.

The service offers a variety of plugins, and what makes is special is the ability to try or even rent certain plugins. If needed, you can also purchase plugins or continue renting them as long as you want.

When it comes to samples, the AI will recommend suitable samples for you, and there are even 100% royalty-free samples that you can use right away.

The service is fully compatible with all major streaming services such as Spotify, Apple Music, YouTube, TikTok, Tidal, Deezer, and Pandora, so you can easily release your tracks as soon as they are done.

LANDR is a great music production website, and we barely covered its most basic features. If you’re looking for a professional music production tool, LANDR is the way to go.

LANDR features:

  • AI-powered
  • Variety of plugins that you can try, rent or purchase
  • 100% royalty-free samples
  • Compatible with all major music streaming services
  • Unlimited storage

LANDR

LANDR is a music production website that offers a wide array of high-quality royalty-free samples to music professionals.
Check price Visit website

Soundation

Soundation music production websites

Another great music production website that you should consider is Soundation. The service offers 20.000+ different samples to choose from, and all of them are sorted into specific categories.

The service also offers various instruments, including drum machines, samplers, and synthesizers. Of course, there’s also a wide array of effects that you can use and configure.

Soundation supports collaboration, so you can produce music with your coworkers in real-time. There are also audio editing features so you can trim, loop, cut, paste, your audio samples with ease.

The service is available for free with the most basic features, but you’ll be limited to more than 700 loops and samples. However, you can always purchase additional samples from the store.

Overall, Soundation is a solid music production website, and if you want, you can try it out free of charge.

Soundation features:

  • Over 20.000+ samples
  • Support for virtual instruments
  • Various audio effects
  • Audio editing features
  • Real-time collaboration

⇒ Get Soundation

Soundtrap

Soundtrap music production websites

If you want to create music online, you might want to consider using Soundtrap. This software comes with a wide collection of beats, loops, and instruments that you can use.

Speaking of beats and presets, there are about 4000+ available for you to use. The Auto-Tune feature is available as well, so you can easily modify your voice recordings.

Soundtrap also supports automation allowing you to easily adjust the volume or other sound settings. Another great feature is the ability to connect and use your own instruments.

It’s important to mention that the service supports collaboration, and since this is a web app, you can use it on any platform or device.

Soundtrap is a great music production website, and if you want to create music, this might be the right service for you.

Soundtrap features:

  • 4000+ available beats and presets
  • Auto-Tune support
  • Collaboration support
  • Available on all major platforms
  • Ability to use your own instruments

⇒ Get Soundtrap

Audiotool

Audiotool music production websites

Another great music production website that you should check out is Audiotool. The service has over 250,000 samples and over 50,000 device presets available.

Since this is a web service, all your data is stored in the cloud, and you can access it easily from any web browser and device, regardless of the platform you’re using.

The software has various instruments available including Heisenberg, Pulverisateur, Machinste, Beatbox 8/9, and Bassline.

As for mixing and routing, there’s Master Output, as well as a Centroid mixer with 16 stereo channels. Additional features include splitter/merger, crossfader, and minimixer.

Audiotool is a great music production website, and with a wide array of effects, instruments, and samples, it’s a perfect tool for all music producers.

Audiotool features:

  • Over 250,000 samples
  • Over 50,000 device presets
  • Supports various instruments such as Heisenberg, Pulverisateur, Machinste, etc.
  • Can work on any web browser regardless of the platform
  • Collaboration support

⇒ Get Audiotool

Looplabs

Looplabs music production websites

Looplabs offers thousands of royalty-free samples thanks to the collaboration with Beatport. For easy navigation, all samples are sorted into specific categories.

The service supports voice recording, and you can record your voice on top of the beats with ease. You can also add your vocals to one of many available community-created tracks.

The collaboration feature is available as well, and you can create music with other members of the community with ease.

The service has a simple and friendly interface, and you should be able to create all sorts of music with ease, even if you’re not familiar with music production.

Looplabs is still in beta, but it offers great features, and since it’s completely free, there’s no reason not to try it out.

Looplabs features:

  • Free to use
  • Offers thousands of free samples thanks to Beatport integration
  • Support for voice recording on top of tracks
  • Collaboration feature
  • Simple and friendly user interface

⇒ Get Looplabs

Music production doesn’t require expensive software, and with these music production websites, you should be able to create great music from any web browser with ease.

3 Quick Ways to Fix DayZ Packet Loss & Unstable Connection

DayZ is a popular sandbox multiplayer game where you have to survive at all costs. The game originally started as a free mod for Arma II and required the original game and its Operation Arrowhead standalone expansion to run.

You can tell at a glance that the game was way more popular back when it was a free mod. However, even in its current state, it still manages to rally thousands of players who enjoy it.

But we’re not here to talk about DayZ, are we? Chances are that if you landed on this page, you already know all there is to know about this game, except one thing: how to fix packet loss in DayZ.

So let’s not waste any more time and focus on this topic. But first, we’ll help you understand more about the DayZ latency fix, so you can be more effective in your battle against it.

What is packet loss in DayZ?

Packet loss is a bummer, no matter where you spot it. Whenever you establish a connection, you send and receive data packets.

Sometimes, a bunch of these packets never make it to their destination, and we refer to this phenomenon as packet loss.

During a packet loss episode in DayZ, you may notice:

  • Sluggish movement
  • Rubberbanding (when you freeze then suddenly teleport to another place on the map)
  • Unresponsive menus and controls
  • Sudden disconnections
  • De-synchronization
  • Game crashes

From a few standpoints, packet loss might look exactly like high latency or jitter. But the reality is that those phenomena are wildly different. To summarize:

  • High latency: packets take a little longer to arrive, but they eventually make it to their destination
  • Packet loss: data packets get lost on the way, so they never reach their destination point
  • Jitter: when a packet’s delay time starts to vary wildly (it can cause packet loss)

What causes packet loss in DayZ?

What makes packet loss unbelievably annoying is that it doesn’t have any immediate cause. In fact, lots of things can cause packet loss, ranging from a worn-out Ethernet cable to outdated drivers on your system or server-side issues.

That’s also why there’s no silver bullet for this problem. Naturally, you’d have to know what caused the packet loss so you can look into the matter and eventually fix it.

However, most of the time fixing packet loss is poking in the dark until you finally figure it out. Here’s a list of factors that could weigh in to trigger packet loss and DayZ kicked for unstable connection:

  • Network congestion (by far this is the most frequent reason)
  • ISP throttling or improper traffic routing (also very common)
  • Cheap Internet subscription plan (and by cheap we mean with low bandwidth allocation)
  • Broken, old, worn-out Ethernet cables
  • Using WiFi instead of Ethernet connections
  • DayZ server-side issues
  • Running a lot of bandwidth-consuming apps on your PC (even as background processes)
  • Using high game quality settings that your connection can’t handle
  • ISP-assigned DNS

And the list can go on for a while, but we’re not trying to bore you out of your mind. But you get the point: even in DayZ, butterfly effect rules apply to packet loss in DayZ. Even a gust of wind can mess things up badly for your unexpected response data DayZ connection.

The good news is that more often than not, packet loss goes away by itself, so all it takes is a bit of patience.

How to detect packet loss in DayZ?

  1. Identify the IP address of the DayZ server
  2. Launch a CMD instance on your computer
  3. Type pathping x.x.x.x (replace x.x.x.x with the IP address you noted earlier)CMD pathping
  4. Wait for the pathping test to come to an end
  5. Check the results and see if there’s any packet loss

If you notice packet loss on some of the nodes, then it obviously means your connection is leaking packets. But knowing the exact place where it occurs can help you troubleshoot it more effectively.

Results of pathping

As a rule of thumb, the first node (hop) is always your PC (the device you’re running the pathping test from). At the opposite end of the connection (the last node), there’s the game server (the machine you’re running the test against).

Note that you can use any method you feel comfortable with to detect the IP address of the DayZ server. A lot of community servers have their IP address publicly available, so it’s not exactly difficult to spot it if you know where to look.

WireShark or any other third-party tool can also help you identify the IP address faster.

How to fix DayZ packet loss

1. Use a VPN to reroute network traffic

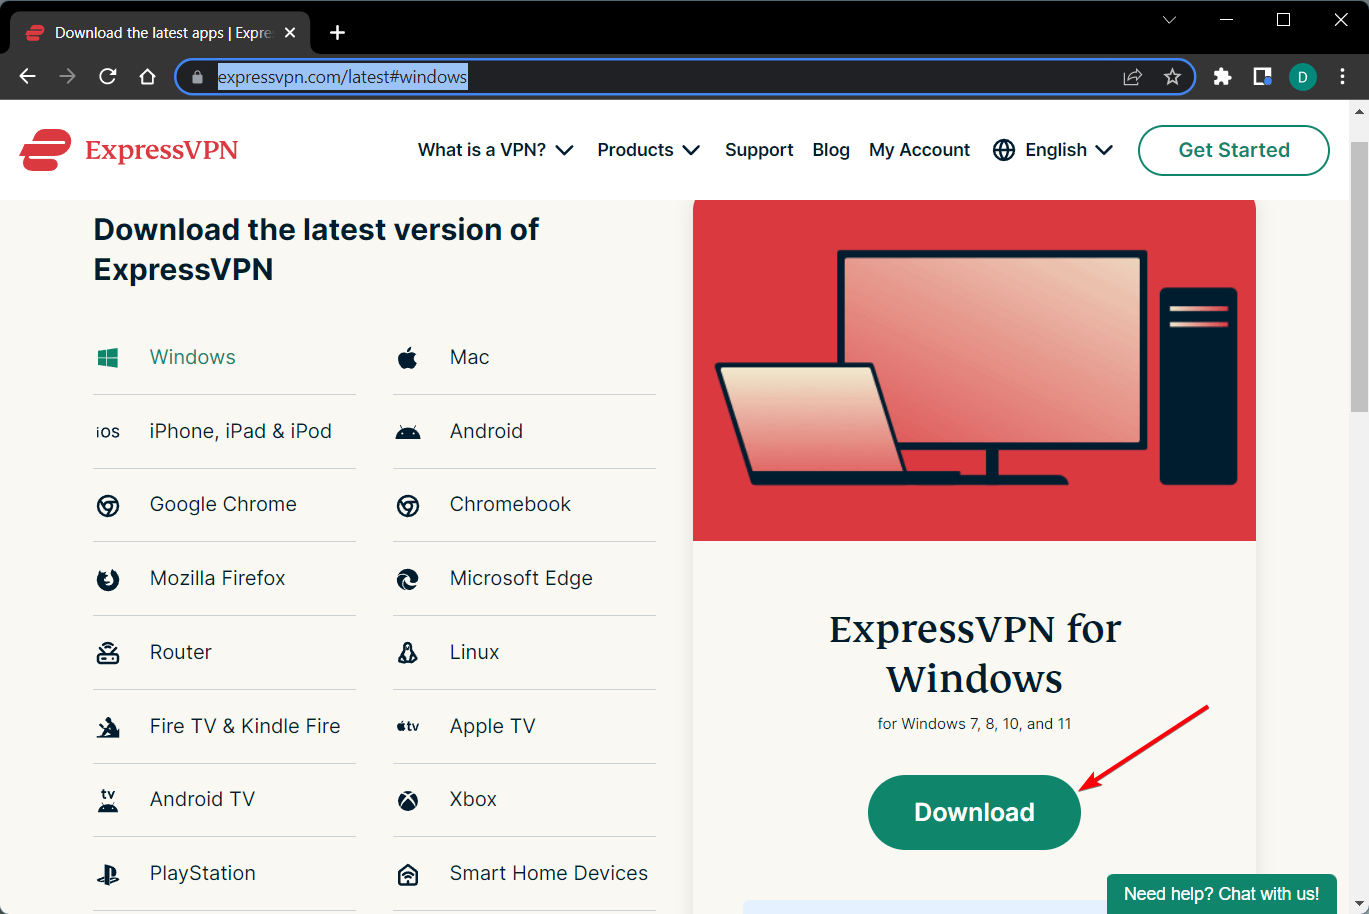
  1. Sign up for a VPN subscription. (We recommend ExpressVPN)
  2. Download and install the VPN client on your PC.
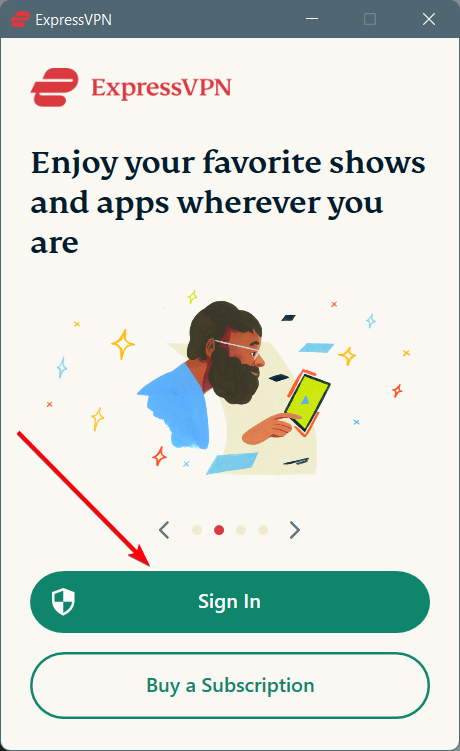
  3. Launch ExpressVPN and log into your account.
  4. Connect to a server of your choice (recommended servers are usually faster).
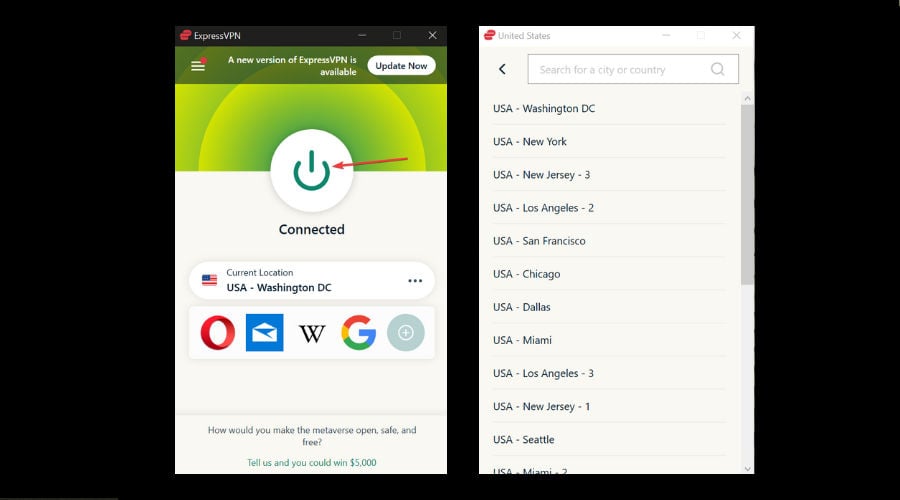
  5. Launch DayZ.
  6. Check if you’re still getting packet loss after one hour of playing.

Granted, a VPN isn’t a silver bullet fix, but it could still solve packet loss faster than other methods. The only downside is that using a VPN will only work if the packet loss doesn’t occur on your side or if it’s caused by the game server.

Using a tool such as Kape Technologies’ ExpressVPN will only work if the packet loss is triggered by your ISP. As we’ve briefly hinted above, an ISP can cause packet loss by limiting your bandwidth or routing network traffic improperly.

ExpressVPN

The DayZ network congestion and limitations stand no chance with this trustworthy VPN provider.
Check price Visit website

A VPN will bypass these limitations by routing your network traffic through its own secure tunnel, away from any ISP-imposed artificial restrictions.

2. Flush your DNS

  1. Press the Win key on your keyboard
  2. Type CMD
  3. Right-click the Command Prompt icon
  4. Select Run as administrator
  5. In the CMD window, type the following commands, one by one:

ipconfig /flushdns
ipconfig /registerdns
ipconfig /release
ipconfig /renew
netsh winsock reset
exit

Restart your computer after closing the CMD window, then launch DayZ and check if you’re still getting packet loss.

Cached data on your PC might build up and cause various conflicts on your connection. This is why regularly flushing your DNS can greatly improve the quality of your connection and even eliminate issues such as packet loss.

Optionally, if you’re using ISP-assigned DNS, you can switch to public DNS addresses. We’ve used Google’s free public DNS and we’re quite satisfied with it.

However, you can also use OpenDNS, Cloudflare, or any other similar service you consider fit for your needs.

3. Troubleshoot your connection manually

  • Thoroughly inspect your home network for any malfunctioning component
  • Replace any troublesome part of your connection (check for old, worn-out Ethernet cables)
  • Make sure to update your system drivers to their latest version
  • Check and update your router’s firmware if needed
  • Always use Ethernet instead of WiFi if possible (WiFi packet loss occurs more often)
  • Call your ISP and ask them (nicely) if they can do anything about your issue
  • Switch the server you’re playing DayZ on (and rule out any server-side issues)
  • Try to avoid peak hours in order to dodge network congestion issues (or use a VPN)
  • Upgrade your Internet plan (if possible)
  • Lower the quality settings in DayZ (your connection might not be able to handle them)
  • Close any app or service running in the background that might consume bandwidth

It goes without saying that even taking all these suggested steps might not fix your packet loss problem if the underlying issue is a more complicated one.

However, our suggestions are meant to help you improve the quality of your connection, which is quite important.

A well-maintained, high-quality connection is less prone to experiencing various issues, including but not limited to packet loss, high ping, jitter, or even sudden disconnections.

For that reason, make sure you take as many suggested steps as you can, to improve your odds at winning your DayZ packet loss battle.

Final thoughts on DayZ packet loss

All things considered, if you’re experiencing heavy packet loss in DayZ, don’t fret. Most of the time, the issue has a temporary nature and can fix itself shortly. More often than not you won’t even notice it was there, to begin with.

However, if you notice a pattern starting to form, you may have to step into action. Using a VPN is still one of the most popular ways to fix packet loss in DayZ, but it only works if your ISP limits your connection.

Check out our Packet Loss Section for more easy-to-follow guides on fixing this issue. Visit our Gaming Hub to learn more about the benefits of using a VPN while gaming.

Remember that since there’s no immediately apparent cause for packet loss, it can be hard to find a guaranteed fix. Oftentimes, you may be able to fix packet loss by trial and error, so arm yourself with a lot of patience. You may need it.

FIX: Windows Update error 0x80072efd in Windows 10/11

The Windows update process sometimes fails, displaying certain error codes, for easier identification.

One such annoying error affecting Windows 10 (or older) is Windows Update error code 0x80072EFD.

We have reported similar issues before, more specifically with the Windows Store App Updates: 0x8007064a, 0×80246007, 0×80248014 Errors.

One user says the following, blaming this problem on the proxy settings

Cant use windows update cause of 80072efd. From what I found the problem is with network proxy, but I tried to reset the IE and the proxy even without automatic detection, also used netsh command to reset proxy but still the problem persists.

But whenever I run a local proxy like Psiphon I can use windows update (proxy is not required for downloads only for update check).

Fortunately for those affected by this problem, Microsoft has officially acknowledged the issue.

So here are the steps that you need to take to fix this problem.

How can I fix Windows Update Error 0x80072efd on Windows 10?

  1. Update Network drivers
  2. Run the Network troubleshooter
  3. Fix connection problems
  4. Restart Windows Update service
  5. Run the SFC scan
  6. Run the DISM
  7. Switch to the iPv4 network

1. Update Network drivers

  1. Go to Search, type devicemngr, and open Device Manager.
  2. Find your router under Network Adapters.device manager
  3. Right-click your network adapter, and go to Update driver…
  4. Wait for the process to finish, and follow on-screen instructions.
  5. Restart your computer.

Whenever you suspect something is wrong with your Internet connection, the very first thing to try is updating your network drivers.

On the other hand, since updating drivers manually needs extra caution, we recommend you use a dedicated tool like Fortect Driver Updater.

Thus, you will prevent file loss and even permanent damage to your computer, because this tool scans your device for outdated drivers and recommends the appropriate new versions to install.

You can rest assured that Fortect Driver Updater offers only reliable driver options, from its built-in database.

⇒ Get Fortect Driver Updater

2. Run the Network troubleshooter

  1. Go to Settings.
  2. Head over to Update & Security > Troubleshoot.windows update troubleshooter
  3. Find Windows Update, and click Run the troubleshooter
  4. Follow further on-screen instructions.
  5. Restart your computer.

Microsoft’s troubleshooting tool is extremely useful when dealing with various system-related issues, including Windows Update problems.

3. Fix connection issues

Now, let’s investigate if something’s wrong with your internet connection. The simplest way to check this is to, well, connect to the Internet.

Check out some of the following articles and see if any of these problems apply to your situation:

4. Restart Windows Update service

  1. Go to Search, type services.msc, and go to Services.
  2. In the Services list, search for Windows Update.reset Windows Update services
  3. Right-click and go to Properties, then choose Disable.
  4. Restart your computer.
  5. Check out Services again and make sure that Windows Update is Disabled.

Now that the Windows Update service is disabled, let’s also delete the Software Distribution folder. This folder stores all the updated data and info before it gets installed on your computer.

So, deleting this folder will reset the complete update mechanism. We’ll also re-enable the Windows Update service after deleting the folder.

Here’s what you need to do:

  1. Find the SoftwareDistribution folder in File Explorer.
  2. Rename the folder to SoftwareDistribution.OLD (you can delete it, as well but why to take unnecessary risks).
  3. Restart your computer.
  4. Once again navigate to Services and find Windows Update.
  5. In Properties, change from Disabled to Manual.
  6. Restart your computer once again.
  7. Check again for updates.

5. Run the SFC scan

  1. In Windows Search type cmd
  2. Right-click and Run as administrator.
  3. In the command line type: sfc/scannowsfc scannow cmd
  4. The process should last a few minutes.
  5. After it’s done, close the command prompt.

In case you’ve never heard of this feature, the SFC scan is Windows’ built-in tool for resolving various problems. And it could be useful here, as well.

6. Run the DISM

  1. Press Windows key + X and run Command Prompt (Admin).
  2. Copy and paste the following command: DISM.exe /Online /Cleanup-image /RestorehealthDISM
  3. In case the DISM can’t obtain files online, try using your installation USB or DVD. Insert media and type the following command: DISM.exe /Online /Cleanup-Image /RestoreHealth /Source:C:RepairSourceWindows /LimitAccess

Note: Be sure to replace the C:/RepairSourceWindows path of your DVD or USB.

Similar to the SFC scan, DISM (Deployment Image & Servicing Management) is also a tool for dealing with various system errors, but a more advanced one.

So, if the SFC scan didn’t get the job done, your chances are better with DISM.

7. Switch to the iPv4 network

  1. Go to Search, type network connections, and open Network Connections.IPv4 disable
  2. Right-click the connection (either LAN or Wi-FI) you’re currently using and choose Properties.
  3. In the list of the connection items, uncheck the iPv6 box and confirm the selection.
  4. Save the changes.
  5. Go to Windows Update and check for updates.

This solution was helpful when dealing with Windows 10 update error 0x8024401c so it might also help in this case.

That’s all, we certainly hope at least one of these workarounds helped you with the 0x80072efd error. If you have any comments, questions, or suggestions, just let us know in the comments below.

YouTube: Video Paused. Continue Watching? [Best Solution]

In 2019, Google updated YouTube with a new video prompt feature. That prompt states, Video paused. Continue watching? Wow, what a great feature – I think not!

The Video paused prompt pops up in a browser when a video has been left playing in an inactive page time for a certain time period. That prompt pauses videos left playing in background YouTube tabs.

However, the Video paused feature hasn’t gone down that well with YouTube users. Some of them want to leave their YouTube music video playlists playing in background tabs, and this prompt can be very annoying.

Furthermore, some YT users have also said on Google’s forum that the Video prompt frequency is increasing.

YouTube doesn’t include any built-in option to disable that prompt, so this guide will cover this topic for all browsers.

How do I stop YouTube from pausing My continue watching?

Add the YouTube NonStop extension to your browser

Note icon NOTE
To make this process easy, make sure that the browser you’re trying to add the extension to is set as your default option. If you want to install the extension in a browser other than your default one, copy-paste the extension’s link presented here.

Google Chrome

  1. Open the extension’s web store page.
    The YouTube NonStop Chrome extension page youtube video paused continue watching
  2. Click the Add to Chrome button.
  3. Press the Add extension button to confirm.
  4. If you utilize Chrome on other devices, select the Turn on sync option to sync the extension with them.

Firefox

  1. Open the NonStop YouTube page.
    YouTube NonStop page for Firefox youtube video paused continue watching
  2. Click the Add to Firefox option.
  3. Select the Add option to further confirm.

Edge

  1. First, click the Settings and more button in Edge.
  2. Click Extensions to open the tab in the shot directly below.
    The Allow extensions from other option youtube video paused continue watching
  3. Toggle the Allow extensions from other stores option if it’s off.
  4. Next, open the YouTube NonStop extension page for Google Chrome.
  5. Click Add to Chrome to add the extension to Edge.
  6. Select the Add extension option to confirm.

Opera

  1. First, open the Install Google Chrome Extensions page in Opera.
    The Install Chrome Extensions page youtube video paused continue watching
  2. Click the Add to Opera button.
  3. Thereafter, open the YouTube NonStop extension page for Chrome in Opera.
  4. Click the Add to Chrome and Add extension options.

Opera is a customizable browser with lots of tools created to enhance your online experience, like the built-in ad-blocker and a player in your sidebar that lets you connect to your favorite music services in one place.

Note icon NOTE
You can also add YouTube NonStop extension to Vivaldi in much the same way as in the case of Opera.

So, that’s how you can disable the silly Video prompt pausing YouTube playback. Then you can listen to your YouTube music playlists in background tabs without frequent video pausing.

How to Fix Generic Audio Driver Problems in Windows 10 and 11

If you’re having sound issues in Windows 10 or Windows 11, it might be due to problems with the generic audio driver, Microsoft’s basic built-in driver used when no specific driver is installed.

You can fix this by learning how to install or set up the correct audio driver. This guide will help you resolve common generic audio driver errors and get your sound working again.

How can I fix the generic audio driver problem?

1. Reinstall your audio driver

  1. Press the Windows + X keys at the same time to open a Win + X menu.
  2. Click Device Manager on the Win + X menu.
  3. Next, double-click Sound, video and game controllers to expand it.
    Device Manager window generic audio driver problem
  4. Right-click your sound driver and select the Uninstall device option.
  5. Select the Delete the driver software for this device checkbox.
    Uninstall Device window generic audio driver problem
  6. Click the Uninstall option to confirm.
  7. Restart your desktop or laptop after uninstalling the audio driver.
  8. Open Device Manager again.
  9. Click the Action menu.
    Scan for hardware changes option generic audio driver problem
  10. Select the Scan for hardware changes option to reinstall uninstalled audio drivers.

Note: You might need to reinstall drivers for multiple audio devices listed within the Sound, video, and game controller to fix the generic audio driver issue.


2. Update your drivers

  1. Go to Settings and select Update & Security
  2. Click on Check for Updates and then on View optional updates
  3. Select the Driver Updates section and expand it
  4. Select the drivers you want to update
  5. Restart your PC

Follow these steps to manually update your audio drivers with ease using Windows Update.

Alternatively, to resolve the generic audio driver issue, you can use third-party driver updating software that downloads and installs the latest drivers for your PC with a few clicks.

3. Check the status of the Windows Audio service

  1. Start the Run accessory by pressing the Windows and R keyboard keys at the same time.
  2. Type services.msc in Run and click OK to open the Services window.
    Services window generic audio driver problem
  3. Double-click the Windows Audio service to open the properties window for it.
    audio properties window generic audio driver problem
  4. Click Start.
  5. Select the Automatic startup option.
  6. Select the Apply option.
  7. Click OK to close the properties window.
  8. Double-click the Windows Auto Endpoint Builder service.
  9. Click the Start button on the Windows Auto Endpoint Builder Properties window.
  10. Click Automatic on the Startup type drop-down menu.
  11. Select the Apply and OK options.

4. Disable audio enhancement effects

  1. Open the Run window.
  2. Input Control Panel and press Enter.
  3. Click Sound.
    Sound window generic audio driver problem
  4. Select your default sound device, and press the Properties button.
    Speaker Properties window generic audio driver problem
  5. Select the Disable all sound effects checkbox on the Enhancements tab.
  6. Click Apply, and Ok.

These are some of the best fixes that will help you resolve the generic audio driver issue.

If you managed to resolve the issue with alternative resolutions, feel free to share them in the comments section below.

If these fixes don’t resolve your audio issues, you might want to explore updated drivers for your system. Check out the best audio drivers for Windows 10 or find the latest Windows 11 audio driver downloads. For USB audio devices, see this guide on the Windows USB audio driver.

And if you’re missing the Realtek HD Audio Manager, this Realtek guide can help you restore it.

Laptop Screen Keeps Dimming or Brightening [Windows 10/11]

Most computer users may have experienced laptop screen issues at one time or another, sometimes with screens that may have lines, go blank, or bring up blue and/or black screen errors.

Other times, though, it could be an issue with the lighting. Another problem occurs when a screen dims and brightens by itself, randomly.

Something like this can happen due to corrupt display drivers on your computer, and not necessarily because of a faulty battery.

Before using any of the solutions below, check the following things:

  • The make and model of your laptop
  • Whether you made any software or hardware changes prior to the laptop screen issue

This is important to note because laptop screen dimming/brightening issues may occur if power settings are corrupt or incorrect.

In case your laptop issues persist, we created a list of several solutions that can easily help you solve the screen problem.

How can I fix the screen dim and brightens issues on laptops

  1. Update latest ACPI drivers
  2. Use Power troubleshooter
  3. Check your laptop screen display settings
  4. Update display card drivers

1. Update latest ACPI drivers

  1. Right-click on Device Manager open Properties and select details.
  2. Use the pull-down list to find the hardware identity (IDs).
  3. Copy the short string and search for it on Google.
find device manufacturer

When you find and download the driver from its manufacturer’s website, remove the current one, then uninstall it completely. Install the fresh copy of the driver once you remove the old one.

Updating the drivers manually can cause a lot of problems on your PC if the wrong ones are being installed.

Having this in mind we strongly suggest doing it automatically by using dedicated software, such as Fortect Driver Updater. After several tests, our team concluded that this is the best-automatized solution.

The software is very easy to use, and its interface is extremely intuitive. All you need to do is run the program and allow it to start scanning your PC for outdated drivers.

Moreover, Fortect Driver Updater will compare your existing drivers with the ones found in its built-in database and fix them if broken

When the scan is completed, you will also get a report with all the faulty drivers that have been found on your PC. Next, you can choose if you want to update them individually or all at once.

⇒ Get Fortect Driver Updater

2. Use Power troubleshooter

  1. Right-click Start and select Control Panel.
  2. Go to the top right corner and change View by option to Large icons.
  3. Click Troubleshooting.
  4. Click on View all option on the left panel.
  5. Click on Power.
  6. Follow the prompts to run the Power troubleshooter.

3. Check your laptop screen display settings

  1. Right-click Start and select Control Panel.
  2. Go to Appearance and Personalization.appearance and personalization control panel
  3. Click Adjust screen resolution.
  4. Go to Resolution and click the drop-down arrow.laptop screen
  5. You’ll see the resolution marked Recommended. This is the one suitable for your laptop screen’s native resolution, the highest your monitor can support.

You can set brightness and contrast from monitor controls. For a laptop screen, these are adjusted within Windows under Power Options.

How to adjust laptop screen on Power Options

  1. Right-click Start and select Control Panel.
  2. Go to the top right corner and change View by option to Large icons.
  3. Click Power Options and change your settings.

4. Update display card drivers

  1. Go to Device manager.
  2. If prompted for administrator permissions and/or password, enter your password and click Continue.
  3. Go to Display Adapters.
  4. Double click your Display adapter entry.
  5. Click Update Driver software.update driver software device manager
  6. Follow the wizard to update the display adapters driver

This is all, please let us know if our solutions worked for you.

Also, in case you have other ways of solving the screen issue, do not hesitate to let us know about them in the comment section below!

Cheaper Xbox Series X/S Storage Expansion Cards from other manufacturers could be on the way

Two days after Microsoft opened pre-orders for its next-gen Xbox Series X and S consoles, the 1TB Storage Expansion cards from Seagate are now available for pre-order with a $219.99 launch price. That’s almost as expensive as the $299 Xbox Series S, which only has 512GB of internal storage, though Seagate’s Storage Expansion cards will deliver the same speed and performance as the custom-designed internal NVMe SSDs found on the Series X and Series S.

Both next-gen consoles will still support traditional USB-based HDD/SSD external drives for playing Xbox One games or backwards-compatible Xbox 360 and OG Xbox games. However, next-gen games that leverage Microsoft’s new Xbox Velocity Architecture will require to be installed on the consoles’ internal storage or the proprietary Seagate Expansion cards.

With games like Destiny 2, Red Dead Redemption 2, and Call of Duty Modern Warfare now taking more than 100GB of storage, 512GB or even 1TB of storage may not be enough for most gamers. Backwards compatible games will also benefit from being installed on the Xbox Series X/S internal drive or a Storage Expansion Card, with Microsoft promising significant improvements in load times.

Paying an additional $219.99 to get more storage will probably be a tough pill to swallow for early adopters, but Xbox’s Jason’s Ronald hinted today that more Expansion Cards from other manufacturers with different storage capacities could be on the way.

Seagate, with a storied history as a critical innovator in the storage industry, was our first choice to collaborate with to provide expandable storage solutions for the Xbox Velocity Architecture. Xbox is continuing to invest in the Expandable Storage category on Xbox Series X|S with goal of offering choice for Xbox fans, including additional capacities and implementations in the future.

It’s a bit unfortunate that Seagate’s $219.99 1TB expansion cards will be the only next-gen external storage option at launch, but we hope more alternatives will follow in the coming months. In the meantime, you can pre-order Seagate’s expansion cards at the Microsoft Store or select retailers in select markets worldwide, with shipments to start on November 10.

4 Best mixing and mastering services for professionals

Mixing involves the complex process of taking recorded tracks and blending them using various processes such as EQ, Compression, and Reverb. Once you have a mixed track, the process of mastering begins.

The online mixing and mastering process has made this complex task easier. With their AI-driven tools, online mixing and mastering services allow you to get studio-quality without breaking your bank.

In this article, we take a look at the best five mixing and mastering services for professional music producers.

What is the best online professional mixing and mastering services?

LANDR

mixing and mastering services for professionals

LANDR is primarily a mastering tool. While it does allow you to tweak some mixing for your unfinished tracks using the tools, the company takes pride in its mastering capabilities.

LANDR audio mastering service gives the power of artificial intelligence that uses data from over 10 million mastered tracks to give your track the professional touch it deserves.

You can begin by using the free plan that allows you to master two tracks for free every month. The premium account comes with unlimited mastering as well as partner service using which you can sell your music on streaming platforms like Spotify and Apple Music.

For the more advanced users, LANDR offers on-site VSTs to discover new sounds and tools. You can try plugins like Lethal for free for three days without any fee.

LANDR

Easily mix and master your tracks at a professional level by using this amazing online service today!
Check price Visit website

AMM – Audio Mixing and Mastering

mixing and mastering services for professionals

If you still prefer the human touch over the AI driver tools, Audio Mixing and Mastering (AMM) offers professional online mixing and mastering service at an affordable price.

AMM offers multiple mixing and mastering plans. If you have separate tracks (Drums, Bass, Vocals, Guitars, etc.), you can choose the Mix only plan for $70. The mastering-only plan starts at $30 per track. However, the $125 plan offers both mixing and mastering of your track by professionals.

After uploading the tracks separately for mixing and mastering, you need to fill the form with the necessary information and file. AMM will work on your track, depending on the requirement, and deliver them to you.

⇒ Get AMM

Doctor Mix

mixing and mastering services for professionals

Doctor Mix is another online mixing and mastering service with professional service starting at $207 for mix and mastering. Based in London, Doctor Mix offers studio-quality tracks worked on by experienced sound engineers.

Doctor Mix offers two more plans for mastering only and remix and production priced at $51 and $818, respectively.

⇒ Get Doctor Mix

Mikes Mix and Master

mixing and mastering services for professionals

Mike’s Mix & Master is a professional online mixing and mastering service. Similar to other services listed earlier, Mikes’ Mix and Master service offer multiple plans for the music producers. The standard Mix and Master package starts at $126 and goes up to $1288 for the Supreme Album Mix and Master package.

⇒ Get Mikes Mix and Master

While LANDR is an excellent AI-driven tool for automated mastering of your tracks, there are also online mixing and mastering services that employ sound engineers for mixing and mastering purposes.

All the mixing and mastering services listed in this article allow you to get your tracks mixed and mastered through professional sound engineers with multiple revisions.

LinkedIn announces major redesign with Teams meetings integration and Snapchat-inspired Stories

LinkedIn announced this morning a big redesign that should affect many aspects of the web and mobile experience including search and profiles, while also adding new social features. The professional social network received its last fresh coat of paint nearly five years ago, and this new design update aims to “make your LinkedIn experience easy, inclusive, enjoyable, and most importantly to put the community front and center.”

The new search experience will add filters to make it easier to find what you’re looking for between people, posts, jobs, industries, groups, and more. In an effort to make the platform more inclusive, LinkedIn will also add new illustrations to reflect the diverse backgrounds and ethnicities of LinkedIn members.

LinkedIn Search

On the messaging front, LinkedIn will add the ability to edit or delete private messages, react to messages with an emoji, as well as the ability to bulk-manage your messages. The professional social network will also make it easy to start a video meeting with LinkedIn contacts on Microsoft Teams, Zoom, or Verizon’s BlueJeans app. These video meetings integrations are coming to the LinkedIn mobile app later this Fall.

meeting messenger

After some initial testing with select LinkedIn users, LinkedIn Stories are now rolling out to all users in the US and Canada. Similar to Snapchat and Instagram Stories, LinkedIn Stories will only be available for 24 hours, allowing users to share brief professional moments with their network. Through tests in various regions around the world, we’ve seen members adopt this format to connect more personally and less formally with their peers and friends. In the COVID world, LinkedIn Stories are letting people replace those essential water cooler moments,” the company explained.

LinkedIn Stories

If LinkedIn Stories are rolling out now on mobile, the bigger LinkedIn redesign will start rolling out to all users over the next few months, and the company is still working on other improvements including a dark mode. LinkedIn now boasts a community of 700 million professionals, and the company said it saw increased usage since the beginning of the COVID-19 pandemic with users sending hundreds of millions of messages every week.

“Whether we’re navigating a COVID downturn or post-COVID recovery, addressing an existing skills gap or a coming skills revolution, breaking systemic barriers to equal opportunity, or tackling whatever else defines work in the future, we’re fully committed to continuing to provide the tools and experiences that will let every professional connect to the right opportunities for them,” the team said today.

5 Best hip hop mixing and mastering services online

The hip hop Mixing and mastering services online help you get your music creation sound right. Whether you are planning on releasing an EP, album, or single, online mastering services can help you make your music loud, dynamic, and clear.

While the automated systems like LANDR can make the mastering process much simpler and quicker, mixing still requires a sound engineer to blend your tracks together.

In this article, we take a look at the best hip hop mixing and mastering services online to help you make your song sound as you intended.

What is the best Hip-Hop mixing and mastering service online?

LANDR

hip hop mixing and mastering services

LANDR is primarily a mastering service. It is an excellent service if you already have a mixed track that needs final touch in the form of mastering.

Apart from AI-driven mastering, LANDR also offers a distribution platform for new music producers to sell their music on streaming platforms like Spotify and Apple Music.

LANDR offers multiple plans catered to beginners and professionals. The standard plan starts $48 a year with some limitations and can go up to $299 a year for everything unlimited.

LANDR

Take your hip-hop mixing and mastering skills to the next level by using this powerful platform!
Check price Visit website

RecordingNow

hip hop mixing and mastering services

RecordingNow by ODI Productions is another online mixing and mastering service geared towards the hip hop music producers. It offers 2 step mastering process in which the vocals are mixed before mastering the whole song.

RecordingNow also has a fast turnaround time of 24 hours for mixing and mastering each. The company specializes in Hip Hop mastering and has mastered tracks for platinum artists such as Waka Flocka Flame and others.

⇒ Get RecordingNow

Audio Animals

hip hop mixing and mastering services

Audio Animals offer a professional mixing and mastering service by sound engineers. To get started, you can either request a mastering demo or request a mix evaluation to see if your music is ready for mixing.

The company also offers unlimited revisions with 24 hours turnaround time for most users. You can download the mastered track in multiple formats, including 24bit WAV master, 16bit CD master, and 320kbs MP3 master.

⇒ Get Audio Animals

Abbey Road

hip hop mixing and mastering services

Abbey Road is a professional mixing and mastering service that can work on a broad range of products. The company has worked on Oscar-winning music featured in Spiderman and Bohemian Rhapsody.

You can download the mastered files in Wav format. All the projects are stored in your account that you can edit and organize. Abbey Road offers one revision with five days of turnaround time.

You can choose from multiple master formats such as DDPi, iTunes, CD master, LP Album, 12” Single, and 7” Single, with different pricing for each format.

⇒ Get Abbey Road

DeviantNoise

hip hop mixing and mastering services

DeviantNoise is a professional mixing and mastering service that uses high-end plugins to produce a full, dynamic, loud, and clear track. The company specializes in Hip-Hop/Rap, R&B, Dance & EDM, and Pop music.

Depending on whether you are producing a single song or an EP, DeviantNoise offers multiple mixing and mastering plans starting from $300 for a single track. Services include level balancing, panning, equalization, compression, effects processing, and limiting.

⇒ Get DeviantNoise

Whether you are planning to release an album or a single, mixing and mastering allows you to make the song sound the way you intended.

These online mixing and mastering services offer the tools and techniques that professional studios and artists use to make a clear and well-balanced track.

The Division 2, Warhammer: Vermintide 2, and Bomber Crew are free to play with Xbox Live Gold this weekend

The Xbox team announced that there’s another Free Play Days event for this weekend on Xbox Wire. From now until Sunday, September 24, at 12:01 a.m. PDT, Tom Clancy’s The Division 2, Warhammer: Vermintide 2, and Bomber Crew are all available for Xbox Live Gold and Xbox Game Pass Ultimate members for free as part of their subscription.

Tom Clancy’s The Division 2 is an online action-shooter RPG experience. Your mission is to save the US on the brink of collapse as you build up your character with the best arsenal you can as you fight your way through the open, dynamic and extremely hostile environment in Washington, D.C.

Warhammer: Vermintide 2 is a first-person online co-op set in the Warhammer Fantasy Battles world. Vermintide 2 brings new enhancements in the sequel with a brand new enemy faction, 15 new career paths, talent trees, new weapons, an improved loot system, and much more. You can buy the Ultimate Edition right now for 75% off the original price, but hurry, this deal ends soon!

Bomber Crew is a World War 2 strategic flying simulator, where you completing the objective is as important as keeping your crew alive. You will need to manage everything; fuel, ammo, hydraulics, and more in your very own physics-based Bomber, which can be customized with an array of upgrades and other customizations. Keep in mind, if you pre-order the upcoming sequel, Space Crew, you will get Bomber Crew for free!

As always, Xbox Live Gold and Xbox Game Pass subscribers can download and install all of these games through Xbox.com or via your Xbox console. Which games will you be playing this weekend? Let us know in the comments.

Webinar registration and reporting features coming to Microsoft Teams soon

Microsoft Teams is finally getting a new webinar feature that will allow meeting organizers to use event registration with automated emails (via Petri). The company announced the feature at Microsoft Ignite 2020, indicating it will be available for all Teams users by the end of this year.

A majority of businesses worldwide have been hosting webinars to conduct presentations, lectures, workshops or seminars in recent months, making it easier to engage with audiences remotely. With this new feature, Teams meeting organizers will also be able to view a detailed reporting dashboard after the meeting has ended. The new capability should help them to understand attendee engagement.

The software giant has also promised to deliver attendee reporting and scheduling APIs to help users bring the data into their marketing and CRM solutions. In case you missed it, Microsoft has also announced a raft of other new Teams features such as Breakout rooms, new Together mode scenes, and more. We invite you to check out our separate post for more details.

Xbox Family Settings app is now generally available on iOS and Android

Microsoft has made it easier for parents to monitor their children’s gameplay time with the Xbox Family Settings app, now generally available on Android and iOS. In May 2020, Microsoft quietly released the Xbox Family Settings app in preview on Android.

Here’s a video look at how the Family Settings app works on Android and iOS.

As noted in a post on Xbox Wire, Microsoft adopted user feedback from the Android preview to implement three new features to the app on Android and iOS:

1. Accept or decline friends your child wants to add.
2. View and manage your child’s friends list.
3. Proactively grant your child more screen time.

The Xbox Family Settings app helps parents monitor their children’s Xbox activity without interfering with their gameplay. Once a child account is set up, parents can set screen time limits, game content limits, as well as play and communication settings. You can view your child’s friends list and actively approve and decline friend requests directly from your phone. There is also an option to get activity reports to view your child’s daily and weekly time on Xbox.

‎Xbox Family Settings


Xbox Family Settings

Pre-orders open for Xbox Series X and Xbox Series S 1TB SSD expansion cards at $219.99

Pre-orders for the Seagate Storage Expansion Card for Xbox Series X have gone live on the BestBuy website (via WC) revealing that each 1TB card will cost $219.99.

Seagate’s expansion cards are designed exclusively for Microsoft’s upcoming Xbox Series X and Xbox Series S video game consoles, feature custom PCIe Gen4x2 NVMe flash memory, and can be used to store Xbox Series X, Xbox One, Xbox 360, and original Xbox video games.

Pre-orders for the Seagate Storage Expansion Card have yet to go live on the official Microsoft website or other online retailers though they are expected to soon. It’s unlikely that such accessories will sell out as quickly as the Series X and Series S consoles themselves did so, if you prefer to order your gaming supplies from elsewhere, there’s no pressure to buy exclusively from BestBuy. At least not yet.

Are you planning to buy a Seagate Storage Expansion Card for your Xbox Series X or S console? Let us know why or why not in the comments below and then follow us on Twitter, Pinterest, and Facebook for more Xbox gaming news. Like podcasts? Check out our new OnMSFT podcast where we discuss Xbox and everything else Microsoft.

Something Went Wrong in Camera on Windows 10: 6 Fixes to use

Microsoft Windows 10 has an improved version of the Camera app, and while the app itself is useful, many users reported Something went wrong camera error.

This error can prevent a pleasant user experience while using the app. So, in this article, we will want to correct this for you. We will go through some possible triggers and the best solutions.

Why am I getting Something went wrong in Camera app on Windows 10?

This error message could signify a few things and is often caused by any of the following factors:

  • Improper installation – Here is a probable cause, as a faulty installation will often cause errors while using the application.
  • Outdated camera app – When apps become outdated, they will be unstable and throw many errors occasionally.
  • Insufficient storage space – Apps will generally misbehave if you are low on memory. This may trigger the Something went wrong in Camera app error message.
  • Outdated or corrupted driver – Your drivers are needed to link hardware and software. You may expect this error if the camera driver is outdated or corrupted.

Now we have an idea of possible causes, let us explore some of the most efficient solutions.

How can I fix Something went wrong Camera error on Windows 10?

  1. Manually update camera/webcam driver
  2. Change privacy options for camera
  3. Run Windows Store Apps troubleshooter
  4. Check your antivirus software
  5. Check permissions for the Pictures folder
  6. Update Camera app

1. Manually update the camera/webcam Driver

  1. Press Windows + R, and type devmgmt.msc, then hit Enter.
  2. In the Device Manager, expand the Cameras section.
  3. Right-click on Integrated Camera Webcam and select Update driver.
    something went wrong camera windows 10
  4.  Select Browse my computer for driver software option.
    Browse my computer for driver camera error
  5. Click Let me pick from a list of available drivers on my computer.
    Let me pick from a list of available drivers on my computer something went wrong camera error
  6. Make sure the Show compatible hardware option is checked.
  7. Select USB Video Device and click Next.
    something went wrong camera windows 10
  8. Windows will install the driver and show a success message.
  9. Exit Device Manager and reboot your system.
  10. After the system restarts, the camera should usually start working.

An outdated or corrupted driver can also cause Something went wrong camera error.

Alternatively, you can use third-party tools such as Fortect Driver Updater to update all your drivers with just a few clicks automatically.

Fortect Driver Updater is exceptionally lightweight, mainly because the driver libraries that power it are online rather than archived and built-in.

This means that as long as you have a stable Internet connection and Fortect Driver Updater is running, you will always have the latest drivers available whenever they become available.

Just download and install it, launch it, and let it scan your entire PC for old, broken, and missing drivers.

After confirming which ones you want to be fixed, it is only a matter of waiting for them to be downloaded and installed, and you can finish the entire process with a PC restart.

Fortect Driver Updater

Don’t waste more time manually updating camera drivers and perform it efficiently from now on.
Check Price Visit Website

2. Change privacy options for the camera

  1. Press Windows + I to open Settings.
  2. Click on Privacy.
  3. Scroll down and click on Camera, then make sure Allow apps to access your camera is turned On.
    something went wrong camera windows 10
  4. If the option is greyed out, click the Change button and Turn On.
  5. Open the Camera app and check if the error is resolved.

If you’re getting Something went wrong camera error, perhaps the issue is related to your privacy options.

3. Run Windows Store Apps troubleshooter

  1. In the Cortana/Search bar, type Troubleshoot and click on Troubleshoot Settings.
    something went wrong camera windows 10
  2. Under Troubleshoot, scroll down, click on Windows Store Apps, and click on Run the troubleshooter.
  3. The Troubleshooter will scan the system and look for any problems.
  4. If it suggests you Reset an App to fix the problem, click on Open Apps and features.
  5. Click on the Camera app and select Advanced Options.
    something went wrong camera windows 10
  6. Under the Camera app section, scroll down and click the Reset button.

Windows Store apps have their troubleshooter that might help you fix the Something went wrong camera error. After the reset is complete, launch the Camera app and check if the error is resolved.

4. Check your Antivirus Software

You may want to disable your antivirus software temporarily. In some cases, it may prevent some apps from functioning.

If disabling it solves the problem, you should consider changing to an antivirus more compatible with your OS and the apps you use.

So, to find practical antivirus programs that don’t interfere with Windows tools, you can use the best antiviruses compatible with Windows 10.

5. Check Permissions for the Pictures Folder

  1. Press Windows + E to open File Explorer.
  2. Right-click on Pictures folder and select Properties.
  3. Click on the Security tab, then Edit.
    Picture Properties something went wrong
  4. Check if your username is shown under Group or user names.permissions something went wrong
  5. If it is, under Permission for Username, check if Full control option is checked under Allow.
  6. Also, check the Deny column to see if read or write permission is denied for the user (they should not).
  7. Click Apply and OK to save the change.
  8. Click Add if your username is not listed under Group or user names.
  9. Type your user name and click on Check names, then click OK to add the user.
    something went wrong camera windows 10
  10. Click on the newly added username, and under Permissions for username, check if Full Control is enabled.
  11. Click Apply and OK to save the changes.
  12. Close the Properties window and open Camera App.

6. Update Camera App

  1. Open the Microsoft Store.
  2. Type Camera in the search and hit Enter.
    something went wrong camera windows 10
  3. Open Windows Camera from the search result and click Update.
    Windows Camera App update camera app problems
  4. Download and install the app.

Something went wrong camera error can be problematic, but we hope that you manage to fix it using one of our solutions.

Note that we have not written these fixes in any particular order. You must select a fix based on the likely cause of the error for your specific situation.

Lastly, we love to hear from you, so leave us a message in the comments below and tell us what worked for you.

FIX: Conexant HD audio microphone driver not working

Has your microphone stopped working after you installed the latest Windows 10 build? Well, I can tell you that you are not the only user who is having an issue with the audio drivers on Windows 10.

Follow the lines below and you will be able to fix your audio microphone driver and get going with your normal daily work.

Although your Microphone is showing as a normal default operational device in the Control Panel window, unfortunately, you cannot access Cortana.

The troubleshooting steps described involving using the built-in device troubleshooter to see if there is anything wrong with the device itself, uninstalling the driver and install it back in, and removing errors affecting the system.

The article below also covers the following topics:

  • Conexant ISST audio microphone not working
  • Conexant SmartAudio HD microphone not working
  • Conexant microphone not working

How do I fix the Conexant HD audio microphone driver?

  1. Make sure that the microphone is enabled
  2. Download the latest audio drivers from your hardware manufacturer’s website
  3. Launch Windows Troubleshooter
  4. Change the default format of your microphone
  5. Run a full system scan
  6. Update your OS

1. Make sure that the microphone is enabled

  1. Right-click on the speaker icon in the task tray > select Recording devices.
  2. Select your microphone > Properties.check microphone
  3. Make sure that the microphone is enabled.
enable microphone windows 10 pc

2. Download the latest audio drivers

Use the Device Manager

  1. Go to Start > type device manager > double click the first result to launch the Device Manager.
  2. Locate the audio device driver in the left-hand pane.
  3. Right-click on it > select Update Driver.update audio driver
  4. After you successfully updated the driver, reboot your computer.
  5. Check again if your microphone is working correctly.

Update drivers manually

  1. If the update driver feature failed, to go on the manufacturer’s website and download the latest driver from there.
  2. After you successfully downloaded the driver, go to the directory where you saved it and right-click on it.
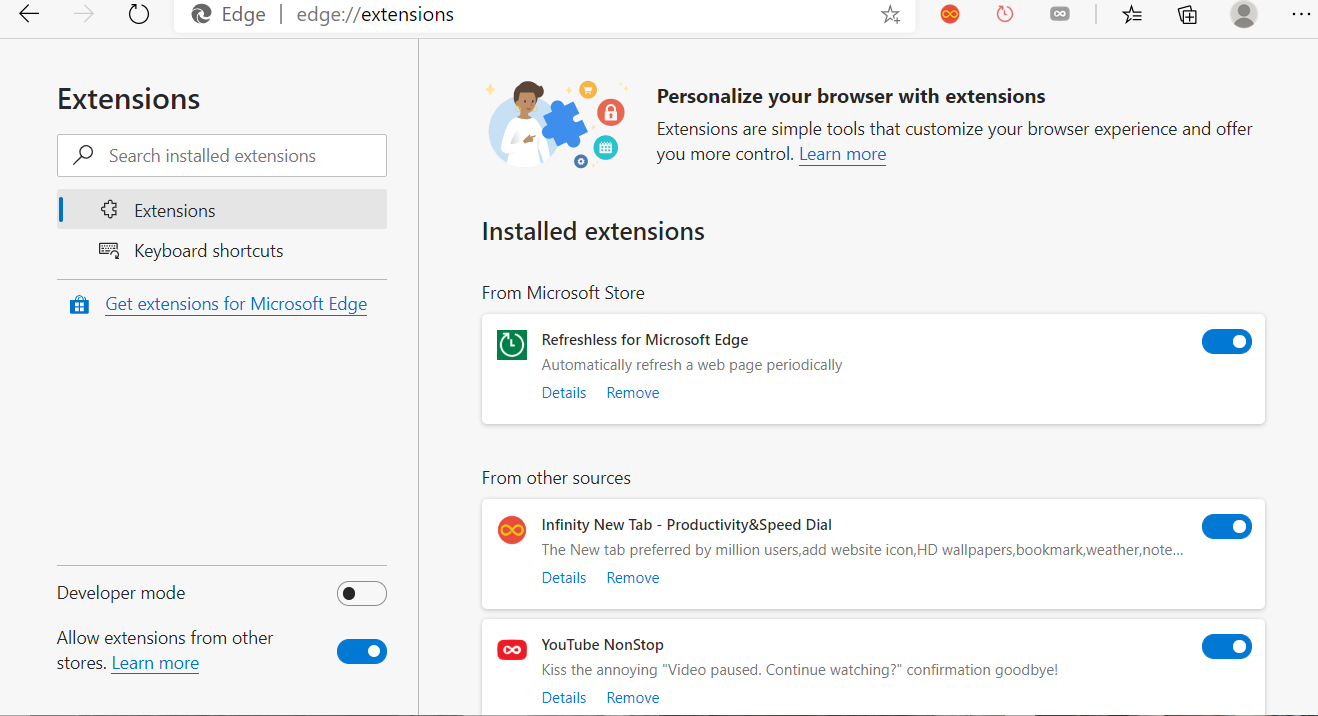
  3. From the menu that appears, select Run as Administrator
    • Note: if you are asked for an administrator account and password please type it in.
  4. Run the installation process normally and reboot your operating system afterward.
  5. Check again if you still have issues with your microphone.

Update drivers automatically (suggested)

Downloading drivers manually is a process that carries the risk of getting the wrong driver installed, which may lead to serious malfunctions.

The safer and easier way to update drivers on a Windows computer is by using an automatic tool.

Not only does it spare you the hassle of having to visit each manufacturer’s website and manually downloading the drivers, but by using it you also know you have the latest version as well.

3. Launch Windows Troubleshooter

  1. Go to search box and type troubleshoot > double click on the first result.
  2. Under Find and fix other problems, click on Hardware and Devices > launch the troubleshooter.fix Conexant HD audio microphone driver
  3. Once the troubleshooting process completes, reboot your Windows 10 computer.
  4. Check again if your microphone is now working properly.

4. Change the default format of your microphone

  1. Right-click the Sound icon in the bottom right of your screen > Recording
  2. Double click on the microphone to open Properties > click on Advanced
  3. Under the Default Format, choose any of the 16-bit options.change microphone format
  4. Click Apply, then OK.

5. Run a full system scan

  1. Go to Start > type ‘defender’ > double click Windows Defender to launch the tool.
  2. In the left-hand pane, select the shield icon.
  3. In the new window, click the Advanced scan option.
  4. Check the full scan option to launch a full system malware scan.

Malware may cause your microphone to stop working. Perform a full system scan in order to detect and remove any malware running on your computer. You can use Windows’ built-in antivirus, Windows Defender, or third-party antivirus solutions.

6. Update your OS

Make sure that you’re running the latest Windows OS updates on your machine. Microsoft constantly rolls out Windows updates in order to improve the system’s stability and fix various issues, including microphone bugs that may trigger Conexant HD Audio Microphone Driver issues.

To access the Windows Update section, you can simply type “update” in the search box. This method works on all Windows versions. Then go to Windows Update, check for updates and install the available updates.

And there it is, you now have above some easy methods that will get your Conexant HD audio microphone up and running in Windows 10.

Also, if you do run into any more issues along the way drop us a line in the comments section of the page situated below and I will help you further as soon as possible.

Samsung re-engages with normal prices with its new S20 Fan Edition release

With Google seemingly shifting gears on its pricing scheme with the upcoming Pixel 5 release, and Apple finding continued success with its SE lineup, the market is primed for Samsung to follow suit.
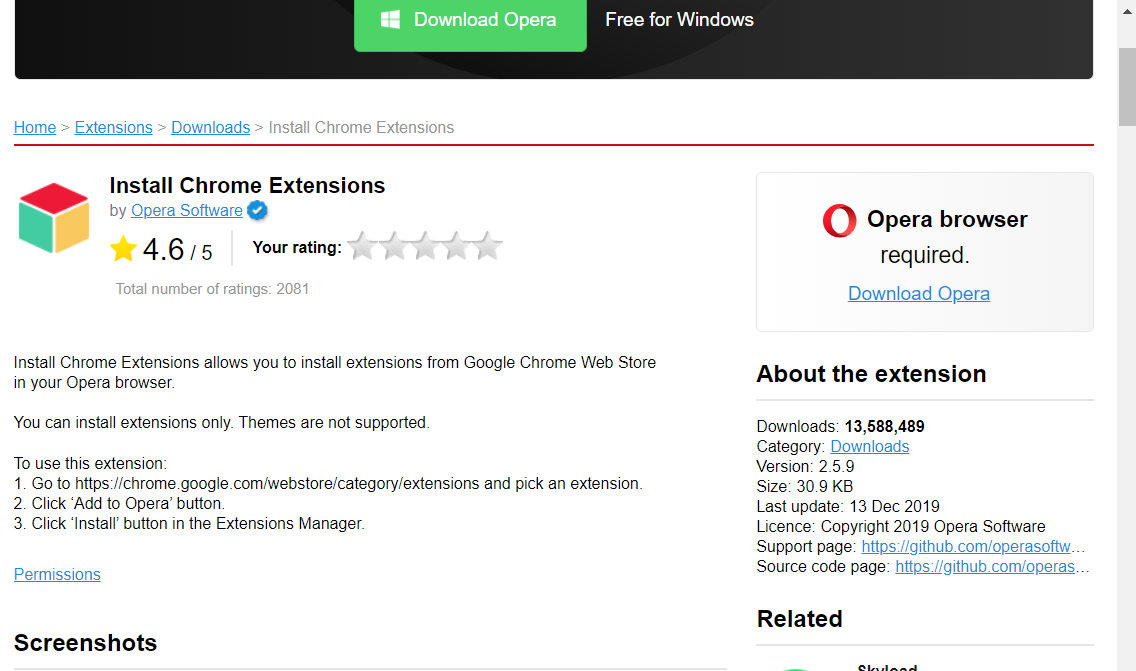
Today, Samsung took its stab at reintroducing what it considers a reasonably priced flagship experience with its new S20 FE (Fan Edition). In the age of $1,000+ phone prices, OEM’s are now doing a sleight of hand with the headroom their recent pricing hikes has created by “offering” a version of their latest flagships in what used to be “normal” retail.

Samsung’s new S20 FE is, by all accounts, a great deal coming in at just under $700 for a phone that’s powered by Qualcomm’s latest Snapdragon 865 processor, 6GB’s of RAM, and 128GB’s of expandable storage. Other Samsung S20 FE features include 5G support on a 6-and-a-half-inch Super AMOLED screen with a 120 Hz refresh rate panel and a camera array of three lenses for various wide-angle photography, digital zooms the telephoto capture.

Perhaps the more compelling value of the S20 FE is its color option pallet. Instead of some sleek “business-friendly” shades of rose gold, black, white, and blue, Samsung is offering more playful pastel-like tones that include lavender, mint, navy, red, orange, and white.

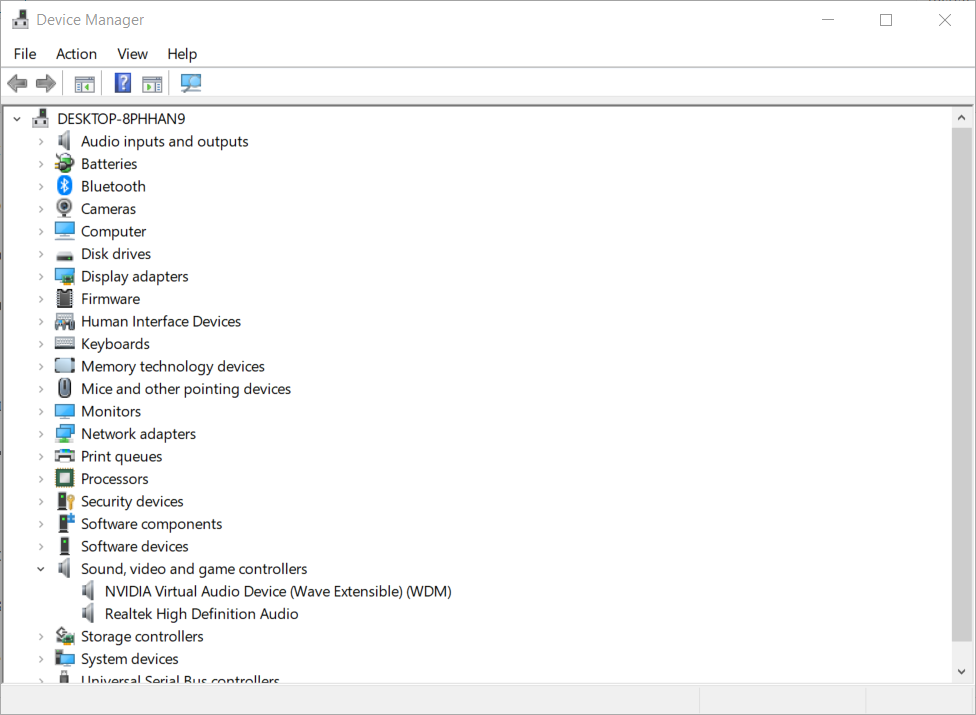
Moments after the Samsung live stream event, the S20 FE was put up for pre-order with device shipping as early as October 1, 2020.

The move for Samsung to offer a value-packed (albeit plastic) version follows those of OnePlus, LG, Google, and even Apple this year, hopefully, the trend continues well into the future and Microsoft’s Duo finds itself part of the trend.

Is Orbot a good VPN? Check our honest review

Orbot is a nifty security/privacy application that can keep your mobile communications private while you’re online. It’s based on Tor, but it’s only available for Android phones.

As you probably figured it out already, you can’t exactly use it on Windows 10. Tor and its browser are enough protection and basically offer the same thing for your Windows 10 PC.

Many take Orbot for a dedicated VPN service, which is not exactly true. While Orbot does offer some VPN features, it functions after a somewhat different set of rules.

Did we mention that it’s entirely free to use?

Is Orbot a VPN?

Long story short, no, Orbot is not a VPN for your Android phone. What this project manages to do instead is bring Tor functionality to Android phones. It’s optimized for these devices, so you can rest assured that it’s not just some port.

Orbot lets you connect to the Internet in a secure, private manner. You’re maybe thinking: right, but that’s the same thing a VPN does, so how is Orbot any different? Well, the truth is that this app has the best of both proxy servers and VPNs.

Proxy vs. VPN

Proxy servers let you access certain websites and services on the Internet by offering you a gateway. A VPN establishes a secure tunnel to any server in its network.

Both proxies and VPNs mask your IP address, but proxy servers are generally less secure due to a lack of encryption. A VPN encrypts your traffic, but it can be a bit slower than a proxy.

Orbot uses Tor to encrypt your traffic by redirecting it through various nodes around the world. The nodes are usually other Tor users, but there’s also a chance you can bounce through an exit relay hosted on a dedicated machine.

Long story short, Orbot can be rather deemed as Tor for Android phones with added VPN functionality (includes a VPN mode).

What is VPN mode in Orbot?

As we’ve briefly mentioned above, this app encompasses a VPN mode. Upon closer inspection, you may notice that it acts exactly like a VPN.

It even asks you for permission to manage your connection, just like any other Android VPN service does.

However, Orbot has a bunch of extra features that regular VPNs may lack. For instance, it’s widely known that many websites have VPN filters, which are used to detect and block VPN traffic. One such website is the US version of Netflix.

How good is Orbot VPN?

Considering that it’s based on Tor, Orbot’s VPN can’t be blocked by websites as easily. Your connection will bounce through several nodes until finally reaching the website, which makes it harder to detect and block.

Furthermore, your traffic will be both encrypted and dispersed throughout all the nodes on your connection. This makes it tenfold harder to decrypt traffic, given that it’s not all in the same place.

Last, but not least, Orbot’s VPN feature lets you enable it only for certain apps on your phone. It kind of works like split tunneling, letting you choose which apps‘ traffic will be encrypted.

How to use Orbot VPN

1. Install it on your device

  1. Visit the product page on Google Play
  2. Hit the Install button
  3. Wait for the installation to come to an endInstall Orbot
  4. Hit the Open button to launch the app

2. Launch Orbot

  1. Find the app icon and tap it
  2. Go through the initial dialogue
  3. Click Done once you’re doneOrbot welcome dialogue

3. Connect to a server

  1. In the main screen, click the location menu
  2. Select a suitable location for your needs
  3. Click the large Start buttonOrbot VPN enabled and connected
  4. Check the status of your connection below the button

4. Toggle VPN mode

  1. Flick the VPN Mode switch next to the location menu
  2. Confirm Orbot’s connection request by clicking OKOrbot VPN connection request
  3. Toggle Use Bridges feature if you have trouble connecting
  4. Configure which apps should use the VPN feature

It’s worth mentioning that you can select the apps for which Orbot will encrypt traffic. Selecting no apps (by default, no apps are selected) will enable a system-wide VPN.

Additionally, we’ve found some hints that the system-wide VPN only works on rooted phones. However, we’ve tested it on a non-rooted phone and it seems to work just fine.

5. Configure Orbot

  1. Click the vertical ellipsis button (the one that looks like three dots placed vertically)
  2. Select Settings from the menu
  3. Customize your Orbot’s configuration schemeOrbot VPN settings

Note that from an accessibility standpoint, Orbot can be easily configured, as most of the customization options work on a disable/enable model.

However, you should refrain from bringing any changes to the default configuration unless you really know what you’re doing. Otherwise, you may break Orbot’s security and even its functionality.

6. Bonus: for Samsung devices

  1. Launch the Orbot app on your Samsung phone
  2. Click the vertical ellipsis button (3-dot button, top-right)
  3. Select Settings from the menu
  4. Scroll down to the Debug sectionOrbot debug settings
  5. Tap Tor SOCKS
  6. Type AUTO instead of 9050Changing Orbot SOCKS port

Reportedly, there’s an app running on Samsung devices that listens to port 9050, which Orbot uses by default. You can either locate the apps that are listening on that port (use third-party apps such as Netstat), force stop them and disable them.

However, it’s far easier to just change Orbot’s default Tor SOCKS port from the app.

How to use Orbot VPN on Windows 10

As we’ve clearly mentioned above, Orbot is Android-exclusive. Thus, not only is the app only available for Android, but it’s also optimized for these devices alone.

In conclusion, you can’t run Orbot on your Windows 10 PC natively, so you’ll have to improvise.

Although you can either use a regular VPN or Tor on Windows to the same effect as Orbot, if you’re stubborn you’ll need an Android emulator such as BlueStacks or NoxPlayer.

Once you have the emulator installed on your PC, deploy the app on it as we’ve described above.

Apparently, the app works without any major issues on Android emulators. However, it won’t be able to hide any traffic from outside the emulator. Furthermore, it may not be as secure as installing and running it on an Android device.

Final thoughts on using Orbot as a VPN

All things considered, if you want a private, secure VPN on your Android device, Orbot is a good place to start. It basically brings all of Tor’s functionality on your Android phone, with added capabilities.

If you plan on using Orbot on your Windows 10 PC, it might be too much hassle. Since the app is Android-exclusive, you’ll need an emulator to get things running, and you might even notice certain bugs during the app‘s runtime.

[wl_navigator]

Firestick Won’t Connect to Wi-Fi? 7 Ways to Fix the Problem

It seems to be a very well-known problem with the Fire TV Stick because many users cannot establish a WLAN connection. The reasons for this seem to be quite different.

It is not unknown that the Fire TV Stick causes problems. One of the biggest issues, besides the sound interruptions, seems to be the WLAN connection, which is interrupted from time to time or cannot be established at all.

In the following lines of this article, you will learn seven simple ways to solve WLAN problems with the Fire TV Stick.

How can I connect a Fire Stick to Wi-Fi?

1. Restart devices

  1. Disconnect both Fire TV Stick and the router completely from the power supply and wait for about 3 minutes.
  2. Now reconnect the router to the power supply, wait about one minute, and then start the Fire TV Stick.

2. Check Fire TV Stick settings

Check settings for firestick wont connect to Wi-Fi

You have to check if the Firestick is connected to one of the following network or router types:

  1. Open, WEP, WPA-PSK, and WPA2-PSK encrypted networks.
  2. B, G, and N routers on 2.4 GHz.
  3. A and N router on 5 GHz.
  4. Hidden networks.

Activate the wireless connection on the Fire TV Stick:

  1. Go to Settings, click on System, and open Wireless connection.
  2. Select the desired WLAN network first.
  3. Restart the router completely.
  4. Retry the connection.

3. Check WLAN signal strength


The router should not be too far from the Fire TV Stick for an optimal connection.

Note: Electrical devices, walls, and cabinets can affect reception quality.

4. Use an Ethernet cable

Use powercabe for firestick wont connect to Wi-Fi

It is also recommended that you use the supplied power cable. Although some TV sets provide enough power to get the TV Stick working, it is generally recommended that you use the power connection.

5. Check network status


Note: If the Internet connection is causing problems, you may receive the error message Check your network status.

If you see the error mentioned above, go to Settings and press the Play/Pause button on the remote control to check your network status.

6. Restart Fire TV Stick

  1. Using the remote control: press the Select and Playback buttons simultaneously until the Fire TV Stick restarts.
  2. Via the Fire Stick menu: open Settings, click on System, then select Restart.

We hope this guide has proven helpful in your situation and that you resumed using your Fire TV stick as usual. Even more, this guide is perfect if the Internet is working, but your Firestick is not connecting. You can simply forget your network and restart your Firestick or apply other tips here detailed.

Feel free to let us know if you have any suggestions by using the comment section below.

Samsung Galaxy Z Fold 2 first impressions: A monster of a Microsoft phone

OK, I don’t need a new phone. I don’t even need all the capabilities of the phone I’ve been using, a used Apple iPhone 7+. But like many of you, I like toys, especially technology toys, and when I saw the “Samsung Galaxy Z Fold 2 5G” announced back in August, I was very intrigued. With Samsung’s recently expanded partnership with Microsoft, and the promise of features like Link To Windows and the Microsoft Launcher (unavailable for iPhone), and also as my colleague Arif Bacchus has been equally stricken with the Surface Duo, I decided to bite the bullet and order a Z Fold 2 for myself from Verizon. I’ll be having more to say about Samsung and Microsoft, the Z Fold 2, and even a bit on Apple vs. Android and Z Fold 2 vs Duo in the coming weeks, but for now, let’s start with some first impressions.

Unboxing:

Yep, it came in a box. Why anyone gets excited about unboxing videos is beyond me, and I didn’t make one. I did snap a few pictures, though, just for fun. Aside from printed cardboard, the Z Fold 2 comes with… a charger. Woohoo!

A note on my backwater life:

First off, a number of issues we’ll come to all boil down to my moving to rural NE Washington (I’m 12 miles from Canada to the north and 12 miles from Idaho to the east). I love it here for every reason except one, broadband internet. The closest thing to “high speed internet” I can get is via an AT&T MiFi, which gives me ~20mbps/10mbps and unlimited bandwidth (only unlimited because AT&T doesn’t actually throttle speeds after 22gb, unlike Verizon or T-Mobile).  My latest incarnation works (and I’ve tried just about everything), but I live in a world far away from fiber optic or cable or 5G. My connection is from a WiFi router to an AT&T cell connection, and it is what it is.

One other note: I’m not a phone reviewer, and I don’t change phones every week or every month. I bought my Lumia 950XL the day it came out in November 2015, and since then I’ve had a Samsung S8+ and an iPhone 6s (used) and an iPhone 7+ (also used). I plan on keeping this Z Fold 2 for years (at $2,000, I’d better!). Some of my setup issues would have been easier if I did it all the time, but most of you probably don’t switch phones every week either. I won’t be spouting off a bunch of specs; I’m a phone user, not a phone reviewing professional. Just one of the people, here :).

Setup (not seamless)

After my last Windows Phone, a Lumia 950XL, I bought a Samsung S8+, which I liked, but due to some of those broadband internet sharing and cap issues, I switched to an iPhone. Now I’m back on Samsung and Android. The trick to moving from one to the other has mainly to do with saving your messages. The iPhone uses iMessage, a thinly disguised attempt to lock you into the Apple platform. Still, Samsung has “Smart Switch,” and once you turn off iMessage, and then back up your iPhone to iTunes (iCloud backs up iMessages, but not SMS messages, but iTunes does, apparently), the process is fairly seamless. Well, seamless after jumping through a bunch of hoops that is.

One big disappointment was with LastPass. After years of managing passwords with an Excel spreadsheet, post it notes, and a healthy does of “oh, I’ll remember that” (you know how that ends), I made the switch to the LastPass password manager. It hasn’t been a perfect experience, more of an incremental step in the right direction than a complete solution, but I’ve been sticking with it.

With the iPhone, I downloaded the app, logged in with my LastPass master password, and was using the service right off. Apparently, however, Android has developed an AutoFill platform, and you not only need to install LastPass, but dig into the depths of Android’s settings and allow LastPass to work with AutoFill, and to enable “Draw over other apps,” an obscure setting deep down in System Settings>Apps>LastPass>Advanced. Since I didn’t know that (and there was no warning when installing LastPass that there were multiple other steps still to go), I lost out on the convenience of LastPass when doing that most intensive of all password enabling endeavors, setting up a new phone. Finally, a couple days in, I buckled down and learned how to set up LastPass, but by then it was too late. Lesson learned, and now everything is working, but a painful experience when LastPass was supposed to make things easier.

Getting Started

Some first first impressions of the Z Fold 2:

  • It’s heavy, but not in a bad way. It feels substantial, like a $2,000 device should. It feels serious, and the metal casing makes it feel more like a fine watch than a mass produced phone. It’s an elegant feel.
  • This is not Samsung’s version of the Surface Duo. It’s a different device altogether. With its world class cameras, great battery life, a fully functioning front screen and a the large main screen, the Z Fold 2 answers a different question than the Surface Duo. It’s not a dual screen device, it’s a big screen device, with an additional small screen, that still fits (easily) in your pocket.
  • The learning curve to getting everything set up is steeper than I’d like. Splitting the big screen for two apps isn’t intuitive, although fairly straightforward once you know how, but again, splitting the screen is a secondary feature of the Z Fold 2, not the be all and end all that it is on the Duo.
  • Smartphones have changed the way we use photography, and this phone is the epitome of that. Great cameras and a large screen to show them off. I can’t wait to unfold the Z Fold 2 to show off pictures. For many users, a phone *IS* a camera, more than it’s a telephone or an internet connection, and the Z Fold 2 is a top of the line camera phone.

Z Fold 2 Shut

Microsoft Launcher and the future of the Microsoft Phone

Although it’s not a seamless setup, either, the Z Fold 2, along with most Android devices, can become a powerful Microsoft machine. The apps, from Microsoft Launcher to Outlook to Edge to Office, are great, and together, they make you *almost* forget about the death of Windows Phone. While I haven’t had a chance to play with it yet except to get it running, the Link To Windows feature is largely a gimmick at this point, but it’s early in what could be a major opportunity to, well, link the desktop to the phone in ways that just haven’t been possible before.

Another impression coming from the iPhone: while Apple is famous for doing everything they can to lock you into their ecosystem (and lock other ecosystems out), the pendulum swings all the way over with Android and the Z Fold 2. Instead of being pushed to iCloud, this phone has cloud services baked in from Google, from Samsung, from Verizon, and from Microsoft (I bought the phone from my carrier, Verizon, instead of from Samsung directly. The Microsoft Store doesn’t yet have the Z Fold 2). You can’t delete these cloud service apps, although you can do an ok good job of hiding them. Samsung’s Bixby is still around, inexplicably, but you can easily remap the power button to power off with a long press instead of open Bixby (on the S8+, this took some hacking).

As much as Microsoft has done to build an ecosystem of Microsoft-centric apps, it’s still Google’s operating system, and Google services remain close to the metal. Instead of fighting that, I’m going to use Google Drive for phone backups and photo storage (while still using OneDrive for lots of other stuff).

Some final first thoughts, and more to come

This is a great phone. It’s a big screen in a small package, without compromise. I bought it because it does all the things I really want in a phone, ie: great battery life, beautiful screens, easy to use, great cameras and an unparalleled main display. It’s going to be great at what I use a phone for: taking and sharing pictures, catching up on Twitter and email, watching movies and playing music, and perhaps doing the occasional work in Office. I still contend that the best productivity suite available is a laptop and a phone, and I don’t see myself leaving a laptop at home when I travel (if I ever travel again). But the Z Fold 2 isn’t a small laptop, it’s a big phone, one that, amazingly, folds up. I’m excited to get past the setup phase and really start using this phone.