Microsoft Leap – All You Need To Know

Microsoft Leap can help you break into the tech industry if you’re from a profession not aligned with the traditional schooling for computer science careers.

So, you could be a musician, carpenter, tailor, high school teacher, freelance ghostwriter, game streamer, grocery store clerk, salesperson, and so on. Microsoft Leap is your pathway for a career transformation. It can help you fill the shortage of IT engineers, focusing on emerging tech niches like AI and ML.

Read on until the end to learn how to apply from various non-IT professions with basic IT training in your resume.

What Is Microsoft Leap?

What Is Microsoft Leap

Microsoft Leap is a Microsoft-sponsored cohort-based apprenticeship program. It helps Microsoft bring fresh talent to the information technology industry from unconventional professions.

It’s a 16-week immersive experience that offers hands-on training and real-world projects. Think of it as a full-fledged outcome-oriented IT course, where you’ll work alongside experienced Microsoft or partner organization engineers. At the end of the course, you should acquire enough skills and expertise to take part in similar IT projects.

The program is open to persons from all professions. Even if you don’t come from a traditional computer science background, you can apply.

All in all, Microsoft Leap is your best bet if you’re passionate about IT and ready to dive into a challenging yet rewarding learning experience.

Pros and Cons of the Program

Find below why the program might or might not be suitable for you:

ProsCons
Experienceless entry to IT career.You must bring in basic training in IT along with basic coding expertise.
Great opportunity to work at Microsoft or equivalent IT partner organizations.Top-level IT projects might be restricted to US-only locations. This apprenticeship program doesn’t offer work or internship visa assistance.
Paid training at state-of-the-art workplaces and IT labs.There’s no job guarantee once the apprenticeship ends.
Extensive networking to secure a job isn’t required.The application process is highly elaborate and requires a comprehensive LinkedIn profile containing all educational and work experience certificates.
Hybrid learning and apprenticeship experiences through online and offline classes and workshops.You must be active on social media platforms, like LinkedIn, Twitter, Facebook, etc., to go through Microsoft Leap-related announcements all the time. The application window is often for just one to two weeks.
The Microsoft Leap organizer provides health insurance.The competition for a Leap spot is intense. You might get rejected even if you fulfill all the qualifications.
Accessible from many countries across the world.

Technology Training Pathways

Technology Training Pathways of Microsoft Leap

This apprentice program’s specialty is the flexibility of choices for the learning path. You don’t have to go through a rigid set of learning materials. You can choose one track from various technology niches:

  1. Cloud: In the Cloud pathways learning board, the program will post all relevant cohort sessions. For example, Cloud Solution Architect and Azure Specialist are the most popular courses.
  2. Data: Here you can enlist for the Data Analyst training cohort that will upskill you for data extraction, collection, transformation, analysis, and visualization.
  3. Design: If you love to create visual designs, graphics, etc., and want to get into the IT career, you can choose a Design cohort, like User Experience Designer.
  4. Engineering: It’s the most elaborate pathway you can go for. Here, you can find various Leap training slots, like Customer Engineer, Cybersecurity Engineer, Senior Software Engineer, Software Engineer, and Technical Support Engineer.
  5. Product/Program Management: If you’d like to see yourself in a managerial role in the IT sector, check out the Leap slots in this pathway. It often offers upskilling programs for Business Program Managers, Product Managers, and Technical Program Managers.

Learning programs and specialties change frequently depending on the trends and talent requirements in the industry. So, if you don’t possess the required basic training in the above niches, check back next recruitment season for newer roles.

Application Eligibility

You should apply for the Leap apprenticeship program if you fulfill the following requirements:

  • You’re absolutely sure that you can go through an elaborate online and classroom training program for 16 weeks. The learning period is continuous. You can’t pause a few weeks and then resume.
  • You’ve got the relevant work authorizations in your country of residence.
  • The application process requires a LinkedIn account. Make sure you’ve added all the relevant experiences and certifications to your account.
  • During the application process, you must add a few links to websites or online files. Those URLs should be publicly available.
  • You can put aside various professional and personal responsibilities for the training duration.
  • You’ll also have to show extensive prior experience in the Leap pathway you’ve chosen during the application, interview, and selection process.
  • Ensure you can access high-speed internet for virtual interviews.

While the application process for Microsoft Leap is relatively simple, some of the requirements seem to contradict the program’s stated goals.

A clear example of inconsistency is, if you select the Azure Specialist role and have a basic understanding of cloud computing, you might not qualify. The eligibility criteria require applicants to demonstrate prior experience in cloud computing, which could be challenging for those without a traditional IT education.

However, the program seems to benefit IT professionals and recent graduates who may struggle to secure desired roles due to limited networking or experience at prestigious companies. Those with sufficient prior experience in their chosen pathway are likely to gain significant advantages from the program.

How To Apply for a Microsoft Leap Cohort

An interesting fact is you can’t apply directly for the apprenticeship program from the Microsoft Leap website. You must use the link provided in one of its social media handles.

So, if you’re looking for a seat in this campaign, join the social media handles as soon as possible. Then, check them regularly for application-related announcements, links, instructions, etc.

The application window is short. Microsoft has designed it in a way that only truly enthusiasts would apply. For example, for the January 21, 2025 – May 9, 2025 training session, Microsoft had announced the application window only two weeks before the commencement date.

Microsoft Leap Cohort social apply one

Also, the application timeframe was open only for seven days.

Microsoft Leap Cohort social apply two

Microsoft Leap Program – Your Expectations

The application process will be elaborate. You’ll have to go through creative and technical questions, that Microsoft won’t reveal before application.

Moreover, the Leap recruiters will thoroughly review your application. You must also pass multiple interview sessions after the preliminary selection process. Usually, there will be two virtual interviews of 45 minutes each.

The interviewer will assess your knowledge and expertise in the following areas:

  • Problem solving
  • Technical skills
  • Collaborative skills.

You should also know that Leap will only choose a few candidates from each application lot. So, you must deliver your best during all the phases.

Additionally, the learning experience you can expect from Leap is state-of-the-art. A team of expert Microsoft engineers and training facilitators have created the course content and designed it. The program includes classroom sessions, virtual events, on-the-job project work, virtual project sessions, etc.

You can also expect to learn other related skills besides technical ones. For example, the course content will also train you on the following topics:

  • Collaboration at the workplace
  • Problem-solving for complex situations
  • Effective communication
  • Creativity
  • Customer-centric mindset development and customer service.

Find other minute yet important expectations below:

Expectation QuestionsPossible Outcomes
Who sponsors the program?Microsoft or one of its partner business organizations.
Do I get paid?Yes.
Do I get health insurance for the training period?Yes.
Are there any relocation assistance?No.
Is childcare provided?No.
Does the program help me find accommodation?No.
Is Microsoft Leap a remote program?There are various considerations when rolling out a new cohort. Usually, it includes both classroom and online learning sessions.
Is there any job guarantee?Though there’s no job guarantee, a report published by Microsoft suggests that 98% of the Leapers find a profession in the technology industry.
Does Microsoft Leap accept multiple applications from the same candidate?Try to apply for a pathway that you believe know the best or have maximum interest in it. If you’re applying for multiple roles, chances are you won’t get selected as you don’t know which cohort suits you the best.

How To Stay Informed

The program organizer will make all the training updates through its social media channels. Here are the most relevant platforms and mediums you should keep an eye on:

Events

The Events portal will provide links to various webinars related to the Leap cohorts. Here’s how you can use this resource effectively to aid your application and interview process:

  1. Navigate to the Events page.
  2. Click on the Location drop-down list and choose your current country or state (for US residents only) of residence. For instance, Multiple locations, United States.
  3. Hit the Choose a pathway drop-down list and select your preferred domain.
  4. Click on the Event type list to select an option, like Application windows to learn about the next cohorts and their application timeframes.
  5. In the Happening now tab, you should see the available events.
Happening now
  1. Click on an event and hit the Join event link at the bottom to sign up for the session.
  2. If there are no events at the moment, click on the Coming soon tab to check if there are any future sessions.

LinkedIn

LinkedIn

Follow the Microsoft Leap home page on LinkedIn. Scroll through all of its posts to learn about upcoming application windows, guidelines, and so on.

Facebook

Facebook

If you’re more of a Facebook person, Microsoft Leap is also available on this platform. It shows similar program updates as the LinkedIn handle.

X (Twitter)

Twitter

You can also stay in the know about all Leap announcements by subscribing to this X (Twitter) handle.

How To Get Help With Microsoft Leap

To clear your doubts about this program, you can visit the Frequently asked questions page.

If you don’t find enough information there, navigate to the Contact Us webpage of Microsoft Leap.

Click on the Subject drop-down menu and choose an option from three primary fields:

  • Upcoming cohort dates
  • Application submission status
  • General feedback/ question.

A detailed form will open. You can then enter your query in the Message field along with demographic data, like First name, Last name, and Email.

contact us

Before you can submit your query, you’ll have to resolve the available Captcha challenge.

Summary

Microsoft Leap is a great way to enter the IT sector especially if you’re looking for an alternative career or you’ve been a stay-at-home parent looking to enter the workforce again.

However, you might find yourself competing with experts who already worked for an IT company and are looking to work for Microsoft or one of its partner organizations.

So, as a professional from an unconventional role, invest at least six months in IT training courses online or offline. Create a good resume consisting of relevant experiences that Leap prefers. Then, you might stand a chance!

You can also accelerate your IT learning track by going through the best offline coding apps, education apps, and browsers for e-learning.

Microsoft Edge will flag Microsoft-based extensions as potential threats

Microsoft Edge is turning off Microsoft-based extensions and plugins to protect the browser from potential cyberattacks. Captured by a Reddit user, the browser has turned off the Microsoft WowTab extension after it deemed it a potential threat to the device’s stability.

However, this isn’t particularly the first time Microsoft Edge has been so careful. The browser has also stopped the Microsoft Rewards extension from working due to the same policy. So, no, Microsoft is not making an exception, even for Microsoft.

However, if you don’t want the pop-up to appear again (especially if it happens with the Microsoft Rewards extension), you can permanently disable it from Settings.

  1. Go to Microsoft Edge’s Settings > Privacy, search, and services.
  2. Scroll down until you find the Address bar and search, and click on it.Microsoft Edge extensions
  3. Make sure the Search engine used in the address bar is set up to Bing.

Microsoft Edge has gained popularity among users and is improving with each update. The browser now has an auto-start option for the sidebar, among many other new capabilities and policies.

However, you should know that the Redmond-based tech giant is deprecating the CryptoWallet capability, and the Edge will no longer support it in future versions. Either way, the browser is thriving. Aside from becoming more popular by the month, it offers many features and extensions that greatly improve the user experience.

How to Fix ERROR_PRINTER_DRIVER_IN_USE

The ERROR_PRINTER_DRIVER_IN_USE usually comes with the 3001 (0xBB9) The specified printer driver is currently in use message. The error prevents you from uninstalling a printer driver, suggesting that another printer or process still uses it. Here’s how to fix this problem quickly. Before anything else, make sure that you are logged into the account you have used to install the printer.

How do I fix ERROR_PRINTER_DRIVER_IN_USE?

1. Stop the Print Spooler service

  1. Press Windows + R, type services.msc, and press Enter.
  2. Scroll down to find Print Spooler.
  3. Right-click Print Spooler and select Stop.

After you stop the Print Spooler service, try to uninstall the printer ant its driver again.

2. Delete the Printer Driver

  1. Press Windows + R, type printmanagement.msc, and press Enter.
  2. Expand Print Servers > [Your Computer Name] > Drivers. Right-click the problematic driver and select Remove Driver Package.

3. Disable Bi-Directional Support

  1. Press Windows + R, type control printers, and press Enter.
  2. Right-click your printer and select Printer properties.
  3. Go to the Ports tab and uncheck Enable bidirectional support.

By disabling the bidirectional support, you will actually end any connection between the printer and the printer server, allowing you to uninstall it and its driver.

4. Rename Print Processors

  1. Follow Step 1 to stop the Print Spooler service.
  2. Press Win + E to start File Manager and go to C:\Windows\System32\spool\prtprocs\x64 (or x86 for 32-bit systems).
  3. Rename all files in this folder (e.g., winprint.dll to winprint.old).
  4. Now, you can restart the Print Spooler service.

5. Use the Printer troubleshooter

  1. Press Win + I to start Settings.
  2. Now, go to System > Troubleshoot > Other troubleshooters.
  3. Finally, click the Run button next to the Printer option.
  4. Follow the instructions to complete the troubleshooting process.

By following these steps, you should be able to resolve the ERROR_PRINTER_DRIVER_IN_USE issue on your Windows system. If you have any questions, go to the comments below and leave a note.

Microsoft Edge now lets you easily enter Picture-in-Picture mode for videos directly from the Windows 11 taskbar

Microsoft is refining its media controls feature in the Edge browser for videos. The company has recently added a Picture-in-Picture (PiP) button and the option to disable these controls on the taskbar to the Edge Canary version.

Google has developed Global Media Controls for Chrome that shows and lets you manage media playing in browser tabs from the toolbar icon. Microsoft has chosen to create its own media controls for Edge.

Unlike Chrome’s GMCs, Microsoft’s media controls appear on the Edge icon in the taskbar on hovering over when a video is playing. The feature makes it easier to find which tab is playing video.

The company recently added a mute button to Edge media controls. Microsoft is actively improving this feature.

Microsoft adds a PiP button to Edge Media Controls

Recently, the PiP button was added to the Edge media controls. This makes it easy to enter or exit PiP mode for a video with a simple click. The PiP experience is intuitive and eliminates the need to right-click and select the PiP option.

Edge Media controls with PiP option. Image Credit: WindowsReport.

Additionally, Microsoft now allows you to disable Edge media controls on the Windows taskbar. To do this:

  1. Open Microsoft Edge.
  2. Go to Settings > Appearance.
  3. Scroll down to Split Screen.
  4. Toggle “Show media control in the Windows taskbar icon” on or off.
Image credit:WindowsReport

Keep in mind, that Picture in Picture in Edge Media Controls is relatively a new feature, we can not guarantee Microsoft to ship this to Stable including the Edge Media Controls feature.

Besides media control improvements, Microsoft has released a New Tab Page Extension for Edge to its add-on store. This extension offers regular and calm modes, which you might want to try.

Upgrading from Windows 10 to Windows 11 comes with a frustrating Visual C++ 2022 pop-up bug, but there are ways to fix it

According to the latest statistics, Windows 11 is finally leaping, and it’s starting to grow in market share. As the EOS for Windows 10 is slowly but surely approaching (little more than a year left), many Windows users are migrating to Windows 11.

However, updating to the newer operating system seems to have its own share of bugs that don’t go away. Many users have reported that a particular pop-up keeps appearing whenever they turn their Windows 11 device on.

This pop-up concerns the “Microsoft Visual C++ 2022 X86 Minimum Runtime – 14.32.31326 unavailable”. While, fortunately, there are ways to deal with the frustrating issue, you should know that upgrading to Windows 11 from a Windows 10 device will most likely cause this bug to happen.

So what do you need to do? First of all, a simple upgrade to Windows 11 will most likely not erase a lot of files, and the incomplete removal of old Visual C++ 2022 components causes this bug.

Here’s what you can do. You’ll want to clean up existing Visual C++ Redistributables. Go to Settings > Apps > Installed apps, and look for any of these entries, specifically for those with 2022 or older versions.Windows 11 Visual C++ 2022

It would be best to try performing a clean boot in Windows 11. Performing one isn’t easy, but it’s not hard either, and it should only take about 15 minutes. If you’re not sure how to do it, we have a comprehensive guide which will show step by step what you need to do.

Ultimately, another solution to fix the Visual C++ 2022 bug in Windows 11 is to try a SFC scan. Open Command Prompt with admin rights, and type in the following command:

sfc /scannow

Then hit enter, and let the process run. Don’t forget to restart your PC after each of these steps. Let us know which one works for you.

How to fix ERROR_BAD_DRIVER on Windows

The ERROR_BAD_DRIVER issue usually comes with the following message and code: 2001 (0x7D1) The specified driver is invalid. Also known as Printer error 0x000007d1, this problem is caused by a Windows bug after updates, usually on Epson printers. Before any more complicated tweaks, do this simple thing: Open Microsoft Ende and try printing anything from there. Many users have managed to fix the problem like this, so you should try it.

1. Update or reinstall the printer driver

  1. Press Windows + X and select Device Manager.
  2. Expand the Printers section, right-click your printer from the list and select Update driver.
  3. Now, choose Search automatically for drivers. If there is any new one, the system will install it.
  4. If this doesn’t work, you can select Uninstall device instead of updating the driver. After you restart your PC, Windows will automatically install a default driver.

If you uninstall the driver, we also recommend reinstalling the printer software. To do that, go to Settings > Bluetooth & devices > Printers & scanners and remove the printer. Then, go to Settings > Apps > Installed apps and uninstall the printer software. Ultimately, go to the manufacturer’s website to download and install the printer software.

3. Run the printer troubleshooter

  1. Press Win + I to open Settings.
  2. Click on Bluetooth & devices, then select Printers & scanners from the right.
  3. Now, select your printer and click on Run the troubleshooter.
  4. If the system detects any issues, it will resolve them swiftly.

The printer troubleshooter is the most effective way to detect and fix printer issues.

3. Use System File Checker (SFC)

  1. Click the Start button, type cmd and select Run as administrator from the results.
  2. Type sfc /scannow and press Enter. This will scan and repair corrupted system files.

The ERROR_BAD_DRIVER issue is essentially a system problem and by repairing any corrupted files, you might get to the bottom of this.

4. Use Driver Verifier

  1. Press Windows + R, type verifier, and press Enter.
  2. Select Create standard settings and click Next.
  3. Now, choose Automatically select all drivers installed on this computer and click Finish.
  4. The system will now check if there are any issues with any of the drivers. Restart your PC to perform the scan.

By following these steps, you should be able to resolve the ERROR_BAD_DRIVER issue on your Windows system. If you have any questions or need any more help, feel free to use the comments section below.

INVALID_REGION_OR_SEGMENT BSOD 0x00000099 [Solved]

The INVALID_REGION_OR_SEGMENT blue screen error, with code 0x00000099, is encountered at boot and generally arises due to problems at the system level. According to Microsoft, the BSOD appears when the ExInitializeRegion or ExInterlockedExtendRegion functions are called with invalid parameters!

The primary causes of Invalid Region Or Segment BSOD include issues with the RAM modules, low or unstable power supply, problematic device drivers, corrupt system files, outdated BIOS, and hardware malfunction.

Before we start troubleshooting, install all pending Windows updates, disconnect the non-critical peripherals, remove any overclocking, and fix overheating issues.

How can I fix the INVALID_REGION_OR_SEGMENT blue screen error?

1. Install/update the drivers

  1. Press Windows + X to open the Power User menu, and select Device Manager.
  2. Expand the different entries here, right-click on individual devices, and select Update driver.update driver to fix INVALID_REGION_OR_SEGMENT
  3. Click on Search automatically for drivers and let Windows install the best locally available version.automatic driver search
  4. After updating all the drivers, restart the computer and check for improvements.

When you are updating the drivers, only devices that have a dedicated driver installed are listed. As for the ones that don’t have a driver, especially any recently connected devices, you must visit the manufacturer’s website, locate the new releases, and then manually install the latest driver.

2. Repair the corrupt system files

  1. Press Windows + S to open Search, type Command Prompt, and click on Run as administrator.command prompt
  2. Click Yes in the UAC prompt.
  3. Paste the following DISM commands individually and hit Enter after each: DISM /Online /Cleanup-Image /CheckHealth DISM /Online /Cleanup-Image /ScanHealth DISM /Online /Cleanup-Image /RestoreHealth
  4. Now, execute this command to run the SFC scan: sfc /scannowsfc scan to fix INVALID_REGION_OR_SEGMENT
  5. Finally, reboot the PC and check for improvements.

Corrupted system files can affect the PC’s core functioning and are a common cause behind BSODs. To get rid of them, you must run SFC (System File Checker) and DISM (Deployment Image Servicing and Management) scans to replace all protected system files with their cached copies stored on the PC.

3. Uninstall conflicting apps

  1. Press Windows + R to open Run, type appwiz.cpl in the text field, and hit Enter.
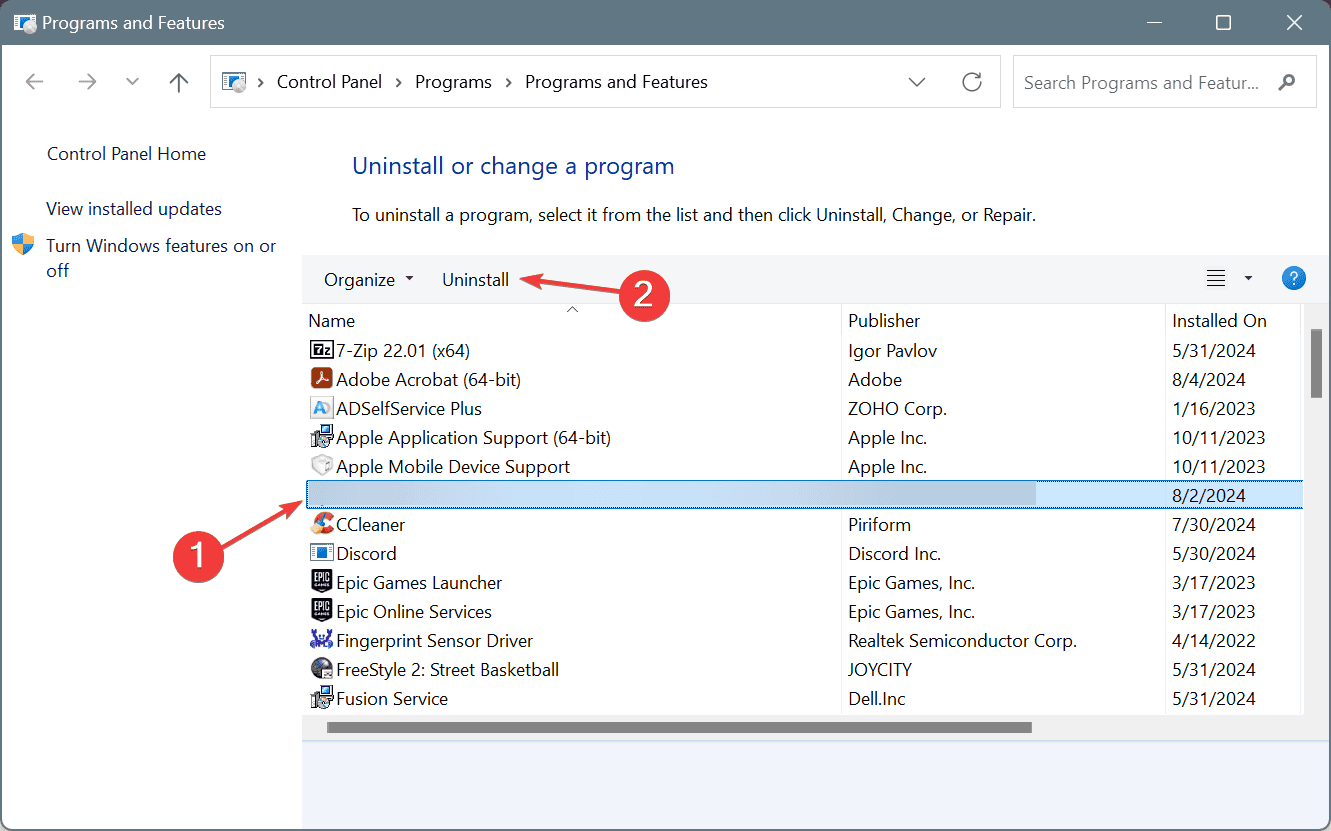
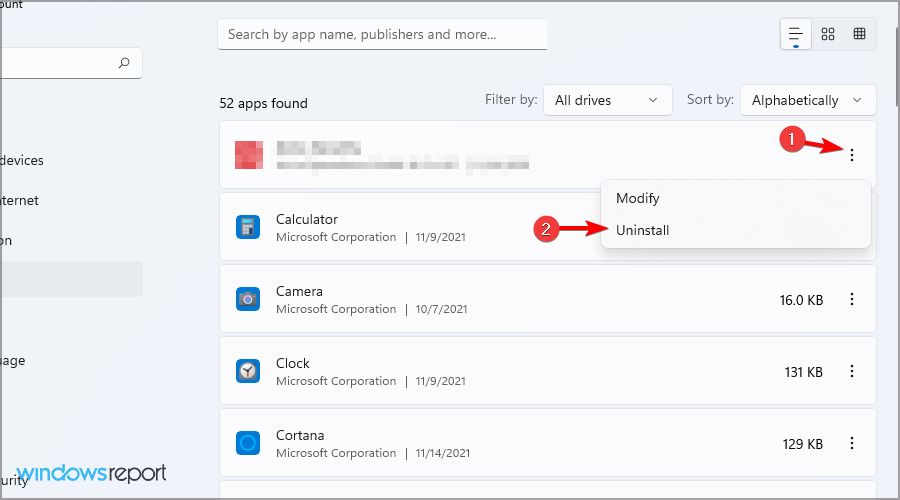
  2. Select any recently installed app from the list and click on Uninstall.uninstall to fix INVALID_REGION_OR_SEGMENT
  3. Follow the on-screen instructions to complete the process, then restart the PC and check for improvements.
  4. If the INVALID_REGION_OR_SEGMENT Windows error still appears, uninstall other similar apps.

Sometimes, programs leave behind files that can trigger BSODs even after uninstallation. In such cases, it’s best to use a top-rated software uninstaller to get rid of all leftover files and Registry entries.

4. Uninstall recent Windows updates

  1. Press Windows + I to open Settings, go to Windows Update from the left pane, and then click on Update history.update history
  2. Scroll down to the bottom and click on Uninstall updates.
  3. Click the Uninstall option next to the recently downloaded update.uninstall update
  4. Again, click Uninstall in the confirmation prompt, then reboot the PC and check for improvements.

5. Check/repair RAM and disk

5.1 Repair the disk

  1. Press Windows + R to open Run, type cmd, and hit Ctrl + Shift + Enter.command prompt
  2. Click Yes in the UAC prompt.
  3. Paste the following command and hit Enter: chkdsk /r
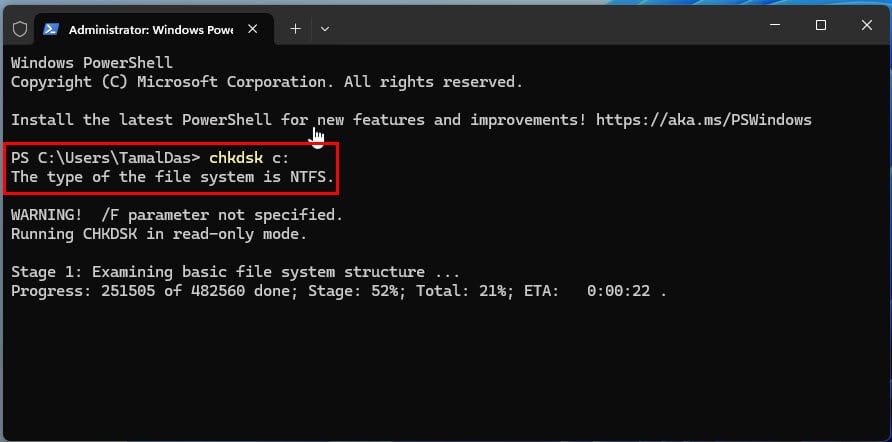
  4. If asked to schedule the scan for the next restart, press Y, hit Enter, and reboot the PC.check disk to fix INVALID_REGION_OR_SEGMENT

The built-in Check Disk utility can fix common hard drive errors, which often result in the INVALID_REGION_OR_SEGMENT BSOD. As for the complex errors, you will need an advanced disk repair tool.

5.2 Inspect the RAM

  1. Press Windows + S to open Search, type Windows Memory Diagnostic in the text field, and click on the relevant result.
  2. Click on Restart now and check for problems.mdsched.exe
  3. After the RAM is tested, check the mdsched.exe error logs, and verify whether there are any problems.

If no problems are found, I recommend you use Memtest86+, an advanced open-source memory testing tool that will run a series of tests on individual RAM modules and identify even the smallest of the issues.

6. Update the BIOS

BSOD errors like INVALID_REGION_OR_SEGMENT and AGP_INVALID_ACCESS appearing at boot often indicate issues with the BIOS. In this case, updating the BIOS is the best solution!

Since the process to update the BIOS slightly differs for each manufacturer, I recommend you check the OEM’s website for the exact steps and follow them. The update process is critical and any mistakes during it can render the PC unusable.

7. Reinstall Windows

As a last resort, you can always reinstall Windows to eliminate all software-based conflicts!

installing Windows
Reinstalling Windows

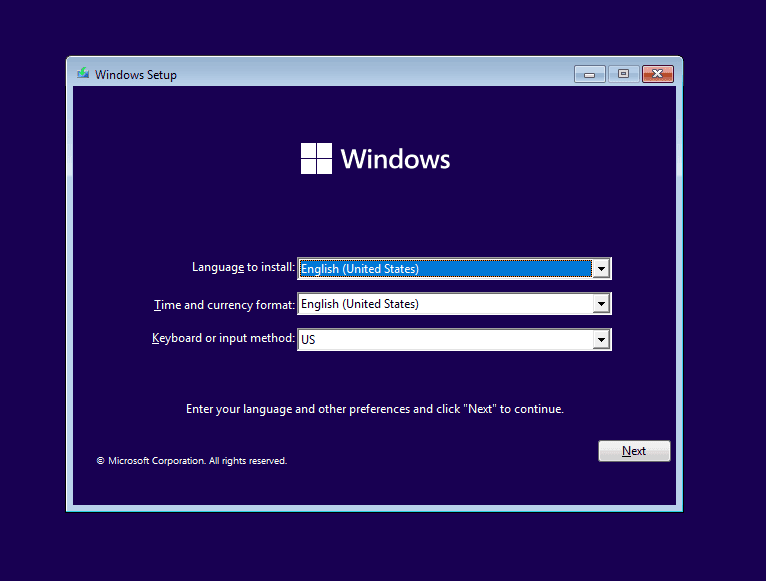
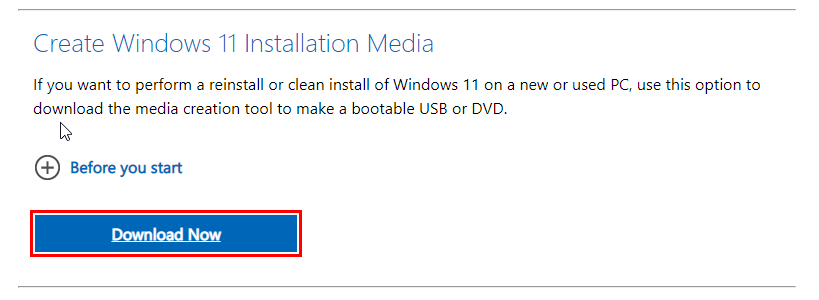
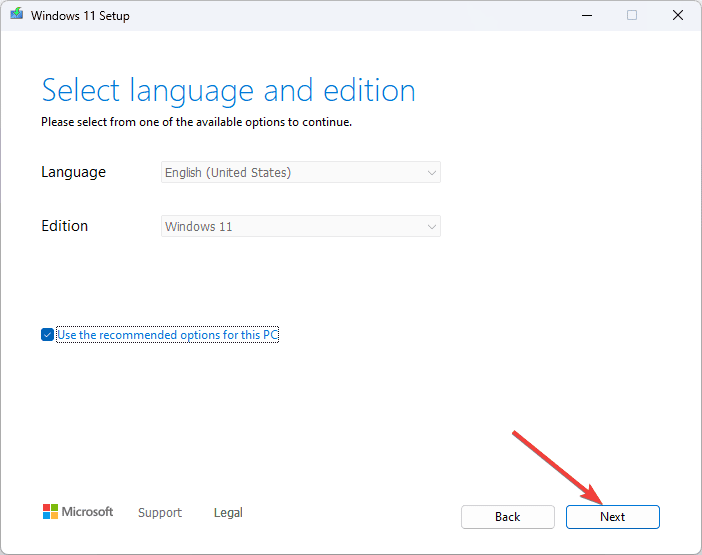
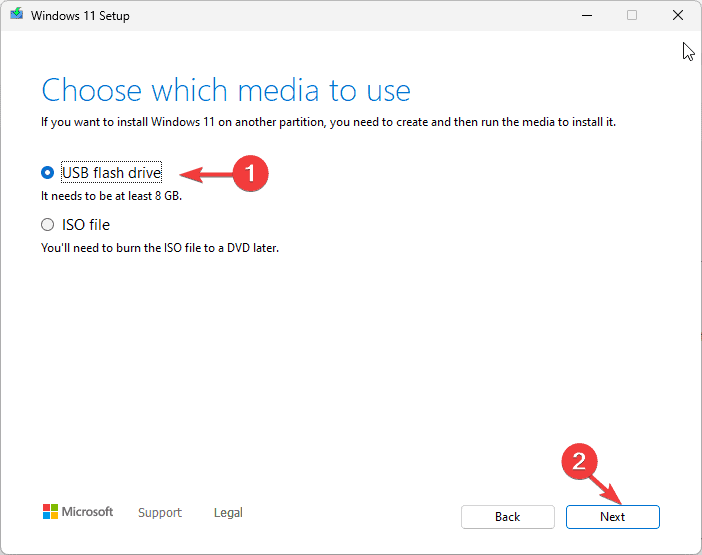
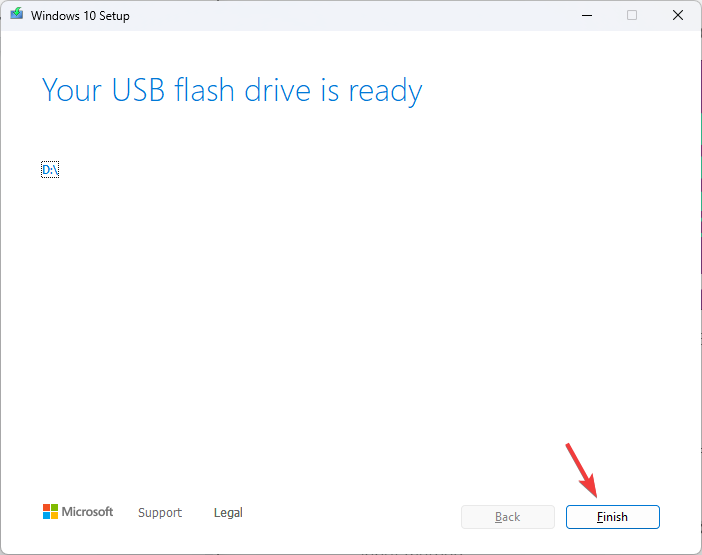
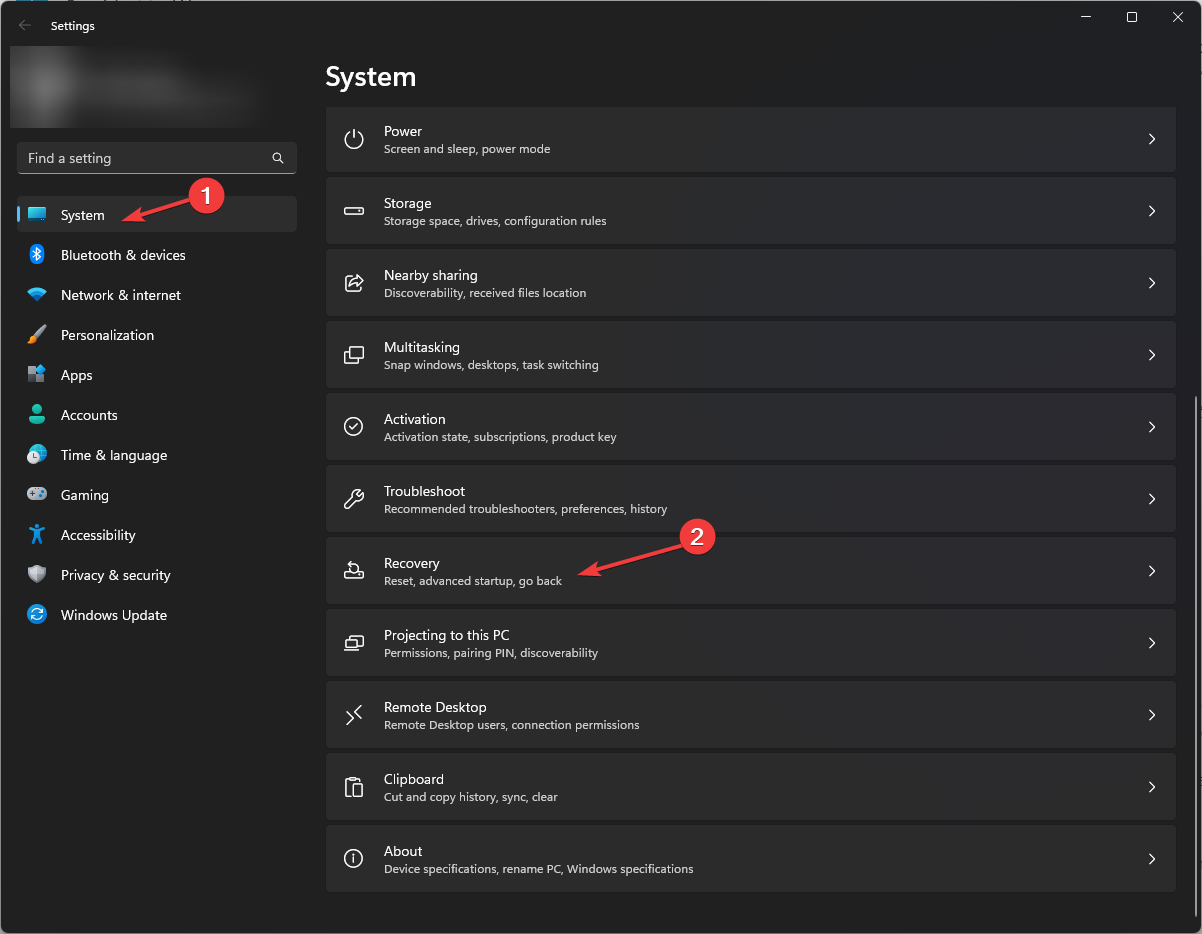
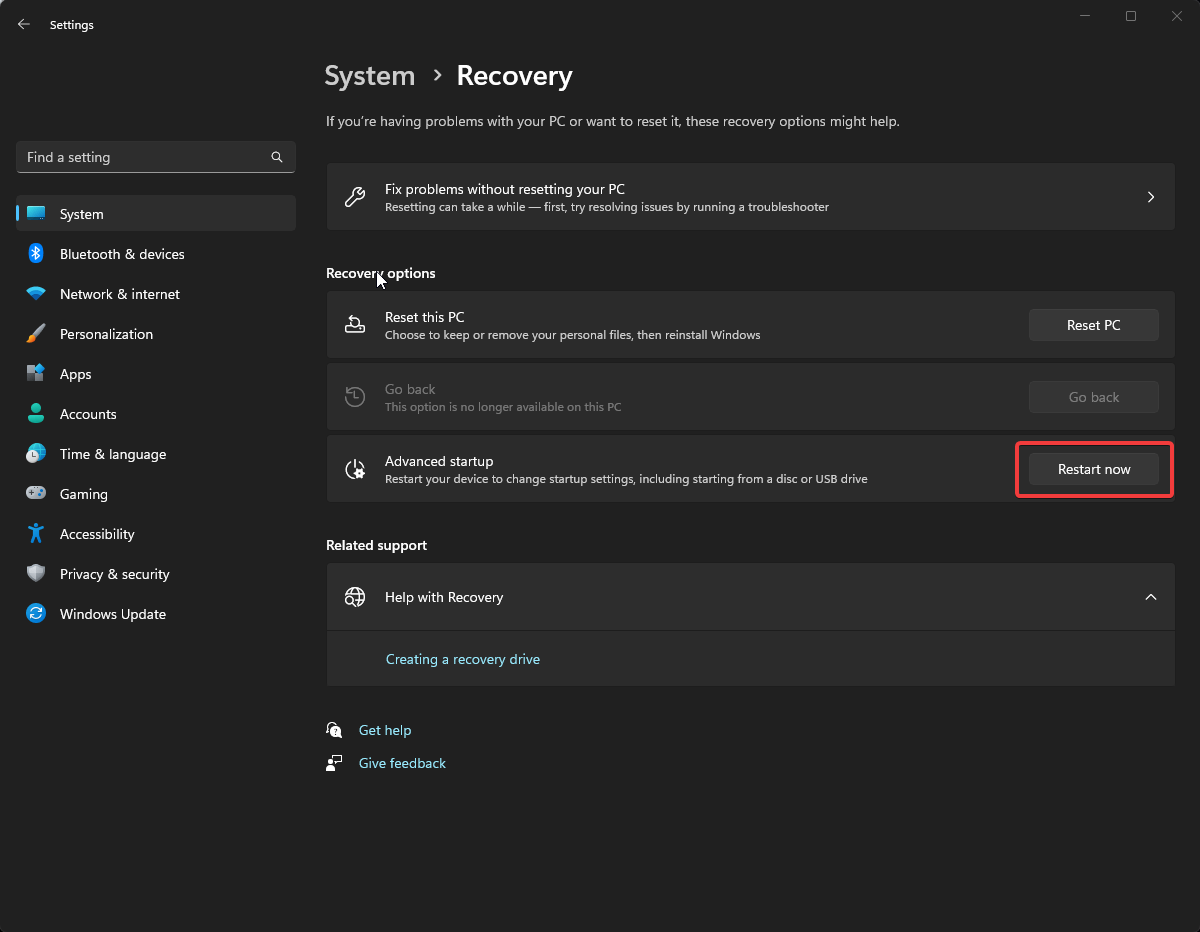
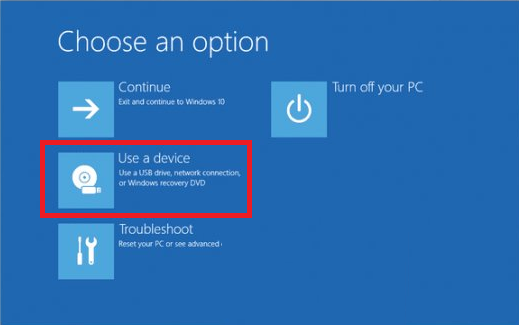
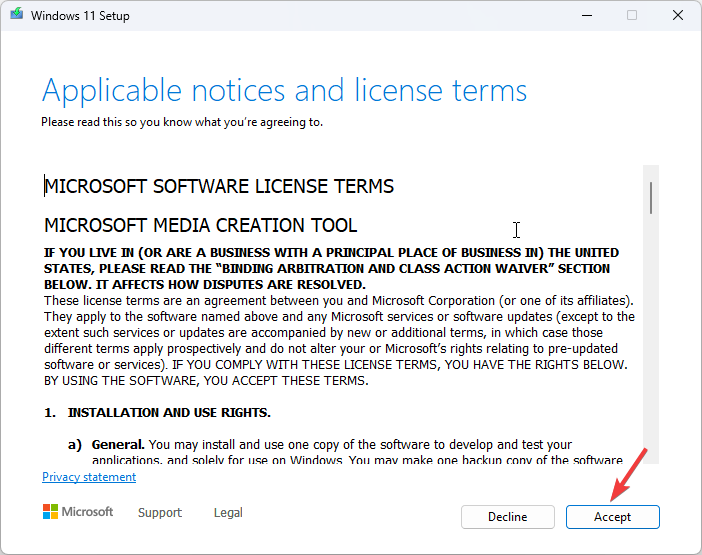
To do that > connect a flash drive to another PC > go to Microsoft’s official website > download the Media Creation Tool > use it to create a bootable Windows USB > plug into into the affected PC > change the boot order to the USB > load the Windows setup > install Windows.

If you still encounter the INVALID_REGION_OR_SEGMENT blue screen after a reinstall, it’s a hardware issue to blame and you must visit a local repair shop to get the PC inspected!

Advanced users can, however, check the BSOD crash logs, identify the problematic component(s), and take the necessary steps for resolving INVALID_REGION_OR_SEGMENT.

For any queries or to share which fix worked for you, drop a comment below.

Exclusive: Full images & specs of the Samsung Galaxy Book 5 Pro 360

Recently, Notebook Check leaked the first photo of the upcoming Samsung Galaxy Book 5 Pro 360. We now have all this sleek laptop’s images and its main tech specs.

Everything we know about Samsung Galaxy Book 5 Pro 360

First, let’s check the technical specifications of Samsung Galaxy Book 5 Pro 360. They are prone to be changed before the actual launch of the laptop, but according to our source, they are at least 90% accurate.

ComponentCharacteristics
ProcessorIntel Core Ultra 5 226V
GraphicsIntel Ark
Memory16 GB LPDDR5X
Storage512 GB NVMe SSD
Display16-inch WQXGA+ AMOLED (2.880×1.800), Touchscreen, S-Pen
WirelessBluetooth v5.4, Wi-Fi 7
Connectivity1x HDMI 2.1 (supports 8K@60Hz, 5K@120Hz)
2x Thunderbolt 4
1x USB3.2
1x microSD card reader
1x 3.5 mm jack
Battery76 Wh, 65 W USB-C charging adapter
Other functionsGyroscope, Accelerometer, Ambient Light Sensor
Dimensions13.99×9.93×0.5 inch
Weight1.69 Kg

First of all, you might notice that we’re talking about a certified AI PC, not just because of the Lunar Lake Intel Core Ultra 5 226V processor but also because you can see the Copilot key on the right of the Alt key.

Galaxy Book 5 Pro 360 features the Copilot key

That being said, Samsung kept much of the laptop’s appeal from Galaxy Book 4 Pro. It has a similar keyboard except for the Copilot key, the amazing 16-inch AMOLED touchscreen is identical, and even the two Thunderbolt ports are placed the same.

The only noticeable changes, except for the processor, are the upgrade from Wi-Fi 6E to Wi-Fi 7 and the Bluetooth version upgrade from 5.3 to 5.4.

On the left side, you will find the HDMI port and the two Thunderbolt ports, same as on Galaxy Book 4 Pro.

On the right side of Galaxy Book 5 Pro 360, you will find the microSD card slot, the USB 3.2 port and the audio jack slot.

A view from the top of Galaxy Book 5 Pro 360 shows again that the Copilot key has replaced the right Ctrl key. The rest of the keyboard is identical to the one in Book 4 Pro.

In conclusion, Samsung didn’t make changes from Book 4 Pro to Galaxy Book 5 Pro 360 apart from the processor, wireless connectivity and the Copilot key. Even the battery remains the same 76 Wh, and we’re anxious to see if it will cope with the new AI capabilities of the new CPU.

Lastly, Galaxy Book 5 Pro 360, just like Book Pro 4 before it, fits the description of an excellent rival for the 15-inch MacBook Air. We would actually venture to say that it might be the Windows 11 alternative to Apple’s laptop.

We don’t know anything yet about the launch date, but we probably won’t need to wait until Christmas.

What do you think about the upcoming Galaxy Book 5 Pro 360 AI laptop? Let us know in the comments below.

BAD_EXHANDLE Blue Screen Error: Fixed

The BAD_EXHANDLE Blue Screen Error is a common issue that can disrupt your computer’s performance. It means something is wrong with your system, like damaged files, driver issues, or new software causing problems. Fortunately, I can show you how to resolve this issue and get your system back on track.

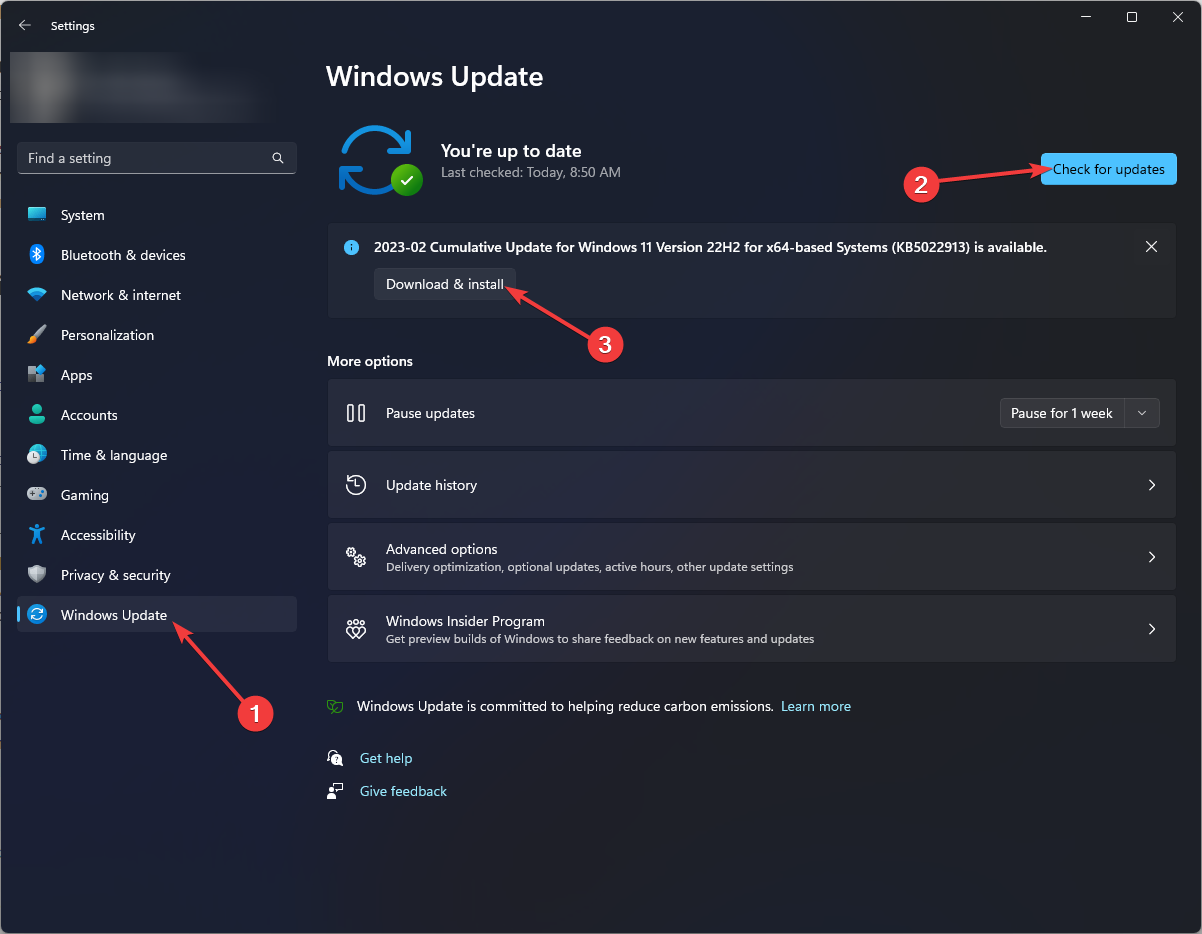
But before we cover more detailed fixes, try to update Windows first. Press Windows + I > Windows Update > Check for updates > Download and install. Often, it’s all you need to do.

But if this doesn’t work, below are more advanced solutions!

5 Ways To Fix BAD_EXHANDLE

Simply follow these instructions:

System Restore

System Restore is a powerful tool that allows you to revert your system to a previous stable state, potentially eliminating the BAD_EXHANDLE error. Follow these steps:

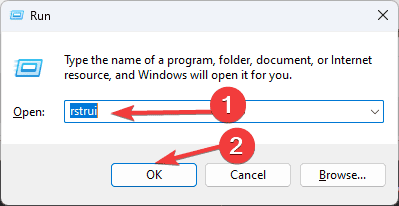
  1. Press the Windows Icon + R, type rstrui, and tap Enter to launch the System Restore tool.
Type rstrui
  1. Tap Next.
Click Next
  1. Pick a restore point, then click Next.
Pick a restore point
  1. Tap Finish. Your PC will restart to begin the process.
Finish

After the restart, confirm whether the problem has been resolved.

Disable Fast Startup

Fast Startup can sometimes interfere with system stability. Disabling it might help resolve the BAD_EXHANDLE error. Here’s what to do:

  1. Press the Windows Icon + S, type Control Panel, and hit Open.
Type Control Panel
  1. Tap Power Options.
Power Options
  1. Select Choose what the power buttons do.
Choose what the power buttons do
  1. Tap Change settings that are currently unavailable.
Change settings that are currently unavailable
  1. Uncheck the Turn on fast startup (recommended) box, then tap Save changes.
Turn on fast startup (recommended)

Reboot your PC, and check if the issue is solved.

Delete Temporary Files

Deleting temporary files can clear out unnecessary clutter that might be contributing to system instability. Here’s how to do it:

  1. Press Windows Key + R to open the Run dialog. Type %temp% and press Enter to open the Temp folder.
Type %temp%
  1. Select all files and folders (Ctrl + A), then hit the delete button.
Ctrl + A

Restart your computer and confirm if the BAD_EXHANDLE error is solved.

Uninstall Recently Added Software

If you recently installed new software before encountering the error, uninstalling it might resolve the issue. Follow these steps:

  1. Tap the Windows Icon and click the Settings gear.
  1. Tap Apps.
Apps
  1. Scroll to find any programs you installed recently.
  2. Tap the program and select Uninstall.
select Uninstall.

Reboot your PC after removing the software and confirm whether the error has been solved.

Run System File Checker (SFC)

System File Checker is a built-in Windows utility that scans for and repairs corrupted system files. Here’s how to run it:

  1. Right-click on the Windows icon and select Windows PowerShell (Admin).
 Windows PowerShell (Admin)
  1. Type sfc /scannow and hit Enter to start the process.
Type sfc /scannow

Once the SFC scan is 100% complete, reboot your PC.

These fixes will help you troubleshoot and resolve the BAD_EXHANDLE Blue Screen Error. By following each step, you can regain control over your computer and prevent further disruptions.

Also, learn to solve other errors blue screen errors like INVALID_WORK_QUEUE_ITEM, ERROR DRIVER FAILED PRIOR UNLOAD, and DRIVER_CORRUPTED_MMPOOL.

PP0_INITIALIZATION_FAILED: 5 Ways to Fix the BSOD

The PP0_INITIALIZATION_FAILED blue screen error with a bug check (value) of 0x0000008F appears when the Plug and Play (PnP) manager cannot be loaded during the system initialization, i.e. Phase 0.

The PP0 Initialization Failed BSOD error is usually caused by outdated/corrupt drivers, misconfigured boot settings, outdated BIOS, corrupt system files, and low system resources.

Before you start troubleshooting, install all available Windows updates, clear any overclocking settings, and disconnect non-critical peripherals. For many of you, these simple checks should fix the PP0_INITIALIZATION_FAILED BSOD.

How do I fix PP0_INITIALIZATION_FAILED blue screen error?

Tip icon Tip
If you can’t sign into Windows, boot the PC into Safe Mode with Networking and then try the solutions listed next

1. Update all the drivers

  1. Press Windows + X to open the Power User menu, and select Device Manager from the list.
  2. Expand the different entries here, individually right-click on the devices listed underneath, and select Update driver.update driver to fix PP0_INITIALIZATION_FAILED
  3. Click on Search automatically for drivers and let Windows install the best locally available version.automatic driver search
  4. Similarly, update the other drivers and then restart the PC.

In 3 out of 5 cases, updating the driver quickly fixes the PP0_INITIALIZATION_FAILED Windows crash. If the OS can’t automatically find a better version, head to the manufacturer’s website, locate the latest release, and then manually install the driver!

2. Run the DISM and SFC scans

  1. Press Windows + R to open Run, type cmd, and hit Ctrl + Shift + Enter. command prompt
  2. Click Yes in the UAC prompt.
  3. Paste the following DISM commands individually and hit Enter after each: DISM /Online /Cleanup-Image /CheckHealth DISM /Online /Cleanup-Image /ScanHealth DISM /Online /Cleanup-Image /RestoreHealth
  4. Now, run this SFC scan command: sfc /scannowsfc scan to fix PP0_INITIALIZATION_FAILED
  5. Finally, restart the PC and check for improvements.

If you are getting PP0_INITIALIZATION_FAILED Windows blue screen due to corrupt system files, running the SFC (System File Checker) and DISM (Deployment Image Servicing and Management) scans should replace these protected files with their cached copy stored on the PC.

3. Disable fast startup

  1. Press Windows + S to open Search, type Control Panel in the text field, and click on the relevant result.
  2. Click on System and Security.control panel
  3. Now, click on Change what the power buttons do under Power Options.
  4. Click on Change settings that are currently unavailable.power buttons
  5. Untick the checkbox for Turn on fast startup, and then click on Save changes.disable fast startup to fix PP0_INITIALIZATION_FAILED
  6. Reboot the PC and verify whether the BSOD error reappears.

4. Reset or update the BIOS

Since the PP0_INITIALIZATION_FAILED error appears during the system initialization stage, it could have to do with a misconfigured or outdated BIOS. So, you should first reset the BIOS to the default settings, and if that doesn’t work, install the latest BIOS version!

reset-bios
Loading BIOS defaults

Remember, the steps for both reset and update differ across manufacturers. So, I recommend you visit the OEM’s website, check the exact steps and follow them as is, because changes to the BIOS can prove detrimental if not done precisely.

5. Perform an in-place upgrade

Note icon NOTE
The steps listed below are for Windows 11. If you are running the previous iteration, check our dedicated guide on performing a repair upgrade in Windows 10.
  1. Go to Microsoft’s official website, choose the OS edition and language, and then download the Windows 11 ISO.windows 11 ISO
  2. Double-click the ISO file, wait for a few seconds, and then click on Open in the confirmation prompt.
  3. Run the setup.exe file.setup.exe
  4. Click Yes in the UAC prompt.
  5. Click on Next to proceed.
  6. Read Microsoft’s license terms and click Accept to continue.
  7. Finally, verify that the setup reads, Keep personal files and apps, and then click on Install.in-place upgrade to fix PP0_INITIALIZATION_FAILED
  8. Wait for the upgrade to complete. It will take 30-90 minutes.

An in-place upgrade effectively fixes the PP0_INITIALIZATION_FAILED blue screen error in Windows. It’s like reinstalling Windows, except for the fact that your personal files and installed apps remain unaffected.

Advanced users can also check the BSOD crash logs to identify and fix the software-based underlying cause, if any.

In case you still can’t boot Windows due to the BSOD, contact OEM’s support or visit a local repair shop because, at this point, this looks like more of a hardware issue. The professionals will need to check the connections, inspect the components, and make the necessary repairs/replacements!

For any queries or to share which fix worked for you, drop a comment below.

ERROR_LOCK_VIOLATION: 11 Best Fixes

Do you keep seeing ERROR_LOCK_VIOLATION when trying to access a file?

The Windows file system uses a robust caching system to address multitasking. However, due to a bug in the early editions of Windows 7, Windows Vista, Windows Server 2008, and Windows Server 2008 R2, you might get the following error:

  • ERROR_LOCK_VIOLATION: 33 (0x21) The process cannot access the file because another process has locked a portion of the file.

Occasionally, there are reports of the same issue in modern versions, like Windows 10 and 11.

How To Fix ERROR_LOCK_VIOLATION

To help you resolve this pressing issue, I’ve listed the tried and tested methods below starting with the easiest ones:

Basic Troubleshooting

  • Restart the system: A simple reboot or force restart might also fix the issue.
  • Make a copy of the source file: Create a copy of the source file in a different directory. Then, try to access the file using the relevant software.
  • Close all open applications: Use the Windows Task Manager to close all open apps to rule out any software conflict. Third-party apps will show up below the Apps section of Processes Name.
Task manager Apps
  • Check for background processes: Also, go through the Background processes section and find if any third-party apps are running except for Windows processes.
Task manager background
  • Briefly disable the antivirus: Deactivate real-time monitoring tools or the built-in Windows Security. For the built-in antivirus, go to Settings > Update & Security > Windows Security > Virus & threat protection > Manage settings > Turn off Real-time protection. Don’t forget to enable it again when testing is over.
Real-time protection

Update Windows OS to Its Latest Edition

For Windows 10 and 11 PCs, follow these steps:

  1. Press Windows + I to open Settings.
  2. Click on the Update & Security menu on the left-side panel.
  3. Now, go to Windows Update and hit Check for updates or Resume updates.
Windows update

For older Windows PCs, try these steps instead:

  1. Hit the Start menu button and select the All Programs option.
all programs
  1. Then, click on the Windows Update menu.
windows update vista
  1. Click on the Check for updates button in the left-side panel.
  2. Select View available updates and check if the Service Pack for Microsoft‌ Windows update is available.
  3. Click on the Install button if visible.
  4. Follow onscreen instructions to complete updating to the latest Service Pack edition.

If you don’t see the above update option, you can manually download the appropriate Service Pack for your Windows OS from the Microsoft Download Center. Since Microsoft has stopped supporting older versions, you might have to install Service Packs manually.

You can also check out the Microsoft Update Catalog portal for more updates.

Use the Sysinternals Process Explorer Tool

Sometimes, Windows Task Manager can’t completely stop conflicting apps. Hence, ERROR_LOCK_VIOLATION will still show up even if you’ve closed a few of them.

You can use the Sysinternals Process Explorer instead. Here’s how:

  1. Download Process Explorer from the official Microsoft website.
  2. Unzip the content in a dedicated folder.
  3. Run the procexp EXE file if your PC is a 32-bit system.
  4. If it’s a 64-bit machine, run the procexp64 EXE file.
Process Explorer
  1. Press Ctrl + F and type in the complete file name with the extension and hit Enter.
Search process
  1. You should see a list of conflicting processes.
  2. If you don’t see anything as shown in the below screenshot, press Ctrl + Shift + F.
  3. This will launch the Process Explorer Search dialog box.
Process Explorer Search
  1. In the Handle or DLL substring field, again type in the problematic file name.
  2. Hit Search. Wait up to a minute for the table to populate.
  3. You’ll now see the list of conflicting apps.
Handle or DLL substring
  1. Close those from the home screen of Process Explorer. Right-click on the target and select Kill Process.
Kill Process

Run a Disk Error Check

  1. Press Windows + E to open the File Explorer.
  2. Click on This PC in the left-side navigation panel.
  3. Select the first drive, like C: and right-click.
  4. Choose Properties from the context menu.
  5. Navigate to the Tools tab in the Properties dialog box.
  6. Click on the Check button below the Error checking section.
Tools check
  1. The Error Checking dialog box will show along with a progress bar.
Error checking scanning
  1. Allow the process to complete.
  2. Now, repeat these steps for the rest of the drives on your PC.

Scan for Malware in Offline Mode

  1. Open the Windows Settings app by pressing the Windows key and the I key simultaneously.
  2. Click on Update & Security at the bottom.
  3. Now, select Windows Security from the list of options in the left-side navigation pane.
  4. Click on Virus & threat protection on the right side.
Virus & threat protection
  1. Select the Scan options button below Quick scan.
scan options
  1. Then, scroll down to the Advanced options and click on it.
  2. Select the Microsoft Defender Offline scan option, and click on the Scan now button below it.
Microsoft Defender Offline
  1. Windows Defender will now perform a thorough malware scan while your computer is in offline mode.

Change File Security Permissions

Are you seeing the ERROR_LOCK_VIOLATION error in a Workgroup/ Homegroup network, shared drive, or non-administrator Windows account? Try allowing access to the file for all collaborators or reducing the security policies by following these steps:

  1. Navigate to the problematic file, select it, and right-click.
  2. Select Properties from the context menu.
properties box
  1. Go to the Security tab of the Properties dialog box.
  2. You’ll see the users in the Group or user name list.
  3. Select the target user and hit the Edit button.
Edit properties
  1. Again choose the same user name in the Permissions for dialog box.
  2. Checkmark all the boxes below the Allow section.
  3. Click Apply and OK on all the dialog boxes to make the changes effective.
Allow all

Fix Hardware, Driver, and Firmware Issues

It might be possible that the disk drive isn’t installed appropriately or it’s facing connectivity issues. So, shut down the PC and open the PC case. Unplug the power and data cable from the HDD or SSD. If it’s an NVMe M.2 SSD chip, remove it from its PCIe slot.

Snuggly connect the cables back to the hard disk or solid-state drive. For the NVMe chip, reseat it appropriately. Power on the PC and check if the issue resurfaces again or not.

Also, ensure that the SATA HDD drivers of the Windows PC are updated by performing these steps:

  1. Right-click on the Start menu flag and click on Device Manager from the context menu.
power user
  1. On Device Manager, extend the Disk drives tree and right-click on a disk drive.
  2. Select Update driver from the context menu.
update driver
  1. Choose Search automatically for driver in the next dialog box that shows up.
  2. Wait for Windows to update the drivers either from Microsoft’s database or other official online sources.
  3. Ensure that the device is connected to the internet the whole time.

If the internal storage is an SSD or NVMe SSD chip, you can install the manufacturer’s SSD management software. For example, I’m using NVMe M.2 drive from Crucial so I’ve installed and tested the method using the Crucial Storage Executive app.

Check if there are any updates available for the hardware firmware.

firmware

Apply the update and restart the PC.

Run the SFC and DSM Scans to Fix the Windows File System

If the Windows file system is compromised, the following scans will reveal and fix that:

Running an SFC Scan

  1. Open the Power User menu by right-clicking on the Start menu button.
  2. Select Terminal (Admin) to open Windows PowerShell with administrator privileges.
  3. Enter sfc /scannow in the console and hit Enter.
sfc scan
  1. You don’t need to do anything if you see any of the following outcomes:
    • No integrity violations found.
    • Integrity violations found and repaired.
  2. However, if you see the following message in the terminal, move on to the DISM scanning step:
    • Integrity violations found but some could not be repaired.

Executing the DSM Scan

  1. Open the Windows PowerShell terminal with admin rights.
  2. Copy and paste the following command inside the console:
dism /online /cleanup-image /restorehealth
  1. Hit Enter to execute the script.
  2. Allow DISM scan to fix the Windows file system with the latest reference image file from Microsoft.
dism scan

Perform a Clean Boot

  1. Type System in the Start menu and click on the System Configuration tool below the Best match section.
  2. Go to the Services tab and checkmark the box for the Hide all Microsoft Services option.
  3. Hit the Disable all button.
System config
  1. Click on the Startup tab and select Open Task Manager.
  2. The link will take you directly to the Startup tab of Task Manager.
  3. Disable all active startup processes except for drivers, like Bluetooth, Realtek HD Audio, etc.
Disable startup
  1. Go back to the Services tab of System Configuration.
  2. Hit the Apply button.
  3. Restart your PC.

Now, test if the issue goes away. Whatever the outcome is, don’t forget to reboot into normal mode by enabling all third-party services again.

Use Windows System Restore

Did the ERROR_LOCK_VIOLATION start appearing after a major change to the PC? You might try rolling back the changes by following these steps:

  1. Open the About window of Windows Settings by pressing the Windows and Pause Break keys together.
  2. Scroll down to the bottom of the About screen and click on System protection.
system protection
  1. The System Properties dialog box will open taking you directly into the System Protection tab.
  2. Click on the System Restore button.
system restore button
  1. The System Restore dialog box will open. Click Next.
  2. Select a restore point from the table and click Next.
system restore dialog
  1. Click Finish to start the System Restore process.
  2. Follow the onscreen instructions.

Contact Microsoft Consumer Support for a Hotfix

If you’re using any of the following Windows PC or Server systems and none of the above fixes are working, you should contact the technical support team:

  • Windows Server 2008
  • Windows Server 2008 R2
  • Windows Server 2008 Service Pack 2 (SP2)
  • Windows Server 2008 R2 Service Pack 1 (SP1)
  • Windows 7
  • Windows 7 Service Pack 1 (SP1)
  • Windows Vista Service Pack 2 (SP2).

Visit the Contact us page and select the Windows OS logo. On the Windows overlay box, hit the Get Business Support button if you’re coming from a business organization. Alternatively, if you’re an individual user, click on the Get Home Support option.

support

You’ll have to sign in with a Microsoft 365 or Microsoft Live account to contact a premium support specialist.

account

Summary

So, these are the methods you can follow to fix the Windows file system error ERROR_LOCK_VIOLATION in various OS editions. We also have a new article on Error_Lock_Failed, so don’t miss it.

Did these solutions work for you? Do you know a better fix? Comment below to share your thoughts. Additionally, learn how to deal with a similar problem, ASSIGN_DRIVE_LETTERS_FAILED.

0x000000A2 MEMORY_IMAGE_CORRUPT error: 7 methods to fix it

The dreaded 0x000000A2 MEMORY_IMAGE_CORRUPT error is quite common among Windows users. It causes a Blue Screen of Death on PCs, which, like many other similar issues, can ultimately harm your device.

What is the 0x000000A2 MEMORY_IMAGE_CORRUPT error?

The 0x000000A2 MEMORY_IMAGE_CORRUPT error is a signal from your computer that something’s amiss with the image of a .exe file in its memory. By this, we mean that the executable has become corrupt or something happened to it that led to its malfunction.

What is causing the 0x000000A2 MEMORY_IMAGE_CORRUPT error?

This error can be caused by many things, such as faulty RAM, malware, corrupt system files, or driver issues. There could also be software and hardware issues.

While the 0x000000A2 MEMORY_IMAGE_CORRUPT error is caused by a broken or corrupt executable, faulty RAM can also be the culprit, as it cannot process the executable correctly and instead labels it as corrupt.

The results vary depending on the root of the problem—whether it’s hardware or software—but the 0x000000A2 MEMORY_IMAGE_CORRUPT error can render the PC unusable unless addressed.

7 methods to fix the 0x000000A2 MEMORY_IMAGE_CORRUPT error

Method 1: Uninstall any programs you recently added

Consider uninstalling any programs you recently added, as one of them may be causing a conflict of drivers of files.

  1. In the Search box, type in Control Panel, and open it.0x000000A2 MEMORY_IMAGE_CORRUPT error
  2. Click on Category, and select Large Icons.0x000000A2 MEMORY_IMAGE_CORRUPT error
  3. Go to Programs and Features, and select the recently installed applications.
  4. Uninstall the most recent ones.

Method 2: Disconnect all of your peripherals

It would be best if you also considered disconnecting peripherals. Please do so with every peripheral connected to your PC, and after you’re done, restart your device. See if the issue persists.

Method 3: Run SFC and DISM scans

If those steps don’t resolve the issue, it’s time to get more technical. Running SFC and DISM scans can help repair corrupt system files, a common culprit behind the error. these scans as the computer’s way of deep cleaning, rooting out any unwanted mess.

To run a SFC scan, you’ll need to:

  1. Open Command Prompt with admin rights.
  2. Type in the following command: sfc /scannow
  3. Let the process run, as it will take a while, but after it’s done, type in the following command: dism /online /cleanup-image /scanhealth0x000000A2 MEMORY_IMAGE_CORRUPT error
  4. Finally, after this step is done, type in dism /online /cleanup-image /restorehealth
  5. Restart your PC.

It would be best to consider running these commands within Windows Recovery Environment. The safest way to enter Windows RE is to hold the Shift key while clicking the Restart button.

Once you are on the platform, you’ll need to:

  1. In the Choose an Option panel, select Troubleshoot > Command Prompt.0x000000A2 MEMORY_IMAGE_CORRUPT error
  2. Run sfc /scannow
  3. Then, run dism /online /cleanup-image /scanhealth.
  4. Now run dism /online /cleanup-image /restorehealth
  5. Go back to the Choose an Option page, and Turn off the PC.

Method 4: Use the Memory Diagnostic Tool to check for hardware issues

If you are still having no luck with the 0x000000A2 MEMORY_IMAGE_CORRUPT error, then the Memory Diagnostic Tool might shed some light on the issue. This handy feature checks your computer’s memory for problems before the system boots up, but it will take some time to complete.

It will check your device’s memory and detect any problems. The results will be displayed in the Event Viewer.

Here’s what you need to do:

  1. Open Command Prompt with admin rights and type in the following command: mdsched.exe
  2. Press Enter.
  3. Select between Restart now and check for problems or Check for problems the next time I start my computer.
  4. Let the process run, and after booting up, press Windows + S, and type in Event Viewer.
  5. There, head over to Windows Logs > System > Find.
  6. Type in memorydiagnostics-results, and press Enter.0x000000A2 MEMORY_IMAGE_CORRUPT error

If it finds any errors, your RAM might be faulty, and you’ll need to replace them.

Method 5: Reinstall your graphics driver

The 0x000000A2 MEMORY_IMAGE_CORRUPT error might also occur due to faulty drivers, so reinstalling the drivers, especially the graphics driver, should also be considered.

  1. In the Search box, type in Device Manager, and open it.
  2. Click on Display adapters, select the graphic adapter, and click on Uninstall.0x000000A2 MEMORY_IMAGE_CORRUPT error
  3. Close Device Manager.
  4. Restart your PC.
  5. Download an updated driver from the graphic adapter’s manufacturer. Make sure you download it from official sources.
  6. Open Device Manager again, and then click on Display adapters.
  7. Click on Update drivers.
  8. Select Browse my computer for drivers and follow all the steps to install an updated driver.
  9. Restart your PC again.

This solution should fix the issue.

Method 6: Perform a System Restore

Another solution that can fix the 0x000000A2 MEMORY_IMAGE_CORRUPT error is a system restore. This will restore your device to a point where the issue that caused the error no longer exists. To initiate it, you’ll need to.

  1. Open Control Panel.
  2. Make sure the View by setting is set up on Large Icons.
  3. Select Recovery.0x000000A2 MEMORY_IMAGE_CORRUPT error
  4. Click on Open System Restore.
  5. Follow all the steps to return your PC to a state before the error resurfaces.

Method 7: Reinstall Windows

In the worst-case scenario, reinstalling Windows might be your final solution to solve the 0x000000A2 MEMORY_IMAGE_CORRUPT error. It’s a drastic step, so make sure to try all the other steps before embarking on reinstalling the operating system.

If you experience this issue in Windows 10, upgrading your PC to Windows 11 might also fix it.

So there you have it, a roadmap to navigating the treacherous waters of the 0x000000A2 MEMORY_IMAGE_CORRUPT error. This isn’t the only error you can encounter, and we wrote about ERROR_MEMORY_HARDWARE in our latest guide.

Since the reasons this error appears are unknown, you’ll need to try all the solutions, not just one. And let us know which one worked for you.

ERROR_CANNOT_DETECT_DRIVER_FAILURE: 7 Quick Fixes

The ERROR_CANNOT_DETECT_DRIVER_FAILURE issue is caused by misconfigured settings, missing drivers, a buggy driver update, or an incorrect Windows installation. The 1080 (0x438) error is highly uncommon, and only a few cases have been reported to date!

Microsoft’s official website describes the error as, Failure actions can only be set for Win32 services, not for drivers, but doesn’t say much about fixing it.

Before you start troubleshooting, install all pending Windows updates, including the optional ones, and scan the PC for malware.

How can I fix ERROR_CANNOT_DETECT_DRIVER_FAILURE?

1. Install a compatible driver

If you have recently connected a new hardware but haven’t installed a compatible driver, the ERROR_CANNOT_DETECT_DRIVER_FAILURE message may appear. This usually happens with a printer.

While Windows auto-installs the driver for most devices, sometimes the operation fails. In such cases, you must visit the manufacturer’s website, locate a compatible version, and then manually install the driver.

2. Update the installed drivers

  1. Press Windows + X to open the Power User menu, and select Device Manager.
  2. Expand the different entries here, right-click on the devices listed underneath individually, and select Update driver.update driver to fix ERROR_CANNOT_DETECT_DRIVER_FAILURE
  3. Click on Search automatically for drivers and let Windows install the best locally available version. automatic driver search
  4. Once done, restart the PC and check for improvements.

If you already have one installed, updating the driver should get rid of the ERROR_CANNOT_DETECT_DRIVER_FAILURE issue in Windows. Again, do this for all devices, especially any recently connected printer.

3. Roll back the driver update

  1. Press Windows + R to open Run, type devmgmt.msc in the text field, and hit Enter.
  2. Expand all the entries here, right-click on the individual devices one at a time, and select Properties.device properties
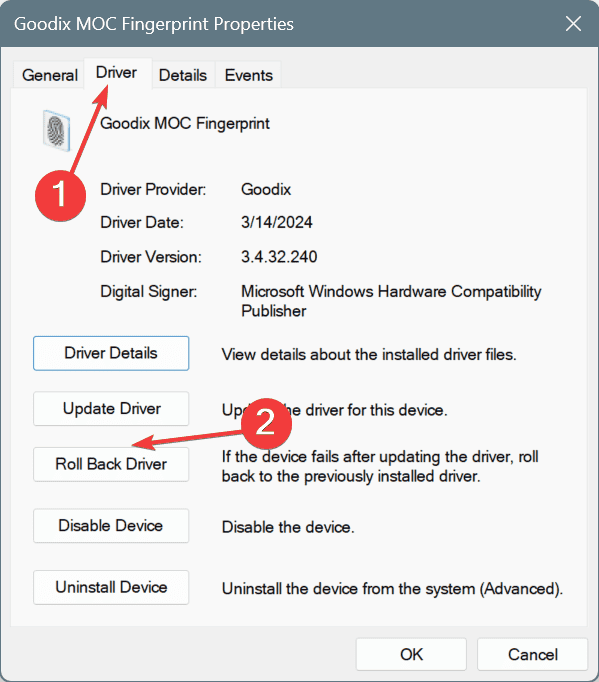
  3. Go to the Driver tab, and click the Roll Back Driver button. If the Roll Back Driver button is greyed out, move to the next device.roll back to fix ERROR_CANNOT_DETECT_DRIVER_FAILURE
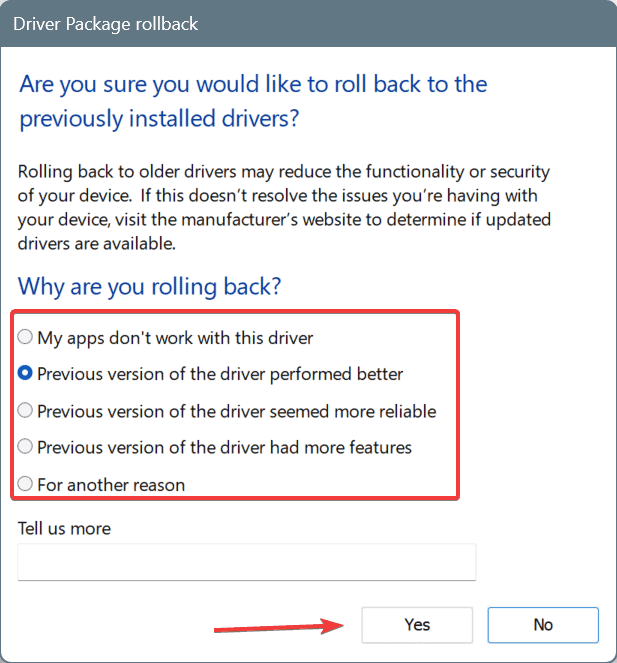
  4. Select a reason for rolling back the update, and click on Yes to confirm.confirm
  5. Restart the PC and check for improvements.

4. Reset the firewall settings

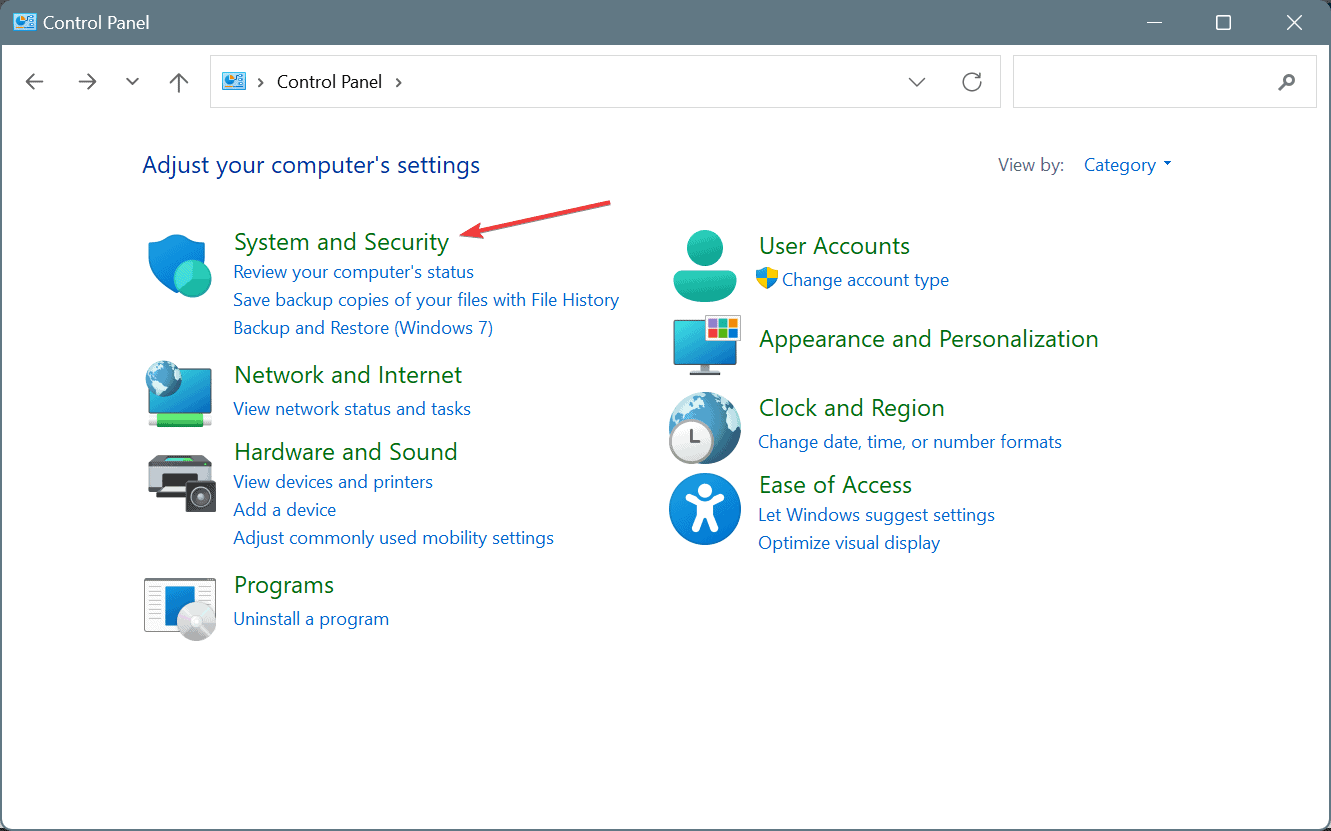
  1. Press Windows + S to open Search, type Control Panel in the text field, and click on the relevant result.
  2. Click on System and Security.control panel
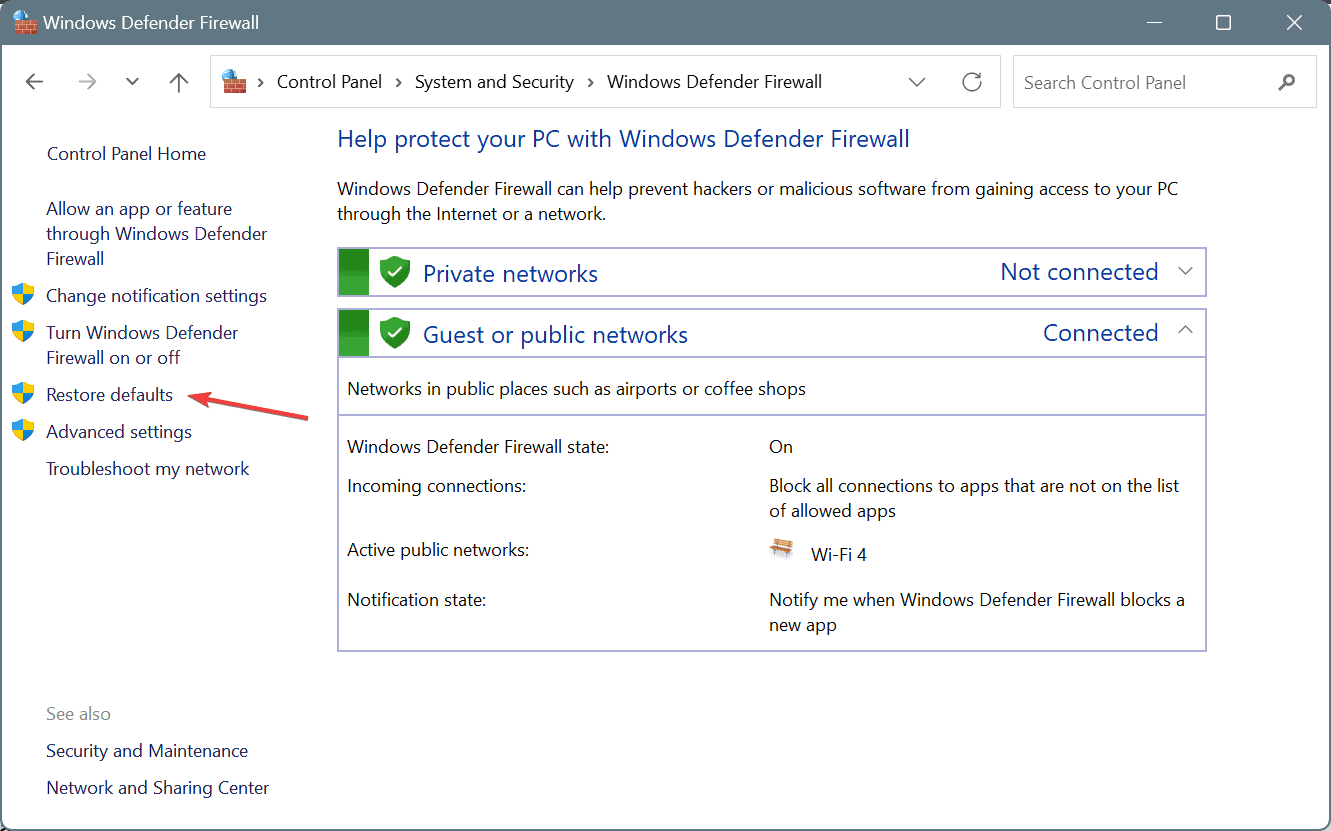
  3. Now, click on Windows Defender Firewall.
  4. Select Restore defaults from the left pane.restore firewall defaults to fix ERROR_CANNOT_DETECT_DRIVER_FAILURE
  5. Again, click on Restore defaults to confirm the change.

If some custom firewall rules are triggering the Error Cannot Detect Driver Failure Windows message, resetting Windows Defender Firewall to defaults should get things up and running in no time!

5. Uninstall conflicting third-party apps

  1. Press Windows + R to open Run, type appwiz.cpl in the text field, and hit Enter.
  2. Select any app that might be conflicting with the OS, and click on Uninstall.uninstall app to fix ERROR_CANNOT_DETECT_DRIVER_FAILURE
  3. Follow the on-screen instructions to complete the process.
  4. Finally, restart the PC and check for improvements.

If the ERROR_CANNOT_DETECT_DRIVER_FAILURE Windows error message still appears, use a top-rated uninstaller software to delete the program’s leftover files and Registry entries.

6. Perform a system restore

  1. Press Windows + S to open Search, type Create a restore point, and click on the relevant result.
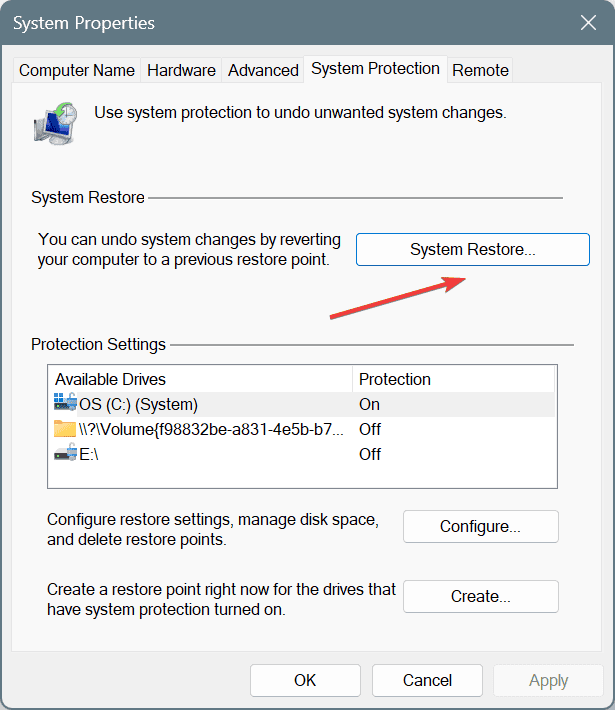
  2. Click the System Restore button.restore to fix ERROR_CANNOT_DETECT_DRIVER_FAILURE
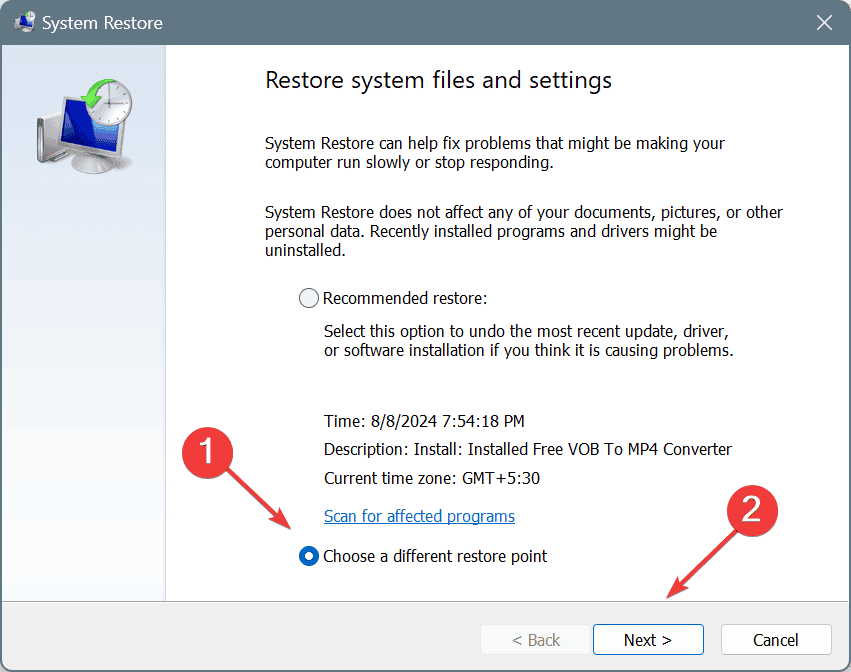
  3. Select the Choose a different restore point option and click on Next.choose a different restore point
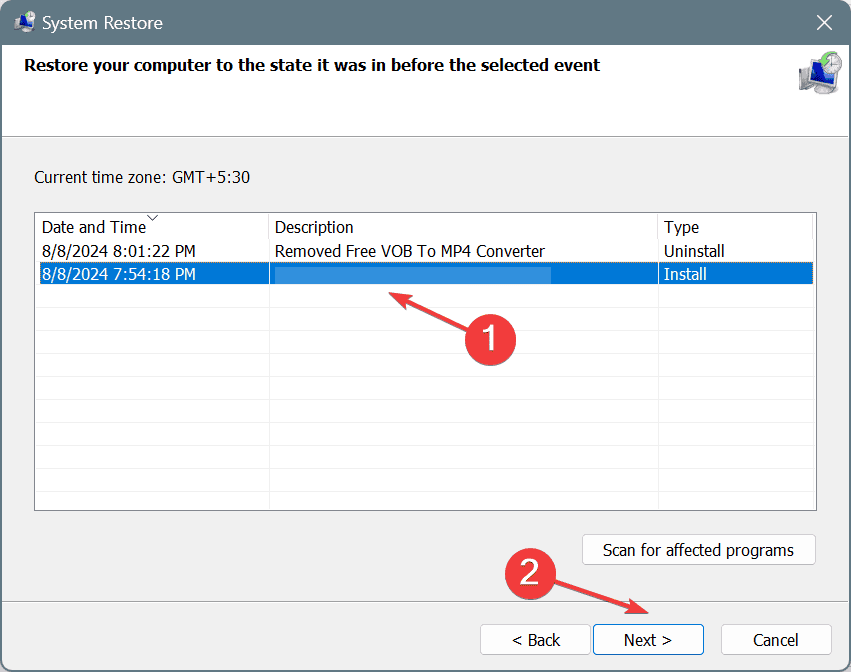
  4. Pick the oldest restore point from the list and click Next.choose restore point
  5. Verify the restore details, click on Finish, and confirm the change.
  6. Wait for the system restore to complete. It may take 15-30 minutes.

7. Reinstall Windows

When nothing else works, the last option is to reinstall Windows on the PC. This will clear any misconfigurations as well as fix corruption in the Registry triggering the ERROR_CANNOT_DETECT_DRIVER_FAILURE issue.

reinstall Windows
Reinstalling Windows

To reinstall Windows, connect a USB flash drive to the PC > go to Microsoft’s official website > download the Media Creation Tool > create a bootable USB drive > plug it into the affected PC > change the boot order to the USB drive > load the Windows setup > install Windows.

Remember, the ERROR_CANNOT_DETECT_DRIVER_FAILURE issue usually arises due to software misconfigurations and rarely has to do with hardware. But if the problem persists, you should take the PC to a repair shop and get the hardware inspected.

Before you leave, discover expert tips to make your Windows PC faster than ever!

Which fix worked for you? Share with our readers in the comments sections.

ASSIGN_DRIVE_LETTERS_FAILED – 8 Step-by-Step Solutions

Learn how to fix the ASSIGN_DRIVE_LETTERS_FAILED error in Blue Screen of Death (BSOD) or non-BSOD situations with these neat tricks.

If you connect a new hard drive or SSD before powering on the PC, the operating system attempts to assign the existing drive letter to the storage automatically. However, software or hardware issues might prevent this usual process.

The result could be any of the following scenarios:

  • Unexpected abort in system boot-up process with BSOD followed by an error code 0x00000072.
  • The PC boots to the Desktop and shows a warning message for the recently connected storage device with the error.

You can try the following DIY troubleshooting methods in both situations to resolve the problem.

How To Fix ASSIGN_DRIVE_LETTERS_FAILED

I’ve tried several different ways to solve this problem and found these methods to be the most effective. Moreover, I’ve listed them from easiest to hardest, so you can start with the simplest solution and work your way up if needed.

Perform These Basic Hardware Checks

Here are the most common reasons that generate this error. Check and fix these before trying any exhaustive troubleshooting:

  • Check for physical damage: If the HDD or SSD has any physical damage, it probably won’t work.
  • Reseat cables: Maybe you haven’t connected the power cables and data connectors appropriately. Remove them and snuggly reseat them in the appropriate slots.
  • Remove hardware: If the issue has started surfacing after installing new hardware, remove it and check.
  • Verify hard drive health: You can check whether the disk is in good condition by running the following test:
  1. Connect the HDD/ SSD to the originating PC where it worked previously.
  2. Open Command Prompt (or PowerShell) as an administrator.
  3. Type chkdsk D: (replace D: with the drive letter you want to check) and press Enter.
run chkdsk
  1. If CHKDSK finds errors, it’ll schedule a scan to fix them.
  2. Restart the PC.
  3. After the scan completes, CHKDSK will report any errors it found and fixed.
  4. Run CHKDSK again.
  5. If the second scan doesn’t show any bad sectors, try connecting the disk to a new device.
  6. Try a third scan if the second pass shows more issues.
  7. If CHKDSK keeps showing new bad sectors, it’s time you replace the drive.

Detach Hardware and Perform Hot Swapping

Hardware and firmware conflicts are more frequent when you connect a new or different internal device to your PC after powering it down. Since most modern HDDs and SSDs come with the hot swapping feature, you should try to plug in the device when the PC is running.

Also, if the BSOD screen goes away when you detach it, this is the only approach you can try.

  1. Wear an anti-static wrist strap. Alternatively, touch a metal grounded to the earth. Then, wear an unsoiled shoe, preferably made of thick leather or PVC materials.
  2. Carefully open the left-side door of the PC case.
  3. Pull out a SATA power and data cable.
  4. Place the HDD or SSD on a solid flat surface.
  5. Connect the cables to the dedicated slots on the storage device.
  6. Your PC should show that a new device has been connected.
System tray 1
  1. Wait for the device to install automatically.
  2. In most cases, you’ll see the Device installed successfully notification.
  3. Click on the Start Menu and type Disk Management.
  4. Select the Create and format hard disk partitions option below the Best match section.
  5. The Windows Disk Management tool will open.
  6. Scroll down to find the newly connected HDD or SSD.
  7. The new storage media will be marked as Disk 1 if the PC has one HDD. Contrarily, if there are two disks, then the new storage drive would be tagged as Disk 2, and so on.
  8. You should also see the total usable storage volume along with the tag Unallocated if the disk is unused.
unallocated
  1. So, select the appropriate disk and right-click.
  2. Choose the Change Drive Letter and Paths option from the context menu.
change letter
  1. Click Add on the next dialog box.
add letter
  1. You should see a drop-down list with possible drive letters that are free.
add letter path
  1. Click on that and assign a drive letter.
  2. Click OK to save.
  3. Ensure that the drive letter is reflected in the Disk Management tool before closing it.
  4. Now, navigate to This PC and access the new drive. You’ll need to format the drive if the manufacturer didn’t do so.
format disk
  1. The system will automatically reassign the drive letters.
auto assigned system tray

Disable and Re-Enable Fast Startup

You can often fix the ASSIGN_DRIVE_LETTERS_FAILED error easily if you follow these simple steps:

  1. Open the Control Panel from the Start Menu.
  2. Find and click on the Power Options menu.
  3. Select Choose what the power buttons do from the left.
Choose what the power buttons do
  1. Click on the Change settings… shield.
Change settings
  1. Uncheck the box for the Turn on fast startup option.
  2. Click Save changes.
Save changes
  1. Now reboot the PC.

If the issue is resolved, follow the above steps again to re-enable the Windows PC fast startup feature.

Disable Third-Party Services and Startup Programs

Malicious third-party services and apps can also cause the ASSIGN_DRIVE_LETTERS_FAILED error. Here’s how you can fix this with a Clean Boot process:

  1. Type msconfig in the Start Menu search bar and press Enter. This will open the System Configuration window.
  2. Go to the Services tab and check the Hide all Microsoft services box. Then, click the Disable all button.
disable all
  1. Navigate to the Startup tab and click the Open Task Manager button. This will open the Task Manager window.
  2. In the Task Manager window, go to the Startup tab and disable all startup items.
disable startups
  1. Close the Task Manager window and click the Apply button in the System Configuration window.
apply in system config
  1. Click the Restart button to restart your computer.

After the PC restarts, it’ll be running only the essential services and drivers. Now, shut down the PC and connect the new drive. See if the issue surfaces again.

If ASSIGN_DRIVE_LETTERS_FAILED is resolved or you need to try the next method, go back and enable all third-party services as well as the Task manager Startup processes.

Update Disk Drivers

You might need to follow both of these methods to ensure your PC has the latest drivers:

  1. Open the Device Manager tool by right-clicking on the Windows flag.
  2. Locate the Disk drives tree in the app interface and expand that.
  3. Select the appropriate disk drive, right-click, and select Update driver.
update driver
  1. On the next dialog box, choose the Search automatically for drivers option.
search auto

Now, open the Settings app by pressing the Windows + I keys together. Navigate to the Windows Update menu and hit the Resume updates or Check for updates button.

Resume updates

Let Windows update itself to the newest version. Reboot the PC if it doesn’t do that automatically.

However, if you’re facing an issue with an SSD or NVMe M.2 SSD chip, follow these steps instead. SSD manufacturers, like Samsung, Micron, WD, etc., develop dedicated management apps.

  1. Download and install the SSD storage management software from the manufacturer’s website.
  2. Open the app.
  3. You should see a Dashboard or System information interface showing the health and status of installed SSDs.
  4. If you see the New Firmware Available button next to one or more SSDs, click on those one by one.
update firmware
  1. This should update the chip’s firmware and drivers.
  2. Restart the PC to make the changes effective.

Scan for and Remove Malware

You can use the built-in Windows Security tool or a third-party antivirus to get rid of malware which might be causing the ASSIGN_DRIVE_LETTERS_FAILED error.

Here are the steps for the built-in security software. However, they’re highly similar for most standard third-party apps.

  1. Use the Windows + I shortcut to open Windows Settings.
  2. Navigate to the Privacy & security menu on the left-side navigation panel.
  3. Select the Windows Security menu on the right side.
Privacy & security
  1. Click on the Virus & threat protection option below Protection areas.
  2. The Windows Security app will open on a separate window.
  3. Click on the Scan options hyperlink.
Scan options
  1. Select the Full scan option and scroll down to find the Scan now button. Click on that.
Full scan
  1. Once done, select the Microsoft Defender Antivirus (offline scan) option and hit Scan now again.

Use System Restore

If you’ve installed the disk successfully but still face the ASSIGN_DRIVE_LETTERS_FAILED error intermittently, try reverting back to the last known stable configuration:

  1. Click on the Start Menu button and type Restore.
  2. Select the Create a restore point option below Best match.
Create a restore point
  1. You should see the System Properties dialog box.
  2. Click on the System Restore button.
  3. The System Restore window will open.
  4. Click Next.
System Restore
  1. Select a restore point from the table.
  2. Click Next and then hit Finish on the next window.
System Restore Next

Wait for the PC to be restored. The device might reboot a couple of times.

Contact the Manufacturer for Technical Support

If none of the above works for you, it’s the right time to reach out to a technical support specialist from either the PC or HDD/SSD manufacturer. Find below website links to some of the top manufacturers:

PC Support Resources

Disk Support Resources

Summary

These are the tried and tested approaches to fix ASSIGN_DRIVE_LETTERS_FAILED. The methods will work for various operating systems, like Windows 7, Vista, 8, 10, and 11.

You can also read about common Windows 11 bugs, how to fix a Windows 11 BSOD, and what to do if Windows 11 won’t restart. Additionally, if you keep encountering ERROR_LOCK_VIOLATION, we can help out!

HAL_MEMORY_ALLOCATION BSOD 0x000000AC [Solved]

The HAL_MEMORY_ALLOCATION bug check with a value of 0x000000AC is encountered when you turn on the PC and prevents Windows from loading. Every time you boot the OS, it crashes with a blue screen!

The HAL Memory Allocation blue screen error appears when the Hardware Abstraction Layer (HAL) can’t secure the required available memory. It’s usually caused by misconfigured memory settings, corrupt/conflicting drivers, malfunctioning RAM modules, outdated BIOS, or a problematic Windows installation.

To fix things, start by installing all pending Windows updates, disabling any overclocking, and properly reseating the RAM modules.

How do I fix the HAL_MEMORY_ALLOCATION blue screen?

Note icon NOTE
For solutions below that require accessing the OS, you can boot Windows into Safe Mode. As for the rest, you will need to get into Windows RE (Recovery Environment).

1. Reset max memory

  1. Turn on the PC, and as soon as Windows starts to load, press the Power button to turn it off.
  2. Repeat it twice, and on the third attempt, Windows should initiate an Automatic Startup Repair.
  3. Once the repair is complete, click on Advanced options.
  4. Click on Troubleshoot.
  5. Again, click on Advanced options.troubleshoot
  6. Now, choose Command Prompt.command prompt
  7. If asked, confirm your user profile and password.
  8. Next, paste the following commands individually and hit Enter after each: bcdedit /deletevalue {current} removememory bcdedit /deletevalue {current} truncatememory bcdedit /deletevalue {default} removememory bcdedit /deletevalue {default} truncatememoryreset memory to fix HAL_MEMORY_ALLOCATION
  9. Finally, reboot the device and check for improvements.

If the HAL_MEMORY_ALLOCATION Windows error started appearing after you changed the Maximum Memory in System Configuration (MSConfig) or set it to 0, that could be the reason the Hardware Abstraction Layer can’t obtain the required resources. Resetting it to default will get things up and running!

2. Uninstall any corrupt/conflicting drivers

  1. Press Windows + X to open the Power User menu, and select Device Manager from the list.
  2. Look for any devices with a yellow exclamation mark sign near the device icon.
  3. If any are found, individually right-click on them, and select Uninstall device.uninstall driver to fix HAL_MEMORY_ALLOCATION
  4. Tick the checkbox for Attempt to remove the driver for this device, if available, and click Uninstall.uninstall driver
  5. Finally, reboot the PC, and Windows will automatically install a fresh copy of the removed driver(s).

In the past, the HAL_MEMORY_ALLOCATION Windows 11 crash has been caused by webcam drivers or its components. Also, if a quick reinstall doesn’t work, roll back the driver update!

3. Test/repair the RAM modules

  1. Press Windows + S to open Search, type Windows Memory Diagnostic in the text field, and click on the relevant result.
  2. Now, click on Restart now and check for problems.memory diagnostic
  3. After the tests are run, check the mdsched.exe logs and verify whether the RAM is faulty.

If Windows Memory Diagnostic cannot detect problems, I recommend you use Memtest86+, an open-source tool, to run a series of tests on individual RAM modules and identify all problems. In case any are found, it’s best to contact a professional or replace the malfunctioning module.

4. Update the BIOS

Since the HAL_MEMORY_ALLOCATION blue screen error appears at startup, it might be caused by a corrupt or outdated BIOS. So, check the installed version and update the BIOS!

Updating the BIOS is tricky, and the process differs slightly from manufacturer to manufacturer. For this reason, I recommend you check the OEM’s website for the exact steps and follow them as is.

5. Reinstall Windows

When none of the software-based solutions work, you can always reinstall Windows!

reinstall Windows
Reinstalling Windows

To do that, go to Microsoft’s official website > download the Media Creation Tool > use it to create a bootable USB drive > connect it to the affected PC > change the boot order to the USB drive > wait for the setup load > follow the on-screen instructions to reinstall Windows.

6. Increase the physical memory

As discussed earlier, the HAL_MEMORY_ALLOCATION is caused when insufficient RAM is available during system initialization. While this could have to do with pool corruption, we can’t negate the possibility of low physical memory.

So, if you have spare RAM modules, seat them into the memory slots and check for improvements. Make sure you don’t increase it beyond the PC’s maximum RAM capacity.

7. Visit a repair shop

If all else fails, your last option is to contact the manufacturer’s support team or visit a local repair shop. Because, at this point, it seems like a misconfigured connection or hardware malfunction is causing the error. And this can be best fixed by a professional!

Advanced users can check the BSOD error logs, identify the faulty software component or module, and take the necessary steps. Also, you may try our expert solutions for BSOD on Windows 11.

If you know of more fixes for the HAL_MEMORY_ALLOCATION blue screen error, share them with our readers in the comments section.

Minecraft Error Code Obsidian: How to Solve it

Various errors can appear in Minecraft, but the Minecraft error code Obsidian will prevent you from logging in to your Microsoft account and other services that use it. Luckily, a few solutions might help you.

How can I fix the Minecraft error code Obsidian?

Before we try more complex solutions, try using a VPN before you log in as a few users suggested that this worked for them. Also, remember to keep the game up to date to prevent further issues.

1. Change account settings

  1. Open Minecraft.
  2. Go to Settings and then to Account.
    settings minecraft
  3. Enable Use remote to connect for Microsoft account sign-in.

2. Reinstall the game

  1. Press the Windows key + X and choose Apps and Features.
    apps and features menu
  2. Locate Minecraft on the list, click the three dots, and choose Uninstall.
    uninstall app w11
  3. Follow the instructions on the screen.
  4. Once the game is removed, install it again.

A few users suggested installing the Minecraft website instead of the Microsoft Store, so try that as well.

Minecraft error code Obsidian is not a common Minecraft error, and in most cases, it’s caused by an inability to log in to your Microsoft Account in Minecraft.

Another similar error is Error code Deep Ocean and if you encounter it you can’t sign in Minecraft until it’s fixed, but luckily we have a guide on how to tackle it.

Before you go, don’t miss our latest guide on Minecraft error code Drowned on Switch to see how to fix it. We also have a guide on error code C-0010 in Minecraft, so feel free to check it out.

How to Fix the SPIN_LOCK_INIT_FAILURE Bug Check 0x81

Encountering the SPIN_LOCK_INIT_FAILURE error on your Windows system comes with the value of 0x00000081. This error typically points to issues with hardware or software conflicts, but don’t worry—we’ve got a series of solutions that can help you resolve it.

How do I fix the SPIN_LOCK_INIT_FAILURE BSoD?

1. Scan Device Performance and Health

  1. Open Device Manager by right-clicking the Start button and selecting Device Manager.
  2. In Device Manager, right-click on each device and select Scan for hardware changes.
  3. Check for any listed issues with updates, storage, and drivers.
  4. If issues are detected, follow the prompts to resolve them.

Scanning your device for performance and health issues helps identify faulty hardware or software that might cause errors like SPIN_LOCK_INIT_FAILURE.

2. Run Windows Defender Offline

  1. Select Start , and then go to Settings.
  2. Navigate to Update & Security  > Windows Security  > Virus & threat protection.
  3. Under Current threats, select Scan options.
  4. Select Microsoft Defender Offline scan, and then select Scan now.

Running Windows Defender Offline can remove malware that might be causing the SPIN_LOCK_INIT_FAILURE, as some viruses can corrupt system files leading to this error.

3. Uninstall recently installed software

  1. Open the Control Panel by typing Control Panel in the search bar and pressing Enter.
  2. Click on Uninstall a program under the Programs section.
  3. In the Programs and Features window, look for software installed recently.
  4. Select the recently installed software and click Uninstall.
  5. Follow on-screen instructions to complete the uninstallation.
  6. Restart your computer to see if the issue persists.

Uninstalling recently installed software can resolve compatibility issues that might be causing the SPIN_LOCK_INIT_FAILURE.

4. Unplug or uninstall external hardware

  1. Power down your computer and unplug all external devices (like printers, scanners, external hard drives).
  2. Boot your computer to see if the issue persists.
  3. If the BSoD does not occur, plug in the devices one by one until you find the problematic device.
  4. Once identified, update the device’s drivers from the manufacturer’s website or through Device Manager.
  5. Alternatively, uninstall the device drivers and then reinstall them.

Removing external hardware isolates the problem to determine if an external device is causing the SPIN_LOCK_INIT_FAILURE.

5. Toggle Fast Startup

  1. Type Power Options in the search bar and press Enter to open Power Options.
  2. Click on Choose what the power buttons do on the left side.
  3. Click on Change settings that are currently unavailable.
  4. Scroll down to Shutdown settings and locate Turn on fast startup.
  5. Change the status of Turn on fast startup:
    • If it is on, turn it off.
    • If it is off, turn it on.
  6. Click Save changes.

Toggling fast startup might fix startup issues that lead to SPIN_LOCK_INIT_FAILURE, as this feature can sometimes cause conflicts.

6. Run System Restore

  1. Type System Restore in the search bar and press Enter.
  2. Click on Create a restore point and then System Restore.
  3. Follow the prompts to choose a restore point before the error occurred.
  4. Click Next and then Finish to confirm the restore.
  5. Allow the system to restore and restart.

Running System Restore reverts your system to a previous state, which can fix SPIN_LOCK_INIT_FAILURE caused by recent changes or corruptions.

Keeping your system updated and regularly scanning for hardware and software issues can help prevent errors like SPIN_LOCK_INIT_FAILURE in the future.

Also, take a look at our article about the causes of BSoD to learn more about such issues. We also have a complete guide on how to fix BSoD errors on Windows 11 that might come in handy.

Did you manage to fix the SPIN_LOCK_INIT_FAILURE bug check using our solutions? Let us know in the comments below.

Windows 11’s popularity is growing: more than 50% Steam users have migrated to it

Windows 11 popularity is growing, as the operating system is quickly becoming the go-to operating system for gamers on Steam, surpassing the halfway mark among Windows users on the platform.

Specifically, 50.81% of Windows Steam users have adopted Windows 11, marking a significant 3.36% increase from the previous month. This shift comes at the expense of Windows 10, which decreased by 48.66%. Seeing such a rapid change is fascinating, especially considering Windows 10’s long-standing dominance.

The survey didn’t just stop at operating system usage; it delved into other aspects of gamers’ setups. For instance, 16 GB of RAM is the most common configuration among Steam users, with a 47.35% share. This is closely followed by 32 GB setups, highlighting a trend towards more powerful gaming rigs.

Additionally, the survey shed light on language preferences, revealing that Simplified Chinese has overtaken English as the most common language among Windows users on Steam.

Outside of the gaming community, Windows 11’s market share is steadily growing: In June, the operating system had a little under 30%; by August, it had surpassed that percentage, and it sits at 31,63%, according to the latest stats.

This transition to Windows 11 is noteworthy, especially as we inch closer to Windows 10’s retirement date in October 2025. However, the persistence of older operating systems like Windows 7 and 8.1, despite their lack of support, raises questions about the complete migration to newer versions.

The move to Windows 11 seems inevitable for gamers, but it’s clear that not everyone is ready to leave Windows 10 behind just yet.

What do you think of the new-found popularity of Windows 11? Are you part of the group jumping to Windows 11 or holding onto Windows 10 for a bit longer? It’s a pivotal moment in the PC gaming world, with the landscape shifting beneath our feet.

New Outlook’s Immersive Reader will read your emails for you

Microsoft recently made the new Outlook for Windows generally available to users. With this critical step, the Redmond-based tech giant has also started to enhance it with new capabilities and shortcuts.

In a blog post, Microsoft says it is on a mission to ensure that everyone finds Outlook familiar and productive regardless of their abilities. While the Mail, Calendar, and People apps on Windows will be retired by the end of this year, the new Windows 11 devices are set to include this revamped Outlook as the default mailbox application.

However, the new Outlook for Windows and the web seems bright: the Redmond-based tech giant is updating it with enhancements in accessibility and usability. Have you ever wished you could listen to your emails instead of reading them? The Immersive Reader feature is here to make that wish come true. Plus, with Dictation, drafting emails is as easy as speaking your thoughts out loud. And for those who find comfort in larger text or specific themes, Outlook has got you covered with adjustable settings to suit your viewing preferences.

But what about creating content that’s accessible to others? The Accessibility Checker is a handy tool that identifies potential barriers in your emails, ensuring your message is clear and reachable to all. Microsoft’s commitment to inclusivity shines through with these thoughtful additions, all based on feedback from the community.

For keyboard warriors, navigating Outlook has never been easier. A plethora of shortcuts have been introduced, making tasks like jumping between emails or folders a breeze. For those who use screen readers, the experience has been significantly improved, ensuring that the most valuable information is immediately accessible.

These include:

  • Ctrl+Y shortcut 
  • Tab efficiency 
  • Alt shortcut 

Looking ahead, Microsoft isn’t stopping here. More features, including enhancements for navigating the Calendar module and better integration with screen reader tools, are coming.

You can read more about it here.

How to Fix the ERROR_FLOPPY_UNKNOWN_ERROR

Encountering the ERROR_FLOPPY_UNKNOWN_ERROR usually comes with the following message and stop code: 1124 (0x464) The floppy disk controller reported an error that is not recognized by the floppy disk driver. This error often stems from BIOS settings or hardware issues related to non-existent floppy drives.

How do I fix the ERROR_FLOPPY_UNKNOWN_ERROR?

1. Change the BIOS settings to set the hard drive as first boot device

  1. Turn on your computer and immediately start tapping the Delete key repeatedly to enter BIOS (the key might be different for your system).
  2. Navigate to the Boot menu.
  3. Locate the setting for the First Boot Device and ensure it is set to your hard drive.
  4. Within the BIOS settings, find and disable the Floppy Drive or Floppy Seek function if it is enabled.
  5. Save the changes and exit the BIOS settings.

This solution helps by ensuring that your computer attempts to boot from the hard drive first, bypassing the non-existent floppy drive.

2. Check RAID configuration in BIOS

  1. Restart your computer, and press the appropriate key (such as F2, Delete, or another specified key) to enter the BIOS setup.
  2. Navigate to the Advanced or Integrated Peripherals tab.
  3. Look for SATA Configuration or RAID Configuration and ensure that RAID is enabled for all hard drives if you use a RAID setup.
  4. Save the changes and exit the BIOS.

This solution ensures that RAID configurations are correctly recognized and set, which can solve issues if the error is related to RAID setups.

3. Check the hard drive connections

  1. Turn off your computer and unplug it from the power source.
  2. Open the case of your computer.
  3. Inspect the connections on your hard drive, ensuring that all cables are firmly connected.
  4. Reconnect any loose cables, particularly the SATA or IDE data cables and the power cables.
  5. Close the case, plug in your computer, and start it again.

This solution ensures that all physical connections to your hard drive are secure, which can sometimes prevent the BIOS from detecting the drive properly.

4. Reset BIOS to default settings

  1. Restart your computer and press the designated key (such as Delete, F2, etc.) to enter the BIOS settings.
  2. Find the option to Load Setup Defaults or Reset to Default Settings.
  3. Confirm the action, then save and exit the BIOS.

Resetting the BIOS to its default settings can clear any improper configurations that might be causing the floppy seek error.

5. Disable the Floppy drive in Device Manager

  1. Right-click the Start button and select Device Manager.
  2. Expand the category for Floppy Disk Drives.
  3. Right-click on the floppy drive entry and select Disable.
  4. Confirm the action if prompted, and then restart your computer.

Disabling the floppy drive in Device Manager ensures that the operating system does not attempt to access the non-existent floppy drive, eliminating related errors. If you do use a floppy disk drive, make sure you install the correct driver for it and reenable it.

Common issues and final troubleshooting tips

  • Loose Cables: Double-check all internal connections if the issue persists.
  • BIOS Updates: Ensure your BIOS is up-to-date, as newer firmware can resolve compatibility issues.
  • Hardware issues: Faulty cables or connectors can cause errors. Consider replacing cables if none of the above solutions work.

By following these steps, you can effectively troubleshoot and resolve the ERROR_FLOPPY_UNKNOWN_ERROR. For future prevention, regularly check your BIOS settings and keep your hardware connections secure.

We covered another issue with floppy drives in our ERROR_FLOPPY_VOLUME article, so you might want to visit it.

Microsoft debuts new Insider Community on Skype, but you’ll need to sign an NDA to join it

Skype has been enhanced with many amazing capabilities lately, slowly bringing the app more in tune with the current messaging apps, such as WhatsApp and Messenger. From Content Channels to camera enhancements, all of these features were first previewed in the Skype Insider Community before going live on the stable channel.

So, if you’re a Skype user and want to experience more capabilities, especially those the Redmond-based tech giant is currently working on, Microsoft has a proposition for you. Join the Skype Insider Group on… wait for it… Skype.

You’ll not only be able to experience the new features ahead of everyone else, but you’ll also be able to contribute feedback and provide insights for the Skype Team. In other words, you can help build new features, changes, and enhancements for Skype users.

Plus, the Redmond-based tech giant promises other perks. In a blog post, Microsoft says you’ll be able to participate in interactive discussions with other Insiders.

However, to do so, you’ll need to sign an NDA. Yes, you heard that right. Microsoft says it’s for good reason, as the company will try to create an open environment where sensitive information is freely shared within that space.

To create a more open and collaborative environment, an NDA will be a requirement within this group. This allows us to share updates and information more freely, both in the group and during our Community Calls.

Microsoft might ask you for some demographic information, but this is entirely optional and will not affect your experience as an Insider.

If you’re used to NDAs and you already use Skype frequently, you should try it. Otherwise, it might not be worth it.

You can read more about the Insider Community on Skype here.

How to Determine Google Meet Maximum Participants

If you’re looking to hold large meetings and Google Meet is your chosen fighter, you need to be aware of the different tiers and the maximum participant each can hold.

Google Meet is a strong contender when compared to other video conferencing tools but one limitation is that each tier has a limited maximum number of participants. So if your Google Meet is stuck in a getting ready loop, you’ve probably exceeded the maximum limit.

What’s the Google Meet’s maximum participants cap?

Anyone with a Google account can create and join a Google Meet meeting which is limited to 100 participants. This is the free version available to everyone.

However, if you want to expand and accommodate more people, you’ll have to subscribe to one of the paid versions. The more you pay, the more participants you can accommodate.

  • Business Starter – 100
  • Business Standard – 150
  • Teaching and Learning Upgrade – 250
  • Business Plus – 500
  • Enterprise Plus, Enterprise Essentials Plus, Education Plus – 1000

Note that for the Enterprise tier, the last 500 who join the meeting will have view only privileges. This means, they cannot speak, present or record.

The good thing is that these meetings are not limited and you can hold as many as you would like. The only issue is that the more participants, the less time you have.

For instance, for the free tier one on one meetings, you can go up to 24 hours. Three or more participants slashes the time to 60 minutes per meeting. When you join a workspace, the time bumps up to 24 hours.

What factors may affect participant capacity?

Even though you may meet the system requirements to hold a Google Meet meeting, other factors may influence how many participants can join. For instance:

  • Hardware specs – The more participants you’d like to join a meeting, the higher the hardware specs required. If you have lower-end hardware, you may experience frequent technical glitches. Check to ensure your device meets the minimum system requirements.
  • Connection – Your internet should also be strong, fast and stable enough to avoid interruptions.
  • Type of account – Your account and subscription determines how many participants can join the Google Meet meeting.

How can I increase the maximum number of Google Meet participants?

Although the top most tier allows up to 1000 participants, your meeting may require more participants for events or webinars. Since no subscription allows you to go over this number, you can use Google Meet’s live streaming feature.

This will allow you to exceed the participant limitations by broadcasting your meeting to a larger audience. Alternatively, you can record the meeting and share it later with those who could not join.

Now that you know how to increase the number of participants for your Google Meet meetings, you may want to take it a notch higher by adding some spice to your background.

If you have an unsightly background during your meeting, you can use one of the free Google Meet backgrounds and enhance your viewers’ video experience.

Have you experienced any challenges with Google Meet’s participant limitation? Let us know in the comment section below.

Driver Cannot be Resolved in Selenium: How to Fix it

Encountering the driver cannot be resolved error in Selenium with Java can be quite frustrating, especially when you’re in the middle of writing or running your tests. Let’s walk through some effective solutions to get you back on track.

How can I fix the Driver cannot be resolved error?

Before we try more complex solutions, try restarting your IDE.

1. Define WebDriver at class level

  1. Ensure you are editing the correct Java file for your Selenium test.
  2. Locate the method where you attempted to initialize the WebDriver.
  3. Move the declaration of WebDriver to the class level, before the method definitions.
  4. Example:
    public class FirstTestNGFile {
        WebDriver driver;  // Declaration moved here

        @BeforeTest
        public void setup() {
            driver = new ChromeDriver();
        }
        // Other methods remain the same
        }

    webdriver declaration
  5. Save the file and rerun your test.

By moving the WebDriver declaration to the class level, it ensures the driver variable is accessible in all methods of that class. This resolves the scope issue causing the driver cannot be resolved error.

2. Check your imports

  1. Open your Java file.
  2. Ensure you have the correct import statements for Selenium WebDriver at the top of your file.
  3. Required imports typically include:
    import org.openqa.selenium.WebDriver;
    import org.openqa.selenium.chrome.ChromeDriver;

    import selenium

3. Add Selenium JARs to the classpath

  1. Open Eclipse or any other Java IDE you use.
  2. Select Properties from the context menu.
  3. Click on Java Build Path from the left-hand menu.
  4. Switch to the Libraries tab.
  5. Click Add External JARs… and navigate to the directory where you downloaded the Selenium JAR files.
    add external jars
  6. Add selenium-server-standalone.jar or individual JAR files for WebDriver.

4. Verify WebDriver binary location

  1. Download the correct WebDriver executable (e.g., chromedriver for Chrome) from the official website.
  2. Add a line in your setup method to set the system property for the WebDriver.
  3. Example:
    System.setProperty("webdriver.chrome.driver", "path_to_chromedriver");
    WebDriver driver = new ChromeDriver();

    setproperty chromedriver

5. Clean and rebuild project

  1. Open your project in your Java IDE.
  2. In Eclipse, go to Project in the menu.
  3. Select Clean.
    clean eclipse
  4. Choose your project and click OK.
  5. After cleaning, rebuild your project to remove any lingering compilation errors.

6. Check the Java compiler version

  1. Right-click on your project and select Properties.
  2. Navigate to Java Compiler.
    compiler eclipse
  3. Ensure it’s set to a version compatible with your Selenium library (e.g., Java 8 or later).
  4. Apply the settings and rebuild the project.

Matching the Java compiler version with your Selenium dependencies ensures compatibility and resolves potential conflicts.

By following these solutions, you should be able to resolve the driver cannot be resolved error in Selenium with Java.

We covered a similar error in our WebDriver cannot be resolved to a type guide, so don’t miss it. If you’re using an Edge driver, you might get a Microsoft Edge WebDriver unknown error, but we have an article that covers that issue.

INVALID_WORK_QUEUE_ITEM – How To Resolve This Error

0x00000096 INVALID_WORK_QUEUE_ITEM is a Blue Screen of Death (BSOD) error caused by related hardware, device driver, software, or firmware problems. It can be frustrating, as it disrupts your workflow and may cause system instability. Luckily, I’ll show you some effective methods to resolve this issue and restore your system.

But before we dig deep into the solutions, try these quick fixes:

  • Remove external hardware: Unplug any external devices like USB drives, printers, or hard drives, then restart your computer.
  • Update Windows: Press the Windows Icon + I > Update & Security > Windows Update > Check for updates.
  • Scan for viruses and malware: Open Windows Security > Virus & threat protection > Scan options > Full scan > Scan now.
  • Remove third-party antivirus programs: Press the Windows Icon + I > Apps > Apps & features > Select the antivirus program > Uninstall.
  • Uninstall similar apps: Press the Windows Icon + I > Apps > Apps & features > Select a similar app > Uninstall.

If these haven’t helped, let’s move on to more detailed solutions!

7 Ways To Solve INVALID_WORK_QUEUE_ITEM Error

Check out these steps:

Disable Automatically Restart

Your computer automatically restarts after a system crash, which can make identifying the specific error causing the problem difficult. Disabling this feature allows you to see the error code and take the necessary steps to fix it.

  1. Right-click on This PC and select Properties.
This PC
  1. Tap Advanced system settings, then select Settings under Startup and Recovery.
Advanced system settings
  1. Uncheck Automatically restart under System failure. Tap OK to save changes.
Automatically restart

Run SFC and DISM

System File Checker (SFC) and Deployment Imaging Service and Management Tool (DISM) are powerful utilities that repair missing or corrupted system files. They can help resolve issues that may be triggering this error.

Here are the steps:

  1. Press the Windows Icon + X, then select Windows PowerShell (Admin).
Windows PowerShell (Admin)
  1. Type sfc /scannow, press Enter, and wait for the process to complete.
Type sfc /scannow
  1. Type DISM /Online /Cleanup-Image /RestoreHealth, hit Enter, and wait for the scan to complete.
DISM /Online /Cleanup-Image /RestoreHealth

Uninstall the Latest Windows Updates

A recent Windows update can introduce conflicts or bugs that result in Blue Screen errors, including INVALID_WORK_QUEUE_ITEM. Here’s what to do:

  1. Press the Windows Icon + I to open Settings, then tap Update & Security. 
Update & Security
  1.  Tap View update history.
View update history
  1. Click on Uninstall updates and remove the latest ones.

Update Drivers

Outdated or faulty drivers can cause various system errors, including INVALID_WORK_QUEUE_ITEM. Here’s how to keep them up to date:

  1. Right-click on Start and select Device Manager.
Device Manager
  1. Right-click on the driver with issues; normally, they have a yellow exclamation mark. Select Update driver.
Update driver
  1. Tap Search automatically for drivers, then follow the onscreen instructions.
Search automatically for drivers

Perform System Restore

A System Restore can revert your computer to a previous state before the error occurred. This way, you can undo recent changes that may have caused the problem. Follow the below steps:

  1. Press Windows + R, type rstrui, and tap Enter.
Type rstrui
  1. Tap Next.
Tap Next
  1. Pick a restore point, then hit Next.
Pick a restore point
  1. Tap Finish. 
Tap Finish

Your computer will automatically reboot to start the restoration process.

Run CHKDSK

The Check Disk (CHKDSK) utility scans and fixes your hard drive for errors. Running this tool can help resolve issues contributing to INVALID_WORK_QUEUE_ITEM. Here are the steps:

  1. Right-click the start button, then select Windows PowerShell (Admin).
Windows PowerShell (Admin)
  1. Type chkdsk /f /r and hit Enter.
  2. Type Y and press Enter if prompted to schedule the scan the next time your system restarts.

Reboot your PC, and CHKDSK will scan and repair any disk errors in the system.

Run Windows Memory Diagnostic Tool

Memory problems are a common cause of Blue Screen errors like INVALID_WORK_QUEUE_ITEM. The Windows Memory Diagnostic Tool checks your RAM and can help you identify if faulty memory is causing the error. Here are the steps:

  1. Type Windows Memory Diagnostic in the search bar and tap Open.
Windows Memory Diagnostic
  1. Choose Restart now and check for problems.
Restart now and check for problems

After your computer restarts, review the results and replace any faulty RAM modules.

The above fixes will help you address the INVALID_WORK_QUEUE_ITEM error and restore your system’s stability. Regular maintenance and updates will also help prevent future occurrences.

Additionally, learn to fix ERROR_FAILED_DRIVER_ENTRY 647 (0x287), BAD_EXHANDLE, and ERROR_DRIVER_DATABASE_ERROR.

Mfc120u.dll is Missing or Not Found [Solved]

Often, you get the mfc120u.dll missing error upon booting the PC or loading a program, which then fails to open. Affected programs/processes include Microsoft Office, Google Chrome, AccelerometerSt.exe, VSDC Video Editor, Ableton Live 9 Suite, Avira Internet Security, and Adobe Lightroom, amongst others!

For those wondering what is mfc120u.dll, it’s a DLL file published by Microsoft and is related to the Visual C++ library. On a healthy PC, the default storage path of mfc120u.dll is: C:\Windows\System32

When mfc120u.dll is not found or stops working, first install any pending Windows updates, verify that your antivirus is not blocking access to the DLL file, and scan the PC for malware using the built-in Windows Security or a reliable antivirus solution.

What can I do when mfc120u.dll is missing?

Tip icon Tip
While many websites claim to offer mfc120u.dll, I recommend you don’t download it from the web since the DLL file could be bundled with malware or viruses. The solutions listed below are safer alternatives.

1. Use a DLL repair tool

One of the simplest solutions for the mfc120u.dll missing error in Windows is to use a top-rated DLL repair tool!

These automatically identify any missing or corrupted DLLs and download a fresh copy on your PC within minutes.

2. Transfer mfc120u.dll from another PC

If mfc120u.dll is missing on your computer, copy the DLL file from another PC and then move it to the affected one. As stated earlier, it’s stored in the following location:C:\Windows\System32

mfc120u.dll
mfc120u.dll in System32

So, all you have to do is get an external USB drive > connect it to another computer running the same iteration and OS architecture (32-bit or 64-bit) > transfer mfc120u.dll to the drive > then plug it into the affected PC > move the DLL file to the System32 folder.

Once done, reboot the PC, then launch the affected program, and it should not throw the C:\WINDOWS\SYSTEM32\mfc120u.dll is either not designed to run on Windows or it contains an error message anymore.

3. Install Visual C++ Redistributables (both x64 and x86)

  1. Go to Microsoft’s official website, and click on Download.download to fix mfc120u.dll missing
  2. Now, tick the checkboxes for both vcredist_x64.exe and vcredist_x86.exe, and then click on Download.x64 and x86
  3. Individually run both downloaded setups and follow the on-screen instructions to complete the process.
  4. Finally, reboot the PC and check for improvements.

If you see the mfc120u.dll missing CorelDRAW error, it could be that the version of the DLL required on the PC is not the same as the one present. So, it’s recommended that you get both the x64 and x86 versions!

4. Run the affected program in compatibility mode

  1. Right-click on the affected program’s launcher (.exe file), and select Properties.
  2. Go to the Compatibility tab, tick the checkbox for Run this program in compatibility mode for, and select an older iteration of Windows from the dropdown menu.compatibility mode to fix mfc120u.dll missing
  3. Click Apply and OK to save the changes.save changes
  4. Launch the affected program.
  5. If it still throws an error, select another iteration from the compatibility mode menu, and try again.

5. Reinstall the affected program

  1. Press Windows + R to open Run, type appwiz.cpl in the text field, and hit Enter.
  2. Select the affected program from the list, and click on Uninstall.remove app
  3. Follow the on-screen instructions, and once uninstalled, restart the PC.
  4. Now, reinstall the program from the official website or Microsoft Store, and the mfc120u.dll missing error in Windows should be fixed.

If the error message keeps reappearing, use an effective uninstaller software to get rid of all leftover files and Registry entries, and then proceed with the reinstallation!

6. Run the SFC and DISM scans

  1. Press Windows + S to open Search, type Command Prompt in the text field, and click on Run as administrator.command prompt
  2. Click Yes in the UAC prompt.
  3. Paste the following DISM commands individually and hit Enter after each: DISM /Online /Cleanup-Image /CheckHealth DISM /Online /Cleanup-Image /ScanHealth DISM /Online /Cleanup-Image /RestoreHealth
  4. Now, execute this command to run the SFC scan: sfc /scannowsfc scan to fix mfc120u.dll missing
  5. Once done, restart the PC and check for improvements.

7. Perform an in-place upgrade

Note icon NOTE
The steps listed below are for Windows 11. If you are running the previous iteration, check our dedicated guide on performing an in-place upgrade in Windows 10.
  1. Go to Microsoft’s website, select the OS edition and product language, and then download the Windows 11 ISO.windows 11 iso
  2. Right-click on the ISO file, select Mount, and then click Open in the confirmation prompt.
  3. Run the setup.exe file.setup.exe
  4. Click Yes in the UAC prompt.
  5. Click on Next to proceed.
  6. Now, click Accept to agree to Microsoft’s license terms.
  7. Make sure the setup reads, Keep personal files and apps, and then click on Install.in-place upgrade to fix mfc120u.dll missing
  8. Wait for the process to complete. It may take 30-90 minutes.

When nothing else works, the last option is to perform an in-place upgrade. The process is akin to reinstalling Windows and will replace all the system files, including mfc120u.dll, when it’s missing or corrupted.

If other DLL files are also missing on your PC, it’s a sign of malware/virus infection, and the best option is to reinstall Windows from scratch. While running a malware scan will eliminate the threat, you would never know the extent of damage to DLLs. Subsequently, reinstalling Windows becomes a viable solution!

For any queries or to share which fix worked for you, drop a comment below.

ERROR DRIVER FAILED PRIOR UNLOAD: 3 Ways to Fix it

The ERROR DRIVER FAILED PRIOR UNLOAD message is very frustrating when it happens on Windows devices, and unfortunately, it can render many applications unusable when this issue is active. While many components can cause it, this error usually involves driver files, and it will usually display the following message:

654 (0x28E) The driver could not be loaded because a previous version of the driver is still in memory.

The first thing you’ll need to check is your drivers: whether we’re talking about a recent update or not installing any driver updates at all, drivers are responsible for it. So you have many options: running the native Windows troubleshooter, uninstalling drivers entirely, and allowing Windows to reinstall them again, or as another solution, hard rebooting your system.

Method 1: Fix the ERROR DRIVER FAILED PRIOR UNLOAD by running the Windows troubleshooter

Windows’ troubleshooter can help check and fix any issues with hardware and devices. Here’s what you need to do:

  1. Go to Settings > System > Troubleshoot.ERROR DRIVER FAILED PRIOR UNLOAD
  2. Here, click on Other troubleshooters.
  3. Run all the Troubleshooters there.

Method 2: Fix the ERROR DRIVER FAILED PRIOR UNLOAD by uninstalling the USB controllers

  1. Right-click on Start and select Device Manager.ERROR DRIVER FAILED PRIOR UNLOAD
  2. Please scroll down to Universal Serial Bus controllers and double-click to expand it.
  3. Right-click on the Host Controller, and click Uninstall > OK.ERROR DRIVER FAILED PRIOR UNLOAD
  4. Restart the system, and Windows will reinstall all USB controllers automatically.

Note: If the issue persists, check the manufacturer’s website for chipset driver updates. The chipset drivers usually have the USB controller drivers as well.

Method 3: Hard Reboot your Windows device

Another unconventional way to fix the ERROR DRIVER FAILED PRIOR UNLOAD on Windows devices is to simply hard reboot the system. Many Windows users who dealt with the issue found that this solution works almost all the time.

To do that, you’ll need to:

  1. Press and hold the Shift key while pressing the SHUT DOWN/Power button.

After rebooting, your Windows device should no longer encounter this frustrating bug. Plus, this method might fix many other undiscovered issues with your PC, so before trying the other solutions, you might want to go with the simplest one first. Moreover, we can help you out with similar issues like BAD_EXHANDLE and CNSS_FILE_SYSTEM_FILTER.

Let us know which one of these solutions worked for you.

Synaptics Touchpad Driver Code 24: How to Fix it

Dealing with a Synaptics touchpad driver code 24 error can be a real headache, especially when your touchpad suddenly stops working.

What is code 24 on the Synaptics touchpad?

This error usually appears if the driver you installed isn’t properly working or if it’s corrupted. In some instances, issues with BIOS or the hardware can cause it.

How can I fix Synaptics touchpad driver code 24?

Before we start, ensure that you don’t have an external mouse connected and that you have the latest Windows updates installed. You can also access Safe Mode and check if the problem appears there.

1. Uninstall and reinstall the Driver

  1. Press the Windows key and the R key simultaneously to open the Run dialogue box. Type devmgmt.msc and click OK.
    Device Manager Run command
  2. In Device Manager, expand the category Mice and other pointing devices.
  3. Right-click on the Synaptics SMBus TouchPad and select Uninstall device.
    remove unknown devices
  4. Check the box that says Delete the driver software for this device. Click Uninstall.
  5. Restart your PC to complete the uninstallation process.
  6. Go to the HP Driver Support page HP Driver Support.
  7. Enter your HP model number and download the latest Synaptics TouchPad driver compatible with your version of Windows.
  8. Install the downloaded driver and reboot your computer.

For more information, we have a guide on how to download Synaptics touchpad driver for Windows 11.

2. Restore the system to a previous point

  1. Press the Windows key + R and type rstrui. Click OK.
    rstrui command run window
  2. Follow the on-screen instructions to choose a restore point that dates back to a time when your touchpad was working correctly.
    select restore point
  3. Click Next and then Finish to start the restoration process.
  4. Confirm that you want to restore your system.
  5. Your computer will reboot to complete the restoration.

3. Update the BIOS

  1. Visit the HP Driver Support page HP Driver Support.
  2. Enter your HP model number and download the latest BIOS update.
  3. Follow the on-screen instructions to install the BIOS update.
  4. Make sure your laptop is plugged into a power source to avoid interruptions.

4. Use hardware diagnostics

  1. Turn off your computer and then turn it back on.
  2. Press the F2 key repeatedly during startup to enter HP PC Hardware Diagnostics UEFI.
  3. Navigate to Component Tests and select Mouse.
    components test hp
  4. Follow the on-screen instructions to run the test.
  5. If the test indicates a failure, you may need to replace the touchpad.

5. Check and reseat the touchpad ribbon cable

  1. Ensure that your laptop is completely powered off and unplugged from any power source.
  2. Refer to your laptop’s service manual for instructions on opening the case.
  3. Locate the touchpad ribbon cable.
  4. Carefully disconnect and reconnect the ribbon cable to ensure it is seated properly.
  5. Reassemble your laptop and power it back on.

Keep in mind that this will void your warranty, so it might be better to contact HP support instead.

What happens if I uninstall Synaptics touchpad?

If you uninstall Synaptics touchpad driver, the touchpad won’t work anymore. However, the default driver will most likely be installed automatically once you restart your PC.

Following these solutions can help you fix the Synaptics touchpad driver code 24 addressing both software and hardware issues.

Many reported that Synaptics touchpad is not working and this can happen if you don’t resolve this error. Speaking of which, many reported SynReflash file on their devices, and we have a special guide that tells you what it does, so don’t miss it.

Recently we covered Synaptics touchpad driver error code 10 in another guide, so don’t miss it if you’re having additional problems. Many also reported that Synaptics Touchpad driver scroll not working, and we have a dedicated article addressing this issue.

If you’re getting Synaptics touchpad driver code 24, it means that there’s a driver issue, but these solutions can help.

Download and Install the Synaptics Touchpad Driver for Windows 7

Dealing with touchpad issues on Windows 7 can be quite a hassle, especially when your Synaptics touchpad driver isn’t working as it should. Installing the correct driver can make a world of difference, whether you’re facing unresponsive touch gestures or erratic cursor movements.

How to Install Synaptics Touchpad Driver on Windows 7

1. Download the driver from Microsoft’s Update Catalog

  1. Open your web browser and go to the Microsoft Update Catalog website.
  2. Search for Synaptics Touchpad driver Windows 7.
  3. You will find it as Mouse, not touchpad. Click on the Download button to get it for Windows 7.
  4. Once the download is complete, locate the downloaded file in your Downloads folder.
  5. Double-click the downloaded file to start the installation process.
  6. Follow the on-screen instructions to complete the installation.
  7. Restart your computer to apply the changes.

Although it’s technically a mouse driver, it worked for many as a Synaptics touchpad driver for WIndows 7, so you should try it.

Solution 2: Use Windows Update

  1. Click on the Start button and type Windows Update in the search bar.
  2. Select Windows Update from the list of results.
  3. Click on Check for updates on the left-hand side.
  4. Wait for Windows to find any available updates, including drivers.
  5. If a Synaptics touchpad driver is found, check the box next to it and click Install updates.
  6. Follow the prompts to install the driver.
  7. Restart your computer once the updates are installed.

Using Windows Update might automatically provide you with a compatible driver that integrates seamlessly with your system.

3. Download the driver from your laptop manufacturer’s website

  1. Open your web browser and navigate to your laptop manufacturer’s support page. For example:
  2. Enter your laptop’s model number or use the auto-detect feature if available.
  3. Navigate to the Drivers & Downloads section.
  4. Select your operating system as Windows 7.
  5. Look for the Synaptics touchpad driver in the list.
  6. Download the driver file to your computer.
  7. Locate the downloaded file and double-click it to start the installation.
  8. Follow the on-screen instructions to complete the installation.
  9. Restart your computer.

This method is particularly useful because the driver provided by your laptop manufacturer is tailored to work specifically with your laptop model.

4. Install older Vista driver in Compatibility Mode

  1. Download the latest Windows Vista touchpad driver from your laptop manufacturer’s website.
  2. Locate the downloaded driver file.
  3. Right-click the file and select Properties.
  4. Navigate to the Compatibility tab.
  5. Check the box labeled Run this program in compatibility mode for and select Windows Vista from the dropdown menu.
  6. Click Apply and then OK.
  7. Double-click the driver file to start the installation.
  8. Follow the on-screen instructions to install the driver.
  9. Restart your computer after the installation is complete.

Running the driver in compatibility mode can resolve issues where newer drivers are not available for Windows 7.

5. Using Device Manager

  1. Press Windows + R keys to open the Run dialog box.
  2. Type devmgmt.msc and press Enter to open Device Manager.
  3. Expand the Mice and other pointing devices category.
  4. Right-click on your Synaptics touchpad device and select Update driver software.
  5. Choose Search automatically for updated driver software.
  6. Follow the on-screen instructions to complete the driver installation.
  7. Restart your computer.

Updating the driver through Device Manager ensures that Windows attempts to find the best available driver for your device.

6. Install the driver manually from Device Manager

  1. Download the appropriate Synaptics driver from the manufacturer’s website.
  2. Open Device Manager by pressing Windows + R, typing devmgmt.msc, and pressing Enter.
  3. Expand Mice and other pointing devices.
  4. Right-click on the Synaptics device and select Update driver software.
  5. Select Browse my computer for driver software.
  6. Click Browse and locate the folder where you downloaded the driver.
  7. Click Next and follow the instructions to install the driver.
  8. Restart your computer.

Manually installing the driver allows you to ensure the exact driver file is used, which can be helpful if automatic methods fail.

7. Roll back the driver

  1. Open Device Manager by pressing Windows + R, typing devmgmt.msc, and pressing Enter.
  2. Expand the Mice and other pointing devices category.
  3. Right-click on your Synaptics touchpad device and select Properties.
  4. Click the Driver tab.
  5. Select Roll Back Driver if the option is available and follow the on-screen instructions.
  6. Restart your computer.

Rolling back the driver can solve issues caused by recent updates that may have introduced compatibility problems.

These detailed solutions cover various methods for installing Synaptics touchpad drivers on Windows 7, ensuring you have multiple options for getting your touchpad working correctly. To avoid future issues, regularly check for driver updates and create system restore points before making significant changes.

We also have a guide on how to download and install the Synaptics touchpad driver for Windows 11. If the Synaptics touchpad driver is not working, click the highlighted link for the right solutions to fix it.

Did our guide help you download and install the Synaptics touchpad driver on Windows 7? Let us know in the comments below.

Microsoft WowTab Extension for Edge promises to give a clean and tidy New Tab Page to focus on your work

Surprise, surprise, can you believe it? Microsoft has been offering a New Tab extension named “WowTab” for the Edge browser in the Add-ons Store for some time now, we noticed it today on the Edge Addons Page.

Microsoft Edge comes with a cluttered New Tab Page with background, news feed, and site links. But, Edge allows users to adjust the NTP layout to their needs with options such as Focused, Inspirational, and Informational. Users also can customize their backgrounds from the plenty that Microsoft offers. Edge New Tab Page supports video wallpapers too.

There were already plenty of New Tab Page extensions available on Chrome Web Store and Edge add-ons Store, where you can notice some fine ones such as Momentum, but there are other ad-focused and malware intent extensions to be aware of that change Browser search engine and New Tab Page and act like malware.

Microsoft WowTab, New Tab Extension for Edge

Taking this into account, Microsoft has released a new Tab Page extension named “Microsoft WowTab” to the Edge add-ons Store. WindowsReport noticed it today while navigating through the add-ons store. While Chrome itself doesn’t offer a New Tab extension, Microsoft has other ideas for this on Edge.

WowTab extension is available in the Edge Add-ons Store. Image Credit:WindowsReport

Microsoft designed WowTab extension for Edge to give a clean and tidy Home Page to focus on your work and study.

It comes with Regular and Calm modes. The regular mode shows the weather forecast and includes some top site links as usual for access to popular websites, along with a news feed that appears as you scroll down.

Image Credit:WindowsReport.

WoWtab includes an AI section that shows links to AI sites and services such as ChatGPT, Gemini, Claude, Grammarly, etc.

ImageCredit:WindowsReport.

Regular Mode Settings include wallpapers to customize the WOwTab New Tab Page and widgets for a surprise with the weather you already see. You can try widgets such as “Bookmarks”, “Current Goal”, “White Noise Player”, and “Focus Timer”.

Image Credit:WindowsReport

Work Tab included on the left navigation includes shortcuts to navigate to Github, Office, iCloud, Gmail, Slack, etc. Wowtab allows to show or hide feeds in General Settings.

Calm mode with ocean background and sound definitely may give inner peace and focus with good motivational quotes.

Image Credit: WindowsReport.

Note: Microsoft Edge disables New Tab extensions and alerts you about the same when you install. WoWTab makes Bing as default search engine.

Microsoft WowTab Extension in Edge add-ons Store. The Extension is available for Edge running Mac as well on the Mac App Store.

Apart from this New Tab Extension release, Microsoft has deprecated Cryptowallet in the Edge browser.

Chrome soon could prompt to save Bookmarks to Google Account, After Passwords

Google is preparing to add an ‘upload prompt’ dialog for bookmarks in Chrome, which will appear when you save a new bookmark. The browser prompts you to save it to a specific folder in your Google Account.

Chrome has been prompting users to save passwords to their Google Account for some time now. This feature allows users to access their saved passwords across all devices where they are signed in with the same Google Account.

Google is now stepping in and could prompt users to save bookmarks saved in Chrome to particular folders in Google Accounts. The company is working on variations of this dialog, as you can see in the screenshots attached to the article.

“[desktop] Add first version of dialog to upload bookmark to account” Google notes in a commit message spotted by WindowsReport.

Chrome already allows you to sync passwords and bookmarks to your Google Account. When you sign in to Chrome and enable sync, your bookmarks, along with other data like history, passwords, and settings, are saved to your Google Account and can be accessed on any device where you are signed in.

In addition to automatic syncing, you may encounter a modal dialog that prompts you to move local-only bookmarks to your signed-in Google account. This dialog appears if you have a signed-in account and helps you centralize your bookmark collection for easier management.

“Save to a folder in your Google Account? This bookmark is saved only on this device. You can save it in your Google Account”. The dialog reads.

The bookmark is saved only on this device. You can save it in your Google Account prompt

if Chrome does indeed introduce this feature, it would likely work similarly to the password-saving feature. When you create a new bookmark, Chrome would prompt you to save it to your Google account. This would allow you to access your bookmarks from any device signed in to your Google account.

Save to a folder in your Google Account prompt


Apart from this, Google Chrome has Parallel Process launching support on Windows to improve start performance and stability. Additionally, the Reading list is getting Toast notifications support, PDF Viewer got a refreshed design as well as Picture in Picture Controls also with the 2024 update Google is working on.

Google Chrome learns a new trick for faster Performance on Windows 11

Have you ever noticed how Chrome can sometimes feel a bit sluggish when you open multiple tabs or windows? Google is working on adding a new feature designed to make Chrome’s startup and overall performance faster on Windows computers by adding support for “Parallel Process launching”.

Google Chrome uses a multi-process architecture to improve stability, security, and performance. This approach divides the browser into multiple processes, each responsible for specific tasks.

Normally, Chrome creates processes one by one, which could slow things down. Google is now addressing this for Chrome processes on Windows.

Chrome on Windows gets Parallel Process launching support

Parallel process launching is a technique where multiple processes are started simultaneously to accelerate the execution of a task. This can significantly improve performance, especially for functions that can be divided into independent subtasks.

Parallel Process launching could benefit from distributing the workload across multiple processes, allowing tasks to be completed faster.

” This change adds support for Parallel Proces launching for Windows”, Google notes in a commit message spotted by WindowsReport.

This feature can be tested by running Chrome with the below command line switch.
--enable-features=WinSboxParallelProcessLaunch

Parallel processing can better use available system resources, such as CPU cores and memory. Additionally, for interactive applications, parallel processing can help prevent the user interface from becoming unresponsive during long-running operations.

In some cases, parallel processing can provide fault tolerance by allowing the system to continue functioning even if one or more processes fail.

It’s used in many areas, like science, websites, videos, and storing information. While it can be very helpful, it also has some challenges that need to be handled carefully to get the best results, like, for instance, creating and managing multiple processes can introduce overhead, which may offset some of the performance gains.

Overall, parallel process launching is a powerful technique that can significantly improve the performance and responsiveness of Chrome.

So, what does this mean for you? Expect a faster, more responsive Chrome experience on your Windows PC. No more waiting around for tabs to load or for the browser to start up.

Unless otherwise mentioned, this could be utilized by Microsoft Edge as well as Microsoft worked with Google on this.

Apart from this Process improvement, Google Chrome is adding toast notifications to the Reading list, a new look to PDF Viewer, and new streamlined controls in Picture in Picture mode.

GeForce Experience Driver Download Stuck at 100% [Fix]

Getting stuck at 100% while downloading drivers through GeForce Experience can be incredibly frustrating, but there are ways to fix this issue.

Before trying anything else, try waiting for a bit and see if the installation finishes. If not, restart the PC, disable the VPN, and try again.

What can I do if the GeForce Experience driver download is stuck at 100%?

1. Close all background programs

  1. Press Ctrl + Shift + Esc to open the Task Manager.
  2. Click on the Processes tab.
  3. Look for any background programs, especially Steam.
  4. Click the program you want to close and select End Task.
    end task task manager
  5. After closing unnecessary apps, try again.

2. Manually download and install the driver

  1. Go to the NVIDIA driver download page.
  2. Select your graphics card, operating system, and other details.
  3. Click on Search and then Download the appropriate driver.
    download nvidia driver
  4. Once downloaded, double-click the installer file.
  5. Follow the on-screen instructions to complete the installation.

3. Update driver via Device Manager

  1. Press Windows + R to open the Run dialog. Type devmgmt.msc and press Enter.
    devmgmt run window
  2. In Device Manager, expand Display adapters.
  3. Right-click on your NVIDIA graphics card and select Update driver.
    Graphics Driver update - ERROR_FAILED_DRIVER_ENTRY
  4. Choose Browse my computer for drivers.
    manually install network drivers
  5. Select the directory where the driver is downloaded and click Next.

4. Restart GeForce Experience

  1. Open Task Manager with Ctrl + Shift + Esc.
  2. Under the Processes tab, find GeForce Experience.
  3. Right-click and select End Task.
  4. Right-click on the GeForce Experience icon on the Desktop or Start Menu and select Run as Administrator.
    run as administrator w11

Running GeForce Experience with administrative rights can provide the permissions needed to complete the driver installation successfully.

By following these solutions, you should be able to fix the issue of GeForce Experience being stuck at 100% while downloading the driver.

This isn’t the only problem, users reported that GeForce Experience is stuck on preparing to install.

We also have a guide on what to do if the GeForce Experience driver downloads but doesn’t install, so you might want to check it out.

How to Fix ERROR_FAILED_DRIVER_ENTRY 647 (0x287)

Many of our readers have reported facing a Blue Screen of Death: ERROR_FAILED_DRIVER_ENTRY 647 (0x287). The driver was not loaded because it failed its initialization call. This issue generally occurs when a driver fails during its initialization phase. This blue screen error happens due to driver corruption, compatibility problems, or system conflicts.

To begin with, turn it off, unplug it from the power source, open the case, and reseat components like GPU, RAM, and storage drives. Also, ensure all the cables are securely connected.

How can I fix the ERROR_FAILED_DRIVER_ENTRY issue?

1. Update/ reinstall the driver

  1. Press Windows + R to open the Run window.Device Manager Run command
  2. Type devmgmt.msc and click OK to open the Device Manager app.
  3. Expand the categories one by one to find a device associated with the problematic driver (to spot it, look for a yellow triangle with an exclamation mark).
  4. Right-click it and select Update driver from the context menu.Graphics Driver update - ERROR_FAILED_DRIVER_ENTRY
  5. Click Search automatically for drivers.search automaticaLLY "ERROR_FAILED_DRIVER_ENTRY
  6. Follow the onscreen instructions to complete the process. You can repeat the process to update other problematic drivers.

If there is no update available, it is recommended that the driver be reinstalled. To do that, follow these steps:

  1. Open the Device Manager app using the steps from the above method.
  2. Locate the problematic driver, right-click the driver, and select Uninstall device from the context menu.Uninstall device 
  3. Click Uninstall again.
  4. Once uninstalled, go to Action and select Scan for hardware changes to reinstall the driver.Action scan for hardware changes ERROR_FAILED_DRIVER_ENTRy

If Windows cannot find a better driver version, you have a couple of options. You can use a reputable third-party driver updater and fixer to update the drivers on your PC easily. Alternatively, visit the manufacturer’s official website and manually download and install the latest driver for your hardware.

2. Check for Windows updates

  1. Press Windows + I to open the Settings app.Windows update - ERROR_FAILED_DRIVER_ENTRY
  2. Go to Windows Update, then click the Check for updates.
  3. If an update is available, click Download & install to install it.

3. Run the hardware and device troubleshooter

  1. Press Windows + I to open the Settings app.
  2. Go to System, then click Troubleshoot.troubleshoot  - ERROR_FAILED_DRIVER_ENTRY
  3. Click the Other troubleshooters option.Other troubleshooters
  4. Locate Hardware and Devices and click Run.

4. Perform a clean boot

  1. Press Windows + R to open the Run dialog box.Msconfig - "ERROR_FAILED_DRIVER_ENTRY
  2. Type msconfig and click OK to open System Configuration.
  3. On the System Configuration window, go to the Services tab, place a checkmark next to Hide all Microsoft services, and click Disable all.  This will ensure only non-Microsoft services are disabled.Disable ALL - "ERROR_FAILED_DRIVER_ENTRY
  4. Switch to the Startup tab and click the Open Task Manager link.Open task Manager Clean boot
  5. On the Task Manager window, select each Enabled item and click Disable. Remember all the startup items you have disabled so that you can turn them back on later.Disable startup
  6. Close Task Manager.
  7. On the System Configuration window, click Apply, then OK.Apply OK
  8. Click Restart to reboot your PC.Restart "ERROR_FAILED_DRIVER_ENTRY

5. Run an SFC scan

  1. Press the Windows key, type cmd in the search box, and click Run as administrator.CMD elevated ERROR_FAILED_DRIVER_ENTRY
  2. Copy & paste the following window and hit Enter: sfc /scannowSFCSCANNOW CMD
  3. Once the command is successfully completed, restart your computer.

6. Run the Windows Memory Diagnostic tool

  1. Press Windows, then type Windows memory diagnostic in the search box and click the first result to launch Windows Memory Diagnostic tool.Memory diagnostic tool - ERROR_FAILED_DRIVER_ENTRY
  2. Select Restart now and check for problems.Restart and check now
  3. Your PC will reboot automatically, and the scan will start, so wait for it to finish.
  4. During the scan, press F1, then configure the type of scan you wish to run. You can switch between different sections using the Tab key and F10 to save changes.
  5. You can select Standard or Extended scan with at least five passes for best results.
  6. Once done, your computer will restart, and you will see the results.
  7. If the results don’t appear, press the Windows key + X and choose Event Viewer.Event Viewer
  8. Go to Windows Logs and select System. In the right pane, choose MemoryDiagnostics-Results, then you should see the mdsched.exe log.

7. Reinstall the Windows

Note icon NOTE
Before starting the process, create a backup of important data and ensure you have the product key or access to your Microsoft account for Windows activation. Also, keep an 8 GB USB drive handy to create a bootable installation media.

7.1 Create an installation media

  1. On another computer, go to the Microsoft Windows 11 download page, locate Create Windows 11 Installation Media, and click Download NowDownload now Installation Media - ERROR_FAILED_DRIVER_ENTRY
  2. Once the file is downloaded, connect the USB drive, double-click the Media Creation tool file to run it, and click Yes on the UAC prompt.
  3. Click Accept to agree to the license terms and agreements.
  4. Now, choose a language, edition, and architecture (32-bit or 64-bit) for Windows 11, and click Next.NExt Setup Windows 11 step 2
  5. Choose the USB flash drive option and click Next.USB flash drive and click Next
  6. Select the USB drive that you want to use and click Next.
  7. Follow the on-screen steps to create a USB bootable media, then click Finish.Finish

7.2 Install Windows 11

  1. Connect the USB drive to the targeted computer, then press Windows + I to open Settings.
  2. Go to System, then click Recovery. System - Recovery Windows 11
  3. Go to Advanced startup, and select Restart now.Recovery Advanced Startup
  4. On the blue screen, choose Use a device. If you don’t find it, restart your computer in BIOS mode and select a USB device to boot. Use a device "ERROR_FAILED_DRIVER_ENTRY	" 
  5. Choose language and other suitable options on the first screen, and click Next.
  6. Click Install now.
  7. Click Accept.Accept Setup Windows 11 step1
  8. Select Custom: Install Windows only (advanced).
  9. Next, you’ll see a list of drives and partitions. Select the ones you want to remove and click Delete. Afterward, if a Windows Setup notification appears, click OK to confirm the changes.
  10. Click Next.
  11. The installation will start now; once complete, your device will restart.
  12. The process may take some time, so wait and follow the on-screen prompts to complete it.

7.3 Configure Windows settings

  1. Once the installation is complete, select the region and keyboard layout.
  2. Connect to the Wi-Fi network when prompted.
  3. Next, sign in with a Microsoft account or create one if you don’t have one already.
  4. Choose the privacy settings per your preferences, then follow other prompts to set up other features.
  5. Once the setup is finished, press Windows + I to open Settings and go to Windows Update.Windows Update Check for updates 0 ERROR_FAILED_DRIVER_ENTRY
  6. Click Check for updates.
  7. If an update is available, click Download & install to get it.

If you face this problem on Windows 10 and want to fix it via a clean install, check out this quick guide to performing a Windows 10 repair upgrade.

To effectively address and resolve Blue Screen of Death (BSoD) errors, carefully reviewing the information provided alongside the error code is essential. This will help you take more precise steps to troubleshoot and fix the issue. Additionally, you can learn how to resolve a similar error, INVALID_WORK_QUEUE_ITEM.

If you have any questions or suggestions about the ERROR_FAILED_DRIVER_ENTRY BSoD error, feel free to mention them in the comments section below.

Microsoft Outlook Dark Mode – Classic, New, and Web App Guide

Microsoft Outlook Dark Mode provides an eye-friendly interface that helps reduce strain, especially in low-light environments. Besides enhancing readability and focus, it can give your inbox a modern look. You can set it using the New Outlook, Classic Outlook, or Outlook Web. 

I’ll take you through the steps across different versions, so let’s jump right in!

How To Switch to Microsoft Outlook Dark Mode

Here are the instructions for each version:

Classic Outlook

For users who prefer the traditional interface, Classic Outlook also supports Dark Mode. Here’s how to enable it:

  1. Click File.
File
  1. Tap Office Account.
Office Account
  1. Scroll to locate Office Theme, tap the drop-down menu, and select “Black.”
Office Theme
  1. Dark Mode will be applied to the entire Outlook interface.
Dark Mode

Web or New Outlook

The web version operates similarly to the new one. Enable it with these simple steps:

  1. Sign in to your Outlook account, or launch the new app.
  2. Click the gear icon (Settings) in the upper right corner.
Settings
  1. Tap General, then click Appearance.
 Appearance
  1. Under Dark mode, select Dark and tap Save.
Pick Dark
  1. Your Outlook will switch to a dark theme. 
Dark mode

As you can see, it’s easy to set Microsoft Outlook to Dark Mode, whether in the New, Classic, or Web Version. Follow these steps to enjoy a more comfortable and visually appealing interface across all platforms.

Also, learn to manage storage limits and change where sent items go in Outlook.

4 Ways to Fix the ERROR_DRIVER_DATABASE_ERROR

Many of our readers have complained about getting an error message: ERROR_DRIVER_DATABASE_ERROR 652 (0x28C) There was error [%2] processing the driver database.

This error indicates that your system faced an issue while processing the driver database. It could happen due to corrupted or misconfigured drivers or file system errors.

To begin with, first, ensure you have logged in to your computer with admin rights, and check the event logs for more details about the error.

How can I get rid of ERROR_DRIVER_DATABASE_ERROR?

1. Update your drivers

1.1 Restart your computer in safe mode

  1. Press Windows + R to open the Run window.MSCONFIG - ERROR_DRIVER_DATABASE_ERROR?   
  2. Type msconfig and click OK to open the System Configuration window.
  3. Go to the Boot tab, under Boot options, place a checkmark next to Safe boot and Network.Safe boot
  4. Click Apply and OK to save the changes.
  5. Click Restart.Restart - ERROR_DRIVER_DATABASE_ERROR?

If your computer is stuck on a blue screen and you’re unable to access Safe Mode through conventional methods, you’ll need to force your computer to start in Safe Mode. Follow this detailed guide for step-by-step instructions on how to do so.

1.2 Update the drivers

Once your computer has restarted in safe mode, follow these steps to update drivers on your computer:

  1. Press Windows + R to open the Run console. Device Manager Run command
  2. Type devmgmt.msc and click OK to open the Device Manager app.
  3. In the Device Manager window, expand the categories one by one and look for drivers marked with a yellow triangle containing an exclamation mark. This symbol indicates that there is a problem with the driver.
  4. Right-click the problematic driver and choose Update driver from the context menu.Update driver
  5. Select Search automatically for drivers, allowing Windows to find and install the latest driver. Repeat these steps for all the problematic drivers in the list.Search automatically 
ERROR_DRIVER_DATABASE_ERROR

If Windows cannot find a better driver version, you can use a third-party driver updater tool to safely update the drivers on your PC, or you can also head to the manufacturer’s official website and manually install the driver.

1.3 Reinstall the drivers

If no update is available for the problematic drivers, you can try reinstalling the driver. To do that, follow these steps:

  1. Open the Device Manager app using the steps from the above method.
  2. Locate the problematic driver, right-click the driver, and select Uninstall device from the context menu. Uninstall graphics driver ERROR_DRIVER_DATABASE_ERROR
  3. Click Uninstall again to confirm the action.
  4. Once uninstalled, go to Action and select Scan for hardware changes to reinstall the driver. Repeat these steps to reinstall all the problematic drivers.Action scan for hardware changes

2. Run the System File Checker scan

  1. To restart your PC in Safe Mode, follow the steps outlined in Method 1.1. If your PC is already in Safe Mode, press the Windows key, type cmd in the search box, and click Run as administrator.CMD elevated
  2. In the command prompt window, copy & paste the following command to repair or restore the corrupted system files and press Enter: sfc /scannowSFCSCANNOW CMD - ERROR_DRIVER_DATABASE_ERROR
  3. Wait for the scan to complete, then reboot your computer to let the changes take effect.

3. Check for Windows updates

  1. To restart your PC in Safe Mode, follow the steps outlined in Method 1.1. If your PC is already in Safe Mode, press Windows + I to open the Settings app.Windows Update ERROR_DRIVER_DATABASE_ERROR
  2. Go to Windows Update, then click the Check for updates.
  3. If an update is available, click Download & install to install it.

4. Perform a system restore

  1. If your computer is not in Safe mode, you can use the steps mentioned in Method 1.1.
  2. Once your computer is in safe mode, log in, press the Windows key, type the control panel in the search box, and click Open.Control Panel start menu - 
 ERROR_DRIVER_DATABASE_ERROR 
  3. Select Large icons as View by, then click Recovery.Recovery Control Panel
  4. Click Open System Restore.Open system restore
  5. Select Choose a different restore point in the System Restore window and click Next.Next Choose a different restore point
  6. You will then see a list of available restore points. Choose the oldest one or the most recent restore point before you saw the ERROR_DRIVER_DATABASE_ERROR, and click Next.Choose a point - ERROR_DRIVER_DATABASE_ERROR
  7. Click Finish to start the process.

Your computer will reboot and restore your device settings to the selected version. If you get the System Restore wasn’t completed successfully message after your computer reboots, we suggest you check out this informative guide for solutions.

To conclude, carefully reviewing the information provided alongside the error code is essential to fix such driver issues, as it will help you take informed steps to resolve the problem. Additionally, you can learn how to resolve a similar error, INVALID_WORK_QUEUE_ITEM.

If you have any suggestions or concerns about the ERROR_DRIVER_DATABASE_ERROR Blue Screen of Death error, feel free to mention them in the comments section below.

Before you leave, you might be interested in our latest guide that covers ERROR_CANTSCROLLBACKWARDS message for more useful information.

Solved: 0x00000098 END_OF_NT_EVALUATION_PERIOD

If you have encountered the 0x00000098 END_OF_NT_EVALUATION_PERIOD on your Windows Server, this guide is for you. This bug indicates that the trial period for the Microsoft Windows NT Server has ended.

The issue might occur if the evaluation period has expired, causing the system to become non-functional. Other potential causes include an incorrectly set system clock or activation with a trial key that has now expired.

How can I fix the END_OF_NT_EVALUATION_PERIOD issue?

1. Extend the evaluation period

  1. Press the Windows key, type cmd in the search box, and click Run as administrator.CMD admin rights - END_OF_NT_EVALUATION_PERIOD
  2. In the Command Prompt window, type the following command to extend the evaluation period and hit Enter: slmgr.vbs /rearmextend the evaluation period
  3. This command will reset the evaluation period. Once done, you will see a confirmation message.
  4. Now restart your server to save the changes.

2. Activate with a license key

  1. Press the Windows key, type cmd in the search box, and click Run as administrator.
  2. To install the license key, copy & paste the following command after replacing Your license key with the license key in the Command Prompt window and press Enter: slmgr.vbs /ipk [your license key]
  3. After installing the license key, you need to activate it; for that, type the following command and hit Enter: slmgr.vbs /ato
  4. This command will connect to Microsoft activation servers and will activate your Windows server/ Once done, you will get a confirmation message.

3. Set the correct date and time

  1. Press the Windows key, type cmd in the search box, and click Run as administrator.CMD admin rights - END_OF_NT_EVALUATION_PERIOD
  2. To synchronize the system clock, copy & paste the following command and press Enter: net time /setSet correct time
  3. Once executed, the command will sync the system clock with a network time server, ensuring the server’s date and time are correct.
  4. To check if the time is correct, press the Windows key, type control panel in the search box, and click Open.
  5. Select Small icons for View by and click Date and Time to check the date, time, and time zone.

3. Perform a System Restore

  1. Click Start.
  2. Select All Programs.
  3. Navigate to Accessories > System Tools > System Restore.
  4. In the System Restore window, select Restore my computer to an earlier time, then click Next.
  5. Select a restore point from the list provided and click Next.
  6. Click Finish to start the restoration process.
  7. Next, click Yes to confirm the action.

4. Restore or repair your server

Note icon NOTE
Before starting the process, ensure all the important data is backed up to an external storage device or network location. Keep the Windows Server NT installation CD or ISO file & valid product key for Windows Server NT handy. Next, make sure the server hardware meets the requirements for the version.

4.1 Preparing the device

  1. Insert the Microsoft Windows NT Server CD into the CD-ROM drive and reboot the server.
  2. Press Ctrl+I when you are prompted during Boot.
  3. Choose Advanced Functions.
  4. Select Boot CD-ROM and INT13 Extensions.
  5. Set the BIOS Support for the Bootable CD-ROM to Yes.
  6. Select Exit three times, and power down the server.
  7. Press F6 when you see Setup is inspecting your computer’s hardware configuration message.
  8. Press S to specify mass storage media device, select Other, and press Enter.
  9. Next, press F8 at startup to start from the installation media.

4.2 Repairing or restoring the server

  1. Select your language and other preferences after the Windows Server files load, and click Next.
  2. On the following page, click Repair your computer. Remember not to select Install now as it will delete all configuration settings and all data on the system drive, then perform full system installation.
  3. On the Choose an option page, click Troubleshoot.
  4. Choose the current system.
  5. On the Select a system image backup page, choose one of the options and click Next:
    • Use the latest available system image (recommended)
    • Select a system image
  6. Follow the on-screen instructions to complete the process.
  7. After the server is successfully restored, remove the installation DVD and restart the server.

If you face this problem on Windows 10 and want to fix it via a clean install, check out this quick guide to performing a Windows 10 repair upgrade.

In case nothing works for you, and you still see the END_OF_NT_EVALUATION_PERIOD error, we advise you to contact Microsoft Support and tell them detailed information about the issue and mention all the troubleshooting steps you tried to take to get further help.

To avoid these issues in the future, you should always ensure that you have activated Windows after reinstallation of Windows or after installing a new piece of hardware.

If you have any suggestions or concerns about the END_OF_NT_EVALUATION_PERIOD Blue Screen of Death error, feel free to mention them in the comments section below.