Setting up Azure Virtual Desktop can seem daunting, but with the right steps, it’s a breeze. Getting the Azure Virtual Desktop to run smoothly requires several distinct steps, but we outlined them all below for your convenience.
How do I download and install Azure Virtual Desktop?
1. Download and Install the Remote Desktop Client (MSI)
Double-click the file you downloaded to start the installation.
On the welcome screen, select Next.
Accept the end-user license agreement by checking the box for I accept the terms in the License Agreement, then click Next.
Now, select one of the following options:
Install just for you: This installs the Remote Desktop Client in a per-user folder, available only for your user account. No Administrator privileges are required.
Install for all users of this machine: This installs the Remote Desktop Client in a per-machine folder, available for all users. Administrator privileges are required.
Click Install and once the installation is completed, click Finish.
If you left the box checked for Launch Remote Desktop when setup exits, the Remote Desktop Client will automatically open. Alternatively, use the Start menu to search for and select Remote Desktop.
Completing this step will ensure that the Remote Desktop Client is ready to use, giving you access to connect to Azure Virtual Desktop.
2. Download and install the Azure Virtual Desktop App from Microsoft Store
Click Install to start downloading the app and installing it. Once the app has finished downloading and installing, select Open.
The first time the app runs, it will install the Azure Virtual Desktop (HostApp) dependency automatically. Initial setup takes care of any additional components needed, making sure your app works smoothly.
3. Subscribe to a Workspace
Launch Azure Virtual Desktop App.
From the Let’s get started screen, select Subscribe or Subscribe with URL.
If you selected Subscribe, sign in with your user account when prompted. After a few seconds, your workspaces should show the desktops and applications available to you.
If you see the message No workspace is associated with this email address, try Subscribe with URL:
Azure for US Government: https://rdweb.wvd.azure.us/api/arm/feeddiscovery
Azure operated by 21Vianet: https://rdweb.wvd.azure.cn/api/arm/feeddiscovery
Click Next and sign in with your user account when prompted. Your workspaces will appear, showing the available desktops and applications.
Subscribing to a workspace is essential to access the resources allocated to you, enabling your remote work or learning.
4. Connect to your desktops and applications
Launch a Session:
Open the Azure Virtual Desktop app on your device.
Double-click one of the icons to launch a session to Azure Virtual Desktop.
You may be prompted to enter the password for your user account again, depending on how your admin has configured Azure Virtual Desktop.
Launching a session connects you to your remote desktop or application, allowing you to start working immediately.
Optional: Pin desktops and applications to the Start menu:
Right-click one of the icons and select “Pin to Start Menu”, then confirm the prompt.
Pinning frequently used desktops or applications can save you time by providing quick access directly from your Start Menu.
By following these steps, you’ll have Azure Virtual Desktop up and running in no time. To avoid future issues, always keep your software updated and regularly check for new features or security patches.
Turing on your Windows Defender is not enough to counter all threats. You need to allow security intelligent updates from Microsoft Update to continually update on emerging threats and cover a wider surface area.
Although Windows Updates occur automatically on most devices, sometimes they fail. Intelligence updates being high-priority security updates need to be installed. Not only do they update the protection for newly discovered and potential security threats, but they also minimize the risk surface area.
With these improvements, your devices, especially those on a domain are optimized for enhanced efficiency safeguarding essential services from avoidable downtime.
How do I install Security Intelligence Updates for Microsoft Defender Antivirus?
1. By using the Group Policy Setting
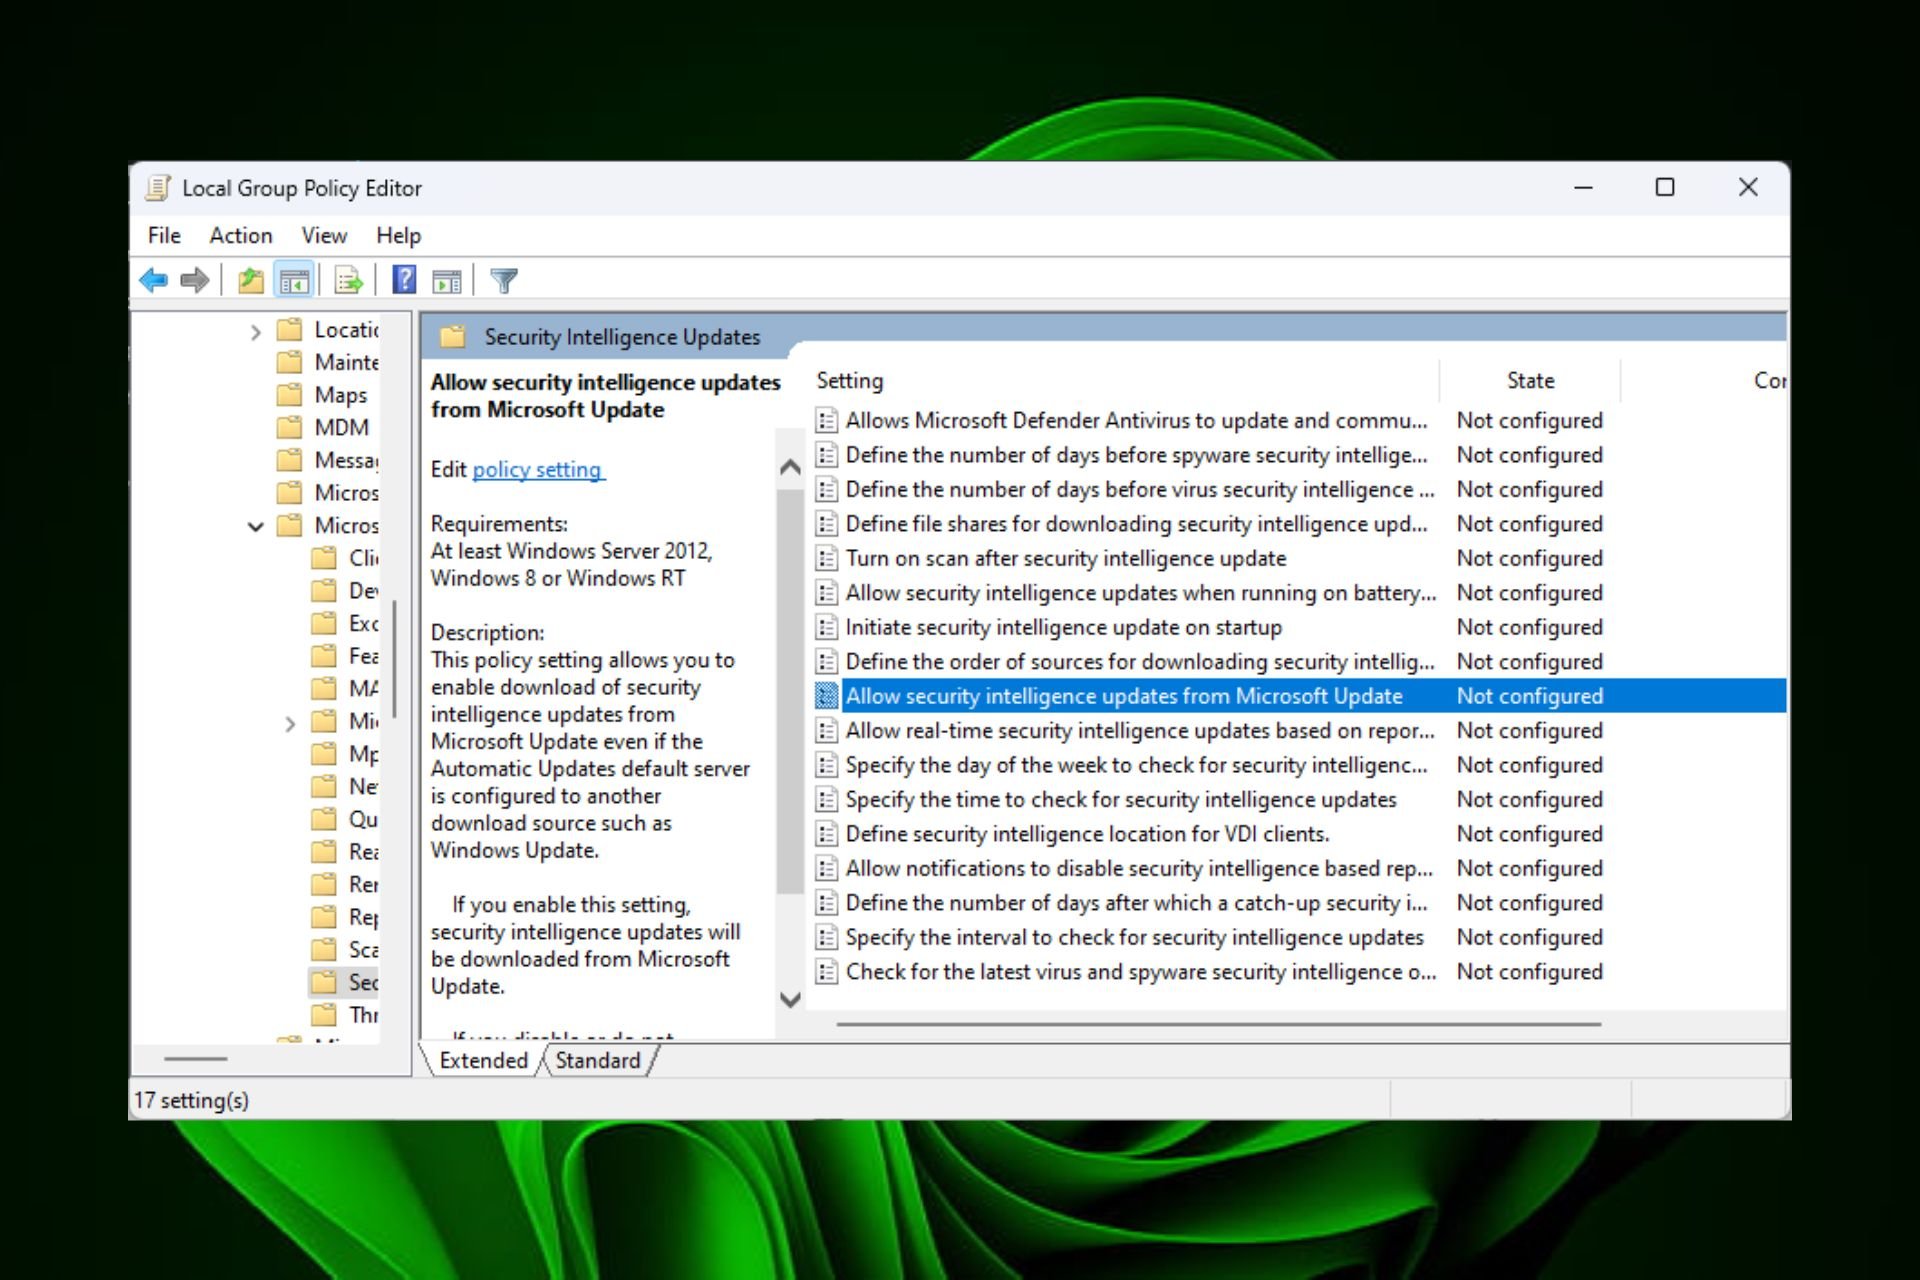
Press the Windows key + R, type gpedit.msc, and click OK to launch the Group Policy Editor.
Navigate to the path below in the left pane: Computer Configuration > Administrative Templates > Windows Components > Microsoft Defender Antivirus
Double-click the Security Intelligence Updates.
Next, double-click on Allow security intelligence updates from Microsoft Update.
Set this policy to Enabled and click Apply and OK to save changes.
Then browse to the path below in the left pane: HKEY_LOCAL_MACHINE\Software\Policies\Microsoft\Windows Defender\Signature Updates
Select the ForceUpdateFromMU key on the left of the window. If not available, right-click on an empty space, select New>DWORD (32-bit) and name it as so.
Double-click the ForceUpdateFromMU DWORD in the right pane.
Scroll down, and under the Latest security intelligence update heading, you will find the information about the latest available security intelligence update.
Click on the version of your PC and download the update.
Launch the update and install it by following the on-screen instructions.
The manual option should only suffice if the first two methods fail. It may not be an automatic method but you’ll still get to install your security updates in case there are problems installing Windows Update or system-related issues preventing the installation.
Best practices for managing Security Intelligence Updates
Automate updates – Security updates rolled out in large organization settings require automation for them to be uniformly applied. This will ensure the update process is fast and easy across the board.
Schedule regular updates – For priority updates, you can schedule them during users’ inactive hours to avoid interruptions and maintain workflow.
Backup and restore – Updates can be buggy at times so ensure you have a sound backup system such that if you need to roll back an update, you could easily do so.
Also regularly check for issues with Windows Updates to prevent install issues as this could corrupt an entire update.
Hopefully, you have now equipped your device with security intelligence updates but a third-party antivirus can also come in handy to detect risks that may not be visible to Microsoft Defender.
That’s all for this article but let us know if there are any other security measures you have taken to minimize threats. Let us know in the comment section below.
HP’s newest OmniBook Ultra is the first AMD Ryzen-powered Copilot+ PC AI notebook officially announced. The device was the subject of talks at the HP Imagine AI 2024, where the company showed off this tech with a big 14-inch display and abilities that might change what many think of as productivity.
What makes it different from the current Snapdragon-based Copilot+ PCs in the market is the AMD Ryzen AI 300 series processor, combined with integrated AMD Radeon 800M graphics, which ensures it provides strong and fluid performance.
According to the official website, the HP OmniBook Ultra is not only strong; it’s about smart power. It can give you as much as 55 TOPS of NPU output. The design allows this system to manage any task or function you throw at it—from demanding tasks requiring a lot of muscle power to simple operations—while ensuring your productivity levels don’t drop even slightly.
But there’s a catch: the complete AI PC functionality isn’t readily available once the package is opened. HP has said that this will be unlocked with a free Copilot+ PC update from Microsoft, but the date for this update has not been revealed.
Now, you may ask yourself, “And what about the battery’s lifespan?” To this, HP asserts that the OmniBook Ultra can endure for as long as 21 hours without recharging. Yes, it is not a mistake. 21 hours. Also, it has a 9 MP camera with AI capability, using Poly Camera Pro application and Windows Studio Effects for high-resolution video conversations.
However, HP is not done yet. Another device from the company is joining the OmniBook Ultra league and two new AIOs (All-In-One Desktop PCs). They are HP OmniStudio X 27″ and 31.5″ All-In-One Desktop PCs. These stunning machines can be powered by an Intel Core Ultra 7 processor at maximum capacity with an optional NVIDIA GeForce RTX 4050 GPU to give you even more power. They’re not just performance tools; they also care for your digital wellness, with features like screen time and distance reminders to reduce eye fatigue.
Okay, but when can you grab them? The HP OmniBook Ultra 14-inch Next Gen AI PC will be ready for sale in August on HP.com from US$1,449.99. Likewise, the OmniStudio X AIOs can also be obtained in August with a cost beginning at US$1,149.99.
You’ll find these devices for pre-order at HP.com.
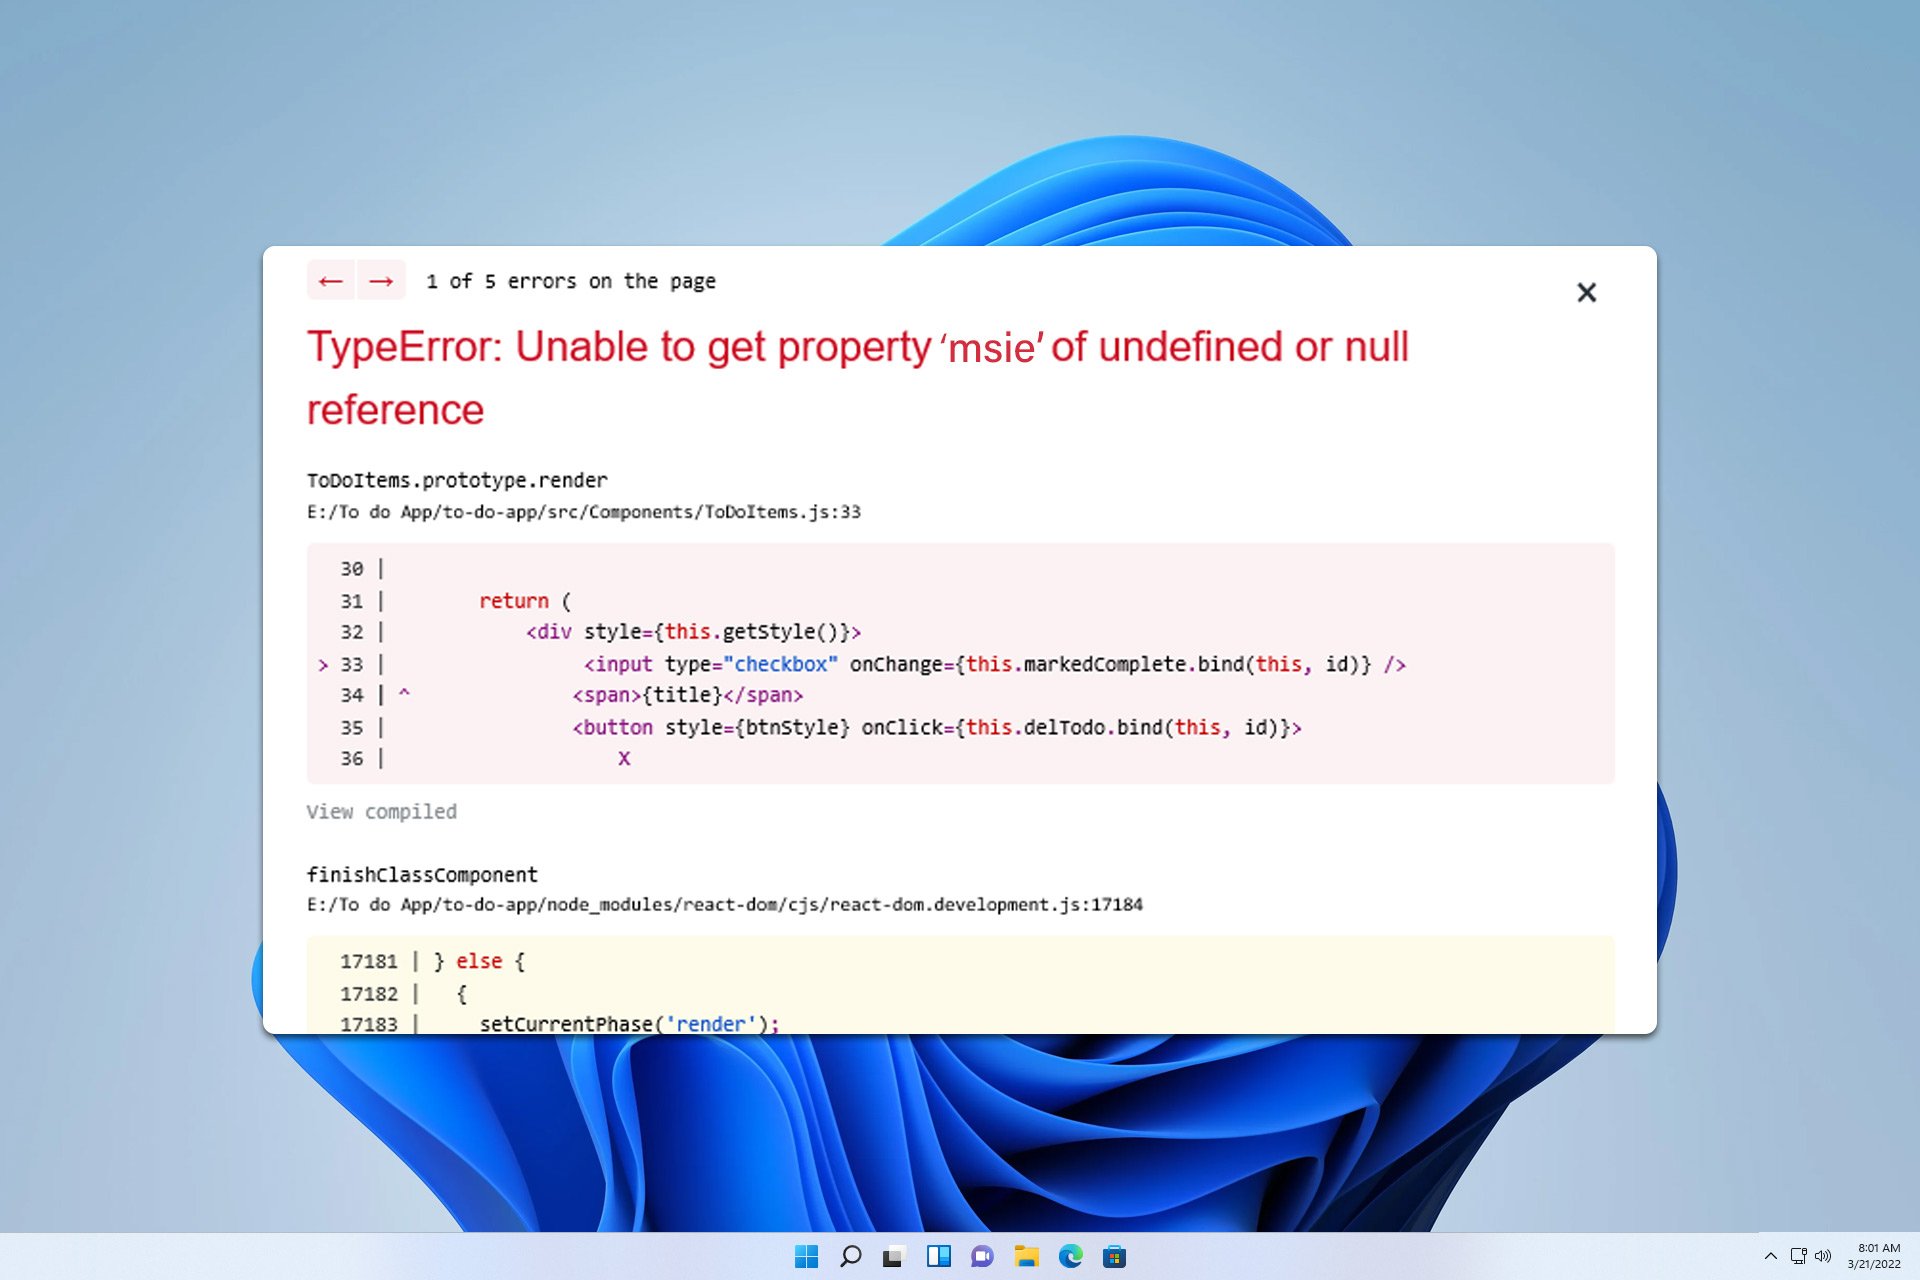
Unable to get property ‘msie’ of undefined or null reference error usually affects web developers and it’s related to jQuery. However, the problem can be fixed in just a matter of moments.
How can I fix Unable to get property ‘msie’ of undefined or null reference error?
Switching back to the older version of jQuery can fix this problem. Updating jQuer-UI can also help.
1. Use custom code
Open your project.
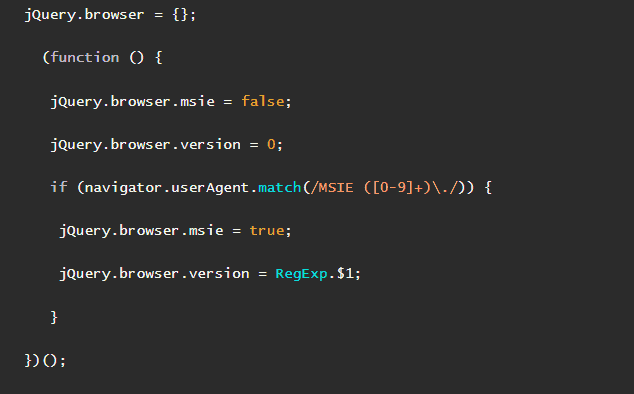
Open a script tag and insert the following: jQuery.browser = {}; (function () { jQuery.browser.msie = false; jQuery.browser.version = 0; if (navigator.userAgent.match(/MSIE ([0-9]+)\./)) { jQuery.browser.msie = true; jQuery.browser.version = RegExp.$1; } })();
Read the documentation and add the jQuery Migrate to your project.
Check if the problem is gone.
Unable to get property ‘msie’ of undefined or null reference error appears because jQuery.browser function was removed, and to fix it you need to update your code.
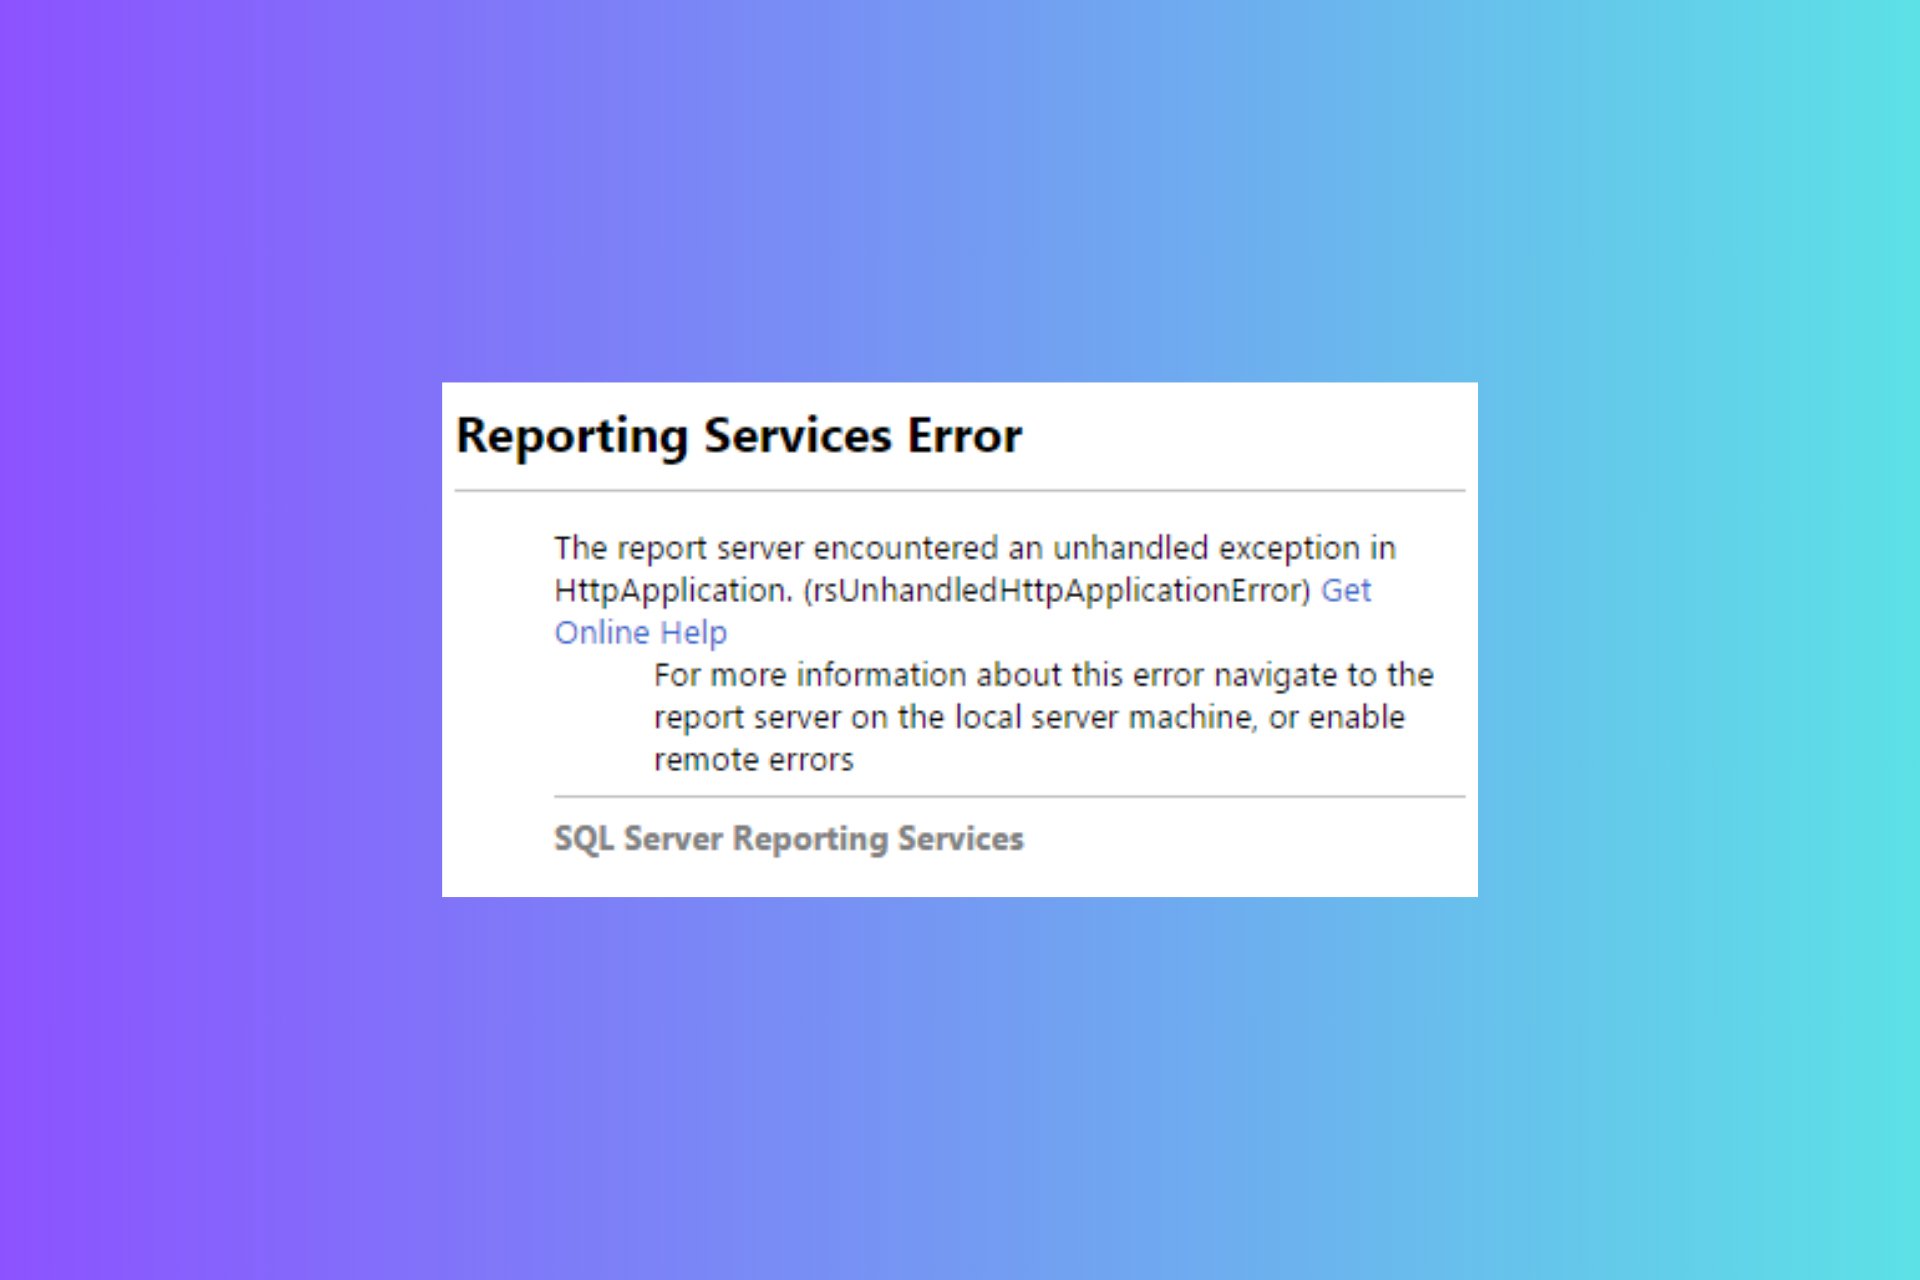
The complete error message states that The report server encounter an unhandled exception in HttpApplication. (rsUnhandledHttpApplicationError). Let’s dive into some practical solutions to get you back on track.
How do I fix the rsUnhandledHttpApplicationError?
1. Check for missing assemblies
Go to the server where SQL Server Reporting Services (SSRS) is installed.
Open the file explorer and navigate to the installation path of SSRS, which is typically: C:\Program Files\Microsoft SQL Server\MSRSxx.MSSQLSERVER\Reporting Services\ReportServer
Ensure that the following assemblies are present in the bin directory:
Microsoft.ReportingServices.Authorization.dll
System.Web.Extensions.dll
If any of these files are missing, copy them from a working instance of SSRS or download the necessary files from a trusted source.
Restart the SSRS service by opening Services, finding SQL Server Reporting Services, and clicking Restart.
Making sure all required assemblies are present ensures that SSRS has access to all the components it needs to function correctly.
2. Update rsreportserver.config
Open File Explorer and navigate to the SSRS configuration folder: C:\Program Files\Microsoft SQL Server\MSRSxx.MSSQLSERVER\Reporting Services\ReportServer
Locate the rsreportserver.config file and open it with a text editor (like Notepad or Notepad++).
Ensure the following configurations are set correctly: <MachineKey ValidationKey="73456BAB6C0B195891670108D437481F13FE3D96DE061FB15CAEC42CFD6191E396F8C69938F62BF26BC0F9A15193D41F3E6B3CBB64F4487800F790C42BD93889" DecryptionKey="A82C0E01BFDFF33DDB3C9919521C43D6FBBE90FD64832F1C" Validation="AES" Decryption="AES" />
Save the changes and close the file.
Restart the Reporting Services by opening Services, finding SQL Server Reporting Services, and clicking Restart.
Ensuring your configuration file is set correctly helps SSRS use proper encryption keys, which can resolve authentication and decryption issues.
3. Enable Remote Errors for SSRS
Open SQL Server Management Studio (SSMS) and connect to the Reporting Services instance.
In the Object Explorer pane, right-click on the SSRS server and select Properties.
Go to the Advanced tab.
Scroll down to the EnableRemoteErrors property and set it to True.
Click OK to save the changes.
Restart the SQL Server Reporting Services service by opening Services, finding SQL Server Reporting Services, and clicking Restart.
Enabling remote errors allows you to receive more detailed error messages, which can help in diagnosing and fixing issues.
4. Adjust the SSRS timeouts
Open SQL Server Management Studio (SSMS) and connect to the Reporting Services instance.
In the Object Explorer, right-click on the Reporting Services server and select Properties.
Go to the Advanced tab.
Here, adjust the SystemReportTimeout value to a higher value such as 14400 seconds:
Navigate to the Reports section.
Find the SystemReportTimeout property.
Change its value to 14400.
Restart the SQL Server Reporting Services service by opening Services, finding SQL Server Reporting Services, and clicking Restart.
Increasing the timeout value ensures that long-running reports have sufficient time to complete without hitting a timeout error.
By following these steps, you should be able to resolve the rsUnhandledHttpApplicationError in Power BI and SSRS. Always keep your system and configurations up to date to avoid running into similar issues in the future.
In a significant announcement that will impact the tech community, Microsoft has unveiled a new update strategy for Windows 11, along with version 24H2 and Windows Server 2025. This fresh approach, named “checkpoint cumulative updates,” aims to streamline the update process—faster, more efficient, and less resource-heavy.
The central change in this update is how Microsoft packages its updates. Rather than using the usual method where each update adds to the previous one, resulting in a bigger and bigger download size over time, we now have checkpoint cumulative updates that aim to lessen the volume of updates. These upgrades only incorporate alterations from the last main “checkpoint” update. This means that you are solely getting the modifications made lately during system updating and not continually getting a bigger heap of updates each instance.
These are great changes for all who dislike the seemingly unending “Updating Windows” screen. Smaller updates imply faster download and installation times and less congestion on internet bandwidth and hard drive capacity. Picture yourself receiving the most recent characteristics and security improvements without waiting long for them to be incorporated. That’s the future Microsoft is promising with this change.
Microsoft’s new strategy also suggests a more sustainable method for distributing updates. With fewer data needing to be transferred per update, there is a possibility for a decrease in server load, which can lead to reduced energy needed in delivering updates across millions of devices worldwide. This benefits both users and the environment, improving performance and reducing carbon emissions.
We’re excited to further optimize the delivery of continuous innovation in Windows 11 with new checkpoint cumulative updates. As early as late 2024, you will automatically get this optimization on any devices running Windows 11, version 24H2 or later, as well as on Windows Server 2025. Keeping your organization updated and secure will involve smaller, faster, and more sustainable updates, with no action required from you.
Microsoft
This alteration is especially important for those who work in IT and system administration. The checkpoint cumulative updates will easily fit into the ongoing update handling processes. Whether you are relying on Windows Update, Windows Update for Business, Windows Autopatch, or Windows Server Update Services (WSUS), these updates will appear as any other update but will be more effective. There’s no extra work required on your part to start benefiting from these improvements.
For the technical part, Microsoft’s method involves making “incremental binary differentials” against the version of binaries in the previous checkpoint. This signifies that update packages are small because they only contain changes between your system’s present state and the new update—not a complete update package from the original release.
Microsoft has mentioned that Windows 11, version 24H2, is the first one to benefit from checkpoint cumulative updates, and Windows Server 2025 is the next one in line for this improvement. If you are excited about learning more about it, then check out the Windows Insider Preview Build 26120.1252 (Dev Channel) or the official blog post.
Microsoft’s step to present checkpoint cumulative updates shows a big jump in how Windows updates are given. Suppose you work as an IT professional handling hundreds of devices or want your computer to remain updated without any trouble. In that case, this change will make it easier to manage those devices.
After a lengthy break, Microsoft finally released a new build, KB5038603, for Windows 11 into the Dev Channel. This marks the restart of adding new functions that were on hold. Build number 26120.1252 isn’t just any update; it signals Microsoft’s return to its development cycle by introducing improvements and fixes to enhance user experience.
Microsoft will reintroduce the features initially turned on on June 28 but paused two days later, on June 30. This is done gradually, with these features being turned on for a small percentage of Insiders. So, not everyone will see these new things right away.
Another change that stands out is the new feature that allows you to drag and drop apps from the Start menu onto the taskbar. It might seem like a small change, but it makes customizing your work area easier for users. Also, there is now the ability to use drag-and-drop in File Explorer between breadcrumbs on the Address Bar, an improvement made because of Insider feedback.
Like the latest Canary build, the lock screen is becoming livelier in KB5038603. Weather updates and more are being introduced to keep users aware and productive. This includes card design enhancements that feature acrylic blur in optimized sizes, improved spacing between cards, and font adjustments for finance, traffic, and sports sections, among other areas. To make it work, go to Personalization and select Lock screen settings.
In the fix area, Microsoft has handled different issues throughout the system. A bug that made explorer.exe crash when moving away from Home and a problem where pinyin appeared twice in the list of input methods during Windows Setup have been fixed. Additionally, an underlying problem thought to cause error 0x80370106 while starting up Windows Sandbox has been resolved alongside many other fixes focused on improving stability and performance for Windows 11.
But it’s not completely perfect. There are some known problems in KB5038603 that Insiders should know about, like the issue where the Windows Update page in Settings might not show up correctly for users who use specific languages. Also, there is a caution for those running Windows 11, version 24H2 Build 26100.xxxx who could see “(repair version)” next to the latest Dev Channel build in Windows Update, and this would mean they need an in-place upgrade.
Those eager to try these fresh characteristics and enhancements must be patient, as the rollout for KB5038603 will happen in steps, as we mentioned earlier.
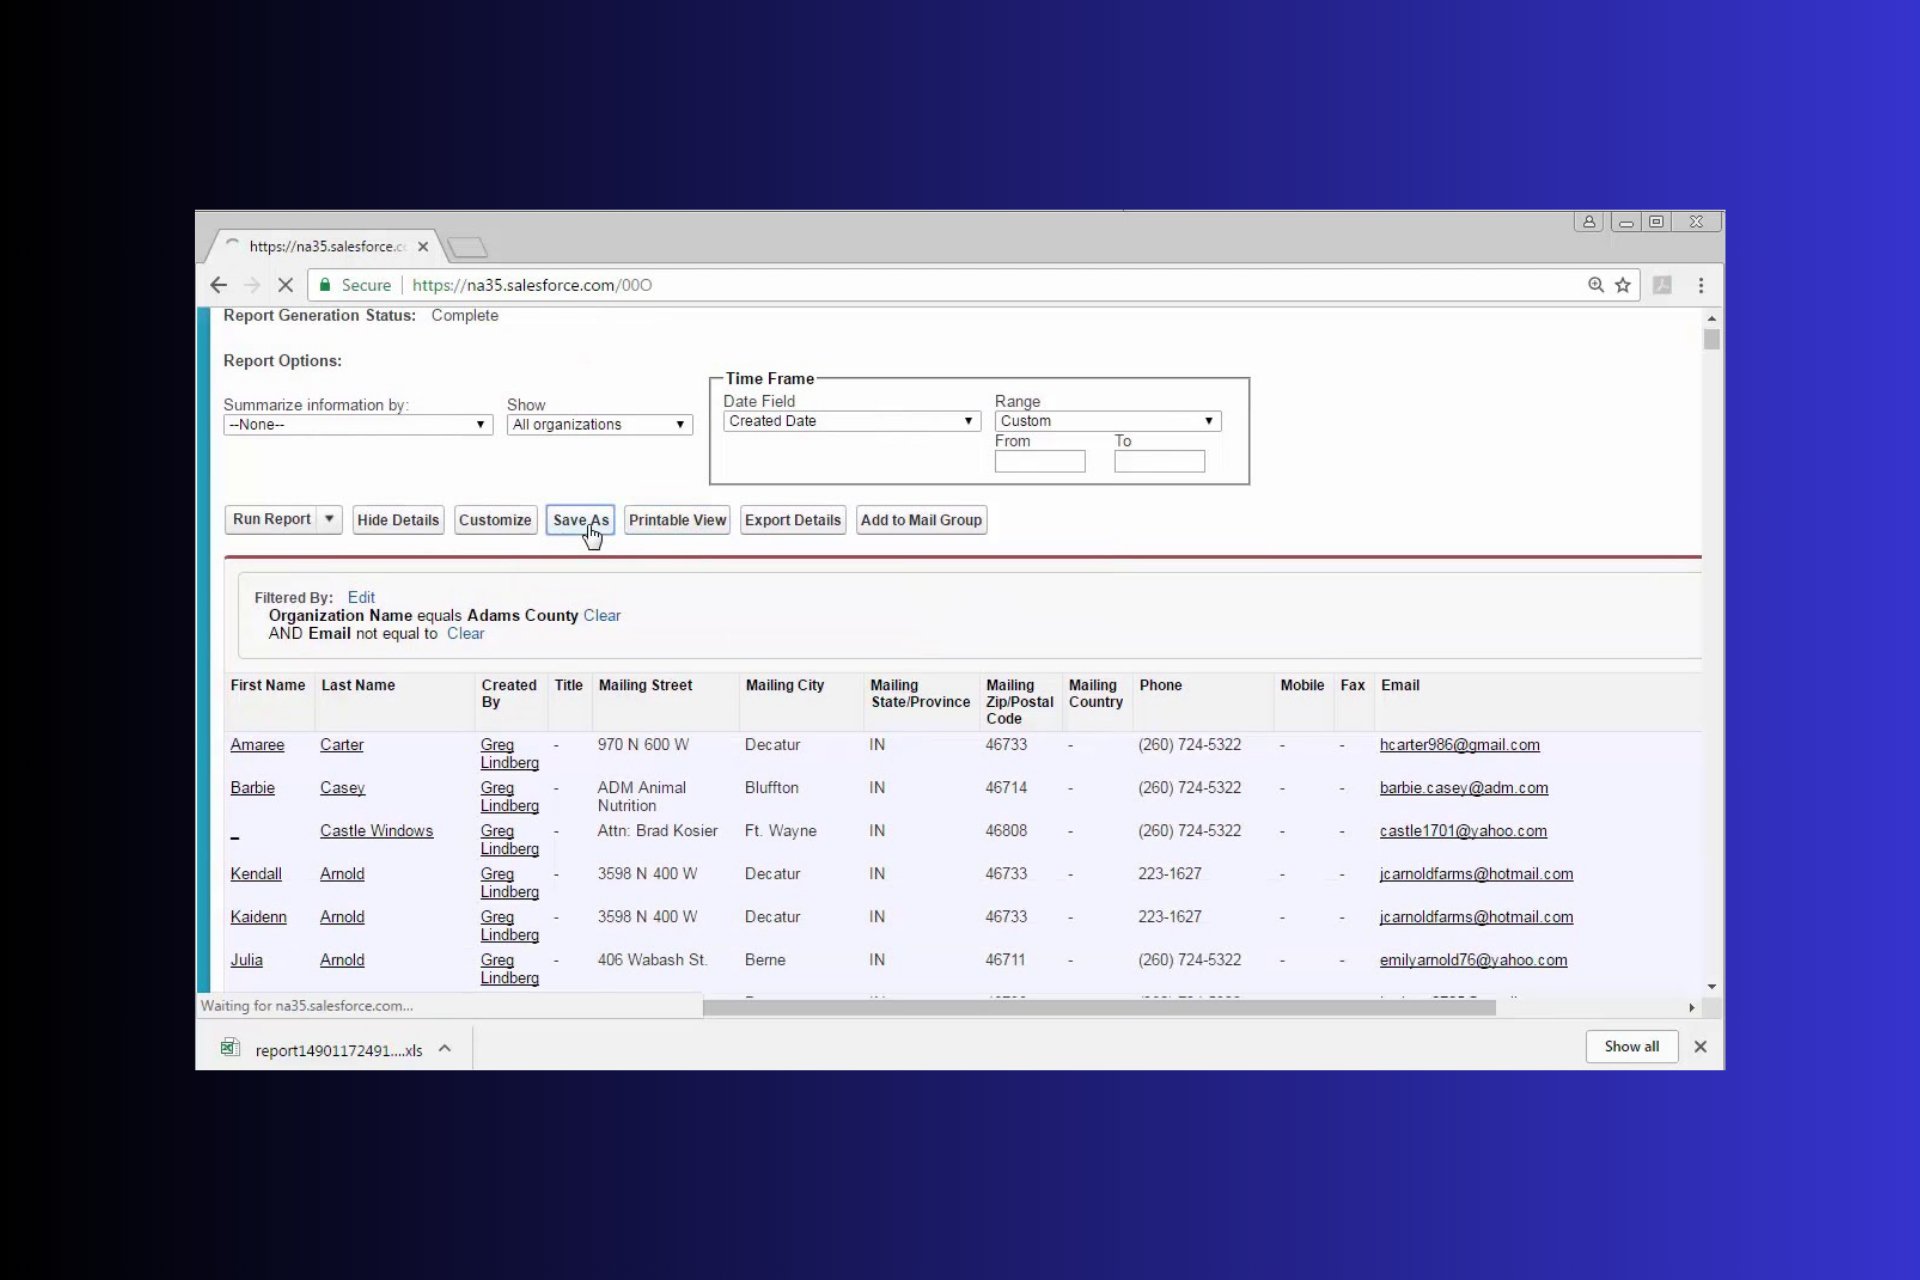
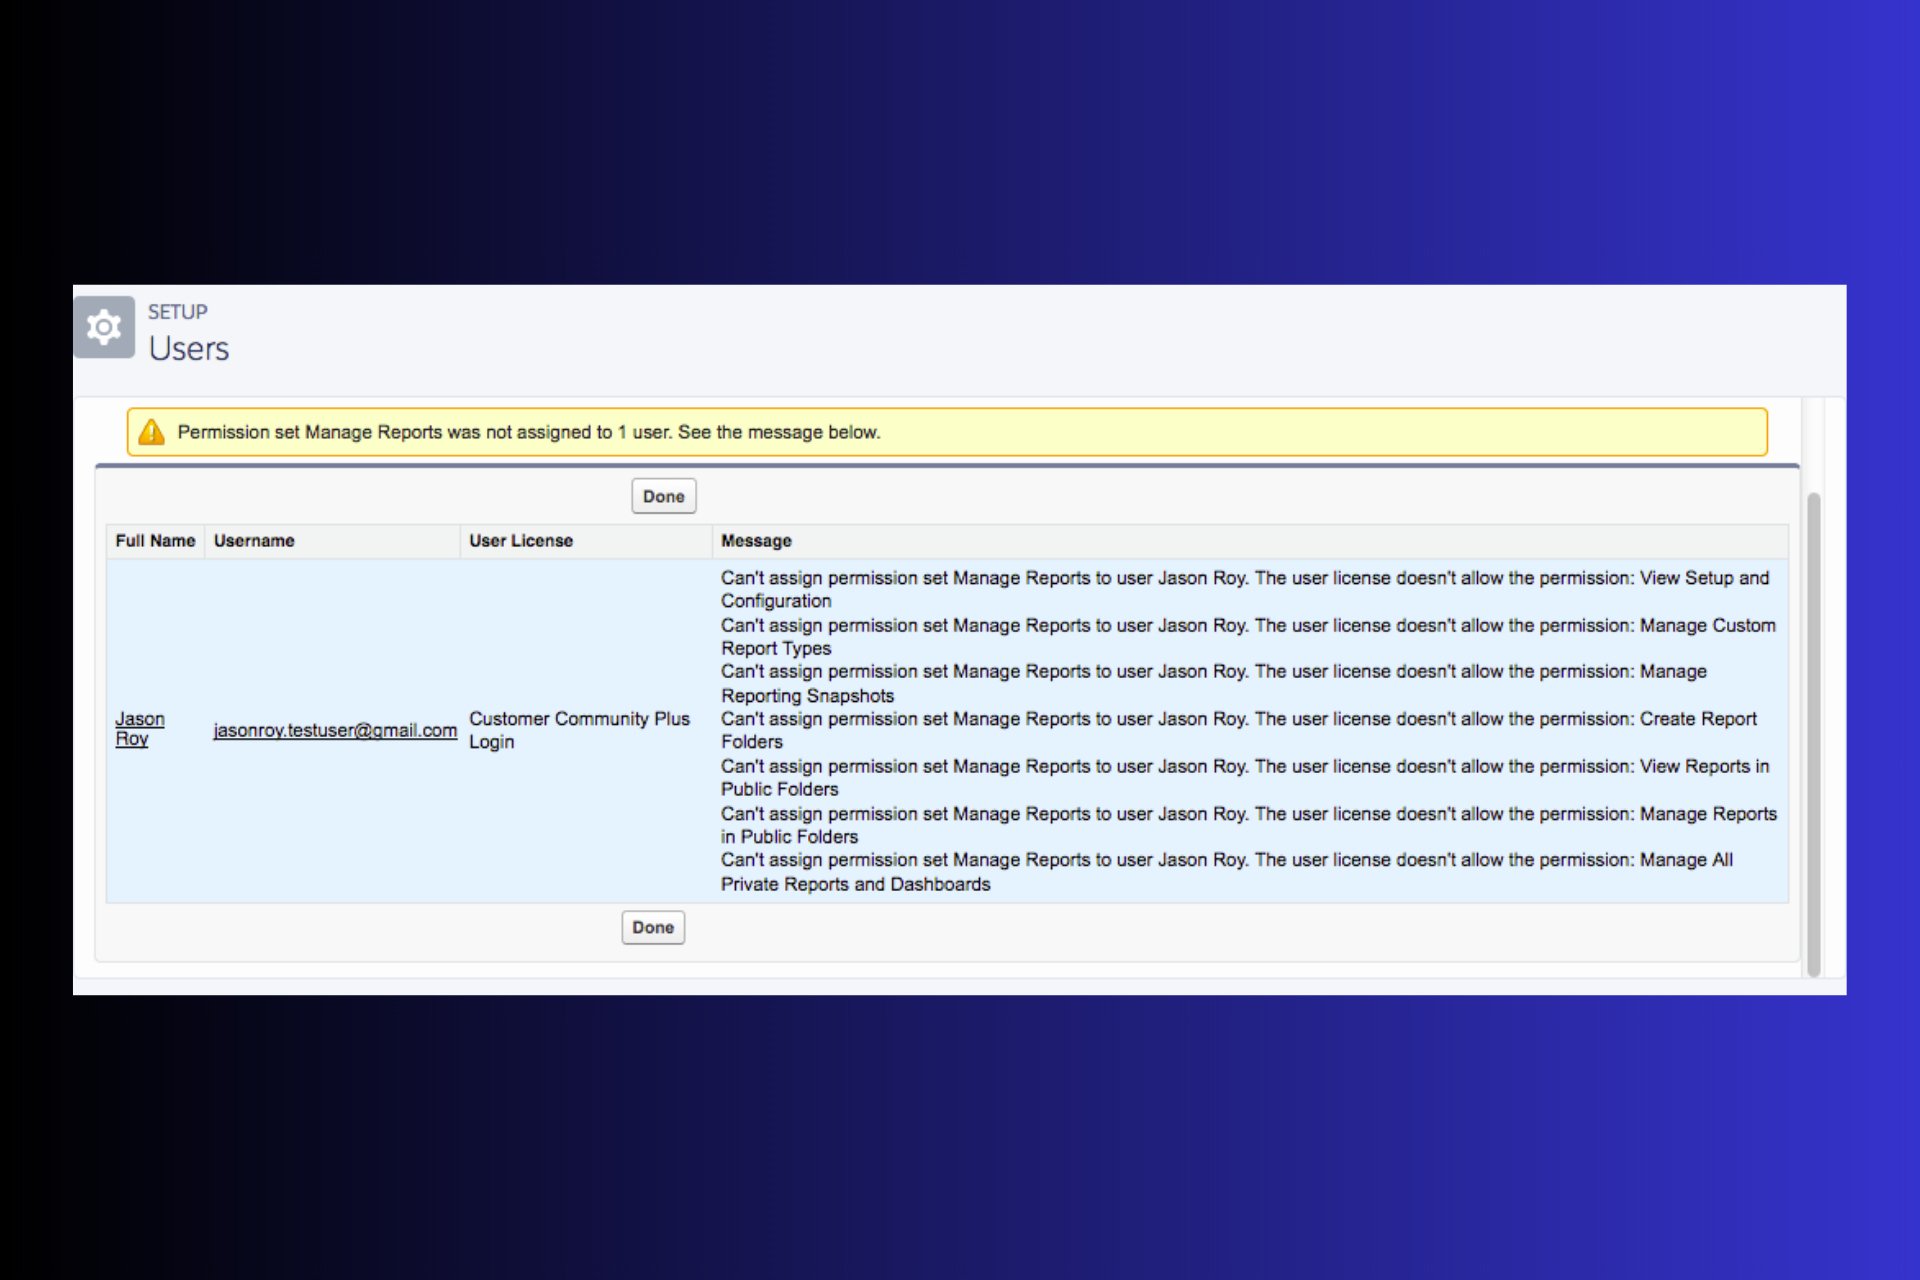
If the report failed to be saved in Salesforce, the error can be quite a headache because the app doesn’t offer too much information about the situation. Moreover the Salesforce failed report saving can be due to a myriad of causes, but below we covered most instances and solutions.
What do I do if Salesforce failed to save the report?
1. Check the Report folder permissions
Click on the Salesforce logo at the top left corner to ensure you are on the main page.
From the main menu, find and click on the Reports tab.
Find the report that fails to be saved. You may use the search bar at the top of the Reports tab.
Click on the drop-down arrow next to the report name and select Edit Folder or Folder Sharing depending on your Salesforce version.
Ensure the user has Edit access and not just View access.
If the folder is public, make sure the user has the Manage Public Reports permission enabled on their profile.
Ensuring proper permissions on the report folder allows the user to save changes directly instead of using Save As. This removes the frustration caused by duplicates and ensures smoother workflow management.
2. Enable Manage Public Reports on a profile
Click on the gear icon at the top right corner of the Salesforce interface, then select Setup.
In the Quick Find box on the left, type Profiles and click on it.
Find and click on the profile corresponding to the user experiencing the issue.
Scroll down to the Administrative Permissions section.
Look for the Manage Public Reports permission and check the box next to it.
Click on the Save button at the top or bottom of the page to apply the changes.
Enabling this permission ensures that the user can manage and save changes to reports in public folders, avoiding the need to create new reports each time they make edits.
3. Adjust the report type and filters
Navigate to the Reports tab, find the problematic report, and click on it to open the editor.
Click on the Report Type drop-down at the top of the editor.
Ensure the report type is suitable for the data you are working with, avoiding the need for complex cross-filters.
Simplify filters by using EQUALS instead of CONTAINS and remove any unnecessary row-level formula filters.
Look at the columns in the report and remove any columns that are not essential to the report’s purpose.
Simplifying report types and filters reduces the complexity and load time of reports, making it easier for Salesforce to process saves without errors.
4. Convert the report to a data extension
From the Reports tab, click on New Report or open the existing report.
Simplify the report as much as possible by removing unnecessary columns and filters.
Click on the Export button and choose a suitable format, like CSV.
Now, go to the Data Extensions section.
Create a new Data Extension and upload the exported CSV file.
Instead of running operations directly on the report, use the Data Extension.
Converting complex reports to data extensions helps Salesforce handle large datasets more effectively, reducing the likelihood of save errors due to system limitations.
5. Retry saving the report
Go to the Reports tab and open the report that failed to save.
Remove complex filters and unnecessary columns to reduce load.
Click on the Save button at the top right of the report editor.
If the save fails, try again at a different time when the system might be less busy.
Sometimes, report saves fail due to temporary system issues or high traffic. Retrying after simplifying the report and at a different time can resolve transient issues.
By following these steps, you can minimize disruptions and keep your Salesforce reports running smoothly. Remember to periodically review permissions and simplify your reports to avoid similar issues in the future.
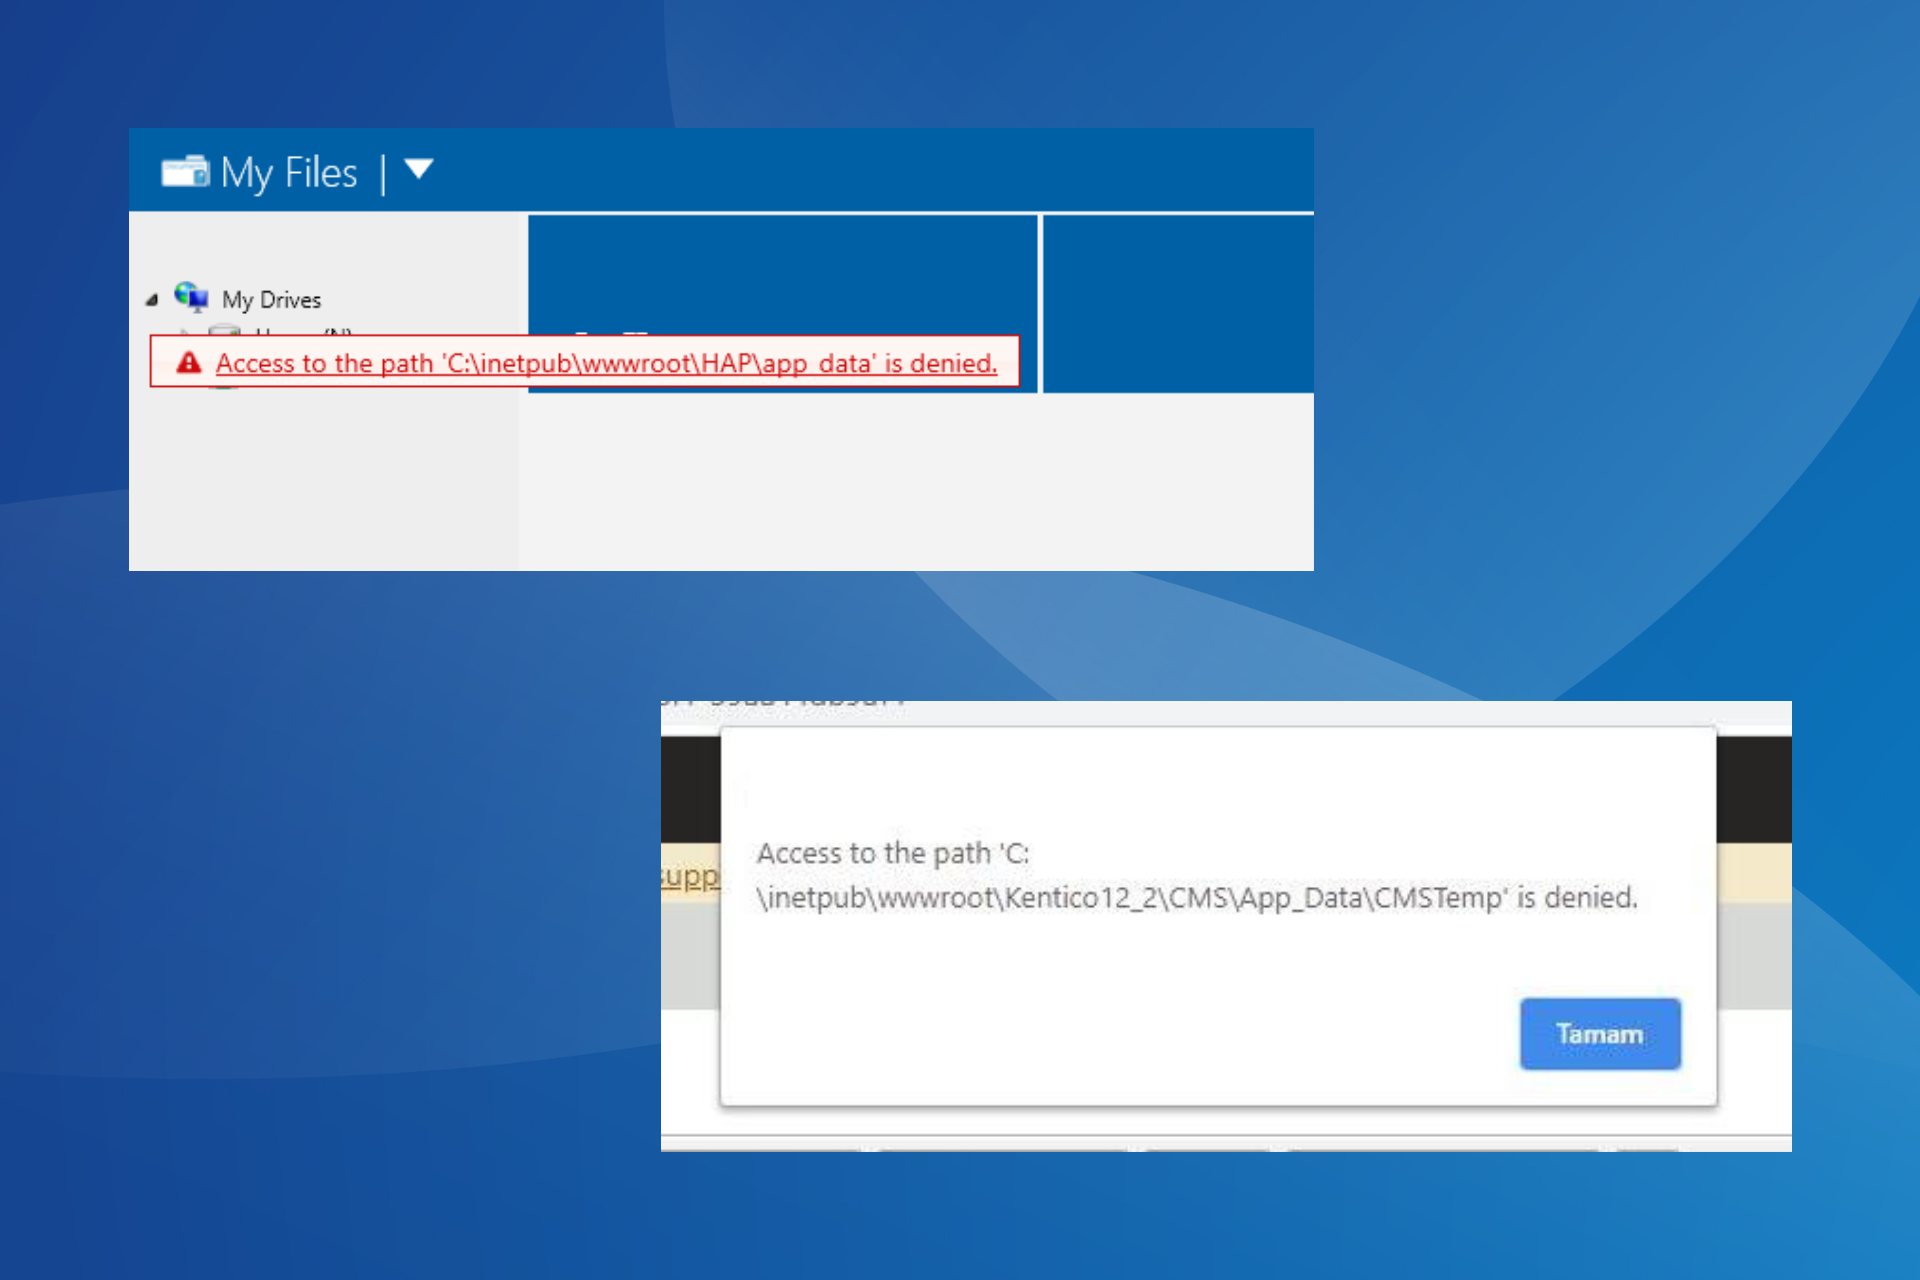
While trying to execute an app in Visual Studio or publish a website, you often come across the Access to the path App_Data is denied error. It lists the entire path of the file the web app needs to access and edit but can’t do so due to missing permissions!
The access denied error usually appears when Visual Studio doesn’t have the necessary privileges, IIS_IUSRS doesn’t have read and write access to the wwwroot folder, another process is accessing the file, or a third-party antivirus has blocked access to it.
How do I fix the Access to the path App_Data is denied error?
1. Run Visual Studio as an administrator
Right-click on the Visual Studio launcher (.exe file), and select Properties.
Navigate to the Compatibility tab, and tick the checkbox for Run this program as an administrator.
Click on Apply and OK to save the changes, then run Visual Studio and check if the access denied error still appears.
2. Grant IIS_IUSRS permissions to access the wwwroot folder
Press Windows + E to open File Explorer, paste the following path in the address bar and hit Enter: C:\inetpub
Right-click on the wwwroot folder and select Properties.
Go to the Security tab, and click on Edit.
Now, select the entry that starts with IIS_IUSRS from the list, and tick the checkbox for Full control.
Finally, click Apply and OK to save the changes and check for improvements.
If this doesn’t work, give read and write permissions to Network Service and ASPNET. Also, you can give full folder control with the same steps for the App_Data folder to all three, IIS_IUSRS, Network Service, and ASPNET!
3. Terminate any processes accessing the file
Press Ctrl + Shift + Esc to open the Task Manager, and identify any processes that might be accessing the file appearing in the error message.
Select each individually and click on End task.
Once done, you should be able to execute the app.
4. Whitelist the wwwroot folder in your antivirus
If the previous solutions didn’t fix the Access to the path App_Data is denied error it could just as well be an antivirus blocking access to the folder/file. In this case, you could temporarily disable the antivirus and check for improvements.
If the error message disappears, add an exclusion for the wwwroot folder in the installed third-party antivirus solution, and finally re-enable it!
Microsoft released its latest update to the Validation OS ISOs. This update is made for developers and tech lovers. It uses the Windows 11 24H2 26100.1 build and has seen a notable rise in size from its prior iteration – it now occupies 890 MB compared to only 340 MB before.
But why did it become so big? Microsoft has included important folders such as SDK, GenImage, and ValidationOSImageBuilder in the ISO, which enhances its usefulness for developers.
For people who may not know, the Validation OS is a lightweight and customizable type of Windows 11. It’s made to find, reduce, and fix issues with hardware when making Windows devices. It starts in a command-line setting for better reliability. It supports Win32 apps to make going from initial hardware setup easier towards creating operating systems and applications for end-users. The ISO comes in x64 and ARM64 versions, covering various hardware spec requirements.
You may ask yourself, “What is different this time?” Microsoft has strengthened and expanded the ISO. By including SDK, GenImage, and ValidationOSImageBuilder folders, they have given developers and hardware vendors additional resources to test their devices before selling them.
This method is especially helpful for people beginning their journey into hardware creation. It facilitates the transition to complete production and software development stages.
But how do you obtain this updated ISO? It is quite simple. Microsoft has made the Validation OS ISO available to download from its official website. It provides detailed instructions for mounting, booting, and customizing the image.
There are references for Validation OS feature packages and hints about launching apps or commands when the OS initiates, which is very helpful in debugging and app-making.
You can find the latest version of the Microsoft Validation OS ISO here.
Google works constantly to improve Chrome browser performance, recently, we reported Chrome will let you select and discard specific tabs. The company is now experimenting with a new feature that helps background tabs load smoother and feel more responsive when you switch to them.
How will Google improve background tab performance in Chrome?
Normally, Chrome prioritizes renderer processes for active tabs (foreground) over background tabs. This means active tabs get more resources from your computer’s CPU to load content faster and appear smoother.
This can sometimes make background tabs feel unresponsive or slow when you switch to them. Google is now working to bridge this gap in performance by giving background tabs a temporary edge during their crucial loading stage.
Previously, when a background tab started, its renderer process would immediately be assigned a lower priority. This could make the background tab lag when you switched to it because it hadn’t yet finished loading content.
Thanks to Background Tab Boost (sort of), Chrome keeps the foreground tab’s renderer process priority even after the background tab starts loading. This higher priority is maintained until the background tab basic structure of the content has been finished loading.
A new commit spotted by us, Windows Report, reveals that Google has plans to improve background tabs performance and responsiveness on par with active tabs.
Introduce kRenderProcessBoostForLoading feature. Chrome deprioritizes renderer processes when the process serves backgrounded contents. This CL adds a new feature that keeps foregrounded renderer process priority from CommitNavigation to DOMContentLoad.
In simpler terms, the new feature gives background tabs a temporary boost during a critical stage of loading. This can help background tabs load faster.
When SSRS (SQL Server Reporting Services) fails to send emails, that’s usually due to improper SMTP server configuration. You should also check the SSRS permissions. There are a lot more possible cause but we covered all with the solutions below.
What can I do if SSRS is not sending emails?
1. Check the SMTP server configuration
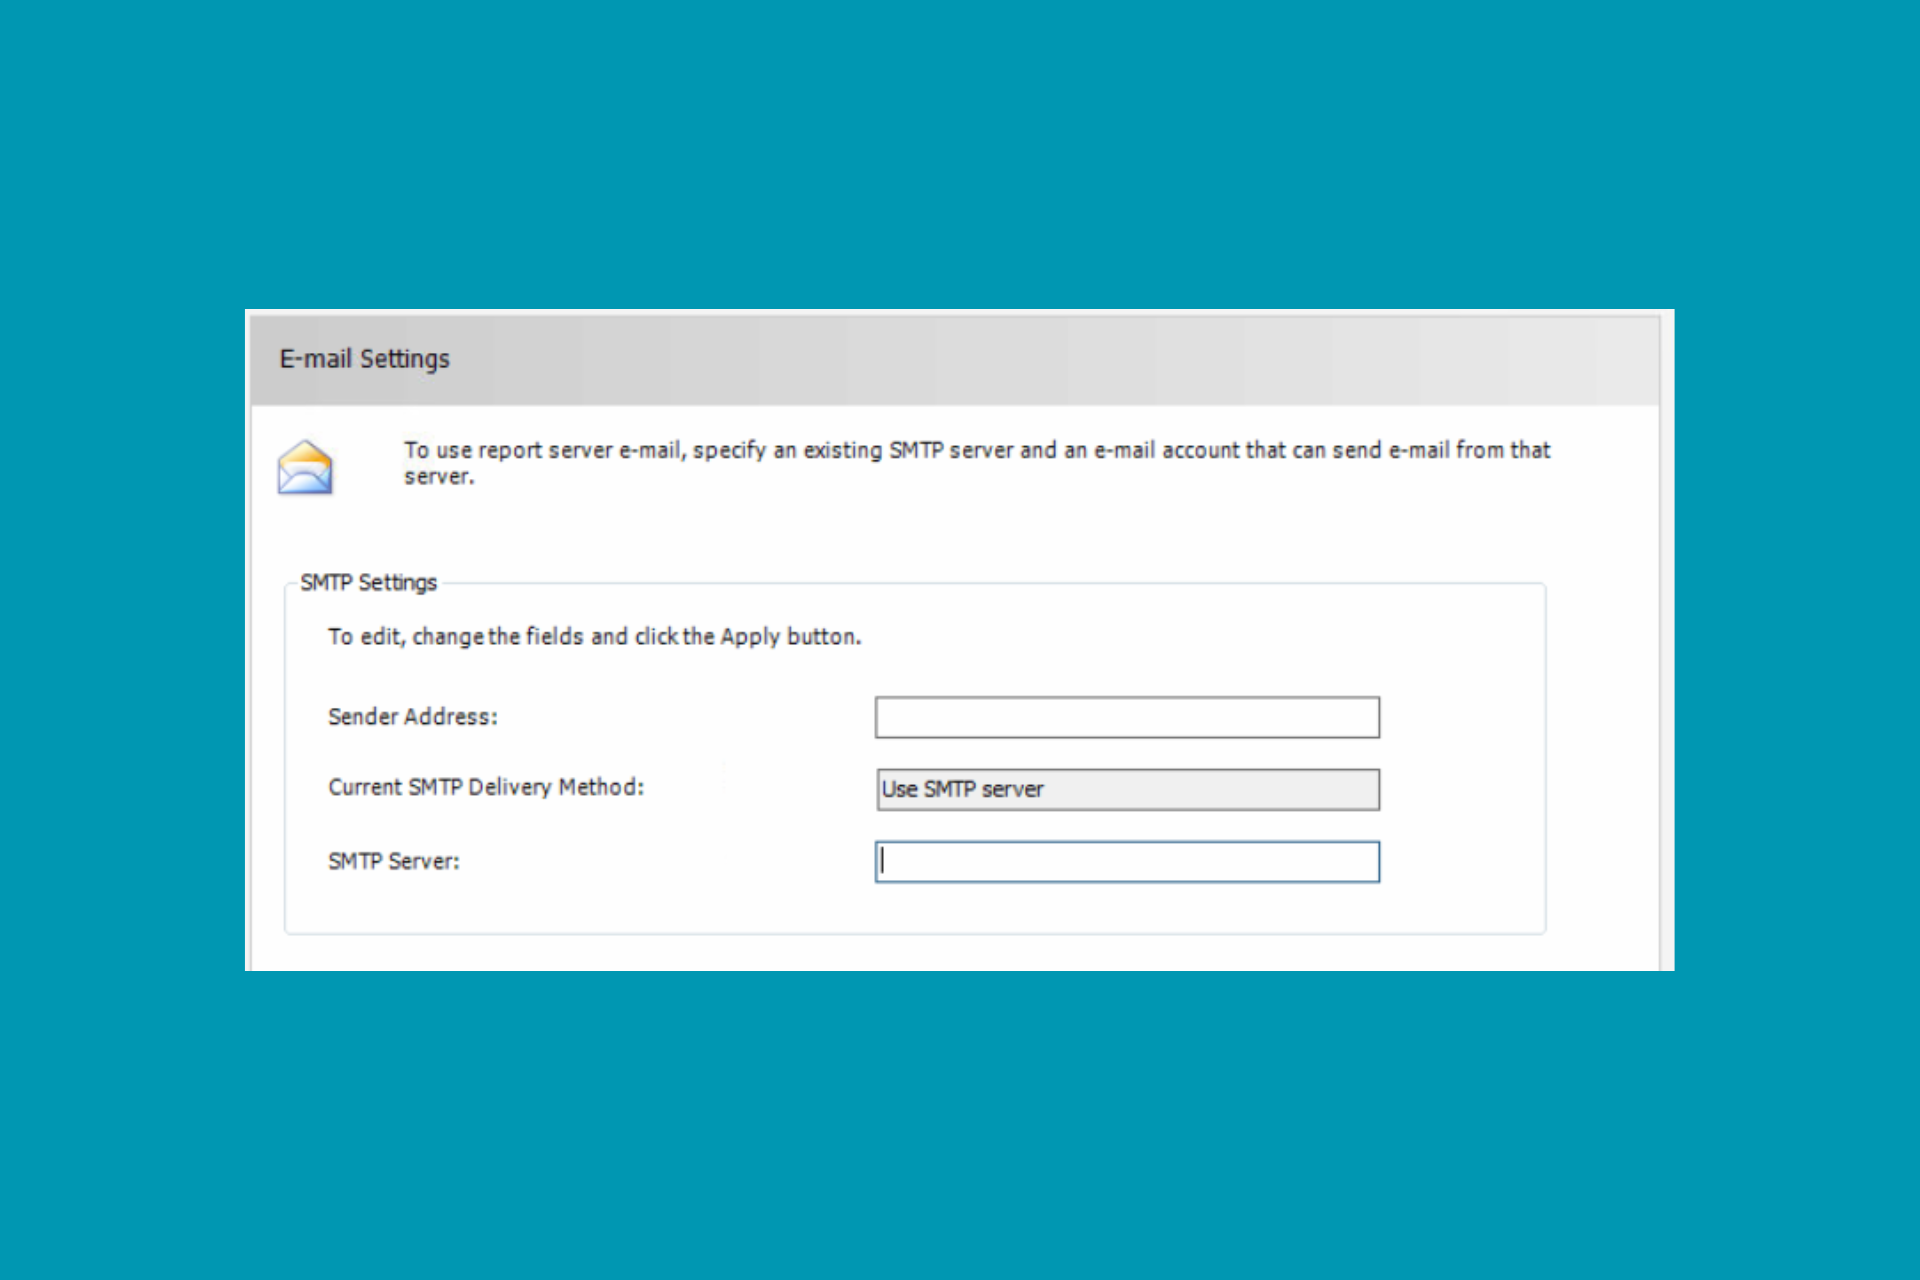
Open the Reporting Services Configuration Manager on your SSRS server.
Go to the Email Settings section.
Verify the SMTP server settings, including the SMTP server name, port, and authentication method.
Ensure Use SSL checkbox is ticked if your SMTP server requires a secure connection.
Save the settings and restart the Reporting Services.
Ensuring that your SMTP server settings are correctly configured will allow SSRS to communicate properly with your email server, facilitating successful email delivery.
2. Ensure proper permissions
Open the Reporting Services Configuration Manager.
Go to the Service Account section.
Ensure the service account used by SSRS has sufficient permissions to send emails.
If using an Azure Active Directory, ensure the account is properly registered and has required permissions.
Correct permissions are crucial for the seamless sending of emails by SSRS, as insufficient permissions can block the email-sending process.
3. Update and configure .NET Framework for TLS 1.2
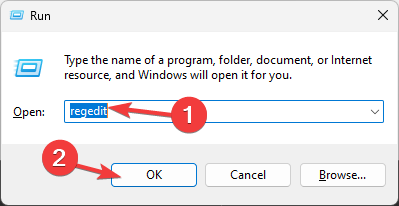
Open the Registry Editor by typing regedit in the Run dialog (Win+R).
Navigate to the following path: HKEY_LOCAL_MACHINE\SOFTWARE\Microsoft.NETFramework\v4.0.30319
Add or update the following DWORD values:
SystemDefaultTlsVersions = 1
SchUseStrongCrypto = 1
Repeat these steps for the v2.0.50727 key.
Restart the server to apply the changes.
Enabling TLS 1.2 ensures a secure and compatible connection with modern SMTP servers, potentially resolving many mail sending issues.
4. Check the log files for errors
Navigate to the log files directory, usually found at: C:\Program Files\Microsoft SQL Server\MSRS13.MSSQLSERVER\Reporting Services\LogFiles
Open the latest log file and search for any errors related to email sending.
Identify the error message and take corrective action based on the error details.
Log files provide detailed error messages which can help pinpoint the exact issue causing the failure in sending emails.
5. Use an alternative SMTP relay service
Sign up for an SMTP relay service such as AuthSMTP.
Configure SSRS to use the new SMTP relay server details in the Reporting Services Configuration Manager.
Update the SMTP server, port, and authentication details as provided by the relay service.
Save your changes and attempt to send a test email.
Using a reliable SMTP relay service can bypass issues caused by specific SMTP servers, ensuring consistent email delivery.
6. Restart the SQL server Reporting Services
Open the Services Management Console by typing services.msc in the Run dialog (Win+R).
Locate and select the SQL Server Reporting Services service.
Right-click the service and select Restart.
Restarting the Reporting Services can resolve temporary glitches and refresh the service’s ability to send emails.
7. Validate the email address and addresses format
Double-check the email addresses in the subscription settings for any typos.
Ensure multiple email addresses are separated by semicolons (;).
Validate that all email addresses conform to standard email formats.
Correct and properly formatted email addresses are essential for successful email delivery.
Search for the error code online to find specific solutions or workarounds.
Apply the recommended fixes based on the error code.
Addressing specific error codes can provide targeted solutions for issues that are hindering the email sending process.
9. Change email subscription owner
Open SQL Server Management Studio (SSMS).
Run the following query to identify the current owner: SELECT u.UserName, s.SubscriptionID FROM ReportServer.dbo.Subscriptions s INNER JOIN ReportServer.dbo.Users u ON s.OwnerID = u.UserID;
Update the owner to a valid account: BEGIN TRAN DECLARE @newid UNIQUEIDENTIFIER; SELECT @newid = UserID FROM ReportServer.dbo.Users WHERE UserName = 'newuser'; UPDATE ReportServer.dbo.Subscriptions SET OwnerID = @newid WHERE OwnerID = (SELECT UserID FROM ReportServer.dbo.Users WHERE UserName = 'olduser'); COMMIT TRAN
Changing the ownership ensures that outdated or invalid user accounts do not block the email subscription process.
10. Use PowerShell to test email sending
Open a PowerShell window on the server.
Run the following command: Send-MailMessage -SmtpServer smtp.yourserver.com -To '[email protected]' -From '[email protected]' -Subject 'Test Email' -Body 'This is a test email.'
Check if the test email is received.
Using PowerShell allows you to manually verify if the email configuration is correctly set up and working.
By following these steps, you should be able to resolve most issues related to SSRS not sending emails. To prevent future issues, regularly check your SMTP server settings and ensure your SSRS service account has the necessary permissions.
Struggling to get WMIC (Windows Management Instrumentation Command-line) back on your Windows 11 system? The feature was deprecated and replaced by PowerShell for WMI, but you may still reenable and use WMIC FoD. So, if WMIC is not recognized, follow the steps below.
How do I install WMIC FoD on Windows 11?
1. Enable WMIC through Optional Features
Click on the Start menu and then on the gear icon to open Settings.
Go to the System section within Settings and click on Optional features under the Apps & features section.
Click on View features next to the Add an optional feature option at the top.
In the search bar, type WMIC and check the box next to WMIC from the search results.
Click Next and then Install to add WMIC to your Windows 11 computer.
By following these steps, you can easily re-enable the WMIC utility on your Windows 11, allowing you to continue using it for command-line management tasks. If you can’t find it within the search results in the Optional features, that means it’s already installed and the command should work in CMD.
2. Install WMIC using DISM Command
Press Win + X and select Command Prompt (Admin) or Terminal (Admin).
To add WMIC, type the following command and press Enter: DISM /Online /Add-Capability /CapabilityName:WMIC~~~~
Alternatively, if you need to remove WMIC, type: DISM /Online /Remove-Capability /CapabilityName:WMIC~~~~
Using the DISM command is a quick way to manage WMIC installation directly from the command line, especially useful for advanced users or automated scripts.
3. Check and update the Windows build
Press Win + R, type winver, and press Enter to see your current Windows build. If your build is lower than 22572, update your OS.
Open Settings by clicking on the Start menu and the gear icon, then go to Update & Security.
Click Check for updates and install any available updates to ensure you are on the required build version.
If you are not on the required build version (22572 or later), updating Windows might resolve the issue and enable the option to install WMIC.
4. Create a custom FoD repository
Use the following command in CMD or Terminal as administrator to mount the Windows image: dism /mount-image /imagefile:install.wim /mountdir:C:\mount
Mount the Features on Demand ISO using File Explorer, noting the assigned drive letter (e.g., D:).
Run the following command to export the WMIC feature: dism /image:"C:\mount\windows" /export-source /source:d: /target:c:\repository /capabilityname:WMIC~~~~
Use the created repository (C:\repository) as a source to install WMIC with the DISM command: DISM.exe /Online /add-capability /CapabilityName:WMIC~~~~ /Source:C:\repository
Creating a custom repository allows for more control over the installation process, and is particularly useful in an enterprise environment where multiple installations are required.
5. Use the PowerShell alternative to WMIC instead
Press Win + X and select Windows PowerShell (Admin) or use the Windows Search feature to run PowerShell.
Use the following command: Get-CimInstance -Namespace 'root\cimv2' -ClassName 'Win32_OperatingSystem'
Using PowerShell’s CIM cmdlets offers a modern, supported alternative to WMIC for system management and querying tasks.
By following these steps, you can get WMIC up and running on your Windows 11 system. For future reference, keeping your Windows updated and exploring PowerShell alternatives can help you avoid similar issues.
The INVALID DATA TYPE error in Smartsheet usually occurs when you try to perform an operation on a data type that isn’t supported or expected in that context. In this guide, we will discuss a few scenarios where you encounter this error and how you can address them.
How can I fix the Invalid Data Type error on Smartsheet?
1. Using the wrong data type for a function or operation
When applying formulas in Smartsheet, ensure the input cell data types match the expected data type for the function or formula you use. For example, if a formula needs a date input but adds a text or number instead, you will get the invalid data type error.
So, to fix it, you need to verify the data types of input cells and use conversion functions (DATEVALUE (), TO_TEXT (), TO_NUMBER ()) so that the data types are what your formula expects them to be.
2. Mismatched data types in cell references
If your formulas referencing cells have incompatible data types, this could cause calculation errors. Mixing text and numeric values incorrectly can trigger this issue.
To fix it, you must check and align the data types of referenced cells. You can use Smartsheet functions (TO_NUMBER(), TO_TEXT()) for data type conversion to make sure there is consistency.
You must always remember to keep the specified formats for the data imported into Smartsheet to prevent problems like an Invalid Data Type error. For example, if the dates in the data are not in the specified format identified by Smartsheet, which is DD/MM/YYYY or MM/DD/YYYY, it could lead to an error.
To fix it, check data formats against Smartsheet’s guidelines before importing. If you find any discrepancies related to formatting, make sure you correct them to avoid errors.
4. Data type handling in API integrations
If the data passed through Smartsheet’s API doesn’t match the expected data types, you may see the Invalid Data Type error. Check the Smartsheet’s API documentation to know the required data types for API requests. Once you learn, validate, and convert data inputs in your integration code.
Tips to avoid the Invalid Data Type error
First, check where the invalid data type errors occur, whether in formulas, data imports, cell references, API integration, or data imports.
Use a Smartsheet function like (DATEVALUE (), TO_TEXT (), TO_NUMBER ()) to convert the data types and ensure the data inputs are aligned with the expected formats.
Make sure the formula you use appropriately handles different data types. You can use conditional logic in formulas to change data types.
Before applying the formula to a larger data set, test it in a controlled environment to validate fixes.
So, this is how you can fix the Invalid Data Type error and ensure the formula or operation you perform works accurately, enhancing productivity in Smartsheet.
If you have any questions or suggestions about the policy, please mention them in the comments section below.
In the constantly changing world of graphics cards, people are discussing Nvidia’s future steps with the GeForce RTX 5000 series, such as their theoretical performance, a possible release date, and an estimated price. This big jump—Nvidia, a powerful player in the GPU sector and one of the biggest companies in the world, has been fiercely competing against AMD to be the top maker of the best consumer-level graphic card.
While the RTX 4000 range has already created ripples due to its remarkable capacity for ray-tracing and better frame rates, attention is now focused on what the “Blackwell,” also known as the RTX 5000 series, will offer.
There are rumors that a wide range of improvements, like the GDDR7 memory with high bandwidth and backing for PCIe 5.0, could change how gaming and content creation are done. Yet, even with all these forward steps, it’s hard not to think about what cost this new beast will bear.
Nvidia usually presents new products every two years, but talks in the tech world suggest a release date for the new 5000 series between the end of 2024 and the beginning of 2025. This timeframe might change according to how well the RTX 4000 line sells or if AMD’s RDNA 4 series becomes more competitive. The talk regarding the launch date is very erratic, with some people saying it will be out this year while others believe we won’t see it until next year.
The 5000 series release date could change depending on how NVIDIA’s current graphics cards perform against rival options from AMD and Intel – particularly under pressure from Apple Silicon M1 chips. However, talking about dates for product releases can be very imprecise. Nobody can say precisely when the new graphics cards will come out because this depends on many factors, such as ensuring enough chips and other parts are available to produce them in large quantities.
Also important is not rushing things too much so they can guarantee high quality when they hit store shelves without any problems during use or testing stages before production begins (also known as “yield issues”). All these variables make pinning down an exact time for the Nvidia 5000 series release date quite difficult, even though general trends may give us clues about possible windows for release periods – like late December through early January, as one example here mentioned before, with some potential flexibility.
Nobody can predict prices exactly yet, but usually, when a new flagship like the RTX 5090 comes out, it remains similar to the launch price of its previous version. However, there might be a chance for an increase too.
What might the RTX 5000 series have in store? Stories are circulating that Nvidia could adopt a Multi-Chip Module (MCM) design for its top-level products, which would differ from its usual monolithic method. This change might make the GPUs more flexible and possibly stronger. Additionally, there is anticipation that the flagship models will have GDDR7 memory, which could considerably increase bandwidth. However, with this thrilling progress, the important issue of affordability has arisen. Would these fresh GPUs be within reach for regular consumers, or will they focus only on the high-end market?
The technical improvements are noteworthy. For instance, the RTX 5090 is said to have a remarkable 24,576 CUDA cores and a memory bus that’s 512 bits wide. This suggests an unmatched level of performance, but as we know, high power brings high consumption; this means they might need lots of watts due to their support for PCIe 5.0. The ability to show things is also receiving an increase. As the talk goes, there might be support for the DisplayPort 2.1 standard, allowing even bigger resolutions and fresh rates.
But should we accept these rumors without question? The sources seem reliable, but last-minute alterations and strategic shifts are common in tech. An alleged TDP of 800W for the RTX 4090 did stir some excitement—yet it turned out to be a more feasible 450W. It’s a gentle poke at all the excitement and guesswork surrounding the RTX 5000 series. Until Nvidia makes an official announcement, you should take them with a pinch of salt.
Microsoft has taken a significant step forward by enhancing its Microsoft Edge with SVG (Scalable Vector Graphics) support across various browsers. This feature, particularly in the Async Clipboard API, is set to revolutionize how we interact with SVG files across the web and applications. For those who might not be familiar with SVG files, they are essentially digital images that can be scaled to any size without losing quality, making them a perfect fit for the modern, visually driven web.
But until now, copying and pasting these files between applications and browsers was anything but straightforward. However, Microsoft’s recent update makes it easy to copy-paste SVG files across different platforms. This game-changer is especially useful for web developers and graphic designers who frequently work with these files. Imagine moving an SVG from your desktop to a web app without losing sleep.
Previously, the process was clunky, involving manual copying, special parsers, and even static image rendering—not exactly the pinnacle of efficiency. But those days are behind us, with Edge version 124 entering the arena.
In a blog post, Microsoft says this update benefits Edge users and those using other Chromium-based browsers, such as Chrome, Opera, and Vivaldi.
Today we’re announcing support in Microsoft Edge, and Chromium browsers, for SVG files in the Async Clipboard API. This means copying and pasting SVG data across any app that wants to use SVG, whether it’s native or web, is now possible.
Microsoft
Even more exciting is that this is not the first time Microsoft has led such initiatives. Earlier this year, they improved text rendering, and now, with SVG support, they’re continuing to shape a more integrated web experience.
For those eager to see this in action, Microsoft has provided a demo and a test page where you can witness the magic of seamless SVG copy-pasting firsthand.
This move by Microsoft is a testament to its commitment to enhancing web standards and interoperability among browsers. It’s not just about making life easier for Edge users; it’s about pushing the entire web ecosystem forward.
And let’s be honest, who wouldn’t want a web where sharing high-quality graphics is as simple as copying and pasting text?
So, what do you think? Are you ready to dive into this new world of effortless SVG handling? Whether you’re a developer, a designer, or someone who loves playing around with graphics, the SVG support in Microsoft Edge will make your digital life more manageable. And in a world where ease and efficiency are king, that’s something to celebrate.
When trying to start a new project or publish one in Visual Studio, you often get the App_global.asax.dll – Access is denied error, which prevents the process from going through.
The error appears due to missing privileges, misconfigured permissions, third-party conflicts, or the pre-stored temporary files. All these can be fixed in no time with the solutions listed next!
How do I fix the App_global.asax.dll – Access is denied error?
1. Precompile before publishing
The easiest fix, and one that worked for 3 out of 5 users, was to precompile before publishing. All you have to do is tick the checkbox for Precompile before publishing under the Settings tab.
Precompile before publishing
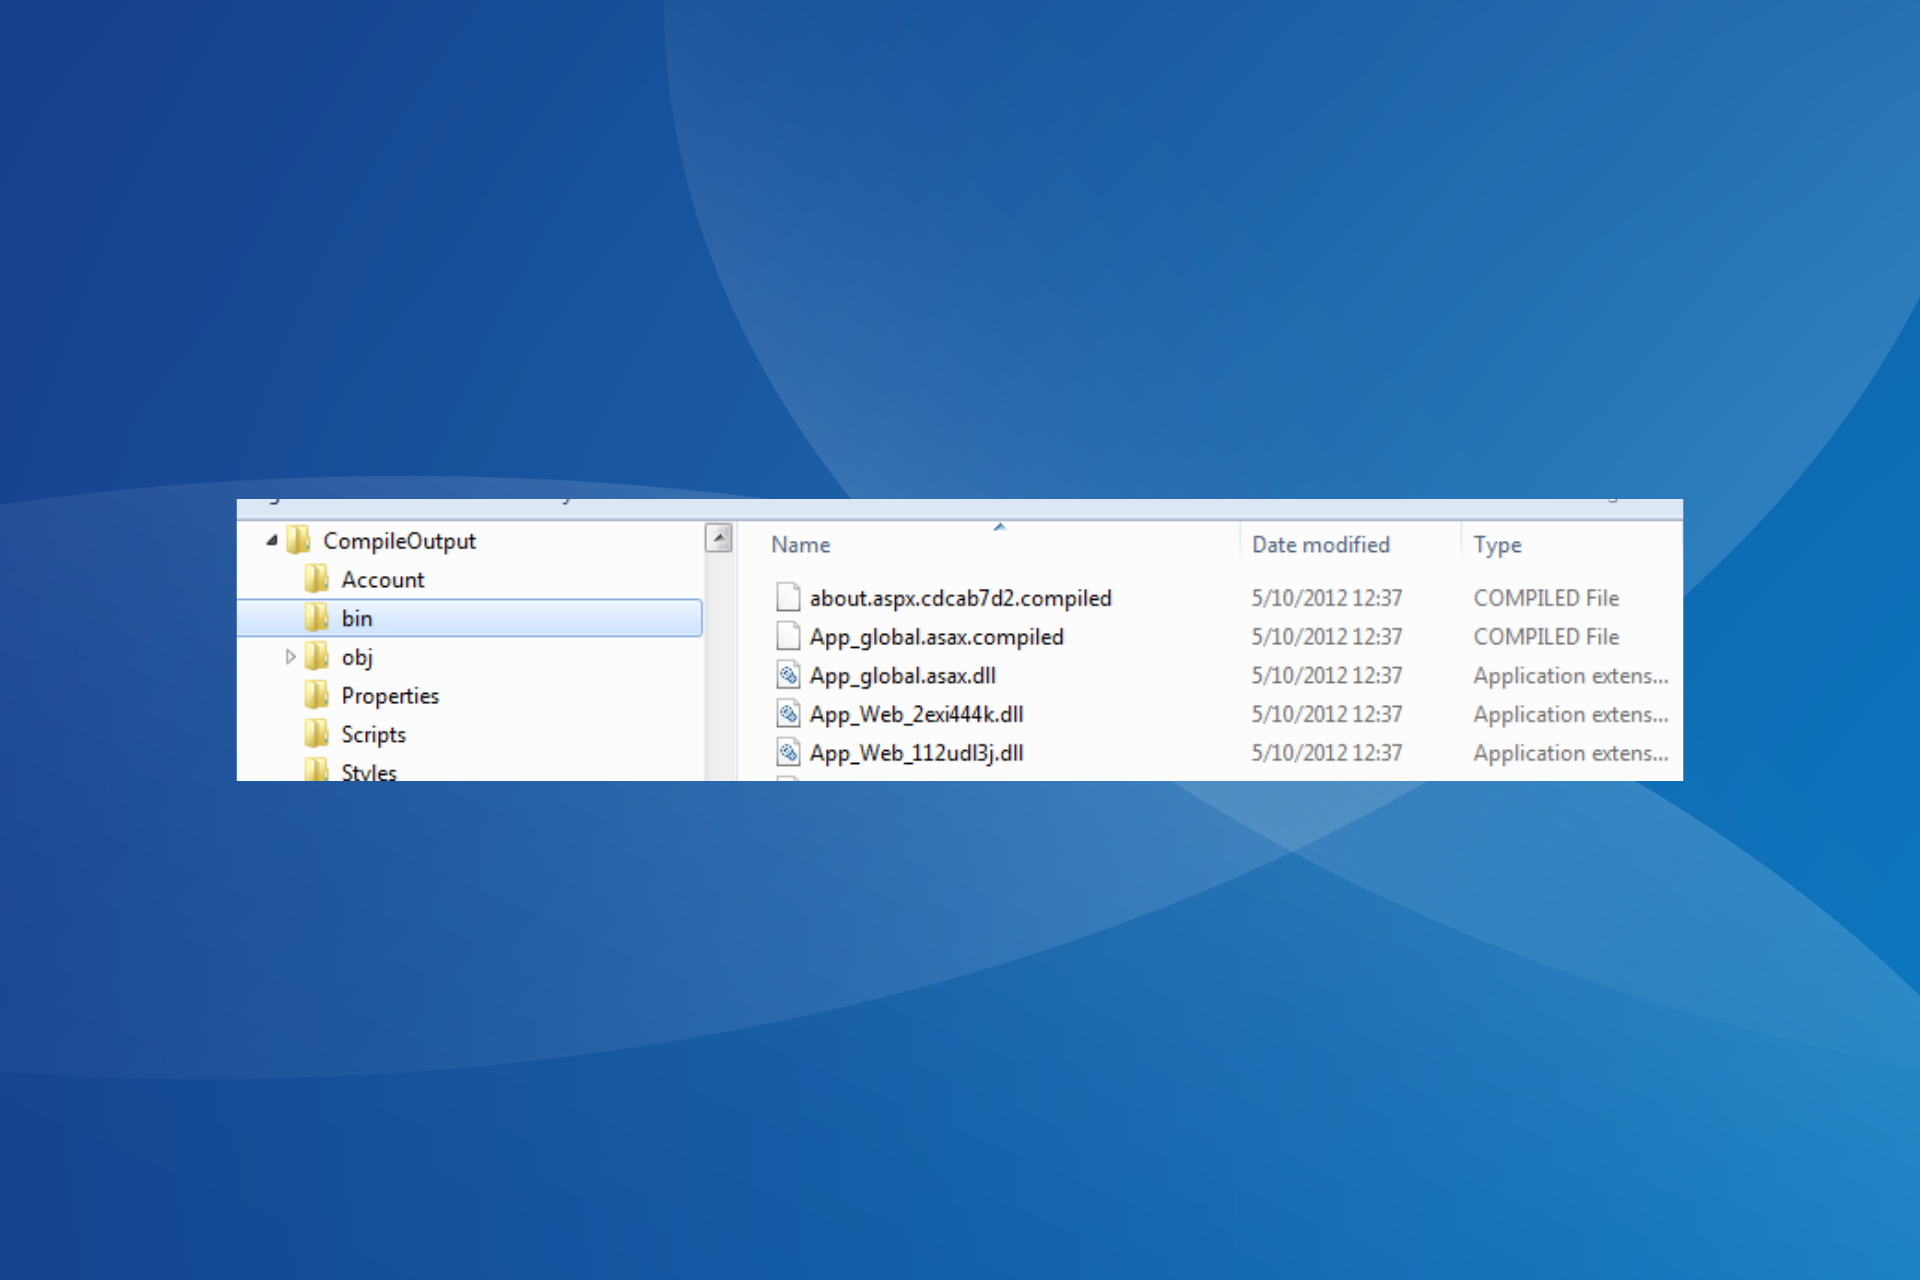
Once done, the App_global.asax.dll and app_global.asax.compiled files should reappear in the required folder.
2. Run Visual Studio as administrator
Right-click on the Visual Studio launcher (.exe file), and select Properties.
Go to the Compatibility tab, and tick the checkbox for Run this program as an administrator.
Finally, click on Apply and OK to save the changes and then try publishing the app in Visual Studio.
If you are getting the App_global.asax.dll – Access is denied error due to missing privileges in Visual Studio, running the app as an administrator should get things up and running!
3. Reconfigure the permissions
Press Windows + E to open File Explorer, navigate to the path listed for the App_global.asax.dll file in the error message, right-click on the file, and choose Properties.
Go to the Security tab, and click on Advanced.
Click on Change.
Now, enter Everyone in the text field, click Check names, and then OK. If you want to limit the permissions to a specific user or group, add it instead.
Click on Apply and OK to save the changes.
Close the Properties, again open it, head to the Security tab, and then click on Edit.
Click on Add.
Again, enter Everyone in the text field, click on Check names, and then on OK.
Select Everyone from the list, and tick the checkbox for Full control.
Finally, click Apply and OK to save the changes.
Now, try publishing the application using Visual Studio, and verify whether the App_global.asax.dll – Access is denied error persists.
4. Add/remove the PrecompiledApp.config file
For most errors related to App_global.asax.dll, simply restoring the PrecompiledApp.config file does the trick. Make sure to place the file in both the root and bin directories to get rid of the Access is denied errors!
Surprisingly, for a few, deleting the PrecompiledApp.config from the root of the publish folder also worked. So, do try that when nothing else works.
5. Uninstall any third-party antivirus
Press Windows + R to open Run, type appwiz.cpl in the text field, and hit Enter.
Select the third-party antivirus from the list, and click on Uninstall.
Follow the on-screen instructions to complete the process.
Once done, reboot the PC and check for improvements.
In many of the cases I observed, it was actually a third-party antivirus like Kaspersky and McAfee that triggered that App_global.asax.dll – Access is denied error. Here, simply uninstalling the app works!
You could also create an exclusion in the antivirus for the following folders to prevent such errors:
Depending on the version of the .NET framework installed, you will need to head to one of the following locations and delete all the temporary files for your application:
C:\WINDOWS\Microsoft.NET\Framework\v2.0.50727\Temporary ASP.NET FilesC:\Windows\Microsoft.NET\Framework64\v4.0.30319\Temporary ASP.NET Files
Once done, you can finally build your solution and run it without facing any more errors!
These are the best and tested ways to fix the App_global.asax.dll – Access is denied error. Remember, before you delete any file(s), always create a copy of it to restore the data in case things don’t go as expected.
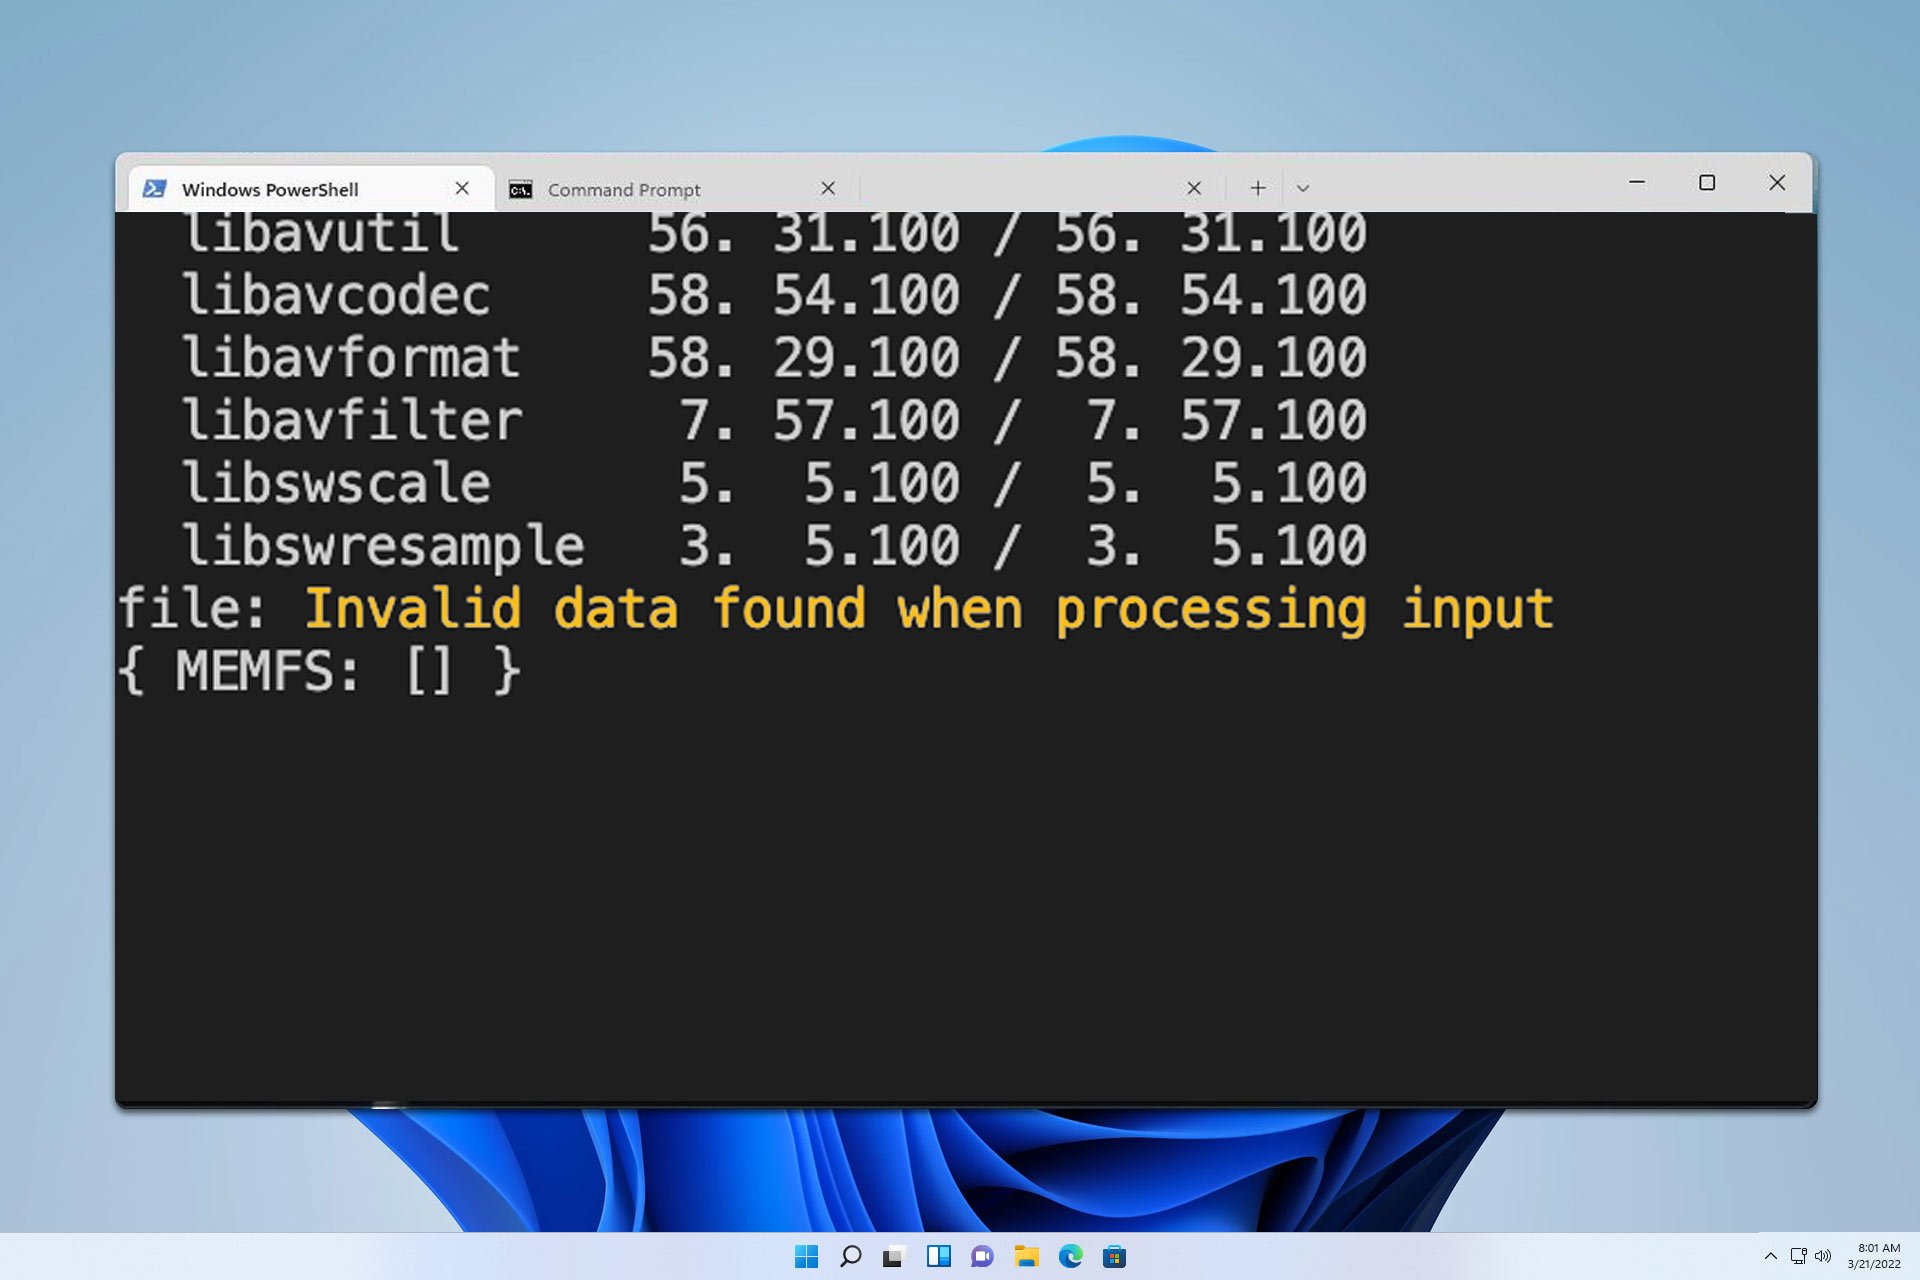
Invalid data found when processing input is an FFmpeg error, and it can appear in various applications or setups. However, the issue can be fixed and today we’re going to show you how to fix it.
How can I fix Invalid data found when processing input error?
Before we start, make sure you have the latest version of FFmpeg installed. If you’re software that uses FFmpeg, update it to the latest version.
Make sure that you’re using the right command
If you need to use a text file, use the conact command like this: ffmpeg -f concat -i input.txt output.mp4
In case you don’t want to use concat, list the files in the command, like this: ffmpeg -i 1.mp4 -i 2.mp4
Add input options before input file, like this: ffmpeg -ar 48000 -ac 1 -f s16le -i step2.pcm step3.wav
Don’t forget to use the file keyword before the filename: file ./index9.ts
Also, try using the following parameter as a workaround: --stop-at-time 3
If you’re using FFmpeg with Home Assistant, a few users suggested using AlexxIT WebRTC integration.
As you can see, this is a pretty technical issue, but in most cases updating the FFmpeg fixes the problem. To see how to install the latest version, check our guide on how to download FFmpeg.
Looking for Thorium browser download instructions? If you want to improve your browsing speed or explore a new alternative, Thorium is an excellent choice. I’ll show you how to download and install it easily.
Let’s begin!
How To Download Thorium Browser
You can get the browser from its official website or a third party source.
Download From the Official Website
Go to the official Thorium browser download page, scroll, and tap on your operating system. For this example, I’ll choose Windows.
Tap the Thorium installer, and it’ll start downloading automatically.
Click on the Downloads icon in the top right corner to access your recent files. Then, double-click the Thorium installer.
The browser will launch automatically.
Download From a Third Party Website
Apart from the official site, you can download it from a trustworthy third-party website like Uptodown. However, you should prioritize the official site to avoid getting contaminated with malware from unreliable third-party sources.
Overall, the Thorium browser download process is straightforward. By following the above steps, you can easily set it up on your operating system of choice, including Windows 7. You can also read our complete Thorium browser review and see its comparison with Chrome!
Moreover, you can learn how to install a similar, privacy-focused browser such as Aloha.
Microsoft has recently caused a stir among its Xbox users, as the company apparently removed the option to use Rewards points for Game Pass auto-renewals. However, after consideration, it seems that the Redmond-based tech giant backtracked its decision: this featured favorite will not disappear.
So, what happened? After some noise and misunderstanding, Microsoft explained the situation. As seen on Reddit, the first message to Xbox owners implied a big change – ending the lesser-priced Game Pass Ultimate or PC Game Pass auto-redeem subscription.
Your Game Pass auto-redeem subscription is being discontinued.Important changes are coming to the auto-redeem functionality for your Game Pass Ultimate or PC Game Pass subscription. As of 8/12/2024, you will no longer be allowed to use your Rewards points to fund your Game Pass Ultimate or PC Game Pass subscriptions. If you’d like to elect another service to use Rewards points for auto-redemption, please visit the Rewards catalog. Available options:
Select a new auto-redemption subscription
Let your auto-redeem subscription expire on 8/12/2024
Explore the catalog to redeem points for other prizes
Microsoft
This created a reaction, as was expected. However, a new message came with an update: while the current auto-renewal points plan is closing down, it’s not completely over. Gamers must adjust to become accustomed to new auto-renewal setups because of the changes in pricing for PC Game Pass and Xbox Game Pass Ultimate.
You might ask, “What does this imply for my points?” Here is the situation: Auto-renewal of PC Game Pass will soon require 7,750 Microsoft Reward points, compared to the earlier 6,750. Xbox Game Pass Ultimate membership will require 12,000 points instead of the current rate of 10,500 points for each month’s renewal. The new change has most likely occurred due to the recent increase in prices of the Xbox Game Pass subscriptions.
Microsoft’s first failure to explain these modifications made things more puzzling, but all doubts have been clarified. However, sometimes, it serves as an excellent reminder that we must watch out for updates from our preferred tech giants because confusion can sometimes happen.
This ultimate Microsoft Forms vs Google Forms comparison will help you choose the appropriate form-making app for personal or business use.
At first glance, both apps appear similar, convenient to use, affordable, and with intuitive user interfaces. However, if you start using one or the other, you might face unexpected issues.
I’ve compared Google and Microsoft Forms head to head based on their features, pricing, security, and user experience reviews. Also, I’ve put both of them to rigorous use. So, let’s see which one suits you best!
What Is Microsoft Forms?
Microsoft Forms is a native quizzes, surveys, and polls-making tool for the Microsoft 365 workspace solution. It’s available for both free and premium users.
You can either download a standalone copy of the app on your Windows 10 or 11 PC from the Microsoft Store app. Or, you can access the service online.
Google Forms is the form-building app for the free and premium Google Workspace solution. It’s a strictly web app meaning there’s no standalone installable version for PCs. It scales up and down automatically based on the browser user agent (PC or smartphone) to provide a seamless experience to form respondents from different devices.
Pros and Cons of Google Forms
Pros
Cons
There are no limits of forms respondents except fair-usage policy limitations.
You must sign in with a Google Workspace account to use its services.
Freely available for personal and business use.
Not suitable for offline response collection.
Offers plenty of question types, like multiple-choice, linear-scale, and drop-down.
Unable to create word clouds, unlike Microsoft Forms.
You must sign in with a Google Workspace account to use its services. No sign-up usage isn’t allowed.
There are certain fair usage policies that may limit access to forms.
Offers branching of questions based on form responses given by different users.
You might need to practice using the tool a few times to edit images, fonts, colors, etc., according to brand guidelines.
Allows you to integrate videos and pictures freely anywhere in the form.
It shows questions in a continuous form. You can’t show one question at a time as you can do in Microsoft Forms.
Microsoft Forms Vs Google Forms
Now, let’s compare the two head-to-head!
User Interface and Experience
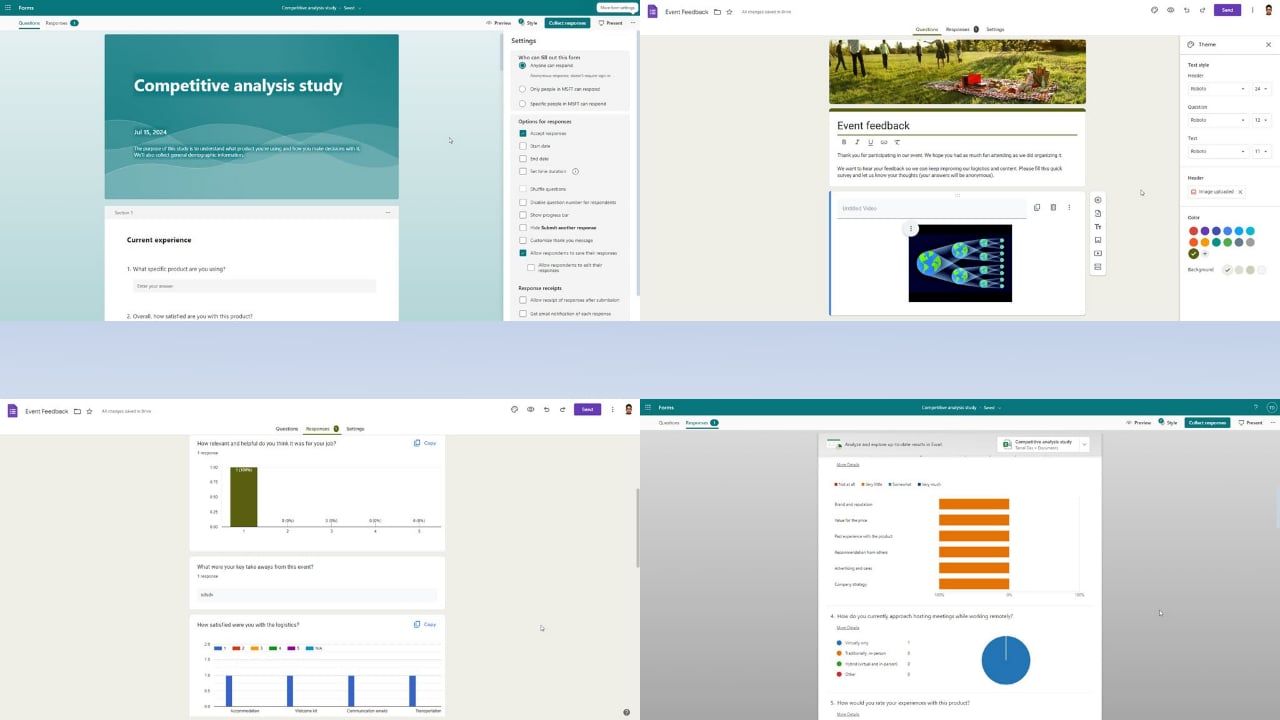
The UI of Microsoft Forms is intuitive but a bit elaborate. The welcome screen offers the most popular form formats, like New Form and New Quiz. When editing, you can simply click on a form element to change content like Date, Text, Rating, Choice, and more.
Moreover, it has a top menubar for menus like Questions, Responses, Preview, Style, Collect responses, and Present. For additional settings, there’s a three-dot menu named More form settings in the top right corner. The overall user experience is friendly but you must know the basics of online form-making.
Contrarily, Google Forms is a beginner-friendly online form-making tool. Its welcome screen shows the option for a blank form and a few choices from the templates gallery. You can easily add new question cards and choose from a wide range of types, like Short answer, Paragraph, Multiple choice, Checkboxes, Dropdown, and so on.
It also has a top menubar containing options like Customize Theme, Preview, additional settings, etc. The general user experience is better than on MS Forms because there are fewer customizations and there’s almost no learning curve.
Data Privacy and Security
Microsoft Forms comes with the latest data privacy and security compliance certificates. These include GDPR, BAA, FERPA, and HIPAA. Microsoft also encrypts the form content in transit and at rest using standard digital data encryption protocols.
Furthermore, Google Forms protects your data via stringent encryption protection at rest or in transit. If your organization needs compliance features like HIPAA and BAA, you must get an appropriate Google Workspace subscription for such businesses and sign Google’s Business Associate Addendum agreement.
So, from the compliance perspective, it’s better to use Microsoft Forms than Google Forms. You must manually get a compliant certificate for Google while for Microsoft it’s built-in.
Templates
Microsoft Forms comes with many ready-to-use online form templates. You can discover them from the Explore template categories link at the bottom of the tool. It has categorized them all into four sections, namely Events, User research forms, Employee satisfaction surveys, and Digital requests. I could find a total of 16 templates when I reviewed this tool.
Google Forms also comes with pre-configured form templates. You can find the library by clicking the Template gallery link in the top right corner below the Search field. There are a total of 17 templates distributed in sections, like Personal, Work, and Education.
Images and Videos
Depending on the template or question type, you can add vector images, pictures, videos, and background music to the Microsoft Forms interface. The Style button in the toolbar lets you introduce such customizations. You can import images online from Bing search, upload from your organization’s OneDrive storage, or upload directly from local PC directories.
Compared to MS Forms, media customization options are more diverse in Google Forms. You can add images and videos to almost any part of the form, it’s not mandatory to add these assets only to the question card. Also, you can customize the header image with your brand’s suggested visual assets especially if you’re using a prebuilt form template.
Not to mention, Google Forms also allows you to customize the fonts of the header, question, and text.
Data Analytics and Reporting
Microsoft Forms offers automated data analytics and summary report generation with smart data visualization cards. Its visualizations include word clouds, bar charts, pie charts, column charts, and so on. The tool analyzes and presents response reports for each question considering all participants’ input. All data visualizations populate instantly with real-time updates when you access the Responses tab.
Furthermore, you can review individual response copies from the View results menu. It also prepares a copy of an Excel spreadsheet when responses are detected from participants. You can download the Excel workbook or sync it to your web account for online data analysis.
However, you can’t designate a preexisting worksheet or workbook for response inclusion like Google Forms. It generates a new workbook for each survey.
Compared to MS Forms, Google Forms’ reporting and analytics are more primitive. It uses simple data visualization cards, with column chart as the most popular one. Therefore, if you’re an entry-level data analyst or presenting reports to a less tech-savvy audience, this is the right tool.
However, if you’re planning to present your survey analytics to a group of professionals, MS Forms’ reporting feature will be more suitable.
Google Forms allows you to review form inputs in a complete sheet or question-by-question. Also, you can customize the database of the form responses to custom spreadsheet workbooks.
Sharing and Online Controls
You can access various ways to share Microsoft Forms from the Collect responses menu. Here are the major distribution options:
A sign-in-less option for respondents to interact with online forms without any account.
Configure form links for all users in a specific MSFT domain or a few users of the same domain.
You can record or don’t record details.
You can customize form controls for one response per user.
Get a shareable URL for distribution via WhatsApp, SMS, email, Messenger, and more. You can also shorten URLs for free.
Create Outlook email or Microsoft Teams invitations with automatically personalized messaging.
Get a QR code image for widespread distribution.
HTML code for embedding forms in websites and apps.
Contrarily, Google Forms offers fewer form distribution options but enough for convenient use. They’re available under the Send button on all interfaces. Here are its prominent features:
Collect or don’t collect emails from the responder. It also allows email verification.
The major forms-sharing system is via email. You can draft them right on the Send form interface.
You can also generate a hyperlink for direct sharing via WhatsApp, SMS, and more.
If you’re running a survey campaign on social media, you can choose social media platforms like Facebook and Twitter.
There’s also an option to generate HTML embed code for the form for websites and apps.
Google Forms allows you to add certain recipients as editors of the forms for collaboration purposes.
Overall, Microsoft Forms is more advanced than Google Forms in this area.
Pricing
Microsoft Forms is included in the Microsoft 365 package. You can use it for free if you’re not planning to attract truly large public responses for your forms.
But if you plan to use it for business, you can start with Microsoft 365 Personal for $6.99/ month or get Microsoft 365 Business Standard for $12.50 user/month.
Google Forms is also a part of Google Workspace and is available for free for personal and commercial usage. You could get the Business Standard plan for $12 USD per user per month with a 1-year commitment.
A paid Google Workspace account will allow you to request additional quota allowance via Google Forms API.
Microsoft Forms vs Google Forms – Verdict
All things considered, Google Forms is more user-friendly and affordable than Microsoft Forms. However, if you require a digital forms tool for special business cases that require stringent compliance and sophisticated designs, Microsoft Forms is the better choice.
Additionally, Google Forms is visually more customizable, while Microsoft’s service is more focused on advanced reporting and analytics.
Signed updates are important as they verify the authenticity and source of updates before being installed on devices.
For companies with internal networks, managing updates via an intranet Microsoft update service location provides security benefits and control over the update distribution process. Let’s learn more about it.
What is the Intranet Microsoft Update Service Location?
An intranet Microsoft update service location is a centralized server within an organization’s internal network that hosts and distributes Microsoft updates. It allows companies to manage and control the deployment of updates independently of external servers.
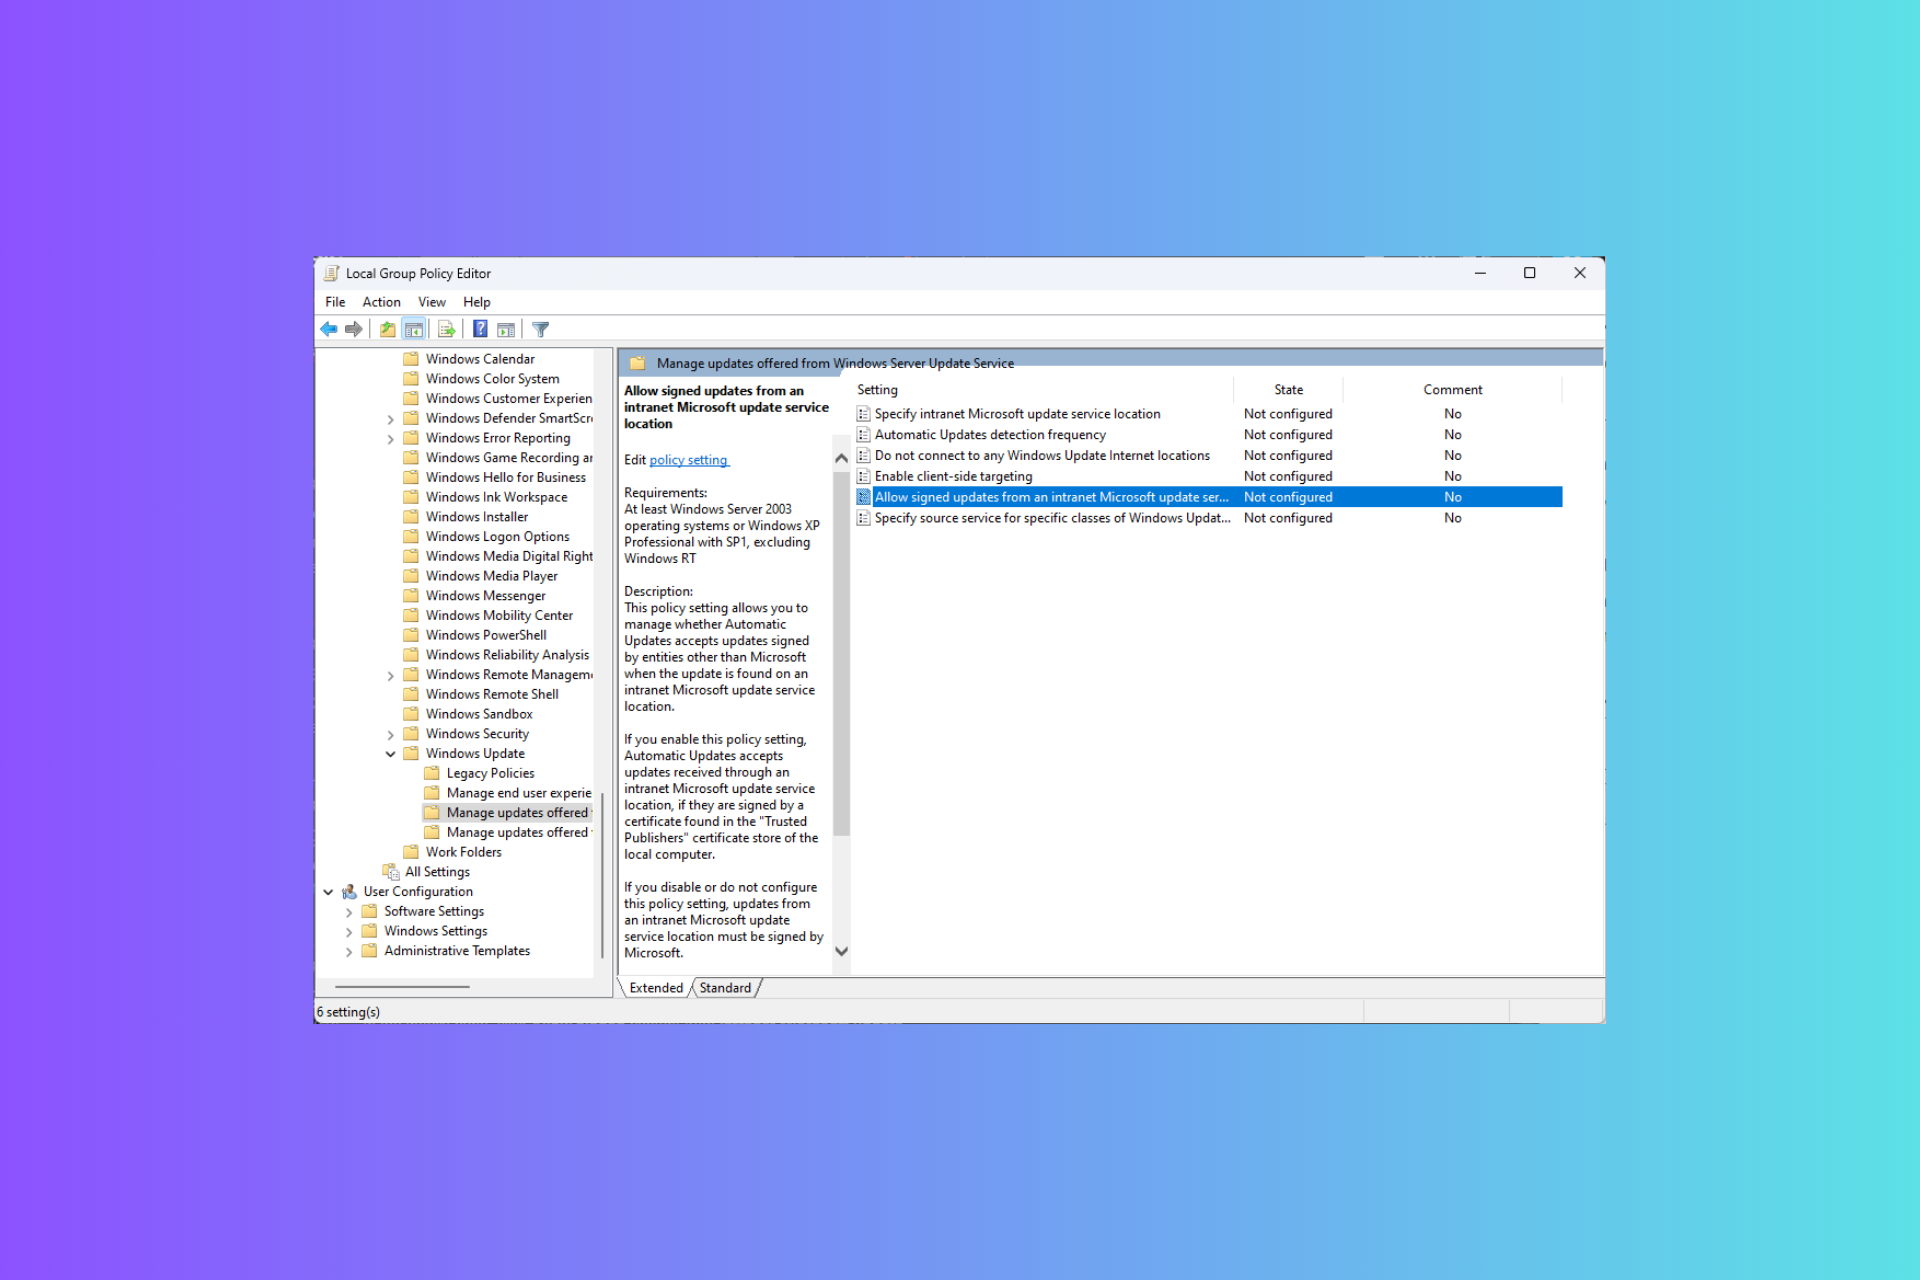
The Allow signed updates from an intranet Microsoft update service location policy specifies whether the automatic updates will allow installation of updates signed by entities other than Microsoft, specifically when these updates are to be installed from an intranet Microsoft update service location. The policy is still supported on Windows operating systems under the Microsoft Product Support Lifecycle.
How does the policy work?
The Allow signed updates from an intranet Microsoft update service location policy setting enables administrators to manage whether Automatic updates allow updates signed by any entity other than Microsoft when those updates are located on an intranet Microsoft update service location.
It is important to note that updates from sources except the intranet Microsoft update service must always be signed by Microsoft. Also, remember this policy doesn’t support Windows RT therefore, it will not affect any Windows RT computer.
How can I enable the policy?
Press Windows + R to open the Run window.
Type gpedit.msc and click OK to open the Group Policy Editor.
Navigate to this path: Computer Configuration\Administrative Templates\Windows Components\Windows update\Manage updates offered from Windows Server Update Service\Allow signed updates from an intranet Microsoft update service location
Double-click the Allow signed updates from an intranet Microsoft update service location policy to open its properties.
If you click on Enabled, the automatic updates allow updates to be received via an intranet Microsoft update service location.
However, if you disable or don’t configure this policy setting, the updates from an intranet Microsoft update service location must be signed by Microsoft.
Here is the table from Microsoft Learn defining the meaning of the options available within the policy:
Policy setting state
Behavior
Not Configured
Specifies that updates from an intranet Microsoft update service location must be signed by Microsoft.
Enabled
Specifies that automatic updates accept updates received through an intranet Microsoft update service location if they’re signed by a certificate found in the local computer’s Trusted Publishers certificate store.
Disabled
Specifies that updates from an intranet Microsoft update service location must be signed by Microsoft.
What are the best practices for managing signed updates from an intranet Microsoft update service location?
Maintain update repository integrity – Update regularly and secure the intranet server hosting Microsoft updates to avoid unauthorized access.
Policy review and updates – Review and update your update policies periodically to adhere to the current security and regulatory requirements.
Testing and deployment – Always test the updates in a controlled environment to avoid potential issues while deploying them to production environments.
To conclude, the Allow signed updates from an intranet Microsoft update service location policy helps organizations maintain control over update distribution and safeguard against potential security threats due to unauthorized updates.
Also, in case you are getting this program blocked by a Group Policy error, you need to fix it by disabling the software restriction policy; read this guide to learn more.
If you have any questions or suggestions about the policy, please mention them in the comments section below.
Microsoft will officially launch the new Outlook for Windows app on August 1, 2024. The Redmond-based tech giant has been working on this change for quite a while, and making the app available for personal use is a new step in its continuous efforts to improve user experience and support.
According to reports, people used to the classic Outlook can still use it. Microsoft has explained that this change doesn’t mean people must immediately give up the known interface. They present the new Outlook as an optional experience, guaranteeing users retain the choice in deciding when or not to transition.
Additionally, Microsoft promised to give a 12-month notice warning before any important changes are implemented, including any migration steps led by the company in managed environments. This way, the Redmond-based tech giant intends to reduce disturbances and offer organizations sufficient time to properly plan and execute their transition methods.
For those people interested in the new Outlook but worried about changing, the company has also founded Assisted Support, which is available so that users can shift into this fresh environment without issues. Also, from August 2024 onwards, the classic Outlook will be marked by adding “(classic)” to its name to clearly distinguish between old and new versions, and it might be turned into a web app.
Acknowledging some organizations may have different reasons to stick with the classic Outlook, Microsoft assures users that support for the older app will be available until 2029 at minimum.
The company is also relying on users’ feedback, as it is an important part of Microsoft’s new Outlook plan. It plans to gather user input so that it can improve the app and solve any issues.
The change to the new Outlook for Windows has always been imminent. Whether you are prepared for the new Outlook currently or would rather wait is your decision, and Microsoft promises to assist at every stage along the path.
Deploying Microsoft Office can sometimes feel like navigating a maze, but with the Office Deployment Tool (ODT), the process becomes much more manageable. Here’s a comprehensive guide to help you master the Office Deployment Tool and streamline your Office setup.
How can I download and use Office Deployment Tool?
Complete all required fields based on your deployment needs.
For Office 365 ProPlus, select Office 365 ProPlus under Office Suites.
For Remote Desktop installations, select Shared Computer as the activation option.
Export the configuration file by clicking the Export button.
Save the exported file to the folder where you extracted the Office Deployment Tool files.
This configuration file will contain all the necessary settings for deploying Office 365 based on your choices, ensuring a smooth installation process. We also have a complete guide on how to use the Office Customization Tool.
3. Run the Office Deployment Tool in Download Mode
Open Command Prompt as an Administrator.
Navigate to the ODT folder using the cd command: cd C:\Users\YourUserName\Desktop\ODT
Run the tool in download mode: setup.exe /download ODTConfig.xml
setup.exe is the name of the executable file.
/download is the mode you are running the tool in.
ODTConfig.xml is the configuration file you created.
This will download the Office installation files specified in your configuration file. The process may take some time depending on your internet speed.
4. Run the Office Deployment Tool in Configure Mode
Ensure you are still in the ODT directory in Command Prompt: cd C:\Users\YourUserName\Desktop\ODT
Run the tool in configure mode: setup.exe /configure ODTConfig.xml
The installation window for Office will open and begin the installation process.
This command will use the configuration file to install Office based on the specified settings.
5. Apply new application preferences
Create a new configuration file with the desired application preferences.
Save the file to the ODT folder.
In Command Prompt, run the tool in customize mode: setup.exe /customize preferencesconfig.xml
This will apply the new application preferences to Microsoft 365 Apps without changing other deployment settings.
6. Create an app-v package
Create a configuration file for the App-V package.
Save this file to the ODT folder.
In Command Prompt, run the tool in packager mode: setup.exe /packager packageconfig.xml \\path\to\save\appv
This will create an App-V package for Microsoft 365 Apps in the specified directory.
7. Troubleshoot extraction issues
Run regsvr32 /i shell32.dll in Command Prompt.
Reboot your system.
If the Office Deployment Tool fails to extract files, this command can often resolve underlying issues with system file registrations.
8. Add publisher after initial installation
Edit your existing configuration file to remove the line <ExcludeApp ID=”Publisher” />.
Run the following commands in sequence from the Command Prompt in the ODT directory: setup.exe /download CustomOffice365-x64.xml setup.exe /configure CustomOffice365-x64.xml
This will download and add Publisher to your existing installation.
By following these steps, you can effectively use the Office Deployment Tool to download, install, and configure Microsoft 365 Apps, handle updates, exclude specific applications, and troubleshoot issues.
Remember to keep your configuration files updated and regularly check for any new updates or changes in the Office Deployment Tool to ensure smooth and efficient deployments in the future.
You might also be interested in how to get the Office Click to run installer. We hope that our guide cleared all the useful information about Office Deployment Tool and how to use it.
If you have any questions or suggestion, feel free to use the comments below.
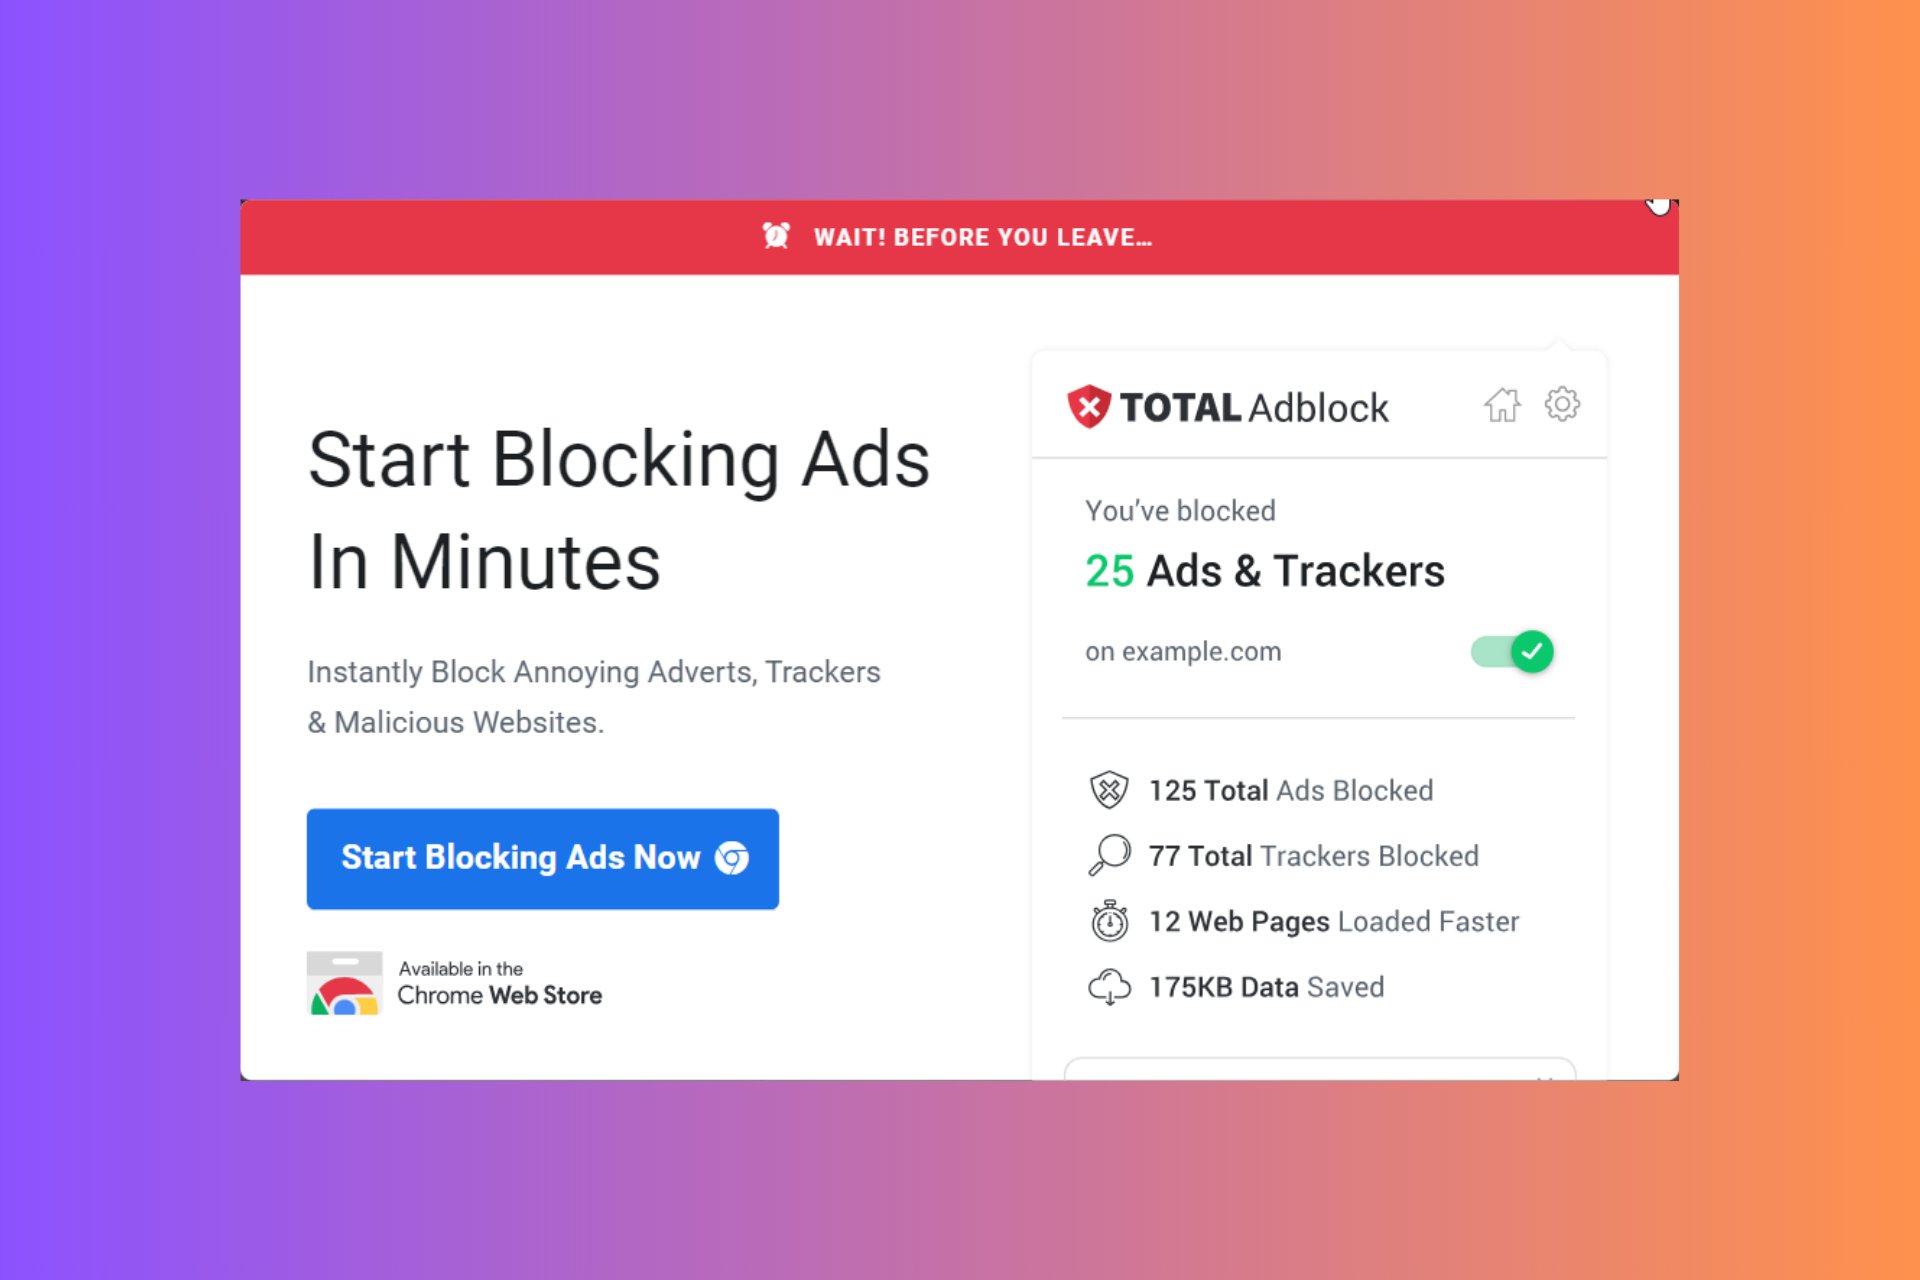
An Adblock is great to enhance your browsing activity but your choice will determine how efficient it is so here’s how you can download the Total Adblock extension on various browsers.
How do I install the Total Adblock?
1. Google Chrome
Launch your browser.
Type chrome.google.com/webstore in the address bar and hit Enter.
Next, type Total Adblock in the search bar and from the results, hit the Add to Chrome button.
Confirm installation in the next dialog box then restart your browser.
2. Microsoft Edge
Launch your Edge browser, click on the vertical ellipsis then go to Extensions.
Next, click on Get for Microsoft Edge extensions.
Type Total Adblock in the search box on your left, then click Get on the desired add-on.
Click on Add extension.
3. Mozilla Firefox
Launch your Firefox browser and go to the Firefox Browser add-ons website.
Search for Total Adblock, select the one you want from the search results, and then click Add to Firefox.
The extension will be downloaded and installed. Click Add to allow the extension to access browser tabs, and browser activity during navigation.
You might also get a prompt to allow this extension to work in a private session. To enable it, place a checkmark and click Okay.
The Total Adblock may be unavailable on older versions of Firefox and on newer versions, UBlock may prevent you from installing it. Try disabling it and see if the issue persists.
Click on the Sign in button located in the top-right corner of the extension marketplace.
Enter your Google Account which you’ve been using in the Chrome browser.
Enter the password and authenticate the sign-in process with OTP, Android device, etc.
You should now see the Chrome Webstore home screen signed into your account.
Click on the Extensions tab and search for Total Adblock by typing the name in the search bar.
Click the Add to Opera button to install it on Opera GX.
Once you’re done, click on the three-dots menu in the top right corner, near your Google Account profile picture and select My extensions & themes from the context menu. You should now see the Total Adblock extension.
The Total Adblock is not available on the Opera addons store so you’ll have to install it via Chrome webstore.
You’ll get a File might be harmful, click on Download anyway.
Wait for the file to finish downloading, launch it and wait for it to install.
Total Adblock is available as an APK for Android users but iOS users can get it directly from the App Store.
Is Total Adblock OK to download?
If you’re looking for safety in terms of privacy concerns, then Total Adblock passes these checks. It also has a fairly good rating on the Chrome web store. Android and iOS users may get the This file is harmful message but it passes all security checks.
What might get on your nerves is the cancellation process. If you’d like to cancel your subscription, you may experience some drawbacks that make it hard to get rid of it but most users were able to unsubscribe by getting in touch with customer care directly.
Ultimately, it’s a preference matter so you’ll have to choose whether downloading Total Adblock is good or bad for you. And since there’s a subscription fee attached to it, it might become a costly affair. Further, browser extensions tend to slow down your browser.
That’s it from us but do let us know how you’re finding the Total Adblock extension so far on your chosen browser. Is it effective? Does it slow down your browser? Would you consider signing up for the subscription fee? Let us know in the comment section below.
If you regularly stream videos, you must have faced buffering issues. The problem affects all devices, including laptops, computers, TVs, mobile phones, and other smart devices!
As to what causes video buffering, the underlying factors include unstable Internet connectivity, slow Internet speed, misconfigured network settings, other devices hogging the network resources, and outdated software/drivers.
To decrease video buffering when streaming, move the router closer to the device in case of a wireless connection or switch to a wired network. Also, you could disconnect other devices from the network, terminate other apps/programs, reduce the video streaming quality, clear the app/browser cache, or pause the video for a few minutes!
How do I stop my stream buffering?
Tip
While the solutions listed below illustrate steps on a Windows PC, all these work just as well on any device, be it a smart TV or a smartphone. All you need to do is apply the equivalent measures. The steps for each can be found on the official website.
1. Quick tips
If our previous tricks didn’t work, here are a few more tips that will help stop, or at least reduce, buffering when streaming on a PC or TV:
Use a VPN: If you are streaming videos from a server in another country, it’s best to use an effective VPN solution and choose a server based in that region. It will help improve the streaming quality and speed, effectively eliminating buffering.
Update the affected software/OS: If buffering is limited to video streams on a specific program (say YouTube, Netflix, or Twitch) or device, update the program or the operating system running on the device.
Use the 5 GHz band in case of dual-band routers: If you have a dual-band router, connect to the 5 GHz band. It offers higher Internet speed, albeit with a limited range!
Place the router at an optimal location: If a single wireless router has to cover a large area, place it at a central location and an elevation of 2-5 feet. Also, ensure it’s not near an electronic device and faces no obstructions.
Reboot/reset the router: If you don’t regularly turn off the router, power it off, then disconnect the power supply cord, wait for a minute, and finally reconnect the cable and turn on the router. Also, you could try resetting the router.
2. Identify and terminate applications hogging the network
Press Windows + S to open Search, type Resource Monitor in the text field, and click on the relevant result.
Go to the Network tab, expand the Processes with Network Activity section, and identify the ones consuming the maximum network resources.
Right-click on the non-critical entries here individually, and select End Process.
After disabling all non-critical processes, check whether this decreases buffering when streaming video.
While ending processes in the Resource Monitor (or Task Manager), only terminate the ones related to third-party programs. Don’t go for critical Windows processes, say any that reads svchost.exe.
3. Update the graphics and network drivers
Press Windows + X to open the Power User menu, and select Device Manager from the list.
Expand the Display adapters entry, right-click on the active graphics adapter, and choose Update driver.
Now, select Search automatically for drivers and wait for Windows to install the best locally available version.
If a new driver is installed, restart the computer to apply the changes.
Similarly, you can update the network drivers on Windows. For that, you have to expand the Network adapters entry in the Device Manager, and update the driver for the adapter used to access the Internet, be it Wi-Fi or Ethernet.
If Windows can’t find a newer version, visit the manufacturer’s website, locate the latest one, and manually install the drivers. An easy and expert-recommended option is to use a reliable driver updater software, which will automatically install the latest driver version for all available devices!
4. Run the affected app as an administrator
Right-click the affected app’s launcher (.exe file), and select Properties.
Go to the Compatibility tab, and tick the checkbox for Run this app as an administrator.
Click Apply and OK to save the changes.
If the video is buffering when streaming on OBS, Netflix, Prime Video, Twitch, or even Chrome, you can decrease buffering by running the app as an administrator. This grants the app all the critical permissions, allowing it access to the required network resources.
5. Reconfigure the graphics preference
Press Windows + I to open Settings, go to the System tab from the navigation pane, and click on Display.
Click on Graphics under Related settings.
Now, verify whether the affected app is listed here. If not, choose Desktop app or Microsoft Store app from under the Add an app dropdown menu, locate it, and then add the app.
Next, click on the affected app that’s buffering while streaming videos, and select Options.
Select High performance and click on Save.
Finally, reboot the device for the changes to come into effect.
6. Perform a clean boot
Press Windows + R to open Run, type msconfig in the text field, and hit Enter.
In the General tab, choose Selective startup, and then tick the checkboxes for Load system services and Load startup items under it.
Go to the Services tab, tick the checkbox for Hide all Microsoft services, and then click on Disable all.
Now, navigate to the Startup tab, and click on Open Task Manager.
Select any non-critical app/process that reads Enabled under the Status column, and click on Disable near the top right.
After disabling all the non-critical startup items, head back to System Configuration, and click on Apply and OK to save the changes.
Click on Restart in the confirmation prompt.
Once the PC reboots, you should find reduced video buffering when streaming through any app or browser.
Press Windows + R to open Run, type ncpa.cpl in the text field, and hit Enter.
Right-click on the active network adapter, whether Wi-Fi or Ethernet, and choose Properties.
Select Internet Protocol Version 4 (TCP/IPv4) from the list, and click on Properties.
Choose Use the following DNS server addresses option, and enter the following data:
Preferred DNS server: 8.8.8.8
Alternate DNS server: 8.8.4.4
Finally, tick the checkbox for Validate settings upon exit, click on OK to save the changes, and then restart the device.
While I have used Google’s Public DNS, you could go with Cloudflare’s or pick the fastest DNS server near you for improved speed as long as it stops buffering when streaming movies or shows!
8. Reset the network settings
Press Windows + I to open Settings, go to Network & Internet from the left pane, and then click on Advanced network settings.
Click on Network reset.
Click the Reset now button.
Finally, click on Reset in the confirmation prompt, wait for the process to complete, and then restart the device.
9. Set up a streaming-friendly network
If you want to stop buffering on live streaming but the wireless network strength is not high, you will have to either set up an extender or a mesh network to improve connectivity!
An effective extender comes in handy when only a small area away from the router lacks network connectivity. As the name suggests, an extender will extend the connectivity to this part. It’s best for apartments.
A mesh network, on the other hand, is more suited for bigger spaces, say a multi-storey house, and provides ample network connectivity to all parts. When picking the best Mesh Wi-Fi systems, make sure they provide the required coverage!
10. Upgrade the Internet plan
When nothing else works, the last option is to upgrade the Internet plan. A plan with 50 Mbps+ Internet speed should allow you to stream videos without buffering and not having to worry about terminating background programs and processors.
Internet speed test result for my device (Courtesy: speedtest.net)
Upgrading the Internet plan may cost you a bit more, but it is a cheaper alternative to setting up a mesh network. Talk to your ISP (Internet Service Provider) and find out a plan that best meets your needs.
You now know how to effectively decrease buffering when streaming videos, movies, or shows across apps, browsers, and devices. Remember, for some, a single trick does the job, while for others, a combination achieves the desired purpose. So, I recommend you try them all!
In case you are looking for an automated option, check our top picks for anti-buffering software which are proven to reduce buffering significantly.
Which recommendation worked best for you? Share with our readers in the comments section below.
Navigating the digital landscape can be a challenge, especially with the constant barrage of ads. Total Adblock promises to be a solution to this problem, but does it live up to the hype? In this unbiased 2024 evaluation, we’ll dive into the features, installation process, and overall performance of Total Adblock.
Total Adblock installation, features and usage
1. Installing Total Adblock
Go to the Total Adblock website and download the software for your preferred device.
Locate the downloaded file and double-click it to start the installation process.
Follow the prompts on the screen to complete the installation.
You might be instructed to install a CA certificate. This is for enhanced security features. Make sure you understand the risks involved before proceeding.
By installing Total Adblock and carefully following the instructions, you will be able to block annoying ads and pop-ups across different websites and platforms.
2. Adding sites to the Allow list
Click on the Total Adblock icon in your browser or open the application on your device.
Find and click the Settings or Preferences option.
Look for a section labeled Allow List or Whitelist.
Enter the URLs of websites you want to support by allowing their ads, and save your changes.
This will help you support your favorite websites by allowing their ads while still blocking ads on other sites.
3. User-friendly features
Open the Total Adblock Interface: Click on the Total Adblock icon in your browser or open the application on your device.
Browse User-Friendly Features: Explore options for ad blocking presets, web annoyance blocking, and social media tracking blocking.
Adjust Settings: Customize these settings based on your preferences for a more tailored browsing experience.
By utilizing these user-friendly features, you can enjoy a cleaner, faster, and more private browsing experience.
4. Subscription management
Access Subscription Settings: Go to the Total Adblock account management page.
Check Your Subscription: Look for details about your current subscription, renewal dates, and charges.
Cancel or Modify Subscription: If needed, follow the instructions to cancel or modify your subscription.
Managing your subscription settings ensures that you are aware of billing cycles and can make changes to your plan as necessary. However, many users have complained online that it’s pretty hard to cancel their subscription without success. Apparently, the developer has made it pretty hard to do that although if you follow the instructions to the letter, you should be fine in that scenario,
5. Customer Support
Visit the Total Adblock Help Page: Go to the help section on the Total Adblock website.
Submit a Contact Form: Fill out a contact form with details about your issue.
Check Email for Responses: Look for responses in your email inbox and spam folder.
By contacting customer support, you can resolve any issues related to billing, technical problems, or general inquiries.
6. Enhancing Security
Install CA Certificate: During installation, you may be prompted to install a CA certificate. Follow the instructions carefully.
Understand Risks: Before installing, make sure you understand any potential risks and benefits.
Installing a CA certificate can enhance security, but make sure to understand the implications before proceeding.
7. Optimizing Performance
Open Total Adblock Settings: Click on the Total Adblock icon and navigate to the settings.
Enable Data and Battery Saving Features: Look for options to reduce data usage and prolong battery life.
Activate These Features: Turn on the relevant settings to optimize performance.
By enabling performance-optimizing features, you can enjoy faster browsing and longer battery life.
8. Troubleshooting
Check the Total Adblock Website: Look for any known issues or troubleshooting guides.
Reinstall Software: Sometimes reinstalling the application can resolve issues.
Contact Support: If problems persist, contact Total Adblock support for assistance.
Following these troubleshooting steps can help resolve any issues you may encounter with Total Adblock.
Install and Open the App: Follow the installation prompts and open the app once installed.
Configure Settings: Go through the app settings to customize your ad blocking preferences.
Using the Total Adblock app on iOS will help you block ads and enjoy a smoother browsing experience on your mobile device.
10. Review and Feedback
Write Reviews: Share your experience with Total Adblock on platforms like Trustpilot or the App Store.
Provide Feedback: Leave constructive feedback to help the developers improve the application.
Writing reviews and providing feedback can help others make informed decisions and contribute to the improvement of the software.
Pros
There is a free app version for Android and iOS devices
Blocks ads efficiently on most pages
Easy to install browser extension and mobile app
There are options to manage websites and ad preferences
The Premium plan includes TotalAV antivirus protection
Cons
The free version doesn’t include the top 15,000 websites
Constant pop-ups that will nag you to upgrade to a Premium account
Many users complained that it’s hard to cancel their subscriptions
In conclusion, Total Adblock offers a comprehensive solution for blocking ads and enhancing your browsing experience. However, ironically, the app will bug you constantly to buy the Premium version. Since nowadays the most important browsers have their own ad-blocking tools, Total Adblock is not really a must-install tool. However, the Premium version does a pretty good job blocking ads that other tools don’t get to.
You have the final decision, of course, but just so you know, right now you can but a full year with only $20 and get the PC Tune-Up tool for free.
Download Dolphin Emulator for PC to play your favorite GameCube and Wii games in HD right from your Windows machine. This guide breaks down everything beginners need to know, from downloading the right files to configuring graphics and loading your first game.
Click the Windows x64 button to download the latest version.
Wait for the archive to download.
How do I install a Dolphin Emulator?
Open the archive file you just downloaded.
Locate Dolphin-x64 directory.
Drag and drop it to the desired location.
After extracting the directory, the Dolphin emulator will be ready to use, so no installation is needed.
Which Dolphin Emulator should I download?
Always download the latest version since it’s usually free from all bugs. Also, pay attention to the system architecture, if you’re using an ARM device use the ARM version of Dolphin and vice versa for the x64-bit version.
How is Dolphin Emulator legal?
Most emulators are perfectly legal since they don’t come with any games, they just let you run them. The issue with emulators is copyright infringement when downloading games from third-party sources.
Instead, you should rip Wii games that you own if you want to play them on PC with Dolphin.
Yes, the Dolphin emulator is virus-free as long as you download it from the official website. If you get it from third-party sources, it might come with malware.
FAQ
Is Dolphin Emulator legal?
Yes. The emulator itself is legal. However, downloading commercial game files you do not own is not.
Does Dolphin support Wii Motion Controls?
Yes, with a real Wii Remote and Bluetooth adapter, or by emulating it via mouse and keyboard.
Where can I get custom texture packs?
You’ll find active community mods on sites like Reddit or Dolphin’s forums. Just drop the packs into User/Load/Textures.
Wrapping up
As you can see, it’s incredibly simple to download the Dolphin emulator and it will take you less than a minute to get it running.
Keep in mind that issues with this software can occur, but we covered most of them in our Dolphin emulator not working guide, so don’t miss them.
Running into a situation where a report isn’t visible to a user in Salesforce can be quite frustrating. This issue often stems from permission settings, folder sharing, or other configuration nuances. Let’s dive into some practical solutions to get your reports visible to the right users.
What can I do if a Salesforce report is not visible?
1. Check user permissions on Objects and Fields
Log in to your Salesforce account.
Click on the Gear icon (Setup) at the top right corner of the page and select Setup from the dropdown menu.
In the Quick Find box on the left side, type Object Manager and click on it.
Find and click on the object that contains the fields used in your report.
Click on Fields & Relationships and select each field used within the report.
Click Set Field-Level Security and ensure that the field has the Visible checkbox checked for the user’s profile.
In the Quick Find box, type Profiles and select it.
Choose the profile assigned to the user.
Under Field Permissions, make sure the user has both Read access to all fields involved in the report.
Under Object Settings, ensure the user has the required access to the object (Read, Create, Edit, or Delete as necessary).
By ensuring that the user has the correct permissions on the objects and fields, you resolve the insufficient privileges error.
2. Ensure folder sharing permissions
Log in to your Salesforce account.
From the App Launcher (the grid icon), select Reports.
Locate the folder containing the report.
Click on the dropdown menu beside the folder name and select Share.
Click Add and search for the user.
Choose the required access level (Viewer, Editor, Manager) and click Share.
By sharing the folder with the appropriate permissions, the user will gain access to view the reports within the folder.
3. Review organization-wide default settings for Activities
Log in to your Salesforce account.
Click on the Gear icon (Setup) at the top right corner of the page and select Setup from the dropdown menu.
In the Quick Find box, type Sharing Settings and click on it.
Scroll down to find Activity Settings.
Ensure that the setting is either Controlled by Parent or as per your organization’s sharing rules.
If activities are set to private, the user may not be able to see tasks they didn’t create or aren’t assigned to. Adjusting these settings can help ensure the relevant activities are visible.
4. Troubleshoot Field not displaying in Reports
Log in to your Salesforce account.
Click on the Gear icon (Setup) and select Setup from the dropdown menu.
In the Quick Find box on the left side, type Object Manager and click on it.
Find and click on the object with the field that isn’t showing up in the report.
Click on Fields & Relationships and select the problematic field.
Click Set Field-Level Security and ensure that the field is visible to all necessary profiles.
Ensure the API name of the field matches the fields being called in the report.
If you’re using a formula field, verify the logic and that it references valid, accessible fields.
Check if data integrations (like AWS for example) are correctly populating the field.
Ensure there are non-zero values in the field by running a SOQL query if necessary.
If the field is properly configured for visibility and contains data, it should appear in your report.
5. Use Joined Reports as a workaround
Log in to your Salesforce account.
From the App Launcher (the grid icon), select Reports.
Click New Report and choose Joined Report as the report type.
Add multiple blocks to your report, each pulling from different objects or datasets as needed.
Drag and drop fields from different objects to your joined report.
Save and run the report to ensure it pulls the correct data.
Though not always ideal, joined reports can serve as a useful workaround when dealing with reporting limitations, allowing you to compile and view data from multiple objects in one report.
To prevent future issues, regularly review user permissions and folder sharing settings. Keeping your Salesforce environment well-organized can save you a lot of troubleshooting time down the road.
The Windows 11 taskbar will be getting some major changes that will upgrade the user experience. Microsoft has been active and working in the background, and it seems that the company is ready to make them widely available in the next weeks.
Firstly, the latest build to the Windows 11 Beta channel revealed that the taskbar and its area for notifications will be redesigned to look more streamlined. Imagine a situation where you only observe the system clock, short date, and notification bell, and no notification bell takes up your room.
However, if you’re not in love with this new look, don’t stress. Microsoft has your back. In settings, you can flip the switch to return to the old layout.
The taskbar is not just about appearances; Microsoft also intends to make it more intelligent with neat animations. Move your mouse over a running app, and boom! You see its thumbnail appear in a subtle animation.
To aid those who use shortcuts, the taskbar is getting more attuned to keyboards. Just hit Win + T, press a letter, and you’re all ready to start your preferred app, which begins with that very same letter.
Moreover, for individuals knowledgeable in technology using devices that support Windows Studio impacts, a fresh tray button enables simple entry into these impacts.
Now, for Microsoft’s secret treasures that are being tested, such as the capability to open taskbar jumplists by just placing the pointer over an app that is not running, Windows enthusiast, @phantomofearth has discovered that additional features might be coming up soon, like showing jump lists on hover for unopened pinned apps.
Even more taskbar features are in the works: Beta 22635.3930 includes a new option for showing jump lists on hover for unopened pinned apps. (disabled by default.)
In all cases, it’s clear that Microsoft is boldly moving forward with enhancing the Windows 11 taskbar. What’s your opinion on it? Do you like the new features, or would you prefer the classic taskbar?
Knowing how to delete browser history automatically is important for privacy and security. Regularly clearing it helps protect your online activities from prying eyes. However, doing so manually can be tedious.
Luckily, you can automate this process. I’ll show you how below, so let’s get started!
How To Delete Browser History Automatically
I’ll demonstrate the process on the most popular browsers:
On Google Chrome
Google Chrome offers a straightforward way to automate this. Here are the steps:
Click on the three dots in the top-right corner, then select Settings.
Tap “Privacy and security,” then click “Site settings.”
Click on the drop-down menu beside Additional content settings.
Scroll down and tap On-device site data.
Select “Delete data sites have saved to your device when you close all windows.”
Google Chrome will now automatically delete your history when you close all windows.
On Mozilla Firefox
Firefox also allows you to automate clearing your browsing history. Follow the below steps:
Click on the Settings gear in the top right corner of your screen.
Select “Manage more settings.”
Tap Privacy & Security. Under history, tick “Clear history when Firefox closes,” then hit the Settings buttons.
A Clear browsing data and cookies tab will pop up. Tick the boxes of items you want to clear automatically when Firefox closes then hit Save Changes.
On Microsoft Edge
If you use Microsoft Edge, here’s how you can automate clearing your browsing data:
Click on the three horizontal dots in the top-right corner and tap Settings.
Choose Privacy, Search, and Services. Tap “Choose what to clear every time you close the browser” under Delete browsing data.
Toggle on the data types you want to clear automatically.
Opera also provides an option to automate the clearing of your browsing data. Here’s what you need to do:
Click on the Opera icon in the top-left corner, then tap Settings (or press Alt + P).
Scroll down and click “Advanced” to expand the settings menu.
Click “Privacy & security” and then tap “Site settings.”
Click Additional content settings.
Tap On-device site data.
Select “Delete data sites have saved to your device when you close all windows.”
So, now you know how to delete your browser history automatically. You can rest assured that your online activities remain private without having to clear them manually. However, if your browser won’t clear your history for some reason, we can help you out.
Many reported The request could not be completed during Epic Games login, and this will prevent you from playing all Epic games, so let’s see how we can fix this error.
Why is it not letting me log into Epic Games?
This issue is most likely caused by issues with Epic Games servers or your installation might be damaged.
How can I fix The request could not be completed during Epic Games login?
Check if Epic Online Services and other services are having issues.
If there are any issues, you’ll have to wait for developers to fix them.
2. Reinstall Epic Games
Press the Windows key + X and choose Apps & features.
Next, locate Epic Games, click the three dots next to it and choose Uninstall.
Follow the steps on the screen to complete the process.
Next, install Epic Games again.
In most cases, this issue is caused by server problems, and there’s nothing you can do except wait for developers to fix it or contact Epic Games support.
In excellent news for developers and tech lovers everywhere, Microsoft released a fresh batch of Windows 11 virtual machines, now available to download.
These are not regular virtual machines; they have the most recent Windows 11 updates and developer tools. Imagine yourself equipped with Visual Studio 2022 Community Edition, Windows Subsystem for Linux 2, including Ubuntu, Windows Terminal, and Developer mode.
The most recent version, Windows Development Environment 2407, is based on the Patch Tuesday update. However, this time, there’s a small twist: due to technical issues that happened earlier in the month, it is only available in two formats—Hyper-V and VirtualBox. If your anticipation was for VMware Workstation or Parallels Desktop editions, you may need to wait a bit more.
The evaluation virtual machine includes:
Windows 11 Enterprise (Evaluation)
Visual Studio 2022 Community Edition with UWP, .NET Desktop, Azure, and Windows App SDK for C# workloads enabled
Windows Subsystem for Linux 2 enabled with Ubuntu installed
Windows Terminal installed
Developer mode enabled
Microsoft
You have a good 90 days to check out and try these virtual machines without requiring a license key. But make sure to mark this date: October 9, 2024. That’s when the enjoyable, no-cost phase concludes. You’ll start encountering those irritating “activate now” notifications and undergo the every-hour shutdowns typical for a non-activated OS.
You’ll need at least 70GB of free disk space and a minimum of 8GB of RAM. This will guarantee that your interaction with these virtual machines goes smoothly.
If you’re curious about the needs or have any passionate queries, such as the user password or whether you can keep these active for a long time, Microsoft has it all in its extensive FAQ section. The Redmond-based tech giant is also very interested in your feedback, so do not hesitate to contact them with any thoughts or suggestions you may have.
Suppose you are a developer who desires to test your application on the latest version of Windows 11 or a technology enthusiast who wants to examine the operating system’s newest features. In that case, Microsoft’s virtual machines are ideal for quickly getting into action.
Dealing with the Active Directory Web Services error 1053 can be a real headache. This error typically indicates that a service is taking too long to start, leading Windows to declare it unresponsive. Let’s dive into some effective solutions to tackle this issue.
How do I fix the Active Directory Web Services error 1053?
1. Change the timeout settings from the Registry
Press Win + R keys to open the Run dialog box, type regedit and hit Enter to open the Registry Editor.
Navigate to the following path: HKEY_LOCAL_MACHINE\SYSTEM\CurrentControlSet\Control
Right-click on the right pane and select New > DWORD (32-bit) Value.
Name the new value ServicesPipeTimeout.
Double-click on ServicesPipeTimeout and set its Value data to 180000.
Click OK and close the Registry Editor, then restart your computer to apply the changes.
This solution increases the service timeout period, allowing the service more time to start before Windows declares it unresponsive, which can resolve the 1053 error if it’s caused by timeout issues.
2. Check system file corruptions
Press Win + S to open the search bar, type cmd, and select Run as administrator.
In the Command Prompt, type sfc /scannow and press Enter.
Wait for the scan to complete and repair any corrupted system files.
If issues are found that cannot be repaired, type the following commands one by one and press Enter after each:
DISM /Online /Cleanup-Image /CheckHealth
DISM /Online /Cleanup-Image /ScanHealth
DISM /Online /Cleanup-Image /RestoreHealth
Restart your computer after the scan completes.
Running System File Checker (SFC) and the Deployment Imaging Service and Management Tool (DISM) can fix any corrupted or missing files that might be causing the 1053 error.
3. Check for Windows Updates
Press Win + I to open the Settings app.
Navigate to Update & Security.
Click on Check for updates and install any available updates.
Restart your computer after installing the updates.
Updating Windows can often resolve underlying issues that cause services to fail to start by patching known bugs and improving system stability.
4. Reset Winsock
Press Win + S, type cmd and select Run as administrator.
In the Command Prompt, type the following command and press Enter to run it: netsh winsock reset
Now, type the next command and press Enter: ipconfig /renew
Restart your computer.
Resetting Winsock and renewing the IP configuration can fix networking issues that prevent services from starting properly, which can sometimes cause the 1053 error.
5. Check the .NET Frameworks
Press Win + S to open the search bar and type Windows Features.
Click on Turn Windows features on or off.
Ensure that all necessary .NET Framework versions are checked (e.g., .NET Framework 3.5 and 4.8).
If any required versions are missing, download them from the official Microsoft website and install them.
Restart your computer.
Ensuring that the required .NET Framework versions are installed can resolve compatibility issues that cause services to fail to start.
6. Take ownership of the application
Navigate to the folder where the application resides.
Right-click on the application folder and select Properties.
Go to the Security tab and click on Advanced.
Click on Change next to the owner field.
Enter your username and click Check Names to ensure it’s correct.
Click OK and then Apply.
Ensure your user account has full control permissions on the folder.
Click OK to apply the changes and close the properties window.
Taking ownership of the application folder can resolve permissions issues that prevent services from starting.
7. Reinstall the application (if applicable)
Press Win + R, type appwiz.cpl, and press Enter to open the Programs and Features window.
Locate the problematic application, right-click on it, and select Uninstall.
Follow the prompts to remove the application.
Restart your computer.
Download the latest version of the application from the official website.
Install the application and retry starting the service.
Reinstalling the application ensures that all its components are correctly installed and up-to-date, which can fix the 1053 error if caused by a corrupt installation.
Keeping your system updated and regularly checking for file corruptions can prevent many issues, including the Active Directory Web Services Error 1053.
In the busy realm of technology, where adjustments and fixes are as regular as weather changes, Microsoft recently faced some unexpected problems with its latest Windows 11 update known as KB5039302.
This non-security update, optional to install and meant to improve user experience, has caused more issues than expected. It has been a headache for users and IT admins, from messing up the taskbar functioning to causing chaos in whole systems.
And in case you were thinking things couldn’t possibly deteriorate further, Microsoft has delivered another shocker: an annoying bug influencing the Windows Update Agent API, or WUA for short. In KB5039302, this issue is recognized by the error code 0x8002802B and bears the name “TYPE_E_ELEMENTNOTFOUND.”
After installing the June 2024 Windows preview update, released June 25, 2024 (KB5039302) and later updates, you might face issues using Windows Update Agent API (WUA) from your script (PowerShell, VBScript, etc.) while searching for Windows updates. Due to this issue, you might get an empty result when querying the properties of IUpdate objects present in the IUpdateCollection and error code 0x8002802B (TYPE_E_ELEMENTNOTFOUND) when calling methods on the object from your script.
Microsoft
Now you could think, “What’s so significant about this mistake?” Essentially, it affects scripts that use PowerShell or VBScript to communicate with the API. When these scripts query specific object properties, they return empty results because of the error. But some good news: Microsoft released a fix and made it available through the Known Issue Rollback feature. This solution, which works most of the time, may require IT administrators to apply special Group Policies for complete resolution.
This issue is resolved using Known Issue Rollback (KIR). IT administrators can resolve this issue by installing and configuring the special Group Policy listed below. The special Group Policy can be found in Computer Configuration -> Administrative Templates -> <Group Policy name listed below>.
Microsoft
For those who may be puzzled by the term Known Issue Rollback, it is a characteristic of Microsoft that enables them to reverse troublesome alterations from afar, as they have done with the Taskbar issue in Windows 11, last month. Users don’t need to perform any action to complete this process. Still, suppose the automatic remedy doesn’t work as intended in certain situations. In that case, an elaborate direction exists on implementing and setting up the Group Policy required to eliminate this bug.
The error 0x8002802B on KB5039302 might be irritating, but it isn’t likely to keep organizations that depend on Windows Automatic Updates or normal home users awake. Instead, this issue is more of an annoyance for people who handle their updates manually or employ scripts to automate things.
About a month ago, Microsoft revealed a persistent bug that caused people to look at a loading spinner before the Photos app in Windows 11 crashed and failed.
This problem was more of an annoyance for organizations and businesses, with regular users not experiencing much impact. But now, Microsoft has found a workaround. However, according to the official blog post, the solution might not be easy for some IT admins, but the Redmond-based tech giant says it’s working.
Here’s the deal: you must get hold of the new WinAppSDK. Don’t know which one to choose? You can find out if your system is x64, x86, or arm64 by simply typing System Information into the Start menu and opening it.
After you get the correct installer for your computer’s architecture, run it as an administrator and let it work its magic. There is no need to watch over everything; allow the command prompt window to continue its task until it closes automatically.
Currently, this is everything you have to do. Microsoft knows this fix is quite complicated, and it’s working for a more permanent and easier-to-implement solution for the Photos app, which will be released in an upcoming Windows 11 update.
This trick is only possible once for each device, not for every user. It makes life a little easier for IT administrators.