Windows 10 Build 19546 bugs: Install issues and driver errors

Windows 10 Build 19546 has already been released for those that are part of the Windows Insider program. This build currently contains the latest features and bug fixes among all available Windows Builds.

On the flip side, it is also the build with the most bugs and issues, and that is why it was first released to users that are part of the Fast Ring, and not straight to Live.

Speaking of which, users have already detected the first round of bugs with Windows 10 Build 19546. That is why we’ve created this article so that you can see for yourself what are the bugs present in the latest Windows 10 Preview Build.

Windows 10 Build 19546 reported bugs

1. Internet Explorer 11 cannot download files

Users reported issues with using Internet Explorer to download any type of file:

IE 11 is still broken. Cannot download and save file. Clicking on “Save” or “Save as” option does nothing.

This is an issue that has been present for a while now. However, keep in mind that Microsoft is slowly migrating users to Microsoft Edge anyway.

2. Issues with the uaspstor.sys driver

The uaspstor.sys driver, a vital component for Windows drivers, is having issues as of the latest Windows 10 Preview Build:

Error message: This device cannot start (Code 10) Not enough quota.
USB attached SCSI Device NS106X
USBVID_2537&PID_1068MSFT300123456789ABCDE

3. Some users are taking a lot of time to update

Despite being just a mere update like any other, some users have reported it took them upwards to 26 minutes to download and 55-minutes to install. While this isn’t an uncommon issue, it is nonetheless bothersome.

4. Some users cannot install the update

A few users have reported that the installation process for Windows 10 Build 19546 suddenly stops at some point:

I can’t get pass %62 in installing it hung up at 62

5. Update download pauses at 6% for some

Several users have reported that their update download would pause somewhere around the 6% mark, and then it would resume without issues.

My desktop machine had some trouble downloading the update this time. It sat unexceptionally long at 6% downloading. I looked at the Perf mon and saw a fault there. TimeZone Sync Task stopped working.


This is more of an inconvenience rather than a problem since the download would resume and proceed normally afterward.

6. This update sends some users into the Windows Recovery environment

Once installed, Windows 10 will not reboot normally back to itself. Instead, it will send the user into the Windows Recovery environment

it’s not letting me install this build like the last one. after windows update downloads and installs it once i restart my PC it starts into the recovery enviorment with “troubleshoot” and “turn off PC” as the only options availible. once i restart the PC it will boot back into windows

Conclusions

These are the most significant issues that have been currently discovered by users of the Windows Insider program regarding Windows 10 Preview Build 19546. Some of the issues are more severe than others, but keep note that the Fast Ring is supposed to receive the versions with the most bugs and issues.
Which of these bugs do you find the most frustrating? Share your opinion with us in the comment section below.

Thumbs.db OneDrive Error: 4 Ways to Fix it

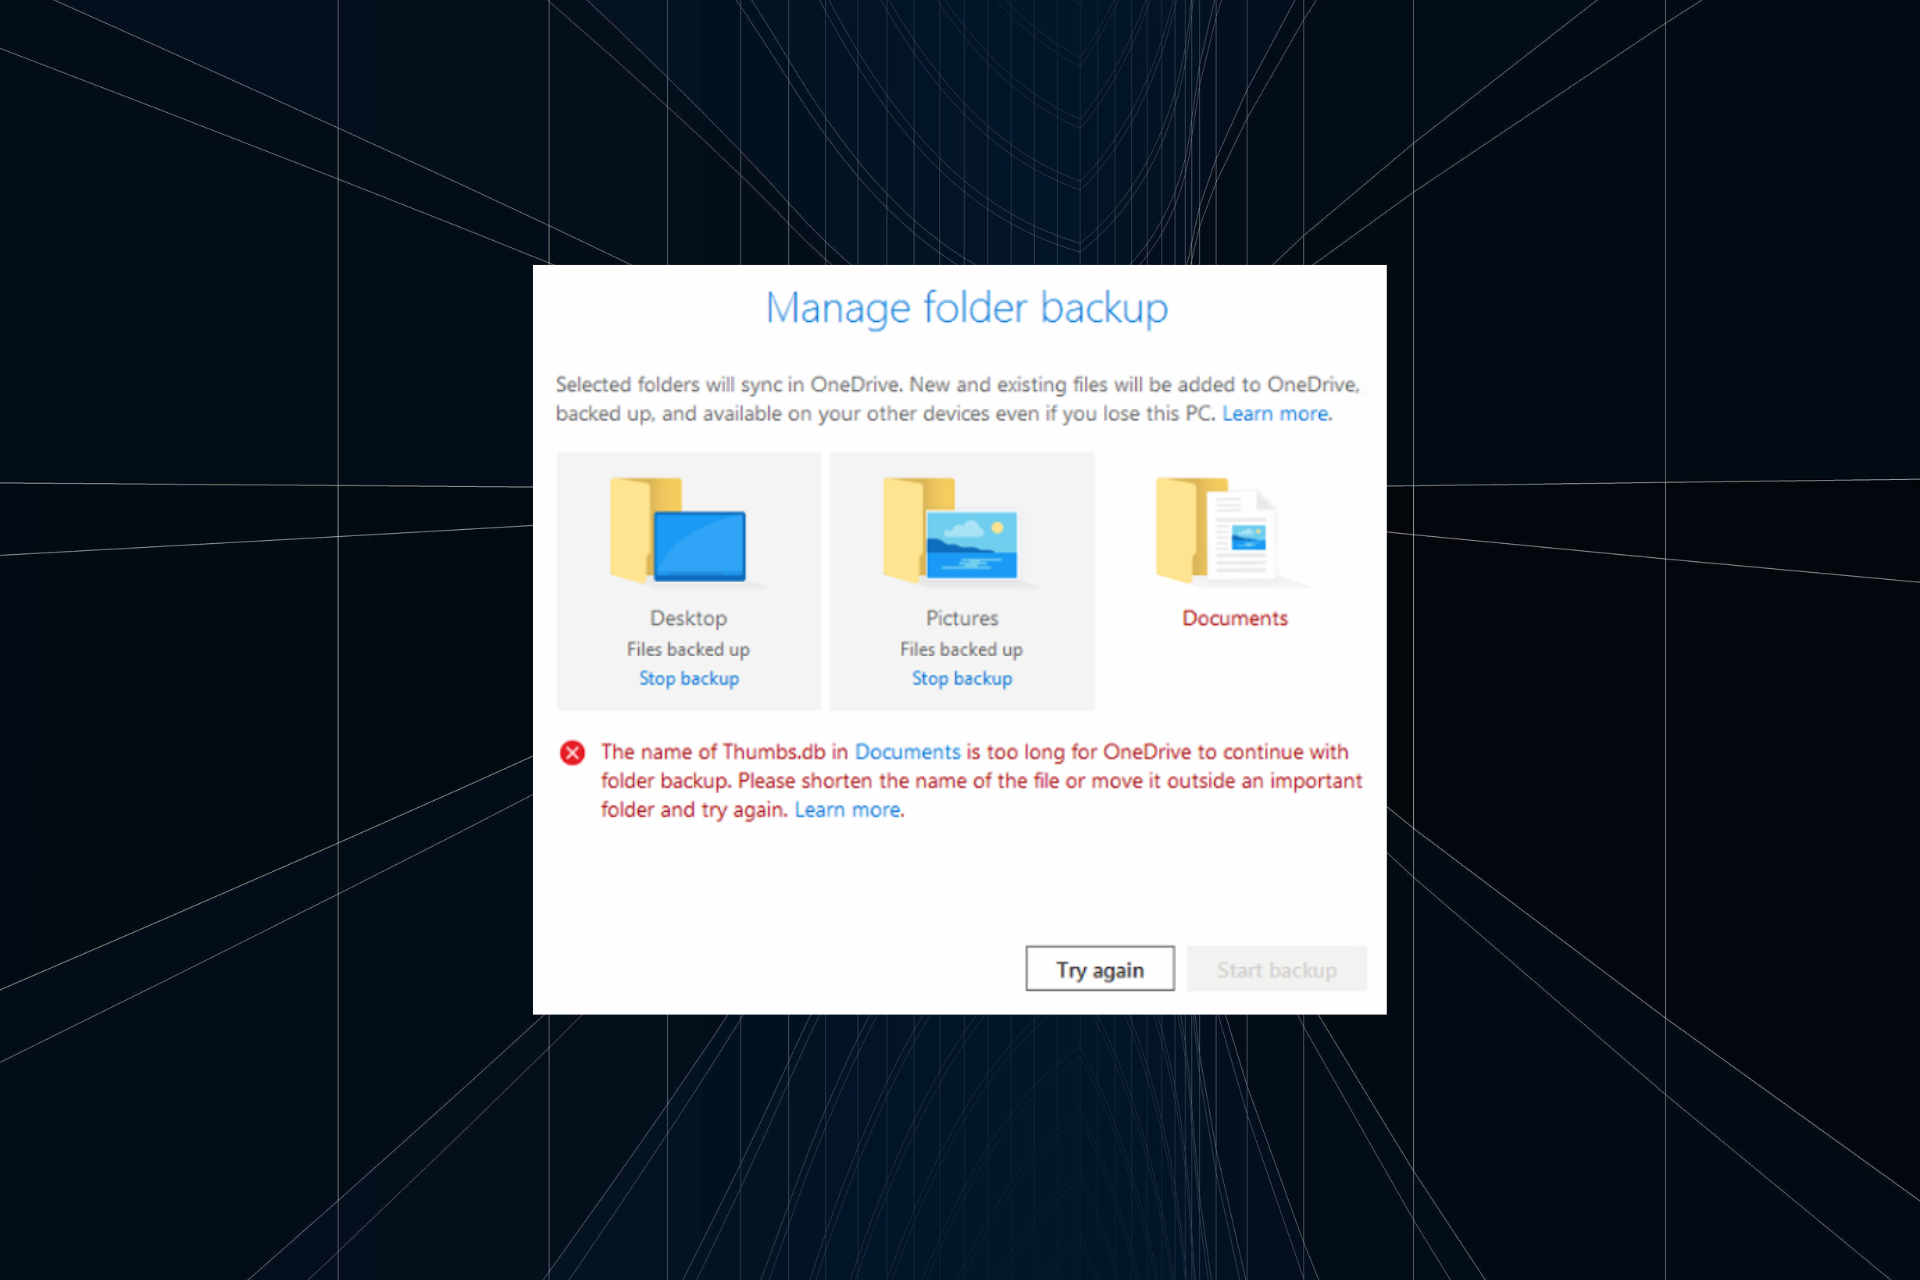
When the OneDrive desktop client encounters sync issues, it may throw the OneDrive thumbs.db error. This error usually occurs due to the invalid file types that OneDrive fails to upload.

The thumbs.db error is often encountered in SharePoint, and the same concept applies to it. Keep reading to find out the solutions that work for both!

How do I force delete OneDrive thumbs.db files?

Before we move to the slightly complex solutions, here are a few quick tricks:

If none work, move to the fixes listed next.

1. Directly from the OneDrive folder

  1. Press Windows + E to open File Explorer, and navigate to the OneDrive folder.
  2. Thumbs.db files are invalid file types and are usually hidden by default. So, click on View, and select Options.
  3. Go to the View tab and choose Show hidden files, folders, and drives and click OK to save the changes.show hidden files
  4. Find all the thumbs.db files in the folder and delete them.
  5. Relaunch the OneDrive client and try to sync.

Since the Thumbs.db files are invalid file types, deleting any file with the extension will resolve the issues related to OneDrive sync.

2. Check for pending updates

  1. Launch the Microsoft Store app and search for OneDrive.
  2. Navigate to the Library, and install any pending updates.update to fix onedrive thumbs.db error
  3. Relaunch the OneDrive client and check for any improvements.

If the issue is occurring due to a bug in the Microsoft OneDrive desktop client, check if Microsoft has released an update to fix the problem.

3. Reset the OneDrive client

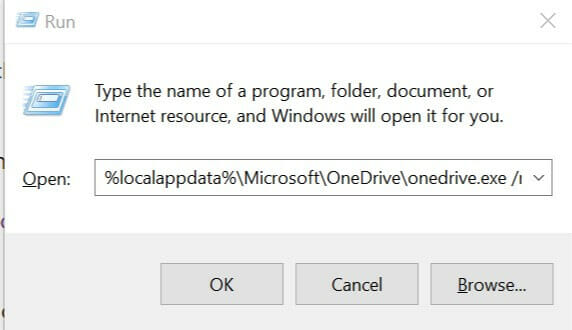
  1. Press Windows + R, paste the following command, and hit Enter:%localappdata%\Microsoft\OneDrive\onedrive.exe /resetreset onedrive
  2. Wait for the reset the complete.

Launch the client, proceed with the setup process, and check whether the OneDrive thumbs.db error is fixed.

4. Reinstall the OneDrive client

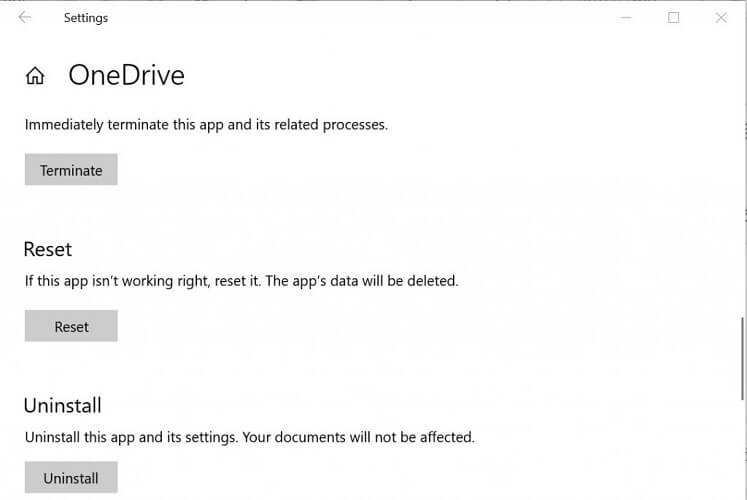
  1. Press Windows + I to open Settings, go to Apps, and then click on Installed apps.
  2. Click the ellipsis next to OneDrive, and select Uninstall.uninstall OneDrive
  3. Again, click Uninstall in the confirmation prompt.
  4. Restart the computer for the changes to come into effect.
  5. You can reinstall the OneDrive app from the Microsoft Store.

And that’s how you can get rid of the thumbs.db error in OneDrive for good.

Before you leave, find out how to speed up file uploads in OneDrive.

If you have any other questions or suggestions, leave them in the comments section below.

How to fix Outlook can’t upgrade your database error

The can’t upgrade your database error arises specifically for Outlook for Mac. Outlook for Mac users have posted on the Microsoft forum about a Please upgrade the Outlook database dialog box message.

When they click the Upgrade button on that dialog box, an Outlook can’t upgrade your database error message pops up. Consequently, users can’t launch Outlook for Mac when that issue arises.

How can I fix the Outlook database error?

1. Add a new profile

  1. Users have confirmed they’ve fixed the Outlook can’t upgrade your database error by adding a new Outlook profile. To do that on a Mac, click Go on the menu bar.Go menu outlook can't upgrade your database
  2. Select Applications to open the window shown directly below.Applications window outlook can't upgrade your database
  3. Right-click Microsoft Outlook and select the Show Package Contents option.
  4. Click the Contents and SharedSupport folders.
  5. Then click the Outlook Profile Manager to open the window shown directly below.Outlook Profile Manager outlook can't upgrade your database
  6. Click the + button there, and enter a profile title.
  7. Click the cog button icon to select the Set as Default button.
  8. Close the Outlook Profile Manager window.
  9. Open the Outlook for Mac application. Then you can set up an email account for the new default profile.

2. Run the Microsoft Database Utility

  1. The Microsoft Database Utility, which fixes the Office database, might also resolve the Outlook can’t upgrade your database error. First, close Outlook for Mac if it’s open, along with any other Office applications.
  2. Press and hold the Option key and click Outlook on the Dock to open the Microsoft Database Utility.
    Microsoft Database Utility outlook can't upgrade your database
  3. Select the default database on that window.
  4. Then click the Rebuild button.
  5. Click Done after the database rebuilding.

There aren’t many resolutions for the Outlook can’t upgrade your database error. However, adding a new Outlook profile as outlined above is widely confirmed to fix the error. Users who have fixed the same error with alternative methods are welcome to share their resolutions below.

Also, if you have any other questions or suggestions, leave them in the comment section and we’ll be sure to check them out.

RELATED ARTICLES TO CHECK OUT: 

Microsoft takes more jabs at Slack with new NFL Playoffs ad for Teams

As Microsoft Teams becomes more popular, Microsoft wants to solidify the collaboration tool as a better solution for the workplace when compared to Slack. In what The Verge calls a first, the company will be airing a new TV commercial for Microsoft Teams this weekend during the NFL Playoffs, which you can watch below.

The 30-second ad is titled “The Power of Microsoft Teams,” and begins by highlighting how much the “boring” meeting and conference room has evolved over the years. It then shifts to show that, with Teams, employees and companies can invite everyone they work with to meetings, and “be seen, be heard, and be there when you’re not.”


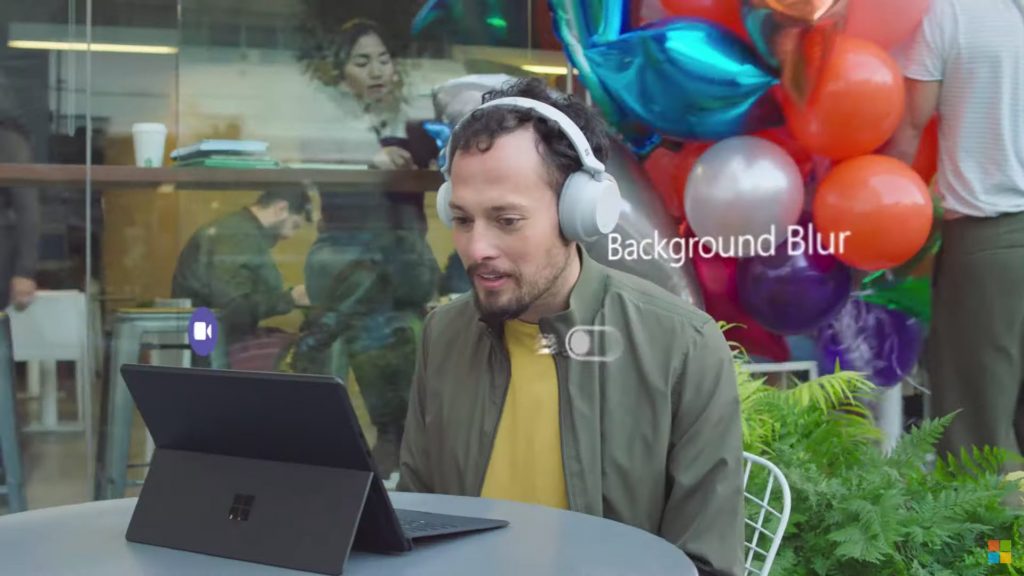
Several features of Teams can be seen throughout the ad, all of which are highpoints of the service when compared to Slack. That includes its integrations and sharing files with Office 365, Microsoft Whiteboard, the background blur feature, and native support for sharing GIFs. Naturally, the video even shows off instances of how Teams complements other Microsoft products in the modern office, such as the Surface Laptop 3, Surface Pro X, and the Surface Hub 2S. The video ends with a tagline obviously aimed at Slack: “When you’re ready to unleash the power of your team, open Teams.”

The ad comes after software company AvePoint announced it secured $200 million in funding to move more customers to Teams, and away from Slack. Slack also previously accused Microsoft of ripping off their ad, so this might as well mark a new moment in the collaboration software rivalry.

How to fix OneDrive’s document library synchronization error

OneDrive sync errors can occur for several reasons. While Microsoft offers a built-in repair tool with OneDrive for Business, it may not be able to fix all the errors. One such bug is An error occurred while attempting to synchronize this document library.

Several users have reported similar errors in the Microsoft community forum as well:

Hi, I am receiving this error when attempting to synchronize my OneDrive for Business library – and I have no idea why.

If you are also troubled by this error, this is the article that you need. In this guide, we have listed a couple of troubleshooting tips to help you resolve syncing issues with OneDrive for Business.

How do I fix the document library sync error in OneDrive?

1. Update the OneDrive client

1.1 Update with Office 365

error occurred while attempting to synchronize this document library

  1. Launch any Microsoft Office app like MS Word
  2. Click on File and select Account
  3. Under Office Updates, click Update Options.
  4. Select Update Now
  5. Wait for Microsoft Office updates to download and install
  6. Launch OneDrive and check for any improvements

1.2 Update standalone installer

error occurred while attempting to synchronize this document library

If you have installed a standalone installer, you may have to install the updates manually:

  1. Click on the OneDrive icon on the taskbar
  2. Click the arrow icon to show hidden icons
  3. On top of the panel, check if it says updates are available
    • Download and install the updates if available.
  4. If it says OneDrive is Up to date, skip the step

After installing the update, reboot the computer before relaunching the OneDrive client.


2. Clear OneDrive cache

error occurred while attempting to synchronize this document library

Note: These steps are for OneDrive for Business users. We haven’t tested it with OneDrive consumer client.

  1. Make sure you have the backup of unsynced files on the OneDrive folder
  2. Click the small arrow icon on the Taskbar to show hidden icons
  3. Right-click on OneDrive and select Pause Sync
  4. Right-click on the OneDrive icon again and select Close OneDrive
  5. Open the Task Manager and close all the Microsoft Office processes
  6. Open File Explorer and navigate to the following location:
    C:UserstashreefAppDataLocalMicrosoftOffice
  7. Now click on the numbered folder, which indicates the office version
  8. Next, open the OfficeFileCache folder
  9. Delete all the files inside the OfficeFileCache folder.
    • Don’t delete the folder itself, but only the files inside
  10. Close File Explorer and open OneDrive client and check for any improvements

3. Reset OneDrive clientreset onedrive


  1. Click on Start and select Settings
  2. Go to Apps > Apps and Features
  3. Search for OneDrive
  4. Click on OneDrive and then click on Advanced
  5. Scroll down and click on Reset
  6. Click Reset again to confirm the action
  7. Alternatively, you can also reset OneDrive by running a command
  8. Press Windows Key + R to open Run
    error occurred while attempting to synchronize this document library
  9. Type the following command and hit enter:
    %localappdata%MicrosoftOneDriveonedrive.exe /reset
  10. Open OneDrive and check for any improvements.

If you’re having trouble opening the Setting app, take a look at this article to solve the issue.


The An error occurred while attempting to synchronize this document library issue can occur due to an outdated version of OneDrive or because of the bad cache. Carefully follow the steps in this article to fix the OneDrive sync issue quickly.

Have you also encountered this OneDrive error? Tell us how you managed to fix it in the comment section below.

RELATED STORIES YOU MAY LIKE:

How to run Windows 10 on a Chromebook

Chromebooks don’t officially support Windows, but this doesn’t mean that you cannot run Windows on a Chromebook. Let us assure you that there are a couple of workarounds to use Windows desktop programs on a Chromebook too.

Google is constantly updating its Chrome OS with new features, but it cannot be compared to Windows, Mac, or even some Linux distributions. That’s why this thought of running Windows 10 on your Chromebook gives you no peace of mind.

Even if Chromebooks ship with a special type of BIOS designed for Chrome OS, you can install Windows on many Chromebook models. We just hope you’re not afraid of those unofficial ways to run Windows.

However, if getting your hands dirty isn’t the best option for you, access to the Office suite might sound like a great alternative. Here we’ll give you detailed steps for both options.

How can I run Windows 10 on a Chromebook?

1. Get the Office suite

  1. Access the official Microsoft Office site from your Chrome browser.official Microsoft Office site


  2. Click on Use Free at Office.com.
  3. Click on Sign In.
    Click on Sign In
  4. You are now asked to enter your Microsoft Account ID and Password.
  5. Up next, you will be taken to the office.com page.office.com page
  6. Click on the application that you wish to use.
  7. You will be redirected to the website of that particular application. Start using the online application there.

If you’re only after getting the Office suite, that’s the easiest solution we’re recommending. Be though prepared for giving up on all other apps offered on Windows 10.

2. Install Windows on your compatible Chromebook

  1. Turn off your Chromebook and flip it over.
  2. Unscrew all the screws at the bottom to remove the plastic panel and gain access to the motherboard.
  3. You must now find the write-protect screw. Remove it.write-protect screw
  4. Then, re-attach the bottom cover of the Chromebook.
  5. You may now press Esc+Refresh+Power while the Chromebook is still powered off.
  6. Your Chromebook will boot up and display a message saying that Chrome OS is missing or damaged.
  7. Press Ctrl+D and Enter to turn OS verification OFF. Then, you’ll boot into developer mode.
  8. You are now ready to flash your Chromebook’s BIOS From within Chrome OS. To open a terminal window, press Ctrl+Alt+T.
  9. In the terminal, type shell and hit Enter to access the more powerful Linux shell environment.type shell
  10. In the terminal window run this command: cd ~; curl -L -O https://mrchromebox.tech/firmware-util.sh; sudo bash firmware-util.sh. This downloads the script file, and runs it with root privileges.
  11. Select the Custom coreboot Firmware (Full ROM) option by typing 3 and Enter.Custom coreboot Firmware
  12. Enter Y to agree to flash your firmware.
  13. Then, enter U to install the UEFI firmware.enter U
  14. The script will offer to create a backup copy of your Chromebook’s stock firmware and place it on a USB drive for you. Agree to that.
  15. After the backup process is finalized, the script will download the replacement Coreboot firmware and flash it onto your Chromebook.
  16. Power the Chromebook off.
  17. You may re-install the write-protect screw if you want.
  18. Go to the microsoft.com website.
  19. Click on Download tool now.
  20. Select Create installation media for another PC, and download an ISO file.ISO file
  21. Download and run the PowerISO processing tool.
  22. Plug a USB drive into the PC.
  23. Select your USB, then GPT partition scheme for UEFI and NTFS.
  24. Select the downloaded Windows 10 ISO image.
  25. Click on the Start button to create a Windows USB drive installation media.
  26. You’re now ready to install Windows on the Chromebook, so insert the USB drive into the Chromebook.
  27. Switch it on. It should now boot from the USB.
  28. Up next, connect either a USB mouse or a USB keyboard or both to your Chromebook.
  29. Normally install Windows like on any other PC.
  30. Remove your USB drive when the Windows installer restarts.
  31. Then, restart your Chromebook. It will boot Windows from your Chromebook’s internal drive and will complete the setup process.

Note: Windows doesn’t ship with hardware drivers for various pieces of hardware incorporated into many Chromebooks. Look for third-party drivers that could give Windows support for these components.

As you can see above, you need to install a replacement BIOS for your Chromebook. This can only be done on supported Chromebook models, so first check if your Chromebook is supported or not.

A PC running Windows to create the USB installation media is not optional either. Moreover, the built-in keyboard and mouse of your Chromebook won’t work in the installer. So, you’ll also need a USB keyboard and mouse to complete the installation.

No less important, you’re obviously about to wipe your Chromebook. Make sure not to take any action before backing up anything important stored on it.

Have you successfully completed the above procedure? Remember that we’re here to answer any questions you might have. Just reach for the comments section below.

Microsoft Ignite gets new conference location, heads to the ‘Big Easy’ in 2020

For the past few years, Microsoft has hosted its comprehensive technology conference during the fall in Orlando, FL, however, that tradition is coming to an end as the company looks to move it to New Orleans for 2020.

Microsoft Ignite has been the company’s showcase conference for ideas and tools designed to power big data, empower IT professionals and support near-future cloud infrastructures; and until this year, the company used to invite attendees to the Orange County Convention Center in Orlando, FL to be a part of it.

According to the official Microsoft Ignite registration page, from September 21-25, the conference will be hosted in the Big Easy, aka New Orleans, LA.

Learn innovative ways to build solutions and migrate and manage your infrastructure. Connect with over 25,000 individuals focused on software development, security, architecture, and IT. Explore new hands-on experiences that will help you innovate in areas such as security, cloud, and hybrid infrastructure and development.

Even though there is a place to pre-register for the conference, there is sparse information about the exact location of this year’s Ignite conference.

Presumably, Microsoft will use a similar convention center set up for the conference which could include attendees booking lodgings in and around the Ernest N. Morial Convention Center near the French Quarter.

Should I upgrade from Windows 7 to Linux?

After 10 years of service, Microsoft has finally decided to cease support for Windows 7. This means that the OS will no longer receive any type of updates and that anyone still using it will be exposed to online threats.

Given this change, many users are left wondering what they should do. Most think that they are limited to just three choices:

However, what users need to be reminded of is that there are other operating systems out there as well, such as macOS or Linux.

Now that Windows 7 is no longer supported and they should upgrade anyway, maybe it is time to migrate to a whole new OS entirely and see how that feels.

Why you should upgrade to Linux

1. You save money

There are plenty of differences between the two OS, even down to the most basic of components. However, there are many pros in favor of Linux if you are considering an upgrade.

For starters, the hardware you need in order to install Windows 1o needs to be quite good. Here’s a quick look at the minimum system requirement for Windows 10:

  • 1 GHz processor
  • 1 GB for 32-bit or 2 GB for 64-bit RAM
  • 16 GB for 32-bit OS or 20 GB for 64-bit OS
  • A 800 x 600 resolution display

Besides the cost of the hardware upgrade itself, let’s not forget that you also need to pay for the OS as well. Fortunately enough, most PCs now come with Windows 10 pre-installed, but the license is OEM.

This means that it is bound to that particular machine, and if anything were to happen with the hardware, you’ll be off shopping for Windows 10 again.


 Looking for a hardware upgrade anyway? Check out these premium laptop offers!


2. Linux is more lightweight

On the flip side, Linux is an open-source operating system that’s completely free to use. Additionally, it prioritizes being a lightweight OS above all else.

In fact, this is taken to the point where it’s the OS of choice for embedded systems, smart home devices, and IoT. Even the Android OS that you use every day on your phones and tablets is also based on Linux. 

3. Linux is more versatile

Everyone knows that Windows 7 or Windows 10 comes in just a handful of editions:

  • Home
  • Pro
  • Pro Education
  • Education
  • Pro for Workstations
  • Enterprise

Out of the 6, half of them aren’t even used by the vast majority of consumers. On the other hand, since Linux is open-sourced, it has branched out into a variety of versions, each focusing on different aspects of running a PC.

Some are made for gaming, some for desk work, others are made to run on older PCs, etc.

4. Linux is more secure

Because Linux is open-source, it benefits from a vast community of developers that are more than happy to develop new security features for their beloved OS.

Keep in mind that certain distros are updated more frequently than others, so if security is your number one priority, do some research before making your pick.


For better security on Windows 7, check out our picks for antivirus programs!


How do I migrate from Windows 7 to Linux?

1. Pick your distro

The first thing when considering a migration to Linux is choosing a good distro that will fit your needs. One of the most popular distros out there is Ubuntu. Not only is it easy to use, but it is also supported by a lot of apps.

If style and innovation are more of your thing, then you might want to opt for Solus. You will get most of the tools that you will eve need at installation as well.

If you are curious which are the best distros in use today, check out this official ranking.

2. Install Linux

Because of how lightweight it is, installing Linux will take only a few minutes from start to finish, even on very old machines. You can pretty much use the same methods as you would with a Windows install, either via direct download or through removable media.

Conclusion

As you can see, there are many benefits to installing Linux over Windows 10. These range from reduced expenses to a much smoother PC experience.

All things considered, it doesn’t matter if you choose to go for Windows 10 or a Linux distro, as long as you stop using Windows 7.

Do you think Linux is a much more efficient OS than Windows 10? Let us know what you think in the comment section below.

RELATED ARTICLES YOU SHOULD CHECK OUT:

The Elder Scrolls Online: Greymoor content is now available for Xbox One players

The latest expansion for The Elder Scrolls Online, Greymoor, is now available to pre-order and pre-purchase on Xbox One consoles with certain content being playable today before the rest of the content arrives on June 2nd.

Essentially, while The Elder Scrolls Online: Greymoor doesn’t officially launch until June, those who buy it before then will unlock the Holdbreaker Warhorse for use within the main The Elder Scrolls Online immediately. This is being referred to as a pre-purchase bonus.

Pre-release buyers will also be rewarded with a variety of exclusive digital content once the game launches. These are being referred to as pre-order bonuses and work the same as the pre-purchase one but players can’t access them until June 2nd.

The pre-order bonuses include Jarl Finery, Sacrificial Pocket Mammoth, Nightfall Preview Crown Crate, Western Skyrim Treasure Maps, Jarl Crown, and Two XP Scrolls.

Current owners of The Elder Scrolls Online can upgrade via the following:

Those who don’t own the base game can buy these digital versions:

A physical version is also available in select retailers called The Elder Scrolls Online: Greymoor Physical Collector’s Edition.

Which version of The Elder Scrolls Online: Greymoor are you going to buy for Xbox One? Let us know in the comments and then follow us on Pinterest and Twitter for more Xbox gaming content.


All 3 versions of the Dragon Ball Z: Kakarot video game are now live on Microsoft’s Xbox One

Dragon Ball Z: Kakarot is now available to play on Xbox One. The title is a completely new Dragon Ball Z video game but, as a lot of other games based on the franchise have done, revolves around a kind of retelling of the main storyline from the manga and anime series.

Here’s the official game description:

Relive the story of Goku and other Z Fighters in DRAGON BALL Z: KAKAROT! Beyond the epic battles, experience life in the DRAGON BALL Z world as you fight, fish, eat, and train with Goku, Gohan, Vegeta and others. Explore the new areas and adventures as you advance through the story and form powerful bonds with other heroes from the DRAGON BALL Z universe.

Dragon Ball Z: Kakarot is available in a regular version, a Deluxe Edition, and an Ultimate Edition. The Deluxe Edition contains the full game plus a special stat-boosting item and the season pass for future DLC while the Ultimate Edition comes with everything in the Deluxe Edition plus a special music compilation pack and the The Tao Pai Pai Pillar when they launch in Spring 2020.

Are you a Dragon Ball Z fan and have you had a chance to play Kakarot yet on your Xbox One console? Let the community know if it’s worth buying in the comments below and then follow us on Pinterest, YouTube, Twitter, and Facebook for more Xbox gaming content.


How to delete a page in Google Docs

If you ever need to work on a text document, create a spreadsheet, or even a presentation, the first thing that may come to your mind is to use the Microsoft Office Suite.

While it may indeed contain incredible programs such as Microsoft Word, Excel, PowerPoint, and other of the sorts, they usually come at a hefty price.

However, Google has created for some time now a web service called Google Docs, as part of the Google Drive services. These services are 100% free, and all you need to access them is an Internet browser and a Google account.

One of the most popular components of Google Docs is the text editor, which has almost the same functionality as the much more expensive Microsoft Word.

However, there are a few differences between the two, such as how you can delete pages. That is why we’ve created a step-by-step guide that will show you precisely how you can delete pages in Google Docs.

How do I delete a page in Google Docs?

  1. Go to the Google Docs website
  2. Go to File
  3. Select Open
  4. Load a document from either a cloud service or by uploading from your hard drive

Now that you have a document in front of you, you can go ahead one of the methods listed below.

1. Select and delete

  1. Move your cursor to the beginning of the text in the page you want to delete
  2. Drag it down to the bottom by holding left-click pressed
  3. Once the entire text is selected, press Backspace or Delete

2. Adjust the page margins

  1. Select the ruler in the upper part of the screen
    • If you cannot see the Ruler, go to View, and select it from the menu
  2. Adjust the arrows at the sides of the page until any unwanted pages disappearmargins

Sometimes extra pages (even blank ones) appear when there is too much spacing at the edge of a page. Adjusting it to a smaller size might fix the issue.

3. Check and delete unwanted page breaks

  1. Go to the page after the one you want delete
  2. Place your cursor before the first letter on a page
  3. Press Delete

This will delete any blank page that may have appeared before it.

By following these steps, you should be able to delete any page in Google Docs. While none of the methods actually delete the pages themselves, they pretty much do the same thing.

What other methods do you know for deleting pages in Google Docs? Share your tricks with the other users in the comment section below.

RELATED ARTICLES YOU SHOULD CHECK OUT:

How to Uninstall Fortnite in Just a Few Steps

Fortnite is currently one of the world’s most popular Battle Royale games on the market. It has millions of players and makes tens of millions in revenue every year just from selling skins.

Players spend hours and hours fighting to the death in the digital battlefield using whatever resources they can muster, on an island that is getting smaller and smaller. The match eventually stops when only one player is left standing.

However, regardless of how engaging and fun a game may be, there comes a time when you don’t feel like playing it anymore. For a game like Fortnite, this also means that you may also want to know how to uninstall it, given how it takes up so much disk space.

That is why we’ve created this short step-by-step guide that will show you the quickest way you can uninstall Fortnite, and clear your hard disk for good.

How do I uninstall Fortnite?

  1. Launch the Epic Games Launcher
  2. Select the Library tab in the left pane
  3. Click on the Settings button next to Fortnite
    • It looks like a set of gears
  4. Select Uninstalluninstall fortnite
  5. Confirm your action

As you may know, the only way to install, update, and launch Fortnite is by launching the Epic Games launcher first. Following this trend, uninstalling Fortnite also requires that you make use of the Epic Games Launcher.

By following these steps, you should be able to completely delete Fortnite from your hard drive. However, keep note that this operation will not delete the Epic Games folder from your hard disk.

In order to do that, you will need to uninstall the Epic Games Launcher as well.

Once you’ve uninstalled Fortnite, it would be a good idea to perform a standard disk cleaning, given how much storage space has suddenly been freed up.

Uninstalling the game will not affect your ability to download it later in the future, as you can also repeat the steps above to uninstall it again.

Do you have issues uninstalling Fortnite? Let us know in the comments section below.

Download Indexer Diagnostics to fix Windows Search issues

Many users were disappointed when they saw that the January round of Patch Tuesday updates did not contain a fix for the File Search issues.

These issues were around for 3 months already, and they were preventing functionality of some very basic Windows features.

However, it seems that Microsoft has finally addressed this particular issue since it released an Indexer Diagnostics utility to help users troubleshoot and, in some cases, fix the issue.

How does the Indexer Diagnostics utility work?

While the existence of this utility is indeed good news, it is still in Beta testing. It works by detecting potential issues affecting the Search Indexer service.

It does so by making it possible to check if your files are indexed and what paths are indexed.

Regarding the file indexing process, Microsoft stated that:

Indexing is the process of looking at files, email messages, and other content on your PC and cataloging their information, such as the words and metadata in them[…]
When you search your PC after indexing, it looks at an index of terms to find results faster.

Additionally, it seems that advanced users such as system admins can also use the Indexer Diagnostics utility to track a device’s resource usage. It does this by collecting resource traces when the indexer uses too many resources from the app’s Performance tab.

The utility is available through the Microsoft App store and it is completely free. The decision to make it available this way stems from the desire to make the utility much more readily available.

Given how all you need to do to get a store app is downloaded and then launch it, this seemed like the perfect course of action.

Do you think that a solution for the File Search issues has been a long time coming? Tell us what you think about the Indexer Diagnostics utility in the comment section below.

SURVEY: 44% of Windows 7 users risk having their money stolen

If you’re using Windows 7 for online shopping or online banking, your risk more than having your data stolen by hackers. Attackers can go as far as stealing your money simply because Windows 7 is no longer a safe OS for doing any activities that involve money and online payments.

If you continue to use Windows 7, you should know that you’re exposing yourself to a lot of risks. Banking and online shopping on Windows 7 is no longer safe.

Windows 7 users doing online shopping and banking are sitting ducks for hackers

Because it will no longer receive any support, hackers will now have free reign over those that still use the now-dated OS.

Getting access to personal information will be increasingly easier for them. That is why it is recommended that you refrain from performing any type of online shopping and banking transactions.

Windows Report recently conducted a survey on the website whereby 2684 persons agreed to answer our Windows 7-related questions. Interestingly enough, 24%  of users still use Windows 7 for online shopping, while 20% use it for banking.

That means 44% of users risk having their information and money stolen from them, as you can see from the screenshot below.Windows 7 banking

Hackers can end up stealing your data, and that can lead to a whole world of problems. Even the British government has warned its people to stop using Windows 7 because of the increased security risks.

Microsoft is slowly but surely encouraging the population to grate to the next better OS, either by advertising the benefits of Windows 10 or by slowly ceasing support for all Windows 7 apps.

Get ready for EOS security mayhem

The first Patch Tuesday release of 2020 is actually the last Patch Tuesday rollout for Windows 7. Microsoft ended mainstream support for the OS and will no longer push security updates to Windows 7 computers, leaving users an easy target for hackers.

As such, users are left with one of 3 choices:

If you still use Windows 7, what will you do now that support for it has ended? Tell us what course of action you will take in the comment section below.

RELATED ARTICLES YOU SHOULD CHECK OUT:

Fast Ring Windows 10 Preview 19546 brings a fix for Timeline and notes update error 0x8007042b as Known Issues

New year, new build.

Sixteen days into 2020 and Fast Ring Insiders are being greeted with a shiny new build to test in preview 19546.

As with other builds as of late, there isn’t much in the way of new features, but a handful of issues have been addressed, however, an equal number of known issues have been reported.

Here’s what’s been changed, improved, fixed as well as what to keep in mind before downloading.

General changes, improvements, and fixes for PC

  • We fixed an issue resulting in Timeline not showing any activities.
  • We fixed an issue resulting in Outlook search not working for some.
  • We fixed an issue significantly impacting Task View reliability for some.
  • We fixed an issue where pressing Spatial Sound -> Off in the sound menu caused Explorer.exe to crash.

Known issues

  • BattlEye and Microsoft have found incompatibility issues due to changes in the operating system between some Insider Preview builds and certain versions of BattlEye anti-cheat software. To safeguard Insiders who might have these versions installed on their PC, we have applied a compatibility hold on these devices from being offered affected builds of Windows Insider Preview. See this article for details.
  • We are aware Narrator and NVDA users that seek the latest release of Microsoft Edge based on Chromium may experience some difficulty when navigating and reading certain web content. Narrator, NVDA and the Edge teams are aware of these issues. Users of legacy Microsoft Edge will not be affected.
  • The cloud recovery option for Reset this PC isn’t working on this build. Please use the local reinstall option when performing Reset this PC.
  • We’re looking into reports of the update process hanging for extended periods of time when attempting to install a new build.
  • We’re investigating reports that some Insiders are unable to update to newer builds with error 0x8007042b.
  • We’re looking into reports of certain external USB 3.0 drives not responding with Start Code 10 after they’re attached.
  • The Optimize Drives Control Panel is incorrectly reporting that optimization has never run on some devices. Optimization is completing successfully, even though it is not reflected in the UI.
  • The Documents section under Privacy has a broken icon (just a rectangle).
  • Remote Desktop Connection crashes when attempting to connect to multiple sessions.
  • Snipping isn’t working on secondary monitors.
  • The IME candidate window for East Asian IMEs (Simplified Chinese, Traditional Chinese, and the Japanese IME) may not open sometimes. We are investigating your reports. As a workaround if you encounter this, please change the focus to another application or editing area and back to the original and try again. Alternatively, you can go to Task Manager and end the “TextInputHost.exe” task from the Details tab, and it should work afterwards.

Per usual, the update is currently being rolled out, if it’s not listed under Windows Update settings, it can be manually initiated with a click of a button.

Happy downloading, Insiders!

Windows 10 build 19546 is out for the Fast Ring, with a new graphing mode in Windows Calculator, Indexer Diagnostics app

Late this afternoon Microsoft released Windows 10 Insider Preview build 19546 to Windows Insiders in the Fast Ring. This build comes with just two major new features for testing, a new graphing mode in Windows Calculator, and an Indexer Diagnostics app.

Starting first with the graphing calculator, Microsoft says this has been one of the top feature requests in Feedback Hub. There are a few things you can try out when testing it, which we describe below. These include plotting equations, using equations with variables, and analyzing graphs. Microsoft is also making the project available on GitHub, and is accepting contributions from developers. The app will also be available for anyone running Windows 10 version 1809 or higher.

  • Plot one or more equations on the graph. Enter multiple equations so that you can compare plots against each other and see interactions between the lines. You can also customize the line style and graph viewing window to suit your needs.
  • Add equations with variables. If you enter an equation with a secondary variable (e.g., “y = mx + b”), you’ll be able to easily manipulate those variables so that you can quickly understand how changes to the equation affect the graph.
  • Analyze the graph. Trace plots with your mouse or keyboard to better understand the relationship between variables in the equation on the graph. You can also analyze equations to help identify key graph features, like the x- and y- intercepts.

Secondly, there is the new Indexer Diagnostics app. This app isn’t linked to this build but is rather available in the Microsoft Store as a download. Microsoft says this app was created to help enhance your understanding of the capabilities of search. It is available for anyone running Windows 10 version 1809 or higher. You can find the link below.

Indexer Diagnostics
Indexer Diagnostics

There aren’t any other major new features in this build. Microsoft has fixed the issue where Windows Timeline not showing any activities. The build also resolves problems with Outlook search, Task View, and Spatial Sound. Known issues range from cloud recovery option not working and external USB 3.0 drives not responding with Start Code 10.

Microsoft starts migrating users automatically to new Edge

This year started off strong for Microsoft. The first round of updates, called the January Patch Tuesday updates, has just been rolled out.

Not only did it bring the typical improvements, bug fixes, and security patches, but they were also the last Patch Tuesday updates for Windows 7.

After 10 years of being a customer favorite, the OS has finally been retired by Microsoft. Unfortunately, not everyone is willing to migrate from it just yet.

Of course, other changes were made as well, even though they weren’t as publicized.

Microsoft installs Edge on your PC via Windows Update

One day after the January patch Tuesday updates, Microsoft finally released the first full version of their Chromium-based Microsoft Edge. Not only that, but they are also urging users to migrate towards Microsoft Edge.

For those that are still using Windows 7, Microsoft announced that this latest version of Edge will still be compatible with the now-dated OS, and will continue to be compatible for at least another 2 years.

Even if you don’t want to install Microsoft Edge, it will be part of the Windows Update patches anyway. This is Microsoft’s subtle way of introducing the new browsers to consumers.

If you use any browser other than Edge, it will carry over any saved data and settings once it gets installed automatically.

Those that are part of the Windows Insider program have already received the latest updates that also come with the browser. If you can’t wait to try it for yourself, you can always download it from Microsoft Edge’s official website.

Do you think Microsoft Edge will be just as good as other mainstream Internet browsers? Let us know in the comment section below.

READ NEXT:

How to fix OneDrive’s SSL_error_no_cypher_overlap

If you are using a third-party firewall on your computer, the firewall may block some connections.

Several users have reported the OneDrive SSL_error_no_cypher_overlap error while trying to access OneDrive from the browser.

As discussed above, this error occurs if a security program is blocking the connection for security reasons. If you are also troubled by this error, here are a couple of troubleshooting tips to help you resolve this error.

Steps to solve OneDrive’s SSL_error_no_cypher_overlap

1. Disable BT Web Protect

OneDrive SSL_error_no_cypher_overlap

If you are using the BT broadband connection, do the following:

  1. Launch the My BT app
  2. Go to Inclusive Extras and select BT Web Protect.
  3. Disable BT Web Protect if enabled.
  4. Close My BT app
  5. Try accessing the OneDrive account and check for any improvements.

BT Web Protect is a software feature offered by BT broadband with its My BT app. The app may block some websites if found to be suspicious. In this case, it is nothing but a false flag that is causing the issue.


Unable to download OneDrive files to your PC? Read how you can easily fix it in this awesome guide.


2. Disable Windows Firewall

OneDrive SSL_error_no_cypher_overlap

  1. Click on Start and select Settings
  2. Go to Updates and Security
  3. Select Windows Security
  4. Next, click on Firewall and Network Protection
  5. Click on the currently active network
  6. Scroll down and toggle the switch to turn off Windows Firewall
  7. Close and relaunch the web browser. Check for any improvements

2.1 Disable third-party antivirus

  1. If you are using a third-party antivirus, check if it has a firewall option enabled
  2. Disable any third-party software that can block the connection
  3. If necessary, disable the antivirus temporarily
    • Right-click on the Antivirus icon from the taskbar and select Disable temporarily

Do you want to check if your firewall is blocking some features? Follow the simple steps from this guide to find out.


3. Check for web browser issues

  1.  Try to use a different browser to check if it is a browser-related issue.
  2. If the issue is with a particular web browser then do the following.

3.1 For Google Chrome and Microsoft Edge 

OneDrive SSL_error_no_cypher_overlap

  1. Launch the Google Chrome
  2. Click on the Chrome menu
  3. Select Help and feedback option
  4. Select About Microsoft Edge / Chrome
  5. The browser will check if any updates are pending
  6. Click on Update if the option is available to install the updates

3.2 For Firefox

OneDrive SSL_error_no_cypher_overlap

  1. Launch the Firefox browser
  2. Click on the Open Menu icon
  3. Go to Help > About Firefox
  4. You will see the Update button if any updates are available for installation.

Once the web browsers are updated, check if the OneDrive SSL_error_no_cypher_overlap error is resolved.


4. Reset TLS settings in Firefox

OneDrive SSL_error_no_cypher_overlap

  1. Launch Firefox
  2. In the search box type about:config and hit entertrong>
  3. Click on I accept the risk! 
  4. In the search box, type TLS

Now check if any of the value is in bold. If so, that value is modified recently.

  1. Right-click on the value in bold and select Reset.
    • This will restore the value to its earlier settings.
  2. Next, repeat the search again with SSL3.Check for any value that appears in bold.
  3. Right-click on the value and select Reset.
  4. Make sure the following values are set to <strong< span=””>>False</strong<> before closing the browser:
    • security.ssl3.dhe_rsa_aes_128_sha
    • security.ssl3.dhe_rsa_aes_256_sha

The OneDrive SSL_error_no_cypher_overlap is caused by third-party security programs or apps from your ISP. By following these steps you can fix the problem and access OneDrive online without any issues.

Do you know of any other way that can fix this OneDrive error? Share what you know with the other users in the comment section below.

RELATED STORIES YOU MAY LIKE:

How to connect Alexa to a stereo receiver in a few easy steps

You’re obviously looking for a quick way to connect Alexa to a stereo receiver. If you’ve invested in a nice stereo system already, be sure that it’s easier than ever to ask Alexa to play music.

The idea is that Amazon’s Alexa voice control system already offers a wide range of voice commands on its Amazon Echo systems. Wired and wireless are both great options to go for when you want to immediately connect Alexa to your stereo receiver.

Moreover, the possibilities of voice control seem endless these days. So, that’s even better if integrated voice control was on the initial checklist for your stereo receiver.

From using Bluetooth to voice control, here we’ll tell you everything you need to know for successfully establishing the connection. Just keep on reading the lines below.

How can I connect Alexa to a stereo receiver?

1. Connect Alexa to your stereo receiver via Bluetooth

Connect Alexa to stereo receiver via Bluetooth

Assuming that your current sound system supports Bluetooth or has a line-in connection, let us assure you that integrating the voice assistant works like a breeze.

An Amazon Alexa system (e.g. Amazon Echo, Echo Dot, Echo Plus, or Echo Spot) is though required. Each of these Amazon devices has Bluetooth and an analogue sound output as active interfaces to the existing systems.

Therefore, waste no more time and pair an Amazon device with your own sound system in the Alexa app. Enter into Settings > Bluetooth and remember that both systems must be in pairing mode.

You can manage pairing and device control more easily by installing the desktop client, so you may use the Amazon Alexa app for PC to set up your Echo device and access additional configuration options.

Alexa will immediately answer with a voice message, proving the successful coupling to your stereo receiver.

While setting up Alexa with your stereo is simple, smart devices can sometimes cause additional headaches. If you also use Sengled bulbs and they aren’t responding to Alexa, check this guide on Sengled not working with Alexa for detailed fixes.


Interested in the best 2 channel stereo receiver with Bluetooth? Check out this list with our top picks.


2. Stream music by using an AUX cable

Use aux cable

How to stream music over a system that is not even equipped with Bluetooth? Just use your smartphone and connect Alexa to your stereo receiver with an AUX cable (3.5 mm).


3. Use voice control to establish the connection

Harmony Hub-based remotes

Another simple way to connect your stereo receiver to Alexa is by using voice control. Unfortunately, there’s an unpleasant limitation you need to take into consideration from the very start.

There’s no chance to switch the system on or off, just as you cannot control video by only using your receiver. Voice control is limited to music playback. That’s rather disappointing with this list of commands expanding so rapidly.

If music playback isn’t enough for you, give a try to Harmony’s Hub-based remotes. Bottom line, these are compatible with Alexa and give you that touch of extra functionality you want to enjoy.

One remote is all it takes to control your home entertainment system and all home automation devices. Feel free to choose between:


Looking for some voice-controlled home automation software? Take a look at this handy list.


No matter what you’re thinking of, you’re clearly attempting to make Alexa a part of your daily life. Now that there are so many ways of interaction, you might find yourself talking to Amazon’s voice assistant more often.

Besides giving voice commands such as Alexa, show me the weekend forecast, connecting Alexa to your stereo receiver is just another natural step to take in this process.

If you have any other questions about the procedures detailed above, remember that you can get into contact with us. Just leave a comment in the section below and we’ll get back to you.

READ ALSO:

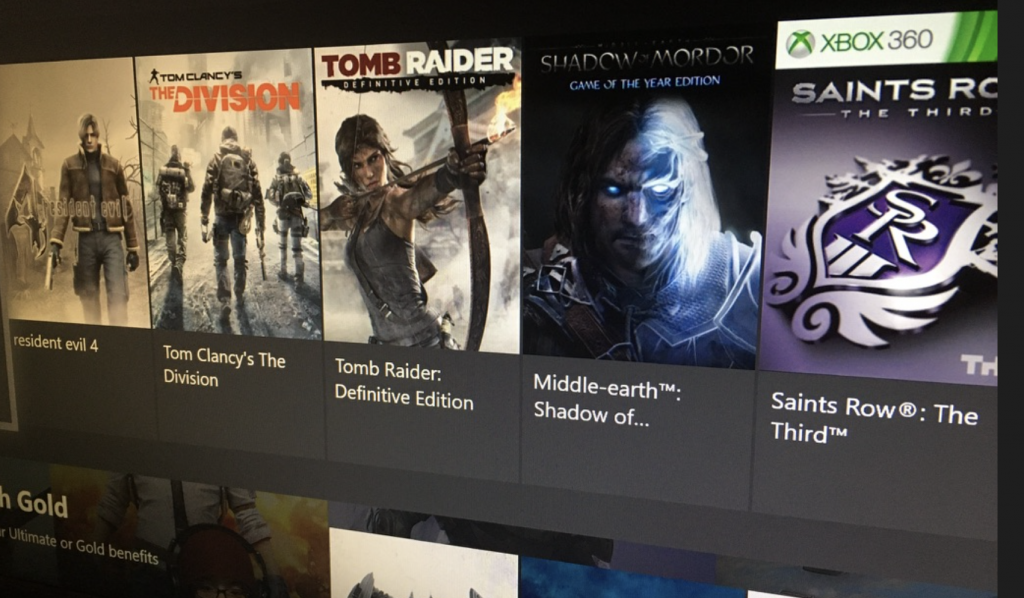
Tom Clancy’s The Division, four more games to leave Xbox Game Pass soon

If Microsoft announced three new additions to Xbox Game Pass for PC earlier today, Xbox Game Pass for console subscribers will soon lose access to five games (via Windows Central). Tom Clancy’s The Division, which came back the catalog on December 12 is among the list of games to be removed at a still unknown date

The four other games to disappear soon from the Xbox Game Pass catalog are Resident Evil 4, Tomb Raider: Definitive Edition, Middle-Earth: Shadow of Mordor, and the Xbox 360 title Saints Row: The Third. You can check out the list by yourself on the Xbox Game Pass section of the Xbox One dashboard, or the Xbox Game Pass app for iOS and Android.

If some games leave Xbox Game Pass every month, they’re usually quickly replaced by new games. Tekken 7 and Children of Morta are the latest additions to the catalog, and the Xbox team will likely announce more in the coming days.

If you have yet to try Xbox Game Pass, Microsoft currently offer one month of Xbox Game Pass Ultimate (which also includes Xbox Live Gold and Xbox Game Pass for PC) for $1 instead of $14.99. With more than 200 Xbox games and over 100 PC games, Xbox Game Pass Ultimate remains one of the best deals in gaming.

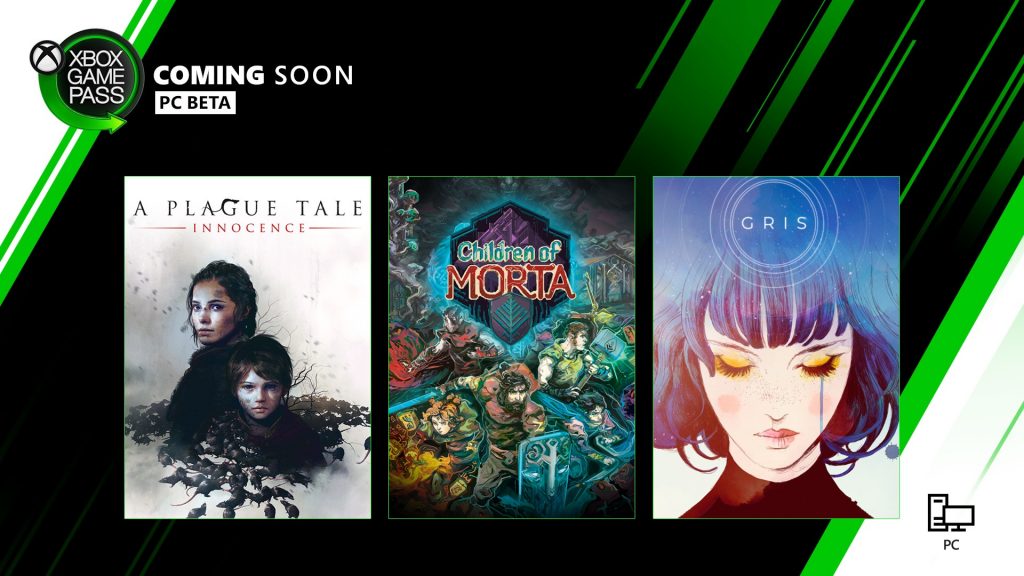
A Plague Tale: Innocence, Children of Morta, and Gris are coming to Xbox Game Pass for PC

Microsoft has just announced three exciting additions to Xbox Game Pass for PC. The subscription service that is still in beta is welcoming the story-driven action RPG Children of Morta today, an Xbox Play Anywhere game that is also available now on Xbox Game Pass for Console. The ID@Xbox title also supports Xbox Live cloud saves, so you can switch between the two platforms at will T

Gris, another ID@Xbox game is also coming to Xbox Game Pass for PC later this month. The platform-adventure game was released on Windows back in December 2018, and Spanish indie developer Nomada Studio has yet to port it on Xbox One.

The third game coming to Xbox Game Pass for PC this month is A Plague Tale: Innocence, the critically-acclaimed game from French developer Asobo Studio, currently hard at work on the next Flight Simulator game. A Plague Tale: Innocence is a horror stealth game that has often been compared to the hit PlayStation exclusive The Last of US, and it also received a nomination for Best Narrative game at The Game Awards 2019. The fact that this high-profile game joins Xbox Game Pass for PC and not console is quite a surprise, to be honest.

If you didn’t take advantage of the 3 months of Xbox Game Pass Ultimate for $1, Microsoft is now offering 3 months of Xbox Game Pass for PC for just $1 for a limited time. As a reminder, Xbox Game Pass for PC requires Windows 10 version 1903 and newer and the new Xbox Beta app available on the Microsoft Store.

Microsoft quietly removes pledge to share 95% of app revenue on the Microsoft Store

Back in March, Microsoft brought new policies to the Microsoft Store to allow developers to keep a 95 percent cut of revenue generated from purchases, provided the traffic comes from the developer itself as opposed to straight from the Store. It seems this type of revenue model didn’t pay off, as the company has removed the clause from its developer agreement, as spotted by an app developer on Twitter.

It’s no secret the Redmond tech giant wants its Microsoft Store to be the central place for users to obtain applications on Windows 10. The company continually promotes it as the most secure way to install apps, and even forbids installing apps outside of it on devices with S Mode enabled.

Of course, in order for that vision to become reality, the Microsoft Store needs a healthier catalog of apps. It’s more than likely that the initial revenue program was meant to further attract developers to jump on its platform, even as companies Apple and Google can easily get away with taking almost a third of app revenue on their respective platforms.

To be clear, the 85% of revenue the developer keeps from app sales on Windows devices (outside of Xbox consoles) when a users find it though Microsoft’s own sources doesn’t seem to have changed. While it’s likely disappointing for many developers, the company is still be charging considerably less than that of Apple and Google.

What do you think about the app revenue policy changes?

Microsoft Edge Insider beta channel is now ready for Windows 10 on ARM

Microsoft Edge has officially been released, and while definitely more stable than the Insider versions that users are testing, it was shipped with many features still missing—including support for ARM-based processors. Only a day after its release, however, Beta users are now able to test the Beta version of Edge with full support for the 64-bit ARM architecture. The company has been testing ARM64-support in the Dev builds of Edge for nearly a month now, providing some time to smooth out some rough edges (pun intended) before the Beta build.

The beta release gives many mobile devices running ARM-based processors—notably the company’s own Surface Pro X—the ability to run the full Chromium-based browser with uncompromised performance, with likely more stability running the Dev builds. Should testing go well, it’s possible that the feature could be added to the next stable version of Edge, presumably six weeks after its launch.

For those who aren’t caught up, the stable version of Microsoft Edge was officially released yesterday for Windows 7, 8.1, and 10 with Intel/AMD CPUs as well as for macOS. While these users are likely best to download the stable version for their general browsing needs, ARM-based PC users can test and provide feedback of the Beta version ahead of support for stable users.

Do you own an ARM-based Windows PC? Feel free to leave you comments and heads-on impressions below.

Microsoft goes all-in on education with new Windows 10 devices, Always Connected PCs, and new features for OneNote, PowerPoint

Microsoft is announcing today, January 16, several new updates to its education initiatives. The company is planning on introducing new Windows 10 devices for the education market and will be bringing new education-related features to OneNote and PowerPoint. Microsoft will also be entering a new partnership with T-Mobile to offer schools Always Connected PCs.

We’ll be starting first with the new Windows 10 devices. On this front, Microsoft and its partners will be introducing updates to 14 of the most affordable Windows 10 devices from Acer, Dell, HP, Lenovo, JP.IK, and Positivo. In a continued jab at Chromebooks, prices on the devices will start at $200.

Some of these new Windows 10 PCs will have Intel’s newest Gemini Lake processors, which Microsoft promises will boost device performance by 46%. Other features on some of the new education PCs include indicator lights to see students’ status from the front of the classroom and built-in pen storage with charging on select devices.

Next, there are the Always Connected PCs, which Microsoft hopes can close the broadband gap for 1.15 billion students around the world. In this area, Microsoft’s partners Positivo and JP.IK will be introducing two new Always Connected PCs, built and priced especially for education — the JP.IK Turn T101 and Positivo Wise N1212S. Microsoft claims these PCs will be the “most affordable Connected PCs yet,” with the JP.IK Turn T101 starting at $299 and the Wise N1212S at $575 USD. Both devices will be shipping later this summer, and Microsoft promises the PCs will have twice the battery life and 25 percent better performance than competing platforms.

Microsoft will also be partnering with T-Mobile to offer select school districts in rural and underserved areas in the U.S. a chance to test the newest Connected PCs. T-Mobile will provide pilot schools with SIM cards and free 4G LTE coverage plans to get these new PCs up and running. Outside of the United States, Microsoft will partner with Vodafone (and its subsidiary Vodacom in Africa) to provide education-specific cellular plans to customers using the newest Connected PCs.

Third up is the news on the Microsoft Edge and OneNote side of things. Here, Microsoft will be planning to push its new Chromium-based Edge browser as a solution for educators, with ease of management for IT, the ability to change text size, reading text aloud, and even inking on PDFs right in the browser. Microsoft will also be starting a private preview of OneNote Live Captions, which will allow students to connect OneNote to a Microsoft Translator session via a Join Code and receive the captions and translation stream while still taking notes.

Finally, there’s the news about the new professional development tools for educators that Microsoft will be introducing for the education market. There are three specific things here, including PowerPoint Live Presentations, updates to Microsoft Stream to create training videos on the web, and Microsoft Teams Class Insights.

With PowerPoint Live Presentations schools will be able to train teachers from anywhere via the web. Schools will be able to present slides on the web and using a QR code, while viewers will be able to follow along with live translation in more than 60 languages on their personal device. With updates to Microsoft Stream, a new Flipgrid camera integration will make it fun for anyone to personalize and share content in seconds. Stream will also soon support browser-based screen recording and editing, too. Lastly, with Microsoft Teams Class Insights, Microsoft will help equip educators with more data on student performance and activity and help educators generate Parent and Guardian emails that summarize a student’s weekly progress and the week ahead.

Microsoft will be in attendance and is a worldwide partner of BETT, an annual trade show in the United Kingdom organized by ITE Group. You can expect to hear more about these initiatives as the show rolls on.

Taskbar Not Going Away in Fullscreen? 3 Ways to Hide it

Windows 10 is an incredible OS with plenty of features, but it has issues such as Taskbar not going away in fullscreen.

This is a minor issue compared to Takskbar not working at all, and since it’s a minor issue, it can be easily fixed.

While this does not break system functionality, it can interfere with your work, video, or game, making it unpleasant, so let’s see how to fix it.

Why does my Taskbar show in fullscreen?

  • Temporary glitches with Windows Explorer can cause this issue.
  • Issues with DPI calling in certain web browsers can lead to this problem.
  • Certain visual settings in Windows can affect the Taskbar.

How do I make the Taskbar go away in fullscreen?

1. Restart explorer.exe

  1. Press Ctrl + Shift + Esc. This will open the Task Manager
  2. Go to the Processes tab.
  3. Locate Windows Explorer, and press Restart.
    task manager explorer

2. Override high DPI scaling behavior in Chrome

  1. Right-click on Google Chrome in your Taskbar or Start Menu.
  2. Select Properties.
  3. Go to the Compatibility tab.
  4. Go to the Settings tab.
  5. Check the box next to Override high DPI scaling behavior.Chrome DPI
  6. Click Apply
  7. Restart Chrome

After doing that, check if the problem is resolved.

3. Turn off visual effects

  1. Press Windows + R and type in control.

  2. This will open the Control Panel.
  3. Go to System and Security.
  4. Select the System subheading.
  5. Go to Advanced system settings.
  6. In the new window, go to the Advanced tab.
  7. Click on Settings, under Performance.
  8. Select the option labeled Adjust for performance.
    Adjust for best performance, visuals

Following these steps, you should no longer see the Windows taskbar when running programs in fullscreen mode.

If you’re still having problems, check our guide on how to permanently hide the Taskbar on your PC.

Did you find this guide to be useful to you? Let us know of any other fixes to this problem in the comment section below.

3 months later, File Search still unusable on Windows 10 1909

With the first round of Patch Tuesday updates coming around, many users were expecting improvements in the security department.

While there have been significant improvements as far as security goes, some users are not happy about certain issues.

For example, users are reporting that File Search is still unusable on Windows 10 v1909, despite being promised otherwise.

Ever since I updated to Windows 10 1909 the Search Box in the File Explorer is completely unuseable. It shows a text cursor but I cannot click inside the box or type any text into it. Essentially it’s a text box with no “wiring”.

This problem has been affecting the OS for three months now and it seems Microsoft still needs more time to fix it.

No one knows what causes the File Search error

What makes matters worse is that there doesn’t seem to be a precise trigger for this issue to occur. This makes it all the more difficult since users don’t know what actions to avoid.

Problem seems to be inconsistent, sometimes I am able to use the search, other times it won’t let me click. This morning I was able to use it, but the text box appeared broken and misaligned. After a reboot, it returned to not working.

Unfortunately enough, no word from Microsoft has come out regarding the issue. This leaves users with no choice but to either perform a rollback or use temporary fixes such as shutting down File Explorer.

I wrote a .bat that taskkills file explorer. That seems to have fixed the problem, but its only a temporary fix. If you go into taskmgr and kill explorer.exe it should start working again. 

Indeed, this is the 3rd consecutive month since this issue has first been reported, and users are not pleased that is has still gone unsolved.

This bug can seriously hinder the efficient use of the Windows 10 OS.

Have you experienced this File Search error ever since installing Windows 10 version 1909? Let us know in the comment section below.

Salesforce Add-in not Showing in Outlook: How to Restore it

After the recent Salesforce for Outlook updates, the side panel has been added. As a result, the old Add Email button has been relocated, and many users have reported that the Salesforce Add-in is not showing from Outlook.

This issue can occur due to the new Side Panel, and disabling the feature can fix it. However, there can also be other reasons for this problem.

In this article, we have listed a couple of troubleshooting tips to help you find the Salesforce button in Outlook.

What can I do if the Salesforce Add-in is not showing in Outlook?

1. Enable Salesforce add-ins

  1. Launch Outlook client and click on New Email.
    new email salesforce add-in not showing outlook
  2. Right-click on the Clipboard ribbon and select the Customize the Ribbon option.
    customize
  3. Click Add-ins.
  4. At the bottom, select Disabled Items for the Manage: option.
  5. Click Go to proceed.
  6. Select anything with Salesforce in the name and click Enable.
  7. Click on Close.
  8. Again from Manage: menu, select COM Add-ins and click GO.
  9. Make sure that the Salesforce for Outlook Add to Salesforce Toolbar and Salesforce for Outlook Side Panel options are checked.
  10. Close Salesforce for Outlook and Outlook clients.
  11. Restart Salesforce for Outlook and Outlook clients and check for any improvements.

These steps are only required if the Salesforce for Outlook add-in is not working or disabled.

2. Enable Email to Salesforce in Salesforce

  1. On the Classic client, click on the User Name.
  2. Select Setup and go to Email Administration.
  3. Email to Salesforce and make sure the Active box is checked.
    active
  4. On the Lighting client, click on the User icon.
  5. Go to Settings and select Email.
  6. Select My Email to Salesforce.
  7. Make sure the Active box is checked for My Email to Salesforce.
  8. Relaunch the client and check for any improvements.

3. Reset Outlook customization

  1. Click on File and select Options.
    options
  2. Select Customize Ribbon.
  3. You can export the current customization to a file. It can be imported by the users if required.
  4. In the Customize the Ribbon window, click on Reset.
  5. Next, click on Reset all customization.

Alternatively, you can also reset only the selected tab. In the Customize the Ribbon window, select the default tab that you want to reset to the default settings.

4. Confirm Add Email is enabled for Outlook Configuration

  1. On the Classic client, click on your name.
  2. Click on Setup.
  3. Select Desktop Integration
  4. Click on Salesforce for Outlook and make sure it is enabled.
  5. On the Lighting client, click on the User icon.
  6. Go to Settings and select Dekstop Add-ons.
  7. Select Salesforce for Outlook and make sure it is enabled.

Note that you must have Salesforce System Administrator rights to be able to view or edit settings.

5. Turn off User Account Control

  1. Press the Windows key + R to open Run.
  2. Type msconfig and click OK to open the System Properties window.
    msconfig salesforce add-in not showing outlook
  3. Click on the Tools tab.
  4. Select Change UAC Settings and click on Launch.
  5. Drag the slider to Never Notify.
  6. Click OK and click Yes when asked to confirm the action.

The Salesforce add-in not showing in Outlook issue mostly occurs due to the add-ins being disabled in the Salesforce for Outlook setting. We have listed all the possible fixes, so go through them and see which solves your problem.

If you have any more questions or suggestions, feel free to reach for the comments section below.

KB4528760 still plagued by old errors and unresolved bugs

Microsoft recently released the first round of updates for 2020, called the Windows 10 January Patch Tuesday updates. Part of this major set of updates is the Windows 10 Cumulative Update KB4528760 for Windows 10 version 1903 and 1909.

Several security vulnerabilities regarding the crypt32.dll component of Windows were probably the highlight of the entire round of patches, as far as security goes.

However, KB4528760 also comes with its fair share of issues as well.

The list of bugs is already pretty long, despite the updates barely having been rolled out. As such, we expect the list to grow as users discover more and more issues, and we will update the article as new problems emerge.

KB4528760 reported bugs

Error messages when installing the Cumulative Update

Users are receiving constant error messages when trying to install the Windows 10 Cumulative Update KB4528760. This error bears the code 0xc1900403.

Windows10 update 2020-01 Cumulative Update for Windows 10 Version 1903 for x64-based Systems (KB4528760)failed 3 times with this error:

Last failed install attempt on ‎1/‎14/‎2020 – 0xc1900403  (also displayed download error, reason for 3 runs)

On the same note, other users are receiving an error code 0x80073701 when trying to install the Windows 10 Cumulative Update KB4528760. This isn’t the first time this particular issue affects users, as it also appeared back in the August Patch Tuesday updates.

If you too are encountering this issue, make sure that you follow this in-depth guide that will show you exactly how to fix it.

Night Light is broken

Several users have reported that Windows 10’s Night Light feature no longer works after installing the latest Cumulative Update. Apparently, it stopped working, regardless of whether it was set to scheduled or non-scheduled.

it doesn’t work. scheduled or non-scheduled.

Explorer issues

Users were also expecting that this round of updates would also bring a fix to the Explorer issues for WIndows 10 version 1909. However, it would seem that these have failed to come.

This pretty much sums up the list of issues for Windows 10 Cumulative Update KB4528760 for now. If any more appear, we will constantly update this article, so be sure to keep an eye on it.

If you bumped into any other problems with KB4528760, don’t hesitate to share them in the comments section below.

RELATED ARTICLES YOU SHOULD CHECK OUT:

How to get the new Edge on your Windows 10 PC today

After nearly a year-long journey of testing, Microsoft’s new Chromium Edge browser is exiting beta and an official final version is now available for download. There’s plenty that’s new in this new version of Edge, be it the improved performance, user interface, and support for a wider set of extensions. In this guide, we’ll show you how you can download it.

Step 1: Head to Microsoft’s Website

The first step in getting the new Microsoft Edge is to head over to Microsoft’s website in an existing web browser like the old Microsoft Edge, or even Interner Explorer or Google Chrome. You can then click the blue Download for Windows 10 button. If you’re on other platforms, you can also click the down arrow and choose from Windows 8.1, 8, 7, or macOS.

There are even links to the iOS and Android versions, available through the app store. Anyway, you’ll need to read through the licensing terms and then click Accept and download to proceed with the download. The file is pretty small and should download in seconds.

Step 2: Run the installer

After you download the file, head over to where you saved it. That can be in your download folder or desktop. Next, double click it. You’ll get a prompt from the Windows 10 UAC, and you’ll need to press Yes to allow the system to the installer to make changes to your system. The installer will then download Edge from the internet. Give it a few minutes to download, and install it to your system.

Step 3: Set up your browser and enjoy

After the installer is complete, you’ll notice that the new Microsoft Edge will automatically launch. If you’ve been using the old version of Edge, you’ll also see that it’s now gone from your Windows 10 PC. New Edge replaces and “hides” the old Edge, but you can still bring back old Edge with a few steps if needed. We previously talked about that here.

And, that’s it! In just three simple steps, you’re now up and running with Microsoft’s newest web browser. There’s plenty that you can enjoy in the new browser. Chrome extensions, tracking prevention and more. Compared to Old Edge, you’ll also get more security updates and new features, as Microsoft has now committed new Edge to a six-week update cycle. Are you enjoying the new Edge? Let us know in the comments below.

How to view and delete your Bing search history

Bing tracks every search you make when you’re logged into your Microsoft account. That history can be useful if you need to get back to something you did in the past. It could also be a privacy concern, as search history can by nature reveal some quite personal information. Here’s how to take back control.

Search history in Bing's menu

The easiest way to see your search history is by visiting Bing itself. From the homepage, click the hamburger menu in the top-right. Click the “Search history” link towards the top of the drop-down which appears.

Bing’s Search History interface is simple but functional. Your search history is broken down by date. By default, an infinitely loading list of your search history is visible. You can filter to data from the past week, month or six months using the tabs.

Viewing Bing search history

Bing displays a basic graph of the types of content you search for. There are categories for Web, Images, Videos and News, depending on which of Bing’s services you use.

You can search for specific items from your history using the searchbar below the graph. Click any item to reopen the search results page in Bing.

Clearing search history from Microsoft account

To disable search history tracking, click the “Show new searches here” toggle button at the top-right of the screen. Once it’s toggled to the off position, Bing will stop logging all new searches. However, existing search data will be preserved.

To delete everything you’ve already stored, click the “Go to dashboard” link under “Manage your search history.” Login to your Microsoft account when prompted. On the Privacy dashboard, you’ll see another, less-detailed view of your search history. Click the “Clear activity” button to erase all stored records.

In a blow to Slack, AvePoint secures $200M in funding to help move more customers to Microsoft Teams

There’s no doubt that Microsoft Teams is picking up steam when compared to Slack, but the competition might have just gotten a bit rougher for Slack. Microsoft Partner AvePoint recently announced that it raised $200 Million in funding to help businesses and enterprises running Slack move to Microsoft Teams.

According to a report from Business Insider, AvePoint attributed the “bright future” of Teams for a reason to raise the funding, led by TPG Sixth Street Partners. AvePoint is actually a Microsoft Global ISV Partner, and in its own press release, states that it is seeing an “outstanding growth driven by the rise in adoption of Office 365 and other cloud office solutions.” The company also claims that over 7 million cloud users and 16,000 large enterprises across all seven continents already use its software to help move from traditional services like Google G Suite to Office 365, and Slack to Teams.

Tianyi Jiang, co-founder, and co-CEO of AvePoint, reflected on this in a statement seen in Business Insider.

“Once you start using [Teams], you have hundreds, if not thousands of teams populating everywhere and it becomes unmanageable. “So we’re able to…handle all of that, essentially automate all of that and give companies that governance and control, so in return, we’re increasing significant Teams adoption”

Jiang also tells Business Insider that AvePoint is trying to help customers get the most out of Teams. With the new funding, AvePoint is hoping to add 40,000 more customers through its channels. That’s a lot of users, and Slack might just have to watch its back.

How to create a collection of Bing search results

Searching the web and taking notes: there’s dozens of ways to do it, and Microsoft itself offers quite a few. Whether it’s with To-Do, OneNote, or Edge’s new Collections feature, you’ve got plenty of options when it comes to snipping search results for later.

Yet if you’re using Bing, you might not need to use any of them. Although now barely mentioned, Bing has had its own “collections” feature for years. It lets you save images, videos and news from search results into a special interface that’s reminiscent of both note-taking apps and Pinterest.

You can use collections from any image, video or news search. We’re using images in this example. To add an image to a collection, click its thumbnail preview to open the fullscreen image. Then, click the “Save” button at the bottom of the screen. Click the “See all” link to view the image in your collections.

Saving an image to a Bing collection

Content is automatically sorted into collections named after the search result you saved them from. Bing automatically grabs metadata such as image title and description too. You can access your saved collections at any time via the “My Content” link in Bing’s top-right hamburger menu.

To create a new collection, click the “New” button in the left sidebar. Name your collection. You can then move items into it by clicking their checkbox, pressing “Move to” and selecting your new collection.

Bing collections

To delete items, click the three dots icon on their card (“…”) and then press “Remove.” You can share collections via the “Share” button in the top-right. This will generate a publicly accessible link which others can use to view your content.

All things considered, Bing’s collections are rather barebones compared with Microsoft’s more recent attempts at web snipping. Apps such as OneNote and To-Do already surpassed Bing’s featureset while remaining as quick and simple to use. With the advent of Collections in Edge, you might find little reason to use Bing Collections.

It does have a few advantages though, such as true cross-device and cross-platform compatibility (it’s just a website) and automatic labelling of content by search query. Even so, we wouldn’t be surprised to see it disappear or get integrated into another service in the coming years.

Windows 7 vs. Windows 8 Comparison: Old Meets New

If you are still wondering what are the differences between Windows 7 and Windows 8, then it’s time to put a stop to that, as we have compiled a guide showcasing what has been improved in Windows 8 compared to Windows 7.

Windows 8, the newest operating system released by Microsoft, one that carries the Microsoft Flag into uncharted waters and promises to assure in a new age in mobile and computer communications.

Of course, like every product, it has received good reviews and bad remarks.

Some are still wondering if the new way Microsoft is heading is not what users want, after all, the new OS comes with a completely renewed user interface and with lots of new improvements and features.

Despite all the new aspects of Windows 8, some still want to downgrade to the old version, Windows 7, an operating system that has been around since 2009 and proved its worth time and time again. So, which one is the best, in a head-to-head battle, will the new Windows 8 take out Windows 7?

Or will the old beat the new? Let’s see how this battle of generations will go and who will be crowned the Microsoft king. Also, if you want to downgrade from Windows 10 to Windows 7 or 8, you can check this article.

Windows 7 vs. Windows 8

Because the first thing users will see when installing Windows 8 is the new Modern UI and other visual improvements, we will first look at the surface changes, and later, we will delve deeper into the performance and other lower-level improvements that Microsoft have implemented in their new operating system.

A step-by-step comparison will reveal which operating system is better on each level of operation and when we will be done, we will compare results. Now, let’s begin!

1. Look and Functionality

personalization

Windows 7 has not gone astray from the look we were accustomed to.

Although it received some improvements over its predecessor, Windows Vista (one of Microsoft’s more rubbish operating systems), it kept to the wide lines and anyone who looked at it would realize from the get-go that it was a Microsoft OS.

The same is not true about Windows 8. Microsoft seemed to have tossed legacy out the windows (get it? out the “windows”?) and went with a completely revamped UI.

We previously covered all the major visual improvements that Windows 8 brings to the table in our “getting started with Windows 8” article.

Winner: This is a very personal decision, each having a different opinion on which of them looks best, but as far as innovation goes, I would say that Windows 8 is the winner here.
If you’re looking for the best Windows 10 skin packs for Windows 7 and 8, you can find here the best options.

2. Windows Explorer

8-29-2011windows8explorer

In Windows 7, Windows Explorer was something that no one gave attention to.

It was the medium for every action you would do on your computer, and until then, it was virtually unchanged, keeping pretty much the same aspect since Windows 95.

It did receive some upgrades, but nothing so eye-catching that we would call it a big improvement.

Yet again the story changes in Windows 8. One of the most striking improvements brought by Windows 8 is the Explorer Ribbon. This is where all the different formatting and viewing tools are located, making them more accessible.

Other explorer upgrades can be seen in the new Task Manager and the copy/move window.

On the other hand, one change here has left users wondering why Microsoft would do such a thing: they have removed the Start Orb.

Winner: I don’t think anyone would have a problem with Windows 8 taking the prize here. Windows Explorer has definitely become more useful and it has a great aspect.

3. Other elements

Although Windows 7 has the old elements that we are all used to it, they present themselves at their pinnacle. They work as they should, and the visual features are awesome (compared to the other versions before it).

But apart from this, there is not much innovation here, as opposed to Windows 8.

Microsoft has implemented some new elements that make Windows 8 truly unique: the Charms bar. This element is present throughout Windows 8 and it allows users to search their computers or do accomplish other tasks.

This is somewhat of a replacement for the start orb, but opinions differ on how well it can accomplish the task.

Winner: For those who prefer the Charms bar, Windows 8 would be the winner here, but some might want to use the old start orb, and for them, Windows 7 is still the way to go.

4. Personalization

win 8 vs win 7

Windows 7 had some great personalization features. Allowing you to add more than one desktop background and they would change automatically.

Also, you could add transparency to Windows and desktop gadgets. All these awesome features made Windows 7 a great OS and it offered many customization options.

Windows 8 has some new features, but it also dropped some of the old features. For instance, you now have an entire Personalize Panel from where you can change the visual aspects of your Windows OS.

Also, Microsoft has removed the desktop gadgets and window transparency features.

Winner: I can’t be subjective here, the lack of window transparency is something that Microsoft should have implemented, so the winner is Windows 7.

5. Integrated Elements

windows 8 pc settings

Windows 7 did not have many integrated programs from the get-go. Only the usual Windows utilities and Internet Explorer, which we have nominated to be the best Internet browser to download other browsers with.

But that’s about it, and what was the biggest problem is that it was no simple way to download some other programs. This being said, let’s look at what its competitor has to offer.

Windows 8, right from the start has a bunch of apps pre-installed. Of course, Internet Explorer is still there, but it does not suck as much as before. But what is the best feature: the Windows Store.

This is where you can download apps and get started. You can find here almost all the apps you need for utilizing Windows.

The only bad part is that you still have to install all the programs you need in Windows Explorer because the apps are separate from the desktop.

Winner: Windows 8

6. Moving to the Clouds

Although Windows 7 had some cloud integration features, they could only be used if you manually installed cloud services like DropBox, Box.com, or other storage services.

So, as you can see, not many integrated cloud storage options. This is somewhat understandable because when Windows 7 was released, cloud storage was not a big deal.

But now it is, and Microsoft has jumped on the opportunity to improve its SkyDrive, which is preinstalled on Windows 8 and it offers users 7 GB of space.

This is a great initiative for Microsoft, because they were kind of falling behind in regard to cloud storage, and with Windows 8, SkyDrive integrates seamlessly.

Also, Windows 8 allows users to log on to their computer using a Microsoft account that can sync their settings and other information to a server and have it ready for them if they choose to reset their computers.

Winner: Windows 8

7. Compatibility

dualmonitor windows 8

As far as Windows 7 is concerned, it pretty much was limited to computers and laptops. This however is not true for Windows 8.

The Modern UI was specially designed for touchscreen devices, allowing users to quickly open programs and jump between them.

Also, the multi-monitor support is very well designed and much faster to set up.

ARM compatibility lets Windows 8 run not only on computers anymore, but on mobile devices also, this makes for better cross-device compatibility.

This single feature is probably its most powerful aspect, allowing Windows to run on multiple devices.

I guess, in this regard, Microsoft is covering all bases and they are trying to get into the race for mobile devices, right alongside Google and its Android OS and Apple with iOS.

Winner: Windows 8

8. Security

Your system security is rather important, so you want to make sure that your system is secure and free from malware. To ensure the security of your system, it’s important to install a good antivirus, and this is where Windows 8 comes out ahead of its predecessor.

Windows 7 doesn’t have a built-in antivirus, so you’ll need to download Microsoft Security Essentials or any other antivirus software. We recently wrote about the best antivirus solutions for Windows 10, so be sure to check them out. On the other hand, Windows 8 comes with built-in antivirus software that should provide decent protection to your system, so you won’t have to use a third-party antivirus.

Windows 8 also supports Secure Boot on the UEFI system thus providing extra protection to your bootloader.

Winner: Windows 8

9. Price

Price is a very important aspect of any device or software. And here is where Windows 8 lands the finishing blow to Windows 7. Microsoft allows any user to upgrade to Windows 8 for only $40 (or $70 for Windows 8 Pro).

This will definitely drive Microsoft sales up and users will be far more likely to spend so little and get so much than to take out of their pocket over $100 for a copy of Windows 7.

Winner: Windows 8

10. Performance

In terms of performance, we will use Windows 7 as the starting point and we will compare different aspects of each operating system.

To better show the improvements in performance that are present in Windows 8, ZDNet has done a side-by-side comparison of the two operating systems, on the same computer and has created a pretty good comparison table that clearly shows the differences between the two.

Here is the test computer that the comparison was made:

  • Intel Core i7-2600K processor
  • Crucial 4GB DDR3 1600 (PC3 12800) RAM
  • EVGA 01G-P3-1460-KR GeForce GTX 560
  • GIGABYTE GA-Z77MX-D3H motherboard
  • Western Digital Caviar Black WD1002FAEX 1TB hard drive
  • CORSAIR Enthusiast Series TX650 V2 650W power supply unit

After the tests were done and the results were in, here is what the benchmark has revealed:

Test-performance-speed-of-Windows-8-and-Windows-7

Windows 8 has a faster boot time than Windows 7 and it also performs slightly better in benchmarks. Although, from a gaming perspective, they are about the same.

The differences come when we look at the other stats of the two operating systems. As seen in the graphs below, Windows 8 performs much faster on specific tasks, such as copy time, file compression, and boot or shutdown speed.

Here are the benchmark results, so you can have a look for yourself:

Test-performance-speed-of-Windows-8-and-Windows-7

These stats are, of course, based on testing in lab conditions, so they might not apply to everyone.

Also, they can widely depend on your system and on the amount of information stored on your hard drive, and the number of programs that you have installed.

Bechmark-Windows7-vs-windows-8

But, regardless of what the numbers say, I can attest from personal experience that Windows 8 is faster than Windows 7 on many different levels, but I cannot say that Windows 7 is too slow either.

Winner: Windows 8

11. System requirements

Although I don’t think anyone has ever looked over the system requirements for an operating system before, we do have to take them into account for the purpose of this article.

Windows 7

  • 1GHz or faster 32-bit (x86) or 64-bit (x64)
  • 1 GB RAM (32-bit) or 2GB (64-bit)
  • Hard Disk space: 16 GB (32-bit) or 20 GB (64-bit)
  • DirectX 9 graphics device with WDDM 1.0 or higher driver

Windows 8

  • Processor: 1 gigahertz (GHz) or faster with support for PAE, NX, and SSE2
  • RAM: 1 GB (32-bit) or 2GB (64-bit)
  • Hard Disk space: 16 GB (32-bit) or 20 GB (64-bit)
  • Graphics card: Microsoft DirectX 9 graphics device with WDDM driver

So, from a requirements standpoint, the two are not different. They both require the same components to work, so we will have no winner here. Of course, apart from x86 processors, Windows 8 offers support for ARM processors.

Winner: Tie

A quick recap:

Browser_1

After seeing all the pros and cons of each operating system, your decision will definitely be easier, but just to give you one more extra hand, here are some highlights of the battle:

Windows 7 pros

  • familiar interface with a start button and start menu
  • better personalizing features (at least in my opinion)

Windows 7 cons

  • slower overall speed, from booting to copy/move
  • poor cloud integration
  • no compatibility between devices
  • higher price

Windows 8 pros

  • improved functionality
  • compatibility with ARM designs
  • faster
  • many new features

Windows 8 cons

  • missing start orb and start menu
  • no possibility to deactivate Modern UI

Running the numbers

So, we covered all the major aspects, we looked at all the features and we decided who is the winner for each category.

Before we begin adding, we will have to make some remarks: in aspect, we will consider a draw, due to the fact that each of them has a different look, and so, they will appeal to different people.

Now, let’s see who wins the most points:

Windows 7 earns points for aspects, different elements, personalization, and requirements, so it gets an overall score of 4/10
Windows 8 has on its side aspect, windows explorer, other elements, integrated services, cloud storage service, compatibility, price, performance, and requirements.

This totals up to a very good score of 9/10.

But is this outcome surprising? I would say not and it would have been a surprise if it was any other way. Windows 8 is, after all, the “new and improved” operating system.

I only wish they taught more about us computer users. It is true that for touchscreen devices, this operating system will be absolutely awesome and it will give users many great features.

Update – Windows 10: upgrade or not?

When Windows 10 has been launched, many users were very skeptical about it.

In fact, they thought that this was Windows 8 + the traditional start menu and Cortana. Despite that, since its launch, Windows 10 proved that upgrading it’s worth it.

The best components from Windows 7 and Windows 8 are bundled into Windows 10.

There are many features added to Windows 10 that may push a non-upgrader over the edge :

  • New features added to Cortana: asking it about meetings, flight information, and more, directly from the lock screen
  • Ink API added – that means that Stylus users don’t need anymore to come up with their handwriting and gesture algorithms because they can work directly into their apps
  • Edge extensions – now, the browser can be customized with extensions like Chrome or Firefox (still better than IE from Windows 7)

Windows 10 vs. previous versions

While Windows 7, 8, and 8.1 versions were paid for, their users can upgrade to Windows 10 without any cost. Even if there are some that say it’s not free anymore – you can do it for free, just check our article.

Another major reason to upgrade to Windows 10 and leave behind previous editions is the support offered by Microsoft: the company announced that Windows 10 will be supported longer than any of the 7,8 or 8.1 versions.

Other reasons why Windows 10 is more flexible than previous versions are:

  • It brings DirectX 12 – an important piece of software for every true gamer
  • Universal compatibility for apps – the new Windows Store apps will work on any device
  • Possibility to stream games from Xbox One
  • Multiple desktops – a useful separation between your workspace and personal space
  • Several security features were added like Device Guard (blocks unsigned software and apps) or Windows Hello (biometric support);

You can find more arguments and information in the following titles:

– Windows 10’s market share eclipsed Windows 7 in October 2017

– Windows 7 market shares drop below 40 percent and Windows 10 takes over

– Windows 8 vs Windows 10: Worth the Upgrade?

Bottom Line

If now is the time that you wanted to see a definitive winner, I am sorry to disappoint you.

Picking an operating system is pretty much based on personal options. If you were to rely strictly on the benchmark scores and you want an operating system that is blazing fast, then Windows 8 is the one for you.

Also, if we were to look only at the features it offers, Windows 8 has a bigger dish of toys than Windows 7, so this would be a chapter where it also takes the prize.

However, some of its visual changes might not appeal to everyone (including myself) and because the operating system was designed for touchscreen interfaces more than for regular computers, I can see many still sticking to Windows 7 for a while.

The decision is up to you: which do you prefer?

Do you choose Windows 7 or Windows 8? And now that Windows 8.1 and 10 have been also launched, how does that change your opinion or you’ll rather stick with good old Windows 7?

Watch: Xbox One’s Doom Eternal and Resident Evil 3 video games get exciting new trailers

DOOM Eternal and Resident Evil 3, by far two of the most highly anticipated Xbox One video games of 2020, both got new trailers today showcasing their characters, plot, and location.

Check them out below:

DOOM Eternal is due out on Xbox One consoles on March 20th and supports online multiplayer for up to three players. All pre-orders of the game get a copy of the classic DOOM 64 title for free in addition to a host of additional skins.

Resident Evil 3 is a remake of the classic game of the same name. It’s due for release on Xbox One on April 3rd and comes with the free Resident Evil Resistance online multiplayer game. It will support 4K Ultra HD when played on an Xbox One X console and, presumably, also on the Xbox Series X console which is due out later in 2020.

Are you more excited for Resident Evil 3 or DOOM Eternal? Share your thoughts with the community in the comments below and then follow us on Pinterest, YouTube, Twitter, and Facebook for more Xbox gaming news.


RESIDENT EVIL 3
RESIDENT EVIL 3
Developer:
CAPCOM CO., LTD.
Price:
Free

The Hitman 2 Isle of Sgail Pack is now live and playable on Microsoft’s Xbox One consoles

The latest expansion for the popular Hitman 2 Xbox One video game, the Isle of Sgail Pack, is now live and ready to play.

Like previous Hitman 2 expansions, the Isle of Sgail Pack is also completely playable as a standalone title and doesn’t require the player to own the main Hitman 2 video game. If players enjoy this expansion though, they can upgrade to the full game by purchasing the Upgrade Pack DLC.

The Isle of Sgail Pack adds two new locations based within the North Atlantic and New Zealand, a new Sniper Assassin Map based in Austria, new contracts, and the promise of future content.

Here’s the full description:

Welcome to the Isle of Sgail, one of the most secretive places on Earth. Located somewhere in the North Atlantic, this mysterious location is preparing to host a gathering of Ark Society members – but not all of them will make it out alive.

Get started with HITMAN 2 today and enter the world of assassinations in style with the Isle of Sgail Pack.

  • Included in the Isle of Sgail Pack:
  • Isle of Sgail (North Atlantic) sandbox location
  • Hawke’s Bay (New Zealand) sandbox location
  • Contracts Mode for the Isle of Sgail & Hawke’s Bay
  • Himmelstein (Austria) Sniper Assassin Map
  • All permanent and future content for the Isle of Sgail and Hawke’s Bay

If you enjoy this pack and want more HITMAN 2 in your life, you can upgrade to the full HITMAN 2 experience at a reduced cost via the Upgrade Pack.

Are you a fan of Hitman 2? Let us know if you’re enjoying these packs in the comments below and then follow us on Pinterest, Twitter, YouTube, and Facebook for more Xbox gaming content.
Download Adobe Patch Tuesday Updates [January 2020]

The January Patch Tuesday updates are here adding improved security features to all the supported Windows operating systems.

As always, Adobe rolled out their own security updates for a series of products affected by various security vulnerabilities.

The updates target five critical security issues that could enable arbitrary code execution on Illustrator following memory corruption attacks. The affected versions are Illustrator CC 2019 versions 24.0 and earlier running on Windows computers.

These vulnerabilities are described in detail under the following security reports:

  • CVE-2020-3710
  • CVE-2020-3711
  • CVE-2020-3712
  • CVE-2020-3713
  • CVE-2020-3714

The updates are rated 3 on the company’s severity and priority rating system. This means the product has not been a target for hackers. This is reassuring for users, but the best approach is to install the update for peace of mind.

To benefit from the latest security patches, Adobe recommends that users install the newest software version via the Creative Cloud desktop app. Simply launch your Adobe product, go to Help and search for updates.

Adobe Experience Manager, the company’s content management solution for building websites also received important security updates this month (CVE-2019-16466 and CVE-2019-16467). These flaws could enable hackers to send malware code to users via specially crafted web apps.

Editor’s Note: If you want to know everything there is to know on Patch Tuesday, check out this in-depth guide.