Windows Lite reportedly may not be publicly announced until 2020

If you were expecting Microsoft to announce some big software news at its Build developer conference next week, it looks like you’re setting yourself up for disappointment. Tom Warren from The Verge previously reported that Microsoft wouldn’t be talking about Windows Core OS and one of its derivative dubbed “Windows Lite” at Build, and today Windows Central is reporting that Microsoft may well not announce the new software projects until 2020.

Windows Lite is the unofficial name for a new lightweight OS designed for Chromebook-like PCs and innovative form factors such as dual-screen devices. According to Zac Bowden’s information, Microsoft Edge’s recent switch to Chromium may be one of the reasons why Microsoft need some time before publicly announcing Windows Lite, as the new Chromium-based Edge doesn’t run yet on the new OS.

I hear Microsoft wants Windows Lite to go into broader internal testing sometime this summer. It’s likely that by then, the new Microsoft Edge will be up and running on Windows Lite. So, realistically, the earliest we should expect to see Microsoft announce Windows Lite is sometime this fall. But even, that’s not guaranteed, because Windows Lite isn’t scheduled to start shipping on devices until sometime in 2020 at the earliest. It all depends on whether Microsoft is planning a public preview for Windows Lite before it starts shipping.

If Microsoft isn’t planning a Fall event to unveil Windows Lite, we hope that we’ll get some exciting Windows 10 news to compensate. Unfortunately, we still don’t know anything about the upcoming 19H2 update, which could be a minor update in preparation for a much more substantial release (20H1) in Spring 2020.

Microsoft Imagine Cup Championship finals to kick off Build 2019

The seventeenth annual Imagine Cup championship is taking place on May 6 at 8 AM Pacific Time right from Microsoft Build. For those who might be unfamiliar, the Imagine Cup brings teams of students all of whom create applications to “solve the toughest problems” using Microsoft’s technologies.

The winning team will take home $100,000 in cash plus Azure credits and will also get to meet Microsoft CEO Satya Nadella for a one-on-one mentoring session. Many teams are participating, so you’ll be able to watch what the finalists have to offer on the date above.

Last year saw the Canadian smartARM as the winner of the 2018 Imagine Cup for their robotic psosthetic hand with a built-in camera at the palm used for recognizing objects to find the best grip. The prosthetic was made possible thanks to Microsoft Azure Computer Vision and machine learning in the cloud.

If you head over to the Imagine Cup website, you’ll be able to find more information this year’s competition taking place next week, as well as add the event to your calendar to be able to livestream the event.

Delivery Status Notification (Failure): 3 Ways to Fix it

Spammers quite often come up with new and clever techniques to spam email account users with unwanted product recommendations or force them to download and install malware-infected programs. The Delivery Status Notification (Failure) error is an example.

If you are facing the issue, you may have become a victim of the same. The users receive a delivery status notification for the emails they haven’t sent with an HTML file attachment that usually redirects to some shady websites.

Keep reading to learn how to stop getting Delivery Status Notification (Failure) in Gmail and other accounts!

How do I fix Delivery Status Notification Failure?

Before we head to the slightly complex solutions, try these quick ones:

  • First, you should not open the email attachment, as it may contain a third-party script. Open the email if necessary to see if it is a legitimate delivery notice. But don’t open any attachments in those emails.
  • Make sure the recipient’s email address is correct before taking other measures.
  • Restart the device. A reboot often fixes Delivery Status Notification (Failure) in a Live Mail account or Outlook client.
  • Verify whether the email servers are down. If the forwarding server is down for maintenance or other reason, your emails may bounce back, resulting in an error. In this case, wait for a couple of hours.
  • Check your email for large attachments. While your email service provider may support large email attachments, the recipient’s email service provider may have set limitations on attachments.

If none work, move to the fixes listed next.

1. Check your PC for malware

If you have already opened the email attachment, you may want to run a full security scan of your PC to check for any unwanted program traces or group policies.

Malware-byte-virus-removal

In case you don’t have a security program installed already, try the TotalAV solution. It comes with high detection scores and impeccable malware removal and protection.

⇒ Get TotalAV

2. Change your Email Account Password

  1. Go to the Live Password Reset page.
  2. Enter your email address and click Next.
    Reset Microsoft account Hotmail password
  3. Microsoft will ask you to verify your identity. You can either use your backup email to receive the confirmation code or use your mobile number to get a text.
  4. Select any of the verification methods, enter the verification code, and enter your new password.
  5. Make sure you enter a strong password consisting of letters, numbers, and special characters.
  6. Login with your new password.
  7. You may also need to update other applications linked to your Outlook account with the new password.

Some users have reported that changing their Live / Outlook account password stopped the spam emails and helped them get rid of the error.

Check your email account’s Sent Item folder and verify whether you get Delivery Status Notification (Failure) for emails you didn’t send. If sent, you may need to change your email account password to be on the safer side.

3. Disable Automatic Reply for your account

  1. Log in to your Outlook account, and click on the Settings icon.
  2. Click on View all Outlook Settings.
    view all outlook settings
  3. Go to the Mail tab and select the Automatic replies option.
    Outlook - Mail - Automatic Replies
  4. If you find the feature enabled, toggle the switch to turn off Automatic replies for your Outlook account.Outlook Disable automatic replies
  5. Click the Save button and exit the settings page.

If you have set up Automatic Reply for your account, it may result in the Delivery Status Notification (Failure) message. Try to disable automatic reply for your account and see if that resolves the error.

Before you leave, find out how the best email scanner software to protect prevent hacking attempts and data loss.

For any queries or to share the measures that worked for you, drop a comment below.

Xbox’s xCloud streaming service reaches “takehome” milestone

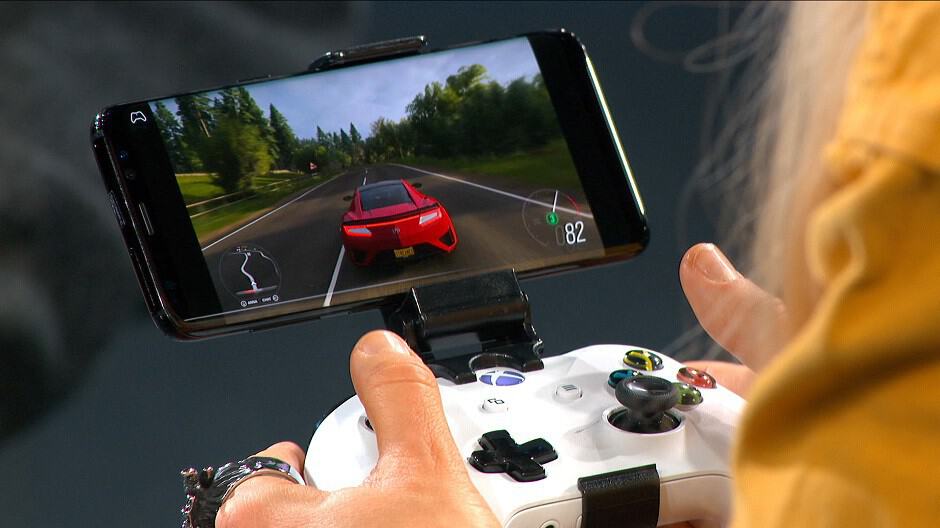
Microsoft’s Project xCloud, the under-development service which brings cloud streaming of Xbox games to phones and desktops, has reached the “takehome” milestone, as announced by Xbox head Phil Spencer on Twitter (via Thurrott).

The service has been in very limited testing under tightly controlled networks from within the company, however now employees working on the project can take their game streaming into the general public and at home. This will allow the development team to further test the product on the varying network conditions before the project is officially available in “public trials later this year” in the words of Spencer.

We’re expecting to hear a lot more about xCloud during E3 next month, and Brad Sams from Thurrott has pointed out that an in-home demonstration of the service could be shown off at the event. Is xCloud something you’d use more at home or on the go? Feel free to let us know in the comments.

Xbox Ambassadors will soon be able to set their Specializations and win exclusive Xbox Live badge

Microsoft announced two interesting updates for its Xbox Ambassadors program yesterday. Since its launch its 2011, the program has become the place to go for Xbox fans who want to share their expertise with the community, as well as complete some challenges to get exclusive rewards.

Xbox Ambassadors have their own profile distinct from their Xbox Live identity, and this Ambassador profile will soon get a new Specializations tab where Ambassadors will be able to display their preferences about games, skills, social media platforms, and more. “This is the first step in a larger objective for the program to create a more personalized Ambassador experience, the Xbox team explained in the announcement. “Once we know what Ambassadors are most interested in, we can use those insights to solidify partnerships with Xbox teams and studios that give our community more opportunities that are meaningful to them.”

Specializations in Xbox Ambassadors Profile will go live “in the near future,” and the Xbox team didn’t provide a more precise ETA. However, a separate blog post published yesterday also announced that all Xbox Ambassadors who reached Bronze tier will soon unlock an exclusive Xbox Ambassadors badge for their Xbox Live profile. This has been one of the top-requested features from Ambassadors according to the team, and the badge will start to appear on the Xbox Live profiles of eligible members on May 7 (with an option to turn it off).

If you have yet to join the Xbox Ambassadors program, you can do on this page. To get on board, be aware that you’ll need to be 17 years of age or older, have a Gamerscore 1500 or higher as well as no enforcement actions on your Xbox Live account within the last year. You may also want to join the official Xbox Ambassadors Discord server which already includes more than 7K members.

Sorry we’re having trouble getting this optional feature installed [FIX]

Windows 10 comes with multiple language options making it easier for the non-English users to use the Windows OS. However, if you have installed the Windows OS with a single language pack, you may want to install other languages easily from the settings.

However, at times the user may face Sorry we’re having trouble getting this optional feature installed error while downloading any optional features such as language packs, etc. If you are facing similar error, here is how to fix it.

What to do if you can’t install optional language packs

  1. Turn off Metered Connection
  2. Restart your PC in Clean Boot Mode
  3. Install Language Packs Manually

1. Turn off Metered Connection

Windows 10 allows you to turn on the Metered Connection feature to prevent the OS from downloading automatic updates on a limited network data connection.

If you have the feature turned on and are getting the error, turning it off can fix the issue.

  1. Click on Start and select Settings.
  2. Select Network and Internet.
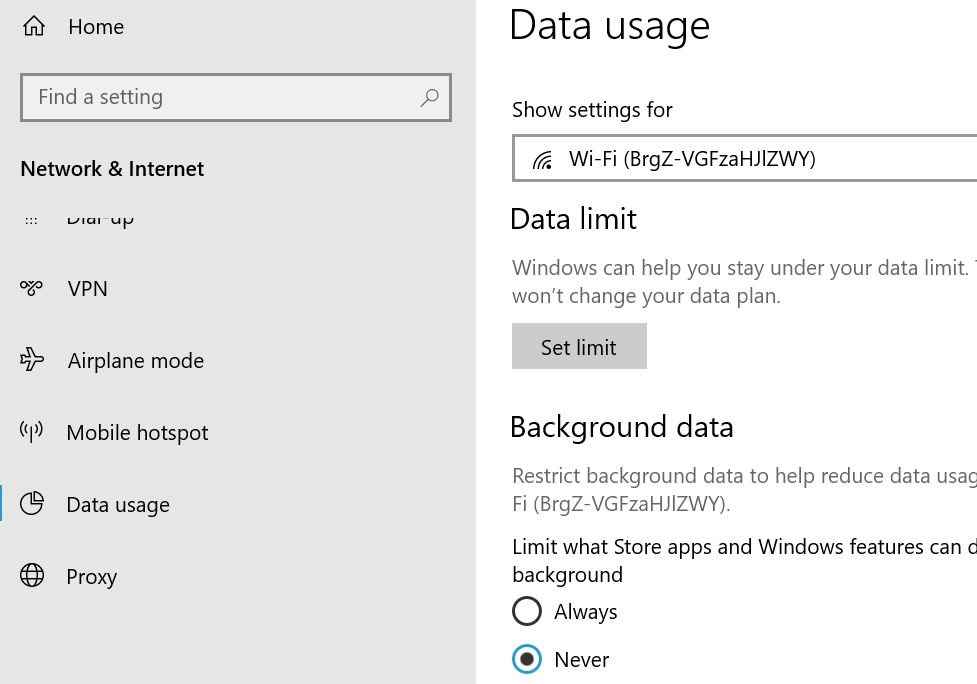
  3. Go to Data usage.
    Data usage Limit Never - Optional Features failed to download error.
  4. Under Background data select “Never” for “Limit what Store apps and Windows features can do in the background.”
  5. Go to WiFi tab, click on Manager known networks.
    WiFi - Manager Known Networks
  6. Click on your WiFi / Hotspot Network and click Properties.

  7. Scroll down and Turn off “Set as metered connection” option.

Close the settings window and try to download the language pack and check for any improvements.

2. Restart your PC in Clean Boot Mode

By restarting your PC in Clean Boot mode, you can make sure that no third party software installed on your system is creating conflict with the download and update operation.

  1. Press Windows Key + R to open the Run dialogue box.
  2. Type msconfig and hit enter.
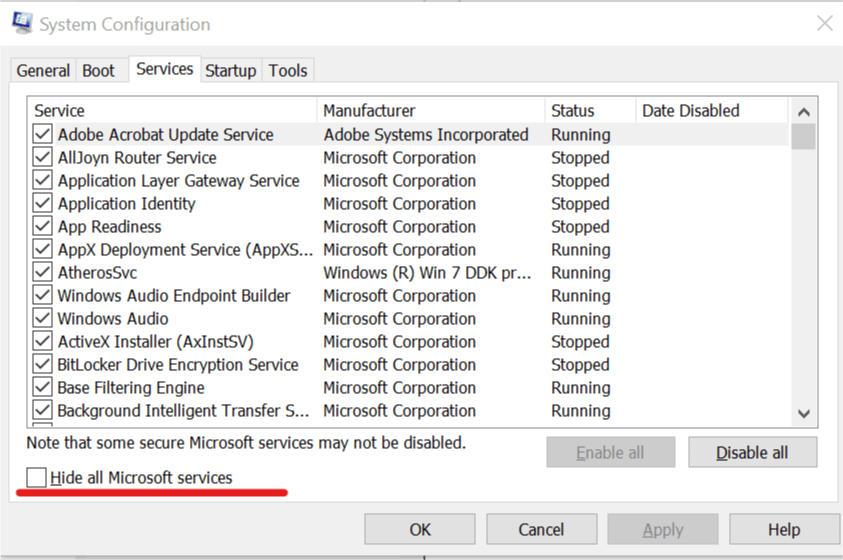
  3. In the System Configuration window, go to Services tab.System Configuration - Services - Hide microsoft services
  4. Tick the “Hide all Microsoft services” box at the bottom. This will hide all the important services related to the OS.
  5. Select, all the other remaining services and click on Disable All.
  6. Go to the Startup tab, click on Open Task Manager.
  7. From the Startup tab in Task Manager, disable all the startup services.Disable Startup Services -Windows
  8. Close the Task Manager. Click OK on the System Configuration window to save the changes.
  9. Restart your computer.

Once the system is booted in the clean boot state, try to install the optional features, in this case, the language pack and see if it can be successfully installed.

If the optional features can be installed in the Clean boot state, then you probably have a third-party software creating conflict with the Windows update and installation.

To fix this problem, you can try to uninstall any recently installed software on your PC.

  1. Go to Setting > Apps > Apps and Features.
    Uninstall App
  2. Select any of the recently installed programs and uninstall it.
  3. Restart the PC to save the changes.

3. Install Language Packs Manually

First, download the language pack you want to install from the internet. Make sure you download the language pack that is supported by your Windows 10 build and edition (32-bit/64-bit). Once downloaded, follow the below steps to install the language pack manually.

  1. Press Windows Key + R to open the Run dialog.
    run lpksetup
  2. Type, lpksetup.exe and hit enter.
  3. You will see  Install or Uninstall display languages option — select Install display languages.
    Install Uninstall Display languages
  4. Click the Browse button and select the downloaded Language pack (.cab) from your hard drive and click OK.
    African language pack install
  5. Click Next to continue and wait for the installation to complete. The installation does take some time, so have patience until it is installed.

Once the language pack is installed, you need to switch the language for your user account.  Here is how to do it.

  1. Open Control Panel (type control panel in the search bar).
  2. Click on Clock and Region > Region.
    Language Preferences - Add a Language
  3. Click on Languages Preferences.
  4. In the Settings page, click on Add a language.
    Add a Language - Settings - Windows 10
  5. Search for the language pack you installed and select it.
  6. It may ask you to install the selected Language pack again. Make sure the box “Install language pack and set as my Windows display language” is checked.
    Install Language Pack and set as my Windows display language
  7. Click on Install to proceed.
    Display language multiple
  8. If you want,  you can change the Display language from the Languages screen again.

Restart your PC, and you should have installed your preferred language as a display language without any error.

Note that, like the first solution, for you to be able to install language packs manually, make sure the metered connection is turned off. Microsoft does not download any major update packages over the metered connection to save the data.

How to connect your TV to Microsoft Surface 2 tablets

How many times we’ve wanted to watch a movie on a bigger screen than the one we have on our tablet? Also, how many times we wanted to make a presentation for someone at work and the screen was too small for them to understand?

Well, with Windows RT we have the feature to connect a bigger tv or a projector directly to our tablet.

Everything we see on our tablet will also be showing on our tv or projector. This way we won’t have to worry about not being able to view our favorite movie or play our favorite game.
Connect Windows RT to tv
Connecting your Windows RT operating system to the tv is a relatively easy way to achieve, but first you will need a cable to connect to the tv.

Unfortunately, the wireless transmission isn’t available on Windows RT tablets but they implemented this on Surface 2 tablets in a newer edition.

The good thing about this is that the video adapters are relatively cheap. You can probably find them at any electronics store situated near you.

Nevertheless, Windows RT users did had some problems connecting to the tv in their homes. For this reason we will show you a quick tutorial below.

This will explain exactly how to connect Windows RT to the tv by cable or by wireless transmission on tablets with Surface 2 in a few easy steps.

Steps on how to connect the TV to Windows RT operating system

How to connect your Windows RT operating system by cable to a tv:

  1. First of all we need to figure out which cable to use. Usually most TVs have a HDMI port. In this case we need a HDMI cable (see lower right picture) with a Surface HD Digital AV Adapter (see lower left picture).Windows RT to tv Windows RT to tv
  2. Now connect the HDMI cable to the TV with HDMI port and the other end of the cable to the Surface HD Digital AV Adapter.
  3. Lets plug the Surface adapter to the HD video out port situated on the upper right side of the Surface Windows RT.
  4. Drag your mouse cursor to the lower right side of the Windows RT screen.
  5. Click (left click) on “Devices”.
  6. Click (left click) on “Project” in order to choose the options you want for your screens.
  7. You will have four options for your screen in “Project“.
  • Duplicate option : this will allow you to see on both screens
  • Extend option : this feature will allow you to see the desktop or a movie you are watching spread on both screens.
  • PC screen only : You can only see on your Surface Windows RT screen.
  • Second screen only : you are able to see only on the tv, your surface Windows RT screen will be blanked out.

Now depending on the features you want to have, you can choose one of the above mentioned.

How to connect your Windows RT Operating system via wireless connection:

Remember, this only works on Surface 2 Windows RT tablets.

  1. Drag your mouse cursor to the lower right side of the Windows RT screen
  2. Click (left click) on “Devices”
  3. Click (left click) on “Project” in order to choose the options you want for your screens.
  4. Click (left click) on “Add a wireless display“
  5. A list of wireless devices will appear on the screen.
  6. Choose the wireless device you recognize as your TV or monitor.

These are the two easy tutorials on how to connect your Windows RT with an outside TV. If you have any thoughts on this let us know below by writing us a few ideas.

READ ALSO:

How to retrieve your files from Windows.old

You just upgraded your system to Windows 10, and now you want to retrieve your old files from Windows.old?

Well, you better hurry up, because Windows.old is not going to be there for ever. If you don’t get your files on time, they’ll be gone forever.

windows.old windows 10

What is Windows.old, and how do you recover files and data with it

So what is the Windows.old folder exactly?

Well, when you upgrade your system from one version to another, all files and data from your old system are stored in Windows.old folder.  So, you can access them, even after the upgrade to the newer version of Windows.

But, Windows.old folder only appears if you perform an upgrade. If you clean install Windows, and perform a hard drive format before that, you won’t get Windows.old folder

As we said, data and files from your old Windows are stored in this folder, so you can retrieve from there. Files from Windows.old are also used for Recovery option in Windows 10.

Window.old indeed takes some space on your HDD, and deleting it will give you some extra free memory.

But there’s a catch, maybe you won’t even need to delete it manually. Windows will delete it automatically after some time to free up some disk space.

windows.old windows 10 recovery

And that’s the topic of our article actually. We saw a lot of people complaining on Microsoft forum how their Windows.old folder just disappeared. Also, they’re unable to retrieve their valuable files.

Well gentlemen, if these files are so valuable to you, what took you so long to just copy them to another folder?

So, if you also have valuable files in Windows.old folder, copy them to a safer location as soon as possible. Windows will automatically delete this folder after 30 days.

As you can see when you go to Settings>Recovery>Go back to Windows 7/8/8.1, you can see the message which tells you that this option will only be available for 30 days.

So basically, as long as you have this option in your Settings, Windows.old is still present on your computer, because they’re tightly connected, as we said before.

Microsoft says that it’s impossible to retrieve files once the Windows.old folder is deleted, and we tend to believe in that.

Some people say that installing some third-party software for file recovery. Since no one actually confirmed that using such kind of program to get Windows.old folder back, we advise you not to waste your time with that.

If you don’t know how to get files from Windows.old to your computer, it can’t be simpler.

You need to search through Windows.old folder for a certain file, or more files you want to get back. Then, simply copy them to another location.

On the other hand, if you’re sure you’ve copied everything from this folder, or you have nothing to copy at all, you can delete Windows.old folder by yourself. This will free up to 20GB of disk space.

Unfortunately, you can’t delete this folder normally, like any other folder in Windows. So, you’ll have to do a couple of things to delete it, and here’s how to do that:

  1. Go to Search, type disk cleanup, and open Disk Cleanup
  2. Choose C:/ and press Enter
  3. Click Cleanup system files
  4. Find Previous Windows installation(s) in the list, and check itwindows.old disk cleanup
  5. Click OK and wait a few moments

That’s about it, after performing this, Windows.old will be gone from your computer. So, you can delete it by yourself, or you can let Windows delete it automatically, it’s completely up to you.

Once again, if you have meaningful files in Windows.old, don’t be lazy, don’t wait more than a month to move them to another location, because there’s a chance you’ll lose those files forever.

However, if you don’t have valuable files in this folder, you don’t have to wait for Windows to delete it, you can delete it by yourself and free up some space, right now.

Read Also:

Fix: WD My Cloud Not Working in Windows 10

Many people use cloud services to store their essential files, and one of those services is WD My Cloud. Although WD My Cloud is an excellent service, it seems that some Windows 10 users are having problems with it.

According to users, WD My Cloud used to run perfectly on Windows 7, but after upgrading to Windows 10, there seem to be some issues.

Today, we’re going to try to resolve these issues. If you’re having problems with WD My Cloud, you might want to try one of the following solutions.

How can I fix WD My Cloud issues in Windows 10?

1. Add My Cloud to the list of credentials

  1. Open Control Panel > User Accounts and go to the Credential Manager.credential manager
  2. Next choose Windows credentials and click on Add a Windows credential.Add a windows credential
  3. In the Internet address field enter the name of your My Cloud device.add a windows credential internet, user name, password
  4. In the Username field enter the username that you use to access My Cloud.
  5. In the Password field enter your password.
  6. After you’ve saved your changes restart your computer and try accessing My Cloud again.

We have to mention that some users advise not to use a PIN, so instead of using PIN, make sure that you use your username and password.

2. Modify the Registry

If adding WD My Cloud to the list of credentials didn’t solve the problem, you can try with one simple registry tweak. To perform this registry workaround, follow these steps:

  1. Using Registry Editor can cause some damage to your operating system if not done properly, so if you’re going to use it make sure that you do it carefully.
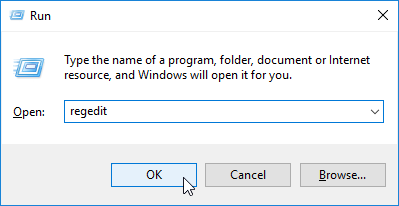
  2. Open Registry Editor. You can open it by pressing Windows Key + R and typing regedit.regedit run
  3. When the Registry Editor opens navigate to:
    • HKLMSYSTEMCurrentControlSetServicesLanmanWorkstationregistry editor HKLM SYSTEM CurrentControlSet Services
  4. Next, on the right side you need to create a new DWORD called AllowInsecureGuestAuth registry editor new DWORD
  5. Edit the AllowInsecureGuestAuth DWORD you’ve just created and set its new value to 1.
  6. Close Registry Editor and restart.

3. Change Internet Protocol Version 4 (TCP/IPv4) settings

If your shares don’t show up as they did on Windows 10, you might want to try the following steps:

  1. Open Control Panel.
  2. Go to Network & Internet > Network and Sharing Center in Control Panel.
  3. In Network and Sharing Center go to Change Adapter Settings.change adapter settings
  4. Find the adapter that you’re currently using, right click it and choose Properties.
  5. Select Internet Protocol Version 4 (TCP/IPv4) and click Properties.ipv 4 proprieties
  6. When Properties window opens go to Advanced > WINS.ipv 4 advanced
  7. Click on Enable NetBIOS over TCP/IP and click OK to save your settings.

4. Perform a Network Reset

This is a rather simple and quick fix that had a lot of success for many users. To try it yourself, follow the steps:

  1. Press the Windows Key +I
  2. Windows Settings should appear. There select Network & InternetNetwork and Internet
  3. In the left panel select Status
  4. In the bottom, the last option should be Network Reset. Click on it and then confirm with Reset Nownetwork reset

That’s about it. We hope this article helped you solve your problems with WD My Cloud on Windows 10. If you’re on Windows 11, we have a similar guide on what to do if WD My Cloud is not showing on the network, so don’t miss it.

If you have any questions or if you found another way to solve the problem, reach for the comments section below.

Edge Insider moves web app installs to Windows 10 top level after feedback

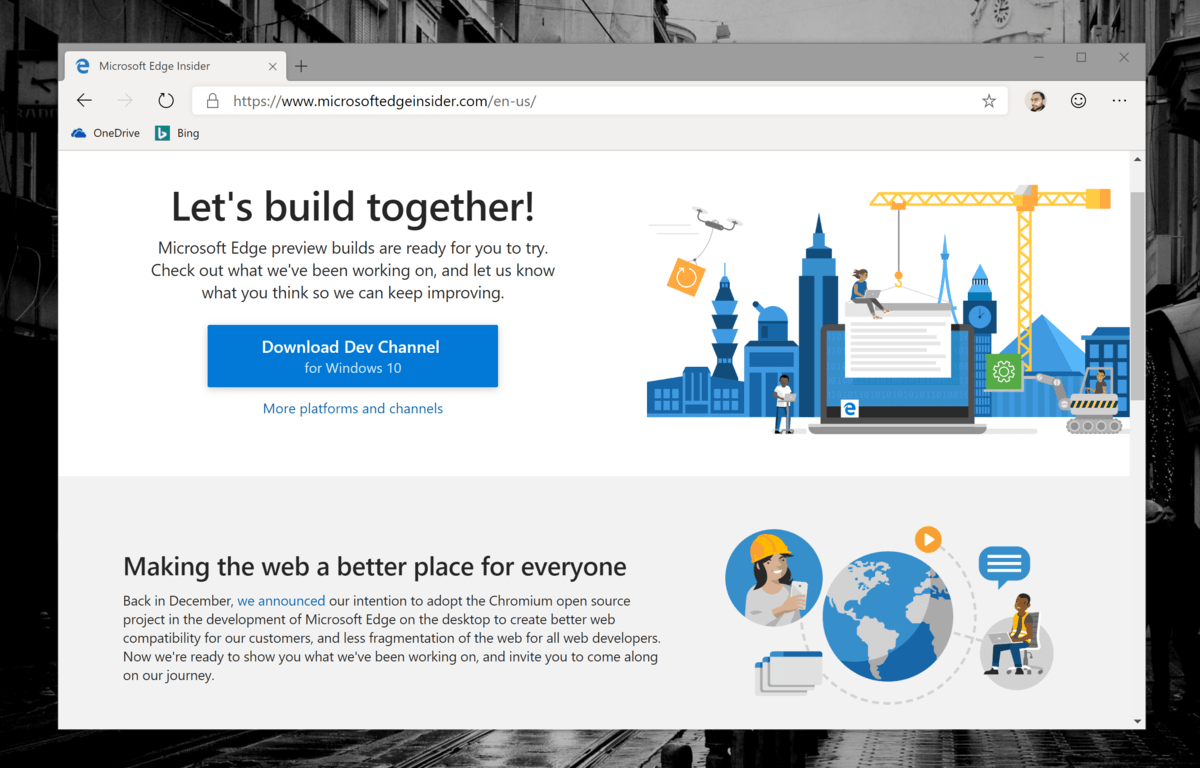
After listening to feedback from Edge Insiders, Microsoft has changed how web apps appear on the Windows 10 Start Menu. The new Chromium-based browser allow users to quickly install web apps from the browser’s ellipsis menu, but until now these web apps were somewhat hidden in an Edge app folder in the Windows 10 Start Menu.

That wasn’t really great for discoverability, and Microsoft has changed it to make web apps installs show up at the top level of the Windows 10 Start Menu. This change is automatic on the Canary and Dev channels, and it doesn’t require an app update.

Web apps are quite a big deal in Microsoft Edge, especially since the company adopted the Chromium open source project to improve compatibility with modern web technologies. However, it’s quite a bumpy road so far, as there are some surprising compatibility issues with some of Google’s web apps such as Google Docs or Google Meet. Unfortunately, that’s the kind of issue that could make it difficult for some Edge users to finally leave Google Chrome behind.

May the fourth be with you – Microsoft Store celebrates Star Wars “holiday”

As you can probably tell from the pun, May 4th is Star Wars Day. To celebrate such an occasion, the Microsoft Store is hosting a sale which knocks down the price of multiple games in the Star Wars universe.

Star Wars Battlefront II for the Xbox One is just $7.50 right now, which is 70% off its $24.99 price. Additionally, the LEGO Star Wars: The Force Awakens is also half off, bringing the game to just $10, or $15 if you want to go with the Deluxe Edition.

Numerous Xbox 360 games are also on sale, and Xbox One owners also have the benefit of being able to play most of the games on the newer console. The LEGO Star Wars: The Complete Saga is on sale for $6.99 (65% off), Star Wars: Battlefront and Battlefront II are both 40% off, and many other games are also on sale. You can head over to the Microsoft Store to see all of the games on sale.

In addition to the games on sale, the Microsoft Store is also expected to host a Star Wars movie sale later this week, just as it did last year. We’ll just have to wait and see, so feel free to sound off in the comments which games or movies you’ve been looking at.

Unreal Tournament 2004 fullscreen not working [Windows 10/11]

Windows 10 is the latest operating system from Microsoft, and sometimes new operating systems have issues with older software. One of these issues is related to a video game called Unreal Tournament 2004.

Users report that Unreal Tournament 2004 isn’t working in fullscreen, so let’s see if we can fix this.

Unreal Tournament 2004 is an old game, so some issues are expected. Users report that they are getting errors when they are trying to run the game in fullscreen.

This isn’t just related to Unreal Tournament 2004 and other games that use Unreal 2 engine are having these issues as well.

It appears that there are no issues in window mode, but let’s see if we can make Unreal Tournament 2004 run in fullscreen.

What to do if Unreal Tournament 2004 isn’t working in fullscreen:

  1. Use OpenGL
  2. Set ReduceMouseLag to False
  3. Run the 64-bit version of the game

Solution 1 – Use OpenGL

To do this, you’ll need to locate the UT2004.ini file and change it. This file should be located in the Unreal Tournament 2004 installation directory.

When you find the installation directory, locate the System folder and in there you should find UT2004.ini.

  1. Right click UT2004.ini and choose Open With.
  2. Select Notepad from the list of applications.
  3. Find the following lines and set them to these values:
    • [Engine.Engine]
    • ;RenderDevice=D3D9Drv.D3D9RenderDevice
    • RenderDevice=OpenGLDrv.OpenGLRenderDevice
  4. Save the changes.

Now your game should be working properly.

Solution 2 – Set ReduceMouseLag to False

  1. Open the UT2004.ini file like in previous solution.
  2. Find the ReduceMouseLag=False and set it to ReduceMouseLag=True.
  3. Save the changes and start the game.

Solution 3 – Run the 64-bit version of the game

These issues with fullscreen appear only on 32-bit version of Unreal Tournament 2004, so you might want to try using the 64-bit version of the game. If you have all the patches, you probably have 64-bit version launcher for the game in its installation directory.

We hope that one of our solutions worked for you. Feel free to tell us in the comments section below what other issues did you encountered in UT2k4 and how did you fixed them.

[wl_navigator]

Facebook is building a new faster, smaller Messenger app for Windows and MacOS

There has been talk about Facebook’ efforts to consolidate its disparate app framework to a unified backend and create one master messaging platform for the company.

Facebook hasn’t made any distinct moves to create its new homogenous messaging service but it has announced that it’s going back to the drawing board to offer users a new messaging experience across smartphones, tablets, and PCs.

As Facebook opens its annual F8 developer’s conference this week, the company seems intent to bring Project LightSpeed to the masses.

According to VentureBeat, Project LightSpeed represents Facebook’s efforts to provide a drastically reduced Messenger App footprint for mobile and PC users with the mobile version coming in at less than 30MB in size but retains all of the features built baked into the normal app unlike its Messenger Lite alternative. The current Messenger App weighs in at a hefty 410 MB for mobile users to download while Messenger Lite comes in at sparse 6.1 MB, but again, with several features stripped out.

Beyond the sheer size of the app, Facebook would also like to reduce the loading time of the app as well on mobile, down to less than two seconds from click to launch according to the blog post.

In addition to addressing the Messenger experience on mobile, Facebook is also looking to update its PC and Mac experiences as well that include new group chat and video call features that will coincide with the company’s efforts to meld new social aspects into the platform.

Similar to Instagram, Facebook is going ‘everything but the kitchen sink’ route with its roadmap for Messenger as the company plans to integrate a “digital living room,” into the app. The idea behind the digital living room is that it would offer users a single secure place for users to engage with content from their trusted sources/friends.

Facebook is currently testing its new apps internally but expects to roll out its new efforts starting in late 2019. You can read more about the new Messenger now that Facebook has finally published the blog post.

MSN Weather App is Not Working in Windows: 3 Tested Solutions

Users have reported that the MSN Weather app no longer works in Windows. So, we’re going to offer you a couple of solutions, and we hope that at least one of them will help you.

Why is the MSN Weather app not working?

Like any other app, MSN Weather is prone to bugs, poor OS integration, or even conflicts with other Windows systems. Here are some of the main possible causes:

  • Poor update implementation – MSN Weather is updated automatically, and if the latest update is bugged, this issue may occur.
  • No internet connection – The MSN app needs to connect to the internet to return weather results; if that is poor, the software might have issues starting.
  • Corrupt files – If some of the app’s files get corrupted, the program will fail to run.

Now that we know the problems, let’s fix it by following the solutions below.

What do I do if the MSN Weather app doesn’t work?

1. Rename the configuration file

  1. Press the Windows key + E to open File Explorer.
  2. Go to the following directory (write your username, instead of YourUser): C:\Users\YourUser\AppData\LocalPackages\Microsoft.BingWeather_8wekyb3d8bbweLocalState
  3. Find the file called configuration_3.0.4.366.sqlite
  4. Rename that file to configuration_3.0.2.258.sqlite weather app doesn't work
  5. Once you’ve renamed the file, close File Explorer
  6. And now, the MSN Weather App should work

Something went wrong with applying the latest update for the Weather app, and that error negatively affected the configuration file of MSN Weather, which is necessary for running this app.

After renaming the configuration file as instructed in the solution above, and Weather app will probably work fine again.

2. Reinstall the MSN Weather app

  1. Go to Search, type powershell, and open PowerShell as administrator.
  2. Enter the following command and press Enter: Get-AppxPackage *bingweather* | Remove-AppxPackageweather app doesn't work windows
  3. And wait for the process to finish.

Most of our readers reported that renaming the configuration file solved the problem for them, but if you’re still unable to run the MSN Weather app, you can try to uninstall it, and then install the updated version from Microsoft Store again.

Just like it’s the case with most other Windows 10 built-in apps, you can’t regularly uninstall the Weather app, just by choosing Uninstall from the Start Menu.

3. Reset your system

  1. On the login screen, hold Shift, right-click on Power, then select Restart.
  2. Select Troubleshoot, Reset this PC, and Keep my files options.

That would reinstall Windows 10 and will keep your files. Also, it will remove changes, apps, and drivers you or your PC manufacturer had installed.

Of course, resetting your system can be too extreme to retrieve the MSN Weather app. There are a lot of excellent third-party free weather apps out there you can install.

Did you manage to restore the MSN Weather app to working order? Let us know in the comments section below.

Microsoft works with VA to provide Xbox Adaptive Controllers for veterans’ rehabilitation facilities

Microsoft has announced that it is partnering with Veterans Affairs to provide its Xbox Adaptive Controller to 22 initial VA rehab centers in the U.S. For those unfamiliar, the Adaptive Controller allows those with limited mobility, including injured veterans, to play virtually any game through customized setups including by using external buttons, switches, and joysticks to adapt to their needs.

As explained in the Redmond giant’s press release, gaming is not only relieves stress and helps brings injured veterans into society, but can also be used to improve muscle activation as well as hand-eye coordination. As such, Microsoft will donating Xbox Adaptive Controllers, game consoles, and various games, and additional equipment to the rehab centers.

“When I first heard about the Adaptive Controller, I just thought it was amazing that they’re actually trying to do stuff for guys who aren’t able to compete as well as others playing video games,” said Mike Monthervil, a veteran who was injured in July of 2014 just three days before his discharge date. He lost much of his finger and hand function, so traditional controllers for people like him are impossible to use.

However, thanks to the Adaptive Controller, injured veterans like him are able to rejoin the gaming community. “I think gaming is helping soldiers like myself getting back into playing and doing what they love, and are bringing joy back to their life,” he went on towards the end of the video.

“We owe so much to the service and sacrifice of our Veterans, and as a company, we are committed to supporting them,” said Satya Nadella. “Our Xbox Adaptive Controller was designed to make gaming more accessible to millions of people worldwide, and we’re partnering with the U.S. Department of Veterans Affairs to bring the device to Veterans with limited mobility, connecting them to the games they love and the people they want to play with.”

Ex Microsoft President Steven Sinofsky hosts an hour and 14 minute long “unauthorized biography” of Clippy

Over the past 20 years, Microsoft has built several products that didn’t fare very well in the market, to the point where they even became subject of mockery. From Microsoft Bob to Clippy to the short-lived Kin mobile phone, it seems that Clippy may be probably the rare exception that now generates some kind of nostalgia among long-time Microsoft fans.

Clippy (née Clipit) has been officially retired in April 2011, and eight years after its demise Steven Sinosfky, the former President of the Windows Division has participated to an hour and 14 minute long “unauthorized biography” of the Office Assistant. This is actually from the latest a16z podcast from Andreessen Horowitz, a private American venture capital firm that Sinofsky joined as a Board partner after leaving Microsoft back in 2012.

https://twitter.com/stevesi/status/1122199404536942592

As a person who previously had a key role on the development of Microsoft Office, Sinofsky has some unique insights about what was pretty much a very early version of the digital assistants many of us now use almost every day. “In the 90’s software was really hard to use”, explained Sinofsky in a long Twitter thread, adding that “the choice to take on massive risk in a feature like Clip-It should not be under-estimated. I love this part of that era of MS. Taking risk as a leader, regardless of how secure, is a truly differentiated part of culture,” he continued.

Microsoft obviously failed to achieve what it wanted to do with Clippy, but the former Office Assistant still has its fans after all these years. As a matter of fact, Clippy was almost resurrected as a downloadable pack of stickers for Microsoft Teams last month, but the software giant quickly removed them from the Internet. “Clippy is flattered by all the attention but plans to continue his retirement,” a Microsoft employee announced on the Microsoft Teams feedback website.

Windows Media Player Won’t Rip a CD: 4 Ways to Fix it

Windows Media Player is a media player software used by many for its features. However, users reported that Windows Media Player won’t rip a CD on their PC.

If you want to convert your audio to MP3, you won’t be able to do it without this feature. Luckily, it’s rather easy to fix this problem.

Why can’t I rip music with Windows Media Player?

  • Multiple music libraries on your PC might be coming into conflict.
  • In some rare instances, missing codes can cause problems with CD ripping.
  • The default Music library isn’t properly set on your PC.

How do I get Windows Media Player to rip a CD?

1. Manage music libraries

  1. Open Windows Media Player.
  2. Press Alt to open the File context menu
  3. Go to File and select Manage Libraries. Lastly, go to Music.
  4. Delete all music libraries except the default one, where your music will be placed windows media player won't rip music
  5. Try to rip your music again

2. Install necessary codecs

  1. Visit K-Lite Codec Pack download page.
  2. Download the software.
  3. Once it’s downloaded, run the setup file to install it.

After you install the codecs, check if the problem is resolved.

3. Improve the quality of ripped music

  1. Open Windows Media Player.
  2. Right-click on the ribbon of Windows Media Player and choose Tools and then Options.windows media player options
  3. Go to Rip Music and turn the audio quality to the maximum for each format.windows media player max quality
  4. Click Apply to save the modifications, then try to see if still Windows Media Player cannot rip music.

4. Restore to Default the music library folder

  1. Close Windows Media Player or make sure it is closed.
  2. Open File Explorer, find Music section, right-click on it and click Properties.
  3. Select Location tab and click Restore Default. music properties default
  4. Restart your computer to see if you can rip music with Windows Media Player.

If Windows Media Player won’t rip the CD, these steps will surely help you. In case the problem is still there, you might want to consider using a different CD ripper software.

How did you fix this problem on your PC? Share your solutions with us in the comments section.

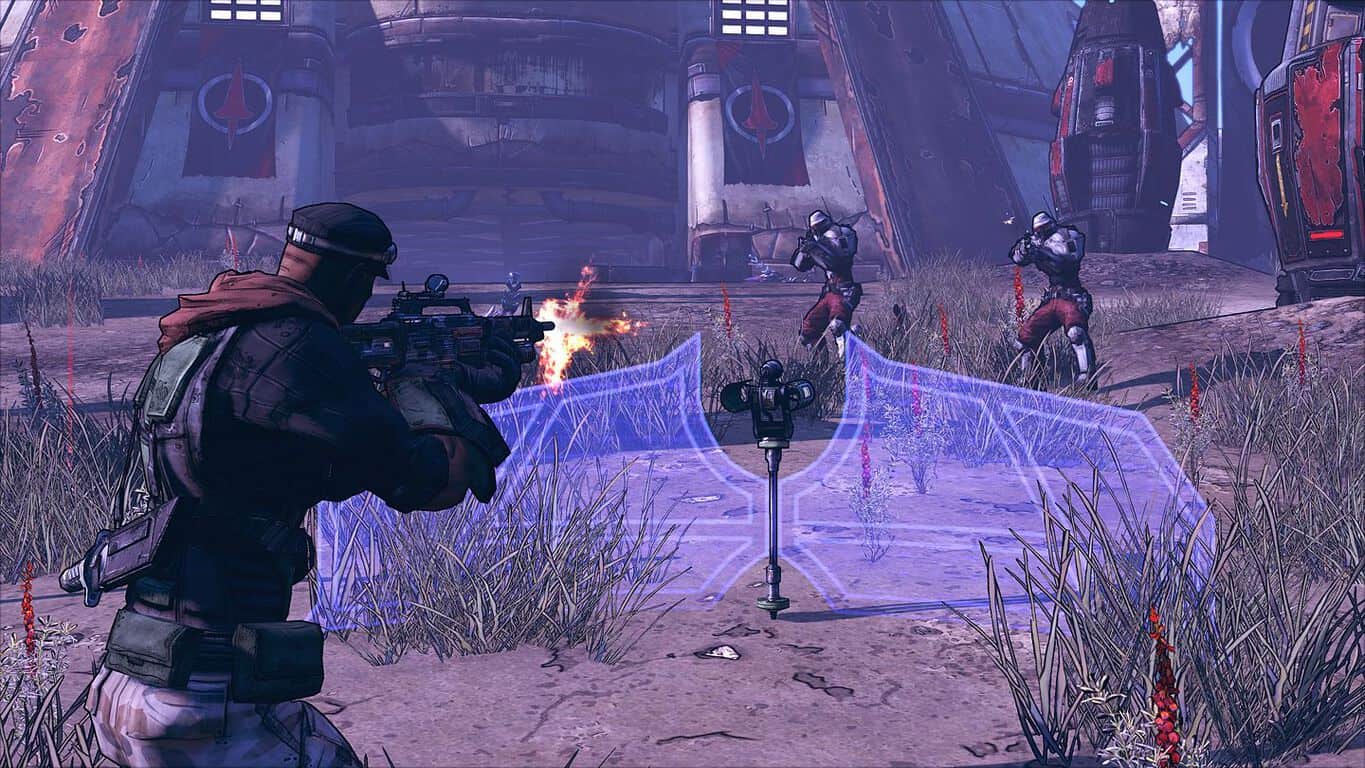
The Xbox One X Enhanced Borderlands: Game of the Year Edition is 33% off with this week’s Deals with Gold

The freshly-released Borderlands: Game of the Year Edition highlights this week’s Deals with Gold on Xbox One. The remastered version of the 2009 game has been released earlier this month on Xbox One with support for 4K at 60FPS on Xbox One X, and you can now get it for just $20.09 (33% off) with Xbox Live Gold.

Borderlands: The Handsome Collection, the bundle that includes Borderlands 2 and Borderlands: The Pre-Sequel is also 75% off this week, and both games also received a 4K update earlier this month. These are all well-timed discounts as Borderlands 3, to be released on September 13 on Xbox One, will get its gameplay reveal event tomorrow, May 1st.

This week’s Deals with Gold also include up to 75% discounts on the Forza Horizon 4 Expansions Bundle, Hitman 2, NieR:Automata Become as Gods Edition, and The Crew 2. Don’t forget to take a look at the Focus Home Interactive Publisher Sale featuring Vampyr and Farming Simulator 19, as well as the Star Wars Day Sale including several Xbox One and backward compatible Xbox 360 titles. The full list of discounted games can be found on Major Nelson’s blog.

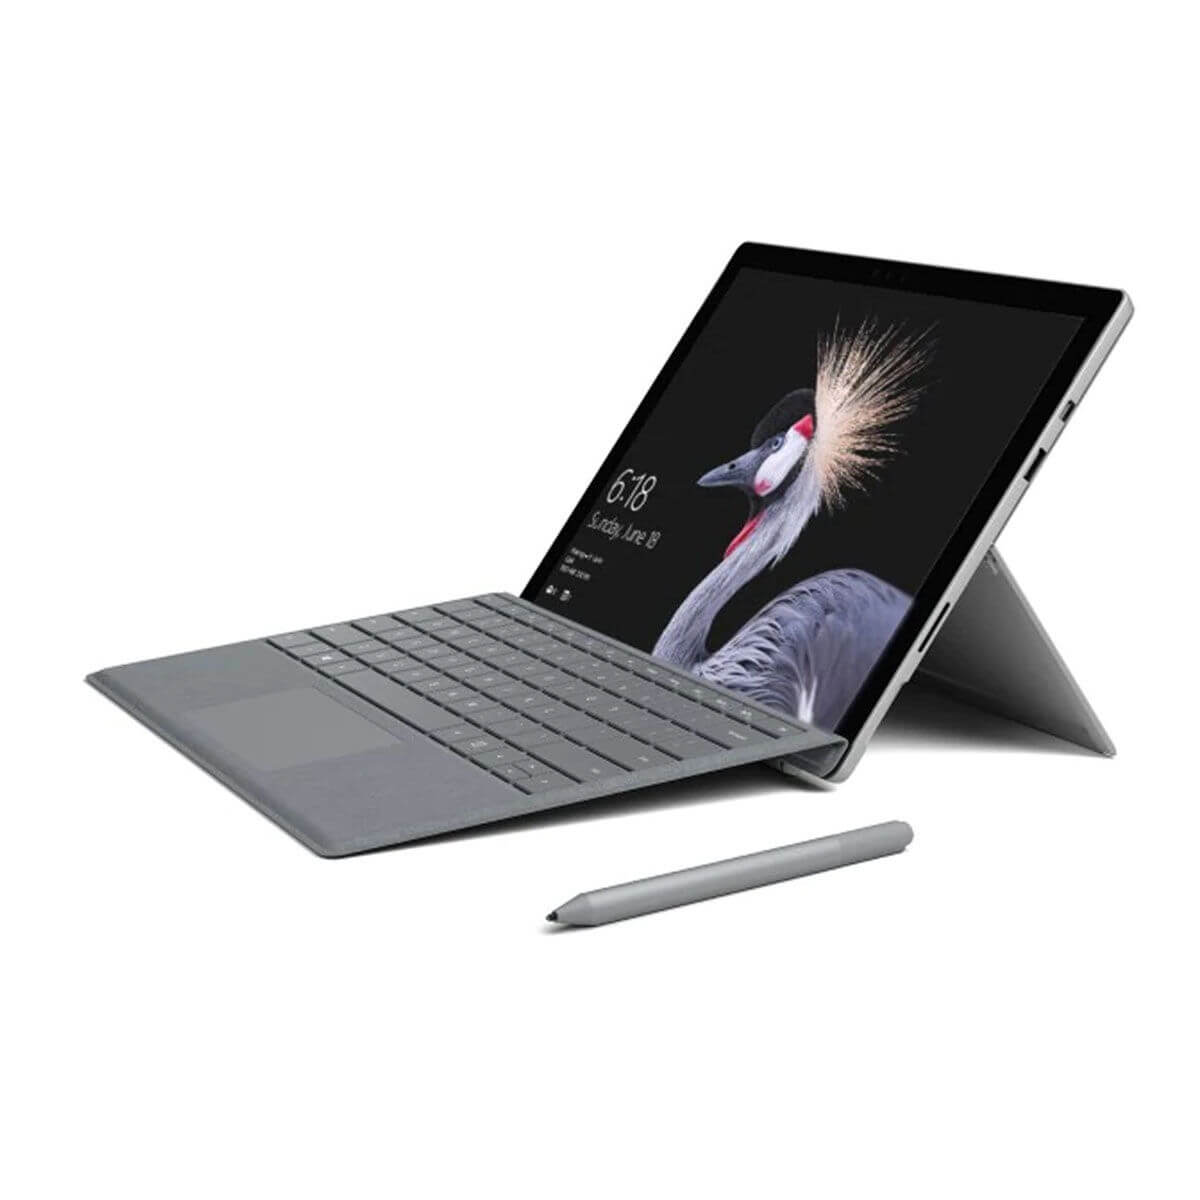
Microsoft Surface sales up by 21% in Q3 thanks to Surface Go

Microsoft recently unveiled the latest statistics for Q3 2019. The Redmond giant saw a huge boost in its revenue coming from Surface devices. 

The latest statistics released by Microsoft show an increase of around 21% in Surface sales . Microsoft surprisingly earned an amount of $1.329 billion in the third quarter of the current year.

The company saw a 14 percent ($30.6 billion) boost in its overall revenue compared to the previous year. Cloud revenue saw an impressive improvement of 41% and hit the $9.6 billion mark. However, the revenue of Windows OEM increased by around 9%.

These results clearly show that more and more people are now interested in Microsoft’s Surface devices. The upcoming version of Surface Pro is expected to land by the end of this year.

The much-awaited version will finally come with Thunderbolt 3 connectivity. As a quick reminder, the Redmond giant released Surface Studio 2 and Surface Go laptops last year.

Microsoft shifts its focus on cloud services

Microsoft also recently announced the addition of the Surface Hub 2S to the family. As far as the specifications are concerned, this version features a 50-inch screen.

In fact, It is much lighter compared to the previous models. Furthermore, Surface Hub 2S comes with equipped with a UHD 620 graphics chipset, 8GB RAM, Core i5 Intel processor and 128 GB hard disk. 

It seems like Microsoft is now focusing on Surface devices, cloud services and software. The plan worked for the company in terms of quarterly revenue.

The tech giant is also rolling out firmware updates for Surface Pro 5 and 6. These updates will bring a bundle of enhancements and fixes for both models.

You can manually check for updates from the Settings menu to update your devices. Alternatively, you can also download the latest firmware updates using the links provided below. 

RELATED ARTICLES YOU NEED TO CHECK OUT:

When is Windows 10’s next big update?

Microsoft launched Windows 10 in 2015. Since then, the software giant has released six Windows 10 build updates that have added new things to the platform. The current build version is 1809, and the big M will soon roll out the next big update for Win 10, which will be version 1903.

However, when exactly Microsoft will roll out what was codenamed the 19H1 (2019 half one) update remains slightly unclear. The big M still hasn’t confirmed an exact launch date for the first big Windows 10 update of 2019. The Corporate Vice President for Windows, Mr. Fortin, has confirmed that Microsoft plans to release the next big Win 10 update in May 2019. Mr. Fortin stated:

I’m pleased to announce that the Windows 10 May 2019 Update will start to be available next week in the Release Preview Ring for those in the Windows Insider Program. We will begin broader availability in late May for commercial customers, users who choose the new May 2019 Update for their Windows 10 PC via “check for updates,” and customers whose devices are nearing the end of support on a given release.

So, the Windows 10 May 2019 Update is the next big update for Microsoft’s flagship OS. Note that Mr. Fortin states the next update will be broadly available “in late May.” That highlights the release date for the next Win 10 build update will most likely fall somewhere between May 20 to May 31. Thus, Windows 10’s next build update release date might be about a month off at the time of writing.

Microsoft released the last two Win 10 spring updates in April. Therefore, the software giant is giving the Windows 10 May 2019 Update more weeks of testing to avert a repeat of the October 2018 Update fiasco. Microsoft rereleased that update in November 2018 after it deleted some users’ files. The rollout for that update has been one of the slowest yet.

Beyond the Windows 10 May 2019 Update, Microsoft will release the 19H2 (2019 half two) and 20H1 (2020 half one) updates. The software giant has already released Windows Insider preview builds for both those updates. Microsoft will roll out 19H2 and 20H1 to all users in the fall of 2019 (September, October, or November) and spring 2020 (March, April, or May).

Before the Windows 10 October 2018 Update, Microsoft had seemingly settled on April and October being the regular launch months for its annual build updates. However, things have changed a bit with Microsoft announcing a May release for 2019’s spring update. Now it can only be assumed that the big M will launch its Win 10 build updates in the spring and fall of each year.

RELATED STORIES TO CHECK OUT: 

How to block Windows 10 v1903 from installing on your PC

Microsoft decided to release Windows 10 version 1903 to the general public in May so as to offer a longer preview phase to software and PC OEMs manufacturers.

This will give them more time for testing their hardware and detect potential conflicts on the upcoming OS version.

The Windows 10 May 2019 Update is unique in the sense that it can flag systems with software and hardware conflicts with the help of machine learning algorithms.

Windows 10 users are now interested in blocking/delaying the May 2019 Update considering the issues caused by previous feature updates.

There are three ways to delay or block the Windows 10 May 2019 update. We’ll list them below.

How to delay Windows 10 May 2019 Update installation

1. Block Windows 10 v1903 on Windows 10 Home PC

You can enable a metered connection to block the Windows 10 May 2019 Update. This option was designed for Windows 10 users who have limited bandwidth on a monthly basis.

You can avoid installing the large update files by enabling the metered connection. Here are the steps to follow:

  1. Go to Start > Settings > Network & Internet and select Ethernet or WiFi based on your type of connection.
  2. Click on the name of your internet connection.set internet metered connection
  3. Go to Metered Connection section and click to turn on the Set as a metered connection option.

2. Block Windows 10 v1903 on Windows 10 Pro PCs

Microsoft provides Windows 10 Pro users with more options to pause or defer updates. You can use the Pause updates option to pause updates for a period of 35 days.

Click Start > Settings > Update & security > Windows Update > Advanced Options.

The “When updates are installed” option helps you to defer updates even longer than 35 days.

There are two options: Semi-Annual Channel and Semi-Annual Channel (Targeted). The first one deals with tested and ready for release updates and the second one deals with feature updates.

  • Choose the default, “Semi-Annual Channel (Targeted)” channel.
  • Click the next dropdown and choose from 1-365 days to defer next feature update.

3. Use the Group Policy Editor

Windows 10 Pro users can choose a start date for deferring updates by using Group Policy Editor.

  • Enable Group Policy Editor, open it and go to Computer Configuration > Administrative Templates > Windows Components > Windows Update > Defer Updates group editor defer windows 10 updates
  • Go to Select when Preview Builds and Feature Updates are received > click Enabled.
  • Select any one of these options Semi-Annual Channel (Targeted) or Semi-Annual Channel and type your desired number of days up to 365.

And this is how you can defer the Windows 10 May 2019 Update.

Remember that the latest Windows 10 versions pack a plethora of new features and system improvements. In order to avoid technical glitches that are inherent with a brand new OS version, you should pause updates for one or two months.

This will give Microsoft enough time to patch any major issues that went under the radar during the testing phase.

RELATED STORIES TO CHECK OUT:

Latest Edge Insider Canary gets spell checking

In its efforts to reinvent its web browsing experience, Microsoft’s Edge team has been quickly re-engineering features and experiences into its new Chromium-powered browser.

Today, the Edge team has brought back a crucial feature to its browsing experience with the addition of in-line spell checking.

For those who aren’t able to keep up with the change logs of the daily updated Canary builds of Edge, various Redditors have taken the liberty to chart and catalogue most of the new additions come down the release lane to Microsoft latest browser development efforts.

As of a few hours ago, news about spell check coming to the new Chromium Edge browser began surfacing with attached images as confirmation of the feature’s release.

According to some Redditor’s, spell check has been buried in previous builds of the new Edge browser, but it hasn’t been until today that a flag has been associated with its enabled ability. To begin using spell check in the new Edge, there are a couple of steps some users need to follow to enable the feature.

Similar to enabling a dark theme in the new Edge browser, users will need to visit the flags section of the browser here, to turn it on, for now.

Presumably, Microsoft will release an Edge build down the road with the spell check featured enabled automatically, but until then, it’ll have to be a manual affair for those who would like to bask in the convenience of in-line spell experiences similar to the old Edge browser or other mainstream alternatives.

Microsoft partners with Dell to bring VMWare to Azure

Microsoft and Dell have become further entrenched in their OEM and software partnership that now includes native support, and certified VMware experiences on Microsoft Azure.

According to a post on the Official Microsoft Blog from Scott Gutherie, executive vp of cloud and enterprise  the two companies are coming together to provide customers with VMware technologies in the new Microsoft 365 ecosystem experience that will enable extended management and security capabilities of Microsoft Intune and Windows Virtual Desktop, all on top of, native virtual machine experiences in Azure.

Customers can now seamlessly run, manage, and secure applications across VMware environments and Microsoft Azure with a common operating framework. Customers will be able to capitalize on their existing VMware investments, skills and tools, including VMware vSphere, vSAN, NSX, and vCenter while leveraging the scale, performance and innovation of Azure.

The news comes roughly two years after Dell first announced its majority stake acquisition of VMware back in September of 2016. While the goal was and seems to remain to this day was to allow VMware to operate independently, “the whole is greater than the sum of its parts”, according to Gutherie.

As it will be known as, VMWare One will be rolled out in later in 2018, and bring with it established partners such as SAP, Citrix, and Adobe out of the box all looking to spur innovation in the sector by later this calendar year.

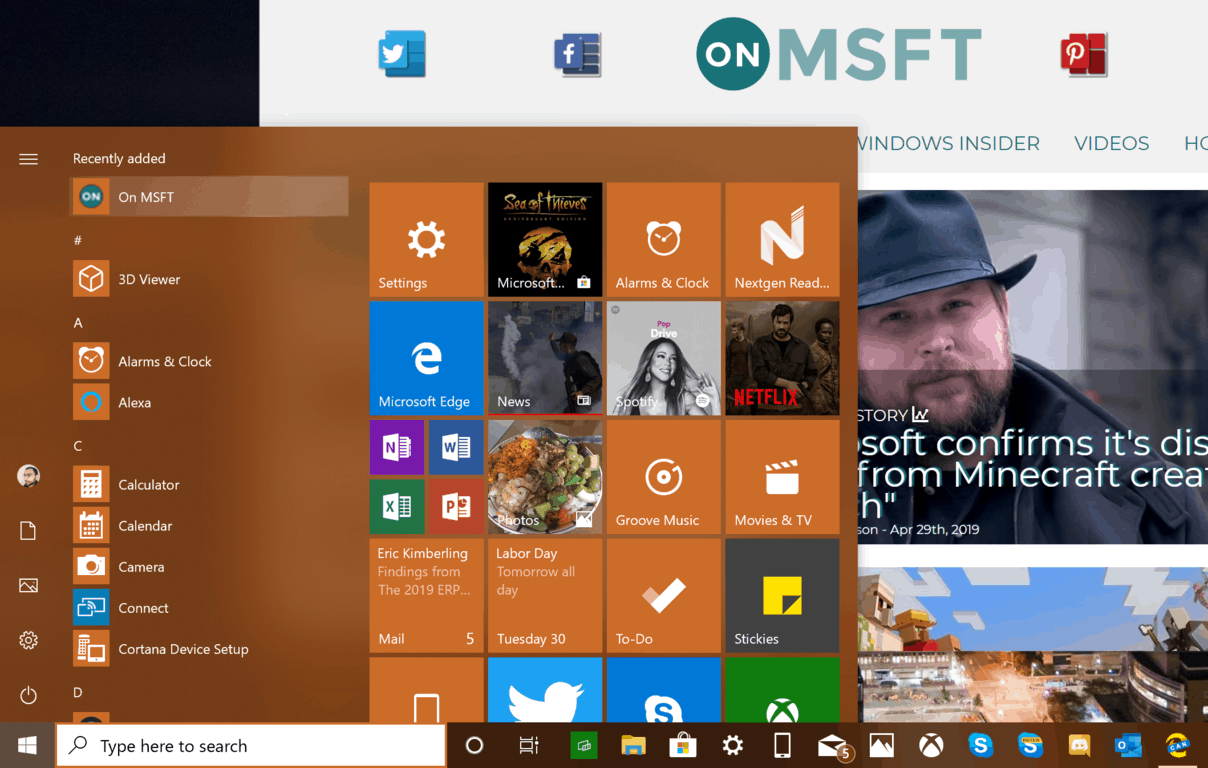
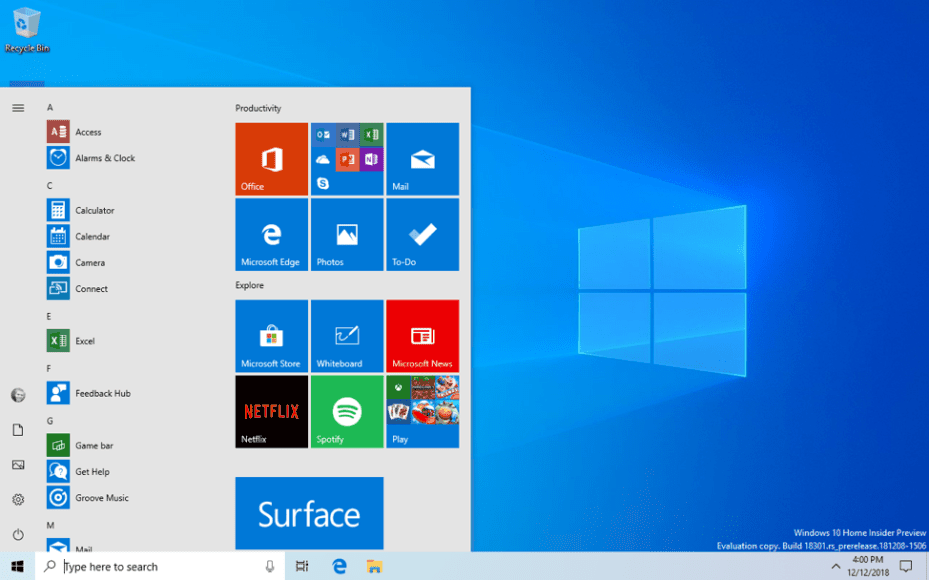
Simplified Start Menu on Windows 10 May 2019 Update doesn’t completely skip the bloatware

Despite Microsoft announcing that the Windows 10 May 2019 would come with a “simplified Start layout” for new devices and clean installs, Microsoft hasn’t completely given up on preinstalling apps like Candy Crush or Netflix. After Microsoft released new ISOs for the May 2019 Update on MSDN, some users have shared their different Start Menu after doing a clean install (via AskWoody), and regarding bloatware it seems like your mileage may vary.

As noticed by Tero Alhonen, the Start Menu will change depending on the user opting for a Local Account or a Microsoft Account during the out of box experience. Users choosing a local account will get apps like Netflix, Sptoify and Adobe Photoshop Elements preinstalled, while those choosing a Microsoft account will get many casual games being pinned on their start menu.

It looks like having Windows 10 Home or Pro doesn’t matter, as all users options for a Microsoft account during setup will get games like Candy crush on their Start Menu. In a reply to one of Term Alhonen’s tweets, Michael Niehaus, Principal Program Manager, EMX, modern deployment team at Microsoft said that “Targeted apps can vary by region.”

While we didn’t try this on our own machines, there’s apparently a trick to get a clean Start Menu with no games when doing a clean install: you’ll need to choose “Continue with limited setup” during the out of box experience, so that Windows 10 won’t connect to the Internet to download those superfluous apps.

In the end, Microsoft did clean up the Start Menu in the Windows 10 May 2019 update a little bit with a single column design with reduced top-level tiles, but you’ll still get a fair amount of preinstalled apps. Of course, if you just update from a previous version of Windows 10, be assured that Microsoft will let your Start Menu just as it is.

Microsoft is working on an “open design” philosophy, but there’s still a long way to go

Since Microsoft launched the first version of Windows 10 back in 2015, we’ve seen the desktop OS evolve quite a lot after Microsoft adopted a much faster release cycle. It’s hard to argue with the fact that Windows 10 is probably the best version of Windows ever, but from a design standpoint, we’d say we still have mixed feelings.

In a way, it looks like Microsoft has yet to manage to recreate the same magic that pervaded in Windows Phone, a mobile OS that looked like nothing else in the market at the time. Unfortunately, if Windows Phone 7/8/8.1 introduced the beautiful Metro UI with its smooth and tasteful animations, Windows 10 Mobile and its disjointed design looked like a big step back. The same can be said about Windows 10, as many of the concept images we saw during the early months of the Windows Insider Program never saw the light of day.

This old concept image for the Windows 10 Contacts app never became reality.

Using a Windows 10 PC today, it’s still far too easy to find design inconsistencies across Microsoft’s own inbox apps, or many different versions of what a dark theme should look like from the same company. We were hopeful when we saw Microsoft announced its new Fluent Design Language back at Build 2017, but the gradual rollout that was announced at the time still leaves much to be desired.

By choosing to roll out Fluent Design in waves instead of doing it all at once, Microsoft allowed some apps to look more modern while others took longer to update, and sometimes with a different result. Unfortunately, the end result is something that looks unfinished, which is a shame as Microsoft is really capable of creating beautiful concept images, as seen in the first Fluent Design video from Build 2017.

If Fluent Design still remains very important for Microsoft, the software giant has apparently changed how it operates to enforce a new “open design” philosophy. According to The Verge which recently visited Microsoft’s Redmond headquarters to speak with designers and engineers, this is all about breaking silos and create synergies between different teams. Apparently, his change already had a profound impact on hardware and software design within the company, the report says.

This isn’t just about improving Microsoft’s visual design, though. It’s a much deeper change meant to modernize how Microsoft ships software and competes with far more nimble startups that can aggressively go after the many businesses it’s traditionally controlled. A lot is at stake in a technology industry that’s moving faster every year.

The Verge’s report is a very interesting read, though it has already earned some interesting comments on the Internet. Owen Williams, a former Mac loving developer who recently made the switch to Surface devices, emphasized that Microsoft’s implementation of Fluent Design is still quite a mess after almost two years.

Yesterday, another developer published a long Twitter thread highlighting all the design inconsistencies still found across Microsoft products, as well as the lack of detailed documentation about Fluent Design. “Microsoft announcing they would roll out Fluent Design in “waves” was a huge red flag from the start and it shows,” wrote the developer, adding that “right now Fluent Design isn’t a System. It’s just a bunch of poorly defined elements.”

We’ll likely hear more about Fluent Design at Build 2019 next week, as the developer conference seems to be the perfect opportunity to do so. There’s actually a session named “Fluent Design system: the journey to cross-platform,” indicating that Microsoft is ready to bring the design language to the web and apps on other platforms than Windows 10. We’re not sure if this should be the priority considering the not the great design situation on Windows 10, but maybe Microsoft is finally ready to enforce some clear design guidelines after two years of experimentation.

Rumor: Microsoft may not talk about WCOS or Windows Lite at Build 2019, or Andromeda at all

Microsoft’s annual developer conference Build is slated to start in just a week, with lots of news and sessions about Azure, Microsoft 365, open source developments, and enterprise advancements. However one bit of news that apparently won’t be making an appearance at this year’s Build, according at least to Tom Warren from The Verge, is any unveiling of Windows Core OS, or WCOS, or any news about a long rumored new platform built on top of it, Windows Lite:

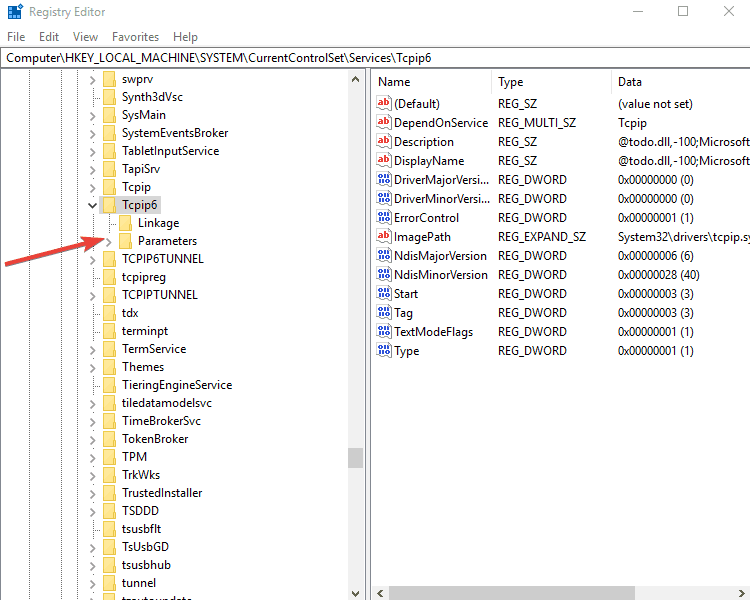
Microsoft hasn’t talked publicly at all about WCOS or “Windows Lite,” all the news about this new platform have come from tech writers, along with some rather cryptic mentions in places like Registry settings from the latest Windows Insider builds. Neither has it talked at all about another much rumored Microsoft product, “Andromeda.” That code name refers to a mobile device, at one time thought of as a “Surface Phone,”, but according to another Tom Warren tweet (and there’s really no telling how serious he’s being), we won’t be hearing much, if anything at all about Andromeda:

Warren is promising “a big story” publishing today, although nothing has gone up on The Verge as of yet. We’ll keep our eyes and ears open, but it’s a good time to remember that what Microsoft does does not always follow along with what various tech writers have heard they’re going to do (including, of course, this bit of “news” from Tom Warren).

We’ll keep our eyes and ears open, and make sure to stay up to date on all the latest from Build and beyond with OnMSFT.com

Install KB4497093 to fix Windows 10 v1903 upgrade issues

Microsoft recently released Windows 10 build 18885 to Fast Ring Insiders. This release takes the Windows 10 May 2019 Update build to version 18362.86. 

Microsoft came up with the idea to merge the Skip Ahead and Fast Rings. However, users immediately started reporting were are unable to upgrade to 20H1. The bug forced Microsoft to block the update for everyone who skipped build 18875.

The Redmond giant recently fixed all these upgrade issues by releasing KB4497093. This update addressed different issues including a bug that was restricting users from upgrading their systems.

KB4497093 improvements and fixes

Upgrade issues fixed

Some users previously experienced various issues while upgrading to Windows 10 20H1. Thankfully, Microsoft noticed that issue and fix the bug with KB4497093’s release.

UWP VPN plugin bugs

KB4497093 fixed another issue affecting UWP VPN plugin apps. The respective apps failed to function properly.

Japanese IME and date/time bug fix

The update came with some improvements for Japanese users. Windows 10 users can now install KB4497093  to fix Japanese IME and date and time issues on their systems.

Windows Update error 0x80242016 fixed

The recent release addressed error 0x80242016 which restricted users from updating to new Windows 10 builds.

KB4497093 bugs

KB4497093 also brings a few issues of its own. The patch seems to be a bit buggy compared to the recent cumulative updates. Many Windows 10 Insiders reported experiencing Green Screen of Death (GSOD) errors after starting the upgrade process.

Moreover, other users reported getting “This PC can’t be upgraded to Windows 10” alerts as well.

Comment down below if you are dealing with any such issues.

RELATED ARTICLES YOU NEED TO CHECK OUT:

Windows 10 news recap: May 2019 Update to require 32GB of storage, Google Chrome gets a dark mode, and more

Welcome back to our Windows 10 news recap, where we go over the top stories of the past week in the world of Microsoft’s flagship operating system.

Windows 10 May 2019 Update to require 32GB of storage

The next update for Windows 10, scheduled for next month, is set to increase the minimum storage requirements to 32GB. The Windows 10 May 2019 Update will bring this new storage requirement, rising from 16GB to 32GB, for both 32-bit and 64-bit versions of Windows 10.

OneNote UWP to receive a page template feature, page sorting, in upcoming update

OneNote is to receive a new update that is “coming up soon” that will add a new page template feature, as well as the ability to sort/filter pages.

Google starts rolling out native dark mode support in Chrome version 74, but you can enable it now

Google Chrome on Windows 10 is finally receiving a native dark mode. Version 74 is rolling out to users and if Windows 10 is set to its native dark theme, Chrome will automatically switch to its dark mode.

Microsoft confirms it won’t remove MS Paint from Windows 10 for now

To the applause of Windows veterans, Microsoft has confirmed that it won’t be removing Microsoft Paint from Windows 10, for now at least, despite previously stating that Paint could be removed in a future version of Windows 10. Ultimately, the company aims to replace Paint with Paint 3D.

That’s it for this week – we’ll be back next week with more Windows 10 news!

Is Minecraft having a mini-resurgence?

Minecraft, a blocky open-world game originally created by Markus “Notch” Persson, later developed under the company Mojang, now owned by Microsoft, is undoubtedly one of the most popular games in recent history. Whilst a simple game at heart, it allows creative minds to be unleashed. It has a huge community of players, mod developers, map builders, and texture pack designers, all with the aim of enjoying the game and extending its core features.

Microsoft purchased Minecraft’s developer, Mojang, in 2014 for $2.5 billion. At the time, it was seen as a large sum of money for a company that essentially relied on one single game. But it made sense; with Microsoft’s huge gaming umbrella, Xbox, and Minecraft’s massive player base and room to grow, there was a lot of routes Microsoft could take with Minecraft. In the end, the company has ended up taking the micro-transaction route with the Minecraft Store on the Bedrock edition of the game, helping to bring in regular income from current players through the selling of virtual currency, Minecoins, that are spent on add-ons to the game.

If you ask original players of Minecraft from 2011-2014 about the game, they’ll probably say they either don’t play it, or don’t play it as much. Minecraft saw its heyday between 2011-2016, experiencing record growth in downloads and players, thanks in part to the number of YouTuber’s that created content for the game.

Despite how popular Minecraft is, things began to quieten down a little. Many YouTuber’s moved to other games that have since taken a leading role, such as Fortnite, Rocket League, amongst others. Content on YouTube began to switch to other games, and Minecraft’s largest YouTube player base began to move to other games. DanTDM (“The Diamond Minecart”) is a strong example – the world’s richest YouTuber in 2017 – began to move away from the game.

But recently, something has changed. YouTuber’s look to be getting a little bit nostalgic and returning, at least for now, to the realms of the Minecraft world. If you have a history of watching Minecraft on YouTube in the past, you’re probably starting to see YouTube’s algorithm begin to showcase recent Minecraft videos… from some large YouTuber’s. Taking DanTDM as an example, Dan has recently posted a video titled “Revisiting the Old Minecraft Lab” which in less than 24 hours has garnered over 1.7 million views, delivering more views than most of his recent videos.

But it isn’t just DanTDM. Other YouTuber’s have begun taking notice of the game too…

Vikkstar, known for his Minecraft and more recently, Fortnite gameplay, has also started uploading regular videos of Minecraft. Here’s an example:

Does anybody remember the YogsCast? Well-known for their Minecraft mod reviews under the name “YogLabs”, but also for their (failed) game, YogVentures. They, too, have started a new series of Minecraft.

It’s not clear if Minecraft’s player base is seeing a sudden growth again, or if people are simply getting nostalgic, but people are once again taking notice of the game. It comes at an important time for Microsoft, as the company continues to release major updates, such as the Minecraft 1.14 update which brought a number of new features and changes, and whilst the company continues to try to push people to the Bedrock edition of Minecraft which works on games consoles, mobile, and Windows 10 – this edition of Minecraft is important for the company as it includes the micro-transactions.

One threat to Minecraft is, surprisingly, one of the companies behind one of the largest Minecraft servers, Hypixel. Hypixel is a well-known mini-game Minecraft server, supporting thousands of players each day. Hypixel is now working on its own game that, to some degree, competes with Minecraft. It’s called Hytale, and the company is preparing for an upcoming beta release of the game and has been teasing it. It’s clearly already gained a fan base from the amount of community interaction online – and it’s not clear how, or if, this will affect Minecraft.

Regardless of whether Minecraft is still as popular as it once was or not, it’s clear there is still a demand amongst the gaming community for a game with Minecraft’s characteristics, whether that’s Minecraft or another game, that demand will be fed by something. Is Microsoft best placed to take on this demand, or will it let it slip to other games?

Download KB4493437 to fix keyboard input issues on PC

Microsoft addressed a bunch of Windows 10 version 1803 issues by releasing KB4493437. The update increases the current OS build to 17134.753. 

Microsoft has a bad track record as far as the Windows 10 updates are concerned. Oftentimes, users delay the installation of new updates until the company has fixed the initial issues.

However, if you still prefer to install the updates, you should first back up your device properly. A back up always comes in handy if you need to recover your data in case anything goes wrong.

KB4493437 major improvements and fixes

The list of improvements and fixes was quite a long one for KB4493437, compared to KB4493436 and KB4493440. Let’s have a brief look at some of key improvements.

Print Workflow Applications launch fixes

Many users reported that they failed to launch Print Workflow Applications. Users will be happy to know that the bug has been eliminated with KB4493437. 

MS Office bug fix

KB4493437 addressed an issue that disabled the new App Container feature for MS Office users.

UWP apps keyboard input fixes

Microsoft also fixed an issue with Universal Windows Platform apps. The bug was blocking input from the keyboard.

Microsoft Edge favorite list fix

Microsoft says that it fixed a bug that caused Edge to remove the Reading List or Favorites. Windows 10 users started reporting the issue right after they updated their OS.

KB4493437 bugs

Apart from the above mentioned fixes, Microsoft acknowledged two known bugs in KB4493437. The big M recommends uses to try any of these option to disable the Variable Window Extension on WDS server so as to fix the first bug.

Option 1:
Open an Administrator Command prompt and type the following:

Wdsutil /Set-TransportServer /EnableTftpVariableWindowExtension:No

Option 2:
Use the Windows Deployment Services UI.

  1. Open Windows Deployment Services from Windows Administrative Tools.
  2. Expand Servers and right-click a WDS server.
  3. Open its properties and clear the Enable Variable Window Extension box on the TFTP tab.

Furthermore, Microsoft says that users may encounter the 0xC00000A5 error while performing some specific operations. We expect a hotfix to be released with the upcoming update release.

If you want to download KB4493437 on your system, you can visit the Settings menu and navigate to Update & Security >> Windows Update and click Check for updates.

RELATED ARTICLES YOU NEED TO CHECK OUT:

Windows 10 Your Phone app now supports additional Android devices

Microsoft has extended the screen mirroring capabilities of Windows 10’s Your Phone app. Android users can use this amazing feature to mirror the screen more phones directly to their Windows systems. For the time being, this feature is limited to Windows Insiders. 

Previously, the original version of the app supported Samsung Galaxy S8, S8+, S9, and S9+ models. Vishnu Nath, Director of Program Management at Microsoft Mobile Experiences confirmed in a recent Tweet that Your Phone app now supports more devices. 


It should be noted that this feature is available to those Windows 10 devices that support the Bluetooth Peripheral role. We can see that right now the only available device that meets this requirement is the Surface Go.

In response to a tweet that inquired about the possibility of expanding the service to additional devices apart from Surface Go, Nath explained:

Currently it is only PCs that support BT Peripheral role which does include Surface Go. We are actively working very hard to aggressively expand this on the PC side.

He confirmed that his team are working to support more Android devices in future. 

Moreover, Huawei, Sony and LG phone users are still wondering that if the company is working on bringing the feature to their phones. One of the users reported in response to the original tweet that this app keeps on disconnecting again and again for no reason.

I really want to love this app but have a hard time keeping it connected consistently. Will connect for a short time, disconnect for no reason, and there doesn’t seem to be a reason it reconnects. Using a 6T, just providing feedback.

Another Twitter user wants to know when the app will offer full MMS texting support. Another user is afraid that the developers will end up skipping most of the devices that are currently not available in the US market.

If you are interested in trying out the feature, then download Your Phone app on your Windows 10 PC.

RELATED ARTICLES YOU NEED TO CHECK OUT:

Windows 10/11 Homegroup Encountered an Error [FULL FIX]

If you encounter a Windows HomeGroup error, it can prevent you from sharing files and printers on your home network. HomeGroups let you securely share content between computers, with permissions controlling who can modify files.

This feature works on Windows 7, 8.1, RT 8.1, and Windows 10, though some editions can only join a HomeGroup, not create one. Check your network, ensure unique PC names, sync the time and date, and confirm your router supports IPv6 to resolve common issues.

Let’s look at the solutions.

Steps to fix Windows 10 Homegroup errors

1. Run Homegroup troubleshooter

  1. Click Start and select Control Panel.
    windows 10 homegroup error
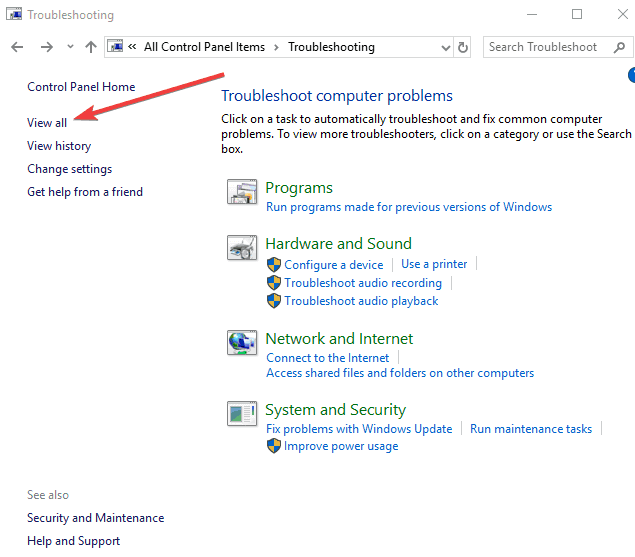
  2. Type troubleshooting in the search bar of the Control Panel.
  3. Click View All on the left panel.
    windows 10 homegroup error
  4. Click HomeGroup.
    windows 10 homegroup error
  5. Select Advanced on the Homegroup troubleshooter dialog box.
  6. Click Run as administrator (enter the password if needed).
  7. Click Next and follow onscreen prompts to complete the troubleshooter.

— RELATED: FIX: Can’t connect to Homegroup via WiFi on Windows 10, 8.1

2. Make Internet Explorer your default browser

  1. Click Start and select Control Panel.
  2. Select Programs.
    windows 10 homegroup error
  3. Click Default Programs.
  4. Click Set your default programs – the settings box will open up.
    windows 10 homegroup error
  5. Select Internet Explorer 11.
  6. Try and print the homegroup password.
windows 10 homegroup error

3. Delete and create a new homegroup

If every user in the homegroup leaves, then the homegroup will no longer exist. To remove a computer from a homegroup, follow the steps below:

  1. Type Homegroup in the search bar and open it.
  2. Click Leave the homegroup then click.
  3. Repeat the steps with the other computers.

Once the Homegroup is deleted, start with a new Homegroup again using the steps below:

  1. Open HomeGroup by typing homegroup in the search box on the taskbar, and then selecting HomeGroup.
  2. Select Create a homegroup
  3. Click Next.
  4. Select the libraries and devices you want to share with the homegroup, and then select Next.
  5. A password will appear – print it or write it down. You’ll need this password to add other PCs to your homegroup.
  6. Select Finish

Note: If a homegroup already exists on your network, you’ll be asked to join it instead of creating a new one.

— RELATED: How to: Remove Homegroup on Windows 10

4. Enable Homegroup services

The Windows 10 homegroup error may occur if the homegroup services are not running, so ensure the services related to it are started and running by doing the following:

  1. Right-click Start and select Run.
    windows 10 homegroup error
  2. Type services.msc and press enter.
  3. Find these services: Peer Name Resolution Protocol, Peer Networking Grouping, and Peer Networking Identity Manager.
    windows 10 homegroup error
  4. Right-click on each of these three services, and select Properties.
  5. Ensure Startup type is set to Automatic.
    windows 10 homegroup error
  6. Ensure Service Status is started.
  7. Click Apply and OK
  8. Restart the computer and check if you can view the Homegroup Password
windows 10 homegroup error

5. Check if the homegroup settings are appropriate

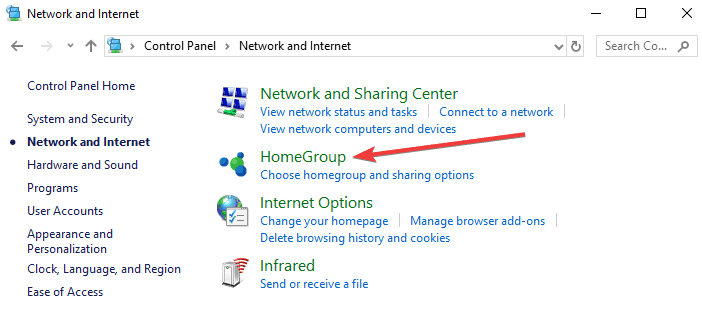
  1. Open Start and select Control Panel.
  2. Select Network and Internet.
    windows 10 homegroup error
  3. Click Homegroup.
    windows 10 homegroup error
  4. Select Advanced Sharing settings and check if they’re correct.
windows 10 homegroup error

In case the settings are correct, try your homegroup again. If not, set them to the appropriate ones and try again. If you still get the Windows 10 homegroup error, try the next solution.

— RELATED: FIX: Settings app won’t launch in Windows 10

6. Run the Network Adapter troubleshooter

  1. Type troubleshooting in the search bar.
  2. Select Troubleshooting.
  3. Select View all on the top left corner.
    view all control panel
  4. Click on Network Adapter.
  5. Follow the on-screen instructions to run the troubleshooter.
  6. If the issue persists then update the Network Adapter driver manually from the Device Manager.

7. Change the name case

Sometimes the Windows 10 homegroup error may be caused simply because of the letter casing on the computer name – this can manifest as an error 1231 in the network view.

If it is in lower case, change to upper case or all caps, and see if it works. Some users have noted that Windows 10 is case sensitive to machine names, so if you have missing shares or completely disappeared machines on your LAN, ensure the machine names are not mixed case, in which case you should rename them to all caps and reboot your computer.

Here’s what to do:

  1. Click File Explorer.
  2. Right-click on This PC.
    windows 10 homegroup error
  3. Click Properties.
  4. In Computer Name, Domain and Workgroup area, click “Change Settings“.
    windows 10 homegroup error
  5. In “To rename this computer…or workgroup, click “Change“.
  6. Change Computer name on the next screen.
  7. Click OK.
  8. Reboot your computer.

8. Check Use User Accounts and passwords

On every computer in the workgroup, do the following:

  1. Click Start and select Settings.
  2. Select Network and Internet.
    windows 10 homegroup error
  3. Click Ethernet.
    windows 10 homegroup error
  4. Click Change advanced sharing options.
  5. Check the Use User accounts and passwords box to connect to other computers.
windows 10 homegroup error

— RELATED: The user account is currently disabled and cannot be used [Fix]

9. Rollback to the previous version

If you still cannot fix Windows 10 homegroup error, you can either wait for the official Microsoft fix it, or perform a rollback to the previous Windows version, using the steps below:

  1. Click Start and select Settings.
  2. Select Updates & security.
    windows 10 homegroup error
  3. Choose Recovery.
    windows 10 homegroup error
  4. Go to Reset this PC and click Get started.
    windows 10 homegroup error
  5. Try and connect to your Homegroup again.

10. Turn on Windows services

For the homegroup networking feature to work, certain Windows services need to be active, enabled and running. If you used a program to disable services or you disabled them manually, it may be causing Windows 10 homegroup error. You need to turn on DNS Client, Function Discovery Provider Host, Function Discovery Resource Publication, Homegroup Provider, Homegroup Listener, SSDP Discovery, UPnP Device Host and Peer Networking Grouping.

You can turn on these services by doing the following:

  1. Right-click Start and select Run.
  2. Type services.msc and press enter.
  3. Click on Services to enable and turn on the ones listed here.

11. Check Network Discovery

  1. Click Start and select Control Panel.
  2. Select Network and Internet.
  3. Click Network and Sharing.
    windows 10 homegroup error
  4. Select Change advanced sharing settings.
  5. Choose turn on network discovery or turn off network discovery.
  6. Click Save changes.

12. Unblock your computer’s visibility

Sometimes, the firewall on your computer may block the access and visibility of your computer, leading to the Windows 10 homegroup error. Try using the command prompt to fix this by doing the following:

  1. Click Start and type CMD in the search bar.
  2. Right-click on Command Prompt and select Run as administrator.
    windows 10 homegroup error
  3. Type or copy-paste the below command into command prompt black screen and press enter: netsh advfirewall reset
  4. Exit the command prompt.
  5. Reboot your PC and see if the problem still appears.

13. Ensure NetBIOS over TCP/IP is enabled on both computers

  1. Choose Start and select Control Panel.
  2. Select Network and Internet.
    windows 10 homegroup error
  3. Click Network and Sharing.
    windows 10 homegroup error
  4. Click View Network Connections.
  5. Right-Click on the connection and click Properties.
  6. Find Internet Protocol (TCP/IP) Version 4 in the list.
  7. Click Properties, and then click Advanced.
  8. On the Advanced TCP/IP settings windows, go to “WINS” tab.
  9. Under NetBIOS setting, click Enable NetBIOS over TCP/IP, and then click OK.

14. Modify IPv6 registry key to enable IPv6

  1. Right-click Start and select Run.
  2. Type regedit and press enter or click OK.
    windows 10 homegroup error
  3. Locate and then click the following registry subkey:
    HKEY_LOCAL_MACHINESYSTEM
    CurrentControlSetServicesTcpip6Parameters.
    windows 10 homegroup error
  4. Check whether the “DisabledComponents” registry key exists.
  5. Double click the “DisabledComponents” registry key and modify the value to 0. If the key doesn’t exist, please create the key above and assign the value 0, i.e. exit Registry Editor, and then restart the computer.

There you have an amazing list of 14 solutions that you can use to fix Homegroup errors on your Windows computers.

Let us know if any of the above solutions helped fix Windows 10 homegroup error by leaving a comment in the section below.

Windows 10 KB4493440 fixes application startup issues

Microsoft recently released a new batch of updates to Windows 10 users similar to the April Patch Tuesday update roll out.

Windows 10 v1709 users can now download KB4493440 on their computers.

Notably, these are optional updates and you need to manually install them. If you choose to skip these updates, you will get them automatically as part of Patch Tuesday updates releasing next month.

KB4493440 improvements and fixes

Application startup fixes

Some applications failed to start for a few websites on IE. The issue had been reported for quite some time and Microsoft fixed the bug in KB4493440.

MS Office setup installation fixes

KB4493440 addresses an issue with the built-in Administrator account. The bug was preventing MS Office setup from running properly that was initially downloaded in Edge.

New Japanese Era character bug fix

KB4469068 brought a bug that caused the input method editor to drop support for the new Japanese Era character. The bug has been resolved with the latest release.

Date and Time Settings control issue fixed

KB4493440 fixed another issue with the new Japanese Era introduced in KB4469068. The bug prevented the Date and Time Settings control from refreshing.

Dynamic User Datagram Protocol ports

Another issue with Windows Management Instrumentation policy provider forced devices to stop responding. Thanks to KB4493440, the issue is no longer there.

KB4493440 bugs

Surprisingly, this release didn’t bring any major bugs of its own. Microsoft acknowledged a single issue in KB4493440 that triggered STATUS_BAD_IMPERSONATION_LEVEL (0xC00000A5) error while performing certain operations on a CSV owner node. 

You can try one of these workarounds to resolve the issue.

  • Perform the operation from a process that has administrator privilege.
  • Perform the operation from a node that doesn’t have CSV ownership.

This temporary fix should solve the problem. Microsoft is working on permanently fixing the issue and a hotfix should be available very soon.

RELATED ARTICLES TO CHECK OUT:

KB4493436 fixes memory leak issues and touchscreen bugs

Microsoft is back with this month’s second batch of updates for various Windows 10 versions. The Redmond giant just released KB4493436 for Windows 10 version 1703. This release bumps the build number to 15063.1784. 

The update didn’t come with any new features but it brought some useful Japanese Era format changes and fixes.

What’s new in KB4493436?

IE download bug fix

Previously, Internet Explorer was blocking a sub-resource download. Microsoft fixed the issue in the latest release.

Japanese Era fixes

KB4469068 brought issues regarding Japanese Eras formats. The CALDATETIME structure was unable to handle more than four Japanese Eras. The latest update resolved the bug.

ShellExperienceHost.exe bug fix

Previously, a bug was forcing ShellExperienceHost.exe to stop working. Update KB4469068 fixed the issue as well.

Win32kfull.sys fixes

Win32kfull.sys triggered the error 0x3B_c0000005_win32kfull!vSetPointer when the driver accessed an invalid memory location. You should no longer encounter this problem after installing the latest updates.

Touch screen issue fixed

Some users reported that their touch screen stopped working after rebooting their devices. The recent update fixed the issue with the touch screen.

LSASS.exe memory leak bug fixed

Systems with cached logon enabled were previously experiencing a memory leak in LSASS.exe. This issue targeted servers that deal with various interactive logon requests.

Start menu settings issue fixed

KB4493436 fixed an issue for some users who lost their customized Start menu settings after installing a previous build.

KB4493436 bugs

Thankfully, KB4493436 brought a single known issue to the table. Microsoft warns Windows 10 users that some specific operations performed on CSV may fail. 

Microsoft recommends its users to try the following workarounds to fix the bug on their systems:

  • Perform the operation from a process that has administrator privilege.
  • Perform the operation from a node that doesn’t have CSV ownership.

However, this is a temporary workaround and the company promises to address the issue in the next update.

RELATED ARTICLES YOU NEED TO CHECK OUT:

The user account is currently disabled and cannot be used [Fix]

One of the greatest strengths of Windows 10 is its robust security, but sometimes that can lead to The user account is currently disabled and cannot be used error. Sometimes the system takes drastic actions such as freezing user accounts if it feels that an account has been compromised or carries an inherent violation risk.

Luckily, Microsoft provides several avenues through which you can recover frozen user accounts even though some involve lengthy procedures, so without further ado, let’s start.

What to do if your account is currently disabled?

1. Log into a different administrative account

If you’re getting The user account is currently disabled and cannot be used message, try signing in to a different administrative account.

Steps:

  1. Restart your PC.
  2. Choose that other account at boot.
  3. Enter the account’s password.
  4. Press Windows+ R key then type lusrmgr.msc on the displayed Tun dialog then press Enter. This loads the Local users and groups (Local) management tool.
    lusrmgr.msc the user cant sign in because this account is currently disabled windows 10
  5. Select Users then double-click on the troublesome user account.
    local users and groups failure reason account currently disabled
  6. Under the user account Properties uncheck the Account is disabled option then click on Apply and OK.
    account is disabled The user account is currently disabled and cannot be used
  7. Restart your computer.

Your account should now be accessible.

2. Enable the account using Command Prompt

If you have not succeeded to fix The user account is currently disabled and cannot be used with our previous solution, try using the Command Prompt.

  1. Click on the Start button and type cmd in the search box.
  2. When the results load, right-click cmd and choose Run as administrator.
    run as administrator the user account is currently disabled and cannot be used
  3. The Command Prompt window opens. Type net user useraccount  /active:yes then press Enter. Replace useraccount with the name of the account you’re troubleshooting.
    net user command the user account is currently disabled and cannot be used
  4. Restart your PC and verify if the account is showing up at the sign-in screen.

3. Create a new user account

In case The user account is currently disabled and cannot be used error is still here, perhaps the best solution would be to create a new user account.

Steps:

  1. Log in to the applicable Administrator account as described in the first solution.
  2. Click on the Start button.
  3. Select Settings.
    settings user account disabled
  1. Choose Accounts.
    accounts the user account is currently disabled and cannot be used
  2. Click Family & other users > Add someone else to this PC.
    add someone else to this pc user account is disabled
  3. Type your desired username and password. You will notice the new account name in the accounts list.
  4. Now click Change account type.
    change account type user account cannot be used
  5. A new window pops up. Choose Administrator to give it administrative privileges.
  6. Restart your PC.

4. Run a Windows 10 System Restore

If you’re yet to fix The user account is currently disabled and cannot be used error, run a Windows 10 System Image Restore on your PC.

This takes your computer back to a point in time when your account had been okay. The biggest advantage here is that you can launch the process even when you can’t log in to the affected user account.

Steps:

  1. Power off your PC.
  2. Switch it back on and wait as the login screen opens.
  3. Click on the Power icon (at login) then choose Restart while holding down the Shift key. If the login screen doesn’t immediately appear, keep restarting your PC until the Automatic Repair screen appears.
  4. Select Troubleshoot then System Restore.
  5. You’ll be presented with several restore points as soon as your computer commences restoration. Choose an appropriate restore point belonging to the period before your PC experienced this issue.

As you can see The user account is currently disabled and cannot be used error can be problematic, but we hope that you managed to fix it using our solutions.

Some users also encounter the You can’t sign in with this account message in similar situations, and a detailed guide explains how to resolve that login issue and restore access by repairing the affected profile. You can read it here how to fix You can’t sign in with this account in Windows.

Download the Windows Media Center SDK from GitHub

An ex Microsoft employee recently open-sourced the SDK for the popular Windows Media Center. This SDK file can help developers to further improve their applications. 

As you already know, the Windows Media Center comes pre-installed on devices running Windows 7. Although most users are not fond of the Windows Media Center, still they didn’t like the idea of removing it from Windows 10.

As a matter of fact, many users used a popular trick to run WMC on Windows 10.

If you still miss the Windows Media Center, here is a piece of good news for you. Charlie Owen, an ex-employee of Microsoft recently uploaded the SDK on GitHub.

Expect some bugs

It’s not an official release but still, you can use the SDK to bring back some nice memories. The Windows Media Center was initially released with Windows XP back in 2002. It allowed users to use a remote device for playing their media files. 

You should keep in mind that Microsoft stopped supporting this service a few years ago and the Media Center may not work as intended on your PC.

However, the SKD version will help developers to improve their applications. Charlie Owen stated the SDK comes with some useful tools that will help them to develop similar applications.

Microsoft is eagerly contributing to the developer’s community by publishing its old applications on GitHub. Some of these examples are MS-DOS, the Windows File Manager and Windows Calculator.

Feel free to dive deep into the new GitHub SDK project to explore the technicalities of the Windows Media Center.

RELATED ARTICLES YOU NEED TO CHECK OUT: