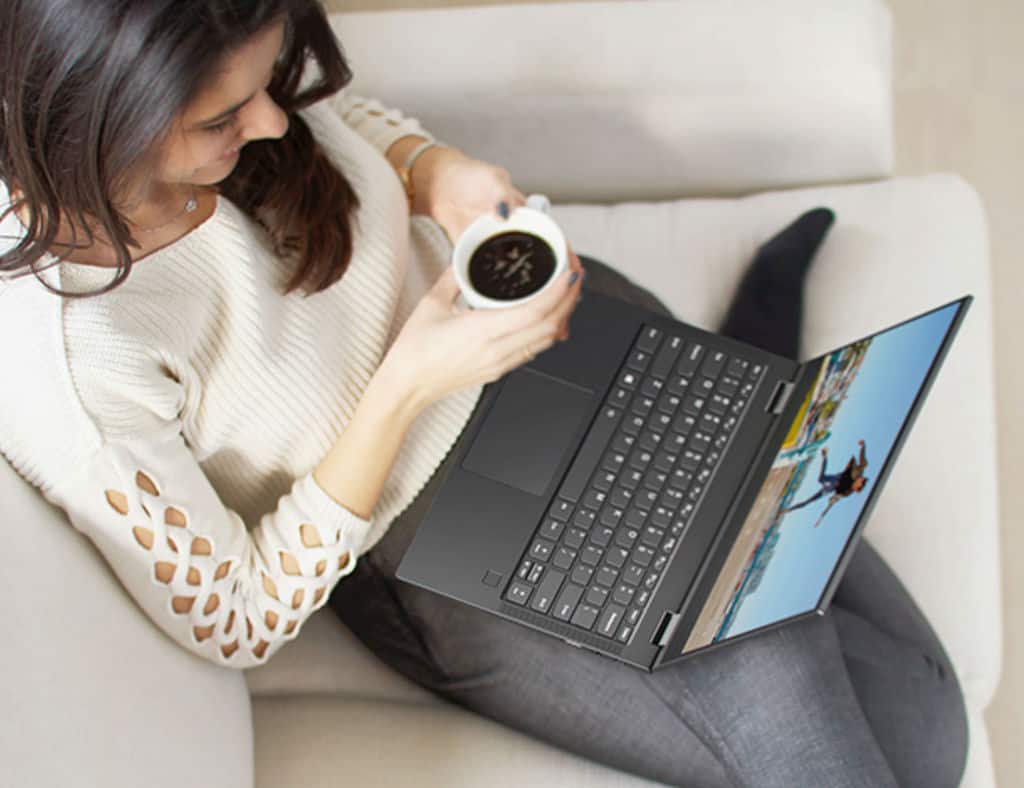
Lenovo Yoga C630: A promising future on an interesting evolution

In a world where smartphone usage is encroaching on the certain feature set that used to insulate PC manufacturers from the worries of cross-blend computing cannibalization, it’s become paramount that OEMs find a successful pivot that will allow them a softer landing as the industry floor continues to seemingly eroded from underneath them.

Enter Windows on ARM and the push for Always Connected PCs.

The zero-sum narrative bandied about by some tech journalist that pits smartphone adoption and consumption against the productivity aspects of laptops and workstations has some teeth, but the reality is that a large majority of people prefer to make use of a smartphone in conjunction with a dedicated PCs of sorts, whether that be an iPad Pro, Surface Pro, or a more traditional laptop or gaming tower.

However, there appear to be telemetry OEMs are seeing that indicate that people would like their PCs to behave more like their smartphone and other mobile devices. The demands for longer battery life, instant-wake functionality, speedy startups, and a steady and consistent connection to the internet regardless of location are at the impetuous of the Windows on ARM hardware and the new Lenovo Yoga C630, not to be confused with the C630 Chromebook.

The Pitch

While I like to put out reviews in succession similar to an episodic TV series, I actually reviewed the Lenovo Yoga C630 before I did the Lenovo Ideapad 730S. I got the C630 late last year in December 2018, but it has taken me some time to put my thoughts into a review that best describes the what and the why of this device.

As most laptops come with the standard array of feature sets and trimmings these days, I like to review units based on the company’s own pitch to the customer. The Lenovo Yoga C630 actually makes several pitches in its marketing efforts such as All-day battery life—and more, Constantly connected and WiFi with a capital whoosh!

To Lenovo’s credit, it delivered on one of the three claims consistently in so far as All-day and more battery life.

However, being constantly connected and its superior WiFi claims fell short more often than I would like.

All-day battery life

The Lenovo Yoga C630 was my favorite PC to use in 2018 simply on its battery life alone. While PC OEMs like to inflate their battery claims, and the C630 is no exception, this laptop consistently provided all-day battery life for me. My day starts roughly at 5:30 am with some light web browsing as I check Google AdWords and CRM tools for metrics from the previous day.

I then, move into casting podcasts onto my Invoke (I know, I’m one of two people who have one) for roughly an hour as I get ready. I then close my laptop for 30-40 mins while I make my way to the train, where I then open it up to check news, social media and YouTube for the duration of my 28 mins train ride.

Close it again as I make my way to my office. For the next eight hours, I used the laptop non-stop for work consisting of Skype meetings, Teams communication, various Office 365 applications multiple Chrome and Edge tabs, PWA Twitter app and Pocket Casts.

It wasn’t until my ride on the train home that I had to worry about the dimming screen and the laptop slipping into battery mode, and while that’s not literally all-day, in the world of Windows-powered PCs, 14 hours of steady use is about as close as it gets.

Constantly Connected

Here is where the laptop began to falter a bit. My test unit graciously came with a Verizon 4G LTE sim that I intended to put through the paces. To its credit, the C630 did a relatively seamless job of switching to from Wifi to LTE, not so much on the switch back.

My daily train commute offers me a chance to jump onto public wi-fi to get some last minute note taking or account management done, but I am at the mercy of poorly concocted implementation. Often the wi-fi drops out and I’m forced to hotspot from my Note 8. With the C630, the connection process was a bit better.

Perhaps,= it was just Verizon’s coverage along the Tri-Rail route going from Pompano Beach to Hollywood FL that was the culprit, but often I found that the SIM had connected to LTE but produced relatively weak connections resulting in a hampered Always Connected PC experience. When I was work, I attempted to ‘cold turkey’ work using only the LTE sim and the results were mixed. The experience proved not as fast as my work’s wireless solution but better than not having any option at all; files downloaded slower, web pages took an extra tick to load and there were several troubleshooting prompts that cluttered my Action Center throughout the day.

Again, I don’t believe this is all Lenovo’s fault, but a confluence of how Windows handles LTE as well as Verizon’s coverage of the Pompano Beach, Ft. Lauderdale, and Hollywood areas.

As much of the sale of the Lenovo C630 depends on it being a device that is Always Connected, it’s a buyer-beware instance rather than a foregone conclusion. While the C630 may suffer from inconsistency, it’s offering an option that few PCs on the market do.

WiFi with a capital whoosh!

It seems like a corny marketing claim to push but I’m sure its one Lenovo’s Qualcomm partner would like to seed to the industry. Much of my review of this claim is tied to the Always-Connected pronunciations from earlier where Lenovo champions it 4G/LTE experience and the Qualcomm 850’s ability to produce connectivity speeds of up to 1.2Ghz or roughly 7x average broadband.

The C630 was able to connect to 4G/LTE near and around my house relatively well and on a trip to Orange County California, the internet connections were decent. However, I’m not sure it’s Verizon or the Snapdragon that would throttle connective performance, and I often would drop from a relative five bars to two and three. In turn, my productivity would take a hit whenever those instances of degraded connectivity would occur and they happened more often than I would like.

Other intangibles

As I mentioned earlier the margin between design and feature sets is becoming slimmer as user preferences have settled on grey-slabbed 12-14 inch boxes. There are iterative design changes that help inch the industry forward such as thinner bezels, options of 1080p or 4K resolution screens, minute keyboard tweaks, speaker, and port availability and the C630 splits much of that check down the middle.

The C630 is another refinement on the Lenovo’s cast grey slab offering with a cool to the touch aluminum brushed chassis and impossibly thin design. At just 12.4 mm/ .5″ it’s one of Lenovo’s thinnest designed laptops and weighs just hair over 2 and a half pounds. The C630’s design inspires mobility and travel as it fits comfortably in all the laptop sleeve and backpack compartments I tested.

As a multi-fold converting laptop, the minimalist weight offered the most natural implementation of large-screen tablet use outside of the iPad Pro, Surface Pro and Surface Book I’ve experienced yet.

The screen on the C630 unit I had got plenty bright but lacked any jaw-dropping characteristics with its FHD multi-touch display.

However, a cool little kicker to the modest screen tech is the support of Microsoft’s N-Trig technology which allowed me to test pen input despite not having one come with the unit. There was some lag but for note taking or webpage edits, it serviced rather well.

There is a two-stage lit keyboard centered in the C630 that offers relatively shallow key travel but a familiar feel with its chiclet-style key design.

Top firing speakers on the Lenovo C630 are a pleasant surprise and give the device a sort of MacBook fill as the speaker grills flank at 2/3 length of the keyboard.

As is becoming customary with most Lenovo’s there is a shallow finger printer reader off to the right of the keyboard that did a decent job of authenticating. There were times when the sleep/wake state of the laptop threw off the reader and I found myself jumping to pin rather than fight the system asking for me input my fingerprint, over and over.

As there are no real games in the Microsoft Store designed to push the limits of a Qualcomm chipset, I saved the gaming review portion of the Lenovo C630, for perhaps the third iteration.

Perhaps, the best physical feature of the Lenovo C630 is the one users may overlook. The C630 is absolutely quiet. However the fans or ventilation is designed in the chassis, they render the computer ninja-like quiet, even when pushing up against Chrome usage and the 32-bit version of Microsoft Teams.

Starting price: $756.79

Windows on ARM

I’m not going to prescribe all of Lenovo’s marketing shortfalls on the company alone, I believe the legacy engineering of Windows has something to do with how the operating system handles on ARM. There need to be several caveats put in place here when addressing this laptop and the Windows on ARM architecture.

  1. Most traditional (hi powered) Windows programs are not native ARM coded. Chrome for Windows comes to mind
  2. To help support the new chipset architecture, the Lenovo C630 ships with Windows 10 S out of the box
  3. Unlike the Surface Laptop, switching out of Windows 10 S only nets you access to 32-bit apps which are inherently slower by design
    UWP apps such as Mail, the Microsoft Store, and Edge were written for native ARM support and their optimizations result in faster app processes.

The C630 makes use of Qualcomm® Snapdragon™ 850 Mobile Compute Platform and while it’s perhaps one of the most powerful architectures to-date for the company, the reality is that it powers the C630 to comfortably to the heights of a Surface Go on a Pentium Gold CPU.

What this amounts to is a device that performed admirably at the basic to moderate computing demands I put it through such as web browsing, Skype, Microsoft Teams on the web, Office docs, downloading/uploading content and viewing YouTube or Netflix.

Unfortunately, the C630’s Qualcomm 850 boosted speed improvements from the previous iteration of the 830 are a bit hamstrung by the USF SSD used for Android smartphone rather than the m.2 SSD more traditionally used. The use of the USF SSD means it’s optimized for speed transfer of media that is usually found on smartphones such as pictures, music in MP4 format and videos in H.264 and H.265, venture anywhere beyond those and you’re looking a slower upload and download process.

Summary

When all is said and done about the processing power of the Lenovo C630, its overall design and the inclusion of Windows 10 S out of the box, the initial assessment is that this is a good second try from Microsoft, Lenovo and Qualcomm. The Lenovo Yoga C630 won’t win over ThinkPad users, it’s not going to convert the Surface Pro with LTE crowd and it’s not going to move the needle for MacBook Pro converters.

However, what the Lenovo Yoga C630 does is offer individuals going to college for the social sciences, history, business, writing or the traveling executive who needs access to secure internet connections and limited documentation and web services, a viable option.


The C630 sits in the uncanny value of almost, but not quite there. Limitations of the processor and operating system are holding the C630 back from being the default Windows device, for now as well as being the poster boy for Windows on ARM.

Perhaps, when Microsoft finishes its Chromium switch and includes native for ARM engineering it could help to mitigate some of the issues with 32/64 bit compatibility with a much more robust web browser application store and allow the Qualcomm chipset to shine.

Right now, the Lenovo Yoga C630 sits in the shadows of its predecessors eagerly awaiting the engineering and technology to catch up to its future promise.

LEGO video games and more heavily discounted this week on Xbox One

A variety of Xbox 360 and Xbox One video games are discounted this week due to a combination of sales.

Of note is a franchise sale which has discounted almost all LEGO video games by 50% on the Xbox One and 70% on the Xbox 360. Games discounted include LEGO DC Super-Villains, LEGO Jurassic World, LEGO Marvel Superheroes 2, and LEGO Star Wars: The Force Awakens.

The LEGO Movie Videogame received a 40% discount on Xbox One and a 70% discount on Xbox 360 while The LEGO Ninjago Movie Video Game was reduced by 40% on Xbox One.

Video games significantly discounted with this week’s spotlight sale include Dead Alliance (70% off), Extinction (70%), and Lords of the Fallen: Complete Edition Bundle (80%).

Members of Xbox Live Gold also gain access to the usual Deals With Gold discounts this week with Ben 10 (70% off), Farming Simulator 17 Premium Edition (70%), INDIE BUNDLE: Shiness And Seasons After Fall (75%), Madden NFL 19 Hall Of Fame Edition (75%), and Stick It To The Man (80%) standing out for those on offer.

Have you bought any discounted Xbox video games this week? Let us know what you picked up in the comments below and then follow us on Pinterest for more Xbox gaming content.

What to Do if Windows Was Unable to Format Your Pen Drive

USB flash drives (pen drives, flash sticks) almost entirely moved disks from the picture. They are fast, you can write anything you want whenever you want, and they come large in storage but small in size. Perfect data companions.

However, due to extensive use, they tend to get corrupt, start misbehaving, and won’t work as intended. There’s this Windows was unable to format pen drive when users tried to format the pen drive within the Windows interface.

Luckily, you can fix this or, even better, use alternative options to format the drive. The important thing is not to have any encryption on your drive, as Windows won’t format encrypted drives. Everything else you need is below.

How to format a pen drive if Windows failed to?

1. Try repairing the pen drive

Firstly, let’s try switching USB ports and rebooting PC. Sometimes, the problem isn’t in the flash drive (pen drive) but rather in the USB port. If your PC can still not format the drive, even when plugged into a different port, we suggest going for repairs.

These are not uncommon, as flash drives are frequently forcibly plugged out. This and frequent read/write changes can lead to corruption or bad sectors.

To fix the affected drive, follow these steps:

  1. Plug in the USB pen drive in a functional USB port.
  2. Open the File Explorer or This PC.
  3. Right-click on the USB pen drive and open Properties.
  4. Choose Tools and then click Check.error checking usb pen drive
  5. After the Error Checking utility is done, try formatting your pen drive again.

If you’re still troubled by the Windows was unable to format pen drive error, continue with the other provided steps.

2. Check drivers

Now, in this step, there are two variations. It depends. If your PC can ‘see’ the USB but can’t format it, you must check the pen drive’s drivers. On the other hand, if it’s unable to see the USB drive in the first place, the Universal Serial Bus controllers should be your concern.

The latter rarely occurs, and if it does, instead of driver issues, it points towards the flash drive malfunction. Nonetheless, it’s worth giving it a try.

Here’s how to reinstall the pen drive driver:

  1. Right-click Start and open Device Manager. For Windows 7/8.1, you’ll want to search for Device Manager and access it that way.
  2. Make sure the USB pen drive is plugged in.
  3. Expand the Disk drives section, right-click on the pen drive and choose Uninstall device from the contextual menu.
  4. Repeat the action for the Portable devices section.uninstall USB pen drive drivers
  5. Unplug your USB pen drive and plug it in again. The drivers should install immediately.

And this is how to reinstall USB controllers drivers:

  1. Open Device Manager.
  2. Expand the Universal Serial Bus Controllers section and uninstall all Generic USB Hub and USB Root Hub drivers. Just right-click on every device individually and choose Uninstall device.uninstall USB controller drivers
  3. Restart your PC.

In any case, if you need to manage your drivers safely and more automatically using practical tools, you can consider a driver manager like Fortect Driver Updater.

3. Format the USB pen drive with Disk Management

Now, if the system on its own can’t access or format a USB pen drive, there are alternatives. More than few. The first is Disk Management. This utility is part of Windows, and it’s used, as you might assume, to manage all storage disks, both internal and external.

It can, of course, carry the load of formatting your pen drive without any issues. You need to know where to find it.

Follow these steps to format the USB pen drive with Disk Management:

  1. In the Windows Search bar, type Disk Management and open Disk Management.
  2. Open Create and format hard disk partitions.
  3. Right-click on the USB pen drive and choose Format from the contextual menu.format USB pen drive via Disk Management
  4. Select FAT32 or NTFS (FAT32 is the default for USB flash drives) and use Quick Format.
  5. Click OK and that should do it.format usb pen drive Disk Management

4. Format the USB pen drive with Command Prompt

Disk Management should allow you to format the USB pen drive without problems. However, we decided to add an extra method just for the sake of variety. You can do everything you do within the Windows UI through Command Prompt.

Of course, if you know a proper set of commands to use, in this case, we’ll go with the diskpart utility commonly used to format and assign storage drives.

Here’s how to format the USB pen drive with Command Prompt:

  1. In the Windows Search bar, type CMD, right-click on the Command Prompt and run it as admin.
  2. In the command line, type diskpart and press Enter.
  3. Next, type list disk and press Enter again.
  4. Now, this step is important. Locate the USB pen drive and then type select disk 2 and hit Enter. In this example, the USB pen drive is Disk 2, which isn’t a rule. You should be able to see what’s the disk based on the storage size.
  5. Finally, once you’re sure you’ve selected proper disk, type clean and that’s it.format USB pen drive via Command Prompt

The Diskpart utility is also of great use when Windows 11 can’t detect an exFAT drive.

With that said, we can conclude this article. If you have any questions or alternative ways to deal with the Windows was unable to format pen drive error, feel free to tell us in the comments section below. We look forward to hearing from you.

Microsoft confirms KB4487044 may break down browser functionalities

KB4487044 brought quite a few quality improvements to Windows 10. It has basically addressed numerous bugs that existed in the previous versions of the operating system.

However, Microsoft has recently acknowledged two new issues that have been reported in this cumulative updates for Windows 10. One of them is responsible for causing some serious issues in the functionality of Internet Explorer.

Although these bugs do not appear very often still there is a chance that some of the users might be affected.

KB4487044 Installation Issues

1. IE Fails To Load Images

Microsoft explains the issue as those images that have a backslash () in their relative source path might not be loaded by Internet Explorer after installing the update. The company has suggested two possible workarounds for the issue. 

The issue can either be resolved by if the relative path of the image element contains a forward slash (/) instead of the backslash ().

Secondly, changing the relative path to the full URI path also helps to get rid of the bug. The company is working to resolve the issue and a patch in the upcoming releases is expected to fix the bug. 

2. Microsoft Access Issue

While this bug is responsible for randomly stopping those apps that are using Microsoft Jet database along with the Microsoft Access 95 file format. Microsoft has offered two solutions for this issue as well.

The first option that is supposed to resolve the issue is converting the database to the .accdb file format. You can also convert the database to the .accdb file format. 

Microsoft is already working on the fix and all Windows 10 devices will be receiving the update in late February. You can automatically download KB4487044 via Windows Update. Moreover, the standalone package can also be downloaded by visiting Microsoft’s Update Catalog. 

Microsoft has recently suggested its Windows 10 users to replace Internet Explorer with a modern browser. The company no longer plans to release updates in the future. It is highly recommended that you should look for an alternate solution asap. 

RELATED STORIES TO CHECK OUT:

How to fix corrupt Outlook distribution lists in 3 easy steps

Distribution list or contacts list is an important shortcut allowing Outlook users to send email to multiple recipients without adding contacts individually. However, some users have had a hard time with their email distribution lists as they seemingly get corrupt.

We made sure to provide you with some steps to address this and you can find them below.

How can I fix a corrupt Outlook distribution list?

  1. Run app troubleshooter
  2. Repair Office365
  3. Re-establish the account

Solution 1 – Run app troubleshooter

The first step we suggest when it comes to all misbehaving Microsoft Store apps is running the Store Apps troubleshooter. This troubleshooter is built-in and it should tackle all major issues. In this case, maybe the Outlook isn’t successfully accessing the cached files.

This, of course, applies only if you’re running a UWP version of the Outlook for Windows 10.

Here’s how to run the app troubleshooter in Windows 10:

  1. Press Windows key + I to open Settings.
  2. Choose Update & Security.
  3. Select Troubleshoot from the left pane.
  4. Expand the “Windows Store Apps” troubleshooter.windows store app troubleshooter
  5. Click Run the troubleshooter.

Solution 2 – Repair Office365

On the other hand, if you can’t pinpoint the problem following the first step, repairing Office is our next suggestion. This way, you won’t have to reinstall the whole suite. If Outlook is having a hard time accessing a certain distribution list.

Here’s how to repair Office on Windows 10:

  1. In the Windows Search bar, type Control and open Control Panel.
  2. Choose Uninstall a program.
  3. Right-click on the Office and click Repair.repair office 2016

Solution 3 – Re-establish the account

Another viable step is removing and then re-establishing the account. Many users have run into the issue the distribution list in Outlook after the reinstallation. Reinstallation shouldn’t affect your contacts nor distribution lists, so the problem might lie in the way you’ve configured your account.

So, try removing the account and re-establish it again. Hopefully, this will help you address the problem. On the other hand, if you’re still unable to send emails to a distribution list as a recipient, try recreating the list and hope for the best.

We suggest using Excel and creating a CSV file. It might take some time, but you should be in the clear afterward.

And, with that said, we can wrap it up. If you have any questions or suggestions, feel free to tell us in the comments section below.

RELATED STORIES YOU SHOULD CHECK OUT:

Posted in Fix

How can I fix Netflix error H7353 on Windows 10?

Netflix is certainly the most popular streaming service at the moment. With hundreds of TV shows, movies, and documentaries. A lot of them in their own production. You can access it on any device, including Windows 10 app which can be found in the Microsoft Store.

Of course, a web-based version is always an option. And if one doesn’t work, the other most likely will.

Except that error H7353 seems to be appearing on both the app and web-based client. We listed 7 solutions for the issue below.

How do I fix Netflix error h7353 on Windows 10?

  1. Clear browser cache or reset app
  2. Check the connection
  3. Use Firefox or Chrome instead of Windows app and Edge
  4. Update Windows 10
  5. Run Windows Store troubleshooter
  6. Reinstall Windows 10 Netflix app
  7. Reset Windows 10 to factory values

Solution 1 – Clear browser cache or reset app

Depending on whether you use the browser or the Windows 10 app, the first step is to clear the cache. The main reason we’re thinking that solution is this simple is the fact that this isn’t a widespread issue. Which points out that there’s an isolated issue. The thing with cached data is rather uncomplicated.

Applications stack cache in order to speed up the usage and reduce loading speeds. However, as the cache piles up over time, cached websites might do quite the opposite. Moreover, they can cause all kinds of issues. In this case, halt the loading of content.

With that in mind, here’s how to clear cache from principal browsers:

Google Chrome and Mozilla Firefox

  1. Press Shift + Ctrl + Delete to open the Clear browsing data menu.
  2. Select All time as the time range.
  3. Focus on deleting Cookies, Cached Images, and Files, and other site data.
  4. Click on the Clear Data button.clear browsing history chrome

Microsoft Edge

  1. Open Edge.
  2. Press Ctrl + Shift + Delete.
  3. Check all the boxes and click Clear.clear browser history

Happy broadcasting with these 4 live streaming software for Twitch


And this is how to reset the Netflix app for Windows 10:

  1. Press Windows key + I to open Settings.
  2. Choose Apps.
  3. Expand the Netflix app and open Advanced options.netflix app advanced options
  4. Click Reset.reset app to default values

Solution 2 – Check the connection

Another possible reason for the Netflix error h7353 might lie in your bandwidth. Streaming services like Netflix work the best with stable bandwidth and low package loss.

Of course, required values depend on the streaming quality, and if you’re accustomed to streaming high-quality content, at least 10 Mbps are necessary.

Also, it’s well-advised to disable all background bandwidth-dependent applications, like VoIP services and torrent clients. They’ll most certainly slow down your bandwidth and might cause the error h7353.

In addition, don’t forget to disable VPN or proxy, unless you specifically need them for streaming Netflix content.

Here are some things you can do to troubleshoot connection issues on Windows 10:

  • Reset router and PC.
  • Disable background applications.
  • Flush DNS.
  • Use wired instead of wireless connection.
  • Reset your router to factory values.

Solution 3 – Use Firefox or Chrome instead of Windows app and Edge

Another rather obvious solution (or rather a workaround) is switching your current browser of choice for Firefox and Chrome. Some users stated that the error was fixed by switching from Edge to Firefox or Chrome.

We can’t say with certainty what’s the deal with Windows 10’s native browser, but it seems that some of the recent major updates broke its streaming capabilities.


8 best free VPNs for Netflix [Windows 10 & Mac users]


In addition, and this goes for all browsers out there, we suggest disabling browser extensions for the time being. Especially adblockers which might interfere with the Netflix web client.

With that out of the way, you should be able to stream Netflix without experiencing the error at hand. If that’s still not the case, keep reading through the list of solutions.

Solution 4 – Update Windows 10

Now, besides possible local issues, the main trademark, a common factor if you like, is one or another major Windows 10 Update. Namely, the error h7353 started plaguing Netflix users just after a major Windows 10 Update.

With that in mind, we have a reasonable suspicion that Windows  10 updates are somehow connected with a minor but still quite debilitating error.

In addition, we can’t say with certainty whether some minor updates fixed the problem but it’s certainly worth a try. They usually install on their own (thanks to Microsoft’s policy), but you can try and install them manually as well.

If you’re not sure how to check for Windows updates on Windows 10, here’s how:

  1. Open Settings.
  2. Choose Update & Security.
  3. Click Check for updates.check for updates win 10

Solution 5 – Run Windows Store troubleshooter

The Netflix UWP app is basically a Microsoft Store port of the web-based client. But, it’s still an app and when there’s an issue with a Windows 10 app, the dedicated troubleshooter should be given a chance to resolve it.

Now, even if it fails, you should get some additional insight into the problem or at least learn what’s causing it.

If you’re not sure how to run Windows Store apps troubleshooter, follow these steps:

  1. Open Settings.
  2. Choose Update & Security.
  3. Select Troubleshoot from the left pane.
  4. Expand the Windows Store Apps troubleshooter.
  5. Click Run the troubleshooter.run windows store troubleshooter

Solution 6 – Reinstall Windows 10 Netflix app

If the problem is persistent, the next obvious step is reinstallation. We can say that updating the app can help, but you’ll get the latest version with reinstallation either way. If you’re quite fond of using the UWP Netflix app instead of the browser version, this is the last step we can think of. Here’s how to reinstall the Netflix app:

  1. In the Windows Search bar, type Netflix.
  2. Right-click on Netflix and choose Uninstall from the contextual menu.
  3. Now, reboot your PC.
  4. Open the Microsoft Store and install Netflix again.
  5. Sign in with your credentials and try streaming again.

On the other hand, if the web-based version is your cup of tea and the h7353 error bothers you there, consider either switching the browser or resetting the current one to factory values.

Solution 7 – Reset Windows 10 to factory values

Finally, based on post-update reports about the error, resetting Windows 10 to factory settings is the ultimate step you can take. We won’t advise you to so before depleting all options and contacting Netflix support. If nothing helps, consider resetting the system to factory values.

Follow these instructions to do it:

  1. Open Settings.
  2. Choose Update & Security.
  3. Select Recovery from the left pane.
  4. Under the Reset this PC section, click Get started.reset PC

And, on that note, we can wrap it up. In case you have any questions or suggestions, feel free to tell us in the comments section below.

[wl_navigator]

Google Chrome now lets you create links targeting words in webpages

Chrome announced a brand new exciting feature that will let users create a link to a word on the existing webpage and share it with others. The Scroll to Text feature will help those users who are interested in jumping to a particular word or phrase to read a webpage. The new feature is expected to be available in all the browsers using Chromium engine including Google Chrome and the upcoming Chromium-based Microsoft Edge.

Chromium developer David Bokan, has worked on the feature and it has been confirmed in a recent code commit on Github. The code is expected to be available to the Canary version in a couple of weeks. While right now it has been added to Chrome as a flag.

The developer is also working to suggest a workaround to highlighting multiple snippets of text. It is expected that Firefox, Safari, and others might also facilitate the users by working on a similar feature in the next few months. 

How Does Scroll to Text Work?

We often come across a situation when we have to share a specific portion that we like from a long article. Currently, we have to refer to the specific point by either sharing a screenshot, using the Ctrl + F Command on the web page or use the anchor link (if available).

Most of you might find it pretty annoying and they end up skipping the information you want to share. 

Now the users will be able to highlight a particular portion of text and then they will be able to create a custom URL. Furthermore, the nomenclature suggests that as soon as the user clicks the URL, it will be loading as usual and then the page will automatically scroll to a specific section of text.

 It works similar to the YouTube feature that allows us to jumps to a preselected time in a video. 

The ‘targetText=’ prefix will be used to encode the text snippet in the URL and the prefix will have the string containing the keywords. You can also encode long phrases by using the beginning and end words. 

Scroll to Text is expected to save most of the people who are stuck in an annoying situation. The feature is still in development phases and the company has not yet shared any details regarding its release to the Stable branch of Chrome. It seems like it might take quite a while to reach us.

Related Articles To Checkout:

PSA: Xbox Live maintenance on February 20 will impact Xbox 360 backward compatible titles

Xbox’s Major Nelson has just announced that Microsoft is planning an Xbox Live maintenance tomorrow that will affect Xbox 360 titles and services. The maintenance is scheduled to occur between 2:00PM UTC and 6:00PM UTC (9:00AM ET and 1:00PM ET), so if you’re planning to play Xbox 360 games during that period, be aware that you may be disconnected from Xbox Live.

For Xbox One owners, the scheduled maintenance will also affect all backward compatible Xbox 360 games on the console, though Xbox One games and Xbox Live should work as usual. There are now over 500 Xbox 360 and original Xbox games that are backward compatible on Xbox One, and the ability to play older generation games is definitely one of the console’s killer features.

The last time Microsoft did such a maintenance was in July 2018, and that time Xbox 360 titles & services were only impacted for an hour and a half. If you’re encountering any issues tomorrow, make sure to check the Xbox Live service status on this page.

Microsoft embracing Open Source internally, pushing “Inner Source” initiatives

Adopting open source development is one thing, but practicing it in everyday engineering is whole other cultural change, and one Microsoft seems to be taking very seriously these days.

According to a report from ZDNet reporter Mary Jo Foley, Microsoft will be embracing ‘Inner Source’ development methods internally to promote more open source-like development practices across the organization.

Contrary to my initial judgment, Microsoft is not looking to take open source development and proprietize it, but instead looking to use the same sorts of open source development methods such a more code sharing and editing amongst its disparate divisions and business interests. Inner sourcing has been around for some time and is a method used by several organizations to help foster better documentation of code development.

Back in November of 2018 a job listing more or less confirmed Microsoft’s new approach as the company was seeking a person to spearhead efforts to integrate inner source practices within the company.

Particularly, the job position would be accountable in identifying what changes to Microsoft’s internal engineering systems and culture are needed to make GitHub one of the tools available to Microsoft engineers, then partnering with both engineering system teams to drive those changes and with product and services engineering teams to adopt those changes so they can start using GitHub.”

  • Identify and design the changes needed to Microsoft’s internal engineering systems and culture to accommodate teams using GitHub
  • Work with an engineering team as a product owner to deliver new engineering system tools and services (and improve existing ones)
  • Partner with other Microsoft engineering system teams to drive the changes they need to make for GitHub use
  • Partner with product and service engineering teams that are interested in using GitHub to help them move

The newer job posting is presumably part of Microsoft’s 1ES (One Engineering System) group that will help the company streamline its core development processes across the entire business and help make better use of open source tools, services, and processes, according to Foley and a new job posting found from Senior Program Manager in Engineering.

The newer job posting continues to emphasize ‘inner source’ as the main component of Microsoft’s 1ES team building and development.

“The broader 1ES team is building the next generation of tools and practices to make engineers across Microsoft more productive and help them focus on building great software. This role is part of an initially small team tasked with bootstrapping, piloting, and ultimately scaling inner source across the company.

You will initially focus on baselining current efforts, finding partner teams across the company, articulating in detail the inner source business rationale and operational roadmap, and understanding opportunities and risks. A big part of your job will be to listen to engineers to understand what they find productive and what is just getting in their way, in order to deliver solutions that successfully address real customer problems and improve engineering satisfaction and productivity at Microsoft.”

In a sort of dogfooding move here, Microsoft’s company-wide inner source initiative is a real-world test bed of the scalability of the process which, if successful, is a major selling point for visiting, contributing and using GitHub and Azure DevOps in the near future. While Microsoft would be cautious to start monetizing any efforts from its GitHub acquisition, adding value propositions for its sales teams seem to be in the company’s peripheral business view.

The beautiful Xbox One X Robot White Special Edition Fallout 76 Bundle is currently $100 off

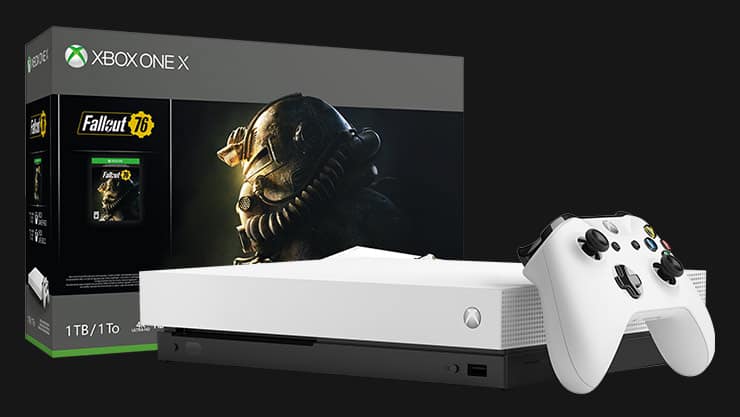
Microsoft is once again discounting select Xbox One bundles for a limited time, and you can currently get the beautiful Xbox One X Robot White Special Edition Fallout 76 bundle for just $399 ($100 off). The same bundle is also available with a black Xbox One X console, but the white version is definitely much more appealing.

This is probably a consequence of the game being hammered by reviewers and Fallout fans, but only these two Xbox One X Fallout 76 bundles are currently $100 off. Microsoft is offering $50 discounts on several other Xbox One X and Xbox One S bundles, including the cool-looking Xbox One X Gold Rush Special Edition Battlefield V Bundle ($449). This one actually comes with three games, Battlefield V, Battlefield 1 and Battlefield 1943.

Other discounted bundles include the brand new Xbox One X Metro Saga Bundle (also $449), which includes Metro Exodus as well as the two remastered Metro Redux games. You can check all the discounts on Xbox.com, let us know in the comments if you’re tempted by this white Xbox One X.

How to Enable Remaining Time Battery Life indicator in Windows 10

Since the Windows 10 Spring Creators Update, Microsoft disabled the ability to see the amount of battery life time  remaining on a Windows 10 laptop. After some simple edits in the Registry Editor, there is a way to re-enable the time left indicator on your Windows 10 PC.
Here’s what you need to do.
Microsoft, Windows Settings, Windows 10

  1. Go to the search bar and type in Registry Editor and select Run as administrator
  2. Navigate to HKEY_LOCAL_MACHINESYSTEMCurrentControlSetControlPower

From here, you will need to make a few changes to the Registry on your Windows 10 PC. If you are not comfortable with making these changes, don’t read any further. These registry edits will enable battery percentage, battery life remaining, and time remaining to charge your Windows 10 PC, but messing with the registry could cause serious problems for your computer if you’re not careful.

Here are the steps you need to follow in Registry Editor:

  1. Navigate to HKEY_LOCAL_MACHINESYSTEMCurrentControlSetControlPower
  2. Delete EnergyEstimationEnabled & UserBatteryDischargeEstimator from the right pane
  3. Right-click and Add a New DWORD (32-bit), and name it EnergyEstimationDisabled

Restart your computer for the changes to take effect.

Now, when your mouse hovers over your battery icon, you should see the estimated amount of time battery life remaining on your Windows 10 PC, as well as the battery percentage indicator.

Microsoft, Windows Settings, Windows 10

While the amount of time is not exact and can change depending on your Windows 10 PC usage, it is more helpful to have a time estimate of remaining battery life than a percentage estimation. Microsoft allows users to know how many hours are left to use on one of their devices, the Surface Headphones. However, it is a bit ridiculous that Microsoft chose to remove the same feature running on all of their other Surface products, including the Surface Pro 6 and Surface Laptop 2.

Minecraft just had its best year on mobile with over $110 million in revenue in 2018

Even though the launch of Fortnite and PUBG on mobile hugely contributed to the battle royale frenzy last year, these free-to-play games didn’t really hurt Minecraft, one of the most popular paid games on iOS and Android. Indeed, according to new data from app analytics platform Sensor Tower (via Gameindustry.biz), 2018 was Minecraft’s most profitable year on mobile with the iOS and Android versions bringing more than $110 million in revenue for Microsoft (up 7% year over year).

Minecraft is a $6.99 purchase on iOS and Android, but there are also lots of in-app purchases to unlock skins and more. “The largest portion of spending in the game last year came from the United States, at 48 percent of the total or approximately $52.8 million. Great Britain’s $7.3 million (about 6.6 percent) was a distant second, while Japan ranked third for spending at 5 percent or approximately $5.5 million,” Sensor Tower’s report notes.

Microsoft’s immensely popular sandbox game hugely benefited from the launch of the new Bedrock version, which brought support for crossplay multiplayer across iOS, Android, Windows 10, Xbox One, and Nintendo Switch. This is all done through Microsoft’s Xbox Live platform, which Microsoft wants to bring to more iOS, Android and Switch games with a new cross-platform XDK.

According to Sensor Tower, the mobile versions of Minecraft generated $500 million of revenue for Microsoft since 2014. That’s definitely not bad for a game with 91 million monthly active users on all platforms, but Fortnite has been doing even better for Epic Games. Earlier this month, Sensor Tower reported that Fortnite mobile revenue reached $500 million on iOS in less than a year.

Minecraft
Minecraft
Developer:
Mojang
Price:
$6.99


‎Minecraft
‎Minecraft
Developer:
Mojang
Price:
$6.99+

Top 4 software to recover lost email account passwords

Whether you use web-based email services or desktop email clients to manage your account, emails are used for business and personal communication by almost everyone.

The fact that emails come with the ability to attach required documents and can be stored forever in your email service provider’s server allows the users to keep information related to important accounts or businesses in email without worrying about it being deleted from a local drive or cloud storage.

However, it may happen that you forgot your email password for your email accounts and the recovery options aren’t working either. Losing the password to your primary email account can be scary.

Fortunately, there is email password recovery software that can extract email account details from web browsers as well as email clients.

In this article, we take a look at the best software to recover email account passwords and gain access to all your email accounts as well as the data.

What are the best tools to recover email passwords?

Passware Kit Basic

Passware Kit Basic is a multi-purpose password recovery software for Windows computers with features to recover Windows administrator, and MS office password-protected documents as well as Internet and Network password recovery option in the tool.

Using Passware Kit Basic, you can recover passwords for Microsoft Mail, Outlook Express, Google Chrome, Firefox, and Internet Explorer websites.

Passware Kit Basic offers instant results using multiple attack modes including Brute-Force attack, Dictionary attack, Xieve, and also uses known/part, previous password, and their combination to crack the password.

Apart from email account passwords, recovery Passware Kit Basic can be used to recover Windows administrator passwords and security settings after creating a bootable flash drive using Passware Kit Basic ISO.

The intuitive user interface makes it easy to recover email account passwords. After launching the program, users have multiple recovery options to choose from. For recovering email accounts password, select the Internet and Network option.

Now proceed with the on-screen instructions and select the email account password you want to recover. The recovered password can be saved for later use.

Passware Kit Basic is an easy-to-use application with multiple uses. The price tag although feels a bit steep, but it is a one-time purchase and can be helpful to recover passwords for all kinds of file formats in the future as well.

⇒ Get Passware Kit Basic 

Mail Password Recovery by Top-Password

Email Password Recovery Top password

Mail Password Recovery is a premium password recovery program that allows you to recover login details for email accounts stored by Windows Mail, Windows Live Mail, Mozilla Thunderbird, Opera Mail, Gmail Notifier, Eudora, Incredimail, Reach-a-Mail, The Bat!, PocoMail, Becky! Internet Mail, Phoenix Mail, Ipswitch IMail Server, Pegasus Mail, etc.

The software claims to offer a 100% recovery rate. It is a Windows-specific tool and supports both editions of Windows irrespective of the version.

If you use an email client that is not listed in the recovery menu, you can use the Asterisk Password option to recover the hidden password.

Using Mail Password Recovery is easy. Download the demo version from the official website and install it. Launch the program and click on the Start Recovery button.

To proceed, you should select the email client or service provider for which you want to recover the password. The software will begin the scanning process and display any recovered password in a dialogue box.

The asterisk password option as I said earlier, helps you to find a password that is hidden behind the asterisks in your local drive, thus making it impossible for humans to recover.

⇒ Get Mail Password Recovery 

Email Password Recovery Master

Email Password Recovery Master
  • Price – Free demo / $9.98

Email Password Recovery Master is another program that can help you to recover a forgotten email account password. It is a premium program but comes with a free trial, just in case you want to try it before making a purchase.

The user interface is very minimal, and the software itself is easy to use. There aren’t too many options to deal with as well.  Email Password Recovery Master can recover passwords stored in email clients such as Thunderbird, Outlook, and the Bat!.

In addition, it supports recovery from all the modern web browsers including Chrome, Firefox, Internet Explorer and Opera web browser.

Email Password Recovery Master can recover passwords irrespective of the length and complexity. All the recovered passwords can be saved to a text file with a single click. The tool itself can be locked with a password to help you protect the password recovery function.

Download the free demo from the official website and install the application on your PC. Next, launch the program and click on the Email Client password tab to begin the recovery process. If you want to recover for Web browsers, the process is the same for recovering passwords from web browsers as well.

Email Password Recovery Master displays the recovered password with the site address and login user ID. Although the official website lists only Windows 8 earlier version as compatible, we tested it on a Windows 10 machine for compatibility and found it working.

⇒ Get Email Password Recovery Master 

Mail PassView & WebBrowser PassView

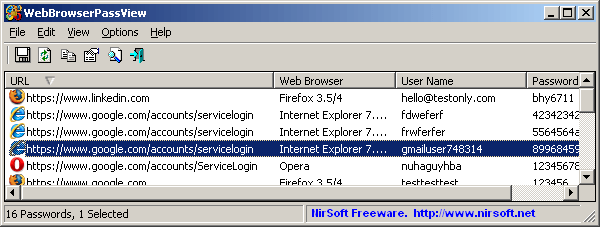
Web Browser PassView

Mail PassView and Web Browser PassView are two small utilities that can help you to recover email account passwords for web browsers as well as desktop clients. Both the utilities are free to download and use, so you don’t have anything to lose.

Mail PassView – This is for recovering email account passwords from desktop clients such as Outlook, Outlook Express, Thunderbird, Windows Mail, etc.

Using the tool is as easy as it gets. You need to download it from the official website, extract the folder and run the setup file. The program will start scanning for the stored password on your PC and displays the email account details on the main window.

Web Browser PassView – This utility from the same developer can help you to recover the email account passwords saved in the web browser. It can recover passwords from all the major web browsers including Internet Explorer, Firefox, Opera, and Google Chrome.

The working of this utility is similar to that of Mail PassView. Download the zip file, extract and run the executable file. Web Browser PassView will scan and display the email accounts details on the main window.

While running the program, the Anti-virus or Windows smart-screen might block the software from being unverified. The problem is listed on the official website, and we did not find any suspicious behavior in our testing.

⇒ Get Web Browser PassView & Mail PassView 

Check your email service provider’s documentation

Losing your primary email account password can be devastating, however, to deal with such a situation, all the major email service providers have a backup option in place.

While setting up an email address, you probably would have entered your mobile number for verification. Email providers like Gmail ask you to enter the backup email address to make the recovery process easier. If nothing works, you can use the security question to recover your forgotten email address password.

Since every email provider has different policies, a better thing to do is to visit your email provider’s official website and look for the documentation.

All the email password recovery tools listed in this list can only recover the email password if it is stored by your web browser or desktop email clients. If you manage to recover your password, make sure you start using a password manager for storing your passwords for all the accounts.

Password Managers are cross-platform services that can be accessed from any computer or device in case your primary device becomes inaccessible, thus saving the day.

How to fix League of Legends patch issues on PC


10 solutions to fix LoL patch issues

  1. Change screen refresh rate
  2. Reset Winsock
  3. Run the game as Admin
  4. Force Re-Patch
  5. Repair game files
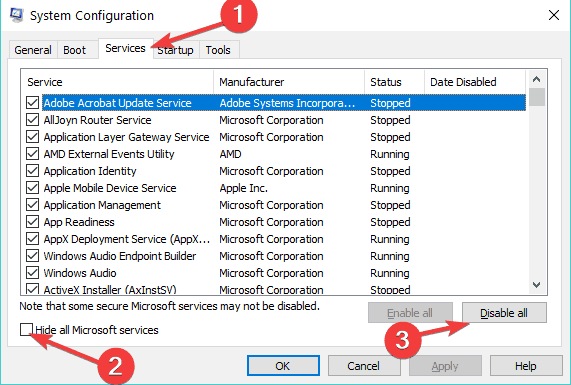
  6. Disable UAC
  7. Disable your Firewall
  8. Make sure .NET Framework 3.5 is installed
  9. Disable your antivirus and firewall software
  10. Make sure your internet connection is working properly

Just like every major MOBA game, League of Legends is being updated on a regular basis. Each new update fixes a certain amount of bugs, and brings occasional new features and gameplay elements. Therefore, it’s mandatory to install every patch, if you want to have the best possible experience.

However, patching League of Legends doesn’t always go as smooth as we might hope. In fact, various errors may occur, and if we don’t resolve them, we may end up with an outdated game. We’we searched for a couple of scenarios, including connection errors, not seeing the patcher, and more.

We’we searched for a couple of scenarios, including connection errors, not seeing the patcher, and more. And we’ve prepared a couple of solutions that might come in handy when dealing with League of Legends patching issues. So, if you have the patching problem, make sure to read this article.

How to solve League of Legends patching issues

1. Change screen refresh rate

There’s a chance you legitimately received a patch, but you can’t see it because your monitor uses a wrong screen refresh rate. In this case, your monitor simply won’t show the patcher, and you won’t be able to download the update.

To change your screen refresh rate, do the following:

  1. Right-click on your Desktop
  2. Click the Display settings icon
  3. Click the Advanced Settings link, and then Display adapter properties
  4. Click the Monitor tab
  5. In the Monitor Settings box, change your Screen Refresh Rate
  6. Change your Screen Refresh Rate to 59hz or 60hz (most monitors support this mode)
  7. Click Apply
  8. Re-launch League of Legends

2. Reset Winsock

League of Legends patcher is designed to work with the default TCP/IP settings. So, if your settings are different, the patcher might not work correctly. Winstock defines how a Windows network accesses TCP/IP services function, so resetting this feature will automatically reset the TCP/IP settings, as well. In order to reset winsock, follow these instructions:

  1. Right-click the Start Menu, and choose Command Prompt (Admin)
  2. Enter the following command, and press Enter: netsh winsock reset
  3. Restart your computer
  4. Launch League of Legends, and try to patch it again.

If the wrong TCP/IP settings were the reason for the patcher not to work, everything should be fine now. However, if the problem still persists, you should move on to another solution.

3. Run the game as Admin

The patcher needs to have Administrator privileges in order to function correctly. So, running the game as Admin might resolve the problem.

To run League of Legends as admin, right click the game icon on Desktop, and choose Run as administrator.

4. Force Re-Patch

If nothing from above helped, you might try to ‘use the force’. Some game files might become corrupt occasionally, and that’s exactly what prevents the patcher from downloading updates correctly. The solution for this is to force  a re-patch.

To force a re-patch, do the following:

  1. Go to your Riot Games folder (Default path: C:/Riot Games/League of Legends)
  2. Open the following directory:
    • C:Riot GamesLeague of LegendsRADSprojectslol_air_clientreleases{highest version number}
  3. Delete the following files:
    • – releasemanifest
    • – S_OK
  4. Open the Deploy folder
  5. Delete the following folders/files:
    • – lib (folder)
    • – META-INF (folder)
    • – mod (folder)
    • – lolclient.exe (file)
    • – lolclient.swf (file)
    • – locale.properties (file)
  6. Restart League of Legends

5. Repair game files

Speaking of corrupt files that prevent the patcher from working normally, there one more thing you can do to make things right. You can repair game files using League of Legends‘ own repair tool. Here’s exactly what you need to do:

  1. Run League of Legends
  2. Click on the ‘?’ button that is located in the top right corner of the window
  3. Click Repair
  4. Wait. The repair function can take anywhere from 5 minutes to over 30 depending on the number of corrupt files it has to repair

Now, restart League of Legends, and try to update the game again.

6. Disable UAC

Windows’ User Account Control (UAC) is a security measure that actually can prevent legit apps, programs, and updates from installing. That’s exactly the reason why the majority of users disable it as soon as they install the fresh system (although it’s not advised).

UAC can also prevent LoL updates from installing, so if none of the previously listed solutions worked, you can try with disabling this feature. To disable UAC in Windows, do the following:

  1. Go to Search, type uac, and open Change User Account Control settings
  2. Set the scan to Never notify, and press OK
  3. Restart your computer

Now, try to update League of Legends with UAC disabled. If you’ve managed to download the update, it’s advised to bring UAC to previous settings after.

7. Disable your Firewall

Windows Firewall is another security measure that can prevent you from installing new apps and updates. So, we’re going to try to disable it, and see if the patcher works then. Here’s what you need to do:

  1. Go to Search, type firewall and open Windows Firewall
  2. Now, click on Turn Windows Firewall off or on
  3. Go to Turn off Windows Firewallwindows firewall anniversary update

However, if you determine that Windows Firewall actually didn’t the patching problems, it is recommended to have it back on. Although it can be annoying sometimes, Windows Firewall is a very useful feature, and it helps your computer running safe.

8. Make sure .NET Framework 3.5 is installed

League of Legends requires .NET Framework 3.5 to be installed on your computer. So, if you don’t have this feature, various issues may occur. Make sure you have .NET Framework 3.5 installed on your computer, and download it from this link if not.

Remember, even if you have .NET Framework 4.0, .NET Framework 3.5 is still required.

9. Disable your antivirus and firewall software

Sometimes, your antivirus may interfere with online gaming activities. This might explain why you can’t update League of Legends update or you can’t launch the game shortly after installing the update. Your security software may block the connection to the LoL game servers.

As a workaround, you can disable your antivirus before launching League of Legends, and then run hit the update button.

As always, don’t forget to enable your antivirus and firewall once you’ve solve the problem to make sure your PC is fully protected.

10. Make sure your internet connection is working properly

And finally, if your internet connection doesn’t work properly, you won’t be even able to run the game, let alone updating it. So, make sure everything is okay with your internet connection and router. If you notice any issues, make sure to check this article for potential solutions.

That’s about it, we’ve tried to cover the most common solutions for League of Legends patch problems in this article. If you know about some workaround we didn’t list here, please let us know in the comments below.

RELATED STORIES YOU NEED TO CHECK OUT:

How to disable the Delete File dialog box on Windows 10

The Recycle Bin stores files that users have selected to erase. Thus, those files aren’t really deleted until users empty the Recycle Bin. When users erase a file, a Delete File dialog box window might open that asks: Are you sure you want to move this file to the Recycle Bin?

Users select Yes to confirm. However, users can disable the Delete File dialog box in Windows 10, and other platforms, as follows.

Are you sure you want to move this file to the Recycle Bin?

1. Deselect the Display Delete Confirmation Dialog Option

The Recycle Bin Properties window includes a Display delete confirmation dialogue option. Users can uncheck that option by right-clicking the Recycle Bin icon and selecting Properties.

That will open the window shown directly below, which includes the Display delete confirmation dialogue setting. Deselect that option to turn off the Delete File dialog box. Then click Apply and OK.

2. Disable the Delete File Confirmation With Group Policy Editor

Alternatively, users can disable the Delete File dialog box with Group Policy Editor in Windows 10 Pro and Enterprise. That will turn off the Delete File dialog for all user accounts. This is how users can turn off Delete File confirmation dialogs with Group Policy Editor.

  1. Right-click the Start menu and select Run.
  2. Then enter ‘gpedit.msc’ in Run’s text box and click OK to open Group Policy.
  3. Click User Configuration > Administrative > Templates > Windows Components > File Explorer on the left of the Group Policy Editor window.
  4. Users can then double-click Display confirmation dialog when deleting files on the right of Group Policy Editor.
  5. Select the Disabled option on the Display confirmation dialog when deleting the files window.
  6. Click the Apply and OK buttons.

— RELATED: Can I undo restored files in Recycle Bin? Here’s the answer

3. Disable the Delete File Dialog Box by Editing the Registry

Some users have stated on forums that the Display delete confirmation option is grayed out on their Recycle Bin Properties windows. Consequently, they can’t disable the Delete File dialog box with that option.

However, users can still disable Delete File confirmations by editing the registry, which might come in handy if the Display delete confirmation setting is grayed out.

  1. Enter ‘regedit’ in Run and click OK.
  2. Navigate to this registry path: HKEY_CURRENT_USER\Software\Microsoft\Windows\CurrentVersion\Policies\Explorer.
    are you sure you want to move this file to the recycle bin
  3. Select Explorer and then right-click an empty space on the right of Registry Editor’s window to select New > DWORD (32-bit) Value.
  4. Enter ‘ConfirmFileDelete’ as the DWORD title.
  5. Double-click ConfirmFileDelete to open the Edit DWORD (32-bit) Value window.
    are you sure you want to move this file to the recycle bin
  6. Enter ‘0’ in the Value data text box, and click the OK button. To turn the delete confirmation dialog back on, enter ‘1’ in the Value data box.


are you sure you want to move this file to the recycle bin

4. Raise the Maximum File Size

A Delete File dialog box pops up when users try to delete a file that eclipses the maximum size value for the Recycle Bin. That dialog box asks, “Do you want to permanently delete it?” Thus, the file is too large for the Recycle Bin to include.

  1. However, users can ensure that the Delete File dialog box doesn’t open by raising the maximum file size for the Recycle Bin. To do so, open the Recycle Bin Properties window.
  2. Then select the Custom size radio button.
  3. Enter a higher maximum value in the text box.
  4. Click the Apply button.
  5. Then press the OK button to close the window.

So, there are a few ways that users can disable Recycle Bin’s Delete File dialog box. It’s not really worth having that dialog box enabled with the Recycle Bin configured to include deleted files. However, it might be worth keeping the Delete File dialog box when you’ve selected the Don’t move files to the Recycle Bin option. Then the confirmation window will ensure against accidental file erasure.

RELATED ARTICLES TO CHECK OUT: 

Here’s what to do if your Xbox One keeps ejecting discs

Using physical copies of games is has its advantages. At the end of the day, you’re not depending on the network to install and play titles. Also, the boxed copy is great for collectors.

However, even the sturdy Xbox One has some users wanting to switch to digital copies. Namely, some of them experienced a rather peculiar issue, as their Xbox One keeps ejecting a disk followed by the well-known beep. On its own and even while in standby. We’ll try and provide you with a fix for this below.

Xbox One ejecting disc on its own? Here’s how to fix this

Solution 1 – Give power cycle a try

Let’s try with the oldest trick in the book. A lot of Xbox One errors, if not the majority, are easily fixed by a simple power cycle sequence. Therefore, if your Xbox One starts misbehaving, your first step is to go for the power cycle or hard reset. The whole Xbox-ejects-disk thing might be a system bug and this should address it.

Here’s how to perform a power cycle on your Xbox One:

  1. Press and hold the Power button for 10 seconds or so.
  2. Wait until the console shuts down.
  3. After a minute, turn on the console again and look for changes.

Solution 2 – Clear persistent storage

Another way to resolve this is by clearing persistent storage and performing a power cycle again. This seemingly fixed the issue for many users. Of course, we must stress that this applies only if the problem at hand is related to software.

If the hardware is an issue, it’ll hardly help and we suggest considering repairs or replacement. A bit ludicrous but certainly possible reason is roaches infestation, as they enter the console.

Here’s how to clear persistent storage and hopefully resolve the problem:

  1. Power On the console.
  2. Press the Home button and then open Menu.
  3. Choose Settings.
  4. Select Disc & Blu-ray and then Persistent storage.
  5. Clear Persistent storage 3 times.
  6. Press and hold the Power button for 10 seconds or so.
  7. Wait until the console shuts down.
  8. After a minute, turn on the console again and place it in standby.
  9. The Xbox One shouldn’t eject a disk anymore.

If you’re Xbox One keeps ejecting a disc, contact the support. They should be able to assist you. And, on that note, we can conclude this article. If you have any questions or suggestions, feel free to tell us in the comments section below. We look forward to hearing from you.

RELATED STORIES YOU SHOULD CHECK OUT:

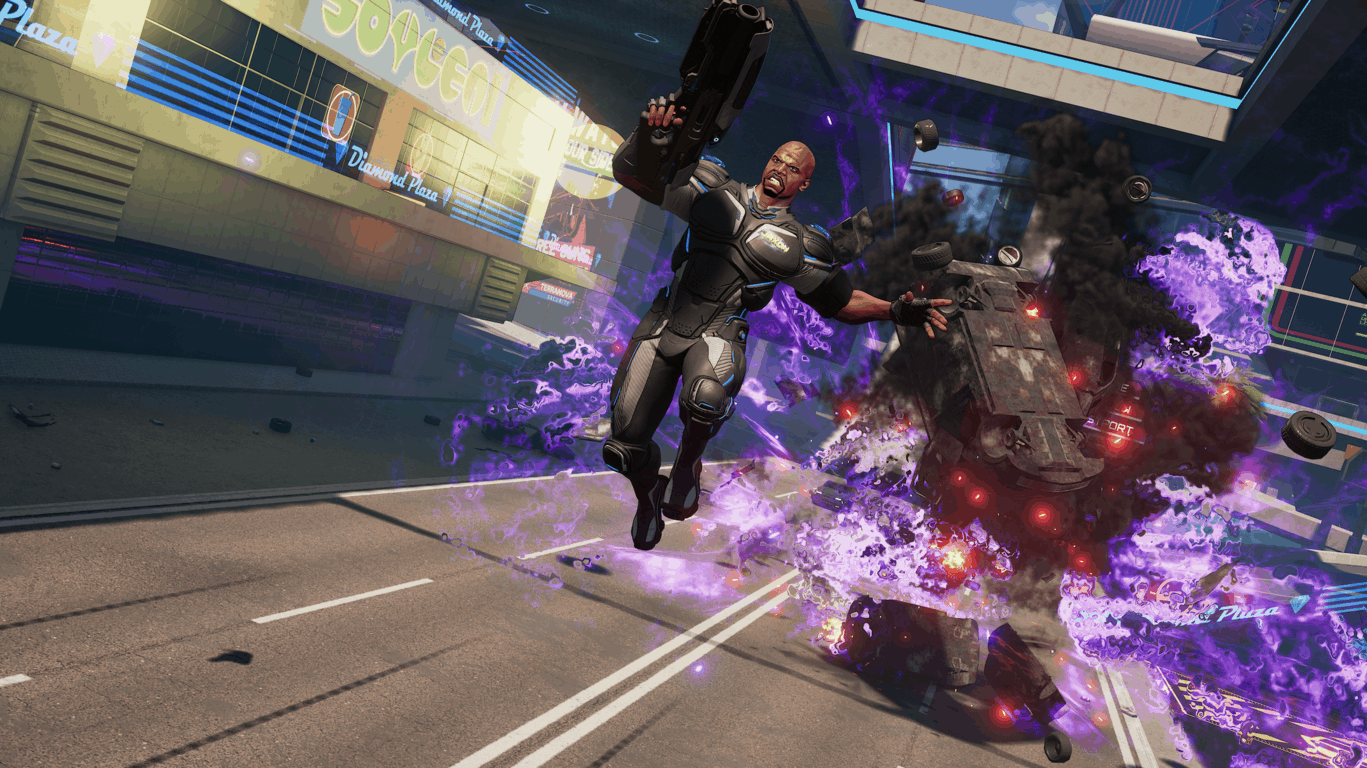
Crackdown 3 video game launches on Xbox One and Windows 10

After a rather significant delay in its development, Crackdown 3 has finally launched on Xbox One consoles and Windows 10 devices.

Crackdown 3 is an open-world action title with a campaign (that can be played solo or with another player) and an online multiplayer Wrecking Zone mode which supports matches with up to 10 players.

Here’s the official game description:

Time to step up your boom and stop crime as a super-powered Agent in Crackdown 3’s open-world sandbox of mayhem and destruction. Explore the heights of New Providence, tear up the streets in iconic vehicles, and use your powerful abilities to stop a ruthless criminal empire. Play the campaign solo or with a friend in co-op mode or compete in the all-new “Wrecking Zone,” a multiplayer mode where destruction is your ultimate weapon. Online multiplayer requires Xbox Live Gold subscription (sold separately).

  • Level Up Your Agent: Level up your super-Agent skills to move as fast as lightning, jump over skyscrapers, hurl trucks at your enemies and protect the city from cold-blooded criminals.
  • Dangerous Open-World Playground: Play solo or with a friend in co-op mode to explore an expansive, vertical world to infiltrate crime lords and take down their syndicates.
  • Take a BOOM Out of Crime: Lure vindictive crime lords out of hiding by completing objectives, attacking criminal operations and taking out high-value captains.
  • All-New Multiplayer “Wrecking Zone”: Crackdown 3 includes the all-new “Wrecking Zone” – an explosive competition with unique modes where destruction is your ultimate weapon against friends and rivals.

Crackdown 3 is an Xbox Play Anywhere title which means that buying it on Xbox One will unlock it on Windows 10 and vice versa. Crossplay is also supported so PC and console gamers will be able to face off against each other in multiplayer.

In addition to being available to buy outright, Crackdown 3 is also available to play for all Xbox Game Pass members. Those who are on the fence about whether to buy it or not after reading the mostly-negative reviews may want to give this Microsoft subscription service a try to have a look at the complete game before paying the full price for it.

Our Laurent Giret reviewed Crackdown 3 and found it to be a fairly average title with a repetitive campaign and a rather lacklustre multiplayer component. You can read his full deep dive into the title here.

Have you played Crackdown 3 yet? Share your thoughts on it with the community in the comments below and then follow us on Pinterest for more Xbox gaming content.

Crackdown 3
Crackdown 3
Developer:
Xbox Game Studios
Price:
Free

Metro Exodus is now live on Xbox One consoles in 4K UHD

Metro Exodus is now live on Microsoft’s family of Xbox One consoles. The game is a first-person stealth shooter set within a post-apocalyptic Russia with dynamic weather, a day/night cycle, and 4K UHD visuals when played on an Xbox One X.

Here’s the official game description:

Metro Exodus is an epic, story-driven first person shooter from 4A Games that blends deadly combat and stealth with exploration and survival horror in one of the most immersive game worlds ever created. Explore the Russian wilderness across vast, non-linear levels and follow a thrilling story-line that spans an entire year through spring, summer and autumn to the depths of nuclear winter.

Inspired by the novels of Dmitry Glukhovsky, Metro Exodus continues Artyom’s story in the greatest Metro adventure yet. Embark on an incredible journey – board the Aurora, a heavily modified steam locomotive, and join a handful of survivors as they search for a new life in the East. Experience Sandbox Survival – a gripping story links together classic Metro gameplay with new huge, non-linear levels.

Metro Exodus is available in a regular edition and a Gold Edition which comes with the main game and the Metro Exodus Expansion Pass which adds additional story and gameplay content.

Have you had a chance to play Metro Exodus yet on your Xbox One console? Let us know if you’re enjoying it in the comments below and then follow us on Pinterest for more Xbox gaming content.

Metro Exodus
Metro Exodus
Developer:
Deep Silver
Price:
Free


Metro Exodus Gold Edition
Developer:
Deep Silver
Price:
Free

How can I fix Lenovo Yoga 2 Pro battery problems?

The Lenovo Yoga 2 Pro surely is an excellent computing device. The same when coupled with Windows 10 does make for a formidable computing platform, ticking most boxes, if not all, of the most die-hard of computer fans. Unfortunately, there is one area, and a mighty important one at that, where the Yoga 2 Pro has often been found lagging – the battery.

For there often are a few nagging battery issues that have plagued the device. Those include the one where the battery has been found to lose its charge even when the device is shut off.

If that is not enough, there also is the issue of the notebook showing its charge levels stagnated at zero percent even after it has been plugged to the mains for hours.

However, like with most issues, there sure is a solution for the battery woes that the Yoga 2 Pro has often come to be identified with. And those aren’t any rocket science either, which means a few simple steps can set things right here.

Solutions to fix Lenovo Yoga 2 Pro battery issues

1. Disable unnecessary start-up programs from Task Manager

Check to see if there are unwanted programs that is getting launched during start-up and is eating up resources unnecessarily. Here is how you do it.

  • Launch Task Manager. You can do that by simply typing Task Manager in the Cortana search box and selecting the same from the search results shown.
  • In the Task Manager window, select Start-up tab.disable startup programs
  • You will get to see a list of programs that gets launched when the computer is starting up.
  • See if there are any unnecessary programs that is getting launched during start up and is impacting performance significantly. Refer to Start-up impact and watch out for ay programs that has medium to high impact.
  • Select any program that you feel is not needed and click on the Disable button at the bottom right corner to get rid of those programs.

— RELATED: Microsoft is at it again, says Edge offers better battery life than other browsers

2. Disable Lenovo apps that aren’t needed

Lenovo has a history of pre-loading their devices with bloatware that have little to no practical usage. In fact, those can be battery hogs and severely impact performance as well. Needless to say, it is best to do away with those. Here is how.

  • Click on Start > Settings > Apps.
  • Select the app that aren’t needed and click on the Uninstall button.
  • Follow on-screen instructions that shows up.
  • If you aren’t allowed to uninstall a proprietary app, which is often the case, you can consider disabling those. Here are the steps:
  • Click on Start > Settings > Privacy.
  • From the list of options on the left, select Background apps.Runtime Broker high disk usage
  • From Select which apps can run in the background, select the contentious app and toggle the button on the left to the Off position.

3. Update battery firmware

An outdated battery firmware can be the culprit leading to your Yoga device losing battery charge even when the device is powered off.

Interestingly, updating the battery firmware for Windows 8.1 does the trick here, even if you have Windows 10 installed on your system. Here is what you need to do.

  • Go to the official Lenovo site and look for the page that applies to the particular model of your notebook.
  • Search for software and firmware download section.
  • Select Windows 8.1 as the operating system on your notebook even if its Windows 10 installed on your notebook.
  • Download and install the battery firmware applicable for your device.
  • You should have your issue of overnight battery discharge resolved.
  • In any case, it’s always a nice idea to have all drivers on your device updated to the latest version.
  • To do so, click on Start > Settings > Update & Security.
  • Click on the Check for updates button to see if there is an update pending. You might be required to restart your device for a successful installation of the updates.

— RELATED: 15 best laptop battery testing software to use

4. Perform battery guage reset

Doing a Battery Guage Reset can also be the solution to get rid of a plethora of issues related to the battery, including the one where the battery might seem to get stagnant and showing to not charge beyond a particular point. Also, it is mandatory to have the notebook connected to the AC mains before you start with the process.

A word of CAUTION

Lenovo Gauge Reset is known to have caused irreparable damage to the battery sometimes and is recommended to be done only as a last resort when all other options have failed. Also, make sure you follow all instructions carefully to prevent a nasty surprise later on, read fully damaged battery. Or, it Is best to do a Guage Reset under supervision of a Lenovo support guy.

Here are the steps to follow:

  • Launch Energy Manager and enlarge the same by clicking on the three dot and line combo on the top right.
  • Under the Maintenance Guide tab you will get to see Battery Status section containing all info with regard to the battery.
  • The Battery Status section is also where the Guage Reset button is placed towards the right. Click on it and follow on-screen instructions thereafter.
  • Also, it might take a while for the entire process to be completed. So it is best to start with the reset process when you have enough time to spare.
  • You will also be need to plugin during the process and won’t be able to use the device until it is over.

So there you have it, ways to deal with battery issues on the Lenovo Yoga 2 Pro running Windows 10.

Also, here are some related resources that you might want to browse:

How to get 60 minutes of free Skype calls on landlines

Microsoft sees off the old method of activating free call minutes on Skype. In the new Skype Insider version (8.39.76.176) Microsoft abandons the manual method of logging in to the Microsoft account page to claim the free Skype call minutes.

The new Skype version will automatically activate the free 60 Skype call minutes for all the users who get an Office 365 subscription.

The manual procedure of activating free call minutes on Skype involves following these steps:

  1. Log in with Microsoft account at Office.com/myaccount
  2. Select Activate your Skype minutes
  3. Choose Activate.

For the time being, you cannot use the above-illustrated method to get free minutes on Skype. The new future should be available with the upcoming Skype releases.

New features coming to Skype

Besides, the new version introduces two more changes. Skype will save conversations with unsent messages as drafts.

The tool also prompts you to set up Caller ID for the outgoing calls and messages. In this way, the recipient will know that it’s you when you contact them on Skype.

Skype free landline calls

Office users can use these 60 free Skype minutes to dial to 60 countries across the globe. The list includes Canada, Hong Kong, America, Africa and many more.

The free minutes supports both mobile phone and landlines in some countries and only landlines in other. The details are:

  • Call to landlines and mobiles in: Canada, Guam, Hong Kong, Puerto Rico, Singapore, Thailand, United States, and China.
  • Call landlines in: Argentina, Australia, Austria, Belgium, Chile, Croatia, Czech Republic, Denmark, Estonia, Finland, France, Germany, Greece, Hungary, Ireland, Israel, Italy, Japan, Korea, Luxembourg, Malaysia, Netherlan>nds, New Zealand, Norway, Poland, Portugal, Russia, Slovakia, Spain, Sweden, Switzerland, Taiwan, United Kingdom, Venezuela, Brazil, South Africa, Morocco, Turkey, Colombia, Costa Rica, Mexico, Panama, Peru, Paraguay, Bulgaria, Romania, Latvia, Lithuania, Indonesia-Jakarta, Slovenia, Malta, Andorra, Brunei, Iceland, and Guadeloupe.

Besides the free call minutes on mobile phones and landlines, the software offers free unlimited video and audio Skype to Skype calls. And for users not on Skype, you can make international calls on a subscription or using credits.

RELATED POSTS  TO CHECK OUT:

Get your grades in order with the free My Study Life app

My Study Life is a cross-platform planner for students, teachers, and lecturers which allows users to store classes, homework, and exams in the cloud. This way, all the data will be available on any device at any time and from whatever location.

My Study Life features

The app can integrate all areas of academic life. With it, users will be able to see homework due for classes, classes which conflict with exams, and can even add revision tasks for a particular exam.

The app is far from a standard calendar application, though. It has been optimized to work for your school life right from the beginning with the ability to add your classes and view them in a beautiful and instantly identifiable week view.

The app is able to seamlessly synchronize all data between devices and the best part is that it allows you to use it even when you are not online. You can add a task from your phone or tablet while you’re on the go, too, and it will instantly be available also in the web app.

OS compatibility

System requirements include the following operating systems: Windows 10, Windows 8.1, Windows 10 Mobile, Windows Phone 8.1, and Windows Phone 8. The app is available on PC, Windows Phone, iPhone, Android and on the web.

User experience

Users who have already tried the app have found it extremely useful, especially for a free application. The ability to log in and sync between the Windows and the Android apps is well-regarded. Users also loved its fluidity and the fact that it reminds you of your next class 15 minutes before it starts.

One minus that was spotted with the app is how some students have online classes which don’t have set dates or hours, and the lack of an option to place the online class so that they won’t have to choose a random date and time for it.

All in all, the app works correctly and is extremely useful.

You can get it for free from the Windows Store here.

UPDATE: The latest version of the tool adds the following improvements:

  • Added support for holidays.
  • Improved week and day rotation schedule setup.
  • Added option to set first day of week.
  • Tasks are shown for the selected day on the calendar month view.
  • URLs in task detail are now automatically detected and clickable.
  • Numerous other improvements and fixes to make the app more stable.

RELATED STORIES TO CHECK OUT:

What are the best Blu-Ray players for laptops?

Blu-Ray offers some of the best movies in high definition (HD) and ultra high definition (UHD). It houses the most advanced storage hub for storing UHD videos (and movies). However, Windows (and other PCs) does not have a default support for playing Blu-ray videos.

Hence, to enjoy the best of video quality (via Blu-ray) on your PC, you might have to outsource and get a third-party Blu-ray player. For your convenience, this article reviews some of the best Blu-ray player Windows 10 software.

As of today, no computer has a preinstalled media player that is capable of playing Blu-ray videos. There are, however, a host of specially designed software, any of which can easily be installed to play Blu-ray movies/videos on PCs.

And this article is designed to help you choose the best one for your computer, specifically Windows PCs.

There are numerous Blu-ray players out there. So, we’ll be looking at only five of the best, Windows 10-compatible, ones.

5 best Blu-ray player software for laptops

CyberLink PowerDVD

CyberLink PowerDVD is an industry-class Blu-ray media player, exclusively designed for Windows PC. The program supports all modern versions of Windows, including Windows 10, Win8.1, Win8, and Windows 7 (it doesn’t support MacOS systems).

Also, CyberLink PowerDVD is equipped to support and play every notable video format and source file, including DVDs, 3D/4K Blu-ray and UHD Blu-ray discs/ISO files/folders.

Also, it houses one of the best obtainable sound/audio systems in the industry. And it can stand toe-to-toe with any media player in this regard.

Key features of CyberLink PowerDVD include HDR support, high-resolution videos (< 4K), DTS-HD/Dolby TrueHD/Dolby Digital (multichannel) audio support, offline media streaming, multiple video formats and more.

CyberLink PowerDVD, though one of the best Blu-ray player Windows 10 software, is also one of the most expensive.

⇒ Get PowerDVD

Macgo Windows Blu-ray Player

best blu ray player windows 10 software

Macgo Windows Blu-ray Player is a media software (player), specially designed for playing Blu-ray Discs/ISO files/BDMV on Windows PC. It is specially optimized to perform better on Windows 10.

In light of this, it is often regarded as one of the best Blu-ray player Windows 10 software; hence, it tops our list.

This software affords its users the opportunity to watch Blu-ray movies in any format they desire with format support (for videos) running up to 50. In fact. any video format you can think of is aptly supported on Macgo Windows Blu-ray player.

Also, the media player supports multiple resolutions, including 480p, 720p and 1080p (it does not support 4K).

Macgo Windows Blu-ray player, although initially designed for MacOS, has a wide compatibility for Windows. The program is compatible with all Windows operating systems between Windows 10 and Windows XP. It gets better, there are also designated versions for mobile iOS devices, as well as the original version for Mac.

Some of the unique features of Macgo Blu-ray Windows Player include an advanced sound system (which supports DTS-5.1, Dolby TrueHD, DTS-HD and more), third-party and built-in subtitles, online playback, cross-platform compatibility, multiformat audio & video support, multilingual support (15+ languages), industry-class security, technical support (including comprehensive tips and tutorials) and more.

The only notable downside of this software is the lack of a Blu-ray menu; although its development is in the pipeline. Also, there is no 4K resolution support.

Macgo Windows Blu-ray Player is offered at a starting pricing of $29.95 (for a single license). However, there is a limited version, which can easily be downloaded for free.

⇒ Get Macgo Windows Blu-ray Player

Leawo Blu-ray Player

best blu ray player windows 10 software

Leawo Blu-ray Player is a multifunctional media player software for Windows, and it makes our list of best Blu-ray player Windows 10 software.

This media player is flexibly designed to, not only play videos on Blu-ray disc/ISO files/folders but also videos on DVDs and other video storage media. It is supported on Windows Vista and later versions, up to the latest Windows 10.

Besides, Leawo hosts a fairly easy-to-navigate UI, which could be a little tricky for beginners. Nevertheless, there are several onboard guidelines to help you out, as every feature is clearly spelled out on the UI/screen display.

The highest resolution obtainable on Leawo Blu-ray Player is 1080p. However, the software’s developers are currently working towards adding the 4K resolution. And this is expected to come with the next update.

Key features of Leawo Blu-ray Player include multiformat video/audio support, multiple HD resolutions (up to 1080p), advanced audio setup (to support DTS-HD, AAC, DTS, TrueHD and more), customizable GUI, external subtitles, customizable video/audio playback, power manager, multilingual support and more.

Leawo Blu-ray Player is free licensed software, which means you can download and use it for as long as possible without paying a dime.

⇒ Get Leawo Blu-ray Player

DVDFab Player 5

best blu ray player windows 10 software

DVDFab Player 5 is undoubtedly one of the best Blu-ray player Windows 10 software out there. The software is supported on all 32-bit and 64-bit Windows 10/8.1/8/7 computers, with minimum RAM storage of 2GB.

In addition, DVDFab Player 5 is an all-in-one media player, which can be employed to play Blu-ray ISO files & folders, Blu-ray discs, DVDs, AVCHD, and conventional videos. It hosts a flexible resolution support for 480p, 720p, 1080p, 2k and 4K.

Notable features of DVDFab Player 5 include HDR10 support, 4K UHD resolution, Advanced audio outputs (Dolby TrueHD, DTS-HD, DTS:X and more), multiple resolutions support (480p to 4K UHD), multiformat videos (MKV, MP4, WMV, FLV and more), customizable UI, modifiable video playlist and many more. The most significant feature of DVDFab Player 5 is, perhaps, its HDR support (which is device-specific).

The most notable downside of DVDFab Player 5 is its pricing, as it is a bit expensive for low/middle-class users. It is available in two pricing editions: Standard and Ultra.

Nevertheless, you can enjoy it on a free trial for 30 days, before subscribing to either of the aforementioned plans.

⇒ Get DVDFab Player 5

VLC Media Player

best blu ray player windows 10 software

VLC is arguably the most used media player in the world, and it is highly suitable for playing Blu-ray movies/videos. Hence, it conveniently stands out as one of the best Blu-ray player Windows 10 software.

This program is an all-around media player, equipped to support virtually all known video formats.

Nevertheless, VLC hosts a cross-compatible platform, with support for both desktop/laptop computers and mobile devices. For PCs, the media player is supported on virtually all Windows versions, from Windows XP SP3 to the latest Windows 10 OS.

Notable features of VLC include audio filters, multi-format videos, subtitle synching, customizable Blu-ray menu, customizable video effects (in real-time), 4K resolution (and lower), user-friendly interface and more.

Essentially, VLC might not be the most powerful Blu-ray software, but it is arguably the most flexible (easy-to-use) media player (for playing all kinds of videos).

VLC media player is an open-source application, developed by VideoLAN – a prominent nonprofit tech firm. And as an open source program, it is available to all and sundry at absolutely no cost.

⇒ Get VLC Media Player

Conclusion

Blu-ray is currently the most advanced video/movie storage medium, having the capacity to store up to 128GB of 1080p HD and 4K ultra high definition videos.

However, no computer, today, has a built-in solution to play Blu-ray videos, which means you have to look outward if you want to enjoy Blu-ray movies on your computer.

To narrow down your search, we have compiled, in this article, five of the best Blu-ray player Windows 10 software. So, if you own a Windows PC, you can download/buy any of the above-listed software, to enjoy an exceptional Blu-ray movie experience.

FIXED: VUDU Player is not working on Windows 10

Streaming services are at the peak, with a few big players and numerous small but still popular services. And one of the specialized services quite popular in the United States is VUDU, with an amazing selection of movie titles. However, it does have a few issues, as the Windows 10 app is subpar and the web-based player is frequently malfunctioning. We conducted research and provided you with the most common troubleshooting steps in case VUDU player is not working on Windows 10.

How to troubleshoot VUDU player issues on Windows 10

  1. Clear browser cache
  2. Reset the app to factory values
  3. Rollback Adobe Air
  4. Reinstall the app
  5. Try an alternative browser
  6. Go for SD quality

Solution 1 – Clear browser cache

Firstly, double-check your connection and make sure you’re using a wired one. An ethernet connection is always a preferable option over Wi-Fi, especially when streaming.

In addition, disable all VPN/proxy solutions as they seemingly won’t work with VUDU. If you’re from an unsupported area, you’ll hardly be able to use it.

Since there are two ways you can access the VUDU player these days on Windows 10, we decided to tackle both options. This solution, of course, applies to a browser-based player. If you’re experiencing any streaming issues, consider trying them out first.

As any browser tends to pile up a lot of the cache and store it locally. This will, eventually, downgrade the performance. And it’s especially bad when it comes to online streaming.

That’s why we highly recommend clearing the browsing data (with passwords being an exception) and moving on. If you’re not sure how to clear browser’s cache, follow these instructions:

Google Chrome and Mozilla Firefox

  1. Press Shift + Ctrl + Delete to open the “Clear browsing data” menu.
  2. Select “All time” as the time range.
  3. Focus on deleting ‘Cookies’, ‘Cached Images and Files‘, and other site data.
  4. Click on the Clear Data button.chrome clear cache

Microsoft Edge

  1. Open Edge.
  2. Press Ctrl + Shift + Delete.
  3. Check all the boxes and click Clear.clear cache edge

Solution 2 – Reset the app to factory values

On the other hand, if you’re using the app, the analogous action is to reset it to factory settings. This might help for various reasons, the main one being a corruption of locally cached files. So, prior to reinstalling the VUDU app, try resetting it.

We’re well aware of a plethora of issues this app brings to the table, but if it’s already your first choice, you might as well try and do everything in your power.

Here’s how to reset the app to factory values:

  1. Press Windows key + I to open Settings.
  2. Choose Apps.
  3. Expand the VUDU app and open Advanced settings.
  4. Scroll down and click Reset.reset app cache

Solution 3 – Rollback Adobe Air

While the VUDU app is certainly bringing a lackluster service, there are still some exterior reasons at play. If VUDU player isnt’ working on Windows 10, the Adobe Air version might be the cause.

Namely, based on reports we collected, it looks like certain versions of Adobe Air won’t work with VUDU player. This suggests that rolling back to an older version might relieve you off of streaming issues.

Here’s what you need to do:

  1. In the Windows Search bar, type Control and open Control Panel.
  2. Choose Uninstall a program.
  3. Uninstall the Adobe Air client.
  4. Navigate here and download an older runtime version of the Adobe Air client.
  5. Install Adobe Air and try streaming with the VUDU player again.

Solution 4 – Reinstall the app

If the previous resolution wasn’t fruitful, the only remaining troubleshooting step we can advise is to go for the reinstallation. This is as generic as it seems but, regardless whether we’re looking at the standard desktop program or a Windows 10 UWP app, a lot of issues can get resolved by a simple reinstallation.

Here’s how to reinstall the VUDU player app:

  1. Open Start and look for the VUDU app.
  2. Right-click on it and uninstall it.
  3. Open Microsoft Store and install VUDU app again.

Solution 5 – Try an alternative browser

If one browser doesn’t work, try a different one. Based on reports, the majority of streaming issues were somewhat related to Microsoft’s browsers — Internet Explorer and Edge. That’s why we suggest trying one of the best browsers for Windows that are both safe and fast.

In addition, the adblocking extensions might interfere with the web-based player, as well. So, while using the VUDU web-based player, make sure to disable them. You can also whitelist a certain website by clicking on the extension in the top corner and disabling it. That way, adblocker will be active on other websites while ignoring VUDU.

Solution 6 – Go for SD quality

Finally, if you’re unable to load a certain title in a preferred high resolution (HDX), try downgrading and it should work. We’re aware that this isn’t a solution per se, but some vocal users experienced crashes solely on these settings. And this is something VUDU support needs to look into. Until then, try with lower quality and it just might work.

Have in mind that the official requirements for high-quality streaming are 11 MB/s. If you don’t meet the requirements, chances are the stream won’t start.

With that said, we can conclude this article. In case you have any questions or suggestions, feel free to tell us in the comments section below.

KB4486563 and KB4486564 fail to install for some but here’s the fix

Despite of the fact that Microsoft announced it would end support for Windows 7 OS next year, users recently received two regular updates on their systems. 

Notably,  the February 2019 Patch Tuesday Edition brings a bunch of bugs along with the updates. If you are someone who has been affected please read till the end.

KB4486563, KB4486564 bugs

As of now, four issues have been reported for the monthly rollup KB4486563 and cumulative update KB4486564.

1. KB4486563 fails to install

Some of the users reported that the operating system failed to install the update with the error code 0x80070003. The problem has been described as under:

Newest security update KB4486563 fails to install with code 80070003.
Can anybody help me find out what´s wrong? I have Win 7, 64 bit.

If you face any such issue at any point during the installation process you can use the workaround mentioned in the following guides:

2. VM Restore Issues

This issue has been inherited from the previous monthly updates in both KB4486563 and KB4486564.  If you have already restored or saved the VM, it may fail to restore successfully.

Failed to restore the virtual machine state: Cannot restore this virtual machine because the saved state data cannot be read. Delete the saved state data and then try to start the virtual machine. (0xC0370027).

The company has also suggested a temporary workaround for the bug. After you have installed the update, you need to shut down the virtual machines just before restarting the host. Microsoft promised to provide a permanent fix to the bug to be available by mid-February 2019, but the patch has not been released as of now. 

— RELATED: Patch Tuesday updates install Candy Crush on Windows 10 PCs

3. Event Viewer Problems

Microsoft states that some event descriptions for network interface cards (NIC) might not be visible in the Event Viewer after the installation of KB4486563 and KB4486564.

The company has not shared any workaround for the problem yet. While the solution is in progress and the patch is expected to be available in March 2019. 

4. Japanese date and time issues

Finally, the last known issue reported by Microsoft is the Japanese date and time issue. The bug has been reported after the installation of in KB4486563. 

You might notice that previously abbreviated Japanese date and time strings fail to parse after the installation of the update. 

You can manually fix the issue by tweaking the registry values as follows:

[HKEY_LOCAL_MACHINE\SYSTEM\CurrentControlSet\Control\Nls\Calendars\Japanese\Eras]

“1868 01 01″=”明治_明_Meiji_M”

“1912 07 30″=”大正_大_Taisho_T”

“1926 12 25″=”昭和_昭_Showa_S”

“1989 01 08″=”平成_平_Heisei_H”

Microsoft is currently working to resolve the issue and it is expected to be available in the next release.

We hope that the bugs will be resolved in the next release for Windows Server 2008. While Windows 7 users are recommended to upgrade their systems to Windows 10 because Microsoft plans to end support after January 14, 2020. 

RELATED POSTS TO CHECK OUT:

New Xbox ‘hoodies’ hit the Xbox apparel store

While the Xbox online appearel store is still a bit of a head scratcher for some, the business continues to plow on as content branded items make their way into the storefront.

The new Xbox Hooded Union Suit and Xbox Hooded Union Suit – Fallout 76 Edition just landed on the Microsoft Store, and for the price of $74.99 or $89.99 will net you cool new piece of memorabilia.

The sentimental staple gets a cool-kid makeover, plus some serious-gamer cred with the official Xbox Hooded Union Suit. Designed for the loud-and-proud gamers, it boasts three separate pockets for an Xbox One controller, TV remote, and phone. And the big sewn Xbox sphere applique on the back ensures the world knows where you stand.

The Xbox Hooded Union Suit – Fallout 76 Edition.

Hoodies will be made available for retail around 3/15/2019 through 3/22/2019, and you can check out the official Xbox Gear store for more official Xbox merchandise.

Xbox Live free titles for the weekend include Rainbox Six Siege & NBA 2K19

There are a handful of highly anticipated games slated for release in the next few months that include Anthem, The Division 2 and Resident Evil 2, but in the meantime, Xbox Live Gold members can take NBA 2K19 and Rainbow Six Siege for a test run over the weekend to occupy their time.

As part of Xbox’s Free Play Days, Live Gold members can download and play both NBA 2K19 and Siege for the weekend, starting as soon as Thursday, February 14 at 12:01 a.m PT.

Similar to a Red Box rental, the games are free to play for a limited time and the grace period ends Sunday February 17 at 11:59 p.m. PT.

For those persuaded by the free gameplay this weekend, the games are currently seeing a steep discount in retail with the regular version fo NBA 2K19 down 67% and coming in at $19.80 Tom Clancy’s Rainbow Six Siege is down to $15.00 singaling a 70% discount from its original price tag.

NBA 2K19 ($59.99 SRP) at 67% off: $19.80

  • NBA 2K19 20th Anniversary Edition ($99.99 SRP) at 67% off: $33.00
    Both part of the 2K publisher sale, which runs up to 2/18

Tom Clancy’s Rainbow Six Siege

In North America and Latin America:

  • Deluxe Edition ($49.99 SRP) at 70% off: $15.00
  • Gold Edition ($79.99 SRP) at 50% off: $40.00
  • Ultimate Edition ($119.99 SRP) at 50% off: $60.00

Rest of World:

  • Deluxe Edition ($49.99 SRP) at 60% off: $20.00
  • Gold Edition ($79.99 SRP) at 40% off: $48.00
  • Ultimate Edition ($119.99 SRP) at 40% off: $72.00

If playing isn’t really your thing this weekend, fans of Siege can also catch the third annual Six Invitational at Mixer.com that will include a Rainbow Six eSports documentary and a reveal of the next season of content coming to the game.

Visual Studio 2019 to be released on April 2 with 9am PST launch event

Microsoft is preparing to release Visual Studio 2019, the next iteration of its popular integrated development environment for Windows and Mac. The company has set April 2 as its release date, which will happen at the 9 AM PST launch event the same day. The company promises “even more productivity than ever before” in this release, which is expected to increase coding space and include smarter debugging. It also promises “something for everyone,” regardless of the programing language or platform they prefer to develop for.

Visual Studio 2019 has been in development for some time, having been announced in June of last year, and a public preview of the development software was made available last December. The third preview was made available just yesterday, and the company says that it will continue to provide future preview updates, accept feedback to help shape the product before its general availability.

Microsoft says that the April 2 event will not only focus on development software’s release, but also on Azure DevOps and the company’s GitHub service. The beginning of the keynote will highlight some of the new featured the company has added to its software, and will move on to live streamed sessions which include Q&A’s to explain the features and programming languages even further.

With the release of Visual Studio 2019 just around the corner, the company encourages those interested in attending to go to the event website for more information and a live calendar. In the mean time, Preview is fully available for download for anyone wishing to try it an help make it better before then.

Here’s the list of changes and improvements for the first 20H1 Windows Insider Skip Ahead build 18836

Microsoft just released the latest Windows Insider build, this one with a bit of a twist. The new build, 18836, is for Skip Ahead Insiders, but for the 20H1 release. In case you’re not caught up with all the latest jargon, Microsoft has yet to release the “Spring 2019” build, 19H1 (first half of 2019), had just started releasing Skip Ahead builds for 19H2, and for the first time in Insider history that we can recall, Skip Ahead Insiders are truly skipping ahead, all the way to 20H1.

Anyway, here’s the list of changes released with this latest build

General changes, improvements, and fixes for PC

  • REMINDER: The new tamper protection setting in the Windows Security app protects your device by helping to prevent bad actors from tampering with the most important security settings. The setting is designed to be on by default, however the default state is not currently in effect for current Insider Preview builds. You may see a new recommendation in the Windows Security app suggesting you turn this setting on.
  • We fixed an issue where turning off Location from the Action Center might take multiple clicks to react.
  • We fixed an issue resulting in being unable to re-arrange pinned folders in Start’s tile grid.
  • We fixed an issue where newly installed apps might not show up in search results.
  • We fixed an issue resulting in some Insiders not being able to open Cortana when in Tablet Mode.
  • We fixed an issue from the previous flight where right-clicking the desktop would bring up a light colored context menu in dark theme.
  • We’re updating the name of the “Windows Light” theme to now be “Windows (light)”.
  • We fixed an issue where Cortana’s icon on secondary monitors wouldn’t update colors after switching between light and dark theme.
  • We fixed an issue where when using light theme + small icons + a vertical taskbar orientation, text written on the taskbar would stay white and thus wouldn’t be readable.
  • We fixed an issue that could result in open apps not being shown on the taskbar (but being visible in Alt + Tab).
  • We fixed an issue resulting in build unable to log into WinRE with an admin account in the last couple of flights.
  • We’ve made another fix to address reports of devices getting stuck with “Hibernating…” text on the screen on resume from hibernate.
  • We fixed an issue resulting in greys having an unexpected slight pinkish/purple-ish tinge on some devices in recent flights.
  • We fixed an issue in Ease of Access’s Cursor and pointer settings, mouse pointer size and color re now retained on upgrade.
  • We fixed an issue where the Windows Security app may show an unknown status for the Virus & threat protection area, or not refresh properly.
  • The issue impacting Creative X-Fi sound cards has been fixed.

Known issues

  • Launching games that use anti-cheat software may trigger a bugcheck (GSOD).
  • While we’ve done some work to improve night light reliability in this build, we’re continuing to investigate issues in this space.
  • When performing Reset this PC and selecting Keep my files on a device that has Reserved Storage enabled the user will need to initiate an extra reboot to ensure Reserved Storage is working again properly.
  • Some Realtek SD card readers are not functioning properly. We are investigating the issue.
  • File Explorer may hang when trying to rename, delete, or move MKV files.
  • In Windows Sandbox, if you try to navigate to the Narrator settings, Settings app crashes.

Known issues for Developers

  • If you install any of the recent builds from the Skip Ahead and switch to either the Fast ring or the Slow ring – optional content such as enabling developer mode will fail. You will have to remain in the Fast ring to add/install/enable optional content. This is because optional content will only install on builds approved for specific rings.

We’ll have to wait to see how this whole 2 versions (really 3) at once thing plays out, but it’s an exciting twist. Make sure you stay tuned to OnMSFT for all the latest Windows Insider news!

Microsoft releases first 20H1 build for Skip Ahead Insiders, 19H2 builds to come later this Spring

That’s quite a surprise, but Microsoft is releasing today the first 20H1 build for Insiders who opted into Skip Ahead. You read that right, it’s not 19H2, the next major Windows 10 update coming in the second half of 2019, but the one coming after in the first half of 2020.

“Some things we are working on in 20H1 require a longer lead time,” the Windows Insider team explained today, adding that “we will begin releasing 19H2 bits to Insiders later this spring after we get 19H1 nearly finished and ready.” Now that Skip Ahead Insiders are getting builds from the 20H1 development branch, it seems that 19H2 builds will only ship to Fast Ring Insiders in the near future.

In some way, Microsoft is changing today the purpose of the Skip Ahead ring, as those Insiders will skip the next major update coming after 19H1. On a different note, the team said today that it will use the Release Preview ring for extensive testing ahead of the release of the 19H1 update, something that hadn’t been done for Windows 10 version 1809. “once 19H1 is “nearly finished and ready” we’ll also use the Release Preview ring for previews of drivers and quality updates on 19H1,” the team explained.

Microsoft isn’t completely done with the 19H1 update for now, but these new 20H1 builds could soon get more interesting. The build 18836 which has just been released only brings some bug fixes, but no new features.

Windows Community Toolkit v5.1 is now available

Microsoft has released a new update to the Windows Community Toolkit, bringing the app to version 5.1. The update brings support for high quality animations thanks to the addition of Lottie-Windows. Additionally, it also provides other new features, including an Image Cropping tool, controls for picking Remote Devices, as well as control accessibility fixes.

The Windows Community Toolkit, which has been downloaded more than a million times on GitHub, provides developers the tools they need to develop their own Universal Windows Platform apps for Microsoft’s desktop operating system, as well as for the Xbox One, mixed reality devices, and the Surface Hub. Version 5.1 is the first update since the company released version 5.0, which included improvements for the WindowsXamlHost and a new TabView control.

While Universal Windows Platform apps don’t seem to have a lot of steam especially given that Progressive Web Apps have been getting better attention from developers as of late, Microsoft doesn’t seem to want to give up on this area just yet. The company’s continued updating of the tool proves that, and while PWA’s can certainly help fill the app gap that the Microsoft Store currently suffers, UWP’s tend to feel a bit more like true apps with better offline support and better access to the live tiles.

New details emerge on Microsoft’s “Lite OS”

Based on several prominent industry rumors, Microsoft has secretly been developing an alternate operating system to its current Windows 10 offering, out in the open. The supposed Lite operating system, or Windows via ChromeOS-likeness is rumored to be some sort of operating system that resembles Windows at its core but ultimately trimmed for lighter install footprints.

The result of Microsoft’s efforts is to build a more flexible OS that offers more casual user feature sets, and perhaps, deals specifically with the rise of Chrome OS and iOS in more modern day computing instances.

In a recent post on Petri.com authored by Brad Sams, he sorts through some of the most recent rumors and observations to cultivate a clearer narrative that Microsoft may come to use as it pitches its new OS, specifically, on newer hardware.

When it comes to hardware, the company is working on Lite for two types of devices that they have categorized as Centaurus and Pegasus. Centaurus devices are the dual-screen devices that have been floating around in patents and other places while Pegasus refers to the many variations of different styles of laptops running the OS.

When it comes to using Lite, there’s a good chance that it will only have a vague familiarity with what we know today as Windows from a UI perspective. It will be significantly simplified and targeted at a simpler use-case; you won’t be running Lite OS on a desktop. Further, the UI will feature windowing but much like iOS and ChromeOS, it’s more of a ‘one app’ at a time experience; for multi-tasking and productivity, Windows 10 will always be the way to go.

From the looks of it, Microsoft may be positioning itself to continue to serve Windows 10 as its enterprise, power-user, creative desktop variant while this new Lite operating system becomes the modern day Windows CE; applied to more mobile, IoT and analytic computing.

While Google does offer Android and Chrome OS as its analogous alternatives to Windows 10 and soon-to-be Lite operating system, the company is working to similarly streamline its OS efforts with its rumored Fuchsia developments.

However it shakes out, companies such as Google, Apple, and Microsoft see an upcoming shift in computing that even the full-bodied mobile operating systems of today alone won’t be enough to handle adequately.

Classic J-RPG Final Fantasy IX launches on Xbox One and Windows 10 with Xbox Play Anywhere support

Final Fantasy IX, a classic J-RPG originally released on Playstation in 2000 is now available on Xbox One and Windows 10. Best of all, the game supports Xbox Play Anywhere and Xbox Live cloud saves, so you can start playing on Xbox One and pick up where you left off on your PC.

Square Enix announced last year that Final Fantasy IX and other games in the series would be released on Xbox One and Nintendo Switch this year, but the release was announced yesterday during a Nintendo Direct livestream.

“Originally released in 2000, Final Fantasy IX is a thrilling tale of love, war, magic and self-discovery. Newcomers and veterans alike can experience legendary moments with Zidane, Vivi, princess Garnet and others with modern enhancements on the Xbox One, Nintendo Switch, and Windows 10, including high-definition movies and character models, auto-save functionality and more,” the press release reads.

According to the store listing on the Microsoft Store, the PC version isn’t supported on Surface devices, with Square Enix saying that “performance is not guaranteed.” The publisher didn’t specify if all Surface models are concerned, but the minimum hardware requirements are an Intel Core i5 processor, 8GB of RAM and an NVIDIA GeForce GTX 760 / AMD Radeon R9 280 GPU.

Final Fantasy IX is a $20.99 purchase, which is right in line with the pricing for the previously released PS4 and PC versions. If you’re a Final Fantasy fan, be aware that the fan-favorite episode Final Fantasy VII will be released on Xbox One and Nintendo Switch on March 26.

FINAL FANTASY IX
FINAL FANTASY IX
Price:
$20.99

How to connect to a network share in Windows 10

A network-connected hard drive, or NAS for Network Attached Storage,  is a great way to add more storage to your PC, while making it available to other devices and users inside your home or office. Once you’ve got your new device connected to your network, you’ll need to add it to Windows 10 so you can access your files.

The first step is to open File Explorer – you can press Win+E to launch a new window from your desktop. Depending on your File Explorer settings, you’ll arrive at either the Quick Access or This PC screen. If you’re not already there, navigate to This PC by finding it in the left sidebar.

Screenshot of mapping a network drive in Windows 10

At the top of the window, in the ribbon control strip, click the “Map network drive” button in the “Network” section. The popup window which appears allows you to configure your drive connection.

First, fill in the “Folder” input. This may be slightly confusing, since it’s not asking for a real folder. You’ll need to know the network address of your hard drive, as well as the name of the folder “share” you’re connecting to. The former is usually the IP address of your network device. You’ll probably have configured the latter while setting up your network hard drive; you should refer to its documentation if you’re feeling stuck.

Screenshot of mapping a network drive in Windows 10

Input the share address in the same format as the example given. We’re connecting to a share called “TP-NAS” on the network device 192.168.0.254, so the correct path is “\192.168.0.254TP-NAS.”

Before moving on, choose a drive letter for the device from the dropdown menu. When you add the network share, it appears in Windows as similar to a regular hard drive or USB stick. The drive letter determines the identifying letter it will get within the system. You can use the drive letter to reference the drive in file paths from anywhere in Windows.

Finally, move your attention to the two checkboxes. You’ll probably want to leave “Reconnect at sign-in” selected; otherwise, you’ll need to manually reconnect to the share each time you start your PC.

Screenshot of mapping a network drive in Windows 10

“Connect using different credentials” is more interesting. If your network drive is password-protected, keeping this disabled will attempt to login automatically using your Windows username and password. If you have a different username or password configured on your network drive, you should check this box. You’ll be able to supply your username and password after you click “Finish.”

Click “Finish” to add your network share. If you’re connecting with the different credentials option enabled, you’ll be prompted to enter your username and password for the network drive. Tick the “Remember my credentials” box here to ensure you don’t need to login every time you access the drive.

Screenshot of mapping a network drive in Windows 10

That’s it! After a moment, you should see Windows open a new File Explorer window displaying the contents of the drive. If you return to This PC, you’ll see the drive show up under “Network locations.” You can now access files on the drive using either its share path (as you entered while connecting to the drive) or the drive letter you assigned it. To disconnect, just right-click the drive in File Explorer and choose “Disconnect.”

Crackdown 3 review: Another Xbox exclusive game that doesn’t live up to the hype

Microsoft initially announced Crackdown 3 back at E3 2014, and after five years of development, it’s safe to say that expectations are pretty high. Crackdown 3 was previously announced as a launch title for the Xbox One X last year, but the game receiving mixed reception at E3 2017 led Microsoft to delay the game even further.

Crackdown 3 had a very troubled development history, and it’s actually surprising that Microsoft didn’t cancel it as it did for other Xbox exclusives like Fable Legend and Scalebound. The original Crackdown game, which was released back in 2007 on the Xbox 360 was a memorable release for the console, but its 2010 sequel Crackdown 2 didn’t reach the same cult-classic status. Nearly 10 years later, it’s not clear if Crackdown 3 is the game that could make the Crackdown franchise join the elite league of Halo, Gears of War, and Forza.

Hollywood actor Terry Crews plays Isaiah Jackson, the game’s protagonist.

To be completely honest, I’m not very familiar with the Crackdown franchise. I gave the original Crackdown game a try when it recently became free on Xbox One, and I hated it. Between the clunky controls, outdated graphics, and goofy action, I found that the game didn’t age very well next to classic Microsoft shooters like the original Gears of War (released a year before Crackdown).

My time with the original Crackdown, Crackdown 3’s difficult development cycle, and a series of disappointing releases from Microsoft Studios made me really fear for the worse. In the end, I think that Crackdown fans will probably like Crackdown 3, but I’m afraid this is another unoriginal Xbox exclusive that targets a niche audience.

Crackdown 3 is actually separated into two different games: there is one client for the Campaign mode and another one for the Wrecking Zone multiplayer mode. I spent most of my time in the campaign mode, which features Hollywood actor Terry Crews playing the game’s charismatic superhero Isaiah Jackson. The campaign’s opening cinematic is actually excellent, and you can watch it below.

Welcome to New Providence

Crackdown 3 isn’t a direct sequel to the previous Crackdown games. I won’t dive into details about the story, but this is pretty much a Manichean conflict between an evil corporation called TerraNova and a group of vigilantes called The Agency. You can choose between different Agents at the start of the game (you can also change later in the game), but I guess most players will choose to play as Terry Crews/Isaiah Jackson after watching the pretty fun opening trailer.

The open-world campaign is set in New Providence, a futuristic city with neon lights and skyscrapers everywhere. There’s a night and day cycle in the game, and the bright lights look pretty cool at night. Crackdown 3 uses cel-shading graphics to get this comic book look, and I’d say it’s a pretty good-looking game overall. I played the game on an Xbox One S where it’s apparently capped to 30FPS, but performance remained consistent while I explored the vast open world.

With its bright Neon lights, the city of New Providence looks quite futuristic.

Crackdown 3 is a non-linear game, but there are quite a lot of things to do in New Providence. You can spend a lot of time exploring the city to collect orbs that will upgrade your skills, and it’s pretty fun to climb on skyscrapers and use abilities like double jump and air dash. If you previously played ReCore, the action-adventure and platform game that Microsoft released back in 2016, you’ll feel right at home with Crackdown 3.

The map also includes many Supply points that will become rearming stations and fast-travel locations once you capture them. Other than that, you’ll find Prisoner hardpoints to hack and liberate, which will strengthen the Civilian militia that can help you during fights. There are also Propaganda towers to climb and hack, and various intel fragments to gather on the crime map.

The Agency vehicle also has an ejectable seat.

Just like in GTA, you can also explore the city by using cars, including the Agency vehicle that you can summon with a press of a button. Driving isn’t the best part of the game, but the campaign includes optional races and stunts that can improve your driving skills once you complete them.

Your main mission in the Campaign is to fight off the TerraNova corporation and take down its lieutenants by all means necessary. You can fight the different bosses in the order you choose, though before confronting them you’ll have to capture some locations or destroy some objectives like Chemical facilities or massive crushers. The boss fights can be pretty long, with some platforming sequences and lots of enemies to kill during the different phases.

There are several bosses to eliminate in the campaign.

A campaign that quickly becomes repetitive

In a way, the world of Crackdown 3 reminds me of a strange mix of Saints Row, Sunset Overdrive, and Far Cry 3: Blood Dragon. You’re in a superhero movie parody playing an overly muscular guy, and you’ll hear a lot of pretty funny one-liners like when Terry Crews/Isaiah Jackson shouts “I’m my own medicine” (you’ll auto-heal when you’re not taking damage). During a fight with an AI turned rogue, I couldn’t help but smile when I heard an ally recommend me to “kick her in the server.”

The campaign is playable with a friend in a co-op, but I couldn’t try that during my time with the game. Overall, the campaign is better than I expected, but after a couple of hours in New Providence, I really started to feel that the different missions become quickly repetitive. The city of New Providence is also pretty empty compared to what you’ll find in a game like GTA V, which of course had a much higher budget.

I’m not sure yet if I’ll finish Crackdown 3’s campaign, but fighting lots of bullet sponge enemies can certainly get tiresome, especially since Crackdown 3 isn’t a great shooter in the first place. There’s an auto-lock feature just like in ReCore, and there’s no cover system. As a result, when you’re cornered by enemies you’ll often have to escape and go hide behind a wall to let your health regenerate.

Although the gunfights are far from great in Crackdown 3, you do feel like a superhero when throwing massive objects on enemies, or when using other abilities like Ground Pound and Flying Fist. There’s definitely a lot of bombastic action in the campaign, but be aware that the city of New Providence isn’t fully destructible. The cloud-powered destruction that has been making headlines since Microsoft unveiled the game is restricted to Wrecking Zone, the game’s PvP mode which is a separate install.

A disappointing Wrecking Zone PvP mode

I had pretty high expectations about Wrecking Zone, especially since this mode has been an opportunity for Microsoft to demonstrate the power of its Azure cloud. A lot of the hype around Crackdown 3 came from pre-alpha footage that Microsoft showed at Gamescom 2015, but what ended up in Wrecking Zone looks less impressive than what we saw nearly four years ago.

First of all, Wrecking Zone will launch with just three maps, and they’re pretty small and empty. There’s a lot of verticality in those maps, but the buildings feel like they’re made of cardboard, and again, they’re all completely empty. Worse, the debris causes no damage when they fall on players, and there’s also no giant cloud of smoke that obscures your vision when a giant building falls down on the map.

Microsoft said that the power of the cloud will allow all gamers on Xbox One and Windows 10 to have the same destruction experience, but I can’t help but feel that this whole destruction thing is a gimmick with no real purpose. Yes, you can punch through walls or destroy the floor under the feet of your enemies, but this often won’t give you any real tactical advantage.

The PvP fights in Wrecking Zone are very fast-paced, and there’s the same auto-lock feature found in the campaign. You can choose between different weapons (all with unlimited ammo), and you can also collect orbs on the map to charge your Overdrive, a limited-time boost that will improve your skills and weapon damage.

There are two separate 5 versus 5 PvP modes at launch, the team deathmatch Agent Hunter mode and the other “King of the hill” mode called Territories. I couldn’t spend much time in both during the early access period, but beyond the legitimate curiosity about the cloud-powered destruction, I’m afraid Wrecking Zone isn’t something that I’ll be spending a lot of time into. Worse, you won’t be able to play Wrecking Zone with your friends at launch, something that is truly inexcusable for a game that has been in development for five years. Microsoft said support for Xbox Live parties will come in a post-launch update, but there’s no ETA for now.

An unessential release from Microsoft

I know that Crackdown 3 isn’t a AAA game like Forza Horizon 4, but after the latter became the best-rated Xbox exclusive game for this console generation, I really expected something better from Microsoft, especially since Crackdown 3 spent five years in the oven. Again, I have no doubt that Crackdown fans will find this new episode to be the best in the series, but I don’t think this is a game that will leave a big mark in the history of Xbox Game Studios. Actually, I think it would have been fine for Microsoft to cancel an unexceptional game to spend more resources on other, better-inspired projects.

“Xbox has no games” has been an ongoing joke among gamers in recent years, especially after games like State of Decay 2 or Super Lucky’s Tale didn’t exactly set the world on fire. That was to be expected, but Crackdown 3 isn’t the game that will convince PS4 players to drop Spiderman or God of War any time soon.

Crackdown 3 is priced at $69.99 on the Microsoft Store, and the game supports Xbox Play Anywhere and Xbox Live cross-platform multiplayer. The game will also be available on Xbox Game Pass tomorrow on its launch day, and I’d really recommend subscribing now that you can get 2 months of Game Pass for just $2 for a limited time.

Crackdown 3
Crackdown 3
Developer:
Xbox Game Studios
Price:
Free

HP launches its new premium Spectre series of Windows 10 laptops in India

HP has unveiled its new premium Spectre range of Windows 10 convertible laptops – the new HP Spectre Folio and the refreshed HP Spectre x360.

HP has always believed in insights-based innovation that allows us to deliver the PC experiences that users want. The new HP Spectre series has made a breakthrough in design, versatility, and connectivity. The HP Spectre Folio and Spectre x360 achieve the perfect balance of beautiful design, cutting edge engineering and outstanding performance.

– Vickram Bedi, Senior Director – Personal Systems, HP Inc. India

HP Spectre Folio

HP Spectre Folio

HP Spectre Folio is the world’s first leather convertible PC demonstrating the series’ focus on design and craftsmanship.

The Spectre Folio sports a thin and light versatile design that allows it to be seamlessly converted between three distinct positions. It’s also completely fanless.

HP Spectre Folio

It sports a 400-nits Full HD touchscreen display and packs In four front-facing speakers tuned by the luxury audio brand, Bang & Olufsen. HP claims that the Spectre Folio incorporates one of the smallest motherboards in the industry packing in the 8th Gen Intel Core i7 processor with up to 16GB of RAM and 512GB of SSD storage.

The HP Spectre Folio is available in Cognac Brown at a price of ₹199,990 ($2822).

HP Spectre x360

HP Spectre x360

The new HP Spectre x360 lineup features a completely refreshed design, with a new Poseidon Blue color variant. It sports a cut design achieved by CNC machining and enables four distinct positions – Laptop, Tent, Reverse, and Tablet.

Powered by the latest quad-core 8th generation Intel Core processors, the HP Spectre x360 comes in both Full HD and 4K (UHD) display options. The uniquely designed speakers deliver a superior audio experience by Bang & Olufsen.

HP Spectre x360

The device also comes with a privacy camera kill switch which allows the user to electrically turn off the webcam when not in use and an optional HP Sure View privacy screen to help users avoid prying eyes in public areas.

The HP Spectre x360 is available now in Dark Ash Grey at a starting price of ₹129,990 ($1834) and in Poseidon Blue at a starting price of ₹139,990 ($1974).

Users ask MS to add these features in Windows 10 Gaming Edition

Windows 10 might be a treat for some of the new gamers due to numerous reasons. According to the statistics, the market share of Windows 10 64 bit on Steam was reported to be 60.62 percent recently. The overall market shared of Windows 10 OS was reported alone to be 96.44 percent.

This huge increase in popularity is just because of the system upgrades with improved hardware specifications.

While it seems like the operating system failed to grab the attention of the experienced gamers who are fed up of the performance issues and cluttered UI. So, they have demanded Microsoft for a Windows 10 Gamers Edition. There are a variety of reasons that are supposed to be behind this strong demand from the users.

Let’s have a look at why users asked Microsoft to implement the respective changes and how the Redmond giant is going to respond to the popular demand?

Why should Microsoft develop a Windows 10 Gaming Edition OS?

1. Ultimate Performance Gains

As the Windows 10 Gaming Edition will be optimized for gaming, so the users are definitely going to experience huge performance gains. It will not only minimize the background processes but also increase GPU cycles and CPU threads that will be dedicated specifically to gaming.  Furthermore, the hardware and software can be optimized for achieving the Ultimate Performance on your PC.

While the minimalist design will also decrease, distractions from the User Interface. A lot of disk space can be saved by removing app notifications, and pre-installed apps including Candy Crush, OneNote, and Office etc. Various overclocking tools can be developed to avoid running processes and applications in the background.

The operating system will also definitely be able to achieve performance tweaks by recognizing that a game has been running in its memory. As soon as the operating system is able to recognize the gaming applications, it will cut down all the memory used by the non-gaming applications.

— RELATED: 8 of the best Windows 10 gaming laptops for 2019

2. User-Friendly

Most of the gamers are not interested in all the pre-installed apps that come along with the Windows 10 operating system. They are just looking for a minimalist design with all the basic apps.

Most of the times they are just looking for just the media player or maybe Google Chrome to run in the background while gaming. Reducing the number of features will not only reduce the memory space but also reduces the bugs to a great extent.

So, all the gamers just want to get rid of all the unwanted programs in the Windows 10 Gaming Edition. Microsoft can simply offer a place or Microsoft Store, where they can install the programs and apps as per their requirements.

3. Built-in Libraries

It is always confusing for most of the gamers to keep on installing C/C++ and other libraries again and again in order to run their favourite games. Especially it is annoying for the new gamers who are yet not aware of the software specifications.

Therefore, a version of Windows 10 with all the built-in libraries will save a lot of time and effort for the gaming community. While the standard users might not be interested in having a built-in version of Windows.

— RELATED: How to run Windows XP games on Windows 10

4. Reduced Game Pricing

Most of the users like PC just because of the fact that games are available at a lot more cheaper rates on Windows as compared to other handheld devices etc. Moreover, there is no monthly subscription fee to enjoy your favourite games for online gaming.

5. Lower OS Costs

A Windows 10 Gaming Edition is definitely going to reduce the operating costs for most of the users. As they will not have to pay for all the extra pre-installed programs and other freebies that come along with the operating system.

It will allow an affordable price range specifically for the loyal Windows customers. Gamers can still enjoy their favourite games by paying once. Furthermore, it will definitely help to reduce piracy as well.

6. Voluntarily Contributions

As Microsoft now owns GitHub, the company can also increase voluntary contributions for the gaming addition by allowing open source developments of the Windows components specifically from the gaming community.

The software packages and drivers can be provided to the users through GitHub in a similar manner just as they are available to download for the Linux users. While most of the developers would be interested in developing anti-cheat tools for the gamers even at the operating system level.

— RELATED: What are the best snake games for PC? Here’s our 2019 list

7. Hardware Upgrade

It will be easy for the PC gamers to upgrade individual hardware components as per their requirements. It will help them customize their gaming PC in order to maximize performance games.

8. Network Bandwidth

It is critical for gamers to have fast network responses while playing online. The network packets need to be sent and received as quickly as possible in order to stay focused on the game and avoid any delays or freezes. Most of the background processes and apps try to chew up the network bandwidth in standard Windows 10.

Telemetry is such an example that involves continuous checking and downloading of updates at the back end along with fetching emails for the users during a gaming session. While the Windows 10 Gaming Edition can prioritize all the gaming packets to increase its bandwidth.

It will just allow the spare packets to be available for all the extra stuff while a user is playing an online game.

Will Microsoft listen to the users?

Apparently, Microsoft has all the resources that are required for the development of a specialized gaming edition of Windows 10. While it’s not necessary that the software giant is going to listen to all the demands of the users.

It might not implement all the features and show up with just the basic features that are vital for the gaming community. It might also come up with a Game Mode or an alternative Boot Option at the start-up of the standard version.

There are also chances that Microsoft can also implement a feature that is going to stop all the unnecessary background processes during a gaming session. It’s just a matter of time to see how Microsoft responds to the user requests.

RELATED ARTICLES: