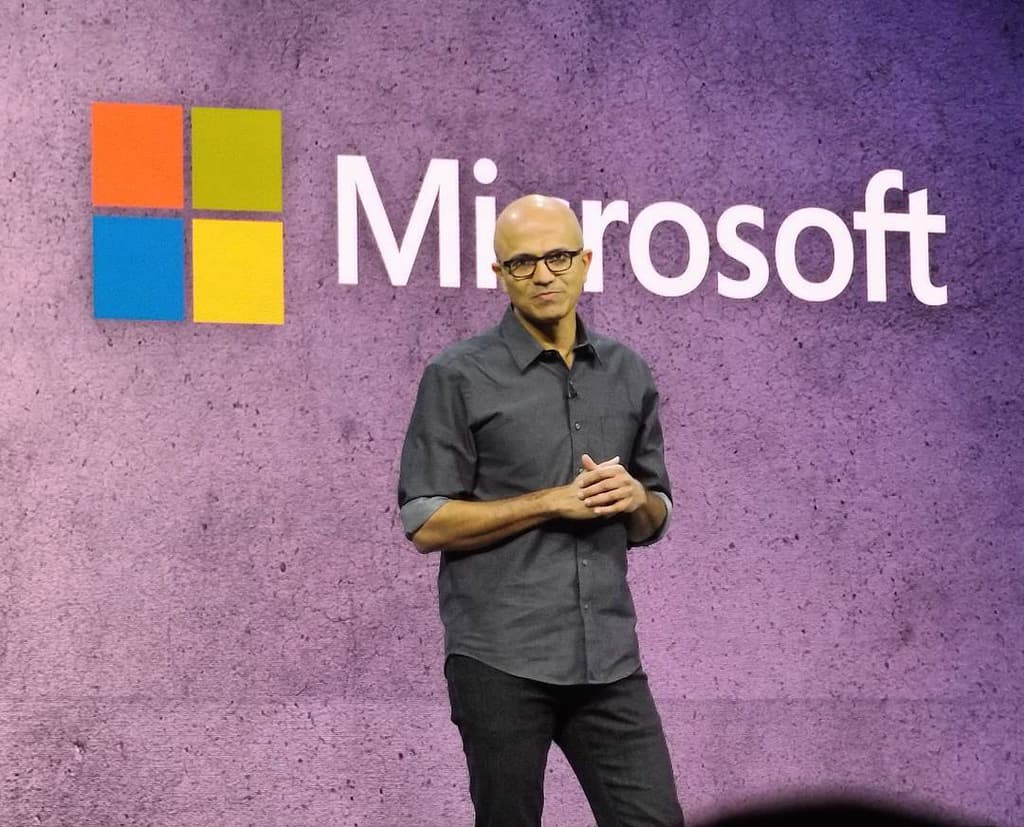
The Department of Governance Reform of Punjab, a state in northern India, has entered in agreements for offering cloud services in the state. Microsoft is the first global cloud service provider to get empaneled for offering cloud services in the state for a period of three years.
The department has empaneled four Microsoft partners in its Cloud Services Directory, allowing government departments and agencies in Punjab to choose Microsoft Cloud to advance their digital transformation and optimize IT operations.
The state’s Land Records Information System and E-Sewa (previously called SUWIDHA – Single User-Friendly Windows Disposal & Helpline for applicants) will soon migrate onto the Microsoft Azure platform.
Microsoft played a key role in the enhancement and efficient delivery of citizenship services in the state and also supports the State Data Center of Punjab.
Microsoft, the only provider of services across all three clouds in the country – private, public, and hybrid cloud, was the first global public cloud service provider to be accredited by the Ministry of Electronics and Information Technology (MEITY) and has three datacenters within the country – in Pune, Mumbai, and Chennai.
According to Parminder Pal Singh, PCS, Director of Governance Reforms, Punjab, the next step of growth will be to move beyond just the Internet and leverage the power of the cloud and hopes Microsoft’s cloud technology will provide transformational e-governance services and financial inclusion opportunities to lakhs of people across Punjab.
The week’s update to the beta versions of the iOS and Android Xbox apps added two new features relating to Xbox One video game screenshots and video clips; the ability to share directly to social media from within the app and the ability to download media locally to an iOS or Android smart device.
Currently, clips can only be shared to the Xbox activity feed or sent as an Xbox Live message to other users and the ability to actually download clips with the app has never been a possibility even though it has frequently been one of the most-requested features.
Share game captures with friends. In response to your feedback, we’ve added the ability to share game captures with friends and across social media
Easily save to phone. Save your game clips and screenshots to your phone
From your Captures page, click the existing share button to view these new options
The Xbox beta apps are used to test new features for bugs and glitches with a smaller audience before rolling them out to the general userbase with the regular iOS and Android Xbox apps. With testing of these features having now begun, it’s likely they’ll come to the public apps sometime over the next few months.
The ability to download apps is already possible within the Windows 10 Xbox app. As is social sharing, though only to Twitter.
Kingdom Hearts III is the first game in the franchise to launch on the current generation of consoles and as a result features a significant graphical upgrade compared to previous entries. The game is enhanced for Xbox One X consoles and will feature two options that can prioritize either visuals or framerate while playing.
Here’s the official game description and gameplay trailer:
The latest entry in the KINGDOM HEARTS series. Having learned that all their struggles thus far were engineered by Master Xehanort in his plot to start another Keyblade War, Sora and his friends continue their search for seven guardians of light capable of standing against the coming darkness. King Mickey and Riku seek out Keyblade veterans from the past, while Sora, Donald, and Goofy begin a new odyssey across Disney worlds to claim the “power of waking.”
Wiser from his many adventures, Sora is about to face his greatest challenge yet. For the first time in KINGDOM HEARTS III, Sora will travel across Pixar and other exciting new Disney worlds that lend the story a grander scale than ever before seen in the series. The battle system reaches new heights as well with thrilling action, rideable theme park attractions, and spectacular team-up moves with Disney’s beloved characters. KINGDOM HEARTS inspires and entertains unlike anything else out there. Don’t miss this brand new installment.
Microsoft Security Essentials (MSE) is an antivirus utility primarily for Windows 7. However, an MSE OOBE error arises for some users. The error message’s Event Viewer log states, Microsoft Security Essentials OOBE stopped due to the following error: 0xC000000D. That can even be a BSOD error for some users. These are a few resolutions that can fix the OOBE error.
What can I do to fix the Microsoft Security Essentials OOBE error?
1. Run a System File Checker Scan
The OOBE error might be due to corrupted system files, which the System File Checker utility can fix. To run an SFC scan, open the Command Prompt with Run by pressing the Windows key + R hotkey.
Enter ‘cmd’ in the Open text box, then press the Ctrl + Shift + Enter hotkey.
Enter ‘DISM.exe /Online /Cleanup-image /Restorehealth’ in the Command Prompt, and press the Return key.
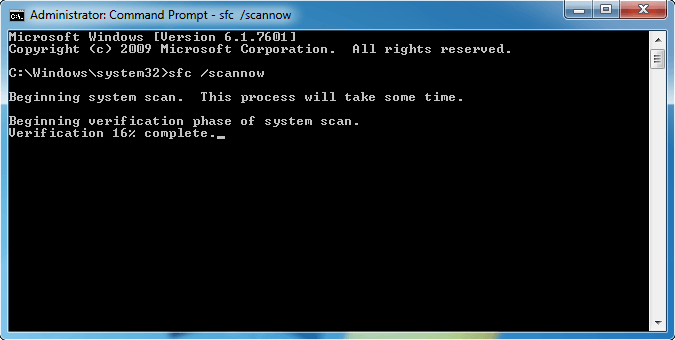
Then input ‘sfc /scannow’ and press Enter to initiate a System File Checker scan that might take about half an hour.
The Command Prompt might tell you that Windows Resource Protection fixed system files when the scan is finished. Restart Windows if that’s the case.
If you want to try an automatic alternative, I recommend a specialized repair tool that can detect all malfunctioning system files and find the new files as replacements.
2. Erase the EppOObe.etl File
Some users have fixed the OOBE error by deleting MSE’s EppOObe.el file. So, erasing the EppOObe.el file might be one of the best resolutions for the OOBE error. Follow the guidelines below to delete that file.
Press the Windows key + E hotkey to open File (or Windows) Explorer.
First, users need to select the Show hidden files, folders, and drives option. To select that setting in Windows 7, click the Organize button in Explorer and select Folder and search options.
Then click the View tab.
Select the Show hidden files, folders, and drives option on the View tab.
Press the Apply > OK buttons.
Users can select the same option in Windows 10 by clicking the Hidden items check box on Explorer’s View tab.
Next, open this folder path in Explorer: C:ProgramDataMicrosoftMicrosoft Security ClientSupport.
Select the EppOove.etl file, and press the Delete button.
3. Turn Off the Program Compatibility Assistant Service
The OOBE error can also be caused by incompatibility with the Program Compatibility Assistant Service. Turning that service off might fix the OOBE error. This is how users can disable the Program Compatibility Assistant.
Open Run in Windows.
Input ‘services.msc’ and click OK to open the window shown directly below.
Double-click Program Compatibility Assistant Service to open the window below.
Press the Stop button if the service is running.
Then select Disabled on the Startup type drop-down menu.
Press the Apply button to confirm the new settings.
Click OK to close the window.
4. Turn Off the OOBE
OOBE item settings can also be responsible for the OOBE error. So disabling the OOBE (Out-of-box experience) for Microsoft Security Essentials can also fix the issue. Follow the guidelines below to turn off the OOBE.
Enter ‘compmgmt.msc’ in Run, and select the OK option.
Then click System Tools > Performance > Data Collector Sets > Startup Event Traces Session on the left of the Computer Management window.
Right-click Microsoft Security Client OOBE and select Properties.
Select the Trace Session tab on the window that opens.
Deselect the Enabled check box.
Press the Apply button to save the settings.
Then select the OK option.
Restart Windows after adjusting the Enabled OOBE setting.
5. Uninstall Microsoft Security Essentials
Microsoft stopped supporting MSE when Windows 7 reached its end-of-support date in January 2020. So, the antivirus utility wasn’t very good after Microsoft stopped supporting Windows 7.
As such, now might be a good time to uninstall MSE and replace it with a third-party antivirus utility still supported on Windows 7. Thoroughly removing MSE will also probably resolve the OOBE error. Follow the guidelines below to uninstall Microsoft Security Essentials thoroughly.
Open the Run accessory.
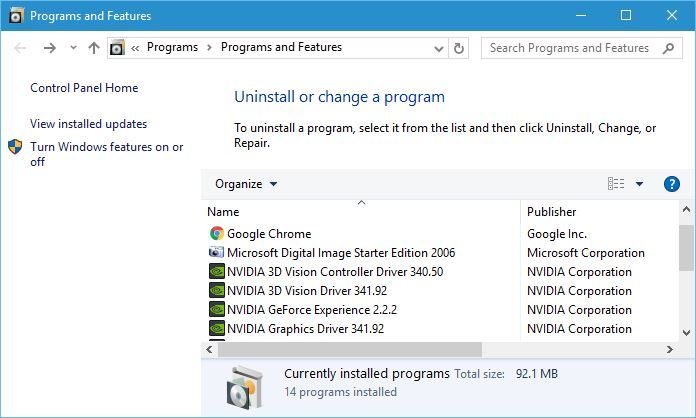
Input ‘appwiz.cpl’ in Run’s text box and click OK to open the uninstaller window shown below.
Select Microsoft Security Essentials on the program list.
Click Uninstall > Yes to remove the software.
Thereafter, restart the laptop or desktop.
Users will then need to erase some leftovers to remove the software thoroughly. Enter this path in Windows Explorer: C:ProgramDataMicrosoftMicrosoft Security ClientSupport.
Erase any files and folders remaining at the path by selecting them and clicking the Delete button.
Users will also need to erase MSE’s leftover registry entries with a registry cleaner utility. Click Download on CCleaner’s website to download the freeware version of that utility.
Then open the software’s installer to add the freeware CCleaner to Windows.
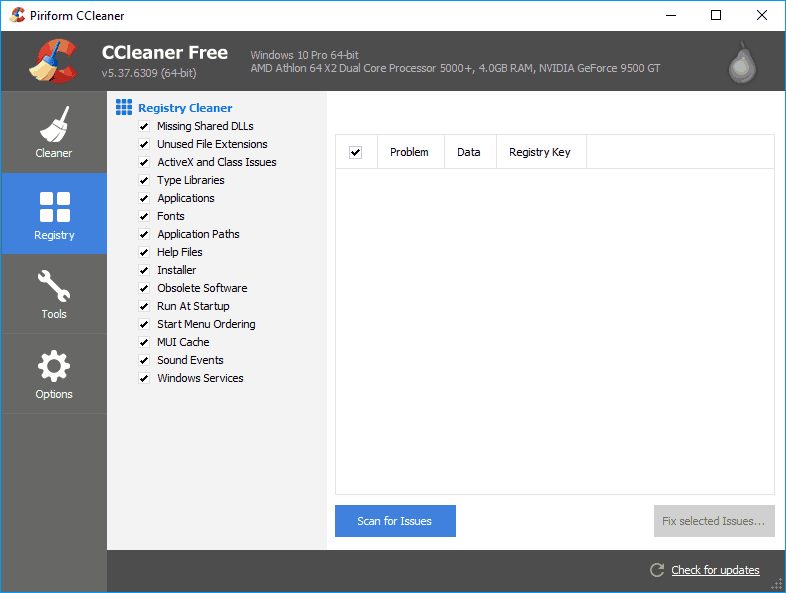
Click Registry on CCleaner’s window.
Then select all the registry check boxes, and press the Scan for Issues button.
Select the Fix selected Issues option.
Click the Yes button to back up the registry if you prefer. Then press the Save button.
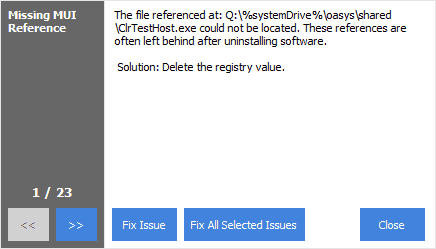
Press the Fix All Selected Issues button to clean the registry.
Then close CCleaner, and restart the desktop or laptop.
So that’s how users can resolve the Microsoft Security Essentials OOBE error in Windows. With MSE in obsolescence, the best resolution might be to uninstall the utility. This page provides details on how MSE stacks up with the best third-party antivirus software.
You can get rid of the OOBEEULA error on Windows 11 with these expert tips and tricks from our dedicated guide, so don’t hesitate to try it out.
Microsoft introduced a new Sysmon update. More specifically, Sysmon 8.o.4 fixes all the memory leak issues that existed in the previous version.
Sysmon is one of the many SysInternals components by Microsoft. It is a troubleshooting utility that monitors and troubleshoots the operating system and writes events to the event log.
The previous version of the program brought some annoying memory leak problems. It was recorded that memory leakage could lead to system crashes after update.
Computer geek Ionstorm talked about this issue on Twitter, saying:
Heads up admins if you still run sysmon 8.0.0 and you run a scheduled task to update the sysmon config each reload will use approximately 15mb of ram, after 30 days it will max out memory on your servers if they dont reboot. Memory is locked in non-paged pool. 8.0.4 resolves
Memory leak issues were also highlighted on the Microsoft SysInternals Forum. The same issue was reported by a user who reported the consumption of memory in Nonpaged pools after each time configuration reloads. He commented:
I faced a bug in Sysmon (ver. 7.01 and 7.03) – Symon’s driver (SysmonDrv.sys) consumes new area in Nonpaged pool memory every time configuration reloads, but driver does not free old area in Nonpaged pool memory. As a result, we can see memory leak. I found this problem on my VM, which had only 4GB RAM and more than 180 uptime days.
However, Microsoft responded that the issue has been fixed in the new update 8.o.4. Sysmon 8.o.o and 8.o.2 users can jump to 8.o.4 version to get this problem fixed.
Microsoft is already working on the very first Windows 10 v1909 build. Windows 10 19H2 is expected to be launched in October 2019.
The Redmond giant has a lot of work to do. The company is now working on two different projects: completing the Windows 10 19H1 build that will be launched in April 2019 and developing the next OS version slated for release in mid-October 2019. As you can see, Microsoft is indeed planning ahead.
The Windows 10 version 1909 or 19H2 has already been built and compiled according to WZor. This Microsoft enthusiast who tracks Windows news is now the successor of BuildFeed keeping an eye on the new builds launched by the Windows team.
Details about the next OS features are not available yet. Still, judging by the usual release schedule of Microsoft, we dare predict that it will reach users in mid-October. Most likely, the rollout will take place in stages.
Windows 10 19H2(Vanadium) is expected to be launched as version 1909 in reference to the month when the RTM build was compiled.
The development of Windows 10 19H1 will be finalized in March. Preview builds are already available online for Fast ring Insiders. As such, the development of Windows 10 19H2 will be completed in September and the final version will be launched in October.
Meet Vanadium and Vibranium
Microsoft started using elements names as codenames for developments of Windows 10, and the first two names are: Vanadium and Vibranium
However, according to the new report, after Windows 10 19H1, instead of using the 19H2 codename, Microsoft will use the element name “Vanadium”.
If the company goes forward with the new scheme, after “Windows 10 Vanadium,” the next feature update releasing in 2020 would carry the Chromium codename. However, Microsoft will most likely use a made-up element name, such as Vibranium since Chromium is already used by Google.
We’ll just wait and see what this new release build brings to the table.
With the evolution of the Windows OS, we know that technology is making progress on a daily basis. Despite the plethora of recent updates, the live tiles view of Start menu hasn’t been updated in a long time. Has Microsoft forgotten about this feature? Or is it working on revamping live tiles? Is the company planning to drop live tiles altogether?
Recent rumors suggest the third variant is the correct one. Reportedly, the big M will add a static menu to Windows Lite and some design elements will be inspired by Windows 7. The surprise is that there will be no live tiles.
Are live tiles useless for users?
Different and consistent tests were conducted according to which people aren’t attentive to the live tile view in the Start menu. This feature allows users to be actively involved in pinning up software according to their needs.
Nevertheless, it is yet to see if the same Start menu makes it to other versions of Windows 10, but for now, it just seems like live tiles aren’t part of Microsoft’s plan. People aren’t really opening the Start menu to look at or customize live tiles. Users prefer pinning everything to the taskbar because it’s easier to open your programs from there rather than from the start menu.
Windows Lite is Microsoft’s Chrome OS rival, which is anticipated to run a user interface known as Webshell which will not be like Windows 10. It will still be able to track Windows apps, but only those downloaded from the Store.
Live Tiles were a way for Microsoft to try to divert tablet owners to go towards Windows 8 and 8.1. Meanwhile, Windows 10 dropped most of the touchscreen-centric design decisions, apart from live tiles.
It’s still unclear whether Microsoft will drop live tiles on all future OS versions or just on the Lite version.
Are live tiles in Start menu really dead? Tell us what you think about this feature in the comments below.
Accurate and speedy news is important if you want to always be up-to-date. Getting accurate online news is a problem and we still don’t know the solution as to how to cope with it.
Nowadays, this issue is even more severe as online news misinformation seems to run as rampant as ever. In other words, without some technical solutions, the fake news dilemma won’t be solving itself any time soon.
In 2019, Microsoft found a solution to this tricky problem. In order to fight the fake news problem, Microsoft has made NewsGuard available.
This is an extension for its Microsoft Edge web browser for mobile as well as desktop versions, which is included by default, though users must enable it.
Microsoft uses NewsGuard to fight against fake news
The extension is out of beta testing now which was a continuous effort from the company’s engineers. NewsGuard uses journalism to fight unreliable news sources.
Experienced analysts and journalists research online news brands to help readers and viewers identify which ones are trustworthy and which ones aren’t.
Microsoft Edge isn’t a very popular browser, but it still makes an interesting case study in the uncontrollable war against low-quality information online.
NewsGuard is the child brain of Gordon Crovitz and Steven Brill. The extension depends on the human team instead of algorithms.
How NewsGuard works
After you enable the extension, the NewsGuard shield icon appears on your address bar, indicating the reliability of news websites. If you select the icon, you’ll see a definition of the icon’s meaning, and a link to see the full details, including whether the info uses credible sources, regularly updates itself, accurately differentiates news and opinion, as well as financing and ownership details.
Our Green-Red ratings signal if a website is trying to get it right or instead has a hidden agenda or knowingly publishes falsehoods or propaganda, giving readers more context about their news online.
An example is that FoxNews.com is marked as commonly credible, presenting users information responsibly and without using misleading headlines. However, the channel fails to regularly correct errors and does not fully provide ownership and financial details (report by NewsGuard).
The good news is that the company seems to be open to criticism. Their co-founder says they are “happy to be blamed,” and that “they are happy to be responsible for.”
As the service continues to improve by the passage of time, we’ll just have to wait and see how well it deals with the false information that comes out of fake news.
How about a browser with a built-in fake news detector?
UR Browser, similar to Microsoft Edge, offers a variety of news portal links on its standard home page. The important thing is that provided articles and news coverage are, firstly, authentic, and secondly, they come from trusted sources.
So there’s no fear of being served a pile of underwhelming pseudo-journalistic rubbish. No need for extensions whatsoever.
You can select and curate news UR Browser to your liking and select topics you deem worthy reading and following. Additionally, this browser is privacy-oriented and focused on the safety of its users. Download it today and learn about the details on your own in the simplest way: by testing it.
A shocking revelation has just been made by Avast: over half of the applications installed on Windows PC as out-dated. The software vulnerabilities can potentially put the users and their private data at a higher risk.
Revelations Made By Avast PC Trends Report 2019
Around 163 million devices participated in collecting the aggregated and anonymized data all over the world. The PC Trends Report 2019 eventually found out that approximately one in six Windows 7users and one in ten Windows 10users are using an outdated OS version. Hence, these systems are easily available to hackers so that they can exploit the system-level security vulnerabilities.
PC users don’t upgrade their apps and software
The updates for most of the applications are usually neglected by most of the users. The report published by the digital security company Avast suggests the percentage to be: VLC Media Player (94%), Adobe Shockwave (96%) and Skype (94%).
The report further stated that right now around 40% of all PCs are using Windows 10 all over the world. While Windows 7 has been able to grab the 43% share globally.
In case you want to be secure while surfing the internet, you will need to get a full-dedicated tool to secure your network. Install now Cyberghost VPN and secure yourself. It protects your PC from attacks while browsing, masks your IP address and blocks all unwanted access.
Hybrid devices are becoming more popular
As compared to the past, tablets, laptops, and 2-in-1 PCs are being used by most of the people these days. One of the main advantages of using laptops and tablets is that they allow users to browse, stream and work on the go.
Around 67% of users are opting for these devices due to these amazing features and it is expected that we will remain the same during this year as well.
Most popular apps on PC
The statistics regarding the most installed applications also represents the same shift to mobile devices. We can see from the latest trends that the installation rate for Google Chrome increased from 79% to 91% during the last 12 months. Adobe Acrobat Reader grabbed the second position with an installation rate of 60%. Moreover, WinRAR, Microsoft Office and Mozilla Firefox have 48%, 45% and 42% installs respectively.
The average PC is 6 years old
An increase in the average age of a PC has been reported to be 6 years during this year. Around 62% of users who have older machines are now running Windows 10. As of now, 63% of notebooks are being used globally. Furthermore, HP, Acer, Asus, Lenovo, and Dell, are known to be the top five PC brands this year.
Currently, the market is being dominated by the PCs having dual-core processors. Around 20% of the machines have been using a quad-core processor. It is worth mentioning that the SSD as a sole storage solution is available to 15 percent of the users these days. Finally, avast reported the most used RAM size to be 4GB.
Today hackers have so many ways to attack your PC, and you have to take a series of steps for the protection of your system. Keeping in mind the PC Trends Report 2019 you just have to ensure that systems and software are patched and up to date to protect your system from potential cyber attacks.
How often do you update your PC? Let us know in the comments section below.
Microsoft has just announced a new “Multiplan” feature for Planner, its Trello competitor for Office 365 customers. With Multiplan, it’s finally possible to create multiple Plans inside the same Office 365 Group (previously, creating a new plan created a new Office 365 Group).
To get started, you’ll just have to create a new Plan from Planner and then click the “Add to an existing Office 365 group” button, right below the field for the Plan name. You can see how it works in the video below:
The “Multiplan” name for the feature may well be some sort of an inside joke, as “Multiplan” was the name of a pre-Excel spreadsheet that Microsoft developed in the eighties. Anyway, creating multiple plans per group was one of the top requested features from Planner users, and it should definitely help preventing the multiplication of Planner-related Office 365 groups.
There are many more new features in the pipeline for Planner, including Plan Templates, integrations with Outlook Tasks/Microsoft To-Do, and much more. You can learn more about upcoming new features and share your feedback with the team on the dedicated Uservoice website.
The Windows Insider team has taken a liking to its interactive Mixer webcasts over the past year and are looking to continue the tradition for this year’s #bugbash event.
Starting From 10 a.m. PST/ 6 p.m. UTC fans can watch a live stream of unadulterated Windows 10 Insider madness, covering all things past, present and future about the company’s latest OS offering while addressing bugs in real-time.
Hello #WindowsInsiders! If you haven't marked your calendar, now's a good time to do it! Our #BugBash webcast will be live tomorrow at 10am PST / 6pm UTC on https://t.co/gKWNaQ5FcM! We'll talk BugBash and our guests will talk about some changes we've made in Windows! pic.twitter.com/cqSfD8BWGm
Tomorrow, January 29, 2019, may be a good time to tune as the Windows team is set to make its leap from the current development branch of Windows 10 Insider development to the next big one that’s rumored to include a more modular approach to Windows 10 and introduce testing of new features planned to accompany folding devices later this year.
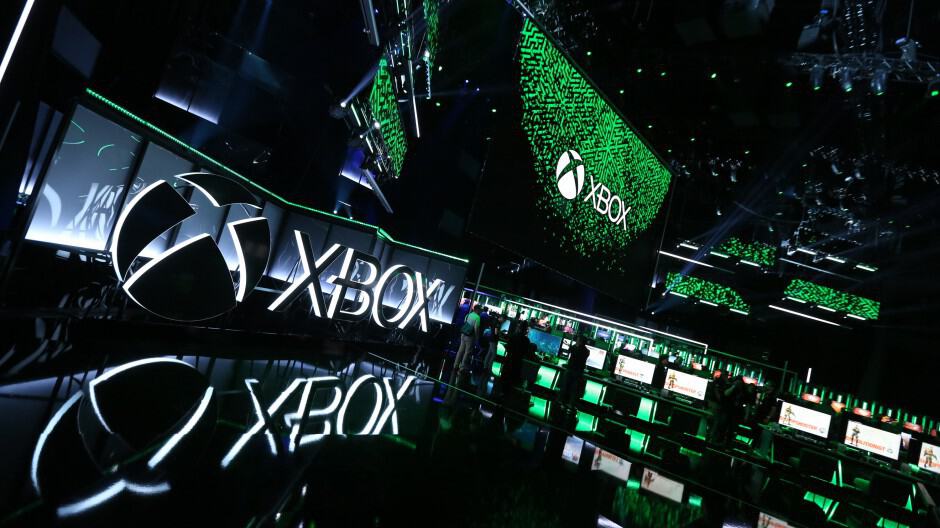
As presumed, Microsoft will be taking advantage of Sony’s decision to pull out of E3 2019 and leverage the company’s lack of presence by going “big” this year.
“This is going to be a fun E3 for us … we had a discussion internally. Should we go big? Should we save some money? No, we’re going to do our thing and we’re going to go and be as big at E3 as we’ve ever been.”
While Hryb and Spencer do not discuss the details of Xbox’s ‘big’ and ‘fun’ presence at E3 2019, the mere fact that its largest competition in the sector will not be in attendance will afford Microsoft a chance to dictate its own narrative rather than losing its messaging through comparison. You can listen to the interview here:
With Sony volunteering the stage, Microsoft will be free to possibly introduce its gaming vision that could include new hardware and a bevy of gaming titles under the Xbox brand such as a new Fables game, Gears 5 news, the next installment of Forza, and demos of Halo Infinite.
Beyond the tried and true games and hardware schtick, Microsoft can also take this opportunity to push its cross-platform pitch as well as an unadulterated message of its software and services ambitions for gamers utilizing Xbox One consoles as well as PCs.
With Sony abdicating its traditional follow-up presence at this years E3, the messaging for the rest of 2019 and into 2020 is Microsoft’s to lose.
Microsoft kicked off yesterday a limited-time sale on select Xbox One bundles, and you have until February 2 to save $50 on seven Xbox One X bundles and five Xbox One S bundles. If you’re looking to upgrade to the Xbox One X, the brand new Metro Saga bundle including the upcoming Metro: Exodus game is included in the list, and you can get it for just $449.
The Xbox One X Robot White Special Edition looks pretty great.
Even though it’s getting hard to recommend purchasing an Xbox One S at the end of this console generation, the console remains great value at just $249. The different Xbox One S 1TB bundles on sale include the Fortnite bundle, the Forza Horizon 4 bundle, or the Starter bundle which comes with no games but 3 months of Game Pass and Xbox Live Gold. You can check out all the discounted Xbox One bundles on this page.
The Nvidia community is quite large, with all kinds of interest points regarding the leader in computing technology. Whether you’re a developer or a user keen on purchasing some hardware, this is the place to be. But many users reported that their Nvidia account is locked.
Signing in with your account isn’t usually something one should worry about. However, some users from the Nvidia community couldn’t sign in with their email and password. Of course, there’s a hefty number of sign-in options, which seemingly work.
You can use Facebook, Google Account, WeChat, or QQ to log in. This, of course, doesn’t mean you should. Using a specific account has its traits, which is why this exists in the first place. Keep reading to find out the ways to recover your Nvidia account!
What can I do if the Nvidia account is locked?
1. Clear the browser cache
NOTE
The steps listed here are for Google Chrome, the most used browser. In case you are using another one, the steps should be similar. For the exact process, search the web or check the official website.
Launch Chrome, and hit Ctrl + Shift + Delete.
Go to the Advanced tab, select the Passwords and other sign-in data option, and click on Clear data.
Once done, restart the browser.
We recommend clearing the browser cache and removing the saved password for the Nvidia account when it’s locked.
Follow the on-screen instructions to complete the process.
Another reason you cannot access the Nvidia account, which appears locked, is that you are entering the incorrect password. In this case, you should reset the password.
If things still remain unresolved and the Nvidia account is locked, the last option is to contact Nvidia Support. They will revert with information on what triggered the blocking and share any other information that might be useful in the recovery process.
Microsoft may have waved the proverbial flag of surrender when it announced its new direction for its web browsing development, but one of the last remaining Chromium-adoption holdouts, Mozilla, just got some help from staunch advocates of competition, when faced by offbeat pressure from Microsoft engineers to convert.
Kenneth Auchenberg, a program manager on the Code team at Microsoft responded via Twitter to a post that recently went up on the blog.mozilla.org site about the company’s decision to forego EdgeHTML development in favor of future Chromium development for its upcoming browser efforts.
Thought: It's time for @mozilla to get down from their philosophical ivory tower. The web is dominated by Chromium, if they really *cared* about the web they would be contributing instead of building a parallel universe that's used by less than 5%?https://t.co/0zi2NCtzb4
Auchenberg’s seemingly flippant response was counter by both the open web crowd as well as a Mozilla engineer himself, all advocating for the persistence demand in companies offering competition in the form of web standards.
Hey, Mozilla engineer and Chromium committer too here… Not having multiple implementations of the web means that the web stops being an open platform… People start relying on Chromium bugs, and standards / specs become useless, making innovating impossible.
Auchenberg addresses Emilio’s concerns with a solid argument that at this point, the market has spoken and development focus for companies should be on the contribution of open source code rather than pandering to the notion of a separate rendering engine. Theoretically, focus on a single open source code should expedite innovation rather than stifle it, as every participating party is bringing new implementations constantly.
2) This complexity it's incredibly expensive to implement a web runtime. Even for Google/Microsoft it's hard to justify such investment that would take thousands of engineers in multiple years.
The web has become too capable for multi engines, just like many frameworks.
The entire exchange between web advocates, Mozilla, and Microsoft engineers are punctuated with a single ominous tweet from former Mozilla CTO Andreas Gal who chimes in with “I’m afraid this will not end well,” as another Mozilla engineer levies the quitter card at Microsoft for its decision to adopt Chromium.
Gal now works Apple on undisclosed projects, but with Mozilla struggling to keep market share and as user behavior settles into a natural dichotomy of selection, the argument held by open web advocates and Mozilla engineers may become moot sooner rather than later by order of the ‘free market.’
One of the leading software solutions for video editing and presentation making is Camtasia Studio by TechSmith. You can always try it free for 30 days. However, after the trial period is over, chances are you would want to activate your copy of Camtasia.
That seemingly wasn’t possible for some users. They were met by the error as Camtasia Studio couldn’t connect to the activation server. We have two solutions for the issue at hand, so give them a try and tell us whether you’ve succeeded.
What to do if Camtasia Studio can’t connect to the activation server
The activation process requires a stable connection in order to work. Your PC needs to be connected to the internet so you can reach the activation server successfully. Now, most of the time, this is hardly the reason for the error at hand. Nonetheless, we still suggest double-checking your network before we can move to the second step.
If you’re certain that your network is working as it’s supposed to, move to the solution which should almost certainly address the issue.
Solution 2 – Activate Camtasia manually
The good folks at the TechSmith support are aware of this problem and they provided the solution. For some reason, the host files stored locally get modified and thus the software is unable to reach the activation server.
Luckily, there’s a workaround which, with some effort, will allow you to activate Camtasia Studio with the pre-acquired license key.
You’re going to need the administrative permission in order to perform the steps below.
Here’s what you need to do:
Navigate to C:WindowsSystem32driversetc.
Open the “etc” folder, right-click on the “hosts” file and open Properties.
Right-click on the CamtasiaUtl.exe file and run it as an administrator.
Wait for some time and start Camtasia Studio again.
Enter your license key and you’re good to go.
With that said, we can conclude this article. In case you have some questions or suggestions, post them below. In addition, if the issue persists, don’t forget to send your ticket to TechSmith Support.
Microsoft news recap is a weekly feature highlighting the top Microsoft news stories of the past week. Sit back, grab some coffee, and enjoy the read!
OneDrive file sharing is now generally available in Skype
Skype is being more tightly integrated with OneDrive. Users can now share OneDrive files amongst themselves directly from within conversations, making it easier than ever to share files with those you communicate with regularly.
4 Xbox 360 Command and Conquer video games go Xbox One back compat
Google has been expanding Chrome support for native Windows features. The search engine giant added Windows 10 notification support to Chrome last year. Now Google has confirmed that it will enable Media Session API for Chrome.
A Chrome engineer confirmed in a Google forum post that the browser will support Media Session API. The engineer stated:
We are intending to enable Media Session API on desktop from M73 onwards. We are enabling it as we are building new features in Chromium that will use the API (e.g. hardware media keys). This was previously enabled on Chrome Android and the API has not changed.
Chrome supports Media Session API
Chrome’s support for the Media Session API means that users can utilize the keyboard media controls for media playback. Some keyboards include play, stop, and pause keys for media playback. Thus, Chrome’s support for the Media Session API will enable users to play, stop, and pause videos on YouTube, and other sites, with those keyboard keys.
Google has also confirmed Chrome Media Session API support on all platforms. Google Git now includes a repository that states:
Enable Media Session API on desktop for all platforms since we have features in M73 using this API. This was previously enable for CrOS and Windows only but we would like to enable it for consistency on all desktop platforms.
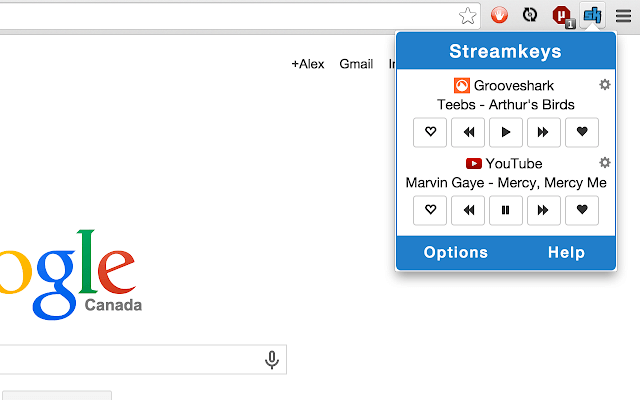
A few browser extensions already enable Google Chrome users to control web-based music players with media keys. Key Socket Media Keys and Streamkeys are two extensions for Chrome with which users can play, stop, and pause web-based media player playback via keyboard. Streamkeys users can also customize the hotkeys.
The Chrome 73 Canary browser already supports the Media Session API. Thus, Google Chrome 73, which is due for a March 12 release, will probably support Media Session API.
Windows OS is not yet dead on smartphones! Although Windows 10 Mobile is going to die by the end of 2019, it is interesting to see that Windows Phone enthusiasts are not yet ready to give up on their smartphones just yet. Their obsession is visible from the fact that they have already started looking for alternative ways to use different Windows 10 versions on smartphones.
We’re sure that multiple projects are still in the pipeline and they won’t allow the Windows Phone to die yet. Speaking of which, there’s a new video on YouTube showing Windows 10 ARM runnin on Lumia 950 XL. While this is not the first video of the kind, watching it is quite an interesting experience.
Can Windows 10 ARM Run Perfectly on Lumia 950 XL?
As you can see in the video below, the user was able to open different apps and games quite easily.
Lumia 950 XL has done a pretty good job at running a desktop operating system, despite being an old device. Well, minor glitches were indeed recorded but that was to be expected, wasn’t it?
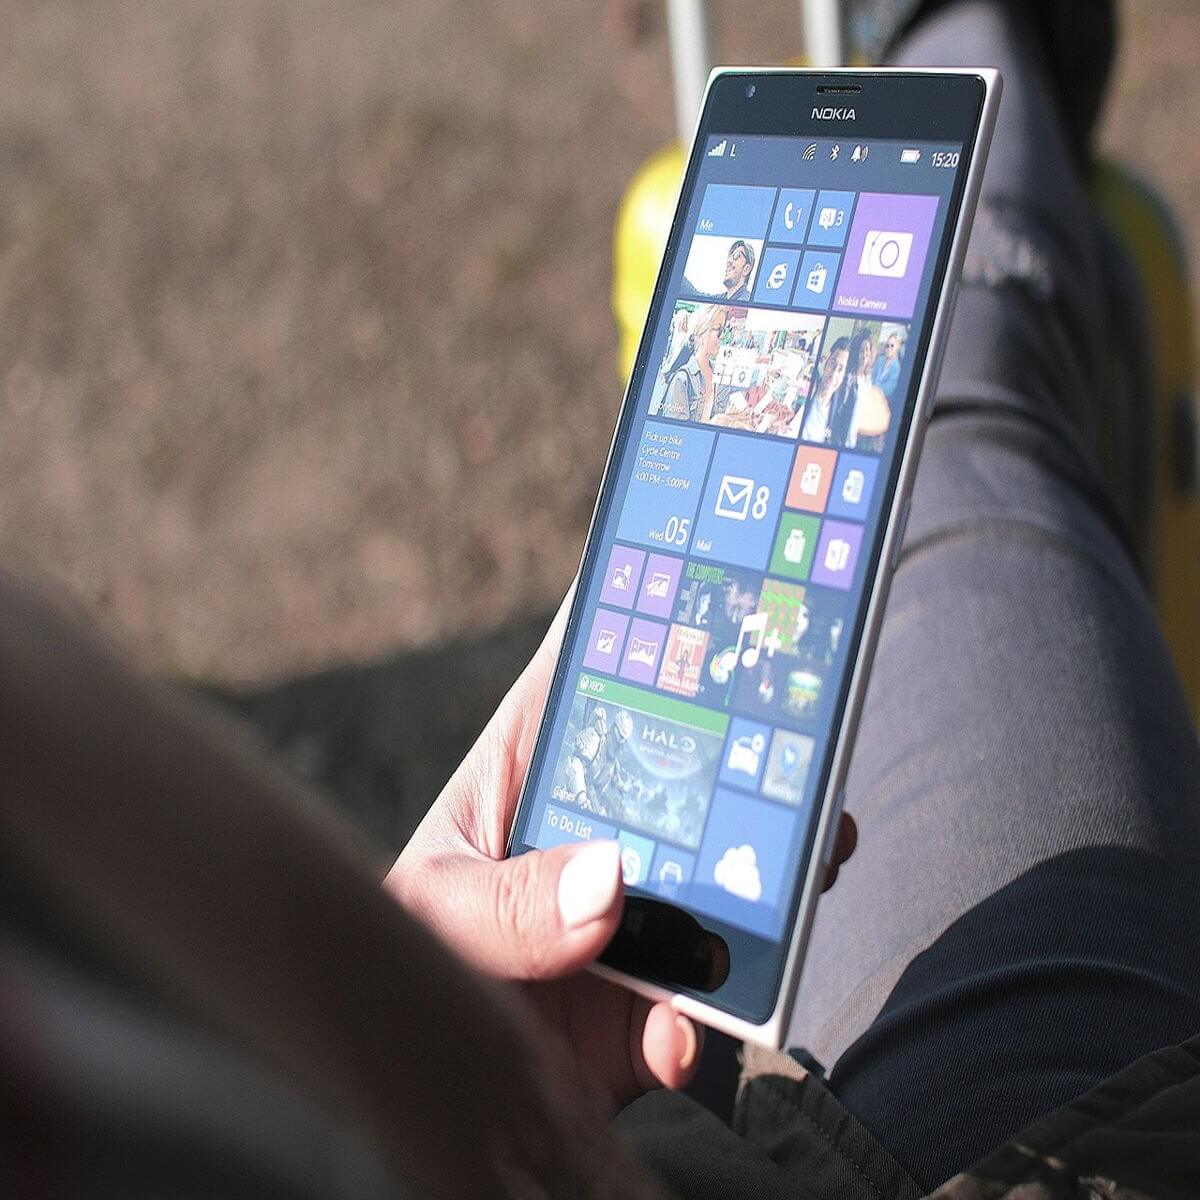
You need to understand that the end of support is not going to jam your Nokia and Microsoft Lumia devices, rather you should expect them to be more unstable than ever before. It is worth mentioning that the tech giant is itself recommending its users to switch to iOS or Android phones.
Comment down below your plans regarding switching to iOS or Android phones soon after the death of Windows Phone.
Microsoft recently announced that Windows 10 v19H1 will feature improved RAW image format support. This is a piece of great news for those who love taking pictures in RAW image formats and had always wanted the RAW files from their camera to be natively supported by Windows.
This new Build 18323 also comes with many bug fixes, and enhanced support for the RAW images is one of the major features. To make proper use of this improvement, Microsoft has created an updated store-delivered RAW codec package that can better improve native RAWfile format support in Windows.
Just as soon as the package (RAWImage Extension, Beta Version) is downloaded from the Microsoft Store, you will be able to view the image thumbnails, camera metadata, and previews of all recent unsupported RAW files in the File Explorer.
Also, all your RAW images can now be viewed in full resolution through any app that utilizes Window Imaging Component outline to decode raw images like Photos or Window app.
Keep in mind that some camera models and raw formats may not be supported. While the beta version of the Raw format supports most cameras, there are some exceptions, as Microsoft informs its users.
The current version of the extension supports a long list of cameras, however some Raw formats like .CR3, and .GPR are not currently supported at this time.
Raw Image Extension issues
There are some issues that are connected with this new feature. We’ll list them below:
In Photos app, opening some RAW images with the newly released store-delivered raw codec pack get stuck at a low-resolution thumbnail image
When view state is switched to “Details Pane” and the new raw codec package is activated, File Explorer hangs almost immediately.
For some raw imageformats, camera properties that are stored as EXIF/XMP metadata are not functioning. These are some of the issues connected with this new feature and so many others.
The Windows 10 Build 18323 has brought many useful general changes, lots of improvements, and fixes for PCs.
Speaking of fixes, we already wrote an article where we listed the main bug fixes and improvements packed in this build. Feel free to check it out.
Keeping your system up to date is important, but some users tend to disable this feature. However, the issue arises when the Windows Update service keeps turning back on.
This can be a problem, especially if you want to disable automatic updates on your PC for any reason.
In today’s guide, we will show you how to fix this issue and keep your updates disabled.
Why does the Windows Update service keep starting?
Windows Update Assistant software is running on your PC.
Services are configured to run Windows Update on your account.
There’s a scheduled event that keeps starting the service.
The registry is configured to run Windows Update.
How can I fix Windows Update service if it keeps turning back on?
1. Uninstall Windows Update Assistant
Simultaneously press the Windows key + R on your keyboard. This opens the Run dialog box (ensure you are logged in as an administrator).
Now, type appwiz.cpl in the provided Run dialog box then click OK.
Locate the Windows Update Assistant and select Uninstall.
Next, you should check whether your PC has a folder named Windows10Upgrade in the local disk C and delete it. For Windows 10 click This PC, then Local Disk(C 🙂
The Windows10Upgrade folder is found in the Windows folder, so go there and delete it- if present.
Next, you need to disable Windows Update service. Follow these steps:
Simultaneously press the Windows key + R on your keyboard. This opens the Run dialog box (be logged in as an administrator).
Now type services.msc in the provided Run dialog box then click OK.
Look around for the service named Windows Update, then right-click it and select stop– if marked as running.
From there you right-click it again then choose Properties.
Now, under Startup type, click on the drop-down arrow and choose Disabled.
Proceed to the Recovery option (in the same Window). Locate the First failure tab and click on the dropdown arrow right against it.
Click Take no Action.
Press Apply and then OK.
This should help if Windows Update service keeps turning back on on your PC.
2. Tweak the user account credentials
Simultaneously press the Windows key + R on your keyboard. This opens the Run dialog box (be logged in as an administrator).
Now type services.msc in the provided Run dialog box then click OK.
Right-click on the Windows Update service then click on properties.
Click Stop to first discontinue the service.
Now Click on the Log On
Under the This account section: type .Guest leaving the password blank.
Click on OK. You will receive this notification.
Now the system will generate an error (to the effect that the account specified is different from the usual account for running the same process) each time your Windows attempts to restart the service and the trial to reenable is halted.
Simultaneously press the Windows key + R on the keyboard. This takes you to the Run dialog box.
Now type services.msc in the Run dialog box. Click OK.
As we have been seeing, search for the Windows Update service and stop it under its properties tab. Also, disable it (Under Startup type, pick Disabled).
Again press the Windows key +R.
Now type taskschd.msc in the dialog box.
Under Task Scheduler Library, find the Microsoft folder.
Then locate the Windows subfolder inside Microsoft. Now identify and first click the UpdateOrchestrator folder.
You will note its numerous triggers on the right pane. Right-click each of these and ensure they are set to disable.
Similarly, locate the WindowsUpdate folder and again disable all its triggers.
Exit the task scheduler window.
Please note that some users might need to additionally disable all the triggers under the Microsoft>Windows>rempl folder for this solution to succeed.
Google has revealed a Manifest V3 document that highlights the company’s plan to replace Chromium’s webRequest API. The changes outlined within Manifest V3 could have a profound impact on some Chrome extensions that utilize the webRequest API to filter traffic from ad sources. Some developers have even warned that the API changes could render ad-blocking extensions for Chrome obsolete.
A Google engineer provided a hyperlink for a draft Manifest V3 document in a post on The Chromium Projects website. That document outlines how Google intends to greatly restrict the webRequest API blocking. The company plans to introduce a new declarative NetRequest API that has more limited rules for ad filtering.
As Chromium is an open-source browser that underpins Chrome, such changes would almost certainly be implemented within Chrome. Google explains that these changes will speed up page loads for its browsers. The new declarativeNetRequest API will speed up page loading as it will enable Chrome to modify network requests. However, ad blockers also speed up browsing by removing ad content from pages.
Some extension developers expressed concerns about the proposed changes on the Chromium website. A uBlock Origin developer, Mr. Hill, stated that the proposed API changes would render some ad-blocking extensions obsolete. Mr. Hill stated in a forum thread:
If this (quite limited) declarativeNetRequest API ends up being the only way content blockers can accomplish their duty, this essentially means that two content blockers I have maintained for years, uBlock Origin (“uBO”) and uMatrix, can no longer exist. Beside causing uBO and uMatrix to no longer be able to exist, it’s really concerning that the proposed declarativeNetRequest API will make it impossible to come up with new and novel filtering engine designs, as the declarativeNetRequest API is no more than the implementation of one specific filtering engine, and a rather limited one (the 30,000 limit is not sufficient to enforce the famous EasyList alone).
As such, Manifest V3 has convinced some developers that Google is trying to kill off ad-blocking extensions with the API changes. Google probably won’t be bothered about the impact such API changes could have on ad-blocking extensions considering the significance of ads to the company. Restricting ad blockers might also boost the web’s economy.
BlueStacks is one of the best Android emulators currently available. The developers sometimes release updates to improve the software, but some users complain that the latest version of BlueStacks is already installed error while trying to apply them.
This can be frustrating, as it makes you miss out on the app’s latest features. Thankfully, this error can be easily eliminated, and we will show you how to go about it in this guide.
Below are some of the potential causes of the BlueStacks already installed error message on your PC:
Accumulation of leftover files: Sometimes, this problem can be due to the collection of corrupt leftover BlueStacks files. You need to clear these files manually or with the help of PC cleaner software.
Present versions not supporting updates: if you have the BlueStacks 5 Beta version, you might not be able to update it directly. You need to uninstall the app and download the latest version on your PC.
How can I fix BlueStacks already installed error?
1. Delete BlueStacks Registry Keys
Press the Windows key + R, type regedit, and click the OK button.
Navigate to the path below in the left pane: Computer\HKEY_LOCAL_MACHINE\SOFTWARE
Now, right-click the BlueStacks key in the left pane and select Delete.
Next, click the Yes button to confirm.
Finally, delete the BlueStacksGP key too.
BlueStacks is already installed error messages can often be due to leftover registry entries. Users have confirmed that erasing leftover registry entries solves the problem.
2. Delete Leftover BlueStacks Folders
Press the Windows key + E to open File Explorer.
Navigate to the following paths and delete their content: C:\Program Files (x86)\BlueStacksC:\ProgramData\BlueStacksC:\ProgramData\BlueStacks\Setup
Finally, restart your PC and try updating the app.
There might also be some leftover folders for BlueStacks in File Explorer, causing the latest version already installed error. As such, you must delete the BlueStacks folders in the paths above.
Alternatively, you can use a dedicated PC cleaner in CCleaner to remove the leftover files. This tool eliminates unwanted files in your PC registry and hard drive with just a few mouse clicks.
Also, it can work as an uninstaller software to remove any app on your PC. It is just the perfect tool to keep your PC clean and create valuable space.
3. Uninstall the app on your PC
Press the Windows key + R, type %Temp%, and click OK.
Press the Ctrl + A hotkey to select all the files in the opened folder and click the Delete icon at the top.
Click the Yes button when prompted to start the BlueStacks removal process.
Next, click OK after the process is complete to close the cleaner.
Finally, go to the official website to download and install the latest version of BlueStacks.
Sometimes, the BlueStacks is already installed error is caused by issues with the current version of the app on your PC. To fix this, you need to clear the content of the Temp folder and use the official BlueStacks uninstaller to remove the app.
Reinstalling the app can help you fix issues like error code 2004 on BlueStacks. To learn more about the error and what causes it, read this guide.
4. Open the Program Install and Uninstall Troubleshooter
Click Download troubleshooter on the troubleshooter’s Windows Support page to download it.
Now, double-click the downloaded file to run it.
Click the Advanced link.
Select the Apply repairs automatically option and click the Next button to initiate the troubleshooting.
Now, select the Installing option.
Choose BlueStacks as the program you’re trying to install if it’s listed. Select the Not Listed option if BlueStacks isn’t listed.
Finally, click Next to go through the troubleshooter’s resolutions.
If you still can’t fix the BlueStacks’ installation error, check out the Program Install and Uninstall troubleshooter for Windows 10. That troubleshooter repairs system errors that block software installation.
Those resolutions should fix the BlueStack’s already installed error. You should now be able to upgrade the app quickly, provided you follow the steps above carefully.
Editing videos isn’t an easy task, especially if you don’t have a proper tool to do that. There are many great video editing applications on the market, but few of them offer the combination of simplicity and power that Wondershare Filmora offers.
Today we have the latest entry from the Wondershare’s Filmora family, so let’s see what does this video editor have to offer to its users.
Wondershare Filmora9, simple but powerful video editing tool
Wondershare Filmora has been a member of Wondershare family since 2014, and it’s a video editor of choice for many users. In late 2018, this video editing software is re-branded as Filmora9. What makes this new tool stand out from the rest is its sleek, straightforward design and simplicity of use, so even the first-time users won’t have any issues using Filmora9.
Friendly and sleek design
The first thing that you’ll notice when you start Wondershare Filmora9 is its friendly and simple user interface. The interface has a sleek dark theme, and it’s incredibly simple to use, even if you’re a first-time user.
Most of the interface is occupied by a timeline on the bottom, and this is the element that you’ll be using the most. Here you can combine different video clips and add various effects simply by dragging and dropping. Each element on the timeline can be moved freely, and you can simply change the duration of any clip by resizing it.
On the right side there’s a real-time preview pane, and you’ll be using it to preview clips and visual effects. It’s worth mentioning that you can adjust the playback quality or the zoom level of the preview pane in order to ensure that your video is always previewing smoothly.
The left pane works as a library and you can use it to easily add clips or effects. You can organize your clips into folders, and thanks to the built-in search, you should be able to find any clip in a matter of moments. It’s worth mentioning that you can add various text, transitions, effects and elements right from this pane. Filmora9 comes with a wide array of effects, and you can always download more from the Effects Store.
Video editing and timeline
In order to start video editing, first you need to import videos from your PC. The Filmora9 video editor now supports truly 4k videos (both 3840*2160 and 4096*2160), and it also allows you to create proxy files for a smoother video editing experience. You can edit with proxy video files in Filmora9 and then export with the full-sized resolution.
Speaking of video importing, it’s worth mentioning that you can record your webcam video right from Filmora9 so you won’t have to rely on third-party applications. Bear in mind that you’re not limited just to your webcam, and you can also record your desktop. You can set Filmora9 to record an entire screen, a specific window or a segment of your screen.
As for video editing, you can easily cut, split or crop your audio and video clips right from the timeline. If needed, you can adjust the zoom level or change the speed of your clips or set them to play in reverse. You can also adjust the color of your clips, and choose one of many available presets.
If you want, you can fine-tune each color setting individually in order to achieve unique results. As for available color settings, you can change temperature, tint, exposure, brightness, contrast, vibrance, saturation, highlights, shadows and various other color settings. Once you’re satisfied with the results, you can save the current color adjustment as a preset.
As for editing, you’ll be pleased to know that you can easily rotate, scale or flip your videos. You can also choose between several blending modes and change the opacity of the videos in order to achieve some impressive results.
Video stabilization feature is available as well, and this feature can be incredibly useful if you’re recording videos without a tripod. Another feature that you might find useful is Lens Correction, and this feature will help you optimize videos recorded by GoPro or similar headsets.
If you’re using a green screen while creating videos, you’ll be pleased to know that Filmora9 can work with greenscreen videos thanks to the Chroma Key feature. The application also allows you to add shadows to your clips, and you can easily change their distance, blur, opacity or color. Lastly, you can add various motion effects to your clips in order to make some impressive transitions.
The timeline can be easily zoomed in or out, so you’ll be able to see the smallest details with ease. If you want, you can also add various markers to your timeline in order to focus on specific areas. It’s worth mentioning that Filmora9 supports up to 100 audio and video channels, which should be more than enough for most users.
Audio editing
Just like with video clips, you can add music and audio clips to your creations. Filmora9 comes with 50 different audio clips in the Audio Library, but you can add your own clips from your PC or you can download more from the Effects Store.
As for audio editing, you can easily adjust the volume from the timeline, and add fade in and fade out effects. If needed, you can also change the speed and duration of your audio clips in order to combine them with the video.
There’s a useful Denoise feature, so you can easily remove background noise from your audio clips, and thanks to the built-in equalizer, you should be able to fine-tune each audio clip. Filmora9 also has the ability to create audio voiceovers, so you won’t have to use a third-party application in order to record your audio.
Lastly, there’s an audio mixer available, so you’ll be able to adjust the volume level of each audio and video channel and ensure that your video sounds perfect.
Effects, elements, and transitions
In order to create some impressive creations, Filmora9 comes with a wide arrange of effects that you can add. The application allows you to add text to your videos, so you can easily create openers, credits or subtitles. There are over 130 text effects available, but more are available for download from the Effects Store.
It’s worth mentioning that text can be highly customized, and you can choose between many available presets. Of course, you can create your unique styles by changing the font, color, and text opacity.
You can also blur your text, add a border or shadow to it. If you want to create some unique effects, you can add shapes or even images from your PC and combine them with text. To top it off, the text supports various animations, and you can set the duration for each animation.
To combine two or more clips, Filmora9 has about 170 different transitions, and you can adjust the duration of any transition right from the timeline. There are also various filters and overlays available, and each of these filters can be fine-tuned in order to achieve the desired results.
Of course, you can always download more transitions and effects from the Effects Store. The application also has about 190 available animated graphics elements that you can add to your videos.
File export and supported formats
Once you’re done editing your videos, you’ll need to export them in order to share them. Filmora9 supports 12 different output formats including MP4, WMV, AVI, MOV, F4V, MKV, TS, 3GP, MPEG-2, WEBM, GIF, and MP3.
Each output format can be customized and you can adjust settings such as encoder, resolution, frame rate, sample rate, and bit rate. If you don’t want to fine-tune your output settings, you can also choose between three available quality presets.
You can also optimize your video for various devices including iPad, Apple TV, Samsung Galaxy, Xbox One, PlayStation 4 and several others. Another great feature is the ability to upload your videos directly to YouTube or Vimeo right from Filmora9.
All that you have to do is to sign in with your YouTube or Vimeo account, enter the required information such as title, description, tags, etc. After doing that, you just have to click the Export button and your video will be uploaded directly to the selected service. If you want, you can also burn your video directly to a DVD right from Filmora9.
Conclusion
Filmora9 offers a simple user interface that should allow even the most basic users to create impressive videos. However, due to the extensive customization options, this tool will be perfect for advanced users as well.
If you’re looking for a sleek and powerful video editing software, we strongly recommend to check out Filmora9.
Syncing calendars between multiple accounts and unifying them into a single thread is a way to go for most users. Some things won’t work as well, as a Document Library sync, but syncing SharePoint Online calendar with Outlook should be a simple task.
However, some users are, allegedly, unable to make it work. Namely, SharePoint Online calendar is not syncing with Outlook for an unknown reason.
How to fix syncing issues between SharePoint Online and Outlook calendars
Using multiple applications for calendars for reminders and meeting schedules might be a burden sometimes. Navigating between one to another app, configuring and meddling with options is something you could easily avoid, especially in this case.
Both SharePoint and Outlook are part of Microsoft ecosystem and, as you already know, you can sync SharePoint to Outlook and do everything from a single app.
This method is so successful that every change you’ve made in one or another application is 2-way sync, meaning that the changes will be unified. Whether you’re making them in SharePoint or Outlook — it doesn’t matter. In general, this is quite a simple task nowadays. Back in the days, users had to use an alternative approach to connect Outlook with SharePoint, but not anymore.
Just open SharePoint > Calendar and, under the Connect & Export section, click Connect to Outlook.
This, of course, relies on the fact that the calendar will successfully sync with Outlook. And it doesn’t for some. The first thing you should know is that this will work only with the Outlook for the desktop. The web-based Outlook doesn’t have this option. If the problems emerge, make sure that you’ve granted all necessary permissions to SharePoint to access your Outlook account.
The complete authorization is of the utmost importance. If the problem is persistent, consider deleting the calendar from Outlook (this won’t delete any events) and sync it again with the aforementioned procedure. In addition, try deleting a browser cache or, alternatively, switching browsers for the time being.
That’s it. If you are still bothered by the same error, feel free to tell us in the comments section below. We might be able to provide you with additional help or point you in the right direction.
Microsoft has released new driver updates for its Surface Laptop 2 and Surface Go LTE this week (via Neowin). The new bits should improve Surface Pen reliability on both devices, and several driver updates for the Surface Laptop 2 should also improve system stability.
Surface Pen Firmware Update – System devices – 3.0.10.1: Ensures reliability of Pen top button click on Surface Pen with no clip-on Windows 10 October 10 2018 Update, version 1809. Use the Surface Pen Checker Tool to verify that the Pen’s firmware was successfully updated.
Surface Pen Integration Device – Human Interface Devices: 1.0.9.0 Enables firmware update to Surface Pen with no clip.
Surface Integration Service Device: 4.18.139.0 Improves system stability.
Surface ME – Firmware: 11.8.56.3522 Improves system stability.
Surface System Aggregator: 145.106.139.0 Improves system stability.
Surface Touch – Firmware: 145.106.139.0 Improves system stability.
Surface UEFI – Firmware: 137.2439.769 Improves system stability.
If you own the Surface Go LTE, this variant is getting its first driver updates this month, which will also allow the installation of the Windows 10 October 2018 Update. You can find all details below:
Surface Pen Firmware Update – System devices: 3.0.10.1 resolves intermittent Pen top button click failure on Surface Pen with no clip, post Windows 10 October 2018 Update. Use the Surface Pen Checker Tool to verify that the Pen’s firmware was successfully updated
Surface Pen Integration Device – Human Interface Devices: 1.0.9.0 enables firmware update to Surface Pen with no clip.
Generic IO & Memory Access – System: 1.5.4.0 improves compatibility issue and enables update to Windows 10 October 2018 Update.
Microsoft says that it’s not aware of any known issues with these latest driver updates, but as usual let us know in the comments if you encounter any problems after installing them on your devices.
Microsoft is now making it possible for Xbox Insiders to leave the program by closing their Xbox Insider account. While it was already possible to remove a console from the Xbox Insider program to stop getting preview builds, closing an Xbox Insider Account will delete all personal information and restore the console to the latest publicly available OS.
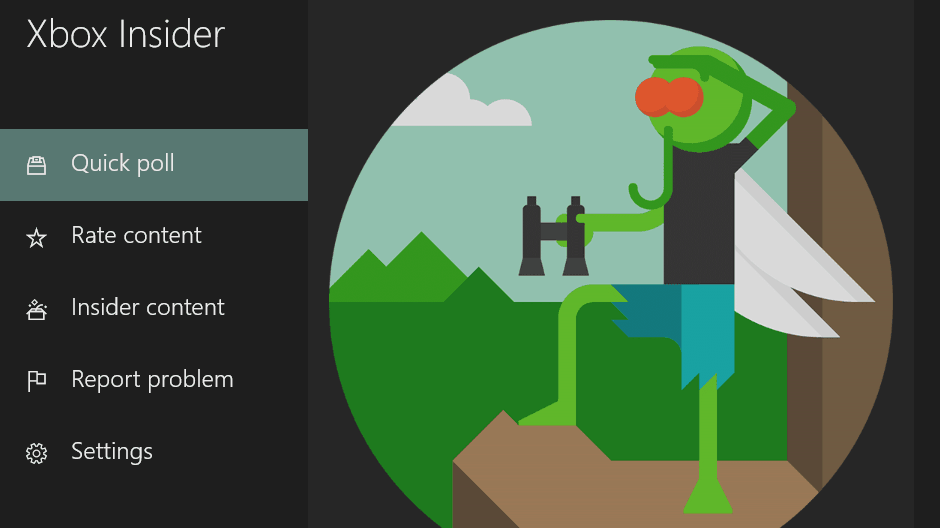
The new feature can be found in the Settings section of the Xbox Insider Hub app, and there’s also an option for exporting your personal data before closing your account. “Please note that the ‘Close account’ feature is permanent and deletes all Xbox Insider details, including flight enrollments, survey and poll responses, ratings, problem reports (including screenshots and game DVR clips), program level, and XP,” the Xbox team explained.
The Xbox Insider Program is mostly for people looking to get early access to new OS features, but you can actually join the program without installing any Xbox One preview builds. Indeed, the Xbox Insider Hub is also the place where you can install beta updates for Xbox apps and games you already own, or sign up for public betas for upcoming games. By closing your Xbox Insider account, be aware that you’ll also lose access to all of this.
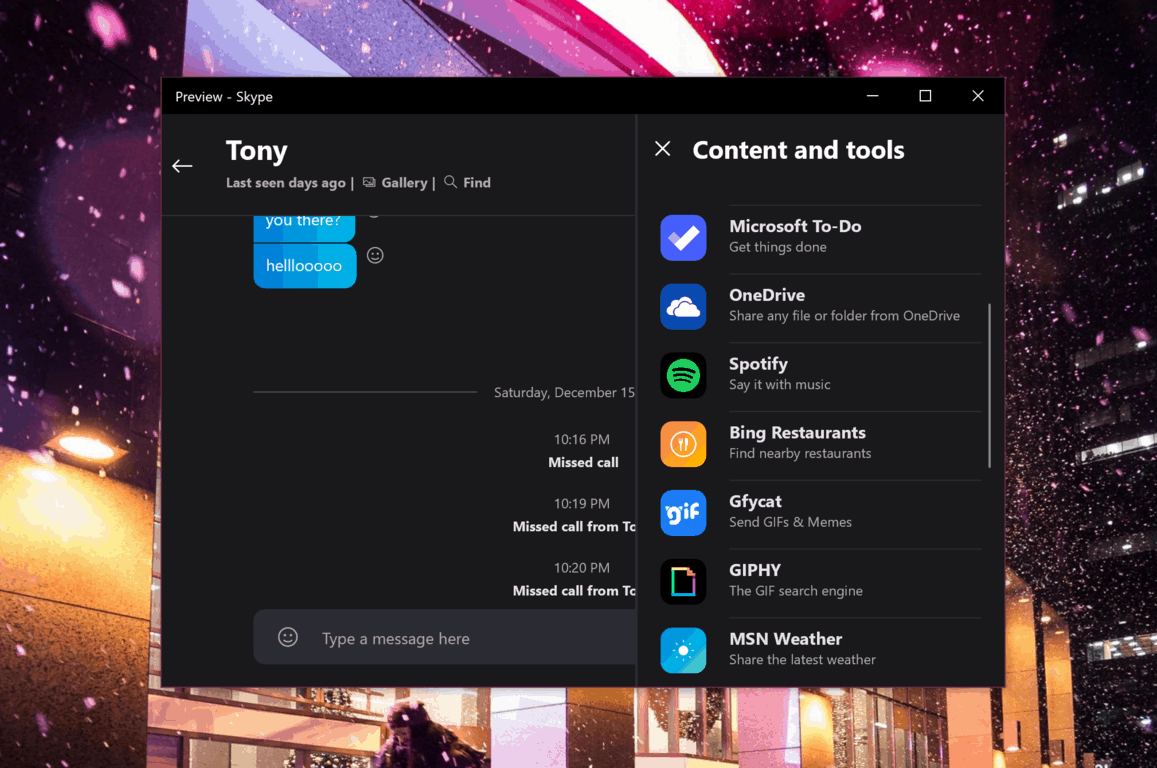
OneDrive joins the growing list of Skype add-ins that already includes Microsoft To-Do, Spotify, and YouTube. You can access the add-in by clicking the “+” Add-ins button in a conversation, and after signing into your Microsoft account you’ll be able to share any file stored in OneDrive. This will send a OneDrive link to the recipient, which is more convenient than having to share large files (Skype currently has a 300 MB file size limit for shared files).
Curiously, this OneDrive add-in for Skype is available on all platforms except macOS and Linux, and Microsoft didn’t say if it will come to these platforms at a later date. For now, the workaround is to use the new Skype for Web preview, which currently only works on Google Chrome and Microsoft Edge on Windows 10.
Citus Data is an open source extension that will help bring scale to Postgre SQL databases and it seems Microsoft’s interest lay in the fact that customers will have no need to re-architect their existing applications because of its extension nature, versus other fork-like scaling solutions.
According to Sudhakar Sannakkayala, the general manager of Azure Data, Microsoft also saw benefit in Citus Data in particular because “customers can take advantage of all the innovations in community PostgreSQL with queries that are significantly faster compared to proprietary implementations of PostgreSQL.”
In the announcement of the Citus Data acquisition, Sannakkayala reaffirms the notion that Microsoft’s pivot to the cloud is expanding customer base beyond the walled-garden of Windows and that this approach speaks to the longevity of the company.
As open source relational databases grow on Azure, we continue to see accelerated adoption from customers across various industry verticals serving diverse, mission-critical application patterns ranging from complex analytical applications for digital marketing to machine learning based IoT applications. These applications demand low latency and high query processing throughput, and our investment in Citus Data is a powerful accelerant to deliver high performance and scalable distributed databases.
Aside from a potential future where Azure customers have access to high profile scaling solution that supports multi-tenant SaaS applications and accelerated real-time analytics, Microsoft seems to be betting on the rapid and diverse development of the open source community for its own future.
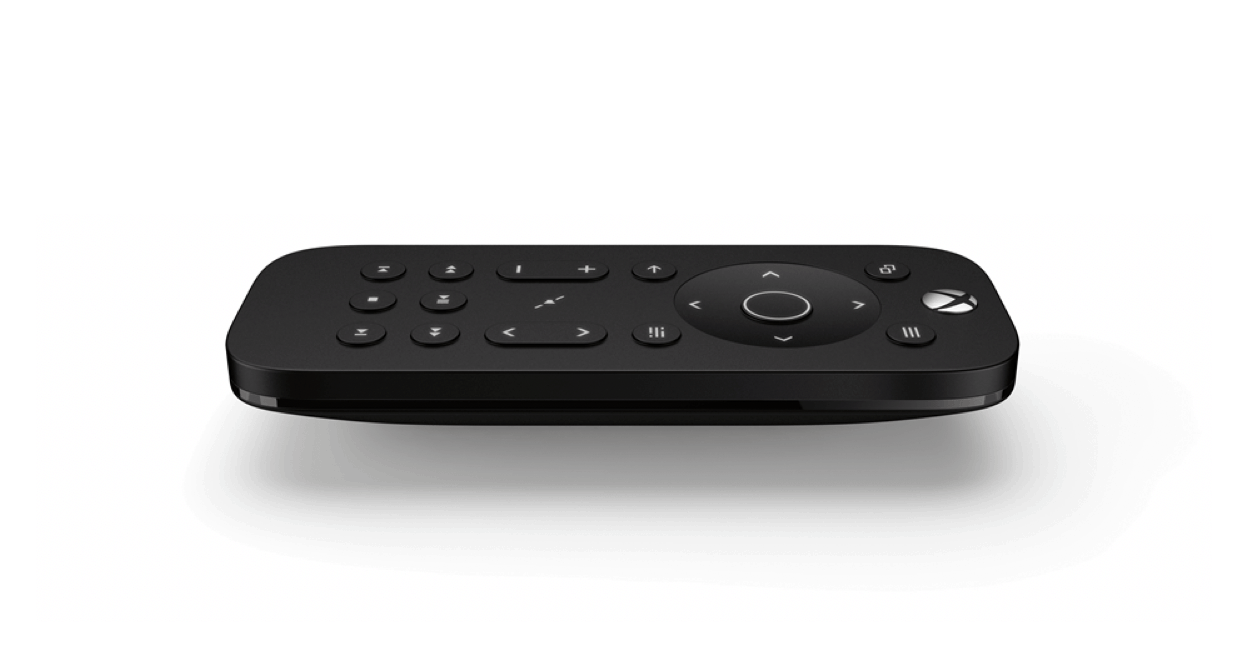
If you use the official Xbox One Media Remote to navigate your Xbox One and control your entertainment, a new feature coming in the 1904 system update will let you choose what happens when you press the dedicated OneGuide button. The latest Xbox One 1904 preview build, which is now available to download for Skip Ahead and Preview Alpha Xbox Insiders lets you assign your favorite app to this OneGuide button, and that includes popular entertainment apps like YouTube or Netflix.
For those unfamiliar, OneGuide is the built-in TV listings guide that brings together your favorite TV channels and entertainment apps on your Xbox One. OneGuide is one of the last remnants of Microsoft’s initial ambition to make its console an all-in-one entertainment system, but it hasn’t evolved much in recent years with the company shifting its focus on new gaming features.
The dedicated OneGuide button on the Xbox Media Remote is still really useful for those who use the feature a lot, but it looks like Microsoft has finally started thinking about everybody else. After installing this latest preview build, you can reprogram this OneGuide button on the Xbox Media Remote by going into Settings>Kinect & devices>Media remote.
This Media Remote programmable buttons feature is the second noteworthy addition we’ve seen in 1904 builds so far, following the the virtual mini keyboard that shipped to Insiders last week. The Xbox One 1904 system update is expected to ship in April, and it will be preceded by the 1902 system update which will bring under the hood changes but no new features.
Microsoft has just unveiled a very rare Xbox One X console that it’s giving away as part of a new Super Bowl-related competition.
The Xbox One X console is G.O.A.T. (Greatest Of All Time) themed with giant green letters on the top and on the side. Its controller also appears to be slightly customized as can be seen by the green triggers in the above image.
In addition to the custom console and controller, the solo winner of this new competition will also get an Xbox G.O.A.T ring that “features 10 carat premium gold (plated black) and weighs over 1.5 ounces, with 188 black diamonds and 46 green tsavorite stones,” a G.O.A.T merchandise pack, a football jersey autographed by Antonio Brown, and the Madden NFL 19 video game.
Unfortunately, this competition is only open to residents of the 50 United States and the District of Columbia but it can be entered without having to buy anything.
Here’s the two entry methods:
To enter by making a qualifying purchase, you must visit www.microsoft.com and make a qualifying purchase of a 3-month Xbox Live Gold membership (a “Qualifying Purchase”) during the Sweepstakes Period to earn one (1) entry into the Sweepstakes and one (1) Offer subject to terms and conditions and eligibility, as listed below. You must be logged into your existing Microsoft account information at the time of purchase to earn one (1) entry into the Sweepstakes. If you do not have an existing Microsoft account, you must create a new, free account.
To enter by e-mail, without making a purchase, you must draft an e-mail with the subject line “Xbox Madden NFL 19 G.O.A.T. Prize Pack Sweepstakes” and include in the body of the e-mail your first name, last name, state, date of birth, e-mail address, and daytime phone number and send the e-mail to [email protected]. E-mail entries must be received during the Sweepstakes Period to be eligible.
Full details and rules for the competition can be read here.
Each game can now be purchased and downloaded digitally on the Xbox One and the original Xbox 360 disks are now also supported.
Here’s the official descriptions for each game.
Command and Conquer 3 Tiberium Wars
Control massive armies and wage war as one of as one of three rival factions in Command and Conquer 3 Tiberium Wars. Embark on an adrenaline-fueled single-player campaign that features explosive 3D special effects, an unparalleled Hollywood cast, and over 90 minutes of live-action video. Then, head onto Xbox Live for devastating multiplayer battles with five exclusive modes and Xbox Live Vision support. You alone can decide the fate of the planet in the epic war over Tiberium. Welcome back, Commander.
Command and Conquer 3 Kane’s Wrath
Kane Lives! Download this map pack and wreck havoc on 4 new maps that can be used in both Skirmish or against other commanders in Xbox LIVE. Choose your army and conquer the world in Command & Conquer 3: Kane’s Wrath, the follow up to 2007’s best selling real-time strategy game, C&C 3 Tiberium Wars. This standalone game features the new CommandStick interface, making RTS easier to pick up and play than ever before. Kane’s Wrath includes all the units, structures, and superpowers from Tiberium Wars, giving you over 100 units and structures to command and 9 unique armies, each with its own play style!
Command and Conquer Red Alert 3
After years of conflict, the Allies are finally on the brink of victory. Cowering behind the walls of the Kremlin, the Soviets decide to turn to one last act of desperation – the use of an experimental time travel device. The mission: to go back in time to eliminate Albert Einstein before he creates the technologies that will lead the Allies to ultimate victory. After a successful mission, the Soviets return to the present, discovering the Allied position has indeed been weakened. But before they can truly celebrate, they find out their actions have spawned a new threat and global superpower, the mysterious, technologically advanced Empire of the Rising Sun. Welcome to World War III.
Command and Conquer Red Alert 3 Commander’s Challenge
Fight for world domination in the all-new Red Alert 3 Commander’s Challenge! Do you have what it takes to withstand the brutal onslaught and relentless taunting of the world’s toughest commanders, including Ric Flair as Commander Hill? Find out as you attempt to conquer the world in 50 challenges featuring explosive new units such as the Giga Fortress, Desolator, and Cryo Legionnaire!
Do you play any Xbox 360 backwards compatibility games on your Xbox One? Are you happy to see these Command and Conquer titles added? Let us know which ones in the comments below and then follow us on Pinterest for more Xbox gaming content.
Have you ever wondered if it’s possible to access the great development capabilities or the powerful command-line tools of Linux, without having to format your PC ?
Running Linux on your PC can be achieved by either installing the Full Linux OS beside your Windows installation, or by using a virtual machine in order to run it. In case you choose to install the full Linux OS, the speed at which it will operate will be greater than if you used a virtual machine software.
On the other hand, running Linux in a virtual machine software allows you to test any app or feature you want without worrying about your data’s safety or the possibility of data corruption.
There is a wide range of Linux based operating systems on the market, and they are known as distros. Here are some of the most popular Linux distro options include:
Linux Mint – based on Ubuntu, designed to be easy to use, and also come with an utility called mint4win which allows you to install Linux on your PC without affecting your base system in any way.
OpenSUSE (Novell) and Fedora (Red Hat) – free and user-friendly Linux distros
Xandros Home Edition – designed for beginners with the ability to run Microsoft Office, Adobe Photoshop, etc.
Ubuntu (Desktop edition) – great option for beginner Linux users, with great support for hardware devices, a 6 months release cycle, and you can also choose to make Ubuntu ship your installation DVDs for free across the globe
In this article, we will focus on the Ubuntu distro and see how you can use them on Windows. Read on to find out more.
4 tools to run Linux on your Windows PC
KNOPPIX: Run Linux from a USB stick or CD
KNOPPIX is a great software that allows you to boot in Linux directly from a physical CD/DVD or USB flash drives.
This app contains a great set of GNU/Linux software options, can automatically detect your hardware capabilities, and offers support for a wide range of graphics cards, sound cards, SCSI and also USB devices.
KNOPPIX can be used in order to run Linux on your desktop PC, and can also help you rescue your system in the case that Windows won’t start.
Using this software as a rescue tool allows you to extract all the data you need from your malfunctioning Windows PC, and store them in a secure environment, before reinstalling it.
WUBI is a great tool that allows you to easily install Linux as a software on your Windows PC. Using this technique allows for greater processing speeds and it can be uninstalled in the same way that you would uninstall a normal Windows application.
It’s incredibly easy to set up and start installing, all you need to do is choose the right options for your system, and then click install.
Another way to run a Linux based OS on your Windows PC is by using a virtual machine software. We’ll list some of the best tools below.
Virtual machines for running Linux on Windows PCs
Virtual Box
VirtualBox is a great software option that allows you to create virtual Linux machines and run them in a window from your Windows desktop. This app is based on a x86 architecture and supports AMD64/Intel64 virtualization.
This software can run on a variety of hosts – Linux, Mac, Windows, Solaris – and also has a large number of guest OS compatibility – all versions of Windows, Linux, etc.
VMware is another great virtualization software that allows you to create a virtual Linux OS on your PC with ease. This is a more simple alternative than having to install a full Linux OS, but offer a slower perfomance.
You can create multiple virtual machines with as many OS options as you want. There are no limits to the number of virtual machines that you can create, but this feature is limited only by your hardware’s capacity to deal with the request.
You can find a good guide explaining how to use VMware to run Linux on your PC. If you want to run your installation from a CD, click here. If you want to run the installation from an virtual image file (.bin, .iso), you can reffer to this page.
Developed by GitHub, Atom is regarded as one of the best visual text editors for cross-platform apps development.
Besides being free, Atom is especially adaptive and super easy to customize amongst a whole load of other benefits. But if there’s one bone to pick with Atom, it’s the difficult uninstallation process in Windows.
That’s because when you go to the uninstall/remove programs option in control panel/settings, the Atom uninstall option doesn’t work like other uninstallers and will tend to leave some program folders intact.
This means the application is only partially uninstalled. Yet you need to completely get rid of such folders to discard Atom.
Now, this article covers how to successfully uninstall Atom in windows including the said folders. So, without further ado, let’s see how to uninstall Atom Windows.
Steps to remove Atom Windows
In Windows 7
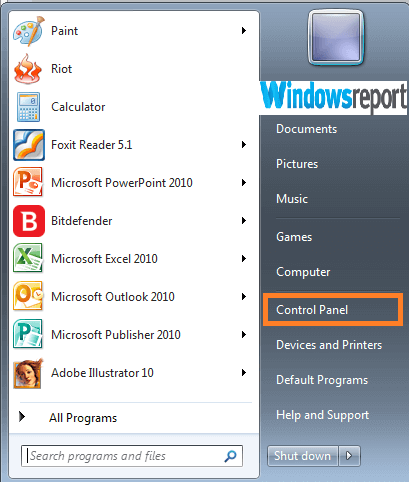
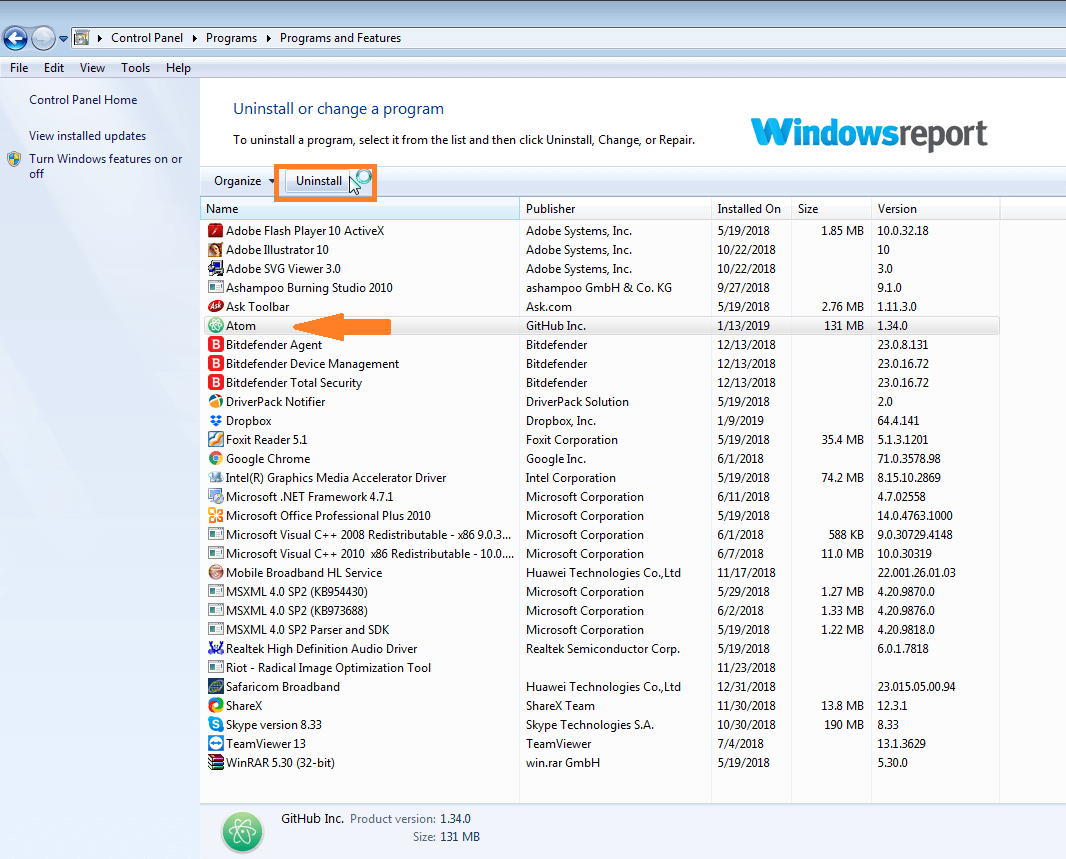
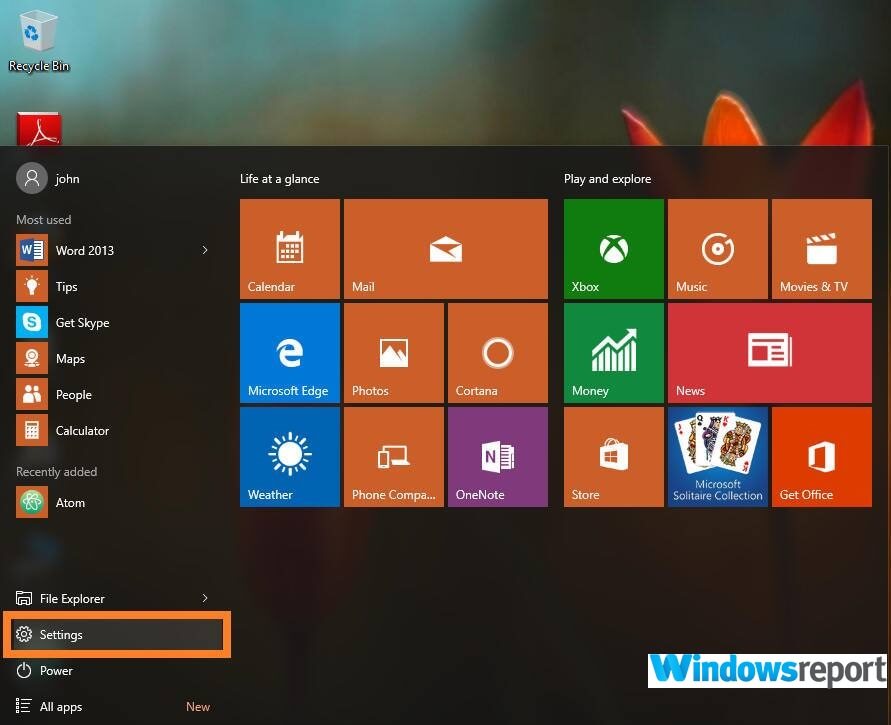
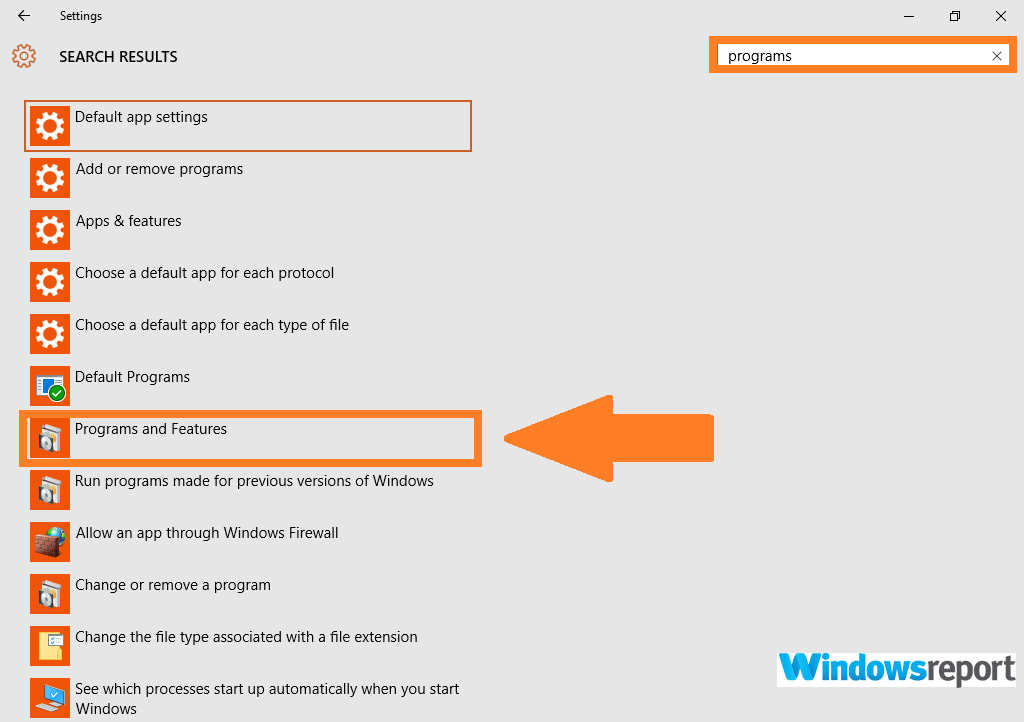
The first step is to remove Atom from the control panel .
3. Locate the programs tab and click uninstall a program.
4. Choose Atom then uninstall.
Atom will be silently removed from your PC.
ALSO READ: Skype’s real-time code editor lets you test your job candidates’ coding skills
The second stage involves deleting all the Atom-related folders to ensure that none of the App’s configurations remain.
Here are the concerned folders:
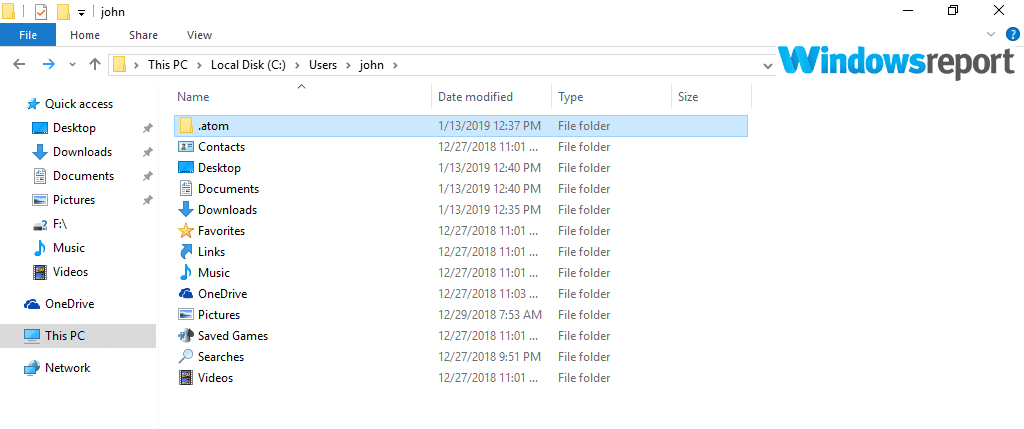
C:UsersUserName.atom
C:UsersUserNameAppDataLocalatom
C:UsersUserNameAppDataRoamingAtom
Steps:
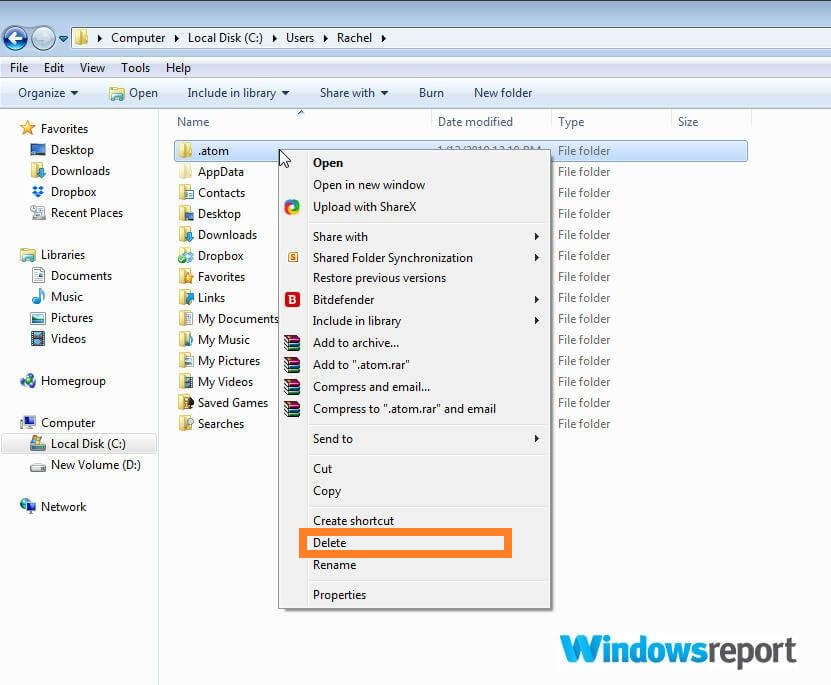
Navigate to the path C:UsersUserName
Look for the folder .atom
Right click and press delete.
Now go to the location C:UsersUserNameAppDataLocal.
Again identify the folder atom then press delete.
6. Using the previous steps, find your way to C:UsersUserNameAppDataRoaming.
7. Once there, find the atom folder and erase it.
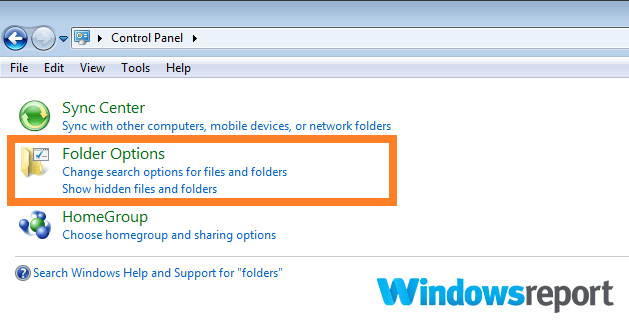
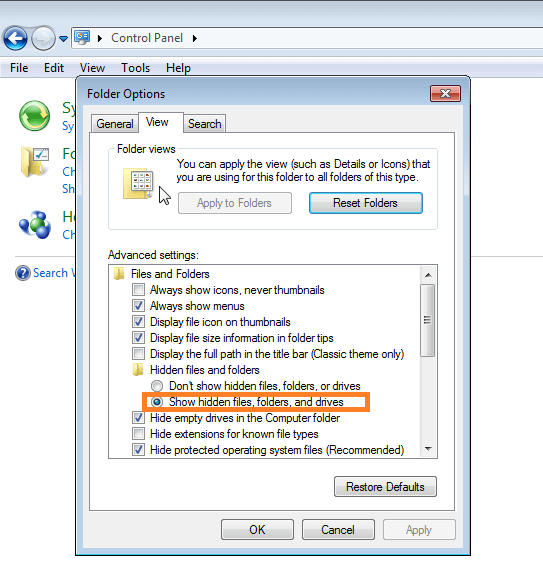
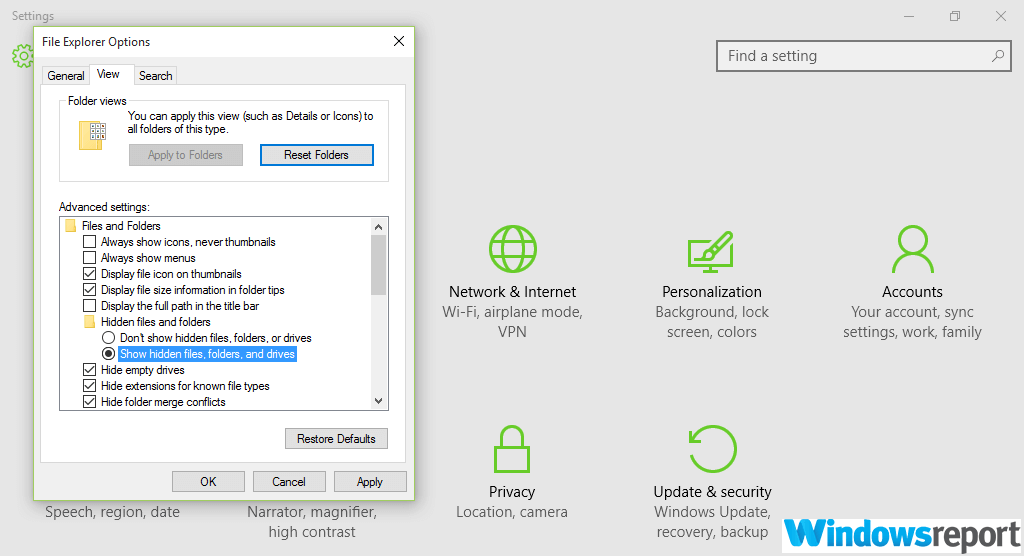
Please note that in some instances, the Appdata folder is not available in Windows 7 and you have to unhide first.
Here is how:
Click the start button.
Press control panel.
Type “folders” in the search button then click Folder options.
Click show hidden files and folders under folder options.
Then press OK.
In Windows 8/8.1
Go to the control panel by right-clicking on the PC’s Start button. (In Windows 8.1 you simultaneous-press the Windows key and X. Then press “programs and features” from the menu)
Select uninstall a program under programs (in the control panel).
A list of all the applications installed in your computer appears. Click on atom then press uninstall.
You still have to delete the .atom folder as discussed here below.
Search for the local disk by typing “C:” in Windows’ 8 start screen. The search results will have a link to C:
Open the link to the drive by clicking it.
Proceed to the users folder, then onwards into your user account.
Look for the .atom folder and delete it.
You also have to go to C:UsersUserNameAppDataRoaming as seen earlier and find then erase the atom folder
Is your Windows 7 PC often freezing all of a sudden? Malwarebytes recently rolled out an update for the machines that are not responding to keyboard or mouse input.
Keep in mind that only the PCs who had the Web Protection Feature enabled are affected by this problem.
The issue was reported earlier this month by the users who are running the Premium Malwarebytes versions.
The only workaround for them to get out of the frozen screen was to hold down the power button.
Malwarebytes efforts towards fixing the issue
The issue was first reported by Windows 7users in the middle of December 2018. As soon as users installed Malwarebytes version 1.0.508, they started experiencing frozen screen issues.
The bug affected only a small number of machines. Therefore, Malwarebytes did not come up with a quick workaround for the bug.
Instead, the company requested users to provide its engineers with logs and data from Windows 7‘s event reports to help them troubleshoot the issue.
Who needs to install the latest update?
Malwarebytes recommends Windows 7users to update to the latest version as soon as possible.
The latest release should be installed specifically by those users who were affected as a result of the Malwarebytes update in December last year.
You can install the latest update in the following ways:
Automatic Update
The update has already been automatically rolled out to all the users who have turned on the automatic update mechanism.
Manual Update
You can use the link on the Box storage service for installing the update manually.
The good news is that although Windows 7 reached the end of life, Malwarebytes still supports it. That’s why this malware removal tool is on our list with the best anti-malware software.
However, the link might disappear very soon, so you need to run a manual check and manually install the latest version using the Malwarebytes‘ interface.
You simply need to navigate to the Settings menu and then to Install Application Updates.
Ok well this has been fun… Microsoft released Windows 10 Insider build 18323 today, the first reports of it coming almost an hour ago (sorry I was stuck on the phone talking health insurance provider, go figure), but it’s taken that long to get the blog post announcing the build and the changes coming along with it, but the post is now up.
This build is not without its problems, at least in getting it out and getting the word out, and the blog post starts out with a word of caution:
Hello Windows Insiders, today we are releasing Windows 10 Insider Preview Build 18323 (19H1) to Windows Insiders in the Fast ring. Please note that due to a small outage in our build publishing system, this build will be rolling out to Windows Insiders over the next few hours so it may not be immediately available at the time of publish of this blog post.
As far as what’s new with 18323, as expected the new features list is becoming shorter as 19H1 gets closer to release. However this build does include improvements to RAW image format support:
Improved RAW image format support
Do you like taking pictures in Raw image formats and wish that the Raw files from your camera were natively supported by Windows?
Good news! Targeting 19H1, we’ve been working hard to release a new store-delivered Raw codec package that dramatically improves native raw file format support in Windows.
By downloading the new Raw Image Extension (Beta) package from the store, you can now view image thumbnails, previews, and camera metadata of previously unsupported raw files right in File Explorer. You can also view your raw images – at full resolution – in apps such as Photos or any other Windows app that uses Windows Imaging Component framework to decode raw images.
How to test
Please note – to install the package, 19H1 Build 18323 or later is required. Open the following link in Edge to install the current beta package: https://www.microsoft.com/store/apps/9NCTDW2W1BH8. We have also created a 19H1 Bug Bash quest for directions. If you are running Build 18323 or later, click on this link to open the quest in Feedback Hub.
Known issues
Exposing camera properties stored as EXIF/XMP metadata is not currently working for some raw image formats.
File Explorer hangs when the view state is changed to “Details Pane” and a raw file that activates the new raw codec package is selected.
Opening some raw images in Photos app using the new store-delivered raw codec pack gets stuck at low resolution thumbnail image.
How to provide feedback
We would love to get your feedback. Please send your feedback through Feedback Hub under “Devices and Drivers > Video Playback” category.
This new build also gets more Light Theme love:
Improving Light Theme
We introduced the new Light Theme in Windows 10 with Build 18282 and today’s build has some improvements to Light Theme worth taking note of based on your feedback:
fixed an issue where the text in the battery flyout might become unreadable in light theme due to it being white.
We fixed an issue where the scrollbar in the network flyout wasn’t visible in light theme.
We fixed an issue where the autoplay icon in the systray wasn’t visible in light theme.
We fixed an issue where impacting the network and volume icons in the notification area where after switching to light theme they wouldn’t update from white to black until explorer restarted.
We fixed a similar issue where not all supported app icons in the taskbar would switch colors on the taskbar when switching between light and dark theme (particularly on the secondary monitor).
We’ve made some adjustments to address issues where when using light theme white icons in notifications weren’t readable.
We’re updating the Settings icon to now be dark grey in the taskbar when light theme is enabled rather than black.
Again, as is usual as we get close to release, the inbox apps, the ones that will ship with the release of 19H1, have been locked down, and you may notice that they’re missing some features from recent builds:
REMINDER: Getting the latest Windows 10 app updates
We have locked down the inbox apps in 19H1. These simplified versions of some of the inbox apps are what will ship with 19H1 when it is released. As a result, Insiders may have noticed that some features have disappeared from these apps. This was probably most noticeable with the Photos app. Insiders can get these features back by going into the settings of an inbox app like Photos and clicking the “Join preview” button.
As usual, too, there’s a long list of changes, fixes, and known issues:
General changes, improvements, and fixes for PC
REMINDER: The new tamper protection setting in the Windows Security app protects your device by helping to prevent bad actors from tampering with the most important security settings. You may see a new recommendation in the Windows Security app suggesting you turn this setting on.
We fixed an issue causing Update Orchestrator Service to stop working periodically. As a result of this issue, you might have seen an error on Windows Update Settings saying that the update failed to restart. This issue also resulted in restart using Update and Restart to sometimes just restart you back into the base OS.
Clicking your account in Cortana Permissions doesn’t bringing up the UI to sign out from Cortana (if you were already signed in) for some users in this build.
We fixed an issue resulting in night light not working recently.
We fixed an issue where the quick actions section of Action Center would be missing sometimes recently.
We fixed an issue where closing an open Excel window from the taskbar might cause Excel to go non-responsive.
We fixed an issue an issue where the WIN + Ctrl + <number> hotkey wasn’t working.
When using your accent color on the taskbar has been enabled, the taskbar and start jump lists will now also be accent-themed.
For the time being we’re returning the Volume Mixer link in the volume button context menu to its October 2018 behavior while we look at improving the experience based on feedback.
We fixed an issue where themes and Microsoft Edge extensions downloaded from Microsoft Store wouldn’t appear in their respective locations after the download finished.
We fixed an issue impacting Action Center reliability in recent builds.
We fixed an issue where you might see multiple Focus Assist notifications in the Action Center at a particular time.
We’re adding Nearby Sharing to the list of default Focus Assist exceptions.
We fixed a recent issue where if you used the screen snip quick action in the Action Center then the resulting screenshot would have the Action Center in it.
We fixed a recent issue that could result in not being able to launch UWP apps from the Start menu sometimes.
We fixed a recent regression resulting in File Explorer sometimes hanging when interacting with MP4s and folders that had MP4s in them.
We fixed an issue where Cortana would close immediately if opened from the Start screen when using tablet mode.
We fixed an issue impacting Snipping Tool reliability.
We fixed an issue resulting in Ctrl + P not activating the Print command in Snip & Sketch in recent flights.
We fixed an issue resulting in Snip & Sketch potentially crashing when closing many Snip & Sketch windows in a row.
We fixed an issue where rebooting would set Nearby Sharing back to an off state if it had been turned on.
We fixed an issue where the lock screen preview in Lock Screen Settings wasn’t showing in recent builds.
We fixed an issue where the scrollbar in Settings was overlapping the text fields when manually configuring your IP address.
We fixed a rare issue that could result in the screen locking up when using the Surface Dial.
We fixed an issue where the tooltips in the Emoji Panel were truncated on the bottom.
We fixed an issue where the Windows feature update might fail but would still be listed as a successful update in Windows Update history page.
We fixed an issue where you might see a Windows Update icon in the notification area saying there was an update when no update was available.
We fixed an issue where you couldn’t type on the touch keyboard when “Turn on Activate a window by hovering over it with the mouse” since focus would move away from the text field and set to the keyboard itself.
We fixed an issue on certain devices that could sometimes result in the screen staying black on boot until CTRL + Alt + Del was pressed.
We fixed an issue resulting in certain devices experience increased battery drain on the last few flights when in Disconnected Standby Mode.
We fixed an issue for devices with multiple monitors resulting in Task View (WIN + Tab) sometimes showing UWP app thumbnails on the primary monitor rather than the monitor where the app was open.
We fixed an issue where some key labels were cut off in Armenian full touch keyboard layout.
We fixed an issue when using the full touch keyboard layout in Korean where pressing the FN key unexpectedly highlighted the IME ON/OFF key. We also fixed an issue for this language where tapping the tab key wouldn’t insert a tab.
Thanks everyone who shared feedback about the new Japanese Microsoft IME we’ve been working on. With today’s build the IME and settings pages are returning to the ones that we shipped with the October 2018 Update, while we take your feedback into consideration.
We fixed an issue where Narrator sometimes did not say anything when reopening Action Center after it was dismissed using the Esc key.
We fixed an issue where Narrator did not speak the volume level value when using the hardware volume button to change the volume setting.
We fixed an issue where Narrator command read from current location did not work when on a heading in Wikipedia.
We fixed an issue where Narrator announced read-only at the end for links.
We fixed an issue where Narrator continuous reading command read the last word of a sentence twice on a web page in Microsoft Edge.
We fixed an issue impacting a small number of users enrolled in Microsoft Intune where they might not receive policies.
We fixed an issue where signing out from inside Windows Sandbox resulted in a blank white window.
We fixed an issue resulting in running c:\windows\syswow64\regedit.exe not launching regedit in recent builds.
Settings header rollout update: This is now available across most regions for Insiders in Fast using Home edition and Pro editions of Windows that are not domain joined.
Small app update: Thanks everyone who reached out about the grid alignment issue in the Calculator – this has been fixed with the 1812 version of the app.
Known issues
While with Build 18323 we fixed the recent spike in Update Orchestrator Service crashes, if you’re on a base OS that’s impacted by the crash, you will still see the symptoms described above until you’re on 18323.
The Windows Security app may show an unknown status for the Virus & threat protection area, or not refresh properly. This may occur after upgrade, restart, or settings changes.
Launching games that use anti-cheat software may trigger a bugcheck (GSOD).
Creative X-Fi sound cards are not functioning properly. We are partnering with Creative to resolve this issue.
While night light functionality is back up and running, you may still find issues with other blue light reduction software not working.
When performing Reset this PC and selecting Keep my files on a device that has Reserved Storage enabled the user will need to initiate an extra reboot to ensure Reserved Storage is working again properly.
Some Realtek SD card readers are not functioning properly. We are investigating the issue.
USB devices, including mice and keyboards, may no longer work after updating. Possible workarounds are to change which USB port it is plugged into or connect the device through a USB hub.
You may consistently see black screens when using Remote Desktop, DisplayLink, or Miracast if you are on an AMD or Nvidia driver. We’re working on a fix, but in the meantime, you can work around this issue by enabling the following registry key and rebooting: reg add HKLM\Software\Microsoft\Windows\Dwm /v EnableFrontBufferRenderChecks /t REG_DWORD /d 0 /f.
The value in Narrator Settings “Change the level of detail Narrator provides about text and control” might be empty. To work around this issue, use the Narrator command Narrator key + v to change the verbosity level, then close and reopen Settings app again.
After upgrade, there might be two Narrator voices talking at the same time. Reboot the machine once, this issue will go away.
Windows Sandbox may launch to a black screen for some users.
The Insider Program Settings pages currently have a bug preventing Narrator and Screen Reader programs from properly reading the page. A fix will be available in an upcoming build.
Taskbar icons may stop loading and appear blank.
Desktop Window Manager will crash if multiple Office and/or video playback applications are running on the same screen on devices that have Multiplane Overlay Support.