Microsoft launches new Xbox Game Pass Twitter account with insane new commercial

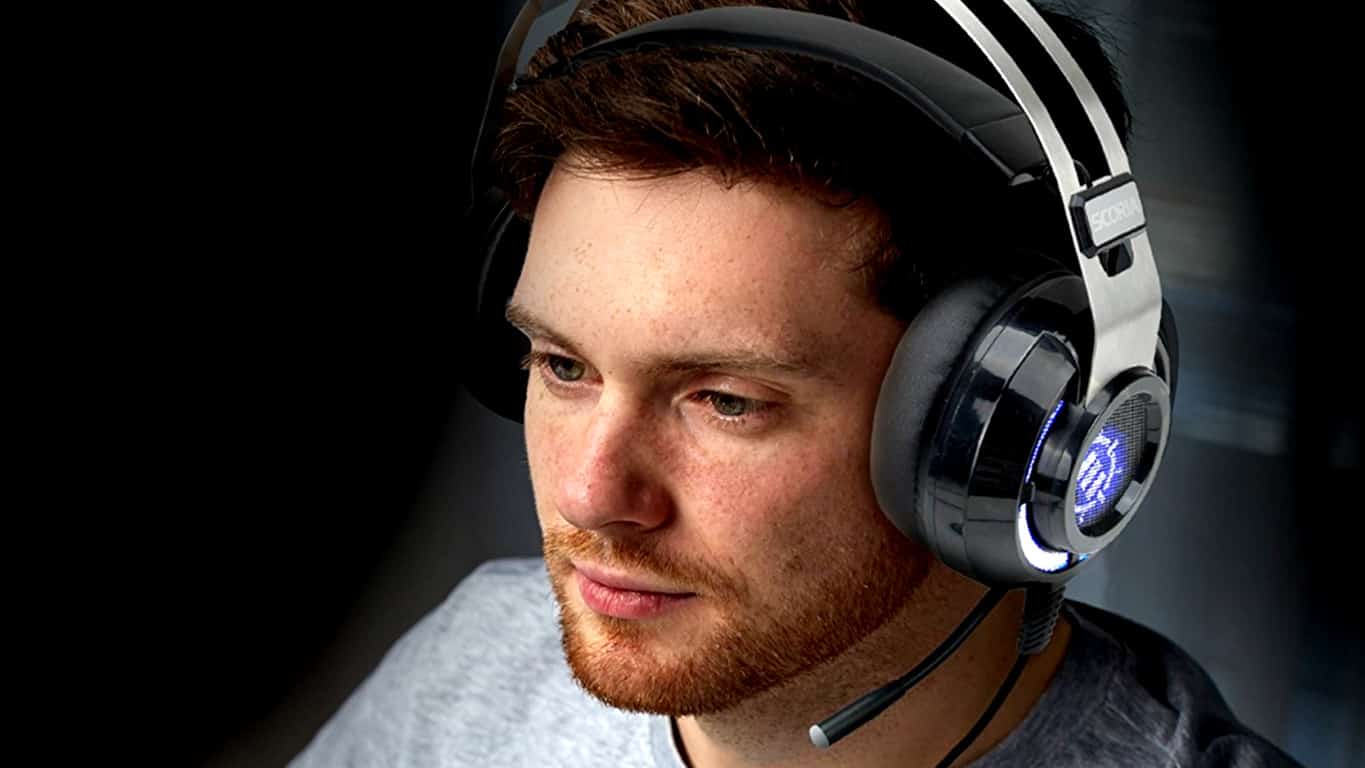
Microsoft has just launched a separate Twitter account for its Xbox Game Pass subscription service and to get people to follow it, they’ve produced a rather insane little video ad. The commercial’s completely crazy and super-random but also really funny and hits the mark perfectly. You can check it out right here.

The entire Xbox Game Pass Twitter account seems to be just as random as the promo video with a very detailed account description that reads, “100% hand-typed tweets” and a solid sarcastic vibe with its personal replies to gamers.

Xbox Game Pass has grown substantially in regards to the general Xbox brand since it first launched so it makes sense that Microsoft would want a new account where it could heavily promote it further without annoying followers of the main Xbox account who have no interest in Game Pass. The company has also stepped up promotion of the service on Xbox One consoles by adding an Xbox Game Pass section to the dashboard this week.

Are you an Xbox Game Pass user? Do you like the new ad? Let us know in the comments below and then make sure to follow us on Twitter for more Xbox news.

How to fix Hulu issues on Xbox One

How do I fix frequent Hulu bugs on Xbox One?

  1. General troubleshooting
  2. Check your subscription
  3. Check your password
  4. Check your email address
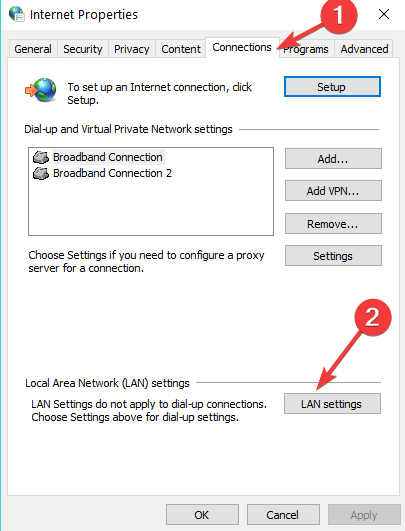
  5. Test your network connection on your Xbox console
  6. Reinstall Hulu app
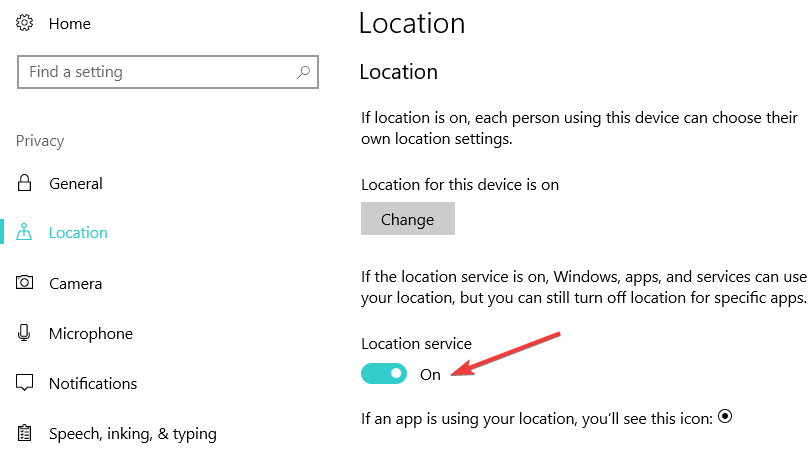
  7. Check Language and Location settings
  8. Clear System cache
  9. Delete saved data
  10. Update Hulu
  11. Check the error and find its fix

Are you experiencing Hulu issues on Xbox One? In this guide, we’ll list a series of solutions to help you fix this issue.

Hulu is a media streaming service that offers its audiences a decent range of live and on-demand videos that can be viewed on different devices, including the Xbox One.

Using Xbox One, you can stream media content using the Hulu app, though a number of users have reported that they’re facing Hulu issues on Xbox One, preventing them from enjoying the content.

These issues are known to arise from various reasons, including a poor internet connection. Hulu app streams videos so you can expect some buffering and shuttering while loading the content, and in most cases, it is normal for the connectivity to behave this way.

With this in mind, we sought to find solutions to help you fix Hulu issues so you can troubleshoot the error on your own, and enjoy watching Hulu content.

How to fix Hulu issues on Xbox One

1. General troubleshooting

If you’re experiencing Hulu issues on Xbox One, here are some quick first things you can try before using any of the solutions that follow.

Perform a speed test on your connection. Once complete, compare the results of the same against the Hulu requirements for internet speed and connectivity. If they exceed the requirements, do the following:

  • Power down and unplug your Hulu device, modem and router for one minute
  • Power the three back on
  • Connect your device directly to your router using Ethernet cable
  • Disconnect other devices from your network
  • Check your router settings and configuration to improve the network strength
  • Contact your ISP for further assistance
  • Reduce the devices using your network connection as these reduce internet speeds. For optimal streaming, ensure only a limited number of devices are using your WiFi, to boost up the speeds. Hulu requires 1.5 Mbps to stream SD videos and 3.0 Mbps for HD videos respectively.

Note: Hulu streams video in different ranges of picture quality adjustable according to your internet speed. Ensure your connection can achieve sustained download speeds of 3.0 Mbps for Hulu on-demand, and 8.0 Mbps for Hulu with Live TV. Watching multiple videos (or using the internet for other activities such as gaming, etc.) may require additional bandwidth.

2. Check your subscription

Are you able to log in to your Hulu account? If you can, are you able to watch videos or log in another device? If any of these are true for you, do the following to resolve it:

  • Go to your Account page and check your billing status
  • Update your billing information as required and try using Hulu again

3. Check your password

Sometimes Hulu issues on Xbox One could be due to your password, thus you may not log in easily. In this case, reset your password.

4. Check your email address

If your email address has issues, check if your Hulu account is registered to a different email address and try to sign in again. If this doesn’t help, try and recover your email.

5. Test your network connection on your Xbox console

If you still have Hulu issues on Xbox One after trying the general troubleshooting, test the connection directly on your console using the built-in network connection test. This helps identify any wireless interference and other network issues specific to your device.

To do this:

  • Go to the home screen on your Xbox One
  • Select Settings
  • Click Network
  • Click Detailed Network Statistics
  • Check if the results match that of the speed test you did earlier, and the speed requirements for Hulu.

6. Reinstall Hulu app

To do this:

  • Log out of Hulu from the app
  • Highlight the Hulu app tile
  • Press Menu on your Xbox One controller
  • Select Manage App
  • Select Internal
  • Go to Uninstall
  • Go to the right and select Hulu to reinstall the app

7. Check Language and Location settings

Ensure these are set to the U.S. by going to the main menu, select Settings>System>Location

8. Clear System cache

  • Turn off your Xbox One
  • Once the indicator lights are off on the console and its power brick is off, unplug the power brick from the console
  • Wait a few seconds, at least 30 or so
  • Plug back the power brick to your console and power it on

9. Delete saved data

This is a permanent step and you cannot undo it so back up your saved data to a USB storage or online (cloud) storage before deleting the data.

To do this:

  • Go to Xbox Home
  • Go to Settings
  • Select System
  • Select Storage
  • Select Manage storage
  • Select View contents
  • Highlight a game, press the Menu button
  • Select Manage game
  • Select Saved data
  • Choose a game to access it’s saved data
  • Use Options Menuto delete files or get more information about a specific file

10. Update Hulu

If Hulu app is outdated, you can get Hulu issues on Xbox One, thus you need to update it right away. Visit Microsoft Store and download the update.

11. Check the error and find its fix

Hulu issues on Xbox One can come in different error codes as described below:

  • Error code 3343, 3322, 3307, 2203, and 3321 – for these, the fix is to uninstall and reinstall the Hulu app and clear caches.

If you’re on a newer Xbox, we also have a guide on what to do if Hulu is not working on Xbox Series X.

Were you able to fix Hulu issues on Xbox One using these solutions? Let us know what worked for you in the comments section below.

RELATED STORIES TO CHECK OUT:

Full Fix: Solitaire stops working in Windows 10/11

Solitaire is one of the three built-in games that Microsoft has introduced in its operating system, but when the Windows 8 was released, the game was removed and users were able to get it from the Metro apps store. Microsoft brought it back in Windows 10, but while most users were enthusiastic to have it pre-installed on the latest OS, others complained on forums that the game stopped working and asked solutions from strangers.

Solitaire not working on Windows 10, how to fix it?

Solitaire is one of the most popular games on Windows, but many users reported that Solitaire stops working on their PC. Speaking of Solitaire, here are some similar issues that users reported:

  • Microsoft Solitaire Collection not opening – Sometimes Microsoft Solitaire won’t open at all on your PC. However, you should be able to fix this issue simply by running a built-in troubleshooter.
  • Microsoft Solitaire Collection not working Windows 8 – This error can affect Windows 8.1 as well, but since Windows 10 and 8.1 are so similar, you should be able to apply almost all of our solutions to Windows 8.1.
  • Microsoft Solitaire Collection Windows 10 won’t open – Sometimes the application might not open because there’s a pending update available. To fix that, open Microsoft Store and check if the game needs to be updated.
  • Solitaire has stopped working – Solitaire can sometimes suddenly crash on your PC. This is a relatively common problem, and if you encounter it, install the missing system updates and check if that helps.

Solution 1 – Run the troubleshooter

If Solitaire stops working on your PC, the problem might be fixed by using the troubleshooter. Windows 10 has many built-in troubleshooters that can fix various problems, and there’s even a troubleshooter for Windows Store apps.

To fix the problem, you need to do the following:

  1. Press Windows Key + I to open the Settings app.
  2. When Settings app opens, go to Update & Security section.
    Microsoft Solitaire Collection Windows 10 won't open
  3. Select Troubleshoot from the menu on the left. Choose Windows Store Apps from the menu on the right and click Run the troubleshooter.
    Microsoft Solitaire Collection not working Windows 8
  4. Follow the instructions on the screen to complete the troubleshooter.

Once the troubleshooter is finished, check if the problem is resolved.


Solution 2 – Reset Windows Store cache

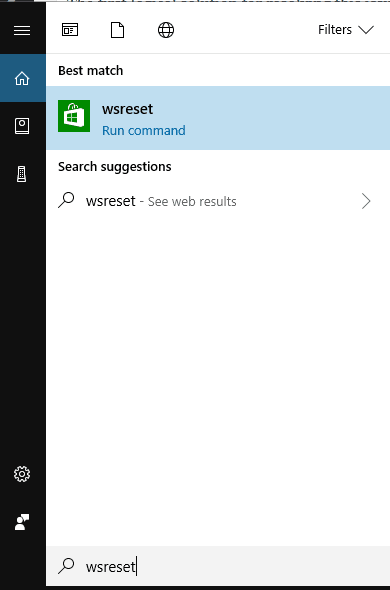
According to users, sometimes Store cache can cause problems with Solitaire and other games on your PC. However, you can fix that issue by clearing the Store cache. The cache can sometimes get damaged and cause this and other issues to appear, but you can fix that with this simple trick:

  1. Press Windows Key + R to open the Run dialog.
  2. Enter WSReset.exe and press Enter or click OK.
    Microsoft Solitaire Collection not opening
  3. The process will now start. It usually takes a couple of seconds.

Once the cache is cleared, check if the problem is still there.


Solution 3 – Make sure that your Taskbar isn’t set to auto-hide

Few users reported that Solitaire stops working on their PC due to Taskbar settings. Apparently, if the Taskbar is set to hide automatically, you might encounter this and other problems. To fix this issue, users are suggesting to reinstall the application and then change the Taskbar properties.

To do that, follow these steps:

  1. Right-click the Taskbar and choose Taskbar settings from the menu.
    Solitaire has stopped working
  2. Now disable Automatically hide the taskbar in desktop and tablet mode.
    Microsoft Solitaire Collection not opening

After doing that, check if the problem is still there. This is a peculiar solution, but some users reported that it works, so you might want to try it out.


Solution 4 – Make sure that you don’t need to update the application

Sometimes Solitaire won’t run on your PC because the application needs to be updated. To check if an update is required, you just need to do the following:

  1. Open Windows Store.
  2. Now look for Solitaire application and check if it needs to be updated. If an update is available, be sure to download it.

Once you update the application to the latest version, check if the problem is still there.


Solution 5 – Just reinstall the application

According to users, the best way to fix this problem might be to reinstall the application. Sometimes there might be a glitch with the installation, and the only way to fix the problem is to reinstall the game.

If Solitaire won’t start on your PC, simply uninstall the game and download it again from the Windows Store.


Solution 6 – Install the latest updates

If Solitaire stops working on your PC, the issue might be the missing updates. Sometimes there might be certain glitches with your system, and that can cause this and other errors to appear. However, you can fix the problem by installing the latest updates.

By default, Windows 10 automatically installs the latest updates, but sometimes you might miss an update or two due to certain bugs. However, you can always check for updates manually by doing the following:

  1. Open the Settings app and go to the Updates & Security section.
  2. Now click Check for updates button.
    Microsoft Solitaire Collection Windows 10 won't open

Windows will now check for available updates and download them automatically in the background. Once the updates are downloaded, restart your PC in order to reinstall them. After your system is up to date, check if the issue is still there.


Solution 7 – Create a new user account

If Solitaire can’t run on your PC, it might be because your user account is corrupted. This can occur due to various reasons, and in order to fix the issue, it’s advised to create a new user account. To do that, you just need to follow these simple steps:

  1. Open the Settings app and navigate to the Accounts section.
    Microsoft Solitaire Collection not working Windows 8
  2. Now choose Family & other people from the pane on the left. In the left pane, click Add someone else to this PC.
    Microsoft Solitaire Collection Windows 10 won't open
  3. Select I don’t have this person’s sign-in information.
    Solitaire has stopped working
  4. Now choose Add a user without a Microsoft account.
    Microsoft Solitaire Collection not opening
  5. Enter the desired username and click Next.
    Microsoft Solitaire Collection not working Windows 8

Once you create a new account, switch to it and check if the issue still appears. If the problem doesn’t appear on the new account, move your personal files to it and start using it instead of your old account.


Solution 8 – Change the font scaling

If you’re using an ultra-high resolution, you might have font scaling enabled. This is a useful feature, however, this feature can sometimes lead to issues with certain applications.

In fact, if Solitaire stops working on your PC, it’s possible that font scaling is the issue. To fix this problem, you need to change font scaling settings by doing the following:

  1. Open the Settings app and go to the System section.
    Microsoft Solitaire Collection not working Windows 8
  2. Now set the size of text, apps and other items to the recommended value.
    Microsoft Solitaire Collection Windows 10 won't open

After doing that, try to start the game again and check if the issue is resolved.


Solution 9 – Change your display resolution

In some cases, Solitaire won’t run on your PC properly due to your resolution. In order to fix this problem, we advise you to try several different resolutions until you find the one that works.

Several users reported that they changed their resolution from 1366 X 768 to 1360 X 768 and that fixed the problem for them. To change the resolution on your PC, follow these steps:

  1. Open Settings app and go to the System section.
  2. Now in the Scale and layout section select the desired resolution.
    Microsoft Solitaire Collection not opening

After changing your resolution, check if the problem with the game is resolved.


Solution 10 – Rename the cache folder

If you have problems with Solitaire on your PC, you might be able to solve them simply by renaming the cache folder. This is relatively simple, and in order to do it, you just need to follow these steps:

  1. Press Windows Key + R and enter %localappdata%. Now press Enter or click OK.
    Solitaire has stopped working
  2. Navigate to PackagesWinStore_cw5n1h2txyewyLocalState directory.
  3. Locate the cache directory and rename it to cache.old.
  4. Now create a new folder and name it cache.

After doing that, check if the problem with the game is resolved.


Solution 11 – Perform a System Restore

In case Solitaire isn’t working properly on your PC, you might be able to fix that problem simply by performing a System Restore. This is an incredibly useful feature that allows you to restore your system and fix various issues. To do that, you just need to follow these steps:

  1. Press Windows Key + S and enter system restore. Choose Create a restore point from the menu.
    Microsoft Solitaire Collection not working Windows 8
  2. System Properties window will appear. Click System Restore button.
    Microsoft Solitaire Collection Windows 10 won't open
  3. When System Restore window opens, click Next.
    Solitaire has stopped working
  4. If available, check Show more restore points option. Now select the desired restore point and click Next.
    Microsoft Solitaire Collection not opening
  5. Follow the instructions on the screen to complete the restoration process.

Once your system is restored to the previous state, the problem with Solitaire will be resolved.


READ ALSO:

Windows Community Toolkit hits 1 million downloads on GitHub

Microsoft’s Windows Community Toolkit has just crossed one million downloads on GitHub, a new milestone for the tool previously known as the UWP Community Toolkit. Nikola Metulev, Senior Program Manager for UWP development at Microsoft announced the news on Twitter yesterday, teasing that more features would be coming soon.

The Windows Community Toolkit can be used for developers to be used to build UWP apps targeting any Windows 10 device, including PCs, phones, Windows Mixed Reality, Xbox One consoles and IoT devices. The toolkit received its biggest update yet two months ago with version 3.0, which introduced Fluent Design updates to existing controls with support for light and dark themes, and much more.

Developers wanting to get started with the Windows Community Toolkit can learn more on GitHub or this support page. With more than 150 contributors, the project is seeing frequent updates and it should continue to be a great resource for UWP app development.

Windows YouTube client myTube gets a big update, includes Windows Timeline support

If you’re using myTube for watching YouTube videos on your Windows 10 PC, Xbox, or Windows Phone, you’re up for a treat. Noted by Windows Central, the developers of the app have just pushed out a version 3.3 update, adding in support for Windows Timeline, a new “Rooms” feature, and much more.

All of the new features in this version are documented by developer Ryken Studio in a post on their website. The latest features mostly target the Windows 10 April 2018 Update, and you can have a look below for more on what’s new.

  • Added myTube Rooms (beta), which allows you to watch videos together and chat with friends
  • Added Private Mode to settings, which prevents watched videos from being recorded to history or the Windows Timeline
  • Reduced memory usage of the WebView player after it’s finished being used
  • Added Theatre Mode
  • Watched videos are added to the Windows timeline
  • Zoom in animation on thumbnails when moused over
  • (PC & Mobile) Added playlist history to history page
  • (PC & Mobile) Added individual video tile pinning
  • (PC & Mobile) Added small size template to live tiles
  • (PC & Mobile) Added “Up next” experience to the end of videos (same as on Xbox)
  • (PC & Mobile) Slightly modified layout for account section
  • (PC & Mobile) Fixed bug that caused the comment section header to sometimes have the title of the video, instead of “Comments”
  • (PC & Mobile) Fixed issue where the text selection highlight wasn’t visible in the search box

In the event that you’re using myTube on your Xbox, you also will see a separate set of improvements. You should now have the ability to leave TV mode and use the PC UI, and see the share button in video details. There’s also a new next up UI and fixes for jumping with the trigger buttons not working properly.

It’s defintley nice to see these features, as myTube remains one of the most complete third-party YouTube clients in the Microsoft ecosystem. The app is actually available for 99 cents, but a free trial is available. Update or find it via the link below, and let us know your thoughts on this update by dropping us a comment.

Buy myTube from the Microsoft Store

TypeScript 3.0, Microsoft’s extension of JavaScript, his general availability

Microsoft this week announced the general availability of TypeScript 3.0, their extension of JavaScript. This version comes with a few breaking changes, and a new scalable way to structure projects (via Neowin.)

To grab up this latest version of TypeScript, all you need to do is enter the “npm install -g typescript” command in your Node Package Manager. Once updated, you’ll see the following new changes.

  • Project references allow TypeScript projects to depend on other TypeScript projects – specifically, allowing tsconfig.json files to reference other tsconfig.json files. Specifying these dependencies makes it easier to split your code into smaller projects.
  • TypeScript 3.0 allows us to better model scenarios by now allowing rest parameters to be generic, and inferring those generics as tuple types.
  • TypeScript 3.0 introduces a new type called unknown. Much like any, any value is assignable to unknown; however, unlike any, unknown is assignable to almost nothing else without a type assertion.
  • In TypeScript 3.0, error messages can provide messages on other locations so that users can reason about cause-and-effect of an error.
  • Support for defaultProps in JSX
  • TypeScript now provides two new productivity features around JSX: providing completions for JSX closing tags
    and providing collapsible outlining spans for JSX

With TypeScript 3.0, editor support will be in Visual Studio 2017 (for version 15.2 or later,) Visual Studio 2015 (which requires update 3,) and Sublime Text 3 via PackageControl. It also will come to other popular editors over time. Microsoft’s Daniel Rosenwasser dives deeper into the changes over on the MSDN Blog, so be sure to check it out.

Microsoft awards grants to expand rural broadband access in five states

Microsoft has announced today (August 1st) the winners of the annual Airband Grant Fund. There were four winners across five states here in the US, all of which are aiming to help bring broadband internet access to rural communities. Microsoft will be providing these grant winners financing, technology, mentorship, and other support to help scale their new technologies, services, and business models.

The winners in the US span across New York, West Virginia, California, Maine, and Texas. In New York, CvWireless was the grant winner, for using innovative broadband solutions to connect 300 households in Essex County. Additionally, in West Virginia, the winner was Skylark Wireless, for their work to extend broadband access to 10,000 households and businesses in Mingo County.

California’s winner was both Tribal Digital Village and Numbers4Health.   Tribal Digital Village (TDVNet) plans to bring broadband to tribal land in the rural community of Valley Center, California, and Numbers4Health will deploy a solution to bring telemedicine and improve healthcare outcomes in Compton, California. Numbers4Health also won in Maine, and Texas for their work to help support telemedicine and improve healthcare outcomes in rural Maine.

There were also four international grant winners in Rwanda, Nigeria, Kenya, and Bangladesh. In the same order, these winners were Mesh Power, Cold Hubs, Agsol, and ME Solshare. You can learn more about Microsoft’s Airband initiatives and the use of TV White Spaces by clicking here.

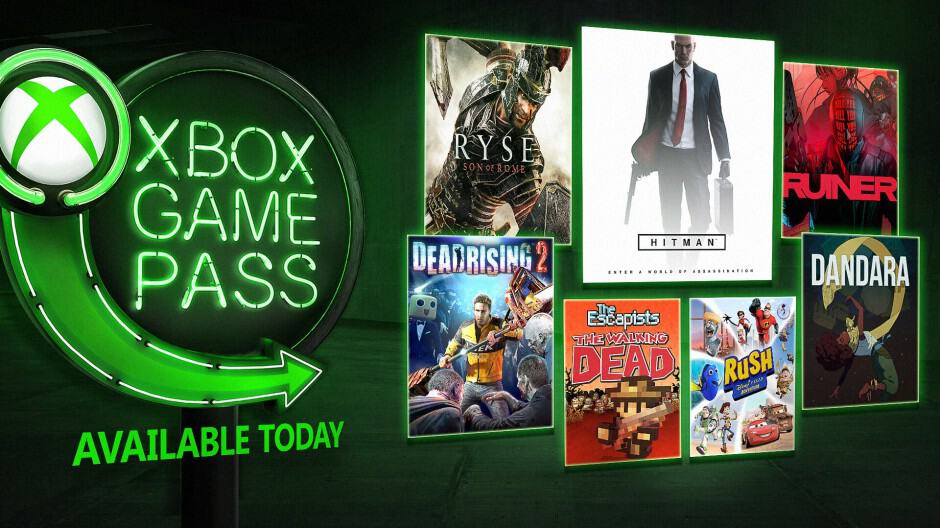
Hitman Season 1, Ryse: Son of Rome and five more games join Xbox Games Pass in August

Microsoft was a bit late to announce it this time, but all the details about the Xbox Games Pass August update are finally out: Headliners include the Xbox One launch title Ryse: Son of Rome, Hitman Season 1, as well as the remastered versions of Dead Rising 2 and Kinect Rush: A Disney Pixar Adventure.

Other additions include the cyberpunk top-down shooter Ruiner, Metroidvania game Dandara and The Escapists: The Walking Dead. Hitman: Season 1, which was released back in 2016 as the sixth entry in the Hitman series (and the first one on 8th gen consoles) is probably the main highlight this month. This was the first Hitman game to experiment with an episodical format, a change that was met with a positive reception. The game was also enhanced for the Xbox One X last year, with support for 4K graphics, HDR and a 60FPS mode.

With Ryse: Son of Rome, Microsoft is bringing another Microsoft Studios game to the catalog, but there are still plenty left that have yet to be added including Ori and the Blind Forest, Minecraft, or any of the old Forza games. As Microsoft is offering Forza Horizon 2 to Xbox Live Gold subscribers this month, it’s a bit surprising that Xbox Games Pass won’t have feature any Forza game until the release of Forza Horizon 4 in October.

How to sync your emails, calendars, and contacts from Outlook.com or Office 365 to an Android phone

If you’ve finally moved on from Windows Phone or purchased an Android device, you’ll likely be wanting to port all the information from your Outlook.com/Office 365 account over on your new phone. Though using the Outlook app may appear to be the best way to leverage your Microsoft information, you can also sync your Outlook emails, calendars, and contacts using the native dedicated apps on your Android device.

You may want to do that if you prefer task-focused apps over all-in-one apps like Outlook for Android. The latter is a solid email client, but Microsoft replacing the Contacts tab with a new Search tab in the app bar was a polarizing change. This adds an additional tap to access your full contact list, and using your phone’s native Contacts app is usually much faster. Now, the Outlook Android app can sync your Outlook.com/Office 365 contacts to your phone’s address book, but you actually don’t need to install the app to do that. Microsoft explained it all on this support page, but configuring your Outlook.com/Office 365 account on an Android handset is not as straightforward as it is on iOS and Windows Phone. So buckle in and follow along as I explain how to make the best of the native apps on your Android phone.

On the Gmail App

The Gmail app is the default mail application on most modern Android phones (and it’s not just for Gmail accounts), so we’ll be starting with this first. To get started with adding your Outlook.com or Office 365 account, first visit the Google Play Store and make sure that the Gmail app is updated to the latest version. Also, please keep in mind that your Gmail contacts (if you have some) will still show up after adding your Microsoft account, but you can easily switch between the two. Gmail accounts need to be added as part of Android set up, so you will have to deal with seeing your Gmail emails, calendars, and contacts no matter what settings you choose.

Anyway, after you do this first step, open up the Gmail app, then tap the menu icon in the upper left corner. Navigate to Settings, Add Account, and choose Exchange and Office 365. Please DO NOT choose Outlook, Hotmail, and Live, as this will just sync your emails and not your contacts. You can then enter in your Outlook.com/Office 365 email and password.

Next up, follow any prompts on the screen until you get to your inbox. From then on, open the message from Microsoft, and click “Use another Mail app instead.” This will grant Gmail the server permissions to read your Outlook account.

Going through the Gmail settings

If you’re on an older version of Android, you can also do this by pulling down from the Android notification bar, and tap the “Unable to sync calendar and contacts” message. Not everyone will see this message but if you do, please press on this and then “Allow” to allow for syncing.  The sync process will take a few minutes, but once you’re done, you’ll be able to use Gmail as your mail client and Google’s Contacts and Calendar apps to manage your Outlook.com/Office365 address books and calendars.

On the Samsung Email App

Samsung’s Galaxy phones, the most popular brand of Android phones, come with a different default email application called “Samsung Email.” This application is a bit different from Google’s Gmail app, but the setup process is similar. Just as before, ensure that the Samsung Email app is updated to the latest version before you proceed.

Next up, open the Samsung Email app and tap on “Add Account.” Alternatively, you can go to settings, and tap “Add account” if you already have other accounts set up. Anyway, you can then enter in your Outlook.com/Office 365 email and password, and then tap Sign in. After that, if you’re prompted, choose “Microsoft Exchange ActiveSync” from the list to proceed. You might not see this, so don’t worry if it does not show up.

Setting up Outlook in Samsung Mail

In the next few steps, you may also see the settings screen which asks you to change your settings or account name. You can tweak to your own liking to show all your mail and calendar from all time, and not just the last few months. Next up tap “Yes” or “Ok” to confirm the setting and permissions, and allow the syncing to proceed.

If you’re on an older Samsung phone, you might see a message that says “Action Required to Sync,” so be sure to press on it and head to settings enable Syncing. Just as with the Gmail app, check the message from Microsoft, and choose “Use another Mail app instead” to proceed with syncing. Please be aware that syncing email, calendar, contacts, and tasks may take a few minutes.

Just to double check…

Once you’re up and running following these steps, you should be able to use the native Contacts, Calendar, and Mail apps on your Android phone to sync information from your Outlook.com or Office 365 account. You can now skip the trip to the Google Play Store and won’t need to download the dedicated Outlook Android app.

On most phones, opening the Google Contacts app will list Gmail contacts, but you can press the hamburger menu and clicking on the Outlook icon to swap between Gmail and Outlook contacts.

On Google’s Calendar app, all of your Calendars will appear on the right when you press the hamburger menu. You can hide the Google account and use ONLY your Outlook Calendar exclusively by unselecting the checkbox under the Google account name.

Samsung Calendar and Google Contacts

On Samsung phones, things are a bit different and you can ONLY show your Microsoft Outlook Contacts. From Samsung Contacts, you can press on the (…) menu on the top, followed by Settings, then “Contacts to Show” and choose the button for Microsoft Exchange ActiveSync.

Finally, with the Samsung Calendar app, you can manage your calendars by tapping the (…) menu on the top right, followed by Manage Calendars. This will let you unselect the Google Calendar, and use the Microsoft Outlook account exclusively.

Samsung Calendar and Contacts

Syncing with the Outlook App installed (and without following the above steps)

If you’ve opted to install the Outlook app on your phone, you can obviously use it as an email client for your Outlook.com/office 365 account, but the app can also sync all your contacts in your phone’s native Contacts app without following the steps above. Simply go Outlook settings, choose the Outlook/Office 365 email account and enable “Sync contacts.” Unfortunately, going this route will NOT sync your Calendars or Emails, and you will still need to follow the steps above. Additionally, syncing contacts through the Outlook app will create double versions of contacts you’ve already added through the steps above.

Changing Outlook sync settings

At the end of the day, the support for setting up your Outlook.com/Office 365 account on an Android phone showcases the beauty of technologies built on open standards. You’re not being forced to use Microsoft’s all-in-one Outlook app to manage your emails, contacts, and calendars, and you should be fine using just the native apps on your Android phone. Microsoft’s Outlook Android app is perfect for power users, but the average Joe will likely be more comfortable with task-focused apps like on Windows Phone.

Xbox One’s new Sport White Controller is now available to buy

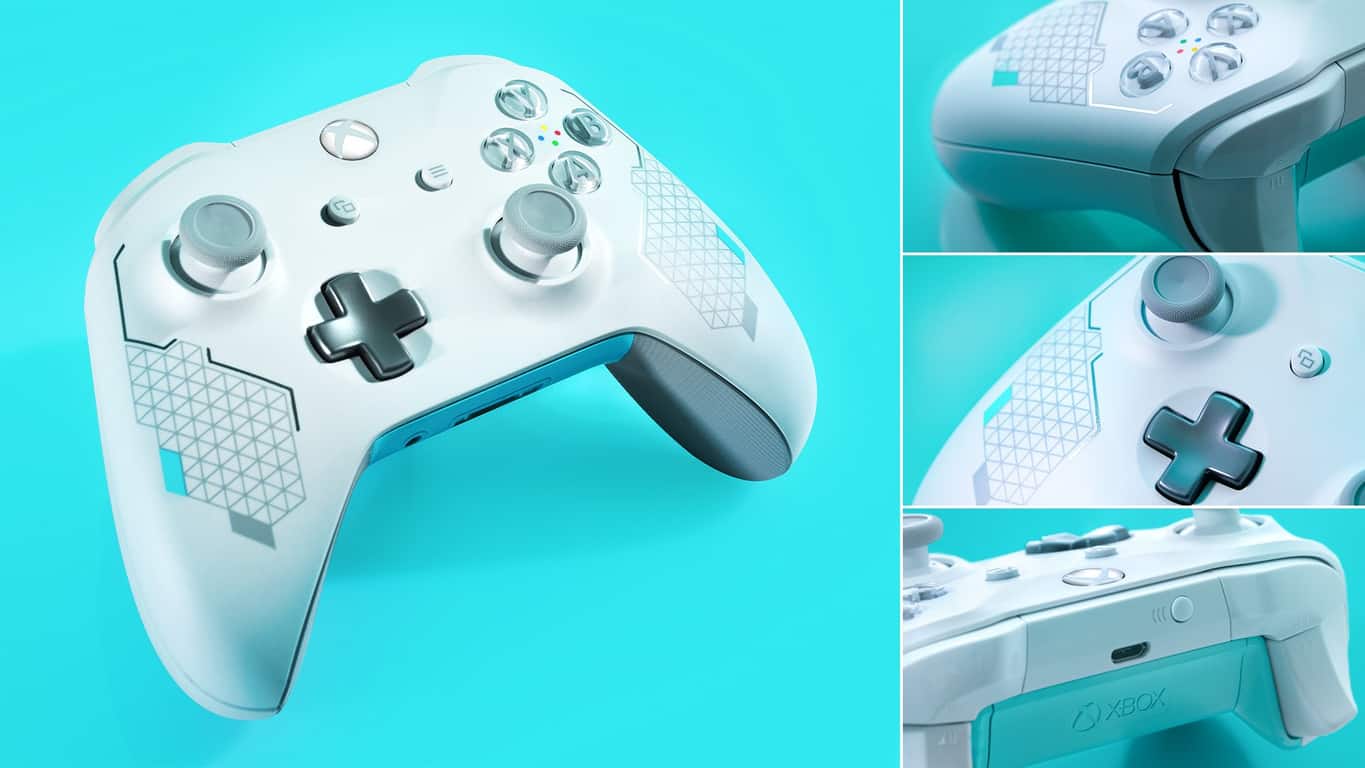
The new Sport White Special Edition Xbox One Controller is now available to buy from Microsoft Store and other gaming retailers.

The Sport White Special Edition controller is compatible with Xbox One consoles and Windows 10 PCs and features a unique design and a rubberized grip.

Here’s the official product details. You can buy your own controller, while they last, here.

Equip yourself with the Xbox Wireless Controller – Sport White Special Edition, featuring a fresh white design with mint and silver accents, and rubberized diamond grip for enhanced comfort. Enjoy custom button mapping and plug in any compatible headset with the 3.5mm stereo headset jack. And with Bluetooth technology, play your favorite games on Windows 10 PCs and tablets.

Do you like to buy the new controllers for more Xbox One or computer? Do you collect them? Share your thoughts with the community in the comments below and then follow us on Pinterest for more Xbox content.

Bluetooth Keyboard Connected but not Working: 4 Fixes to Try

You probably are among the few with their Bluetooth keyboard connected but not working. This, among other Bluetooth-related issues are not uncommon.

The issue could arise for many reasons, and we will go through every one of them and offer you the best solutions in this guide.

Why is my wireless keyboard connected but not typing? First, you should not put the blame entirely on your keyboard because we have noticed that it happens even while using the best Bluetooth keyboards.

  • Interference – This may be the case if many other Bluetooth devices are close. They may conflict with each other.
  • Connection issues – If you have an unstable connection between the wireless keyboard and PC, you may experience this problem.
  • Physical damage – In some cases, you may have a damaged Keyboard. This means it can no longer function mechanically even though it can connect.
  • Driver problems – The most common of these are outdated or corrupt drivers. Once your drivers fall into any of these categories, you may expect a range of malfunctions.

The solution you will adopt will depend on the specific trigger in your case. So since you now know the possible causes, please pick from the resolutions we offer below.

What can I do if my Bluetooth keyboard is connected but not working on Windows 10?

1. Restart the Bluetooth Support Service

1.1 Restarting the service

  1. Press Windows + R, type services.msc, and hit Enter.
    bluetooth keyboard connected but not working
  2. Right-click on the Bluetooth Support Service and select Stop.
    bluetooth keyboard connected but not working
  3. Now right-click on it and select Start.

A better solution may be to set this service to start automatically. You can do so using the steps in the section below.

1.2 Setting the service to Automatic

  1. Press Windows + R, type services.msc, and hit Enter.bluetooth keyboard connected but not working
  2. Double-click on the Bluetooth Support Service.
    bluetooth keyboard connected but not working
  3. Change the Startup type to Automatic and click the Start button.
  4. Click Apply and OK.

2. Reinstall Keyboard drivers

  1. Press Windows + R, type devmgmt.msc, and hit Enter.
  2. Expand the Keyboards category, right-click on your keyboard, and select Update driver.
    bluetooth keyboard connected but not working
  3. Select Search automatically for drivers.
    bluetooth keyboard connected but not working
  4. Restart your computer.

You may also Update your Bluetooth driver using the same process explained above.

Another option will be to look for your drivers from the manufacturer’s website, but this may be a bit more complicated.

If you don’t want the hassle of searching for drivers on your own, you can use a tool that will do this for you automatically.

Therefore, a specialized tool like Fortect Driver Updater would be handy to prevent PC damage caused by installing the incorrect versions and automate the updating process of the drivers. 

⇒ Get Fortect Driver Updater

3. Run Hardware Troubleshooter

  1. Press Windows + I to open your Settings, and head over to Update & Security.
  2. Click Troubleshoot, find Bluetooth, and click Run the troubleshooter.
  3. Restart your computer.

Note: If the Bluetooth troubleshooter didn’t get the job done, repeat the process, but this time, choose Hardware & devices.

4. Reinstall the driver

  1. Press Windows + R, type devmgmt.msc, and hit Enter.
  2. Expand the Keyboards category, right-click on your keyboard, and select Uninstall device.
  3. Confirm your choice and restart the computer.

You may perform these steps again but this time for the Bluetooth driver. If the drivers are faulty or corrupted, uninstalling will allow your device to replace them with a functional version after rebooting.

If none of these solutions work out for you, then chances are that this could be caused by mechanical damage. In this case, you would need to replace your Bluetooth keyboard.

For problems with the Microsoft Designer Keyboard not pairing, this guide will help you fix it in no time.

We hope your Bluetooth keyboard connected but not working problem is now a thing of the past. Let us know using the comments section below what worked for you.

FIX: Can’t Switch Between Programs (Alt+Tab) in Windows 10/11

Do you have issues while trying to switch between your programs in Windows 10 or Windows 8.1 with your ALT + TAB buttons? Well, you are lucky because after you finish reading this article, you would have fixed your ALT+ TAB issue in the Windows 10 or Windows 8.1 operating system.
Fix Unable to switch between programs with alt + tab in Windows 8
Seems that when you have two files of the same kind like a Word document or an Excel document open, you will not be able to switch between them unless you minimize the first file opened. One of the main causes of this issue might be the fact that you installed a third party application that is interfering with your ALT+ TAB feature.

How to I fix ALT+ TAB issues in Windows 10?

  1. Change PC settings
  2. Boot into Safe Mode
  3. Clean boot your computer

1. Change PC settings

  1. Move the mouse cursor over to the lower right side of the screen.
  2. From the menu that appears left click or tap on the “Settings” feature.
  3. Now within the Settings menu you will need to left click or tap on the “Change PC settings”.
  4. Left click or tap on the “PC and Devices” feature inside the “Change PC settings” window.
  5. Left click or tap to open the “Corners and Edges” feature.
  6. Now you will need to search for the “Allow switching between recent apps” and turn it ON.
  7. Now after you turned on the option above you should reboot your Windows 10 or Windows 8.1 device.
  8. When the device starts check again if your alt + tab feature works correctly in your Windows operating system.

2. Boot into Safe Mode

In this method, we will try to boot your device into the Safe Mode feature which uses only the minimum requirements for your device to run and see if the alt + tab feature works there. If it works then proceed with method three below.

  1. Left click or tap on the Power button situated on the log in screen.
  2. Now keep the “Shift” button pressed down and left click or tap on the “Restart” feature.
  3. Now if you kept the Shift button pressed down after the device reboots you will have in front of you the “Choose an option” window.
  4. From the “choose an option” screen left click or tap on the “Troubleshoot” feature.
  5. Now left click or tap on the “Startup Settings” feature present in the Troubleshoot menu.
  6. Left click or tap on the “Restart” button after you chose the “Startup Settings” feature.
  7. Choose the “Safe mode with networking” feature.
  8. Now it will take you to the log in screen in which you will need to write the administrator account and password.
  9. Check to see in safe mode if you can switch between programs with the alt + tab features.
  10. If the feature works read the lines below.

— RELATED: Fix: Can’t Boot Into Safe Mode in Windows 10, Windows 8.1

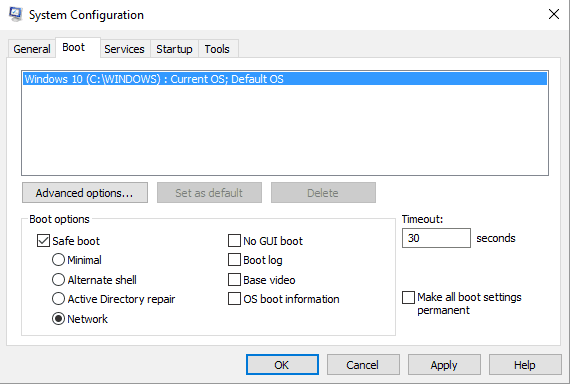
You can access the Safe Mode with networking feature quicker by going to System Configuration > Boot tab. All you need to do is check the Network option under Boot options, as shown in the screenshot below.

safe mode with networking

3. Clean boot your computer

By doing the steps below you will power up you device with only the necessary programs at startup and thus seeing which application is causing your alt + tab feature to react in such a way.

  1. Move the mouse cursor over to the lower right side of the screen.
  2. From the menu that appears left click or tap on the “Search” feature presented there.
  3. Write the in the search box the following: “msconfig” without the quotes.
  4. After the search process has finished left click or tap on the “msconfig” icon.
  5. Left click or tap on the “Services” tab situated in the upper side of the “System Configuration” window you opened.
  6. Check the box next to “Hide all Microsoft services” situated in the lower left side of the Services tab.hide all microsoft services
  7. Left click or tap on the “Disable All” button next.
  8. Left click or tap on the “Startup” tab situated in the upper side of the System Configuration window.
  9. Now in the Startup tab left click or tap on the “Open Task Manager” link.
  10. Now in Task Manager you will have to left click or tap on the “Startup” tab.
  11. For all the applications in the list presented you will need to left click on them and then left click or tap on the “Disable” button situated in the lower right side of the screen.disable task manager programs
  12. Now close the Task Manager window.
  13. You will have to left click or tap on the “OK” button in the “System Configuration” window.
  14. Restart your Windows 10 or Windows 8.1 device.
  15. After the device starts if your Alt + Tab feature works correctly, it means that one of the startup applications you disabled previously is causing your device to react in this manner.
    Note: You will need to disable the apps one by one and see exactly which app is causing your system to react like this.
  16. To bring back your operating system to normal startup you need to move the mouse cursor over to the lower right side of the screen.
  17. Left click or tap on the “Search” feature again.
  18. In the search dialog box write the following: “msconfig” without the quotes.
  19. Left click or tap on the msconfig icon after the search has finished.
  20. Left click or tap on the “General” tab situated in the upper side of the window.
  21. Left click or tap on the “Normal startup” feature.
  22. Left click or tap on the “Services” tab and uncheck the box next to “Hide all Microsoft services”.
  23. Now you need to tap or left click on the “Enable all” button.
  24. Left click or tap on the “Startup” tab.
  25. Tap or click on the “Open device Manager” link again.
  26. Now in the list of applications from your Device Manager you can select each application you disabled and left click or tap on the “Enable” button.
  27. Tap or left click on the “OK” button in the Device Manager window.
  28. Now you will need to reboot your Windows 8.1 or Windows 10 operating system.

That’s it folks, was it hard? I know that someone with a basic knowledge of the Windows 10 or Windows 8.1 operating systems will be able to do the steps above easily. If you need further assistance regarding this subject, you can use the comments section below to let us know and we will help you further.

Speaking of additional help, if you still can’t use the ALT+TAB key combination, you can also check out our in-depth ALT_ TAB troubleshooting guide for Windows PCs. While the instructions available in this guide apply to both Windows 8.1 and Windows 10, the solutions listed in our in-depth guide are valid for all Windows versions.

RELATED STORIES TO CHECK OUT:


iPod not Recognized by Computer: 5 Ways to Get it to Work

Apple devices, namely iPhones, iPads, and iPods, and the Windows OS are commonly used together and, in most cases, work seamlessly. But, for several users, the iPod is not recognized by the computer.

In some cases, the iPod is charging but not recognized by the computer, while on other occasions, there are no signs of a connection between the two altogether. Sometimes, even Windows 11 has trouble recognizing iPod, but the fixes are simple, and you should have things running in no time.

Why won’t my computer recognize my iPod?

Here are a few reasons the iPod Classic isn’t recognized by the computer:

  • Improper connections: An improper connection is the most likely reason you are facing issues connecting the iPod to Windows.
  • The device is turned off: When the iPod or even its display is turned off, it won’t be listed on the PC.
  • Missing permissions: Frequently, it’s the missing permissions, generally the Trusted Device prompt, that lead to iPod Nano not being recognized by a computer.
  • Third-party apps triggering conflicts: A third-party antivirus or a similar security software could also be blocking the connection between the two devices, thus triggering the error.

What can I do if iPod is not recognized by computer?

Before we start making major changes, try these quick tricks:

  • When connecting the iPod to a Windows PC, tap on Allow if a prompt appears.
  • Connect the iPod to a different USB port. Say, if it’s connected to a USB 2.0, plug it into USB 3.0, and vice-versa.
  • Restart both the iPod and the computer while the two are connected.
  • Make sure the cable is not damaged. In case there’s a spare cable lying around, use it, and verify whether iPod Touch 4 is still not recognized by the computer.
  • Disconnect all other devices from the computer and plug in the iPod.
  • Don’t use a USB hub or any other connector.
  • Disable any third-party antivirus or security software installed on the computer.
  • Make sure you have iTunes installed on the PC.

If none work, move to the solutions listed next.

1. Reinstall the relevant driver

  1. Press Windows + X to open the Power User menu, and select Device Manager.device manager
  2. Expand Universal Serial Bus devices, right-click on the Apple entry, and select Uninstall device.uninstall device to fix ipod not recognized by computer
  3. Tick the checkbox for Attempt to remove the driver for this device, and click Uninstall.uninstall
  4. Once done, restart the computer, and Windows will automatically install a fresh copy of the driver.

If it’s the driver to blame when the computer does not recognize iPod, a quick solution is to reinstall it. The process is quick and shouldn’t take more than a few minutes.

2. Update iTunes

Note icon NOTE
The steps listed here are for the Microsoft Store’s version of iTunes, which Apple recommends users download. In case you are on the version downloaded from the web, click on Help and select Check for updates.
  1. Launch Microsoft Store, and then click on the Library icon near the bottom left.library
  2. Click on Get updates.get updates to fix ipod not recognized by computer
  3. If an update for iTunes is available, wait for it to install.itunes
  4. Once done, restart the computer for the changes to come into effect.
  5. Now, connect your iPod to the computer and verify whether it’s recognized.

3. Uninstall recent Windows updates

  1. Press Windows + I to open Settings, and click on Update & Security.update & security
  2. Click on the View update history option.View update history
  3. Now, click on Uninstall updates.uninstall updates to fix ipod not recognized by computer
  4. Select the recent update from the list after which the problem first appeared, and then click Uninstall.uninstall to fix ipod not recognized by computer
  5. Click Yes in the confirmation prompt.uninstall

For many, the iPod was not recognized by the computer after an update, and after uninstalling the Windows update, things got up and running just fine.

4. Reinstall iTunes

Note icon NOTE
If the current version of iTunes from downloaded from Microsoft Store, you will have to uninstall it from Settings, as iTunes won’t appear in Progams and Features.
  1. Press Windows + R to open Run, type appwiz.cpl in the text field, and hit Enter.appwiz.cpl
  2. Select the iTunes entry here, and then click Uninstall.uninstall to fix ipod not recognized by computer
  3. Follow the on-screen instructions to complete the process.
  4. Similarly, uninstall any other applications that have to do with Apple.
  5. Once done, head to Apple’s official website and then use one of the available options to download iTunes.itunes
  6. If you didn’t choose the Microsoft Store option, run the setup to complete the installation.

That’s it! After you have reinstalled iTunes, the iPod not recognized by the computer problem should be gone for good. Also, some users recommend that the downloadable version of iTunes could help fix things, so try that one if you had earlier downloaded iTunes from Microsoft Store.

5. Switch out of S mode

If nothing previously worked, your PC likely runs Windows in S Mode, a version more focused on security and performance, allowing fewer apps to run. Thus, it can often lead to trouble for a lot of users.

So, in this case, switch out of S Mode in Windows 10, wait for the changes to apply, and reconnect the iPod. And, in all likelihood, things should work fine now.

That’s it! One of the solutions here should have worked when the Windows computer does not recognize the iPod, and you should now be able to access the media on the iPod and make changes to it.

Also, if you are looking for a quicker way, check our curated list of the best software to transfer music from an iPod to a PC.

Before you go, we have a great guide on how to transfer music from iPod to iTunes on Windows 7, so don’t miss it.

For any further queries or to share what worked for you in this case, drop a comment below.

Fix: ASP.NET MACHINE ACCOUNT password in Windows 10/11

Are you one of our users who is getting a prompt in Windows 10 or Windows 8.1, 8 every time you try to delete or modify a specific folder or file? Well, all you need to do is follow the steps listed below and you’ll be able to fix your ASP.NET MACHINE ACCOUNT issue in Windows 10 or Windows 8.1 in order to resume your everyday activities in no time at all.
Fix ASP-NET-Machine-Account pop up message in Windows 8
There is a feature in Windows 10 or Windows 8.1 that you will need to disable first called control userpasswords2. You need to uncheck the check mark next to the “Users must enter a username and password to use this computer” option. If this does not solve your issue, we have a couple of more methods below depending whether you are using the asp.net development toolkit or not.

How do I fix ASP.NET MACHINE ACCOUNT password issues?

  1. Disable control userpasswords2
  2. Delete the Machine Account
  3. Change user account settings
  4. Use System Restore
  5. Refresh your PC
  6. Create a new user account

1. Disable control userpasswords2

  1. Press and hold the “Windows” button and the “R” button.
  2. You should now have in front of you the Run window.
  3. In the run dialog box write the following: “control userpasswords2” without the quotes.
  4. Press the Enter button on the keyboard.
  5. Now in the window that pops up, you will need to uncheck the box next to the “Users must enter a username and password to use this computer” option.
  6. Left click or tap on the “OK” button afterwards.
  7. Close all the windows you opened so far and reboot your Windows 10 or Windows 8.1 operating system.
  8. When the device starts you will need to check again for the pop up password message regarding the “ASP.NET MACHINE ACCOUNT”.

2. Delete the Machine Account

If you are not working with ASP.NET, you can delete the MACHINE ACCOUNT and see how it goes.

  1. Reboot your Windows 10, 8 operating system.
  2. When the device starts, log in with your administrator account and password.
  3. Left click or tap on the “Windows Logo” button.
  4. Write “User accounts” without the quotes.
  5. Left click or tap on the Settings feature presented in the menu.
  6. Left click or tap on the “User Accounts” icon.
  7. Left click or tap on the “Manage another account” feature.
  8. Select from the list the “ASP.NET Machine Account” from the list presented.
  9. Left click or tap on the “Delete the account” button.
  10. In the next window, you can choose to keep the files if you wish before continuing with the deletion process.
  11. After the deleted process has finished reboot your Windows 10 or Windows 8.1 device.
  12. When the operating system starts check again if you get the same pop up message.

3. Change user account settings

  1. Move the mouse cursor over to the upper right side of the screen.
  2. From the menu that appears left click or tap on the “Search” feature.
  3. In the search dialog box, write the following “Change user account settings” without the quotes.
  4. In the next window change the settings presented to “Never Notify” option.
  5. Reboot again your operating system.

RELATED: FIX: Windows 10 won’t let me add a new user account

4. Use System Restore

  1. Place the Windows 10 or Windows 8.1 installation media disk into the device.
  2. Reboot your Windows 10, 8 operating system.
  3. After the device reboots, you will get to a black screen where it will tell you to press any key to boot from the CD or DVD in which case you will need to press any button on the keyboard.
  4. In the first window that appears, you will need to set the correct time and keyboard type.
  5. Left click or tap on the Next button.
  6. Now in the next screen, you will need to left click or tap on the “Repair your computer” feature situated in the lower left side of the screen.
  7. In the window “Choose an option” left click or tap on the “Troubleshoot” feature.
  8. From the Troubleshoot window, left click or tap on the “Advanced Options” feature.
  9. Left click or tap on the “System Restore” feature presented in the menu.
  10. Follow the instructions on the screen to finish the System Restore process and then reboot your operating system.
  11. Check again if you still get the pop up message regarding the ASP.NET Machine Account.

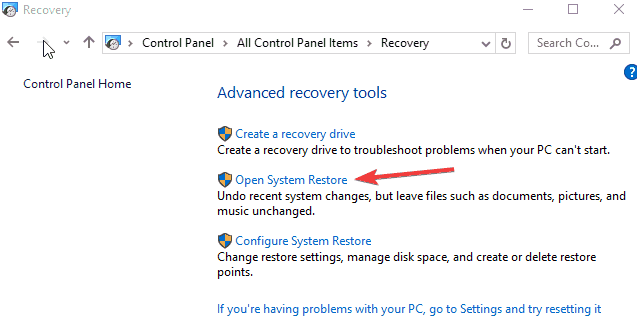
You can also open System Restore from Control Panel, as shown in the screenshot below:

open-system-restore

5. Refresh your PC

Note: Before attempting the steps below please backup all your important documents and folders you use in Windows 8.1 or Windows 10.

  1. Reboot again your operating system with the Windows 10 or Windows 8.1 Installation Media disk inside.
  2. Press any button on the keyboard when the message “Press any key to boot from CD or DVD” appears.
  3. Choose again the time and keyboard type and press the Next button.
  4. Left click or tap on the “Repair your computer” feature situated in the lower left side of the screen.
  5. From the “Choose an Option” window left click or tap on the “Troubleshoot” feature.
  6. Now left click or tap on the “Refresh your PC” feature.
  7. Follow the instructions on the screen to proceed with the system refresh of the operating system.

6. Create a new user account

Some users confirmed that creating a new user account with administrative privileges fixed the problem. So, if none of the solutions above helped you solve the problem, go ahead and create a new user account.

And that is it, if you followed the methods above in the order they are listed, you should have managed to fix your ASP.NET Machine account pop up message in Windows 8.1 or Windows 10. If you’ve run into issues along the way in this tutorial, please use the comments section below to let us know and we will help you further as soon as possible.

RELATED STORIES TO CHECK OUT:


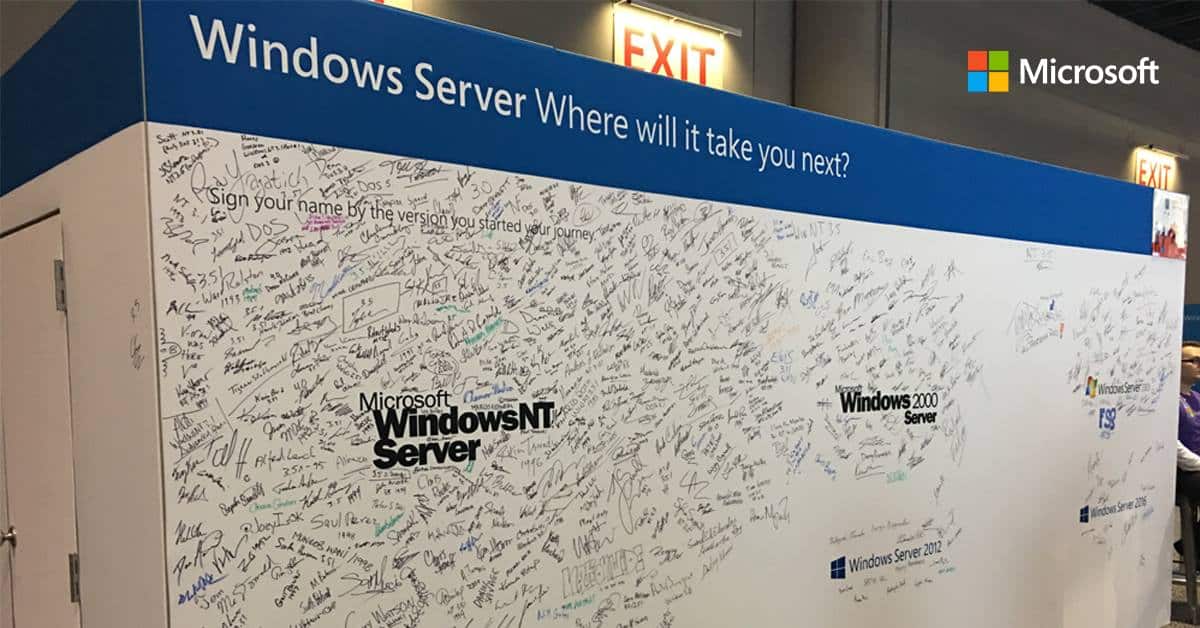
Windows Server 2019 and SDK Preview builds 17723 are now available for Insiders

It’s been almost a week since Microsoft released Windows 10 Insider build 17723 for Windows Insiders in the Fast Ring, and today the company is following suit with Windows Server 2019 Insider build 17723 and the Windows 10 SDK Preview builds 17723. If the new SDK, which is available to download here brings bug fixes and the usual API changes, the latest version of the server OS is probably the most interesting release.

In the Windows Server 2019 build 17692, Microsoft introduced System Insights, a new feature that brings local predictive analytics capabilities natively to the server OS. After installing the latest Insider build, IT Admins will be able to add new predictive capabilities to System Insights without having to install OS updates. “This functionality enables developers, including Microsoft and third parties, to create and deliver new capabilities mid-release to address the scenarios you care about, Microsoft explained.

Other highlights in this new Windows Server 2019 build include the ability to deploy Kubernetes on Windows Server, as well as a new network congestion control provider called LEDBAT. You can download this new build from the Windows Server Insider Preview download page.

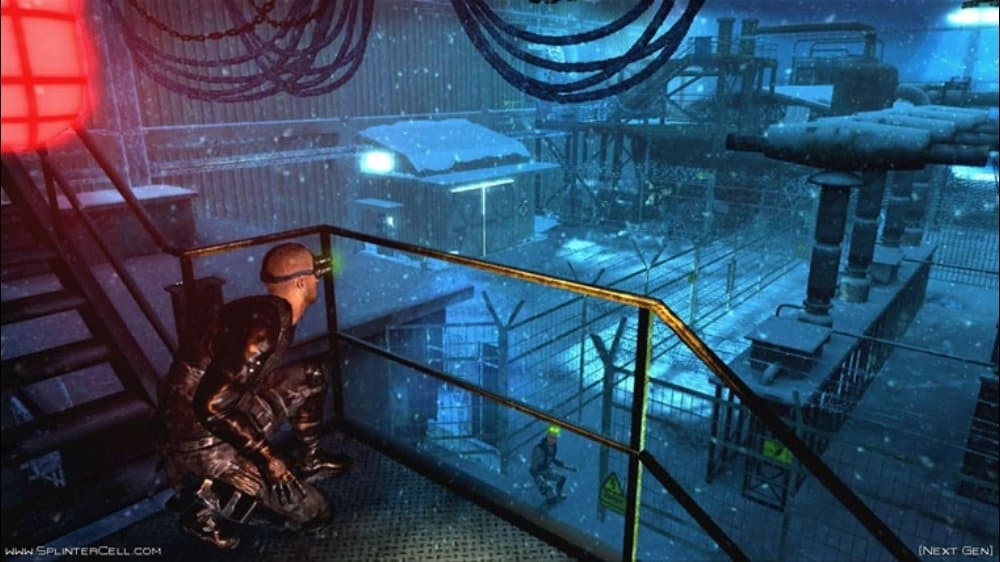
Two Tom Clancy’s Splinter Cell games are now backward compatible on Xbox One

Tom Clancy’s Splinter Cell Double Agent and Tom Clancy’s Splinter Cell Blacklist are now backward compatible on the Xbox One, Xbox’s Major Nelson announced today. These two games were released on the Xbox 360 in 2006 and 2013, respectively, with the latter being the latest installment in the stealth video games franchise.

If you don’t already own it, Tom Clancy’s Splinter Cell Double Agent is a $19.99 purchase on the Microsoft Store, but please note that the more recent Tom Clancy’s Splinter Cell Blacklist doesn’t seem to be available for purchase digitally (it may still be available in select regions). Anyway, those of you who still own the digital versions or physical discs can play both games right away on Xbox One.

Overall, Microsoft brought 10 new games to the Xbox One Backward Compatibiliy list in July, including Tom Clancy’s Ghost Recon Advanced Warfighter, Assassin’s Creed Liberation HD, Silent Hill: HD Collection and Dante’s Inferno. You can see more of the latest entries on Major Nelson’s website.

Sea of Thieves hits 5 million player milestone, “Cursed Sails” update launches

The flood of free content updates seems to do well for Sea of Thieves, as Microsoft has just announced a new five million players milestone for the pirate game. This includes players on both Xbox One and Windows 10, and those who play the game with their Xbox Games Pass subscription.

“Being able to share that we’ve welcomed more than five million players to Sea of Thieves since launch is both inspiring and humbling,” wrote Joe Neate, Executive Producer at Rare. “Home to players from all over the world, the thriving Sea of Thieves community includes an army of content creators who have helped the game rack up 300M views on YouTube and more than 40M live broadcast hours on Twitch.

Despite Sea of Thieves getting mixed reviews at launch, Rare managed to keep players engaged with free content updates, and today marks the release of the second one called “Cursed Sails.” This new update brings new gameplay elements including a new Alliance feature allowing and the Brigantine three-player ship. But the main addition is the limited-time Cursed Sails campaign, which will put pirates against terrifying skeleton ships.

The Cursed Sails campaign and its skeleton ships will be available for three weeks in Sea of Thieves, but all the new gameplay features including the new Brigandine ship will remain once the limited-time campaign ends. Rare is already working on a new content update for its pirate game and we should learn more about it in the coming weeks.

Quick hands on and first impressions of the Microsoft Surface Go

The Microsoft Surface Go won’t be out for another few days, but local Microsoft stores here in the US already have units on display. I had actually already pre-ordered the top range model just a few days ago, but I wandered down to the 5th Ave Microsoft Store in NYC yesterday to try one out for myself before the arrival date. In just spending 15 minutes with the 128GB SSD/8GB RAM Surface Go, I’m already somewhat happy about my pre-order, feeling satisfied with the overall design, performance, and inking. There are a few things which worried me though, and I am looking forward to diving deeper later in the next few weeks with my full on review with my own personal Surface Go.

Design that pops

Microsoft appropriately displayed the Surface Go right alongside the other members of the Surface family, and you can right away see that it’s different. Not only is the device smaller, but its corners are more rounded off, making the Surface Go look just so beautiful. It also makes the device feel much lighter and easier to hold in your hands, especially when in portrait mode. I won’t dive too deep into the rest of the design, as I’m saving that for my review, but for now, the look and feel have got to be the #1 highlight of Surface Go for me.

Peep the more rounded Surface Go on the left, and the Surface Pro 2017 on the right

Inking feels natural

One of the first things I did when I arrived at the Microsoft Store was detach Surface Go from the Type Cover and do some inking. At first, the Surface Go had a rough time accurately tracking the tip of the pen. Some of my movements were not being picked up, but a Microsoft Store rep told me that could just be due to the fact that this display unit was “popular” and was being messed with before. Anyway, after spending a good 4 minutes inking in Paint 3D, everything was smooth and accurate. I actually moved the pen from the Surface Go to the Surface Pro and didn’t feel any difference between the two. Inking on the Go and in a sample PDF file was just as good as the Pro, especially when in comfortable “clipboard” mode.

Inking in clipboard mode on the Surface Go (Sorry, vertical picture, I know)

Cramped Keyboard

When Microsoft first showed off Surface Go, the keyboard was a major concern for me. It initially seemed like the keys were jammed too close together, and it wouldn’t make for a good typing experience. These fears all came true when trying the display unit, as my fat fingers jammed more than one key at a time when attempting to speed type. I wasn’t able to get to my usual 100WPM typing speed, and on the Bing.com typing test, I only got to 51WPM. I only spent about 5 minutes typing and my speed increased over time, so I think that once my fingers get used to the small layout It’ll be okay. Sadly, the Surface Pro keyboards won’t work on the Surface Go, so this small keyboard and the comfort level is definitely something that I’ll keep an eye on and dive deeper for my final review.

The cramped Surface Go Keyboard

Performance

Since Surface Go runs Windows 10 in S Mode, I was assuming that it would perform very well, and these beliefs were confirmed in my time at the Microsoft Store. Unfortunately, I wasn’t able to do any Geekbench testing as the display units were locked to S Mode. I instead put it through my usual web-based stress tests. I opened up YouTube, OnMSFT, and Microsoft website in Edge, and the Surface Go still stayed snappy and speedy. Pages opened fairly quickly and nothing ever froze up. The RAM went up to 3.5GB/7.9 GB, and the CPU usage was anywhere between 60-73%. I opened up Word in the background and also Excel, and again, nothing froze up and slow down. I honestly think the performance is great on this 128GB SSD/8GB RAM variant of the Surace Go, but I wish Microsoft had the base eMMC unit on display so I could compare. Time will have to tell as my full review Surfaces.

Performance on the Surface Go when using Edge

At the end of the day, I’m excited to spend some more time with Surface Go once my unit gets here on August 2nd. I’m traveling to Canada for a family wedding the same weekend as Surface Go releases, and I’ll be keeping my Surface Go right by my side. Be sure to keep it tuned right here to OnMSFT, as I’ll be doing an in-depth review.

Your Computer Needs to be Repaired Error in Windows 10/11

Some users have reported that they didn’t have any problems using Windows 10 or Windows 10 Technical Preview since they’ve installed it, but recently, a strange error which says “Your computer needs to be repaired” shows up, preventing the normal work of the system.

How to Fix ‘Your Computer Needs to be Repaired” Error in Windows 10

Your computer needs to be repaired error can prevent you from starting your PC. This can be a big problem, and speaking of this issue, here are some similar problems that users reported:

  • Your PC needs to be repaired 0xc000000f, 0xc000014c, 0xc0000225, 0xc0000098, 0xc0000185, 0xc0000034 – Various error codes can appear with this message, but you should be able to fix this and many other errors by using one of our solutions.
  • Your computer needs to be repaired blue screen – Sometimes this problem can appear due to missing updates. If you can enter Windows, be sure to download and install the latest updates on your PC.
  • HP, ASUS your computer needs to be repaired – This issue can affect any PC brand, and HP and ASUS aren’t exceptions. All of our solutions are universal, so you should be able to apply them regardless of the PC brand you’re using.
  • Your PC needs to be repaired a required device is not connected, the boot configuration data file is missing, kernel is missing – Sometimes this issue can occur if the boot records are damaged or if your system files are corrupted. However, you can fix the issue by running a few commands in Command Prompt.

Solution 1 – Run Windows Update

According to users, Your computer needs to be repaired message can appear due to missing updates. However, you should be able to fix it simply by downloading and installing the latest updates.

By default, Windows 10 installs the missing updates automatically, but sometimes you might miss an update or two. However, you can always check for updates manually by doing the following:

  1. Press Windows Key + I to open the Settings app.
  2. Now go to the Update & Security section.
    Your PC needs to be repaired a required device is not connected
  3. Click Check for updates button.
    Your PC needs to be repaired 0xc000000f

Windows will now check for available updates and download them in the background. Once the updates are downloaded, they’ll be installed as soon as you restart your PC. After your system is up to date, the problem should be resolved.

Since Windows Update runs automatically in Windows 10, and it downloads new builds and other updates automatically, not receiving the latest build probably means that Windows Update process is disabled. So, we’re going to check, and enable it again, if it’s disabled. To check if Windows Update process is running, do the following:

  1. Go to Search, and type services.msc, and open Services.
  2. Find Windows Update service and right-click on it, and go to Properties.
  3. See if the process is running, if not, select Startup Type as Manual, and click on Start.Your PC needs to be repaired 0xc000000f

Solution 2 – Change BIOS Date

Your computer needs to be repaired blue screen

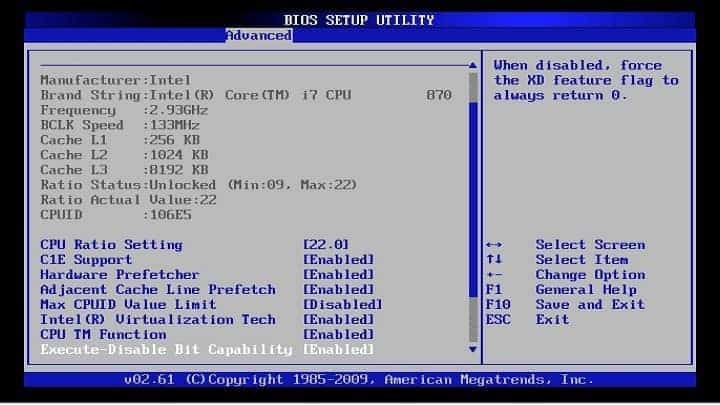
Another thing that could cause this problem is wrong BIOS date. Your current Windows 10 Build reads the date of your BIOS, and according to that date, it ‘decides’ whether it’s still valid or not. So if the BIOS date is wrong, the Build may ‘think’ that it’s expiration time, and you’ll have problems. So, just in case, enter your BIOS settings, and check if the date is right.

To check if your BIOS date is valid, do the following:

  1. Restart your computer.
  2. On the boot, press the key which allows you to enter BIOS settings (it’s usually DEL, but it varies on different computers).
  3. Find date and time of your BIOS, it’s usually under General tab.
  4. Follow the instructions from BIOS on how to change your date and time, and set it to the current date.
  5. Exit BIOS and start your computer again.

Unfortunately, we can’t give you precise instructions about changing your BIOS date and time, because it could be different on some computer, so if you’re having trouble changing the date and time of your BIOS by following our instructions, search the internet, and try to find instructions which fit well with your computer.

Solution 3 – Fix the boot records

According to users, sometimes this problem can occur due to issues with your boot records. However, you can fix that problem by running a couple of commands. To do that, first you need to start Command Prompt outside of Windows. You can do that by following these steps:

  1. Restart your PC several times during the boot sequence.
  2. Now select Troubleshoot > Advanced Options > Command Prompt.
  3. Run the following commands one by one:
  • bootrec /scanos
  • bootrec /rebuildbcd
  • bootrec /fixmbr
  • bootrec /fixboot

After running all commands, restart your PC and check if the problem is resolved.

Solution 4 – Delete the EFI partitions

Several users reported that Your computer needs to be repaired message can appear due to EFI partitions that remained from the old Windows installation. To fix the problem, users are suggesting to create a bootable media and boot your PC from it.

This will start the installation process. Select Advanced settings and look for EFI partitions from the older Windows installation. Once you find and remove those partitions, the problem should be completely resolved.

Solution 5 – Use Automatic Repair feature

If you can’t boot to your PC due to Your computer needs to be repaired message, you might be able to fix the problem by using Startup Repair feature. To do that, follow these steps:

  1. Restart your PC few times during the boot sequence. After a couple of restarts you’ll be presented with the list of options.
  2. Choose Troubleshoot > Advanced options > Automatic Repair.
  3. The repair process will now start. Wait for the few moments to complete.
  4. Once the process is finished, your PC will restart and everything should start working again.

Few users are suggesting to fix this problem by booting from the installation media and choosing the repair option. Once you start the repair option, follow the instructions from above to repair your PC.

Solution 6 – Remove unnecessary hardware and peripherals

HP your computer needs to be repaired

According to users, sometimes your peripherals or hardware can cause this issue to appear. If this problem started recently, be sure to remove any non-essential peripherals from your PC. If you have any USB devices connected, except your keyboard and mouse, be sure to remove them. The same goes for additional monitors.

As already mentioned, your hardware can cause this problem to appear, so be sure to check your hardware as well. If you installed any new hardware recently, check it and make sure that it’s working properly.

Solution 7 – Make sure that correct partition is set as active

Sometimes Your computer needs to be repaired message can appear if the incorrect partition is set as active. To fix this problem, you need to start Command Prompt outside of Windows and run a couple commands. To do that, follow these steps:

  1. Restart your PC several times during the boot sequence.
  2. Now choose Troubleshoot > Command Prompt from the menu.
  3. When Command Prompt opens, enter the following commands:
    • diskpart
      Your PC needs to be repaired 0xc000014c
    • list part
  4. Now find out which partition needs to be selected as active. Enter select partition X and replace the X with the matching number.
  5. Now enter active and press Enter.

After doing that, you can close Command Prompt and check if the problem with your system is resolved.

Solution 8 – Perform SFC and chkdsk scans

According to users, sometimes this error can occur if your system files are corrupted. However, you can fix this issue by performing both SFC and chkdsk scans. To do that, just follow these steps:

  1. Start Command Prompt outside of Windows like we showed you in one of our previous solutions.
  2. When Command Prompt starts enter the following command:
  • sfc /scannow /offbootdir=c: /offwindir=c:windows
    ASUS your computer needs to be repaired

Once the SFC scan is finished, check if the problem is still there. If the issue is still there, you might have to run one more command.

In some cases the files on your hard drive might be corrupted, and to fix them, run chkdsk c: /r command. Once your hard drive is scanned, check if the problem is resolved.

That would be all, I hope this article cleared up the situation for you, and that these solutions were helpful. If you have any comments, or questions, just let us know in the comments.

READ ALSO:

Google’s new Chromebook ads takes big shots at both Windows and macOS

If you’ve been following tech for a while, you likely remember Apple’s “Get a Mac” campaign, and maybe even Microsoft’s “Scroogled” ads. In both instances, the tech giants were mocking their rivals— Apple taunting Microsoft’s Windows, and Microsoft attempting to mock Google’s search engine. Well, fast forward to 2018 and Google is bringing back the hate and mocking both Apple and Microsoft with a new Chromebook ad.

Google’s latest ad mocks older versions of Windows by throwing up “fake” error screens and even a fake Blue Screen of Death. We see tons of errors from Windows XP, Windows Vista, Windows 7, and Windows 8, but Windows 10 is not put in focus for longer than 2 seconds (at the 0:18 mark.) There’s even a piece where we see a fake tech support scam pop up on the screen, and hear “a serious error has occurred” on a loop.

The search engine giant also mimics Apple’s macOS with similar popups messages about disc errors. They also throw in the infamous “App Updates are available” pop up notification, and the “Application quit unexpectedly” error too.

These various segments essentially tell users that if you don’t error screens, and want a laptop you can count on, buy a Chromebook. It’s fun marketing yes, but it would have been more interesting if Google specifically targetted Windows 10, the most secure and current version of Windows where these errors are less common.

FIX: Can’t connect to Homegroup via WiFi on Windows 10/11

Have you upgraded to the Windows 10/Windows 8.1 operating system and you are having trouble connecting to a certain Homegroup or perhaps your own Homegroup? Well, I can tell you that by the time you’ve reached the end of this article your Homegroup in Windows 10, 8.1 will be available and you can connect your laptop to it as you normally do.
Fix Created New Homegroup on Ethernet but WiFi Laptop Doesn't Find it in Windows 8.1
The issues that might occur when trying to connect to a certain Homegroup in Windows 10, 8.1 can be caused by the Windows Firewall, Antivirus or some registry errors that might occur in Windows 10, 8.1. After following the tutorial below in the order it is described, you can fix this problem in the shortest time possible.

How to connect your PC to a Homegroup on Wi-Fi

  1. Run the Network and Internet troubleshooter
  2. Join the HomeGroup
  3. Turn off your antivirus
  4. Turn on Find Devices and Content
  5. Check date and time settings
  6. Check the name of your computer, domain and workgroup
  7. Turn on network discovery
  8. Leave HomeGroup and then join it again
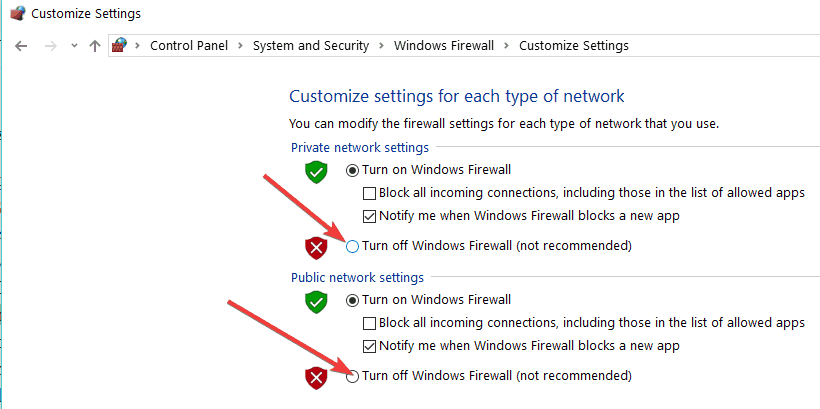
  9. Turn off Windows Firewall
  10. Repair network problems

1. Run the Network and Internet troubleshooter

  1. Move the mouse cursor over to the lower right side of the screen.
  2. From the menu that appears left click or tap on the Search feature.
  3. In the search dialog box write the following: “troubleshooting” without the quotes.

  4. After the search has finished left click or tap on the “Troubleshooting” icon.
  5. Left click or tap on the “Network and Internet” feature present in the troubleshooting menu.HomeGroup windows 10
  6. From the next window left click or tap on the “HomeGroup” feature.homegroup troubleshooter windows 10
    Note: If you get prompted by a user administrator window you will need to write in your administrator user and password.
  7. Left click or tap on the “Next” button to proceed.
  8. Follow the instructions on the screen to finish the troubleshooting process.
  9. Reboot your operating system after you are done.
  10. Check again if you can connect your Laptop to the Homegroup.

— RELATED: Full Fix: Homegroup Cannot Be Set Up in Windows 10, 8.1 and 7

2. Join the HomeGroup

  1. Move the mouse cursor over to the lower right side of the screen.
  2. From the menu that appears left click or tap on the “Settings” feature.
  3. From the next menu left click or tap on the network icon.
  4. From the list that shows you will need to left click or tap on the network you want to join.
  5. Left click or tap on the “Connect” button.
  6. Now try joining the Homegroup.

3. Turn off your antivirus

For the duration of this step you will need to completely disable any kind of third party antivirus.

  1. After you disabled it try connecting again to the Homegroup.
  2. If it works then you antivirus has restrictions that prevent you from accessing the desired Homegroup.

4. Turn on Find Devices and Content

  1. Move the mouse cursor over to the lower right side of the screen.
  2. From the menu that appears left click or tap on the “Settings” feature.
  3. Now left click or tap on the “Change PC settings” button.
  4. In the next window left click or tap on the “Network” option.
  5. Left click or tap on the “Connections” button.
  6. From the list choose your network connection.
  7. Turn on the feature “Find devices and content”.
  8. Reboot your operating system and try again accessing your HomeGroup.

— RELATED: Homegroup problems after installing Windows 10 Creators Update [Fix]

5. Check date and time settings

  1. Move the mouse cursor over to the lower right side of the screen.
  2. From the menu that appears left click or tap on the Search feature.
  3. In the search dialog box write the following: “date and time” without the quotes.
  4. After the search has finished left click or tap on the Settings option.
  5. Left click or tap on the “Date and time” icon.
  6. Left click or tap on the “Change date and time” feature.
    Note: If you are prompt by a user account control window you will need to write in the administrator account and password.
  7. Make sure the correct settings for the date and time are correct and then reboot your operating system.
  8. Try again your laptop to see if you can connect to the Homegroup.

6. Check the name of your computer, domain and workgroup

Make sure your Laptop has its own unique name, domain and Workgroup settings by doing the steps below.

  1. Move the mouse cursor over to the lower right side of the screen.
  2. From the list left click or tap on the “Search” feature.
  3. In the search dialog box write the following: “System” without the quotes.
  4. After the search has finished left click or tap on the “System” icon.
  5. Check your PC name under the “Computer name, domain, and workgroup settings” topic and make sure it is uniquely assigned only to your Laptop.
  6. If there are other PCs with the same name you will need to change the Laptops name to another one.

On Windows 10, you can quickly check and modify your computer’s name by going to Settings > System > About, as shown in the screenshot below.

— RELATED: How to: Remove Homegroup on Windows 10

7. Turn on network discovery

  1. Move the mouse over to the lower side of the screen.
  2. Left click or tap on the “Search” feature.
  3. In the search dialog box write the following: “advanced sharing” without the quotes.
  4. After the search has finished left click or tap on the “Manage advanced sharing settings” icon.
  5. Next to the “Private network profile” topic you will need to left click or tap on the drop-down arrow.
  6. Left click or tap on the “Turn on network discovery” feature.turn on network discovery windows 10
  7. Left click or tap on the “Save changes” button.
    Note: If you are prompted by a user account control window write in your administrator account and password.
  8. After you changed the setting reboot your Windows 8.1 operating system.

8. Leave HomeGroup and then join it again

  1. Move the mouse cursor over to the lower right side of the screen.
  2. Left click or tap on the Settings feature.
  3. Left click or tap on the “Change PC settings” button.
  4. Left click or tap on the “Homegroup” button.
  5. Left click or tap on the “Leave” button next.
  6. Then try connecting again to your Homegroup and see if it works.

— RELATED:  Fix: Asked to Join a Nonexistent Homegroup on Windows 10

9. Turn off Windows Firewall

  1. Move the mouse cursor over to the lower right side of the screen.
  2. From the list that appears left click or tap on the “Search” feature.
  3. In the search dialog box write the following: “firewall” without the quotes.
  4. After the search has finished left click or tap on the “Windows Firewall” icon.
  5. Left click or tap on the “Turn Windows Firewall on or off” option.Turn off Windows firewall
    Note: If you are prompted by a user account control write in the administrator account and password.
  6. Now under each network you will need to choose the “Turn off Windows Firewall (not recommended)” option.
  7. Left click or tap on the OK button.
  8. Try connecting again to your Homegroup.

10. Repair network problems

  1. Move the mouse cursor over to the lower right side of the screen.
  2. Left click or tap on the Search feature presented there.
  3. In the search dialog box write the following: “Identify and repair” without the quotes.
  4. When the search has finished left click or tap on “Identify and repair network problems”
  5. Follow the instructions on the screen to finish the troubleshooting issues.
  6. Reboot your operating system.
  7. Check again if you can connect your Laptop to the Homegroup.

Note: The steps listed above to repair network problems apply only to Windows 8.1 systems. On Windows 10, you can simply go to Settings > Update & Security > Troubleshoot > select Internet Connections and run the troubleshooter.

internet connections troubleshooter

And you are done, we hope one of these methods helped you solve the Homegroup issues that you are having in Windows 10, 8.1. If the problem persists, and you still can’t join your HomeGroup, here are a few additional troubleshooting solutions that you can use:


EA just launched Origin Access Premier, a $15/mo service for its latest games

After pioneering subscription-based gaming services on Xbox One and Windows PCs, EA is pushing forward with Origin Access Premier, a new premium tier for its subscription service for PC gamers. The new membership tier, which is available today for $14.99/month or $99.99/year will give subscribers early access to full versions upcoming games (additional content included) such as Battlefield 5, FIFA 19 or Anthem.

This is exactly what Microsoft did with Xbox Games Pass, which will now include all future Microsoft Studios games on launch day. To sweeten the pot, Origin Access Premier members will also enjoy an evolving collection of PC games plus 10% off on Origin digital purchases

Nothing changes for the pre-existing Origin Access service, except the new “Origin Access Basic” name. These subscribers will still get access to the latest EA games after waiting a couple of months after their release, as well as limited-time trials for new EA games. Origin Access Basic members can also upgrade to the new Premier tier at any time on the Origin website.

EA didn’t say if a “Premier” tier could also come to EA Access, the equivalent to Origin Access on Microsoft’s Xbox One console, but it would certainly be a welcome addition. EA Access preceded Xbox Games Pass on the Xbox One, and the service now has its own dedicated tab in the “My Games and Apps” section of the Xbox dashboard. Microsoft and EA share the same forward-looking approach about subscription-based gaming services, and it remains to be seen if other big publishers such as Ubisoft could follow suit.

Xbox Game Pass is replacing Entertainment tab on the Xbox One dashboard today

A couple of weeks ago, Microsoft started testing with select Xbox Insiders a new Xbox Games Pass on the Xbox One Dashboard. The new tab replaced the “Entertainment” tab, which used to showcase content from Microsoft Movies & TV, Netflix, Spotify and other entertainment apps, and you may remember that this Entertainment tab previously replaced the “OneGuide” tab last year.

Well, after receiving “overwhelmingly positive feedback” from Xbox Insiders, the new Xbox Games Pass tab is rolling out to all Xbox One users today. “This new tab makes Xbox Game Pass even more discoverable to new members and will help our current members check out what’s new every time they turn on their console,” the blog post reads on Xbox Wire. “It also up-levels popular titles in the catalog, highlights newly-added games, spotlights the latest deals on games and DLC for members, and recommends games based on your interests so that you can easily find your next favorite game.”

Xbox Games Pass content was already accessible from the Microsoft Store and the “My Games and Apps” section, and some users may not be happy to be another “ad” for Microsoft’s game streaming service. For those of you who will miss the Entertainment tab, Microsoft says you’ll still be able to find entertainment content in the Store tab, Apps Category tab and Microsoft Movies & TV app. “These will continue to showcase the latest and greatest in trending and popular movies, TV and music across our Microsoft service, as well as our many 3P Partners,” Microsoft said.

Microsoft Edge gets web authentication: sign in to websites with Windows Hello, etc

Microsoft today has just announced the introduction of support for the  Web Authentication specification in Microsoft Edge. This support should make it easier for users to leverage the power of Windows Hello, and log into websites without the need for passwords.

Support for this feature is present in the most recent Windows Insider Build, 17723. The implementation supports a wider variety of authenticators compared to other browsers, with examples including FIDO2 Security Keys, Facial Recognition, a PIN, and even fingerprint. Microsoft is also supporting FIDO U2F devices, for websites which are not yet ready for moving to a passwordless model.

Passwords are easily hacked, but Windows Hello technology is not. Microsoft has long been on a journey to a passwordless and more secure web and actually shipped the first preview implementation of the Web Authentication API in Microsoft Edge back in 2016.

Microsoft is working with its partners to bring this feature to more experiences across the web, but for now, developers can get started by checking this guide.

First Redstone 5 build for HoloLens brings new Miracast projection feature, UI changes

If you’re a Windows Insider sporting a HoloLens, it is time to head to your settings and install a new build. Indeed, HoloLens has just got its first Windows 10 Redstone 5 preview, bringing a new Miracast projection feature, UI changes, and more (via MSPoweruser.)

This Insider Redstone 5 build will show up for those who are running the Windows 10 April 2018 Update on their HoloLens device. If the device is not yet already opted to receive Insider builds, you can do so by heading to Settings -> Update & Security -> Windows Insider Program and selecting Get started. Anyway, the following new features come for everyone running this version 10.0.17720.1000 Redstone 5 build on HoloLens.

  • Stop video capture from the Start or quick actions menu: To start recording, select Start > Video. To stop recording, select Start > Stop video.
  • Project to a Miracast-enabled device: On Start, select Connect. Select the device you want to project to.
  • View and respond to notification toasts on HoloLens, just like you do on a PC: You’ll now see notifications from apps that provide them. Gaze to respond to or dismiss them (or if you’re in an immersive experience, use the bloom gesture).
  • You’ll now see overlays such as the keyboard, dialogs, file picker, etc. when using immersive apps.
  • When you use the volume up/down buttons on your HoloLens you’ll see a visual display of the volume level.
  • A loading indicator was added during the boot process to provide visual feedback that the system is loading.
  • Addition of the Windows Nearby Sharing experience, allowing you to share a capture with a nearby Windows device.
  • Share button is now available on Microsoft Edge windows on HoloLens.

The build also brings new features to developers and commercial users. Developers are getting support for Holographic Camera Capture UI API, and some improvements to Mixed Reality Capture. Commercial users, meanwhile, are getting post-set-up provisioning, assigned access with Azure AD groups, PIN sign-in on profile switch, and more. Feel free to check out Microsoft’s documentation here for more on what’s new and changed for devs and commercial users.

PowerPoint Not Responding or Opening: How to Fix it

PowerPoint is one of the most widely used apps from the Office suite. Millions of students and business users rely on this program to create powerful presentations for school and work. But many found that PowerPoint is not responding.

Just like every other program or app in Windows, PowerPoint might suddenly become unresponsive at some point. If this happens once a month, there’s nothing to worry about, but frequent occurrences point to a critical problem.

According to Microsoft, various factors can cause PowerPoint problems in Windows, including an outdated version of the program, a conflicting add-on, or an outdated antivirus software that conflicts with PowerPoint.

Keep reading to find out what to do when PowerPoint is not responding or stops opening in Windows.

How do I fix PowerPoint not responding?

Tip icon Tip
There’s no way to predict if or when PowerPoint will become unresponsive. But, you can secure yourself from losing your work if such an issue happens simply by having the Office suite (including PowerPoint) connected to the OneDrive account.

Before we move to the slightly complex solutions, here are a few quick ones:

  • Make sure you are running the latest version of Microsoft Office and Windows. If there are any pending updates, install them.
  • Disable any third-party antivirus or security software installed on the PC. If that works, uninstall the program.

If none work, head to the fixes listed next.

1. Remove conflicting add-ons

  1. Click on the Start Menu, type PowerPoint /safe, and hit Enter.
  2. If the issue is resolved, on the File menu, click Options, and then click Add-Ins.
  3. Select COM Add-ins, and then click Go.COM-Add ins to fix powerpoint not responding
  4. Click to clear all the checkboxes (Disable the Add-ins) in the list, and then click OK.
  5. Restart PowerPoint.

Some PowerPoint add-ons actually aren’t good for the program. In case you installed such an add-on, you might experience problems. So, go to PowerPoint, and make sure none of the installed add-ons conflicts with it.

If you notice that the problem doesn’t occur while having add-ons turned off, start turning them on one by one until you find a troublesome extension. However, if none of the add-ons causes your PowerPoint to crash, your problem is caused by something else.

2. Repair Office

  1. Close any Microsoft Office applications that are running.
  2. Open Control Panel, and click on Programs and Features.
  3. In the list of installed applications, right-click your version of Microsoft Office, and then click Change, select Quick Repair, and click Repair.powerpoint-unresponsive2
  4. In case a Quick Repair doesn’t work, go with the Online Repair option.

If some internal error leads to PowerPoint not responding, resetting Office will bring it back to normal.

3. Disable Hardware acceleration

3.1 From within PowerPoint

  1. Open the PowerPoint app.
  2. Go to File, select Options, and navigate to Advanced.
  3. Locate Hardware Acceleration under all the entries and disable it.
  4. After doing that, start Microsoft Office again.

3.2 Via the Registry

  1. Open Registry Editor.
  2. In the left pane, navigate to: HKEY_CURRENT_USER\Software\Microsoft\Office16.0\Common key.
  3. Right-click on Common, choose New, and select Key. 
  4. Enter Graphics as the name of the new key.
  5. Now, right-click the Graphics key, select New, then DWORD (32-bit) Value, and name it DisableHardwareAcceleration.
  6. Double click DisableHardwareAcceleration value and set its Value data to 1. Click OK to save changes.
  7. Close Registry Editor and check if the problem is resolved.

Hardware acceleration is one of the most common causes of various Office issues and is often why PowerPoint is not responding. So, it’s probably the best idea to disable it.

That’s about it, we hope that at least some of these solutions helped you with the crashing problem in PowerPoint. Once again, we highly recommend you have your Office and OneDrive account connected, just in case of issues like this.

If you have any comments, questions, or suggestions, just let us know in the comments below.

Fix: Cortana is Disabled by Company Policy in Windows 10/11

The Settings app on Windows 10 is the new modern control center to make changes in a lot of the components on Windows 10. Windows 10 was developed as an operating system that not only home users but also the office users could use.

When you use Windows 10 in an office, chances are that many settings and programs on Windows 10 are disabled by default by your organization. This is a measure taken by companies to make sure that their employees are not able to access any kind of setting or part of the operating system that they are not allowed to.

It is totally understandable if your company has restricted use of Cortana on your office/company machine but if you have a PC at home and you still see this message, then it might be disappointing for sure. This is an error on Microsoft’s part and can happen cause of a lot of reasons.

Reasons such as having your work or school Microsoft Exchange account setup on your PC can restrict you from using Cortana at all! But you can actually fix this pretty easily. You can just remove that email account from work or school that is restricting you from using Cortana. Let’s see how to fix this.

What to do if  Cortana is Disabled by Company Policy

Table of contents:

  1. Make sure your PC is running Cortana supported region and language
  2. Delete your work/school email account
  3. Check Regional settings
  4. Run the Apps Troubleshooter
  5. Reset Cortana
  6. Enable Cortana in Registry
  7. Run the SFC scan
  8. Run DISM
  9. Fix “Managed by your organization” message

Solution 1 – Make sure your PC is running Cortana supported region and language

Follow the steps to verify the language and region settings. This should fix this error.

cortana language pack speech

  1. Open the start menu and then look for Settings.
  2. Now go to Time & Language Settings.
  3. The look for the Region & Language Settings.
  4. Set the United States and set the English (United States) as the default for the machine.

Solution 2 – Delete your work/school email account

Follow the above steps and you will not see the error message. But if you still see the message, move to the Mail app on Windows 10. Most of the users who received the machines either from school or from their workplace have a Corporate Exchange account configured in the Windows 10’s Mail app. These accounts may not allow Cortana to be used. To fix this follow the below steps.

disabled by company policy mail app 1

  1. Open the start menu and type Mail and open the first result.
  2. Click on Accounts then click on the corporate account and a new window will open up.
    disabled by company policy mail app
  3. You will now see an option that says Delete account and upon clicking that button, you will be able to remove that account from your computer.

Solution 3 – Check Regional settings

If you were able to use Cortana seamlessly before the update, and now it’s not available, there’s a great chance that something with your Region settings is wrong. Either you have installed an unsupported language by mistake or the installation changed the settings on its own. In both cases, you can resolve this issue in a few easy steps.

  1. Open Settings.
  2. Go to Region & Language.
  3. Under the Country or Region drop-down menu, select one of the supported regions/countries.
  4. Now, go to Speech.
  5. Under the Speech Language drop-down menu, select one of the supported spoken languages.
  6. Restart your PC and the Cortana should be placed on the taskbar after the system is up

Solution 4 – Run the Apps Troubleshooter

We can also use Windows 10’s built-in troubleshooting tool to resolve problems with Cortana. Here’s what you need to do:

  1. Go to Settings
  2. Head over to Update & Security > Troubleshoot
  3. Find Windows Store apps, and click Run the troubleshooter
  4. Follow further on-screen instructions
  5. Restart your computer

Solution 5 – Reset Cortana

If none of the previous solutions resolved the problem, let’s try resetting Cortana. To reset Cortana, just follow these instructions:

  1. Go to Search, type powershell and run Windows PowerShell as administrator.
  2. When PowerShell starts, run the following command: Get-AppXPackage | Foreach {Add-AppxPackage -DisableDevelopmentMode -Register “$($_.InstallLocation)AppXManifest­.xml

Solution 6 – Enable Cortana in Registry

If there’s no other way to activate Cortana, there’s a useful Registry tweak you can try. To enable Cortana in the Registry Editor, do as follows:

  1. Go to Search, type regedit, right-click regedit and choose Run as Administrator.
  2. Navigate to HKEY_CURRENT_USERSOFTWAREMicrosoftWindowsCurrentVersionSearch.
  3. Change the BingSearchEnabled value from 0 to 1.
  4. Make sure all of the Cortana flags are set to 1 instead of 0.
  5. Restart PC and check out Cortana again.

Solution 7 – Run the SFC scan

If Windows 10’s troubleshooter didn’t get the job done, we can try with the SFC scan. Here’s how to run it:

  1. Right-click on the Start Menu button, and open Command Prompt (Admin).
  2. Enter the following line and press Enter: sfc/scannow
  3. Wait until the process is done (it may take a while).
  4. If the solution is found, it will automatically be applied.
  5. Now, close the Command Prompt and restart your computer.

Solution 8 – Run DISM

And the last troubleshooter we’re going to try is DISM. Here’s how to run DISM in Windows 10:

  1. Open the Command Prompt as shown above.
  2. Enter the following command and press Enter:
      • DISM.exe /Online /Cleanup-image /Restorehealth
  3. Wait for the process to finish.
  4. Restart your computer.
  5. In case the DISM can’t obtain files online, try using your installation USB or DVD. Insert media and type following command:
      • DISM.exe /Online /Cleanup-Image /RestoreHealth /Source:C:RepairSourceWindows /LimitAccess
  6. Make sure to replace the ”CCortana is Disabled by Company Policy in Windows 10:RepairSourceWindows” path of your DVD or USB.
  7. Follow further on-screen instructions.

Fix “Managed by your organization” message

“Managed by your organization” message mostly appears when to try and change the settings for Microsoft’s default telemetry program. If you don’t know what a telemetry program is, then let me explain it to you. As you know Microsoft collects a bunch of anonymous usage data from your Windows 10 machine. Telemetry helps them in capturing and sending the data from your PC to Microsoft’s servers where Microsoft will look at your data and see how people are using their PC to enhance the experience in a better way. You need to make some changes in order to make sure Cortana works.

  • Open the start menu and then open the Settings app.
  • Open the Privacy settings and then scroll down and choose Feedback & diagnostics.
  • Change the Diagnostic and usage settings to either Full or Enhanced.

Windows 10’s Cortana and some other services need this setting to be at ‘Enhanced’ or even ‘full’ mode. After changing these settings, Cortana will work on your machine normally.

RELATED STORIES YOU NEED TO CHECK OUT:

Microsoft Rewards is experiencing issues with emails, Microsoft recommends checking Order History for redemptions

If you’ve recently redeemed some Microsoft Rewards points and not received an email confirmation or an email with your reward, fear not. Microsoft has placed an alert on the Microsoft Rewards dashboard alerting users to an issue with emails.

Redemptions are still being processed, but to see them, you’ll need to view your Order History within the Microsoft Rewards dashboard.

Points can be earned and redeemed as normal. This issue only affects the sending of email confirmations.

Microsoft news recap: LinkedIn to get voice messaging, Outlook.com gains Dark Mode, and more

Microsoft news recap is a weekly feature highlighting the top Microsoft news stories of the past week. Sit back, grab some coffee, and enjoy the read!

Voice messaging is coming to LinkedIn

Linkedin is rolling out voice messaging across its apps, with the aim of voice messages being to build a “more personal connection”. The rollout will take place over a number of weeks, but all LinkedIn users should have access to the feature within the next few weeks.

Redesigned Outlook.com adds Dark Mode option, gets ready to drop beta tag

The push for websites and online services to add Dark Mode’s is ever-growing, with the benefits being less eye-strain, and a more comfortable viewing experience at night or in dim lighting. Now, Microsoft is adding a Dark Mode to its web-based email service, Outlook.com.

Microsoft Authenticator app updates on iOS with new password-free feature

In a push to reduce the usage of passwords, Microsoft has updated Microsoft Authenticator to enable password-free login on Azure AD accounts, providing a more seamless login experience for work and school accounts.

Microsoft reportedly planning a low cost cloud-based gaming console along with next gen Xbox

Microsoft’s plans for the future of its Xbox console lineup appears to becoming more apparent. A new report claims the company is planning to release a low-cost console that plays games from the cloud, rather than requiring all of the hardware on-board, built for game streaming. Microsoft believes it has a solution to the latency issues often experienced with game streaming.

Microsoft, Xbox

That’s it for this week. We’ll be back next week with more Microsoft news!

Windows Insiders on Windows 10 Release Preview receive new Windows Maps update, brings several new features

Windows Insiders on Windows 10’s Release Preview ring are receiving a new Windows Maps update. The update brings a number of new features that will make the app more useful, particularly for those travelling and exploring areas that they don’t often visit.

Here is the changelog for version 5.1806.1911.0:

  • View the house numbers directly on the map
  • Save the places you are looking for
  • Find locations near you easily with shortcut menus
  • Going for a drive? We’ll show you the scenic route

The update for Windows Maps is available from within the Microsoft Store, for Windows Insiders. It is likely to be released to the general public in the near future.

Windows Maps
Windows Maps
Price:
Free

How to fix error 0xc03f4320 affecting Windows Store purchases

Have you bough a new Surface device or laptop with Windows 10 incorporated? If you are one of those users who are continuously getting the error 0xc03f4320 while trying to buy certain applications from the Windows Store, then you are in luck. After following the tutorial below, you will be able to fix your Windows 10 computer and buy all the apps you wish.
How to fix error 0xc03f4320 while trying to buy apps from a Ms store (Windows 8.1)
The error message 0xc03f4320 appears when your Windows 10 account on your Surface device or Windows 10 laptop is not set up correctly. So, creating a new account is the next step in this tutorial. Also, please follow the steps in the order they are listed in order to fix the error 0xc03f4320 in the shortest time possible.

How do I fix Microsoft Store error 0xc03f4320?

  1. Create a new user account
  2. Let apps use your location
  3. Disable Proxy Server
  4. Run WSReset.exe
  5. Contact Microsoft Support

1. Create a new user account

  1. First of all you will need to sign in with the administrator account you have in Windows 10.
  2. Move the mouse cursor over to the upper right side of the screen.
  3. From the menu that appears left click or tap on the “Settings” feature.
  4. Now in the menu of the Settings feature left click or tap on the “Change PC settings” option.
  5. In the left menu left click or tap on the “Accounts” option.
  6. Now left click or tap on the “Other accounts” option you have in the menu.
  7. Find and left click or tap on the “Add an account” or “Add someone else to this PC” option (depending on your Windows 10 version).add microsoft account add microsoft account login screen missing
  8. Left click or tap on the “Sign up for a new email address” option.
  9. Write in this window there the requested information.
  10. Left click or tap on the “Next” button to proceed.
  11. Follow the instructions on the screen to finish the process accordingly.
  12. Now after you successfully setup the account you will need to move the mouse cursor again to the upper right side of the window.
  13. Left click or tap on the “Settings” feature.
  14. From the menu of the Settings feature left click or tap on the “Change PC Settings” option.
  15. In the Change PC Settings window left click or tap on the “Accounts” button.
  16. Next left click or tap on the “Other accounts” feature.
  17. Left click or tap on the account you created previously.
  18. Select the “Edit” option for this account.
  19. Select by clicking on the “Account type” drop down list the account type.
    Note: The account type should have administrative privileges.

2. Let apps use your location

  1. Press and hold the “Windows” button and the “W” button.
  2. Write in the dialog box the following “Allow apps to use my location”.
  3. Press the Enter button on the keyboard.
  4. Turn on the feature “Allow apps to use my location”.
  5. Also turn on the feature “Let apps use my location”.
  6. Reboot your Windows 10 operating system and try again purchasing an app.

Note: Depending on your Windows 10 version, you can also allow apps to use your location by changing some privacy settings. Go to the Settings page > select Privacy > click on Location and enable location services.

app use location windows 10

3. Disable Proxy Server

  1. Open your Internet explorer application.
  2. Left click or tap on the “Gearbox” feature situated in the upper right side in Internet Explorer.
  3. Left click or tap on the “Tools” feature.
  4. From the Tools menu left click or tap on the “Internet Options” feature.
  5. Left click or tap on the “Connections” tab situated in the upper side of the window.
  6. From the Connections tab left click or tap on the “LANsettings” option.change internet settings windows 10
  7. Now uncheck the box next to the “proxy server for your LAN” feature.
  8. Left click or tap on the “OK” button next.
  9. Reboot your operating system.
  10. Check again if you are able to purchase your applications via Windows Store.

4. Reset the Windows Store app

If the error persists, try resetting the Windows Store app. This quick solution can help you fix a wide array of Microsoft Store error codes, so it’s worth giving it a try.

All you need to do is launch a new Run window, enter the WSReset.exe command, hit Enter and wait for a couple of seconds. Restart your computer and check if error 0xc03f4320 still occurs.

Windows Store cache broken

5. Contact Microsoft Support

If you still get the same error message after you successfully made another account, then you will need to write to Microsoft about your issue because it might be an internal problem from them.

And you are done. You now have a good Microsoft account and therefore you should be able to buy the apps you wish from the Windows Store platform. If you have further questions regarding this subject, you can always write us in the comments section below. We will help you further as soon as possible.

RELATED STORIES TO CHECK OUT:


How to Fix Game Issues on AMD R270X Video Cards

Are you trying to play your games on the new Windows 10 OS and they crash? It seems that some Windows 10 users who use PCs powered by the AMD R270X video cards are getting all sorts of errors. In some cases, there is only a black screen that appears instead of the actual game. I am pleased to tell you that we have found a few fixes to solve these issues. Follow the steps listed below for a detailed explanation on how to fix this issue.
How to fix issues with gaming on video card AMD R270X - Windows 10 TP - DirectX
The error messages you get while trying to play your games on Windows 10 OS appear mainly because the video card driver is not fully compatible with your Windows 10 OS version. In this tutorial, you will learn how to properly install the driver in compatibility mode and see how it goes from there.

Fix AMD R270X issues on Windows 10

  1. Reinstall your display adapter driver and run it in compatibility mode
  2. Refresh your PC
  3. Disable overclocking software
  4. Run SFC scan

1. Reinstall your display adapter driver and run it in compatibility mode

  1. Press and hold the “Windows” button and the “R” button.
  2. You should have the Run window in front of you.
  3. In the run dialog box write the following: “devmgmt.msc” without the quotes.
  4. Press the Enter button.
  5. Now the Device Manager Window will be in front of you.
  6. On the left side pane you will need to left click or tap on the “Display Adapters” to expand it.update display adapter
  7. Right click or hold tap on the device in the list.
  8. Left click or tap on the “Uninstall” feature from the menu.
  9. Check the box next to “Delete driver software“.
  10. After the uninstall process has finished reboot your Windows 10 PC.
  11. After the device starts go on the manufacturer’s website and download the latest driver you have available.
    Note:Be sure to check with what version of Windows the driver is compatible.
  12. After the download has finished go to the directory where you saved it.
  13. Right click or hold tap on the driver executable file.
  14. From the menu that appears left click or tap on the “Properties” option.
  15. Left click or tap on the “Compatibility” tab situated in the upper side of the Properties window.
  16. Put a check mark next to ” Run this program in Compatibility mode”.
  17. From the drop down menu left click or tap on the operating system for which the driver is compatible.
    Note: Windows 8.1 will work for most updated drivers.
  18. Left click or tap on the “OK” button to save the changes.
  19. Now right click or hold tap again on the driver executable.
  20. Select from the menu the “Run as Administrator” feature.
    Note: If you are asked for an administrator account and password please write them in.
  21. Follow the instructions on the screen to finish the installation process.
  22. Reboot your Windows 10 PC and see if you still have gaming issues as you did before.

2. Refresh your PC

Note: Before attempting this step please make a back up copy of all your important files, folders and applications.

  1. Left click or tap on the Start button.
  2. In the search box of the start button write the following: “refresh”.
  3. Press the Enter button on the keyboard.refresh windows 10
  4. After the refresh has finished left click or tap on the “Refresh your PC without affecting your files”
  5. Under the section “Refresh your PC without affecting your files” left click or tap on the “Get Started” button.
  6. Follow the instructions on the screen to finish the system refresh.
  7. Reboot your device after the refresh has completed.
  8. Check again your games to see if they work properly in Windows 10.

In order to boost your game performance and get rid of slowdowns, lags, low FPS and other annoying issues, we recommend downloading Game Fire (free).


3. Disable overclocking software

If you’ve overclocked your computer, try to disable these tools and check of the issue persists. If you’re using really old AMD R270X graphics cards, chances are they’re not fully compatible with your overclocking software. In this case, you can quickly fix the problem by simply disabling your overclocking tools.

4. Run SFC scan

AMD R270X driver issues or crashes may occur if certain Registry entries are missing or are corrupted. You can fix this issue by repairing your Registry. Before you do anything Registry-related, you need to first back up your computer — just in case anything goes wrong and you need it to restore it to a previous working state.

  1. Go to Start > type cmd > right-click Command Prompt > select Run as Administrator
  2. Type the sfc /scannow command > hit EnterSFC scan
  3. Wait for the scanning process to complete and then restart your PC. All the corrupted or missing files will be replaced on reboot.

And that is it, you have reached the end of our tutorial. If you followed the steps above in the order they are listed, then you should now be able to play your games in Windows 10 without any issues. If you did  encounter additional issues, let us know in the comments section below. We will help you further as soon as possible.

RELATED STORIES TO CHECK OUT:


Windows Mixed Reality now lets you peek into the real world

Windows Mixed Reality is a series of Windows 10 virtual reality headsets that mixes VR with AR. Microsoft updated Windows 10 and Edge to fully support Windows Mixed Reality last year. Now the software giant has introduced a Flashlight option that will enable WMR users to take a peek into the real world without removing their headsets.

Microsoft’s Mr. Sarkar announced Flashlight along with the latest Windows 10 preview builds for the Redstone 5 and 19H1 updates. Flashlight is one of the new things Microsoft has included within the latest Windows 10 build previews. Thus, Windows Insiders on the Skip Ahead and Fash rings can try out Flashlight with their WMR headsets. Mr. Sarkar stated on Windows Blogs:

Today we are excited to announce that we are adding the ability to peer into your physical environment through Flashlight – without removing your headset! With the latest Windows Insider Program build, you can open a portal into your real world at any time via the Start menu, a button shortcut, or a voice command.

A YouTube video (below) shows Flashlight in action. The video shows that you can activate Flashlight with a “Flashlight on” command or by pressing a button shortcut pretty much as Mr. Sarkar stated on the Windows Blogs. When users turn on Flashlight, a circular ring appears that includes a monochrome video feed of the real world that they can move around.

Flashlight could be a very handy addition to WMR headsets. For example, without Flashlight you would need to remove the VR headset to pick up a drink glass on a table. Now you can activate Flashlight to pick up a drink with the headset on.

Aside from Flashlight, the new Windows 10 preview builds also include additional emojis. The new build previews include 157 new Unicode 11 emojis to select on the Emoji Panel. Superheroes, pirate flags, llama and softball are among the new emojis in the latest build previews.

However, Flashlight is undoubtedly the most notable new addition in the latest Redstone 5 preview. The new Flashlight will certainly be a handy new video mode for WMR headsets, which are still lagging behind the likes of the Oculus Rift and HTC Vive. You can activate the new Flashlight mode when Redstone 5 rolls out in October 2018.

Hyperkin to release a new HDMI cable for the original Xbox console

Hyperkin has been getting deeply involved in the classic console market, releasing the “Duke” controller in March of this year and showing off neon variants at this years E3.

The company is now turning its head towards the display connector. They are planning to release a new HDMI cable that allows the console to be connected directly to a HDMI port on a monitor and display at a resolution of up to 1080i (via Neowin). The original Xbox made use of proprietary cables and component cables, but this solution will make it easier for direct HDMI use.

Hyperkin’s HDMI cable is likely to be licensed and approved by Xbox, which sets it apart from other cables that already provide similar functionality.

How to Fix VirtualBox Video Driver Problems in Windows 10

Are you interested in trying the new Windows 10 versions? Did you already install them on a VirtualBox system?

It seems that a few Windows 10 users are having issues with the video driver for the virtual machine when they try to install Windows 10 on it.

How to fix VirtualBox video driver in Windows 10 build 10041

Well, we can tell you that the fix for the video driver issue is very simple. All you need to do is follow the steps below in the order they are listed and you should fix the problem in less than 5 minutes.

So, basically, the most important features affected by the video driver issues in VirtualBox are the auto-resize option that you use for the guest display to work properly, the clipboard sharing feature, and also the mouse integration process.

Also, as a reminder, you need to download the last version of Oracle VirtualBox because this is the one that is fully compatible with your Windows 10 operating system.

How do I fix video driver issues in VirtualBox?

1. Enable 2D and 3D video acceleration

  1. Close the Virtual Machine on Windows 10.
  2. Reboot your Windows operating system first.
  3. After the device starts, open the settings page of the Windows 10 Virtual Machine.
  4. Left click or tap on the “Display” settings which you can find on the left side panel.
  5. On the right side of the Settings window, look for the “Extender Features” topic.
  6. Under that section, check the box next to the “Enable 3D Acceleration” feature.
  7. Also, check the box next to the “Enable 2D video Acceleration” feature.
  8. Left click or tap on the “OK” button to save your changes.
  9. You can open now the Windows 10 Virtual Machine.
  10. After the Windows 10 Virtual Machine opened, the system will activate the drivers properly.
  11. Check again if your video driver in VirtualBox is working properly for Windows 10 OS.

To restore proper display resize, clipboard sharing, and mouse integration in your Windows 10 virtual machine, you should install VirtualBox Guest Additions, since it installs the drivers and services that make these features work correctly in VirtualBox.

2. Update your graphics driver

Since this is a video driver-related issue, make sure that you’ve installed the latest graphics driver updates on your computer. The best solution is to download the latest drivers from your GPU manufacturer’s website.

If you prefer to quickly update your drivers, then you can use a dedicated tool that helps you solve many issues related to your computer drivers.

Using specialized driver updating software to update or fix your drivers is definitely more efficient than doing it manually, plus you can finish really fast.

Hence, update all drivers quickly with such practical tools, and avoid other critical issues because of installing the wrong drivers.

You have reached the end of this article. If you followed the steps above in the order they were listed, you should now have a working video driver for Windows 10.

Also, if you encountered other errors along the way regarding this specific issue, let us know in the comments section below. We will help you further as soon as possible.

Xbox One cheaters could soon be caught by a new Microsoft AI

While Microsoft has seemingly divested its business interests into two oddly contradictory buckets in cloud productivity software and services and gaming; the company sees a line between the two. Over the past few months, we’ve seen Microsoft talk up a future where the resources of its cloud platform will power portions of its gaming business.

While the notion of Microsoft leveraging its cloud platform to boost its gaming efforts seems like nothing more than a Skittles bag of buzzwords, the company may be putting its vision into motion sooner rather than later with a new project that will use cloud powered AI to prevent cheating on the Xbox One.

According to the Next Web, Microsoft recently applied for a patent that would filter cheating behavior on Xbox by using AI to search for suspicious behavior, ranks or achievements in a users accounts.

The patent application was published by the US Patent and Trademark Office last month. Unlike other efforts by the likes of Valve, this AI wouldn’t just look for cheaters within active games. Instead, it would snoop through the interactions between game and platform, such as “notifications of achievements, game scores reported to the platform, and/or a player rank achieved on the platform based upon game activities.”

Unlike other platform attempts, Microsoft is attempting to target cheaters outside of games but rather going after the spoils of said cheating to discourage the behavior.

Microsoft’s approach will also minimize console resource demands where the company can offload its AI processes to the cloud rather than using additional cycles during already resources demanding games.