File Opens with the Wrong Program? Here’s How to Fix it

When opening files with the wrong program in Windows 10, this most likely prevents you from running that program correctly, or it will not run at all.

So, if you want to watch a movie, listen to music, or open a Word document for work, you need to set up the right program to open the respective files.

Opening your files in the wrong program in Windows 10 is a common mistake, but luckily your PC comes with a straightforward app to set the default program for a specific file you want to open.

How can I stop my file from opening with the wrong program?

1. Set a default program for opening files using the context menu

  1. Right-click the file you want to open and select Open with.
  2. Select Choose another app.
    choose another
  3. Now, select the app you want to keep using and check the Always use this app to open <extension> files option.

With this, you should have a default app for launching your files. This will prevent the file from opening with the wrong program in the future.

2. Use the Settings page

  1. Press the Windows key + I to launch Settings and select Apps.
  2. Choose Default apps in the left pane.default apps windows 10
  3. Now, click on the type of content that you want to open.
  4. A drop-down menu will appear on the screen, allowing you to select the default program to use.
choose default app windows 10

There you have it, this is how you change the default program for opening files on Windows 10. Follow the instructions listed above to set the correct program for the files you want to open.

If you are getting this file does not have a program associated with it error, check our guide to fix it.

Let us know in the comments below if you could set a default program for your files.

Original X-shaped Xbox prototype lives on

A very long time ago in the year 2000, Microsoft took a prototype of the original Xbox on a tour of the world to help developers become interested in the new console. Almost jokingly so, it was unlike anything else seen at the time since it was literally a giant “X” shaped device. Well, that very prototype is now living on and has a special place at the Microsoft Visitor Center in Redmond (via Eurogamer.)

The prototype device reportedly cost $18,000 to make and was composed of a solid block of Aluminum. It frequently appeared at trade shows, and other gaming-related events, and was apparently a working unit, per Seamus Blackley, the father of Xbox. Seamus even added that the Xbox team would literally carry this prototype device around in penguin cases, by pulling them up and down stairs.

In another Tweet, Seamus revealed that Microsoft once took the prototype Xbox to PlayStation headquarters when they were in Tokyo. They actually placed the Xbox unit on top of the Sony sign as a prank, which someone else joked might be the closest we’ll ever get to seeing Xbox and PlayStation cross-play.

This isn’t the first time that the prototype has surfaced. It was roughly two years ago that Microsoft’s Aaron Greenberg revealed the device on the Xbox Snapchat. Anyway, when the Xbox actually launched, the design was much more conventional, but Microsoft obviously had fun with this prototype device.

State of Decay 2 hits 3 million players, releases Independence Pack

State of Decay 2 released to a mixed bag of reviews, with many gamers citing bugs, glitches, and a repetitive gameplay as negatives for the blended RPG/Sim game.

Seemingly in an effort to address critics’ complaints, the game studio Dead Labs recently released a 20GB patch for SoD2 that resolved a majority of core game mechanic shortcomings and probably helped push the total number of players cross the 3 million mark, two months since release.

Now Dead Labs is set to give those 3 million players some additional content to consume over the 4th of July holiday in the US.

In advance of the 4th of July holiday, we are celebrating that the State of Decay 2 community now exceeds three million players. This, along with the recent news that fans made State of Decay 2 the best-selling game of May, puts us in a festive mood. To celebrate, we are revealing our first post-launch content, the Independence Pack. This pack gives you the opportunity to take on the zombie horde with style, grace and most importantly, colorful gunpowder. Available today on both Xbox One and Windows 10, the pack unlocks an array of fiery new versions of vehicles, weapons and gear for your community. State of Decay 2 wants you to show off with explosive awesomeness to the three million player strong community. Heck, even the zeds are dressed for the occasion in this pack, and there are few things as satisfying as taking out a Revolutionary War-themed zombie during a supply run. It’s like history that you can blow up…with fireworks!

The Independence Pack is an over-the-top visually themed extravaganza that includes, souped-up vehicles with attached flamethrowers, sparklers, and custom caging to support more vehicular zombie killing as well as new handheld and over the shoulder fireworks cannons for close quarter combat.

The new tools can be crafted using the new Fireworks Crafting Station facility mod to customize more creative uses of fireworks to weapons, or gamers could just buy new explosives from a “traditional fireworks sales.”

Unfortunately, for some, the Independence Pack isn’t free but will run at a moderate price of $4.99. For gamers who purchased the more expensive SoD2 Ultimate Edition upfront, the expansion pack will be free.

The Independence Pack isn’t the only new thing coming to SoD2 as Dead Labs also packed 20 new free missions, 10 new weapons, and a “Rare Books” trader for new skills in its giant 2.0 update released a few weeks ago.

SoD2 Ultimate Edition owners will also be getting a new mod following the Independence Pack, that offers new gameplay as a well equipped Red Talon soldier on a mission to hunt zombies in the Daybreak Pack coming out sometime in September.

That all-new content lets you take the fight to the zombies, featuring an exciting new mode where you play as a well-equipped Red Talon soldier. You’ll work to complete a challenging objective while protecting your fortified position against waves of zombies and freaks to earn new rewards and weapons. The Daybreak Pack is also included in State of Decay 2’s Ultimate Edition.

While SoD2 has been criticized for what seemed like a mixed marketing message of AAA backed studio quality for an indie game release, Dead Labs along with Microsoft’s support looks to be giving gamers every cent worth of gameplay possible at varying price points. With the upcoming DLCs and overall patchwork, SoD2 is becoming every bit of the indie phenomenon it was originally billed as, as well working its way towards impressive AAA gameplay. 

How to fix white screen in The Sims 4

Since its introduction, the latest release of The Sims franchise hasn’t exactly met the expectations. With dozens of glitchy add-ons and lots of bugs, The Sims 4 is far from a well-optimized game. In addition, some errors are completely ruining the experience. Just like the reoccurring white screen, with flashes while in the game.

The description of the occurrence vary. Some users were met with the white screen during the initial screen, while others were able to start the game. For the latter, the white screen flashes started unexpectedly and they weren’t able to exit the game. There are some viable solutions and workarounds for this error, and we made sure to enlist them below.

The Sims 4 white screen: How to fix it

  1. Make sure you meet the requirements
  2. Remove mods temporarily
  3. Check the installation integrity
  4. Update the display drivers
  5. Disable Origin In-Game
  6. Start the game in the windowed mode
  7. Start the game without saves
  8. Reinstall the game and Origin

1: Make sure you meet the requirements

First things first. Before moving to standard troubleshooting steps, we need to confirm that your PC indeed meets the game‘s system requirements. At least the minimum requirements. As a side note, if you are unable to close the game, press Ctrl + Alt + Delete to open the Admin menu. Then select Device Manager and terminate the “The Sims 4” process.

Here are the minimum system requirements:

  • CPU: Intel Core 2 Duo E4300 or AMD Athlon 64 X2 4000+ (2.0 GHz Dual-Core required if using integrated graphics)
  • RAM: 2 GB
  • GPU: NVIDIA GeForce 6600 or ATI Radeon X1300 or Intel GMA X4500
  • DIRECTX: DirectX 9.0c compatible
  • HDD: 14 GBthe sims 4 white screen

2: Remove mods temporarily

The Sims 4 is the shadow of itself if we remove all interesting available modes. However, some specific mods can occasionally fail to load or slow down the game execution. Since we can’t determine which exact mod is possibly causing the white screen, we need you to remove the mods folder completely.

Follow these steps to temporarily remove mods from The Sims 4:

  1. Close the game and the Origins client and restart your PC.
  2. Navigate to the C:\Users\: Your Username:\Documents\Electronic Arts\Sims4 folder.
  3. Cut the Mods folder and paste it on the desktop.
  4. Start the game and check whether the white screen occurs.

Later on, you can remove exclude individual mods until you determine which exact mod is causing the issue at hand. This tool called Mod Conflict Detector should help you in your endeavors.

If you want to learn how to install mods in Sims 4, check out our dedicated article.

3: Check the installation integrity

Chances are that you’re using either Steam or, more likely, Origin when playing games. In case you’re, you can use one of those two clients to fix the issue at hand. Namely, both include the same utility which checks the game‘s installation integrity and applies fixes if the need arises. The Sims 4 is Origin exclusive, so the Origin desktop client it is in this case.

Here’s how to run it on the Origin client:

  1. Open the Origin client.
  2. Open My Game Library.
  3. Right-click on The Sims 4 and choose Repair from the contextual menu.the sims 4 white screen
  4. Wait until the tool verifies the integrity of the game files and close Origin.
  5. Restart your PC and run the game.

4: Update the display drivers

When it comes to games and screen errors and crashes, we point our suspicion towards the bad graphics card driver. Before we move with additional steps, we need you to confirm proper drivers are installed. An important note is that the generic drivers might work, but that’s a risky doing. Rather, we suggest navigating to official OEM site and downloading officially supported drivers.

Here’s the short list of all 3 GPU OEM’s:

Once you’ve installed the proper driver, restart your PC and start The Sims 4 again.

5: Disable Origin In-Game

The Origin In-Game feature fits in quite nice if you’re playing online with friends. However, since The Sims 4 is a single player game, this particular Origin integration is of no need whatsoever. Even worse — it might cause some in-game issues. So, with that in mind, we suggest disabling Origin In-Game while playing The Sims 4.

  • READ ALSO: FIFA 2019 on Windows 10, Xbox One: The first game details

Here’s how to do it in the client’s settings:

  1. Open the Origin client.
  2. Click on the Origin in the menu bar and open Application Settings.the sims 4 white screen
  3. Click More and open the Origin In-Game.the sims 4 white screen
  4. Disable Origin In-Game.the sims 4 white screen
  5. Optionally, you can right-click Origin again and Go Offline.

6: Start the game in the windowed mode

There were some reports about The Sims 4 bug regarding the fullscreen. Namely, some gamers weren’t able to start the game in the fullscreen mode. Instead, they tried starting the game in the windowed mode. That’s what we suggest in this scenario, as well. Of course, you can enable the fullscreen later on in the game Settings or try pressing Alt + Enter while in the game.

Here’s how to run The Sims 4 in the windowed mode:

  1. Open Origin and My Game Library.
  2. Right-click on The Sims 4 and open Game Properties.the sims 4 white screen
  3. Choose the Advanced Launch Options tab.
  4. Add -w to the command-line and confirm changes.
  5. Start the game and look for improvements.the sims 4 white screen

7: Start the game without saves

If some of the installation files were corrupted or incomplete, the repair tool from the step 3 would fix them. However, this tool can’t help you with the save game files. If those get corrupted, they are beyond repair. But, let’s not run ahead of ourselves. Maybe this isn’t the issue. Luckily, there’s a simple way to find out. It includes removing temporarily The Sims 4 folder from Documents and starting the game with a blank slate.

Here’s how to do it:

  1. Close the game and the Origins client and restart your PC.
  2. Navigate to the C:\Users\: Your Username:\Documents\Electronic Arts\Sims4 folder.
  3. Move the “Saves” folder from the Sims 4 folder to the desktop.
  4. Start the game again.

8: Reinstall the game and Origin

Finally, if none of the presented solutions help you deal with the white screen error in The Sims 4, the only remaining step we can suggest is the reinstallation. To cover all the ground, you should reinstall both The Sims 4 and Origin and install them back again. Starting from a scratch might help.

With that said, we can wrap up this article. If you were able to resolve the issue, share the joy with us in the comments section. If not, please provide a distinctive explanation of the issue, and we or other readers might offer a helping hand.

RELATED STORIES YOU SHOULD CHECK OUT:

How to fix poor Wi-Fi signal on Windows 10/11

Every Windows 10 user relies on his/her computer to surf the internet. Nowadays, this is a necessity either for work or for home entertainment. Having a Wi-Fi internet connection makes things a lot easier, and we no longer need to connect through an Ethernet cable to access the internet.

Usually, we find that it isn’t always an easy job to connect to the internet via Wi-Fi on your Windows 10 computer, tablet, or phone.

After hearing more and more users having issues with their Wi-Fi internet connection on Windows 10, we have decided to explain exactly how you can troubleshoot your Windows 10 PC for any problems you might encounter trying to connect to Wi-Fi.

How can I fix a weak Wi-Fi signal on Windows 10?

1. Reset the TCP/IP Stack and Autotuning for Windows 10

  1. Hover the mouse over the right of the screen.
  2. When the Charms Bar appears click (left click) on the “Search” icon.
  3. In the search box you have opened type “Command Prompt”.
  4. Click (right click) on the search result and select from the menu “Run as administrator”
  5. In the “Command Prompt” window you opened, type “NETSH INT IP RESET C:RESTLOG.TXT”
  6. Press “Enter” on your keyboard.
  7. In the “Command Prompt” window, type “NETSH INT TCP SET HEURISTICS DISABLED”
  8. Press “Enter” on your keyboard.
  9. In the “Command Prompt” window, type “NETSH INT TCP SET GLOBAL AUTOTUNINGLEVEL=DISABLED”
  10. Press “Enter” on your keyboard.
  11. In the “Command Prompt” window, type “NETSH INT TCP SET GLOBAL RSS=ENABLED”
  12. Press “Enter” on your keyboard.
  13. Try rebooting the PC and see if you can pick up the wifi.

2. Prevent the Wi-Fi adapter from turning off while idle

  1. Press and hold the “Windows” button + the “W” button.
  2. Type “Network and sharing center “ in the search box
  3. Press “Enter” on the keyboard.
  4. Click on your Wi-Fi network
  5. The “wifi status” windows should now open.
  6. Click (left click) on the Properties button in the lower left of the “WiFi status/ Change settings of this connection” option.configure wi-fi connection
  7. In the new windows that opened lets click(left click) on “Configure” button.wifi properties
  8. Let’s go to “Power Management” tab in the upper side of the window and verify if the option “Allow the computer to turn off this device to save power” is unchecked. If it isn’t, then uncheck it.Allow computer turn off device save power
  9. Click (left click) on “OK” button in the lower side of the window.
  10. Reboot the PC.

3. Revert Network adapters

  1. In the search box on the start screen we need to type “Device Manager”
  2. Press “Enter” button on the keyboard.
  3. In the “Device Manager” window that pops up double click (left click) the “Network Adapters”.
  4. Click (right click) on “Wireless Connection” and click (left click) on “Update Driver Software”.update wifi driver
  5. Click (left click) the “Browse my computer for driver software”.browse computer for driver software
  6. On the new window that pops up click (left click) on “Let me pick from a list of device drivers on my computer”.
  7. On the window that says “Select Network adapter” choose the adapter that starts with the Manufacturers name not the one starting with Microsoft. The installation will begin.
  8. After the installation is completed reboot the PC.

4. Reinstall the network adapters

  1. In the search box on the start screen we need to type “Device Manager”
  2. Press “Enter” button on the keyboard.
  3. In the “Device Manager” window that pops up double click (left click) the “Network Adapters”.
  4. Click (right click) on “Wireless Connection” and click (left click) on “Uninstall”uninstall wi-fi driver
  5. Restart the PC in order to make your Windows 10, Windows 8 or Windows 8.1 automatically install the driver.
  6. If the system won’t install the driver automatically, then follow the steps below:
    • In the search box on the start screen we need to type “Device Manager”
    • Press “Enter” button on the keyboard.
    • Click(right click) the username on the top of the “Device Manager” window.
    • Click (left click) on “Scan for hardware changes”, Windows 10 will automatically identify which driver is missing and will install it.
    • Reboot the PC.

5. Get Wi-Fi signal repeater software

If the problem persists, you may need a Wi-Fi signal repeater. We have already compiled a list of the best Wi-Fi repeater software you can install on your computer, so go ahead and check out our list and install the tool that best suits your needs and your network configuration.

6. Buy a Wi-Fi extender

There are also many hardware devices that you can use to boost your Wi-Fi signal. These devices are called Wi-Fi extenders. So, with the help of a Wi-Fi signal repeater software and a Wi-Fi extender, you should be able to fix the weak Wi-Fi signal issues that you’re experiencing, including your Wi-Fi slowing down when you connect a Bluetooth device.

So, these are some workarounds you can use if your computer won’t pick up the Wi-Fi connection. Let us know which off these methods helped you fix your Wi-Fi internet connection problems.

Fix: Problems with VIA HD Audio in Windows 10/11, 7

Most new operating systems have driver issues and Windows 10 isn’t an exception. According to users, they have reported problems with the VIA HD Audio driver for Windows 10, and if you have a problem with these audio drivers today we have a solution that might help you.

But first, here are some more examples of similar issues that can be resolved using the same solutions:

  • VIA HD Audio deck not opening
  • VIA HD Audio front panel not working
  • VIA HD Audio driver Windows 7 64 bit
  • VIA HD Audio headphones not working Windows 10

What to do if VIA HD Audio stops working in Windows 10, 8.1, 7

  1. Uninstall old drivers and download the latest ones
  2. Change the default format of your speakers
  3. Set VIA HD as Default Audio Device
  4. Use the Audio Troubleshooter
  5. Disable Audio Enhancements
  6. Perform the SFC scan
  7. Restart the Audio service

Fix: VIA HD Audio not working in Windows 10, 8.1, 7

1. Uninstall old drivers and download the latest ones

Probably the most common solution for fixing problems with VIA HD Audio is updating your drivers. This is especially important for Windows 10 because updating your drivers is important after the upgrade to the new system. So, if you’re not sure how to do that, follow these steps:

  1. Open the Device manager.
  2. Find the Sound, video and game controllers and left click to expand it.
  3. Find VIA HD drivers from the list, right click on them and press Uninstall.
  4. After the uninstall process is completed restart your computer.
  5. Now you need to go to VIA’s website and download the Windows 10 drivers. As far as we know the 6.0.11.0500b version of the drivers was released just two days ago but if there’s a newer version download that one instead.
  6. Download the driver, and install it.

Users have reported that 6.0.11.0500b drivers have fixed the sound issues while microphone issues remain. VIA has confirmed that there are some issues related to sound and their cards, and they claim that fully functional drivers will be released shortly.

1.1 Update drivers automatically

If you don’t want to wander VIA’s website in search of the right driver, you can use a third-party tool that will do this for you. This software can scan your PC out of date drivers as soon as you install it and provides an accurate account of all of the elements that need to be updated.

Plus, it is guaranteed that you get the correct drivers for your device and not end up with incompatible ones that may damage your PC even more. The tool will find outdated drivers and install the current ones automatically very fast.

The process of updating old drivers is intuitive and you will be guided through the steps, and therefore get the job done in a few clicks.

That being said, you only have to try this tool for yourself and ease the puzzling method of installing PC drivers manually.

⇒ Get Fortect Driver Updater

2. Change the default format of your speakers

If updating your drivers didn’t get the job done, or your VIA HD drivers are already updated, you can try with changing the default sound format of your speakers. Here’s how to do that:

  1. Right-click the Sound icon in the bottom right of your screen and choose Playback devices from the menu.
  2. When the Sound window opens, double-click the speakers icon and you’ll open Speaker Properties.
  3. Navigate to the Advanced tab and find the Default format list.
  4. From the list choose any 16bit option, for example, 16bit 96000hz.
  5. Click Apply then OK.

Now your sound should be working, and if there are still issues, repeat the process and choose a different value.

We have to point out that this also works with your microphone, and the process is almost the same.

  1. Right-click the Sound icon, open Playback devices and choose Recording tab.
  2. Double click the Microphone to open Microphone properties and then click the Advanced tab.
  3. Find the Default format list and choose one of the 16bit options.
  4. Click Apply then OK, and you’re good to go.

This is just a workaround and not the best or the permanent solution, but the number of users has confirmed that it works. As we already stated, both Microsoft and VIA have noticed that there are some issues between VIA’s cards and Windows 10, and VIA has stated that they will release an updated version of their drivers optimized for Windows 10 soon, so we’ll just have to be bit patient until that happens.

3. Set VIA HD Audio as Default Audio Device

If you have multiple devices or simply drivers that can act as the Default Audio Device, there’s a chance VIA HD Audio is not set for that. So, we’re going to check if VIA HD Audio is set as your default audio device, and set it if not. Here’s how:

  1. Right-click the speaker icon from the taskbar.
  2. Head over to the Playback tab.
  3. Click VIA HD Audio device, and click Set as default. 
  4. Save the changes and restart your computer.

4. Use the Audio Troubleshooter

The next thing we’re going to try is Windows 10’s built-in audio troubleshooter. Here’s how to run it:

  1. Go to Settings.
  2. Head over to Updates & Security > Troubleshoot. 
  3. Select Playing Audio, and go to Run the Troubleshooter. VIA HD Audio deck not opening
  4. Follow further on-screen instructions and let the process finish.
  5. Restart your computer.

5. Disable Audio Enhancements

Although Audio Enhancements are meant to improve the audio experience in Windows 10, they usually interfere with drivers. So, sometimes the best solution is to simply disable Audio Enhancements. Here’s how to do that:

  1. Right-click the speaker icon from the taskbar.
  2. Head over to the Playback tab.
  3. Double-click your VIA HD Audio device.
  4. Go to the Audio Enhancements tab.
  5. Check Disable all sound effects.VIA HD Audio driver Windows 7 64 bit
  6. Save the changes and restart your computer.

6. Perform the SFC scan

The SFC scan is another built-in troubleshooter we’re going to try. This tool can help you resolve various issues within Windows, and hopefully, this one too. Here’s how to run the SFC scan:

  1. Go to Search, type cmd, and open the Command Prompt as Administrator.
  2. Type in the following command, and press Enter: sfc/scannowVIA HD Audio headphones not working Windows 10
  3. Wait for the process to finish.
  4. Restart your computer.

7. Restart the Audio service

If none of the previous solutions helped you resolve the problem with VIA HD Audio, let’s try restarting the Audio service. Here’s how to do that:

  1. Go to Search, type services.msc, and open Services. 
  2. Scroll down and find the Windows Audio service.VIA HD Audio front panel not working
  3. Right-click it and go to Restart. 
  4. Wait for the process to finish and restart your computer.

That’s about it. We certainly hope at least one of these solutions helped you resolve the problem with VIA HD Audio in Windows 10. If you have any comments, questions or suggestions, just let us know in the comments down below.

If you have any other Windows 10-related issues you can check for the solution in our Windows 10 Fix section.

Epson Scan Software – How to Download & Install on PC

Epson scanner software is a software used by Epson scanners and is excellent for projecting both prints and film images. Epson printers are powered by Epson scan software which gives users full control of your Epson scanner or printer.

There are several pros and cons concerning this scanner software due to the presence of many scanner software on the market. However, Epson scanner software is efficient as well as free to download on the Epson website.

Epson Scanner software features:

  • This software works with the latest Epson photo scanners.
  • It is capable of processing scanned images and objects to a maximum of 12.2×17.2 inches; this enables batch scanning of up to 30 slides simultaneously.
  • It allows for latest technologies and drivers which ensure efficiency and quality of image scanned
  • Scanner module and transparency module for transparent clear images.
  • The software has an easy to use Graphic user interface which makes it easier for beginners to access scanning features.
  • It has two major film software options with the Epson Scan 2 and the dedicated Lasersoft silver fast software.

epson scanner software for windows 7 8.1 10

Pros:

  • Excellent selection and scanning of images
  • Cool image quality
  • Free to download
  • Cool user interface.

Cons:

  • No inbuilt film profile
  • Fewer features compared to VueScan and Silverfast

More about the Epson scanner software for Windows 10, 8.1, 7

Epson scanner software is the power behind various Epson scanners and three in one printer over the years. Epson scanner is compatible with most Windows Operating Systems from Windows XP up to Windows 10. The scanner software essentially gives your Windows PC access to control your scanner.

Also, you can easily decide the frames you need. The Epson scan controls two lenses present in the scanner. This two lens form the basis of scanning, the first camera gives a pre-focused image for the basics of your work. This gives you better image quality and full features contained in the scanning software. Also, Epson scanner software enables users to scan up to files of 35mm deep, medium format, and large patterns.

Sometimes, Epson scanner software is included in the printer package for easy installation and usage of the software. However, you can install the Epson scanner software independently from the website as it is free to download and use for your system.

There are various versions such as Epson Scan for Personal Use, though you can download the client program of Epson Scan for Businesses. It has more features and users can access simultaneously various scanned documents at a time.

Epson scan can also be used across several computer networks. However, you will need to have “Epson scan for business” available before using it across a network of servers and networking.

The user interface is well arranged making it easy for beginners to use. You can make a modification to your settings which is a cool option to have. An important thing to note is that, the developers are working on improving Epson scanner software with subsequent releases of newer versions.

You can download the scanner software from the official website.

Conclusion

The scanner software is among the best with the Epson using this software for the majority of their scanners and printers.

In addition, Epson scanner software for Windows 7, 8.1, and 10 is free to download here which means you can get all the drivers and executable devices without paying anything. However, the  software has limitation as it only works on Epson printers.

An average Epson photocopier cost around £2000; this is quite expensive. Meanwhile, Epson scanner software is an efficient software. It may be better to settle for a less expensive scanner, however it give good value forget the scanners as you become opened with possibilities.

RELATED STORIES TO CHECK OUT:

Google could be set to move into game streaming and consoles, taking on Xbox and PlayStation

In an interesting move, Google could be ready to make a big move into the gaming industry. While the company has a strong gaming presence via YouTube and YouTube Gaming, new reports, backed by multiple independent sources, suggest Google will be going a bit further (via Kotaku).

The company looks to be planning to create its own game streaming service, in which users wouldn’t necessarily need to download the entire game to play. This comes after Microsoft announced at E3 that it too was working on its own game streaming service, for Xbox.

Separately, reports say that Google is planning on launching its own gaming console. It could be that the console acts as a connector to the game streaming service, or it could contain its own dedicated graphics, directly competing with those who have been in the industry for decades, such as Microsoft and Sony.

Of course, with any game streaming service or console, it also requires games, which requires strong relationships with game developers and publishers alike, which both Microsoft and Sony have strong partnerships and acquisitions in. Google, on the other hand, has slimmer pickings. The company looks like it is ready to recruit new expertise in this area, or announce major acquisitions.

Whatever Google’s plans, it marks a strong industry for the company to move into, and it could put it in direct competition in yet another industry with Microsoft and Sony.

File Explorer won’t detect Network devices in Windows 10/11

Microsoft has confirmed that there are some bugs in the Windows 10 April 2018 Update. And while they have confirmed that they’re fixing a number of issues, some users need to fix them faster, on their own, before Microsoft does.

Many users have encountered a bug that leaves File Explorer unable to find network devices or even share files with other computers. Microsoft is investigating the problem, but there is a way to allow users restore functionality until the company solves this bug.

On their Community forums, a Microsoft agent describes the bug some people can get after the Windows 10 April 2018 Update (version 1803):

File Explorer cannot connect to other devices running version 1803.  When clicking the Network tab in File Explorer, other devices on the home network running version 1803 do not appear, and thus I’m not able to perform file sharing or access files on other devices on my home network.

How to fix the File Explorer bug

To fix the bug, you must change the default configuration of some Windows 10 services. First, you must be signed in with an admin account.

  1. Pres ‘Win key + R’ -> type services.msc in the Run dialog. Press enter. You will see a list with services available in Windows.
  2. You must change the settings of some services (see list below). Double click on each service and go to the section ‘Startup type’ -> select Automatic (Delayed Started) -> apply. Do this action for the same service. Here are the services that must be tweaked:
    • Computer Browser (Browser)
    • Function Discovery Provider Host (FDPHost)
    • Function Discovery Resource Publication (FDResPub)
    • Network Connections (NetMan)
    • UPnP Device Host (UPnPHost)
    • Peer Name Resolution Protocol (PNRPSvc)
    • Peer Networking Grouping (P2PSvc)
    • Peer Networking Identity Manager (P2PIMSvc)
  3. Reboot your PC and the bug should be fixed.

If the networking sharing functionality hasn’t been fixed, then follow the same steps and return to the original settings of the services above. If the fix worked, continue with the new settings until there is an official fix from Microsoft.

RELATED STORIES TO CHECK:

Microsoft drops Windows 7 support on Pentium III CPUs

In 2020, we’ll can say goodbye to Windows 7, but some users might see that their old Intel processors are not supported anymore. It seems that Microsoft has dropped Windows 7 support on a few PCs that have Pentium III CPUs. And that’s because Pentium III cannot support the SSE2 technology, which enables single instruction multiple data. Other processors support this tech – Intel Pentium 4 and next generations – which is a feature mandatory for Windows OS.

The issue was first spotted and added in the list of known issues in the monthly security patch for Windows 7, since March:

A Stop error occurs on computers that don’t support Streaming Single Instructions Multiple Data (SIMD) Extensions 2 (SSE2).

Originally, Microsoft mentioned that an upcoming release would come with a resolution, but in the end, they updated the changelog, with the following recommendation:

Upgrade your machines with a processor that supports SSE2 or virtualize those machines.

Older Products Won’t Get Security Updates

In all honesty, let’s agree that 18 years old CPUs are too old to handle all the security patches for Meltdown or Spectre. So, Microsoft abandoned them, and leaving them without a security patch. Their action does not go against Microsoft’s support policies, and it’s written in a help article:

Microsoft advises customers to install the latest product releases, security updates, and service packs to remain as secure as possible. For the latest information on security updates, please visit our TechNet Library. Older products may not meet today’s more demanding security requirements. Microsoft may be unable to provide security updates for older products.

Considering Pentium III was released in 1999, the news could affect some people that use an old hardware. But whoever still runs a Pentium III in 2018 should immediately go and by a newer one, which is definitely more secure and a lot faster!

RELATED STORIES TO CHECK:

All Xbox Insiders can now test the Xbox One 1806 update

After a couple weeks of testing with select Insiders, the Xbox One 1806 update is now available to download for everyone who joined the Xbox Insider program. Yesterday, the latest Xbox One system update (1806.180626-1359) started rolling out to Beta, Delta, and Omega insiders, and we’re now really close to the public release.

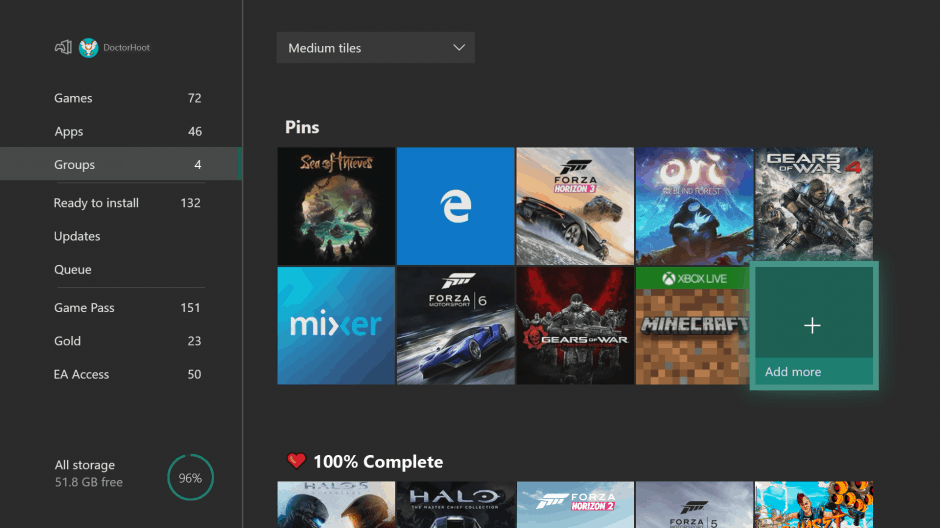
The Xbox One 1806 update (likely to be named “June update”) brings a couple of new features including the ability to group your Games and Apps, improved Search Functionality, as well as additional Accessibility options. Microsoft also recently started testing the new Xbox Live Avatars as well as a Microsoft Rewards Beta app, but the most interesting new feature may be Fast Start, which is leveraging machine learning to speed up the installation of your Xbox games.

It’s still not clear if the 1806 update will be generally available before the end of June, especially since the latest Insider build still has some known issues affecting Groups, Profile Color, and Networking. Anyway, we really like the Xbox team iterating fast on the Xbox One OS, as we’ve now seen new featured updates for three months in a row.

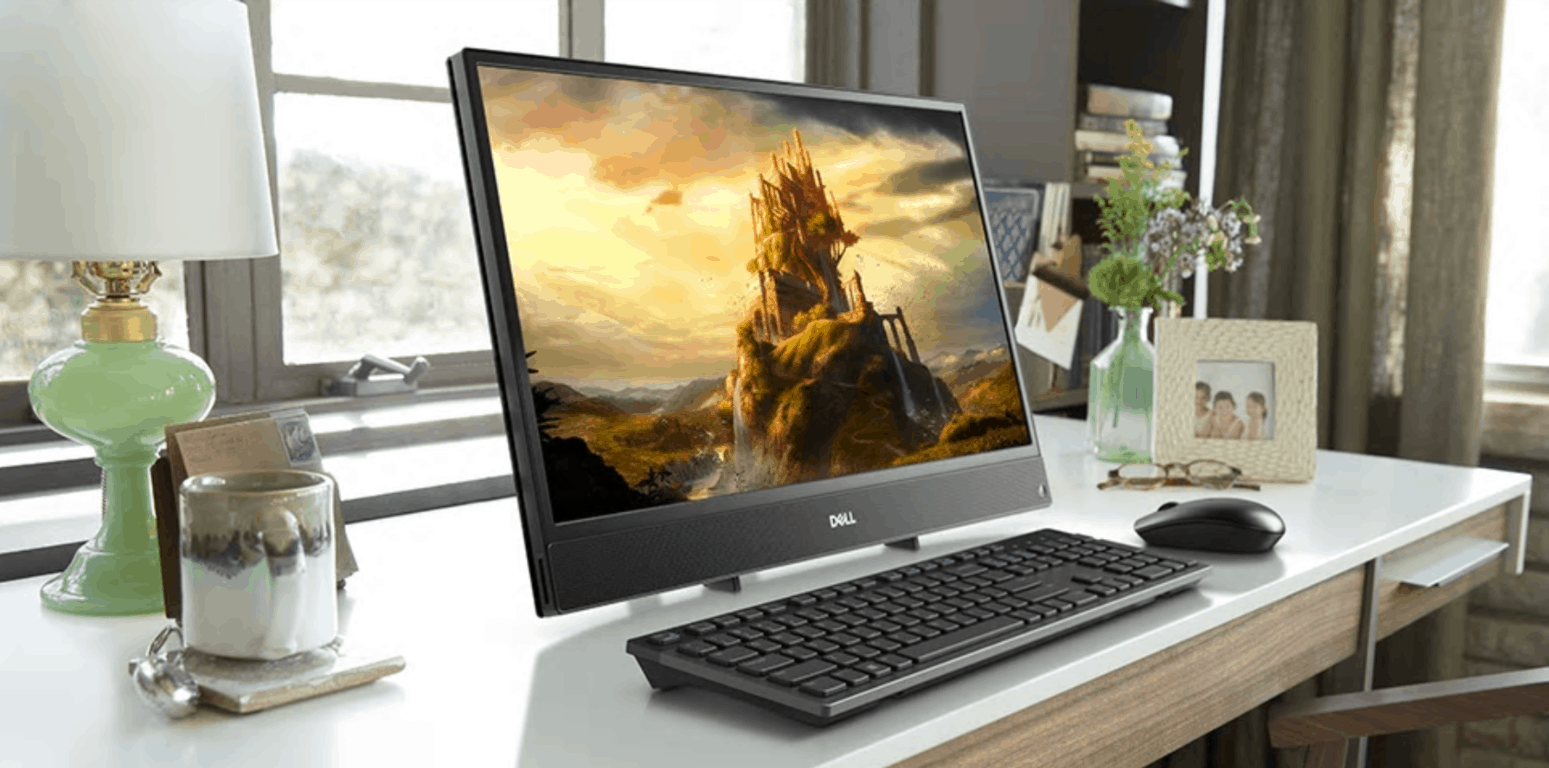
Dell launches a new portfolio of slimmer, wide-screen All-In-One desktops in India

Dell has announced the launch of a new range of Inspiron All-in-Ones (AIO) desktops in India. The highlight of the new range of Inspiron AIOs – Inspiron 22 3000 AIO and Inspiron 24 3000 AIO – is the virtually borderless display and slimmer profile.

Powered by 7th Generation Intel and AMD processors with multiple GPU options, the AIO portfolio is equipped with signature Dell innovations like Dell Cinema. Dell CinemaStream packs in SmartByte technology that allows users to experience lower buffering, fewer drops, and better resolution while streaming video and making web calls. Dell CinemaSound offers in-built Waves MaxxAudio Pro technology to provide professional-grade control for music and videos.

The Inspiron 22 3000 AIO sports a sleek design and features a Full HD IPS Anti-Glare narrow border LED display and weighs around 4.27 Kgs while the Inspiron 24 3000 AIO weighs over 4.62 Kgs.

The new AIOs come with a wireless mouse and keyboard option for a complete one-cord experience.

Available in black and white color options, the new Dell Inspiron 22 3000 AIO with AMD A6-9225 processor is priced at ₹29,990 ($438) and the Dell Inspiron 22 & 24 3000 AIO with Intel processor variants starts at ₹34,590 ($505). The AIOs are available for purchase in India on dell.co.in and across the country at Dell exclusive stores, multi-brand outlets, including Croma.

Next Up Hero is the latest Xbox One game to support Nintendo Switch crossplay

Next Up Hero launched on Microsoft’s family of Xbox One consoles this week and it’s the latest game to support crossplay with Nintendo’s rival console, the Nintendo Switch.

The game also support crossplay with PC players though, as usual, PlayStation 4 consoles aren’t part of the party due to Sony’s strict stance on crossplay with other video game consoles. Other recent Xbox One games that have allowed crossplay with the Nintendo Switch are Minecraft and Fortnite.

Next Up Hero is a game that allows players to create their own unique dungeon for other players to fight their way through. If they beat your dungeon, they get a reward but if they don’t, you get it. Here’s the full game description and trailer. Buy it here.

Fight. Die. Win! (And probably die some more.) Next Up Hero is a dungeon crawler featuring hand-drawn heroes that hack, slash, bongo-drum, boomerang, and jet their way through Ventures. Choose your Hero and start rolling dungeons, gearing out, and maxing your stats. If you’re feeling especially heroic, invite a friend for co-op. You’re going to need all the help you can get.

  • Dungeon Maker Mode: Craft a savage dungeon and challenge the community to beat it. If they beat the dungeon, they get to keep a rare piece of loot. If they fail, the treasure is yours.
  • Perma-Permadeath: Death is so permanent in Next Up Hero that your “echo” remains for the next player to raise. People die a lot in Next Up Hero, so you can resurrect up to 20 AI followers!
  • Mixer Interactive Enabled: It’s Hero vs. Dirge powered by Mixer Interactive. Spectators can control the echo army, helping the hero survive the floor, or buff the Dirge enemies, slowing and freezing the player.

Do you want more crossplay in video games or do you think gamers should only play with those on the same console? Share your thoughts with the community in the comments below and then make sure to like us on Facebook for more video game news.

Next Up Hero
Next Up Hero
Developer:
Aspyr
Price:
$19.99

How to fix Samsung printer/ scanner issues in Windows 10

Many Windows 10 April Update users complained about printer and scanner problems. Judging by the reports available on Microsoft’s forum, these issues are prevalent for Samsung printing and scanning devices.

HP, the new owner of the affected Samsung devices already escalated the problem to Microsoft, as it occurred shortly after users installed the latest Windows 10 version on their computers.

It has been a month since I didnt use my scanner. Yesterday after trying to use it I kept getting the following message : I/O error while communicating with the device.Please wait and try scanning again.If it does not help, please turn the device off, then switch it on and wait while it warms up. […]

I did lookup on the internet, many people seem to have the same problem after the above windows update. Also did contact HP, that is the new owner of Samsung printers and was told that HP has escalated the matter to microsoft, since it did happen after the recent update. HP claims is microsofts problem not their.

While there is no official solution to fix this problem, users suggested a few workarounds that might solve the issue. However, if you want to solve printer and scanner issues in Windows 10 v1803, you also need a bit of luck. Nevertheless, we’ll list a few of the solutions suggested by users as some of them may help you fix the problem.

Fix printer and scanner issues on Windows 10

1. Download the latest OEM drivers for Windows

Users suggested that downloading the newest possible OEM driver package for Windows might solve this bug. Once downloaded,  install the driver package in compatibility mode.

If you want a quicker and safer process, install the OEM driver using dedicated driver updating software. It will automatically install and repair all your drivers.

The software can run in the background and take care of your drivers on a regular basis. It is easy to use and suitable for any device since it is very lightweight.

2. Disable Windows Defender

Other users suggested that Windows Defender might be the culprit and turning it off when using your printer or scanner should fix the problem.

3. Run the Printer and Hardware troubleshooters

In rare cases, running the built-in Windows 10 Printer and Hardware troubleshooters may help you solve the problem. Go to Settings > Update & Security > Troubleshooter and run these two troubleshooters.

fix printer scanner windows 10 april update

If you come across other solutions to fix this problem, let us know in the comments below. We’ll update this guide as soon as new information is available.

How to Make Desktop Default in Windows 10

Making the desktop on Windows 10, Windows 8.1 a default permanent setting is very useful, especially if you are a new user and you are used to the old Windows desktop. Although it wasn’t quite easy to make the desktop default on Windows 10, 8, on Windows 8.1, Microsoft implemented a feature that does this. So, if you are interested in finding out how to do this, then check out the guidelines available below.
How to make Desktop default on windows 8.1
This tutorial explains in a few short steps how to make your desktop default on Windows 10, 8.1 right from the boot of the PC. The whole process won’t take you more than 2 minutes to accomplish. Normally, Windows 10, 8.1 has a different start up image then the previous ones. A lot of people were frustrated about the fact that they have to click every time when the PC starts on the Desktop app. Let’s have a look at how we can make things easier for them.

Make desktop default in Windows 10

1. After booting the windows PC we need to left click on the “Desktop” app on the  left of the screen in order to enter desktop mode.

desktop

2. Right click an open area on the taskbar (situated on the lower side of the screen) and select from there “Properties” by left clicking on it.
3. Left click on “Navigation” tab on the upper side of the “Taskbar and navigation properties” window.
4. Under the “Start screen” portion of the window check the box next to the “Go to the desktop instead of Start when I sign in”.
5. Click “OK” on the lower side of the “Taskbar and navigation properties” window.
6. Reboot the computer in order for the changes to take effect.

If you are stuck in the tile screen and you want to get your desktop back, you need to turn off tablet mode. So, click on the notifications icon which is located by the clock (you should find a square box) and then click on the tablet mode button. You should now be off tablet mode.

This is it, after the computer reboots it will automatically get you to your desktop app. If you have any thoughts or improvements on this article let us know below.

RELATED STORIES TO CHECK OUT:


Microsoft Teams to begin rollout to Government customers in July

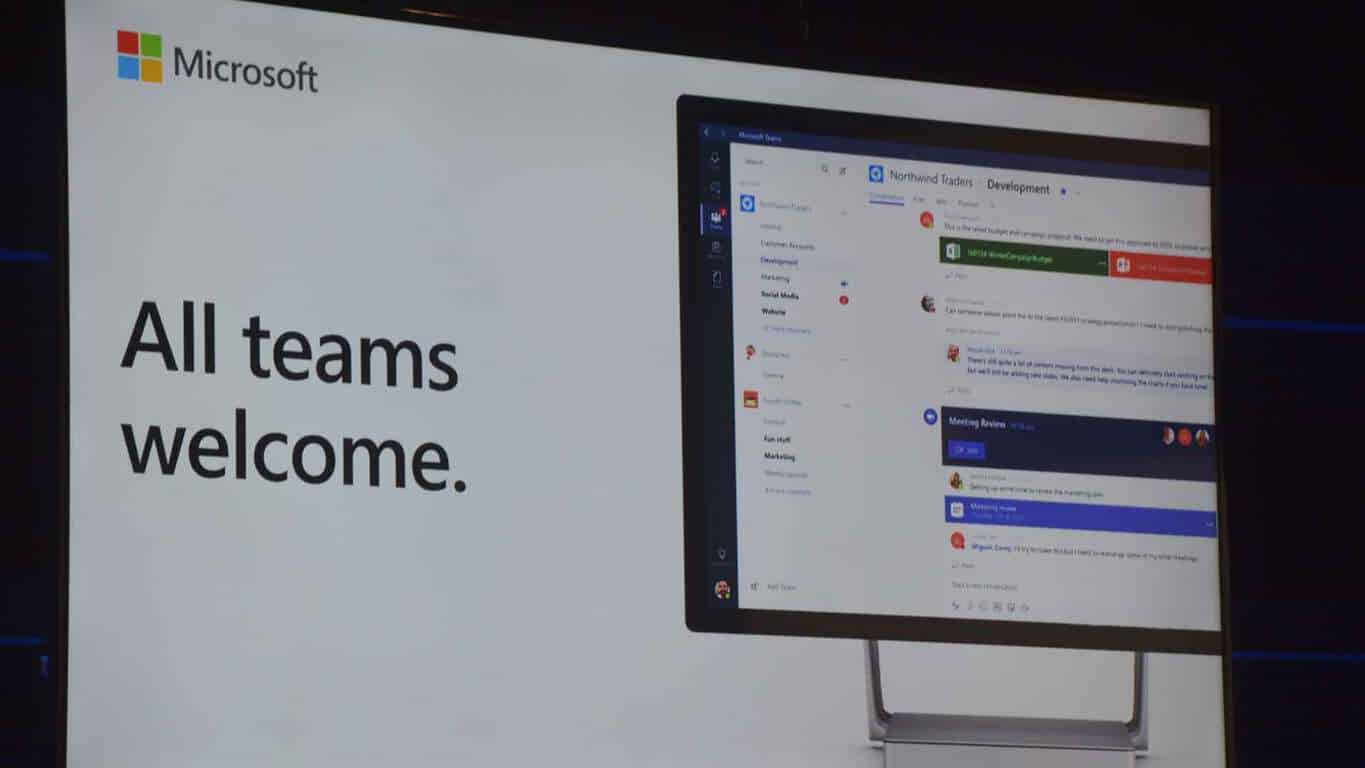
Microsoft announced today that their Microsoft Teams collaboration tool will begin rolling out to Government Community Cloud (GCC) customers starting July 17th. The company says that Microsoft Teams for Government is designed to meet the government strict security standards, and will allow government users to transform the way they communicate and collaborate.

Microsoft Teams for Government and the consumer-facing version of Microsoft Teams are somewhat different from each other. Features like Call and Meeting Recording, Apps, Email Notifications, are all either disabled or unsupported in Microsoft Teams for Government. “New features for Microsoft Teams will arrive to GCC after release to commercial customers due to increased audit requirements and activities to meet the needs of the GCC environment,” Microsoft also explained.

GCC customers with Office 365 for US Government G1, G3, G5, F1 and Microsoft 365 for US Government G3, G5, F1 plans are expected to get access to Teams by the end of August 2018. Administrators will not need to take action, and Microsoft Teams will be enabled by default under these plans. As for other government users, Microsoft detailed that they are working to expand availability to other US government clouds soon.

Microsoft’s Azure cloud continues to float company’s fortunes upwards

Windows 10 was a massive undertaking for Microsoft and came at a time when the company was seemingly reeling from several public initiatives that were poorly received. Between the company’s declining smartphone market share, the disaster that was the Windows 8 release and the fumble of the Xbox One announcement, Microsoft needed a win and Windows 10 was arguably it for the time being.

In a little less than four years, Microsoft has almost entirely pivoted its fortunes from being tied to Windows to now relying on a new platform prospect in Azure, or “The Microsoft Cloud.” Sure, Windows licensing is still a large business for the company, but Microsoft is already seeing sunnier days ahead with Azure and investors are handsomely rewarding the prospects.

A new rating from Atlantic Equities investment firm has further solidified the notion that Microsoft is more a cloud company than it is software packing giant. Equities analyst James Cordwell told its clients that Microsoft’s recent re-org was a clear indicator of the direction the company was going and how that would affect the businesses future financial pursuits.

“Azure has replaced Windows as the platform underpinning Microsoft’s enterprise offering, and we forecast it exceeding $100 billion revenue over the next decade,” Cordwell wrote. “With Office 365, Microsoft has already established a strong position in the software as a service market and there remains robust growth potential as the greater accessibility of the cloud delivery model continues to drive expansion in the user base and customers steadily upgrade from basic packages.”

Cordwell is so bullish on Microsoft’s future that he has set a 24 percent increase in price target for investors that brings the total to $125. Cordwell’s confidence is backed by Microsoft’s recent 3 percent jump in market share from 10 to 13 that results in a direct erosion in Amazon’s leading market share.

Realistically speaking, many investors see the market unfolding similar to the maturing days of the smartphone and PC markets as they settled into a dual provider landscape with Amazon raking in $185 billion and Microsoft racking up $115 billion in revenue in roughly 10 years, for a combined 70 percent market share.

Windows 10 Tweeten app gains dark theme and revamped login screen in new update

Tweeten, the third-party Windows 10 Twitter app, has received a rather significant update this week. In addition to a new dark theme and a completely revamped login/signup page, the Tweeten app now allows users to download images from DMs and has also reorganized its settings screen.

Here’s the official release notes for all of the details.

  • Say hello to Tweeten Black: A beautiful new dark theme that is full of deep blacks, offering a super sexy tweeting experience that you won’t get anywhere else. Now on Tweeten. For free.
  • A new onboarding experience: Completely rebuilt from the ground up, the login and start-up experience for the app has been revamped with a vibrant new design.
  • Settings: A re-organized settings app, with sub-sections, make it much quicker to find the exact customization options you’re looking for.
  • Direct Messages: You can now download private images on DMs. Privacy features such as the ability to blur messages and hide other info on the DM column are once again available.
  • Patching: Tweeten can now automatically update itself to apply patches when there’s a breaking TweetDeck bug, meaning you no longer have to manually download updates from the site. Oh, and, when something is broken and we are aware of the issue, you will be notified on the splash screen of the app so you can rest assured and don’t bug us about the broken things while we are busy focusing on fixing it.
  • Tweeten is now a single instance application by default, but you can enable multiple instances from settings if you’d like.
  • Design tweaks for the dark and light themes, plus a lot of minor UI fixes throughout the app.

Do you use Tweeten on your Windows 10 device and would you recommend it over the official Twitter app? Share your thoughts with the community in the comments below and make sure to follow us on Twitter, in whichever Twitter app you prefer, for more Windows 10 news.

Tweeten
Tweeten
Developer:
Mehedi Hassan
Price:
Free

Plex for Xbox One app update fixes several bugs and glitches

The official Plex for Xbox One app has updated today with a variety of fixes for bugs and improves the display mode switching algorithm. Here’s the full release notes.

  • Fixed an issue where focus would disappear after selecting a different news clip from the play queue
  • Fixed missing jump bars when viewing Artists and Albums from Quick Links
  • Don’t show ‘Browse by Folder’ option when not applicable
  • Fixed missing shuffle button from collections preplay
  • Improve display mode switching algorithm

Plex for Xbox One is an all-in-one media consumption app that allows users to stream their own media library, record live TV, and view news broadcasts from over 190 providers. Plex is also available on Windows 10 Mobile and PC.

Do you use Plex on your Xbox One console? Let us know what you use it for in the comments below and then head on over to our Twitter account and make sure to follow us for more Xbox news.

Plex
Plex
Developer:
Plex
Price:
Free

KB4284848 issues: The update fails to install or Wi-Fi won’t work

Update KB4284848 is now available for download, but many Windows 10 April Update can’t install it on their computers. The download process goes smoothly but the update won’t complete installing, as this user reports on Microsoft’s forum. Unfortunately, the OP doesn’t more details about the exact issues that’s affecting the update install process — it could be an error code, or the system may simply revert the changes.

On the other hand, the Windows 10 v1803 users who managed to successfully install the update encountered other types of bugs. For example, many complained about Internet connectivity issues and particularly Wi-Fi connection problems. Luckily, some users were able to quickly fix this issue by rebooting the network hardware.

KB4284848 wi-fi issues

Me too..after update, i could not connect to my WIFI. As if WIFI was not enabled. Found out that the wireless adapter driver was not even loaded. Rebooted several times and it came back. Am now back online.

The good news is that these are the only KB4284848 bugs reported by users. If you encountered other issues after installing it, do tell us more about your experience in the comments below. If you haven’t found a solution to fix your KB4284848 issues, maybe the best solution is to simply uninstall the update. Go to Windows Update > View Update History > and hit the Uninstall button.

RELATED STORIES TO CHECK OUT:

Some OpenVPN configuration files may sneak malware to your PC

If you installed OpenVPN on your computer, then you should really read this piece of news. Recent reports confirmed that certain OpenVPN config files may be dangerous, opening the gate for malware to enter your Windows computer.

As a quick reminder, OpenVPN configuration files are used to run a series of VPN connection instructions, such as: what crypto solution to use, which remote servers to connect to, what protocols to use, and so on. There is an important command in the OpenVPN config file that allows users to any binary script. This could lead to hackers generating reverse shells that are very hard to spot.

In other words, attackers can direct OpenVPN traffic to one particular IP address and then use it to run commands on the remote computer using the specially crafted OpenVPN configuration file.

In a blog post on Medium, Jacob Baines offers further details about this issue:

Using untrusted ovpn files is dangerous. You are allowing a stranger to execute arbitrary commands on your computer. Some OpenVPN compatible clients like Viscosity and Ubuntu’s Network Manager GUI disable this behavior. However, after a long discussion with [email protected], it does not seem like this behavior will ever be removed from OpenVPN proper. As such, unless you know how to read ovpn files, I suggest you be very wary about the configuration files you are using.

So, if you’re using OpenVPN, the best solution is to simply avoid downloading config files. You can also switch to an alternative VPN solution. We recommend installing Cyberghost, one of the best VPN software in the world. Follow the link available below to get at a discounted price.

Smart choice!
cyberghost vpn for windows logo
  • 256-bit AES encryption
  • Over 5600 servers worldwide
  • Great price plans
  • Excellent support

Windows 11 Calendar is Greyed Out: 5 Ways to Enable it

Some users have stated on forums that Windows 11 calendar is greyed out. This can be a problem since you won’t be able to access your calendar at all

Of course, you can always use other calendar apps for Windows, but many users want to continue using the default one, so today, we’re going to show you how to fix that.

Why can’t I open my calendar on Windows 11?

  • The app is experiencing certain bugs or glitches preventing it from running.
  • Issues with Microsoft Store can also cause this problem.
  • If your Calendar app installation is damaged, you’ll encounter this problem.
  • Outdated graphics card drivers can cause this issue sometimes.

What can I do if my Windows 11 calendar is greyed out?

1. Open the Windows Store App troubleshooter

  1. Press the Type here to search taskbar button to open Cortana’s search box.
  2. Enter troubleshoot in the search box and select Troubleshoot to open the Settings window as in the shot below.
  3. Select the Windows Store App troubleshooter to press its Run the troubleshooter button.
  4. Then you can go through the app troubleshooter’s suggested resolutions.

2. Open the Start Menu Troubleshooter

  1. Open the Start Menu troubleshooter.
  2. Click Advanced and select Apply repairs automatically.
  3. Then press the Next button to run through the troubleshooter‘s fixes.

3. Reregister the Microsoft Store

  1. First, enter PowerShell in the Cortana search box.
  2. Right-click Windows PowerShell in Cortana to open its context menu, and select the Run as administrator option.
  3. Run the following command: Get-AppXPackage | Foreach {Add-AppxPackage -DisableDevelopmentMode -Register "$($_.InstallLocation)AppXManifest.xml"}
  4. Restart your desktop and laptop.
  5. After reregistering MS Store, reset the MS Store’s cache. To do that, press the Windows key + R hotkey.
  6. Then input ‘wsreset.exe’ in Run, and press the OK button. The Store app might then update the greyed out Calendar app.

This is a simple solution, but it can help if Windows 11 calendar is greyed out.

4. Reinstall the Calendar App

  1.  To uninstall Calendar, open the folder C:\Windows\system32
  2. Click the File tab and select Open Windows PowerShell > Open Windows Powershell as administrator to open Powershell.
  3. Run this command: Get-AppxPackage *windowscommunicationsapps* | Remove-AppxPackage
  4. To reinstall Mail and Calendar, open this page.
  5. Then press the Get the app button to install the app.

5. Update the graphics card driver

  1. Next, open your graphics card manufacturer’s website in a browser.
  2. Open the driver section of the website.
  3. Then select your graphics card model and Windows platform from the site’s drop-down menus. If the site has a driver search box, enter your graphics card model there.
  4. Download the most updated driver compatible with your 64 or 32-bit platform.
  5. After that, open the driver installer from the folder you saved it in to install the graphics card driver.

Those resolutions might fix the Mail, Calendar, and other apps, grayed out on the Start menu.

If you haven’t managed to fix this problem, consider reading our guide on how to use Google Calendar on Windows.

What method did you use to fix this issue? Let us know in the comment below.

With Windows 10 Insider build 17704, Microsoft takes Sets offline

Today’s new Windows 10 Insider build brings tons of new enhancements and some tweaks across Windows 10, but it also marks the end of the testing for one of the most anticipated Windows features. Indeed, Microsoft says it is now taking Sets offline, in a decision to “continue making the feature great.”

Microsoft did work on the experience over the past few Insider builds and recently opened it up to new Windows Insiders. Sadly, head of Windows Insider program, Dona Sarkar, had this message for Windows 10 testers in a blog post today:

Thank you for your continued support of testing Sets. We continue to receive valuable feedback from you as we develop this feature helping to ensure we deliver the best possible experience once it’s ready for release. Starting with this build, we’re taking Sets offline to continue making it great. Based on your feedback, some of the things we’re focusing on include improvements to the visual design and continuing to better integrate Office and Microsoft Edge into Sets to enhance workflow. If you have been testing Sets, you will no longer see it as of today’s build, however, Sets will return in a future WIP flight. Thanks again for your feedback.

Though many were looking forward to Sets coming in the final Redstone 5 release, it never really had a solid release date. In fact, at Build 2018 Microsoft’s Joe Belfiore said that the feature would become available “when we think it is great. For now, Windows Insiders will have to wait for the feature to make its triumphant return in a future release. Still, there is plenty to play with in the latest Redstone 5 builds, including a dark mode in File Explorer, Swiftkey, and Cloud Clipboard.

Windows 10 Insider build 17704 brings Windows Security, Task Manager Improvements and more

Microsoft has just announced the release of Windows 10 Insider build 17704 to Fast and Skip Ahead Insiders, and this one is a pretty major release with lots of new features and improvements. It’s been two weeks since the last flight, and fortunately it was well wort the wait: in addition to new features for Microsoft Edge and a big update for the Skype UWP app, this latest build comes with improvements for Windows Security, Task Manager and much more. 

Among highlights, you’ll find a new viewing mode when you’re watching videos outside. Microsoft says that this feature uses your PC’s light sensor to automatically adjust your video accordingly, and you can turn it on in the Settings app. Additionally, you’ll see that the Task Manager app now has 2 new columns in the “Processes” tab called “Power usage” and Power usage trend.” Microsoft says that these columns should help Windows 10 users better understand what apps and services are the most power hungry on their PC

Last but not least, some Insiders may see a new post-update experience after installing this build. This actually came with previous Insider builds, but Microsoft says that Insiders who haven’t seen this page until now have a very good chance to see it after installing the new bits. You can learn more about all the new features included in Windows 10 Insider build 17704 below:

New Diagnostic Data Viewer features to improve your Privacy Experience

To showcase improvements in our privacy tools made in our next release of Windows, we are providing Windows Insiders early access to new improved features coming to the Windows Diagnostic Data Viewer. At Microsoft, we understand that your data is your data. That’s why we are committed to providing full transparency on what diagnostic data Windows collects, when it is collected, and how you can control what you share. We care about your privacy and helping you build trust and confidence in our products.

Windows Diagnostic Data Viewer

We first introduced the Windows Diagnostic Data Viewer on Data Privacy Day earlier this year. The Windows Diagnostic Data Viewer helps you understand exactly what diagnostic data is received from your Windows device.  Available to anyone through the Microsoft Store, the tool provides you full transparency when it comes to diagnostic data.

Through the viewer, you can see the different categories of diagnostic data which includes:

  • Common Data like the OS name, version, device ID, Device Class, and diagnostic level selection
  • Device Connectivity and Configuration such as device properties, preferences, settings, and network information
  • Product and Service Performance such as device health, performance and reliability, and device file queries (this is not meant to capture user patterns or habits)
  • Browsing History such as frequently visited sites
  • Product and Service Usage data like applications and services used
  • Software Setup and Inventory such as installed apps and device update information.

Each of these categories are important so that we can diagnose performance issues and ensure your device is secure. The viewer provides you full insights into exactly what we collect so that you are aware of what’s happening on your device. Through this tool, you can do things like search by keyword, filter data by category, export the data to a separate file, and provide feedback about the tool or a specific data point.
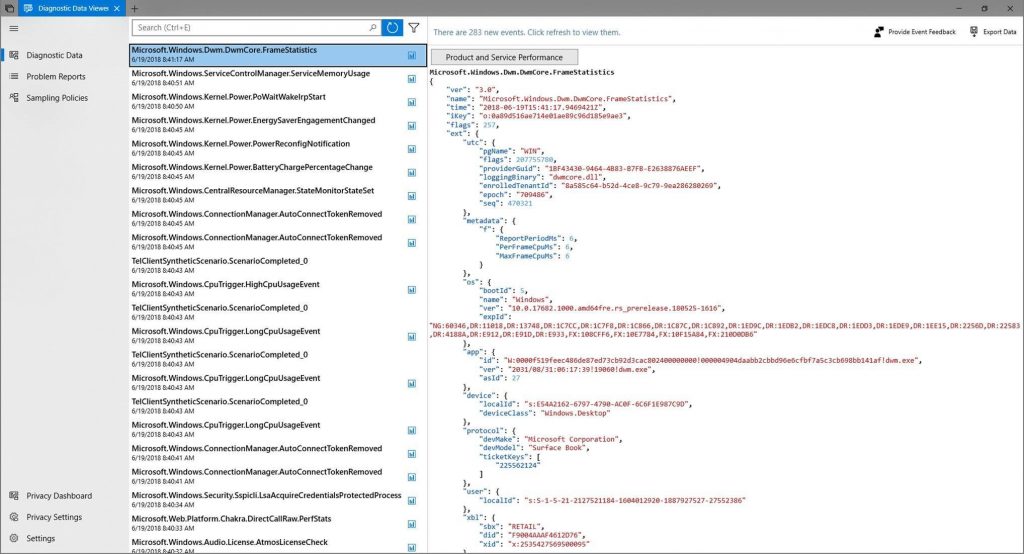
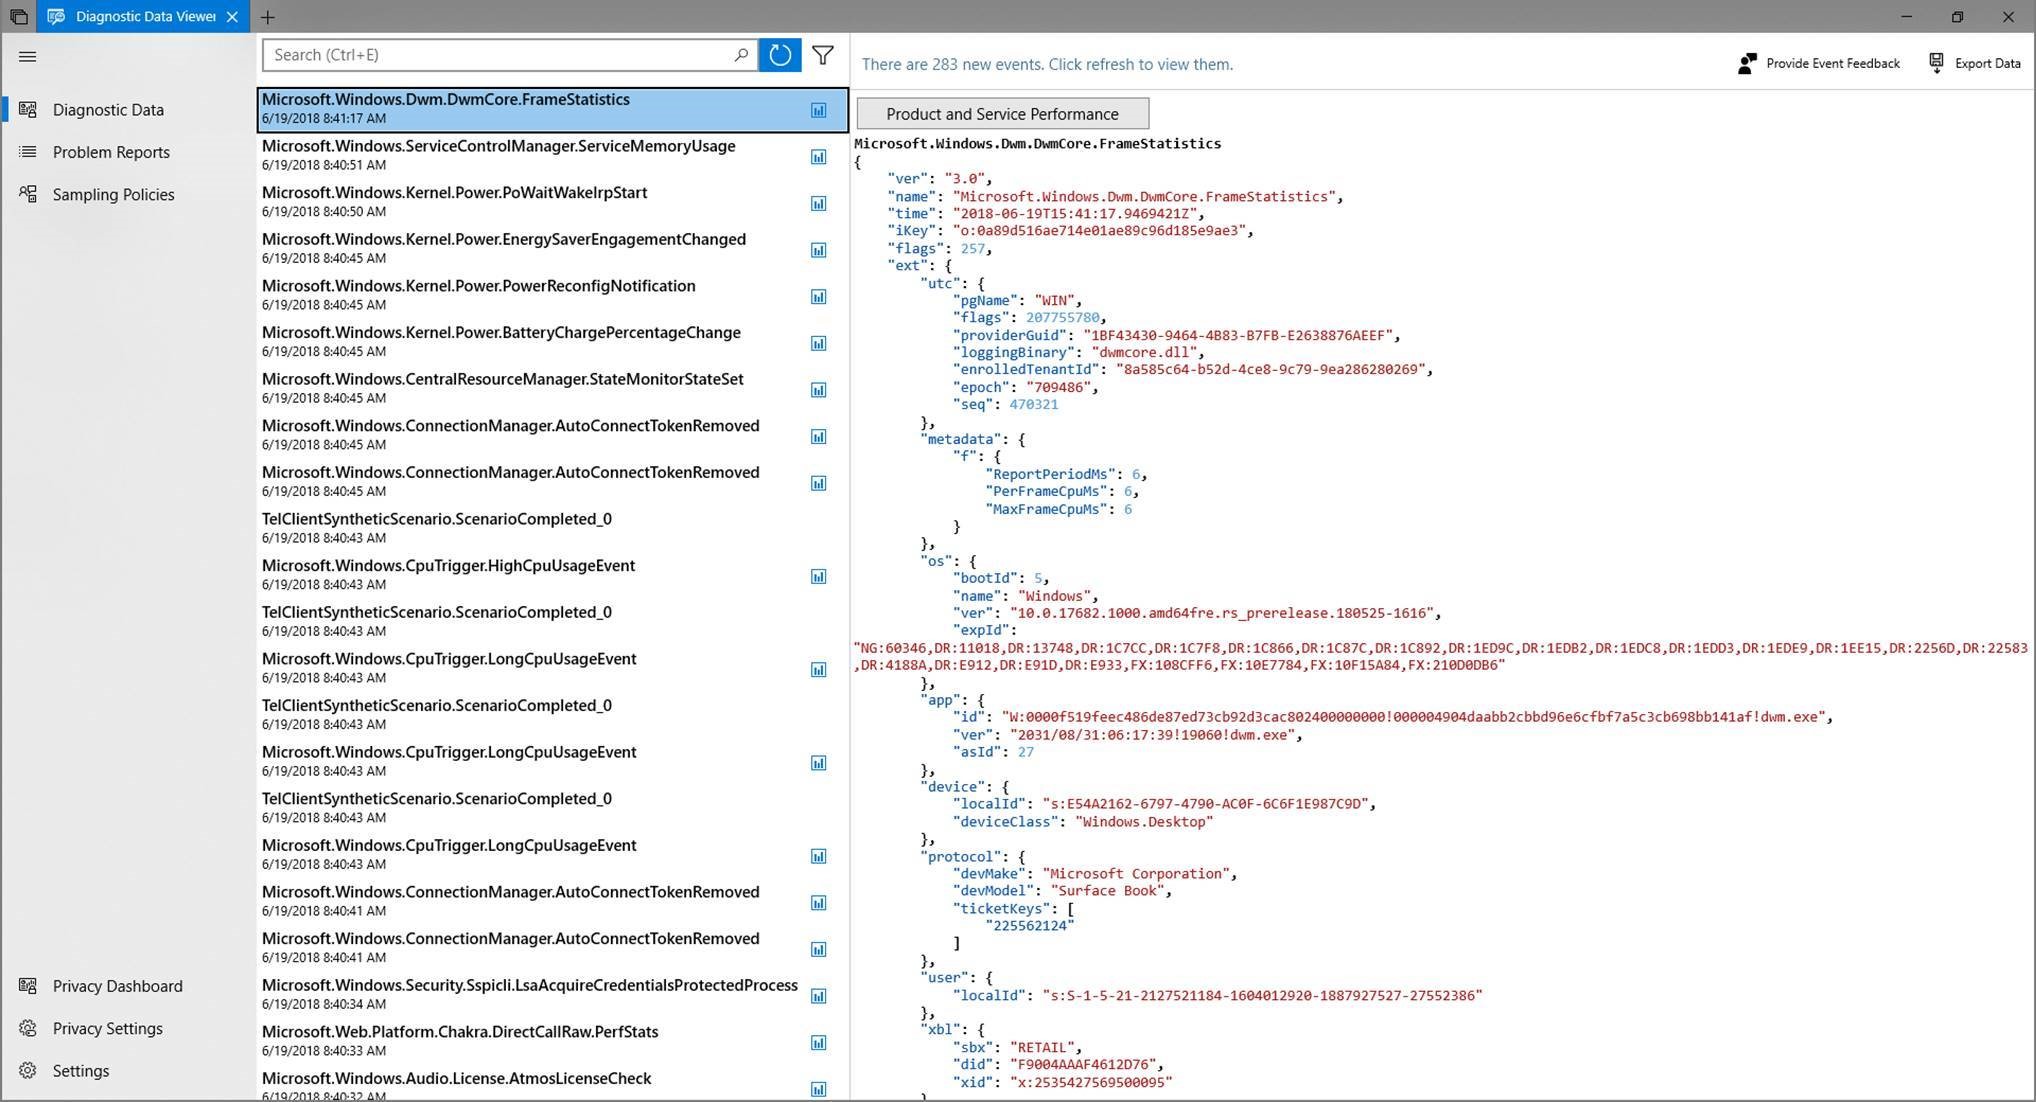
The Diagnostic Data Viewer shows you each diagnostic data point sent to Microsoft in detail. You can do things like filter the view by category (to right of search bar) and export the data to a separate file (top right of tool).

New to the Diagnostic Data Viewer

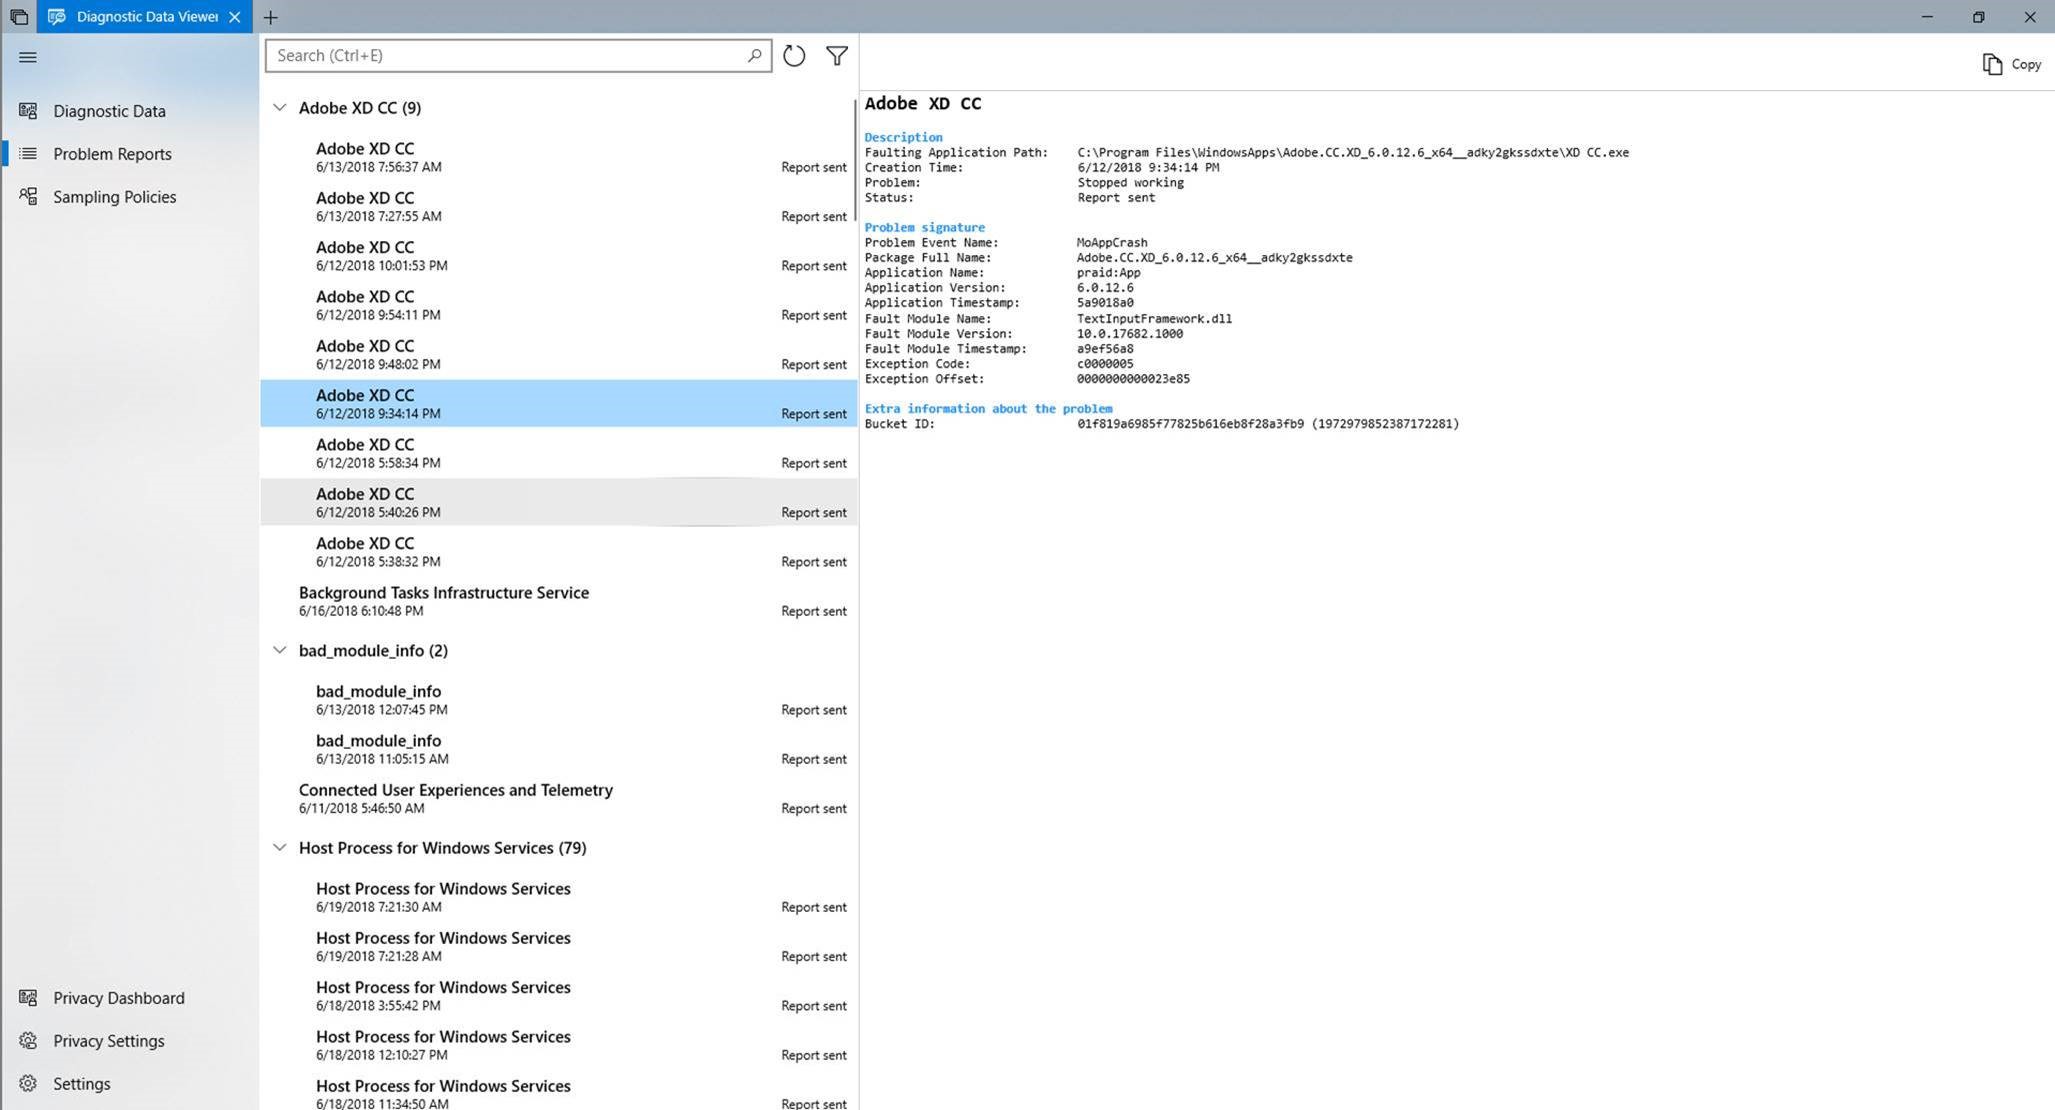
We are excited to say that users can now directly view Problem Reports that have or will be sent to Microsoft. Problem Reports help us identify crashes and other disruptions on your device so that we can improve your Windows experience. On the Diagnostic Data Viewer, users can view specific details about each report collected such as when it was sent and what application or component caused the report to be created.
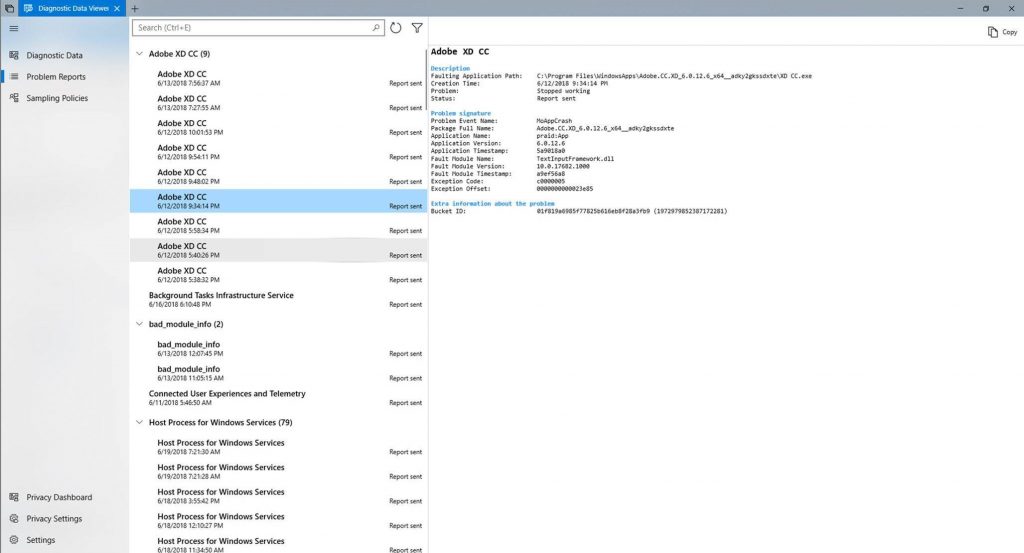
The Diagnostic Data Viewer shows you each Problem Report sent to Microsoft.

Along with the ability to see Problem Reports, the Diagnostic Data Viewer comes with new changes to the UI as well. For example, the filter feature to view data points by category is now directly to the right of the search bar, and the export data feature now exists at the top right of the tool.

How to get it

Whether you’re new to Windows, or If you’ve just updated your OS to the new build, you’ll want to check out these steps.

You can get the Diagnostic Data Viewer on your Windows device through the Microsoft Store. Once you install the tool, open the app through the Start menu.

If you see “No events found”, go to “Open diagnostics and feedback menu in settings panel” on the bottom left of the tool (the middle icon). On this page, double check that “Diagnostic Data Viewer” is enabled. Once it is enabled, it will take some time for the tool to show events.

You can hit the blue refresh button to the right of the search bar to see if any events have been found.

Our Commitment

Windows Insiders get an exclusive look at this new feature releasing to Diagnostic Data Viewer, and we couldn’t be more excited to see the amazing feedback to come.

Our promise to upholding the highest standards of privacy will continue to be a top concern. When you use our products and services, we want you to feel confident that having great experiences and features does not mean sacrificing your privacy. It’s your device. You deserve to know what’s happening on it.

In making Windows 10 better and more secure, we will continue to make your privacy our top concern. This means providing you with the all the right tools to empower you to take control of your data. From prioritizing full transparency of diagnostic data to helping you take action about what you share, we are here to provide you with the power to know what’s on your device and who you share it with.

We cannot wait to hear more from you about making privacy stronger on Windows 10. We welcome you to submit feedback related to the Diagnostic Data Viewer through feedback hub. You can also submit feedback regarding our approach to privacy here.

See Your Videos Better Outside

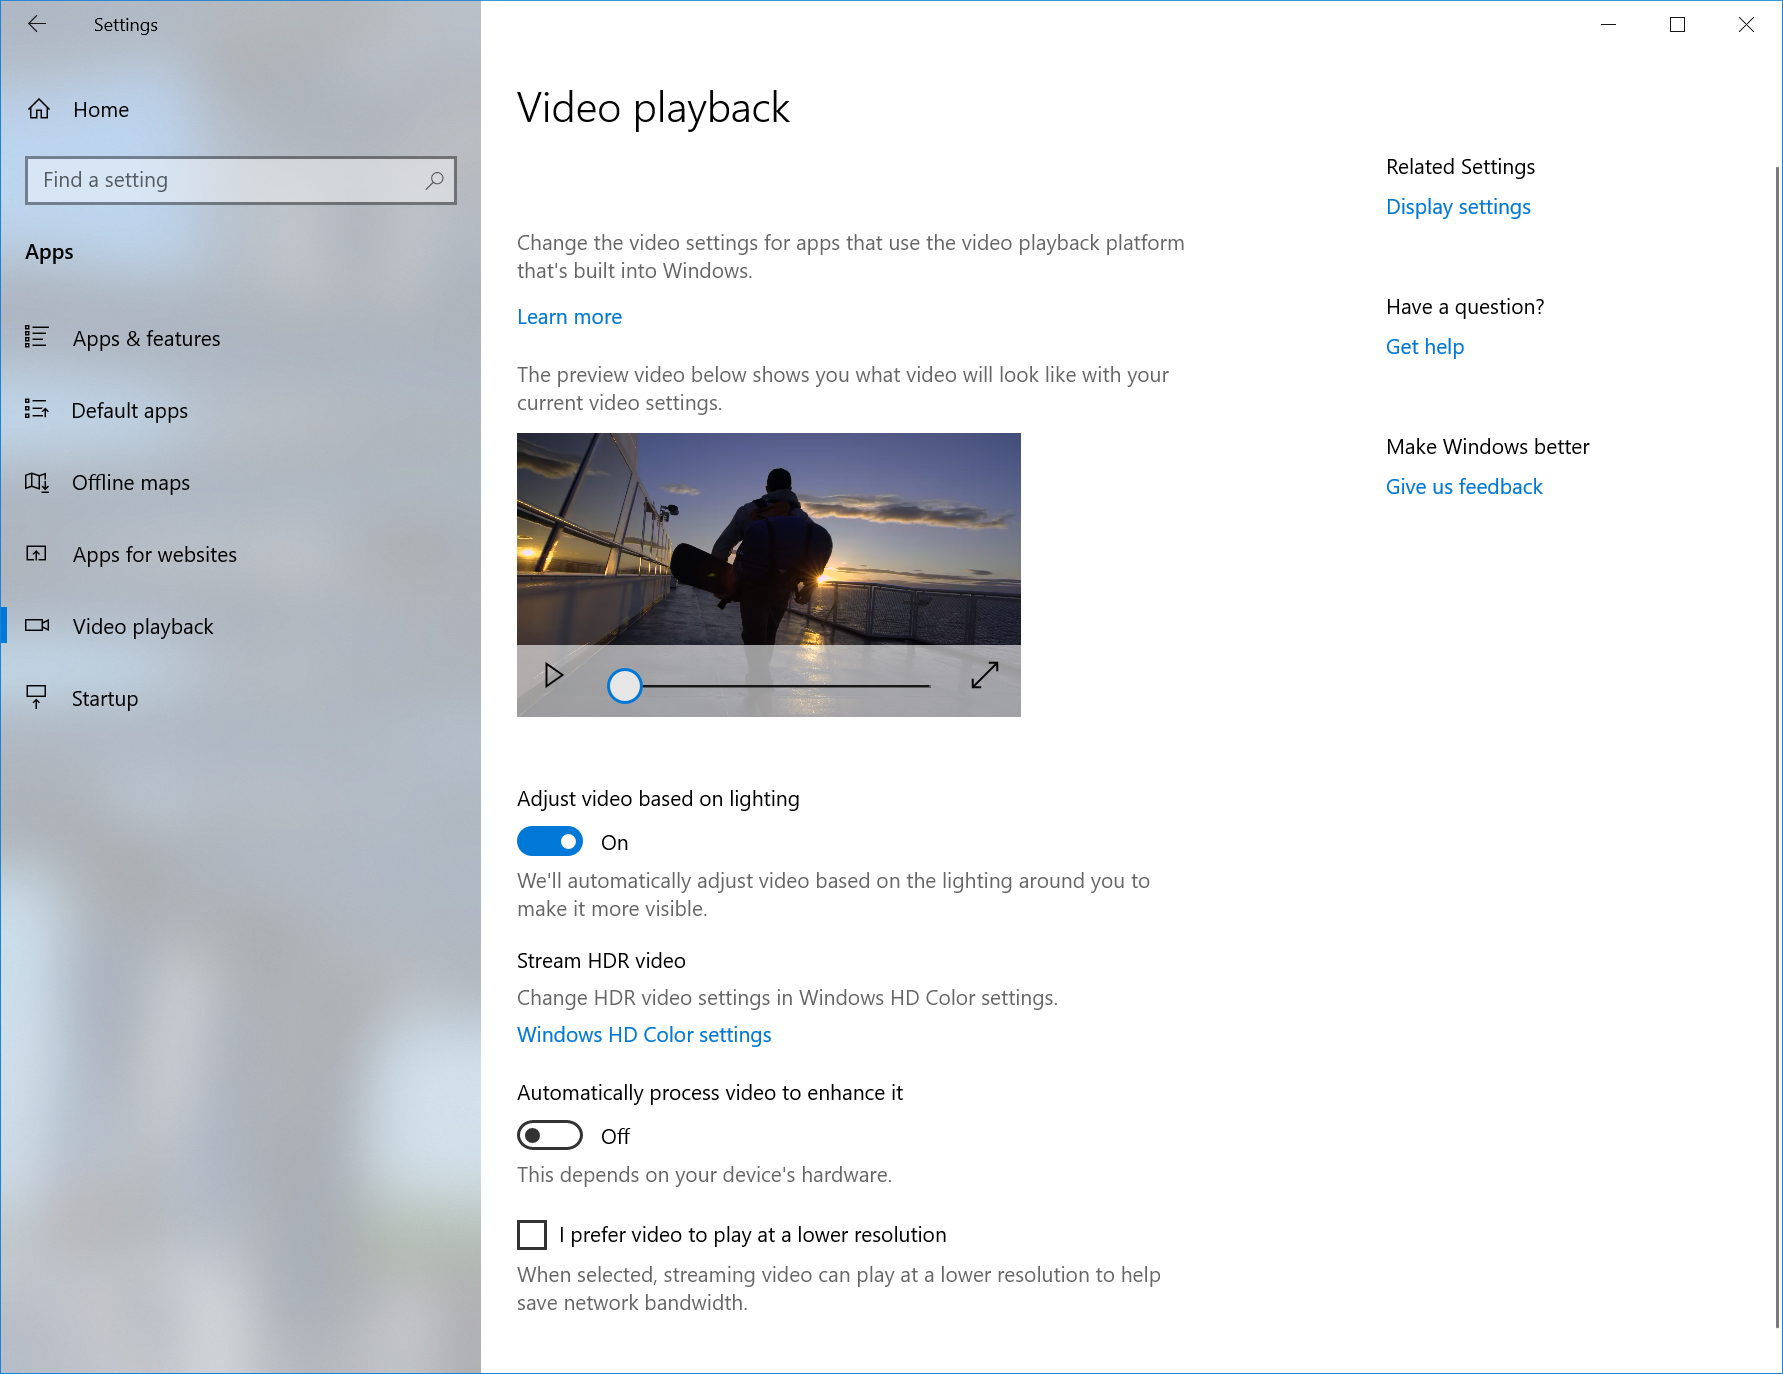
There’s a new viewing mode for you to try out, designed to improve the visibility of your video when you are in a very bright environment. This feature uses the light sensor on your device to detect your ambient light, and automatically adjusts your video accordingly. To turn it on, navigate to Settings > Apps > Video playback, and turn on “Adjust video based on lighting”.
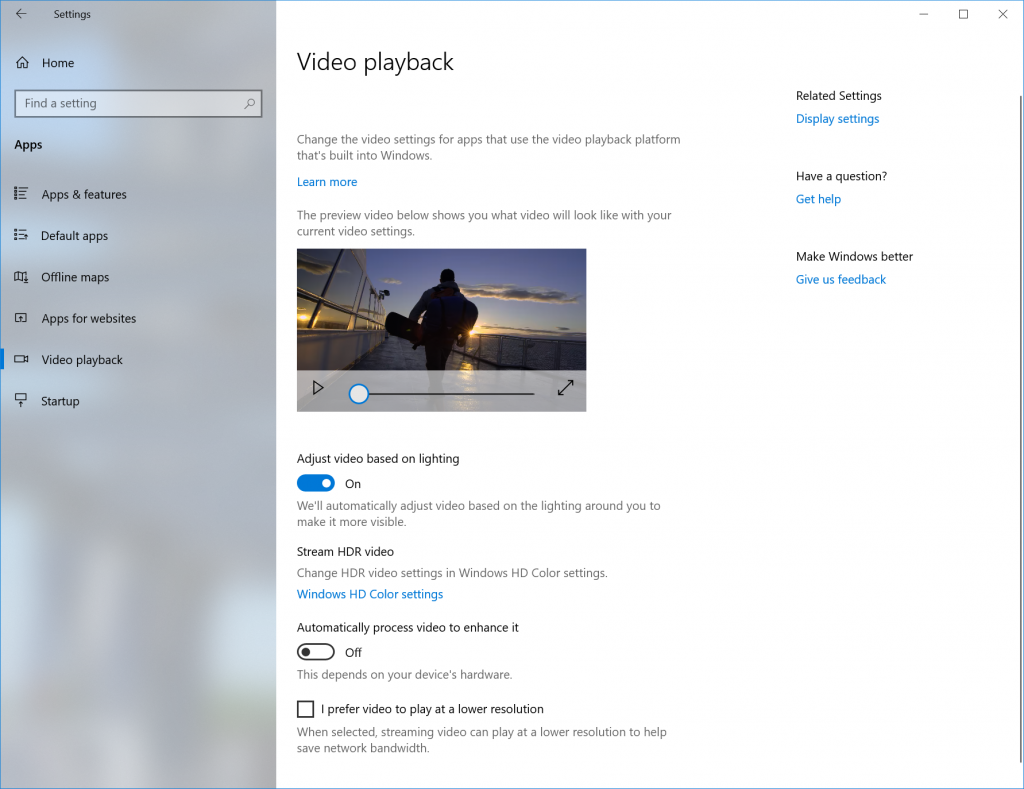
Showing Video Playback Settings with “adjust video based on lighting” setting.

We’d love feedback as we work to refine this feature for the next Windows release! Please use the Feedback Hub and file feedback under Category: “Devices and Drivers”, Subcategory: “Video Playback”. Hit “Recreate my problem” and start the capture of the video playback you would like to give feedback on!

A couple notes:

  • In order for this feature to work, your device must have a light sensor. There are a couple different ways you can check:
    • Go to “Display Settings” in the Settings app. If you have the option to turn on Auto-brightness, you most likely have a light sensor
    • Go to Device Manager. If you have something that sounds like “Light Sensor” under Sensors, you likely have a light sensor.
  • Currently, not all devices have light sensors that are well-calibrated. If you are on a device where video looks really, really bad with this setting on, please let us know via the Feedback Hub!

Typing Insights

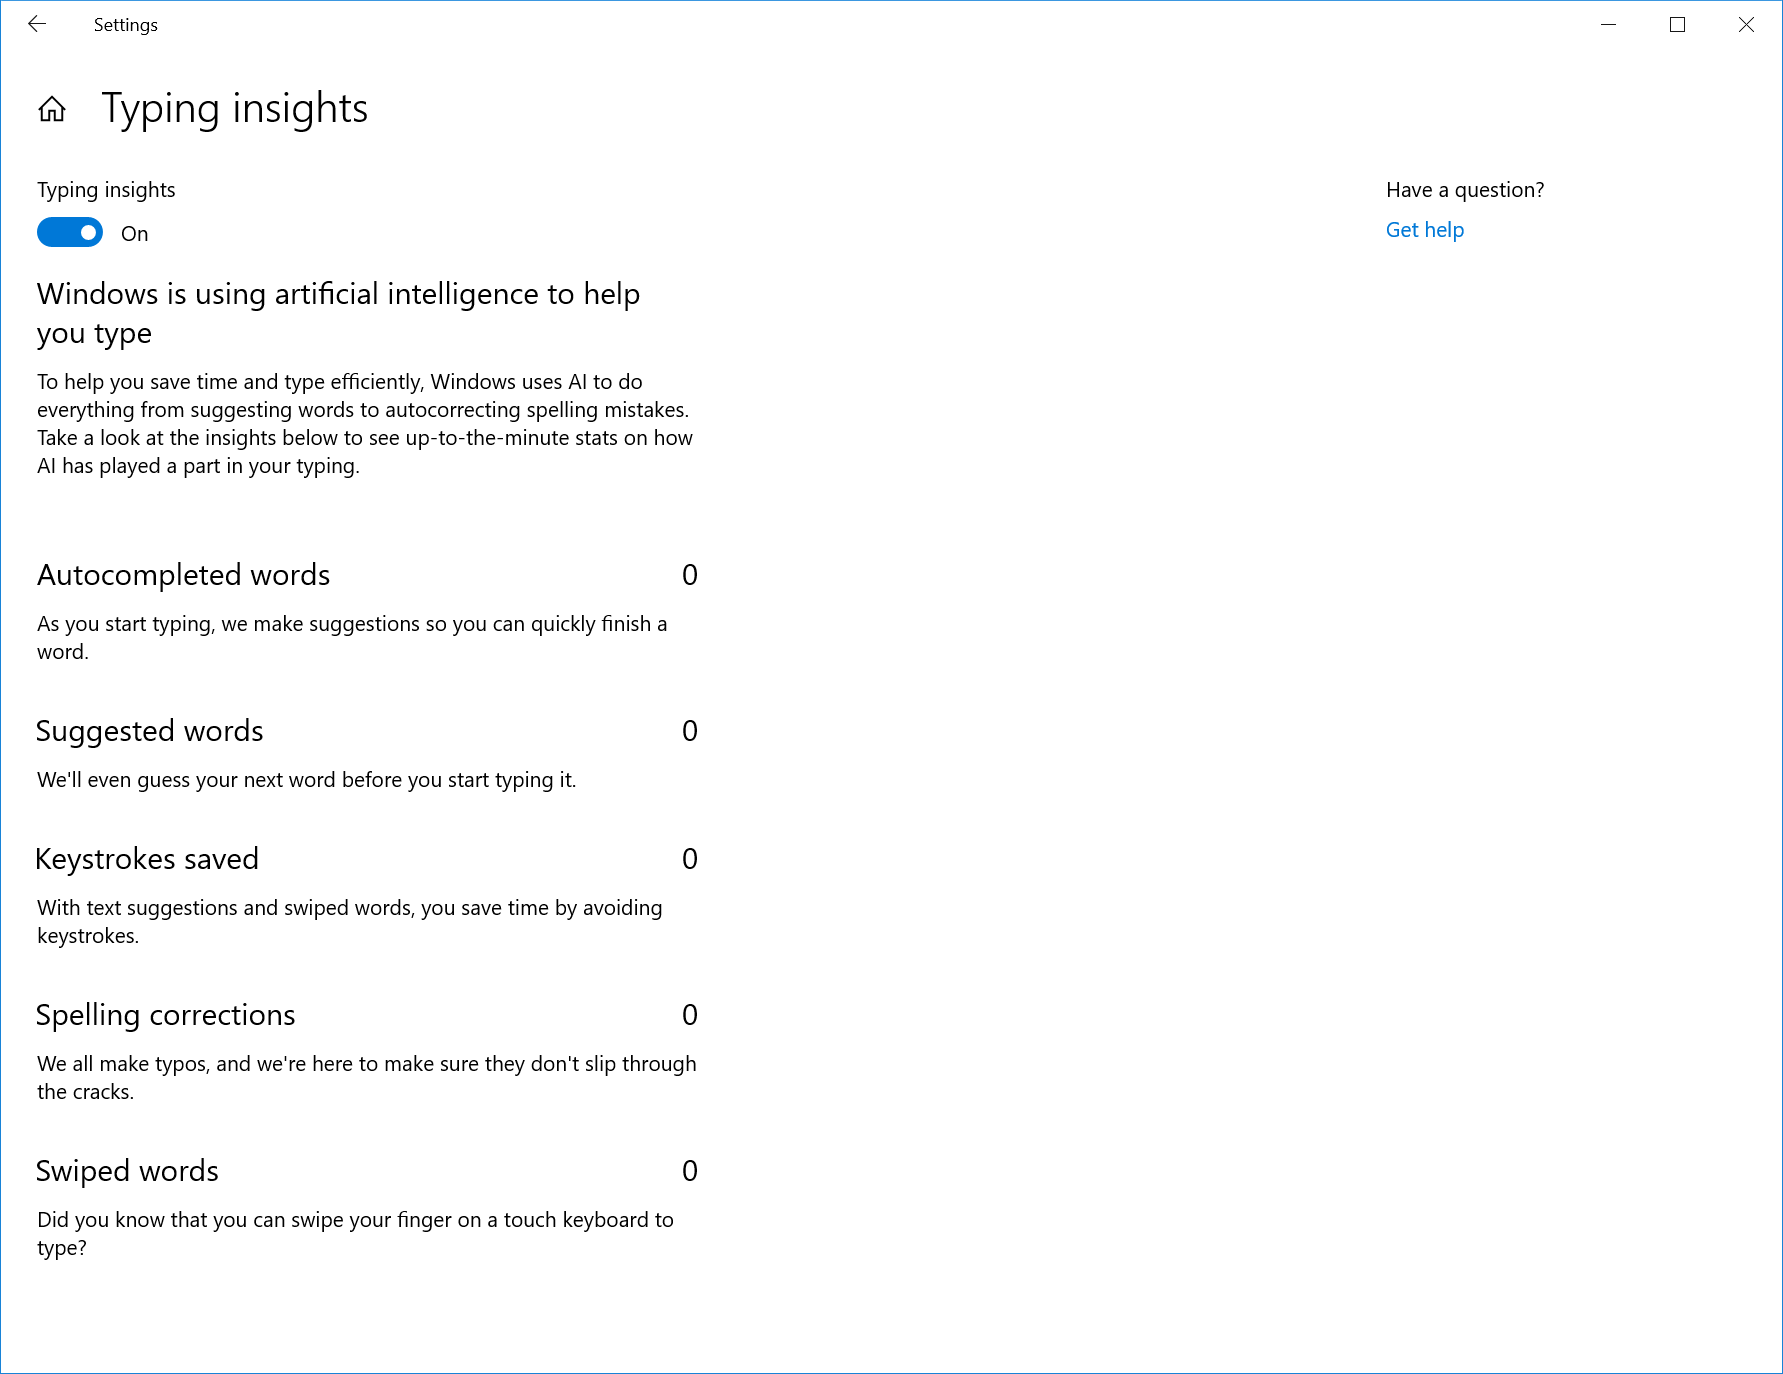
Windows now shows you insights about how its AI has been helping you type with efficiency. If you use the software keyboard on Windows, there are many features built into the typing experience that leverage AI and ML to help you be more efficient. Some examples include autocorrecting your spelling mistakes, prediction of the next word you would type, word suggestions as you start typing so you don’t have to type the full word and the number of words you’ve typed by swiping over the letters on the software keyboard (yes, you can do that, try it out if you have not yet).

Windows now shows you stats about each of these features. Go to Settings > Devices > Typing and click on “View typing insights” link to see them.
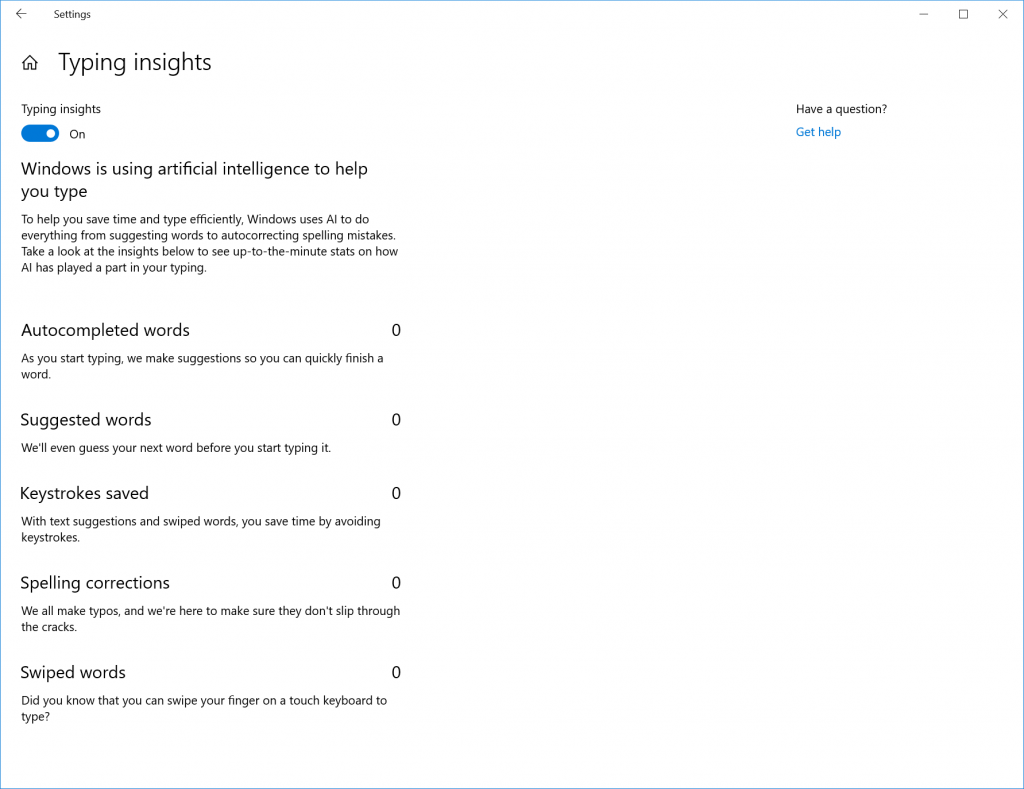
Showing Typing Insights page with stats described above.

Currently these stats cover the typing insights for software keyboard usage and hardware keyboard prediction features. If you like to see additional insights in the future releases, head over to the Feedback Hub and share your thoughts.

Font installation for non-admin users

Have you ever wanted to use your own fonts from your account on a shared school or work PC, but couldn’t because you didn’t have the administrator privileges required to install the fonts? Well, we’ve heard your frustration about this and have made some changes.

In the past, fonts in Windows have always been installed for all users. Because that is a system-wide change, it always required admin privilege. The need for an admin was reflected in the user interface. For example, if you browse in File Explorer to a folder containing a font file and right-clicked on the file to bring up the context menu, then the “Install” option would appear with the security badge, which means that it requires an admin.

If you tried to install a font but didn’t have admin privileges, then you would be presented with a User Account Control dialog, so that an admin could approve the change. If you’re a non-admin user and often need to install (or uninstall) fonts, then that could be a big hassle.

In the Windows 10 1803 feature update, we introduced fonts in the Microsoft Store. To enable that capability, we needed to make changes deep in Windows to allow a font to be installed for a specific user rather than system-wide. That’s why no admin action is needed when fonts acquired in the Store are installed.

Now we’ve extended this further to include font files that you obtain from other sources and want to install. Now when you right-click on a font file in File Explorer, you’ll see two options. “Install for all users” provides the past, system-wide install capability and requires an admin. But now there is another option: “Install” allows any user, including non-admin users, to install a font for their own use.
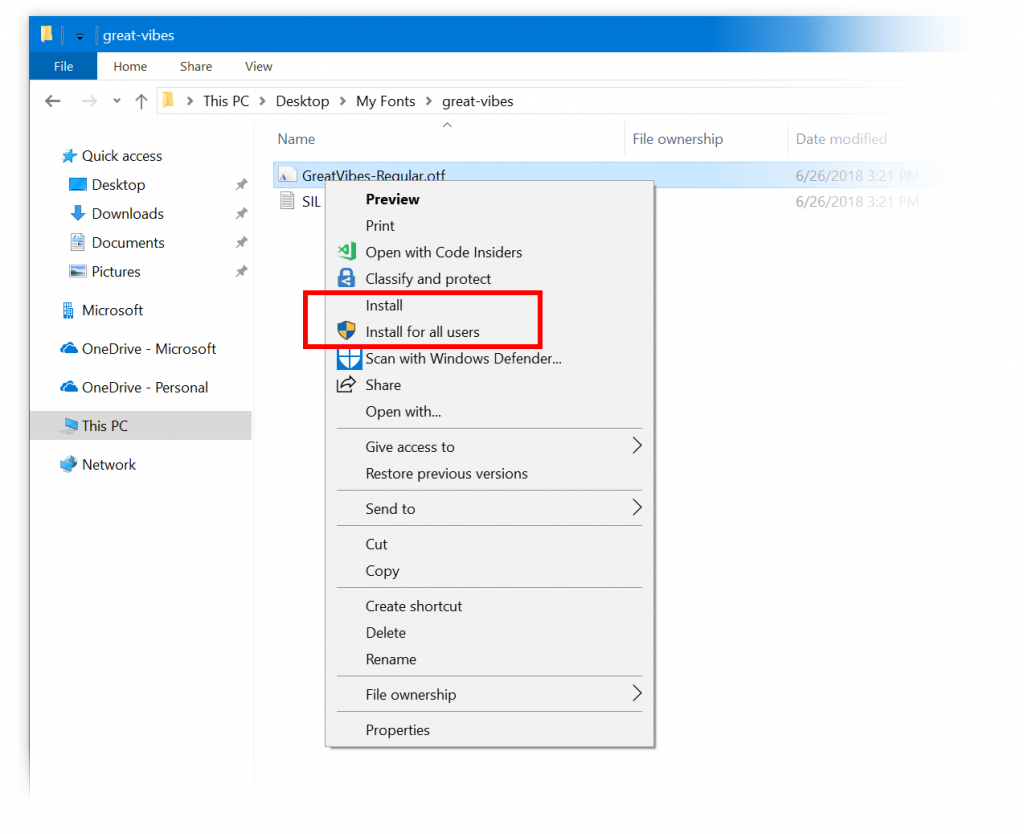
Context menu when right-clicking a font in file explorer, showing the two options described above.

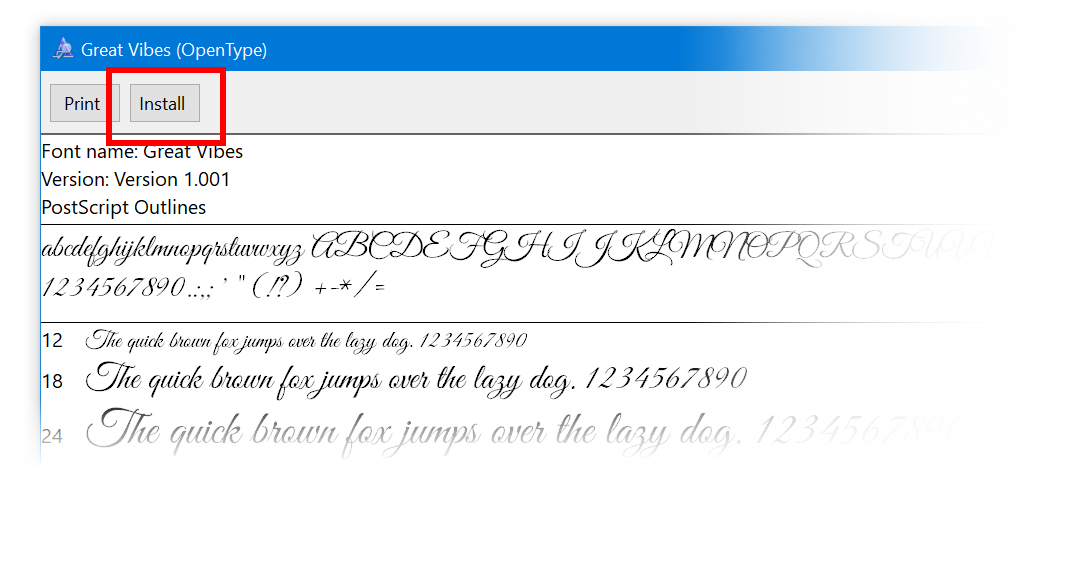
Often font files come within a compressed folder (that is, a .zip file). The “Install” context-menu option isn’t available in File Explorer when you view the contents of a compressed folder, but you can double-click the font file within the compressed folder to open it in the font previewer, and that provides an “Install” button. In the past, the button in the font previewer had the security badge, and it would do a system-wide install, requiring an admin. Now the security badge is gone, and the “Install” button in the font previewer performs a single-user font install, which can be done by non-admins.
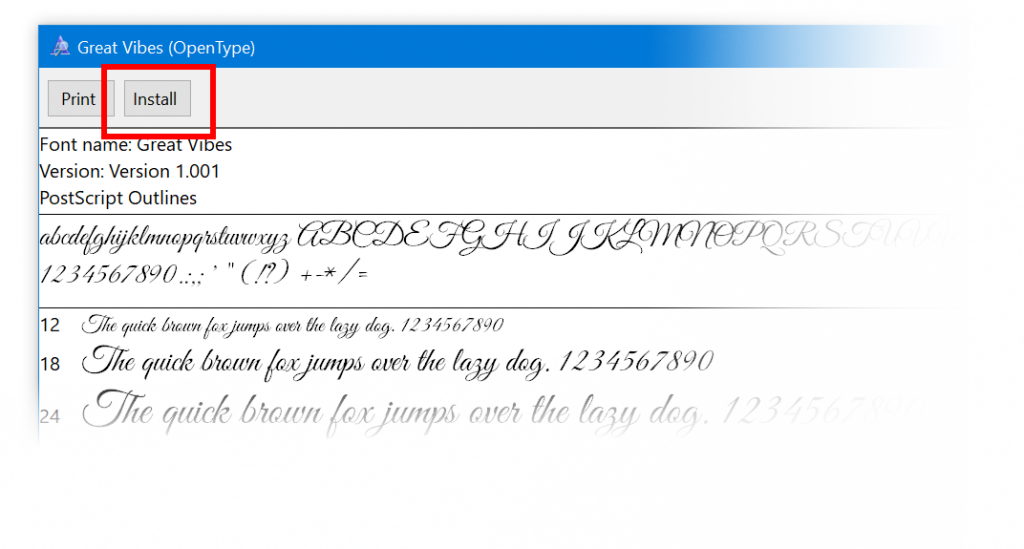
Showing the font previewer with the install button, now available for non-admins.

Let us know what you think of this no-admin-required, single-user capability for installing fonts!

Contextual Commanding Improvements to Text Controls

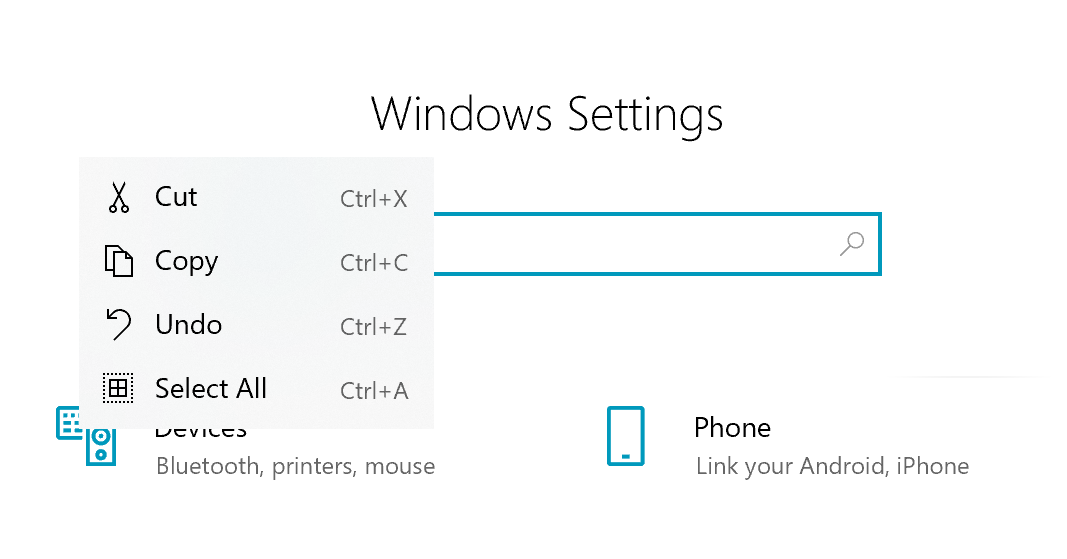
Our inbox text controls are now taking advantage of the new CommandBarFlyout control. This allows a number of exciting improvements including:

  • The ability to quickly cut, copy, and paste in textboxes with touch
  • New icons for common actions
  • The ability to bold, italicize, etc. in our rich text surfaces
  • New animations, acrylic treatment, and depth support
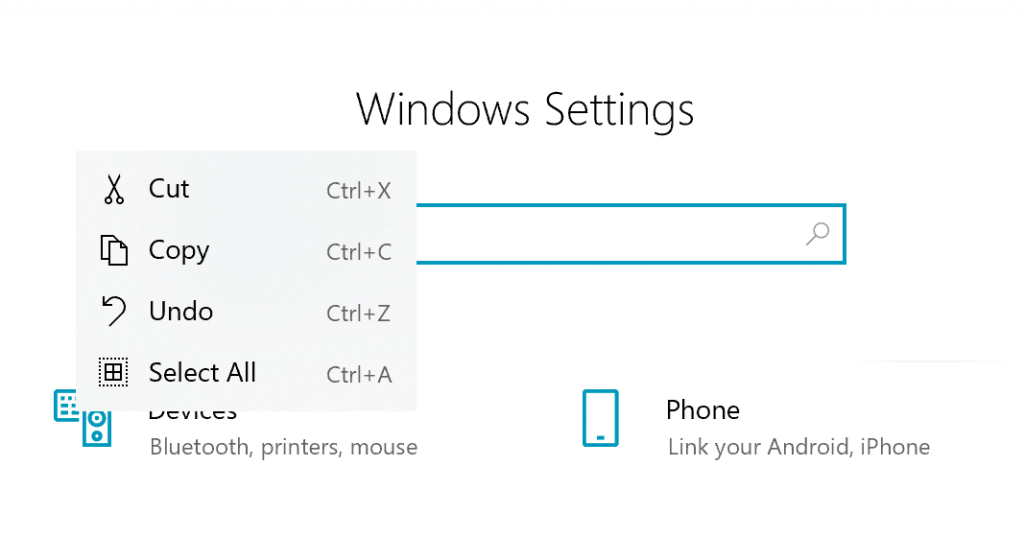
Windows Settings search box, the text “test” has been selected and right clicked, showing a commanding menu with cut/copy/undo/select all with both icons and informational hotkeys.

This change will apply to any XAML based text boxes on this build.

Windows Security Improvements

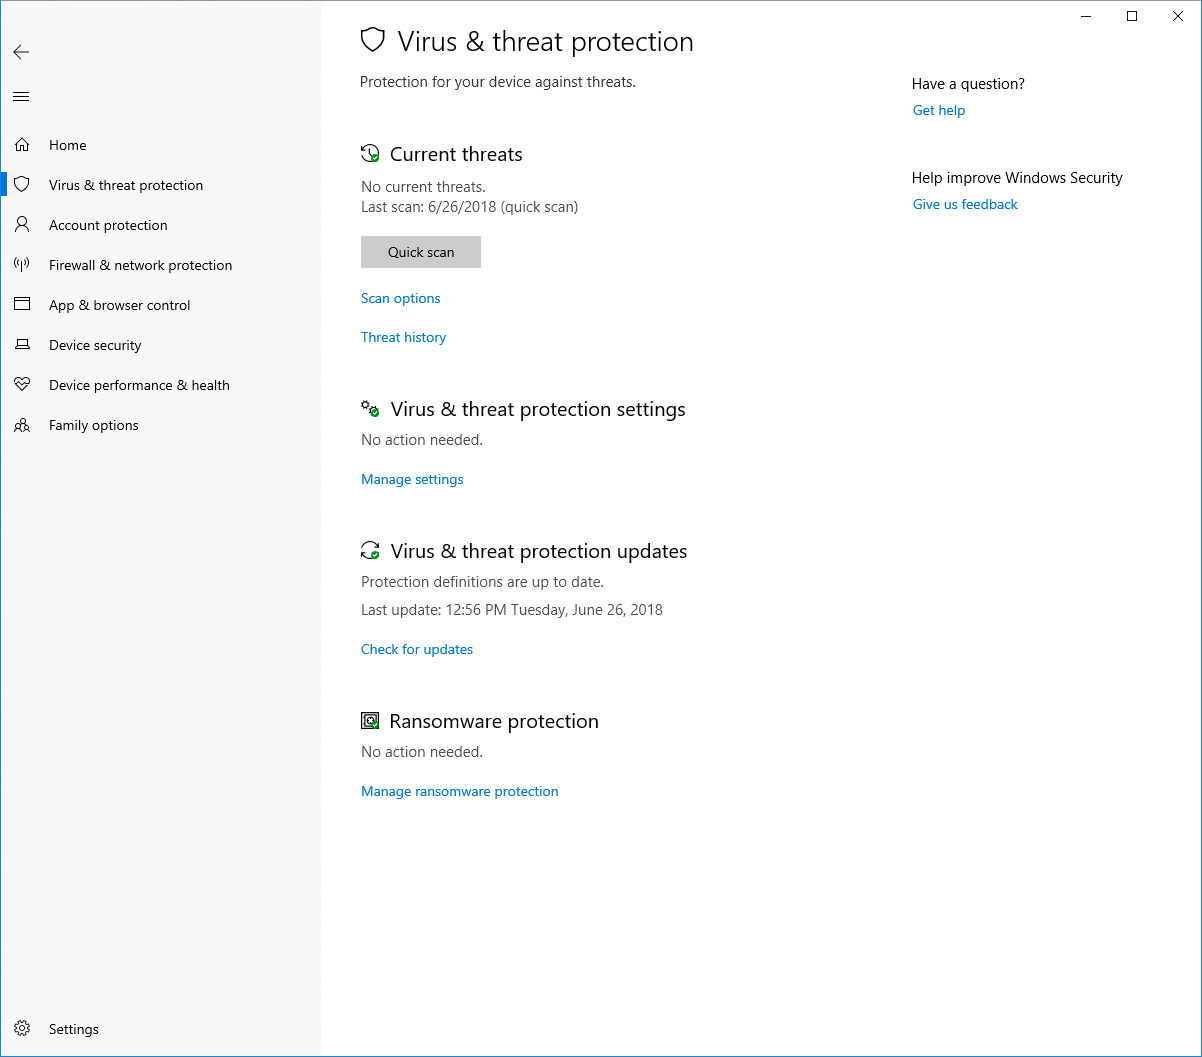
We’ve continued to work on the Current threats area on the Virus & threat protectionsection, which now displays all threats that need action. You can quickly take action on threats straight from this screen.
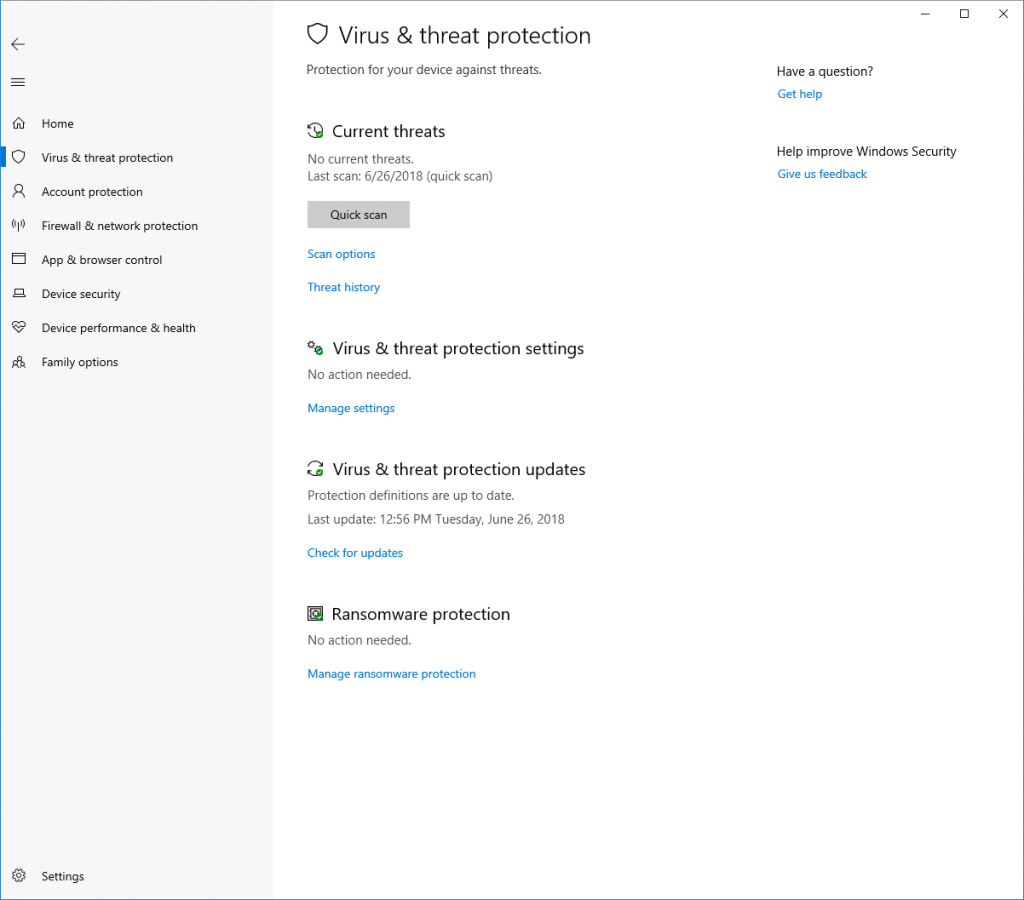
Screenshot of the Windows Security app showing a scan in progress under the Current threats heading on the Virus & threat protection page.

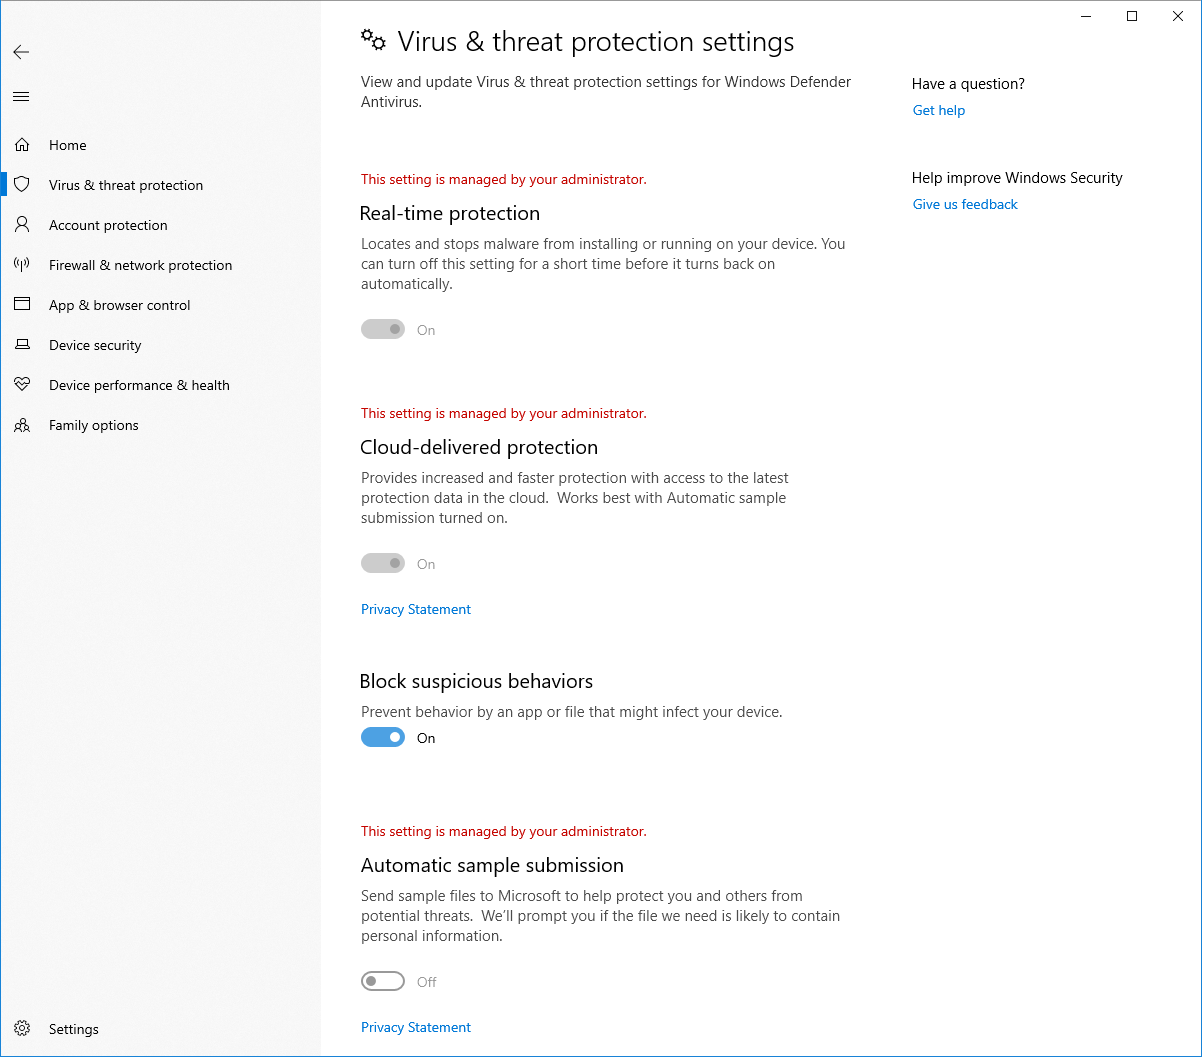
You can enable a new protection setting, Block suspicious behaviors, which brings our Windows Defender Exploit Guard attack surface reduction technology to all users. To enable this setting, go to the Virus & threat protection section and click Manage settingsunder the Virus & threat protection settings heading, as shown in the following screenshot:
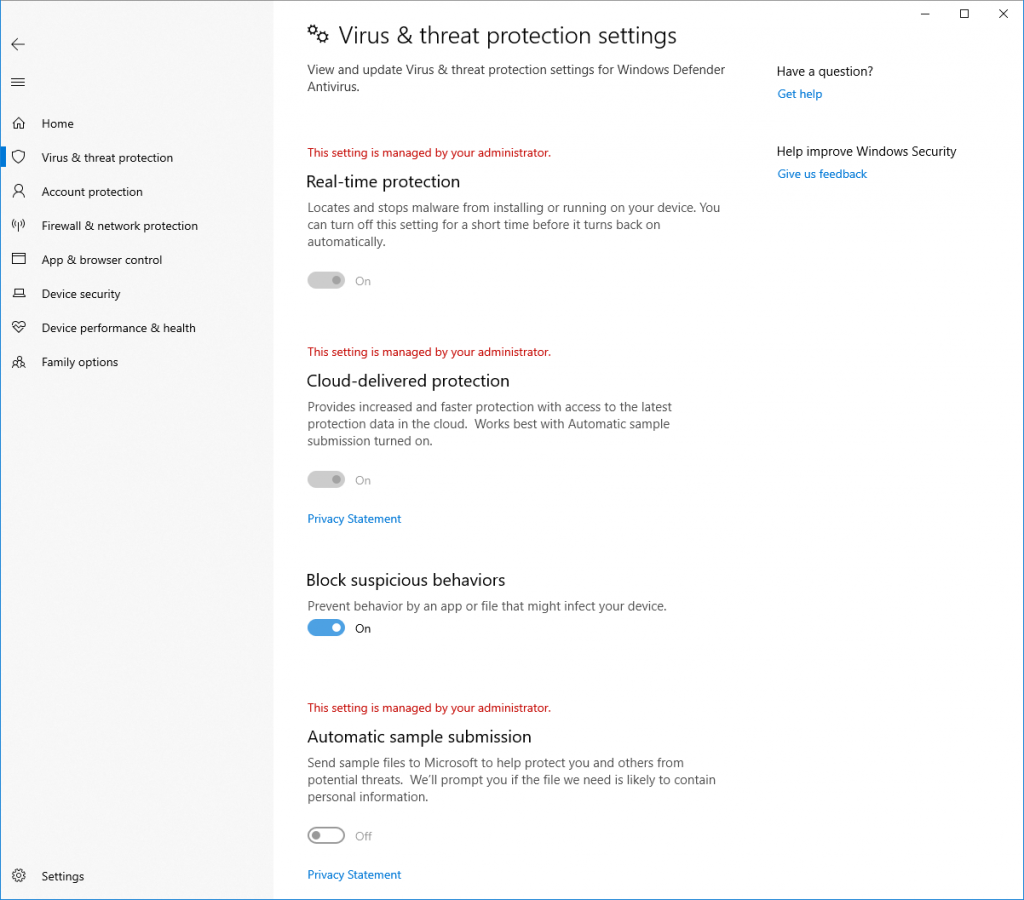
Screenshot showing Block suspicious actions toggle in the Windows Security app, in the Virus & threat protection section.

With Controlled folder access you can help prevent ransomware and other destructive malware from changing your personal files. In some cases, apps that you normally use might be blocked from making changes to common folders like Documents and Pictures. We’ve made it easier for you to add apps that were recently blocked so you can keep using your device without turning off the feature altogether.

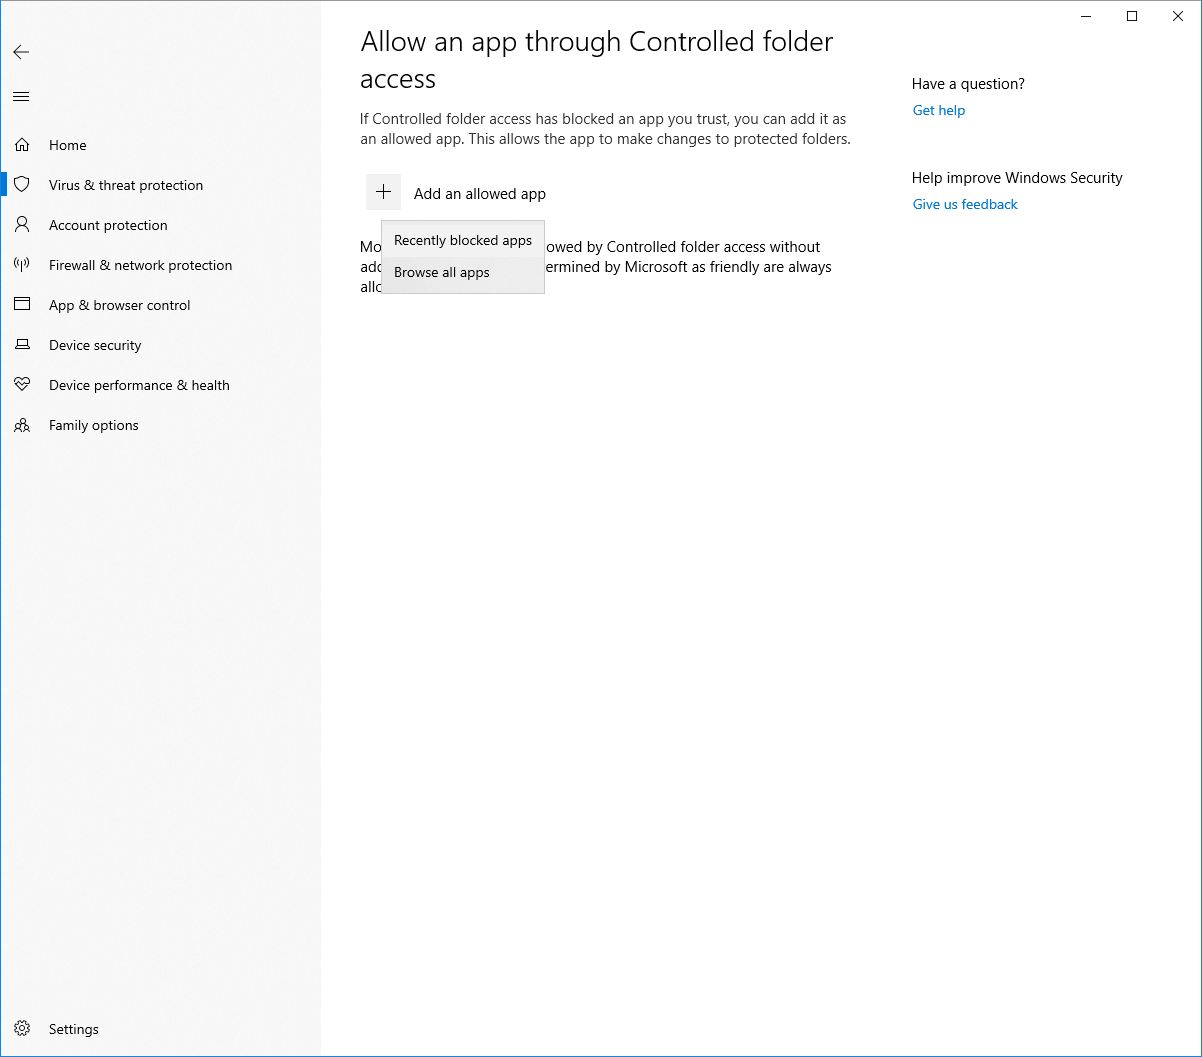
When an app is blocked, it will appear in a recently blocked apps list, which you can get to by opening the Virus & threat protection section, clicking Manage settings under the Ransomware protection heading, and then Allow an app through Controlled folder access. After the prompt, click the plus button and choose Recently blocked apps. Select any of the apps to add them to the allowed list. You can also browse for an app from this page as well.
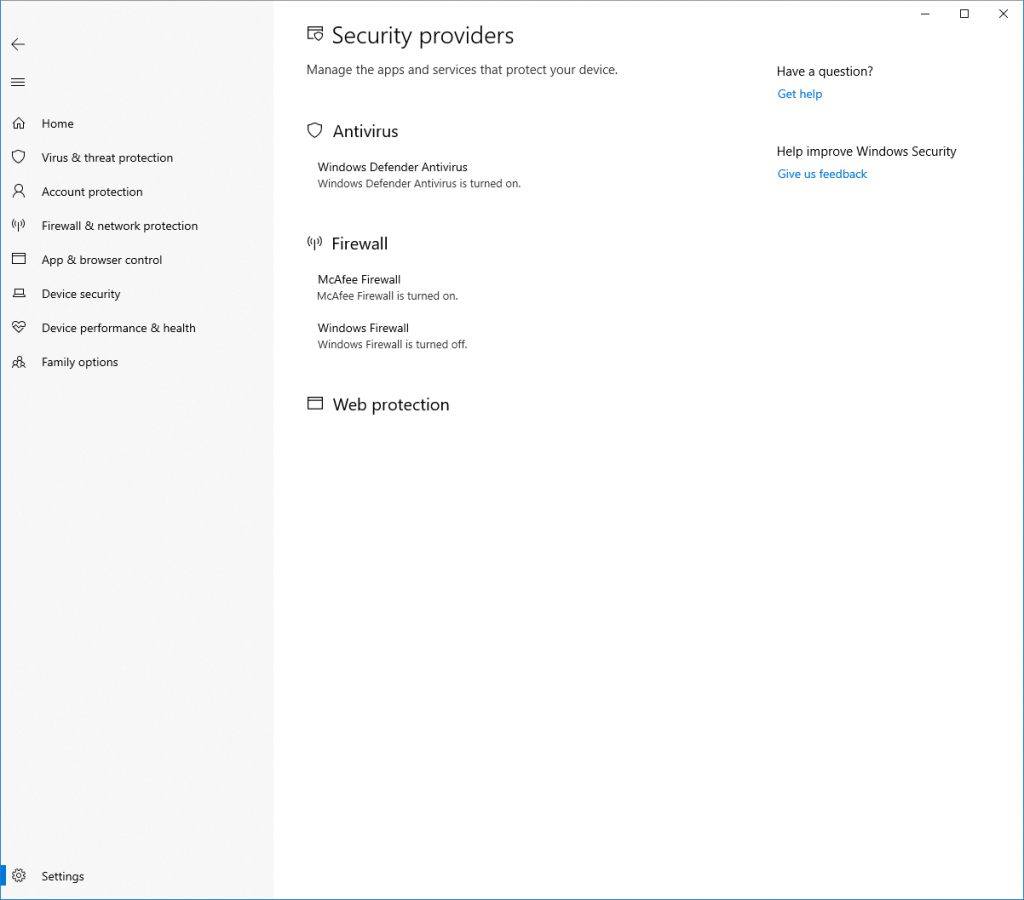
Screenshot showing how to add a recently blocked app by navigating to the Virus & threat protection section, opening the Manage settings link under the Ransomware protection heading, and then interacting with the Allow an app through Controlled folder access link and choosing an app.

In the Device performance & health section, we’ve added a new assessment for the Windows time service. If we detect that your device’s time is not properly synced with our time servers and the time-syncing service is disabled, we’ll provide the option for you to turn it back on.

We’re continuing to work on how other security apps you’ve installed show up in the Windows Security app. There’s a new page called Security providers that you can find in the Settings section of the app. Click Manage providers to see a list of all the other security providers (including antivirus, firewall, and web protection) that are running on your device. Here you can easily open the providers’ apps, or get more information on how to resolve any issue that they have reported to you through the Windows Security app.
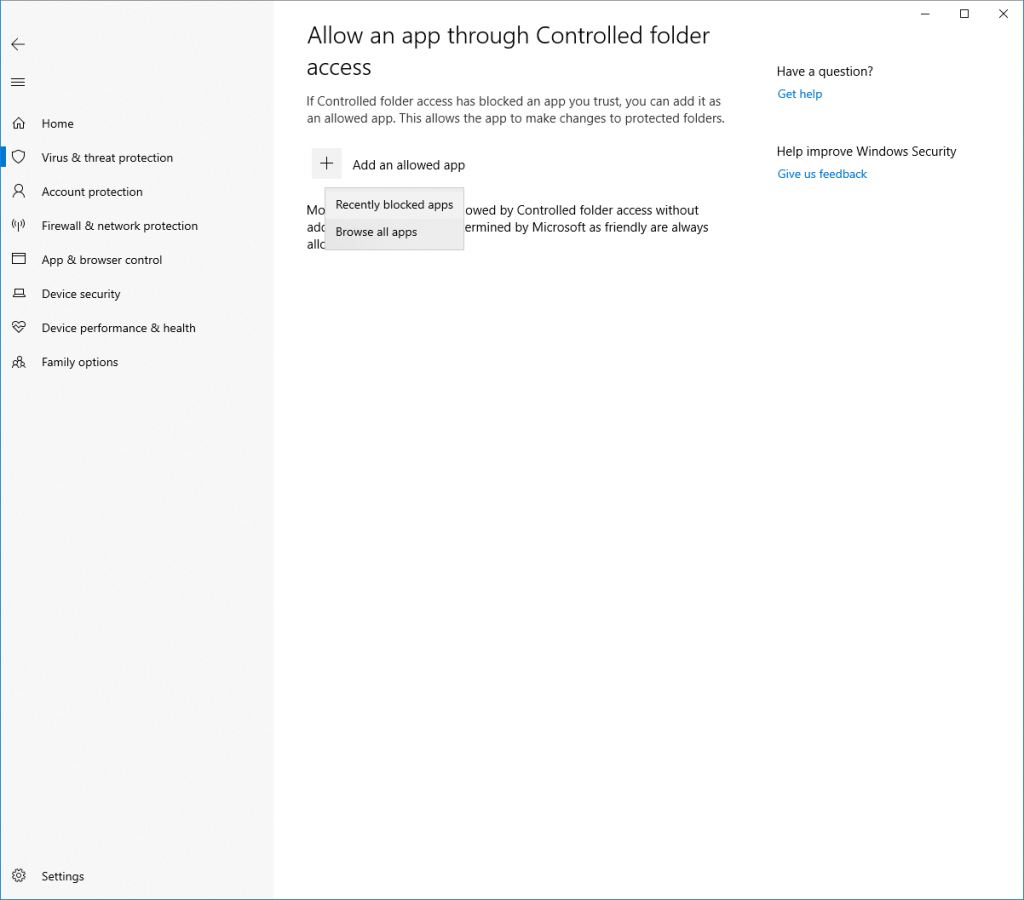
Screenshot showing the Security providers page in the Windows Security app. The pointer goes to the Settings link on the navigation pane, and then opens the Manage providers link under the Security providers heading.

This also means you’ll see more links to other security apps within the Windows Security app. For example, if you open the Firewall & network protection section, you’ll see the firewall apps that are running on your device under each firewall type (domain, private, and public networks).

Task Manager Improvements

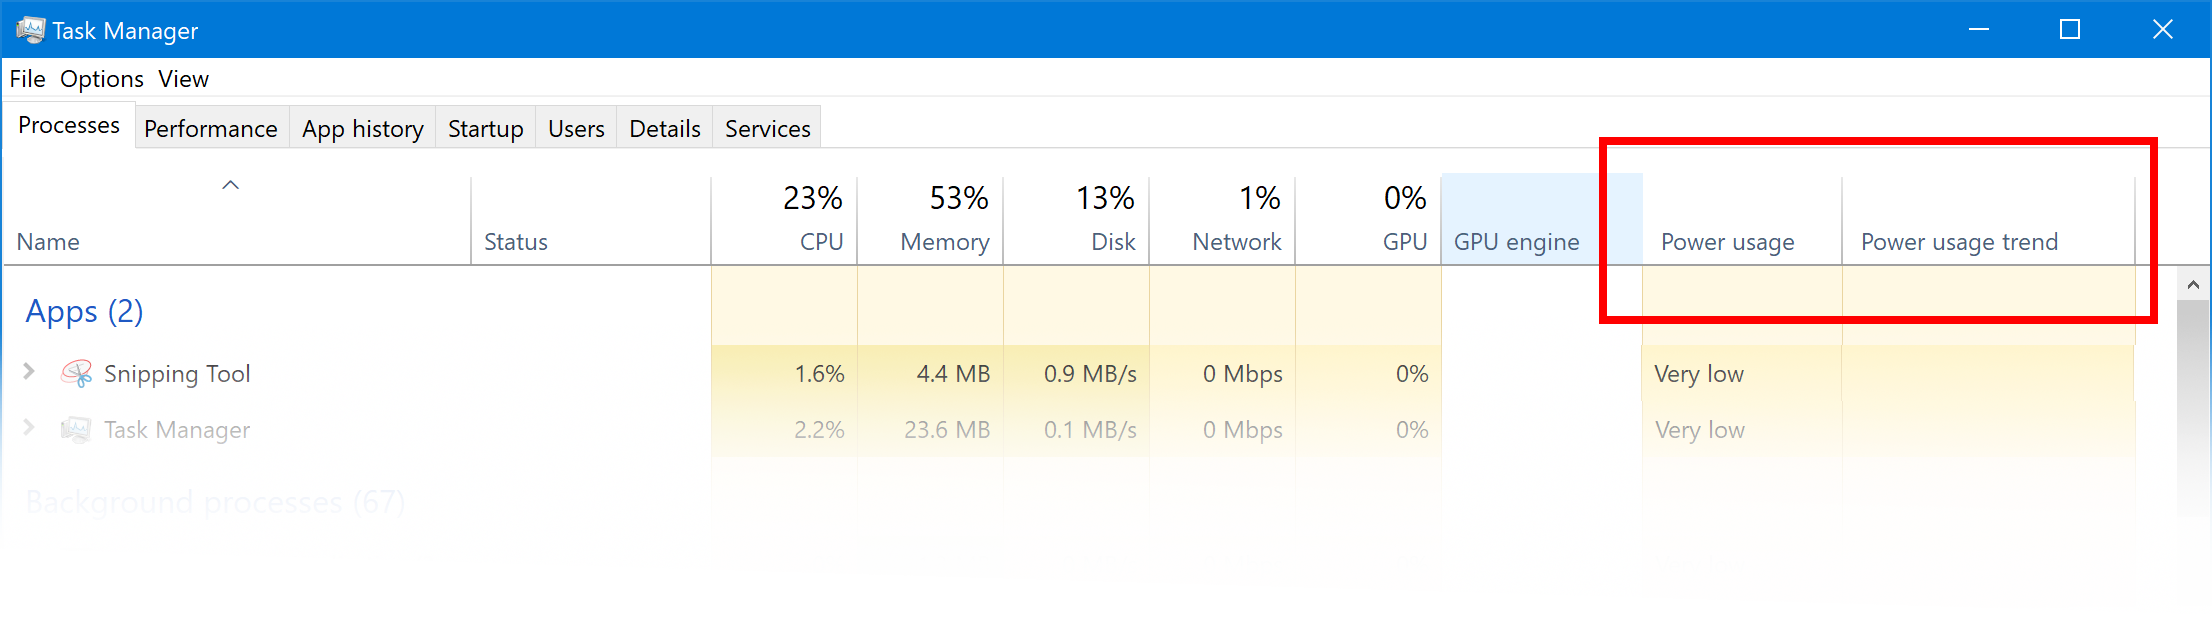
Task Manager now includes 2 new columns in the “Processes” tab to show energy impact of the running process on their system. This should help our customers to understand which apps/services are using the maximum power vs. the least power-hungry apps. The metric takes CPU, GPU & Disk into evaluation when calculating power usage.

  • Power usage: This column will provide an instantaneous view of apps/services using power.
  • Power usage trend: This column provides a power usage trend over 2 mins for each running apps/services. This column will be blank when you start an app but will populate based on the power usage every 2 mins.
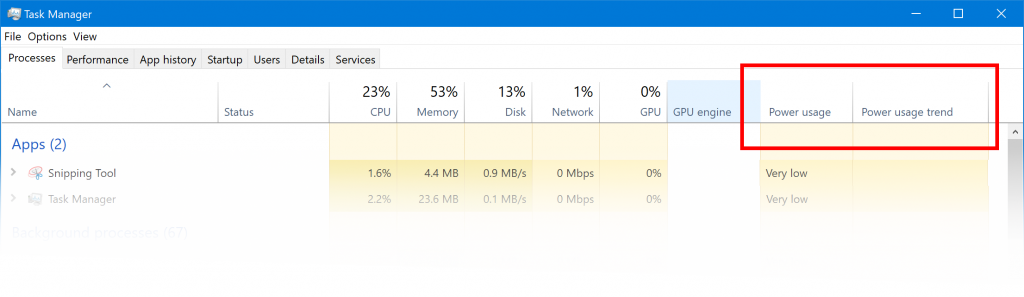
Power usage metrics in Task Manager, showing two additional columns "Power usage" & "Power usage trend".

Ease of Access and Narrator improvements

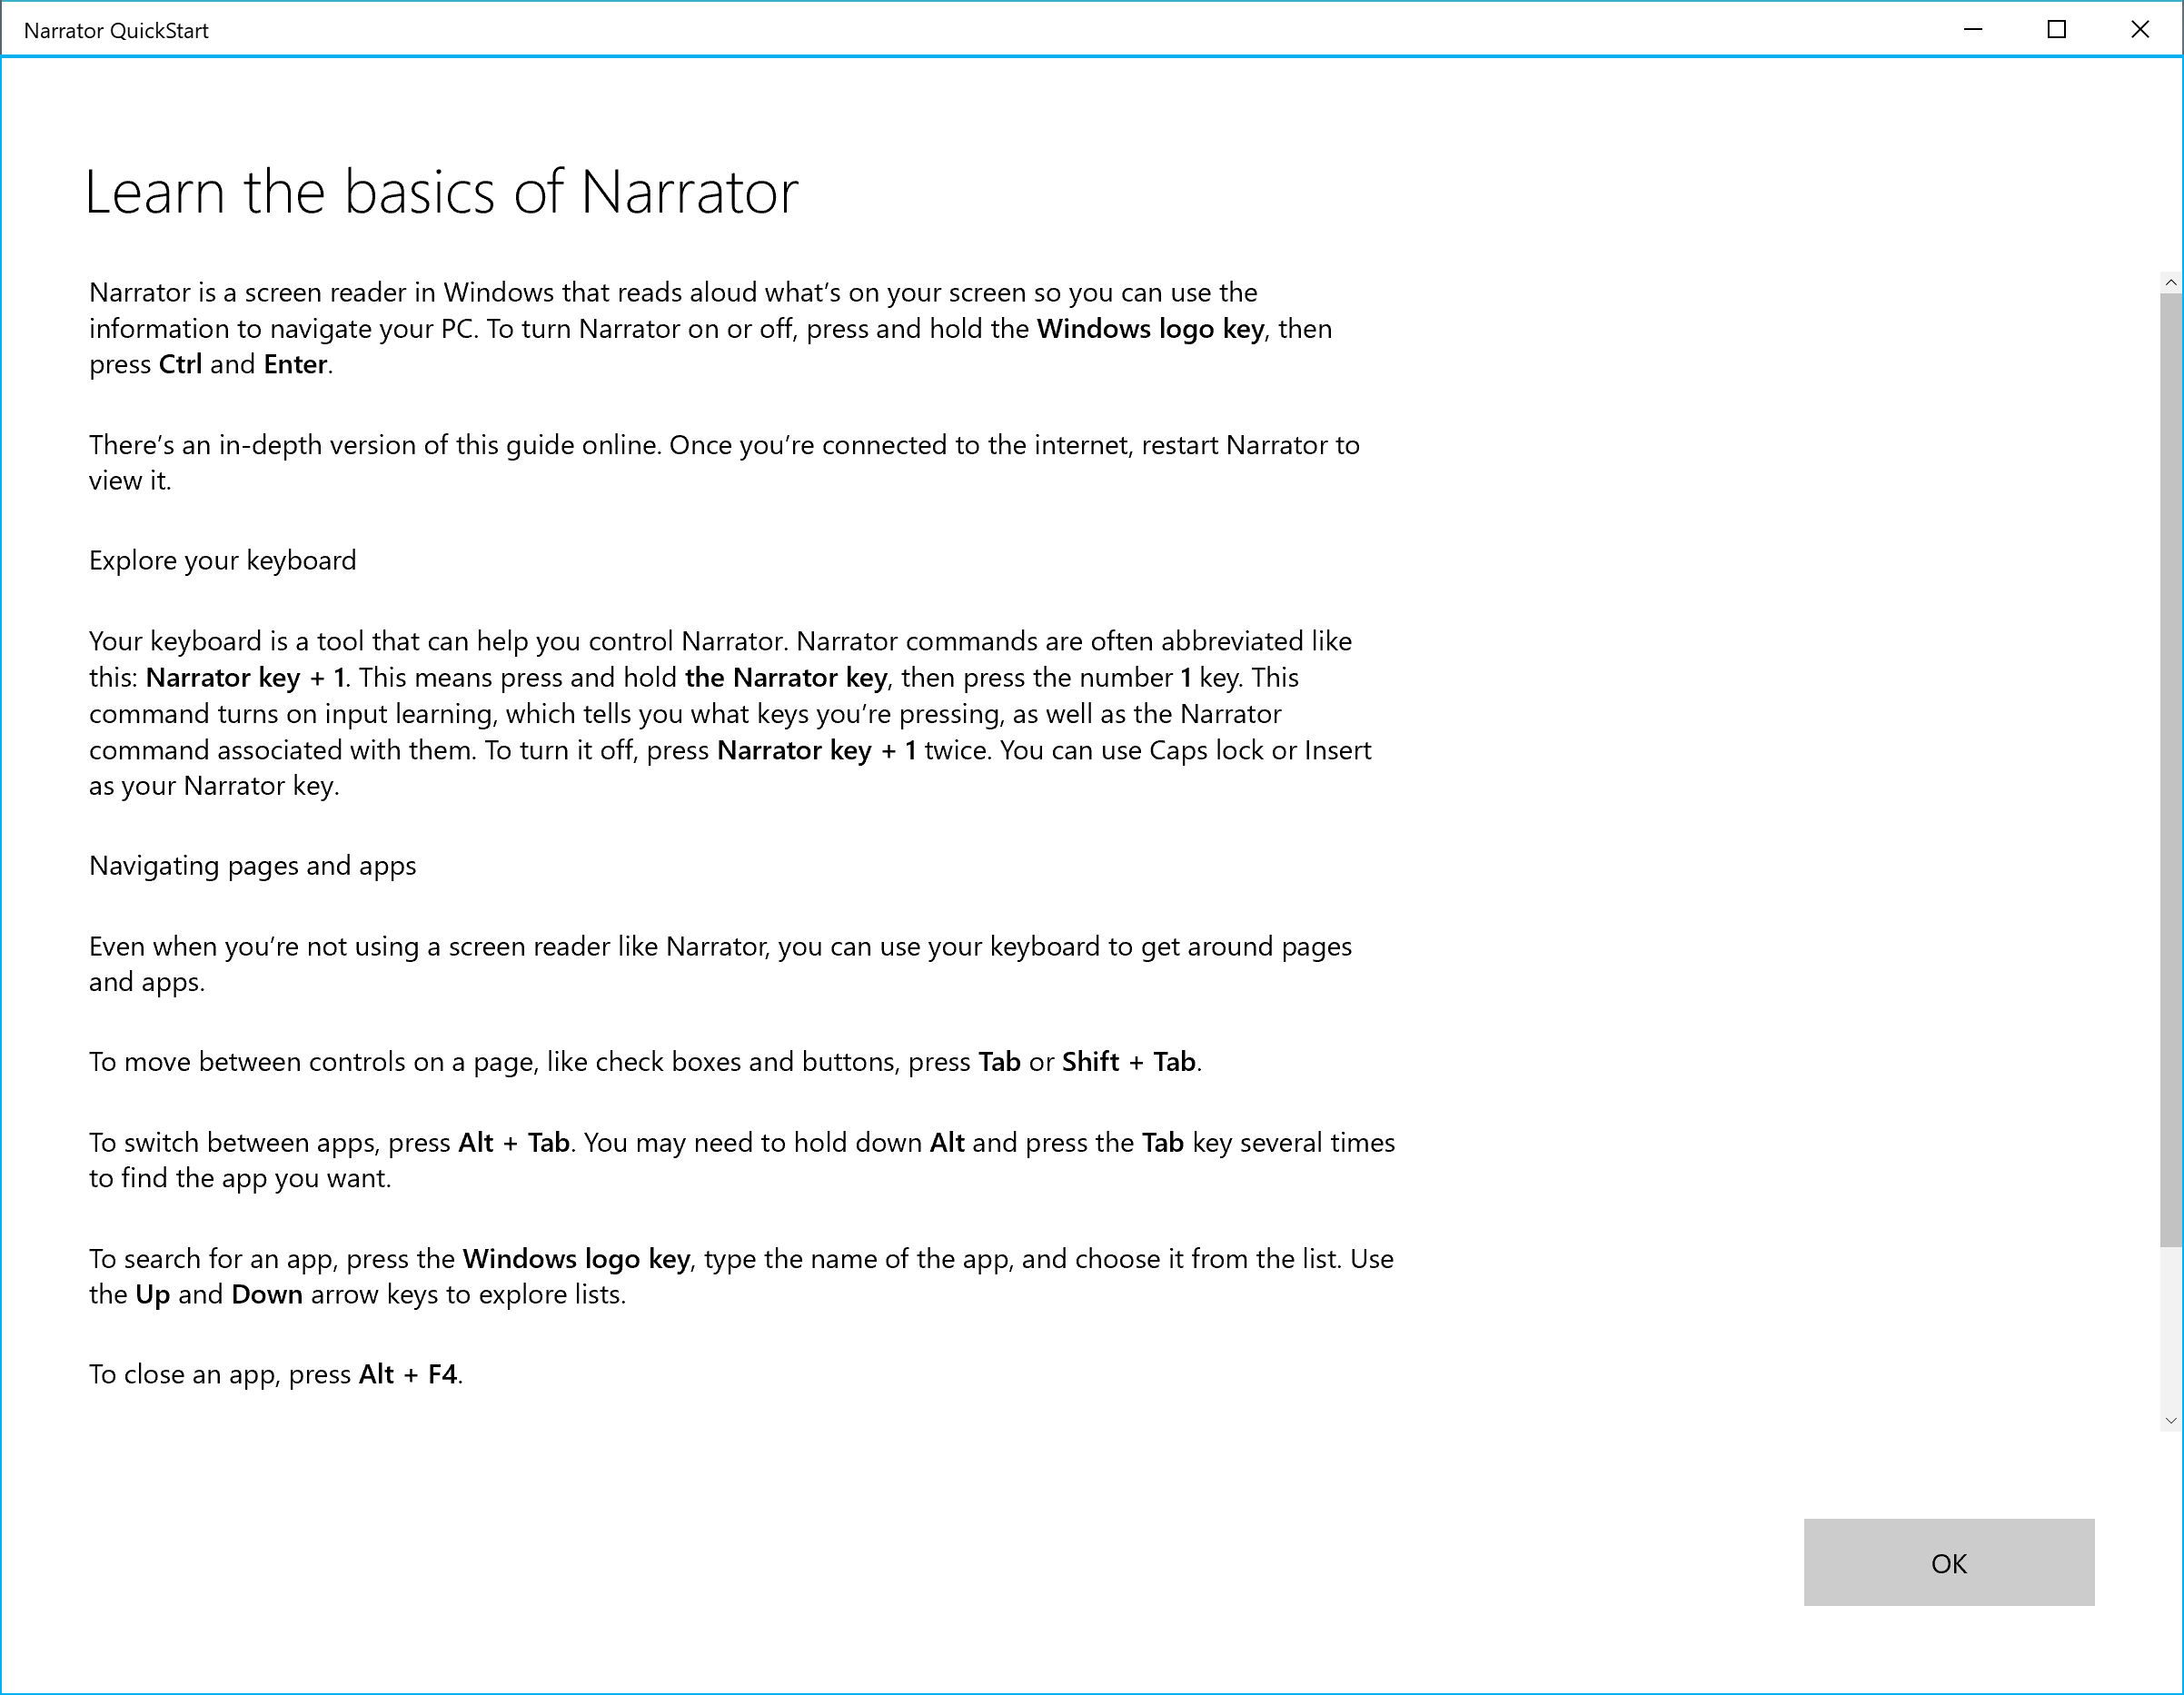
Narrator Quickstart: When Narrator launches, a new Quickstart tutorial experience will be available. The Narrator Quickstart will help you get up and running quickly with Narrator. It teaches the basics of using Narrator, such as learning the keys on your keyboard, navigation, the most used commands etc. At the end of the Quickstart there is a link to the User Guide where you can continue learning about Narrator.
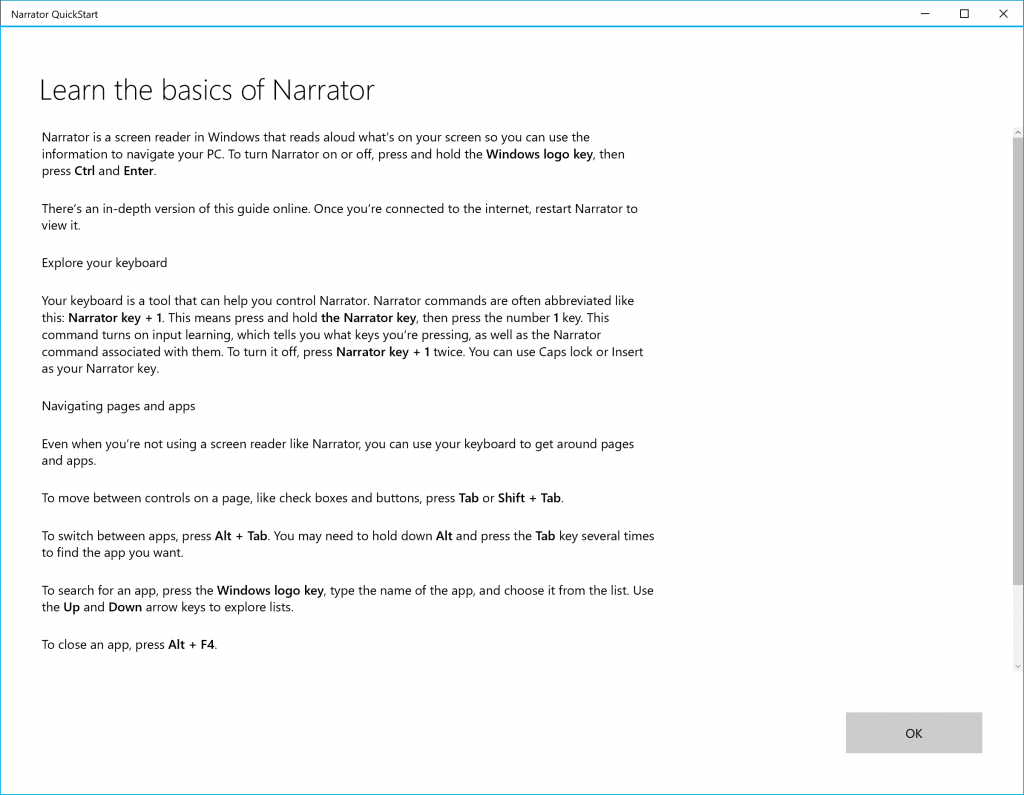
When Narrator launches, a new Quickstart tutorial experience will be available. The Narrator Quickstart will help you get up and running quickly with Narrator.

When the Narrator Quickstart launches, Scan Mode may not reliably be on by default. We recommend going through the Quickstart with Scan Mode on. To verify that Scan Mode is on, press Caps Lock + Space.

Narrator New Standard Keyboard improvements: We have added the scan mode secondary action command (Narrator + F1) and Spell current selection command. Please refer to Intro to New Narrator Keyboard Layout doc for more information.

Updated Ease of Access > Display Settings UI: We’ve made some tweaks to the Make text bigger section under Settings > Ease of Access > Display Setting to make it a bit clearer.

A note about Snipping Tool

As we mentioned with Build 17661, we’re in the process of consolidating and modernizing our snipping experiences in Windows. When you upgrade to today’s build you’ll see a note about this in the Snipping Tool. Currently, we are not planning to remove the Snipping Tool in the next update to Windows 10 and the consolidation work underway will be a feedback and data-driven decision. If you haven’t already, please take a moment to try out the Screen Sketch app and let us know how it’s working for you. Screen Sketch gives you all of the functionality of the Snipping Tool with additional improvements. You can launch the app directly and start a snip from there, or just press WIN + Shift + S, click the back of your pen, or press the Print Screen key (the later two you will need to turn on in Settings – details here).
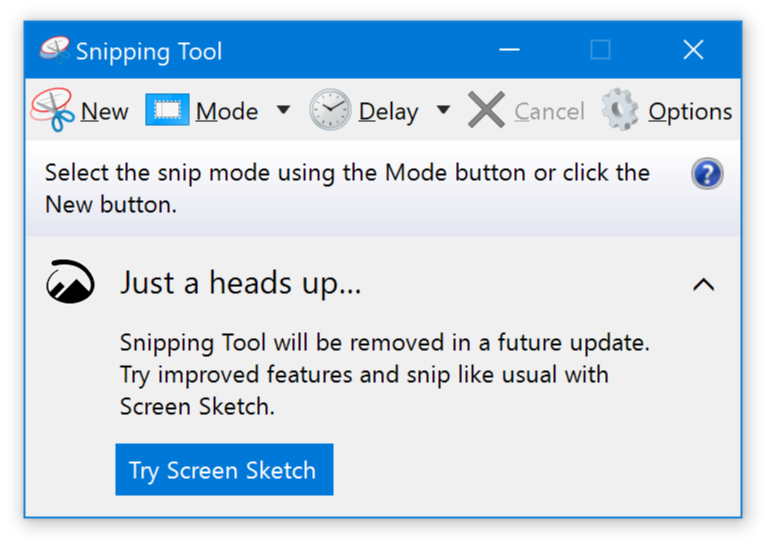
The Snipping Tool showing a link saying Snipping Tool will be removed in a future update. Trying improved features and snip like usual with Screen Sketch.

Windows Container Improvements

New Windows Image: We’re adding a new base image to the Windows Server container collection. In addition to nanoserver and windowsservercore container images, the new windows image is now available. This image carries even more components than its nanoserver and servercore siblings, meaning it can support applications that have additional API dependencies. Go to https://aka.ms/windowscontainer to learn more and get started.
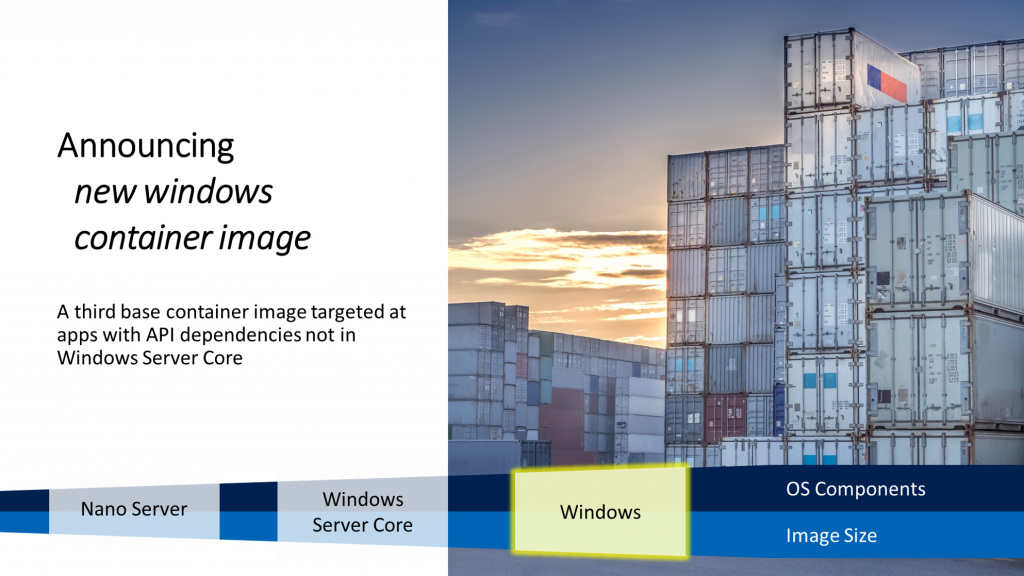
New Windows Container image.

Group managed service account reliability: We’ve improved the scalability and reliability of containers that use group managed service accounts (gMSA) to access network resources. You should see fewer authentication errors when using a single gMSA with multiple container instances. Additionally, you no longer need to set the container hostname to be the same as the gMSA. We also fixed a bug that prevented you from using gMSAs with Hyper-V isolated containers.

Windows Mixed Reality Improvements

Introducing Quick Actions: While using an Immersive Application, Quick Actions allow users to easily Go Home, view the time, or launch Mixed Reality Capture tools (Photo, Video, and more). To launch Immersive Application Quick Actions, simply press the Windows key or use the Bloom gesture.

New post-update experience

We wanted to take a moment to remind you that you may see a screen that looks like the image shown below after upgrading. Don’t worry – all your stuff is still there! We know some of you bought and setup your devices a long time ago – the features available in Windows have changed since then, so we’re giving you an opportunity to go through the setup questions you may have missed to ensure your device has the best setup possible. Click “Let’s Go” to go through those setup questions or click “Skip for now” if you want to go straight to your desktop.

The conditions for showing this page are cloud programmable and may change over time – if you haven’t seen this page on previous upgrades it’s very likely that you will see it with today’s build.
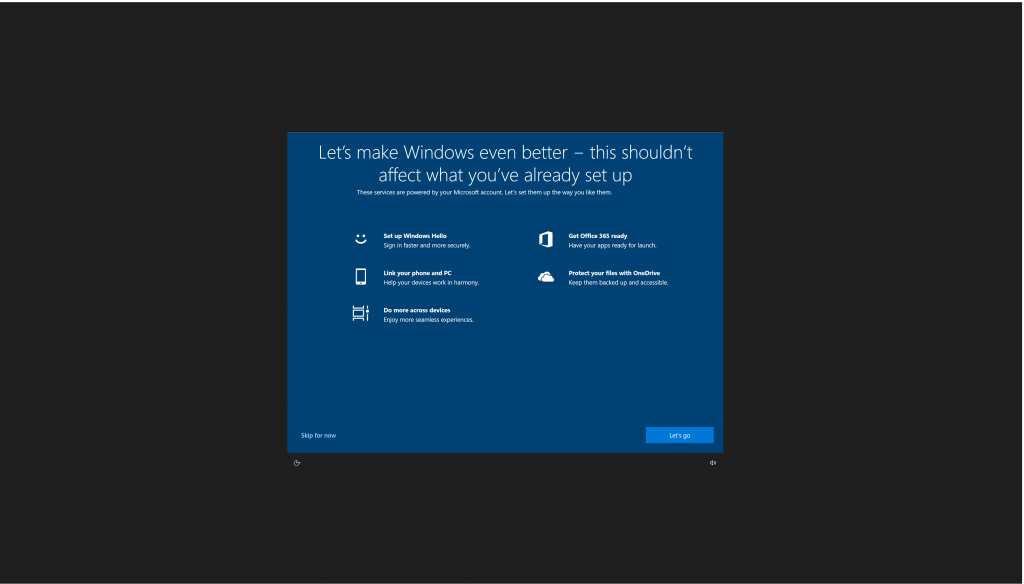
Showing the full screen post-update experience. Says “Let’s make Windows even better – this shouldn’t affect what you’ve already set up”.

Microsoft Font Maker app

Have you tried it out yet? With the Microsoft Font Maker app you can use your pen to create a custom font based on the nuances of your own handwriting – currently available via the Microsoft Store and we’d love to hear your feedback! Install the fonts you create to add a personal touch to everything you do!
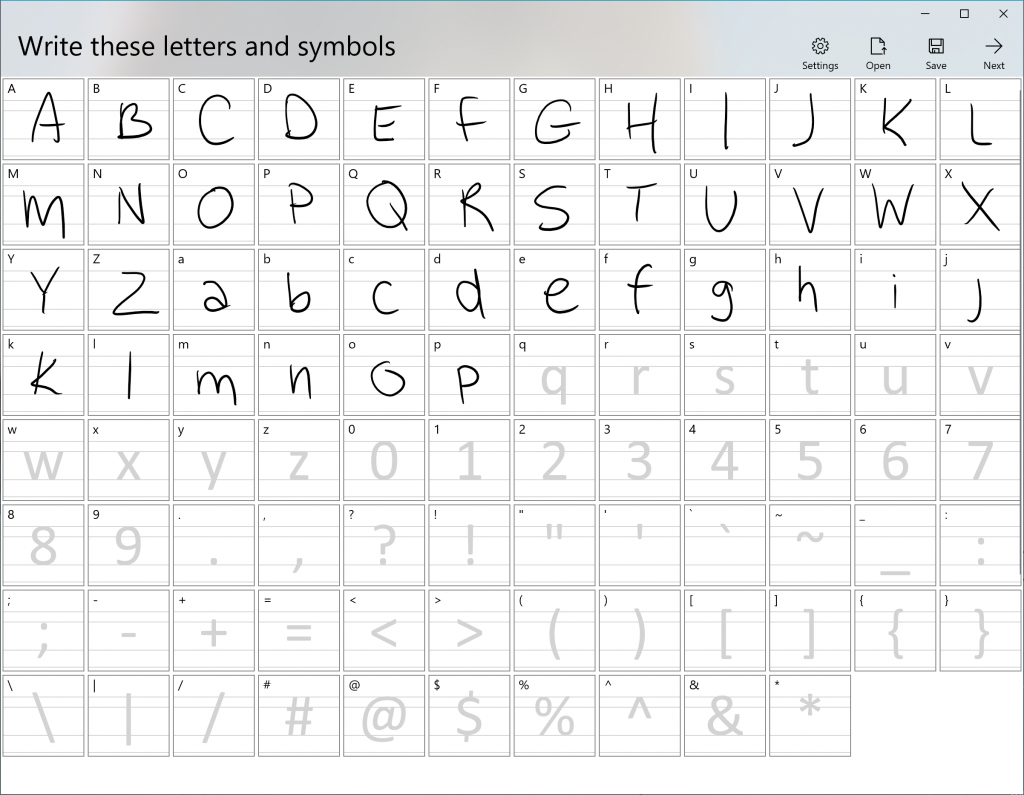
Showing an app page that says “Write these letters and symbols” with a grid of letters and numbers, half of which have been inked over using handwriting.

Note: Currently you can use the app to create a basic English font – interested in support for more characters and languages? Let us know!

As a reminder, Microsoft has also kicked off the RS5 bug bash today, which will be running from June 22nd 12am PDT – July 1st 11:59pm PDT. On this occasion, all Windows Insiders are invited to report all bugs found in Windows 10 Insider build 17704, and those who participate can win a trip to Microsoft’s headquarters in Redmond.

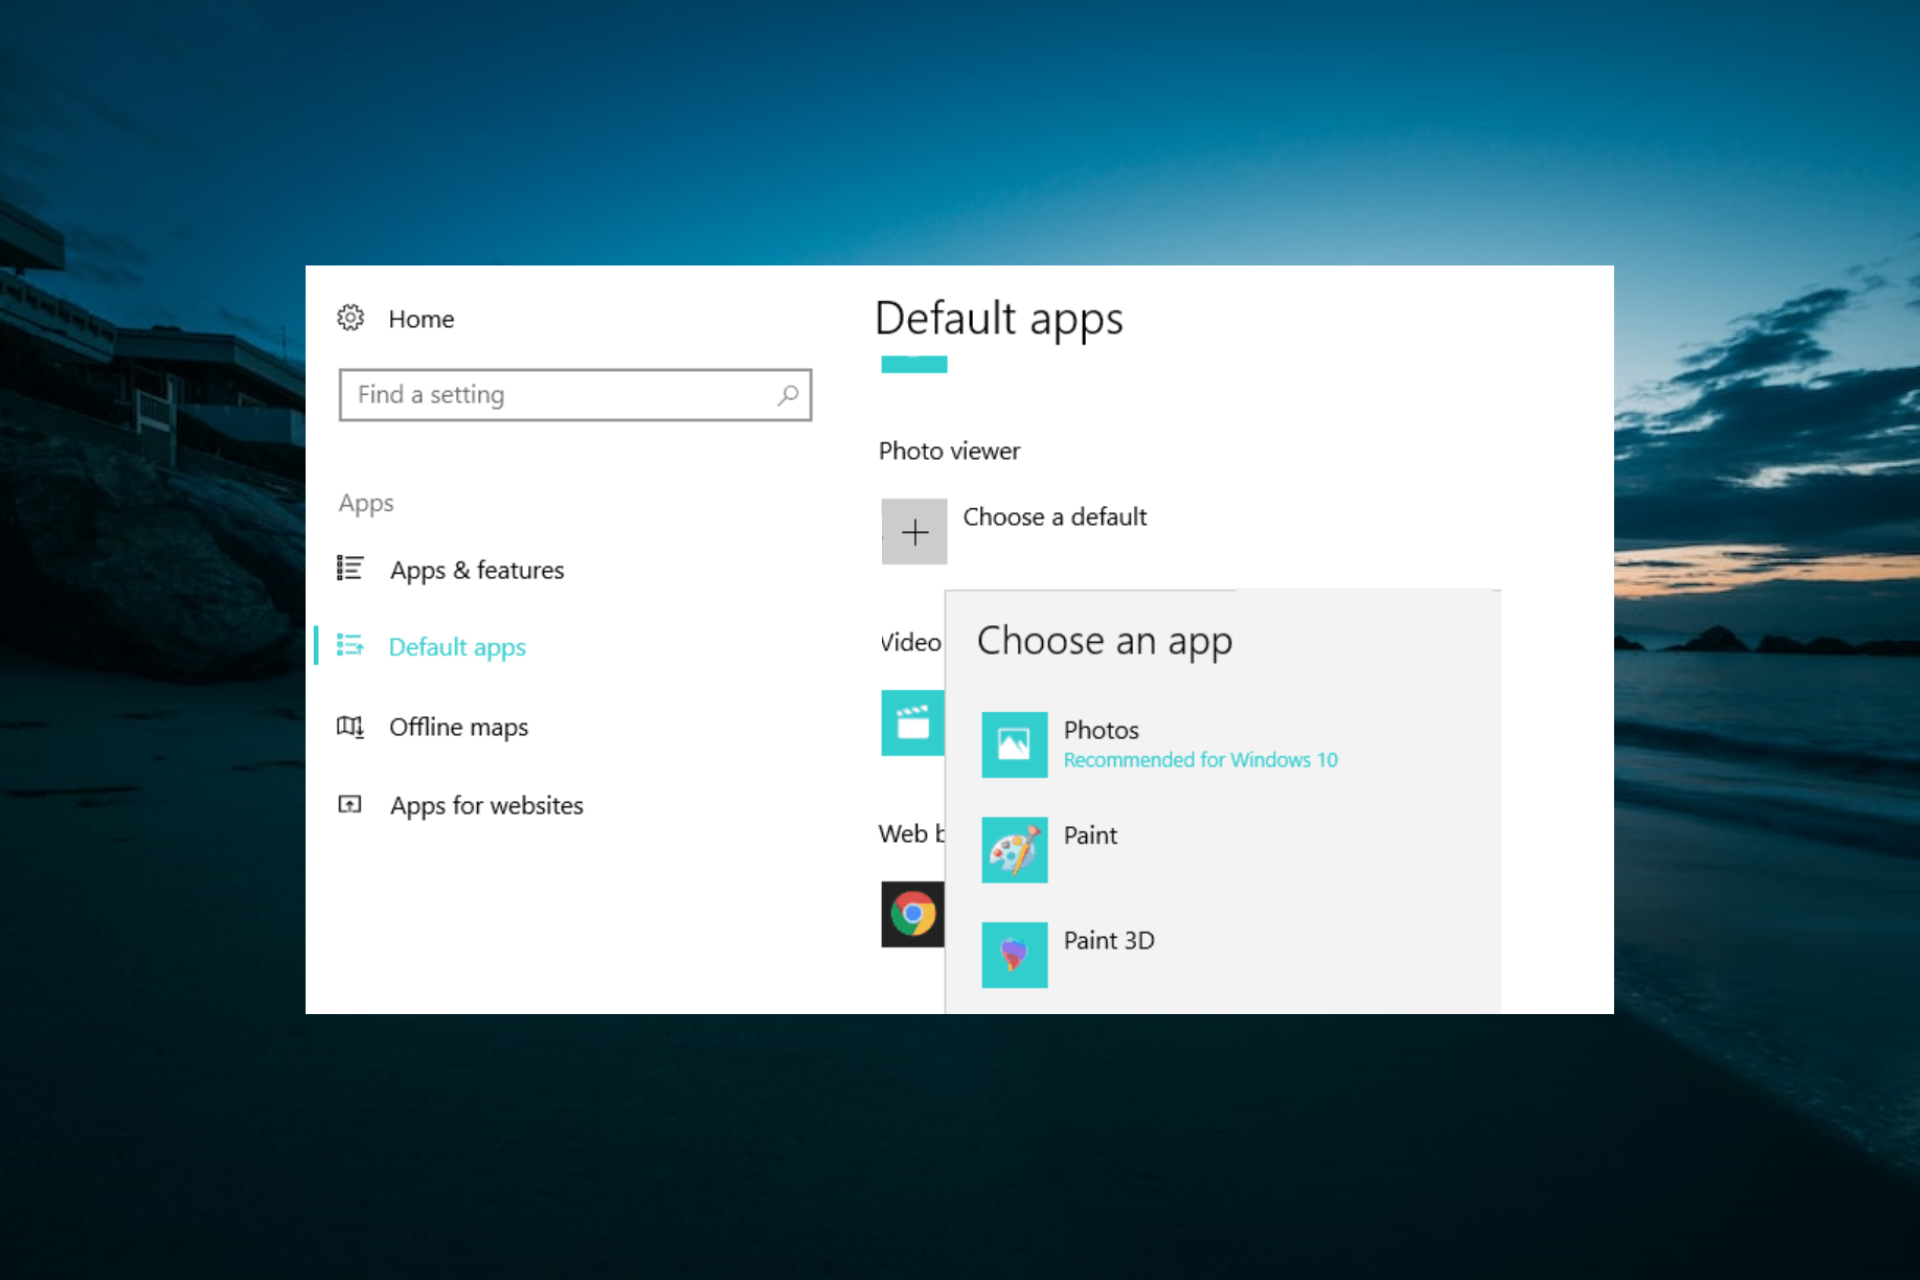
Windows 10 Insider build 17704 is out, complete with big changes in Microsoft Edge and Skype

During the Windows Insider webcast today, Microsoft launched Windows 10 Insider build 17704. This build is significant since it comes with big changes to Edge and Skype. There’s a lot that is new in this build, so here’s what you need to know before you install on your PC.

Microsoft Edge Improvements:

  • New Microsoft Edge Beta logo: We’re introducing a new Edge “BETA” icon to help users visually differentiate between officially released versions of Microsoft Edge and preview builds where Microsoft Edge is in ongoing development. This logo only will be seen on Insider preview builds.
  • New PDF icon: Windows 10 now has a new icon for PDFs in File Explorer when Microsoft Edge is your default PDF handler.
  • New design improvements: As we continue to evolve how Microsoft Edge leverages the Fluent Design System for a more natural and usable experience, you may notice some subtle tweaks to the look of the tab bar in Microsoft Edge. In this build, we’re adding a new depth effect to the tab bar to help emphasize the active tab.
  • Redesigned “…” menu and Settings: We’ve heard your feedback that the Microsoft Edge settings were getting a little complex for a single page. In this release, we’re overhauling the Microsoft Edge settings to make it easier to navigate, put commonly-used actions front and center, and allow more customization than ever.
  • When you click “…” in the Microsoft Edge toolbar, you’ll find a refined menu that puts common commands like “New tab” and “New window” front and center. We’ve also added the much-requested ability to customize which icons appear in the Microsoft Edge toolbar – you can remove them all for a tidier look or add as many as you like to bring your favorite functionality to your fingertips!
  • This build breaks Settings out into subpages by category, with better-organized options and less clutter on each page. The new Settings experience is designed to match the experience in the Microsoft Edge hub, for a quicker and more familiar experience.

Autoplay in Microsoft Edge:

  • It’s really here! In this build, we’ve added a new setting in Microsoft Edge to allow you to control whether sites can autoplay media. You can find this setting under “Advanced Settings” > “Media autoplay,” with options to customize the behavior according to your preferences.
  • “Allow” is the default and will continue to play videos when a tab is first viewed in the foreground, at the site’s discretion.
  • “Limit“ will restrict autoplay to only work when videos are muted, so you‘re never surprised by sound. Once you click anywhere on the page, autoplay is re-enabled, and will continue to be allowed within that domain in that tab.
  • “Block” will prevent autoplay on all sites until you interact with the media content. Note that this may break some sites due to the strict enforcement – you may need to click multiple times for some video or audio to play correctly. Some sites may not work at all – in those cases, you can enable or block autoplay on a case-by-case bases from the website permissions pane (click the icon next to the address in the Address Bar).
  • If you encounter sites that do not work as expected in the “Limit” or “Block” settings, please file feedback in the Feedback Hub app and let us know which site you were using, so we can work with developers and continue to refine the feature.

Skype Improvements:

  • Best in class calling experience – We’ve added several new calling features to make Skype’s calling experience even better than before.
  • Flexible group call canvas – Customize your group call experience and decide who appears in the main call canvas.  Simply drag and drop people between the call canvas and the overflow ribbon to select who you want to focus on.
  • Take snapshots – Use snapshots to capture images of important moments within a call. Snapshots makes sure you never forget important memories like your grandkid’s funny antics or crucial information like the content that’s been screenshared during a meeting.
  • Easily start screensharing – We’ve made sharing your screen during calls even easier. Look for the ability to share your screen with the top level call controls.
  • New layout – Based on your feedback, we’ve made your contacts easier to access and view
  • Customizable themes – Choose a color and theme for your Skype client through your application settings.
  • And much more – Improvements to our media gallery, notifications panel, @mentions experience and more!

There’s definitely a lot to look forward to in this build, so get downloading now! We’ll have more on what else is new later, so be sure to keep tuned. And, once you’ve updated, feel free to let us know how the experience is going for you by dropping us a comment in the section below.
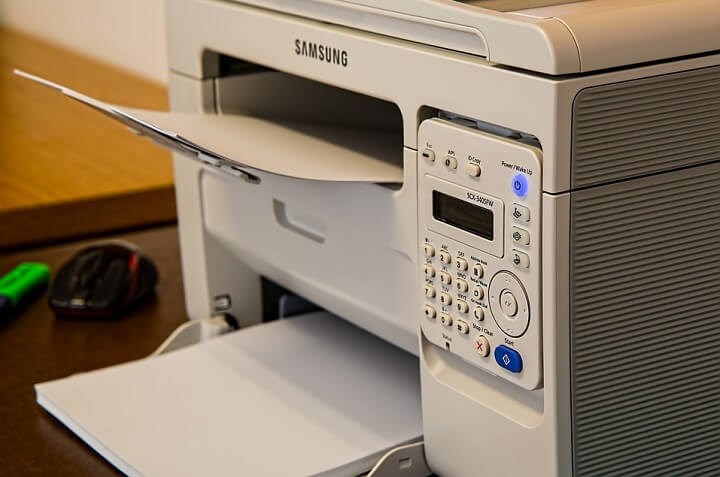
Microsoft Translator gets Levantine Arabic as a new speech translation language

Microsoft today announced the addition of Levantine Arabic as a new speech translation language in Microsoft Translator. With the support, users can expect to further cross the language barrier and better complete their business, education, travel, and more.

Levantine Arabic is rarely written down and is primarily spoken by 32 million people in many Muslim countries like Lebanon, Jordan, and Syria. You can now expect to see Levantine Arabic being supported as a speech translation language in the Microsoft Translator app, Presentation Translator for PowerPoint, and the Skype Translator feature in Skype for Windows 10.

The addition of Levantine now brings the total number of supported Microsoft Translator speech languages up to 11. Other Microsoft products including the unified Speech translation service, an Azure Cognitive Service will also now support Levantine.

You can learn more about Microsoft Translator by checking here. Previous languages added to Microsoft Translator include Vietnamese and Tamil.

Xbox Game Pass July update will add Warhammer: Vermintide 2, DiRT 4 and more to the catalog

Nine new games will join the Xbox Games Pass catalog in July, Microsoft has just announced this morning. Following the addition of Fallout 4 earlier this month, two more classic Bethesda games will be available on July 1, Fallout 3 and The Elder Scrolls IV: Oblivion. These two Xbox 360 games will be joined by five Xbox One games: DiRT 4, Zombie Army Trilogy, ABZU, Shadow Complex Remastered and Human Fall Flat.

That’s not all the new titles that Xbox Games Pass subscribers will get access to next month, as two more games will be available in the catalog the same day as their global release. These include the strategy simulation game Bomber Crew and the action-adventure title Warhammer Vermintide: 2. The latter was released on Windows earlier in March, and it’s nice to see such a quality game join the Games Pass catalog on launch day.

This looks to be a pretty nice mix of quality games overall, but the Xbox team is teasing another “exciting addition” to be announced in July. To know what it’s about, you’ll have to tune in to the Inside Xbox webcast on July 10.

Tune in to the Windows 10 RS5 bug bash webcast this morning at 10AM PST

The Windows Insider team will kick off the Windows 10 RS5 bug bash with a new webcast this morning at 10 AM PST. Since it’s been almost two weeks since we last saw a new Windows 10 Insider build, we expect a fresh one today to go with this new bug bash.

As usual, the webcast will be streamed on the Windows Insider Mixer channel, which allows some degree of interaction with Insiders. If you have some questions for the team, make sure to ask them on Mixer live chat later this morning.

The latest Windows 10 Redstone 5 builds have focused on Windows Sets, Fluent Design changes and other minor improvements, but we’re still waiting to test major new features such as Cloud Clipboard or the upcoming Your Phone app. Microsoft previously said that all these capabilities will ship when they’re ready, and there’s no guarantee that we’ll see them with the Redstone 5 update later this year. Anyway, we hope to learn more about Microsoft’s roadmap during the webcast later this morning.

Microsoft Healthcare team expands, future projects teased

Microsoft yesterday announced the next steps in their longtime goal of accelerating healthcare innovation through artificial intelligence and cloud computing, The company has hired two prominent figures to a new Microsoft Healthcare team, with the ultimate goal of helping drive strategic partnerships and driving Microsoft’s strategy for healthcare and life sciences.

Joining the Microsoft Healthcare team are two industry veterans—Jim Weinstein, and Joshua Mandel. Weinstein will take on a Vice President role and is being dubbed the Head of Innovation and Health Equity. Mandel, meanwhile, is taking on a Cheif Architect role and will be responsible for laying the groundwork for an open cloud architecture for the entire health ecosystem.

In his new role at Microsoft Healthcare, Jim Weinstein will be responsible for working with healthcare organizations and ensuring that they take care as they move to the cloud. He will also build the strategic vision of Microsoft Healthcare and provide leadership, supporting Peter Lee, the Corporate Vice President of Microsoft Healthcare.

Jim Weinstein is best known for once being the CEO of Dartmouth-Hitchcock and the Dartmouth-Hitchcock Health System. He also is known as the co-founder and inaugural executive director of the national High Value Healthcare Collaborative, which is a home for the nation’s tops healthcare systems to share data, and create better outcomes.

In his most recent role, Joshua Mandel worked on the health IT ecosystem at Verily. He too has extensive knowledge of healthcare and is a member of the research faculty at the Boston Children’s Hospital Computational Health Informatics Program.

Microsoft is laying out a blueprint for Microsoft Healthcare, so feel free to check it out and learn more. The two seem like an excellent match for this new team, as noted by Peter Lee, the Corporate Vice President of Microsoft Healthcare. “Jim and Josh join us at an exciting time, as healthcare processes undergo a digital transformation. This transformation has created a wealth of healthcare data that has potential to help identify diseases earlier, create and improve treatments and improve the lives of patients across the globe.”

Parallels launches three packs of tailored productivity tools for Windows and Mac, available at a lower price

Parallels, the company behind Parallels Desktop for Mac and the Parallels Toolbox suite of productivity tools is launching today Parallels Toolbox Packs, which are new tailored suites of tools available at a lower price. This should be handy for customers who don’t have use for the 30+ tools available in the all-in-one Parallels Toolbox app for Windows and Mac.

Three Parallels Toolbox Packs are available today, and the customized packages are categorized by key use. First of all, the Parallels Toolbox Presentation Pack comes with Presentation mode, which will hide all files on your desktop, block all notifications, prevent sleep mode and automatically optimize display settings when you need to give a presentation.  This pack also includes many other Parallels Toolbox tools including the Launch tool for opening multiple files with just one click.

Next, the Parallels Toolbox Screen and Video Pack is targeting users who often need to record audio or videos from their screen, and it comes with various tools including Record Screen, Convert Video, Download Video, and more. Unfortunately, Parallel’s Make GIF tool is still only available on macOS.

Lastly, the Parallels Toolbox Disk and System Pack can help you free up disk space and optimize performance on your PC: the highlight is the Clean Drive tool which can scan, detect, and let you choose what to delete on your PC, but there is also a Free Memory tool for Mac users needing to reclaim RAM memory.

You can download free trials of Parallels Toolbox Presentation Pack, Parallels Toolbox Screen and Video Pack, and Parallels Toolbox Disk and System Pack on Parallels’ website. Each Parallels Toolbox Pack is available for $9.99 a year, which is slightly cheaper than the $19.99/year subscription for the complete Parallels Toolbox suite of tools.

Solve PC issues prompt won’t go away on Windows 10/11 [FIX]

The Action Center is one of the most important pieces of the User Interface in Windows 10. All notifications and most important quick actions toggles are there. Idea is to have a constant grasp of selected applications and system performance. However, after you’ve read those messages, you should be able to dismiss them. Except, some users weren’t able to do so.

There are more than a few solutions for this error, but we decided to stick with the essential ones. If you’re unable to dismiss system messages in Action Center, check out the solutions below.

How to remove important messages from the Action Center in Windows 10

  1. Restart Windows Explorer
  2. Disable individual app notifications
  3. Run SFC
  4. Clear Problem Reports
  5. Repair Windows 10

1: Restart Windows Explorer

This is one peculiar error, simply because there are layers of possible solutions. Most of the users resolved the error and successfully dismissed messages, by restarting Windows Explorer. And this must be the simplest solution but, seemingly, the best-suited for the job. This implies we’re dealing with a random bug plaguing Windows Explorer.

Follow these steps to restart Windows Explorer in Windows 10:

  1. Right-click Taskbar and open Task Manager.
  2. Under the ‘Processes‘ tab, locate Windows Explorer.
  3. Right-click on it and choose Restart from the contextual menu.solve pc issues important messages won't go away
  4. If the ‘Restart’ is absent, End the task but don’t close Task Manager.
  5. Click on File and choose ‘Run new task‘.
  6. Type explorer.exe and press Enter.

In addition, we suggest updating the system as the bug might get resolved after an update. Here’s how to update Windows 10 manually:

  1. Right-click Start and open Settings.
  2. Choose Update & Security.solve pc issues important messages won't go away
  3. Under Windows Update, click ‘Check for updates‘.solve pc issues important messages won't go away

2: Disable individual app notifications

Even though this occurrence can include various apps, these stuck messages in the Action Center mostly concern Security and Maintainance. These are more times than not, quite important pieces of information. They inform you about the results of system scans concerning security (Security Center) and Automatic Maintainance. Ideally (as intended), they should be easily dismissed after in Action Center.

However, if they’re persistently attached in the Action Centar pane, you can disable them. At least, until some alternative solution address this for good. So, this is more of a workaround than the solution, but you won’t be bothered with piles of notifications in the Action Center. Here’s how to do it in a few simple steps:

  1. Right-click on the Start button and open Settings.
  2. Select System.solve pc issues important messages won't go away
  3. Choose Notifications & actions.
  4. Under the ”Get notifications from these senders” section, disable Security and Maintenance.solve pc issues important messages won't go away

If that can’t cut it, you can disable Action Center altogether. Here’s how:

  1. Right-click on the Taskbar and open Taskbar settings.
  2. Click on the ”Turn system icons on or off” link.solve pc issues important messages won't go away
  3. Disable Action Center.solve pc issues important messages won't go away

3: Run SFC

When the third-party software fails, you can reinstall it. When the built-in system services start misbehaving, you turn to SFC. System File Checker (shortened SFC) is the system utility designed for fixing system errors. Basically, if there are corrupted or incomplete system files, SFC will check their integrity and repair them accordingly.

Follow these steps to run SFC in Windows 10:

  1. In the Windows Search bar, type CMD. Right-click on Command Prompt and run it as admin.
  2. In the command-line, type sfc/scannow and press Enter.solve pc issues important messages won't go away
  3. Wait until the scan ends and the tool fixes possible system issues.
  4. Restart PC and look for changes in Action Center.

4: Clear Problem Reports

Even though the Windows 10’s Action Center is, design-wise, different from Windows 7’s version, this error isn’t a Windows 10 exclusive. Windows 7 users have had the same issues with the same error. Important system messages just get stuck in the Action Center and the red-flag notifications follow.

Now, some of them addressed this by simply deleting the error logs which kept reappearing. You can do the same on Windows 10 by following these steps:

  1. Type ‘control’ and open Control Panel from the Windows Search bar.solve pc issues important messages won't go away
  2. Select System and Security.
  3. Choose Security and Maintenance.
  4. Expand the Maintenance section.
  5. Click on ”View reliability history“.solve pc issues important messages won't go away
  6. Click on “View all problem reports“.
  7. Finally, click on the “Clear all problem reports“.solve pc issues important messages won't go away

Hopefully, this allows you to dismiss the messages. On the other hand, if the issue is persistent, check the final step.

5: Repair Windows 10

Finally, if you’re still unable to dismiss messages, even after seemingly solving PC issues, you can repair Windows 10. There are various recovery options at your disposal, but we prefer ‘Reset this PC’ over others. This recovery option allows you to restore your PC to factory values (refresh the system) without losing your data in the process. You can even keep all applications and settings.

Here’s how to run ‘Reset this PC’ on Windows 10:

  1. Press Windows key + I to open the Settings app.
  2. Choose Update & Security section.solve pc issues important messages won't go away
  3. Select the Recovery from the left pane.
  4. Under the “Reset this PC” option, click Get started.solve pc issues important messages won't go away

That’s a wrap-up. As a side note, don’t forget to share your questions and suggestions in the comments section. Also, we’ll be glad to hear whether these solutions were helpful or not. The comments section is just below.

RELATED STORIES YOU SHOULD CHECK OUT:

How to fix network problems on Windows 10 April Update

We know by now that approximately two months ago the Windows 10 April Update was released, which was met with mixed opinions. As far as we know at this moment, based on the AdDuplex number, the majority of Windows 10’s users already have the 1803 version on their computers. This of course is something positive for Microsoft, but given the fact that people had all kinds of problems with the latest update, users had to struggle with various errors.

Network issues on Windows 10 April Update

There has been an ongoing issue that lead to devices not being able to connect properly to the home network. Microsoft is aware of the situation and they are trying to figure out what is causing this problem. In the meantime, they offered a temporary solution that should help fix this issue until a new patch is released. The information we gathered was provided by Microsoft Support on their forum.

Fix network problems for good

We will show you which are the steps that you need to take in order to fix the glitch. Apparently, you can resolve this issue by simply switching certain services to Automatic or Delayed Start and restarting Windows afterwards. Here’s what you have to do:

  1. Press the Windows Key and R simultaneously so that you can bring up the Run dialog, then type “services.msc” in the Run box and press the Enter key
  2. Find each of the following services in the list and right-click the service and select “Properties”, then set the “Startup type” to Automatic (Delayed Start) and click on Apply:
    • Computer Browser (Browser)
    • Function Discovery Provider Host (FDPHost)
    • Function Discovery Resource Publication (FDResPub)
    • Network Connections (NetMan)
    • UPnP Device Host (UPnPHost)
    • Peer Name Resolution Protocol (PNRPSvc)
    • Peer Networking Grouping (P2PSvc)
    • Peer Networking Identity Manager (P2PIMSvc)
  3. 3. Restart Windows

After you’ve gone through all these steps, the network issue should be fixed, but in case you are not sure whether you should do this, then you can definitely wait for the next patch from Windows to be released.

RELATED STORIES TO CHECK:

How to factory reset Windows 10 in just a few minutes

factory reset windows 8

Performing a factory reset on your Windows 8, Windows 8.1 or Windows 10 based laptop, tablet or desktop is easy as you only have to follow the in-built troubleshooting sequence provided by Microsoft. But, in case you don’t know how to deal with the factory reset operation, just check the guidelines form below and learn how to do it by yourself.
Restoring your Windows 8, 8.1, 10 devices back to their initial state might be required in different situations. For example, maybe you want to sell your computer and you want to block access to your personal data, info and accounts to future users. Or maybe you are experiencing various soft-related issues with your Windows 10, 8 system and you want to fix all the problems by restoring your device to its initial state.

In all these situations, a factory reset is being more than recommended, so if you are considering that you need to get rid of your data or if you want to restore your Windows 10, 8 back to stock, then don’t hesitate and apply the steps from below.

Do note that all your data will be erased; thus before heading towards the steps from below make a backup in order to save everything that you might need afterward – in that matter you can use cloud services or other apps from Windows Store.

How to Factory Reset Windows 8, 8.1, 10

  1. Go to your Home Screen and from there launch the Charm bar by pressing Wind + C dedicated keyboard keys.
  2. Choose Settings and then select Change PC Settings.
  3. From the PC Settings window select the General tab.pc settings windows
  4. Next select “Remove everything and reinstall Windows”.
  5. The Reset your PC window will be then displayed; from there click on “next”.
  6. Select the drive which you want to factory reset. Also choose whether to destroy all data or just to remove your files.reset windows
  7. In the end tap on “Reset” if you want to factory reset your Windows 8 device or on “cancel” if you want to abort.

On Windows 10, the Settings page is a bit different compared to Windows 8, but here are the steps to follow:

  1. Go to Update & security >  Recovery tab > click on Reset this PC > hit the Get started button.reset PC
  2. You can either keep your files or remove absolutely all your files and folders from the computer.
  3. Select one of the two options and follow the on-screen instructions to complete the process.

So, there you have it; that’s how you can anytime choose to factory reset your Windows 10, 8 or Windows 8.1 device. Do tell us how things worked for you by using the comments field from below – if you are experiencing problems we will try to resolve the issues as soon as possible.

Speaking of Windows PC reset issues, we already compiled a few troubleshooting guides to help you fix them. You can check them out below:

Important updates needed: What’s the deal with this Windows 10 alert

When someone even mentions ‘updates‘, regardless of the context, the only thing I can think of is Windows 10. This system (or service) which heavily relies on its updates and patches. Especially the major ones, the ones bringing various new features, redesigns, and, hopefully, the dark Windows Explorer. But, what happens when users decide to stick with, say, the Anniversary Update and avoid all new releases? The warning pop-up we’re talking about today.

Important updates are needed in Windows 10

Important updates needed windows 10

Firstly, we can safely say that this isn’t some kind of malware wrongdoing or a hacker’s scam. It’s Microsoft alright, and the message is brought by the system. And, you’re indeed asked to update your current release version. As you already know, with Windows 10, Microsoft changed the whole approach to the OS development and distribution. There are major releases being the part of one platform and nowadays, the latest OS works as a service.

However, this brings out the scheme where every major release is a system on its own. And some users avoided new releases, due to reports about issues the latest release brought to the system. So, they decided to stick with the current version.

Why fix something which isn’t broken? Well, Microsoft begs to disagree. If you want a fully supported Windows 10 iteration, you’ll need to keep up with the update schedule. You can find the due dates for security coverage and support for various Windows 10 iterations in the image below. Focus your attention on the “End of Support” column.

important updates needed

We can only suspect, but the alternative way to get this warning is the lack of the internet connection. If you’ve used the outdated installation setup and avoided updates during the installation procedure, your Windows 10 will be outdated. Hence the warning. So, according to this, you’ll eventually be needing a newer iteration of Windows 10.

In the meanwhile, you can navigate to Settings > Update & Security >View Update History and look for the update with codename KB4091461. Allegedly, if you uninstall it, these prompts won’t appear anymore. Just don’t forget that you won’t get any security patches after the due date. We hope we managed to shed some light on this matter. Feel free to tell us about your experience with this warning in the comments section below.

RELATED STORIES YOU SHOULD CHECK OUT:

How to enable UAC on Windows 10, 8,1, 8

Managing the Windows 10, 8 in built features and programs is easy as Microsoft developed an intuitive OS that can anytime be customized, optimized and personalized. But, for being able to tweak your Windows 10, 8, 8.1 based device you first have to perform some basic operations and knowing how to enable / disable UAC is a must.windows 8 uac disable enable
That’s why in the guidelines from below, I will show you how to easily turn off or turn on the User Account Control feature on your Windows 10, 8 or Windows 8.1 system.

As you know, the UAC (User Account Control) tool is used as a security software that can help you protect your data, programs and also the processes that are running on your Windows 10, 8 device. If the UAC is enabled you can receive precious info related to the changes that are being performed on your computer. Basically the User Account Control notifies you when changes are going to be made to your computer that requires administrator-level permission.

Of course, this is a useful feature, but in some cases it might get quite frustrating an annoying. So, if you want to enable / disable the UAC feature on your Windows 10/ Windows 8 / Windows 8.1 based device don’t hesitate and follow the guidelines from below.

  • RELATED: Security flaw in Windows 10 UAC can change your system files and settings

How to turn off / turn on UAC on Windows 10, 8

  1. On your computer, go to your Home Screen.
  2. From there press on the Wind + X dedicated keyboard keys.
  3. Tools Menu will be displayed; from there head towards Control Panel.
  4. Within the Search box that is available on the Control Panel window type “UAC” and press enter.
  5. From the results choose Change User Account Control Settings.enable disable UAC windows 10, windows 8
  6. Up next you will be able to enable or disable UAC feature.
  7. Confirm the changes and save the same.
  8. In the end reboot your device and you are done.

There are four options available:

  • Never notify: You won’t receive any alerts when apps and programs make changes on your computer. Microsoft doesn’t recommend enabling this option as you won’t be notified when new software is installed on your machine.
  • Notify me only when apps try to make changes to my computer (do not dim my desktop): You’ll receive a quick alert whenever an app is trying to make changes to your computer.
  • Notify me only when apps try to make changes to my computer (default): You can enable this option if you use familiar apps and software and visit familiar websites.
  • Always notify me when apps try to install software: You often install new software on your machine, then this is the right option to enable.

So that’s how you can manage the User Account Control service on your Windows 10, 8, 8.1 tablet, laptop or desktop. For similar tutorials check out our how to section where you can find relevant step by step guides compatible with your Windows 10, Windows 8 and Windows 8.1 devices.

RELATED STORIES TO CHECK OUT:


Microsoft To-Do starts testing new Dark theme option on Windows 10

Microsoft has started testing a new Dark theme option for its To-Do app on Windows 10. For now, the Dark theme is only available for select Insiders, and we’ve noticed it today on the version 1.34.1806.26001 of the app (we saw the update on a PC enrolled in the Skip Ahead ring).

You can turn on this Dark theme option in the settings, and you’ll notice that it looks more like a dark grey, unlike the deep black color we currently see in other Windows 10 apps such as Groove or Settings. Still, this Dark Grey color is much easier on the eyes compared to the Light theme, which can be really hard to look at at night.

The team told us today that they plan to bring this new Dark theme option to all platforms where To-Do is available, though there is no ETA yet. In the meantime, non-Insiders can expect to see it in the Windows 10 app over the coming weeks.