Microsoft disables the WMIC tool on Windows 11

According to a recent Microsoft announcement, Microsoft disabled the WMIC tool from Windows 11 today, January 29, 2024. WMIC stands for Windows Management Instrumentation Command-line and it’s a command line interface tool from Windows OS.

The tool was used for getting system and network information and manage the Windows OS through the WMI (Windows Management Instrumentation).

Although WMIC was a great tool, it was also used by wrongdoers to delete Shadow Volume Copies and perform ransomware attacks. However, it was replaced by Windows PowerShell for WMI a long time ago.

What means that WMIC is disabled?

WMIC has been enabled by default on Windows 11, version 22H2 and later versions but now, on the next Windows 11 release, Microsoft has decided to set it as disabled by default.

So, starting today, or with Windows 11 Build 22572, WMIC will become just optional. You can uninstall and reinstall it by using the Settings app if you want to.

However, it’s a lot better to migrate to PowerShell and Microsoft also offered an example on how to do that, by changing the queries.

WMICPowerShell
Wmic /namespace:\\>namespace< PATH >Class< Get >Attribute1, Attribute2, … Attribute n<Get-CIMInstance -namespace ‘ >namespace< ‘ -query ‘select * from >Class<‘ | ft >Attribute1, Attribute2, … Attribute n<

PowerShell for WMI is a lot more efficient and safe to query Windows Management Instrumentation. Microsoft believes that by this move, it will make the process a lot faster and the administrators more productive.

In a nutshell, the deprecation of WMIC in Windows 11 should not affect anyone and migrating to PowerShell will improve the security.

Are you affected by WMIC’s deprecation in Windows 11? Tell us all about it in the comments section below.

LAPS now has passphrases, better readability & more

Windows LAPS is a feature that automatically manages and backs up passwords of local administrator accounts.

With the latest Windows 11 Insider Preview Build 26040 this feature was enhanced with some new features, so let’s take a closer look at them, shall we?

Automatic account management and other improvements are now available in LAPS

New automatic account management

With this new change, users can now configure LAPS to automatically create a managed local account. Additional features include:

  • The ability to set the name of the account as well as support for randomization.
  • Improved integration with local account management policies.
  • Ability to quickly enable or disable the account.

Improved password readability

Thanks to the changes to the PasswordComplexity setting, you can generate passwords that are less confusing to type.

By setting its value to 5, certain characters that are hard to distinguish won’t be used anymore thus improving password readability.

It’s also worth noting that the LAPS tab now uses a different font that is easier to read, thus minimizing the chance of any confusion.

Passphrase support is now available

LAPS can now generate passphrases that might be easier for users to remember than traditional passwords.

You can now configure the PasswordComplexity policy and choose between long words, short words with unique prefixes, and short words for your passphrase. Of course, you can also set how many words the passphrase will use.

It’s also worth mentioning that the passphrase feature is supported when backing up passwords to Windows Server Active Directory or Microsoft Entra ID.

Image rollback detection feature

LAPS can now detect when an image rollback occurs and it can prevent issues with Active Directory not matching the password hash that is stored locally on the device.

To prevent this, there’s now an Active Directory attribute msLAPS-CurrentPasswordVersion added to the Windows LAPS schema that checks the stored hash values to the local copies.

This feature isn’t available by default, and to enable it users need to run the latest version of Update-LapsADSchema PowerShell cmdlet.

This new build brings some much-needed improvements to LAPS that should make password and user management simpler than before.

Besides LAPS improvements, the new build brings a redesigned Windows Setup Experience as well as support for 80Gbps USB, so don’t miss it.

Aptos is the new default font for Microsoft

Recently, Microsoft abandoned its long-serving font Calibri, which was the default font since 2007. The new default font that has replaced it is Aptos, formerly known as Bierstadt.

You will now see this default font in Microsoft productivity apps like Word, PowerPoint, Excel, and Outlook. You probably didn’t know, but Aptos was in the font list all along with the name Bierstadt.

However, if you are wondering why the name changed, according to Steve Matteson, the font’s creator, some people didn’t take the name seriously, leading Microsoft to choose a new one for the font.

Aptos comes from the grotesque sans serif genre, which includes classic Helvetica, and Microsoft describes it like this:

Aptos is a precise, contemporary sans serif typeface inspired by mid-20th-century Swiss typography.

Along with Regular, Aptos is also available as Aptos Display, Aptos Narrow, Aptos Light, Aptos Dark, and more.

Back in 2021, Microsoft introduced five new fonts: Grandview, Bierstadt, Skeena, Seaford, and Tenorite, which gave us the hint of this happening in the near future, but nobody knew Bierstadt or Aptos would be the winner.

Aptos has this unique coastal climate, where it’s a beach, and all the way up to the redwoods. It’s what I loved about California is the diversity, and it kind of told me that there’s all these different moods and experiences you can have. Similarly, with Aptos, you have all these different voices you can speak in without distorting the message

Steve Matteson

Even though the font name has changed and it is rolled out as the default font, it will still be available in the font list under the old name for people who are used to it.

Also, you can still choose any other font type as per your preference, even the old default font, Calibri.

Furthermore, as Microsoft announced that the new theme is on its way, you will continue to notice new design changes and improvements, including text styles, new color palettes, and more.

Have you tried the new default font, Aptos, yet? Tell us what you think about it in the comments section below.

Windows Setup Experience gets a clean refresh

The new Windows 11 Build 26040 from the Canary Channel brings a lot of new features like the instant photo notifications from your phone but also an update for the Windows Setup Experience.

Microsoft’s new Windows OS Media Setup is the first redesign since Windows Vista and is touted as cleaner and more modern, but its features remain essentially the same.

What’s new with on the updated Windows Setup Experience?

Except for the cleaner look and modern touches, the unattended support feature is now correlated with the current upgrade and experience for your particular device running Windows.

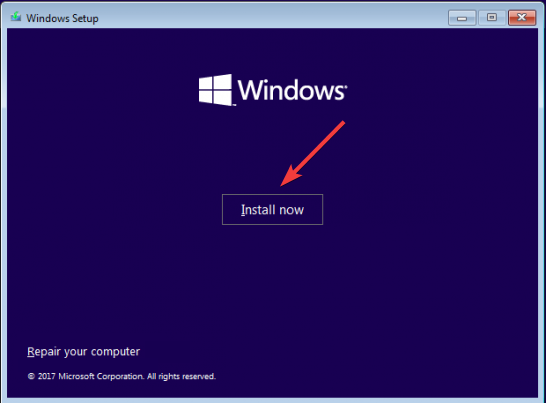
The old and new look of the Windows Setup Experience

The design change is pretty obvious. The interface jumps right to the action of installing the OS and adds the Repair your computer from the old window to add it in the new one as a separate option.

Another addition is the link provided when you click the Support button in the lower-left part of the window, which takes you right where you need if you have any trouble with the installer.

Let’s be honest, the new Windows Setup Experience is not such a big jump forward but it does make things a bit easier for the users.

If you’re a Window insider, you can check out the new Setup experience by downloading the Build 26040 ISO and performing a clean install on a PC or a Virtual Machine.

The new Canary Channel build also brings up another interesting feature: the 80Gbps USB support!

What do you think about the new Windows Setup Experience fresh look?

Windows 11 is now lightning-fast with 80Gbps USB support

Microsoft announced support for 80Gbps USB support not a while ago, and this feature is finally here and it’s available for testing.

So what can we expect from it, and how can we test it? Keep on reading to find out!

Latest Windows 11 Insider Preview sports 80Gbps USB standard

Windows 11 Insider Preview Build 26040 in the Canary Channel brings support for the first update of the USB4 standard. The new standard doubles the transfer speed, allowing you to achieve lightning-fast transfer speeds of 80Gbps on your PC.

The previous version of USB4 offered just 40Gbps, so this is a major performance boost. With the performance boost comes better support for peripherals, including both storage and high-performance displays.

It’s worth mentioning that background compatibility is present, so you should be able to use older USB and Thunderbolt peripherals without any problems. Of course, support for all other Type-C features is still there.

When can we expect to see this USB standard in action? Currently, this feature is only available for Windows Insiders on the Canary Channel, but we hope to see it available to the public in the near future.

Regarding the supported devices, the new USB standard will initially work on selected devices that are based on Core 14th Gen HX-series processors, such as Razer Blade 18. However, we expect to see more native support from hardware manufacturers in the future.

We’re excited about 80Gbps USB support on Windows and we can’t wait to see how it will change the world of peripherals.

The new build brings additional features, such as a redesigned Windows Setup experience, and the ability to access new photos and screenshots from your phone, and we already covered those in our other guides, so don’t miss them.

Instantly access new photos and screenshots from your mobile device

Microsoft just added a new feature in Build 26016 (Canary Channel) that allows you to get instant notifications on your PC when you capture a new image on your Android device. With a single tap, you can view, edit or share the images from your phone!

Of course, that will only happen if you add your device to the managed mobile devices in Windows.

How do I enable photo notifications from your Android device?

  1. Click the Start button on your Windows PC and go to Settings.
  2. Now, click on Bluetooth & devices and select Mobile devices.
  3. Next, choose Manage devices and allow your PC to access your Android phone.
  4. If you didn’t link your phone to your PC yet, click on the Add device button to do that. You will also need to install the Link to Windows app on your mobile device.

After this, every time you take a new shot on your Android phone, you will get a notification on your Windows device prompting you to view, edit or share the image from your mobile device.

You should know that this settings was updated with Build 26016 in the Canary Channel. You will not find it yet on the Windows 11 versions from the general release channel.

Also, after linking your phone, your PC will receive a Cross Device Experience Host update in the Microsoft Store that is required for this experience to work.

You should know that you can already use Phone Link for PC and Link to Windows on Android to get the images from your mobile device. You may also use Phone Link to connect your iPhone with Windows 11.

The new Build 26016 also brings other features like a new Windows Setup Experience and 80Gbps USB support for Windows 11.

However, with the new notification feature, you can access the images instantly on your PC.

What do you think about the new photo notification feature? Let’s discuss it in the comments section below.

Say goodbye to WordPad in the latest Windows 11 Canary Build

Microsoft had plans to remove WordPad from Windows 11 for months, and it was listed as a deprecated feature since September 2023 according to Microsoft’s Deprecated features page.

Windows Insiders reported that WordPad is gone in the latest build, and it’s only a matter of time before WordPad is removed for regular users as well.

WordPad is gone in the latest Windows 11 Canary Build

Judging by the Windows 11 Insider Preview Build 26040, WordPad won’t be installed anymore after performing a clean install and it will be removed automatically after installing this build.

Unlike some features that were removed but made available for installation from the Microsoft Store, that won’t be the case for WordPad, since it’s gone for good.

Here’s an official statement from Microsoft regarding deprecated features:

WordPad is no longer being updated and will be removed in a future release of Windows. We recommend Microsoft Word for rich text documents like .doc and .rtf and Windows Notepad for plain text documents like .txt.

With this build Microsoft finally did that, so no more WordPad on Windows 11. This is no shock because compared to other text editors, WordPad was lacking in features and it didn’t have as large userbase as Word.

This isn’t the first time that Microsoft has removed a core default app, and there were plans to remove Paint app from Windows, however after user backlash it was revamped and returned and it’s now enhanced with DALL-E 3 features.

What are your thoughts on this change? Is WordPad gone forever or will it make a comeback? Let us know in the comments below!

The Xbox mobile app gets touch controls, so you don’t need a controller anymore

In a bid to enhance the remote play experience, Microsoft will soon introduce touch controls to the Xbox’s Android and iOS apps. This is in line with recent developments where Apple opened its store to Xbox Cloud Gaming.

The feature, currently in the Beta testing stage, will allow users to manage their consoles and play games from within the mobile app, eliminating the need for a dedicated controller. So, no more wires dangling around or issues with Bluetooth connectivity hampering your gaming experience.

But users who find the controller a better option would still be able to use it. An Xbox controller’s effectiveness can’t be undermined!

How do touch controls work on the Xbox Android and iOS app?

As per initial reports, the touch control works as an on-screen overlay and is compatible with most games, in addition to the console’s UI. Besides, the touch controls perform well, as was expected.

The feature is aimed at gamers hooked to the Microsoft Xbox Cloud Gaming service, which has had touch controls for a while now.

Source: Xbox

In a report released in 2021, Microsoft confirmed that nearly 20% of its Xbox Cloud Gaming service users rely on touch controls, a number we expect to have increased since then.

By introducing the touch control and remote play functionality to Xbox, Microsoft is changing the rules of the space.

We will share more on the feature in the coming days. But if you have had the chance to use touch controls in Xbox, share your experience in the comments section below!

Now you can unsubscribe from a website in Chrome for Android right from the notification

Google is working on an experimental one-tap unsubscribe button that replaces the site settings button on Notifications. Web notifications on phones can be helpful, but also annoying and disruptive when they pop up constantly.

Until now, getting rid of notifications on Chrome for Android was a pain. You had to tap a tiny button, and then go through a bunch of menus to find the right setting. Google is now making the process a lot easier.

Chrome for Android’s One-tap unsubscribe button for website notifications

Google is planning to make it much easier to unsubscribe from notifications. Instead of the confusing Site Settings button, there will be a clear Unsubscribe button right on the notification. Just one tap and you’re done!

The company has got you covered even if you accidentally tap Unsubscribe. The confirmation screen will include an Undo button to take care of it if you press the wrong button. The new unsubscribe button lets you take control of your notifications.

The feature will be enabled by Google for 50% of users running Canary today itself (January 29) and 1% of Chrome 122 Stable in February via a Finch-controlled experiment. Based on feedback from testing, the company may decide to release it. It can be activated now in Chrome Canary without you needing to wait for your turn.

Here’s how to enable the One-tap unsubscribe button for website notifications in Chrome for Android:

  1. Launch Chrome Canary.
  2. Visit chrome://flags.
  3. Search for one tap, then find and enable Notification one-tap unsubscribe.
  4. Relaunch Chrome.
  5. Visit any website and subscribe to get notifications.
  6. Check the notification on the screen to see the new Unsubscribe button.
  7. Tap to get an unsubscription confirmation from a notification indicating You’ll no longer receive notifications from… respective website with Undo and OK options. The confirmation goes away after a few seconds without you needing to approve. If you accidentally hit unsubscribe, just tap on Undo.

Notification one-tap unsubscribe
Enables an experimental UX that replaces the [Site settings] button on web push notifications with an [Unsubscribe] button. – Android

What’s your take on Chrome addressing control over website notifications in Android? Let us know your thoughts in the comments below.

Microsoft now lets you unenroll your device from Beta Channel with an In-place upgrade

Good news for all those who have been waiting to get off the Beta Channel list and stop getting preview builds on your Windows 11 PCs. According to the new announcements made on January 25, 2024, you will soon get an in-place upgrade.

If you are not on the unenrollment list yet, let us know how to do that first!

How can I unenroll my device from Windows Insiders Program Build?

  1. Press Windows + I to open Settings.
  2. Go to Windows Update, then select Windows Insider Program.Windows Insider program
  3. Select the Stop getting preview builds option. With the new release, you will receive an in-place upgrade that will remove your device from fighting.

This in-place upgrade will install Windows 11 version 23H2, including the latest servicing updates available for retail customers.

Just a heads up, if you have been using features exclusively available for Windows Insider Preview Builds, you won’t be able to access them anymore and will have to wait for the official release, like other retail customers. However, your personal data will not be lost in the process of upgrading.

From now on, whoever chooses to unenroll a device using this process will get an in-place upgrade to opt out of lighting in the Beta Channel.

However, there is a catch to get out of the list, you need to update your machine to Build 2635.3130 or higher in the Beta Channel first.

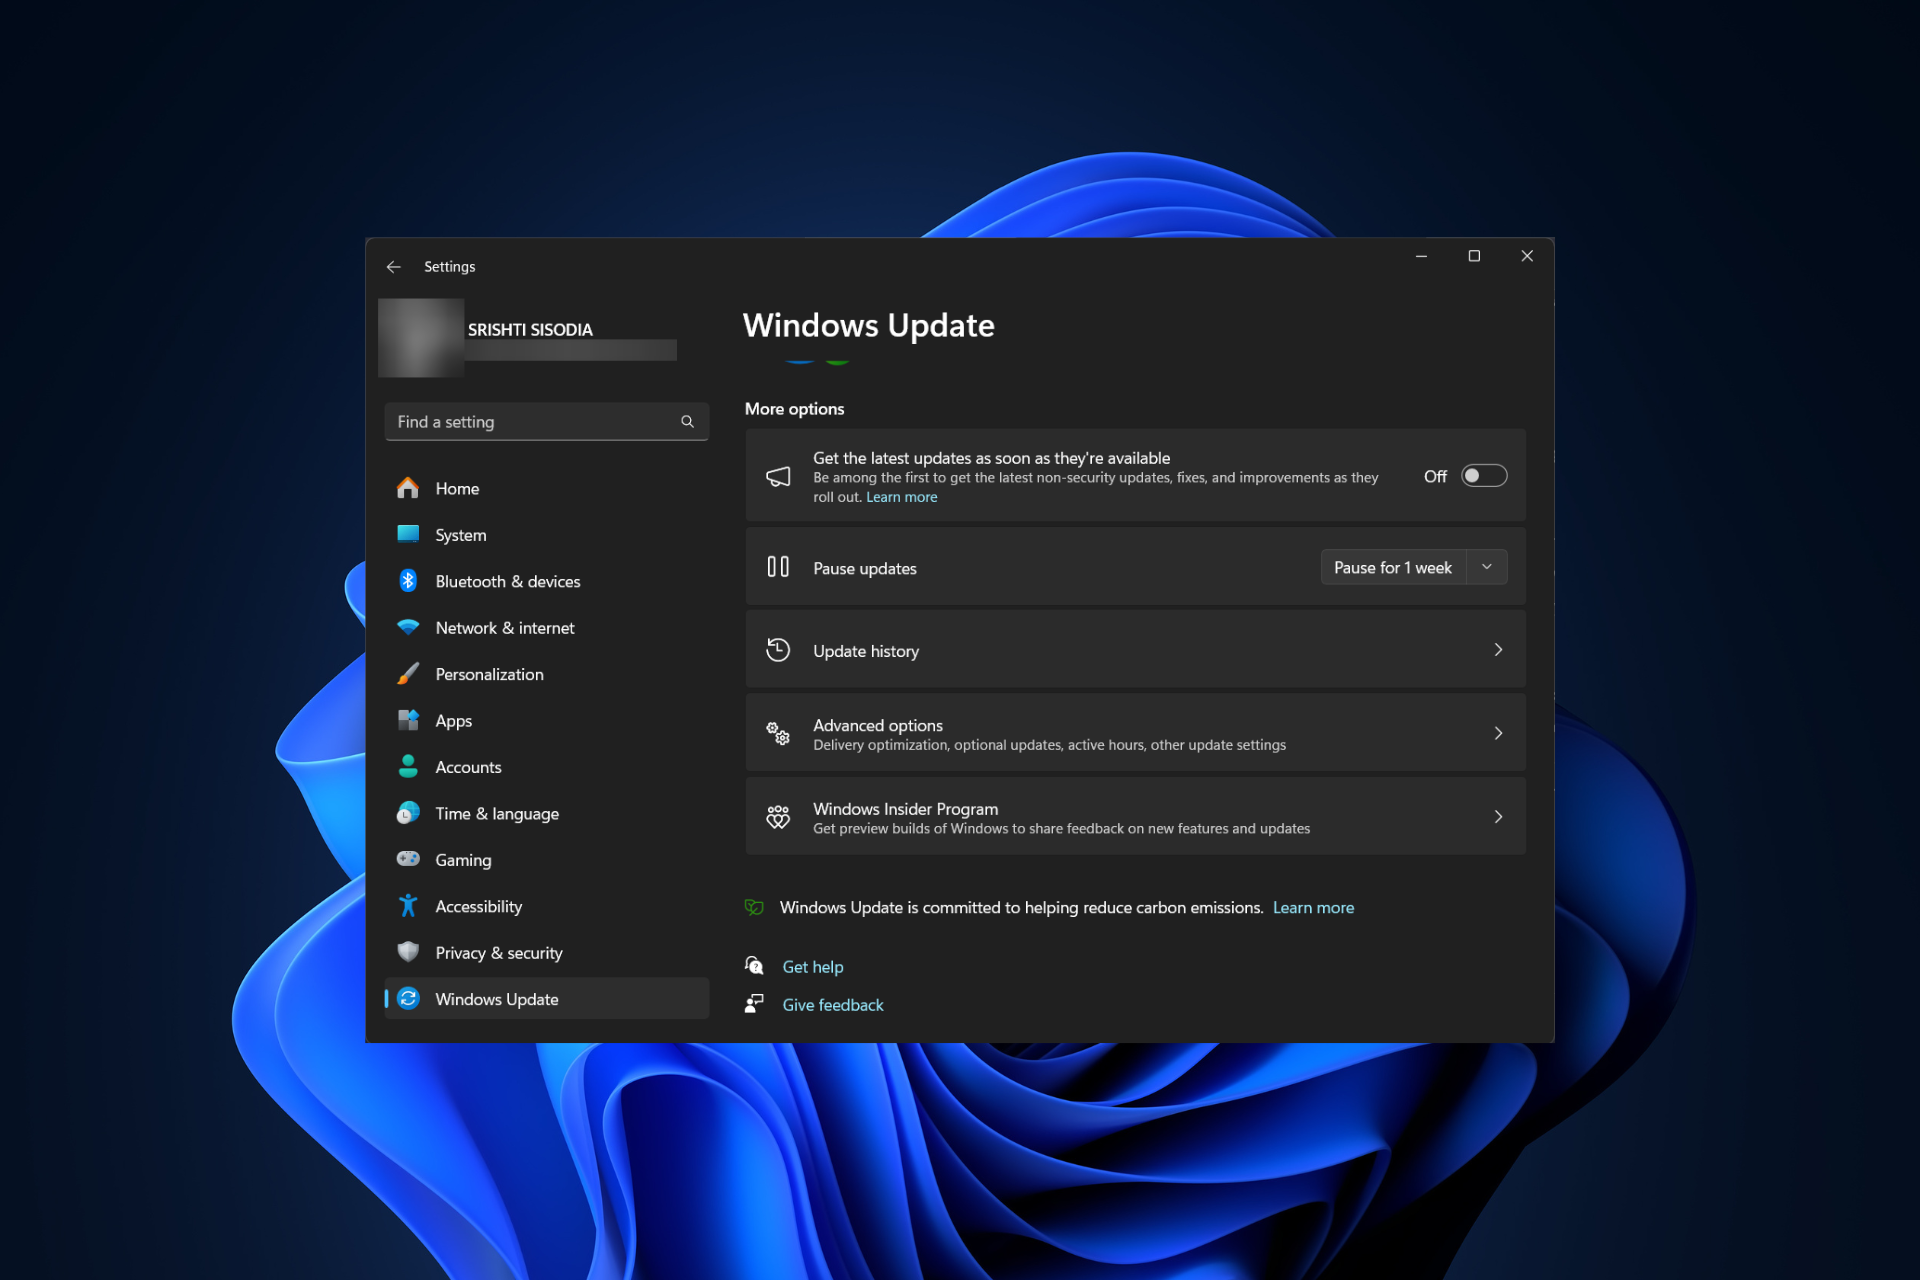
Also, to make this work, you need to turn off the toggle to Get the latest updates as soon as they’re available from the Windows Update Settings page.

What do you think about this newfound freedom from Beta Channel chaos? Tell us in the comments section below.

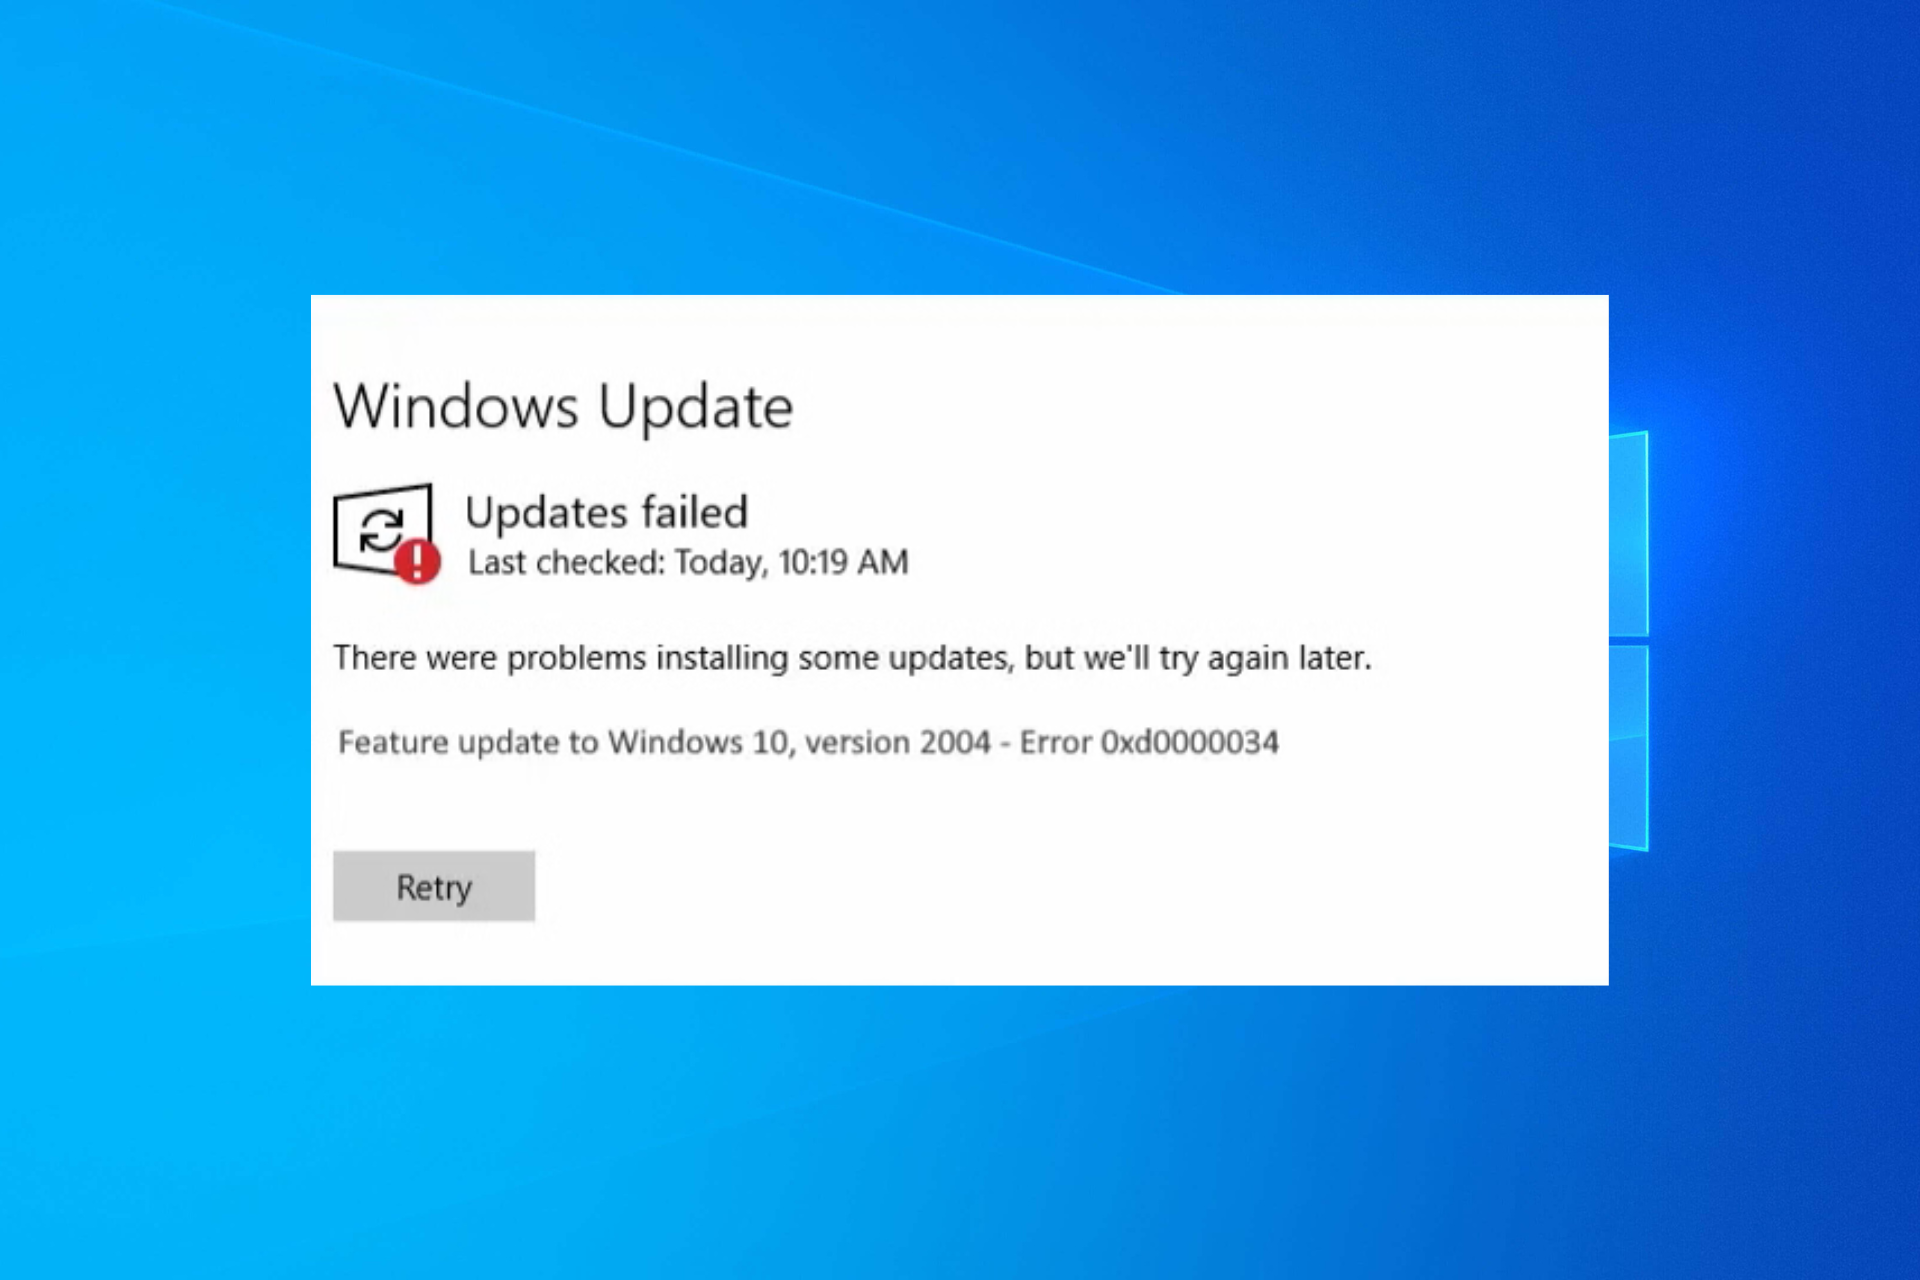
Solved: Windows Update Error Code 0xd000034 on Windows 10

Many users have complained about getting the error code 0xd000034 when trying to upgrade from Windows 10 to Windows 11 or installing updates on Windows 10. The error appears if your machine is low on space, has corrupted Windows Update files or has hardware conflicts.

Remove external storage devices and other hardware, run the DiskCleanup to free up space on the system drive, ensure the device drivers are updated, and then try running the update again.

How can I fix the Windows Update error code 0xd000034?

1. Run the Windows Update troubleshooter

  1. Press Windows + I to open the Settings app.
  2. Select Update & Security.Update & Security  - error code 0xd000034
  3. Click Troubleshoot from the left pane.
  4. Select Additional troubleshooters.Additional troubleshooters
  5. Under Get up and running, select Windows Update and click Run the troubleshooter.Run the troubleshooter - error code 0xd000034
  6. Follow the on-screen instructions to complete the process.

Running the troubleshooter can help you fix other issues like Windows update cannot currently check for newer versions; read this guide to learn more.

2. Restart the Windows Update service

  1. Press Windows + R to open the Run window.Services - error code 0xd000034
  2. Type services.msc and click OK to open the Services app.
  3. Locate Windows Update, right-click it and click Stop.Stop Windows update
  4. Wait for the service to stop, then right-click it again and click Start.Start Windows Update

3. Delete content from Windows Update temporary cache folder

  1. Press the Windows key, type cmd and click Run as administrator.Command Prompt Windows Run as Administrator - error code 0xd000034
  2. Type the following commands to stop the Windows Update and BITS services, then hit Enter:
    • net stop wuauserv
      net stop bits
  3. Minimize the command prompt window, then press Windows + R to open the Run window.
  4. Type the following path and click OK: %windir%\SoftwareDistribution\DataStore
  5. Press Ctrl + A to select all the files & folders, then click the Delete button.Delete Windirectory
  6. Go to the cmd window, copy & paste the following to start the Windows Update and BITS service, then hit Enter:
    • net start wuauserv
      net start bits
  7. Reboot your PC to save the changes.

4. Reset the Windows Update components

  1. Press the Windows key, type cmd and click Run as administrator.Command Prompt Windows Run as Administrator - error code 0xd000034
  2. Copy & paste the following commands one by one to stop the Windows Update, Cryptographic, BITS, and Application Identity service, then hit Enter after each command:
    • net stop bits
      net stop wuauserv
      net stop appidsvc
      net stop cryptsvc
  3. To delete the qmgr*.dat files, type the following command and press Enter:  Del “%ALLUSERSPROFILE%\Application Data\Microsoft\Network\Downloader\qmgr*.dat”
  4. Type the following commands to rename the SoftwareDistribution & catroot2 folders and hit Enter after every command:
    • Ren %systemroot%\SoftwareDistribution SoftwareDistribution.bak
      Ren %systemroot%\system32\catroot2 catroot2.bak
  5. To reset BITS and Windows update services, copy & paste the following commands and press Enter after each command:
    • sc.exe sdset bits D:(A;;CCLCSWRPWPDTLOCRRC;;;SY)(A;;CCDCLCSWRPWPDTLOCRSDRCWDWO;;;BA)(A;;CCLCSWLOCRRC;;;AU)(A;;CCLCSWRPWPDTLOCRRC;;;PU)
      sc.exe sdset wuauserv D:(A;;CCLCSWRPWPDTLOCRRC;;;SY)(A;;CCDCLCSWRPWPDTLOCRSDRCWDWO;;;BA)(A;;CCLCSWLOCRRC;;;AU)(A;;CCLCSWRPWPDTLOCRRC;;;PU)
  6. Now type the following command and hit Enter to enter the System32 directory: cd /d %windir%\system32
  7. You can skip Step 6 if you are already in System32, then copy & paste the following commands one by one and press Enter after each command:
    • regsvr32.exe atl.dll
      regsvr32.exe urlmon.dll
      regsvr32.exe mshtml.dll
      regsvr32.exe shdocvw.dll
      regsvr32.exe browseui.dll
      regsvr32.exe jscript.dll
      regsvr32.exe vbscript.dll
      regsvr32.exe scrrun.dll
      regsvr32.exe msxml.dll
      regsvr32.exe msxml3.dll
      regsvr32.exe msxml6.dll
      regsvr32.exe actxprxy.dll
      regsvr32.exe softpub.dll
      regsvr32.exe wintrust.dll
      regsvr32.exe dssenh.dll
      regsvr32.exe rsaenh.dll
      regsvr32.exe gpkcsp.dll
      regsvr32.exe sccbase.dll
      regsvr32.exe slbcsp.dll
      regsvr32.exe cryptdlg.dll
      regsvr32.exe oleaut32.dll
      regsvr32.exe ole32.dll
      regsvr32.exe shell32.dll
      regsvr32.exe initpki.dll
      regsvr32.exe wuapi.dll
      regsvr32.exe wuaueng.dll|
      regsvr32.exe wuaueng1.dll
      regsvr32.exe wucltui.dll
      regsvr32.exe wups.dll
      regsvr32.exe wups2.dll
      regsvr32.exe wuweb.dll
      regsvr32.exe qmgr.dll
      regsvr32.exe qmgrprxy.dll
      regsvr32.exe wucltux.dll
      regsvr32.exe muweb.dll
      regsvr32.exe wuwebv.dll
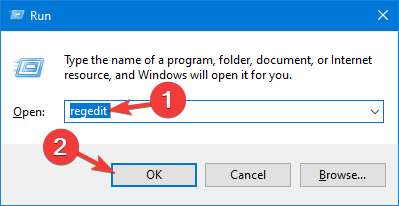
  8. Restart your computer, then once it boots up, press Windows + R to open the Run window.Regedit - error code 0xd000034
  9. Type regedit and click OK to open Registry Editor.
  10. First, backup the registry files, go to File, then click Export to backup registry files, then save the .reg file to an accessible location.
  11. Navigate to this path: Computer\HKEY_LOCAL_MACHINE\COMPONENTS
  12. Locate PendingXmlIdentifier, right-click and choose Delete. Find NextQueueEntryIndex, and AdvancedInstallersNeedResolving and delete them as well.Delete the registry entries
  13. Open Command Prompt with admin rights again, then type the following commands one by one and press Enter after every command:
    • netsh winsock reset
      net start bits
      net start wuauserv
      net start appidsvc
      net start cryptsvc
  14. Reboot your computer to let the changes take effect.

Resetting the Windows Update components can help you fix other issues like Windows Update is missing; read this guide to learn more.

5. Install the updates manually

  1. Press Windows + I to open Settings.
  2. Go to Update & security.Update & Security - error code 0xd000034
  3. From the left pane, select Windows Update, then click View update history to check the latest installed update.View installed update - error code 0xd000034
  4. Now, visit the Microsoft Update Catalog, locate the update you want to install, and click Download.Download Windows update manually
  5. Once downloaded, double-click it to initiate the installation and follow the on-screen instructions.

6. Perform an in-place upgrade

  1. Visit the Windows 11 website.
  2. Under Download Windows 11 Disk Image (ISO), select Windows 11 (multi-edition ISO) from the drop-down menu, then click Download Now.Download Now  - error code 0xd000034
  3. Select the product language from the drop-down menu, click Confirm, then click the 64-bit Download button to download the ISO file.
  4. Right-click the downloaded file, then click Mount and double-click Setup.exe to launch the setup.Setup1 - error code 0xd000034
  5. Click Yes on the UAC prompt. In the Install Windows 11 dialog, click Next.
  6. Next, click Accept.
  7. In the Ready to install page, make sure the Keep personal files and apps option has been checked, then click Install.Ready to install - error code 0xd000034
  8. Follow the on-screen instructions to complete the process.

Use this method only if you are trying to upgrade from Windows 10 to 11.

In conclusion, to fix the error code 0xd000034, first, run the Windows Update troubleshooter, restart the Windows Update service, reset Windows Update components, or delete the Windows Update temporary cache folder.

However, if the issue appears, especially when you are trying to upgrade your Windows 10 to 11, you need to use an in-place upgrade to make it happen.

These methods can also help you fix if there are some problems installing updates on your Windows 10/11 computer.

If you have any questions or suggestions about this Windows Update error? Tell us in the comments section below.

Chrome Android Tests Merging PWA Install and Home Screen Options

Ever visit a website on Chrome Android that you love so much you want it on your home screen, but get caught in the “Install app” vs. “Add to home screen” dilemma? You’re not alone. This inconsistency can create confusion, Google is now trying to address this by creating a “unified path” for two options with the new “Universal Install” UI for Progressive Web Apps (PWAs).

Generally, Chrome offers two separate options for interacting with PWAs:

Install App: This installs the PWA as a standalone app, complete with an icon on your home screen and integration with your device’s app drawer.
Add to Home Screen: This creates a shortcut directly to the PWA’s website on your home screen but doesn’t offer the full app experience.

The choice between these options can be baffling, especially for new users. Do you want the full app experience or just quick access? It’s not always clear! Forget the confusion as Google is streamlining PWA access on Chrome Android with a game-changing unified path. Get both an app-like experience and instant launch, all in one effortless tap.

Chrome for Android’s PWA Universal Install UI

Google’s unified path merges the “Install app” and “Add to home screen” functionalities into one intuitive action. Click once, and your favorite PWA is instantly launched from your home screen, complete with all its app-like features like offline access and push notifications.

Open a PWA menu in Chrome Android and select “Add to home screen.” Instead of immediately adding a shortcut, you’re presented with two options in a bottom sheet:

Install: Install the PWA as a standalone app, complete with an icon in your app drawer and integration with your device’s features.

Create shortcut: Create a quick-launch icon on your home screen that opens the PWA website directly.

How to enable Universal Install UI that unites Install and Add to Home Screen for PWAs

  1. Launch Chrome Canary
  2. Visit chrome://flags
  3. Search for “unified“, find and turn on “Enable the PWA Universal Install feature“
  4. Relaunch Chrome
  5. Open a PWA
  6. Tap on the three-dot icon and select “Add to Home Screen“
  7. Add to Home Screen appears at the bottom
  8. Pull it up to notice the Install and Create Shortcut options.

Note: The options are not working at the moment, but we can see the upcoming PWA’s universal Install UI that combines Install and Add to the Home screen.

Enable the PWA Universal Install feature
When enabled, activates a unified path for Install PWA and Add to home screen – Android

What’s your take on the new PWA install experience in Chrome on Android? Let us know your thoughts in the comments below.

4 Easy Ways to Remove BIOS Password on Windows 11

Whether you want to reset your BIOS password on Windows 11 or want to remove it as you have forgotten it, this guide can help!

To remove the BIOS password on Windows 11, you can take out the CMOS battery for some time, use the jumper on the motherboard, or execute a few commands on Command Prompt.

How can I remove the BIOS password on Windows 11?

Note icon NOTE
To open the CPU cabinet, you need to remove the screws, or if it has a push button, slide to remove it. In case you are using a laptop, turn it upside down, place it on a flat surface, remove the battery, and then unscrew the back panel.

1. Remove the CMOS battery

  1. Turn off your PC, then unplug the power plug & other wires from the CPU cabinet and open it.CMOS battery - How to Remove BIOS Password on Windows 11
  2. Look for the CMOS battery and remove it for about 15-30 minutes, then put it back.

This will reset all the BIOS settings along with the password, so you may have to reconfigure them if you have them customized any earlier.

If removing the CMOS battery for 30 minutes didn’t work, try removing it for an hour and check if that helps.

Removing the CMOS battery for a few minutes can also help you fix issues like your PC automatically starting in BIOS; read this guide to learn more.

2. Use the jumper on the motherboard

  1. Turn off your PC, then unplug the power cable & other wires connected to the CPU and open the cabinet.
  2. On the motherboard, you will see small pins, which are usually three or six in number. You can find them at the edge of the board.
  3. One pair of pins with a plastic covering called a Jumper is for a normal startup; the second one is to clear the password (CLEAR_PWD, PASSWD or CLR CMOS), and the third one is to reset BIOS to default settings.
  4. If you look closely, you might see the labels on the pins as well. To clear the BIOS password from your device, pull out the jumper from pins 1 and 2, then place it on 2 and 3.jumper pins How to Remove BIOS Password on Windows 11
  5. Wait for 30 seconds to 1 minute, then place the jumper back to the default position.
  6. Now close the panel, plug the wires in the CPU, press the Power button on your computer, then press F1, F2, F10, Esc, Ctrl, or Delete keys according to your device manufacturer to enter BIOS.
  7. Go to the Save & Exit/Overview menu, depending on the device, and select Restore Defaults/Load Defaults.Load to defaults BIOS - remove bios password on Windows 11
  8. If you want to reset the password, you can go to Security or a similar tab, locate Administrator Password, and when prompted for a password, leave it empty and press Enter.
  9. Now press F10 to save & exit.

Resetting your BIOS to default settings can also help you fix the BIOS ID check error; it could occur due to incompatible hardware; read this guide to learn more.

3. Use the Command Prompt

  1. In case you can’t boot into Windows, press & hold the Power button on your PC until it shuts down.
  2. Press the Power button on your PC to turn it on.
  3. Repeat steps 1 and 2 twice to get the Automatic Repair screen. Click Advanced options.Advanced options - automatic repair
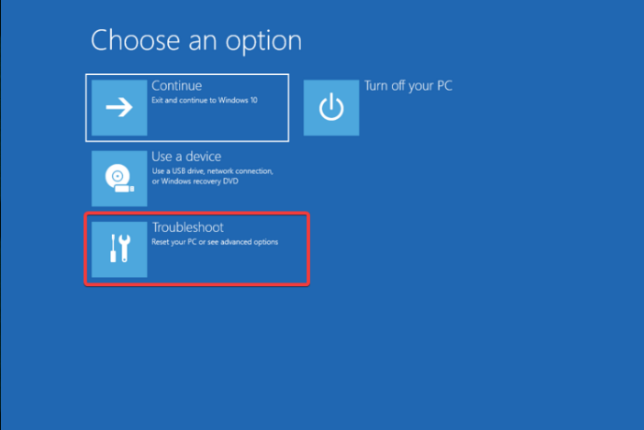
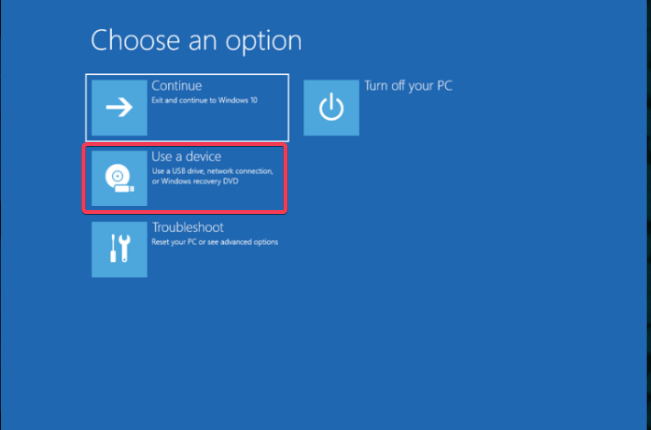
  4. On the Choose an option screen, select Troubleshoot.Choose an option - Troubleshoot
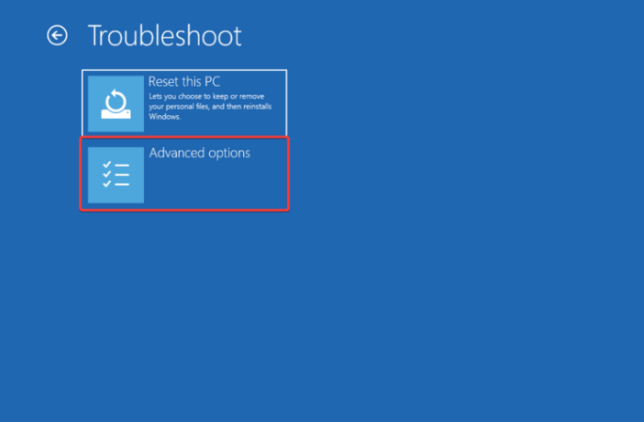
  5. Next, choose Advanced options.Advanced options - remove bios password on Windows 11
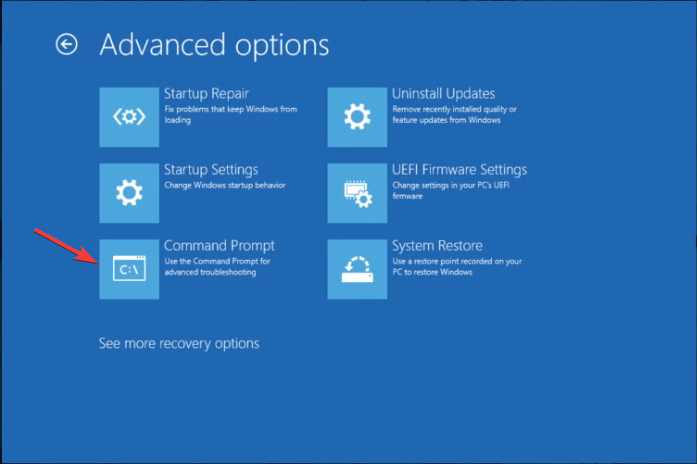
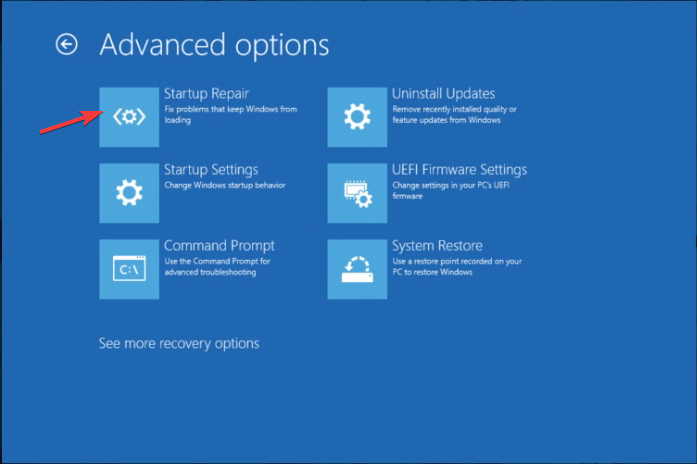
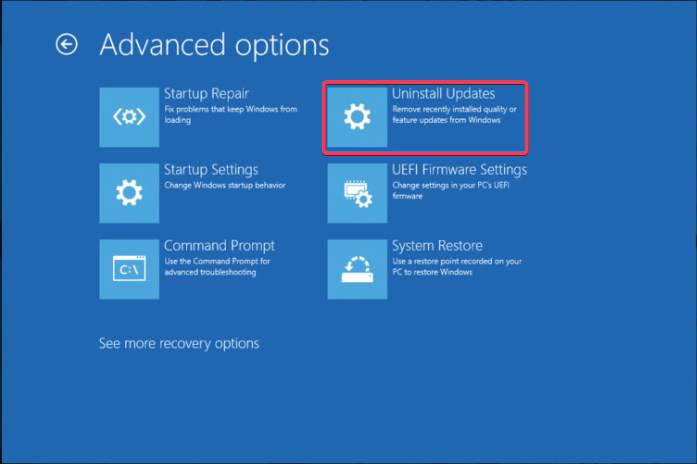
  6. Select Command Prompt from the Advanced options screen.Command Prompt Advanced Options .
  7. If your computer can boot into Windows, press the Windows key, type cmd, and click Run as administrator.
  8. In the Command Prompt window, copy & paste the following commands one by one and hit Enter after each command:
    • debugo
      70 2Eo
      71 FF
      quit
  9. Once the commands are executed, reboot your PC to reset the BIOS password and CMOS settings.

Note that you can also remove BIOS password using CMD, so take a closer look at our detailed guide.

4. Use a backdoor password

  1. Boot your computer, then press F1, F2, F10, Esc, Ctrl, or Delete keys according to your device manufacturer to enter BIOS.
  2. Now, if you are prompted to enter the password, type the wrong password thrice, forcing your computer into lockdown mode. You will get a system disabled message and a code; note down that code.
  3. On another device or phone, visit bios-pw.org/, enter the code when asked, and then click Get Password.Backdoor password - How to Remove BIOS Password on Windows 11
  4. You will get similar-looking passwords to help you remember the right one.

This method can be the best one of all, especially if you don’t want to remove your CMOS battery or open the back panel of your machine.

In conclusion, to remove the BIOS password from your Windows 11 machine, you must remove the CMOS battery for some time, use the jumper on the motherboard, or use Command Prompt with administrator rights.

In case you want to know about BIOS and its settings, we have a detailed guide explaining everything there is to know.

If you have any questions or suggestions about the subject, please mention them in the comments section below.

MSTest Runner is portable & fast, so you can ditch those external tools

Developing software requires a lot of testing, and to make this process faster and more reliable, Microsoft introduced an MSTest runner. This is a welcome addition after the release of Dev Home for Windows Development Environment.

What does MSTest runner do and how can it help developers? Keep on reading to find out!

What is the MSTest runner?

MSTest runner is a new tool from Microsoft that allows developers to run tests as independent and portable executables.

Developers can host and run tests without having to rely on any external tools like in the past. With MSTest, they just need to start the console application and that’s it!

It’s worth mentioning that the runner integrates with dotnet test, vstest.console, Visual Studio Test Explorer, and Visual Studio Code Test Explorer, so you’ll have the same experience as before. To learn more, head over to the MSTest runner documentation page.

How can I install MSTest runner?

  1. Install the latest version of MSTest.TestAdapter. It should be available in version 3.2.0 and newer.
  2. Next, go ahead and and <EnableMSTestRunner> and <OutputType> properties.
  3. Lastly, save changes, and re-build your test project.
  4. Your tests will now create an executable that can directly run tests.

What are the benefits of using the MSTEST runner?

  • Portability – The developers can run tests directly from the exe file thus making the process simpler and less reliant on infrastructure. In practice, running tests will require zero additional setup.
  • Performance – MSTest runner uses one less process thus conserving resources on the build server. During internal testing at Microsoft, it was reported that the MSTest runner was able to complete tests 3 times faster while using 4 times less memory.
  • Reliability – With new defaults, developers will be less likely to miss running any of the tests. The tool is async and parallelizable, so it doesn’t have performance issues such as VSTest.
  • Extensibility – MSTest runner is extensible allowing developers to customize it according to their needs. Microsoft provides optional extensions for MSTests that developers can use.

MSTest runner is a great tool for all developers since it will boost the performance during testing all while making the testing process more straightforward by making tests a portable executable.

It can work great alongside the Windows Software Development Kit, so don’t hesitate to give it a try.

What are your thoughts, have you tried this tool already? Let us know in the comments!

Copilot will generate AI summaries for any Word documents you share with others in OneDrive

Copilot for Microsoft 365 will generate AI summaries for users sharing Word documents with others on OneDrive, according to a new feature coming to Microsoft 365 in February 2024. The entry says the feature will be optional, and users can opt for AI summarization or not, depending on their choices.

If they opt for one, the AI-generated document summary will be included in the share notification email received by the recipients, so that they can gain insight into the files that were shared.

If users decide not to generate the AI summary, they can do so by ticking the box inside the share dialog.

Users can now opt to include an AI-generated document summary inside the share dialog when they share a Word document with other users. The document summary is included in the share notification email sent to the recipient(s) giving them more context around the contents of the shared document. This feature is only enabled for customers with a Microsoft Copilot for Microsoft 365 license and works only when sharing a Word for the web file.

Microsoft

Users will need an active Microsoft 365 license and access to Microsoft Copilot to be able to enjoy this feature, and it only works when sharing a Word file.

However, it is incredibly useful, especially when it comes to longer Word documents that have to be read in a short time: Copilot can generate a summary in seconds with the most important information, greatly reducing time and effort to get others up to date with documentation.

Summarization and editing have always been Copilot’s core capabilities, and this feature, especially, could be the one that would make the AI tool popular among Microsoft 365 users. But if that is not enough, then users should know that Microsoft 365 Copilot will be integrated into Windows Copilot, so theoretically, these summarizations can be easily accessed without even having to open the emails.

We’ll have to wait until February to see how it works, though.

Apple opens its store to Xbox Cloud Gaming and other streaming apps

Apple is known for restricting streaming apps and services so the news that Game Pass Ultimate subscribers can now stream titles from the Game Pass library may come as a shock.

Up until now, Apple users had to go through the Safari browser to access the Xbox Cloud Gaming library and stream the games, but now the struggle is over.

Xbox Cloud Gaming is officially available on Apple

According to Apple’s latest announcement, the Cupertino giant is opening it’s doors to streaming game services and apps.

Today, Apple is introducing new options for how apps globally can deliver in-app experiences to users, including streaming games and mini-programs. Developers can now submit a single app with the capability to stream all of the games offered in their catalog.

Another interesting turnout is that although Apple complied with the EU’s DMA, it will still get a cut from the in-app purchases, including from mini-apps, mini-games, chatbots and plugins.

Other streaming apps will also benefit from this move

Another great news is that not only Xbox Cloud Gaming will benefit from this addition, but also NVIDIA GeForce Now subscribers. They will have their own official app to access the games from their catalog.

Although, there’s a small catch. Apple will finally allow other publishers to regulate the games on their apps which is a big step forward to open the market:

Each experience made available in an app on the App Store will be required to adhere to all App Store Review Guidelines and its host app will need to maintain an age rating of the highest age-rated content included in the app.

Still, the publishers will have to file in certifications for iOS, but it’s still a small price to pay to get into the Apple Store.

Epic Games also announced that it will launch an iOS app to provide access for their subscribers and the ball will hopefully roll pretty fast to all the other publishers.

What do you think about Apple’s move? Tell us your oppinion in the comments section below.

Windows on Arm now supports Google Chrome, one huge step for a wide adoption

Spotted by tech enthusiast Pedro Justo on X (formerly known as Twitter), Google Chrome now runs natively on Windows on Arm, after Google Canary released an Arm64 build of the browser, that can be downloaded and installed here.

This means Chrome will run much faster and its performance will be greatly changed for the better on Windows on Arm devices, much to the delight of those Chrome users who need to use the Chromium-based Edge when accessing the Internet on these devices.

Windows was the last operating system Google was yet to release an Arm-based version of its popular Chrome browser, as the tech giant already released such a version for other OS around, including Linux, or Mac.

This is a huge step in the right direction because it means tech companies are ready to develop apps specifically made for Windows for Arms devices, which are known to last longer due to their durable battery life, be capable of stronger internet connections through 4G/5G technologies, and overall being far more portable than usual laptops.

With Google joining the Arm crowd, Windows on Arm could become a real possibility of being a standard Windows version in the future: we already have processor manufacturers such as Intel, ADM, and Qualcomm working on Arm-based chipsets, but as we could see, the big software companies, such as Google, are joining the hype.

Is the future of Windows Arm-based? Who knows, but now there’s a real possibility.

Microsoft Mesh feels like a Black Mirror episode: should we expect ads coming to it?

Microsoft Mesh is now generally available in Microsoft Teams after the Redmond-based tech giant previewed it to Teams users at the end of 2023. For those of you who don’t know, Microsoft Mesh allows Teams users to create a virtual avatar and engage in social interactions within pre-defined virtual spaces.

Developers can create virtual spaces and Microsoft will make them available to download and install so that companies all over the world can use them for virtual meetings.

Those engaging in Microsoft Mesh will need to make an avatar, select the preferred virtual space, and host virtual hybrid meetings that can range from work sessions to fun activities, brainstorming, etc. It all sounds quite exciting on paper, and according to the glimpses, Microsoft Teams users should be in awe of this new capability.

However, while these virtual spaces can be accessed on PCs and tablets, for a full immersive experience, Microsoft recommends VR devices, such as the Meta Quest.

To support hybrid work and geographically distributed organizations, we created Microsoft Mesh. Mesh powers 3D immersive experiences using next-generation technology that help virtual connections feel more like face-to-face interactions. Mesh is available on PC and Meta Quest VR devices.2

Microsoft

The Redmond-based tech giant says some commercial customers such as Takeda, Accenture, BP, and Mercy Ships are already seeing the benefits of using Microsoft Mesh, not only to enhance and motivate collaboration but also to reflect the companies’ values and image.

From this perspective, Microsoft Mesh could be an excellent way for branding marketing. You know, welcoming guests or hosting meetings in virtual spaces that are displaying your company’s logo and brand. What could go wrong?

Well, it could open the way for Microsoft to introduce ads to these virtual spaces. This could most certainly happen if Microsoft Mesh becomes popular.

Will ads come to Microsoft Mesh virtual spaces?

As we mentioned earlier, Microsoft Mesh can integrate ads to the equation, if the feature becomes popular with companies and users. Theoretically, it has the technology to support ads, as developers can build highly customizable virtual spaces.

However, for Microsoft Mesh to become popular, companies would need to encourage using VR devices to fully grasp the immersive quality of this capability. Otherwise, a Mesh meeting accessed through a PC would not differ much from the existing Teams meeting.

As we noticed in our survey, even AI is not widely adopted by Windows and Microsoft users, and there is still a long way to go before Copilot will be popular among Windows users. But while Copilot doesn’t require Windows users additional devices to get the right experience, Mesh would be quite disappointing without experiencing it with a VR device.

Even so, without a more subtle device, wearing a VR device just to join a Microsoft Mesh meeting is quite dystopian, and I don’t see how wearing one for hours would make one feel comfortable.

Microsoft Mesh could end up being a popular feature, if there would be the right devices to facilitate a seamless transition from the real to the virtual. Maybe we’re not there yet, maybe Microsoft has launched this feature way too soon, or maybe I’m wrong.

We’ll have to wait and see.

The new Indie Selects category brings you the best indie games on the Xbox Store

The ID@Xbox team at Xbox has announced a new initiative, Indie Selects, aimed at showcasing the best indie games on Xbox, featuring new collections and monthly picks.

As part of this program, the ID@Xbox team will select a new themed collection of featured indie games that will be updated every Wednesday on new channels on the Xbox Store and Xbox Dashboard.

The Featured Indies channel will spotlight the latest releases, while other channels may focus on games from different parts of the world, new creators, ID@Xbox sales, imminent indie games that can be waitlisted or preordered, and weekly themes such as Games for Evil Villains, or Games to Play With Your Cat.

Furthermore, the ID@Xbox team will vote to choose the top six indie games every month, which will be announced in the last week of the month along with the digital awards for their creators.

You will see more about Indie Selects in the highlighted section on the Xbox Store & Xbox Dashboard and can check out more information on the social media channels.

If you want to learn more about why each game was chosen, you can check out a dedicated article on Xbox Wire to get the juicy details.

Speaking of the newest releases, Indie twin-stick shooter Go Mecha Ball was made available on Xbox Game Pass starting on January 25, 2024.

The bottom line is that Indie Selects seems to be a game-changer for both players and developers. You can get your hands on the latest Indie games without doing extensive research and if you are a creator, it is your ticket to gain visibility in the gaming community.

What do you think about this new initiative by Xbox? Tell us in the comments section below.

Fatal Error in Tekken 8 affects many, but there’s a hotfix

Steam released the full version of Tekken 8 for Steam Deck on January 25, 2024, amidst much excitement and fanfare. But on opening the game, several, including us, got the Fatal error message. Surprisingly, no one faced the issue with the demo version.

Within hours of the launch, Steam forum and Reddit were filled with posts on the issue. But that didn’t last long. Downloading the Proton Hotfix fixed things for most, again, including us, in no time!

How do I download the Proton Hotfix for Tekken 8?

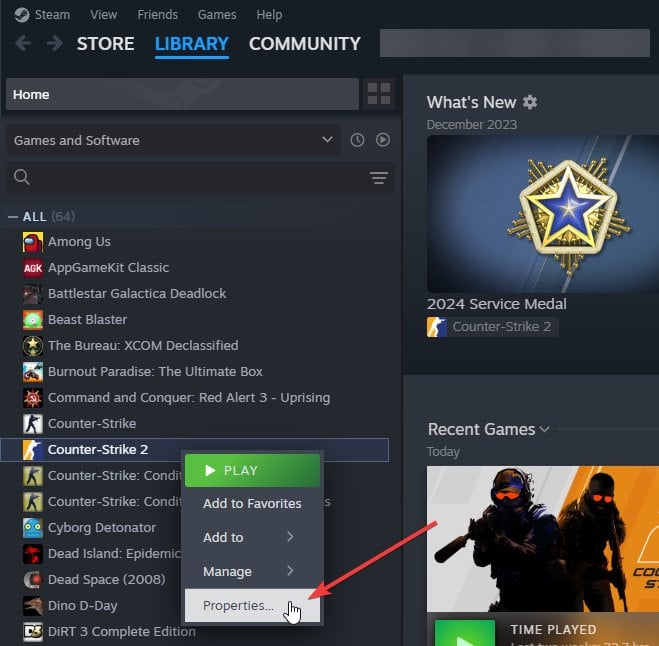
  1. On your Steam Deck, go to Tekken 8, then click on Settings (gear icon) near the far right, and choose Properties.
  2. Go with force compatibility and then choose Proton Hotfix from the dropdown menu.compatibility
  3. Now, load Tekken 8 and let it download the hotfix.

That’s all you need to do, at least to fix the Fatal error in Tekken 8 on Steam Deck!

The game’s performance, too, hasn’t been satisfactory to many, and they were forced to run it at lower settings to improve the gameplay and have a steady FPS. Problems were bound to appear, given that Tekken 8 was just released.

Anyway, as far as Fatal error is concerned, it has been taken care of, and that’s the good news. Do not forget to check our pick for the best games compatible with Steam Deck.

Share your experience of Tekken 8 on Steam Deck and whether you managed to fix the error in the comments section below.

NBA 2K24 server and connection issues leave out many players

If you were on the virtual courts from NBA 2K24, you have noticed that lately, the game had a couple of server and connection issues.

2K Games posted an announcement on their Discord channel signaling the impending issues:

We are aware of the connection issues affecting some players in NBA 2K24 and are currently working to ensure everyone can play. We will provide updates as we have them. Thank you for your patience!

However, many players were unaware of the problems and encountered the following errors when trying to connect to the NBA 2K24 servers:

  • error code b78ee29c
  • nba 2k24 error code 4e940a0d
  • 2k24 error code 6550f7ef

All these NBA 2K24 are network and server connection errors and that means they are mainly due to problems from the developer’s side.

Because of this connection blackout, you can’t access the multiplayer modes, or the progression on the NBA 2K24 Pro and Hall of Fame Pass.

2K Games acknowledged the problems in their latest Twitter post saying that the problem has been resolved.

How can I fix the NBA 2K24 connection issues?

Unfortunately, if the problem is server side, the only option is to wait for the services to come back online.

However, if you still have connectivity issues, first, doublecheck the NBA 2K24 server status.

Then, check your local connection and restart your router. You may also turn off your antivirus temporarily to see if it’s blocking the game.

Ultimately, if nothing works, reinstall a fresh copy of the game on your console or PC.

Do you still have connection problems on NBA 2K24? Let us know in the comments section below.

This browser-based video game lets people experience Windows 11 without installing it on their PC

Even if Windows 11 has been around for more than 2 years, the operating system has only surpassed 400 million users worldwide last October, while Windows 10 has over 1 billion users currently active.

There aren’t any dominant reasons why people aren’t migrating to Windows 11: Windows 10 is still getting the job done, and even if it reaches the end-of-support by the end of 2025, Microsoft has decided to let users extend it for 3 more years, for a price, of course.

But that doesn’t mean Windows 11 is out of the question. The operating system is a better fit for gamers, and it comes with a lot of exciting features, such as Windows Copilot, a redesigned File Explorer, and many other features.

However, for those Windows users who are not yet sure about the 2-year-old operating system, there is an unofficial solution that can be tried to see if Windows 11 is the right fit for them or not.

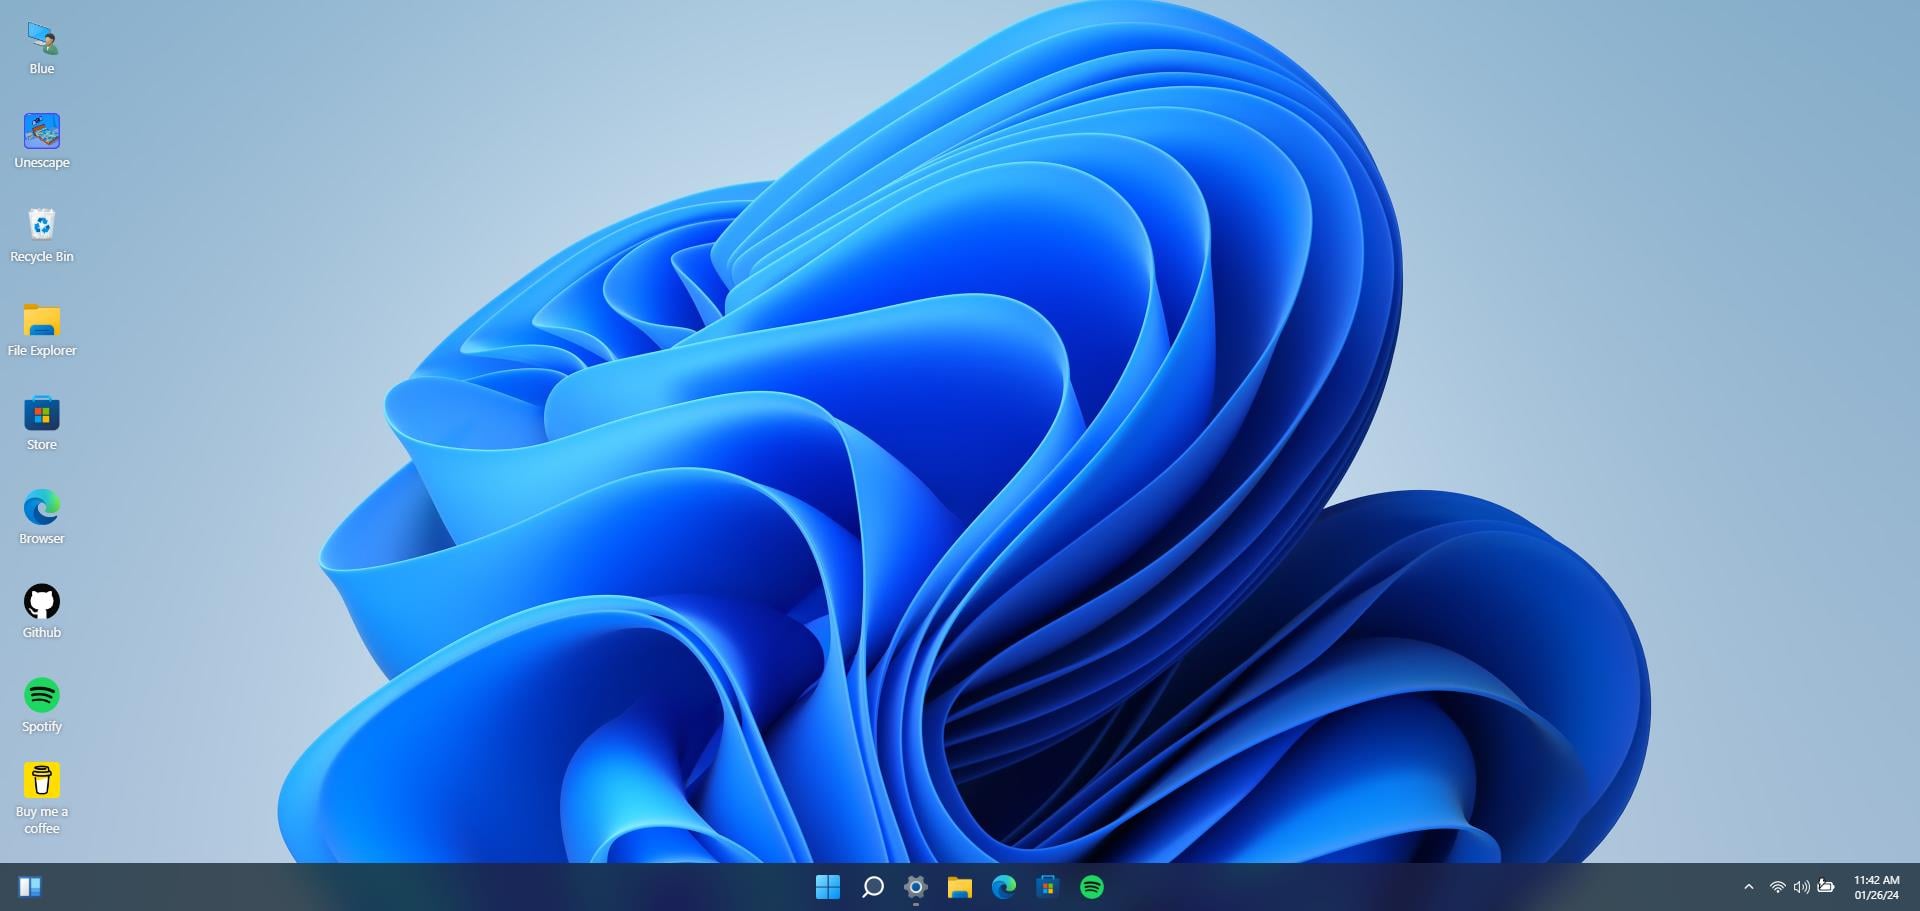
We’re talking about Blue Edge’s Win11 in React, a simulation of a standard Windows 11 desktop experience made with React, CSS, and JavaScript. The project is not affiliated with Microsoft, but the Redmond-based tech giant should release a similar experience for those who want to experience Windows 11.

How to access Win11React

  1. Go to Blue Edge’s Win11 in React official webpage.
  2. Once there, your browser will do the rest: a simulation of the Windows 11 desktop will be initiated, and you’ll be capable of exploring the desktop.Win11React

You’ll have access to File Explorer, Windows 11’s Settings, Microsoft Edge, and Microsoft Store, and you’ll be able to move around and try the Quick Settings, and other places.

However, accessing Spotify will cause the simulation to crash, but it can be restored with a simple refresh.

The simulation is quite superficial, and users have access to a rudimental version of Windows 11, but it should be more than enough to interact with its design and form an opinion.

Unfortunately, the simulation is not suggestive of how your device’s behavior with Windows 11 installed on it, so you might want to be aware of this before downloading and installing Windows 11.

Win11 in React also doesn’t have the newer Windows 11 capabilities, such as Windows Copilot, so the experience of actually using Windows 11 on your device might be a bit different. However, from a UI perspective, this tool should be more than enough to give you an idea of how to move around Windows 11.

If you try it, be sure to let us know your opinions on it.

Ayaneo Next Lite will ship with Windows 11, but that upsets many users

After initial reports that Ayaneo Next Lite will feature the HoloISO system (community version of SteamOS), the developers recently confirmed that the console will instead ship with Windows 11 preinstalled. Though the price remains unaffected at $299.

In a post on X (formerly Twitter), the official Ayaneo handle confirmed the development on January 25, 2024. The reason, they state, is that users weren’t too pleased with their choice of OS and would prefer Windows over HoloISO. But this has certainly upset others!

We agree, HoloISO wasn’t a reliable option, but is Windows the answer? This is a question many of us are grappling with.

The good news is that Ayaneo Next Lite hasn’t ditched HoloISO altogether. While the console comes with Windows 11 64-bit Home edition pre-installed, you can still install HololSO from the official website. The system images and all other relevant files will be available for download.

What can we expect from the new Ayaneo Next Lite?

Ayaneo, founded in 2020, has risen up the ranks pretty quickly, primarily owing to its user-oriented handheld gaming consoles. Ayaneo Next Lite is being marketed as a value-for-money product, and we certainly can’t deny that. Let’s take a quick look at the specifications:

Screen7″ 8000P True color screen
ProcessorAMD Ryzen 5 4500U and AMD Ryzen 7 4800U processors
Battery47Wh battery
ControlsHall sensing big joysticks, hall triggers, and an ergonomic grip
CoolingDual copper-pipe cooling system
Ayaneo Next Lite’ specifications

Ayaneo Next Lite is surely a pocket-friendly option and will attract many first-time handheld console users, given the competitive pricing.

Source: Ayaneo

Is Windows the right platform for handheld gaming devices?

Windows doesn’t work best on handheld consoles. But that could also be blamed on companies not tailoring the OS for the system, which significantly affects the performance and user experience since Windows 11 has emerged as the best version for gaming on PC.

Until we get our hands on Ayaneo Next Lite, commenting on the performance and stability won’t be possible. But, if the developers get it right, Ayaneo Next Lite might be the game changer!

If history tells us anything, Ayaneo is known to experiment. Ditching HoloISO could be seen as an attempt to entice a much larger user base. Subscriptions have been open since January 11, 2024. And if you want to find out more about Ayaneo Next Lite, visit the official website.

Microsoft AI Tour: This is how Microsoft is getting the world ready for its upcoming AI-based Windows

Microsoft has been at the forefront of AI ever since the concept started to gain popularity. The Redmond-based tech giant is investing a lot of resources into AI research, and just in 2023, AI projects such as Llama 2, Orca 13B, Project Rumi, and many others were released.

The company also released Copilot for Windows 11, Windows 10, and Microsoft 365 (virtually all apps within the suite) all in 2023, while 2024 marks the year of the Copilot key, a brand new addition to the upcoming Windows devices and keyboards, as a glimpse of the future Windows, which is also (yes, obviously) AI-based.

The new Windows is set to be released sometime this year, according to various reports, and Microsoft is testing the AI waters around the world with a series of conferences and meetings focused on AI: the Microsoft AI Tour.

Chart the course of the next technological era at one of our exclusive, one-day events. Fully harness the potential of AI by connecting with thought leaders, attending expert-led technical sessions, and more. Redefine what innovation means for you by unlocking the power of AI.

Microsoft

Microsoft AI Tour: Everything you need to know

The series of conferences is meant for AI enthusiasts, tech entrepreneurs, developers, and decision-makers, while Microsoft promises AI will create new opportunities for people everywhere.

There were a couple of conferences within this tour that were held in 2023, but the rest of them will be held in 2024, from January to April. April is also the month Microsoft is reportedly unveiling the upcoming AI-powered Windows, so it will be just in time.Microsoft AI Tour

Here’s the list of all the places Microsoft AI Tour holds conferences:

  • New York, USA: January 25, 2024, and you can register here.
  • Mumbay, India: January 31, 2024, and you can register here.
  • Sydney, Australia: February 7, 2024, registration here.
  • Bengaluru, India: February 8, 2024, registration here.
  • Tokyo, Japan: February 20, 2024, registration here.
  • Paris, France: March 12, 2024, registration here.
  • Paris, France: March 13, 2024, registration here.
  • Berlin, Germany: March 19, 2024, registration here.
  • Sao Paolo, Brazil: March 21, 2024, registration here.
  • Seoul, South Korea: April 30, 2024, registrations coming soon.

Each conference will have a list of keynote speakers and access to premium AI technology, but the Microsoft AI Tour is also a place to get connected with others from the tech industry, and forge partnerships.

While the conferences might not offer a glimpse at the upcoming Windows, its AI-centered topics will definitely create excitement for the AI technology that’s ahead of us all.

Third-party contractor leaks Anthropic account info just one day after the FTC investigation

Recently, all Anthropic clients received a letter warning them about an impending data breach, so if you’ve got the letter, be careful what you click on next.

Apparently, one of their contractors misdirected some account information from Anthropic to a third party, and one can only asume that the so-called third-party was or still using the information for gain.

Is the Anthropic breach linked to the FTC investigation?

Yesterday, the Federal Trade Commission announced that it requested five companies, including Anthropic PBC, to provide information about their investments and partnerships around generative AI companies and major cloud service providers.

The order was also issued to Alphabet, Amazon, Microsoft, and OpenAI, but we also know that Google and Amazon invested in Anthropic so they have pretty strong business connections in the AI landscape.

We don’t have any reasons to believe that the Anthropic data breach is connected to this investigation but when tension arises, mistakes appear.

According to the letter sent by Anthropic, it states that the leak involves information included in the account name and accounts receivable information as of December 31, 2023.

The data leaked basically said that you were a customer with open credit balances at the end of the year.

This information did not include sensitive personal data, including banking or payment information, or prompts/outputs. Based on our investigation to date, the contractor’s actions were an isolated error that didn’t arise from or result in any of our systems being breached. We also aren’t aware of any malicious behavior arising out of this disclosure.

How to avoid any issues?

Although, according to Anthropic, the leak didn’t involve any sensitive data, they advise all their customers to be on alert for any suspicious communication comming from them.

In other words, don’t click on any suspicious links in your email, don’t respond to any credentials or password requests, and verify any contacts that may appear linked to Anthropic.

Of course, don’t send any bank account or credit card information because Anthropic wouldn’t ask for any such details.

This might be just a drop in the ocean or become a very big data loss concern so, if you’re an Anthopic client, we also advise you to be on high alert.

The Sysprep Error invalidates recent updates on Windows 10 22H2, but Microsoft released a temporary fix for it

After a non-security update released on November 30, 2023, many users reported difficulties using the Sysprep.exe tool.

This error message reading Sysprep was not able to validate Windows installations appears with an error code 0x80073cf2 when using System Preparation Tool (Sysprep.exe) in Audit mode to validate Windows installation for deployment, particularly after the installation of KB5032278 or later on Windows 10.

To confirm whether the error impacts you, open the setupact.log file listed in the error message and search for the following entry with 0x80073cf2 error code:

SYSPRP Package Microsoft.MicrosoftEdge_44.19041.3636.0_neutral___8wekyb3d8bbwe was installed for a user, but not provisioned for all users. This package will not function properly in the sysprep SYSPRP Failed to remove apps for the current user: 0x80073cf2

System administrators and IT professionals commonly use the Sysprep tool to create a generic Windows image that can be replicated and deployed across multiple machines on a network.

Microsoft has acknowledged this ongoing issue and confirmed that it specifically affects Windows 10 22H2 when Sysprep is used in Audit mode, attributing it to problems with the status of the Microsoft Edge package.

The Redmond tech giant is actively working to address this issue and will release the fixes with the new update. It has also proposed a workaround in the meantime.

The Sysprep Error on Windows 10 22H2 Workaround

  1. Open PowerShell with admin rights, then type the following command after replacing <PackageFullName> with the name mentioned in the log file and press Enter: Get-AppxPackage -AllUsers | Where-Object { $_.PackageFullName -like '' } | Format-List -Property Name, PackageFullName, PackageUserInformation, InstallLocation, SignatureKind
  2. If your machine is affected, check the PackageUserInformation from the output, and check if you see Installed(pending removal).
  3. If yes, then the Windows image is affected, copy & paste the following command after replacing <PackageFullName> with the name from the log file and hit Enter: Get-Appxpackage -AllUsers | Remove-Appxpackage -AllUsers
  4. Press Windows + E, and navigate to this path: C:\WINDOWS\System32\Sysprep
  5. Double-click Sysprep.exe, locate System Cleanup Action>choose Enter Out-of-Box Experience (OOBE), and select Generalize.
  6. Under Shutdown Options, select Reboot, and click OK.Sysprep Error on Windows 10 22H2

You can use this workaround to fix the issue until Microsoft releases a permanent solution in a future release.

Will Microsoft ruin the already perfect Sticky Notes with the major updates planned for it?

For many of us, Sticky Notes has been the go-to note-taking app on Windows. The post-it note style design makes it easy to use. And finally, Sticky Notes has confirmed that a newer version is on the way!

In a post on X (formerly Twitter), Sticky Notes announced that a new version will be released, though, so far, there has been no official confirmation on the release date. The tweet also states that this will be one of the biggest announcements yet, hinting at significant changes to the app’s interface.

Also, to put an end to all speculations, Sticky Notes has confirmed that they are not releasing a web app, at least for now. The changes will be limited to the existing app that comes pre-installed on Windows PCs.

Frankly, this was long overdue, considering that Microsoft almost revamped most of the built-in apps after the release of the latest iteration, Windows 11. This includes the Notepad, Paint, and Task Manager, amongst others.

What is Microsoft planning to do with Sticky Notes?

As we mentioned earlier, users should be relieved, as Microsoft won’t turn one of its most popular apps into a web app. So what is Microsoft planning to do with Sticky Notes?

Our best guesses are the following: Sticky Notes might get a revamp and will also be enhanced with AI capabilities.

Some of the native Microsoft apps have been enhanced with AI capabilities, such as Microsoft Paint, and Notepad, which leads us to think Sticky Notes would get some of the same features, one way or the other.

For now, Sticky Notes is popular due to its simplicity, and many users would love for it to stay that way. The AI additions could be integrated without having to disrupt the UI experience, and the revamp, while unnecessary, should follow the same patterns with a focus on being very easy to use.

At the same time, some users don’t seem too pleased. A few feel that Sticky Notes was one of the last untouched and it would have been better kept that way. Old habits die hard, you know!

It would certainly be better if the update is optional, though history tells us otherwise.

No matter the case, you will soon be able to use an upgraded version of Sticky Notes. For now, it’s a wait-and-watch situation!

Solved: Error 30005 CreateFile Failed With 32

The error code 30005 CreateFile failed with 32 usually appears when you start a game. It is triggered mainly by EasyAntiCheat. This error can also be caused by corrupted game files or third-party software interfering with EasyAntiCheat.

How can I fix the CreateFile failed with 32?

Note icon NOTE
If you have installed or set any program to run along with the game, then disable/remove it before launching the game.

1. Delete the EasyAntiCheat.sys file

  1. Press Windows + E and head to C:\Program Files (x86)\EasyAntiCheat from the address bar.
  2. Delete the EasyAntiCheat.sys file using the keyboard button or through the right-click menu.

  3. After that, relaunch the game, and the error should be solved now.
Note icon NOTE
Some of the users will have EasyAntiCheat_EOS.sys instead of EasyAntiCheat.sys. Delete that file ending with EOS.sys.

Not able to delete EasyAntiCheat.sys?

You might be getting The action cannot be completed because the file is open in another program error while trying to delete EasyAntiCheat.sys.

This happens when EasyAntiCheat runs in the background, even when the game is closed. You can stop by closing the process from the Task Manager by pressing Ctrl + Shift + Delete.

Then, right-click on the EasyAntiCheat service process and click End Task.

End Createfile process

2. Disable Windows Defender/Antivirus

If you have Windows Defender turned on, turn it off before launching the game. Use our guide to temporarily disable Windows Defender to check if it is behind the problem.

And if you have a third-party antivirus installed, consider deactivating it for an hour through its menu.

3. Repair the EasyAntiCheat service

If the EasyAntiCheat_Setup is not launching on clicking, it is not installed for your game, so here’s what to do:

  1. Open your game launcher’s library and go to Properties.
    Opening Game properties
  2. Then, head to the game’s installation folder.
    browsing game's local files
  3. Then, launch EasyAntiCheat_Setup.exe. Your screen may go blank for a second.
    Launching EasyAntiCheat
  4. Make sure your game is selected, and then click on repair service.
    Fix create file failed with 32 error
  5. After that, you will get an Installation complete message, meaning it has been repaired successfully. You can now close the window and restart your computer to save the changes.
    Repairing EasyAntiCheat

4. Enable the EasyAntiCheat service

  1. Search for services in the Start Menu search and run it as an administrator.
    Opening services wizard
  2. Double-click on the EasyAntiCheat service from the list.
    Open properties of EasyAntiCheat
  3. Then, select Automatic in the Startup type.
    Starting EasyAntiCheat service
  4. After that, click OK and then restart your computer to make the final changes.

5. Verify the game files

For Steam games

  1. Launch Steam as an administrator from the Start Menu.
    Launching Steam as an administrator
  2. Head to Steam Library and select the properties of the games.
    Steam game properties
  3. Then click verify integrity of the game files from the installed files section.
    Verifying game files through Steam
  4. All the game’s files will be verified for corruption or mismatch. It will automatically download the needed files before you can launch the game.

For Epic Games launcher

  1. Launch the Epic Games Launcher and head to the library.
  2. Click on the three dots next to the game and click on the manage option.
    Epic games launcher
  3. Then, click verify to start verifying the game’s files. The process will be completed in a few minutes, and the missing/corrupted files will be downloaded again.
    verifying game files from the launcher

6. Disable the Kernel-Mode Hardware-Enforced stack protection

  1. Head to Core Isolation from the Start menu search.
    Open Core Isolation menu
  2. Scroll down to Kernel-Mode Hardware-Enforced Stack Protection and turn it off.

    Your screen will go blank for a second.
    disable core protection
  3. Restart your computer to finalize the changes.

7. Reinstall the game

The game-specific error 30005 can pop up at any given time. Consider uninstalling the game from the launcher when none of the earlier solutions work.

Then, install it again via the cloud download for a fresh start. It can iron out minor glitches and help you launch the game without error.

So, this is how you can fix Createfile failed with 32 error appearing on your games. It also appears on newer games, so we will update you with more solutions as they become available.

Some users also experience BSOD because of EasyAntiCheat or problems with EA’s anti-cheat, which could be solved by following the steps. 

If you know of any newer solution to this error, then feel free to let us know via the comment section.

How to Fix Windows Maps Shows Wrong Location on Windows 11

If your Windows Maps is showing you the wrong location on your Windows 11 computer, it could be due to corrupted system files, weak internet connection, or incorrect location settings.

To begin with, first, update your device drivers and Windows OS, then restart your computer. Next, check if you have a stable internet connection and make sure the Location services are enabled.

What can I do if Windows Maps shows the wrong location?

1. Run the Windows Store Apps troubleshooter

  1. Press Windows + I to open the Settings app.
  2. Go to System, then click Troubleshoot.troubleshoot -windows maps shows wrong location
  3. Click Other troubleshooters.Other troubleshooters
  4. Locate Windows Store Apps and click Run, then follow the on-screen instructions to complete the process.Windows store app

2. Delete the location history

  1. Press Windows + I to open the Settings app.
  2. Go to Privacy & security and under App permissions, then select Location.Location services - windows maps shows wrong location
  3. Locate the Location history and click the Clear button.Location - clear data

3. Delete the Maps files

  1. Press Windows + E to open File Explorer.
  2. Go to View, then Show and select Hidden items.Hidden items - windows maps shows wrong location
  3. Navigate to this path: C:\Program Files\WindowsApps
  4. Locate the folder Microsoft.WindowsMaps_11.2311.1.0_neutral_split.scale-100_8wekyb3d8bbwe and click the Delete icon. You might see two versions of files; delete the one with an earlier date.Wincows Maps delete
  5. Reboot your computer.

4. Set Location Services to Automatic

  1. Press Windows + R to open the Run dialog box.Services RUn command -windows maps shows wrong location
  2. Type services.msc and click OK to open the Services app.
  3. Locate the Geolocation Service and double-click it to open the properties.Geolocation services
  4. Now choose Automatic for Start type from the drop-down menu, click Apply then OK.Automatic - Geolocation

5. Modify the location settings

  1. Press Windows + I to open the Settings app.
  2. Go to Privacy & security and under App permissions, then select Location.Location services - windows maps shows wrong location
  3. Locate Location services and ensure it is turned on.Location services
  4. Toggle on the switch for Let apps access your location.
  5. Now, go through the list of apps and ensure the toggle button is turned on for Maps.
  6. Locate the Default location option and click the Set default button.set default - windows maps shows wrong location
  7. The Maps app will open and locate the correct location.

6. Remove the MAC addresses for any nearby APs

  1. Press the Windows key, type cmd, and click Run as administrator.CMD elevated - windows maps shows wrong location
  2. Type the following command and hit Enter: netsh wlan show networks bssidnetwork - windows maps shows wrong location
  3. Note down the BSSID addresses of the wifi network you want to remove from the Maps.
  4. Go to the Microsoft website and enter the MAC address you want to delete. You might have to wait for a few days to let the changes take effect.
  5. Now turn off your Wi-Fi adapter and open Microsoft Maps.
  6. Click the Show my location.
  7. Turn on your Wi-Fi adapter, open Microsoft Maps, and click Show my location.

7. Flush DNS

  1. Press the Windows key, type cmd, and click Run as administrator.CMD elevated - windows maps shows wrong location
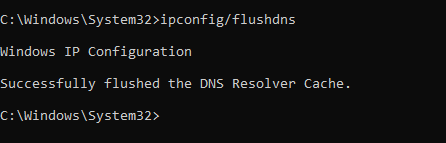
  2. Copy & paste the following command to flush DNS and hit Enter: ipconfig /flushdnsFlush DNS - windows maps shows wrong location
  3. Type the following command to register DNS and press Enter: ipconfig /registerdns
  4. Copy & paste the following commands one by one and hit Enter after every command:
    • ipconfig /release
      ipconfig /renew
      netsh winsock reset
  5. Restart your computer to let the changes take effect.

8. Reinstall the Windows Maps app

  1. Press the Windows key, type powershell and click Run as administrator.Powershell 2 windows maps shows wrong location
  2. Type the following command to uninstall the maps app and hit Enter: Get-AppxPackage *windowsmaps* | Remove-AppxPackage
  3. Press the Windows key, type ms store and click Open.Microsoft Store -
  4. Type maps in the search bar and press Enter.
  5. Select Windows Maps and click Get to initiate the installation of the app.

If you think the issue might be due to corrupted system files or specific to a user profile, so run an SFC scan to repair them or create another user account to overcome the issue.

If nothing works for you, you need to reinstall your computer to fix all the issues on your computer; read this guide for detailed steps.

In case you are still not able to get the current location on Windows Maps, try using Google Maps; here is how to download it on your Windows computer.

In conclusion, if your Windows Maps shows you the wrong location, run the Windows Store apps troubleshooter, flush DNS, modify location settings, or clear location history,

WR experts suggest setting Location services to Automatic, modifying the location setting, or reinstalling the Maps app to fix the issue once and for all.

If the Windows Maps is not working on your PC, we have tackled this issue in a different guide.

In case you are facing similar issues with Google Maps, it could be due to conflicting extensions; read this guide to learn more.

If you have any questions or suggestions about the subject, feel free to mention them in the comments section below.
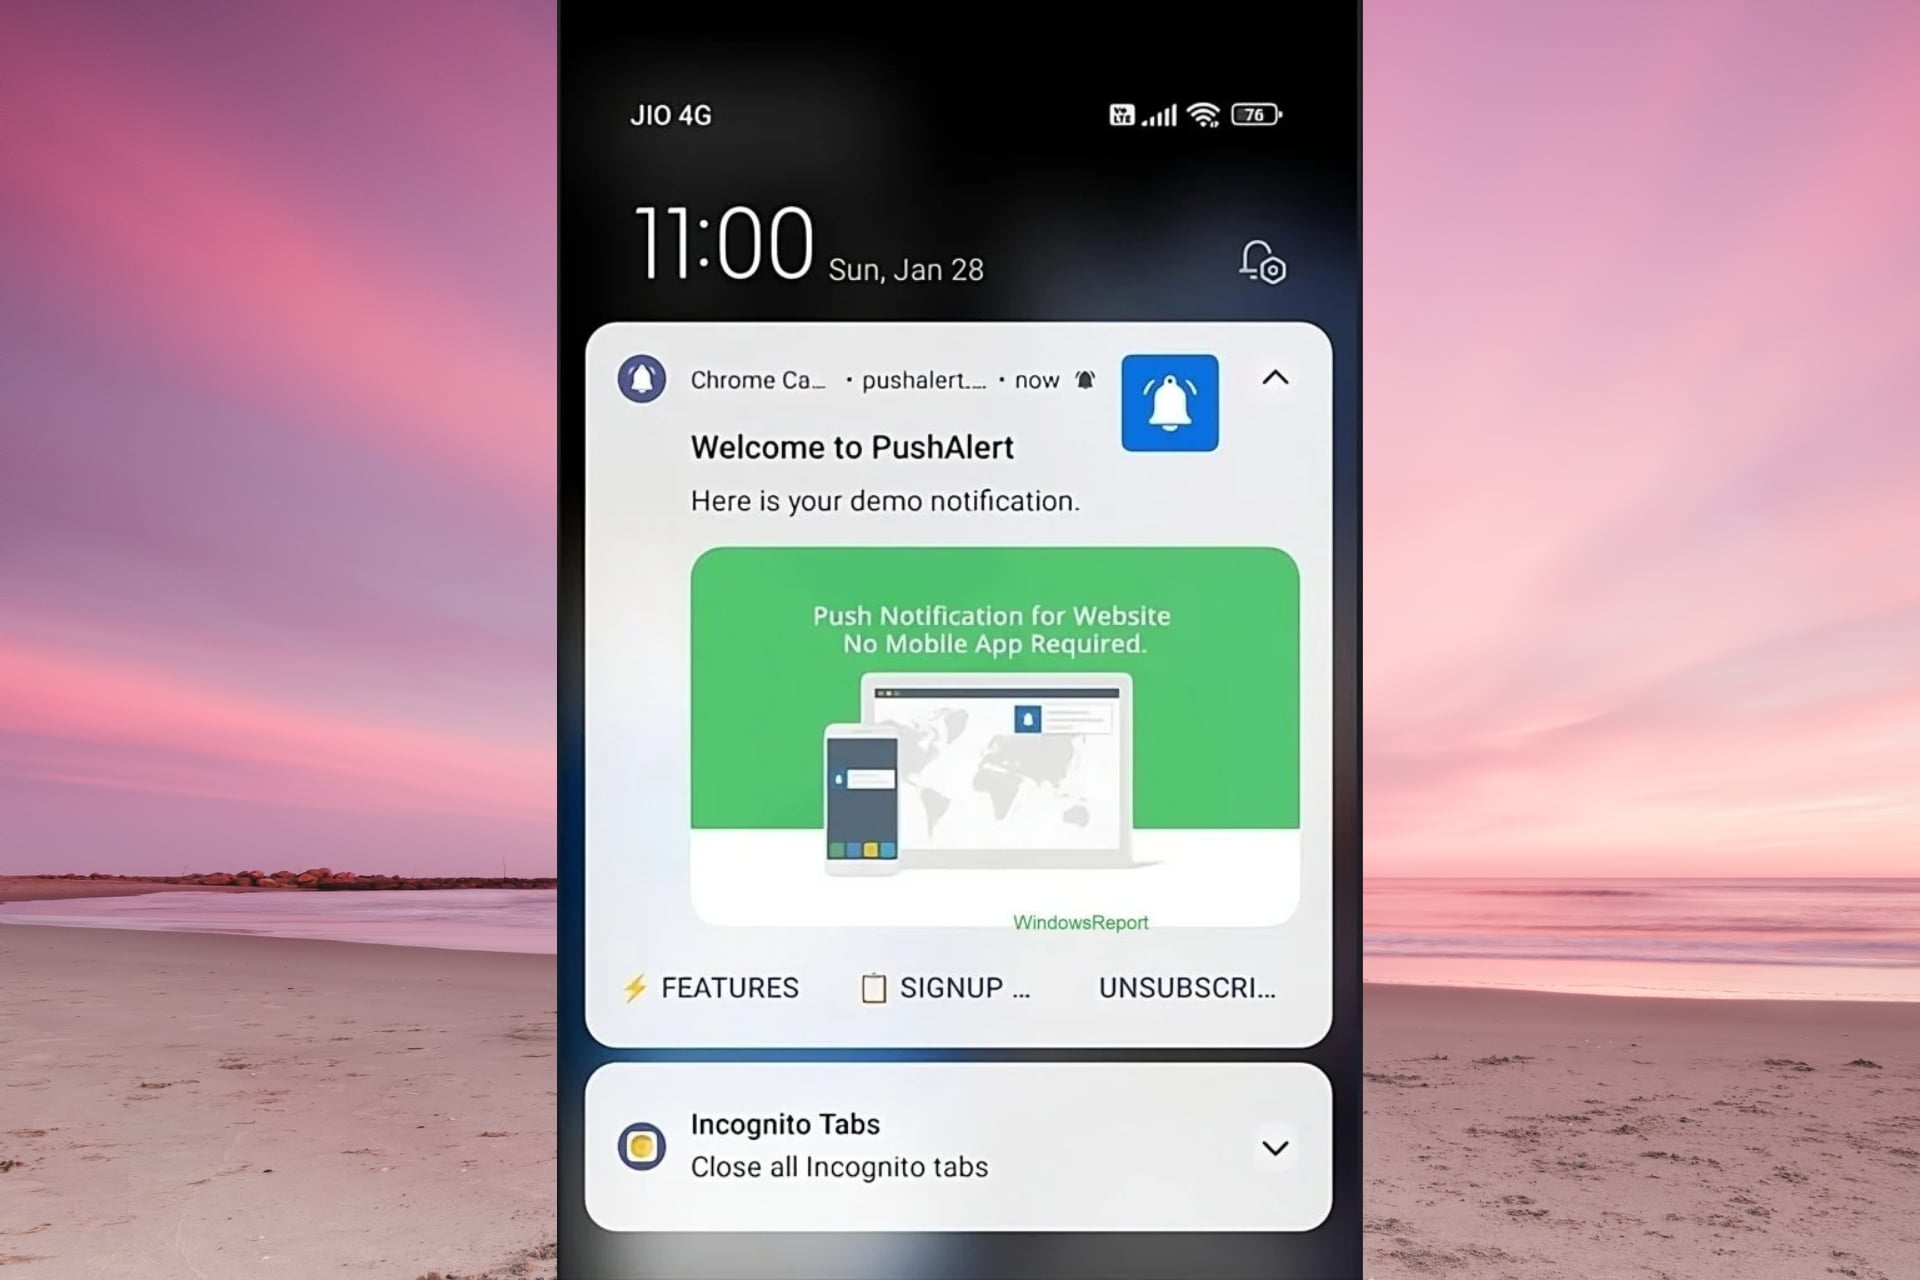
Error Code 80180006: Fix it With These 5 Methods

Many users reported error code 80180006 on their PCs while trying to set up their user accounts using Intune.

This can be a problem, but there are a couple of solutions that can help you fix this problem.

How can I fix the error code 80180006?

Before we start, make sure the date and time are correct on your PC and properly synced.

1. Delete the app cache

  1. Press Windows + I to open the Settings app.
  2. Go to Apps, then select Installed apps.Apps - Installed apps - error code 80180006
  3. Locate Company Portal, click three dots icon and select Advanced options.Advanced options - error code 80180006
  4. Under Reset, click the Repair button.Repair
  5. If that doesn’t work, follow steps 1-4 and click the Reset button.Reset

Once the app is reset, your app data will be deleted from the computer, which means you need to sign in to the app again, so keep your credentials handy.

2. Set the MDM function to All

  1. Go to Microsoft Entra admin center.
  2. From the left pane, select Mobility.
  3. Click Microsoft Intune.Microsoft Intune - error code 80180006
  4. Set the MDM user scope to All or All users and for Windows Information Protection (WIP) user scope to None.MDM user account
  5. Click the Save button.

However, sometimes choosing Some for both the MDM user scope and Windows Information Protection (WIP) user scope works.

3. Add your account under Enroll only in device management

  1. Press Windows + I to open Settings.
  2. Go to Accounts, then select Access work or school.access work or school accounts - error code 80180006
  3. Click the Enroll only in device management option.Enroll
  4. Enter the email address that you want to use and follow the on-screen instructions to complete the process.Enter the email address and click NExt
  5. Reboot your computer.
  6. Once the system restarts, press the Windows key, type company portal and click Open.
  7. Sign in with your Microsoft account and remove the checkmark next to Allow company to manage your device.
  8. Now, try to log in and check if the issue persists.

You can also sync enrolled mobile devices with Intune so that they get pending actions and the latest updates instantly.

4. Disable the Windows firewall temporarily

  1. Press the Windows key, type control panel and click Open.Control Panel start menu - error code 80180006 -
  2. Select Category for View by and click System and Security.System and security
  3. Click Windows Defender Firewall.Windows Defender Firewall
  4. Select the Turn Windows Defender Firewall on or off link.Turn on or off defender
  5. Now choose Turn off Windows Defender Firewall(not recommended) for both Private and Public network settings.Turn on or off, click OK
  6. Click OK to save the changes.

Speaking of Firewall interference, it could also cause issues like Intune sync error 0x80072f99; read this guide to learn the solutions.

5. Update/reinstall the Company Portal app

  1. Press the Windows key, type store and click Open.Microsoft Store - error code 80180006
  2. Go to Library, locate the app and click Update.Update the app

In case updating the app doesn’t work, try reinstalling it using these steps:

  1. Press Windows + I to open the Settings app.
  2. Go to Apps, then select Installed apps.Apps - Installed apps - error code 80180006
  3. Locate the Company Portal app, click the three dots icon and select Uninstall.Uninstall the app -
  4. Click Uninstall to confirm the action.
  5. Open Microsoft Store again, type company portal and click Install.Install - error code 80180006
  6. Wait for some time, and the app will be reinstalled.

If an Intune app fails to install on your device, then it could be because you are not using the Work account; read this guide to learn more.

While you’re still here, check out our list of network management software, especially if you’re interested in automatic policy updates.

This isn’t the only Intune error, and many encountered 0x80180018 error, but we covered that one in a separate guide.

In case you have questions or suggestions about the subject; feel free to mention them in the comments section below.

How to Get Out Of Preparing BitLocker Recovery Screen

Many users complained about getting stuck with the black screen saying Preparing BitLocker recovery on their computer. It usually happens if you have replaced hardware, made changes to BIOS settings, or entered the wrong password too many times.

To fix it, you can wait until you see the screen asking for the BitLocker recovery key, then enter it, restart your PC & perform Startup Repair or reinstall the Windows operating system.

How can I get rid of Preparing BitLocker recovery screen?

1. Enter the recovery key

  1. Reboot you’d computer and you will be taken to a screen where you will be asked to enter a BitLocker recovery key.BitLocker Recovery key - Preparing bitlocker key
  2. If you have the recovery key, enter it and click Continue. If not, you need to access the BitLocker recovery key on another computer.

2. Perform Startup Repair

  1. When you are on the BitLocker recovery blue screen, press the Esc button to access Recovery options.Esc recovery options - preparing bitlocker recovery
  2. Now click Skip this drive.skip-this-drive
  3. On the Choose an option screen, click Troubleshoot.Choose an option - Troubleshoot - preparing bitlocker recovery
  4. Select Advanced options.Advanced options
  5. Now click Startup Repair.Startup Repair
  6. Next, click Restart.

Wait for the repair to complete, boot your computer on Windows, and you will be able to get to the BitLocker recovery screen, wherein you can enter the key and log in to your computer as usual.

In case you can’t get to the Recovery options or BitLocker recovery blue screen, you need to create a bootable USB installation media to boot into the computer, then click Repair your computer to access it.

3. Ensure Secure boot & PTT is enabled

  1. When you are on the BitLocker recovery blue screen, press the Esc button to access Recovery options.
  2. Now click Skip this drive.
  3. On the Choose an option screen, click Troubleshoot.
  4. Select Advanced options.
  5. Choose UEFI firmware settings.UEFI 2
  6. On the next page, click Restart.UEFI Restart - preparing bitlocker recovery
  7. Your computer will restart in BIOS mode; go to the Security tab or a similar option.
  8. Locate Secure boot and ensure it is enabled.Secure boot
  9. Go to Security, locate PTT and enable it.
  10. Press F10 to save and exit the BIOS settings.

In case you are not able to turn on Secure Boot, you need to reset your BIOS settings to default; check out this guide to learn how to do that.

4. Remove protectors from the boot drive

  1. When you are on the BitLocker recovery blue screen, press the Esc button to access Recovery options.
  2. Now click Skip this drive.
  3. On the Choose an option screen, click Troubleshoot.
  4. Select Advanced options.
  5. Choose Command Prompt.Command Prompt Advanced Options - preparing bitlocker recovery
  6. Copy & paste the following commands one by one, wherein C is the system drive or the drive assigned & replace <password> with the BitLocker recovery key and hit Enter:
    • manage-bde -unlock -recoverypassword <password>C:
      manage-bde -protectors -disable C:
  7. Reboot your computer; when prompted, enter your BitLocker recovery key.

In case you want to re-enable BitLocker on your computer, read this guide to learn the steps.

5. Repair the boot files

  1. When you are on the BitLocker recovery blue screen, press the Esc button to access Recovery options.
  2. Now click Skip this drive.
  3. Click Troubleshoot on the Choose an option screen, then select Advanced options.Advanced Options - preparing bitlocker recovery
  4. Select Command Prompt. On the cmd screen, type the following commands one by one and hit Enter after every command:
    • chkdsk c: /f /r
      bootrec /fixmbr
      bootrec /fixboot
      bootrec /scanos
      bootrec /rebuildbcd
      sfc /scannow
  5. Close the command prompt window and reboot your computer.

6. Perform a System Restore

  1. When you are on the BitLocker recovery blue screen, press the Esc button to access Recovery options.
  2. Now select Skip this drive.
  3. On the Choose an option screen, select Troubleshoot.
  4. Choose Advanced options.
  5. Click System Restore.System Restore AO - Advanced Options - preparing bitlocker recovery
  6. On the System Restore window, select Choose a different restore point and click Next.Next Choose a different restore point
  7. Select a restore point before the issue started and click Next.Choose a point - preparing bitlocker recovery
  8. Click Finish.Finish

Windows will restart and try to restore your system settings to the chosen time. If System Restore doesn’t complete successfully, you need to follow the steps mentioned in this guide.

7. Uninstall updates

  1. When you are on the BitLocker recovery blue screen, press the Esc button to access Recovery options.
  2. Now click Skip this drive.
  3. On the Choose an option screen, click Troubleshoot.
  4. Select Advanced options.
  5. Choose Uninstall Updates.uninstall updates -  preparing bitlocker recovery
  6. Follow the on-screen prompts to uninstall the previous Windows update.

8. Reinstall the operating system

Note icon NOTE
Before proceeding be aware that all the information on your computer will be removed. So, to safeguard it, remove the hard drive, connect it to another device and copy the data, then reconnect it to your PC and follow the steps below.
  1. Create a Windows 11 bootable USB drive on another machine and plug it into the affected device.
  2. When you are on the BitLocker recovery blue screen, press the Esc button to access Recovery options.
  3. Now click Skip this drive.
  4. On the Choose an option window, select Use a device.Use a device - preparing bitlocker recovery
  5. Select the USB HDD option; now your Windows will boot using the USB.
  6. Once you see the black screen, press Enter.
  7. Select the Language and Keyboard layout, then click Next.English US
  8. Now select Install now.Install now- preparing bitlocker recovery
  9. Follow the on-screen instructions to complete the process.
  10. Once Windows is installed, you will get the OOBE screen; choose the appropriate options to log in to your computer.

In conclusion, if you are stuck in a loop of Preparing BitLocker recovery screen, you can enter the BitLocker key, repair your computer using Startup Repair, enable Secure boot, or disable BitLocker recovery.

However, if nothing worked for you, you can uninstall Windows update, restore your computer to previous version, or reinstall the operating system to fix the issue once and for all.

You may also come across the BitLocker prompt screen error; we have tackled it in another article with detailed steps to fix this issue.

If you have any questions or suggestions on the BitLocker recovery loop issue? Feel free to mention them in the comments section below.

How to Search With Special Characters on Microsoft Outlook

If you are searching for an email with special characters on Outlook, you won’t find it using the Instant search feature. You need to use the Advanced Search feature on Microsoft Outlook and enter the criteria to locate it.

How do I search for special characters in Outlook?

  1. Press the Windows key, type Outlook and click Open.Outlook-Start-menu-open - outlook search special characters
  2. Go to the folder where you want to locate the email, then press Ctrl + Shift + F to open the Advanced search window. If you use multiple mailboxes, make sure you are in the right now before invoking the Advanced search.
  3. Next, switch to the Advanced tab; under Define more criteria, click Field drop-down, choose All Mail fields, then select Subject or any other suitable option.
  4. For Value, enter the special character, and click Find Now.OUTLOOK_Advanced search
  5. On the Do you want to add the criteria you entered below to your search window, click Yes if you want to save it for future search.
  6. Once the search is over, you will see the list of the emails with the character.
  7. Scroll down to find the email and double-click it to open it in another window.

If you are looking for tips to search for emails in Outlook via keywords, we suggest you read this guide.

In conclusion, you need to use Advanced search to find the emails with special characters but to narrow down the search, you need to define criteria properly; otherwise, you will get no results.

In case you are not able to find recent emails on Outlook using search, we have a detailed guide on the issue; read it to learn more.

Speaking of searching for emails, if Outlook can’t complete the search, check out this awesome guide to solve this problem in no time.

If you have any questions or suggestions about the subject, feel free to mention them in the comments section below.

Windows Copilot will soon become the hub for all Microsoft Copilots out there

For those AI enthusiasts worried that there are too many Microsoft Copilots to keep up with, we have (or rather, Microsoft) some good news for you: Windows Copilot will become the hub for all Microsoft Copilots out there, including Copilot for Microsoft 365.

Spotted by Tom Arbuthnot, the integration is set to be generally available on February 5th, 2024, allowing organizations to access the Copilot for Microsoft 356 capabilities directly from the Windows Copilot.

Copilot for Microsoft 365 capabilities are coming to Windows desktop. Organizations will be able to experience Copilot integrated in the Windows desktop – bringing Graph-grounded chat capabilities to Copilot in Windows for users with a Copilot for Microsoft 365 license.

Microsoft

Copilot in Microsoft 365 has been around for a while now, and paying for a subscription means you have access to Copilot within the Microsoft 365 apps, such as Word, Excel, PowerPoint, OneNote, and so on.

However, even then it seemed that there were too many Copilots to catch up with, and while they are integrated within the platform, meaning Excel Copilot will know what you did with Word Copilot, the simple fact that there were Copilots for each platform was confusing.

The confusion was even higher when Microsoft decided to rename Bing Chat to Copilot, and now Microsoft Edge no longer has Bing Chat, but Copilot, as the default AI tool.

However, the intention to have every Microsoft Copilot readily available within Windows Copilot is more than welcome. In many instances, it is necessary, as it will greatly streamline workflow, reduce time wasted opening up each Copilot, and so on.

Microsoft is releasing it to have a centralized Copilot experience within Windows devices, and assuming organizations work on Windows devices, the option to integrate Microsoft Copilot into Windows Copilot is not mandatory.

On the contrary, Microsoft is keeping it optional, and organizations that are not prepared to use Windows Copilot can turn the option down with the Turn off Windows Copilot policy.

On the other hand, those organizations that want to have a centralized Copilot experience will need to enable Windows Copilot on their Windows desktops.

ChatGPT users everywhere, be aware: Bing Search is indexing your public conversations in its search results

If you’re using ChatGPT for various tasks, Bing Search might be indexing your public conversations with the AI tool in its search results. Spotted by SEO enthusiast, Shameem Adhikarath, on X (formerly known as Twitter), Bing Search is showing several public ChatGPT conversations in results when searching for ChatGPT.

Apparently, Bing Search is able to index public ChatGPT conversations with the help of a special file called robots.txt. The file is then found in ChatGPT’s source code, as the spotter noticed that the AI app adds it to the <meta name=”robots” content=”index, follow command code, as you can see in the image below.Bing ChatGPT index

The tool has indexed dozens of public conversations, according to a video taken by the spotter on X, and many of them focus on various technology subjects.

Shameem Adhikarath also found out that Bing Search is indexing 1-1 ChatGPT conversations, as well, which should make all the ChatGPT users worried. Can your conversation with ChatGPT be indexed?

Can your ChatGPT conversation be indexed by Bing?

If your ChatGPT conversation is part of a shared link, OpenAI explicitly says that they’re not indexed by any search engine.

Should we expect shared links to show up in public search results on the Internet?

No, shared links are not designed to show up in public search results on the internet. They are intended for direct sharing between individuals and are not indexed by search engines. However, anyone with the link can view the shared content.

OpenAI

However, it seems that they indeed show up when searching for ChatGPT on Microsoft Bing. The spotter caught the attention of Mikhail Parakhin, leader of the Windows and Web Experiences Team, and he said that he was going to check the issue for more clarifications.Bing ChatGPT index

However, Bing Search could become a great security risk for those companies or individuals sharing sensitive data with ChatGPT.

While the partnership between the two companies is resulting in some impressive results: including the recent Copilot GPT Builder within Copilot Pro, which allows users to create their own Copilots, this situation could have legal consequences for OpenAI, and Microsoft.

Microsoft sheds 1,900 Activision jobs following acquisition

January 2024 has started with the tech sector undergoing ruthless job cuts across several high-profile companies that include Google, Discord, Twitch, eBay, and now Microsoft joins the group with 1,900 employees shed from its Activision Blizzard studios.

As The Verge is reporting, Microsoft is cutting eight percent of its 22,000 employee Microsoft Gaming workforce and that includes 1,900 positions from its recently acquired Activision Blizzard publishing arm as well as ZeniMax and its own Xbox teams.

Microsoft CEO Phil Spencer addressed the planned layoffs through a company memo issues internally.

It’s been a little over three months since the Activision, Blizzard, and King teams joined Microsoft. As we move forward in 2024, the leadership of Microsoft Gaming and Activision Blizzard is committed to aligning on a strategy and an execution plan with a sustainable cost structure that will support the whole of our growing business. Together, we’ve set priorities, identified areas of overlap, and ensured that we’re all aligned on the best opportunities for growth.

As part of this process, we have made the painful decision to reduce the size of our gaming workforce by approximately 1900 roles out of the 22,000 people on our team. The Gaming Leadership Team and I are committed to navigating this process as thoughtfully as possible. The people who are directly impacted by these reductions have all played an important part in the success of Activision Blizzard, ZeniMax and the Xbox teams, and they should be proud of everything they’ve accomplished here. We are grateful for all of the creativity, passion and dedication they have brought to our games, our players and our colleagues. We will provide our full support to those who are impacted during the transition, including severance benefits informed by local employment laws. Those whose roles will be impacted will be notified, and we ask that you please treat your departing colleagues with the respect and compassion that is consistent with our values.

Looking ahead, we’ll continue to invest in areas that will grow our business and support our strategy of bringing more games to more players around the world. Although this is a difficult moment for our team, I’m as confident as ever in your ability to create and nurture the games, stories and worlds that bring players together.

Phil

Microsoft

Microsoft’s Gaming business underwent an executive reorg following the official acquisition of Activision Blizzard that saw the publisher’s CEO Bobby Kotick being sent off with a comfortable pay day, Microsoft’s Matt Booty moving to president of game content and studios, CFO Chris Capossela departing, and Sara Bond sliding into the role of Xbox.

Microsoft is still settling into its ownership of Activision Blizzard and hopefully the company has measured this out to avoid supplemental firings throughout the year.

CcmSetup Failed With Error Code 0x80004005 [Solved]

The CcmSetup failed with error code 0x80004005 often arises when trying to push updates to the client PCs in a domain. It’s triggered by misconfigured settings, the absence of critical services, when the firewall is blocking the update, or if the MP (Management Point) or DP (Distribution Point) are not accessible.

In our case, it turned out to be the Background Intelligent Transfer Service to blame, but after examining other systems, we did find a few other fixes that will help get rid of the 0x80004005 SCCM error on Windows!

How do I fix error 0x80004005 in SCCM?

1. Run the Background Intelligent Transfer Service (BITS)

  1. Press Windows + R to open Run, type services.msc in the text field, and hit Enter.services
  2. Right-click on the Background Intelligent Transfer Service, and select Properties from the context menu.properties
  3. Choose Automatic under the Startup type dropdown menu, and click the Start button under Service status if it’s not running.automatic to fix CcmSetup failed with error code 0x80004005
  4. Finally, click on Apply and OK and then reboot the device.

SCCM employs the Background Intelligent Transfer Service to migrate data between the servers and the end (client) device, and when it’s not running, you are likely to get the CcmSetup failed with error code 0x80004005. This also helps fix update errors in Windows 11.

2. Reconfigure the Select First Certificate DWORD

  1. Press Windows + R to open Run, type regedit in the text field, and click OK.
  2. Click Yes in the UAC prompt.
  3. Navigate the following path or paste it in the address bar and hit Enter: HKEY_LOCAL_MACHINE\SOFTWARE\Microsoft\CCM\Securitypath
  4. Right-click on the Select First Certificate DWORD, and select Modify.
  5. Enter 1 under the Value data field, and click OK to save the changes.change to fix CcmSetup failed with error code 0x80004005

If you find the Client is on internet entry in the SCCM error logs, it can be fixed by simply enabling the Select First Certificate key. If this works, use GPO to make the same change on all client devices in one go!

3. Disable the firewall

  1. Press Windows + S to open Search, type Windows Defender Firewall in the text field, and click the relevant result.
  2. Click on Turn Windows Defender Firewall on or off from the left.windows defender firewall
  3. Select Turn off Windows Defender Firewall under both Private network settings and Public network settings, then click OK to save the changes.disable to fix CcmSetup failed with error code 0x80004005

We don’t recommend turning off Windows Defender Firewall for long, as it leaves your PC unprotected from threats. If disabling it works, verify whether the firewall is blocking a port, and open it. In our experience, you will need to open Port 80, but check the logs to verify the same!

Also, if you have another antivirus or firewall running, look for problems with it.

4. Reinstall MicrosoftPolicyPlatformSetup

While examining the CcmSetup failed with error code 0x80004005 error on different devices, we noticed issues with MicrosoftPolicyPlatformSetup.msi were also an underlying factor.

In this case, you should reinstall MicrosoftPolicyPlatformSetup.msi on the client’s PC. Make sure you completely remove it and all the related files before proceeding with a fresh installation. An effective software uninstaller tool might come in handy!

5. Reinstall SCCM

If the previous solutions didn’t work, the best option is to completely reinstall SCCM. This is essential in cases where the distribution point server was previously attached to another SCCM, and the uninstall didn’t completely go through.

As a result, the same problematic server was installed from the new SCCM, and you kept getting the CcmSetup failed with error code 0x80004005 error.

So, you can either use ccmsetup.exe /uninstall, or run the script to remove all the components before reinstalling SCCM. A reinstall also helps fix the 0x80041013 SCCM error.

You now understand all the ways to fix the CcmSetup error 0x80004005 on client devices. As you might have guessed, the error has more to do with the system settings and configuration than the SCCM installation.

Before you leave, discover how our readers fixed the 0x87d01107 SCCM error code, as some of the tips and tricks might work in this case!

For any queries or to share what worked for you, drop a comment below.