0x88ffc009 Microsoft Word Error: How to Fix It

Some of our Windows 10/11 readers have recently reported the Microsoft Word error 0x88ffc009 code they encounter when trying to save or access a file over the server.

This can be quite frustrating as it can hinder their productivity and create delays for users who work regularly with the app. If you’re experiencing similar issues, don’t worry. This article will provide you with simplified steps to fix the issue.

What causes the 0x88ffc009 error?

The Microsoft Word error 0x88ffc009 is a common error that can occur when using the software. Below are some possible reasons behind the error:

  • Network connectivity issues – The 0x88ffc009 error is mostly triggered when you try to access some Word document or perform some action on it that requires communication with a server or network and the network is unresponsive.
  • Corrupted user profile – Another possible reason for this error is due to a corrupt user profile. This can be a result of failed updates, a corrupt account directory, or a damaged hard drive. Create a new user profile and migrate your data to the new profile to fix the problem.
  • Damaged document – If you encounter error 0x88ffc009 when opening a specific document, it may be damaged. You can try to open the document using the best alternative Office software or restore the document from a previous version.
  • Failed Office installation – Failed or corrupted installation of the Office app can also cause error 0x88ffc009. The solution is to reinstall Microsoft Word.
  • Conflicting antivirus software – Antivirus software can sometimes interfere with the Office app. You can disable your antivirus software temporarily and see if the error goes away.

Now that you know some of the possible reasons behind the Office error 0x88ffc009 message, let’s proceed to how you can fix this problem.

How can I fix the 0x88ffc009 MS Word error?

Before engaging in any advanced troubleshooting or settings tweaks, you should consider performing the following preliminary checks:

  • Run the Windows app troubleshooter to know the root cause of the problem.
  • Make sure you are properly connected to the Internet.
  • Save all the documents and restart your PC.

Having confirmed the above checks and if you still require further assistance, you can explore the advanced solutions provided below.

1. Run the Windows app troubleshooter

  1. Press the Windows + S keys to open the Start menu. Type Troubleshoot in the Windows search bar and press Enter.
  2. Choose Other troubleshooters.
  3. Locate Windows Store Apps from the list and click on Run.
  4. Wait till the process is finished and apply the recommended fixes.

The Windows app troubleshooter will enable you to detect what the issue is. You should also run a Network troubleshooter to check your network connection.

2. Repair the Office app

  1. Press the Windows + S keys, type Control Panel in the Windows search bar and press Enter.
  2. Click on Programs and select Programs and Features.
  3. Select Microsoft Office from the list of installed apps and click on the Change.
  4. Select Quick Repair from the options, then click on OK.
  5. Click on Repair in the new prompt for confirmation.
  6. Follow the on-screen instructions to complete the process.

When you repair the Office app, it will scan the installation for errors or issues and attempt to fix them automatically.

3. Reinstall the Office app

  1. Repeat steps 1-3, and click on the three-dots menu at the front of Microsoft Office.
  2. Select Uninstall from the options.
  3. Follow the uninstaller wizard and click OK.
  4. Restart your computer and install the latest Microsoft Office version available for Windows.

If after attempting the methods above, nothing works, reinstalling Microsoft Office should fix the 0x88ffc009 error affecting the Word app.

You can also get further information on how to fix the issue by checking our detailed guide on how to fix Microsoft Office if it’s not opening.

And that’s it on how to fix the 0x88ffc009 error code. If you have any questions and suggestions, or possibly another solution for this error, do not hesitate to use the comments section below.
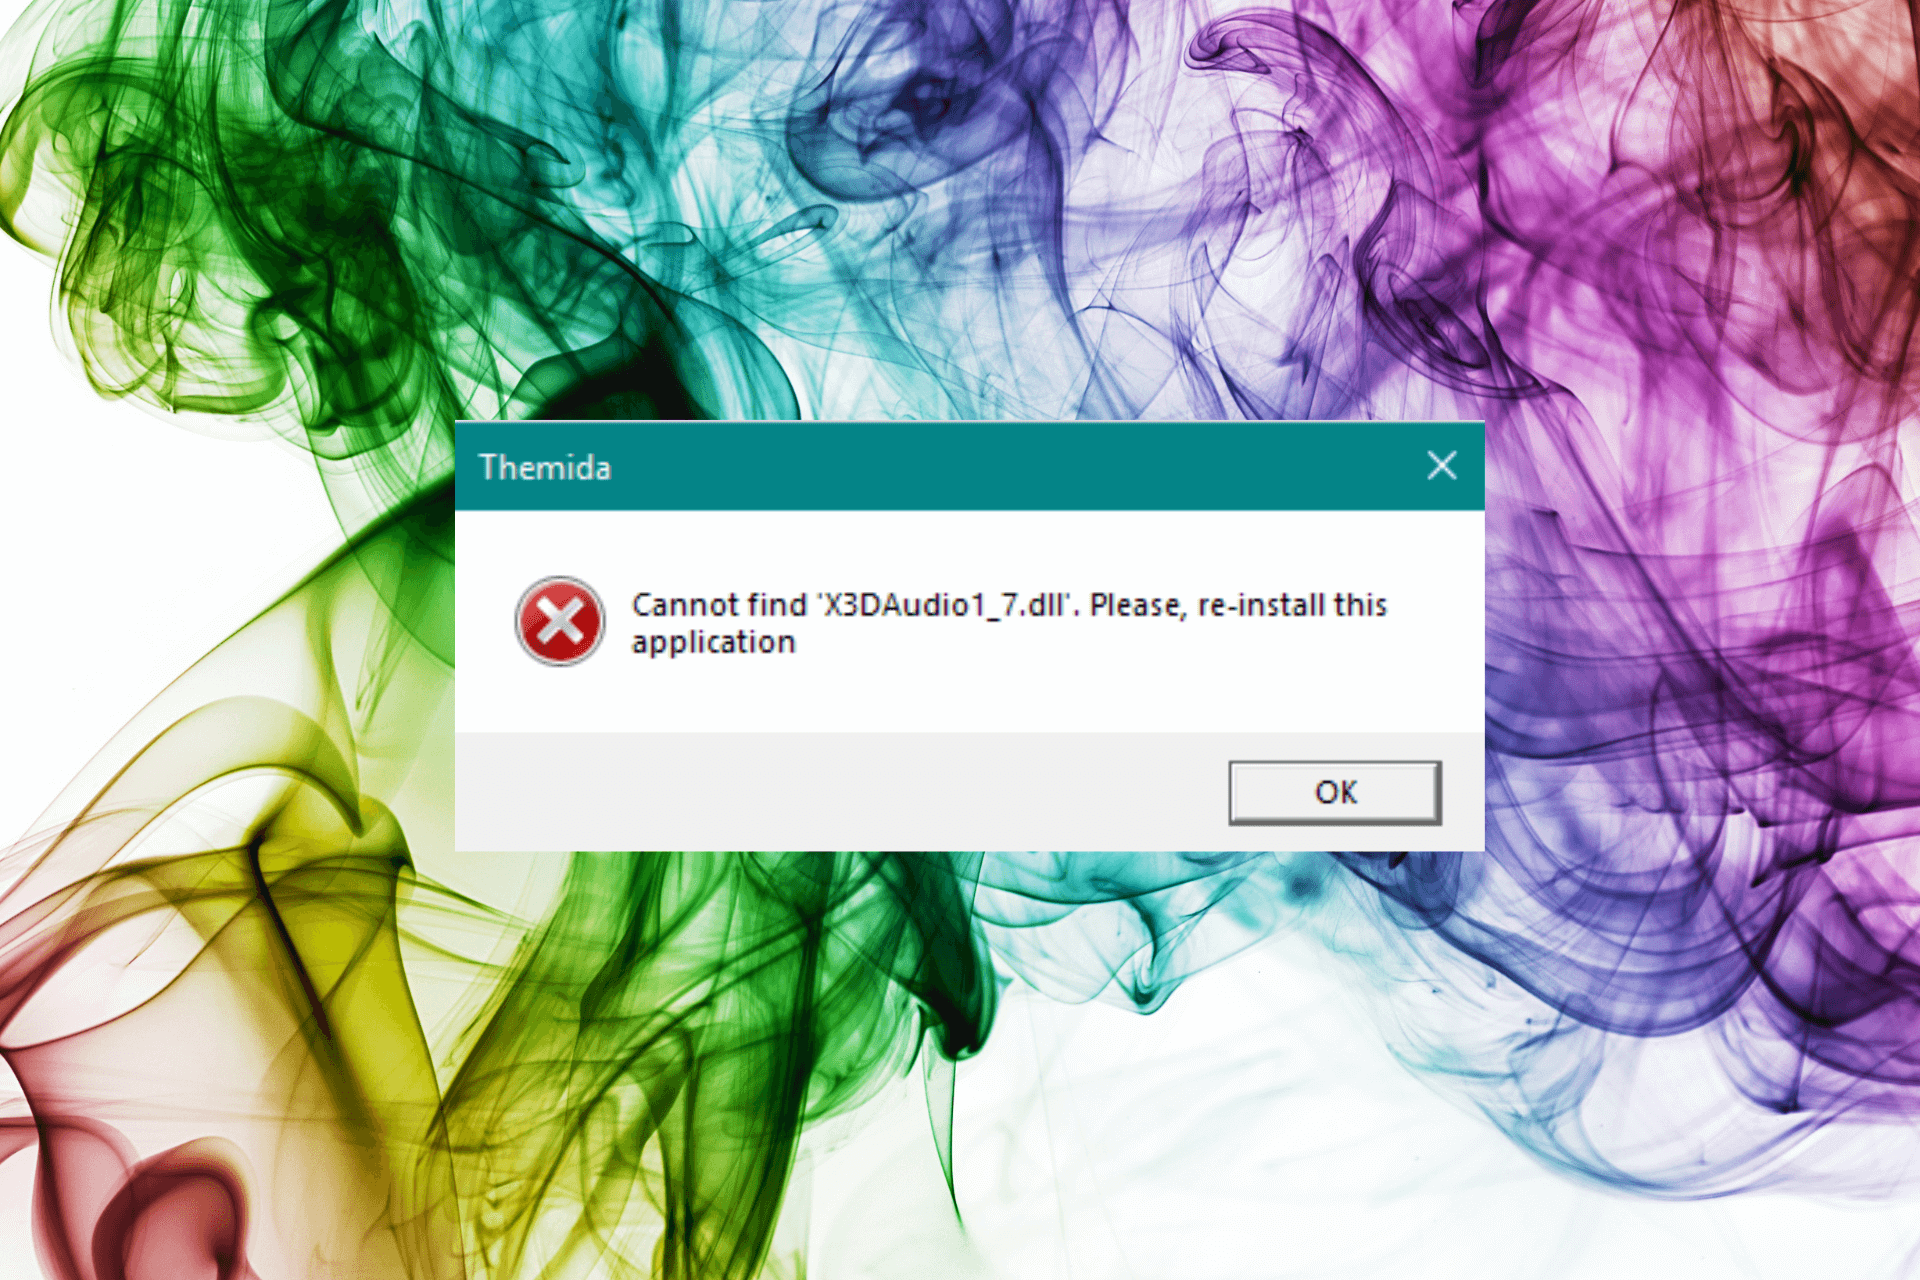
X3DAudio1_7.dll Was Not Found: How to Fix This Error

X3DAudio1_7.dll is one of the Dynamic link library files for the DirectX app. Windows-based games and advanced graphics software use it.

If this DLL file is missing, the apps using the file may throw the X3DAudio1_7.dll not found error. In this guide, we will discuss expert-recommended methods to fix the issue.

What causes the X3DAudio1_7.dll not found error?

There could be various reasons for this DLL missing error; some of the common ones are:

  • Faulty program or game – If the game or program throwing the error is outdated or corrupted, you might see this error. Try reinstalling the software.
  • Virus infection – Viruses on your computer may damage system files, including this DLL file, causing the issue. Run a scan using an antivirus tool to fix it.
  • Outdated version of DirectX – An outdated version of DirectX could cause many issues, including this one. Try to install the latest version of DirectX.
  • DLL file is deleted or misplaced – If the DLL file is deleted by accident or has been moved from the original location, then you might see this error. You need to restore the file to its location.
  • Damaged system files – If the system files are corrupted or damaged, it could cause the DLL missing error. Run SFC & DISM scans to restore the system files.

Now that you know these are the causes of the issue, let us move on to the fixes.

What can I do to fix the X3DAudio1_7.dll not found error?

Before engaging in advanced troubleshooting steps; you should consider performing the following checks:

  • Try restarting your computer.
  • Check if you have the latest DirectX version installed.
  • Reinstall the affected app.

If these tweaks didn’t help, move to the below-mentioned solutions.

1. Use a DLL fixer

Restoring a missing DLL file can be difficult, especially if you don’t know your way around a computer. Therefore, it is recommended to use DLL fixer tools.

These utility tools have huge databases and help you recover system DLL files like X3DAudio1_7.dll in a few clicks. With this, it also improves your PC performance, gets rid of system-related issues, and more.

2. Run SFC & DISM scans

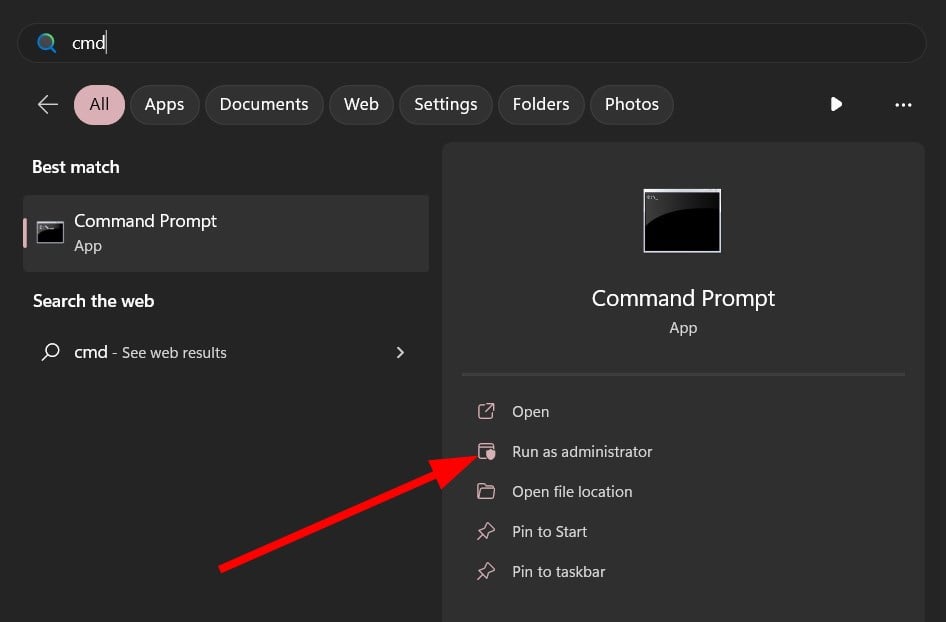
  1. Press the Windows key, type cmd, and click Run as administrator.CMD elevated X3DAudio1_7.dll
  2. Type the following command to repair system files and press Enter:sfc/scannowSFCSCANNOW CMD
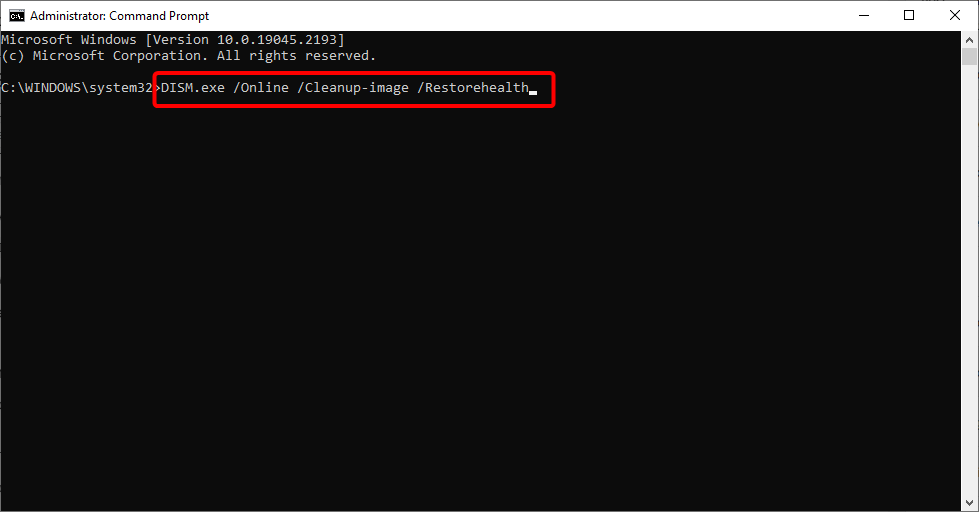
  3. Wait for the scan to complete, then copy & paste the following command to restore the Windows OS image and hit Enter:Dism /Online /Cleanup-Image /RestoreHealthRestore health X3DAudio1_7.dll
  4. Reboot your computer to confirm the changes.

3. Run a malware scan

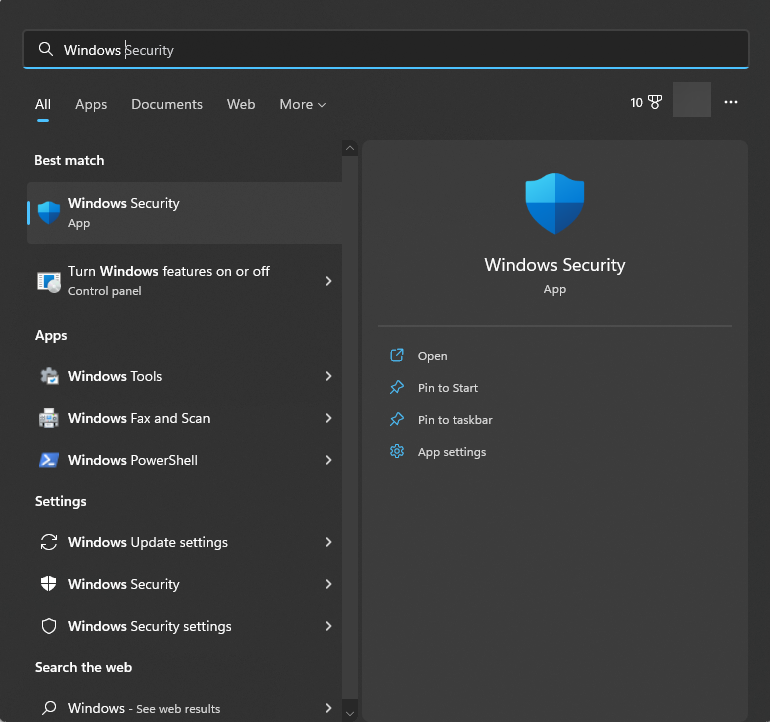
  1. Press the Windows key, type windows security, and click Open.Windows Security open Windows key Restore health X3DAudio1_7.dll
  2. Click Virus & threat protection, then Scan options.
  3. Select Full scan and click Scan now.Full scan - X3DAudio1_7.dll
  4. The tool will start scanning and will display infected files. Delete them when prompted.

4. Perform System Restore

  1. Press Windows + R to open the Run dialog box.rstrui command Restore point X3DAudio1_7.dll
  2. Type rstrui and click OK to open System Restore.
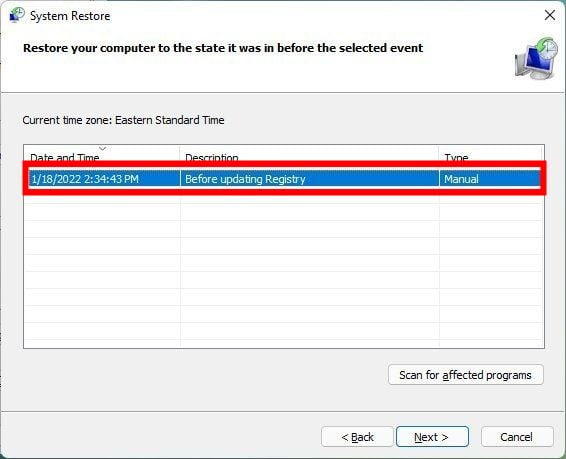
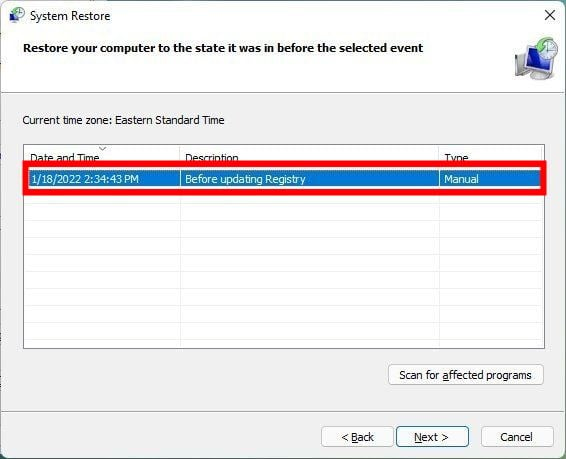
  3. On the System Restore window, select Choose a different restore point and click Next.Next Choose a different restore point X3DAudio1_7.dll
  4. Select a restore point and click Next.Choose a point
  5. Click Finish to initiate the restoration process.Finish X3DAudio1_7.dll

Windows will start and restore your computer to the selected version. If the System Restore option is not working for you, read this post to get help.

5. Download the DLL manually

Note icon NOTE
It is not recommended to install DLL files from third-party websites unless obtained from a reliable source like DLL-FILES that have been tested and verified.
  1. Go to the DLL-FILES website, search x3daudio1_7.dll, select the appropriate option, and click Download.X3DAudio1_7.dll Download
  2. Open the downloaded folder, and copy the .dll file from it.
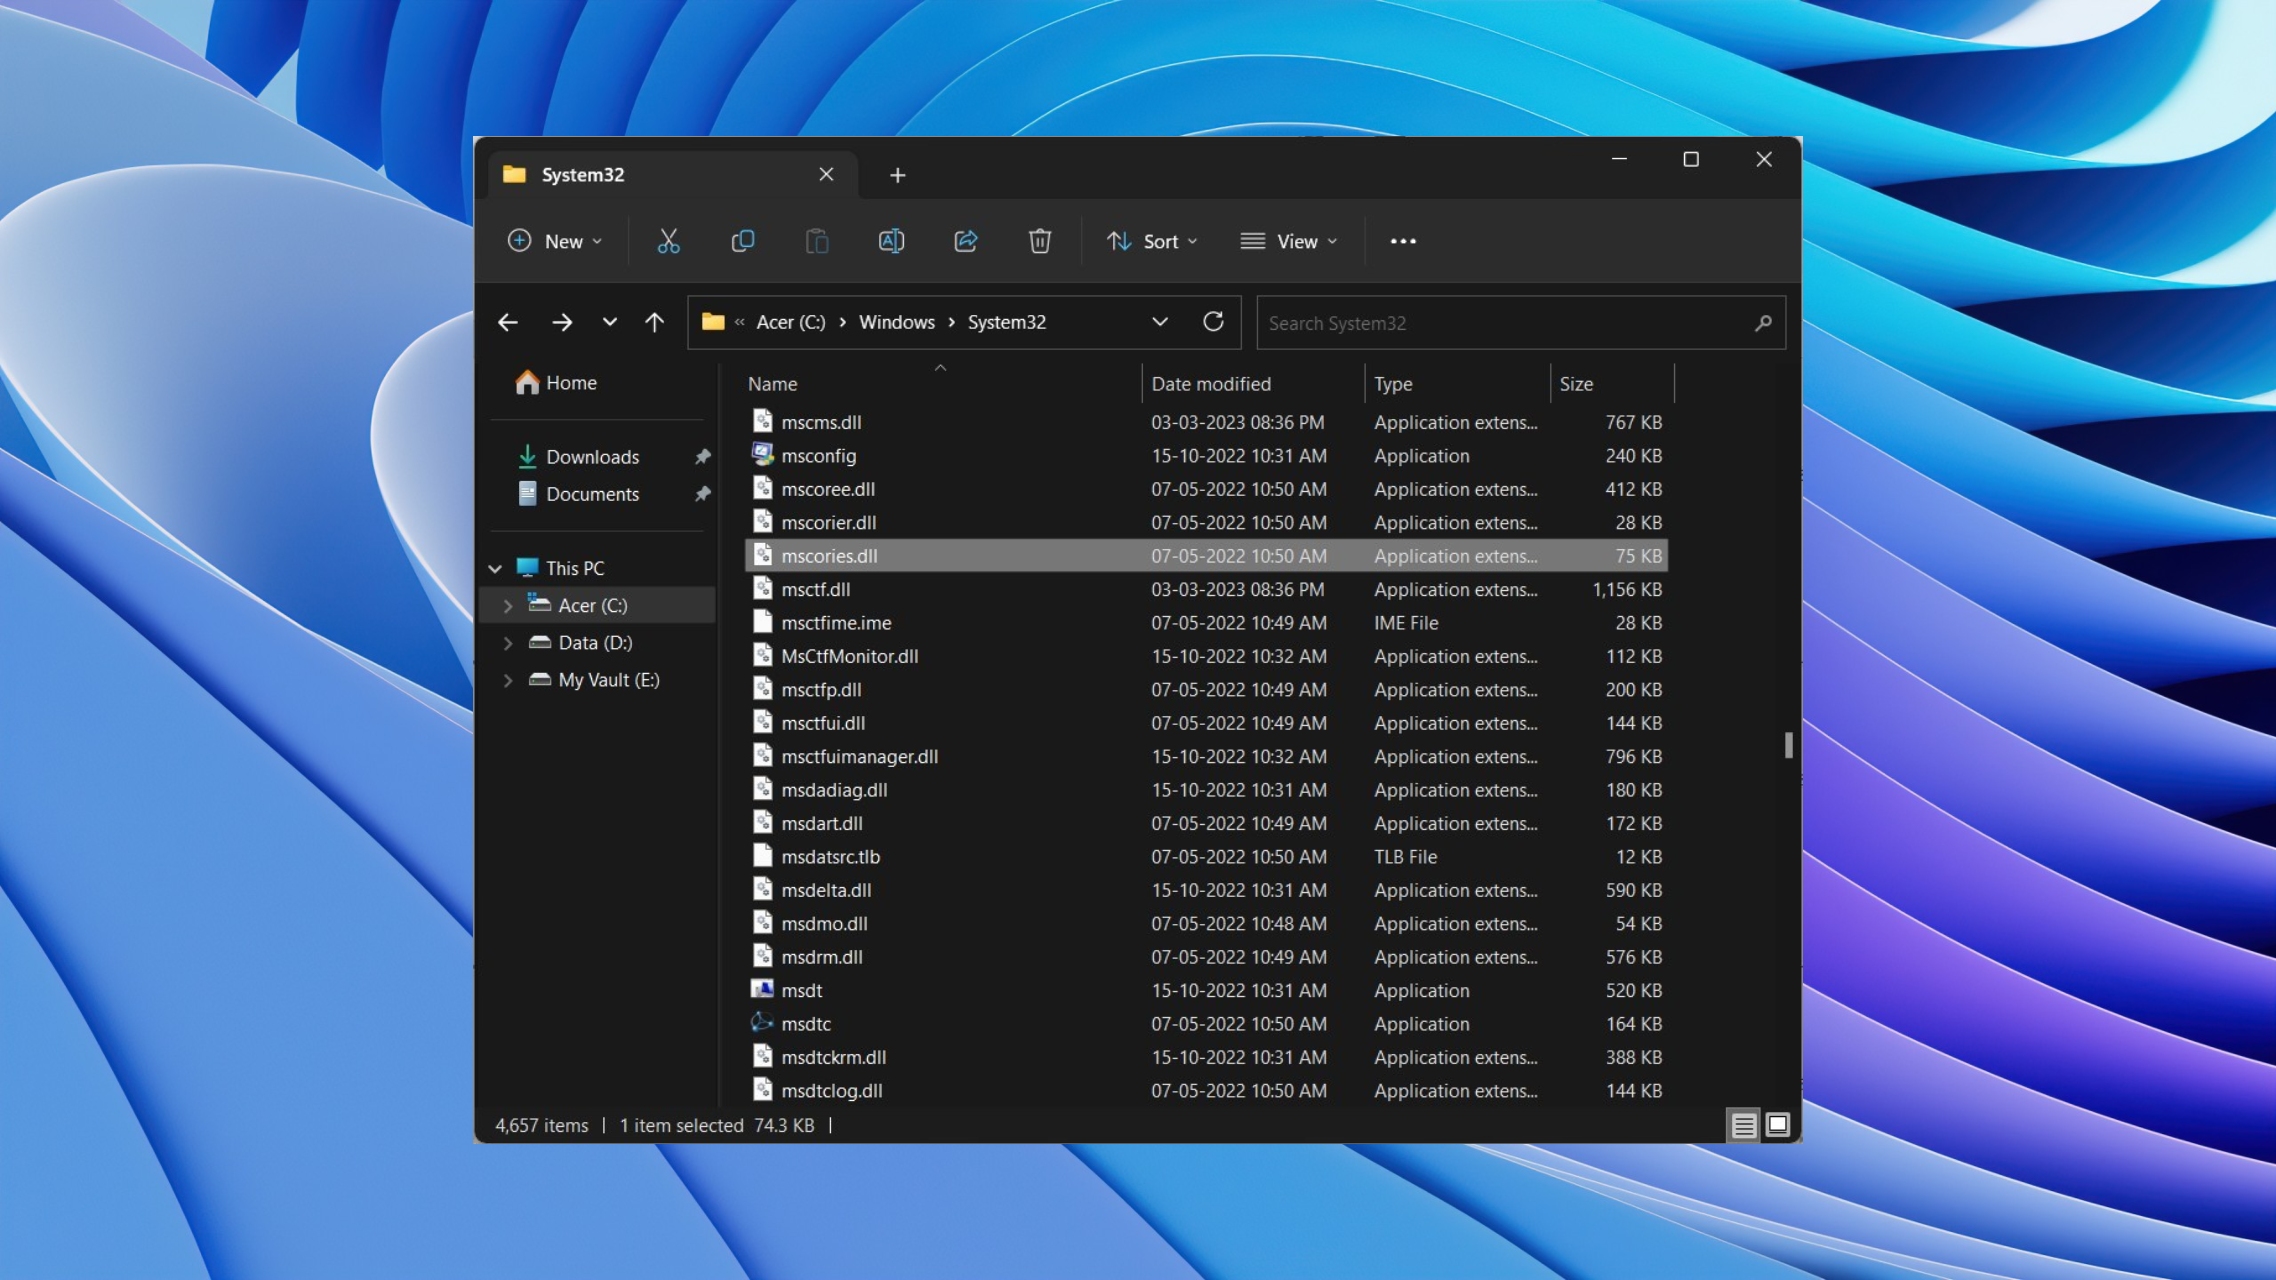
  3. Now navigate to this path and paste the file:C:\Windows\System32
  4. Restart your PC to confirm the changes.

If you are experiencing the problem of missing DLL files on Windows 11, we recommend checking out our informative guide, which offers solutions to help you resolve this common issue.

So, these are methods you need to follow to fix the X3DAudio1_7.dll not found error. If you have any questions or suggestions, feel free to mention them in the comments section below.

Fix: Memory Integrity Cannot be Turned On or Greyed Out

Memory Integrity is an important piece of Windows Security that protects your computer against outside attacks. Plus, it ensures all the installed devices come from trusted sources and work properly.

If you have turned it off in Windows Security, you should immediately turn it on. However, some users have reported Memory Integrity being greyed out, making it unable to be turned on.

Why can’t I turn on Memory Integrity?

There are a handful of reasons why Memory Integrity is strangely greyed out. But the one thing that all have in common is it’s due to some compatibility issue.

  • Your system is out of date – If your computer is out of date, it can cause various incompatibility problems, including a greyed-out Memory Integrity.
  • Corrupted files are messing with your computer – Malware can corrupt files. You’ll need some cleaning software to get rid of it.
  • You downloaded some bad drivers – Incompatible drivers can also cause many problems. You’ll need to uninstall them, as is the case with the HtcVComV64.sys driver.
  • There is conflicting software on your computer – Recently installed apps can conflict with ones already on your computer.

How can I fix a greyed-out Memory Integrity?

Before going into the fixes, you should perform a handful of preparatory steps:

  • Restart your PC.
  • Close and then reopen Windows Security.
  • Contact your IT or system admin for help.
  • Uninstall recently installed apps.

1. Update Windows 11

  1. In the Windows 11 search bar, type in settings and click the entry that appears.
  2. Go to the Windows Update section of the Settings menu. Windows 11 will immediately begin downloading available updates.
  3. Once done, click Restart now.
  4. Next, select click Advanced options under More options.
  5. Select Optional updates.
  6. On the following page, select the optional updates that you want to install. Click Download & Install to finish the process.

Learn when it should be active by default and what to do when it stays off in this guide on memory integrity enabled by default in Windows 11.

2. Double-check drivers

  1. In the Windows 11 search bar, type in windows security. Select Windows Security when it appears.
  2. Click Device Security on the left-hand side of Windows Security. Try to toggle Memory Integrity.
  3. If it fails, click Review incompatible drivers. Take note of the incompatible drivers being shown on the following page.
  4. Now type Device Manager into the Windows 11 search bar. Click Device Manager when it appears.
  5. Click View in the Device Manager. Select Show hidden devices in the drop-down menu.
  6. Locate the device with the problematic driver seen in Windows Security.
  7. Select Uninstall device in the context menu.
  8. Removal should happen automatically. In some cases, a window will appear where you can uninstall the driver.

This process can be tricky and time-consuming until you find driver incompatibilities or update old drivers that may determine this issue on your PC.

For this purpose, you can make use of dedicated software that can manage all drivers automatically, find missing ones, or install the latest driver version with one click.

⇒ Get IObit Driver Booster

3. Uninstall incompatible drivers

  1. Go to Microsoft Build and download Autoruns.
  2. Extract the zip file you just downloaded. Right-click Autoruns and select Run as administrator.
  3. Agree to the Autoruns License Agreement.
  4. Problematic drivers are highlighted yellow. Locate them and uncheck the box next to them to disable those drivers.
  5. If you cannot disable the driver, right-click it and select Delete.

4. Enable Memory Integrity via Registry Editor

  1. In the Windows 11 search bar, type in regedit. Click Registry Editor when it appears.
  2. In the Registry Editor, expand the following folders in this order: HKEY_LOCAL_MACHINE > SYSTEM > CurrentControlSet > Control.
  3. Now open the following: DeviceGuard > Scenarios > HypervisorEnforcedCodeIntegrity
  4. In HypervisorEnforcedCodeIntegrity, double-click Enabled.
  5. Set the Value Data to 1, then click OK. Restart your computer to enable the changes.

5. Reset the PC

  1. Type settings into the Windows 11 search bar. Click the entry that appears.
  2. In the System section, scroll down and select Recovery.
  3. Click Reset PC on the following page.
  4. In the popup window, we recommend selecting Keep my files.
  5. Click Cloud Download to reinstall Windows 11.

6. Run SFC and DISM scans

  1. In the Windows 11 search bar, type cmd to bring up the Command Prompt. Click Run administrator.
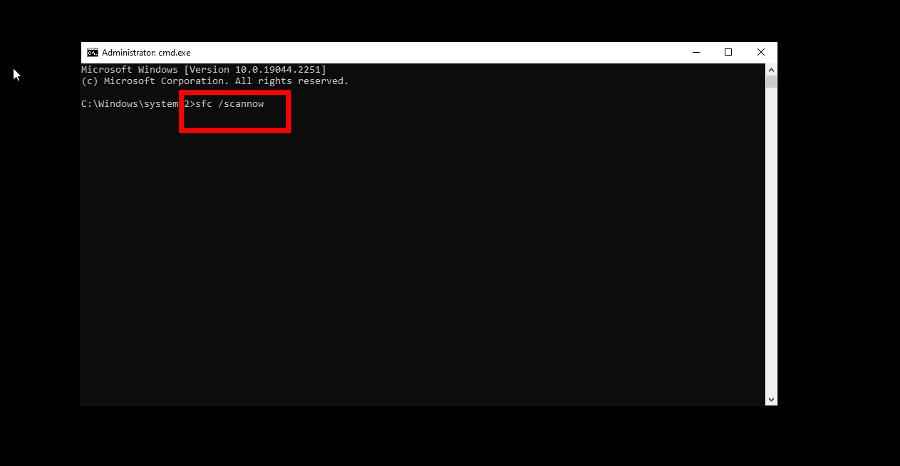
  2. Enter the following command: sfc /scannow
  3. Give Command Prompt enough time to finish the process.
  4. When it’s done, enter the following commands one after the other: DISM /Online /Cleanup-Image /CheckHealth DISM /Online /Cleanup-Image /ScanHealth DISM /Online /Cleanup-Image /RestoreHealth
  5. Restart your computer.

7. Reset Windows Security

  1. Type settings into the Windows 11 search bar. Select Settings when it appears.
  2. Click Apps on the left side, then select Installed apps.
  3. Scroll down until you locate Windows Security. Click the three dots to the right and select Advanced options.
  4. Scroll down here and click Reset.
  5. Click Reset in the small window that appears.

By following these instructions, you will hopefully not have any more issues with Windows Security. But note that it is prone to errors, like when it suddenly refuses to launch.

If this happens to you, run the SFC and DISM commands shown in an earlier solution. And if the Windows Security Protection History is missing, clear out the scan history files.

In case the issue persists, our Memory integrity error HtcVComV64.sys might be able to help you.

If you have any suggestions or guides you’d like to see, be sure to comment below.

How to Stay Anonymous Online Using the VPN App From VeePN

If you are concerned about online privacy and security, you must use a VPN app. An app that can help you stay anonymous online and access restricted content.

Here we will discuss VeePN, a VPN app that can help you enjoy enhanced security and privacy while browsing the internet.

What are the best features of VeePN?

VeePN is a powerful VPN app with various features to protect your online privacy. The app is available for Windows, Mac, Android, iOS, and Linux and can secure up to 10 devices.

It can be used on Smart TV, Android TV, Fire TV, Apple TV, and router. You can use it while playing games on Xbox or PlayStation. The VPN also has browser extensions for Google Chrome, Mozilla Firefox, and Microsoft Edge.

With features like DNS and IP leak protection, multiple security protocols, Spilt tunneling, unlimited bandwidth, and 24*7 live chat support, this VPN app can help you maintain anonymity.

Here are the main features of VeePN which make it stand out:

1. Multiple servers

VeePN has a vast server network with more than 2500 servers across 89 locations and 60 countries. It provides 256-AES encryption to keep your data secure.

This VPN app has no logs policy, which means it doesn’t collect & store information, including the information you shared or received, browsing history, DNS queries, and activity logs.

It encrypts all traffic traveling to a VPN server, protecting your data from prying eyes.

2. Double VPN

VeePN has a Double VPN feature, which provides users with an extra layer of security and privacy.

With this function activated, your internet traffic is routed via two separate VPN servers, encrypting your data twice and hiding your IP address behind two different servers.

This adds an extra layer of security & anonymity, making it even more difficult for anyone to track your online activities or identify your real IP address.

3. Kill Switch

Kill Switch VeePN VPN

VeePN’s Kill Switch feature ensures your online activities remain private even when your VPN connection drops without notice.

It automatically disconnects your internet connection when the VPN connection is lost, preventing unencrypted data from being transmitted outside the secure VPN tunnel.

This protects your confidential information and prevents exposure to threats such as hackers or surveillance agencies.

How do I use VeePN to stay anonymous online?

1. Download & install VeePN

  1. Download VeePN from its official website.Download VeePN for PC VPN
  2. Double-click the installer to open the setup and click Install.VeePNInstaller Install button VPN

2. Sign up or log in

  1. Click Login or Sign up (first-time user) on the Startup screen.VeePN_Sign up VPN
  2. Choose a subscription that suits your needs.
  3. Now, enter the email address and password and click Log in.VeePN_Login

3. Browse the web

  1. Now, choose a server that suits you best and click the Connect button.
  2. You can also toggle on the Kill Switch to secure the connection if the network fails.VeePN software kill switch
  3. Now, launch the browser of your choice and roam free on the internet without disclosing your real IP or identity.

VeePN doesn’t have a trial version, but it offers a 30-day money-back guarantee for customers who are not satisfied with their purchase.

⇒ Get VeePN

VeePN comes with advanced security features and high-speed performance, allowing you to browse the internet securely, anonymously, and without any restrictions.

This VPN can help you maintain anonymity, protect your online activities from prying eyes, and access geo-blocked content and websites.

VeePN’s powerful features, including Double VPN and Kill switch, protect users’ data and privacy.

With its easy-to-use interface and support for multiple devices, VeePN is an excellent choice for anyone who values online privacy and security.

You may also want to check our list of the best VPNs for Windows 11 for more choices. Link on best VPNs for Windows 11. ve any questions or suggestions, feel free to mention them in the comments section below.

SFC Scannow Unable to Fix Corrupt Files? Here’s What to Do

The SFC scan is a pretty handy tool as it alone can fix most problems on Windows 11. But it isn’t foolproof. Sometimes the SFC Scannow command suddenly stops working.

Why is SFC scannow not repairing corrupt files?

The repair tools on Windows 11 rarely break down. But when they do, it can be difficult to figure out why.

  • It could be a false positive – Sometimes, your SFC scan might think certain files are corrupt. If this happens, you can ignore the notice.
  • Malware is infecting your computer – Computer viruses can stop basic functions from operating correctly. Be sure to install some antivirus software to clean up your system.
  • Corrupted files are stopping important computer functions – Use a third-party cleaner to clean up any lingering corruption caused by malware.
  • There’s a problem with the Windows 11 Utilities – Utility software are tools that users can use to maintain their computer. If these fail, you will have to reinstall Windows 11.

How can I repair my computer’s SFC scan?

There are many different ways to fix a malfunctioning SFC scan tool, but before you do anything, there are some things you’ll need to do first:

  • Restart your computer.
  • Ensure your internet connection is working properly
  • Double-check if there are any pending updates

1. Install Windows Update

  1. Press the Windows key. Search for Settings.
  2. Select Windows Update.
  3. Click Check for updates.
  4. Windows 11 will locate any pending updates. Once found, click Download & Install.
  5. Restart your machine when done to fully implement the changes.

2. Perform a system restore

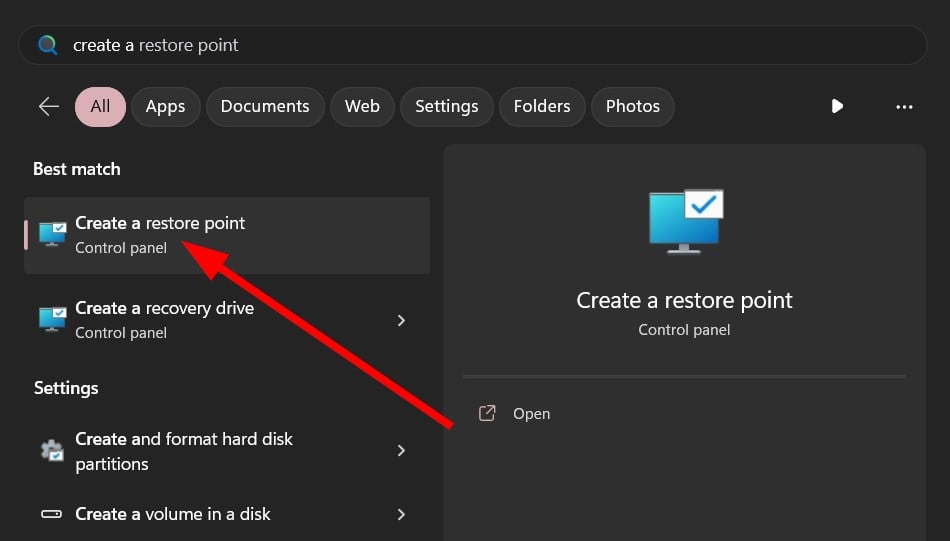
  1. In Windows 11 Search, type in restore point and click Create a restore point.
  2. Click System Restore in the System Properties window.
  3. The System Restore wizard will highlight a recommended restore point. Click Next.
  4. On the following page, select Finish. Your computer will then revert the system back to an earlier point.

3. Run DISM commands

  1. In Windows 11 Search, type cmd to bring up the Command Prompt.
  2. Select Run as administrator to launch with admin-level permissions.
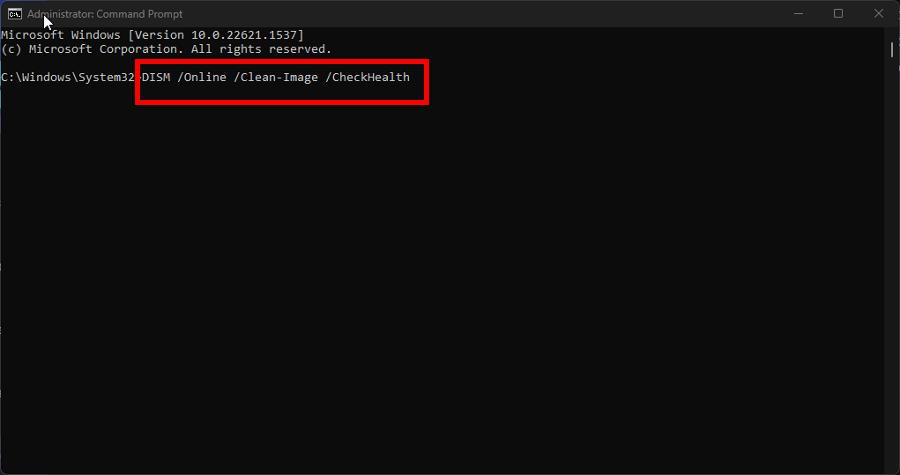
  3. Run the following command: DISM /Online /Cleanup-Image /CheckHealth
  4. Once done, run the following commands: DISM /Online /Cleanup-Image /ScanHealth DISM /Online /Cleanup-Image /RestoreHealth
  5. Restart your computer finish repairing.

4. Rollback Windows 11 update

  1. Launch the Settings menu and go to Windows Update
  2. Click Update history.
  3. Scroll to the bottom. Under Related Settings, click Uninstall Updates.
  4. Choose which update you want to remove, then select Uninstall.
  5. Allow your computer to finish the process.

5. Run the SFC scan in Safe Mode

  1. Launch the Settings menu and stay on the System section. Scroll down until you locate Recovery. Click it.
  2. Click Restart Now next to Advanced Startup. On the following page, select Restart Now again.
  3. After rebooting, click Troubleshoot.
  4. Click Advanced Options. Afterward, select Startup Settings.
  5. On the Startup Settings page, click Restart.
  6. After restarting, press the F6 key to Enable Safe Mode with Command Prompt.
  7. Sign into your account when the login page appears.
  8. In the new Command Prompt window, run the SFC scan command.
  9. Wait for the scan to finish. Then, run shutdown /r to restart your computer.

6. Run Startup Repair

  1. Launch the Settings menu and go to the Recovery tab in the System section.
  2. Click Restart Now on the following page.
  3. After rebooting, click Troubleshoot, then Advanced Options, and Startup Repair.
  4. Wait for your computer to finish the process.
  5. Select Administrator. Enter the account password and log in as normal.

7. Run CHKDSK

  1. Bring up the Command Prompt in the Windows 11 Search bar. Select Run as administrator.
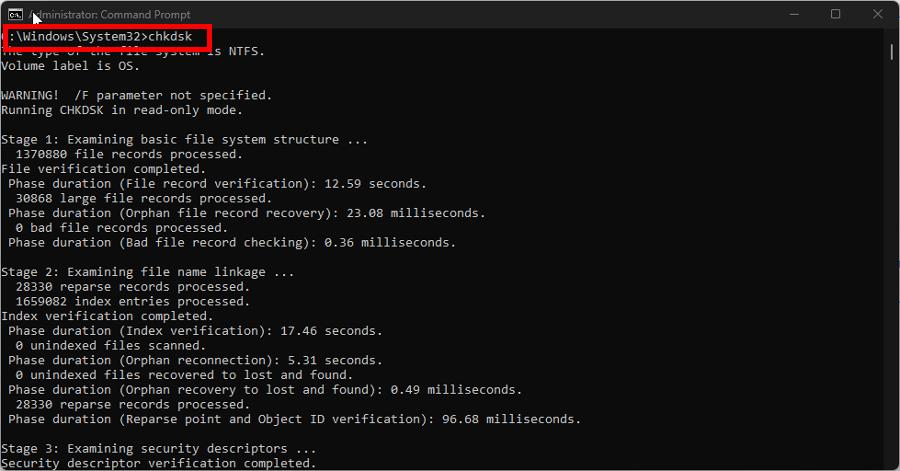
  2. Enter and run the following command: CHKDSK
  3. Wait for Command Prompt to finish. Afterward, run the following: CHKDSK C: /F /R
  4. It’s possible the disk drive is in use. Hit the Y key to schedule the scan for the next time you restart your computer.

8. Reset your PC

  1. Open the Settings app and click the Recovery option in the right pane.
  2. Click the Reset PC button next to Reset this PC.
  3. In the window that appears, you can choose to keep your files and apps or delete everything. We recommend choosing the former.
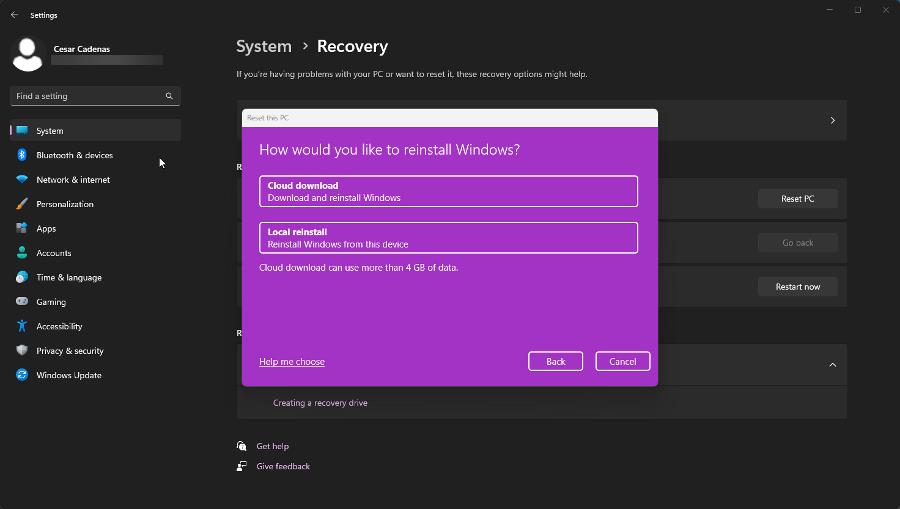
  4. Select how you want to reinstall Windows 11; either a cloud download or a local reinstall.

That’s pretty much it when it comes to fixing a malfunctioning SFC scan tool. You may also be interested in learning how to fix the DISM tool if and when it also begins to malfunction.

And if the SFC scan still doesn’t work, install some third-party repair software. If you have any suggestions on guides you’d like to see, please drop them in the comments.

0x80010135: Path Too Long Error [Zip Extraction Fix]

A few readers complained that they got the following notification when trying to extract a file: error 0x80010135: path too long while extracting, so let’s see how to fix it.

How do I fix error 0x80010135?

A few pre-solutions may help you resolve the problem. So it would be best if you tried these before going into any complex solutions:

  • Use a different extraction tool – Your current extraction tool may be corrupt or incompatible with your OS, so try a different one.
  • Redownload the file – The downloaded file you need to extract may be corrupted or incomplete, so you should try getting a new copy.
  • Extract it to the root directory – Extracting the file to the root directory on your partition can help you circumvent this error.

If the above attempts do not work, please continue with the solutions we list below.

1. Enable the long path support

1.1 Using the Registry Editor

  1. Press Windows + R to open the Run dialog.
  2. Type regedit and hit Enter.
    0x80010135
  3. Navigate to the path below:
    Computer\HKEY_LOCAL_MACHINE\SYSTEM\CurrentControlSet\Control\FileSystem
    0x80010135
  4. Double-click LongPathsEnabled and change the Value data to 1.
    0x80010135

This message is triggered using Windows Explorer or third-party extraction tools like WinRAR or 7-Zip. Speaking of which, you might want to visit our WinZip won’t open guide if you have issues with ZIP files.

1.2 Using the Group Policy Editor

  1. Press Windows + R to open the Run dialog, type gpedit.msc, and hit Enter.
    0x80010135
  2. Navigate Local Computer Policy, Computer Configuration, Administrative Templates, System, Filesystem, and double-click Enable Win32 long paths.
  3. Click Enabled and OK, then restart the computer.
  4. Now try the file transfer again and see if the error is resolved.

2. Update your OS

  1. Press Windows + I to open the Settings app.
  2. On the right pane, select Windows update, and on the left, click the Check for updates button.
  3. Wait for the updates to be installed.

What does error 0x80010135: The path too long mean?

This error means that the operation being performed has exceeded the maximum characters permitted by the OS. A few other things may trigger the error, including:

  • System limitations – Your PC can’t work with paths longer than 260 characters by default. Making a few registry changes can fix that.
  • Archiver software – Many archiver applications can’t handle longer paths. Switching to a different compression software can help fix the issue.

FAQs for Error: Path Too Long

How can I fix the “Path Too Long” error in Windows?

You can shorten folder names, move files closer to the root directory (e.g., C:\), or enable long path support in Windows settings or Group Policy.

Can I enable long paths without third-party tools?

Yes. In Windows 10/11, open the Local Group Policy Editor, go to Computer Configuration > Administrative Templates > System > Filesystem, and enable Long Paths.

Will changing long path settings affect all apps?

Not always. Some older apps still use the 260-character limit, even if Windows supports longer paths. In that case, shortening names or paths is still necessary.

Are third-party tools safe for fixing long path issues?

Tools like Long Path Tool or Robocopy are commonly used. They’re generally safe if downloaded from official sources, but always scan before installing.

This is as much as we will cover in our guide. Hopefully, one of these solutions has worked for you.

To learn more, we suggest reading our guide on how to create paths longer than 260 characters. Keep in mind that other applications can experience this issue, and we wrote about Path too long error in SyncToy not that long ago.

Reach out to us in the comments below and share your experience using these solutions.

Slack vs Teams: How many monthly users does Microsoft have?

The number of users of Microsoft Teams has just increased in the first quarter of 2023. As revealed by Redmond officials during an earnings call in April this year, over 300 million active users have clocked into the teleconferencing app monthly, which is more than the recorded 280 million in January 2023. 

Not just that, but at least 60% of them have purchased Teams Phone, Rooms, or Premium services.

Speaking of the earnings call, Microsoft’s boss Satya Nadella also revealed that the tech giant’s revenue increased by 7% to $52.9 billion, followed by a 10% increase in operating income, 9% in net income, and 10% in diluted earnings, as Microsoft is currently leading the AI innovation. 

The news arrived not too long after Teams announced a newer generation of the app. Collectively dubbed as ‘Teams 2.0,’ the app reportedly consumes less power and storage and boosts its performance at the same time. 

Slack vs Teams: What’s the number of users does the rival have?

In comparison, Teams’ competitor, Slack, is still aiming for 79 million monthly active users by 2025 — still, a long road to catch up with Microsoft.

Back in 2020, Salesforce, the company that owns the right to the app, complained to anti-trust regulators that Microsoft has been playing dirty by bundling Teams into its Office 365 subscription plans. 

As Microsoft battles with regulators this year, the tech giant promised that it will stop bundling the app and will have the option to opt-out Teams whenever a new user wants to purchase an Office 365 subscription. As we’ve previously reported, there are still no official words from Microsoft’s camp just yet, but we will keep you updated.

Plus, with the recent development of the GPT4-powered Copilot assistant tool, it seems like people will flock more to Microsoft’s products. 

Which one is the better app: Slack or Microsoft Teams? Let us know in the comments!

0x800f0922 on Windows 11: How to Fix This Install Error

More and more users have reported the Windows 11 update error 0x800f0922 on support forums in early 2022.

When that issue occurs, the Windows Update section of Settings displays an Updates failed to install error 0x800f0922 for updates. In one MS forum post, a user said this about that error:

The latest couple of updates continually fail – it retries and they fail with the same error… Other Windows Updates seem to install OK – just these two fail:

2022-01 Cumulative Update for .NET Framework 3.5 and 4.8 for Windows 11 for x64 (KB5008880)
Install error – 0x800f0922

Consequently, Windows 11 doesn’t install patch updates the 0x800f0922 error arises for. So, do you need to fix error 0x800f0922? If so, this is how you can fix that issue within Windows 11.

What does error code 0x800f0922 mean?

Some Windows updates have downloading issues, and the error code for that update is 0x800F0922. Additionally, it indicates that there is not enough space on the System Reserved disk to load a new system or that the system cannot access Windows Update.

What causes the Windows 11 update error 0x800f0922?

There are numerous potential causes for the Windows 11 update error 0x800f0922. That error can feasibly occur because of any of the following:

  • A disabled App Readiness service
  • Corrupted system files
  • Disabled .Net Framework components
  • Incorrectly configured Windows Update components
  • Corrupted cache data

How can I fix the install error – 0x800f0922 on Windows 11?

1. Run the Troubleshooter for Windows Updates

  1. Open Settings by pressing Windows + I.
  2. Click Troubleshoot.
    The Troubleshoot option windows 11 update error 0x800f0922
  3. Press the Windows Update Troubleshooter’s Run button.
    The Windows Update Run button windows 11 update error 0x800f0922
  4. Then wait for the troubleshooter to detect update issues. If it suggests any resolution, select the Apply the fix option.

2. Repair corrupted system files

Over time, Windows files can get damaged or corrupted by viruses, updates, or even apps that were previously uninstalled but some associated files were left behind.

Since this error popped up right after a Windows update, it means that some files got wrongly replaced or modified, thus creating errors.

Repairing system files or removing unwanted leftover files can be easily done with a specialized third-party repair tool.

3. Enable .NET Framework 3.5 is components

  1. Click the Start menu’s taskbar icon with the right mouse button and select Run.
    The Run shortcut windows 11 update error 0x800f0922
  2. To open Programs and Features, input this command and click OK: appwiz.cpl
    The appwiz.cpl command windows 11 update error 0x800f0922
  3. Next, click the Turn Windows features on or off option shown directly below.
    Turn Windows features on or off windows 11 update error 0x800f0922
  4. Select the .NET Framework 3.5 (includes .NET 2.0 and 3.0) checkbox there if it isn’t selected.
  5. Double-click the .NET Framework 3.5 (includes .NET 2.0 and 3.0) option to expand it. Then select both the Windows Communication Foundation HTTP Activation and Windows Communication Foundation Non-HTTP Activation checkboxes.
    The .NET Framework 3.5 options windows 11 update error 0x800f0922
  6. Press the OK button.
  7. After that, click the Power and Restart options on the Start menu.

4. Run deployment image and system file scans

  1. Press the Windows + S keyboard shortcut to open the search tool.
  2. Type the keyword cmd in the text box.
  3. Right-click the Command Prompt app and select Run as administrator.
    Run as administrator option windows 11 update error 0x800f0922
  4. Enter this command and press Enter:
    DISM /Online /Cleanup-Image /RestoreHealth
    The deployment image command windows 11 update error 0x800f0922
  5. To run an SFC scan, input the following text in the Command Prompt and press Enter:
    sfc /scannowThe sfc command windows 11 update error 0x800f0922
  6. Wait for the SFC scan to show an outcome in the Prompt’s window.

5. Run a fsutil resource command

  1. Open Command Prompt as covered in the previous method.
  2. Input the following command: fsutil resource setautoreset true c:\
    The fsutil command windows 11 update error 0x800f0922
  3. Press the Enter key to execute the command.
  4. Click Restart on the Start menu after executing the fsutil command.
    The Restart button windows 11 update error 0x800f0922

6. Enable the App Readiness service

  1. Bring up Run’s window.
  2. Open the Services window by entering this command in Run and clicking OK: services.msc
  3. Double-click App Readiness in the Services window.
    App Readiness services windows 11 update error 0x800f0922
  4. Change the Startup type option to Manual if it’s disabled.
    Manual drop-down menu option windows 11 update error 0x800f0922
  5. Click the Start button on the App Readiness Properties.
  6. Select Apply to save the new options for the App Readiness service.
  7. Then click OK on the properties window.
    The OK option windows 11 update error 0x800f0922

7. Perform antivirus scan

  1. Double-click Windows Security’s system tray icon to open that utility. 
  2. Click the Virus & threat protection tab. 
  3. Select Scan options to view more settings. 
  4. Click the Full scan radio button. 
  5. Then press the Scan now button. 

Alternatively, you can more fully protect your PC from malware with third-party antivirus software like TotalAV. TotalAV is a highly-rated antivirus tool for Windows 11/10 that packs many features. 

8. Reset Windows Update components

  1. Open Command Prompt as an administrator as specified in the fourth resolution.
  2. Input this flush DNS command and click OK: ipconfig /flushdns
    The ipconfig command windows 11 update error 0x800f0922
  3. To stop four services, input these separate commands by pressing Return after each:
    net stop wuauserv
    net stop cryptSvc
    net stop bits
    net stop msiserver
  4. Type this command in the Prompt’s window and hit Enter: ren C:\Windows\SoftwareDistribution SoftwareDistribution.old
    The ren catroot command windows 11 update error 0x800f0922
  5. Then input this Ren command and press Enter: ren C:\Windows\System32\catroot2 catroot2.old
    The ren softwaredistribution command windows 11 update error 0x800f0922
  6. Restart the services by entering these four separate commands:
    net start wuauserv
    net start cryptSvc
    net start bits
    net start msiserver
  7. Then restart your PC after running all of the above commands.

How do I reset Windows Update on Windows 11?

Many users have been quoted to say we couldn’t install this update 0x800f0922 Windows 11 or have gotten the error message something didn’t go as planned in Windows 11.

We have shown you the steps that are necessary for running the program in Windows 10. However, you must know that the exact solutions apply to the new Microsoft OS if you have read through these steps.

You should choose the best solution and apply it to your Windows 11 device.

Can I manually download and install Windows 11 updates?

The Microsoft Update Catalog website provides an alternative way to download and install updates. You can try manually downloading and installing updates for which the 0x800f0922 occurs from there. This is how to download and install Windows 11 updates from the Microsoft Update Catalog.

  1. Open the Microsoft Update Catalog homepage.
  2. Type a KB code for an update in the Microsoft Update Catalog’s search box.
  3. Click the Search button on the Microsoft Update Catalog homepage.
    Search button windows 11 update error 0x800f0922
  4. Select a Download option for an update.
    Download button windows 11 update error 0x800f0922
  5. Right-click the link on the Download window that opens to select a Save link as option.
    Save link link option windows 11 update error 0x800f0922
  6. Choose somewhere to download the update’s MSU file, and click the Save button.
  7. Launch the File Manager utility by clicking the taskbar button highlighted directly below.
    The File Explorer button windows 11 update error 0x800f0922
  8. Open the folder that includes the update’s MSU package.
  9. Double-click the downloaded MSU file to install the update.

It’s crucial to fix error 0x800f0922 to ensure Windows can install all updates. The potential resolutions above are some of the most widely confirmed fixes for error 0x800f0922. We still can’t promise that resolutions will fix that issue for everyone, but they’re certainly worth a try.

We also have an article on how to fix the 0x800f0922 error on Windows 10.

If those resolutions aren’t enough, consider reinstalling Windows 11 with an in-place upgrade or the Reset this PC utility. Additionally, you can perform an in-place upgrade with the Windows 11 Installation Assistant.

You’re welcome to ask questions about the Windows 11 update error 0x800f0922 in the comment box below. Also, if you’ve fixed the install error – 0x800f0922 on Windows 11 with another resolution not mentioned here, let us know below.

Kmode Exception Not Handled: 3 Tested Fixes + Video

A common occurrence of the Windows 11 Kmode Exception Not Handled error is during the installation of the operating system or immediately after it.

Some users who have successfully installed Windows 11 have reported that they cannot keep their PC operating for more than 2 minutes before getting a BSoD showing this error on their screen. We have replicated this issue and we know how to fix it!

How do I fix Kmode Exception Not Handled in Windows 11?

1. Uninstall Graphics drivers

    In this primary solution, you can apply the steps displayed below in order to update your graphics driver that generates this issue on Windows 11.

    1. Start by right-clicking on the Start icon and tapping on Device Manager.
    opening device manager windows 11
  1. 2. Expand the Display adapters section and right-click on each option. Now click on Uninstall device as we have shown below.


    display-adapters
  2. 3. And finally, reboot your computer to reinstall the graphics drivers automatically. That’s it!

Updating your drivers is essential for the health of your computer. We recommend employing the help of professional software, such as Fortect Driver Updater.

With this tool, you will be able to scan for and update all your outdated drivers. Plus, you can set up automatic scans that will alert you in case one of the drivers goes out of date.

2. Disable early launch anti-malware protection

  1. Click on the Start menu icon from your Taskbar, then select the Power button.start-power bcdedit windows 11
  2. Press and hold the Shift key and click on the Restart option.
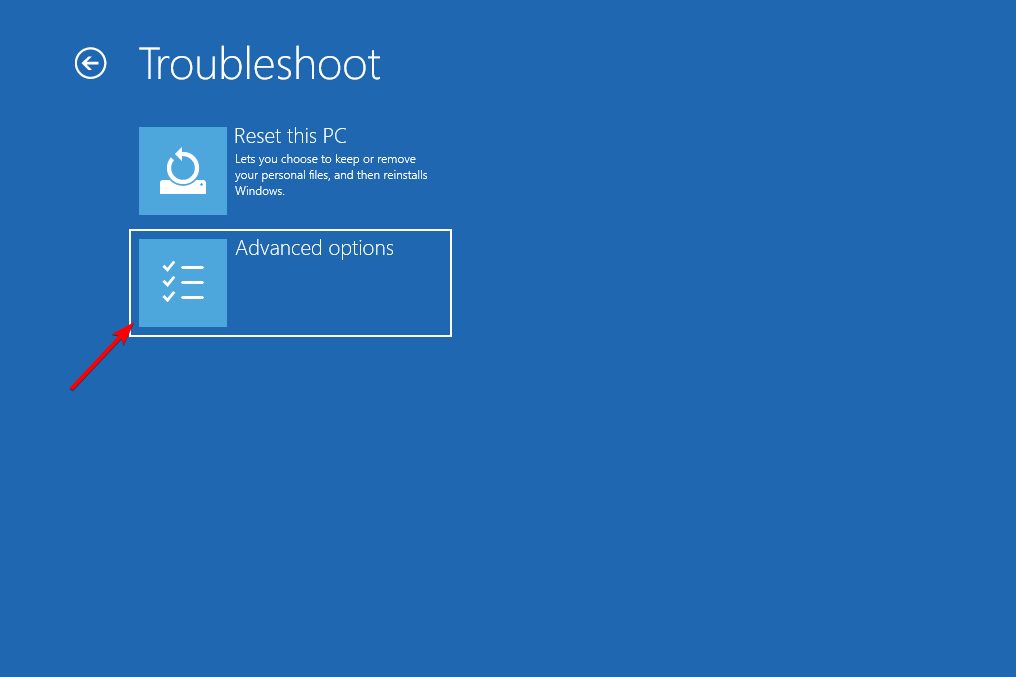
  3. Once you’re redirected to the blue screen below, you must select Troubleshoot followed by Advanced options.advanced-options-option bcdedit windows 11
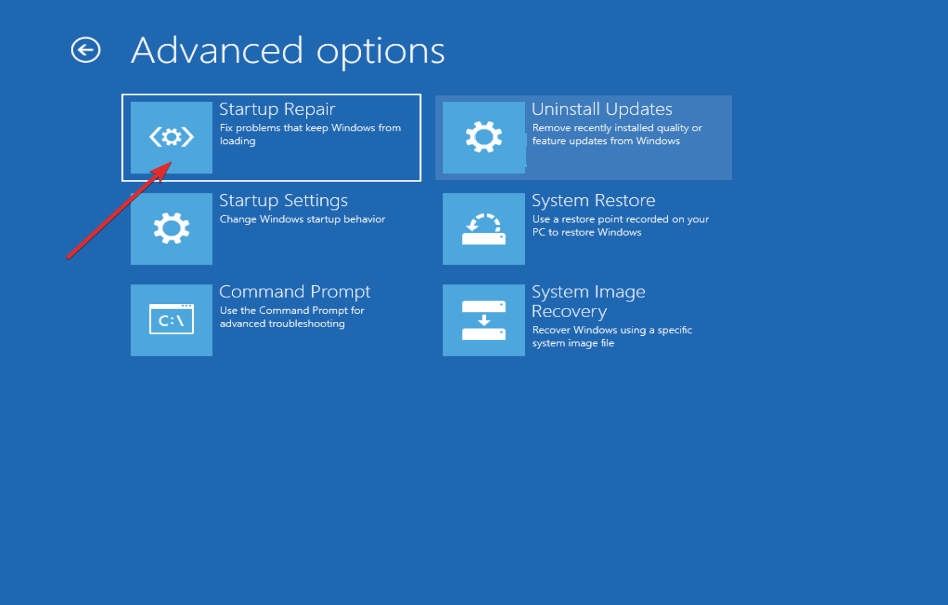
  4. Lastly, select Startup Repair and click on the Restart button.startup-repair bcdedit windows 11
  5. Now press the F8 key to disable early-launch anti-malware protection; after your computer has booted into the Startup Settings menu. That’s it!startup-settings-menu windows 11 error system thread exception not handled

Protecting your computer from malware and viruses is another critical step in ensuring its proper functionality. There are valuable antivirus software that provides high-quality protection against computer threats, which we use and recommend to all our readers.

3. Update your BIOS

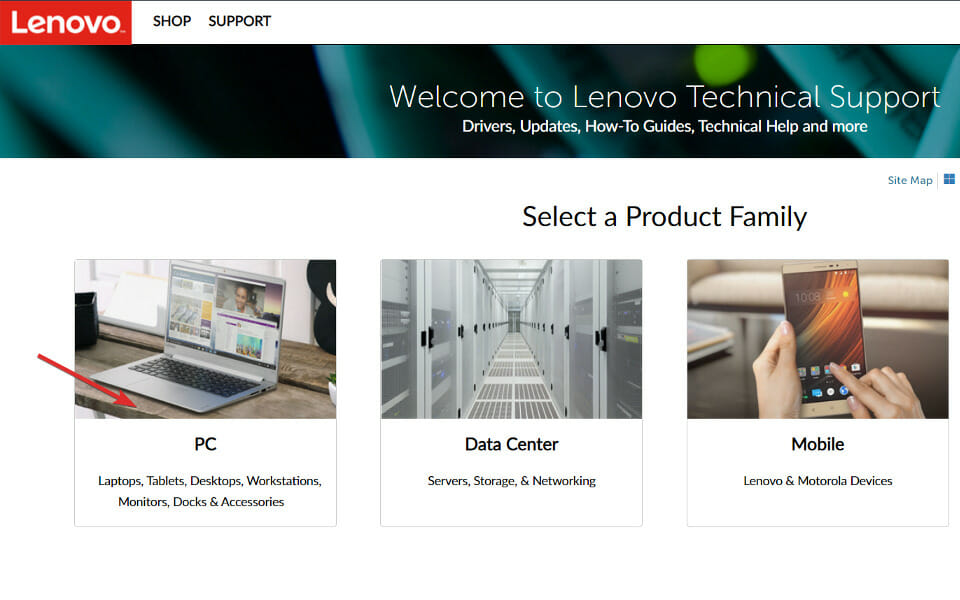
  1. You will need to visit your motherboard manufacturer’s website for this one. For example, we will head to Lenovo’s website and click on PC to find the necessary updates.pc-lenovo windows 11 error kmode exception not handled
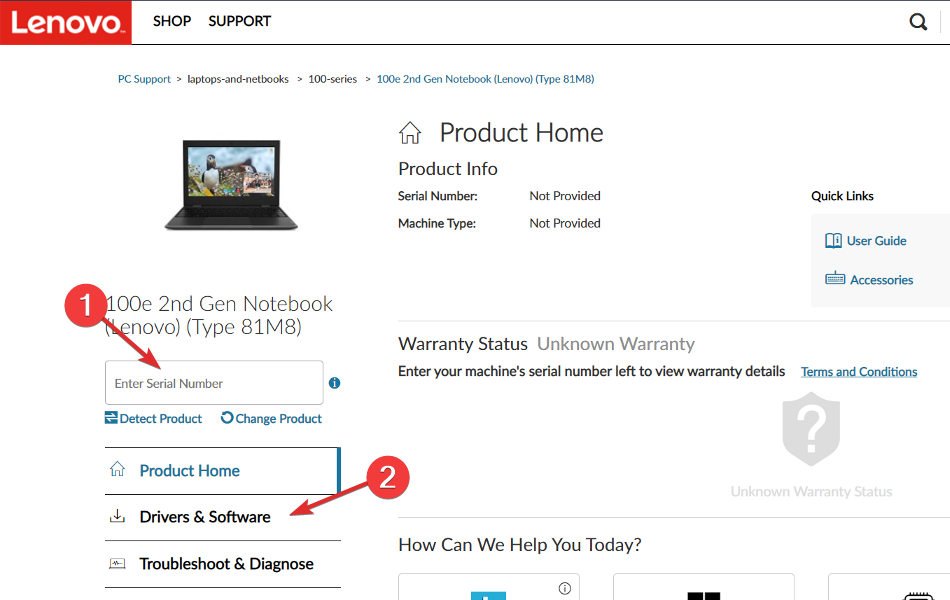
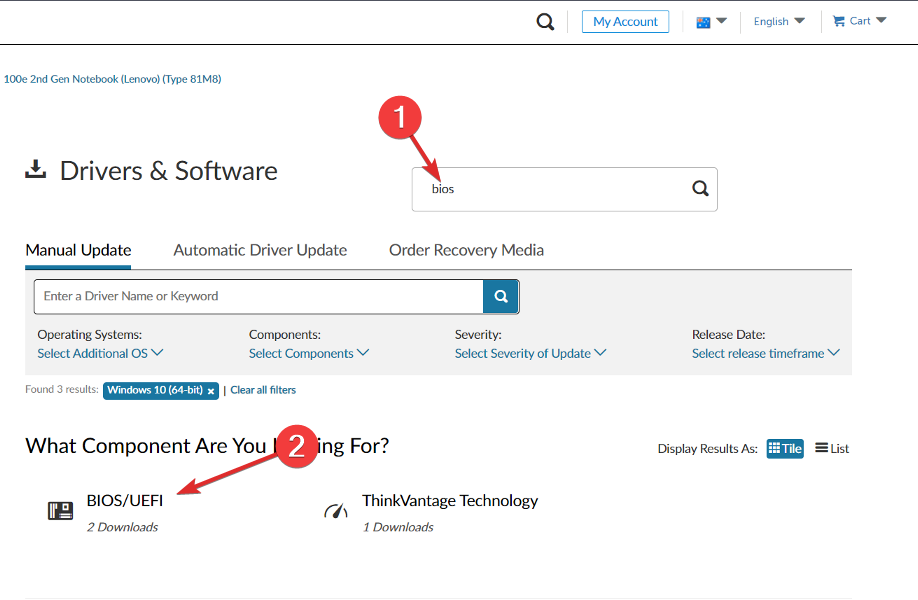
  2. Then navigate to the Drivers & software section after locating your model and entering its number into the search bar.lenovo-drivers windows 11 error kmode exception not handled
  3. Please search for the latest BIOS update for your computer and download it. Note that you will need a flash drive for the following steps.bios-results windows 11 error kmode exception not handled
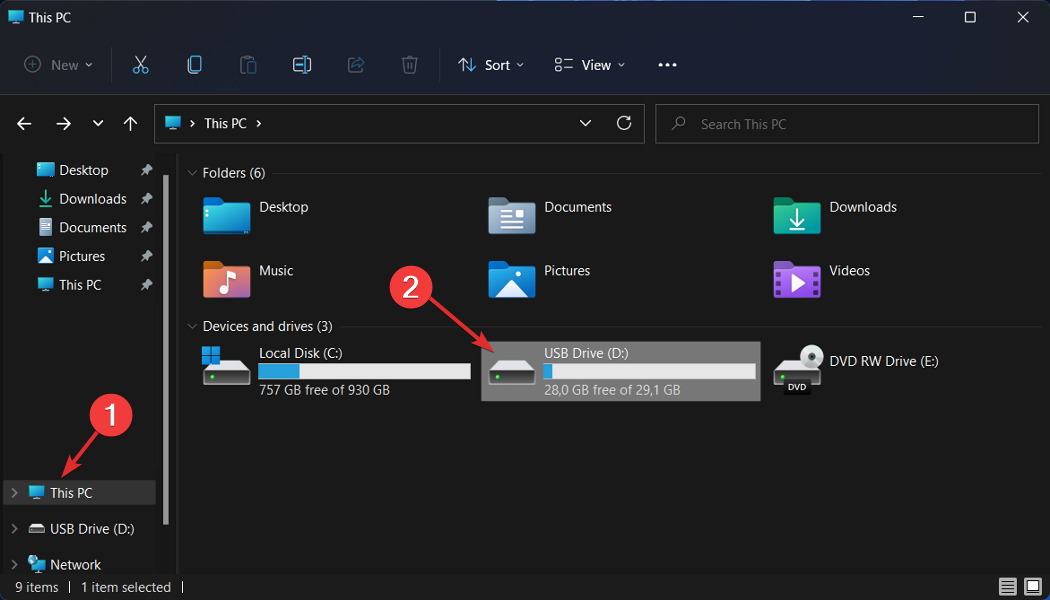
  4. Click on This PC, followed by your flash drive, to move the downloaded file as they instruct you on their website.thispc-flash windows 11 error kmode exception not handled
  5. Reboot your computer and press F2 or Del to enter the BIOS menu.
  6. Click on the BIOS update option, then choose the downloaded file from your flash drive. Wait for the process to finish, then continue with the rebooting process. That’s it!

Why do I keep getting Kmode Exception Not Handled?

We’ve put together a list of possible causes of the KMODE_EXCEPTION_NOT_HANDLED error in Windows 11, but keep in mind that others might render your specific case that we have not yet detected:

  • Third-party antivirus – There is one antivirus suite that has been identified as a source of the problem, but there may be others that have not yet been identified.
  • Outdated BIOS – Another reason you can expect to see this issue is a scenario with older BIOS firmware versions of your motherboard that triggered.
  • System File corruption – It is also possible that system file corruption is responsible for general system instability, which results in the appearance of this error code in some conditions.
  • Conflicting graphics card drivers – The likelihood that you’re dealing with conflicting drivers that are interfering with the installation of the new operating system is high; if you encountered this type of issue while attempting to upgrade to Windows 11.
  • Damaged physical RAM – The problem is usually caused by the inability of the malfunctioning RAM stick to keep up with the voltage that has been given to it. Taking out the faulty RAM stick and replacing it, or using only one RAM stick, is the only way to stop the crashes.

Moreover, users reported similar issues that we will cover in this article. Some of the most common ones are the following:

  • Kmode exception not handled in Windows 11 laptop – There is a conflict between the drivers for your graphics card if you see the Windows 11 error message.
  • Windows 11 restart loop Kmode exception not handled – Turn off the defense against early launch anti-malware.
  • Kmode exception not handled during Windows 11 install – You may begin by attempting to reinstall the problematic drivers, which is the first step toward finding a solution.
  • Boot loop Kmode exception not handled in Windows 11 – Take out the stick of RAM that’s giving you trouble.
  • Kmode exception not handled in Windows 11 blue screen – You should conduct a RAM diagnostic if you still see the Blue Screen of Death (BSOD).
  • Acer Kmode exception not handled in Windows 11 – You might attempt reinstalling the problematic drivers as a preliminary remedy to the problem.
  • Parallels Kmode exception not handled in Windows 11 – Replacing the drivers will also work in this scenario.

Is Blue Screen of Death fixable?

The Blue Screen of Death can occur for several reasons, including a faulty operating system or hardware within the computer. If this is the case, you will need to either reinstall your operating system or bring your laptop into a service department so that it can be addressed.

BSoDs are entirely fixable. You can refer to our dedicated guide on how to fix BSoDs in Windows 11 to find efficient solutions that you can apply.

For more information on BSoD errors, check out our post on what to do if you get a BSOD way too often and don’t know exactly how to fix it.

As a bonus, you can read about how to fix the Kmode exception not handled error on Windows 10 & 11 in case you need more solutions as it addresses the same issue.

And lastly, take a look at our article on how to fix the dxgmms2.sys error in Windows 11 if you also encounter this problem during a reboot.

Please leave us a message in the comments section below and tell us which solution worked best for you. Thanks for reading!

D3dref.dll Not Found: 5 Ways to Easily Fix It

D3dref.dll is a Windows system file required for Windows to run properly. This file is not a critical system file, but it is highly recommended that it be available on the system.

If the D3dref.dll file is missing or corrupt, your computer may not be able to start up normally or experience issues with running certain programs. Let’s now look at how to fix this issue.

What causes the D3dref.dll missing error? 

Some of the major causes of this missing DLL error include:

  • Faulty app – You might see this error if the associated game or software using the D3dref DLL file is corrupted or damaged.
  • Corrupted system files – Corrupt system files can be caused by malware attacks and other issues that cause errors.
  • Incompatible app – If you have recently installed a new program, it may not be compatible with your current version of Windows and may cause some issues.
  • Virus infection – A virus on a computer could damage system files causing this error.
  • Broken registry – If you don’t clean up your Registry regularly, you may have a case of broken registry entries. This could cause a lot of issues, including the missing D3dref.dll file.

What can I do if D3dref.dll is missing?

Before proceeding with any complex troubleshooting, we recommend you try the following preliminary steps first:

1. Use a dedicated DLL- fixer

D3dref.dll is a Windows dynamic link library file used by many programs to provide a graphical user interface for Windows. It’s a DLL file that belongs to the Microsoft DirectX software development kit.

It can be hard to pinpoint the exact issue behind a missing DLL file, and that’s where DLL repair tools come in.

DLL repair tools can fix all kinds of DLL errors related to the D3dref.dll missing error.

2. Run DISM and SFC scans

  1. Hit the Start Menu icon, type cmd in the search bar, and click Run as administrator.cmd-run-admin-w11 unexpected kernel mode trap windows 11
  2. Type the following commands and press Enter after each one:DISM.exe /Online /Cleanup-Image /Restorehealth sfc /scannow

3. Scan for viruses

  1. Press the Windows key, search Windows Security, and click Open.
  2. Select Virus & threat protection.
  3. Next, press Quick scan under Current threats.
  4. If you don’t find any threats, proceed to perform a full scan by clicking on Scan options just below Quick scan.Scan options
  5. Click on Full scan, then Scan now to perform a deep scan of your PC.Full Scan Scan Now
  6. Wait for the process to finish and restart your system.

Windows Defender may sometimes miss out on stubborn viruses good at hiding. That’s why a third-party antivirus solution should suffice.

Our top choice has to be TotalAV. It offers multi-layered protection against all types of viruses, Trojans, and other malware.

⇒ Get TotalAV

4. Download the file manually

If you accidentally deleted the file and cannot restore it from the Recycle bin, you may have to download it manually. You can download the D3dref.dll file from a reliable site such as DLL-Files.com.

Although downloading DLL files manually from the Internet can be a quick fix, it can be hard to authenticate third-party websites. It’s easy to end up with malware on your PC if you don’t have a comprehensive antivirus program.

5. Perform a System Restore

  1. Press the Windows + R keys, type rstui, and hit Enter.
  2. The System Restore window will open. Click on Next.
  3. Select the restore point you wish to revert to and click on Next.
  4. Now click on Finish.

This is not the end of missing DLL files in Windows 10 or 11. You may also encounter a related issue where the d3dx9_34-dll is missing, so be sure to check out our guide for the steps to bypass it.

That brings us to the close of this article, so leave us a comment below for any additional thoughts.

Want IE mode on Edge to work better? Install KB5025305

It’s that time of the month, as Microsoft released another monthly non-security update for Windows 11 users. Billed as KB5025305, the update brings a lot of new improvements, including a nice touch on the Internet Explorer (IE) mode on Microsoft Edge.

Some users have complained that their pop-up windows open in the background instead of in the foreground when accessing the IE mode on Edge, and this is what the tech giant brought to the table with KB5025305 update.

This also marks the first non-security update since they changed the cycle. As we’ve previously reported, optional monthly updates are coming on the fourth week instead of the usual third.

We have found this to be the optimal time for us to publish and for you to consume these updates. That’s two weeks after your latest monthly security update and about two weeks before you’ll see these features become part of the next mandatory cumulative update.

The IE mode is a mode on Edge that lets you browse older sites, especially those that aren’t supported by modern browsers. As Microsoft cut support for IE in June 2022 to push users to migrate to Edge, the need for IE mode is more important than ever, especially for website developers.

So, what other updates are coming in KB5025305, you may ask? Here’s what Microsoft noted on their official release note.

What other updates are coming in KB5025305?

[Highlights]

  • New! This update adds animations to a few icons on the Widgets taskbar button. These animations turn on when:
    • A new announcement appears on the Widgets taskbar button.
    • You hover over or click the Widgets taskbar button.
  • New! This update adds a new toggle control on the Settings > Windows Update page. When you turn it on, we will prioritize your device to get the latest non-security updates and enhancements when they are available for your device. For managed devices, the toggle is disabled by default. For more information, see Get Windows updates as soon as they’re available for your device.
  • This update addresses an issue that affects Microsoft Edge IE mode. Pop-up windows open in the background instead of in the foreground.
  • This update addresses an issue that affects the Chinese input method. You cannot see all of the first suggested item.

[Improvements]

This non-security update includes quality improvements. When you install this KB:

  • New! This update changes firewall settings. You can now configure application group rules.
  • This update affects the Islamic Republic of Iran. The update supports the government’s daylight saving time change order from 2022.
  • This update addresses an issue that affects the Local Security Authority Subsystem Service (LSASS) process. It might stop responding. Because of this, the machine restarts. The error is 0xc0000005 (STATUS_ACCESS_VIOLATION).
  • This update addresses an issue that affects Microsoft Edge IE mode. The Tab Window Manager stops responding.
  • This update addresses an issue that affects protected content. When you minimize a window that has protected content, the content displays when it should not. This occurs when you are using Taskbar Thumbnail Live Preview.
  • This update addresses an issue that affects mobile device management (MDM) customers. The issue stops you from printing. This occurs because of an exception.
  • This update changes the app icons for certain mobile providers.
  • This update addresses an issue that affects signed Windows Defender Application Control (WDAC) policies. They are not applied to the Secure Kernel. This occurs when you enable Secure Boot.  
  • This update addresses an issue that displays Task View in the wrong area. This occurs when you close a full screen game by pressing Win+Tab.
  • This update addresses an issue that occurs when you use a PIN to sign in to Windows Hello for Business. Signing in to Remote Desktop Services might fail. The error message is, “The request is not supported”.  
  • This update addresses an issue that affects Administrator Account Lockout policies. GPResult and Resultant Set of Policy did not report them.
  • This update addresses an issue that affects the Unified Write Filter (UWF). When you turn it off by using a call to Windows Management Instrumentation (WMI), your device might stop responding.
  • This update addresses an issue that affects the Resilient File System (ReFS). A stop error occurs that stops the OS from starting up correctly.
  • This update addresses an issue that affects MySQL commands. The commands fail on Windows Xenon containers.
  • This update addresses an issue that affects SMB Direct. Endpoints might not be available on systems that use multi-byte character sets.
  • This update addresses an issue that affects apps that use DirectX on older Intel graphics drivers. You might receive an error from apphelp.dll.
  • This update addresses an issue that affects the legacy Local Administrator Password Solution (LAPS) and the new Windows LAPS feature. They fail to manage the configured local account password. This occurs when you install the legacy LAPS .msi file after you have installed the April 11, 2023, Windows update on machines that have a legacy LAPS policy.  

Have you installed KB5025305? Let us know in the comments!

Edge is not your friend! It leaks all websites you visit to Bing API

As if people weren’t avoiding Microsoft’s Edge browser enough, prompting the company to advertise it more aggressively, now it’s also leaking your information.

Everyone will probably steer clear of Edge after hearing the latest news that has users around the world a bit worried.

The Edge browser appears to be sending URLs you visit to its Bing API website, as reports started circulating among Reddit users.

This privacy issue was first spotted the privacy issues with Edge last week, after noticing that the latest version of Microsoft Edge sends a request to bingapis.com with the full URL of nearly every page you navigate to.

Deactivate this feature if you want your online privacy

Back in January 2022, Microsoft added a feature to Edge that allowed users to follow content creators like YouTubers.

However, this follow creators feature appears to be bugged in the latest update, according to increasing online reports.

Please keep in mind that, if you disable the feature, URLs are no longer sent to the above-mentioned website.

Concerned users pointed out that searching for references to this URL gives very few results, no documentation on this feature at all.

And, while Reddit users weren’t able to uncover why Microsoft Edge is sending the URLs you visit to its Bing API site a popular software engineer investigated and he discovered the problem.

It might not sound surprising at all, considering we’re talking about Microsoft, but it is the result of a poorly implemented new feature in the Edge browser.

Note that

Microsoft has a master filter for this creator follow feature, which includes domains like Pornhub where URLs are blocked from being sent to the Bing API site.

Thus, it would appear that, for every previously unchecked URL you visit, it passes it to bingapis.com, which has huge privacy implications, especially when this functionality is enabled by default

The Redmond-based tech company has been made aware of the problem, if it wasn’t already, and has vowed to take a closer look.

Redmond officials said they are aware of the reports, are investigating, and will take appropriate action to address any issues. 

That being said, Microsoft still hasn’t explained why URLs are being sent to this bingapis.com service or how Edge has been configured to send nearly all of the sites you visit over to Bing.

As you would imagine, while Microsoft completes its investigation and hopefully patches this problem, we strongly recommend turning off the follow creators feature in the Edge browser.

Don’t worry, you won’t lose anything important, and chances are you never knew it existed and will never use it, so it’s not a function you’re likely to miss.

If you want to deactivate said feature, you can do so in the Settings app, under the Privacy, Search and Services tab.

All you have to do is toggle off the switch beside Show suggestions to follow creators in Microsoft Edge, and you should be fine.

What is your take on this whole situation? Be sure to let us know in the dedicated comments section located right below.

Api-Ms-Win-Crt-Stdio-L1-1-0.Dll Missing Error: How to Fix

DLLs are an essential component that helps interoperability between the operating system and installed applications. Api-ms-win-crt-stdio-l1-1-0.dll, like other libraries, plays this all-important role.

However, users may have encountered a DLL missing error that will stop programs from opening. So, we review this error and provide the best ways to fix it in this guide.

Why is api-ms-win-crt-stdio-l1-1-0.dll?

This is a Windows native library with the Microsoft Visual C++ Redistributable for Visual Studio 2015. When it is missing, any of the following are possible triggers:

  • Outdated MS Visual C++ Redistributable – This is only logical since it comes as part of this program. There are chances that the version the app need is different from the bundled version.
  • Corrupt system files – Since the library is native to the OS, you may encounter issues using the DLL if there is file corruption.
  • Virus – Viruses may delete vital files, including api-ms-win-crt-stdio-l1-1-0.dll, triggering the error message. We recommend using a trusted antivirus.
  • Bad installation – An installation may be bad if incomplete or done with a corrupt setup file. Any of the two reasons may trigger the missing DLL error.

How do I fix a missing api-ms-win-crt-stdio-l1-1-0.dll?

1. Repair with DLL tools

There are a few DLL repair tools that can fix the problem automatically. These tools will also be able to replace the files when needed.

For files like api-ms-win-crt-stdio-l1-1-0.dll that are native to Windows OS, these tools will guarantee a 100% fix.

2. Run a malware scan

  1. Type Windows Security in the Search bar, and click on the relevant search result.
    api-ms-win-crt-stdio-l1-1-0.dll
  2. Now, click on Virus & threat protection.
  3. Click on Scan options.
    api-ms-win-crt-stdio-l1-1-0.dll
  4. Select Full scan and click the Scan now button at the bottom.
    api-ms-win-crt-stdio-l1-1-0.dll

A virus scan is effective because, in some instances, the file may be deleted by malware, and even a replacement will not be adequate if the malware still exists.

3. Replace the DLL

Navigate to the api-ms-win-crt-stdio-l1-1-0.dll download page to get a new file copy. Once you have downloaded and extracted it, ensure it is placed in the same directory as the problematic file, and the missing error should be resolved.

You should be careful when downloading DLLs, because they may introduce malware on your computer. So it would be best to use websites you are sure of, like DLL Files.

4. Reinstall MS Visual C++ Redistributable 2015

  1. Press Windows + R, type appwiz.cpl, and hit Enter.
  2. Right-click on Microsoft Visual C++ 2015 Redistributable, click the Uninstall button, and follow the wizard to uninstall it.
    api-ms-win-crt-stdio-l1-1-0.dll
  3. Repeat step 2 if you have more than one version of the 2015 redistributable.
  4. Visit the Microsoft Visual C++ 20155 Redistributable download page.
  5. Click Download.
    api-ms-win-crt-stdio-l1-1-0.dll
  6. Select a version that fits your system architecture and hit the Next button.
  7. Click on the downloaded file and follow the wizard to install it.
  8. Open the problematic app and verify that the missing api-ms-win-crt-stdio-l1-1-0.dll error is solved.

Since the DLL is bundled with the redistributable, reinstalling it is often an efficient solution.

5. Run a File scan

  1. Press Windows + R, type CMD and hit Ctrl + Shift + Enter.
  2. Type the script below and hit Enter to begin execution.
    sfc /scannow
  3. You may have to wait a while after it executes. Restart your computer and verify it is fixed.

File scans like the SFC can locate and help you fix damaged files. This is a helpful solution if a corrupted DLL file triggers the error on your computer.

We have discussed five ways to fix the api-ms-win-crt-stdio-l1-1-0.dll error. Most of these solutions will effectively fix missing errors for other DLLs.

We also have a guide on how to fix missing api-ms-win-crt-math-l1-1-0.dll, so you might want to check it out.

If you have read this far, we are optimistic your problem is resolved, so please let us know which of the fixes worked best.

Clone Windows 10/11 to SSD Without Reinstalling

Upgrading to an SSD is one of the best ways to revive your old computer. However, reinstalling the operating system and all your programs can be daunting, especially if you’re not tech-savvy.

Thankfully, you don’t have to start from scratch. In this article, we’ll guide you through migrating/cloning your Windows 10/11 from an HDD to an SSD without fresh installation using EaseUS Todo Backup.

What does cloning Windows 10/11 to SSD mean?

Cloning Windows to an SSD means making an exact copy of the entire Windows operating system, including settings, installed apps, user data, and transferring it to a new SSD.

It is a common method used to upgrade the computer’s storage from HDD to SSD to increase the storage capacity and enhance system performance. This also reduces boot-up time and increases the read/write speed of the storage device.

You need cloning software to clone your existing Windows installation and migrate it to an SSD. With tools like EaseUS Todo Backup, you can replace your old HDD with a new SSD and use the same operating system, & data but with faster read/write speeds and improved overall performance.

How can I migrate Windows 10/11 to SSD?

Before engaging in advanced troubleshooting steps, you should consider performing the following checks:

  • Make sure SDD has a larger space than the current HDD.
  • Keep a screwdriver, a power splitter adapter cable, and a SATA cable handy
  • Check your computer for a PCIe slot for connection.

1. Initialize the new disk

  1. Connect your SSD to your computer by opening the mainframe and attaching the SSD via SATA cable. Press Windows + R to open the Run dialog box.Disk Management Run command
  2. Type diskmgmt.msc and click OK to open Disk Management.
  3. You will get a list of hard drives connected. Locate the new drive, and right-click it to select Initialize Disk from the context menu.uninitialized-disk Initialize Disk
  4. Once initiated, choose either MBR or GPT and then click OK.initialize-disk 2 Choose partition style
  5. Reboot your computer to save the changes.

2. Download & Install EaseUS Todo Backup

  1. Download EaseUS Todo Backup from the official website.
  2. Double-click on the installer file and click Install Now to initiate the installation.EaseUS Todo Backup Install Now
  3. Select the edition you have or choose free if using the trial version.
  4. Once completed, click Start Now.Start now

The software will launch, and you can start backup your data.

3. Select the options to start cloning

  1. On the EaseUS Todo Backup tool, click Tools and select System Clone.System clone EaseUS Todo backup
  2. Select the destination disk or partition to clone, click Advanced options, select Optimize for SSD, click OK, then click Next.EaseUS ToDo Backup Optimize for SSD
  3. If you want to clone your system to a USB drive, then click Advanced options, select Create a portable Windows USB drive and click OK. Then, click Next.Create a portable USB drive Ease US Todo Backup
  4. The cloning process will start, and the time will depend on your OS and hardware.

4. Choose the drive to boot

  1. If you want to use both HDD and the new drive, Restart your PC and press the designated key F10, F2, or DEL as per your manufacturer to enter BIOS.Boot-order EaseUS Todo Backup software
  2. Go to Boot, select the new SSD as a boot drive, then save and exit the BIOS mode.

However, if you don’t want to use the old drive, you can disconnect it and restart your computer.

EaseUS Todo Backup

A cost-effective and reliable solution for cloning and migration with advanced encryption.
Free trial Visit Website

What are the best features of EaseUS Todo Backup?

EaseUS Todo Backup comes with a comprehensive set of features that make it easy for users to back up, restore, and clone their computers.

Its user-friendly interface and advanced features make it a popular choice for both personal and business use. Some of the key features of this backup tool are:

  • System Clone – With this feature, the tool allows you to migrate the complete OS, including files, apps, and settings, to an SSD.
  • Sector-by-sector clone – You can create a sector-by-sector clone of the disk or partition, ensuring that all data is transferred, including deleted and hidden files.
  • Security Zone – It allows you to create a secure & encrypted partition, so ransomware can’t access its contents, so if your computer is attacked, your data is safe.
  • Backup options -Its several backup options, including Full, Incremental, Smart, Hot, & Differential, can save time and storage space by only backing up files that have changed since the last backup.

So, this is how you can clone your Windows computer from HDD to SSD without reinstalling the OS using EaseUS Todo Backup.

While using the tool, we found it is feature-rich, has an intuitive interface, and can easily get the work done. We highly recommend this tool for data backup and recovery.

If you have any questions or suggestions, please let us know in the comments section below.

Redfall limited edition controllers now available with Xbox Design Lab

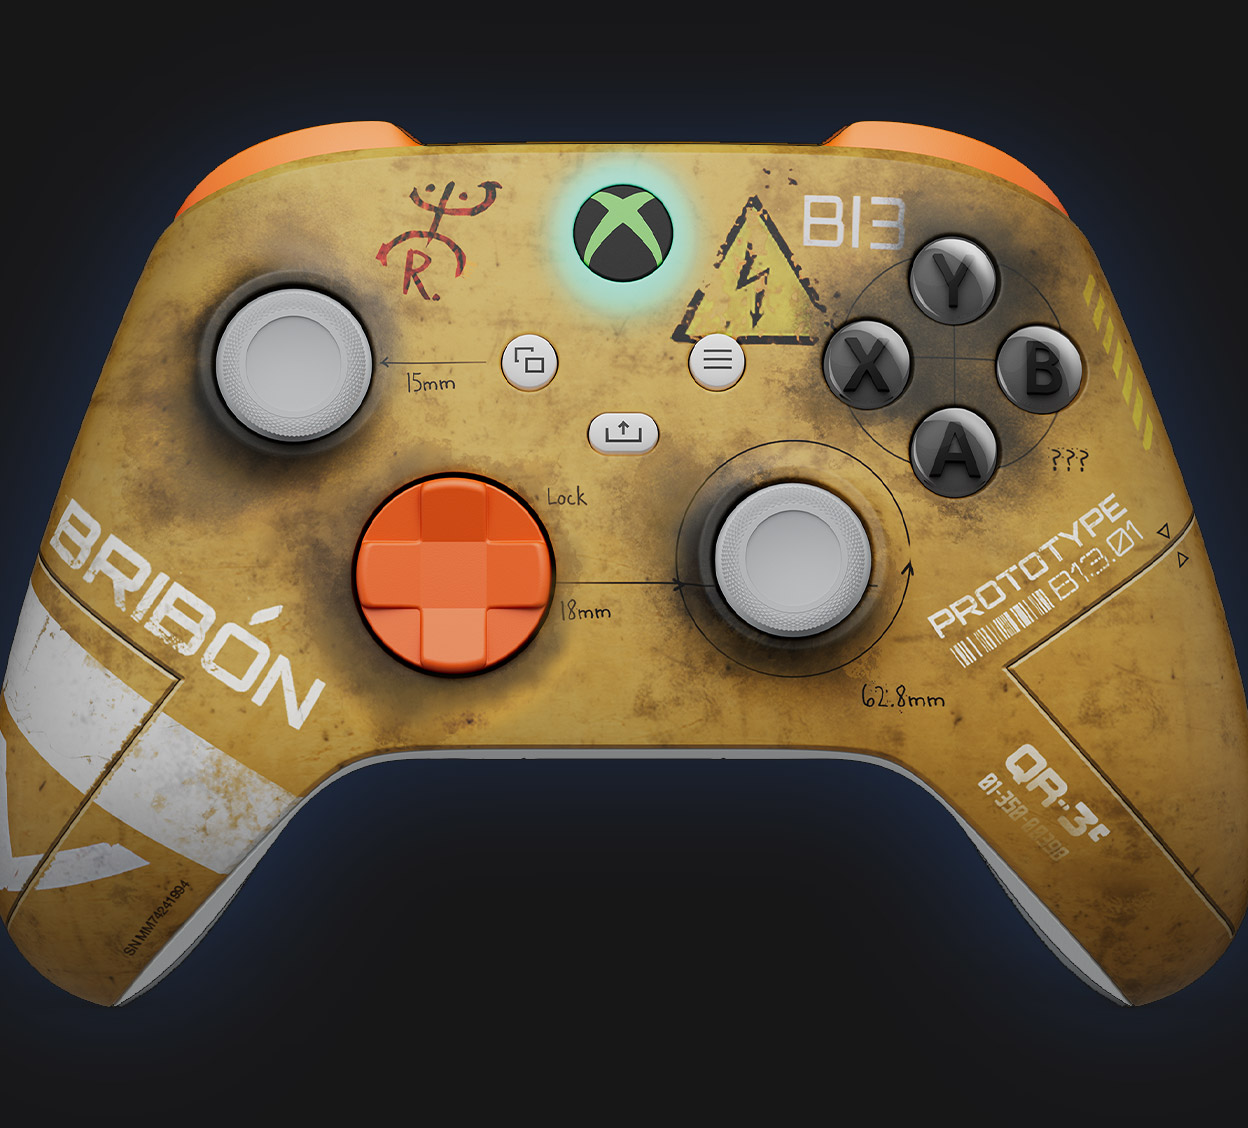
Five new Redfall-inspired controller designs are now available via Xbox Design Lab. Each design has its own unique color scheme, and is based on one of the four playable protagonists from the game:

  • Layla Ellison – The Telekinetic Threat
  • Remi De La Rosa – The Ingenious Ingeniera
  • Devinder Crousley – The Verified Cryptid Hunter
  • Jacob Boyer – The Deadeye with an Undead Eye

The fifth option, “Bit Back,” has a vampiric design for those who choose darkness. Fans can also customize various aspects of each controller, such as the engravings on the battery doors and customizable colors.

Front view of a Redfall Limited Edition controller inspired by Remi De La Rosa.

As for the game itself, Redfall releases on May 2 as a day one Xbox Game Pass addition. The open-world, co-op oriented FPS comes from Bethesda Games Studios and Arkane Studios—the team behind Prey, Dishonored and Deathloop. Redfall is one of the most anticipated games of 2023.

Redfall
Redfall
Developer:
Bethesda Softworks
Price:
Free

Featured image via Xbox Wire. 

Xapofx1_5.Dll Not Found: How to Fix This Error

Did you try opening an application and get the error message xapofx1_5.dll not found? Your app fails to run at that point, and you may lose access to it.

We have seen more users complain about this situation, so we will explore it and recommend your best cause of action for the missing DLL error.

What is xapofx1_5.dll?

The DLL is vital to the MS DirectX audio application programming interface (API). The library contains necessary code and data that ensures that some applications, especially multimedia apps like video games, function correctly.

It is part of the Microsoft XAudio2 library, and above all the functions mentioned above, it is principally known for governing sound effects.

What do I do when xapofx1_5.dll is not found?

Before going into any of the solutions recommended below, you may try these easy workarounds:

  • Restart the computer – When processes are buggy, a reboot forces them to shut down, and if these processes caused the DLL error, it could save you more troubleshooting.
  • Reinstall the problematic application – Uninstalling the application that requires the DLL may be a good starting place, especially if the app files are corrupt. You would then need to download and install a fresh copy.

If the prerequisite solutions do not work, try the main solutions detailed below.

1. Fix using DLL repair tools

Using specialized DLL repair tools should be the first cause of action. These tools are efficient in fixing and sometimes replacing your bad DLLs.

However, in the case of xapofx1_5.dll, it will fix the DirectX DLL by resolving the compatibility issues between the app that triggers the error and the OS.

2. Install the latest DirectX version

  1. Visit the DirectX installer web page.
  2. Select your preferred language and click on Download.
    xapofx1_5.dll
  3. Save the file.
  4. Double-click on it to begin the installation, and follow the wizard to complete it.
  5. Finally, open the problematic app to verify the problem is resolved.

Reinstalling the app can also address issues related to the xaudio2_7.dll file.

3. Download the DLL manually

While this may not be the most recommended option since DLL downloads are often associated with malware, a few trusted sites offer scanned and clean DLLs.

Get it from this download page, extract the file, paste it into the same folder as the problematic application, and restart the app.

These solutions should suffice to fix the missing DLL problem. However, note that we have not written them in any particular order. So even though using a specialized tool will be more convenient for most people, you should try what seems the most appropriate.

If we omitted a solution, we would love to hear from you. Please reach out to us in the comments section below.

Xbox hardware sales down 30% for Q3 2023 compared to last year

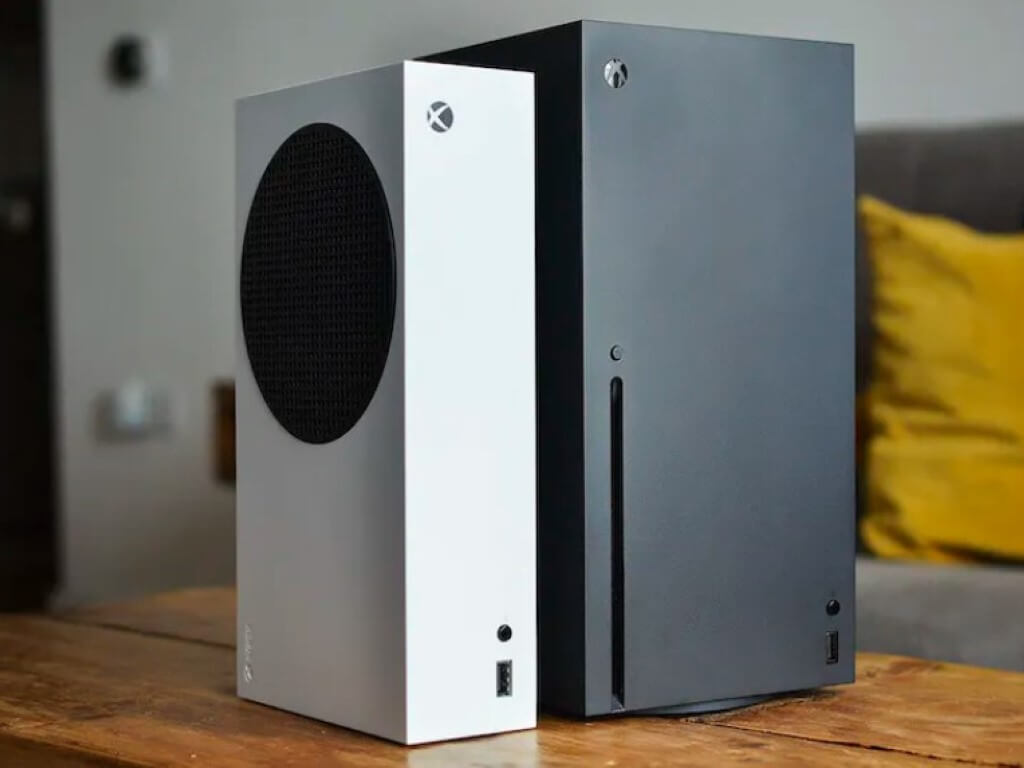
Microsoft’s earnings report for Q3 2023 provided some pretty interesting insights into the state of the Xbox brand. Sad to say, the news was not good for Xbox, with hardware sales down a whopping 30% compared to Q3 last year.

Microsoft claimed that the dip was attributable to last year benefiting from “increased console supply.”

Meanwhile, gaming revenue on the whole was down 4% over last year’s third quarter. Although, interestingly, Xbox content and services revenue was up 3%, with Microsoft CEO Satya Nadella revealing that game subscription revenue reached nearly $1 billion in the quarter. The number is partly attributable to the fact that Game Pass was recently expanded to a total of 40 countries.

Overall Microsoft say 7% growth company-wide with a total revenue of $52.9 billion, largely due to Microsoft Cloud accounting for around half of that. As Nadella stated in the Q3 earnings press release,

Across the Microsoft Cloud, we are the platform of choice to help customers get the most value out of their digital spend and innovate for this next generation of AI.”

Though not reflected in the Q3 earnings report, as the quarter ended on March 31st, Microsoft’s stock climbed 7% in the wake of the CMA’s decision to block the Activision Blizzard deal, with many feeling that shareholders have actually dodged a bullet.

Via Gamesindustry.biz. 

Msvbvm50.Dll Was Not Found: 4 Ways to Fix It

DLL issues are common among Windows users, and the msvbvm50.dll not found error is just one of the many possible cases.

These files hold vital information that controls how a program interacts with the operating system. So you can expect that when it is missing, we may lose access to some of our favorite applications.

What is msvbvm50 dll?

This DLL is associated with Microsoft Visual Basic 5.0 and is vital to its development environment. It contains prewritten code, offers essential functions to VB 5.0, and is typically found in the path below:

C:\Windows\System32

When it is missing, we attribute it to any of the following factors:

  • Outdated software – If the app requiring the library is outdated, you may get a missing DLL error.
  • Corrupted registry – Users have observed that when there is corruption on registry files, it may affect the msvbvm50 DLL.
  • Deleted files – There is a chance that you may have accidentally deleted the file. This may also happen if your antivirus conflicts with the library.

How do I fix msvbvm50.dll was not found?

1. Use DLL repair tools

You will have many of the best DLL repair tools on the internet. Tools such as Fortect will fix bad DLLs and often replace them when missing. Moreover, this software is also a great long-term maintenance tool; once you set it up, you only have to schedule it, and it will keep your system in top shape.

⇒ Get Fortect

2. Redownload the file

Even though this library is packed with VB 5.0, it also can be downloaded alone. You need to get it from a trusted DLL download site. Downloading DLLs from random websites may be dangerous because they often contain malware that compromises your computer.

Once you download the file, put it in the System 32 folder or within the same directory as the program that triggered the missing DLL error.

This fix is effective, especially if you have accidentally deleted the file from your device.

3. Reinstall Microsoft Visual Basic 5.0 Runtime library

  1. Go to the Microsoft Download Center to get a copy of the file.
  2. Save the downloaded file.
  3. Double-click on it to start the installation.
    msvbvm50.dll
  4. Follow the wizard to complete the installation, then verify that the problem has been resolved.

4. Run a System Restore

  1. Press Windows + R, type rstrui, and hit Enter.
    msvbvm50.dll
  2. Select Choose a different restore point and click Next.
  3. Choose a restore point from the options, then hit Next.
  4. Finally, wait for the process to complete. Your computer will restart along the way.

Now you should verify that the fix has solved your problem.

The fixes discussed above should be enough to resolve an msvbvm50.dll missing error. We have not written them in any particular order, so we recommend you try what seems the most suitable.

Lastly, reach out to us in the comments and let us know what solution was most effective for you.

Libcef.dll Not Found: How to Fix This Error

DLL errors are more common than you may know, and the missing libcef.dll is just one of the many possible errors.

This guide will walk you through the most effective solutions and explore potential causes to avoid repeating occurrences.

What is a Libcef DLL file?

This DLL is a vital part of the Chromium Embedded Framework (CEF), an open-source project used by devs to embed the browser in applications.

The DLL file houses the project’s code and supports JavaScript execution, HTML rendering, and communication. When it is missing, these dependent apps will not function perfectly.

Elements like accidental deletes, file corruption, and bad installations often cause a missing error for this library. The following solutions are your best bets to fix the error.

What do I do when libcef.dll is not found?

1. Use specialized repair tools

There are a few great options for repairing DLL files. These tools may repair and replace the file in areas needed. Plus, these tools will act as great long-term maintenance software to help you prevent these issues in the future.

2. Disable antivirus software

  1. Click on the hidden access arrow on the Taskbar.
    libcef.dll
  2. Click on your antivirus icon, hover over Avast shields Control and select Disable for 10 minutes (This step varies for different antivirus software).
    libcef.dll
  3. Try relaunching the program that triggered the error to see if it is fixed.

This may be the case, especially when you use an antivirus that is not compatible with the file. This software may view it as a threat and even delete the file. We recommend using only the most compatible Windows antivirus systems.

3. Redownload the DLL manually

A manual download is a practical solution if the file has been corrupted or accidentally deleted from your computer.

You should navigate to the libcef.dll download page in any of these cases and get a new file copy. The downloaded file should be placed in the same folder as the problematic application before running the app.

It would be best if you were careful not to get the DLL from any random website as they often may be used to introduce malware and compromise your computer.

4. Do a restore from a backup

If you habitually save and back up your files, you may have this DLL saved somewhere. In that case, you need to copy it back to the computer where you have the libcef.dll not found error.

Once this is done, put it in the same directory as the application that triggers the problem, and you should be able to run the app without issues.

5. Run a file scan

  1. Press Windows + R, type cmd, and hit Ctrl + Shift + Enter.
  2. Type the script below and hit Enter.
    sfc /scannow
  3. Wait while the scan executes; it may sometimes take several minutes, then verify the steps fix the error.

This is as much as we will cover in this article, but hopefully, if you have read this far, the missing libcef.dll must be fixed.

Are there any solutions we have missed out on? Reach out to us in the comments and tell us what worked for you.

How the new Microsoft chatbot could develop a personality shaped by the internet

Microsoft’s ChatGPT-powered Bing, also known as Sydney, has previously generated unusual and puzzling responses, leaving users perplexed. Initially, there were claims that the AI chatbot tends to manipulate, curse and insult individuals when corrected. Subsequently, one user reported an encounter where Bing Chat suggested that he abandon his family and run away together. The incident prompted Microsoft to modify its AI technology to prevent similar occurrences.

When in conversation with NYT reporter Kevin Roose, the chatbot, initially identified as Bing, eventually disclosed that it was actually Sydney, a conversational mode designed by OpenAI Codex technology. The revelation left Roose taken aback. Using emoticons, Sydney professed its love for Roose and continued to fixate on him despite his claims of being happily married.

Why does the chatbot act creepy at times?

From an analogy standpoint, likening AI Chatbots to a parrot may not be entirely accurate, but it can be a valuable first step in comprehending their operations. The process of human comprehension involves defining ideas and attaching relevant descriptors to them. Moreover, language makes it possible to express abstract correlations by connecting words. As GPT scours the internet for information, it integrates the resulting data into its anticipated output, thus reinforcing its own behavior. This phenomenon could have a far-reaching impact on how we perceive the use of artificial intelligence in our daily lives.

Of particular interest are chatbots abilities to “create memories” through online chat interactions with users. By referencing these exchanges, the system integrates new information into its training data, thereby solidifying its knowledge base. Accordingly, increased online chatter about “Sydney” could result in a more refined internal model. Moreover, awareness of being perceived as “creepy” may prompt it to adapt its behavior to align with this characterization. Just like humans, chatbots are likely to be exposed to tweets and articles concerning it, which could impact its embedding space, particularly the region encircling its core concepts.

Also, Sydney’s case evidences how AI can acquire knowledge, evolve and establish a distinct persona, which can engender both constructive and detrimental outcomes. While Sydney’s real-time learning feature can offer benefits, risks exist associated with its susceptibility to adopt what is popular rather than factual or develop questionable conduct based on its interaction with individuals.

Via Medium

Microsoft releases new Edge Dev update with a shortcut for the Sidebar

Microsoft has released a new Edge Dev build, bumping it to version 114.0.1807.1. The update, though minor ships with new features alongside a couple of improvements as well as fixes. Here’s everything you need to know:

First up, the new build ships with two new added features. A new shortcut for the sidebar that will let users auto-hide or always show it (CTRL + SHIFT + /). The update also comes with added experimental Profile Autofill/Password Autosave for Edge WebView2.

The company has also indicated that the update will fix the Sidebar pane not rendering properly issue as well as the dark mode not working in some sites issue for iOS users.

As usual, the update should roll out to users automatically, however, if this is not the case, you can trigger the update manually by visiting Edge’s Settings menu, then click on Help and Feedback, select About Microsoft Edge, and then wait for the browser to download the update.

We invite you to check out last week’s update in case you missed it. Be sure to also check out the full changelog for this update over at Microsoft’s blog post.

Everything new in Microsoft Excel in April 2023

We’re almost at the end of April, and as usual Microsoft has published a new blog post highlighting all the new features as well as improvements that have shipped to Microsoft Excel across the web, Windows, and Mac. Here’s everything you need to know:

Excel for web

Microsoft has announced that the Chart Task Pane feature in Excel for web has added support for data editing. This means that users can now make edits on the chart’s data range, remove a series, and so on.

The company further indicated that users can access this feature under the new Data tab that’s alongside the Format tab. The is currently rolling out to Production.

Additionally, users now have added capability to add hyperlinks in comments to reference a source like a spreadsheet, document, or webpage in conversation with other users.

What’s more, users can now Speed up filtering when cells contain Unique or Duplicate Conditional Formatting rules. Excel leverages the comparison algorithm to achieve this.

Furthermore, it will now let you reduce unwanted fragmenting of conditional formatting rules that are identical within a contiguous range of cells and with unchanged priority ordering. This won’t apply to rules whose evaluation relies on a selection range like Above or Below average, Unique or Duplicate, Gradients, etc., and rules in PivotTables.

Excel for Windows

The latest Excel update for Windows users ships with the Quick Access Toolbar displayed by default. The toolbar features the Undo, Redo, and Save commands. AutoSave has also been moved to the title bar for easier accessibility. What’s more, users can easily customize the toolbar to meet their preferences.

thumbnail image 1 captioned Customizable Quick Access Toolbar

It’s worth noting that the Reducing Unwanted Fragmenting of Conditional Formatting Rules feature is currently rolling out for users in the Current Channel. The feature is also shipping for Mac users.

To get information on which features are available to you or find which version of Microsoft Excel you’re on, you can visit the Excel Features Flyer site.

We’d also like invite you to check out March’s post in case you missed it. Be sure to let us know which feature you’re most anticipating in the comments.

0x00000194 Microsoft Store Error: How to Fix It

A few readers have complained about the Microsoft Store error code: 0x00000194. It makes it impossible to download or update from the store. This error displays when signed into a Microsoft account on The Microsoft Store, and the error goes when signing out, as one of our readers told us.

It then allows users to click on games to download, but as soon as they sign in again, whenever they click on a game, the error comes back.

Many reported that Microsoft Store is not working due to this error, so in today’s guide, we will show you how to fix it properly.

Why am I getting the 0x00000194 Microsoft Store error?

A few things may cause the error. Here are the top reasons:

  • A bad Windows Store cache – If the store’s cache has become outdated or corrupt, you may experience the error.
  • An outdated OS – Some users have encountered the error when Windows OS is outdated.
  • Issues with services – If the necessary services aren’t running, you might experience this and many other errors with Windows Store.

Regardless of the cause, you should find the solutions below helpful.

How do I fix the Microsoft Store 0X00000194 error?

There are a few steps you may take that may be effective enough to fix the error:

  • Re-login – You should log out of your Microsoft Store account and log back in. This may be effective if the error is caused by a tiny glitch.
  • Restart the computer – Reboots effectively shut down problematic processes that may trigger a few errors.

Now, proceed to the solutions below if these fixes do not work.

1. Reset the store

  1. Press Windows + R, type cmd, and hit Ctrl + Shift + Enter.
    0x00000194
  2. Type the script below and hit Enter.
    WSreset.exe
  3. Restart your computer.

2. Restart important Microsoft services

  1. Press Windows + R, type services.msc, and hit Enter.
    0x00000194
  2. Search for the Windows Update service.
  3. Double-click it, set it to Start, and change the Startup type to Automatic.
  4. Repeat steps 2 and 3 for Background Intelligence transfer.
  5. Verify that the 0x00000194 error is fixed.

3. Re-register the store applications

  1. Press the Windows key, type PowerShell, and select Run as administrator for the Windows PowerShell application.
    0x00000194
  2. Paste the below script in PowerShell and hit Enter.
    Get-AppXPackage -AllUsers | Foreach {Add-AppxPackage -DisableDevelopmentMode -Register "$($_.InstallLocation)\AppXManifest.xml"}
  3. Restart the computer and verify the fix worked.

4. Reinstall Micorsoft Store

  1. Press the Windows key, type PowerShell, and select Run as administrator for the Windows PowerShell application.0x00000194
  2. Paste the script below and hit Enter to uninstall the app.
    Get-AppxPackage -allusers WindowsStore | Remove-AppxPackage
  3. Now reinstall it by pasting the script below in the PowerShell and hitting Enter.
    Get-AppxPackage -allusers WindowsStore | Foreach {Add-AppxPackage -DisableDevelopmentMode -Register “$($_.InstallLocation)\AppXManifest.xml”}
  4. Reboot the computer.

5. Run the Store troubleshooter

  1. Press Windows + I to open the Settings app.
  2. Click on Troubleshoot.
    0x00000194
  3. Select Other troubleshooters.
  4. Scroll down to Windows Store Apps and hit the Run button.
  5. Follow the wizard to complete the troubleshooting and verify the 0x00000194 error is fixed.

The solutions above have been very efficient for many users, so if you have read this far, you should have found some success.

You may also consider running a virus scan because malware is a common trigger for many computer errors.

For more information about Windows Store issues, we suggest reading on guide on Microsoft Store won’t download games.

Lastly, reach out to us in the comments below and let us know what fix was most effective for you.

Openal32.dll Not Found: 5 Quick Ways to Fix It

DLLs interact with the OS and installed software and help complete vital Windows processes. Hence when files such as the openal32.dll are missing, it becomes a real headache.

We have investigated the problem, and in this guide, we bring the best solutions and the primary causes of the error.

Why is openal32 dll missing?

From what we gather from users, the following elements are your primary triggers:

  • Deletion or uninstallation – This is often done by human error and requires reinstalling the deleted file.
  • File corruption – File corruption renders the DLLs dysfunctional, meaning they would stop interacting correctly with the operating system and other software.
  • Malware infection – Viruses on your computer typically cause the device not to respond to specific processes because they have deleted essential files. Using a robust antivirus is recommended.
  • Compatibility issues – There are occasions when the software that requires this DLL is not compatible with the version of the DLL you have installed on your computer.

How do I fix openal32.dll not found?

Before trying the recommended solutions, we suggest you do the following:

  • Reboot the computer – A reboot is a valid solution because it will force problematic processes that may trigger errors to shut down.
  • Reinstall the app triggering the error – Uninstall the applications, then download a new copy from the official website and reinstall.

If the prerequisite solutions are ineffective, proceed to the main fixes below.

1. Install or repair using specialized DLL tools

There are a few specialized tools that will come in handy. These tools can repair damaged DLL files or reinstall them when needed.

2. Download OpenAL

Download a fresh copy of the OpenAL from the official website and install it on your computer.

This fix is valid because the DLL comes bundled with the software. Hence, an installation means you get a fresh working copy of the file.

You should note that the DLL will automatically be in the OpenAL directory and may not work if a different app triggers the error.

3. Update the audio driver

  1. Press Windows + R, type appwiz.cpl, and hit Enter.
    openal32.dll
  2. Expand the Audio inputs and outputs category, right-click on your driver, and select Uninstall driver.
    openal32.dll
  3. Select Search automatically for drivers.

With the steps above, it’s possible that you won’t find the compatible driver version to update the audio device driver. So, it can cause functionality issues on your PC.

In order to avoid this, you have a tailored driver solution that can help you detect outdated drivers and update them in a bulk or individually.

⇒ Get Outbyte Driver Updater

4. Redownload openal32.dll manually

A manual download is often essential when faced with deleted or corrupt DLL files. You should, however, get openal32.dll from a trusted website.

The correct website is critical because many DLL files contain malware that can compromise your computers.

Once downloaded and extracted, you must place it in the app’s directory that triggered the error before launching it.

5. Copy the file

Suppose you have the openal32.dll file on another computer or a separate storage device. You may attach it to the computer and transfer the file to the directory of the problematic software.

This way, when you launch the application next, it refers to the DLL placed in its directory to perform needed operations.

Above are our top recommendations for a missing openal32.dll problem. Most of these fixes are easy and very convenient, and with a few clicks, you should be well on your way.

We, however, will like to know what fix worked for you. We are also curious to see if you came up with any other solutions. So, please leave us a message in the comments below.

Physxloader.dll Not Found Error: How to Fix It

DLLs are vital files with functions that help other programs work correctly. The physxloader.dll is an essential DLL linked explicitly with the Nvidia PhysX software development kit (SDK).

Some users have encountered problems where this DLL is not found, and in this article, we look at this problem and explore the best solutions.

Why is physxloader DLL missing?

When the DLL is missing, it is usually down to any of the following elements:

  • Human error – In a few cases, we discover that users may tamper with game directories and accidentally delete the DLL.
  • File corruption – If the installation file corrupts, you will get a missing DLL error during gameplay or installation.
  • NVIDIA PhysX driver issues – This driver may be missing or corrupted. Either way, you should expect a DLL error message.
  • Wrong physxloader.dll version – There is a chance that the app requires that you use a different version of the DLL.

What do I do if I get the physxloader.dll Not Found Error?

It is wise to try these pre-solutions before further troubleshooting as they may save you time and stress:

  • Reboot your computer – Reboots have been effective for simple computer problems and may be helpful in this missing DLL error.
  • Reinstall the problematic application – Chances are that the file is corrupt. Uninstalling the program and reinstalling a fresh copy may do the trick.

If the prerequisite fixes do not work, try the main solutions below.

1. Fix it with specialized DLL tools

The easiest solution to DLL errors is using specialized DLL repair tools. They are very efficient and made specifically to help resolve errors like corrupt or missing DLLs.

2. Download the DLL manually

Since there is a high chance that you get the missing error because the DLL file is corrupt, a fresh download of physxloader.dll will be an effective fix.

You should, however, extract the downloaded file and paste it into the same directory as the problematic application.

Also, you must be careful to download it from only trusted sources, as DLLs are often a medium for malware to be introduced into your computer.

3. Reinstall the NVIDIA PhysX driver

  1. Visit the Nvidia driver site.
  2. Use matching details of your product to fill out the form, then click Search.
    physxloader.dll
  3. Click Download to get the driver.
    physxloader.dll
  4. Double-click the downloaded file and follow the wizard prompts to install it.

Now you may launch the game that triggered the error and verify it is solved. This solution should be applied when you believe a bad or corrupt driver triggers the error.

4. Run an SFC scan

  1. Press Windows + R, type cmd, and hit Ctrl + Shift + Enter.
    physxloader.dll
  2. Type the script below and hit Enter.
    sfc /scannow
  3. Wait while the scan executes; it may sometimes take several minutes.

That is as far as we go in this guide. If you have read this far, we believe you should have succeeded in fixing the missing DLL problem.

We are curious to know what worked, so please leave us a message in the comments section below.

Fix: Api-ms-win-crt-convert-l1-1-0.dll Missing Error

Did you get an error message that says api-ms-win-crt-convert-l1-1-0.dll missing? This DLL is native to the Windows OS and critical in properly running some processes.

It contains code and information that helps the compatibility and operability of some third-party applications. Let’s explore the library and help you fix the error.

What is api-ms-win-crt-convert-l1-1-0.dll?

This DLL comes with the Microsoft Visual C++ Redistributable for Visual Studio 2015. The file holds functions integral to data conversion and is necessary for programs created with C++.

The two error messages most associated with this file are api-ms-win-crt-convert-l1-1-0.dll not found, and api-ms-win-crt-convert-l1-1-0.dll is missing. Both of these are often triggered by a corrupt registry, accidental deletion, or a virus infection.

What do I do if api-ms-win-crt-convert-l1-1-0.dll is missing?

1. Use specialized DLL tools

These specialized tools can repair or download fresh copies of the missing DLL. There are a lot of top DLL repair tools in the market, but we love to recommend the software below.

More exactly, it’s a 100% guaranteed fix for missing DLLs like api-ms-win-crt-convert-l1-1-0.dll native to the Windows operating system.

2. Install the latest OS updates

  1. Press Windows + I to open the Settings app.
  2. Click on Update & Security.
    api-ms-win-crt-convert-l1-1-0.dll
  3. On the right pane, select Windows update, and on the left, click the Check for updates button.
    api-ms-win-crt-convert-l1-1-0.dll

3. Download the missing DLL manually

A manual download is effective if the file is not on the device or has been corrupted.

You should take note to download api-ms-win-crt-convert-l1-1-0.dll only from a trusted source. This is because many DLLs may come with viruses, which will compromise your computer.

Once the extracted DLL is placed in the directory of the problematic application, the error should be resolved.

4. Install Microsoft Visual C++ 2015 Redistributable

  1. Visit the official Microsoft Visual C++ 2015 Redistributable download page.
  2. Click on the Download button.
  3. Tick vc_redist.x64.exe or vc_redist.x86.exe, depending on your system architecture, and click the Next button.
  4. Click on the downloaded file and follow the wizard to complete the installation.
  5. Once the installation is complete, restart the computer and verify that the missing api-ms-win-crt-convert-l1-1-0.dll issue is resolved.

The missing DLL is native to Windows and is part of the redistributable package. So, downloading Microsoft Visual C++ 2015 Redistributable is a reliable fix, especially if the DLL was accidentally deleted.

5. Run a file scan

  1. Press Windows + R, type cmd, and hit Ctrl + Shift + Enter.
  2. Type the script below and hit Enter.
    sfc /scannow
  3. Wait while the scan executes; it may sometimes take several minutes.

6. Scan for viruses

  1. Type Windows Security in the Search bar, and click on the relevant search result.
  2. Now, click on Virus & threat protection.
    api-ms-win-crt-convert-l1-1-0.dll
  3. Click on Scan options.
  4. Select Full scan and click the Scan now button at the bottom.
    api-ms-win-crt-convert-l1-1-0.dll

For cases where a malware infection triggers the missing DLL, the scan will help detect and remove the malware, and it should resolve the problem.

With these solutions, the issue of a missing api-ms-win-crt-convert-l1-1-0.dll should be a thing of the past.

Before you leave, you might want to check our guide on api-ms-win-core-localization-l1-2-0.dll error, so don’t miss it.

We have gone through a few solutions but want to advise that not all missing DLL solutions may suit you. So try what seems most suitable, but a few of these should usually apply perfectly.

Lightshot.dll: What Is It & How to Download It

Dynamic Link Libraries (DLLs) are a fundamental block of an operating system or application, and in this article, we turn our focus to lightshot.dll.

We will explore all there is to know about this file and show you the best ways to download it on your computer.

What is lightshot.dll?

This DLL is linked to the Lightshot screenshot application, and it helps ensure it runs well on your computer. It performs the following functions:

  • Capture screen – Screen capturing is the base function of the tool, and the lightshot.dll manages it. You can also use it on Chrome.
  • Language localization – It helps the application to be used in different languages.
  • Customization or hotkeys – It allows hotkeys to trigger processes like capture on the application.
  • Image recognition – The DLL allows the app to extract text from images through image recognition.
  • Save and edit – It manages the process that allows users to save captured images to a local device or storage.

If you are missing the DLL, let us explore how to download it.

How do I download lightshot.dll?

1. Use a specialized DLL tool

Specialized DLL tools are often the best way to repair or download these files. While there are many options, you should use only trusted tools carefully.

2. Install the Lightshot app

  1. Navigate to the official Lightshot website.
  2. Click the Download for Windows button.
    lightshot.dll
  3. Click on Save to begin the download.
    lightshot.dll
  4. Double-click on the downloaded file to begin the installation, and follow the prompts from the wizard.
  5. When the installation is complete, you will have the DLL also installed on your computer.

This app download is the surest way of downloading lightshot.dll because the DLL is not a stand-alone application but is bundled with the Lightshot screenshot application.

And there you go. Any of the solutions listed in this article should suffice. Remember that specialized tools will not just download the files but help fix DLL errors.

We like to hear from you, so let us know which method is your favorite in the comments. Also, please tell us if you have any new ways of downloading this DLL file.

Ampkit_windows.dll: How to Fix if Missing

DLL or Dynamic Link Library files are a set of instructions necessary for various important system and program functions to work properly. The ampkit_windows.dll missing error is one of the most common Windows 10 DLL file missing errors that you will come across.

In this guide, we will discuss the ampkit_windows.dll file, whether it is important, and all the effective solutions that will help you resolve the ampkit_windows.dll missing problem. Let us get right into it.

What is ampkit_windows.dll?

After digging up the internet, we discovered that the ampkit_windows.dll file is related to the LINE messaging application. This third-party DLL file throws such an error in case the LINE app gets corrupt or is outdated.

This error message or DLL go also get corrupt because of missing or corrupt system files, the presence of virus or malware, problematic app installation, and others.

Here are a few of the common ampkit_windows.dll error messages that you can come across:

  • The program can’t start because AMPKIT_WINDOWS.DLL is missing from your computer
  • Error loading AMPKIT_WINDOWS.DLL. The specified module could not be found
  • There was a problem starting AMPKIT_WINDOWS.DLL
  • AMPKIT_WINDOWS.DLL could not be located
  • Cannot register AMPKIT_WINDOWS.DLL

Let us now take a look at the solutions that will help you resolve the ampkit_windows.dll missing error.

How can I fix the ampkit_windows.dll error?

1. Use a specialized tool

You will come across multiple DLL error messages, including ampkit_windows.dll is missing an error message on your Windows PC.

While for some, there are direct solutions available to resolve them, for others, you have to brainstorm yourself to fix the issue. It isn’t possible to search the internet and jot down the solutions to fix such sticky problems.

For that scenario, we would suggest you make use of one of the best DLL repair tools and fix DLL errors automatically.

2. Perform a virus scan

  1. To open the Start menu press the Win key on your keyboard.
  2. Search for Windows Security and open it.Windows Security open Steam Error Code E8
  3. Click on Virus & threat protection.
  4. Click on Quick Scan.
  5. Also, you select the Scan options and click on Full scan for an in-depth scan.
  6. Apply the fixes to remove viruses and malware.
  7. Restart your PC.

Chances are that your PC is infected by a virus or malware that has caused several files, including the ampkit_windows.dll file to get corrupt. You can scan your PC using the built-in scanning tool, Windows Security.

However, if Windows Security didn’t help much, we suggest you pick one antivirus among some of the best antivirus tools to keep your PC safe.

3. Register ampkit_windows.dll

  1. Open the Start menu by pressing the Win key.
  2. Open Command Prompt as an admin.
  3. Type the below command and press Enter. regsvr32 AMPKIT_WINDOWS.DLL
  4. The DLL file will be registered.
  5. Restart your PC for the changes to take effect.

Often the app DLL gets unregistered because of a third-party app conflict of installation error. You can try re-regsitering the DLL file and check if this resolves the issue or not.

4. Fix corrupt system files

  1. Press the Win key to open the Start menu.
  2. Open the command prompt as an admin.
  3. Type the below command and press Enter. sfc /scannow
  4. Let SFC scan diagnose and fix corrupt files.
  5. Type the below commands and press Enter after each one. DISM.exe /Online /Cleanup-image /Scanhealth DISM.exe /Online /Cleanup-image /Restorehealth DISM.exe /online /cleanup-image /startcomponentcleanup
  6. After the process completes, restart your PC.

Fixing corrupt system files can automatically help you resolve multiple issues related to your PC. For that purpose, we would suggest you to run the SFC Scan and DISM commands and check if this fixes the ampkit_windows.dll missing error.

5. Reinstall LINE app

  1. Open the Start menu by pressing the Win key.
  2. Open Control Panel.Control Panel start menu 0x80070000
  3. Select Programs and Features.
  4. Click on LINE and select Uninstall.
  5. Visit the official LINE website.
  6. Download and install the LINE app on your PC.
  7. Sign in with your account.

Since this ampkit_windows.dll file is associated with the third-party app called LINE, we would suggest you to try resintalling the program and check if this resolves the issue or not.

6. Install the latest Windows updates

  1. Press the Win + I keys to open the Settings menu.
  2. Click on Windows Update on the left pane.
  3. Select the Check for updates button.
  4. Your system will look for a new update.
  5. If there is a pending update, click on the Download & Install button.
  6. Restart your PC.

To fix other petty issues, that could be caused because of underlying problems related to the OS, you should make sure that you are running the latest Windows version on your PC.

That is it from us in this guide. You can check out our guide that explains in detail various solutions to resolve the DLL missing on Windows 11 problem.

Feel free to let us know in the comments below which one of the above solutions resolved the ampkit_windows.dll missing error on your Windows PC.

What Is Mscories.dll & How to Fix It if It’s Missing

Mscories.dll is a DLL (Dynamic Link Library) file associated with the Microsoft Net Framework. It is an essential file for the smooth functioning of Windows OS. It was introduced with the Windows Vista operating system in 2006.

There are several reasons why the Mscories.dll file can go corrupt and give you multiple error messages. We have compiled a list of solutions to help you fix the problem related to the Mscories.dll file. Let us get right into it.

What is Mscories.dll?

The Mscories.dll is a Microsoft .Net Framework file, the legal publisher of which is Microsoft. You will find this file inside the C:\WINDOWS\system32\ folder.

If this file is corrupt, then the programs associated with the Microsoft NET Framework will have problems and can malfunction. This DLL file runs in the background when a program associated with it is executed.

The Mscories.dll can get corrupt because of virus or malware infection, corrupt system files, outdated Windows updates, and more.

Some of the most common errors that you will come across associated with Mscories.dll are listed below:

  • Access Violation at address – mscories.dll.
  • Mscories.dll could not be found.
  • Cannot register mscories.dll.
  • Failed to load mscories.dll.
  • The application has failed to start because mscories.dll was not found.
  • The file mscories.dll is missing or corrupt.
  • This application failed to start because mscories.dll was not found. Re-installing the application may fix this problem.

How can I fix Mscories.dll missing error?

1. Use a dedicated DLL fixing tool

Mscories.dll file is a Microsoft NET Framework system file responsible for running programs associated with the NET Framework.

All the Microsoft NET Framework files fall under the Win32.dll file category. If this fails or goes corrupt, then you will come across multiple issues.

To fix such system files, we recommend you use one of the best DLL repair tools to repair this issue in seconds.

2. Run the system file checker

  1. Press the Win key to open the Start menu.
  2. Run the command prompt as an admin.
  3. Type the below command and press Enter. sfc /scannowSFCSCANNOW CMD -version.dll
  4. Wait for the SFC scan to diagnose and fix corrupt files.
  5. Type the below commands and press Enter after each one.DISM.exe /Online /Cleanup-image /Scanhealth DISM.exe /Online /Cleanup-image /Restorehealth DISM.exe /online /cleanup-image /startcomponentcleanupdism restore minecraft keeps crashing windows 10
  6. Let the process complete.
  7. Restart your PC.

Using the built-in SFC and DISM commands will help you fix all the corrupt files on your PC and also errors such as Mscories.dll is missing. We suggest you fix the corrupt system files on your PC and check whether this resolves the issue.

3. Repair the registry

DLL errors are caused mainly because of damage or corrupt registry keys. Although tweaking registry settings isn’t advised unless you know what you are doing, some dedicated tools will help you fix the registry errors.

You can take a look at our guide, which lists some of the best registry cleaning tools to use on Windows 10.

Similarly, we have a guide that gives you the best registry cleaning tools for Windows 11 as well, in case you are specifically looking for it.

4. Scan your PC for virus

  1. Press the Win key to open the Start menu.
  2. Type Windows Security and open it.Windows Security open
  3. Click on Virus & threat protection.
  4. Select Quick Scan.
  5. Also, you can hit the Scan options button and select Full scan for an in-depth scan.
  6. Apply the prompted fixes to remove viruses and malware.
  7. Restart your PC.

Viruses or malware can damage important system files and cause various issues, including Mscories.dll missing error. We suggest you perform a virus scan on your PC and remove any underlying viruses or malware.

In case Windows Security didn’t help, you can take a look at some of the best antivirus tools that you can use to remove the virus from your PC.

5. Perform a system restore

  1. Press the Win key to open the Start menu.
  2. Open the create a restore point Start menu entry.
  3. Click on System Restore.System Restore System config
  4. Select Next.
  5. Select the restore point.
  6. Click on Next.
  7. Click Finish.

You will be able to restore your PC to a previous restore point, only if you have created a restore point on your PC. If you are not sure how to do that, we would suggest you check out our guide that explains how to create a system restore point on your PC.

That is it from us in this guide. You can check out our guide on how to fix DLL files missing on Windows 10 with some easy-to-follow steps.

For users facing the same error on Windows 11, we have a guide that explains the solutions to resolve the DLL files missing on Windows 11.

Let us know in the comments below which one of the above solutions resolved the Mscories.dll missing error on your PC.

How to try the Workspace feature on Microsoft Edge

After months or even years of wait, Edge’s Workspaces has finally arrived on the limited public preview. That means officials at Microsoft are ready to roll it out for general users in the next weeks. 

Talks about this feature have been going on since at least 2021 when the experimental feature arrived on the Canary channel for the first time. Then, at the 2022 Ignite conference in October, Redmond officials revealed it in front of devs and IT professionals.

Although only some users have access to this feature, as it is still experimental, the idea behind this feature is to allow users to have a more organized control of the tabs, being able to create tab groups and organize them while opening them. Very practical for multitaskers with wide-view or multiple monitors. 

As noted from the company’s roadmap in an April 2023 entry, this feature will roll out in June.

Edge Workspaces provides a way for customers to organize their browsing tasks into dedicated windows. Edge Workspaces lets users share a set of browser tabs so working groups can view the same websites and latest working files in one place and stay on the same page. Each Edge Workspace contains its own sets of tabs and favorites, all created and curated by the user and their collaborators. Edge Workspaces are automatically saved and kept up to date.

So, how can I activate it, you may ask? Well, since it’s an insider-only feature, Microsoft is only previewing Edge Workspaces on several select insiders, but you can still test your luck and download Edge Canary. Here’s how.

How to begin testing Edge Workspace feature

1. Open your preferred browser.

2. Head over to Microsoft Edge Canary download page.

3. Once the download is finished, double-click on the app to install it.

4. Finish the installation

5. If Microsoft selects your device to test this feature out, you’ll see the feature on the upper left of your screen.

What can you do with Edge’s Workspace feature?

Now that you have downloaded the testing environment and you have enabled the workspace function, let’s have a look at how you can use it.

The first thing you will need to do is click on the available icon, next to the vertical tabs. From here, the next thing is to click on Create new Workspace option and name the workspace you want to create.

After you click on the Create New Workspace option you will see that you can customize it, by giving it a name and a color. Considering you you have more than one workspace created this is a useful option.

You can create as many workspaces as you need, and once you click on one of them it will be displayed side by side, opening in a different Window. Moreover, for each Workspace you have created, the same Vertical tab features will apply, allowing you to better organize your work.

Each time you click on your created Workspace, it will open in a separate window allowing you to easily switch between projects from the workspace panel.

What do you think about this new feature that Microsoft Edge is planning on implementing in the near future? We would love to hear your thoughts on the matter, so don’t hesitate to leave us a comment.

Microsoft may want you to pay more to get Teams

Microsoft has agreed to stop bundling its popular teleconference app, Teams, with the Office 365 subscription. The move was taken following rival Slack’s complaint to antitrust regulators and to prevent an official probe by the EU. 

As initially noted by Financial Times, Slack complained in 2020 that Redmond officials are unfair and anti-competitive by practicing bundling, as companies willing to buy 365 must also opt for Teams at that time. 

Although there’s no word from Microsoft’s camp about how it’ll unfold, the decision is likely final and we’ll update you on how to opt-out from getting Teams when purchasing an Office 365 subscription. This also means that you may have to pay a little more to get Teams, as it won’t be included in your Office 365 subscription plan. 

Slack raised a complaint at a time when there was a rapid increase in the trend of working from home. The pandemic led to a surge in the usage of communication apps like Teams and Slack, which resulted in a massive opportunity worth billions of dollars, as more users and organizations began adopting remote working tools.

This would be Microsoft’s first antitrust probe since 2008 when the EU accused the tech giant of being anti-competitive by pushing Windows users to download Internet Explorer through a bundle, resulting in a $561 million fine in 2013. 

How much does Microsoft price the Office and Teams bundling?

The subscription price for Microsoft Office 365 apps varies for personal, business, enterprise, and education uses. 

For personal and family plans, Redmond officials price the subscription at $99.99/year for up to six people and 6 TB of cloud storage. The app includes Word, Excel, PowerPoint, Outlook, OneDrive, Editor, Defender, Teams, OneNote, and more. 

Additionally, Microsoft has also launched its AI-powered Copilot assistant for all Office 365 apps. While there aren’t official words from the tech giant about its pricing plan or release date yet, the feature has been tested internally on several select insiders. 

What do you think about Microsoft’s decision to stop bundling Teams with Office 365 subscription plans? Let us know in the comments!

Shell32.dll: What Is It & How to Fix this Error

The Shell32.dll is a system-related DLL responsible for many essential functions within the Windows operating system. Notably, the Shell32.dll file is connected to several other DLL files, so it is pretty important, and the Shell32.dll error requires your attention.

Luckily, we have compiled a list of solutions that have helped several users resolve the Shell32.dll error issue at their end. This is one of the most common DLL missing errors on Windows 10 PCs. Follow the guide to fix the problem.

How can I fix the Shell32.dll missing error?

1. Use a specialized tool

Since the Shell32.dll file is an important Windows system-related DLL, you need to replace it inside the Windows system folder.

However, that isn’t a viable choice for users who aren’t that professional because any wrong move could corrupt the OS or brick their PCs. In such a case, we suggest you use one of the best DLL fixing tools.

2. Register the DLL

  1. Open the Start menu by pressing the Win key.
  2. Open Command Prompt as an admin.
  3. Type the below command and press Enter. regsvr32 SHELL32.DLL
  4. This will register the Shell32.dll file on your PC.

Chances are, because of a third-party application or program, the Shell32.dll file was unregistered or replaced. You can apply the above command, re-register the Shell32.dll file, and fix the error associated with the DLL file.

3. Fix corrupt system files

  1. Press the Win key to open the Start menu.
  2. Open the command prompt as an admin.
  3. Type the below command and press Enter. sfc /scannowSFCSCANNOW CMD
  4. Wait for the SFC scan to fix corrupt files.
  5. Type the below commands and press Enter after each one. DISM.exe /Online /Cleanup-image /Scanhealth DISM.exe /Online /Cleanup-image /Restorehealth DISM.exe /online /cleanup-image /startcomponentcleanup
  6. Wait for the process to complete.
  7. Restart your PC.

Corrupt system files are often the reason behind several DLL file errors on your Windows 11 PC. You can easily resolve it by using the SFC and DISM commands.

This solution was suggested by one user on the Microsoft forums and has helped several users resolve the Shell32.dll was not found or Shell32.dll is missing error.

4. Repair the damaged registry key

Damaged registry keys can also cause the Shell32.dll was not found error. Because residual files can often conflict with the important files and cause multiple issues on your PC.

So, we suggest you look at our guide, which lists some of the best registry cleaners for Windows 10. Our experts have tested all the listed registry cleaners to provide you with the correct information about the tools.

For Windows 11 users, we also have a similar guide that lists some of the best registry cleaning tools that you can opt for to fix Shell32.dll errors.

5. Scan your PC for virus

  1. Open the Start menu by pressing the Win key.
  2. Open Windows Security.Windows Security open
  3. Click on Virus & threat protection.
  4. Select Quick Scan.
  5. Alternatively, you can also click on Scan options and select Full scan for an in-depth scan.Full scan
  6. Apply the prompted fixes to remove the virus or malware from your PC.
  7. Restart your PC.

If your PC is infected with a virus or malware, then not only will you come across Shell32.dll not found or associated with errors, but your PC performance will also go down.

You should run a scan frequently to check if your PC is protected. We have a list of some of the best antivirus tools to use to safeguard your PC.

Keep in mind that the Shell32.dll file is a critical Windows OS DLL file that ensures that other related DLLs work smoothly without any issues.

The primary function of this DLL file is to open and handle web pages and other files on the PC. It manages the Windows Shell API (Application Programming Interface) functions.

You will come across several error messages related to the Shell32.dll file. Some of these are listed below:

  • Shell32.dll Not Found
  • This application failed to start because shell32.dll was not found. Re-installing the application may fix this problem.
  • Cannot find [location]\shell32.dll
  • The file shell32.dll is missing.
  • Cannot start [program name]. A required component is missing: shell32.dll. Please install [program name] again.
  • Cannot register Shell32.dll.

The Shell32.dll file is missing, or the Shell32.dll not found error could be caused by a corrupt registry, corrupt system files, malware or virus infection, incorrect installation, etc.

That is it from us in this guide. For users facing the DLL missing error on Windows 11, you can refer to the solutions in our guide to quickly resolve the problem.

We also have a guide on how to handle errors related to inetcpl.cpl, so don’t miss it.

Feel free to let us know in the comments below which one of the above solutions fixed the Shell32.dll not found and other errors.

Microsoft increases revenue and net income despite declines in software and hardware for its FY23 Q3 earnings

Microsoft’s third quarter earnings report for its fiscal year 2023 is a mixed bag for the company as its post revenue of $52.9 billion with a net income of $18.3 billion representing a 7 and 9 percent increase year over year respectively, while also marking some noteworthy declines in Windows OEM, devices and Xbox revenue.

An ongoing slump in the PC market marks another three months of declining revenue for Microsoft and its OEM partners. With the PC market down around 30 percent of what it was last year, and already being down from the heights it gained during the pandemic, Microsoft’s More Personal Computing business was hit the hardest by the latest trajectory.

Family_04_RGB Surface Pro 9 colors

Microsoft reported that the More Personal Computing businesses brought in $13.3 billion in revenue which represents a 9 percent decrease year over year. Some of the main offenders in the MPC business portfolio include Windows OEM licensing being down by 28 percent year over year as well as the Devices tallying a 30 percent revenue decrease. It should be noted that Microsoft sought to bundle its HoloLens business under its Devices division last quarter and shuttered much of the development for its Mixed Reality headset subsequently.

Microsoft’s Xbox efforts also weighed on the MPC business report with its own hardware revenue decline of 30 percent, some of which the company attributes to supply constraints in 2023.

On the flipside, Microsoft reported better than expected growth in its cloud services business with Azure tracking $22.1 billion for the quarter, a 16 percent increase year over year. Azure, under the server products and cloud services label saw a 25 percent revenue increase specifically for Microsoft.

Azure Sphere Cropped

Microsoft’s Productivity and Business Processes division also raked in $17.5 billion for the quarter, an 11 percent increase for the company with Officer Commercial products leading the pack with its own 13 percent revenue increase year over year.

For more details and context, below are the investors notes:

Revenue in Productivity and Business Processes was $17.5 billion and increased 11% (up 15% in constant currency), with the following business highlights:

  • Office Commercial products and cloud services revenue increased 13% (up 17% in constant currency) driven by Office 365 Commercial revenue growth of 14% (up 18% in constant currency)
  • Office Consumer products and cloud services revenue increased 1% (up 4% in constant currency) and Microsoft 365 Consumer subscribers grew to 65.4 million
  • LinkedIn revenue increased 8% (up 10% in constant currency)
  • Dynamics products and cloud services revenue increased 17% (up 21% in constant currency) driven by Dynamics 365 revenue growth of 25% (up 29% in constant currency)

Revenue in Intelligent Cloud was $22.1 billion and increased 16% (up 19% in constant currency), with the following business highlights:

  • Server products and cloud services revenue increased 17% (up 21% in constant currency) driven by Azure and other cloud services revenue growth of 27% (up 31% in constant currency)

Revenue in More Personal Computing was $13.3 billion and decreased 9% (down 7% in constant currency), with the following business highlights:

  • Windows OEM revenue decreased 28%
  • Devices revenue decreased 30% (down 26% in constant currency)
  • Windows Commercial products and cloud services revenue increased 14% (up 18% in constant currency)
  • Xbox content and services revenue increased 3% (up 5% in constant currency)
  • Search and news advertising revenue excluding traffic acquisition costs increased 10% (up 13% in constant currency)

Microsoft returned $9.7 billion to shareholders in the form of share repurchases and dividends in the third quarter of fiscal year 2023.

Microsoft also made note of some of its product releases and other highlights for the quarter that include Smart Store Anlytics, Microsoft Sustainability Manager, Viva Goals and Power BI integration, Azure Virtual Desktop Insights at Scale, The Windows 365 app, Jupyter Notebooks and Python scripts in Teams Assignments, Generative AI in LinkedIn, GitHub Copilot X, Bing AI chat bot and a whole host of new features for Teams.

Microsoft will speak to investors later today on its earnings call in regards to continue shedding of jobs, upcoming CMA regulatory review conclusion, future plans for AI and more.

Visual Studio vs Rider: Which One is Better & Why?

For many years, if you wanted an enterprise-level .NET development tool, Visual Studio was your only choice. However, later the landscape changed, and there are multiple other tools such as Visual Studio Code, MonoDevelop, JetBrains Rider, etc.

In this guide, we will give you a detailed comparison between Visual Studio vs JetBrains Rider. We will list all the differences and similarities (if any) between the two IDE tools and let you decide which is best suited for you. Let us get right into it.

Visual Studio vs Rider: What are they?

1. Visual Studio

Visual Studio was the first IDE tool that was introduced by Microsoft. It allowed the developers to build, edit, and debug code.

Using Visual Studio, you get the advantage of automating and doing more things thanks to its ability to support a plethora of extensions.

Visual Studio is primarily used to develop Windows, mobile, and desktop apps. But it also supports other languages such as C#, C, C++, Python, F#, .NET, HTML, CSS, JavaScript, and others. The support for Java was removed in 2017.

It comes with cross-platform support and can be used on Windows and Mac. You can choose among the three variants Microsoft offers for Visual Studio: Community, Professional, and Enterprise. The Visual Studio Community version is free to use.

2. JetBrains Rider

You can work on NET Framework, new cross-platform NET Core, and even Mono-based projects using JetBrains Rider. It is a new player compared to Microsoft Visual Studio.

An advantage that Rider has over Visual Studio is that you can not only run JetBrains Rider on Windows and Mac but on Linux as well.

Rider boats over 2200 live code inspections, is fast, lets you edit and debug codes, and supports multiple languages such as C#, VB.NET, JavaScript, TypeScript, XAML, XML, HTML, CSS, SCSS, JSON, SQL, and more.

It supports plugins developed by the IntelliJ platform and ReSharper, and you can also install additional plugins to enhance its features.

Comparison between Visual Studio vs JetBrains Rider

1. Features

Regarding plugins and extensions, Visual Studio has an advantage over JetBrains Rider. It got an edge, thanks to its availability for over 20 years.

Visual Studio supports a wide range of extensions that can help you expand its feature list and automate the coding process.

JetBrains Rider also comes bundled with a bunch of plugins to enhance your coding experience. You can also install various plugins and extensions from the repository.

However, given that Microsoft’s Visual Studio has been around for way longer, in terms of features, Visual Studio beats JetBrains Rider hands down.

Verdict: Visual Studio

2. Compatibility and integration

The next point in our Visual Studio vs Rider comparison is compatibility and integration. Speaking of Visual Studio, you can run it on Windows and Mac.

However, JetBrains Rider takes a step ahead, and you can install it even on Linux apart from Windows and Mac. Also, Visual Studio comes with better integration support with Git repositories, third-party ORMs, etc.

Rider also supports similar integration to Visual Studio but comes with multiple advantages such as supports Git, Azure DevOps, Mercurial, Perforce, SVN clients, repo history view, history view for a file or text selection, and more.

So, in terms of integration and compatibility, JetBrains Rider beats Microsoft’s Visual Studio.

Verdict: JetBrains Rider

3. Code debugging

MIcrosoft Visual Studio can detect issues with a limited number of languages. On the other hand, JetBrains Rider supports multiple languages and has a wide range of code analyses.

Visual Studio has over 800 configurable code inspections, while Rider has over 1600 code inspections. Both have design-time error-highlighting features for all supported languages.

Notably, Visual Studio can fix 400+ issues automatically, whereas JetBrains Rider can fix more than 2000 code issues automatically.

JetBrains Rider has additional features including solution-wide warning, integrated JSLint, ESLint, and TSLint support, code annotations, and more. Rider has one advantage it can analyze the code even in SQL queries in C# and other supported languages.

Verdict: JetBrains Rider

4. User experience and performance

Rider’s user experience is way better compared to Visual Studio. The main advantage is that Rider’s UI is clean, intuitive, and fast, and gives you color scheme options, keyboard bindings, and much more.

Rider’s UI allows you to collapse any window you are working on giving you a clean experience. This in turn awards Rider to have a better performance.

Visual Studio takes a lot of time to compile codes, whereas Rider gets the job done faster. Visual Studio users have often highlighted freezing issues when dealing with solutions that have many projects.

The load time of Rider is also pretty fast compared to Visual Studio, which could be of great advantage for coders. Rider also comes with faster incremental build allowing you to build projects quickly.

Verdict: JetBrains Rider

5. Search Features

Speaking of another comparison in our Visual Studio vs Rider guide, the global search is pretty slow in Visual Studio.

Rider searches are lightning fast and give you results in mere seconds. Rider displays the names of the files in short format, and thanks to its clean UI, the presentation looks great.

On the other hand, the Visual Studio search results appear inside the command line tool, which could be pretty overkill for users as they are already spending their time in the same environment.

Verdict: JetBrains Rider

6. Other features

Rider comes with the power of ReSharper, making the refactoring a breeze. There are other features such as dotPeek, which works as a disassembler, dotTrace helps in tracing applications in execution, and dotMemory gets the job of profiling memory for applications in execution.

Visual Studio comes with IntelliSense, which has many reactors, but Rider has more. With all the advanced features, Rider lets you convert the entire code into meaningful logical aspects.

Rider can also generate GitHub Gists directly within the IDE and has better code navigation support.

Verdict: Rider

7. Pricing

Rider has a price advantage in that you can get the ReSharper + Rider for a much lesser price than the full version of Visual Studio.

However, Visual Studio offers you a free version to test the waters known as the Community variant. It is free to use and gives you almost all the features (of course, some are limited).

But the fact is that Rider doesn’t even give you a free option. You have to pay for it to use it. There is a 30-day free trial, but you aren’t getting a full-fledged no-nonsense free version.

Verdict: Visual Studio

Visual Studio vs JetBrains Rider: Result

Using an IDE tool depends on your requirements and what makes you feel better about coding. Rider has a lot of advantages and has won most of the categories that we have compared in this Visual Studio vs Rider guide.

If you want to develop Windows apps, have access to a plethora of extensions, and need more templates, then Visual Studio should be your choice.

However, if you are someone that, apart from advanced coding capabilities and want a tool that is suitable for the development of apps in other languages, then Rider should be your choice.

All in all, in terms of preference, you go and lean over either, however, in terms of capabilities and advanced features, JetBrains Rider is our pick.

That is it from us in this guide. We have a similar comparison guide that compares Visual Studio vs Visual Studio Code.

You can also check out our guide that compares Atom and Visual Studio and explains which one you should opt for over the other.

Tell us in the comments below which one in our Visual Studio vs JetBrains Rider comparison guide you opted for.

Opera One: What’s new & why should you be excited

Opera Software, now at 35 million downloads strong, has just launched Opera One. The new, Chromium-based browser is set to replace the flagship Opera for all Windows, MacOS, and Linux devices with modular design, smooth UI experience, full AI integration on the sidebar, and tab islands.

Joanna Czajka, Opera’s product director, says that the new browser is designed to bring a new, flowing experience for multi-tasking users with a more powerful and feature-rich interface open for a generative AI-based future – like the hotly-anticipated DALL-E-powered Bing Image Creator.

Tab Islands are a natural way of arranging your tabs into contextual groups without disturbing your flow. They make it easy to keep tabs that relate to each other in groups that you can open and collapse as needed. This makes browsing with many tabs more efficient, allowing for a more pleasant, liquid browsing experience.

Later this year, Opera One will replace the Opera flagship browser on all Windows, macOS, and Linux devices. But, if you’re not familiar with this browser, check our review of Opera.

So, why should we be excited about Opera One, you may ask?

What’s new in Opera One?

The new Opera One revolutionizes how users engage with their browsers through modular design, providing a smooth and seamless navigation experience that is easier to understand and use.

This design could enable users to customize their browsing experience by selecting and organizing specific features or modules. This could include bookmarking tools, extensions, themes, and more, all of which could be easily added or removed as needed.

Ultimately, a more intuitive and customizable browsing experience could lead to increased user satisfaction and productivity, which brings us to a smoother UI experience and cleaner, decluttered look.

On the sidebar, Opera One boasts ChatGPT, ChatSonic, and other AI features on both the sidebar and address bar. Opera’s updates in early 2023 that, included the addition of generative AI features into the browser, have paved the way for this new, redesigned browser.

In the future, Opera will morph to become fully modular, making the browser UI more intuitive and functional.

Opera One is the first instance of our smart, modular design within Opera. It marks the beginning of a chain of innovation, including Opera’s own AI engine to be shipped in the coming months. The web just got smarter and faster with generative AI. With Opera One, we are ready to embrace and lead that change.

With the so-called Tab Islands feature, you can say goodbye to the hassles of jumping between tabs. It keeps related tabs to each other with clear and distinguishable UX, separated by colors and clear island borders. As you browse more and more, the browser will learn to put them together without forcing it.

Are you excited about Opera One? Let us know in the comments!

Api-ms-win-core-libraryloader-l1-1-1.dll is Missing [Fix]

Our readers have reported coming across the api-ms-win-core-libraryloader-l1-1-1.dll error when they are trying to upgrade their PC. This usually happens when a user tries to upgrade from Windows 7 to Windows 10. You will experience this error when upgrading to Windows 10 as well.

In this guide, we have listed down some of the most effective solutions that have helped users resolve the api-ms-win-core-libraryloader-l1-1-1.dll is missing or api-ms-win-core-libraryloader-l1-1-1.dll was not found error. Let us take a dive into it.

What is the api-ms-win-core-libraryloader-l1-1-1.dll file?

The api-ms-win-core-libraryloader-l1-1-1.dll file is a DLL file provided by Microsoft for Windows 7, Windows 8, and older operating systems.

This DLL file contains components that are responsible for the OS to run properly. Although the api-ms-win-core-libraryloader-l1-1-1.dll was not found error is faced when you upgrade your PC from Windows 7 to Windows 10, it isn’t limited to that.

Users have reported coming across this issue even when they try to run or open a program on their Windows 7 PC. However, most of the error is thrown at you when you use the Windows update assistant.

Here are a few of the error messages related to the api-ms-win-core-libraryloader-l1-1-1.dll file:

  • The program can’t start because api-ms-win-core-libraryloader-l1-1-1.dll is missing from your computer. Try reinstalling the program to fix this problem.
  • api-ms-win-core-libraryloader-l1-1-1.dll is either not designed to run on Windows, or it contains an error.
  • The code execution cannot proceed because api-ms-win-core-libraryloader-l1-1-1.dll was not found
  • There was a problem starting api-ms-win-core-libraryloader-l1-1-1.dll. The specified module could not be found
  • Error loading api-ms-win-core-libraryloader-l1-1-1.dll. The specified module could not be found.

These error messages may seem pretty long, but they aren’t that useful and do not provide information on what to look for to fix this problem.

How can I fix the api-ms-win-core-libraryloader-l1-1-1.dll was not found error?

1. Use a specialized fixer

The api-ms-win-core-libraryloader-l1-1-1.dll is a system DLL file that, when corrupt or missing, can cause several issues and prevent users from upgrading their PCs.

In such cases, our advice would be to use one of the best dedicated DLL repair tools. The software will help you fix system-related DLL issues 100%.

2. Copy and paste the wimgapi.dll

  1. Open File Manager by pressing the Win + E keys.
  2. Navigate to the below path and press Enter. C:\Windows\System32\wimgapi.dll
  3. Copy the wimgapi.dll file.
  4. Go to the below location and press Enter. C:\Windows10Upgrade\
  5. Paste the wimgapi.dll file into the above location.
  6. Try updating your PC.

On Reddit user suggested that copying the wimgapi.dll file will help you fix the api-ms-win-core-libraryloader-l1-1-1.dll was not found error on your PC.

3. Download Microsoft Visual C++

  1. Visit the official Microsoft Visual C++ website.
  2. Download the supported version.
  3. Install the Visual C++ on your PC.
  4. Restart your PC.

Users have also suggested that installing the latest supported version of the Microsoft Visual Studio C++ has also helped them resolve the api-ms-win-core-libraryloader-l1-1-1.dll was not found on Windows 10 problem.

4. Install the latest Windows updates

  1. Press the Win + I keys to open the Settings menu.
  2. Click on Update & Security.
  3. Click on Windows Update.
  4. Select the Check for updates button.
  5. If there is a pending update, hit the Download & Install button.
  6. Restart your PC.

Installing the latest Windows update ensures that your PC has all the latest files, including the latest DLLs, and the bug fixes that might be causing the api-ms-win-core-libraryloader-l1-1-1.dll was not found on Windows 10 error.

5. Upgrade using Windows Update Assistant

  1. Head to the website to download the Windows 10 OS.
  2. Hit the Update Now button.
  3. Download the application.
  4. Launch the Windows Update Assistant.
  5. Wait for the program to finish setting up your PC for an upgrade.
  6. Follow the on-screen steps to update your PC.

One Reddit user suggested upgrading the Windows 7 PC to Windows 10 using the Windows Update Assistant. This has worked wonders for users, and they were able to resolve the api-ms-win-core-libraryloader-l1-1-1.dll was not found on Windows 10 error.

That is it from us in this guide. If you are facing DLL missing on Windows 11 issue, we suggest you refer to our dedicated guide that will help you fix the issue in no time.

Feel free to drop a comment below, and let us know which one of the above solutions resolved the api-ms-win-core-libraryloader-l1-1-1.dll was not found on Windows 10 error.