Microsoft has an excellent and secure sign-in way to access a PC, Windows Hello. Though it has simplified the ways users log in, there are still some Windows 11 errors that you may come across, 0x80090011 being the most common.
The error message reads, Something went wrong and your PIN isn’t available (status: 0x80090011, substatus: 0x0). Click to set your PIN again. In most cases, the error appeared after an update, and some users even came across 0x80090011 in Microsoft Office 365. Let’s find out more about it!
Why do I see the 0x80090011 error when signing in?
Here are a few reasons you get the Windows Hello error:
A buggy Windows update: For most users, the problem appeared after updating Windows, which points to a bug in the latest version of the OS.
Problems with the NGC folder: The NGC folder stores all the information related to login, and issues with it can trigger an error when signing in to the PC.
Corrupt system files: Even when the system files are corrupt, there’s a chance that it may affect the sign-in process.
How do I fix code 0x80090011?
Before we proceed, try these quick tricks first:
Restart the computer and check if you can now sign in.
If you recently changed the pin or password, use an older password.
If these don’t work, head to the solutions listed next.
1. Run startup repair
Turn off the PC, press the power button to turn it on, and as soon as the display lights up, again hold the button to shut down the computer abruptly.
Repeat the process another two times, and when you next turn on the computer, Automatic Repair will kick in. Wait for it to identify and fix any issues. If it can’t, click on Advanced options.
Now, choose Troubleshoot.
Again, click on Advanced options.
Select Startup Repair from the options listed here.
Now, choose the user account you are facing the problem with.
Enter the password for it, if one is set, and click Continue to proceed.
For most users, running Startup Repair, a built-in option in Windows to eliminate issues that prevent it from booting effectively, fixed the 0x80090011 Windows Hello error.
2. Uninstall Windows updates
Abruptly restart the computer thrice to run Automatic Repair, and click Advanced options.
Click on Troubleshoot.
Select Advanced options.
Now, click on Uninstall Updates.
Choose the one you want to remove, Feature or Quality update.
If you earlier choose quality update, click the Uninstall quality update button.
Follow the on-screen instructions to complete the process.
If the problem appears after updating Windows, uninstalling the update should get things up and running in no time and help you get rid of 0x80090011 in Windows 11.
3. Enable the administrator account
Power off the computer, turn it on, and again turn it off as soon as the display appears. Do this thrice and on the fourth attempt, let Automatic Repair run. Then click on Advanced options.
Click Troubleshoot to proceed.
Now, click on Advanced options.
Choose Command Prompt from the list of options.
Choose an account and enter the password for it.
Now, paste the following command and hit Enter:net user administrator /active:yes
Once done, restart the computer and try to log into the affected account.
Enabling the built-in administrator account, in some cases, allowed users to sign in to the problematic one throwing the 0x80090011 error. However, if that’s not the case, you can always create a new user account via the one you just enabled and use the new one on the PC.
Once the PC boots, press Windows + E to open File Explorer, paste the following path in the address bar, and hit Enter:C:\Windows\ServiceProfiles\LocalService\AppData\Local\Microsoft
Now, select the Ngc folder and click the Delete icon.
Once done, boot Windows into normal mode and verify whether you can now sign in.
5. Perform a system restore
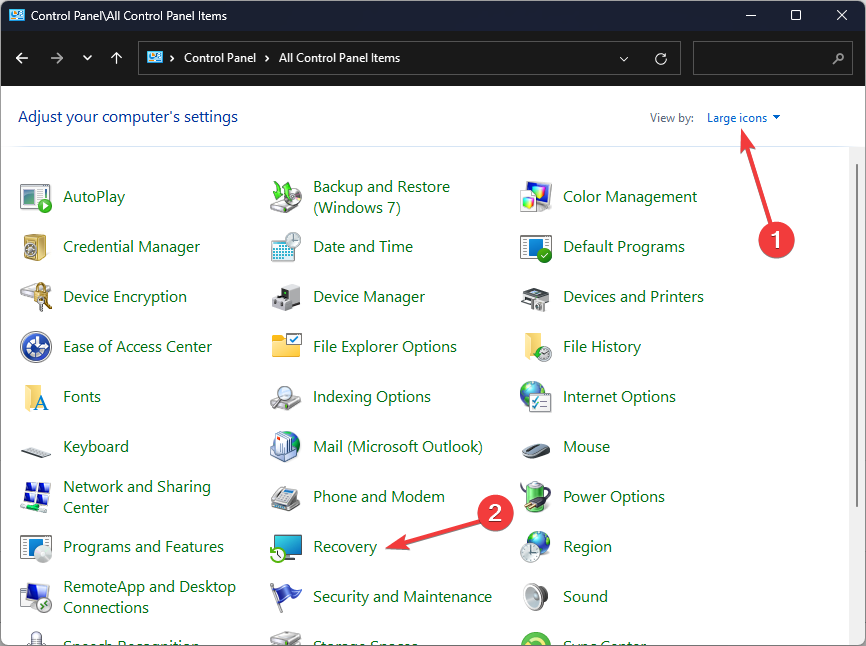
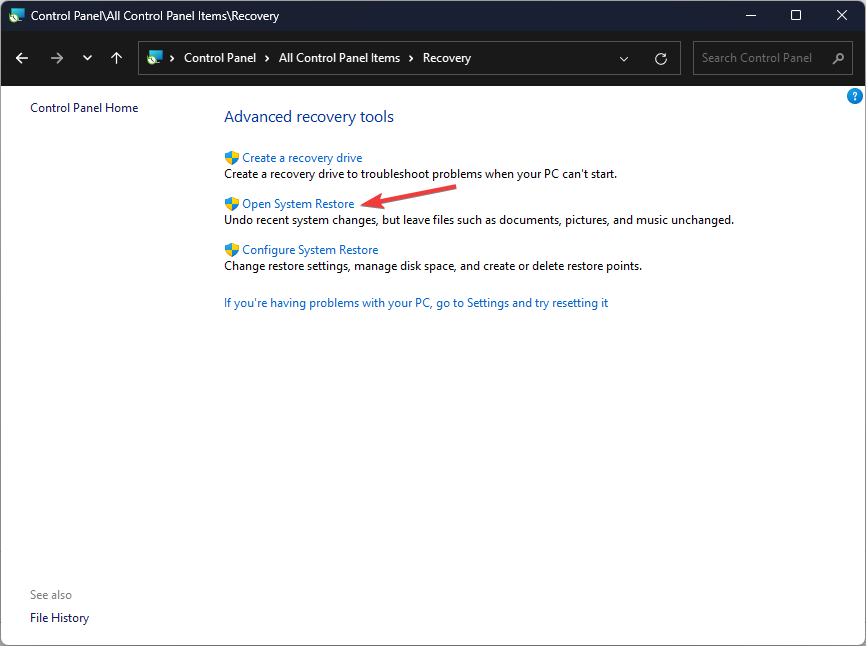
Access the Recovery Menu in Windows and select System Restore.
Choose an account to proceed.
Enter the password for the selected account, and click Continue.
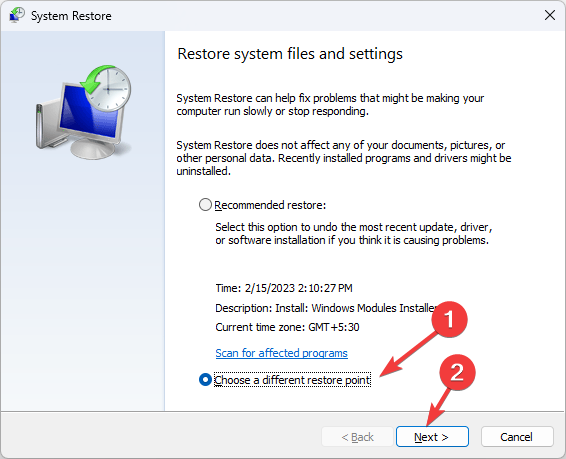
Click on Next.
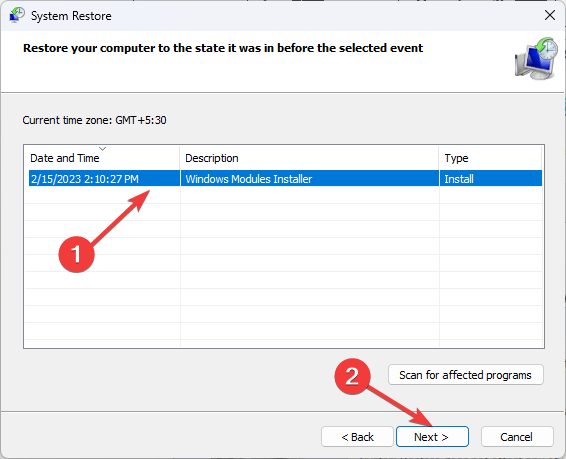
Now, select a restore point from the list, one created before the problem first appeared, and click Next.
Verify the restore details and click Finish to start the process.
Click Yes in the confirmation prompt.
Wait for the restore to complete.
That’s it! Performing a system restore should help when other solutions fail to work. But you need to create a restore point before the 0x80090011 error first appeared.
Though Windows automatically creates them when system protection is enabled, we recommend you manually create restore points to counter such situations.
6. Reinstall Windows
When all else fails to work, you will have no option but to reinstall Windows. The process is a bit complex but will definitely help with the Windows Hello 0x80090011 sign in error. To do that, create a bootable drive, boot the PC through it, and run the setup to install Windows.
The setup is simple, with each step explained in detail. And, in all likelihood, you should be able to seamlessly install the OS and fix the error in every iteration of Windows.
The Windows Hello 0x80090011 error can be tricky to troubleshoot, but with the right approach, you can get things up and running in no time.
Microsoft is always on the lookout for ways to enhance the user experience on their products, and their latest experiment involves the Edge browser. The tech giant is currently testing a new feature on Edge that promises to improve web browsing efficiency for its users.
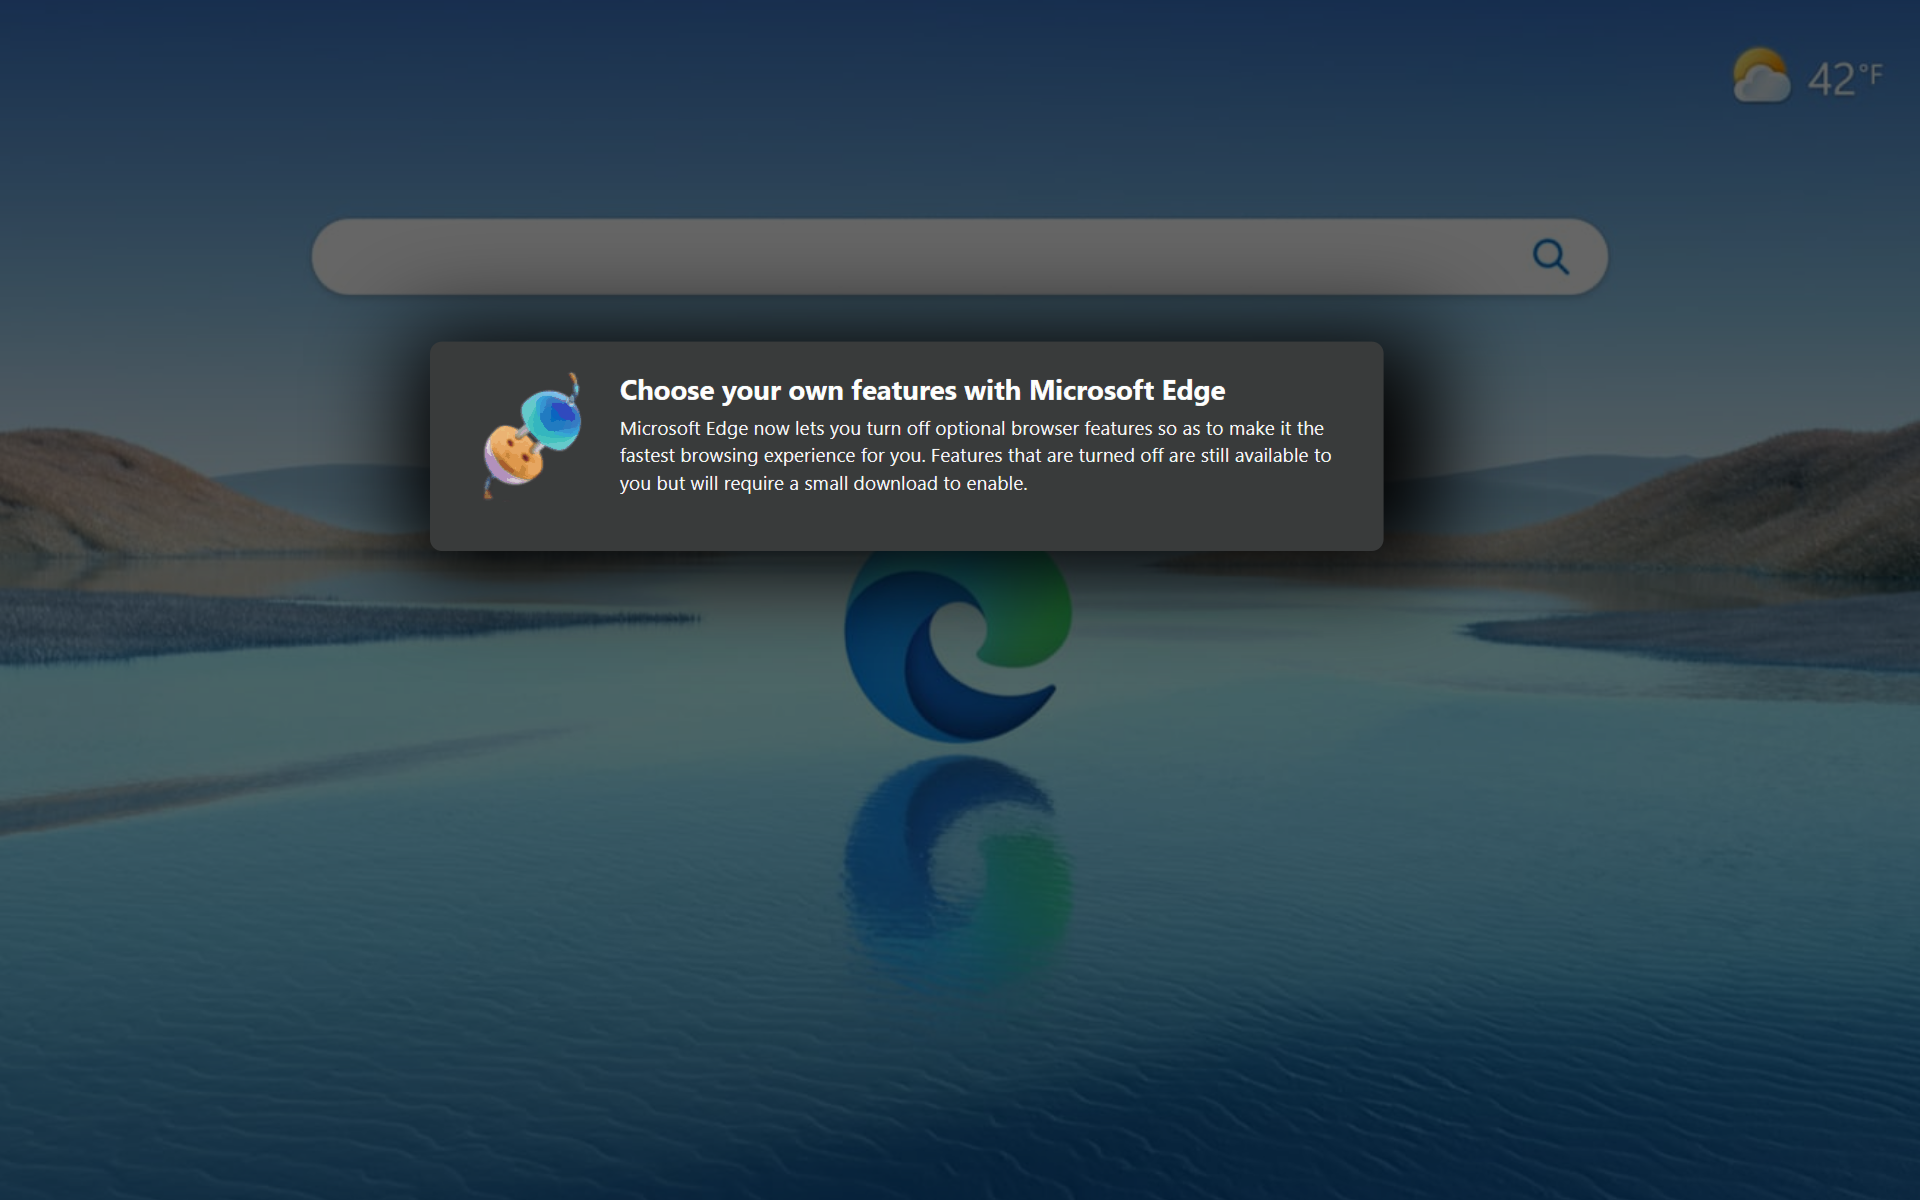
The feature in question is called add or remove additional features and it aims to speed up the browser’s startup time by running a few processes in the background when the user logs in to their Windows account as a result of the features being axed.
As spotted by Windows enthusiast @Leopeva64, the feature is currently living in Edge Canary under a controlled rollout, meaning not all insiders are able to see this just yet.
It looks like Microsoft will let you remove some of Edge's features:https://t.co/t1HbJS6nhS . I wonder what other features will be included in that section in the future… Games? E-tree? ? pic.twitter.com/9aQC146rJM
As you can see, what this feature does is offload any additional feature that you may not use to ensure the fastest browsing experience, and if you want to turn it back, you’ll need a small download.
It may not seem like a lot, but for users running Edge on a weaker system, this could help boost its performance little by little.
What are people saying about the option to remove features on Edge?
The response from the Edge community has been quite polarizing.
One user on Reddit writes that this may not be what people are expecting. There doesn’t seem to be a solution for eliminating current features that users find unnecessary, such as the Collections feature that has been compromised.
“It seems to be focused on new “optional features” that can be downloaded on demand. What these will be is still unclear, but I’m guessing that most of them will be highly annoying.”
Another one says that it’s just like removing extensions, but those that are exclusive to Edge, like the Collections or the unwanted Wallet feature.
What do you think about Microsoft’s latest attempt in improving Edge by allowing users to remove unwanted optional features? Let us know in the comments!
Regarding issues in Windows, BSOD errors are probably the most difficult to troubleshoot. Also known as the Stop Code errors, because each has a specific value, these crash Windows and lead to a blue screen. Lately, several users have reported the 0x00000078 BSOD error.
The problem with the 0x00000078 Windows error is the dearth of reliable information and solutions on the web. And it’s also imperative to eliminate the underlying cause, given the trouble accompanying a BSOD. So, let’s find out the fixes that did the trick for others!
What is 0x00000078?
As per Microsoft’s official website, the PHASE0_EXCEPTION bug check is triggered when HAL (Hardware Abstraction Layer) is in action, and users have the /break parameter without kernel debugging enabled. Simply put, it’s a BSOD encountered at boot and caused by malfunctioning hardware or driver issues.
Here are the primary reasons the 0x00000078 error appears in Windows:
Outdated or buggy drivers: The most common reason you will get the BSOD is when buggy or outdated drivers are installed. If the problem arises after a driver update, it’s likely that the new version contains a bug or is incompatible.
Problems with hardware: In many cases, it was hardware, usually the disk or RAM, that triggered the error. However, you can’t ignore the possibility of other devices being responsible.
Improper Windows installation: Missing critical Windows components or corrupt system files not just lead to performance issues but can also cause a blue screen error.
Issues with the settings: Since the 0x00000078 BSOD is generally encountered when you boot Windows, it could be the BIOS or boot settings to blame.
How do I fix the 0x00000078 blue screen error?
Tip
For some of the solutions listed here, you need to access Windows, and if it throws the BSOD on boot, the best option is to boot in Safe Mode, preferably with networking, to get the latest drivers and download the required tools.
Before we move forward, try these quick solutions:
Since most of the BSoD errors are related to outdated drivers, keeping the drivers updated to the latest version can help you prevent other errors like EMPTY_THREAD_REAPER_LIST.
In addition, we advise you to choose the intelligent method to update any OS drivers using automatic support from professional software.
It scans your PC entirely and detects outdated drivers, which can be renewed with their official versions in one click.
Press Windows + I to open Settings, select Windows Update from the navigation pane, and click on Update history on the right.
Now, scroll down to the bottom and click Uninstall updates.
Click on Uninstall next to the recently installed update.
Again, click Uninstall in the confirmation prompt.
Similarly, remove a few other recent updates.
In case the problem appears after updating the OS, uninstalling Windows updates should get things up and running when you get the 0x00000078 BSOD in Windows 11.
Uninstalling the updates can also help you fix other BSoD errors like the BSoD INVALID_AFFINITY_SET error on Windows 11; read this guide to learn about other solutions.
3. Run tests on the memory
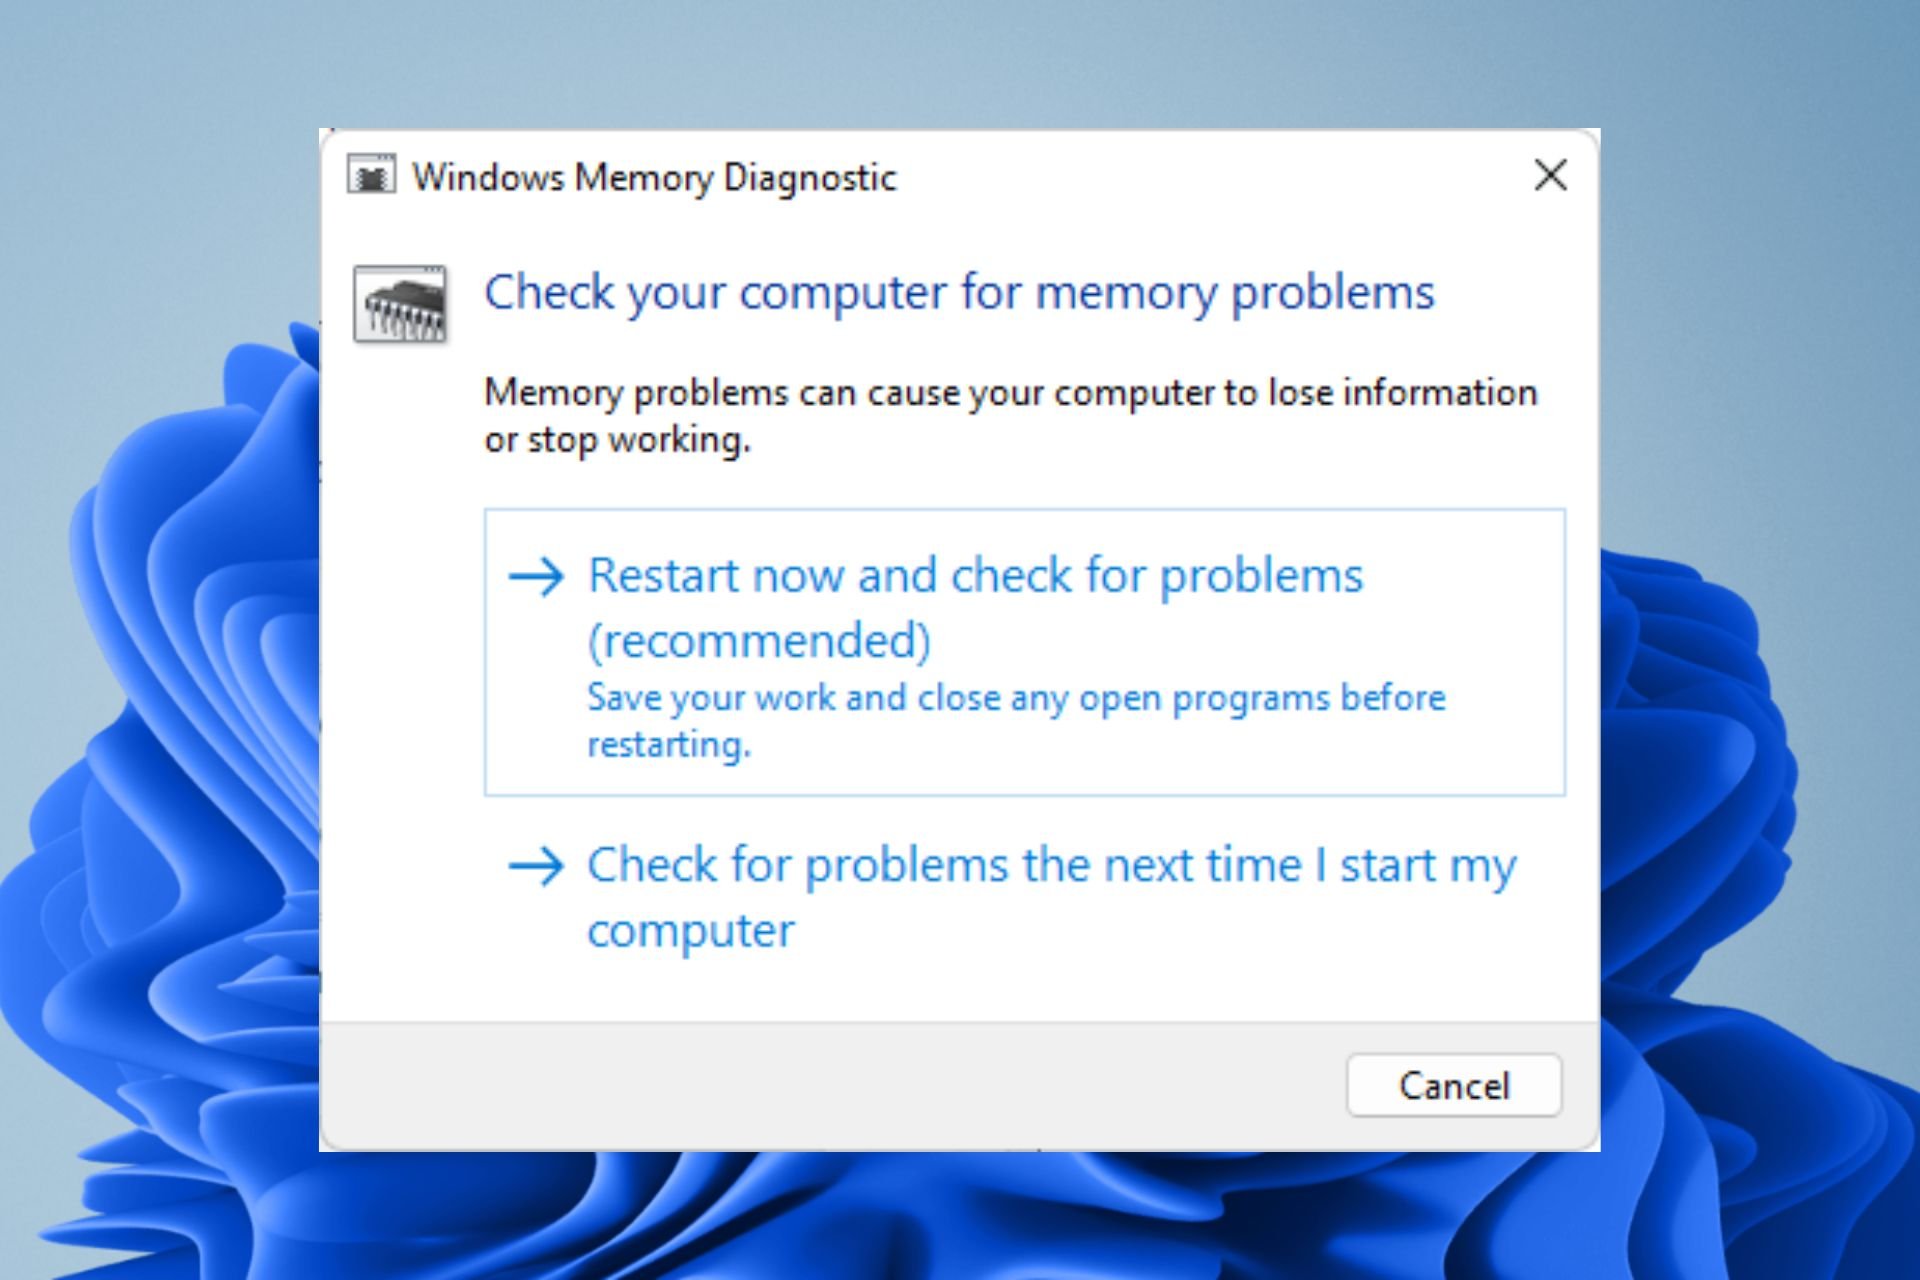
For some users, the problem was linked to the RAM modules. In this case, your primary approach should be to run the built-in Windows Memory Diagnostic tool and allow it to identify and fix problems with the installed physical memory.
If that doesn’t work, use Memtest86+, a dedicated open-source memory testing tool that runs an extensive series of tests, locates any issues with the RAM, and eliminates them. It’s best to run the tool overnight to fix 0x00000078 in Windows 7.
Turn off the computer, then press the power button to turn it on, and hit the F1, F10, F12 or Del key to access the BIOS, depending on the system manufacturer.
Now, locate the Default option or one that looks similar, and click on it.
Choose the appropriate option to confirm the change.
Finally, restart the computer and check whether the error has disappeared.
5. Reinstall Windows
When nothing else works, the only option to fix 0x00000078 is to reinstall Windows. We recommend creating a bootable USB drive, changing the boot configuration to load from it, and then running the setup to install Windows, instead of resetting the PC with the built-in option.
This is because a reset is not as effective as a reinstall. While doing so, you will lose the personal files and apps stored on the PC, so use a reliable backup tool or copy the critical files to a USB drive.
Once you have fixed the BSOD, do not forget to check some quick tips to improve Windows 11 performance and make it faster.
For any queries or to share what worked for you, comment below.
On Windows 11 and even 10, there’s an option where you can set how sensitive your mouse is. This mouse sensitivity feature keeps track of how responsive the tracker is, but sometimes, it just keeps changing.
If you’re experiencing mouse sensitivity issues on your Windows 11 device, you’re not alone. This problem is not uncommon, and it can be incredibly frustrating. The mouse sensitivity keeps changing unexpectedly, making it difficult to navigate your computer.
Fortunately, there are several steps you can take to fix this problem. In this article, we’ll explore some of the common causes of mouse sensitivity issues on Windows 11 and provide solutions to help you regain control of your mouse.
How to fix mouse sensitivity that keeps changing on Windows 11
Restart the mouse
1. Unplug the USB Bluetooth adapter from your PC
2. Head over to the system tray & turn off the Bluetooth
3. Wait for a few seconds, then plug it back.
Update the Bluetooth driver
1. Go to Control Panel ➜ Device Manager.
2. Click the drop-down for Bluetooth.
3. Right click on Intel Wireless Bluetooth, then hit Update
4. Look for the option that says Browse my computer for driver.
6. Select Let me pick drivers available drivers.
7. Then choose an old driver version and click next to use it.
8 Restart your PC
Install the latest Windows updates
1. Go to Settings ➜ Windows Update.
2. Click Update if your PC isn’t up-to-date yet.
Enable enhance pointer precision
1. Go to Settings ➜ Bluetooth & device ➜ Mouse.
2. Scroll down and click Additional mouse settings.
3 On the Pointer options tab, uncheck the Enhance pointer precision check box.
4. Click apply and okay.
5. Restart your PC.
If the problem persists, however, it may be caused by hardware incompatibility, and there’s nothing else you can do except for testing another mouse and see if it’s still there.
Do you find these tips helpful? Let us know in the comments!
The latest iteration from Microsoft, Windows 11, is said to be the most advanced, sports a sleek interface, and offers a wide array of user-friendly features, as evident from the Windows 11 market share. But a question troubling many is when Windows 11 support ends.
While Windows 10 continues to be supported until October 14, 2025, it will stop receiving security and quality updates from that date. And inquiries regarding Windows 11 support end date have surfaced. Since there’s a lot of misinformation, here are some quick facts and figures for you.
Can I still use Windows 11 after 2025?
Yes, you can still use Windows 11 after 2025. With the Windows 11 release date being October 5, 2021, it is expected to run for a few more years. Though users will have to install the latest updates for the best performance and enhanced security.
Remember, Windows 11 has several editions, Home, Pro, Enterprise, Education, and Windows 11 SE. And these will have a different end-of-support date. Also, the OS version considerably influences the support date, and the newer ones last longer.
How do I know when Windows 11 support ends?
That’s the tricky part since Microsoft is yet to announce the Windows 11 Pro end of support or even for other iterations. It’s all speculation for now, and we will only have a definite answer once the next iteration of the OS is released, as has been the case until now.
With Windows 10, the end of support date was not made public until the latest iteration, Windows 11, was announced in a virtual event on June 24, 2021.
But fret not! Even when a new iteration is released, users can continue using Windows 11 for a few more years. Some experts have suggested the Windows 11 end of life to be 2031, though that should be the time when the iteration stops receiving any updates and will be out-of-support altogether.
For those trying to find out Windows 11 Enterprise’s end of life, keep checking this page for the latest news from Microsoft.
Here’s the support timeline for all recent iterations of Windows:
This should provide a basic idea for those trying to find out when Windows 11 support ends. Until this point, all the information was based on patterns previously followed by Microsoft. But we do have some information that might be valuable.
End of support for Windows 11 21H2 and 22H2
Microsoft’s official website states the support end dates for versions 21H2 and 22H2. This applies to all of the OS’s Home, Pro, and SE editions.
Version
Release date
End of support date
21H2
October 4, 2021
October 10, 2023
22H2
September 20, 2022
October 8, 2024
So, you can check the installed version of Windows 11 and figure out which of the two is installed. Microsoft releases two of these major updates annually, H1 and H2, with the figure before it describing the year it was released. For instance, 22H2 was the second major update in 2022.
Windows specifications in Settings
Can I use Windows after the end of support?
Whether users can still use Windows after the end of support is a question that fascinates and troubles many. Remember, devices running an out-of-support iteration of Windows continue to run fine, though these don’t receive any updates and are left exposed to malware attacks.
For example, Windows Server 2016 end of life has a confirmed date, and once support ends, it no longer receives security updates, leaving systems vulnerable in the same way. It is also important to review the full timeline for Windows Server 2019 EOL so you can plan long-term migrations with confidence.
Also, if your computer meets the hardware requirements for the newest release, it’s recommended that you upgrade Windows for the best performance, better security, and an unmatched experience.
While many believed that Windows 10 would be the last OS iteration and is now soon to reach the end of the support lifecycle, Microsoft, to everyone’s surprise, released Windows 11.
And now, it looks likely that there will be a Windows 12, expected to be released sometime around 2024. The date of release is speculated based on Microsoft’s three-year upgrade cycle it followed until recently, though the gap between Windows 11 and the previous iteration was six years.
You may soon be able to upgrade to Windows 12. But do not get your hopes up right away, and wait for an official statement from Microsoft!
By now, you must have a fair understanding of when Windows 11 support ends and what the future holds regarding the OS experience and subsequent iterations.
After a long wait of six years, when users had almost given up hope, Microsoft, to everyone’s surprise, announced Windows 11 on June 24, 2021. While the latest iteration has received mixed reviews, it’s the Windows 11 disadvantages that many are concerned about.
Like every other OS released in the past, Windows 11 offers new features, has revamped the user interface, prioritizes security, and delivers superior performance. But not everyone seems too pleased. So what’s the hue and cry all about? Let’s find out!
Is Windows 11 good or bad?
When compared to previous iterations, Windows 11 offers a more appealing interface. Be it the File Explorer, the notifications, the new Start Menu, the centrally aligned taskbar icons, and much more. It’s all more user-friendly and offers a better experience.
The new Start menu in Windows 11
But an OS is much more than looks! It’s the compatibility that matters. And whenever a new iteration is released, it takes a few months before things become polished. Until that happens, users experience app crashes, driver failures, and in some cases, BSOD errors.
While there are a range of Windows 11 problems, whether or not to upgrade is a personal choice. We often find conflicting Windows 11 reviews, but is Windows 11 bad?
1. Unbelievably strict minimum system requirements
Frankly speaking, upgrading to Windows 11 is far more difficult than one would imagine. PCs (or processors) seamlessly running Windows 10, and that should ideally, just as well, run the latest iteration, have been dropped from the list of supported processors.
The reason behind it is security, and two critical requirements to ensure this aspect are Secure Boot and TPM (Trusted Platform Module) 2.0. Though users can bypass the TPM and SecureBoot to install Windows, the process isn’t straightforward and requires making changes beyond the skillset of most.
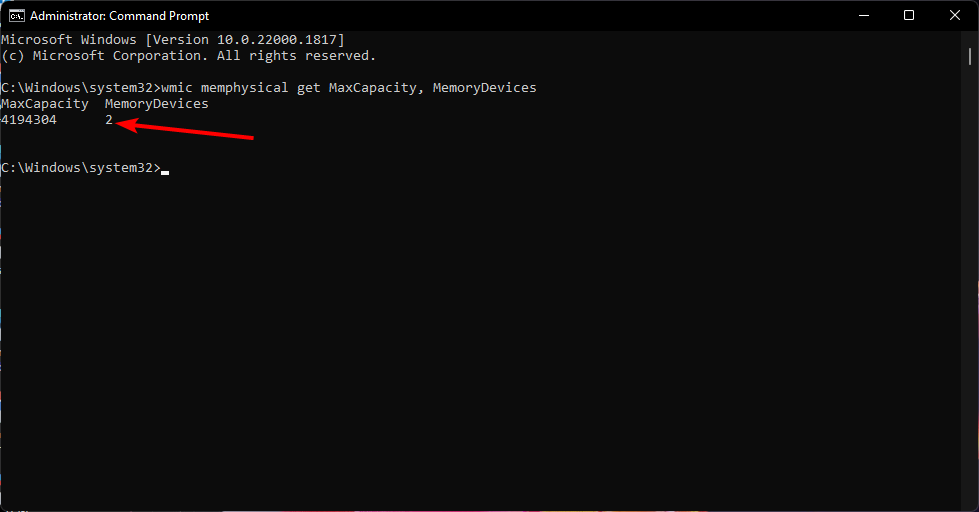
Coming to memory, while Windows 10 requires only 2 GB of RAM for the 64-bit version (1 GB for the 32-bit version), you will need at least 4 GB to run Windows 11, but the recommended RAM size is 8 GB. You will have to shell out a few bucks to upgrade the RAM, given your PC can handle the addition.
When drawing a comparison between Windows 10 and Windows 11 system requirements, we notice several such changes. For instance, support for DirectX 12 is an absolute necessity in the latest iteration, whereas a graphics card compatible with DirectX 9 was the requirement for Windows 10.
Here’s a point-by-point comparison of the critical system requirements in Windows 10 and Windows 11:
Parameter
Windows 11
Windows 10
Processor
1 GHz or faster, 2 or more cores
1 GHz or faster
RAM
4 GB minimum
1 GB for 32-bit, 2 GB for 64-bit
Storage
64 GM minimum (you will require more to install future updates)
16 GB for 32-bit, 20 GB for 64-bit
TPM
TPM 2.0
Not required
Firmware
UEFI, with the option for Secure Boot
Secure Boot not required
Display
720p, more than 9″ diagonally
800×600
Graphics card
Compatible with DirectX 12
Compatible with DirectX 9
While most of these changes are necessary to deliver a superior experience, especially when it comes to security, performance, and gaming in Windows 11, this does leave out a lot of users and is a significant Windows 11 disadvantage.
2. Privacy is at an all-time low
Recent reports suggest that Windows 11 collects data about user activity and behavior and transfers it to this third-party servers. While there was a lack of conclusive evidence until recently, a check by Rohit Satpathy, a renowned face in the cybersecurity community, made it evident.
Lack of privacy is one of the major Windows 11 disadvantages and something users should be wary of.
Privacy settings in Windows 11
In the video posted on the official YouTube channel, the cybersecurity expert used Wireshark, a network inspection tool, to identify which all servers the information were being transmitted to. And two of these, TrustedSource.org and ScoreCardResearch.com, were third-party servers.
The test was run on a device that just had Windows 11 installed with the default settings in place and no third-party app installed, which highlights that the latest iteration does collect data, sometimes even without the user’s consent.
And when the same tests were run on Windows Vista, no such activity was identified. So, for those asking, should I upgrade to Windows 11, check the privacy aspect, as Microsoft has made some significant changes there.
3. Incompatibility becomes a nightmare for many
Incompatibility with certain apps is going to affect your Windows 11 experience. App crashes were common in the initial days, and though the situation has improved, it’s far from perfect. Go through forums, and you will find out the problems users face on Windows 11.
Many drivers developed for Windows 10 didn’t work on the latest iteration, and users had to wait for a compatible version to release before they could update the drivers. Such issues are bound to appear, but it’s the job of Microsoft and manufacturers to develop solutions that ease the load off users.
4. Incessantly pushing Microsoft apps
One of the major disadvantages of Windows 11 is that Microsoft pushes in-house apps. No doubt, Edge has some great new features, but many still prefer Chrome, Firefox, Opera, or alternatives.
Besides Edge, Microsoft has integrated Teams Chat into the taskbar. For those of us that use the app, it’s not a big deal, but many don’t. Again, though, there’s an option to remove taskbar icons, they shouldn’t appear by default in the first place.
Our take, Windows 11 is bad when it comes to pushing Microsoft apps.
5. Inability to reposition the Taskbar
While Windows 10 allows users to move the Taskbar across the screen, the option is missing in the latest iteration. A feature many had so gotten used to being removed from Windows 11 doesn’t seem right.
Taskbar settings in Windows 11
It was earlier possible to move the taskbar by modifying the Registry, but it doesn’t work anymore. While Microsoft did go back on a few changes, for instance, the ability to drag and drop, it remains to be seen whether it will allow users to reposition the taskbar.
6. Way too complex to change the default apps
While discussing Windows 11 pros and cons, one has to highlight how the steps to change the default apps have been modified, making things more intricate than ever.
On Windows 10, one could simply select a category and change its file association. But in Windows 11, a user has to choose the default app for every specific format, be it the file or link type.
Changing default apps on Windows 10 vs. Windows 11
Something so simple has been completely transformed into a strenuous task. While it may be favorable to tech enthusiasts or users requiring the ability to make such minute customizations, most users find it an unnecessary change and one of the major disadvantages of Windows 11.
Some changes seriously take a toll! Microsoft’s decision to modify how the System Tray works is one of these. While we could earlier click on an icon, view the details, and access the dedicated settings, it’s not the case anymore.
Clicking on the Wi-Fi icon won’t list the available networks. Instead, it would open all the Quick Settings, and you have to choose Wi-Fi and view the networks.
Quick settings in Windows 11
Another change to Windows 11 features, basically the interface, is the revamped Action Center. Earlier, we had all the quick settings and notifications in the Action Center, ensuring seamless accessibility. But not anymore! Because apparently, the developers at Microsoft thought otherwise.
The Control Panel has been a part of Windows for as long as one can remember, and we are so used to configuring various settings, adding devices, or uninstalling apps via it. That’s about to change in Windows 11!
Microsoft has decided to push the Settings app as the one-stop solution for all PC-related changes. Several of the features that could earlier be configured through both the Control Panel and Settings, are now available only in the latter.
Though the options have not been outright removed from the Control Panel, clicking on these will redirect users to their dedicated section in the Settings app. For instance, when you click on Add a device, it opens the Bluetooth & devices settings.
Control Panel redirecting to Settings in Windows 11
You will find this happening for several features and options, and there’s absolutely nothing one can do. So, get ready to adapt if you plan to upgrade to Windows 11.
9. Cortana, the voice assistant, is missing from the Taskbar
Cortana, Microsoft’s alternative to Siri and Google Now, was the digital voice assistant many used on Windows 10, and it could easily be accessed from the Taskbar.
Not anymore! Microsoft decided to drop the feature from the first boot experience and the taskbar in Windows 11, though you can still open it from the Search menu.
Opening Cortana from the Search menu
Though it’s unlikely to be a major deterrent for the majority, users that did rely on Cortana to perform actions will be unhappy with the change.
10. No significant boost in terms of performance
While this is not particularly one of the Windows 11 disadvantages, it does seem like one. With every upgrade, users expect a significant performance improvement, but that didn’t happen with Windows 11.
When tested on different computers with the same specifications, Windows 11 didn’t perform extraordinarily well, as one would have expected.
As for Windows 10 vs. Windows 11 gaming, there wasn’t any visible performance boost either. The latest iteration did perform slightly well on some parameters, but it also failed to match Windows 10 on several others. Though more gaming features have been introduced to deliver a better overall experience.
It’s imperative to mention one of the major Windows 11 disadvantages here for those asking, is Windows 11 slower than Windows 10. The OS is not meant for older PCs. You will notice reduced performance and frequent crashes, especially on unsupported devices.
Microsoft recommends against installing Windows 11 on unsupported computers. Users who do may face compatibility issues and might not receive security updates, thus exposing their computers to a barrage of malware and threats.
Is it risky to install Windows 11?
While it has received some criticism, there’s no absolute risk to installing Windows 11. It’s still an upgrade over Windows 10, offers a wide array of new features, and is optimized to deliver a superior gaming experience.
And given that Windows 10 will not be supported post-October 14, 2025, it only makes sense to install Windows 11. Users on supported devices will automatically find Windows 11 listed as an update and can seamlessly upgrade to the latest iteration.
By now, you have a fair understanding of the disadvantages of installing Windows 11. And for those earlier wondering, is Windows 11 better than Windows 10, you should now have the answer. We just lay out the bare facts and let the readers decide.
Data deduplication allows administrators to reduce the consumed space and save on data storage costs. While several ways exist to find and delete duplicate files, some prefer the conventional approach. That’s where Windows 11 Data Deduplication comes into the picture.
Also known as Dedup, Data Deduplication is the first choice of Windows system administrators. And the process is just quite simple, given you have a basic understanding of how things work on the OS. So, let’s find out!
How does Windows data deduplication work?
As the name suggests, Data Deduplication is the process of identifying duplicate chunks of data and then moving them using reparse point, which will redirect to the unique file copy.
Dedup is a multi-step process, from scanning the files, breaking them into chunks, identifying the unique ones, moving them to the chunk store, and then using the reparse point.
Remember, any changes here are registered unoptimized, and the process takes place the next time the Optimization job is run, typically once every hour. Though it sounds complex in theory, the process is automated and occurs in the background without requiring manual interference.
Also, as per Microsoft, configuring Data Deduplication can help reduce storage requirements by up to 95% in cases of high duplication. The average range for documents and similar files is 30-50%, while for virtualization libraries, it’s 80-95%.
The deduplication process has been developed considering two vital aspects. It does not affect the writing operations, and the programs accessing the file should be able to do so seamlessly, remaining completely unaware that these have been deduplicated.
What are the benefits of deduplication and compression?
Here are the primary benefits of Data Deduplication:
Reduces storage requirements: By identifying and eliminating duplicate chunks of data, Dedup helps reduce the required storage space. This also clears up the disk for other pieces of data.
Lowers incurred costs: With reduced storage requirements, the cost to maintain hardware also comes down significantly, ensuring that major corporations save big time.
Simplifies data recovery: Data recovery can be complicated when duplicate files exist on the server, but with Data Deduplication enabled in Windows 11, the process will be both simple and quick.
Enhanced network performance: Fewer duplicate files also translate to lesser data being transferred over the network, thus freeing up considerable network resources, and users, in turn, enjoy higher Internet speed in Windows 11.
How do I enable deduplication in Windows?
Tip
Data Deduplication is only available in the Windows Server series and is one of the primary differences between the regular and Server versions of Windows. So, we will list the ways to enable Data Deduplication on Windows Server and the effective options you have in Windows 11 to identify and clear duplicate files.
1. Data Deduplication in Windows 11
1.1 Search for duplicate files
Press Windows + E to open File Explorer, and navigate to the folder where you want to locate duplicate files.
Now, enter the file name in the search bar near the top-right corner and wait for the results to populate.
Select the duplicate file here and then click on Delete or hit the Del key.
Choose the appropriate response in case a confirmation prompt appears.
You can similarly perform a search and delete the other duplicate files.
This is by far the simplest method to delete duplicate files in Windows 11 without using the Data Deduplication methods or a third-party tool. It works the same way in the previous iteration, allowing users to remove duplicate files in Windows 10.
1.2 Sort files by name to identify duplicate files
Press Windows + E to open File Explorer, and head to the folder that has duplicate files.
Click on the View menu, and select Details from the list options.
Now, choose Name from the Sort menu to list the files in alphabetical order.
Any duplicate files will be listed right under the original ones making it easier to identify them.
To remove them, select one and hit Delete. You can also select multiple files in one go by holding the Ctrl key.
If you are unsure about the name of the duplicate file, there’s always to option to sort them and get the duplicate ones listed next to the original. Though this is way harder than Microsoft’s solution, and if you feel the same, there are a few Data Deduplication tools for Windows 11.
1.3 Use a third-party tool
Download CCleaner on your PC and launch the software.
Select Tools from the navigation pane on the left, and click on Duplicate Finder.
Select the drive in which you want to find the duplicate files, and click Search. You can also customize the settings here for a modified search with different parameters and exclusions.
Once the duplicate files are found, choose the ones to remove, and then click on Delete Selected.
These simplify the job and help find and delete duplicate files across the PC within seconds without installing Windows Server and enabling Data Deduplication.
Launch the Server Manager on your PC, and click on Add roles and features.
Click on Next to proceed.
Choose Role-based or Feature-based installation and click Next.
Double-click on File and Storage Services, expand File and iSCSI Services, then select Data Deduplication and proceed.
Choose the appropriate response on the next few windows, and click Install when you see Confirm installation selections.
Wait for the installation to complete.
2.2 Setting up Data Deduplication
Expand Local Server from the navigation pane in Server Manager, and select File and Storage Services
Now, choose Disks under Volumes if the former is not initialized yet.
Right-click on the drive, select New Volume, choose the appropriate options, and then enable Data deduplication.
If you want to enable Data Deduplication on a drive that’s already initialized, go to Volumes, right-click on the drive, and select Configure Data Deduplication.
Now, choose the appropriate option from the Data deduplication dropdown menu, choose a time period for files to be checked, add any excluded extensions or folders, set Deduplication Schedule, and click on OK once done. You could also go with the default settings.
You can now either wait for Data Deduplication to run automatically as per the configured schedule or start it manually.
2.3 Running Data Deduplication from PowerShell
To run manually, press Windows + R to open Run, type powershell, and hit Ctrl + Shift + Enter.
Click Yes in the UAC prompt.
Paste the following command while replacing Drive Letter with the one you want to perform the deduplication on, and then hit Enter:Start-DedupJob -Volume Drive Letter :\ Optimization
It will now list the progress of deduplication, and the same should reflect in Server Manager.
Once done, you can view the Deduplication Savings.
This is how you can install and set up Data Deduplication on Windows Server within minutes. As we mentioned earlier, the process is simple and quick.
Besides, if you find Configure Data Deduplication greyed out, make sure you have not selected the system drive, usually C:, because you can’t enforce the deduplication process on it.
Like anything else, Data Deduplication in Windows does come with a set of cons, basic factors that will affect the normal workflow or the data being worked upon. Here are a few drawbacks of Data Deduplication:
Not useful when duplication is low: We often are enticed by the massive storage space savings from enabling Data Deduplication, but that’s not always the case. For many, the duplication is quite low, and the process doesn’t yield significant results.
May affect performance: Although Data Deduplication ensures that reading and writing operations for the file remain unaffected, there are times when users report Windows taking a long time to open these files or work on them.
Chances of files incorrectly being identified as duplicates: Though rare, there is always the chance of a file being incorrectly flagged as duplicates during deduplication. And this will lead to a loss of data.
Increased probability of data corruption: When any part of the process malfunctions or the referencing is not configured correctly, there’s a high likelihood of data corruption. It will render the file useless unless you take measures to fix file corruption.
Doesn’t work on encrypted data: Encryption and deduplication don’t work together. And encrypted data on the PC or the server won’t see any deduplication savings.
That’s all on Data Deduplication in Windows 11 and the Server edition of the OS! You can now easily enable the feature or clear duplicate files using the manual approach. But you won’t need as much effort to remove duplicate drives in Windows 11.
Windows 11, the latest release, has been a popular and in-demand upgrade, but the system requirements have worried users. The Windows 11 market share is a testament to the former. But many wonder, will Windows 11 support more processors.
And it only makes sense! Given the taxing requirements for the latest iteration, many users won’t be able to upgrade to Windows 11. And the lack of clarity on the subject makes things even worse. So let’s find out, will Windows 11 support more CPUs in the future.
Can I get Windows 11 if my processor is not supported?
And the reason is simple! After installing Windows 11, users may experience compatibility issues, random crashes, and, worst of all, they might not receive security updates, leaving the PC exposed to all sorts of threats.
Watermark on Windows 11 desktop
Also, Windows 11 will display a watermark on the desktop specifying that the device doesn’t meet the minimum requirements for the OS to apprise users of it, though you can remove the watermark. But in this case, it’s best to roll back to Windows 10, as per Microsoft.
Will more processors be added to Windows 11?
Coming to will Windows 11 supports more processors, the answer is no. It’s very unlikely that Microsoft will expand the list of supported processors since it’s directly linked to security.
Though Microsoft did make some additions, as described in its official blog post, it’s unlikely that more CPUs will be entrusted with running Windows 11.
The latest iteration is increasingly focused on privacy and security, and processors that don’t offer the level required by Microsoft can’t ideally run Windows 11. Essential support for Secure Boot and TPM 2.0 should give you a sense of it.
Secure Boot enabled in BIOS
We have also encountered users asking if Windows 11 support 7th Gen Intel. It would, but this change took place quite a while after the OS was released, and Microsoft identified that Intel 7th Gen processors meet the set principles for Windows 11, though the options are limited.
Besides, for all those wondering why Windows 11 does not support old CPUs, here’s the list of primary reasons:
Lack of security features: Older processors don’t support the security features employed by Windows 11. And it will prove to be an impediment in Microsoft’s quest for a secure OS experience.
Enhanced compatibility and fewer errors: This is another critical reason Microsoft is ditching the older processors. As per reports, Windows reported far fewer crashes on modern processors when compared to the ones released, like a decade ago.
Seamless performance: Windows 11 is designed to be fast and offer an unmatched experience to users. But this won’t be possible on older processors.
The Windows 11 security settings offer a massive upgrade over the previous iterations and, when configured right, can protect the PC from both online and offline threats.
What processors support Windows 11?
While there is very little chance that Windows 11 will support more processors, the current list of those that run isn’t that exclusive either. There’s a good chance that your PC might run Windows 11. And the same could be verified using the PC Health Check app.
You can easily check whether your PC falls under the list of supported Windows 11 processors. Or you could do the same from Microsoft’s dedicated page for each manufacturer as listed below:
For anyone asking: should I upgrade to Windows 11?, we recommend you do. The reason, the latest iteration has a lot to offer in terms of user-friendly features, privacy, and security. Besides, Windows 10 would be out of support by October 14, 2025.
And remember, Windows 10 users will get a Windows 11 upgrade on supported PCs. The option will be offered directly via Windows Update in a phased manner. Though there are other ways to install Windows 11.
DLLs play a vital part in Windows when it comes to both the built-in applications and the third-party ones. While the ones for the former are stored by default, others are bundled with the app files. But, many reported that api-ms-win-core-synch-l1-2-0.dll is missing.
Another variation of the error when launching an application reads, The procedure entry point CreateEventW could not be located in the dynamic library api-ms-win-core-synch-l1-2-0.dll. This basically means that the DLL is missing, corrupt or unreadable. Let’s find out all about it!
What is api-ms-win-core-synch-l1-2-0.dll?
The DLL is used by applications for various critical functions but is not a part of Windows by default. So, in most cases, the application that requires the files installs it.
So, let’s understand why you get the api-ms-win-core-synch-l1-2-0.dll error in DaVinci Resolve and other applications:
Problems with the program: In most cases, it turned out to be the program itself at fault for not adding the file, which triggered the DLL not found error message. Apparently, issues during installation are a common cause here.
Missing Visual C++ Redistributables: The DLL also has links to Visual C++ Redistributables, and when these are not installed or corrupt, you are likely to face the problem.
DLL can’t be read: Due to repeated modifications or an incorrect change, the DLL sometimes becomes unreadable, and the applications that rely on it fail to launch.
What do I do when api-ms-win-core-synch-l1-2-0.dll is missing?
Before we head to the complex ones, here are a few quick things you can try:
Restart the computer and relaunch the program throwing the error.
Check for any pending app updates and install them.
Revert any recent changes to the PC that may trigger the error. For instance, uninstall the applications added recently, or undo changes to the file locations. A simpler solution is to perform a System Restore.
If none work, move to the solutions listed next.
1. Use a dedicated DLL repair tool
For issues with DLLs used by third-party apps, it’s generally incompatibility between the file and Windows to blame. However, the problem is not as intricate as you would believe and can be easily fixed using a reliable DLL repair tool.
2. Move the file from another computer
Another solution that appears simple but often turns out tricky is transferring the file from another PC running the same application seamlessly. Finding another computer with the DLL is the challenging part here. If you do, here’s the api-ms-win-core-synch-l1-2-0.dll location:C:\Windows\System32
In case you can’t find the DLL in the System32 folder, look it up in the program’s dedicated directory. In some cases, it’s stored there as well.
Also, for those wondering where to put api-ms-win-core-synch-l1-2-0.dll, it should be moved both to System32 and the app’s folder in Program Files or Program Files (x86), depending on whether it’s a 64-bit or 32-bit program. You may have to take full folder permissions to add the file.
3. Download Microsoft Visual C++ Redistributables
NOTE
Even if you have the redistributable packages installed, get the latest one because it’s often just one of these that makes the difference. So make sure you have each.
Now, run the setup and follow the on-screen instructions to install it.
Similarly, install the other redistributable packages you downloaded earlier.
Often reinstalling the missing Microsoft Visual C++ Redistributables is all it takes to fix issues with api-ms-win-core-synch-l1-2-0.dll in CCleaner and OneNote. Also, if you already have the packages, remove the current ones and install them again.
Press Windows + R to open Run, type appwiz.cpl in the text field, and hit Enter.
Locate the program that’s throwing the error, select it, and click Uninstall.
Choose the appropriate response when prompted and follow the instructions to complete the uninstallation.
Once done, reboot the PC and download the program from the official source.
In case the program was supposed to add the DLL and didn’t, reinstalling it should do the trick. If you still face problems, contacting the support team is the only solution.
Do not forget to get an effective DLL repair tool to prevent such errors.
Tell us which fix worked for you in the comments section below.
Microsoft develops a wide range of DLLs, some installed by default in Windows while others come bundled with additional packages or third-party programs. One such that falls in the latter category is the vccorlib140_app.dll.
When the DLL is not found, several apps stop running. While most apps will throw an error code highlighting the reason, some don’t and simply won’t launch at all, making things all the more tricky. So, let’s find out why vcruntime140_app.dll is missing in Windows 11.
Corrupt system files: When the DLLs or system files are corrupt, programs have difficulty loading and running in Windows.
Improper app installation: Most programs have the required DLLs in their directory and come with it. So, when the file is missing, there’s a chance that the installation didn’t go through properly.
Missing redistributable packages: The DLL file is linked to MSVC, and missing redistributables here often cause the vccorlib140_app.dll error.
What can I do if vccorlib140_app.dll is not found?
1. Use a dedicated DLL repair tool
While multiple online platforms claim to be hosting vccorlib140_app.dll for free, none are reliable. There have been several instances of these files containing malware and affecting the user’s PC. This is why you need a safe and dedicated DLL repair tool.
2. Transfer the file from another PC
A quick solution to the problem, though not feasible to all users, is transferring the missing DLL from another computer to the affected PC. The usual vccorlib140_app.dll location is:C:\Windows\System32
In case you can’t find it in the System32 folder, check the program’s directory. And make sure to move the file to the same folder on the PC throwing the error. The only drawback here is that finding a PC with vccorlib140_app.dll might be challenging for many.
3. Run the DISM and SFC scan
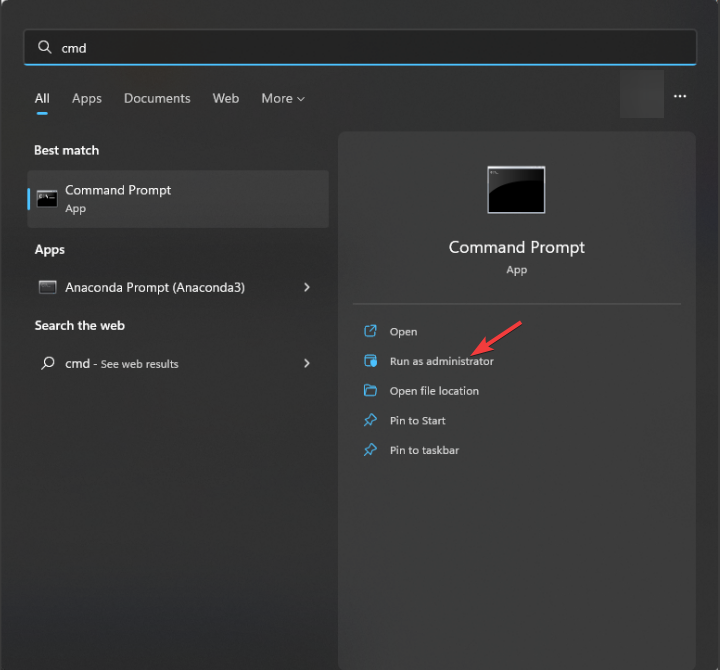
Press Windows + R to open Run, type cmd, and hit Ctrl + Shift + Enter.
Click Yes in the UAC prompt.
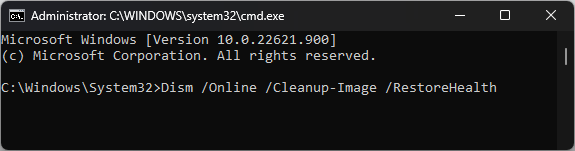
Paste the following commands and hit Enter after each to run the DISM tool:DISM /Online /Cleanup-Image /CheckHealthDISM /Online /Cleanup-Image /ScanHealthDISM /Online /Cleanup-Image /RestoreHealth
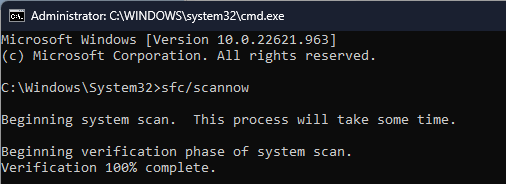
Now, execute this command for the SFC scan: sfc /scannow
The DISM commands and SFC scan are effective at repairing corrupt system files in Windows, a common reason users face issues with vccorlib140_app.dll. So, run them both and check whether the error disappears.
Run the setup for each and follow the on-screen instructions to complete the installation.
Similarly, install the other redistributables you downloaded earlier.
Once you have all the relevant and latest Microsoft Visual C++ Redistributable packages installed, the vccorlib140_app.dll missing in State of Decay 2 error should be fixed. Just make sure to download all the packages for a given version.
5. Reinstall the application
Press Windows + R to open Run, type appwiz.cpl in the text field, and hit Enter.
Select the affected application from the list, and click Uninstall.
Choose the appropriate response in the prompts and follow the instructions to complete the process.
Once done, restart the computer for the changes to come into effect, and then reinstall the program from an official source.
After reinstalling the application, the missing vccorlib140_app.dll should appear in the program’s directory, and the application should run seamlessly.
Before you leave, check our curated list of the best DLL repair tools and get one today to prevent such errors.
For any queries to share which solution worked for you, drop a comment below.
Minecraft is a popular video game many people consider the ultimate sandbox game. Players enter a virtual realm, using building blocks and other resources to create a world of their imagination.
The game has a ton of flexibility, as it comes with zero instructions or goals. Players build and explore however they wish. It’s trendy among adults and children and can be played on many devices, from smartphones to consoles and PCs.
The game comes in two separate versions: Minecraft Bedrock and Java edition.
What are the differences between Bedrock and Java editions?
Content-wise, Bedrock and Java are mostly the same but there are some distinct differences between the two.
Minecraft Java is the original version that came out back in 2009 and only works on the PC. Players on this version can only play with other Java players. Cross-play with other platforms is not enabled. Players on this version can customize their skins, add mods, and have access to Hardcore and Spectator modes.
Minecraft Bedrock, also known as Minecraft for Windows 10, is the version you see on console and mobile platforms alongside a PC. It came out in 2017 and brought nine of the major platforms at the time under the Bedrock Engine to create a singular community.
This version also includes a marketplace and parental control it, but it does lack Hardcore and Spectator modes and doesn’t allow modding.
Bedrock has been ported over to Windows 11, but it’s unknown at this time if Microsoft or Mojang, the game’s developer, will create a special Windows 11 version of the game or keep it all the same.
Over time, Mojang had added new content, features, and bug fixes to the game. The fixes improve the stability and performance of the game, so it’s necessary to keep the game updated.
Typically, the game updates itself automatically, but sometimes the auto-update doesn’t work for whatever reason. This guide will show you how to update multiple versions of Minecraft manually. It will also show you how to reinstall Minecraft as a last-ditch effort to fix any problems.
How do I update Minecraft on Windows 11?
Update Minecraft Bedrock
If you want to enjoy some of the newer features in Minecraft, we’ll show you how to update Minecraft Bedrock to 1.19.10 with these quick steps:
1. Open the Microsoft Store by double clicking on the store icon on taskbar.
2. In the Microsoft Store app, click the Library button from the lower-left corner of the window.
3. On the Library page, click the Get updates button in the upper-right corner.
4. If any new updates are found, Microsoft Store will download and install them automatically.
5. If errors are found, you will need to reset the Microsoft Store app.
6. To reset the Microsoft Store app, click on the magnifying glass icon on the taskbar.
7. Click on the Settings icon.
8. Click on the Apps tab.
9. Scroll down until you locate the Microsoft Store app listed.
10. Click on the three dots next to Microsoft Store.
11. In the small window that appears, click on Advanced options.
12. In the next window, scroll down to the Reset option.
13. Click on the Reset button to fix any errors.
Enable Auto-Update
In the Microsoft Store app, click on your profile page in the top right corner.
Select App settings.
Turn on App updates by clicking on the toggle swtich next to the tab.
Reinstall Minecraft Bedrock Edition
Click on the magnifying glass icon on the taskbar.
Click on the Settings icon to open it.
Click on the Apps tab.
While in this new tab, click on Apps & features on the right.
Scroll down until you locate the Minecraft app listed.
Click on the three dots next to Minecraft.
In the small window that appears, click on Uninstall to remove the game.
Once the game is uninstalled, restart the computer by clicking on the Home icon.
Click on the Power button and click Restart.
After your computer finishes restarting, go to the Microsoft Store and install Minecraft again.
If you already paid for the game, the license will automatically log you in the game with your account.
Update Minecraft Java Edition
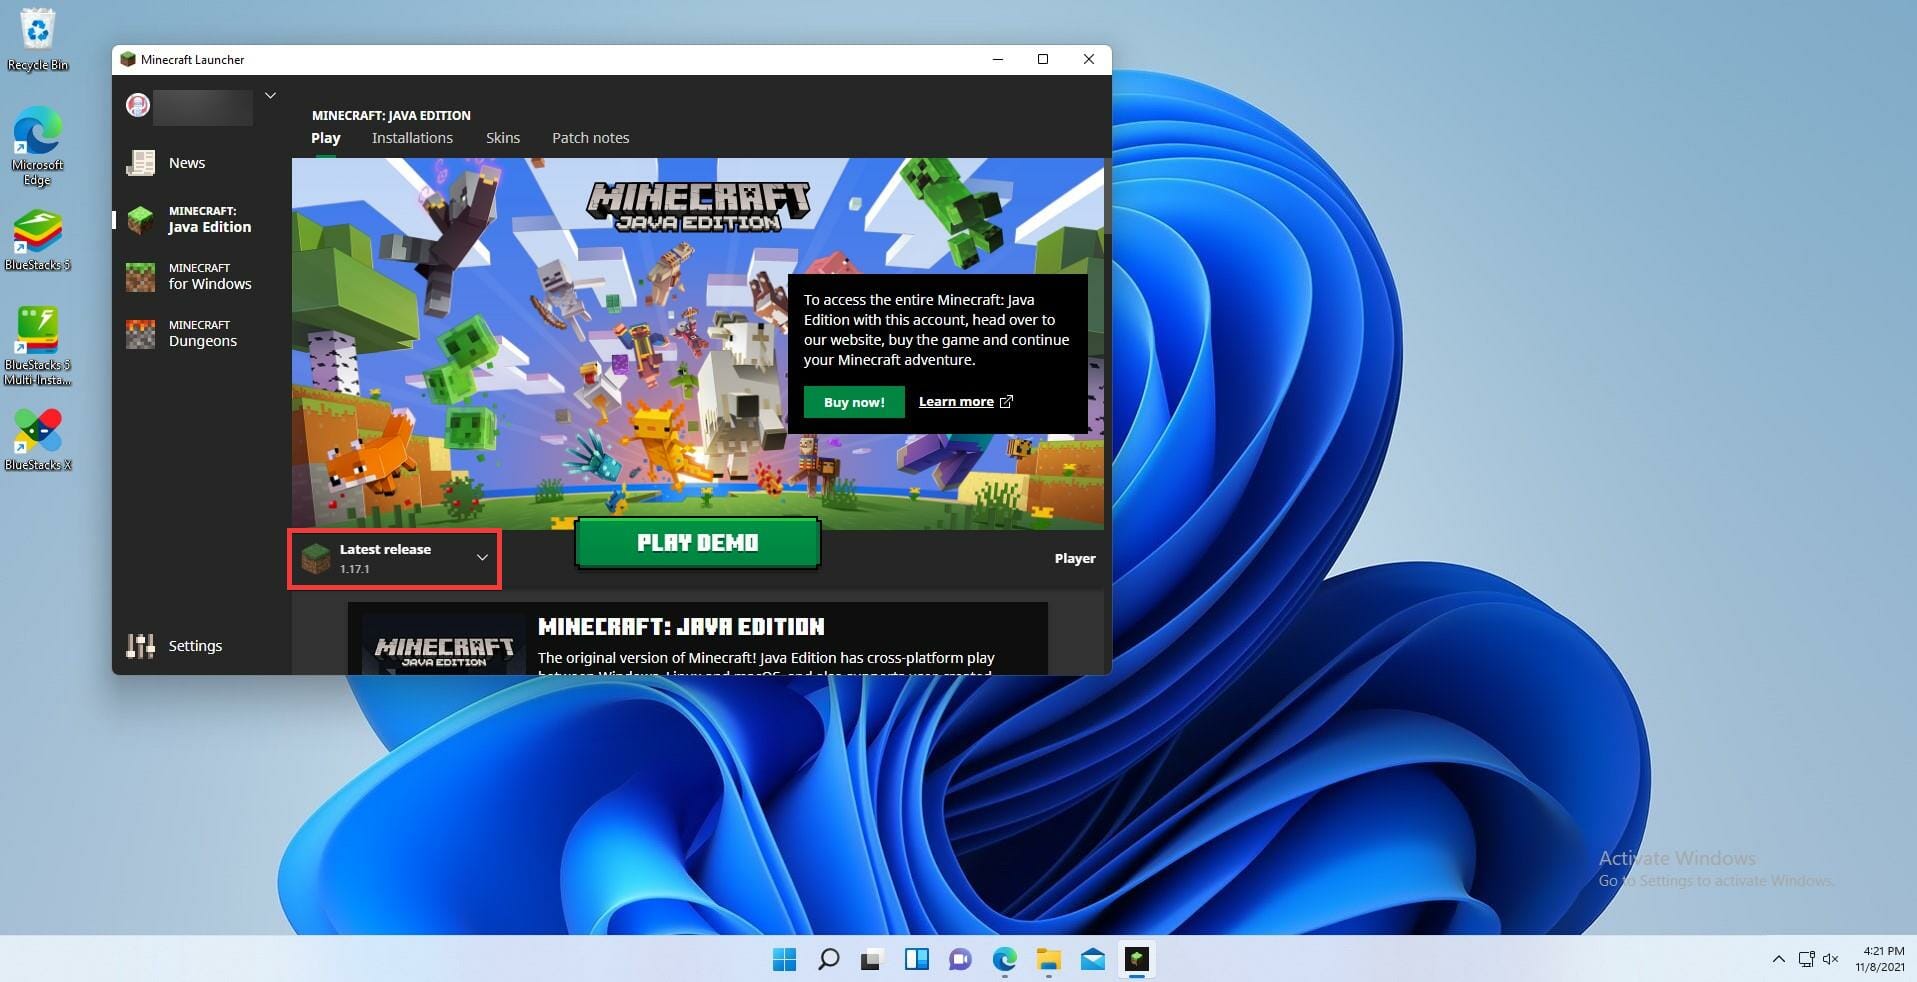
Open the Minecraft Launcher by clicking on the taskbar icon.
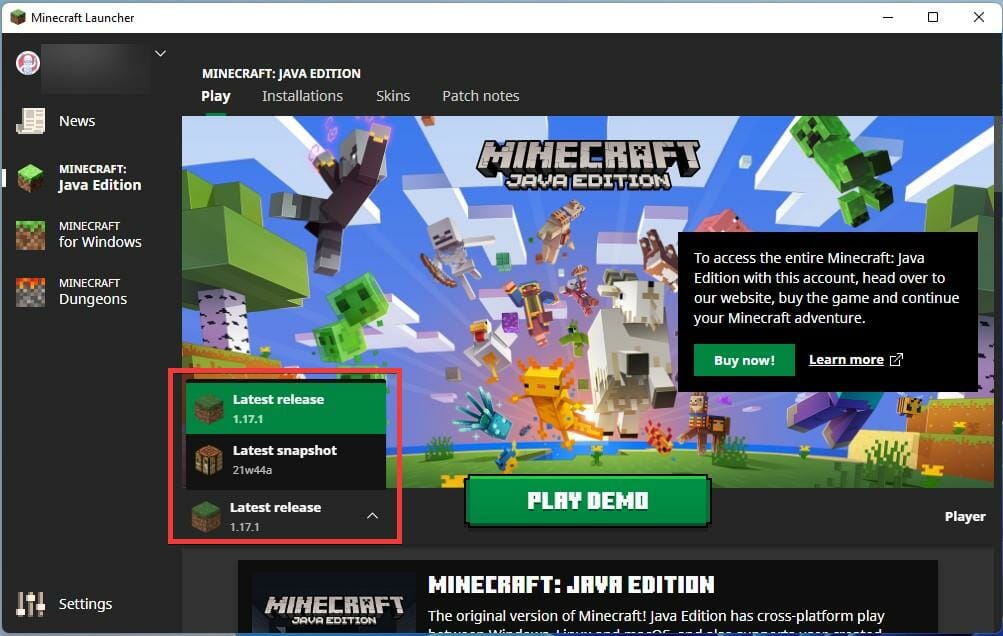
Once the launcher open, select Latest Release from the drop-down menu next to the Play button.
Select the most recent release version.
Once you select this, the game will automatically update and install any changes if there are any.
Reinstall Minecraft Java Edition
To uninstall Minecraft: Java Edition, go to the Settings menu.
Select the Apps tab.
and then open Apps & features tab.
In the Apps & features setting, locate Minecraft Launcher in the list of apps.
Then, click the three-dots button, and select ‘Uninstall’ to remove the game.
Once uninstalled, restart your computer by first clicking on the Start icon at the bottom.
Click on the Power button and select the Restart option.
After restarting, download the Minecraft Launcher again.
Open the Minecraft Launcher and log in to your Minecraft Account.
Click the Play button to install the latest version of the game. The launcher will automatically download and install the latest version of Minecraft.
What if I get an error message while updating Minecraft?
You may sometimes get an error message saying, Try that again. Something went wrong when trying to update. Minecraft. It is probably related to a Windows update issue. To stop that error, you need to install the latest Windows 11 updates
You can do this by going to the Settings menu and scrolling down to Windows Update at the bottom of the left panel. Click Check for updates and see if there’s anything available now. If there is, click the Download Now button. Restart your PC and update Minecraft again; it should work now.
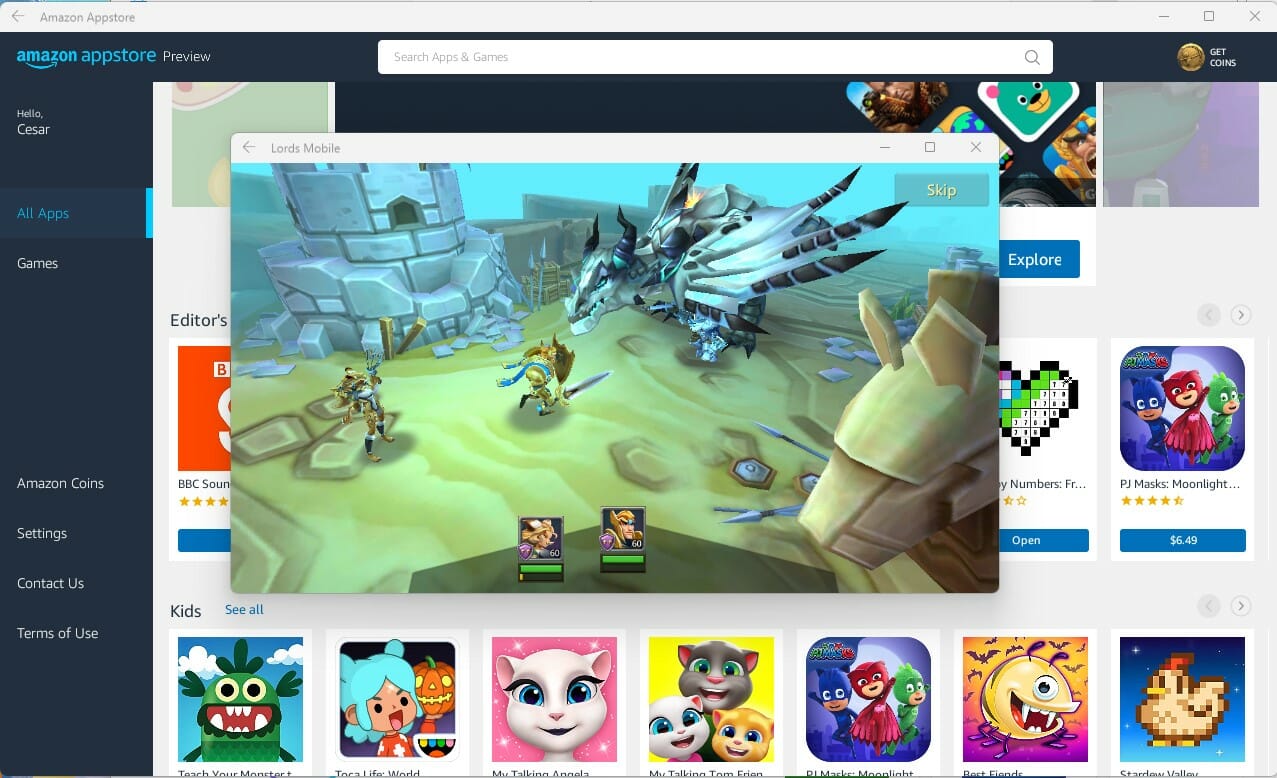
If you ever wanted to try out Android games on PC, now’s your chance with the Android app beta. You will, however, need to be a member of the Windows Insider Program.
To enhance your Minecraft experience and download shaderpacks, take a closer look at our article.
Let us know if you have any questions on Minecraft updates. Feel free to leave comments about guides you’d like to see or information on other Windows 11 features.
Earlier today Microsoft announced that it was opening up access to its artificially intelligent social media content platform Microsoft Designer to the masses, and it looks like the company’s second order of business today is to promptly nestle the service into the Edge browser.
Microsoft’s Canva-like designer tool is a relatively inexpensive one-stop-shop for producing online content such as social media posts, greeting cards, branding, alerts, promotionals, and more.
Microsoft Designer will now feature in ‘preview-mode’ alongside Bing Chat, AI-powered Image Creator, Microsoft 365 and a handful of other tools tucked away in the sidebar of Edge.
Instead developing a separate app for Windows that would need to be maintained in various versions of the Microsoft Store within differing iterations of the operating system, the company has jumped straight into progressive web app development for Microsoft Designer.
From the Edge browser, users will be able to manage and create visuals, text, animations, and design templates specifically made to share on social media sites like Facebook, Instagram, and TikTok.
With Designer in Edge, we are bringing these capabilities into the web browser, too. It’s built natively into the Edge sidebar and can be accessed by clicking on the Designer icon, making Edge the first and only browser with an integrated, AI-powered graphic design app. You can create unique designs instantly by simply describing the graphic you want. You don’t need to leave the page you’re on, switch windows, or download an extension to your browser to start working on an idea when creativity strikes. With Designer in Edge, you can also create high-quality, unique content without interrupting your workflow. As you’re drafting a post on Facebook, Twitter, and Pinterest, Designer in Edge will provide AI-powered design suggestions to include in your post, which you can customize and publish without ever leaving your browser window.
Microsoft has not given a timeline on the rollout of a non-preview version of Microsoft Designer to Edge, but with the news of the platform coming out of preview, it shouldn’t be much longer until browser users are creating, editing and sharing their next Instagram post all straight from the desktop.
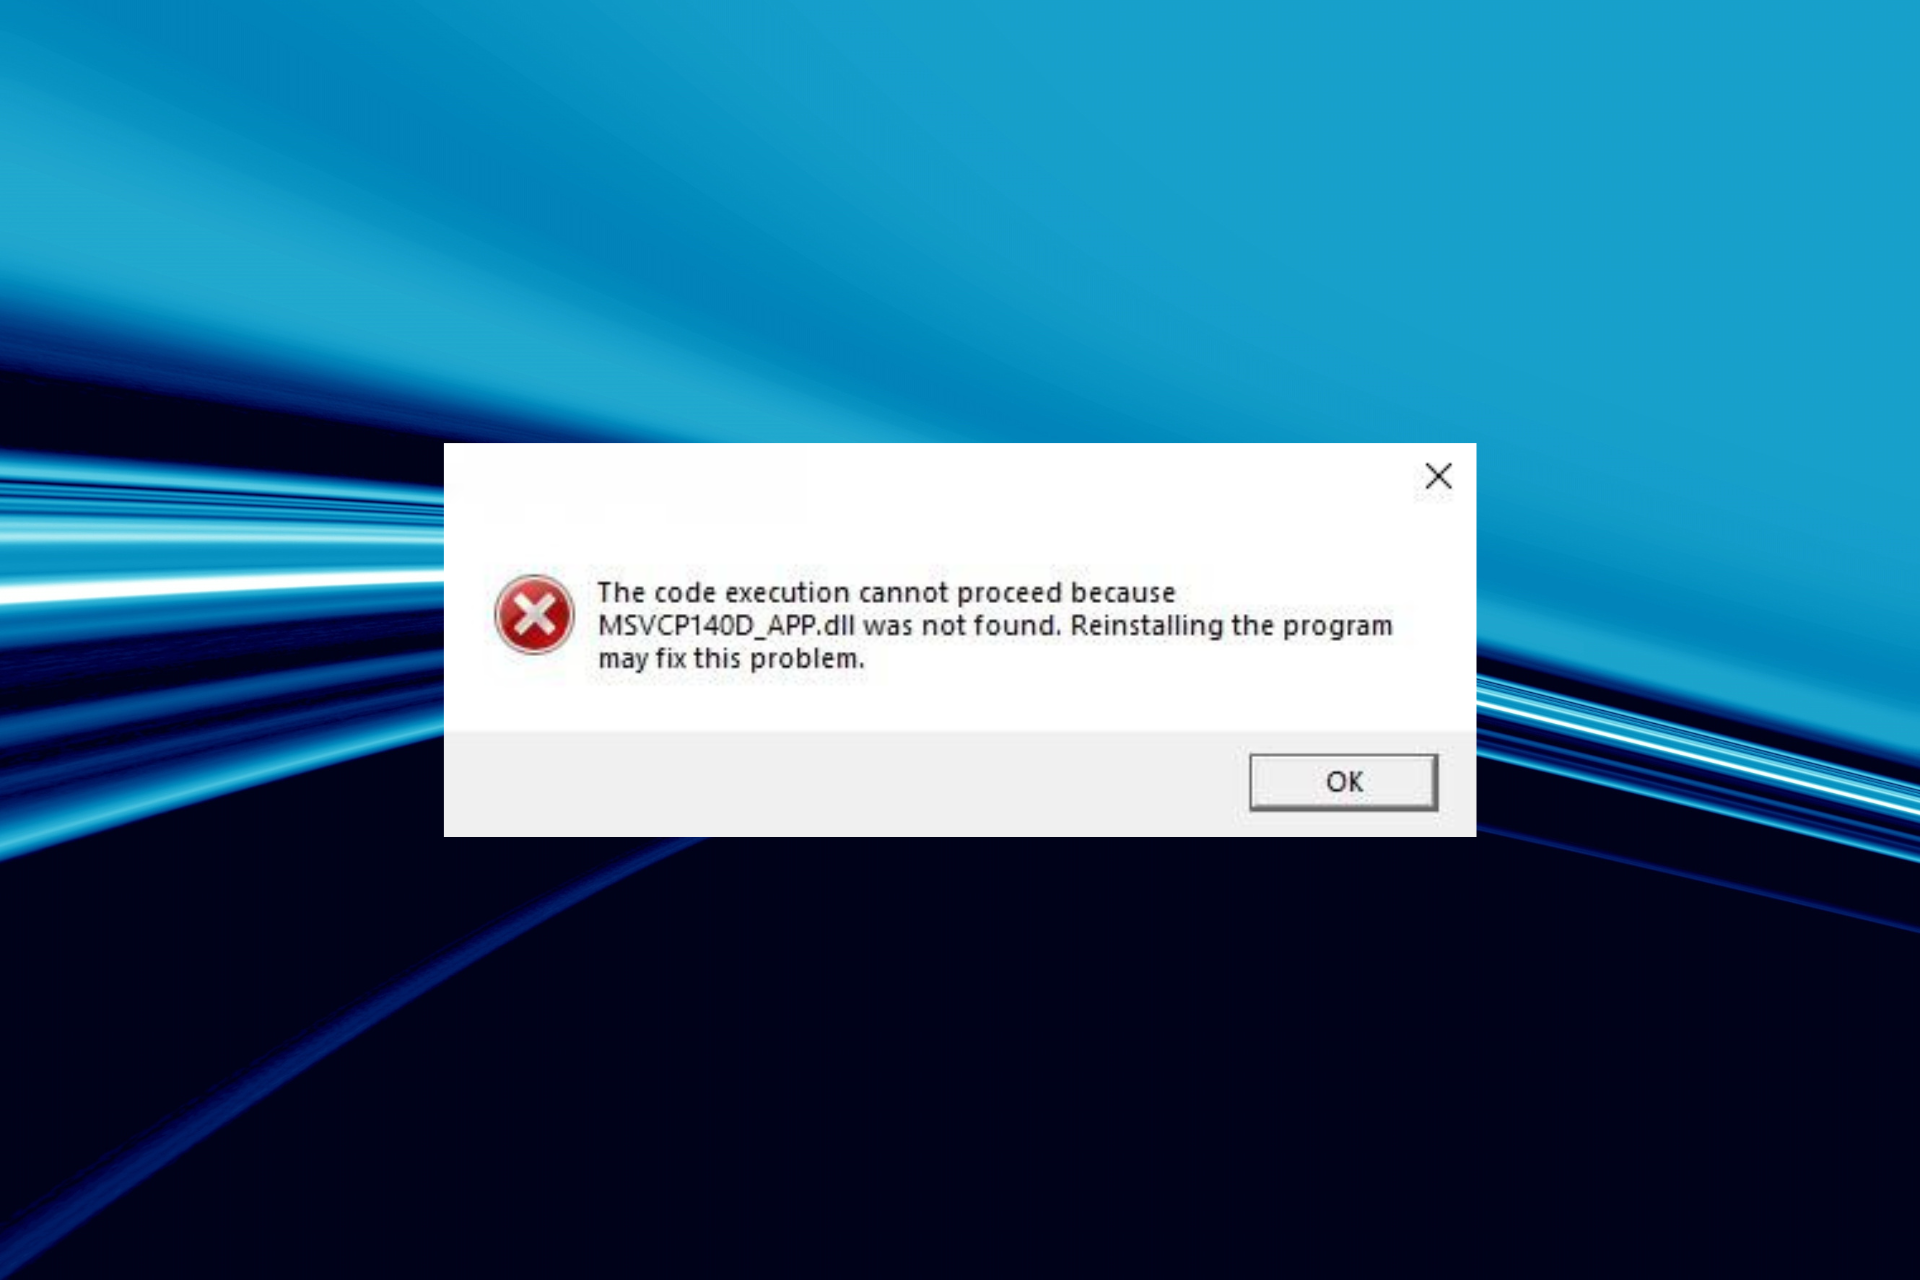
DLL or Dynamic Link Library files play a critical role in Windows and allow built-in and installed programs to run efficiently. And when a DLL is missing, you will notice that a few apps stop running. This was particularly the case with MSVCP140_APP.dll, a file that has troubled many.
DLLs are released by Microsoft and third parties to support their programs, and the two are equally crucial for the effective running of apps. The MSVCP140_APP.dll file, released by Microsoft, is mostly used by games, primarily Forza and Gears of War. So, let’s find out all about the problem.
Why is the MSVCP140_APP.dll not found?
Here are a few reasons MSVCP140_APP.dll is missing in Windows 10 and other iterations:
Issues with the app installation: The primary reason users encounter the problem is due to an improper app installation since most apps that require the DLL have the file bundled with the installer setup.
Missing Visual C++ Redistributable packages: Given that the file is linked to the Visual C++ Redistributable packages, when these are not installed or functioning, an error may appear.
Corrupt system files: When the system files are corrupt, you will face several issues with both the built-in and third-party apps and may even encounter a BSOD error.
Another app locking the DLL: In a few cases, another app on the PC is using the DLL and blocking other programs from accessing it, though a quick restart should fix things.
What can I do if MSVCP140_APP.dll is not found?
1. Use a dedicated DLL repair tool
There are several reasons a DLL can not be found or remains unreadable, but replacing it with a new copy in the required directory always does the trick. When it comes to that, a dedicated DLL repair tool is all you need.
2. Copy the file from another PC
When a particular DLL is not found, your approach should be to look for it on another PC and then transfer it to the affected computer. This does work in many cases. The MSVCP140_APP.dll file location is usually:C:\Windows\System32
If placing the new DLL in the System32 folder doesn’t work, move a copy to the app’s directory. It’s usually found in the Program Files or Program File (x86) folders, depending on whether it’s a 32-bit or 64-bit app.
3. Download Microsoft Visual C++ Redistributables
Go to Microsoft’s dedicated webpage, and click on the download links for the latest Visual C++ Redistributable packages.
Run the setup and follow the on-screen instructions to complete the installation process.
Similarly, install the other redistributable packages.
If you don’t have Microsoft Visual C++ Redistributable packages installed, chances are that’s causing the MSVCP140_APP.dll error in Forza 3. So get it from the official website and make sure to download and install every package for a particular version.
Press Windows + R to open Run, type appwiz.cpl in the text field, and hit Enter.
Select the program throwing the error and click Uninstall.
Follow the on-screen instruction and choose the appropriate response when prompted to complete the process.
Once done, restart the computer.
Now, download the program from a reliable source, either the official website or Microsoft Store.
When a DLL is not found, Windows recommends that you reinstall the program because it often has the file bundled as a part of the package. Also, if the Gears of War 4 MSVCP140_APP.dll was not found error is not fixed in the first attempt, use an effective uninstaller software to clear leftover files.
5. Perform a system restore
Press Windows + R to open Run, type rstrui.exe, and click OK.
Select Choose a different restore point, if the option is available, and click Next.
Now, pick a restore point from the list and click Next.
Verify the details and click on Finish to start the restore process.
Once done, the PC shouldn’t be throwing a missing DLL error anymore.
That’s it! One of these solutions should have helped when MSVCP140_APP.dll is not found, and you can now launch Forza Horizon 4 and other programs.
Before you leave, check the best DLL repair tools and get one today to prevent similar issues in the future.
Tell us which fix worked for you in the comments section below.
If we look through the Windows directory, there would be hundreds of DLL files. Besides, many specific third-party programs are stored in dedicated folders. Remember, when a DLL is missing or corrupt, errors start appearing. And advpack.dll is a common troubling factor for users.
The error message with the advpack DLL usually reads, Error creating process <path>. Reason: Windows\System32\advpack.dll. Also, re-registering the DLL throws the message, Make sure that “advpack.dll” is a valid DLL or OCX file and then try again. So, let’s find out!
What is the use of Advpack DLL?
The advpack.dll is a critical file in Windows that facilitates the installation of programs by identifying and reading the .inf files. Published by Microsoft, the DLL plays a vital role, and even simple issues with it can trigger a range of errors.
Here are the primary reasons you get the advpack.dll error with DirectX:
Corrupt system files: One of the most common reasons, corrupt system files are often responsible when you get a DLL not found error.
Malware infection: A system infected with malware doesn’t perform effectively and will keep throwing errors randomly.
Missing redistributable packages: Some users reported that advpack.dll went missing after uninstalling Microsoft Visual C++ Redistributable packages, and reinstalling it did the trick.
What can I do if advpack.dll is missing?
Before we head to the slightly complex solutions, here are a few quick things to try:
Check for pending Windows updates and install them.
Make sure you are not installing a 64-bit program on a 32-bit version of Windows.
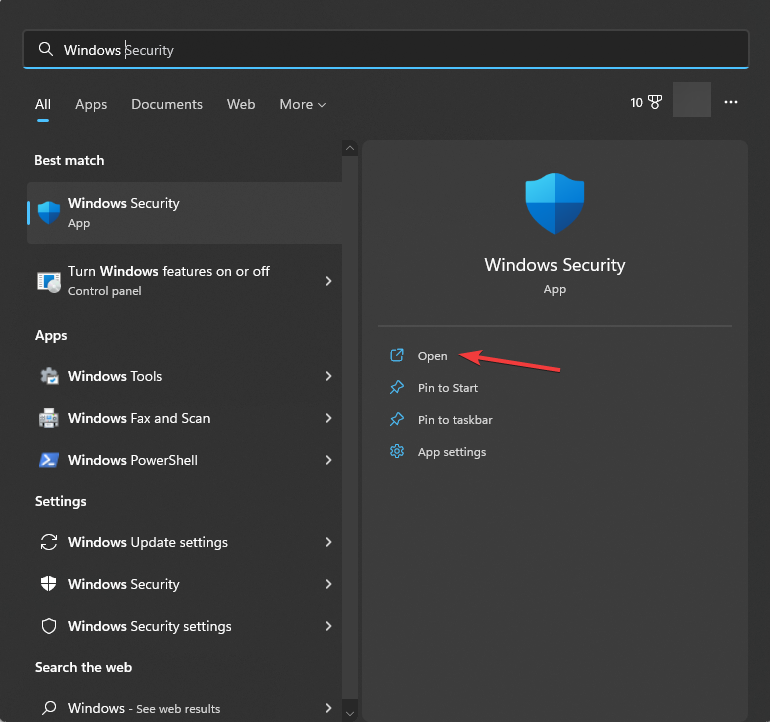
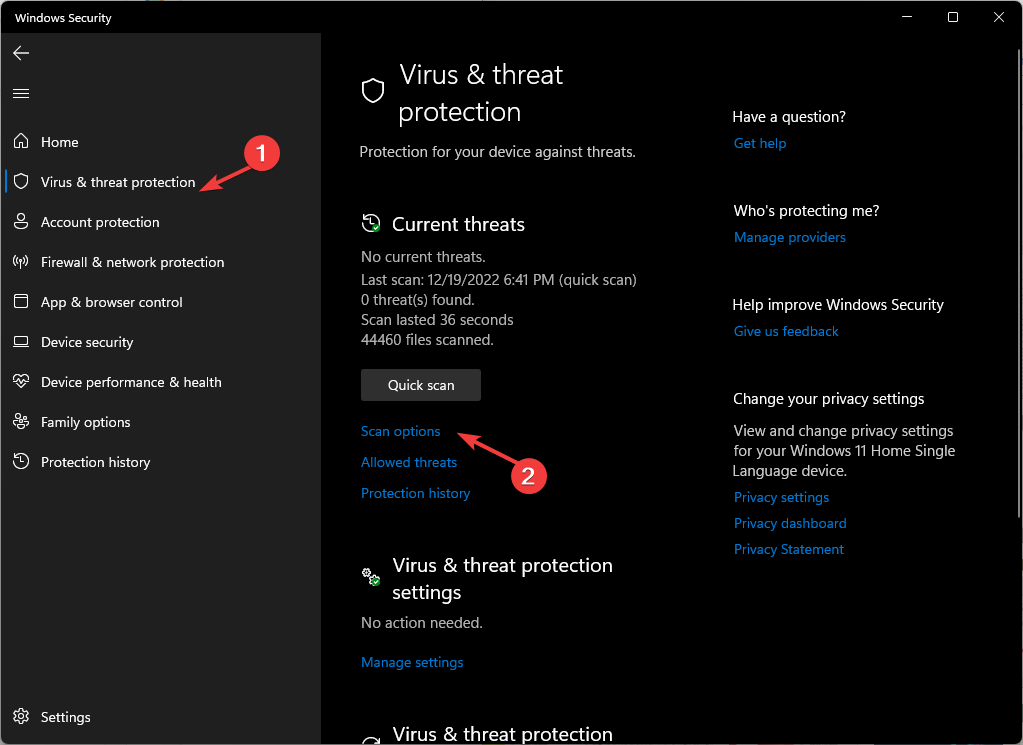
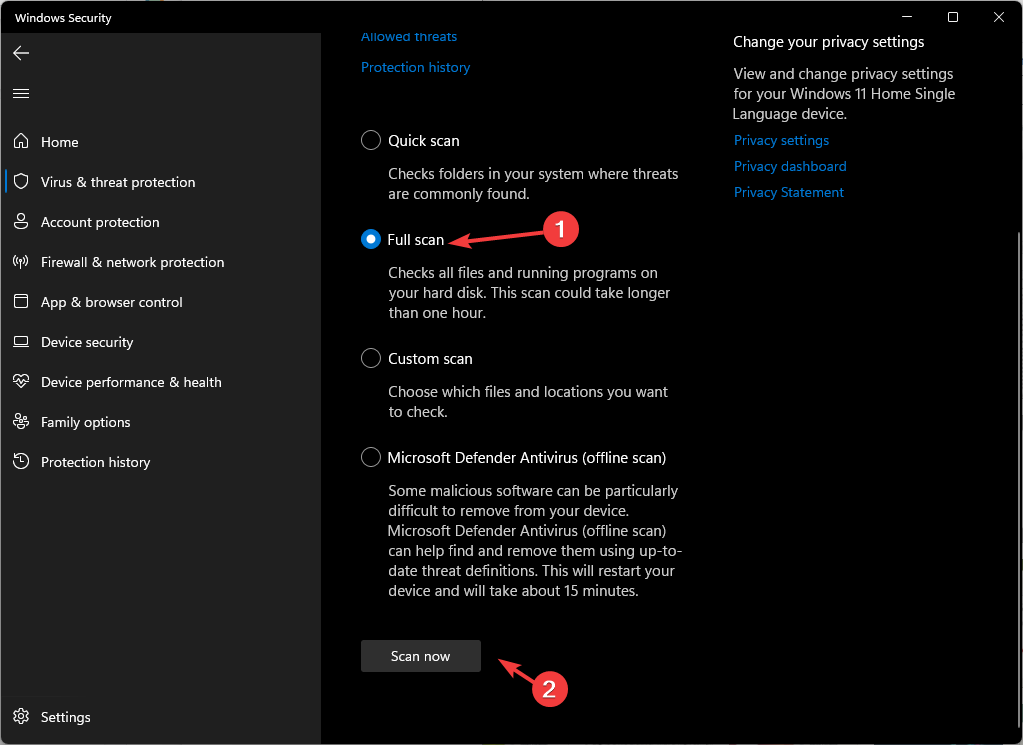
Scan your PC for malware with the built-in Windows Security or use an effective antivirus.
Copy the DLL to the System32 folder from another computer running the same OS.
If none work, move to the fixes listed next.
1. Use a dedicated DLL repair tool
When one of Microsoft’s DLLs is missing or throwing an error, you could go with the handful of built-in tools, but none guarantee results and users often have to fend for themselves. An ideal approach, in this case, is to use a DLL repair tool.
2. Run the DISM and SFC scan
Press Windows + R to open Run, type cmd, and hit Ctrl + Shift + Enter.
Click Yes in the UAC prompt.
Now, paste the following DISM commands individually and hit Enter after each:DISM /Online /Cleanup-Image /CheckHealthDISM /Online /Cleanup-Image /ScanHealthDISM /Online /Cleanup-Image /RestoreHealth
Once done, execute this command for the SFC scan: sfc /scannow
Finally, restart the computer for the changes to come into effect.
3. Download Microsoft Visual C++ Redistributables
Since the advpack.dll is linked to MSVC, missing or deleted Microsoft Visual C++ Redistributables can also trigger the error when installing or updating DirectX in Windows.
When faced with the situation, head to Microsoft’s dedicated webpage and download the latest redistributable packages. Make sure to get every package for a specific version to be sure, and install them. Once done, check whether the advpack.dll update error disappears.
Press Windows + S to open Search, type View advanced system settings in the text field, and click on the relevant search result.
Click on Environment Variables.
Select the Temp entry, and click on Edit.
Enter the following value in the Variable value field, and click OK:C:\Temp
Make similar changes to the TMP variable, and click OK to save the changes.
When the environment variables are misconfigured, you may come across the advpack.dllError creating process message while installing programs in Windows. And reconfiguring them should instantly get things running.
Now, choose the product language from the dropdown menu, and click Confirm.
Click on the link that appears to start downloading the Windows 11 ISO.
Once done, double-click on the file and click Open to confirm.
Launch the setup.exe file.
Click on Next to proceed.
Click Agree to accept Microsoft’s license terms.
Finally, verify that the setup reads Keep personal files and apps, and then click on Install.
When nothing else works, the last option is to perform an in-place upgrade to eliminate the advpack.dll error in Internet Explorer and all other programs. Though the process takes a few hours, the personal files and installed apps remain unaffected.
And before you leave, do not forget to check our curated list of the best DLL repair tools to fix such errors with ease in the future.
For any queries or to share which solution worked for you, drop a comment below.
Errors in Windows are common, and while some are quick to troubleshoot, others require a fair bit of technical expertise and effort to eliminate. A missing DLL file problem falls in the latter category. Speaking of it, the DivxDecoder.dll has, of late, affected many users running games.
While there isn’t much information regarding the developer, the DivxDecoder.dll file, when missing, seems to affect Worlds of Warcraft (WoW) the most, in addition to a few other games. So, let’s find out why the DLL is not found and the solutions that would work.
Why is DivxDecoder.dll missing in Windows?
Here are the primary reasons programs can’t find the DLL:
Issues with the installation: Programs, especially games that rely on DivxDecoder.dll, have it bundled with the installer package. So, when the file is not found, it could be an improper installation to blame.
The file path was changed: In some cases, users reported the problem after either moving the program’s executable (.exe) file or the DLL out of the main directory and undoing it got things in order.
The DLL file got deleted: There are also instances where a user deletes the file inadvertently, which results in the program being unable to find it, and, as a result, throwing the DLL not found error.
What can I do if DivxDecoder.dll is not found?
1. Use a dedicated DLL repair tool
When it comes to third-party DLLs, the problem mostly arises due to incompatibility between the file and the OS. However, the idea of the DLL missing cannot be ignored altogether. An effective solution in both these cases is to use a dedicated repair tool.
2. Check the file location
Remember, when a program installs a DLL on the computer, the file should not be moved from the directory, nor the launcher. The two, executable (.exe) and DivxDecoder.dll, have to be in the same folder.
So, if you find the DLL in another directory or have transferred it to the System32 folder, move it back to the program’s installation folder accessible through either of the following paths:C:\Program FilesC:\Program Files (x86)
After you are done, the app should run seamlessly without throwing any errors.
3. Reinstall the problematic program
Press Windows + R to open Run, type appwiz.cpl in the text field, and hit Enter.
Select the program that’s throwing the error on launch, and click Uninstall.
Follow the on-screen instructions to complete the installation process.
When the problem is limited to a particular program, say, a missing DivxDecoder.dll in WoW 3.3.5, chances are that the program’s initial installation did not go through properly. So, uninstall the app and then reinstall it. Use a reliable uninstaller software to clear leftover files, if required.
Press Windows + R to open Run, type rstrui.exe in the text field, and click OK.
Select Choose a different restore point and click Next to proceed.
Pick a restore point from the list, one created before the error first appeared, and click Next.
Verify the details and click Finish.
Wait for the restore process to complete.
If nothing else works, performing a system restore should help get things up and running when DivxDecoder.dll is not found while running WoW in Windows. The personal files remain unaffected during the process. Besides, you can always undo a system restore if things don’t turn out as expected.
And before you leave, check our curated list of the best DLL repair tools and get one to keep such errors at bay.
For any other queries or to share a solution not listed here, drop a comment below.
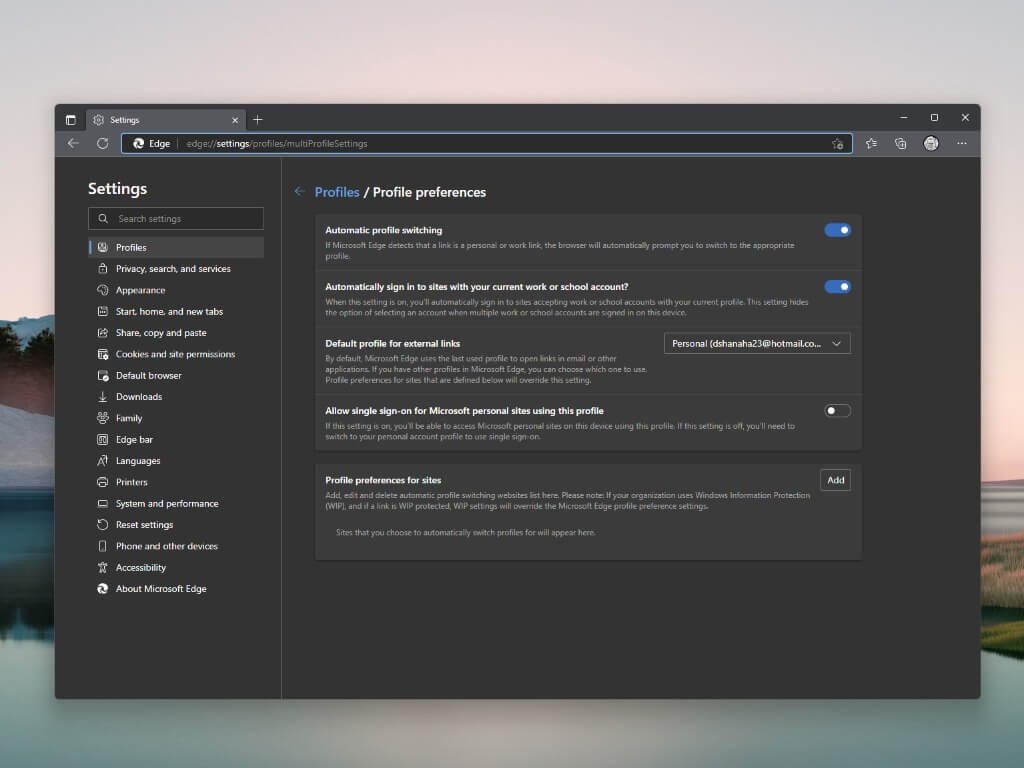
As Microsoft Edge continues to introduce new features, trying to keep it as private and secure can be hard. But what if you also want to set up Microsoft Edge running at the optimal performance at the same time? If you are like me and hate being tracked by Microsoft, follow along with this guide as I run through all the annoying ways Microsoft tries to track you using its Edge browser.
Microsoft has a feature in its Edge browser called Performance Mode, which is aimed at enhancing system performance by reducing memory, processor, and battery usage. This feature is particularly useful for new Windows 11 laptops and Surface devices. The Performance Mode is a part of the Optimize Performance settings and works alongside Sleeping Tabs, another feature on the Chromium-based browser that puts inactive tabs to sleep to reduce system resources. Enabling Performance Mode will deactivate the timeout setting and configure tabs to sleep after five minutes of inactivity.
Tips to set up Microsoft Edge for performance and privacy
If you’re a user of Microsoft Edge, you might be concerned about recent reports of a privacy flaw in the browser. According to a Reddit user, the latest version of Edge is sharing your digital footprint with Bing. This could lead to privacy concerns for many users. But don’t worry, there are steps you can take to set up Edge for both performance and privacy, here are some tips:
Disable Bing search suggestions: By default, Edge uses Bing as its default search engine. However, you can disable Bing search suggestions by going to Settings > Privacy, search, and services > Address bar and search and searching. Turn off the switch for “Show me search and site suggestions using my typed characters” and “Show me suggestions from history, favorites, or other data on this device using my typed characters.”
Use a VPN, such as Private Internet Access (PIA): If you’re concerned about your online privacy, using a VPN when you first set up Microsoft Edge, you can help protect your data. There are many VPNs available, both free and paid, that you can use with Edge.
Clear your history and data: To keep your browsing history private, clear your history and data regularly. You can do this by going to Settings > Privacy, search, and services > Clear browsing data. Choose the time range you want to clear and select the types of data you want to delete.
Use Edge’s built-in privacy features: Edge has several built-in privacy features that can help you stay safe online. For example, you can use Tracking Prevention to block trackers and cookies, and you can use InPrivate browsing to browse the web without leaving any traces.
Manage your permissions: Edge allows you to manage which websites have access to your location, camera, microphone, and notifications. To manage these permissions, go to Settings > Cookies and site permissions > Cookies and data stored. Click “Manage and delete cookies and site data” to manage and delete cookies and site data.
Disable unnecessary extensions: Extensions can be useful tools, but they can also slow down your browser and compromise your privacy. Disable any extensions that you don’t use or that you don’t trust.
Consider using an ad blocker: Advertisements can be intrusive and can even contain malware. Using an ad blocker can help protect your privacy and improve your browsing experience. However, be aware that some websites may block users who have ad blockers enabled. Although some websites, like this one, rely heavily on ad revenue to operate, so keep that in mind.
By following these tips, you can set up Edge for both performance and privacy. While the recent privacy flaw is concerning, taking steps to protect your data can give you peace of mind while browsing the web. By using these tips, you can enjoy a fast, efficient, and private browsing experience when you set up Microsoft Edge. With the browser’s built-in tools, features, and a few extra steps, you can protect your personal data and stay safe online.
Microsoft is looking to remedy years of overlapping domain fragmentation with a new single unified cloud.microsoft subfix.
Instead of users fishing through Microsoftonline.com, viva.office.net, teams.microsoft.com or manage.kazia.la to navigate and manage apps and services online, users will soon be able to simply input the product name plus .cloud.microsoft to access their desired workflows.
While it doesn’t fundamentally reduce the number of apps users may have to cycle through on any given day, Microsoft is hoping it will “streamline the overall experience by reducing sign-in prompts, redirects, and delays when navigating across apps. As for admins, the move to a single domain URL should help to alleviate some levels of complexity of the allow-lists required for tenant stay secure while enabling users to access the apps and services they rummage through daily. Lastly, customers and developers will now have a single domain to point their efforts towards, which should help bolster Microsoft’s intentions of making M365 an even more robust platform in the future, according to the company’s blog post.
As for the practical transition elements of Microsoft’s newly proposed domain change, net-new services will be automatically point to the cloud.microsoft domain, but as for the current jumble of existing domains, Microsoft plans for a slower paced transition.
Fortunately, for customers and admins alike, Microsoft appears poised to do the heavy lifting during this transition as it points out, “In most cases, no customer action will be needed to continue using Microsoft 365 workloads the same way you do today.” Microsoft has already added .cloud.microsoft to the official list of Office 365 URLs and IP address ranges, so admins do not have to manually adjust their lists. Consumer-facing users will see no noticeable change other than a redirected URL name change when utilizing their existing links and bookmarks.
Microsoft also notes that while .cloud.microsoft will be the face of M365 going forward, Microsoft.com will continue to exist and eventually serve the purpose of hosting non-product experiences likely dealing with marketing, support, retail and informative research.
Microsoft has a wide range of published DLLs used by built-in and third-party applications on the PC. When any of these DLLs are missing, several linked applications fail to launch. One such, msvcrt.dll, when missing, has affected many users in the recent while.
A DLL developed by Microsoft comes bundled with Windows and doesn’t need to be added manually. But users may come across the DLL not found error for several reasons. So, let’s find out why msvcrt.dll is missing and the solutions for it!
What is Msvcrt dll for?
The msvcrt DLL, linked to Visual Studio, is used by several applications and games to run efficiently. It’s part of the library for MSVC (Microsoft Visual C++) compiler and allows programs developed using it to access a range of essential functions, including input/output calls and memory allocation.
The msvcrt.dll location is:C:\Windows\System32
msvcrt.dll in the System32 folder
Here are a few reasons msvcrt.dll is not found in Windows:
Unreadable DLL file state: After prolonged use, a DLL, having undergone a series of writing operations, may become unreadable, and you get a missing DLL error.
Corrupt system files: When the system files are corrupt, built-in programs may have trouble locating the relevant DLLs and, as a result, can’t launch properly.
The DLL got deleted: In a few cases, users later realized that msvcrt.dll got manually deleted due to a user’s fault, and there was no other option but to replace it.
How do I fix missing msvcrt.dll?
Tip
You can always copy a missing DLL to the affected computer from another device. Just make sure to get the directory right. But never should you download DLL files from websites since there’s a high chance of the PC being infected with malware.
1. Use a dedicated DLL repair tool
DLL-related issues are common, and given the large number of such files on the computer and their role in the effective functioning of apps, all these problems must be fixed at the earliest.
So, we recommend using a dedicated DLL repair tool that works in 100% of the cases when one of Microsoft’s DLLs is missing. The tool will help download msvcrt.dll in no time.
2. Run the DISM and SFC scan
Press Windows + S to open Search, type Command Prompt in the text field, and click on Run as administrator.
Click Yes in the UAC prompt.
Paste the following commands individually, and hit Enter after each to run DISM:DISM /Online /Cleanup-Image /CheckHealthDISM /Online /Cleanup-Image /ScanHealthDISM /Online /Cleanup-Image /RestoreHealth
Now, execute this command for the SFC scan:sfc /scannow
Restart the computer for the changes to come into effect.
Now, download the packages listed here for the latest version.
Once done, run the setup, and follow the on-screen instructions to complete the installation.
Similarly, install the other redistributable packages you downloaded earlier.
If you witness an msvcrt.dll crash or the DLL is not found in Windows 7, installing the Microsoft Visual C++ Redistributables should help get things up and running.
Press Windows + R to open Run, type appwiz.cpl in the field, and hit Enter.
Select the program that’s throwing the error, and click Uninstall.
Follow the on-screen instructions to complete the process.
Once done, download and install the program all over again. Just make sure to get it from an official source.
In case the problem is limited to a specific app, say, msvcrt.dll is missing in Visual Studio, uninstalling the program and then reinstalling it from scratch should do the trick. Also, you may use a reliable uninstaller software for the best results.
Select the product language from the dropdown menu, and click Confirm.
Click on the link to download the Windows 11 ISO.
Once done, double-click the ISO file and click Open to confirm.
Now, run the setup.exe file.
Click Next to proceed.
Click on Accept to agree to Microsoft’s license terms.
Finally, make sure the setup reads, Keep personal files and apps, and then click on Install.
When nothing else helps, and you still find msvcrt.dll as the faulting module, an in-place upgrade would help since Microsoft publishes the DLL and should ideally be stored on the PC.
Before you leave, check the best DLL repair tools and download one to prevent such errors. We also have a new guide on msdia80.dll, so feel free to check it out.
Tell us which fix worked for you in the comments section below.
In an interview with the BBC podcast Wake up to Money, Smith expressed his disappointment with the U.K. regulatory agency, calling Wednesday’s announcement “probably the darkest day in our four decades in Britain and adding,
It does more than shake our confidence in the future of the opportunity to grow a technology business in Britain than we’ve ever confronted before.
He also called the CMA decision “bad for Britain,” adding that it sends a message “that will discourage innovation and investment in the United Kingdom.”
Unsurprisingly, the CMA disagrees with Smith. CMA Chief Executive Sarah Cardell said in a statement to Today,
I think this decision shows actually how important it is to support competition in the UK and that the UK is absolutely open for business.
We want to create an environment where a whole host of different companies can compete effectively, can grow and innovate.”
Microsoft has already stated its intention to appeal the decision. The European Commission in Brussels has until May 22 to deliver its own conclusion on the merger. And in the U.S. the FTC has filed a lawsuit to block the deal. Regardless of the outcomes of these various hurdles, the CMA decision deals a major blow to Microsoft’s chances of closing the buyout if it is not ultimately reversed.
If you’re new to the Windows 11 OS, you are probably not familiar with the Windows versions available. Microsoft regularly releases major updates in the form of versions.
For instance, now that Windows 11 is about to hit two years in the market, version 22H2 has been released, the first build since its release of the OS. Get to know about these versions and what they entail here.
What is the highest version of Windows 11?
First, before we get into the best version of Windows 11, it is important to point out a common mistake that most users make. It is easy to use the terms edition and version interchangeably to refer to the same thing.
However, these two terms mean something different. A version is a specific build of a product that receives regular updates and bug fixes to improve stability and performance over time.
Historically, there were two major versions per year, but this is the first major update since Windows 11 came out. The latest and highest Windows 11 version is the 22H2, also known as Sun Valley 2.
On the other hand, Windows editions are the major release of Windows and are what you will find in retail boxes. When you check your OS specifications, you’ll find it is named either Windows Home or Windows Pro. These are editions.
The main difference between Windows 11 editions is the number of PCs they can be installed on and whether they are aimed at consumers or professionals.
For instance, Windows 11 Home is a consumer-oriented operating system with some features removed to make it easier for new users to get started.
Windows 11 Pro is an enterprise-oriented operating system with all the features of Windows 11 Home and additional features for professional users.
What is the Windows 11 21H2 build version?
The initial Windows 11 build update was released in October 2021, and it is called Windows 11 21H2 build version. It’s the first build of Windows 11 since its release in and it brings a mix of improvements and new features to the operating system.
Most users are still on this build, as the latest 22H2 build is still fairly new. Microsoft is usually slow in making these updates publicly available as they want to ensure they are stable enough.
If you’re yet to receive this update, you can check through Windows update to get the latest version of Windows 11.
All features from the 21H2 version will be included in the 22H2 version alongside any other new feature improvements.
What is the difference between 21H2 and 22H2?
1. Security
The main difference between 21H2 and 22H2 is that the latter has more security features. Windows 11 has already been feted as the most secure OS yet, so it’s no surprise that this department will continue to flourish.
Any additional security is simply an enhancement of what was already there. Now in 22H2, you don’t have to worry about phishing as the Microsoft Defender SmartScreen has received a boost to protect your passwords and school work.
The Smart app control will also be a breath of fresh air, especially regarding unwanted apps and ads.
2. User interface
In the previous 21H2 version, opening the Task Manager would not match the system-wide theme. For instance, the dark mode theme would not reflect when you open the Task Manager.
Now, not only has the user interface received a facelift, but now the window will match the system-wide theme.
In addition, it is more efficient as you can now limit the usage of a single process. Unlike the previous version, you had to end superfluous tasks if you noticed high CPU usage.
3. Accessibility
The Windows accessibility features are designed to make using Windows easier for people with disabilities.
The accessibility features in Windows 11 include:
Narrator – You can use your computer without a mouse or keyboard. The narrator provides spoken feedback, including text and alerts.
Magnifier – You can zoom in on the content you see on your screen to help you work more effectively and easily. Magnifier also includes a high-contrast setting that makes it easier to read text.
On-Screen Keyboard – You can use the On-Screen Keyboard to enter text without a physical keyboard.
All these have been present in 21H2, but now, in 22H2, Microsoft has added system-wide live captions and more natural voices. Sometimes, it can be hard to understand the narrator, so a more inclusive voice is a much-welcomed addition.
With version 21H2, to play HEVC videos, you had to get third-party software or install the HEVC extensions. This won’t be an issue in the 22H2 version, as support has now been included.
If you edit videos regularly or enjoy high-quality videos, you’ll appreciate this feature even more. Again, this all depends on the hardware capabilities of your Windows 11 device.
Which version of Windows 11 will I get?
As usual, any new feature updates in Windows 11 require that your device be eligible. By now, you must be aware of the stringent system requirements for Windows 11, and the same applies to whichever version you are on.
Therefore, any device not meeting these prerequisites may miss out on this version.
If you’re still on the 21H2 version, you may have either stopped your updates permanently or paused them. You’ll have to perform a manual check to upgrade to the 22H2 version.
Consequently, because this is a fairly new version, it is bound to have some bugs, so you may want to hold off on the upgrade until you are sure it is stable.
However, don’t hold off for too long because the version is nearing its end-of-service date, which is listed as October 2023. When the time comes, Microsoft will no longer send security updates to that version.
If the update is not what you expected, you can always uninstall recent Windows updates or create a restore point so that in case anything goes wrong, you can revert to an earlier time when your PC was functioning well.
Hopefully, this article has helped you differentiate between the two main versions available now for Windows 11.
Feel free to let us know of any additional thoughts you may have on this topic.
While Microsoft is seemingly trying to turn its Edge browser into a platform unto itself with the list of growing features it continues to bake in, users may still long for the more streamlined experience it initially launched with and a new test may bring back that feeling.
The folks over at Windows Central spotted Twitter user Leo Varela (@leopeva64) who shared a GIF highlighting a new section within Microsoft’s latest Edge Canary release that allows users to remove certain ‘optional features’ from the browser. Valera’s GIF specifically walks through removing the cite this feature recently added to Edge which allowed users to quickly reference cited locations for recent searches.
It looks like Microsoft will let you remove some of Edge's features:https://t.co/t1HbJS6nhS . I wonder what other features will be included in that section in the future… Games? E-tree? ???? pic.twitter.com/9aQC146rJM
With the new ‘removal’ feature launching in the Edge Canary channel there is a possibility it doesn’t make its way into the consumer version of the browser. However, Microsoft has dedicated some supplemental dialogue to walk users through the features planned purpose, and that could be a good signal that the company intends for this to be public facing at some point.
Choose your own features with Microsoft Edge
Microsoft Edge now lets you turn off optional browser features so as to make it the fastest browsing experience for you. Features that are turned off are still available to you but will require a small download to enable.
For those who bemoaned the addition of seemingly unavailing features to the Edge browser such as a Crypto Wallet, embedded financing options, citations and even the new Bing Chat client, this new development in the Canary channel could finally be the right balance of feature development and user customization necessary to keep Edge relevant and usable.
The Windows version of the game released in March to a very lackluster reception, due to a slew of performance issues and generally poor optimization for PC. When they did get their hands on review copies literally minutes before the game’s public release, reviewers were quick to point out the PC port’s many flaws. It is currently Naughty Dog’s worst-reviewed game ever on Metacritic with a Metascore of 57 and a user score of 2.1.
This latest patch is the second to be released in April. It continues improvements made in graphical textures (such as water surfaces no longer appearing black) and frame rate optimization. Also implemented in version 1.0.4.0 are a number of crash fixes, including those that could occur upon dying in the game or when quitting the main menu.
All this has to be encouraging for fans of the game on PC. In the patch notes post the team said,
We at Naughty Dog and our partners at Iron Galaxy are closely watching player reports to support future improvements and patches. We are actively optimizing, working on game stability, and implementing additional fixes which will all be included in regularly released future updates.
The Last of Us Part 1 is a remake of the 2013 PlayStation 3/4 action-adventure game The Last of Us. The 2022 remake itself is highly acclaimed on console; if the team continues to clean up this Windows version it may go a long way toward winning back the trust of gamers on PC. Now if we could just get HBO to hurry up with season 2 of The Last of Us TV show…
One of the most critical questions you must answer is how much memory your PC can have before buying a new computer. It’s easy to find yourself with more RAM than you know what to do with or less, making it hard to determine how much is enough.
Unfortunately, there isn’t a simple formula for determining how much memory is right for your system. But some factors will help you make the best decision. In this article, we share what to look out for.
Is 16 GB RAM enough for Windows 11?
RAM, or random access memory, is the type of memory your processor uses to store instructions and data it needs to access.
When you’re working on your PC, it’s the RAM that allows you to keep multiple applications open at once without sacrificing performance.
This makes your PC’s memory a key component in determining how well it will perform. The more memory you have, the more tasks your computer can perform simultaneously.
In addition to being able to run more applications simultaneously, having a lot of RAM also allows you to open large files and use programs that rely on lots of data.
This brings us to whether 16 GB is enough for Windows 11. Yes and no. Yes, because it exceeds the minimum system requirements for Windows 11.
You must have at least 4GB RAM to install Windows 11. 16 GB of RAM is enough for Windows 11 if you just use it for normal tasks like email, videos, and music.
No is for users who want to do more advanced things with their computer, like gaming or editing photos and videos.
The other factor that could make 16 GB too little is that Windows 11 does not come in a 32-bit system. It would probably be enough if it did, but it doesn’t.
Since the OS only comes in a 64-bit system, it can access more physical memory than 32-bit ones. This, in turn, will improve performance, but only if there is a lot of RAM to work with.
There are a lot of factors that can determine how much memory you need for your computer. Below are some of the factors:
1. Operating System
Some computers come with Windows 11 pre-installed, but this does not mean that they can run this operating system smoothly regarding performance and stability issues.
Even though it has many features that make it user-friendly, it may still require more memory than what comes standard in most machines today (4 GB or 8 GB).
In general, newer operating systems require more memory than older ones. If you’re using a heavier OS like Windows 11 or macOS, the usual 4 GB that comes with most PCs will barely keep up once you start firing up multiple browser tabs.
You’ll likely get that your PC’s memory is running low on notifications more often than not. As a rule of thumb, always go above the recommended minimum RAM for your OS. For instance, since Windows 11 recommends at least 4 GB RAM, anything above it will work.
2. Type of processor
The type of processor you have determines how much memory you can use. For example, if you have a laptop with an Intel Core i3 processor, you can use up to 8 GB of RAM.
A desktop computer with an Intel Core i5 or Core i7 processor can support up to 16 GB of RAM. When it comes down to choosing what type of processor you should get for your PC, the faster your processor is, the less memory you need.
Most programs don’t need to use all available memory slots. They use what they need and then return to free slots when they’re not needed.
The more cores there are in your processor, the more tasks it can handle simultaneously with less lag between them. On the flip side, this also means that more RAM is required per core than with fewer cores.
That’s why single-core CPUs tend to have a limit of 2 and 4 GB, while those with multiple cores can accommodate more RAM.
4. App demands
Most applications require at least some amount of RAM to run, whether an Internet browser or a game. The more memory an application uses, the more responsive it will be when you’re working with it.
For example, if you have a graphics-intensive program such as a game, you’ll notice a significant improvement in performance if you add more memory to your system.
Similarly, if your system doesn’t have enough memory for these applications to run smoothly, you’ll notice a lot of lagging or freezing up.
That’s why when shopping for a CPU, you need to consider the kind of apps you’ll be running and their demands in terms of memory. Also, you’ll need more memory than the average user if you’re a multitasker.
Can Windows 11 use 64GB RAM?
You’ll probably never need that much memory, but as long as your motherboard has enough slots for all those sticks of RAM, yes, you can.
If your motherboard can handle 64 GB, but its current maximum is less than that, then upgrading will be easy. Sometimes, you may need to enable these memory slots to use them.
So, what is the Windows 11 RAM limit, and how much RAM should you aim for? If you’re performing everyday tasks like browsing and watching movies, 4 GB should be enough. However, if you’re a serial multitasker with heavy tasks, aim from 16 GB and upwards.
That being said, RAM sticks don’t come cheap. Your needs may exceed your financial capabilities. Still, there are things you can do to avoid running out of RAM so quickly or make your Windows 11 faster.
Finally, from a performance perspective, it’s not worth upgrading your memory unless you’re having issues. This is because the speed of RAM is almost always faster than the speed of your processor.
Microsoft’s partnership with OpenAI seems to be finally paying off as the software giant experienced a 9% increase in share prices during Tuesday’s extended trading following the issuance of its third-quarter financial results surpassing analysts’ forecasts.
The collaboration between Microsoft and OpenAI, known for developing ChatGPT, has ushered in a new era of innovation in artificial intelligence. This partnership has successfully disrupted the industry by challenging Google’s dominant position in search, thanks to the integration between OpenAI and Bing search engines.
In recent weeks, Microsoft’s Bing search engine has achieved a remarkable milestone, with over 100 million daily active users. This is a significant development, especially considering the software maker’s steady growth over the years. The introduction of Bing Chat, an AI-powered feature, has helped attract new users to the search engine, many of whom may not have used it before. The impressive success of ChatGPT has also helped bolster Bing’s credibility. Nevertheless, it is important to note that Google currently boasts over 1 billion daily active users, putting Microsoft’s accomplishment into perspective as it continues to strive for greater market share.
Microsoft’s investment in AI had instilled a sense of cautious optimism among analysts, and the company’s quarterly earnings report released on Tuesday has substantiated their faith in the same. CFO Amy Hood communicated during a call with analysts that Microsoft anticipates a revenue growth rate of 26% to 27% in the upcoming quarter at its cloud division, Azure, compared to that of the prior year’s corresponding quarter, with AI services contributing to approximately one point. Financial experts on Wall Street interpreted this as a clear indication that Microsoft’s bold move in the AI landscape is already delivering tangible financial gains. The achievement suggests a promising future for even greater growth.
According to Bernstein analyst Mark Moerdler, the significant increase in Azure’s growth rate due to AI – particularly following the GPT announcements – is noteworthy. This trend suggests that there is a high demand for AI, which can potentially lead to Azure surpassing Google’s position in the AI market. Furthermore, Moerdler believes that Azure may become a leading hyperscale provider and outpace Amazon Web Services (AWS) in this area.
During a conference call with analysts on Tuesday, Satya Nadella, the CEO of Microsoft, reiterated the company’s commitment to focus on advancing the “new wave” of artificial intelligence and expanding its market share. Nadella pointed out that Microsoft’s ongoing efforts in the field of AI have enabled the company to engage in fresh conversations with its customers, leading to the emergence of novel sources of income.
Microsoft’s quest to acquire Activision Blizzard King has been a longer and more arduous one than anyone likely imagined when it was first announced back in early 2022. At the time of this writing the fate of the Activision Blizzard deal is still very much undecided whether the deal will ultimately clear its regulatory hurdles, not taking anything as granted. At this point it seems more doubtful than ever given the CMA’s recent decision to block the merger. Although Microsoft could potentially close the merger without the CMA’s approval, it is a massive blow nonetheless.
It has been anything but smooth sailing for Microsoft and Activision. The two companies’ merger has been met with major obstacles from the European Commission, CMA and the U.S. FTC, with the latter filing a lawsuit to prevent the merger.
And then there is Sony. Sony has mounted a fierce effort to sway regulators to block the deal. The point of contention surrounding the deal has largely been on the fate of the Call of Duty franchise. But in reality, ABK is much more than just Call of Duty, something that seems to have gotten lost somewhere in the ongoing discussion over the deal’s merits. So just what exactly will Microsoft be getting if it does ultimately succeed in bringing ABK into its fold? Let’s have a look at what that $68 billion dollars buys in the video game industry.
The Activision Blizzard deal grand prize: Call of Duty
The Call of Duty series needs little introduction as the hottest franchise in gaming. And it’s still going strong into its 20th year, with 2022s Modern Warfare II the best-selling game of that year, marking the fourth year in a row a Call of Duty game has topped video game sales in the U.S. It’s no wonder Microsoft has its eye on this prize. To get Call of Duty on Game Pass would be a huge win for Xbox gamers. It would also put Xbox in a much stronger position should it gain control of the franchise.
With that said, there has been much made over that possibility, with Sony being the most vocal opponent. The PlayStation maker has stated that losing access to Call of Duty would irreparably harm the PlayStation brand, in spite of Microsoft’s offer to keep the series on PlayStation for the next ten years—a deal which PlayStation CEO Jim Ryan rebuked as “inadequate.” Sony has even suggested even if it kept the franchise on PlayStation, Microsoft could sabotage the PlayStation version by making it buggier.
Microsoft has entered into agreements with several other parties—including Nintendo and Nvidia—to keep Call of Duty on other platforms for the next ten years if the Activision Blizzard merger finalizes.
King’s mobile games & Xbox’s plans for mobile game store
Candy Crush Soda Saga on Windows Phone
King, which was acquired by Activision Blizzard for $5.9 billion in 2016, is a juggernaut in the realm of mobile gaming. The Maltese developer/publisher is the owner of powerhouse mobile gaming IPs like Candy Crush Saga, Bubble Witch Saga, Pet Rescue Saga and more. King has also handled some of Activision’s mobile offerings as in Crash Bandicoot: On the Run! and Call of Duty: Mobile.
Microsoft currently has no meaningful presence in mobile gaming and the Transaction will bring much needed expertise in mobile game development, marketing and advertising.”
Activision Blizzard’s Online & Esports titles
Like other industry giants, Activision Blizzard has invested heavily in esports, with most of its esports initiatives centered around Call of Duty and Overwatch. Activision runs the Call of Duty League (CDL), while Blizzard manages not only Overwatch League but also Major League Gaming Corp. (MLG) professional esports gaming leagues.
Activision Blizzard also owns several classic game series going all the way back to the early years of gaming, including some that have been dormant for years. Could some beloved classic games be making a return once the deal concludes? Microsoft’s CEO of Gaming Phil Spencer has expressed an interest in reviving some of these gaming icons, so there is reason for hope.
The classic game franchises in question? They include the following.
Crash Bandicoot
Spyro the Dragon
King’s Quest
Pitfall
Heretic
Hexen
Starcraft
Zork
Tenchu
And that is by no means a comprehensive list.
The Activision Blizzard deal’s hidden gem: Activision Blizzard Studios
Not to be forgotten in all this is a film production company, Activision Blizzard Studios. The studio was founded in 2015 following the release of the Warcraft movie. The studio focuses on bringing Activision Blizzard’s video game IPs to the big screen. A Call of Duty movie was announced all the way back in 2015, but is apparently in production limbo.
What can we expect once the Activision Blizzard deal is done?
If Microsoft succeeds in buying Activision Blizzard, it will mean a huge win not only for the Xbox brand but for those who game on Xbox—whether it be on console, Windows PC, newer Samsung smart TVs, or on mobile devices and Chromebooks via the Xbox App.
While no one could say for sure what we’ll see from ABK in the future, what we can say is that Microsoft tends to go hands-off when it comes to their studios. We’ve seen this with Bethesda and Mojang, and there’s no reason to expect it would be any different with ABK. However, Phil Spencer said in an interview with Wired,
I’m excited about getting to sit down with the teams at Activision and Blizzard and King to talk about back catalog and opportunities that we might have.”
Windows 11 is a great operating system, but it can sometimes run slowly and not work as well as it should. If you’re experiencing performance issues, it could be the number of processes running.
One of the easiest ways to optimize your system is by adjusting how many processes are running on your machine at any given time. If you’ve ever had a computer freeze or crash because it ran too many programs at once, this article is for you.
What background tasks can I close?
Background tasks run in the background on your device and are important because they help keep your system stable. They include updates, syncing, and other services.
The background tasks you can close will vary for every user. Taking an example from our PC at this time, the CTF Loader was one of our culprits.
This service supports alternative input methods such as speech recognition and text translation. Since we only use the keyboard and mouse, it is an unnecessary task, hence the need to disable it.
So, How do I determine which programs should be closed?
The goal is to find the right balance between keeping your computer running smoothly and safe.
You can determine which programs to close by looking at each program’s CPU and memory usage. The programs you should close are those that have been running for a long time and have not been used recently.
If a program is running, and you’re not using it, it takes up memory and processor resources for no reason.
You can single out as many but be careful about closing critical tasks that keep Windows running. Sometimes, your CPU may be 100% even when no program is running, so address such issues first.
How many background processes are normal?
The number of processes running on your computer will vary depending on the applications used, configuration, and hardware. Generally, you should have no more than 50 or 60 processes running at any given time.
Other factors that affect the number of processes running include:
1. Amount of RAM
Of course, this will depend on how much RAM you have. The more RAM your computer has, the more processes can run simultaneously. RAM is fast and temporary storage.
It’s where programs store the data they need to work with while running. The more RAM you have, the more programs can be opened without slowing down your computer.
2. Type of processor
The number of processes a CPU can run will depend on the type. In general, faster processors can handle more processes at once than slower processors. However, the number of cores in a processor also plays a significant role.
For example, if you have a single-core processor, only one process can run at a time. If you have a dual-core processor, then two processes can run simultaneously, and so on.
The speed of your CPU determines how quickly it can process instructions and execute tasks. If your CPU is slower, then it will take longer for each instruction to complete.
This means that if two PCs are running the same program at different speeds, the slower computer will take longer to complete each instruction because it takes longer for each instruction to be processed by the CPU.
The more user activity there is on your computer, the more likely it is that more than one process will run at any given time.
For instance, the average user who performs light tasks on the internet will typically have at least a dozen different processes running in the background simultaneously.
On the other hand, someone who is a heavy user who frequently plays games, edits videos, and uses different apps may see well over 100.
That being said, there’s no right or wrong number of processes. Examine how your system behaves when you keep opening programs. This should act as your guide. If you notice some lagging or difficulty opening more tabs, your CPU communicates that it is up to capacity.
The number of processes running on your computer can be a useful indicator of your system’s performance. It also provides an indication of how much processing power they require.
How do I reduce the number of processes running in Windows 11?
To keep the number of processes open on your PC to a minimum, follow the steps below:
Avoid opening too many programs
The more programs you open at once, the more resources each one will take up, especially if running in the background.
So limit yourself to five or six instead of having 20 browser tabs open simultaneously. Once you’re done, close and open more.
Clear your hard drive
If your hard drive is full, Windows will need more memory to temporarily store files until they can be written to the hard drive. This makes it slower and uses more power than necessary.
You may have installed some apps you don’t use or more than one app that does the same thing. Try uninstalling these apps to free some hard drive space.
Unnecessary apps can use up CPU resources and drain your battery. If possible, try using web versions of apps you don’t use regularly.
Disable startup apps
Press the Windows key + X and select Task Manager to open the Processes tab.
Select the Start-up tab.
Select any non-essential program and press the Disable button to remove it from the Windows Startup.
The fewer startup programs you have, the faster your boot time. Hopefully, you now know how many processes you should have running on your Windows 11.
One of the most common problems with Windows 11 is running out of memory. This can happen if you have too many programs open at once or if you don’t have enough RAM installed on your computer.
A ripple effect of BSoD errors, random shutdowns, and crashes will ensue if apps compete for the available memory. To counter this, you need to perform a regular memory test to ensure everything is in check, and this is how to do it.
How much RAM does Windows 11 use?
Windows 11 is probably one of the most demanding software ever released, mostly because of its new design. It is also the most RAM-hungry OS that Microsoft has ever released.
The amount of RAM that Windows uses depends on several factors:
The number of apps/processes running simultaneously – The more open processes you have running, the more RAM they need. For instance, if you’re working on a spreadsheet and switch to Microsoft Word, your spreadsheet may be cached in memory, but it will still need some free space to reopen.
Open and idle programs – Windows 11 stores a copy of all open applications in memory so that they can be quickly accessed if necessary. If you have too many programs open for too long, this can use up a lot of RAM even though those programs aren’t currently running and aren’t actively using any system resources.
Available disk space – If your computer doesn’t have enough available disk space to perform a task, it will try to store temporary files on the hard drive instead of using RAM. This slows things down and uses more power than necessary.
Type of apps running – Complex programs use more memory than simple ones do. For example, Photoshop needs more memory than Notepad because it can do much more. It’s also more likely to crash if it uses all your available RAM due to high demand from other tasks.
The version of Windows 11 you’re using – The more RAM you have, the better it will perform, but with 64-bit systems, you need to be careful that you don’t exceed the amount of memory your system can support.
How do I check my RAM health on Windows 11?
If your computer is running slowly or experiencing random crashes, it could be a sign of a memory problem. Even if you have plenty of RAM, you may notice problems if the system isn’t using it properly.
The first step to diagnosing any PC performance issue is to ensure all your hardware is functioning properly.
Of course, there will be signs like frequent BSoD errors, but there’s a more sure way of checking the RAM health on your Windows 11.
Windows 11 has a built-in tool that will help you check the health of your RAM. This utility is called Memory Diagnostic and can be used to test your PC’s memory, detect and fix errors.
It’s a good idea to regularly test your RAM for errors, especially if you have noticed problems with your computer after installing new hardware or software.
If your computer passes the RAM test, it means your computer’s memory is fine. If your computer fails, it means that you may need to run the test again after replacing any faulty memory or making other changes to your computer.
How do you test RAM in Windows?
Before you dive in and start testing your RAM, some preliminary steps need to be taken first:
Ensure that the RAM module is installed correctly.
Disconnect any unnecessary peripherals from your computer.
Ensure your PC is plugged into an uninterruptible power supply such as a UPS.
1. Use Settings
Hit the Windows key and click on Settings.
Type memory diagnostic in the search bar and click Open.
From the two options, Restart now and check for problems or Check for problems the next time I start my computer, select either, depending on when you want to run the test.
2. Use the Run command
Hit the Windows + R keys to open the Run command.
Type MdSched in the dialog box and hit Enter.
The Windows Memory Diagnostic prompt will appear, then select between Restart now and check for problems or Check for problems the next time I start my computerto run the test.
3. Use the Command Prompt
Hit the Windows key, type cmd in the search bar, and click Run as administrator.
Type in the following command and hit Enter: MdSched
The Windows Memory Diagnostic prompt will appear, then select between Restart now and check for problems or Check for problems the next time I start my computer to run the test.
While Windows’s built-in memory diagnostic tool may work most of the time, it’s not thorough enough to catch all types of errors. The most accurate way to test RAM for errors is to use a third-party tool.
Memtest86+ is one of the most thorough test tools. This tool will run through the entire range of possible test patterns and check for errors. It can take several hours to complete, so ensure you have enough time before starting the test.
If you’re looking for something simpler, then you can give MemTest64 a try.
How long does Windows Memory Diagnostic take?
The time it takes to run depends on the amount of RAM (memory) in your computer and the speed of your hard drive.
On a typical desktop PC with 4 GB of RAM, the scan typically takes between 30 seconds and several minutes to complete depending on the number of files written to disk.
The Windows Memory Diagnostic results will show you how much memory is currently in use and how much is available for apps. As long as there’s enough free memory available, you should be fine.
In conclusion, RAM health is important because it determines whether your computer can perform well and keep up with your needs.
If there’s no problem with RAM, run a computer performance test to spot CPU, GPU, and disk issues to ensure your PC is working properly.
If your computer uses too much RAM, it can cause problems like lag when opening new programs or apps. Check out a similar article on how to perform a RAM test in Windows 10.
Let us know how you keep your RAM health in check in the comment section below.
If you’ve just installed Windows 11, congratulations. Now it’s time to get started. Of course, you’ve probably heard about all its cool features and can’t wait to experience the same. It’s not just about using the right apps or hardware.
There are some simple things you can do to make sure your experience with Windows 11 is as smooth as possible. So, here are some things you need to know before you fire up your new operating system.
How to use Windows 11 to the best?
There are steps you need to take to ensure you’re using Windows 11 to its full capacity 11. Here’s what you need to know:
Check hardware compatibility – First and foremost, make sure your computer meets the minimum requirements for Windows 11. You can check on Microsoft’s product page or use the PC Health Check app. If it doesn’t meet the requirements, you’ll need to upgrade your computer or buy a new one before you can get Windows 11. Although you may be able to install Windows 11 on unsupported hardware, your use of the OS will be limited.
Use the right version of Windows – Windows 11 isn’t just one product. There are several different versions available, each with its strengths and weaknesses. Some of these versions are free upgrades, while others require you to purchase a new license. For instance, Windows 11 Home and Windows 11 Pro. The most appropriate version for your needs depends on several factors, including which apps you use, the type of hardware you have, and whether it is for individual needs or business. We have a special article that recommends the best Windows version for gamers.
Sign up with a Microsoft account – When you first boot up your PC, you’ll be asked if you want to sign in with a Microsoft account or create one. If you have one already, it’s worth signing in. Not only does this provide seamless integration with all your settings across devices, but also access to other essential services. Still, you can set up Windows without a Microsoft account.
What do I need to do to prepare for Windows 11?
1. Check for Windows updates
Windows updates usually contain bugs and security fixes that keep your system protected. If you just upgraded via the Installation assistant, you should do this regularly to ensure your computer runs smoothly and securely. Whereas there are optional updates, you should also check them and update accordingly.
Optional updates usually include driver updates which are also essential for the smooth running of your PC and keep BSoD errors at bay.
Alternatively, you can update drivers using other methods if you don’t want to use the Windows update route.
2. Check the activation status
Windows 11, like any other version of Windows, can be activated using a product key. This is very important, especially if you want to experience all the features.
It’s also a way to verify that you’re using a legitimate copy of Windows. If you see that your edition is activated, then there is nothing to worry about.
However, If your version of Windows is not activated, it might still be in its trial period. This means that your access to some features may be limited.
If you are new to the Windows 11 OS, creating a restore point should be at the top of your list. Getting a new OS is like getting a new toy.
You are curious, so, normally, you will be exploring a lot. While this is a good way to get acquainted with Windows 11, it can quickly become catastrophic.
Restore points allow you to revert to an earlier time when your PC was working fine if it gets damaged or you make a mistake. They are like a safety net, so creating one before you make any major changes to your PC is important.
Once you have activated your copy of Windows and created a restore point, the next thing is to set up user profiles, especially if it is a shared PC.
If you’re a longtime Windows user, you’re probably familiar with the concept of profiles. You can create multiple user accounts that all use the same computer, each with its own settings and data.
Once set up, you can select login methods using one of the many Windows 11 sign-in options. You can choose from Windows Hello (Face recognition, fingerprint, and PIN), security key, password, or picture password.
If you’re a single user and don’t wish to password-protect your PC, you can opt for the auto-login feature.
5. Backup files
You should always back up your files because there is no guarantee that your PC will always be virus-free. Files can also get corrupted when you change the registry, so it’s great to have a backup somewhere.
Although Windows 11 has a built-in Windows Defender, it may not be as comprehensive as third-party antivirus. A secure computer is protected from viruses, malware, and other threats.
Ensure you have an antivirus program installed on your computer and keep it up to date with regular updates. If we had to recommend one, ESET NOD32 would be our top choice.
Also, firewalls will come in handy. They will block unauthorized access to your computer from the Internet or another computer on your network.
7. Disable unnecessary Startup programs
Many programs start up automatically when you start Windows. This is good because it saves you the hassle of opening each program individually. However, if your computer takes a long time to boot, it’s probably because you have a load of startup programs.
Startup programs can slow down your computer and make it less responsive. The problem is that these programs are not always necessary, and they can take up memory and CPU resources that could be better used by the applications you actually want to run.
If you don’t want a program running in the background all the time, you should disable these programs. This will ensure your system boots faster and uses less memory when running.
8. Uninstall unnecessary apps
If you’ve ever heard of the term bloatware, here’s where it comes from. Manufacturers like to include their own apps on new PCs and don’t always get rid of them when they’re no longer needed.
Windows 11 comes with a lot of preinstalled apps. Some are useful, but many are just there to take up space on your hard drive and distract you from what you’re trying to do.
They can also make the OS extremely slow, so it’s best to get rid of these apps to improve on speed and performance.
You probably already know that your computer has temporary files that accumulate over time and take up space on your hard drive. These files don’t serve any useful purpose and take up space on your hard drive.
This may not seem like a big deal, but it is. All those small bits and pieces of files left behind after downloading something or installing an app can add up in size over time.
You can use Windows 11’s built-in Disk Cleanup tool to eliminate any unnecessary files taking up space on your hard drive.
10. Personalize your PC
Personalization options are many and varied in Windows 11. A few customizations you can make include:
Change the theme
The first thing you’ll notice after updating to Windows 11 is that it has a new look. The default desktop background is now black instead of white, which gives it a slightly darker feel than previous versions of Windows.
However, if you feel the dark theme is not for you, you can switch to the light theme. Themes are a set of colors, sounds, and other aspects that can be applied to your computer. You can choose from several preloaded themes or create your own custom theme.
The Start Menu is the main menu displayed on the screen when you start using your computer. It contains all the programs and applications installed on your computer, so it makes sense to tweak it to your preferences.
You can choose which apps appear in the All Apps list, pin apps, and even customize recommendations. Find out more about the Start Menu customization options from our detailed article.
Customize File Explorer
As the main file manager app in Windows 11, you use File Explorer a lot hence the need to make a few changes that work for you.
The lock screen is the screen that appears when you start up your computer, and it’s also what you see when you lock your computer.
You can customize it to show additional information like calendar events, weather forecasts, and more.
What cool things can you do on Windows 11?
Let’s face it, from face value, Windows 11 may seem like a basic OS with just a new facelift. However, you’d be surprised to know just how cool the operating system is.
Luckily, we share below some things that you probably didn’t know about and how they can make your life easier:
Run apps as a different user – Although not a new feature, most people usually switch profiles if they want to run an app unavailable on their profile. Well, you don’t have to do that anymore.
Create keyboard shortcuts – You’re probably aware of the common everyday shortcuts we use to multitask. However, Windows 11 allows you to create your own keyboard shortcuts that will definitely make your life easier.
Remove Windows 11 ads – Ads in any form and on any platform can be annoying. They tend to pop up at the most inopportune time and can frustrate you. Well, not anymore. You can now remove ads from your Windows 11.
Change Startup/shutdown sound – Did you know you don’t have to stick to the default Windows 11 startup or shutdown sound? You can actually disable it altogether if you want to do away with it.
We still have more Windows 11 cool things you can try, so head over to our dedicated article to learn more about what you may be missing out on.
That’s it for this Windows 11 to-do list, but keep the conversation going in the comment section below with more things you think one should do after installing Windows 11.
Windows users have become accustomed to missing DLL errors on their PC. One such error included the msvcp110.dll, which is triggered during a software launch or installation.
If you’re experiencing the msvcp110.dll error, this article will briefly discuss some of the causes of the error and provide you with five ways to help you resolve the error.
What causes the msvcp110.dll missing error?
The msvcp110.dll error is commonly triggered by:
Corrupt or Missing DLL Files – The primary cause of missing DLL files in Windows is a corrupt or missing DLL file. If the application you’re attempting to launch requires a DLL file that isn’t installed on your PC, you’ll trigger the msvcp110.dll error.
Virus and Malware – Aside from missing DLL files, PCs infected with viruses can also trigger the msvcp110.dll error.
Incorrect Registry Entries – If your Windows registry is damaged or has a couple of incorrect entries, you’ll experience a lot of errors.
Faulty App Installations – If you experience errors while launching an app, it’s likely the app wasn’t correctly installed. Faulty app installations can cause the msvcp110.dll error and prevent the app from launching.
How can I fix the msvcp110.dll missing error?
1. Via a Dedicated DLL fixer
Missing DLL errors are a very big problem for Windows computers. To fix the error, users usually need to download and install the DLL file again. However, installing DLL errors involves a lot of technicalities, and usually poses a security risk due to the multitude of viruses and malware disguised as DLL files on the internet.
To fix the error and also ensure your PC’s security, it’s better to use a DLL repair tool as they guarantee a 100% fix for bad or missing DLL files native to your Windows OS.
2. Install Microsoft Redistributable C++
Press the Windows key, type the name of your browser, and hit Enter.
Scroll through the website to locate the download links, click on any of the corresponding x86 and x64 for 32-bit and 64-bit Windows respectively.
The download will begin automatically, wait for the file to completely download, and click on the .exe file to run the installer wizard.
Follow the onscreen instructions to complete the installation.
Before downloading the Microsoft C++ Redistributable, knowing your PC’s architecture is important to prevent you from downloading the wrong DLL file.
3. Run a Virus Scan
Press the Press the Windows key, type in Windows Security, and hit Enter.
In the next window, click on Virus & Threat Protection, and click Scan Options under the Current Threats option.
Then, select Full Scan and click the Scan Now button to initiate the virus scan.
Wait for the scan to complete and restart your PC.
Viruses are one of the common causes of errors in Windows PCs. If you’re experiencing the msvcp110.dll error, one of the ways to fix it is to run a virus scan.
Left-click the Start menu, type restore and click Create a restore point.
Select System Protection and choose System Restore button.
In the Restore Files and Settings box, click Next.
In the next window, select the Restore Point that you wish to restore your PC to, and click Next.
Then, click Finish to complete the system restore.
Running a system restore can help you fix missing DLL errors in Windows. It’ll restore your PC to an earlier state where the msvcp110.dll error was non-existent. However, it’s essential to have a backup of your PC before performing a system restore because you can lose some important files in the process.
Like most DLL missing errors in Windows, resolving the msvcp110.dll error is quite easy and straightforward. If you follow our guide accordingly, the error should be fixed in no time.
If you have alternative solutions to help resolve the msvcp110.dll error, let us know in the comments below.
Let’s be real: it can get extremely unpleasant when your PC randomly restarts for some Windows update, especially during work/study hours in the daytime. We’ve had that experience before, especially on Windows 8 and 7. So, to fix that, Microsoft has an option where you can change your active hours on Windows 11.
What this option does is to download the update and save it on your device until the active hours pass, or for you to manually restart it. It can be useful, especially if you’re working in a fast-paced environment where up-to-date operating systems are necessary.
On another hand, you also have the option to get you up to date as soon as possible. We’ve previously covered an option to get non-security optional updates on Windows 11 2H22 as soon as possible, but what this option does is restart automatically even during active hours to finish updating.
So, how can I change active hours on my Windows 11 device, you may ask? Read along to find out how.
How to change active hours on Windows 11
1. Hit Start.
2. Click on Settings ➜ Windows Update ➜ Advanced options.
4. On Active hours, you can set the drop-down to Automatically. Your device will automatically put the best active hours depending on your behavior.
5. If not, you can also set it to Manually and put the hours by yourself.
However, if you have issues with the operating system ignoring your active hours, we’ve prepared a guide you can try, whether you’re on Windows 10 or 11.
What do you think about this option? Do you find it helpful? Let us know in the comments!
Msvcp120.dll is a native DLL file required to run most modern applications and games. While trying to launch some applications, users have reported the msvcp120.dll error which prevents them from running.
If you’re experiencing the msvcp120.dll error, this article will provide a couple of common causes and detailed steps to help you resolve the error.
What causes the msvcp120.dll missing error?
Here are some of the common causes of the msvcp120.dll error:
Incomplete Program Installation – Failed application installations are one of the most common causes of errors on Windows. The msvcp120.dll error can be triggered if the app in question isn’t successfully installed.
Viruses and Malware – If you’re currently experiencing the msvcp120.dll error, it’s likely your PC is infected with a virus.
Damaged Windows Registry – A damaged Windows registry is also one of the common causes of the error. The Windows Registry can be damaged through forced system shutdowns, virus infection, corrupt system files, etc.
Corrupt Application – If the application you’re attempting to launch is corrupt or has corrupt files in its application folder, you’ll trigger the msvcp120.dll is missing error.
How can I fix the missing msvcp120.dll error?
Apply the following checks before anything else:
Scan your PC for Malware.
Reinstall the problematic app or program.
If the error persists, try the following solutions:
1. Use a Dedicated DLL Fixer
One of the easiest ways to fix the msvcp120.dll missing windows 11 error is to apply a third-party party DLL repair tool. Third-party tools eliminate the struggle of detecting, troubleshooting and fixing errors with your PC.
Once the software is installed, the software will help you scan your PC for missing or corrupted DLL files. Since the msvcp120.dll is a system DLL, you’re guaranteed a 100% success rate for DLL fixes.
2. Update Windows
Press the Windows key + I to open the Settings app.
Click on the Windows Update tab and click on Check for Updates. If any updates are available, click Download and Install to update your Windows OS.
Close the Settings app, and restart your PC and launch the program to see if the error persists.
By updating your PC, you will automatically rid the PC of all the corrupt files and fix all incompatibilities that could prompt this DLL error.
3. Reinstall Microsoft C++ Redistributable
Press the Windows key, type the name of your browser, and hit Enter.
Scroll through the website to locate the download links, click on any of the corresponding x86 and x64 for 32-bit and 64-bit Windows respectively.
Then, the download will begin automatically, wait for the file to be completely downloaded, and click on the .exe file to run the installer wizard.
Follow the onscreen instructions to complete the installation.
The Microsoft C++ Redistributable is an essential Windows application that contains libraries required to run Windows applications. If the file is missing or corrupt, you’ll be unable to run Windows-based applications properly.
Press the Windows key, type in cmd, and select Run as Administrator.
Now, click Yes to grant the app administrative access in the User Account Control window.
Once the command prompt opens, type the following and hit Enter: sfc /scannow
Wait till the scan is complete, and restart your PC to check if the error persists.
Should you encounter any issues with the steps above or the SFC scan is not working, try the steps outlined in this guide to fix them.
5. Update the Display driver
Right-click the Start menu and select Device Manager from the options.
Then, expand the Display driver, right-click the driver and click Update driver.
Select Search automatically for drivers.
Then, close your Device Manager and restart your PC.
If you’ve attempted all the troubleshooting solutions and the error remains unfixed, your last option is to reinstall the Program triggering the error.
The msvcp120.dll missing in Windows 11 is a common error, especially among gamers. Resolving the error is straightforward and can be accomplished in a few minutes.
If you follow our guide thoroughly, you should be able to get rid of the msvcp120.dll error in no time. If you’ve stumbled upon this error in the past and successfully resolved it, you can tell us more about your solutions in the comments below.
Xinput1_3.dll is a Dynamic link library file, a part of Microsoft DirectX. It is a system file required for running games and other graphics software.
If the xinput1_3.dll is missing or outdated, it could cause games or other apps, depending upon it, to crash. In this guide, we will discuss solutions to fix the missing DLL issue.
What causes the xinput1_3.dll not found error?
There could be various reasons for the DLL file missing; some of the common ones are mentioned here:
Outdated or faulty app – If the graphics software or game using the DLL file is corrupted, you might see this error. You need to reinstall the affected app, which is showing the error.
Corrupted system files – If the system files are corrupted or damaged, it could cause the DLL missing error. Run an SFC scan to repair the system files.
DirectX is outdated – When the DirectX app is outdated, you may face various issues, including this error. You need to install the latest version of the app to fix it.
Malware infection – Virus infection could corrupt your important files, leading to this error. Run a scan using an antivirus tool to fix it.
Now that you know the causes of the issue, let us check out the solutions to fix it.
How can I fix the xinput1_3.dll not found error?
Before moving to the advanced troubleshooting steps, go through these preliminary checks:
Sometimes restarting your computer can do the trick.
If these didn’t help you, let us check out the fixes below.
1. Use a DLL fixer
Manually fixing DLL files can be time-consuming and complex, especially if you don’t know your way around a computer.
However, with DLL fixers solutions, fixing issues like xinput1_3.dll not found could be resolved with ease. It can scan and repair DLL files in a few clicks, saving you plenty of time and effort.
Thereby resolving conflict between third-party apps and OS, improving performance, and preventing system crashes.
2. Run SFC & DISM scans
Press the Windows key, type cmd, and click Run as administrator.
Copy and paste the following command to repair system files and press Enter: sfc/scannow
Type the following command to restore the Windows OS image and hit Enter: Dism /Online /Cleanup-Image /RestoreHealth
Press the Windows key, type windows security, and click Open.
Go to Virus & threat protection and click Scan options.
Select Full scan and click Scan now.
The tool will scan and display infected files. Delete them to fix the issue.
4. Perform a System Restore
Press the Windows key, type control panel, and click Open.
Select View by as Large icons and click Recovery.
Click Open System Restore.
Select Choose a different restore point and click Next.
Now select the desired point and click Next.
Click Finish to initiate the restoration process.
Windows will restart and will be restored to the previous version. If the System Restore option is not working for you, then we recommend you check out our guide.
5. Download the DLL manually
NOTE
It is not recommended to install DLL files from third-party websites unless obtained from a reliable source like DLL-FILES that have been tested and verified.
Go to the DLL-FILES website, search xinput1_3.dll, select the appropriate option, and click Download.
Open the downloaded folder, and copy the .dll file from it.
Now navigate to this path and paste the file:C:\Windows\System32
Reboot your PC to let the changes take effect.
If you’re encountering the issue of missing DLL files on your Windows 11, we suggest referring to our informative article that provides solutions on resolving this common problem.
So, these are methods to follow to fix the xinput1_3.dll missing issue. If you have any questions or suggestions, feel free to mention them in the comments section below.
The amtlib.dll is a critical component for most Windows applications. Sometimes, you might experience the amtlib.dll missing error while trying to run any Windows applications.
In this article, we’ll briefly discuss the amtlib.dll error, its causes, and provide you the steps to help resolve the error.
What causes the amtlib.dll is missing?
The following are some of the common causes of the amtlib.dll missing error:
Virus and Malware – One of the common causes of errors in Windows is the presence of viruses. If your PC is infected with a virus, it can trigger the amtlib.dll missing error.
Registry Issues – Incorrect Registry entries tend to trigger a lot of errors on Windows. If the amtlib.dll entry is wrong or invalid in the Registry, it can trigger the amtlib.dll missing error.
Faulty Program Installations – While installing an app on your PC, you can trigger several errors if the installation is unsuccessful. If you’re experiencing the amtlib.dll error, it’s likely the app wasn’t installed properly.
What can I do if the amtlib.dll is missing?
1. Use a DLL Fixer
Resolving Windows-based errors can be done through troubleshooting or applying a third-party Fixing tool. However, because the amtlib.dll is a system DLL file, you’ll have a 100% guarantee of fixing the error using fixer tools compared to troubleshooting.
The best DLL repair tools can help you resolve errors with your PC by scanning your PC’s overall status, identifying harmful and corrupt files, faulty system configurations, and a lot more.
2. Reinstall Microsoft Visual C++ Redistributable
Press the Windows key, type the name of your browser, and hit Enter.
Scroll through the website to locate the download links, click on any of the corresponding x86 and x64 for 32-bit and 64-bit Windows respectively.
The download will begin automatically, wait for the file to be completely downloaded, and click on the .exe file to run the installer wizard.
Follow the onscreen instructions to complete the installation.
Before downloading the Microsoft C++ Redistributable, it’s important to know your PC’s architecture, i.e 32-bit or 64-bit; this will prevent you from downloading the wrong DLL file.
3. Scan for Virus and Malware
Press the Windows key, type in Windows Security, and hit Enter.
In the next window, click on Virus & Threat Protection, and click Scan Options under the Current Threats option.
Select Full Scan and click the Scan Now button to initiate the virus scan.
Wait for the scan to complete, restart your PC and check if the error is fixed.
4. Reinstall the Program
Press the Windows key + I to open the Settings app.
Select Apps, and click on Installed apps.
Click on the Program or App triggering the amtlib.dll missing error, select the options icon, and click Uninstall.
After deleting the app from your PC, you’ll need to reinstall the app afresh to check if the error is fixed. Depending on the type of application, you can download the app from the Microsoft Store or through the application’s website.
Press the Windows key, type in cmd, and select Run as Administrator.
Click Yes to grant the app administrative access in the User Account Control window.
Once the command prompt opens, type the following and hit Enter: sfc /scannow
Wait till the scan is complete, and restart your PC to check if the error persists.
The amtlib.dll missing error is similar to most DLL missing errors in Windows 10. Resolving the error is pretty straightforward and doesn’t involve a lot of technicalities compared to more complex Windows errors.
If you followed our guide, you should be able to rid your PC of the amtlib.dll error in no time.
Additionally, if you’ve got alternative steps that helped you fix the error in the past, you can let us know in the comments.
Windows users are occasionally plagued by errors like the missing msvcr100.dll. The error is triggered when users attempt to launch an application or during system boot-up.
The error is frustrating and prevents you from accessing the app. In this article, we’ll briefly overview some of the causes of the msvcr100.dll missing error and the steps to resolve it.
Why is the msvcr100.dll missing?
Registry Error – Incorrect registry entries trigger all kinds of errors on Windows. If the msvcr100.dll registry entry is corrupt, it can cause the msvcr100.dll missing error.
Virus Infection – Computers infected with viruses tend to trigger a lot of system errors. In addition, malware can also cause occasional data loss; if the DLL file is lost, you’ll trigger the msvcr100.dll missing error.
Corrupt system files – In some cases, the DLL file might have been deleted by corrupt system files that can trigger the msvcr100.dll error.
Hardware Malfunctions – In rare cases, the msvcr100.dll error is triggered due to errors with your RAM and Hard drive. For example, installing an incompatible RAM on your PC, and a corrupt hard disk can all give rise to the msvcr100.dll missing error.
What can I do if the msvcr100.dll is missing?
The following are the ways to fix the msvcr100.dll is missing error in Windows:
1. Apply a DLL Fixer
You’re most likely to get this error when running programs developed with Visual C++. Due to the fact that the msvcr100.dll is a system DLL file, one of the best ways to fix the missing DLL error is by using a DLL fixer.
DLL Fixers scans your PC’s overall status, identifies faulty configurations, corrupt System files, and a lot more. With just a single click, it reinstalls entirely fresh system components so you don’t waste your time troubleshooting the error.
Employing the help of a top-notch fixer will guarantee you that the error will be 100% fixed.
2. Download Microsoft C++ Redistributable
Press the Windows key, type the name of your browser, and hit Enter.
Scroll through the website to locate the download links, and click on any of the corresponding x86 and x64 for 32-bit and 64-bit Windows respectively.
The download will begin automatically, wait for the file to be completely downloaded, and click on the .exe file to run the installer wizard.
Follow the onscreen instructions to complete the installation.
Before downloading the Microsoft C++ Redistributable, it’s important to know your PC’s architecture, i.e 32-bit or 64-bit; this will prevent you from downloading the wrong DLL file.
Press the Windows key, type in Windows Security, and hit Enter.
In the next window, click on Virus & Threat Protection, and click Scan Options under the Current Threats option.
Select Full Scan and click the Scan Now button to initiate the virus scan.
Wait for the scan to complete, restart your PC and check if the error is fixed.
4. Run a System Restore
Left-click the Start menu, type restore and click Create a restore point.
Select System Protection and choose System Restore button.
In the Restore Files and Settings box, click Next.
In the next window, select the Restore Point that you wish to restore your PC to, and click Next.
Then, click Finish to complete the system restore.
Resolving missing DLL files in Windows 11 is pretty straightforward and the msvcr100.dll is no exception. By following our guide, you should be able to fix most DLL-related errors on your PC.
If you’ve experienced the msvcr100.dll missing error in the past and successfully resolved it with alternative methods, do well to let us know in the comments below.
If you’re experiencing the mss32.dll missing error, you’re in the right place. The mss32.dll file is the Miles Sound System dynamic link library. It enables sound files to be loaded efficiently into multimedia applications that require music and sound effects.
Hence, this article will briefly discuss the error’s causes and provide steps to fix the mss32.dll missing error.
Why is the mss32.dll missing?
Here are some of the reasons why the mss32.dll is missing in Windows:
Virus and Malware – Viruses are known to delete important system files and, as a result, might have deleted the mss32.dll file.
Unsupported DLL File – In some cases, the DLL file you installed on your PC is inappropriate for your OS. For example, installing a 32-bit DLL file on a 64-bit PC might lead to missing DLL files in Windows.
Incorrect Software Installations – If the program displaying the mss32.dll not found error was not correctly installed, you’d likely trigger errors like the mss32.dll missing.
Damaged Windows Registry – If the Windows Registry is damaged or contains incorrect entries on specific DLL files, you’ll trigger the mss32.dll missing error.
What can I do if the mss32.dll is missing?
1. Use a dedicated DLL fixer
Fixer tools are software developed to fix errors on a computer. With the help of such tools, you can resolve missing DLL errors without performing any form of troubleshooting.
Instead of manually downloading the DLL file and risking exposing your PC to viruses, you can employ the help of some of the best DLL repair tools. These tools will guarantee you a 100% fix for the missing MSS32.dll error because the MSS32.dll is a system file.
2. Run the System File Checker Utility
Press the Windows key, type in CMD, and select Run as Administrator.
Click Yes to grant the app administrative access in the User Account Control window.
Once the command prompt opens, type the following and hit Enter: sfc /scannow
Wait till the scan is complete, and restart your PC to check if the error persists.
SFC scans help in resolving errors caused by corrupt Windows files. If the mss32.dll error was triggered due to corrupt files, the System File Checker Utility would scan, identify, and delete such files from your PC.
Press the Windows key, type in Windows Security, and hit Enter.
In the Windows Security window, click on Virus and Threat Protection, and click on Scan Options.
Select the Full Scan option and click Scan Now to initiate the scan.
4. Reinstall the Program
Left-click the Start Menu, type control panel and launch it.
Select Programs and choose Programs and Features.
Locate the Music or Video player (Multimedia) apps triggering the mss32.dll error, select it and click Uninstall. Then follow the uninstaller prompts.
Go to Microsoft Store, re-download, and install the program.
The mss32.dll error is often triggered when the program you’re attempting to launch isn’t correctly installed, or the program’s files have been corrupted. If that’s the case, reinstalling the program is the best way to fix the error.
Resolving the mss32.dll not found in Windows is a straightforward process that involves little technicality. By following our guide, you should be able to fix the error in no time.
We also have a guide on how to download 3dmgame.dll if it’s missing, so be sure to check this guide before you leave.
If you’ve experienced the mss32.dll missing error in the past and you fixed it using alternative methods, you can let us know in the comments below.
The d3dx9_26.dll file is usually associated with Windows-based games and advanced graphics programs. If the DLL file is missing, it may result in a variety of error messages.
In this article, we’ll briefly discuss the reasons behind the d3dx9_26.dll error and provide the necessary steps to help you resolve the error.
Why is the d3dx9_26.dll missing?
The following are some of the reasons why you’re experiencing the d3dx9_26.dll missing error:
Corrupt DLL Files: DLL Files such as the d3dx9_26.dll are installed automatically during their corresponding software or game installation. However, such files can get corrupted by actions like a Windows Update or System error. This would leave the DLL file broken and rendered completely unusable.
Viruses and Malware: A PC infected with viruses or malware triggers many errors. Some viruses specialize in deleting essential system files.
Unsupported DLL Files: When games get updated, the DLL file associated with the game can become unsupported after the update. This is common with games like GTA V, PUBG, Minecraft, etc. If the pre-existing DLL file becomes unsupported due to the update, you can trigger the d3dx9_26.dll error.
How can I fix the missing d3dx9_26.dll?
There are several possible fixes you can attempt to resolve the d3dx9_26.dll is missing error; here are some of the most common fixes:
1. Apply a DLL error fixer
Most DLL errors originate from problems with the Windows registry. This is why one of the most efficient ways to resolve the d3dx9_26.dll error is to use an error-fixing tool.
Efficient tools can help you repair your PC and protect it from threats and considering that the d3dx9_26.dll error is a system error, you can be guaranteed 100% that it will resolve the error.
2. Install or Reinstall Microsoft Visual C++ Redistributable Package
Press the Windows key, type in the name of your browser, and hit Enter.
Press the Windows key, type in CMD, right-click on the displayed result, and select Run as Administrator.
Click Yes to grant the app administrative access in the User Account Control window.
Then, input the following and hit Enter: sfc /scannow
Wait till the scan is complete, and restart your PC to check if the error persists.
The System File Checker Utility helps in resolving errors triggered due to corrupt system files. Running the scan can help resolve the d3dx9_26.dll error.
Press the Windows key, type in cmd, and select Run as Administrator.
Click Yes in the User Account Control (UAC) window.
In the command prompt window, type in the following and hit Enter: regsvr32 D3DX9_26.DLL
Wait for Windows to initiate the DLL registration, and restart your PC once it’s complete.
Registering the DLL will add the necessary information to the Windows registry that Windows can utilize.
The d3dx9_26.dll error is one of the easiest DLL errors to resolve. The troubleshooting techniques are straightforward and require little to no technical know-how. If you follow through with our guide, you should be able to fix the error in no time.
If you’ve previously experienced the d3dx9_26.dll error and resolved it using alternative methods, you can let us know in the comments below.