Windows Update blocks Remote Desktop [Full Fix]

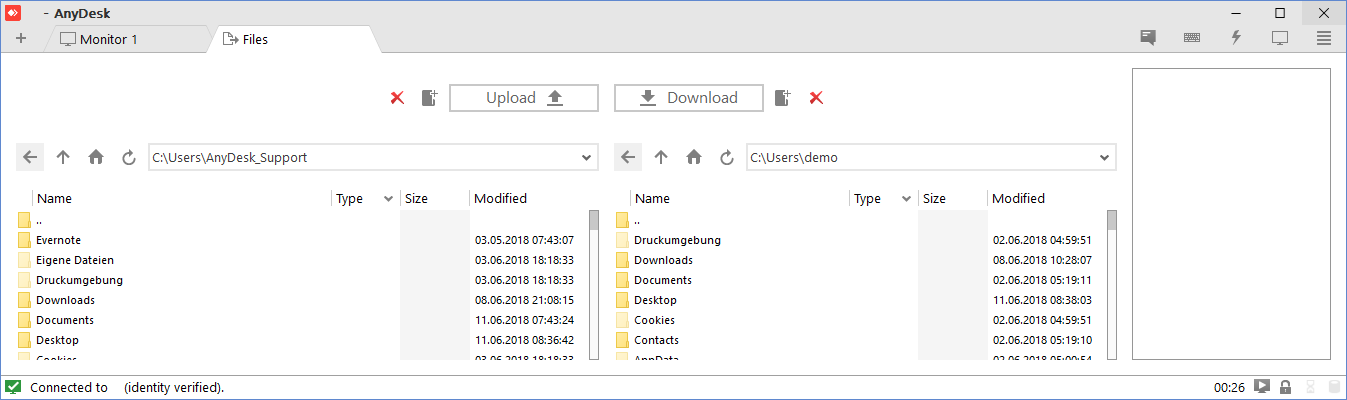
The Remote Desktop Connection app in Windows enables users to connect to a desktop or laptop with another PC. However, numerous users have stated on forums that Remote Desktop stops working for them after Windows updates.

Consequently, the users can’t connect to a host (or server) with Microsoft Remote Desktop.

The KB4103727 update is one update that stopped Remote Desktop Connection connecting to hosts.

A number of users stated in May 2018 that they couldn’t connect with Remote Desktop after the KB4103727 update for Windows 10 version 1709.

In June and July 2018, some users also stated on forums that RDC stopped working for them after the Windows 10 April 2018 Update (version 1803).

These are a few fixes for Remote Desktop when it stops working after a Windows update.

What can I do if Windows Update blocks Remote Desktop?

  1. Check if both the host and client PCs have been updated
  2. Check for the latest Windows Updates
  3. Roll back updates with System Restore

1. Check if both the host and client PCs have been updated

  1. Press Windows Key + R to open the Run dialog.
  2. Enter appwiz.cpl in Run, and press the OK button.
  3. Then click View installed updates on the left of the Control Panel’s window to open a list of recent updates. There you can check if the host has received the same updates as the client.
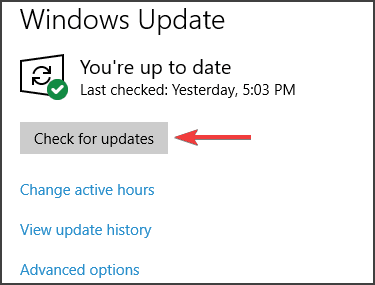
  4. If the host is missing one of the client’s updates, press the Check for updates button on this page to manually search for and install missing updates. You can also download updates from the Microsoft Update Catalog.

The Authentication error has occurred error was due to users utilizing Remote Desktop on an updated client to connect to an unpatched host server.

Thus, the KB4103727 or equivalent update wasn’t installed on the host’s platform. So check that both the client and host have been updated with the same monthly updates.

2. Check for the latest Windows Updates

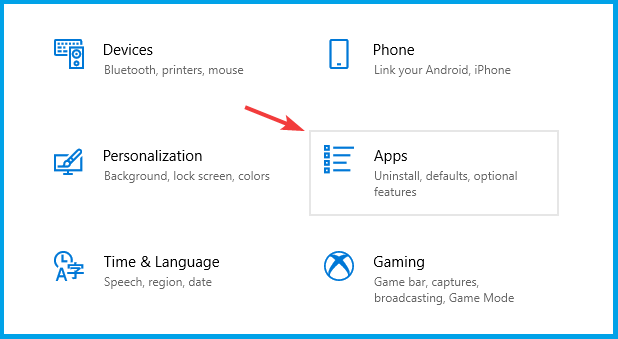
  1. Press Windows Key + I to open the Settings app.
  2. Head over to Update & Security section.
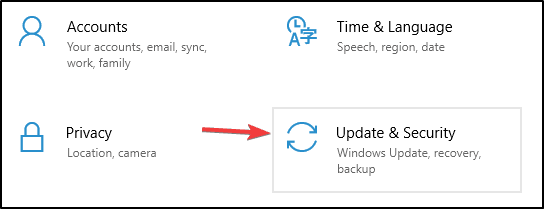
  3. Click the Check for updates button.
  4. If updates are available, Windows will install them automatically.

This might be surprising to see that Windows Update stops Remote Desktop from working properly. However, Microsoft has already fixed this issue in the form of KB4284848 update.

The KB4284848 page states that the update includes this fix, Addresses an issue that causes a connection failure when a Remote Desktop connection doesn’t read the bypass list for a proxy that has multiple entries.

3. Roll back updates with System Restore

  1. Press Windows key + R keyboard shortcut.
  2. Input rstrui in Run’s text box, and press the Enter key.
  3. Click Choose a different restore point on the System Restore window.
  4. Select the Show more restore points check box to fully expand the list of restore points.
  5. Then choose a restore point that will roll Windows back to date when Remote Desktop connected to the required host.
  6. Click the Next button. Click Finish to confirm the selected restore point.

To ensure Windows doesn’t automatically reinstall the update, check out the Show or Hide Updates Tool. Be sure to check our guide on how to block Windows driver updates with wushowhide.diagcab to see how to properly use the software.

You can also remove the update on the client desktop or laptop that stops Remote Desktop from connecting to the host. If you’re not sure what update to uninstall, roll Windows 10 back to a restore point with System Restore.

After restoring your system, check if Windows Update still blocks Remote Desktop on your PC.

Some of those resolutions might fix Remote Desktop when it doesn’t connect to hosts after a Windows update. Remember, however, that Windows updates aren’t always to blame if RDC doesn’t work.

Another option is to try Mikogo. It is a good Remote Desktop alternative that may not cause as many issues. Or you can check out some of the best remote management software and see which one you prefer.

In case the problem is still there, you can check our Remote Desktop connection not working guide for more solutions.

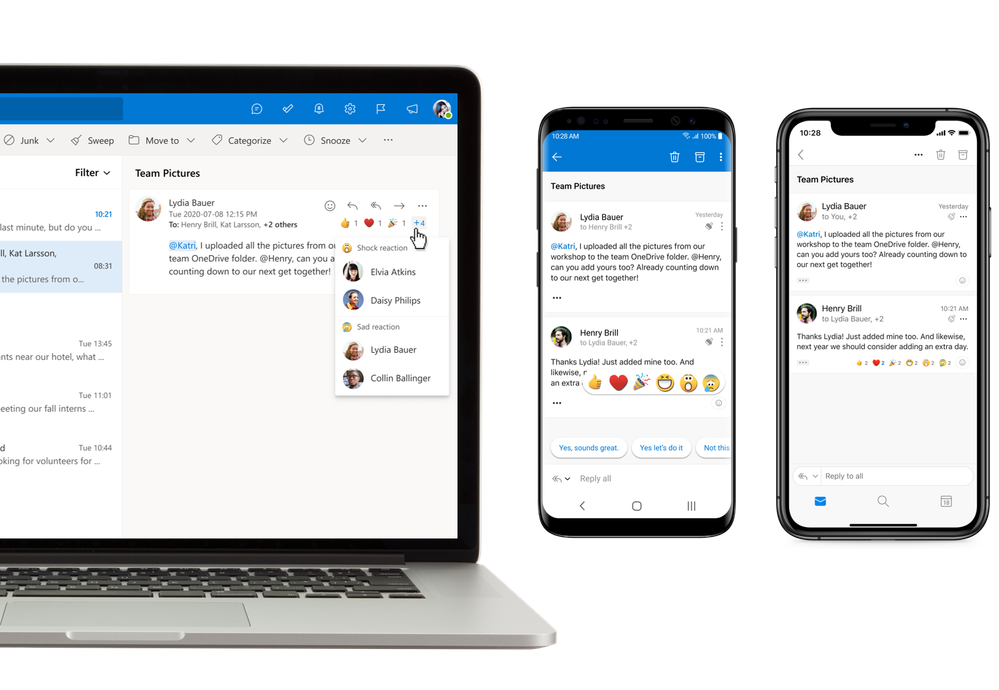
Outlook on the Web will soon let users book travel time and transportation between meetings

Microsoft’s Outlook e-mail service is getting some important updates in the coming months. The news comes from a recent update to the Microsoft 365 roadmap, which lists these new capabilities as in development for Outlook on the web.

First of all, Microsoft is actively working on a feature that will allow business users to book travel time appointments and transportation between meetings. “Now when you need to go to a different building or place between meetings, Outlook will enable you to book travel time and way of transportation between the places you need to go,” the company explained on the Microsoft 365 roadmap. The feature is planned for release in August this year.

The other new feature is emoji reactions, which is also coming to iOS and Android. This update will enable users to messages with love, laughter, celebration, sadness, or surprise emojis when accessing their inbox in Outlook through a web browser. Emoji reactions are expected to roll out to both mobile and web users in June 2021.

Reactions group.png

Next up, Microsoft Outlook is adding an option to start meetings late. The feature will bring the ability for users to opt for appointments and meetings to start 0 -15 mins after the specified time. The Microsoft 365 roadmap listing suggests that the company is planning to roll out this update to the Web and Windows clients later this month.

Apart from the aforementioned features, Outlook on the web is making it easier to add OneDrive and SharePoint files to emails. Lastly, Microsoft also announced some new time management features for Outlook on the web and mobile last month, and you can learn more details in our separate post.

New Xbox Insider update brings much-needed improvements to Quick Resume

Microsoft’s Quick Resume feature on Xbox Series X|S consoles is about to get much better in the coming months. Indeed, the latest Xbox OS update for Insiders in the Alpha and Alpha Skip Ahead rings will automatically create a group for games that are currently in a Quick Resume State.

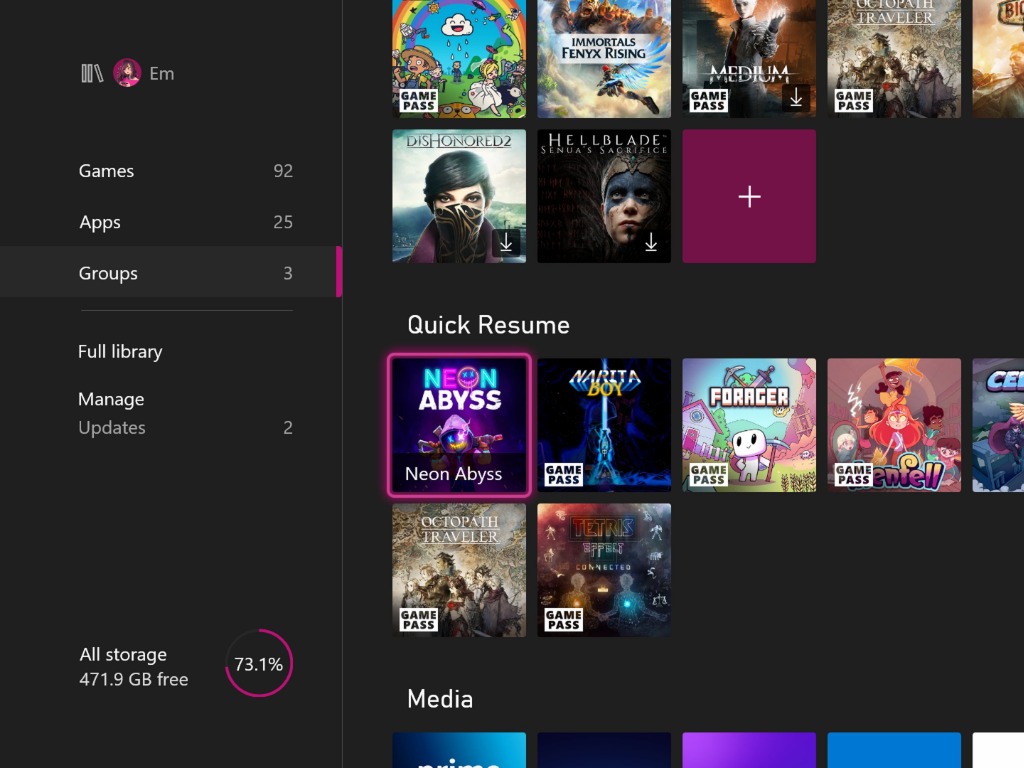
As of today, gamers on Series X|S consoles have no easy way to see which recently played games can be resumed almost instantly thanks to Quick Resume, but that’s finally changing with this new Quick Resume Group. Games in a Quick Resume State will appear in that group automatically, and the group will be visible in My Games & Apps, the Xbox Guide, and it can also be added to the Home Dashboard for convenience.

Moreover, opening the Xbox Guide will now indicate if the game that’s currently running on Xbox Series X|S consoles supports Quick Resume. A dedicated “Quick Resume” label will appear on the top right corner of the screen to indicate when a game supports Quick Resume. Most Xbox games are currently compatibles with the new features, but there are still some exceptions for multiplayer games.

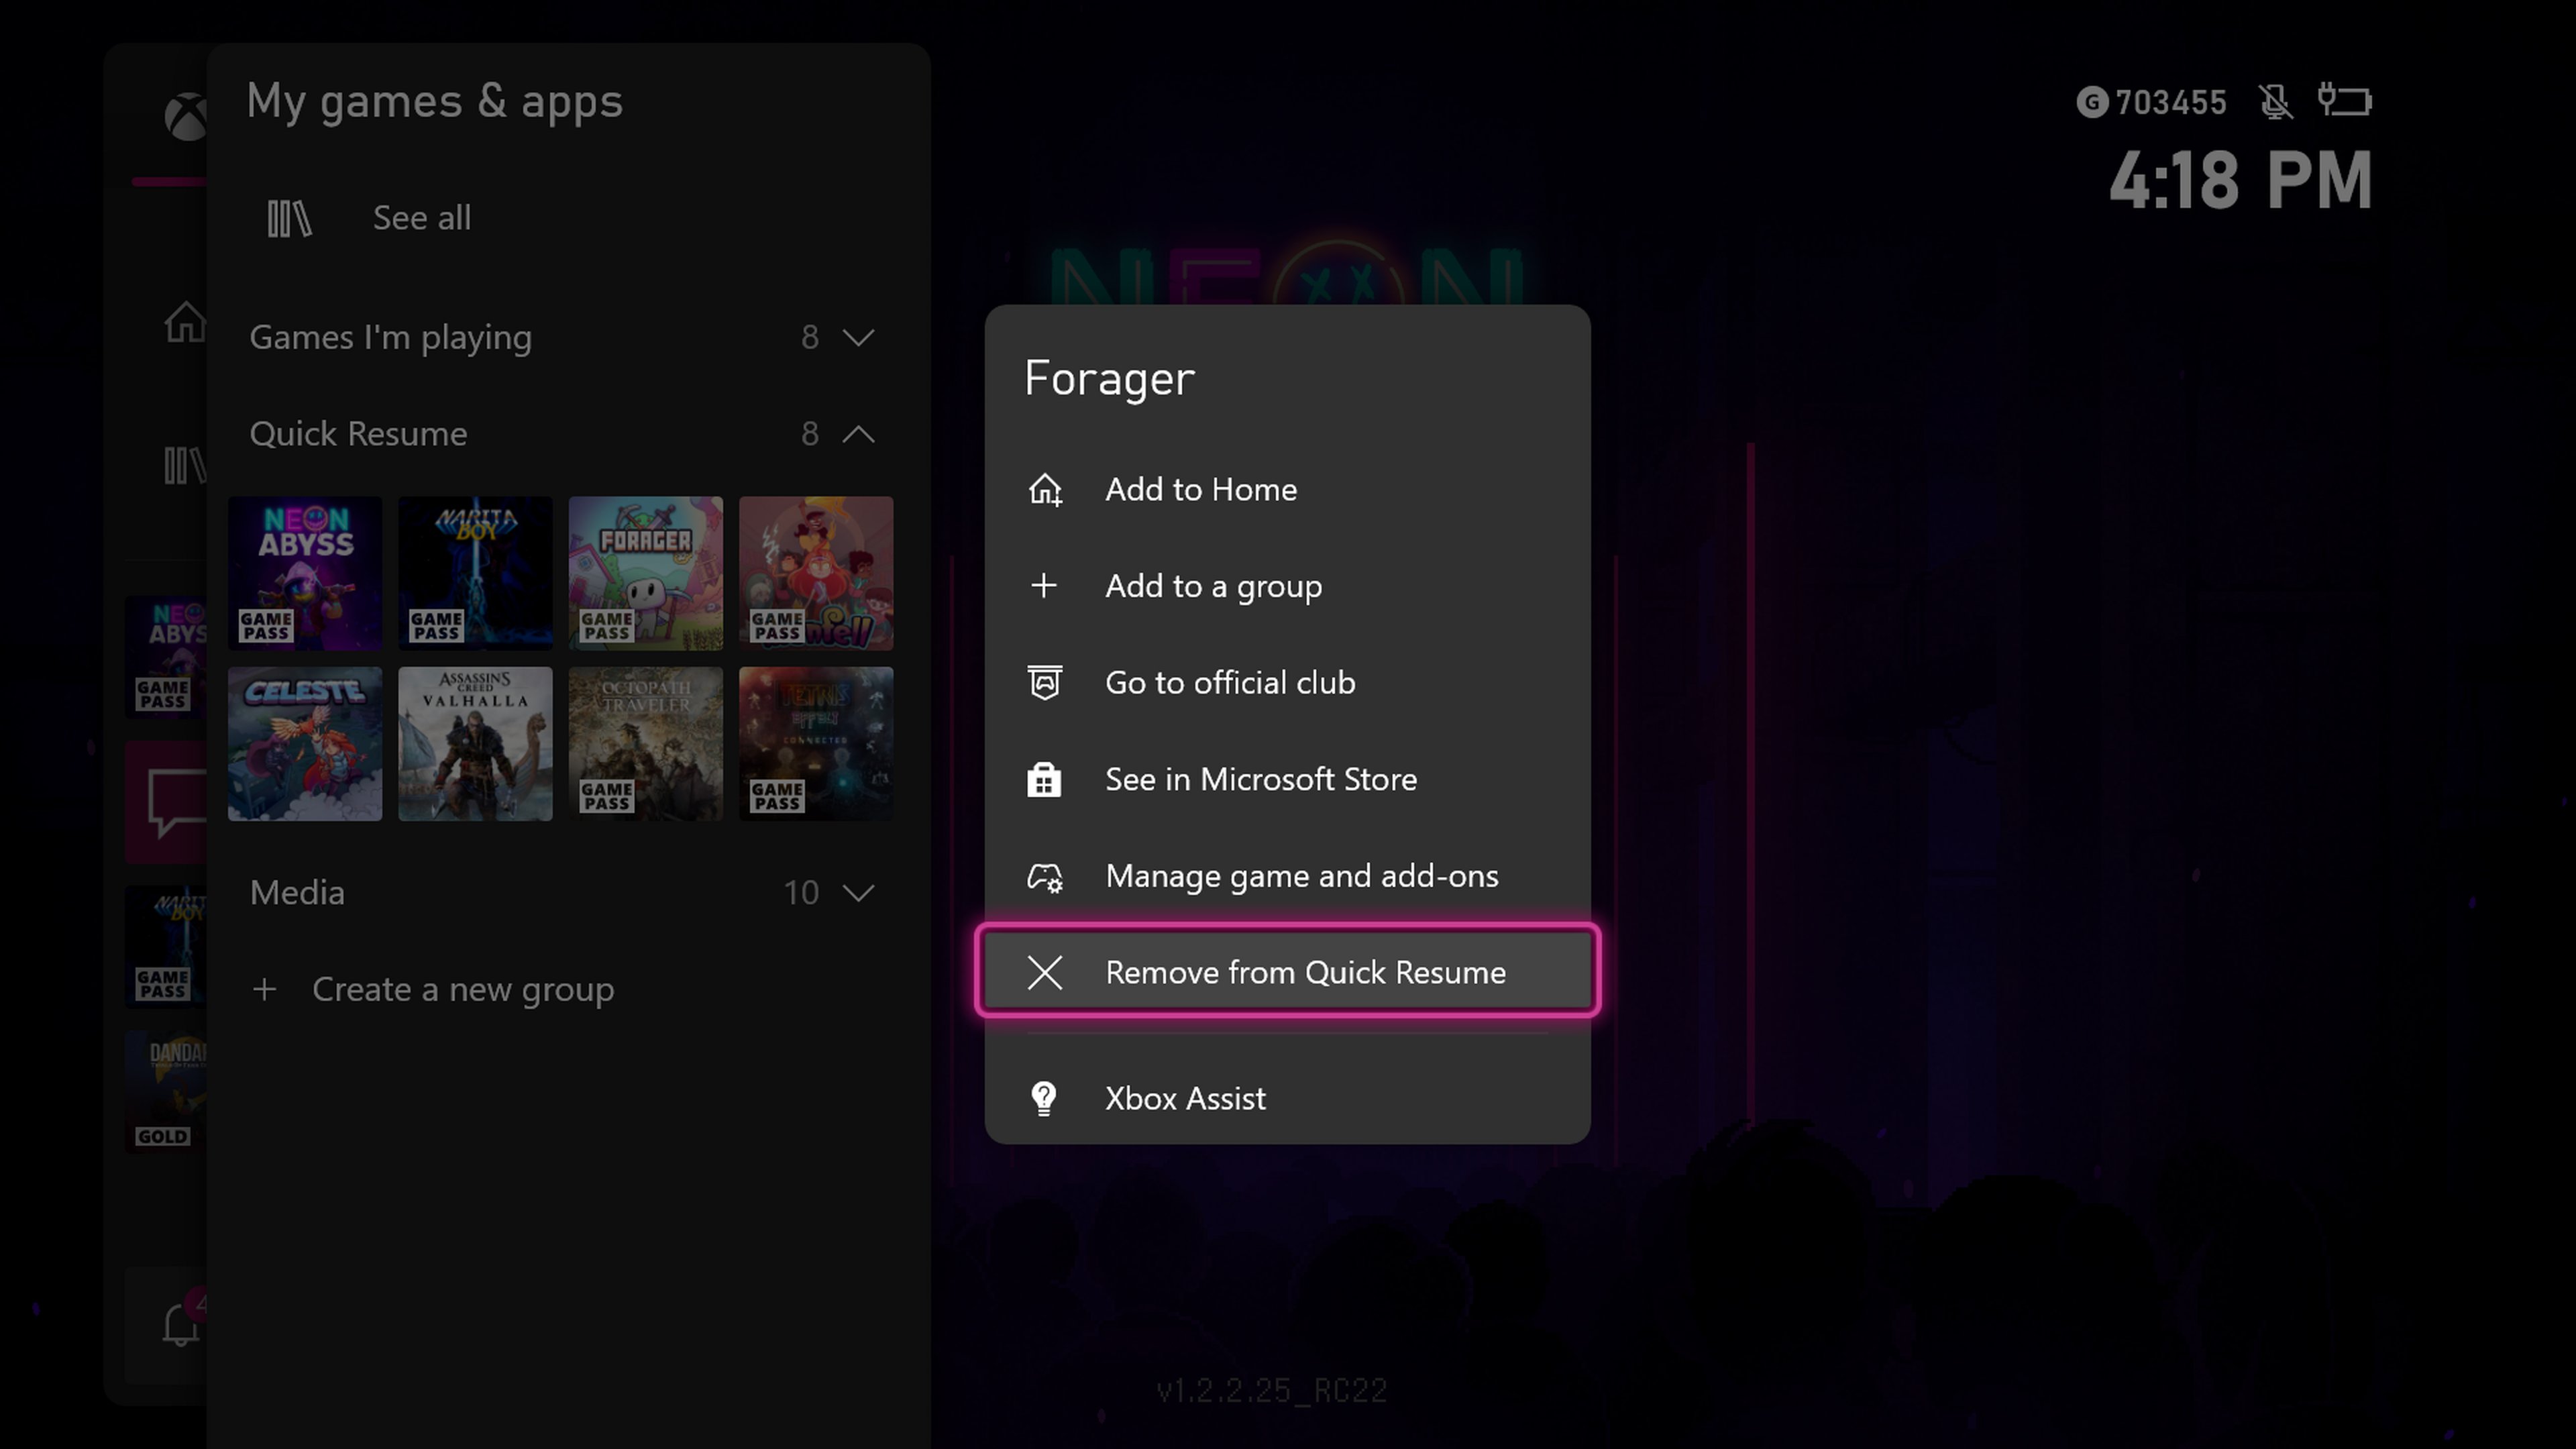
From the new Quick Resume group, Xbox Insiders will also be able remove games from the Quick Resume pool to leave room for other titles. Overall, these improvements are important new steps in giving Xbox gamers more control over Quick Resume, a feature that’s probably not very easy to understand for newcomers.

Image

In addition to these Quick Resume improvements, the new Insider builds also add a new option to enable audio passthrough for media apps on Xbox consoles. When enabled, audio coming from media apps like Netflix will directly pass onto a receiver, skipping all the audio processing that usually happens on the console. This can help reduce audio delay for users with complex audio systems connected to their Xbox.

TeamViewer clipboard synchronization not working [Fix]

TeamViewer is one of the best remote assistance applications, but many users reported that TeamViewer clipboard synchronization is not working.

This can be a big problem, especially if you’re trying to provide remote assistance to your coworker or a friend remotely.

Here’s how one user described the issue on TeamViewer Community forums:

We just bought enterprise, and it’s a deal breaker if we can’t copy and paste from the Windows 10 host into the TV window.
I’ve tried with Sync clipboards checked, and unchecked. I’ve restarted TV multiple times with both options.
It does not work.
Is there a fix for this or do we need to cancel our account to find something which has this feature?

We managed to come up with a series of simple fixes that should fix this inconvenience.

How can I fix TeamViewer clipboard synchronization issues?

1. Enable Clipboard synchronization

  1. Open TeamViewer.
  2. In the top menu click Extras and select Options.
  3. Click Advanced.
  4. Select Show advanced options.
  5. Find the Advanced settings for connections to other computers option and check the Clipboard synchronization box.
    clipboard synchronization enable teamviewer clipboard synchronization not working
  6. Press OK and restart TeamViewer.

The clipboard synchronization has to be enabled in your TeamViewer options to allow copy-paste. Make sure that this option is activated on both computers.

2. Reboot your PC

  1. Go to the Start Menu.
  2. Click the Power button and choose Restart from the menu.
    restart PC teamviewer clipboard synchronization not working

As simple as it seems, sometimes restarting your computer can resolve numerous issues. Windows 10 still has glitches and can block the functionality of some software.

However, due to certain reasons, the Restart process might encounter some problems. If your computer remains stuck on the restart, use our dedicated guide to fix the issue.

3. Use the Copy – Paste option

  1. Right-click the text you want to copy.
  2. Now select Copy/Paste depending on your needs.

We recommend you try using the Copy-Paste option instead of the keyboard shortcuts Ctrl+C, and Ctrl+C.

Sometimes, the shortcuts are not properly configured, or they are used by other apps, thus, leading to interference when used in other software.

We hope that our guide helped you fix TeamViewer clipboard synchronization when is not working. As you can see, this problem is easy to fix.

If you encounter repeated issues with TeamViewer, there are other tools available that you can try. Take a look at our list including the best remote control software and choose the one you like. Mikogo is a great alternative that’s easy to get used to and it has a set of useful additional features.

Feel free to leave us your opinion in the comment section below, and don’t forget to mention if any of our solutions worked for you.

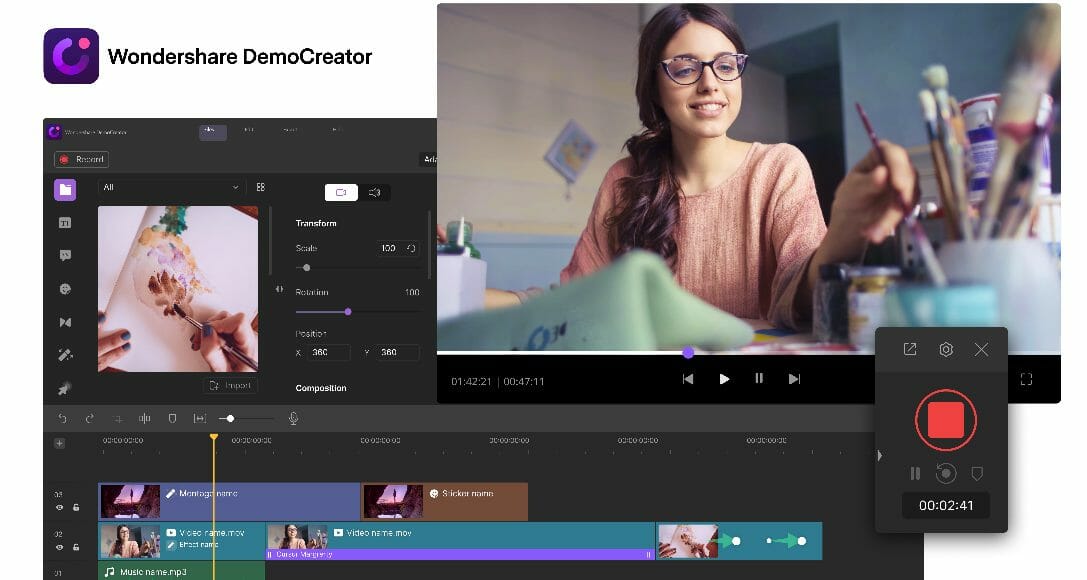
Wondershare Democreator 2026 Review & Usage Guide

The gain in popularity only encouraged people to follow their artistic dreams and create videos with diverse topics. Therefore, more and more companies developed awesome tools to help these pursuers.

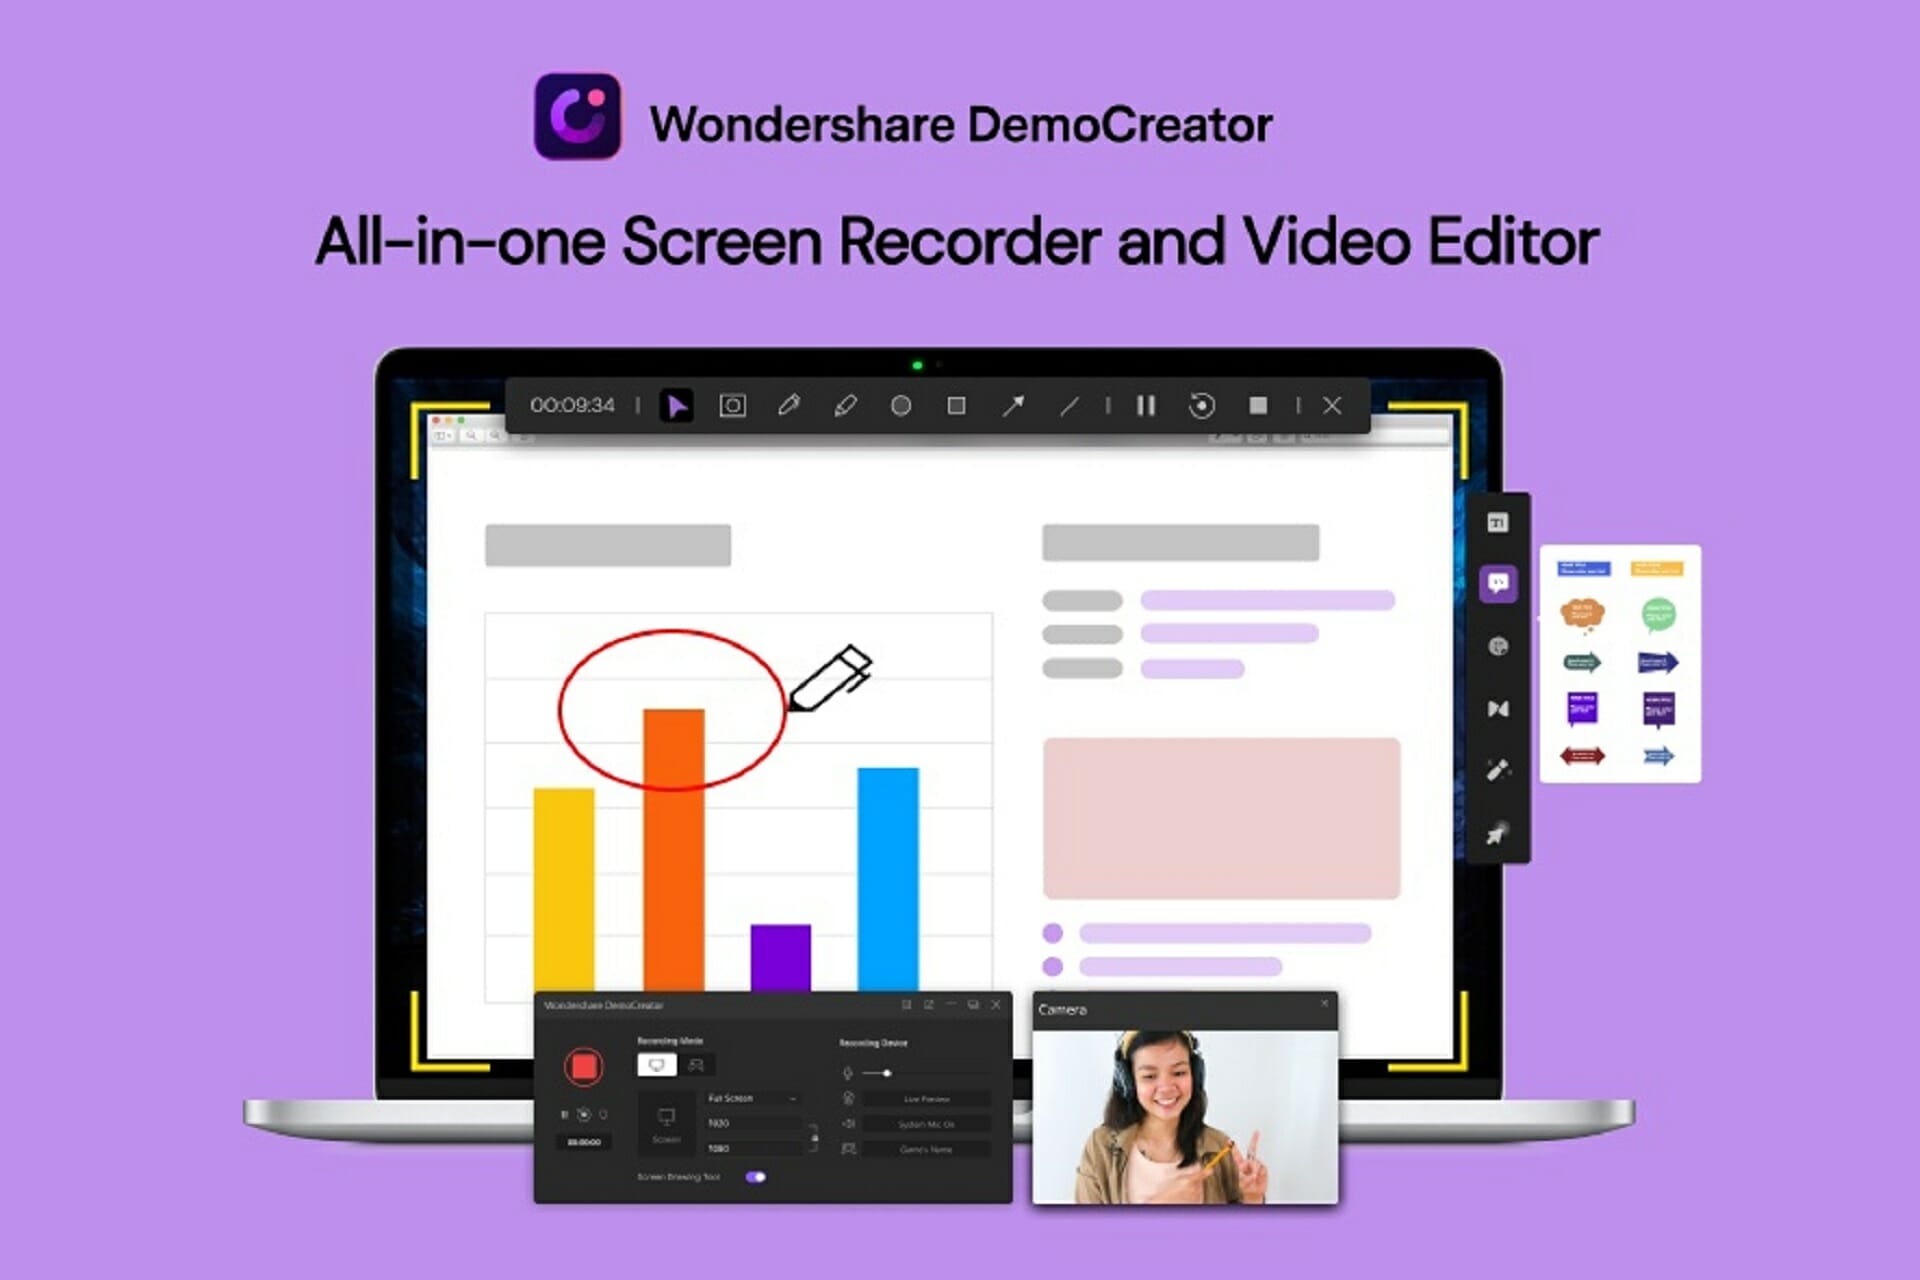
The renowned company, Wondershare, developed software called Wondershare DemoCreator, which combines screen recording and video editing into one product.

Today, we shall take a thorough look at this interesting screen recording software in our Wondershare DemoCreator review and decide whether or not it is worth trying.

What is Wondershare DemoCreator?

For starters, we should talk about Wondershare’s overall reputation as a company. They have been around for a while, more precisely, since 2003, and they own quite a library of products.

When it comes to Wondershare DemoCreator, they claim that the software is perfect for creating video tutorials, recording training courses, holding presentations, and live-streaming games.

Let’s see if the software’s features can back up their claims. Not every screen recording software can do these tasks successfully, especially when we talk about streaming games that require lots of resources.

Here are the program’s system requirements:


OS
: 64-bit Windows 7/Windows 8/Windows 10
CPU: Intel i3 or better multicore processor, 2GHz or above
RAM: At least 3GB physical RAM, and 8GB for HD and 4K videos
Screen Resolution: 1366×768 or higher
Disk: At least 2GB free space for installation, and an SSD is recommended for HD and 4k videos”,”icon”:”/wp-content/themes/windowsreport/assets/images/svg/note-clipboard.svg”} /–>

Wondershare DemoCreator’s features

Record computer screen and audio

Wondershare Democreator allows you to freely record your computer’s screen, system audio, and microphone. You can customize everything before you hit the rec button.

For example, you can change the resolution of your recording and select a certain area to capture or select the entire screen.

Additionally, you will find other customization options such as hotkey, recording region, and framerate selection. You will also find toggles for your camera, microphones, and system sound there.

One other cool tool you can find in this interface is the game mode. Activating it will allow you to select the game you wish to record, and the software will only record that specific game’s window.

Now that we’ve showcased the different things you can do with the screen recorder, let’s show you how to do it:

  1. Open Wondershare DemoCreator.
  2. Select New Recording.
  3. Read through the User’s guide and select Start.
  4. Press the cog icon in the top-right of the program to get more customization settings.
  5. Change your framerate, the audio, and camera settings, according to your needs.
  6. After you’re done setting up, select Capture, then press the Rec button.
    • You can freely pause and unpause the recording after you pressed the button.

Here’s a video made by Wondershare showcasing the process:

After you’re done creating your videos, Wondershare DemoCreator gives you all the necessary tools to edit your records and transform them into quality content for your channel, live stream, or class.

Edit recorded videos and add effects:

Never again will you feel frustrated that you couldn’t properly explain something during your recordings because you can add annotations and freely draw on the videos.

Moreover, make your presentations more interesting with special effects for annotations, cursor, and transitions. You can also import and filter media files for your videos. Another thing you can do is panning and zoom certain parts of your videos.

Here’s a brief tutorial on how to use the video editor:

  1. Open Wondershare DemoCreator and select the Video Editor.
  2. On the top-right side of the newly opened window, you will see all the different customization tabs.
  3. Cut, split, or crop your video
    • To perform the basic editing like cutting, cropping, or splitting, refer to the basic video editor section of the interface as follows:
  4. Add Annotations: 
    • Now to add various screen drawing shapes and annotations to your recorded video, simply refer to the Annotations menu of the DemoCreator video editor as follows:
  5. Add Animated Captions
    • Now, if you want to add an animated intro with texts in your recorded videos, refer to the Captions menu bar and select your favorite one from the list:
  6. Export your video or directly upload it to YouTube 
    • You can also add cursor effects, stickers to your video, adding transition effects between two video clips with DemoCreator. After you’re done editing your video, you can save it in multiple formats or directly upload to YouTube.

Pricing and plans

First and foremost, we have to mention that you can use Wondershare DemoCreator completely free of charge, but with a twist. That twist is actually a watermark.

There is no trial period and no features locked behind a paywall. You can test the product out and use it as much as you’d like, as long as you don’t mind the watermark on the final video.

That being said, let’s focus on the paid versions of the program, which come in different plans for businesses, students, and individuals alike.

The Annual Plan for individuals:

  • $32.99 billed yearly, and you can cancel any time
  • All recording and video features
  • No watermark
  • Free updates
  • Tech support

The Perpetual Plan for individuals:

  • $59.99
  • One time purchase per user
  • All recording and video features
  • No watermark
  • Free updates
  • Tech support

The Team Plan for businesses:

  • Annual or perpetual plan for up to 5 users
  • All recording and video features
  • Free updates and upgrades for the annual plan
  • No watermark
  • Tech support
  • Flexible payment options
  • Volume discount
  • Flexible payment options
Note icon NOTE
All of the products come with a 30-day return policy that will guarantee your money back.

Wondershare DemoCreator

Wondershare DemoCreator allows you to create content by capturing your screen and editing the recordings with awesome effects.
Free trial Visit website

Closing thoughts

Pros
Intuitive interface
A great amount of video editing effects
Record and zoom specific parts of your screen
The trial version has no limits, just the watermark
Can also capture webcam video and microphone sound
Different price plans for different needs
Free updates
Tech support
Cons
There will be a watermark for the trial version.

To give some insight into the pros and cons above, we must admit that we’ve been pleased by the number of features this software brings, especially since the trial version has no limits.

We can definitely see Wondershare DemoCreator being used by both beginner and professional content creators. It is intuitive, has lots of customization options, and it offers all the necessary tools.

Teachers, students, and others who only need to use the screen recorder to share something in a meeting or a presentation will also benefit from this software.

The price includes video editing functions as well; the free version of the program would be more adequate for them. We do encourage everyone to try Wondershare DemoCreator out.

How to access your iPhone from your Windows 10 PC

iPhones are Apple products and were build to work mostly with other products from the company, in order to create exclusivity and brand value.

So, if you need to access your iPhone from a device that wasn’t manufactured by Apple, such as a Windows 10 PC, how will you go about it?

Actually, using your iPhone from a different device is quite simple. You just need to install remote control software on both of the devices and you’re set.

That being said, this article contains a list of the best remote control software to access your iPhone from your Windows 10 PC.

How do I access my iPhone from my computer?

1. Use AnyDesk

AnyDesk is a cross-platform collaborative software that is great for project management, remote control, screen sharing presentations, and many other things.

The software has no limits when it comes to platform compatibility. You can establish a connection between any device brand and with any Operating System.

The software’s UI will optimize itself to your current screen, while converting the controls from touchscreen to cursor, or vice versa, depending on the situation.

AnyDesk offers high-speed, latency-free, and high-FPS sessions that will maintain a stable connection and fluent refresh rates, while not affecting your PC’s performance at all.

Let’s take a look at some of the app’s key features:

  • Military-grade security and encryption
  • Backward compatibility with older AnyDesk versions
  • Screen sharing
  • Voice, video, and chat communication during sessions
  • File transfer
  • Connect remotely from anywhere in the world
  • Cross-platform
  • Lightweight, no installation required
  • Fast and stable connection speeds
AnyDesk

AnyDesk

Connect your iPhone to any device and use it remotely with the AnyDesk remote control software.
Check priceVisit website

2. Use Mikogo

Perhaps one of the most accessible remote control software is Mikogo since it doesn’t require any download, being browser-based.

Since all you need to do is create an account, you can use it from any device, including iPhones and Windows PCs, and you won’t have any compatibility problems.

The app has mobile versions that you can download if you think it is more convenient for you. Customization is key when it comes to Mikogo.

Take a look at Mikogo’s other awesome features:

  • Voice conferencing
  • Session scheduler
  • App selection and monitor
  • Multi-user whiteboard
  • Session recording
  • Profile manager
  • Chat
  • File transfer
Mikogo

Mikogo

Mikogo is a popular browser-based remote control software that works between all platforms and devices.
Check priceVisit website

3. Wondershare MirrorGo

With the increasing number of remote work, we rely more and more on using both our PCs and phones. Therefore, Wondershare created a neat tool to cast the screen of your phone to your PC.

We have to mention that this works only for devices connected to the same Wi-Fi network, but it works flawlessly nonetheless.

Wondershare MirrorGo will optimize your phone screen to work with a mouse and keyboard. The transition is great, and it even allows you to play games on your PC this way.

Some other of the software’s neat features:

  • Record, capture, and share screens
  • Data sync
  • Full UI and software compatibility
  • Hotkeys
  • High resolutions
Wondershare MirrorGo

Wondershare MirrorGo

A great phone emulator for casting you iPhone to your Windows PC
Check priceVisit website

4. Use TeamViewer

TeamViewer is a very popular remote control program that is being used by lots of people worldwide. It features a free license for personal use and paid license for commercial use.

With TeamViewer, you can connect any two separate devices between each other with no compatibility issues. All you have to do is download the software on both of them and create a session.

When it comes to other key features, TeamViewer has plenty of them:

  • Voice and message chat integration
  • Screen sharing
  • File transfer
  • Customizable permissions for extra protection
  • Multi-layered security
  • Lightweight
  • Free unlimited usage for personal projects

⇒ Get TeamViewer

These were the best programs that will let you access your iPhone from your Windows 10 PC. You can use them in your personal, work-related, or school projects.

If you have another similar software that you would recommend, feel free to do so in the comment section below.

7 Best Multi-Engine Antivirus Scanners [Windows 10/11 & Mac]

Are you worried that your personal files are not properly secured on your Windows 10 PC? Do you think the safety of your sensitive data is at risk?

If you think that a single antivirus is not enough to protect your operating system against the daily released malware and malicious/deceptive apps, you should try another solution.

There are hybrid antivirus programs working cross-platform with Linux, Mac OS, and other operating systems, that use multiple scanning engines in order to increase the detection rate on a single scan.

Multiple scanning engines can detect infected files, malicious apps like malware, or security breaches by using two or more third-party antivirus engines simultaneously.

If you are working with important or sensitive files and programs and security is mandatory, a regular antivirus solution might just not be enough.

Therefore, to avoid unpleasant situations you should use a hybrid with multiple scanning engines.

What’s the best antivirus tool with multiple scanning engines?

TotalAV – Local engine plus cloud lookups

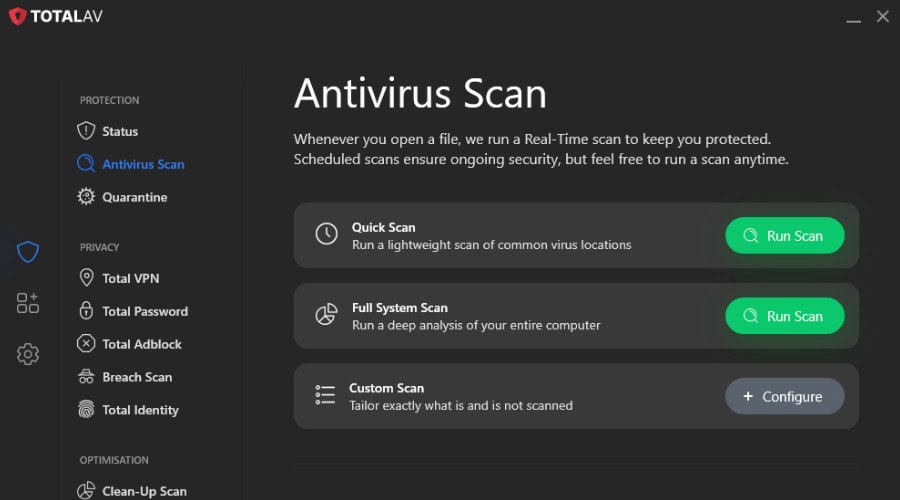
TotalAV antivirus scan

TotalAV pairs its on-device antivirus engine with cloud-based threat intelligence: files are checked locally, and unknown ones are confirmed against continuously updated data. That gives you real-time protection, WebShield for dangerous websites and scheduled scans in a package that is easy to set up on Windows and Mac and needs no maintenance.

  • Local engine with cloud lookups
  • Real-time protection
  • WebShield for malicious and phishing sites
  • Scheduled scans, no maintenance needed
  • Windows and Mac
TotalAV

TotalAV

The industry-leading and one of the most trusted antivirus software that you can find on the market.
Check Price Visit Website

Emsisoft Anti-Malware – User-friendly interface

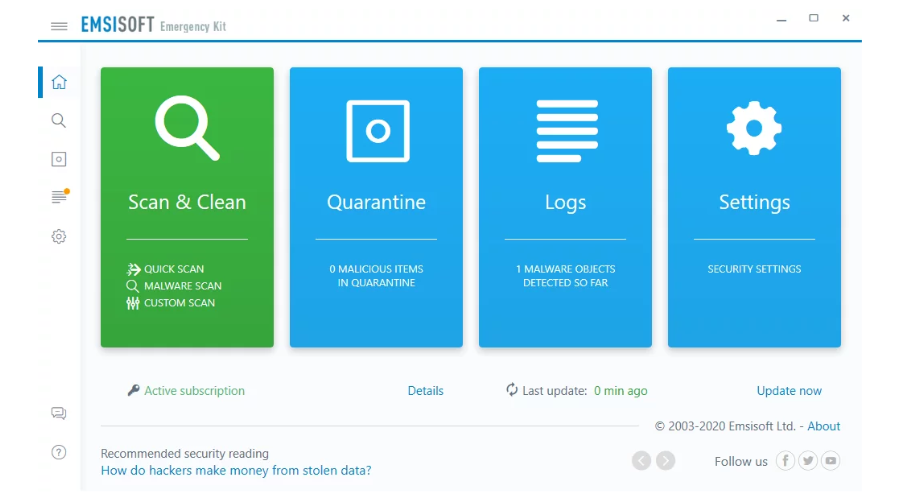
Emsisoft is one of the best security tools and it’s very popular among Windows 10 users. The antivirus offers complete PC protection for both online and offline environments.

Additionally, it currently ranks high in all AV tests in terms of performance, stability, usability, and false-positive results which means that its scanning results are almost 100% accurate.

Let’s quickly look at its key features:

  • Dual-engine scanner
  • Behavior Blocker (offers protection even when not-yet-knows signatures are threatening your system)
  • Combines only two scanning engine platforms (a native one and Bitdefender’s)
  • Can be used for personal or business purposes

Emsisoft Anti-Malware

Launch super-fast scans to find and remove unwanted programs from your device in no time.
Check Price Visit Website

HitmanPro – Easy to use

HitmanPro ensures 3 multiple scanning engines based on Emsisoft, Ikarus, and Bitdefender.

It is a fast platform that can be used effortlessly without an actual installation process. Measuring only 10 MB, it can be run from a desktop, USB Flash Driver, or through a remote storage device.

Let’s quickly look at its key features:

  • Remove infected Windows files
  • Replace infected files with the original and safe packages
  • Requires few resources and will offer accurate results on a single scan
  • Only takes 10MB of space

HitmanPro

An efficacious digital threat removal tool that keeps your device safe and secure.
Free Trial Visit Website

Avast Free Antivirus – DND mode

Avast Free Antivirus also uses multi-layered protection to stop malware, adware, ransomware, and other harmful software from entering your device and stealing your data.

Avast has multiple price plans for its antivirus, but all of them, including the Avast Free Antivirus, use the same level of protection.

The only downside of using this otherwise free tool might be the fact that it runs ads. This will not bother everyone, but it was worth mentioning.

Here are some other of the program’s core features:

  • Do Not Disturb mode that won’t interrupt when you’re gaming or watching movies
  • Designed for effortless security
  • Behavior shield keeps a watch on suspicious files
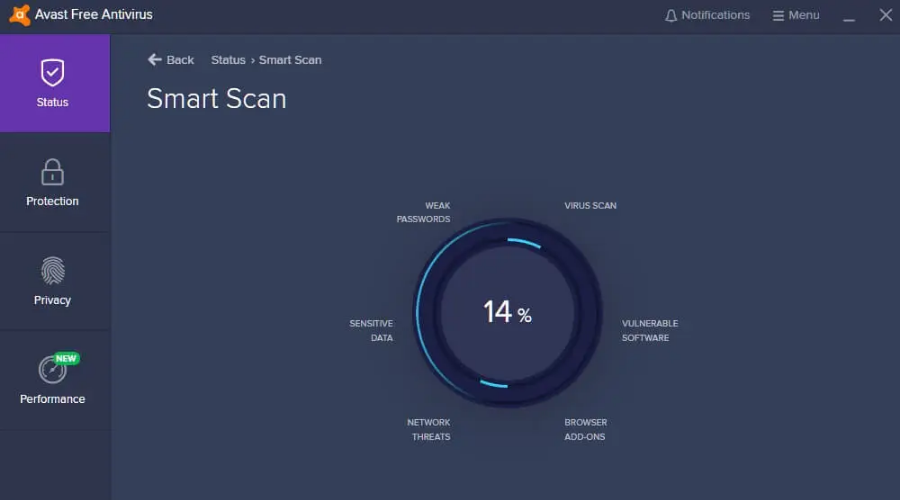
  • Smart scan
  • Wi-Fi Inspector

Avast Free Antivirus

A powerful antivirus program that eliminates all kinds of malicious files from your PC.

OPSWAT – Light Infrastructure

OPSWAT is a free antivirus program with multiple scanning engines that combines a configurable number of anti-malware engines (from 1 to 30), while in the cloud it’s based on 42 multiple scanning engines.

It has a light infrastructure that can successfully run on older configurations and can detect the latest threats.

Let’s quickly look at its key features:

  • Intuitive UI is with basic features for entry-level users.
  • Detects the latest threats
  • Compatible with major OS platforms

⇒ Get OPSWAT

SecureAPlus – AI-based

secureaplus antivirus with multiple scanning engines

SecureAPlus is an antivirus with multiple scanning engines that combines 10 different algorithms from the most popular and powerful third-party security programs available for Windows 10.

It’s partially free because you can use it for up to 90 days without having to pay anything.

This software scans your computer and will show individual results for each of the scanning engines included in its platform.

Let’s quickly look at its key features:

  • Artificial Intelligence to reliably & speedily identify freshly released threats
  • Light and easy on your PC resources
  • Multiple Cloud Antivirus Engines

⇒ Get SecureAPlus

herdProtect – Low resource usage

herdprotect antivirus with multiple scanning engines

herdProtect is based on 68 scanning engines and it provides an extremely fast and smooth security solution that can work along with any other anti-malware program.

In that respect, it’s recommended to use her protect as a backup antivirus solution – this program will work great with a powerful antivirus platform such as Bitdefender or Bullguard.

Let’s quickly look at its key features:

  • Easy to use and extremely fast
  • It won’t use resources so it can run in the background without problems
  • Detects malicious files, infected packages, or scams in less than 60 seconds
  • Cloud performed scanning

⇒ Get herdProtect

These are the antivirus programs with multiple scanning engines that can be used on Windows 10.

We recommend checking out our detailed list of antivirus software with unlimited validity if you want to get other useful security software.

Feel free to choose the software that you like the most or test all of them before installing the right security solution for your system.

If you know other similar programs that can be trusted, don’t hesitate and share your experience with us via the comments section below.

Is DriverAgent Plus safe? How can I remove it from my PC?

Even though DriverAgent Plus seems like a handy little software that allows you to keep all the drivers on your PC up to date, this app comes bundled with other dangerous and hidden third-party software.

This tool is presented as the free software but doesn’t allow you to fix any drivers on your Windows 10 PC if you don’t pay for the services.

Beyond this, DriverAgent Plus installs some adware on your PC, that can pester you for a long time after you decided to uninstall the base software, and also leaves you open to phishing and other cyber attacks.

As we concluded that DriverAgent Plus is adware, in this article we will explore the best method to solve this issue.

We will first remove every trace of this software from your computer’s hard-drive, and then make sure no adware remains. Read on to find out how to do it.

How to remove Driver Agent Plus on Windows 10?

1. Use anti-malware software to remove any malicious files

The easiest way to remove DriverAgent is using reliable antivirus software that uses advanced AI and multi-layered protection to scan and find even the most hidden malicious content.

Besides, the app comes with other useful features that will keep your identity and data safe from intrusions, while gettind rid of existing threats on your devices.

The program will also protect you while you’re shopping online, keeping your banking information safe. The antivirus also works on multiple devices, so you can keep your phone, tablet, and PC safe.

We suggest installing this antivirus software if you also want to get rid of malware, bloatware, crypto miners, and spyware from your computer.

⇒ Get TotalAV

2. Completely remove DriverAgent Plus from your computer

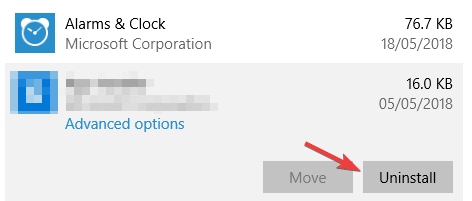
  1. Press Win + X keys on the keyboard, and select Apps and features from the menu.
  2. Inside the programs list, search for DriverAgent Plus > Select it > click Uninstall.
    uninstall application is driveragent plus safe
  3. Follow the on-screen instructions to finish the removal process.
  4. Once this process is complete, follow the next step.

3. Use a third-party uninstaller

The Windows uninstaller is an easy way to get rid of unwanted programs, but it’s not the best method out there. Sometimes, there will be traces left of the program you wanted to rid of.

Additionally, some malicious software can remain hidden and inaccessible by your Windows uninstaller, so you need something better that can find them all.

Thankfully, there are software solutions that do just that. These apps will scan your computer for software and offer you the option to remove anything, completely wiping out the app from your PC.

Dedicated uninstallers will find all leftover files and registry entries and remove them from your PC so no traces of your old file will clutter your system or prevent it from working at best capacity.

This concludes our article. If you were wondering if Driveragent is safe, it definitely isn’t. We’ve included the best solutions in order to remove all aspects of this software from your PC.

Looking for more antivirus software to protect your data? This awesome list with the best antivirus tool with unlimited validity is what you need.

Please let us know if this article helped you, or give us any suggestion regarding the subject, by using the comment section below.

FIX: Your computer has been blocked [Red screen warning]

If you just received the Your computer has been blocked red screen warning while navigating towards a certain web page, it means that a scammer is displaying fake alerts in order to intimidate you.

The goal, of course, is to make you call the number that’s displayed on the screen or convince you to purchase a dedicated program that can further protect your identity, data, and online profile.

Well, as already outlined, this is a scam, a deceptive alert that’s not related to Microsoft or any other OEM.

The message is usually accompanied by a red screen that disables the web browser UI.

So, you might think that everything was indeed blocked and that your computer and your info are at risk.

When you receive this fake red screen, it’s important to stay calm. Don’t download anything and don’t follow the instructions listed on that page. Most likely, your PC is not infected.

However, depending on what you choose to do next, you might end up experiencing issues. So, here is what you need to do to smartly handle this situation.

How can I fix the Microsoft warning alert red screen?

  1. Close the web browser
  2. Enter Safe Mode and perform a full system scan
  3. Install and run an additional antimalware program

1. Try to close the web browser

Usually, if your Windows 10 system is not infected, you can solve the red screen scam easily. Just click on the X icon to close the browser.

Afterward, restart the web browser app and if everything works normally, you are safe.

Of course, try to avoid the page that showed you the Your computer has been blocked alert as from there you might get malware or other harmful software.

End any processes that might be related to the webpage or the app that initially caused the red screen alert.

Also, take a closer look at our options for the best antivirus tools with boot scan to remove hidden malware, and choose the right one for your needs.

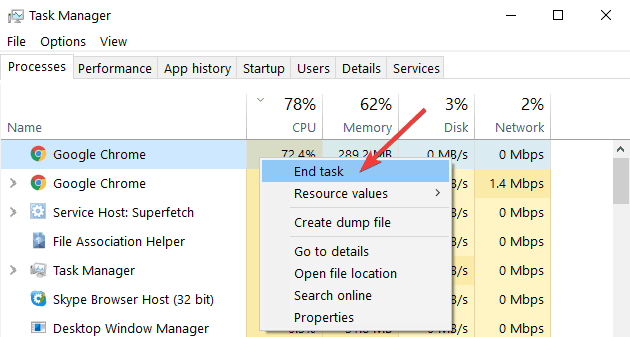
If the browser re-opens the same red screen page, then you have to enter Task Manager and end any related processes from there.

The same must be applied if you cannot close the web page by clicking on the X icon.

So, press Ctrl + Alt + Del keyboard hotkeys and reach Task Manager.

task manager end task

Switch to the Processes tab and end any process that might be related to your browser or with a strange app or program that might represent a risk for your computer.

Hopefully, in the end, you will be able to use your web browsing engine without experiencing further problems.

In case you want to be secure while surfing the internet, you will need to get a full-dedicated tool to secure your network like Private Internet Access.

2. Enter Safe Mode and perform a full system scan

  1. Enter your computer into safe mode – in safe mode, all third-party apps and processes are disabled by default.
  2. For reaching safe mode: press the Win+R keyboard hotkeys and in the Run box enter msconfig; then from System Configuration switch to Boot tab and under Boot options check Safe Boot. When done, save your changes and reboot your computer.boot options bios problems
  3. Now, once Safe mode is reached you can run a dedicated scan by running your favorite antivirus program. We recommend you to use specific software and not the built-in Windows Defender platform.
  4. If the antivirus system finds any infected files, make sure you remove them from your computer.
  5. In the end, reboot your computer into Windows mode.

Even after successfully closing the web browser, you still have to scan your Windows 10 system in order to be 100% sure that you haven’t got any malicious codes from that fake red screen page.

The best way to do this is by running an in-depth antivirus scan.

3. Install and run an additional antimalware program

We also recommend you install and run an antimalware program.

You should do so even after applying the previous section of this guide as sometimes regular antivirus programs cannot detect certain malware packages.

Protect your files, system, and personal data against malware, phishing, and spyware with the supreme security tool.

Once more, choose to perform a full system scan in order to make sure that everything is safe and secured.

⇒ Get TotalAV

The Your computer has been blocked red screen alert isn’t displayed by Microsoft.

This is a scam, a fake notification that tries to trick you into buying certain programs or into downloading malicious files.

Thus, for avoiding such unpleasant situations, you should always use a dedicated security solution.

You can rely on Windows Defender, but if you want a more complex antivirus tool, then we recommend you install a third-party multi-engine antivirus solution that includes online protection features.

Also, navigate only to web pages that you can trust and don’t download any files that look suspicious.

How to remove Win32/Dartsmound from Windows 10

Win32/Dartsmound is a high-risk software bundler that installs unwanted software on your system at the same time as the software you are trying to install.

This Trojan sneaks into your computer, performing unauthorized modifications of system settings. The alerts from your antivirus might be the only symptom you’ll see.

Win32/Dartsmound can install a wide range of unwanted software on your computer: from adware and toolbars that slow down your Internet navigation to malware that allows hackers to remotely access your system.

Once it gets inside your computer, it immediately modifies Windows registry entries and generates lots of hidden files.

Since Win32/Dartsmound is a severe malware, uninstalling it is a priority. Below you’ll find some workarounds to completely remove Win32/Dartsmound from your computer.

How can I remove Win32/Dartsmound on Windows 10?

1. Uninstall all unwanted/suspicious programs

  1. Press the Windows Key + I to open the Settings app.
  2. Go to the Apps section.
  3. Locate the suspicious application and click the Uninstall button to remove it.
    Remove Win32/Dartsmound Windows 10

After the application is removed, check if the problem is still there.

Keep in mind that this malware can disguise itself as an actual application, so if you notice any application that you didn’t install by yourself, remove it and this nasty malware should be gone as well.

To be on the safe side, do quick research for each suspicious application before you remove it.

Although this method is useful when removing applications, sometimes certain leftover files and registry entries can remain, even after you uninstall the application.

To completely remove the suspicious application, along with all its files and registry entries, it’s advised to use uninstaller software.

Uninstaller software is a special application that can remove any software, along with all of its files and registry entries from your PC.

This way, you’ll make sure that the suspicious application is completely removed from your PC, along with all of its malicious files.

If you’re looking for good professional uninstaller software, we recommend browsing our picks to narrow down to the best choices. Our recommendations will not only remove the software you need to get rid of, but also its leftovers.

This is very important as many of these leftovers may be the cause of different errors on your PC.

2. Perform a full system scan

If you’re having problems with the Win32/Dartsmound virus on your PC, you’ll need to perform a full system scan.

In order to do that, you need to have proper antivirus software. There are many antivirus applications that might be able to help you with this problem.

However, if your current antivirus can’t remove this threat, then you should consider switching to different antivirus software.

Our antivirus recommendation offers great protection, so it should be able to remove almost any threat from your PC.

This antivirus software also has a special feature that warns you every time your system is in danger and helps you get rid of the problem.

This is the perfect tool for those of you who are not high-level PC users.

TotalAV

Activate the best protection against Win32/Dartsmound and other malicious infections.
Free trial Visit website

3. Remove suspicious extensions

  1. Open Chrome and open the Menu button. Now select More tools > Extensions.
    Remove Win32/Dartsmound Windows 10
  2. Locate the suspicious extension and click the little switch next to it to disable it.
    Remove Win32/Dartsmound Windows 10

Sometimes Win32/Dartsmound virus can disguise itself as a browser extension. To fix this issue, it’s advised to open your browser and remove any potentially suspicious extensions.

After disabling the suspicious extension, check if the problem is still there.

If the issue doesn’t appear anymore, be sure to remove the suspicious extension and check if that solves the problem.

We showed you how to remove extensions in Google Chrome, but the process should be similar in all other browsers.

4. Manually delete the Registry entries made by Win32/Dartsmound

  1. Press Windows Key + R and enter regedit. Press Enter or click OK.
    Remove Win32/Dartsmound Windows 10
  2. Go to File > Export.
    Remove Win32/Dartsmound Windows 10
  3. Now set the Export range to All. Enter the desired file name and click the Save button to save it. In case anything goes wrong after modifying your registry, simply run the file that you just created and you’ll easily restore the registry to its original state.
    Remove Win32/Dartsmound Windows 10
  4. Now go to Edit > Find or simply press Ctrl + F shortcut.
  5. Enter SoftwareBundler:Win32/Dartsmound and press Find Next button. Once you locate any entries associated with Win32/Dartsmound, remove them. Now repeat the search until you find and remove all problematic entries.
    Remove Win32/Dartsmound Windows 10

Win32/Dartsmound virus can make changes to your registry, and if you want to remove this malware, it’s important that you remove all its entries from the registry.

This is a bit of advanced procedure, so you’ll need to be extra cautious since your registry is quite delicate. After you remove all entries from your registry, check if the problem is still there.

Keep in mind that this solution is for advanced users, so if any new issues appear after modifying the registry, simply run the file you created in Step 3 to restore the registry.

5. Try removing the file from Safe Mode

  1. Open the Settings app. And go to the Update & Security section.
    Remove Win32/Dartsmound Windows 10
  2. Pick Recovery from the left pane. In the right pane, click the Restart now button.
    Remove Win32/Dartsmound Windows 10
  3. You should now see a list of options. Pick Troubleshoot > Advanced options > Startup Settings. Click the Restart button.
  4. Once your PC restarts, you should see a list of options. Select the version of Safe Mode you want to use by pressing the appropriate keyboard key.
  5. After you enter Safe Mode, try to find and remove the problematic file.

If you’re unable to remove the Win32/Dartsmound virus from your PC, perhaps you’ll be able to do so from Safe Mode.

In case you didn’t know, Safe Mode is a special segment of Windows that runs with default settings and by using it you might be able to fix this problem.

6. Perform a Clean boot

  1. Press Windows Key + R. When the Run dialog opens, enter msconfig and click OK.
  2. System Configuration window will appear. Navigate to the Services tab and check Hide all Microsoft services option. Now click the Disable all button.
  3. Go to the Startup tab and click Open Task Manager.
  4. Task Manager will now appear, and you’ll see the list of startup applications. Right-click the first entry on the list and choose Disable from the menu. Repeat this step and disable all startup applications.
  5. After doing that, you need to go back to the System Configuration window. Click Apply and OK to save changes and restart your PC.

Sometimes Win32/Dartsmound virus can be disused as a regular application and start automatically with your PC. However, you can fix that issue simply by performing a Clean boot.

By doing so, you’ll prevent all startup applications and services from starting automatically with Windows 10.

Once your PC restarts, check if the problem is still there. If the issue doesn’t appear anymore, you need to find the suspicious application or service, and remove it from your PC.

Win32/Dartsmound virus can be problematic, especially because it can disguise itself as a regular application.

If you want to get a free antivirus for Windows 10 to safely protect your Windows 10 PC from malware threats, be sure to check out the best antivirus tools with a lifetime license.

However, you should be able to find and remove it using one of our solutions. Let us know which one did the trick for you by reaching for the comments section below.

Fix Windows Defender Hacktool Win32keygen in a few easy steps

​​Windows Defender, which comes automatically installed with each copy of Windows 10, usually does recur scanning in the background.

Sometimes, after a scan, it can detect a threat that is labeled as HackTool: Win32keygen. Naturally, some people are complaining about this:

​​I faced this threat HackTool: Win32keygen in windows defender. What should I do?

We’ve found some quick fixes to help you remove HackTool: Win32keygen. To get rid of this problem, check out our guide below.

How can I remove HackTool: Win32keygen?

1. Quarantine or remove the threat via Windows Defender

  1. Open Windows Defender and check the History tab to see if the threat has been properly dealt with.
  2. ​Go back to the Home tab, and perform a Full scan.
  3. See if there are any other threats discovered after the scan and take notes of where the infected files were found.
  4. Restart Windows 10 to complete the removal of the files that were found during the scan.

​​Alternately, on newer versions of Windows, you can go to Windows Defender Security Center, click on Scan Options and perform the Full Scan from there.

​​2. Detect and remove the software that came with the Win32keygen

  1. Go to Control Panel.
  2. Select Programs, and choose Programs and Features.
  3. Click on the name of the software you identified and then on the top tab click Uninstall.
  4. Complete the steps shown on the screen and repeat for each software, if necessary.

In the previous step where we noted down where the files were found, we can determine what software came with the file.

You can usually determine this by looking at the parent folder that contained the infected file.

Also, if you are having trouble opening the Control Panel in Windows 10, just follow the steps in our simple guide, and solve this issue with ease.

​​3. Use Microsoft Safety Scanner

microsoft safety scanner remove hacktool win32/keygen
  1. ​Go to the official page and download Microsoft Safety Scanner.
  2. Open the executable.
  3. Perform scan and follow instructions to complete this action.

​​4. Install a third-party antivirus and scan

  1. Download and install the latest version of antivirus software.
  2. Perform a scan.
  3. After the scan is complete, the results screen will appear.
  4. To remove the infected applications, check them and click on the Remove Selected button.
  5. If it asks you to reboot your PC, do so as instructed.

⇒ Get TotalAV

If you arrived at this point, it means that you managed to get rid of Hacktool: Win32keygen from your system and you cleaned your computer.

Don’t forget to protect your PC from viruses with one of the best lifetime license antivirus tools from our list.

We hope that our recommendations from were helpful. If you have other questions or suggestions, please access the comments section below.

Microsoft releases first public preview of Visual Studio 2022

Microsoft has just announced that its Visual Studio 2022 preview is up for developer testing ahead of its planned summer release this year.

In a lengthy and feature teasing posted to the Visual Studio blog, developers can read about the new 64-bit nature of VS 2022, updated icons, new personalization options, improvements to .NET cross-platform development UIs, real-time collaboration support, and improved code search, just to list a few.

The next major release of Visual Studio will be faster, more approachable, and more lightweight, designed for both learners and those building industrial-scale solutions. For the first time ever, Visual Studio will be 64-bit. The user experience will feel cleaner, intelligent, and action-oriented.

Today’s release boasts a ton of features developers have been belaboring about for some time.

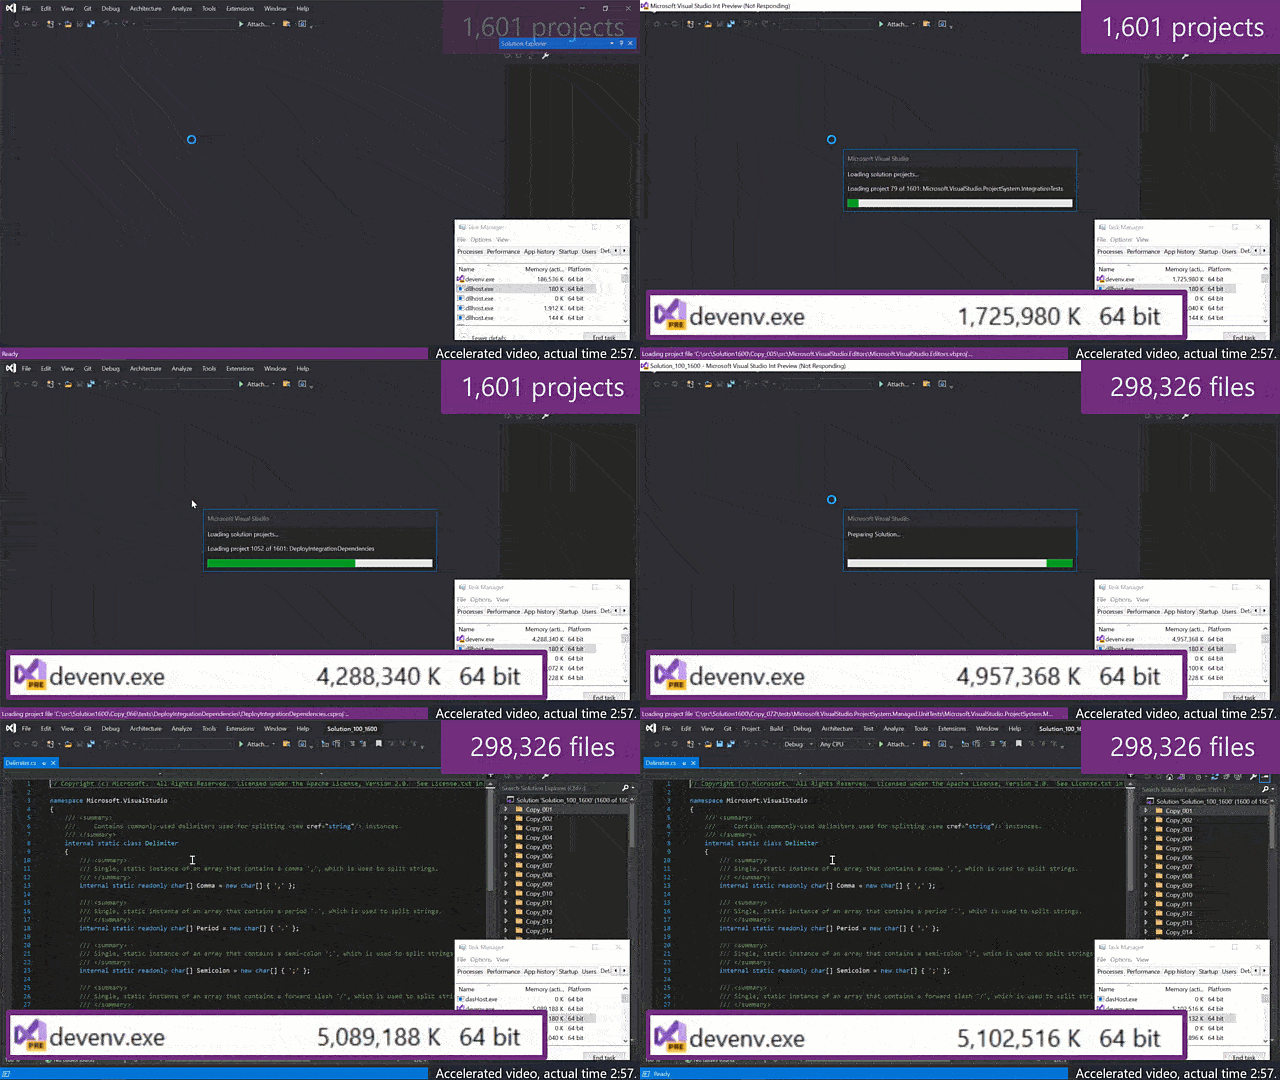
Regarding some of the specifics, developers can start playing with the scalable memory main devenv.exe process with the new 64-bit support.

Visual Studio 64-bit

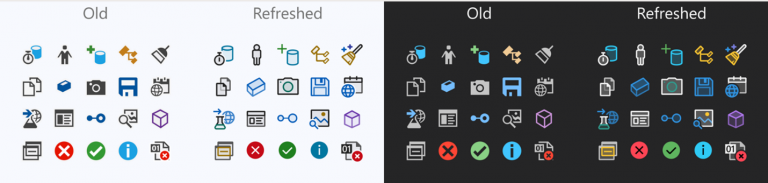
There are also some cosmetic changes coming to VS 2022 that should help modernize the overall UI and reduce some redundant visuals as well as making things more accessible for more developers.

  • Updated icons for better clarity, legibility, and contrast.
  • Cascadia Code, a new fixed-width font for better readability and ligature support. (If you like, you can try Cascadia Code today! https://aka.ms/CascadiaCode)
  • Refreshed and improved product themes.
  • Integration with Accessibility Insights to detect accessibility issues early on—before they get to your end-users.

Visual Studio Icon Refresh

To speed up the development process, VS 2022 is also bringing support for .NET6, .NET MAUI, and ASP.NET Blazor, C++20 tooling as well as some pre-built GitHub workflows.

Debugging is also getting some attention with improvements to core debugger with flame charts in the profiler allowing developers to search through code from various places.

Perhaps, the most interesting tools coming with VS 2022 are Live Share and real-time collaboration. Developers can now basically schedule development times to work with others on code and mark them as a reoccurring event with noted instruction sets. However, for the lone coder there are asynchronous collaborative tools baked in as well as improvements to the AI IntelliCode engine to catch potential code issues in real-time so you developers can hand over their portion of code quickly.

Mac developers also get a nod in VS 2022 with a more modern-looking IDE visual update to the platform that Microsoft also claims does a better job of taking advantage of “built-in macOS accessibility features.” Unfortunately, it appears the macOS redesign will be a piecemeal affair as Microsoft plans to roll out visual upgrades gradually for now.

Visit the Visual Studio blog, to read up on the new features coming to the public preview today.

Google Chrome Now Includes a Built-in Antivirus for Windows

Google Chrome is arguably the most widely used web browser. Google has baked in a lot of features for the Chrome browser over the years and a great example is the antivirus tool.

Yes, Google Chrome offers a built-in antivirus for Windows. This cleanup tool will automatically scan the computer for malware and other security threats.

If you’re still confused about it, do note that Google has developed Chrome Cleanup by collaborating with ESET security firm. Even more, using it is extremely intuitive, as described below.

How can I use the built-in Google Chrome antivirus?

1. Discover Chrome Cleanup tool

Interestingly enough, the Chrome Cleanup Engine is completely baked into the Chrome browser and doesn’t require any sort of additional installation.

The scan is scheduled to happen daily and once done, the Chrome browser will notify you. The notification is beamed via a dialogue box that asks you to remove the file from the PC.

You can simply click on the Details button in order to find out the type of file that has been considered harmful.

The Chrome Cleanup tool will also contain information on how the file in question might be harmful to your computer.

Even more, it will automatically detect any intrusion and subsequent modification by third-party software.

The feature adds a layer of security and should help in minimizing security threats like browser hijacking, installation of potentially unwanted programs, and phishing attacks.

That being said, some users also complain about how this feature addition affects the browser’s speed and the overall UX.

⇒ Get Chrome Cleanup

2. Try out a professional antivirus solution

Needless to say, the Chrome Cleanup tool is very useful, especially for newbies who are not accustomed to using advanced security tools.

However, the Chrome Cleanup tool often ends up making it the browser more sluggish. Use a professional antivirus and these issues will become a part of the past.

Unlike Chrome Cleanup, rest assured that our recommendation constantly looks out for potential entry points for cyberattacks, including unsecured Wi-Fi networks.

antivirus old pc best antivirus windows vista

It allocates background processes and memory functions off of the processors that are running your games so that you can enjoy high-performance gameplay.

These are just some key features that you should know about:

  • Webcam protection
  • Multi-platform support
  • Low system requirements
  • Top-notch anti-malware protection

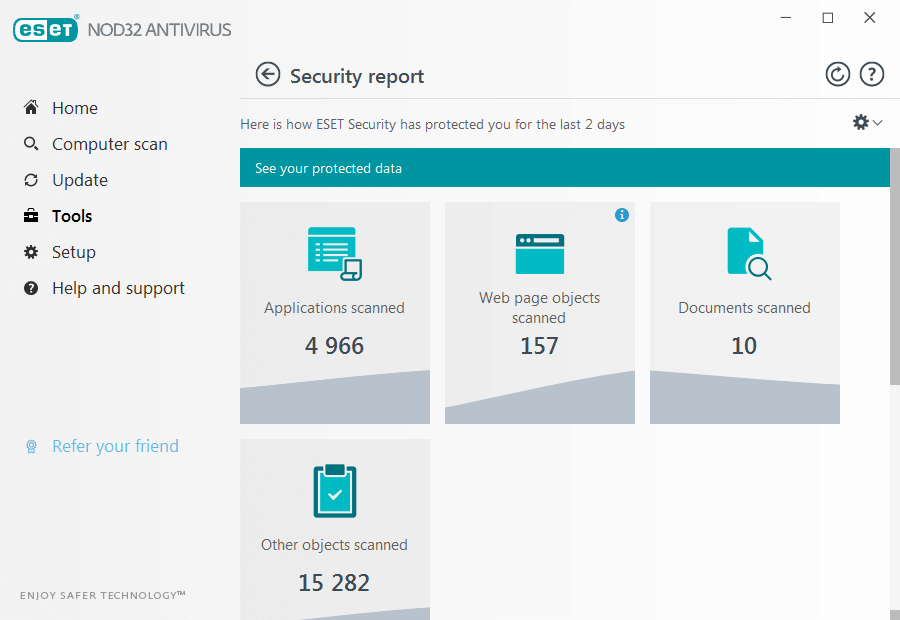
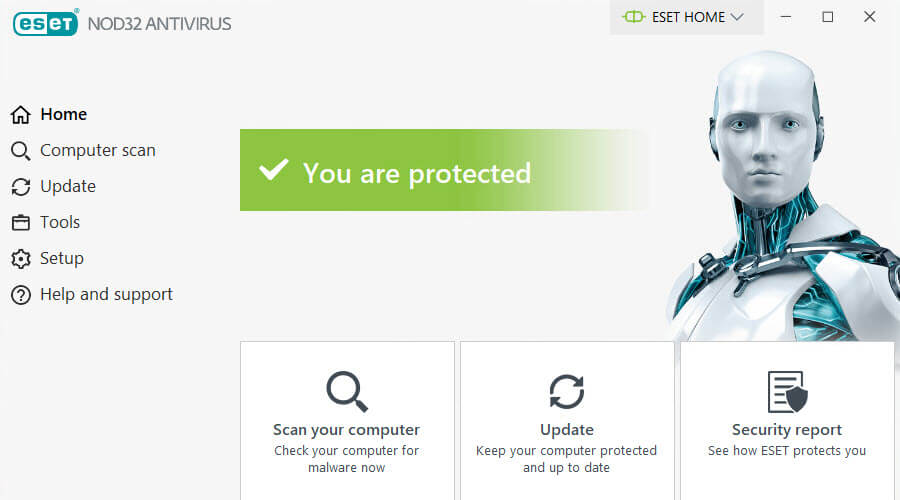
ESET NOD32 Antivirus

When Chrome Cleanup fails to meet your expectations, try out ESET NOD32 Antivirus. Get ready for unmatched protection!
Free trial Visit website

If you want to have your PC always protected from cyber viruses, then make sure you choose one of the best lifetime license antivirus tools from our list.

Are you sticking with Chrome’s Cleanup tool or do you find our antivirus software suggestion as a much safer choice? Let us know your opinion via the comments area below.

New Xbox update brings Game Pass recommendations and Suspend games feature

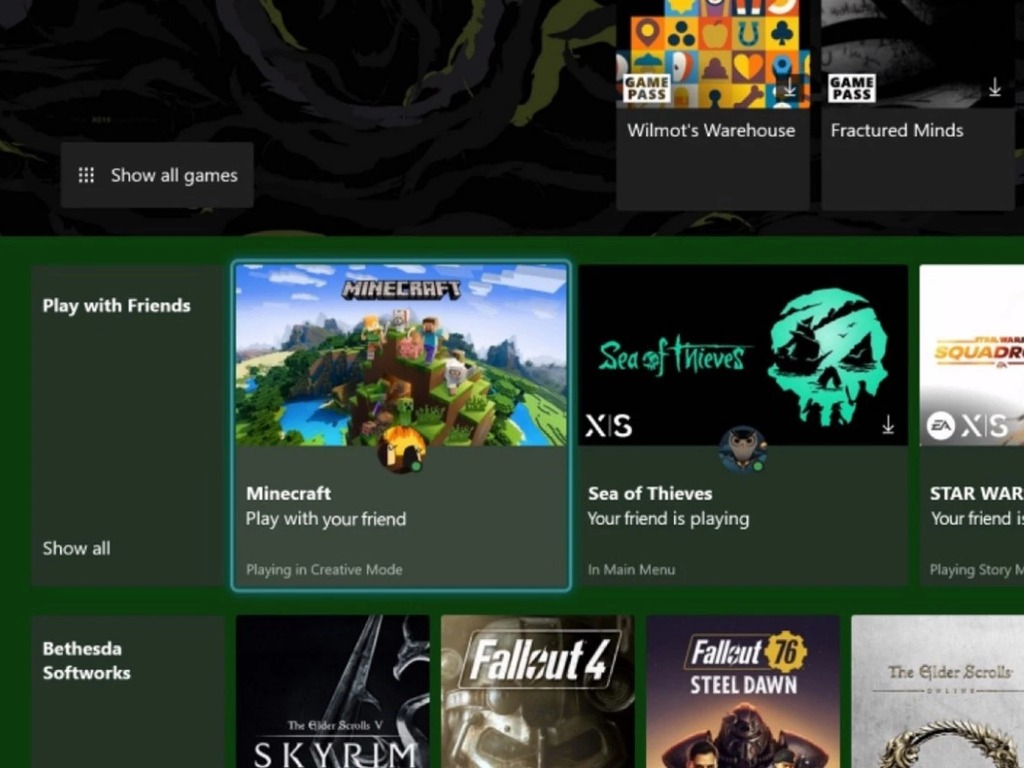
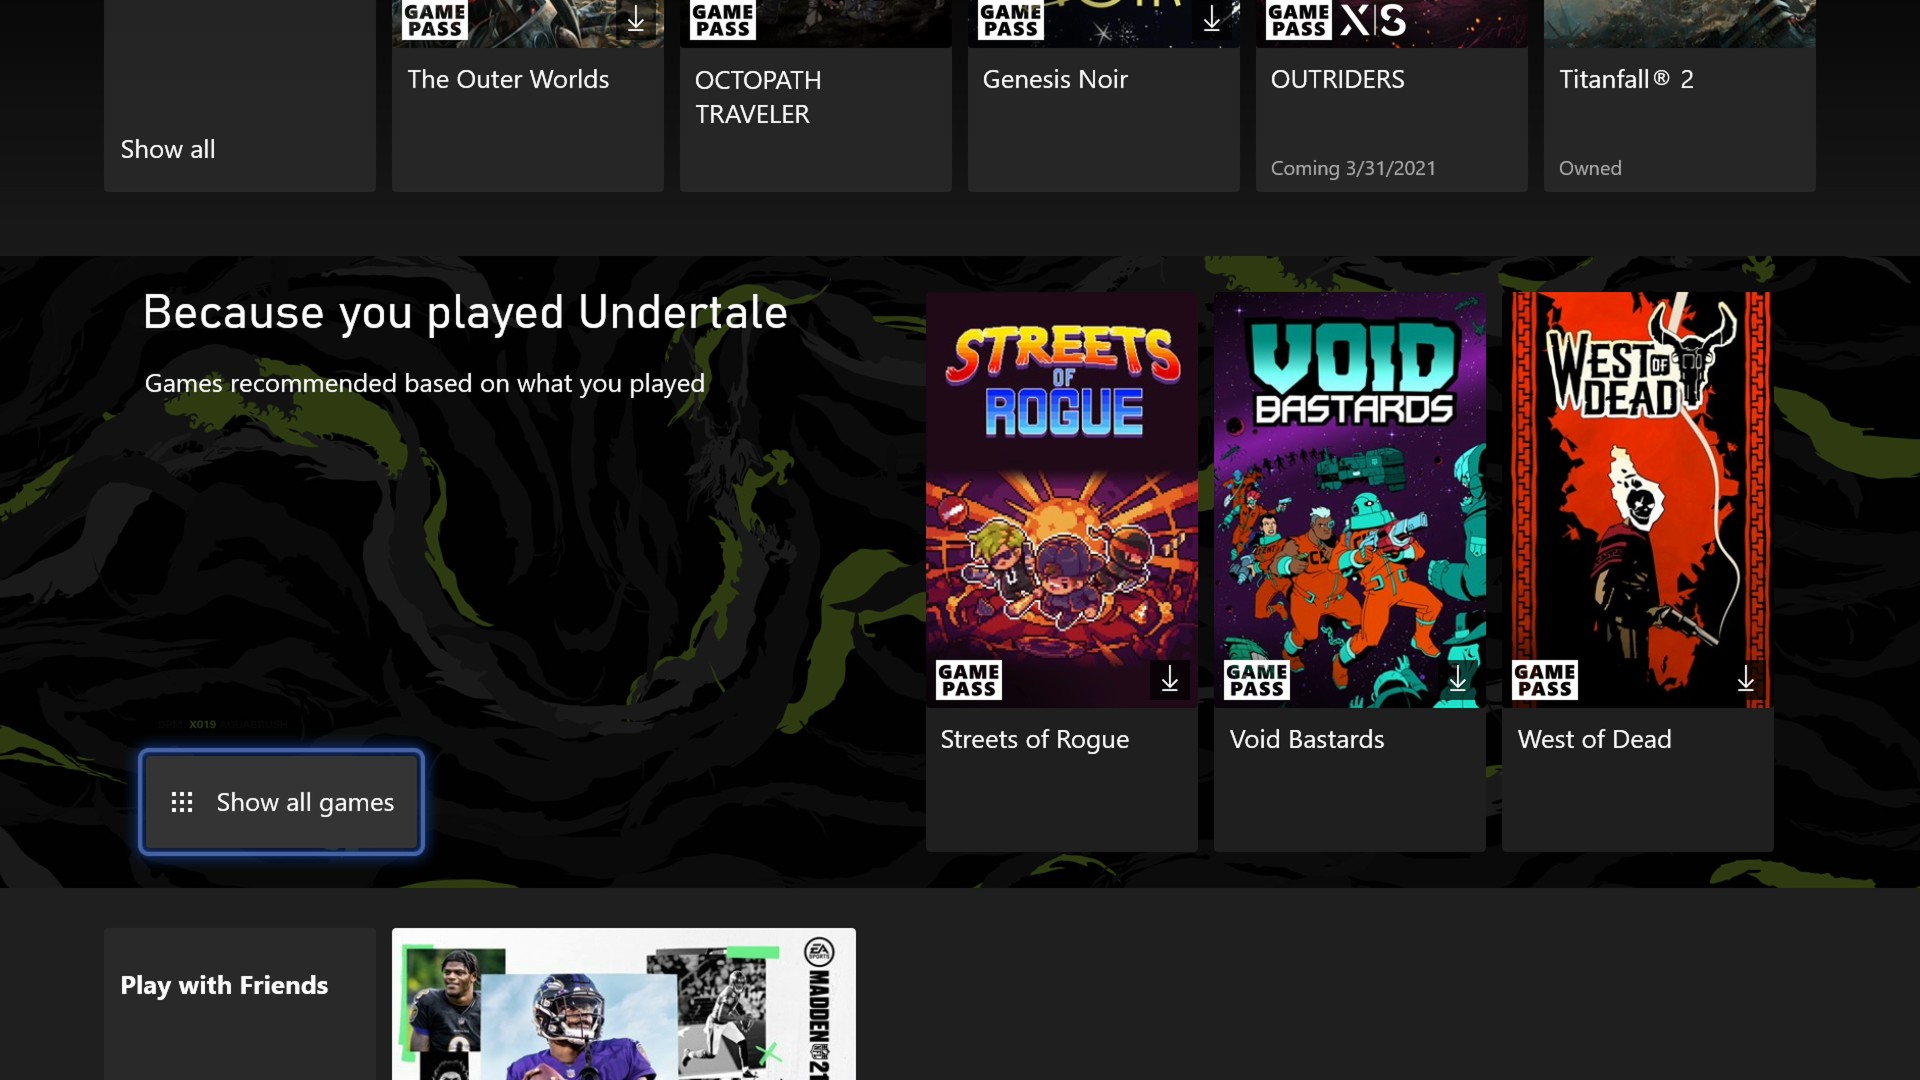
A new Xbox update is available today on Xbox One and Xbox Series X|S consoles, bringing improvements for Xbox Game Pass and game downloads. After installing this update, Xbox Game Pass subscribers will notice new game recommendations and collections in the Xbox Game Pass hub on the console.

The “Because you played” section will offer a curated collection of games based on your gameplay history, and there’s also a a new “Play with friends” section showcasing Xbox Game Pass games your friends are currently playing. Subscription services like Netflix have done a great job at recommending new content to watch to subscribers, and maybe Microsoft can do more here in the future by introducing a like/dislike system for Xbox Game Pass games.

Because you Played

The second new feature coming with this update is the ability to suspend active games to improve download speeds for your games installing in the background. On Xbox Series X|S consoles, suspending a game won’t prevent Quick Resume to work, meaning that you can still jump right back into your game after suspending it.

Last but not least, Microsoft has recently brought back achievements to the Xbox app for iOS and Android, but more improvements are coming later this month. “Starting today, select gamers can check out monthly leaderboards to see how you rank against your friends. We’ll also be adding the ability to view achievements on game detail pages to help track your progress,” the Xbox team said today.

Remote Troubleshooting Software: 7 Best to Use in 2026

Remote troubleshooting software allows people to access computers using the internet from a remote location.

This is useful in such situations where multiple computers need to be managed, connecting devices for educational purposes, or for sharing files while giving presentations.

Having said that, this article is going to concentrate on one of the most important aspects of remote troubleshooting software, which is for support, but we can’t negate the importance of keeping safe from online threats as well.

How can the remote troubleshooting tools help me?

For anyone who has ever had to sit at home or at their office waiting for tech support, remote troubleshooting software is an extremely useful way to save time and money.

Even though in some cases, you can encounter issues with the remote software, these types of apps have become increasingly important considering most people work remotely at this point in time.

For people looking for an easier, quicker, and cheaper option than getting onsite support, here there is the best remote troubleshooting software for Windows 10.

What are the best remote desktop troubleshooting tools for Windows?

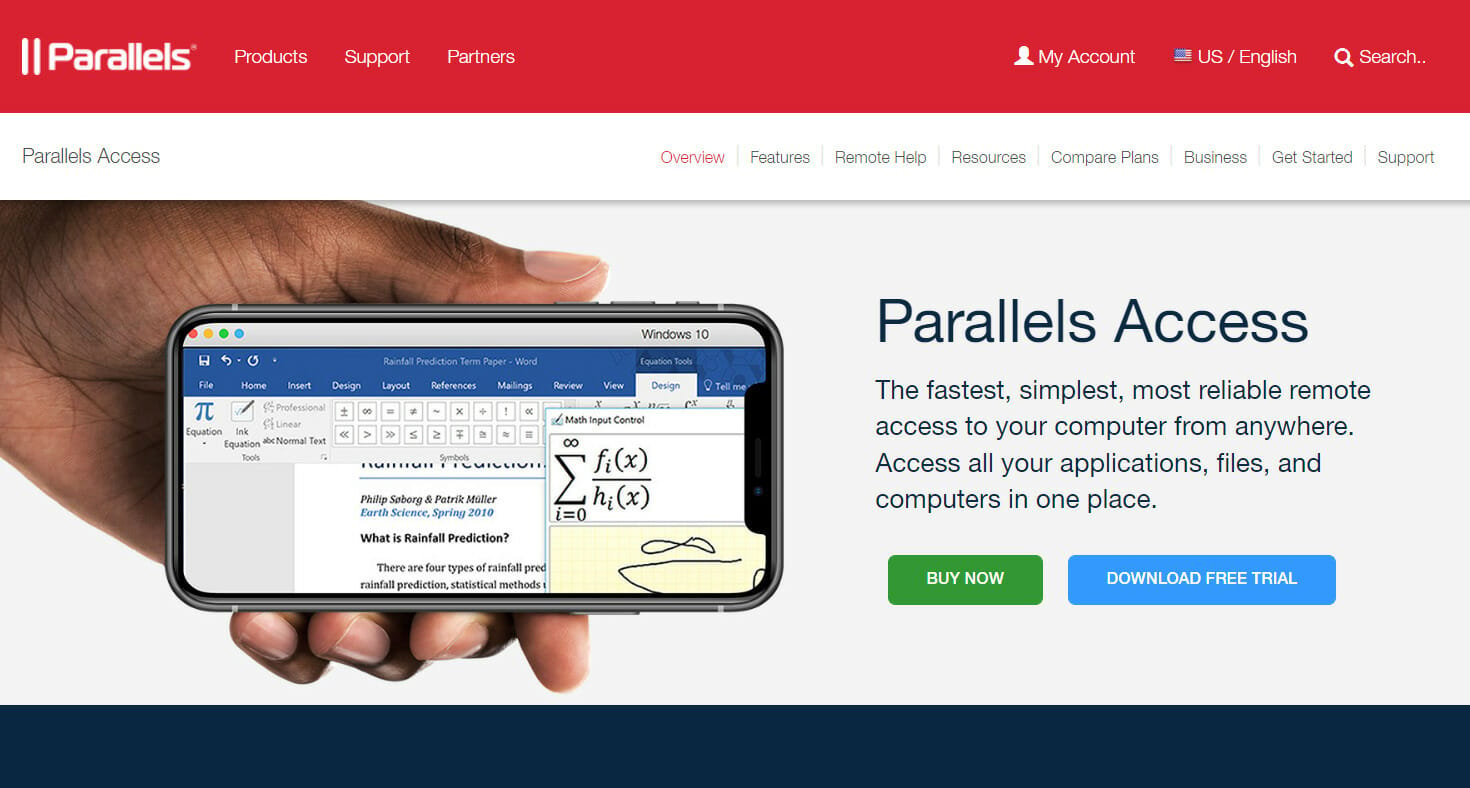
Parallels Access – The fastest tool

Parallels Access offers you quick access to troubleshooting tools that can be operated remotely, and all you need to do is download and install it on your system.

Where Parallels Access really comes into its own is its ability to change desktop apps to the same size as mobile apps.

This is a real advantage for anyone who has ever tried to use traditional remote desktop software and found that the size of the desktop on the mobile device makes it almost impossible to use.

This feature is extremely useful if you use a tablet or phone to troubleshoot technical problems.

On a side note, another important feature of Parallels RAS is the reduction of the possibility of data loss or malicious activity.

This helps organizations when it comes to adhering to data compliance including GDPR, which came into law on May 25, 2018.

Key features:

  • Virtual Desktop Infrastructure
  • Remote desktop services (RDS)
  • Remote PC and hosted desktop infrastructure (HDI)
  • Turbo.net containerization
  • Microsoft App-V

With its ease of installation and use, especially with mobile devices, Parallels Remote Application Server is certainly worth considering for your remote troubleshooting software needs.

Parallels Access

Take advantage of the great speed offered by the HDI infrastructure and other features of Parallels Access today!
Check price Visit website

Mikogo – Great all-rounder

If you are looking for easy-to-use remote troubleshooting software, Mikogo is definitely one you should look at.

Besides built-in VoIP services that offer crisp and clear voice conferencing, you will be able to take advantage of the scheduler and multi-user whiteboard, to offer top-of-the-range troubleshooting aid remotely.

Even though this software doesn’t have any encryption features, you can easily use a VPN with it, to cover this aspect as well.

This lightweight remote control software not only gives you good speeds because of its infrastructure but also great performance.

Key features:

  • Desktop sharing with multiple participants
  • Switch presenter
  • Remote keyboard/mouse control
  • Scheduler
  • Recording and playback

Mikogo

This lightweight but fast software enables you to quickly and efficiently offer remote troubleshooting support.
Free trial Visit website

Radmin 3 – Reliable for professionals

Radmin was developed by Famatech’s and is one of the company’s most popular products. You can use this tool to access office computers from anywhere in the world.

However, even though it allows easy access to files, Radmin is primarily a remote control software for desktop and server management.

The remote troubleshooting software was first developed in 1999 and the company has been continuously developing and improving it since then.

It can also be used for system administration, making remote system administration easy and efficient for unattended computers and servers over a LAN or via the Internet.

System administrators can update software, troubleshoot PCs and servers, and switch off computers remotely.

There is a 30-day free trial, which is always appreciated but unlike some of the other software listed below, there is no free option.

Famatech has some fairly impressive figures behind it as well. It has over 17 years of remote support software solutions market experience, and 18 million users worldwide.

While it is fair to say that the software is not loaded with features, Famatech’s Radmin is very good at doing the job it was primarily designed to do.

It is worth mentioning this tool is used by 40% of the Fortune 500 enterprises. These companies can’t all be wrong.

Let’s review some of its best features:

  • Provide internal IT support across your organization
  • Access your office computer, e-mail, and files from home or while on a business trip
  • Access unattended computers and perform server maintenance remotely
  • Control remote computer comfortably even on 3G connections
  • AES256-bit data encryption

Radmin 3

Easily access office computers remotely from anywhere in the world with this powerful and efficient software.
Check price Visit website

SupRemo – The most flexible

SupRemo is a cost-effective, highly secured, trustworthy, and reliable remote access tool that is great for tech customer support.

The software is cross-platform, available for Windows, macOS, Android, iOS, and even Linux. Therefore, you can connect any device, including phones, PCs, tablets, laptops, from anywhere in the world.

The app increases productivity, especially for those who work in customer support, having lots of features designed to make the interaction between the customer and the employee smooth and easy.

Additionally, you shouldn’t worry about security. SupRemo benefits from a strong security system that will protect your connection and keep your data safe while using it.

You can use the tool completely free of charge for non-professional and/or non-continuous use, but you can purchase it for these purposes at an affordable price, starting from 6$/month per user.

All the licenses allow unlimited installation to an infinite number of PCs. This means that you can use your license on multiple devices since what really matters is the number of simultaneous connections.

There’s actually no limit on endpoint or seats where to install the license.

That’s not all. Flexibility is their motto. The company offers quarterly or annual plans, depending on your company’s needs.

Still not convinced? Why don’t you try it out, since you get 21 days of a fully functional trial!

SupRemo’s main features will improve your workflow. Let’s take a look at them:

  • Integrated Chat for better interaction with the remote user through instant messaging
  • Encrypted connections provide secure data flow
  • The unattended access feature lets you access devices without needing permission
  • The Allowed ID feature lets only the devices you consider safe access your PC
  • File transfer between the connected PCs during the connection
  • Automatic Update keeps you up with the latest features and patches
  • Online Address Book that lets you share your SupRemo contacts between colleagues
  • Online Reports from all the connected devices
  • Remote printing lets you print documents stored on the remote device to your local printer
  • Full customization to make your interface suit your needs

⇒ Get SupRemo

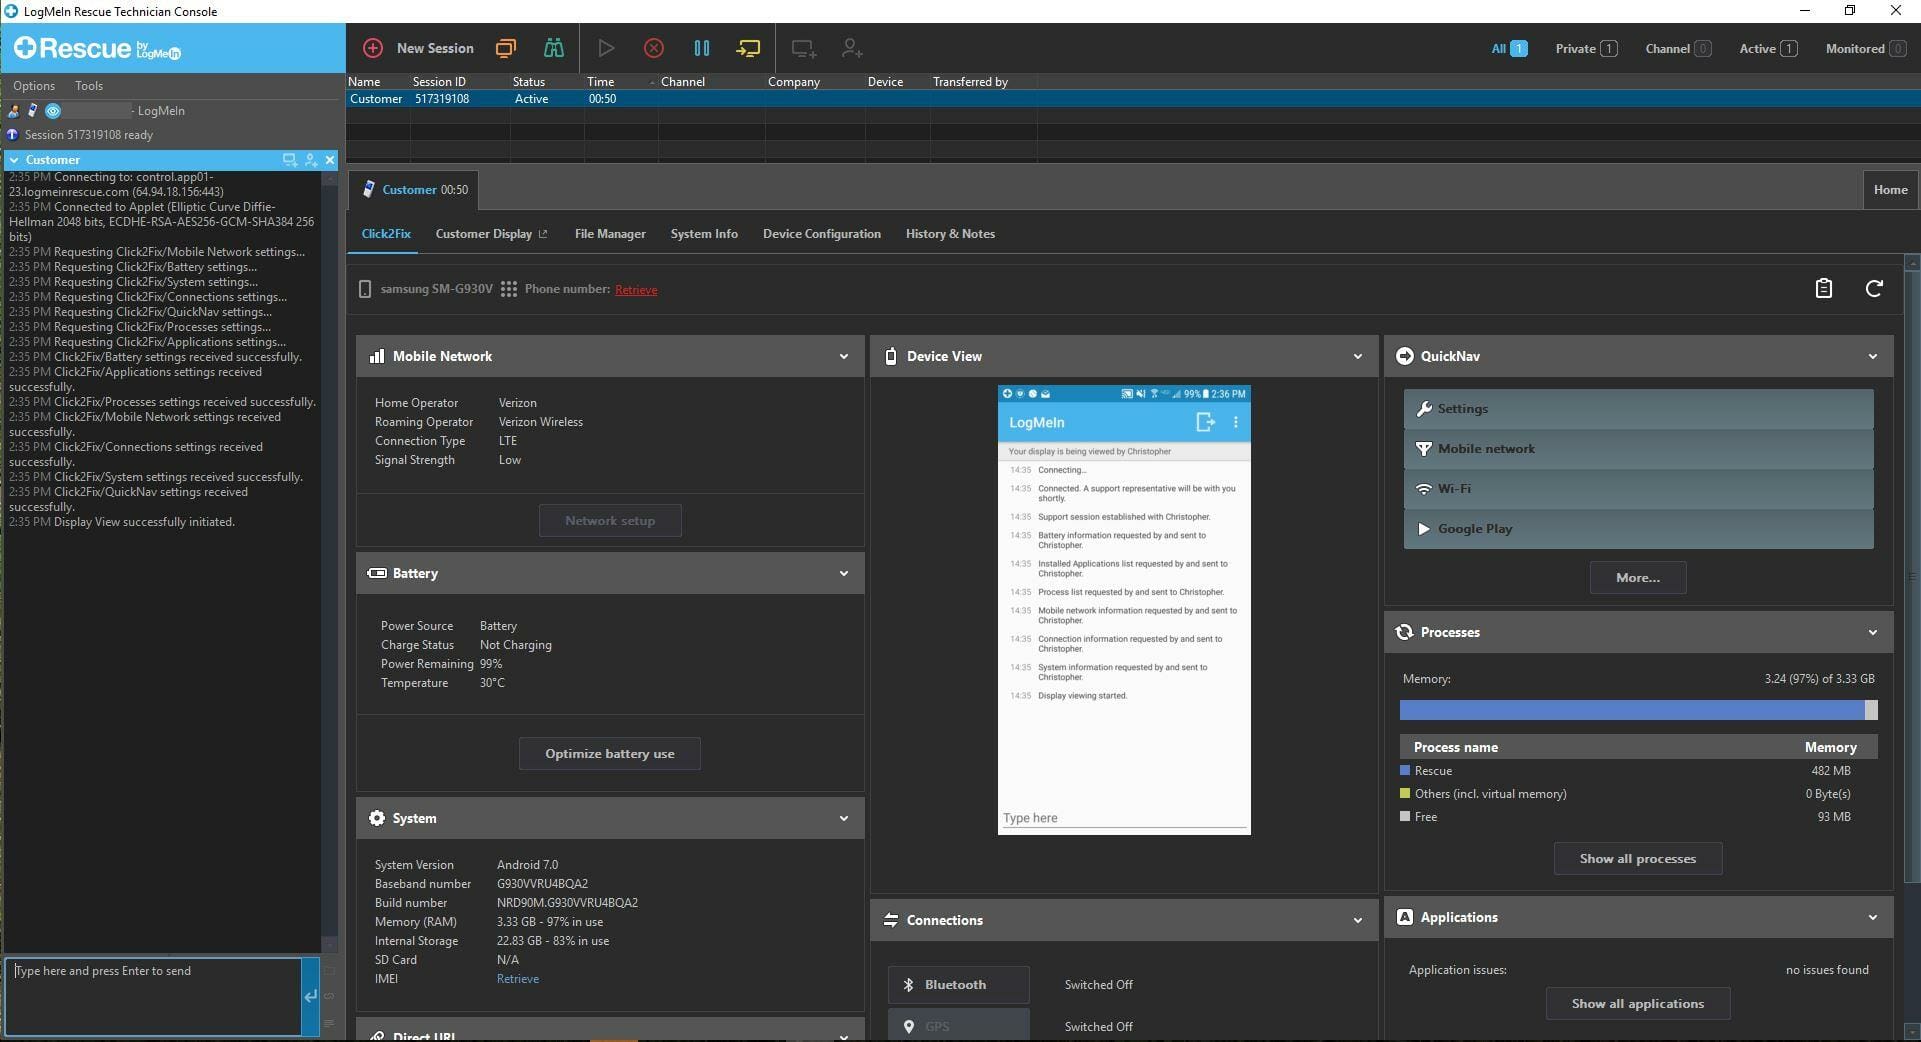
Rescue by LogMeIn – Very popular

Rescue by LogMeIn is one of its most popular products, and there are a lot of reasons why.

Besides great portability, the Rescue software offers good processing speeds, and also some very efficient tools that might be of help in your troubleshooting endeavors.

The seamless integration enables you to use the software on a variety of devices, and on a variety of operating systems.

LogMeIn Rescue has a number of useful features One such feature is Reboot and Reconnect which can be done even if the computer being worked on is unattended or in Safe mode.

Another extremely useful feature is ‘Remote Diagnostics’, which allows the remote user to get a summary of everything on a machine.

This feature works particularly well with another feature that allows the remote device to be accessed during periods of downtime — for instance, lunch breaks or after work.

Key features:

  • Remote support
  • Mobile support
  • Video support (Lens)
  • Integrations and Apps
  • Security
  • Administration and Reporting
  • Customization and branding

⇒ Get LogMeIn Rescue

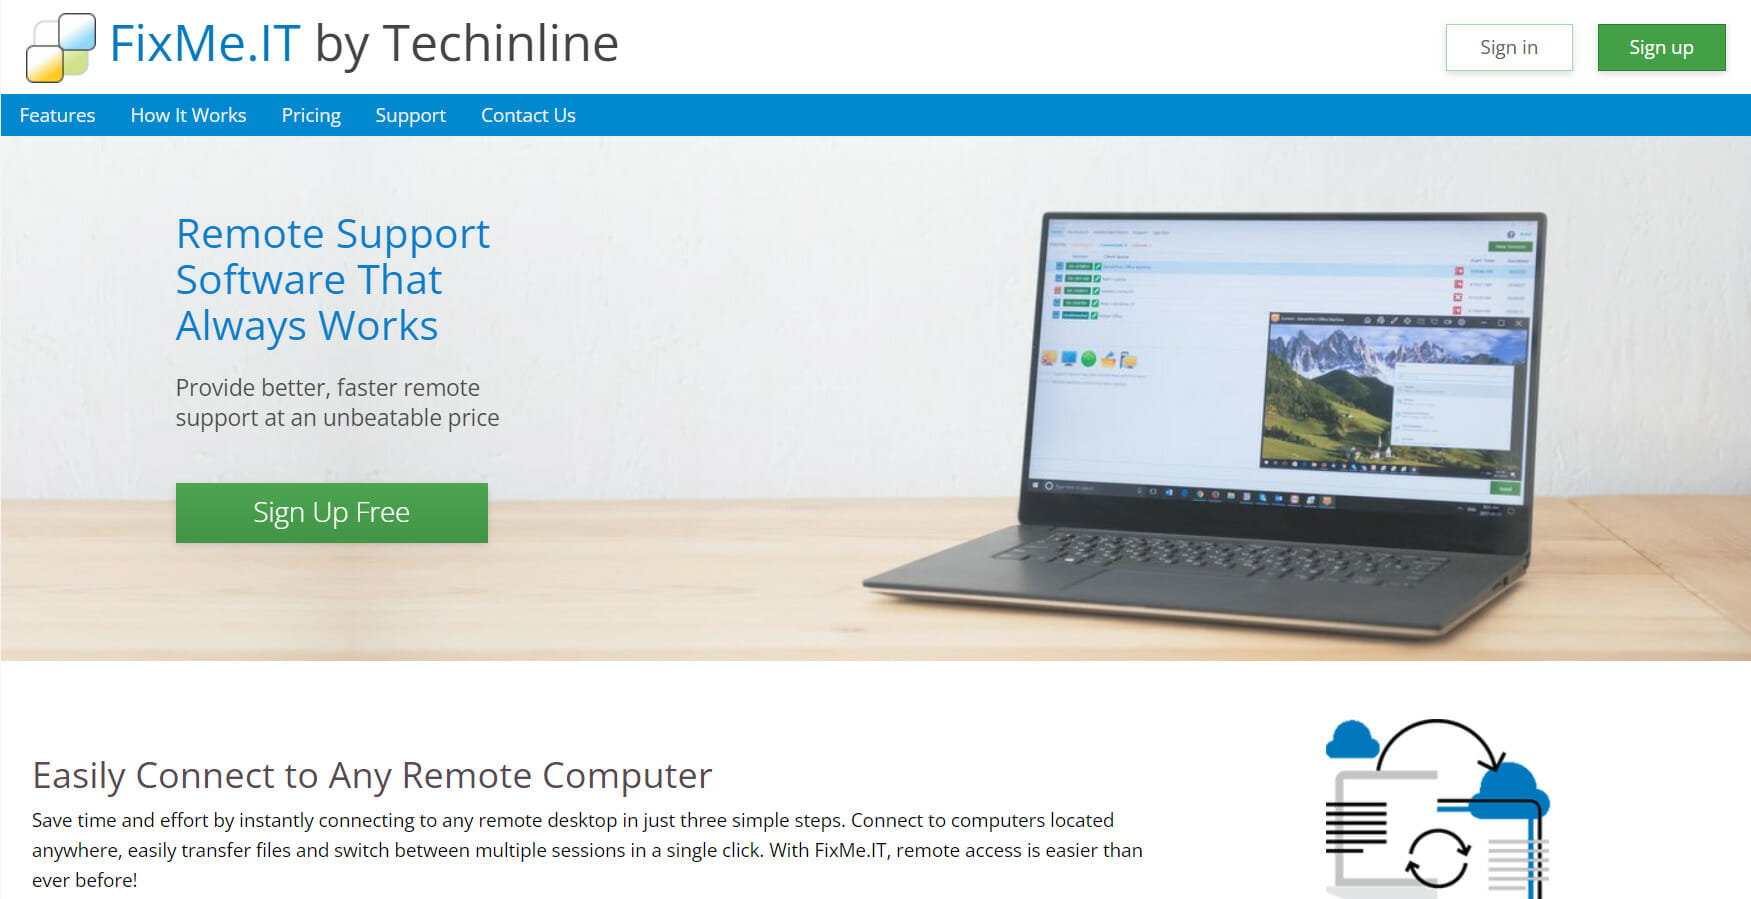
FixMe.IT – Fast and reliable

While FixMe.IT is not the oldest company to offer remote troubleshooting software, it may well be one of the least expensive. Additionally, you get quite a lot of features for your money.

One of the best features that FixMe.IT has its own support on the website. There are a plethora of articles, which makes working with the program so much easier.

FixMe.IT is a good alternative to the more advanced platforms above with more than enough features for most people’s needs.

This is not an extensive list and nor is it meant to be, but I hope it gives you some idea of the remote troubleshooting software that is available, not only for established businesses but also for the entrepreneur just starting out.

Key features:

  • Multi-session handling
  • Unattended access
  • Drag-and-drop file transfer
  • Share clipboard data
  • Instant chat
  • Whiteboard tools
  • Perform administrative tasks

⇒ Get FixMeIT

AnyDesk – Great encryption

AnyDesk offers an incredible set of features that can be easily accessed and understood with its easy-to-understand and customizable user interface.

This not only de-clutters the main menu environment but also enables you to easily access the features that are needed.

Beyond good looks, this software offers unparalleled protection from third-party intruders by using TLS 1.2 encryption and RSA 2048 standard. This is a state-of-the-art privacy protection that fits this powerful software seamlessly.

To ensure that you’ll always be able to access the wide range of useful features AnyDesk has to offer, this software was designed with compatibility across systems, including macOS, Linux, Chrome OS, iOS, Android, and, of course, Windows platforms.

Optimized to work at great speeds while also not trading any other feature, AnyDesk is the software to have when in need of stable and powerful remote access software.

Key features:

  • International keyboard support
  • Can be used locally on in the cloud
  • User-friendly UI
  • Amazing processing speeds
  • TLS 1.2 encryption with RSA 2048 standard

⇒ Get Anydesk

This guide has presented you with a useful set of information that will enable you to choose remote troubleshooting software wisely.

No matter if you’re more interested in great processing speeds, or compatibility on a variety of platforms, this list covers them all.

Make sure to try out our top picks first, as they have been chosen because of their ease of use, adaptability, and number of useful features.

Feel free to share your thoughts on this subject by using the comment section found below.

How to show drive letters before drive names in Windows 10

I know that many of you are wondering if you can change and place the drive letter before the drive names in Windows 10. The answer to your question is Yes.

So, follow the instructions below to learn how to change the drive letter positions in Windows 10. This will only take you a few minutes of your time.

The default status in the system of Windows 10 is that the drive letter is shown only after the HDD name. With the help of some Registry tweaks, we can change the order.

Also, another idea to keep in mind is that before attempting the steps below, you should create a backup of all your important files, folders, and applications.

We are going to the Registry Editor feature and if by any chance, something goes wrong, this will damage your operating system might get damaged.

How can I show drive letters first in Windows 10?

1. Tweak your Registry

  1. Press and hold the Windows  + R hotkeys.
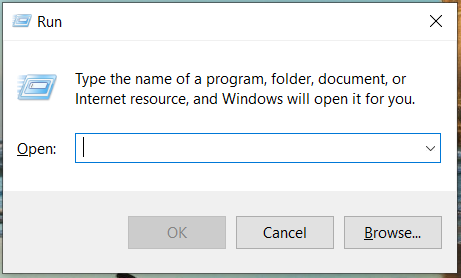
  2. You should have in front of you the Run window.
  3. In the run dialog box write the following regedit.
  4. Press the Enter button on the keyboard.
  5. The Registry Editor will pop up. If you are asked by a user account control window to allow access please left-click or tap on the Yes button to proceed.
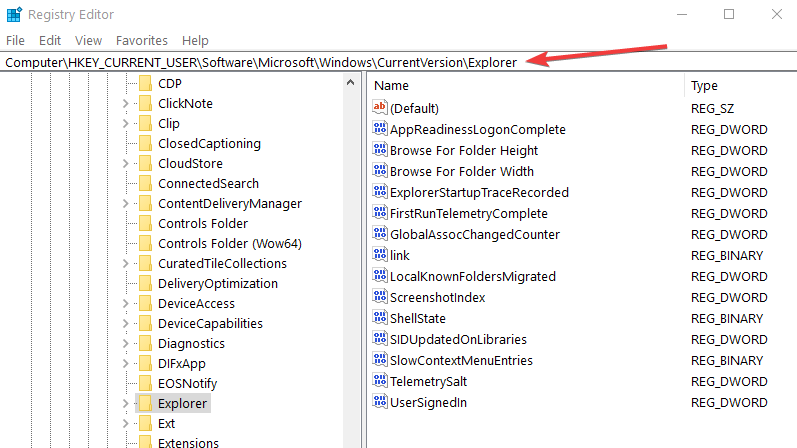
  6. Find on the left side panel the folder HKEY_CURRENT_USER and left click or tap on it to open.
  7. In the HKEY_CURRENT_USER folder find and open SOFTWARE.
  8. From the SOFTWARE folder find and open Microsoft.
  9. Now in the Microsoft folder find and select Windows.
  10. Within the Windows folder find the CurrentVersion folder and open it.
  11. From the CurrentVersion folder find and open the Explorer folder.ShowDriveLettersFirst windows 10 registry
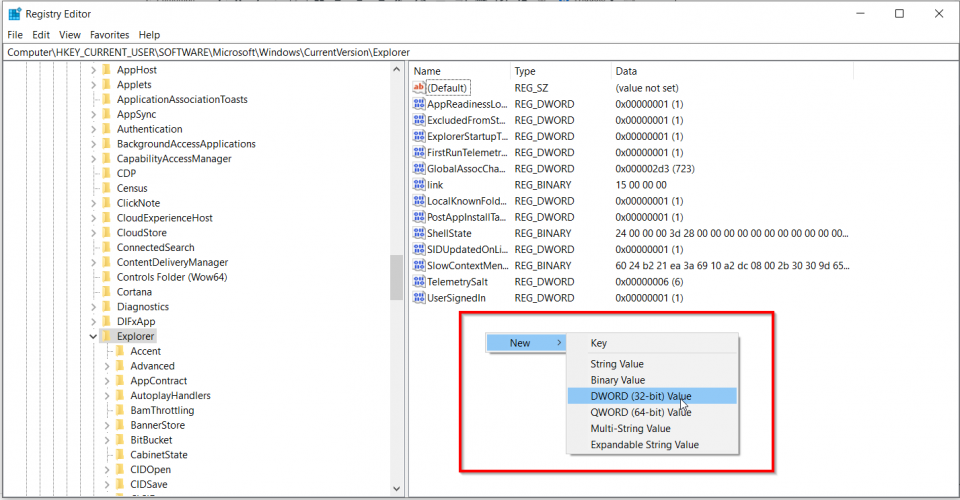
  12. In the Explorer folder search for the ShowDriveLettersFirst DWORD. If you don’t find the DWORD, you’ll have to create it.
  13. To create the key, in the right-side panel right-click or hold tap on a blank spot, left-click on the New sub-menu, and select from there DWORD (32 – bit) Value.
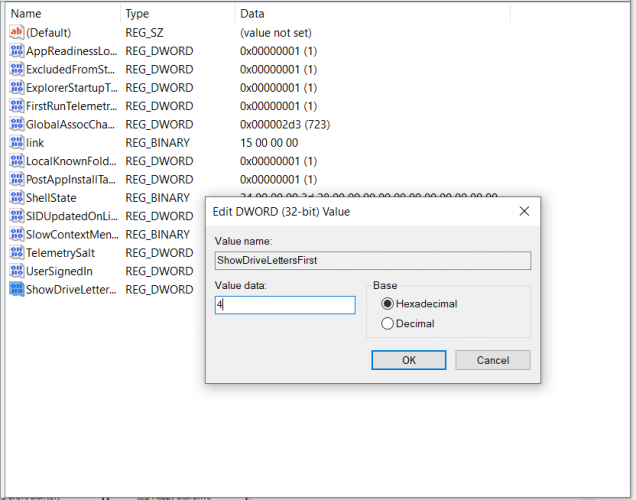
  14. After you created it you will need to name it ShowDriveLettersFirst.
  15. Now double click the new key created to open it, and in the Value data field, you will have to write the number 4 in order to set all your drive letters before the drive names.
  16. Left-click or tap on the OK button to save your changes.
  17. Close the Registry Editor window and reboot your Windows 10 operating system.

After the device has started open the File Explorer folder to check if the drive letters show in the order you wish.

If you wish to change back the drive letters and drive names you will only have to go back to the registry DWORD you changed and set the value to 0.

Sometimes, the Registry editor is disabled or other issues prevent you from opening it. In this case, check our dedicated guide and fix the problem with ease.

2. Use DriveLettersTool

driveletterstool download

If the idea of tweaking the Registry is not at all appealing to you, then you can download and install a little software called DriveLettersTool.

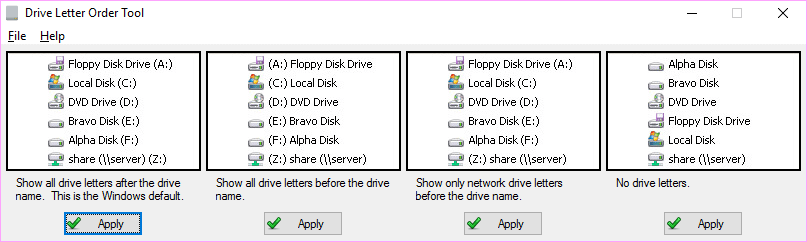
As its name suggests, this software lets you tweak Explorer settings so that you can change the drive letter order. More specifically, there are four options that you can choose from:

  1. You can use the Explorer default drive letter order, for example, Local Disk (D:)
  2. The tool can show drive letters before the drive name, for example, (D:) Local Disk
  3. The tool can display shows only network drive letters before the drive name
  4. You can drop the drive letters entirely

You now know how to change the drive letters position on the Windows 10 operating system. If for some reason, your HDD doesn’t appear in File Explorer, use our quick guide to fix the issue.

Use the comments section below to let us know if you’ve run into any issues along the way. We will help you fix these issues as soon as possible.

Microsoft Teams now lets meeting organizers set a time limit for Breakout rooms

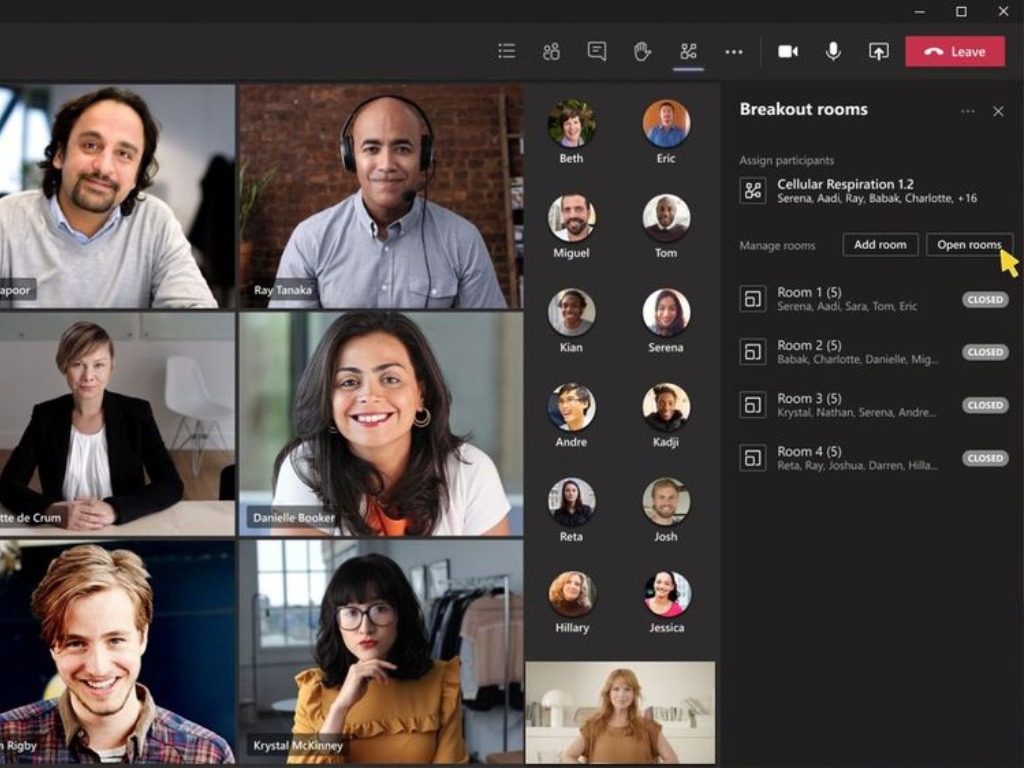
Last month, we reported that Microsoft Teams is getting a big update which will make it easier for organizers to manage Breakout rooms in meetings. Indeed, these features and enhancements have started rolling out globally to all desktop users, according to the Microsoft 365 roadmap.

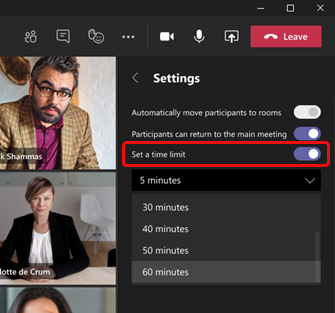
The first new functionality that is coming to Microsoft Teams meetings is the ability to set timers for Breakout rooms. The organizers will now be able to set a time limit for all breakout rooms created in a meeting session. To do this, head to the Breakout rooms Settings panel and turn on the “Set a time limit” toggle button.

Breakout timer

The timer starts when the first participant joins the meeting, and it will automatically alert all attendees that the Breakout room session will close in 60 seconds. Once the timer expires, the room will automatically close, and participants will come back to the main meeting. The meeting organizer can also provide an option to participants to choose to disconnect or return to the main meeting room.

Next up, the app is also introducing a participant reassignment capability in Breakout sessions. Previously, reassignment could only be done when rooms were closed. Thanks to this feature, the organizer will also see an option to move joined participants across rooms and main meeting while Breakout rooms are open.

Finally, Microsoft Teams will now keep room configuration and assignments over multiple sessions or recurring meetings. This means that all attendees will remain assigned to their Breakout rooms, and the meeting organizer will need to change them manually.

The new Breakout room functionality is a welcome change for Microsoft Teams users. The ability to set timers could be helpful in a classroom setting where a teacher may want to split students into different groups for brainstorming sessions. While the update started rolling out a couple of days ago, and it’s not available to everyone just yet. We hope that the deployment will be complete by the end of this month.

How to Spotlight someone in a Microsoft Teams meeting, and why you might want to

There might come a time when you’re in a Microsoft Teams meeting and you’ll want to put focus on a certain person who is talking on your call. It could be an important guest, a student, or even yourself. As long as you’re an organizer or presenter in the meeting, Teams makes it possible to do this with a feature known as “Spotlight.”

As the name suggests, spotlighting will allow you to make someone’s video feed the main feed for everyone else in the meeting. It’s a nice little Teams trick, and today, we’ll show you how to use the feature for yourself.

Some quick notes

Before getting into anything, we just want to mention some quick notes about spotlighting in Teams. The feature does not work if your view is set to Large gallery or Together mode. Additionally, if you end up recording a meeting where you spotlight someone’s video feed, their own feed will not be spotlighted in the final recording. Finally, you only can spotlight one video at a time.

These last two issues are just the current limits of Teams. Microsoft urged you to “stay tuned for updates” on these limits in the future.

Spotlighting on desktop or the web

Microsoft Teams Spotlight Feature


To spotlight a video on Teams on the desktop on the web, you can right-click the person’s video feed and choose Spotlight from the menu. In addition, you also can choose to Show Participants to see a list of everyone who is in the meeting, and then look for the person who you want to spotlight, then select the Spotlight button. You can end the spotlighting at any time by right-clicking and choosing Stop Spotlighting.

If you’re hoping to spotlight your own video, the process is a bit different. You can select Show Participants and then under Participants, right-click your name and choose to Spotlight me. To stop spotlighting, you can Right-click again and choose to stop spotlighting to exit.

Spotlight on mobile

Teams Spotlight Mobile

Unfortunately, spotlighting video feeds in a Teams meeting on iOS and Android is a bit of a complicated situation. Currently, it is not possible to start or stop spotlighting on the mobile versions of Microsoft Teams. However, if someone using the desktop version of the app is spotlighting a video feed, the video feed will be spotlighted for you on mobile, too. You can also spotlight first on desktop, and then transfer the call to mobile, following our previous guide, if need be.

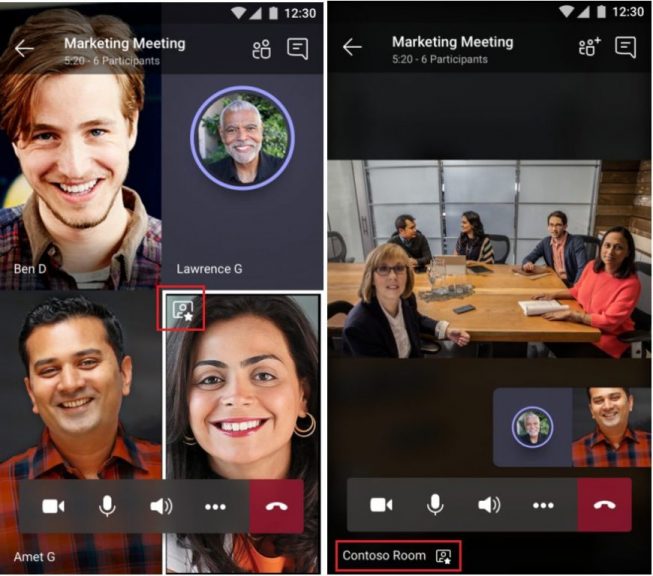
You’ll know when you’re spotlighted, as you’ll see an icon in the top-left corner of your video feed. If another person is spotlighted, you’ll see the video as the most prominent one on your screen, and you’ll see the spotlight icon in the lower-left corner.

Other ways to get the most out of video meetings on Teams

Spotlighting someone in a Teams meeting is a great way to improve your meeting experience and focus on who/what matters, but we do have some other tips, too. We previously covered how you can get the most out of video calling in Teams. Our list includes using background blur, a pre-set background, or a custom background, raising your hand when you want to speak, together mode, and a lot more. Check our article on that here, and also feel free to visit our Microsoft Teams hub, we have other guides, how-tos, and the latest Microsoft Teams news.

FIX: MaxxAudio Pro not working [Full Guide]

Waves MaxAudio Pro is an audio enhancement suite that comes preinstalled with Dell PCs. However, some users have reported issues about MaxAudio Pro not working right.

Those users have said that app’s controls don’t work for them or it doesn’t detect certain audio devices on their PCs, and in today’s guide, we’re going to show you how to fix that.

How can I fix MaxxAudio Pro if it’s not working properly?

1. Update your Realtek audio driver

Waves MaxAudio Pro not working can be due to app incompatibility with your PC’s Realtek audio driver. Updating your PC’s Realtek audio device driver with driver updater software might fix the issue.

A driver updater utility such as Fortect Driver Updater will notify you if you need to update your PC’s Realtek audio device driver.

⇒ Get Fortect Driver Updater

2. Deselect the Enable auto popup dialog

  1. Press the Windows + E keys at the same time to open the File Explorer window.
  2. Next, open this folder in File Explorer: C:Program FilesRealtekAudioHDA
    HDA folder maxxaudio pro not working
  3. Click the RtkNGUI64.exe file to open an audio manager app.
  4. Then click the Advanced tab.
  5. Select Jack Information to open the options in the snapshot directly below.
    The Enable auto popup setting maxxaudio pro not working
  6. Uncheck the checkbox for the Enable auto popup dialog, when device has been plugged in option.

Note: This resolution is for fixing Waves MaxxAudio Pro not detecting headphones and other audio devices.

3. Roll back Windows 10

  1. Press Windows Key + R and enter rstrui. Now press Enter or click OK.
  2. Then select the Choose a different restore point option if it’s available.
  3. Click Next to proceed to the restore point list.
  4. Select the Show more system restore points checkbox if the System Restore utility doesn’t list all available ones.
  5. Now choose a restore point that will roll Windows 10 back to a date when your MaxxAudio Pro worked fine. If you’re not sure, just select the oldest restore point available.
  6. Press the Next button to proceed to restore point confirmation.
  7. Click the Finish button to start the system restoration.

By performing System Restore you should be able to fix the problem with Waves MaxxAudio Pro not detecting headphones on your PC.

Note: Rolling Windows 10 back to an earlier time will uninstall software installed after the selected restore point’s date.

To check what software and updates a restore point removes, click the Scan for affected button within System Restore.

4. Reset the Waves MaxxAudio Pro UWP app

  1. First, open Settings with the Windows + I hotkey for it.
  2. Click Apps in Settings.
  3. Select the WaveMaxxAudio Prop app.
  4. Click Advanced options to open the application settings .
  5. Press the Reset button.
    Reset button maxxaudio pro not working
  6. Then click Reset again to provide further confirmation.

Note: This resolution is more specifically for users utilizing the Waves MaxxAudio Pro Microsoft Store app.

The above resolutions might fix the Waves MaxxAudio Pro app’s when it’s control options not working and it’s not detecting audio devices.

As for other issues, many reported WavesSvc64 high CPU usage, but we covered that in a separate guide.

In addition to those resolutions, uninstalling and reinstalling the MaxxAudio Pro by downloading it from its MS Store or Dell page might also fix some issues.

Microsoft to open first datacenter region in Malaysia

Microsoft announced this morning that it will open its first datacenter region in Malaysia as part of an ambitious plan to advance the country’s economy. The new datacenter region in the Greater Kuala Lumpu will provide local customers access Azure, Microsoft 365, and Dynamics 365 and Power Platform, with the ability for customers to store data in-country.

This planned Malaysia datacenter region will support Microsoft’s global sustainability goals, with the company aiming to use 100% renenable energy by 2025. Moreover, Microsoft intends to support Malaysia’s digital transformation by working with the government, startups and enterprises, in addition to plan to help 1 million Malaysians to learn digital skills by the end of 2023.

Microsoft has been operating in Malaysia for 28 years, where it has 200 employees and 2,000 partners in the country. According to an IDC study (sponsored by Microsoft), the company’s latest investments in Malaysia could generate up to $4.6 billion in new revenues and 19,000 new jobs in the country over the next four years.

The upcoming datacenter region will be a game-changer for Malaysia, enabling the government and businesses to reimagine and transform their operations, to the benefit of all citizens,” said Jean-Philippe Courtois, Executive Vice President and President, Microsoft Global Sales, Marketing and Operations.

Xbox Cloud Gaming on Windows 10 PCs and iOS devices will enter private beta tomorrow

Microsoft is finally getting ready to bring its Xbox Cloud Gaming technology to more devices beyond Android phones and tablets. Starting tomorrow, select Xbox Game Pass Ultimate members will get access to over 100 cloud-enabled Xbox Game Pass games on Windows 10 PCs and Apple iPhones and iPads via the web on xbox.com/play.

Microsoft’s cloud gaming technology will work on Microsoft Edge, Google Chrome, and Apple’s Safari browser. Xbox Game Pass Ultimate members who receive a beta invite will just need a compatible Bluetooth or USB-connected controller to get started, but over 50 Xbox Game Pass games also support touch controls.

The limited beta is our time to test and learn; we’ll send out more invites on a continuous basis to players in all 22 supported countries, evaluate feedback, continue to improve the experience, and add support for more devices. Our plan is to iterate quickly and open up to all Xbox Game Pass Ultimate members in the coming months so more people have the opportunity to play Xbox in all-new ways,” the Xbox team said today.

Xbox Cloud Gaming launched in beta on Android devices in Fall 2019, and Microsoft officially launched it in September as a free perk for Xbox Game Pass Ultimate members. Even though there are now more 2.5 billion Android devices in use worldwide, Windows 10 and iOS both have more than a billion users, and using the web is the best way to bring Xbox Cloud Gaming to more people.

Competing cloud gaming services including Google Stadia have been available on the web from the beginning, and it’s great to see the Xbox team finally catching up. “This is an exciting step on our journey to bring gaming to the 3 billion players around the world,” said Catherine Gluckstein, Vice President & Head of Product, Project xCloud.

Microsoft starts testing new Performance Mode in the Edge Canary channel

Microsoft Edge is adding a new Performance Mode feature that will help to optimize the overall speed and resource usage of the browser. The experimental feature was first spotted by Microsoft Tech Community Forums user HotCakeX, and it is currently available to select Insiders in the Microsoft Edge Canary build 91.0.856.0 or higher (via WinCentral).

Performance Mode is an optional feature that users can turn on or off in Settings. This feature could come in handy for low-end devices, and it will likely improve the overall browsing experience for Edge users. “Performance mode helps you optimize speed, responsiveness, memory, CPU and battery usage. Performance improvements might vary depending on your individual specifications and browser habits,” the description reads.

Microsoft Edge performance mode

Microsoft Edge Canary Insiders can enable it manually with a launch parameter by following the steps mentioned below:

  1. First of all, right-click on the Edge Canary desktop shortcut and select “Properties”.
  2. Navigate to the target field in the Shortcut tab, add a space, and then paste the following parameter:  –enable-features=msPerformanceModeToggle
  3. Click the Ok button and restart the browser to apply the latest changes.
  4. Finally, head to Settings >> System >> and enable the “Performance Mode” toggle button available under the Optimize Performance section.

It is important to note that enabling performance mode will automatically set the Sleeping tabs timer to five minutes. The Sleeping tabs feature will put inactive tabs to sleep to help save system resources.

Currently, there’s been no word on when this update will go live for everyone in the Stable, but we hope that but it should begin showing up for users in the Dev channel soon. Microsoft is also working on a new Workspaces feature for its Edge browser, which makes it easier for users to manage tabs by creating dedicated Workspaces.

Microsoft Word hasn’t been activated? Fix it in 5 easy steps

Microsoft Word is a text input and storage-based software that affords a great deal of versatility to its users. Fittingly, it is popular across industries and has become the standard for composition.

However, many complain that their Microsoft Word hasn’t been activated. This is despite purchasing it from the website.

This can be a consequence of many different errors. Find out more about these errors and how to negate them in our all-purpose comprehensive guide below.

How can I fix Microsoft Word is not activated?

1. Make sure you’re covered

  1. Visit your Microsoft services page to check if your plan has expired.
  2. Scroll to the bottom and find the Help with Microsoft Account section.services and subscriptions Microsoft office
  3. Read up on options like recurring billing to automate payments at the end of each plan.
  4. Scroll to the top of the page and select your subscription under the Microsoft 365, Office 2019, or Office 2016 heading (depending on your purchase).
  5. Follow the prompt to renew your plan or choose a new one.

We urge you to read up on the full specs before making your choice. This method will only activate Microsoft Word if you are late on updating your subscription.

Microsoft Office 365 has been renamed Microsoft 365, and several plans have been renamed as well. As a result, you may need to reconfigure Word, which is part of the Microsoft 365 suite, due to recent updates or changes. We recommend that you double-check this on the official website linked below.

Choose only official Microsoft 365 products to make sure that your Word copy is genuine and fully updated. This way, you are secured from being blocked and you can safely use your Microsoft 365 account.

2. Check your login credentials

  1. Sign in with the email address used to purchase your current Microsoft Office plan.
  2. Login to your Microsoft Account and navigate to your Services tab  (if the email address is correct, you will see your Microsoft Office subscription listed).
  3. Open Microsoft Word and press Alt + F.
  4. Navigate to Account and double click. File Menu Check Activation

Users with the correct email account and an existing plan may still see that Microsoft Word is not activated. For such users, deactivation is most likely caused by software issues or faulty settings.

3. Check for installed versions of Microsoft Office

  1. Go to Control Panel and double click on Programs and Features. programs and features Microsoft Word
  2. Uninstall all versions of Microsoft Office but leave the latest one untouched. Uninstall Microsoft Word
  3. After all the uninstall/uninstalls, reboot your PC and subsequently login to Word to check activation status.

4. Streamline your computers date, time, and time zone settings

  1. Close all Microsoft Office applications.
  2. Navigate to Settings and then Time and Language. Time and Language Microsoft Word
  3. Once in the Date & Time menu, turn on the Set time automatically and Set time zone automatically options.date and time Microsoft Word
  4. Your time should be updated to the time zone you’re in. If not, turn off the set time zone automatically option and manually select your time zone.

When you restart Microsoft Word, the calibration of your new time will enable your computer to communicate with the Microsoft Office server and any pending activation request will be queued and executed.

5. Troubleshoot Microsoft Word

  1. For Microsoft 365 users, download the Microsoft Support and Recovery Assistant.
  2. Run the downloaded .exe file and click install. The install itself is fairly straightforward and offers no customization. Troubleshoot install microsoft word
  3. When the program executes, you will be prompted to log in. Enter the email that was used to purchase Microsoft 365. Troubleshoot login microsoft word
  4. Follow the prompt to troubleshoot.Troubleshoot interface microsoft word

For Office 2019 or Office 2016, download the Activation Troubleshooter. The install and usage are also fairly similar to the Microsoft Support and Recovery Assistant.

Microsoft Word is one of the most versatile programs given its usage and popularity. However, this also means that the bugs will be just as multifaceted.

It is important to be aware of system irregularities or changes when you face this issue. Your knowledge of your own system coupled with our guide should definitely resolve this problem.

BookSteam: Online appointments scheduling made easy

Making appointments face to face is almost long-forgotten history by now, with online appointment scheduling being far easier and much faster, while also being accessible to anyone from pretty much anywhere.

Well, dedicated apps exist to make that even easier, allowing businesses to boom and make more revenue while dealing with less paperwork and manpower, and one of the best is BookSteam.

What is BookSteam?

BookSteam is an online appointment scheduling software, also includes class and course scheduling, and it is constantly enhanced to include more and more tools so that it can stay among the top tools of its kind.

It already includes a ton of useful tools, including:

  • Syncing your personal calendars with BookSteam
  • The ability to personalize client notifications
  • Online credit card processing services
  • Invoice management and sending
  • Scheduling courses and workshops, and more

Online video scheduling has just been added

Businesses everywhere have been impacted by the global pandemic, and with more people forced to work remotely, and with video conferencing tools, webinars, and other similar tools being on the rise, BookSteam decided to join the ride as well.

That being said, BookSteam released a new highly requested feature, that being the ability to add video and/or meeting links to your services, classes or courses.

As of the writing of this article, BookSteam supports the following video conference software: Zoom, GoToMeeting, Microsoft Teams, etc.

These links will be automatically added to the customer email confirmations and reminders, and using the feature is incredibly easy, as we will proceed to describe below:

  1. Log into your BookSteam service.
  2. Navigate to the Settings.
  3. Go to the Services tab and edit an existing service.
    • You can also add a new one.
    • This can be done for both classes and courses.
  4. Go to the Service, Class, or Course profile.
  5. In the section Video Link (optional): add your link and click Save.

Once customers book their sessions online, your live streaming link will be displayed, and they will receive the booking email notification containing the live streaming link.

This live streaming link can also be viewed from the customer’s Bookings section on their account page.

As for the staff, they can view the live streaming link by clicking on the booking and switching to the Calendar view.

With this new tool, BookSteam has elevated its toolset to that of other top-tier conferencing tools, allowing users to get in touch and schedule appointments in a much more personal way than before.

This concludes our brief overview of BookSteam and its newly-added video meeting scheduling tool.

What do you think about this latest feature that they have added? Let us know what other tools BookSteam should include in its service by leaving us your feedback in the comments section below.

How to securely transfer big files with AnyDesk

Transferring large files between your devices is not easy if you don’t have external storage to put them in. Cloud systems are also great, but they require you to upload the files before transferring them.

Therefore, using remote control software that allows you to transfer the files on the go is the easiest way. But not all of these tools work well with larger files.

Thankfully, AnyDesk has no problems transferring files of any size, and it benefits from file encryption for maximum security. Today, we’ll show you how easy it is to do it.

AnyDesk has different interfaces for Linux, Windows, and MAC, but today we will be focusing on the Windows 10 side of things.

If security is your concern, you should know that AnyDesk benefits from access control list, device locking, permissions, and other security-related features.

More exactly, it uses military-grade TLS technology to block unauthorized acces to your device, and utilizes RSA 2048 asymetric encryption that verifies any c onnection.

There are two ways to transfer files between your devices if you use AnyDesk. Both of them are easy to use and comprehensive and don’t have limits to the size of the file.

How can I transfer big files securely with AnyDes?

1. Use the Clipboard

  1. Right-click the file you wish to transfer on the respective device.
  2. Select Copy or press the CTRL + C keys.
  3. Go to the other connected device.
  4. Right-click and select Paste or press the CTRL + V keys.

Thankfully, AnyDesk provides a synced clipboard that integrates the Copy & Paste features from Windows and MAC.

2. Use the File Manager

  1. Connect to the devices you want to transfer files from.
  2. Once you start the session, click on the File transfer icon.
  3. Next, two separate windows will pop up.
    • The one on the left will be your current device.
    • The one on the right will be the remote-controlled device.
  4. Select the files you want to transfer, then press the Upload button at the top.
  5. Then, press the Download button to retrieve the selected files on the remote-controlled device.

AnyDesk has a File Manager mode that opens up two windows from both devices. There, you can navigate through the system directories and select the files you wish to transfer.

That’s about it for this quick article. There wasn’t much explaining to do, since AnyDesk’s has a comprehensive and simple UI.

We have to mentiona that you can transfer any type of file format with no problems, and all of the files are secured, so nobody else has access to them.

Have you tried our methods to transfer files with AnyDesk? Tell us about your experience, and feel free to share with us any other tipes regarding the subject in the comment section below.

Remote Printing Software: 5 Best to Use in 2026

Printers are everywhere nowadays. Everybody has one in their home, because they are useful, especially when you have to deal with mass amounts of documents.

If you travel and move a lot during the day, you won’t have access to your computer or laptop often, and subsequently, you won’t be able to use your printer.

Thankfully, there’s nothing to worry about, because you can still access your computer from anywhere in the world, through your phone. How exactly will you do that? With remote control software.

What is the best remote printing software for Windows 10?

AnyDesk

AnyDesk is our first remote control software choice because it is compatible with every device, including tablets, phones, PCs, and laptops from different brands and operating systems.

The program provides a fast and latency-free connection between two devices. This means that you can download the program on your phone and on your desktop, leave it on, and control everything with the phone app.

What’s even better is that AnyDesk allows you to send files between the connected devices, so you can actually send the documents you need to print to your desktop in case you don’t have them.

Since the phone interface is optimized to show your desktop’s contents in an accessible manner, you can open up the printer software and customize the document as well.

Besides being easy to use, AnyDesk is also quick to set up. You just need to download it, then you can connect right away.

Also, make sure you give the necessary permission to change system files to your connected phone.

Lastly, we’d like to mention that the software is very secure, which will protect you from unauthorized access. AnyDesk verifies the connection with RSA 2048 asymmetric encryption.

AnyDesk

AnyDesk

Use your devices from half-way across the world thanks to AnyDesk, the muli-platform remote control software.
Get AnyDeskVisit website

Mikogo

Mikogo is a browser-based collaboration software that doesn’t require any download. You just need to create an account and log in on both devices.

Speaking of devices, you should know that Mikogo works with all of them, and it allows you to connect between them. All you need is an internet connection and a browser.

The tool is the perfect fast alternative, since creating an account is completely free, and you don’t have to encumber your computer with yet another software.

Millions of people around the globe are using Mikogo, especially for meetings and other work-related tasks, but the program has remote control functionalities as well.

Therefore, you can safely use it for personal purposes. We should mention that Mikogo also benefits from an encrypted connection, so security is not a problem.

Mikogo benefits from a session scheduler, app selection and multimonitor, and file transfer, which, as mentioned before, is great when you need to transfer files that need to be printed.

Mikogo

Mikogo

Mikogo is a popular browser-based remote control tool with screen sharing and other useful features.
Free trialVisit website

Radmin VPN

Radmin VPN is the most secure choice on the list. The software creates a special VPN for your connected devices and hides their actual location and sensible data throughout the session.

It manages connection speeds of up to 100mb/s, ensuring a smooth and latency-free connection, even while transferring or downloading the files that you need to print.

Although the program is really secure, these extra security measures come at a cost, having to set up a specific server and modifying some parameters on your computer before being able to use it.

This shouldn’t be much of a problem, since the interface is pretty straightforward, and you won’t get lost in it, but it might be confusing for those with no background knowledge of computers.

Consequently, once you manage to set everything up and connect to your other device, you’ll find that the program does its job well, and completely free as well!

Radmin VPN

Radmin VPN

Radmin is a secure remote control tool which you can safely use to print and do other tasks on your home computer from anywhere.
Free downloadVisit website

Parallels RAS

Parallels is a dedicated software that is compatible with legacy and current Windows servers. This means that you can mix and match technologies from different operating systems.

This is the perfect tool for remote desktop usage, using streamlined VDI deployment, automated image optimization, configuration wizards and customizable tools for IT usage.

Parallels allow you to quickly switch between your devices, having full control over them. This means that you can access emails, delete, transfer, and, obviously, print data whenever you want.

The software is secured with granular permission policies, SSL (Secure Sockets Layer), 140-2 encryption, smart card authentication, and FIPS.

Parallels RAS

Parallels RAS

A proffesional remote desktop software for business, enterprise, and personal use.
Check priceVisit website

TeamViewer

Our last product is TeamViewer, the choice of many IT corporations, and often used in customer support, since it is free, has a fast set up, and an easy-to-use UI.

The TeamViewer cloud platform provides you with access to any devices, at any time, from anywhere in the world. Additionally, it allows you to customize your permissions.

The tool is used by many well-known companies since it is reliable, secure, and provides a smooth experience.

TeamViewer is also great for remote work, since you can set it up to fully acces, delete, and transfer files between your devices.

⇒ Get TeamViewer

That’s about it for this article. All of the tools mentioned above will allow you to fully utilize your printer remotely. If you have any other suggestions, feel free to tell us in the comment section.

FIX: License limits the maximum session duration to partner

If you’re a TeamViewer user, and you encountered your license limits the maximum session duration to a partner error message, also known as commercial use detected or suspected, you’re in luck.

The error mostly appears because TeamViewer is free for personal use only, not commercial use. This means that you can help your loved ones, or use it to access your own devices.

If the program’s algorithm considers that you violated the free-of-use agreement, it will give you this error and your session will end.

A random Reddit user complained about the following problem on the software’s subreddit:

Just got this error (detail below) shortly after trying to reconnect to my mom’s laptop. We’re on a free personal license. I had been connected to her laptop for only a minute before that and then she brought something else up so I tried to reconnect and got this error.

It seems that the program might glitch and think that you are trying to use it unconventionally, resulting in you being stuck with the same error message and unable to use it.

It seems that more and more people are affected by these issues. Some users came to the conclusion that TeamViewer’s detection algorithms are getting more aggressive to push sales.

How do I fix the TeamViewer maximum session duration error?

1. Uninstall TeamViewer and reinstall it again.

  1. Press the Windows Key + S and type in Control Panel.
  2. In the Control Panel window, select uninstall a program.
  3. Find TeamViewer, right-click on it then select Uninstall.
  4. Let the program uninstall itself.
  5. On your start menu, type %appdata%.
  6. Search and delete the TeamViewer folder.
  7. Open the regedit  then delete the follow the following paths: HKEY_CURRENT_USER\Software\TeamViewer HKEY_LOCAL_MACHINE\SOFTWARE\TeamViewer
  8. Delete the folders at the end of those paths.
  9. After, reinstall TeamViewer.
  10. See if the issue persists.

The first thing that you should try is a free reinstallation of TeamViewer. This will work if the program glitched or bugged out, and requires a bit of work.

Note icon NOTE
You should also try contacting TeamViewer customer support about the issue. Reinstating your free license for personal use can also fix the Windows 10 error.

2. Switch to a third-party remote control software

You are able to fix this error by switching to another efficient remote control tool. Mikogo will offer the service of screen sharing free, with practical features like connecting via web or great audio conferencing.

Mikogo is an efficient share screen software that allows you to show the desktop easily in online meetings, or to help anyone remotely to solve any issues.

So, regardless of your sharing screen needs, using this software you will get qualitative remote support for your PC.

⇒ Get Mikogo

That being said, this concludes our article. TeamViewer’s growing licensing problem can be easily fixed, but we do recommend trying out other specialized software.

We encourage you to leave us any kind of feedback or suggestion regarding the subject in the comment section below.

Windows 10 news recap: Surface Laptop 4 announced, Windows Terminal gets a new Settings UI, and more

Welcome back to our Windows 10 news recap, where we go over the top stories of the past week in the world of Microsoft’s flagship operating system.

Windows Terminal version 1.7 is out with new Settings UI

Version 1.7 of Windows Terminal has started rolling out to users, and with it comes a new interface for Settings, whilst a new Preview version has also been released, coming in at version 1.8.

Windows Terminal version 1.7 is out with new Settings UI OnMSFT.com April 15, 2021

Xodo PDF Reader updates on Windows 10 with new viewer settings

Users of the Xodo PDF Reader app have received a new update this week that brings new viewer settings, as well as some bug fixes. You can see the changelog here.

Xodo PDF Reader app on Windows 10

Microsoft unveils new Surface Laptop 4

The latest Surface Laptop was announced by Microsoft this week, introducing the Surface Laptop 4. With the latest incarnation of the Surface Laptop, customers will have a choice of either Intel or AMD CPUs on both the 13″ and 15″ models. Whilst the design of the new and old laptop are essentially identical, there is a new “Ice Blue” finish.

That’s it for this week. We’ll be back next week with more Windows 10 news.

Microsoft news recap: Microsoft Edge rolls out Kids Mode and Password Monitor, Minecraft’s next update split into two, and more

Microsoft news recap is a weekly feature highlighting the top Microsoft news stories of the past week. Sit back, grab some coffee, and enjoy the read!

Surface Duo for business expands to education and commercial customers in new European markets,

Microsoft is expanding its Surface Duo for business to more education and commercial customers across 9 new European markets. The new markets include Austria, Belgium, Denmark, Finland, Ireland, Italy, Netherlands, Sweden, and Switzerland.

Surface Duo Book Mode

Microsoft Edge version 90 starts rolling out with new Kids mode and Passwords Monitor

The latest major version of Microsoft Edge, version 90, began rolling out to users this week. The latest release includes a new Kids mode, as well as Password Monitor. Kids Mode allows parents to select an age range, which will deliver a curated experience for the respective age range, as well as enabling Bing SafeSearch and preventing tracking. Password Monitor, on the other hand, will detect if any saved passwords are involved in any leaks, and will alert you to change your password if that’s the case, helping increase security of your accounts on the internet.

Minecraft’s big Caves and Cliffs update is being split into two releases

The next major update for Minecraft, Caves and Cliffs, has been split into two separate releases to help ensure that the quality of the update is high, to deliver a polished experience. The first-half is still expected to be released this summer, whilst the other is expected in the holiday season.

Microsoft Flight Simulator’s latest free World Update focuses on France and Benelux

The next free World Update for Microsoft Flight Simulator will be taking the game to France and Benelux, providing more detailed visuals of Paris and Amsterdam, and providing three new hand-crafted airports at Megève, Nice, and Rotterdam.

This week in Microsoft Teams

Dynamic View for Microsoft Teams Meetings is now available in public preview

Microsoft Teams’ Dynamic View feature, which lets you share content side-by-side with participants, has now entered public preview.

Microsoft Teams now lets Mac users share system audio with Meetings participants

System audio on Mac can now be shared with meetings participants, allowing you to share audio from your Mac with those taking part in the meeting.

Microsoft is simplifying the name of its Tasks app in Teams

The name of the Tasks app in Microsoft Teams is to be simplified. Currently named “Tasks by Planner and To Do”, it will soon be renamed to just “Tasks”, making it easier to understand.

Microsoft Teams for iOS gets custom backgrounds support for meetings

Video calls and meetings on the Microsoft Teams app on iOS have now received support for custom backgrounds. The feature has started rolling out across iPhone and iPad.

Microsoft launches new “Modern” accessories certified for Microsoft Teams

A new line of accessories have been launched by Microsoft, dubbed “Modern”, that are certified for use with Microsoft Teams. The line-up includes a webcam, two headsets, and a USB-C speaker.

Approvals in Microsoft Teams is getting eSignature support, Approval Templates this month

A slew of new features are coming to the Approvals feature in Microsoft Teams, including the ability to have eSignatures, create templates, and more. Some features have already launched, with the remainder expected by the end of the month.

That’s it for this week. We’ll be back next week with more Microsoft news.

Windows 7 Screen Sharing Tools: Best Options in 2023

Unfortunately, not many screen sharing software tools are still working on Windows 7 but we found the best ones that you can continue using.

As you probably know, Microsoft dropped the support for Windows 7 so at least for security reasons you should cross over to the more advanced and feature-rich Windows 10.

Coming back to our subject, these remote desktop solutions might be the ideal way of either help someone solve a problem remotely or just communicate with someone.

Without any other introductions, let’s take a look at what we consider to be the best screen sharing software for this operating system.

What is the best screen sharing software for Windows 7?

AnyDesk

get AnyDesk

AnyDesk is perfect even to use on the old Windows 7 because it’s extremely light and doesn’t need a lot of resources to operate.

In fact, this tool is praised by its editors as a lighting fast solution, with a latency of only 16 ms that will make you think that you’re actually on the computer you’re trying to control remotely.

Although Windows 7 can be vulnerable because of its lack of support, AnyDesk comes with TLS technology and RSA 2048 asymmetric encryption that verifies any connection.

Of course, this tool is not only designed for Windows, but for all major platforms and operating systems and can work seamlessly across them.

Key features that you are about to enjoy:

  • Two-Factor Authentication
  • Privacy Mode included
  • Compatible with all major platforms
  • User-friendly interface
AnyDesk

AnyDesk

Even though you’re still using Windows 7, you can have the best screen sharing app too.
Get AnyDeskVisit website

Mikogo

get Mikogo

If you’re looking for a more complex, conferencing software, Mikogo can be a viable option for your Windows 7 device.

This tool not only offers screen sharing capability but also comes with voice conferencing, multi-user whiteboard, application selection, multi-monitor, and many more.

And yes, in case you were wondering, you can even send files of up to 200 MB across which will save you the time and means to send the files later in the e-mail app.

What makes it perfect for business is the fact that you can record your screen and VoIP call so you can watch it later by using the built-in Session Player.

Key features that you are about to enjoy:

  • Session Scheduler to set up meetings in advance
  • High-quality VoIP
  • Advanced Annotation Tool 
  • Instant chat messages
Mikogo

Mikogo

Forget about voice assistance, with Mikogo you can start live conferences to convey your message to all peers.
Free trialVisit website

TeamViewer

get TeamViewer

Well, TeamViewer still works on Windows 7. For how long? We don’t know that but for now, let’s enjoy this great collaboration software that works on multiple platforms.

As you already know, this is not only a free screen sharing software for Windows 7 but a complex tool that you can use for conferencing, remote desktop access, file sharing, and more.

This solution even comes with a whiteboard function and it can be used independently, without installation with its portable version.

And yes, you can log your conversations so it can be really helpful in a business working environment without problems.

⇒ Get TeamViewer

Join.Me

Get Join.Me

Join.Me was designed to work even on Windows Vista and XP so it will work for Windows 7 without problems and you can also use it on 32-bit or 64-bit systems.

With this tool, you can share your screen on the spot for all participants to the meeting space. Yes, as its name suggests, this solution is more complex and implies conference and collaboration.

Designed by LogMeIn Inc, the software is very easy to use and you can invite up to 10 participants to the VoIP meeting. It comes as a free version too, so you can test it before committing.

⇒ Get Join.Me

Microsoft Remote Desktop

Get Microsoft Remote Desktop

Remote Desktop is one of the most popular apps for screen sharing on Windows as it’s part of your system. It’s free, so you don’t need to do any extra effort to get it.

It’s not the most easy-to-use app out there and it doesn’t feature the most interesting user interface but it does the job right and you can definitely use it for screen sharing.

It also doesn’t have the richest function for remote desktop controlling but it’s simple to configure and it’s perfectly matched for Windows users, even for the Windows 7 ones.

⇒ Get Microsoft Remote Desktop

This is our selection of the best screen share software for Windows 7. We hope that you found one that can perfectly fit your needs.

If you decide not to stop your searches here and improve your workflow, take a look at these reliable collaboration tools for small businesses too.

Tell us in the comments section below what solution did you choose and why. We would also like to see some of your other suggestions if you have any.

5 Best Remote Pairing Software for Windows 10/11

Nowadays, more and more individuals are looking for job offers that can be done from home. Thus, using the best remote pairing software is a must.

Working from home evolved in the past years, and technological advancements made this possible. You don’t need to be in the same place to have a business meeting or to access your Windows 10 PC.

Collaborative tools made it possible to speak with multiple persons at the same time, share the screen, and particular files, and even work on the same document remotely.

These tools were most used in IT support, for remote troubleshooting. But they also include features like screen sharing, whiteboards, or video conferences.

Because of these great elements, they can also be used when working from a distance and need to get together with others, but not in the same physical space.

In this article, we will present you with the best tools to use when you need to remotely access your work PC, or collaborate with someone else, be it a friend, coworker, or a business meeting.

What is the best remote pairing software to use?

AnyDesk

AnyDesk is maybe one of the best tools to use as remote pairing software. Working from home brings unique challenges that are easily addressed by this app.

It helps you easily access your work computer remotely, but in a secure way, keeping your company data safe from any intruders.

Additionally, it features a whiteboard, allowing you to share your screen with others, write notes, draw over the shared information. Best features when you have to train new employees, for instance.

Trusted by many IT professionals, that’s why AnyDesk is an ideal tool to use when you have to work with people around the world.

Here are some of the best features:

  • Remote support to easily solve issues
  • Connect from anywhere
  • Runs stable even with low bandwidth
  • Remote printing option
  • File transfer between remote and local devices

AnyDesk

Use a reliable and secure remote software to easily share your screen, information, and ideas.
Get AnyDesk Visit website

Radmin 3

Radmin 3 is another reliable software that you may use in order to access work computers from anywhere in the world if you have an Internet connection.

This tool is mostly used for remote control over a computer, such as in IT support to troubleshoot issues on other PCs from distance.

If your company includes servers, the system administrator can use it to manage them remotely for installing updates, solve issues, and even shut them down.

When you need to work outside your office, use Radmin to access your files with no risks of losing data because the files remains on the office PC.

Some of its important features include:

  • Secure remote access to computers in a network
  • High operating speed
  • All transferred data is protected with AES256-bit encryption
  • Can be used for remote essential network operations
Radmin 3

Radmin 3

Access your work PC from distance, no matter where you are, with one of the best remote tools available now.
Check priceGet it now

Mikogo

mikogo

Mikogo is another collaborative tool that makes online meetings more interactive and productive, due to its amazing features.

You can use this tool on multiple platforms, such as Windows, Mac, and even on your phone, so no meetings remain unattended.

While in a business meeting, you can assist them with a remote keyboard and mouse control and even hand them the control of your PC if needed.

Moreover, its whiteboard and annotation tools let you highlight the main ideas from your presentations.

Other important features of Mikogo:

  • Session scheduler tool to help you set up your meetings in advance
  • Chat options to improve communications
  • You can share up to 4 monitors
  • Session recording also included

Mikogo

Attend online meetings, share your presentations, and more with this great remote pairing software.
Free trial Visit website

Microsoft Teams

Microsoft Teams is part of the Microsoft Office 365 office, being the tool that helps users to collaborate on the same projects, hold meetings, and more.

This a complete solution that can be used for multiple purposes such as chats, video calls, file sharing, online meetings. You can even share your desktop and give control to others.

Within this tool, you can create teams where everyone can easily chat and share files with all participants. The conference has a File tab, where the documents are available for everyone.

Furthermore, individuals from the same team can edit documents at the same time. You can actually see where your coworker is editing so you won’t write over him.

Teams is also a cloud solution, and it works remotely. You don’t even need to connect to your company network in order to use it. Just use your own Internet solution.

More great feature of Microsoft Team includes:

  • Synchronized calendar with Outlook
  • Can be used even on mobile phones
  • It is also web-based if you don’t want to install the client
  • Online video calling and screen sharing
Microsoft Teams

Microsoft Teams

Use this amazing tool that allows you to remotely work and collaborate with coworkers on the same projects.
Check priceGet it now

Zoom

Zoom is maybe the most used platform for online meetings. You only need an Internet connection to be part of an important meeting, from the comfort of your home.

It can be used for meetings that include up to 1000 participants around the world, from any type of device (phone, computer, tablet) and platform.

Zoom for home is a dedicated remote solution to use when not in the office. You can attend video meetings, phone calls, collaborate with colleagues through interactive whiteboarding.

The Zoom Developer Platform can be used to pair programs remotely, helping developers to build apps, by offering a dedicated infrastructure including forums, extensive documentation.

⇒ Get Zoom

This list includes the best remote pairing tools to use when you need to interact with people that can’t be in the same place with you or to access your work computer.

If you want to discover even more great teleworking tools for similar project management tasks, check our best telework software list.

Feel free to tell us in the comments section below, which one you have used until now, or if you have any other suggestions that we should include in our guide.

PDF to Excel Converter: PDFs to spreadsheets in 3 clicks

In a world where working from a PC or laptop has become the new norm, knowing how to handle PDF files and spreadsheets is pretty much mandatory.

However, while you may develop the skill over time to work easily with both PDF and Excel, there still isn’t a fast and efficient way for users to quickly convert from one format to the other.

Fortunately enough, there are a few software solutions that can get the job done easily, one of them being PDF To Excel Converter.

Turn PDFs into spreadsheets easily

There’s not much to say about PDF to Excel Converter other than the fact that it works. The interface may look a bit dated, but at least it is simplified and uncluttered with all manner of tools that the average user may never even touch.

Using this tool is extremely simple, and converting a PDF to an Excel spreadsheet can be done easily:

  1. Download and install PDF to Excel Converter for free
    • A free trial is available, but it only lets you convert the first page of a PDF
  2. Launch the program, and open a PDF by using one of the following methods:
    1. Press the big green Plus icon to add a single PDF file
    2. Press the Folder with a plus button to add a PDF file from a folder
  3. Select the conversion parameters from the right side of the screen
  4. Press Start Converting Now

This process should take anywhere between a few seconds to a good couple of minutes, depending on how big the PDF file is, the conversion parameters, and how much data there is that needs to be dealt with.

Here is a brief overview of PDF to Excel Converter’s features:

  • It can convert PDF to Excel without Microsoft Excel installed.
  • Allows you to merge all PDF pages into one single Excel XLSX sheet.
  • Will not just convert forms, but also keep all PDF text into Excel result files.
  • Conversion engine that is reportedly 160% faster than that of other PDF converters.
  • Converts PDF to Excel XLS or XLSX format, which lets you edit PDF forms in MS Excel.
  • Converts PDF to XML and CSV formats, which can be edited in most spreadsheet tools.
  • Batch conversion that can handle hundreds of PDF documents to Excel XLS and XLSX files at once.

Try it before you buy it

As mentioned earlier, the program can be downloaded and tested for free, although you can only convert the first page of a PDF.

This feature is pretty helpful since a single page can let you understand whether the program is actually good or not, although you are pretty limited in terms of what you can convert.

PDF to Excel Converter

PDF to Excel Converter

Turn hundreds of PDF files into Excel spreadsheets easily with this amazing tool!
Free trialVisit website
Tip icon Tip

While these notifications can indeed be a bit of a nuisance, it doesn’t change the fact that the program is actually good at what it does., efficiently turning tables from PDFs into functional Excel worksheets.

This concludes our brief overview of PDF to Excel Converter. If we’ve managed to pique your interest in this product, let us know by leaving us your feedback in the comments section below.

Foxiebro Virus: What is It and How to Get Rid of It?

If you’re familiar with the idiom A wolf in the sheep’s clothing, you’re already halfway in understanding what Foxiebro is and how dangerous it can be.

The adware browser modifier is one of the most deceitful malicious programs you’ll ever encounter in everyday use. And Foxiebro is right there at the top.

For that purpose, we prepared a detailed explanation of this malware and ways how to remove it from your system.

If your browser is already infected, or you want to find out how to protect, make sure to continue reading.

Quick Tip:

Whenever you suspect that any type of malware has gotten into your OS, your first concern should be to clean the device as quickly as possible. It is possible that you have to enter Safe Mode to do that.

Our recommendation comes with a Ransomware Protection tool that is designed to find exploits even before they are launched.

However, if the system has already been infected, the tool will rapidly scan your system and detect even the most advanced known or emerging threats, thanks to the ultimate technologies it uses.

TotalAV

TotalAV

With TotalAV software solution you can have total protection for your PC against malware threats. Try it out now!
Free trialVisit website

What is Foxiebro malware and how it works?

Foxiebro is primarily a variation of BrowserModifier (adware), but it is commonly associated with Trojan viruses and various spyware extensions.

It installs in the background and integrates into your default browser. And then the problems begin. This nasty malware commonly comes in the form of an add-on, plug-in, or browser extension.

Once installed, it will do the following:

  • Bombard you with numerous ads in search results, on websites, or with pop-up advertisement windows.
  • Change the default search engine and the home page of the affected browser.
  • Tweak registry keys in order to start with the system.
  • Occasionally hijacking your online accounts and spam acquired e-mail address.
  • Enable viruses and malware to install on your computer in the background.

So, it’s not only an annoyance as BrowserModifiers tend to be but a proper high-level threat. An ad blocker might help you to some extent, but as you can see for yourself, ads are only the tip of the iceberg.

It can reach your system in various ways, including spam e-mail, malicious links, or, most commonly, through a third-party program installation.

The following programs are known carriers for the Foxiebro malware, as stated by Microsoft Malware Protection Center:

  • AdvanceMark
  • AppBud
  • Between Lines
  • BrowseFox
  • DoughGo
  • Fragile Fixer
  • GrooveDock
  • Hold Page
  • Jotzey
  • KingBrowse
  • Metal Maker
  • Nettock
  • Newer Version
  • Primary Result
  • ResultsBay
  • Screen Flip
  • Search Vortex
  • Special Box
  • TowerTilt
  • Web Amplified
  • Wiseenhance

Take a close look when dealing with these or similar programs and don’t let them install any unwanted feature.

Due to the complexity of Foxiebro malware intrusion, you’ll need to make an effort in order to remove it from your computer.

How do I remove Foxiebro from my PC?

  1. First, type Control in the search bar, and open Control Panel.
  2. From the Category view, open Uninstall a program.
  3. Uninstall lately installed, suspicious programs. (The list above should come in handy here.)
  4. Navigate to C:Programs (or Programs x86) and delete the remaining files of the uninstalled program.
  5. Now, open Windows Defender from the taskbar notification area.
  6. Choose Virus & threat protection.
  7. Open Advanced scan.
  8. Select Windows Defender Offline Scan and click Scan now.
  9. Your computer will restart and the scanning procedure will start.

You can perform the deep scan using Vipre, as well, as suggested in the beginning.

Additionally, in case the adware got too far into the system, you can find here a full guide on recovering your Windows 10 device after malware infection.

And this is the safest way to deal with Foxiebro. We’d like to hear what’s your experience with BrowserModifier or Foxiebro in particular? Tell us in the comment section below.

Here’s why Microsoft pushes AMD64 specific updates to Intel PCs

Back in 2019 a lot of Windows 10 users have noticed that Windows 10 v1903 includes AMD64 software updates even though they have an Intel based system.

Because Intel and AMD are different manufacturers and also competitors, this raised some eyebrows. Here’s how one user described it:

Microsoft Windows Professional 10 was using a 64 bit intel chip was downloading only AMD64 updates.[…] have to reboot into safe mode and remove the contents of the directory every time the delay ticker is met to stop a 16 hour update cycle with a 52% install and the a forced return to the previous version as the update is trying to apply AMD code to my windows installation on an Intel 64bit processor.

windows v1809/v1903 amd64 update on intel system

And here’s a screenshot of the original OP:

Although this could seem a big problem that affects a lot of people, you don’t have to worry about it.

AMD64 update is applicable to Intel based systems

If you saw the same thing on your PC, you have to understand that AMD owns the 64-bit architecture and the AMD64 updates are applicable to AMD and Intel-based systems alike, as another savvy user confirms:

AMD invented and owns the 64bit architecture, so even if your system is Intel based, as long as it is 64bit, that update will be applicable.

AMD64 is a generic name for an instruction set used by AMD and Intel. It doesn’t affect one or the other in any way because it’s used for 64-bit processors, regarding the manufacturer of the CPU.

So if you were having the same dilemma, don’t worry about it and just leave the update run its course. Everything is how it’s supposed to be and the update should take place without any issues.

If you encounter any problems similar to the user above, they are most likely caused by something else and surely not from the AMD64 update.

OneDrive is getting the 64-treatment as well

Two years after the release, an update to the Microsoft 365 roadmap stated that,

OneDrive is now available as a 64-bit install for AMD64-based devices.

Thanks to the 2019 AMD64 update, you don’t have to worry if you want to install the new OneDrive on an Intel PC, since they will now work.

If you have any more questions, feel free to reach for the comments section below.

AVG Antivirus Won’t Update or Uninstall

It’s more essential to update antivirus utilities than most software. However, some users have stated on forums that their AVG antivirus utilities don’t update.

That leaves them with outdated AVG antivirus software. Here are a few resolutions that might fix an AVG utility that isn’t updating.

What can I do if AVG fails to update?

  1. Manually Update AVG
  2. Change your antivirus solution
  3. Delete Temporary Update Files
  4. Scan for Malware
  5. Turn Off the Windows Firewall
  6. Reinstall AVG Antivirus

1. Manually Update AVG

  1. First, open this page in your browser.
  2. Select your AVG version on the page, and then click update to save to HDD or USB drive.
    AVG antivirus won’t update or uninstall error
  3. Open your AVG utility in Windows.
  4. Click Options at the top right of the AVG window.
  5. Then select Update from directory to open a Browse for Folder window.
  6. Select the folder that includes the AVG update, and press the OK button.

First, try updating AVG manually. That’s not exactly a fix for AVG’s automatic updates, but at least you might then get the software updated. This solution shows you how you can manually update AVG.

2. Change your antivirus solution

If AVG does not make the cut, it might be a good idea to consider replacing your antivirus with a more well-balanced security solution that benefits from regular updates.

It is the ideal software to keep your computer virus-free, protecting it from viruses, spyware, worms, ransomware and different types of malware.

This antivirus will not affect your computer performance while running, so that you can play games, watch movies or create presentations without any interruptions or slowdowns.

Whenever you perform different actions at your computer, you will not experience any annoying pop-ups or system updates.

This antivirus solution contains an intelligent battery-saving mode, thus allowing you to stay online and unplugged longer.

Enjoy playing your favorite games without having to stop and close different pop-ups that may appear.

TotalAV

Choose TotalAV to protect your computer from viruses, worms, ransomware and other types of malware.
Check price Visit website

3. Delete temporary update files

  1. Click Options and select Advanced Settings on the menu.
  2. Click the + to expand Update, and press the Manage button.
  3. Then you can select a Delete temporary update files option.
  4. Click Yes to confirm and erase temporary update files.

Deleting the software’s temporary update files might fix AVG updates if it returns an error message when updating. To do that, open the AVG window and complete the above procedure.

4. Scan for malware

Whenever we hear about different programs that affect our computers in a negative way, they enter the malicious software category.

Also known as malware, these harmful computer programs are divided into many sub-classes such as viruses, ransomware, and spyware.

The malware is a code developed by cyberattackers, whose purpose is to cause damage to your computer or to gain access to your private information.

Malware can block AVG updates. As such, purging malware might fix the utility’s updates.

5. Turn Off the Windows Firewall

  1. Open the Cortana search box by pressing the Type here to search button on the taskbar.
  2. Input the keyword Windows Defender in Cortana’s search box, and select to open Windows Defender Firewall.
    Fix error when AVG antivirus won’t update or uninstall
  3. Click Turn Windows Defender Firewall on or off to open the firewall settings shown directly below.
    How to fix the error AVG antivirus won’t update or uninstall
  4. Select both the Turn off Windows Defender Firewall options there, and press the OK button. You can turn the firewall back on after AVG updates.

The Windows Firewall might be blocking AVG from updating. To ensure that isn’t the case, you can temporarily switch that firewall off.

6. Reinstall AVG Software

  1. Open the Run accessory by pressing the Windows + X hotkey and selecting Run.
  2. Enter appwiz.cpl in Run to open the Control Panel applet shown directly below.
    AVG antivirus won’t update or uninstall error
  3. Select your AVG antivirus package listed there, and press its Uninstall button.
  4. Then click Yes to confirm that you intend to remove the software.
  5. Restart Windows after uninstalling the software.
  6. Alternatively, you can more thoroughly remove AVG utilities with AVG Remover.
  7. Click Download on this page to add AVG Remover to Windows.
  8. Uninstall the antivirus software with AVG Remover, and restart Windows.
  9. You can download the latest AVG software from this page.
  10. Then reinstall your AVG utility with its setup wizard.
    • Note that you might also need to reactivate non-freeware AVG antivirus software with a product key.

For a clean reset of your security setup, follow our guide to uninstall AVG Antivirus completely before you reinstall the latest version.

Reinstalling the AVG utility will at least ensure that you have the latest version installed. A fresh copy of AVG will also replace the utility’s components and settings, which can fix numerous update issues.

Follow the guidelines above to reinstall AVG. One or more of those resolutions might get your AVG anti-virus software updated.

Note that you can also select a Repair option for AVG in the Programs and Features Control Panel applet. That option might also come in handy for fixing AVG update errors.

If you want to discover other great security tools, we recommend you to take a look at our guide including the best lifetime license antivirus tools.

Share your experience with us in the comments section below.

Skype has over 300 million monthly active users, says Microsoft

Skype has become synonymous with the idea of VoIP programs, with the term skyping becoming a real thing.

Well, the program’s popularity has only grown, or at least that’s what we are to believe according to the Skype 2016 release.

Skype reaches an important milestone in terms of active users

The Build 2016 conference brought many new announcements for developers that will improve their efforts to build more functionality and features into their apps.

Microsoft also took the opportunity to announce some great news, like Windows 10 having more than 270 Million users and Skype being integrated with Cortana.

Microsoft also announced that Skype has finally reached the 300 million monthly users mark, a great milestone for the program.

In addition to the new Cortana and Bots-related feature to be built right inside Skype, Microsoft has worked quite hard to integrate Skype deeper inside Windows after acquiring it.

With this number of monthly users, Skype has entered the league of some of the most used instant messaging and VoIP apps even if its numbers are still lower than the number of WhatsApp and Facebook Messenger users.

Apart from this, Microsoft made several other announcements related to Cortana as well as HoloLens, which you should definitely check out.