Xbox One’s April Update to get a revamped Guide and improved Mixer experience

Microsoft’s Xbox One console is due to get its next big update later this month with a variety of features that the company has been testing with its Xbox Insider testers recently.

These changes include a bit of a revamp of the Guide menus, some improvements to the My Games and Apps section, and some added functionality to the native Mixer experience.

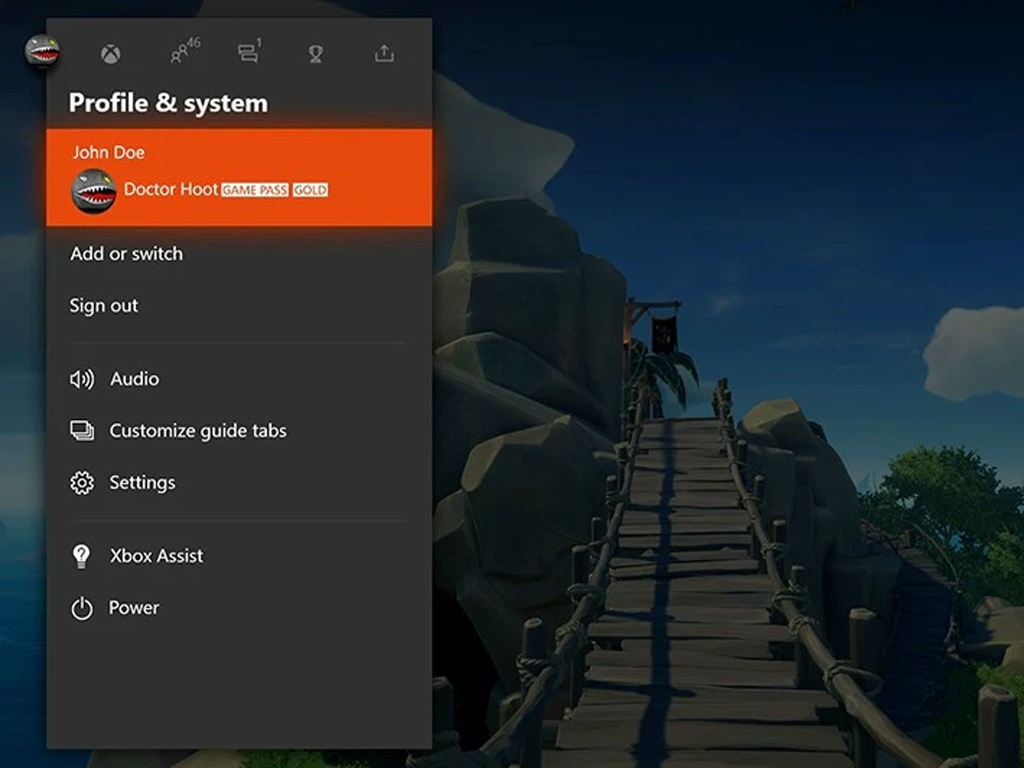
The new Guide moves the main Xbox icon to the left side and reorganizes several links. Here’s the official list of changes:

  • The new default tab order opens Guide with tabs in a left-to-right configuration, the order of which can continue to be customized from the “Profile & system” tab.
  • Party, messaging, and invites have been combined in the new “Parties & chats” tab, providing one single location to communicate with other players.
  • Settings, audio, and power options are now located in the “Profile & system” tab on the left side of Guide, as identified by your gamerpic.
  • Looking for Group can be found in the “People” tab next to the “Find someone” option.
  • App & system notifications are now grouped under the bell icon with other alerts.

The My Games and Apps section will add a new Surprise Me! button which will select a game for the user to play when they can’t make up their mind.

Here’s a pic of it from Xbox Wire:

Xbox One Surprise button

Finally, the relatively new native Mixer experience will finally gain support for subscriber badges, emotes, and Ember messages while having video options more easily accessible via the controller’s Menu button as opposed to the rather confusing current menu which auto-hides.

While these additions to the Mixer experience are good to see, the soon-to-be-removed Xbox One Mixer app, which is essentially a web wrapper of the Mixer website is still much easier to use, looks better, and offers more features for viewers such as XP and channel rank tracking and significantly better search screens for finding channels to watch.

Hopefully updates to the Mixer console experience will be pushed out at a faster rate going forward.

What do you think of these changes coming to Xbox One consoles this month? Share your thoughts with us in the comments below and then follow us on Pinterest and Facebook for more Xbox gaming content.

Microsoft announces expansion of Project xCloud in 11 new countries amid COVID-19 pandemic

Microsoft today announced that they are now beginning to expand the preview of their Project xCloud video game streaming platform to 11 new countries.

The countries being added to the xCloud preview are Belgium, Denmark, Finland, France, Germany, Ireland, Italy, Netherlands, Norway, Spain, and Sweden. Those located within any of these 11 countries who are interested in trying out this new service are encouraged to sign up via this web page. Note that only Android users are being accepted as of this moment. iOS devices will likely be added at a later date as was done in existing test regions.

This expansion of the cloud streaming service is a bit surprising as most of Europe, like many other regions, has restricted internet services due to the global COVID-19 pandemic which has forced the majority of the popular to stay at home.

“With that in mind, we continue to evaluate the COVID-19 situation and will begin rolling out the Project xCloud preview across 11 Western European countries when we are confident it is sensible to do so,” a blog post on Mirosoft’s Xbox Wire website says of the situation. “We will take a measured approach to help conserve internet access, beginning the preview in each market with a limited number of people and adding more participants over time.”

Microsoft has continually been testing and improving its Project xCloud service adding new games and regions on a regular basis over the past several months. Just last week, the new Bleeding Edge video game was added to the xCloud library.

Are you excited for Project xCloud and have you had a chance to try it yet? Share your thoughts with the community in the comments below and then follow us on Pinterest and Twitter for more Xbox gaming news.

Epic Games Launcher error Something went wrong [Fixed]

We’re all familiar with Epic Games and their game client called the Epic Games Launcher, but some users have experienced the Something went wrong with Epic games.

The cause of this issue can vary from permission, network connection, or the game client being corrupted. But luckily, we have a few solutions for you.

How can I fix Something went wrong Epic Games error?

1. Log out and log in

log out Something Went Wrong Epic Games
  1. This solution involves you exiting whichever game you’re playing and logging out of the Epic Game Launcher.
  2. Wait for a couple of moments, and log back into the launcher.

2. Firewall permission

  1. From your Start Menu select Control Panel.
  2. Select Windows Firewall, and click on Allow an app or feature through Windows Firewall.
    allow apps to communicate firewall Something Went Wrong Epic Games
  3. The Allowed App windows will open. Click on the Change Settings
  4. Check Private and Public checkboxes next to Epic Games Launcher. If the application isn’t on the list, you’ll have to add it manually.
  5. Click OK to save your new settings.

If you are facing other issues like Install Failed error code: II-E1003 while downloading game files on Epic Launcher, we suggest you check out this guide for easy solutions.

3. Uninstall and reinstall Epic Games Launcher

  1. Start Control Panel.
  2. Now click on Uninstall a Program.
    uninstall a program control panel Something Went Wrong Epic Games
  3. Select Epic Games Launcher and uninstall it.
  4. Afterward, proceed to download Epic Games Launcher from its official website.
  5. Open the file and reinstall the program with the onscreen instructions.

Alternatively, you can use helpful uninstaller software to completely remove Epic Games Launcher and all of its related files.

It will save you a lot of time cleaning up games leftover from a standard uninstall by going from folder to folder.

Reinstalling the game can also help fix other similar issues like Invalid Drive error. You can also follow this guide on fixing the Epic Games Launcher setup ended prematurely error for additional installation troubleshooting steps.

4. Update your network drivers

  1. From the Start Menu select your Device Manager.
    device manager start menu Something Went Wrong Epic Games
  2. Now expand the category with the hardware you want to update.
  3. Right-click on the device, and select Update Driver.
    update driver device manager Something Went Wrong Epic Games
  4. Click the Search automatically for updated driver software.

If the solution above is not working or you need an alternative method, we’re here to offer the most suitable answer.

More exactly, a driver update application is the most suited way to manage all drivers from your Windows OS due to its automatic technology that will scan and update obsolete drivers one by one.

⇒ Get Fortect Driver Updater

5. Remove left-over files

  1. From your Start Menu, select Run and click on it.
  2. You’re going to type %appdata% in the box and press Enter.
    appdata run window Something Went Wrong Epic Games
  3. Search for the Epic Games folder and delete it.

6. Change launcher properties

  1. Find the Launcher shortcut on your desktop.
  2. Right-click on the Epic Games Launcher and now select Properties.
  3. From the Target field, add the –OpenGL line.
    epic games properties opengl Something Went Wrong Epic Games
  4. Click on Apply and then OK.

7. Malware scan

  1. Perform a full scan on your machine with a good antivirus program.
  2. After you’ve performed the scan, restart your machine for the changes to take effect.

If you don’t have a reliable antivirus, you might consider trying out a gaming-compatible third-party security software that includes malware scans and detection.

A gaming-friendly antivirus solution even has a dedicated mode for playing games when alerts and other distractions are silenced so that the game is not disrupted.

If your computer is powerful enough to run the game, it should be able to manage the antivirus software that is running alongside it. The antivirus should detect and prevent malware infection if it’s a proper one installed, so make sure.

We hope that these solutions were of help to you. In the meantime, let us know in the comment section down below what other issues have you stumbled upon when running the Epic Games Launcher.

C:/Users/[Your Username]/AppData/Local/EpicGamesLauncher/Saved/webcache

  • How do I reinstall my Epic game launcher?
  1. Go to Control Panel
  2. Open Programs and Features
  3. Find the Epic Launcher
  4. Click Uninstall

Another way to do this is:

  1. Click on Start
  2. Type Apps and Features
  3. Search for Epic
  4. Uninstall

Once you uninstall the Epic launcher, go to the official website and download and run the installer.

  • How do you fix the glitch on the Epic Games launcher?

Close the Epic Games launcher from Task Manager, then delete your web cache folder. If that does not work, then reinstall the launcher.

If you have encountered the error code 502 while launching Epic Games Launcher, you need to force close the app and then restart it; read more to learn other solutions.

Skype’s ‘Meet Now’ feature is arguably the experience Zoom users crave

Despite being among the top-considered teleconferencing solutions in the market, the Skype team is finding itself having to promote its more casual friendly solutions in the wake of new competition.

Begun the video conferencing wars have.

While Zoom seems to be on the lips of most people as the go-to service for hosting everything from business meetings to weddings, there is an equally growing concern about its privacy and security handling of user data; and to that end, the Skype team is looking to regain mindshare by positioning itself as the safer Zoom alternative.

Late in 2019, Skype began testing its Meet Now feature that functionally gave the platform the same hassle-free experience being touted by Zoom users daily.

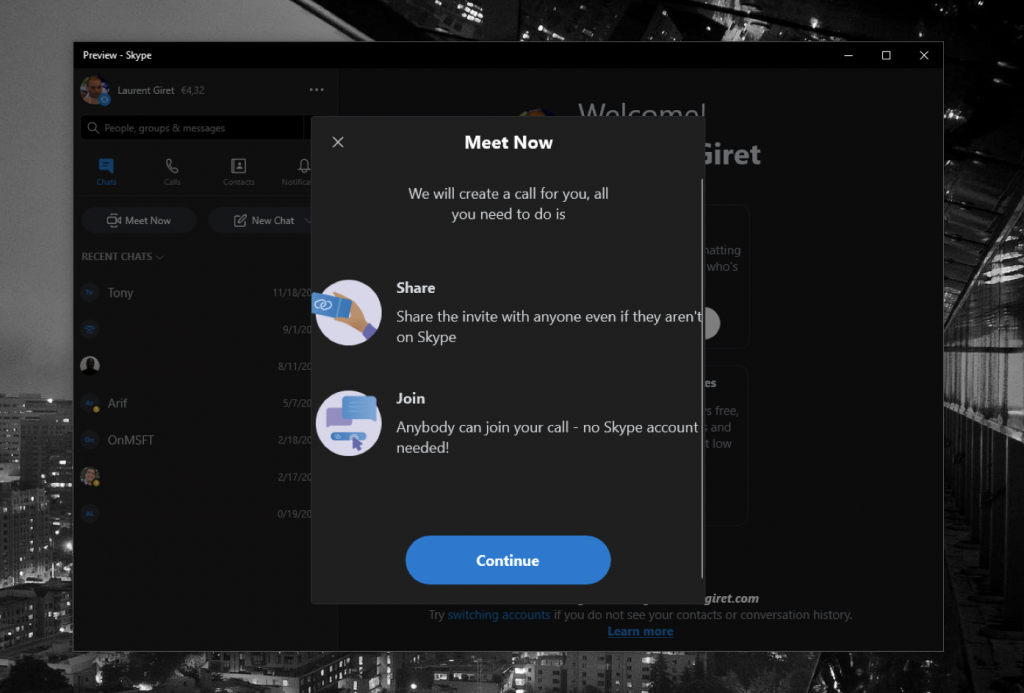
Meet Now appears as a new button in the new Skype Insider build, and clicking it will open a window where you can see a call link you can share with others. Again, the nice thing is that even users without a Skype account will be able to participate to the group call, but “Meet Now” also creates a regular group chat where you can send messages to other participants.

However, Meet Now was rolled out to only Insiders and given no public air to showcase a solution to arguably the biggest hurdle casual users have with the platform, regarding the need for a Microsoft account for use.

In addition to lowering the barrier to entry by removing the asinine need of a Microsoft account ID with Meet Now, Skype is already a more secure platform than Zoom at the moment and is offering more features for free.

Along with Meet Now, users will also get the customary ability to utilize picture-in-picture when navigating away from the app in progress, split-view mode as well as the ability to record meetings and have those recordings stored for up to 30 days.

Skype Insider update brings back Split View mode on Windows, Mac, and Linux

It remains to be seen how well Skype markets Meet Now and when it will make it a full-fledged part of the platform, but as Zoom continues to take fire for its handling of user data and security flaws, it would serve Microsoft well to rush out a bunch of ads promoting its latest features to stem the loss of mindshare it is currently experiencing.

Microsoft Office Picture Manager is not working? Try this

At times, when you try to launch Microsoft Office Picture Manager, the app may stop responding. This is a common problem and many users have reported similar issues in the Microsoft Community forums:

When I try to start Microsoft Office Picture Manager, a window appears with the message: Microsoft Office 2010 has stopped working. 

This error can occur due to corrupted Picture Manager files or if a third-party app is creating issues with the app’s functionality.

In this article, we have listed a couple of troubleshooting tips to help you repair the Picture Manager app if it’s not working issue in Windows 10.

What to do if Microsoft Office Picture Manager is not responding?

1. Repair the Office application

Microsoft Office Picture Manager not working
  1. Press Windows Key + R to open Run.
  2. Type control and click OK to open the Control Panel.
  3. Go to Programs > Programs and Features.
  4. From the list of app, select the Microsoft Office app.
  5. Click on Change.
  6. In the Office Repair tool you will see two options:
    Quick Repair – First select this option and click Repair. The troubleshooter will scan and fix any software related issues.
    Online Repair – Select this option if Quick Repair did not resolve the issue. This option might take longer and requires an active internet connection.
  7. Follow the on-screen instructions suggested by the tool to apply fixes.

The Microsoft Office repair tool should fix any issues with the Picture Manager. However, for this to work, you must have Office 2010 or earlier versions installed. If you have installed Picture Manager separately, try other steps in this article.

2. Check for third-party issues

microsoft office picture manager not working
  1. Press Windows Key + R to open Run.
  2. Type msconfig and click OK to open System Configuration.
  3. Open the Boot tab.
  4. Under Boot Options, check the Safe boot box and click Apply.
  5. When prompted to restart the computer, click on Restart.
  6. After the computer restarts, start Picture Manager and check if the issue is resolved.
  7. If everything works fine in Safe boot mode, you may have a third-party app installed on your computer creating issues.
  8. Make sure you disable Safe boot by unchecking the Safe boot option in the System Configuration window to restore all the functionality.

The best way to find the conflicting program is to open Control Panel > Programs > Programs and Features.

Start by uninstalling the most recently installed app and check if that resolves the issue. You may also want to scan your system for malware and virus.

Safe mode is not working? Don’t panic, this guide will help you get past the booting problems.

3. Other solutions to try

Run as administrator

  1. Right-click on the Microsoft Office Picture Manager icon in the Dekstop.
  2. Select Run as Administrator from the context menu.
  3. If prompted by UAC, click Yes.

Does nothing happen when you click on Run as administrator? Don’t worry, we’ve got the right fix for you.

Run from the source

  1. Open File Explorer and navigate to the following location where the Picture Manager is installed:
    C:Program Files (x86)Microsoft OfficeOffice14
  2. Double-click on OIS.exe and check for any improvements.

4. Use a third-party software

Even though it was a standards-defining tool a while ago, an ill-functioning Picture Manager might just be an indicator that it is time to upgrade to more modern software, better equipped for viewing and organizing your photos.

Lightroom is a cutting-edge, cloud-based service that gives you everything you need to edit, organize, store, and share your photos across any device.

Let’s quickly look at its key features:

  • Capture, edit, and share your photos all from one place
  • Cross-platform functionality
  • Cloud storage starting at 1TB
  • Machine learning-based photo management with unlimited capacity
  • Interactive, in-app tutorials
  • Photo library for inspiration

⇒ Get Adobe Lightroom

We know that Microsoft Office Picture Manager has been replaced by the Photos app in Windows for quite a while now.

However, for those who are still running the Picture Manager and having issues with it, the steps described in this article might be useful.

If you have any other questions or suggestions, leave them in the comments section below and we’ll be sure to check them out.

Eager to discover more similar solutions? Check out our Photo Software page.

Match your cutting-edge software with an impeccably-functioning operating system thanks to our Windows 10 Troubleshooting Hub.

Putty Fatal Network Error: Connection Refused [Fix]

PuTTy is a free and open-source terminal application that allows the system administrator to log in to a remote server over SSH. This small yet highly stable application is also used to transfer files securely via SCP and SFTP.

If you work in IT or have your own set of servers that need to be connected, PuTTy is not an alien concept to you. However, what can be an alien concept is the Putty Fatal error.

The fatal error “Network error: connection refused” in Windows 10 is one of the common PuTTY-related errors that you may face while working with Putty. The error pops up when you try to connect to a remote server for the first time or the 100th time.

I have had my fair share of problems with PuTTy, but most of the time, the errors are caused by small but not-so-obvious issues.

If you are one of those trying to diagnose a connection refused error, this article will help you to resolve the error.

In this article, I have listed all the possible solutions to the PuTTy connection refused error. Make sure you try each one of them a try until the issue is resolved.

What causes Network error: Connection Refused errors?

The error can occur due to several reasons. Some of them are listed below.

  • If the application tries to access the services not offered/supported by the server
  • If the application tries to connect to a telnet server not supported by the server.
  • Users may encounter a Putty Fatal Network error: connection refused.
  • If your router blocks the connection due to security reasons.
  • If the server does not support the default port used by the system administrator on PuTTy.

These are some of the common reasons for network error: connection refused error in PuTTy. Below are some common solutions that you can try to fix the issue.

How do I fix a connection refused error in PuTTY?

1. Contact the system/network administrator

If you are not a system administrator, it is a better idea to start by contacting your system administrator.

System Administrators may change some permissions in the router if they notice any unknown device trying to connect or for other security reasons from time to time.

If that’s the case, you can easily resolve the issue by contacting the system admin before trying to resolve the issue on your end. While you are at it, you can also tell him about how NetCrunch Tools could help with their daily tasks.

2. Check if the SSH connection is enabled

Depending on the device you are trying to connect, the network error – connection refused error may appear if the device settings have SSH disabled.

For example, if you are using Raspberry Pi to connect through your PC, make sure SSH is enabled in the configuration. Here is how to do it.

In Raspberry Pi, go to Configuration > Interfaces > ssh. Enable the service and try again.

The settings may change depending on the device you are using, but the end result should be a working network connection through PuTTy.

3. Check if your domain records point to the server

If you are working with a new server and a fresh domain, the error can occur due to an incorrect DNS server address in the domain settings. All the domain registrar allows you to point your domain to you any third-party hosting provider using the name server.

If you have only installed a server and did not change the name server, you might end up with a network error: connection refused error.

To fix the problem, log in to your domain name provider and check the name server settings to see if the name servers are pointing to your hosting provider.

4. Check for Blacklisted and Whitelisted IP Addresses in the server

For security reasons, system administrator may allow connection from only computers with a known IP address that is already whitelisted in the configuration file.

If your ISP IP address has changed or if you are new to the job, you probably need to ask the network admin to make an exception.

The same can also happen if your IP address is blacklisted by the network admin accidentally.

So, check with your network admin for both scenarios and see if that can help you resolve the issue.

5. Disable Firewall

5.1 Disable Firewall in Windows Security

  1. Click on Start and select Settings.
  2. Open Update and Security, and click on Windows Security.
    Windows Fire Settings
  3. Open Firewall and network protection.
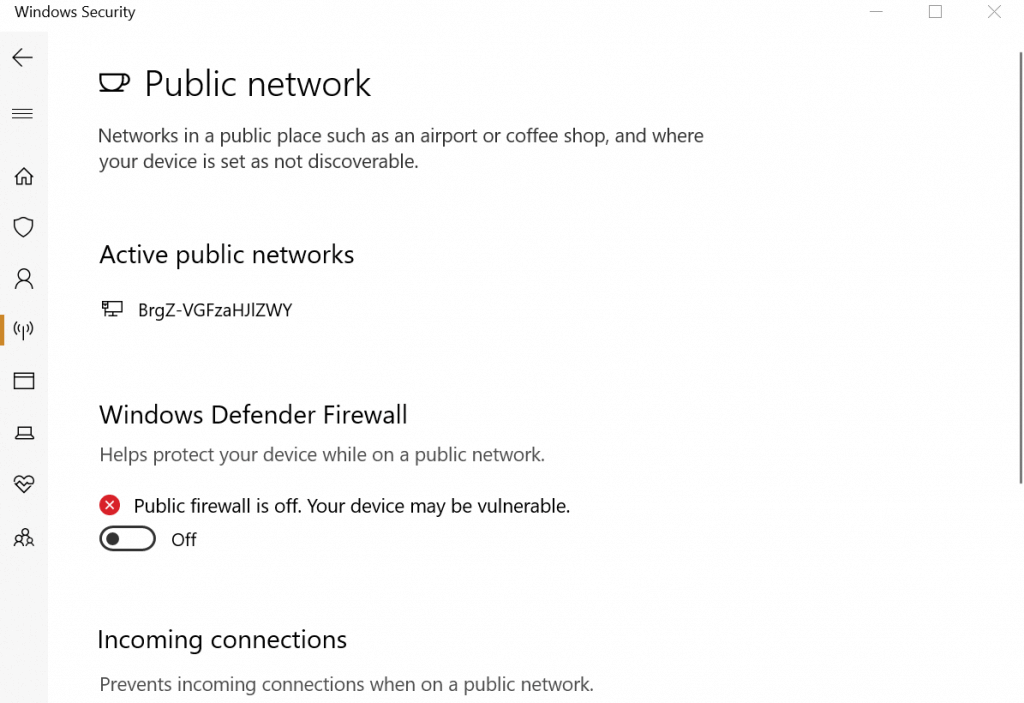
    Windows Defender Firewall Off
  4. Select the preferred network type (Public, Private or  Domain Network) and disable Windows Defender Firewall.

If you are using Windows, your anti-virus or the default Windows Security firewall and network protection feature may block incoming connections resulting in a connection refused error.

Try disabling the firewall temporarily to see if that can resolve the connection refused error. If it does, you may need to tweak the firewall setting to fix the error completely.

5.2 Disable Anti-virus Firewall

If you have a third-party anti-virus program running, you may also need to disable the firewall offered by the application. You can disable the firewall from the anti-virus settings option.

Try to connect using PuTTy now. If the connection goes through, you need to tweak Firewall settings to fix the problem.

Even so, having a compatible antivirus solution installed on your PC keeps you safe and protected all the time without interfering with your tasks or activities.

Therefore, we strongly recommend choosing the best antivirus for your PC, even though right now, as a temporary workaround, you can disable the Firewall and fix this issue. It is not recommendable to be vulnerable to dangerous attacks throughout the network.

Other Fixes

If none of the fixes worked, you could try to restart the SSH server or reboot the servers.

If your server was set up by someone else, the possibility is that they may have moved the default port as per their convenience. Contact and ask for the configuration nodes to get a better idea of the ports.

If you are using a fully managed server, contact support. If the issue is from the hosting provider’s end, the system administrator will fix the issue.

Last but not the least, start using other alternatives to Putty, such as other SH terminals, in case you encounter an error that is specific to PuTTY.

The Putty Fatal error “Network error: connection refused error can occur due to several reasons, and we have tried to list the most common problems and solutions for the same.

However, if the fixes listed in this article don’t work for you, you may ask in forums related to your device or OS on which the error is appearing.

Do let us know if any of the fixes worked for you or if you have a solution that is not listed in the article in the comments below.

FIX: Microsoft Internet Games not working

Is Microsoft Internet Games not working? A number of users have reported that for some reason they can’t play games on the Internet while using Internet Explorer.

Users have encountered errors indifferent to the location of the games on the web. The issues with playing games were seen on websites like Facebook, MSN, Yahoo, and others.

Trying to play games using Internet Explorer can lead you to different issues. Here are some of the most common:

  • Games not starting.
  • Not loading the game data completely.
  • You might be disconnected from the website while playing.
  • The game freezes randomly.

This issue can become frustrating over time, as you will not be able to play online games comfortably using IE.

The most common reasons for your Microsoft Internet Games not working:

  • Missing or outdated add-on.
  • Windows not updated to the latest version.
  • Not having the latest version of Internet Explorer installed.

For this reason, in this article, we will discuss what to do to fix this issue. Please follow the steps carefully to avoid any issues.

What to do if Microsoft Internet Games server is down?

Microsoft Internet Games part of Windows 7 will not be playable starting from the date of 22 January 2020. If you’re reading this article before that date, please follow the next methods to solve the issue.

1. Update your Internet Explorer to the latest version

  1. Download the latest Internet Explorer version.
  2. Install it on your PCs hard-drive by following the on-screen instructions.
  3. Check to see if the issue persists.

2. Try a different browser

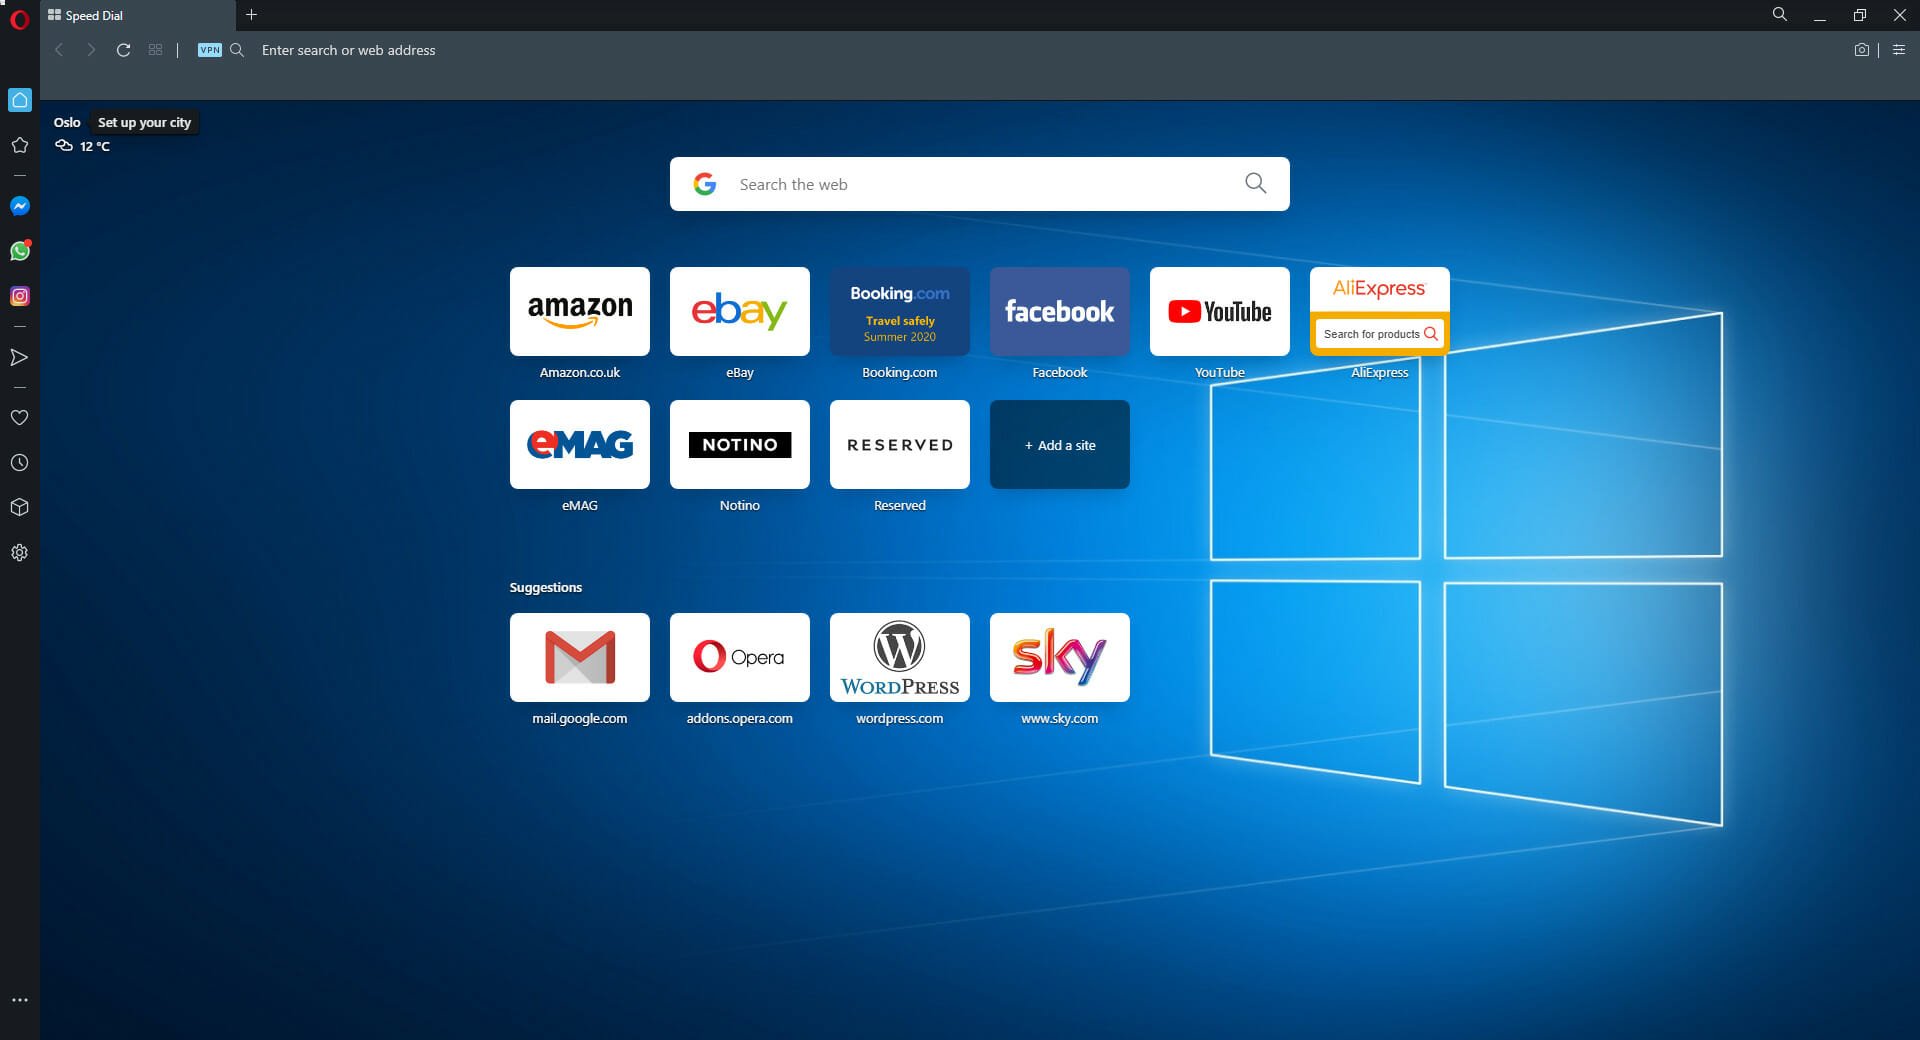
Sometimes switching to a different web browser can help. You can use any browser that you want, but if you’re looking for a reliable and safe web browser, we would have to recommend Opera One.

Using this refreshed browser you assure helpful features, such as built-in AI or increased security with native VPN and Ad blocker. More so, you can even use a dedicated gaming browser for more possibilities.

⇒ Get Opera One

3. Update Silverlight to the latest release


Of course, this method only applies to online games that require Silverlight to run. It is recommended that you update your version of this software to avoid any other issues.

Follow these steps to finish this process:

  1. Download and install the latest version of Silverlight.
  2. Enable Silverlight in Internet Explorer by opening the Options menu.

4. Update your Java version

  1. Download and install the latest Java version.
  2. Follow the on-screen instructions to complete the setup.
  3. After the installation process is completed, restart your browser, and check to see if the issue persists.

5. Update your Adobe Flash driver to the latest version

  1. Download and install the last released Adobe Flash driver.
  2. Follow the instructions found on the screen to completely finish the installation process.

6. Enable all the required add-ons inside Internet Explorer

Follow these steps to make sure that your browser is fully configured to play games online:

  1. Open Internet Explorer -> click the Tools button -> select Internet Options.Internet options IE - microsoft internet games not working
  2. Inside the Programs Tab -> click the Manage add-ons button.
  3. Click on the Show drop-down selection -> choose Run without permissions.

Conclusion

In today’s article, we explored how to make Microsoft Internet games work on Internet Explorer. In order to do so, we concluded that you need to make sure you have all the updated tools required to do so.

Please feel free to let us know if this guide helped you in any way, by using the comment section found below.

  1. Launch the Microsoft Store app and log in to your Microsoft account
  2. Go to the gaming section and browse the collection of games
  3. Select the game you want to download and hit the download button.

Monitor Color Calibration Software: 5 Best To Use in 2026

If your display looks a bit off, not necessarily too bright or too dim, but maybe with some colors not as accurate as they should be, then you can adjust it yourself with the right display color calibration software.

You can calibrate your display with a colorimeter as well.

This device is also called a color calibrator, and you have to stick in it front of your screen in order to calibrate colors.

But if you don’t own such a machine, you can efficiently use a color calibration tool, and we picked up five of the best tools for calibrating the colors of your display.

Top 5 display color calibration tools to use today

Calibrize

Calibrize won’t do anything for your other display settings, but it will be able to calibrate the colors of your system’s monitor.

This is free software that adjusts the colors of your monitor in three very simple steps. It is able to give your system a reliable color profile, and it also maintains color fidelity throughout your system.

Check out the best features that are included in this program:

  • Works quickly, reliably and efficiently even if you don’t know anything about calibrating your screen.
  • This will work really well for CRT monitors, LCD monitors, and beamers as well.
  • This tool is able to read out the color data from the monitor.
  • Calibrize produces an ICC monitor profile.
  • It installs the profile into the appropriate system folder.
  • This tool is able to load a set of adjusted values into the lookup table of your video card.
  • Calibrize also provides background information about the whole process.
  • It can cooperate flawlessly with other graphical software.

⇒ Get Calibrize

QuickGamma

QuickGamma is a small utility program that is able to calibrate a monitor without having to buy all kinds of expensive hardware tools.

You can check out the best features included in this tool below:

  • QuickGamma is free for personal use, and it’s compatible with Windows 7 and beyond.
  • When you download the program, you will get QuickGamma.exe, the help file called QuickGamma.chm and the printable help file as well called QuickGamma .pdf.
  • These are free of charge for private use.

Windows 7 includes a visual calibration wizard that can be used for display calibration, but the images that are used for the optical calibration are not ideally suited for the job.

This is where QuickGamma comes into the picture.

This tool comes with Norman Koren’s excellent gamma images, and now it creates a monitor profile with a vcgt tag that includes LUT data.

The profile is installed automatically, and the Windows 7 Display Calibration feature is automatically enabled.

⇒ Get QuickGamma

W4ZT

With the help of W4ZT, you will be able to check your monitor’s response and change the adjustments in order to obtain perfect calibration. You have to make your screen wide enough to see both the arrows on the line that is featured on the first page of this program.

Take a look at the most important features included in this color calibration tool:

  • You will get a few options to calibrate the colors from your monitor.
  • The minimum number of colors that are accepted should be 256.
  • You will also be able to adjust your monitor’s gamma, brightness, and contrast as well.
  • The Monitor Adjustment Target can be used to judge whether your monitor is adjusted for the best viewing or not.

The Monitor Adjustment target was designed in order to allow computer users to adjust the contrast and the brightness of their computer monitor so that the graphic images, such as photographs and scans, maps, text docs will look their best.

⇒ Get W4ZT

CalMAN ColorMatch

CalMAN ColorMatch is a free color calibration tool that is able to provide a quick and easy pass or fail test for any monitor or display that comes with a range of commonly used colorspace and gamma standards.

This color calibration software will require a colorimeter to run all of its tests correctly.

Check out the best features of this software:

  • You will be able to benefit from an average and maximum grayscale/white balance error.
  • CalMAN ColorMatch is able to plot all the data on one single comprehensive page, and it will only take about three to five minutes.
  • During the process, more than 100 pattern changes are made by the program automatically, and hundreds of critical color values are sampled with just a push of one button.

CalMAN ColorMatch is SpectraCal’s free program for testing monitor accuracy, and it will provide you a simple five-minute pass or fail the test of a reference monitor’s color performance informing users when and if their monitors need to be calibrated.

⇒ Get ColorMatch

Lagom LCD monitor

The Lagom LCD monitor test tool provides test images online that you can use to easily adjust the settings of your monitor in order to get the best picture quality.

There are also some additional test images that will be able to help you judge the image quality of a monitor.

Take a look at more impressive features that are packed in this tool for monitor calibration:

  • You can take a look at the images that are presented on the webpage and you can also place them on a USB stick to try them on your computer.
  • The test pages are more revealing regarding monitor shortcomings than ordinary photographs.
  • With the first images, you will be able to calibrate your monitor by adjusting the contrast, brightness, sharpness, and gamma settings for your monitor.

If you have any kind of color management system active in your OS or video-card driver, it is recommended that you disable it first before using this tool.

You will have to first make adjustments to the monitor settings to let your display behave as close to the ideal picture that you have in mind.

Only then, it’s recommended to use the color management tool to compensate for any small issues.

⇒ Get Lagom LCD monitor

Conclusion

These are five of the best tools for color calibration of your monitor that you can find online these days. Calibrating your monitor is a step that usually people forget to take or they even ignore.

Calibrating your monitor will make sure that your colors are displayed correctly and accurately and that they are also set consistently across every display and even when you are printing them.

Color calibrating tools for your monitor are really important because they will get your display as close to the real thing as possible.

Check out all these five tools and head to their official websites where you can see and analyze all their sets of features and after that, make sure to choose the one that is the best for your color calibration needs.

Need to help friends and family with Windows, but remotely? Check out Quick Assist

Microsoft’s newest “Simply Windows” video provides a showcase for Microsoft’s easy to use Quick Assist app in Windows 10 and the timing couldn’t be better.

If you haven’t tried it already, Quick Assist lets two people share a computer over a remote connection letting one user assume control of the device to troubleshoot and fix a problem. This can be especially helpful right now while we are all working from home and need to help out a family member, friend, or grandparent who may have run into a technical issue.  The Windows Blog team has made it easy for anyone to start using Quick Assist with a simple walkthrough .

What is Quick Assist?

Quick Assist is a native Windows 10 app that lets two people share a device over a remote connection and includes various tools and functionality like chat.  Once connected, the remote user can help fix problems, check drivers, connect a printer or set up a second monitor.

Can I use Quick Assist?

Anyone with Windows 10 device that is connected to the internet can use Quick Assist. Note, if the technical issue includes the device not powering on then Quick Assist won’t be able to help you.

A simple walkthrough using Quick Assist

It’s easy to get started with Quick Assist.  You can find the app in Windows Accessories, or just type Quick Assist into the Windows search box on the taskbar and select it to open.

Quick Assist in Windows 10
create remote connections between two people with Quick Assist in Windows 10

Once you have opened the app, you will see two different options, Get assistance and Give assistance, and you can use the one that applies to you.

Windows 10 Quick Assist
Get assistance, or give assistant with Quick Assist in Windows 10

Now, if you are the one giving assistance select the option to “Assist another person.”  Note, if you aren’t already signed in, log in with your Windows account and on the next screen, you will receive your security code to share with the other person.

Give assistance with Quick Assist

Have your friend enter the code and they will see the following confirmation screen.   At this point, the person receiving the request can decide if you want to share their screen or cancel it.  Note, be sure to never allow requests from people you don’t know.

Once confirmed, you will see two options to either take “full control” or simply “share screen.”


Quick Assist take Control


Quick Assist is now running and your screen will look like the following example.  In this case, we have Quick Assist enabled with full controls and you have the ability to check settings, add devices, update drivers and more.

While Quick assist is running will see some options at the top including screen pause,  resize window and a chat option.  If audio is an issue this can be especially helpful letting you type messages back and forth similar to the example below.

After you have resolved the technical issue you can stop the session by selecting the “x” on the right-hand corner.  At this point, you will see the “Close Quick Assist dialogue box.

You can confirm the session has ended when you see the following message.

With Windows 10, help is just a family member away with Quick Assist.  It’s easy, and it’s free.  Next time a loved one, or a friend needs help, give Quick Assist a try to avoid costly support or long wait times at your local electronic store.  What’s your preferred way to help a friend or family member fix a Windows 10 issue?

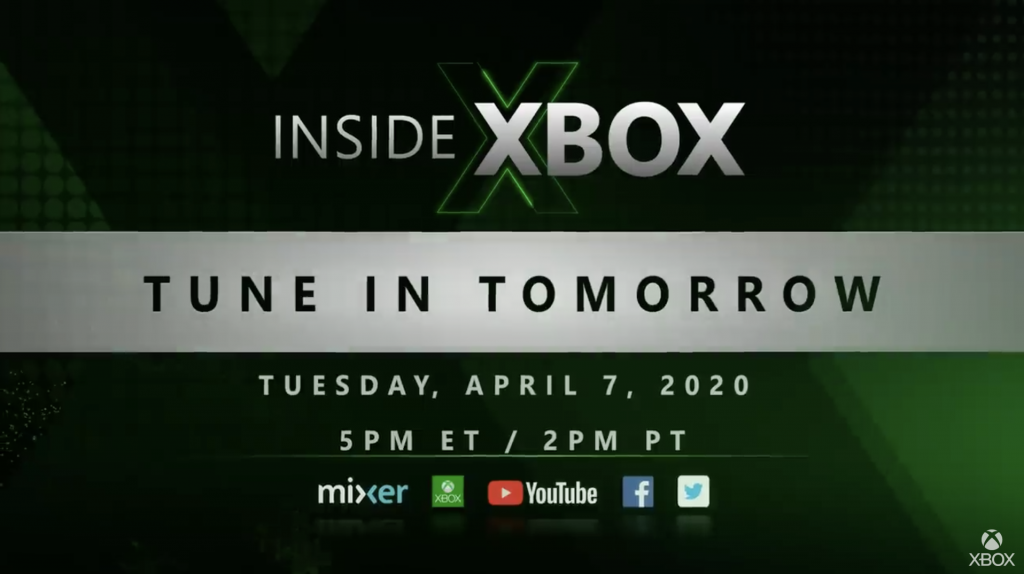
Microsoft announces Inside Xbox livestream tomorrow at 2PM PT

Microsoft’s Inside Xbox series of live streams is coming back tomorrow at April 7, at 2 p.m. PT / 5 p.m. ET. This first episode of 2020 won’t have any new info about Xbox Series X, but Director of Program Management for Xbox Series X Jason Ronald will be here to discuss all of the console’s specs Microsoft revealed last month.

In addition to some chit chat about Xbox Series X, Microsoft also promises to deliver “the latest news on Grounded, Gears Tactics, Sea of Thieves, Xbox Game Pass, some surprises from our ID@Xbox team and more.” For those unfamiliar, Grounded is the new first-person survival game announced by Obsidian Entertainment back at X019 last year, and a first gameplay reveal will follow tomorrow’s Inside Xbox episode.

It will also be interesting to get more information about Gears Tactics, which made a good first impression in the first previews published last month. The turn-based strategy game is the next big title coming from Xbox Game Studios on April 28, ahead of the launch of the much-anticipated Minecraft Dungeons in May.

As usual, tomorrow’s episode will be live-streamed on Mixer, Twitch, YouTube, Facebook, and Twitter. This episode should be pretty special due to the coronavirus outbreak, and Xbox’s Major Nelson joked on Twitter that this would be the “at home edition” of Inside Xbox.

Gears 5 is free to play with Xbox Live Gold through April 12th

As noted in a post on Xbox Wire, Gears 5: Operation 3 Gridiron is available to play free for Xbox Live Gold subscribers on Xbox One and Windows 10. Starting today until April 12, 2020, Xbox Live Gold subscribers can play Operation 3 Gridiron for free as part of a special edition of Free Play Days. Gears 5 is already available for free as part of an Xbox Game Pass subscription.

Operation 3 Gridiron is a free upgrade for those who already own Gears 5 on Xbox One, Windows 10, and Steam. Operation 3 Gridiron is a no-holds-barred version of capture-the-flag in the Gears 5 universe. Players on teams (5v5) have a single life to grab the flag and run it into the opponents’ end zone. Each round is two-minutes and the first team to score 13 points wins. As an added bonus, if you play now through April 20, 2020, you will receive the Batista Bomb execution and Batista skin.

In addition, Xbox One players can earn up to 500 Microsoft Rewards points for watching the new Operation 3 Gridiron trailer, earning any of the Xbox achievements added for Operation 3, and by watching Gears 5 on Mixer. If you are not an Xbox Live Gold or Xbox Game Pass Ultimate subscriber, you can sign up today using the links below.

Xbox Game Pass Core
Xbox Game Pass Core
Price:
$9.99


Xbox Game Pass Ultimate

You can buy Gears 5 right now for 50% off at $29.99 in the Microsoft Store. For a limited time, if you buy Gears 5 from the Microsoft Store, you will receive 15% off Gears 5 Tactics, which is slated to be released on April 28, 2020. It is important to note that Xbox Game Pass Ultimate subscribers will be able to play Gears 5 Tactics free at launch.

Gears 5
Gears 5
Developer:
Xbox Game Studios
Price:
Free


Gears Tactics Pre-Order

Do you play Gears 5 Operation 3 Gridiron? Let us know what you think of the game in the comments.

Why Has Microsoft Edge Disappeared & How to Get It Back

Windows 10 was basically a new chance for Microsoft to unify the desktop as well as mobile ecosystem using Windows.

Microsoft’s vision of having one single operating system for both mobile devices as well as desktops has become true to a huge extent with Windows 10.

Features like Continuum allow users to use their Windows 10 system on any type of device in its best form i.e.

Windows 10 automatically detects the type of device it is being used on and then adapts as per the device and so if you are using it on a touch-based device, then Windows 10 will automatically adapt the UI which is best suited for touch-based interfaces.

Anyway, one of the many new things on Windows 10 was Microsoft Edge which is a totally new browser that Microsoft has developed in order to provide a better Internet browsing experience to users.

But as you know Windows 10 has many bugs and sometimes people do run into some of these annoying bugs.

One of the bugs is Microsoft Edge disappearing totally from the system and only appears when you open some news on Cortana.

In this post, we will go ahead and fix the issue of Microsoft Edge disappearing so let’s get started!

The following solutions have proven to be useful in the following scenarios as well:

  • Microsoft Edge disappeared
  • Edge missing Windows 10
  • Microsoft Edge disappeared from Windows 10
  • Edge disappeared
  • Microsoft Edge missing from Windows 10

What do I do if Microsoft Edge disappears in Windows 10?

Table of contents:

  1. Consider using a different browser
  2. Search for it
  3. Try System File Checker
  4. Use Windows Powershell to fix it
  5. Turn off Firewall
  6. Disable antivirus
  7. Run the Troubleshooter
  8. Install the latest updates
  9. Uninstall the latest update
  10. Change the security permission

1. Consider using a different browser

If you follow all the troubleshooting steps and notice that Microsoft Edge still doesn’t appear, then maybe you should consider using an alternative tool. For example, if you chose because of the Chromium engine, we recommend you give Opera One a shot.

It is built using the same architecture, but it is more reliable and stable, and therefore less prone to bugs and issues.

It is incredibly lightweight, can be heavily customized, features built-in Ad blocker, VPN and AI. It also has social media and messaging app integration for the most popular platforms.

Opera One

This web browser will captivate you with how light and modern it feels, and it may end up being your default browser in no time.
Free Download Visit website

2. Disable antivirus

The same goes for your third-party antivirus. Although it’s supposed to keep Edge secure, your antivirus can also prevent it from working.

So, the solution is to disable your antivirus for a couple of minutes and see if Edge works with the antivirus off. If the browser works, you can add it to the antivirus whitelist, to prevent further interference.

Alternatively, you could try using an antivirus tool that interferes less with your system processes. The antivirus market has plenty of good alternatives that may be more stable than your current antivirus.

Just make sure that your antivirus of choice provides all the security requirements you need. First and foremost, a good threat database is a must, as well as a strong firewall.

Good online privacy features are also important. Many Windows 10 compatible antiviruses include built-in VPNs to make sure your identity and browsing activity are private.

Another thing to look for is multi-layered protection. If your antivirus comes with multiple security features that can block various types of threats, there is a higher chance that there are no weak points anywhere in your system.

3. Search for it

  1. Open Start Menu and type Edge.
  2. You will notice that Microsoft Edge pops up in results.
  3. Right click on the result and click on Pin to taskbar.
  4. There is also an option to Pin/Unpin from Start which means you can either pin or unpin the icon from Start Menu.
  5. After you pin it back, you will be able to use Microsoft Edge properly without issues.

4. Try System File Checker

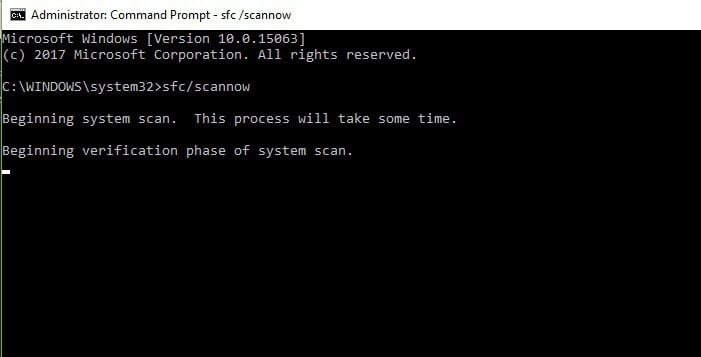
  1. Press Windows + X keys on your keyboard and then click command prompt(admin).
  2. Now you need to type in the following command in command prompt and press Enter.
    • sfc /scannow

  3. This should fix the issue of disappeared Microsoft Edge on Windows 10. But if it hasn’t, move on to the next method.

5. Use Windows Powershell to fix it

  1. Open Start Menu and type PowerShell.
  2. You will notice that two results will pop up. Choose the one that just reads Windows PowerShell.
  3. Now enter the command given below.
    • Get-AppxPackage -AllUsers| Foreach {Add-AppxPackage -DisableDevelopmentMode -Register “$($_.InstallLocation)AppXManifest.xml”}

  4. You might see some error but no not worry about it.
  5. After the command is executed, restart your PC.

6. Turn of firewall

  1. Go to Search, type firewall, and open Windows Defender Firewall.
  2. Select Turn Windows Defender Firewall on or off.
  3. Disable Windows Firewall for both private and public networks.
  4. Confirm the selection and try updating again.

7. Run the troubleshooter

  1. Go to Settings.
  2. Head over to Updates & Security > Troubleshoot. 
  3. Select Windows Store Apps, and go to Run the Troubleshooter.
  4. Follow further on-screen instructions and let the process finish.
  5. Restart your computer.

8. Install the latest updates

As Microsoft Edge is a part of the Windows 10 OS, it regularly receives updates through Windows Update. If your problem with Edge is well-known, Microsoft is probably already working on the fix, which will be delivered through Windows Update.

So, just keep your system up to date. To check for new updates, go to Settings > Updates & Security, and check for updates.

9. Uninstall the latest update

  1. Go to Settings.
  2. Head over to Updates & Security > Windows Update.
  3. Go to Update history > Uninstall updates.
  4. Now, find the latest update installed on your computer (you can sort updates by date), right-click it, and go to Uninstall.
  5. Restart your computer.

10. Change the security permission

  1. Go to Search and enter %localappdata%. Open the AppDataLocal folder.
  2. Go to the MicrosoftWindows folder. Locate WER folder, right click it and choose Properties.
  3. Go to Security tab and click the Edit button.
  4. Select APPLICATION PACKAGES user and check Read & execute, List folder contents and Read options in Allow column.
  5. Click Apply and OK to save changes.

These are three methods that should definitely fix this error of Microsoft Edge disappearing for some odd reason.

Fix: Another Installation Is in Progress Office 365

Are you getting error code 0-1018 0 when installing Office 365? That states:We’re sorry but we could not start your Office installation. Another installation is in progress.

This is usually due to another Office installation or update process in the background or older MS Office installation files that have not been thoroughly removed from Windows.

Here are a few ways you can fix it and get Office 365 up and running.

How do I fix the Another installation is in progress error?

Another installation is in progress message can prevent you from installing Office 365 on your PC. This can be a big problem, and speaking of installation problems, here are some issues that users reported:

  • Microsoft Office error code 0-1018 (0)
    • This problem can occur if your system files are corrupted, but to fix the problem, you need to repair your installation by performing an SFC and DISM scans.
  • Office 365 error code 0
    • This error can sometimes appear due to your antivirus, and in order to fix the problem, you need to disable your antivirus and check if that helps temporarily.
  • Couldn’t start Office installation error code 0-1018 (0)
    • Another cause for this issue can be your firewall, and if you can’t install Office, be sure to disable Windows Firewall temporarily and check if that helps.
  • Error 1500 another installation is in progress Microsoft Office
    • If you encounter this error message, be sure to disable any other installations that might be running in the background. You can do that with ease by using Task Manager.

1. Check for Another Installation Process

  1. Press Ctrl + Shift + Esc to start Task Manager.
  2. When Task Manager opens, locate the installation that is running in the background.
    • Office installation processes are usually IntergratedOffice.exe and Microsoft Click-to-Run.
  3. Right-click the installation process and choose End Task from the menu.
    Couldn't start Office installation error code 0-1018 (0)

Sometimes you might have another installation running in the background, and that might give you Another installation is in progress message while installing Office 365.

To fix this problem, you need to stop the installation on your own or use the Task Manager to end the installation process.

It’s also worth mentioning that Windows Installer and msiexec processes can cause this problem to appear, so if you see them running, be sure to disable them. After closing the problematic process, try to install Office again.

2. Fix Error 0-1018 0 With the System File Checker

  1. Press Windows Key + X to open Win + X menu.
    • Alternatively, you can right-click the Start Menu button.
    • Choose Command Prompt (Admin) or PowerShell (Admin).
      Microsoft Office error code 0-1018 (0)
  2. After Command Prompt starts, enter sfc /scannow and press Enter to run it.
    Microsoft Office error code 0-1018 (0)
  3. The SFC should now start.
    • It’s worth mentioning that the scan can take around 15 minutes, so don’t interfere with it.

In some cases, your installation can become corrupted, and that can cause Another installation is in progress to appear. If you encounter this issue while trying to install Office 365, you might be able to solve the issue by performing an SFC scan.

Once the SFC scan is finished, check if the problem is resolved. Several users reported that the issue can persist even after you run an SFC scan. If that’s the case, you need to run DISM scan by doing the following:

  1. Start Command Prompt as administrator.
  2. Enter DISM /Online /Cleanup-Image /RestoreHealth command and press Enter to run it.
    Office 365 error code 0
  3. Keep in mind that DISM scan can take about 20 minutes, so don’t interfere with it.

After the DISM scan is finished, check if the problem is still there. If the problem is still there, or if you weren’t able to perform an SFC scan before, be sure to run the SFC scan again.

3. Check your antivirus

In some cases, Another installation is in progress error can appear due to your antivirus. Third-party antivirus can often interfere with your system and cause this and other problems.

To fix the problem, it’s advised to disable certain antivirus features or your antivirus altogether temporarily. If that doesn’t work, your next step is to remove the third-party antivirus from your PC.

Windows 10 comes with Windows Defender, which works as a default antivirus, so even if you remove a third-party antivirus, you should remain protected. If removing the antivirus solves the issue, you should consider switching to a new antivirus solution, such as TotalAV, as it offers maximum protection and won’t interfere with your system.

4. Register Office 365 DLL Dependencies

  1. Press the Win key + R hotkey to open Run.
  2. Then input regsvr32 office start.dll into the Run text box as shown below.
    Couldn't start Office installation error code 0-1018 (0)
  3. Now you can press the OK button or Enter to register the DLL dependencies.

Office 365 might be missing some DLLs (dynamic link library files) required to launch.

5. Uninstall Other Office Versions

Sometimes previous versions of Office can interfere with your current installation and cause Another installation is in progress error to appear. If that’s the case, you need to find and remove all Office installations from your PC.

You can do that using the regular method, but this method can sometimes leave certain files and registry entries behind. These leftover files can interfere with future Office installations, therefore it’s always recommended to use uninstaller software to remove applications from your PC.

If you’re unfamiliar with it, uninstaller software is a unique application that can remove any application from your PC, but it will also remove all files and registry entries associated with that application.

Once you remove all previous versions of Office from your PC, the problem should be completely resolved.

6. Run the Office 365 FIXIT Tool

  1. There’s also an Office 365 FIXIT tool that will completely remove MS Office installation files.
    • You can open that by pressing the Download button on this page.
  2. Then open the folder you saved the Office 365 FIXIT tool to, and select 015-ctrremove.diagcab to open the window below.
    Error 1500 another installation is in progress Microsoft Office
  3. Click Advanced and select the Apply repairs automatically check box.
  4. Now press the Next button on the window.
  5. Then you can select an Apply this fix option.
    • The troubleshooter will then erase existing MS Office files, which might take up to 30 minutes.
  6. When the troubleshooter has finished, press Next and Close.
  7. Press the Start menu button and restart Windows.

7. Disable Windows Firewall

  1. Press Windows Key + S and enter firewall.
  2. Select Windows Defender Firewall from the list.
    Error 1500 another installation is in progress Microsoft Office
  3. Windows Defender Firewall window will now open.
  4. Select Turn Windows Defender Firewall on or off from the menu on the left.
    Microsoft Office error code 0-1018 (0)
  5. Now select Turn off Windows Defender Firewall (not recommended) for both Private and Public networks.
  6. Once you’re done, click the OK button to save changes.
    Office 365 error code 0

Sometimes Another installation is in progress error can appear due to Windows Firewall. Office 365 installations need to download specific files from the Internet, and if your firewall is blocking it, you might encounter certain error messages.

To fix this problem, you are advised to temporarily disable your firewall.  After you disable Windows Firewall, try to install Office 365 again and check if the issue reappears. Once you manage to install Office 365, turn back on your firewall.

8. Install the latest updates

  1. Open the Settings app.
    • You can do that instantly by using Windows Key + I shortcut.
  2. When Settings app opens, you need to navigate to Update & Security section.
    Error 1500 another installation is in progress Microsoft Office
  3. Click Check for updates button.
    Office 365 error code 0

Sometimes this error message can appear due to certain glitches on your system. However, Microsoft is working hard to fix these problems, and the best way to fix them is to install the latest updates.

For the most part, Windows 10 installs the missing updates automatically, but sometimes you might skip an update or two.

Windows will now check for available updates. If any updates are available, they will be downloaded automatically in the background and installed as soon as you restart your PC. Once your system is updated, check if the problem is still there.

Now, you should be able to install Office 365 on Windows 10 with those fixes. The Microsoft Support and Recovery Assistant tool for Office 365 and Outlook, which this Windows Report post provides further details for, might also come in handy for fixing errors 0-1018 0 and other things.

In case your device is controlled by your organization, the best way is to use a configuration file created with the help of the Office Customization Tool to control Office installation and updates.

FIX: Surface Pen won’t work with Surface Pro 4

The Surface pen delivers the ultimate modern writing experience, as you write, draw, or mark up your documents, take notes, and capture your thoughts quickly.

This tool instantly converts these to text for ease of search and sharing – digitally.

Under normal circumstances, the Pen will interact with the screen of your Surface Pro, but if you have a Surface Pen not working with Surface Pro 4, check out some solutions to resolve the issue.

  1. Surface Pen won’t ink
  2. Surface Pen light blinks red or won’t turn on
  3. Update Surface Pen driver
  4. Buttons don’t work/writing is inaccurate or jagged
  5. Surface Pen isn’t connected with Surface Pro 4
  6. Surface Pen won’t pair with Surface Pro 4 or open apps
  7. Clicking or double-clicking doesn’t work
  8. Pen tip broke, got lost or is worn out
  9. Reboot your tablet to clear corruption issues

FIX: Surface pen not working with Surface Pro 4

1. Surface Pen won’t ink

If the Surface Pen won’t ink, make sure to test the LED functionality, if it doesn’t come on, then the problem is a power issue.

Another thing you can do is to run Windows Updates or the Surface Diagnostic Toolkit.

Making sure that the battery is charged and working is another thing you’ll have to check as well.

2. Surface Pen light blinks red or won’t turn on

This means your AAAA battery is low and needs replacement. To replace it, do this:

  • For Surface pen with no clip, pull the top end out from the bottom, replace the battery and push the parts of the pen back together
  • For Surface pen with a single long button, turn the cap or the end of the eraser in a counter-clockwise manner to the body until it clicks. Pull the cap from the body and replace the AAAA battery with the negative end pointing toward the writing tip. Replace the cap by lining up the metal guide bump on the cap with the half-circle cutaway on the body, and slide the cap back into its place. Turn it a little to align the flat edges.
  • For Surface Pen with two buttons on the side: unscrew the top of the pen from the bottom, replace the battery with the positive end pointing toward the tip, then screw the top back on

3. Update Surface Pen driver

If you’re using the wrong driver, you may not be able to use your Surface Pen, but you can update the Surface Pen driver manually, or use a driver detector.

In that matter, we suggest you use Fortect Driver Updater so you can easily get rid of the problem instantly.

All you need to do is download it and then proceed with scanning your system for any damaged, outdated, or missing drivers.

Once the scan is completed, Fortect Driver Updater will automatically fix them. Due to its included library, it will find the latest versions to install. Just make sure you are connected to the Internet.

You can therefore update drivers easily by just pressing a button, and resolving any problems associated with drivers really fast with Fortect Driver Updater.

4. Buttons don’t work/writing is inaccurate or jagged

  1. Go to Start, and select Settings.
  2. From Devices go to Bluetooth and turn it on.
  3. Select Surface Pen from the list and remove it.
  4. Select Pair when the pen appears on the list.

5. Surface Pen isn’t connected with Surface Pro 4

  1. On the Surface Pen, press and hold the button at the top until the LED light blinks to make the pen discoverable.
  2. Select Start then choose Settings and go to Devices.
  3. Select Bluetooth & other devices on your PC.
  4. Ensure Bluetooth is on and select Add Bluetooth.
  5. Choose Surface Pen from the list of devices then select Done.

6. Surface Pen won’t pair with Surface Pro 4 or open apps

  1. Press and hold the top button for about five seconds then let go.
  2. If the LED light blinks continuously, the pen is receiving power and is trying to pair with the device, so follow the pairing steps.
  3. If this doesn’t help, restart your Surface Pro 4 and try pairing again.
  4. If the LED light blinks for about 3 seconds, then the Pen is paired to another Surface device nearby so find it and remove the pen.
  5. Once you remove the pairing, go back to your own Surface Pro 4 and pair it again with the pen.

7. Clicking or double-clicking doesn’t work

  1. Go to the taskbar, select Windows Ink Workspace.
  2. Select Pen & Windows Ink settings.
  3. Go to Pen shortcuts.
  4. Choose Windows Ink Workspaceor the app you want to open for each pen shortcut.

8. Surface Pen tip broke, got lost or is worn out

If your Surface pen has no clip or has a single long button on a flat edge, get a pen tip kit at the Microsoft Store or online.

The tip kits differ from one pen to another, so ensure you get one that matches your pen model.

Your Surface needs to be registered to order pen tips, plus you have to log in with your Microsoft account.

9. Reboot your tablet to clear corruption issues

  1. Press and hold the power button on your Surface Pro 4 for thirty seconds, then release it
  2. Press and hold the power button and volume up (+) button at the same time for 15 seconds. If the logo displays, don’t let go of the buttons
  3. Wait for a little over 10 seconds and then start the Surface Pro 4 again, and see if the Surface Pen works

Did any of these solutions help? Let us know by leaving a comment in the section below.

Make sure to check out our Peripherals section to find more handy fixes for any issue that you might encounter.

In our dedicated Troubleshooting Hub, you can find more useful guides and articles so check it out!

Windows 10 Photo Viewer won’t print

While the Photo Viewer is somehow a thing of the past now, it was a big deal back in the Windows 7 and 8 days, used by millions across the world.

It did not make the leap in Windows 10 whose built-in photo viewer is now called simply: the Photos app.

Nevertheless, if you upgraded from Windows 7 or Windows 8.1, you might still have it and it might be worth knowing that other nostalgic users have been reporting printing problems with the Windows Photo Viewer application.

Especially users with XPS drivers claim that Windows 10 imported Photo Viewer won’t print or that it won’t print in color.

Our recommendation? Install a better-performing third-party app from the Microsoft Store or desktop programs like IrfanView, XnView, or Adobe Photoshop that are more feature-rich than the basic default tool.

Speaking about improvements in the photo viewers department, your best bet is definitely Adobe Photoshop if you want to always print crisp-looking images with perfect colors.

How do I change Windows Photo Viewer?

Install Adobe Photoshop

Adobe Photoshop

When it comes to photo editing and photo viewers, you simply cannot beat the world’s best imaging and graphic design software.

With Photoshop you can crop, remove objects, process, retouch, combine photos, integrate color, effects, and achieve stunning print-ready images every time.

Photoshop can send your images to a wide range of devices to be printed onto paper directly or converted to a positive or negative image on film.

Simple images use one color in one level of gray while photographs require various color tones that must be printed on separate master plates, one for each color. Photoshop even allows you to adjust how the various plates are generated.

Let’s quickly review its impressive printing focused key features:

  • Position and scale images
  • Print part of an image
  • Print vector data
  • Color management feature (to reproduce screen colors accurately on the printed page)
  • Color separation feature

⇒ Download Adobe Photoshop free here


Now you know that the Photo Viewer is not the only app that can help you open different types of image files. Though it is free, there are other software that can do a better job.

While we’re at it, check out this article for a complete list of free photo viewers. Is your favorite one in there? Let us know in the comments section below.
[wl_navigator]

ID@Xbox Spotlight launches to showcase indie games

The ID@Xbox team announced ID@Xbox Spotlight, a new initiative to highlight new indie games coming soon to Xbox One. With several industry events like GDC and E3 being either postponed or cancelled this year, Chris Charla, Sr. Director, ID@Xbox explained that this new format will also allow indie devs to discuss their upcoming games with the Xbox audience.

“With these videos, you’ll hear from the developers themselves as they walk you through some of the exciting titles coming to Xbox – including some brand new announcements like Mischief’s Adios, Strange Scaffold’s An Airport for Aliens Currently Run by Dogs, Goblinz Studio’s Legend of Keepers, Sector D2’s Project Wingman, Mighty Yell’s The Big Con and Vanimals’ Undying,” said Carla.

Five videos have been published on the ID@Xbox YouTube channel today, showing just a small part of the 1,600 ID@XBOX games currently in development. You can watch the first one below.

In recent years, the ID@Xbox program gave Xbox gamers some pretty great games including the puzzle platformers Limbo and Inside, the run and gun game Cuphead, or the cooperative cooking simulation game Overcooked 2. Two years ago, Carla announced that 1,000 ID@Xbox games had been released on Xbox One since the launch of the program.

Microsoft’s new Edge browser inches up in popularity, now 2nd most popular browser

Just a year ago, Microsoft was not in a position to compete against Mozilla Firefox in terms of market share. Interestingly, now it seems like the new Microsoft Edge has turned out to be a winning card for the Redmond giant. NetMarketShare released its monthly report for March 2020 which shows that the new Microsoft Edge browser is now the second most popular desktop browser (via TechRadar). It’s surprising to see that the browser has finally surpassed Mozilla Firefox to secure the second position worldwide.

According to the report, Microsoft’s Chromium powered Edge has finally managed to move ahead of Firefox with a 7.59 % market share. Notably, Firefox stands at the third position with its 7.19 % share. As for Google Chrome, it is still one of the most popular web browsers amongst desktop users which still remains ahead of all, as its market share is now close to the 70 % mark.

Netmarketshare Edge surpasses Firefox
Netmarketshare March 2020

However, it remains to be seen how many people have actually switched to the new Microsoft Edge from Firefox because we still don’t know the exact figure. But at the same time, it would be interesting to see if the gap between the two decreases within the next few months as Microsoft is constantly improving its default browser by releasing new features.

Do you think that Microsoft would be successful in its efforts? Let us know in the comments section below.

Gears 5 errors on PC and Xbox [COMPLETE GUIDE]

You may experience dozens of bugs while playing Gears 5 on your Windows machine. Most of them are displayed in the form of error codes like Gears 5 error gw502, error 0x00000c46, Gears 5 fatal error, to name just a few.

Normally, gamers often don’t understand what an error code means and many ignore them completely.

Please keep in mind that the solutions of many issues are hidden in the error codes themselves. You just need to figure out what each error code indicates.

Fortunately, Gears 5’s developers posted a list of error codes that generally appear while playing the game.

How do I fix Gear 5 errors on PC / Xbox?

1. Fix Gears 5 error GW500/GW504

If you get the error code GW500 or GW504, this means that your device does not meet the minimum requirements to play Gears 5.

You should upgrade your graphics card to play Gears 5 on your device. You can try one of the following cards to get optimal performance while playing Gears 5.

  1. AMD Radeon RX 570 or AMD Radeon RX 5700
  2. NVIDIA GeForce GTX 970 or NVIDIA GeForce GTX 1660 Ti

2. Fix Gears 5 error GW501

You may get error code GW501 or GW502 when you try to play the game on your Windows PC. This is a known issue and it is triggered when your graphics card has some compatibility problems.

Contact your graphics card manufacturer to check for the latest driver updates.


This is how you can update outdated drivers in just two minutes.


3. Fix Gears 5 error GW502/GW503

The error code GW502 means that your video card has stopped responding on your Windows device. The error code GW503 appears when your system fails to detect your graphics card.

The issue is caused due to the unstable state of your graphics card. You should reboot your machine to resolve it.

If the problem persists, check for latest driver updates by contacting your graphics card manufacturer. If you are already running an updated version, reduce visual settings.


4. Fix Gears 5 error GW510

The error code GW510 means that your graphics card does not meet the minimum VRAM requirements to play the game. Your graphics card should have at least 2GB of video memory.

You can play the game at less video memory, but it will affect the performance and quality of the game. The optimal performance can be achieved by upgrading your graphics card

If you fixed the GW511 error but still face connection problems, check our guide on Gears of War Reloaded multiplayer not working to troubleshoot online issues.


Still getting Gears 5 issues? Maybe you need a new graphics card. Here are some of the best options.


5. Fix Gears 5 error GW511

If you get the error code GW511 it means that your Windows system has less than 6GB of system memory.

You should upgrade your system with at least 6GB of system memory (RAM). It is the minimum requirement to play Gears 5.

You need to carefully follow the instructions to resolve these errors on your machine. Some of them would be resolved in no time.


[wl_navigator]

Toshiba webcam not working

Toshiba laptops are very reliable devices, but still, their users are not without issues. One commonly reported issue concerns the webcam which isn’t always working on Windows 10.

There are so many reasons why this may occur, so we’ll cover all approach angles in order to help you. If you need to fix the Toshiba webcam, check the steps below.

What can I do if Toshiba webcam is not working

  1. Check drivers
  2. Scan for malware
  3. Run Windows Troubleshooter
  4. Use OEM’s camera software
  5. Check BIOS
  6. Tweak Registry
  7. Check hardware

1. Check drivers

  1. Right-click Start and open Device Manager.
  2. Navigate to Imaging devices.device manager
  3. Right-click on your webcam and choose Update driver.
  4. Restart your PC and look for changes.

Now, if this wasn’t enough, you should navigate to Toshiba’s official site and download proper drivers from there.

  1. Navigate to Toshiba’s official site by clicking on this link.
  2. Open the Drivers & Software section.
  3. In the Search bar, type your device model and press Enter.toshiba support drivers & software
  4. That way, you should be able to locate proper and updated camera drivers.
  5. Download, install drivers and restart your PC.

In 90% of reported issues, the problem was driver-related. As you might know, drivers are the essential part of the Windows shell, and, consequently, without proper drivers, you won’t be able to run a single piece of hardware. That includes a built-in camera.

So, for all intents and purposes, you’ll need to check your drivers firstly before we move to additional steps. When it comes to Toshiba webcam drivers, most of the time, those are provided by Windows Update. Now, this might work for some users, while for others, the generic driver won’t suffice.

Automatically update drivers (third-party tool suggested)

We also strongly recommend a third-party driver updater tool that uses advanced updating technology to will help you update your drivers in order to avoid permanent damage to your computer by manually downloading the wrong driver versions.

2. Scan for malware

Some users tried every known workaround but succeeded in resolving camera issues only after dealing with viruses. It seems that certain malicious software affects laptop cameras rendering them unusable. Namely, it seems that it automatically disables the camera, and users are left with the black screen.

Now, for in order to address this concern, you’re going to need either third-party antivirus or up-to-date Windows Defender.

If you’re not sure how to perform a deep scan with Windows Defender make sure to check the instructions we presented below.
  1. Double-click on Windows Defender icon in the notification area to open the dashboard Security Center.
  2. Open Virus & threat protection.
  3. Choose Advanced scan.
  4. Select Windows Defender offline scan.Windows Defender Offline Scan

3. Run Windows Troubleshooter

This might seem like an extremely generic solution, but, when in doubt — try every given option. Windows’ native troubleshooting tools changed a lot on the latest few system iterations, but they remained useful for minor issues troubleshooting and fixing. If nothing else, they can give you a better insight into the cause of the problem.

  1. Press Windows key + I to open the Settings app.
  2. Choose Update & security.
  3. Select Troubleshooting from the left pane.
  4. Run Hardware and Devices troubleshooter.run the hardware troubleshooter

4. Use OEM’s camera software

Occasionally, it doesn’t matter if your camera drivers are properly installed. It all falls down to the individual program that’s responsible for the camera. In Windows 10, once you install the system, the default Camera app will take over the camera device. And, as we already said in one of the previous articles, this app can misbehave occasionally.

For that purpose, we advise you to try original OEM’s software or some other third-party camera app and look for changes.

Just make sure not to download the untrusted applications and you should be good to go. A detailed explanation of the best-suited apps for the job can be found in this article.

5. Check BIOS

We all know that UEFI and BIOS settings on laptops are fairly limited option-wise. However, some users reported that their Toshiba laptops have an option to enable or disable the built-in camera in BIOS settings. We can’t say with certainty what models have this option, but it will cost you nothing to go and check out on your own.

If you have this option, there’s a chance that this mistakenly led to disabling your web camera. In order to do so, follow the instructions below:

  1. Restart your PC and, while booting, press repeatedly the Delete button.
  2. Once you’re in the Boot Settings menu, choose the Advanced tab. It may differ on various Toshiba laptops.
  3. Choose System Configuration.
  4. Select Web Camera and make sure to Enable it.
  5. Save changes and exit BIOS settings.

6. Tweak Registry

Due to differences in the encoding standard, webcams available on older devices start misbehaving in Windows 10. If your Toshiba laptop falls into this category, you might need to turn to a subtle Registry trick in order to use your camera like before the problem emerged.

This might come as a surprise, but there’s a registry entry that fixes the problem completely. However, act with caution. We don’t want to make rush moves while in the Registry Editor.

So, in order to avoid additional issues and to resolve the camera problem, follow closely the instructions below:

  1. In the Search bar, type Regedit.
  2. Right-click the Registry Editor and run it as an administrator.
  3. Click on File, choose Export, and backup your registry. This is a security measure in case something goes wrong.backup registry
  4. Follow this path:
    • For 32-bit system: HKEY_LOCAL_MACHINESOFTWARE
      MicrosoftWindows media foundationPlatform 
    • For 64-bit system: HKEY_LOCAL_MACHINESOFTWARE
      WOW6432NodeMicrosoftWindows media foundationPlatform
  5. Right-click in the right window and choose New > DWORD (32) Value.
  6. Rename this value and name it EnableFrameServerMode.EnableFrameServerMode set value to 0 in registry
  7. Right-click and choose to Modify this newly created registry value.
  8. Set its value to 0 (zero) and save changes.
  9. Restart your PC.

7. Check hardware

Finally, if none of the previous software-related workarounds helped you, there’s a chance that the hardware is malfunctioning. There are some things you can do in this department, too, but we advise you to rather take your PC for a repair.

If you’re inexperienced, it’s always better to let the professionals take care of your laptop. And, as we’re aware, the camera sensor replacement isn’t too pricey. On the other hand, if you’re an experienced user, you can try googling for hardware troubleshooting and perform minor repairs on your own.

Either way, that should conclude it. We certainly hope you were able to resolve the issues with your Toshiba webcam in Windows 10 by following the aforementioned steps.

In addition, don’t forget to share with us your webcam issues in detail. You can do it in the comments section below.
  • How do I turn off the camera on my Toshiba laptop?

In the search bar type Device Manager and select. Click the dropdown arrow next to Imaging devices/Camera. Right-click Integrated Camera and select Disable device. If your Toshiba webcam not working, this guide will help.

Fix Windows 10 Troubleshooter error code 0x803c0103

Windows 10 Updates are occasionally quite troublesome. There are dozens of different update-related errors plaguing users from day one.

And, since updates are mandatory in Windows 10, chances are you’ll run into one of the errors sooner or later. After the error occurs, most users will reach for the built-in troubleshooter.

However, there seems to be an error with the Update Troubleshooter itself and it goes by the 0x803c0103 code.

If this or similar errors bother you while running the Update Troubleshooter, make sure to try the steps below in order to resolve it.

How can I fix update error 0x803c0103?

1. Run SFC and DISM

Let’s start with the usual solution whenever any system tool fails to deliver. If some of the essential Windows files are corrupted, chances are that certain built-in features will get broken.

This isn’t uncommon for Windows Update for Windows 10, which tends to break PCs left and right. Users who experienced the update error and then tried running the troubleshooter, have tasted this first hand.

When something like this happens, we need to check the system for corruption. Whether the last unoptimized update brought this upon you, or it’s something else at hand – it doesn’t matter.

What matters is that you have all the tools you need to fix it right there. The first tool is the System File Checker, which scans and resolves system corruption.

The other one takes the same task to another level and it’s called Deployment Image Servicing and Management or DISM. They work best when combined.

Here’s how to run SFC and DISM on your PC:

  1. In the Windows Search bar, type cmd. Right-click click on Command Prompt and run it as admin.
  2. In the command-line, type sfc/scannow and press Enter.windows 10 update troubleshooter error 0x803c0103
  3. After its done, type the following command and press Enter after each:
    • DISM /online /Cleanup-Image / ScanHealth
    • DISM /Online /Cleanup-Image /RestoreHealthwindows 10 update troubleshooter error 0x803c0103
  4. When the procedure ends, restart your PC.

Alternatively, you can rely on third-party optimizing tools that can restore your PC from crashes or errors like the one here.

Plus, you have the benefits of optimizing your PC processes and repairing various system or program malfunctions.

2. Reset Update services

If we avoid the premise that the update in itself is badly administered, we are left with some internal issues you should check up.

Namely, maybe the update files stored on your PC are corrupted or the associated services won’t start when needed.

If that’s the case, we suggest resetting the said services and redownloading the update files stored in the SoftwareDistribution folder. Here’s what you need to do:

  1. In the Windows Search bar, type cmd.
  2. Right-click the Command Prompt and run it as an administrator.
  3. In the command-line, type the following commands and press Enter after each:
  • net stop wuauserv
  • net stop bits
  • net stop cryptsvc
  • ren C:WindowsSoftwareDistribution SoftwareDistribution.old
  • ren C:WindowsSystem32catroot2 Catroot2.old
  • net start wuauserv
  • net start bits
  • net start cryptsvc

After that, check for updates again.

3. Use a downloadable troubleshooter

If the built-in Update Troubleshooter won’t work, we suggest using a downloadable alternative provided by Microsoft. This tool should, in theory, completely fill in for the built-in Update Troubleshooter.

It doesn’t require installation and you can run it as soon as it’s downloaded. It should scan for update-related errors and fix them accordingly.

If you’re not sure where to get it and how to run it, here’s the whole step-by-step explanation:

  1. Download Windows Update Troubleshooter from here.
  2. Right-click on the tool and run it as administrator.windows 10 update troubleshooter error 0x803c0103
  3. Follow the instructions and restart your PC after the fix is applied.

4. Reset this PC

Finally, if none of the previous steps helped you resolve the error at hand, we suggest resetting your PC to factory values.

I’ve done it myself multiple times after an insider update that completely ruined my system or made some of the key features inaccessible.

After the reset, everything worked just fine. And, most importantly, you get to keep your files and settings. Errors like the 0x803c0103 usually affect users who upgraded over Windows 7/8.1.

So a clean reinstallation is another option you might consider.

Here’s how to reset your PC to factory settings:

  1. Press Windows key + I to summon the Settings app.
  2. Open the Update & Security section.
  3. Select Recovery from the left pane.
  4. Under Reset this PC, click Get started.windows 10 update troubleshooter error 0x803c0103
  5. Keep your files and start the restoration process.

With that said, we can conclude this article. Hopefully, one of the enlisted steps helped you address the troubleshooter error 0x803c0103.

In case you have any questions or suggestions, feel free to tell us in the comments section below.
If completely removing it from your PC is required, be sure to use the best uninstaller software of the moment.

  • How do I run Windows Troubleshooter?

To do so, follow this path Start > Settings > Update & Security > Troubleshoot. If you can’t open the Setting app, take a look at this article to solve opening Settings issues.

  • Is Windows 10 repair tool safe?

Microsoft developed a troubleshooter program and a repair tool specifically to help you with all sorts of problems. The Windows 10 repair tool is safe, so don’t hesitate to try it out.

Slow Xbox One Game Downloads: 10 Ways to Speed Them up

The biggest benefit of Xbox Live, of course, is to make every game available for users to download and play without a CD. Although having a big collection of Xbox One discs is a pretty cool thing, we must agree that keeping them on the hard drive is more practical.

However, not everything is always flawless when downloading games from the Xbox One Marketplace. One of the most common issues many users face is the problem of slow downloads or the Xbox app failing to update games. There’s nothing more annoying than waiting for your new favorite game to download longer than you should.

But don’t worry, though. If you’re facing the problem of slow download speeds while downloading a new game, we got you covered. We gathered some of the most common solutions for the slow download problem on Xbox One, and you can check them out below.
How do you fix a slow download speed on Xbox one?

1. Check internet connection

In most cases, the problem is not on your Xbox One, but your internet connection. So to start, make sure your internet connection is working properly. You can log in to your computer and see if everything is in its place. If you notice any problem and don’t know how to solve it, check out our article about internet connection problems and you might find the solution.

2. Restart the console

On the other hand, there’s a chance that something indeed is wrong with your console. To make sure everything is right, try restarting it, and see if the restart manages to get your game to download faster.

To restart your Xbox One, do the following:

  1. Scroll left on the Home screen to open the Guide.
  2. Select Settings.
  3. Go to Restart console.
  4. Select Yes to confirm.

This will automatically restart your Xbox One. When Xbox One is restarted, all your downloads will be paused. Once you run the console again, you’ll have to initiate downloading of your queued games once again. If you’re not sure how to do that, follow these instructions:

  1. On the Home screen, scroll to the right, and press the A button to open My games & apps.
  2. Select Queue and select the game you’re trying to download.
  3. The game should show as Installing (If the status shows as Queued or Paused, select the game, press the Menu button, and then select Resume installation).

If your game is now downloading faster, all your Xbox One needed was one simple restart. But if the problem still persists, try some of the solutions listed below.

3. Make sure you’re not downloading multiple games at once

If you’re downloading something else on your PC or some other device, that download will take priority. Therefore, the game download on your Xbox One will be slower. So, make sure you’re not downloading anything else except the Xbox One game.

If you have another download running, pause it, and your game should start downloading faster.

4. Make sure nothing else uses the protocol

The same goes for other Xbox One games. If you’re downloading two games at the time, both downloads will be slower. You probably want to download all games as soon as possible, but running multiple downloads at once will only make things slower.

5. Close any running games

Xbox One is programmed to slow down any running downloads while playing a game to provide the best possible gameplay experience. So, you can’t expect to play another game on Xbox and have the download perform at the best possible speed.

If you assume that a particular game is left running, you can force close it. If you’re not sure how to do that, follow these instructions:

  1. On the Home screen, navigate to your most recently run game from the list of games and apps.
  2. With the game selected, press the Menu button and select Quit.

6. Check your router

If all the previous solutions failed to make your download faster, we’re going to get back to your internet connection. If something’s wrong with your router, logically, you won’t be able to download the game at full speed. So, check your router for any possible flaws. In case you’ve noticed a problem, check out our article about router problems for possible workarounds.

7. Check the Xbox Live service status

One of the most common reasons for downloading issues is the Xbox Live server itself. If the server is down, you obviously won’t be able to download your game. Even though it doesn’t happen on a daily basis, it’s possible for the server to go down from time to time.

You can check the status of the Xbox Live service at any time here.

8. Sign in with the right Microsoft profile

You have to be signed with a Microsoft profile that the purchase of the game is associated with. So, make sure you are.

9. Check the space on your hard drive 

  1. From Home, select My games & apps.
  2. On the left side, a meter shows space used and total free space.
  3. If you don’t have enough storage space to download the game you can simply delete a game you’re not playing frequently.
  4. From the same My games & apps menu browse your games and apps and select the ones you want to uninstall.
  5. Press the Menu button on your controller.
  6. Select  Manage game/Manage app.
  7. Select the installation (for example, select Internal Manage all).
  8. Select Uninstall all.

Another reason for not being able to download an Xbox Game on your console is if you don’t have enough storage space for it. If you’re not sure how to check the available space on your Xbox One, just follow the above instructions.

NOTE: If you have low storage space, you’ll likely receive a notification about it, so make sure to check all your notifications.

10. Install Xbox updates 

Updates for every Microsoft product can be messy at times. So, it’s possible that some of the previous updates you installed on your console actually messed it up. For that reason, it’s highly recommended to install the latest update available, as there’s a chance Microsoft already addressed the issue. Here’s how to check for updates on your Xbox One console:

  1. Press the Xbox button to open the guide.
  2. Go to System > Settings.
  3. Now, head over to System > Console info.
  4. If there’s a new update available, the system will automatically prompt to install it.
  5. Now, just wait for the update to install, and restart your console.

Resident Evil 3 remake is now live on Microsoft’s Xbox One video game consoles

The highly-anticipated remake of Resident Evil 3 is now live on Microsoft’s family of Xbox One consoles.

This latest version of the game is designed from the ground up for modern consoles with improved graphics, gameplay, and 4K Ultra HD when played on an Xbox One X.

Here’s the official store description and trailer:

Jill Valentine is one of the last remaining people in Raccoon City to witness the atrocities Umbrella performed. To stop her, Umbrella unleashes their ultimate secret weapon; Nemesis! Also includes Resident Evil Resistance, a new 1 vs 4 online multiplayer game set in the Resident Evil universe where four survivors face-off against a sinister Mastermind.

Resident Evil 3 also comes with the new multiplayer game, Resident Evil Resistance. It’s a one versus four online multiplayer experience which tasks four players with being survivors and the remainder being the evil Mastermind.

Experience a new 1 vs 4 online multiplayer game set in the Resident Evil universe where four survivors face-off against a sinister Mastermind. As the Mastermind your aim is to prevent the survivors from escaping by whatever means necessary. At your disposal will be all manner of tools including summoning vicious monsters, setting deadly traps, weaponizing cameras and more! In turn, the Survivors must work together to fend off the Mastermind’s attacks and complete puzzle style objectives to escape the map before time runs out!

Have you had a chance to play Resident Evil 3 yet on your Xbox One? Let us know if you liked it in the comments below and then stay tuned for our full review in the very near future.

RESIDENT EVIL 3 for Xbox
Developer:
CAPCOM CO., LTD.
Price:
$39.99

Voice Assistant for PC: 6 Best to Use in 2026

Talking PC software tools take your ordinary computer and give it Artificial Intelligence powers. There are a lot of AI programs that allow you to interact with your PC and transform the machine into your very own personal assistant.

Thankfully, we live in a time where interacting with your computer is not Sci-Fi anymore. And this possibility is right here at your fingertips, so it would be a shame not to try it for yourself.

We gathered the 6 best PC tools that can talk back to you, so make sure to check out their features. Some are unique.

After seeing what they’re capable of, you can make an informed decision for your needs. Become BFFs with your computer today!

Top 6 software programs that talk back

Jarvis

Jarvis is created by The Pennyworth Project, and it’s a great context-sensing software program with prediction support. It supports Learners, Predictions, Rules, and Sensors.

The automatic mode provides correction when a specific trigger is detected, and you will get the opportunity to configure the triggers via the configuration menu.

Here are the key features of Jarvis:

  • After you install the Jarvis app, you can launch the software by finding and clicking the new Jarvis group entry in Windows’ Start Menu.
  • When you first launch the tool, there’s a small icon that will appear in the system notification area, and this will be the main way that you will use to interact with JARVIS.
  • If you right-click on the icon, there will appear a menu, and this will expose all the functionalities that this software is able to provide.
  • You will be able to train the software and monitor its context predictions until it gets better and better.
  • Over time, the software will become great at predicting your context automatically.

⇒ Get Jarvis


Looking for a language-learning software with speech recognition? Find the best ones in this article.


Braina

Braina is short for Brain Artificial, and it’s an intelligent virtual assistant that will allow you to interact with your PC via voice commands.

If you think that this sounds a lot like Siri or Cortana, we have to tell you that you’re wrong. Braina is not a search program, and it can do much more.

Here are the key features of the Braina AI software:

  • This is a human language interface, voice recognition and automation software for systems running Windows.
  • This fantastic software allows users to accurately convert speech to text in more than 100 different languages.
  • Using Braina, you will be able to control your computer using natural language commands.
  • This is not a simple chat-bot, and its primary focus is to be extraordinarily functional and to help users in doing various tasks.
  • You will be able to type all kinds of commands and even speak to it, and Braina will understand perfectly what you want from it.
  • Braina is a result of intense research that was made in the field of AI.
  • The software is a digital assistant that is able to understand, think and also learn from its experience just like a human brain.
  • Braina can also learn from conversations.

This is a multi-functional AI software that provides a single-window environment to control your PC and perform a massive range of tasks such as dictation, searching data online, playing songs, opening and searching files on your PC, setting alarms and reminders, performing mathematical operations, remembering notes, automating various tasks, reading e-books and more.

⇒ Get Braina


Take a look at the best speech therapy software for Windows 10 in this useful article. 


Talk for Me

Talk for Me is an app that is designed to offer a voice to those without a voice.

It comes with a few sections with tiles that are designed to help users string together sentences in order to be able to communicate better with the ones around.

This tool also packs a dedicated keyboard function where a user will be able to type in a message and then have the computer speak on their behalf.

This tool is more than useful for people who have Autism, PSP, ALS, CBD, survived strokes and more.

Here are the key features of Talk for me:

  • This is a text to speech designed app with massive touch points.
  • The software comes with a customizable home screen that makes it easy to use even for people who are not really advanced or experts in this kind of software.
  • The customizable sections include People, Food, Phrases, People, Sports, Entertainment, Medical, Numbers, and Persona Information.
  • The app comes with a large on-screen keyboard.
  • You will be able to adjust the rate of speech and the voice based on your computer’s installed voices.
  • This software works flawlessly with mouse, touch, keyboard and also pen, but this depends on the device that you are using.

This app packs a lot of useful features and the fact that it’s highly customizable comes in handy every time.

There are lots of users who say that they use this app for patients who are not able to speak and via this app, the patients are able to communicate with others, and this is beyond amazing.

⇒ Get Talk to Me


If you’re interested in speech recognition apps for Windows 10, find our best picks in this article.


DataBot

DataBot is a free virtual talking robot that you will be able to install on your computer running Windows. It answers to your question with its own voice, depending on the topic.

There are various apps and services that are integrated into this software to module in the bot’s memories, to give back to you images and to search all kinds of data.

You will be able to use DataBot whenever you travel, study, work, relax or play because it will search for you all that you need to listen or know in just a few seconds.

Here are the key features of DataBot:

  • This software is able to quickly identify the subject that you required.
  • DataBot can create customized multimedia presentations using text, images, and voice as well.
  • This program is also able to answer various specific questions, and it will create reports that will include the answer, related details, search services, materials, links and more.
  • DataBot allows you to share answers effortlessly using SMS, social networks, and emails.
  • You can also enhance the bot’s abilities by using free or purchased upgrades.
  • DataBot has the fantastic features of customizing itself based on your preferences that include voice, language, name, and behavior.
  • The software will gain experience while you are using it and this can be considered as an alternative method to obtain upgrades that are available in the store or various exclusive rewards.
  • The services and modules that are available in DataBot include some of the following: dictionary, horoscope, secretary, thematic, jokes, news, sounds, brain train, riddle, quotes, and more.

⇒ Get DataBot


Cortana

cortana microsoft launcher

If you’re using Windows 10, you should already be familiarized with the Cortana virtual assistant. It’s a useful AI-powered tool you can use to set reminders, dictate emails to, find various information on the internet and so on.

Microsoft has added a series of new features to its virtual assistant in recent years. You can now use it on other operating systems as well, including Android.

Of course, in order to work properly, Cortana needs to access all the information on your computer. Some users may feel this affects their privacy, so keep this fact in mind when you turn on Cortana.

⇒ Get Cortana


Want to know how to install Cortana language packs on Windows 10? Check out this handy guide.


Computer Talker

Many people rely on text-to-speech programs since the PC does all the talking. Computer Talker is a free text-to-speech software for Windows, created by Point64.

It’s a simple tool that translates and converts anything you write to make the computer speak it out loud. Computer Talker has a built-in naturally sounding voice that can read your text out loud.

Here are the key features of Computer Talker:

  • It comes with a straightforward user interface that makes it easier to be used even for beginners.
  • The software is able to read or convert the text into speech using its naturally sounding female voice.
  • This piece of software is effortless to use, and all you have to do is copy and paste the text that you want to convert into speech, and after you are done, you have to press the Talk button.
  • The program can easily recognize English words, and it is able to pronounce them correctly.

⇒ Get Computer Talker


If you want to change your voice on Skype, check out this article with the best tool to do that.


Conclusion

These are six of the best programs that can make your computer talk to you and it’s recommended that you check out the whole set of their features before making your final decision.

You can also try Google Assistant for PC when you want a powerful alternative voice assistant that works smoothly on Windows.

If you have any other recommendations or questions, feel free to reach for the comments section below.

Microsoft operations team pivots to help local communities in Coronavirus crisis

With the Coronavirus crisis impacting Seattle hard, Microsoft is taking significant steps to help out their local community. In a series of tweets sent out by John Trujillo, the director of Microsoft’s Puget Sound real estate operations, we learned a bit more about how the company has shifted some of its usual operations to do its part.

According to Trujillo, once Microsoft’s work from home orders came, he realized that the community’s needs needed to be put first. Instead of supplying the Puget Sound Microsoft campus with materials, work shifted to scouring for personal protection equipment, hand sanitizer, and disinfectant wipes for employees, and for local hospitals in need.

In a few weeks, John’s team distributed over 240,000 medical masks, 100,000 nitrile gloves, 74,400 goggles, and 850 protective suits. Additionally, instead of putting campus food usually reserved for employees to waste, Microsoft also assembled and delivered 6,000 lunch boxes a day to families in need, for a total of 30,000 lunches per week.

The folks behind the operation had to work with local philosophies to source, assemble and distribute the meals and also source the necessary equipment. There was also a tremendous learning curve, and Microsoft coordination with its suppliers to make this possible.

Microsoft’s won’t release a new Windows Insider build this week due to blocking bug

Sorry Fast Ring Insiders, Microsoft has just announced that there won’t be a new flight this week. Indeed, the Windows Insider team has recently discovered a blocking bug that won’t be fixed until next week.

Microsoft released the build 19592.1001 for Fast Ring Insiders last week, which brought back the Tablet posture improvements for 2-in-1 convertible PCs that Microsoft first started testing last year. This build also brought an update for the Windows Search Platform (Indexer) to make it more efficient.

For Slow Ring Insiders, Microsoft also released a new cumulative update for Windows 10 version 2004 (20H1), which is likely almost ready to roll out to the general public. The company has yet to announce a release date as well as an official name (April 2020 Update? May 2020 Update?), but we’ll likely get more details very soon.

Zoom is popular and easy, but just how dangerous is it?

As more and more people head online due to the Coronavirus pandemic companies have turned to telecommunication tools like Microsoft Teams, Zoom, and Slack to continue their operations. Much like other services, Zoom has seen a surge in use. Reports have even said that it has seen up to 190 million daily users.

There have, however, been many security worries behind the service, causing the company itself to come out and respond. Here’s a recap of everything you need to know.

The Zoom risks and worries

We already covered the encryption, data collection, and privacy issues of Zoom in the ending of our separate post, but recently, security researchers have found things that go beyond that.  Most of these have been patched, however, but are still worth mentioning in retrospect. There’s also the concerning fact that government agencies running the response to the Coronavirus epidemic here in the United States spent big money on Zoom, and are actively using it, too, according to Forbes.

Anyway, for Windows 10 users, the biggest risk of them all was a UNC party injection in Zoom’s Windows 10 app. As pointed out by Bleeping Computer, with this security flaw, Zoom’s Windows 10 apps turns Windows networking UNC paths into clickable links. This allows Windows to connect to a remote site using SMB-file sharing protocol, and then send over the user’s login and password hash. It wasn’t isn’t the easiest thing for the average user to do, or for the receiver to recover, but it was still a glaring risk that was since patches, nonetheless.

For a few thousand, there’s another issue involving leaking peoples’ email addresses and photos. Noted by Vice, with this problem, the company directory setting of Zoom will automatically add people to a user’s lists of contacts if they signed up with a personal non-standard public email address that shares the same domain. It’s designed to make it easier to find a colleague, but it also pools people together as if they worked together with the same company, allowing you to see their names, email addresses, photos, and more.

Other security issues relate to macOS, where a zero-day bug allows any website to open a Zoom call with their video camera activated. As reported on Vice, Apple patched this via a silent update to the Malware Removal Tool.  Of course, there is the (now-patched) Facebook connection with Zoom, too. Without users permissions, the Facebook SDK in the Zoom iOS client was collecting non-personal device information and sending it to Facebook.

Oh, and let us not forget “Zoombombing” where random people could join in on Zoom meetings that aren’t protected. There are some suggested workarounds to prevent this as well, including using waiting rooms, passwords, and muting controls.

The Zoom response

As a response to these worries, Zoom’s own founder Eric Yuan has admitted to these concerns and showed how the company would respond. Interestingly, Yuan admits that the platform was built primarily for enterprise customers with a large IT base. He also admits that there was no way of knowing that everyone in the world would end up using Zoom, and said that “we now have a much broader set of users who are utilizing our product in a myriad of unexpected ways, presenting us with challenges.”

This alone shows why it’s best to keep away from Zoom for personal use, but still, Yuan admits that any security threats will be taken seriously and that “We are looking into each and every one of them and addressing them as expeditiously as we can.”

In the post, Yuan pointed to a company a blog post to help explain how to stop Zoombombing. The company also removed Facebook SDKs from its iOS app and updated its privacy policy to say it does not sell user’s data.  Zoom also will put all new features on hold to better handle privacy concerns, expand its bug bounty program, and even host a weekly webinar to explain privacy and security updates to the public.

Now, what about Microsoft?

With Teams being used by 44 million people daily, and Skype recently hitting the 40 million daily active users mark, there is a need to look at Microsoft’s security practices, too. After all, people are in need of virtual ways to communicate. People want a trusted platform where they can communicate, without worry. People don’t want their data to be sold.

Microsoft’s policies on this are clear and simple. As we’ve said multiple times, Microsoft does not use your data for anything other than providing you with the service that you have subscribed to. Microsoft also does not scan your email, documents, or teams for advertising or for purposes that are not service-related. Microsoft even doesn’t have access to your uploaded content. We suggest that while popular and easy are enticing, that you don’t forget privacy and security when making decisions on ways to make it through these difficult times.

Microsoft files patent for human powered crypto mining system

Earlier this week, Microsoft filed a patent for a new human-powered cryptocurrency mining system that uses data generated by people to solve computationally difficult problems without even thinking about it.  While the description of the patent application goes into specific technical details, the idea is that people could be rewarded with cryptocurrency based on the activities they perform.

Imagine, you go running, play a video game, or participate in a yoga class, based on your mental concentration or physical exertion during those activities, you generate data that this proposed system could use to solve complicated math problems. While the patent seems to be a bit of science fiction, the reality is that the patent seems to tap into something many of us are already doing.  For example, tracking a run with a watch or mobile device and sharing that data with different apps or services, and with this patent, Microsoft is looking at using those same sensors to detect when the body is doing a physical task, such as a faster pulse, and then use that data to solve the math problems.

Microsoft describes the patent this way, “instead of massive computation work required by some conventional cryptocurrency systems, data generated based on the body activity of the user can be a proof-of-work, and therefore, a user can solve the computationally difficult problem unconsciously.”

Whether this patent idea becomes a reality remains to be seen and there are still a significant amount of questions that remain around privacy and on whether this will work on existing blockchain protocols, or be a new one is unknown.  I think it would be safe to assume that Microsoft will at least leverage their Azure Blockchain as a Service as a fundamental part of their system. However, if someone wants to pay me for data I am already generating sounds pretty good to me.


Microsoft’s pirate game Sea of Thieves is coming to Steam

Sea of Thieves started off as an Xbox One exclusive before moving to Windows 10 PC via the Xbox Game Pass Ultimate. Now, Sea of Thieves is “coming soon” to Steam. In the last couple of months, Gears 5, Halo: The Master Chief Collection (MCC), and State of Decay 2 have also appeared on Steam. On Twitter, Nibel spotted the Sea of Thieves page on Steam.

Sea of Thieves is an open-world, co-op pirate simulator that was developed and released in 2018 by Rare. Sea of Thieves has been available for free for Xbox Game Pass subscribers since the game’s launch on Xbox One and Windows 10 PC via the Microsoft Store. Since its launch, Sea of Thieves has gotten plenty of updates to squash bugs and performance issues. Sea of Thieves has also added new game expansion packs for free to Xbox Game Pass subscribers. It should be noted that an Xbox Live Gold subscription is required to play Sea of Thieves.

Here is the official announcement from Xbox. Or if you want, you can join Xbox Game Pass and start playing Sea of Thieves today. Otherwise, Sea of Thieves is available for $39.99 through the Microsoft Store.

Xbox Game Pass Ultimate


Do you think Xbox Game Studios should release more games on Steam? Let us know in the comments.

Xbox head Phil Spencer feels “really good” about Xbox Series X’s appeal following PlayStation 5 reveal

Head of Xbox Phil Spencer was the special guest of IGN’s Podcast Unlocked this week, and this episode is a nice follow-up to the full reveal of the Xbox Series X and the PlayStation 5’s specs last month. On paper, Microsoft will kick off the next console generation with the most powerful console, a stark change compared to the Xbox One launch seven years ago.

Speaking with IGN, Phil Spencer did seem really confident about the hardware choices the Xbox team made for the Xbox Series X, especially compared to what Sony revealed about the PlayStation 5. “I will definitely have respect for any platform team that’s launching, it just takes a lot of work. But I will say, when we finally saw the public disclosure, I felt even better about the choices that we made on our platform. And I kind of expected that I would,” Spencer said.

Even though the 12 teraflops of computing power for the Xbox Series X should appeal to many hardcore console gamers this holiday season, Sony’s slightly less powerful PlayStation 5 could still beat Microsoft on price, just like it did with the PlayStation 4 back in 2013. But again, Phil Spencer isn’t too worried about that.

“You have to set a price target at the beginning for yourselves. And then you kind of roll in as you see the competition come in and start to go to market planning. I feel good about the price that we’re going to be able to get to. I feel good about the price and the performance capabilities that we have with Series X. I feel incredibly strong about the overall package,” the head of Xbox explained.

Phil Spencer’s strong hammering reached a new point in the podcast when the exec Microsoft leading the next generation of consoles. “We’re definitely going to be continuing to keep our eyes wide open as we go towards launch, looking at what the competition is doing, but you know, we have a plan and we feel very solid about our plan. We think it’s a winning plan. I believe we have a plan that can win, we’ve got to go execute. But I feel really good about the plan that we put together,” Spencer said.

It’s quite striking to see the head of Xbox with such a level of confidence ahead of the launch of Xbox Series X and PlayStation 5, but as the exec said, it’s now up to the Xbox team to execute on the company’s plans. Microsoft appears well-positioned with an incredibly powerful console and great services like Xbox Game Pass, but we shouldn’t underestimate the power of brand loyalty, with Sony managing to sell more than 100M PlayStation 4 consoles during this generation. Sony also has a stellar lineup of exclusive games, something that Microsoft has been willing to address by acquiring several new studios in the past two years.

In the meantime, it’s hard to ignore that the Xbox team has been winning on the communication front so far. Microsoft already showed the design of its new console, as well as some gameplay footage of Gears 5 running on Xbox Series X. In the meantime, Sony has yet to reveal the design and internals of its PlayStation 5. Phil Spencer also reconfirmed during IGN’s podcast that as of today, the coronavirus outbreak won’t delay the release of Xbox Series X this holiday season, even though the Xbox team has been impacted.

“I’d say things right now aren’t easy, I think they’re stretched. I can feel it in the teams – they’re stretched. We have nothing right now that says we’re not going to make the dates we’ve been planning but I’ll also say this is real-time stuff and I’ll put the safety and security of teams at the top, along with a quality product. I don’t want to rush a product out if it’s not ready,” Spencer said.

If Phil Spencer is also working from home these days, the exec said on Twitter that he’s shaking things up with a work meeting done in the much-anticipated Minecraft Dungeons game. That sounds indeed more fun, if maybe not as productive as using Microsoft Teams.

Microsoft starts sending invites for its Project Cortex Preview program

Microsoft unveiled its Project Cortex Preview program back in November 2019. However, the Redmond giant was not accepting applications from the participants back then. In a follow-up step, Microsoft has now announced that the company has finally started to send invites for its Project Cortex Preview program though, but there is a catch. The invites are currently limited to a subset of applicants.

A blog post to the Microsoft Tech Community forums explains:

We’re opening a limited number of spaces for the next wave of our Project Cortex private preview program. Applications are open through April 8, 2020. We’ll notify selected participants by the end of April. Visit our preview program blog post to get more details on requirements and apply for the preview program.

Moreover, Microsoft confirmed that those applicants who have already applied don’t need to reapply. The Project Cortex team will “consider both existing and new applicants” during the selection process.

For those don’t know, with this new service, Project Cortex, Microsoft plans to help enterprises in organizing their corporate data. Notably, the service first leverages artificial intelligence to analyze valuable data within your organization’s documents. The data is then organized into topics and shared in Outlook, SharePoint, and Microsoft Teams.

Do, you think that Project Cortex is going to be a useful addition in your organization’s workflow? Sound off in the comments section below.

Xbox beta app on Windows 10 to get better performance after switch to React Native

Microsoft’s Xbox beta app for Windows 10, which made its debut last year with the launch of Xbox Game Pass for PC, is about to get faster and leaner. Windows Central noticed the under-the-hood changes in the latest update that shipped to Fast Ring insiders, with the app ditching the Electron framework also used by Skype on Windows in favour of Facebook’s React Native framework.

According to Windows Central, the new version uses over 50% less memory, and its size also went down from 300MB to 60MB. Those are very welcome improvements, especially since the existing Electron can be really resource-hungry when you’re downloading games. Except for this switch to React Native, this latest version of the Xbox beta app doesn’t seem to introduce any new features.

Overall, the Xbox beta app on Windows 10 remains the easiest way to check out the Xbox Game Pass for PC catalog, but social features such as the Xbox Live News Feed, Clubs, and Looking for Groups are still only available in the old Xbox Console Companion UWP app. For now, the Store section of the app also remains focused on Xbox Game Pass for PC titles, skipping other high-profile Xbox Live-enabled games available on the Microsoft Store such as Minecraft for Windows 10, Resident Evil 7, or Call of Duty: Infinite Warfare.

Xbox
Xbox
Price:
Free

Telegram Desktop app updates on Windows 10 with new chat folder feature and COVID-19 emoji

The official Windows 10 Telegram app updated today to Version 6.0 and added several new features such as folders to organize chats, advanced stats for channels with over 1,000 subscribers, and several new emoji groups including some inspired by the COVID-19 pandemic.

Here’s the brief release notes that were sent to users:

  • If you have too many chats, you can now put your work and school chats into separate tabs – and swipe to switch between them.
  • If you’re looking to hide some chats from view, you don’t need folders – simply send them to your Archive.
  • Owners of large channels with more than 1000 subscribers can now view detailed statistics about the growth of their channels and the performance of their posts.
  • We’ve also added a host of new animated emoji and stickers.

Telegram is a popular chat app with a strong focus on security and privacy. Do you use Telegram? Let us know why or why not in the comments below and then follow us on Twitter and Facebook for more Windows 10 app news.

Telegram Desktop
Telegram Desktop
Price:
Free

The Microsoft Editor browser extension is now live for Microsoft Edge and Google Chrome users

The recently announced Microsoft Editor extension is now available to install on both the Microsoft Edge and Google Chrome web browsers.

Microsoft Editor is completely free to install though Microsoft 365 users gain extra functionality such as premium features that enhance the flow and style of your writing.

Here’s the official store description for Microsoft Editor:

Become a better writer across the web with Microsoft Editor(1), your intelligent writing assistant. Microsoft Editor(1) moves with you across sites, so you can confidently write clear, concise posts online. With this browser extension, you receive:

  • Intelligent writing assistance – nail the basics of spelling, grammar, and punctuation for free. Receive advanced grammar and stylistic feedback on clarity, conciseness, formality, vocabulary, and much more with premium(2).
  • Assistance anywhere you write – Receive feedback on sites like LinkedIn, Gmail, Facebook, and many more of your favourites with this browser extension. If you want Editor’s assistance beyond the web, open Word and look for the Editor icon to see how Editor can help across documents, email, and the rest of the web.
  • Feedback in multiple languages – receive basic feedback in 20+ languages (and spellchecking specifically in over 80) to communicate clearly, no matter what language in which you’re writing.

(1) Available for Microsoft Edge or Google Chrome browsers and requires a Microsoft Account. Editor connects to a Microsoft online service that offers spelling, grammar and refinements suggestions for your writing on most websites.

(2) Microsoft 365 subscription required to access premium Editor features

Microsoft Editor works in much a similar way to the popular Grammarly service by automatically checking your writing across services as you type. Our own Arif wrote an in-depth comparison of the two services so make sure to check it out if you’re trying to decide between which service to use.

Have you tried Microsoft Editor yet? Let us know if you’re happy with it in the comments below and then follow us on Pinterest and Facebook for more Microsoft news.

You can now wear Xbox and Mixer gear in Animal Crossing: New Horizons on the Nintendo Switch

One of the most-popular video games out right now is Animal Crossing: New Horizons and, while it’s only available on the Nintendo Switch, Xbox gamers and streamers have still found a way to express their brand loyalty by designing their own custom Microsoft clothing that can be worn in-game and shared with others to wear in their games.

Olda Robot, a partnered video game streamer on Microsoft’s Mixer streaming platform (check his channel out here), has designed an entire wardrobe of Mixer-inspired hats and tops for others to wear (see above image).

Here’s his tweets with images of each item and the codes for importing them:

Twitter user, VIDEO1, has created an impressive amount of Animal Crossing: New Horizons wearables including Xbox-branded hats, tees, and images.

Here’s the relevant images and codes for his creations:

After a basic Xbox logo? Here’s two designs that you can use:

https://twitter.com/snorkel_dolphin/status/1240823463234895873

Have you created any Microsoft-related Animal Crossing designs? Share them with the community in the comments below and then follow us on Pinterest and Twitter for more geek content.

How to fix error code 20 on Outlook

Error code 20 is an error message that occurs for some Outlook users when sending emails.

When they try to send an email, the application returns this error message, Outlook is unable to connect to the proxy server (error code 20).

This issue occurs when the software can’t connect with the proxy server. So does that error message sound familiar? If so, here are a few potential resolutions for error code 20.

How can I fix error code 20 on Outlook?

1. Check Windows’ Date and Time Settings

Error code 20 can often be due to a laptop’s or desktop’s date and time settings.

Check that Windows is displaying the correct time and date. If not, this is how you can configure the date and time settings in Windows 10.

  • Click the Cortana button on the taskbar, and enter date & time in the search box.
  • Select Date & time settings to open the window shown directly below.
Date and Time settings
  • To manually configure the date and time, switch the Set time automatically setting to off if it’s currently selected.
  • Press the Change button to open the window directly below.
  • Then configure the date and time settings there as required, and press the Change button.
  • You might also need to replace the desktop’s or laptop’s CMOS battery, which keeps the time.
  • Check out this post for further details on how to fix the system clock in Windows.

2. Run a System File Checker Scan

The System File Checker tool in Windows fixes corrupt system files. Error code 20, like many other software issues, can be due to corrupted system files. This is how you can scan system files with the SFC tool in Windows.

  • Press the Win key + X hotkey, and click Command Prompt (Admin).
  • First, enter DISM.exe /Online /Cleanup-image /Restorehealth in the Command Prompt; and press the Return key.
  • Then input sfc /scannow in the Prompt’s window, and press the Enter key to initiate the scan.
The exclusive semaphore is owned by another process
  • When the scan is complete, restart the OS if Windows Resource Protection repaired some files.

3. Run an Anti-Virus Scan

It might also be the case that a virus or malware is responsible for error code 20. There are myriad third-party anti-virus utilities you can utilize to scan for viruses.

If you don’t have any anti-virus software currently installed, run an anti-virus scan with Windows Defender as follows.

  • Press the Cortana button to open that app’s search box.
  • Enter ‘Windows Defender’ in the search box, and select to open the Windows Defender window shown directly below.
  • Click the shield icon on the left of the window to open scan options.
  • Press the Quick scan button to open further settings.
  • Then select the Full scan option for the most thorough scan.
  • Press Scan now to initiate the scan.

In case you want a powerful antivirus solution with lots of protection features, you should use the comprehensive scans provided by TotalAV.

4. Turn off Firewalls

Windows and third-party software firewalls block software from making connections.

Thus, a firewall blocking Outlook could be responsible for the code 20 error, which is a proxy server connection issue. This is how you can switch Windows Firewall off.

  • Enter the keyword ‘Windows Firewall’ in Cortana’s search box.
  • Click Windows Firewall to open its Control Panel tab below.
Windows Firewall
  • Click Turn Windows Firewall on or off to open further settings.
  • Select the Turn off Windows Firewall option and click OK.
  • If switching the firewall off resolves the issue, click Allow an app or feature through Windows Firewall on the Windows Firewall tab.
  • Press the Change settings button, and then scroll down to Outlook in the listed software.
Windows Firewall allowed applications
  • Click both Outlook‘s check boxes if they’re not currently selected.
  • Press the OK button to close the Allowed applications tab.
  • Select the Turn on Windows Firewall option, and press the OK button.

Your third-party anti-virus utility might also have a firewall that’s blocking Outlook.

To switch its firewall off, right-click the anti-virus utility’s notification area icon on the right side of the taskbar.

You can usually select a disable or stop option to temporarily switch the software off from the context menu.

5. Reinstall Outlook

Uninstalling and installing Outlook again is another potential fix for error code 20. Reinstalling Outlook will give the application a fresh configuration and replace its program files.

You can uninstall the software by pressing the Win key + R hotkey and entering appwiz.cpl in Run.

Then click OK, select Outlook on the Programs and Features tab, and press the Uninstall button. Thereafter, restart Windows before reinstalling the email application.

Those are a few fixes that might resolve error code 20 so that Outlook sends emails again.

You can also try fixing the issue with the Microsoft Support and Recovery Assistant or Stellar Phoenix software.

5 Best Jukebox Software for PC [2026 List]

It’s almost pointless to boast the advantages packed into a high-quality jukebox software because a music enthusiast knows how it’s like to shake your head and tap your toes to the beat.

An excellent jukebox tool is a welcomed addition to any music lover’s system, and it’s something that should not be missing from your computer if you adore music the way we do.

There are lots of jukebox programs on the market but to make your choice much easier we picked out the best options that are currently available.

Make sure to check out their sets of features and make the best choice for your musical needs.

What are the best PC jukebox tools?

MediaMonkey (recommended)

The main screen of MediaMonkey

MediaMonkey is a killer digital jukebox software. This is quite a popular tool that manages all of your music files, and it comes with high audio effects, and the ability to burn and rip.

Check out more exciting features that are included in this software below:

  • MediaMonkey allows you to manage more than 100,000 music and video files effortlessly.
  • You will be able to record CDs and download music, podcasts, and movies as well.
  • MediaMonkey automatically looks up, and it intuitively tags album art lyrics and more metadata.
  • You can create playlists and allow the Auto DJ and Party Mode to handle the musical part of your party.
  • You will be able to manage any audio and video genres and play MP3 and more audio formats without having to worry about varying volume.

When you visit their official website, you will see that this tool can be downloaded for free and there’s also a Gold version of the software that packs more features and functionalities.

⇒ Get MediaMonkey

TouchJams Jukebox Software

TouchJams Jukebox Software lets you easily transform your system running Windows into the coolest digital jukebox that you and your friends have ever seen.

You will be able to use your current music collection with this software, and even if this tool is designed in order to be used via a touchscreen monitor, you can also use a mouse to navigate.

This tool is also packed with loads of amazing features so make sure to take a look at some of the best ones below:

  • TouchJams Jukebox Software offers you the advantage of having a user-friendly and intuitive interface that allows even beginners quickly navigate to the songs that they love the most.
  • This tool will keep the music playing with powerful playlist support, and the Auto DJ feature will come in handy especially since it’s incredibly customizable.
  • If you need a switch from your music collection, TouchJams Jukebox Software is the ideal solution because it offers support for Internet radio with built-in radio station presets.
  • This is a commercial grade jukebox program that includes a robust media player engine.
  • Other amazingly useful functionalities include National Music Charts, enhanced media search, enhanced playlist support, automatic crossfader, ten bands EQ.
  • The software’s interface is fully skinnable, so you will be able to enjoy a highly customizable software to meet your preferences.

On the TouchJams Jukebox Software’s official website, you will be able to download the free demo for this software just to see how it works and to be able to decide if it suits your needs.

⇒ Get TouchJams Jukebox Software

E-Jukebox for Windows

E-Jukebox for Windows is another option that you will be able to use in order to transform your system into the wildest jukebox. Get the feeling of a real jukebox in a pub while you’re in your own room in front of your PC.

This software is packed with so many useful features and functionalities that you won’t know what to do with them. And this is not because they’re easy to use but because they’re so many and variated.

Take a look at the key features that are included in this juicy jukebox software:

  • E-Jukebox for Windows’ interface is perfect for your music and video collection and YouTube as well.
  • You will be able to personalize the software with your very own skins and favorite options.
  • You can also import meta tags from the video and audio files automatically.
  • E-Jukebox for Windows allows you to list, play and add related YouTube videos to your lists.
  • The program allows you to convert your CD collection to the highest-quality MP3s.
  • You will be able to drag and drop albums and maintain the track order of your songs.
  • The program automatically finds the cover arts for all the songs and album that you are playing.
  • You can remote control the software over wireless networks, PCs, tablets, and phones.
  • You will have the ability to use the tempo and the time shift video features on your TV, monitor or touchscreen.
  • There’s also a built-in web browser for surfing the Internet while you are playing media.
  • The AutoPlay modes will help you keep your music going.
  • You will get the chance to lock the interface full screen for public use via the Kiosk Mode.

Head to the official website of this cool software and download E-Jukebox for Windows to start having fun.

⇒ Get E-Jukebox

ZenPoint Digital Center

Using ZenPoint Digital Center, you can turn your system into the wildest jukebox ever.

This tool is an all-in-one media navigation and player, and this means that while using it, you will be able to listen to your favorite tunes, music videos, play karaoke, online radios, and also check out your favorite movies and enjoy all of your pictures in a cool slideshow.

Take a look at the key features and functionalities that are packed into this amazing software:

  • ZenPoint Digital Center allows the navigation through your music collection, and it lets you create playlists among other advantages.
  • The Radio Center allows you to listen to all of your favorite radio stations and it comes with various stations online.
  • You will also be able to navigate through all of your favorite movies and organize them into different categories.
  • The Karaoke Center lets you choose a karaoke song and all you have to do afterwards is press play and sing along.
  • You can also search through your music videos and create playlists of all your favorite videos.
  • This tool also offers you the chance to look through all of your family pictures and show a slideshow while your own music is playing in the background.
  • You can customize your skin, languages, and theme as well.
  • Other remarkable features and functionalities that are packed in this tool include Music Fade, Dual Monitors, Party Mode, Multi Languages, Smart Device Remote Control, CD Ripping, Coin Acceptor and more.

If you head over to the official website of ZenPoint Digital Center, you can download the software for free and enjoy its amazing features.

⇒ Get ZenPoint Digital Center

Jukeblaster

Jukeblaster’s solutions for your PC will leave you speechless.

All the jukebox solutions that are provided by Jukeblaster can be used with a mouse or via the touchscreen, and they provide background music functions that allow you to play music in the background until you make your favorite selection.

You can also enjoy the software’s solutions that offer Coin-Op credit functions just in case you decide to build a jukebox that can take coins.

Most of the jukeboxes provided by Jukeblaster are able to play music videos, and some of them will also play karaoke files.

Take a look at the options that you have available and their advantages:

  • Home Jukebox offers users an audio jukebox for their home use, and the software is user-friendly even for beginners.
  • The Pub Jukebox is designed for business, and extreme music enthusiasts and this commercial class solution mixes the ease of use with amazing features such as background music timers, Happy Hour, vertical and horizontal screen support, and more.
  • Videobox is Jukeblaster’s original all-rounder jukebox that is adored by all music enthusiasts, and it is able to play videos, mp3s, karaoke files and more.
  • The Karaoke Jukebox is perfect for karaoke lovers, and it comes with an interval time in order to allow the singer to get to the microphone.

The solutions offered by Jukeblaster are quite a blast, and we strongly recommend that you head over to Jukeblaster’s official website to check out more details, features and pricing plans for these amazing tools.

⇒ Get Jukeblaster

These are the best jukebox tool that will work with any PC running Windows.

They all come packed with great sets of unique features, so make sure to head over to their official websites to check out more in0depth information on each of them before you make your decision.