Microsoft has announced its first edition of IoT in Action conference in India to be held on June 18 in Mumbai.
The daylong ‘Solution Builder Conference’ is part of a worldwide series aimed at exploring the tremendous possibilities with IoT technologies and has covered 7 countries, 8 cities over the last 18 months with over 4000 attendees and 70+ partner showcases.
The India edition will host 600 participants, including data scientists, students, developers, government elites, start-ups, and Microsoft experts.
The event will give actionable insights into high-value IoT topics, including business transformation through new IoT business models, IoT security, the hybrid cloud, building on the intelligent edge, and leveraging cognitive services to enable innovative IoT solutions. Additionally, it will include discussions on how to use industry-aligned solution accelerators to build scalable repeatable solutions that get your IoT solution to market faster.
The in-person event will showcase how you can leverage the investments Microsoft is making with its partners to reduce development complexity and speed time to market. There will also be a Partner Solution Expo to showcase solutions in Industrial IoT, Smart Building, Intelligent Edge, and Azure Sphere and an onsite Partner-Customer Matchmaking program that will give a platform to companies and developers to connect.
BitLocker is a vital component on Windows for some users, allowing them to encrypt their partitions. However, this feature isn’t available on all Windows iterations and editions. Basically, that’s the probable reason why you don’t have BitLocker on your Windows edition. However, if you deem it necessary, we have a few things to suggest.
Windows 10 versions (editions) that have the built-in BitLocker are Windows 10 Pro, Windows 10Enterprise, and Windows 10 Education. And if you’re unsure how to find which edition you run on your PC, navigate to Settings > System > About and scroll down. You should be able to see the exact edition and iteration of Windows 10 there.
Why my Windows 10 doesn’t have BitLocker?
1. Upgrade your Windows OS
On your taskbar, right-click on the Action Centre.
Double-click on the executable file and follow the prompts to install the program.
Now, use the newly installed program to encrypt your drive.
With those steps, we can conclude this article. Whether you choose to upgrade Windows 10 to a more advanced option or decide for third-party software, it’s your choice. We suggest the latter option as there are much more advanced tools then the built-in encryption tool that comes with the system. Albeit, BitLocker is not all that bad.
Tell us in the comments section below about your choice.
Microsoft rolled out a new series of Patch Tuesday cumulative updates to all Windows 10 versions. These updates fixed some known issues introduced by the previous builds.
Soon after Microsoft pushed KB4503293, Windows 10 users started to complain about booting issues on Microsoft’s forums. At the time of writing this article, there is no official workaround for this bug.
Therefore, if you have not installed the update yet, it is better to pause the updates for a few days. Otherwise, you may experience some serious issues after installing KB4503293.
Quite a few Windows 10 users who installed KB4503293 on their systems reported running into startup issues.
The users stated that their systems were previously working fine with Windows 10 v1903. Here’s how one user described this problem:
I have a trouble after updating my PC with the package “Cumulative Update for Windows 10 Version 1903 for x64-based Systems (KB4503293)”. Then the PC could not boot anymore, what I see and hear are:
– 4-long-beep cycle.
– No display, keyboard and mouse sign.
– Removal of RAMs and GPU board did not change status.
Screen brightness adjustment issues
It seems that KB4503293 introduced some screen brightness issues as well.
BUT yesterday after 2019-06 Cumulative Update KB4503293.. the change in brightness NO LONGER adjusts when the machine is plugged or not plugged in.
Actually, this is not a new issue as such problems existed in previous builds as well. The tech giant released the necessary patches to fix the bug at that time.
We’re sure Microsoft is working on fixing these issues. However, you need to wait a few more days until the company releases the hotfixes.
Speaking of screen brightness issues, here are two troubleshooting guides that may come in handy:
Heads up Windows Insiders, Microsoft has just released the Windows 10 20H1 build 18917 for those of you in the Fast Ring. This update brings four new features, the first first big one being Windows Subsystem for Linux 2. This new architecture should provide the same experience as WSL 1, but with much faster performance and full system compatibility.
The other interesting new update feature is for Windows Ink Workspace, which has now been redesigned to use less screen real estate. Additionnally, you’ll find a new option to throttle the bandwidth used by Delivery Optimzation for users with low connection speeds, as well as Data Table reading improvements with Narrator.
You can read more details about all these new features below.
New download throttling options for Delivery Optimization
We’ve heard from our users with very low connection speeds that setting download throttling as a percentage of available bandwidth isn’t providing enough relief in reducing the impact on their network. That’s why we’ve added a new option to throttle the bandwidth used by Delivery Optimization as an absolute value. You can set this separately for Foreground downloads (downloads that you initiate from Windows Store for example) or background downloads. This option already exists for IT Pros who use Group Policies or MDM policies to configure Delivery Optimization. In this build, we’ve made it easier to set via the settings page.
You can access this option via Settings > Update & Security > Delivery Optimization > Advanced Options
Narrator improvements
Data Table Reading Improvements: We’ve optimized the information you hear with Narrator when navigating a table using table navigation commands. Narrator now reads the header data first, followed by the cell data, followed by the row/column position for that cell. Additionally, Narrator only reads the headers when the headers have changed, so you can focus on the content of the cell.
Windows Subsystem for Linux 2
WSL 2 is a new version of the architecture that powers the Windows Subsystem for Linux to run ELF64 Linux binaries on Windows. This new architecture, which uses a real Linux kernel, changes how these Linux binaries interact with Windows and your computer’s hardware, but still provides the same user experience as in WSL 1 (the current widely available version). WSL 2 delivers a much faster file system performance and full system call compatibility, which lets you run more applications like Docker!
As we mentioned last week, you may notice that Windows Ink Workspace has changed on your PC. That’s because we’re updating the Windows Ink Workspace experience and starting to roll it out to some Insiders.
As part of this, Windows Ink Workspace now takes up less screen real estate, and we’re converging our whiteboarding experiences with a new direct link to our Microsoft Whiteboard app. Microsoft Whiteboard is a freeform digital canvas where ideas, content, and people can come together. It includes an infinite canvas, optional backgrounds (including graph paper and solid dark grey) to choose from, rainbow ink support, multiple pages, and generally addresses much of the feedback you shared with us about Sketchpad. If you used Sketchpad, don’t worry – we saved the sketch you were working on in your Pictures folder.
We heard your feedback, and we’ve streamlined the Windows Ink Workspace for you. Stay tuned as we continue to evolve! Once the new experience arrives on your PC, please take a moment to try it out and share feedback via Feedback Hub under Desktop Environment > Windows Ink Workspace. If the Windows Ink Workspace icon isn’t visible in your taskbar, you can show it by right-clicking the taskbar and selecting “Show Windows Workspace Icon.”
As usual, this new build brings a couple of bug fixes and improvements, and it also addresses an issue where some Insiders experienced a 0x8007000E error code while downloading the previous build due to high RAM consumption. The new Search experience in File Explorer (which is still rolling out to Fast Ring Insiders) will also now be dark when dark theme has been set in Settings. Please check out our separate post for more details about the other fixes and known issues in this build.
Cumulative updateKB4503267 is now available for download on PCs running Windows 10 v1607. This June 2019 Patch Tuesdayupdate bumps Windows 10 to build version 14393.3025.
Apart from the security updates for Edge, and other Windows Components, KB4503267 fixes some annoying authentication issues affecting Windows Hello.
Unlike the other Patch Tuesday updates released this month, KB4503267 brings a bundle of known issues. Microsoft says that they are working to fix all of them.
However, you need to wait until the next release to get rid of all these issues.
And now let’s quickly review some of the key changes and fixes included in KB4503267.
KB4503267 improvements and fixes
Authentication issues fixed
Microsoft addressed an issue with Windows Hello for Business that triggered authentication issues. The issue affected the program when Server Core was installed on Windows Server 2016.
Device startup bug resolved
KB4503267 resolved a bug that caused premature termination of your connection to the WDS server. The issue basically trigged because the Preboot Execution Environment (PXE) failed to start a device from the WDS server.
Internet Explorer 11 launch issues fixed
Internet Explorer 11 is often affected by bugs and issues. The previous cumulative update introduced a new bug in IE11 but KB4467684 fixed the problem.
Alternatively, if you’re tired of IE’s limitations, you can switch to a new browser. If you’re looking for a fast, privacy-focused browser, then UR Browser is the right choice for you.
Microsoft recently rolled out KB4503279 to Windows 10 version 1703 PCs. This new patch brings Windows 10 to build version 15063.1868.
This Patch Tuesday Update resolves connection issues with Bluetooth devices. Furthermore, KB4503279 brings security updates for IE11 as well as other Windows components.
As far as the bugs are concerned, as you all know, Microsoft has a bad history of Windows updates. Luckily, Microsoft didn’t acknowledge too many issues affecting this patch. In other words, the update process should go smoothly for most users.
In this article, we are going to quickly list some of the key changes and quality improvements included in KB4503279.
What’s new in KB4503279?
Windows Update will just download new fixes on your device if the previous updates are already installed on your machines.
Security vulnerability issues fixed
Microsoft fixed a security vulnerability issue that prevented connection requests between Bluetooth devices and Windows OS.
If you experienced the same issue, you need to also contact your Bluetooth device manufacturer to get the specific update for your device.
Internet Explorer 11 issues resolved
KB4503279 fixed the issue that restricted users from opening IE11. You need to install KB4503279 on your device to fix the bug.
Alternatively, if you’re tired of IE’s limitations, you can switch to a new browser. If you’re looking for a fast, privacy-focused browser, then UR Browser is the right choice for you.
This patch brings a bundle of security updates for various components of the Windows 10 operating system. The complete details are available on the official support page.
Download KB4503279
Microsoft recommends its users to install the latest servicing stack updates (SSU) on your PC before downloading KB4503279.
SSUs improve the reliability of the update process to mitigate potential issues while installing the LCU.
Your system will automatically download the update. You can still manually force your system to check for update via Windows Update section.
Microsoft released KB4503284 for Windows 10 version 1709 as part of the June 2019 Patch Tuesday Edition. This update bumps the current version of Windows 10 to build 16299.1217.
As a quick reminder, Microsoft stopped releasing updates for Windows 10 v1709 Home, Pro, Pro for Workstation, and IoT Core editions on April 9 this year.
Microsoft recommends users to install the latest Windows 10 version so as to be eligible for monthly security and quality updates.
Let’s have a look at some of the major improvements and fixes that came along with KB4503284.
KB4503284 changelog
Security updates for Windows components
Update KB4503284 addresses many security vulnerabilities in various components such as Internet Explorer and Microsoft Scripting Engine.
Internet Explorer 11 bugs fixed
Microsoft acknowledged a bug that prevented users from opening Internet Explorer 11. The company kept its promise and fixed the issue in this release (KB4503284).
Alternatively, if you’re tired of IE’s limitations, you can switch to a new browser. If you’re looking for a fast, privacy-focused browser, then UR Browser is the right choice for you.
Some users encountered a bug preventing Windows from establishing a connection with certain Bluetooth devices. Microsoft fixed this issue with KB4503284.
KB4503284 known issues
Surprisingly, Windows 10 cumulative update KB4503284 is affected by the same issue acknowledged in KB4503286.
Microsoft says that Windows 10 users may fail to perform some specific operations on Cluster Shared Volume (CSV) files and folders. This bug is triggered when a process lacks administrator privileges while performing an operation.
Download KB4503284
The latest updates are automatically available via Windows Update. Check for updates and your PC will automatically download and install the latest Windows 10 cumulative updates.
This update focuses on improving the overall security level of your system. More specifically, it blocks Bluetooth connection that are not secure and adds some general security improvements to Windows 10’s main components.
At the same time, KB4503293 also brings a few issues of its own. The good news is that these bugs are far and few between.
KB4503293 reported issues
KB4503293 won’t install
There are some Windows 10 users who are still struggling to install this patch on their machines. The update process suddenly stops for a few minutes, then resumes only to fail again a few minutes later.
The first download got to 73% downloaded and stopped. No disk, CPU or ethernet activity. I left it an hour and then it failed with no error given. It suggested restart and I did, but the restart continued and I left that an hour. Eventually I used hard shutdown and rebooted. This time it missed the download, just installed and completed successfully.
Windows Sandbox error 0x80070002
Windows Sandbox may fail to start for some with the following error code: ERROR_FILE_NOT_FOUND (0x80070002).
This problem mainly occurs on devices in which the OS language was changed during the update process when users initially installed Windows 10 version 1903.
Microsoft is working on a fix which should be deployed in an upcoming update release.
These are the only issues reported so far.
As you can see, if you manage to install KB4503293 in the first place, then everything should go smoothly.
Just in case you’re experiencing performance issues after installing this update, use this troubleshooting guide to fix your PC.
Did you encounter any other issues after installing KB4503293? Do let us know in the comments below.
Folks, it’s Patch Tuesday time. Microsoft started rolling out this month’s security updates via the Windows Update Service.
If you’re running Windows 10 v1903, you can now download and install cumulative update KB4503293 on your machine.
As far as the changelog if concerned, there are only two main improvements.
The first one is a security improvement that blocks all Bluetooth connections that are not secure. The patch also adds a series of general security improvements and fixes to various OS components such as Windows Media, Windows Shell, Windows Server, Windows Authentication, and more.
KB4503293 changelog
Here’s the official changelog as listed on Microsoft’s website:
Addresses a security vulnerability by intentionally preventing connections between Windows and Bluetooth devices that are not secure and use well-known keys to encrypt connections, including security fobs. If BTHUSB Event 22 in the Event Viewer states, “Your Bluetooth device attempted to establish a debug connection….”, then your system is affected. Contact your Bluetooth device manufacturer to determine if a device update exists.
Security updates to Windows Virtualization, Microsoft Scripting Engine, Internet Explorer, Windows App Platform and Frameworks, Windows Input and Composition, Windows Media, Windows Shell, Windows Server, Windows Authentication, Windows Cryptography, Windows Storage and Filesystems, Windows SQL Components, the Microsoft JET Database Engine, and Internet Information Services.
Keep in mind that KB4503293 may break Windows Sandbox. So, if you’re using this feature, you should wait for a few more days until Microsoft has fixed this bug.
In case you’re experiencing performance issues after installing this update, use this troubleshooting guide to fix the problem.
Microsoft’s new Chromium-based Edge Insider browser will soon get the same autoplay media settings that are currently available in Edge UWP on Windows 10. Kyle Pflug from the Microsoft Edge team confirmed on Twitter yesterday that the feature was coming, adding that it will have “global and per-site setting” matching what’s currently available in Edge UWP.
We’re working on adding a global and per-site setting similar to what we have in the current version of Edge ????
Following the release of the Windows 10 October 2018 Update, Microsoft finally allowed Edge users to control whether sites can autoplay media. The option is currently available in “Advanced Settings,” and it’s a pretty great feature in an era when more and more websites use autoplaying video ads.
More control over autoplay videos isn’t the only Edge UWP feature that Microsoft wants to bring to the new Chromium-based Edge. The software giant is also working to implement more syncing options including history, open tabs, and other settings, and improving scrolling performance is another big focus for the Edge Insider team. Lastly, we learned at Build last month that the new browser would get a Fluent Design update, as well as a new Collections feature, additional privacy controls, and a new IE mode.
Are you using a widescreen monitor? Do images get distorted on it? If your answer to both questions is yes, you came to the right place.
Oftentimes, when this error occurs, the problem is erroneously attributed solely to “issues with video cards or drivers”. However, the issue actually has a lot to do with Windows’ awful scaling on widescreen high-res monitors which is, truthfully, getting better with each new update.
In any case, we’ve come up with a handful of plausible solutions to this issue, and these have been outlined in the next section.
Fix: Photos distorted on a widescreen monitor
1. Update Your Display Driver
Press Windows Key + X to open Win + X menu.
Select Device Manager from the list.
Locate the display adaptors driver.
Right-click on it and select Update device from the menu.
Wait for the update procedure to be complete.
Restart your computer to confirm the changes.
Alternatively, we strongly recommend a third-party tool to automatically download all the outdated drivers on your PC.
Fortect Driver Update is a simple and light option that is able to update your outdated drivers and fix the damaged ones. It is easy to use and can be set up to regularly scan and update your drivers.
Extract the downloaded driver to a specified folder on your PC.
Press Windows Key + X and select ‘Device Manager’ from the list.
In ‘Device Manager’ window, locate the device that you want to update. Right-click the device and choose Update driver.
Select the Browse my computer for driver software option. This option will enable you to install the driver software manually.
Choose Let me pick from a list of device drivers on my computer option.
Click the ‘Have Disk’ button.
Install from Disk window will now appear. Click on the Browse menu and locate the driver on your hard drive. After you select the driver, click the OK button.
After doing that, the driver will be automatically installed to your PC.
4. Run Windows Updates
Go to Start > type “update” in the search box and then click on “Windows Update” to proceed.
In the Windows Update window, check for updates and install the available updates.
After the update is complete, restart your Windows PC.
Some Windows users have complained that the computer consistently boots in Safe Mode. This can be an issue, since it will prevent you from using your PC normally.
Many issues can force Windows to start in Safe Mode, and in this guide, we’re going to take a look at what causes this issue and how to fix it.
So without any further ado, let’s get started.
Why does my computer keep starting in Safe Mode?
Safe Mode boot is enabled in System Configuration window.
System corruption can force your PC to boot to Safe Mode.
How do I fix my computer consistently booting into Safe Mode?
1. Check System Configuration
Click on Start and choose Run. (Alternatively, Press Windows + R keys).
In the Run box, type msconfig to bring up the System Configuration window.
In the System Configuration window, navigate to the Boot tab.
If selected, uncheck the Safe boot tick box.
Click Apply and then OK.
Restart your computer.
2. Use Command Prompt
Right-click on the Start button and then click on Command Prompt (Admin).
In the Command Prompt window, run the following command: bcdedit /deletevalue {current} safeboot
Afterward, restart your computer.
This is a simple solution, so be sure to try it if your computer always boots in Safe Mode.
Windows 10 users have been complaining about the Windows Update process ever since the OS was initially released back in 2015.
Thankfully, Microsoft is now determined to improve the way Windows updates are installed on your machines.
Microsoft plans to give Windows users more control over the download process starting with Windows 10 20H1. Microsoft is currently testing a new feature named Advanced Bandwidth Settings in one of the latest Insider builds.
You must be thinking that Windows 10 users can currently adjust bandwidth limits. So what’s new about this feature? Users can now set an absolute value to restrict the download speed in the Windows Update section.
Twitter user Albacore spotted the feature in the recent Fast Ring Insider Preview builds. As you can see, users need to enter the value in Mbps to enable this new feature.
New hidden Delivery Optimization settings in Windows 10 Build 18912, letting you limit download speeds with absolute Mbps values pic.twitter.com/hJfzTZBT8b
Windows 10 20H1 allows users to limit the bandwidth consumed during the Windows Update process. However, these controls are not enabled by default and users need to manually enable this new Windows Update feature. Microsoft explains that:
By default, we’re dynamically optimizing the amount of bandwidth your device uses to both download and upload Windows and app updates, and other Microsoft products. But you can set a specific limit if you’re worried about data usage.
Windows 10 19H2 is scheduled for release in the next few months.
What does this mean for users?
Your entire bandwidth will not be consumed for Windows updates once you adjust these advanced bandwidth settings.
The feature allows you to set a specific percentage of your bandwidth that Windows Update can use. The feature can be a lifesaver for users who are using slow internet connections.
Many Windows 10 users often complain about slow speeds while updating their Windows 10 PCs on Wi-Fi. Many Windows 10 users are eagerly waiting for this feature to hit the general public. As one Twitter user said:
That’s awesome! I don’t need to use third party program to limit Internet speed.
If you want to access the new Windows 10 20H1 preview builds, you need to enroll in the Windows Insider program.
Certain users have had a hard time with their Windows 10 PCs after the system reset. Namely, it seems that there’s an error after they choose the Keyboard Layout, as soon as the system reset to the default settings is done. It just says Something went wrong and they are unable to successfully boot into Windows 10 and get stuck in a boot loop.
One user shared the problem online, on the dedicated Microsoft Answers forum.
I just bought a used Lenovo T460 and reinstalled Windows 10 so that I could use it with a “clean slate”. The system restore process went smoothly (I chose option: restore without keeping any data). However, now that system recovery is being finalised I have to choose the keyboard layout, after I choose my preferred keyboard layout I get a message saying: ‘Something went wrong but you can try again’. After I press the ‘try again’ button, I get the same error.
In order to fix this, follow the steps below.
How do I get past Choose keyboard layout?
1. Try booting in the Safe Mode and install all drivers
Restart your PC 3 times to summon the Windows Recovery menu.
Choose Troubleshoot.
Open Advanced options.
Select Startup settings and then click Restart.
Once the PC reboots, choose Safe Mode with Networking.
Right-click Start and open Device Manager.
Install all missing drivers and reboot your PC.
2. Use Startup repair
Reboot your PC 3 times to access the Windows Recovery menu.
Choose Troubleshoot.
Select Advanced options.
Click on the Startup Repair and follow the instructions.
3. Reinstall Windows 10
Backup your data, this process will wipe out all the data from your system drive.
Create a Windows 10bootable USB drive by following the steps provided in this article.
Boot from the USB.
Press Shift + F10 to open the Command Prompt in the initial window.
In the command line, type the following commands and press Enter after each:
DISKPART
LIST DISK
SELECT DISK 0 (providing Disk 0 is the drive you want to install Windows 10 on)
CLEAN
CONVERT GPT
EXIT
After that, boot with the USB bootable drive again and reinstall Windows 10.
We hope that these solutions were of help to you to address the Something went wrong error after you choose the Keyboard Layout.
It’s Patch Tuesday again! Microsoft will start releasing the June 2019 Patch Tuesday cumulative updates within the next few hours.
Those of you who are running earlier versions of Windows 10 should update their machines as soon as possible in order to get the latest cumulative updates.
The upcoming Patch Tuesday updates are expected to fix security and non-security issues within the operating system. Microsoft specifically aims to address the existing vulnerabilities in Windows 10 OS and its components.
Additionally, the tech giant is releasing monthly cumulative updates for Windows 7 and Windows 8.1. These updates will also bring security-only updates along with some security and non-security enhancements.
Microsoft highly recommends users to upgrade to Windows 10 before January 2020. That is the only way you can stay safe online and enjoy the latest features available in Windows 10.
Install Windows 10 June Patch Tuesday updates
These updates will be automatically available on your system. You just need to visit the Settings menu and click Check for updates.
Last month, Microsoft released the Windows 10 May 2019 Update. We’re sure the company will address the bugs introduced in the recent update.
As you already know, all new Windows 10 updates bring some bugs to the table. Therefore, you need to take the necessary precaution measures and backup your system. You can always roll back to the previous version in case something goes wrong.
We will keep an eye on the Patch Tuesday Updates as update this post as soon as the rollout begins.
Keep visiting Windowsreport.com to learn more about this month’s Patch Tuesday updates.
Microsoft finally shared the first details about its next-gen console at E3 2019, which is codenamed Project Scarlett. Just like Sony’s PlayStation 5, Scarlett will come with a fast SSD and support 8K graphics, though we probably won’t have the full list of specs for both consoles for a couple of months.
In case you missed the reveal video, Microsoft said that Project Scarlett will come with a custom-designed processor leveraging AMD’s Zen 2 architecture, high bandwidth GDDR6 RAM, and its next-gen SSD should deliver more than 40x times performance increases over the current generation.
Among other highlights, Microsoft mentioned support for up to 120FPS in games, variable refresh rate, and hardware-accelerated ray-tracing. Overall, Microsoft says that Project Scarlett should be four times more powerful than the Xbox One X and its six teraflops of computing power, and this should represent a much more significant shift compared to the transition from 7th gen to 8th gen consoles.
If Google Stadia will be the first next-gen gaming platform to launch this November, it seems that both Project Scarlett and the PlayStation 5 will surpass it in terms of pure performance. At launch, Stadia will deliver 10 teraflops of computing power and make all games playable at 60FPS in 4K (if you have a fast internet connection), but Google will certainly improve Stadia’s performance over time to catch up with next-gen consoles.
This is also something that Microsoft plans to do with its Project xCloud game streaming service, with Microsoft replacing the ageing Xbox One S consoles in server blades with the much more powerful Project Scarlett hardware. “Project Scarlett and all of its power and all of its performance is the foundation of our future in console and the formation of our future in cloud,” Xbox head Phil Spencer said earlier this week.
After Sony announced that its PlayStation 5 will be backwards compatible with all PlayStation 4 games, Microsoft announced something even better for Project Scarlett: the new hardware will be able to play games from all three past generations of Xbox consoles, it will also come with a disc drive and support existing Xbox One accessories.
“We definitely want to make sure that we were compatible across all the generations, not just with the games but with the accessories. Obviously Xbox Live will continue, and you are who you are across the whole ecosytem. It’s really us respecting the purchases that our gamers have made on our platform,” explained Xbox head Phil Spencer during yesterday’s Inside Xbox episode.
The fact that existing accessories including Xbox One controllers will work on Project Scarlett is pretty big news. As you may know, Microsoft ignored Bluetooth on the Xbox 360 and Xbox One, choosing to create its own Xbox Wireless protocol instead. All controllers released after the Xbox One S also support Bluetooth in addition to the Xbox Wireless protocol, and Microsoft also added Bluetooth support to its new Xbox Wireless Elite Controller Series 2.
See what makes it more Elite than ever. Look under the hood of the Xbox Elite Wireless Controller Series 2. #InsideXboxE3
This new Elite controller is the first model to use an USB-C port instead of the older micro-USB port, and it also comes with a built-in battery delivering up to 40 hours of battery life. It’s still not clear if Project Scarlett will come with a brand new controller, but there’s a high probability that it will.
Around the release of the Xbox One back in 2013, we learned that Microsoft had spent over $100 million to create the Xbox One controller. During the development process, the company experimented with integrated displays and scent-emitters, features that were ultimately scrapped.
The Xbox One controller remains one of the best options on the market these days, but Microsoft may well need take some inspiration from the competition. Sony’s PS4 controller has a button dedicated to game captures and streaming, while the Google Stadia controller added another button to summon the Google Assistant during gameplay.
Can Microsoft create something better than the new Xbox Elite controller?
If an improved controller with USB-C port is highly likely, we also expect some changes on the connectivity front. We hope that the console will support Bluetooth accessories, but we’re also wondering if Microsoft will keep the HDMI in port to connect other devices, including set top boxes. Microsoft made quite a big deal of this HDMI passthrough feature ahead of the Xbox One launch, but this may no longer be seen as a killer feature for most Xbox One owners.
After Microsoft received lots of criticism for focusing too much on multimedia feature with the original Xbox One, Project Scarlett appears to be a comeback to a pure gaming console with all the bells and whistles hardcore Xbox fans expect. Previous reports suggested that Project Scarlett would be accompanied by a cheaper “Lockhart” SKU, but Microsoft didn’t mention this second console at all during E3 2019. It remains to be seen if Microsoft will reiterate the current two consoles approach with the Xbox One S and Xbox One X, but these days the company seems to be all about offering more choice to games. That’s why we now have Xbox Game Pass on PC, and why the company is also working on Project xCloud.
Project Scarlett already looks like an incredibly powerful console, but raw power may no longer be the killer feature in the console market. The underpowered Nintendo Switch has been enjoying some real momentum since launch, with many third-party developers porting their AAA games on the system. But as Xbox head Phil Spencer reiterated in a recent interview with The Verge, Microsoft is no longer obsessed about selling the most Xbox units.
“The business isn’t how many consoles you sell. The business is how many players are playing the games that they buy, how they play. So if somebody bought an original Xbox One from us on launch day, and they’re buying and playing games, I don’t need to sell them an S. I don’t need to sell them an X. If they want to stay on the Xbox One they have and stay as a great member of our community or subscribe to Game Pass, that’s a great business for us.”
This is exactly why Microsoft stopped reporting Xbox One sales years ago, choosing to focus on Xbox Live engagement instead. Microsoft certainly isn’t the only company to prefer selling services instead of making razor-thin margins on hardware, but that doesn’t mean Project Scarlett could be the last Xbox console for Microsoft. “I think for years and years the best way to play a game on a console will be to download that game and play it,” Spencer said after Microsoft announced Project xCloud last Fall.
Microsoft didn’t spend a lot of time discussing Project Scarlett and Project xCloud during its E3 press briefing this year, but there were some xCloud hands-on session ahead of the first public trials in October. Project Scarlett won’t be released until 2020, and we the Redmond giant may well reveal the final design at E3 next year ahead of an holiday 2020 launch. That should give the company plenty of time to complete work on backwards compatibility, and prepare an excellent line-up of launch titles beyond the much-anticipated Halo: Infinite.
Lenovo is constantly updating and refreshing its product lines, sometimes even twice in a calendar year depending on the feedback, it gets from consumers.
At its NXT BLD convention in London, Lenovo took the wraps off its updated precision ThinkPad P73, P53, P1 Gen 2 and 53s, 43s workstations all running Microsoft’s Windows 10 Pro operating system.
ThinkPad P73
Imperceptibly similar to the ThinkPad Extreme line up the ThinkPad P series also represents a push for the overabundance of productivity feature sets and the P73 brings a 17.3 inch screen with a 9th generation Intel Core or Intel Xeon multicore processor as well as NVIDIA Quadro 5000 series RTX graphics that support real-time 3D and VR rendering.
At 17.3 inches the P73 also comes with an optional 4K UHD (3840 x 2160) screen supporting 400-nits of brightness and 100% Adobe color accuracy as well as X-Rite Pantone Color Calibration Service and Dolby Vision for that sweet high dynamic range support.
As with most ThinkPads the P73 also comes MIL SPEC up to 200 quality checks for use in extreme conditions that include hot and cold temps as well as passing dust, water or drop tests.
The P53 is the 15.6 version of the P73 bringing much of the same performance and specs. Differences arise in the battery department where the P53 loses the quick charge technology of its 17-inch brethren.
ThinkPad P43s & P53s
The s-line up represents the more affordable versions of the regular P53 and new P43 SKUs where the company offers a slightly more limited version of the device where 1080p panels are the norm and maximum of 48 GB of RAM on 2TB SSDs.
ThinkPad P1 Gen 2
While all of the above options pack more power than most average people need, the ThinkPad P1 Gen 2 is the perfect compromise of raw power and conventional sleekness.
Lenovo’s updated P1 Gen 2 brings the same sort of thinned out design as the original P1 and X1 but with the same sort of specs as the beefier P73 and P53.
Gen 2 comes with the same Dolby Vision HDR 4K UHD OLED panel with X-Rite Pantone calibration in a super packed screen with reduced bezels. Creators, processors, IT, factory workers and executives alike should all enjoy the various certification standards the P1 Gen 2 meets that include ISV, ArcGIS, AutoCAD, Creo, Decision Space, McKesson, Revit, SolidWords and 3dsMax to name a few.
A little bit of future proofing went into the P1 Gen 2 with support of Wifi 6 for up to 9.6 Gpbs, 3 Thunderbolt ports, optional Windows Hello IR camera and more.
ThinkStation P940 & P720
Lastly, Lenovo unveiled its ThinkStation P940 and P720 towered workstations that also sport Quadro GPUs and Intel Xenon processors. Obviously less portable, but the P920 and P940 can handle up to RAID capable M.2 PCIe solutions and 60TB of HDD storage.
More importantly, the P920 can support Flex Trays drives per bay alongside the towers unique air ventilation architecture which employs air baffle and the use of fewer fans in its design.
The ThinkPad P series isn’t your typical laptop or tower consumer play and Lenovo is rightfully targeting people who work in oil, gas, energy industries who need process gigabits of data per minute. I may not be comparing a ThinkPad P1 up against a Huawei Matebook anytime soon, but I can’t wait to push one of these laptops to my limits.
Pricing and availability vary with the ThinkStation P920, P720, and P72 only sporting price tags. The P73, P53, and P1 Gen 2 just have a coming soon header above their selections at Lenovo’s dedicated P series website.
Games from the Microsoft Store won’t necessarily run offline without some prior action on your part. The Microsoft Store requires you to nominate a single device as your “offline” device, which can be used to run apps and games with restricted licenses without an Internet connection.
Unless you’ve set a device to be your offline device, you may find you can’t launch games until you’re back online. Since only one device can be used offline at any time, you’ll need to think carefully about which of your Windows products should be used for mobile gaming. You can’t just change the setting when you switch device either – Microsoft allows only three changes in each calendar year.
The easiest way to assign an offline device is through the Microsoft Store itself. Launch the Store app on the device you want to use offline. When it opens, click the three dots menu button (“…”) in the top-right corner, and then click “Settings.”
Scroll down to the “Offline Permissions” heading and turn the toggle button to the “On” permission. You’ll see a warning notifying you of how many offline device changes you have remaining. Once you confirm the prompt, your current device will become your offline device – if you’d previously assigned this status to another PC, it will now be revoked and you won’t be able to play games offline.
Not every game is affected by this setting. It typically applies to games you’ve purchased which identify as PC or Xbox titles, not the simpler mobile-style games which can also be found in the Store.
To make sure you can play your favourite titles offline, you should launch them once while connected to the Internet. This will ensure the necessary licensing information is available on your device for when you go offline. You should then be able to run the game at any time, with or without a connection, and enjoy gaming on the go.
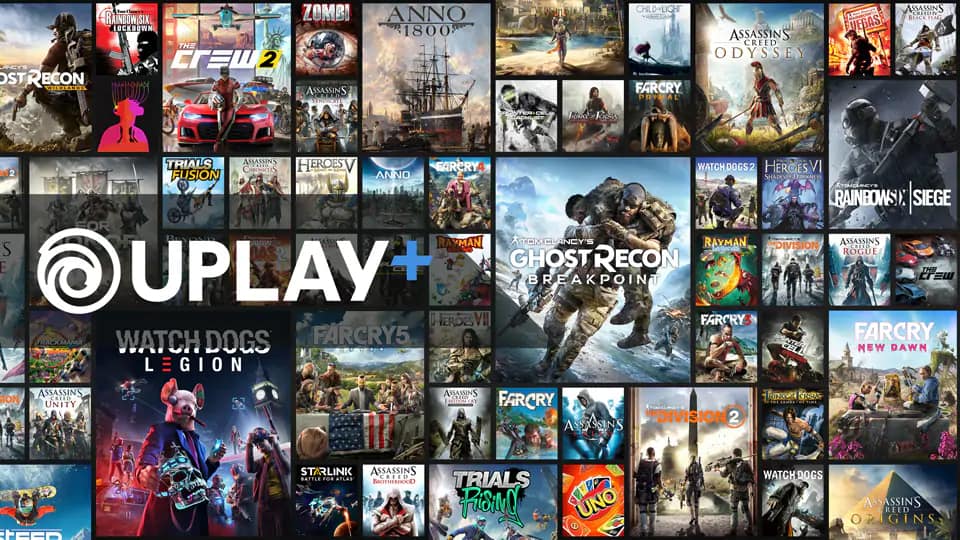
Announced this week at E3, Ubisoft is launching its own gaming subscription service, Uplay+, which will give PC gamers access to more than a hundred titles from its offerings for $14.99 each month. The company’s announcement also happens to follow shortly after Microsoft’s release of Xbox Game Pass for PC, which also sports a digital games library of more than a hundred as a separate subscription from its console variant.
The subscription service will be pricier than it’s competitor offerings, which include EA Access ($4.99 per month), and Game Pass for PC ($9.99 per month afters its introductory monthly price of $4.99). It will also cost about the same as Xbox Game Pass Ultimate, which will bundle Game Pass for both the Xbox One and Windows 10 devices along with Xbox Live Gold as part of its bundled $14.99 per month price.
Ubisoft says as part of its heftier subscription cost, you’re also getting access to “premium edition” titles for no extra charge. “For example, the Ghost Recon Breakpoint Ultimate Edition is a $120 value, and Uplay+ subscribers will have access to it as part of their subscription. If you add up the value of all the premium editions of our new releases over the course of a year, the total value is well above the $14.99 per month price of Uplay+,” according to the company’s vice president of platform and product management, Brenda Panagrossi
The service is also coming to Google Stadia users, a service that will be available this November and is expected to compete directly with Microsoft’s upcoming xCloud service. It’s especially interesting that Google Stadia will be one of the first platforms this is available on, as opposed to existing Xbox One and PS4 platforms that have existed for much longer.
The service will launch on September 3rd, and will be available as a free trial for the four remaining weeks of the month. Players will also be able to access upcoming titles and early access programs, including Ghost Recon Breakpoint’s beta testing on September 5, and its early access release in October.
Microsoft has confirmed during its latest Inside Xbox episode that it would be changing how Xbox gamertags work across Xbox One, Windows 10, and other platforms. First of all, Microsoft is adding support for 10 new worldwide alphabets including Cyrillic, Basic Latin, and CJK Symbols for languages in China, Japan, and Korea.
“With this change, new gamertags will support over 200 commonly spoken languages so more gamers can express themselves in their chosen language – you could be “SeñorBúho#5405” or even “닥터 부엉이#1882,” explained Dan McCulloch, General Manager of Xbox Live.
The other important change is that Xbox Live Gamertags now support Discord-like hashcodes. If you want to change your Gamertag to something that’s already taken, you’ll now be able to do that, though you’ll automatically get an ID suffix at the end of your Gamertag. “For example, if you want to be “Doctor Hoot,” and it’s already taken, you could now be assigned “Doctor Hoot#1056,” explained McCulloch.
Nothing will change for existing Gamertags, and suffixes will only be assigned when Xbox gamers want to choose another Gamertag that’s already being used by somebody else.
For now, these more flexible Gamertags will only appear in the new Xbox beta app and the Xbox Game Bar on Windows 10, with other platforms to follow over the next year. “This is the first step in an ongoing journey for evolving Gamertags, so we appreciate your patience as the team continues to implement new features based on your feedback,” McCulloch said.
If you’re seeing the error code CopyPE.cmd not working when trying to create an image file on your Windows 10 PC, you came to the right place. We’ve got a wide range of complaints about this error message.
This error is caused by the fact that Microsoft decided to remove the PE (Windows Preinstallation Environment) on Windows ADK 10 V1809 (Windows Assessment and Deployment Kit). Because of the fact that these options no longer exist in Windows in a pre-installed format, whenever you’re trying to use these specific services, your processor can’t find them on the hard-drive.
When I run copype.cmd x64 C:WinPE, I get following message :’copype.cmd’ is not working.I tried to search CopyPE but couldnt find anywhere, Any idea whats going on, Please help !!!
In this article we will explore the best methods to deal and solve this issue once and for all. Please follow the steps described here closely to avoid any issues.
Note: In order to run the ADK application without issues, you will need 15 GB of free space on your C drive. Also, when using the ADK, it is recommended that you disable any antivirus software, or add the Windows 10 Kits folder to your antivirus exclusion list.
What to do if copype is not recognized on Windows 10?
Follow the on-screen instructions and fully install this software.
After the installation of these files is completed, you can try running Windows 10Assessment and Deployment Kit, and see if the problem persists.
In this article, we explored a quick fix that was released directly by Microsoft in order to tackle the problem with CopyPE.cmd and the wide number of other issues users had while trying to use the Windows Assessment and Deployment Kit on Windows 10.
Did this article help you? Please feel free to let us know by using the comment section found below.
There are times when you would send an email and get the Recipient inbox full error on Gmail or Outlook. Normally, when you get this error message on Gmail or Outlook, it means that the recipient’s mailbox is full and thus cannot accept new messages.
But that’s seemingly, not always the case, and something else might be causing the error. Irrespective of the cause of the error, the solutions in this guide will help you fix it quickly.
Read how to resolve this error on Gmail or Outlook below.
Select Admin centers > Exchange in the Microsoft 365 admin center.
Locate Recipients and click on it.
Locate and select the target mailbox (the affected Outlook mailbox).
Click on Edit.
Select mailbox usage and click on the Customize the quota settings for this mailbox radio button.
Fill in the new quota value(s) in the designated box(es), as appropriate.
Apply changes and close the program.
Once this is done, the changes should be applied in your Outlook, and you should be able to fix their inbox is full or if it’s getting too much mail right now error for good.
You can then try and resend the email for confirmation.
Use the web-based client instead of any desktop client to send emails. The web-based client supports much more (500 instead of 150) outgoing emails, and you’ll hardly encounter the Gmail error again.
Sign in with your Gmail account.
Continue sending emails before you are interrupted by the error.
If using the web client does not fix the recipient inbox full, your message couldn’t be delivered to them error on Gmail, the only option is to delete old emails and/or attachments.
Hope you were able to resolve the Recipient inbox is full error. If not, you can contact the Gmail support team. If you are dealing with other issues, like Outlook not sending meeting updates, check our detailed guide to fix it.
Feel free to let us know the solution that helped you solve this issue in the comments below.
According to Microsoft‘s latest update, users can now access Internet Explorer from the all-new Chromium-Edge browser.
The new Edge is still in the public beta testing stage on Mac OS and Windows 10. But the preview models can be downloaded on both operating systems.
The tech giant recently shifted its EdgeHTML browser to Chromium. Although Chromium was supposed to appear the same as the original browser and retain most features, it obviously couldn’t.
Since not all the features of the old app can be retained, having access to Internet Explorer becomes a must.
Chromium features a Enable IE integration flagas it was in the previous version. Any tester who wants to try this beta version of new Edge needs to enable the flag.
This flag was specially added to “enable IE integration” allowing the users to open dedicated tabs on the browser. These exclusive tabs on the browser would then run with the help of the Internet Explorer‘s Engine.
However, it appears that the flag has been enabled in the latest version of the Microsoft Edge (Canary) only recently.
How to enable IE integration on Chromium-Edge
Go to Edge
Go to Menu
Click More tools
Open Show this page using Internet Explorer
Once the IE integration flag is enabled, users can open any website in the Internet Explorer mode.
So, those companies using IE to develop apps and services for internal purposes can now run them even on Chromium.
But currently, users would need administrator rights to access Internet Explorer on the new Edge. This calls for opening the browser as an administrator or with administrator permission.
Browser issues in IE mode
While using the new Edge with IE mode enabled, users may come across this error: Can’t open this page in Internet Explorer mode. Try reinstalling Microsoft Edge with administrator privileges.
This error pops up when users try to load a web page on the browser in IE mode.
However, Chromium-Edge is still work in progress. We expect Microsoft to fix these issues in the coming weeks.
Why doesn’t Windows 10 support AptX Bluetooth drivers? This is a question that many Windows 10 users asked on Microsoft’s forum.
For example, let’s take the case of a Windows user who bought an EKSA Bluetooth 5 wireless trans-receiver and remained puzzled when he realized that this machine does not support AptX and HD Bluetooth 5 and won’t pair with EKSA.
I recently bought an EKSA Bluetooth 5 wireless transceiver with RCA outputs to amplifier. I needed it to transmit from Windows 10 laptop to audio amplifier to improve sound quality and what do I get? After searching online I see that Microsoft does not support aptX and HD bluetooth 5 and Windows 10 ACER Laptop will not pair with EKSA. aptX has been around since the 1980’s and now that many companies are switching to aptX Bluetooth 5 there is no way we can stay on this platform.
The user bitterly criticized Microsoft for this situation. He blamed Microsoft for not keeping up with the latest technology, interfering with the universal compatibility of Bluetooth technology, and making Windows products obsolete.
Microsoft’s support agents responded to the query. They mentioned there are two essential components for the AptX codec to be enabled.
The first one is the Bluetooth driver for the device which must support AptX from the device manufacturer. The second component is the Bluetooth audio receiver which must support the AptX codec.
Keep in mind that Windows 10 does support AptX Bluetooth drivers. However, the OS doesn’t clearly show when your Bluetooth connection is using AptX.
The 0x803D0000 error is related to programs that require a network connection. This error is caused by a corrupted system file, or a faulty network connection, however, we have a few solutions for you.
Here’s how users described this problem on the Microsoft Answers forum:
Just updated to Office 2016. When I try to share a document with someone else this message appear in the share window :
Sorry, something is preventing us from sharing this. We encountered an unexpected error. Please try our user forums for a potential solution : The server couldn’t complete this action. Error Code: 0x803d0000
How can I fix error 0x803d0000: The server couldn’t complete this action?
Select Windows Firewall, and click on Allow an app or feature through Windows Firewall.
Now, the Allowed App windows will open.
Click on the Change Settings.
Check both Private and Public check boxes for the application you want to allow to access the Internet.
Click OK to save your new settings.
There you go, six quick and easy solutions that should help you fix error 0x803D0000 on your PC. If these solutions worked for you, feel free to let us know in the comments section below.
While cloud outages can pose more of an immediate stumbling block for enterprise adoption, security undoubtedly presents a close second, and to that end, Microsoft would like to employ more security researchers to crack find vulnerabilities in its service by hacking it.
Microsoft has put out a summons for White Hat Hackers to try and find exploits in its Azure cloud services.
According to Bloomberg, “Microsoft is planning to release what’s called a Safe Harbor statement giving researchers legal clearance to report a vulnerability.” Microsoft has, in the past, issued bug bounty approaches to tightening up its Azure cloud services but according to Kymberlee Price who oversees Microsoft’s Security Response Center programs, “it’s just not getting as much activity as I would like to see.”
The difference between old bug bounty attempts and this new call to arms for White Hat Hackers is the formalization of the research policy which supports the legal clearance for hackers to report exploits without feeling like they might shut down businesses and networks reliant on the service during their testing.
As more companies, governments and educational institutes move to and rely on the cloud, the level of sophisticated attacks appear to increase proportionally and Microsoft is looking to stay ahead of the curve with its new White Hat Hacker strategy for Azure.
Fortunately, Microsoft isn’t in the hunt alone as both Amazon’s AWS team and Google’s Cloud engineers are making it a practice of sharing research and techniques which is adding an additional layer of security efforts for all customers who share data across multiple services.
Microsoft’s E3 2019 press conference went pretty big on games, with 60 different titles being showcased during the event. Unfortunately, the company didn’t spend much time on two important topics, Project xCloud and the next-gen “Scarlett” Xbox console.
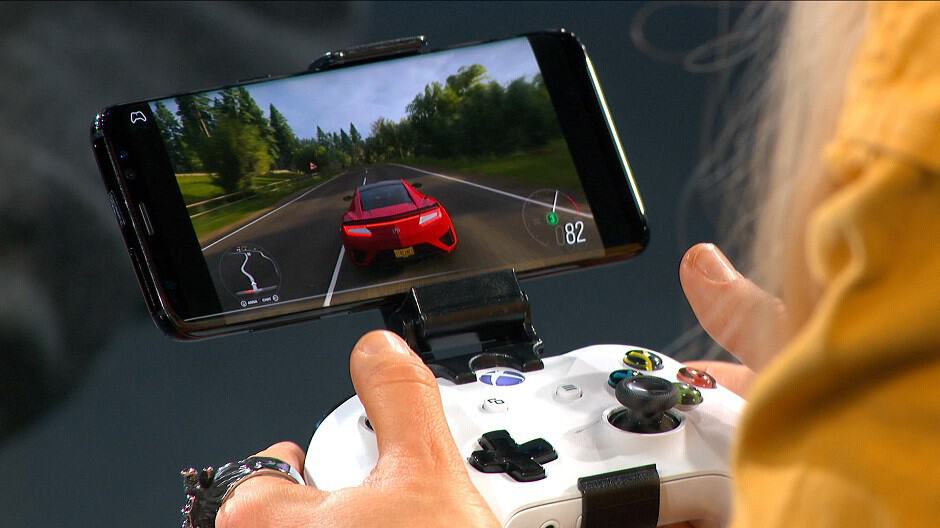
Microsoft is still building a global game streaming service that will compete with Google Stadia and Sony’s PlayStation Now, and the first public trials of Project xCloud are currently happening at E3. Howover, the software giant also revealed yesterday that xCloud will have a free variant with console streaming: That’s right, Microsoft will allow all Xbox One owners to turn their consoles into their own Project xCloud server, allowing them to stream any games they own or any Xbox Game Pass games to other devices, including smartphones.
With Console Streaming from your Xbox One you'll be able to:
✅ Turn your Xbox One into your own personal console server ✅ Stream your Xbox One library, including Xbox Game Pass, for free
Console streaming will go into preview in October 2019, just a month ahead of the Google Stadia launch. Microsoft didn’t reveal yesterday when the full-fledged Project xCloud game streaming service would launch, but the company hinted that it will be leveraging its next-gen “Scarlett” console to beef up the infrastructure behind xCloud (via The Verge).
“When we talk about freedom to play, when we talk about Xbox in the cloud, when we talk about streaming your games, Project Scarlett and all of its power and all of its performance is the foundation of our future in console and the formation of our future in cloud,” Xbox head said Phil Spencer yesterday. Back in October, Microsoft explained that it was building Project xCloud by putting Xbox One S consoles in server blades, but Microsoft is certainly well aware that the now ageing consoles won’t be enough to compete with Google Stadia.
When it launches on November 14, Stadia will be the first next-gen gaming platform on the market, delivering more than 10 teraflops of computing power. Players with a high-speed Internet connection will be able to play games on Stadia at 60FPS in 4K, something that’s Project xCloud couldn’t match by leveraging the existing Xbox One S hardware, or even the more powerful Xbox One X architecture. As of today, there are still too many Xbox One games that are capped at 30FPS (even on Xbox One X), and that’s true even for some flagship Microsoft games such as Sea of Thieves, which is far from being the most photorealistic title you can find on the platform.
Microsoft said yesterday that its next-gen Project Scarlett console would be four times more powerful than the Xbox One X and its six teraflops of computing power, and that should put Scarlett way ahead of Google Stadia in terms of performance. It really makes sense for Microsoft to choose the Scarlett hardware as the future of Project xCloud, especially since Scarlett will be backward compatible will Xbox games from older consoles.
Anyway, now that Google already shared pricing details and more for Google Stadia, we hope that Microsoft won’t wait to do the same for Project xCloud. It was quite surprising that the company didn’t do it during its E3 press briefing yesterday, but the company may well be waiting for other opportunities such as gamescom in August.
Microsoft opened its Business Applications Summit in Atlanta today, and announced a number of new features to the Power Platform, consisting of Power BI, PowerApps, and Flow. The company introduced the new features to the some 4,500 business leaders attending the summit, and via a post on the Microsoft Dynamics 365 blog. Starting with AI Builder, a new program to help build AI capabilities with the Power Platform without writing code, and including a new more Office 365-like look for Power BI and AI and blockchain capabilities built in to Power Apps and Flow, the announcements showcased Microsoft’s continued push for a cohesive strategy for companies to make better use of their data.
The announcements come just as Microsoft’s chief rival in the space, Salesforce, announced the acquisition of a direct Power BI competitor, Tableau Software. The $15.7 billion all stock deal promises to up the ante on the already fierce competition between Microsoft and Salesforce, as noted by GeekWire:
The deal promises to escalate the competition between Salesforce and Microsoft, which competes with Tableau through its Power BI data visualization and business intelligence technology. The Redmond-based tech giant already competes heavily with Salesforce’s core business with its Microsoft Dynamics customer relationship management technology.
Salesforce lost out to Microsoft in its efforts to acquire LinkedIn, but is gaining mindshare with the acquisition of the popular data visualization tools created by Tableau. Expect the competition to continue to play out.
Xamarin is a software designed by Microsoft that gives you the entire range of tools you need in order to write native Android, iOS, and also Windows applications, but many users reported Something went wrong connection is closed error message.
This error can be very frustrating as it doesn’t allow you to preview your code before exporting it to a virtual Android device, or any other device you use.
For this reason, in this article, we will explore some of the proven methods to fix the Something went wrong connection is closed on Xamarin.
Just opened the Xamarin.Forms Previewer and it says “Something went wrong, Connection is closed” Its a fresh Visual Studio 2017 install and a blank Xamarin Forms Project.
Does anyone know how to solve this problem?
How can I fix Xamarin Forms previewer Connection is closed error?
1. Check Visual Studio settings
Open up Visual Studio.
Select the Tools menu and choose Options.
Inside the options menu, scroll down through the list on the left side, and choose XAML Designer (the last option in the list).
Make sure to enable XAML Designer by ticking the box next to the option.
Restart Visual Studio for the changes to take effect.
Retry the action that caused the error, to see if the issue is fixed.
2. Close and re-open the XAML file
Close the problematic XAML file.
Wait for a few seconds and open it again.
After restarting the XAML file, try previewing it, and check to see if the issue persists.
3. Check your Xamarin.Forms version
Open Visual Studio.
Click on Extensions button from the top menu.
Inside the Extensions manager window, select Xamarin.Android, or any other extension you want to update and click the Update button.
Check the box next to the Automatically update this extension option, so Visual Studio will keep your files updated.
Restart Visual Studio and check to see if the problem persists.
4. Completely uninstall and reinstall the latest Visual Studio version
Here is how to completely uninstall Visual Studio from your PC:
Press the Win Key + X keys on your keyboard, and select Apps and features.
Search for Visual Studio in the list of programs, select it, and click Uninstall.
Wait for the process to finish, and then restart your PC.
In this article we explored some of the best fixes for the Something went wrong. Connection is closederror on Xamarin and Visual Studio.
Please feel free to let us know if this article helped you solve your issue by using the comment section below.
It is extremely annoying to try and copy some of the files stored on your PC to an external drive (SD card, thumb flash drive, external hard drive) and get the error message 0X80071AC3 volume is dirty.
Users who had a hard time with the error, make sure to share their concerns online.
Hi, i have posed the question to win 7 forum but never got reply. So i am getting Error 0x80071AC3: Volume is Dirty message. I have tried below cmd prompt but the volume is exfat not ntfs. Can you please come up with the solution quickly
Read the instructions below to fix the error.
How do I fix the dirty volume error?
1. Make sure your drive doesn’t have any errors
Connect the USB device that has issues to a port on your PC.
Open up File Explorer (press ‘Win + E’ keys on your keyboard)
Right-click the USB drive you connected earlier, and select Properties
Inside the Tools tab, click on ‘Check’.
Select ‘Scan and repair drive’.
After the scanning process is complete, try copying your files to your external drive again, to see if the error is fixed.
2. Slide your SD card lock
In case you’re using an SD card, it is recommended that you slide the lock on and off a few times, and then try connecting it again to one of your PCs USB ports.
3. Format your drive
Press ‘Win + E’ keys on your keyboard to launch Windows Explorer.
Right-click on your USB drive, and select ‘Format‘.
Select the ‘Restore device defaults’ option, and click on ‘Start’.
In the next ‘Warning’ prompt window, select Ok.
Once the formatting process is completed, you can simply close the window and try to copy the files to your drive.
Note:Please be careful, as formatting your drive will erase all the data and files that are stored on the device.
We would love to know if this guide helped you solve your issue. Also, if you know any other troubleshooting methods for the 0X80071AC3 volume is dirtyerror, please feel free to share them with us, by using the comment section below.
Now that Google is planning to launch its Stadia game streaming service in November, we were all waiting to see Microsoft share more details about its own Project xCloud service. Well, the Redmond giant finally did so during its E3 2019 press briefing, and there was some unexpected surprises..
Essentially, Microsoft announced today that it will try a hybrid approach with Project xCloud. On one hand, the software giant is building a cloud service by putting current Xbox One consoles in server blades, and the game streaming service will be compatible with all existing and future Xbox One games when it officially launches.
On the other hand, Microsoft announced today that there will be another way to enjoy xCloud by streaming games from your own Xbox One console to the devices of your choice. It was already possible to stream Xbox One games to a Windows 10 PC through the Xbox app, but what Microsoft announced today is the ability to turn your Xbox One into your own personal free xCloud server, letting you play the games you already own on any device. “Where you play is entirely your choice, you decide,” said Xbox head Phil Spencer.
With Console Streaming from your Xbox One you'll be able to:
✅ Turn your Xbox One into your own personal console server ✅ Stream your Xbox One library, including Xbox Game Pass, for free
Microsoft announced that the first public hands-on with Project xCloud will happen at E3 2019, and a public preview for the console streaming feature as well as Microsoft’s hybrid gaming cloud will launch in October of this year.
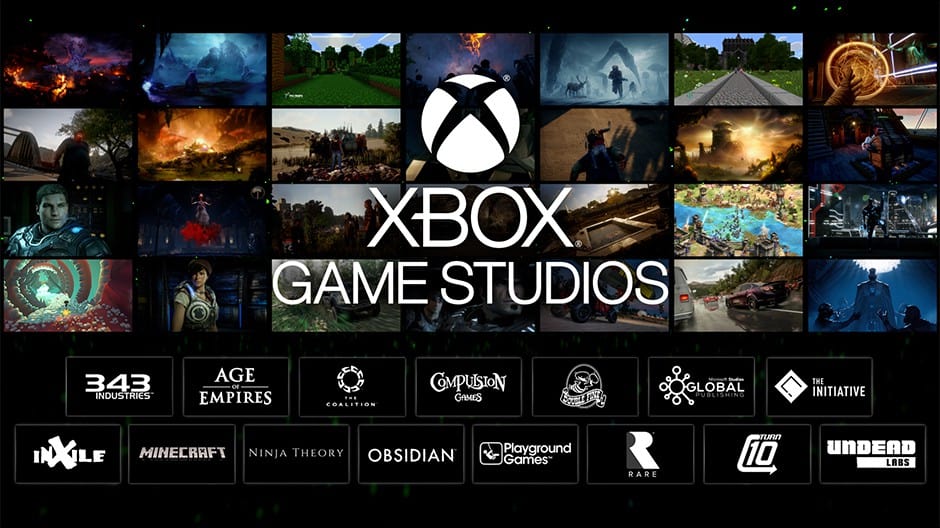
Matt Booty, Head of Xbox Game Studios has just announced Microsoft’s upcoming acquisition of Double Fine Productions, developer of Pyschonauts, Brütal Legend and Broken Age. The company will join the seven other game studios that Microsoft acquired last year including Ninja Theory, Playground Games, and Obsidian Entertainment.
“At the root of every game is an emphasis on creating crazy worlds with originality, story and fun. That commitment to creating a unique, player-centric experience is what drew us to the studio, and I’m looking forward to seeing what we create together,” explained Booty. “With the addition of Double Fine, there will be a total of 15 unique, standalone studios that comprise Xbox Game Studios, including our newly-created Age of Empires studio headed by Shannon Loftis and our Publishing group headed by Peter Wyse,” the exec added.
Microsoft’s E3 press briefing is still ongoing, and you can watch it live here.
Windows 10Mailapp notifications are not working on your PC? This tutorial will show you how to fix them once and for all.
This can be a big problem since you might miss an important email, which can lead to all sorts of trouble. Even some of the best email clients have problems, but luckily, you can fix them by following these steps.
Why is my Windows Mail not showing notifications?
You might miss certain notifications if the application isn’t allowed to run in the background constantly.
This issue can occur if the email account isn’t pinned to the start menu.
The app might be configured not to show notifications.
What can I do if Windows Mail notifications are not working?
1. Allow the Calendar app to run in the background
Open the Start Menu and then click on Settings.
In the Setting window, click on Privacy.
Click on Background apps, and enable the Let apps run in the background
Click on the Choose which apps can run in the background option, locate the Mail and Calendar app and then turn it On.
Exit Settings.
2. Pin email account(s) to Start menu
Launch the Mailapp.
Right-click on the desired email account.
On the list of options, select Pin to Start.
If you have other email accounts on the Mailapp, repeat the procedure for each of them.
There you go, these are two simple solutions that you can use to solve the problems with Mailapp notifications.
Origin is one of the best alternatives to the Steam gaming client. However, some users have said that a Your Origin client is too old error message appears when they try to launch games (especially Battlefield) from Origin.
Affected users of the EA Origin client were vocal about the issue at hand.
To the point, now I am trying to run a Battlefield 1 trial. When I press play, I get a notification saying the game won’t run ‘Origin client is too old.’
Read about the applicable solutions below.
Should I update my Origin client?
1. Reinstall the Origin Client
Launch the Run accessory with the Windows key + R hotkey.
Input ‘appwiz.cpl’ in the Open box. Press the OK button to open the window shown directly below.
Select Origin in the software list.
Click the Uninstall button, and select the Yes option to confirm.
Restart Windows after uninstalling Origin.
Click Windows on the Get the latest version of Origin page, here.
Then open the Origin installer to add the latest version of the software to Windows.
2. Check that Origin Updates Are Turned On
Origin will automatically update itself so long as the Automatically update Origin option is selected. To turn on automatic Origin updates, open the gaming client and click Origin at the top left of the software’s window.
Click Application Settings on the Origin menu.
Then toggle the Automatically update Origin setting on.
Close the Origin software. Thereafter, Origin will get updated when restarted, which should resolve the error.
3. Upgrade to Windows 10
Windows XP and Vista users will probably need to upgrade to Windows 10 (or at least 7) to fix the Your Origin client is too old error. As Origin no longer supports those platforms, XP and Vista users can’t utilize the most updated versions of the gaming client. Windows 10 Home is currently retailing at $139 on the Microsoft website.
If you stumble across the IGOProxy64 error when opening Origin, this guide will help you fix the problem.
There aren’t that many confirmed fixes for “Your Origin client is too old” error. Uninstalling and then reinstalling Origin to ensure that it’s the most updated version will usually resolve the issue for most players. However, any players who have fixed the “Origin client is too old” issue with alternative resolutions are welcome to share their fixes below.
On the eve of E3 2019, images of Microsoft’s new built from the ground up Xbox app have begun surfacing on the internet.
First spotted by Microsoft sleuther the Walking Cat aka @h0x0d on Twitter, showcases more fluent design and appears ready to support the company’s Xbox Game Pass push.
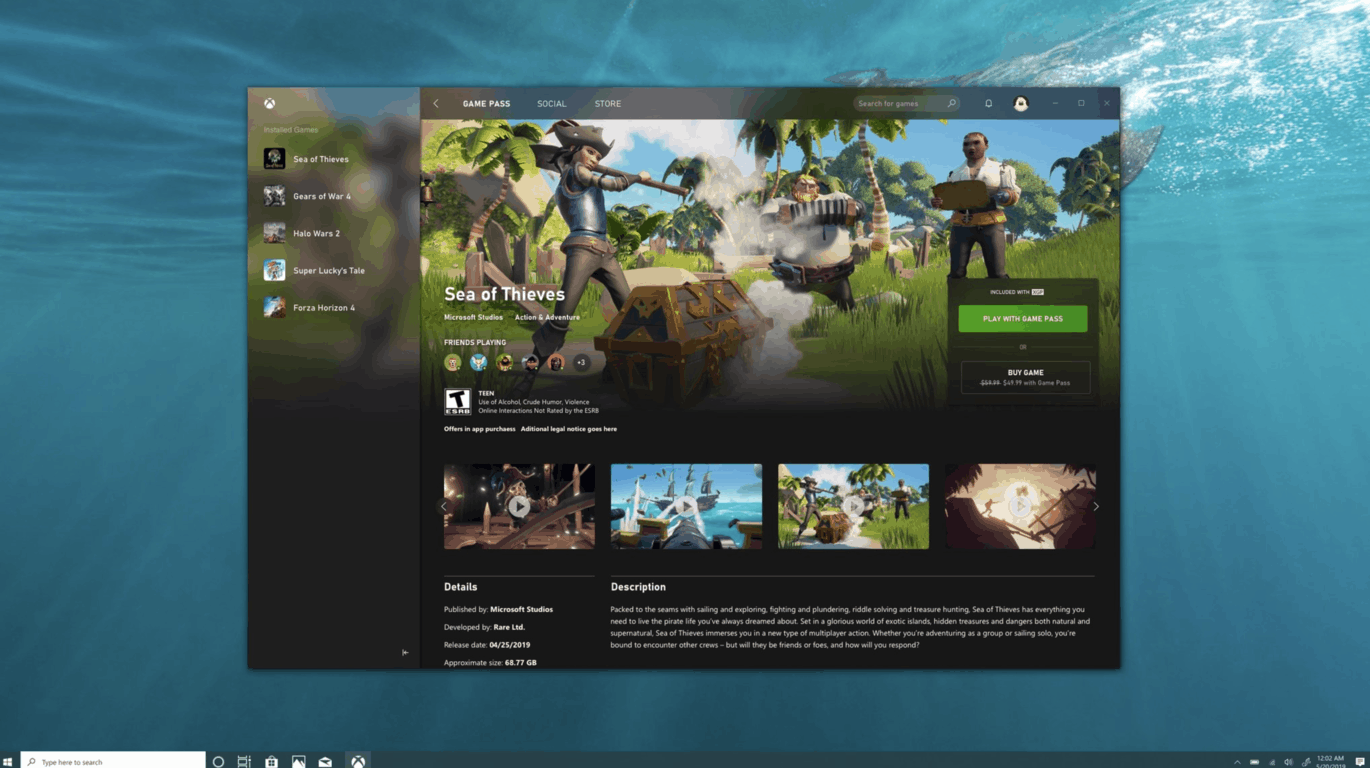
Other tidbits about the app that have found light include its codename Garrison, its Win32 architecture implying that Microsoft will be shelving its UWP version for its seemingly older design and its ability to download and install Game Pass games directly to PCs from within the app.
Perhaps, the most eyebrow-raising feature of the new Xbox app is its Electron nature as reported by Windows Central. While users will get a new Xbox app with better game-related integration from chat to download features, the app apparently will be a rather heavy piece of software.
Zac Bowden of Windows Central is reporting via Twitter that the app reaches Chrome levels of memory consumption.
The new Xbox app is a heavy boi. And it wants to set itself to auto-start with your PC. PLEASE. pic.twitter.com/MqAa1tv97R
Granted, the app is in beta and can only be accessed with a redemption code from the Windows Store, so there is time for the app to develop.
Chances are Microsoft shows off the app at this years E3, unveils an Insider program to help test and tweak the app until its official rollout perhaps sometime later this year.
PowerShell is an extremely powerful tool, and many users wonder what the Get-MpComputerStatus command does.
In case you’re not familiar with this tool, we have a great guide that explains what is PowerShell, so we encourage you to read it before using this command.
Now that you’re familiarized yourself with PowerShell, let’s see how we can use this command on our PC.
What is Get-MpComputerStatus?
Get-MpComputerStatus is a PowerShell cmdlet.
It’s used to get the status of the anti-malware software on your PC.
You can use Get-MpComputerStatus on a remote computer to check antimalware status.
What are Get-MpComputerStatus properties?
-AsJob – Runs the cmdlet as a background job.
-CimSession – Run the cmdlet on a remote computer.
-ThrottleLimit – Specifies the maximum number of concurrent operations.
How do I check my Defender status with Get-MpComputerStatus?
Use PowerShell
To do so, open the search box with the Windows key + S hotkey.
Input PowerShell in the Type here to search box.
Right-click Windows PowerShell and select its Run as administrator option.
Input the following and press Return: Get-MpComputerStatus
PowerShell will then display a list of Windows Defender properties as shown directly below.
Make sure that the following properties are enabled to ensure that Windows Defender is working:
AntispywareEnabled
AntivirusEnabled
IoavProtectionEnabled
NISEnabled
OnAccessProtectionEnabled
RealTimeProtectionEnabled
As you can see, this command is pretty simple, and it will give you the status of Windows Defender on your PC or a remote one.