Fix: ”The folder can’t be displayed” in OneDrive

Windows 10 and OneDrive go hand in hand, and it seems that the cloud services are something Microsoft finds especially lucrative. However, there are so many variations of OneDrive and, even though the most preferred one is the UWP native app, the software is plagued with various issues. One of the errors is ”The folder can’t be displayed”, which prevents users to access one or more synced online folders in OneDrive.

For that sake of resolving this issue, we provided a few most commons solutions that should help you address it. If you’re in doubt on how to tackle this problem, make sure to check them out below.

How to address OneDrive’s ”The folder can’t be displayed” error on Windows 10 app

  1. Run automatized troubleshooter
  2. Update the app
  3. Check the connection settings
  4. Sign out/sign in again
  5. Reinstall the app

1: Run automatized troubleshooter

This procedure is the part of basically any troubleshooting procedure concerning Windows 10. The success rate isn’t exactly sky high, but since we’re addressing the issue regarding the UWP app, it should be more helpful than usual. Furthermore, there’s only so much you can do when the native app starts misbehaving due to various complex factors, so the unified Windows App troubleshooter is within the group of the scarce options the end-user can use.

Here’s how to run Windows 10 App troubleshooter in Windows 10:

  1. Right-click Start and open Settings.
  2. Choose Update & Security.the folder can't be displayed onedrive
  3. Select Troubleshoot from the left pane.
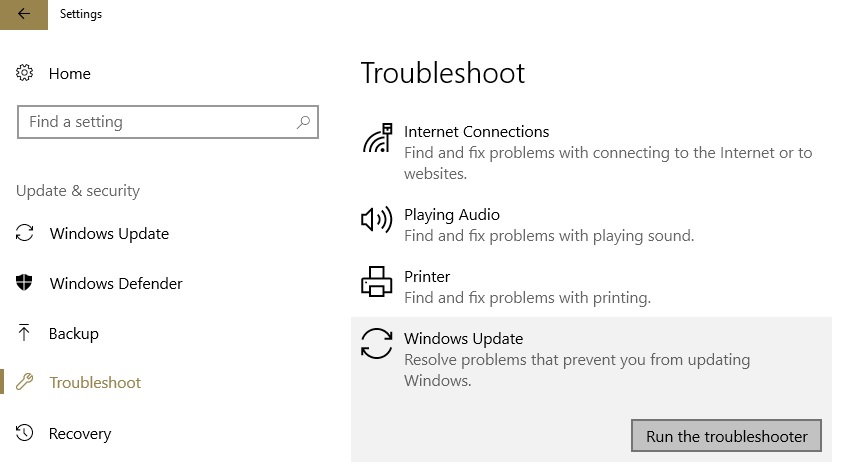
  4. Scroll to the bottom and expand Windows Store Apps troubleshooter.
  5. Click on the ”Run the troubleshooter” button.the folder can't be displayed onedrive

2: Update the app

As you can conclude on your own, the possibility that one of the updates for OneDrive break it is fairly high. Luckily, since updates are somewhat frequent, you can hope to resolve the ”The folder can’t be displayed” error by obtaining the latest update. Most updates include minor changes and fixes, so there’s a hope in that.

Here’s how to update OneDrive app on Windows 10:

  1. Open Microsoft Store.
  2. Click on the 3-dot menu and select Downloads & updates.the folder can't be displayed onedrive
  3. Click on the ”Get updates” blue button.the folder can't be displayed onedrive
  4. Wait for the updates to install.

3: Check the connection settings

In comparison to the standard OneDrive desktop app, the UWP app accesses only online files. With that in mind, you can access the locally stored files with the former, but not with the latter. Thus, you’ll need the proper connection in order to access the files online. Now, there are various steps you can take to confirm that your connection is working as intended. We’ll try and stick with segments which can affect the OneDrive access and invoke the aforementioned error.

Here’s what to do:

  • Restart PC, modem, and router.
  • Disable third-party firewall temporarily.
  • Turn off VPN and Proxy and try accessing OneDrive without them.

4: Sign out/sign in again

”Sign out and sign in again” is a frequently advised solution when OneDrive starts misbehaving. We’re aware that this seems to simple to address the complex errors reoccurring on OneDrive app. But it shouldn’t take too much of your time and it can certainly help in some scenarios. We can’t reproduce the error and thus it’s hard to tell whether this will restore your missing files and resolve the error, but you can try it out.

Here’s how to sign out and back in the OneDrive app for Windows 10:

  1. Open OneDrive app and click on the sandwich menu to expand options.
  2. Click on the Accounts icon and expand your Microsoft/OneDrive account.the folder can't be displayed onedrive
  3. Click Sign out.the folder can't be displayed onedrive
  4. Close the app and reopen it.
  5. Follow the same path and sign in again.

5: Reinstall the app

Back when Windows 10 was introduced, OneDrive was the indelible part of the platform. However, that changed over time and now you can uninstall OneDrive just like any other third-party app. This is more than useful when things go astray as in this case. With that in mind, you’ll need to enter your credentials again and select the sync folder. However, this should resolve the ”The folder can’t be displayed” error.

Here’s how to reinstall OneDrive in Windows 10:

  1. Press Windows key + I to open the Settings app.
  2. Open Apps.the folder can't be displayed onedrive
  3. Under the Apps and features tab, navigate through the list and locate OneDrive.
  4. Expand it and click Uninstall.the folder can't be displayed onedrive
  5. Navigate to Microsoft Store and install OneDrive again.

That should do it. As a side note, if you’re using Bussines account, we advise you to inform your network administrator about the issue, as they can impose certain limitations upon the usage of the stored data. In case you have questions, suggestions, or alternative solutions, be so good to share them with us and our readers in the comments section below.

RELATED STORIES YOU SHOULD CHECK OUT:

Download Windows 7 KB4074598, KB4074587 to fix browser crashes

It’s Patch Tuesday, folks! If you haven’t updated your Windows 7 computers yet, it’s time to check for updates and install the latest patches available for the OS.

Windows 7 Monthly Roll-up KB4074598 and KB4074587 focus mainly on security, addressing a series of issues that could affect the following Microsoft components: Windows Graphics, Windows Kernel, Common Log File System driver, Microsoft Windows Search component, and Windows storage and file systems.

Monthly rollup KB4074598  also fixes some bugs that could cause input issues in Internet Explorer and prevent users from properly using their browser.

Also, if you often experience crashes on Internet Explorer, this update will fix them. Microsoft addressed a script-related issue that caused Internet Explorer to stop working. Thanks to this update, IE freezes and crashes should now be history.

Speaking of this browser, it is worth mentioning that Microsoft also fixed the issue with launching a new page in Internet Explorer. Sometimes, when users tried to launch a new page nothing happened or the respective page would quickly close.

Download KB4074598, KB4074587

You can automatically download and install Windows 7 KB4074598 and KB4074587 throughWindows Update.  You can also download the standalone package from the Microsoft Update Catalog website.

As a quick reminder, Microsoft warns Windows 7 users that these patches won’t install on computers on which the antivirus ISV have not updated the ALLOW REGKEY.

You should contact your antivirus manufacturer to verify that they set the following REGKEY: Key=”HKEY_LOCAL_MACHINE"Subkey="SOFTWAREMicrosoftWindowsCurrentVersionQualityCompat"Value Name="cadca5fe-87d3-4b96-b7fb-a231484277cc”
Type=”REG_DWORD”
Data=”0x00000000”

KB4074598 issues

KB4074598 issues

Some users reported that KB4074598 fails to install due to error 80073701. However, it seems that this error is not related to the antivirus ALLOW REGKEY requirement that we mentioned above.

My computer is running Windows 7. Recently, I received a bunch of updates to Windows and Office which I have installed, except for KB4074598. Whenever I tried to install it, either automatically or manually, it returned error 80073701. I have tried to reset Windows Update components but it didn’t solve my problem.

If you’re also experiencing this error, try running the Windows Update Troubleshooter and then rename the SoftwareDistribution folder.

Go to Start, search for cmd and launch Command Prompt as administrator. Run the following command: Ren %systemroot%SoftwareDistribution SoftwareDistribution.bak

When this command completes, enter a new one: Ren %systemroot%system32catroot2 catroot2.bak
Restart your computer and check for Windows Updates again.

Have you installed KB4074598 and KB4074587 on your Windows 7 computer? Tell us more about your update experience in the comments below.

RELATED STORIES TO CHECK OUT:

[wl_navigator title=”Find out more”]

Microsoft announces Windows App Preview Program, giving early access to Windows 10 app updates

To pair up with Windows 10 Insider Preview Build 17101 for Fast & Build 17604 for Skip Ahead, Microsoft today officially announced the Windows App Preview Program. The announcement comes several days after reports indicated the company may be considering such a program.

With the Windows App Preview Program, Microsoft will make it easier for Windows fans to try out the latest app updates with Insider Preview builds. “We heard feedback from Windows Insiders that having to opt-in to Skip Ahead to receive the latest app updates wasn’t ideal,” noted Dona Sarkar in today’s announcement post.

Indeed, this means any Windows Insider (regardless of which Ring they are enrolled in) can now opt-in to preview new versions of individual Windows 10 apps. According to Microsoft, the following apps will be in the first-wave of the program, with previews rolling out in the next few days.

  • Feedback Hub
  • Microsoft Photos
  • Microsoft Sticky Notes
  • Microsoft Tips
  • Paint 3D
  • Windows Alarms & Clock
  • Windows Calculator
  • Windows Camera
  • Windows Mixed Reality Viewer
  • Windows Voice Recorder
A look at app previews in settings.

Windows Insiders who already opted into Skip Ahead won’t need to opt-in to the program to preview these apps. Microsoft will be pushing app updates to Skip Ahead Insiders just like before. Other Insiders in the other rings can opt-in to preview an app by going to the settings or about page for the app and clicking “Join Preview” (Seen above.)

Microsoft, though, appears to be limiting the number of Insiders who can preview apps but is also allowing Insiders to leave the preview at any time. ” If the limit has been met for that app preview for the app you will get a notification on clicking the button and as more slots open up you can join the preview,” writes Dona Sarkar.

This program is currently only for Windows Insiders, and Microsoft will be gathering feedback from how the program is going. It is likely to grow over time, so be sure to check it out!

Here are the fixes, general changes, and known issues with Windows 10 RS4 build 17101

It’s shaping up to be a lovely day to be a Windows Insider. Microsoft today released Windows 10 Build 17101 to the Fast Ring and Redstone 5 Build 17604 for those who opted to Skip Ahead. As always, neither of these builds is perfect and will have a set of issues. We’re dividing up the releases today, so have a look below for the known issues and fixes in Build 17101.

Known issues (Build 17101)

  • We have observed seeing longer-than-normal delays during install at the 88% mark. Some delays are as long as 90 minutes before moving forward. Please be patient as the install will complete successfully.
  • Plugging in an external optical drive (DVD) will cause an Explorer.exe crash.
  • Settings will crash if you open the Themes Settings page.
  • Buttons on Game bar are not centered correctly.
  • Selecting a notification after taking a screenshot or game clip opens the Xbox app’s home screen instead of opening the screenshot or game clip

General changes, improvements, and fixes for PC (Build 17101)

  • We fixed an issue from the last flight were some PCs failed to resume from hibernate (requiring a hard reboot to recover).
  • We fixed an issue resulting in 3 and 4 finger gestures on the touchpad being unresponsive in the last two flights.
  • We fixed an issue after upgrading to the last flight where Start didn’t work for Insiders who’d had HomeGroup added as a folder to appear on Start.
  • We’ve updated the touch keyboard so that if you try to shapewrite in an unsupported text field or when the typing resources aren’t installed, you won’t see the shapewriting trail as you swipe your finger over the keys.
  • We fixed an issue where the touch keyboard showed an English layout with no IME on/off key when an East Asian keyboard is the only input method on your system.
  • We fixed an issue where if you install a font product from the Microsoft Store, then later install a new build (feature update), the Store package will remain installed, but the fonts within the package are not installed. Until this is fixed, the temporary workaround is to uninstall the product from the Apps page in Settings, then re-acquire the product from the Store.
  • We fixed an issue where the touch keyboard might stop invoking automatically after locking the PC and then unlocking the PC by using the touch keyboard to enter your PIN or password.
  • We fixed an issue where the Japanese IME sometimes wouldn’t turn on correctly.
  • We fixed an issue where the floating dictation UI could be unexpectedly tiny.
  • We fixed an issue that could result in the mouse cursor suddenly jump to screen corner while mouse was moving in a List Control.
  • We fixed an issue that could result in tabs hanging and not loading content recently in Microsoft Edge after using the browser for a few days with an adblocker enabled.
  • We fixed an issue resulting in newly installed Microsoft Edge extensions not appearing in the Extensions pane in the last two flights.
  • We fixed an issue in Microsoft Edge where favicons in light theme were unexpectedly getting black backgrounds.
  • We fixed an issue that could result in UWP apps sometimes launching as small white rectangular boxes.
  • We fixed an issue resulting in certain fingerprint readers not working in recent flights.
  • We fixed an issue where Windows Hello failed to work on Surface Laptops with the last build.
  • We fixed an issue that could result in the labels for files on the desktop overlapping their icons.
  • We’re updating the “Advanced graphics settings” link on the Display Settings page to now just say “Graphics Settings”.
  • When your volume is muted, the volume icons in the Sound Settings page will also now appear muted.
    If you click the Reset button on the App volume and device preferences page, it will now also reset any app specific volumes you’ve set back to default (100%).
  • We fixed an issue resulting in app updates failing in the Microsoft Store with error 0x80070057 in recent builds.
  • We fixed an issue resulting in app updates failing in the Microsoft Store with error 0x803FB005 in recent builds.
  • We fixed an issue where bringing up Game bar using the Xbox button on an Xbox One controller didn’t work in some games.
  • We fixed an issue where in the text box for the Mixer stream title using non-character keys (e.g. Tab, Delete, Backspace, etc.) might cause the game to hang for a few seconds.
  • We fixed an issue where keyboard and mouse input might not work correctly in the Game bar when playing a first person game (e.g. Minecraft).
  • We fixed an issue where in some games—such as Destiny 2 and Fortnite—mouse and keyboard input would still go to the game while Game bar was open.
  • We fixed an issue during first shutdown/boot, or reboot, where for some users the device goes into a boot loop and the OS never loads.

As you can tell, lots of fixes in this build. With the release of Redstone 4 coming in a few months, you can expect many more fixes to come soon. Keep your feedback coming to Microsoft via the FeedbackHub and let us know your thoughts on this build by dropping us a comment in the section below.

Here’s what’s new in Windows 10 RS4 build 17101 and RS5 build 17604

In quite a surprise announcement, Microsoft released today the Windows 10 Insider build 17101 for Fast Ring Insiders as well as the Insider build 17604 for Insiders who opted into Skip Ahead. The first one is the latest Redstone 4 build from the current development branch, while the second one is the first Redstone 5 from the new RS_PRERELEASE branch.

“Please be aware that builds from RS_PRERELEASE will get less stable as teams start checking in new code”. So, things will likely be a little rough as they normally are at the beginning of the development cycle for a new Windows 10 release,” the Windows Insider team explained. “If this concerns you or makes you uncomfortable, you may want to consider opting out of Skip Ahead and simply wait for the Fast ring to transition back to RS_PRERELEASE down the road.”

For now, the RS4 build 17101 and the RS5 build 17604 come with the same list of new features and improvements: there are some important updates for Windows 10 Emojis, Windows App Permissions as well as new features for users running the Workstation or Enterprise edition of Windows 10. You can learn everything about what’s new below:

Input Improvements

Emoji design updates: Based on your feedback and to improve consistency, we’ve made adjustments to the design of some of our emoji. Examples of updated emoji include:

Before:
Before emoji update.

After:

After emoji update.

Emoji search comes to more languages: Earlier in RS4, we updated the Emoji Panel to support browsing and picking emoji in many new locales. With today’s build, we’re bringing search support to more locales too! Now you can find an emoji by keyword in over 150 locales, including English (Great Britain), French (France), German (Germany), Spanish (Spain), and more. This will help you get the emoji you want easily and quickly. As a reminder, to bring up the Emoji Panel set focus to a text field and press WIN + (period) or WIN + (semicolon).

Emoji Panel in view above Sticky Notes, with the text “chat” in French searching for cat emoji

Windows App Permissions

UWP File System Access: With this build we’re giving you more control so you can now decide which UWP apps can access your full file system. Particular UWP apps will be granted permission to have broad file system access. This capability will be granted on a per app basis by Microsoft. If a UWP app has the broad file system access restricted capability, you will receive a consent dialog prompting you to accept or deny the request. If at any time you change your mind about the decision, you can go to Settings > Privacy where you’ll find a new Settings page for File System Access. On this page, you can turn access on or off globally, and if it’s on you can also turn it on or off for each app that has requested the capability. UWPs with broad file system access will not appear in the Photos, Videos, or Documents privacy settings pages. If you grant broad file system access, this includes Photos, Videos and Documents.

New features for Windows 10 Pro for Workstations

Last year, as part of the Windows 10 Fall Creator’s update, we announced a new edition of Windows designed for demanding mission critical scenarios targeting advanced users. As part of RS4, we are adding two more features for our most advanced users running these mission critical scenarios:

A new power scheme – Ultimate Performance: Demanding workloads on workstations always desire more performance. As part of our effort to provide the absolute maximum performance we’re introducing a new power policy called Ultimate Performance. Windows has developed key areas where performance and efficiency tradeoffs are made in the OS. Over time, we’ve amassed a collection of settings which allow the OS to quickly tune the behavior based on user preference, policy, underlying hardware or workload.

This new policy builds on the current High-Performance policy, and it goes a step further to eliminate micro-latencies associated with fine grained power management techniques. The Ultimate Performance Power plan is selectable either by an OEM on new systems or selectable by a user. To do so, you can go to Control Panel and navigate to Power Options under Hardware and Sound (you can also “run” Powercfg.cpl). Just like other power policies in Windows, the contents of the Ultimate Performance policy can be customized.

The Ultimate Performance Power plan is selectable either by an OEM on new systems or selectable by a user. To do so, you can go to Control Panel and navigate to Power Options under Hardware and Sound (you can also “run” Powercfg.cpl).

As the power scheme is geared towards reducing micro-latencies it may directly impact hardware; and consume more power than the default balanced plan. The Ultimate Performance power policy is currently not available on battery powered systems.

We’ll continue to tune and evaluate the power plan settings. To submit feedback please use the Feedback Hub and file your feedback under Power & Battery > Setting category.

Productivity focused out of box applications: In the Windows 10 Fall Creators Update, the out of box experience for Windows 10 Pro for Workstations draws from the Pro edition of Windows 10. One area where this is noticeable is the suite of applications installed out of the box visible as tiles in the start menu. In the next release for Windows, you will see for Windows 10 Pro for Workstations productivity and enterprise focused applications in place of consumer applications and games. This was one of the top feedback shared with us by our partners and users and we’re delivering this in our next update.

In the next release for Windows, you will see for Windows 10 Pro for Workstations productivity and enterprise focused applications in place of consumer applications and games.

If you’re a Windows Insider running the Workstation or Enterprise edition, you can see these features in Builds 17079 or greater.

If you’re a Fast Ring Insider, be aware that the Windows Insider team will allow a “small subset” of you to opt in to Skip Ahead in the Settings app. “If we open Skip Ahead up for more Insiders, we’ll let you know,” the blog post reads, without giving more details. In the meantime, Insiders who already opted into Skip Ahead can enjoy the first Redstone 5 build today. “Once we’ve finished RS4, we will move everyone in the Fast ring back to the RS_PRERELEASE branch and then the Fast ring and Skip Ahead will be back to receiving the same builds again,” the team explained.

Instagram Apps for Windows 8, 10: The Best to Use

Do you want to share your special moments with your friends, colleagues or family? If you do, then the best service you can use is, of course, Instagram.

Instagram, as we all know, can be easily used on any device that is running on Windows 8, 10 Android, iOS or any other platforms.

As for Windows 8, 8.1 and Windows 10 users, in this article, I will try to resume the best Windows 10 Instagram apps that are currently available on Windows Store, so don’t hesitate and check them all out.
windows 8 instragram apps
Since Facebook decided to buy Instagram, the software had become the best and one of the most popular photo sharing app. With Instagram you can easily capture images using your Windows 8, 8.1, Windows 10 portable device and share your photos with your friends that are also using the same app on their own devices. You can also change the images you take, you can add effects and you can play with numerous features that can be used for modifying your pictures.

Now, if you want to use Instagram on your Windows 8, 8.1 or Windows 10 as well as Windows RT device, you can use the official Instagram app or a client or app that can be downloaded from Windows Store. As usually, you will find many tools, though some of the apps will be buggy and inappropriate for a daily use. That’s why I have decided to develop this review on which you will be able to learn which the best Windows 8 Instagram apps are.

Enjoy Instagram on Windows 10 with these apps

  1. Instagram
  2. InstaPic
  3. TLVstagram
  4. WinGram
  5. Milligram
  6. Pictastic

1. Instagram

Instagram

Instagram arrived in the Windows Store in 2016, after it had been available on other platforms for quite a while.

The social app lets you connect to your friends and family and see what they’re up to. The Instagram community counts over 500 million people, so you’ll definitely going to find something that interests you.

You can use the app to post photos and videos and share wonderful moment of your life with your friends. You can also edit your content, add various, combine multiple clips into one video.

If you don’t want the whole world to see what’s going on in your life, you can send private messages, photos, videos and

2. InstaPic

InstaPic

InstaPic is definitely one of the best Instagram app developed for the Windows 8, 8.1, 10 system. With InstaPic you can upload photos to your Instagram account, browse photos and videos from people you follow, as well as download Instagram content to your Windows 8, 10 PC or tablet.

The app is stable and works without lags and can be installed on any Windows 8, 10 and Windows RT device. InstaPic can be anytime downloaded for free from Windows Store; the app had received five stars ratings from the users who have tested it.

3. TLVstagram

TLVstagramAnother free Instagram app for Windows 8, 10 is TLVstagram. This tool brings only basic features as you can use this software if you want to view photos by #tags, set best #tags for your Main page, share photos with your friends, or set your favorites picture as your Lockscreen Image. You can test the app anytime you want as TLVstagram can be downloaded for free from Windows Store.

4. WinGram

WinGramWinGram app for Windows 8, 8.1 and Windows 10 can be somehow seen as an improved version of TLVstagram as there are new features added in adition to the ones mentioned above. So, with WinGram you can also log in to your Instagram account and view photos of users you follow.

You can leave a comment, you can like photos and of course you can search for #tags, similar as with TLVstagram.

5. Milligram

MilligramMilligram is an Instagram client for Windows 8, 8.1 and Windows 10 which can be downloaded for free from Windows Store. The best is that this tool is coming with all the features you need for enjoying a proper Instagram experience on your own Windows 8, 10 device. Thus, with Milligram you can easily pin any search tag to your home screen for live feeds, you can leave comments, like and also share images and lot more.

6. Pictastic

Pictastic

Pictastic’s creator proudly say that the app offers the most complete Instagram experience on Windows Phones.

You can check out your friends’ stories, send them messages, create photo collages and see who has followed or unfollowed you recently.

Pictastic perfectly mimics the official Instagram app, allowing users to choose filters and transform their look, tag  photos with location information or limit people’s access to your photos and select only a few people from your friend list that can follow your latest post.

So, there you have it; that was what we think that is the best Windows 8, 10 Instagram list of apps that can be anytime checked on Windows Store. All the tools described above are stable and can be used for daily use on any Windows 8, 10 laptop, tablet or phone.

Test the apps and then use the comments field from below for sharing your experience with us. Also, don’t hesitate and share your favorite Instagram apps with us and with other users who might want to hear a second opinion on that matter.


RELATED STORIES TO CHECK OUT:

9 best Windows 10/11 drum apps for your entertainment

Windows 10 is a wonderful OS if you know the right approach towards it. Finding interesting apps in the Windows Store is something that we do here and this time, we want to share with you some of the best Windows 10 drum apps for entertainment purposes.

windows 8 drum apps
Transforming your Windows 10 tablet, tablet or any other Windows 10 device into a real musical instrument is a lot of fun. In the past, here on WindowsReport, we shared with you some apps that you could use to play guitar on your Windows 8, 10 tablet, and two piano apps – Piano8 and Piano Time. Now, it’s time to have a look at some of the best drum apps to be played on your Windows 10 device.

Best best drum apps to get the party started

  1. Drums
  2. DrumKit
  3. Electro Beat Drum
  4. Drum Time
  5. Djembe
  6. Bongo
  7. Drum Teacher
  8. Rock Drums Lite
  9. Majestic Drums

1. Drums

windows 8 drumsRead Also: Windows 8, 10 App Check: LinkedIn HD

With a name that doesn’t get any simpler than that, the Drums app for Windows 10 turns your tablet into a real drum set. Drums comes with 12 different drum sounds that you can play by using your fingers or with keyboard and mouse, since there’s support for desktop devices, as well. The app has recently been updated for performance improvements and various other bugs have been taken care of.

2. DrumKit

windows 8 drumkitDrum Kit for Windows 10 is another interesting app for your Windows 10 tablet or non-touch device. Use it to play a virtual set of drums, with high quality sounds. You can also choose to play it with your keypads, in the alphabetical order. The app features high quality drum sounds, low latency, animated drums and customizable drum layout.

3. Electro Beat Drum

windows 8 electro beat drumThis is not a regular drum set to be played on your Windows 10 tablet, but rather an emulation of an electronic drum pad. The isn’t too complicated and can be used equally by those who know who to master such a dedicated instrument – professional musicians and for even for those who just want to have a little fun in their daily lives.

4. Drum Time

windows 8 drum timeDrum Time isn’t rated as good as the other drum apps in this Windows 10 app top, but it comes with some interesting features. Besides the traditional touch screen, keyboard, or mouse input, there’s also the option to record and playback your creations. The live tile option also lets you keep track of the beats played. And with less than 2MB, it’s as light as a feather for your storage.

5. Djembe

windows 8 djembe Not a drum app per se, this basic Windows 10 app will let you play the popular Djembe instrument; so, now you can take your Windows 10tablet with you at parties and just start the app to get those nice African rhythms going. The app has five different sounds, is DirectX accelerated and also support for nultitouch, which means you can use ore fingers to play this nice Djembe app in Windows 10.

Read Also: Best Windows 10 GPS Apps to Use

6. Bongo

bongo drum app windows 10

If you like the sound of the Cuban bongo drums, check out this app. You can play the different sounds of the bongo with your fingers or your keyboard.

Playing the bongo on this app is very fun. If you need some time alone but the house if full of kids, just give them a Windows 10 tablet, install the app on it and let them play all day long.

7. Drum Teacher

drum teacher app

Now, if you want to learn how to play drums, the Drum Teacher app is the right thing for you.

This simulation software can help you learn some simple rhythm using the Teaching function. Sound is nice and clear and you won’t experience any delays while drumming.

Keep in mind, Drum Teacher is a challenging app. So, if you have no musical flair it will be difficult for you to follow the instructions. You can polish your skills with a simpler app and then install Drum Teacher.

8. Rock Drums Lite

Rock Drums Lite

Rock Drums Lite is a multi-touch drum app for Windows 10. The app is highly responsive thanks the low latency and delivers high-quality sounds.

It also comes with a bunch of settings that you can change to play with sounds and find the right sound combo for you.

9. Majestic Drums

Majestic Drums is a virtual drum set that’s suitable both for education and fun. If you’ve always wanted to make some noise, plug your headset and start playing.

The app is very responsive and you can easily use on keyboard as well.

Best drumset app out there! I plugged into a speaker and jammed with a guy who plays guitar. I can play on the keyboard and hear myself in real time. The sounds are top notch and I am very happy!

There you go, there are the best drum apps that you can download from the Microsoft Store. Have fun!

By the way, if you used other drum apps that you think we should include to this list, let us know in the comments below.


RELATED STORIES TO CHECK OUT:
Party Chat comes to the Xbox app for iOS and Android

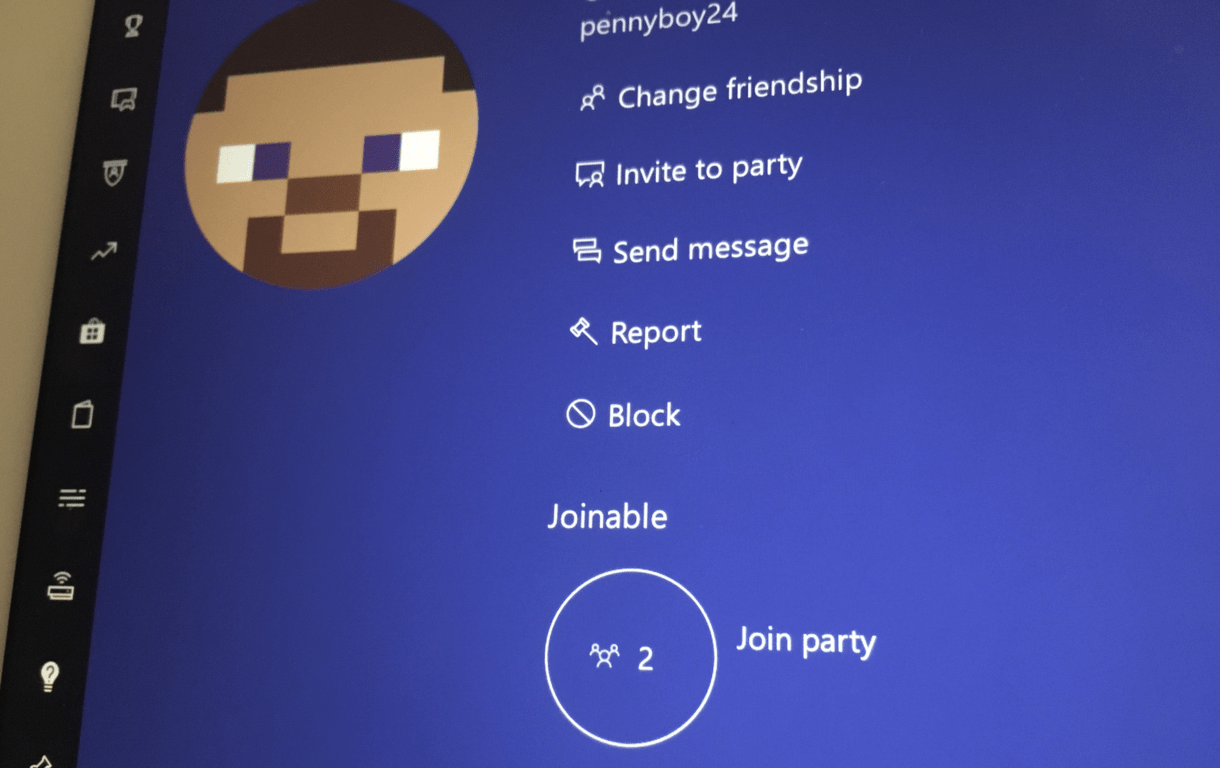
Party Chat, the Xbox Live feature that allows for voice chat between Xbox gamers is now available on the Xbox app for iOS and Android. The feature first appeared two months ago in the Xbox beta app on both mobile platforms, and we’re glad to see it rolling out to everyone.

To use Party Chat, you’ll have to visit the Xbox profile of one of your friend and then tap “Invite to Party.” In case your friend is already in a joinable party, you’ll be able to see it and join the voice chat right from his or her profile. When you’re a party, you’ll be able to access party controls (including a mute option) and text chat.

PartyChat on iOS

Overall, this is a nice option for gamers needing to keep up with their Xbox Live friends on the go. Party Chat is also available on the Xbox app for Windows 10, but it has yet to make its way to Windows 10 Mobile. You can get the Xbox app for iOS and Android from the download links below.

Xbox
Xbox
Price:
Free


‎Xbox
‎Xbox
Price:
Free

Microsoft for Startups launched with $500 million to spend in next two years

Microsoft today announced Microsoft for Startups, a program which aims to help startups grow their customer base and also gain better access to technology. The company will commit $500 million over the next two years to the program and will offer joint sales engagements with startups, and more.

Under the program, Microsoft will provide the “dedicated resources” necessary to help startup marketing and sales teams sell their solutions to enterprises. Microsoft will also create new community spaces that “promotes collaboration across local and global ecosystems.”

Some other areas and benefits of the program are listed below.

  • The program provides startups with up to $120,000 in free Azure credits, enterprise grade technical support and development tools.
  • Qualified startups also get access to productivity and business applications, including Office 365 and Microsoft Dynamics 365.

The Microsoft for Startups program is an addition to many other programs which already are helping companies, startups, and businesses. Microsoft Reactors, Microsoft ScaleUp, and Microsoft Ventures are all examples of how Microsoft is empowering its partners and businesses around the world. You can learn more about Microsoft Startups by checking here.

Internal Hard Drive Won’t Power On? 3 Ways to Fix it

Of all the main PC components, the HDD is the most prone to malfunctions. In fact, many reported that internal hard drive won’t power on at all.

To avoid issues such as these, it’s crucial to use data backup software and ensure that your files are safe, it issue such as this appears.

It might be possible to fix this problem, and in today’s guide, we will show you the best ways to do that.

Why won’t my internal hard drive won’t power on?

  • Connection problems – If the hard drive isn’t properly connected, it won’t be able to power on.
  • Damaged hard drive – In case the drive isn’t showing in BIOS, it’s possible that it’s damaged.

What can I do if the internal hard drive won’t power on?

1. Check if the hard drive is spinning

  1. Open your computer case and locate the hard drive.
  2. Power on the PC and listen if the drive is spinning.
  3. If it is, it means that it’s getting power.

2. Check cables

  1. Open the computer case.
  2. Locate your hard drive and make sure that all cables are tightly connected.
  3. If that doesn’t help, connect a different data and power cable to your HDD and try again.

You can also try replacing cables from a different hard drive or SSD and check if they work.

3. Check BIOS

  1. Restart your PC and press Del or F2 to enter BIOS.
  2. Check if your drive appears in BIOS.
  3. If not, the hard drive may be faulty.

There’s only so much you can do when HDD won’t power up, but we advise you to get it to professionals to avoid data loss. Even though the HDD won’t power up, the chances are good that you’ll be able to preserve your data.

For more solutions, we suggest reading our internal hard drive won’t show up guide, since it covers a similar subject matter.

That should do it. If you have a question or suggestions regarding the HDD power issues, post them in the comments section below.

Best cryptocurrency price tracker extensions [Chrome & Firefox]

Looking for an easy way to track cryptocurrency prices? Try using cryptocurrency price tracker extensions! These extensions are extremely easy to use, because they are attached to your web browsers. Since they are extensions, you can quickly access them at any time while you are browsing the internet.

Now what are some of the best cryptocurrency related extensions? Well, for your convenience, I’ve compiled a list of some of the best extensions available for both Chrome and Firefox. Hopefully, these extensions will give you an edge when it comes to making money off of cryptocurrencies. 

Cryptocurrency price tracker extensions for Chrome

  1. Bitista
  2. CryptoVision
  3. Cryptocurrency Price Tracker

Chrome is the most popular web browser these days. Therefore, it is only natural that we start with Chrome extensions. It is important to note that since these extensions work on Chrome, you can use them on almost every type of platform.

In other words, they will most likely work on Windows, Mac, Android, iOS, etc, as long as they have a Chrome browser installed on it. That’s the beauty of browser extensions. Okay, without further ado, let’s get started.

1. Bitista

Bitista is a lightweight Bitcoin exchange rates converter extension that not only works on the Chrome browser, but also on Firefox. Furthermore, there is an android version of Bitista that you can download for your mobile device. There are rumors that this cryptocurrency tracker will soon be available for the iOS and Windows systems.

In addition, you have the ability to access all of the information online, if you don’t feel like downloading or installing anything.

However, while Bitista is flexible it only shows the current price for Bitcoin. In other words, there aren’t any graphs or portfolios that you can use. You also can’t see the price of other cryptocurrencies.

On the hand, it does have an extremely impressive list of fiat currencies. You will be able to track the price of Bitcoin in anything from the Zimbabwean Dollar to the US Dollar. There are 157 currencies to choose from to be exact. You also have the function to edit what currencies are displayed on your featured list. (1)

So, the bottom line is that this extension is ideal for people who usually trade Bitcoin in more than one currency. The user interface is both minimalist and easy to use. There aren’t any advertisements or anything, clogging up your screen space. It is a highly recommended extension.

Find it Here: Bitista

  • Check Out: 2 best cryptocurrency mining computers for beginners

CryptoVision – Portfolio Tracker

Next up the line is a more popular price tracker available for the Chrome browser called CryptoVision. As you can see in the picture above, it is highly convenient to track your favorite crypto coins. All you have to do is click on the extension and you will see live, up-to-date information of your coins of choice.

One of the best things I like about CryptoVision is that it has a very easy to use system. All you have to do to add a cryptocurrency to your portfolio or “watch list”, is to click on a button. Furthermore, you can drag and drop the coins to rearrange them.

All in all, if you want an easy and simple extension to keep track of your coins, then I recommend CryptoVision.

Find it Here: CryptoVision

2. Cryptocurrency Price Tracker

Okay this one is also quite easy to use. All you have to do to access your list of coins and their respective prices is to click on the extension. The prices are updated every 5 minutes and information is gathered from coinmarketcap.

This extension also has an unique function that allows you to not only see the price in one currency but two. In other words, if you want to see the price of Ethereum (ETH) in let’s say EUR, then you will also have USD underneath it. You can see how it is set up in the picture above.

In addition to the USD, you can choose to see the value in EUR, GBP, CNY, CHF, CAD, and AUD. You will need to change to currency in the options page. Remember, whatever currency you choose, the USD will always be there for convenient comparison.

You of course also have the option to choose which coins are shown on the popup window. You have hundreds of cryptocurrencies to choose from, and more are added frequently. Select the coins you want to see in the options menu. You will also be able to compare any cryptocoin with Bitcoin. To do this , click on a coin in the drop down menu.

Finally, there is a timer at the bottom of the pop up that indicates when the next update will happen.

In conclusion, Cryptocurrency Price Tracker is one of the best extensions you can use for Google Chrome. I especially how easy it is to compare coins to both USD, other currencies, and Bitcoin.

Find It Here: Cryptocurrency Price Tracker

Cryptocurrency price tracker extensions for Firefox

  1. Cryptocurrency Price Tracker
  2. Crypto Ticker

Firefox is also a highly popular web browser that can be used on multiple platforms. If you are a Firefox user, then you will find the list below helpful.

Cryptocurrency Price Tracker – Bitcoin, Ethereum (By Louis Baker)

This FireFox extension looks easy to use, but it is also packed with features. With this extension you can easily keep track of the prices of most of the major cryptocoins.

You will also have easy access to other information such as Market Cap, Max Supply, circulation, graphs, and more.

While you do have a limited amount of coins to choose from, you can also choose which coins are allowed to be seen on the drop down menu.

Personally, I like the user interface of this extension. It has a “night”theme and is easy on the eyes.

The extension also receives regular updates and maintenance.

I recommend this Firefox price tracker extension for people who enjoy having flexible settings. The extra features on this extension also makes it ideal for more experienced traders.

Find It Here: Cryptocurrency Price Tracker

Crypto Ticker

Crypto Ticker is an unique price tracker extension. This extension keeps things simple by showing the live update of only one cryptocoin at a time. However, the great thing about this is that you don’t have to click on anything to see the price of your favorite coin. Instead, the price of the coin is shown right in your FireFox’s toolbar.

You can of course change which cryptocurrency you want to see. In fact, there are over one thousand cryptocurrencies you can choose from.

As for fiat currencies, there are over 30 to choose from.

Price changes are updated every minute.

Who is Crypto Ticker ideal for? Well, this extension is great for people who like to browse the internet and keep an eye on their favorite cryptocurrency while they are at it.  Obviously, since you can only view one coin at a time, this extension is ideal for individuals who only have invested in one type of coin. Honestly, not having to click on a button to check on your coin is a highly convenient feature.

Find It Here: Crypto Ticker

Conclusion

There you have it, the list of the best cryptocurrency price tracker extensions For Chrome and Firefox. The extensions aren’t ordered from the best to worst. All of these cryptocurrency trackers are great and it is up to you to decide which one fits your taste.

See Also:

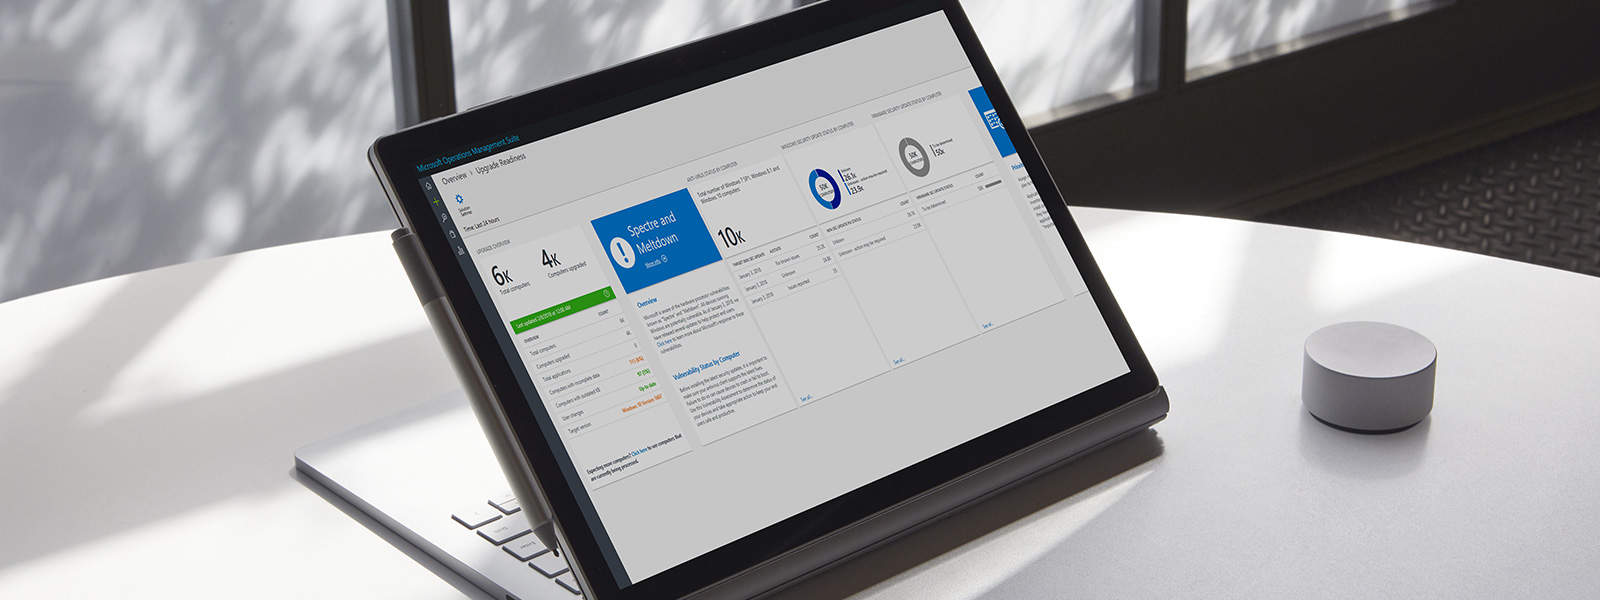
Windows Analytics Service adds Meltdown / Spectre insights for IT Pros

Microsoft previously shared how the average Windows user can protect themselves from the Spectre and Meltdown security flaws, but today the company explained how IT Pros can do the same with all Windows PCs across their enterprise. Indeed, the Redmond giant is now adding more capabilities to the free Windows Analytics service to give professionals detailed insights on the Windows 7, 8.1 and 10 PCs they manage.

There are now new Anti-Virus Status, Windows Operating System Security Update Status, and Firmware Status sections in Windows Analytics: Anti-virus Status will help indicate if a device’s anti-virus software is compatible with the latest Windows Updates. Windows Operating System Security Update Status will help display which Windows updates are running on any device and if any of these updates have been disabled.

A look at firmware status in Windows Analytics service

Finally, Firmware Status shows more information about the specific firmware running on any given device. Moreover, it lists if the firmware includes specific protections required by CPU manufacturers. This feature is currently limited to security updates from Intel, but Microsoft says more CPU partner data will be added soon. IT Professionals can get started with these new capabilities today by visiting this website.

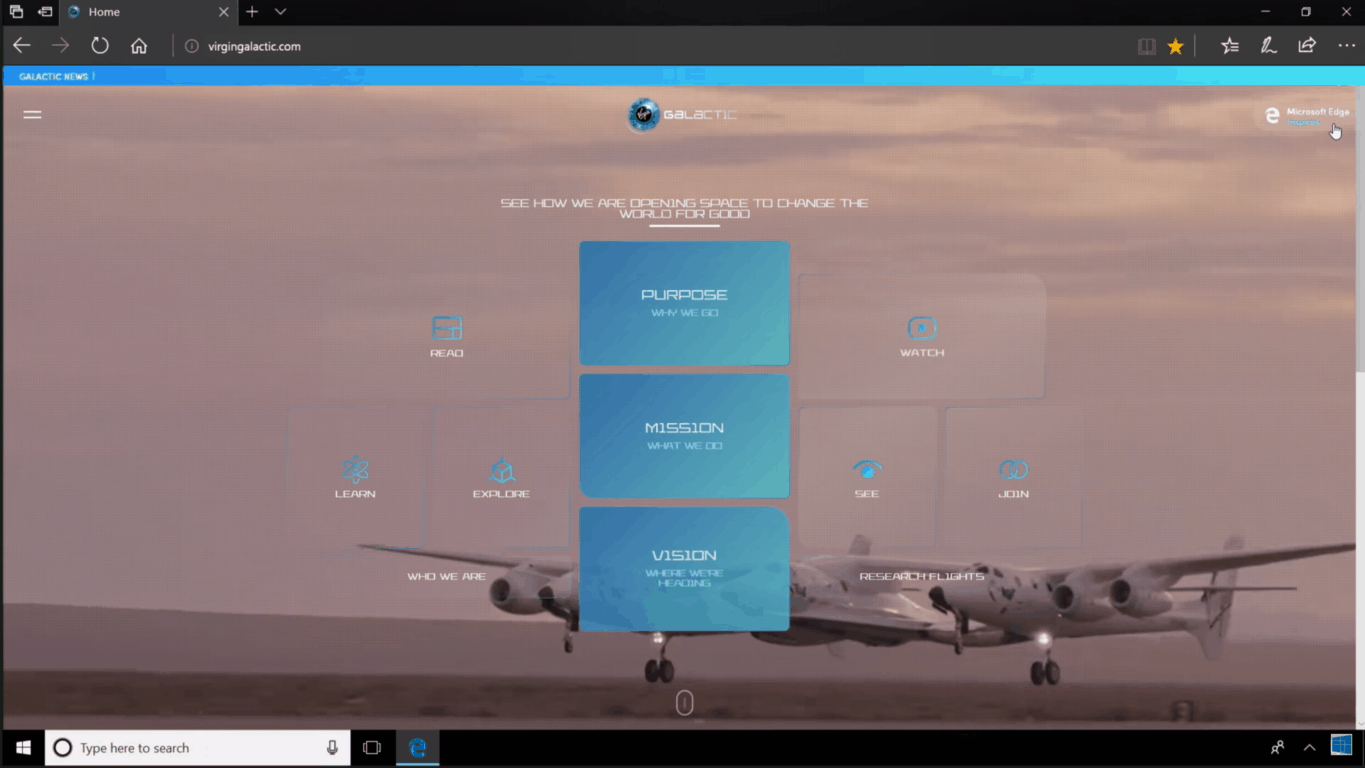
Microsoft Edge helps Virgin Galactic showcase new age of space exploration

Microsoft today is highlighting a new partnership with Virgin Galactic which is helping the spaceflight company showcase the newest age of space exploration. The two companies developed a mobile-friendly and touch-optimized Virgin Galactic website which is accessible to all, highlighting the journey ahead for aspiring astronauts.

According to Microsoft, the website is meant to help the public connect with space travel by showing off how “space exploration, research, and transportation has the potential to improve life for everyone.” Anyone on a mobile device or a PC can visit the website (obviously best viewed in Edge) by clicking here, and experiencing modern spaceflight discoveries firsthand for themselves.

The Virgin Galactic website uses the latest web technology and supports WebVR for those with Windows Mixed Reality devices. There is even a 3D tour for those who aren’t lucky enough to experience Mixed Reality. Other features of the website are listed below.

  • With immersive browser WebVR, and anyone can tour the space fleet using Windows Mixed Reality devices. Hotspots provide key details about the WhiteKnightTwo mothership, spaceship VSS Unity and the Virgin Galactic team
  • Enjoy a fluid site experience by interacting with a variety of VSS Unity features, the sensation of views in parallax, and animations that enhance your discovery.
  • Mobile-friendly and touch-optimized – In keeping with the goal of a captivating venture, the site is mobile-friendly and touch-optimized for intuitive use.

This is definitely a cool experience, and we’re hoping it may inspire many more to sign up with Virgin Galactic, become an astronaut, or explore the wonders of our universe. Feel free to check out the website for yourself and let us know your thoughts in the comments below.

Rare opens up about PC specs for upcoming Sea of Thieves release

After gathering feedback from beta testers over the past couple of months, Rare’s pirate game Sea of Thieves will be released on March 20 on both Xbox One and Windows 10 PC. This will be Rare’s first PC release, and because the game will be a Microsoft Store exclusive, the game studio has a lot of pressure on its hands to meet the expectations of hardcore PC gamers. Today, Rare expounded a bit on just what that PC experience will be like.

“We know that as PC gamers, having the ability to change the field of view, unlock or lock the frame-rate, rebind keys, change video settings, resolution, and graphics options, as well as offering extra functionality like full ultra-wide support and a dedicated FPS Counter, is all part of the expectation,” explained Rare’s PC Design Lead Ted Timmins. “It’s with great pleasure then for us to announce that after all of the above, and more than a year of working with our partners at AMD, Intel and NVIDIA, it’s time to smash a bottle of rum against our PC specifications so that you can see how your rig will fare.”

First of all, you should know that Sea of Thieves on Windows 10 will ship with an auto-detect experience that will give PC gamers “the Rare-certified spec based on your hardware.” The game studio detailed six different sets of specs, going from the “Cursed” 540p at 30FPS to the “Mythical” 4K at 60FPS.

“The game is perfectly playable at 540p,” explained Timmins, which means that PCs with Intel Integrated GPUs (Intel Iris Pro Graphics 6200 or Intel Iris 540) and 4G of RAM should have a pretty good experience. Sea of Thieves isn’t the most photorealistic game to be released this year (except for the gorgeous water effects), but playing the game in 4K at 60 FPS will require a high-end Intel Core i7 or AMD Ryzen processor, 16GB of RAM and an Nvidia Geforce GTX 1080 or AMD Radeon RX Vega 64 GPU.

Sea of Thieves will also require the Windows 10 Anniversary Update or higher, and it will be a 60GB download. The game is already available to pre-order from the Microsoft Store, though we remind you that it will also be available for free with Xbox Games Pass on launch day. It remains to be seen if Sea of Thieves will be the smash it that Microsoft’s Xbox division desperately needs, but at least the company will be making the Xbox Play Anywhere game more accessible than ever.

Sea of Thieves
Sea of Thieves
Developer:
Microsoft Studios
Price:
Free

Chalkup co-founder Justin Chando joins Microsoft, plans to expand their education offerings

Microsoft today announced Chalkup co-founder Justin Chando has joined Microsoft Education. The move is part of the company’s plans continued investment to “help save teachers time, build collaborative classrooms and drive better learning outcomes for students.”

After spending time with Chando, the Redmond giant is planning on working with Chalkup, educators, and students to bring elements of Chalkup into Microsoft Teams, including a rubric system. According to Microsoft, Chalkup customers will have continued support through the end of June and can then transition into Microsoft Teams.

Justin Chando originally founded Chalkup back in 2013, and it has since grown in popularity. In a note on the company’s website, Chando mentions educators & students from 1 in 3 universities and 1 in 5 high schools in the United States have used the Chalkup Class Collaboration Platform. He also issued the following statement to Microsoft.

“In spending time with the amazing people at Microsoft, it was clear that we were completely aligned in our mission for connecting classrooms, sparking student collaboration, and finding new and innovative ways to work together. We knew Microsoft would be a great fit and we’re thrilled for what the future holds for our customers,”

Existing users should keep in mind that Chalkup will shut down on June 30, 2018, so the company can shift focus to building Microsoft Education products. New signups are also closed, and Chalkup users are being urged to sign up for Microsoft Teams, free and included with Office 365 for Education.

Update: An earlier version of this article incorrectly stated that Microsoft acquired Chalkup. We’ve since updated to clarify Chalkup CEO Justin Chando has joined Microsoft.

Leaked video suggests Xbox Live Free Play Days coming this weekend

A new video tweeted out by notorious Microsoft Leaker WalkingCat suggests Xbox Live Free Play Days is coming this weekend.

https://twitter.com/h0x0d/status/963414577961553922

The video shows that Free Play Days will run from February 15-18th. It also highlights the several benefits of Free Play Days, including playing Rainbow Six Seige, NBA 2K18, and enjoying multiplayer for free on any game you already own (that is if you’re not already a paid Xbox Live member.)

Microsoft has yet to announce Xbox Live Free Play Days for this month, but we’re assuming an announcement may be coming soon. As always, be sure to stay tuned for more information, as we will update this post with more information once things become more official.

We’d also like to remind you that this week’s Deals with Gold is now live, including big savings on Call of Duty WWII and Destiny 2. These titles are Xbox One X enhanced, so sure to check it out if you’re looking to enjoy new games this week.

Outlook is down: some users can’t log in or send messages [February 2018]

Recent reports suggest that Outlook is down for many users. More specifically, users are experiencing login issues which prevent them from connecting to their accounts for more than a few seconds.

outlook issues bugs

There are also some lucky users who can connect to their Outlook accounts but are unable to send or receive messages.

Can’t send or receive mail on — constantly asking me to re-enter password for outlook account

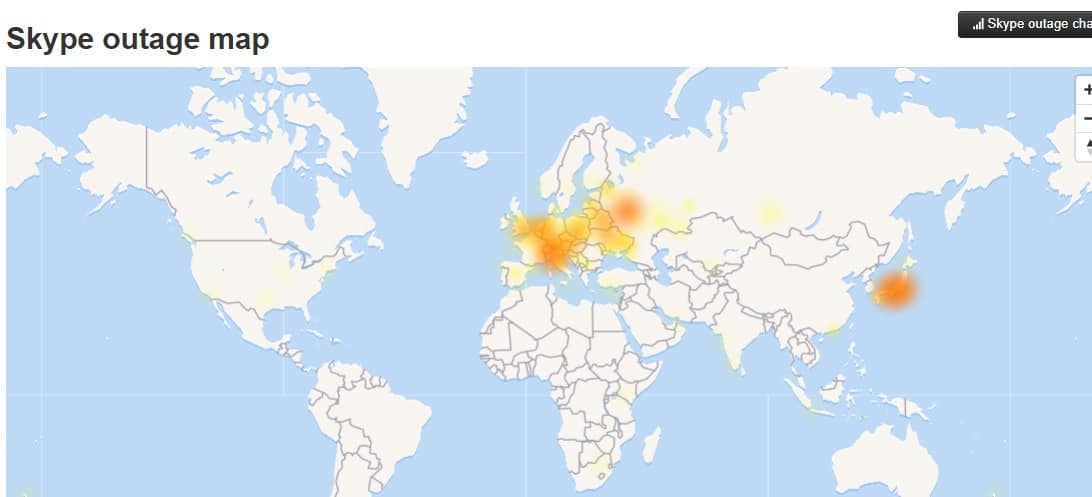
Judging by the outage map, it seems that the issue is prevalent for European users.outlook issues february 2018

Also, it seems that mobile users are more affected by this problem than desktop users.

For the time being, there is no information available about this issue on the official Office page. Users already contacted Microsoft on Twitter but the company has yet to reply.

outlook down

We’ll update this article as soon as new information is available.

UPDATE: Judging by the number of reports available on DownDetector’s website, it seems that the issue has been partially resolved. However, some Outlook users may still experience login issues on mobile devices.

outlook connection issues

Are you still affected by this problem? Tell us more about your experience in the comments below.

No Running Apps in Task Manager: 5 Ways to Get Tem Back

Task Manager is a Windows utility that shows you all the running applications on your PC, however, many reported no running apps in Task Manager.

This can be a big problem because you won’t be able to end Windows processes that you don’t need, or close an application that is frozen.

Luckily, there are a few solutions that you can use to fix this.

Why is an app not showing on Task Manager?

  • Your Windows installation might be damaged causing Task Manager not to work properly.
  • In some rare instances, incorrect date and time will cause this problem on your PC.
  • A corrupted user profile can cause this and many other problems.

How do I fix Task Manager if there are no running apps?

1. Run an SFC scan

  1. Click Start
  2. Go to the search field box and type CMD
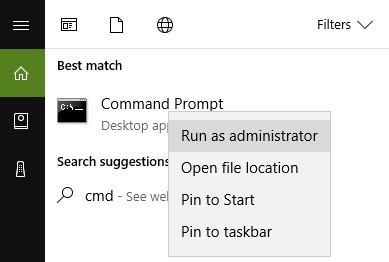
  3. Go to Command Prompt then right click and select Run as Administrator
    Empty task manager/Task manager is empty/Nothing shows up in task manager
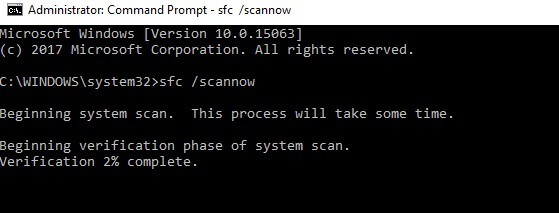
  4. Run the following command sfc/scannow
    Empty task manager/Task manager is empty/Nothing shows up in task manager

Some users may still experience errors after running the SFC scan. Thus, if this is the case for you, we recommend a trustworthy repair app to take care of it.

2. Check Time and Language settings

  1. Click Start and select Settings
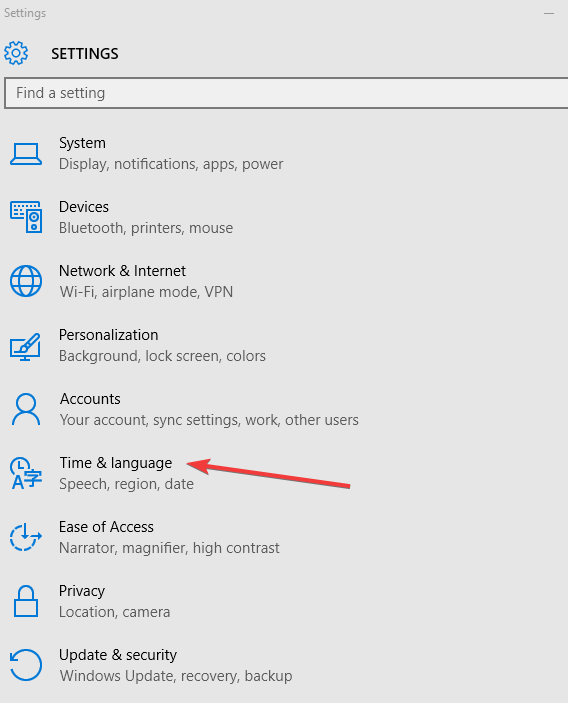
  2. Select Time and Language
    Empty task manager/Task manager is empty/Nothing shows up in task manager
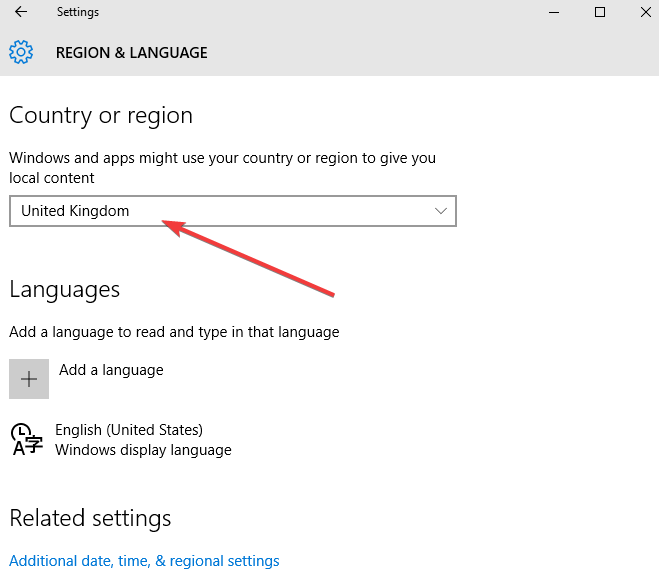
  3. Click Region and Language
    Empty task manager/Task manager is empty/Nothing shows up in task manager
  4. Under Country or Region, click on English (United Statesdf), and if not there, you can add it using Add a Language button
    Empty task manager/Task manager is empty/Nothing shows up in task manager
  5. Restart and check if Task Manager is empty or nothing shows up in Task Manager after this.

3. Run DISM tool

  1. Click Start
  2. In the search field box, type CMD
  3. Click Command Prompt in the search results list
    Empty task manager/Task manager is empty/Nothing shows up in task manager
  4. Run the following commands:
    Dism /Online /Cleanup-Image /ScanHealth
    Dism /Online /Cleanup-Image /CheckHealth 
    Dism /Online /Cleanup-Image /RestoreHealth

4. Create new user profile

  1. Click Start
  2. Select Settings
  3. Select Accounts
  4. Click Family and other users
    Empty task manager/Task manager is empty/Nothing shows up in task manager
  5. Click Add someone else to this PC

  6. Fill in the form with the user name and password. Your new user account will be created.
    Empty task manager/Task manager is empty/Nothing shows up in task manager
  7. Click on Change account type
  8. Click the drop down arrow and choose Administrator to set the account to administrator level
  9. Restart your computer
  10. Login to the new account you just created

If Task Manager is restored in the new profile, then it may mean your other user profile is corrupted, so do the following:

  1. On your new account, use it to downgrade your usual account
  2. Click Apply or Ok
  3. Raise back your old account to its default admin level
  4. Rinse and repeat a few times as this will help to remove any corruption
  5. Leave your account on as Administrator

If the problem disappears, then you can either fix the old user account or migrate to the new account.

5. Perform a system restore

  1. Click Start
  2. Go to the search field box and type System Restore
  3. Click Create a Restore Point in the list of search results
    Empty task manager/Task manager is empty/Nothing shows up in task manager
  4. Enter your administrator account password or grant permissions if prompted to
  5. In the System Restore dialog box, click System Restore
    Empty task manager/Task manager is empty/Nothing shows up in task manager
  6. Click Next
  7. Click a restore point created before you experienced the problem
  8. Click Next
  9. Click Finish

To go back to a restore point, do the following:

  1. Right-click Start
  2. Select Control Panel
  3. In the control panel search box, type Recovery
  4. Select Recovery
    Empty task manager/Task manager is empty/Nothing shows up in task manager
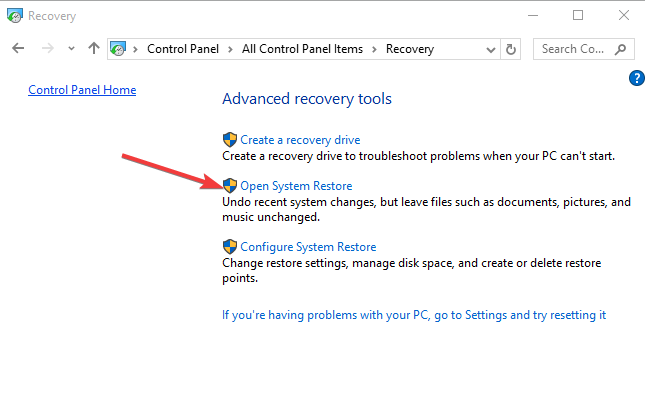
  5. Click Open System Restore
    Empty task manager/Task manager is empty/Nothing shows up in task manager
  6. Click Next
  7. Choose the restore point related to the problematic program/app, driver or update
  8. Click Next
  9. Click Finish

This isn’t the only issue and many reported that Task Manager won’t end the task, but we covered that in a separate guide. Another similar error is when programs won’t show up in your Control Panel so be sure to check that out too.

Has any of these solutions helped you with no running apps in Task Manager? Let us know in the comments below.

Get the latest Dolby version for Windows 10/11 [QUICK GUIDE]

Dolby Audio Driver represents a dedicated utility that can be used on any Windows based device for improving the sound quality of your laptop, tablet, or desktop.

Now, in order to get the best experience you need to use the latest version of Dolby, which means that you need to download the latest release of the software.

download dolby windows
Unfortunately, a common problem is related to some incompatibility issues between Dolby and Windows 10 OS. Basically many users reported Dolby issues after updating to Windows 10 from Windows 7, or to Windows 10 from Windows 8.

Well, all these are problems related to the Dolby driver, or to the sound driver that is installed on your device; so for fixing the incompatibility issues you just have to uninstall the current drivers and to download the latest versions.

You can then normally, or in compatibility mode, re-install the sound and Dolby drivers as everything will work without problems on your Windows 10 device.

You can’t really download some of Dolby’s software separately for Windows 10

Therefore, if you have to use the latest version of your Dolby as provided by your OEM.

Now, installing Dolby is easy as all you have to do is to download the proper drivers while then you just have to follow the on-screen prompts that will be provided by the installation wizard.

How can I download Dolby drivers for Windows 10?

1. Go to your computer manufacturer website

The company explains that you can find and download the latest Dolby audio drivers on your computer manufacturer’s support page. Keep in mind that every computer is custom-tuned to deliver the best possible audio experience.

Dolby doesn’t have access to these custom audio drivers.

The list below includes some of the most popular computer manufacturers among Windows 10 users. Go to their support page to download the latest Dolby drivers:


Did you know that the majority of Windows 10 users have outdated drivers? Be a step ahead using this guide.


2. Update Windows 10

When you install the latest OS updates on your computer, you also download and install the latest driver version for your device.

So, if you want to get the newest Dolby driver for Windows 10, simply go to Settings > Update & Security > and click on the ‘Check for updates’ button.

update dolby drivers

If you’re having trouble opening the Setting app, take a look at this article to solve the issue.


Having trouble updating your Windows 10? Check out this guide that will help you solve them in no time.


Of course, if you have further issues and if you can’t still use your Dolby Audio Driver on your Windows based device, don’t hesitate and share your problems with us – use the comments field in that matter.

Then we will develop a dedicated tutorial that will show you how to easily address your incompatibility problems.

Here’s what Dolby wants you to know if you have recently updated to Windows 10 and you are having some problems. Also, do check out our article on how to solve problems with Dolby Sound in Windows 10, if you do encounter any.

Important notice regarding Dolby Advanced Audio and Home Theater

Dolby Advanced Audio v2 is designed into select PC models and is not available for direct purchase or download. Our experts work with PC manufacturers to custom-tune each model for the best possible audio performance.

Dolby Home Theater v4 is designed into select PC models and is not available for direct purchase or download. Our experts work with manufacturers to custom-tune each model for the best possible PC audio performance.

If you’ve got additional tips and suggestions related to this post, let us know in the comments below.

RELATED ARTICLES:

Fix: Your Developer License has Expired in Windows 10/11

Windows 10 and Windows 8, 8.1 platforms are offering access to numerous apps, all thanks to the Windows Store client which comes pre-installed on the mentioned systems. But, you can download and install apps from Windows Store only as long as you have a valid Windows 10 8 license.

That’s not a problem, but what should you do when you will be prompted with the following alert: ‘Your Developer License has Expired’?

expired windows license
As you can already tell, this is an error message that might be issued by your Windows 10 or Windows 8, 8.1 based device. Unfortunately, the alert has nothing to do with your license which means that you don’t have to panic or worry because you still have your license and you can still download and install apps from Windows Store.

All you have to do is to address the ‘Your Developer License has Expired’ system error and that’s it, you are back on track.

So, if you are experiencing the mentioned issue, don’t hesitate and check the guidelines from below, where I will show you how to easily fix your Windows 10 / Windows 8, 8.1 OS.

First, you should know that the ‘Your Developer License has Expired’ message is usually displayed after you apply a system restore operation or even a disk scan. These are the most common situations which are causing the License error, thus when dealing with the same, apply the steps from below.

How to fix ‘Your Developer License has Expired’ system error in Windows 10?

  1. Reinstall each app
  2. Sync app licenses
  3. Update Windows 10

1. Reinstall each app

The first thing you can do for addressing this issue is to reinstall each of your app individually. Of course, in case you have numerous tools, this job isn’t recommended, but it works; so after reinstalling an app the same will run without showing the ‘Your Developer License has Expired’ message.

2. Sync app licenses

If you want to use a better solution and if you also want to restore your Windows Store access, follow the steps from below.

  • Open Windows Store on your Windows 10 / Windows 8, 8.1 device by clicking on the Windows Store icon located on your Start Screen.
  • With your mouse swipe to the right edge of your display in order to display the main panel from Windows 8.
  • From there, click on Settings.
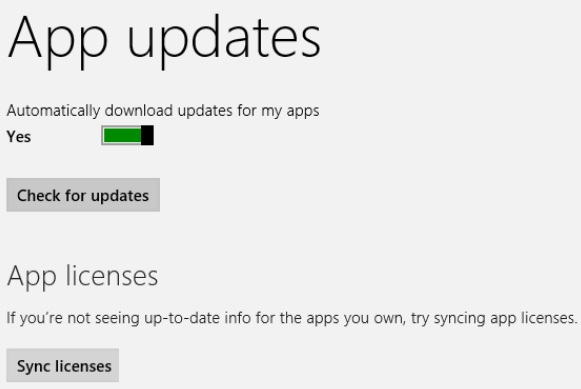
  • Within settings choose “App updates”.
  • And from the bottom of the following page select “Sync license”.

sync app licenses

3. Update Windows 10

Make sure that you’ve installed the latest Windows 10 updates on your computer. Many users confirmed that the problem went away after they downloaded and installed the latest OS version.

Go to Settings > Update & Security and click on the ‘Check for updates’ button to install the available updates.

install windows 10 updates

That all, now you can successfully use Windows Store and you can run, download and install your favorite apps without dealing with the ‘Your Developer License has Expired’ Windows 10 or Windows 8, 8.1 system error.

If you’ve got additional tips and suggestions related to this post, let us know in the comments below.


[wl_navigator]

Fix: Can’t Set a Custom Ringtone in Windows 10/11

We love customizing our smartphones and an important part of customization are our ringtones. Unfortunately, there are users who report that they can’t set custom ringtones on their Windows 10 phones, so let’s see if we can fix this issue somehow.

Can't Set a Custom Ringtone in Windows 10

What to do if you Can’t Set a Custom Ringtone in Windows 10

Users report trying to use both .mp3 and .wav files as ringtones but without any luck, so how to fix this issue?

  1. Set the genre of mp3 to ringtone
  2. Change the file extension of your ringtone
  3. Try a different ringtone app
  4. Update your phone

Solution 1 – Set the genre of mp3 to ringtone

This is quite unusual solution, but according to users it really works, so here’s how to set the genre of your mp3 files.

  1. Find your mp3 file and right click it.
  2. Choose Properties from the list.
  3. Next navigate to Details tab.
  4. You should see a list of tags, you just need to find the Genre tag and change it to ringtone.
  5. Then just click Apply then OK to save the changes.
  6. After you’ve done that you need to transfer the mp3 file to the ringtone folder on your phone. The folder location should be something like:
    • Settings/Personalization/Sounds/Ringtone

This is it, your custom ringtone should now appear in the list of ringtones. For some users the custom ringtone doesn’t appear under custom section, it just appears in the list.

Solution 2 – Change the file extension of your ringtone

  1. Convert your custom ringtone to .m4a file. To do so you can use many free online converters or use any conversion software.
  2. After you’ve converted your custom ringtone to .m4a you need to rename it to .m4r file. To do so, you’ll need to show file extensions of your files. If this options is turned on for you you may go to step 4. If not, go to Step 3 to see how to show file extensions for your files.
  3. In File Explorer go to View option to open the Ribbon menu. After that you just need to check File name extensions option and you’ll revel file extensions for all your files.Can't set custom ringtone
  4. Find your .m4a ringtone file, right click it and choose Rename.
  5. Change its name from ringtone_name.m4a to ringtone_name.m4r. Basically, you just need to change .m4a to .m4r in the file name and you’ll change its extension.
  6. You’ll have to confirm if you want to change the file extension, so click Yes.
  7. After that you just need to move your ringtone .m4r file to your Ringtone folder on your phone, and that’s it.

Solution 3 – Try a different ringtone app

If you can’t set a custom ringtone on your Windows 10 phone, maybe the ringtone app that you’re using is the culprit. Try installing a new ringtone app and check if this workaround solves the problem.

There are many such apps that you can you download from the Microsoft Store. For example, one of the most popular ringtone apps for Windows 10 Mobile is Free Ringtones.

This app allows you to download thousands of ringtones for Windows phone for free. You can search ringtones by artist, preview them online and then download them on your phone.

Other reviews ringtone apps that received positive reviews on the Microsoft Store include Ringtone Hub, Mega Ringtones or Ringtone +. They are also free to download.

Solution 4 – Update your phone

Outdated OS versions may trigger various technical issues. Make sure that you’re running the latest Windows 10 Mobile version on your device. Go to Settings > Phone update > install the available updates.

There you go, we hope that one of these four solutions helped you fix the custom ringtone issue. Let us know which one worked for you.

If you’ve got additional tips and suggestions on how to fix this problem, you can list them in the comments below.


Read Also: 

Download UltraSurf for Windows 11, 10 & 7

If privacy is extremely important for you, and it should be, then you should try the Ultra Surf platform on your Windows 8, or Windows 8.1, 10 based device.

Ultra Surf is a great tool that can be used in order to keep your web browsing activity anonymous. In case you want to learn more about this platform and for downloading the latest version of the same, don’t hesitate and check the following lines.ultra-surf
The most annoying thing nowadays is that anyone with some advanced internet knowledge can track and register our online activity. So, if you are not paying attention you can end up in losing precious data and you can deal with other risky situations. Therefore, if you are spending most of your time online, browsing and accessing various websites, the best will be to use a dedicated tool that can guarantee full protection and an anonymous state of your account.

In that matter you should download Ultra Surf on Windows 10 or Windows 8, 8.1. By using this app no one will know from where you are connecting to the network or who you are.

Moreover, Ultra Surf hides your IP address and changes it for another one that has nothing to do with the original one. It also clears your web browsing history and the cookies that are usually stored on your web browser client. So, in a few words, with Ultra Surf you are secured and also anonymous.

At the same time, the tool uses strong end-to-end encryption to protect your data transfer from being collected and analyzed by third party entities.

Download UltraSurf on Windows 10, 8, 8.1 [Latest version]

The best is that UltraSurf can be easily used on any Windows 10, or Windows 8.1 device. All you have to do is to download the tool on your laptop, tablet or desktop and that’s it. You don’t need to install the program, as it will start once you launch the software. This means that you can easily place it on an USB stick and take it with you without any kinds of problems.

So, UltraSurf is easy to use without installing anything on your device and ensures secured web browsing activity. You can learn more about this tool by accessing its official web page, from where you can also download the latest version of UltraSurf for Windows 10 or Windows 8, 8.1 systems.

UltraSurf 17.04

At the time of writing this article, the latest UltraSurf release is version 17.04. Unfortunately, the official changelog is not available yet, but we’ll update this article accordingly as soon as the information is available. Users confirmed that the software is now faster and more reliable.

Fix UltraSurf issues on Windows 10

While Ultrasurf runs smoothly on Microsoft Windows and the default browsers of the OS, you may encounter various issues when using the tool on other browsers. To fix that, you need to manually set up proxy and you should be able to use Ultrasurf without any problems.

UltraSurf is also available as a Chrome extension and you can use it on all platforms, Linux included. You can download the UltraSurf Chrome extension from the Chrome Store.

Keep in mind that certain antivirus programs may block Ultrasurf from downloading or launching. To fix this issue, add Ultrasurf as an exception, or you can simply disable your antivirus. Turn it back on as soon as you’ve downloaded or launched UltraSurf.

More about UltraSurf for Windows 10, 8, 8.1

UltraSurf is a proxy service, designed to enable users inside countries with heavy Internet censorship to visit any public web sites in the world safely and freely. If you are not located in such a country, you can also use the software to hide your real IP address to protect your privacy. UltraSurf is a standalone application (no installation needed) that automatically configures Internet Explorer to use UltraSurf whenever you run the program and displays a lock icon on the desktop to indicate that anonymous browsing is active. You can also use UltraSurf with Firefox, Chrome or other browsers, however you need to configure the proxy settings manually (localhost:9666) or use the available Firefox add-on tool to do this (in addition to this download).

We hope this article helped you find and download the latest UltraSurf version on your computer. If you’ve got additional questions regarding this post, let us know in the comments below.


RELATED ARTICLES:

New patent provides clues to Windows 10 Cloud Clipboard features

Microsoft has been working on a better Windows clipboard for quite a long time now. Back in 2015, we first heard about an internal Microsoft Garage experiment called OneClip, which reappeared a year later as “Cache.” If this previous attempt at creating a universal clipboard never materialized, Microsoft did unveil a new Cloud Clipboard feature back at Build 2017, which will leverage the Microsoft Graph, the Project Rome APIs as well as Microsoft’s Swiftkey keyboard on mobile devices.

In case you don’t remember it very well, you can watch Microsoft’s Joe Belfiore discuss this new Cloud Clipboard feature in the video below (starting around 45’45):

A Cloud Clipboard prototype was recently discovered in the Windows 10 Insider build 17004, but it wasn’t connected to the Microsoft Graph. It’s been quite some time now since Microsoft publicly discussed the feature, but a recently published patent titled “Interacting with a Clipboard Store” seems to reveal more details about this Cloud Clipboard.

The patent was originally filed in August 2016, and it explains how “a multi-item clipboard store” would work. The various drawings show a UI that looks similar to what Microsoft showed during Build 2017, with a pop-up window displaying the latest content items recently added to the clipboard.

Interestingly, this patent also mentions a “cross-device transfer operation” to transfer content from one device to other devices specifically targeted by the user. This specific feature is also described in the drawing below:

The patent actually describes nine different copy modes, including ones where the cloud clipboard would tag the selected content item as being private, favorites, or temporary items that disappear after a certain amount of time. There are really a lot of good ideas in this patent, but as with all patents, it’s not clear if those smart features will eventually make their way to Windows 10. Anyway, Cloud Clipboard likely won’t make it to the Redstone 4 release, so we may have to wait until Build 2018 to learn more about the feature.

Microsoft again ranked one of the world’s most ethical companies

For the eighth year in a row, Microsoft has been chosen as one of the world’s most ethical companies by the Ethisphere Institute. To create its annual ranking, the organization uses its Ethics Quotient framework, which takes different variables into account such as corporate citizenship and responsibility, culture of ethics and more.

This year, 135 companies spanning 23 countries have been honoured by the Ethisphere Institute. In the technology sector, other honorees include Dell, Intel, Adobe, Nokia and LinkedIn, now a Microsoft subsidiary. The full list of honorees can be seen on this page.

“Over the last 12 years, we have repeatedly seen that those companies who focus on transparency and authenticity are rewarded with the trust of their employees, their customers and their investors,” explained Ethisphere CEO, Timothy Erblich. “While negative headlines might grab attention, the companies who support the rule of law and operate with decency and fair play around the globe will always succeed in the long term.”

Microsoft President Brad Smith echoed this sentiment in a statement published by the Ethisphere Institute. “At Microsoft, trust and integrity are core to our values and critical to our success. We’re passionate about applying the power of technology to improve our world, and that starts with doing business in a way that builds and maintains trust with our customers,” Smith said.

Windows 10 news recap: Microsoft and Fujitsu working on vein authentication, per-app preview programs being tested, and more

Welcome back to our Windows 10 news recap, where we go over the top stories of the past week in the world of Microsoft’s flagship operating system.

Microsoft and Fujitsu partner to let you log in with the veins in your palm

As Microsoft continues its work on Windows Hello, the company has partnered with Fujitsu to work on developing vein authentication, by using the veins in your palm to authenticate you.

Preview Program on a per-app basis is being tested for Windows 10 by Microsoft

To separate early access to app updates from the Windows 10 Insider Program, Microsoft is testing per-app preview programs that allows users to test app updates early without having to be a Windows 10 Insider.

Windows 10 Logo Generic Featured Image Hero

Windows 10 Mobile’s Microsoft Photos app receives major update

The Microsoft Photos app on Windows 10 Mobile has received a major new update that brings it more inline with its PC counterpart, although for some users it brings reduced performance.

Wileyfox, who brought a Windows Phone to market late last year, is now in financial trouble

Windows Phone manufacturer, Wileyfox, who brought a new Windows Phone device to market last year, is now in financial trouble. This may not come as a surprise to many, particularly with how Windows 10 Mobile is abandoned by Microsoft.

That’s it for this week. We’ll be back next week with more Windows 10 news!

Microsoft news recap: Build 2018 registration to open soon, Bing adds multi-perspective Instant Answers, and more

Microsoft news recap is a weekly feature highlighting the top Microsoft news stories of the past week. Sit back, grab some coffee, and enjoy the read!

Cortana picks up brand new design on iPad, launches 20% faster

iPad users are receiving a new update for Cortana. While bringing a new design to Microsoft’s virtual assistant, Cortana will now also launch 20% faster compared to previous versions.

Users of Bing’s Webmaster Tools can now login with their accounts on Google and Facebook

In an unexpected update, Bing Webmaster Tools has gained a new feature. Microsoft has added third-party account login for Google and Facebook, as well as the current login system with Microsoft Accounts. The new login options are only available in the United States for now, but are expected to roll out to other regions in the near future.

Microsoft to open registration soon for May 7-9 Build 2018 in Seattle

Microsoft’s annual Build event is fast approaching. The company is to open registration for the event, that takes place in Seattle between May 7-9, on February 15th.

Bing highlights new “multi-perspective” Instant Answers

Bing has been working on improving its Instant Answers feature. When users search and Bing believes it can show an Instant Answer, it uses neural networks to find the best answer from multiple sources, and then provides it to the user. In an update to this, Bing can now show multiple different answers that show different points of view, so that the user can make a more informed decision.

Microsoft, Bing, Search

That’s it for this week. We’ll be back next week with more Microsoft news.

Xbox news recap: DayZ coming to Xbox this year, Pre-orders open for OG Xbox controller and more

Welcome to our weekly Xbox news recap series, where we go over the top stories of the past week in the world of Xbox. Let’s get started.

DayZ coming out to Xbox this year

DayZ made a huge impact when it first came out. It was one of the most streamed games on Twitch for quite a while, only losing its popularity when newer, shinier copycats like H1Z1 came along to try and get a piece of the pie. The game will be coming out on Xbox at some point this year via the Xbox Game Preview program, giving it a chance to come back to popularity among a chunk of gamers.

OG Xbox One controller opens for pre-order

Pre-orders have opened up for “Duke,” the replication of the original Xbox controller that will be hitting the market. The controller is going to cost $70, and will have a few new bells and whistles to keep it up to date with the quality of hardware we’ve come to expect. One of the nicer novelties of the new Duke is the fact that the Xbox button in the middle has a LED screen under it which will play the original Xbox starting video when pressed.

Microsoft, Xbox, The Duke, Duke

Limited Edition Sea of Thieves controller is now available

The limited edition Sea of Thieves controller that was revealed not too long ago is finally available for those who are interested in snagging it. The controller has a beautiful purple paint job, along with a few visual effects that really give it the “pirate” fantasy that Sea of Thieves is meant to convey. The controller will cost you $75, but it’s worth it if you’re a collector.

Microsoft, Xbox One, Xbox, Sea of Thieves

PUBG bans 2.5 million cheaters, 1 million in January

PUBG has a lot of cheaters. 2.5 million cheaters have so far been banned in the game’s lifetime, with 1 million of them being caught in January alone. While the problem isn’t lending itself to Xbox nearl as much as in the PC community, it has certainly been demoralizing for PUBG fans across the board to be seeing people trying to break the game like this. PUBG is working on ways to prevent cheating like this to happen, but until then, we’ll be seeing a ton of bans coming out.

PlayerUnknown’s Battlegrounds (PUBG) on Xbox One

Thanks for joining us. To keep up to date with all the latest Xbox news, keep a close eye on our Xbox One tag.

Preview Program on a per-app basis is being tested for Windows 10 by Microsoft

Those who use Windows 10 are most likely aware of the Windows 10 Preview Program which allows users to test our new updates for Windows 10 before they’re released to the public. Once part of the Preview Program, users also receive early updates to apps, however, Microsoft looks to be wanting to take this a step further.

As of this week, the company has begun inviting users to join individual Preview Programs (via Thurrott) for some of the stock apps on Windows 10, including Windows Camera, Microsoft Photos, Alarms & Clock and more.

There’s been no mention of the Windows App Previews from Microsoft so far, however, it signals a more user-centric process, as it will allow users to gain access to early updates of their favourite apps, without having to sacrifice their Windows 10 device to potentially buggy early builds of Windows 10.

Windows 10 Sync Settings Not Working: 4 Ways to Force Them

Having a Microsoft account and syncing your settings can be useful, but many reported that the sync settings feature is not working in Windows 10.

This isn’t the only issue with settings, and we already wrote about the Settings app not opening in the past. However, today we’re going to focus solely on syncing issues.

Why are sync settings not working on Windows 10?

  • Certain system settings related to diagnostics can interfere with this feature.
  • Problems with your Microsoft account can cause this issue.
  • Corrupted system files can lead to many issues, including this one.
  • Outdated versions of Windows can experience syncing glitches.

How do I force Windows settings to sync?

Before we start fixing this issue, there are a few preliminary checks you can perform:

  • Make sure that Windows is up to date in order to avoid any syncing bugs.
  • Temporarily disable antivirus software since it can interfere with syncing process.

1. Change Feedback and Diagnostics settings

  1. Open Settings
  2. Go to Privacy, Feedback & diagnostics
  3. Your Diagnostics and usage data settings are probably set to Basic. Just change it to Enhanced or higherunable to sync settings windows 10

Changing Feedback and Diagnostics settings should solve the sync problem.

2. Sign in with a different Microsoft account

  1. Go to Settings, Accounts
  2. Go to Add Microsoft Accountunable to sync settings windows 10
  3. Enter login info of your new account and follow further instructions
  4. Once you login to the new Microsoft account, check if you’re able to sync your settings now. If you are, problem was definitely in your previous account.

3. Run a SFC scan

1. Go to Start > type cmd > right-click Command Prompt > select Run as Administrator

2. Now type the sfc /scannow

3. Wait for the scanning process to complete and then restart your computer. All corrupted files will be replaced on reboot.

If you’re having trouble accessing Command Prompt as an admin, then our can’t run Command Prompt as administrator guide should be able to help you.

4. Run a DISM scan

  1. Start Command Prompt as administrator.
  2. Enter the following command: DISM /Online /Cleanup-Image /RestoreHealth
    Corrupted user account active directory
  3. It is worth mentioning that the scan can sometimes take up to 30 minutes or more to complete. Wait patiently until the whole process finishes and don’t press any key.

Sometimes this process can encounter issues, and we have a great guide on what to do if DISM fails on your PC, so be sure to check it out.

That should be all. We hope these solutions helped you to solve the sync settings not working issue on Windows 10.

In case you have more problems,  check our guide on how to transfer Windows settings to a new computer.

If you have any comments, questions, or suggestions, just reach for the comment section below.

Skype’s having messaging and video issues on mobile and desktop

If you can’t send messages or initiate video calls on Skype, you’re not the only one. Many users have reported these issues in the last 24 hours.

Well it’s the third day I haven’t been able to send messages.. Skype status says there is a problem with desktop version… I tried iPhone.. android.. also reinstalled… also desktop… nothing working… Skype status says they believe it’s fixed.. just log out then in.. I reinstalled ànd logged in that doesn’t work… tried updating tried my old backup version of skype.. nothing working just calls.

UPDATE 1 (February 7): The messaging issues are no longer listed on Skype’s Support page. This means that Microsoft already deployed the fix mentioned below.

UPDATE 2 (February 10): Unfortunately, the issue persists. Microsoft updated the status of the Skype Service again, stating that:

We have discovered new related issues for the incident and are actively resolving those.
Some users might be experiencing problems with instant messages (chat). There might be delays with sending or syncing messages.

Fix incoming

skype is down

Microsoft has officially acknowledged the problem and is currently verifying the fix. This means that the hotfix should be available for the affected users in the coming hours.

Limited service of Instant messaging affecting Skype for Windows desktop
Some users might be experiencing problems with instant messages (chat). There might be delays with sending or syncing messages. We believe to have fixed the causes for the incident and are verifying the fix.

If Skype is vital for you, then you should also know that logging out from Skype and login back in should fix this issue for most of users.

However, if you already did that and the problem persists, then the only thing that you can do is wait for Microsoft to roll out the fix.

The company has yet to issue any comments about the Skype issues affecting phones.

We’ll update this article as soon as new information is available.

So, did it fix the problem for you? Are you still experiencing messaging issues on Skype?

Fix: Maps App Doesn’t Work in Windows 10/11

Windows 10 Maps app is very useful, especially when you’re on the go. But if you rely on this app to guide you in a foreign city, and it doesn’t work, you can be in a big problem. So, we will show you what to do if you are unable to run Windows 10 Maps.

What can I do if Windows 10 Maps isn’t working?

1. Enable location

Windows 10 Maps is tightly connected with your location settings. It uses your location to determine proper maps you need, and available routes.

So if your location is turned off in Windows 10, Maps won’t work. Location in Windows 10 is turned on by default, but many users tend to disable it because they fear that Microsoft is using it to collect their data. And then, when you need an app such as Maps, and your location is turned off, you could be a problem because the app won’t work.

Luckily, the solution reveals itself. So, to make Windows 10 Maps work normally again, you just need to turn your location back on. And if you’re not sure how to do that, follow these steps:

  1. Open Settings
  2. Go to Privacy>Location
  3. Turn Location onlocation problem windows 10
  4. Also, scroll down, and make sure Maps is set to, under Choose apps that can use your location

Turning on location should solve all the problems with Maps, and you should be able to use them usually again.

2. Reset the Maps app

But if somehow you still have issues, maybe you can try resetting the app. To reset the Maps app, do the following:

  1. Go to Search, type powershell, and open PowerShell as Administrator
  2. Paste the following command, and press Enter: Get-AppxPackage *windowsmaps* | Remove-AppxPackagemaps problem windows 10
  3. Your Maps app will be uninstalled
  4. Now, head to Windows Store, search for Maps, and install it again

3. Flush DNS

As you browse the Internet, DNS collects cache, and all these piles of stored cache may block your connection or prevent your apps from running properly.

So, if your Maps app is still unavailable, try flushing DNS. Here are the steps to follow:

  1. Go to Start > launch Command Prompt as administrator
  2. Enter the following commands and hit Enter after each one:
    •  ipconfig /release
    • ipconfig /renew
  3. Wait until the process completes and then type the command ipconfig /flushdns to flush DNS > hit Enter.
flush DNS

4. Update your computer

Running outdated Windows OS versions may trigger various app and software issues. The Redmond giant regularly rolls out updates to Windows 10 to improve system stability and fix the issues reported by users.

Maybe the current Maps App problems you’re experiencing are triggered by a general OS bug. Installing the latest OS updates may help you fix the problem.

Go to Start > Settings > Update & Security > Check for updates.

windows 10 updates

Install the available updates and then launch the Maps App again to check if the problem persists.

5. Delete the file maps

Some users confirmed that deleting the file maps with the earlier date quickly fixed the problem.

  1. Launch Windows Explorer > go to View > check Hidden items in order to display hidden files and foldersdelete maps app file maps
  2. Go to Program Files located the Windows Apps folder Scroll > open it
  3. Navigate to the folder Microsoft.WindowsMaps_4.1509.50911.0_neutral_split.scale-100-8wekyb3d8bbwe. Remember that this file should have two versions with two different creation dates.
  4. Delete the file with the earlier date > restart your computer

6. Run the Windows Store Apps Troubleshooter

Windows 10 has a built-in troubleshooter to help you fix app issues in less than five minutes. All you need to do is go to Start > Settings > Update & Security > Troubleshoot and select the appropriate troubleshooter for your situation.

In your case, select the Windows Store Apps troubleshooter.

fix windows 10 maps app

Run the troubleshooter and then check if the problem persists.

That’s about it, I hope this article helped you to solve the problems with Maps app in Windows 10. If you have any comments or questions, just write them down below.

Also, if you’ve got additional suggestions on how to fix this issue, feel free to list the steps to follow in the comments.

If you face issues like Windows Maps showing the wrong location on Windows 11, read this guide to learn more about it.

Tell us, what do you think of the Windows 10 Maps App? Are you using it? Is it good? Please tell us your opinion using the same comments section below.

WiFi Extender Password Not Working: How to Fix it

If you can’t connect to the Internet because your WiFi extender password is not working, we may have the solution for you.

This problem usually occurs after a power outage or after you replaced your router. Without further ado, here’s what you can do to fix this issue and connect the extender.

Why does my WiFi extender keep saying incorrect password?

  • Settings issue – Sometimes your settings might be altered thus causing this problem. Resetting your extender to default can help.
  • Firmware problems – In some instances, outdated firmware can cause this problem to appear.

What can I do if WiFi extender password not working?

1. Install the latest firmware update

  1. Visit your extender’s firmware download page.
  2. Select the firmware that you want to download.
  3. Once the firmware is downloaded, carefully follow the instructions from your manual to update it.
Note icon NOTE
This is an advanced and potentially dangerous procedure. Always check your extender’s manual for exact instructions.

2. Reset your device

  1. Plug your extender into the socket near your Wi-Fi box.
  2. Perform a factory reset by holding the reset button with the help of a paperclip, toothpick or another sharp object.
  3. The light on the extender should change. Wait until the light turns green.
  4. Once the process is finished, you should be able to log in with the default password and username.

You can improve stability after fixing extender password issues by following a proper configuration guide such as this one on how to set up a WiFi extender, which helps ensure the device connects and repeats your network correctly.

Note icon NOTE
Remember that this process might slightly differ depending on the model you’re using.

These are just a few quick and easy solutions you can try if your WiFi Extender password is not working.

If you’re having additional problems, you can check our guide on what to do if Windows can’t find WiFi network.

One of these two solutions should help you fix your issues. If you found a different solution, feel free to share it with us in the comments section below.

Fix Cuphead issues and errors on Windows 10/11

Cuphead is run-and-gun shooter game inspired by 1930s cartoons that has been getting rave reviews. You can get this game via the Microsoft Store, Steam or chase the offers from Amazon.

However, the Windows 10 Cuphead game hasn’t been launching for some players. Furthermore, some players who have the game up and running have also found that it doesn’t save progress. This is how you can fix Cuphead if it isn’t launching and saving game progress.

Fix Cuphead on Windows 10 PCs

  1. Keep on Launching the Game
  2. Install Cuphead on an Alternative Drive Partition
  3. Turn Off Your Anti-virus Software
  4. Reset the Microsoft Store Cache
  5. Open Steam With Admin Rights
  6. Fix Cuphead not Saving

1. Keep on Launching the Game

This is a simple fix, but some players have confirmed that Cuphead eventually launched for them after opening and closing the game numerous times. Some players stated on forums that the game ran for them after launching it five times in quick succession. So open and close Cuphead about six or seven times to kick-start the game.

2. Install Cuphead on an Alternative Drive Partition

Some Cuphead players have also confirmed that uninstalling the game from the C: drive and reinstalling it on another drive partition got the app up and running. So if you have an extra D: drive partition, install Cuphead on that drive. If you don’t have any extra partitions, you’ll need to set up a new D: drive. You can do that with any one of the partition utilities included in this software guide.

3. Turn Off Your Anti-virus Software

Disabling anti-virus software is another potential fix for Cuphead not launching. You can temporarily disable most anti-virus utilities by right-clicking their system tray icons and selecting a disable or shield off option. Alternatively, you might need to open the anti-virus software’s window and select a pertinent setting from there. Or you could temporarily remove an anti-virus utility from the Windows startup and then restart Windows as follows.

  • Right-click the taskbar to open its context menu, and then select Task Manager.
  • Select the Start-up tab on the Task Manager’s window.
  • Select the anti-virus package there, and press the Disable button.
  • Then restart Windows and launch Cuphead.

Another solution would be to try another antivirus service that lets you customize the settings with ease and gives you the freedom to add certain programs or apps to the exclusion list.

⇒ Get TotalAV

4. Reset the Microsoft Store Cache

  • If you downloaded Cuphead from Microsoft Store, reset the Store cache. To reset the Microsoft Store cache, press the Win key + X hotkey.
  • Select Command Prompt (Admin) on the Win + X menu.
  • Enter ‘WSReset.exe’ in the Command Prompt, then press the Return key.
  • Thereafter, it might be worth checking for Store app updates. So open your Microsoft Store app to do that.
  • Then press the … button at the top right the window, and select the Downloads and updates option.
  • Press the Get updates button.

5. Open the Windows Store Apps Troubleshooter

Windows 10 now includes a Windows Store Apps troubleshooter to fix Store apps with. So that troubleshooter might help fix the Cuphead app. This is how you can utilize the Windows Store App troubleshooter.

  • Click the Cortana button on the Windows 10 taskbar to open the app’s search box.
  • Input the keyword ‘troubleshoot’ in the search box.
  • Click Troubleshoot to open the window in the snapshot directly below.
troubleshoot windows update
  • Scroll down to the Windows Store Apps troubleshooter.
  • Select the app troubleshooter, and press the Run the troubleshooter button. That will open the troubleshooter’s window below.
  • Then you can go through the troubleshooter to fix apps.

6. Open Steam With Admin Rights

Opening Steam with admin rights has also fixed Cuphead for some players running the game with the Steam client software. To run Steam as administrator, you’ll need to right-click the Steam.exe and select Run as administrator on the context menu. If there’s a Steam shortcut on your desktop, you can jump straight to the Steam.exe folder by right-clicking the shortcut and selecting Open file location.

7. Fix Cuphead not Saving

If one of the above resolutions kick-starts Cuphead, the app might not always auto-save your game! The game has a bug that really needs fixing with updates and patches. However, a widely cited fix for this is to not switch between apps whist playing Cuphead. So don’t press the Alt + Tab hotkey or Windows key when you’ve got the game up.

Those are a few fixes that might kick-start Cuphead. If you’re running Cuphead with the Steam client software, check out this article that provides further fixes for games that aren’t launching.

RELATED STORIES TO CHECK OUT:

FIX: Notepad Status Bar not available, not working or greyed out

Notepad is a great text editor pre-loaded within the Windows OS. This small program offers basic text-editing features alongside intuitive options that are useful even for entry-level programing tasks.

Anyway, if you are using Notepad for the first time, or if you cannot understand why its Status Bar is disabled by default, you are in the right place.

In this article, we will see how to enable the Notepad Status Bar when it’s not available, not working or greyed out. The troubleshooting steps listed below were tested on the Windows 10 platform.

Enabled Notepad Status Bar that’s not available, not working or greyed out

  1. Use Notepad built-in settings
  2. Apply a registry tweak

1. Use Notepad built-in settings

  1. Start by launching Notepad on your Windows 10 system.
  2. Now, under View the Status Bar should be greyed out.
  3. In order to enable it click on the Format tab.
  4. From the options that will be displayed uncheck the Word Wrap feature.enable notepad status bar
  5. That’s it; now you should be able to access the Notepad Status Bar – verify that by clicking on the View tab.

2. Apply a registry tweak

Another way in which you force-enable the Notepad Status Bar is by applying a registry tweak as showed during the following steps:

  1. Press Win+R keyboard hotkeys on your Windows 10 computer.
  2. In the RUN field type regedit and press Enter.open registry editor windows 10
  3. Within Registry Editor access the following path: HKEY_CURRENT_USER\Software\Microsoft\Notepad.fix notepad status bar
  4. From the right-main panel double-click on the StatusBar entry.
  5. Change the StatusBar DWORD value from 0 to 1.
  6. Save your changes (you can press F5 for refreshing Registry Editor).
  7. Open Notepad and enjoy your now enabled-by-default Status Bar.

So, these are the methods that you can use to enable the Notepad Status Bar when it is not available, not working or greyed out.

The first section of this tutorial offers only a temporarily solution. You will have to repeat those steps each time you open Notepad (its Status Bar value will be reset on each reboot). Thus, if you want to permanently force enable the Notepad Status Bar, we recommend the second method.

If you have any questions or if you have other similar problems while trying to use Notepad, share your thoughts with our team. Based on the info you will provide we will try to assist you as soon as possible.

RELATED STORIES TO CHECK OUT:

Windows 10/11 Can’t Play DVD or Blu-ray [Fix]

Just upgraded to Windows 10 and discovered that you can’t play your favorite DVD movie anymore? Well, it’s not just you. It is surprising but for some unknown reason, Microsoft decided to remove the default media center support from Windows 8 back in the day and this has followed into Windows 10 as well.

This specific limitation does not apply on all the DVD disks. You can definitely use DVD disks that don’t have any sort of media on them. You can use them to install programs, to carry documents and what not. As per Microsoft, new systems like tablets and ultrabooks don’t come with a disk drive anymore which means having support for DVD disks will be useless. But looks like they forgot about a large number of Windows users who use it on PC and laptops that already have a disc drive. That is a very senseless justification, Microsoft.

But all this does not mean that you will not be able to play DVD and Blu-ray movies on your Windows 10 system at all. Following are some ways that will let you play DVD and Blu-ray discs with movies and media on it.

Windows 10 can’t play DVD or Blu-ray? Here are a few solutions

  1. Use Windows DVD Player on Windows 10
  2. Use the default installed utility on your system
  3. Convert discs to digital
  4. Install a third party video player

1. Use Windows DVD Player on Windows 10

If you are coming from a system on which you had Windows 8 or Windows 8.1 with media center installed, then you will find a Modern UI app named Windows DVD Player which you can now use to play DVD discs with media.

2. Use the default installed utility on your system

If you bought a pre-built system from some sort of OEM like HP, Dell or any other company, then keep in mind that these companies have their own utility installed for playing DVD disc media etc. So it is a wise option to use these utilities to play your disc media. So, these are some of the ways that you can use to play a DVD disc or a Blu-ray disc on Windows 10 for free!

3. Convert disks to digital

Granted, this is not the easiest and straightforward solution to use, but you can use it in case everything else failed. Fortunately, there are many programs out there that allow you to quickly convert DVD to digital files. Check out the selection on this list of the best DVD to digital converting software.

DVD and Blu-ray disks – End of an era

Nowadays, fewer notebook computers are equipped with built-in DVD drives. The general trend among manufacturers is to build smaller, ultra-portable devices that don’t weight much. Moreover, spinning the disk puts a strain on the battery and all manufacturers want their devices to offer a good battery autonomy. As a result, many decided to simply remove DVD drives in order to gain ultra-portability and enhance battery life.

Of course, there are still many laptop models that do offer built-in DVD drives, but they are usually high-end computers and the average user simply doesn’t afford to buy them.

4. Install a third party video player 

Alternatively, you can try using a professional third-party media player that supports all major media formats, including DVD and Blu-ray.

For a complete audiovisual experience with no errors, the tool needs to have audio-oriented features as well. A customizable interface and flexible interface is recommended, in order to adjust the settings with ease.

⇒ Get PowerDVD

So, when it comes to playing DVD or Blu-ray disks on Windows 10, the best solution is to simply download and install a third-party tool. However, keep in mind that Microsoft warned users that installing third-party software, especially hardware drivers, may trigger various boot up issues.

In case you encounter such issues, check out the troubleshooting guides listed below:


New bipartisan CLOUD Act could provide a final answer to Microsoft’s Ireland data case

Positions regarding the US political climate is contentious, to say the least. The past two years of partisan rhetoric has created a visible rift among citizens and continued tribalistic devotion looks to widen that divide for some.

However, there seems to be one area were men and women can venture across the political aisle and come to a common consensus that they want to finally build out a set of agreements to adequately address cross-border data investigation.

For Microsoft, this is a good thing.

Earlier this week, US senators Hatch, Coons, Graham, and Whitehouse introduced a bipartisan legislature called the Clarifying Lawful Overseas Use of Data (CLOUD) Act which looks facilitate cross-border access to data as it pertains to the investigation of serious crimes.

Specifically, the on-the-nose titled act attempts to clarify whether or not companies such as Microsoft could be compelled to turn over internationally stored data being a US-based enterprise with caveats but ultimately validating the Stored Communications Act (SCA). The CLOUD Act would also amend blocking provisions in the SCA that currently prohibit US-based data providers from disclosing data to international law enforcement. Instead, CLOUD would enable the United States executive branch to enter into agreements authorizing international governments to make a direct request for data from US-based companies, after meeting a set of stringent requirements based on human rights laws and procedural protections in maintaining confidential data.

How does all of this help Microsoft?

On the face of it, it would seem Microsoft’s accumulated court victories would be wiped out as the US would uphold the SCA which would compel Microsoft to hand over any overseas held data during warranted investigations. However, CLOUD builds in two very important structural astricts that should help prevent abuse of SCA.

According to JustSecurity.org,

Together, the explicit statutory provision establishing a motion to quash based on comity grounds, plus the explicit recognition of other possible motions to quash based on common law comity, ensure that the legitimate interests of foreign governments are taken into account if and when the application of the US’s warrant authority generates a conflict of laws. It thus sets the kind of precedent the United States would want other nations to follow if seeking access to US citizens and residents – helping to ensure that US citizen and resident data is adequately protected as well.

Secondly, the blocking provisions are more clearly examined and laid out for international governments seeking data for investigation of domestic or local crimes.

The foreign government must make a diplomatic request to the United States for this data, via the mutual legal assistance process, even if the only US tie to the case is that relevant data happens to be US-held. This is a time-consuming process which ultimately requires a US attorney’s office to issue a warrant on behalf of the foreign government.

These data requests are also subject to numerous limitations designed to protect the interests of US citizens and residents and to ensure the application of baseline substantive and procedural protections.

In the end, this is a good thing that could help get Microsoft out of court regarding its high profile Ireland case and make the entire proceedings a non-starter going forward for many companies such as Google, Apple, IBM, Samsung and more. The CLOUD Act is a substantive first step at legitimately establishing norms for both domestic and international request for data companies with globally residing customers. CLOUD helps establish a set of procedures for accessing data of citizens using services domestic and abroad while also enabling increasing transparency in how government obtains data.

Hopefully, we’ll continue to see a growing understanding of how data, communications, and investigations are evolving and an effort by US law to accommodate international business.