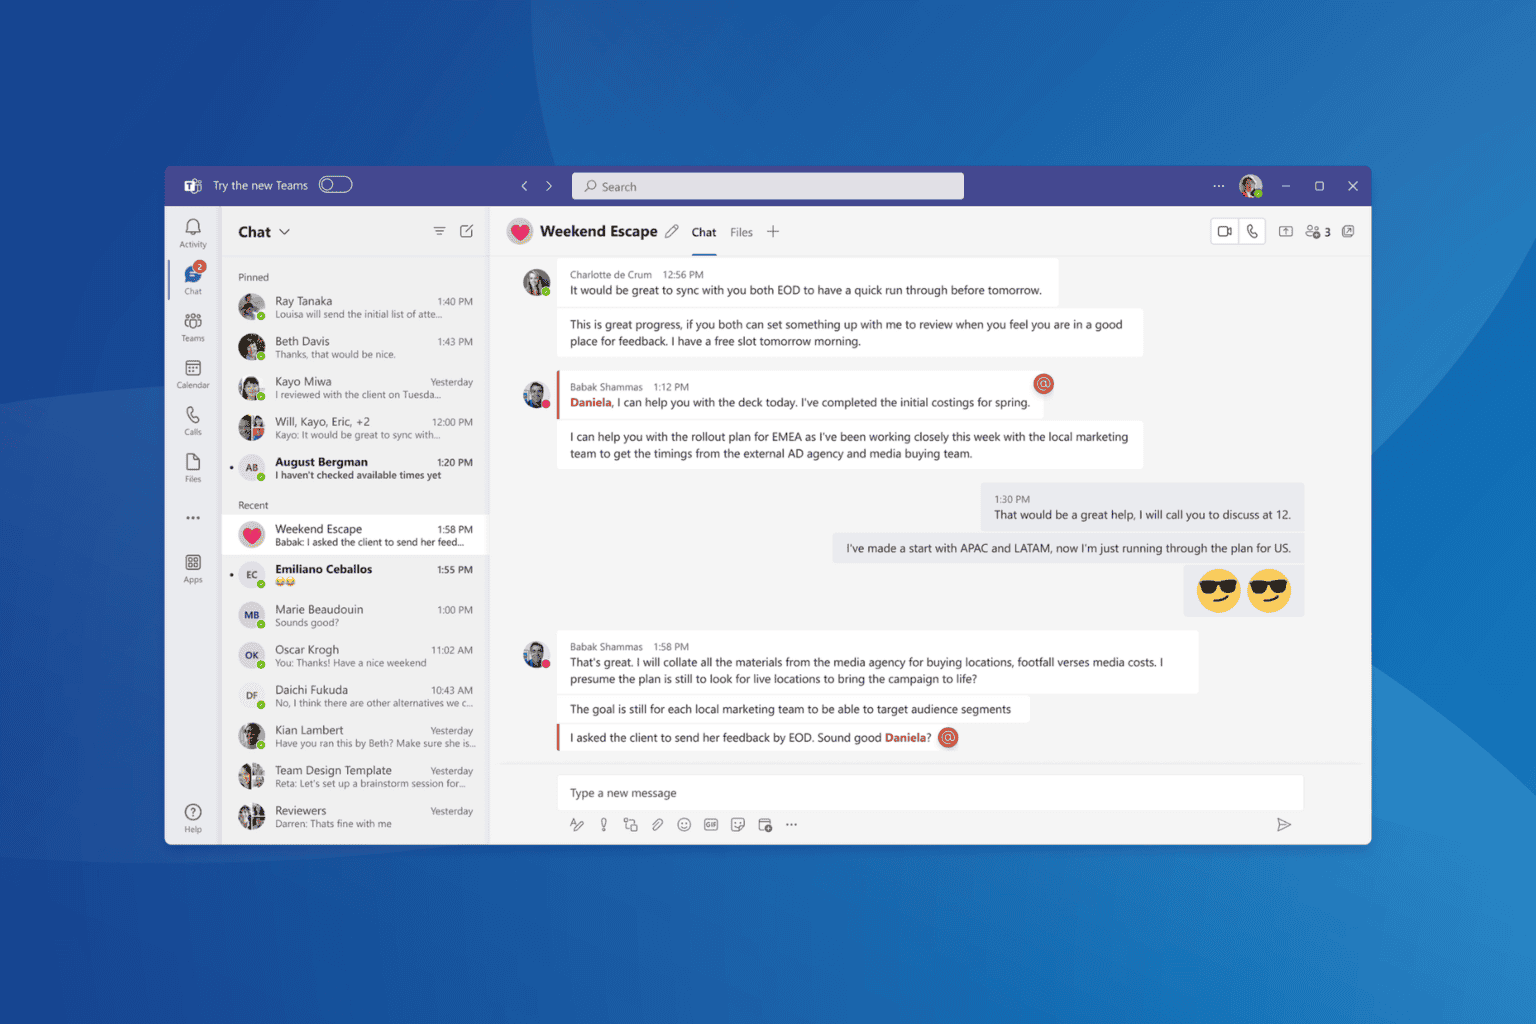
Microsoft Teams will introduce private moderators who can reply to individual attendees without displaying their replies to the other meeting participants.
In a recent entry to the Microsoft 365 Roadmap, the Redmond-based tech giant says this capability should be helpful when dealing with sensitive questions, personal inquiries, or follow-up discussions unsuitable for the entire audience.
Allows moderators to answer questions from specific attendees without displaying the reply to the other participants. This capability can be helpful for sensitive questions, personal inquiries, or follow-up discussions that are not intended to be broadcast to the entire audience.
Starting in December 2024, private moderators in Microsoft Teams will impact all devices, including Android, Mac, iOS, and Desktops.
We don’t know yet if this capability will only be released on New Teams, which was recently made the platform’s default client. However, if it is, it might be worth migrating to the new version of the app.
In other news, the Teams unified experience was also recently released. It allows users to access their personal and professional accounts from the same client.
OpenAI has announced a significant update to the visual interface for its ChatGPT conversational AI model, called Canvas.
With Canvas, ChatGPT now offers a more interactive and flexible method for users to provide feedback to the model. This includes inline editing and the ability to highlight and focus on specific sections of ChatGPT’s output.
In a blog post, OpenAI says Canvas also introduces a new user interface that can be used for various tasks — not just text generation. For example, developers can use Canvas to debug code, generate comments, convert code between programming languages, and more. Canvas also includes various language and tone control features designed to help users customize ChatGPT’s output to their needs.
ChatGPT will suggest prompts for when to use Canvas, and users can also manually invoke Canvas by entering the “use canvas” prompt.
“Canvas unlocks the power of ChatGPT’s new capabilities and makes it easier to use ChatGPT for a much wider range of tasks,” OpenAI said in a blog post.
Canvas is now in beta to ChatGPT Plus and Team subscribers and will be available to Enterprise and Edu users next week. OpenAI plans to launch Canvas to all ChatGPT users once the feature is out of beta.
In other news, OpenAI recently announced the Advanced Voice Modes for ChatGPT, allowing the AI model to support a variety of new voices.
What do you think of Canvas? Would you be more likely to use something like ChatGPT for content creation with a feature like this?
Excel Obstacle Course is a fun way to learn the Excel shortcuts and use them without touching your mouse. We’ve already provided a list with the must-know Excel shortcuts but the only way to assimilate them into your muscle memory is to perform them regularly and that’s what the Excel Obstacle Course is for.
All about the Excel Obstacle Course
1. What is the Excel Obstacle Course about?
As we’ve highlighted in the beginning, the Excel Obstacle Course is an Excel sheet that challenges you to do certain tasks featured in separate tabs in a timed manner.
You start by checking a box with an X that will start the timer. In the first Obstacle Course, when you move to the next tab, you will get to practice selecting columns and deleting them. On the next, you will be required to select and delete some rows and so on.
All the tabs have indications with the requirements to complete the tasks and at the end, you have to press the shortcut to go back to the first tab and stop the timer by checking another box with an X.
The sheet will display a final timer counter and you will see how well you did.
2. What do I need to play the Excel Obstacle Course?
In order to properly use the Excel Obstacle Course, you will need a full keyboard, complete with a numerical keyboard, PgUp and PgDown buttons, function buttons, and ideally, a right-click button.
You can try on a smaller, laptop keyboard, but you won’t be as proficient as with a stand-alone, desktop keyboard.
Another requirement is to have the Microsoft Excel desktop version installed on your PC. Many shortcuts are not the same in the online version, for instance.
3. Where do I get the Excel Obstacle Course sheets?
Above, you will see a tutorial for beginners on how to use the Excel Obstacle Course. Stan, create lots of other similar challenges for Google Sheets, for Mac, and for different type of tasks.
For instance, there is a sheet to test your Pivot Table shortcuts, and even VLOOKUP and XLOOKUP obstacle courses.
After you download the .xlsx sheets, just open them in the Microsoft Excel desktop app. Unfortunately, they won’t work in the online version, at least they won’t work with the timer.
However, you can still load them in Excel online version and simply perform the puzzles, but you won’t have that satisfaction to compete with others unless you set up a separate timer.
Also, as we’ve mentioned above, many of the Excel desktop shortcuts won’t work in the online version and you will have to use the mouse, which defeats the purpose of the obstacle course.
That’s it! Now you know what is the Excel Obstacle Course, how to get the sheets and how to use them to perfect your desktop shortcut skills.
If you need more information or have questions, leave them in the comments section below.
Microsoft 365 (Office) has announced that it will remove the Feed feature from its web endpoints (www.microsoft365.com, www.office.com) and the Windows app.
In the official announcement, Microsoft says the Feed feature, designed to help users explore the latest content and team activities, will no longer be accessible from the Microsoft 365 app starting November 1, 2024.
The company has ensured that the change will not affect existing workflows.
Feed’s essential characteristics have been integrated into the “Recommended” files on the Home tab in the Microsoft 365 app.
The Feed feature was launched in 2022.
We are committed to ensuring that your existing workflows remain unaffected. Launched in 2022, Feed was designed to help users explore the latest content and team activities. Over time, we have integrated all the essential features of Feed into a more accessible surface within the Microsoft 365 app: the “Recommended” files on the Home tab (shown in figure 2 below).
Jira is a popular project management tool to effectively keep track of the work and tasks at hand. It’s available for all major operating systems, including Windows, MacOS, and Linux.
The project management tool is employed by countless organizations worldwide and helps streamline tasks right from the initial stages to bug tracking and future development. If you are planning to download Jira (previously called Jira Software) on Windows 11, it won’t take more than a few minutes!
How can I download and install Jira on Windows 11?
Go to Atlassian’s official website, select the preferred download option from the dropdown menu, and click on Download. While I am downloading a long-term support release, you can get the latest release as well.
Accept the license agreement by ticking the checkbox, and then click on Submit. The download may take some time since it’s a 570 MB installer.
Once done, right-click on the installer (.exe file) and select Run as administrator. This is critical since you need administrative privileges for complete installation. Running it without the privileges will throw a warning.
Click Yes in the UAC prompt.
Click on Next to proceed.
Select the Express Install option and click on Next. This installs Jira with the default settings and is the ideal choice unless you want some customizations.
Click Allow in the confirmation prompt.
Click on Install to start the process. On my Windows 11 PC, the installation took a little less than a minute.
After the installation is complete, tick the checkbox for Start Jira Software now and click Next.
When it appears, tick the checkbox for Launch Jira Software in browser, and click Finish.
In the browser window that opens, select Set it up for me, and click on Continue to MyAtlassian.
If you already have an account, log in. For those who haven’t yet signed up, click on Create an account.
Once done, you will be asked to generate a license. Pick the product from the dropdown menu, choose a license type, enter the name of the organization, and then click on Generate License.
Click Yes in the confirmation prompt.
Fill out all the details to create an administrator account, and then click on Next.
Wait for a few minutes for the initial setup to complete, and then click on Let’s get started to start using Jira.
The entire Jira download, install, and setup process took me less than 15 minutes.
So, if you want to download Jira for Windows 11 and deploy it across development, management, operations, or marketing teams, go ahead and do it right away!
The Cookie Editor Firefox extension is a helpful tool for managing website cookies. You can view, edit, and delete cookies for more control over your browsing experience. You can also quickly improve your privacy or test cookies for web development.
I’ll show you how to install and use it, so read on!
How To Install the Cookie Editor Extension on Firefox
Here are the steps:
Launch your Firefox browser.
Tap the hamburger menu (the three horizontal lines) in the top right corner of the screen, then click Add-ons and themes.
Type “Cookie Editor” in the search bar and press Enter. You should see the extensions in the search results.
Tap the Cookie-Editor add-on and click the “Add to Firefox” button.
A pop-up will appear asking for confirmation. Click Add. Firefox will then download and install the extension.
After installation, you can access it by clicking the extension icon in the top-right corner of your browser.
How To Use the Cookie Editor Extension
Now you can manage cookies with it. Here’s how:
Go to any website.
Tap the extension icon at the top right, and click the Cookie-Editor.
The extension will display all the cookies that are stored on that site.
Select a cookie to edit its Name and Value.
Tap Show Advanced to edit the Domain, Path, and Expiration.
If you want to remove a cookie, hover your mouse over it and click the Delete button (a red dustbin-like icon). To remove all cookies, tap the Delete icon at the bottom.
To add new cookies, tap on the “+” icon.
Enter the Name and Value and click the “Add” button.
The Cookie Editor Firefox extension is a valuable tool for efficient cookie management. It offers a user-friendly way to view, edit, and delete cookies.
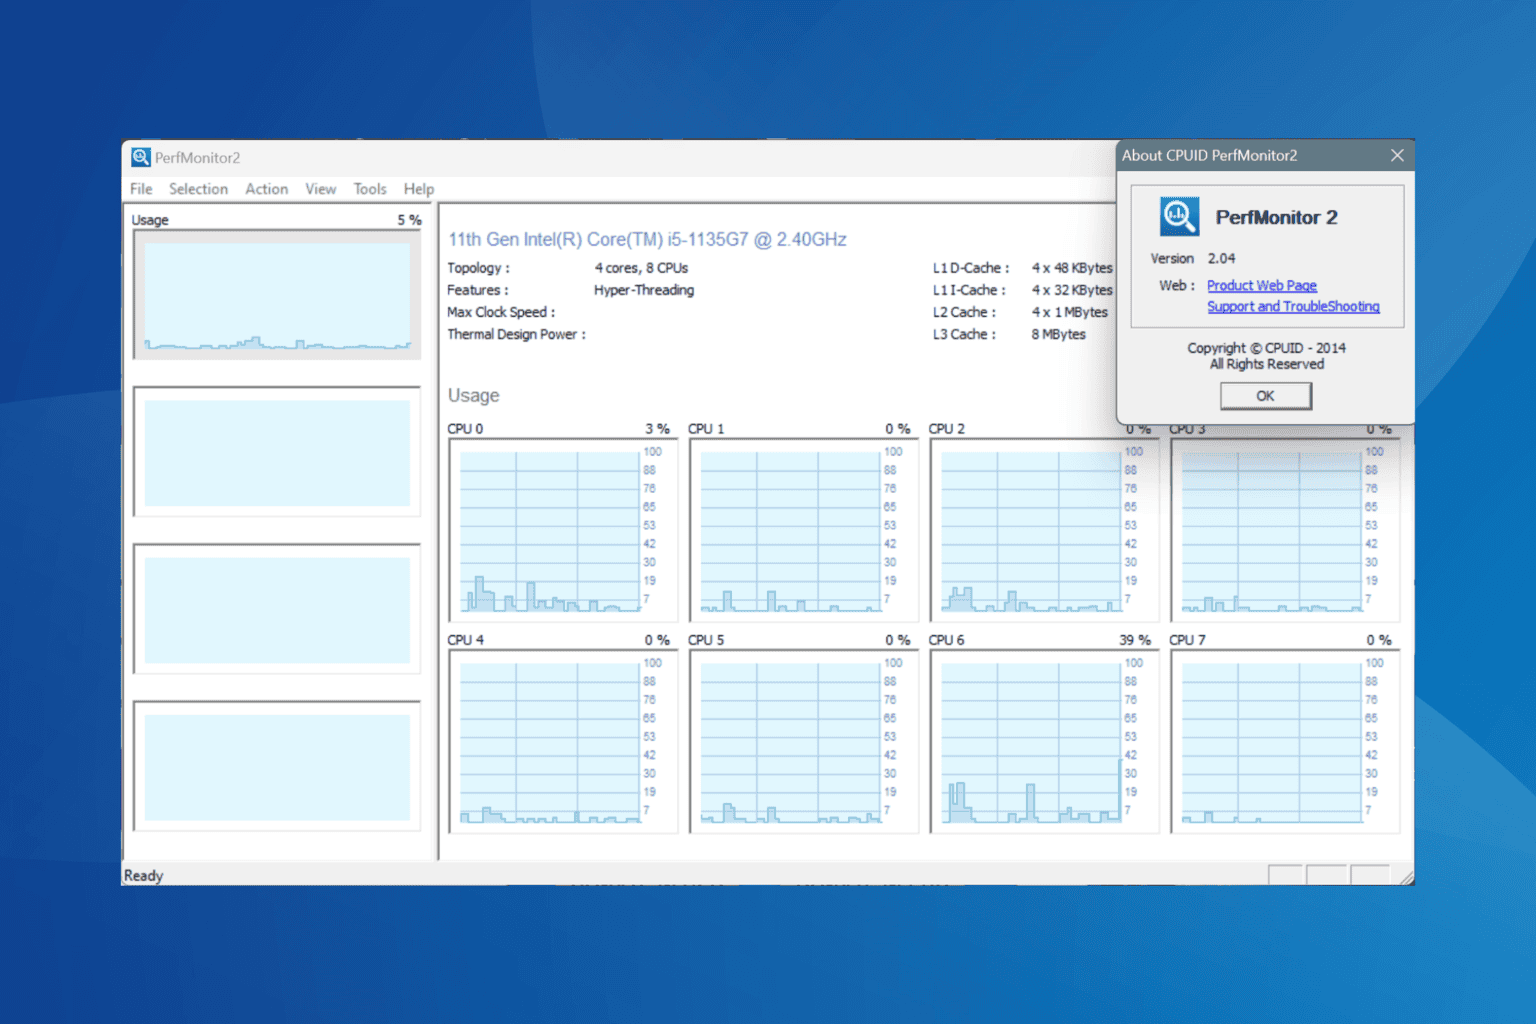
With hundreds of active processes at any given instant, monitoring the performance of a Windows PC can be challenging. While Microsoft offers effective built-in tools for the purpose, many opt for third-party options. A popular software amongst these is PerfMonitor.
Initially released over a decade ago, PerfMonitor 2 2.04, the latest version, is available for download on several different websites and is compatible with Windows 11, along with the other older OS iterations. You can download both the 32-bit and 64-bit versions of PerfMonitor!
How can I download PerfMonitor on Windows 11?
NOTE
WindowsReport is not associated with PerfMonitor or CPUID and can’t guarantee the effectiveness of the software or its safety and security. We recommend you scan for any malware, viruses, and adware before using the tool. Also, make sure an antivirus and firewall is active at the time of download.
Go to the CPUID’s official website, scroll down to the bottom, and select the latest version of the tool.
You will have two download options, Setup or ZIP file. I recommend choosing Setup.
Click on the Download Now button.
Now, head to the folder where the downloaded setup is stored and run it.
Follow the on-screen instructions to complete the installation of PerfMonitor.
After installation, you can launch and run the PerfMonitor tool.
It wouldn’t take you more than a few minutes to download and install PerfMonitor on Windows 11 or any other iteration of the OS. The setup is simple and to the point!
Is PerfMonitor 2 good?
The effectiveness of PerfMonitor is subjective, depending on your expectations. Although the tool does a decent job at tracking the PC’s performance and highlighting the processor’s load.
The user interface is kept simple so that anyone can utilize the tool, even users with a minimal understanding of the hardware side of things.
In the top bar, you see six options, File menu, Selection menu, Action menu, View menu, Tools menu, and Help menu. While the first four configure the tool’s settings, the last two help install updates and discover more information about the tool.
To select or change the processor you want to monitor in PerfMonitor, click the Selection menu > choose Processors > then pick one from the list.
After selecting a processor, all the counters will be listed on PerfMonitor’s main screen, allowing you to monitor these effectively.
What are PerfMonitor alternatives for Windows?
If we were to look at the built-in options from Microsoft, Performance Monitor remains the most effective alternative for PerfMonitor. It, too, is simple to use and I personally find it more streamlined with Windows 11 compared to PerfMonitor.
In my opinion, PerfMonitor should be avoided, if possible, since the tool was last updated in 2014 and has since been running the same version. So, it’s most likely not aligned with the latest security and cybersecurity practices. However, the choice is ultimately yours!
Before you leave, discover expert tips to make your Windows PC faster than ever. We also have a great guide on how to download SysAid on Windows 10, and the same steps can be applied if you’re using Windows 11, so don’t miss it.
Before we end this article, you should know that this software is available for older versions of Windows, an we have a guide on how to download Perfmonitor on Windows 7, so don’t miss it.
For any queries or to share your favorite performance monitor for Windows, drop a comment below.
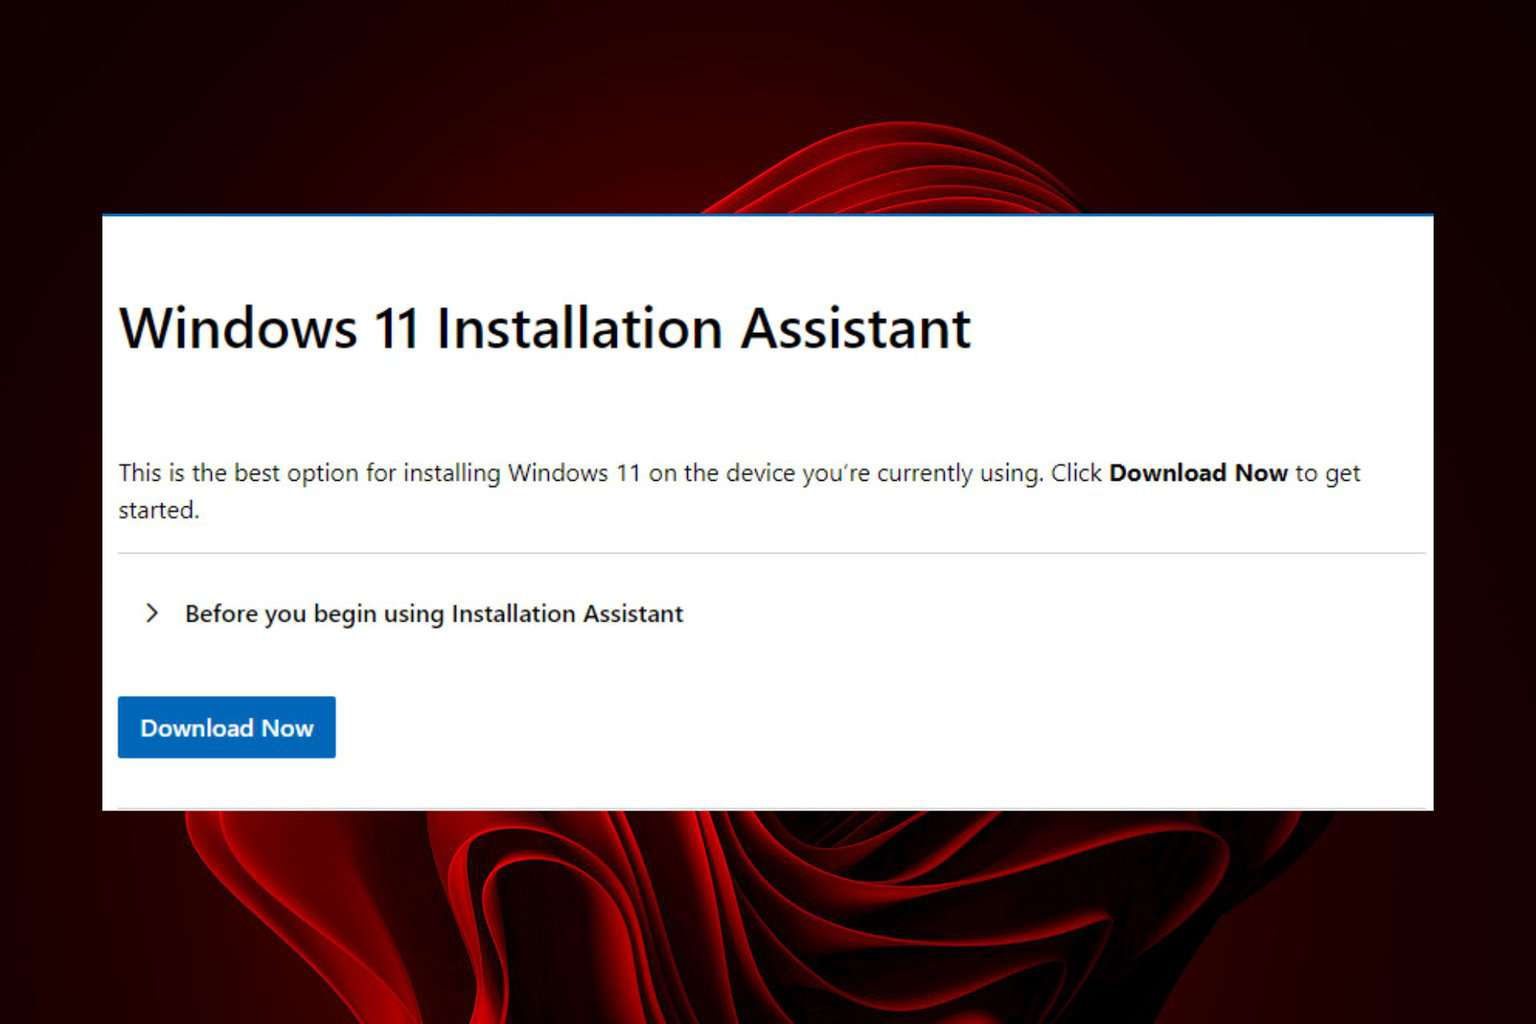
Upgrading to Windows 11 doesn’t have to be a tedious task especially for the not-so tech-savvy users when the Windows 11 assistant tool exists and is available for download.
Apart from a streamlined upgrade process, it also checks whether your device meets the minimum requirements and ensures your PC passes all the compatibility checks so that you don’t end up with a failed Windows 11 upgrade.
The requirements to successfully download the Windows 11 assistant include:
A valid Windows 10 /11 license
Your device must be on Windows 10, version 2004 or higher
At least 9 GB of free disk space to download Windows 11
The executable file for the Windows 11 Installation Assistant will begin downloading and once it’s done, you can locate it in your downloads folder.
Double-click on it to run it. Ensure you’re on your administrator account.
You’ll be prompted by User Account Control (UAC), click Yes to allow the program to proceed.
Next, you’ll start the Windows 11 upgrade process where you’ll be directed to check system requirements by downloading the PC Health App.
After you’re done, you can follow the on-screen prompts to install Windows 11.
If for some reason you can’t download it from the official Microsoft site, you can also download the assistant from third-party sites. However, ensure you have a comprehensive antivirus to protect your device from unforeseen risks.
Once you’ve installed your new OS, we have a first-things-first list we think you should begin with to get you settled in.
If you’re still on Windows 10 and want a similar experience before moving to Windows 11, you can use the Windows 10 Upgrade Assistant. It offers the same streamlined process, helps verify hardware compatibility, and ensures your system is updated to the latest version before making the jump to Windows 11.
That’s all about getting the most convenient tool to upgrade to the best OS yet. Have you sed the Windows 11 installation assistant? What are your thoughts? Let us know in the comment section below.
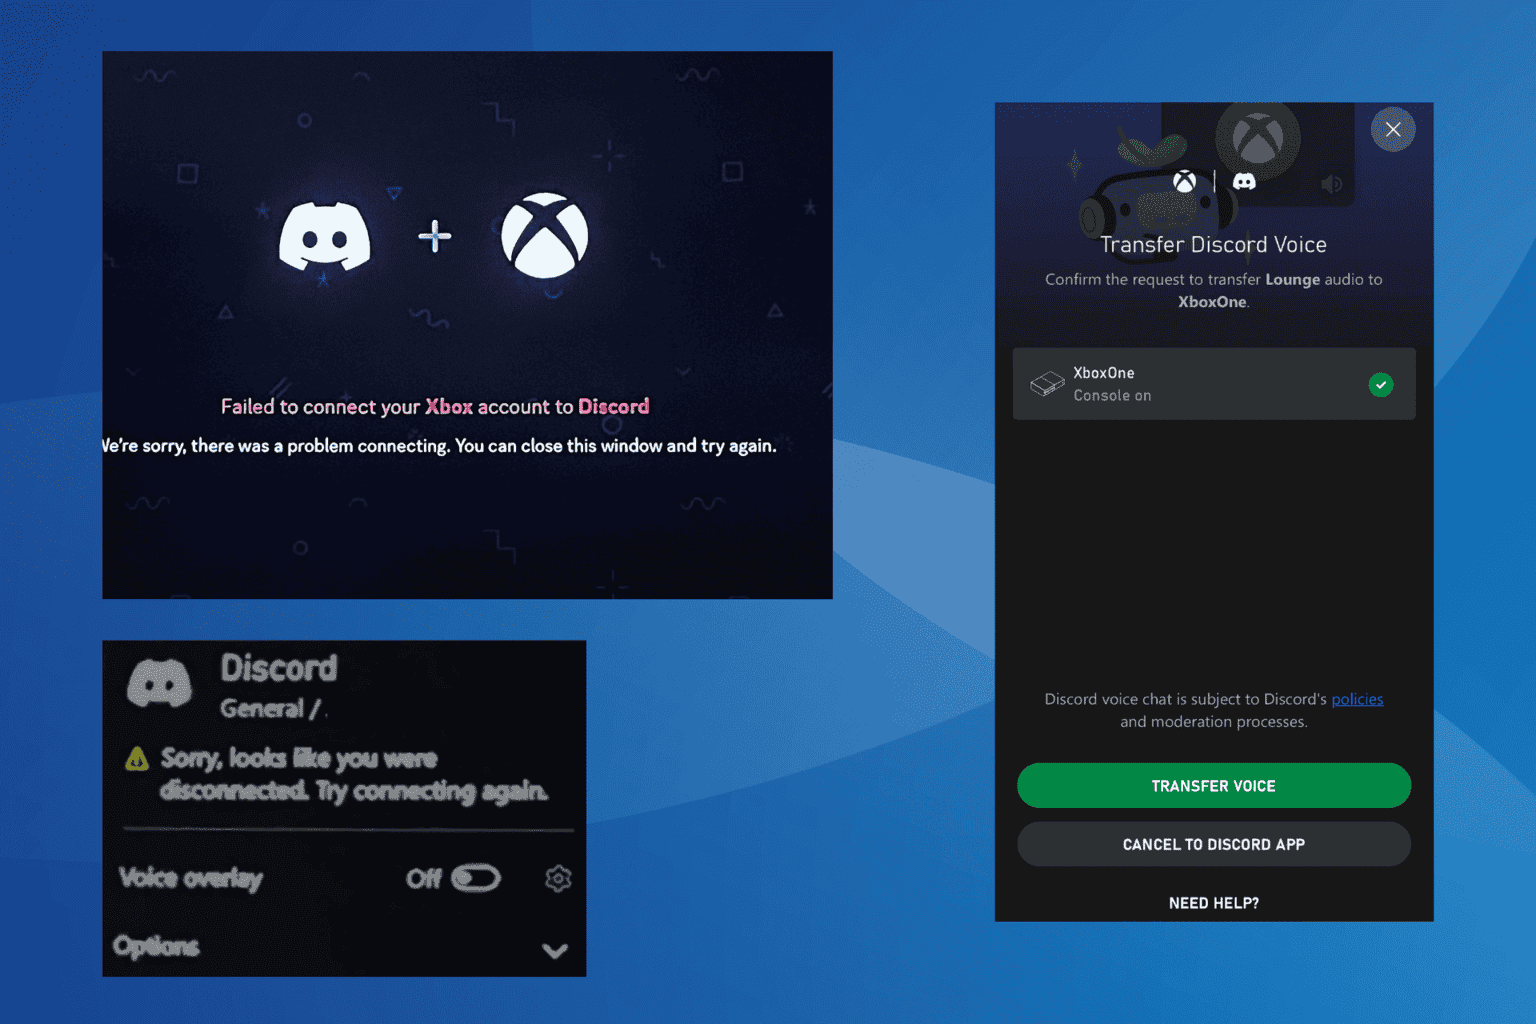
Discord on Xbox throws a wide array of issues, from sign-in problems to voice chat errors to trouble linking the account. In most cases where Discord is not working on Xbox, it’s a problem on the app’s side to blame!
Other common causes for Discord issues on Xbox include corrupt cache, unstable network connection, misconfigured DNS and MAC address, and incorrect Xbox settings.
Before you start troubleshooting, switch to another network, preferably a mobile hotspot, and check for improvements. If the Discord issue is fixed, you can reconnect to the previous network. For some users, resetting the modem/router also did the trick!
What can I do if Discord is not working on Xbox?
1. Power cycle your Xbox
Press the Power button on your Xbox console for 10 seconds to turn it off.
Unplug the power cord from both ends and wait for 1 minute.
Now, reconnect the power cord, then turn on the console, and check for improvements.
When Xbox and Discord keep disconnecting, or it repeatedly shows you to Relink Account, power cycling your console will work.
2. Update Xbox and Discord
For 3 out of 5 users who recently faced sign-in issues with Discord on Xbox, installing the latest updates fixed things!
The August Xbox update, which rolled out a series of new features, also patched several critical issues with Discord. Besides, install any pending updates for the Discord app.
3. Relink your Discord account
Open the Discord app on your PC and go to Settings.
Now, go to Connections under User Settings, and click the X icon next to Xbox.
Click on Deathuorize in the confirmation prompt.
Similarly, in the Discord mobile app, open Settings, go to User Settings, tap on Connections, and reauthorize the Xbox connection, as you did earlier.
After you have disconnected Discord from both PC and mobile, go to its desktop app, head to Connections, and click the Xbox option.
Follow the on-screen instructions to re-link Discord and Xbox. You will be redirected to a browser to enter the login credentials.
Similarly, re-link Xbox and Discord via the mobile app.
Once done, verify whether Discord is still not working on Xbox Series X or S.
4. Enable Remote Features in Xbox
Open the Settings on your Xbox console.
Go to Devices & connections from the left pane, and select Remote features.
Now, tick the checkbox for Enable remote features.
Next, go to Test remote play and make sure it works fine for the active network connection.
According to reports, you just have to enable Remote Features when Discord is not connecting to Xbox, even when the app reads, Success! Your console is now connected to the Discord voice channel.
5. Enable Make this Xbox my home Xbox
Open the Settings on your Xbox console.
In the General tab, go to Personalisation from the right.
Select My home Xbox from the list of options.
Tick the checkbox for Make this my home Xbox.
Restart the console and check for improvements.
6. Reconfigure Online Status & History on Xbox
Open your Xbox Settings, and in the General tab, select Online safety & family.
Now, choose Privacy & online safety.
Under Choose settings, select the Xbox privacy option.
Select Custom and then choose View details and customize.
Pick Online status & history from the list of options.
Now, reconfigure the three options like this:
Others can see if you’re online: Everybody
Others can see what you’re watching or listening to: Everybody
Others can see your game and app history: Everybody
Save the changes, then reboot the console, and check for improvements.
When Discord is not showing your status or fails to work on Xbox, you must set the online status and visibility to Everybody. This worked for 2 out of 5 users faced with Discord’s status-related problems!
7. Change the DNS address
Open your Xbox Settings, and in the General tab, go to Network settings.
Select Advanced settings from the bottom right.
Choose DNS settings from the list of options.
Now, select Manual.
Next, enter the following the two fields:
Primary IPv4 DNS: 1.1.1.1
Secondary IPv4 DNS: 1.0.0.1
Save the changes, then reboot the console and check for improvements.
While I have used CloudFlare’s DNS since it helped most of the affected users when Discord was not working on Xbox, you could set Google’s Public DNS or the even the fastest DNS server near you for improved Internet speed!
8. Clear MAC address
On your Xbox, open the Settings, and in the General tab, select Network settings.
Now, choose Advanced settings.
Select Alternate MAC address from the list of options.
Choose the Clear option.
Finally, select Restart to fullly apply the changes, and then check for improveemnets.
9. Reset your console
Open the Xbox Settings, go to the System tab, and then select Console info.
Select the Reset console option.
When asked to pick the type of reset, choose Reset and Keep My Games & Apps.
Confirm the reset, and once it’s done, sign back into your Xbox console.
If nothing else works, a reset should, in all likely, fix things when Discord is not working on Xbox, certain features are failing, or you are facing sign-in issues.
In case the problem persists, I recommend contacting Xbox support and Discord support for more help. Because, if it’s an issue at their end, nothing you do will fix it. Some of these solutions may provide temporary reprieve but the problem is likely to reappear unless fixed by the developers.
Rufus is the most popular tool for creating bootable media, but many want to know does Rufus still work with Windows 7. Today we’re going to answer this and all your other questions about Rufus.
How can I use Rufus on Windows 7?
Can Rufus run on Windows 7?
Rufus is no longer available on Windows 7. The newer versions don’t support this operating system anymore. However, you can use an old version of Rufus, such as 3.22 or older, on Windows 7 without issues.
There are numerous alternatives to Rufus and we covered many of them in our bootable pendrive software article.
Which is better Rufus or Ventoy?
Rufus is simpler to use, and it has fewer compatibility issues than Ventoy. However, Ventoy allows you to have multiple ISO files on a single flash drive, as well as a drive for file storage.
To learn more, we suggest reading our Ventoy vs Rufus guide.
Rufus is an amazing tool, however maintaining a retired operating system with a shirking user base takes a lot of time and effort, so it’s no wonder that developers dropped support for Windows 7. If you still want to use it on legacy systems, you’ll need to download version 3.22.
A lot of people use password protection on their Excel workbooks to safeguard sensitive information but you can sometimes forget this password and need to remove it.
Apart from forgetting your password, some Excel workbooks fail the compatibility test when opened in newer or older versions and with this colliding formats, the password may not work prompting you to remove it to access the file.
How do I force remove a password from an Excel File?
1. Change file extension
Right-click on an empty space on your desktop and select New > Folder.
Locate the Excel file you wish to remove the password then copy and paste it into the newly created folder.
Right-click on the file and select Properties and in the dialog box that opens, navigate to the General tab.
Click on the file extension name change it to ZIP then click the OK button.
Now right-click on the new ZIP file and select Extract all.
Choose the extract location and click on the Extract button.
Wait for Windows to extract files and a few new folders and files will appear.
Go to the xl directory, locate the protected XML file, right-click on it and select Open with>Notepad.
Hit the CTRL + F key combo then search for sheetProtection.
Select all attributes within these brackets <> and hit Delete. <sheetProtection algorithmName="SHA-512" hashValue="o8YQJHtmuaFsZ074zWsq4GdWM/OHVDfJRzOKy5yF9wEnzR/LnodlUUXFq4+F73XLhMI0p6IY8xlSre5hyfY31Q==" saltValue="uOjkpLlBqR3Qr00jLbiGuQ==" spinCount="100000" sheet="1" objects="1" scenarios="1"/>
Press Ctrl + S to save the Notepad file.
Now, close the Notepad file and go back to the New folder.
Navigate to the file location of the files or folders you want to compress, right click on the folder/folders you want to zip then click send to and select Compressed zipped folder.
Next, a compressed folder will be automatically created in the same location you are currently located and with the same name as the file/folder you zipped.
Now, change the file extension to XLSX and the Excel sheet’s password should be removed.
Windows Report is not affiliated to Passwordfind.com. Do your due diligence before uploading any sensitive files on this site.
With the built-in Windows tools, anything can go wrong especially since you’re deleting codes manually. You risk data loss or your worksheet getting corrupted midway.
Your Excel files may also fail to open in Notepad or open back in Excel with all the conversion processes. If you’d like a more seamless process, try one of the online password remover tools.
Password Find is one of the free Excel password removers we found to be efficient. We created an Excel workbook, protected it then copied and pasted it on the site.
The only drawback was that it took a little over seven minutes to unlock the file so if you have lots of files you wish to remove the password to, it can be time-consuming.
If you’re looking to recover your Excel password instead, we have an excellent list of Excel password recovery tools.
Best password protection techniques
From above, it was relatively easy to remove passwords from the Excel file. This means that one can leverage Microsoft Office’s vulnerabilities and bypass restrictions. Your sensitive and confidential data is therefore not safe if anyone does not adhere to ethical considerations.
We recommend installing a password manager if you frequently forget your password and use secure file sharing tools. Also, create backups of your files and use version history whenever possible to recover files without data loss.
That brings us to the end of this article but do let us know if you have any other useful tips to remove passwords from your Excel files without data loss. Drop us a line below.
Microsoft Rewards has been acting weird lately on browsers, and unfortunately, the Xbox App is no exception. After flagging suspect search activity and limiting users’ access to earning points, Microsoft Rewards has been resetting itself on the Xbox App.
For instance, many users reported that Game Pass quests had reset a week earlier than usual, and right after that reset, many other quests, especially the monthly ones, appeared as completed.
The weekly Microsoft Rewards quests were also affected in the Xbox App.
Yesterday GP quests reset a week early Now it’s changed again – monthly is showing as complete and my weekly are wrong too. Anyone else?
Many users were impacted by these bugs. As a result, they lost achievements; others completed daily targets only to have them reset.
As a reminder, Microsoft Rewards resets the quests on Xbox on the 8th of each month.
According to an Xbox employee, the errors were caused by a bug that prompted the reset to start earlier, and the company has already fixed it.
We’ve fixed the early start date for this month’s quests. September’s quests will go until the 7th (as advertised), reset happens on the 8th. Any progress earned yesterday/early today toward October’s monthlies while the dates were showing 11/4 will count towards progress for October.
If you were affected by these bugs, you should be able to complete your quests with no errors.
Wondering how to turn off Google Lens in Chrome? It’s a useful tool integrated into Chrome’s image search feature. However, some people prefer the classic image search functionality or don’t need it.
I’ll show you how to disable it below!
How To Turn Off Google Lens in Chrome
Follow these steps:
Open Google Chrome on your desktop.
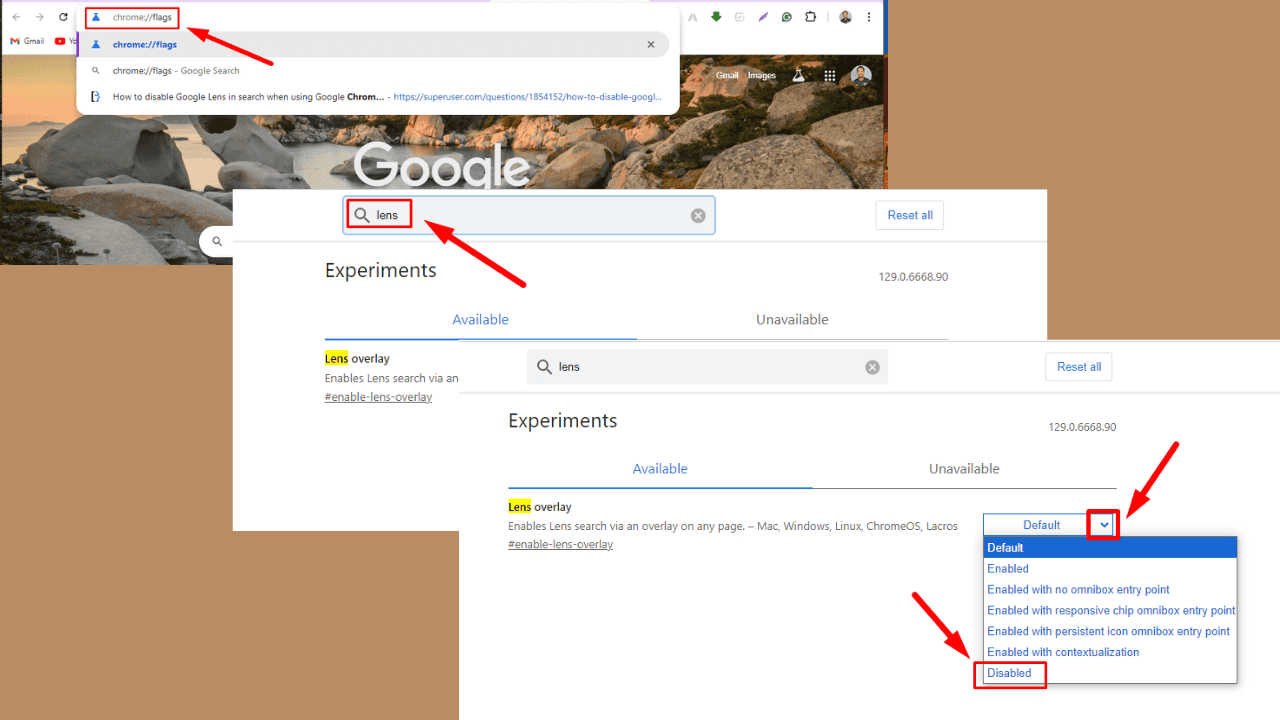
Type chrome://flags in the address bar and press Enter.
Type “Lens” in the Chrome Flags search bar to access the Lens overlay.
Click on the dropdown menu beside the Lens overlay and select Disabled.
Click the Relaunch button to restart Google Chrome so the changes take effect.
So, now you know how to revert to the classic search method. It’s a more familiar browsing experience if you prefer the old way of finding information about images online.
With the popularity of Microsoft Flight Simulator and its recent updates (which are quite expensive, but for a good reason), many people have been wondering why Microsoft doesn’t leverage Bing Maps to create a Microsoft Truck Simulator.
While it might seem like a good idea, the Microsoft Truck Simulator would not be as detailed on the ground as the Microsoft Flight Simulator makes it look from above.
If you’re flying from above, the terrain below looks clear with fine textures and details, but as soon you get closer to the ground, those details become pixelated.
Some people agree with it and suggest becoming a truck driver and actually experience that realism for themselves:
You ever gone down to the ground level and peeked around in MSFS? it’s pretty rough. For flying overhead it looks fine, but getting the surface to be detailed enough at a country size scale for a game centered around driving is probably a decade off or more.
If you crave the realism you might as well get a CDL and hit the road for real lmao
Others agree it’s not viable at all:
Exactly. Plus, a 1:1 scale map would be a major turnoff for many casual players (which is how ATS and ETS2 get their money mainly), and would only appeal to the most hardcore players, not to mention how much time it’d take to do so. It just ain’t all that viable.
However, with the AI advancements, a Microsoft Truck Simulator might actually manage to emulate the real world through procedural generation, but it might take some years for the graphic quality to get there:
Flight Simulator has the advantage of not needing to interact with 99% of the map. Microsoft can just model the airports and use Bing maps for everything else. A truck sim would need to model boundaries for every road and intersection. One day this may be possible with AI or procedural generation, but the tech and map quality isn’t there yet.
Then you’d also have to consider other factors: budget, viability, and a way to keep gamers entertained—maybe achievements or certain certificates that would help them get a driver’s license specialized in truck driving easier.
However, a Microsoft Truck Simulator is actually a good idea, and the Redmond-based tech giant should think about down the road. It would be a perfect opportinity to place Bing Maps on the map (excuse the pun), and make it a worth competitor to Google Maps, or Apple Maps.
Many users are still wondering if is it possible to get a Windows 7 installation disc, and the answer is yes. In this guide we’ll show you how to do that on your PC, so let’s get started.
Expand the ISO image files section and select the desired version.
Wait for the Windows 7 installation disc ISO to download.
Keep in mind that Windows 7 isn’t available for download from official sources, so you can only get it from third-party sources. Some third-party sources aren’t safe, so use them at your own risk.
How do I make a bootable CD for Windows 7 from an ISO?
Next, click on Open and locate the image file you downloaded.
Click on Burn.
Wait for the process to finish.
How to install Windows 7 from a DVD drive?
Insert Windows 7 installation disc.
While your PC boots keep pressing F4 or F8.
Select the DVD drive from the boot options.
Follow the installation steps on the screen.
Alternatively, you can boot to BIOS by pressing F2 or Del and setting your DVD as the first boot device.
You can also follow this detailed Windows 7 installation guide to make sure the process goes smoothly after creating your bootable media.
Windows 7 installation disc or USB flash drive?
In our opinion, using a USB flash drive is always a better option since many modern PCs don’t have a DVD reader or burner, and flash drives are a better choice.
Can I install Windows 7 without a USB or CD?
No, it’s not possible to install Windows 7 without a USB or CD as the installation needs to boot before your currently installed system starts.
How to reinstall Windows 7 without a CD?
If you don’t have an installation disc, you can always download Windows 7 ISO from third-party sources and create a bootable flash drive. We covered this subject in our guide on how to download Windows 7 ISO, so don’t miss it.
Since Windows 7 ISO isn’t available for download anymore, many users are wondering if they can still use Windows 7, and if they can run Rufus on Windows 7, but we have answered these questions in our previous guides.
Microsoft released Windows 11 24H2, the annual Windows patch, a few days ago, and users are finding it a bit hard to get used to it so far.
If they were stunned to find out Windows Mixed Reality is no longer supported on this version. You should also know that it won’t automatically disable VBS when you disable Memory Integrity in Windows 11 24H2.
VBS, or Virtualization-Based Security, is a security feature that uses hardware virtualization to keep your Windows 11 safe and protected.
It’s recommended that you enable it if you’re running Windows 11 (any version, including 24H2) on a virtual machine. Still, the drawback is that VBS also affects performance in Windows 11, especially gaming performance, up to 25%.
So, if you’re looking to improve your PC’s gaming performance in Windows 11 24H2, you might want to disable VBS entirely. If you’ve installed the patch, it might be good to do it.
Fortunately, there is already a solution on Reddit that will allow you to disable it once you’ve installed the patch.
Go to HKEY_LOCAL_MACHINE\SYSTEM\CurrentControlSet\Control\DeviceGuard
Search for “EnableVirtualizationBasedSecurity” and set its value to 0.
Restart your PC.
After restarting, the System Information should display VBS as Not enabled. Let us know if this worked.
Now, is it necessary to disable it? Well, that’s up to you. If you want to compromise a bit of performance security, go for it. But if approximately 3% to 25% performance loss doesn’t bother you, you should leave it enabled.
Since the developers released Patch 7, you can get Baldur’s Gate 3 mods on Xbox Series X and S. For the moment, you’ve got 69 mods to choose from but new ones will be added gradually as they pass internal testing. They are not as many and as extensive as the ones on PC,
All you need to know about Baldur’s Gate 3 mods for Xbox
1. How do I get mods for Xbox?
Open BG3 on your Xbox Series S or X console and update the game first.
After you install Patch 7, restart the game and access the new Mod Manager option in the game’s menu.
Next, you will see the library of BG3 approved mods. Select which one you like and download it to be installed automatically.
Once you get one or more mods, you will be able to see them in the Installed tab from the top menu, on the right to the Browse tab.
From that menu, you may also select one and uninstall the mod.
So, after you install Patch 7 for Baldur’s Gate 3, installing and uninstalling mod is as simple as pressing a button on your Xbox.
2. What type of mods are available in BG3?
Right now, there are 9 possible types of mods although some of them may contain more traits from 2 or more categories.
The BG3 mods range from new or improved items and cosmetics to spells, races, user interface and even new classes or subclasses. Here’s the list of mod categories as listed by the developer:
Items
Equipment like weapons and armours, consumables, and various other items.
Cosmetics
Includes texture for the character appearance such as clothes, hair, beards, and others.
Classes and subclasses
You can create new class types or modify existing ones and change their abilities, powers, and skills.
Races
Create and edit new and existing character races to determine their overall appearance, individual powers and abilities.
Dice skins
Edit or redesign the appearance of your dice skins.
User interface
Manage your extensions and restyle the game UI.
Spells
Create custom statuses as well as spell stats and properties.
Scripting changes
The Osiris scripting language, is designed to react to player actions and state changes in the world, including things like being attacked, used, and moved.
Quality of life improvements
Such as some mods that edit or improve gameplay which don’t directly rely on tools outside of the Baldur’s Gate 3 Toolkit.
3. How do I create a new mod for Baldur’s Gate 3?
First, you can’t create a mod directly on Xbox, so you will have to install Baldur’s Gate 3 on Steam to do that. After you have it and create a mod, you can also publish it for Xbox and wait for approval from the developers.
Next, you will need to link the Larian Studios account and the Steam account on the dedicated page.
Next, go to the Steam Store and get the Baldur’s Gate 3 Toolkit app from the Toolssection. It is free so you should be able to download and install it.
Now, go to Baldur’s Gate 3 in your library, right-click on it and select Properties.
In the next window go to DLC, and enable the BG3 Toolkit Data.
Finally, you can launch the toolkit and create your mod for BG3.
We’re not going to include an actual guide here on how to go through with the mod creation for Xbox, but if you need more information, the developer has a whole library of guide clips with everything you need to know from start to finish.
4. What BG3 mods should I get first?
At the moment we wrote this piece, there were 69 available mods for Baldur’s Gate on Xbox. There is a pretty hefty list to choose from so here the ones you should install first.
This is a first go-to bod that improves the UI. It includes custom action resource support that add a lot of Character Creation (CC) UI tweaks. With this mod you will have no head limit, and access additional racial UI options above standard races.
DoubleXP – This mod doesn’t require much explanation, right? You will get double XP from any source of the game. That means you will progress faster in the game. Does it take something out of your experience with the game? You decide!
Carry_Weight_Extra – Another mod that looks like a must is to be able to carry more weight with your character. The mod also increases the PickupObjectMultiplier and MaxPickUpMultiplier to 75 which is a LOT, right? No more dropping your stuff all the time!
Adjustable Party Limit – You get a spell to increase the party for up to 16 characters! The best part it that it also works in multiplayer mod if all the people in the party loaded the mod.
These are the best BG3 mods for Xbox at the first glance but there are a lot more to come so keep your eyes on the mod list every day for those cheats or changes you really need.
To conclude this guide, you now know how to install and create your own BG3 mods for Xbox, and you also got our first glance opinion about the must-have mods right now.
As you might already know, Microsoft finally released Windows 11 24H2 a few days ago. The long-awaited annual patch brings dozens of new features and AI capabilities to Windows 11, which might seem like a lot for any modern PC/laptop.
However, as this Reddit user proved, you can install Windows 11 24H2 on a 10-year-old Intel Celeron and not only get away with it but also run it smoothly on such an old device.
The user bypassed the TPM 2.0 mandatory requirement and installed Windows 11 on the device a while ago. They kept downloading updates, and they were stunned to find out that the latest 24H2 Patch actually improved Windows 11’s performance.
performance experience increased! atleast in my experience. opening explorer is a lot quicker (opens in one click no hesitation: same ssd cuz i never reinstalled), scrolling through chrome is smoother and playing youtube videos loads faster (i always watch on 1080 btw)… overall ui smoothness increased.
on very lowend unsupported devices, windows 11 24h2 definitely gives a performance increased in terms of ui experience and its smoother.
As the user continues, you can play cloud and source games on an Intel Celeron device with Windows 11 24H2 as your primary operating system.
Whoever said those old Intel Celeron PCs are obsolete by now should take it back. If you have such a device, maybe you should put it to the test and let us know if it works.
Microsoft finally updated the Canary Insider Channel with a new build, and the Redmond-based tech giant also made some huge changes to the Microsoft Store.
In a blog post, Microsoft says these changes bring new categories to the home page and are part of the Microsoft Store app version 22409 and higher, rolling out to Windows Insiders in the Canary and Dev Channels.
The new homepage in the Microsoft Store features app categories below the featured applications and games. Clicking on any of the categories will take you to a page where you can browse a variety of apps for that category. The same line of categories is also available in sections like apps and games.
In addition to the new categories, the Microsoft Store app is also getting a slightly updated look for the pages of individual applications and games. The updated design has a larger header and more rounded corners.
The Microsoft Store app will update itself automatically, so you should see these changes in a few days, but you can also update it manually to speed up the process.
App Categories: The apps page on the Microsoft Store will now show a new categories experience just under the featured section. Clicking on any of the options will lead you to a page where you can browse a variety of apps for that category. We hope you find this new experience helpful as you browse the store to find your next favorite app.
What do you think of the homepage and categories of the Microsoft Store app? Is the new design more accessible to navigate? Let us know in the comments section below.
After more than a month of inactivity, prompting many to believe the Canary Channel was being deprecated, Microsoft finally released Windows 11 Insider Preview Build 27718 to the Canary Channel. It comes with some pretty exciting changes.
First things first, though: starting with Build 27695, the expiration date for Insider Preview builds flighted to the Canary Channel has been updated to September 15, 2025. To avoid any issues, it’s recommended that Insiders in the Canary Channel make sure they’re on the latest build of Windows 11.
Three new features are rolling out to the Windows 11 Insider Preview Build 27718 in the Canary Channel. First, the Windows sharing experience is getting a minor redesign that should make sharing content with friends and family easier. Microsoft is changing the Lock screen to show the media controls at the lower center when media is being played.
The update also brings the ability to drag apps from the Pinned section of the Start menu and pin them to the taskbar, first letter navigation in the toolbar, an improved Windows Share window, performance improvements for Narrator scan mode, and more.
The Windows 11 Share experience has been simplified for sending content to friends and family. There’s now a search box in the Windows Share window, and Microsoft has made some visual tweaks to the share sheet to make it easier to find the app you want to use to share content.
They will also have a more direct sign-out option and a list of signed-in users under “…” in the new account manager on the Start menu – Microsoft introduced this feature recently in another Insider Channel.
There are also a slew of fixes for things like sporadic explorer.exe crashes, a bug check with the error message “SYSTEM_SERVICE_EXCEPTION,” the emoji panel closing when trying to switch to the kaomoji and symbols sections.
Users may also be unable to access purchased content in the Movies & TV app on the recent Canary Channel builds, but Microsoft is currently working on a fix.
Windows 11 Insider Preview Build 27718 is now available for download through Windows Update, and Microsoft has also released ISO images for this build—they can be downloaded here.
For the time being, we are not planning to release SDKs for 27xxx series builds.
If you’re on the HP devices bandwagon especially printers, then you can appreciate the role of the HP Smart App and how it is an essential download on your Windows 11 device that streamlines all things printer management.
Most users download it on their mobile phones but it is just as good on your PC. Apart from keeping check on your HP instant ink levels, you can also update your printer drivers, manage several printers, scan, cancel printing mid-printing to save on paper and print from your mobile phone.
Apart from the advanced features, it also enhances your productivity by improving efficiency and gives you remote access.
How do I download HP Smart for Windows 11?
1. Download from the Microsoft Store
Launch your Microsoft Store and search for HP Smart.
Click Get to download and install the app.
Launch the app once the installation is complete.
Click on Set up a new printer from the app’s home screen.
The app will guide you through connecting your HP printer to your PC. This includes selecting your printer from a list of detected devices and following the steps to download and install the necessary drivers.
Unfortunately, the Microsoft Store does not download apps at times and you’ll find yourself in a cycle of restarting your PC. If this is the case, try the next method.
If you’re also using HP accessories like docking stations, you may need additional drivers. For example, you can follow this HP USB-C Dock 5G drivers guide to download and install the correct package for your dock.
HP Smart app won’t install– This is probably a storage issue so try Disk Cleanup and clear some disk space then try again. It’s also possible your security software is blocking the installation so disable it temporarily and whitelist the app.
App won’t launch – This is probably a compatibility issue so ensure your OS is up-to-date and retry.
Once you’ve downloaded and installed the HP Smart app on your Windows 11, you may experience some performance issues. The HP Smart app may stop working. If so, check out our article on how to resolve this issue.
Have you used the HP Smart app before? What was your experience and does it make your work easier? Let us know in the comment section below.
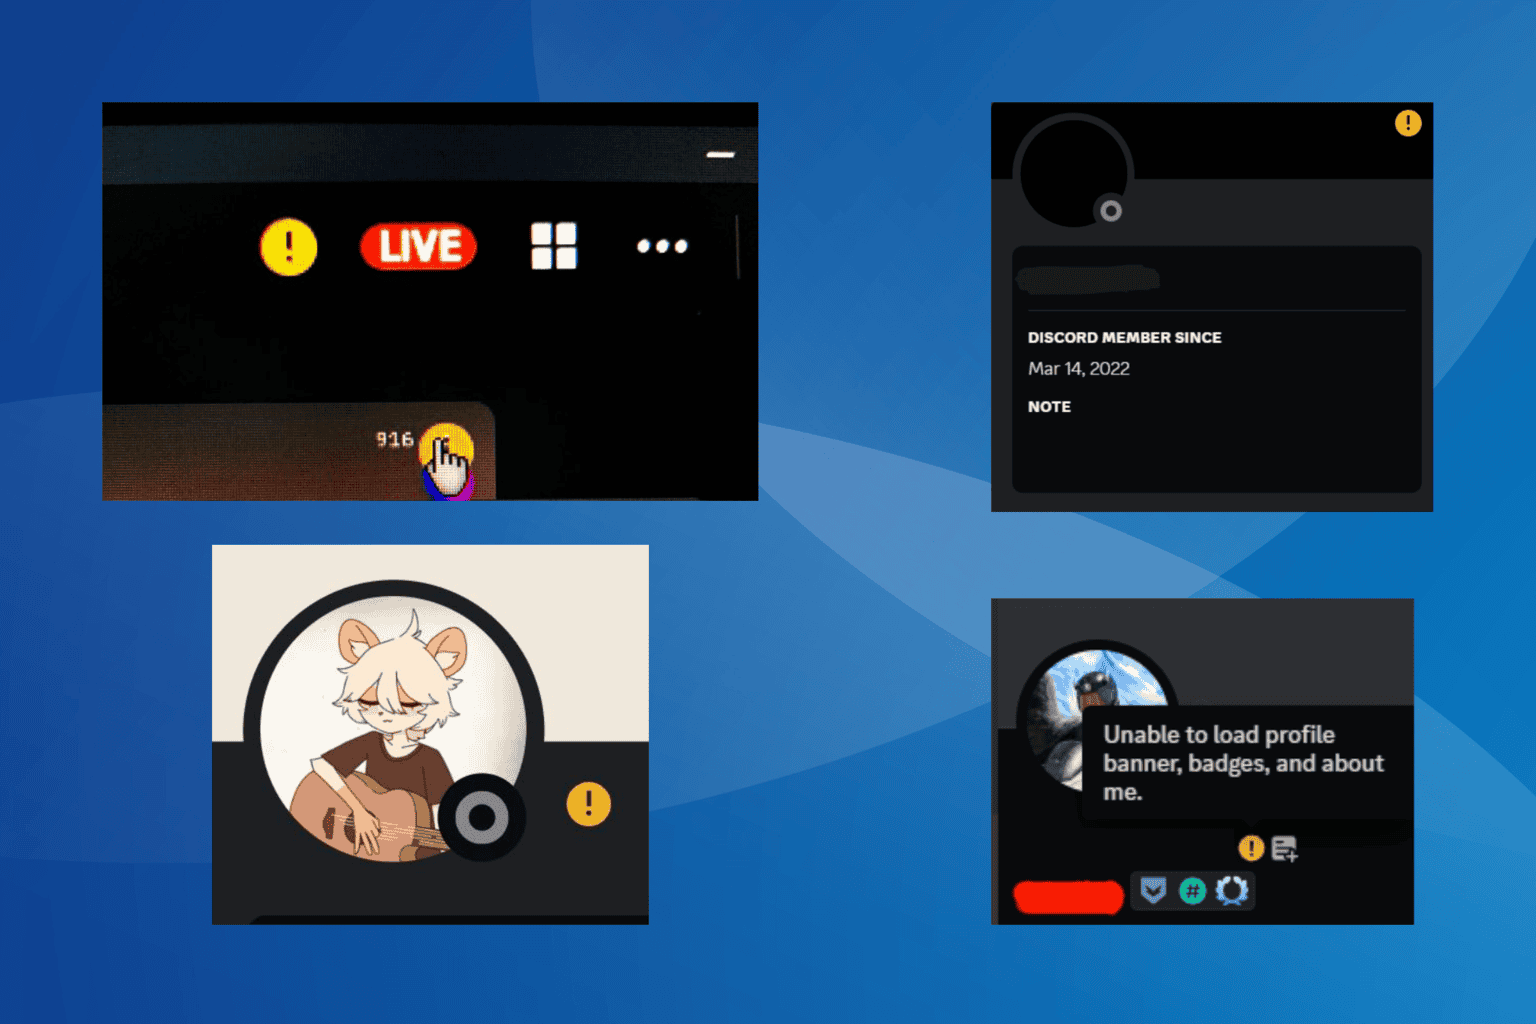
A yellow exclamation mark in Discord could mean different things, depending on where it’s seen. For instance, an exclamation mark on one’s profile is entirely different from that during streaming.
Due to this reason, there’s a lot of confusion around the true meaning of the exclamation mark and what it signifies in each situation. So, let’s find out!
What does the yellow exclamation mark mean on Discord?
1. Discord yellow exclamation mark on profile
1.1 You are not friends with the user and don’t share any common servers
The common reason you see a yellow exclamation mark next to Discord name of another user is because the two of you aren’t friends, don’t have mutual friends, and are not part of any common servers.
As a result, you can’t see their achievements, badges, or trophies. When you hover over the exclamation mark, it reads, Unable to load profile banner, badges, and about me in Discord.
Yellow exclamation mark on profile
To get rid of the yellow exclamation mark in this case, simply send the user a friend request and wait for them to accept it.
1.2 The user is banned by Discord
According to reports, several users who had their account mass reported were found to have a yellow exclamation mark next to the profile icon, indicating that Discord took action and banned their account.
Also, there’s the possibility that the user has blocked you.
To find out if someone has blocked you on Discord, go to their message history with you > right-click on any message > add a reaction. If the reaction disappears instantly, you are most likely blocked.
1.3 Network issues
Sometimes, the problem is as simple as slow Internet speed or no Internet at all on your end. When this happens, the profile, badges, and any other details will fail to load.
1.4 Discord servers are down
A yellow exclamation mark may also appear during server downtimes. To verify this, check Discord’s server status via the official website or use a real-time monitoring service like Downdetector.
2. Discord yellow exclamation mark in streaming
When you see a yellow exclamation mark while streaming, it points to issues with frame rate encoding, as mentioned in the message hidden within the sign.
To get rid of this yellow exclamation mark, launch Disocrd > open the Settings > select Advanced under App Settings from the left pane > disable the toggle for Hardware Acceleration.
Disable hardware acceleration in Discord
Also, if the Discord stream is pixelated and repeatedly freezes, consider disabling any active overlays, especially in the GeForce Experience, or use a top-rated VPN solution.
3. Yellow exclamation mark on Discord server
For Discord servers, a yellow exclamation mark means that the details were not properly loaded either due to an overload of requests or network issues at your end. The best option is to check your Internet connection and try again in a while.
In case that doesn’t work, verify whether others too are facing similar issues from the server owner. If not, leave and rejoin the server!
4. Yellow exclamation mark in Discord voice chat
A yellow exclamation mark in voice chat indicates that Discord can’t capture your audio or there are network or server-related issues. If your Internet connection works fine, check with other user. If they can hear you, you simply have to disable this warning sign.
To turn off the yellow exclamation mark in voice chat, open Settings > go to Voice and Video under App Settings > then disable the toggle for Show a warning when Discord is not detecting audio from your mic.
Disabling the warning sign in Discord’s voice chat
You should not see any more warnings in Discord’s voice chat. Although, only disable it if Discord incorrectly shows the warning.
5. Yellow exclamation mark as a guide
If you are new to Discord and keep seeing yellow exclamation marks across different sections of the app, these are basically quick guides to help you understand your way around Discord. Click on any and it will tell you all about the section/option.
To get rid of guide signs in Discord after signing up, either join a server or create one!
How can I fix the yellow exclamation mark in Discord?
Relaunch the app: Often, simply relaunching Discord gets rid of the yellow exclamation mark in no time.
Restart the device: Many were able to fix the yellow exclamation mark on Android and iPhone by restarting the device.
Connect to another network: If it’s a connection-related issue, switching to another network (preferably a wired one) will help.
Re-login to your account: Log out of Discord > terminate the app from Task Manager > relaunch it > then sign back in.
Contact Discord support: When nothing else works, the last option is to contact Discord support. Based on where the exclamation mark appears, they should share a relevant solution with you.
You now know all possible meanings and implications of a yellow exclamation mark in Discord as well as ways to fix it!
Remember, the mark usually indicates a problem. So, your primary approach should be to identify and eliminate the underlying cause instead of trying to get rid of it.
XLS is probably one of the most popular table formats on PCs, but many tend to use CSV. Luckily, you can easily convert Excel files to CSV, and in today’s guide, we’ll show you the best ways to do that.
How do I convert Excel files to CSV?
1. Use Save as an option in Excel
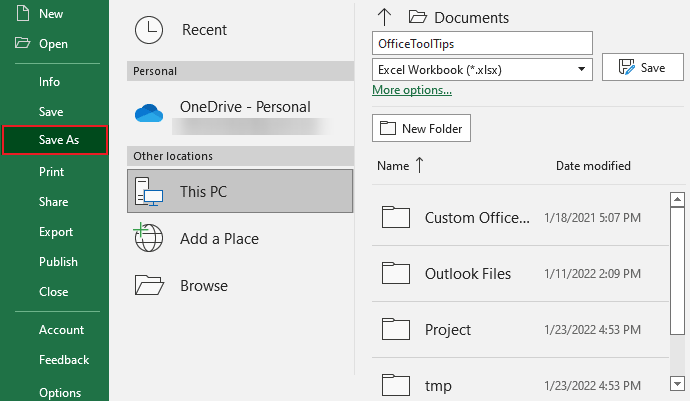
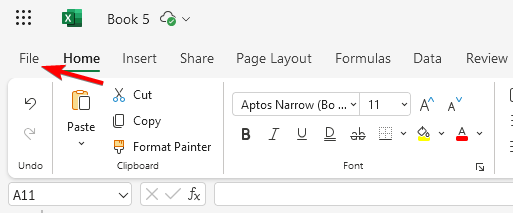
In Excel, go to File and choose Save as.
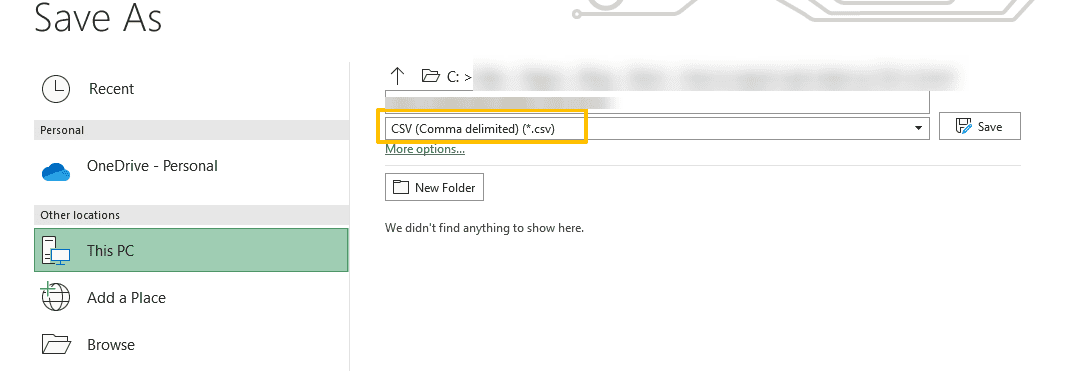
Next in the list of available formats, select CSV.
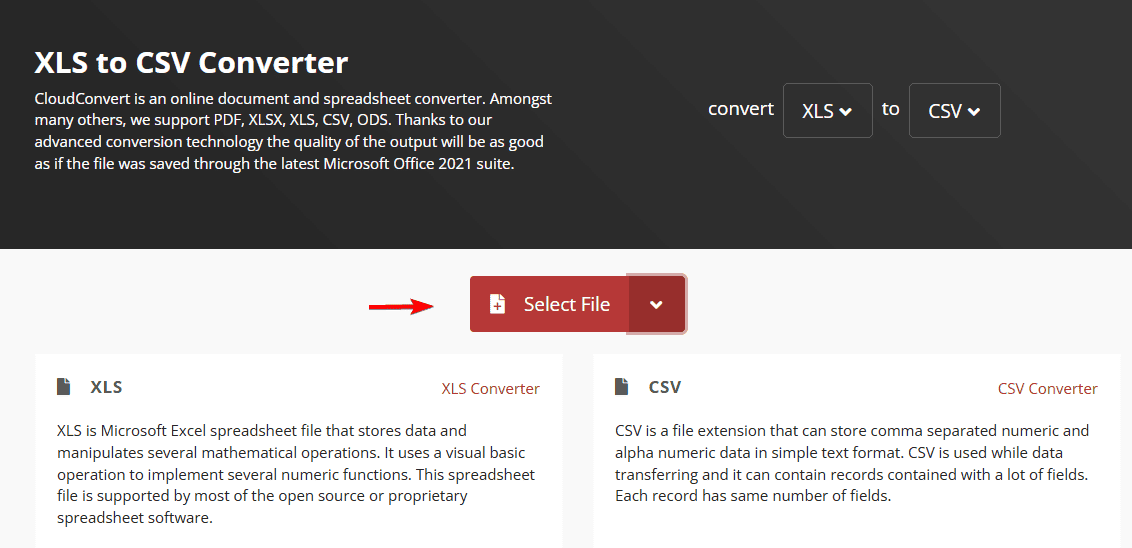
Once it’s uploaded, it will be converted automatically.
Download your CSV file.
Keep in mind that there are many services like this available, and since they will store your files, it might be best to avoid using online converters for any sensitive files.
You can also convert Excel to JPG and we have a great guide that shows you how to do that, so don’t miss it. Before leaving, don’t miss our latest guide on how to open XLSX files for more information.
The best Rufus alternative should easily create bootable USB drives or flash OS images. Rufus is a popular tool for such tasks. Still, it may not always meet your needs, especially if you require additional features like cross-platform compatibility or a more user-friendly interface.
Fortunately, there are several alternatives. After testing more than 25 tools, I’ve narrowed it down to the top five options. Eager to know which ones made it to my list?
BalenaEtcher is a popular Rufus alternative that offers a simple way to create bootable USB drives. One of its most unique features is its cross-platform support. Unlike Rufus, which only supports Windows, it also runs on macOS and Linux.
Additionally, Etcher simplifies the process, allowing users to flash OS images with just a few clicks. All you need to do is to select Flash from file/URL> select Target > Flash.
This tool also allows you to flash up to 16 drives simultaneously. It’s important for big projects like installing operating systems on many devices or cloning drives to save time and effort.
You can use it for free and access all its features on the first 10 devices. However, you’ll have to pay if you connect more. The subscription options are $159 per month (Prototype), $329 per month (Pilot), $1,439 per month (Production), and custom (Enterprise).
Pros:
It’s very easy to use with a sleek, beginner-friendly interface.
Cross-platform (Windows, macOS, and Linux).
Protects against overwriting internal drives.
Fast and reliable for creating bootable USB drives.
Cons:
You’ll need a subscription to connect to more than 10 devices.
UNetbootin provides an easy way to create bootable USB drives without needing CDs. You can install various Linux distributions and system utilities effortlessly.
It works on Windows, macOS, and Linux. Its user-friendly interface is designed for those who may not be highly technical, while its open-source nature ensures regular updates and improvements.
Another key feature is downloading and installing Linux distributions directly. Users can choose from various Linux versions right from the app.
Pros:
It’s free to use.
Cross-platform support (Windows, macOS, and Linux).
You can download and install Linux distributions directly from the tool.
Easy-to-use interface.
Open-source with regular updates and improvements.
USBImager is a lightweight and simple alternative to Rufus. It’s focused on creating bootable USB drives quickly. Its minimalistic design makes it easy for users to write image files to USB drives without any unnecessary features.
Unlike some other options, USBImager is known for being lightweight and requiring minimal system resources, making it perfect for older or less powerful machines.
Moreover, it’s cross-platform, working on Windows, macOS, and Linux, and it’s open-source. However, it doesn’t offer as many advanced features as some alternatives.
Pros:
It’s lightweight and requires minimal system resources.
Verifies data after writing the image, reducing the risk of corruption.
Cross-platform (Windows, macOS, and Linux).
Easy to use with a clean and minimalistic interface.
Win32 Disk Imager is another powerful Rufus alternative designed specifically for Windows. It can write raw disk image files (.img) to a removable storage device like a USB drive or SD card. It’s frequently used to create backups and clone USB drives, making it a reliable tool for data protection and OS deployment.
One standout feature is its ability to read data from devices. This allows you to create exact replicas of your bootable USB drives or SD cards. It’s useful for backing up disk images that you may want to restore later. Additionally, it supports various formats, including ISO, IMG, and ZIP files.
Another notable feature is its minimalistic UI, making it easy to use. Its lightweight design also ensures it won’t take too much system memory or processing power.
Pros:
Free and open-source.
It’s ideal for creating exact backups of USB drives or SD cards.
Intuitive interface.
Reliable for writing raw disk images to removable storage devices.
Universal USB Installer is a free bootable USB creator that supports Linux and Windows. It’s easy to set up, making it simple to select your preferred Linux distribution, choose the ISO file, and create a bootable USB drive. This simplicity makes Universal USB Installer an excellent Rufus alternative for those new to creating bootable media.
It also includes a built-in USB formatting feature that lets you clear the storage on your drive after installation.
Pros:
It’s free.
It has a simple and user-friendly interface.
Supports various Linux distributions, Windows, and system utilities.
Offers persistent storage for some Linux distributions.
I considered several key features to cover a wide range of needs. Below are the main factors I focused on:
Cross-platform compatibility to ensure they work on Windows, macOS, and Linux.
Ease of use.
Multi-boot support allows multiple operating systems to be on a single USB.
Speed and reliability for quick and error-free bootable drive creation.
Additional features such as USB formatting or data verification options.
Choosing the best Rufus alternative depends on your needs and the features you’re looking for. I included various options, whether you prioritize cross-platform compatibility, simplicity, or additional functionalities like multi-boot or persistent storage. Each tool has its strengths, so you’ll find the perfect match for creating bootable drives.
The CE-33743-0 error means your PlayStation console failed to connect to the internet or to PSN. It’s usually caused by unstable Wi-Fi, DNS issues, or incorrect network settings. This error may occur when running a connection test or trying to sign into your PSN account.
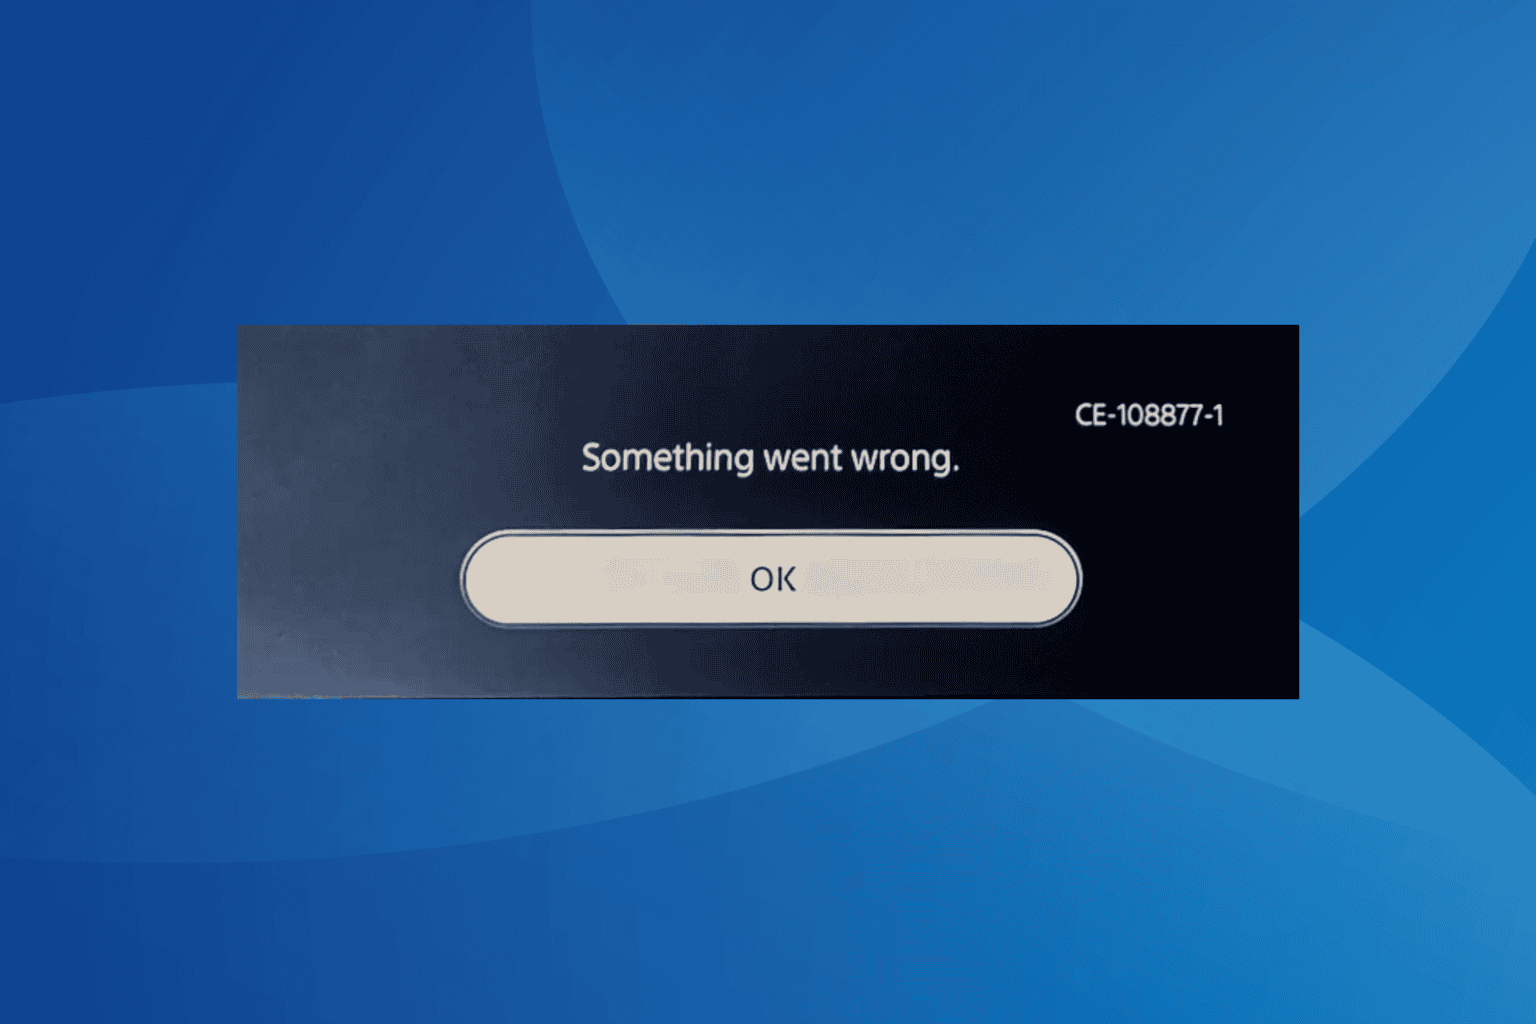
How can I fix error code CE-108877-1 on PlayStation?
Since we know that error CE-108877-1 on PS4 is most commonly a server-related issue, your primary approach should be to check the PlayStation Network’s service status.
PlayStation Network’s status captured during the last outage
If all the services are down or some are experiencing issues, it’s best to wait until Sony gets the server back up and running.
Also, if the official website doesn’t yet reflect the outage, use a real-time monitoring service like Downdetector, which quickly highlights such issues based on user reports.
2. Connect to another network
For many users facing PS5 error code CE-108877-1, connecting to another network did the trick. While you could switch to another wireless network, Ethernet is the preferred option for gaming. Also, mobile hotspots often help fix such issues.
If all this is not an option, consider resetting the network device, be it the modem or router, and check for improvements!
3. Change the DNS
On your PS4 console, open the Settings, and then go to Network.
Select the Set Up Internet Connection option.
Choose the Use Wi-Fi option.
Select the Custom option.
Pick your connected network from the list.
Now, for IP Address, select Automatic, and for DHCP Host Name, choose Do Not Specify.
For DNS Settings, select Manual.
Enter the following details in the available fields:
Primary DNS: 8.8.8.8
Secondary DNS: 8.8.4.4
Without changing the other settings, save the changes, then reboot the console and verify whether error CE-108877-1 is fixed.
If it’s not a widespread outage and reconfiguring the network settings doesn’t help, you should contact PlayStation support. Apprise them of the situation, provide as much information as possible, and then wait for a resolution.
In case it’s an issue at their end, they should soon fix it. As for problems with your console, they should share a series of relevant solutions.
5. Reset the PS console
On your PS5 console, go to Settings, and then select System.
In the System Software tab, choose Reset Options.
Now, select the Reset Your Console option.
Again, choose Reset in the confirmation prompt.
Once done, re-login to your PlayStation account and check for improvements.
Resetting the console should always be employed as the last measure for Sony PlayStation error CE-108877-1 because it will wipe out all the data on your console and, unlike other changes, is irreversible.
FAQs
What causes PSN error code CE-33743-0?
It’s usually caused by network issues, such as unstable Wi-Fi, bad DNS, strict NAT, or an offline router.
Is CE-33743-0 a PlayStation Network problem?
Not directly. The error usually means your console can’t reach PSN, but PSN itself may still be online.
How do I fix PSN error CE-33743-0 without changing my DNS?
Try using a wired connection, restarting your router, or resetting your PS5/PS4 network settings.
Can CE-33743-0 be fixed permanently?
Yes. Once your network settings are stable and correctly configured, the error should not return.
Wrapping up
Remember, in most cases, as has been seen in the past, error code CE-108877-1 on PlayStation resolves on its own within a few hours, or at the maximum, a day. So, I recommend you don’t take any drastic measures until then and let Sony fix their servers!
If you want to enhance the visual appeal of your Word document, you can use one of the border templates or create your own. Organization and presentation when sharing a document is paramount as it can add more emphasis to its intended purpose.
With page borders on Word, you can customize based on:
Styles – There’s a variety of styles from dotted lines, continuous solid lines and double to triple solid lines.
Colors – You can select the page border colors or customize to your liking.
Width – If the default width, usually 1/2pt, you can increase or decrease based on your preference.
How do I add page borders on Microsoft Word?
1. Page borders
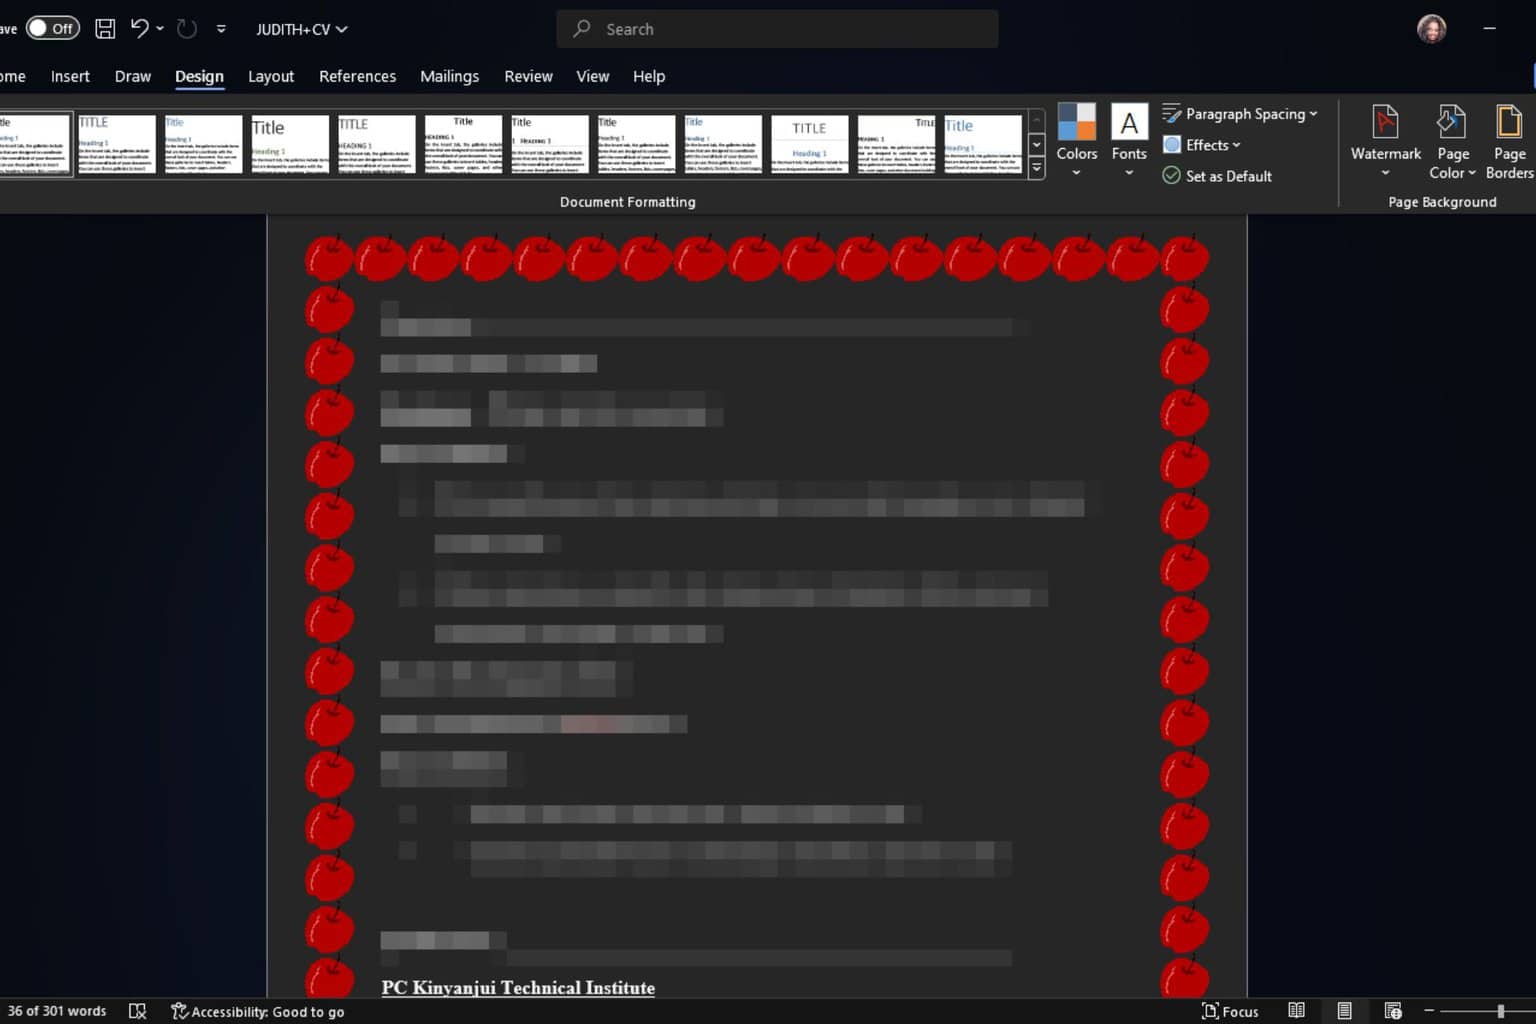
Open a word document you wish add page borders to, navigate to the top menu and select Design >Page borders.
A page border will open where you can tweak the style and other settings like color and whether to apply the borders to all pages. Further, you can choose to add art to the page borders and make it pop out even more.
Once you’re satisfied with the outcome, click on OK and Apply buttons.
This applies to the entire document and any page border will reflect on the entire document. However, if you only want borders on select sections of your document, you can go for paragraph borders as seen below.
2. Paragraph borders
Open a word document you wish add page borders to, navigate to the top menu and select Design >Page borders.
On your document, select the paragraph you wish to add page borders to, navigate to the Borders section at the top then select your choice.
You can adjust the color of the border, width then select paragraph and hit OK once done to apply changes.
If you’d like to reuse your customized page borders, open a blank word document, apply the borders then Save as and select Word template.
Now, whenever you need to use the same page border for other documents, you don’t have to recreate it especially if you had used custom colors.
While you can customize the page borders on Microsoft Word, you may feel the options are limited. if so, you can download online page borders. There are a lot of online sites with free page border templates.
Once you’ve selected your page border, you can also customize it on Word. Make sure to preview it before applying it. Also try with different colors, widths and styles to decide which one best matchet your document.
And Microsoft Word is not the only word processor that allows you to upgrade your documents. You can also add page borders on Google Docs.
So the next time you’re trying to create a Christmas card, aside from the delectable fonts, you can put more thought into it with these page borders if you don’t like the Christmas templates.
Away from creating cheer, on your Windows 11 system, you can also adjust your borders to accommodate round corners, a dark theme or even new colors.
Have you tried adding any page borders on Word? Do you like full page borders or just select sections? Let us know in the comment section below.
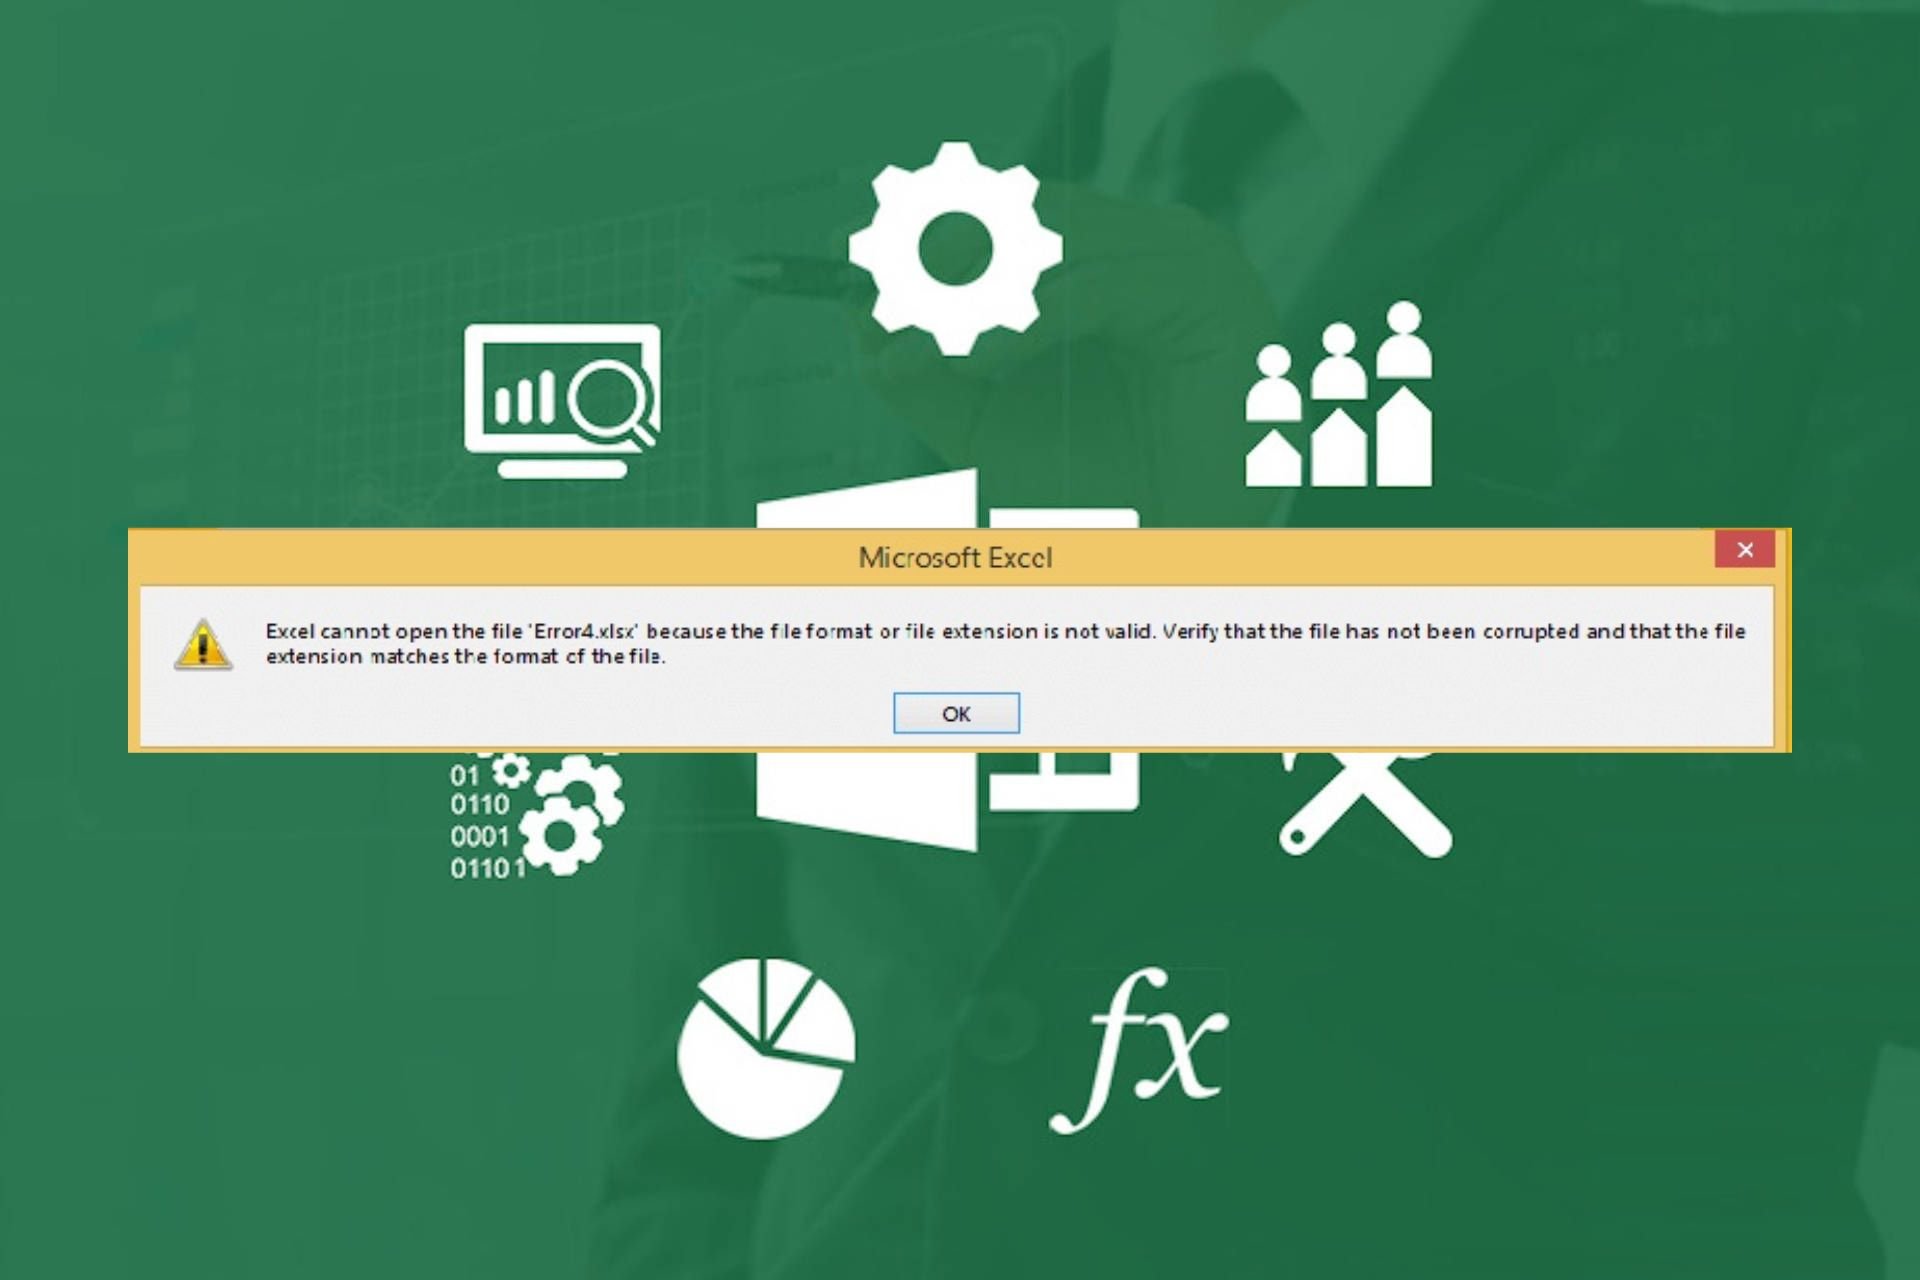
If you’ve tried to open an Excel file and been met with the dreaded extension not valid error, you probably have a corrupt workbook in your hands.
It is common to get the common Excel xls and xlsx formats where the latter is supported on most OSes and devices. In such cases there’s a mismatch in file formats which causes the file not to open.
It is also possible that the file extension is not valid because it is not compatible with your version of Excel or OS.
How do I solve Excel file extension is not valid?
1. Change the extension format
Press the Win + E keys to open the File Explorer.
Duplicate the file in case of any errors.
Right-click on the target file and select Rename. You can alternatively, click on the file and press F2 to rename it.
Change the file extension from XLSX to XLS or vice versa and hit Enter.
Select Yes in the warning prompt that appears, and the file format will be changed.
If changing to the XLSX format doesn’t open the file, you can also play around with other supported Excel file formats and see whether this gets rid of the file extension is not valid error.
2. Open with Notepad
Right-click the Excel file you want to open and select the Open with option.
Select the Notepad option.
Opening the file in another program can help you isolate the issue whether it is a file error or problem with the Excel program. And since Notepad may not display the contents of the Excel file as it should, you can try alternative spreadsheet software that support a wide range of formats.
3. Repair the workbook
Launch MS Excel and open a blank workbook.
Click on File.
Select Open and click on Browse.
Locate the problematic file, select it, and click on the drop-down icon next to Open.
Select Open and Repair.
This built-in repair method is designed to identify basic issues with your workbook so if it doesn’t resolve the error, try some Excel repair tools with advanced options and see if this works out.
Click the Search button from the taskbar, type excel, then right-click on it and select Open file location.
Press and hold the Ctrl key and double-click the Excel executable file.
Click Yes when you’re prompted if you want to open Excel in safe mode.
Starting Excel without the add-ins or any customizations can help pin-point the issue of why the file extension is not valid error occurs. If the file launches, you’ll have to disable add-ins one by one or restore Excel to default settings.
5. Repair the Excel app
Click on the Start menu icon and select Settings.
Type Control Panel in the search bar and click Open.
Go to Programs and select Uninstall a Program.
Now, click Microsoft Office and select Change.
Finally, click Online Repair, then select Repair.
Alternatively, you can click on Windows Settings, select Apps, then click on Apps & features.
Locate Microsoft Excel/Office, click on the three ellipses, and select Advanced options.
Next, click on Repair.
Once the repair process is complete, restart your computer and check whether the issue still occurs.
Finally, to prevent a repeat of such issues, ensure your Excel app is always up-to-date and create a back up of your files. Also, ensure whenever you’re saving your files, they’re in the supported formats preferably with wide compatibility.
That’s a wrap from us but do let us know if you’ve encountered this error before, what solutions did you use? Is there any other we’ve not mentioned that you think could be of help to other users? Drop us a line below.
Microsoft has released a new update for Edge, version 131.0.2863.0, to the Dev Channel. This comes after the Channel received an update, version 130.0.2862.0, on September 30.
The update also includes a fix for an issue that could cause the browser to crash when opening an InPrivate tab from the browser’s contextual menu or widget on iOS.
The update brings a few new features and settings to the browser and bug fixes. One of the new features is the ability to restart the browser from the Prism Collections page in the browser’s Settings, and Microsoft has also added a new “…” menu to the tab center.
While the latest update does include a few new features, Microsoft is still working on a number of other features that it detailed last month.
This update is available to Windows 11, Windows 10, and macOS users and will be installed automatically when you close and reopen the browser. You can check for the update by heading to Settings -> About Microsoft Edge.
The update is also available to iOS and Android users. The iOS update brings the Edge to version 131.0, and the Android update brings the app to version 131.0.2866.0.
Now that Windows 11 24H2 is out in the world and can be downloaded before you do so, please remember that Microsoft is no longer supporting Windows Mixed Reality on this version.
The Redmond-based tech giant has announced that its Windows Mixed Reality VR platform will be deprecated.
This means that the feature is no longer in active development. The announcement was made via this blog post last year, which also mentions that Windows Mixed Reality would be removed in a future version of Windows, which turned out to be the 24H2 version.
The announcement surprised many who have been following the VR space over the last few years.
Microsoft’s Hololens and Hololens 2 headsets never gained much traction against Steam and Meta’s offerings. The Redmond-based tech giant is discontinuing Hololens 2. Nor did other headsets designed for the platform, like the HP Reverb G2.
Windows Mixed Reality is deprecated, and the deprecation includes the Mixed Reality Portal app, and Windows Mixed Reality for SteamVR and Steam VR Beta.
Even though it has been out in the world for a while, the deprecation has still surprised Windows users, with many hurrying to warn others before installing Windows 11 24H2.
Ever since Microsoft introduced the new Teams app in Mar’23, highlighting all the changes and upgrades, comparisons have been drawn between Microsoft Teams Classic and the new Teams. This becomes all the more important as Microsoft plans to discontinue Classic Teams by July 1, 2025, and replace it with the new Teams app altogether!
In the last few months, a significant user base that upgraded to the new Microsoft Teams has reported a 2-3x improvement in performance and resource consumption. However, the upgraded user interface and discontinuation of certain features remain key criticisms of the new Teams app.
If you haven’t yet switched, read this analysis of Microsoft Teams Classic vs New Teams, and discover all the much-talked-about improvements!
What is the difference between Microsoft Teams Classic and New Teams?
Aspect
Microsoft Teams Classic
New Microsoft Teams
Web Client
Custom HTML/CSS, AngularJS
Fluent, React, Client Data Layer
Host
Electron
WebView2
Performance and installation
No major improvement in recent updates
2-3x faster
Wiki app
Available
Replaced with the Notes app
Activity tab in Chat
Available
Not available
Adaptive card-based tabs
Available
Not available
Search box commands
Available
Following have been discontinued: /activity, /files, /goto, /help, /join, /keys, /mentions, /org, /saved, /testcall, /unread, /whatsnew, /who, /pop
Adding a third-party cloud storage
Can be added from the Files app and Files tab in channels
Can be added from the Teams App Store
App support
End of Support: July 1, 2024 End of Availability: July 1, 2025
No data available
Microsoft Teams Classic vs new Teams
Improvements in the new Microsoft Teams
1. AI integration
Microsoft’s AI push now brings Copilot to Teams. This allows users to better track the minutes of the meeting, not miss out on the key details, and customize their messages by adjusting the tone and language. These are just a few of the changes!
Copilot in Teams improves the overall app usage experience and simplifies the workflow, allowing users to save crucial time and effort.
2. Significantly better performance
The new Teams app delivers unmatched performance without straining the resources. According to Microsoft,
News Teams installation is up to 3x faster
New Teams launches up to 2x faster
You can join meetings up to 2x faster
You can switch chats/channels up to 1.7x faster
As per user reports, these aren’t just claims, but the improvements can be witnessed in real-time.
Microsoft focused on streamlining frequent interactions, say switching between chats and channels, and subsequently, this was prioritized. So, if you open the new Microsoft Teams app, actions like these feel much quicker and smoother.
Besides, with reduced loading and installation time, deployment of Microsoft Teams across larger organizations won’t be as time-consuming!
3. Lower storage requirements
For users with relatively older PCs, storage remains a key factor before installing a new program. And Microsoft has addressed that perfectly in the new Teams app, helping users save storage space.
According to Microsoft, this has been achieved through optimization and integration of Edge WebView2 runtime. This also helped ensure seamless updates.
4. Consumes fewer resources
Lower memory consumption is undoubtedly on of the biggest factors for anyone comparing Microsoft Teams Old (Classic) vs. New Teams. According to Microsoft,
New Teams app consumes up to 50% less memory
New Teams app consumes up to 70% less disk space
Monitoring resource consumption by Micorosft Teams
This reduced memory and disk consumption, achieved through support for MSIX, allows other applications to run unhindered and improves the overall speed of the PC. Besides, Microsoft tells us that the new Teams app leverages Windows and webview2 APIs to regularly free up unused memory.
Network usage is also significantly lower in the new Teams app compared to Microsoft Teams Classic.
5. Improved security
Microsoft has rolled out several changes to boost the security infrastructure in the new Teams app. Here are the highlights:
Adoption of Trusted Types and implementation of Content Security Policy.
Support for Virtual Desktop Infrastructure and Government Cloud.
With support for MSIX installation, the new Teams app is now installed in the WindowsApps folder instead of the user’s profile, boosting security and preventing unauthorized access from non-admin users.
Improved update roll out and installation.
All of this makes the new Teams app more secure than Microsoft Classic Teams.
6. Collaboration and multi-tasking made easy
The new Teams app provides a major boost to collaboration and multi-tasking. Amongst the notable changes, it allows you to be simultaneously signed in to multiple accounts across different organizations and receive real-time notification for all, irrespective of the one currently active.
Adding another account in the new Microsoft Teams
Next, the new Teams app has improved large meeting experiences, typically with more than 1000 participants. Here, you will notice reduced app-response time, minimal noise, and fewer UI renders and IPC events.
Alongside the periodic updates, Microsoft rolled out a series of features in the new Teams app aimed at improving multitasking.
7. Integration with Windows 11
The new Teams app offers support for Windows 11’s High Contrast theme. Besides, with the Windows integration in place, the new Microsoft Teams app follows the notification settings set in the OS.
So, if you have Do Not Disturb enabled on the system level, there’s no need to configure the same in Teams!
How is Microsoft Teams Classic better than new Teams?
While Microsoft boasts of improved performance and security, several users are finding the new Teams app laggy and riddled with bugs. Also, there are reports of screen flickering during meetings. However, most of these problems can be fixed by clearing the cache in Microsoft Teams.
Others have expressed anguish over the fact that certain useful features have been discontinued in the new Teams app. For instance, you can’t access contacts from the Chat tab anymore, and the Activity tab has been removed.
While there were expected to be some issues during the transition from Microsoft Teams Classic to new Teams, the list keeps growing. And that’s something the Redmond-based tech giant must address on priority.
Although even if it doesn’t, users on supported devices will, anyway, be upgraded to the new Teams app after March 31, 2024!
How can I upgrade to the new Microsoft Teams?
If you haven’t yet upgraded to the new Teams app, look for any upgrade-related prompts that show up on launching Microsoft Teams and follow the on-screen instructions. Or simply wait for a few days and you will be automatically upgraded to the new Teams.
In this comparison of Microsoft Teams Classic vs. the new Teams app, the latter emerges as a clear winner when considering performance, resource consumption, and security. And given the rise in cyber and malware attacks, upgrading to the new Teams app is a wise decision!
As for the performance-related issues faced by a few, these sometimes arise due to problems with the local PC and can be fixed in no time, especially by clearing the cache and freeing up resources.
Which do you think is better, Microsoft Teams Classic or the new Teams version? Share with our readers in the comments section.
Many readers want to remove the Firefox List all tabs button. Whether if you’re not using it or just don’t want it there, you will see that it’s easy to remove the List all tabs button from Firefox.
How do I remove the List all tabs button from Firefox?
1. Turn it off from the about:config page
Open Firefox, type or paste about:config in the address bar and press Enter.
Click the Accept the Risk and Continue button if it shows up.
Now, click the Show All button.
Scroll down or search for browser.tabs.tabmanager.enabled and click the toggle button to its right side to change its value from true to false.
Restart the browser to acknowledge the change.
If this solution doesn’t work anymore, that means your Firefox is updated to version 108 or up. If so, apply the solution below.
2. Exclude the List all tabs button using the userChrome.css file
Click the Menu button in Firefox, and go to Help.
Select More troubleshooting information in the Help menu.
Scroll down to find the Profile Folder and hit the Open Folder button.
Here, create a new folder named chrome and inside, create a new text file called userChrome.css.
The file is case sensitive so follow this exact name. Also make sure the file is not saved as txt.
Open the file with Notepad and enter the following content: #alltabs-button { display: none !important; }
Save the file and in Firefox, type about:config and press Enter.
In the config list, look for the toolkit.legacyUserProfileCustomizations.stylesheets setting and toggle it to true.
Restart Firefox and the List all tabs button should have disappeared.
Since Firefox 108, the first solution doesn’t work anymore. However, creating the userChrome.css file still works to disable the button. However, if you don’t enable toolkit.legacyUserProfileCustomizations.stylesheets in about:config, Firefox will ignore the chrome css stylesheet.
No one really understands why Firefox is trying to block users from customizing their browser. As you can see, removing the List all tabs button is quite time consuming, but we managed to make it vanish using the second solution.
Firefox is a popular browser with many hidden feature, and one of them is the List all tabs icon in Firefox. Not many use this feature, so in today’s guide, we’ll show you how to use it properly.
How do I list all tabs in Firefox?
1. Use the list all tabs icon
Click the List all tabs icon in Firefox.
You will now see all the tabs that are currently open.
Click the desired tab to switch to it or click the X button to close a tab.
You can also click the search option to search for open tabs or close all duplicated tabs.
For quick access you can also use Firefox list all tabs shortcut: Ctrl + Shift + Tab.
You’ll now see a list of all open tabs, and you can easily search or close them.
As you can see, it’s pretty simple to list all tabs in Firefox, and this doesn’t require any additional addons since it’s a native feature of the browser.
Can I remove the List all tabs from Firefox?
Even though this is a native Firefox feature, you can still remove it if you don’t plan on using it. To see how to do it, visit our guide on how to remove the list all tabs button from Firefox.
While this feature is useful, there are various extensions that improve it by adding additional functionality such as sessions, and better tab management, such as OneTab for Firefox.
SharePoint’s OCR (Optical Character Recognition), which extracts printed or handwritten text from images and documents, will finally support the PDF format, which includes text and images.
SharePoint OCR feature now extends support to hybrid PDFs, which contain both images and text. Previously, OCR was limited to image-only PDFs, but with this update, you can seamlessly extract and utilize text from hybrid documents.
Is your Windows 11 administrator account locked out? Try these proven fixes for a quick resolution.
This can happen for various reasons, such as:
Too many failed login attempts
Account Lockout Policy settings
Domain Policy settings
Too many failed remote access attempts
A corrupted user profile.
You’ll need trusted solutions that don’t waste your time or put your files at risk. To address this, I’ve tested different approaches to recover an admin account in Windows 11. Here are the methods that worked for me.
How To Fix Windows 11 Administrator Account Locked Out
Follow the steps in the order they appear in:
Use Microsoft Account to Reset Password
This method has a higher success rate than others. However, the only downside is you must be connected to the internet and should know the work or personal Microsoft Account credentials before attempting. Keep your account information handy and try these steps:
Go to the Windows 11 Sign-In screen.
Select the admin account you want to sign in with from the lower left corner.
You’ll see a warning screen explaining to you the risks involved in the process.
Click Continue and follow the on-screen instructions to unlock your admin account.
If you don’t wish to continue after the 8th step with resetting your PIN and syncing your Microsoft Account from scratch, there’s a workaround you can try.
Closethe Are you sure? dialog box.
Windows 11 should show your user account’s avatar or initials briefly and automatically take you to the Desktop, bypassing the sign-in screen.
The above approach will only work if the underlying user account files in the Windows 11 PC aren’t corrupted.
Use Another Administrator Account
If another admin user can access the same PC, use that to log in.
Click the Start menu button and type Computer.
Select the Computer Management tool below the Best match section on the Start menu.
On the Computer Management interface, select the Local Users and Groups menu in the left-side navigation panel.
Double-click the Users menu on the right.
You should now see all the user accounts.
Select the one that’s locked out.
If you can’t log in due to a password issue, right-click and select Set Password.
On the warning message that pops open, click Proceed and follow on-screen instructions.
If the PIN isn’t the issue, right-click on the selected user account and choose Properties from the context menu.
Go to the General tab and uncheck the following boxes:
Account is disabled
Account is locked out
Click Apply and OK.
Restart the PC to log in using your own admin account.
Use a Password Reset Disk
If you’ve got a password reset disk, here’s how you can put it to use when the Windows 11 administrator account is locked out:
On the Windows 11 log-on screen, enter an incorrect PIN.
When you see the Use a password reset disk instead prompt, click on that link.
Insert the USB stick or CD/DVD disk you’ve got.
Follow the onscreen prompts on the Password Reset Wizard to create a new PIN or password.
Select the View by drop-down menu on the Control Panel interface and select Small icons.
Now, select the User Accounts link from the list of Control Panel resources.
Click on the Create a password reset disk on User Accounts.
The disk will be created for the currently logged-in account. To make a password reset disk for a different one, switch users on the PC.
The Forgotten Password Wizard will open. Click Next.
Windows will automatically select the USB stick or CD/DVD available on the PC, if any.
If none are there, insert any of the above alternative password reset disk media.
Click Next.
Enter the password or PIN for the logged-in user account on the next screen and hit Next.
Now, follow the on-screen guidance to complete the process.
Activate Built-in Admin Account Using CMD
You can use a standard or admin account to enable the factory-configured administrator account that usually isn’t visible to a basic user. Here’s how:
Press the Windows key and type CMD.
Click on the Command Prompt tool shown below Best match.
Copy and paste the following command inside the CMD terminal:
net user Administrator /active:yes
Hit Enter to execute the code.
If standard CMD doesn’t work, try it with admin privileges. Choose Run as administrator from the Start menu when you search for CMD.
Restart the PC. When it reaches the log-in screen, you should see a second user account as Administrator. Click on that and sign in.
Enable Hidden Administrator Account Using PowerShell
Windows PowerShell gives you more access to personalize the built-in admin account, like setting a custom password. You must first use an alternative administrator account to log in and perform these steps:
Press Windows + X on the keyboard to bring up the Power User context menu.
Click on the Terminal (Admin) option.
PowerShell will open with administrative privileges. Copy and paste the following script into the console:
# Run the script as Administrator

# Enable the built-in Administrator account
$adminAccount = "Administrator"
Enable-LocalUser -Name $adminAccount

# Optionally, set a password for the Administrator account
# You can set a strong password or skip this part if you want to keep it without a password.
$password = Read-Host -AsSecureString "Enter password for the Administrator account"
Set-LocalUser -Name $adminAccount -Password $password

# Optionally, ensure the account is not disabled
Set-LocalUser -Name $adminAccount -Enabled $true

Write-Host "Built-in Administrator account has been enabled."
You might need to click on a Paste anyway pop-up.
The script will run automatically and pause to ask you for the custom password.
Type in the one you want to set and hit Enter.
The script will continue to run and show the ‘Built-in Administrator account has been enabled.‘ message once done.
Restart the PC and sign in with the newly activated admin account.
Using the Local Security Policy Tool
The Local Security Policy interface allows Windows 11 to control account lockout duration, threshold, and the lockout counter. So, use another admin account to access the PC and make the following changes in this security tool:
Bring up the Run command by pressing the Windows + R keys together.
Type secpol.msc inside the Open field and hit Enter.
The Local Security Policy tool will open.
Double-click on the Account Policies directory in the left-side navigation panel.
Select the Account Lockout Policy below the Password Policy directory.
On the right side, a few binary files will show up. Here are the changes you need to make:
Reset account lockout counter after:Not Applicable, the features disable automatically as you edit the previous three binary files.
Close the Local Security Policy app.
Again bring up the Run command and execute the lusrmgr.msc command.
The Local Users and Groups dialog will open.
Select Users on the left and double-click your admin account on the right.
Make sure the Account is disabled option isn’t checked on the General tab of the User Account Properties dialog.
Make necessary changes if needed, click Apply, and hit OK.
Restart the PC and attempt to log in using your admin account again.
Use Command Prompt via Recovery Mode
When you can’t log in with any alternative admin account, you must enable the hidden admin or fix the existing one with a CMD interface in WinRE. Here’s how:
Press the Shift key and click on the Power button on the log-in screen.
Select Restart. Keep the Shift key pressed until you see the Please wait screen after the reboot.
When you see this screen, release the Shift key.
You’re now on WinRE.
Click on the Troubleshoot option.
Select Advanced options on the next screen.
Hit the Command Prompt button.
Enter the following command into the terminal:
net user adite /active:yes
Don’t forget to edit the username part of the command after the net user syntax.
Hit Enter.
If the account exists or the underlying user profile files are in working condition, you’ll see a positive confirmation.
When the account doesn’t exist or the user profile directory is corrupted, you’ll get an error message.
Restart the PC to log in now using your existing admin account.
If you’re unable to fix the existing user account, activate the hidden admin by following everything until step 8 and use the following command instead:
net user administrator /active:yes
Restart the PC and sign in using the admin profile.
Type in the issue and hit Enter to create a ticket and contact a chat, phone, or email support specialist.
Reset Windows 11 (Without Losing Data)
If you’ve got enough time, you can also attempt a Windows 11 PC Reset by following these instructions:
Follow the steps mentioned earlier to access WinRE.
Click Troubleshoot.
Hit the Reset this PC button on the next screen.
Choose an option that suits you:
Keep my files: Keeps personal files only. Windows discards apps and settings.
Remove everything: This option will delete everything from the installation drive.
The next screen is about selecting a source for the Windows 11 installation media.
If you’re connected to the internet, choose Cloud download.
If you aren’t, select Local reinstall.
WinRE will take a while to process background files and settings.
Hit the Reset button when it appears.
Summary
So, now you know what to do when your Windows 11 administrator account is locked out. Which method has worked for you? If there’s anything I missed, feel free to comment below.
Even though admins are quite tired of Microsoft frequently changing and renaming its platforms, the Redmond-based tech giant doesn’t want to stop here: according to a recent entry to the Microsoft 365 Roadmap, the Teams app usage report will be renamed the Integrated Apps usage report.
Don’t worry, though; Microsoft is doing it in good faith. The new Integrated Apps usage report will be a redesigned Teams app usage report and include new metrics and charts.
Microsoft says it will include and provide insights into apps enabled for Teams, Outlook, Microsoft 365 Apps, Copilot, and all of its extensions. The new redesign will feature two sections, App Usage, and User Activity, plus a reorganization by different criteria and apps.
The Teams app usage report will be renamed to the Integrated Apps usage report and redesigned with new metrics and charts. These will provide insights into apps enabled for Teams, Outlook, Microsoft 365 apps, and Microsoft 365 Copilot (Copilot extensions) in your organization. The report will feature two sections: App Usage and User Activity. Insights will be organized by Publishing Type (Line-of-business apps, Microsoft partner apps, and Microsoft apps), Host Product (Teams, Microsoft 365 app, Outlook, Copilot), and Platform (Desktop, Mobile, Web). Additionally, the report will include views of app and user details.
While the change is welcome, many admins agree that Microsoft should slow down, as they can’t keep up with all the changes. Some feel very pressured to learn how the platforms work, while others are just tired of this pattern from the Redmond-based tech giant.
However, if you’re an admin, you have no time to breathe: this change will be released in November 2024.
Microsoft will discontinue HoloLens 2, marking the end of the company’s original and second-generation augmented reality (AR) headsets. The Redmond-based tech giant advises those who still want to purchase the device to do so as soon as possible, as the stock will soon dwindle.
According to the latest reports, Microsoft will continue supporting the HoloLens 2 with security updates and critical patches until 2028.
HoloLens 2 was released in 2019 and designed for businesses and developers. However, the device hasn’t yet become popular among usual consumers. Its price, $3,500, makes HoloLens 2 a pretty expensive machine.
The HoloLens 2 has gained popularity among business users, and the US Army is also using HoloLens-based IVAS headsets. Meanwhile, Microsoft informed UploadVR that it is ‘fully committed’ to its collaboration with the US Army.
The future of Microsoft’s AR efforts remains unclear—especially given the exits of longtime mixed reality executives, including Alex Kipman, the creator of HoloLens—but one thing’s for sure: HoloLens is no more.