Civilization VI, Tekken 7, and Need for Speed Hot Pursuit Remastered are free to play on Xbox this weekend

The Tekken 7, Need for Speed Hot Pursuit Remastered, and Sid Meier’s Civilization VI video games are currently free to play in full on Xbox One and Xbox Series X consoles for all gamers with an active Xbox Live Gold subscription as part of this week’s Free Play Days campaign.

As is typical, all three titles will be available to download and play as if owned until the end of the weekend on Sunday at 11:59 PM PDT after which those who want to continue playing will need to buy the game.

To help encourage those who are tempted to buy Civilization VI, Need for Speed Hot Pursuit Remastered, or Tekken 7 by the end of Sunday, all three games have been temporarily discounted in the Microsoft Store digital storefront on the web and on Xbox consoles with all three full games having their prices cut by 40 to 80% off.

Here’s the trailers for each title along with their store links at the bottom of the page to initiate downloads on your linked Xbox consoles.

Which Xbox video game are you going to play this weekend? Share your preference with the community in the comments below and then follow us on Twitter and Pinterest for more Xbox gaming content.

Sid Meier's Civilization VI
Developer:
2K
Price:
$5.99


TEKKEN 7
TEKKEN 7
Price:
$9.99

VPN router vs VPN service (Quick Guide)

Nowadays, with the recent uprise in cyber attacks and privacy breaches, having a VPN is paramount.

However, end-users always end confused considering there are so many different types of VPNs they can use to protect their privacy.

For instance, many fail to understand that VPN routers are not the same as a VPN service.

One of the main differences between these types of VPNs is, in fact, the very device you can set them up on.

Not to worry, though; in this guide we’ll walk you through the differences between VPN routers and VPN services.

That way, you’ll be more informed and ready to make a better decision when it comes to your personal privacy.

VPN router vs VPN service

What is a VPN router

A VPN router is still a VPN, but it’s meant to be used by an entire network, as opposed to personal VPN services.

After being deployed, a VPN router shields the entire network’s privacy from prying eyes.

Depending on the VPN that you choose to install on the router, you may benefit from additional features, so as to make up for the lack of personal control.

Once a VPN is installed on a router, it actually replaces the router’s firmware so it can assume full control of the network.

The network administrator can change or toggle certain settings such as the server location, kill switch, or split tunneling.

It goes without saying that you won’t be able to make any modifications, but that could actually be a good thing.

With a standard VPN, you may need to remind yourself to launch it and connect to a secure server.

A VPN router is always on, and applies the same settings to all the devices connected to the network.

If the VPN supports it, you can make sure to exclude certain devices from the VPN’s protection by using the split tunneling feature.

How to set up a VPN router

Contrary to popular opinion, you can’t just install any VPN on any router.

Therefore, you’ll have to find a router that supports VPN apps (recommended) or one that supports manual VPN configuration (less secure, less features).


If you’re at a loss, check out our recommendations for the best VPN routers you can buy.


At the same time, you’ll have to find a VPN that can handle being installed on a router.

Depending on your router and VPN of choice, the process of setting a VPN router up can be wildly different.

For instance, some VPN providers (such as ExpressVPN) offer custom firmwares you can flash on your router.

On the other hand, you can also try to grab configuration details from your VPN and attempt to load them on your router.

Note that the VPN router setup process depends on the model of your router, so unfortunately there’s no silver bullet for this.

What is a VPN service

When we say VPN service, we mean a VPN service that you can install on individual devices and use it on a per-person basis.

Therefore, any VPN that provides you with an app, a client, or a configuration file for your personal use could fall in this category.

With VPN services you have full control over everything that the VPN does for your device and on your network.

Depending on its capabilities you can toggle a kill switch, enable split tunneling, change location, or turn it off altogether.

Since you’re using it on your device only, it won’t have any impact on your network and other users connected to it.

Additionally, it’s infinitely easier to install and configure a VPN service than a VPN router.

Considering that many VPN providers support multiple connections on the same account, you may not even need a VPN router.

However, if you have more devices you want to connect than the provider can accommodate, you may need to switch to a VPN router.

Which is better, VPN router or VPN service?

Truth be told, there’s no right answer to this question, as it strictly depends on your needs.

If you have a handful of devices that need privacy protection and added security, you can safely go with an individual VPN service.

VPN providers can usually cover at least 5 simultaneous connections on the same account, so as long as you don’t have a lot more devices, you should be fine.

The plus side is that an individual service is easier to install and can be re-configured at any time.

On the other hand, having a VPN router means that your entire network is protected 24/7 and there’s no need for you to interact with your VPN so often.

You just set it up, configure it according to your needs, and just leave it running in the background.

Unfortunately, setting up a router VPN takes more time and requires that your router can handle VPN apps or manual configuration.

Conclusion

All in all, having a VPN is highly important if you plan on keeping your online whereabouts private, away from prying eyes.

Whether you choose to install a VPN on your router for network-wide protection or just use it on your device, it can and will greatly enhance your privacy.

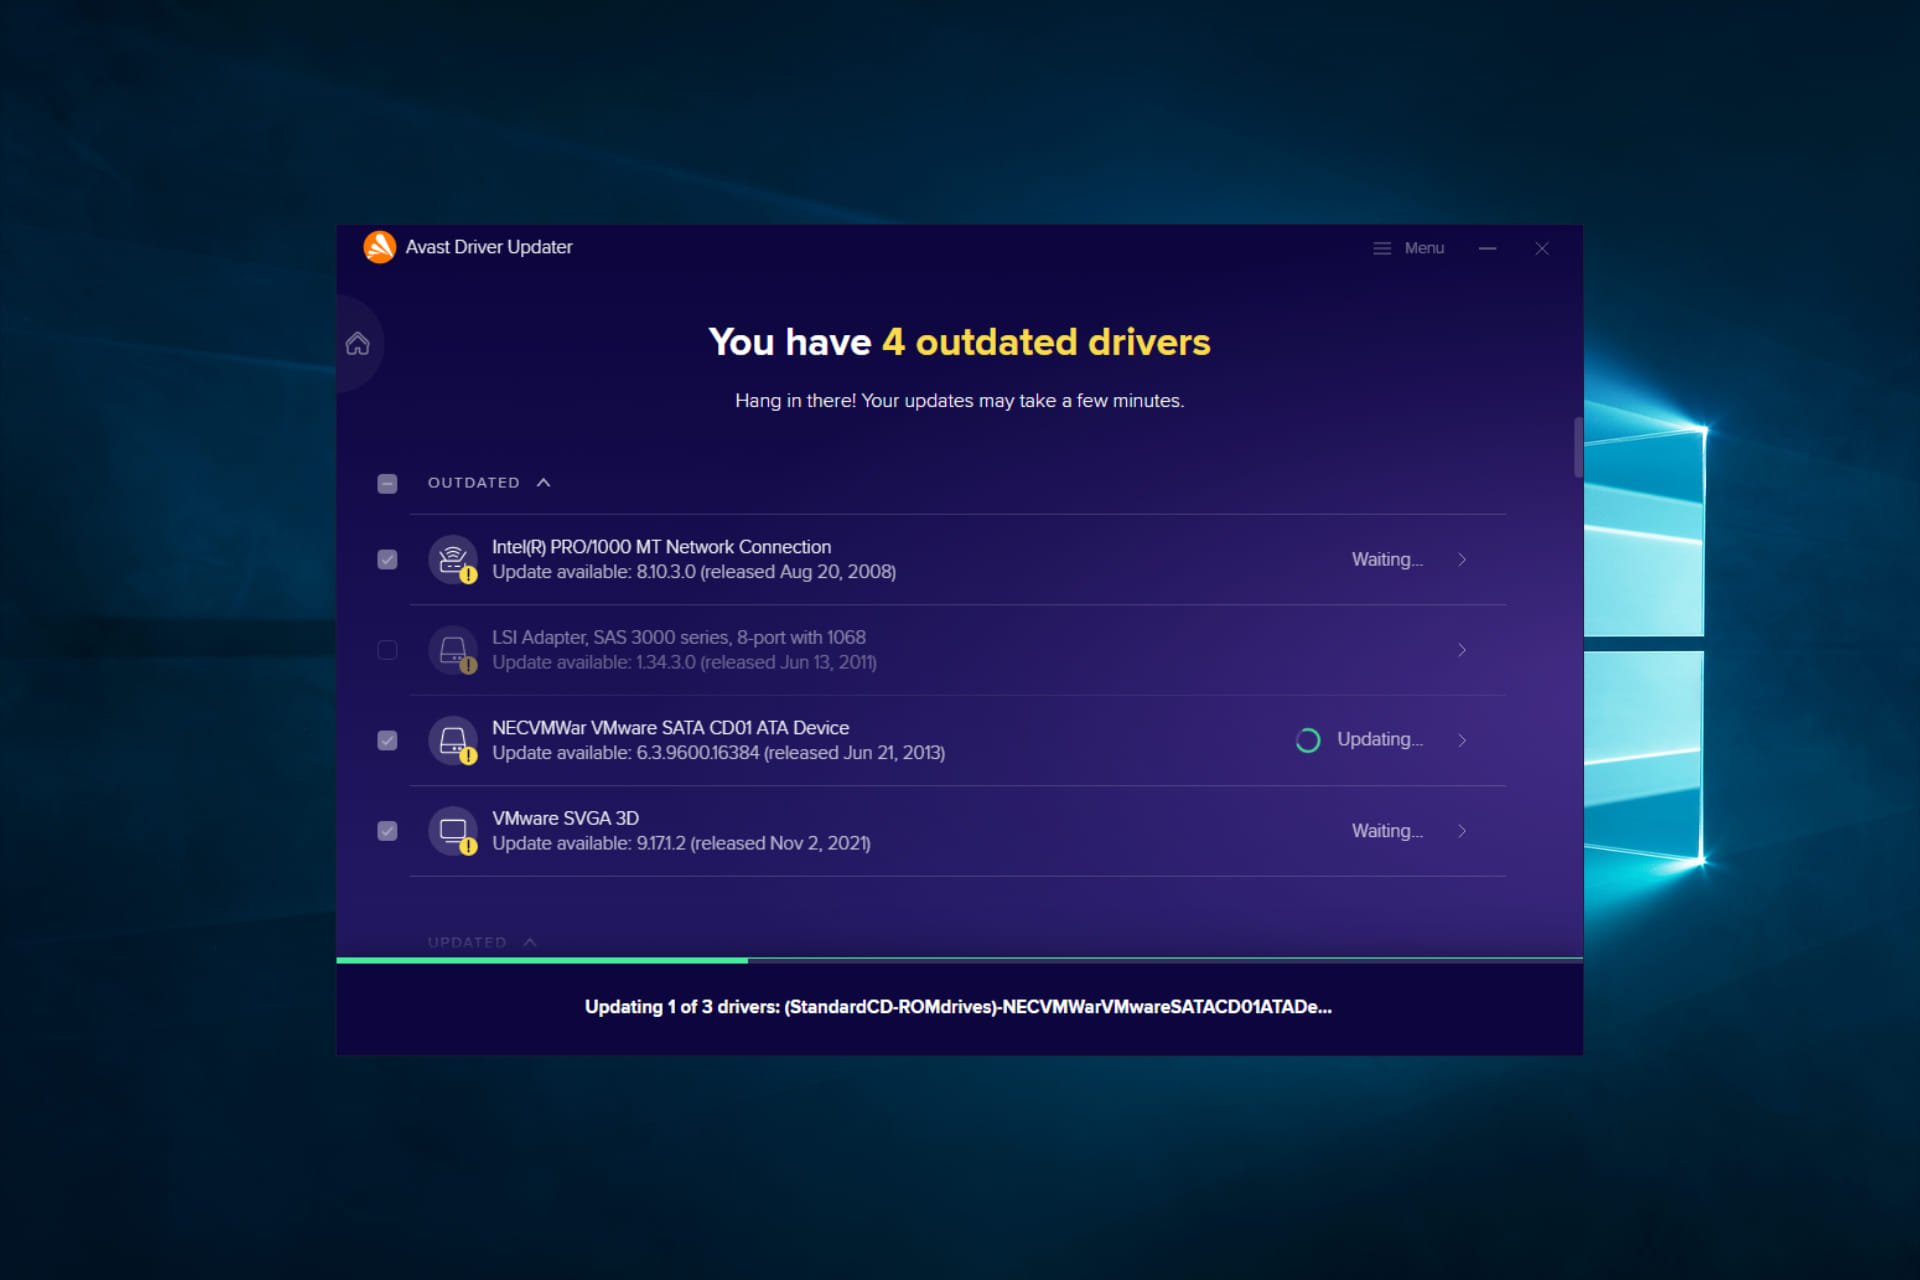
Avast Driver Updater not Working: 3 Simple Fixes to Use

If you have any outdated or broken drivers, Avast Driver Updater, as the name suggests, scans your hardware and updates them to prevent any issues with your device.

Some users report that the Avast Driver Updater is not working, which can cause many future issues if left unsolved.

Avast Driver Updater is not working as it should be due to not being stalled properly. In this article, we will explore the steps you need to take to fix the Avast Driver Updater not working, so keep reading.

Why is Avast Driver Updater not working?

There could be several reasons why Avast Driver Updater is not working. Here are some possible reasons:

  • Outdated version – If you use an outdated version of Avast Driver Updater, it may need to be fixed.
  • Internet connectivity – Avast Driver Updater requires a stable internet connection to download and install the latest drivers. Poor internet connectivity or connection issues may prevent the program from functioning correctly.
  • Interference from other programs – Other programs running on your computer, such as antivirus software or firewalls, may interfere with the operation of Avast Driver Updater.
  • Corrupted or missing files – If the Avast Driver Updater program files are corrupted or missing, they may not function correctly.
  • Compatibility issues – Avast Driver Updater may not be compatible with your operating system or other hardware/software components on your computer, leading to malfunctions.

What can I do if Avast Driver Updater is not working?

1. Use a specialized software

Plenty of driver updating software out there scans your hardware and updates all outdated or broken drivers, and using one that is error-free and reliable is our recommendation.

2. Check for other security software installed on your device

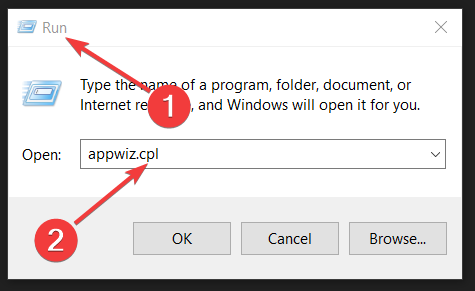
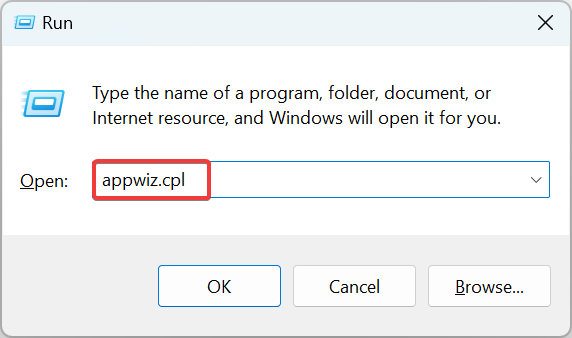
  1. Press Windows + R, type appwiz.cpl, and hit Enter.
    avast driver updater not working
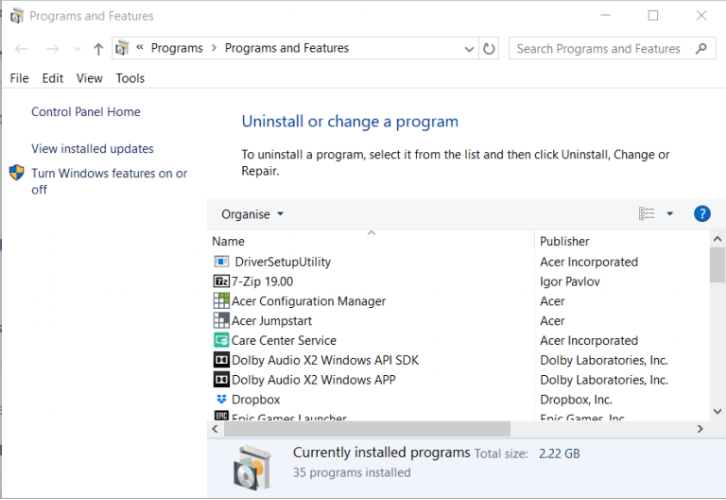
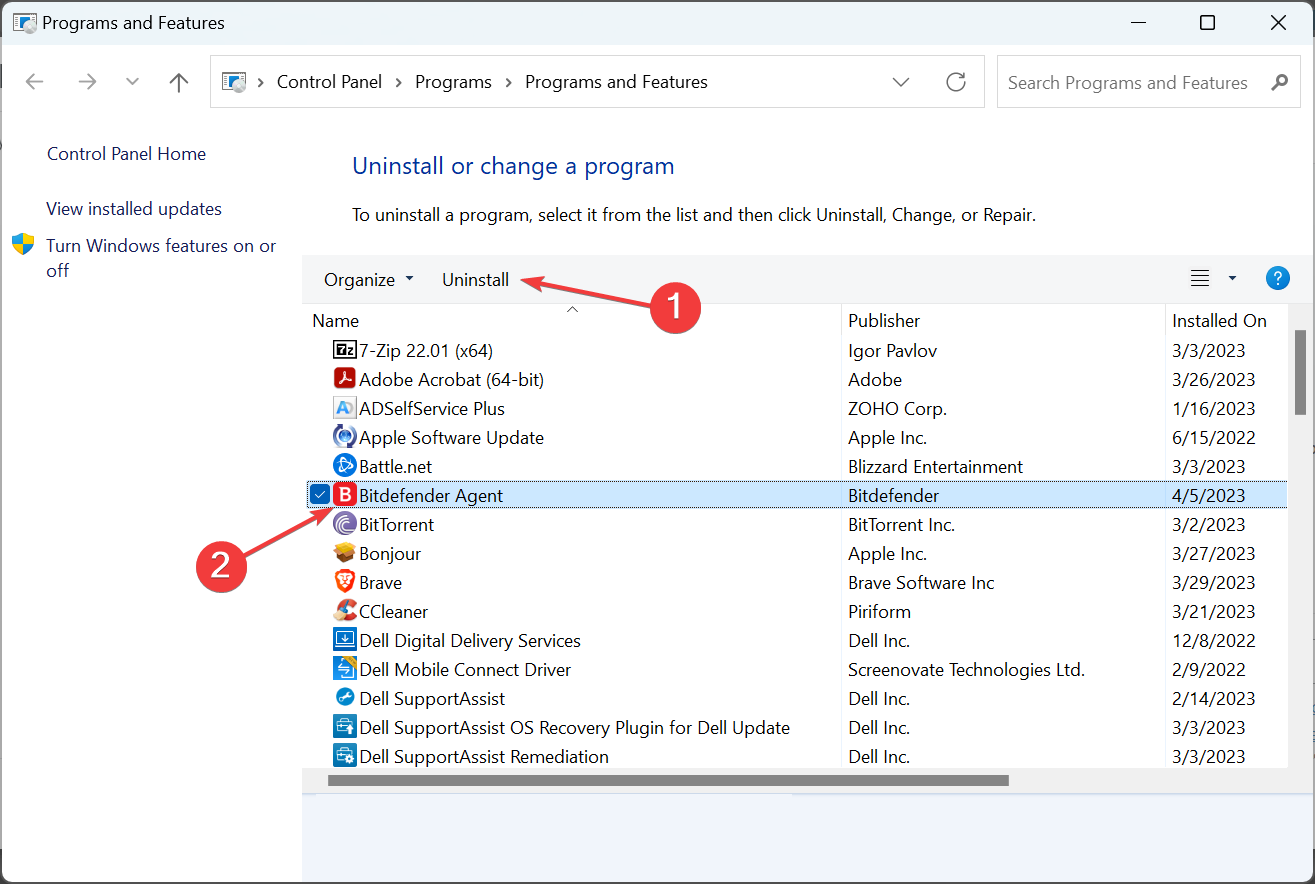
  2. Click on any other security app, and choose Uninstall/Change.
    avast driver updater not working
  3. Wait for the process to complete.

Having more than one security software installed on your device can be why the Avast Driver Updater is not working.

Since you are trying to use it and another software is also running, having both open is conflicting, which results in the malfunctioning of the Avast Driver Updater.

Make sure to check if you have other security software installed, and if you do, uninstall it, and after you reboot your device, try to rerun the Avast Driver Updater.

This is a simple solution, but it might help if Avast Driver Updater is not backing up drivers properly.

3. Install Avast Driver Updater properly

  1. After downloading the Avast driver updater file, click on it.
  2. Right-click on the downloaded setup file and choose Run as administrator.
  3. Click Yes when asked for permission from the User Control dialog box.
  4. Next, click Scan Drivers, wait for the software to finish scanning, click on Update all, and select Unlock all features.
    avast driver updater not working
  5. Choose the appropriate option and click OK.
  6. You are now all set up.

This is a simple solution, so try it if Avast Driver Updater is not working.

This is about all. Be sure to try all our solutions if the Avast Driver Updater is not working on your PC.

We would love to hear which solutions worked best for you, so don’t hesitate to comment in the section below.

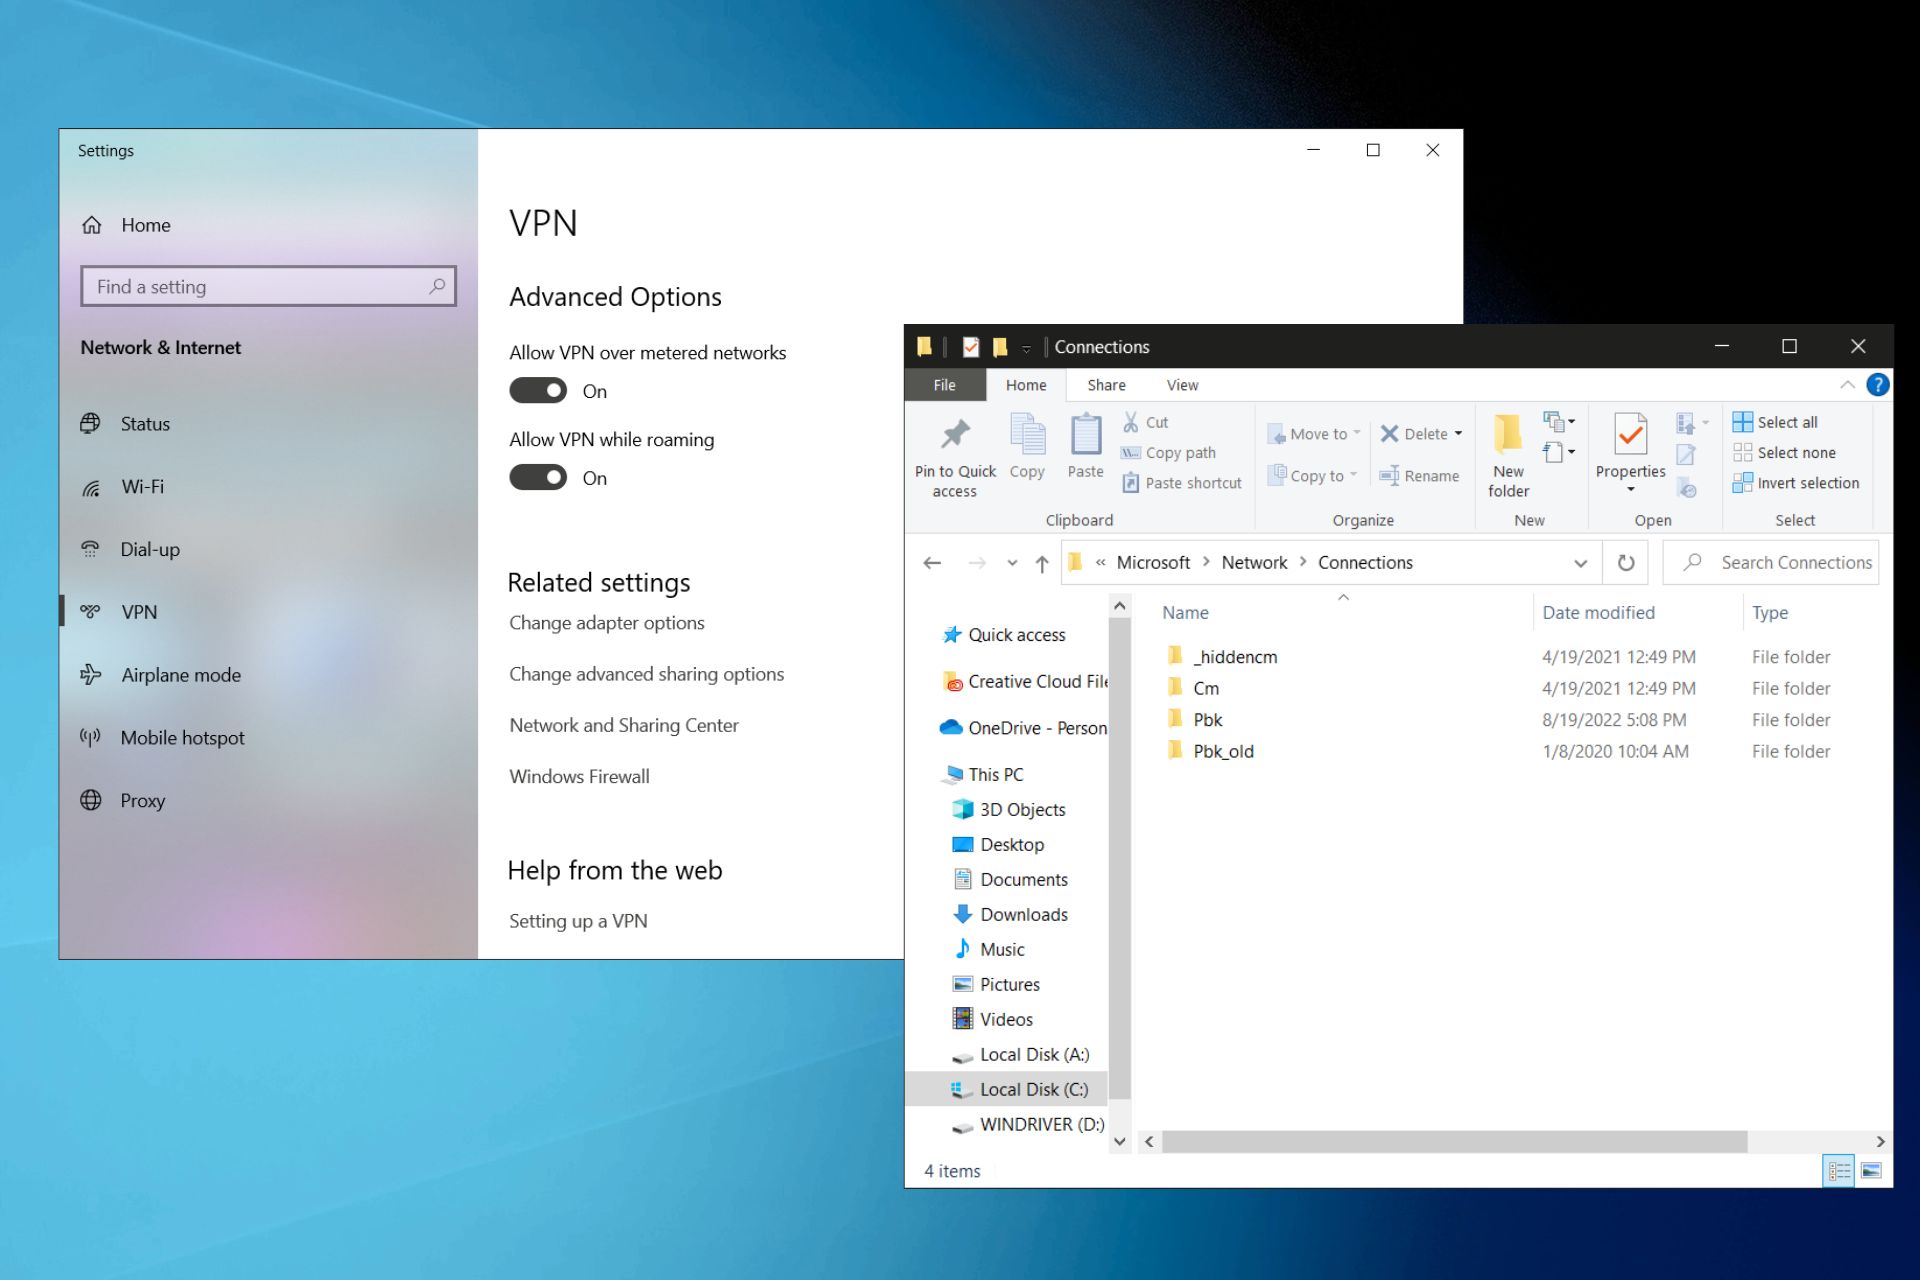
How to change VPN password on Windows 10

If VPN authentication failed on your Windows PC, it might be because you entered the wrong password. On PPTP connections, this results in VPN error 619.

Perhaps you made a typo, or your company’s network administrator changed the VPN credentials associated with your user account.

Or maybe you decided it’s time to update all your old passwords and avoid any security breaches (kudos, by the way).

Whatever the case may be, you need to change your VPN password on Windows 10. If you have no clue how to get there, we’re here to help.

Check out our easy guide below to quickly edit your VPN password using the Windows 10 VPN provider. We’re also showing you a free software tool that gets things done faster.

How do I change my VPN password on Windows 10?

set VPN password in Windows 10
  1. Click the Start button, type VPN settings, and press Enter.
  2. Select your VPN connection and click Advanced options.
  3. Click Edit.
  4. Scroll down to Password (optional) and change it.
  5. Click Save.

If you can’t think of a new safe key, use a password generator for your VPN.

An alternative solution is to use Dialupass. It’s a free and portable software tool that lists all dial-up and VPN connections on your Windows PC.

use Dialupass

You just have to double-click a VPN connection in the main application window, change the password, and click a button to confirm.

Besides, you can also view the current password and its strength. It’s ideal for quickly changing the VPN login credentials of multiple connections.


Can’t type your password in Windows 10? Our guide shows you how to get around this problem.


If your VPN freezes on verifying the username and password, there might be an underlying issue with the VPN connection or Windows 10, not because you typed the wrong password.

To avoid having to deal with technical problems like this, we suggest opting for a premium VPN client like Private Internet Access (PIA).

It has an impressive network of VPN servers, speedy connections, and top-notch security. It’s also the best VPN for Windows 10.

Private Internet Access

Private Internet Access

Use this fast and secure VPN client to avoid Windows 10 errors and enjoy total Internet freedom.
Check priceBuy it now

To summarize, you can easily change your password using the Windows 10 VPN provider. To keep track of the new secret code without having to scramble your brain, we recommend using a password manager.

How to Export and Import VPN Settings in Windows 10

There’s no option in Windows 10 to export VPN settings, but there’s an easy workaround.

Creating a VPN connection in Windows 10 using the operating system’s native settings is a great way to conceal your IP address, spoof your geo-location, access blocked websites, and improve your ping while gaming without having to install a desktop client.

But it’s also a bit more complicated than using the actual VPN client designed for Windows 10 because you have to create a new VPN connection or edit your existing profile every time you want to change the VPN protocol or connect to a different VPN server address.

Besides, you can’t export the VPN settings in Windows 10 as easily as clicking a button to save the profile to another location.

Although Microsoft’s operating system hasn’t come up with a simple solution for this, you can do it by copying and pasting the system folder that contains all VPN connections in Windows 10.

How do I export VPN settings in Windows 10?

copy the Windows 10 Pbk folder

  1. Open the Windows 10 File Explorer (Win key + E).
  2. Type the following in the address bar and press Enter: %AppData%\Microsoft\Network\Connections
  3. Select the Pbk folder, right-click and Copy (Ctrl + C).
  4. Choose a different location on your PC and Paste (Ctrl + V).

How do I import VPN settings in Windows 10?

To import settings in Windows 10, you have to go to the same location and paste the Pbk folder.

Since the folder size is quite small, you can keep it stored in OneDrive or another cloud storage service as well as keep it saved as a draft in your email account.

  1. On the PC you want to import VPN settings, launch File Explorer.
  2. Type %AppData%\Microsoft\Network\Connections.
  3. Copy the Pbk file from OneDrive or the removable media device you decide to use and paste in this folder.

You can use this method to export/import VPN settings between pretty much any Windows 10 PC.

For example, you can import the VPN settings from your home PC at work on Windows 10. Just keep in mind that any existing VPN profiles will be overwritten with the new ones.

If you’re interested in keeping multiple VPN profiles on standby, create multiple folders on your PC where you can paste the Pbk folder with your preferred VPN settings.

Whenever you need a new profile with specific VPN settings, simply swap the existing Pbk folder with one of the copies.

To conclude, it’s not exactly a walk in the park to export VPN settings in Windows 10. But it’s still possible by using the workaround above.

We suggest investing in a premium VPN service for Windows 10 on the long run since it will save you a lot of headaches.

New Feature Experience Pack hits the Windows Insider Beta & Release Preview Channels

Following new updates for Windows 10 20H2 and Windows 10 21H1 Microsoft is also rolling out a new Featured Experience Pack, too. Coming in at 120.2212.3530.0, this one is for Insiders in the Beta & Release Preview Channels.

There’s nothing major to note with this Feature Experience Pack. Microsoft says it is just improving the reliability of displaying the candidate list for users of the Input Method Editor (IME.) Note that if you’re a Windows Insider in the Release Preview Channel, this will be an optional update for you.

Microsoft also says that this update will not be offered to commercial devices in the Release Preview Channel. That’s because these devices are getting Windows Feature Experience Packs delivered through “C” Preview releases which then get rolled up into monthly “B” releases.

As always, you’ll find this Featured Experience Pack under Windows Update. However, for Windows Insiders in the Release Preview Channel, this will be an optional update for you. Happy downloading, and we remind you that these types of Windows Feature Experience Pack updates are meant to deliver a scoped set of features and improvements outside of a full build.

0x800f0825 Windows Update Error [Fixed]

Error 0x800f0825 is an update error that could show up while installing updates or when you try to remove a corrupt update file, but there are ways to fix it.

Corrupted files can be repaired with the help of specialized software in less time and with fewer resources than other methods. These kinds of tools don’t require any specific or advanced skills to operate.

How do I fix the 0x800f0825 package cannot be uninstalled?

1. Perform a System Restore

  1. Press the Windows key and type system restore.
  2. Click on Create a Restore Point.

  3. Click the System Restore button.
  4. Choose Next.
  5. Choose the most recent restore point available. 
  6. Click Next.
  7. Read the description and then click Finish.

Wait for Windows to restore your PC to the selected point. After the restart, open the Control Panel and check if the 0x800f0825 permanent package cannot be uninstalled error is resolved.

2. Make the update removable

  1. Download PowerRun from the official website. Unpack the zip archive to a local folder.
  2. Launch PowerRun. Click Run if prompted by UAC.
  3. Right-click on Notepad.exe and choose Run File in the PowerRun window.
  4. In the Notepad window, click File and choose Open. Set file Filter to all files.
  5. Next, navigate to the following path using the Open window:
    C:\Windows\servicing\Packages
  6. In the search field, enter the update code that you are trying to uninstall. For example, enter KB5000802.mum.
  7. Note that we need to find all the .mum files associated with the update. You may see more than one .mum file for the same update.
  8. Select the first .mum file and click Open.
  9. Press Ctrl + F to open the Find dialogue box. Enter permanency=”permanent” in the field and click Next.
  10. Once you locate permanency=”permanent”, change it to permanency=”removable”.
  11. Click Ctrl + S to save the changes. Click Yes if prompted by UAC again.
  12. Repeat the steps of changing permanency=”permanent” to permanency=”removable” for all the .mum files associated with the KB update you are trying to uninstall.

Once you have made the changes to KB Update files, you can uninstall the KB update causing the error 0x800f0825 permanent package cannot be uninstalled.

Uninstall the KB Update 

  1. Press the Windows key + R to open Run.
  2. Type control and click OK to open the Control Panel.
  3. Click on Uninstall a Program under Programs.
    0x800f0825 permanent package cannot be uninstalled
  4. From the left pane, click on View installed updates.
  5. Choose the KB update that you want to uninstall and click Uninstall.
  6. Click Yes to confirm the action when prompted by UAC.

Uninstall update using Command Prompt

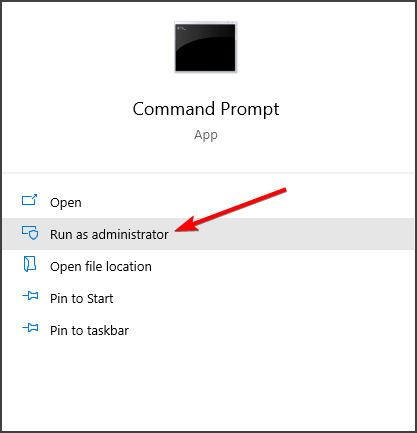
  1. Press the Windows key, type cmd, and click on Run as Administrator. This will open the Command Prompt as administrator.
    0x800f0825 permanent package cannot be uninstalled
  2. To uninstall the KB Update, enter the following command and hit enter. Make sure to replace the KB update number below with the update that you are trying to uninstall.
    wusa /uninstall /kb:KB5000802/quiet /norestart
  3. Wait for the update to uninstall and until you see a success message. Close the Command Prompt window and reinstall the essential updates.

This is an advanced solution, but it will help you fix Windows KB5000802 – Unable to uninstall package error.

3. Run System File Checker 

  1. Press the Windows key, and type cmd.
  2. Right-click on Command Prompt and choose Run as Administrator.
    0x800f0825 permanent package cannot be uninstalled
  3. In the Command Prompt window, type the following command and hit enter:
    Sfc /scannow
  4. The scanning process may take some time, so wait till it is 100% complete.

System File Checker tool is a built-in repair tool that scans for missing or corrupted system files and repairs them if required. However, if you are still unable to fix them, try resetting your PC.

4. Go back to the previous version of Windows 10

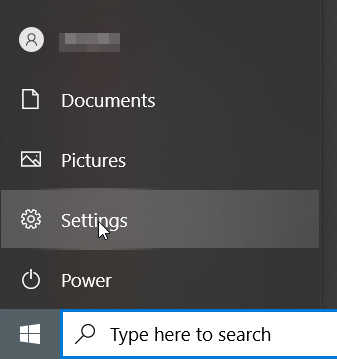
  1. Click on Start and choose Settings.
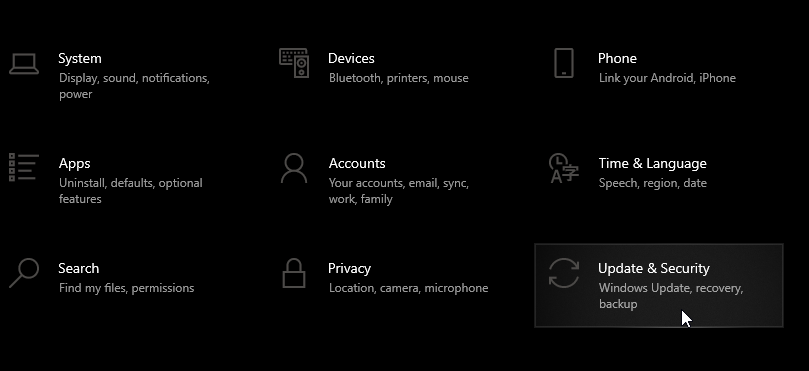
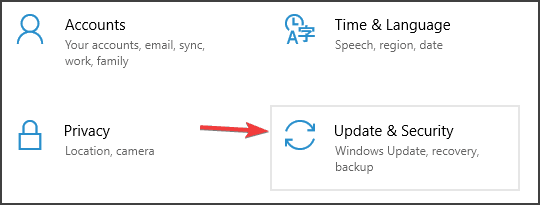
  2. Click on Update & Security.
  3. Open the Recovery tab from the left pane.
  4. Click the Get Started button under Go back to the previous version of the Windows 10 section.
  5. Follow the on-screen instructions to restore your PC back to the last update.

However, this option is only available before 10 days of installing the update. If the Get Started button is greyed out, this option is not available for you.

This isn’t the best solution, but it’s a one way to fix Windows 10 package for rollup issue.

5. Refresh or reset your PC

  1. Press the Windows key + I.
  2. Go to Update & Security.
  3. Open the Recovery tab.
  4. Click the Get Started button under Reset this PC. 
  5. Under Choose an Option, choose to Keep my files. This option will keep your personal files but delete all the installed third-party programs and reinstall Windows.
  6. Follow on-screen instructions and complete the reset process.

Refreshing or resetting your PC will help you uninstall uninstallable Windows updates. If the error persists, you may have to clean install Windows 10 to resolve the issue.

The 0x800f0825 permanent package cannot be uninstalled usually occurs if you have installed an essential Windows update that is corrupted.

Error 0x800f0825: FAQs

What is error 0x800f0825 in Windows?

It is a Windows Update error that appears when updates or features fail to install.

How can I fix error 0x800f0825?

Run the Windows Update Troubleshooter, reset update components, or install the update manually from the Microsoft Update Catalog.

Is error 0x800f0825 caused by system file issues?

Yes. Corrupted or missing system files can trigger it. Running SFC and DISM often resolves the problem.

What if the error keeps coming back?

Try an in-place upgrade using Windows installation media. If that fails, consider a clean install after backing up your data.

Windows Update issues can show up in different ways, and error 0x800f0825 is just one example. There are also other update errors you might encounter, such as error 0x80070017 in Windows but we have a guide that can fix it.

We hope that our guide helped you fix this issue on your PC. If you managed to find the solution on your own, share it with us in the comments section.

How to fix the mouse lag in Doom Eternal [Quick Guide]

Doom Eternal is an award winning game and definitely a challenge for many players which is why any interruptions or errors while playing it aren’t desired.

Unfortunately some of the reports experiencing mouse lag while playing the Doom Eternal which is frustrating and it affects negatively their overall performance.

Solving the mouse lag while playing Doom Eternal is easy and we will show you in this article the exact steps you need to take in order to do that, so make sure to keep on reading.

How can I fix the mouse lag in Doom Eternal?

1. Use a specialized software

One of the things that can cause your mouse to not work properly has a lot to do wit the current version of the drivers.

Since this is such an important aspect, using dedicated software to make sure that you have the correct drivers installed on your device is the first thing we would recommend.

2. Turn off Nvidia threaded optimization

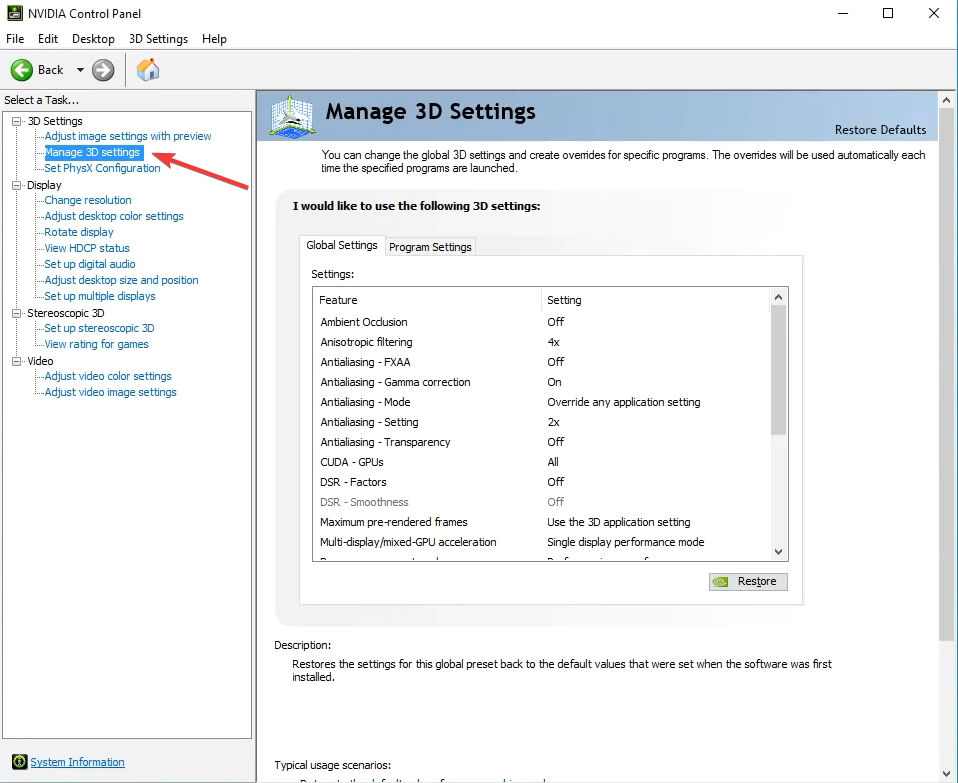
  1. Open Windows Control Panel and go to NVIDIA Control Panel.
  2. Click on 3D Settings and select Manage 3D settings.
  3. Go to the bottom of the list and locate the Threaded Optimization parameter.
  4. Now, change the value from Auto to Off.
    threading
  5. Finally, click Apply to save the changes.

This is one of the simplest ways to fix mouse lag in Doom Eternal, so be sure to try it out.


3. Disable the V-Sync

  1. Navigate to Nvidia Control Panel.
  2. Click on Manage 3D Settings and select Program Settings.
  3. Here locate Doom Eternal and on the Vertical sync option make sure it is Disabled.

4. Change you PC power plan

  1.  Open the start menu by pressing on the Windows key.
  2. Type in powercfg.cpl and press Enter.
  3. Now select the High performance option.

After doing that, check if mouse lag in Doom Eternal is gone.


5. Disable Steam Overlay

  1. In the Search box type Steam and click on it when displayed.
  2. Head over to the Settings and click on the In-Game option.
  3. Next, disable Enable the Steam Overlay while in-game.
    steam overlay not working windows 10
  4. Finally, click on OK to apply the settings.

6. Adjust Discord Settings

  1. Go to Start and launch Discord.
  2. Next, click on User Settings and select Voice & Video from the left sidebar.
  3. Click on the Advanced and disable OpenH264 Video Codec provided by Cisco System, Inc.
  4. Then disable Enable Quality of Service High Packet Priority.
  5. Next, go to Overlay and turn off the in-game overlay.
  6. In the Appearance option go to Advanced.
  7. Disable Hardware Acceleration.
  8. Finally, click Apply and restart the system.

This is about all. We hope that one of the solutions presented in this article will help you solve the mouse lag in Doom Eternal.

We would love to hear if you have additional recommendations and suggestions, so don’t hesitate to write them in the comments section below.

The new Windows 10 build may crash your games

Microsoft launched Windows 10 Insider Preview Build 21343 (RS_PRERELEASE). It brings some important changes and fixes, but it may also crash games.

The build is available only for those in the Windows Insider program, for testing. In case you’re an avid gamer, Microsoft warns against installing this build lest you want to risk losing gaming data.

There is an issue in this build where certain games may crash, will not sync save data when a game is played on a different device, or will not save when a new game is installed.

Games crash, but refresh-rate issues are fixed

refresh rate fix

While the report warns about the mentioned issue, it also promises to debug it and to have a solution ready in the next build.

If you experience game crashes upon launching or while playing them, note that the problem might not be the updates. Games often crash also due to interfering programs or outdated drivers.

On the other hand, gamers have something to be happy about with this build. The release notes announce that the issue where some high-refresh-rate monitors only ran at 60Hz is now fixed. This should also avoid tearing in variable-refresh-rate monitor scenarios.

Other important improvements

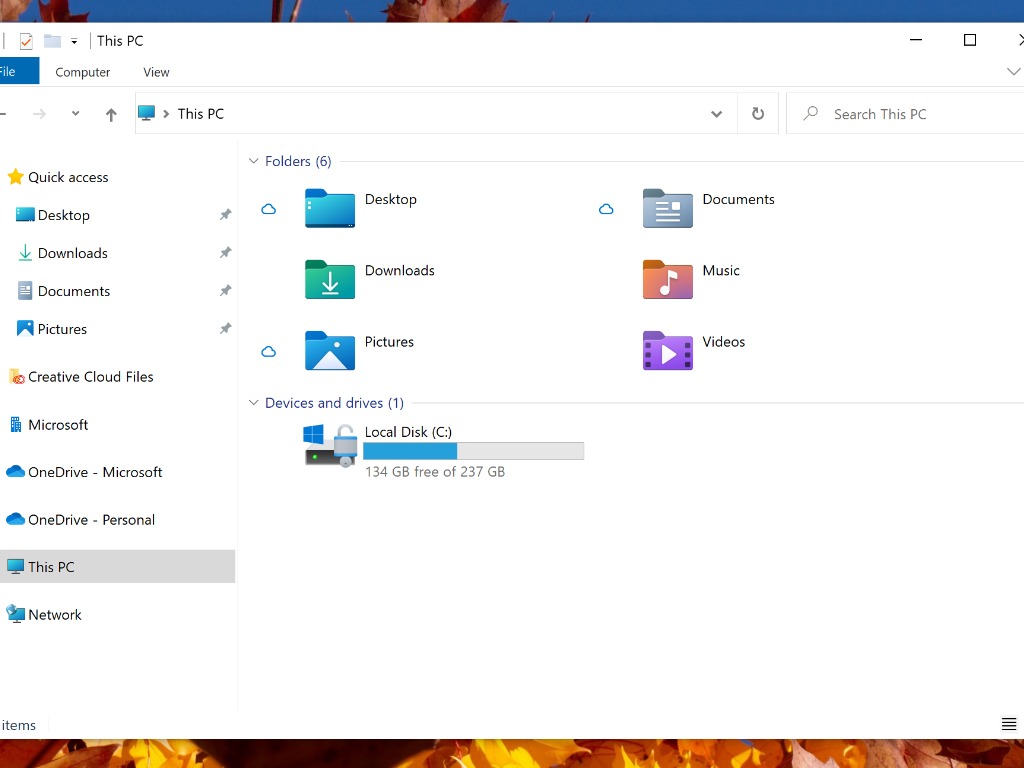
The build introduces new Fluent Design-based icons for File Explorer, Desktop, Downloads Recycle Bin, and other folders. The idea, says Microsoft, is to differentiate them easier and to have a more consistent design across all Microsoft apps.

The new icons will be available to the general public starting with the Windows 10 21H2 update. This is expected to launch in the second half of this year.

new fle explorer icon

Also related to File Explorer, users can now rename files using CTRL + Left / Right arrow shortcut to move your cursor between words in the file name.

According to another warning, after installing this build, all folders pinned to Quick Access in File Explorer will disappear. So users should be aware of what is pinned prior to upgrading, to find those folders afterward.

Additionally, the build brings a new runtime designed and optimized for container scenarios. As a result, the Windows Sandbox and the contained programs will launch faster, especially on older computers.

In case you’ve experienced frequent app crash during installation or other activities recently, after getting this update all programs should work smoothly, Microsoft adds.

You can see the full list of changes and fixes in the cited report. Microsoft encourages feedback; so don’t hesitate to contact them should you experience any unusual system behavior or should you have any suggestions.

BSoD error code 0x00000016 or 0x00000017? Try these methods

The CID_HANDLE_CREATION error is one of those dreaded Blue Screen of Death (BSOD) errors that arise on Windows desktops and laptops.

That particular BSOD error has a 0x00000016 stop error code. That BSOD error often arises for players playing specific games with higher system requirements in Windows.

CID_HANDLE_DELETION is a similar BSOD error that can arise in Windows. That BSOD displays a 0x00000017 Stop error message. The potential resolutions for the 0x00000016 and 0x00000017 Stop errors are much the same.

How do I fix the 0x016 and 0x017 BSoD errors?

1. Use a professional solution

Regardless if you must fix the CID_HANDLE_CREATION or CID_HANDLE_DELETION error, there are professional solutions that will simplify your task.

There are BSoD Fixers for codes such as 0x00000016 or 0x00000017 that can resolve this matter fast and efficiently. More so, these tools will remove malware threats and warn you against visiting any dangerous websites they detect. It will also free precious disk space from your computer.

After you download the BSoD repair tool, let it scan your operating system, and after the scanning process has ended, it will also replace any damaged Windows files it detects. After using dedicated software for fixing BSoD problems, your computer will operate again at maximum performance.

Since these programs employ incredible technology – they have a remote database of genuine and up-to-date Windows system files that can replace broken files on the examined system.

2. Close startup and other background software

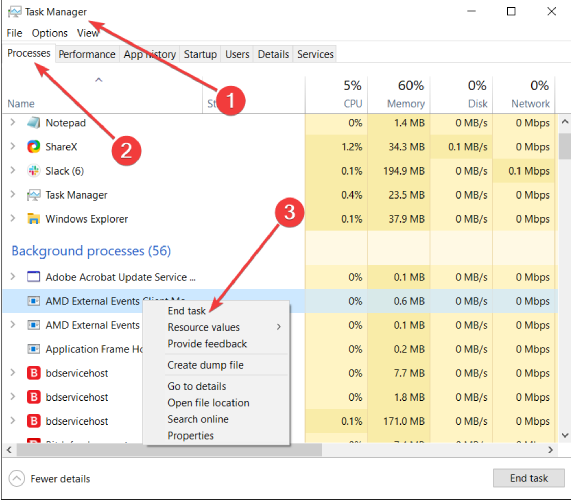
  1. Right-click the taskbar and select Task Manager.
  2. Select third-party apps and background apps listed on the Processes tab and select End task to close them.The Processes tab tab Fix 0x00000016, 0x00000017
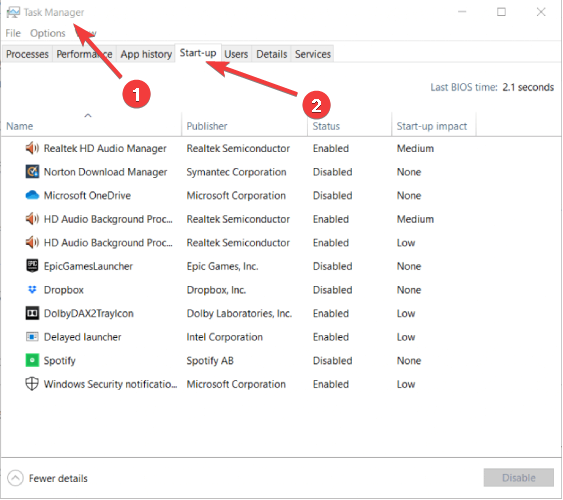
  3. To stop programs starting with Windows, click Start-up.The Start-up tab Fix 0x00000016, 0x00000017
  4. Then select superfluous software there and click Disable to remove them from startup.

Closing startup and other background software in Task Manager will free up system resources. It might also remove conflicting programs that trigger BSOD issues.

3. Update the graphics card driver

Error 0x00000016 can be due to an outdated or incompatible graphic card driver. You can update your graphics card driver, and others, with specific software.

Since BSoDs are very serious, you probably want a quick and efficient solution, and there’s none better than a third-party driver updater and fixer.

These lightweight utilities scan your entire PC from the first launch and then identify older, malfunctioning, or even missing drivers.

Replacements will then be downloaded and installed on your PC. All you need to do to finish the whole process is simply restart your PC.

After your drivers have been updated, this offers you a better gaming performance.

4. Run a system file scan

  1. Press the Windows key + S hotkey to open a search box.
  2. Type cmd in the search box to find Command Prompt.
  3. Right-click Command Prompt and select Run as administrator on the context menu.
  4. Type in this command, and press the Enter key:
    •  DISM.exe /Online /Cleanup-image /Restorehealth
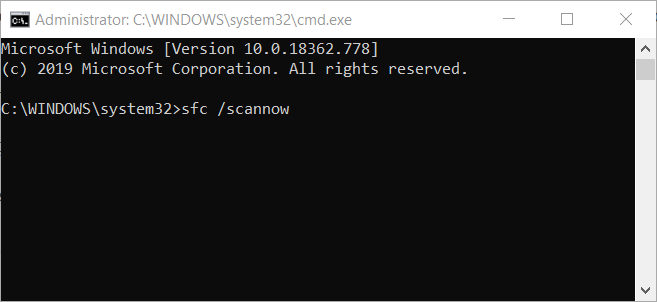
  5. Next, input sfc /scannow
  6. Press Return to initiate a System File Checker scan.
    System File Checker command Fix 0x00000016, 0x00000017
  7. When SFC is done, it will display one of four alternative messages in Command Prompt.
  8. Restart the desktop or laptop if Windows Resource Protection repaired files.

BSOD errors can often arise due to system file corruption, which is something the System File Checker can fix.

5. Uninstall the Avast Antivirus utility

The 0x16 and 0x17 errors can be due to the Avast Antivirus utility. Even Avast concedes that its antivirus utilities can conflict with third-party software and generate BSOD errors.

Click avastclear.exe on the Uninstall Utility page to download the uninstaller for Avast Antivirus utilities. Then uninstall your Avast software with that uninstaller.

6. Adjust power plan settings for the hard drive

  1. Open the Run accessory with the Windows key + R keyboard shortcut.
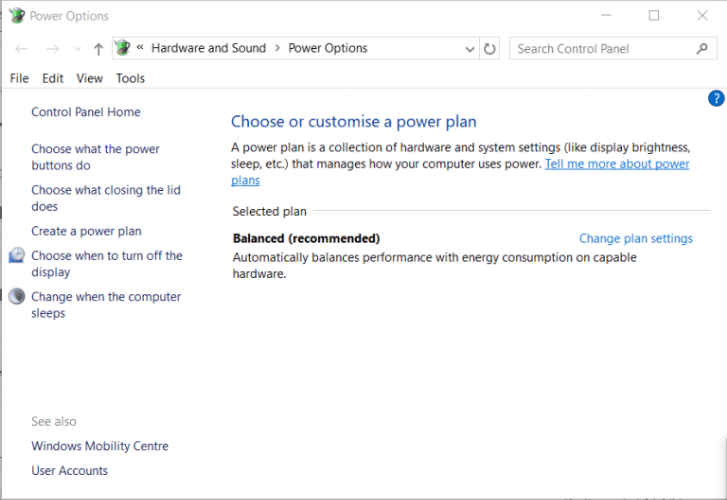
  2. Type powercfg.cpl in the text box and click OK to open the Control Panel.The Power Options applet Fix 0x00000016, 0x00000017
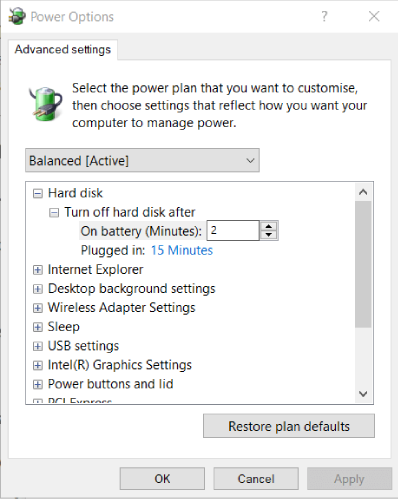
  3. Click Change plan settings > Change advanced power settings to open the Advanced settings tab.Advanced settings tab Fix 0x00000016, 0x00000017
  4. Click Hard disk > Turn off hard disk after to open the On battery text box.
  5. Replace the current value in the On battery box with 0.
  6. Click the Apply option, and press the OK button.

6. Reinstall the game the error arises with

  1. Press Start, and then enter appwiz.cpl in Run.Open appwiz cpl to fix the 0x00000016, 0x00000017 errors
  2. Click the OK option.Programs and Features applet Fix 0x00000016, 0x00000017
  3. Select the game the Stop error arises for.
  4. Click the Uninstall button.
  5. Select the Yes option on any confirmation prompts that might pop up.
  6. Restart Windows before reinstalling the game.
  7. Then reinstall the latest version of the game.

If the 0x00000016 error arises when playing a specific game, try reinstalling that game.

Those are some of the potential fixes that might resolve recurring 0x00000016 and 0x00000017 Stop errors.

Some of the resolutions on Microsoft’s Troubleshoot blue screen page might also fix the 0x016 and 0x017 BSOD errors.

New Insider updates are available for Windows 10 versions 20H2 and 21H1

Microsoft has released today new Insider updates for Windows 10 versions 20H2 and 21H1. Windows Insiders in the Release Preview channel can now install the 20H2 build 19042.906, while Insiders in the Beta channel can download the 21H1 build 19043.906. Both patches will appear as “KB5000842” patch in Windows Update, and you can check out the list of bug fixes and improvements below:

  • We fixed an issue with zoom that occurs when using Microsoft Edge IE Mode on devices that use multiple high-DPI monitors.
  • We enabled administrators to use a Group Policy to enable extended keyboard shortcuts, including Ctrl+S, for users in Microsoft Edge IE Mode.
  • We fixed an issue that prevents the icon for a Toast collection from appearing in the Action Center if the icon file’s URI contains spaces.
  • We fixed an issue that makes high dynamic range(HDR) screens appear much darker than expected.
  • We fixed an issue that causes video playback to be out of sync in duplicate mode when you use multiple monitors.
  • We fixed an issue that might cause applications to stop working while you type Japanese characters using the Microsoft Japanese Input Method Editor (IME) in compatibility mode.
  • We fixed an issue that might cause a device to stop responding during hybrid shutdown.
  • We fixed an issue that prevents users from adjusting or turning off the touchpad because of administrative settings.
  • We fixed a window rendering issue that causes content in a window to flash frequently when FlipEx is used.
  • We fixed a window rendering issue that causes content in a window to flash frequently when multi-plane overlay (MPO) is used.
  • We fixed an issue with Japanese input that occurs after focus changes between boxes in Microsoft Edge Legacy.
  • We fixed an issue that displays nothing or shows “Computing Filters” indefinitely when you filter File Explorer search results.
  • We fixed an issue that makes the split layout unavailable for the touch keyboard when you rotate a device to portrait mode.
  • We informed users when a child account in the Family Safety plan has administrative privileges.
  • We fixed an issue that prevents you from closing Toast Notifications using the Close button on touchscreen devices.
  • We fixed an issue with a heap leak that might cause explorer.exe to consume high amounts of memory.
  • We updated the Volgograd, Russia time zone from UTC+4 to UTC+3.
  • We added a new time zone, UTC+2:00 Juba, for the Republic of South Sudan.
  • We fixed an issue with the Windows Event Log Forwarding client, which returns the first matching certificate without checking private key permissions. With this update, the Windows Event Log Forwarding client selects the client’s certificate only if the Network Service has read permissions for the private key.
  • We fixed an issue that causes PowerShell-based monitors to stop working when you enable transcription on the systems.
  • We fixed an issue that stops BranchCache from working if you activate Windows using Cloud Solution Provider (CSP) license.
  • We fixed an issue that prevents Windows 10 Home edition devices from upgrading to the Windows 10 Pro Education edition using mobile device management (MDM) services such as Microsoft Intune.
  • We fixed an issue that prevents App-V applications from opening and generates error 0xc0000225.
  • We fixed an issue in which some machines enrolled with an MDM service fail to sync if the device manufacturer’s name contains a reserved character.
  • We fixed an issue with using a configuration service provider (CSP) policy to configure a custom setting for Audit Other Logon/Logoff events. The custom setting fails to take effect.
  • We fixed an issue that causes a system to stop working when no Trusted Platform Module (TPM) is present in the system. The error code in TpmTasks.dll!TrackTPMStateChanges is c0000005.
  • We fixed an issue that causes multiple instances of appidcertstorecheck.exe to run on a system when AppLocker is enabled and the system is not on the internet.
  • We fixed an issue with credential roaming when Windows Hello for Business is enabled.
  • We fixed an issue that prevents performance monitoring tools from displaying logged data for single instance counter objects.
  • We fixed an issue that prevents the Chromium-based Microsoft Edge from working. This issue occurs when Microsoft Edge is used in combination with Microsoft App-V and fonts are enabled inside the virtual environment.
  • We fixed an issue that might cause a black screen or delay signing in to Hybrid Azure Active Directory joined machines. Additionally, there is no access to login.microsoftonline.com.
  • We fixed an issue that causes the system to stop working and generates error code 0xC9.
  • We fixed an issue with 7.1 channel audio technology.
  • We fixed an issue that turns on Caps lock unexpectedly when using RemoteApp. 31259510
  • We enabled Windows to retrieve updated printer capabilities to ensure that users have the proper set of selectable print options.
  • We updated support for hole punch and stapling locations for print jobs with long edge first paper feed direction on certain printers.
  • We fixed an issue with high memory usage when performing XSLT transforms using MSXLM6.
  • We fixed an issue that might cause File Explorer and other applications to stop responding for several minutes. This issue occurs after a client reconnects to the corporate network and attempts to use mapped drives to access file shares on the corporate network.
  • We fixed an issue that prevents Server Message Block 1 (SMB1) clients from accessing the SMB share after restarting the LanmanServer service.
  • We fixed an issue that might cause the cluster network interface to stop working for a short time. As a result, the network interface controller (NIC) is marked as failed. When the network is operational again, the system might not detect that the NIC is working and the NIC remains in a failed status.
  • We fixed an issue with signing in to a device that is in the current domain by using the default user profile of a device that is in a different, but trusted domain. The profile service of the current domain cannot retrieve the default user profile from the trusted domain and uses the local default user profile instead.
  • We fixed an issue that causes a device to stop working if you delete files or folders that OneDrive syncs.
  • We fixed an issue that prevents Windows from activating Windows 10, version 2004 using the OA 3.0 key after installing KB4598291.
  • We fixed an issue with evaluating the compatibility status of the Windows ecosystem to help ensure application and device compatibility for all updates to Windows.
  • We removed the Microsoft Edge Legacy desktop application that is out of support and installs the new Microsoft Edge. For more information, see New Microsoft Edge to replace Microsoft Edge Legacy with April’s Windows 10 Update Tuesday release.
  • We fixed an issue that prevents users from using the Remote Desktop Protocol (RDP) to connect to a Windows Server 2019 device that is in Desktop Experience mode.
  • We fixed an issue to allow our enterprise partners to work with the Microsoft Support program to create customized mitigations.
  • We fixed an issue that causes Remote Desktop sessions to end unexpectedly.
  • We fixed an issue with an HTTP Keep-Alive connection in Azure Front Door. After completing a previous request and response to keep the connection open, Azure Front Door will try to reuse the connection. After an idle timeout, a race condition might occur that closes the Transmission Control Protocol (TCP) connection. As a result, the client might fail with an invalid server response.
  • We fixed an issue that might cause a blue screen when attempting to print to certain printers using some apps and might generate the error, APC_INDEX_MISMATCH.
  • We fixed an issue that fails to print the graphical content in a document after installing the March 9, 2021 update.

Windows 10 version 21H1 is the next version of Windows 10 that is currently being tested with Insiders in the Beta channel, but Microsoft also made it available for commercial pre-release validation last week. 21H1 is expected to become generally available later this spring, and it’s a minor update that will only bring multi-camera support for Windows Hello as well as performance improvements for Windows Defender Application Guard.

In case you missed it, Microsoft also released a new Windows 10 preview build for the Dev Channel yesterday with some cool-looking new File Explorer icons. Microsoft is reportedly planning a big design update for Windows 10 version 21H2 coming in the second half of 2021, and we hope to see even more UI changes pop up in future builds.

Interview: Yubico’s Chief Solutions Officer explains why Yubikey security keys are valuable for business

There is no doubt that YubiKey is a great tool for consumers. As we explained, it can help you stay secure and add another layer of two-factor authentication to your personal accounts like Twitter, Instagram, a Microsoft Account, and so much more.

However, YubiKey is also in use across the world by enterprises and small businesses alike. Microsoft and YubiKey also have a shared goal, too of securing logins and helping keep accounts safe. OnMSFT had a chance to sit down with Jerrod Chong, Yubico’s Chief Solutions Officer, to talk about what YubiKeys can do for business.

How can YubiKey help small businesses and enterprises?

To begin our conversation, Jerrod Chong and I chatted about YubiKey for small businesses and also enterprises. Chong and I talked about how security is often a challenge for smaller groups as solutions like Windows Hello webcams or fingerprint readers can be expensive, and don’t always work across platforms. We also got into how YubiKey is compatible with all open security standards such as FIDO U2F, FIDO2, WebAuthn, and Smart Card/PIV.

There are also the challenges of using different services, too, like AWS, GSuite, Microsoft 365, and more. He tells me this is something Yubico has in mind when it thinks of helping small businesses and enterprises, especially in their security transition.

For these smaller groups, YubiKey can an inexpensive solution. It is cross-platform to allow for secure logins on various services which we mentioned above. It also is easy to deploy and manage, with a simple 5 step configuration, distribution, enrolling, backup, and revoke process.

“Buying YubiKey is far more valuable from an authentication perspective. It’s very common to see an iPhone user using Windows or a Mac user with an Android. Interoperability is special for YubiKey as it allows the users to traverse various technologies,” said Jerrod Chong.

For larger groups, Yubico also has its own YubiEnterprise Subscription, which helps solve this. Jerrod Chong mentioned that YubiKey’s products are used and trusted by 9 of the top 10 internet companies and 2 of the top 3 financial, retail, healthcare, and research institutions globally.

With YubiEnterprise Services, enterprises can easily procure and distribute YubiKey authentication solutions for employees at scale. This is for enterprises with more than 750 users. The service lets these groups purchase YubiKeys on a per-user basis. They also can upgrade easily to the latest YubiKeys as they become available, and access Yubico experts with always-on technical support. More information on that is available here.

Can you tell me about Yubico’s partnership with Microsoft?


If you didn’t already know, Yubico and Microsoft have a deep relationship. YubiKey has been rated as the #1 security key for Azure AD Authentication, and Microsoft’s own IT team switched to passwordless authentication, too. In fact, over 90 percent of Microsoft’s employees sign in without entering a password. YubiKey support is built into Windows 10, Microsoft Edge, and Microsoft Accounts with Microsoft Account Guard. Yubico also recently partnered with Microsoft to help make elections secure, as well.

Point is, in addition to their original partnership with Google on the FIDO Universal 2nd Factor (U2F) standard, Jerrod Chong tells me that Yubico works with major tech giants, to ensure secure logins are safe, easy, and available for everyone. Microsoft has also been key in Yubico’s journey and with rolling out open security standards such as FIDO2 and WebAuthn.

“Early in our mission, we had to identify the biggest tech giants in the world that we could work with. We need the platform, and we needed the browser and the operating system. Part of our mission is to help everyone. Microsoft Account Guard is part of that” said Chong.

Which YubiKey is right for small businesses, and which is right for consumers?

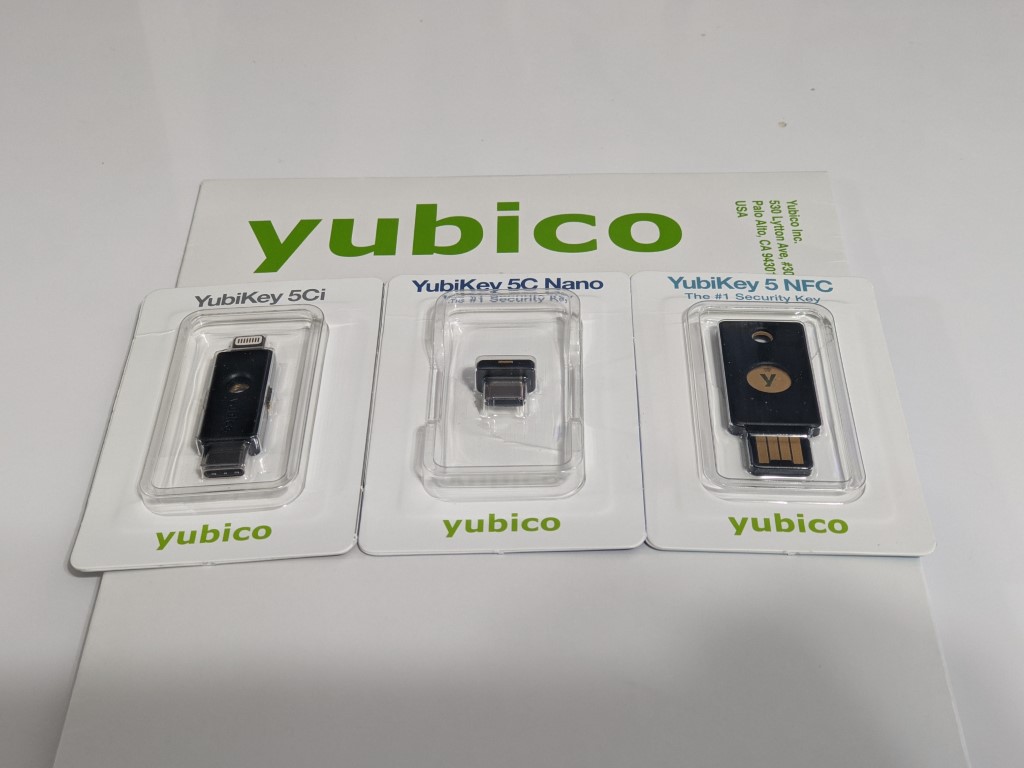
As we covered in our initial review, YubiKey has quite a diverse product lineup. The YubiKey 5 Series is the most popular, but there is also the FIPS series, YubiHSM, and the Security Key series, too. I was curious which key is right for who. Jerrod Chong was happy to answer and tell me it’s all about giving users choice, regardless of platform. He pointed to how YubiKeys are built on an open standard that works across major platforms, so choosing a key isn’t too hard for potential buyers.

“YubiKey takes the approach that you can take control of the things you want to have. Maybe you want to change from Google to Apple? It’s a way to control that, and it’s a way to encompass the security, usability in something tangible,” said Jerrod Chong.

I actually experienced this when I tried the YubiKey 5Ci, which works across both iOS and Android thanks to the lighting port, and USB-C port. Jerrod Chong and Yubico PR pointed me to YubiKey’s comparison tool a method for choosing the right key. Simply scroll down in the chart, and you’ll be able to find the right key for your own business, enterprise, or personal needs. You also can take this survey to find which YubiKey is right for your needs.

What are your thoughts on recent high-profile hacks, and how can YubiKey help prevent these?

With things like the SolarWinds attacks, as well as common phishing schemes making headlines, I was curious to see where YubiKey could have stepped in to help and help avoid scenarios like this. Chong was happy to discuss these issues with me. In most cases, he told me these types of hacks were mainly about the escalation of privileges. Creating a barrier and slowing down potential hackers with YubiKey and multi-factor authentication are things that could have helped out.

“There’s one common theme, and it’s an escalation of privileges. No matter how you got in, in most cases, it’s a phishing attempt, but if you don’t have phishing resistance and multi authentication, you’re giving attackers a free-range environment.”

Chong also told me that it’s about monitoring, too, and seeing the number of authentication requests. “We strongly believe that if people create this barrier, you’ll make hackers rethink their strategy and cost vs rewards,” he said.

Other thoughts and what’s ahead for YubiKey

Our interview ended with a question that I was really eager to ask. I was curious, how does Yubico take customer feedback into consideration, and what’s ahead for Yubico? On this, Jerrod tells me that Yubico gets feedback and requests from direct users, enterprises, as well as Microsoft and Google’s product team. The company is always listening and is eager to add support for more services. Sometimes, they even read Amazon reviews and take those into consideration, too.

“The top thing people are asking us is two-fold. What new services are being added, but they tend to ask us when our bank is doing it? We’re working on this and it is happening. People always want new form factors and capabilities. We need to keep our eyes open for new things and what devices and communications people are using,” said Chong.

To close, Chong was excited to talk about biometrics. This is something that’s been a topic of discussion during the global pandemic. “We are exploring […] and we are going to release a biometric device later this year,” Chong said.

You can learn more about YubiKey’s journey, and buy a Yubikley for yourself here. We thank Yubico and Jerrod Chong for their time!

0x00000008 Stop Error IRQL NOT DISPATCH LEVEL [Solved]

The 0x00000008 IRQL NOT DISPATCH LEVEL error is a relatively rare Blue Screen of Death (BSoD) issue that can arise in Windows 10 due to various causes.

This blue screen issue usually happens when installing or updating Windows and is often due to a hard drive or driver problem. In rare cases, it can be a software error.

When that Stop error occurs, a BSoD message appears stating:

A problem has been detected and Windows has shut down to prevent damage to your computer: IRQL_NOT_DISPATCH_LEVEL Error Code 0x00000008.

If the IRQL BSoD error becomes a recurring issue, you’ll need to fix it. Check our solutions below and get rid of the problem in no time.

How can I fix the IRQL NOT DISPATCH LEVEL error?

1. Use a dedicated tool for BSoD issues

These types of problems are hard to diagnose and troubleshoot for anyone because you never know exactly why they appeared. Fortunately, you can use specialized tools that will scan and fix BSoD errors.

2. Free up hard drive space

  1. Open File Explorer by pressing the Windows key + E hotkey.
  2. Select This PC on the left of File Explorer.
  3. Then right-click the hard drive icon there to select Properties.
    C: Properties window 0x00000008
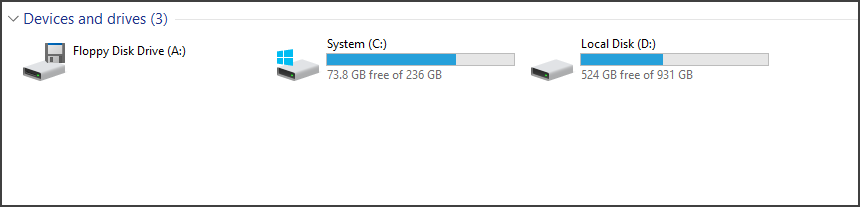
  4. If your hard drive has less than 20 percent free space, you’ll need to free up some HDD storage.

The HDD stores all the files, folders, and installed programs on your computer. The above steps shows you how to check exactly how much space is still free.

To make some space on your HDD in case there is less than 20 percent, you can check our dedicated guide including the best methods to free up hard disk storage.

3. Check for Windows 10 updates

  1. Input updates in the home screen search box.
  2. Click the Check for updates button.
    Check for updates button 0x00000008
  3. Allow Windows to search and see if there are any available.

Microsoft is constantly working on Windows 10, therefore if you wish to keep your PC stable and error-free, we strongly advise that you download the latest patches.

4. Initiate a driver scan

According to Microsoft, 70 percent of blue screen stop errors are due to third-party drivers. So, the IRQL NOT DISPATCH LEVEL error is often a driver issue.

You can update all your drivers manually from Device Manager, but, this is a very time-consuming activity. A solution is to use a tool that will automatically download and install updates.

As soon as it’s launched, the tool will scan the system and highlights any incompatible, missing, faulty, or outdated drivers that need updating.

⇒ Get Outbyte Driver Updater

5. Remove superfluous peripherals from PC

BSOD stop errors can be triggered by superfluous peripherals, such as printers, flash drives, external DVD drives, game controllers, etc.

So, try disconnecting any non-essential peripheral devices from your PC. If the issue no longer persists, then the error is probably due to one of your peripherals.

You can then try to connect them back one by one until the problem appears again. In this way, you will know exactly what external devices are problematic and need to be replaced.

6. Roll back Windows with System Restore

  1. First, open Run with the Windows key + R keyboard shortcut.
  2. To open System Restore, type rstrui in the Run box and click OK.
    System Restore window 0x00000008
  3. Select the Choose a different restore point option if System Restore displays that setting.
  4. Click Next to proceed.
  5. Select Show more restore points to get a full list of restore points.
  6. Select a restore point that restores Windows to a time that predates the BSOD error on your PC.
    Show more restore points option 0x00000008
  7. Click Next to continue.
  8. Press the Finish button to roll back Windows to the selected restore point.

System Restore is one of the more likely fixes for the IRQL NOT DISPATCH LEVEL error as that might undo recent system changes that generate the BSOD issue.

7. Reinstall Windows 10

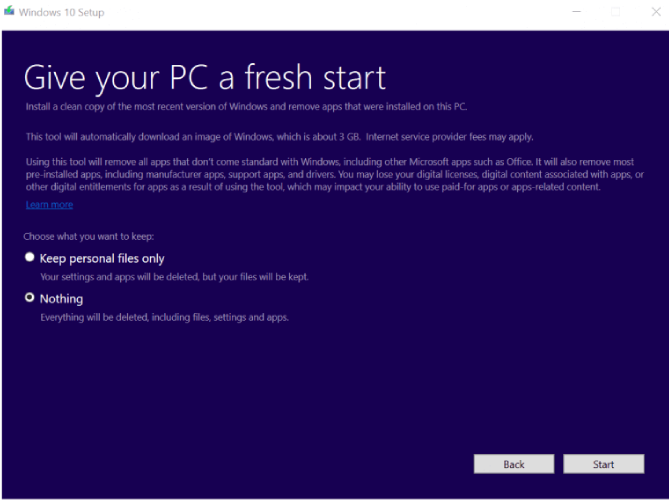
Reinstalling Windows 10 is the last resort for resolving the IRQL NOT DISPATCH LEVEL error. To do a clean Windows 10 install, you’ll need bootable USB media with a Windows 10 ISO on it.

A factory reset is similar to reinstalling Windows 10, and you can retain your own files with that method. So, some users might prefer resetting Windows to default instead of a completely clean reinstallation.

Our factory reset guide provides further guidelines for resetting Windows 10. Follow the steps provided in the article to don’t get any errors while performing this procedure.

To find more about the exact cause of a blue screen, you can check the log file. If you need more details, you can check our dedicated article on where to find and how to read the BSoD log file.

Those are some of the fixes for the 0x00000008 IRQL NOT DISPATCH LEVEL error. If one of these solutions helped, we’d like to hear your feedback so feel free to use the comments section below.

Outlook for Windows will get support for suggested replies this month

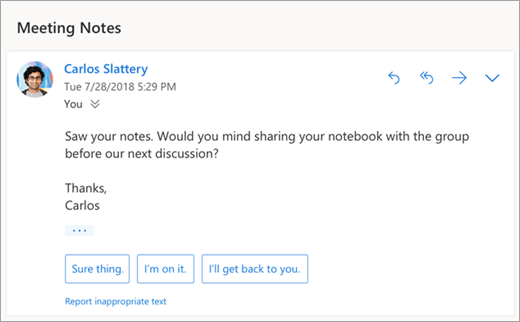
Microsoft is adding a new AI-based feature to Outlook for Windows that should help users save some time while responding to emails. Outlook on the web, iOS, Android already supports suggested replies, but the feature is coming to the Windows client later this month (via Neowin).

When this feature rolls out, Outlook for Windows will be able to provide users three related responses based on the message received in the email. The feature uses machine learning and AI to suggest the best possible reply, and users will simply need to click one to send it. However, users will be able to turn off suggested replies in the Settings menu.

A screenshot of suggested replies

The capability is already available for Office Insiders in the beta channel, and it has been designed to save users from the hassle of typing out simpler responses for their emails.

While Suggested replies launched first in the US for English-speaking users, but Outlook on the web is currently rolling out this functionality to customers worldwide in additional languages. The list includes French, German, Italian, Portuguese, and Spanish. Let us know in the comments down below if you have already spotted this feature on your PCs.

How to create a fake blue screen of death

Do you know you can make fun of your colleagues or even your boss in a funny way? This will work only if everybody at your workplace has Windows 8 or Windows 10, otherwise, they might not get the joke.

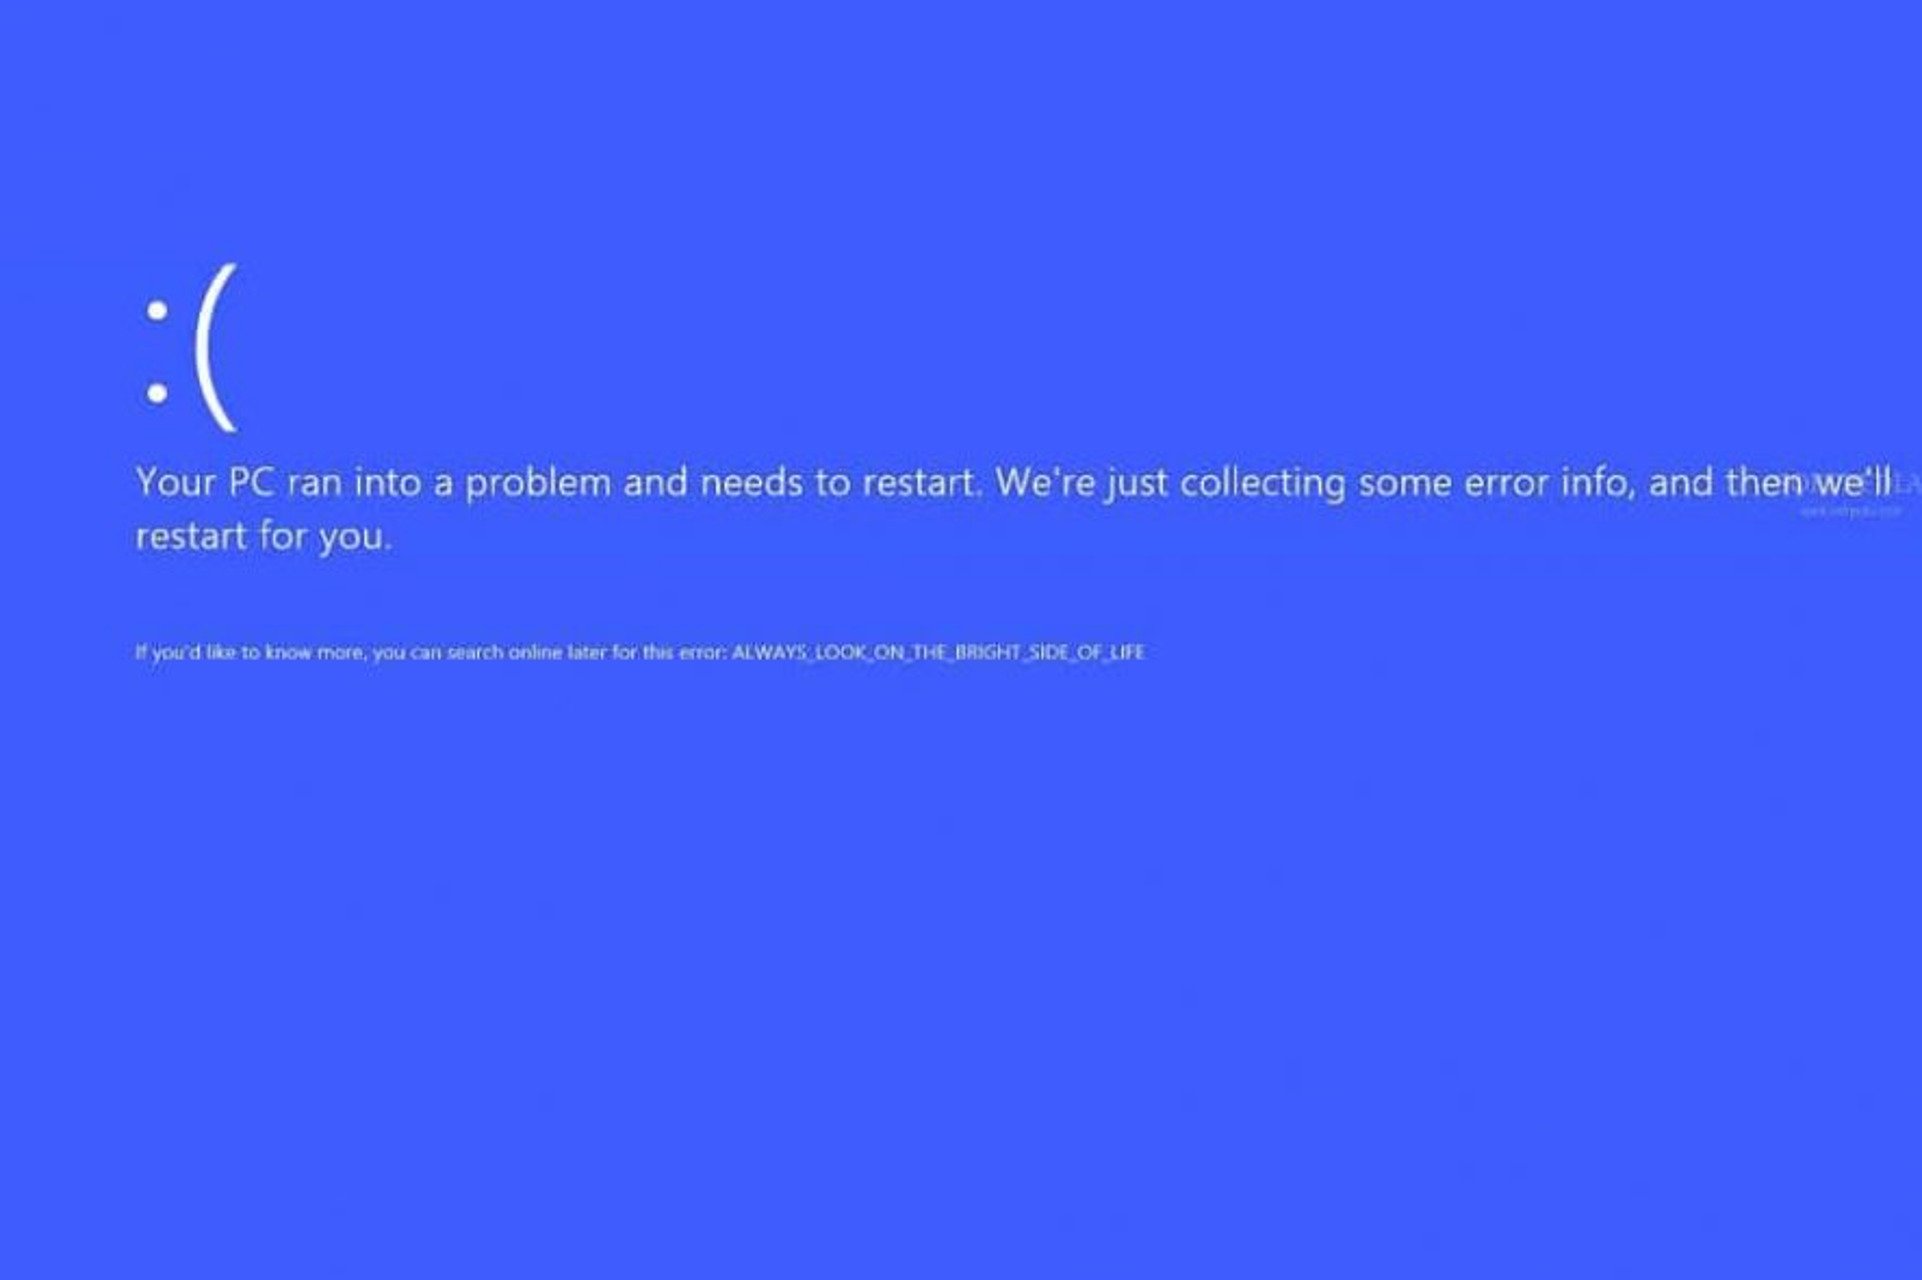
If you’ve encountered Blue Screen already on your Windows 10 or Windows 8 device, you know that it’s much nicer and friendlier than in previous versions.

And Windows used to even have an app to help you make pranks with this type of error. Unless someone read the full error message on the screen, they wouldn’t realize it was a joke. Because it read ALWAYS_LOOK_ON_THE_BRIGHT_SIDE_OF_LIFE.

Now Microsoft has discontinued that app, but there are other ways to still try the joke, even with real-life scarier messages. As you’ll see below, most of them imply a print screen or an HTML full-screen page only.

How can I do a blue screen of death Windows 10 prank?

Fakebsod.com

bsod prank dpc watchdog

The idea is pretty simple: you only have to access the page + press F11 to get the display into full screen and wait for your colleague to return to the computer.

Unless the full-screen mode is exited, they might not realize it’s a prank. You can try this joke on older systems such as Windows XP or 7, as well as on Windows 8 or 10.

The error message is based on a real BSoD error DPC_WATCHDOG_VIOLATION caused by hardware components or outdated drivers.


Screenprank

bsod prank hail initialization

This, in fact, is a whole website with similar pranks. You just have to access it, scroll down to the blue screen joke, open it and press F11.

Just as in the previous case, the HAL_INITIALIZATION_FAILED message points toward a real BSoD error with not-so-funny consequences.


Geekprank.com

bsod prank geekprank

This one is a bit different as it will keep the screen on the Installing updates message forever. It takes a long time for the fake process to get to 100%, but then it will only continue, so your friend my figure out the joke.

One nice aspect about this source is that it includes similar pranks for a whole range of instances such as iOS, Windows 7, BIOS, or virus infection.


BSOD alternative

In some cases, the pranked can be seriously affected by the joke. The thing is that when people see BSOD‘s, they instantly think about all the files they have lost. If you are not sure about the reaction that the pranked will have, try another easy prank:

  • Go to desktop and press PrintScreen.
  • Open Paint and paste it (Ctrl+V) and save the image somewhere.
  • Open it, do a right-click and set it as Desktop Background.
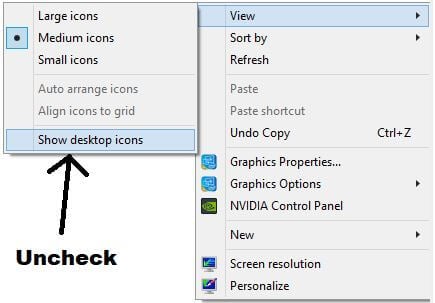
  • Now go to the desktop and uncheck Desktop icons: Right-Click > View > Show Desktop Icons.
  • Sit back and enjoy the reaction.

We hope you enjoyed these recommendations. Now go ahead and try them to see which one would work on your friends or colleagues.

FIX: KERNEL_APC_PENDING_DURING_EXIT [BSoD error]

The KERNEL_APC_PENDING_DURING_EXIT is a relatively common BSOD error that can arise in Windows 10.

In one Microsoft forum post, a user said: 

My computer always shows BSOD every time I shut down.

So, this can be a recurring BSOD that users really need to fix. Since this error will crash your PC, it is quite hard to point out the exact cause of it.

Thankfully, we performed some tests and we came out with lots of helpful solutions that should make the kernel_apc_pending_during_exit error a thing of the past.

How can I fix KERNEL_APC_PENDING_DURING_EXIT error?

1. Use a third-party system restoration tool

The best and safest way to rid your PC of major errors and crashes such as Blue Screens of Death is by installing a third-party app.

The software keeps your PC safe and sheltered from malware adware or other harmful software, and automatically scans and repairs any damaged system files.

Additionally, when it comes to BSoD errors on Windows PCs, an ideal method to resolve them is represented by dedicated tools that can detect corrupted files and replace them with new functional ones.

You should therefore use dedicated software to safely repair system errors like this one and revive your PC.

2. Run an SFC scan

  1. Open Run by pressing the Windows key + R.
  2. Type cmd in the blank box and choose to open Command Prompt as admin.
  3. Next, type this command in the Prompt and press Enter: DISM.exe/Online/Cleanup-image/Restorehealth
  4. After that, type and press Enter: sfc/scannow
    SFC command kernel apc pending during exit
  5. When the SFC scan is complete, a Windows Resource Protection message will tell you if it repaired files or not.
    • If so, restart your desktop or laptop.

3. Run a Check Disk scan

  1. Open the Command Prompt as outlined for the first resolution.
  2. Then input this command: chkdsk C: /f /r /x
    Check Disk command kernel apc pending during exit
  3. Press the Enter key to initiate the Check Disk scan.
  4. Allow the process to finish and see if the issue is solved.

4. Scan your device drivers

  1. Press the Windows Key + S.
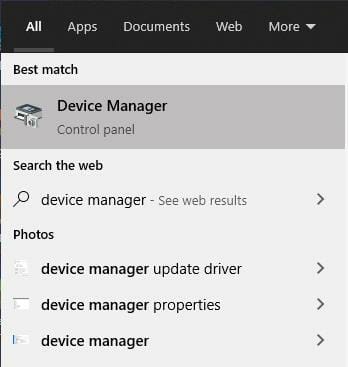
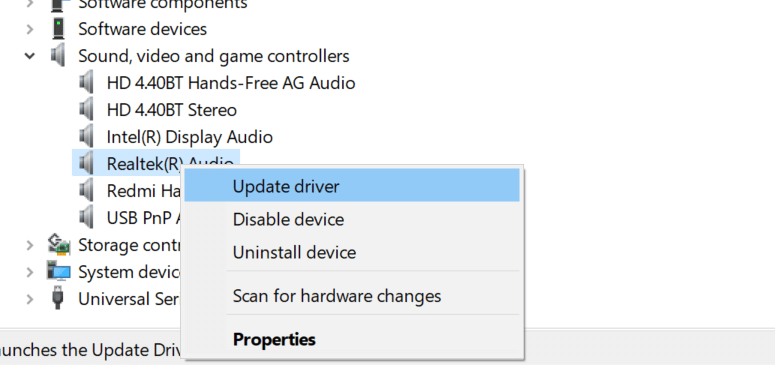
  2. Search for Device Manager and open it.
  3. Search for the device you want to update.
  4. Right-click on it and select Update Driver.
    0x00000002 DEVICE_QUEUE_NOT_BUSY
  5. Repeat for all the devices.

Scan device drivers automatically

You can scan your device drivers automatically to check for corrupted or outdated ones with a specialized third-party tool.

Simply download the software, and it will scan your PC by itself periodically. In addition, it will also install the newest drivers and keep them updated constantly.

⇒ Get Outbyte Driver Updater

5. Test your RAM

  1. Press the Windows Key + S.
  2. Type Windows Memory Diagnostic.
  3. Select Restart now and check for problems.
  4. Let Windows run the scan.

The KERNEL_APC_PENDING_DURING_EXIT BSOD error might also be due to a RAM issue.

You can utilize the Windows Memory Diagnostic tool to check for and fix RAM issues.

6. Roll Windows 10 back to a restore point

  1. First, press the Windows key + R at the same time to launch run.
  2. Enter rstrui in the accessory’s text box to open System Restore.
    System Restore kernel apc pending during exit
  3. Select the Choose a different restore point radio button if that option is available, and click the Next button.
  4. Next, click Show more restore points to fully expand the list of available restore dates.
    Show more restore points check box kernel apc pending during exit
  5. Choose a restore point that will restore Windows to a date that predates the KERNEL_APC_PENDING_DURING_EXIT error on the desktop or laptop.
    • If you’re not sure, select the earliest restore point, which will remove the most installed software.
  6. Click Next to continue.
  7. Click Finish to roll back Windows 10.

The above resolutions are among the more likely fixes for the KERNEL_APC_PENDING_DURING_EXIT error.

As a last resort, try clean installing Windows 10 with installation media. Learn how to get a clean Windows to install using our dedicated guide.

We hope that this article was helpful. If you happen to know another useful method to correct the BSoD error described here, share it with us in the comments.

HDMI Is Not Working on Your Laptop? Fix It with These Steps

As we all know, using Windows 10 can be quite frustrating, especially if you updated recently and you didn’t get used to the new interface, with the new features, and of course with the new bugs.

In that matter, many users have reported HDMI not working problems after updating from Windows 7 (or from any other version of Windows) to Windows 10.

So, because of that, we have decided to help you out. How? Well, by showing you how to easily resolve your HDMI problem on your laptop.

As you will see, fixing this Windows 10 issue is quite easy as you only have to apply a few steps.

Of course, we will detail more methods, so that anyone can find a compatible troubleshooting solution within this step-by-step guide.

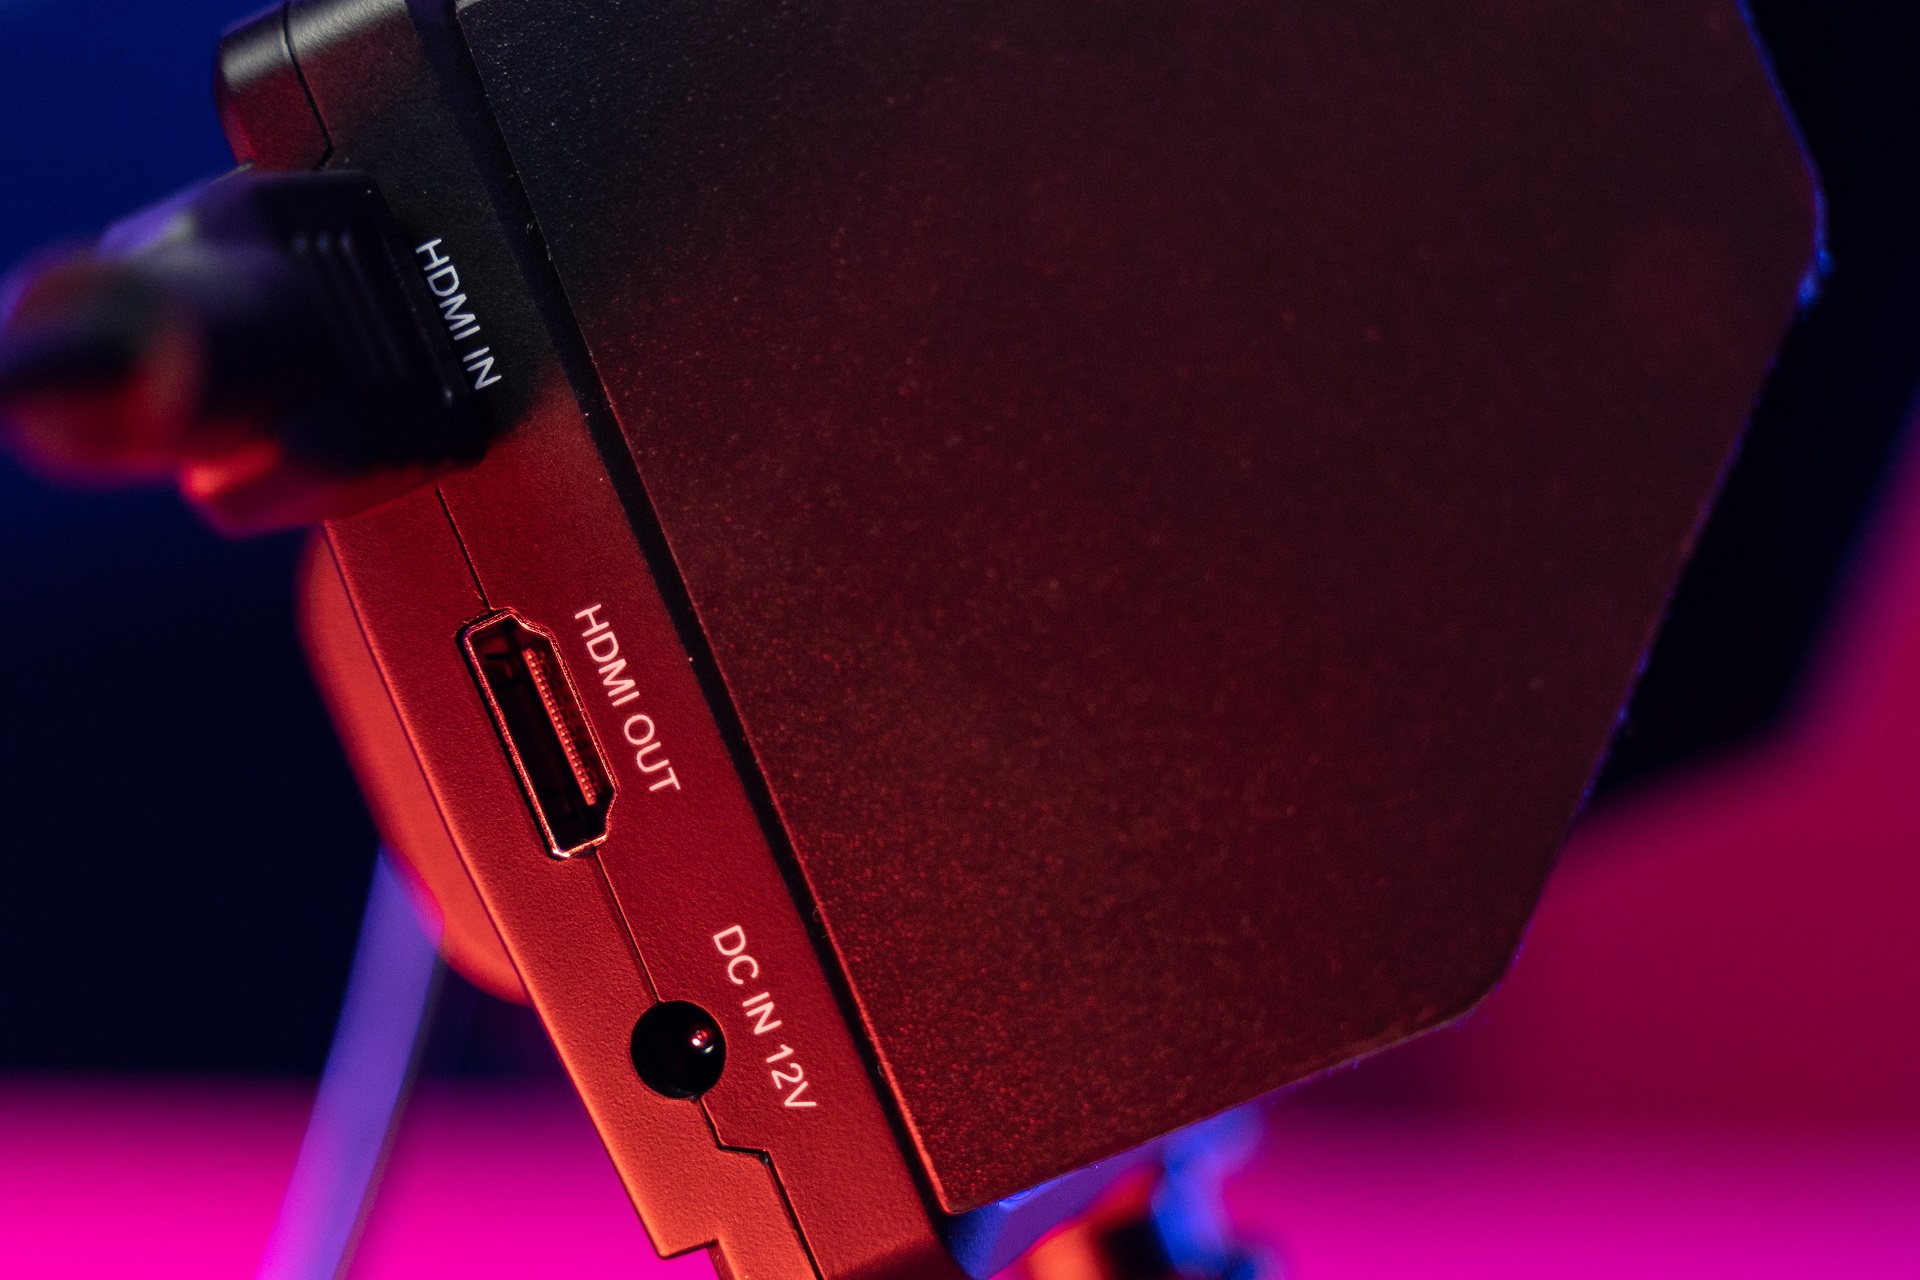
The HDMI port is used for connecting your Windows 10-based device with other gadgets such as a monitor, TV, Home Theatre, and so on.

If your HDMI port worked perfectly on your previous Windows version but after applying the Windows 10 update you can’t connect your device through the HDMI port, use the guidelines below.

How to fix Windows 10 HDMI not working?

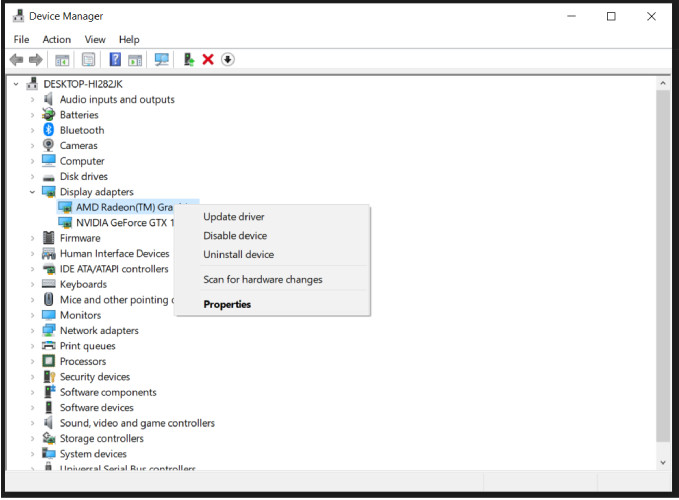
1. Uninstall your Graphic Card drivers

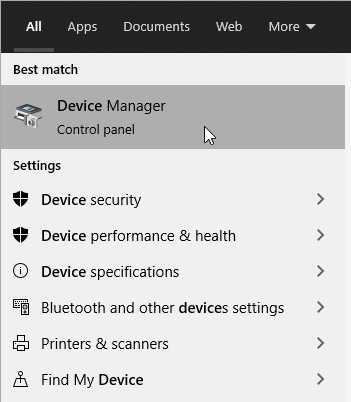
  1. Right-click the Start button and select Device Manager.
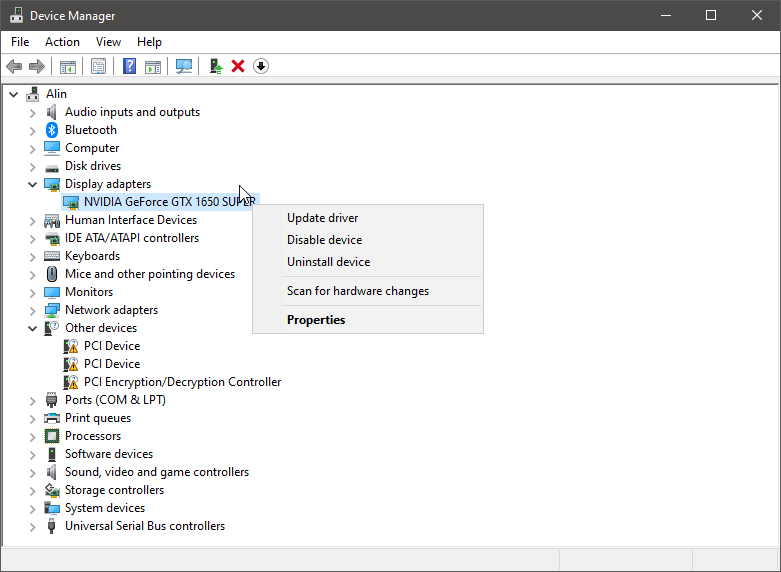
  2. Click on the Display Adapters section to expand it.
  3. Right-click the adapter and select Uninstall device.

The first thing to do when dealing with such problems is to uninstall the graphic drivers from your Windows 10 device. Follow the steps above to get it done.

Once you restart your PC, the system will automatically install a default driver.

2. Install the graphics card manually

The default driver is not the ideal way of using your graphics. So, after uninstalling the driver, go to your manufacturer’s official website and don’t download the driver from the graphic card maker’s website.

So once on the manufacturer website, search for your graphic card for the version of Windows you’re running and install the same on your computer in compatibility mode. 

3. Install the drivers automatically

  1. Start Device Manager by right-clicking the Start button and selecting the app from the list.
  2. Expand the Display adapters category.
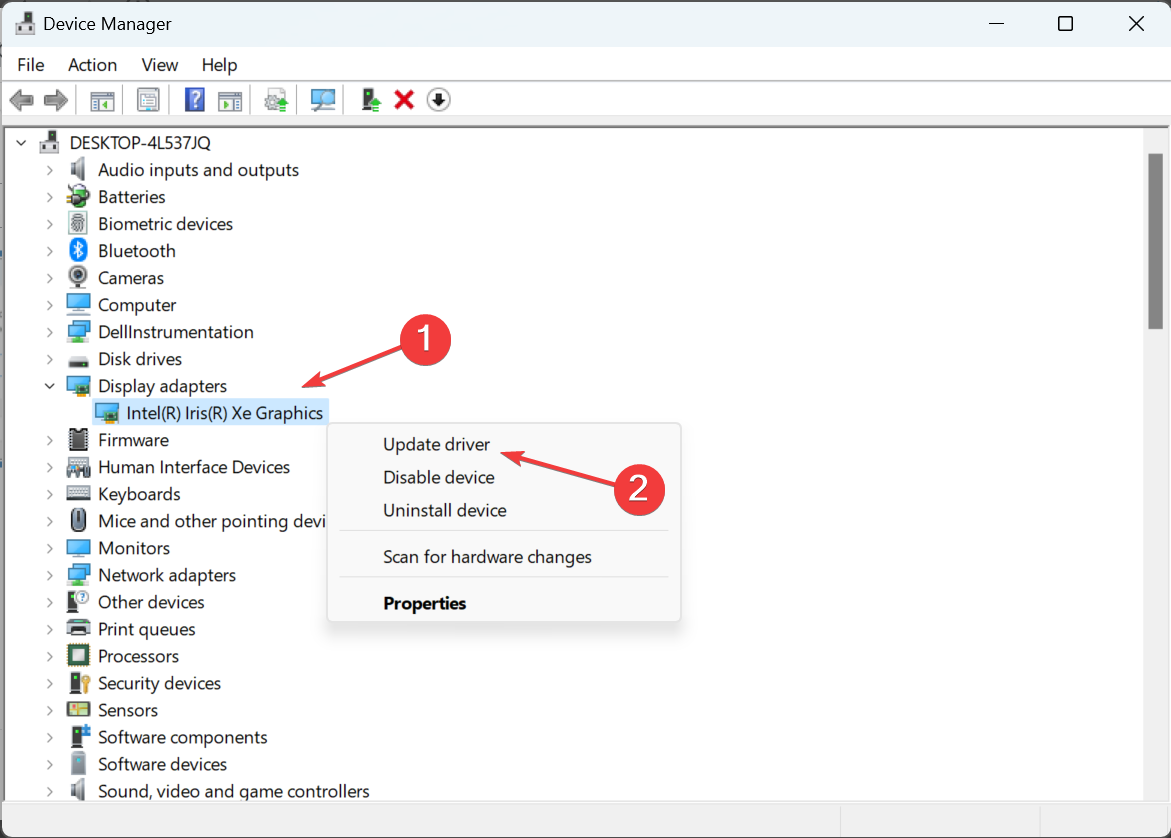
  3. Right-click the display adapter and select Update driver.
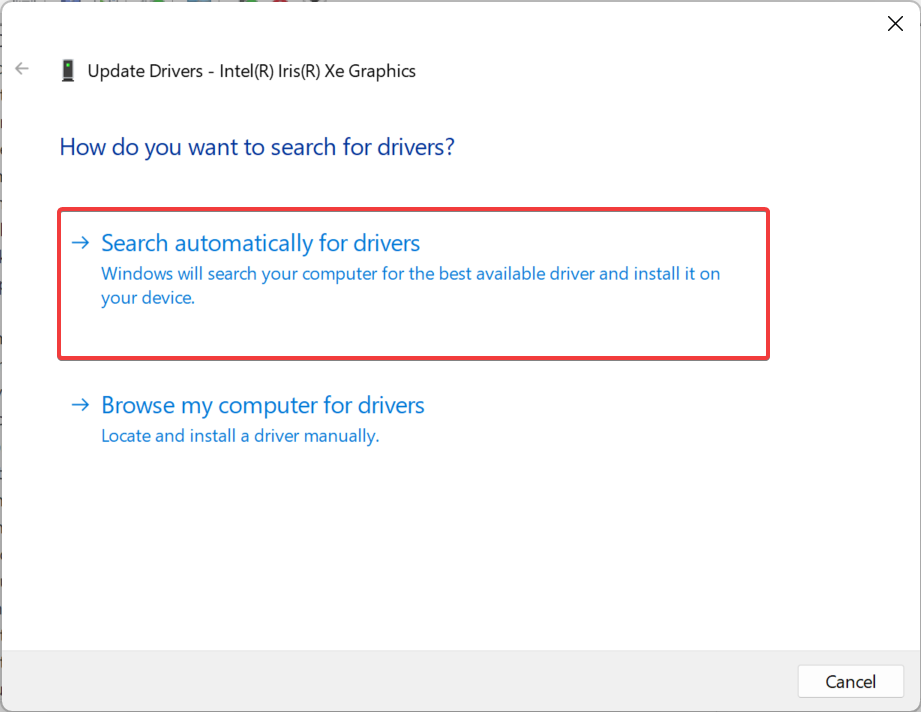
  4. Click on the first option, to search automatically for drivers.

By doing so, the system will automatically look for the correct drivers online for your graphics adapter.

Updating drivers can be very annoying, so we recommend you use a dedicated tool to prevent file loss and even permanent damage to your computer.

4. Restart and reconnect your devices

  1. Disconnect the cable from your HDMI port.
  2. Shut down the laptop and the HDMI device.
  3. Unplug the power cable from the laptop and if possible, remove the battery from the laptop.
  4. Leave them like that for at least 5 minutes.
  5. Put the laptop battery back and plug in the power cables.
  6. Reconnect the HDMI cable to your laptop and device.
  7. Power on the laptop and the HDMI device.

Sometimes, the simple procedure of restarting and reconnecting your device can get your HDMI port working again.

Now see if you can use your HDMI port and if the external HDMI device was identified by your laptop.

5. Configure your computer’s display settings

  1. Press the Windows key + P to start the PROJECT menu.
  2. You will see 4 possible Display settings:
    1. PC Screen Only – This option is when you want to display the image only on the screen of your laptop. If this is set, like in our example above, your HDMI video device was not detected.
    2. Duplicate – Try to use this option to duplicate the screen on your external HDMI device.
    3. Extended – You can also try this option to extend your screen to the external HDMI device.
    4. Second Screen Only – This option will force the image to be displayed only on the external device
  3. Choose one of the options with the exception of the first one.

If the display settings of your laptop are not set properly, you won’t be able to display the content from your screen to an external HDMI device.

If you still have problems with the HDMI connection, you should also consult our comprehensive article about how to fix the HDMI port problems on your computer or monitor. As for our guide on fixing Samsung monitor HDMI connection problems, rest assured that it won’t disappoint you either.

These are our solutions to fix the problem the HDMI is not working on your laptop. If you have any other solutions, don’t hesitate to leave them in a comment below.

Yakuza 6 video game launches on Windows 10, Xbox One, Xbox Series X, and Game Pass

The highly-anticipated entry in the Yakuza franchise, Yakuza 6: The Song of Life, is now finally available on the Xbox One and Xbox Series X console families and Windows 10 PCs via the Microsoft Store. The game originally launched on Sony’s PS4 console in Japan way back in 2016 and eventually launched internationally on the PS4 two years later in 2018. That’s a bit of a wait for Xbox and PC gamers but it’s still a release that’s been getting a lot of hype.

While the Yakuza 6 video game doesn’t support cross-buy between Xbox consoles and Windows 10 like some other titles do, the Xbox One and Xbox Series X version is supported completely between console generations so the same version you buy for an Xbox One console will work on an Xbox Series X (or S) and vice versa.

Both the Xbox and Windows 10 versions of Yakuza 6: The Song of Life are also available to play for free with an active Xbox Game Pass subscription.

Here’s the official game description and original trailer:

In Yakuza 6, Kazuma Kiryu will find out exactly how much people are willing to sacrifice for family – be those ties through blood or bond – when he investigates a series of shadowy events that involve the ones he holds closest to his heart. Fresh out of a three-year prison sentence, an older and weathered Kiryu comes to find out that his surrogate daughter, Haruka, has gone missing from the orphanage he looks after. The trail leads him to his old stomping grounds in Kamurocho, where he discovers that she has been struck by a car and now lies in a coma. To make matters worse, Kiryu learns that Haruka now has a son that he must look after. With baby in hand, Kiryu journeys to the seaside town of Onomichi, Hiroshima to unravel the truth about Haruka, her son, and a sinister secret that the Hiroshima yakuza are harboring.

From the unparalleled realism of the new setting of Onomichi, a beautiful, sleepy port town in Hiroshima Prefecture, to the latest evolution of Kamurocho, the biggest red-light district in Tokyo, Yakuza 6 is the ultimate iteration the game’s blend of gritty crime story, hyper-explosive combat, and all the vices and distractions those locales have to offer.

Are you a fan of the Yakuza video games? Let us know why or why not in the comments below and then follow us on Twitter and Pinterest for more Xbox gaming news.


FIX: Power BI Memory error allocation failure

Power BI is a fantastic tool from Microsoft, and while it may not be the stablest software tool of its kind, it’s admittedly still new and under active development.

The memory allocation failure error in Power BI usually occurs if the system does not have enough memory to process the task at hand.

You can try to close some apps, allocate more memory or make edits to the original table to fix this error as reported by the users in the Power BI Community.

Hi
I have created a pbix file in 64bit machine. File Size: 22 MB. Rows: 5.5 Million Approx.
Data is fetched from MYSQL Database.
While I try to open the same file in a 32-bit machine, an error message pops up
“Failed to save Modification to the server. Error returned: Memory Error : Allocation Faliure. If you are using 32 bit version of the product,consider upgrading to the 64 bit version or increasing the amount of memory available on the machine”.

Follow the troubleshooting tips in this article to fix Power BI allocation failure error.

Quick Tip:

You may adjust your browser to control how much of your PC’s resources are consumed while streaming, playing games, or downloading files.

Opera GX is one such browser that provides the GX Control Panel, which allows you to set limits on network bandwidth, RAM, and CPU use while navigating on it.

Opera GX

Control the resources used by your browser, and save battery life for laptops and mobile devices.

Not enough memory error in Power BI

1. Increase the memory available on the Machine

power bi memory error allocation failure
  1. If you are using the service on a Virtual Machine, check if the allocated memory is enough for the operations.
  2. Since you are getting this error, try to allocate more memory to the machine.
  3. You can also try to better utilize the available memory by optimizing your data model.
    • You can check the Internet for guides on optimizing your data model.

2. Enable Windows page file

  1. The error can also occur if your system has Windows Page File disabled.
  2. Login with the Administrator account to your system.
  3. Press Windows Key + R to open Run.
  4. Type control and click OK to open the Control Panel.
  5. Click on System and Security.
  6. Click on System.
  7. From the left pane of the System window, click on Advanced System Settings.
  8. By default, you should be in the Advanced tab.
    power bi memory error allocation failure
  9. From the Advanced tab, click on the Settings button under the Performance section.
  10. Open the Advanced tab in the Performance Options window.
    power bi memory error allocation failure
  11. Click the Change button under Virtual Memory section.
    power bi memory error allocation failure
  12. Make sure Automatically manage paging file size for all drives option is checked.
  13. Click OK to save the changes.
  14. Restart the computer and check if the memory allocation failure error.

3. Other solutions to try

power bi memory error allocation failure
  1. Try to remove any unnecessary column in Edit Queries before importing in the data model.
    • While Power BI supports 2bn rows and 16,000 columns, it can be limited by the machine performance.
  2. Try to allocate more memory in the Data Load tab. From Power BI dashboard, open Option > Data Load.
    • Now increase the maximum allowed memory.
  3. If you using 32-bit Excel app, I would recommend you to use 64-bit Excel which should overcome any memory limitation issues.
  4. Memory issues can also be caused by too many columns and bad cells, but thankfully enough these can be fixed.

This concludes our article covering the temporary memory allocation in PowerBI. Let us know if there is any other method you know of that we may have skipped, and we’ll update the article accordingly.

FIX: 0x0000000C MAXIMUM_WAIT_OBJECTS_EXCEEDED

The 0x0000000C MAXIMUM_WAIT_OBJECTS_EXCEEDED error is another Windows Blue Screen of Death (BSOD) issue some users might encounter.

This issue can arise after users install new hardware device drivers or software. The error can be due to a corrupted or deleted subroutine (program instruction sequence).

This is how you can fix the 0x0000000C Stop error in Windows.


How do I fix the 0x0000000C BSoD error?

1. Use an efficient system solution

Prevent the 0x0000000C MAXIMUM_WAIT_OBJECTS_EXCEEDED from affecting your computer with dedicated repair software.

Perfect for removing malware threats and detecting any dangerous website, these tools will optimize your computer and restore its performance.


2. Run a system file scan

  1. Right-click the Start button in Windows 10 and select Run.
  2. Enter cmd in Run’s Open box, and press the Ctrl + Shift + Enter hotkey.
  3. Type this command in the Prompt’s window, and then press the Enter key: DISM.exe /Online /Cleanup-image /Restorehealth
  4. Then initiate the SFC scan by entering sfc /scannow
  5. Press Enter and wait for the SFC scan to do its stuff.
    SFC scan 0x0000000C MAXIMUM WAIT OBJECTS EXCEEDED
  6. Restart Windows if the scan repairs files.

BSOD errors can be due to corrupted system files, which the System File Scanner can fix.


3. Run a CHKDSK scan

  1. Open the Command Prompt as administrator as outlined within the first resolution.
  2. In the Prompt’s window input the following command: chkdsk c: /f
  3. Press the Enter key.
Chkdsk scan 0x0000000C MAXIMUM WAIT OBJECTS EXCEEDED

Some users might need to run a CHKDSK (Check Disk) scan to fix the 0x0000000C error.


4. Update device drivers

BSOD errors often pertain to newly installed third-party hardware device drivers. So, updating device drivers with driver updater software are among the more likely fixes for the 0x0000000C error.

For that, download a powerful software that performs an efficient driver management, and have your problems solved in no time. When you get this complete solution for your drivers up and running, it will start a scan automatically.

That scan will show a list of devices with outdated, missing, faulty, or even drivers that are missing entirely. Afterward, the program will automatically download the latest compatible version, and then update, fix, or replace the ones you already have.

⇒ Get Outbyte Driver Updater


5. Check for Windows 10 updates

  1. Press the Windows key + S keyboard shortcut for the search utility.
  2. Input updates as the search keyword.
  3. Click Check for updates to open the Settings tab shown directly below.
    The Check for updates button 0x0000000C MAXIMUM WAIT OBJECTS EXCEEDED
  4. Press the Check for updates button to download available updates.

As updates extend Windows 10’s driver database, make sure your platform is fully updated.


6. Turn off Remote Desktop connections

  1. Open the Run accessory by pressing the Windows key and R at the same time.
  2. Type SystemPropertiesRemote.exe in the Open box, and click the OK button.
  3. Go to the Remote tab on the System Properties window will open.
    Remote tab 0x0000000C MAXIMUM WAIT OBJECTS EXCEEDED
  4. Select the Don’t allow remote connections to this computer option.
  5. Select the Apply option to confirm the settings.
  6. Click OK to exit the System Properties window.

This 0x0000000C MAXIMUM WAIT OBJECTS EXCEEDED error fix is more specifically for the Windows Sever 2008 and 2012 platforms.


7. Remove recently installed drivers and software with System Restore

  1. To do that, open Run.
  2. Next, type rstrui in the Open box. That will open System Restore when you click OK.System Restore utility 0x0000000C MAXIMUM WAIT OBJECTS EXCEEDED
  3. Select the Choose a different restore point option if it’s on the System Restore window.
  4. Click Show more restore points to select from a full list of restore points.
    Show more restore points option 0x0000000C MAXIMUM WAIT OBJECTS EXCEEDED
  5. Choose a restore point that will roll Windows back to a date that predates the 0x0000000C error on your desktop or laptop.
  6. Click the Next option.
  7. Then press the Finish button.

Restoring Windows to a restore point will uninstall recently installed programs and drivers that might have triggered the 0x0000000C error.


8. Clean Install Windows 10

If the above resolutions aren’t enough, a clean install of Windows might be your best bet.

You’ll lose all installed third-party software (and your own files that aren’t backed up) when you reinstall Windows with a clean install.

However, that’s why a clean install can likely resolve the 0x0000000C issue. To reinstall Windows 10 with the Refresh Tool, check out our clean install of Windows 10 guide.


These fixes will probably solve the MAXIMUM_WAIT_OBJECTS_EXCEEDED error.

The resolutions provided by Microsoft’s Stop error troubleshooter might also come in handy for fixing the 0x0000000C.

Windows 10 2004 black screen bug bothers some users to date

Since Windows 10 2004 came out on May 27, 2020, it has had multiple issues, some of which were resolved by Microsoft over some time. On the other hand, the new OS brought certain bugs that are as stubborn as they’re weird.

The black screen problem is a perfect case in point. It’s not your typical Windows 10 bugcheck, and as such, it has no error code.

However, these are a few typical scenarios when such a black screen would occur: before or right after logging into Windows, or after installing Windows 10 updates.

On the Windows 10 Subreddit, a user posted a screenshot of a dark Windows Update page with blank lines and no text in some sections.

Some users have installed the Windows 2004 update and a black screen appeared, strangely related to their graphics card. In addition, the bug is so unpredictable that it can affect any app on Windows 10 2004, sometimes at random.

One user arrived at that conclusion after experiencing the problem on the Windows Mixed Reality (WMR) platform.

This user noticed that the black screen appeared on their Acer OJO 500 headset’s display, sometimes every 30 minutes when playing a game.

The black screen only happen in the display headset but the preview on the desktop will show correctly.

The black screen is intermittent. Some time 30 minutes after playing a game.

The black screen can happen even when the headset is placed on the table with no input.

The black screen can also happen during the calibration (moving headset side to side and look down) part.

This user replaced their WMR headset, but the black screen glitch didn’t go away. However, dual booting with Windows 10 v1903 solved the problem.

The majority of Windows 10 2004 users are agonizing over the fact that, without an official point of reference, troubleshooting the bug starts out as a wild goose chase. Yet, there are at least three solutions that anyone can try in this case.

How do I fix Windows 10 2004 black screen issues?

1. Use a debugging software

This is the easiest thing to do, actually, especially since you can’t really pinpoint the cause of the black screen. A debugging software will scan your system and fix any issues or recommend the appropriate actions to take. You might have to run this tool in Safe Mode.

2. Roll back to your previous OS version

  1. Open Settings and choose Update and Security.
  2. Scroll down to the Recovery option.
  3. There, choose Go back to the previous version of Windows 10.

The system will allow you to restore one of the previously saved OS versions. Whenever certain updates cause system issues. Microsoft recommends uninstalling the respective feature or or roll back to a previous version of Windows 10:

So these are all easy-to-use troubleshooting solutions in case the Windows 10 2004 update causes a black screen. We’ve extensively tackled this subject when other details were specified as well:

3. Install the latest graphics card drivers

Normally, Windows updates drivers automatically. But, for various reasons, the process might fail and lead to BSoD issues such as this one.

You can update drivers manually by opening Device Manager, right-clicking on your graphics driver and choosing to update.

But in many cases, the process will say that the driver doesn’t need an update. So again we recommend using dedicated software such as Outbyte Driver Updater for a more in-depth analysis of your system components.

Outbyte Driver Updater will scan your device and show all drivers that need updating. The tool will also suggest viable driver options suitable for your device brand and version.

Additionally, Outbyte Driver Updater doesn’t have to be a one-time tool. You can use it for subsequent updates of all your device drivers since this is a best practice when it comes to your device’s health.

⇒ Download Outbyte Driver Updater

We hope that you found a solution for your black screen event in one of these articles. We’d be happy to hear which step helped so don’t hesitate to drop us a line in the comments.

FIX: Solarwinds VSS error 0x8004231f

Solarwinds is one of the most trusted and reliable monitoring and management tool that helps IT professionals stay on top of their game when it comes to their network health.

Unfortunately, the tool does come with its share of errors, and users report getting the Solarwinds VSS error 0x8004231f when trying to use it.

The error is caused by insufficient storage space or it can just as well be caused by defining shadow associations with a size smaller than necessary.

In this article we will explore the exact steps you need to make in order to fix the Solarwinds vss error 0x8004231f, so make sure to keep on reading.

How can I fix the Solarwinds VSS error 0x8004231f?

1. Use a specialized software

downgrade your bios

One small error can have a huge impact on the overall network if left undetected or unsolved for larger periods of time.

This is why, using a tool that is error free and is reliable, is one of the best choice. In this matter we would recommend PRTG Network Monitor as a tool that will not let you down.

The incorporated features, customizable interface, notification system and alerts are some of the most important selling points of this software.

PRTG Network Monitor

PRTG Network Monitor

Keep an eye on your network and monitor the devices with one of the world’s best monitoring tool.
Free trialVisit website

2. Verify the available free space

  1. Press the Windows key + E to open File Explorer.
  2. Next, click on This PC and go to the Devices and drives section.
  3. For each storage device, you can see the free space available under the status bar.

If your storage space is low, try freeing it up and that will hopefully fix Solarwinds VSS error 0x8004231f.


3. Delete Shadows using vssadmin

  1. Type cmd in the Search box, to open Command Prompt.
  2. Next, select Run as administrator.

  3. Type in the following command and press enter: vssadmin delete shadows /all
  4. Wait for the process to finish and restart your device.

We hope that one of the above solutions will help you solve the Solarwinds vss error 0x8004231f once and for all.

Please let us know in the comments section below which one worked best for you and if you have additional recommendations or suggestions.

Getting the BSoD error 0x000000f7? Fix it in 4 simple steps

Windows BSoD( Blue Screen of Deaths) issue 0x000000F7 can occur due to multiple reasons and often shows different error messages.

Some of the error 0x000000F7 messages include RIVER_OVERRAN_STACK_BUFFER, KMODE_EXCEPTION_NOT_HANDLED, or UNEXPECTED_KERNAL_MODE_TRAP.

The BSoD error with the stop code 0x000000f7 can be related to the ntkrnlmp.exe, which is an executable file associated with Windows Operating Systems.

This error can occur due to a bad RAM module, incompatible drivers, glitch in any of the recently installed Windows updates, or hardware issues as reported by the users in the Microsoft community forum.

I keep getting a blue screen and the: “DRIVER_OVERRAN_STACK_BUFFER” Message!! when playing game. This can happen 10-30 mins in the game.
I use Advanced SystemCare 10.2 Pro to fix but nothing works. i also update all driver with Driver Booster 4.2 Pro. HELP!!!

In this article, we explore a few common solutions to fix the BSoD error 0x000000f7 in Windows computers.

How do I fix the BSoD error 0x000000f7?

1. Update your computer drivers

Many BSoD errors are related to hardware issues or outdated drivers. Thus, make sure to have all your drivers up to date. You can do this manually from Device Manager.

Searching for computer drivers on your own can be time-consuming. So, we advise you to use a tool that will do this for you automatically.

It works with all versions of Windows and makes upgrading drivers a breeze. Outbyte Driver Updater may be set to find outdated drivers automatically.

Outbyte Driver Updater can assist you in automatically updating drivers and preventing PC harm caused by installing the incorrect driver version. It keeps up with the latest modifications, preventing the system from experiencing latency, system failures, and BSoD faults.

Outbyte Driver Updater is an excellent choice for this task. It has a clean interface and is simple to use, even for computer rookies.

2.  Run System File Checker

  1. Press the Windows key and type cmd.
  2. Click on Run as Administrator for Command Prompt.
  3. In the Command Prompt, enter the following command and hit Enter:
    sfc /scannow
  4. Wait for the system file checker tool to scan and validate the system files.
  5. The tool will fix missing or corrupted files in the system if required.
  6. Once the scan is 100% complete, reboot the computer and check if the error is resolved.

The SFC scan is a command-line tool that will scan your system for potential errors and resolve them on the way. So, it can also fix the BSoD with stop code 0x000000f7.

If you have any problems while running SFC, it stops or does not work at all on Windows 10, take a look at our dedicated guide in order to fix the issue.

3. Check for memory issues

One of the reasons for the error 0x000000f7 is a bad memory. If your system has a removable RAM module, try changing them.

Restart the device to see if the error is resolved. If you have a custom-built PC, you should be able to remove all the RAM modules. Remove all but one stick and boot the PC to see if the error is resolved.

Try these will all the RAM modules to see which memory kit is causing the error. In some cases, it could be the RAM slot that is causing the error, so avoid using the faulty RAM slot.

4. Use system restore point

  1. Press the Windows key and type system restore.breakpoint has been reached restore
  2. Click on Create a Restore Point option.
  3. Click the System Restore button in the System Properties window.system restore
  4. Select Next to proceed.
  5. Select the most recently created restore point.Session has valid pool on exit
  6. Click on Scan for affected programs. This will show if Windows will uninstall any existing programs on your system.
  7. Click Next to continue with the restore process.
  8. Read the description and then click on Finish.

The system restore process may take some time depending on the size of the restore point. The PC will restart once the restore process is complete and show a success message.

If you encounter any other BSoD errors and are curious why they happen, take a look at our guide including the most common causes for blue screens.

Don’t hesitate to let us know if this guide was useful in your situation. You can do so by simply leaving a comment in the section found below this article.

Session has valid pool on exit [BSoD error fixed]

You may encounter a Blue Screen of Death error with the stop code SESSION_HAS_VALID_POOL_ON_EXIT on the terminal server when trying to log off from a Remote Desktop Services session.

The error stops the remote desktop session to the remote desktop server from responding followed by an abrupt disconnect.

According to Microsoft, the error occurs because some objects that the Win32k.sys driver allocates from the session pool are not freed before the session ends.

Another similar error generated by the random user logoff you can see is the 0x000000AB SESSION_HAS_VALID_POOL_ON_EXIT in ntoskrnl.exe. 

If you encounter this problem, we recommend you follow the steps in this article to know how to fix the error with your Windows 10 system.


How do I fix the SESSION_HAS_VALID_POOL_ON_EXIT error? 

1. Use a dedicated tool for BSoD issues

Troubleshooting blue screen errors can be hard for most of us. There are multiple causes and various methods to fix them. Fortunately, there are specialized tools that help us to diagnose and solve any BSoD problem.


2. Install all Windows updates

  1. Click on Start and select Settings.
  2. Go to Update & Security.
  3. Open Windows Update from the left pane.
  4. Click on the Check for updates button and install all the pending updates.

Windows updates often fix compatibility issues and security flaws, so it’s a good practice to download and install them frequently. Many of these updates address both hardware and software issues.


Windows Update not working in Windows 10? Take a look at our dedicated guide and solve this problem with ease.


3. Restore to an earlier point

  1. Press the Windows key and type system restore.breakpoint has been reached restore
  2. Click on Create a Restore Point option.
  3. Click the System Restore button in the System Properties window.system restore
  4. Select Next to proceed.
  5. Select the most recently created restore point.Session has valid pool on exit
  6. Click on Scan for affected programs. This will show if Windows will uninstall any existing programs on your system.
  7. Click Next to continue with the restore process.
  8. Read the description and then click on Finish.

Windows will now restore your computer to the state it was in before the event shown in the description. The process may restart your system a few times to apply the changes.

If System Restore is not working in Windows 10 and you are not being able to follow this solution, we recommend you check our dedicated guide in order to fix the problem.


4. Check for Windows OS compatibility

If the session has a valid pool on exit error is occurring after or when using a peripheral device like a printer, make sure the printer driver is compatible with your Windows version.

You can check for different drivers on the manufacturer’s website. You can try to install the newest one, but if the issue is not solved, you can also use an older version of the driver.

Searching for drivers on your own can be time-consuming. So, we advise you to use a tool that will do this for you automatically.

Using an automatic driver updater will certainly save you from the hassle of downloading drivers manually, and it will always keep your system up to date with the latest drivers.

⇒ Get Outbyte Driver Updater


The blue screen error SESSION_HAS_VALID_POOL_ON_EXIT usually occurs if you have a bad patch of Windows installed. However, you can easily solve it with the above solutions.

If you encounter other types of blue screen problems, you can try to solve them by using any of these dedicated software that fixes BSoD errors.

Do let us know which method helped you resolve the issue, or if you have any other suggestions for us, in the comments section below.

Edge Startup boost feature is now temporarily disabled

Microsoft has decided to disable the newly added Startup boost feature after users complained of loop browser relaunch.

Released a few months ago along with Edge 88, Startup boost promised a faster browser launching process. Certain browser features are running in the background once you boot your device, so the browser opens even faster whether launched from the taskbar, desktop, or other hyperlinks.

The feature was still rolling out to the general public, but it was withdrawn. due to the numerous complaints.


You can still run a buggy version of Startup boost

startup booster loop

While until a few days ago the feature came enabled by default in Edge, currently the users can still use it, but they have to enable it manually.

Note that using Startup boost may lead to higher CPU values or game lagging, as one user puts it:

I haven’t noticed any difference in performance when this feature was enabled/disabled. Only that it took an impact on my CPU which caused my games to lag horribly. It may very well work for others but, I have to disable it for now.

And indeed, some users have been satisfied with the feature and noticed some improvements. While others mentioned that Edge would launch promptly on newer devices, given the fact that the system is less worn out.

On the other hand, the background-ready processes could make Edge restart unnecessarily, while also opening multiple processes in Task Manager.

I just had to disable this on all my Windows 10 PCs as it was causing Edge to immediately restart every time it was closed. I am guessing this is not the expected behaviour. 

Given the feedback, a few days ago Microsoft decided to temporarily halt automatically enabling this feature with their Edge browser.

Our team is working on fixing a couple of issues where some customers are seeing the browser reopen immediately after exiting and/or a message about reopening tabs when startup boost is enabled. 

edge startup boost button

Users can still enable the feature if they go to Edge > Setting > System and toggle the Startup boost button. Additionally, Microsoft encourages users to keep submitting feedback on this feature, which helps them improve it.

One user noted that the feature was missing on his Edge version and Microsoft support promptly helped with this issue.

It’s likely that Microsoft will promote Startup boost again once the option is more stable. Meanwhile, if you’re keen to try out the option, go ahead and activate it.

Also, we’d like to hear whether it made any improvement on your browsing experience at all, so feel free to use the comments section for that.

Windows 10 Insider build 21343 is out with redesigned File Explorer icons

Microsoft is introducing a couple of redesigned File Explorer icons in the Windows 10 Insider build 21343, which is now available to download for Dev Channel Insiders. The company gave a fresh coat of paint to top-level user folders in File Explorer such as Desktop, Documents, Downloads, and Pictures, and even the Recycle Bin icon has also been refreshed in this build.

“We first began updating the icons in Windows 10 last year starting with the built-in apps. Since then, we have continued updating icons throughout Windows 10 including the icon for Windows Security, the Narrator icon, and most recently the icon for Notepad. Now we’re taking the next step by updating many of the system icons used throughout File Explorer,” the Windows Insider team explained today.

A lot of Windows 10 icons are still waiting for an update, but what we’re seeing so far looks pretty good. “Several changes, such as the orientation of the folder icons and the default file type icons, have been made for greater consistency across Microsoft products that show files,” the team said today.

Before and after of Photos folder icons.

Please note that after upgrading to this build, any custom folders you’ve pinned to Quick Access will disappear. Before the team can fix this issue, insiders should either skip this build or make note of any custom folders before installing it.

This new build also brings minor improvements to Windows Sandbox and Microsoft Defender Application Guard, while News and Interests in the task bar will start rolling out to Insiders in China. You can also find below the list of other changes, bug fixes, and known issues for the build 21343:

Changes and Improvements

  • We’re changing the name of the Windows Administrative Tools folder in Start to Windows Tools. We are working to better organize all the admin and system tools in Windows 10.
  • [News and interests] Update on the rollout: following our last update on languages and markets, this week we’re also introducing the experience to China! We continue to roll out news and interests to Windows Insiders, so it isn’t available to everyone in the Dev Channel just yet.
  • We are now rolling out the new IME candidate window design to all Windows Insiders in the Dev Channel using Simplified Chinese IMEs.
  • We’re updating the “Get Help” link in the touch keyboard to now say “Learn more”.
  • We’re updating File Explorer when renaming files to now support using CTRL + Left / Right arrow to move your cursor between words in the file name, as well as CTRL + Delete and CTRL + Backspace to delete words at a time, like other places in Windows.
  • We’ve made some updates to the network related surfaces in Windows so that the displayed symbols use the updated system icons we recently added in the Dev Channel.
  • Based on feedback, if the Shared Experiences page identifies an issue with your account connection, it will now send the notifications directly into the Action Center rather than repeated notification toasts that need to be dismissed.

Fixes

  • We fixed an issue where devices with certain NVMe drives were experiencing disk resets or WHEA_UNCORRECTABLE_ERROR bugchecks.
  • We fixed an issue where some devices were receiving DPC_WATCHDOG_ERROR bugchecks.
  • We fixed an issue where some devices with Realtek network adapters running driver version 1.0.0.4 were experiencing intermittent loss of network connectivity.
  • [News and interests] Fixed an issue where on some occasions the news and interests button text was using the wrong high contrast color.
  • [News and interests] Fixed an issue where news and interests may not be available when signing into Windows without internet access but returns when online.
  • [News and interests] We’ve made multiple fixes to help improve performance and reliability for explorer.exe.
  • We fixed an issue resulting in explorer.exe crashing with Event ID 1002.
  • We fixed a memory leak when interacting with the Recycle Bin.
  • We fixed a deadlock in recent Dev Channel builds related to the Indexer, which could result in not being able to launch Start menu or other apps on first boot after an upgrade.
  • We fixed an issue where on some high-refresh-rate monitors, games would only run at 60Hz. This issue may have also resulted in tearing in variable-refresh-rate monitor scenarios.
  • We fixed an underlying issue resulting in some apps crashing during install and potentially other activities recently.
  • We fixed an underlying issue resulting in some apps unexpectedly displaying a message saying, “You must restart your computer before the new settings will take effect.” recently.
  • We fixed in issue resulting in blurry text on secondary monitors in recent Dev Channel build when the monitor was set to portrait orientation.
  • We fixed an issue impacting the reliability of WIN + Shift + Left / Right Arrow in recent builds.
  • We fixed an issue where the size information for large capacity drives could be truncated in File Explorer’s properties dialog.
  • We fixed an issue that could result in the header at the top of Settings having truncated text in some languages.
  • We made a fix to help address an issue where the user profile picture in the Settings header would flicker when resizing the window. Please let us know if you’re still noticing this after upgrading.
  • We fixed an issue where after changing audio end points the volume controls in Sound Settings might stop working.
  • We fixed an issue where the Properties and Data Usage options were missing in Network Status settings page recently.
  • We fixed an issue where if you searched for “Advanced touchpad gesture configuration” and clicked the result, it would just launch Settings, and not that specific Settings page.
  • We fixed an issue resulting in Settings crashing for some Insiders after launching it by double clicking on the Windows Update icon in the taskbar.
  • We fixed an issue that was blocking Azure Data Studio from updating to a newer version on ARM64.
  • We fixed issues that were causing Ngen.exe to fail to precompile .NET Framework binaries on ARM64.
  • We fixed an issue that could result in some of the touch keyboard’s child keys being cut off.
  • We fixed an issue where a flick up on the top row of the touch keyboard wouldn’t insert the corresponding number when using the small touch keyboard layout, unlike the other layouts.
  • We fixed an issue that could result in display issues with the IME candidate windows after switching between light and dark theme.
  • We fixed an issue where after typing a very long string of text the Japanese IME could become disabled.
  • We fixed an issue where it wasn’t possible to use SHIFT + Space in Excel when typing with the Japanese IME.
  • We fixed an issue with the Japanese IME where it wasn’t possible to enter a sentence that began with “を” when typing in Kana input mode.

Known issues

  • [Gaming] There is an issue in this build where certain games may crash, will not sync save data when a game is played on a different device, or will not save when a new game is installed. We are working on a fix, but if you believe this may impact you, to avoid any potential data corruption, we recommend you pause updates until we release a new build with the fix.
  • [File Explorer] After installing this build, all folders pinned to Quick Access in File Explorer will disappear. Please make sure to take note of what is pinned prior to upgrading, so you can find those folders again.
  • [File Explorer] Some Insiders may experience that the entire folders section of Quick Access is missing. If you encounter this, deleting this string %appdata%\Microsoft\Windows\Recent\AutomaticDestinations\f01b4d95cf55d32a.automaticDestinations-ms will bring back the section, however it will not bring back the items that became unpinned. We are working on a fix for this and appreciate your patience.
  • We’re looking into reports of the update process hanging for extended periods of time when attempting to install a new build.
  • We’re working on enabling the new taskbar experience for existing pinned sites. In the meantime, you can unpin the site from the taskbar, remove it from the edge://apps page, and then re-pin the site.
  • [News and interests] Pressing ESC key to dismiss an opened context menu in the flyout dismisses the whole flyout instead.
  • [News and interests] Sometimes the news and interests flyout cannot be dismissed with pen.
  • [ARM64] Insiders who installed the preview version of the Qualcomm Adreno graphics driver on the Surface Pro X may experience reduced brightness of the display. This issue is fixed with an updated version of the preview graphics driver at https://aka.ms/x64previewdriverprox. If you are experiencing this issue, please see the feedback collection for more information.
  • The network flyout on the login screen doesn’t open on this build, which will prevent you from connecting to a new network before logging in. If your account is in a state that requires internet to log in, you can work around the issue by plugging in Ethernet, getting the device in range of a previously configured Wi-Fi network, or logging in with any other available account first.
  • The Handwriting Input Panel will not work for pen input on ARM64 PCs running this build.
  • There is an issue in this build that may result in Search crashing on launch for some Insiders. We are working on a fix.

Microsoft rumored to be working on a big design update for Windows 10 coming later this year with the “21H2” update, and we hope that these new File Explorer icons are a good taste of things to come. Microsoft’s Chief Hardware Officer Panos Panay recently said that 2021 would be “a massive year” for Windows, and we’re really looking forward to see more design updates in upcoming Dev Channel builds.


FIX: BSOD after CorsairVBusDriver.sys failure on Windows 10

After running an optional Windows update to get the latest Corsair driver, a lot of users have faced a Blue Screen of Death pointing towards a CorsairVBusDriver.sys failure.

Corsair driver updates are usually optional and ensure the correct functioning of the Corsair peripherals or hardware.

System failures after Corsair driver updates are not a novelty, but BSOD is one of the most common issues. This is how it’s described by one user:

After running optional system update for Corsair devices, my ASUS RoG G771 laptop is completely unusable.  It’s stuck in a BSOD reboot loop and not one recovery method is working.[…] Safe mode doesn’t work, either.

The error message might also read: SYSTEM_THREAD_EXCEPTION_NOT_HANDLED

Corsair has responded to recent BSOD issues, mentioning that an old CorsairVBusDriver is conflicting with the new one. Their recommendation is to perform a system restore to get rid of the faulty update.

However, they’re forgetting that the users can’t even log into their systems because of this error.

In this article, we’ll explain how to fix the CorsairVBusDriver.sys failure and get your device up and running again.

How do I fix a CorsairVBusDriver.sys blue screen?

1. Run a BSoD debugging tool

This is a preferable solution that doesn’t require too much technical knowledge and it doesn’t imply you losing your apps and files.

With a BSoD fixer for Windows, you have all the support to fix this type of errors and repair the damaged system files occured.

2. Use advanced repair

  1. Start the PC, and then hold the Shift key and hit F8 frequently. This should take you to the advanced recovery options. Fix Corsair bus driver.sys issue
  2. Click on Troubleshoot.
  3. Select Advanced Options, then Command Prompt. 
  4. Run the following command: diskpart
  5. Run the next command to see all your disks. usually, your drive should be  Drive 0: list disk
  6. Then, type this command, replacing the drive number/letter with your actual system drive: select  disk 0 diskpart
  7. Then, you need to see all partitions, so type: list partlist part in diskpart command prompt
  8. Select your primary partition (#3 in this example, but can be something else for you): select part 3
  9. Assign your primary partition a drive letter: assign letter=X
  10. Exit diskpart.
  11. Still in Command Prompt, type the following to get a list of installed drivers (replace X with your driver letter): dism /Image:X: /Get-Drivers | more 
  12. You should get a notepad list with drivers; look for the driver mapped to CorsairVBusDriver.sys (should be oemx.inf, x = a number)
  13. Run the following to get rid of the faulty driver (once again, replacing X): dism /Image:X: /Remove-Driver /Driver: oemx.inf
  14. Exit Command prompt and reboot.

Note: If you already know your system partition, you can skip steps 4-8, straight to step 9. 

3. Use installation disk

If you’re lucky enough to have a Windows 10 OS on a disk or mounted on an SSD or USB stick, you can clean install Windows.

Just insert the disk or attach the external drive to your device, reboot and follow the on-screen instructions.

Note that some users complained that even with a clean install, upon automatic update, the faulty Corsair driver would get back into the system.

We hope that this guide has helped you restore your device back to normal. In case you’ve got something to add to the steps above to improve the process, feel free to use the comments section.

How to easily add Yammer to the Microsoft Teams app to engage with your coworkers

The Microsoft Teams app is a great collaboration hub where you can engage and chat with your coworkers, but did you know Microsoft also has something called Yammer? It’s an internal social networking tool to help you and your coworkers openly connect and engage around a central community. Yammer has its own Microsoft 365 app which we previously explored, but it also plays nicely with Teams, too. So, here’s how you can add Yammer to Teams!

Why add Yammer to the Microsoft Teams app?

Before diving into the process, it’s worth mentioning why you might want to add Yammer to Teams to begin with. The reason has to do with collaborating with a Yammer post or topic while you’re working in Teams. You can stay in your workflow and add a tab for Yammer inside Teams, add it as an app, and have your Team members participate in the Yammer conversation directly in Teams, before going into a wider Yammer community.

Basically, this will help you skip out the need to manually open Yammer inside of a web browser. And, anyone can do it, too. Team members must also be enabled to add tabs, too. If you can’t add tabs, then speak to your IT admin.

Steps to add the Yammer Communities app to the Microsoft Teams app

Microsoft Teams App Yammer

There are two things we’ll be discussing today. We’ll talk about how you can add the Yammer Communities app to Teams, and how you can add a Yammer tab to Teams. The Yammer app is the full-on Yammer experience, whereas the Yammer tab will just be a specific Yammer page. Depending on your needs, you might need to add one, or the other. Here’s how to add the Yammer app first.

To install Yammer as an app in Teams click the Apps icon in the bottom left sidebar. Then, search for Communities. From there, click on the Communities app and then click Add. Yammer will then be added to all of your Teams apps, including mobile. If you’re having trouble finding the Yammer app for Teams, try clicking this link here to add it.

If you still can’t add Yammer, then the experience might have been disabled by your IT admin. Anyway, once the Yammer app is open, you can choose to Pin it. Simply right-click on the icon, and then choose “Pin” so you’ll have quicker access later on.

Steps to add a Yammer Page to a Microsoft Teams channel

Microsoft Teams App Communites

Now, for part two — adding a Yammer page to a Microsoft Teams channel. This is a little bit easier. In the Teams channel that you want to add a Yammer page to, simply click the “+” on the tab bar. Then, from there, select the Communities tab. You can then select the content type. If you pick a Yammer Group, all messages will be visible in the community. If you choose Yammer Topic, all messages visible will be visible to the user with the select topic hashtag.

Using the search box, you can also type a community name or topic you want to include, and select the community or the topic of the list. When ready, you can click Save, and the new Yammer tab will show up in the tab bar for all members.

Check our guide for more on Yammer!

Now that you’ve added Yammer to Teams, we invite you to check out our guide to Yammer for more. Yammer is quite a useful tool, and it is a great way to connect with coworkers and share professional resources. It’s also a great tool to host how-to guides, community information, and more. Explore Yammer today, and let us know how it is working for you by dropping us a comment below.

0x0000009f Driver Power State Failure: 4 Methods to Fix It

There are several Blue Screen of Death errors that plague Windows, and most take time and effort to troubleshoot. One such is the DRIVER_POWER_STATE_FAILURE 0x0000009F blue screen error.

The error has long been present in Windows and continues to affect users on the latest iteration as well. So, let’s find out all about it!

What is 0x0000009F blue screen error?

As the name suggests, the DRIVER_POWER_STATE_FAILURE BSOD error has to do with the power or the driver. But there are other issues as well that can trigger it. Given below are a few primary ones:

  • Issues with the installed drivers: More often than not, it’s the incompatible, corrupt, or outdated drivers to blame when you get stop: 0x0000009F.
  • Malfunctioning or incompatible peripheral: A connected peripheral can often lead to issues with the PC and can lead to a BSOD.
  • Third-party apps triggering conflicts: A security software, or other performance optimization apps, too, are just as likely to cause the DRIVER_POWER_STATE_FAILURE error.

How can I fix the 0x0000009f error?

Here are a few quick tricks and checks to perform first:

  • Unplug any non-critical peripherals from the PC, especially the ones that were added around the same time the error first appeared.
  • Check for any pending Windows updates and install them.
  • Make sure all the connections are in order, i.e., the graphics card, RAM modules,fFan, and other similar components.
  • Shut down your computer at the end of each session instead of putting it in sleep or hibernate mode.
  • Check the current version and update the BIOS. Remember, this is a complex process, so proceed with caution.

If none work, move to the solutions listed next.

1. Reconfigure the device’s power settings

  1. Press Windows + X to open the Power User menu, and select Device Manager.device manager
  2. Locate the device you think might be causing the trouble, right-click on it, and select Properties.properties
  3. Now, go to the Power Management tab, untick the checkbox for Allow the computer to turn off this device to save power, and click OK.change settings to fix 0x0000009f
  4. Check the other devices and make similar changes to those as well.

In many cases, the OS turns off the device, which triggers the 0x0000009f error after sleep in Windows 10. Here, it’s best to reconfigure the Power Management settings to get things running.

2. Set to max performance in NVIDIA Control Panel

  1. Launch the NVIDIA Control Panel, and go to Manage 3D Settings from the navigation pane.manage 3d settings
  2. Now, click on the Restore button on the right.restore to fix 0x0000009f
  3. Click Yes in the confirmation prompt.reset
  4. Next, select Prefer maximum performance from the Power management mode dropdown menu, and click on Apply to save the changes.change power management mode
  5. Once done, restart the computer for the changes to come into effect.

3. Update the device driver

  1. Press Windows + R to open Run, type devmgmt.msc, and then hit Enter.device manager
  2. Locate the problematic device, right-click on it, and choose Update driver. Since we are following the hit-and-trial approach, let’s start with the graphics driver, the most likely reason behind the BSOD.update driver to fix 0x0000009f
  3. Select Search automatically for drivers and wait for Windows to find and install the best version.search automatically for drivers
  4. Restart the computer for the changes to come into effect.

Updating the drivers is also vital and helps fix a wide range of errors in Windows. Besides, when the automatic methods don’t work, you can always manually install the drivers in Windows. After the graphics driver, start with the network drivers and those for connected devices.

The search results may show that no new drivers were found for your device. This is why we recommend using dedicated third-party software for a more accurate result.

Outbyte Driver Updater will scan your PC, find all the outdated drivers, and update them in just a few clicks.

It is simple, light, and safe to use. You can set it up to regularly check and update your drivers so you won’t have to worry about them anymore.

⇒ Get Outbyte Driver Updater

4. Uninstall the antivirus

  1. Press Windows + R to open Run, type appwiz.cpl, and click OK.appwiz.cpl
  2. Select the antivirus on the PC, and click Uninstall.uninstall to fix 0x0000009f
  3. Follow the on-screen instructions to complete the process.

To avoid errors, we recommend using the built-in Windows Security, a more-than-effective antivirus capable of handling even the trickiest problems and threats. Besides, it’s more Windows-friendly than any other, so there won’t be any software conflicts.

By now, you should have fixed error 0x0000009F in Windows 10 or the other iterations. In case nothing works, we recommend you take your PC to a repair shop and get the hardware inspected.

And if you are looking for a simpler way to fix things, check the best BSOD repair tools in Windows to get rid of blue screen errors automatically.

For any queries or to share what worked for you, drop a comment below.

FIX: DRIVER_VERIFIER_IOMANAGER_VIOLATION error

Blue Screen of Death errors can appear on any version of Windows. As expected, Windows 10 is no exception.

Errors such as DRIVER_VERIFIER_IOMANAGER_VIOLATION can create many problems, but fortunately, there is a way to fix this error.

How do I fix DRIVER_VERIFIER_IOMANAGER_VIOLATION error?

1. Use a third-party system restoration app

Getting constant errors and Blue Screens of Death is quite annoying and puts you at the risk of losing your work and project data.

Thankfully, you can download a specialized system repair tool that will scan your PC for faulty files and remove them or restore them to their original state.

2. Remove the problematic software

Third-party applications can often cause Blue Screen of Death errors, therefore you need to find problematic applications and remove them.

Users reported that PeerBlock, Gpass, and Logitech Gaming Software can cause these types of errors, so if you’re using one of those applications be sure to remove them or reinstall them.

Another common cause for the driver verifier iomanager Blue Screen can be your antivirus software.

Users reported issues with ZoneAlarm, so if you’re using this tool, we advise you to remove it.

We have to mention that almost any antivirus program can cause this error to appear, therefore we advise you to remove all antivirus programs from your PC.

If you want to completely remove certain antivirus we advise you to use a dedicated removal tool. Many security companies offer these tools for their software, so make sure that you download and use one.

3. Update your drivers and Windows 10

  1. Press the Windows Key + S and search Settings.
  2. Click on Update & Security.
  3. Then, select Windows Update, and click Check for updates.
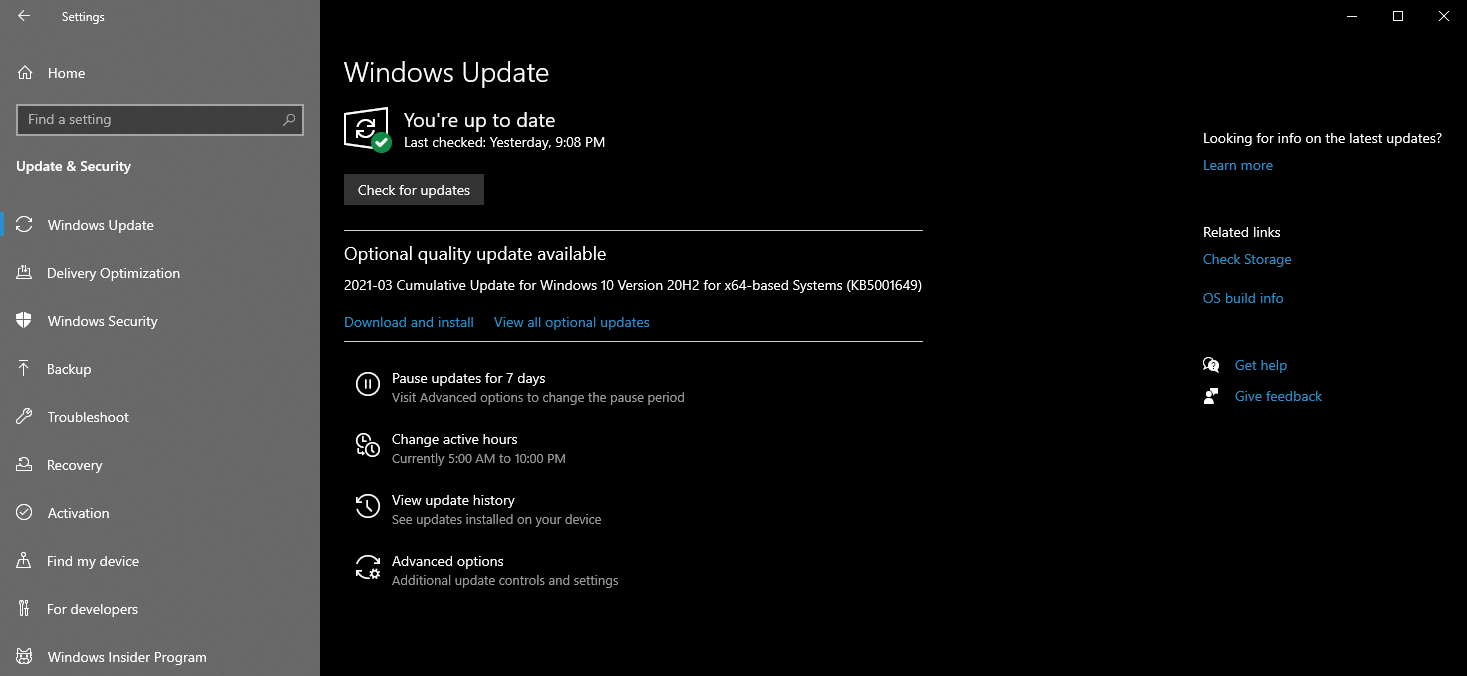
  4. Allow Windows to install all the necessary updates.

Blue Screen of Death errors can be caused by hardware or software issues, and in order to avoid these types of problems, it’s highly recommended that you update Windows 10.

Microsoft is frequently releasing new patches and you can download them all through Windows Update.

Most of these patches fix security issues, but there are also various bug fixes related to both hardware and software.

By installing these patches you’ll ensure that your system is safe and stable, so we urge you to download them as often as you can.

Install the latest drivers

Although Windows updates are important for your system, it’s also important that you download the latest drivers for your computer.

Windows 10 relies heavily on drivers in order to work with your hardware, and if a certain driver is out of date, you won’t be able to use your hardware.

You could even get this annoying DRIVER_VERIFIER_IOMANAGER_VIOLATION error. To fix these errors it’s recommended to update all your drivers.

In order to do that you just need to visit your hardware manufacturer’s website and download the latest drivers for your device.

Several users reported that this error was caused by Logitech drivers, so if you’re using any Logitech software or devices, be sure to update their drivers.

Update drivers automatically

If this method doesn’t work or you do not have the necessary computer skills to update or fix the drivers manually, there’s another thing you can do.

Well, we strongly suggest doing it automatically, by using a specialized tool. It is lightweight and intuitive, not to mention that it’s the quickest way to access a huge database of drivers.

⇒ Get Outbyte Driver Updater

4. Perform DISM and SFC scans

  1. Press Windows Key + X to open Power User Menu.
  2. Select Command Prompt (Admin) from the menu.
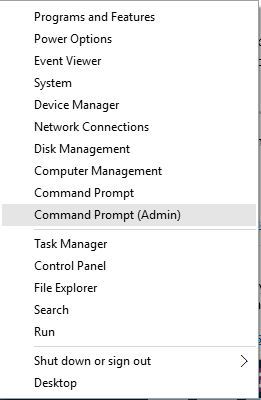
    driver-verifier-iomanager-violation-admin
  3. When Command Prompt starts enter the following lines and press Enter after each line: dism/online/cleanup-image/scanhealth dism/online/cleanup-image/checkhealth dism/online/cleanup-image/restorehealth 
  4. After the DSIM scan is complete enter the following command: sfc /scannow
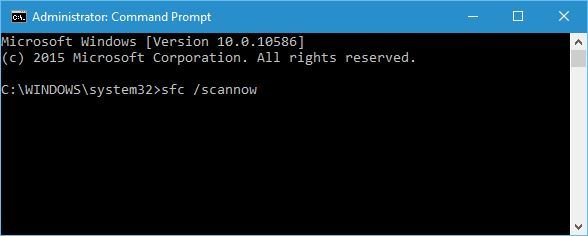
    driver-verifier-iomanager-violation-windows-10-sfc

A few users claim that they managed to fix this issue by performing a DISM scan and using the SFC tool. To do so, follow the above steps.

If you cannot enter Windows 10 normally, you can perform this scan from Safe Mode. To enter Safe Mode follow this procedure:

  1. Restart your computer while it boots. Repeat this step a few times until you start Automatic Repair.
  2. Choose Troubleshoot > Advanced options > Startup Settings and click the Restart button.
  3. Once your PC restarts you’ll see a list of options. Select Safe Mode with Networking by pressing 5 or F5.

Once you enter Safe Mode, you should be able to perform a DISM scan by following the steps above. Then, also use the System File Checker utility.

Safe mode is not working? Don’t panic, this dedicated guide will help you get past the booting problems.

5. Update the BIOS

Updating BIOS unlocks new features of your motherboard and fixes certain hardware-related compatibility issues.

Some users claim that updating BIOS fixed the DRIVER_VERIFIER_IOMANAGER_VIOLATION error for them, so you might want to try that.

Before you start, we have to mention that BIOS update is an advanced procedure, and if you’re not careful you can cause permanent damage to your PC,.

So, be extra careful if you decide to update BIOS, and be sure to check your motherboard manual for detailed instructions.

6. Perform a Windows 10 reset

  1. Restart your computer a few times during the boot in order to start the Automatic Repair.
  2. Choose Troubleshoot > Reset this PC > Remove everything and insert Windows 10 installation media if necessary.
  3. Select Only the drive where Windows is installed > Just remove my files and click the Reset button.
  4. Follow the instructions to complete the Windows 10 reset.

If the DRIVER_VERIFIER_IOMANAGER_VIOLATION Blue Screen of Death error is caused by software, you can easily fix it by performing a Windows 10 reset.

This procedure is similar to a clean install, so we urge you to back up all important files before you decide to perform Windows 10 reset.

You might also need a Windows 10 installation media in order to complete this step, so be sure to create one. To perform Windows 10 reset you need to do as described above.

7. Scan your computer for malware

  1. Go to Start > type defender > double click Windows Defender to launch the tool.
  2. In the left-hand pane, select the shield icon.fix DRIVER_VERIFIER_IOMANAGER_VIOLATION
  3. In the new window, click the Advanced scan option.
  4. Check the full scan option to launch a full system malware scan.

If you don’t want to resort to complex solutions, such as resetting your computer yet, you can launch a malware scan.

Malware may cause various issues on your computer, including the DRIVER_VERIFIER_IOMANAGER_VIOLATION error.

You can detect and remove malware using Windows’ built-in antivirus, Windows Defender, or third-party antivirus solutions.

Run a thorough system scan to make sure that you have eliminated this possible cause.

8. Remove recently installed hardware

If Windows 10 reset didn’t fix the problem, it’s most likely that this issue is caused by faulty or incompatible hardware, so be sure to remove any recently installed hardware.

In addition, we advise you to perform a detailed inspection of your hardware in order to find the faulty component.

Open up your device and check each component, switch them with the older ones and check if the problem persists. Some BSoD error happen due to compatibility issues.

Make sure that your motherboard is compatible with your RAM and CPU. You should also make sure that its current BIOS version is supported by the GPU.

Take this chance and clean your PC as well. Dust can gather up and cause overheating which will also crash your PC or cause permanent damage to your components.

9. Clean boot your computer

  1. Press the Windows Key + S and search msconfig.
  2. Select System Configuration.

  3. Go to the Services tab deselect Hide all Microsoft Services.
  4. Now, click Disable all.
  5. Select the Startup tab, and disable all startup programs.
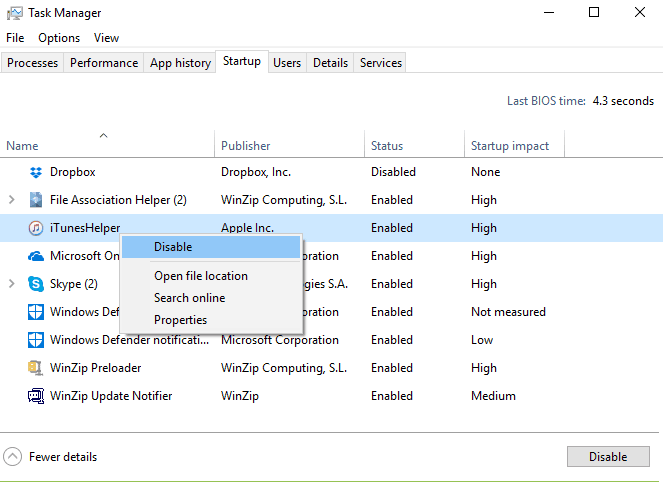
  6. Select Ok, then close the Task Manager.
  7. Restart your computer and see if the issue persists.

A clean boot starts Windows by using a minimal set of drivers and startup programs to eliminate software conflicts that may occur when you install a program or an update or when you simply launch a program.

If you’re having trouble opening Task Manager, you can easily fix it by reading this detailed article.

Some Windows 10 users confirmed that this action helped them fix the DRIVER_VERIFIER_IOMANAGER_VIOLATION error, so give it a try. 

DRIVER_VERIFIER_IOMANAGER_VIOLATION error can be easily fixed by updating your drivers or BIOS, but if those solutions don’t work, feel free to try any other solution from this article.

Make sure you tell us which solution worked for you, and give us any other tips regarding the subject in the comment section below.


Hunting Simulator 2 video game gets a new 4K 60FPS version for Microsoft’s Xbox Series X console

The Hunting Simulator 2 video game may have launched on the Xbox One family of consoles in mid-2020 but it’s now gotten a brand new separate release for Microsoft’s newer Xbox Series X and S consoles with improved visuals and a higher framerate.

While the Xbox One version of Hunting Simulator 2 can be played on both the Xbox Series X and Xbox Series S consoles, this particular version, called Hunting Simulator 2 Xbox Series X|S in the Microsoft Store digital storefront, boasts 4K visuals when played on a Series X, 1440p on the Series S, and 60 FPS on both.

For those who own an Xbox Series X or S, or are planning to buy one in the future, this newer version of Hunting Simulator 2 is clearly the preferred choice. Especially since its price is exactly the same as the Xbox One version. Of course, for those who are planning on hanging onto their Xbox One console for a bit longer, the Xbox One version is really the only option.

Here’s the official trailer for Hunting Simulator 2 Xbox Series X|S:

Are you a fan of the Hunting Simulator series? Which version of Hunting Simulator 2 will you buy? Share your thoughts with the community in the comments below and then follow us on Twitter and Facebook for more Xbox gaming news.

Hunting Simulator 2 Xbox Series X|S
Developer:
Nacon
Price:
$49.99


Hunting Simulator 2 Xbox One
Developer:
Nacon
Price:
$49.99

Got the BSoD error 0x00000109? Try these 7 simple methods

The Bluescreen of Death errors are no stranger to the Windows OS and can occur due to multiple reasons. However, with the use of an error code, you can diagnose and fix the issue.

Several users have reported the BSoD error 0x00000109 when booting or working on their Windows computers.

Some users claimed that they weren’t even on their PC when they noticed that the screen displayed an error message that said that their device had recovered from a bug check.

If you are also troubled by this error, here are a couple of troubleshooting tips to help you resolve the BSoD error 0x00000109 error in Windows.

How do I fix the BSoD error 0x00000109?

1. Repair your PC with advanced software

One of the best solutions for fixing the unknown disk error 0x00000109 is to restore your PC to a healthier state using a professional tool.

We recommend software that can repair damaged files on your device and remove any remaining bugs from previous virus infections.

This is only one of the many reasons why you should keep your registry clean and healthy, removing any obsolete, damaged, or unnecessary entries.

The best part is that you won’t have to seek a needle in a haystack; all this and more can be done with an automated solution.

These malware removal tools for Windows systems are incredible repair programs that maintain your PC in the best condition with only a few clicks.

2. Restart your PC in Safe Boot mode

BSOD error 0x00000109
  1. Press Windows Key +R to open Run.
  2. Type msconfig and click OK.
  3. In the System Configuration window, open the Boot tab.
  4. Under Boot options, check Safe Boot and click Apply and OK.
  5. System Configuration will ask you to restart the computer.
  6. Click Restart.

In Safe Boot mode Windows loads the computer with minimal drivers and functionalities. This will allow you to analyze if the error is caused by third-party software or hardware.

If the BSoD error 0x00000109 does not occur in Safe Boot mode, you may have a third-party app creating conflict with the system.

We highly recommend you find out what program is causing the Blue Screen of Death in order to do that you will need to locate and read the BSoD log file.

3. Remove peripheral devices

  1. If the BSoD error started to occur after installing a new USB device, try disconnecting the devices.
  2. In case you haven’t installed any new devices, unplug all the peripheral devices and restart the computer.
  3. If the BSoD does not occur, try connecting all the devices one by one to find if a specific device is causing the error.
  4. If found, open Device Manager and try updating the device driver.

When you get the unknown disk error: 0x00000109 among the first things you should do is check your hardware settings, start off by disconnecting your devices and then follow the steps we presented above.

If you want to be up to date with the main factors that generate the Blue Screen of Death errors, we advise you to take a look at this great article that explores the main causes of the BSoD problem.

4. Scan your system for malware

Certain bugs on your PC can be a main cause for the error code Windows 10 0x00000109, so in order to fix the issue, it’s required you scan your device with high-quality malware removal.

With the help of a high-quality antimalware tool, you can remove a variety of cyber threats such as adware, or malware and in addition, it also offers multiple layers of security, including real-time protection.

You are aware that the internet is a conduit for malware, and if the operating system is left unsecured, the malware will attack the OS’s stability.

You should always secure the operating system while also safeguarding all files and folders. Protect your operating system with a high-quality malware security fence.

One of the best things about malware removal software is that it warns any time you visit a site that contains malicious or fraudulent data such as tech support scams and ads.

5. Remove third-party apps

  1. If the BSoD started after installing a new application, try uninstalling the app.
  2. Press Windows Key + R.
  3. Type control and click OK.
  4. Go to Programs > Programs and Features.
  5. Select the recently installed app and check for any improvements.

Your PC may have installed some apps that are interfering with the optimum functioning of your device that’s you need to remove the problematic software as shown in the steps above.

6. Check for Windows updates

Windows BSOD error
  1. Click on Start and select Settings.
  2. Go to Update and Security.
  3. Click on Windows Updates.
  4. Check for any pending updates. Click on Download to install the updates.
  5. Once the updates are installed, reboot the system and check for any improvements.

Missing updates can often cause Blue Screen of Death errors, that’s why you should never forget to download the latest patches for your device.

7. Use System Restore Point

  1. Press the Windows key and type system restore.
  2. Click on Create a Restore Point option.
  3. Click the System Restore button.
  4. Check the Show all the restore points option if available.
  5. Select the most recent restore point and click Next.
  6. Make sure you read the description and click on Finish.
  7. The restore process can take a few minutes to complete. Windows will restart and show a success message when the process completes.

The Restore Point does not delete any personal files in the process. However, it may uninstall any updates or applications installed after the restore point was created.

If the issue persists, check for BIOS updates. You can download the required update for BIOS from the motherboard manufacturer’s website or from the computer manufacturer in the case of laptops.

The BSOD error 0x00000109 can occur due to various reasons including driver issues as well as malware. Follow all the steps in this article to resolve the error.

It is also good to be up to date with the main factors that generate the Blue Screen of Death errors, that’s why we advise you to take a look at this great article that explores the main causes for the BSoD problem.

If you want more info on the Blue Screen of Death error we recommend you check out this excellent guide on the best quick fixes for Black Screen of Death on Windows 10.

Which solution from this guide worked for you? Tell us more on this subject by leaving a comment in the dedicated section below.

How to fix Windows errors 0x00000010, 0x00000011, 0x00000012

Windows errors are coded in a common format so that anyone trying to figure it out can easily identify the problem and the best solution.

In this article, we are going to elaborate on Windows errors 0x00000010, 0x00000011, and 0x00000012.

In most cases, the operating system crashes due to missing configuration files, damaged or corrupted registry files, and poor system maintenance.

How to fix error 0x00000010 (SPIN_LOCK_NOT_OWNED)?

1. Run a System Restoresystem restore to fix 0x00000010

  1. In the search box type Create a restore point > Open.
  2. In the System Protection tab > click the System Restore button.
  3. Click Next.
  4. Select the Restore point (the most recent point in time when the system was working properly) > Next.
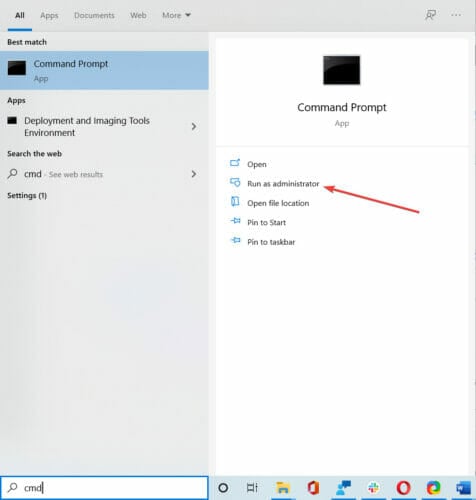
  5. Click Finish when the process is done and reboot your device.

2. Uninstall recently added filesuninstall files to fix 0x00000010

To uninstall recent files, open the Start menu > look for the most recent apps at the top of the menu > right-click on one > Uninstall.

This should delete all files, corrupted ones included if any that came with the respective app.

3. Unplug or uninstall external hardware

  1. If error 0x00000010 appears after you added another device, unplugging it should help you get back to your desktop.
  2. If you know that the device is in good condition, update your operating system by running Windows Update or update your device drivers.solution for error 0x00000010
  3. Uninstalling and reinstalling the device driver may also work: type Device Manager in the search bar > Open > find the device in the available list > right-click on in > Uninstall > reboot your computer.

4. Check for Windows/driver updateswhat to do to fix error 0x00000010

  1. Type Update in the search box.
  2. Select Check for Updates.
  3. Wait for the process to finish and reboot your computer.

5. Start fresh with a clean installation

  1. Gather your installation CD, product key, and anything necessary for a re-installation of the OS.
  2. Type Windows Security in the search bar > Open.can i fix error 0x00000010
  3. Go to Device performance& health.
  4. Scroll to Fresh Start > Additional info.
  5. Click on the Fresh Start button and follow the process. Reboot the device after the process is finished.

6. Uninstall recent updates

  1. First, reboot in Safe Mode: Hold the Shift key + click the Power button > Restart.
  2. Go to Troubleshoot > Advanced Options.
  3. Find Startup Settings.
  4. Click Enable Safe Mode > Restart.
  5. After Windows 10 restarts, choose which boot option you want to be enabled.
  6. Go to Windows Update and uninstall the recent updates.

How to fix error 0x00000011 (THREAD_NOT_MUTEX_OWNER)?

1. Run the sfc/scannow commandone way to fix 0x00000011

  1. In the search bar, type cmd from the keyboard.
  2. Launch it as administrator.
  3. In the command prompt window, type in sfc /scannow and press Enter.

This process may take several minutes. Similar to the previous step, this one should also clear and repair the system of any damaged files.

2. Check the hard disk for errorssolution to fix 0x00000011

  1. In the search bar, type cmd from the keyboard.
  2. Launch it as administrator.
  3. In the command prompt window type chkdsk c: /f and press Enter (use the letter of the drive where your OS is installed).

Wait until the process is over and restart your computer. This will check the disk for file system errors and bad sectors and fix any issues.

3. Check the system for viruses

The error can be caused by computer viruses that infected your system, so if you’re using an antivirus program, run a full system scan.

 If you’re not using antivirus and you’re not sure what to choose, take a look at our recommendations in this article.

Some fixes are similar for several errors, so if the problem persists, you might want to try whichever solution is more at hand than the ones suggested for the previous error.

How to fix error 0x00000012 (TRAP_CAUSE_UNKNOWN)?

This error is usually caused by corrupted registry files or missing configuration files. It falls under the same category of BSOD errors as the ones discussed before.

Therefore, troubleshooting solutions are similar. We recommend that you use any method that we’ve already listed and it will surely solve the problem.

Troubleshooting Windows BSOD errors is never fun, but we hope that you found this article helpful. Comments are welcomed in the section below.

FIX: Minecraft remote connect not working

Minecraft, one of the most popular games out there, can be played online with friends and family.

Unfortunately, many users complained about An existing connection was forcibly closed in Minecraft although they are using the correct credentials.

We will explore in this article what is the easiest way to solve this issue, so make sure to keep on reading.

How can I fix the Minecraft remote connect not working?

1. Make sure no one else is using the account

How to fix the PANIC STACK SWITCH error in Windows 10

If Minecraft remote connect option is not working, the account that you are trying to use in order to connect to Minecraft, is already being used by someone else.

You can fix this issue by manually checking all the other accounts that may be using your account and log out.

Once you performed this action, you will have to try to connect again to Minecraft and see if it works now.


2. Delete your saved file

This step has been proven to solve the Minecraft log in issue, so if the above step did not work, make sure to delete all the saved files.

After you have deleted all the saved files, make sure to log out from your account and try to connect again.


3. Use the Microsoft sign-in codes

In your Microsoft account, go to the Code access page and write down the codes displayed there.

Open the Microsoft website from another device and make sure to enter these codes in order to get access to Microsoft and visit the Minecraft store.


We hope that one of the presented solutions in this article will help you solve the Minecraft remote connect not working issue.

Please let us know in the comments section below which solution has worked best for you, we would love to hear it.

FIX: Black Screen issues in Windows 10 [Simple Guide]

Many users have recently reported that there are some problems with the installation process of Windows 10.

As we all know even though these platforms are stable and great in both performances and built features, there are a few annoying and stressful issues.

Maybe the biggest problem is related to the black screen bug that occurs when you are trying to install or update your Windows 10 OS.

So, if you are dealing with black screen problems, don’t panic and read the guidelines below as we will try to easily fix this Windows 10 issue.

Now, since Microsoft noticed so many complaints, the company decided to provide a few instructions to apply in order to fix the blank black screen received on the installation process of Windows 10.

Therefore, by using the steps from below you will learn how to fix the black screen issue by applying Microsoft’s own solution.

Now, use the steps below and try to repair your Windows 10 system. Also, check our own tips if the method presented below isn’t working as expected.

How do I fix Black Screen issue in Windows 10?

  1. Official method provided by Microsoft
  2. Update your graphics drivers
  3. Disable your antivirus software

1. The official method provided by Microsoft

  1. You need to have your bootable Windows disk.
  2. Insert the DVD on your device and restart the handset.
    • In case you need to change the boot order just press F9 key from your keyboard.
    • Pay attention as you will have to press any key in order to boot from CD / DVD – do that.
  3. Now the install sequence will begin; wait while all the Windows files are being loaded.
  4. The default Microsoft installer windows will be then displayed.
  5. From there click on next.
  6. Up next tap on Troubleshoot option placed on the lower-left corner of the Windows installer screen.
  7. From the next window choose Troubleshoot Refresh or reset your PC, or use advanced tools and then head towards Advanced options.
  8. Open a command prompt window within the installation process by selecting Command Prompt option.
  9. In the cmd window that will be then displayed type C: and press Enter.
  10. Then, type the following command and hit Enter: bootrec /fixmbr
  11. You should notice that The operation completed successfully message displayed on your device.
  12. In cmd type exit and press enter.
  13. Reject the Windows 10 installation DVD and select turn off your PC.
  14. Wait while your device is being powered off, reboot and that’s it.
  15. Now, that is how you can fix the black screen on Windows.

2. Update your graphics drivers

  1. Press the Windows Key + S and type Device Manager.
  2. In the Device Manager window, expand the Display Adapters.
  3. Select your GPU from the list.
  4. Right-click on it, and select Update driver.
  5. Follow the instruction and install the driver.

Basically, this issue is caused by driver incompatibility issues. So, if the steps above aren’t working for you, you can also try to install the latest graphic drivers in safe mode.

You can also install your GPU drivers by checking your GPU model, visiting your manufacturer’s website and downloading the drivers from there.

Updating your GPU manually can be tedious, since you need to search for the right driver, and Device Manager is not the most reliable driver updater you can find.

If you want to learn more about updating your drivers using the Device Manager, we’ve got a useful article that will help you out.

2.1 Use a third-party driver updater

Get rid of all the time wasted searching for the right drivers by installing a third-party app such as Outbyte Driver Updater that scans and installs them automatically for you.

The program will find the latest compatible drivers for your hardware and software and update them accordingly so you won’t have to worry about finding them by yourself.

3. Disable your antivirus software

Another common cause for black screen issues after installing the latest Windows OS version might be your antivirus software.

As a matter of fact, many users who installed a new Windows 10 update experienced black screen issues during the upgrade.

After they temporarily disabled their security solutions, they were able to install the new OS version. Do not worry, since Windows Defender will still protect your PC.

If you are looking for new antivirus software, we strongly recommend checking out this detailed list containing the best ones on the market.

So, try these steps and see if you can resolve the black screen from your Windows 10 system. We hope they will help you get rid of the black screen issue.

Also, use the comments field from below for sharing your experience with us and for pointing out any other solution that might work and help other Microsoft users.

[Full Fix] Steam invite not working for Factorio

As the name suggests, Factorio is a game in which players can build and maintain factories.

With your imagination you can decide how to design factories, and create amazing structures and protect it from other creatures.

Although this is a great game some users report that when playing Factoria they can’t invite friends to join the game.

The game does allow for up to 500 game players in a single game and inviting friends to join Factorio shouldn’t be an issue.

How do I invite friends to Factorio?

Inviting friends to Factorio is quite simple and if you both have unique Factorio accounts you should be able to connect through the multiplayer portal.

We will explore in this article how you can fix the Steam invite not working in Factorio, so make sure to keep on reading.

How can I fix Steam invite not working for Factorio?

1. Change the profile settings

  1. From your Steam Profile, click the Edit Profile link.
  2. Click the My Privacy Settings tab.
  3. Select your privacy state and click on the Public or Friend option.
  4. Click the Save button.

After making these changes, check if Factorio Steam invite is still not working.


2. Reduce multiplayer lag

If you can’t invite a friend to Factorio, the cause of the problem might be lag. Lag issues in Factorio aren’t uncommon, but there’s a way to fix them.

One of the easiest ways of solving this issue is by using a VPN that will help reduce the ping, such as Private Internet Access.

A VPN is perfect for gaming as well, not only for encrypting internet traffic. You can improve packet loss and optimize the network connection when gaming, with a VPN.

This VPN supports up to 10 devices, stores no traffic logs, it’s easy to both use and to set up. As for the number of servers, there are more than 34000 servers available in 77 different countries.

Private Internet Access

Use Private Internet Access for private browsing and a lag-free gaming experience.
Check price Visit Website

3. Set up the multiplayer game correctly

  1. To start playing a multiplayer game click on the Multiplayer button in the Play menu.
  2. Choose New or Load or Scenarios to host and play.
  3. Choose Browse or Play on LAN to connect to an already-running game.

In case you can’t join friend in Factorio, make sure that everything is properly configured.

Note: Factorio servers use port 34197. Factorio uses UDP only. The hard limit for the number of players is 65,535


We hope that one of the presented solutions will help you fix the Factorio Steam invites not working.

Please let us know in the comments section below if you have additional suggestions or recommendations.