This change in Windows 7 updates might trigger some nasty bugs

You may not know, but the April 2019 monthly roll up for Windows 7 no longer packed the PciClearStaleCache.exe component. This tool automatically fixed system consistencies and compatibility issues thus ensuring a smooth update process.

Unfortunately, Microsoft confirmed this tool would no longer be shipped with future Windows 7 updates.

The news was confirmed when the tech giant shipped KB4493472 update without PciClearStaleCache.exe.

Microsoft recommends System Administrators to make sure the monthly roll ups released between April 2018 and March 2019 are installed on their systems.

These updates are mandatory before the installation of the April 2019 updates and future updates because they came with the PciClearStaleCache.exe tool. 

Microsoft says that this tool is necessary to resolve potential consistencies that might exist in the internal PCI cache. That is why you are required to install an update that comes with PciClearStaleCache.exe in any of these situations.

Microsoft pulls Windows 7 Updates

Windows 7 and Windows 8.1 users got security-only updates on April 9, 2019. These updates were released to fix security issues that existed in both versions of Windows.

 However, these Patch Tuesday Updates came with system crash issues for Windows 7 and Windows 8.1 users.

Thankfully, the  bugs did not affected Windows 1o April Updates as those users were already dealing with buggy October 2018 update released last year.

Most Windows 7 users reported they failed to boot their systems after the installation of latest Windows 7 April Updates.

Microsoft has not yet released a fix for this bug. This situation forced Microsoft to halt Windows 7 And 8.1 April Updates to avoid any further issues.

Microsoft has temporarily blocked devices from receiving this update if the Sophos Endpoint is installed until a solution is available.

Apart from Sophos Endpoint, the bug also affected users running Avast antivirus security solution.

Although Microsoft said nothing Microsoft Security Essentials users, some reports suggest they are also facing the same issue.  

RELATED ARTICLES YOU NEED TO CHECK OUT:

Microsoft confirms Outlook data breach, change your password now

Microsoft confirmed that a recent attack exposed the content of many user emails. Hackers accessed a subset of Outlook email accounts by compromising the credentials of a Microsoft Support Agent.

Last week, a Reddit user shared a screenshot of an email that was sent by Microsoft. The email warned him that  hackers managed to access some details of his account.

Microsoft claims that the attack  affected only a limited set of user accounts. Furthermore, the tech giant states that the attackers got access to just 6 % of the content of user emails.

Email address  and email subjects leaked

microsoft outlook data breach info

Microsoft says that attackers first breached its  support agent’s credentials that allowed them to access some user account information.

However, the tech giant claims that the attackers were not able to access attachments or emails.

The leaked information includes the user’s email address, subject of emails, folder names, along with the email addresses that were communicated by the specific users between January and March 2019.

Notably, Microsoft confirmed it notified a limited subset of users that  hackers also got access to wider email content.

The Redmond giant is offering additional support and guidance to the respective users. The company has not shared the total number of accounts that were compromised by the breach.


In case you want to be secure while surfing the internet, you will need to get a full-dedicated tool to secure your network.  Install now Cyberghost VPN and secure yourself. It protects your PC from attacks while browsing, masks your IP address and blocks all unwanted access.


What does it mean to you?

Meanwhile, Microsoft warns its users that they should avoid clicking on links they receive from unrecognized email addresses.

The company says that the incident can increase phishing and spam emails in your inbox. Microsoft is currently investigating the matter and it is not clear how the hackers managed to compromise the credentials of a Microsoft’s employee.

Although Microsoft claims your password details were not affected as a result of the breach.

The company is also continuously monitoring the affected accounts. Change your password as soon as possible to avoid further issues.

RELATED ARTICLES YOU NEED TO CHECK OUT:

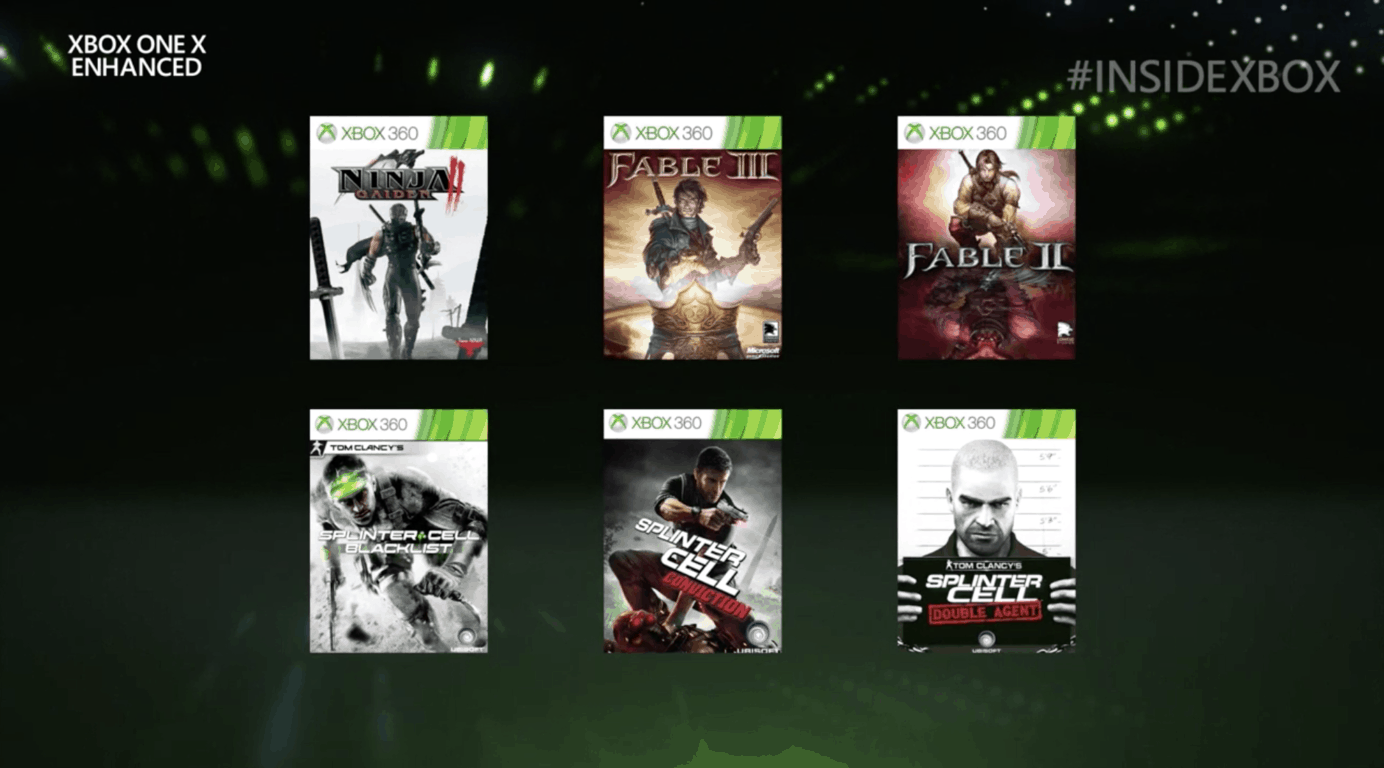
Ninja Gaiden 2, Fable 2 and four other Xbox 360 games are now Xbox One X enhanced

Microsoft’s monthly Inside Xbox live show is still ongoing, and the company has just announced a batch of new backward compatible games that are now enhanced for the Xbox One X. Ninja Gaiden II is becoming backward compatible today and will run better on Xbox One X, but Microsoft is also giving the same enhanced treatment to five existing backward compatible games, including three Tom Clancy’s games and two Fable games.

Tom Clancy’s Splinter Cell Double agent, Tom Clancy’s Splinter Cell Conviction, Tom Clancy’s Splinter Cell Blacklist, and Fable 2 and Fable 3 are now Xbox One X enhanced. This means that these games will now run in 4K on the high-end console, and Microsoft and its team of Xbox engineers are improving the pixel count on these titles without doing changes to the game’s code. This is a great way to breathe new life into old-gen games, and the list of Xbox 360 titles enhanced for the Xbox One One X already includes several classics such as Fallout 3, Halo 3, Gears of Wars 2, or Final Fantasy XIII.

Microsoft regularly markets the Xbox One X as the best console to play games from the past, present and future, and Sony has apparently been paying attention. We got the first official details about the PlayStation 5 earlier today, and the next-gen console will be able to run all existing PlayStation 4 games thanks to its x86 architecture.

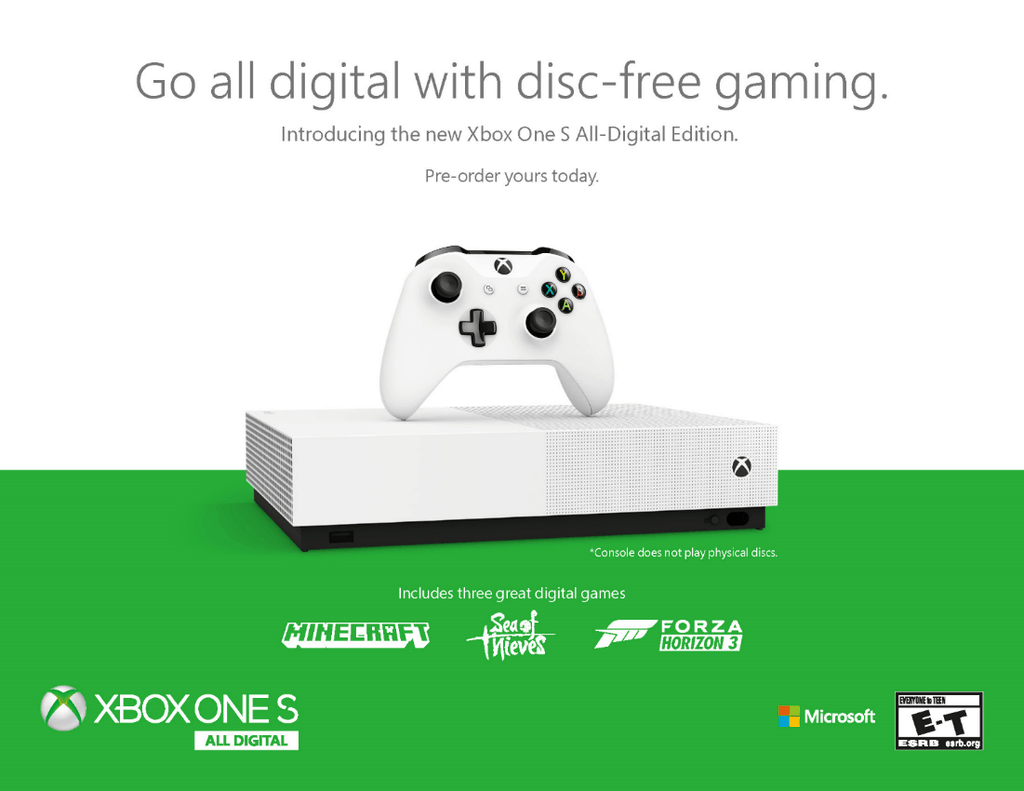
Xbox One S All-Digital Edition is launching on May 7 and will cost $249.99

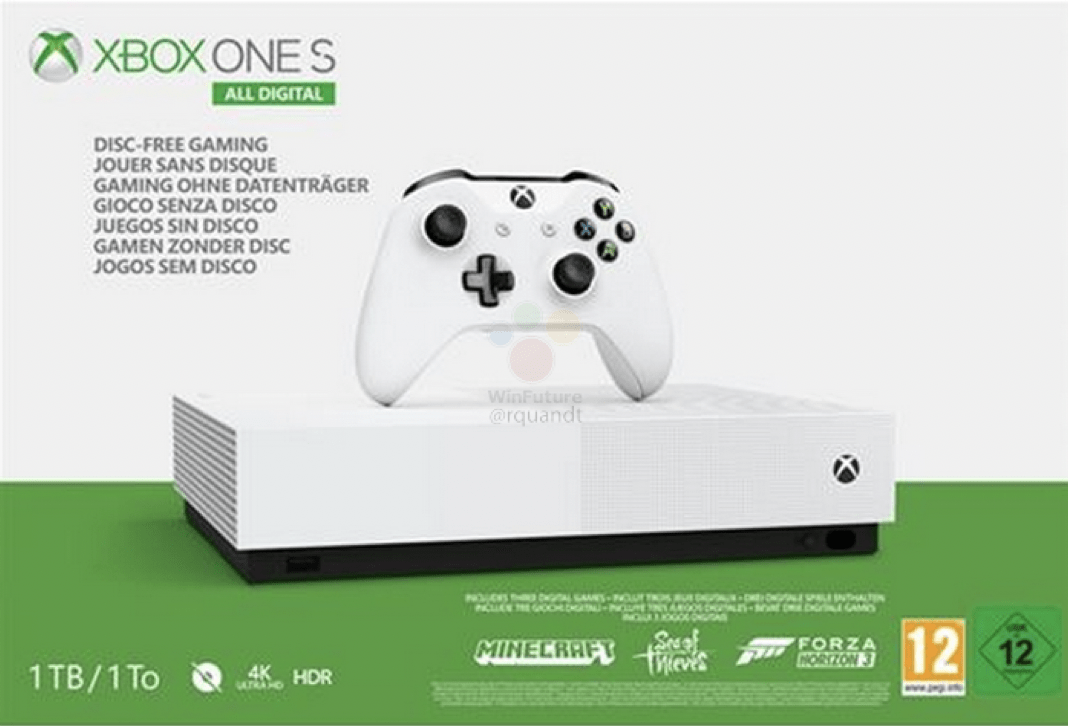
It’s official, Microsoft is launching a discless version of its Xbox One S console on May 7. The Xbox One S All-Digital Edition was previously revealed in multiple leaks, and the information we had so far was accurate: This is just a 1TB Xbox One S without the disc drive, and it comes with three games: Minecraft, Sea of Thieves, and Forza Horizon 3.

The Xbox One S All Digital Edition will be priced at $249.99, which is quite expensive considering that it’s not too difficult to find cheaper Xbox One S bundles right now. The standard Xbox One S also remains one of the cheapest 4K Blu Ray players you can find on the market today, and the disc drive also gives gamers access to the used games market.

“The Xbox One S All-Digital Edition was created for those who prefer to find and play their games digitally and are looking for the most affordable way to play Xbox games,” Microsoft said in today’s announcement. “The Xbox One S All-Digital Edition is $50 USD less than Xbox One S, and we expect to maintain at least that price difference between the two consoles going forward.”

The new console is available to pre-order on the Microsoft Store starting today, and it will also be available at select retailers worldwide including Walmart, Best Buy and Amazon.com starting on May 7. Sound off in the comments if you think this discless version will resonate with consumers.

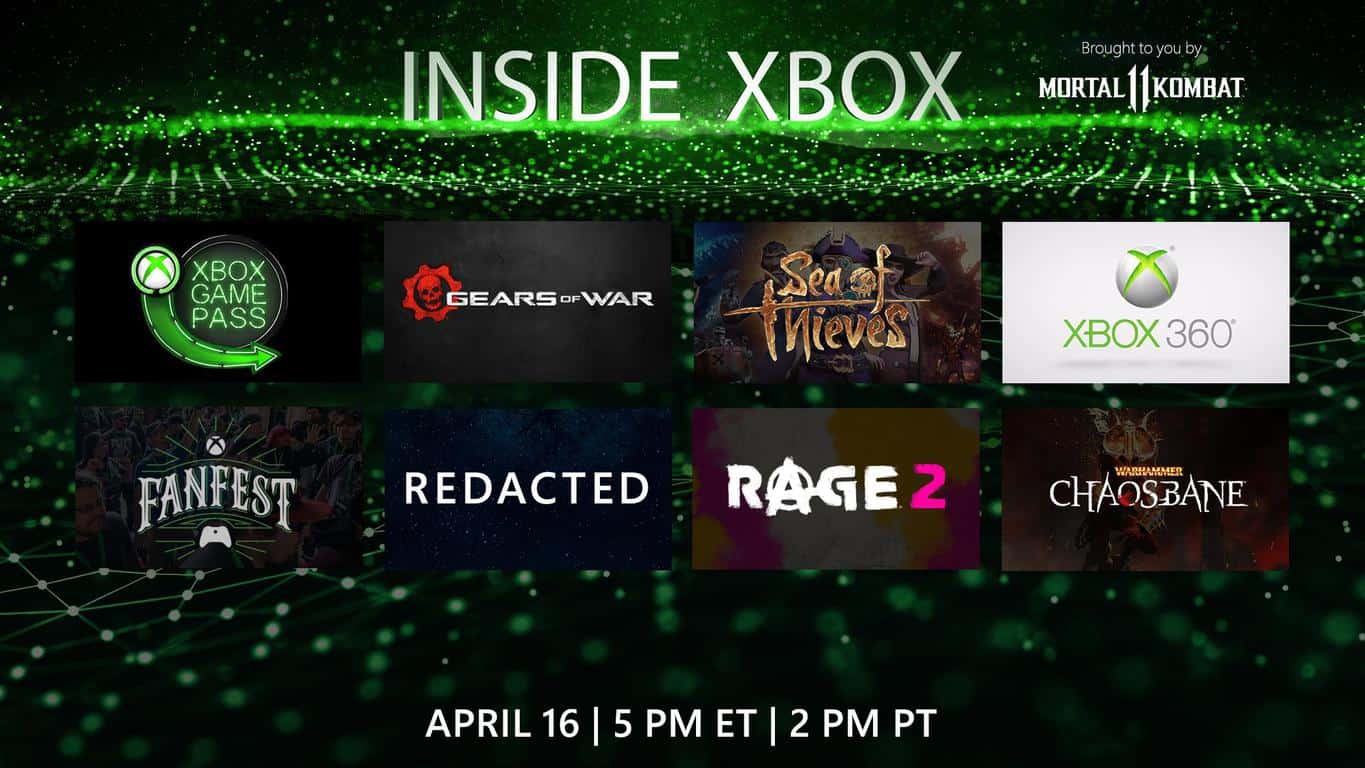
Tune in to Inside Xbox at 2PM PST to get exclusive Sea Of Thieves and RAGE 2 MixPot content

Microsoft’s Inside Xbox monthly live show will air later today at 2 p.m. PT / 5 p.m, and those of you who watch it on Mixer will get another free “MixPot.” This time, the digital rewards will include an Xbox avatar item from the upcoming game Rage 2, as well as the Ebon Flintlock in-game accessory for Sea of Thieves.

Today’s episode should be quite interesting as we expect Microsoft to finally announce the new Xbox One S All Digital Edition console, and the company may also unveil a new Xbox Game Pass Ultimate subscription that combines Xbox Game Pass and Xbox Live Gold in a $15/month bundle.

There are many other things on today’s agenda including some “exciting Xbox Game Pass news,” as well as new backward compatible games to play on Xbox One. Rod Fergusson, Studio Head of The Coalition will also be here to talk about new Gears of War game, including the new Gears Pop! mobile game that is now available in closed beta on iOS (we just got our invite today!).

If you haven’t done it yet, make sure to link your Mixer account to your Microsoft account, and don’t miss today’s episode at 2 p.m. PT / 5 p.m on mixer.com/xbox.

Latest Edge Insider Canary build fixes scrolling crashes

When Microsoft announced that it was going to drop its development of EdgeHTML and begin work on a Chromium-based alternative, some fans and users feared that all the beneficial engineering done for Edge on Windows 10 would be lost.

Thankfully, as early developer and Insider builds are revealing, the Edge team has been able to port some of the features users have come to enjoy and rely on such as stored passwords, extensions, and Edge scrolling.

However, perfecting Edge’s scrolling dynamics on the Chromium-based browser has proven to be a bit of a task as other Chromium-based browsers do not leverage the unique Windows 10 and EdgeHMTL off-thread scrollbar engineering.

In an attempt to optimize scrolling on the Chromium-based Edge, the developers pushed out a Canary build last week that was causing some browsers to crash when attempting to scroll.

Earlier this week Microsoft acknowledged and put out a fix for ‘Canary’ Insiders and developers who were reporting issues with the way the Chromium Edge browser handled scrolling with the browser often crashing when applying two-finger touchpad gestures or just after page loads.

As by the very nature of Canary software development, Microsoft’s expeditiousness on the matter is expected but the company has made it a priority to port its arguably superior scrolling technology to the new Chromium Edge browser as well as the open source project itself.

In a world of diminishing differentiators between general web browsing experiences, smoothing scrolling is something Microsoft cannot afford to leave by the wayside as it continues to build its replacement browser and industry alternative.

Microsoft Edge Insider will carry Administrator Mode warnings

Microsoft has always put security as a focus in its Edge web browser. The upcoming Chromium remake is no exception to this rule, as the new browser will soon begin warning those who run it in Administrator Mode (via BleepingComputer).

While the event in which a user runs Edge in such a way sounds unlikely, it’s always possible for it to be done unintentionally. This could happen when another application in Administrator Mode opens the browser with the same privileges. If another program is launched from Edge running this mode, the app retains the same privileges, which leaves the computer vulnerable to attack if the software proves to be malicious.

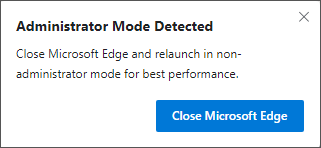
The warning titled “Administrator Mode Detected” will alert users in this instance, telling him or her to “close Microsoft Edge and relaunch in non-administrator mode for best performance.” By closing the browser and reopening it without Administrator privileges, an application won’t be able to run in the same mode without the user’s prior consent.

Administrator Mode Detected Alert
Administrator Mode warning in the new Edge

Microsoft continues to push out refinements to its Edge Insider builds, and those wishing to give it a try can download either the Dev or Canary versions for Windows 10 to see how it fairs. The company also plans to bring its browser to older versions or Windows and macOS soon, for those who might be interested.

Microsoft is planning its “biggest presence ever” for Xbox at E3, Sunday Showcase times set

As E3 2019 is now less than two months away, Microsoft has just shared its plans for the event and they’re consistent with Xbox’s head Phil Spencer previous statement about “going big” this year. “From our briefing to our fan events, the Xbox Experience to the Xbox Official Gear Shop, this will be our biggest E3 presence ever,” the company said today.

First of all, Microsoft’s E3 press briefing will be on Sunday, June 9 at 1 p.m. PDT. Just like last year, Microsoft will offer free “MixPot” digital rewards to those who watch the event live on the company’s Mixer service. “During the briefing, you’ll have a chance to check out everything from trailers for unannounced titles coming in 2019 and beyond to in-depth looks at previously announced games,” the company said today. We expect to learn more about Project xCloud, Gears 5, Halo Infinite, as well as the new RPG that Forza Horizon 4 developer Playground Games is currently working on.

In addition to the E3 press conference on Sunday, there will also be an special Inside Xbox Episode on Monday, June 10 at 3 p.m. PDT. Microsoft is teasing “exclusive announcements, game demos, interviews, and more” during the show, and this should guarantee that Xbox will remain part of the conversation during the annual trade show.

E3 2019 will be open to the public from Tuesday through Thursday, and attendees will be able to enjoy The Xbox Experience at The Microsoft Theater and the Xbox Plaza at LA Live. Microsoft announced 100 gameplay stations, a “massive” Xbox Official Gear Shop, as well as a Mixer Dome for game streaming enthusiasts. Xbox FanFest will also make a come back at E3, and Microsoft will share more details during Inside Xbox later today. Tune in to the livestream at 2 p.m. PDT on Mixer if you want learn more earn another exclusive MixPot.

Newsflash: Microsoft was late and lame in early 2000s consumer push

A new Twitter thread is making the rounds today, with investor Garry Tan (who conveniently pushes his small startup investing strategies over big companies like Microsoft), reminisces about Microsoft and their many failings over the last 20 years:

Every major battle: iPod, iPhone, iOS, iMessage, Slack, Dropbox Completely dropped the ball. Total capitulation through just mismanagement. Much infighting.

Here’s the thread (click through for all 5 tweets):

While Tan’s viewpoint may be a bit self-serving, the message is clear, Microsoft’s toxic infighting allowed other companies like Apple, Google, Dropbox and Slack to move in and innovate while Microsoft floundered. At the time, Microsoft was bent on competing in the consumer space, but hampered by both having to uphold Windows and Office while also, yes, being slow to move on what turned out to be important trends like the move to mobile computing and the evolution of messaging to include co-working.

There just isn’t any question that Microsoft dropped the ball with mobile, a loss that could continue to hurt the company for years to come. CEO Satya Nadella is making a valient effort to make the company’s products cross-platform and mobile friendly, but it just isn’t the same. In other areas, Microsoft is making far more money in the enterprise space with SharePoint and Office 365 than it probably ever could competing as a pure consumer play with OneDrive and Teams, so is “losing” the consumer space while winning in the more lucrative enterprise really losing?

Microsoft to its credit did continue to build out infrastructure for Bing, Xbox, and Online Services that turned out to become Azure, turning out to be quite a big win in the same span of time that Tan calls “total capitulation.” It also pivoted from Office to Office 365, is moving Windows to a new generation with “Windows Lite” (although we’re yet to see how that plays out), and is trading at record levels with a near trillion dollar market cap, so all isn’t quite lost yet.

Did Microsoft “lose” in the consumer space? Does it matter?


Xbox One gamers get free Game of Thrones, Shazam, and Warframe avatar items

A host of new avatar items based on popular properties have recently gone live within the Microsoft Store for Xbox gamers to customize their Xbox avatars with.

What’s particularly cool is that all of these new items are completely free due to them being more about brand promotion than actually earning individuals or companies a profit. Among the new items worth checking out are the Jon Snow and Daenerys costumes from Game of Thrones, a pet Viserion from the same series, a Shazam costume, a new Borderlands 3 mask, Warframe outfits and helmets, Mortal Kombat 11 cap and t-shirt, and a Sekiro t-shirt.

All of these free Xbox avatar items can be viewed and claimed here.

Microsoft completely revamped the Xbox avatar system last year. This revamp resulted in the trashing of all of the digital items for the old avatars but new items made for the new system, such as the ones mentioned above, have since begun to repopulate the online storefront.

Free Xbox avatar items

Xbox avatars are digital representations of players which can be used on Xbox One consoles and on Windows 10 devices. While they can be used in some video games, they’re primarily used to represent gamers within the friends list on the Xbox One’s dashboard and within the Xbox apps.

Do you like to customize your Xbox avatar and will you try any of these free items? Let us know which ones in the comments below and then follow us on Pinterest for more Xbox gaming content.

Windows 10 May 2019 Update soon available through Media Creation Tool

Microsoft recently launched a new Media Creation Tool version. Users initially thought the tool allowed them to install the May 2019 Update (version 1903) on Windows 10 systems.

Many thought the tool also supported production systems that were not a part of the Windows Insider program.

This was a very exciting piece of news especially for the Windows 10 users who are not currently enrolled in the Windows Insider program.

Indeed, the tool allows users to download the MediaCreationTool1903.exe version but there’s a catch.

Notably, a Twitter user just spotted that the Media creation tool is actually downloading Windows 10 version 1809 build 17763.379 rather than Windows 10 version 1903.

The Media Creation Tool automatically starts upgrading your system once the download is complete.

Users who were eagerly waiting for the May 2019 Update are extremely disappointed with Microsoft for offering them the wrong OS version.


How often are Windows 10 updates released? Find out from our constantly updated article!


Wait for an official release

We will let you know when version 1903 goes live and you can use it to install Windows 10 May 2019 Update on your computer.

Still, you should think twice before upgrading your system. Right now, Microsoft is testing the Windows 10 May 2019 Update and Windows insiders are working to report all the bugs that exist in the build.

The tech giant wants to patch those bugs before the update is released to the general public in late May. Therefore, we can’t deny the possibility that the current version might come with some major bugs.

Microsoft plans to release several cumulative updates to address issues in this build.

Once your PC is on the May 2019 Update, we will continue to release Cumulative Updates over the coming weeks that improves your experience.

You should first install the Windows 10 May 2019 Update on a virtual machine or wait for an official release next month.

Microsoft added some major changes to Windows Update ahead of May 2019 release. For example, the Windows 10 May 2019 Update separates feature updates from cumulative updates.

It seems like Microsoft is concentrating more on last-minute testing following the buggy release of October 2018 Update last year. 

RELATED ARTICLES YOU NEED TO CHECK OUT:

How to fix Game DVR issues on Windows 10/11

Some Windows 10 users might be having to trouble recording game clips using Game DVR. The Xbox Support team provides information to help users resolve some Game DVR issues on Windows 10.

Before starting the troubleshooting process, however, check if your PC has the latest version of the Xbox app on Windows 10.

Also, users in the European Union and Korea who are using Windows 10 N or Windows 10 KN must first install the Media Feature Pack for N and KN versions of Windows 10 to carry out the troubleshooting.

Below, you will find a list of several known issues with Game DVR and some solutions we found:

1. Recording a game in full-screen mode

Users won’t see the Game bar in PC games in full-screen mode. This problem can be solved by using the Windows logo key + Alt + R to start and stop recordings. The screen flashes once the recording starts and completes.

You can also record the last 30 seconds (or whatever time you picked) using the Windows logo key + Alt + G, provided you have already turned on background recording.

You can also select Win + G in the event that the shortcuts do not work for a full-screen game. You will then see the screen flash twice, which means the game is recognized.

Then you can run the game in full-screen again and use the Windows logo key + Alt + R and Windows logo key + Alt + G.

2. Game bar and shortcuts not working

check for updates

Download and install the latest Windows 10 updates on your PC. Select Settings from the Start menu then go to Update & security, and select Check for updates.

Also, check your Game DVR settings by selecting Settings in the Xbox App and clicking Game DVR. See to it that the Record game clips and screenshots using Game DVR setting is turned on.

Press the Windows logo key + G to open Game bar when playing a game and you will be asked to open Game bar. Select Yes.

3. Location for game clips and screenshots

To see the location of your captures, open the Xbox App, select Settings, and click Game DVR. Choose Open folder to see your captures in File Explorer under Saving captures.

Windows 10 stores your game clips and screenshots in the Videos folder by default, in a folder named Captures. You can also move this to different places on your PC, including elsewhere on your hard drive or to external drives.

4. Fix recording issues

Recording may sometimes work only once or twice. To fix the issue, restart Game DVR:

  1. Close the game.
  2. In the search box on the Windows taskbar, enter Task manager, and then select that desktop app.
  3. In Task Manager, select More details.
  4. In the list of running processes, select the Broadcast DVR server (bcastdvr.exe) process (if it’s still there), and then select End task.
  5. Restart the game and try recording again.

So, if you can’t record your gameplay using Game DVR, maybe you should try using a different software solution for this task. Check out our guide on the best game recording software to use in 2019.

5. Customized shortcuts for Game bar not working

Custom keyboard shortcuts may sometimes not work because some games block keys. Update your apps and games in order to use Game bar with all games.

6. Using the Game bar on your tablet PC

Although Windows key-based Game bar shortcuts may not work on tablets without an attached physical keyboard, you can create your own shortcuts that make use of keys available on the virtual keyboard.

You can do so by opening the Xbox App and selecting Settings. Then choose Game DVR and enter your preferred keyboard shortcuts.

7. Deleting game memory in Game bar

The Game bar will remember a game once you’ve indicated that something is a game by pressing the Windows logo key + G.

On the other hand, if you want to make Game bar forget a game, start the game, open Game bar, select Settings, and uncheck Remember this as a game.

We hope that these solutions are going to help you to solve your issue. Please let us know in the comment section below if we somehow missed any issue known regarding Game DVR.

Also, feel free to provide other solutions if you happen to find any.

Fix KB4493472 and KB4493446 booting issues in Windows 7

Many users are experiencing booting issues after installing monthly and security-only Windows 7/Windows 8.1 updates launched on April Patch Tuesday.

However, Microsoft decided to block these updates after widespread reports of a major bug affecting Windows users. 

In fact, KB4493467, KB4493446, KB4493448, KB4493472, KB4493450 and KB4493451 were the culprits.

The bug primarily affects Windows 7 and Windows 8.1 PCs running Sophos Central Endpoint Standard/Advanced and Sophos Endpoint Security and Control. Windows Server 2008 R2 and Windows Server 2012 are also affected by this issue.

Sophos recommended its users to avoid these updates until the issues have been fixed.

Moving further, these updates are also causing startup freezing issues in PCs running Avast antivirus. We heard initially that this bug is causing some serious issues in Windows 7 and Windows 8.1 systems.

All in all, the affected security products are Sophos Enterprise Console, Sophos Central Endpoint, Avast for Business, some versions of Avira Antivirus, and Avast CloudCare. 

However, now we are hearing reports that it might affect Windows 10 users. Microsoft is collaborating with security vendors to resolve these issues.

Steps to fix KB4493472/KB4493446 bugs

Solution 1: Uninstall recent updates

Right now, Microsoft suggests its users that they should uninstall these updates.

  1. If you are using Windows 7 and Windows 8.1 and you can do that by navigating to Control Panel >> Programs >> Programs and Features
  2. Go to Installed Updates
  3. Now search for the recently installed update on your system and click Uninstall.
  4. Finally, reboot your systems to apply changes.

Solution 2: Uninstall through Safe Mode

Some times users face device freezing issues and they are unable to boot. You can boot to the Safe Mode to remove the update.

Here is how you can enter into the Safe Mode:

  1. Restart your system and keep on pressing F8 key just before you see the Windows 7 loading screen.
  2. You will now see some advanced options on this new screen. Search Safe Mode and click on this option.
  3. Your Windows 7 PC will now boot into Safe Mode.
  4. Log in to your desktop and follow the above mention steps (Solution 1) to remove the recently installed update that is creating issues.

Solution 3: Remove the affected security products

As mentioned before, the issue exists in the following security products Sophos Enterprise Console, Sophos Central Endpoint, Avast for Business, some versions of Avira Antivirus, and Avast CloudCare.

You can remove these security products to get rid of boot issues. 

RELATED ARTICLES YOU NEED TO CHECK OUT:

Fix: Windows is Checking for a Solution to The Problem

Windows is checking for a solution to the problem message usually appears right after certain application crashes. In most cases Windows 10 can’t automatically fix the problem, thus making this message somewhat useless.

Many report that programs keep crashing despite this error message, so today, we’re going to show you how to fix this error message.

Why does Windows is checking for a solution to the problem message appear?

  • This is an automated message that appears whenever an application crashes suddenly.
  • It offers users the ability to analyze the crash and offer potential solutions.
  • In most cases, this feature doesn’t work, and many choose to disable it.

How do I fix Windows is checking for a solution to the problem?

1. Edit your registry

  1. Press Windows key + R and enter regedit. Click OK or press Enter.
  2. When Registry Editor opens, in the left pane navigate to HKEY_LOCAL_MACHINE\SOFTWARE\Policies\Microsoft\Windows\Windows Error Reporting
  3. Once you open Windows Error Reporting key, look for the Disabled DWORD in the right pane. On some computers this DWORD isn’t available, so you’ll need to create it manually. If you already have this DWORD, skip to Step 7.
  4. If this DWORD isn’t available, right-click the empty space, and choose New and select DWORD (32-bit) Value.
  5. Enter the Disabled as the name of the new DWORD.
  6. Double click Disabled DWORD to open its properties.
  7. When the Properties window opens, change Value data to 1 and click OK to save changes.
  8. After doing that, close Registry Editor.

We have to mention that modifying the registry can be potentially dangerous, therefore we advise you to back up your registry and create a System Restore point just in case.

2. Disable Windows Error Reporting from Group Policy Editor

  1. Press Windows key + R and enter gpedit.msc. Click OK or press Enter.
  2. When Group Policy Editor opens, navigate to User Configuration >Administrative Templates >Windows Components > Windows Error Reporting in the left pane. In the right pane locate and double click Disable Windows Error Reporting.
  3. When the Properties window opens, select Enabled and click on Apply and OK to save changes.

After making the aforementioned changes you shouldn’t see the error message anymore.

Keep in mind that this tool is available only on the Professional version of Windows. However, you can install Group Policy Editor on Windows Home as well.

3. Disable Windows Error Reporting service

  1. Press Windows key + R and enter services.msc. Press Enter or click OK.
  2. List of all services will now appear. Locate Windows Error Reporting Service and double click it to open its properties.
  3. After Properties window opens, set the Startup Type to Disabled. Now click Apply and OK to save changes.
  4. Close Services window.

As you can see, this is a rather simple solution and after disabling the service the error message won’t appear anymore.

Windows is checking for a solution to the problem message can be annoying, but you can disable it by using one of our solutions. Users reported that changing the registry stopped the message from appearing, so be sure to try that solution first.

We hope that following these steps you will be able to solve your issue. In case the issue is still there, our Application was unable to start correctly guide should be able to help you.

Please let us know if you find any other workarounds regarding this annoying dialog that keeps checking for a solution but is rarely able to find it.

Titanfall 2 Audio Crackling or No Sound: How to Fix it

Titanfall 2 is an amazing first-person shooter with multiplayer-oriented, adrenaline-pumped gameplay. The game is highly regarded for its various mechanics and in-game abilities. But a few users reported audio crackling in Titanfall 2.

Moreover, sound issues were related to specific in-game sequences, making it more confusing. For some, there was no sound in Titanfall 2.

We thoroughly inspected this problem and prepared a list of probable solutions. Keep reading to find out!

How do I fix audio crackling in Titanfall 2?

1. Check the system requirements

Let’s start with the elementary steps: If you don’t meet the requirements — especially with CPU — you may encounter many issues. Sound stuttering or crackling in Titanfall 2 can be one of them.

Here are the system requirements for Titanfall 2:

  • MINIMUM OS: Windows Vista SP2 64-bit / Windows 7 SP1 64-bit / Windows 8 64-bit.
  • CPU: AMD Athlon X2 2.8GHz / Intel Core 2 Duo 2.4GHz.
  • RAM: At least 4 GB.
  • DISC DRIVE: DVD-ROM drive is required for installation only.
  • HARD DRIVE: At least 50 GB of free space.
  • VIDEO: AMD Radeon HD 4770 with 512MB RAM or better / Nvidia GeForce 8800GT with 512MB RAM or better.
  • DirectX: DirectX 11.
  • INPUT: Keyboard and mouse, Microsoft Gamepad.
  • ONLINE CONNECTION REQUIREMENTS: 512kbps down and 384kbps up or faster Internet connection.

Moreover, make sure your CPU isn’t overheating and that its sound card is connected properly to the motherboard. If you find any irregularities, clean or replace your CPU cooler and thermal paste.

On the other hand, if everything is correct, try alternative speakers or a headset to check for hardware malfunctions.

2. Update sound drivers

  1. Right-click Start and run Device Manager.
  2. Expand Sound, video, and game controllers, right-click on the sound device, and select Properties.
  3. In the Details tab, open Hardware Id and copy the first line to your clipboard.
  4. Now, move on to the Drivers tab and click on Uninstall device.
  5. Confirm the change.
  6. Next, search for the Hardware ID you copied earlier. You should see the exact name and details of the sound device you’re using.
  7. Navigate to an official drivers provider site and download the proper drivers.
  8. Install drivers and restart the PC.

Once we eliminate hardware issues from the equation, let’s turn our attention to software. Generic sound drivers will serve their purpose most of the time.

However, if you have a specific sound system, you’ll need proper drivers from the official support site. Because of that, we strongly recommend you update the drivers.

To perform this safely while saving time, it’s highly recommended to fix the sound drivers automatically.

To be more specific, you can utilize a driver update application that scans your PC altogether and find all the outdated drivers, thus updating them individually or at once.

⇒ Get Fortect Driver Updater

3. Check System sound options

  1. Right-click the sound icon in the notification tray, and open playback devices.
  2. Now, right-click on the preferred device and select Set as Default.
  3. Right-click again and open Properties.
  4. In the Levels tab, make sure that sound is not muted.
  5. In the Advanced tab, check both boxes of Exclusive mode to enable them.
  6. Additionally, try lowering the sound quality to 16 bit, 44100 Hz (CD Quality).
  7. Confirm the selection, save the changes, and try out the game.

If the driver isn’t a culprit for sound issues, you may as well check your sound settings. First, you’ll need to set your default playback device and check the game and master volume. Additionally, try out the sound in other games to look for irregularities.

4. Reinstall C++ redistributable

  1. Search for Add or remove programs and click on the relevant search result.Add or remove programs control panel
  2. Find every Visual C++ redistributable installed, and uninstall them. Make sure to write down the names so you won’t forget.
  3. Now, download the Visual C++ Redistributable packages from the official website. Make sure you install both 64-bit and 32-bit versions.
  4. Restart your PC and start the game.

Some users reportedly fixed audio crackling in Titanfall 2 with tweaks to C++ redistributables. There’s a chance you have a bunch of those installed yourself, so uninstall them all and install them again.

While this is a bit dubious since not every redistributable is needed for the game to function seamlessly, it just might work.

5. Check the game’s file integrity via the Origin Client

  1. Open the Origin desktop client.
  2. Right-click on Titanfall 2 in the My Games menu, and choose Repair Game.
  3. After the process is done, restart the PC and try Titanfall 2.

On some unfortunate occasions, your game installation files can be corrupted or even deleted. This can be because of antivirus programs or misuse.

Luckily, you can fix every issue with the Origin client repair tool. This tool scans for possible errors and repairs installation by adding proper files.

Some users first deleted the VPK file (sound related) and then performed the repair. While we don’t advise you to do so, it may sometimes help.

6. Reinstall the game

If the previous steps were insufficient, you are left with two solutions: either you reinstall the game or wait for the patch to address this issue.

Since you can’t speed up the creation of a patch, uninstall the game and then perform a clean reinstall. Also, you could use a reliable uninstaller software to clear any registry entries and leftover files.

The only problem is that the game is huge, so the download process may last hours.

By now, you should have solved the audio crackling in Titanfall 2. Before you leave, find out how to optimize the PC for gaming and get the best performance.

Tell us which fix worked for you in the comments section below.

Surface pen driver error: 3 quick solutions to fix it

Are you worried about your Surface pen driver error problem? Do not worry, we’ve got you covered. This post is meant for you.

Surface pens are essential accessories used on surface mobile devices such as tablet or mobile phones. In addition, you can draw and write on the tablet just like you would on a sheet of paper. However, like every other tool, the surface pen may suddenly cease to work properly. How would you tackle such a situation?

In this post, we will be showing you proven methods to solve surface pen driver error with all surface pen models.

3 ways to fix Surface pen driver issues

  1. Use your tablet to fix the Surface pen
  2. Update the Surface pen drivers
  3. Change the battery of your Surface pen

Solution 1: Use your tablet to fix the Surface pen

You probably know how to connect the surface pen to the tablet through Bluetooth. Windows users reported that they were able to solve the Surface pen driver problem simply by connecting to their surface tablet. Here’s how to do this:

For Windows 8.1 users, Follow these steps:

  1. On your Surface tablet, go to settings.
  2. Select ‘change PC settings’.
  3. When the window of PC settings opens, go to Bluetooth.

For Windows 10 users, Follow these steps:

  1. Go to settings, select devices then Bluetooth & other devices.
  2. Click on Surface pen and select “remove device”.
  3. This will result in your Surface pen being invisible under Bluetooth.
  4. Press and hold your pen’s top button for up to 7 seconds and only stop when a green light flash in the middle.

Meanwhile, after the above steps, your surface pen will appear under Bluetooth again. Then select “pair”.

Solution 2:  Update the Surface pen drivers

Your Surface pen drivers might be outdated or damaged, so a quick update or repair can fix the problem. You can do so manually, by double-clicking the .exe file to initiate the firmware update.

Alternatively, we recommend using third-party software to update the right drivers for you in a fast and secure way.

In a matter of seconds, Fortect Driver Updater will scan your system for errors or missing drivers and generate a report. The software will scan your PC’s hardware and peripherals for potential driver upgrades with a few clicks.

Fortect Driver Updater is an excellent choice for this task. It has a friendly interface and is simple to use, even for computer rookies.
Make use of one to save yourself some time.

⇒ Get Fortect Driver Updater

Solution 3:  Change the battery of your Surface pen

The perfect battery for your surface pen is an AAAA battery. Your new Surface pen should come with that type of battery. Do you notice malfunctioning buttons or experience difficulty when trying to write with them? The first step to carry out should be to swap the current battery with a new one.

You can also charge your Surface pen using various methods if it is not using rechargeable batteries.

However, if you are unable to fix the Surface pen driver problem using all the solutions we mentioned above, you may consider returning it to the Microsoft store for warranty replacement.

Do share with us your experience in solving the surface pen driver error problem. Feel free to comment below.

How to show most used apps on Windows 10

The Start menu is Windows 10’s primary app launcher and includes an indexed list of the software along with tile shortcuts to open apps with.

You can also add a handy Most Used App list to the top of the menu, which provides shortcuts to software you open more often.

How to Configure the List of Most Used Apps on PC

The Most Used software list is a handy list of apps you can add to or remove from right on the Start menu with a settingWindows provides:

  • Press the Cortana button on the taskbar and enter ‘most used’ in the search box.
  • Click Show most used apps in Start to open the window directly below.
  • This window includes a Show more used app option. Click that setting to switch the Most used list on.
  • Click the Start button to open the menu, which will now include a Most used list on it as below.
  • You can also remove an app from the Most used list by right-clicking it, selecting More and Don’t show in this list.

How to fix the Most Used List in Windows 10

The Windows 10 Creators Update was first rolled out in April 2017. However, some Windows users have found the Show most used apps option grayed out after the update.

This is because of the new Let Windows track app launches to improve Start and search results setting introduced in the Creators Update. You can fix the Most used list by switching that option on as follows.

  • Press the Win key + I hotkey to open the Settings app.
  • Then, select Privacy to open the General options below. The updated Windows will include a Let Windows track app launches to improve Start and search result setting there.
  • Switch the Let Windows track app launches to improve Start and search result setting on. Now you can also select the Show most used apps option, which is no longer grayed out.

The Most used list is certainly a convenient part of the Start menu. The Show more used app option is just one of the Start menu‘s numerous customization settings.

You can also customize the Start menu‘s color scheme, transparency and Live Tiles.

No Boot Screen on Windows 10/11? Here’s how to Fix it

Experiencing boot problems in Windows 10 is a common situation that can be addressed by using certain troubleshooting solutions. In this article, we will see how you can fix these boot issues and repair your Windows 10 system.

How can I fix the no boot screen issue on Windows 10?

Before proceeding to the solutions in this section, try the following troubleshooting steps:

  • Force restart your PC
  • Remove all peripheral devices
  • Check your video connection
  • Wake up display

If these do not work, explore the fixes below:

1. Reinstall/update the video driver

  1. Press the Windows key + X and select Device Manager.
  2. Double-click the Display adapters option to expand it.device manager drivers
  3. Now, right-click your display device and select Update driver.
  4. Click Search automatically for drivers and install any available updates. your video driver and choose to update it.
  5. Finally, if that isn’t fixing the problem, return to Device Manager and, remove the driver, then reinstall it manually.

The no boot screen issue in Windows 10 might happen if your video driver is outdated or if it must be reinstalled:

If your computer has two graphic processors (integrated and dedicated video graphics), you might experience a conflict between these two processors. Try switching the video connection to the integrated graphics, as it could be a problem with the discrete card.

2. Turn off fast startup

  1. Press the Windows key + R, type control, and click OK.
  2. From Control Panel, click on System and Security.power options control panel
  3. Select Power options.
  4. From the left panel, pick Choose what the power button does.
  5. From the next window, click on the link that says Change settings that are currently unavailable.disable fast startup
  6. Uncheck the Turn on fast startup(recommended) feature.
  7. Save your changes and restart your Windows 10 system.

3. Disable high contrast feature

  1. Press the Windows + I hotkeys and click Ease of Access.settings windows 10
  2. From the left pane, click on High contrast.turn off high contrast windows 10
  3. Under Choose them dropdown select None.
  4. Restart your computer when that’s done.

4. Create a new Microsoft account

  1. Press the Windows + I hotkeys and select Accounts.account settings windows 10
  2. Scroll down and click on Add a Microsoft account.
  3. Follow on-screen prompts in order to create a new account.
  4. Make sure you ensure administrator rights.
  5. Restart your Windows 10 system through the newly created account.

5. Repair in Advanced startup

  1. Insert your Windows 10 installation CD.
  2. Start your PC and when the blue screen appears, press and hold the Power key.
  3. Repeat this process three times.
  4. The Advanced Options menu should be displayed.
  5. From there, select Troubleshoot.
    troubleshoot
  6. Now, select Advanced options.
  7. Just follow the on-screen prompts for applying a system reset or a system repair.

If, after completing the guidelines from above, you are still experiencing the no boot screen malfunction, you can also try to repair/restore your Windows 10 system. You can do it by using your Windows 10 installation CD.

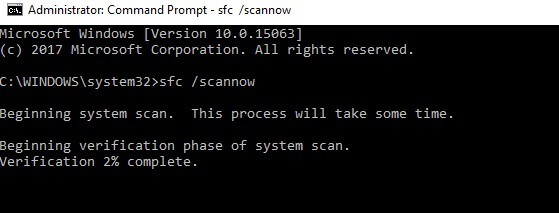
If you can access your Windows 10 system, you can also run an SFC scan in an elevated Command Prompt.

Hopefully, the boot screen is now available on your PC. If the issue persists, try to describe your particular situation in detail using the comments field below or our contact form.

Other users reported that their PC is stuck on boot screen, but we tackled that in a separate guide. If you would like to customize your boot screen, we have a whole article on how to change the boot logo on Windows 11, so don’t miss it.

Based on the info you provide us with, we can try to find the right troubleshooting solution. Also, stay close for further Windows 10 tips and tricks.

Fix: Screen Resolution Changed after Nvidia Driver Update on PC

Screen resolution changed by itself on your computer? Updating drivers is an essential action in all Windows operating systems.

But some users of NVidia graphics cards reported that after they updated the video driver, screen resolution changed and they were unable to bring it back to normal.

This error could occur in both Windows 8 and Windows 10 operating systems. But we expect it to appear more to Windows 10 users because Windows 10 gets more updates, and new improvements and compatibility fixes are being released every day.

So there’s a big possibility that your NVidia driver is just not compatible with Windows 10, just like a lot of other drivers or software.

The incompatibility of the driver with the operating system could cause a lot of problems, and messed-up screen resolution is just one of them.

How to fix screen resolution changes after Nvidia driver update

If your screen resolution changed, after the Nvidia driver update, you can try one of the solutions below, that most likely will solve your issue:

  1. Roll back your graphics driver
  2. Update Windows
  3. Disable your screen saver
  4. Manually change resolution

1. Roll back your graphics driver

So, to bring your screen resolution back to normal, or solve whichever graphical problem you have, you’ll have to roll back your driver to the version that worked well for you. To roll back your driver to the previous version, follow these steps:

  1. Right-click on This PC and go to Properties
  2. From the left pane select Device Managerroll back display driver
  3. Under Display Adapters, find your NVidia driver, right-click on it and go to Properties
  4. Beneath Driver tab, go to Roll back driver
  5. Restart your computer

This solution could be applied to both Windows 10 and Windows 10/8.1 operating systems, and it should solve your problems with screen resolution. On the other hand, if you’re unable to roll back your driver, go to NVidia website, find the working version of the driver, download it and install it manually.

In order to properly manage your drivers and uninstall or roll back to previous versions, you certainly need secure driver management tools. You’re in luck because the perfect job for this is Fortect Driver Updater.

2. Update Windows

All the drivers running on your computer depend on Windows 10 to work properly.

In other words, running outdated Windows versions may trigger various issues, including driver incompatibility problems and driver errors.

To avoid that, install the latest Windows 10 updates on your computer. Here’s how to do that:

  1. To access the Windows Update section, type “update” in the search box. This method works on all Windows versions.
  2. Then go to Windows Update, check for updates and install the available updates.
screen resolution changes after update

3. Disable your screen saver

Some users said that disabling the screen saver helped them fix the problem. So, go to Settings > Lock Screen >scroll down to Screen Saver settings > disable the screen saver.

4. Manually change resolution

If none of the solutions listed above worked, you only have one option left: manually adjust your display resolution.

  1. Right-click on desktop > select Display Settings
  2. Go to Resolution and use the drop down menu to select the right resolution for you.
screen resolution changes after update

Applying one of these solutions will probably solve your resolution issue without that much effort. However, if you find any other useful information or method, make sure to let us know in the comment section below!

Gray Screen of Death: How to Properly Fix it

Some might have heard of the Blue Screen of Death, but what about the Gray Screen of Death? While BSOD causes are well-known and can appear due to hardware, this is a software issue.

If you’re getting a Gray Screen of Death, this guide will show you the best ways that you can use to fix it.

What causes the gray screen of death?

  • Outdated AMD drivers can often cause this problem, so be sure to update AMD drivers regularly.
  • Bugs with AMD drivers can sometimes cause this issue as well.

 How do I fix the grey screen of death in Windows?

1. Update the AMD driver

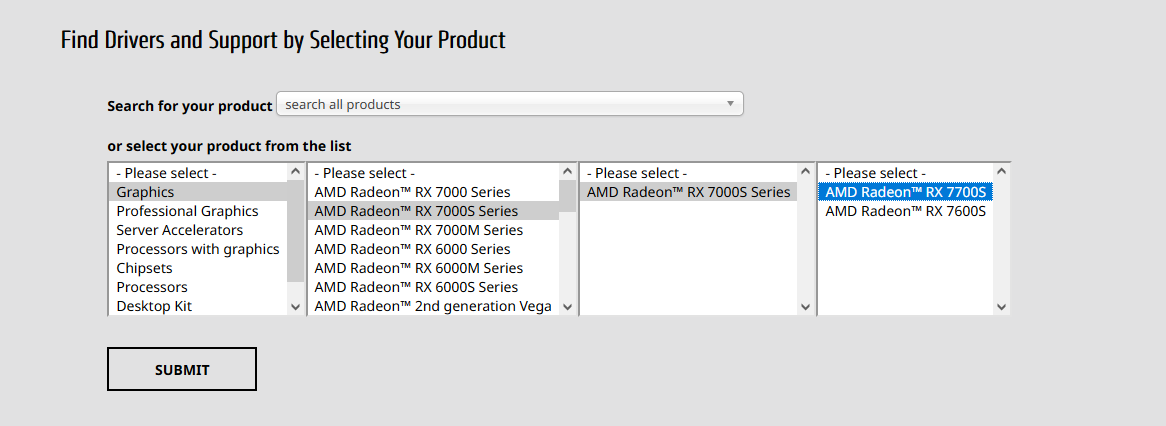
  1. Visit the AMD download page and select your graphics card on the list.
  2. Select your version of Windows and click the download button.
  3. Once the driver is downloaded, run the setup file to install it.

2. Fully uninstall the ATI graphics card driver and update it

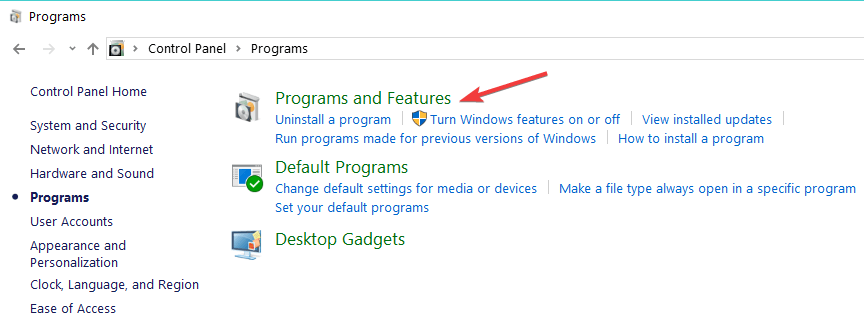
  1. First, open the Control Panel and click Programs and Features to open the window shown in the shot below.Programs and Features
  2. Select the AMD Catalyst Install Manager listed there and click the Change button.
  3. Click the Uninstall Manager option on the Catalyst Install Manager window, and select to remove ALL the AMD software components. You should be left with VGA drivers.

Some users are suggesting to use Display Driver Uninstaller, and you can do that by following these steps:

  1. Open the Display Driver Uninstaller software by right-clicking its icon and selecting Run as administrator.
  2. Select AMD from the Selected graphics driver drop-down menu to clean any ATI fragments found.
  3. Follow the instructions on the screen to complete the process.

After that, you need to follow the steps from the previous solution to download and install the latest version of AMD drivers.

In case you encounter AMD driver installation problems, we have a dedicated guide that can help you with that.

3. Run the Hardware and Devices troubleshooter

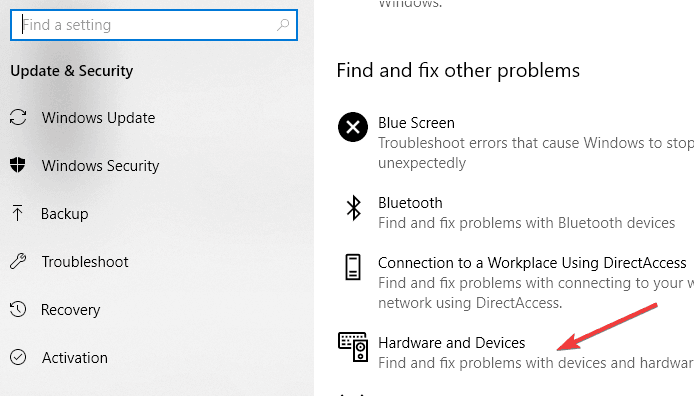
  1. Open the Settings app.
  2. Navigate to the Update & Security section and select Troubleshoot in the left pane.
  3. Now run Hardware and Devices troubleshooter
troubleshoot hardware and devices

After running the troubleshooter, don’t forget to restart your computer.

As you can see, this issue can be easily fixed, and it’s not as serious as a Blue Screen of Death.

Since this is an AMD driver issue, you might want to check our guide on how to roll back AMD drivers on your PC.

We hope you fix the gray screen of death using the solution listed above. If you come across other troubleshooting methods, feel free to list the steps to follow in the comments below.

Outlook.com was hacked, and it’s worse than expected as hackers also had access to some email content

Microsoft’s Outlook.com service has been the subject of a pretty serious hack in recent weeks. Microsoft first confirmed to Techcrunch that its email service has been compromised for months, with hackers being able to access subject lines of emails and names of people within conversations in select Outlook.com accounts.

However, following a new report from Vice’s Motherboard website revealing that hackers were actually able to read the content of emails, Microsoft has been forced to change its stance.

Microsoft confirmed to Motherboard that it sent breach notification emails to Outlook.com users who had their emails read by hackers, and the company added that this was just 6% of users affected by the hack. “We addressed this scheme, which affected a limited subset of consumer accounts, by disabling the compromised credentials and blocking the perpetrators’ access,” a Microsoft spokesperson told Motherboard in a statement.

The hack is apparently the consequence of hackers gaining access to customer support account for Outlook.com, a tool that does give support agents full access to Outlook.com emails. “Microsoft, like many other tech giants, does have the ability to scan or read user’s messages. In 2014, Microsoft looked into the email account of a French blogger to identify a Windows 8 leaker,” highlighted the Motherboard report.

According to Motherboard’s source, hackers had access to this compromised support tool for at least six months, until Microsoft spotted the hack at the end of March. The Redmond giant disputes this claim, saying that the breach took place from 1st January 2019 to 28th March 2019. Anyway, this isn’t a good look for Microsoft and the email service considered as one of the best alternatives to Google’s Gmail.

Got a Windows 10/11 Apple iPhone driver error? Fix it now

iPhone is a great device, but many users reported Apple iPhone driver error on their PC. This can be a big problem, especially if you want to transfer files from your phone, so today we’ll try to fix this issue once and for all.

What to do if iPhone is not showing up on Windows 10 computer?

  1. Update iPhone driver
  2. Update Windows 10
  3. Force install device driver
  4. Check if Apple Mobile Device USB driver is installed
  5. Restart Apple Mobile Device USB driver
  6. Uninstall and download iTunes from Apple website

1. Update iPhone driver

This is the first thing you should do if you get an Apple iPhone driver error. An outdated driver may create conflict with your device, so be sure to update it by following these steps:

  1. Disconnect your iPhone from the PC.
  2. Make sure the iPhone is unlocked and reconnected it to PC. Use the official Apple USB cable. Close iTunes if it starts automatically.
  3. To update the driver, type Device Manager in the Cortana/search bar and open it from the search results. Or right-click on Start and select Device Manager.
  4. In the Device Manager, look for the Portable Devices section. Expand it, right-click on your iPhone model and select Update Driver.
  5. Select Search automatically for updated driver software. Windows will search for any available updates and install it automatically.
    search automatically Apple iPhone driver error
  6. Restart the PC. Now try to connect your iPhone and see if the error is resolved and detected by the iTunes.

Additionally, you can resolve this issue by automatically updating your iPhone driver using reliable driver update software for your Windows 10 PC.

2. Update Windows 10

If you’re still having issues with the Apple iPhone driver error, you can try updating the Windows 10 OS. Microsoft releases new improvements and bug fixes for third-party software bundled with the Windows update.

  1. To update Windows, go to click Start and open Settings.
    Windows Update Apple iPhone driver issues
  2. Click on Update and Security option.

If there is a new update, click on Download update. If the updates are already downloaded and pending install, click on the Install now button.

You may need to restart the PC after the update to apply the changes.

3. Force Install Device Driver

If you are facing an Apple iPhone driver error, you can fix it by installing the required drivers on your PC:

  1. Disconnect your iPhone from PC.
  2. Make sure the iPhone is unlocked and connect it to PC.
  3. Press Windows Key + R on your keyboard, copy and paste the following directory path and hit Enter / OK.
    • %ProgramFiles%Common FilesAppleMobile Device SupportDrivers
  4. From the Drive folder, go to View tab, and check the file name extension option in the Show/Hide section. 
  5. Next, locate usbaapl64.inf or usbaapl.inf file. Right-click on the file and select Install.
    Install Apple Mobile Device Driver Manually Apple iPhone driver error
  6. Do the same for all the files with a .inf extension in that folder.
  7. Disconnect your iPhone and restart your computer. After the restart, reconnect and open iTunes.

4. Check If Apple Mobile Device USB driver is installed

If the Apple Mobile Device USB Driver is not installed you might encounter an Apple iPhone driver error. A quick fix for this problem is to check if the said driver is functioning properly.

  1. Right-click on Start and select Device Manager.
  2. From Device Manager, scroll down and expand Universal Serial Bus Controllers section.
  3. Look for Apple Mobile Device USB Driver.
    Apple Mobile Device Driver Apple iPhone driver error
  4. If you see the driver, right-click on it and select Disable Driver. Right-click again and select Enable Driver option.

5. Restart Apple Mobile Device USB driver

If you can see the Apple Mobile Device USB Driver but you’re still getting Apple iPhone driver error, try restarting the AMDSs. Here is how to do it.

  1. Make sure you disconnect iPhone if it is connected to the PC. Close iTunes if running.
  2. Press Windows Key + R. Type services.msc and hit/OK enter.
    Apple Mobile Device Driver Service Apple iPhone driver
  3. In the Services window, look for Apple Mobile Device Services. Right-click on the service and select Properties.
  4. Set the Startup type to Automatic.
  5. Click the Stop button to stop the service.
    Apple Mobile Device USB Driver Service stop Apple iPhone driver error
  6. Click the Start button to restart the service and click OK to save changes.
  7. Restart your computer and launch iTunes to check for any improvements.

6. Uninstall and download iTunes from Apple website

One way to fix the Apple iPhone driver error is to download iTunes from the official Apple website.

  1. First, uninstall iTunes app from the Settings > Apps.
  2. Go to iTunes download page.
  3. Scroll down and click on Windows under Looking for other versions section and download the version that matches your system architecture.

Check if the problem is still there.

We have listed all the possible solutions for Apple iPhone driver error, so be sure to try them all.

Do you want to view in fullscreen: How to disable the pop-up

Most of the web browser apps are coming with dedicated security features to protect your Windows 10 system and personal files. Among these security add-ons, we can also discuss about the full-screen permission pop-up that can turn out to be quite annoying sometimes.

If you want to learn how to disable the ‘Do you want to view in full-screen?’ pop-up, check the guidelines below. We will list the steps to follow to disable the alert on the most important web browser clients that are currently used by the Windows 10 users.

Quick Tip:

Pop-ups can sometimes affect your online experience and they are hard to remove. Using a customizable browser with built-in privacy features like ad blockers can solve this issue.

Opera One not only comes with it’s own VPN and Ad blocker, but it also features a built-in AI and modular AI-ready design.

Opera One

Enjoy a seamless online experience with no pop-ups or interruptions with this versatile browser!
Free Download Visit website

How to turn off full-screen permissions on Windows 10

  1. Disable full-screen alert on Google Chrome
  2. Disable full-screen alert on Mozilla Firefox
  3. Disable full-screen alert on Microsoft Edge

1. Disable full-screen alert on Google Chrome

Each time you grant full-screen video access the actual website will be added into an exception list. This exception list can be accessed within Settings – > Advanced – > Privacy – > Content Settings – > Flash.

chrome flash permission settings

From that path you can see all the exceptions that were recently added. For turning off the full-screen permissions you just have to select one entry and change its hostname value into *://*/*.

2. Disable full-screen alert on Mozilla Firefox

Open the Firefox web browser and in the web address bar enter about:config. Agree with the alert and then in the search field enter dom.disable_beforeunload. Select this entry and change its value to true.

set full-screen-api.approval-required firefox

Then, in the Firefox web address bar enter about:permissions and find the full-screen-api.approval-required entry; set its value to false.

3. Disable full-screen alert on Microsoft Edge

Open Microsoft Edge and click on the Hub icon. From there switch to History tab. Select Clear History and uncheck the ‘Full screen permissions’ field. That should allow you to navigate towards websites without having to recheck the ‘do you want to view in fullscreen’ pop-up.

manage website permissions microsoft edge

Now you should know how to disable the ‘do you want to view in full-screen’ pop-up from your favorite web browser software. Do remember that the full-screen permission feature was installed for a certain reason: keeping you safe from possible malware attacks. As a quick reminder, ransomware attacks increased by two fold this year and hackers are actively seeking new ways to infect your PC.

Therefore, we recommend you to keep this setting available all the time. Turn it off only if you have Firewall protection enabled and an additional security program set. Yes, we’re talking about an antivirus program that offers web browsing advanced security features. For more information on the best antivirus software for browsing, check out this list.

More tips to keep your PC safe from malware attacks:

How to Fix Common Halo Wars 2 Install Errors

Halo Wars 2 is a real-time strategy game that allows players to lead Spartans, Warthogs, and other classic Halo fighting forces in a brutal and terrifying war. A new enemy has appeared on the biggest Halo battlefield ever, and your main task is to stop it.

But before you engage in fierce battles against your enemies, you may need to battle various technical issues first. Players report that various Halo Wars 2 bugs sometimes affect the game, limiting their gaming experience.

In this article, we’re going to focus on a series of error messages that may appear on the screen and how to fix them.

How can I fix the common Halo Wars 2 errors?

1. License Unverified error

This error indicates that you may have created a new Microsoft account to redeem the game code. If this is the case, here’s what to do:

  1. Complete your installation of Halo Wars 2.
  2. Restart your Windows 10 computer.
  3. Go to the Microsoft Store and sign in using the Microsoft account you used to redeem your code.
  4. Go to My Library and confirm that you added Halo Wars 2 to your list of games.
  5.  If Halo Wars 2 is available in your Library, you should be able to launch it. If Halo Wars 2 is not available in your game list, make sure you’ve used the right Microsoft Account to sign into the Microsoft Store.
  6. If you’re using the correct account, yet Halo Wars 2 is not visible in your library, contact Haloway support.

2. Install failed error

  1. Restart your Windows 10 computer.
  2. Disable all non-essential apps and programs.
  3. Restart the game‘s installation process.

This error usually occurs when other apps run in the background during the game install process. To get rid of this error, follow the above steps.

3. Target drive error

  • Make sure that your installation disc has no scratches or defects.
  • Check the target drive to make sure that there is no issue with the drive itself or writing data to that drive.
  • Restart your Windows 10 computer and launch the installation process again.

This error message informs you that there is a problem with your install disc or with the target drive that you are trying to install the game to.

4. Install error 0x80070005

  1. Launch the Store troubleshooter.
  2. Make sure you’ve installed the latest Windows updates.
  3. Clear Store cache.
  4. Run a full virus Scan.
  5. Disable your firewall and try to install the game again.
  6. Run an SFC scan.

This error occurs mainly on the Windows Store. If you’re experiencing error 0x80070005, follow the steps listed above.

5. Install error 0x80073cf9

For more information about this installation error 0x80073cf9, check our detailed guide.

That is about it for the common Halo Wars 2 error. You should now be able to fix most of them by applying the fixes in this guide.

If you’ve encountered other Halo Wars 2 error messages and found a workaround to fix them, use the comment section below to tell us more about your experience.

Posted in PC

Windows 10 news recap: Sling TV adds support for Microsoft Edge, Chromium-based Microsoft Edge now available for testing, and more

Welcome back to our Windows 10 news recap, where we go over the top stories of the past week in the world of Microsoft’s flagship operating system.

ARM64 version of Firefox browser begins beta testing

Mozilla has begun testing of its Firefox web browser on ARM64 devices. It is available for users running Windows 10 PCs with Snapdragon processors.

Mozilla Firefox browser on Windows 10

Sling TV adds support for the Microsoft Edge web browser

Microsoft Edge users can now use Sling TV to play media, making it easier to watch content and not have to switch to a different browser, or in some cases, an app.

Woman reading email on a Surface on bed

Microsoft makes Edge Chromium Insider preview available for download, get Dev or Canary channel builds now!

Microsoft’s new Chromium-based Microsoft Edge is now available for users to test on Windows 10. Through a new website, users can download a copy of Microsoft’s new web browser to give it a whirl and see how it works for them.

Chromium-based Microsoft Edge now lets you switch search engines on the Canary channel

Following the launch of Microsoft’s new Edge browser for testing, the company has already released an update to the Canary channel. This update allows users to change their search engine from Bing to either Google, DuckDuckGo or Yahoo.

That’s it for this week – we’ll be back next week with more Windows 10 news!

Microsoft’s Outlook.com has been compromised for months, email addresses and subject lines, and more were left exposed

If you or someone you contact via e-mail uses Microsoft’s webmail services, such as Outlook.com, then it is possible that you have been involved in a data breach.

Microsoft confirmed to TechCrunch this week that the firm’s webmail services have been a victim of a data breach. Data on customers was left exposed through a support agent’s credentials which were compromised, which cybercriminals used to access the data.

Of the data affected, Microsoft noted that the following information was left exposed:

  • Email addresses
  • Subject lines of emails
  • Names of people within conversations
  • Custom folder names

Microsoft noted that it doesn’t know which data has been viewed, or the reasons why, but that users may experience increasing phishing or spam emails as a result of the breach, therefore, it advises users to be more vigilant when checking their emails.

The breach took place over a long period of time, from 1st January 2019 to 28th March 2019. It isn’t clear how many people have been affected, but it says it was a “limited” number of people. The company did confirm that enterprise users have not been affected.

Microsoft has disabled the compromised account of the support agent to prevent more data being accessed.

In an email letter sent out to affected users, Microsoft said:

Dear Customer

Microsoft is committed to providing our customers with transparency. As part of maintaining this trust and commitment to you, we are informing you of a recent event that affected your Microsoft-managed email account.

We have identified that a Microsoft support agent’s credentials were compromised, enabling individuals outside Microsoft to access information within your Microsoft email account. This unauthorized access could have allowed unauthorized parties to access and/or view information related to your email account (such as your e-mail address, folder names, the subject lines of e-mails, and the names of other e-mail addresses you communicate with), but not the content of any e-mails or attachments, between January 1st 2019 and March 28th 2019.

Upon awareness of this issue, Microsoft immediately disabled the compromised credentials, prohibiting their use for any further unauthorized access. Our data indicates that account-related information (but not the content of any e-mails) could have been viewed, but Microsoft has no indication why that information was viewed or how it may have been used. As a result, you may receive phishing emails or other spam mails. You should be careful when receiving any e-mails from any misleading domain name, any e-mail that requests personal information or payment, or any unsolicited request from an untrusted source (you can read more about phishing attacks at https://docs.microsoft.com/en-us/windows/security/threat-protection/intelligence/phishing).

It is important to note that your email login credentials were not directly impacted by this incident. However, out of caution, you should reset your password for your account.

If you require further assistance, or have any additional questions or concerns, please feel free to reach out to our Incident Response Team at [email protected]. If you are a citizen of European Union, you may also contact Microsoft’s Data Protection Officer at:

EU Data Protection Officer
Microsoft Ireland Operations Ltd
One Microsoft Place,
South County Business Park,
Leopardstown, Dublin 18, Ireland
[email protected]

Microsoft regrets any inconvenience caused by this issue. Please be assured that Microsoft takes data protection very seriously and has engaged its internal security and privacy teams in the investigation and resolution of the issue, as well as additional hardening of systems and processes to prevent such recurrence.

It is advised to check both your inbox and spam email folders for an email from Microsoft. Some reports suggest Microsoft’s email, ironically, is ending up in spam folders for some users.

Here’s how to fix error 0xa00f4245 on Windows 10/11

We’ve all used a webcam on various occasions, but let’s say you stumble upon an error, more precisely error 0xa00f4245, on your Windows 10 machine. What now?

This Windows 10 webcam issue is mostly caused by improperly configured system files. This usually occurs when the computer’s registry system is overloaded with too much data, or when certain system files become missing or corrupted.

There are many instances when the privacy settings are blocking the camera access. But worry not, we have some solutions for you.

What to do if you can’t start your camera on Windows 10?

  1. Fix privacy issues
  2. Reinstall your webcam
  3. Reinstall chipset drivers
  4. Perform Automatic Repair
  5. Perform a reset

1. Fix privacy issues

Windows 10 allows users to allow or deny access to any connected devices, in this case, your webcam. In order to fix error 0xa00f4245 you’re going to allow access to your webcam, so please follow these steps:

  1. Open your Start Menu.
  2. Click on Settings.
  3. Type webcam into the search box located in the top-right corner of the window, and press Enter.
  4. Find and click on the Webcam privacy settings in the search results at hand.
  5. Find Allow apps to access your camera option and make sure that it is enabled.
    error 0xa00f4245 allow apps to access your camera
  6. You now have access to the camera.

Also, be sure to check if your antivirus or Windows Firewall is blocking access to the webcam.

2. Reinstall your webcam

In some instances, error 0xa00f4245 can appear due to corrupted webcam driver. However, you can fix that by reinstalling it.

device manager error 0xa00f4245

  1. Right-click on your Computer.
  2. Click on Properties and select Device Manager.
  3. In Device Manager, select your webcam, and then select Properties.
  4. Select the Driver tab, select Uninstall, and then select Delete the driver software for this device, and then select OK.

If your camera isn’t found in Device Manager, and this issue persists. Try using the camera with a different USB port on your device.

After you’re done with this solution, simply head on over to your webcam’s manufacturer website and download the latest drivers. Alternatively, you can use third-party tools to automatically update all your drivers with just a couple of clicks.

It works with all versions of Windows and makes updating drivers a breeze. Fortect Driver Updater may be set to find outdated drivers automatically.

However, a tool like Fortect Driver Updater not only downloads and installs drivers, but also manages them by troubleshooting, backing up, and restoring them.

With a few clicks, the software will scan your PC’s hardware and peripherals for potential driver upgrades. Use one to save yourself some precious time.

⇒ Get Fortect Driver Updater

3. Reinstall chipset drivers

Sometimes, the root of your problem isn’t the webcam not having permissions on your machine. You might be facing non-compatible chipset drivers for your motherboard. Head on over to the website of your motherboard manufacturer and search for Windows 10 chipset drivers compatible with your machine.

After you install them, check if the issue is still there.

4. Perform Automatic Repair

Maybe the previous solutions fixed error 0xa00f4245, but if you’ve gotten to this point, you might consider running an Automatic Repair on your system. To do this, follow these steps:

  1. Open the Settings panel.
  2. Go to Update & Security.
  3. In the Recovery section, click on Advanced Startup and select Restart now.
    advanced startup webcam error 0xa00f4245
  4. At the Choose an option screen, click on Troubleshoot.
  5. At the Advanced Options screen, click on Automated Repair.
  6. Choose an account and log in, when asked to do so.
  7. Automatic Repair will start and your computer may reboot during the process.
  8. You’re good to go.

5. Perform a reset

This solution should only be used as a last resort because it will erase all your stored data. So performing backups for essential files is strongly recommended.

  1. Firstly, head to the Settings panel.
  2. Go to Update and Security.
  3. Click on Recovery.
  4. Click on Get Started.
    reset this PC error 0xa00f4245
  5. At the Reset This PC section, click Get started.
  6. Click on Remove Everything.
  7. Follow the instructions to finish this procedure.

We hope these solutions we’re helpful in solving error 0xa00f4245. In the meantime, let us know in the comment section down below what issues have you faced while using a webcam on Windows 10.

How to fix error 49.4c02 on your HP printer

If you’re working from home or at the office, and encounter the 49.4c02 HP error code on your printer, we have some solutions on how to fix it.

Nothing can be more frustrating than when you’re just about done with your work on your computer, then you send it for printing and it won’t work.

When your printer displays the HP error code 49.4c02, it’s usually caused by a print job. Here are some steps you can take to fix the issue.

How can I solve HP printer error 49.4c02?

  1. Delete any jobs in the print queue
  2. Print a test page
  3. Disable Advance Printing Features
  4. Check whether you’re using the Franklin Gothic Book font
  5. Flash and update the firmware
  6. Contact your printer’s manufacturer

1. Delete any jobs in the print queue

You can do this by opening your printer device, usually, a little printer icon is found on the bottom right-hand corner of your computer. Right-click to open the print queue. Once the list opens up, delete all jobs.

2. Print a test page

Power off the printer, then disconnect the cable that plugs to your computer and power it back on. If your HP printer switches to a ready state when the cable is disconnected, print a test page.

If the test page prints, then the cause of the error is most likely one of the print jobs on the print queue.

If these steps don’t fix the chop, here are some solutions to help you fix the HP error code 49.4c02.

3. Disable Advance Printing Features

To execute this, follow these steps:

  1. Go to Windows Logo printers
  2. Choose the printer queue
  3. Left click and choose Printing preference
  4. Choose Advance option
  5. Under Document option, choose Advance Printing Features
  6. Change it to Disabled

Try printing again using a test page. If this doesn’t help, try the next solution.

4. Check whether you’re using the Franklin Gothic Book font

Sometimes the HP error code 49.4c02 can be as a result of printing a document with the Franklin Gothic Book font, especially on the HP MFP Series, causing it to display the error.

In this case, do the following:

  • For PCL 5e and PCL6 drivers, enable the ‘Send True Type as Bitmaps’ setting under the Advanced tab of either of the two drivers. This will allow the document to print without the HP error code 49.4c02.
  • For PS driver, set the True Type Font Download option to Bitmap. This allows the document to print without the HP error code 49.4c02. Go to the Advanced tab under PostScript Options to do this.

You can also install the font on the printer’s hard drive using the Web JetAdmin plugin known as Device Storage Manager. This allows the font or document to print without using the Bitmap settings as mentioned in the above two drivers.

5. Flash and update the firmware

Follow the steps below to flash your printer’s firmware when connected to your computer with a parallel cable:

  • Turn on your printer
  • Check whether Ready is displayed on the LCD
  • Print a test page
  • Check the firmware revision of your printer then do the following:
  1. Press Select button
  2. Press Down button to highlight Information menu
  3. Press Select
  4. Press Down to display Print Configuration on the LCD
  5. Press Select to print the test page

The firmware date and revision will be listed on the test page under Printer Information.

  1. Click Start
  2. Select Run
  3. In the Open box, type CMD or COMMAND
  4. Click Ok
  5. Go to the directory where the firmware is saved, for example, C:FIRMWARE, then type the path on the command window
  6. Press Enter
  7. Type copy /B *.RFU LPT1 on the command window prompt
  8. Press Enter to copy the firmware file to your printer and upgrade the firmware
  9. If successful, the LCD should display Receiving Upgrade

Note: there should be no interruptions during the upgrade process as this may damage the printer severely.

  1. Once the upgrade is complete, the LCD will display Ready.
  2. Turn off the printer then wait 15 seconds before turning it on again.
  3. Print a test page and check that the firmware revision is listed under Printer Information on the test page.

In case you encounter problems when upgrading your printer’s firmware, take the following steps for an emergency firmware update:

  1. Turn off the printer
  2. Hold down the Cancel button and turn on the printer. During this process, the memory will count up, and the Ready and Attention LEDs will remain on
  3. Release Cancel button
  4. Press and release Select button
  5. Press and release Resume You will see the message Load File and Execute on the LCD display
  6. Press and release UP Do this until the Program File to Slot 4 Flash displays on the LCD
  7. Press and release Select button
  8. Press and release Select button twice until Download File Now shows on the LCD
  9. Right-click Start on your computer
  10. Select Run
  11. In the Open box, type CMD or COMMAND
  12. Go to the directory where the firmware is saved, for example, C:FIRMWARE, then type the path on the command window
  13. Press Enter
  14. Type copy /B *.RFU LPT1 on the command window prompt
  15. Press Enter to copy the firmware file to your printer, and upgrade the firmware
  16. If successful, the LCD should display Receiving Upgrade

Note: there should be no interruptions during the upgrade process as this may damage the printer severely.

  1. Once the upgrade is complete, the LCD will display Ready.
  2. Turn off the printer then wait 15 seconds before turning it on again.
  3. Print a test page and check that the firmware revision is listed under Printer Information on the test page.

6. Contact your printer’s manufacturer

As a final resort, you can contact your printer’s manufacturer (in this case HP Support) to find out more about how to resolve the issue.

Let us know in the comments section whether these steps and solutions worked for you.

[wl_navigator]

How to fix frequent Risk of Rain 2 bugs on PC

Here we have it folks, the sequel to Risk of Rain, brought to us by Hopoo Games. If you’re familiar with the previous installment and its 2D rogue-like platforming, you’re gonna love Risk of Rain 2, with its new 3D enviroments and uncompromising  action.

You can now face off alien planets with up to four players in co-op mode. Loot hunting is back, and better than before, scavenge for that special item that either boosts your Offensive or Defensive capabilities.

Or if you’re inclined, gather credits and hunt for the upgrade station that’s scattered across the map.

But enough about the key aspects of the game, let’s talk about the bugs and issues that the game faces at the moment.

While still being in early access, many players have reported instances of bugs on numerous Steam threads.

Common Risk of Rain 2 bugs

  1. Game not launching
  2. Camera always points down
  3. Framerate issues
  4. Game stuck at first screen
  5. Save files disappearing
  6. Black screen with sound
  7. Multiplayer issues

1. Game not launching

Early access games are bound to have some hiccups, in this case players reporting that the game won’t launch in the first place.

The game won’t launch – crashes on startup!

2. Camera always points down

Strange things might happen to games in early access, in this case camera problems being reported. With the camera going to weird angles, or downright causing input latency for users.

The camera is always pointing down, or I’m getting weird input latency!

3. Framerate issues

Nobody likes it when a game starts to stutter uncontrollably, but Risk of Rain seems to be plagued by this issue at the moment, with many reporting this problem occurring during longer playthroughs.

Currently when I get to around 50-60 minutes, my framerate starts to tank in the large fights that occur. None of the settings really effect it at all and I’m 100% sure it’s not my hardware.

4. Game stuck at first screen

Some have been stuck at the main menu screen, with the Early Access disclaimer stuck on the screen, and no further progression is available from that point onward.

I can’t get past the first screen, and it says EARLY_ACCESS_DISCLAIMER.

5. Save files disappearing

Some users have reported the game not being able to save their progress. With most having to restart the game, to similar results.

i played ror2 and i have unlock a lot of things but every time i play on an other desktop i lose all my data and saves

6. Black screen with sound

There are some cases in which the sound works just fine, but the screen fades to black, and some have been waiting on that loading screen for ages.

On startup of the game I encounter a black screen that stays loading for a long time(I waited about 30 minutes to see if it would load).

7. Multiplayer issues

We all love to spend some in-game times with out friends. But Risk of Rain 2 doesn’t actually work that well on this aspect, with instances of the multiplayer not working at all or lagging to a crawl.

I have been having lag issues since release. The multiplayer is unplayable for me. It’s nothing but being in limbo for minutes at a time, being unable to interact or damage anything.

How do we fix these issues?

  1. Game launch
  2. Camera issues
  3. FPS fix
  4. Game stuck fix
  5. Save file fix
  6. Black screen issues
  7. Multiplayer fix

1. Fix Risk of Rain 2 launch issues
firewall Windows was unable to create

In order to do this, simply whitelist your game in your Windows Firewall, and add an exception rule to you game in your antivirus program.

2. Camera fix

Firstly, try unplugging and re-plugging your controller if you’re using one. Secondly you can access you Device Manager from the Start Menu, and try reinstalling your controller.

3. Fix Risk of Rain 2 FPS issues

  1. Open your Nvidia Control Panel;
  2. Select Manage 3D Settings and select Risk of Rain 2 from the Program Settings and set the Power Management to Prefer Maximum Power;
  3. Save your changes and exit.

4. What to do if Risk of Rain 2 got stuck

In order to work past the early access disclaimer screen, please check that your Window System Timezone is not Invalid in the Clock section.

5. Fix game file save bugs
properties steam play nothing happens steam

  1. Open up the Steam window;
  2. Click Library to open the game collection;
  3. Then right-click on Risk of Rain 2 and select Properties;
  4. Press the Verify integrity of game files button.

6. Fix Risk of Rain 2 black screen
Task manager Process tab

Press Ctrl+Shift+Esc to bring up your Task Manager, locate RoR2.exe and select it and click End Task. Now restart your game.

7. Fix Risk of Rain 2 multiplayer issues

Firstly you can repeat the steps shown in the save file fix. Also, try running the game on Administrator rights, and add an exception rule in your antivirus for the game.

We hope that these fixes were of use to you. In the meantime, let us know on what you think about the game so far, in the comment section down below.

RELATED STORIES TO CHECK OUT:

Posted in Fix

Destiny 2 Failed to Download Configuration Files [Fix]

Destiny 2 is one of the most played online-only multiplayer first-person shooter games, gaining even more celebrity with the latest release.

We all want to play our favorite games with the best graphical quality possible and without any interruptions in the form of errors and other issues. One of the most common issues when trying to play Destiny 2 on your Windows 10 PC is the error Destiny 2 failed to download configuration files.

If the error we mentioned above is known to you, then you came to the right place for the fix. In this article, we will explore some of the best strategies that can be used to fix this error and get back to playing Destiny 2.

How to fix Destiny 2 failed to download configuration files error?

1. Repair the game using the Blizzard app

One way to fix Destiny 2 failed to download configuration files error is to repair the game. To do that, follow these steps:

  1. Open your Blizzard app like you normally would.
  2. In the Games tab, navigate to Options, and choose Scan and Repair from the drop-down menu.scan and repair Destiny 2 failed to download config files
  3. This method should fix all the corrupted or missing files from your game installation.

2. Uninstall and re-install the game

Several users claim that reinstalling the game fixed the Destiny 2 failed to download configuration files error. To do that, follow these steps:

  1. First, open up Blizzard app, and navigate to Games tab.
  2. Search for the Destiny 2 game in the list of installed games, and uninstall it.
  3. Re-install the game as you did the first time.
  4. If the problem still persists, try Solution 1 again with a fresh install.

3. Try getting help from the official Blizzard team

contact support failed to download configuration files
  1. Try opening up Destiny 2, and note the error code mentioned underneath the error message.
  2. Go to this link.
  3. Search for the specific error code your Destiny 2 produces (Ex. error code: termite, weasel, etc.)

In this article, we explored some of the best ways to deal with the Destiny 2 Failed to download configuration files error.

The team at WindowsReport searched far and wide for the best methods to deal with this issue, and the first option we presented in this list has shown great results for other users.

If you’re stuck on Destiny 2 loading screen, we also have a dedicated guide that can help you fix that, so don’t miss it.

Please feel free to let us know if this guide helped with your problem, and also let us know if you found any other solution that worked by using the comment section below.

FIX: Service Host causes high CPU in v1709 of Windows 10/11

If you already installed the Fall Creators Update on your computer, you may have noticed that Service Host often triggers high CPU usage. This issue is quite frequent affecting thousands of users.

Usually, the culprits are these two processes: Service Host Local Service and Service Host Internet Connection Sharing.

service host high CPU windows 10

The reasons why your PC shows a high CPU usage are complex and range from update issues to corrupted files. Since this problem occurs shortly after you installed Windows 10 v1709 on your device, chances are that Windows Update got stuck when downloading an update.

How to fix Service Host high CPU usage

1. Run the System File Checker

The System File Checker can quickly detect and repair corrupted files that may have caused the issue.

Here’s how to run an SFC scan:

  1. Go to Start > type cmd > right-click Command Prompt > select Run as Administrator
  2. Now type the sfc /scannow command

sfc scannow cmd

3. Wait for the scanning process to complete and then restart your computer. All corrupted files will be replaced on reboot.

You can also use a dedicated tool, such as CCleaner, Advanced SystemCare, etc. Don’t forget to first backup your registry in case anything goes wrong.


2. Refresh DISM

If the first solution didn’t fix the proble, you can use Microsoft’s Deployment Image Servicing and Management tool.

  1. Launch Command Prompt as Admin
  2. Type the commands listed below and hit Enter after each one. Wait for the previous command to complete scanning and repair and only then insert the next one:
  • DISM.exe /Online /Cleanup-image /Restorehealth
  • DISM.exe /Online /Cleanup-Image /RestoreHealth /Source:C:RepairSourceWindows /LimitAccess
    sfc /scannow 

    Don’t forget to replace the “C:RepairSourceWindows” placeholder with the location of your repair source.

Check if the issue persists. If this is the case, go to the next solution.


3. Perform a network reset

Many users reported that sometimes the first two solutions only solve this issue temporarily. Fortunately, one resourceful Windows 10 user found a permanent fix and listed the troubleshooting steps on Microsoft’s forum:

  1. Go to Start > type ‘firewall’ launch the Windows 10 Firewall
  2. Click ‘Change notification settings’ > and toggled “Block all incoming connections including those in the list of allowed apps” back to default (not checked)windows firewall settings
  3. Run the following troubleshooters from Settings > Update & Security > Troubleshoot > Internet Connections/ Incoming connections
  4. windows 10 internet connections troubleshooterReset your network by going to Settings > Network and Internet > Network reset
  5. Remove network interfaces in Device Manager
  6. Restart your computer twice
  7. Put your network configuration settings back and check if Service Host is still causing high CPU usage.

There you go, we hope that the solutions listed above helped you fix Service Host high CPU usage.

4. Roll back to previous iteration of Windows 10

You can also, if necessary, roll back to previous version of Windows 10. Here’s how to do it:

  1. Press Windows key + I to open the Settings app.
  2. Choose Update & Security section.
  3. Select the Recovery from the left pane.
  4. Under the “Go back to the previous version of Windows 10” option, click Get started.Go back to the previous version of Windows 10
  5. Keep your files and start the resetting procedure.

Have in mind that this procedure will delete your applications, which might be a problem for some.

As always, if you found other workarounds to fix this problem, you can help the Windows community by listing the troubleshooting steps in the comments below.

RELATED STORIES TO CHECK OUT:

Accidentally Deleted Admin Account in Windows 10 [Fix]

If you accidentally deleted an admin account in Windows 10, whether you were in a rush or, perchance, something else contributed to this event, there are known ways to resolve the issue.

The problem is widespread and affects several users. It’s not just about losing data but also the administrative rights in Windows 10 that allow performing a range of advanced operations.

Fixing things after you accidentally deleted an administrator account in Windows 11 isn’t simple, but a few factors analyzed beforehand should help:

  • The number of administrator accounts on your computer.
  • How you deleted the administrator account (because it isn’t possible if you’re using a standard or guest account)?
  • Did you delete a local administrator or a Microsoft administrator account?

Now that you have a fair understanding of the situation, let’s find out what to do if an administrator account is deleted!

How do I recover a deleted admin account?

Here are a few solutions you could try:

  • Reinstall your computer’s previous operating system using the installation CD/DVD or a bootable USB, then upgrade to Windows 10 again.
  • In case you have created a restore point, performing a system restore will help recover the deleted administrator account.

If none work, move to the fixes listed next.

1. Create another Administrator account

  1. Click Start and select Settings.
  2. Go to Accounts.
  3. Click Family & other users.family & other users
  4. Click Add someone else to this PC.
  5. Type a username, password, and password hint.
  6. Click Next.
  7. Select the account and click on Change account type.
  8. Click the drop-down arrow and choose Administrator.
  9. Disable the previous administrator account.
  10. Restart your computer and log in to the new account you just created.

When you accidentally delete an administrator account in Windows 11, the best option is to create another one.

2. Change account type from the built-in administrator account

Tip icon Tip
If things don’t work out under normal settings, boot Windows into Safe Mode, and then enable the built-in administrator account.

2.1 Enable built-in administrator account

  1. Press Windows + R to open Run, type cmd, and hit Ctrl + Shift + Enter.
  2. Type the following command and hit Enter:net user administrator /active:yesadmin account
  3. The built-in administrator will be available to sign into
  4. Restart your computer

Go into administrator account and change the standard account to an administrator account using the steps below:

2.2 Change account type

  1. Click Start, type User account, and select the relevant search result.
  2. Select the local account, and click Change account type.
  3. Now, choose Administrator from the dropdown menu, and click OK to save the changes.change account type

2.3 Disable the administrator account

  1. Open Command Prompt with administrative privileges.
  2. Execute the following command: net user administrator /active: nodisable to fix accidentally deleted admin account windows 10
  3. Close the Command Prompt, and the built-in administrator account will be disabled.
  4. Restart your computer.

Your standard account is now your admin account, and the previous admin account is disabled. This way, you can continue using the PC with administrator privilege when you accidentally deleted the admin account in Windows 10.

Tip icon Tip
Reset Windows 10 to factory default and start from scratch if you can’t access the PC to make these changes. Though, this should be used as the last resort.

Before you leave, find out to repair a corrupt user profile to eliminate errors and improve performance. And for advanced troubleshooting, here’s how you can enable the hidden administrator account.

Any luck with these solutions? Let us know by leaving us a comment in the section below.

Something bad happened. Unknown layout specified in manifest [FIX]

During the past few days, users reported a new problem occurred while Windows Store was accessed. Apparently, without any particular reasons, the Windows Store app cannot be used anymore. When experiencing this issue you cannot download, update or install any apps. The alert that’s received says that ‘Something bad happened. Unknown layout specified in manifest’.

Microsoft officially announced that their tech team is already trying to find what’s causing this error message and how to fix it. Most likely, an update will be soon released in order to address this new Windows Store bugs.

But, until then, we will show you some troubleshooting solutions that may fix the ‘Something bad happened. Unknown layout specified in manifest’ Windows Store error.

How to fix Something bad happened. Unknown layout specified in manifest Windows Store error

  1. Reset the Store
  2. Initiate System File Checker
  3. Run Microsoft Safety Scanner
  4. Set Region and Language correctly
  5. Reset your PC 

Solution 1 — Reset the Windows Store app

Similar with other Windows Store malfunctions, this error can be caused by a system problem within the Store platform. So, you need to reset the app in order to get a fresh start. This process should fix the error along with other bugs or malfunctions that occurred on the Store. The reset can be applied by following:

  1. Press Win+I keyboard hotkeys for bringing up System Settings.windows 10 settings
  2. From there, click on Display.
  3. From the left panel select apps&features windows 10.
  4. Scroll and find the Store entry.
  5. Click on it and select Advanced options.
  6. Click on the Reset button from the next window.
  7. Restart your Windows 10 system in the end.

READ ALSO: Microsoft rebrands the Windows Store to Microsoft Store, reveals a new logo

Solution 2 — Initiate System File Checker

Another way in which you can fix the errors related with Windows Store is by running the Windows 10 default troubleshooter dubbed as System File Checker. This troubleshooting solution runs a system scan which will look for corrupted files and other similar Windows 10 issues. Afterwards, the troubleshooter will fix the problems automatically. And all you need to do is to apply these steps:

  1. On your computer open an elevated command prompt window: right-click on the Windows start icon and from the list that will be displayed pick ‘Command Prompt (Admin)’.elevated cmd
  2. Next, in the cmd window type sfc /scannow.
  3. Just wait while the scan is running – it might take a while depending on the amount of files which are stored on your device.
  4. In the end, restart your computer and try to use the Store.

For more information on the best tools that you can use to fix corrupted files, check out this article.

Solution 3 — Run Microsoft Safety Scanner

You can receive the ‘Something bad happened. Unknown layout specified in manifest’ error message if malware was somehow installed on your computer. So, you should initiate a security scan for making sure that your Windows 10 system is still protected.

By default, you can download the Microsoft Safety Scanner (you can get the software from this page) which can help you detect if there are inappropriate files installed on your PC. Additionally, you should also install a dedicated antivirus or antimalware program and perform a full scan for all the files that are currently stored on your device.

Solution 4 — Set Region and Language correctly

Apparently, if the region and language isn’t set correctly the Windows Store will not work properly and you can receive the ‘Something bad happened. Unknown layout specified in manifest’ alert message. So, verify these settings and make sure that everything is set how it should:

  1. Open System Settings by pressing the Win+I hotkeys.
  2. From there click on Time & Language.
  3. From the left panel of this window select Region & language.set region and language windows 10
  4. Now, from there you can set everything accordingly.
  5. Hint: you can try to change your current region to UK as this might fix the Windows Store problems according to some users who managed to do the very same thing.

As already pointed out, Microsoft knows about this new Windows Store problem which means that a possible system update might be developed as we speak.

5. Reset your PC

Finally, if you’re unable to fix the Windows Store with the steps we enlisted here and you’re in a dire need to use the Store, consider resetting your PC to factory settings an option. You can reset your Windows 10 PC by following these steps:

  1. Press Windows key + I to open the Settings app.
  2. Choose Update & Security section.
  3. Select the Recovery from the left pane.
  4. Under the “Reset this PC” option, click Get started.reset this pc

Don’t forget to share your own experience on the troubleshooting method that worked in your particular situation. Use the comment section below to contact us.

RELATED STORIES TO CHECK OUT:

More details about Xbox One S All Digital console leak ahead of public reveal

Microsoft is usually pretty good at keeping Xbox secrets, but we now have a good picture of what the upcoming Xbox One S All Digital console will look like. Windows Central previously shared a mockup of the official packaging, but Roland Quandt from the German blog Winfuture.de published two pictures of the retail box today.

This latest leak also confirms the May 7 release date we’ve heard before, but there’s also some exclusive pricing information. The Xbox One S All Digital console will be reportedly be priced at €229.99 in Europe, which roughly equals $260. If true, that’s a bit expensive for a console with no disc-drive, especially since the standard Xbox One S with its 4K Blu Ray player can often be found at $250 or less when it’s on sale.

This new report also confirms what we knew about this disc-less version of the Xbox One S. The design of the console will be pretty much unchanged except the missing Blu Ray player, and it will also come with a 1TB hard drive. The console will also ship with three games, Sea of Thieves, Minecraft and Forza Horizon 3.

Microsoft is expected to officially unveil its Xbox One S All Digital console on April 16 during the Inside Xbox livestream, and the company may also use this opportunity to unveil a new Xbox Game Pass Ultimate subscription that will combine the game subscription service with Xbox Live Gold.

Microsoft is experimenting with Xbox Live notifications for discounted games in your Wish List

Microsoft is looking for ways to make the Wish List feature on the Xbox Store more useful for Xbox users. The company has started testing sending Xbox Live notifications to users when Xbox games in their Wish List are currently on sale.

Reddit user xektor17 shared the following screenshot of an Xbox Live notification informing him that the Red Dead Redemption 2 game he added in his wish list was being discounted during the current Xbox Spring Sale (via Windows Central). Xbox’s Major Nelson confirmed in the Reddit thread that the Xbox team was “testing this out with a small group of folks.”

Xbox just notified me that a game on my wishlist is on sale! from xboxone

Microsoft is already using Xbox Live notifications to notify Xbox gamers about new Xbox Game Pass releases or share other Xbox-related news. The good thing is that these notifications can be seen in the Xbox app for Windows 10, iOS and Android, so users can see them when they’re away from their consoles.

Do you have many games in your Xbox Store Wish List, and would you like to get personalized notifications when they’re on sale? Sound off in the comments below.

Fix: Shadow of War has stopped working on PC

Well, well, well, we’ve got another AAA title with the emerging issues that render it completely unplayable for some users. Yes, that seems to be the case for Shadow of War, the sequel to highly-regarded Shadow of Mordor.

The game is, as we ourselves can witness, quite a treat if we exclude a micro-transactions and crashes that seem to plague a lot of users.

Some of them are able to start the game and just anxiously wait for the crash to happen. Others? Well, they can’t start it in the first place.

For that purpose, we conducted a little research in order to provide you with a few solutions. We hope they’ll serve you justice and you can look them up below.

How to fix Shadow of War sudden crashes on PC

  1. Check the system requirements
  2. Update GPU drivers
  3. Install C++ Redistributables, .NET Framework, and DirectX
  4. Check the game integrity with Steam
  5. Run the game as admin/in compatibility mode and from the installation folder
  6. Shut down background programs
  7. Reinstall the game

Solution 1 – Check the system requirements

First things first. You’ve probably checked the system requirements before you decided to buy the sequel to Shadow of Mordor. However, in case something slipped from you, here are the system requirements you need to meet in order to even start this game, let alone play it.

Minimum system requirements for Shadow of War:

  • OS: Windows 7 SP1 with Platform Update for Windows 7
  • CPU: Intel i5-2550K, 3.4 GHz
  • RAM: 8 GB RAM
  • GPU: GeForce GTX 670 | Radeon HD 7950
  • DirectX: Version 11
  • Network: Broadband Internet connection
  • Storage: 60 GB of available storage space

Recommended system requirements for Shadow of War:

  • OS: Windows 10 version 14393.102 or higher required
  • CPU: Intel Core i7-3770, 3.4 GHz
  • RAM: 16 GB RAM
  • GPU: GeForce GTX 970 or GeForce GTX 1060 | Radeon R9 290X or Radeon RX 480
  • DirectX: Version 11
  • Storage: 60 GB of available storage space

Once you’re certain that your gaming rig can run Shadow of War without a hitch, continue with the steps below.


Solution 2 – Update GPU drivers

Another thing that’s essential for seamless gaming concerns GPU drivers. As you’re well aware, without the proper drivers, even the top-notch GPU’s are as useful as a screen door on a submarine. Basically, in order to use the full potential of your GPU, you’ll be needing the corresponding drivers.

As the case shown on so many occasions, the generic drivers provided by Windows Update in Windows 10 or even Windows 7 for that matter, just won’t suffice. In addition, some graphics processors require legacy drivers.

So, let’s follow the tracks of the problem to an official OEM site and found ourselves a well-balanced and compatible driver.

On the other hand, if the GPU isn’t responsible for your problem, just move to the next step.


In order to boost your game performance and get rid of slowdowns, lags, low FPS and other annoying issues, we recommend downloading Game Fire (free).


Solution 3 – Install C++ Redistributables, .NET Framework, and DirectX

Windows is the king of PC gaming for a good reason, and that’s, ladies and gents, the compatibility. However, even though you’re in rush to enjoy the Shadow of War, that reminiscence to The Lord of the Rings, there are still some things you’ll need to check in order to play this game on Windows 10 platform. And these are C++, .NET Framework and, last but not least, DirectX.

Some users reported that the crashes left after they installed the latest version of the Windows Runtime C++ 2017. Now, we’ll take that to another level and advise you to, besides the latest C++ version, install both 2015 and 2013 versions, respectively.

Furthermore, if you run Windows 10 with the 64-bit architecture, install both 32-bit and 64-bit Visual Studio C++ variations. They can be found here.install redistributables

Now, after we dealt with the C++, let’s move to .NET Framework and install that, too. There’s a high probability that you’re already having a .NET Framework of some kind since that’s covered with the Windows Update. However, it won’t hurt to navigate to this site, download and install the latest .NET Framework version.

Finally, the most important part of Windows 10 following software is DirectX. Download and install the latest DirectX version and look for changes. You can do so by following this link.


Solution 4 – Check the game integrity with Steam

Since most of the PC users obtained their copy of Shadow of War through Steam, let’s use its desktop client to fix the possible corruption of the game files. Namely, the game installation files can get corrupted or incomplete for some reason. We point our finger at malware, as the main suspect.

Luckily, with the Steam client, you can check for the integrity of the installation files. If the tool finds out the affected files, it should re-download the missing or corrupted files. In order to run this tool, follow the steps below:

  1. Open the Steam app.
  2. Select Library.
  3. Right-click on Shadow of War and open Properties.steam game properties
  4. Select the Local Files tab.
  5. Click on the ”Verify the integrity of game files” button.verify integrity of game files

Solution 5 – Run the game as admin/in compatibility mode and from the installation folder

Moving on. The way the system reacts to Shadow of War can also be an issue. Namely, some users reported that, by changing the compatibility mode and granting the game administrative permissions, they were able to run the game without crashes. At least, not for some time.

This seems to be more of a workaround than a solution per se since the game crashes eventually. At least, in most cases. Either way, it won’t harm and it might help, so here’s how to do it:

  1. Navigate to the game installation folder. By default it’s: C:SteamsteamappscommonShadowOfWarx64ShadowOfWar.exe
  2. Right-click on the ShadowOfWar.exe and open Properties.
  3. Choose the Compatibility tab.
  4. Check the ”Run this program in compatibility mode for” box.
  5. From the drop-down menu, select Windows 7.
  6. Now, check the ”Run this program as an administrator”.
  7. Click OK to confirm changes.run program in compatibility mode

After that, we advise you to run the game from the installation folder, by double-clicking the ShadowOfWar.exe. Let’s eliminate Steam from the equation and give it a go. In case you’re still experiencing sudden crashes once the game starts or the game won’t start at all, check the remaining solutions.

  • ALSO READ: Common Wolfenstein 2: The New Colossus bugs and how to fix them

Solution 6 – Shut down background programs

Now, although everything looks like the Shadow of War is the initiator of the issues, we encourage you to check the background programs, too. Namely, some users reported that programs like MSI Afterburner are the real reason why the game crashes.

Since we’re unable to distinguish one program, we advise you to start your system with the Clean Boot procedure and look for changes.

If you’re not sure how to do it, follow the steps below:

  1. Press Windows key + R to open the Run command line.
  2. In the command line type msconfig.msc and press Enter to open System Configuration.
  3. Under the General tab, select the Selective startup.
  4. Uncheck the ”Load startup items” box.system configuration disable load startup items
  5. Now, navigate to the Services tab.
  6. Check the ”Hide all Microsoft services” box.
  7. Click on the Disable all and then OK to confirm changes.system configuration disable non-microsoft services
  8. Finally, restart your PC and start the Shadow of War again.

If even this wasn’t enough to resolve the problem and you’re still stuck with the same crashes that tear through your nerves, make sure to check the one last step.


Solution 7 – Reinstall and update the game

Finally, there stands the reinstallation as the last resort. Reinstalling the digital copy of the game can take some time, but we reckon that it’s still worth it if makes the game work.

A lot of users reported the crashes and all that fuss, however, the majority runs the game without problems whatsoever. So, either we’re looking at the isolated optimization problem or you did something wrong down the stretch.

Here’s how to reinstall Shadow of War:

  1. Navigate to Steam and open Library.
  2. Right-click on Shadow of War and choose Uninstall.steam uninstall game
  3. Now, before we move to installation, make sure to delete Shadow of War files from folders located in C:Program FilesSteam and C:Users: your username:AppData.
  4. Open Library again, right-click on Shadow of War and click Install.steam install game

With that, we’re done. We can only hope that Monolith Productions, developers responsible for the game, will sort things out and let troubled players finally slain some orcs. As a side note, don’t forget to tell us about your experience with Middle-earth: Shadow of War. You can do so in the comments section below.

RELATED ARTICLES YOU SHOULD CHECK OUT: