Many people enjoy in multimedia on their computers, and if you want the best multimedia experience, you usually want to go for a sound card that supports 5.1 audio.
However, if you’re a Windows 10 user, you might experience some issues with Sound Blaster Recon3D PCIe sound cards.
According to some users, Sound Blaster Recon3D PCIe card is broken in Windows 10, and it doesn’t perform on it as well as on other operating systems.
Users claim that after switching to Windows 10 they have lost the support for 5.0 audio, and now they are limited only to 2.0 audio.
After switching to 5.0 sound, the sound gets lost on Sound Blaster Recon3D PCIe cards. If you’re experiencing these issues, we have a solution that might help you.
What to do if Sound Blaster is not working in Windows 10?
1. Use Compatibility mode
Download the latest driver for your sound card.
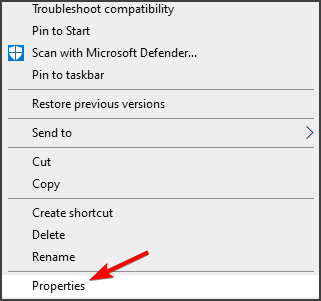
Right-click on the downloaded driver file.
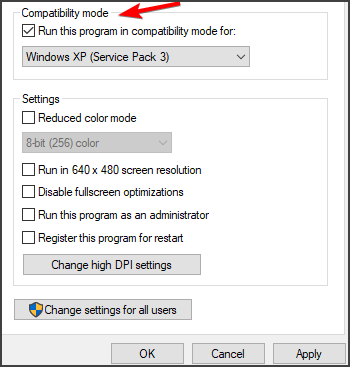
Click on Properties and then go to the Compatibility tab.
Find and check the Run this program in Compatibility mode for option.
Select Windows 8.1 or any other older version of Windows operating system.
Click OK, and install the driver.
This is a workaround given by Microsoft software engineers. However, we don’t know whether this workaround will fix your problem with 5.0 sound.
If this doesn’t help, worry not. Microsoft has acknowledged that they have broken multi-channel audio on some Creative audio cards, and they already released some hot fixes for this issue.
You should then update your computer to install them.
If your Sound Blaster Recon3D PCIe sound card is broken With Windows 10 it’s probably just a compatibility issue.
Windows 10 is still a new operating system, as Microsoft rolls out to new OS versions every year. Some issues with certain hardware manufacturers are a common thing for a new operating system.
2. Run the Audio/ Hardware and devices troubleshooters
To launch thees tools, go to the Settings app.
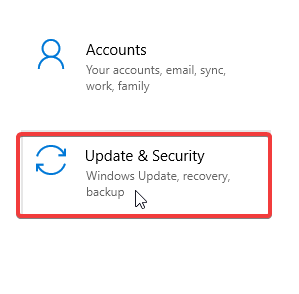
Choose the Update and Security section, and select Troubleshoot.
Since this is an audio issue, there are two Windows 10 built-in troubleshooters that you can use: The audio troubleshooter and the Hardware and devices troubleshooter.
As for the permanent and best solution, we’ll just have to wait for hardware manufacturers to release the latest drivers that will support Windows 10.
3. Use third-party software for drivers
Sound card issues are often caused by faulty drivers in need of an update. Without the latest updates, your PC and Windows OS can’t function properly.
We recommend using reliable third-party software that aims to keep your system stable and healthy by downloading and installing the latest drivers for your device.
The driver updater tool is useful in updating windows drivers automatically. Otherwise, if you do it manually, it takes time and also requires comprehensive knowledge of the drivers you are looking for.
A computer cannot manage video cards, computer programs, sound cards, or other hardware; they must be managed by a driver.
You can manually update drivers if you have a thorough understanding of the drivers your PC requires. The driver updater utility is the best alternative.
You may rely on Outbyte Driver Updater to make such changes to ensure a proper update with the most recent sound card drivers.
Even though the new build for Microsoft’s upcoming OS has just been released, users were quick to track down and flag some of the issues that cast a shadow over the software.
In this article we are going to tell you all about the bugs that are present in this current version of Windows 11, so you will know what does and doesn’t work as it should, still.
Official issues for the 22000.65 build of Windows 11
As with every new software release, nothing is going to be perfect. In fact, the whole point is to get the community involved in this all-out bug hunt, to better improve the system.
And Windows users are known for their relentlessness when it comes to this kind of call-to-arms actions initiated by Microsoft.
We will do our best to keep you informed about all the things that go on with this new build, and all the others to come before Windows 11 will be finally complete.
If you are also interested in the list of bugs that were reported for the first preview build of Windows 11, you can go ahead and check our extensive article.
So, without further ado, here are some of the bugs that have been reported so far for the 22000.65 build of the upcoming OS.
Clicking on Refresh will disable the context menus
As signaled by a Reddit user, apparently, when you click on the Refresh feature, Windows 11 goes completely haywire.
After performing a simple refresh, which is by far the most common and used action that was ever performed on a Windows operating system, the right-click dropdown menus will no longer function.
This is also reportedly happening when you right-click a folder, in order to get to the same menu.
Yep broken here too. Also my right click work now only on desktop, if I go any other folder right click is completely gone.
This problem isn’t affecting everyone, as many users are claiming that things are working as they should, at their end.
NVIDIA display drivers trigger visual stuttering
As reported by another Windows 11 user, all across social media, the new Windows 11 build goes through a bit of a visual ordeal, when other third-party software is introduced into the mix.
More exactly, while Nvidia GPU drivers are installed, the system will have a hard time adjusting and delivering a clean visual experience.
Even uninstalling and then reinstalling these drivers did not solve this problem, only an update rollback, which brought the user back to Windows 10 seemed to actually work.
Another issue that users were quick to spot, on this new Windows 11 build, involves the taskbar itself. As opposed to the previous build, it seems that this time around, icons are taking up much more space.
The person that reported this problem also checked if the TaskbarSi file in did not get reset, by any chance, but it wasn’t the case.
This visual glitch came with the package, apparently. Although it’s not something that anyone would instantly spot, to the trained eye of a tech-savvy Windows user, it’s a red flag.
We know that a lot of people were actually waiting on Microsoft to deliver better spacing and a tighter, more fluent fit for everything that goes on the taskbar, so they weren’t expecting this.
Even though it’s not one of the system-threatening flaws, user standards still stand and esthetics are still a big part of everyone’s private Windows 11 experience.
Hi Sergey! Love that you found a way to give us small Taskbar icons. But with the 22000.65 update the spacing between icons has increased a lot! I had to unpin about 6 items to get things to fit again. Any chance for a tweak enabling us to change the space between icons?
This is one of the weirder problems that users reported, when it comes to Microsoft’s upcoming operating system, one that wasn’t present on the previous build.
Reddit user xrandallx says that, after installing build 22000.65, his Windows OS was no longer active, due to the activation key getting erased from the system.
This seems like a serious issue, considering that, without the activation key, your Windows operating system will no longer benefit from a long list of features.
Can’t use Fn key after the device goes to sleep
Where you thinking that the issues we listed above weren’t strange enough for you? Well, here’s one that is also a strong contender for the weirdest Windows 11 bug prize.
Apparently, as flagged by another Reddit user, after the device on which this new build of the OS runs is put to sleep, or automatically times out and goes to sleep, when you use it again, the Fn key is actually unresponsive.
Only a system reboot will solve this annoying problem, so you can understand how people won’t see this as an actual workaround.
All drivers are fully up to date, and I’m running the latest build of Windows 11 (22000.65 at time of writing).
If the machine either falls asleep (timeout) or is put to sleep (Lid Closure, Fn+4, etc) then on wake all Fn combinations fail to register until the machine is rebooted. It’s definitely a driver issue or a Windows issue of some kind and is more of an irritant than a serious problem, but I was wondering if anyone here had experienced similar on their ThinkPads?
Missing/transparent taskbar
This is one that users stumbled upon even on the previous build version for Windows 11. Nobody knows exactly what system problem is causing this visual bug yet, but the effects seem to be the same.
Some of the triggers are changing the desktop wallpaper, the theme, or simply enabling the power save feature on your device.
After performing some of these actions, the taskbar goes completely invisible, as it if it wasn’t even there in the first place.
Some of the users that also found themselves facing this same issue actually found some workarounds for it. Changing the theme a few times, or hiding the taskbar and enabling it again seems to fix it.
However, people are still waiting on an official and more permanent solution from Microsoft, regarding this matter.
Language input change spawns a new button on the taskbar
We came across this issue report on the popular social media platform Reddit. One of the users that frequents this website was kind enough to share this problem with the rest of the Windows 11 speaking world.
Many don’t even know how to react to this, as the unicity and pointlessness of the entire situation got some wondering what Microsoft was even attempting here.
Apparently, immediately after changing the input method, from the taskbar, a new button would appear. The icon only displays an X and the button itself has absolutely no function.
Weird mouse cursor behavior
A number of users are describing some erratic mouse cursor behavior when they hover with it over open folders, on the taskbar.
It seems that the cursor becomes slowly responsive when dragged across the above-mentioned files, located, as we said, on the Windows 11 taskbar.
The amount of people that are dealing with this problem is not quite certain yet, as reports are still coming in.
This uncommon issue was flagged by a Windows 11 build 22000.65 user, over Reddit.
Cropped or incomplete text in the Start menu
Since we are on the topic of visual glitches, here is another example, from the 22000.65 preview build for Windows 11.
While browsing through the operating system, some users found areas in which the planned text did not find accordingly, and it shows as if it was cropped.
The first instance where this visual bug was noticed, was on the Start menu.
Start menu won’t open on Windows 11 Bussines 21H2 22000.65
It would be a real nuisance to try opening the Start menu, in order to access a pinned app, or a recently used file, only to find out that you can’t. and for no apparent reason.
Some Windows 11 build 22000.65 users, that run the Bussines edition, have experienced such issues. Clicking on the Start button, on the taskbar, will trigger absolutely no response.
The OS intrerupts cooling system on Surface 2 laptops
Based on some new information that became available on of the most popular social media platforms, Reddit, users that upgrade to Windows 11 preview build on Surface 2 devices, will be surprised.
Allegedly, after the new OS is installed, the cooling fans are no longer working. You can understand how this can cause the device in question to quickly overheat.
However, the Redmond company has to come with a quick response for this issue, because surely the cancelation of core hardware features was not in the plan.
NVME drives constantly disconnecting
It seems that Microsoft’s new idea of an OS is affecting user software and hardware in more ways than initially expected. People using NVMEs will also be in for a little surprise, and not the pleasant kind.
As a reminder, when dealing with such an early version of an unreleased operating system, which is still in testing, these troubles are somewhat expected.
This is what Reddit user PacuFTW had to say about his experience with Windows 11 so far, just in case you found yourself in the same situation:
It started with Windows 11, I’m making this post, because it affected the BIOS too somehow, and now I can’t even install Windows 10, without it disconnecting.
I built this PC in October last year. And until today everything was fine, but now when I opened Event Scheduler in Windows, it shut off. I didnt think much of it so I tried to turn it on, but it didnt post. Researed the ram, and now its working. Except for when I was in Windows, and randomly everything comes to a halt. After restarting (via the power button, because my windows is frozen) then I am thrown into the BIOS because my SSD is not detected. After unplugging the power cable and plugging back in it works for a random time, until the same thing happens.
What exactly causes this problem, and is there any fix?
Not all widgets are showing
After installing the Windows 11 build 22000.65, a user reported on the Microsoft Community page that he cannot see all the widgets and he cannot add new ones:
I wanted to know one thing that I see only limited widgets in the Windows 11 widgets panel, that are weather and Market only. After that it’s news only. Also, there is no button to add widgets. Please help with the solution/confirmation I desperately need calendar and sports too, how do I get them? I am currently using build: 22000.65
This looks like a trivial problem but it’s not quite so because many users not only got used to the new Interests (in Windows 10) and Widgets (in Windows 11) but they really connect with that information.
As you will see from the user’s screenshot below, the Add widgets button is missing completely, preventing the user from setting up his widgets as intended.
We don’t have yet any feedback from Microsoft but we will keep an eye on any developments and provide a solution when we will find one.
What other bugs have you run into while testing Windows 11 build 22000.65? Share your experience with us in the comments section below.
However, with this new build, these commands have become obsolete and will no longer help you perform the alterations you had in mind.
The Start menu registry tweak won’t work in build 22000.65
Microsoft is continuously working on its upcoming operating system, making sure that it will be user-ready by the end of the year.
Users have constantly submitted bugs and suggestions for Windows 11, so the tech company’s job is considerably easy, with such a test army at its side.
And now that they’ve brought back the Bug Bash event, users will be even more inclined to squeeze every last bit of information out of the OS.
After a series of tweaks and modifications, Microsoft has released the new OS build, which is 22000.65. With this new version, some of the registry hacks that we’ve mentioned above, simply won’t work anymore.
@JenMsft I've noticed that with 22000.65 the option to bring back the old start menu (Start_ShowClassicMode) doesn't work anymore. Is there any minor chance at all that you guys revert that change so people who REALLY want it back, can use it?
For example, the one hack that people are still having a hard time getting over, helped them revert the Windows 11 Start menu back to how it looks on Windows 10.
If you remember, the hack they used was:
setting HKEY_CURRENT_USER\Software\Microsoft\Windows\CurrentVersion\Explorer\Advanced\Start_ShowClassicMode to 01
Some users are not really happy with this decision, as they miss the old UI elements and, for some reason, can’t get accustomed to the new way of things.
Social media has been buzzing with news of these changes, and many disagree with Microsoft’s choice.
Surely this won’t be the last time that the Redmond-based tech company hears of users’ exploits that target their new OS and quickly work out a fix to it.
Because, as you can imagine, no matter how user-friendly they want to make Windows 11, and how much creative freedom everyone has, there are still some standards that the company must adhere to.
So, all we can do is just wait for the final version of the operating system, and only then make the final judgment.
Do you have any other examples of registry hacks that won’t work anymore on the new build? Share them with us in the comments section below.
The Windows 10 systems, like any other Windows OS, are usually used with a permanent network connection enabled.
In this way, you can have access to Windows Store from where you can download and install various apps, and you can also stay in touch with everything that’s new.
Anyway, since you are using an Internet connection, you might be prompted with the following message or alert:
Your Location has Recently Been Accessed.
What does this warning message mean?
Should you worry about something? Well, first of all, you should know that you have no reason for getting worried.
If you’re wondering how Windows knows your exact location, you should already know that, starting with Windows 8, Microsoft introduced location services and personalized content.
This is a normal message that is often displayed on Windows 10 platforms and is caused by the apps that are installed on your device.
So, basically, after installing a tool like the weather gadget or any other app that is accessing your location through a network connection, you might get the Your location has recently been accessed alert.
Now, even though you shouldn’t worry about the same, the message might become quite annoying at some point. So, you will want to remove the same or resolve this issue.
In that matter, you can anytime check the guidelines below, which will easily take you through the troubleshooting process.
How to fix the Your location has recently been accessed alert?
From there, press the Start button, and click on Settings.
Go to the Privacy section.
Also pick Location.
And now just turn off the location access service, and you are done.
If you turn off location, then this frightening alert message will disappear, because your PC will no longer track your current location for any app until you turn it back on.
2. Clear location information
Open the Settings app.
Double-click the Privacy icon and go to the App permissions section.
Select Location, and scroll down to Location History.
Click on the Clear button.
Once it has cleared your location history, this alert should stop appearing when you use certain apps in Windows.
3. Control which apps can access your location
Open the Settings app.
Double-click the Privacy icon, and go to the App permissions section.
Select Location. If location is enabled, go to Choose apps that can use your precise location.
Simply toggle off the apps that you want to limit from accessing location information.
That’s how you can turn off location service on Windows 10 computers.
If you want to stop receiving system messages related to your location, installing a third-party VPN provider for Windows is also a viable solution.
Private Internet Access software has customizable privacy features, so you can set it to work according to your needs and activities.
So, from now on you won’t get the Your location has recently been accessed alert, though there might be some apps that will no longer run properly on your device – the tools that are requiring info related to your location.
How does Windows Location Services affect my virtual experience?
Through Location Services, Windows 10 determines your location around the world for advertising purposes, as well as to personalize the content it delivers to you.
You should also make sure you can’t access regionally locked content, so you don’t run into legal issues in certain countries around the world.
This is a serious problem globally, which is why it’s especially recommended that you use this service when you’re travelling and want to access web pages you would otherwise access at home.
➡ Why should you let Windows know your exact location?
For automatic time zone setting if you often travel to different parts of the world for work.
In the unfortunate event that your laptop is lost or stolen, this feature helps you keep track of it in real time
Take advantage of location-aware city browsing
➡ What can I do to improve my online privacy?
It’s not exactly the end of the world if you’re restricted from opening certain pages because using a reliable VPN service can help you get rid of this problem just a click away.
Also, if you want to ensure your online security as well as your PC and data, then you should consider using one of the best antivirus programs on the market that suits your needs.
You can always use this location service, but you can also turn it off when you decide you don’t need to use it or when it affects your experience on other apps.
Once you’ve established your Internet connection, the apps come into their own and the location service is of course also on duty.
If you still get the Your location has recently been accessed alert, try not to panic and use one of the methods above to get rid of the message.
Microsoft has started testing a visual refresh for its Edge browser, which is designed to match the upcoming Windows 11 OS launching later this year. As spotted by Reddit user Leopeva64-2, a recent update to the Microsoft Edge Canary channel has brought an experimental flag that lets users enable “Windows 11 visual updates” on their PCs.
The subtle changes introduced in this visual refresh include rounded corners, new font, size, & color for the menu items, and a new design for the hover effect. In addition, the company has aligned the context menus with the design of Windows 11 to provide seamless experiences on PCs. The description for the experimental flag indicates that it “enables in-progress visuals appropriate for your currently installed version of Windows.”
Microsoft Edge Canary before applying the Windows 11 Flag
Microsoft Edge Canary after applying the Windows 11 flag
If you’re an Edge Insider, you can enable this new UI design on your PCs by following these steps:
Open Microsoft Edge and then head to the “edge://flags” page.
Search for the “Enable Windows 11 Visual Updates” flag and enable it.
Finally, relaunch the browser to apply these changes.
Once the browser is relaunched, Insiders will see some new design elements that look consistent with Windows 11. More specifically, the browser will add slightly redesigned menus, updated fonts, and other minor UI changes.
These visual changes can be enabled in Edge Canary build 93.0.945.0 or newer on both Windows 10 and Windows 11. However, it is important to note that these changes are still a work in progress, and more improvements will be available in future builds. This new design update will need to go through Edge’s different Insider channels before it becomes generally available in the Stable channel.
We print various documents all the time, but some users reported that their printer is slow to start printing or that the printing process takes forever.
While sometimes the problem could be caused by your network (especially if you’re using a network printer), the print spooler or printer drivers might also be responsible for the issue.
Whatever the cause, the situation is not only annoying but will also slow down your workflow. So, let’s see how to solve this problem.
How can I improve printing time on Windows 10?
1. Update your printer driver
1.1 Update the driver manually
Right-click the Start button and select Device Manager from the list.
Expand the Printers section.
Locate your printer, right-click on it, and select Update driver.
If the system will find a more suitable driver it will download and install it.
Restart your PC if the system installed a new driver.
If your printer is slow to start printing, the problem might be your driver. If it’s corrupted or out of date, not just this error but many other problems can arise.
However, you can easily fix the problem by updating your printer driver.
You can also visit your printer manufacturer’s website and download the latest drivers for your model. In order to do so, you’ll need to know the model of your printer and where exactly to look for the driver.
1.2 Update the driver automatically
If this process seems a bit complicated, you can always use third-party tools such as the one recommended below to automatically update all outdated drivers with just a couple of clicks.
Download the tool using the button below, allow it to scan your device, and check the recommended actions. You can update drivers either all at once or take them one by one.
2. Reinstall the printer driver
Right-click the Start button and choose Device Manager from the menu.
Locate your printer, right-click it, and choose Uninstall device from the menu.
When the confirmation dialog appears, check Remove driver software for this device, if available, and click the Uninstall button.
After you successfully remove the driver, click Scan for hardware changes icon.
Windows will now try to install the default driver for your printer.
If Windows manages to find a suitable driver for your printer, check if the problem is still there.
If the driver isn’t found, you’ll have to manually install it. To see how to do that, check the following solution.
3. Assign a new IP address to your printer
If you’re using a network printer, sometimes your printer is slow to start printing due to its IP address.
Apparently, there can be an issue with your IP address that can lead to this problem. What you need to do, is to assign a new IP address to your network printer and the problem should be resolved.
This can be a slightly advanced procedure, so if you don’t know how to do it properly, we suggest that you look for an online guide.
Once you change the IP address of your printer, the problem will be permanently resolved.
Keep in mind that this solution works only for network printers, so if you’re not using your printer as a network device, then this solution doesn’t apply to you.
4. Set the printer pointing to the port
This solution is intended for network printers, so if you’re not sharing your printer with a local network, this solution won’t apply to you.
Basically, if your printer is slow to start printing, the issue might be because your printer is mapped across the server.
To fix that, you just need to add a printer as a local printer and point it to the port and the issue should be resolved.
This might be a bit advanced solution, and if you don’t know how to perform it, contact your network administrator.
5. Stop the Print Spooler service and clear the printers directory
Press Windows Key + R and enter services.msc. Now press Enter or click OK.
Locate Print Spooler service, right-click it, and choose Stop from the menu.
Minimize the Services window. Open File Explorer and go to the following location: C:\Windows\System32\spool\PRINTERS
Delete all files from the Printers directory.
Go back to the Services window, locate Print Spooler service, right-click it, and choose Start from the menu.
After doing that, check if the printing problem is still there. If not, proceed to the next solution.
6. Remove the WSD port and switch to the TCP/IP
Sometimes your printer is slow to start printing because it’s using a WSD port. Bear in mind that this issue only affects network printers, so if your printer isn’t shared with the network, then this solution won’t work for you.
If you’re using a network printer, remove the WSD port and switch to the TCP/IP and the problem should be resolved.
Go to Options, select Advanced,and click on Printing.
Now locate the Background print checkbox and disable it.
After doing that, save changes and check if the problem is resolved. The solution applies only if printing time takes longer than it should when trying to print in Word.
8. Disconnect your printer
If the printer is slow to start printing, it’s likely that the issue is also related to certain printer glitches.
For a start, disconnect your printer entirely. Also, disconnect the USB cable and wait for a few minutes.
Then, press and hold the power button for about 30 seconds or more to remove any additional charge. Connect the printer to your PC once again, and power it on.
Once your printer powers up, check if the problem is still there. This is a generic solution, but if you have any glitches with your printer, it might help you out, so feel free to try it.
As mentioned, printer problems can seriously impact your work. So, if your printer is slow to start printing, be sure to try any of the solutions listed in this article.
NOTE
If you’re one of the users who faced the PrintNightmare vulnerability, your problems are over. Read our guide on how to download the KB5004945 patch and fix the problem in no time.
If you’ve already tried another solution, we’d be glad to hear about it so use the comments section below.
Both Dead by Daylight and R.B.I. Baseball 21 are now free to play on Xbox consoles as part of this weekend’s Free Play Days campaign for Xbox Live Gold subscribers.
As is usual with such promotions, both video games are now playable in full as if they had been purchased outright and will lock again at the end of Sunday at 11:59 p.m. PDT. The free period is available to all Xbox Live Gold members with an active subscription playing on a console in either the Xbox One or Xbox Series X console families.
Storage capacity, supported video formats, streaming quality, unlimited media library, and of course a fair price are some of the main aspects that fans are looking for when deciding to buy a Kodi box.
Let’s not forget the (many) pre-installed add-ons, which are one of the top details that sellers use to lure their clients.
But you have to be careful about that since a lot of content is pirated and can lead to even more problems with your device.
And perhaps some of you are also looking for a reliable support service, that offers prompt solutions, no beating around the bush, and preferably in no time.
Having said this, we’ve done some research and we’ve come up with a list of the top Kodi boxes available on the market. The raking is done depending mainly on the ease of installation, video quality, and price.
Indeed, the price tag of $280 might be a little drawback for this one, but you can’t easily beat the fast performance given by the Tegra X1 CPU processor and the fully customizable features.
It also comes with a built-in Chromecast 4K streamer and a Google Assistant, it’s perfect for gaming and streaming any content you want, even look at your photos.
Kodi needs to be installed from the Play Store, but you can simply tell the device what to install and it will do it for you.
This one is a big price difference compared to the previous option: $99 on Amazon. The display quality is exceptional with saturated colors and detailed contrast in 4K Ultra HD and HDR.
One of the best features of the Amazon Cube is the far-field voice support with the Alexa built-in speaker. The Kodi app needs to be installed via the Play Store, but that’s almost no trouble at all.
What’ more, you can use the Cube as a central hub for controlling all your smart home devices.
This one in one of the top streamers for Kodi users, with a new, faster processor and 4K Ultra HD streaming.
The main reason why we’ve chosen to include it in the top three is the portability aspect since this is easy to carry around if you’re traveling, just to make sure you have all your music and TV shows with you.
Once again, the Kodi app needs to be installed but the set-up is pretty easy.
We’re back to a gaming console, that supports 4K content and 4K Blu-Ray discs, and comes with Spatial Audio.
The device offers access to hundreds of media streaming apps and comes with native Kodi support, which means that you can quickly install the app. Once again, the price can be a bit of a blocker, but you can try and find special deals.
This is a great budget Kodi box, that supports up to 4K video resolution and up to 60 frames per second. It is small and portable, also perfect for traveling.
It runs on Android 6.0.1, while the latest Kodi app runs on Android 5 or higher – which will likely change in the future, so pay attention to this detail.
Working as a central hub for all your smart devices, the Asus Chromebox 3 features an Intel Celeron 3865U CPU with 4GB of RAM and 32GB SSD drive. It has 2 USB ports to connect external hard drives and peripherals.
It comes with native Kodi support, so the app can be easily installed.
With a speed of 18Gbps, this minimal Kodi box can be just the perfect streaming and gaming device. The picture and sound quality are admirable. Easy to get started with, it comes with a native Kodi support and plenty of apps and games.
Software updates are rare and this is one of the minuses, but otherwise the device offers just what it advertises.
Last but not least, if you’re familiar with the Raspberry Pi boards, you can build your own Kodi media center with the Raspberry Pi 3.
The CanaKit Model B+ board comes with a 32GB memory card, premium Raspberry Pi case, USB power supply, 1.2GHz quad-core ARM Cortex-A53 which can easily support 1080p videos.
You have plenty of options to install and configure Kodi as you please. Actually, this would be the only downside of this board, that you have to assemble everything yourself.
So these would be our choices for the best Kodi boxes. For any feedback related to this list or any other suggestions, drop us a line in the comments section below.
Earlier today, we spotted some chatter on the Reddit forums, with some fellow Insiders suggesting that a new build could be released soon by Microsoft. However, for most of us that was a glitch, as this does occur from time to time.
But as it turns out, we actually have a new build on our hands, the 2nd one – Windows 11, Build 22000.65. We have extensively reviewed the very first build and now let’s have a look at what’s changed in this one.
NOTE
We will be releasing soon a review of this new build, as well, so stay tuned.
Windows 11 Build 22000.65 comes to Insiders in the Dev Channel
The newly released build comes with a few minor tweaks as well as a bunch of fixes, pretty much acting as a build that fixes the 1st release, which was obviously huge. So let’s have a look at everything that’s changed in this new minor release:
Changes and Improvements
Start now has a search box to make it easier to find what you’re looking for.
Taskbar will now show across multiple monitors which can be enabled via Settings > Personalization > Taskbar.
We have updated several system alert dialog boxes such as the alert for when the battery is running low on your laptop or when you change your display settings with the new Windows 11 visual design.
The Power mode settings are now available on the Power & battery page in Settings.
Right clicking the desktop now directly has a Refresh option without needing to click Show more options.
Right clicking a .ps1 file in File Explorer now directly has a Run with PowerShell options without needing to click Show more options.
Available snap layouts when using smaller PCs in portrait orientation have been optimized for that posture. You can now choose to snap three apps on top of each other, instead of four quadrants.
Based on the collaboration with the most popular GIF provider in China, weshineapp.com, GIF selections are now available for Windows Insiders in China via the emoji panel (WIN + .). If the location is set as China, then GIF data will appear from weshineapp.com.
Right-clicking on the volume icon in the taskbar now includes an option to troubleshoot sound problems.
Fixes
We fixed a remote code execution exploit in the Windows Print Spooler service, known as PrintNightmare, as documented in CVE-2021-34527. For more information, see KB5004945.
We fixed an issue where it wasn’t possible to click the Show Desktop button with your mouse at the very edge of the Taskbar.
We fixed an issue where the date and time in the Taskbar weren’t reflecting your preferred format.
We fixed an issue where the preview window might not display the entire window when hovering over Task View on the Taskbar.
We fixed an issue pressing ESC or clicking the desktop wouldn’t dismiss the window of open app preview thumbnails if you set focus to it after pressing WIN + T.
We fixed an issue where if you rotate a PC to portrait orientation and back to landscape, it could result in app icons not displaying in the Taskbar despite there being room.
Settings:
We fixed an issue resulting in Settings failing to launch. If you were impacted in the previous flight, please see here.
We fixed a noticeable stutter in the animation when closing Quick Settings and Notification Center by clicking on their respective icons in the taskbar.
We fixed an issue where the Quick Settings and Notification Center windows were missing shadows.
We fixed an issue where it wasn’t possible to launch Quick Settings by setting keyboard focus to it in the taskbar and pressing the Enter key.
We fixed an issue where Quick Settings wouldn’t render correctly if you removed all settings except volume.
We fixed an issue that mitigates Focus Assist enabling unexpectedly.
We fixed an issue with the animation in the touch keyboard when resizing it in Settings.
We fixed an issue where Sign-in Options in Settings had an unexpected checkbox under Facial Recognition with no text.
We fixed an issue where the button to disconnect a work or school account in Account Settings wasn’t working.
We fixed an issue where Lock screen Settings had a toggle with no text.
We fixed an issue where the title of the Advanced Options page under Windows Update in Settings could be missing.
We fixed an issue where the Windows privacy options at the bottom of Privacy & Security > Search Permissions in Settings wasn’t working.
We fixed an issue where the Open Navigation button could become overlapped with other text.
We fixed an issue causing Settings to crash when applying a theme under Contrasts.
We fixed an issue where parts of Settings were unexpectedly in English for some non-English languages.
File Explorer:
We fixed an issue resulting in pinning and unpinning apps from Start not working, the command bar in File Explorer disappearing, and the snap layouts unexpectedly not appearing until rebooting your PC.
We fixed an issue that could result in the elements of File Explorer’s title bar being unreadable due to low contrast.
We fixed an issue where some of the icons in File Explorer’s context menu could be blurry.
We fixed an issue where the see more menu in File Explorer’s command bar wouldn’t dismiss when you clicked on Options.
We fixed an issue that could result in not being able to create a new folder on the desktop.
Search:
We fixed an issue resulting in Search having grey boxes sometimes instead of app icons.
We fixed an issue that could result in Search dropping the first keystroke when pressing the Windows key and starting to type.
We fixed an issue where when hovering your mouse over the Search icon on the taskbar, the third recent search would not load and remained blank.
We fixed an issue where if you searched for Windows Update, it would open Settings but not navigate to the Windows Update settings page.
Widgets:
We fixed an issue where system text scaling was scaling all widgets proportionally and could result in cropped widgets.
We fixed an issue where when using screen reader/Narrator in widgets it wasn’t properly announcing content sometimes.
We fixed an issue where resizing the Money widget could result in the bottom half of it not displaying anything.
Other:
We fixed a memory leak that was noticeable when using one of the C# printing samples.
We fixed an issue causing an error in safe mode saying 0xc0000005 – Unexpected parameters.
We fixed two issues that could cause explorer.exe to start crashing in a loop, when the display language was set to Russian or when multiple input methods enabled.
We fixed an issue where if you minimize a full screen window and later restore it, there was a chance it could result in a bug check with win32kfull.
We fixed an issue resulting in some WSL users seeing The parameter is incorrect when opening Windows Terminal.
We fixed an issue causing blurry windows in ALT + Tab.
We fixed an issue resulting in a flicker in the taskbar when Korean IME users used ALT + Tab.
We fixed an issue impacting reliability of displaying the UI when using WIN + Space to switch input methods.
We fixed an issue impacting voice typing reliability.
We fixed an issue resulting in the New snip in X seconds options in Snip & Sketch not working.
How to download and install Windows 11 Build 22000.65
You might get stuck here for a little while, but just wait it out
If you’re new to the Insider program, he’s a sweet and short article on how to set you up and become the geek among your friends that knows what Windows 11 is all about. You simply need to do the following:
From the looks of it, it seems that this update is the first one that gets delivered on a way faster route (which is one of the new features that we loved in Windows), being delivered via a normal cumulative update (installed in just several minutes), as opposed to a full build download and install (close to an hour).
However, this wasn’t the case on all of our test machines, and we did have the usual failed installed problems that you would get.
Moving forward, what we particularly enjoyed was the taskbar that finally works properly on multiple monitors. Of course, the issue at hand remains that you can’t yet move the taskbar to the sides or top of the screen.
We’re going to have a quick look at the new refresh button, as there’s been some buzz around it, as well. And we will keep digging, as always.
As are most likely aware by now, Windows 11 will be a free upgrade for Microsoft’s users, starting sometime towards the end of 2021.
However, from what they’ve seen or, in some cases, tested themselves, many are finding it hard to get accustomed to some of the new UI changes that come with this future OS.
Luckily, for some of them, there are ways to revert the look to a Windows 10 appearance version.
How do I restore the classic File Explorer spacing?
If you just can’t get used to the updated UI that Microsoft has envisioned for their new operating system, note that there are some actions you can perform, in order to restore some of them to their previous appearance.
Let’s take, for example, File Explorer for Windows 11. If you desire to quickly revert the spacing back to the way it was in Windows 10, you are in luck, as there are two quick ways in which you can do so.
The first method to achieve this is, after opening the File Explorer, to click on the three dots, located towards the top of the window, action that will spawn a drop-down menu, from which you need to select Options.
The next step is to check the box that says Decrease space between items (compact view), as a Reddit user exemplified in the picture below.
The second, much easier way, which leads to the same result but with fewer clicks, is to open the File Explorer and click on the icon situated to the immediate left of the three dots shown in the screenshot above.
This icon looks like a few horizontal lines stacked on top of each other and, after clicking it, will also spawn a drop-down menu.
After doing so, simply click on the Compact View option, as in the screenshot below, provided by the same Reddit user, and you are good to go.
That’s pretty much the entire process, shown in two quick and simple ways. Pretty easy right?
Windows 11 took the entire world by storm and all early adopters are extremely eager to install it and test it to the limit.
However, the new OS can be riddled with lots of bugs and compatibility issues that can turn things to worst in just a few days.
That’s why we recommend installing it on a secondary system or on a virtual machine to avoid any problems.
In this article, we will help you install Windows 11 on VMware. The process is extremely similar to any other virtual machine so you can use your preferred tool for the job.
Of course, you will need to pick the correct version for the system you are installing it on.
Once it is downloaded, double-click the installer to start the installation. It will request administrative privileges so agree to that.
Don’t forget to check the box (if it is not already checked) with Add VMware Workstation console tools into system PATH.
After the installation, restart your PC.
We’re using this tool because we tested it with a lot of software and it’s the most reliable in our opinion but you can also try some of the tools in our best virtual machine software list.
2. Create a Windows 10 ISO
If you don’t have a Windows 10 ISO file already, you can create one by using the Windows Media Creation Tool.
You will need the Windows 10 ISO so you can run it on the virtual machine so this is one of the most important steps in the process.
We have an excellent guide on how to create a Windows 10 ISO so if you’re having trouble, this will help you speed up the process.
3. Setup the virtual machine
Start VMware.
You will see a window with three options. Click on Create a New virtual machine.
It will be asked if you want to set up a typical or custom configuration. Select Typical and hit Next.
You will now be prompted to locate the iso file or install an OS later. Select the Installer disc image file iso option, then browse and select a Windows 10 ISO file.
Select the type of operating system. Select Microsoft Windows and choose Windows 10 x64 as the version, then click on Next.
You can now name your machine so you would probably type Windows 11 and click Next.
The next step is to allocate storage space to be used by the virtual machine. For Windows 11 you can leave at least 60 GB for storage and click on Next.
Now, click on Customize Hardware and set the RAM amount, processors, and all other components. You will need at least 4GB to run the system that will use the memory from your physical PC.
Click on Close, then select Finish.
You will be able to see your virtual machine’s specs on the left pane and the Power On option at the top.
To start your virtual machine simply click on the Power onthis virtual machine button.
NOTE
Note: You will need to allocate at least 4GB for the virtual machine but you actually need to have at least 6GB of physical RAM on your PC. You can’t actually allocate all the RAM from your computer. So, if you only have 4GB on your PC, you will not be able to run Windows 11 on the virtual machine.
4. Check if the virtualization is on your PC and enable it
4.1 Check if the virtualization is on
Type command and click on Run as administrator to start Command Prompt with full privileges.
Type systeminfo.exe and press Enter.
On the bottom, look at the line saying Virtualization Enabled In Firmware. If the value is No, then you need to proceed with the rest of this solution to enable it. If it’s Yes, you can go on to the next solution.
4.1 Enable virtualization on your PC
Click the Start button and select Settings.
Now click on Update & Security.
Click on Recovery from the left pane and hit the Restart button on the right.
In the next screen, select the Troubleshoot option.
Now select the Advanced options button.
Next, click on the UEFI firmware settings.
In the next window, press Restart.
Next, you will see a Startup menu. You need to open the BIOS setup so press the corresponding key on your keyboard to open it. For us it was F10 but it might be different on your PC.
You will get into BIOS now. Click on System Configuration.
Find the Virtualization Technology option and change its value from Disabled to Enabled.
Press the F10 key to save the changes and exit, then confirm.
Now the computer should boot up normally and you will be ready for the next step, to install Windows 10 on your virtual machine.
5. Install Windows 10 on your virtual machine
Open VMware and click on Power on this virtual machine to start the Windows 10 machine you just created.
After a few seconds, you will see the Windows 10 logo, and then you will set up the keyboard, language, date.
Now, click on the Install now button.
Click on the I don’t have a product key option.
Next, select the operating system you want to install. Windows 10 Pro will do just fine.
Choose the partition you want to install it on, and you will see the one created at the previous step.
Now, the installation will go through normally and it will take a little bit more time than it would do on a regular PC because you’re running it on a virtual machine, of course.
Now you will have Windows 10 installed on your virtual machine.
In the end, you will need to enter your Microsoft account. If you will use your Windows Insider account, you will be able to access your Dev channel content.
Even if it looks like a complicated endeavor, the steps are pretty self-explanatory and easy to follow. Once as you have the Windows 10 ISO and the virtual machine installed, setting it up is pretty easy.
On your newly installed Windows 10 on the virtual machine go to Settings and click on the Update & Security.
Click on the Windows Insider Program option from the left pane and then click on the Get started button from the right.
Use the Insider Account email address to log into the Microsoft account on the Windows 10 virtual machine.
Open Settings in VM and navigate to the Windows Insider Program – found at the bottom of your Windows Update section.
Click Get Started and then click Link an account.
Select the insider account that you used to log into your Windows 10 VM.
Choose the DevChannel option.
Click Confirm.
Click Restart Now.
Wait for Windows to load.
Open Windows Update again and check for updates.
It should start downloading Windows 11.
Of course, you will also need to reboot your virtual system when prompted.
So, the whole trick about installing Windows 11 on your VM is to first emulate a Windows 10 OS and then use your Dev Channel-abled Microsoft account to check for updates and install the new OS.
If don’t have a Windows Insider account already, you can register for one on the Microsoft dedicated webpage.
Extra tips on how to run Windows 11 on VM
Once you get it running, install VM tools within the Windows 11 copy because it will adjust the size of your machine to your PC
Try to give the virtual machine as many resources as you can, especially memory
Use the settings from your virtual machine to improve the resolution and the way you see the VM windows
This is how you can simply install Windows 11 on VMware and any other virtual machine for that matter.
Have you ever enjoyed navigating through Windows 8, 10 and the mouse pointer suddenly disappeared?
Well, you don’t need to get alarmed because this issue happened to a lot of Windows users, and it can be easily fixed.
You can lose your mouse pointer directly when the operating system starts, or it just freezes when you are trying to surf the internet or do something for work.
One of the main causes as to why this is happening is because your OS has encountered some errors related to the mouse drivers, and is unable to repair them after a reboot.
There are three possible options to try in order to fix the mouse pointer, but keep in mind that some laptops have a function key on the keyboard specifically to enable or disable the mouse cursor.
The tutorials below will explain exactly what to do in order to never have the mouse pointer disappearing in the middle of your work.
So before following the options below, check the function key and see if it is activated or not.
What to do if the mouse cursor disappears in Windows 8, 10?
Go to the Windows search box, and type Control Panel.
Type Troubleshoot in the top-right box.
Click the Troubleshooting icon you find after you finish the search.
In the next window, click on the Hardware and sound icon.
Check for Hardware and devices, and click on it.
Select Next, and follow the on-screen instructions.
Close the troubleshooter by clicking on OK after the troubleshooter is finished.
Reboot your device and see if you have the same issues with the freezing mouse pointer.
Sometimes the most convenient and intuitive solution is also the most useful. Windows even provides a Troubleshooter that deals specifically with such problems.
Don’t hesitate to use this tool with confidence if you experience the problem of a disappearing mouse pointer to get rid of it quickly.
If you experience the problem of a corrupted mouse, then follow our step-by-step guide and fix this issue for good.
Also, if the Windows Troubleshooter stopped working, there is no need to get worried, you can fix it in no time by using our detailed guide on this matter.
2. Reconfigure the mouse
Move the mouse cursor to the right of the screen.
After the Charms bar is opened, click on the Search icon.
This error might be caused by outdated drivers. Once you use one of the above solutions and the mouse pointer appears, we recommend installing the latest drivers to prevent similar issues.
To save time and ensure your device will benefit from the right mouse drivers, you can use an automatic tool that downloads and installs the latest drivers that are suitable for your PC.
Bluestacks is one of the most popular applications for Android emulation, but many users reported An error has occurred message in Bluestacks.
This error message can prevent you from running Bluestacks, and in today’s article, we’re going to show you how to fix this issue.
Bluestacks issues can sometimes appear, and speaking of issues with Bluestacks, here are some common problems that users reported:
Error logging in please try again Bluestacks – Sometimes this issue can occur due to your antivirus. To prevent this issue from appearing, try disabling your antivirus.
Bluestacks 4 error – In order to run Bluestacks, certain services need to be running. If one of the Bluestacks services isn’t running properly, you might encounter this and similar errors.
Bluestacks couldn’t sign in – This is another common problem that you may encounter. If this issue appears, try restarting Bluestacks and check if that helps.
Bluestacks an unknown network error has occurred – Various errors can appear in Bluestacks, and if you’re having this issue, try reinstalling Bluestacks and check if that solves your problem.
Bluestacks stuck on one time setup, welcome screen, checking info – These are some of the common problems that you might encounter in Bluestacks, but you should be able to fix some of them using one of our solutions.
Bluestacks app player error system.nullreferenceexception – This is usually cause by interferences from other third-party solution.
How do I fix the error has occurred message in Bluestacks?
1. Completely uninstall Bluestacks and install the latest version
Go to the search bar, type Control Panel and hit Enter.
Click on Uninstall a program under Programs.
Locate BlueStacks App Player, right-click it and select Uninstall. Click to confirm the action in the resulting pop-up and go through the uninstallation process until all the way to the end.
To further delete Bluestacks from your PC, navigate to C:ProgramData. If Windows is installed on another partition of your computer hard drive, replace C with the correct drive letter.
Here, locate and delete the BlueStacksSetup folder. Confirm the action in the resulting pop-up as well.
Now press the Windows + R keys to open a Run dialog box.
Type %temp% and hit Enter.
Select and delete everything in the folder.
After you’ve followed all these steps, download and reinstall Bluestacks from their official website.
If you’re getting An error has occurred message in Bluestacks, it’s possible that your installation is corrupted, and that’s what’s causing the problem.
To fix the issue, users are suggesting removing Bluestacks completely from your PC and reinstalling it.
Because some stubborn programs might be difficult to uninstall, if not downright impossible, as they always seem to leave residual files behind, you can also check out the 5 best uninstaller software for Windows 10 PCs.
2. Update drivers
Go toSearch, typedevicemng, and open Device Manager.
Go to theDisplay adapters section and right-click your graphics driver.
ChooseUpdate Driver from the menu.
Click on Browse my computer for driver software and install the previously downloaded software on your PC.
If you’re having problems with Bluestacks and you’re getting An error has occurred message, perhaps you can fix the problem simply by updating your drivers.
Usually, the issue is caused by outdated graphics card drivers, and in order to fix the problem, you just need to update them.
To do that, you need to visit your graphics card manufacturer’s website and download the latest drivers for your model. Once you download the latest drivers, follow the steps above to install them and the issue should be resolved.
There is also an easier and faster way to install your missing drivers with a dedicated driver updater to handle the job.
With a dedicated driver updater tool, not only do you know you’ll always have the latest available drivers, but you will also fix the ones you already had or the ones that were missing.
This is thanks to the libraries that the application has at its disposal that are updated themselves every time a driver manufacturer has a new release.
Look for the Bluestacks icon in the bottom right corner.
If it’s not there, click the arrow icon to show more applications.
Right-click the Bluestacks icon and choose Quit from the menu.
After doing that, start Bluestacks again and check if the problem is still there.
Sometimes certain glitches with Bluestacks can appear, and these glitches can lead to An error has occurred message in Bluestacks. To fix this problem, users are suggesting simply restart Bluestacks.
This is a pretty basic solution, but few users reported that it worked for them, so you might want to try it out.
4. Make sure that the necessary services are running
Press Windows Key + R and enter services.msc.
Press Enter or click OK.
When Services window opens, locate BstHdAndroidSvc, BstHdLogRotatorSvc,and BstHdPlusAndroidSvc
Right-click each service and choose Start from the menu.
After making these changes, check if the problem is still there. If starting these services fixes the problem, we advise you to change their startup type to automatic. To do that, follow these steps:
Open the Services window and double-click on BstHdAndroidSvc, BstHdLogRotatorSvc,or BstHdPlusAndroidSvc service to open its properties.
When the Properties window opens, set the Startup type to Automatic and click the Start button to start the service.
Now click Apply and OK to save the changes.
Do the same for the other services.
Bluestacks relies on certain services in order to run properly, and if those services aren’t running, you might encounter An error has occurred error.
To fix this problem, you just need to ensure that the two services are running properly.
After changing the startup type for BstHdAndroidSvc, BstHdLogRotatorSvc,and BstHdPlusAndroidSvc service, they should always be running and the problem with Bluestacks will be permanently resolved.
5. Install the latest version .NET Framework
If Bluestacks isn’t running properly, the issue might be the lack of .NET Framework, an important software component.
Certain applications require this framework in order to work properly, and if you don’t have it installed, you might encounter An error has occurred message in Bluestacks.
To fix this issue, it’s advised to download .NET Framework and install it. Once the .NET Framework is installed, try running Bluestacks again and check if the problem is still there.
6. Perform a Clean boot
Press Windows Key + R to start the Run dialog.
Now type msconfig, and click OK or press Enter.
The System Configuration window will appear. Navigate to the Services tab and check to Hide all Microsoft services checkbox.
Disable all services except several Bluestacks services on the list.
Go to the Startup tab and click on Open Task Manager.
Task Manager should now start, and you’ll see a list of all startup applications.
Right-click the first entry on the list and choose Disable.
Repeat this for all startup applications.
Once you disable all applications in Task Manager, go back to System Configuration window and click Apply and OK to save changes. Restart your PC.
As previously mentioned, sometimes third-party applications can interfere with Bluestacks and cause this problem to occur.
To fix the issue, users are suggesting performing a Clean boot and disable all third-party applications and services.
Once your PC restarts, only Bluestacks services should be running. Now try to run Bluestacks and check if the problem appears again. If not, you need to enable applications and services one by one or in groups.
Bear in mind that you’ll need to restart your PC after enabling a group of applications or services in order to save changes.
Once you find the problematic services or applications, remove them or keep them disabled and you won’t encounter this issue anymore.
Press Windows Key + S and type create a restore point.
Now choose Create a restore point from the list of results.
You should now see System Properties window on your screen.
Click the System Restore button.
System Restore window will now start.
Click the Next button.
Now you need to check the Show more restore points option if it’s available.
Now you just need to pick the desired restore point and click Next.
Follow the instructions on the screen to complete the process.
If this problem started occurring recently, it’s possible to fix it using System Restore.
In case you don’t know, System Restore is a built-in feature of Windows that allows you to restore your system to a previous state and fix many issues along the way.
After your system restores, check if the problem is still there.
8. Switch to a different emulator
If the previous solutions didn’t fix the problem with An error occurred message in Bluestacks, maybe you should consider switching to a different emulator.
Bluestacks isn’t the only Android emulator on the market, and we already covered the best Android emulators for Windows 10, but if you’re looking for a reliable Bluestacks alternative, we suggest that you try out LDPlayer.
Bluestacks is a great application, but sometimes you might encounter An error has occurred message. This issue can prevent you from using Bluestacks, but we hope that you managed to solve it using one of our solutions.
Communication is the key to success, so you should know that Microsoft Teams is very visible on Windows 11, which can only make fans happy.
This communication platform, which allows online meetings and offers chat functionality, is integrated directly into this system instead of Skype, which will only become accessible in the Microsoft Store.
If you’re wondering how you’ll be able to access Teams, things are more accessible than you thought.
How can I use Microsoft Teams on my Windows 11 PC?
With Windows 11, the last remnants of the live icons in the Start menu that we’re all so used to will disappear.
Users are now offered to place the icons of the apps they use most frequently or want to access most quickly in the new Start menu.
The significant change, both visually and functionally, will revolutionize the routine of decades past. The Start menu will move to the center of the screen, and the programs and documents used frequently will be displayed.
But what we’re interested in today is the Microsoft Teams button that comes integrated directly into the Taskbar, which is a big change for users.
From here, you can start chatting or calling just one click away and share documents, texts, or images as before.
Here, users can turn off the microphone or launch presentations. The new interface has a Meet button in the top left to create a video call or invite other users.
It’s also worth mentioning that the new Teams platform also supports sending SMS messages to Android or iOS.
Thus, the Meet Now feature of the former Windows 10 has been replaced by the Chat app, which is easily pinned to the taskbar by default.
This cross-platform also comes with another benefit: it consumes half as much memory as the current form that users are successfully using anyway, which is just another big plus.
Another feature worth mentioning for wishers is that the app allows for multiple accounts and the ability to scale quickly for customers who need it. Businesses can use this, sign up for Teams Exploratory, and try out the premium features for free. You can also check out Teams Essentials.
You can also expand the functionality of Microsoft Teams, and to learn more, don’t miss our article on Flipgrid for Microsoft Teams.
Please access the comments section below if you have more suggestions or other questions about Microsoft Teams as an integrated part of the new Windows 11 OS.
Diagnosing if your device is ready to actually run Microsoft’s new operating system is the first step that we, as users, must take before making any plans involving the software.
But how can you know for sure if your PC or laptop is compatible with Windows 11?
Instead of reading the requirements list and going through your system, checking items off your list, which can be a slow and boring process, you can just use an app, designed to do it for you.
WhyNotWin11 will quickly diagnose your system
To begin, once you get past your computer’s security concerns regarding this foreign software, the application itself is blunt and straight to the point.
It’s safe to say that WhyNotWin11 delivers a very detailed look at where your PC may be lacking when it comes to Windows 11 requirements.
In total, there are 11 categories that the app checks, among which are boot type, CPU architecture, generation, DirectX support, RAM, Secure Boot, and TPM Minimum.
You can get this awesome tool by heading over to the GitHub dedicated page and download it from there.
The details that this app offers, in regards to the CPU information, architecture, generation, core count, and frequency, are much more comprehensive than Microsoft’s PC Health Check app.
Another very important feature of the app is the ability to automatically check for the latest updates.
Know that the current version of this app, which is version 2.1, reflects all the changes that Microsoft keeps making to the requirements list for Windows 11.
So, all-in-all, it seems like it’s a pretty reliable tool for users that want to find out if their systems are Windows 11 worthy.
After the app finishes downloading, simply install it and click on the Check button, which will perform the system diagnosis, automatically.
Have you already diagnosed your system for Windows 11 compatibility? Share your experience with us in the comments section below.
Across various social media platforms and forums, current Windows OS users keep inquiring about their choices, when comes to upgrading to a Windows 11 supported laptop.
As you most likely remember, when Microsoft announced the new operating system, the company also published a list of mandatory requirements for the devices on which users plan to run Windows 11.
So, if you are still wondering what criteria you should keep in mind while choosing your new laptop, we got some tips for you.
How do I choose a Windows 11 compatible laptop?
Let’s get one thing straight from the very beginning, which is that most of the newer models of laptops are surely compatible with Microsoft’s new OS.
The model you choose is more of a personal preference, as long as the device itself meets the required parameters for running Windows 11, some of which are:
Processor: 1 GHz or faster with 2 or more cores
System memory: 4 GB minimum
Storage: 64 GB minimum
System firmware: UEFI
Security: TPM 2.0 required, UEFI Secure Boot
Display: 9-inch minimum in diagonal, High definition (720p), 8 bits per color channel
Graphics: DirectX 12 API, WDDM 2.0
Connectivity: Bluetooth (excluding desktop PC), Wi-Fi or Ethernet connection
Digitizer: Precision Touchpad (if touchpad is present)
Hardware buttons: Power button and volume up and down buttons required
Ports: USB ports (at least one), video output required
Microsoft is strict towards the devices the users will decide to install the upcoming operating system on and made a few blunt statements about some deciding factors.
Another factor you should keep in mind while browsing for your new laptop, and this one is quite important, is 5G support.
To put your mind at ease, most of the new models of laptops already have the TPM 2.0 security chips installed, so you won’t have to worry about this either. Also, you can check our list the best Windows 11-ready laptops.
A lot of brands and models to choose from
The most time-consuming aspect of purchasing a new laptop is the fact that there are, literally, hundreds of models, from different brands, to choose from.
And while some look awesome, some have better specs, while others have both, plus a certain feature that separates them from the rest.
It all comes down to budget, mostly. We are each going make our choice depending on needs, and the amount of money we are willing to spend on this new gadget.
As far as HP laptops go, an official list hasn’t yet been released, but the company states that the devices that fall under the HP Spectre, HP ENVY, and HP Pavilion categories, will support Windows 11.
Dell hasn’t revealed a list of devices that are compatible with Windows 11 yet either but said that most of their laptops will run the new OS without any issues.
Motherboards and graphic cards manufacturer Gygabite announced that Windows 11 compatible motherboards include Intel’s X299, C621, C232, C236, C246, 200, 300, 400, 500 lineups, as well as AMD’s TRX40, 300, 400, 500 motherboards.
If you simply can’t make up your mind or don’t really know much about all the technology that powers these devices, you can turn to Microsoft for a helping hand.
They will provide quite a number of choices, which include both desktops and laptops, which you can browse based on your preferences and desired specs.
The silver lining here is that, by choosing a device that Microsoft recommends, you have the absolute guarantee that Windows 11 will run on it.
However, you shouldn’t let the tech giant totally influence your pick, just rely on their basic guidelines, while still choosing the model of laptop you want.
Whether it will be a Lenovo, an Asus, or a Razer laptop, the multiple choices listed on Microsoft’s help page are, as we said, guaranteed to support the upcoming OS.
All that remains is for you to set your sights on the desired model and start enjoying everything that Windows 11 has to offer.
Which laptop model did you choose for running Windows 11 on? Let us know in the comments section below.
We’ve been constantly talking about Windows 11 and everything it brings to the table so far, including all the bugs that have been flagged ever since the OS became available for public testing.
However, even though this is not a bug, here’s something else you need to keep in mind while testing Microsoft’s new operating system.
The Windows driver update will downgrade your GPU driver
Users have indicated that they are having some issues with the Windows 11 dev preview. 22000.51. It seems that, after updating the system to this version of the OS, Windows is actually performing a GPU driver downgrade.
I am facing this issue in the windows 11 official dev preview. 22000.51
I already installed the latest version. 21.6.2 (27.20.22001.16006).
I tried to fix using DDU, + Regedit but always got this. I must install the windows driver version. otherwise, I can’t install any windows update. when install windows update automatically install GPU drivers also.
After installing the windows version of the GPU driver can’t open the AMD settings it says ” AMD Radeon Software and Driver Versions do not match” doesn’t matter trying to fix using Regedit. also can’t install the windows store AMD app because the store says no Hardware matching for install the app.
basically, Windows Tring to downgrade GPU Driver Version.
Windows Update GPU Driver Version 27.20.11035.3002
AMD Latest GPU Driver Version 27.20.22001.16006
Does anyone face this issue?
The Windows driver update tool seems to have a mind of its own and it is now messing with hardware drivers that were already updated to the latest version.
As the Reddit post says after the built-in Windows update tool is done with its job, the GPU settings panel can no longer be accessed.
All users get when trying to open the GPU settings is an error that reads: AMD Radeon Software and Driver Versions do not match.
So, as a piece of advice, in order to avoid facing the same situation, it may be wise to actually deactivate the Windows automatic driver update tool.
How can I fix this?
Besides flagging this annoying issue, the author of the Reddit post also offers his fellow users a solution for fixing it.
There is, apparently, a third-party tool that will solve the problem. This particular application is called Wumgr and can be found by simply searching for it on Google.
After installing this software on your PC, all you have to do is:
Click the Update icon.
Select updates you don’t want to install.
Select the eye icon for the hide.
You can install other Windows updates without GPU Drivers.
Remember to always keep an eye out for every change that these Windows 11 preview builds perform on your devices, to make sure you don’t run into surprises next time you plan on using certain software or features.
Have you experienced cases in which the new OS changed or disabled features on your device? Share your experience with us in the comments section below.
If you or your company are still running Windows 7 on your devices, upgrading to Windows 11 will not quite go as you imagined.
For this big leap, you will most likely need to perform a clean installation, a process that will result in the loss of all your settings and preferences.
You will need to clean install Windows 11
So, if you decided that you want to make the big jump from Windows 7 to Windows 11, it turns out that Microsoft will not make it that easy for you.
It seems that this ordeal will actually involve starting from scratch on your new operating system. Thus, many users are reluctant to perform the upgrade, specifically because of this reason.
For example, in a support document from Lenovo, the tech company confirmed that apps and settings will not be migrated if you install Windows 11 on a Windows 7 PC.
What is the upgrade path from Windows 10 to Windows 11? My company still has some Windows 7 devices. If they meet the hardware floor, can these devices be upgraded directly to Windows 11?
Most devices available for purchase now will be upgradeable to Windows 11. You will have the option to upgrade, clean install, or reimage Windows 10 devices to move to Windows 11. For Windows 7 devices that meet hardware requirements, you will need to clean install or reimage to go directly to Windows 11.
We know that, for some, the preservation of all settings and preferences is essential and the only advice, in this case, would be to make sequential upgrades.
What this means is, there still is a way you can go from the old Windows 7 to Windows 11 and keep all your settings.
So, it would be smarter to first upgrade to Windows 10, and only after doing so, upgrading your device to Windows 11.
If anything will change in the near future, meaning if other ways of making the big jump from Windows 7 to Windows 11 without losing any preferences become possible, we will keep you posted.
What Windows OS will you be upgrading from? Let us know in the comments section below.
There’s no shortage of Windows 2-in-1s these days, but just as I said when I reviewed the XPS 13 2-in-1, all are not created equal. Microsoft’s Surface Pro devices, in particular, are known to sport thick bezels around the edges of the screen. The Surface Pro X’s slim bezel design attempts to address that concern but ends up lagging behind the rest of the Pro lineup because of its Qualcomm-based processor.
So what happens if you blend the Intel power of the main Surface Pro with the design of the Surface Pro X, but also cater the device for the needs of businesses? You get the Latitude 7320 Detachable.
Dell provided me a Latitude 7320 Detachable for review, and after using one for two weeks, it’s shaped up to be quite the device. As someone who is used to sporting a Surface, the Latitude has proven to be an intelligent and powerful machine that seeks to outdo the Surface Pro in more ways than one.
Specs & Price
The unit we were provided for review is up for sale on Dell.com for $3,209. We were also provided the optional Dell Detachable Travel Keyboard ($200) as well as the Latitude 7320 Detachable Active Pen ($70.) Note that the keyboard and pen aren’t included in the main price and will be extras, just like the Surface lineup from Microsoft. Pricing on Dell.com is also subject to change, so you can sometimes see it on sale for less.
As far as specs go, our unit comes configured with the Intel 11th generation Core i7-1180G7-vPro Processor. That is paired with 16 GB of RAM, and a 256 GB SSD. Dell added some extras to our unit, including a fingerprint reader, and the ultra-small form factor 60W power adapter. If you’re interested in LTE, you also can opt for the LTE model via either AT&T, Verizon, or Sprint.
Other configurations on this Latitude are available for sale at Dell.com range from an Intel Core i3-1110G5 processor, or an Intel Core i5-1140G7 and Intel Core i5-1130G7 processor. Picking the Core i3 model and the smaller 128GB storage would kick the price down closer to the $1,587 range when on sale and $2,000 when not.
Oh, and this 2-in-1 is certified for Windows 11. Dell has updated its product listing to mention that you’ll be getting a free upgrade to Windows 11 when available.
Design
If you’ve ever seen a Surface Pro X, then the Dell Latitude 7320 Detachable should feel pretty familiar. It sports a brushed aluminum back. Then, there’s a flexible kickstand that almost goes all the way flat. Weight comes in at about 3 pounds if you count the tablet and the keyboard.
Visually, this Dell 2-in-1 is nearly identical to the Surface Pro X, with the exceptions being that the kickstand is a little thinner, and aluminum being used over magnesium. Dell also leaves a notch at the side of the kickstand so it’s easier to pull out. Even the display is quite the same, with slim bezels along the top and the sides (we get more into that later.) Dell says the display is 10% thinner over previous generations, thanks to an 84% screen-to-body ratio.
All around, the Latitude is plenty premium and it isn’t a device that will creek, bend, or warp as you put it through your daily workflows. It is cool to the touch and feels absolutely great in the hands. A note though for those who don’t like branding. That kickstand sports the Latitude logo, and the Dell logo is in the middle of the chassis.
Of course, the world-facing camera is tucked inside the back chassis, too. right next to the neighboring fingerprint reader. And to keep the Latitude cool, you’ll find ventilation holes to the left side and right top of the chassis. It’s similar to what Microsoft has done on the Surface Pro lineup.
At the bottom side of the Latitude, you’ll find the POGO connectors for the keyboard. We’ll get into that in a later section, but it’s able to grab onto the extra keyboard just fine and hold it in pretty solid. We never had issues with the keyboard becoming loose, even when used on a lap, or on a slippery surface like a glass table.
Ports & Security
Now we come down to the ports and the security aspect. All models of the Latitude 7320 Detachable come with 2 USB Type-C Thunderbolt 4 ports (one on each side.) The ports support power delivery 3.0 as well as DisplayPort. Other than that, unlike the Surface Pro X, you’ll find a 3.5mm headphone hack onboard.
Optional ports onboard the device include the fingerprint reader, a contact or contactless smart card reader. All units have a wedge-shaped lock slot, and on LTE units, there will be an external uSIM card tray option. Just like the Surface Pro X, there’s no microSD card slot here. It’s also not easy to swap out the SSD, as you’ll need to remove screws, and the display to do so.
As far as security goes, the Latitude sports a Windows Hello webcam. That fingerprint reader can also be added to double up on security, too. The fingerprint reader was super accurate in all of my tests, and it never once failed when used as the primary way of login over Windows Hello facial recognition.
Display & Webcam
The real star of this 2-in-1 is the display. Measuring in at 13 inches, the display is larger than what you get on the Surface Pro 7, but almost exactly the same as the Surface Pro X. The display is flanked by some tiny bezels along the left and right sides. The top has a bit of a chin for the webcam and sensors, but the bottom has a small lip, just to grab the keyboard.
Coming from using a Surface Pro 5, and Surface Go 2, it’s refreshing to see how much Dell has managed to slim down the display on its business tablet. It feels modern, almost like an iPad Pro – making other competitors like the ThinkPad X12 feel very dated.
In terms of display quality, you won’t be disappointed. The display is set in the 3:2 aspect ratio, which is taller and a bit narrow. This made opening windows side by side quite easy and scrolling through the web a breeze. It is no change from the ratio on the Surface Pro 7, but that extra 1 inch of screen real estate also means you can fit more on the display.
This is important considering that this is for enterprise and business use. The Pro X is an exception with its similar screen, but it is a shame that Microsoft’s main Surface Pro lineup still uses cramped 12-inch panels. The Latitude now leads in this area.
We ran some tests with our colorimeter, and the display put up some good numbers. It’s about 418 nits bright and hits 90% of the DCI-P3 color gamut. We couldn’t compare it to the Surface Pro X directly because the Pro X doesn’t support the software we use, but visually, the two were on par.
When I watched episodes of Bob’s Burgers, the colors on the restaurant floor and the pink in Louise’s hat were clear and bright. Even in dark shows like NBC’s Debris, the bright lights of strange space debris falling from the sky in the intro sequence lit up the panel and stuck out against the darkness of my room.
With the webcam, you’re getting something that’s rare. Included onboard is a 1080p 5MP FHD webcam and not the 720p webcam you find on a typical 2-in-1. When I called my colleagues in Portland on the Latitude, they instantly noticed how clear I looked. It’s great to see that Dell put some thought into this in an era where almost everyone works from home. The back webcam, though, is decent. I wouldn’t use it in place of a DSLR, but for taking photos of whiteboards and documents, it really can be useful.
Performance
Coming configured with an 11th Generation Intel Core i7-1180G7 processor and 16GB of RAM, this 2-in-1 is a machine that just keeps on chugging along. It has no issues handling my workflow of 20+ tabs in Microsoft Edge, along with Spotify and YouTube running in the background. There will be no real performance issues with this device unless you stress it too far by trying to edit 4K videos or crunch a lot of layers in Photoshop. For office work, the Latitude is plenty powerful. The fans also never really kick in unless the screen gets hot, or if you’re pushing the tablet too far with gaming or video encoding.
The Geekbench 5 multi-core score of around 4,200 can test to that, as well as the fact that I was able to encode a 1 hour and 30-minute 1080p podcast in Filmora in under 12 minutes. I even enjoyed some light gaming in Fornite, too, with frames hitting close to a playable 20 FPS, though it was choppy at times. Intel’s Iris Xe graphics can only go so far.
But this is a really powerful machine and shows what Microsoft could have done with the Surface Pro X, if it had opted for an Intel chip, rather than Qualcomm. Business folks who want a fancy tablet to power their way through multitasking with the convenience of LTE don’t want to worry about app compatibility issues. Since this Latitude is powered by an Intel chip that supports all types of Windows apps, it’s setting the bar as a reference design and device, with the bonus being that LTE option via that Qualcomm Snapdragon X20 LTE-A modem.
Keyboard & Pen
As far as the keyboard and pen, it’s very similar to what you get with the Type Cover Surface Pro lineup. Dell, though adds some unique touches to the overall design that end up making the device feel premium. The keyboard is made out of a metal and faux suede material that makes it tougher than the Type Cover. That’s a change from the Type Cover, which is all fabric or Alcantara.
The keyboard can also sit flat on the desk, or raised up at an angle against the screen for typing. The raised angle is what I recommend, as it makes the keyboard comfier, feeling like a traditional laptop. At some angles, though, the keyboard might hide the screen, so best to be careful how you lap the tablet.
In my time with the Latitude, I punched through posts with speed thanks to the keyboard. I didn’t have any issues with bottoming out, or missed keystrokes. Things feel very responsive, and I got to about 80 words per minute in my typing tests. My fingers slid across the chicklet keys with ease. The trackpad is just as responsive and supports Microsoft’s precision gestures. No issues there, though I wish it was slightly wider to adjust for moving my hands.
The pen has some special sauce that’s similar to what Microsoft did with the Surface Pro X. It houses in a spot on the keyboard via POGO connectors and it can accept 100% within 30 seconds. Overall, the pen feels very comfy in the hands as it holds just like a carpenter’s pencil.
Dell is using Wacom Active ES technology (AES) 1.0 technology on the pen, and it’s very responsive for drawing as well as inking in OneNote. I just wish the tip was a bit bigger, like the Surface Slim Pen. There’s also no eraser tip, so I had to depend on the side buttons for those controls.
Battery life
When it comes to battery life, the Latitude is on par with the rest of the industry. It easily got me through my day, lasting about 8 hours on a single charge for web browsing, media consumption with the brightness at around 25%. When I looped a video for the prolonged battery tests, it also lasted for about 11 hours, which isn’t too bad. I would not worry too much about the battery either, as since the Latitude supports charging via USB-C, any PD-compatible power bank will work with it. Note that for these tests, Dell’s Optimizer settings were turned off.
Unique Intelligent Features
For all that I’ve mentioned so far, the Latitude does have some special features you don’t get on any other 2-in-1. A lot of those features leverage the sensors onboard the device via the Dell Optimizer software.
The first of those include Express Connect, which joins the strongest Wi-Fi network in the office or at home. Express Response also prioritizes the most important apps, so they can open faster. And, ExpressSign-in uses proximity sensors so that when you step away from the PC, it automatically locks, and logs you back in as you approach. Finally, Intelligent Audio enhances audio quality and reduces background noises during conference calls.
Of all the features, I loved ExpressSign-in. When I stepped away from my desk, the Latitude knew I wasn’t there and automatically locked my session, so that peeking eyes won’t see what I was working on.
Channeling and challenging the Surface
Though priced well over $2,000 and mainly focused on business, the Dell Latitude 7320 is an excellent Surface Pro killer. It takes the design principles set forth by Microsoft and adds in Intel processors under the hood to make a huge difference in terms of usability. The intelligent features, as well as the 1080p webcam and slim-bezel display, are only the cherry on the top and the Latitude 7320 Detachable is a serious contender for best 2-in-1 of the year.
That great news, of course, moreover that Teams stepped out from the business area and is turning towards all the users, to families and friends.
However, when you receive an important call, before answering, you should be muting your microphone in all other apps you’re using it and that can be pretty daunting.
That’s why Microsoft included a Universal Mute button in Windows 11 that can be used to mute the mic from all the apps.
How can I enable the Universal Mute button in Windows 11?
Well, that’s the whole trick. You won’t need to do anything. The button will be placed right in the notification area along with the Wi-Fi, battery, and sound indicators.
That means that with one click, you will be able to spare yourself the possible awkward situation to be heard by third-party listeners that you forgot to mute when taking another call.
The beauty of it is that you won’t even need to open any apps. However, after that, you will need to unmute yourself from the app that you really want to use at that moment.
We don’t have an instance with the alleged button but once Windows 11 rolls out officially, we will surely get a glimpse of it.
Windows 11 is going to roll out soon enough to Windows Insiders and it will be available as a free upgrade.
If you want to know whether or not you can go with the upgrade, you can take a look at the Windows 11 system requirements.
How do you feel about this new feature? Tell us your opinion in the comments section below.
BitLocker is a free built-in encryption program that comes pre-installed on Windows Pro and above versions. It helps the users to encrypt their hard drives with a password to protect any information in it.
However, some users have reported that they are unable to decrypt their hard drives using BitLocker.
BitLocker is not working is one of the common issues among Windows users, as we have seen in the Microsoft Community Forums.
I bit locked my external hard drive by accident and unlocked it but when it started to decript it it paused and has not resumed the decription. so as it stands i cant remove it or use my drive or change settings. what can i do to get my hard drive back working again?
Follow these steps to fix the BitLocker decryption issues in Windows 10.
What can I do if BitLocker will not decrypt?
1. Wait for the decryption to complete
Most of the BitLocker decryption-related errors are about the decryption being stuck at 60%, 70% or even 99%.
If this is the case, then you may want to wait a little more before trying any other solutions to resolve the issue.
The encryption and decryption process is very complex and can take more time than you anticipate, so you only need to be patient.
It is recommended that you wait for a few hours or more before taking any step to resolve it on your own, or you can download and install a reliable BitLocker alternative on your PC.
Right-click on Command Prompt, and select Run as Administrator.
In the command prompt, enter the following command, and press Enter: repair-bde F:E: -pw -f In the above command, change F: with your Sources Drive Letter (that is the encrypted drive letter), and E: with your output drive letter.
Now you will be asked to enter the password for your BitLocker Encrypted drive. Enter the password and press Enter.
If you see the Action Required: Run Chkdsk E: /f message, then run the Chkdsk tool on the suggested drive.
Close the command prompt after the disk checking utility is finished.
This should create a complete backup of your encrypted drive in the output drive. You can format and move the data back to your source drive and encrypt it again.
If the recovery was not successful with the password, you can use the Recovery Key to do the same.
Just make sure that when the recovery process is in progress you keep your computer plugged in to prevent any power outage issues which may, in turn, cause damage to the hard drive.
3. Upgrade your Windows OS
On your taskbar, and right-click on the Action Center.
Choose All Settings, and click on Update & Security.
Now, select Activation, and click on Go to Microsoft Store.
You can buy the Windows 10 Pro/Enterprise/Education package.
Restart your PC.
Windows 10 versions (editions) that have the built-in BitLocker are Windows 10 Pro, Windows 10 Enterprise, and Windows 10 Education.
And if you’re unsure how to find which edition you run on your PC, navigate to Settings > System > About and scroll down. You should be able to see the exact edition and iteration of Windows 10 there.
Keeping your drivers up to date is an essential step in order to run your PC in proper conditions. Thus, for optimal work, you need to constantly get the latest versions of your computer components.
Rest assured that the universal touch screen driver is no exception to the rule, for Windows 10, 7, or even Mac devices. Quite the opposite, you might feel a huge difference if you choose to do so.
Therefore, in this article, we’ll discuss some options you should surely consider to update your universal touch screendriver.
How can I quickly update the generic touch screen driver?
1. Use Windows Update
Open Settings.
Select Update & Security.
From the left side, select Windows Update and then click on Check for updates, from the right side.
2. Use Device Manager
Open Device Manager.
Expand Display adapters.
Locate the needed touchscreen device on the list, right-click on it, then choose the Update driver option.
Click on Search automatically for updated driver software.
Windows will automatically find a suitable driver and will try to update it.
3. Try third-party software
To quickly update the universal touch screen driver, you should definitely consider the support of dedicated software.
It is easy to use and will also provide automatic support. Thus, your components are going to be secured, without any trouble.
4. Use the manufacturer’s website
You can also access your device manufacturer’s support website and check the listed drivers. Note that you should look for the ones compatible with the exact model of your device.
If you can’t figure out which one is good, do not hesitate to submit a ticket to the dedicated support team.
We created the above list considering a variety of forums. So, these are the best helpers to update your universal touch screen driver.
Internet Explorer has been the default browser of various versions of Windows for almost two decades. This browser also includes a web compatibility viewer function.
With this setting, Internet Explorer allows users to view older web pages designed for previous versions of the browser, making it compatible with older web pages.
The major change that Microsoft is making with the new Windows 11, however, is dropping Internet Explorer altogether, with the new default browser becoming Microsoft Edge.
It’s true that not necessarily many users expected to find IE on the new OS, but they hoped at least to find the 32-bit version. This will not be the case, because Windows 11 is planned to run only on 64-bit.
Although it was already announced that IE would be removed as of June 15, 2022, Microsoft has however made it public that Windows 10’s Long-Term Servicing Channel (LTSC) will include IE for certain OS versions.
But what will happen to users who, for various reasons as well as for enabling Compatibility View settings, will need to access IE on the new Windows 11? Discover below our ways to get the online experience you need.
How do I enable Compatibility View in Windows 11?
Change the default browser
Go to the Start menu, and click on the Settings button.
Select the Apps section.
Choose the Default apps tab, and scroll down until you find the Web browser section.
Click on the Web browser button, select your desired browser, and set it to the default status.
As we already know from the preview provided by Microsoft, Windows 11 comes with the default Edge browser.
If you are used to working with a different browser or need to access older sites, then you can choose the browser that suits your needs.
By performing this action, you will not disable other installed browsers, but you will only make the selected browser the default one.
IE features supported by Microsoft Edge
IE settings and Group policies that affect the Security zone settings and Protected mode
Microsoft Edge Extensions
Controls for ActiveX (Silverlight/Java)
All Enterprise modes and Document modes
The F12 developer tools for Internet Explorer
Browser helper objects
IE features not supported by Microsoft Edge
IE11 or Microsoft Edge F12 developer tools
IE toolbars
IE settings and Group policies that affect the Navigation menu
On the new Windows 11 operating system, organizations can use the Local Group Policy Editor to update or remove a website from IE compatibility for all devices on the intranet at the same time.
In a marketing move that no one saw coming, Microsoft has released a new music video featuring All-4-One singing a parody version of their 90s hit, I Swear, called It’s All There.
The video, which can be watched below, is a full-on 90s-style music video used to promote the Xbox All Access subscription service that allows consumers to get their hands on a new Xbox Series S or Xbox Series X console and pay it off gradually on a monthly basis.
The video shows a woman playing on a Day-One Xbox One console and eventually upgrading to the new Xbox Series S after checking out the Xbox All Access details on her smartphone. The Xbox Game Pass service, which is included in the Xbox All Access plan, is also featured.
“As gamers begin the next generation of play on Xbox Series X|S, we do so remembering the great experiences we had before with excitement for what’s to come,” Xbox All Access’ senior marketing manager, Bogdan Bilan, said of the promotion. “And no one knows how to navigate the waters of love, loss and love again than 90s R&B singers. So, we thought, what better way to celebrate the reimagining of how you can join Xbox with the all-inclusive offer of Xbox All Access than with the ‘90s R&B sensation, All-4-One, reimagining “I Swear,” their 1994 ballad?”
I Swear originally came out in 1994 and was All-4-One’s second single. The hit went on to win a Grammy for Best Pop Performance by a Duo or Group with Vocal and was awarded Favorite New Artist Soul/Rhythm and Blues at the 1995 American Music Awards.
Starting today, Xbox Insiders will begin receiving notifications on their enrolled Xbox One and Xbox Series X consoles relating to new Insider news and changes.
The notifications will use the Xbox toast system that’s also used for Xbox Achievement notifications and those relating to screen recordings and downloads.
Once live, all Xbox Insiders will receive notifications by default though they can be disabled by manually turning off the Xbox Insider option in the Xbox Notifications settings page.
Xbox Insiders are groups of Xbox consoles owners who have opted into testing new features and builds of the Xbox operating system before they’re pushed out to the general public.
Writing on your Windows 10 tablet or touchscreen laptop is easier when you are using the tools that you find most useful or that meet your needs to help you have a relaxed typing experience.
Everything is easier to accomplish if you have the right writing apps at your disposal. Go distraction-free with these best apps to start writing on your tablet.
The typing experience had to go through a lot of changes since touchscreens were integrated on most of the devices we use.
Fewer people are looking for the perfect keyboard feeling and more are looking at how responsive and user-friendly the software they are using is. And with Windows 10 this is just as valid.
It is harder and harder to find the all-in-one software wonder we are all looking for, however, there are some apps available at the Microsoft Store.
If you are trying to find the best writing apps to fit your writing needs, you deffinitely have to check out some of these apps.
No introduction needed, if you are in need of something simple, this is the best app for you. Everyone remembers Notepad, the easy-to-use writing software that was integrated on all Windows-operated computers.
This Windows 10writing app is somewhat different compared to what Notepad used to be, but as we all know, not all change is bad.
The app looks great with its new and shiny appearance and it is certainly easier to use. The pro version includes different themes as well.
The UI was completely remade to fit the current generation of devices and everything is more accessible and feels natural even when you are using it from your Windows 10 tablet or smartphone.
The keyboard is very touchscreen-friendly and responsive which makes it ideal when in need to write something while on the road, or you only have access to your smartphone.
The software is compatible with the Xbox series X|S, Xbox One, Hololens, PC, and even mobile devices that run the Windows system.
Here are the software’s main features:
Dark and light theme
Can be set as default text editor
Jump list for recently accessed documents
Edit multiple documents concurrently
Drag & drop support
Notepad
The classic writing software that gets the job done in a simple, comprehensive, and easy way.
If you are someone that finds himself editing a lot of the previously created text documents, this is the app you are looking for your Windows 10 tablet.
At a first glance, the UI looks like it needs some time to get used to, but after a couple of minutes everything seems really intuitive.
There are some important features that are needed by some but not available on most Windows 10 writing apps.
The software has a really easy to follow interface with comprehensive tools that don’t require background knowledge to use.
You will find basic text editing stuff, like Bold, Italic, Underline, highligts, and different text colors to evidentiate important parts from one another.
If you are looking for simple text formatting, search, or spell-checking, you will be happy to hear that ModernNote is tailored specifically for you.
Here are the software’s main features:
Create and edit text files
Cut/copy and paste text
Spell checking
Multi-document support
ModernNote
This awesome app lets you create, view, and edit rich text documents!
Accessibility is one of the signature traits of today’s world and is one of the best characteristics of Cloud Notes+.
The ability to store, share and access your work from all your Windows 10 devices is one of the main things that make our life easier.
The app itself uploads your documents on cloud and allows you to access, edit or create new documents on-the-fly.
You can modify text written on your PC from your smartphone on your way to work or just complete it with new ideas effortlessly.
All of the changes will be synchronized on the stop with all the different connected devices you have. All you have to do is make sure you’re logged into the same account.
The software works in snapping mode as well, so you can place it on the left or right side of your screen while keeping other apps opened on the other side.
Take a look at the program’s core features:
Simple text notes
Synchronize notes between devices
Share text links into Cloud Notes
CloudNotes+
This is a simple and intuitive cloud-based text software that is compatible with all of your devices.
WritePlus is a very useful writing app that you can use to quickly write texts on a distraction-free platform. WritePlus has a minimalist interface that features only basic formatting options.
However, these options are more than enough to allow you to write and edit your texts in an efficient manner.
WritePlus also features a built-in dictionary/thesaurus that you can use in case you’re running out of words or ideas.
The minimalist interface will not desitract you from focusing on the matter at hand, and that is, obviously, writing stuff!
Most of the similar apps in our list are compatible with multiple devices, but unfortunately, WritePlus only works for Windows PCs.
Additionally, this app was previously knowsn as WritePlus++, but has been changed and rebranded as WritePlus, so some of you might know about it.
Check out the app’s best features:
Minimalist interface
Basic formatting settings
Spellcheck
Autosave
Word count
Text to speech
WritePlus
WritePlus is a simple text editing app that includes essential formatting tools to take notes on the fly.
This is one of the most simple Windows 10 apps you can find out there to do your writing, and that is probably what makes it one of the better ones.
The UI contains the bare minimum number of elements and it is built to help you accomplish one thing: write.If you get easily distracted by features while trying to get something done, you will love writing on this app.
Write operates on the principle point and shoot and that is exactly what you have to do. The pages will keep rolling and you will never lose focus, getting lost in the interface or the settings menu.
The app is no longer available in the Microsoft Store, however, it has its own website created especially for the app, which is great.
This way, the software doesn’t have to rely on the Microsoft Store or doesn’t have to give them a portion of the profit earned through it.
In case you were wondering, we’re going to give you a brief explanation of what text formatting means, and what is consists of precisely.
Text formatting is the name of the process of changing either the size, color, or the content of a written text, and is usually associated with editing.
Most of the software that deals with texts has different fonts, dimensions, and other things that will make different parts of the text different from others.
Notepads are useful
As the title suggests, having a notepad to quickly write important information can be a life saver in many situations.
Taking notes of important details you out about will make sure you don’t lose the information later. You never know when you need someone’s number or name.
Additionally, people usually take notes during conferences, presentations, and other work-related things. Keeping track of metrics and numbers is the best way to increase productivity.
Digital versus paper
We all know that nothing beats paper, both when it comes to writing and reading. However, there are some benefits when using a digitalized notepad.
For instance, you’re never going to run out of it. You can create endless pages of text, delete and change them freely. The same cannot be said for paper, obviously.
More so, there’s another benefit. Accessibility and space! Your phone is much smaller than a notebook and occupies less space.
The above four mentioned are what we consider to be the best, but maybe we are mistaken and there are others equal or even better.
Given the fact that, for now, Windows 11 is simply a preview build, bug reports are flowing in large quantities, each day.
It just goes to show how much work this new operating system still needs, and why user feedback is critical in this early stage.
The silver lining here is that the community is constantly flagging these issues so that Microsoft can take action and actually solve them before the OS goes live.
Xbox Game Bar not properly recording
And speaking about Windows 11 bugs, users keep signalling major issues going on with the Xbox Game Bar. Apparently, there are a lot of things going wrong with this gaming integration.
The record feature is not working as it should and users are starting to get fed up with not being able to properly record their gameplay.
Microsoft Answers user Mr sideways reported that, although recording works for him, it doesn’t record fullscreen, but only shows a zoomed out version of what he is trying to actually record.
Quick question for the PC Xbox game bar. I’ve had issues with recording and it not capturing the gameplay on the complete screen. In this case, it will just be a zoomed-out video and isn’t zoomed in to the normal computer size. Is there something I’m doing wrong or is there a fix?
Troubleshooting the app from the system settings won’t do you any good, as it doesn’t fix this issue.
So, if you were thinking about capturing some awesome gaming moments using the Xbox Game Bar, on Windows 11, you better change your plans because there is no workaround or fix for this problem, yet.
You can’t disable the Xbox Game Bar on Windows 11
So we established that the Xbox Game Bar is far from functional on the new OS and there might some users that would just want to deactivate it, in order to spare themselves future disappointment.
However, while navigating the Windows 11 settings, you will not find such an option, unfortunately.
In conclusion, before Microsoft releases a new build, with applied fixes to all the issues and bugs that were flagged during this testing period, we have to accept that some features aren’t completely functional.
And this should come as no surprise, considering the state that Windows 11 is in right now, meaning that it is the earliest version of the OS, and everything that’s happening is somewhat normal for new software.
What issues have you stumbled upon, while using Windows 11? Let us know in the comments section below.
Recently, it has felt like Windows vulnerabilities have been piling up as various third-party endpoint connections lead to large swaths of personal information being compromised.
Fortunately, it seems Microsoft is aware of the latest compromises and is underway issuing updates and companion information on its known vulnerabilities.
Working from semi-oldest to newest, Microsoft published an update to PowerShell 7.0 and 7.1 to protect a .NET Core remote code execution vulnerability reported last week.
More specifically, Microsoft listed on its GitHub repository at the time that “a remote code execution vulnerability exists in .NET 5 and .NET Core due to how text encoding is performed.” As it stood, it vulnerable package is System.Text.Encoding.Web and left versions 4.00-4.5.0, 4.6.0-4.7.1, and 5.0.0 vulnerable.
Fortunately, Microsoft’s July 1 update can be applied to version 7.0 to 7.0.6 and version 7.1 to 7.1.3 and appears to protect against the new vulnerability. Meanwhile, Microsoft also claims that “Windows PowerShell 5.1 isn’t affected by this issue.”
Next up is the now infamous “PrintNightmare” remote code execution vulnerability that’s affecting Windows Print Spooler services. The “PrintNightmare” compromise is a bit stickier in that it deals with a more widely used Windows execution, printing.
By creating a middle-man setup between print processes and Windows, “An attacker who successfully exploited this vulnerability could run arbitrary code with SYSTEM privileges. An attacker could then install programs; view, change, or delete data; or create new accounts with full user rights,” according to Microsoft.
Microsoft has not gotten a handle on the “PrintNightmare” vulnerability it has issued an update on the situation via Twitter.
— Security Response (@msftsecresponse) July 2, 2021
Issuing CVE-2021-34527 to “PrintNightmare” means Microsoft can now also highlight some ways to mitigate exploitation while the company continues to work on a solution.
Administrators
Domain Controllers
Read Only Domain Controllers
Enterprise Read Only Domain Controllers
Certificate Admins
Schema Admins
Enterprise Admins
Group Policy Admins
Power Users
System Operators
Print Operators
Backup Operators
RAS Servers
Pre-Windows 2000 Compatible Access
Network Configuration Operators Group Object
Cryptographic Operators Group Object
Local account and member of Administrators group
There are also some recommended workarounds that can include disabling print spooler service or disabling inbound remote printing through Group Policy. To read the impacts of doing either option, visit the MSRC page here.
Last and the most recent Windows vulnerability includes NETGEAR firmware vulnerabilities that could, in Microsoft’s words, “lead to identity theft and full system compromise.”
Microsoft discovered the vulnerabilities in NETGEAR DGN-2200v1 series routers that can be used to compromise a network’s security structure.
More specifically, Microsoft’s Security Vulnerability Research team found three vulnerabilities in the router firmware that they have been able to reliably replicate.
However, working with NETGEAR, Microsoft and the router company were able to issue a critical security issue score (CVSS) of 7.1 9.4., to which NETGEAR has already begun issuing fixes. To read the full breakdown, Microsoft outlines unpacking the firmware, the codes to identify the specific vulnerabilities, deriving saved router credentials, how information is retrieved, and preparatory steps for prevention, here.
Microsoft is expanding the availability of its Together mode feature in Teams meetings. As spotted by Microsoft MVP Amanda Sterner, the company is rolling out a new update that will make Together mode available for all meeting sizes.
The Microsoft Teams desktop app launched Together Mode for meetings back in July 2020. Currently, the feature accommodates up to 49 people at a time, and it uses AI to place all participants in a shared background digitally. Up until now, the feature was enabled when 5 people, including the organizer, had joined the meeting. Thanks to this update, organizers will now be able to activate the Together mode option in small meetings with two or more participants.
To try out Together mode, users will need to navigate to the meeting controls available at the top of the meeting window. Then click on the 3-dot menu on the top right corner and finally select the “Together Mode” option from the list.
Overall, the new Together mode experience should help to make small meetings more engaging and effective for participants. In case you missed it, Microsoft announced in May that Teams users can now build their own Together Mode scenes using a newly built Scene Studio, and you can find more information on this support page.
Microsoft has revealed this morning the next wave of new Xbox Game Pass games coming to the catalog in July. This week, the construction and political simulation game Tropico 6 will be available on Console, PC, and Cloud on Thursday, July 8. On this same day, the Minecraft-like Dragon Quest Builders 2, which is already available on Xbox Game Pass for Console and PC will also become available on Xbox Cloud Gaming.
The MMA fighting game EA Sports UFC 4 will also join the EA Play list on July 8, meaning that it will also be available on Xbox via EA Play for Xbox Game Pass Ultimate subscribers. Two new games will also join Xbox Game Pass on July 15 with Farming Simulator 19 and the indie action game Bloodrots, and unlike EA Sports UFC 4, both of them will be available on Xbox, PC, and Xbox Cloud Gaming.
Xbox Cloud Gaming is now generally available on Android, iOS devices, and PCs in 22 markets, and all you need to try it is an Xbox Game Pass Ultimate subscription that costs just $1 for the first month. There are currently over 100 cloud-enabled games in the catalog, and many of them support touch controls on Android, iOS, and Windows devices. Xbox Game Pass Ultimate remains excellent value for gamers, and stay tuned for more Xbox Game Pass announcements later this month.
In a bit of a surprise move, the popular drawing app, Autodesk SketchBook, has rebranded as Sketchbook and been spun off from Autodesk into its own company, Sketchbook, Inc.
“After careful consideration and evaluation, we found the perfect home for SketchBook with a company formed by people who previously built and evangelized the SketchBook brand,” Autodesk’s Thomas Heermann wrote in a blog post. “This company, appropriately named Sketchbook, is focused wholly on the health and growth of SketchBook and its community.”
Since this announcement was made, the listings for the Sketchbook app have begun to update in app stores across all of its supported platforms from Android and iOS to Windows 10. With the update, Sketchbook will be switching back to being a paid app, just over three years since it changed from paid to free. No subscription model is planned.
As of the time of this writing, Android and iOS users who currently have the app in their accounts will continue to receive updates going forward (presumably at no charge) while those on a Mac computer will need to upgrade to the new paid Sketchbook Pro app. The original Sketchbook app should still work though, it just won’t get any updates. Those who downloaded the app directly from the Autodesk website or via the Amazon app store are in the same boat as Mac users.
The original app listing for the free Autodesk SketchBook app has been removed from the Microsoft Store app store while a new listing for the paid Sketchbook Pro app has appeared as a separate product currently being sold for $19.99. An official blog post is encouraging Windows users to wait before buying the new app as the company is currently talking with Microsoft about how to transfer ownership to owners of the original app.
Regardless of what happens with the new Microsoft Store version of Sketchbook, the original app should still work as usual. It will no longer receive updates though.
Sketchbook has been one of the more popular digital drawing apps in the market for over a decade now and was one of the first of such apps to launch on Apple’s iPhone in 2009 before eventually coming to Microsoft’s Windows App Store in 2012. Last year, Sketchbook attracted over 10 million monthly users across all of its supported devices.
There’s no question that Windows 11 is vastly improved from the old Windows 10. However, many of our readers are asking if the HDR feature on Windows 11 is better optimized and that’s what we’re discussing in this article.
The short answer is that Windows 11 improves HDR for gaming, movies, and TV content substantially but let’s see more about that.
What do I need to use HDR on Windows?
HDR is an acronym for High Dynamic Contrast and if you enable it on your PC, the image on your display will have brighter and more vivid colors and a better definition image.
However, HDR is not available for all devices. You will need a compatible display and a capable graphics card.
Here are the requirements to use HDR on your computer and an external display:
An HDR display supporting HDR10
DisplayPort 1.4 or HDMI 2.0 or higher
Integrated or dedicated GPU with PlayReady 3.0 support such as:
Intel UHD Graphics 600 series or higher
Nvidia GeForce 1000 series or higher
AMD Radeon RX 400 series or higher
Windows 11 has a new, Auto HDR feature that you may turn on and enjoy the improved graphics but that is only if your machine fulfills the above requirements.
Is Windows 11 HDR optimized better than Windows 10?
As a well-known fact, with Windows 10, leaving the HDR option enabled on your PC kind of messes up the overall visual experience, making things washed out and generally unappealing.
This no longer seems to be an issue on the new OS. Even with games, there are significant improvements to how this setting affects visuals.
With the Use HDR option on, Windows will automatically ensure that the HDR is on when you launch a game.
While Auto HDR is on, supported games will be automatically upscaled, and the games that won’t support such high resolution will display SDR, without having to toggle it every single time.
Windows 11 HDR is better on a good display
HDR manifests itself at the system level. In other words, the Auto HDR option on Windows 11 is affecting all the content on your display.
However, we reached a definitive matter here: the display! If your display has a lower brightness than 1000 nits or a low contrast, Auto HDR won’t make much of a difference.
We also remind you that your display has to be at least HDR 10 compatible and connected to the PC through HDMI 2.0 or DisplayPort 1.4 for Auto HDR to work on your Windows 11 device in the first place.
We’re all curious to see how Microsoft will deal with the increasing graphics demands of games, movies, and other software, now that 4K is no longer the maximum threshold.
Are you running Windows 11 on a device that supports HDR? If so, tell us about your visual experience so far, in the comments section below.
There can be many issues regarding the wireless N routers you have in your home but following this tutorial below will explain exactly what you need to do in order to fix the problems you are having and get your wireless N router.
This issue you are having with your wireless N router is usually caused by upgrading to Windows 10 and in order to fix it, you will need to adjust some IP settings for the router in Windows 10.
You also need to check your router and your connections if they are in good parameters in order to get it up and running in no time on the Windows 10 operating system.
How can I fix problems with wireless N routers in Windows 10?
1. Turn off/restart your router from the power socket
First, you will need to reboot your Windows 10 device.
Check and see if the wireless connection were made properly and you don’t have the limited connectivity exclamation mark.
If you still have the exclamation mark on the wireless internet connectivity you will need to unplug the wireless N router from the power socket.
Wait 30 seconds for the router to power down correctly.
Plug in the wireless router to the power socket now.
Wait approximately 30 seconds and try to connect to the wireless router.
Check and see if your Internet connection works now.
If you have limited connectivity on the wireless N router it means that your Windows 10 device is connected to the wireless router but the Internet connectivity is not working.
2. Check IPv4
Type command in Windows search and click on Run as administrator to start Command Prompt with full privileges.
Write the following command and press Enter to run it: Ipconfig /all
You will have there a list in which you should have an IP Adress (IPv4).
If you have an IP address that means it can establish a connection with the router.
If the connection is working then you will need to update the wireless card driver you use for the Windows 10 and also check if there are any updates available on the Wireless N router you are using.
This is a simple method to check whether or not you can establish a connection with a router so perform the easy steps above to do that.
3. Reset your router
You will need to try to reset the Wireless N router.
This is usually done via a small button at the back of the router but for a more detailed explanation, read the Wireless N router manual.
After the reset is completed, reboot your Windows 10 device.
Connect to the Wireless N router and see if you have the same connection issues.
Resetting the router is a basic procedure in such cases and in can be easily performed by pressing the reset button on the router.
Common wireless connection issues in Windows 10
It is important to mention that some of these problems may also occur because of other system errors. You may want to check your computer if it connects to the router and if it is not a wireless adapter or access point issue.
It may be that the problem is in your Wi-Fi adapter range and in this case, check our dedicated article which will guide you in order to fix these Wi-Fi range problems.
These are the methods that you can try in order to fix your Wireless N router and make it work as it should with the Windows 10 operating system.
If you’re buying a new Surface in hopes of running Windows 11, Microsoft has your back. The company recently updated its store listings for Surface devices with a new banner to indicate compatibility with the next-generation operating system.
As of right now, the majority of the “modern” Surface devices from the last three years are compatible with Windows 11, per the store listings. Looking at just the “Free upgrade to Windows 11” banner at the top of the product listing, the following devices are getting Windows 11: Surface Laptop 4, Surface Book 3, Surface Laptop Go, Surface Pro 7/7+, Surface Pro X, and Surface Go 2.
Currently, it looks as though the Surface Studio 2 is the only “modern” Surface that is still up for sale in the Microsoft Store that won’t be getting Windows 11. Though not listed in the Microsoft Store, Surface Pro 6, Surface Laptop 3 and Surface Book 2 are eligible for the WIndows 11 update, too, according to PCWorld. Everything else is out of the picture and won’t work with Windows 11, officially.
You probably already know why, but this limit is because Microsoft has some strict requirements for Windows 11. That includes TPM 2.0, as well as 8th generation Intel or Ryzen 2000 and newer CPUs. A lot of Surface devices aren’t including in that range, but you can always try the Dev Channel of the Windows Insider program workaround to beta test Windows 11 on ineligible devices, then go back to Windows 10 once the OS ships.
A week ago, Microsoft announced a visual refresh of its Office apps for Windows 10 and Windows 11, with a new design language that looks consistent with the upcoming Windows 11 launching later this year. Microsoft asked Office Insiders to start testing this new visual refresh using a “Coming Soon” toggle in the top right corner of the Office apps, but the redesigned apps were nowhere to be seen last week.
The Office Insider team has since apologized and promised that the much-anticipated visual refresh will make its debut later this week in a new build coming to Beta Channel Insiders. Once it’s available, you can except a coherent user interface across Word, Excel, PowerPoint, OneNote, Outlook, and other Office apps, with a new neutral color palette, a customizable ribbon, and rounded corners.
This new version of Office for Windows will also match your Windows theme and Dark Mode will look really good in Word. Office Insiders will also notice that the Quick Access Toolbar is now hidden by default to simplify the UI across the Office apps for Windows. While Microsoft will be listening to user feedback to improve this visual refresh ahead of its general availability, Insiders will be able to turn the new design on and off by using the “Coming Soon” feature.
In case you missed it, Microsoft also released last week the first ARM64 build of Office for Windows 11 on ARM testers. This build was also slightly delayed, but it brings some very welcome performance improvements on Qualcomm-powered PCs such as Microsoft’s Surface Pro X tablets.
Civilization 5 is a great game, but many users reported that Civ 5 video settings are not saving. This can be a major problem, especially if the game isn’t running properly, and you need to change the video settings.
However, there are ways to fix this problem, and in today’s article we’re going to show you how to do it properly, so be sure to follow our instructions.
What can I do if Civ 5 video settings are not saving?
1. Update your graphics card driver
If your video settings are not saving in Civilization 5, your graphics card drivers may be causing this issue.
To fix this problem, we suggest updating your graphics card drivers with specialized driver updater software.
2. Run the game in Compatibility mode
Navigate to the Civilization 5 installation directory. By default, it should be: C:\Program Files(x86)\Steam\SteamApps\common\Sid Meier's Civilization 5
Locate the game launcher, right-click it and choose Properties.
Navigate to the Compatibility tab.
Check Run this game in compatibility mode for and select Windows 7 or older from the list.
Click on Apply and OK to save changes.
After making these changes, check if the problem with saving settings is gone.
3. Try manually changing the .ini file
Navigate to the following directory: C:\Users\UserName\Documents\My Games\Sid Meier's Civilization 5\
Open GraphicsSettingsDX11.ini or GraphicsSettingsDX9.ini file depending on the version that you’re using.
Now edit the file to change the settings.
Save changes.
This is an advanced solution, and in order for it to work, you need to make sure that you change the values in the .ini file correctly.
This is a simple workaround, but it might help if Civ 5 video settings are not saving.
4. Disable Controlled folder access
Press Windows Key + S and enter folder access. Select Controlled folder access from the list of the results.
Not set Controlled folder access to Off.
After disabling this feature, check if the problem is still there. Keep in mind that disabling this feature in Windows Defender can make your PC slightly vulnerable to ransomware.
Therefore, if you choose to disable it, be sure to remain vigilant while browsing the web.
If Civ 5 video settings are not saving, it’s possible that you don’t have the access to the directories that hold the configuration files or that your drivers are out of date.
We hope that this guide helped you fix this problem on your PC. And if Civilization V won’t launch, then we’ve got a dedicated guide as well.
Did you find a way to fix this issue on your own? Feel free to share it with us in the comments section below.


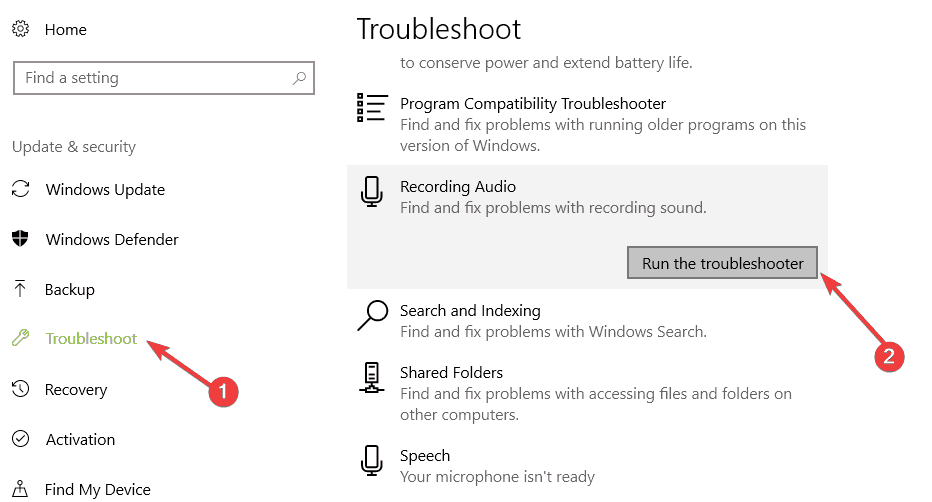
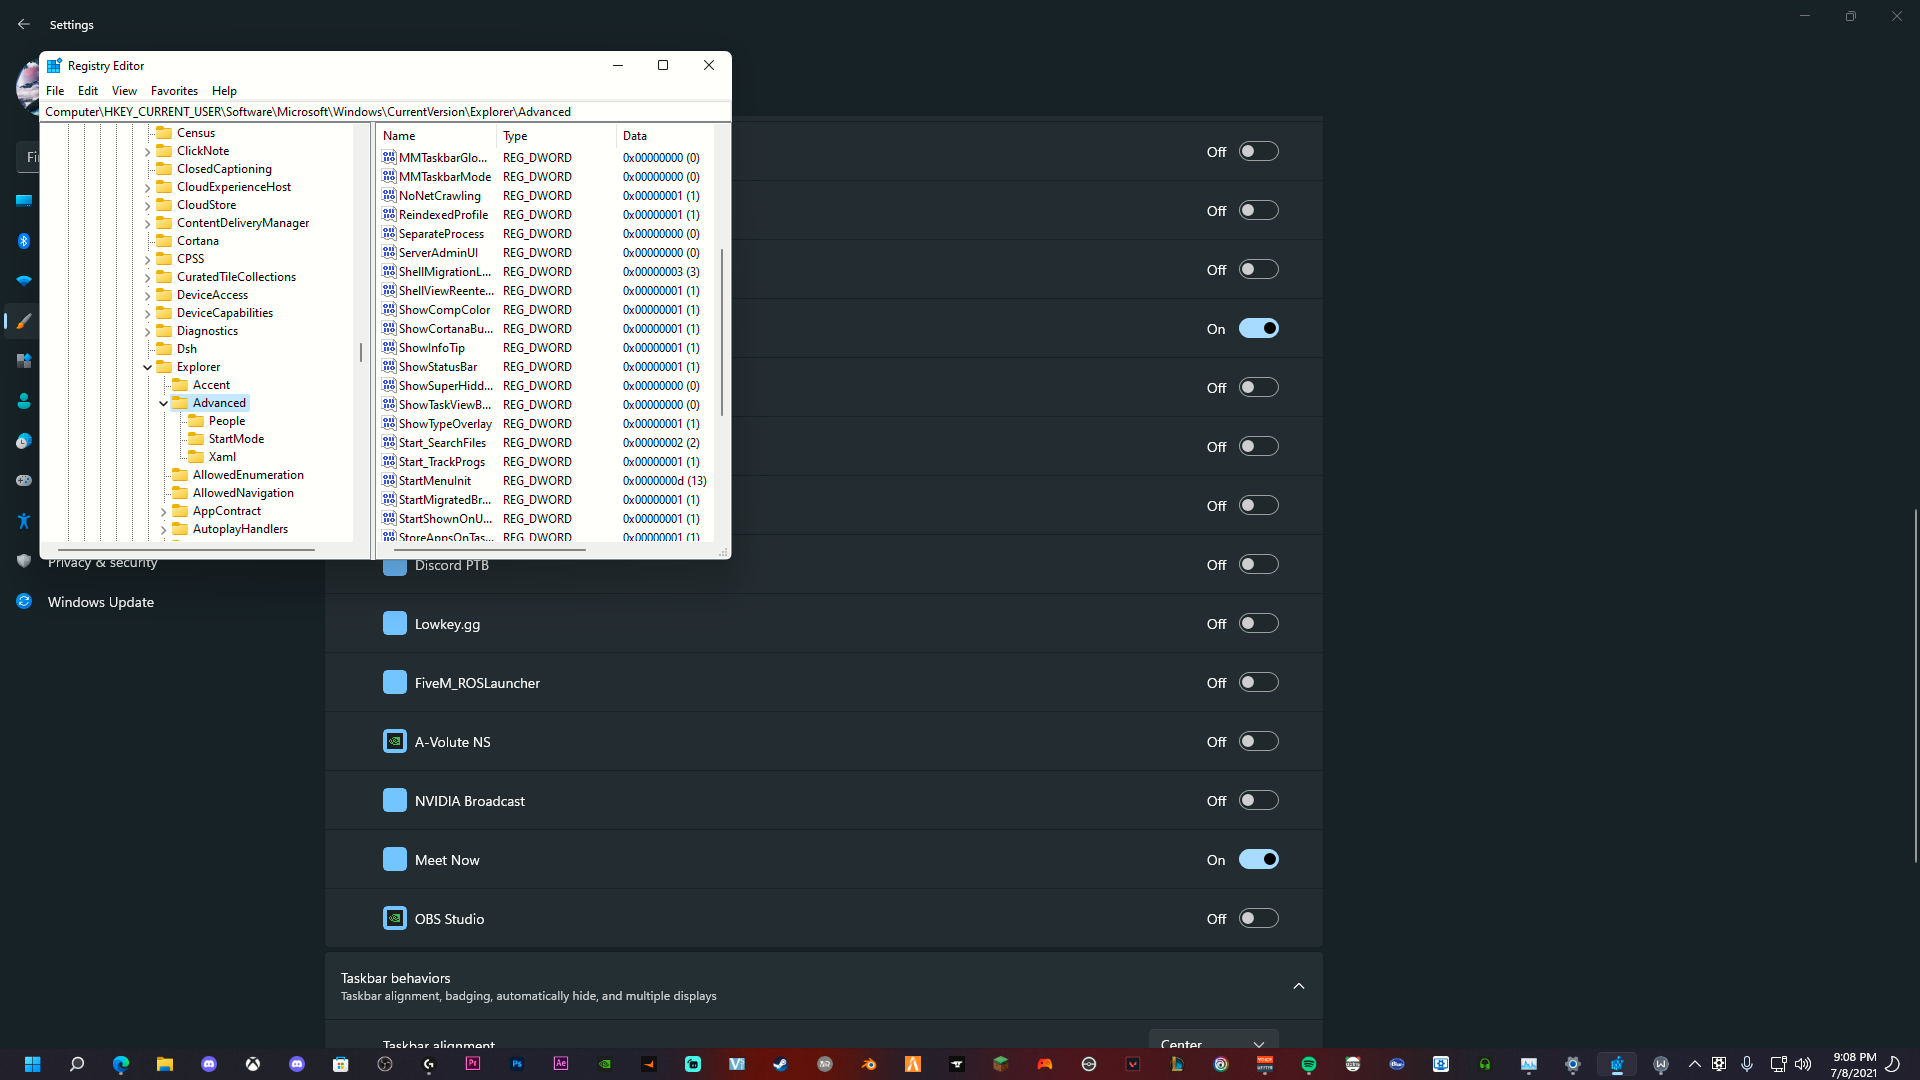
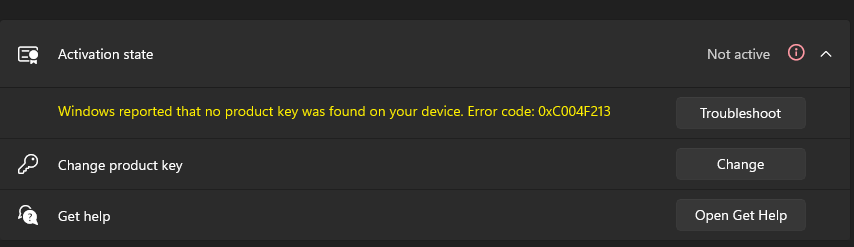

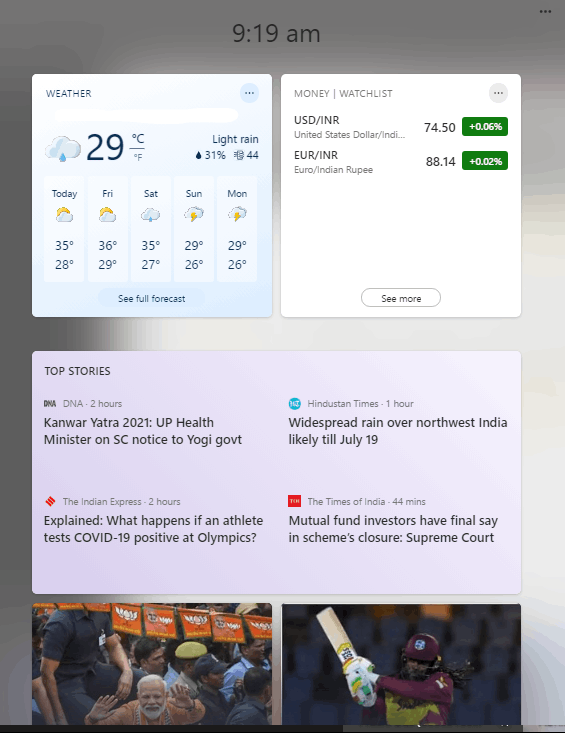
![FIX: Your location has recently been accessed [Easy Guide]](https://windowsreport.com/wp-content/uploads/2021/08/FIX-Your-location-has-recently-been-accessed-Easy-Guide.jpg)


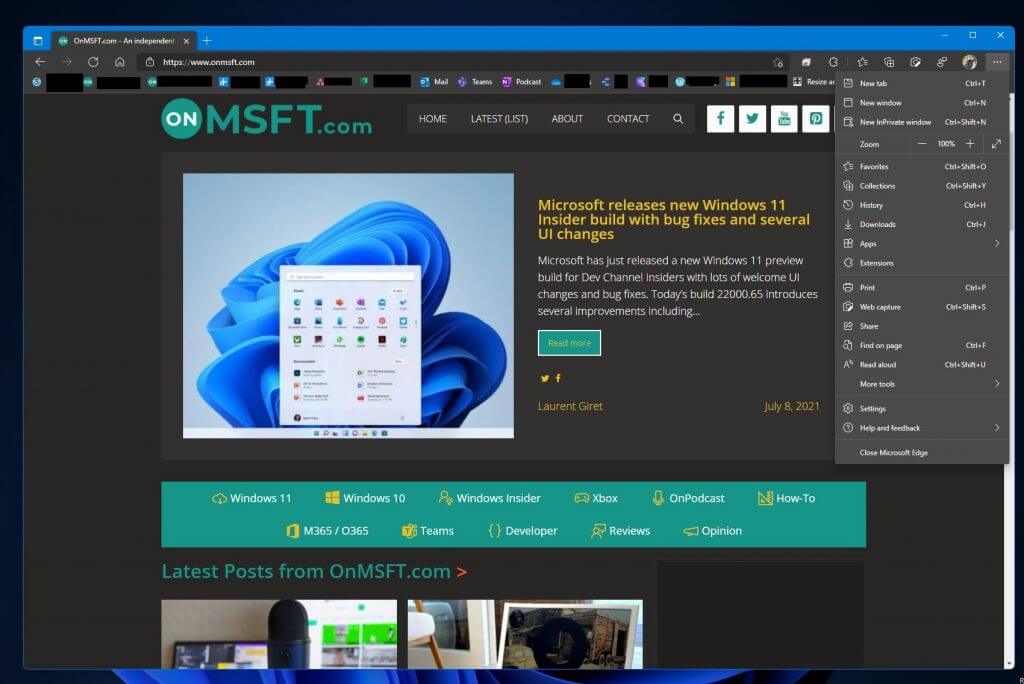
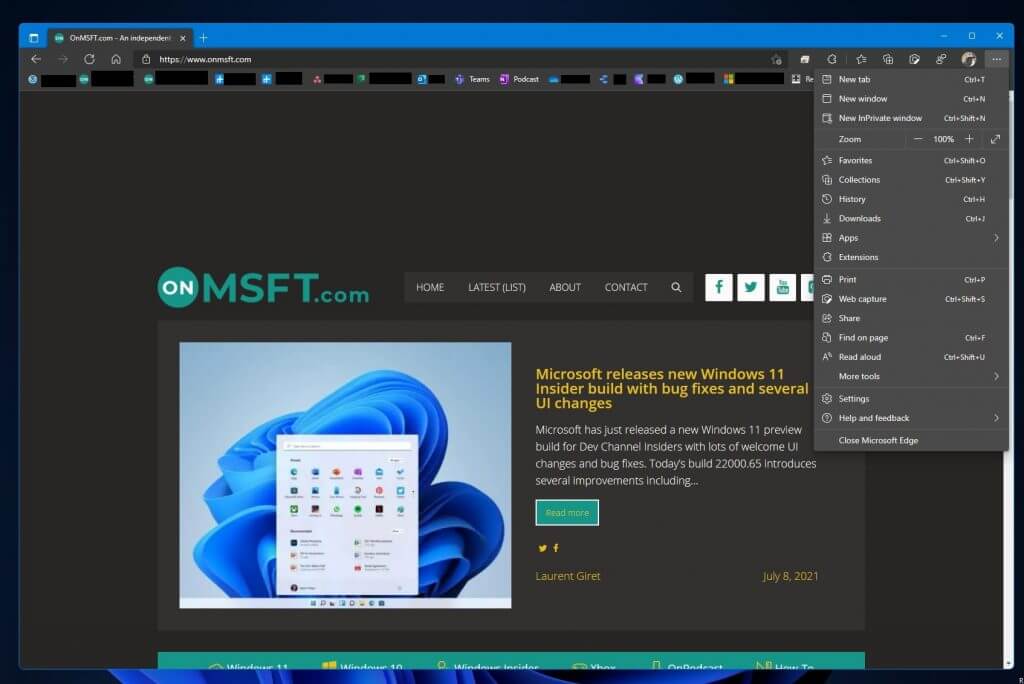
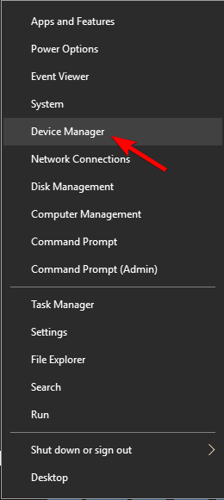


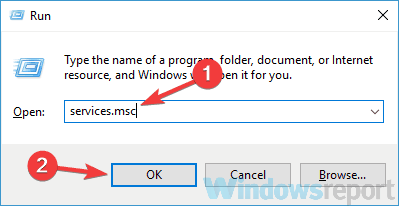





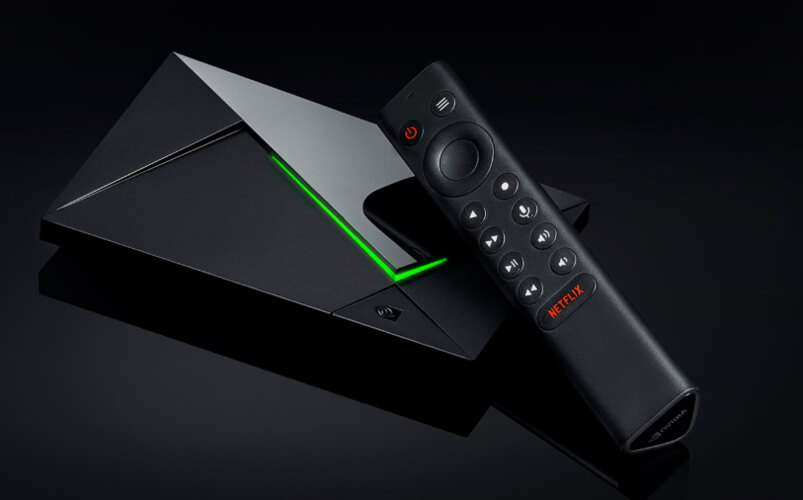

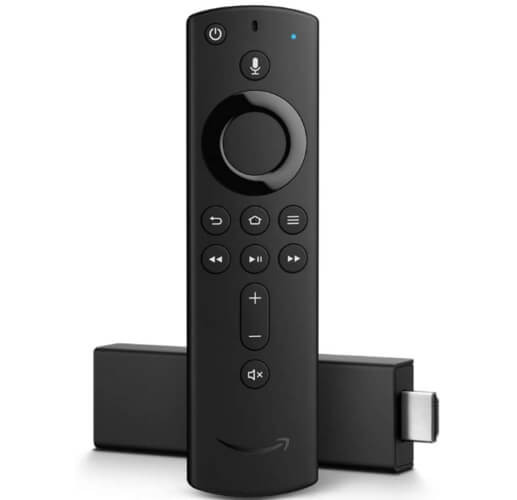
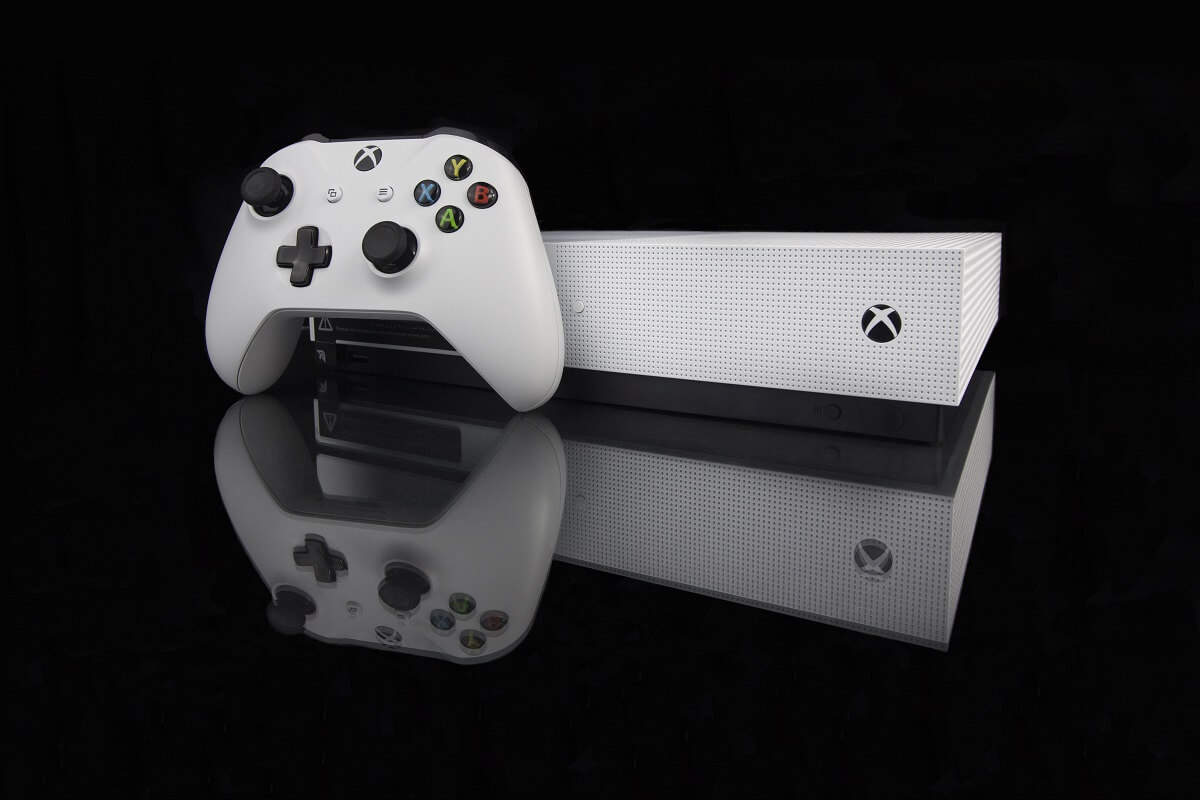
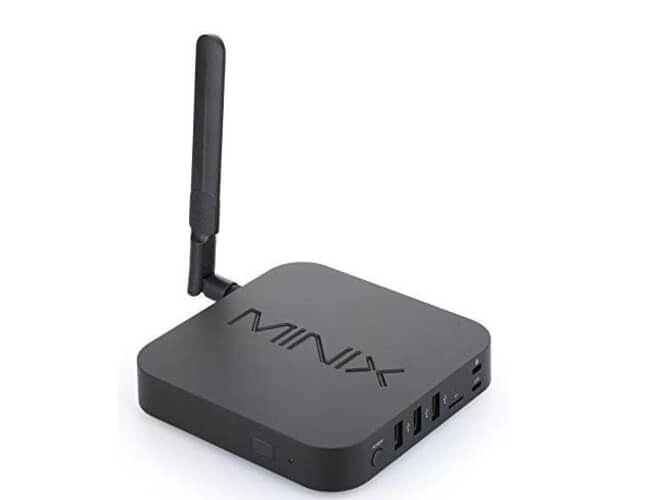
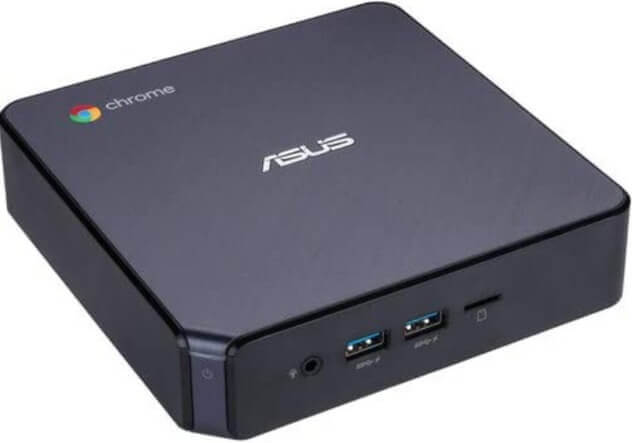
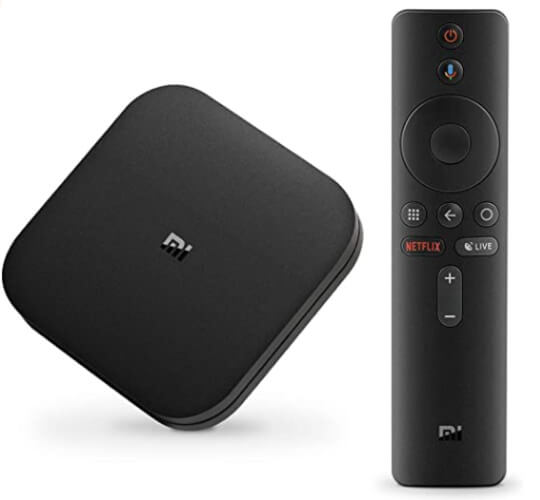
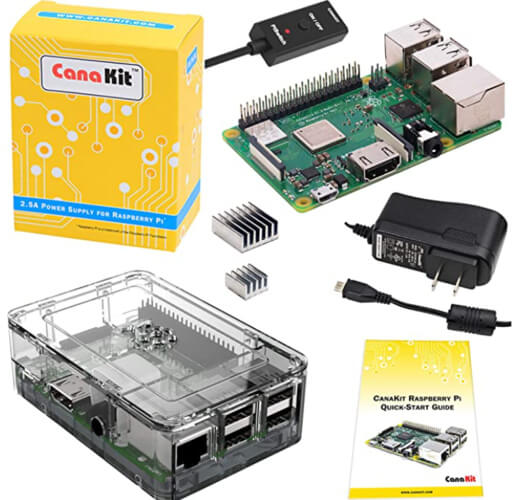
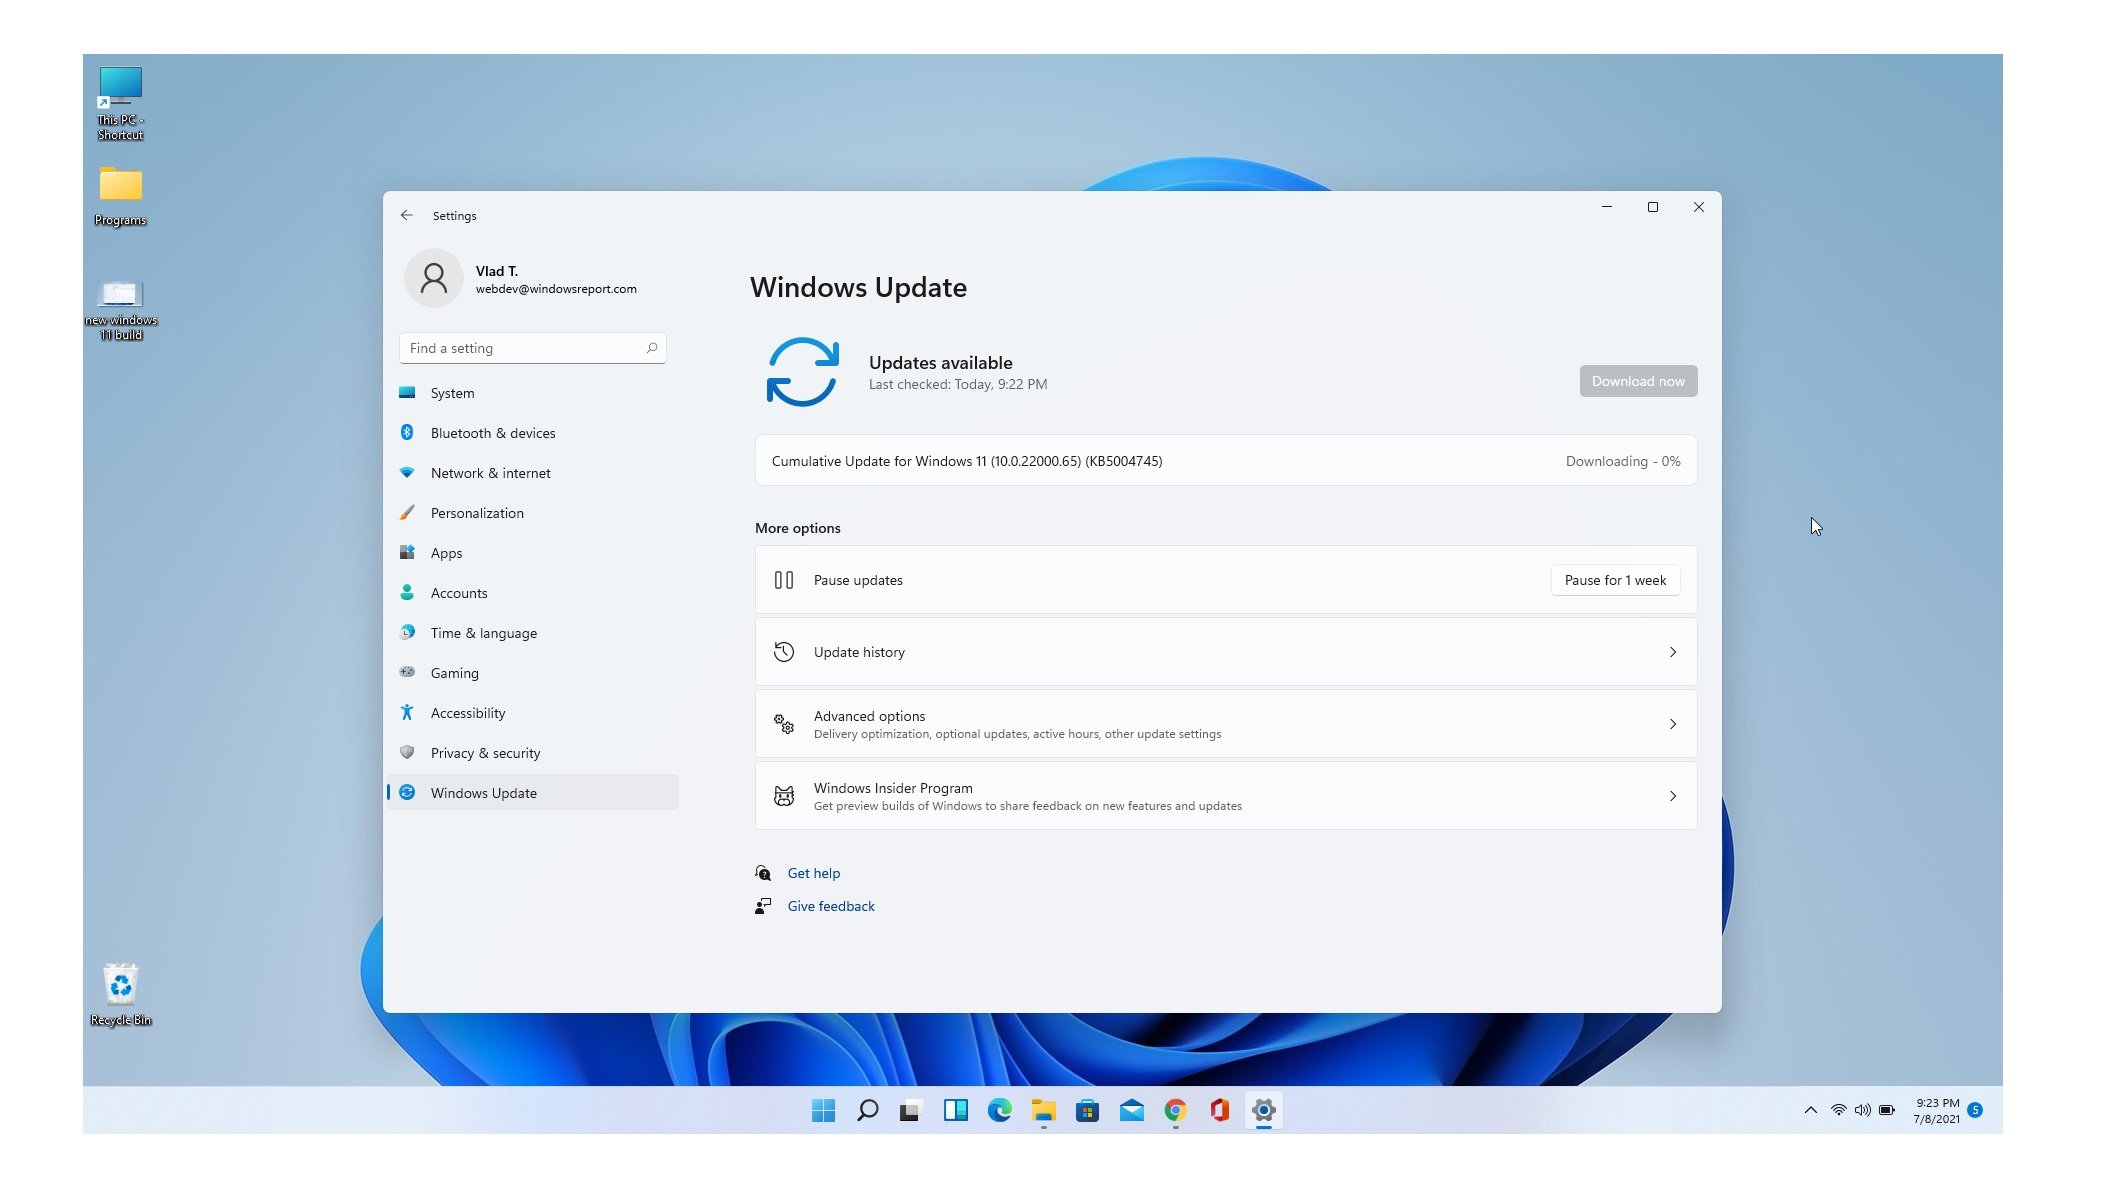
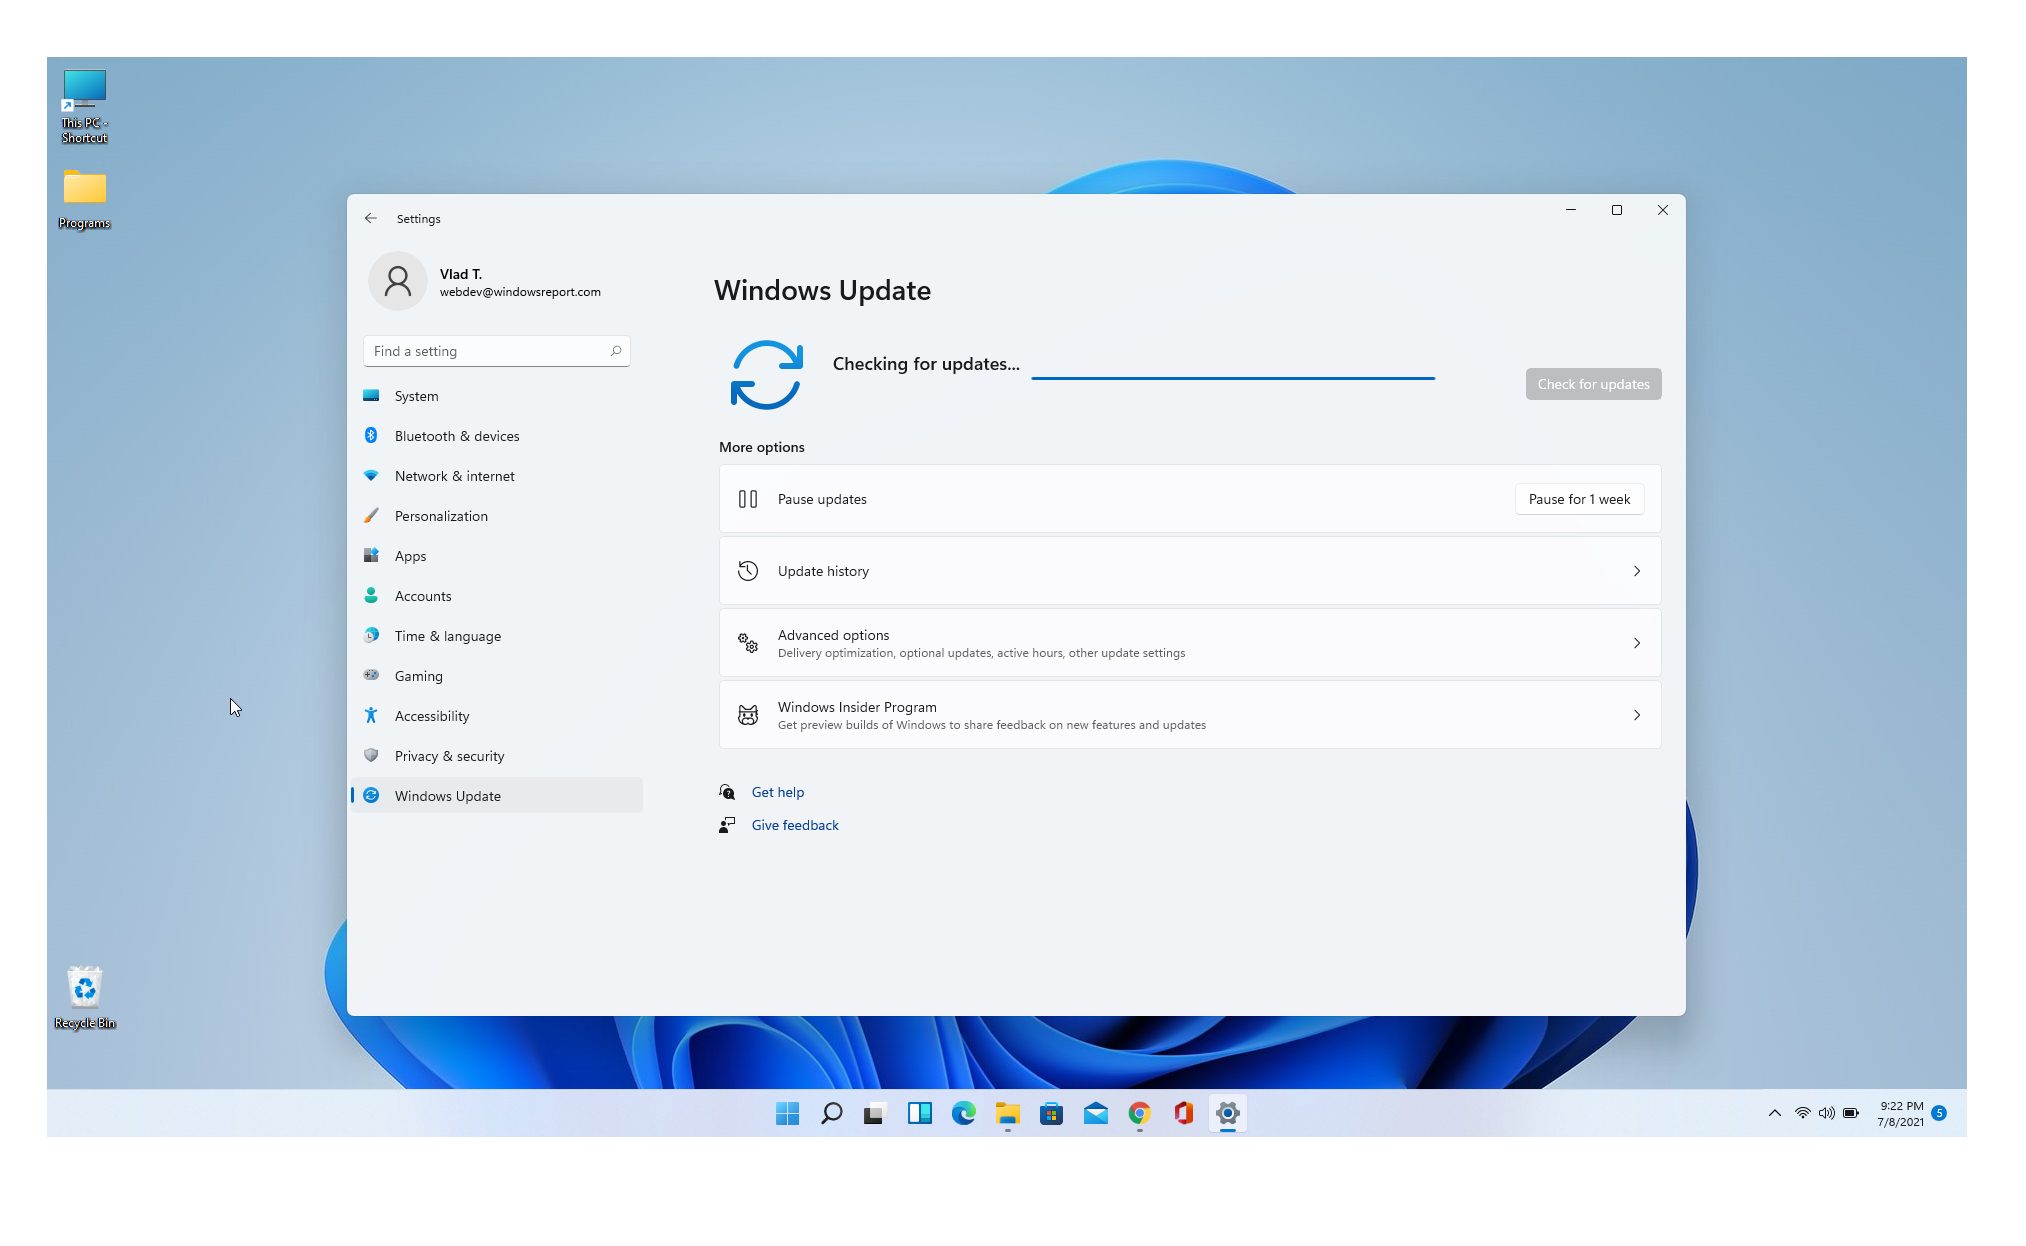

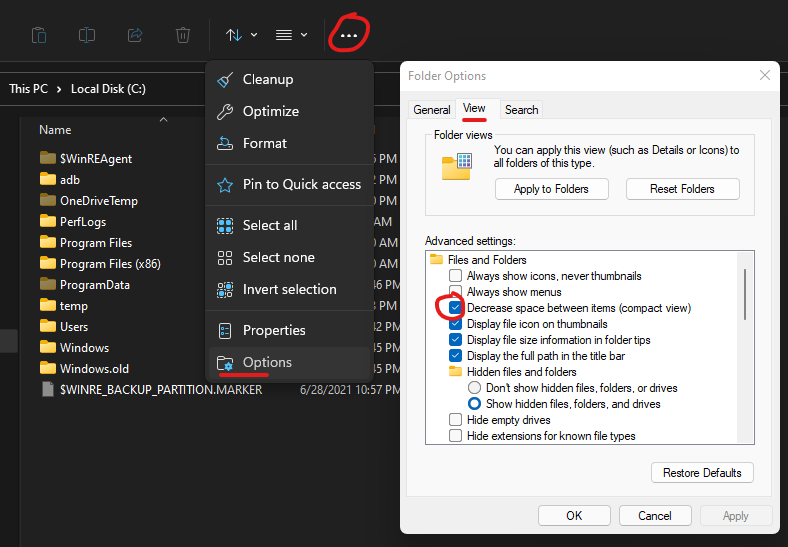



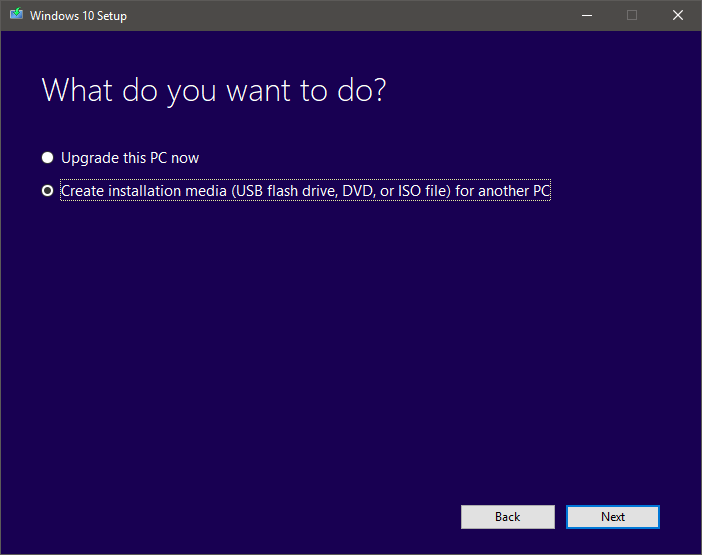


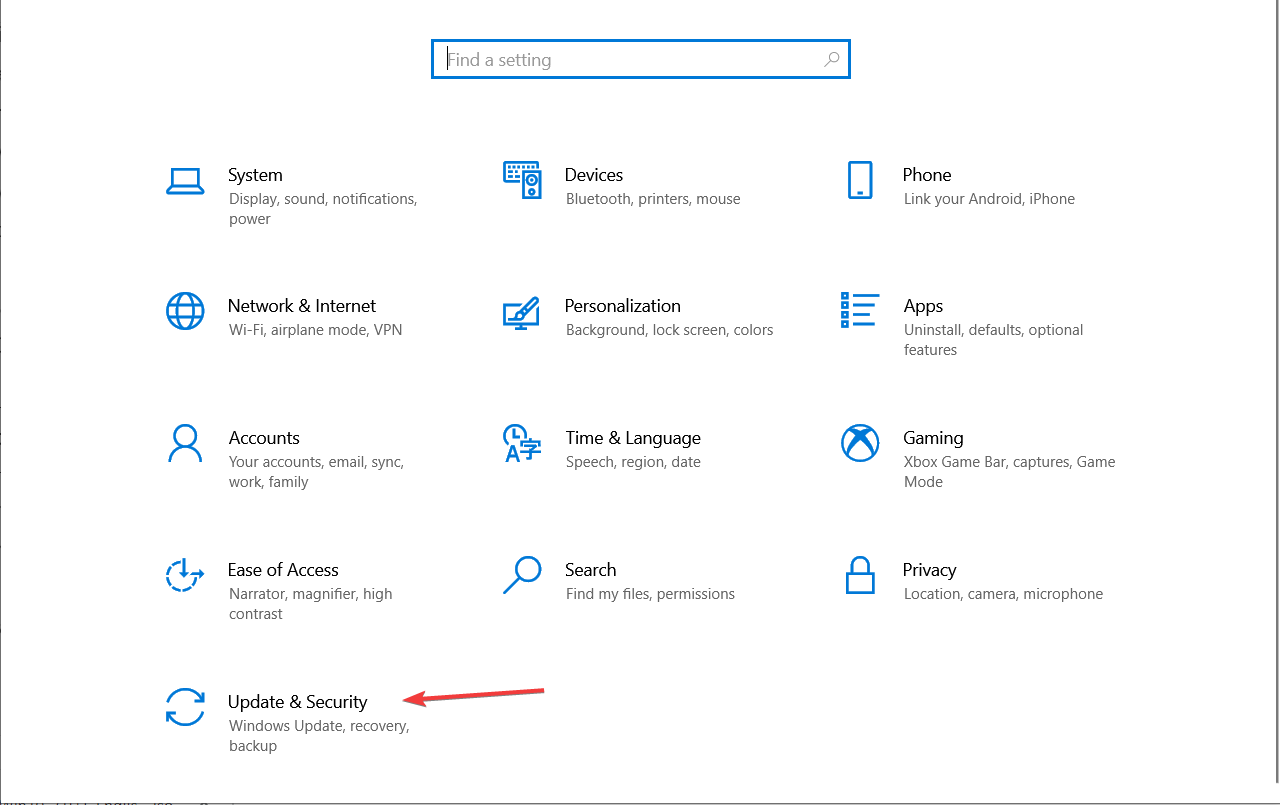

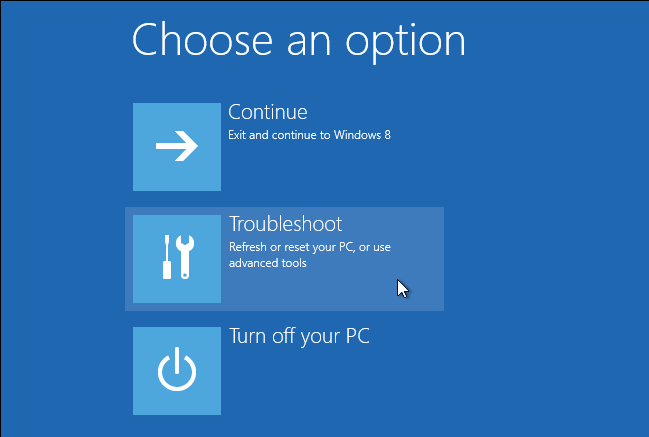


![FIX: Mouse pointer disappears in Windows 8, 10 [Easy Guide]](https://windowsreport.com/wp-content/uploads/2018/07/FIX-Mouse-pointer-disappears-in-Windows-10-Easy-Guide.jpg)
![FIX: An error has occurred message in Bluestacks [Log in]](https://windowsreport.com/wp-content/uploads/2019/02/Bluestacks.jpeg)
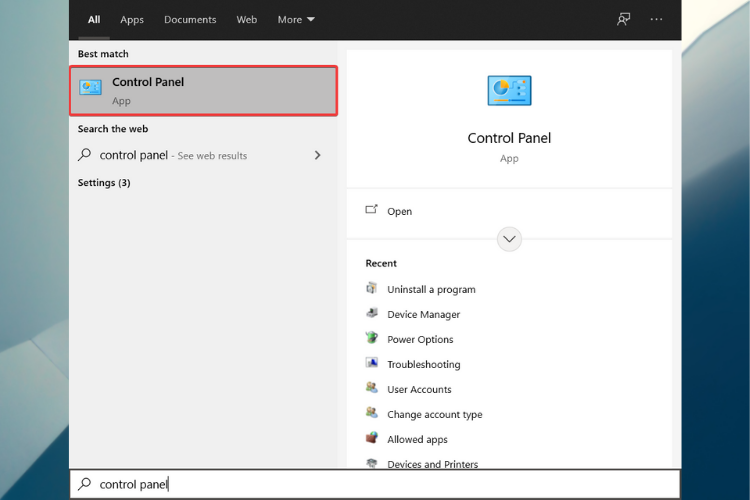
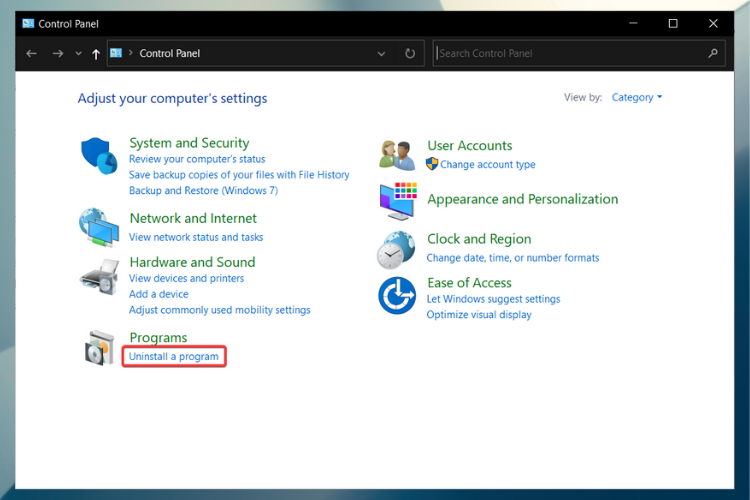




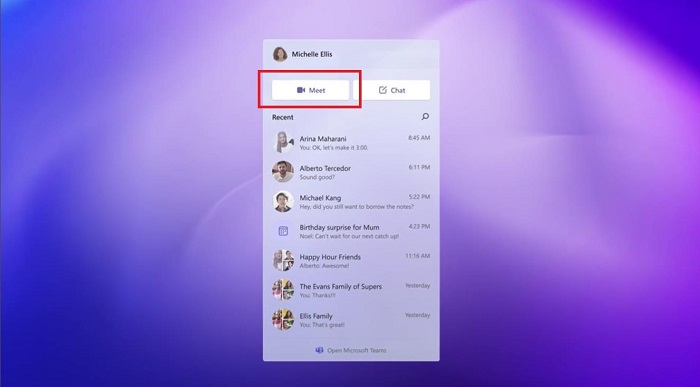
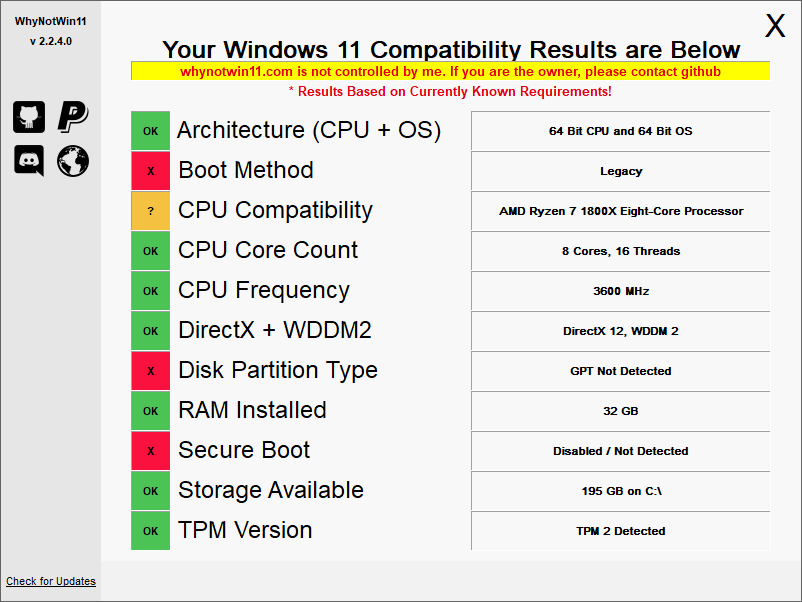


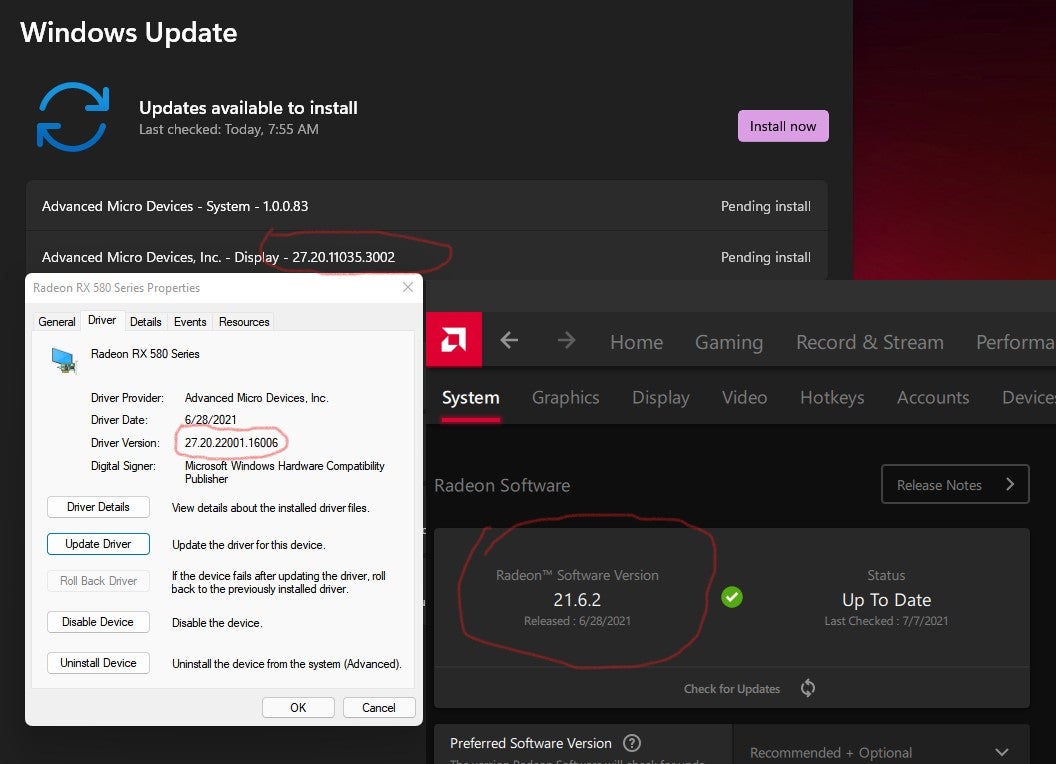
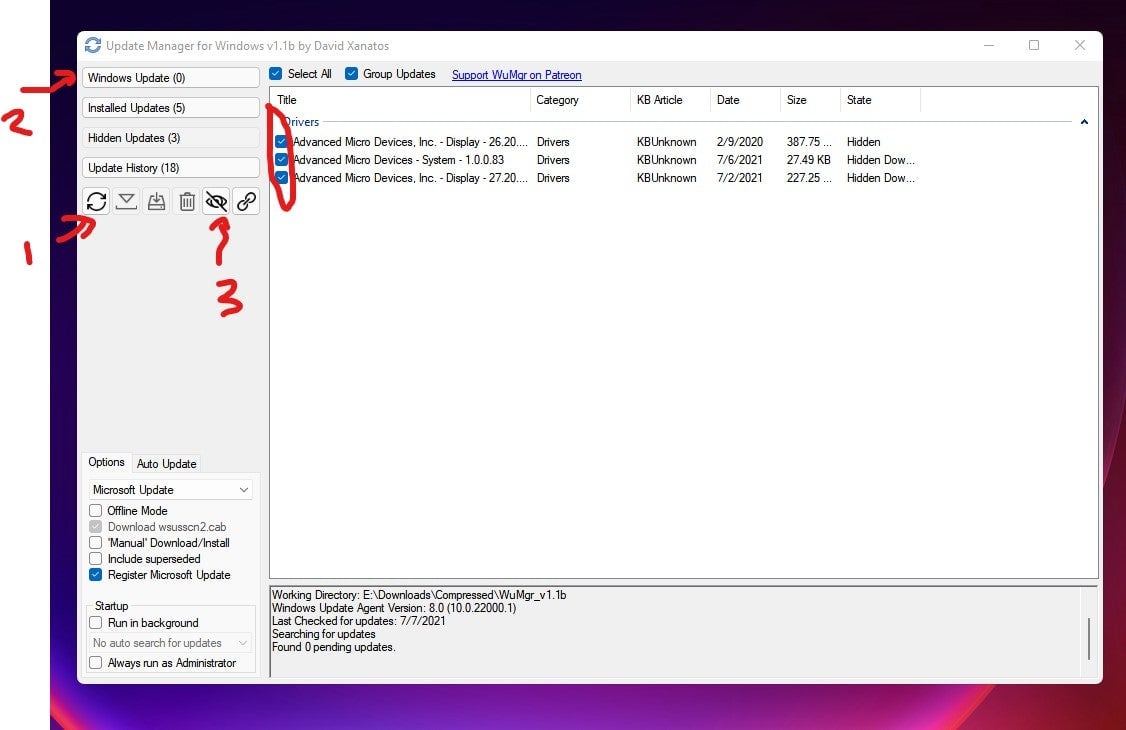
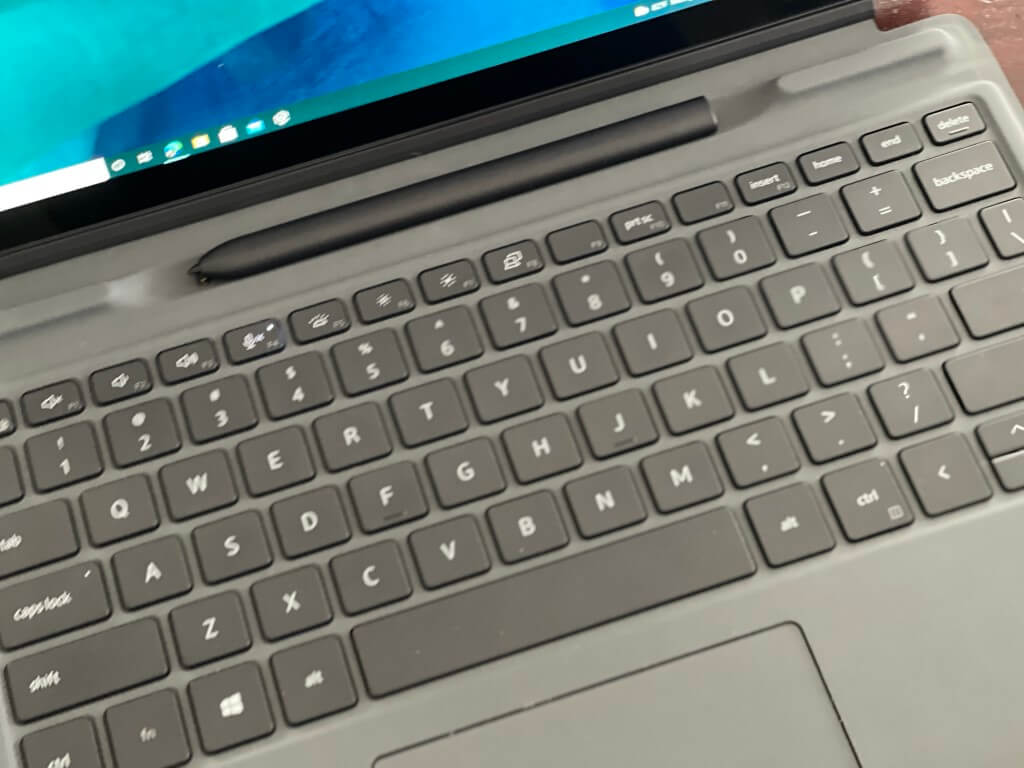
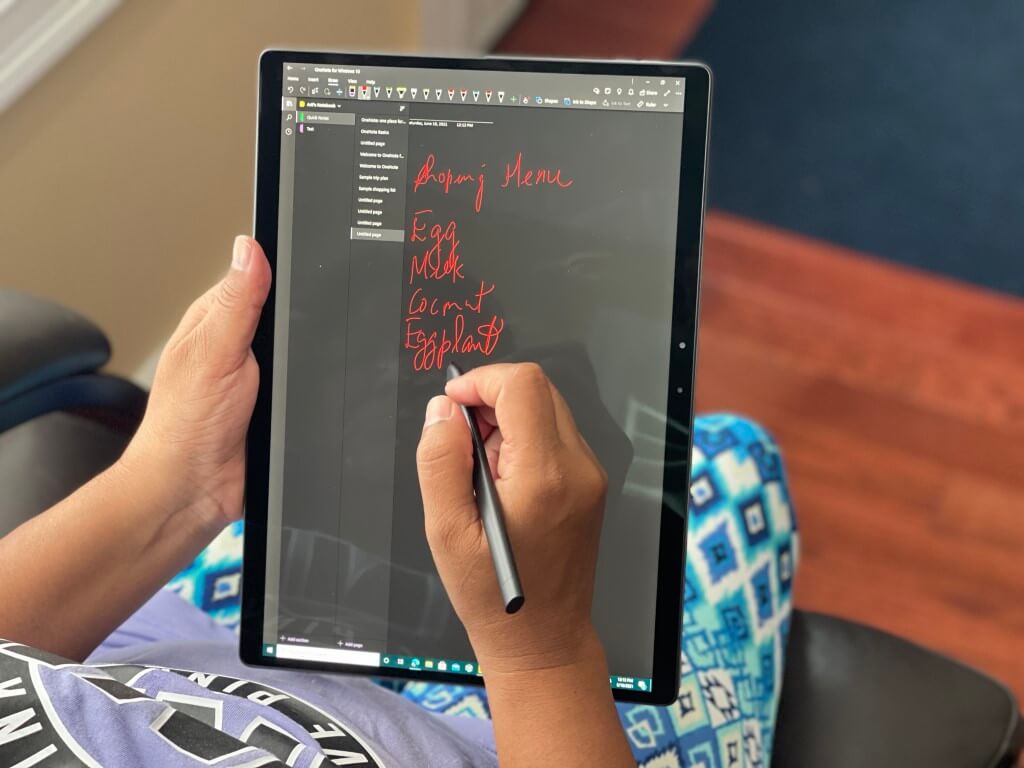
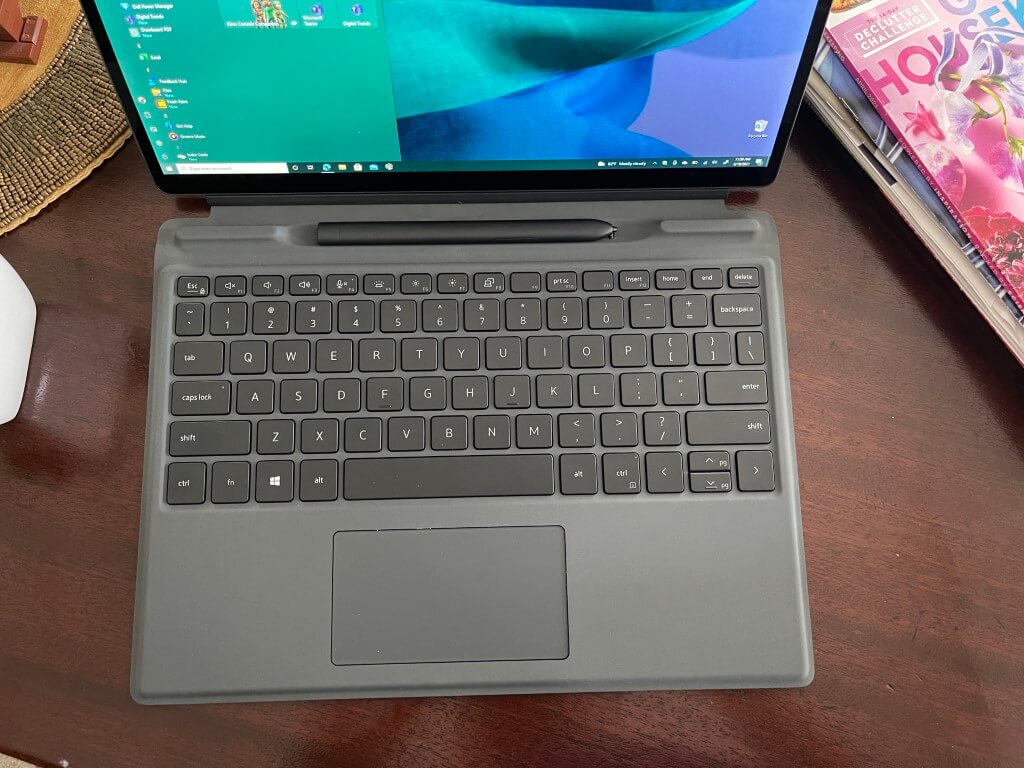
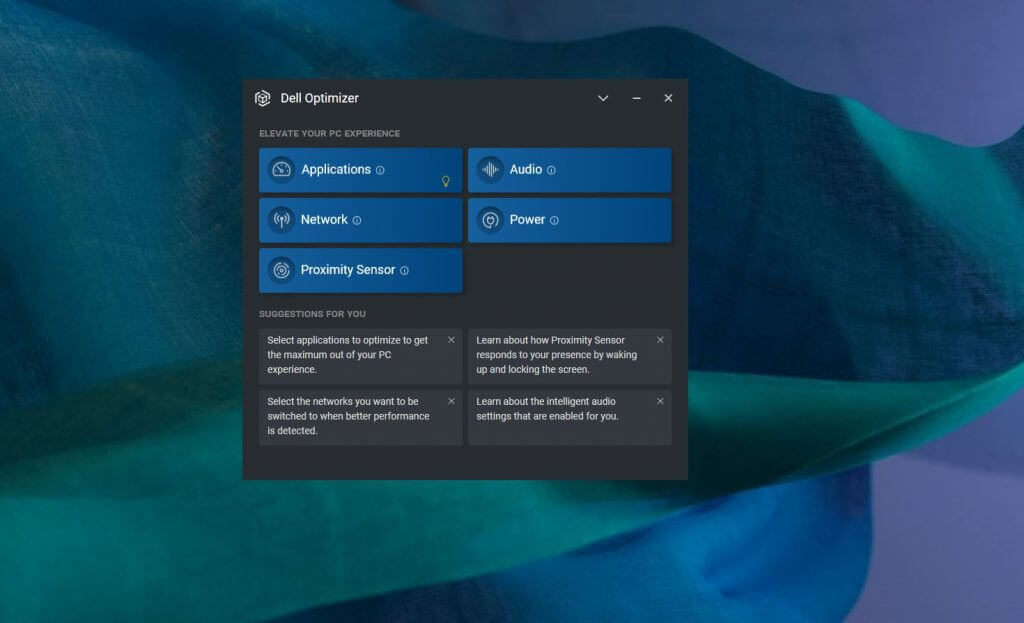
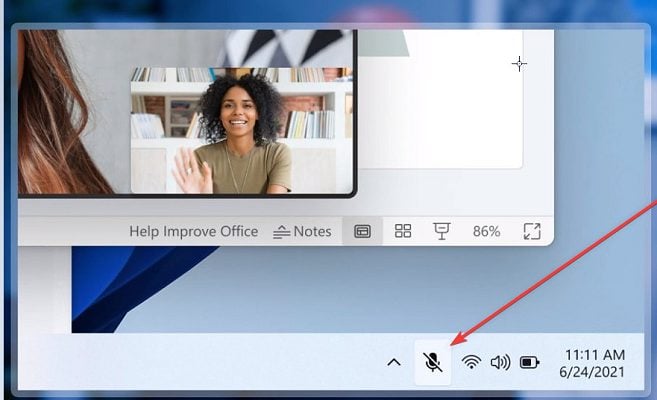
![BitLocker’s Decryption Not Working [Expert Fix]](https://windowsreport.com/wp-content/uploads/2019/07/BitLockers-decryption-not-working-EXPERT-FIX.jpg)





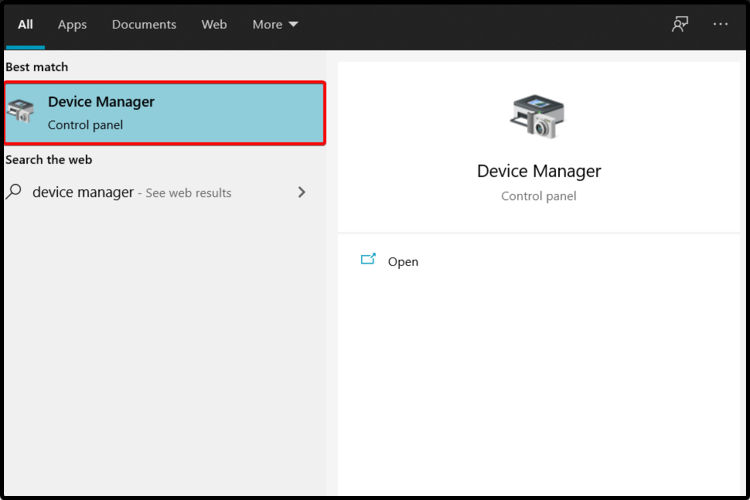
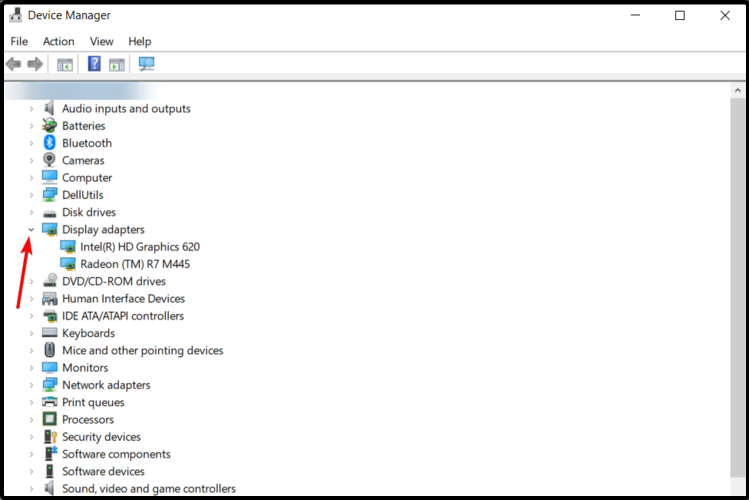

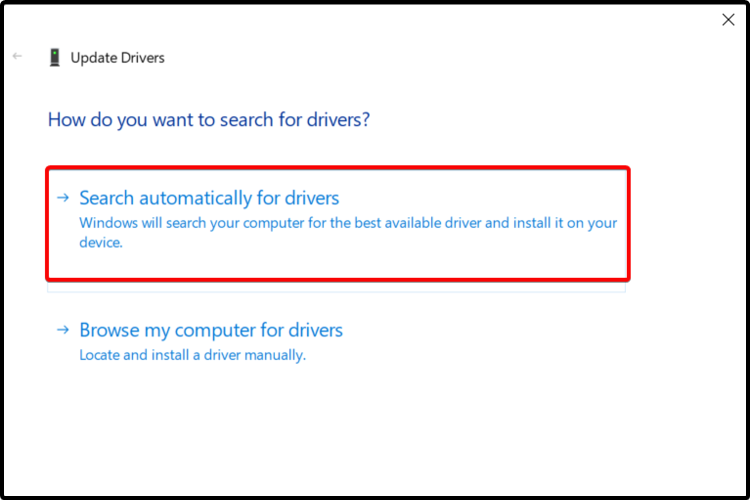
![Compatibility View Settings on Windows 11 [Enable/Change]](https://windowsreport.com/wp-content/uploads/2021/06/Enable-Compatibility-View-settings-in-Windows-11.jpg)

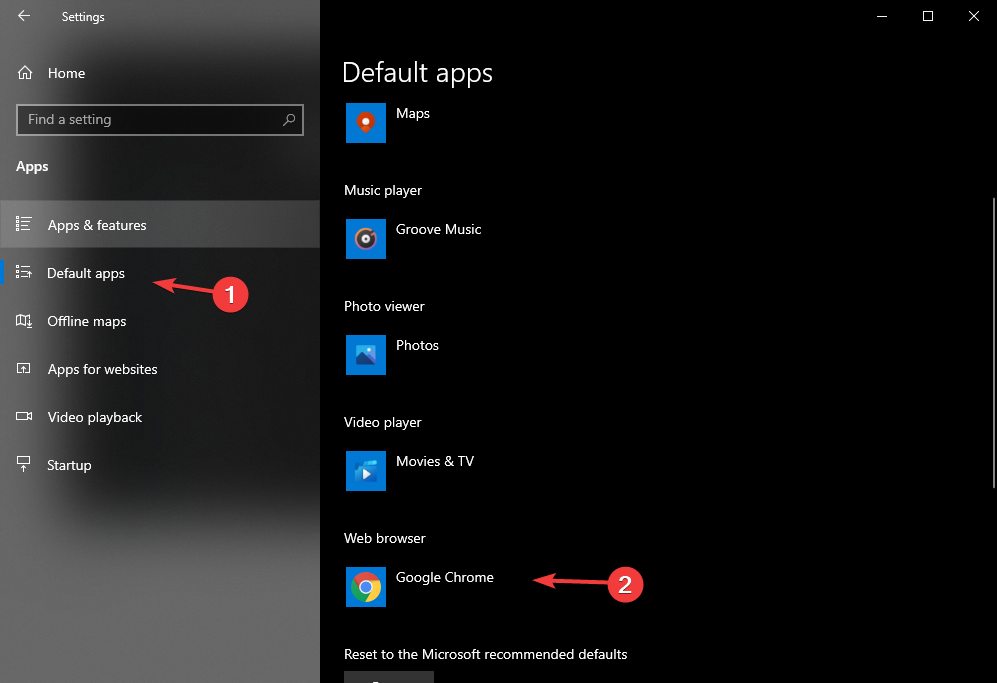













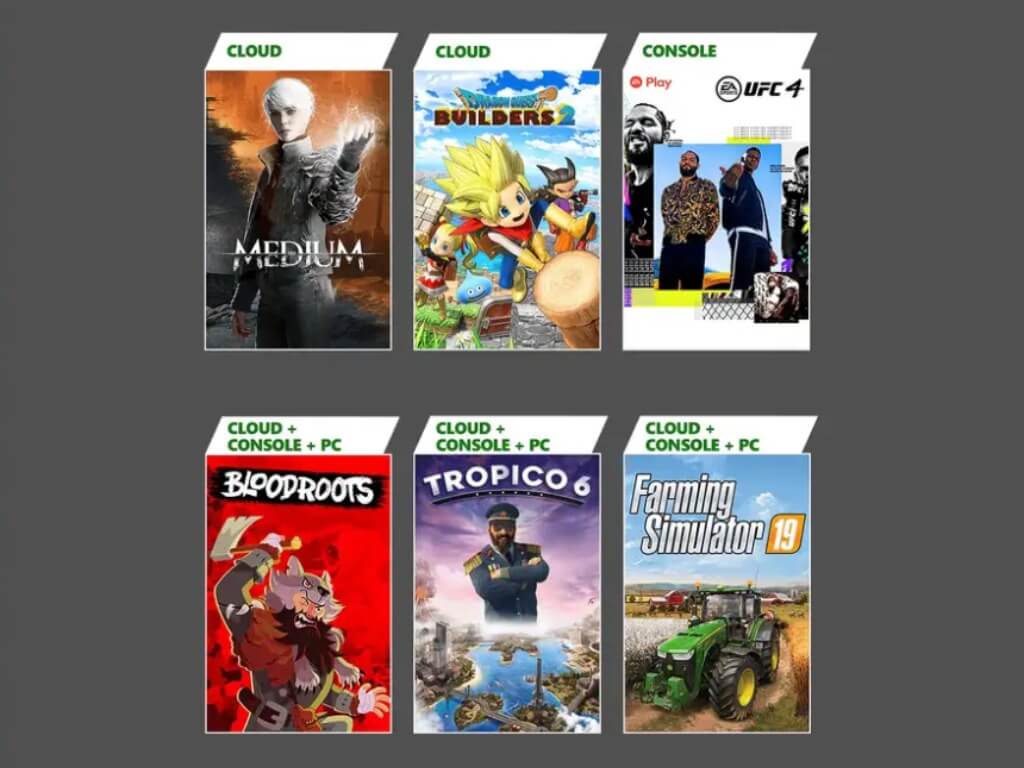



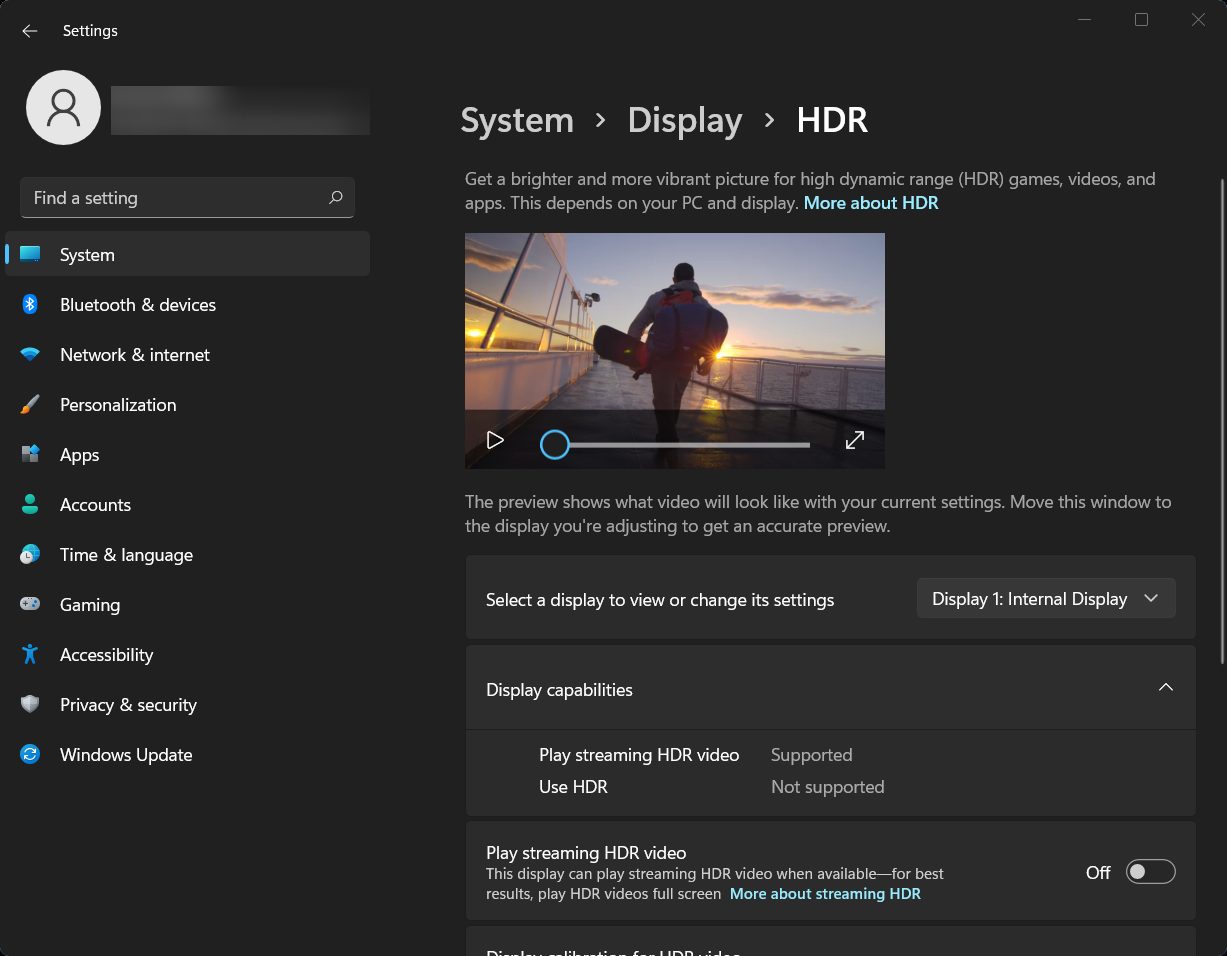


![Civ 5 video settings not saving [Easy Fixes]](https://windowsreport.com/wp-content/uploads/2021/06/civ-5-video-settings-not-saving.jpg)